md1400cs
-
Posts
2,862 -
Joined
-
Last visited
Content Type
Profiles
Forums
Gallery
Events
Everything posted by md1400cs
-
 Mark, Buck, Dave, El_J Thanks for you thoughts Happy that you approve. Also thanks for the "likes" mates (;-) Michael
 -
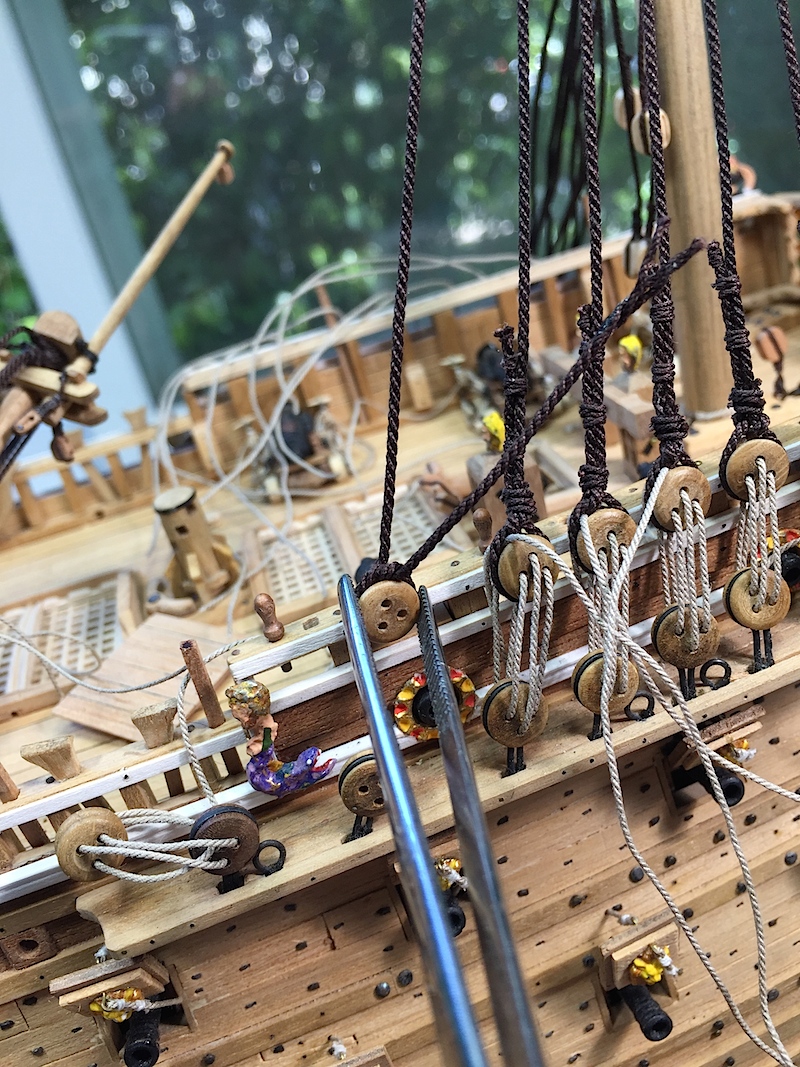
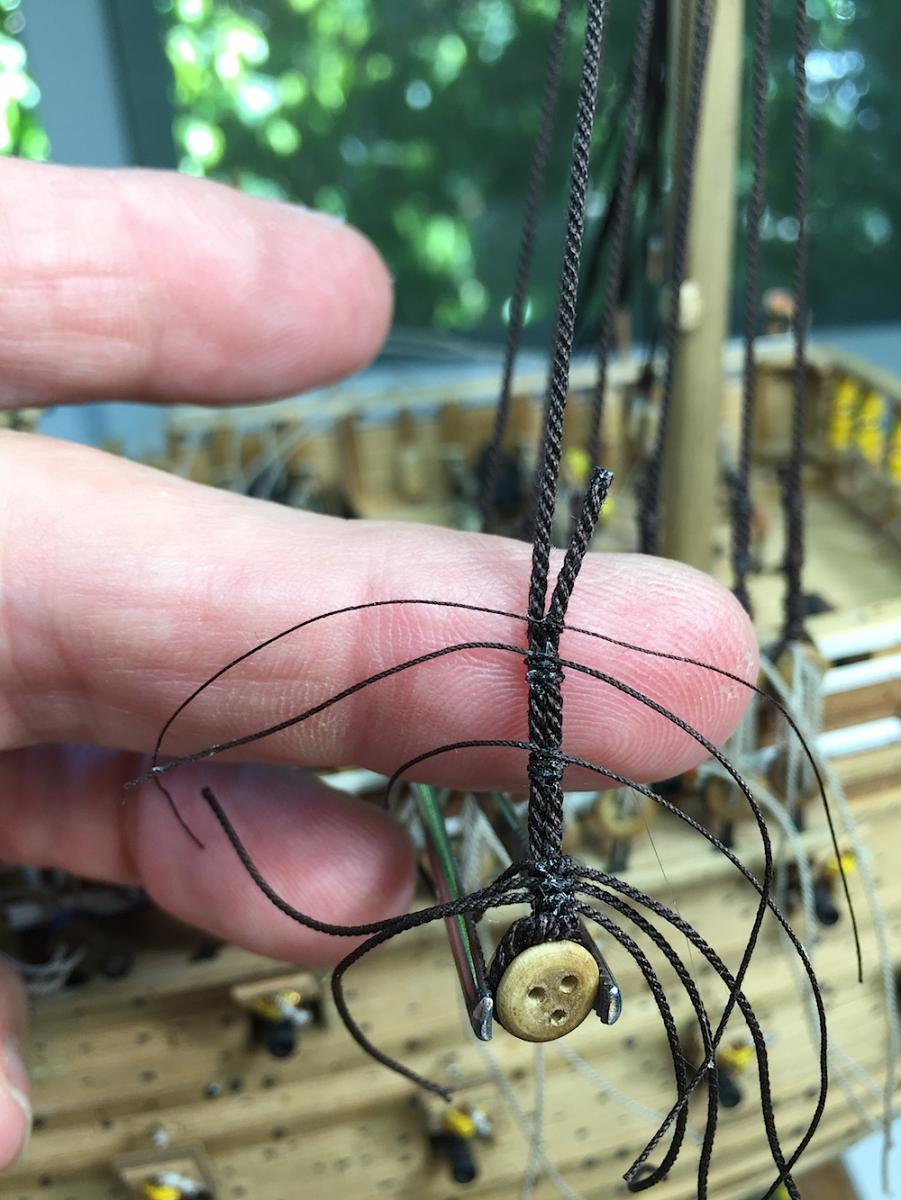
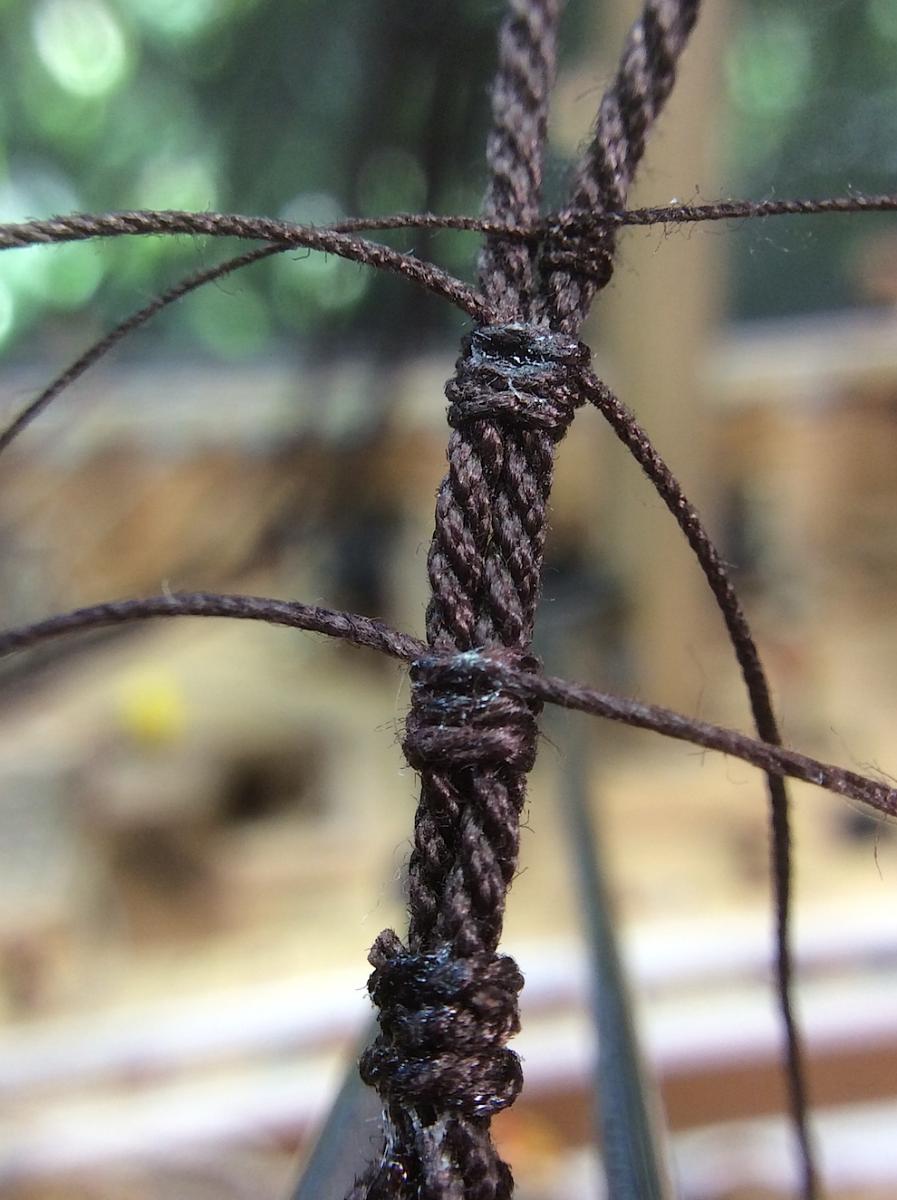
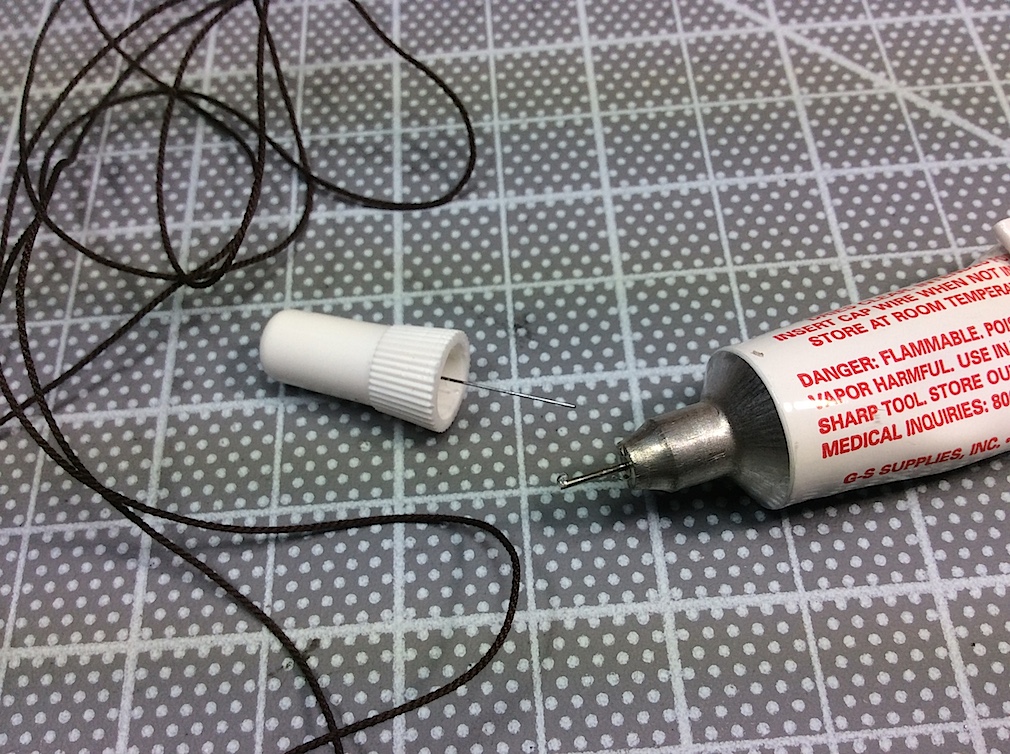
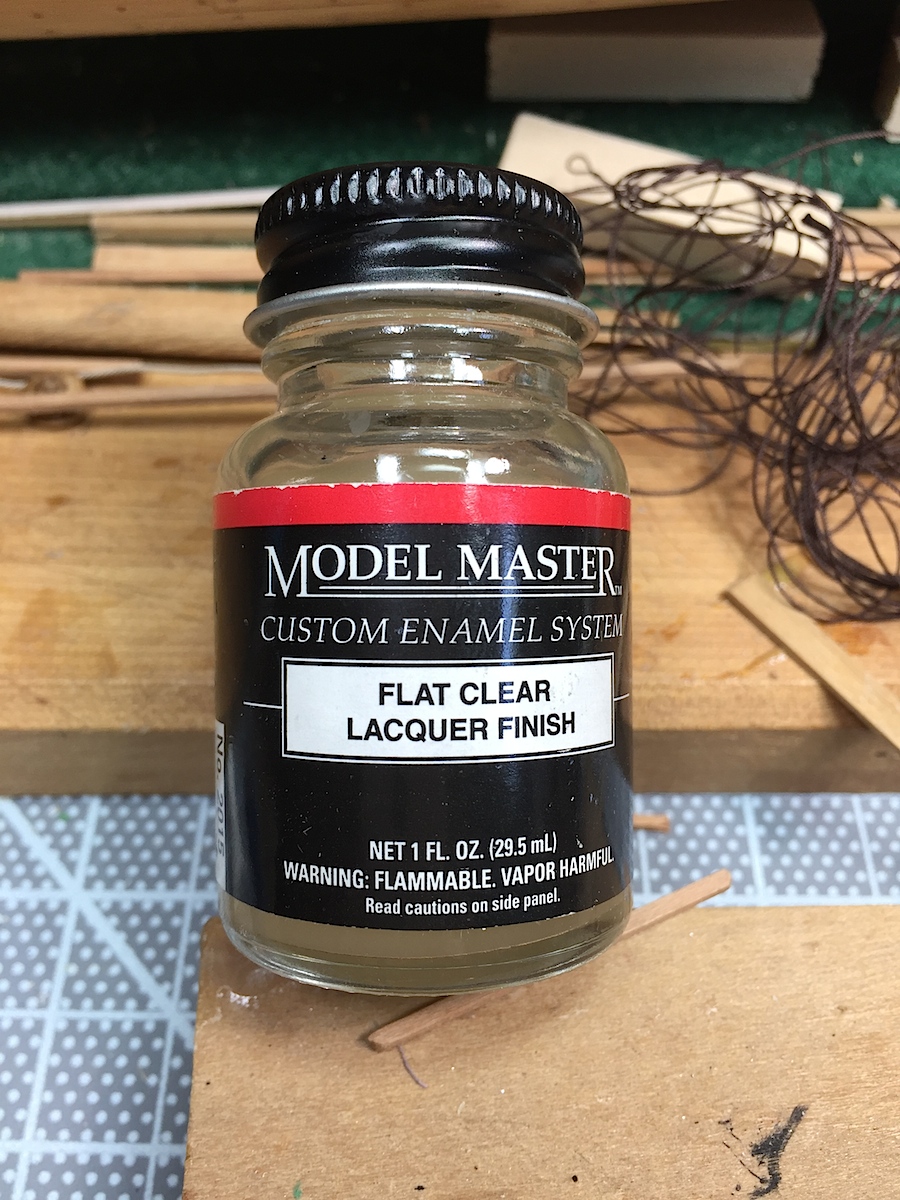
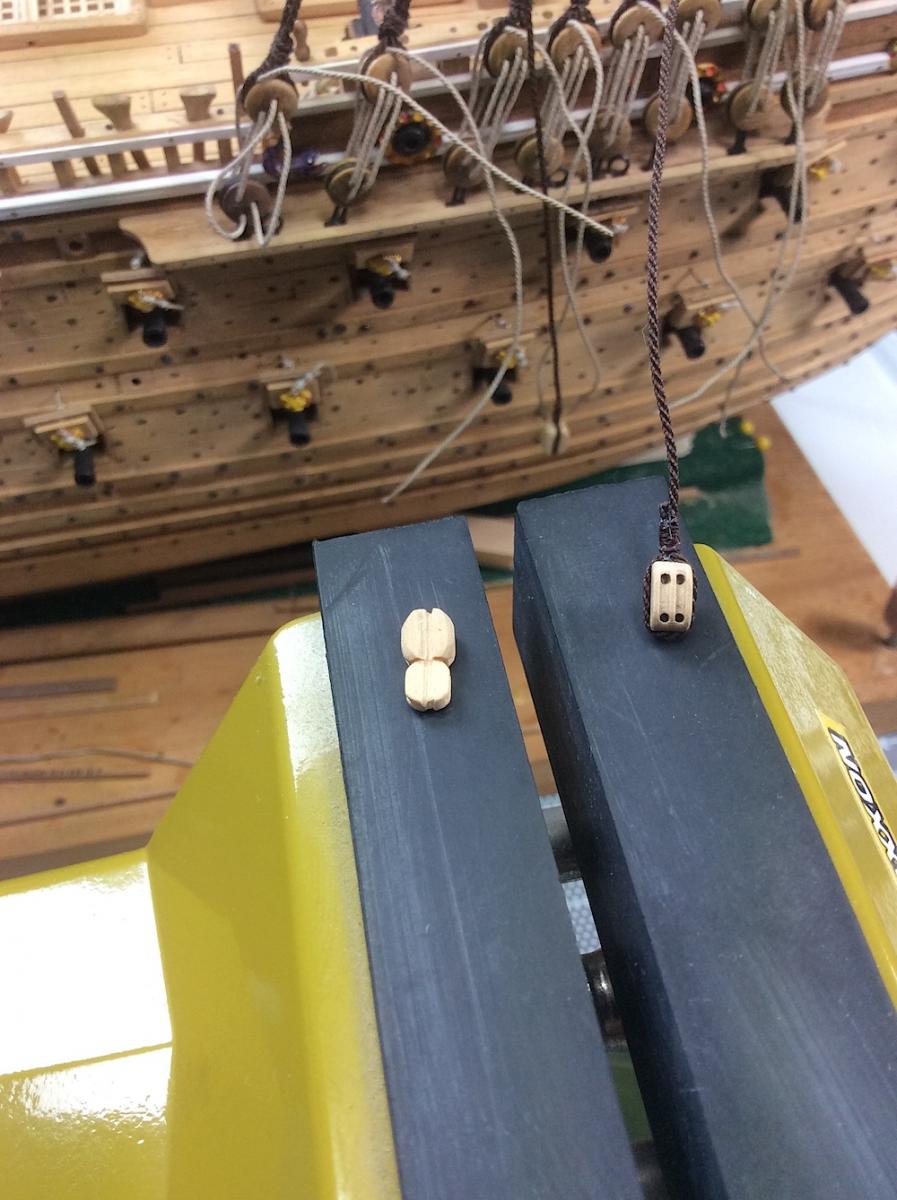
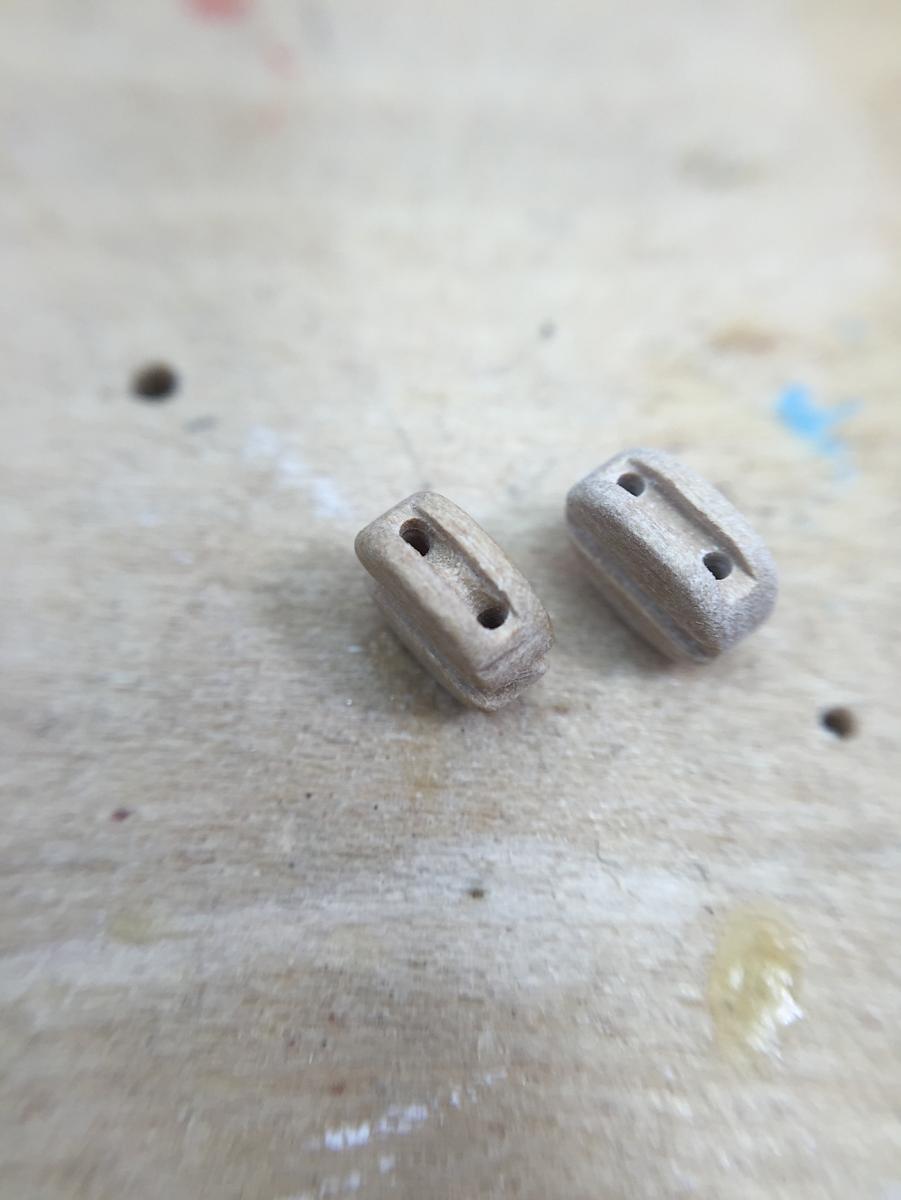
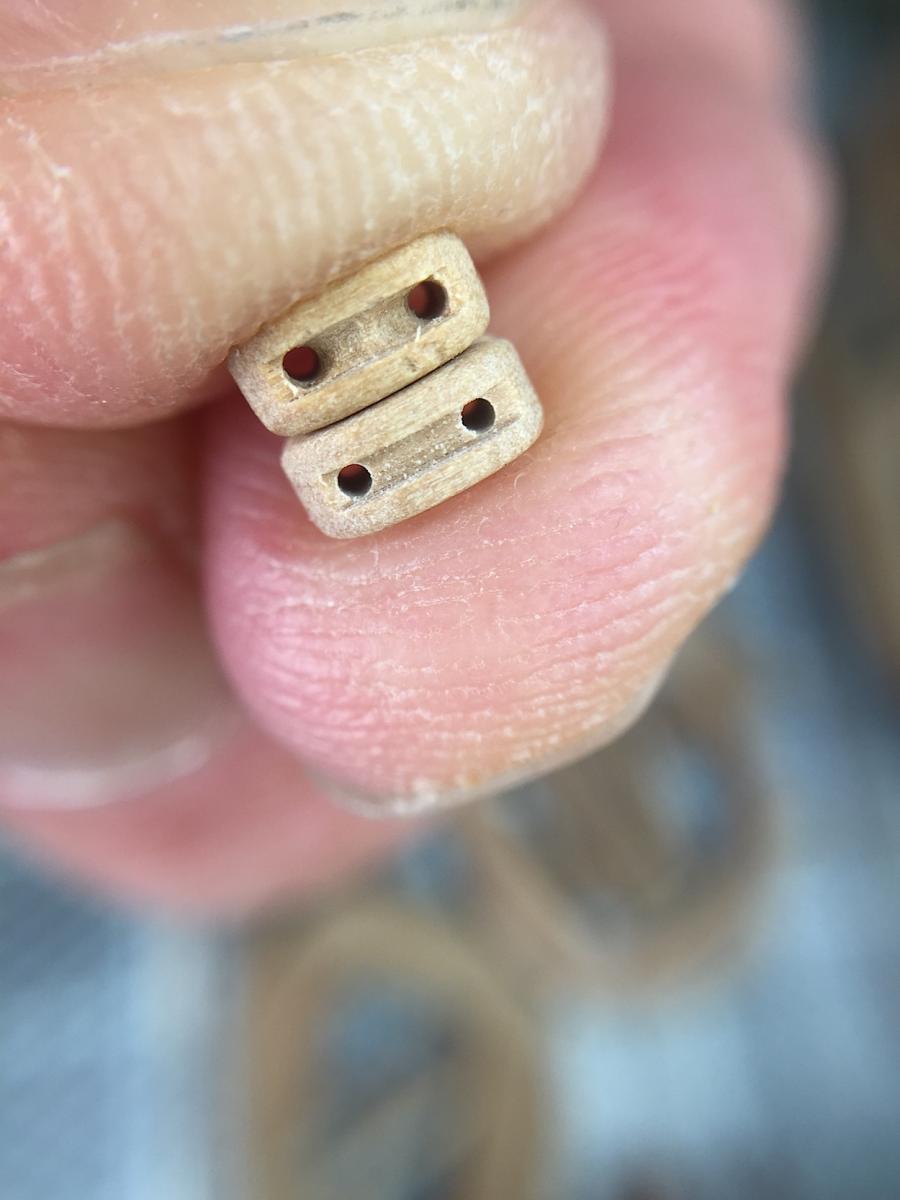
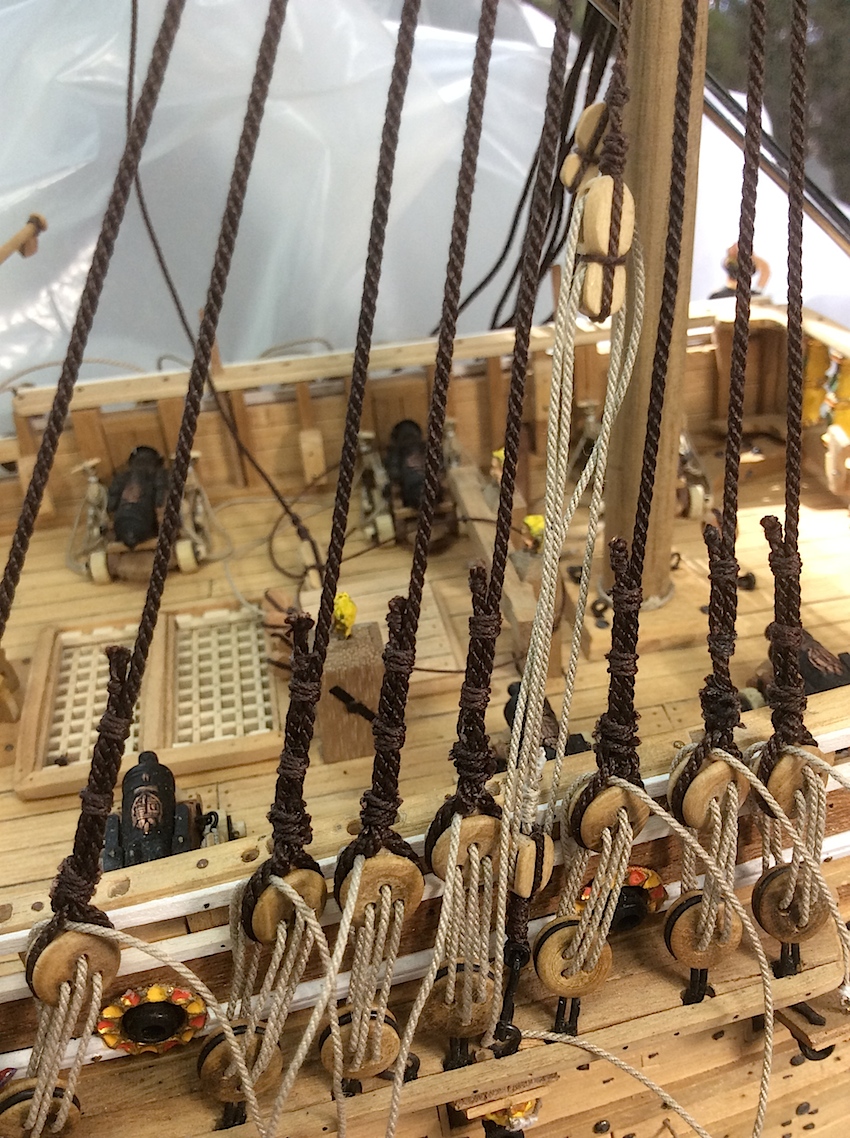
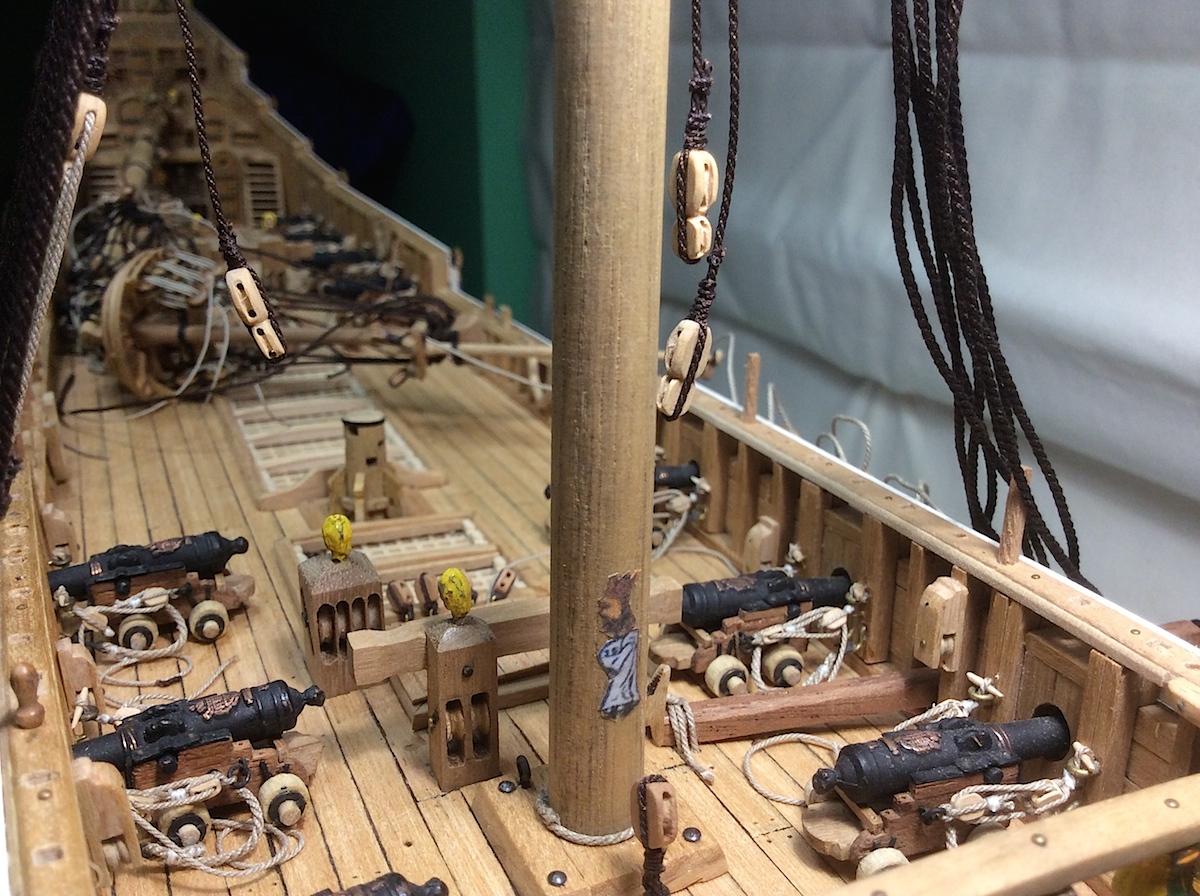
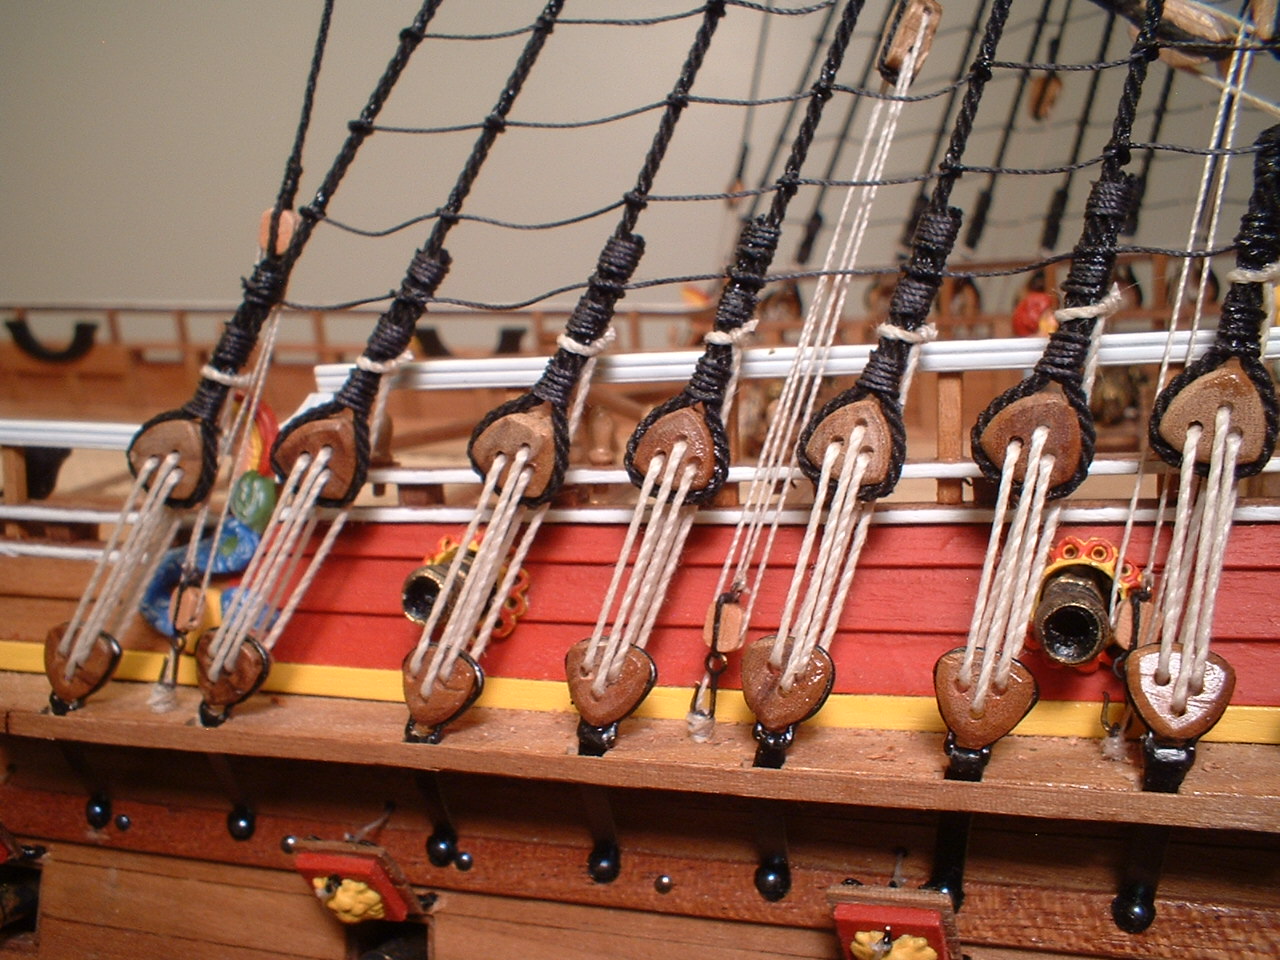
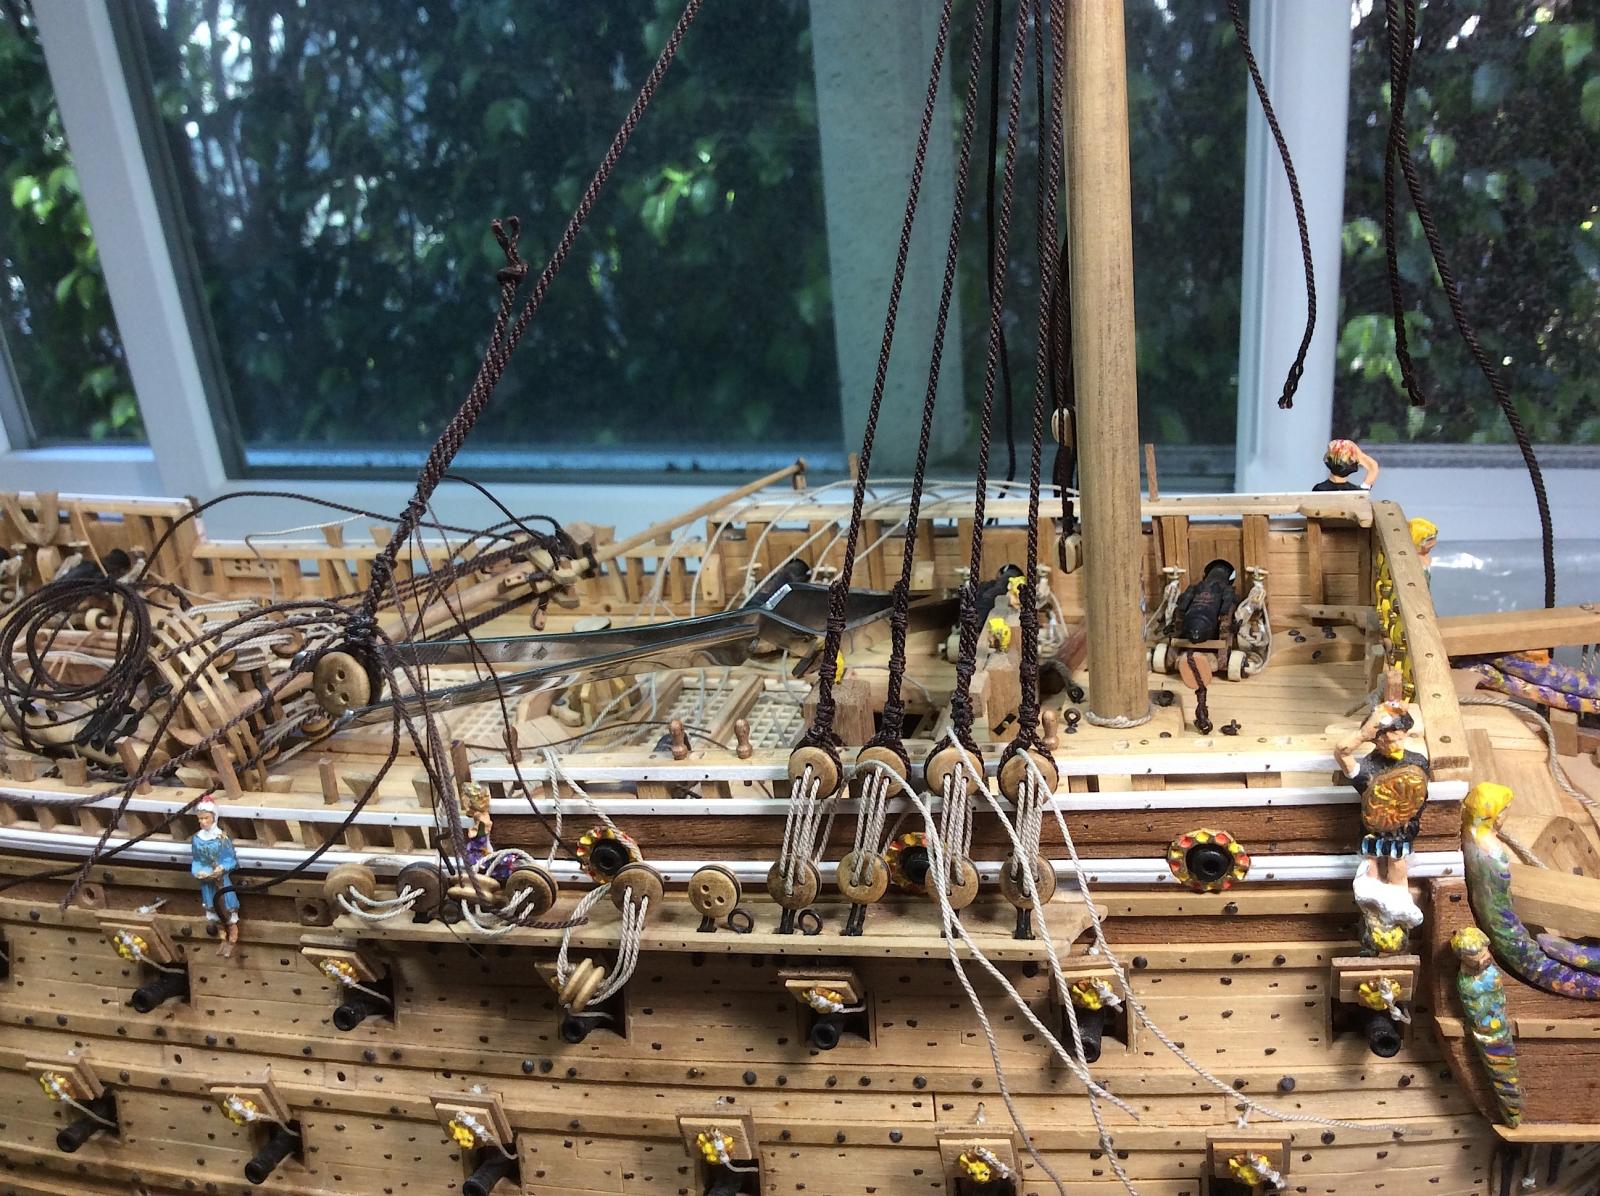
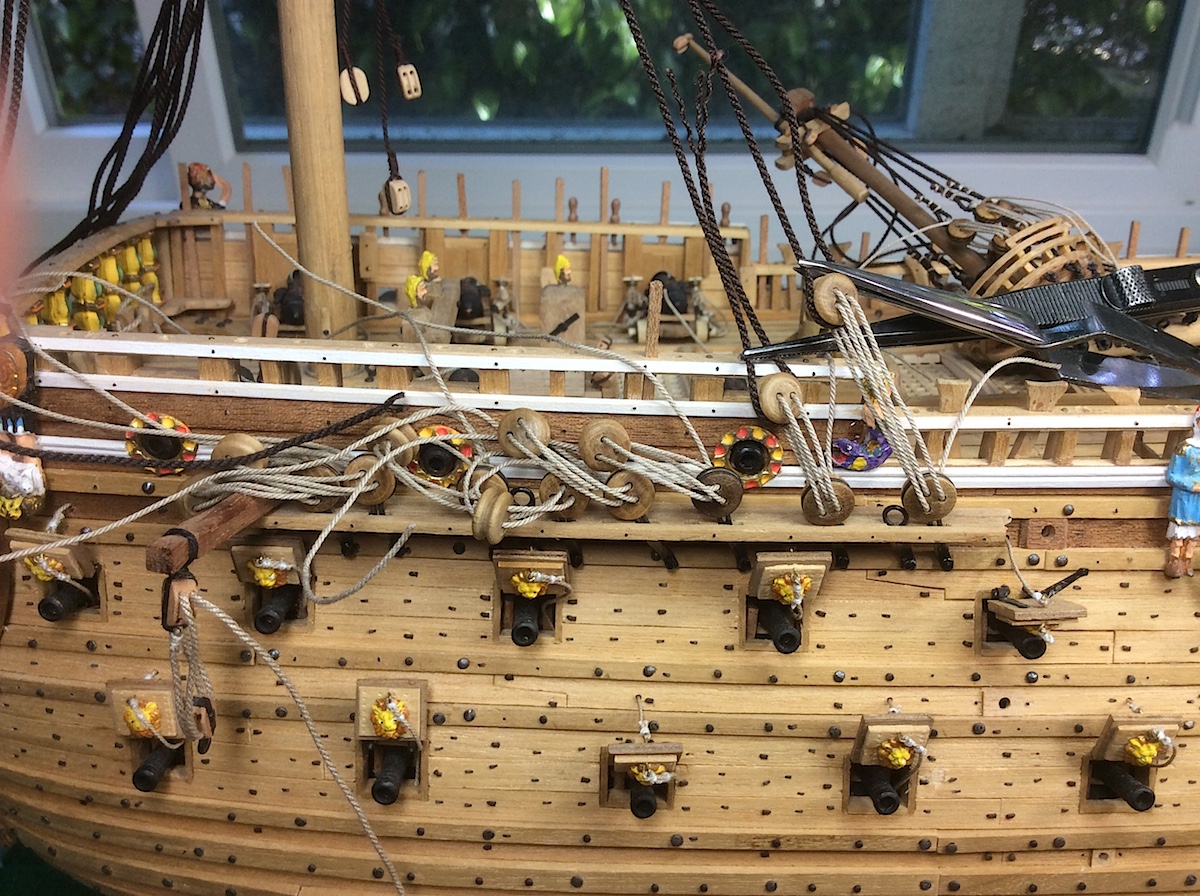
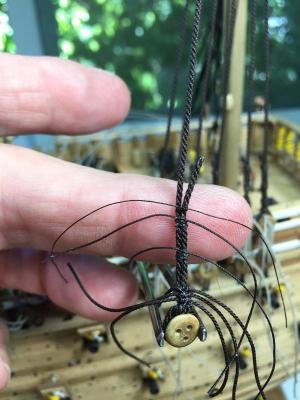
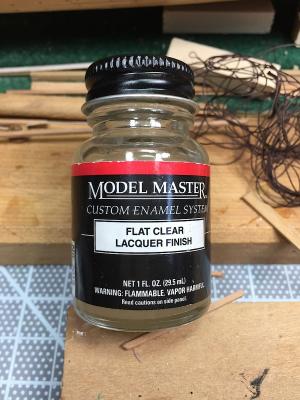
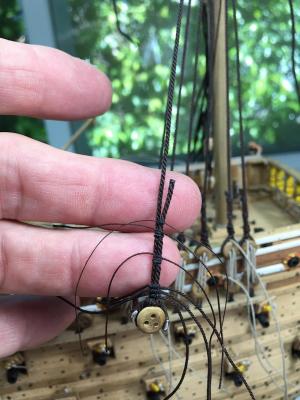
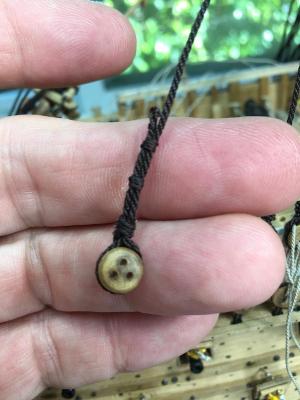
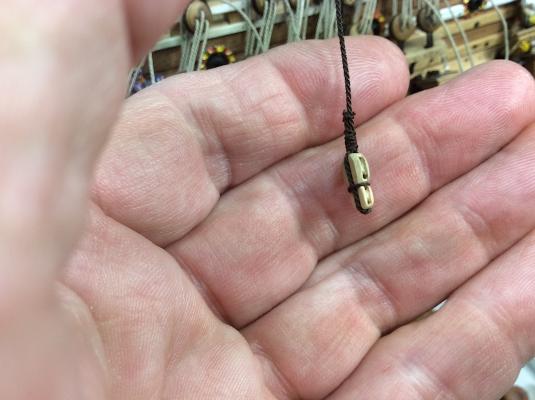
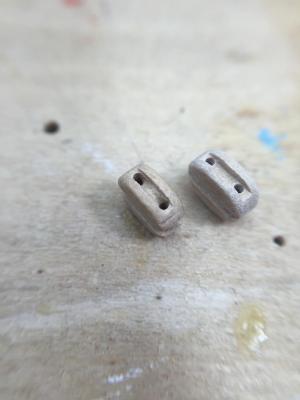
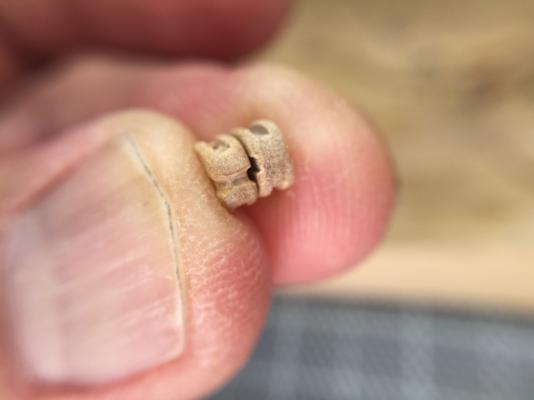
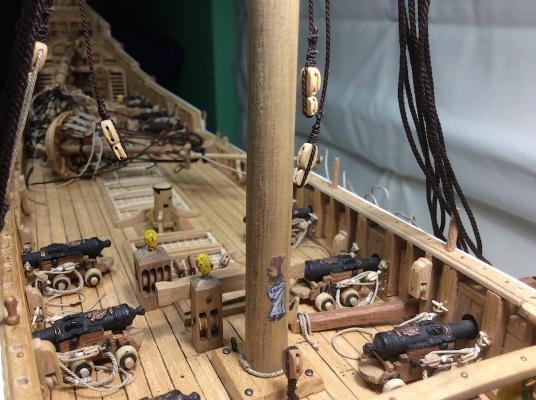
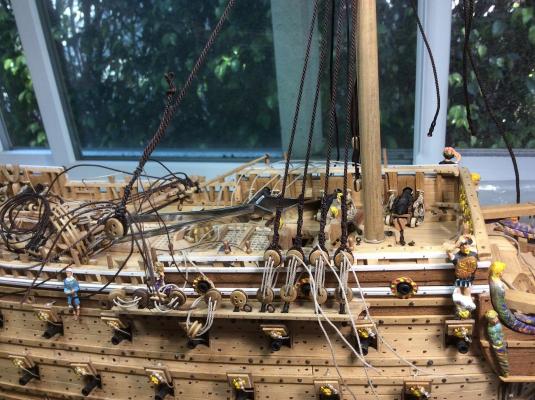
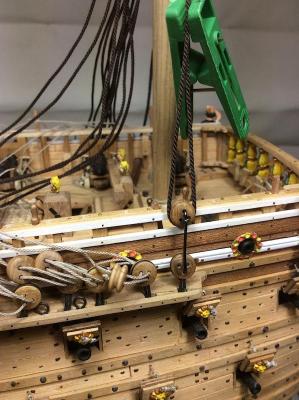
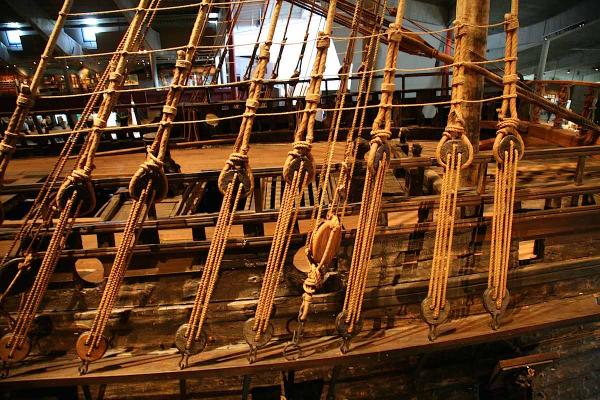
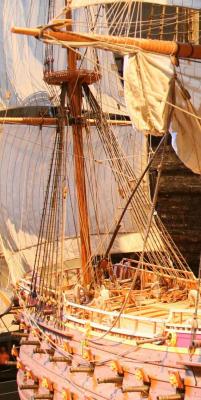
Hi Mates, Some thoughts in two areas. Shroud installation. Used the wire spacer clip for only the first two, most forward shrouds. Subsequently I decided to use locking tweezers and “eyeball” each subsequent spacing after an initial rope knot around a deadeye (tended to be faster, easier, and accurate after a couple of adjustments) Key is using self locking tweezers that leave the deadeye and its rope “locked” into place ready for seizing’s. Added the seizing’s and glued them tight. I find G-S Hypo cement to be so excellent for ropes, but it leaves a bit of a visible reflective residue on dark ropes (not so on tan) Once the glue dries I then brush on Hobby Master Flat Clear, and residue totally disappears. Then cut the overhanging threads. Spooled the deadeyes (will adjust and wrap tension ropes after installing the other side). PS: If you decide this is good. Be SURE to shake the heck out of the bottle-otherwise the results will not be flat, but semi-gloss clear NEXT I needed to remove the four previously installed double blocks for the foremast backstays. They were just hanging in place, waiting for their chainplate blocks and ropes. Turns out that fiddle blocks were called for - grrrr. BUT the wo ropes were loose at the mast cap, so I could pull each side through, and I had enough length to easily remove the four double blocks with the ropes still attached to the mast J Made fiddle blocks by using two blocks, flattening (a bit) the tops and used CA to glue them together. BLOCKS IN BETWEEN this I wanted to add a bit of extra definition to Syren’s super excellent blocks. In a previous post I described this using a small drill bit and sort of reshaping the inside by “rubbing” the spinning bit along its side reshaping the inside “pulley”. It’s a subtle change, but it works for me. Also deepened the blocks longitudinal attaching rope grooves as well as adding grooves at top and bottoms. IMO once the blocks are spooled it gives them a bit more realistic look. The wood is very soft so it’s simple and easy to do. Did the same detailing with the fiddle blocks, and also tried softening the sides by rounding the edges a bit more. Note the lower installed block rope ring/hook from a couple of previous posts – at the chainplate. This came out to my satisfaction. OH one last bit (;-) I added the king to the foremast. Clayton had this detail on his Vasa. It is apparently an historically correct detail. He let me copy his example – so nice of him indeed. How? Printed one of his foremast jpg’s; adjusted the size, printed it, sprayed the page with Krylon Crystal Clear coating, cut out the king, glued it to the mast. King’s crown was not cut just right but - oh well J I need to improve my shroud seizings, Mark – Marktiedens gave me some tips, need to improve their horizontal alignments with their mates. And need to more evenly nip the tips of the seized shrouds to match the others heights as well. Always a learning thing - isn’t it? But I “get” this bit now. And thanks for dropping by, always so appreciated Regards, Michael


-
Ferit, Yes indeed please go back to your shipyard. It is my honor to post your excellent Berlin work on my log. PS: Loved your G-S translation. So excellent. I will have to remember that line....You are so right. It is almost overlooked here at MSW as an amazing bonding agent for ropes. ------------------------ Buck, Thanks so much as well. BUT when it comes to super small complicated details, Well you are the lighthouse !! (:-) -------------------------- I will post an update with a detailed look at G-S and why it it perfect. Mates thank for the clicks and all of your encouraging thoughts. Regards, Michael
-
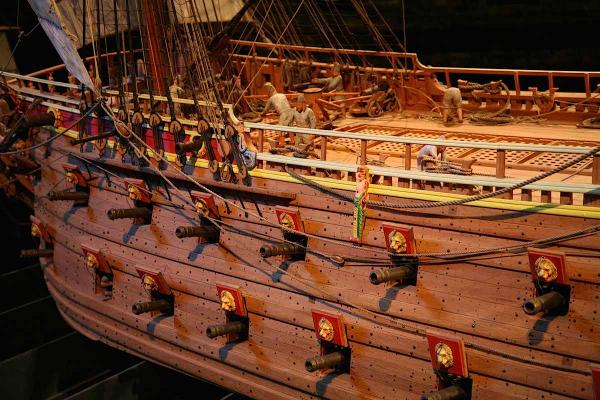
Ferit, Thanks so much. Brilliant idea indeed. And as always you are so kind with your comments. Many of us miss YOUR work. Hopefully you will, one day, get back to your ship yard. Below are a couple of examples of Ferit's beautiful Berlin from his build log. (I hope that you don't mind my posting two photos). PS: You are also the one who introduced me to G-S Hypo Cement. so perfect for rigging work (:-) Thanks for still visiting my build log (:-) Cheers, MIchael

-
Mark, Thanks! I've copied and pasted your technique. I will read it carefully in the a.m. The Admiral tells me that it is time for TV (:-) PS: Thanks I appreciate your thoughts regarding my same work. Cheers, Michael
-
Mark, Your #213 photo of the shroud seizing three rows are so perfect. As you know this is where I am right now. BUT how did you make your loops SO perfect. I remember those details. Help (;-( Mine are so weak -so far) Michael

-
Lawrence, Thank you - always so nice to see you dropping in. So I have spent the last two + hours going through Frank and Karl's logs during sail construction. So informative. Wonderful reference. Frank what step-by-step details! Thanks mates... OH Frank I need to apologize, I don't know why I thought that your Admiral stitched those sails. It was you. You are the artist. Apologies my friend. So I found this place close to my home. https://www.sewingarts.com/ Guess who will be signing up for sewing classes? The shrouds are coming along, slowly. I've learned some things - I'll post some details coming up. But I'm still not comfortable with the way I seize the shrouds, knots are all wrong. Hmmm,

-
Jan, I have been thinking about your post, interesting information. I am still vacillating back and forth regarding the sails. Though I have, finally decided to have them sewn by a "third party". Well I did buy the material and thread. After, if I think that they look good enough, I will possibly move forward adding them to the masts before installation. I certainly have several excellent build logs to refer to for guidance. PS: I'm a Libra so it is almost impossible to make decisions about anything ha ha As is sometimes the case with our builds, looking back-we sometimes wish we had taken more time and done things differently. After spending, going on three years on this one, I just bet that once finished I would regret not having challenged myself further by not adding sails. Cheers, Michael
-
Bruce, So nice indeed. I am also enjoying following along. Very nicely detailed work !. Michael
-
Ed, Your iron brackets from #1700 are BRILLIANT. Very creative indeed. Michael
- 3,618 replies
-
- 5
-

-
- young america
- clipper
- (and 1 more)
-
Bill, Also THANKS for your large format jpg's it allows us to really appreciate your superlative level of excellent details/work. Michael
- 382 replies
-
- 1
-
-
- sovereign of the seas
- carving
- (and 1 more)
-
Mates, Thanks for your clicks and comments. ================ Ferit, yes noted, thanks for your advice. This has occurred to me, but I have not yet thought of how to make those adjustments. Yes a single wire clip length won't work. Thanks for mentioning this issue. That was my reason, initially, for pre spooling the deadeyes, then lacing shrouds one at a time, adjusting as I went along. But the first one was too frustrating. So the wire clip seems much easier - so far. I think that I will need to make several separate wire clips. Then use those same wires (in proper order) for the other side. This would also assure the same drift on each side? Kevin, thanks for your very kind post. Regarding the sails; my concerns (along with rigging) is that I will have to have them stiched by a 3rd unknown party. There is a sewing school nearby I could contract someone? My only big "fear" is that if they (sails) look too "fake" and stitching is too out of scale, it would detract from the other details I have been attempting with this build. IMHO sails actually look amazing or they look well Hmmmm. Certainly difficult. Furling (hiding) them all is also an option. I should fly to Boston and have Frank's (fmodajr) Admiral do a second set for me ha ha. The sails on his are really special ! She did a superb job. And his running rigging is well (:-))) PS: I did buy the same material, and thread. He PM'd me with the source etc, We shall see. I am tempted just very unsure. I also have all the needed dimensions. Karl's (Karleop), also beautiful Vasa, with sails, shared all the dimensions in his build log. It was always my intention to fully rig it, until now.... Again mates thanks for your suggestions Michael
-
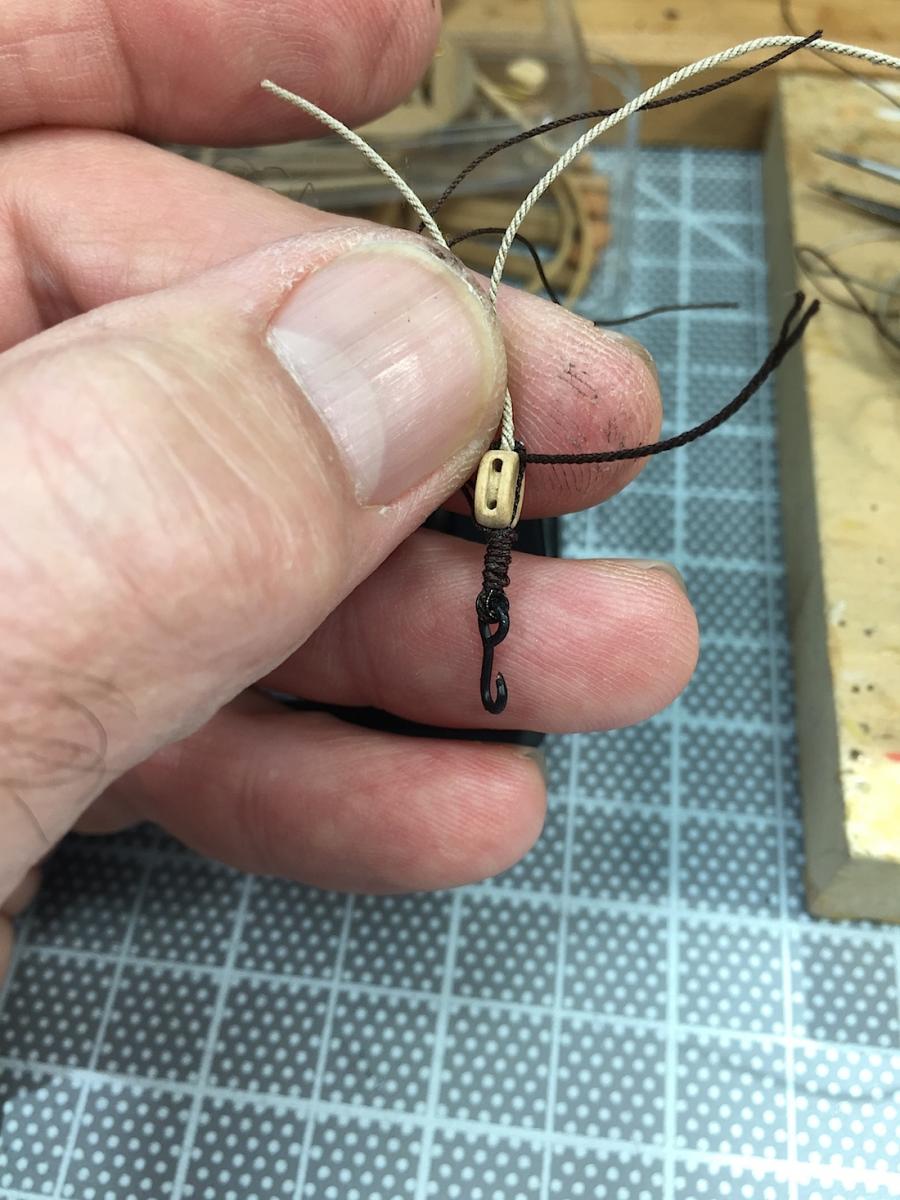
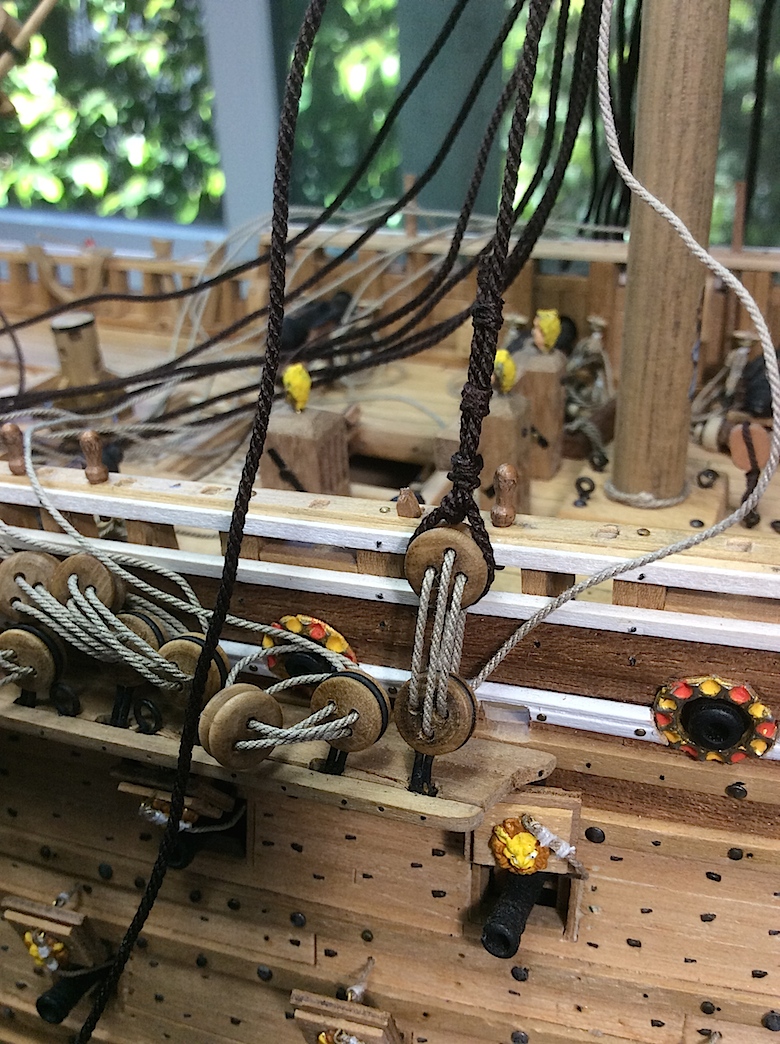
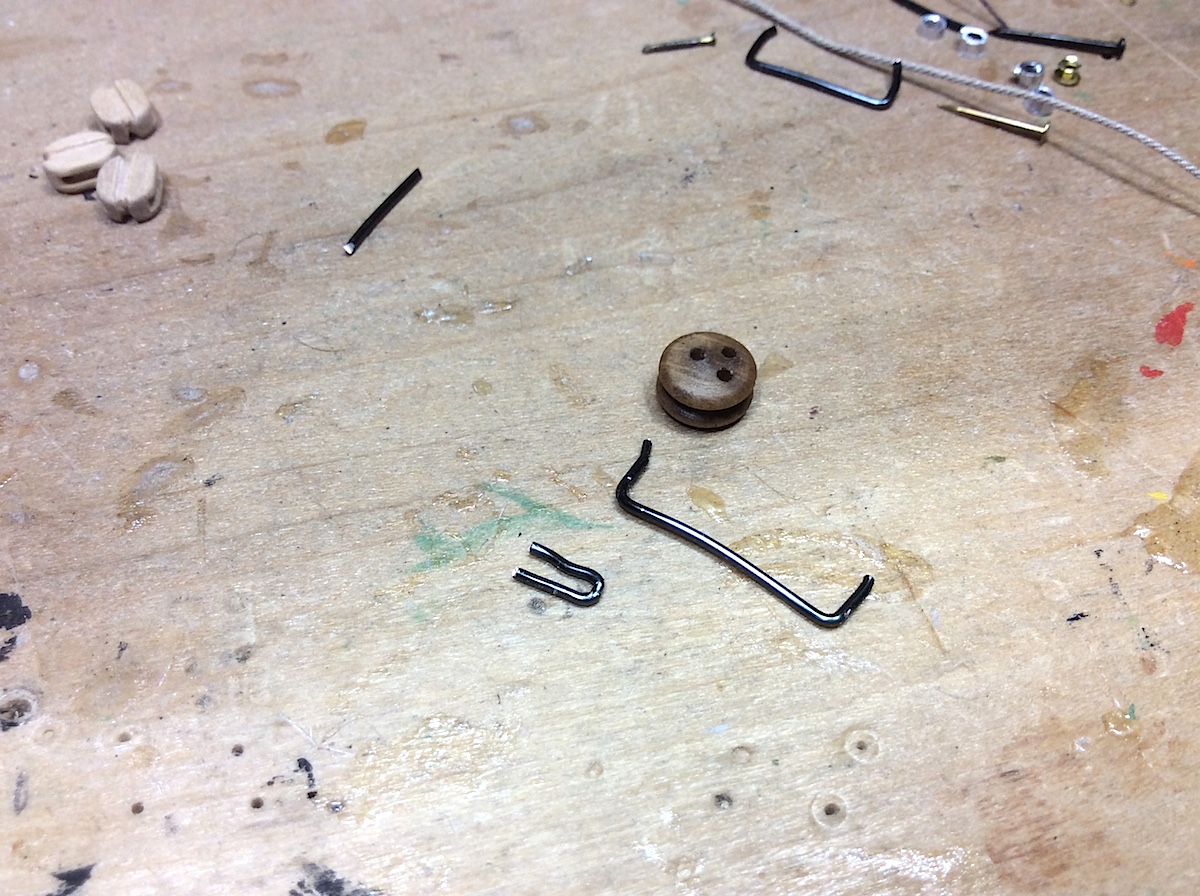
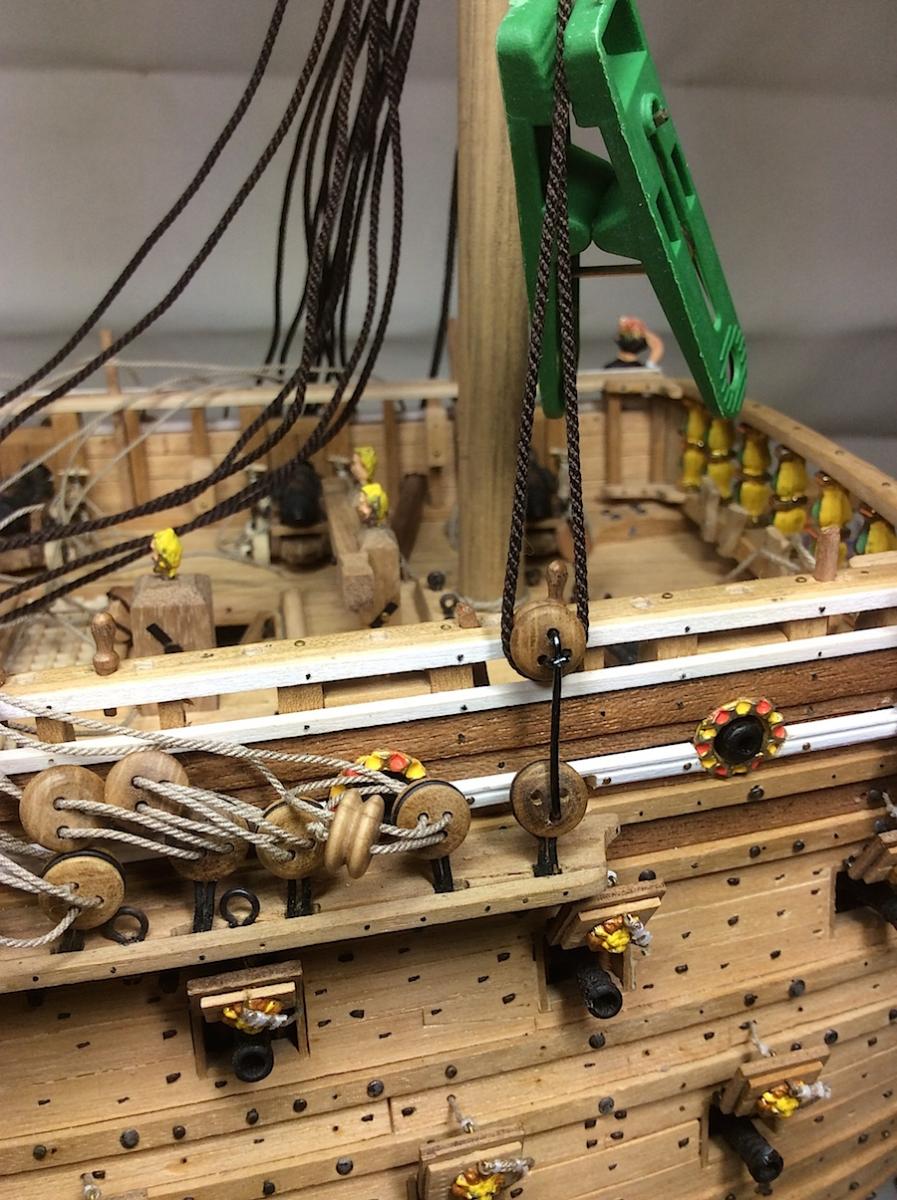
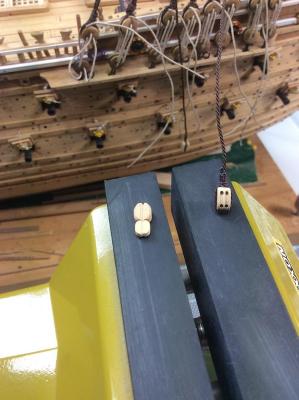
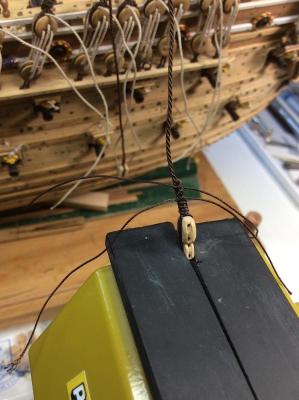
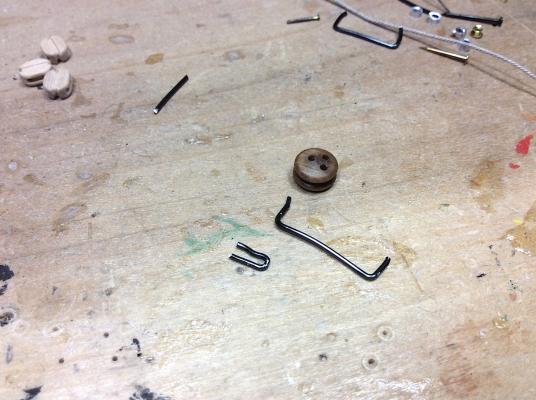
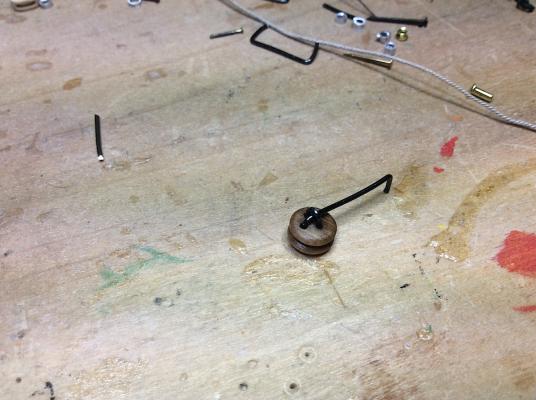
Hi mates, So I made a mistake (that’s new for me) – attempted to attach the first foremast shroud after having first laced the two chainplate deadeyes. You were kind in not remarking on this error J It became/was too labor intensive/frustrating to loop the shroud, and also trying a “throat seize” and then adjust the deadeyes spacing. Went back to visit Frank’s Wasa (fmodajr) and on his #340 he had made metal spacers. This is apparently the much-preferred method. So bent wire for spacers, but in my case the upper deadeye kept rotating upside-down as I tried adding the shroud. SO added this small extra metal “U” hook so that deadeye would stop rotating. Just sharing this small bit that will reduce this frustration when I do this part of the build. Cheers as always Michael
-
Lawrence thanks for your vote of confidence (:-) NEW Vasa Kit coming Hmmmmm http://www.deagostini.com/it/collezioni/vasa/ ================= Click on the pages and they open up http://www.deagostini.com/it/collezioni/vasa/sfogliatura/index.html ---------------------------------------- From Fred H on the Vasa Forum site (PS: his link does NOT work) so found other sources just above. Hello all! I am pleased to be able to let you know that there is a new wooden kit of Vasa now available in some European markets. It is a plank-on-bulkhead kit in scale 1:65 (finished length 109 cm). It is a partworks format, where you subscribe and receive a few pieces each week or month (depending on the market) over a three-year period. The kit was developed by an Italian company, deAgostini, who specialize in this sort of partworks approach, with the kit design and production carried out by Artesania Latina of Malaga, Spain (actual production of parts in China). The kit is being released in Scandinavia by Editions Atlas in a subscription format; it is available in Italy at newstands or by subscription. For more information, seewww.editionsatlas.se/collection/VBU/Majestatiska-vasa.html. You will see there that the model was developed in cooperation with our museum. In reality this means that we provided the most current digital documentation of the ship and assisted in the kit design, as well as providing text and illustrations for the written material that accompanies the kit. I will be building it as it is released, and will try to post here about it. Fred
-
Giampiero Following your work as well. Just catching up, and as usual updates are brilliant. From a few clicks back, those doors and hinges are beyond perfect. (:-) Michael
-
Henry, As usual You are so knowledgeable. Thanks - Sold! will stay with the lower drift (also new vocab for my "memory" list). Michael
-
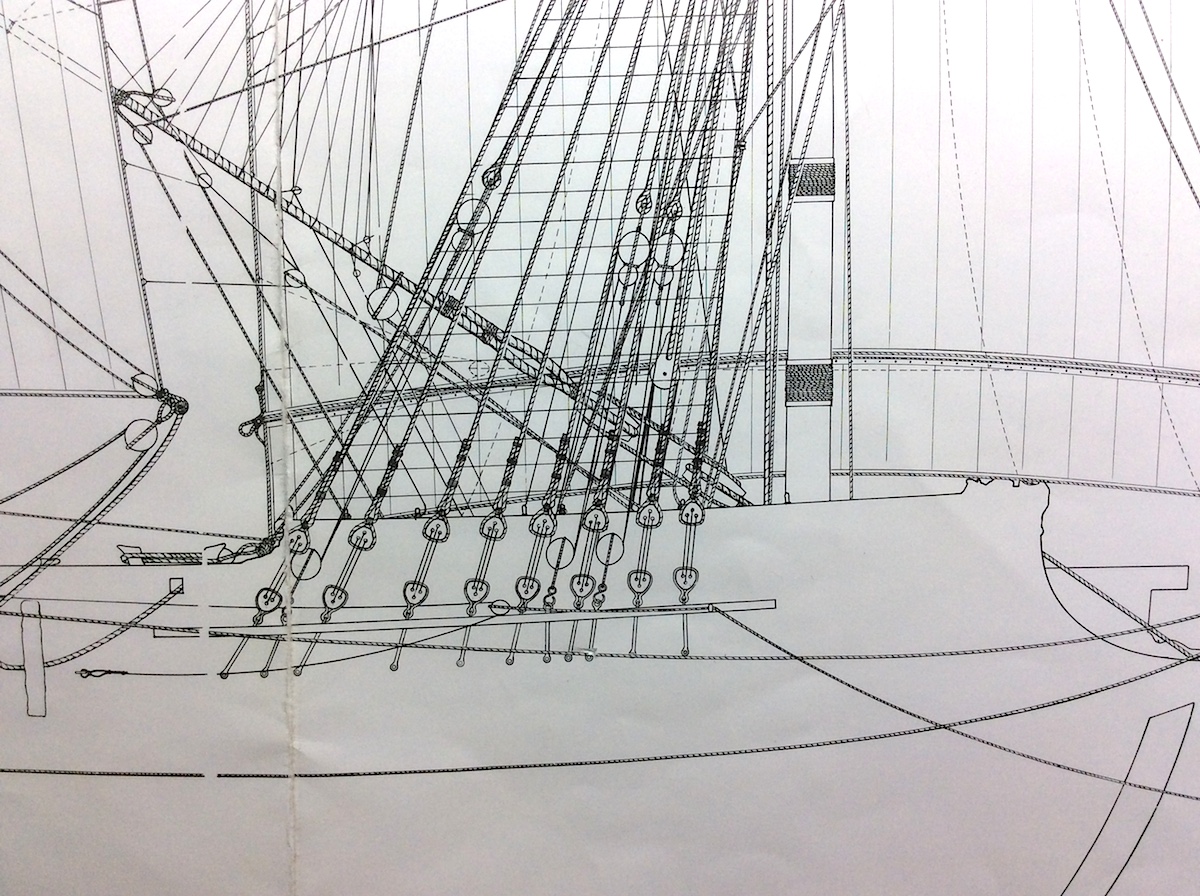
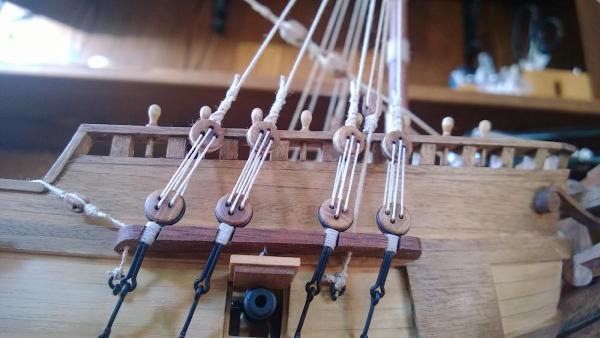
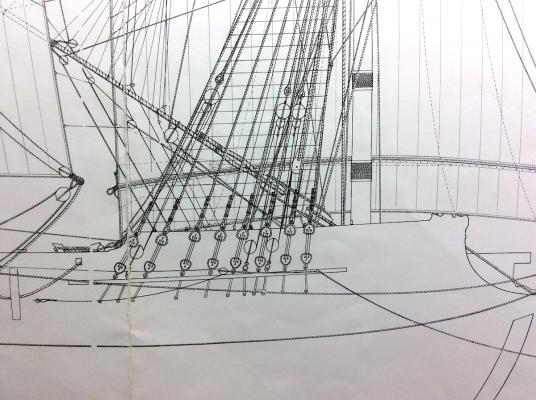
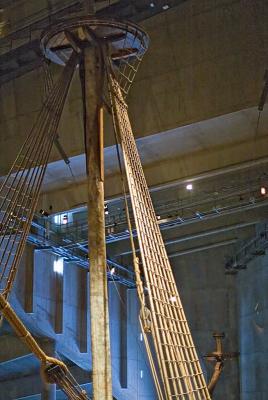
Hi Mates, Getting the second set of foremast chainplate deadeyes strung. Then looked at the 1/1 for a reference. Then also looked at the 1/10th. The upper deadeyes on each are at diff. heights. The 1/1 has them rising to just above the second upper railings/ The 1/10th stay well below. So where do I loop the shrouds? Looked at other builds here, as well as the Vasa profile plan sheet. They all seem to indicate the lower positions for the upper deadeyes seem correct. I also checked Clayton’s his are lower as well. So, if I decide to follow the 1/1 photo I would have to restring them all (ropes would be too short). Hmmmm. Should I write Fred H. and tell him that HE made a mistake ha ha ..... Cheers, Michael
-
Bill, Yes indeed - brilliant idea on your treenails. Michael
- 382 replies
-
- 1
-
-
- sovereign of the seas
- carving
- (and 1 more)
-
Mark, I just above just clicked "like", but I must, now, also say that your build is really great. I will look at many of your jpg's when I try "to maybe" match your rigging details on mine. PS: you have also been so kind remarking on my efforts T. You(:-) Big Cheers to you indeed !!, So well done. Michael
- 249 replies
-
- 2
-
-
- billing boats
- vasa
- (and 1 more)
-
Frank, Again - sooo lovely indeed. Yes #476 does this one justice. Awesome work. Michael
-
Mates, Thanks for the likes. I hope to install the deadeyes and shrouds for the foremast by sometime next week. JanV - so nice that you are back (sort of) with your Vasa as well (got an update). Thanks for your dropping by as well. Michael
-
Mark, some further thoughts below. I have been an avid follower of your beautiful work. Frank, also some thoughts below -I was thinking of your superb work with sails Thanks Mates for your encouraging words. ------------------------------------------- Ouch – here I go again; only looking at “what I want to see” Turns out that the just installed four shrouds (not mast stays as I called them) L will have the correct hooks and blocks at the chainplates for attaching the tackles….. BUT the just installed lines with double blocks should have been attached to fiddle blocks NOT double blocks - grrrrr. Mark I also feel your pain ! Now what should I do? Still thinking. Hmmmm. My rigging may become the “Titanic” part of this build in any case. That said, I have for all intents-and-purposes nixed my “dreams” of adding sails. Skills are just not there. (I did buy the sail material) funny OK done venting. Ha ha - After following those of you who have added sails to your beautiful Vasa CHEERS ! “I’m just not there” PS: Now if ONLY Vasa II got published, I might learn enough to “wing it” with sails, and certainly proper rigging. PS 2: I SO appreciate all of your super nice comments, and I do feel comfortable as I have mentioned before with these posted bits of the build and, I do enjoy trying to create “ideas” for details that I have not yet seen visiting other builds. I also plan, for example, to attempt building the main mast out of several main pieces a seen in Landtröm's book and from the museum mainmast plan sheet. I will try to give it the right perspective. Michael
-
Mark, Very nice work. Your final details are great. As many have noted very excellent knowledge research work on your part. You are also very astute especially in your vocabulary knowledge; impressive indeed. Hmmm yes this has been a great project; for something very different you may want to consider a cross-section to fill the two year Vasa void? My next one will be the Occre Santisima Trinidad 1:90th cross-section, that I plan on "kit bashing" having learned so much here, Also rigging that one won't be as mysterious of guesswork. Your build skills are exemplary, so just a thought. Michael
- 249 replies
-
- 2
-
-
- billing boats
- vasa
- (and 1 more)
-
NIgel, Thank you - you are always so kind with your remarks. Regarding scale, I do think that I have succumbed to the dark side of "having to" add tiny bits that are - so not needed, and almost impossible to see - That said, thanks I will try your suggestion, and continue with this obsession (:-) PS: I hope that a torch lighter will do the trick.Thanks Regards, Michael