HOLIDAY DONATION DRIVE - SUPPORT MSW - DO YOUR PART TO KEEP THIS GREAT FORUM GOING! (Only 20 donations so far - C'mon guys!)
×


Pirate adam
-
Posts
240 -
Joined
-
Last visited
Content Type
Profiles
Forums
Gallery
Events
Everything posted by Pirate adam
-
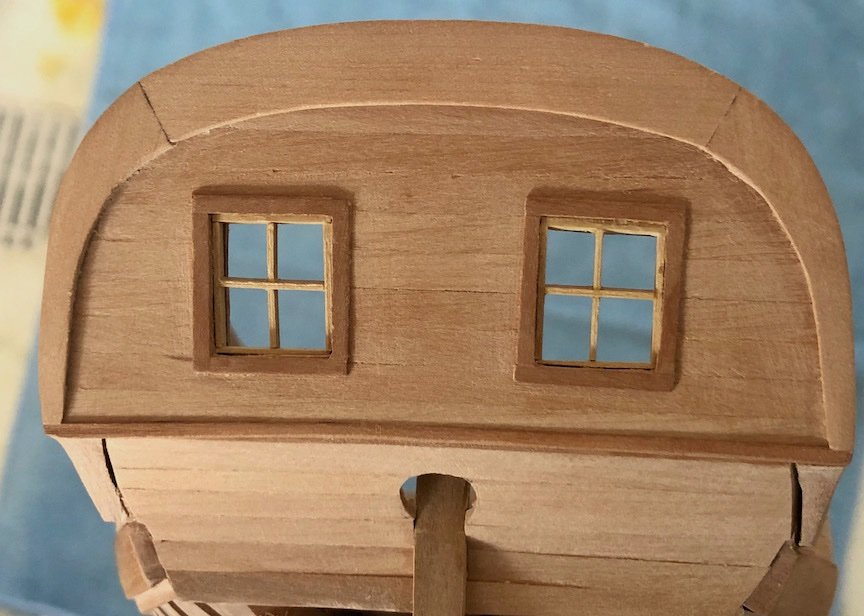
I also managed to frame in the stern windows. Not sure yet if I will add something to simulate glass. Zoomed in photos are brutal, lol.
-
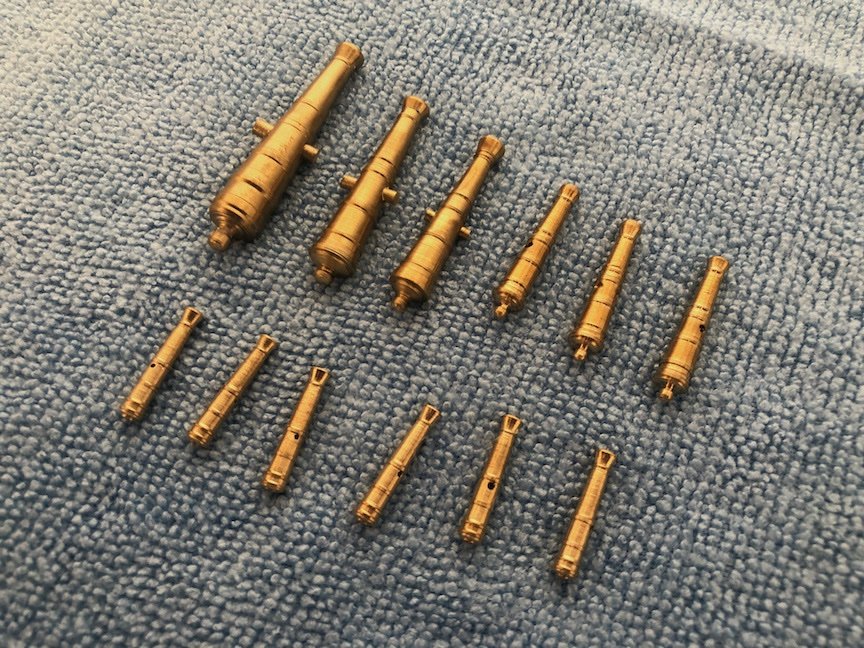
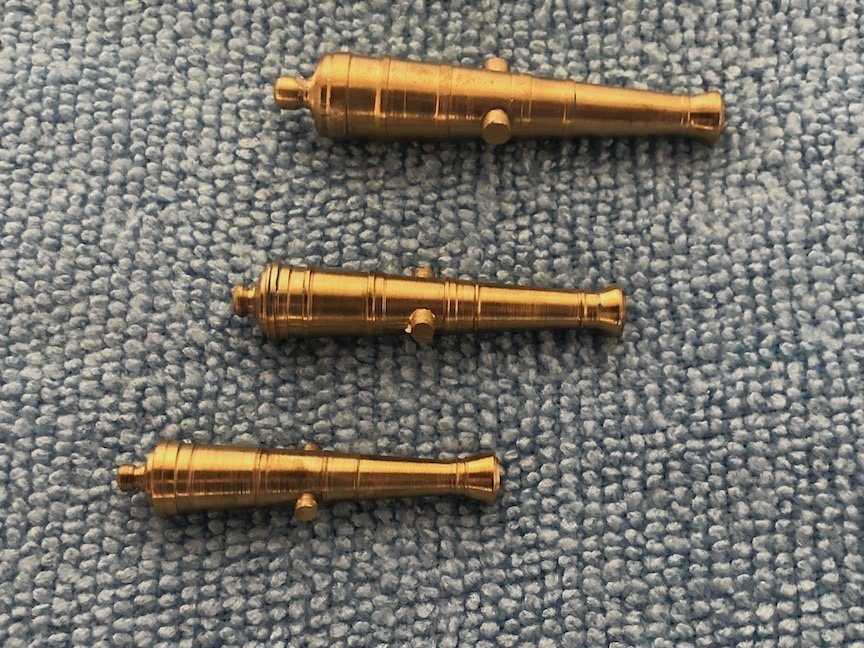
I have also spent the last several months learning some new skills. I turned all of the cannons and swivel guns on a Sherline lathe. There is a whole bag of practice cannons before I got to these. Next I need to learn silver soldering to finish these guys up as well as the various other metal working on the ship.
-
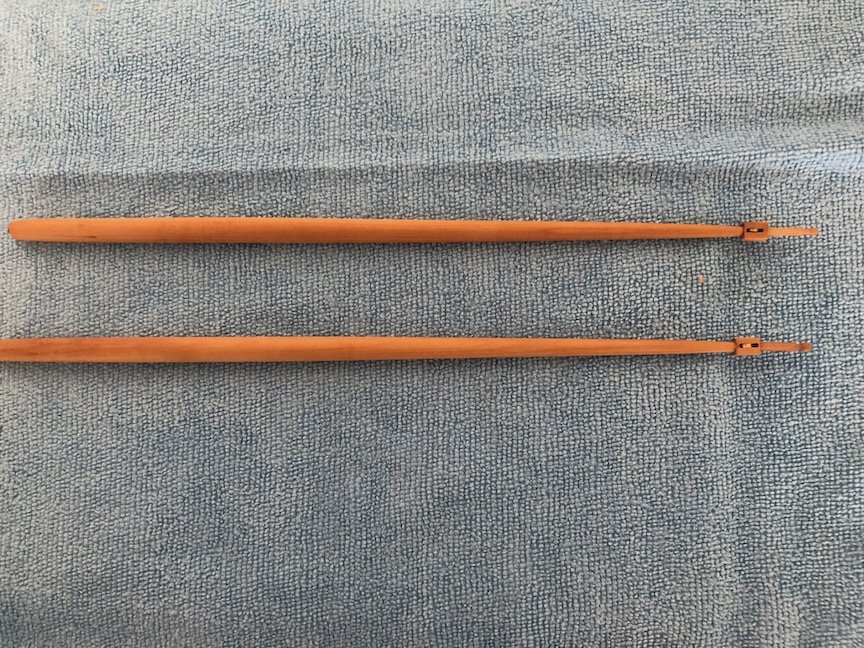
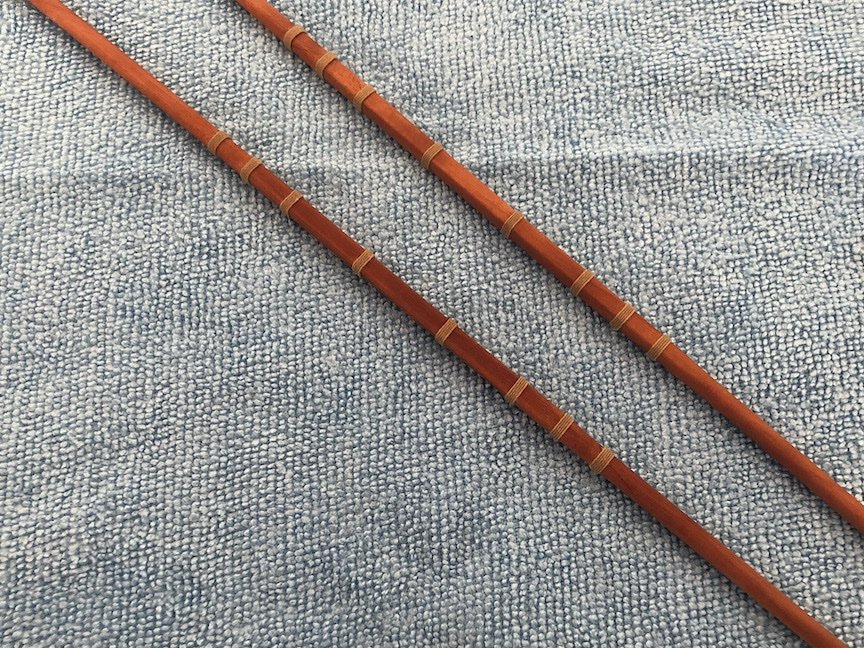
Masts and yards:
-
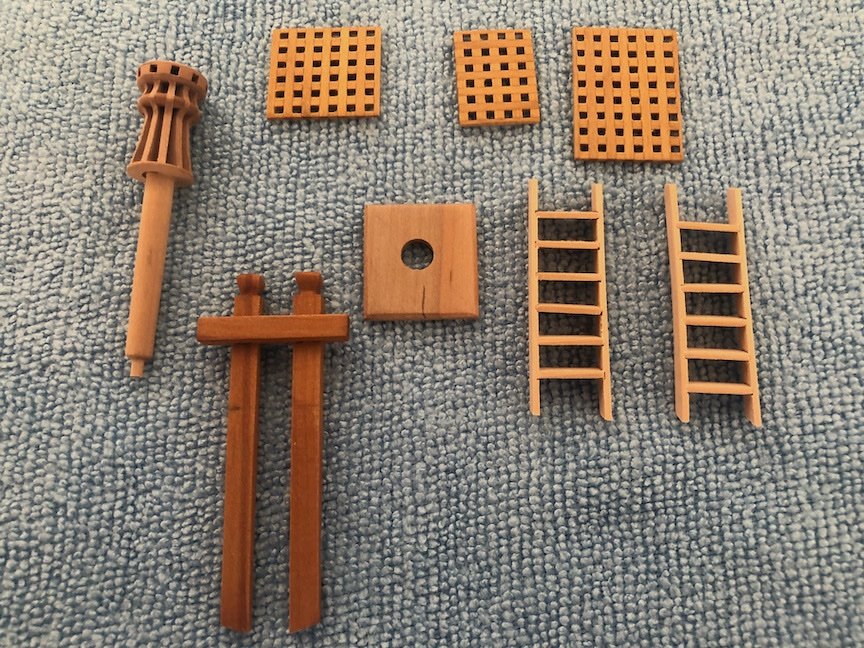
I have also been working on lots of little bits here and there. I am especially happy with how the capstan turned out.
-
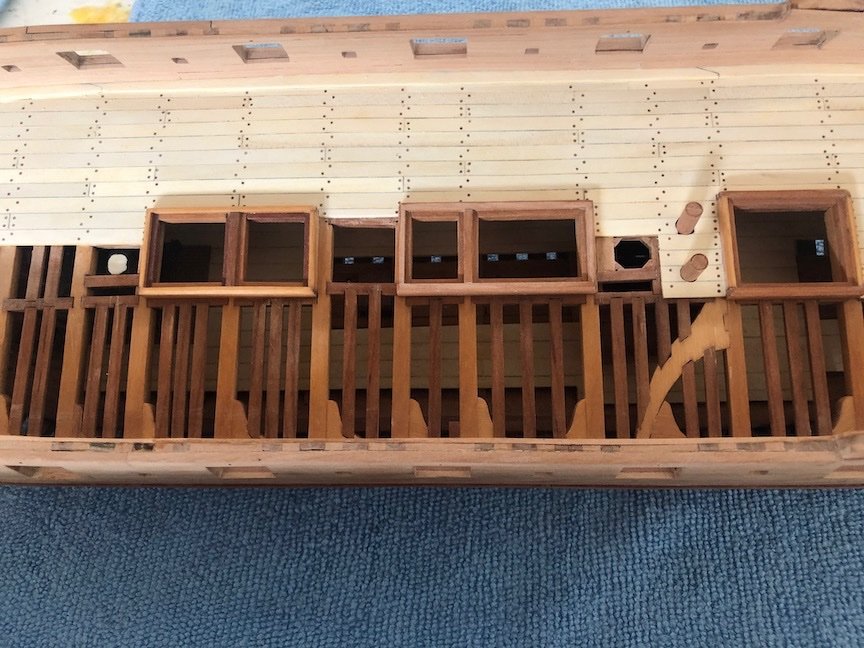
Construction on the galley has proceeded in fits and starts since the last post. Time for some updates. I wasn't sure about adding treenails to the deck. I decided on yes, and am very happy with the result. Nails were made from cherry. Adam
-
MONTAÑES by Amalio
Pirate adam replied to Amalio's topic in - Build logs for subjects built 1751 - 1800
There are many amazing models on this site, but this is one of my role models for precision wood working. Incredible! Adam -
The curved grating is amazing. Very inspirational high standard of work. Adam
- 589 replies
-
- 1
-

-
- le gros ventre
- cargo
- (and 1 more)
-
NAIAD 1797 by Bitao - 1:60
Pirate adam replied to Bitao's topic in - Build logs for subjects built 1751 - 1800
Bitao, This is amazing work. Your craftsmanship is beyond most of us on the site, but I love seeing the limits of what is possible. It gives a lot of inspiration and ideas for techniques even for those of us not quite as skilled. This is one of the few models I have seen with the pump dales actually in place. Adam -
Glen, That is a really cool display. One of the most unique displays of a ship in bottle I have seen. Adam
- 177 replies
-
- 3
-
-

-
- Independence
- bottle
- (and 1 more)
-
Chuck, Sorry if this has been asked before, but I can't find anything in the various logs. Do you have a sense of how much the Winchelsea's hull weighs at this point? Adam
-
You make it look so easy Marsalv! I have learned so much from reading through this log and your Pandora log. It makes me want to practice, practice, practice. Great work. Adam
- 589 replies
-
- 4
-
-
- le gros ventre
- cargo
- (and 1 more)
-
Rope making attempts - Feedback requested
Pirate adam replied to Moonbug's topic in Masting, rigging and sails
It looks great to me. I also recently bought a Rope Rocket, and I have been really happy with it so far. I agree with Chuck that making the rope is weirdly satisfying, and my wife even found it interesting. -
I really like the river raft. That is a cool execution of a very creative idea. Adam
-
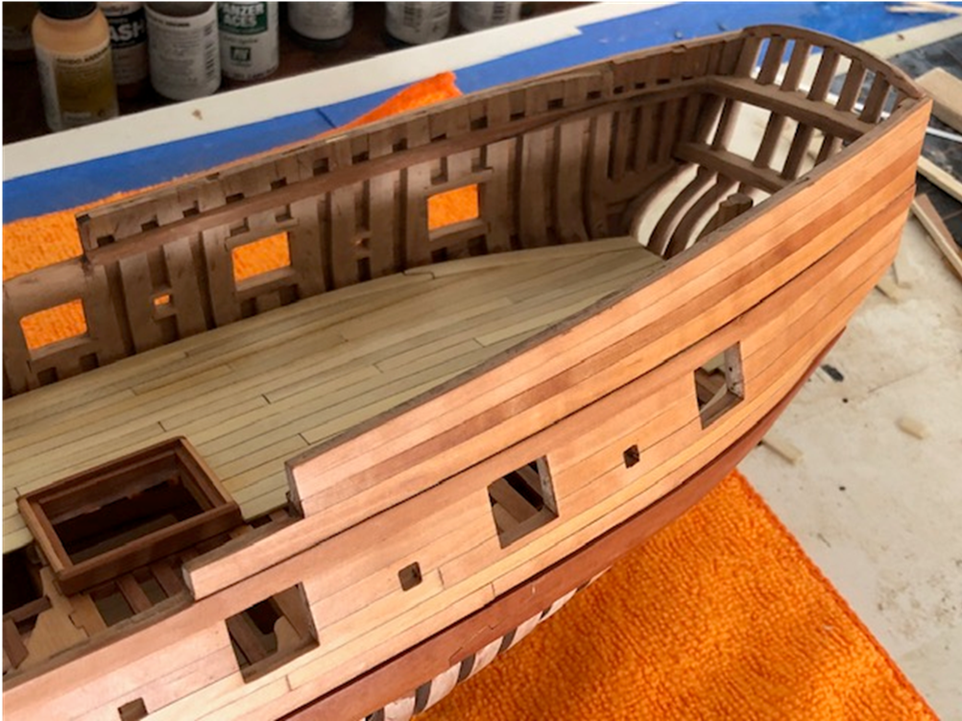
BTW, all of the Vallejo paint on the bench is NOT for the Washington. It is only used for plastic airplanes
-
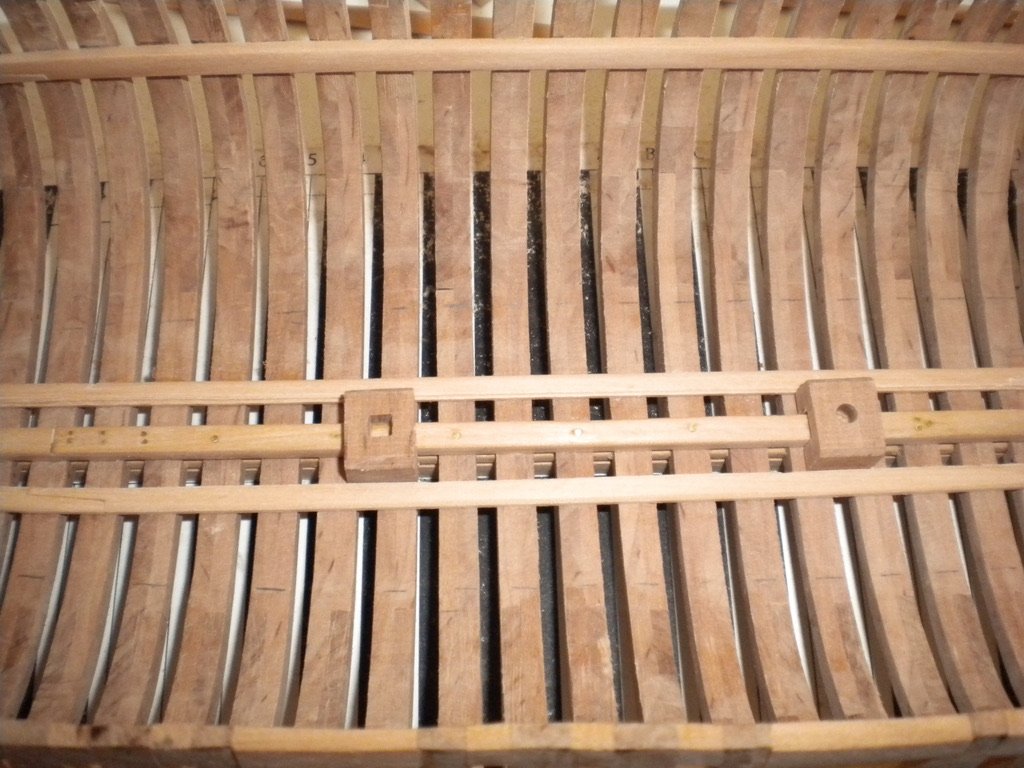
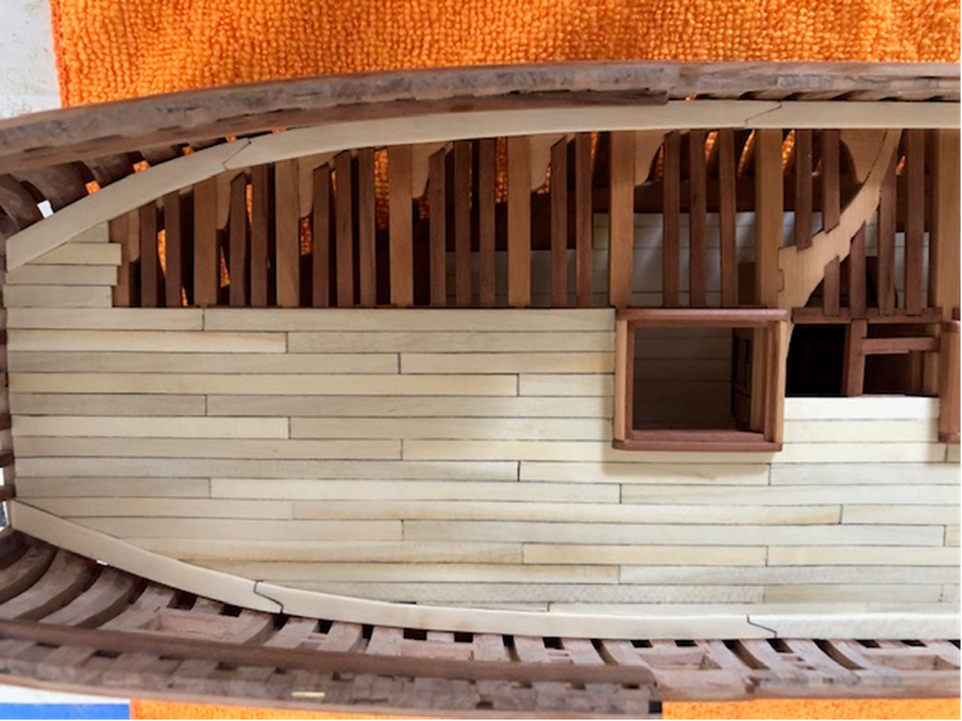
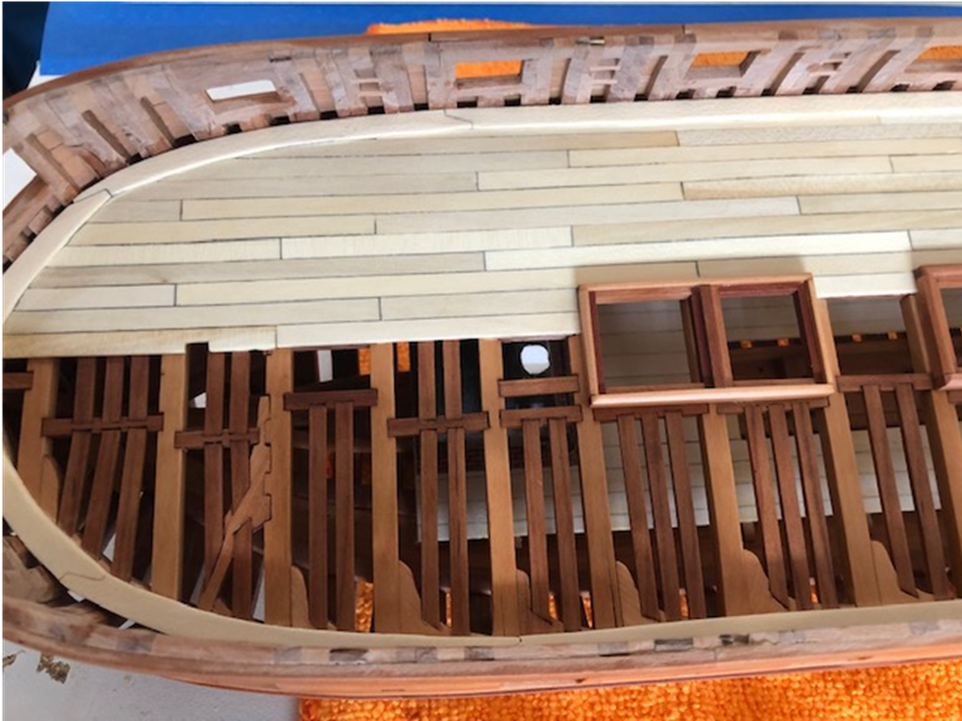
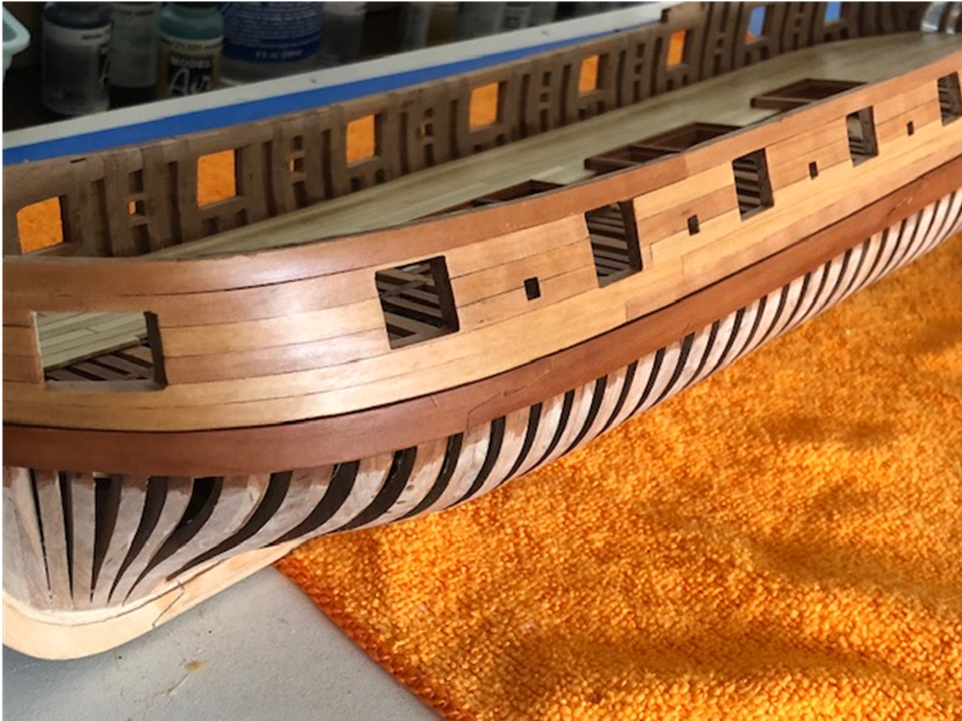
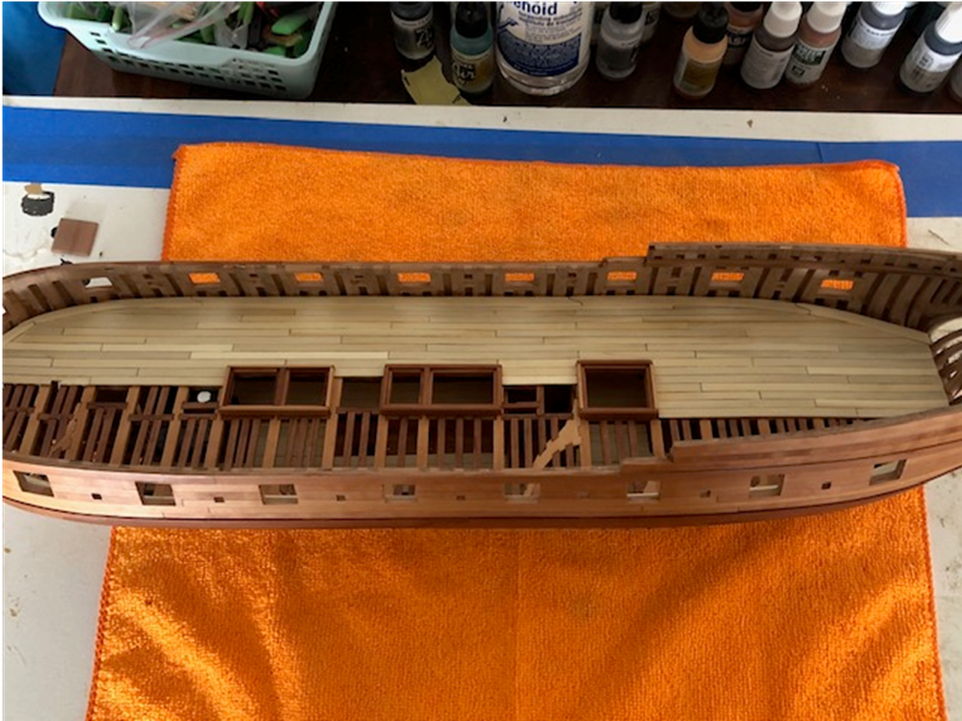
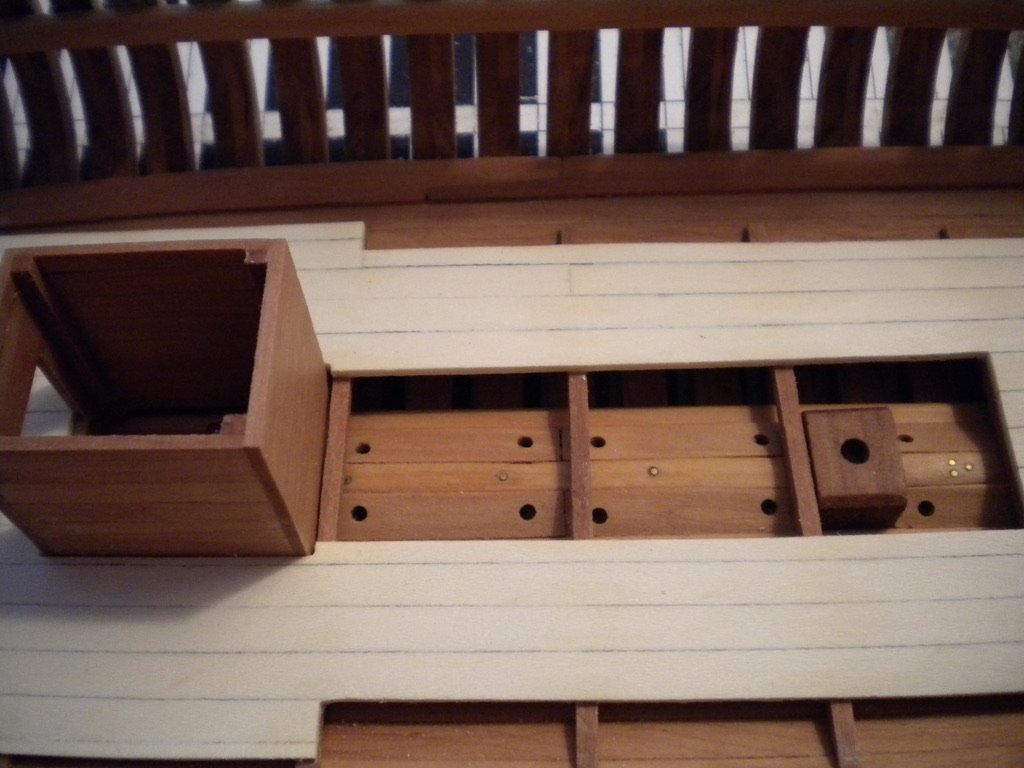
I have been a bit of the passenger on the site as late, but work on the Washington has continued in fits and starts over the last couple of years. Construction has picked up nicely as of late, and I think we may just end up with a finished galley at some point Here is the latest look at work to date. I have treated a lot of the pear wood as well as the decking with a layer of tung oil. Decking is holly. I'm super happy with the look especially on the areas that were coated a year+ ago. I am planning to leave the gun deck more or less as-is with half of the beams exposed. I'm still deciding whether or not to add another row or two of planks below the wales. I have seen models either way, and both look fine. Next up I will start with the internal planking. Adam
-
HMS VICTORY 1765 by albert - 1/48
Pirate adam replied to albert's topic in - Build logs for subjects built 1751 - 1800
Looking forward to seeing this one develop Albert. -
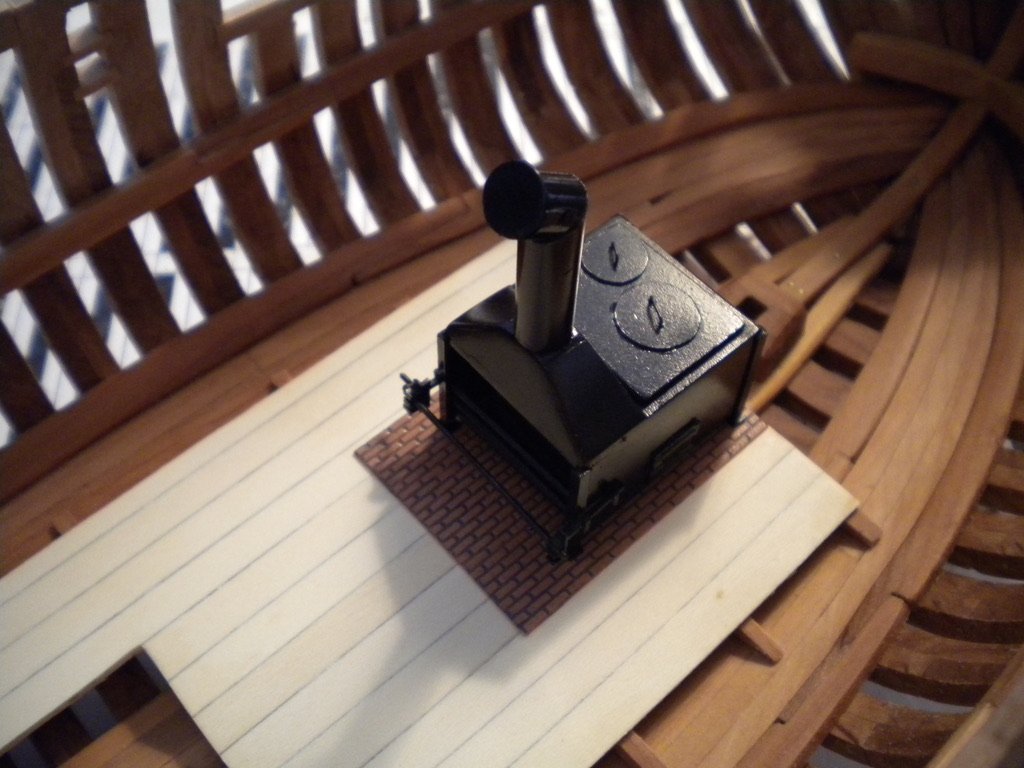
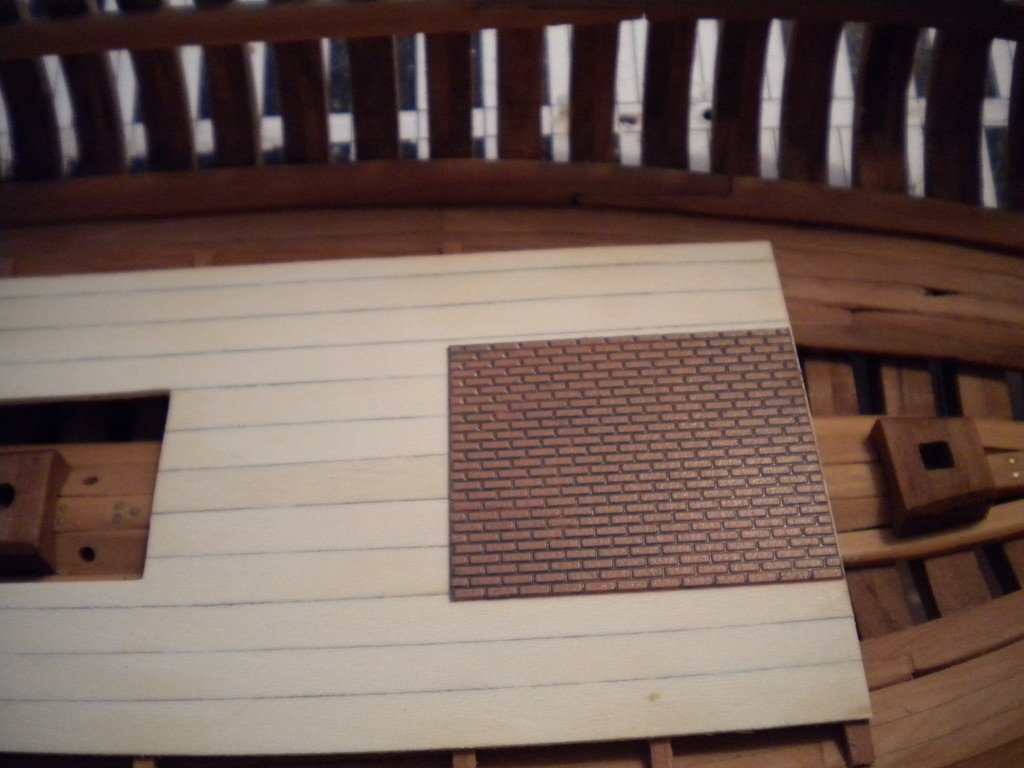
Stove in place.
-
I used model railroad materials for the fire bricks.
-
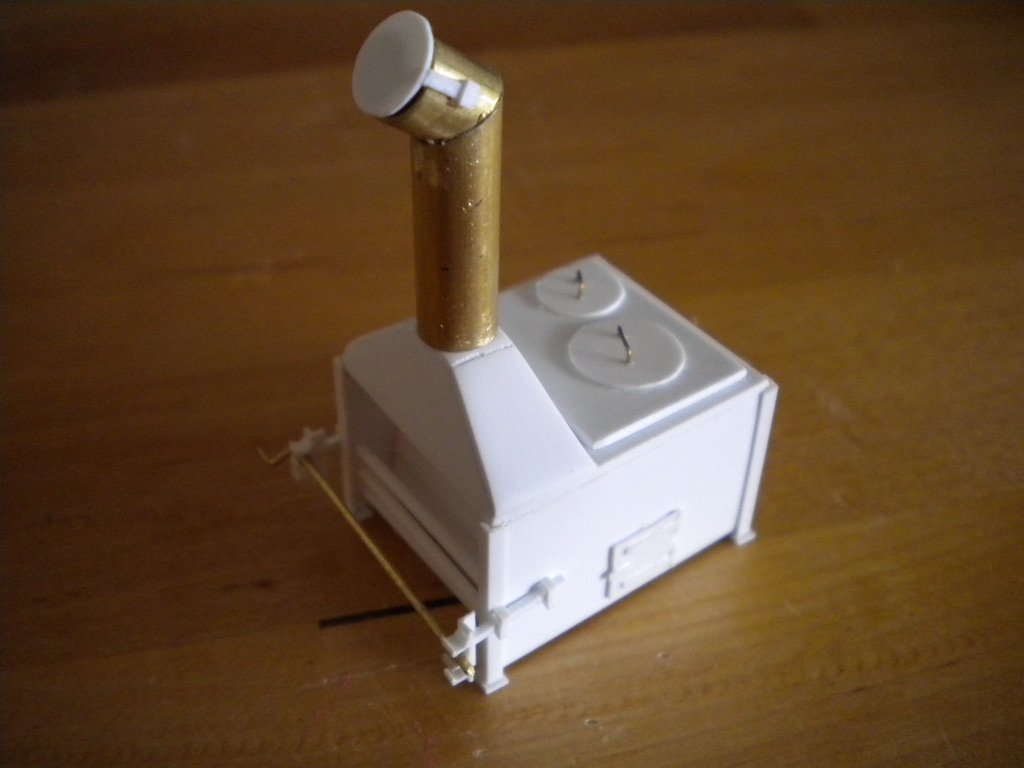
I made the stove out of plastic and brass bits.
-
Platform and well in place.
-
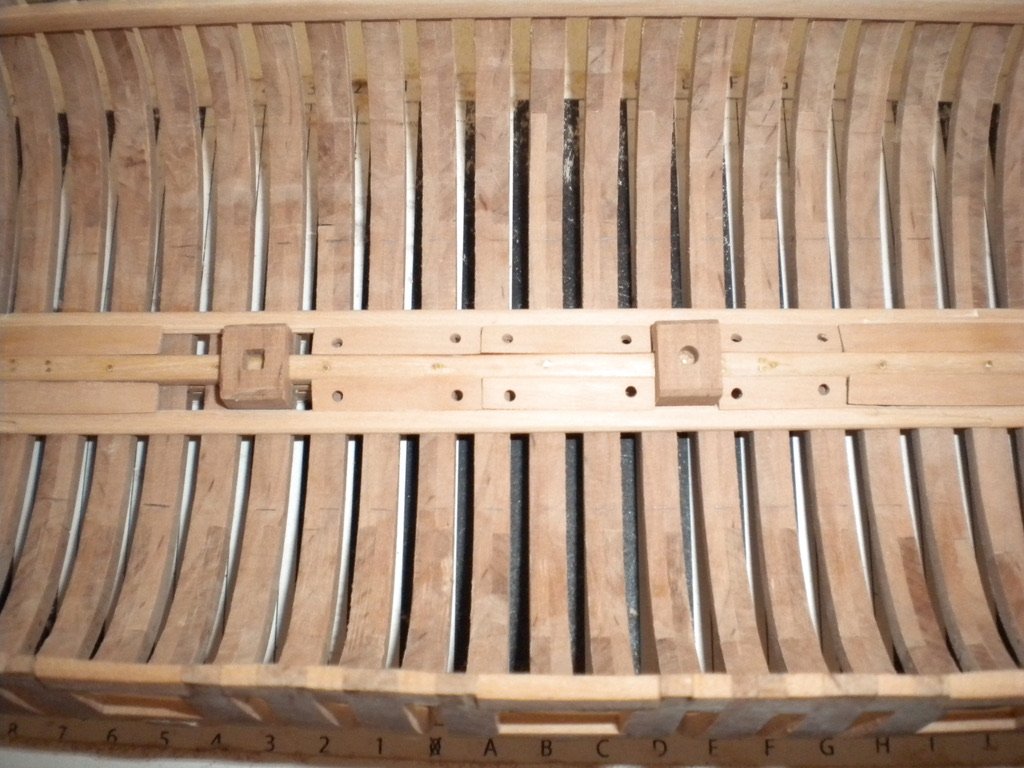
Limber boards in place.
-
Mast steps and limber strakes.