


Glenn-UK
-
Posts
3,005 -
Joined
-
Last visited
Content Type
Profiles
Forums
Gallery
Events
Posts posted by Glenn-UK
-
-
28 minutes ago, chris watton said:
You are doing a wonderful job, Glenn, well done.
Thanks Chris. Looking forward to my next project which will be another one from your ever expanding fleet.😁
-
30 minutes ago, Thukydides said:
Indeed she is looking good Glenn, Alert looks so small in the background :).
Many thanks. Indy is a beast compared to all my other builds😁
-
9 minutes ago, James H said:
She's coming along real nice. Not long to go now.
Thanks Jim.
-
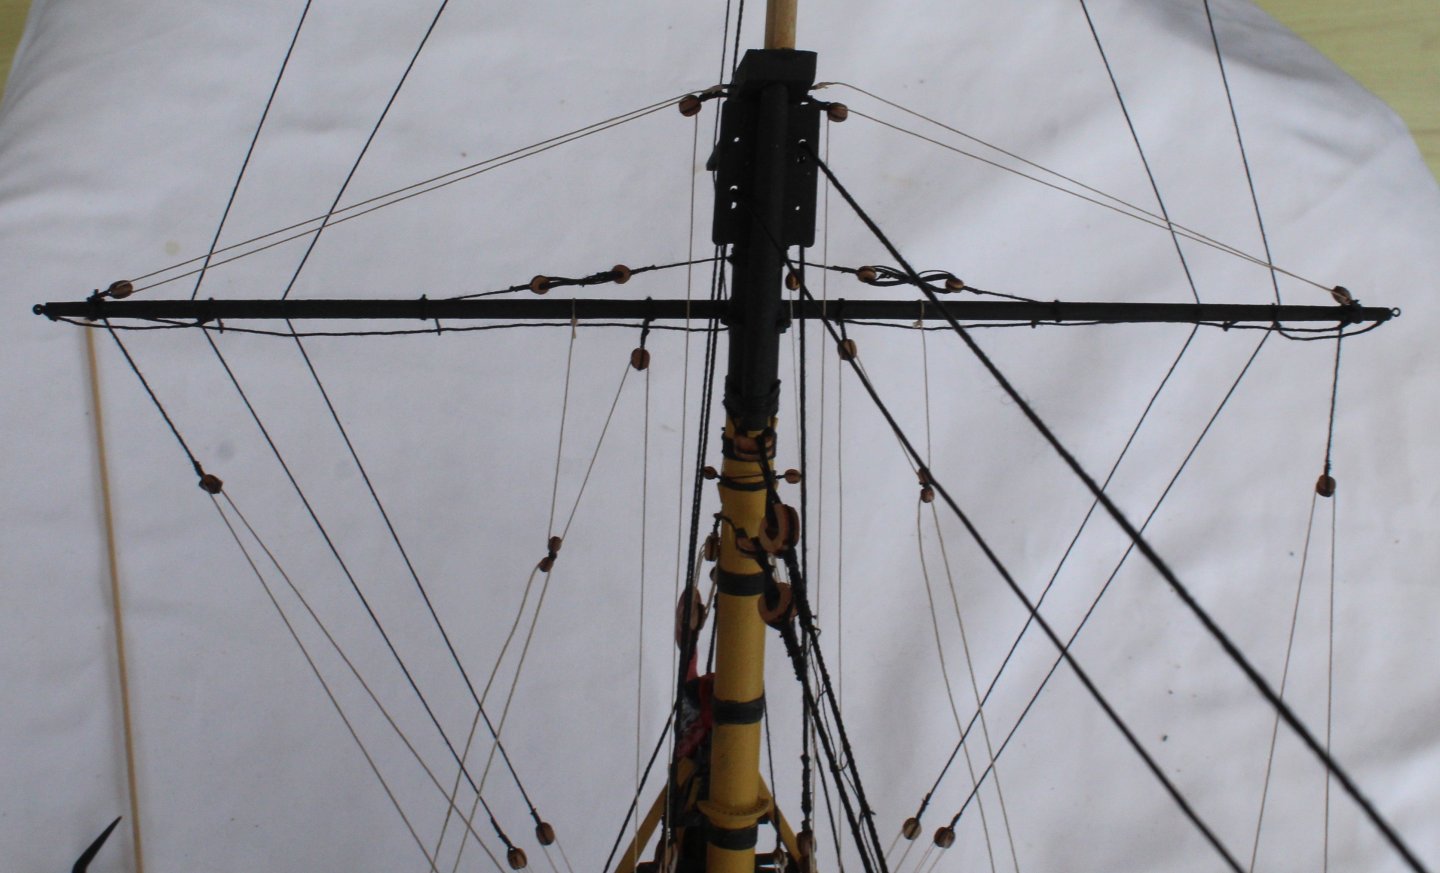
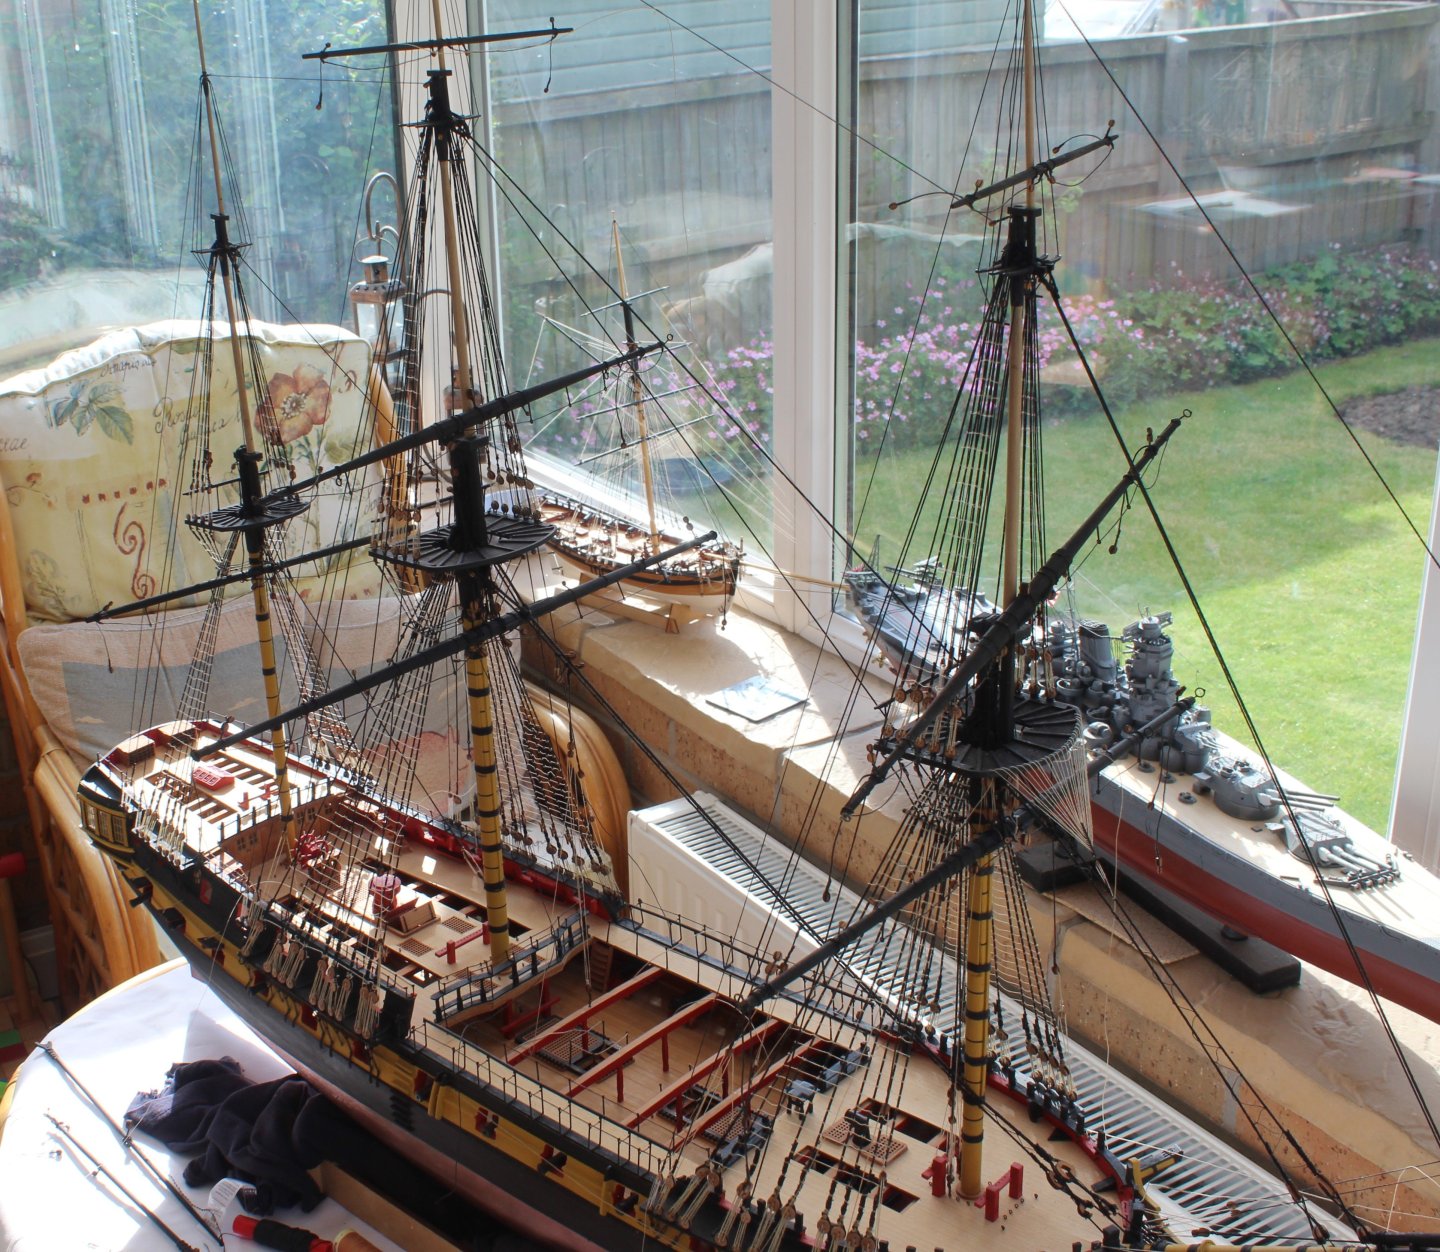
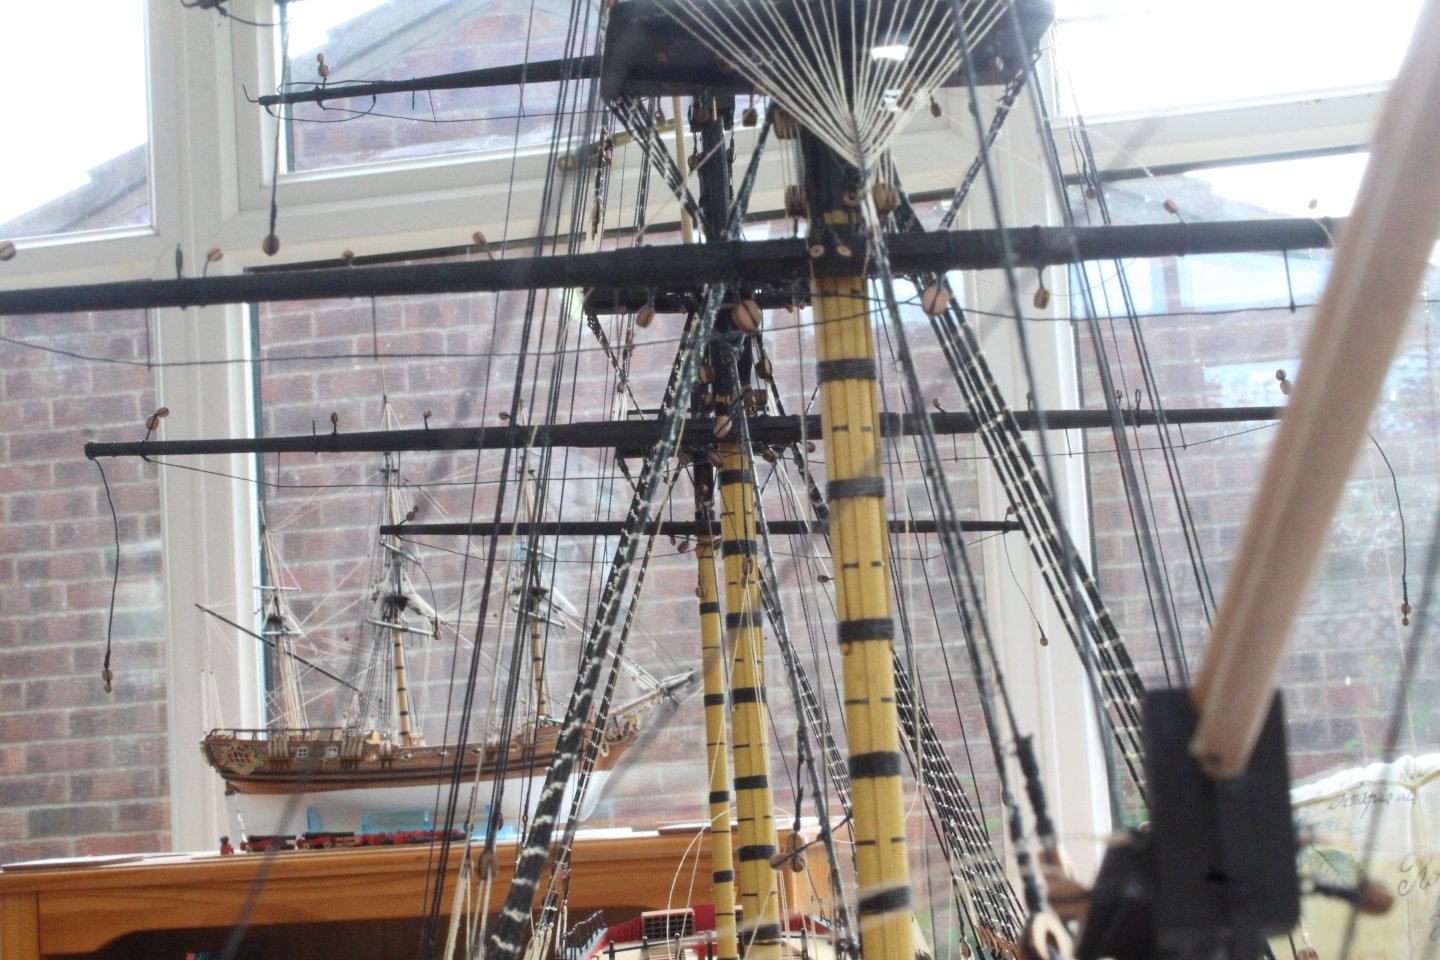
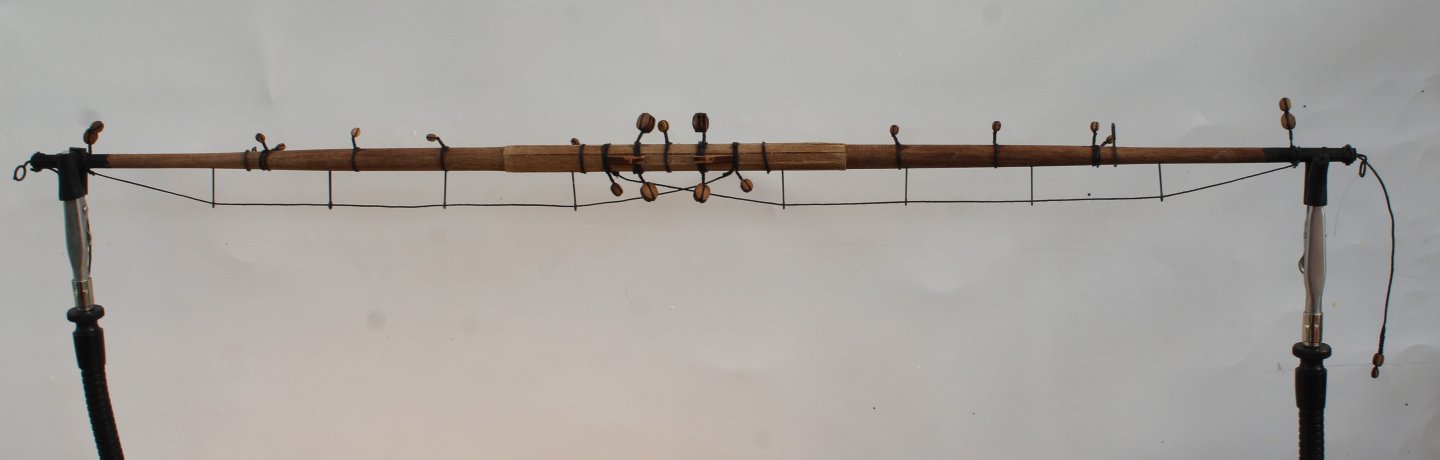
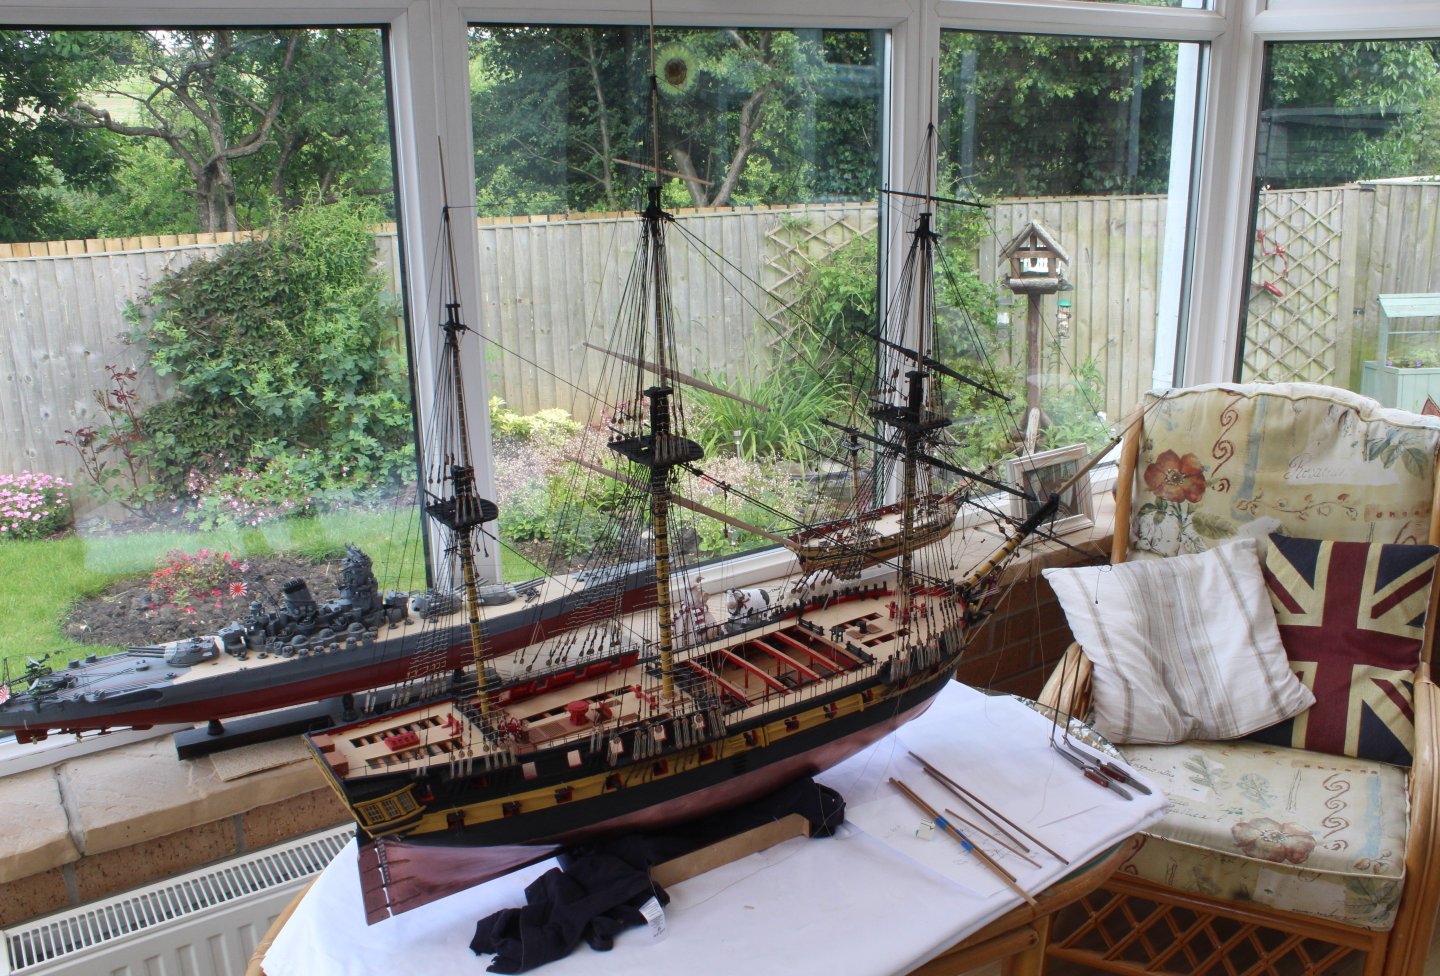
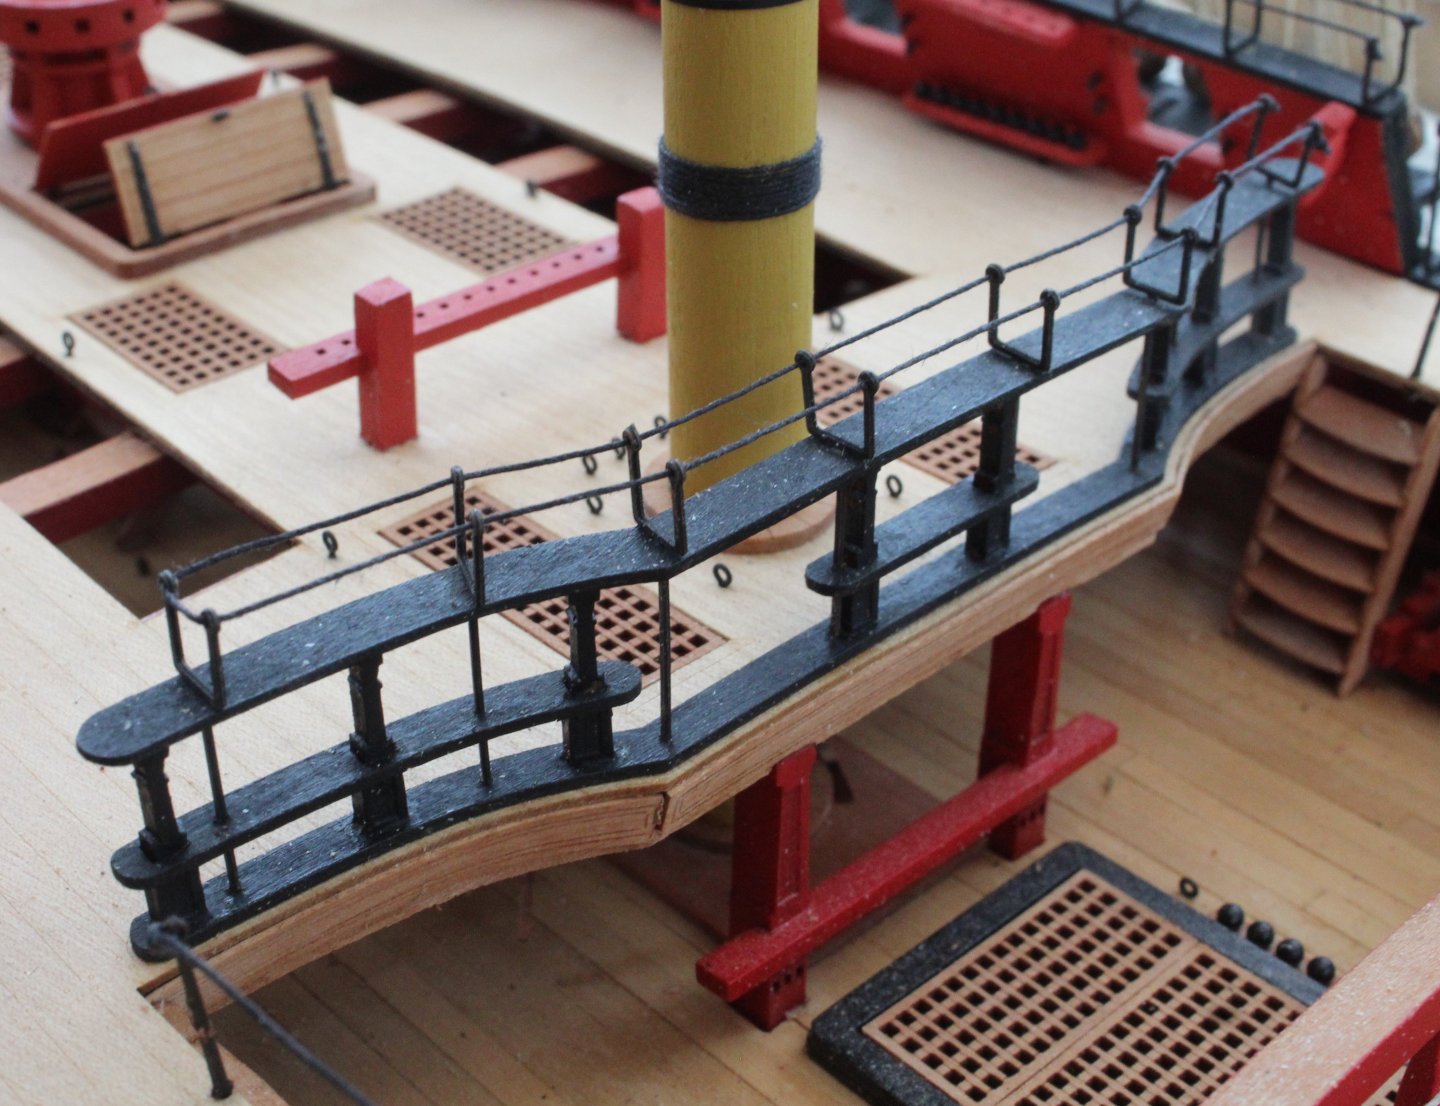
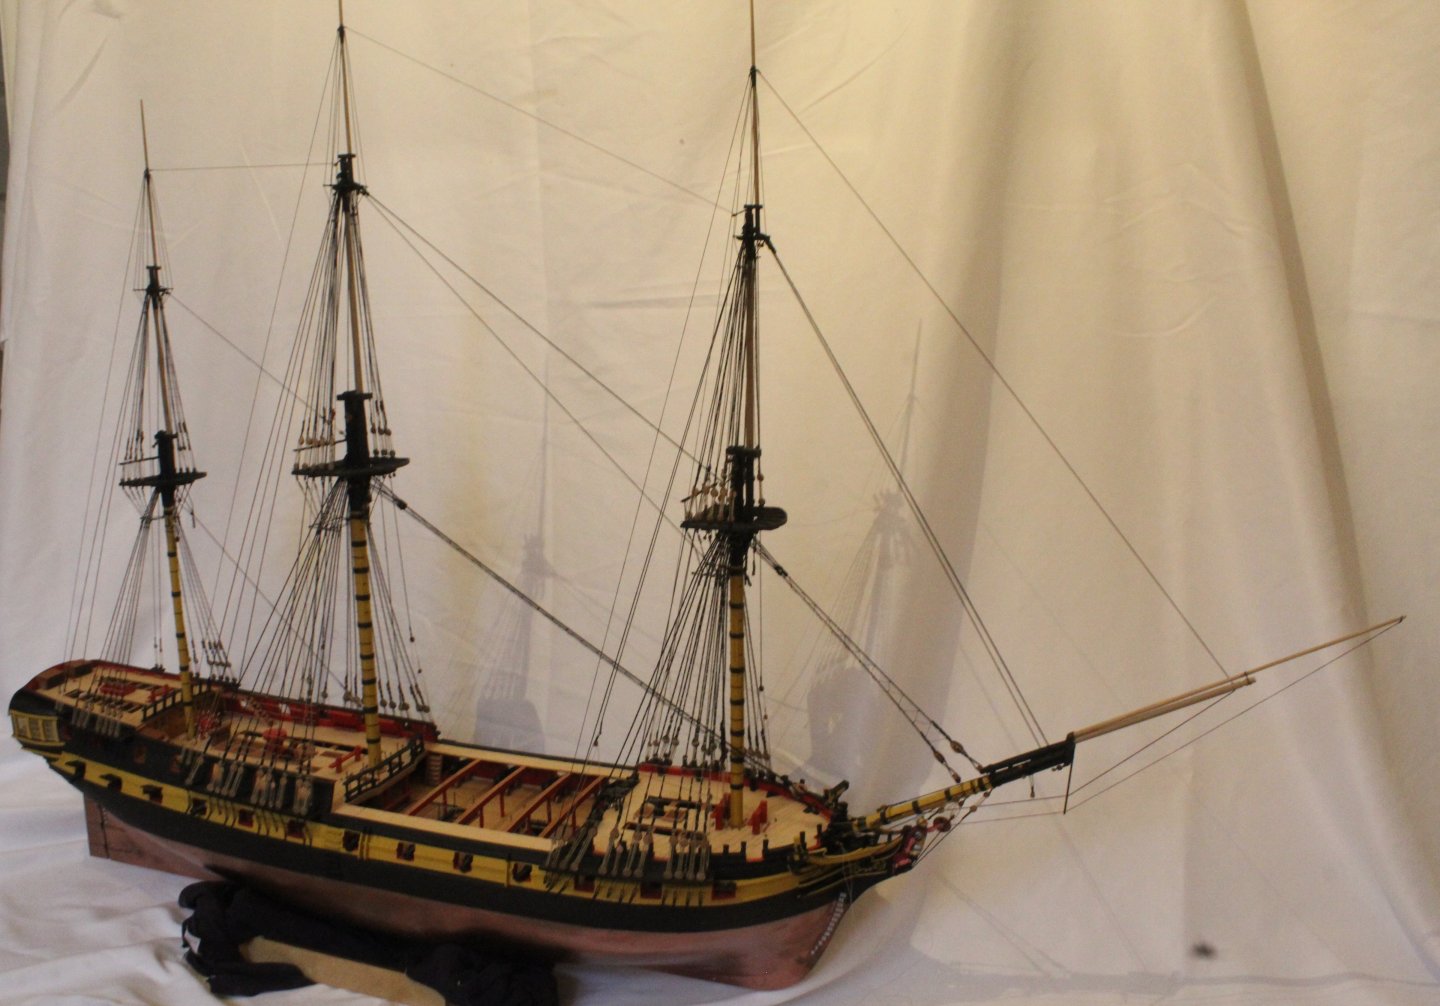
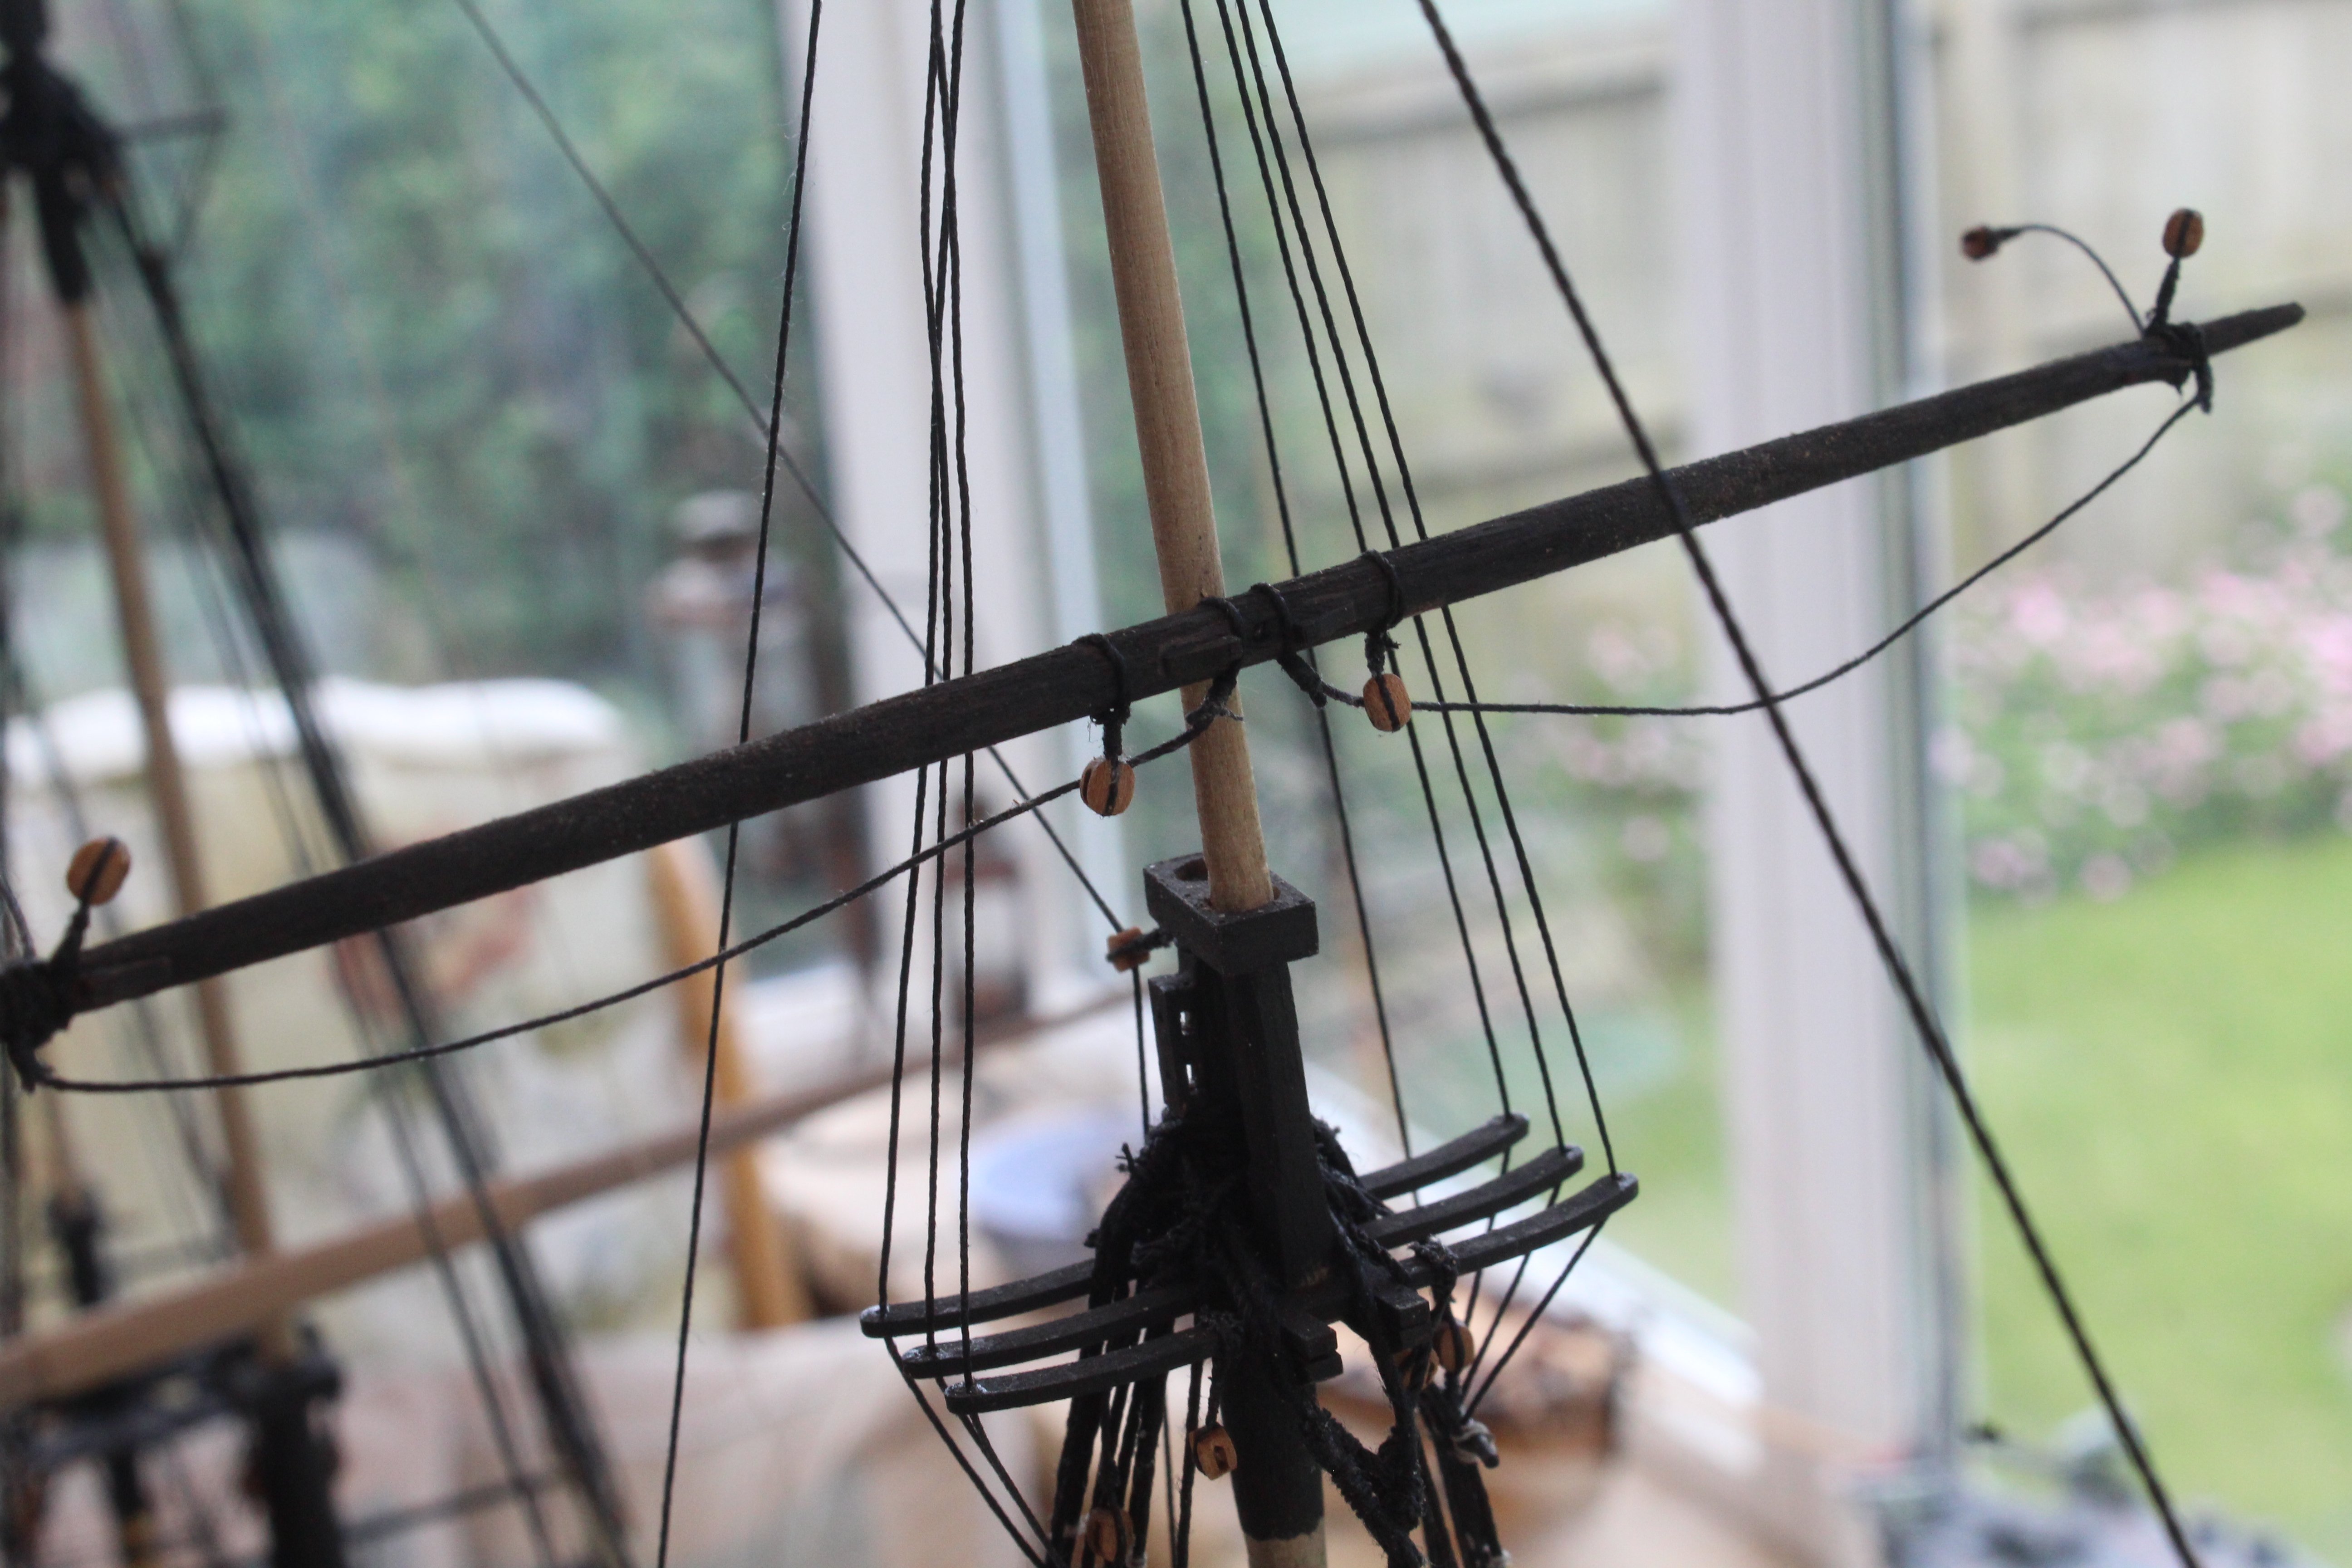
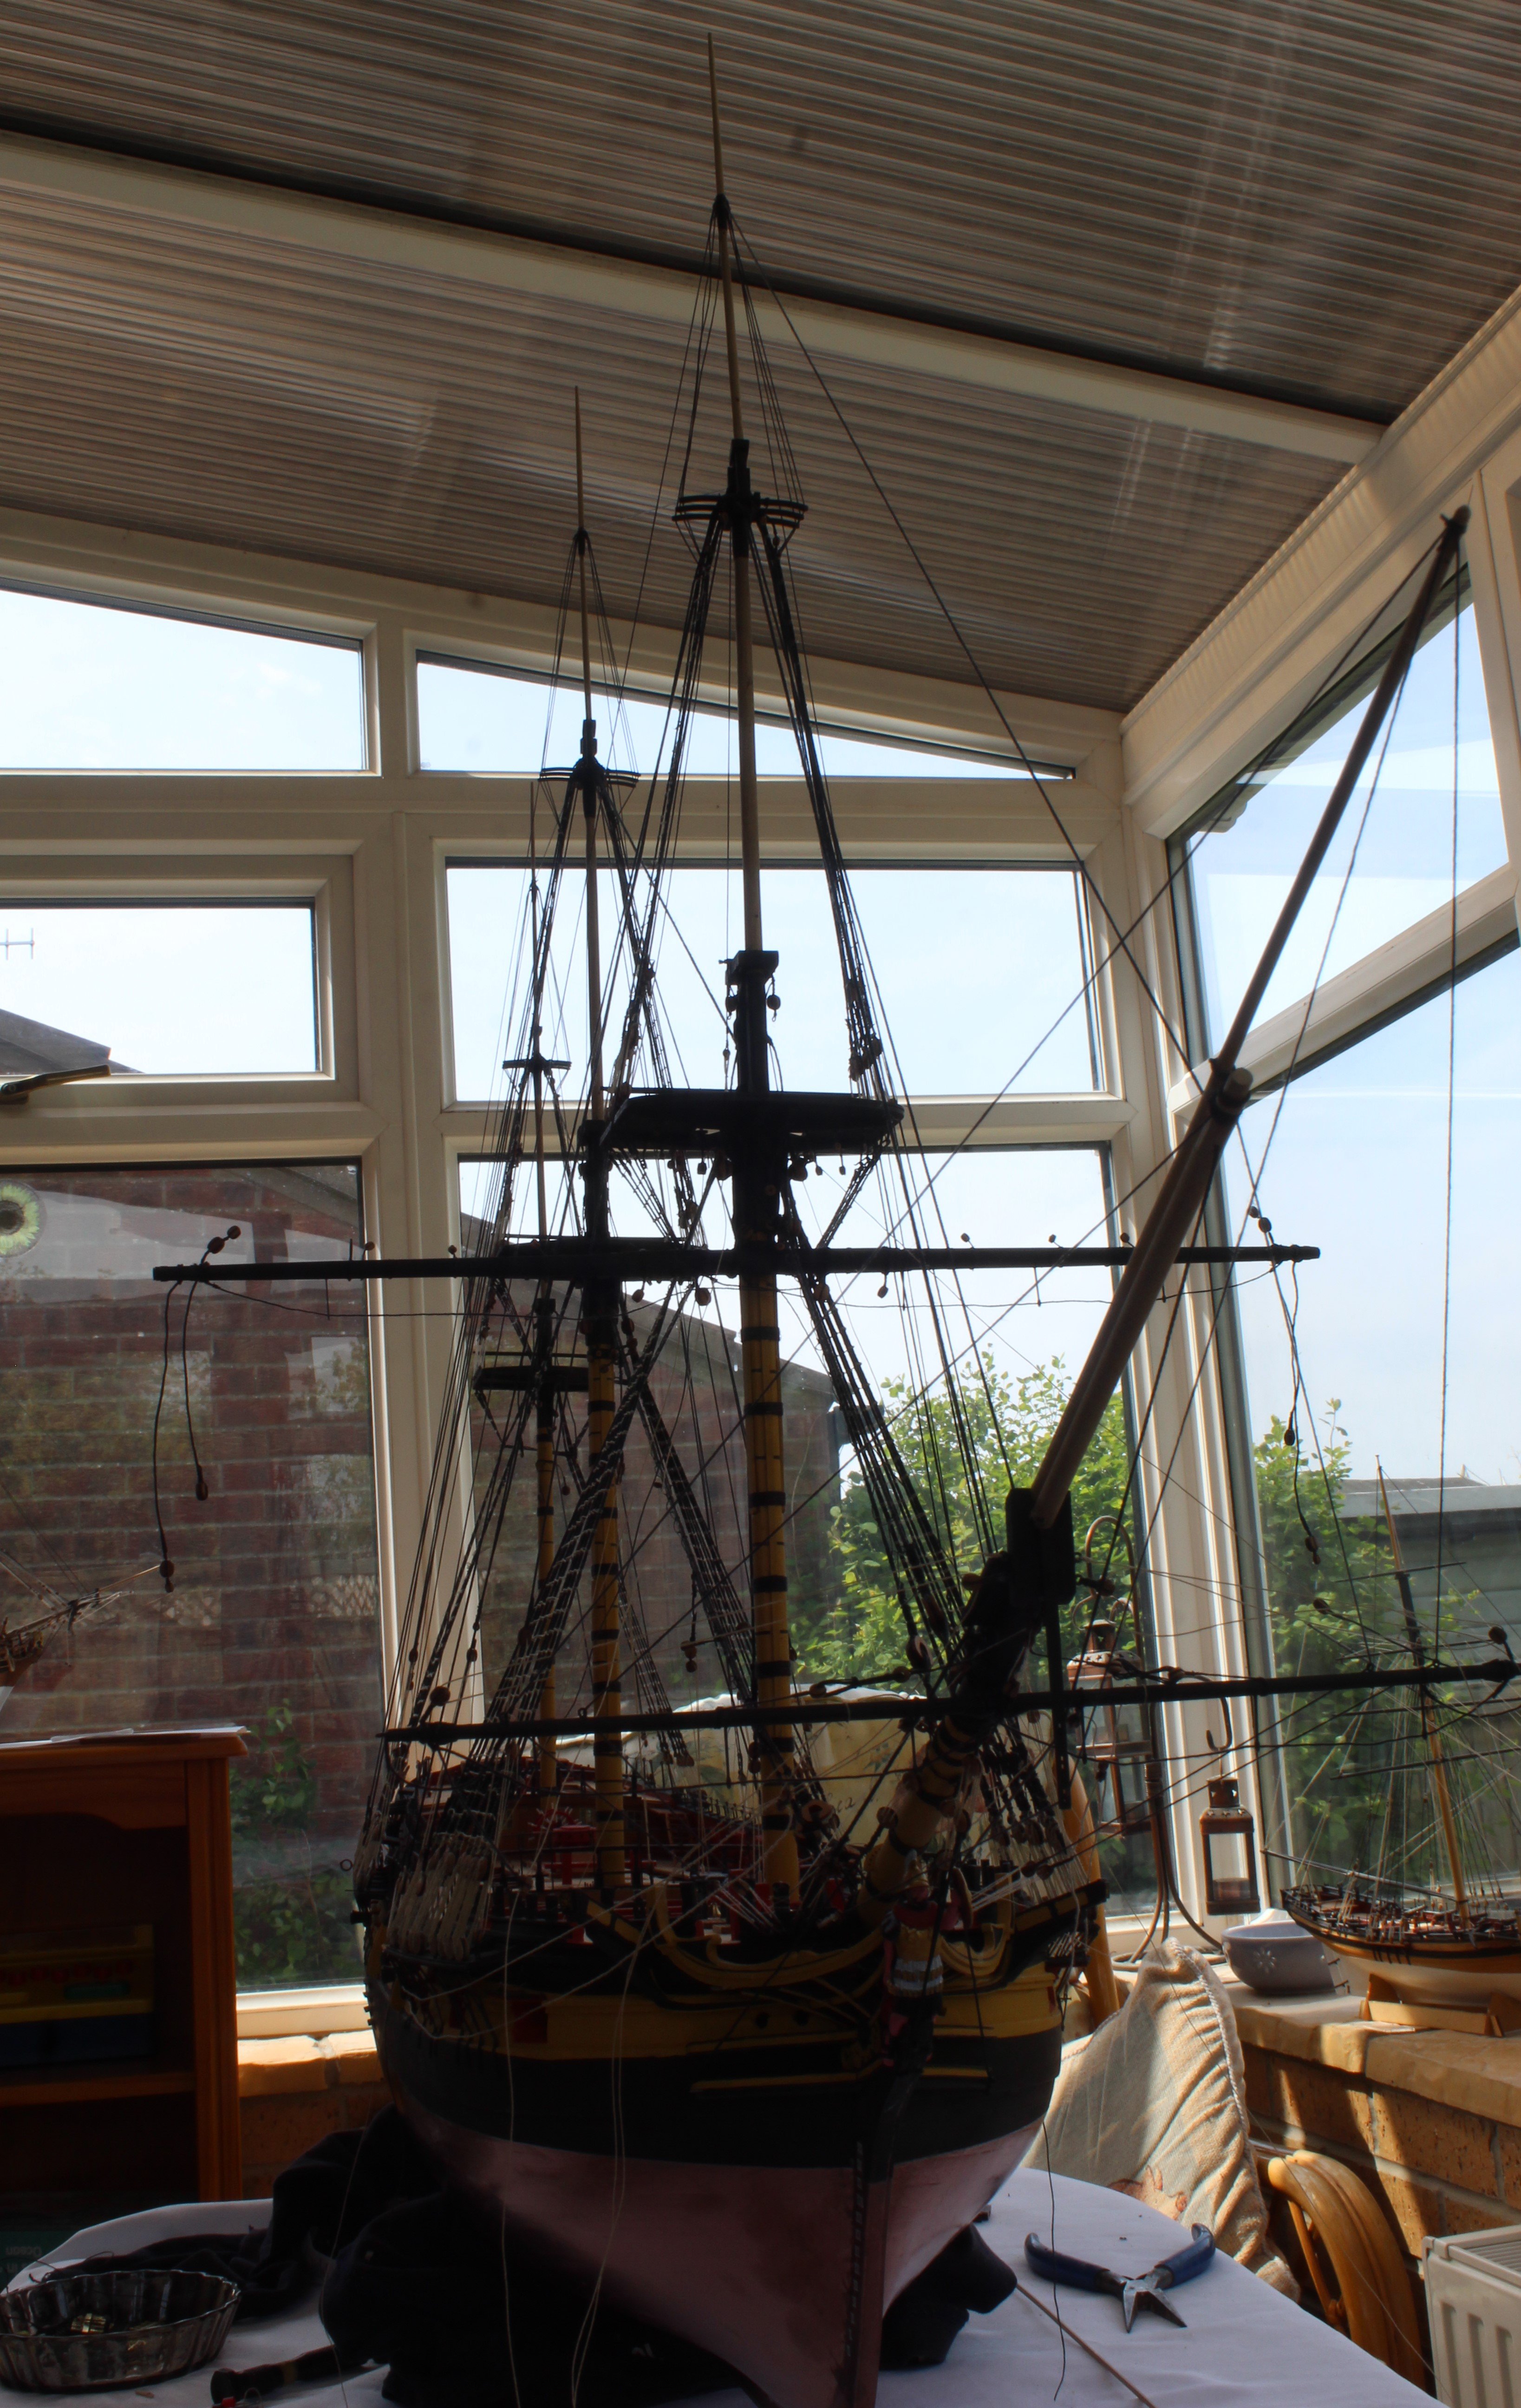
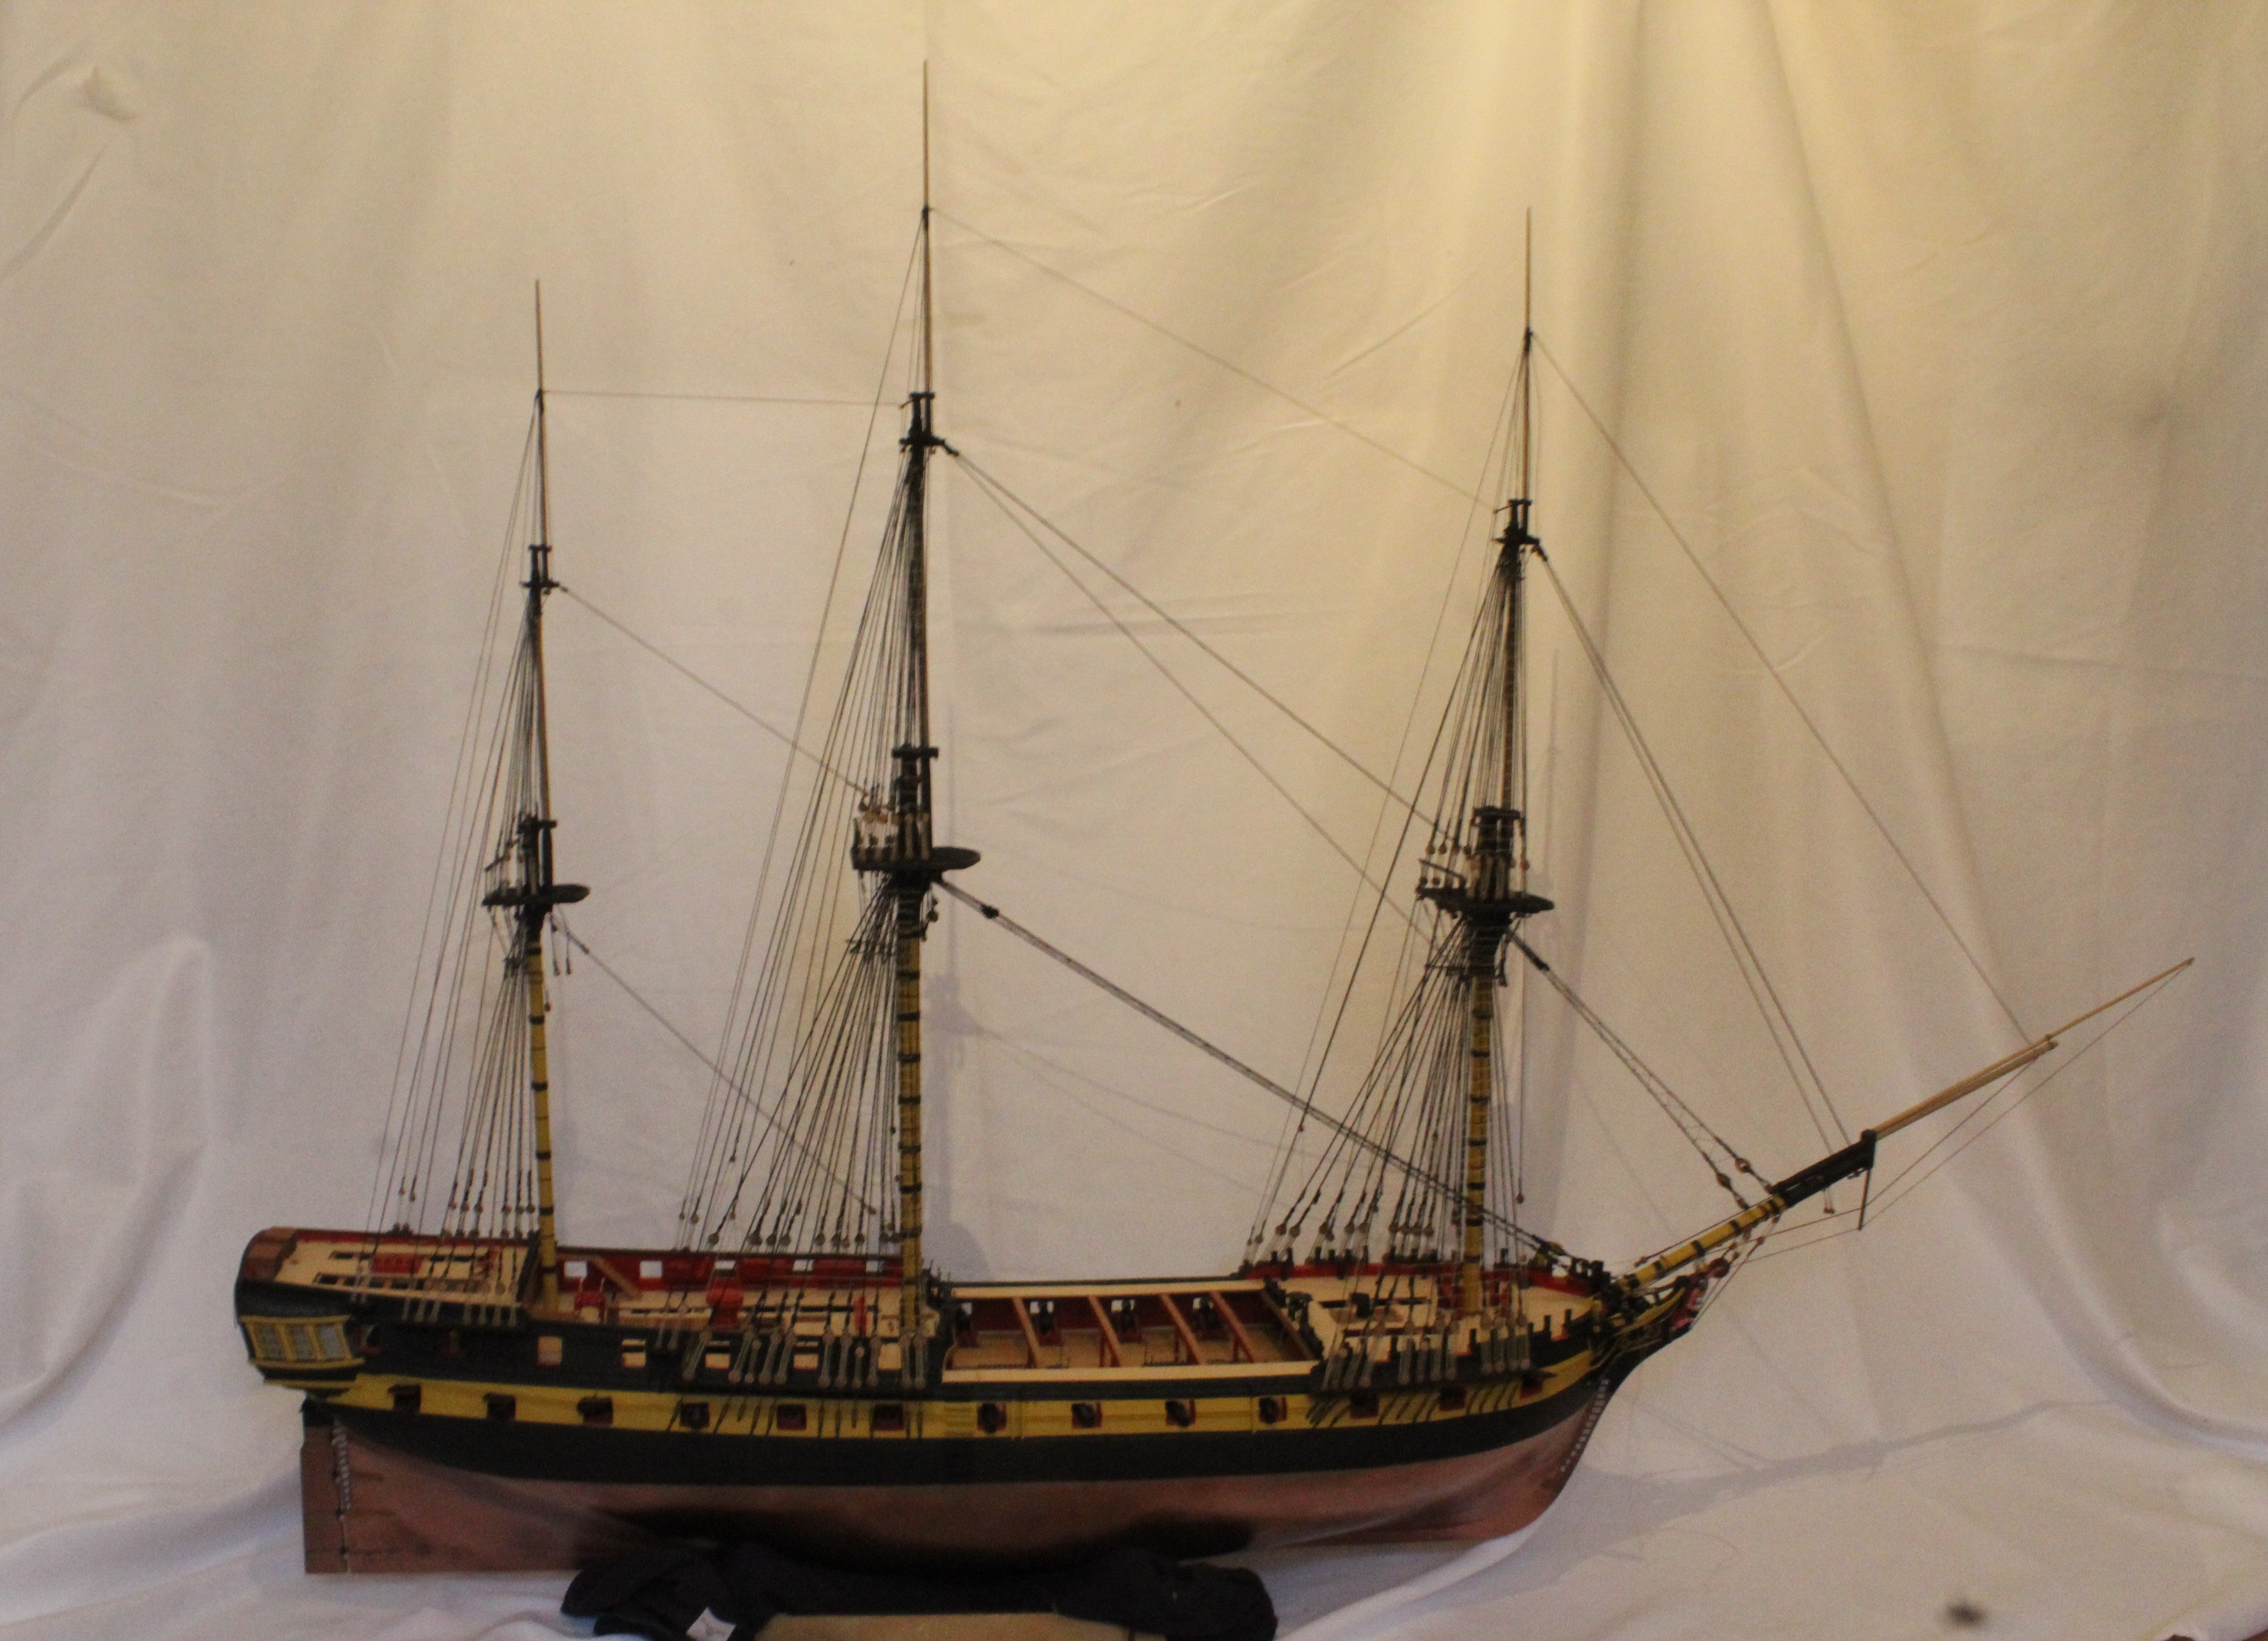
It has been a productive last few days with several little tasks completed. To start this post I have included a picture of the current build status. I still have to add the 3 off topgallant yards and the driver gaff & boom to the Indy. There is still quite a few weeks work left before the Indy build is completed.

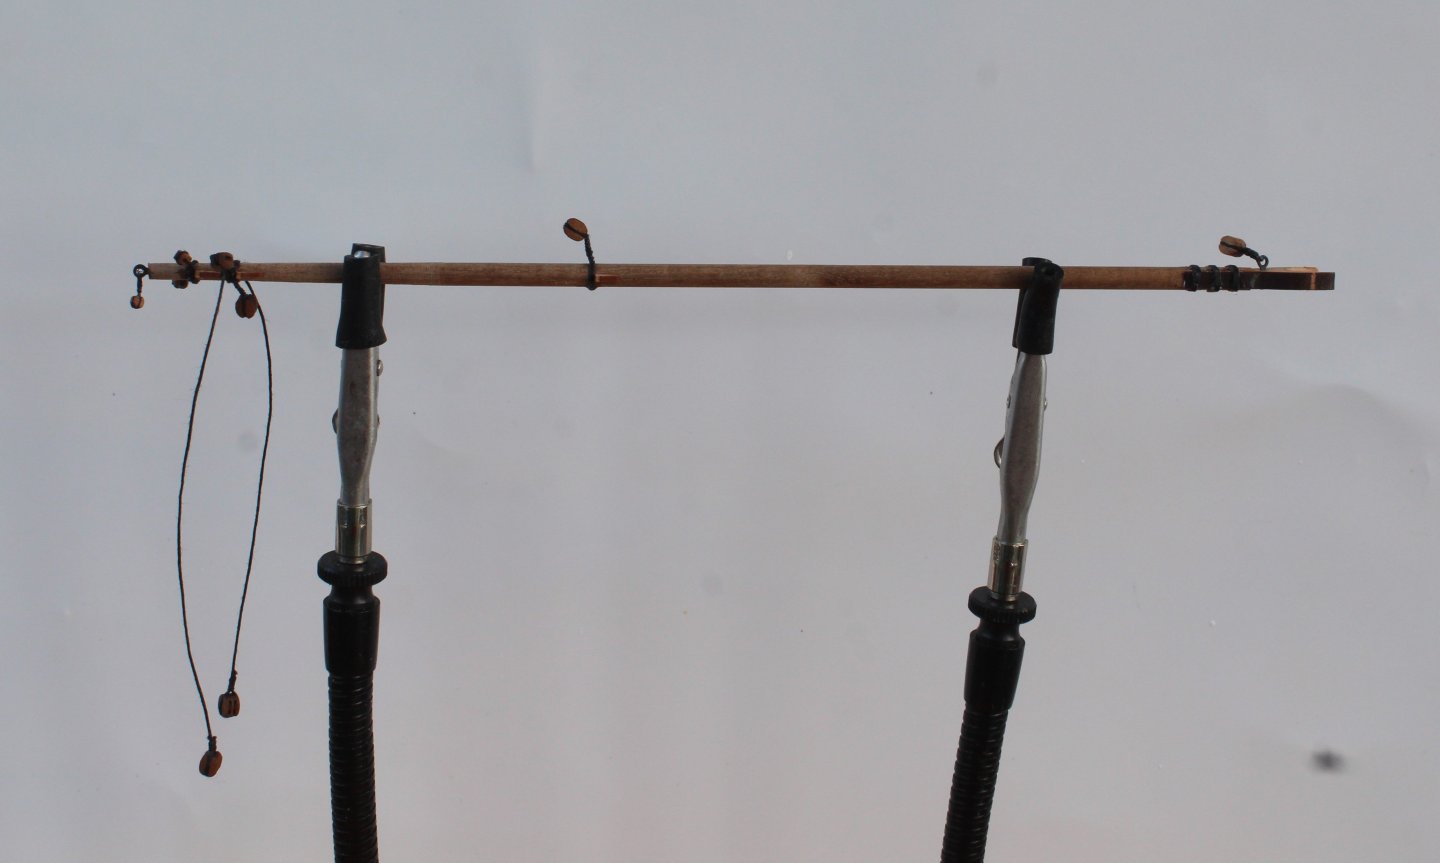
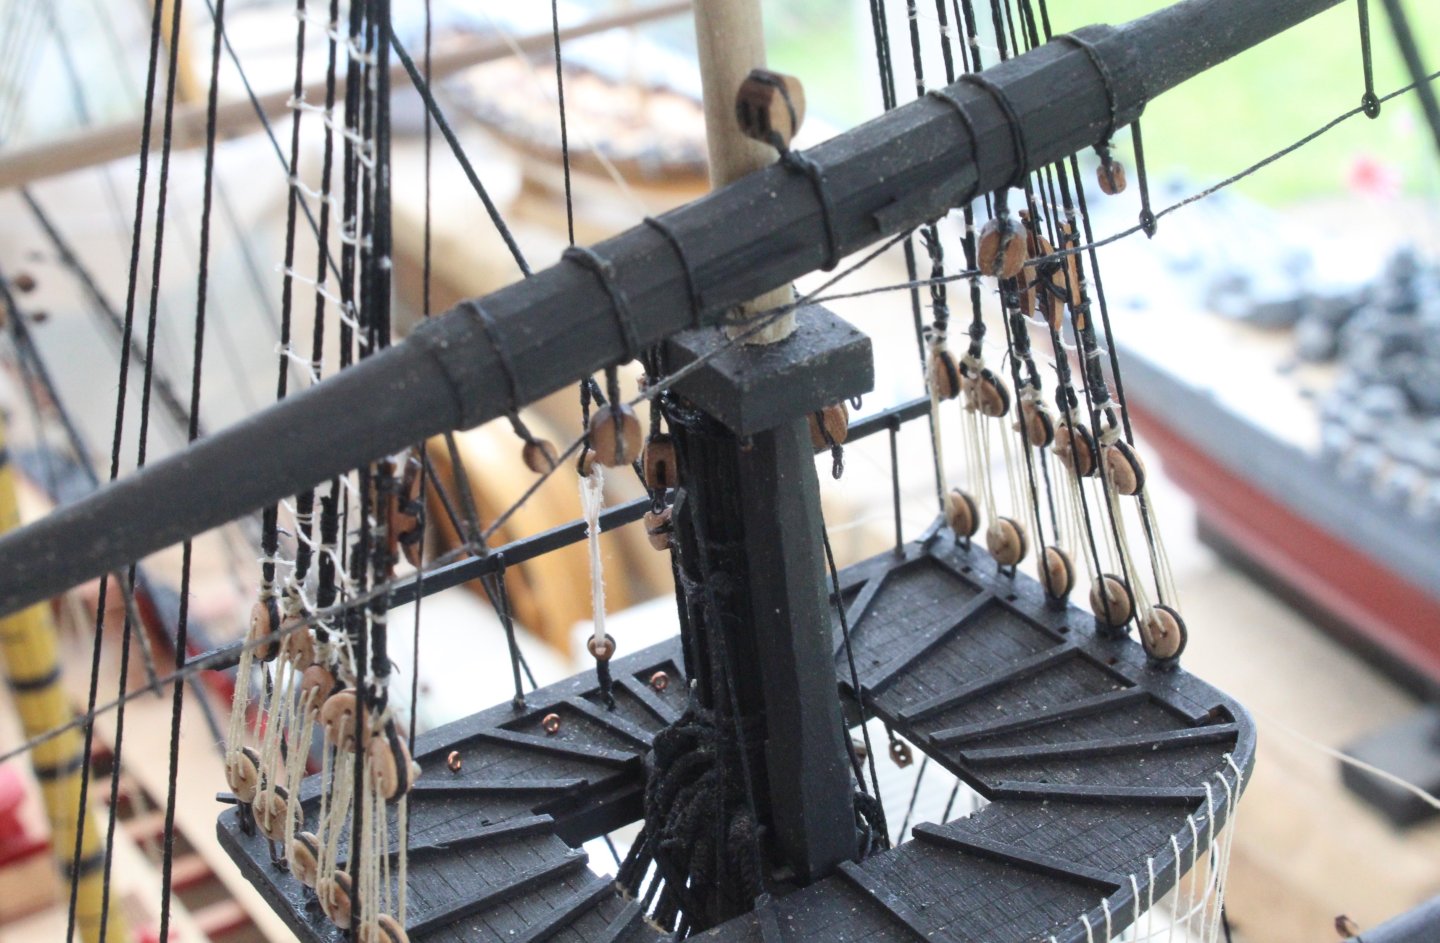
Spritsail Yard
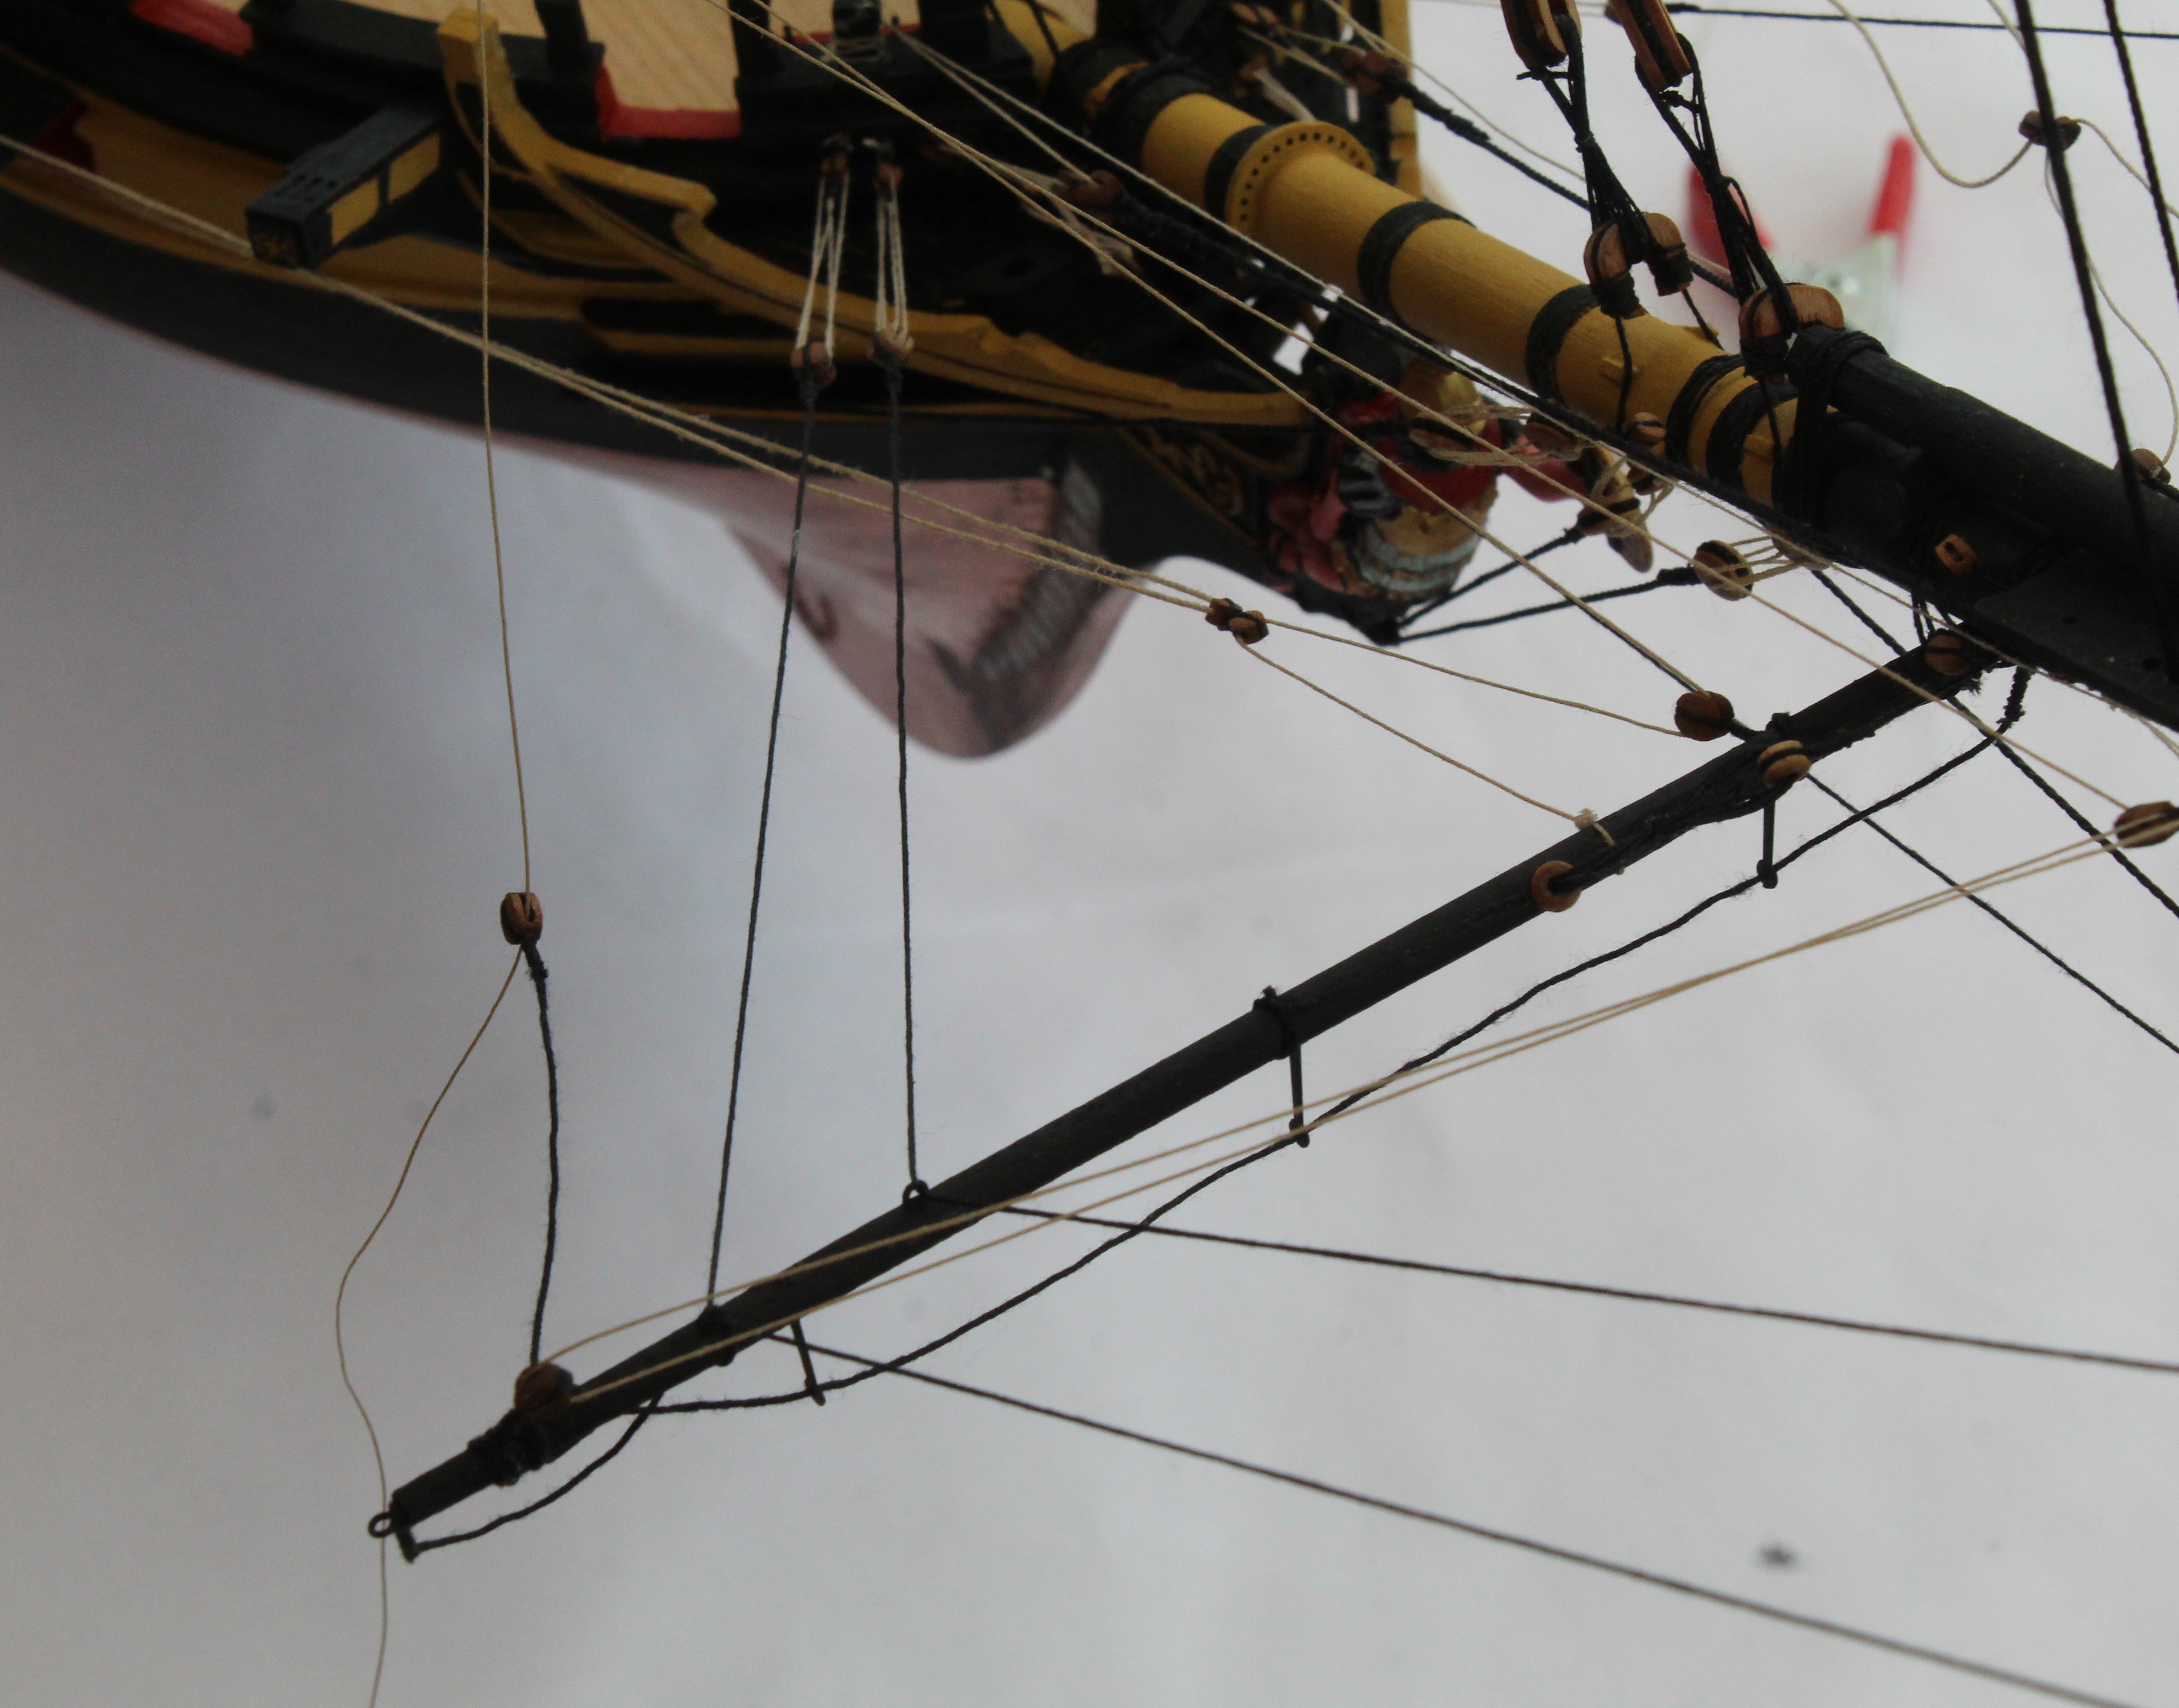
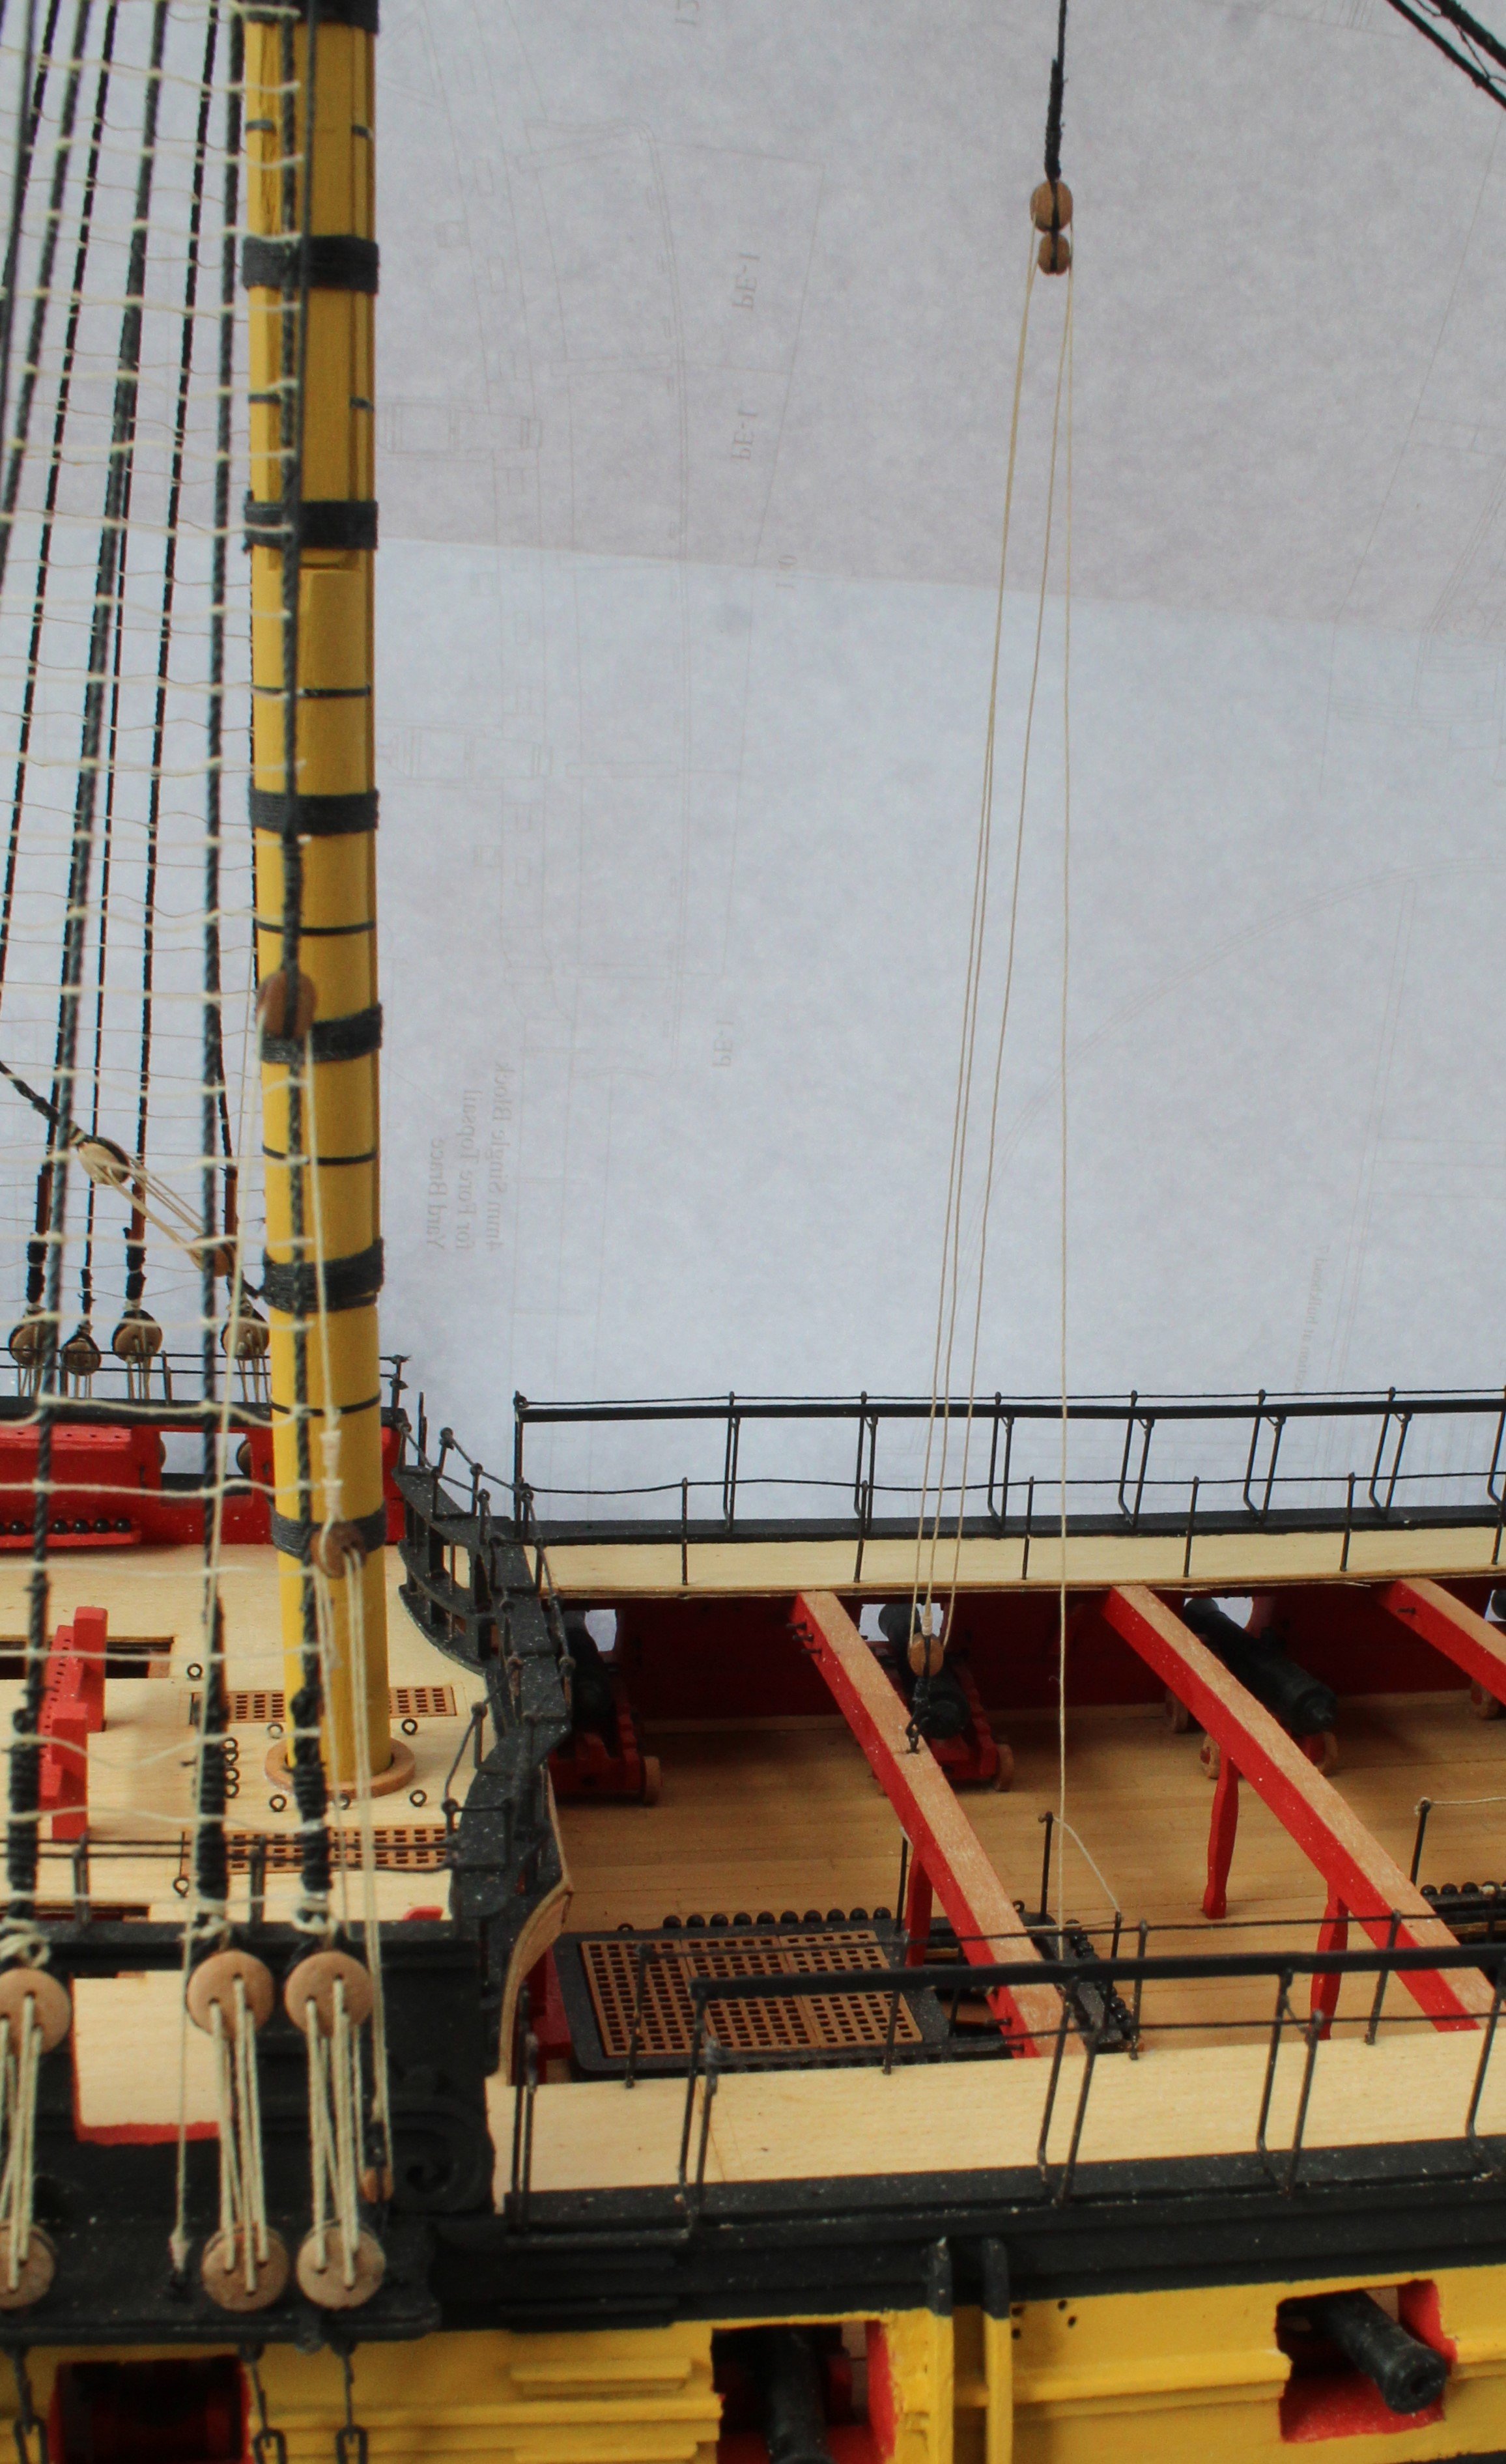
I have now rigged the spritsail sheet, spritsail clew line and braces which completes all the rigging for the spritsail yard. I am very pleased with how this aspect of the build now looks.
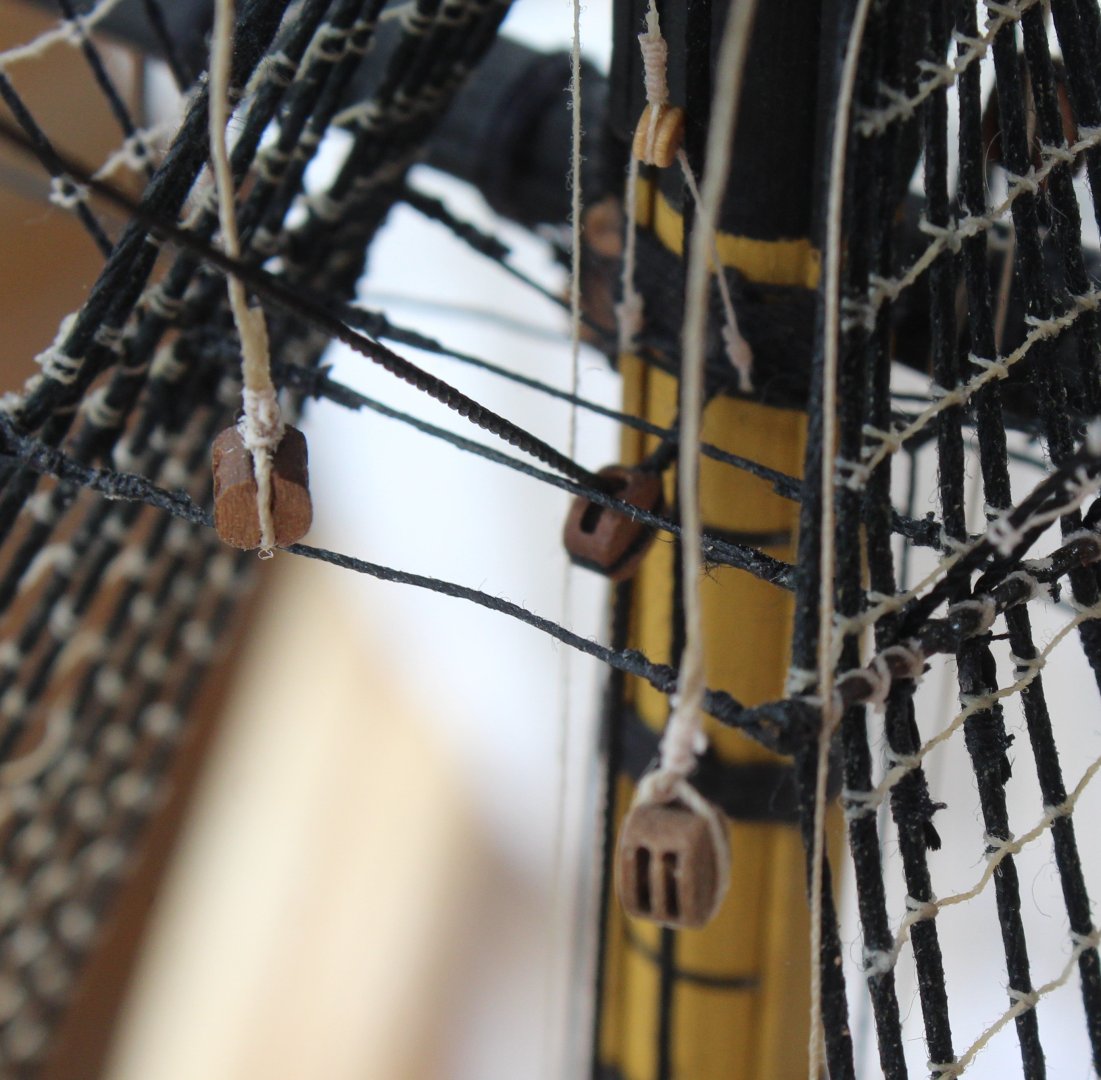
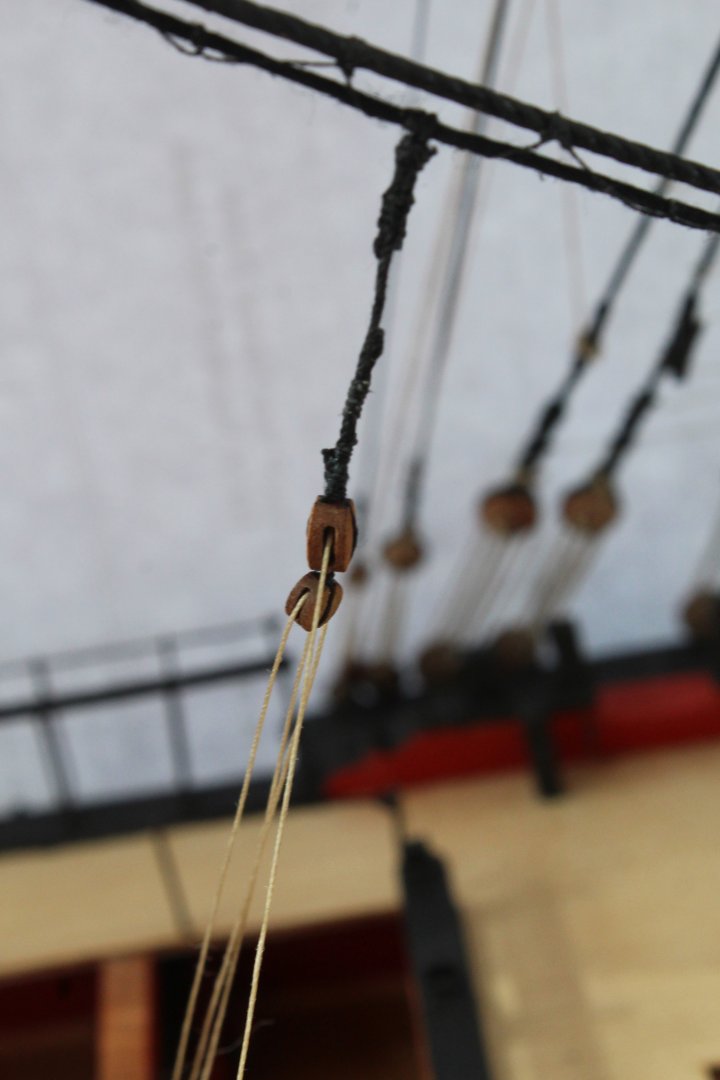
The next photo shows the spritsail sheet and spritsail clew line rigging. This was probably the hardest aspect of the spritsail yard rigging.
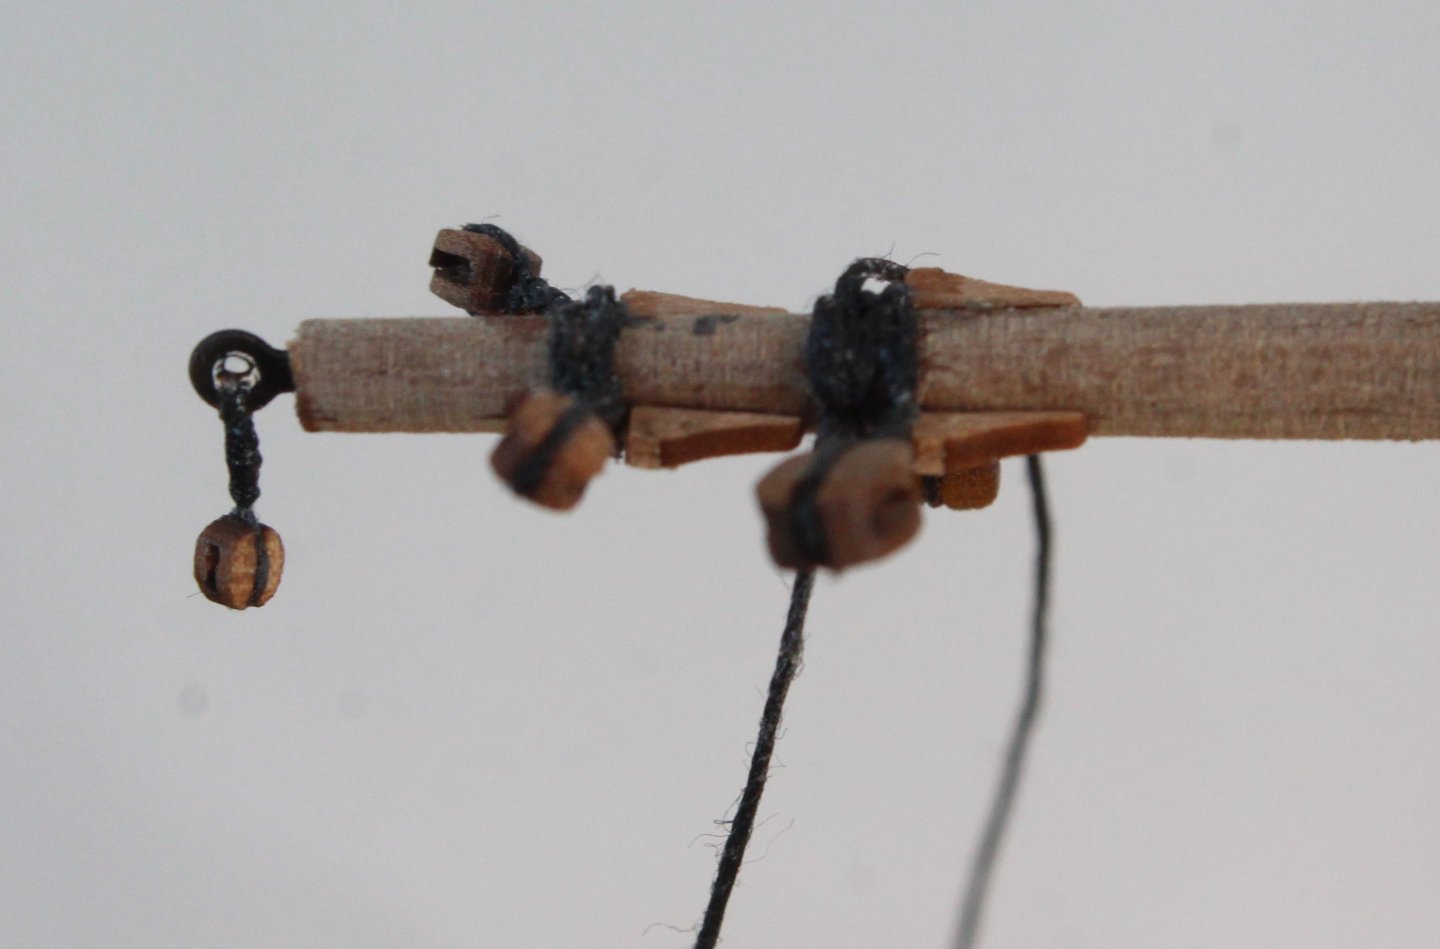
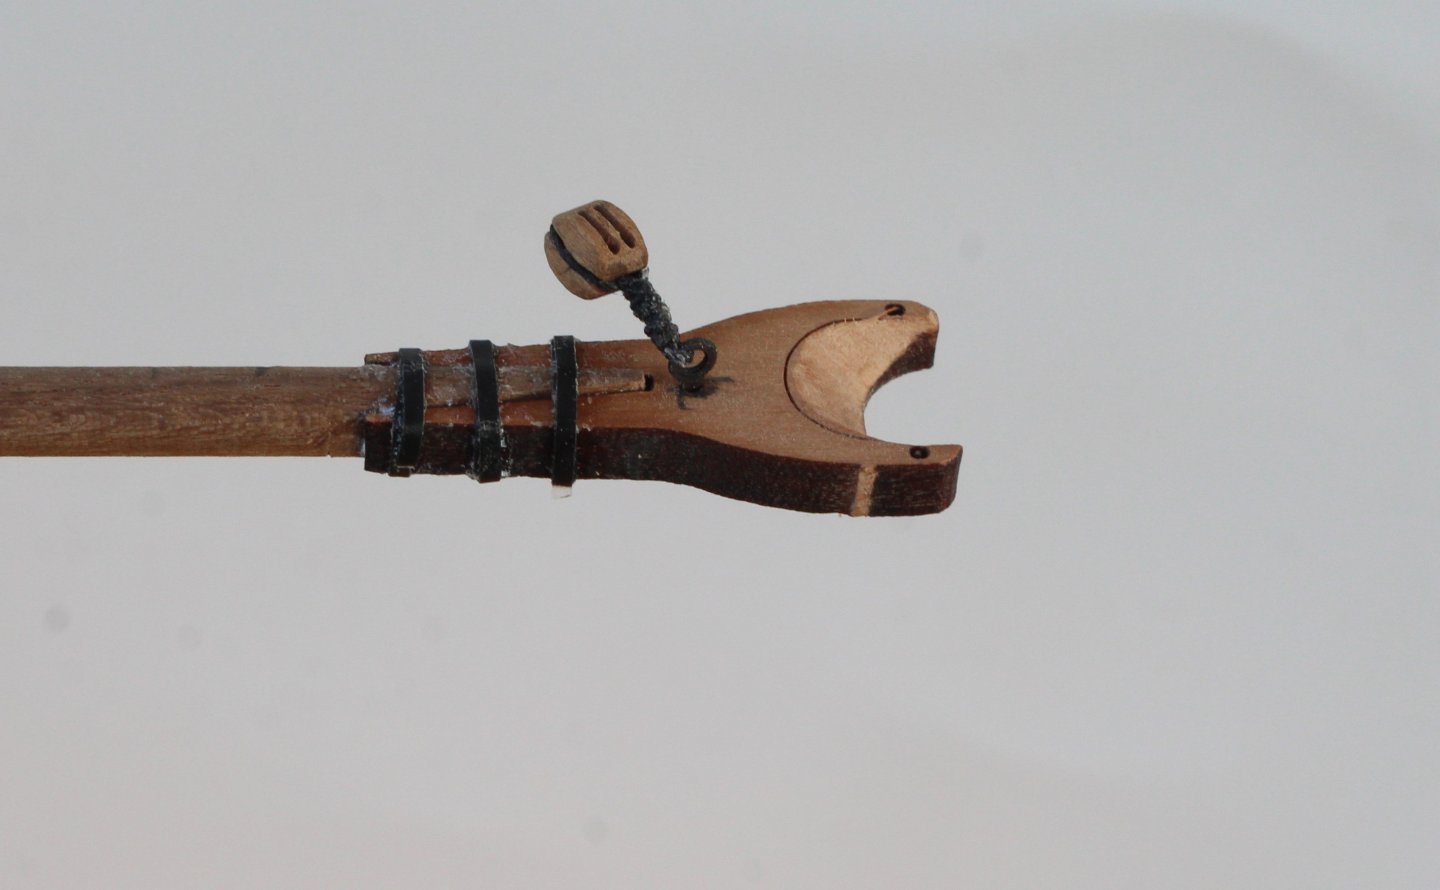
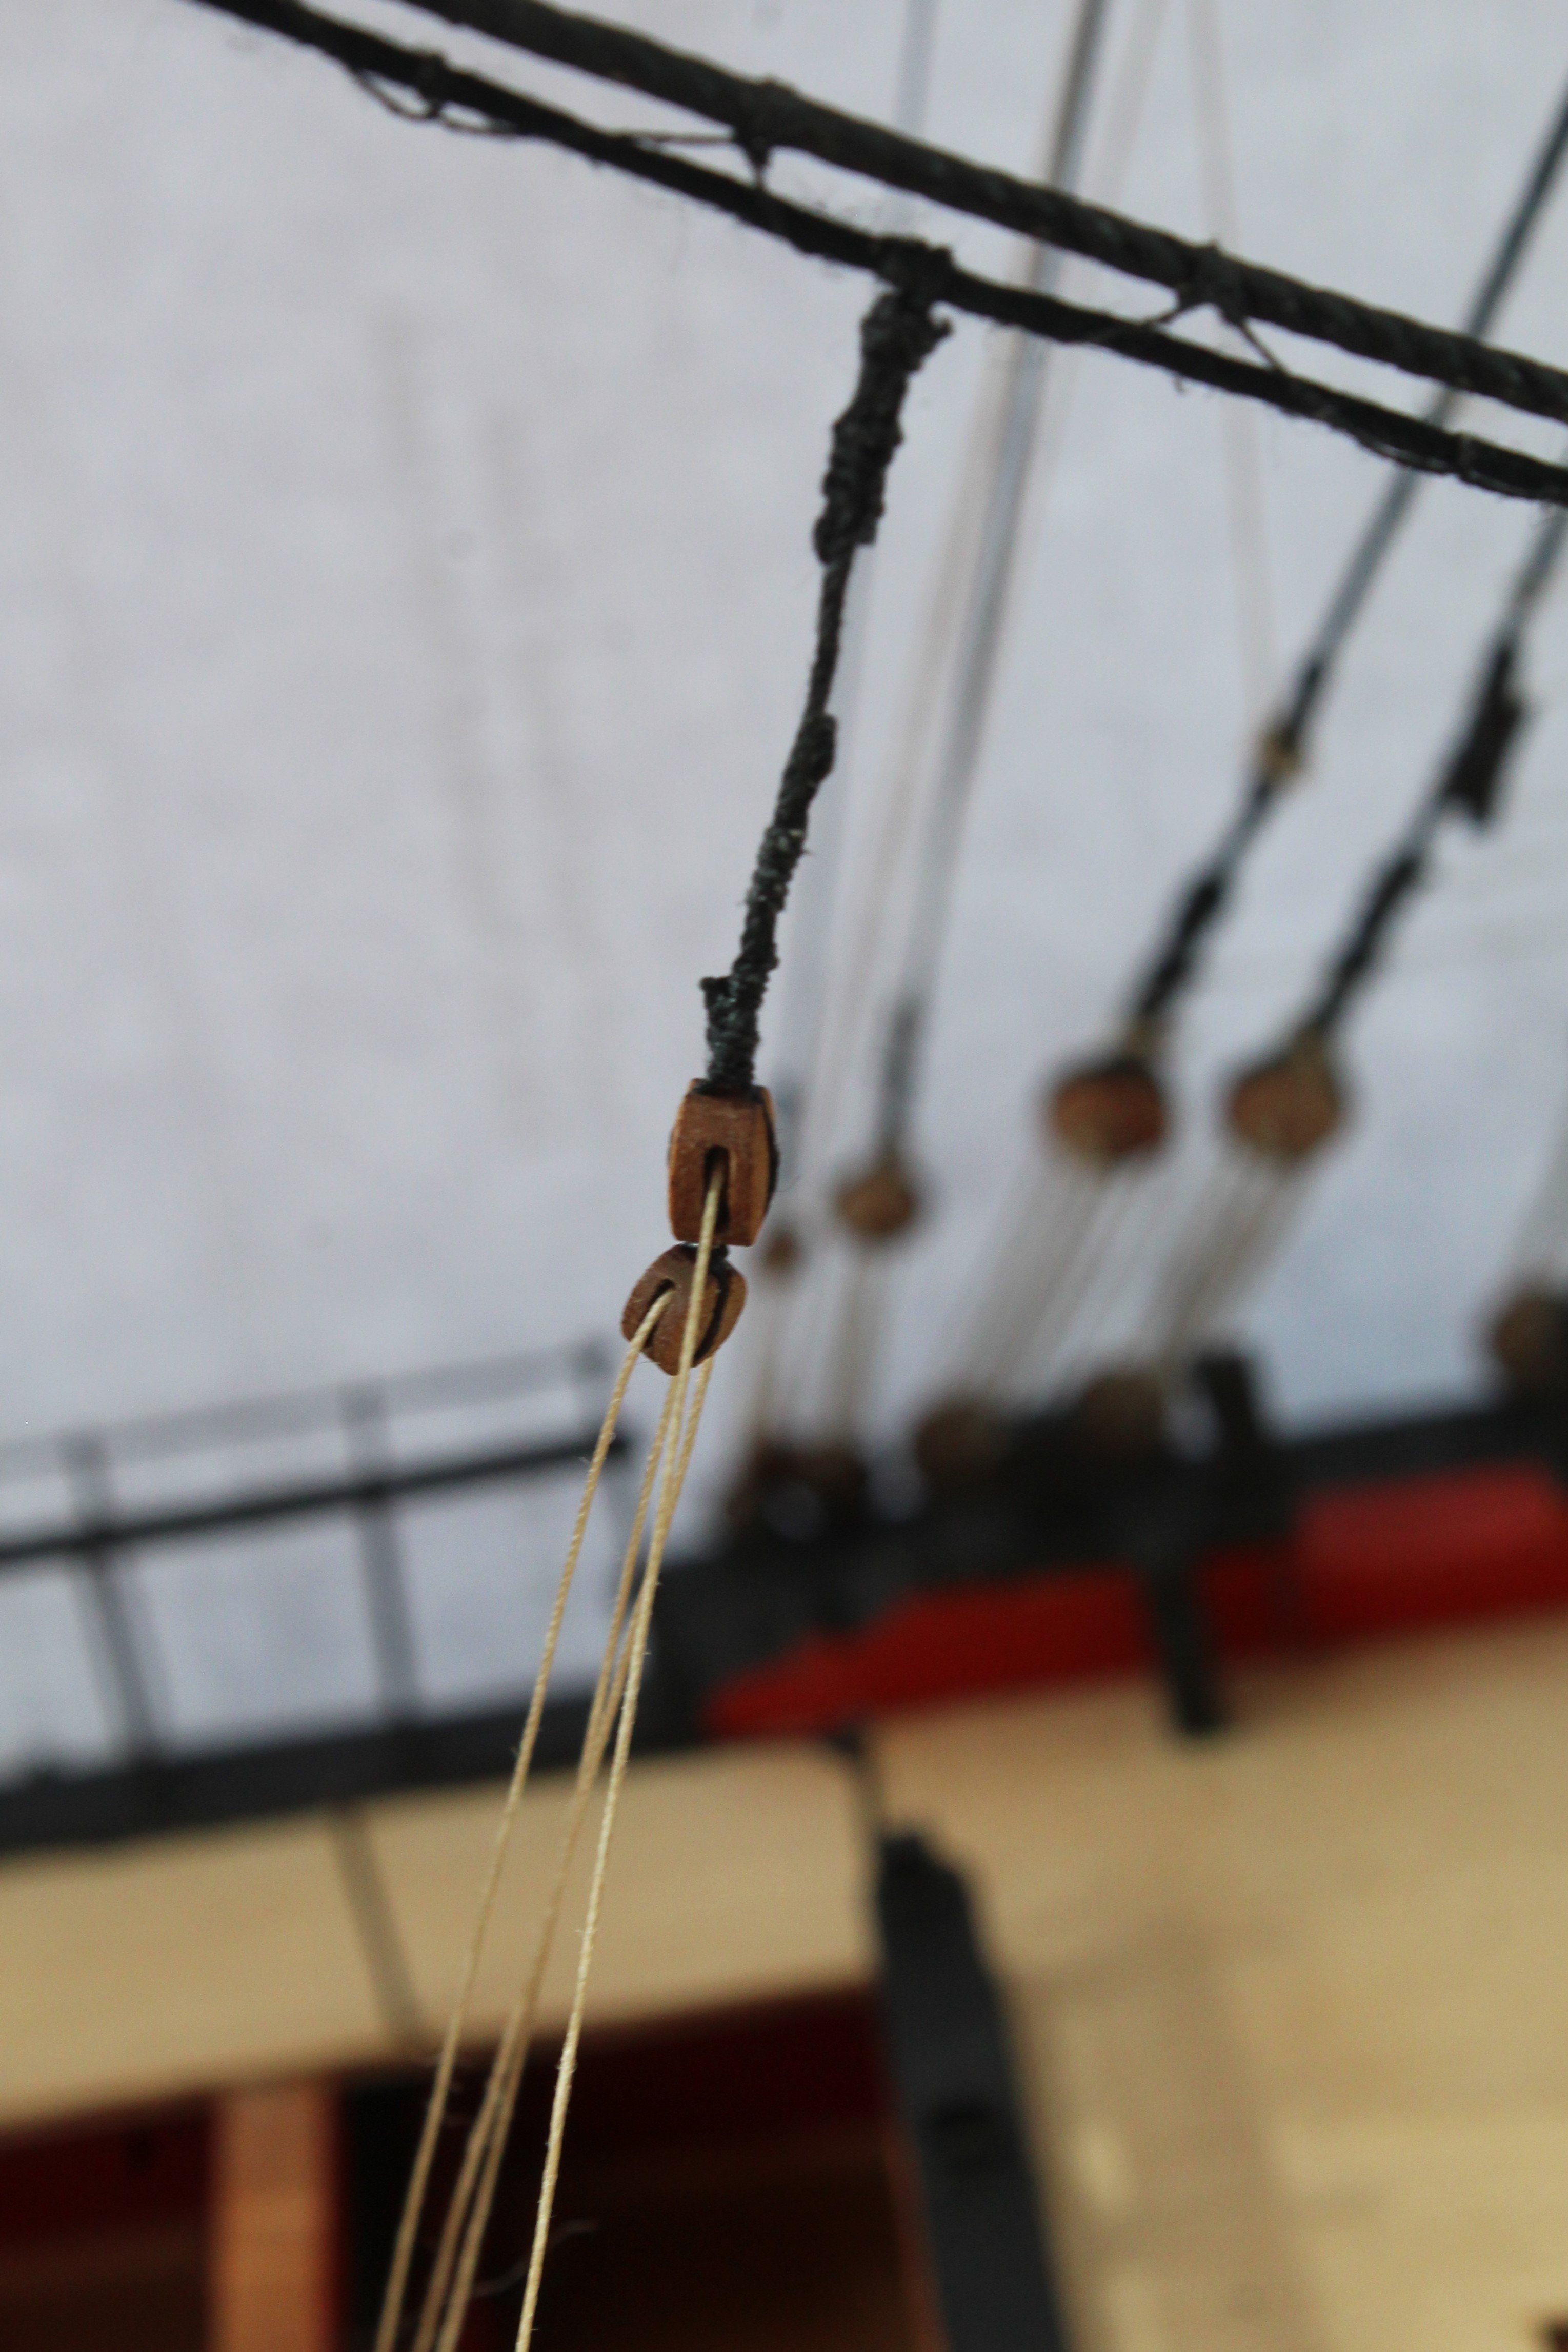
The next photo shows the flying lead block on the spritsail yard.

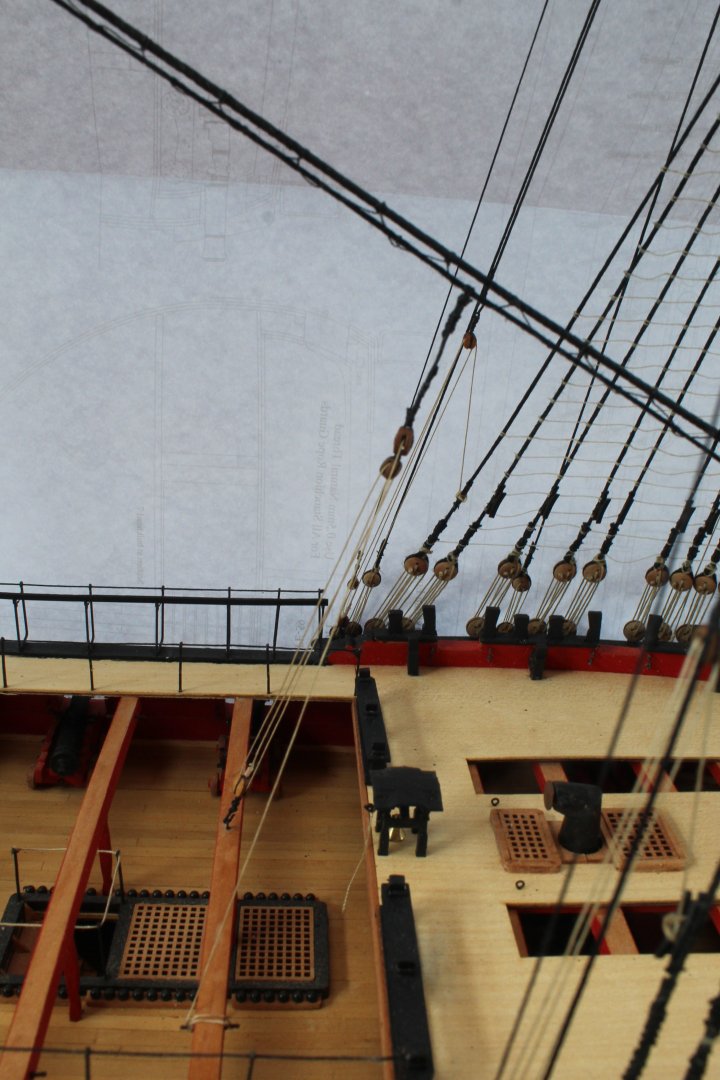
The braces natural thread starts on the foremast stay and after it has been fed through the spritsail yard's flying lead block it is then fed through a couple of blocks sited on the underside of the crosstress.
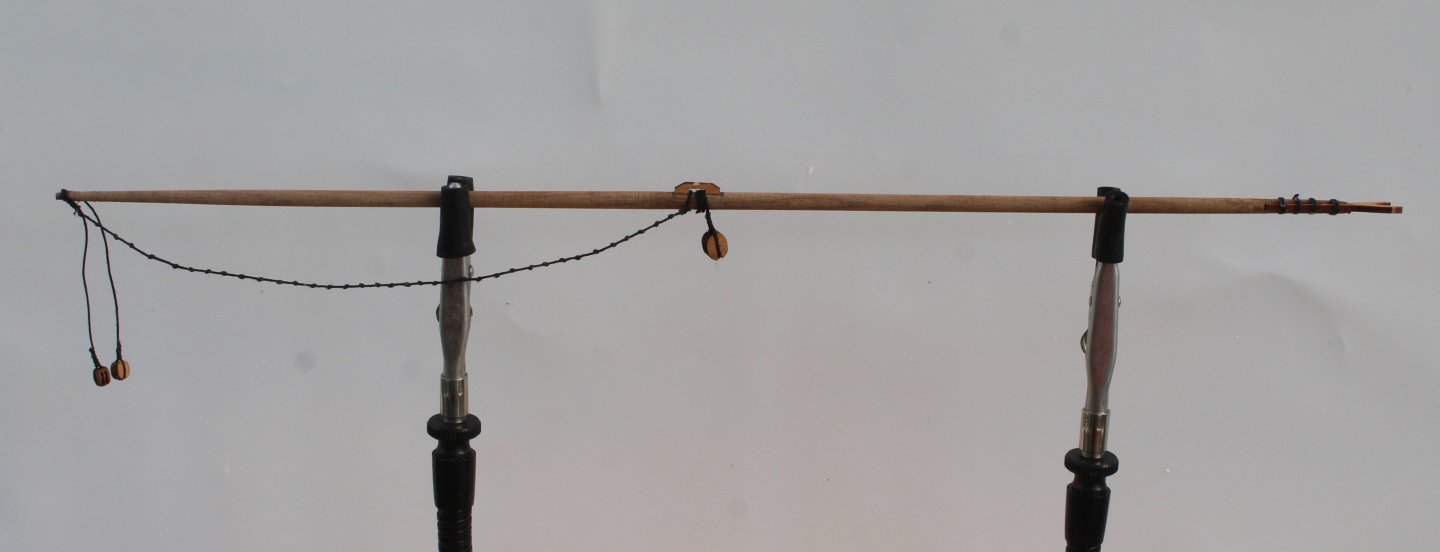
The brace is then belayed to the rail on the forecastle, as shown below.

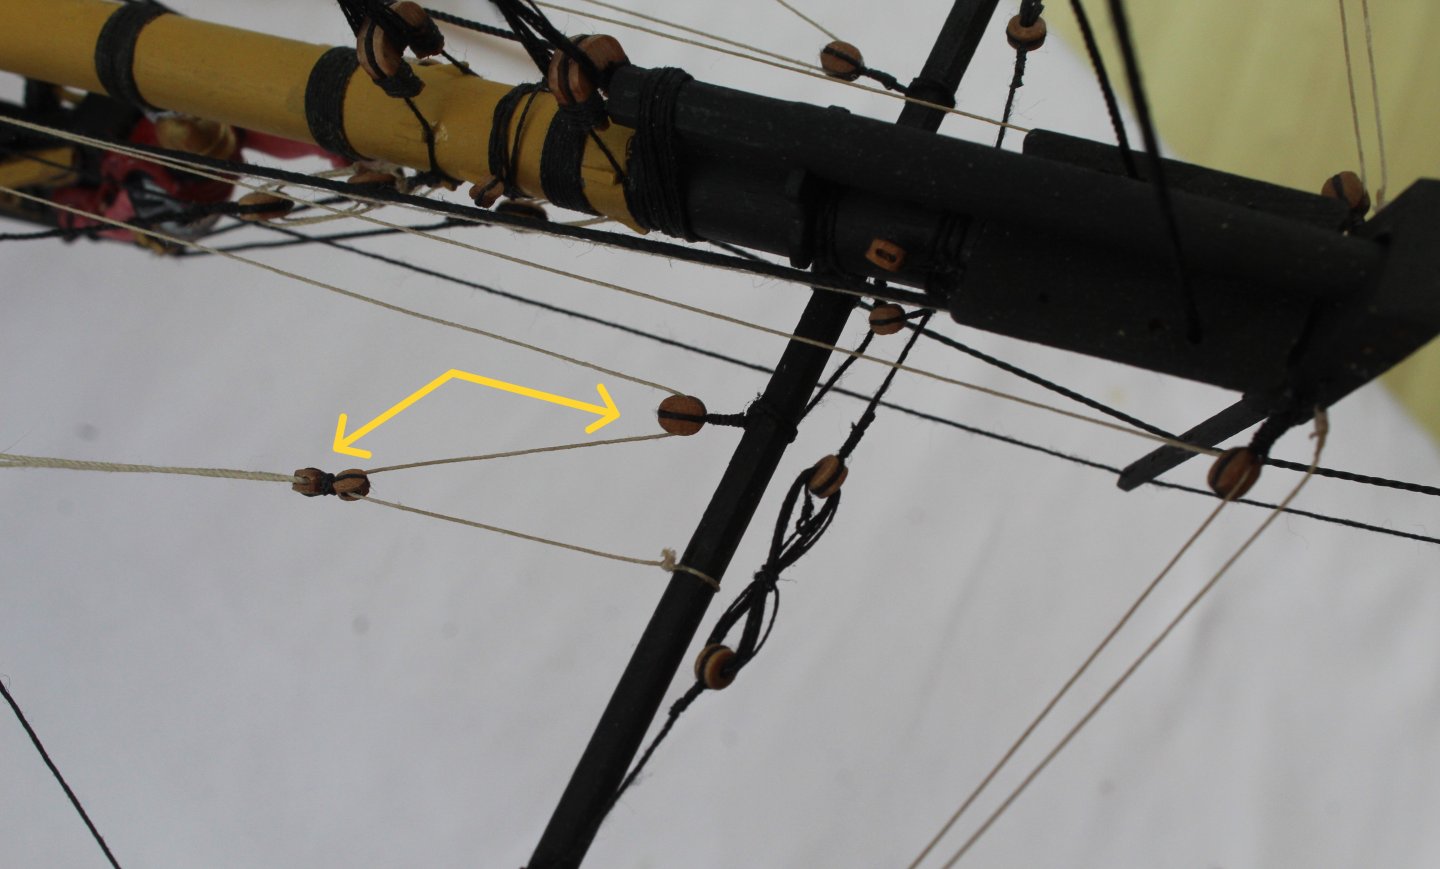
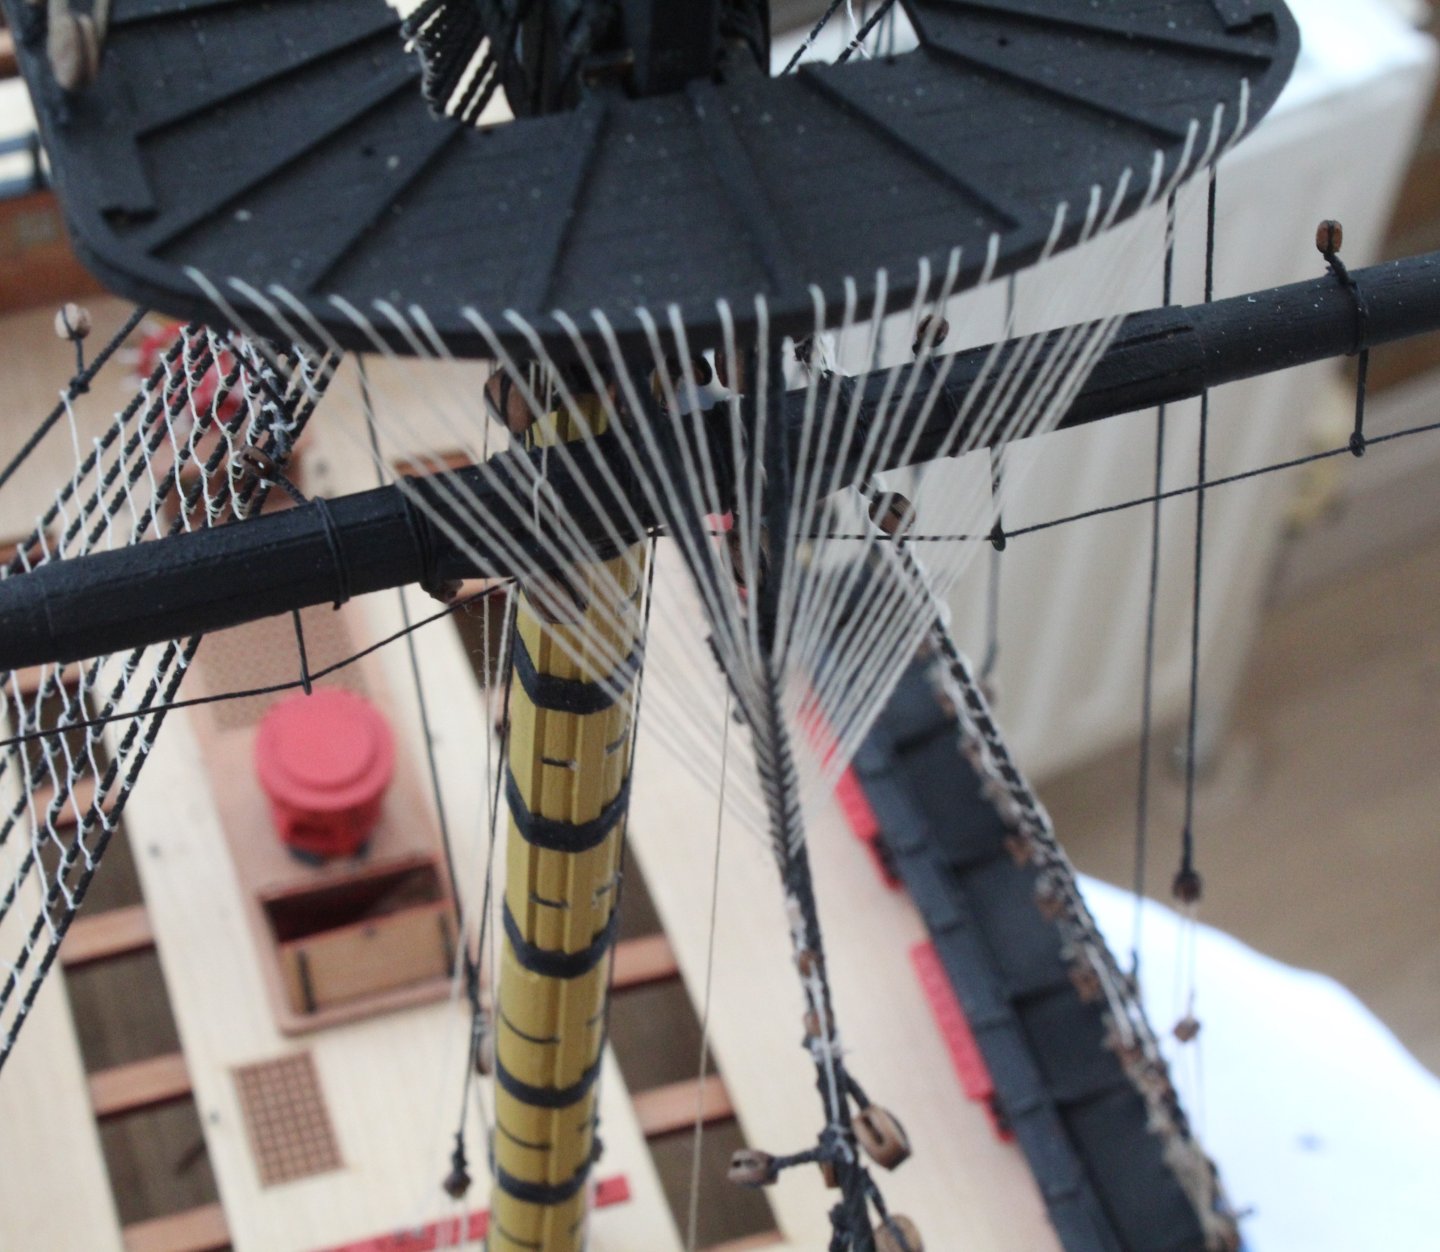
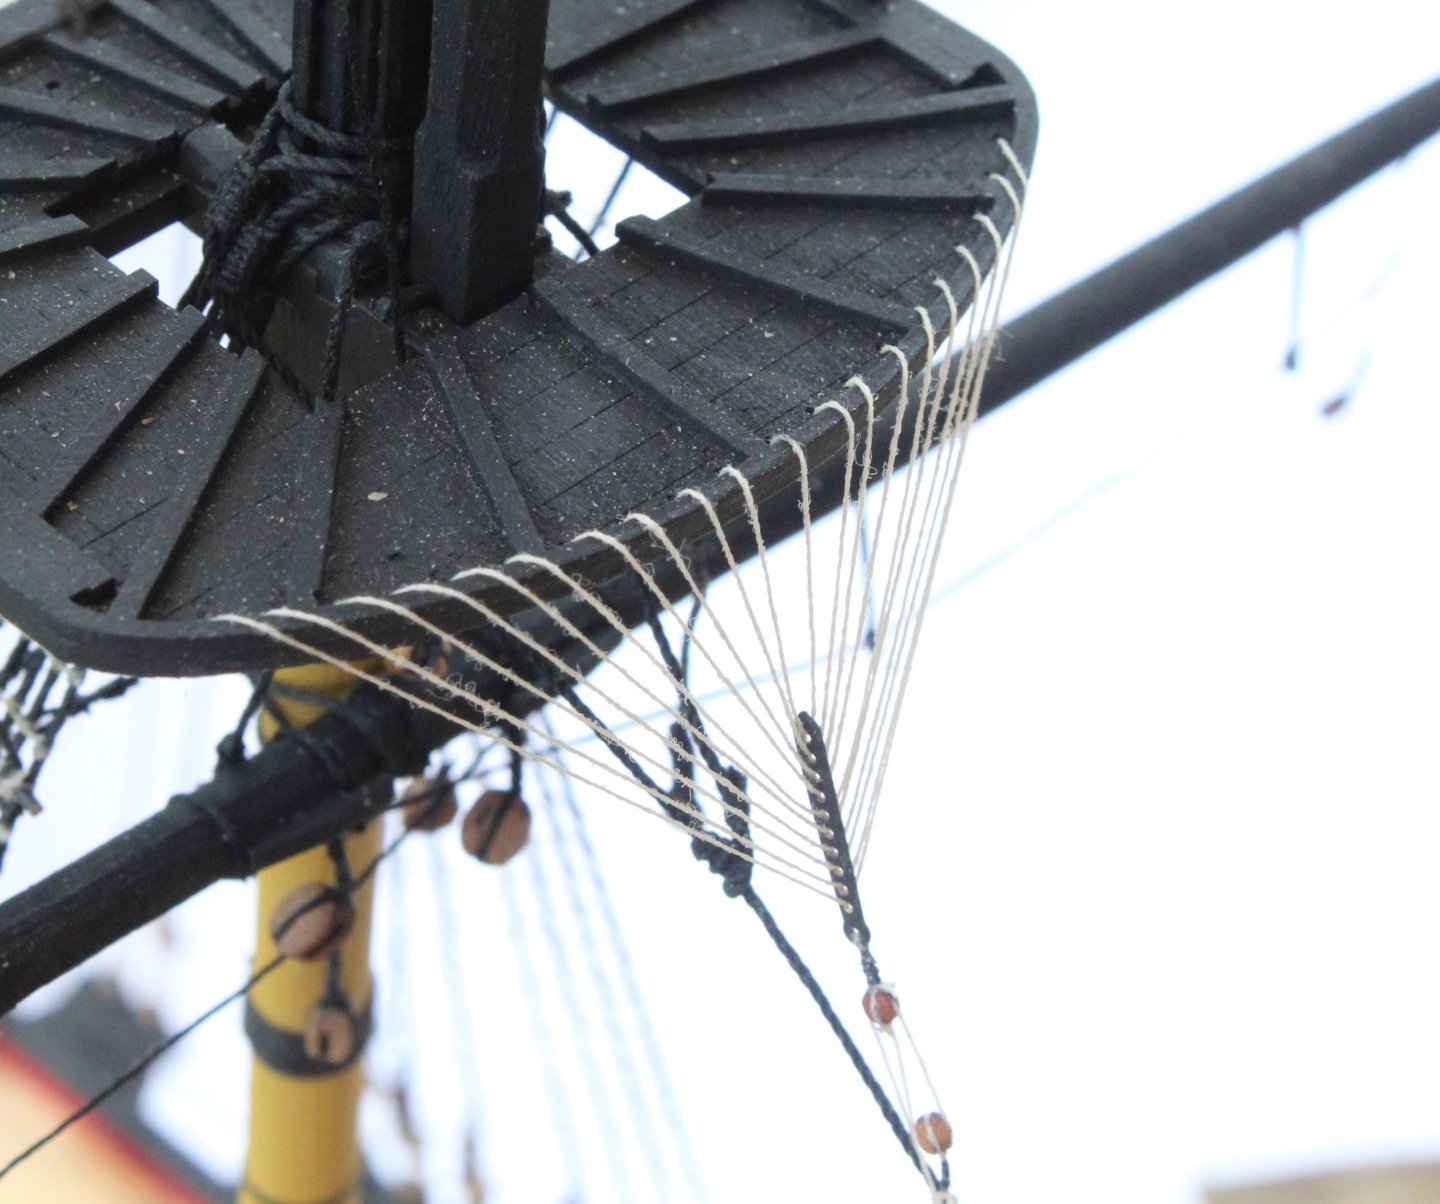
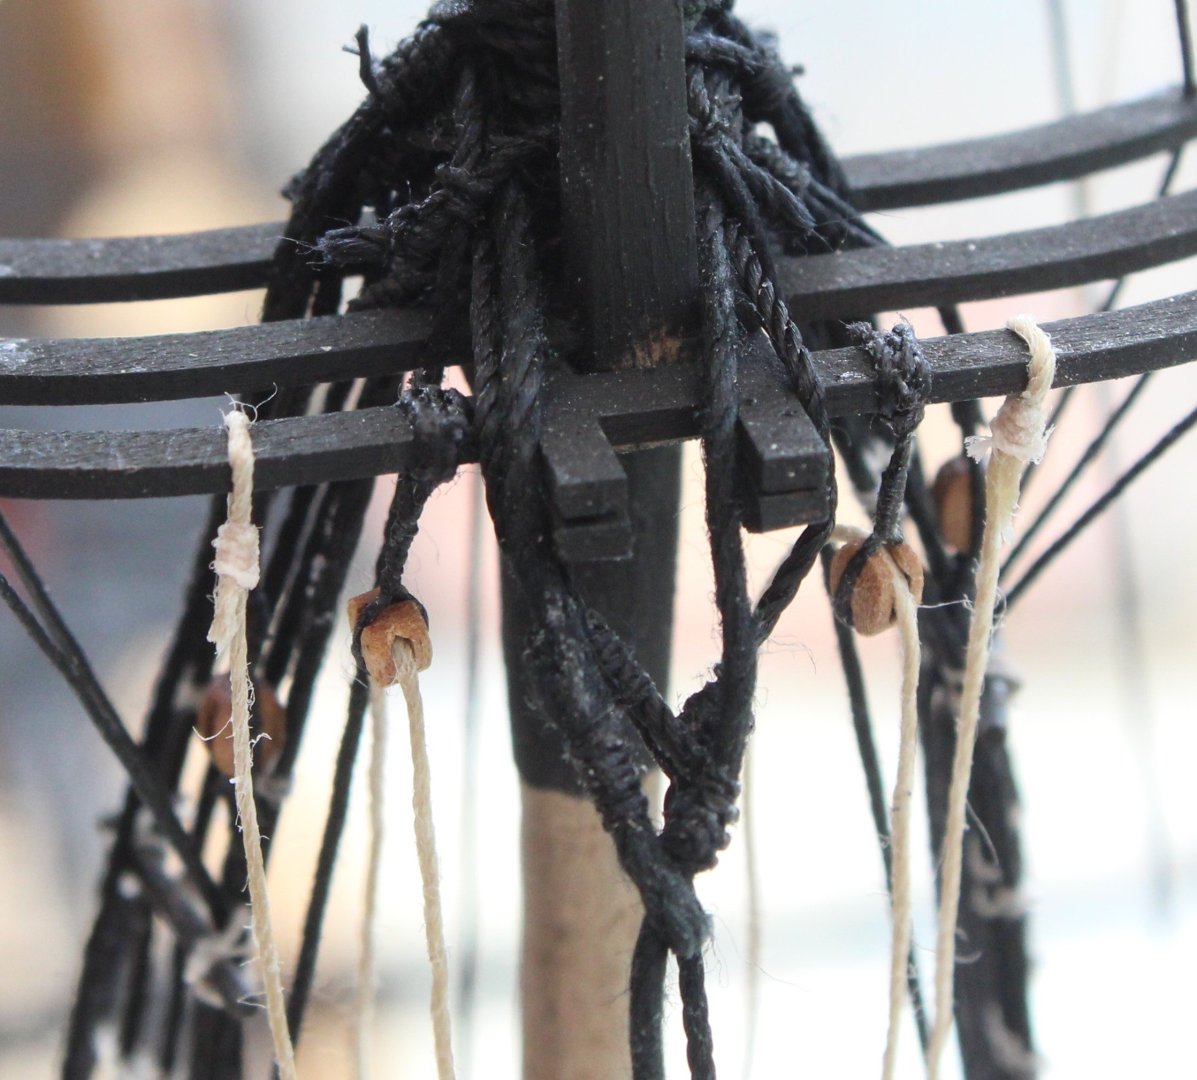
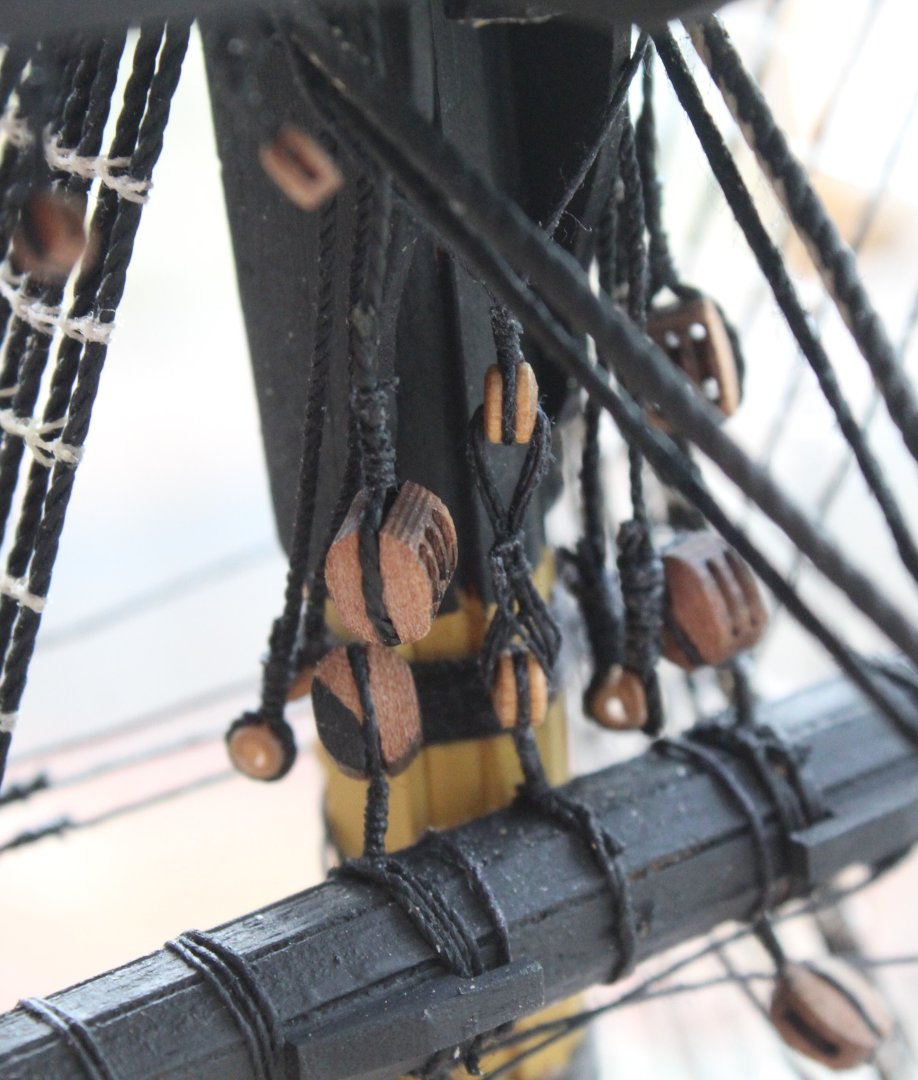
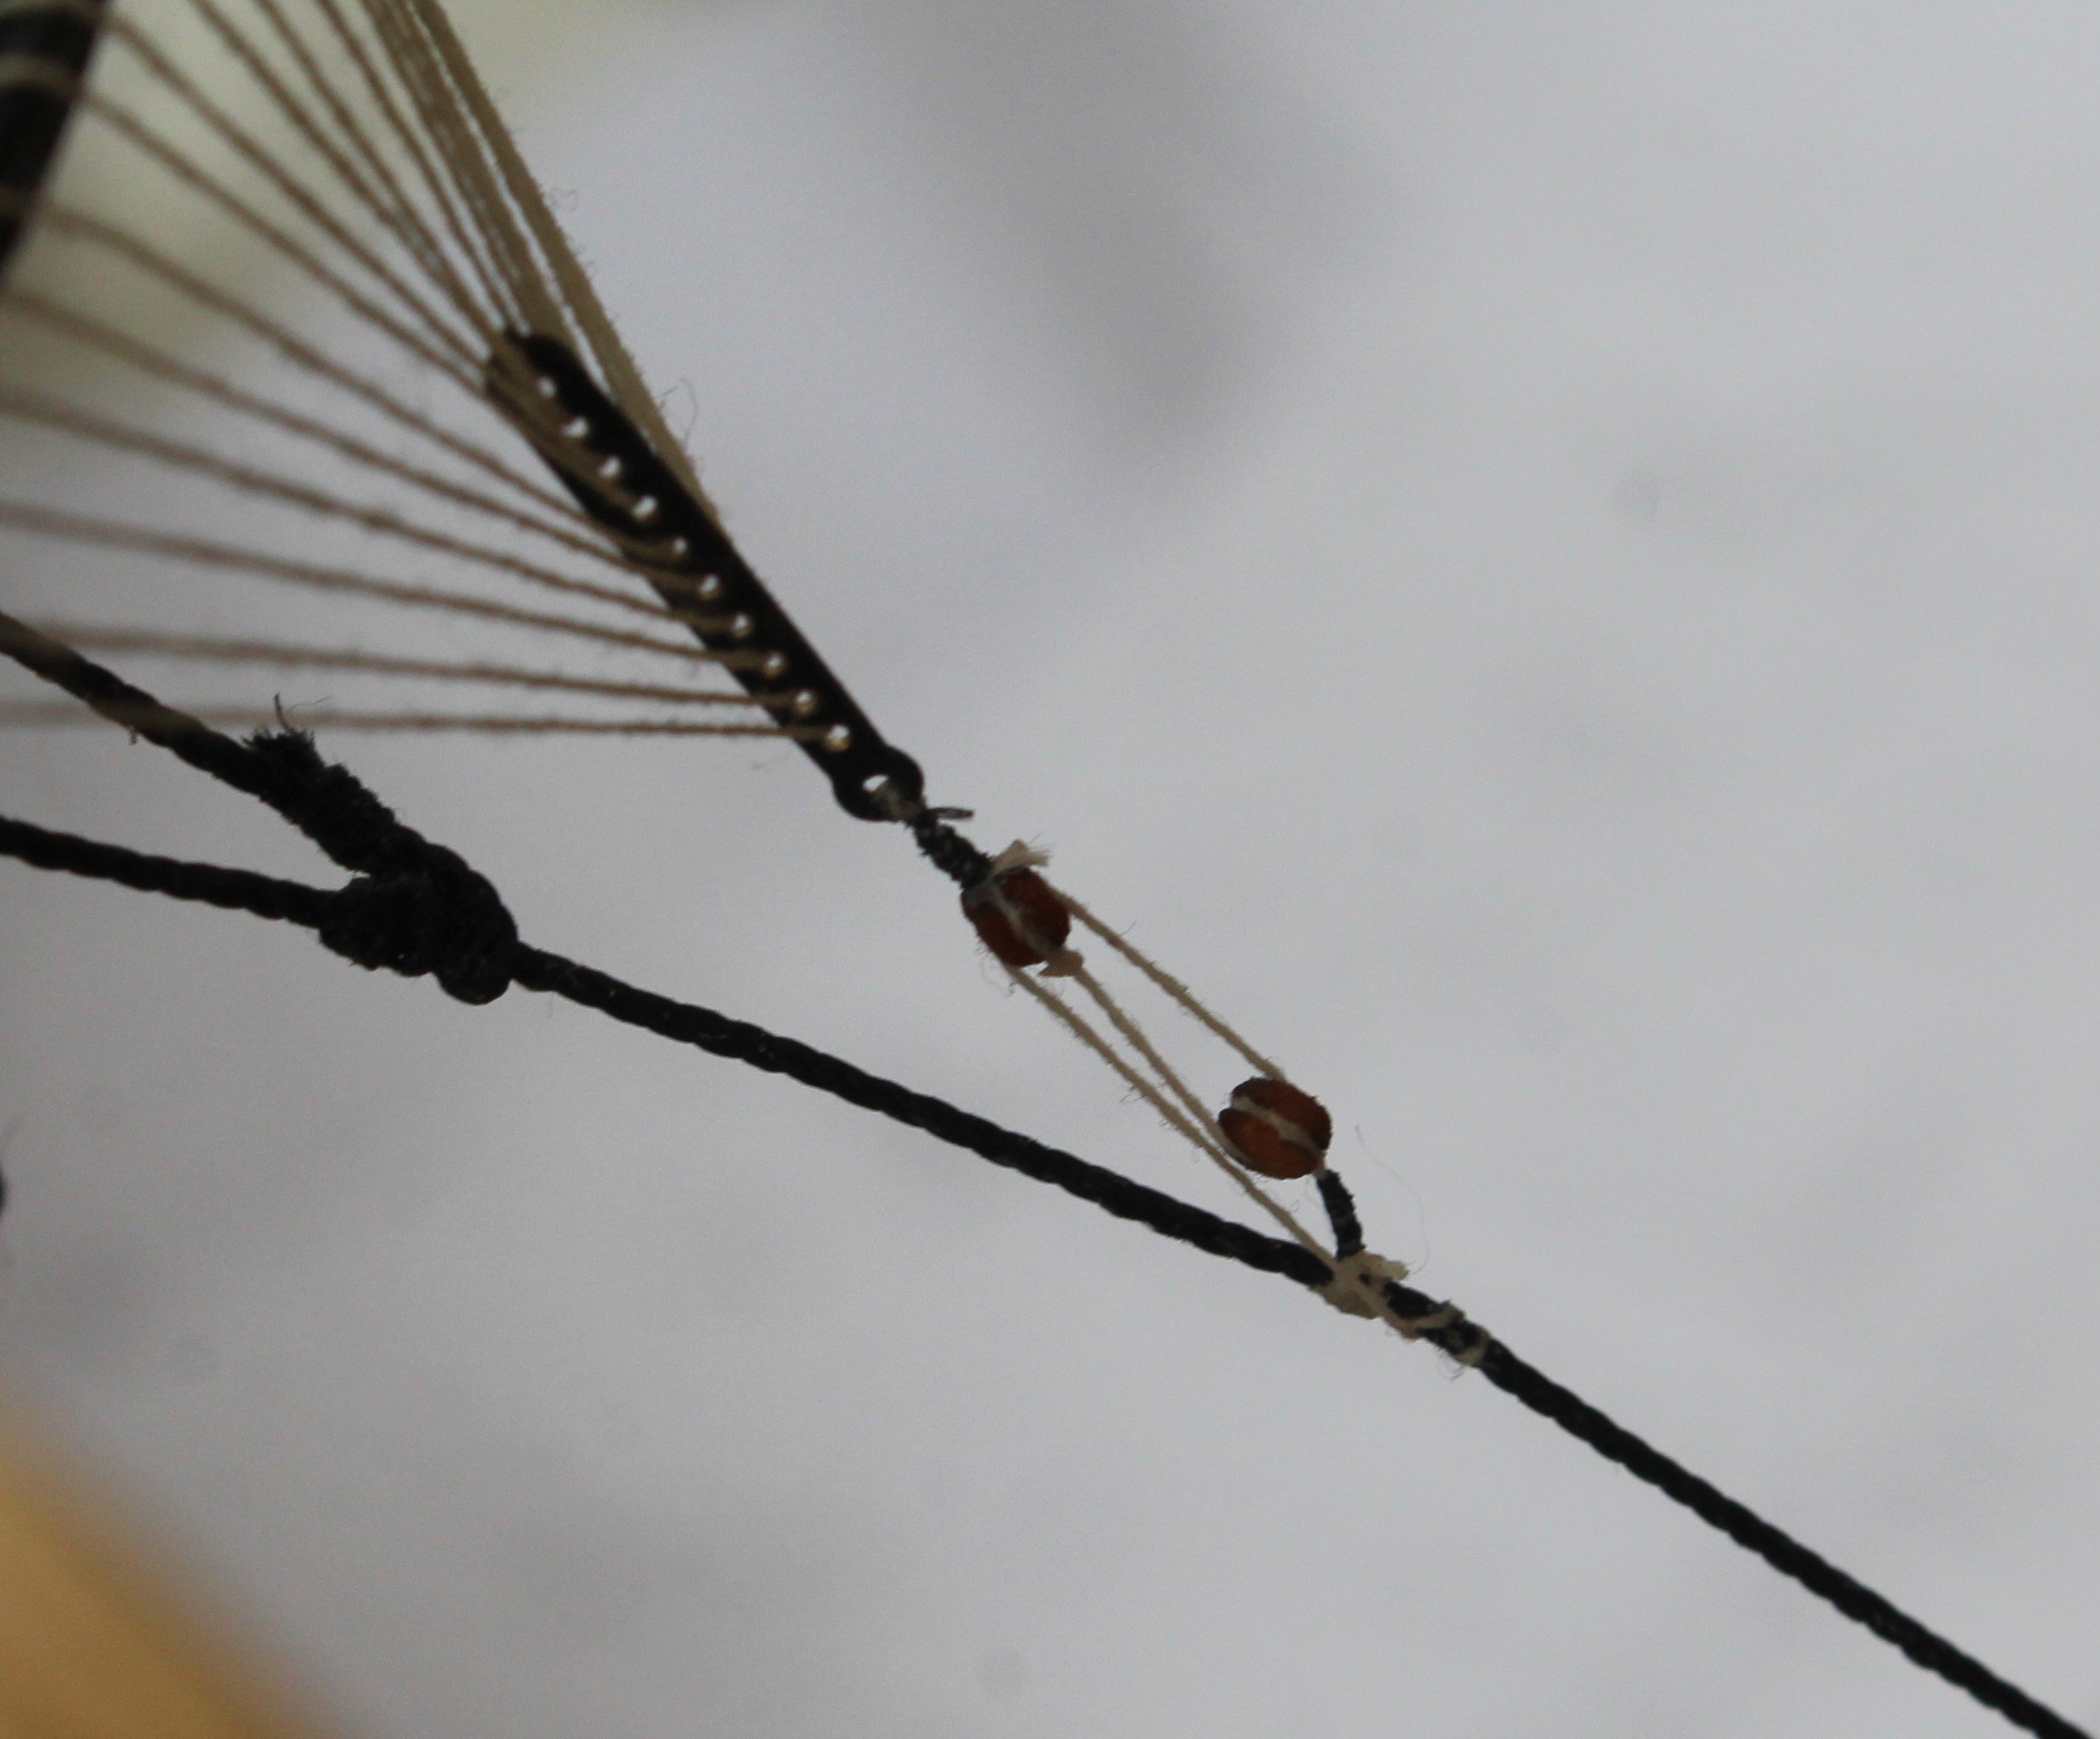
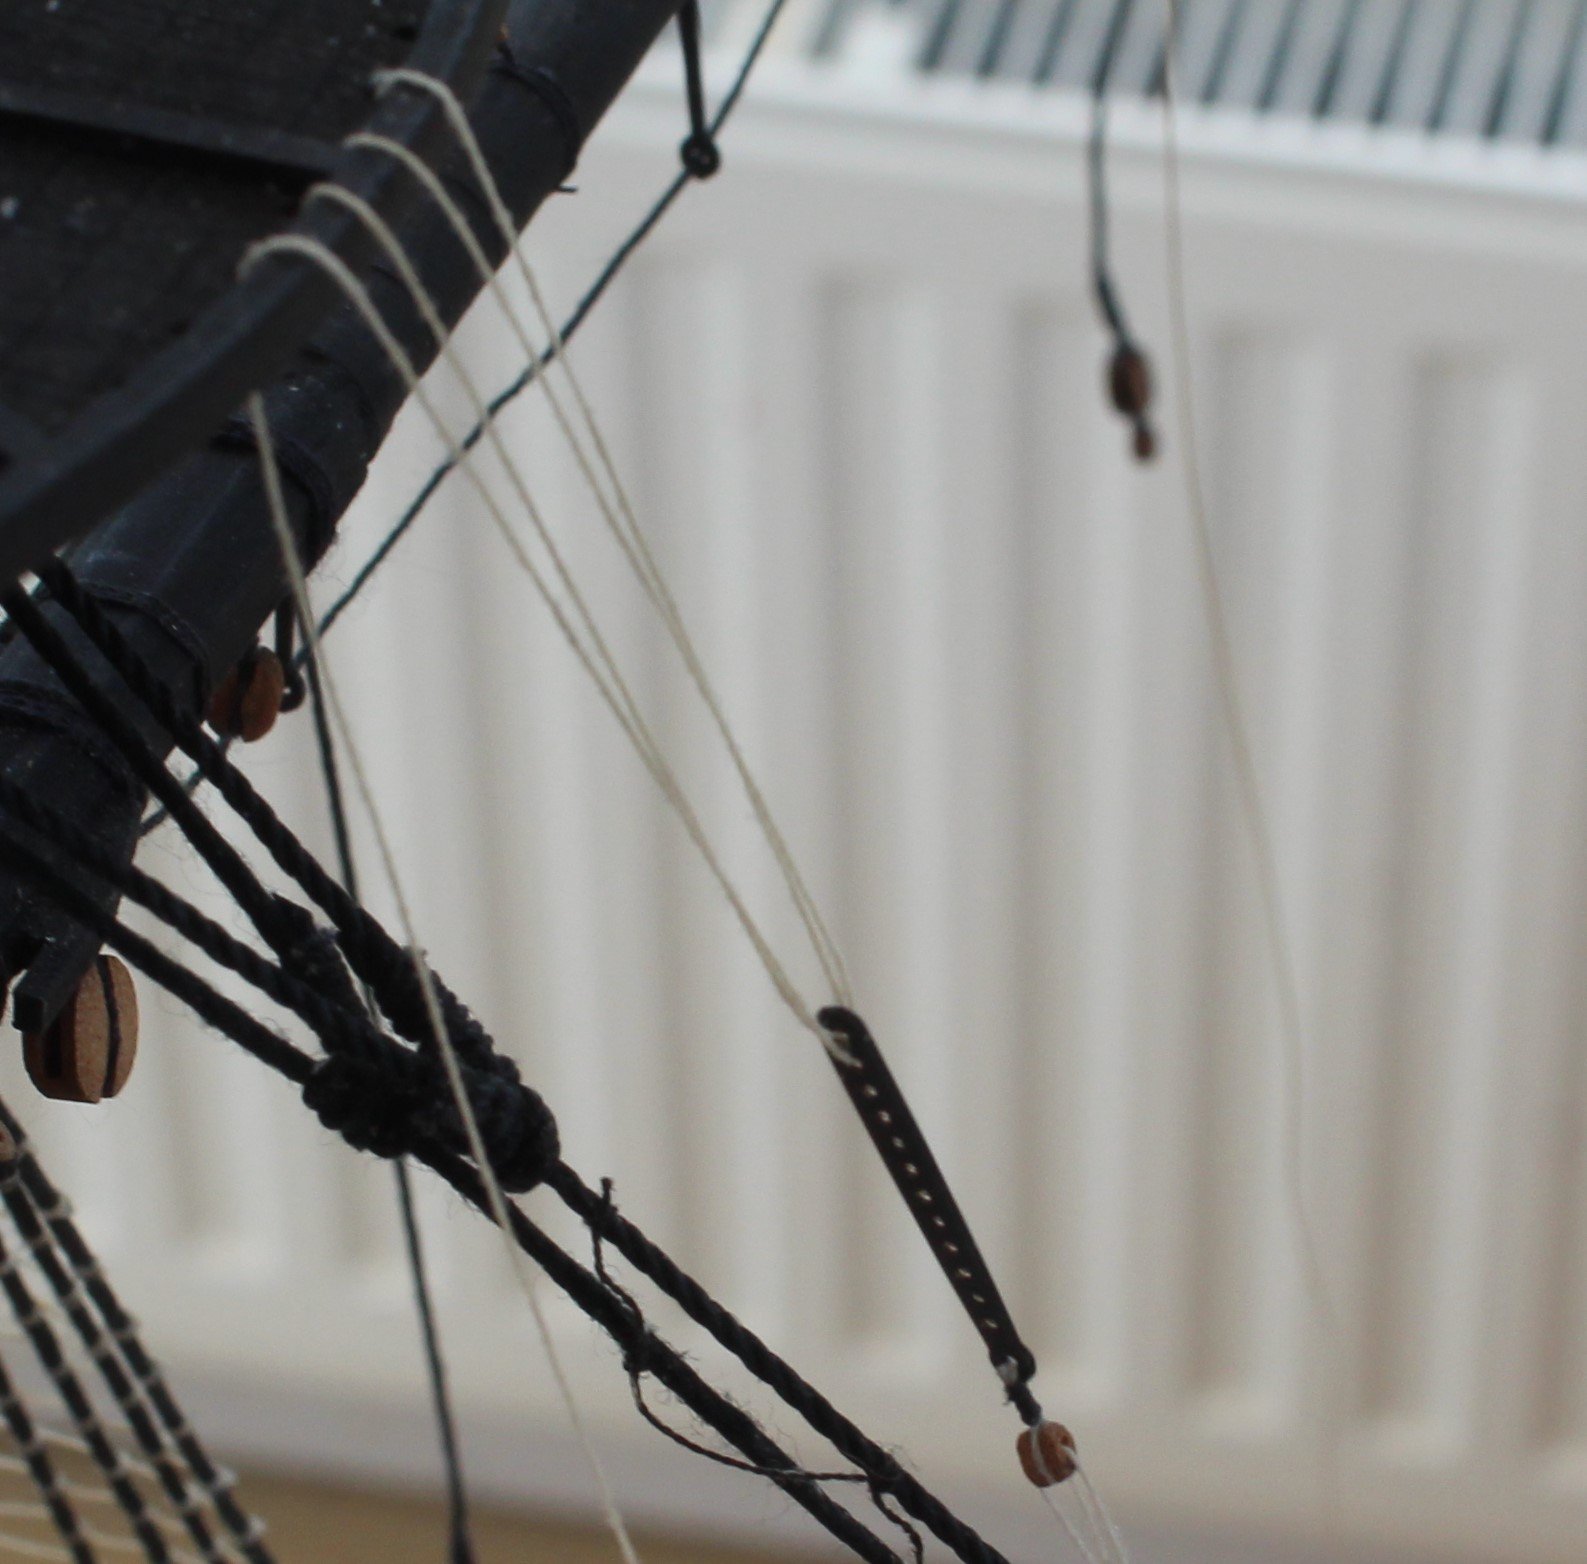
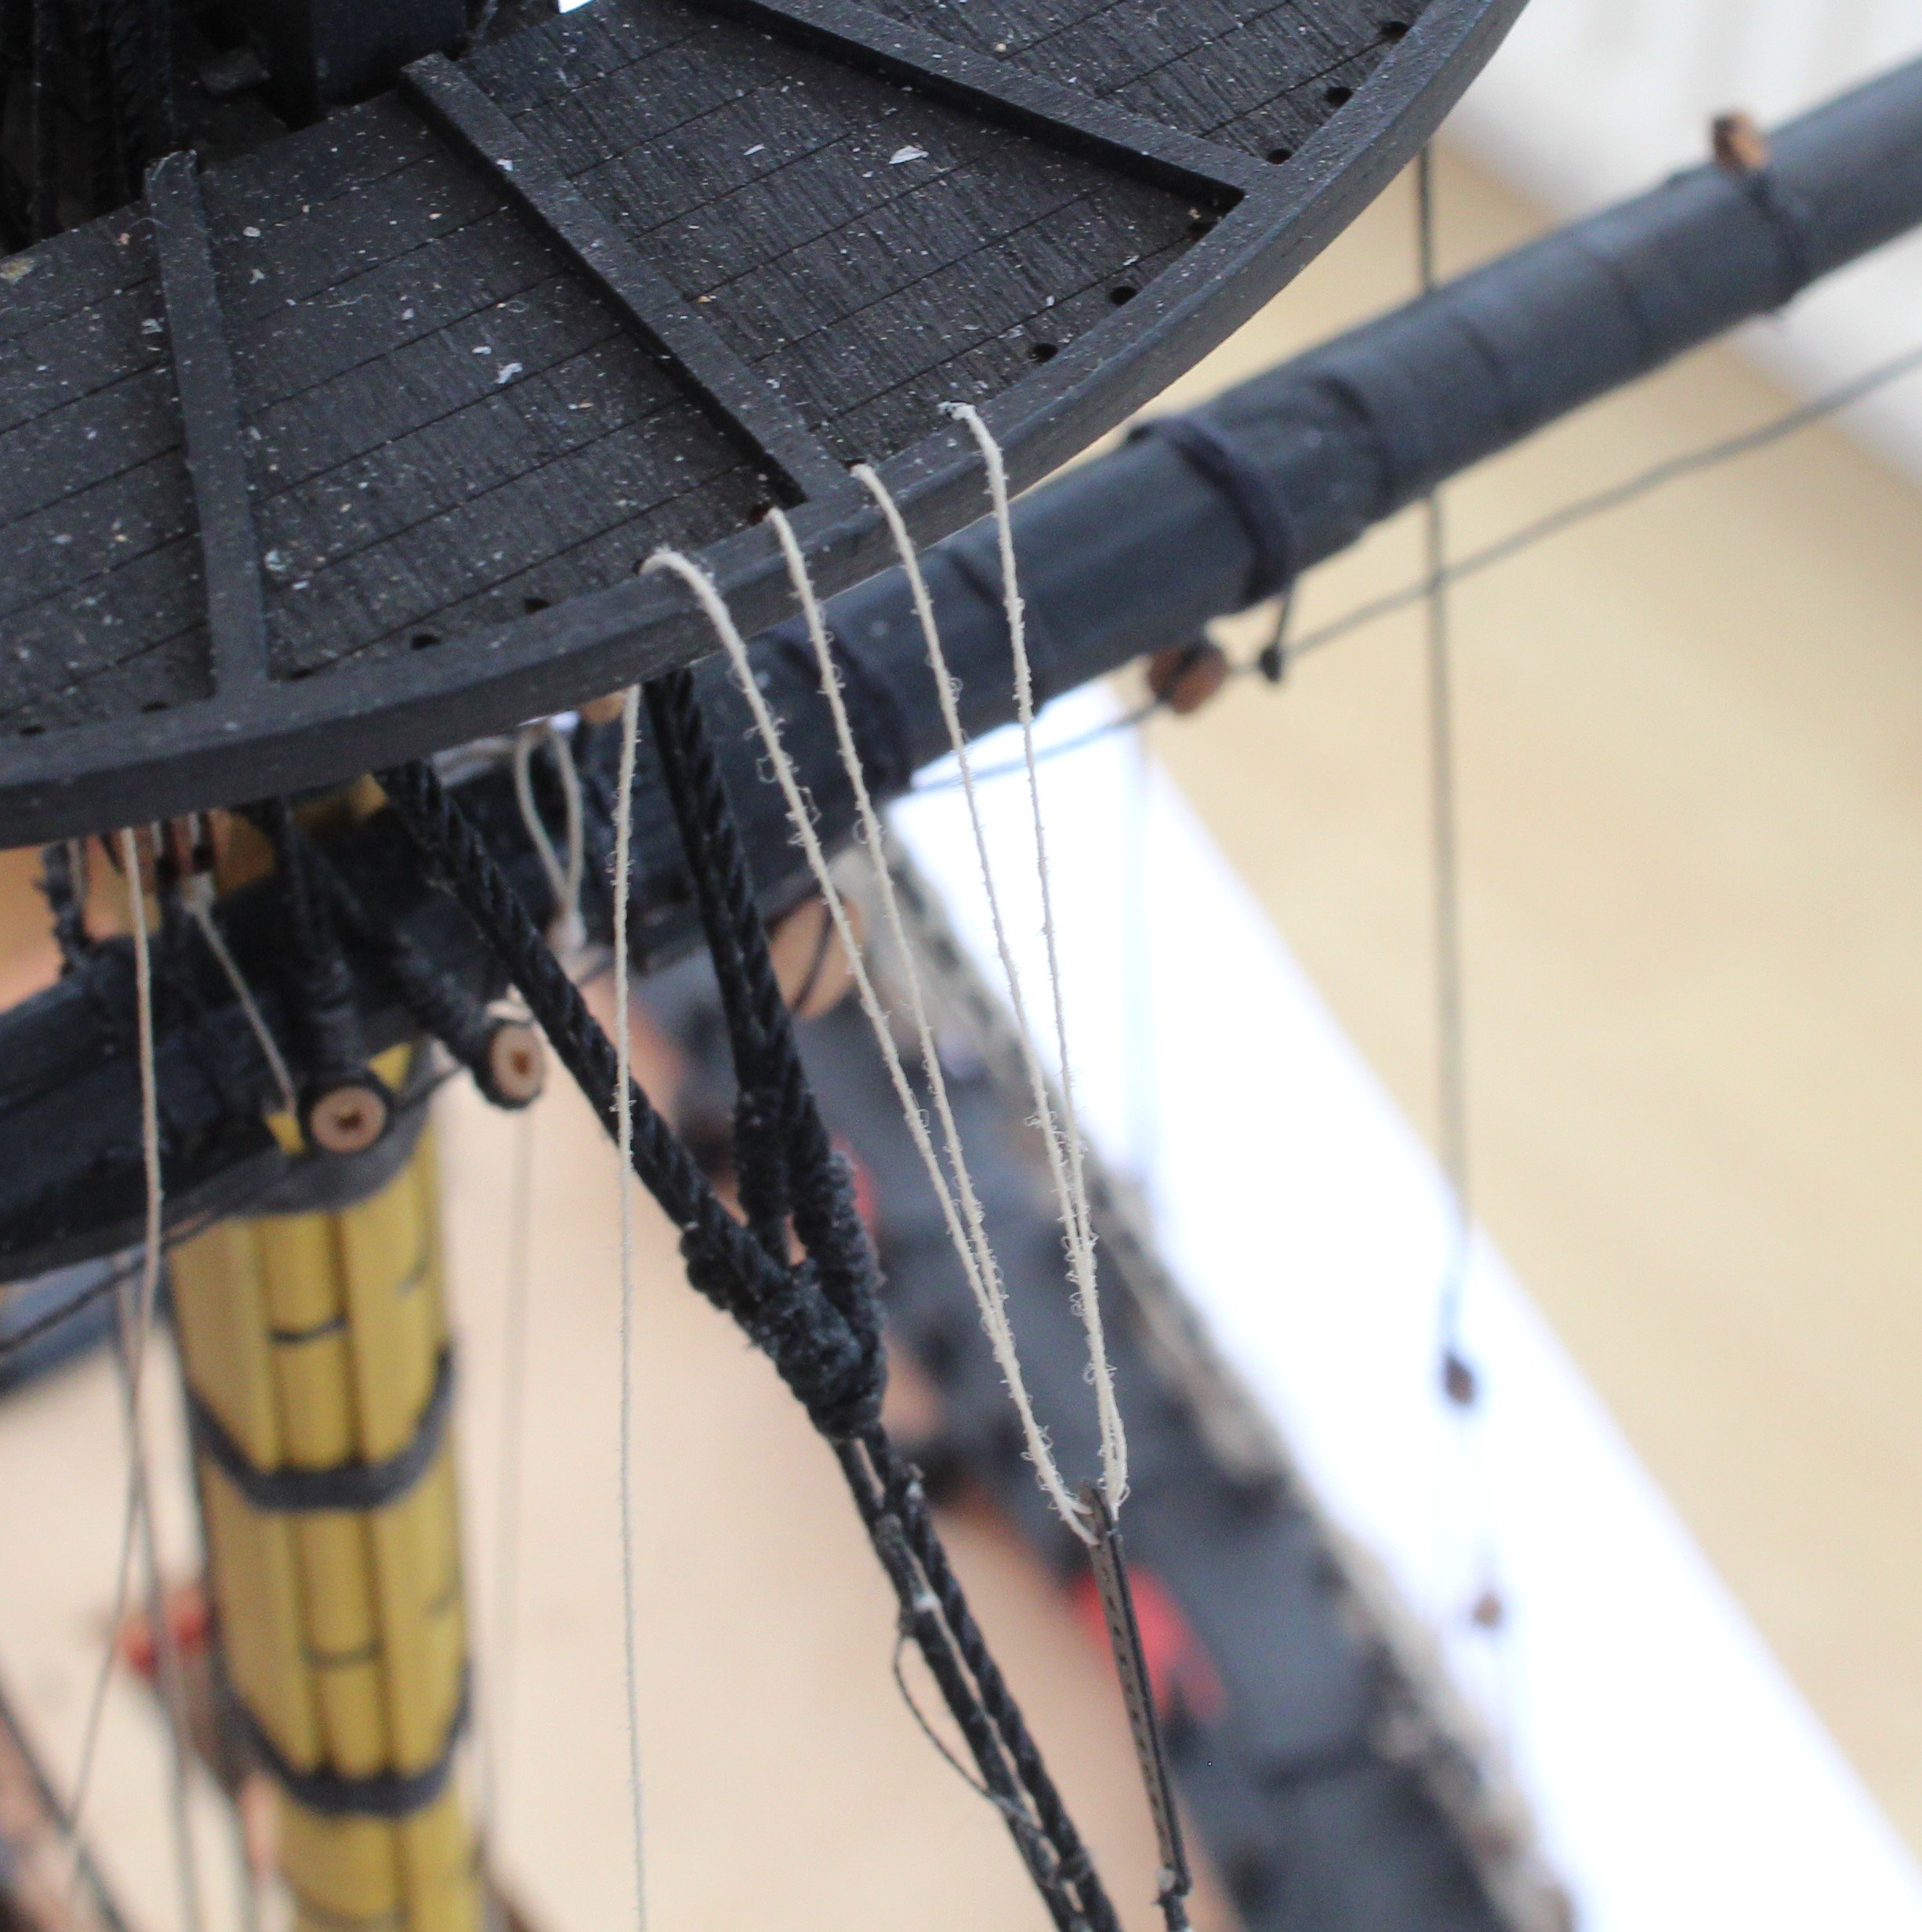
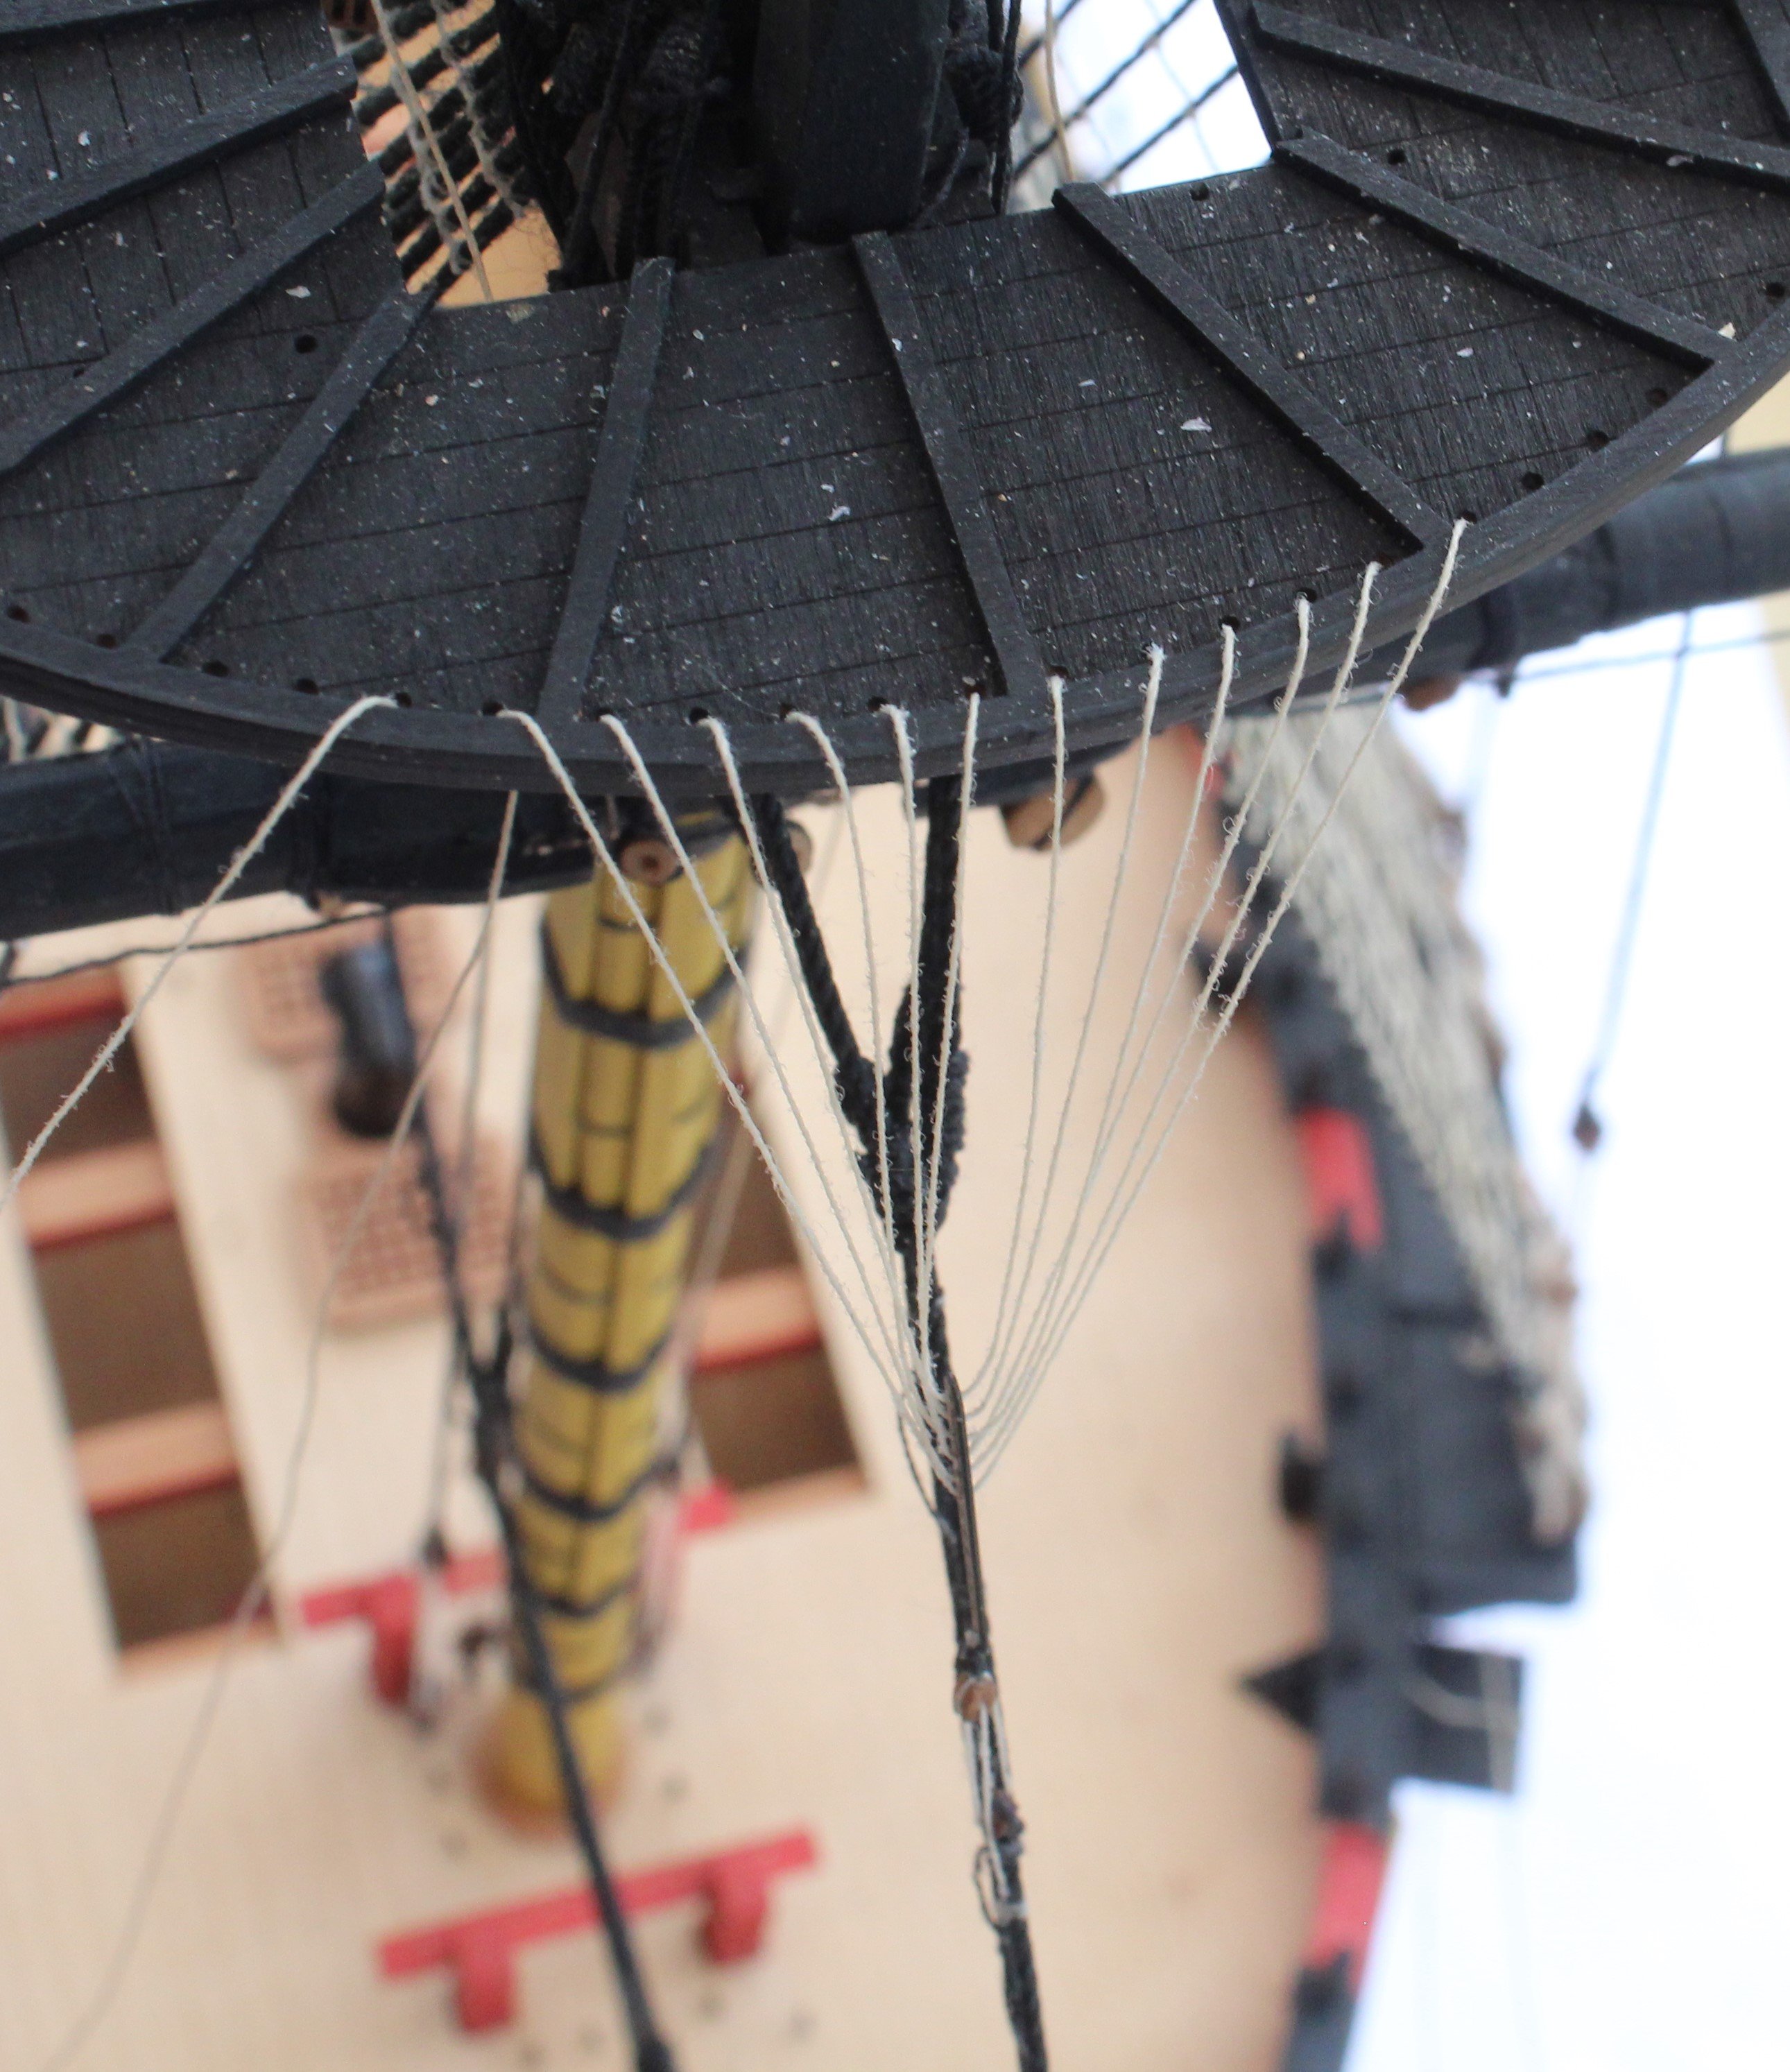
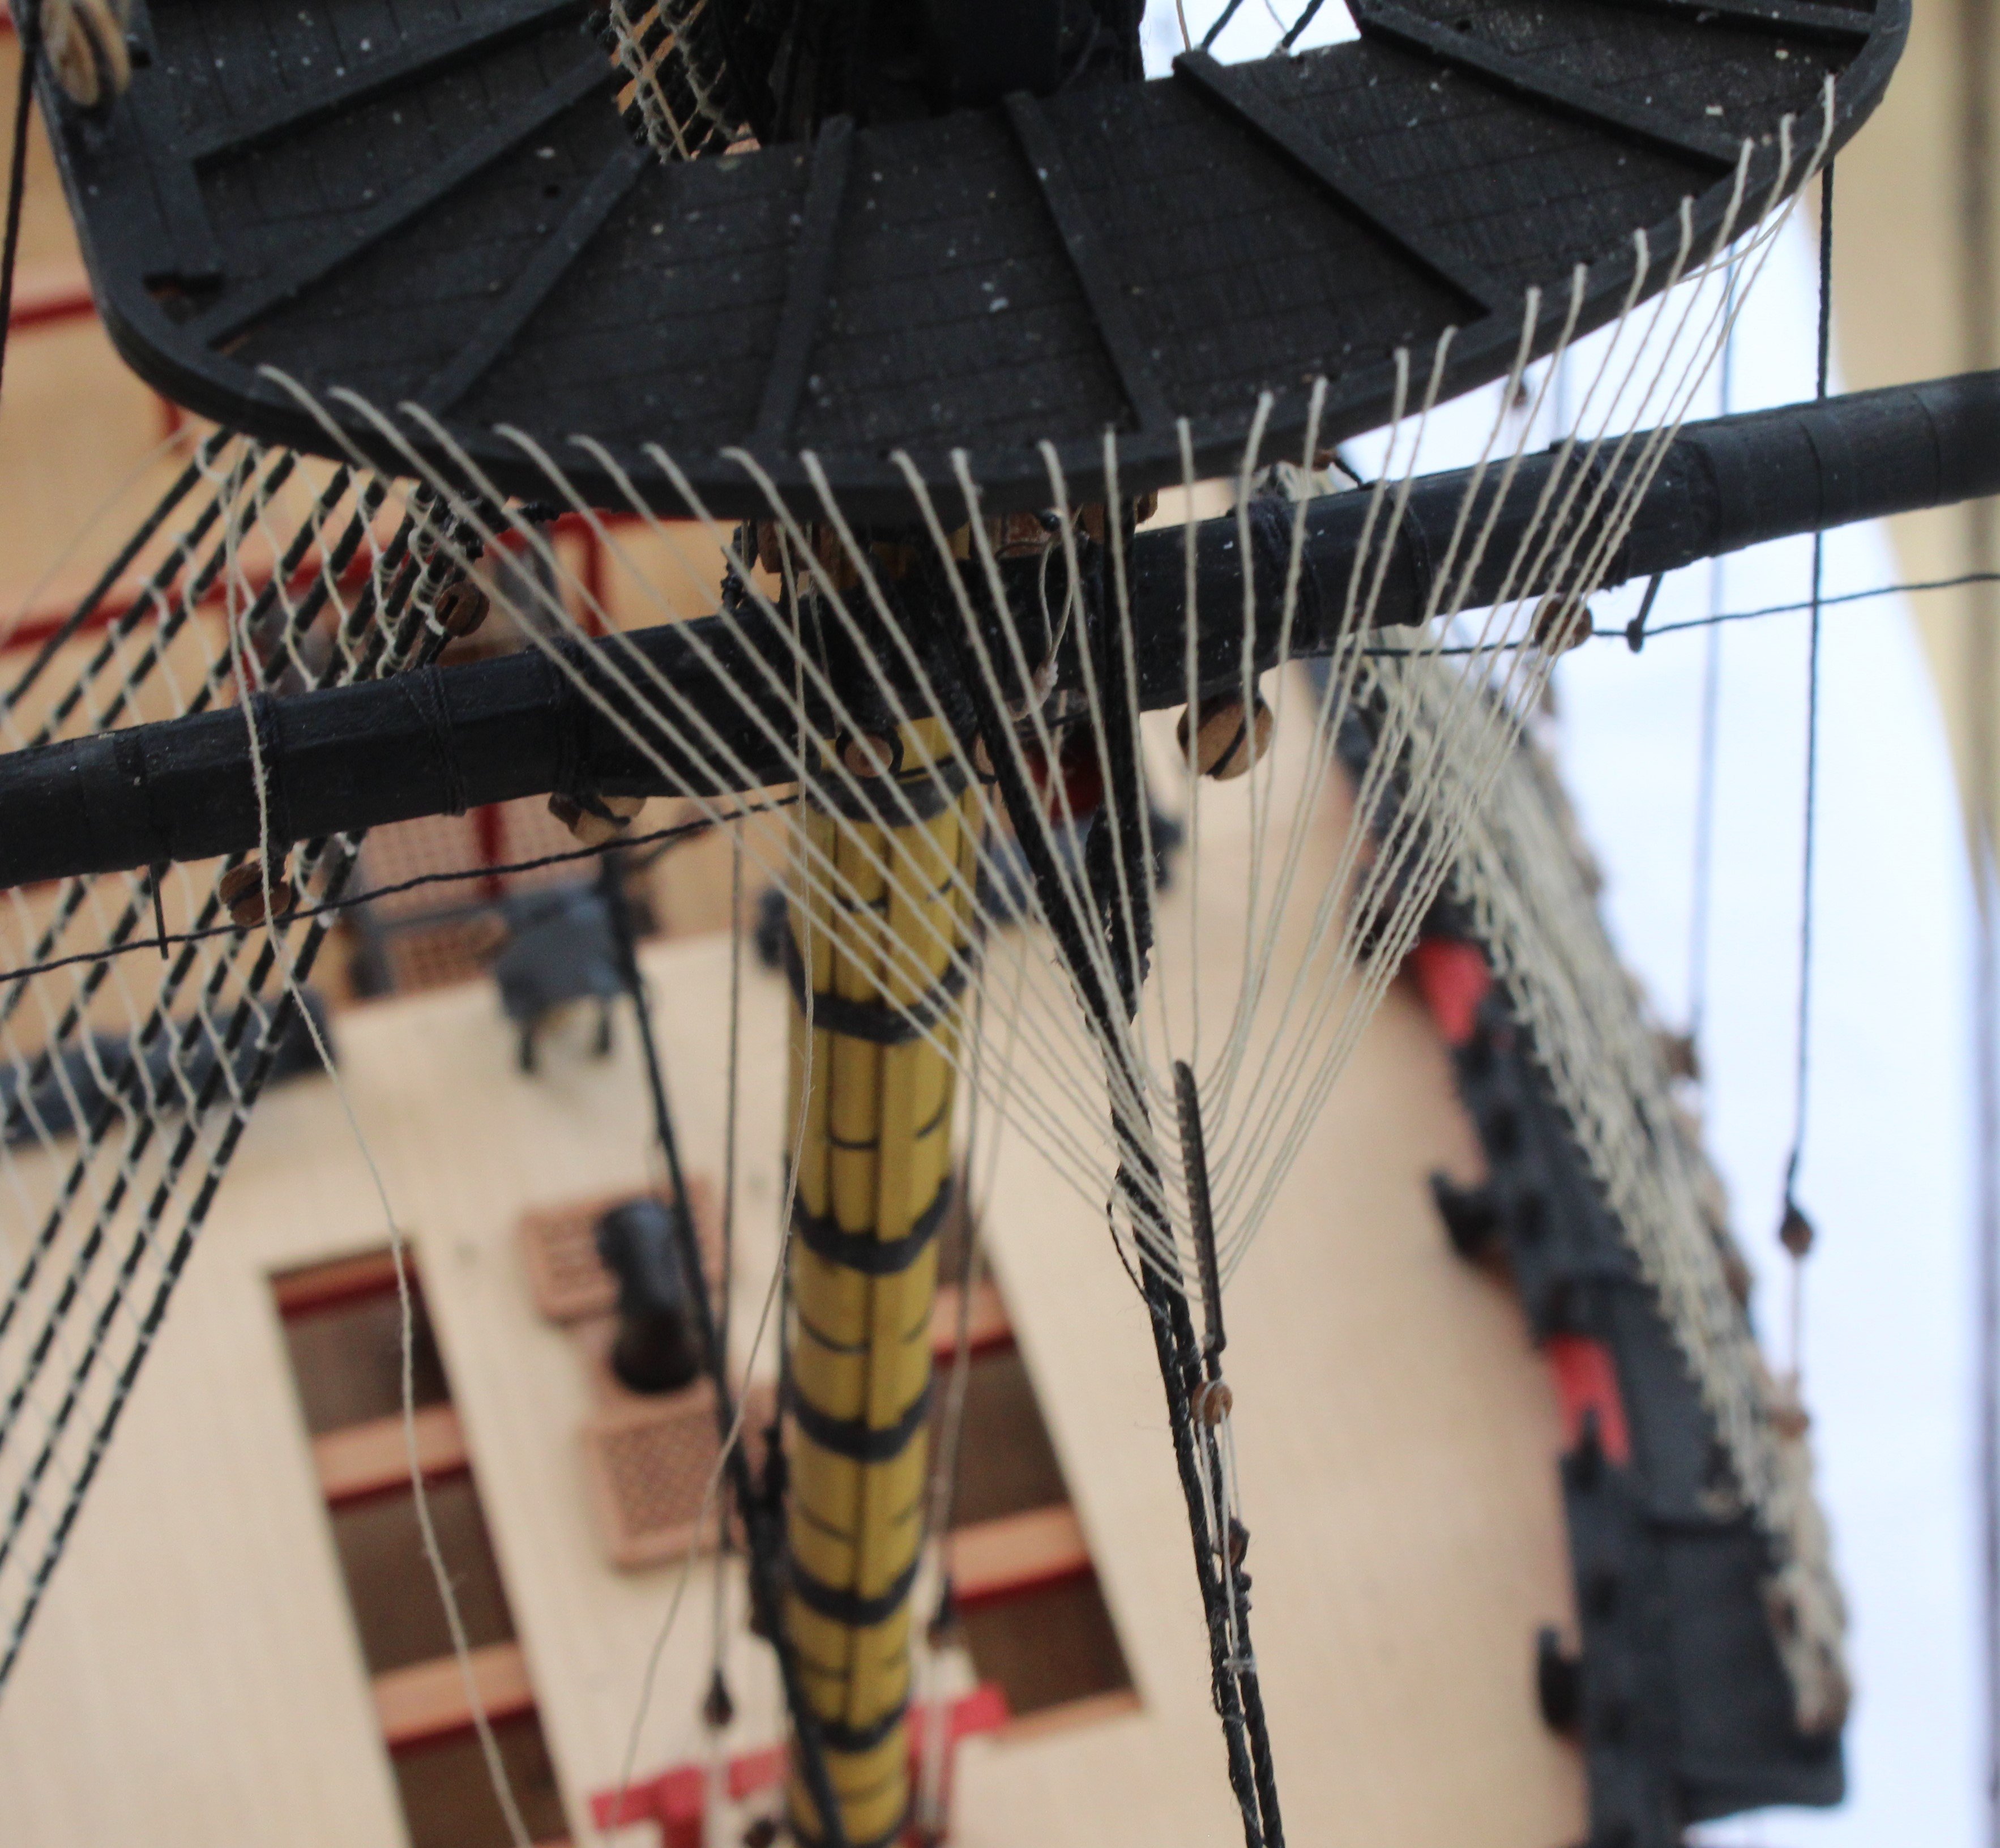
Crows Feet
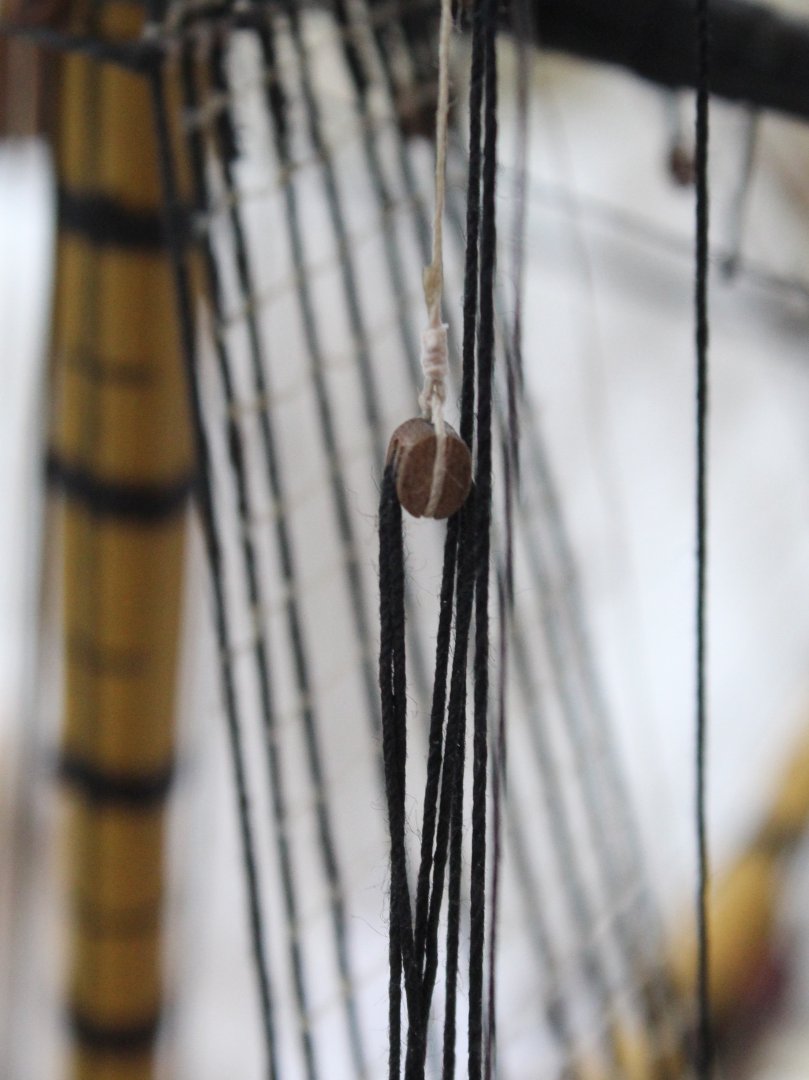
I have added the crows feet rigging to the main and mizzen mast, noting I had added the crows feet to the fore mast a few weeks ago. The first photo shows the rigging required for the euphroe which is secured to the stay with 2 x 2mm single blocks.
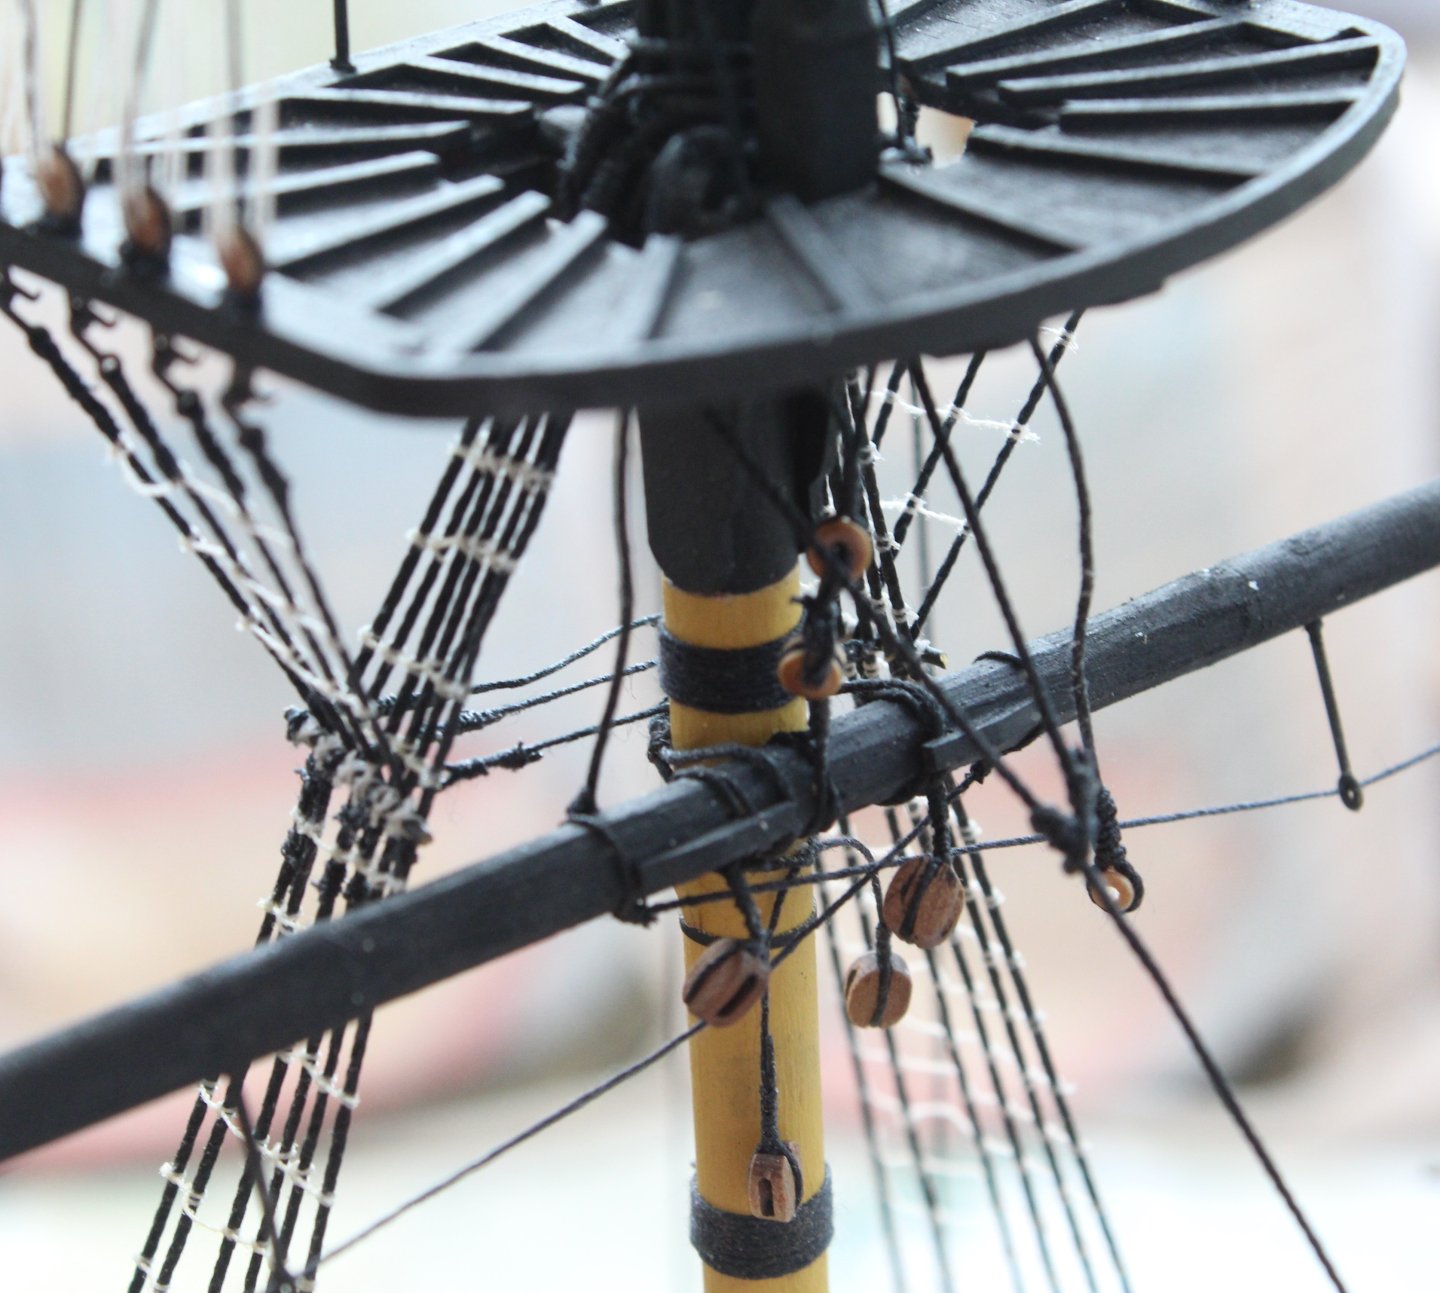
The completed main mast crows feet is shown on the next photo. I used a locking slip knot once the rigging was completed.
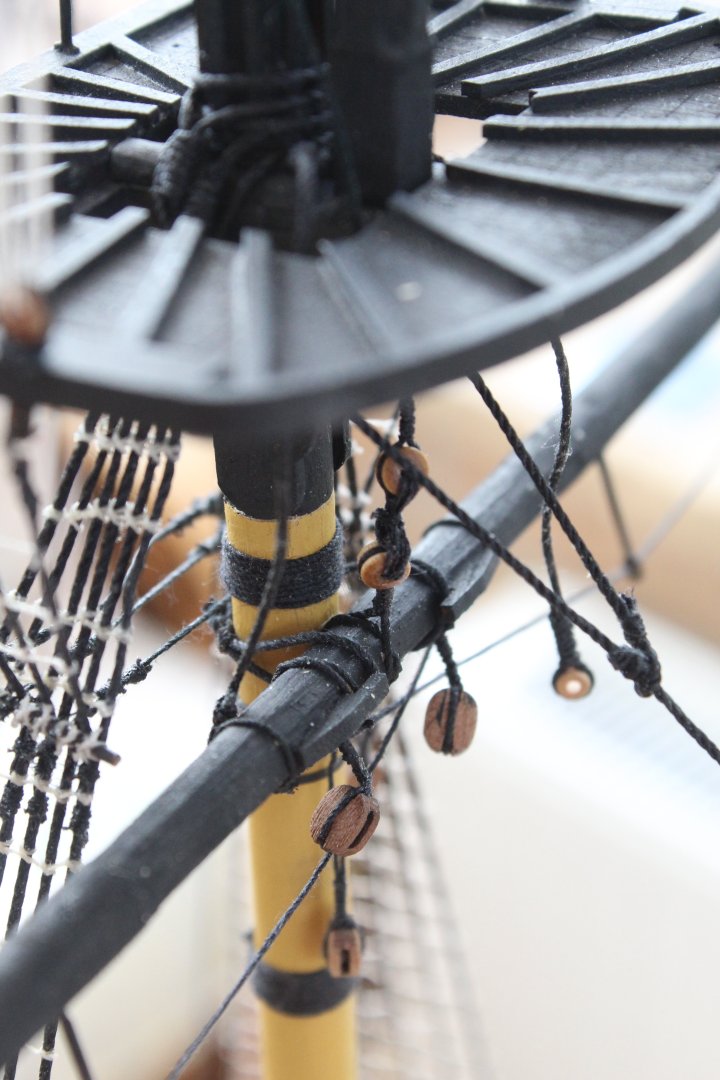
The next photo shows the mizzen mast crows feet rigging
The final three photos shows the belaying of the fore, main and mizzen topsail jeers.


- DB789, Knocklouder, Ronald-V and 8 others
-
 11
11
-
Nice work so far.
I echo Theo's comment below which is the rational I normally apply to my builds when I have made an error:
but in the end it is you who will look at it the most so the question is how much does it bother you.
- Lee Spender, DB789 and Oboship
-
3
-
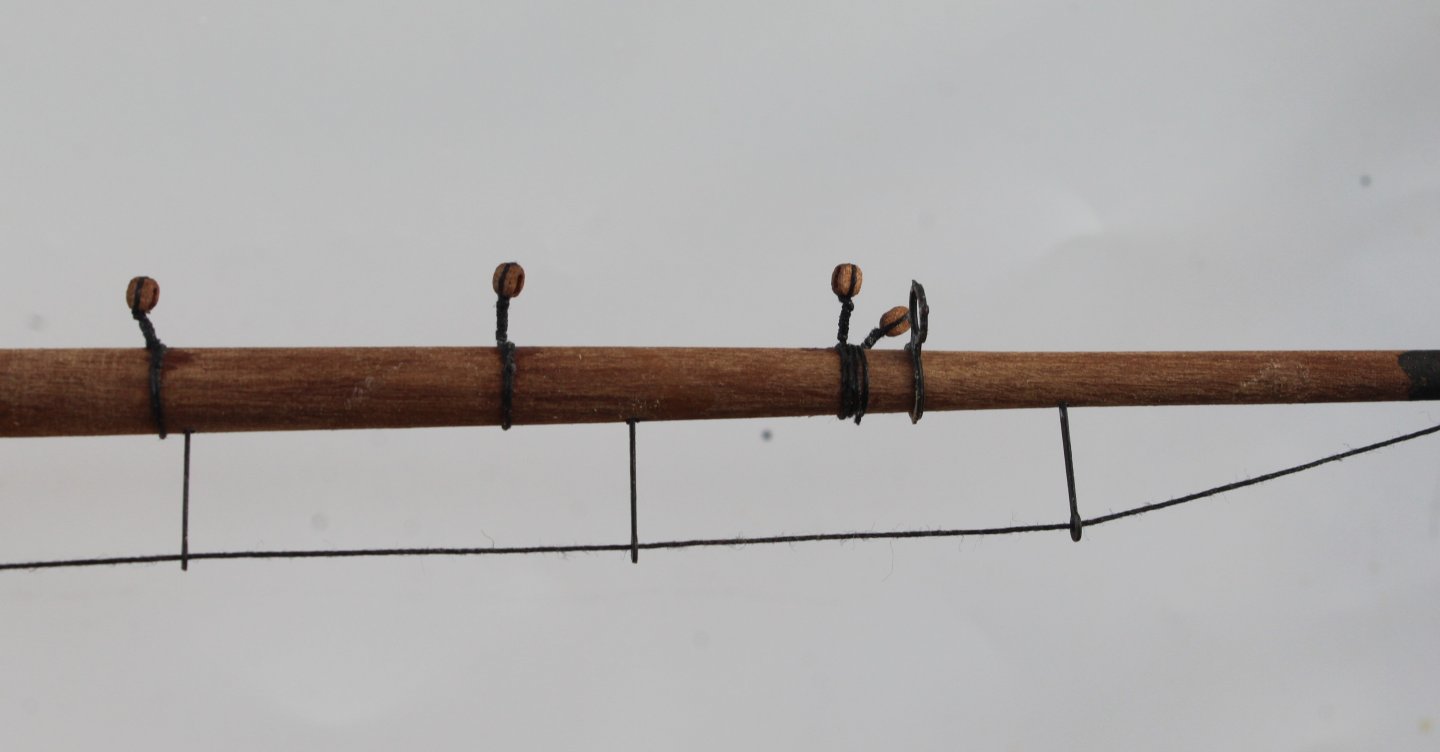
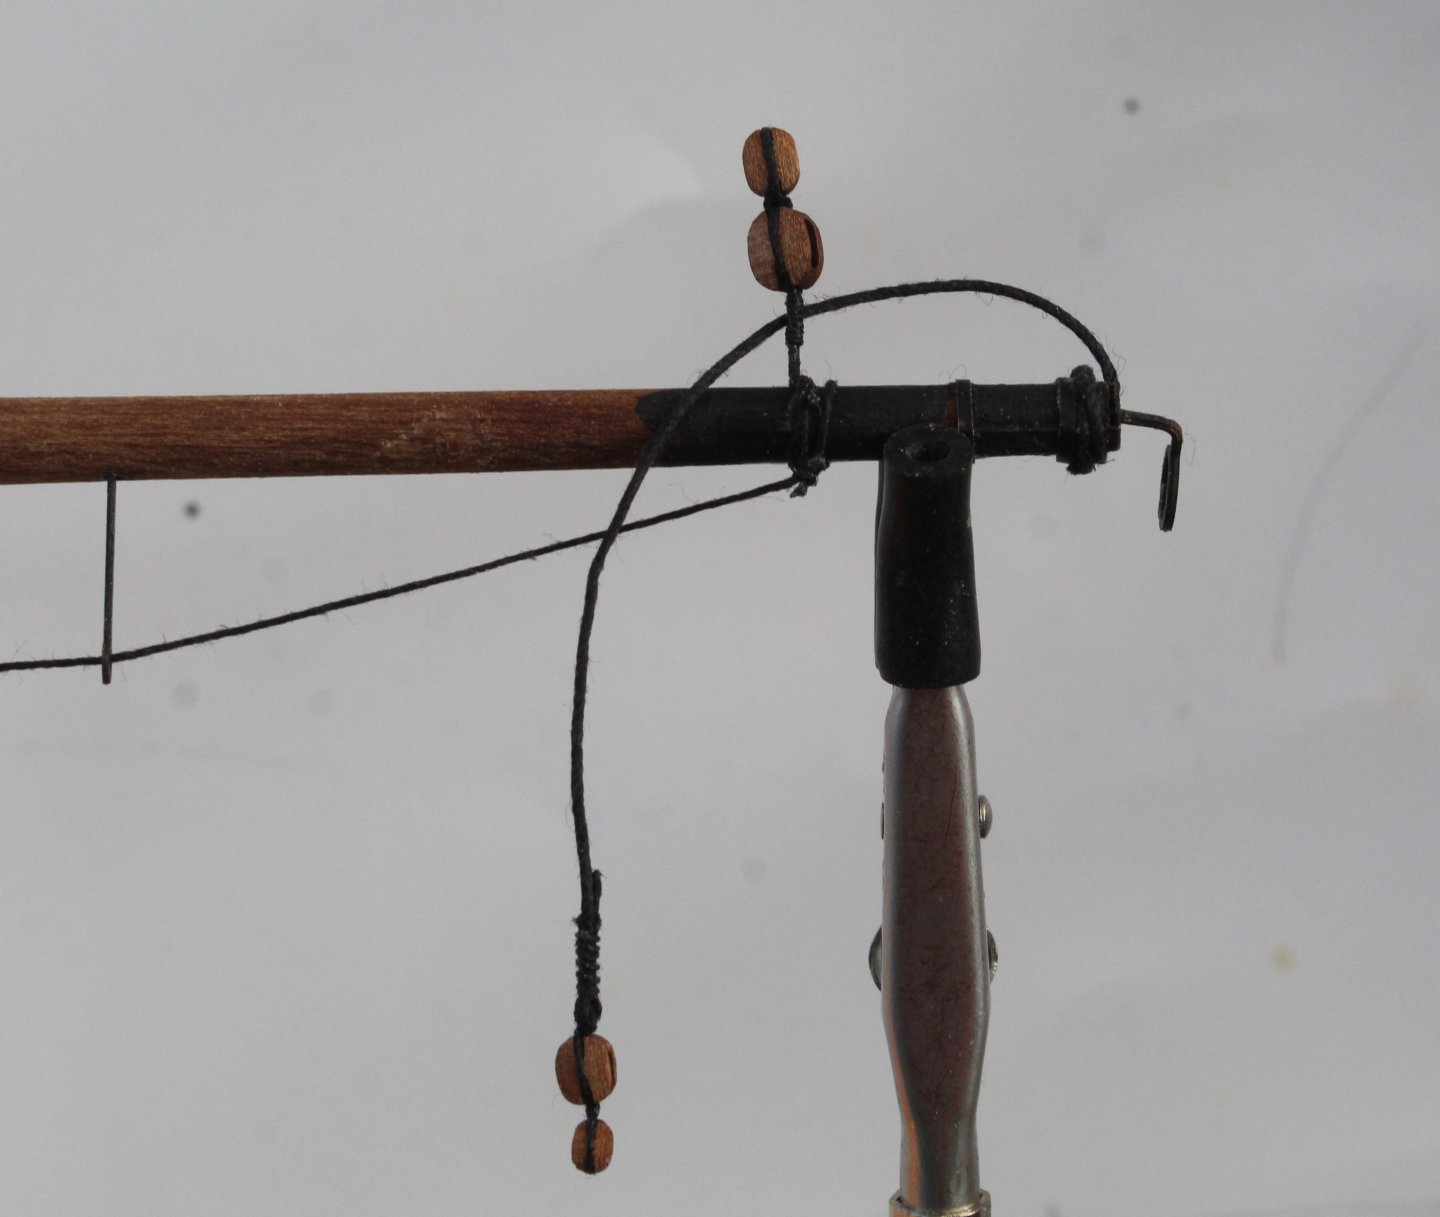
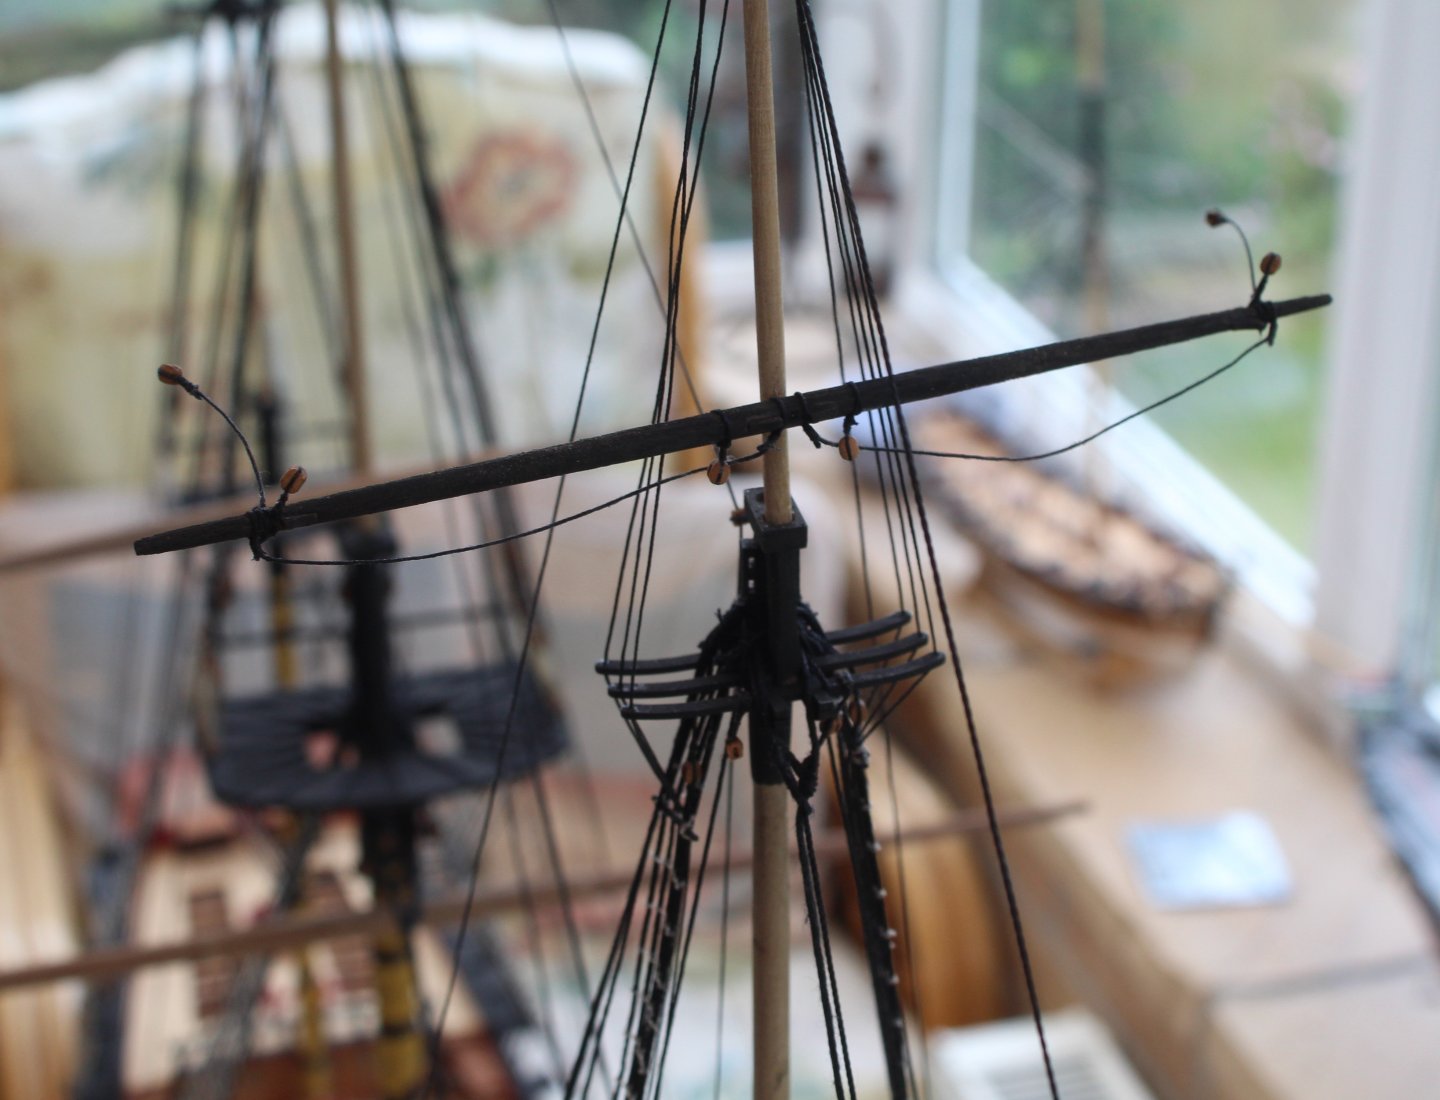
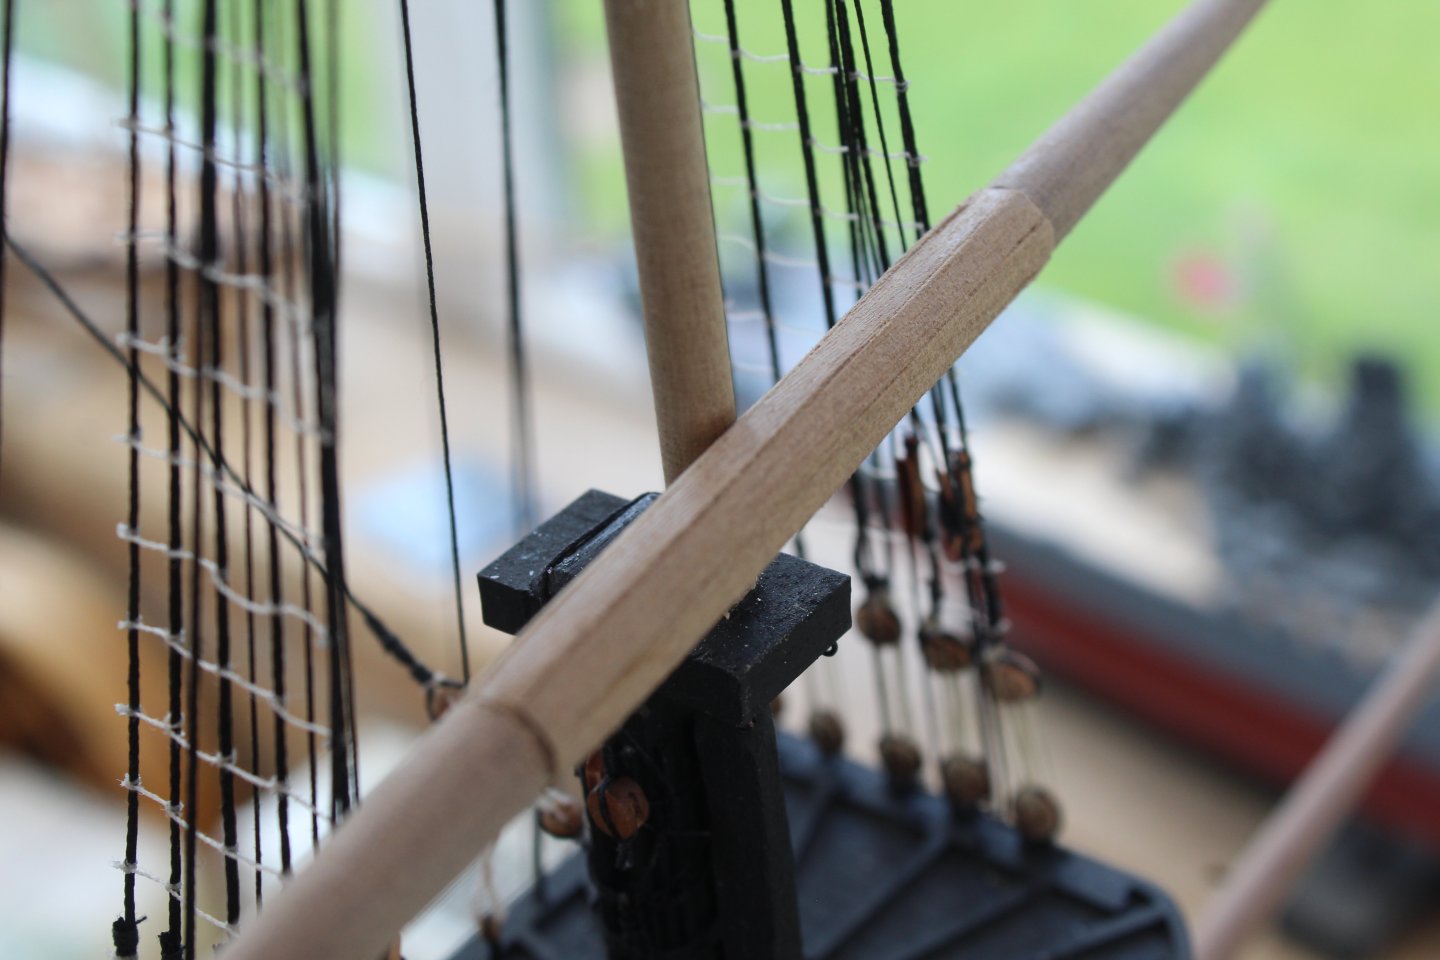
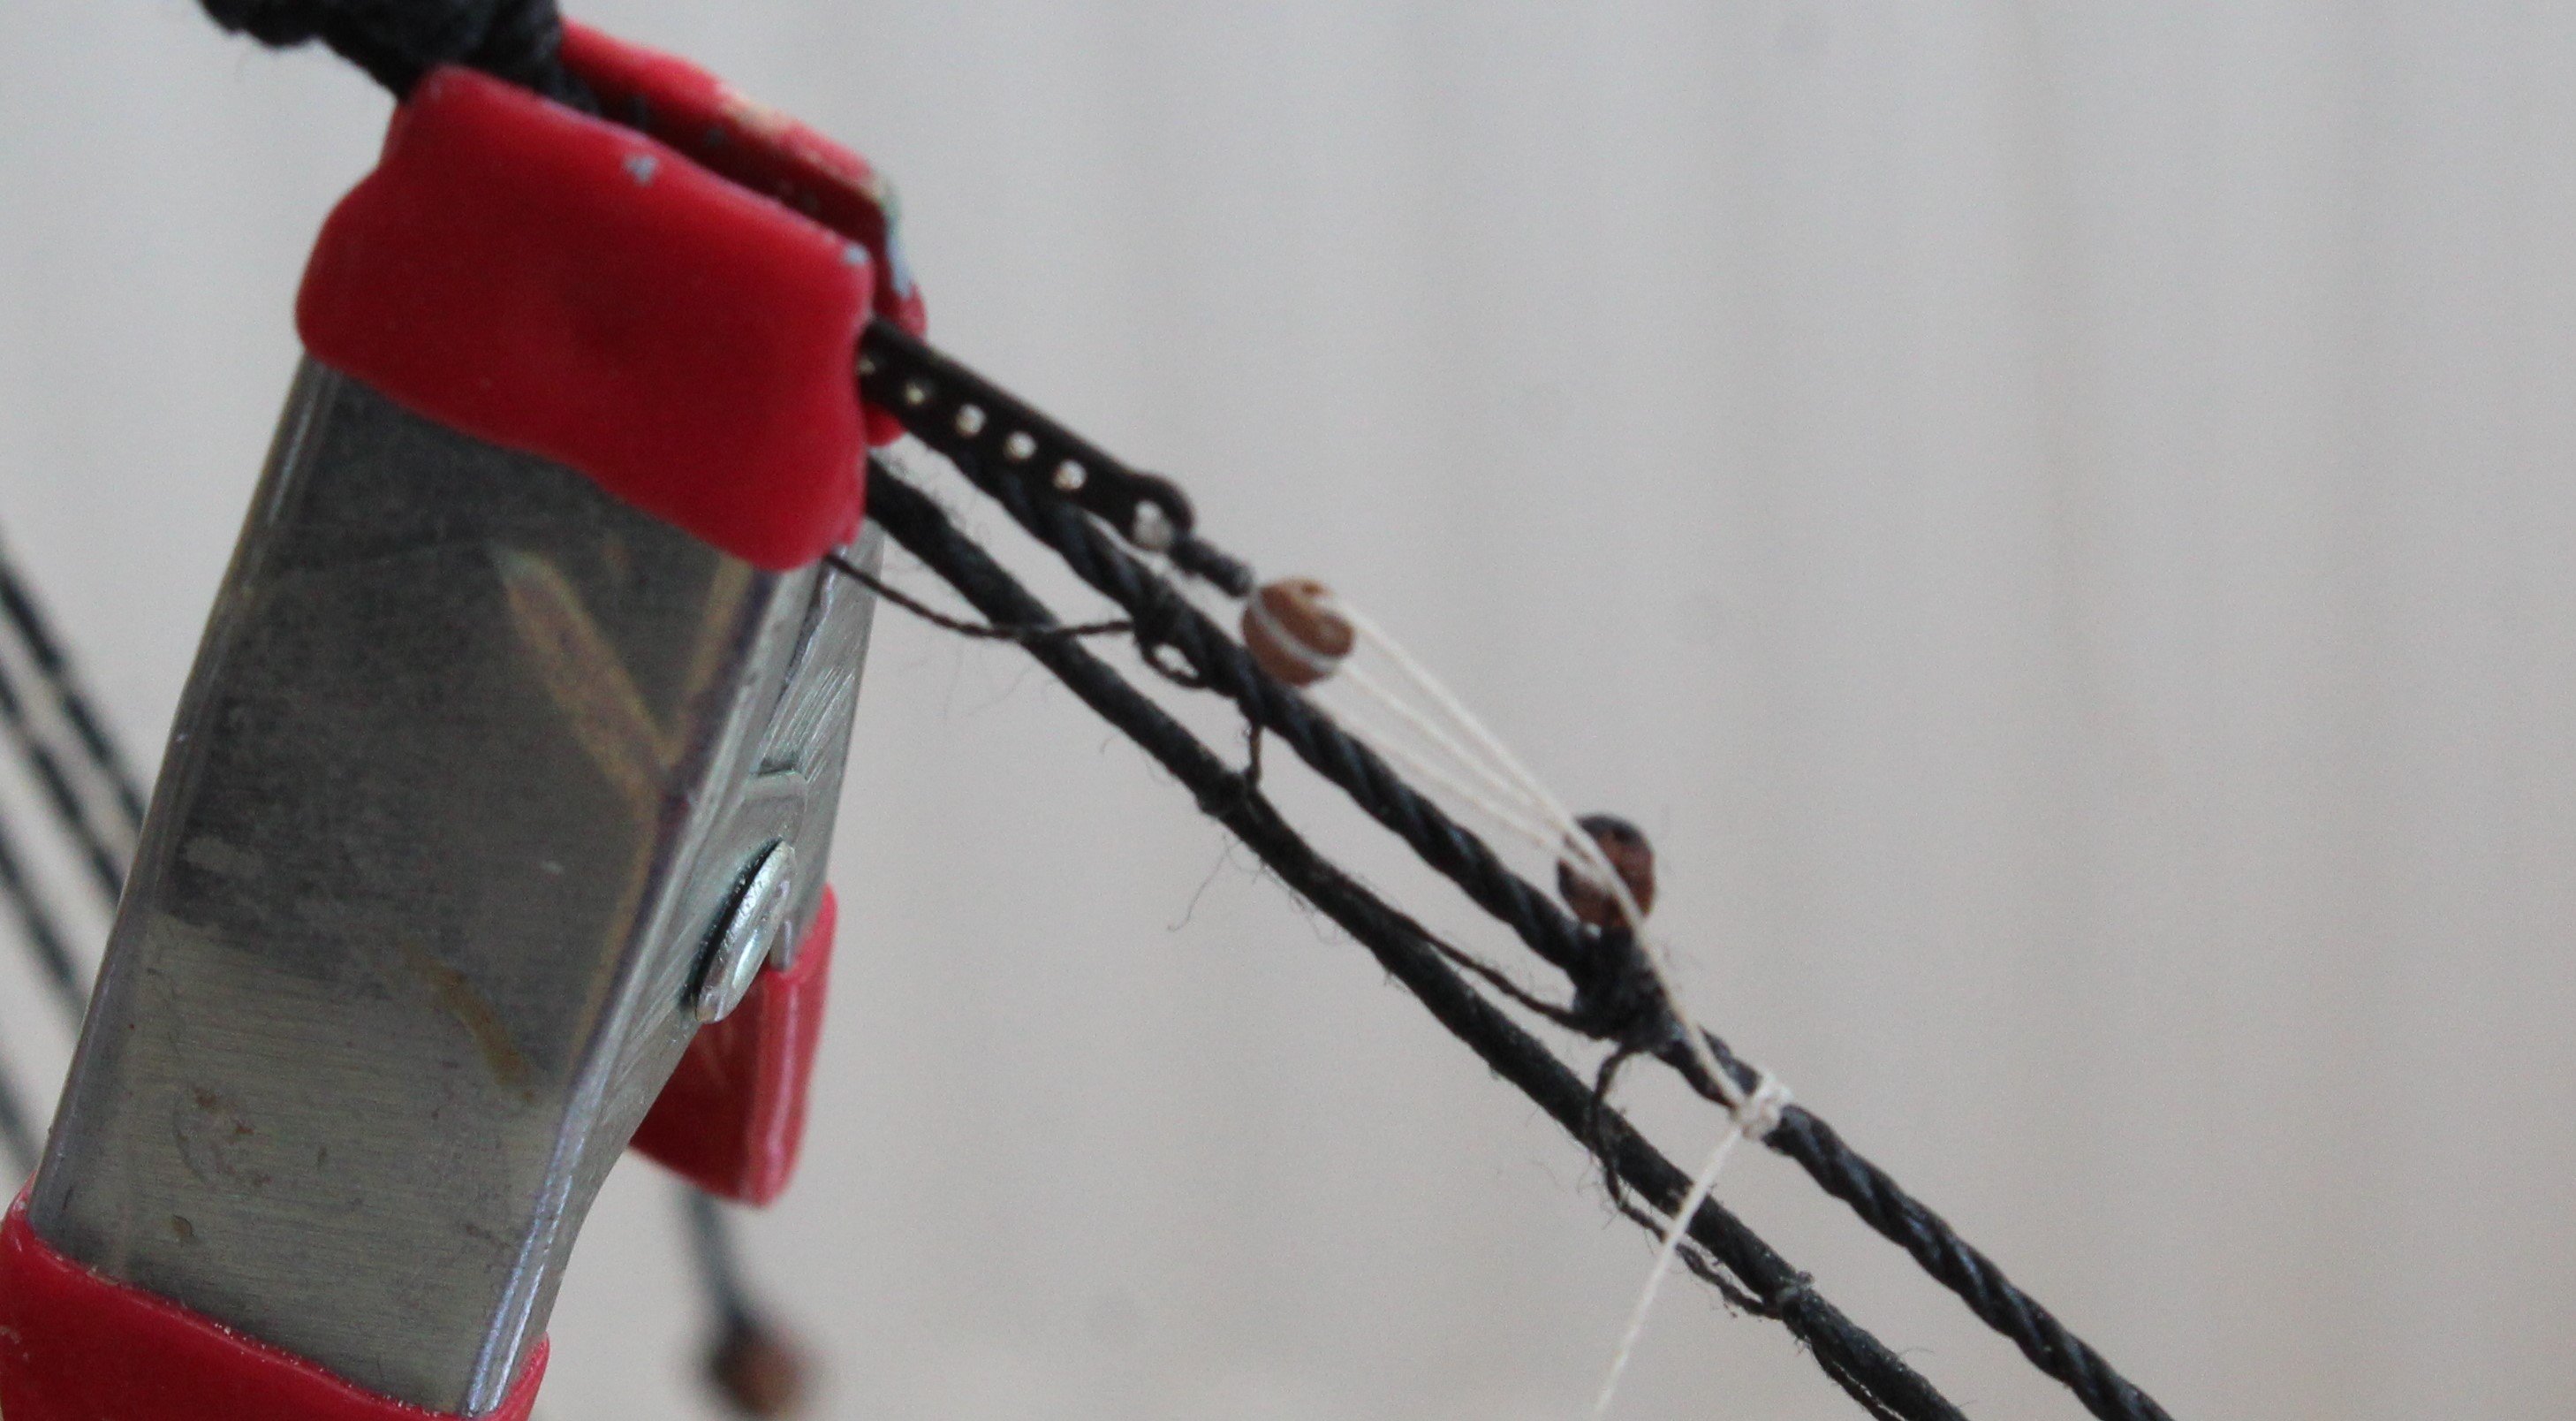
Topsail Yards and Tyes
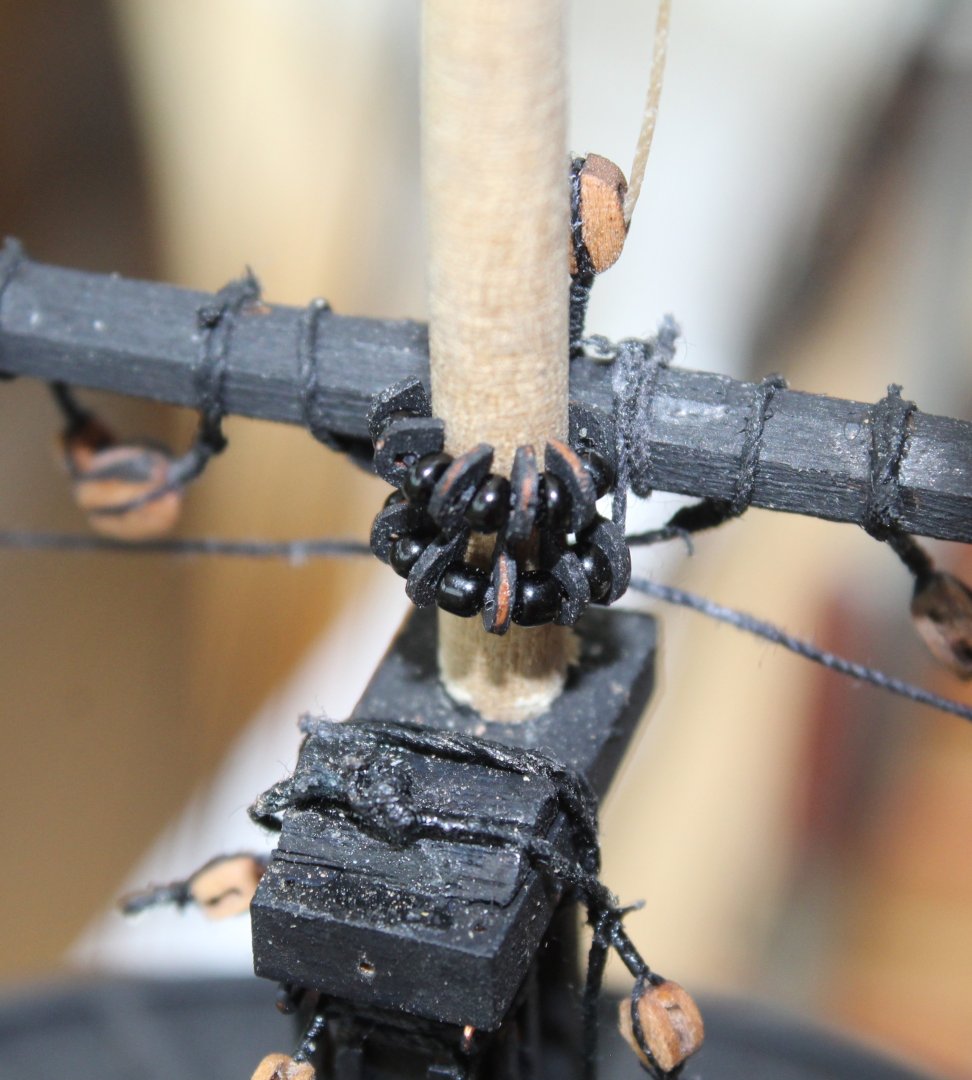
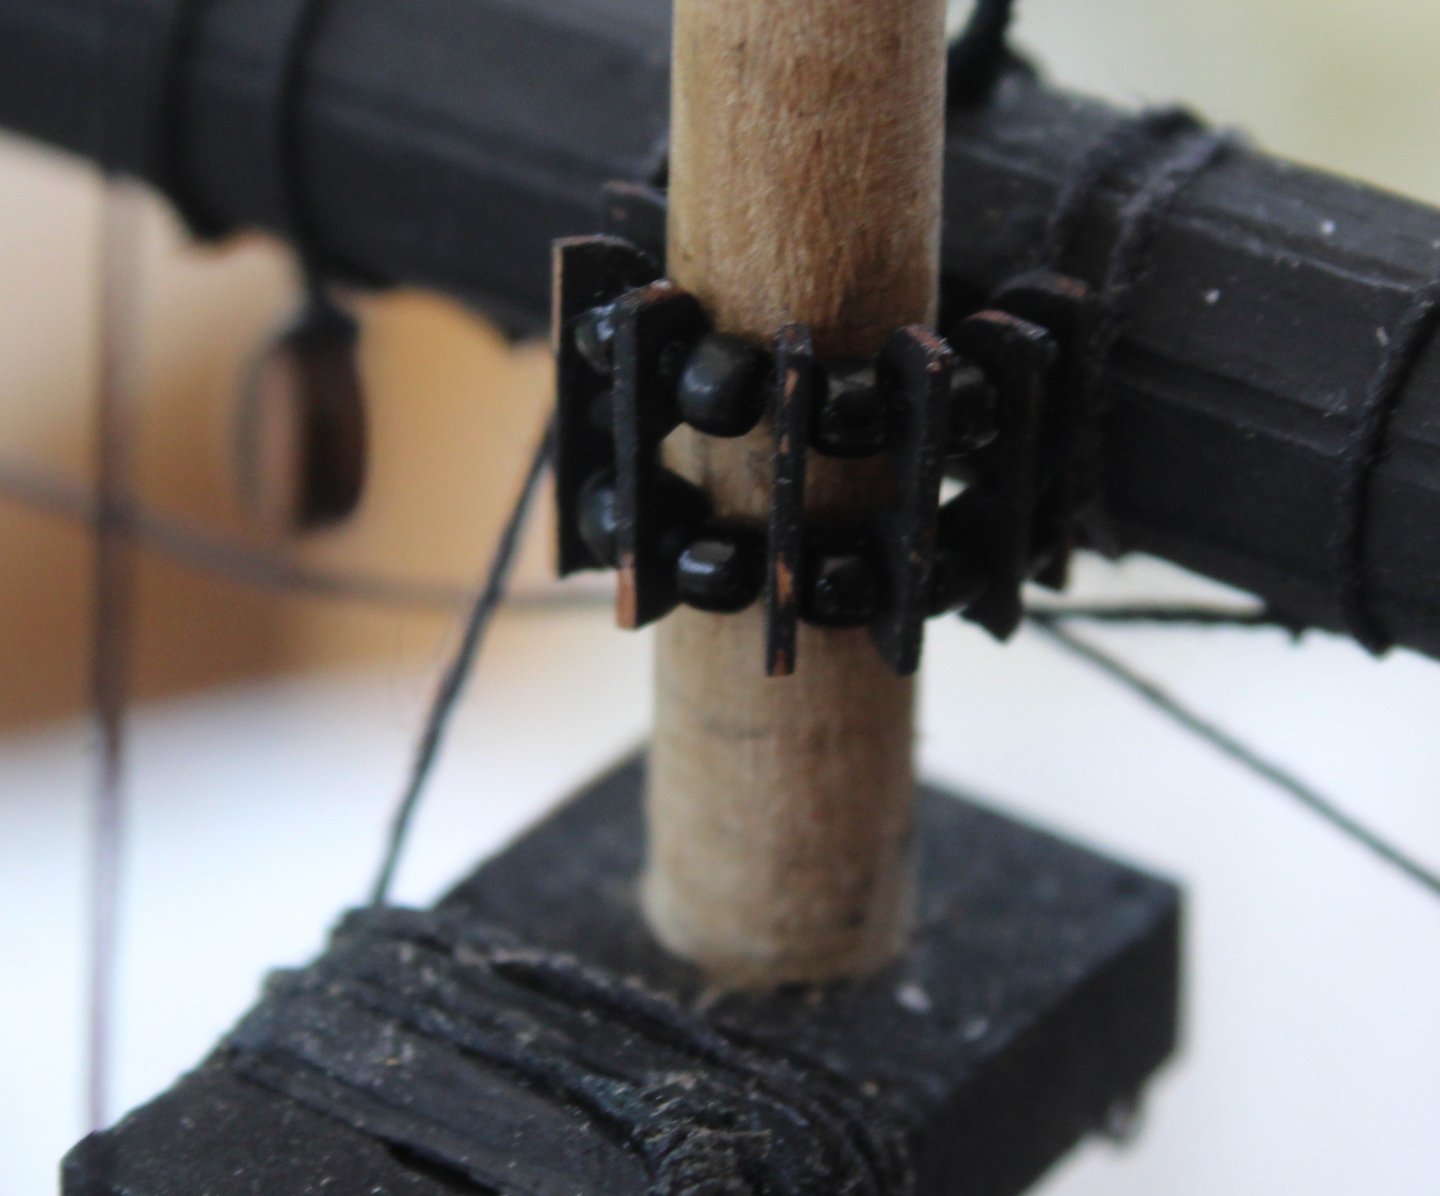
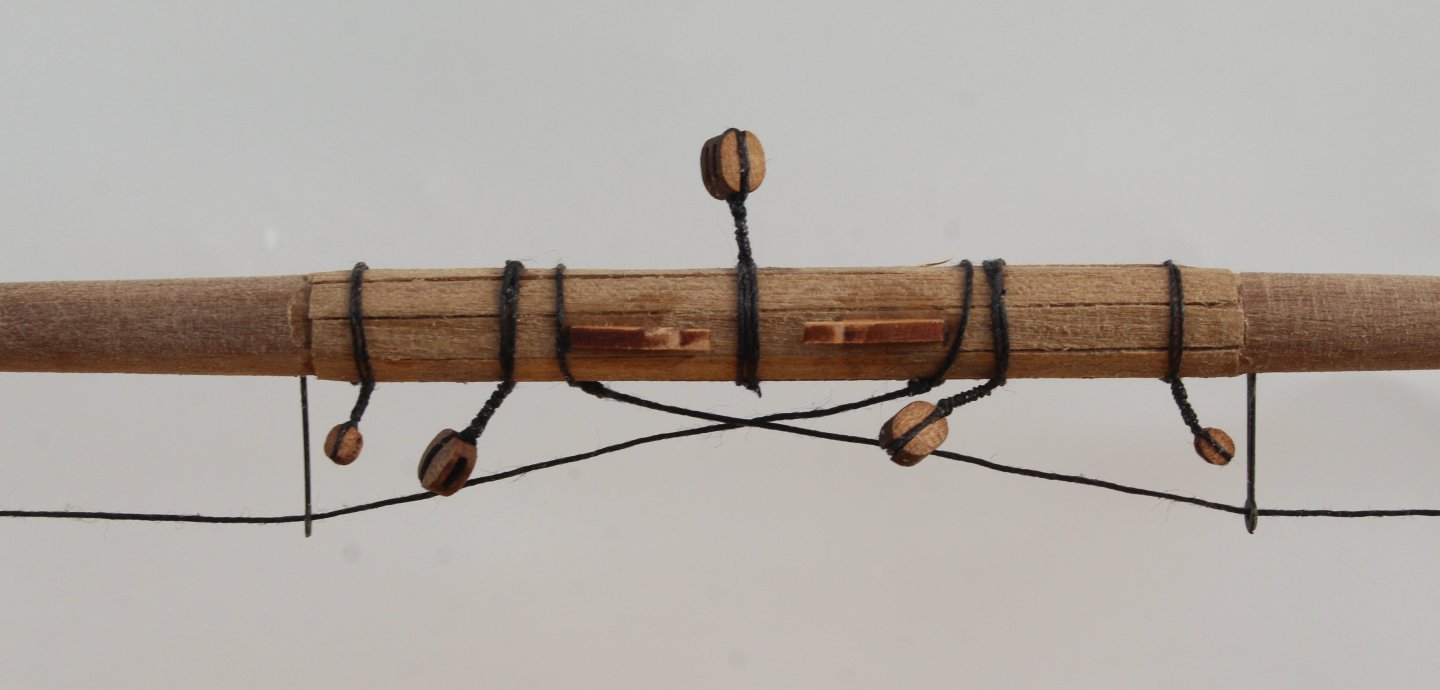
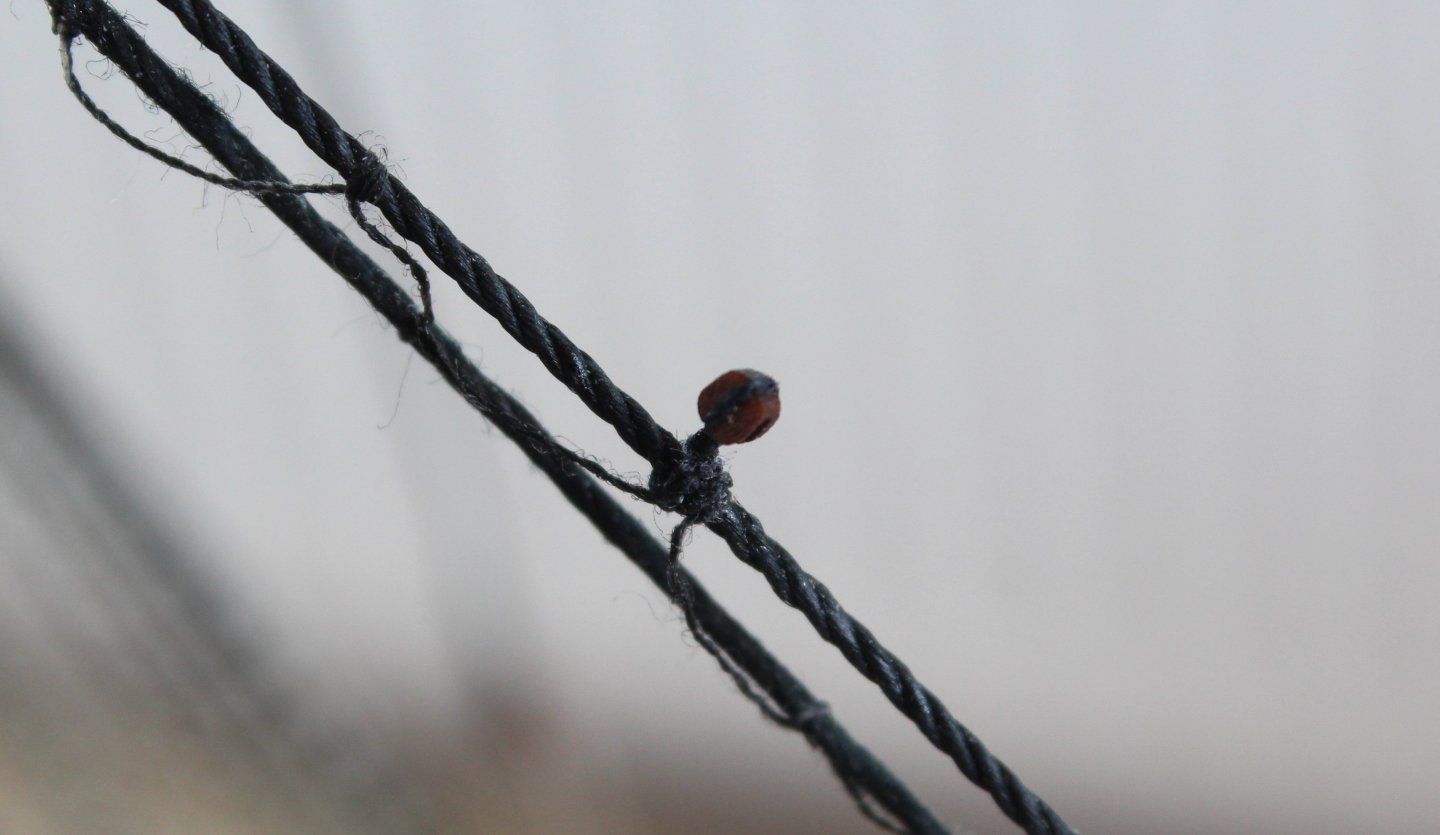
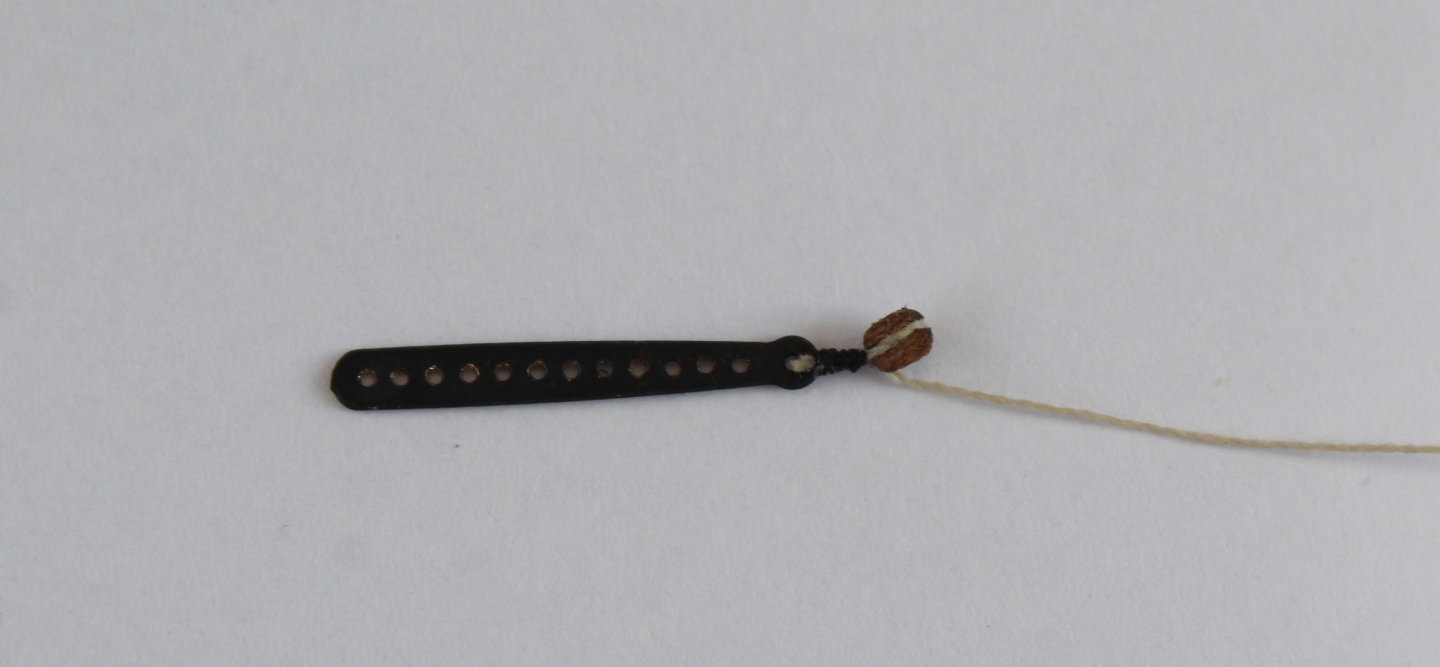
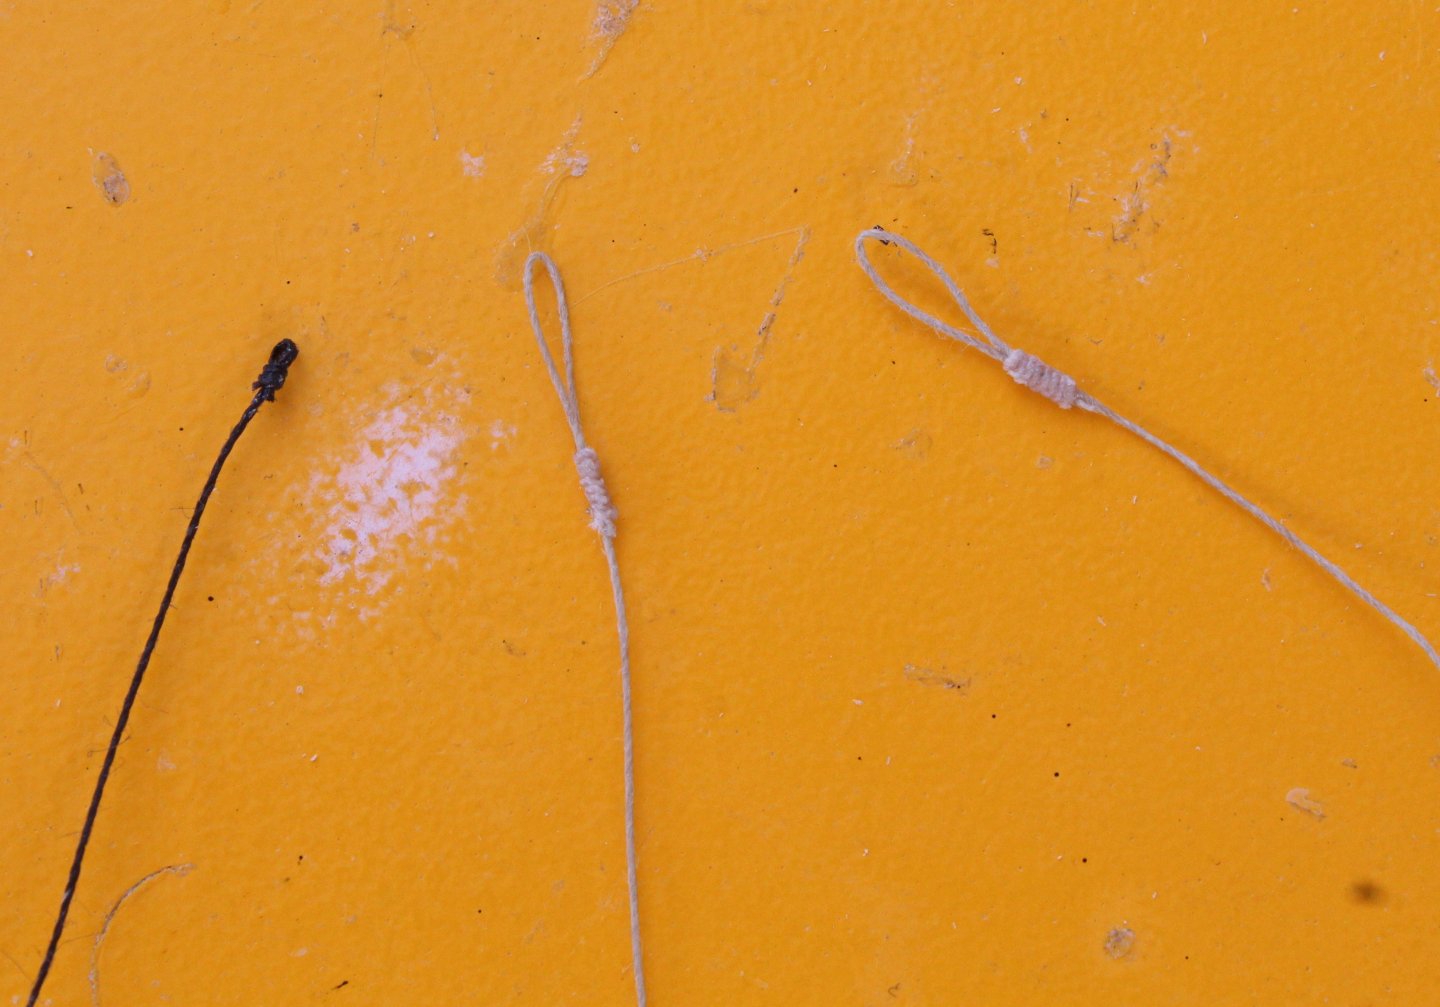
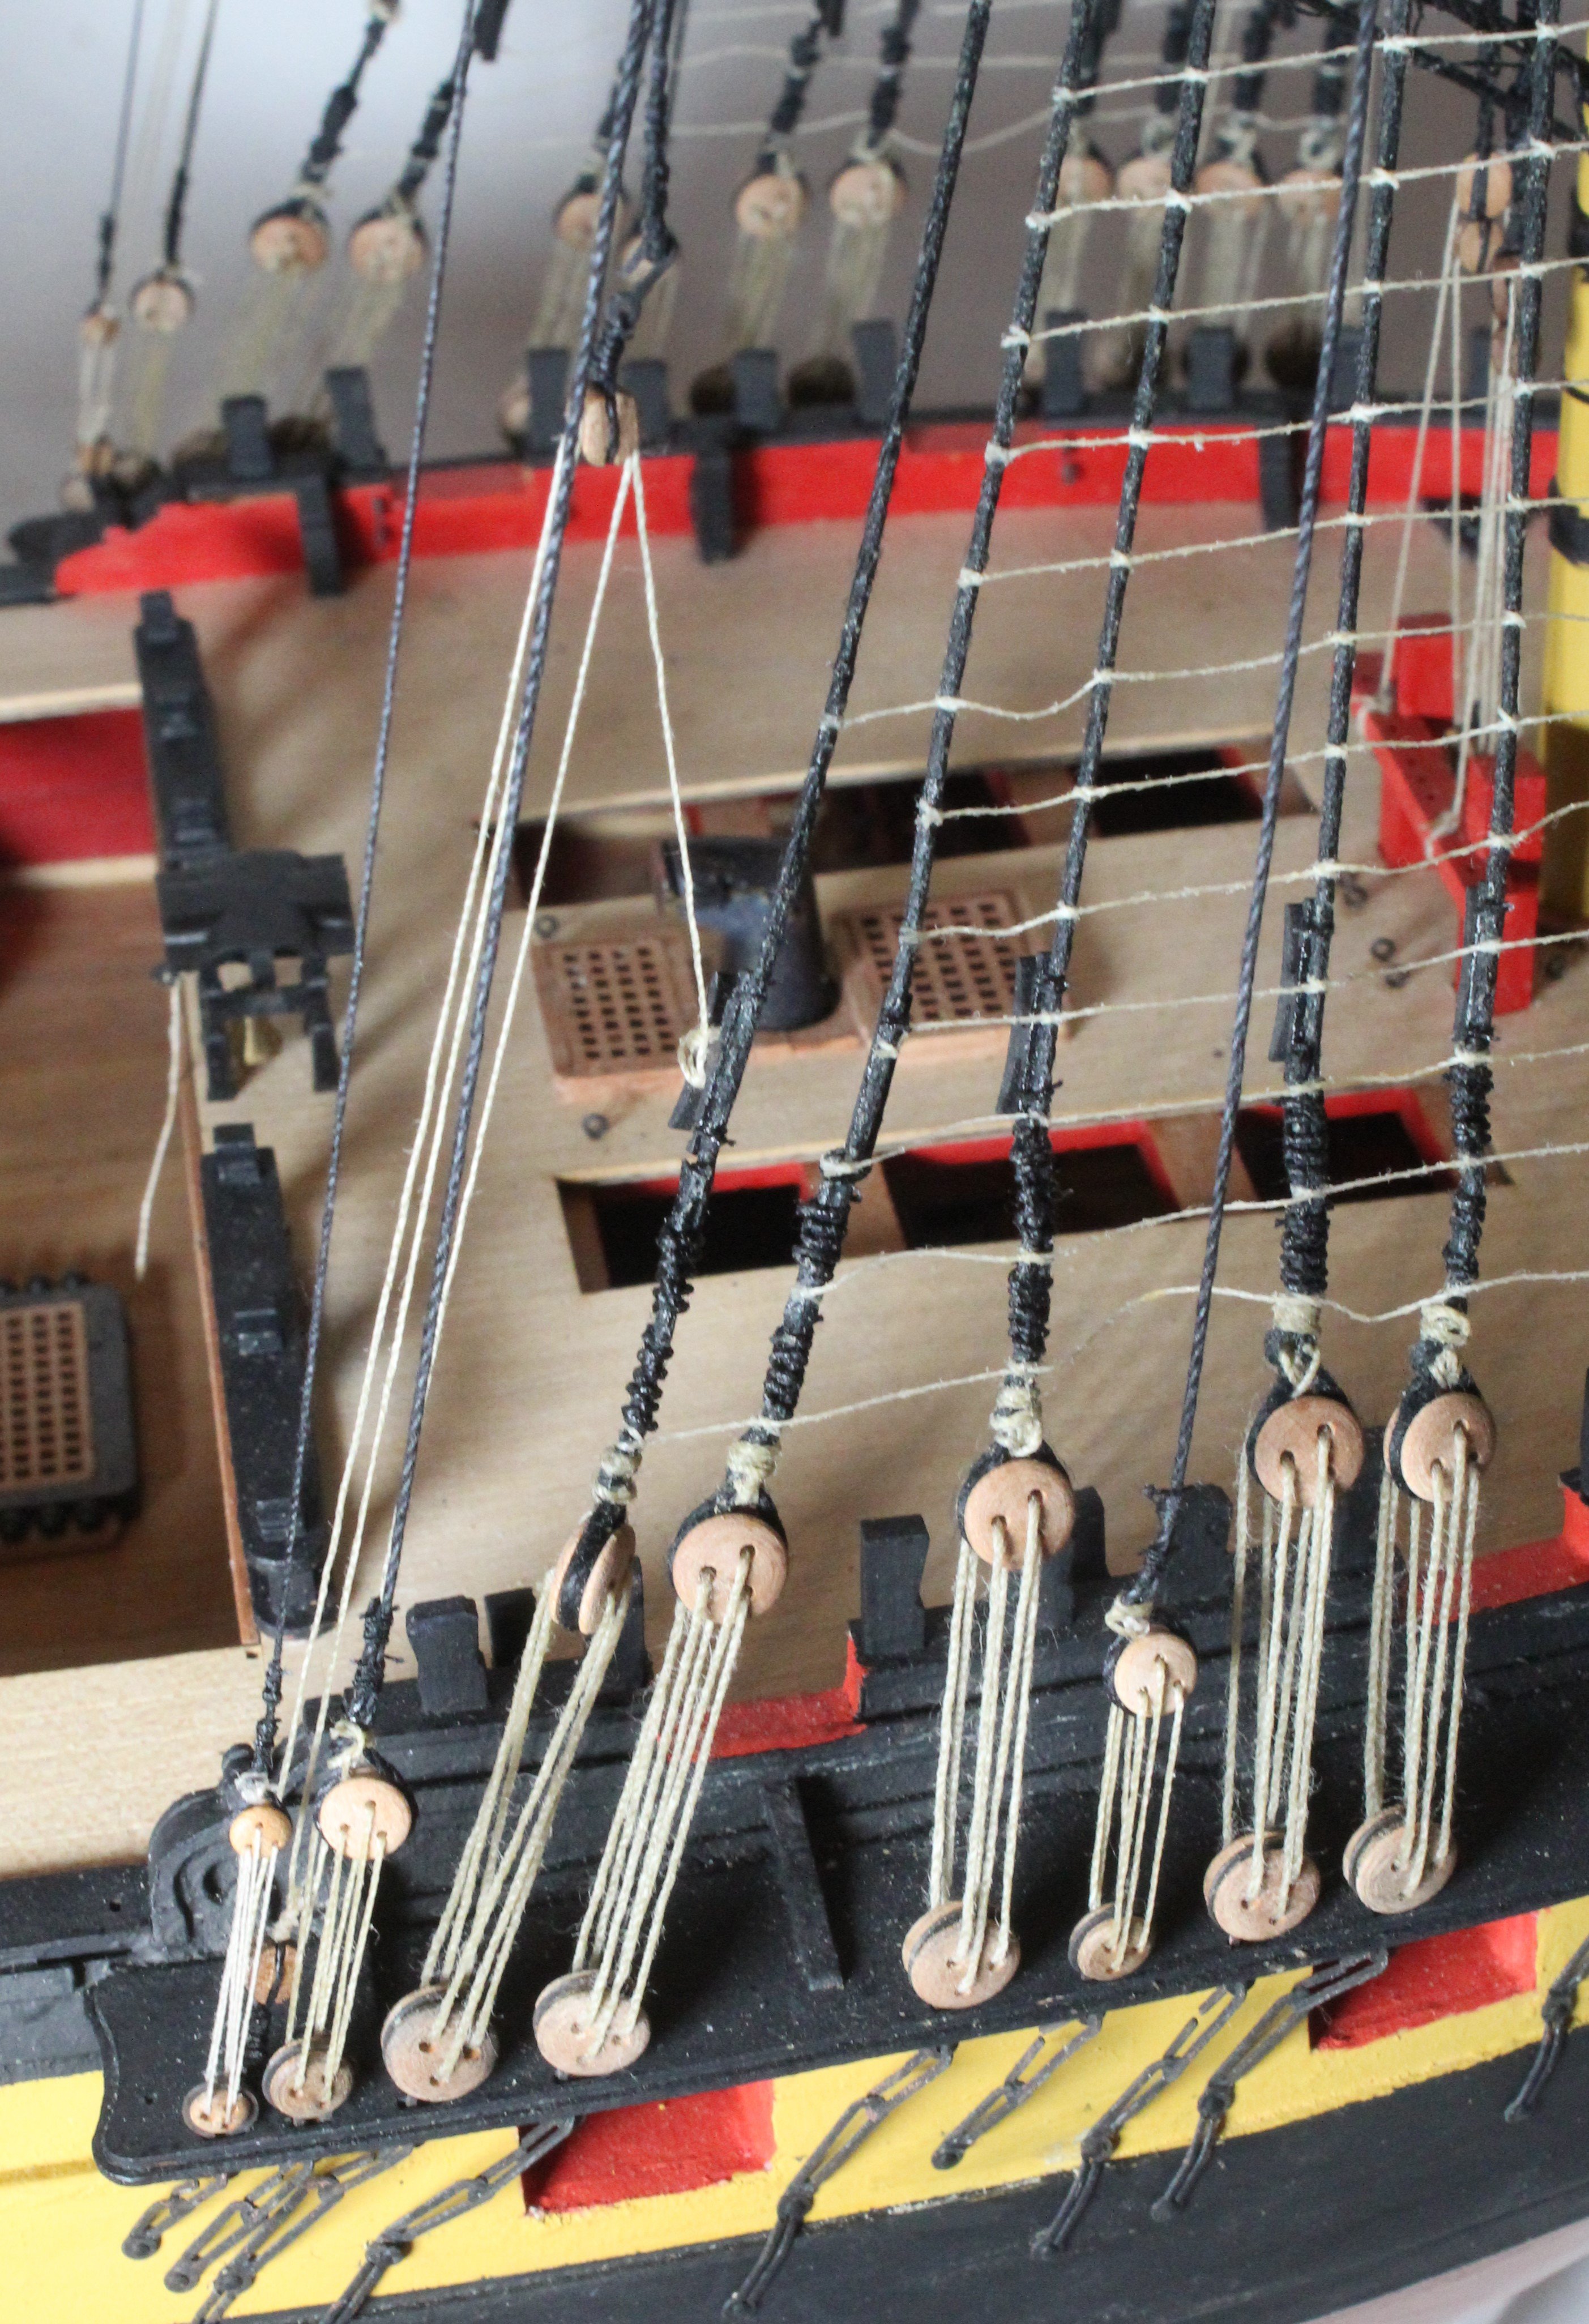
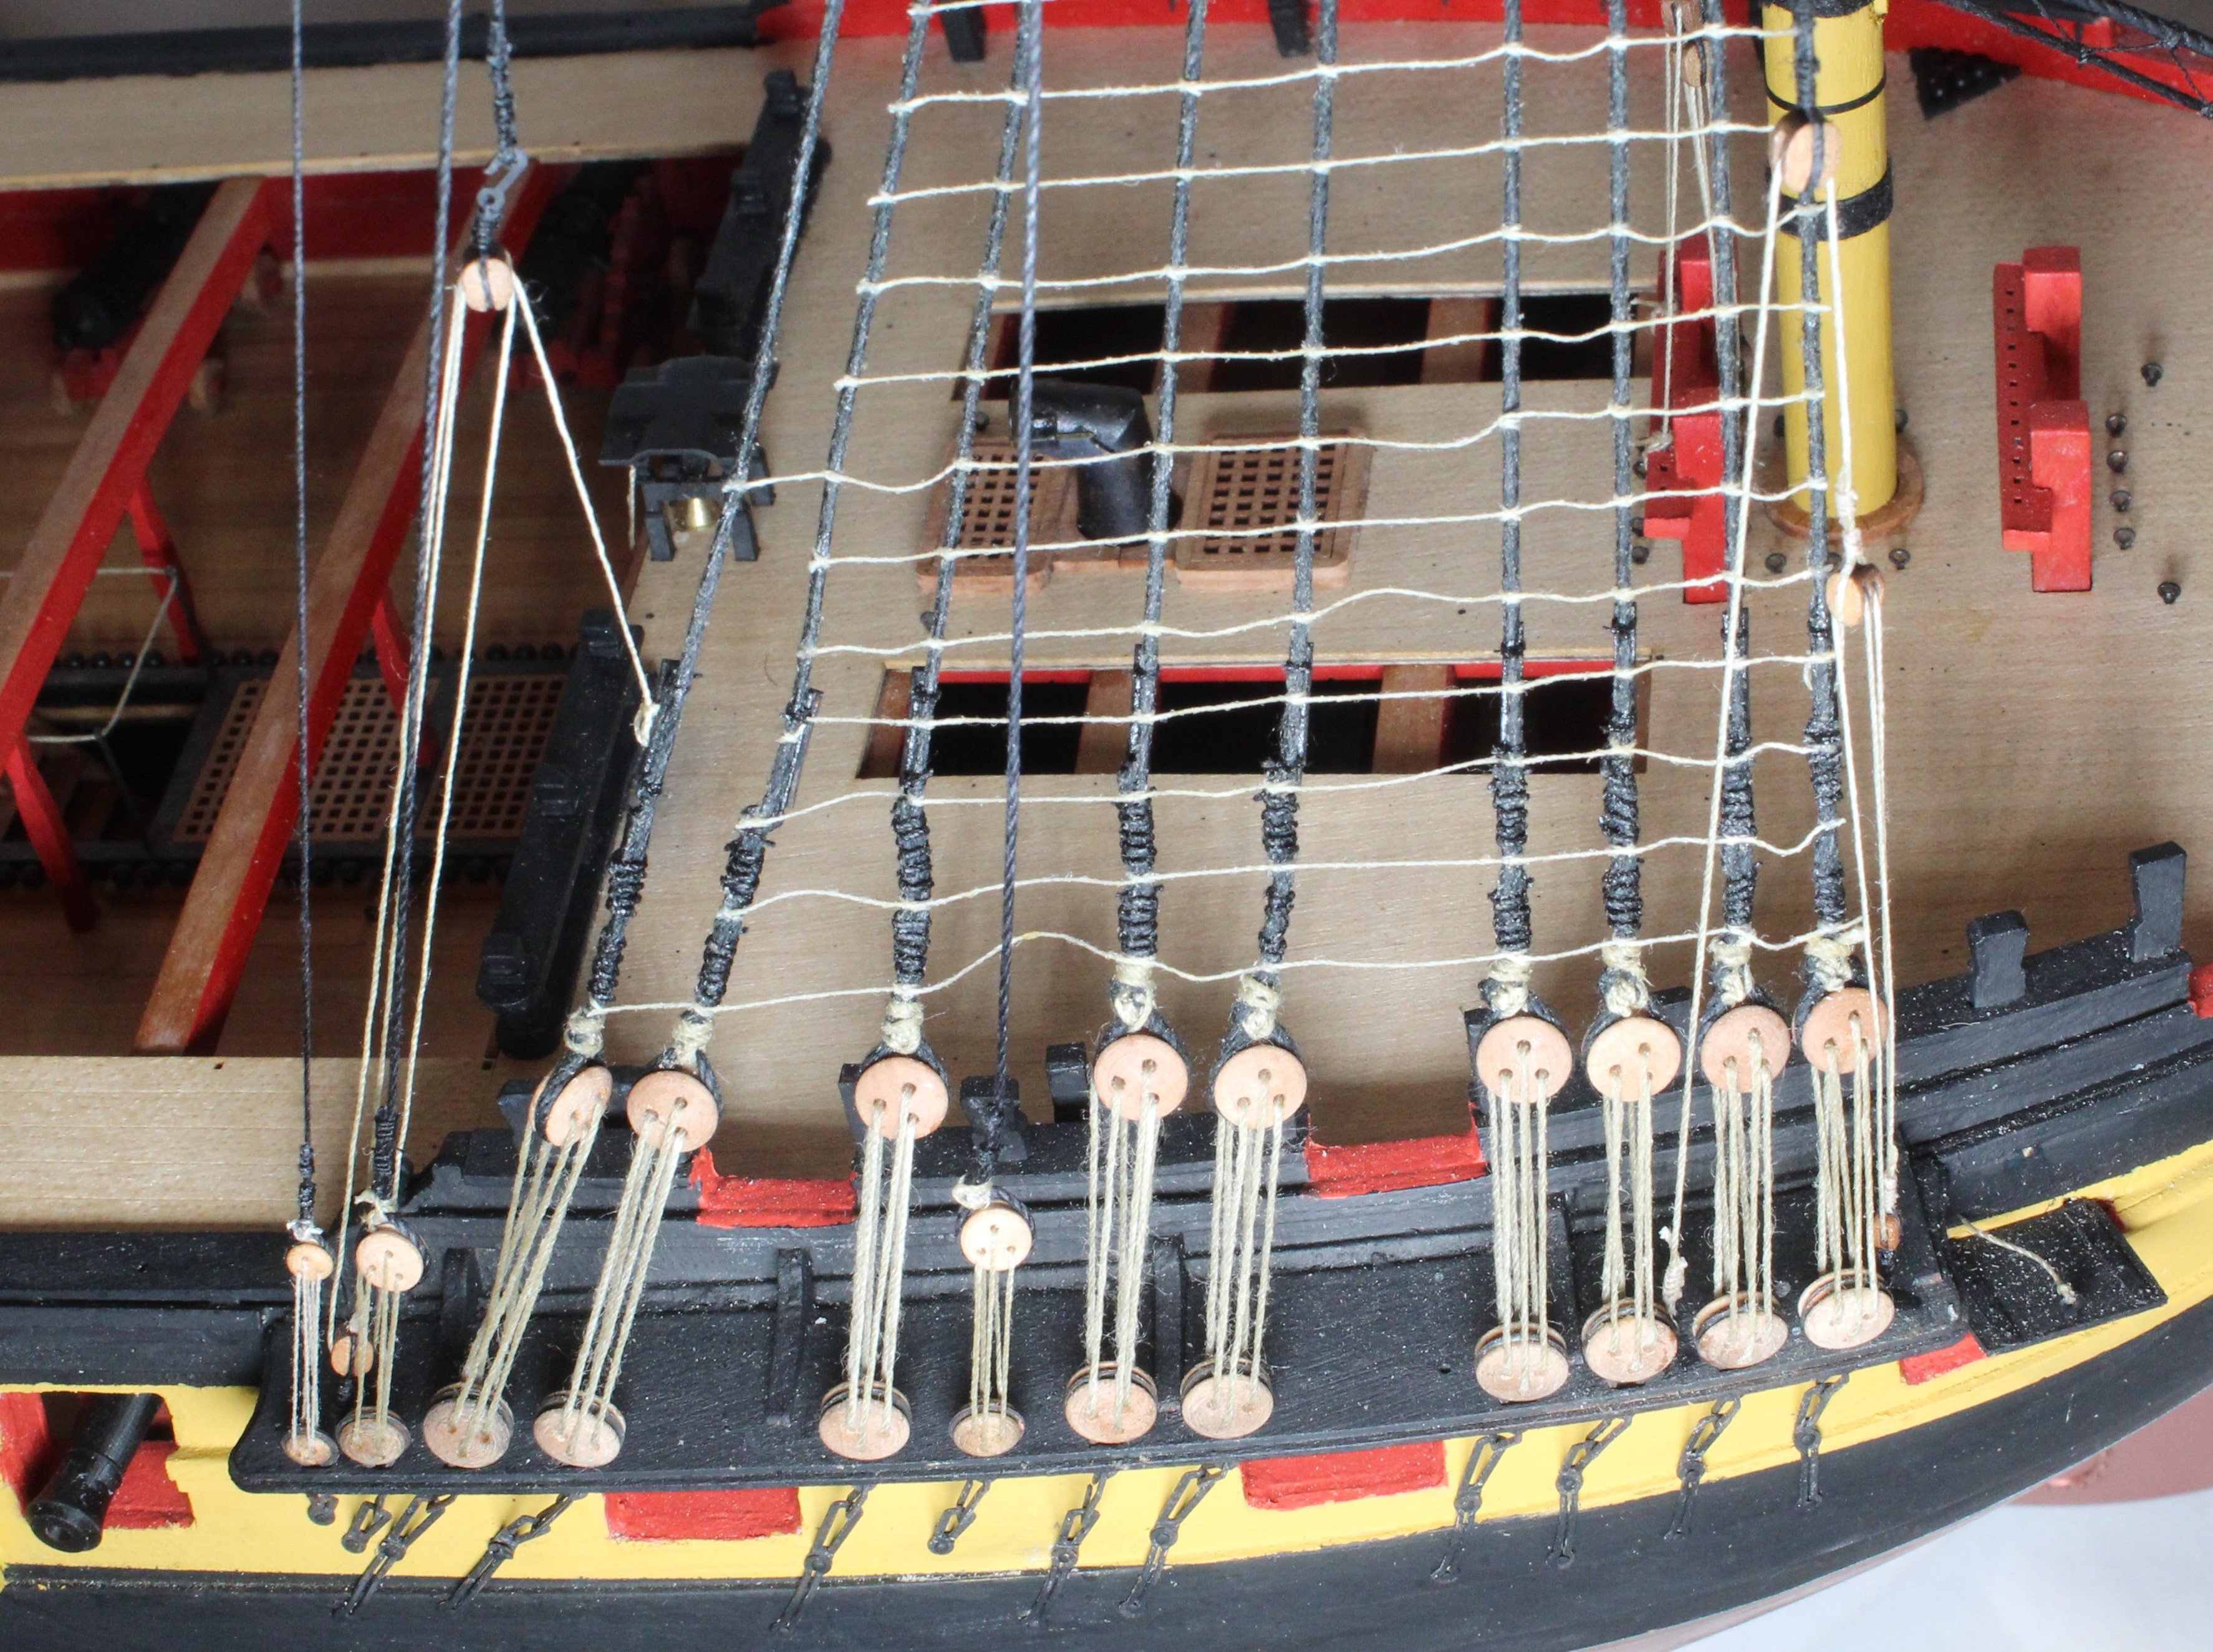
Over the last few few days I have been adding the topsail yards to the fore, main and mizzen masts. After each yard was pined to their respective masts they were secured with a parrel bead arrangement. I added a small loop to one end of each thread which pass through the upper and lower holes on the parrel bead / spacers. With the parrel bead arrangement in position I did apply a little bit of wood glue to hold them in place before completing the rigging. The threads were wrapped around the yard and the free end(s) were then fed through the loop(s). The threads were then pulled tight around the yard and tied off. As can be seen in the photos below I will need to touch up the paint on the parrel bead spacers.
Mizzen Mast Parrel Beads
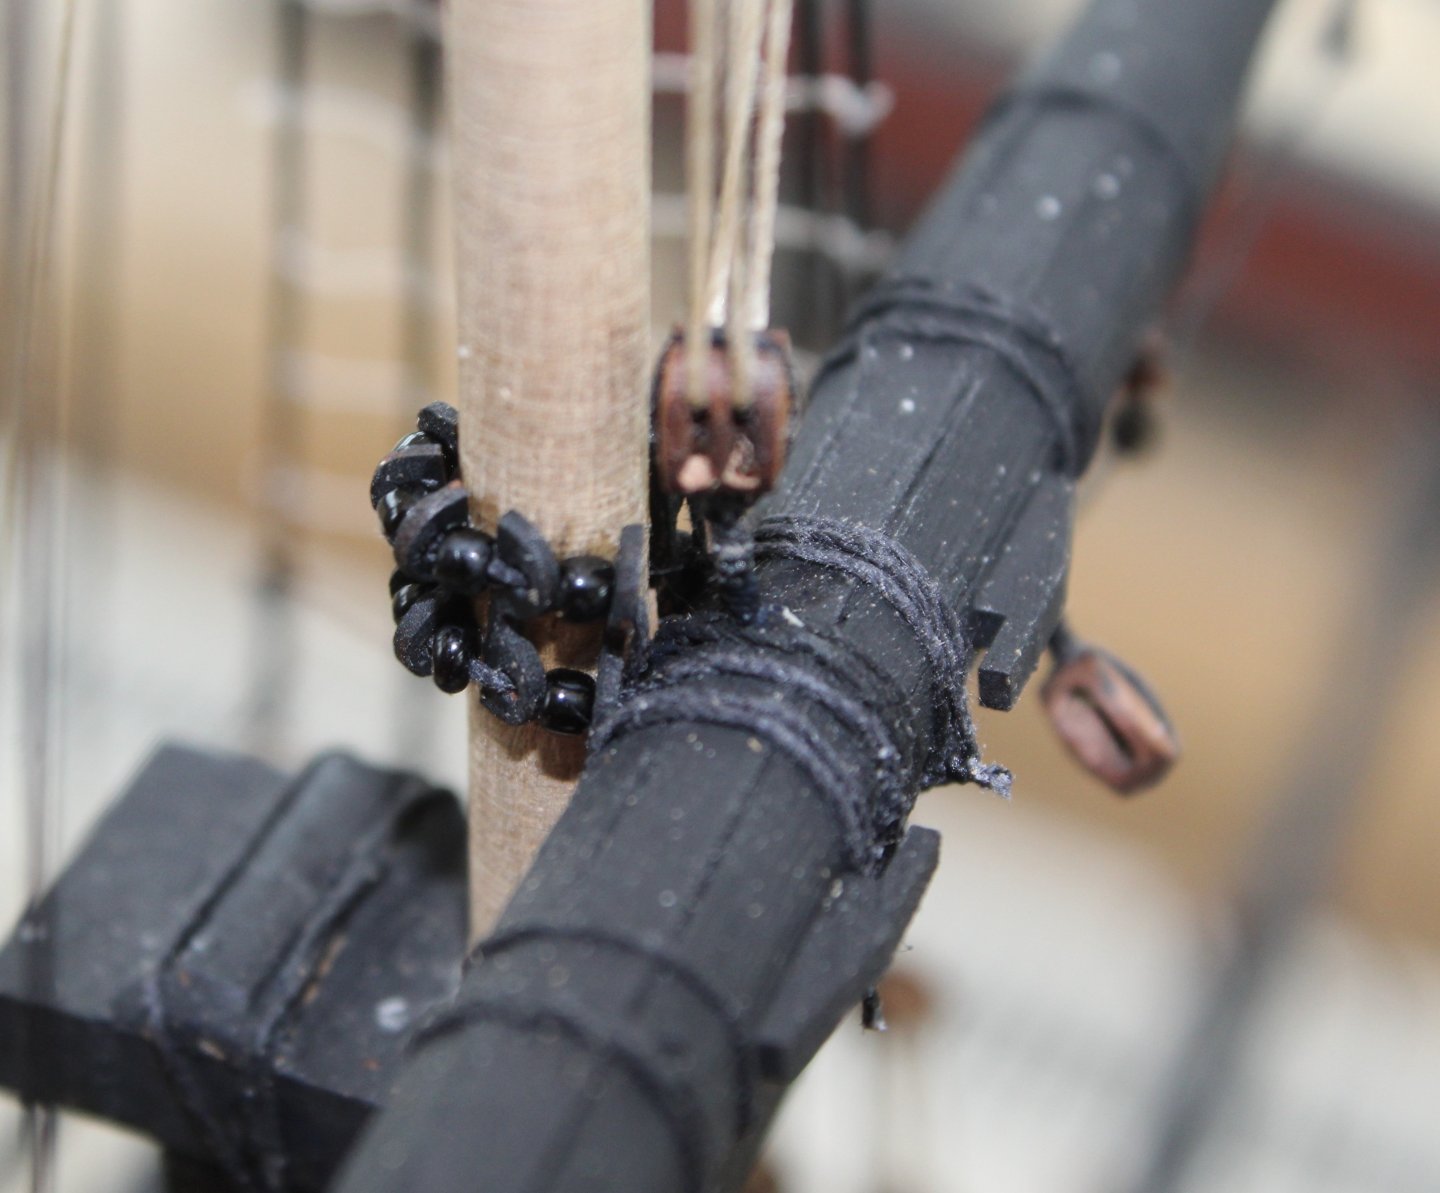
Main Yard Parrel Beads
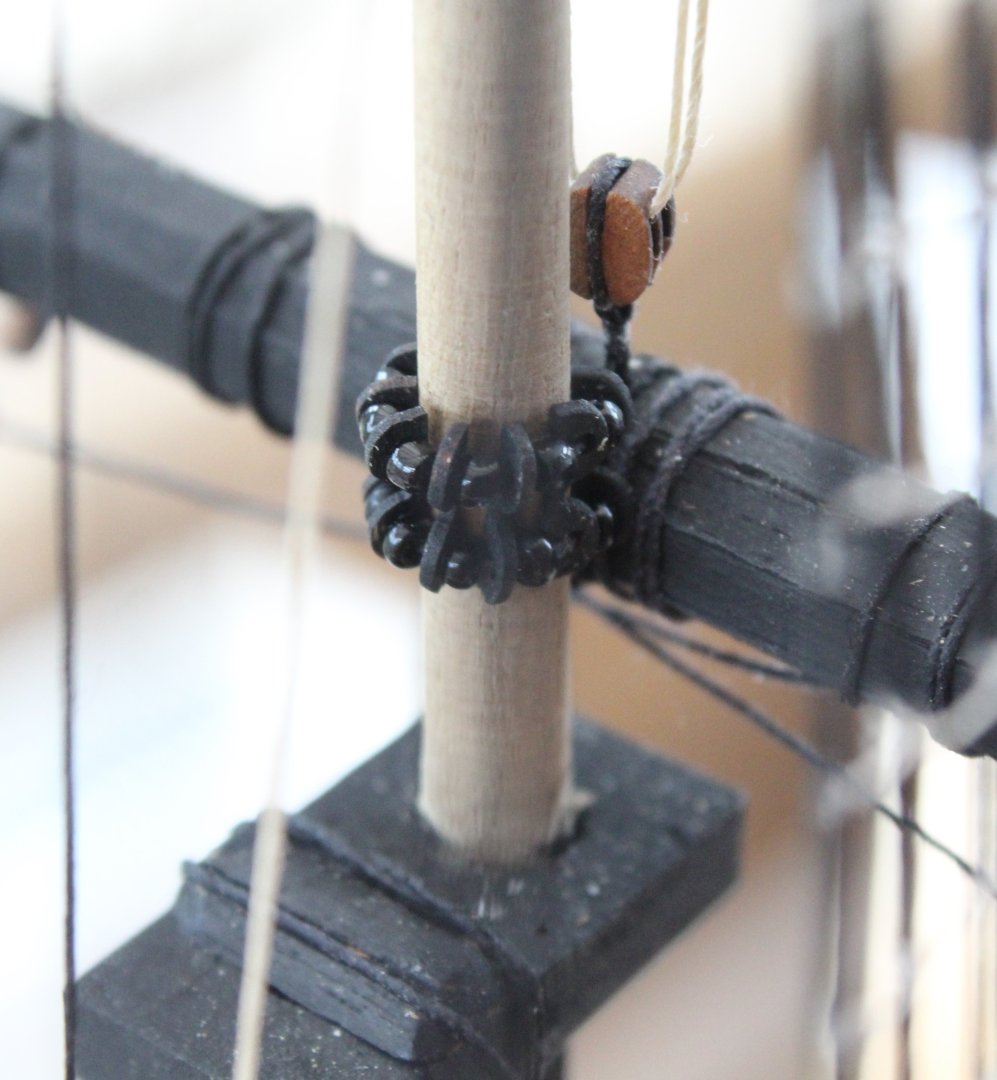
Foreyard Parrel Beads
I did not notice until I took this photo that I had made an error in that the spacers are the wrong way round. I have no plans to correct this error.
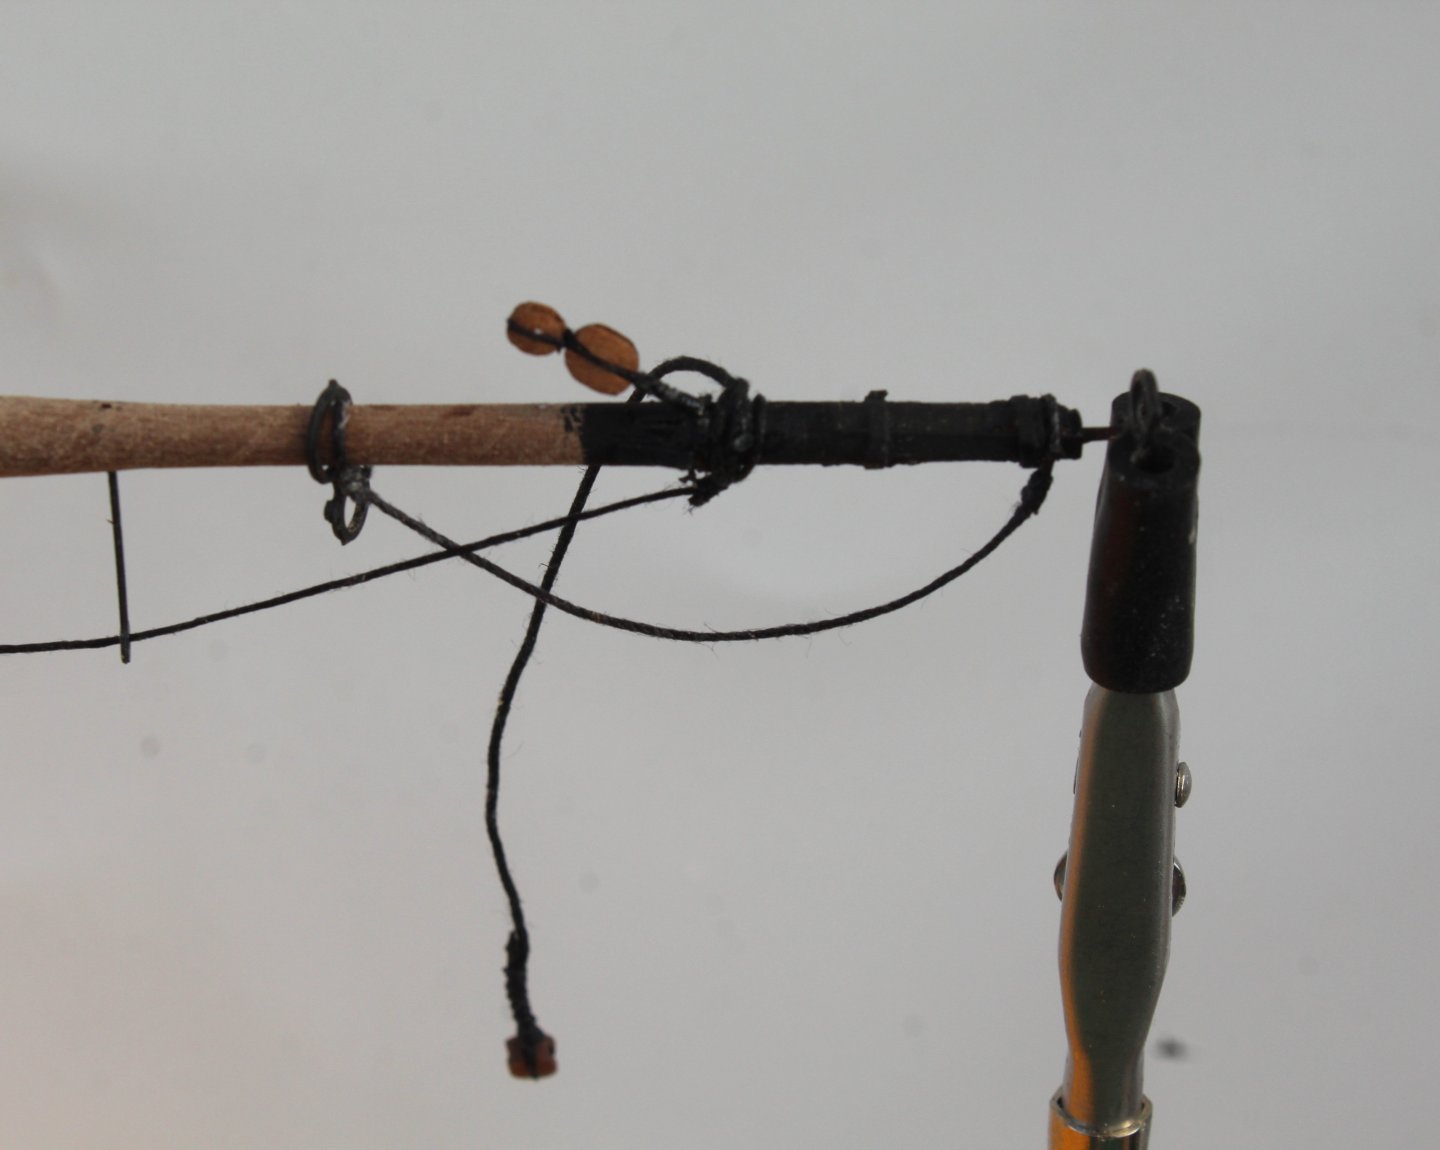
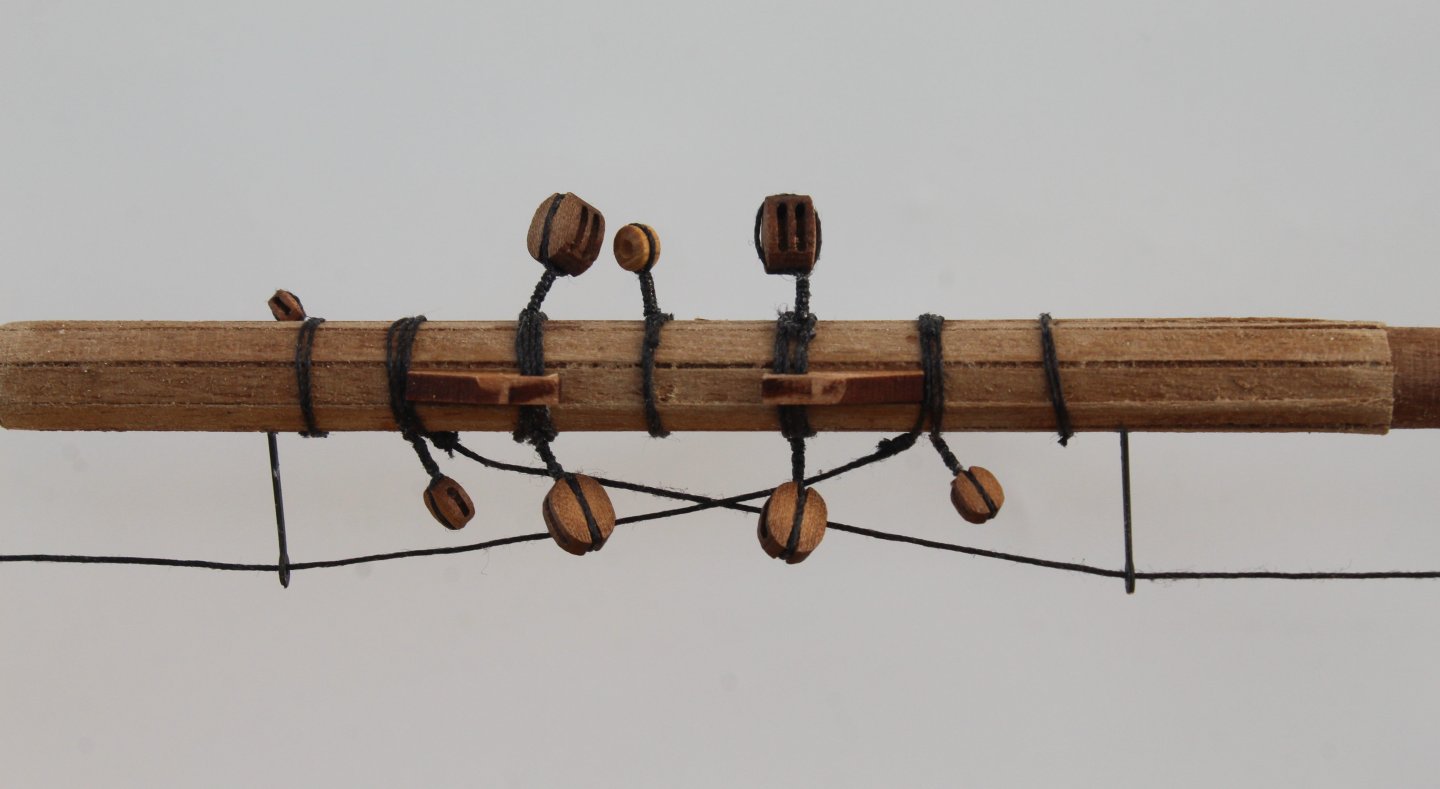
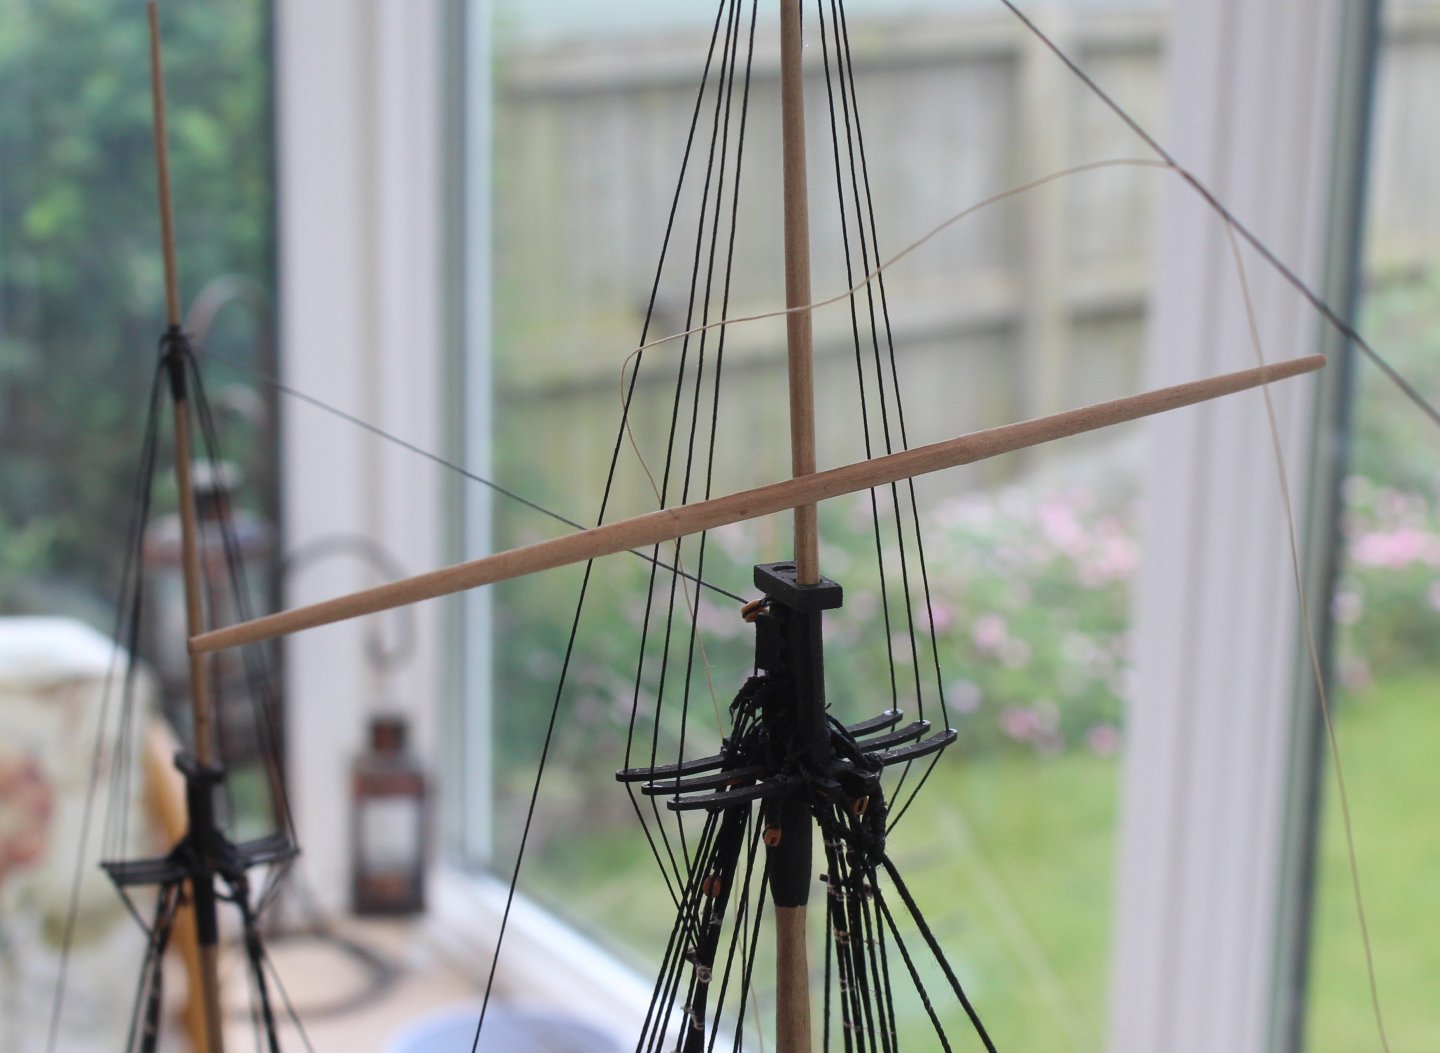
Topsail Yard Tyes
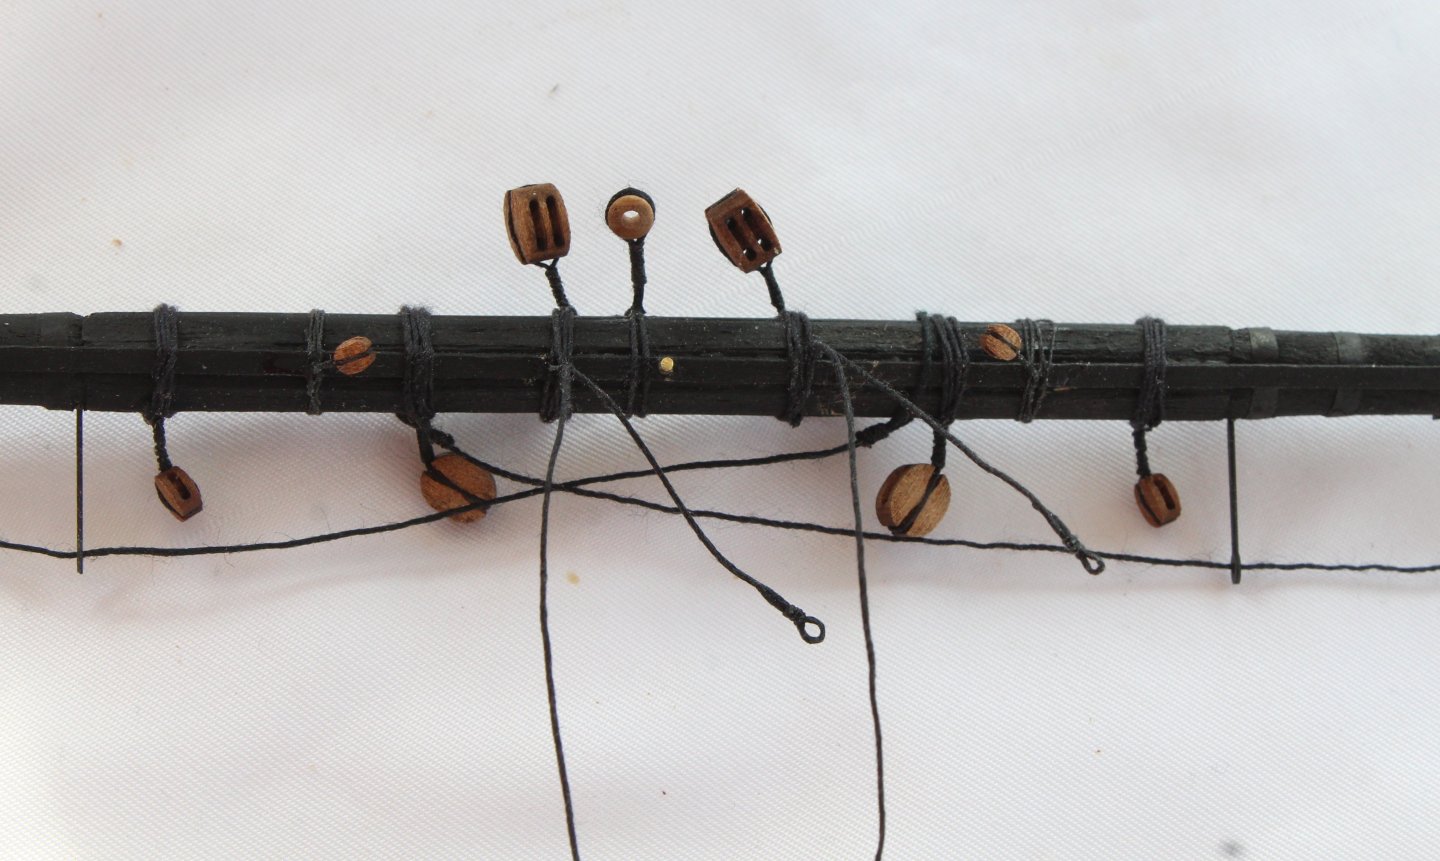
The next task was to add the topsail yard tyes. As can be seen from the next photo there are a number of processes required for the fore and main topsail yard. The mizzen yard is not as complicated as there is only one tye required.

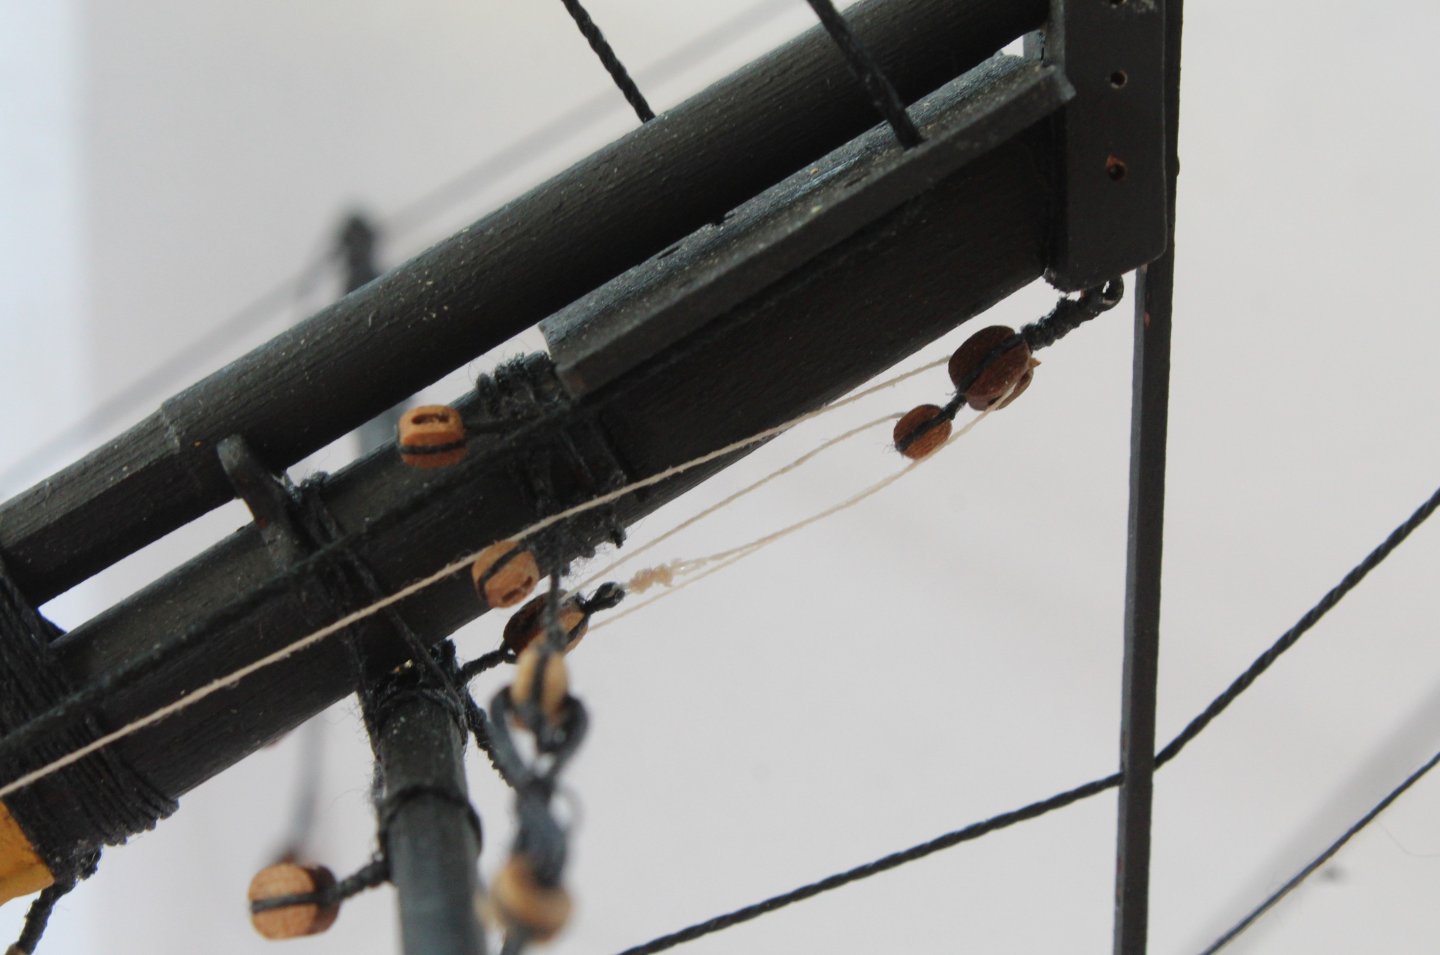
The first task was to add the rigging between the yard central double block and the blocks fitted to the underside of the upper crosstrees. Not sure why the thread is in the foremost top block hole in the photo below as it should be in the bottom block hole. This will be corrected. I think I have the same problem with the main topsail yard tye double block which will be corrected also.

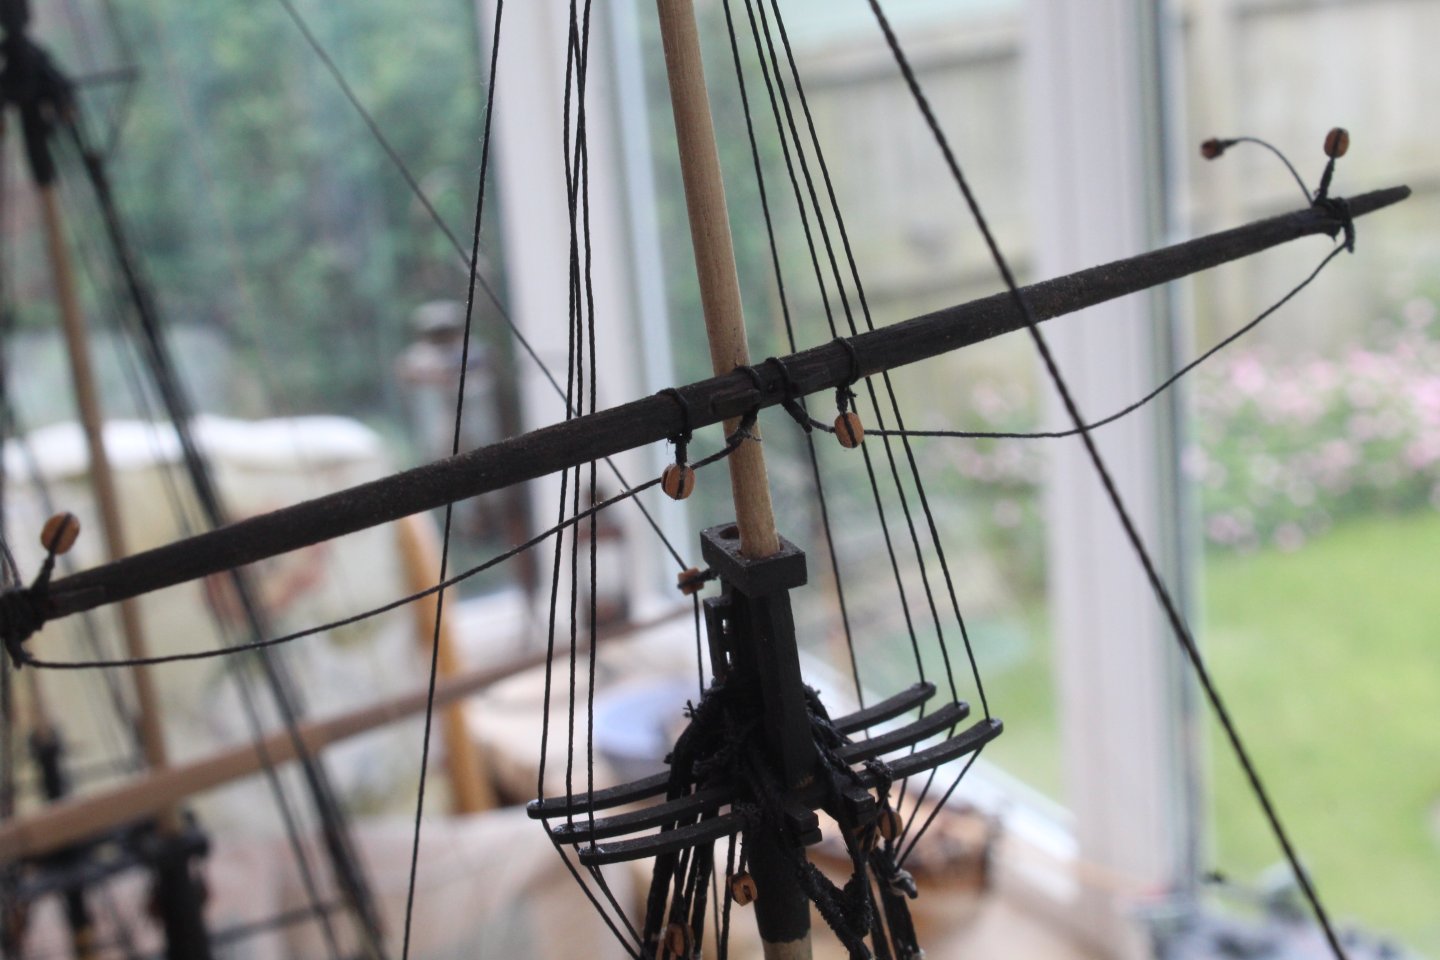
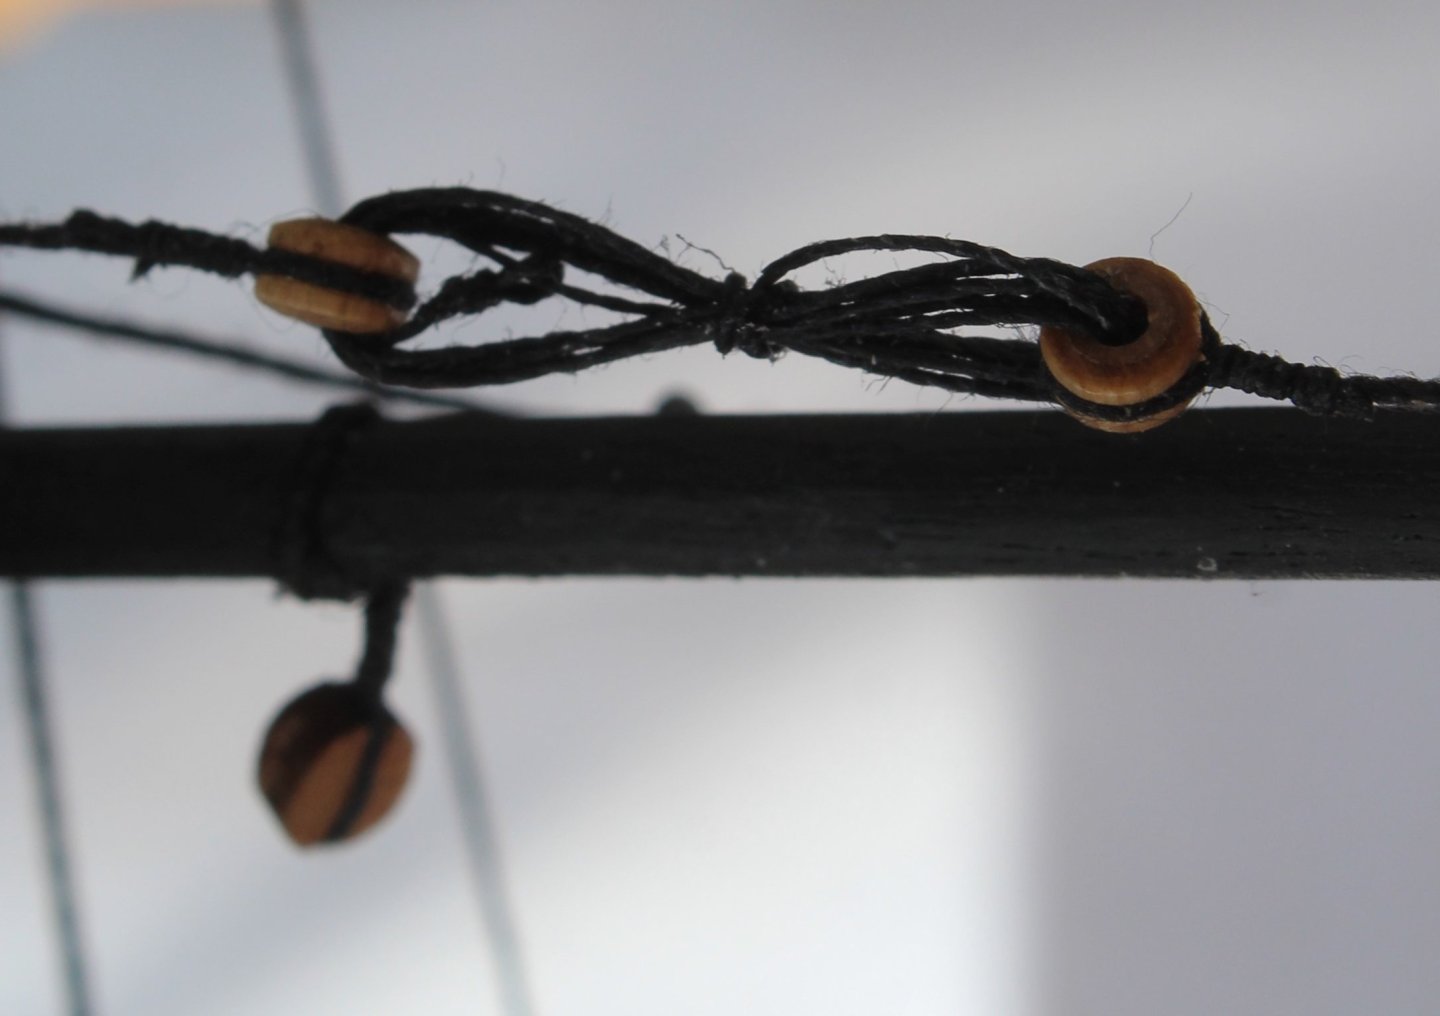
I have just noticed the right-hand block has split and is held together by the block seizing.
Once that rigging was completed the double blocks were added to the free ends as can be seen in the next photo.
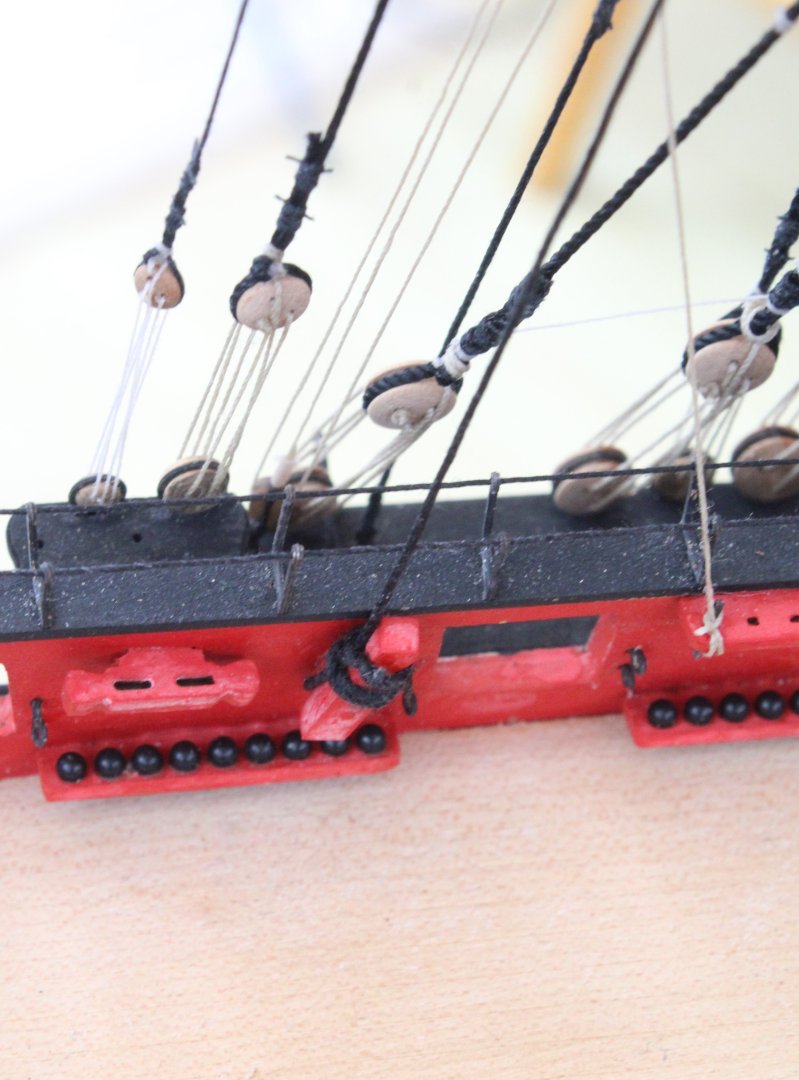
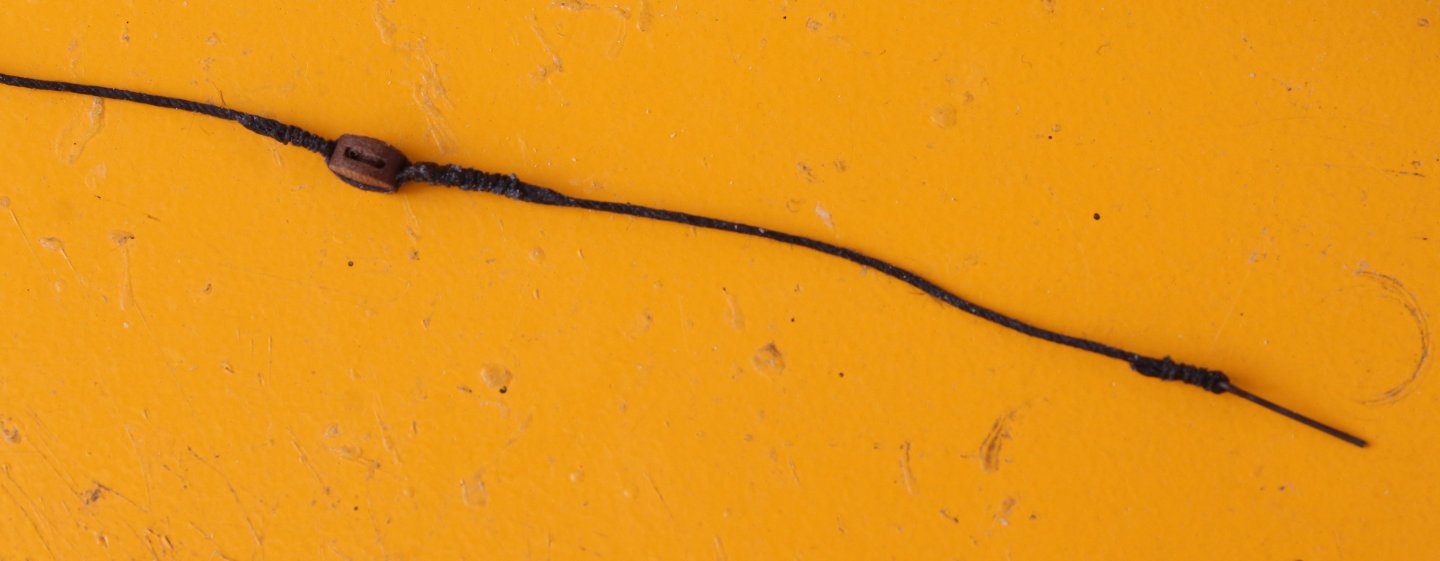
I decided to make up the inter-block rigging next. This consisted of a small length of thread secured to an eyebolt and the other end secured to a thimble on a single block. A longer length of thread was secured to a thimble on the other end of the single block. This is shown in the next photo and is now ready to be added.
The eyebolt was then secured to the channel and the inter-block rigging added, as shown in the next two photos.
The final task was to belay the free end, once all the rigging had been checked.

-
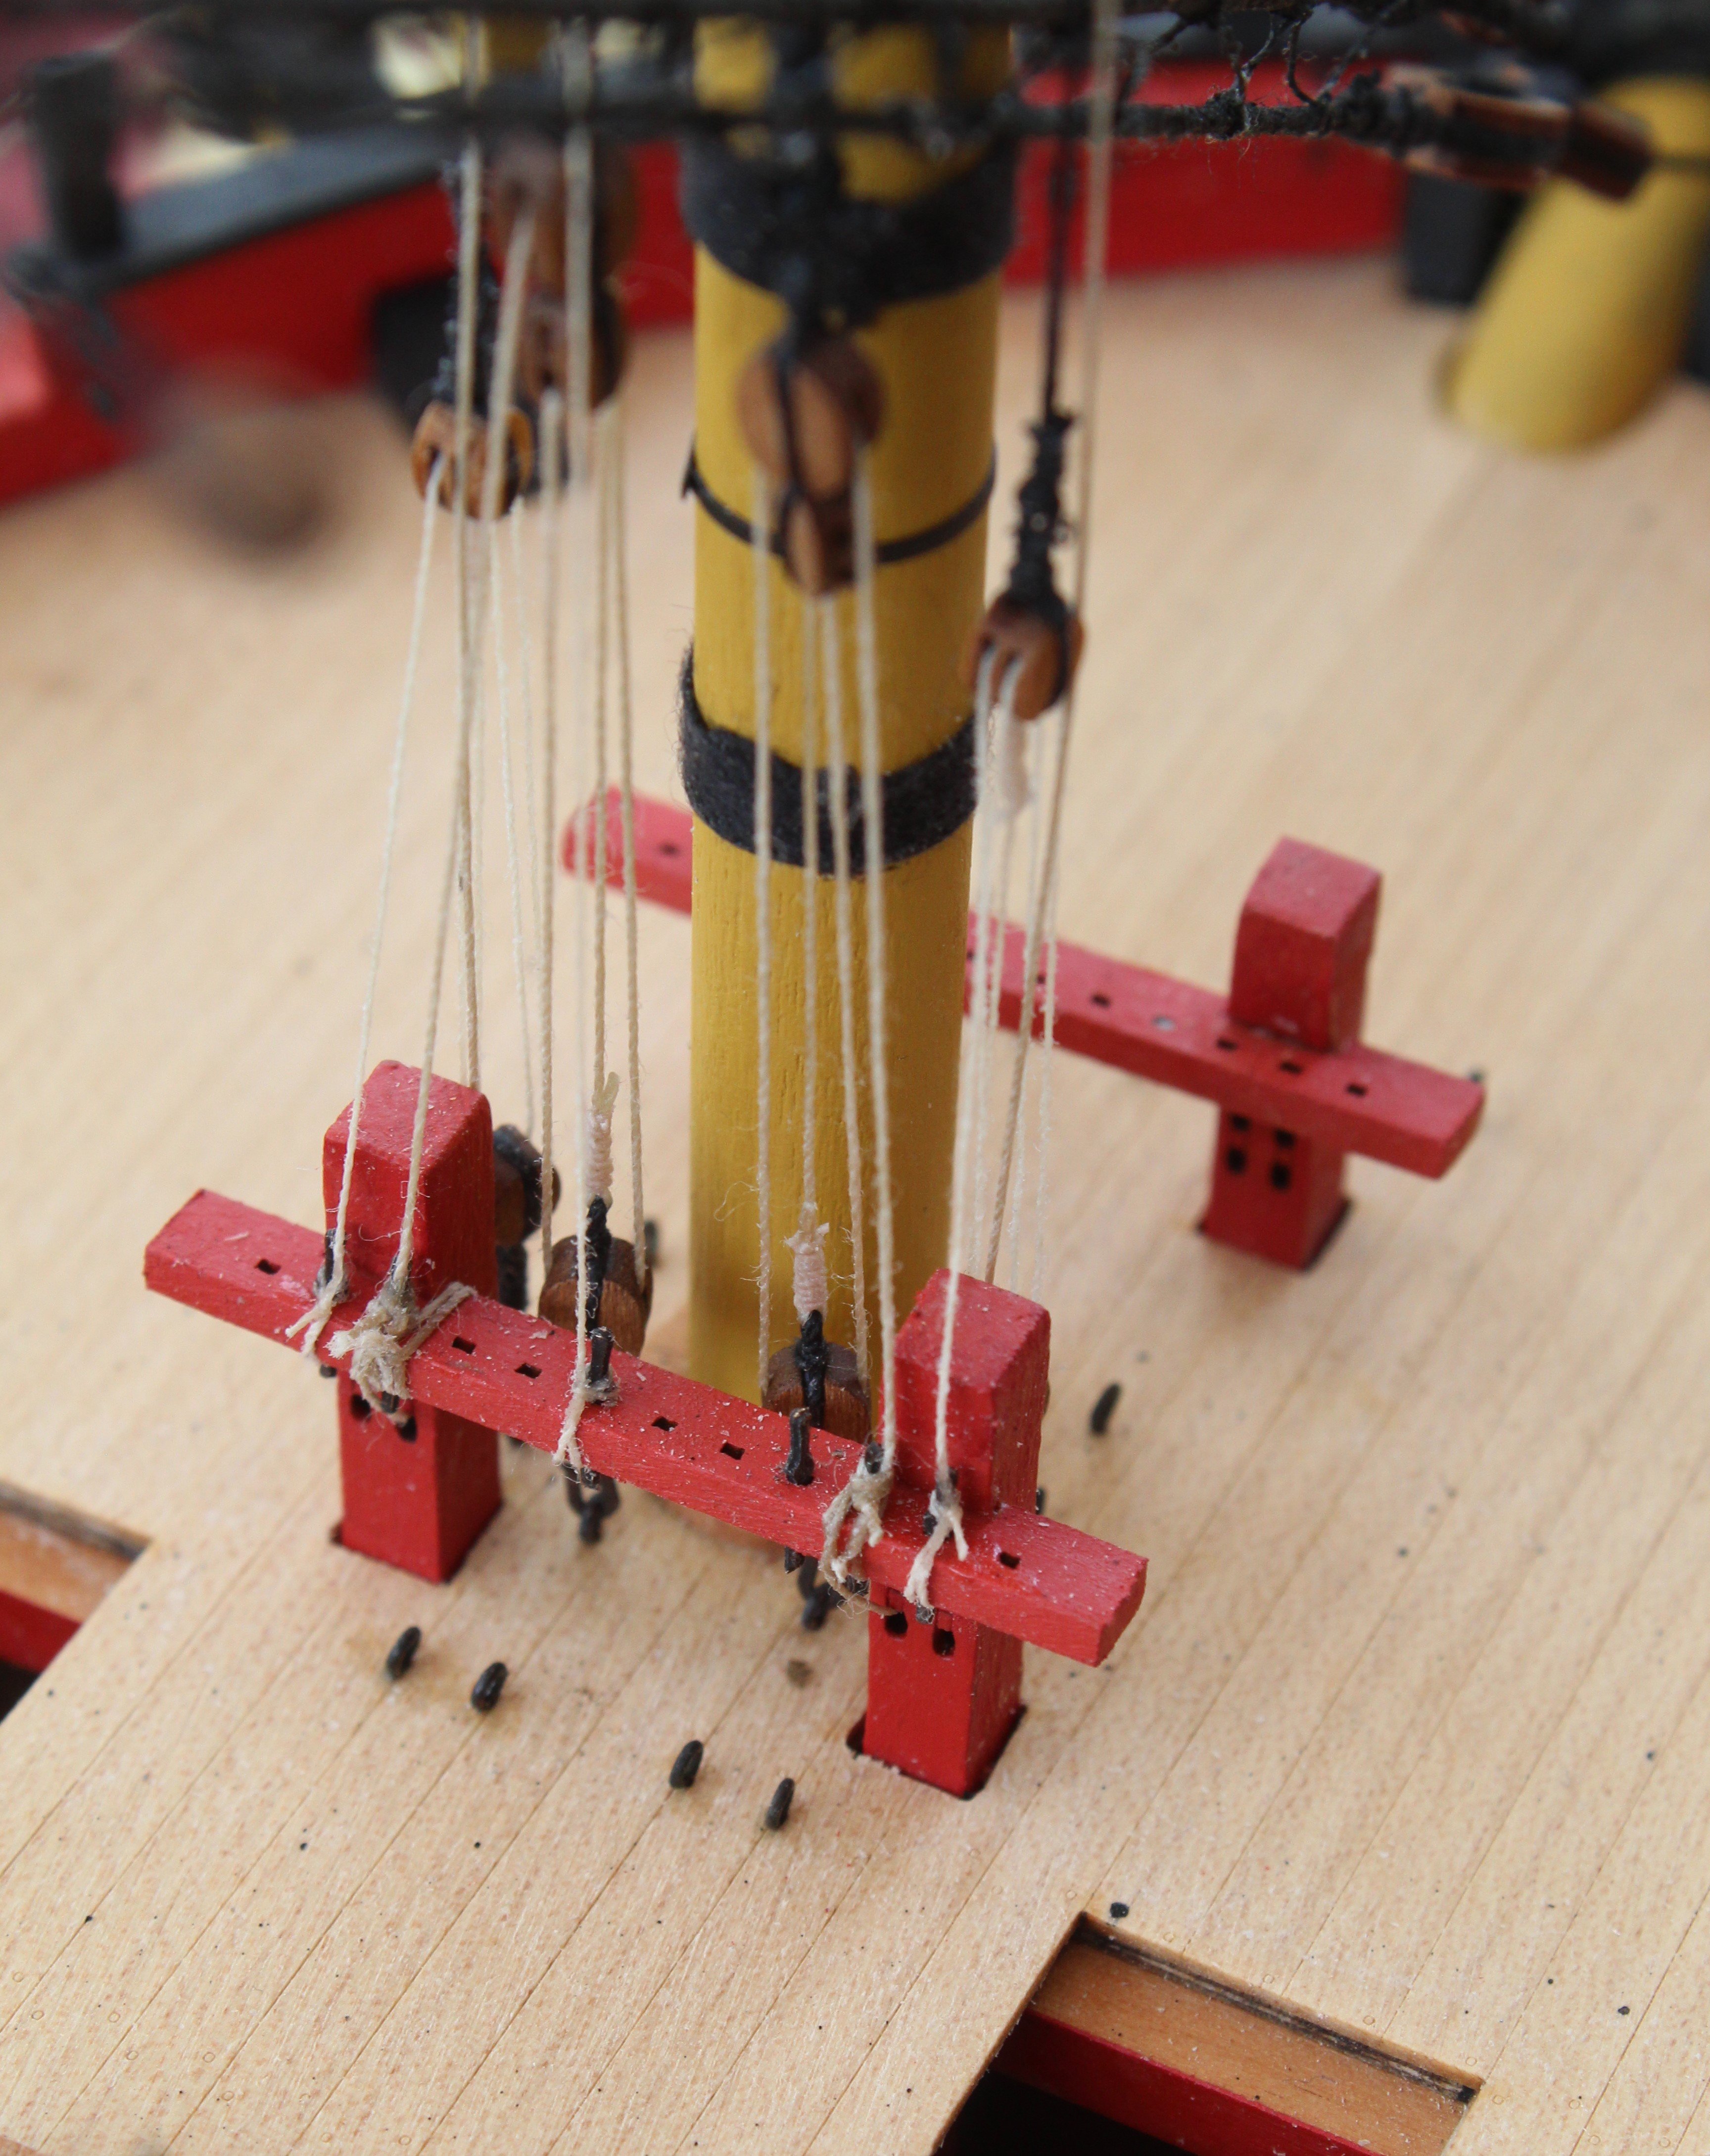
Belaying Main Mast Jeers, Truss Pendants and Nave Line
I have been away for a few days so I was only able to return back to the shipyard this afternoon. The first task was to belay the main yard rigging for the Jeers, Truss Pendants and Nave Line.
Jeers
The rigging between the double block assembly was carefully adjusted and the free end was then taken down to the deck level.
According to the rigging plans the jeers should be belayed through the holes on the aft main mast bitt posts. As can be seen in the photo below access to this bitt rack is very limited.
Chris did tell me that:
"these jeers are a problem for models, as they are fixed in a very awkward position on the main gun deck. I see nothing wrong with 'cheating' and tying them off in a more convenient place - that's what I'd do!"
Jim provided me with some additional advice:
"Remember that if you can't easily rig to a certain point, then don't worry about rigging to an alternative point either in the vicinity or in the 'flow' of the line. I've tied more things down to the shroud cleats that the plans show, and relocated other rig points which allowed me to safely access via tweezers and crochet hooks etc. "
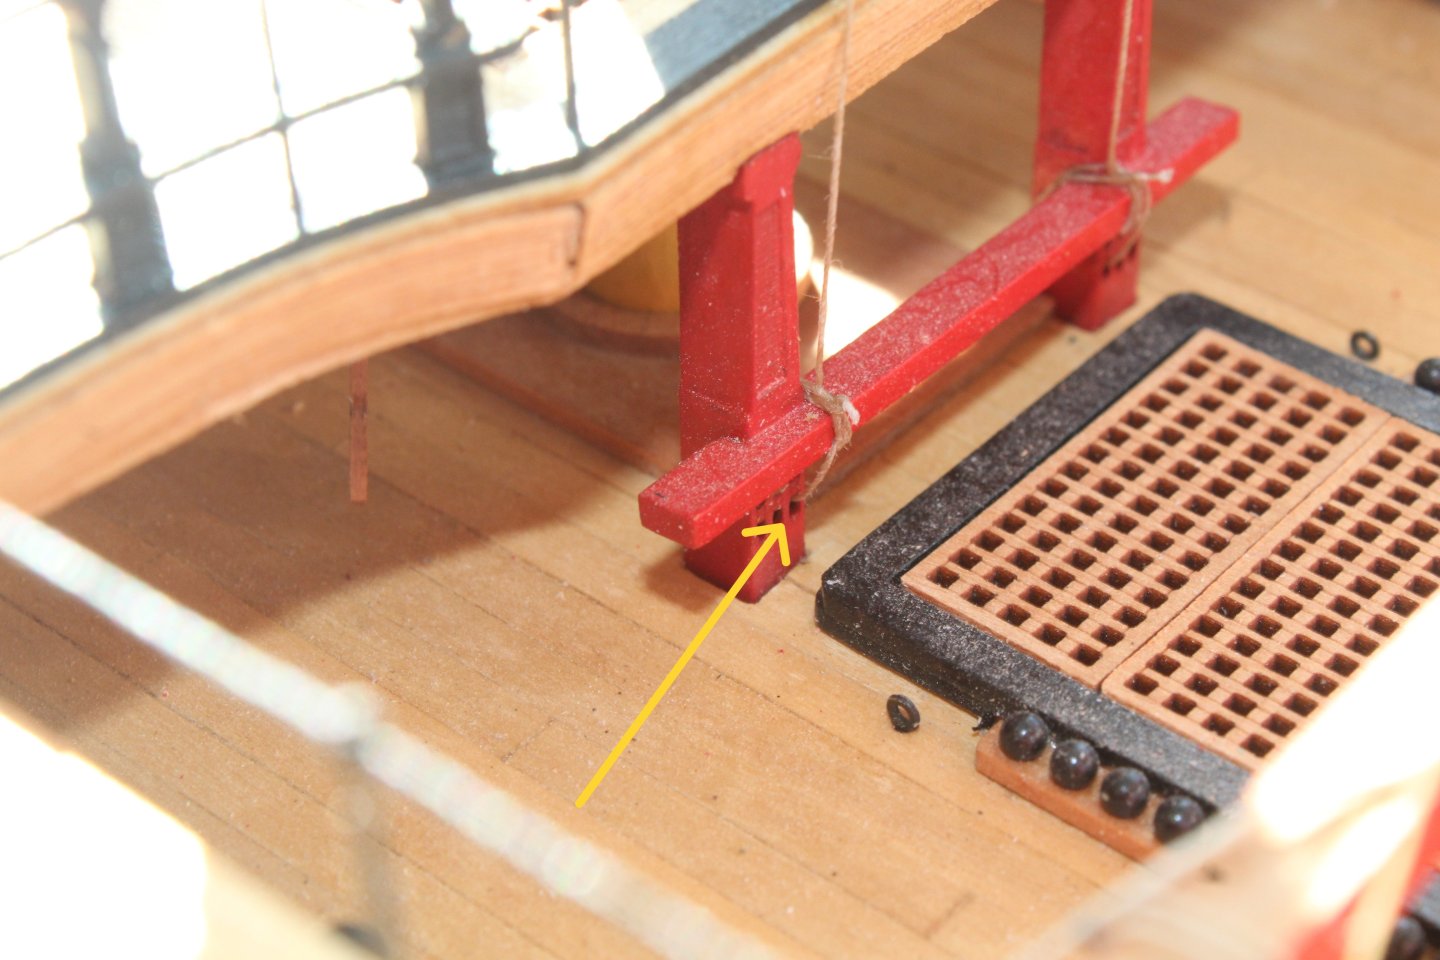
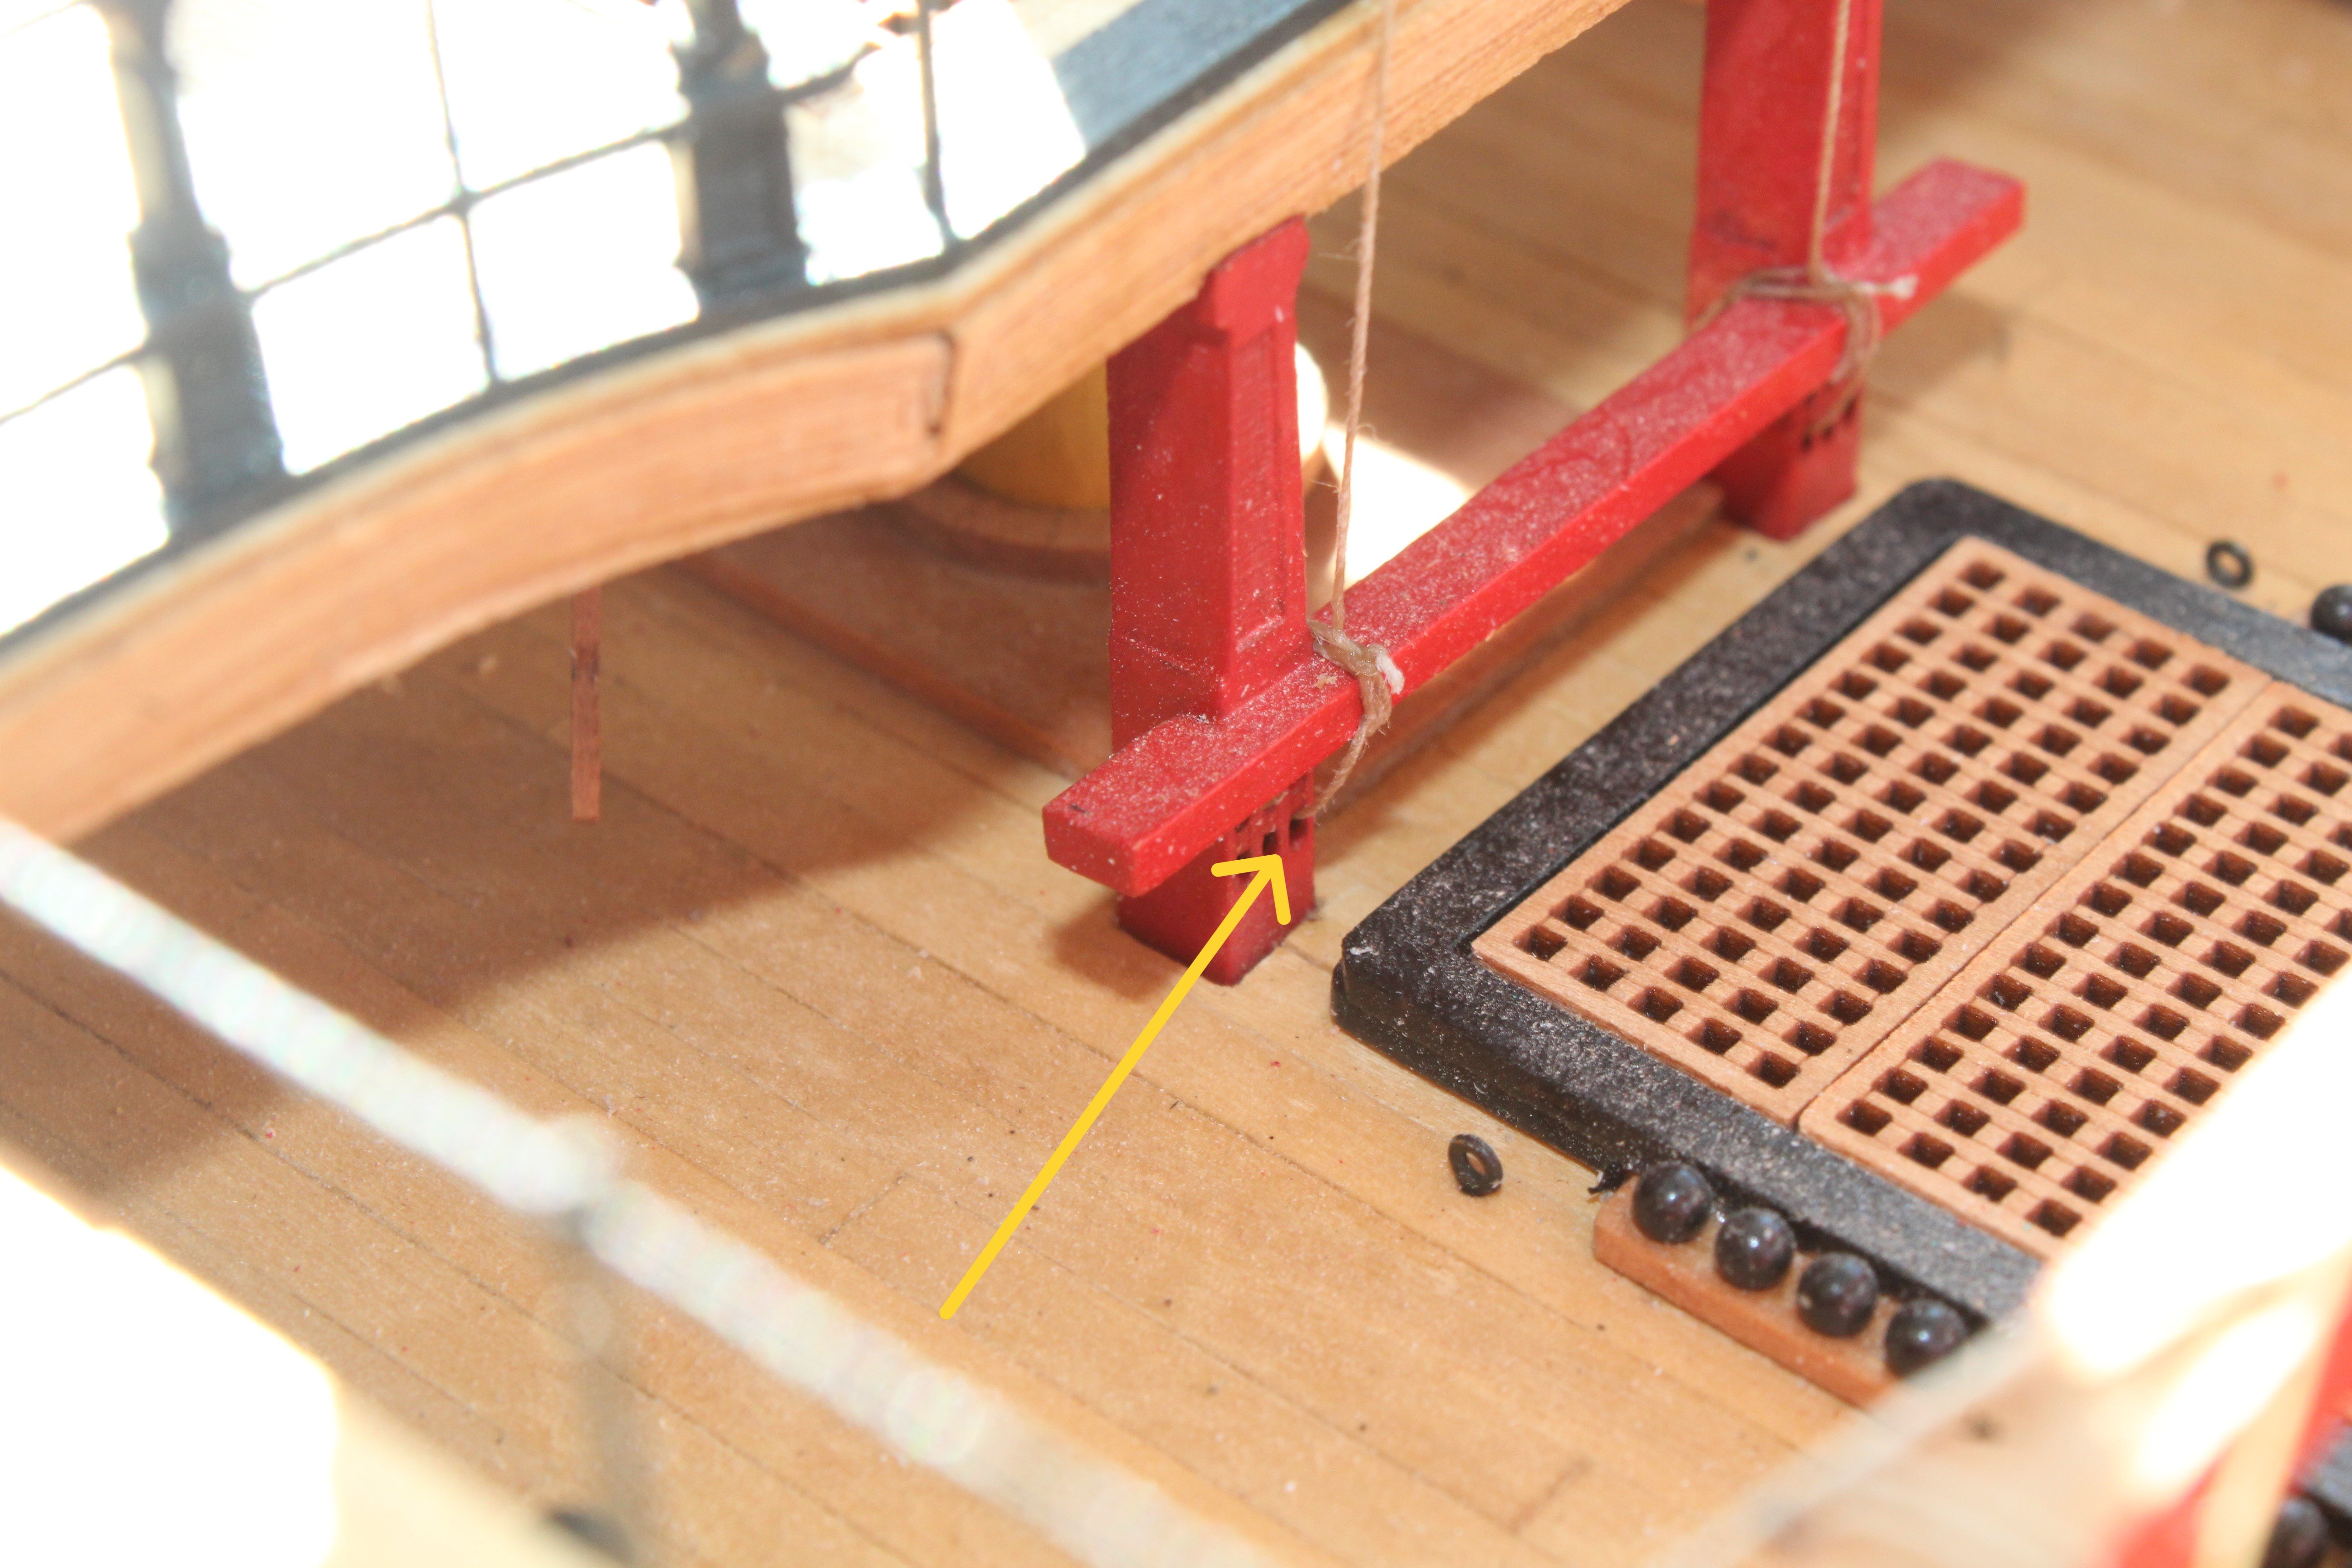
Reassured with their excellent advice I opted to belay to the forward main mast belaying rack, using the hole in the bitt post before securing to the crossbeam, as can be seen in the next photo.
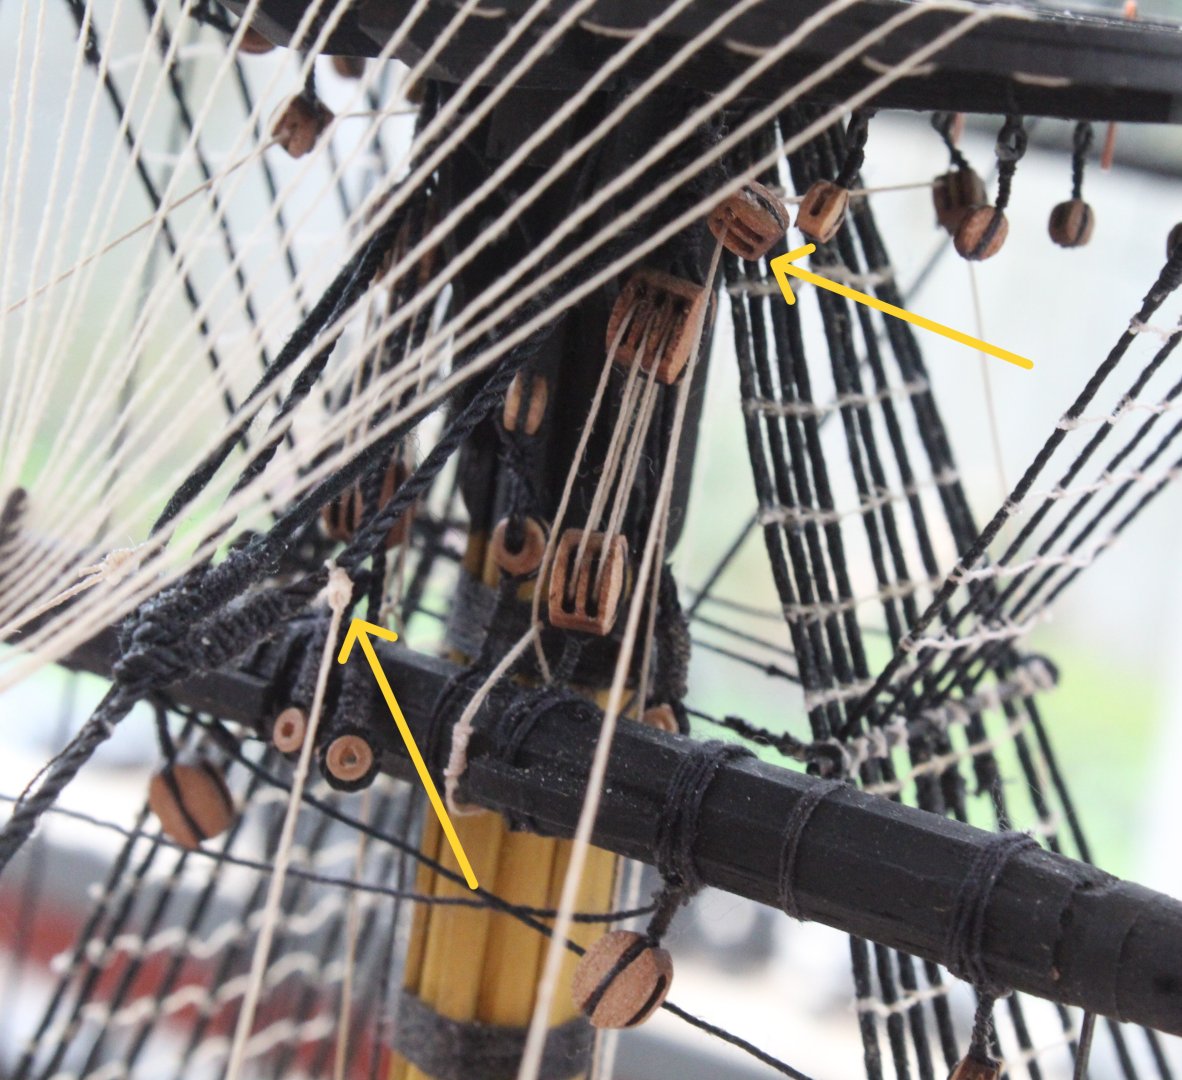
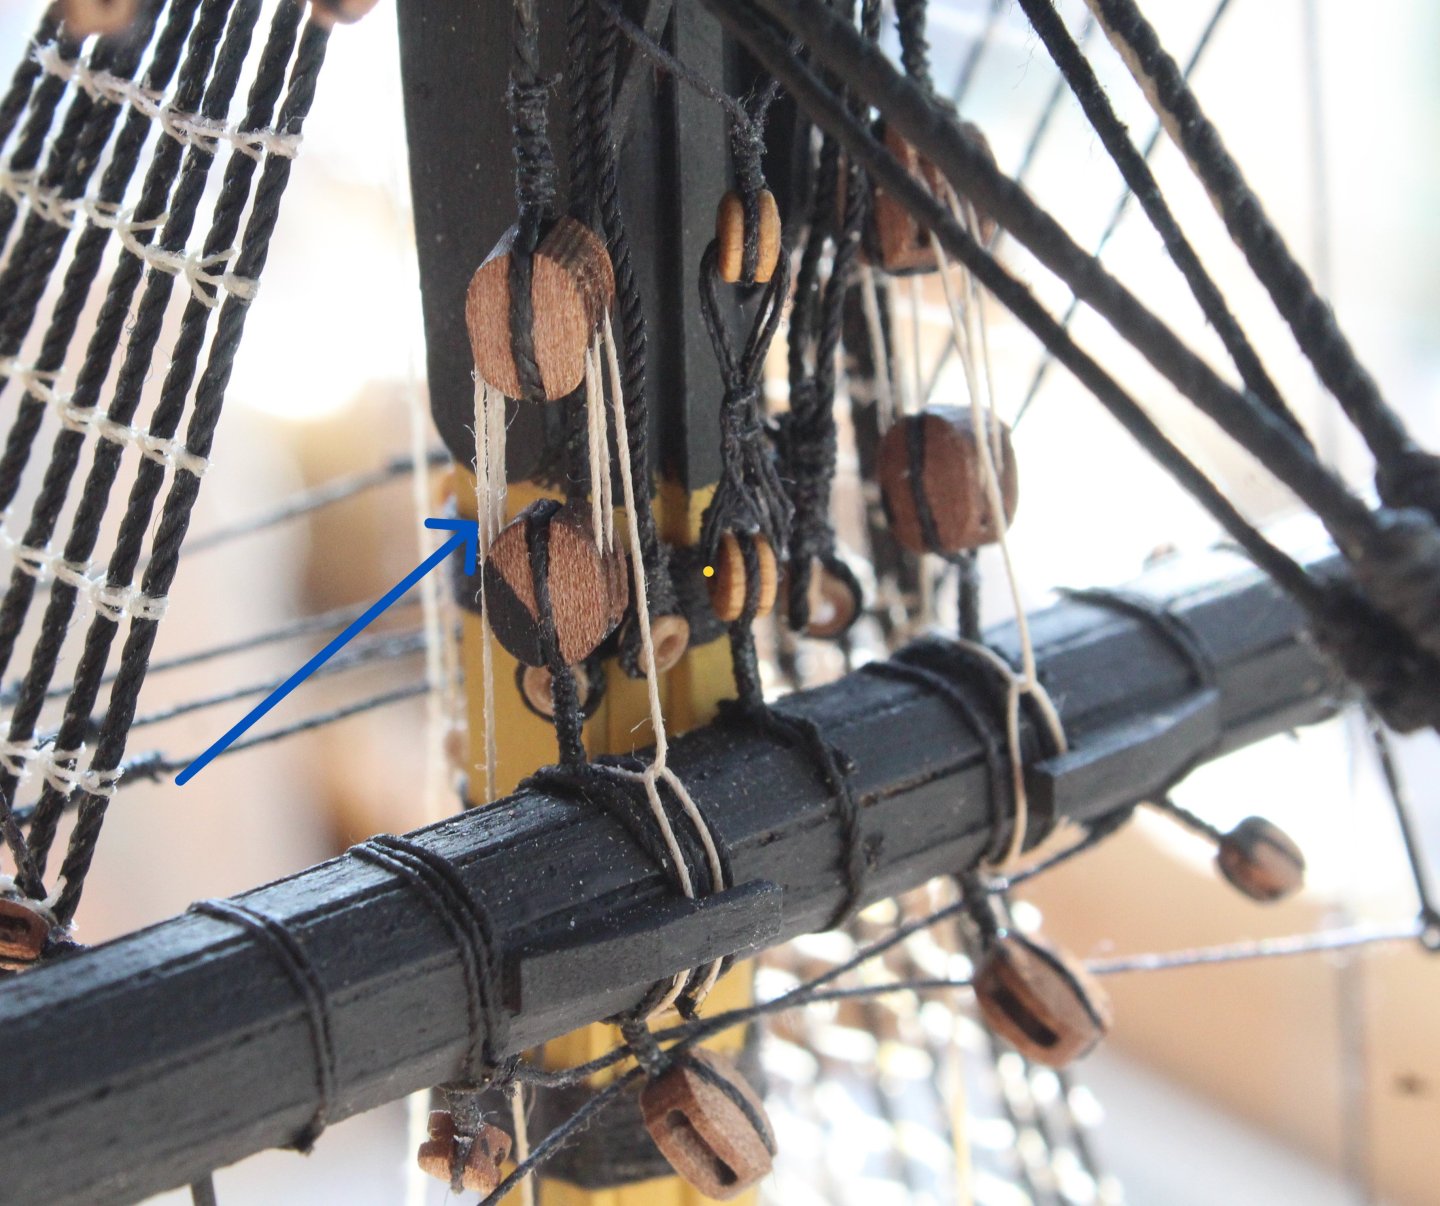
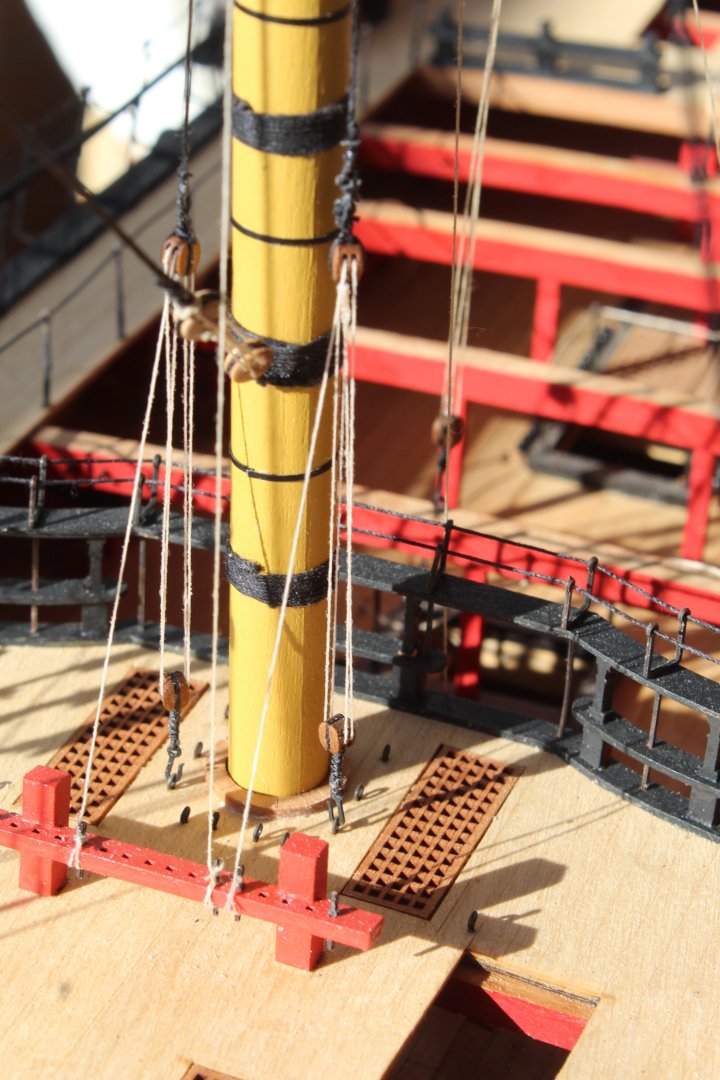
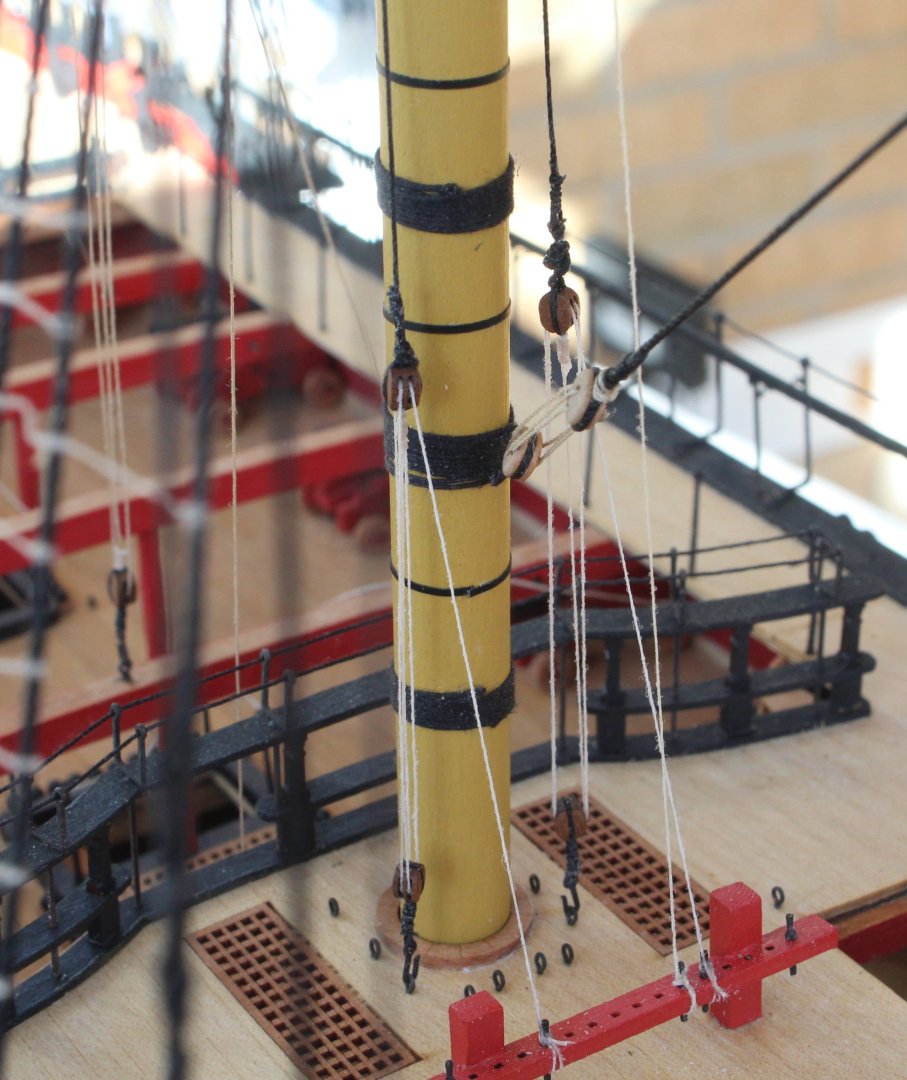
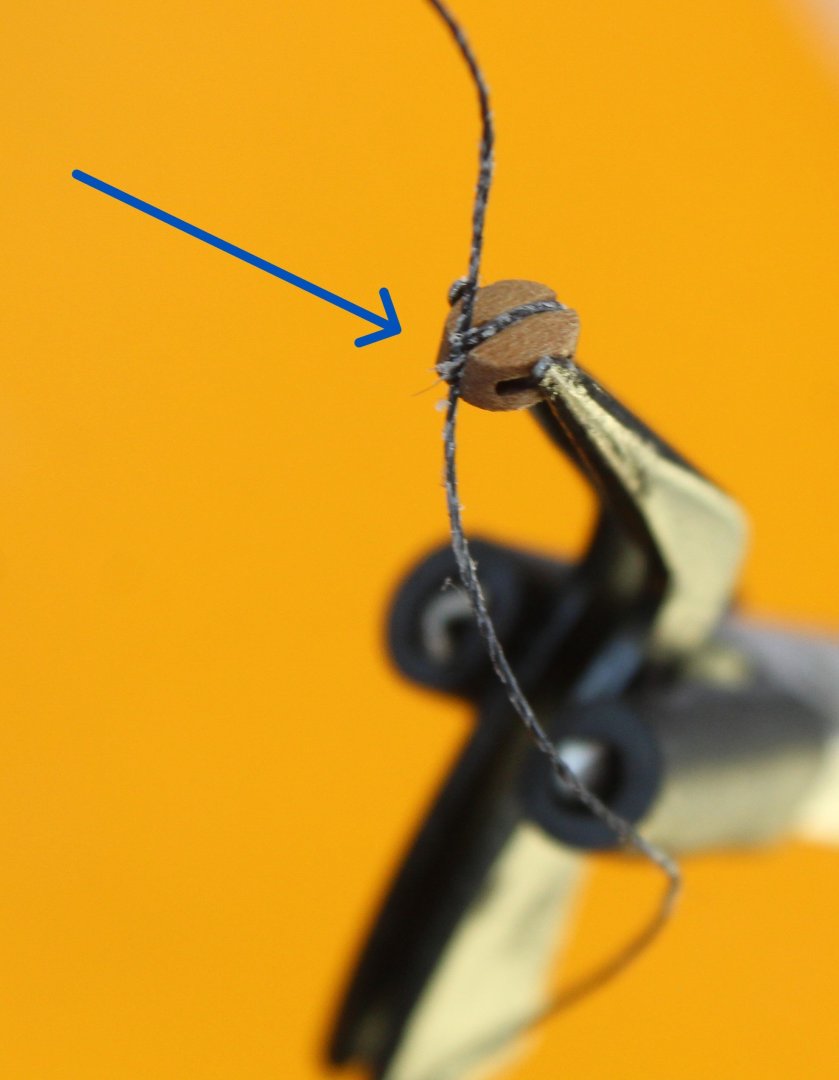
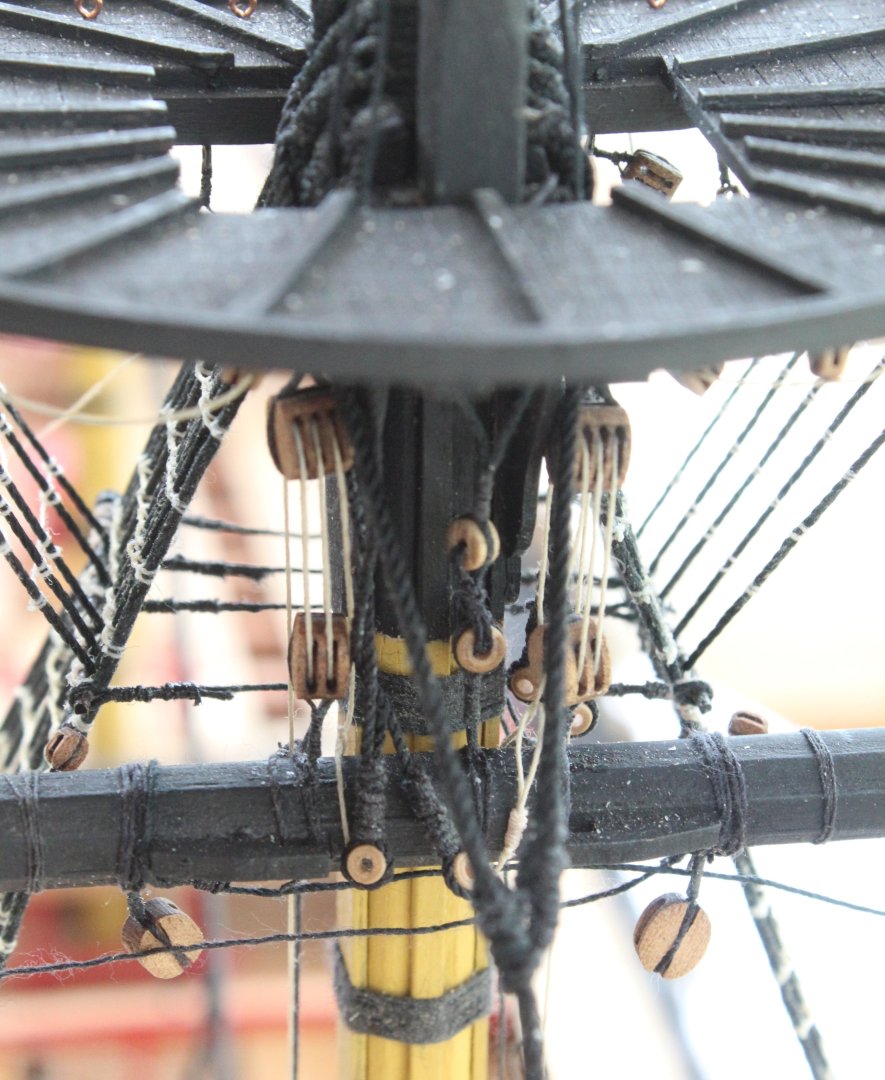
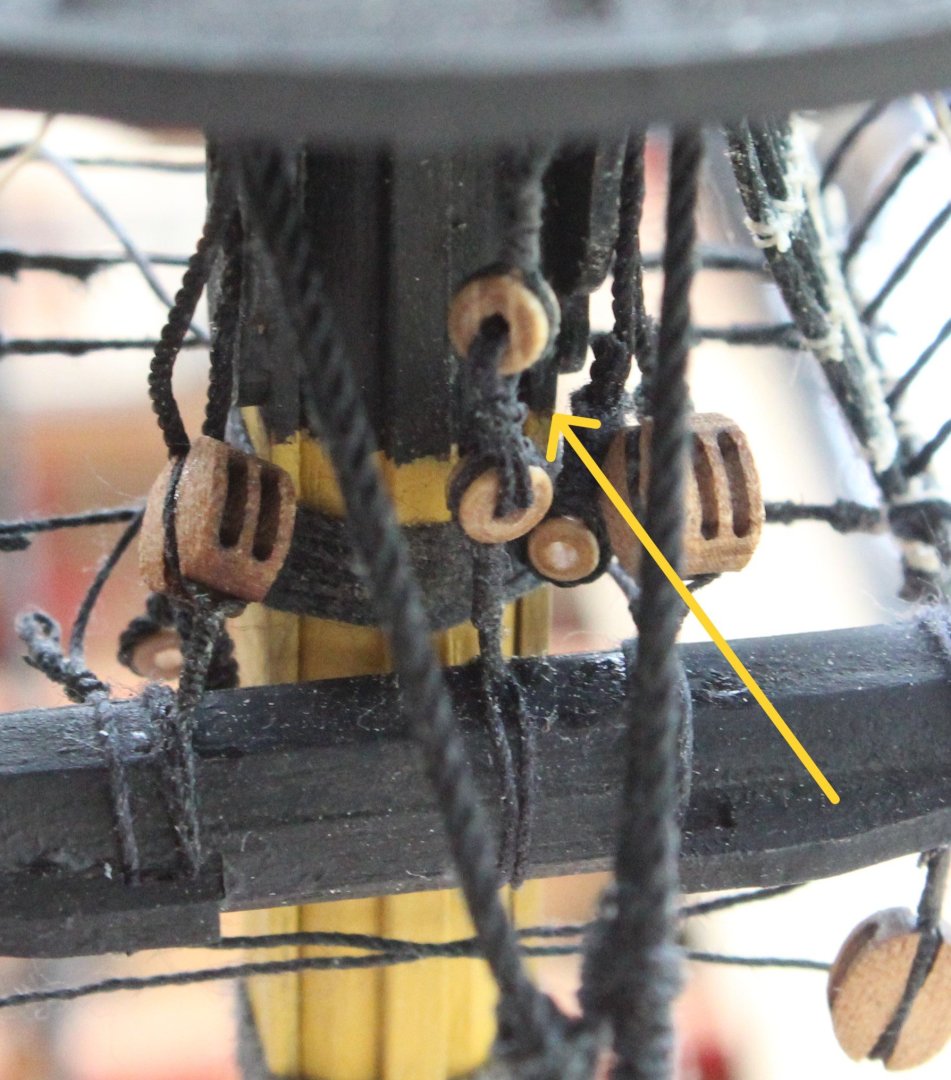
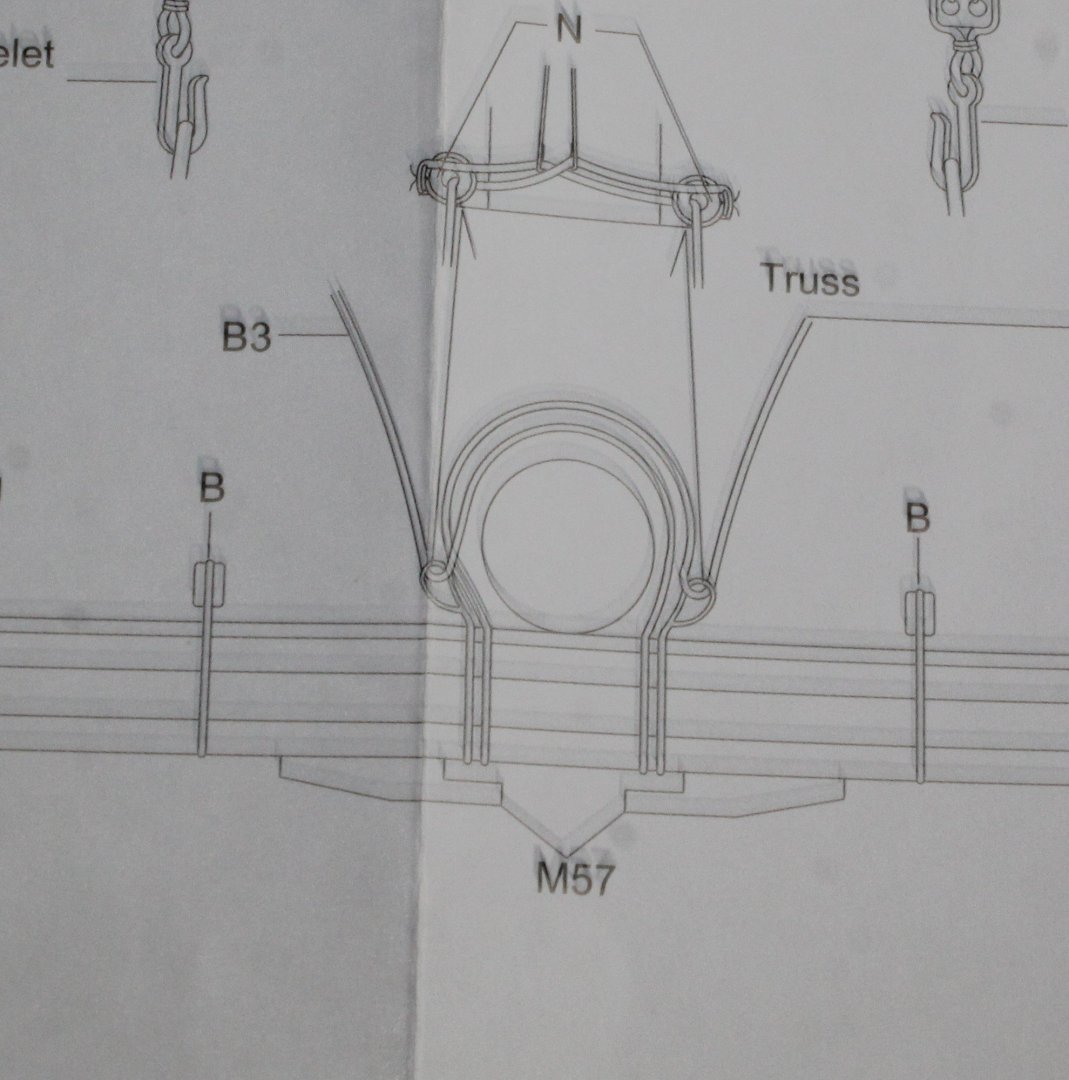
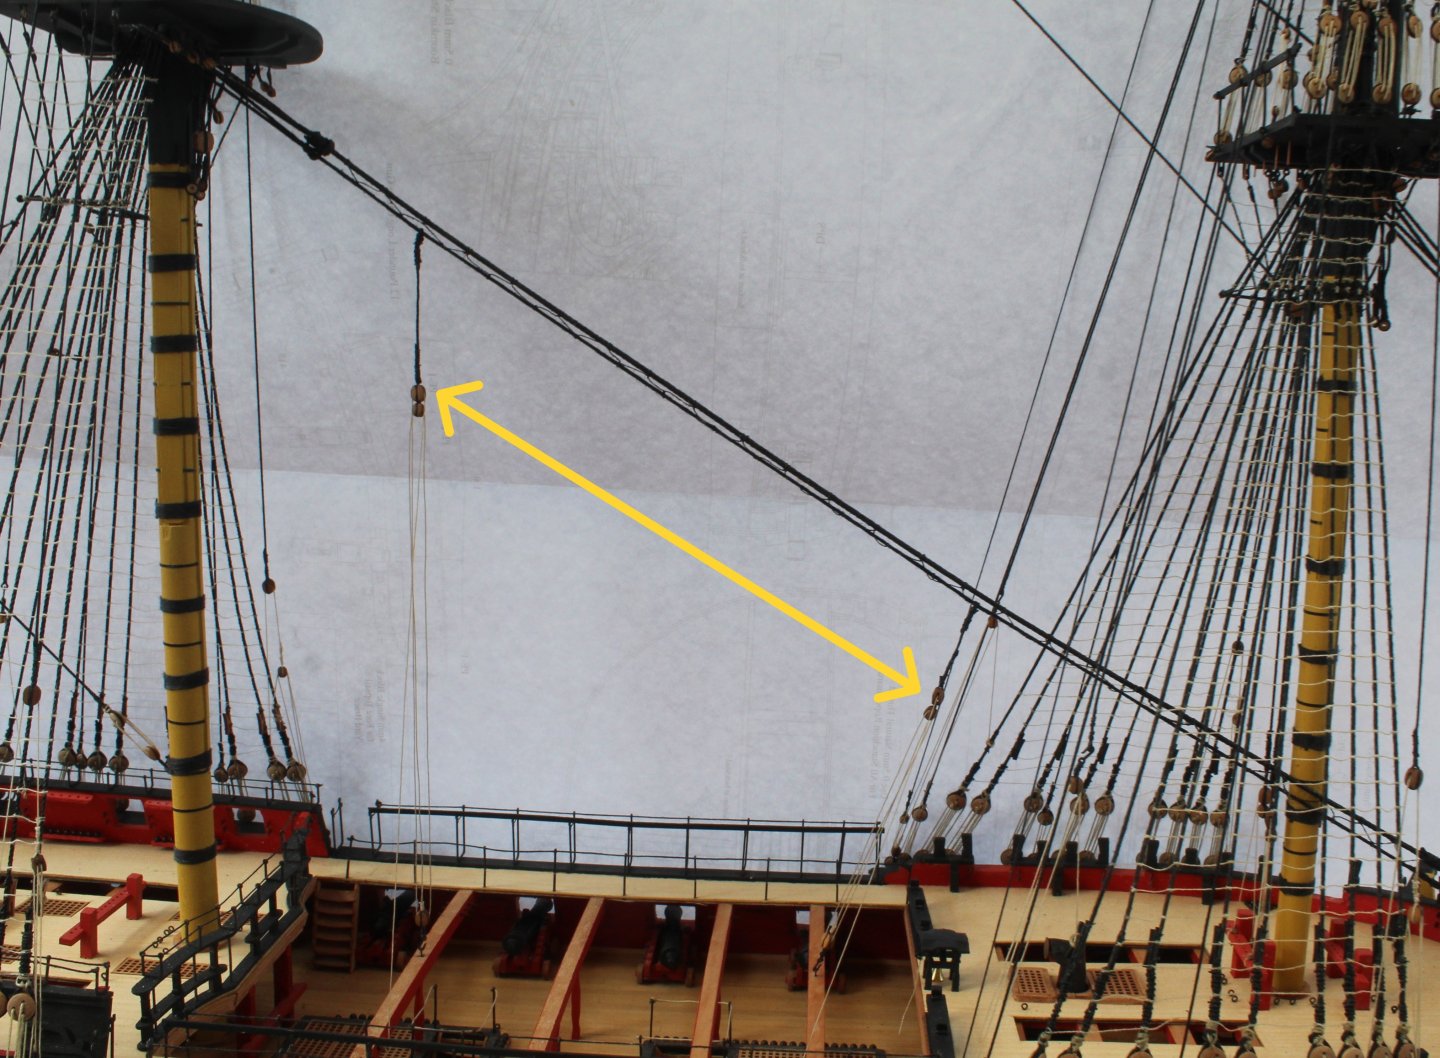
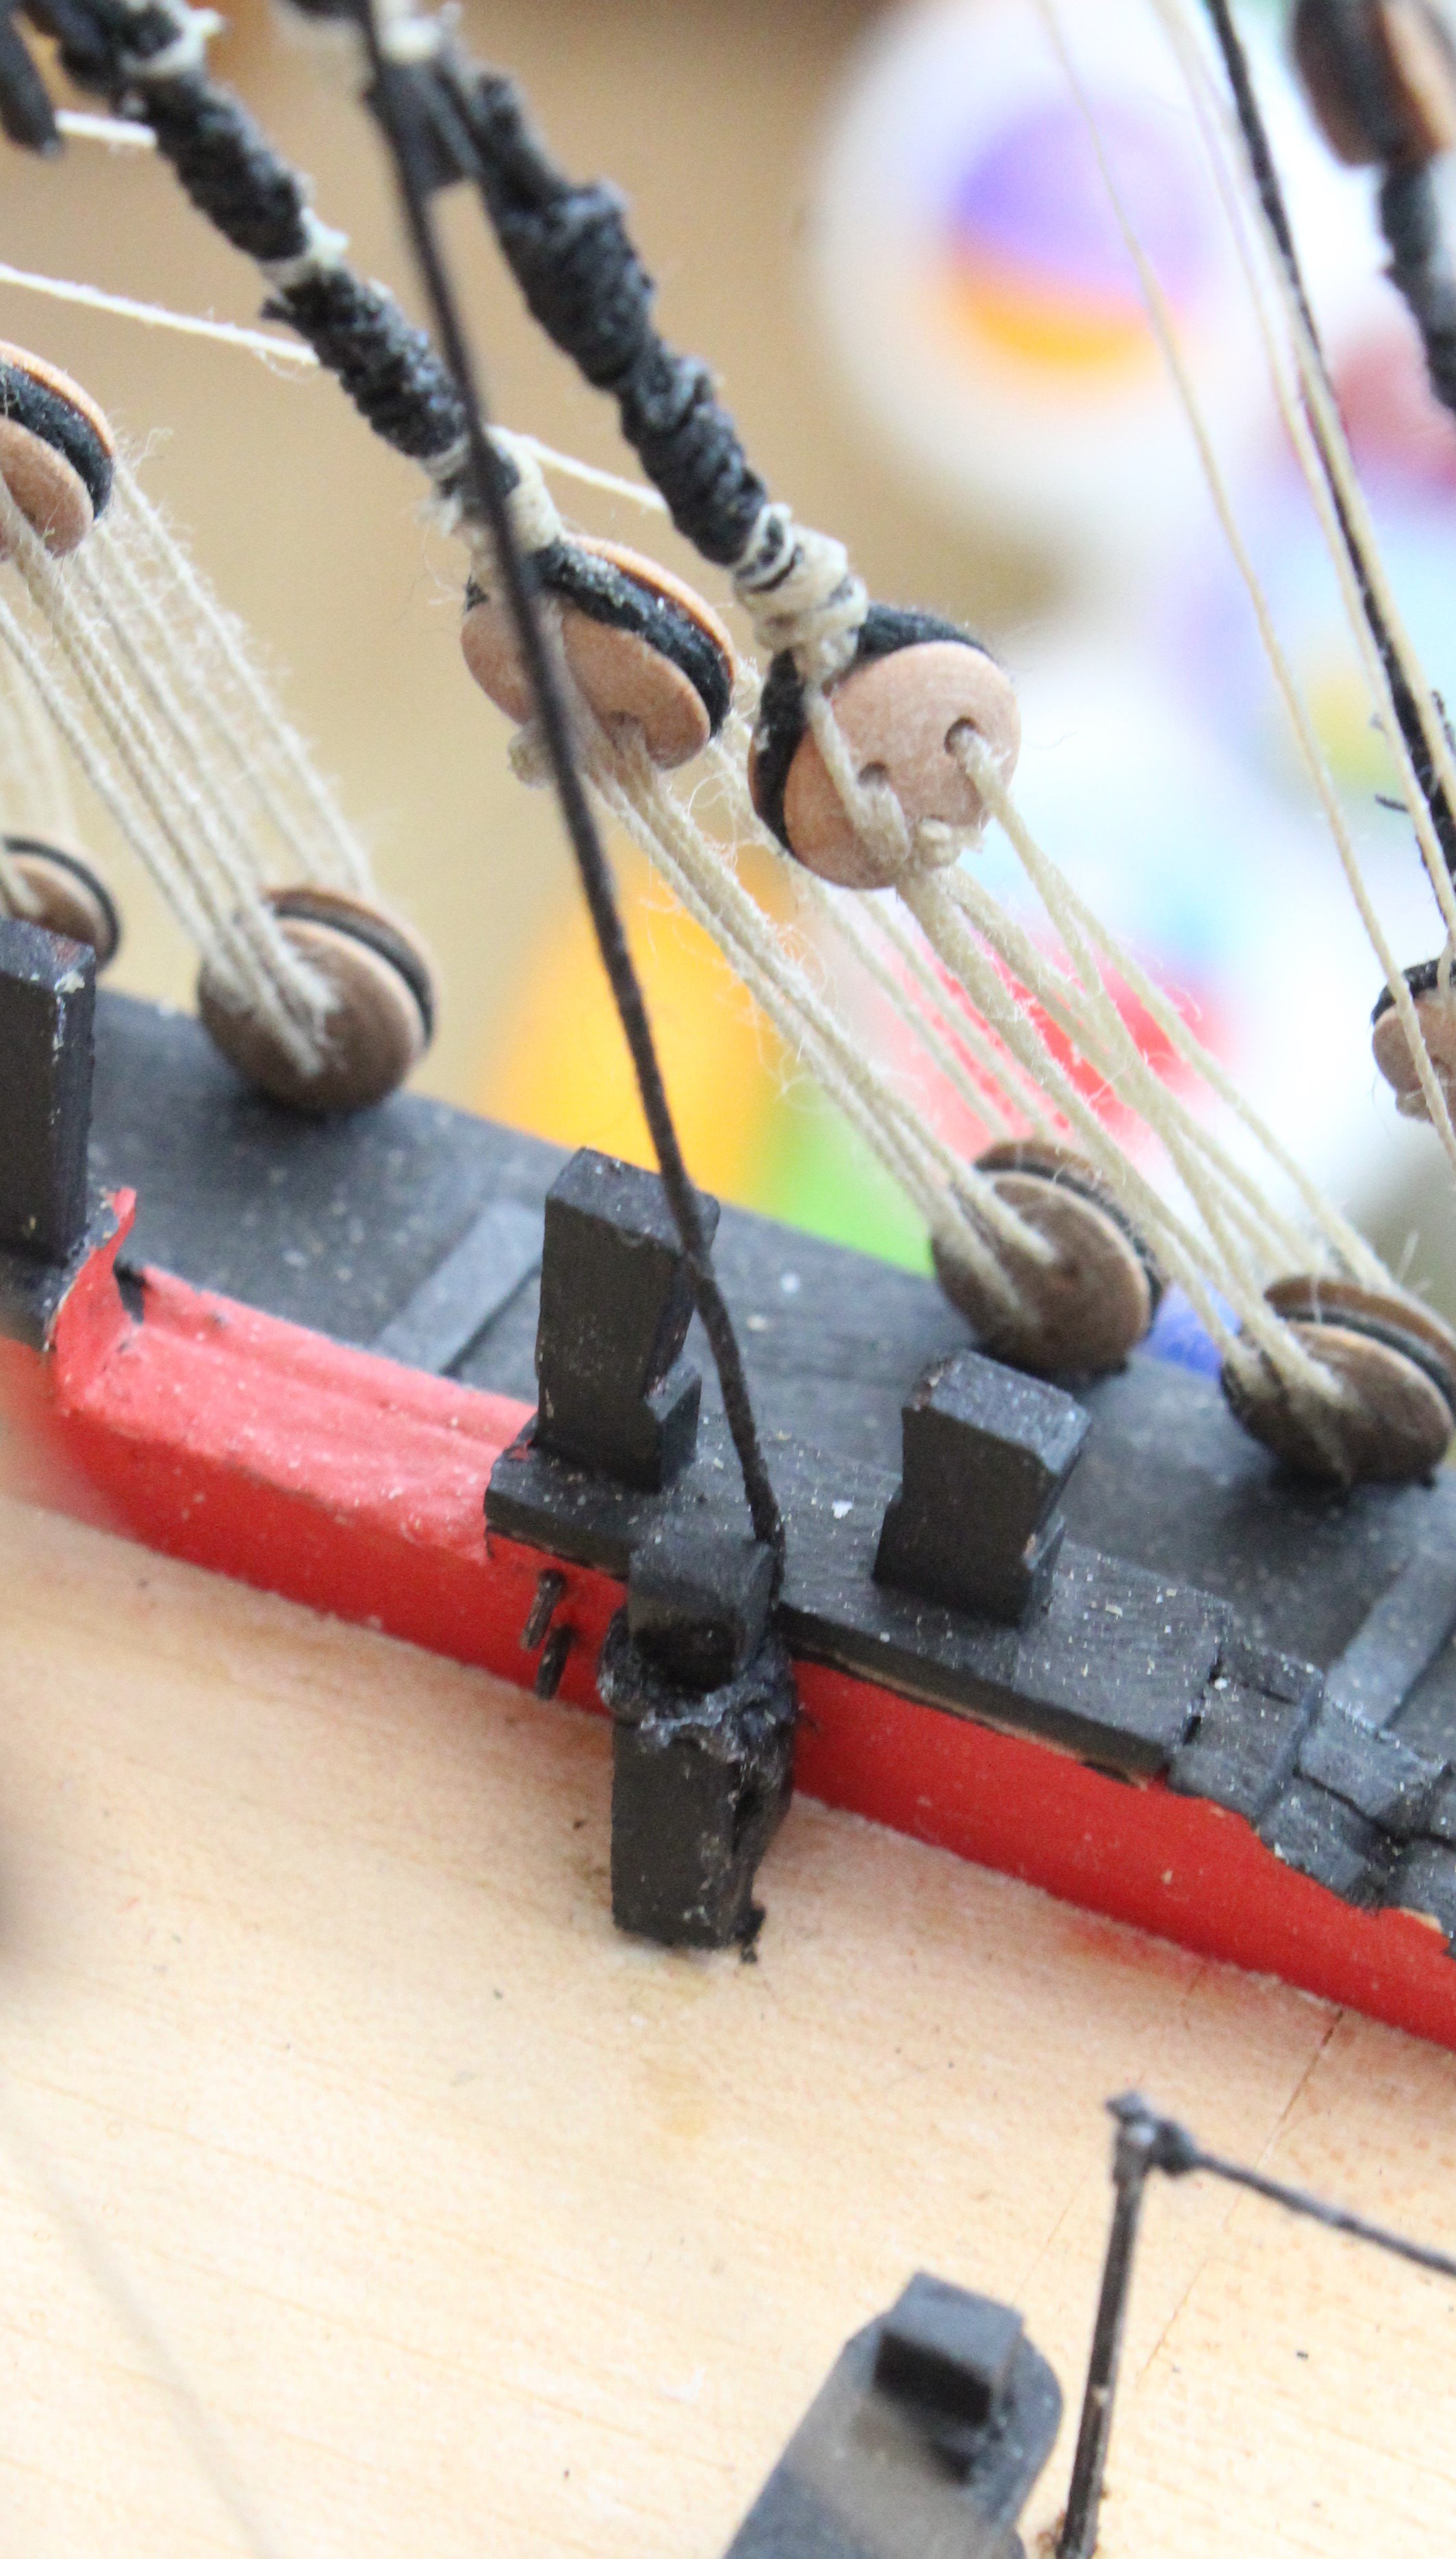
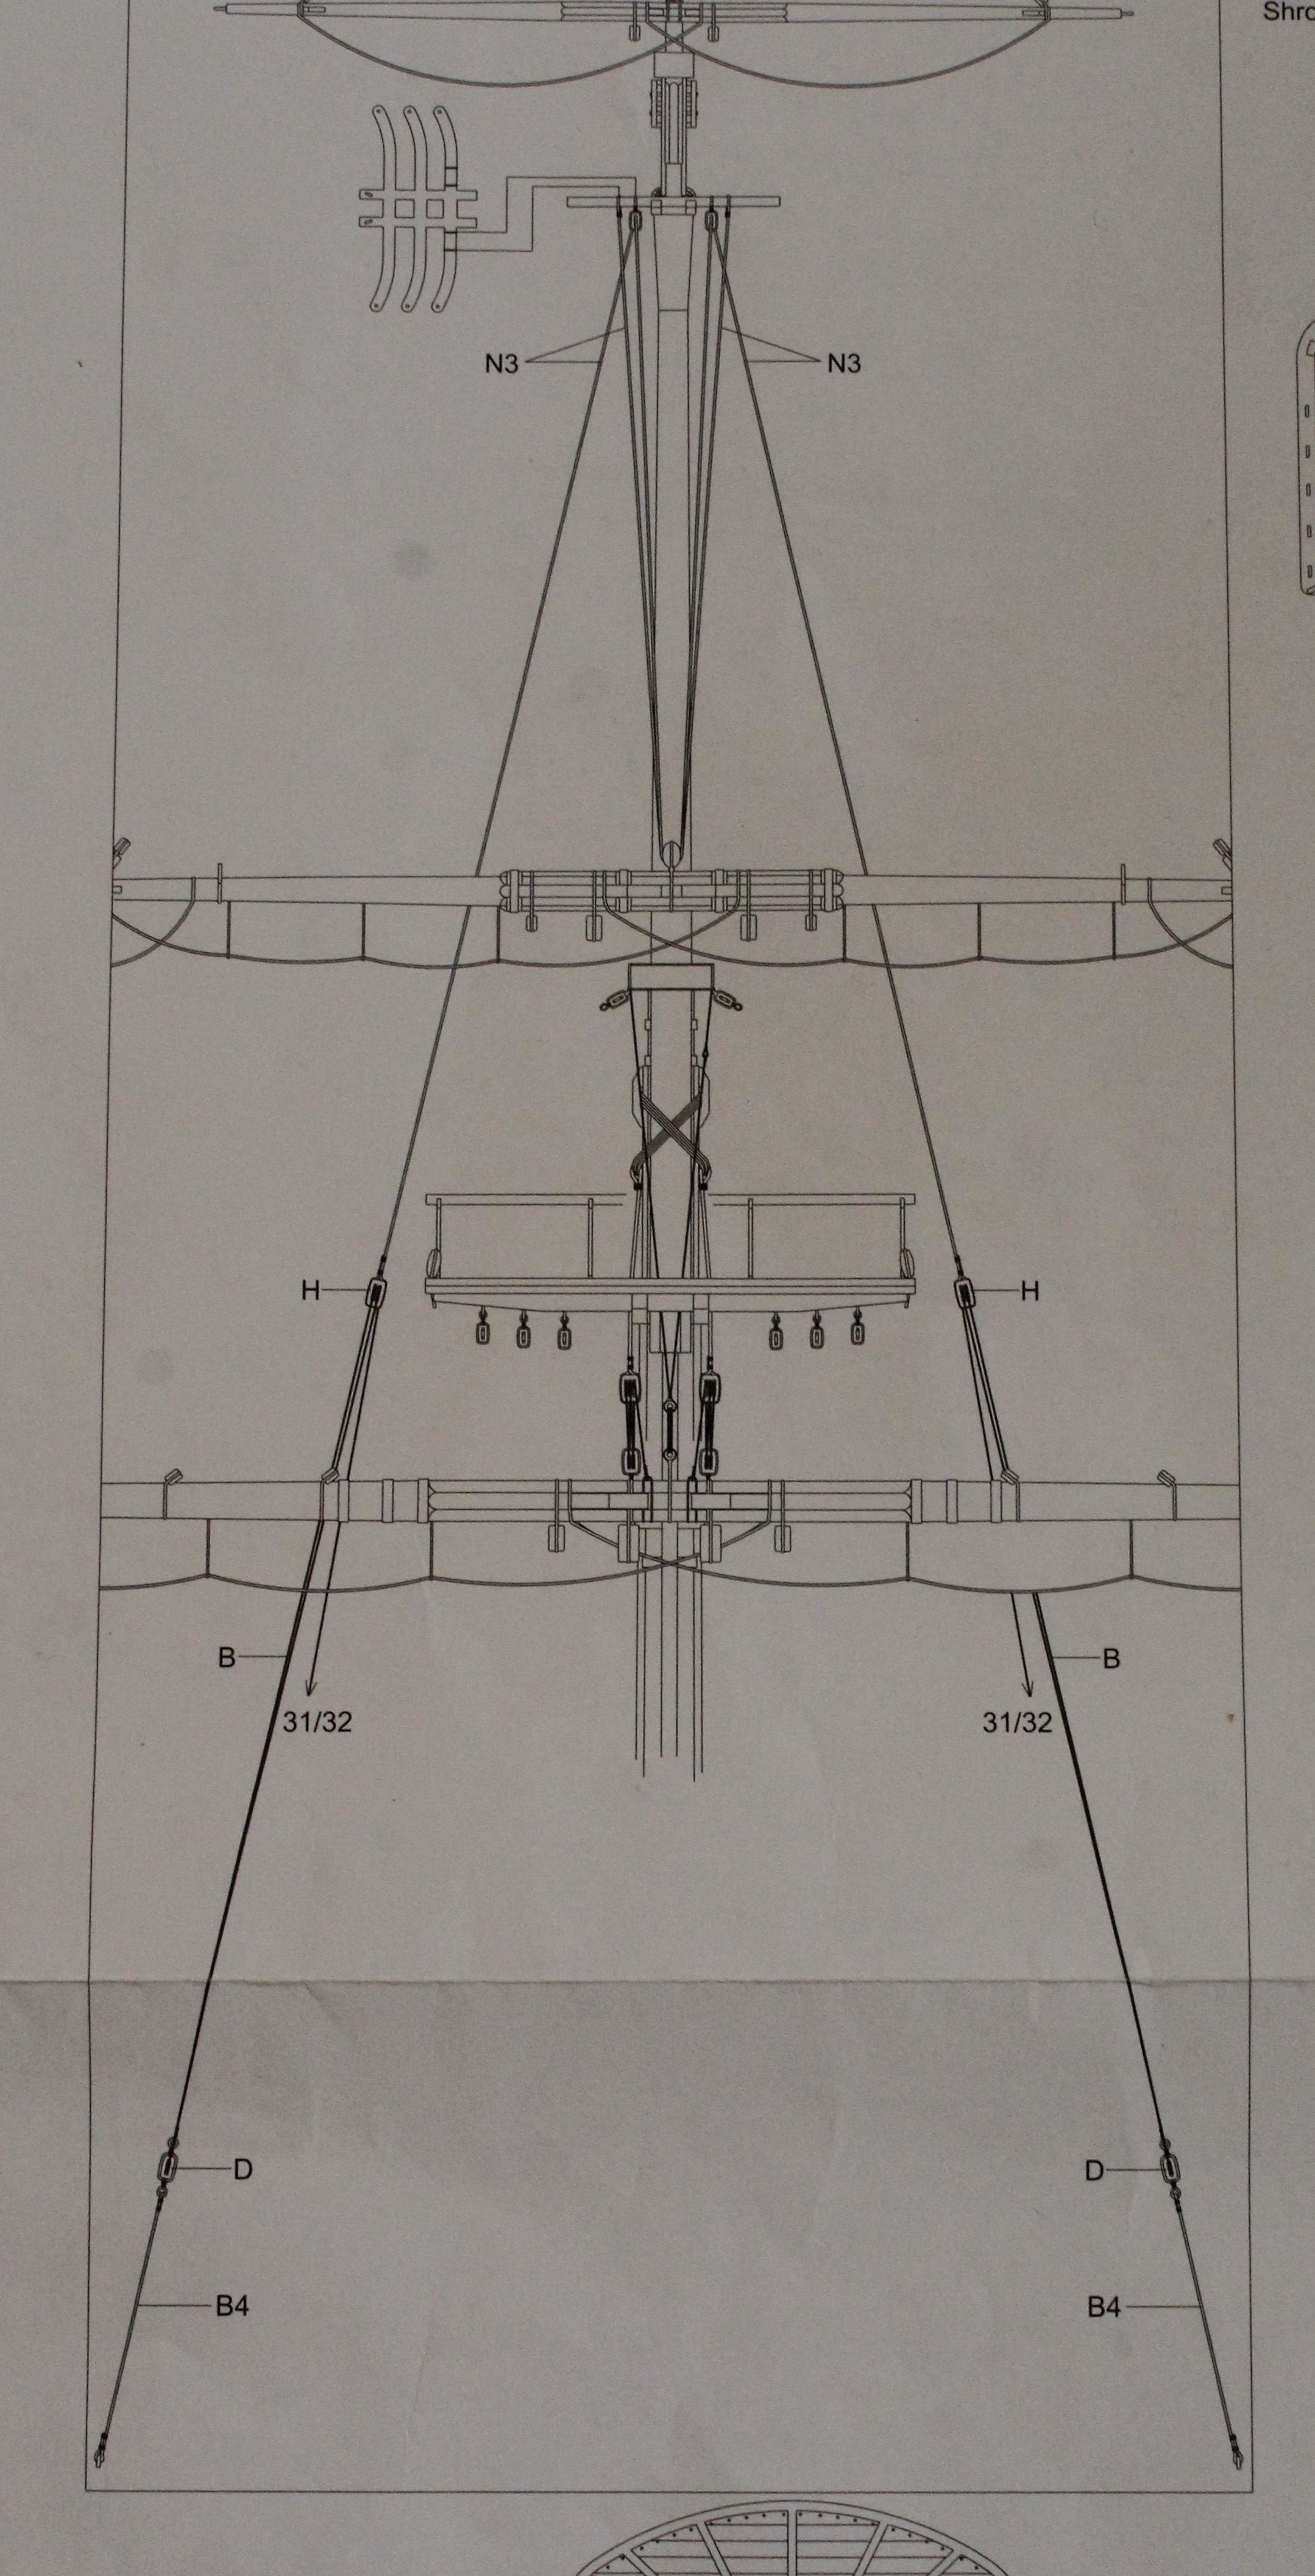
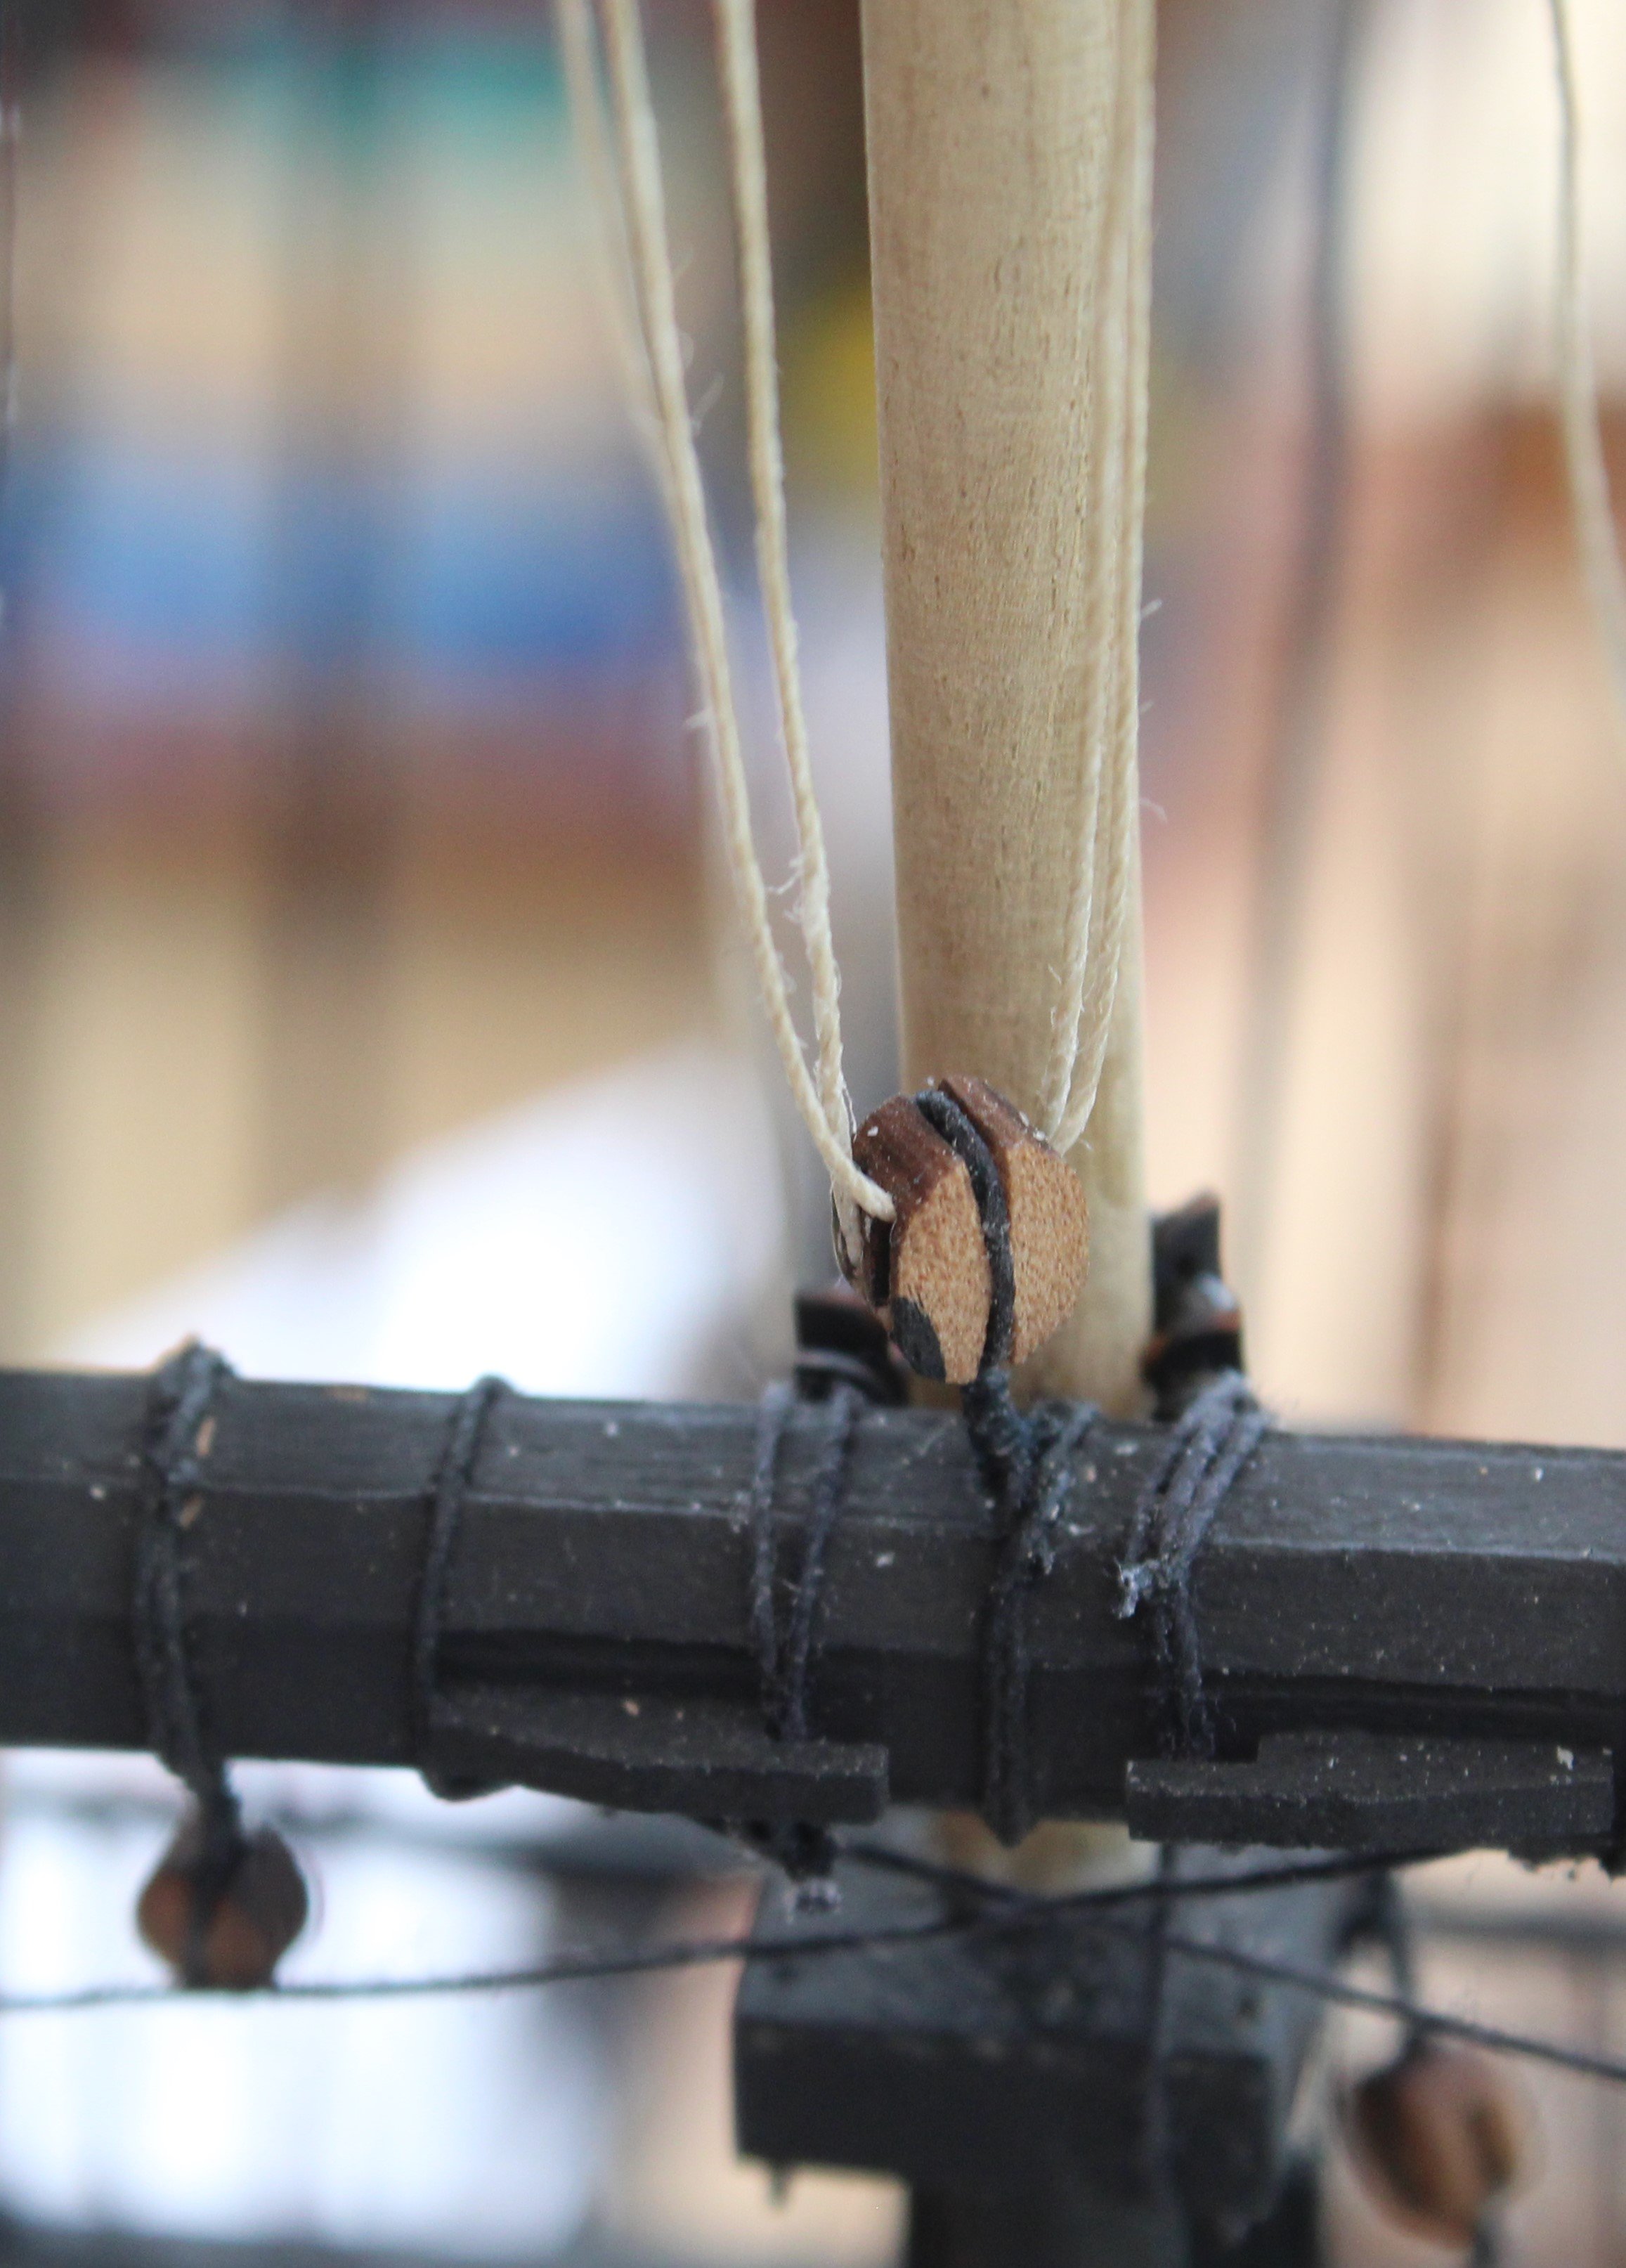
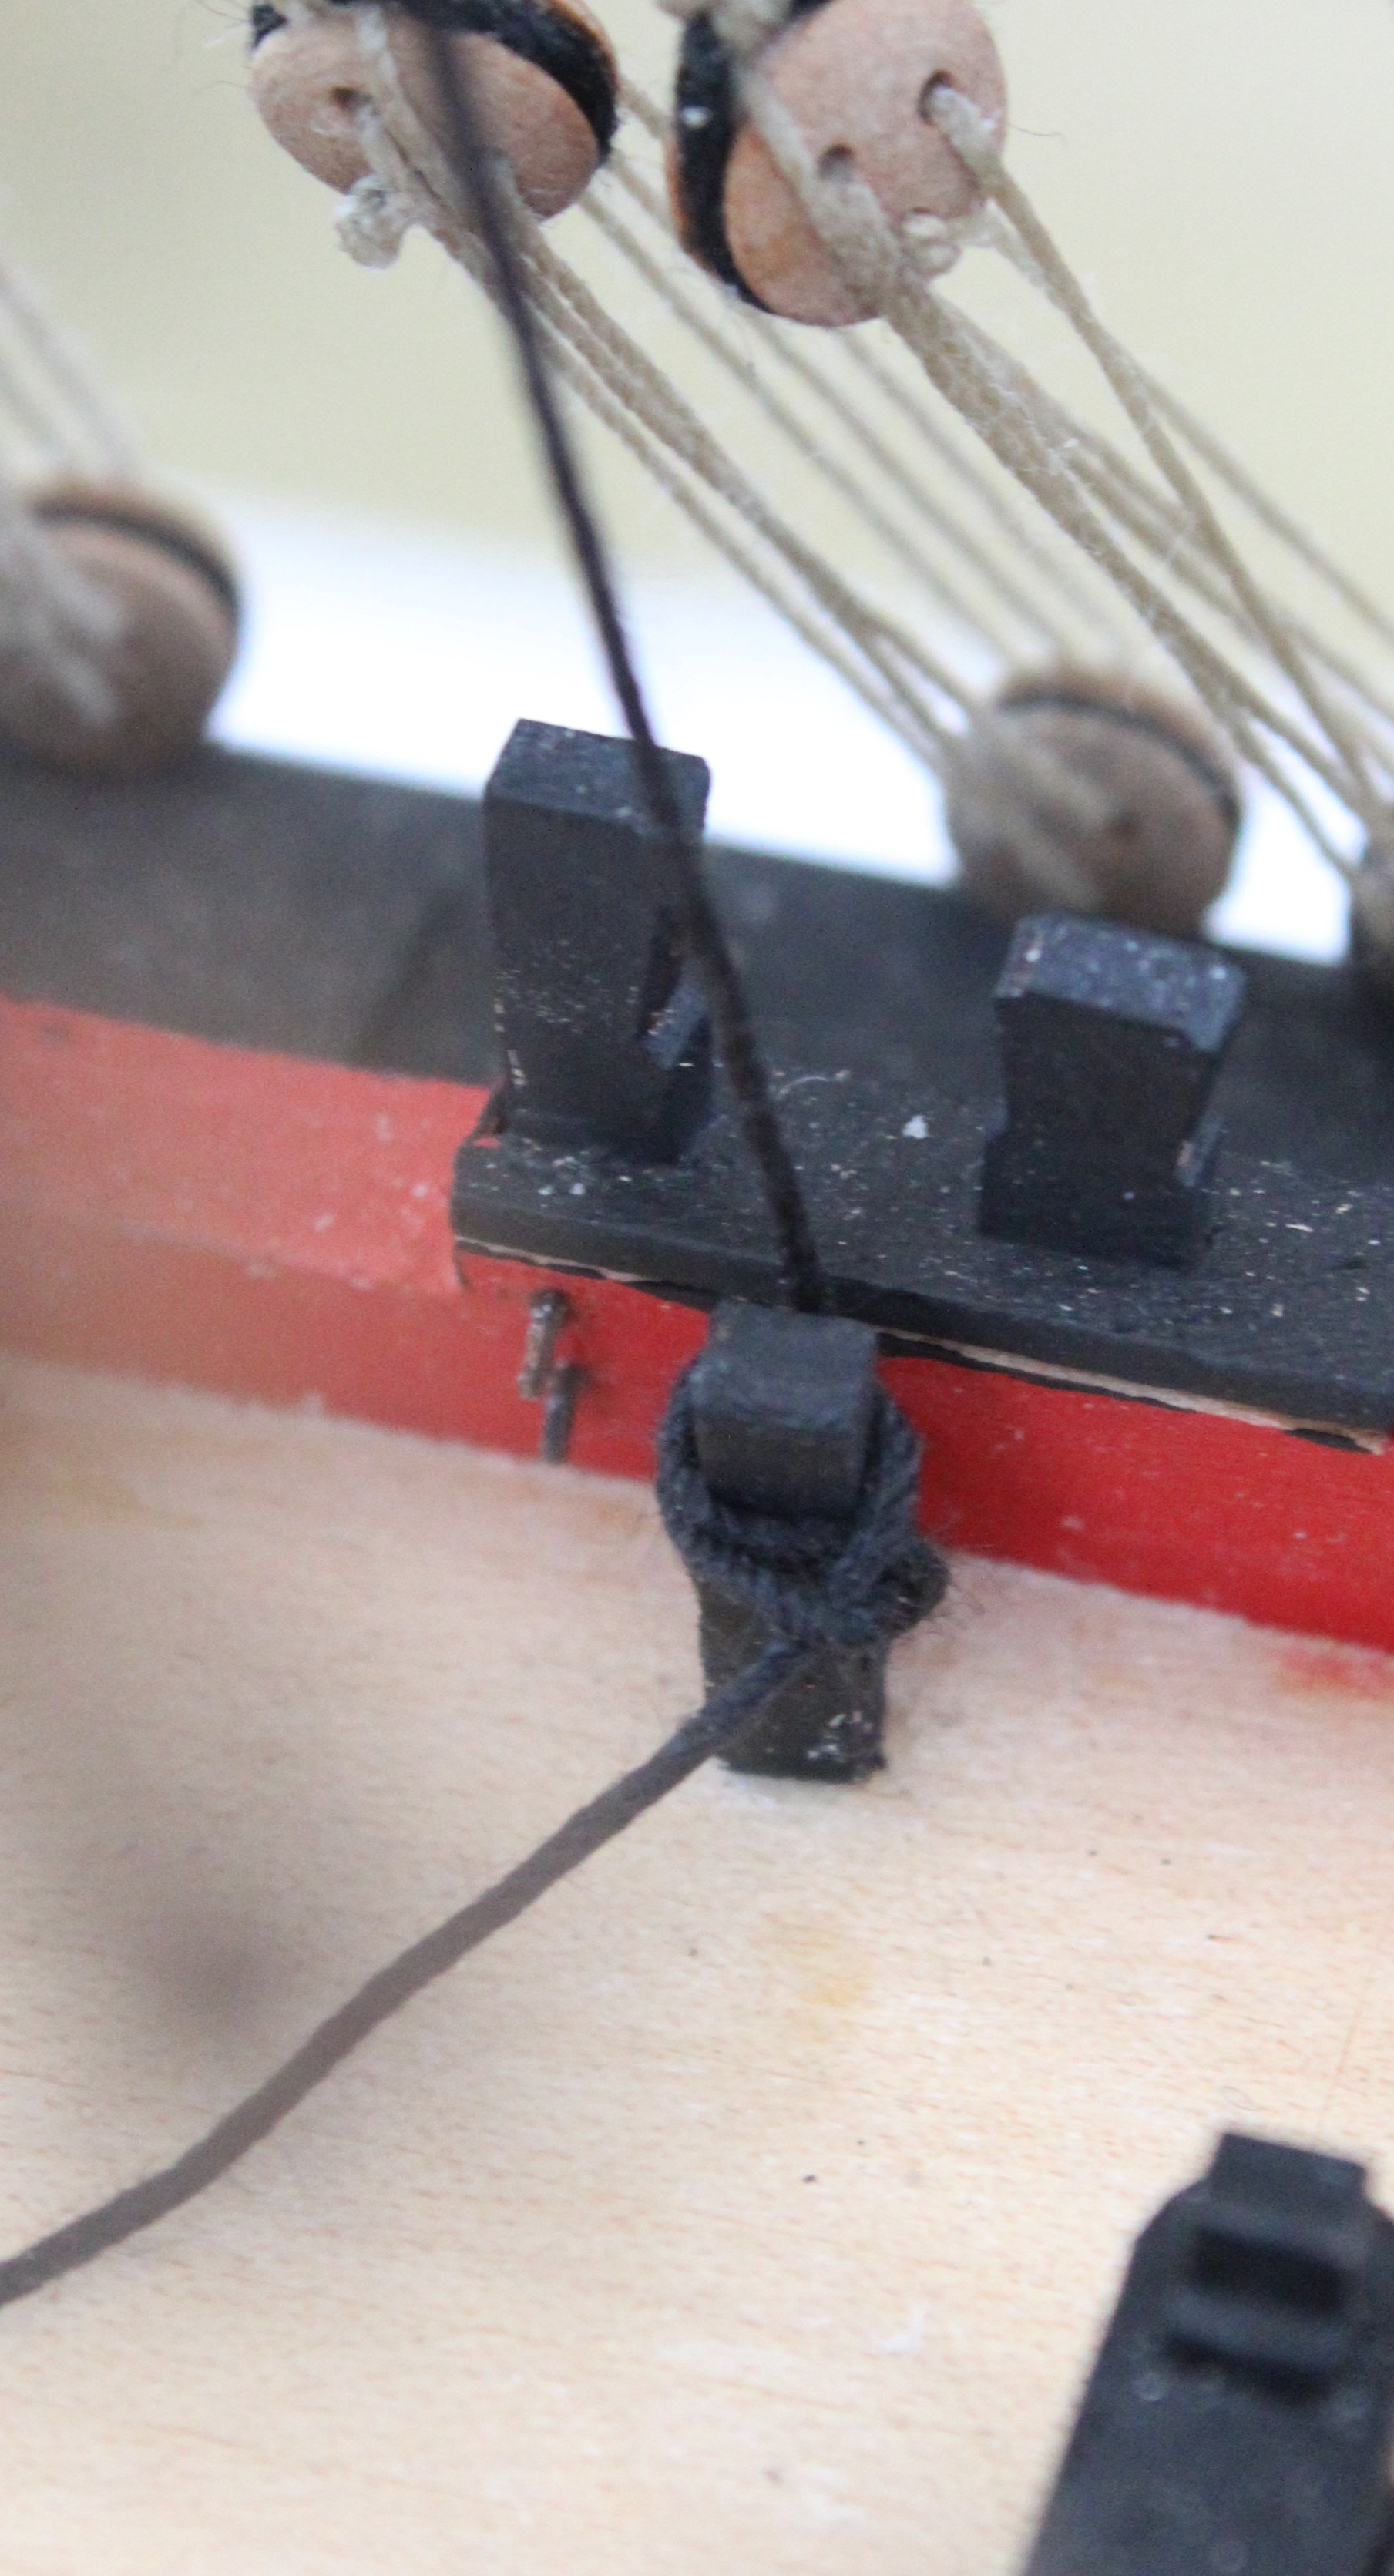
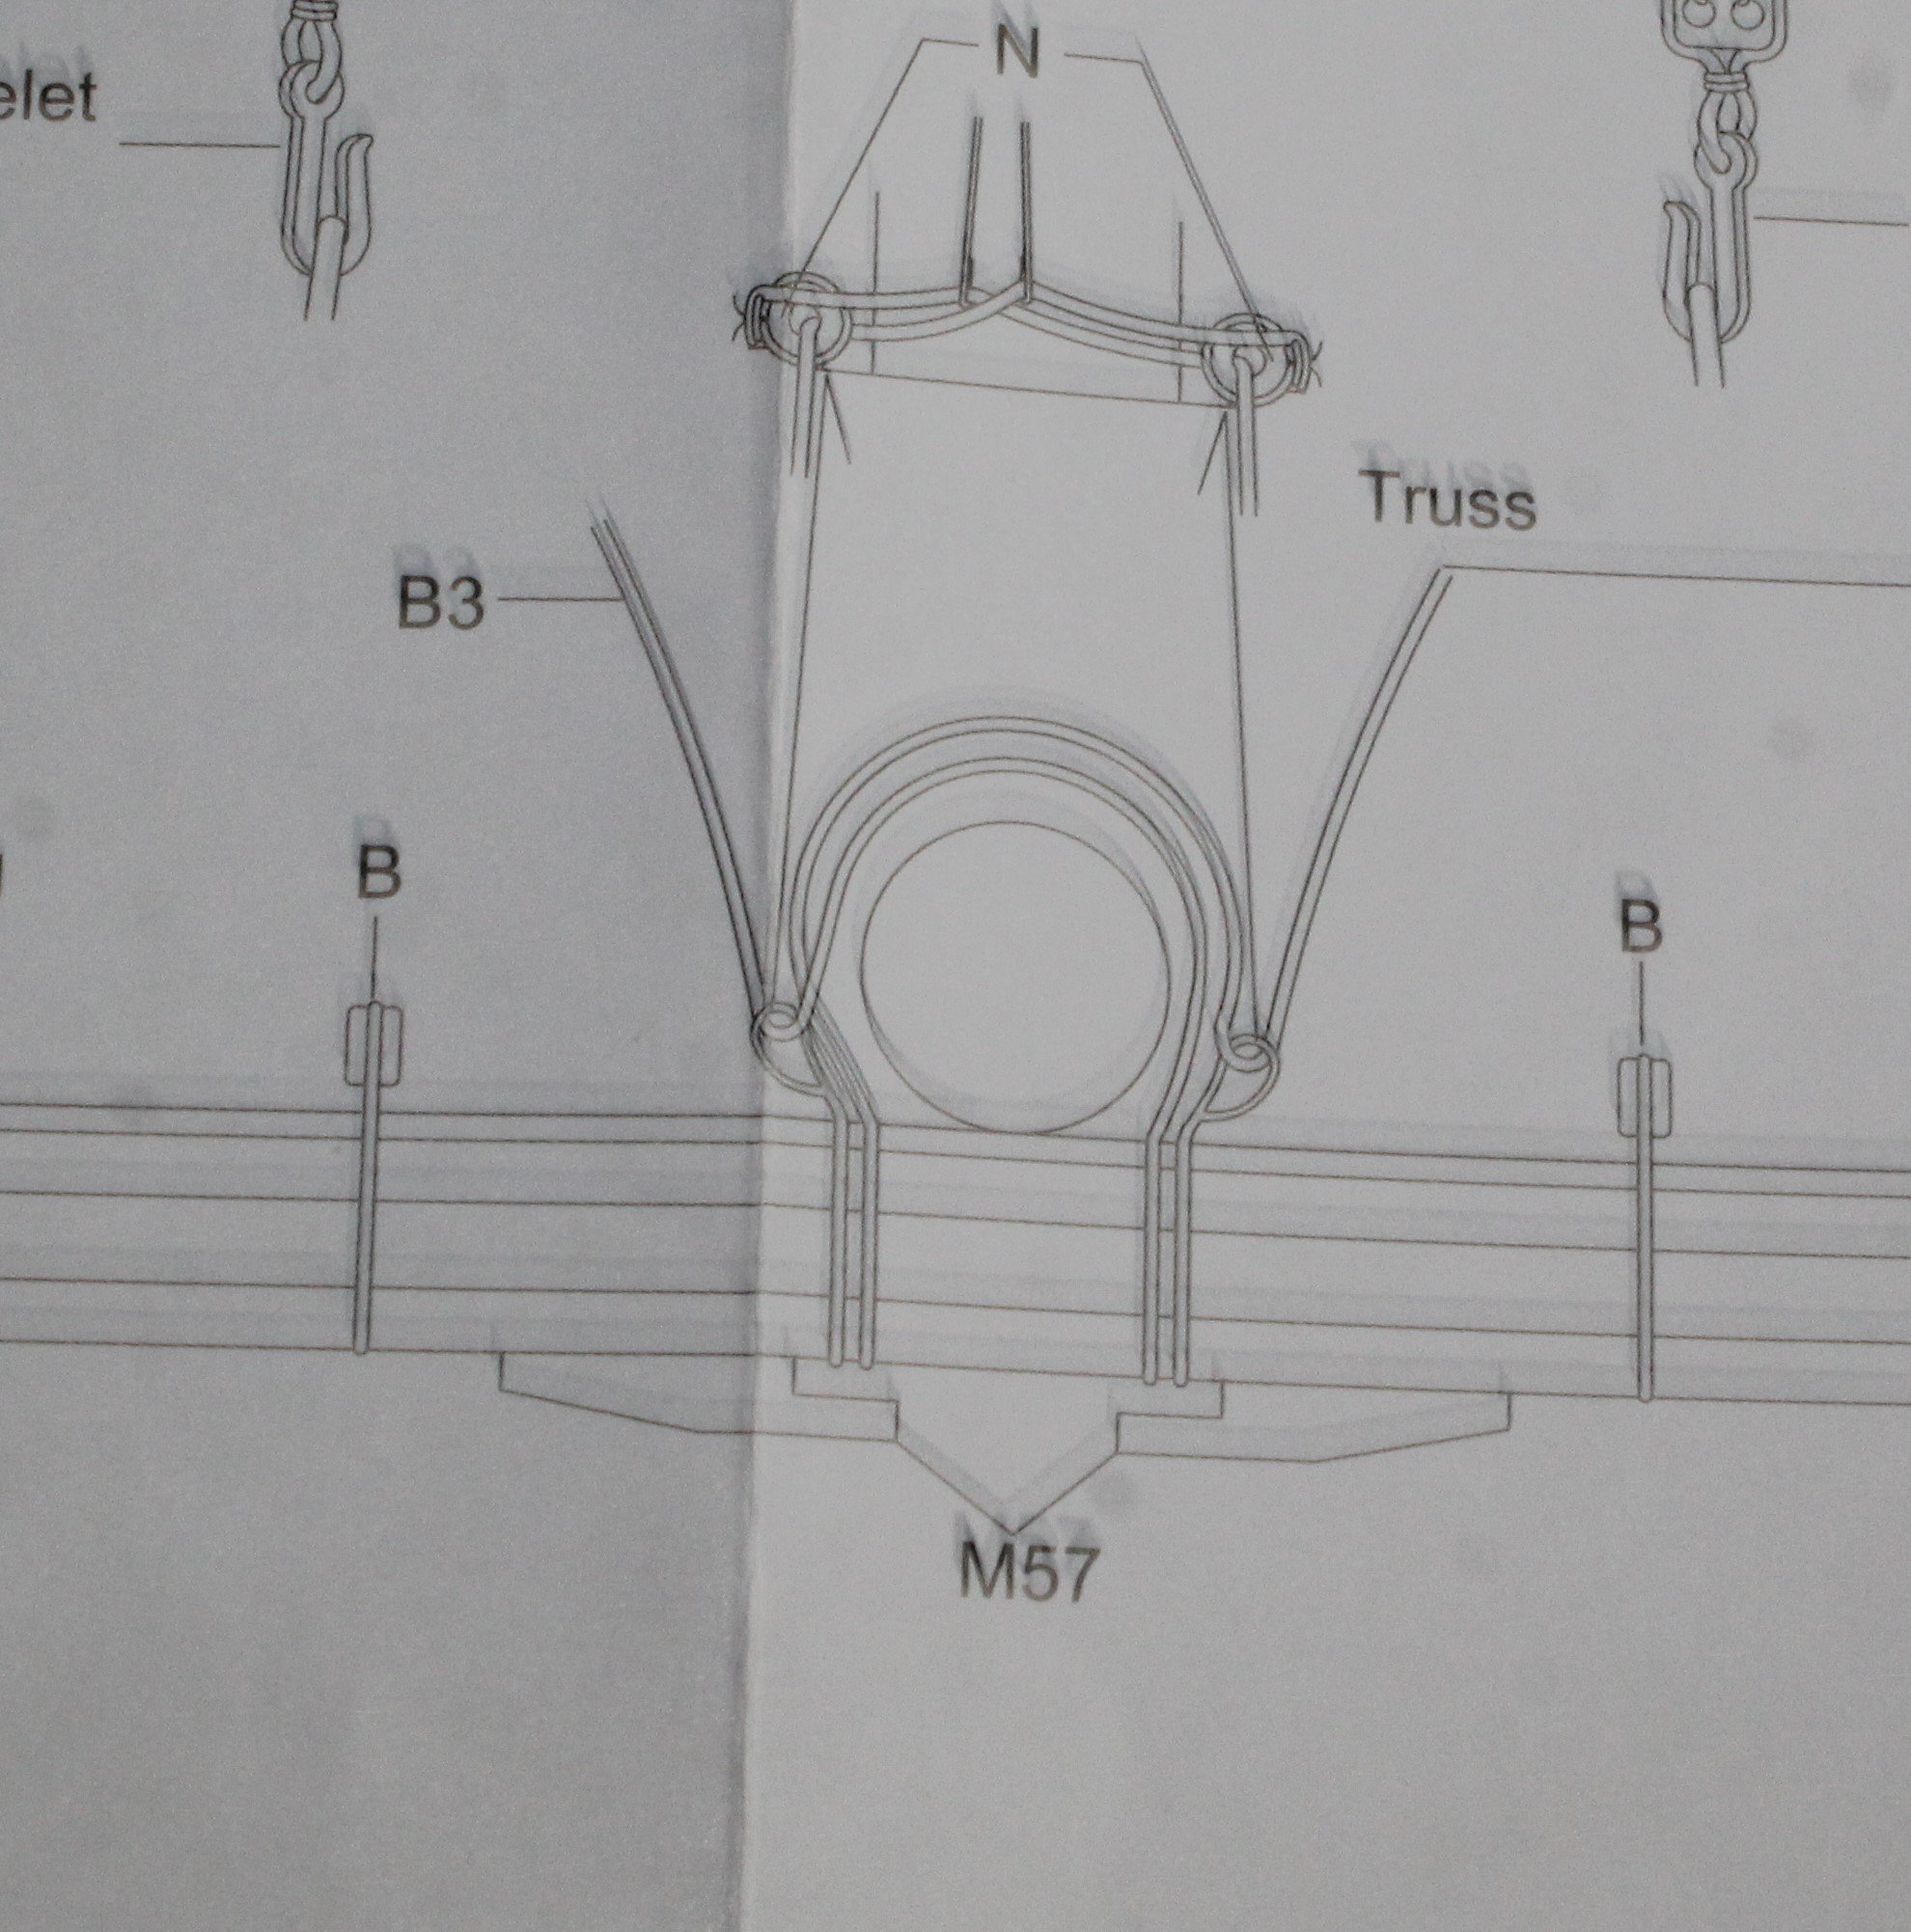
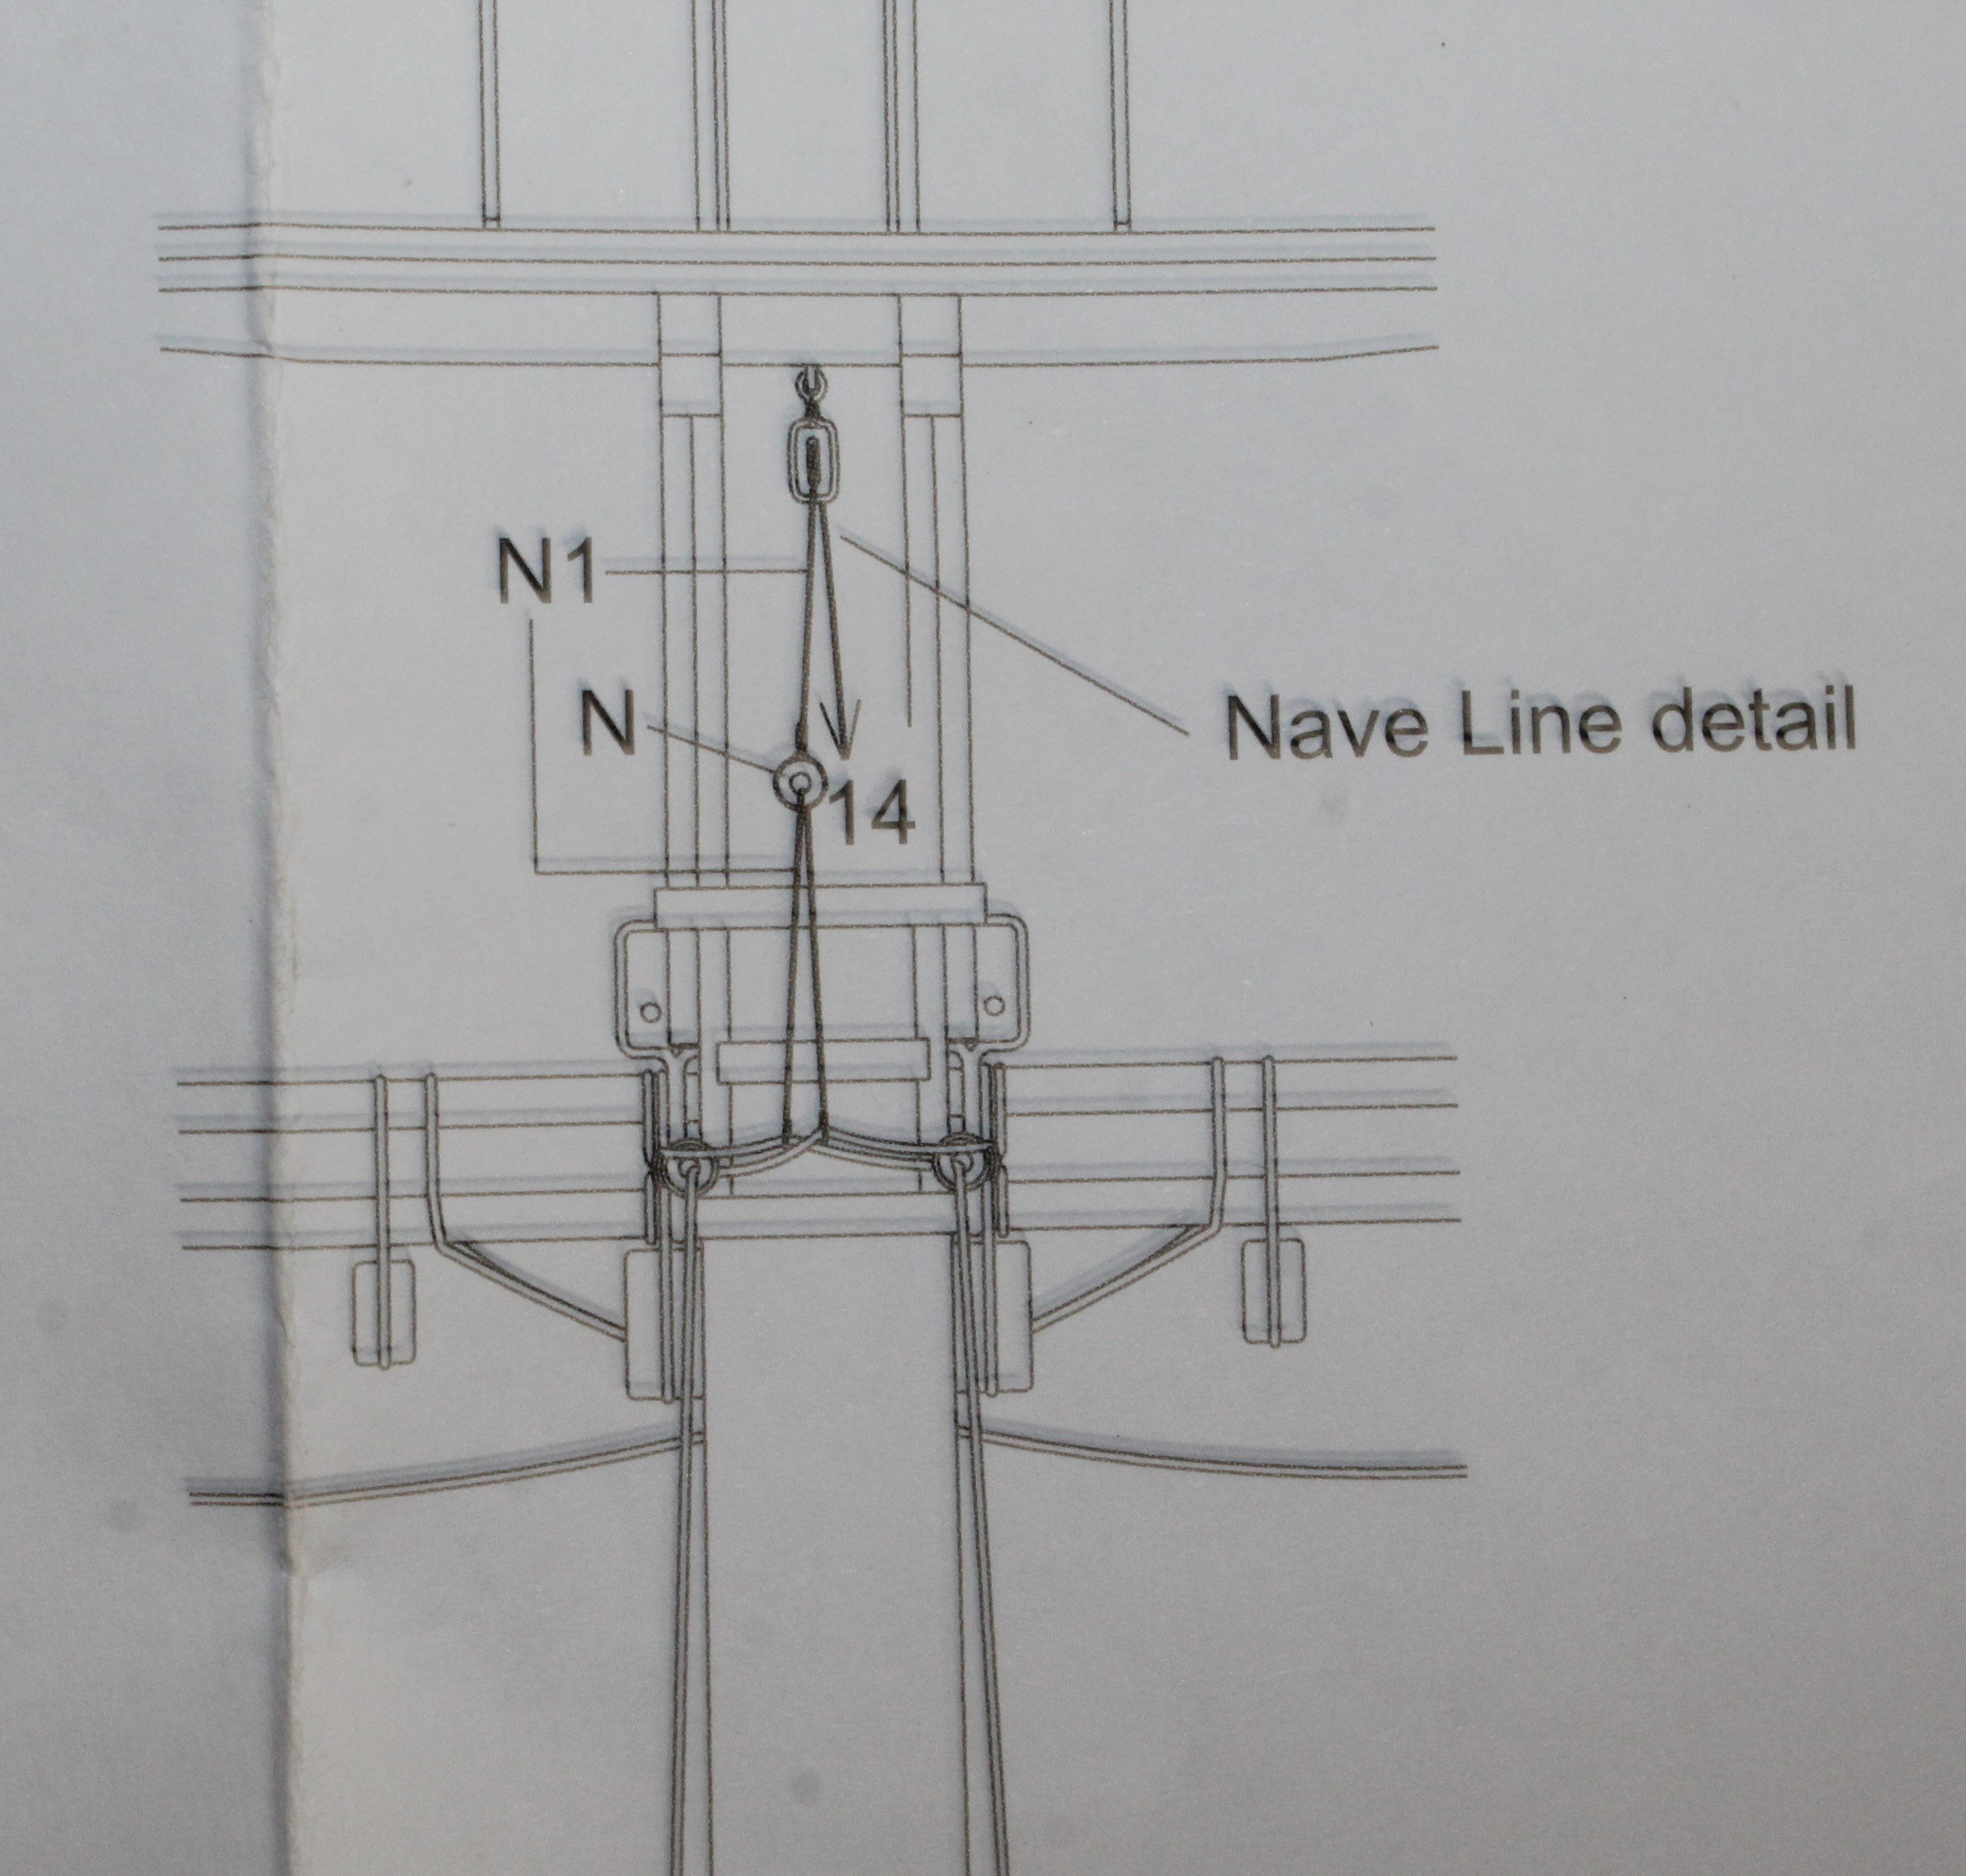
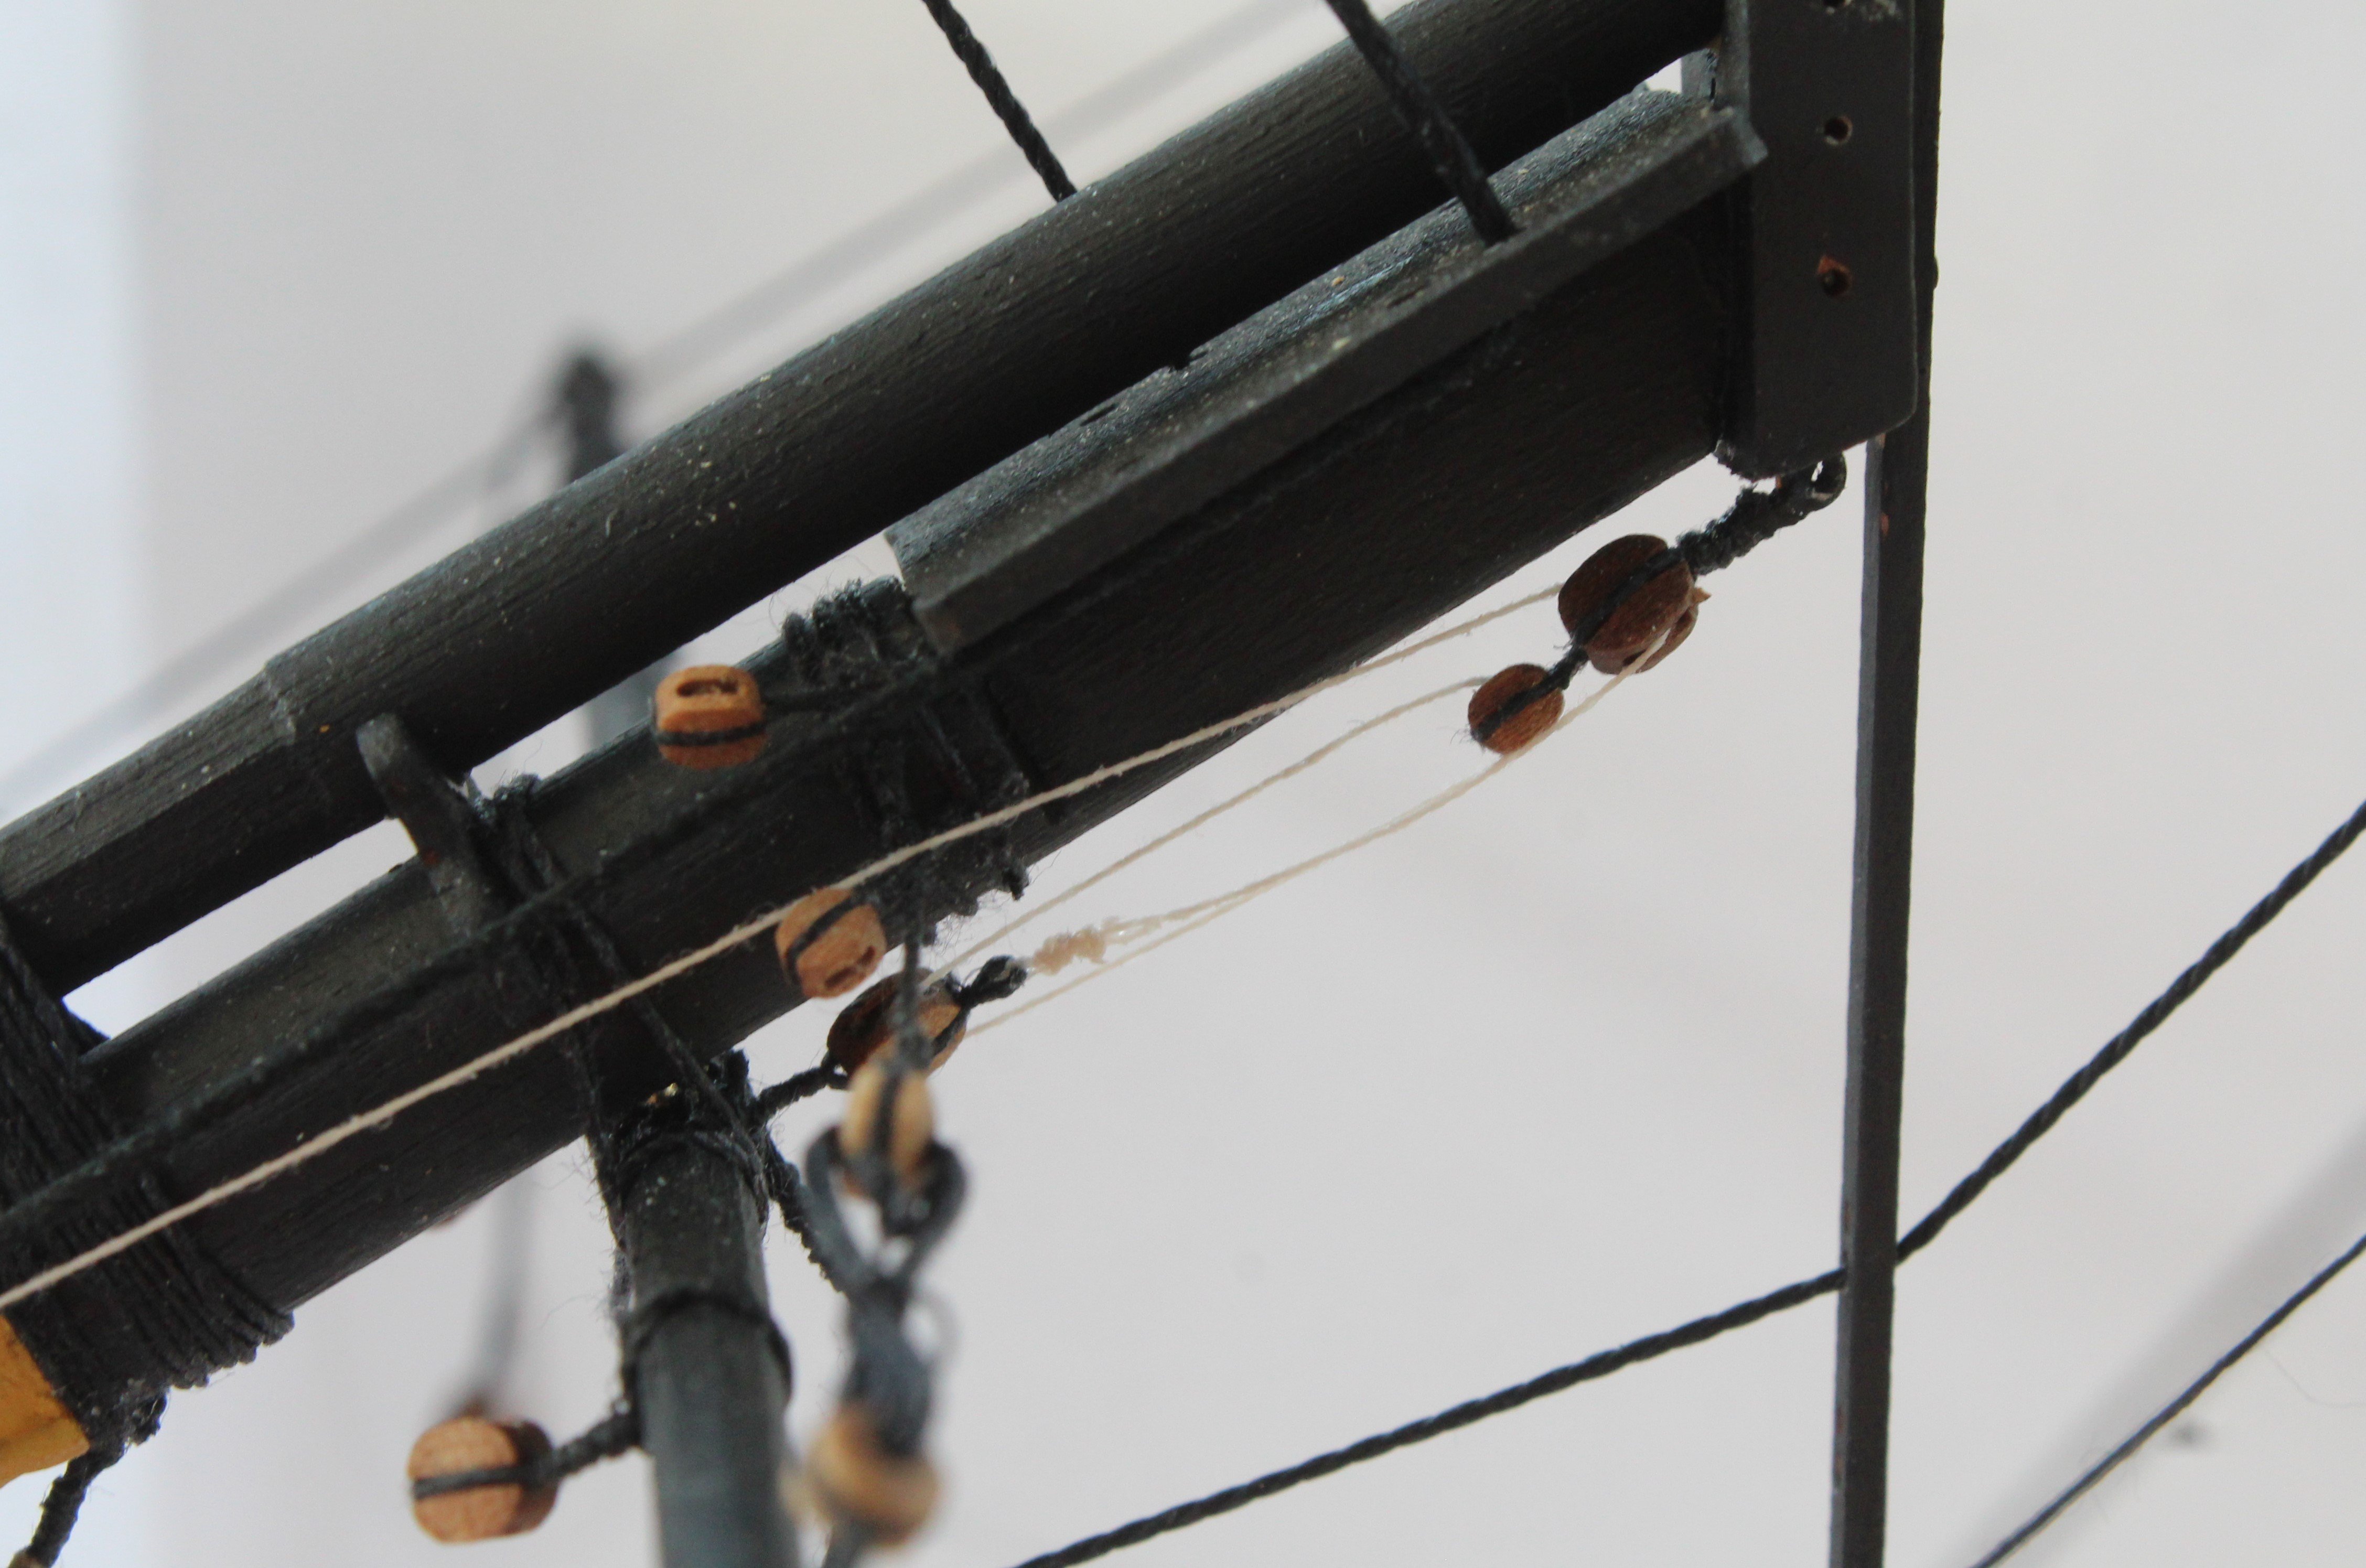
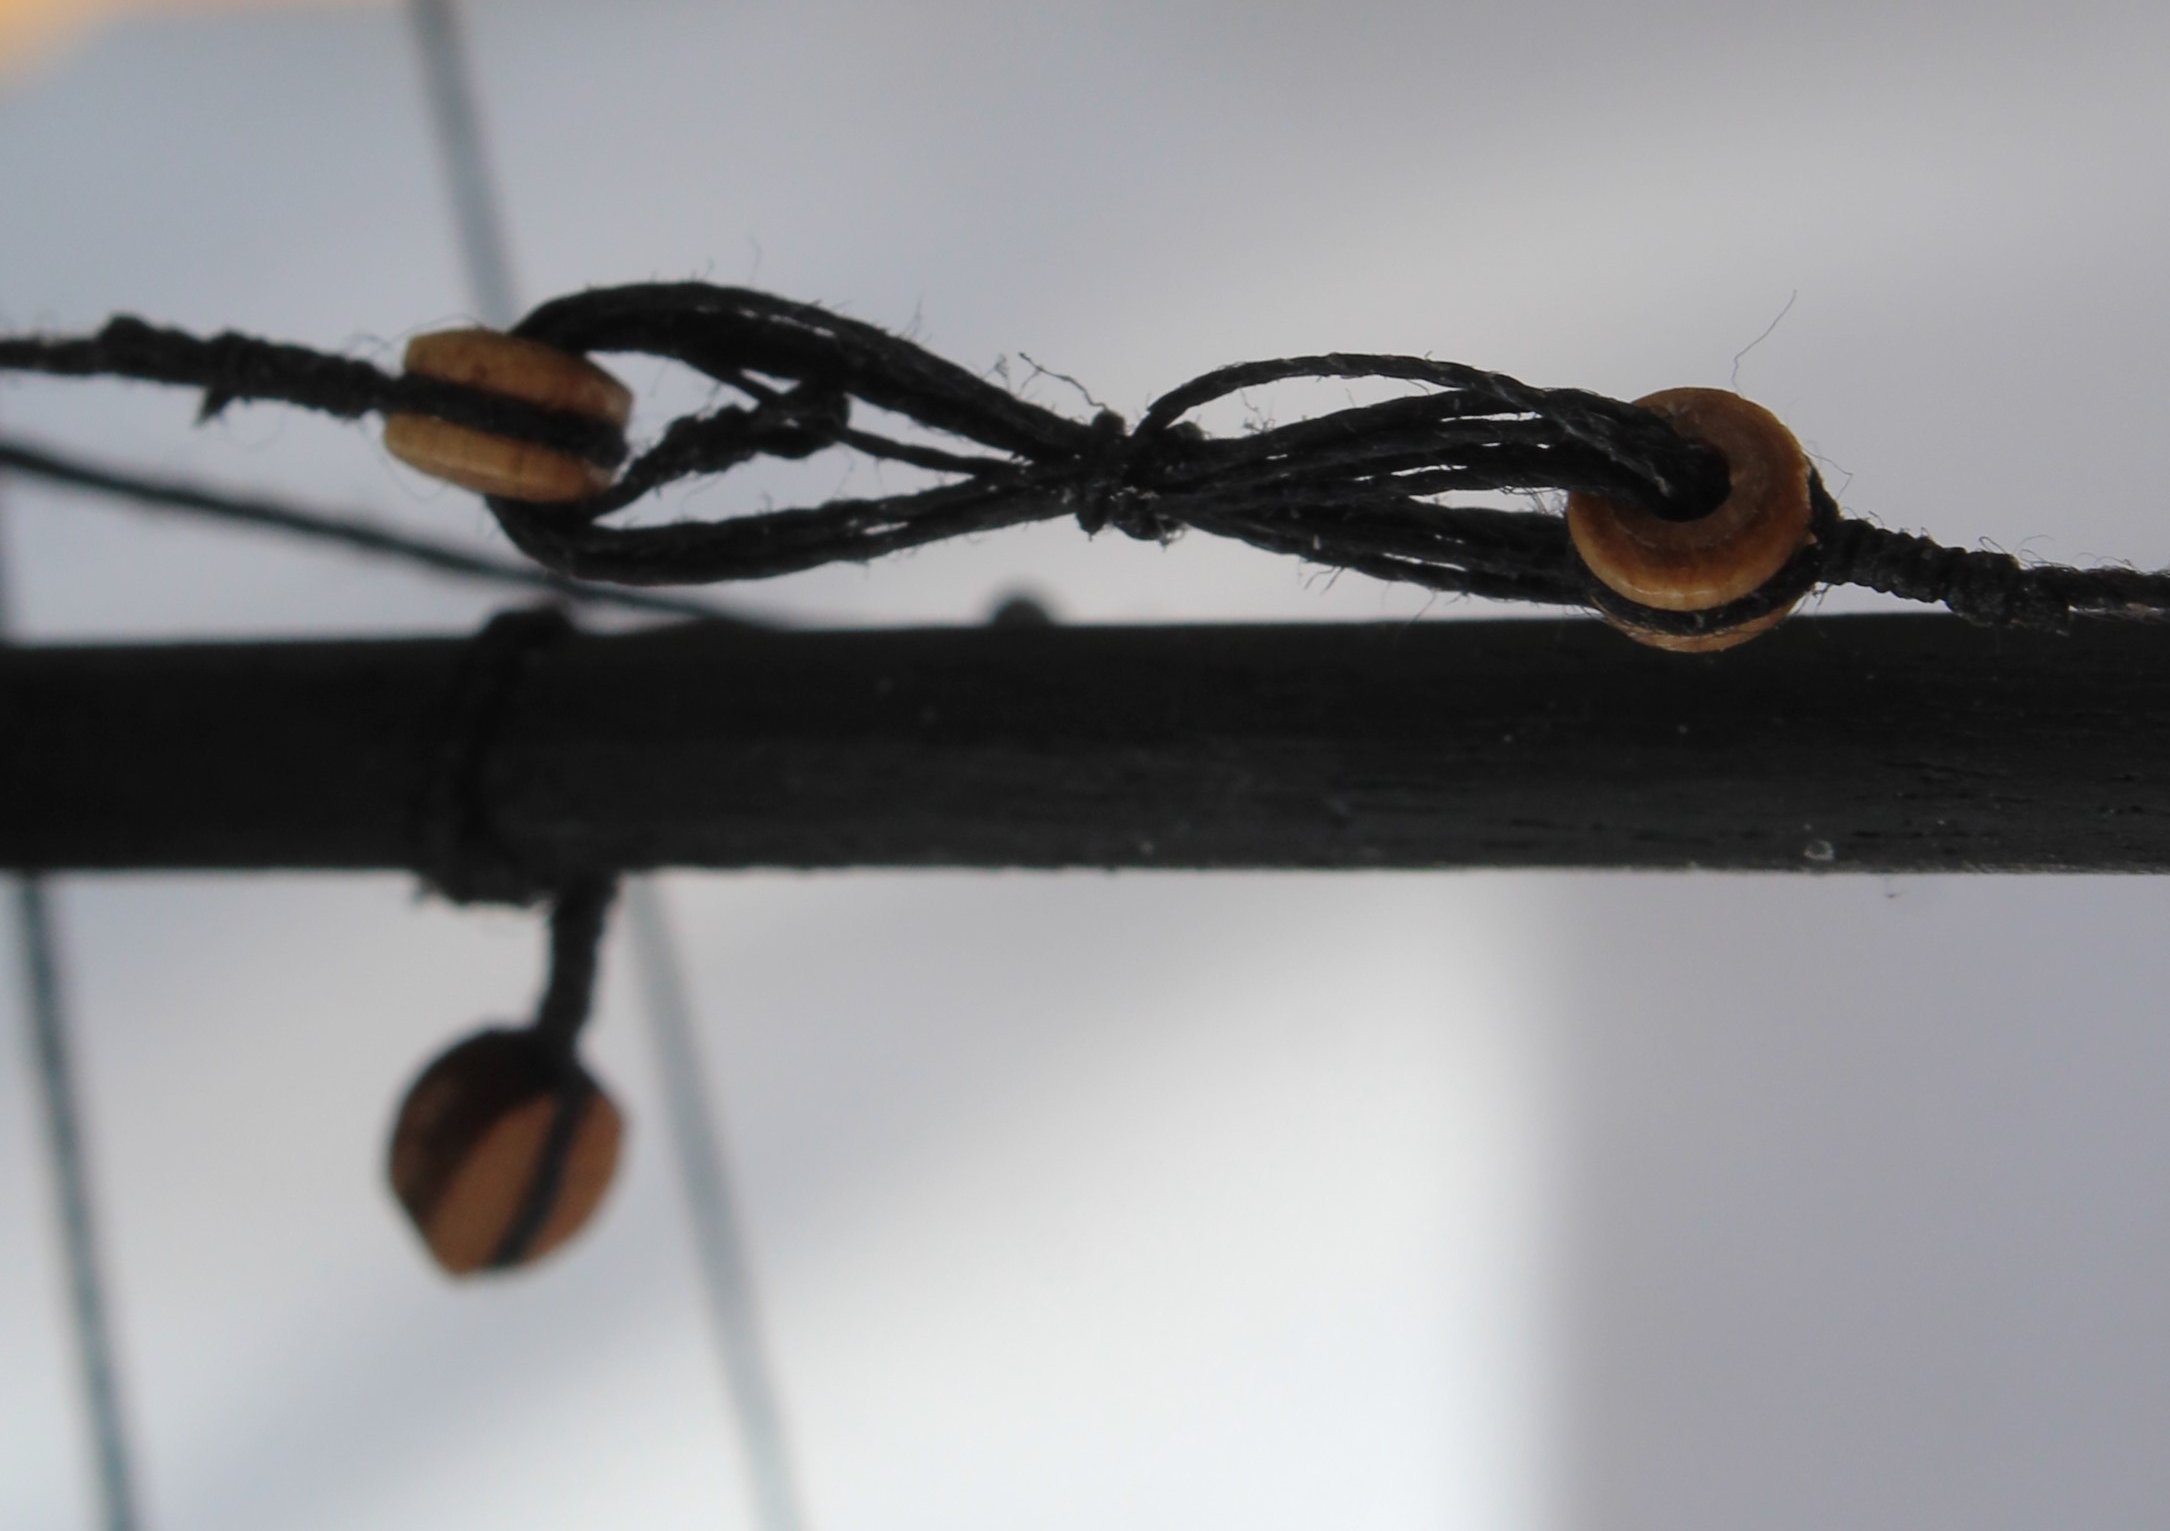
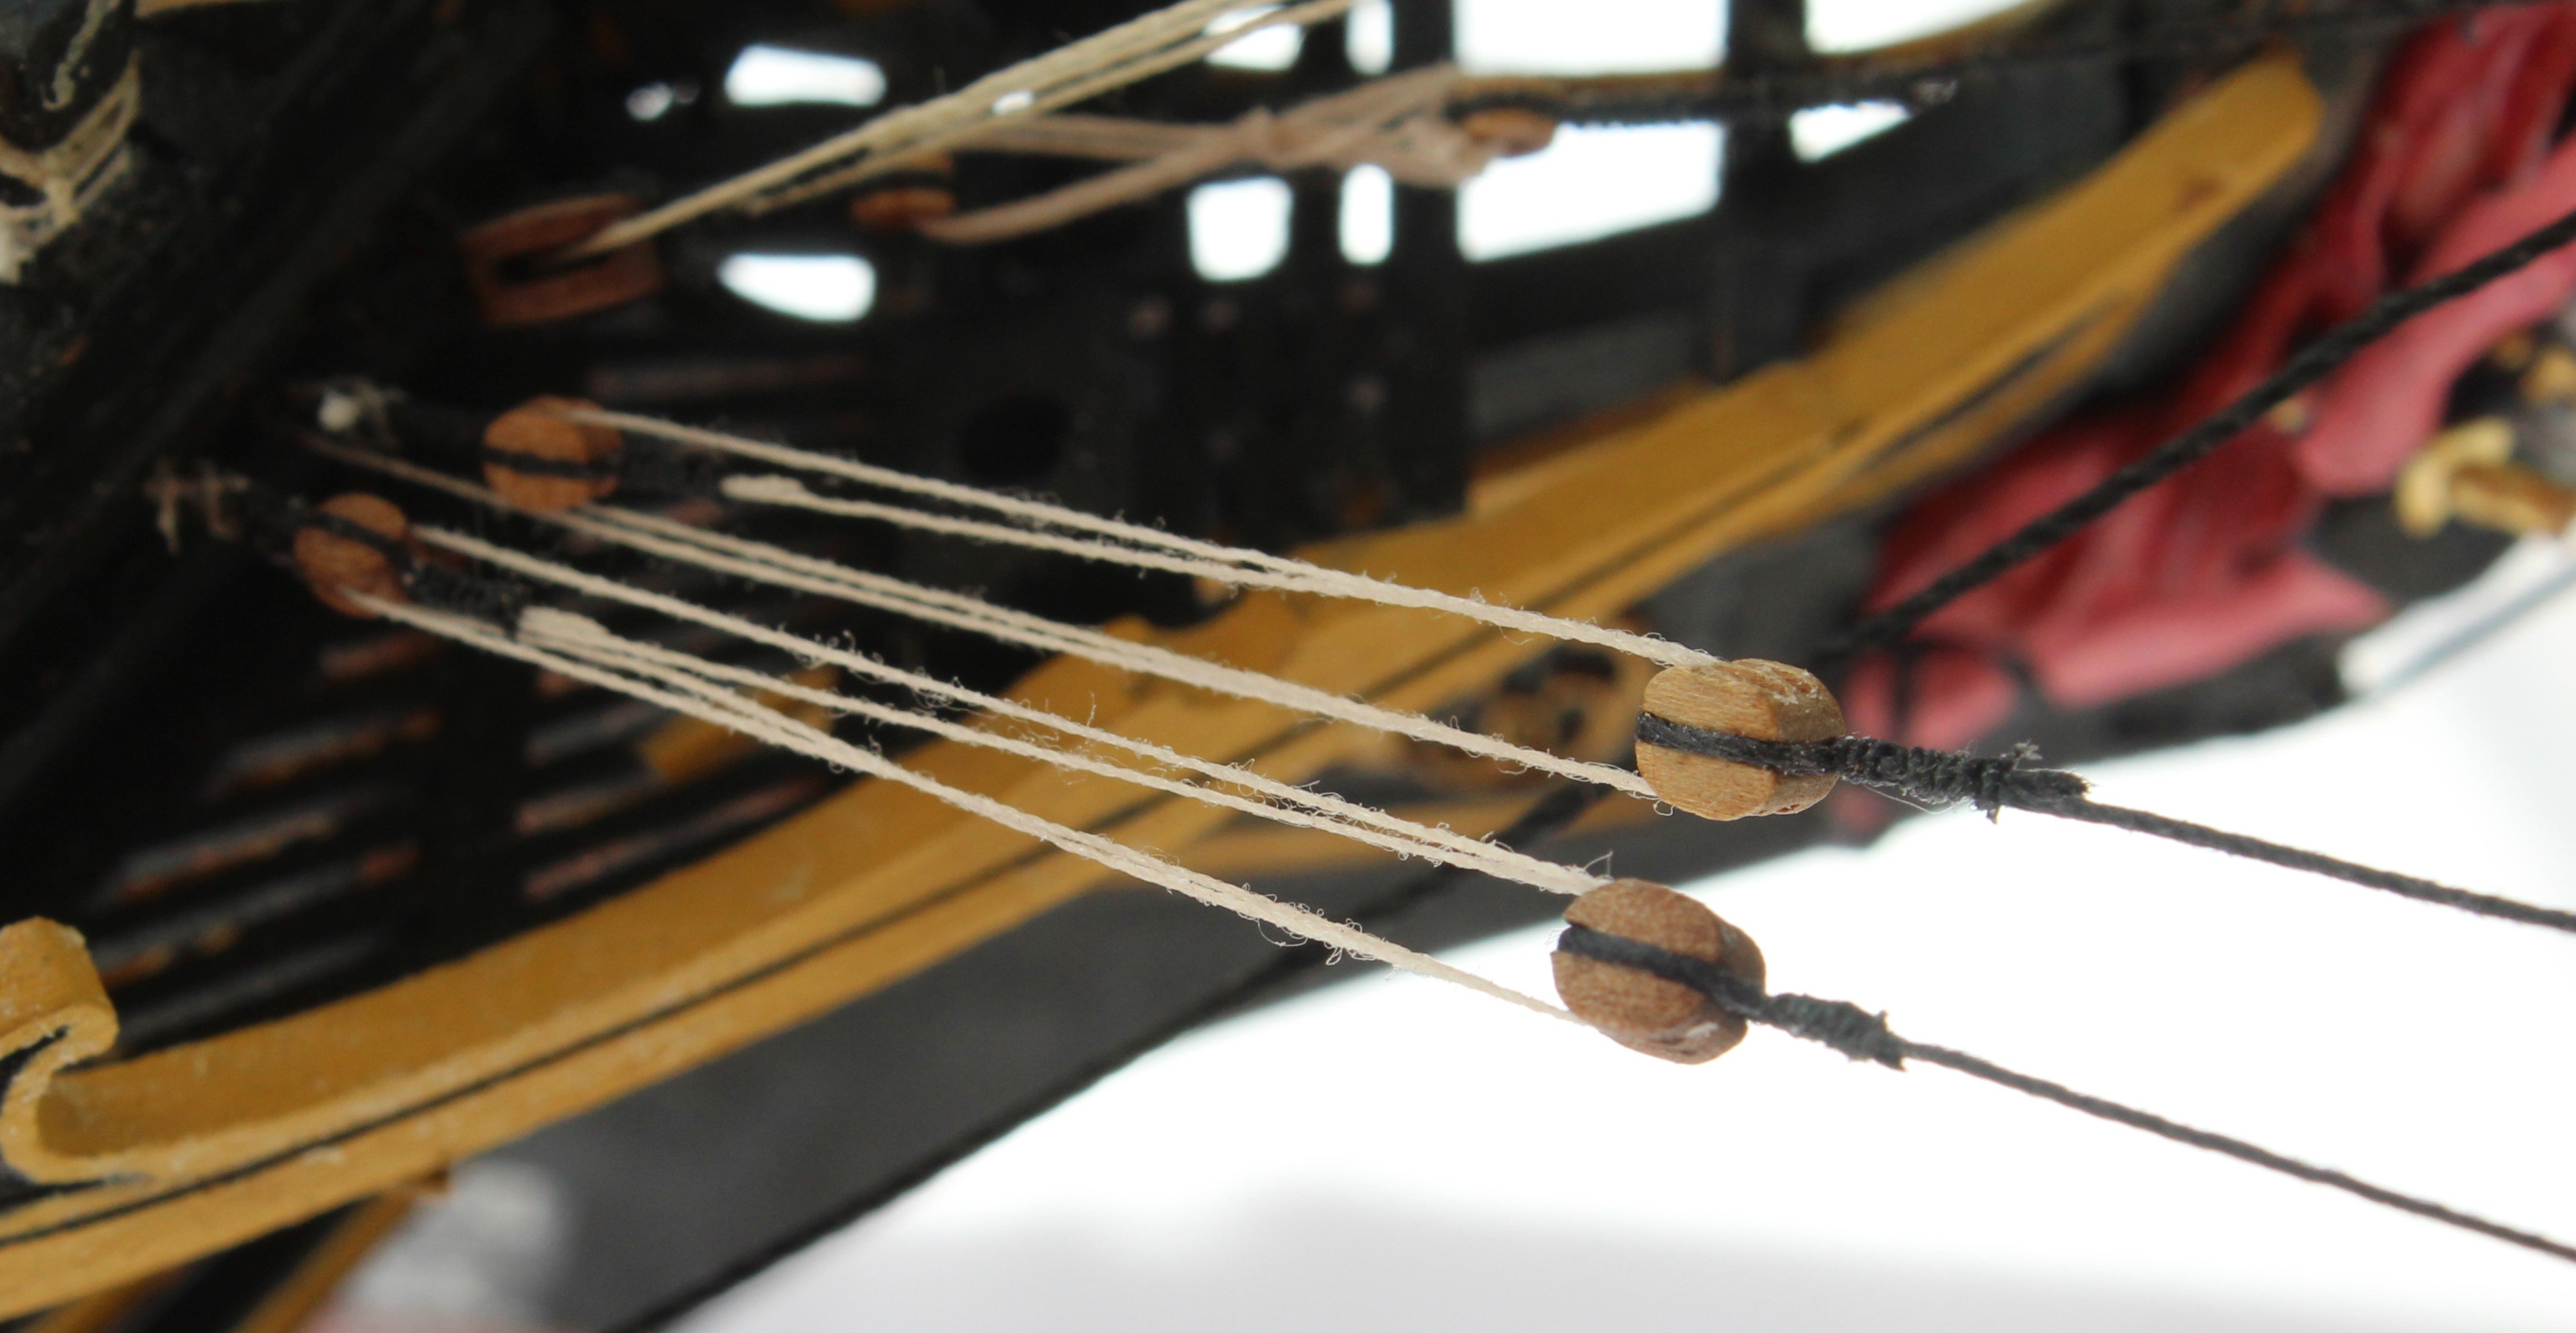
Truss Pendants and Nave Line
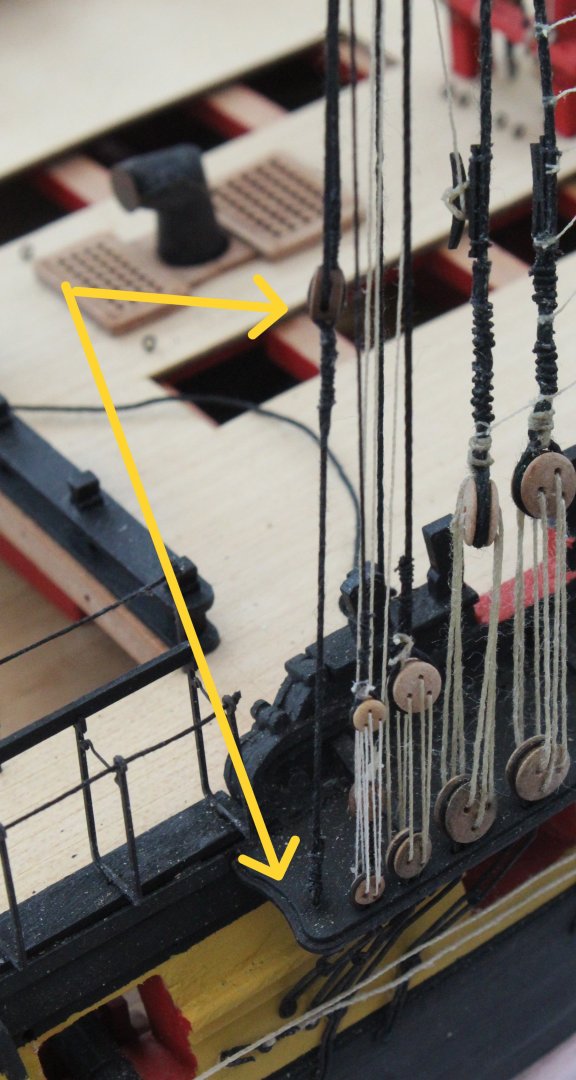
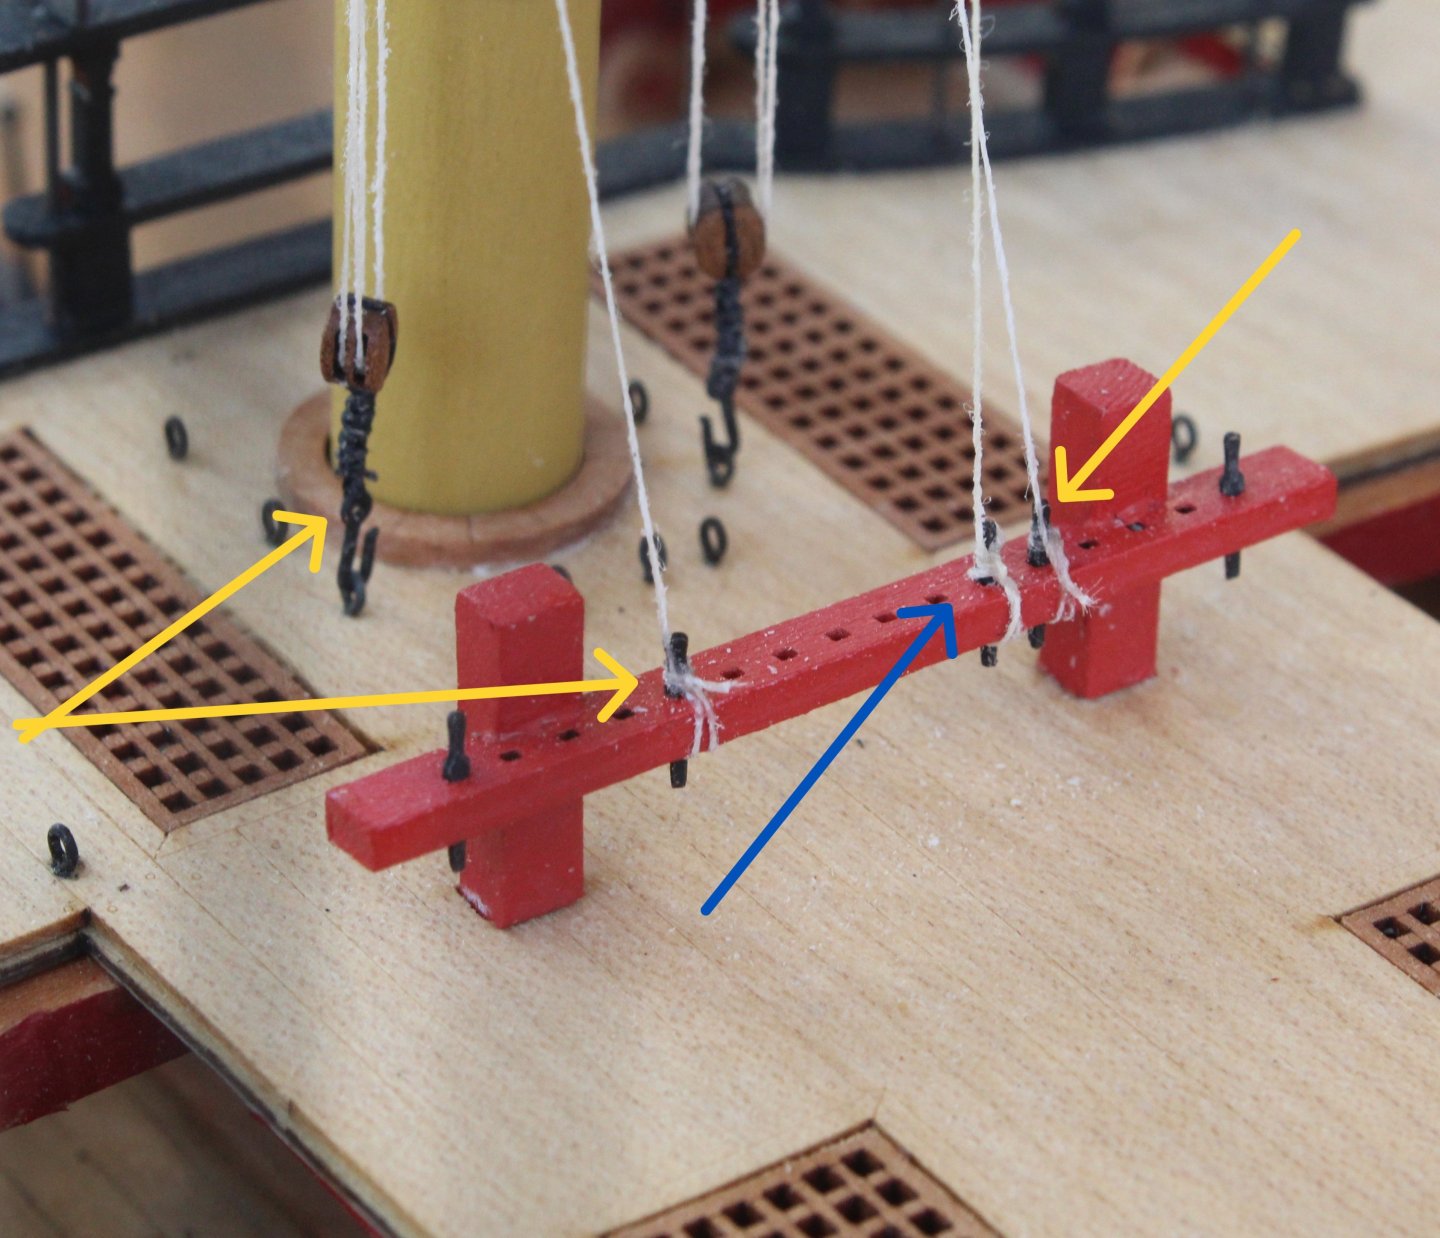
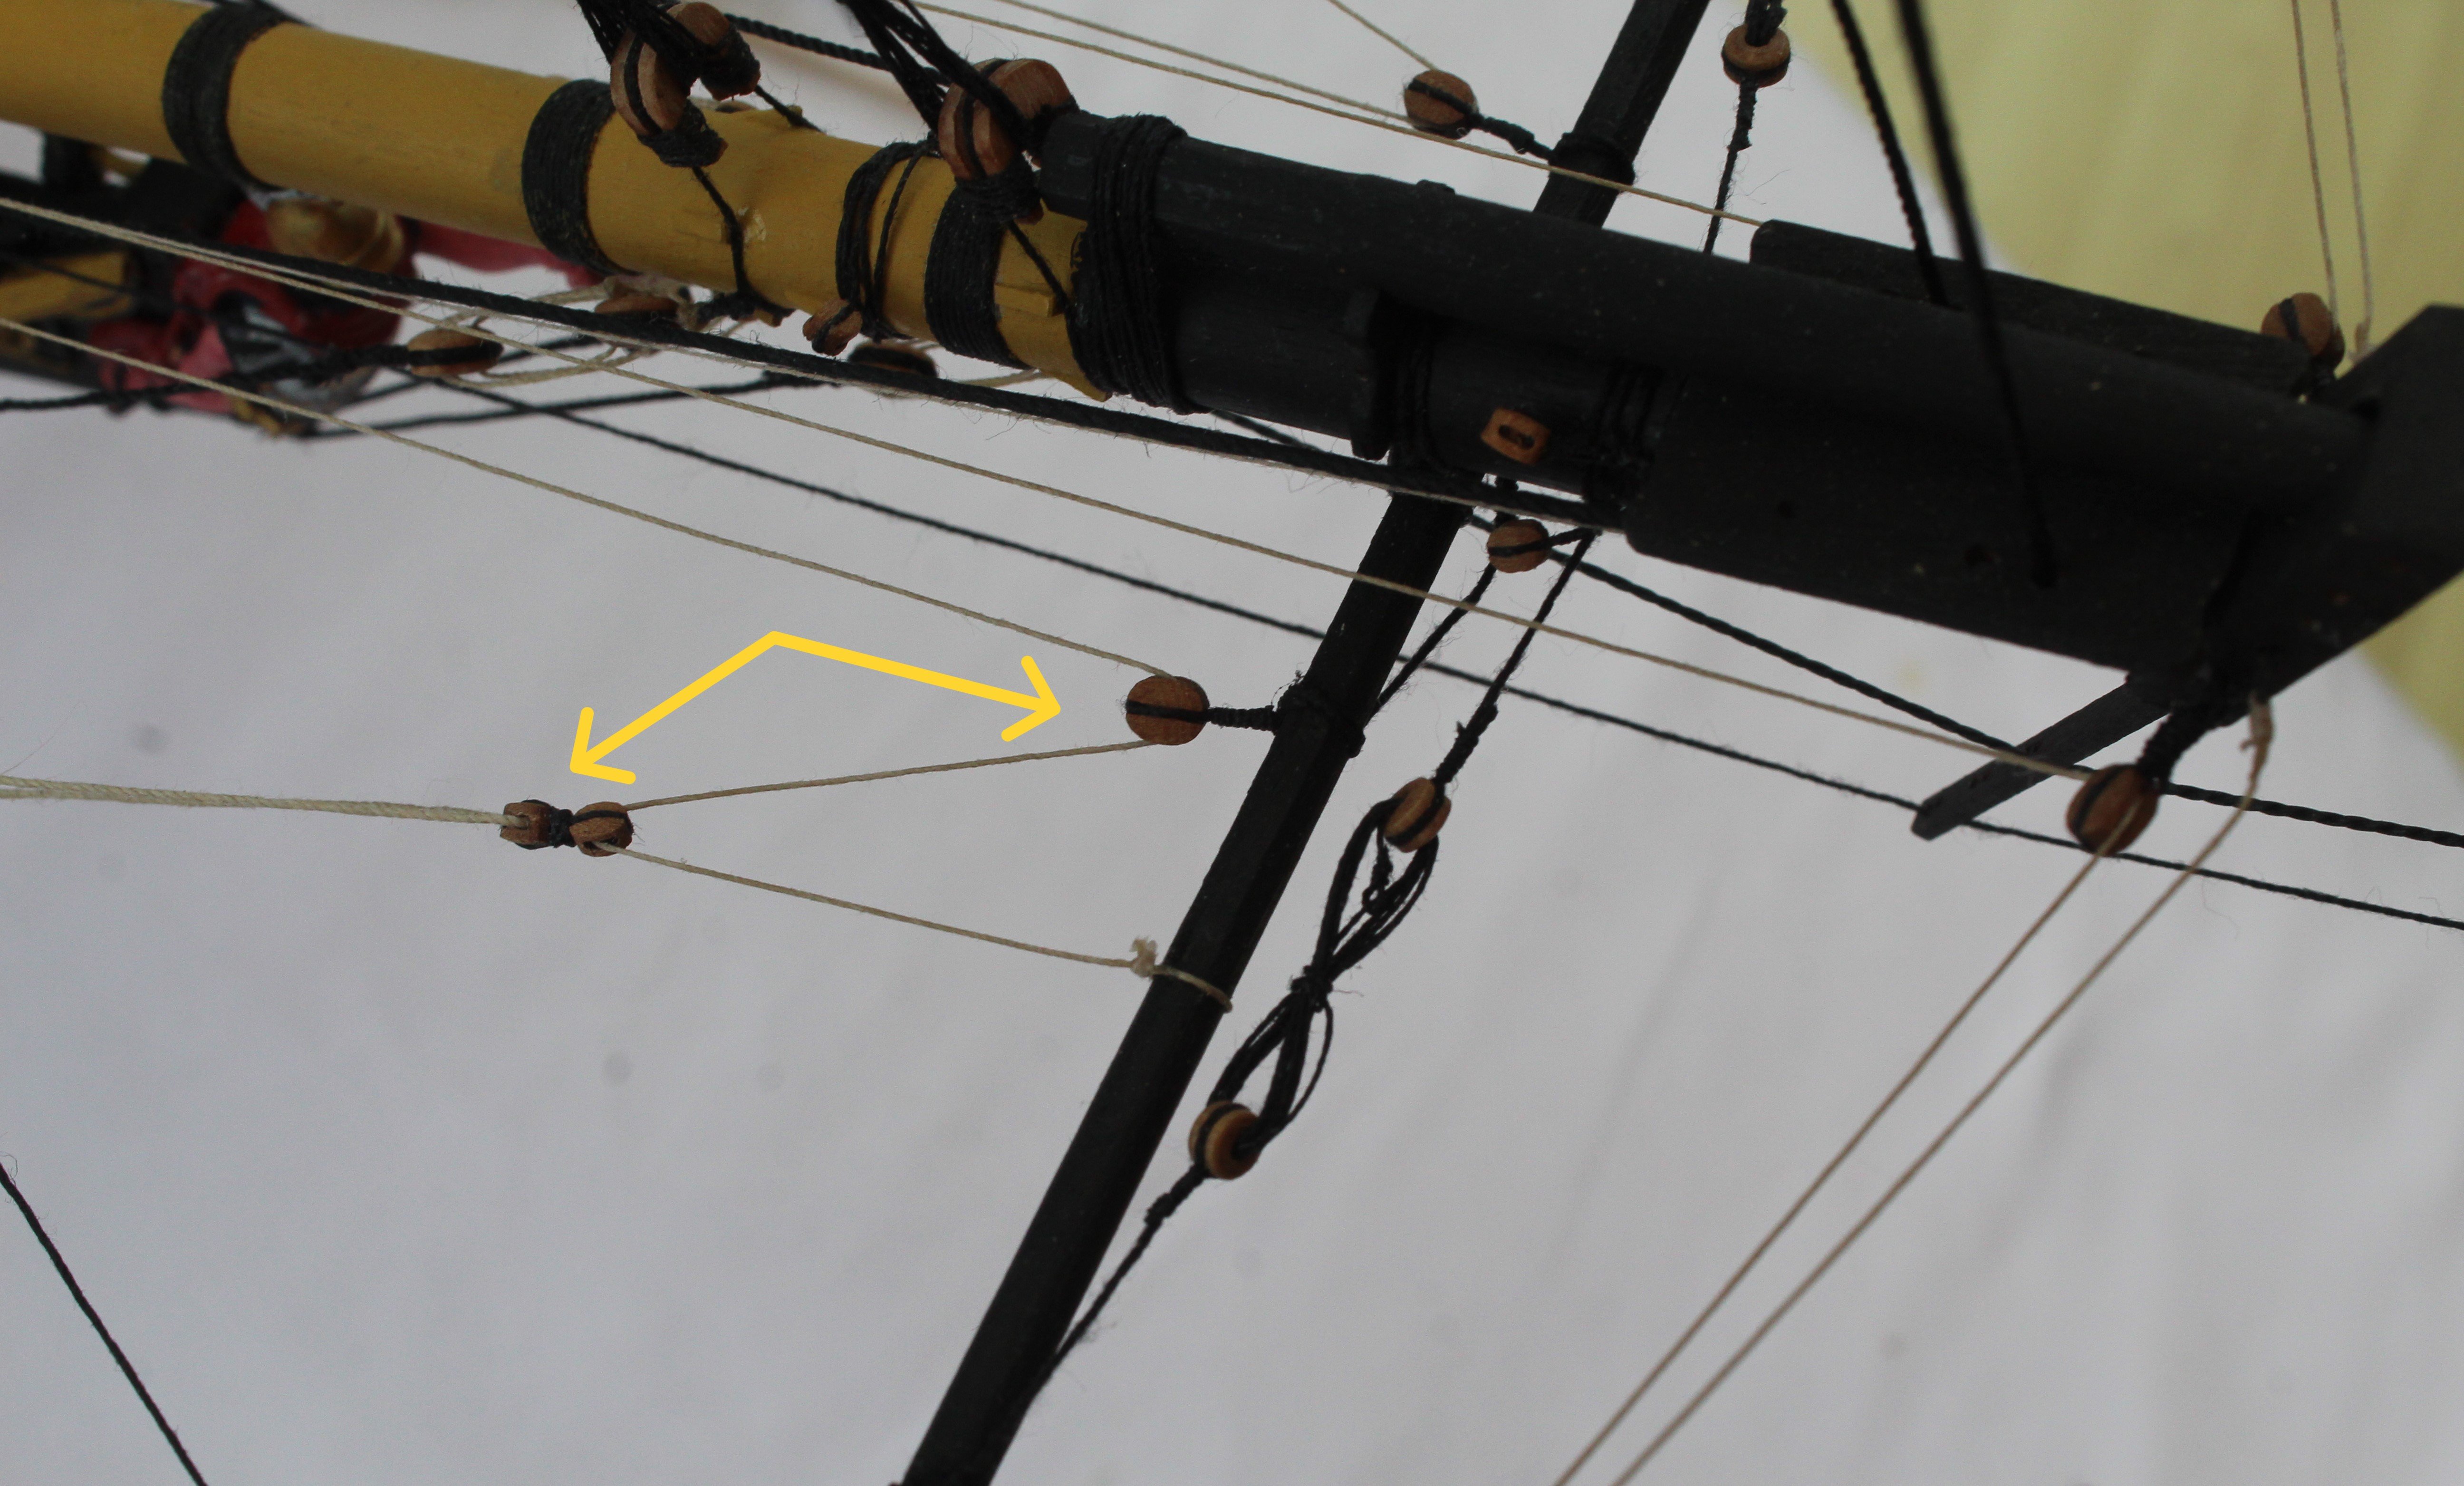
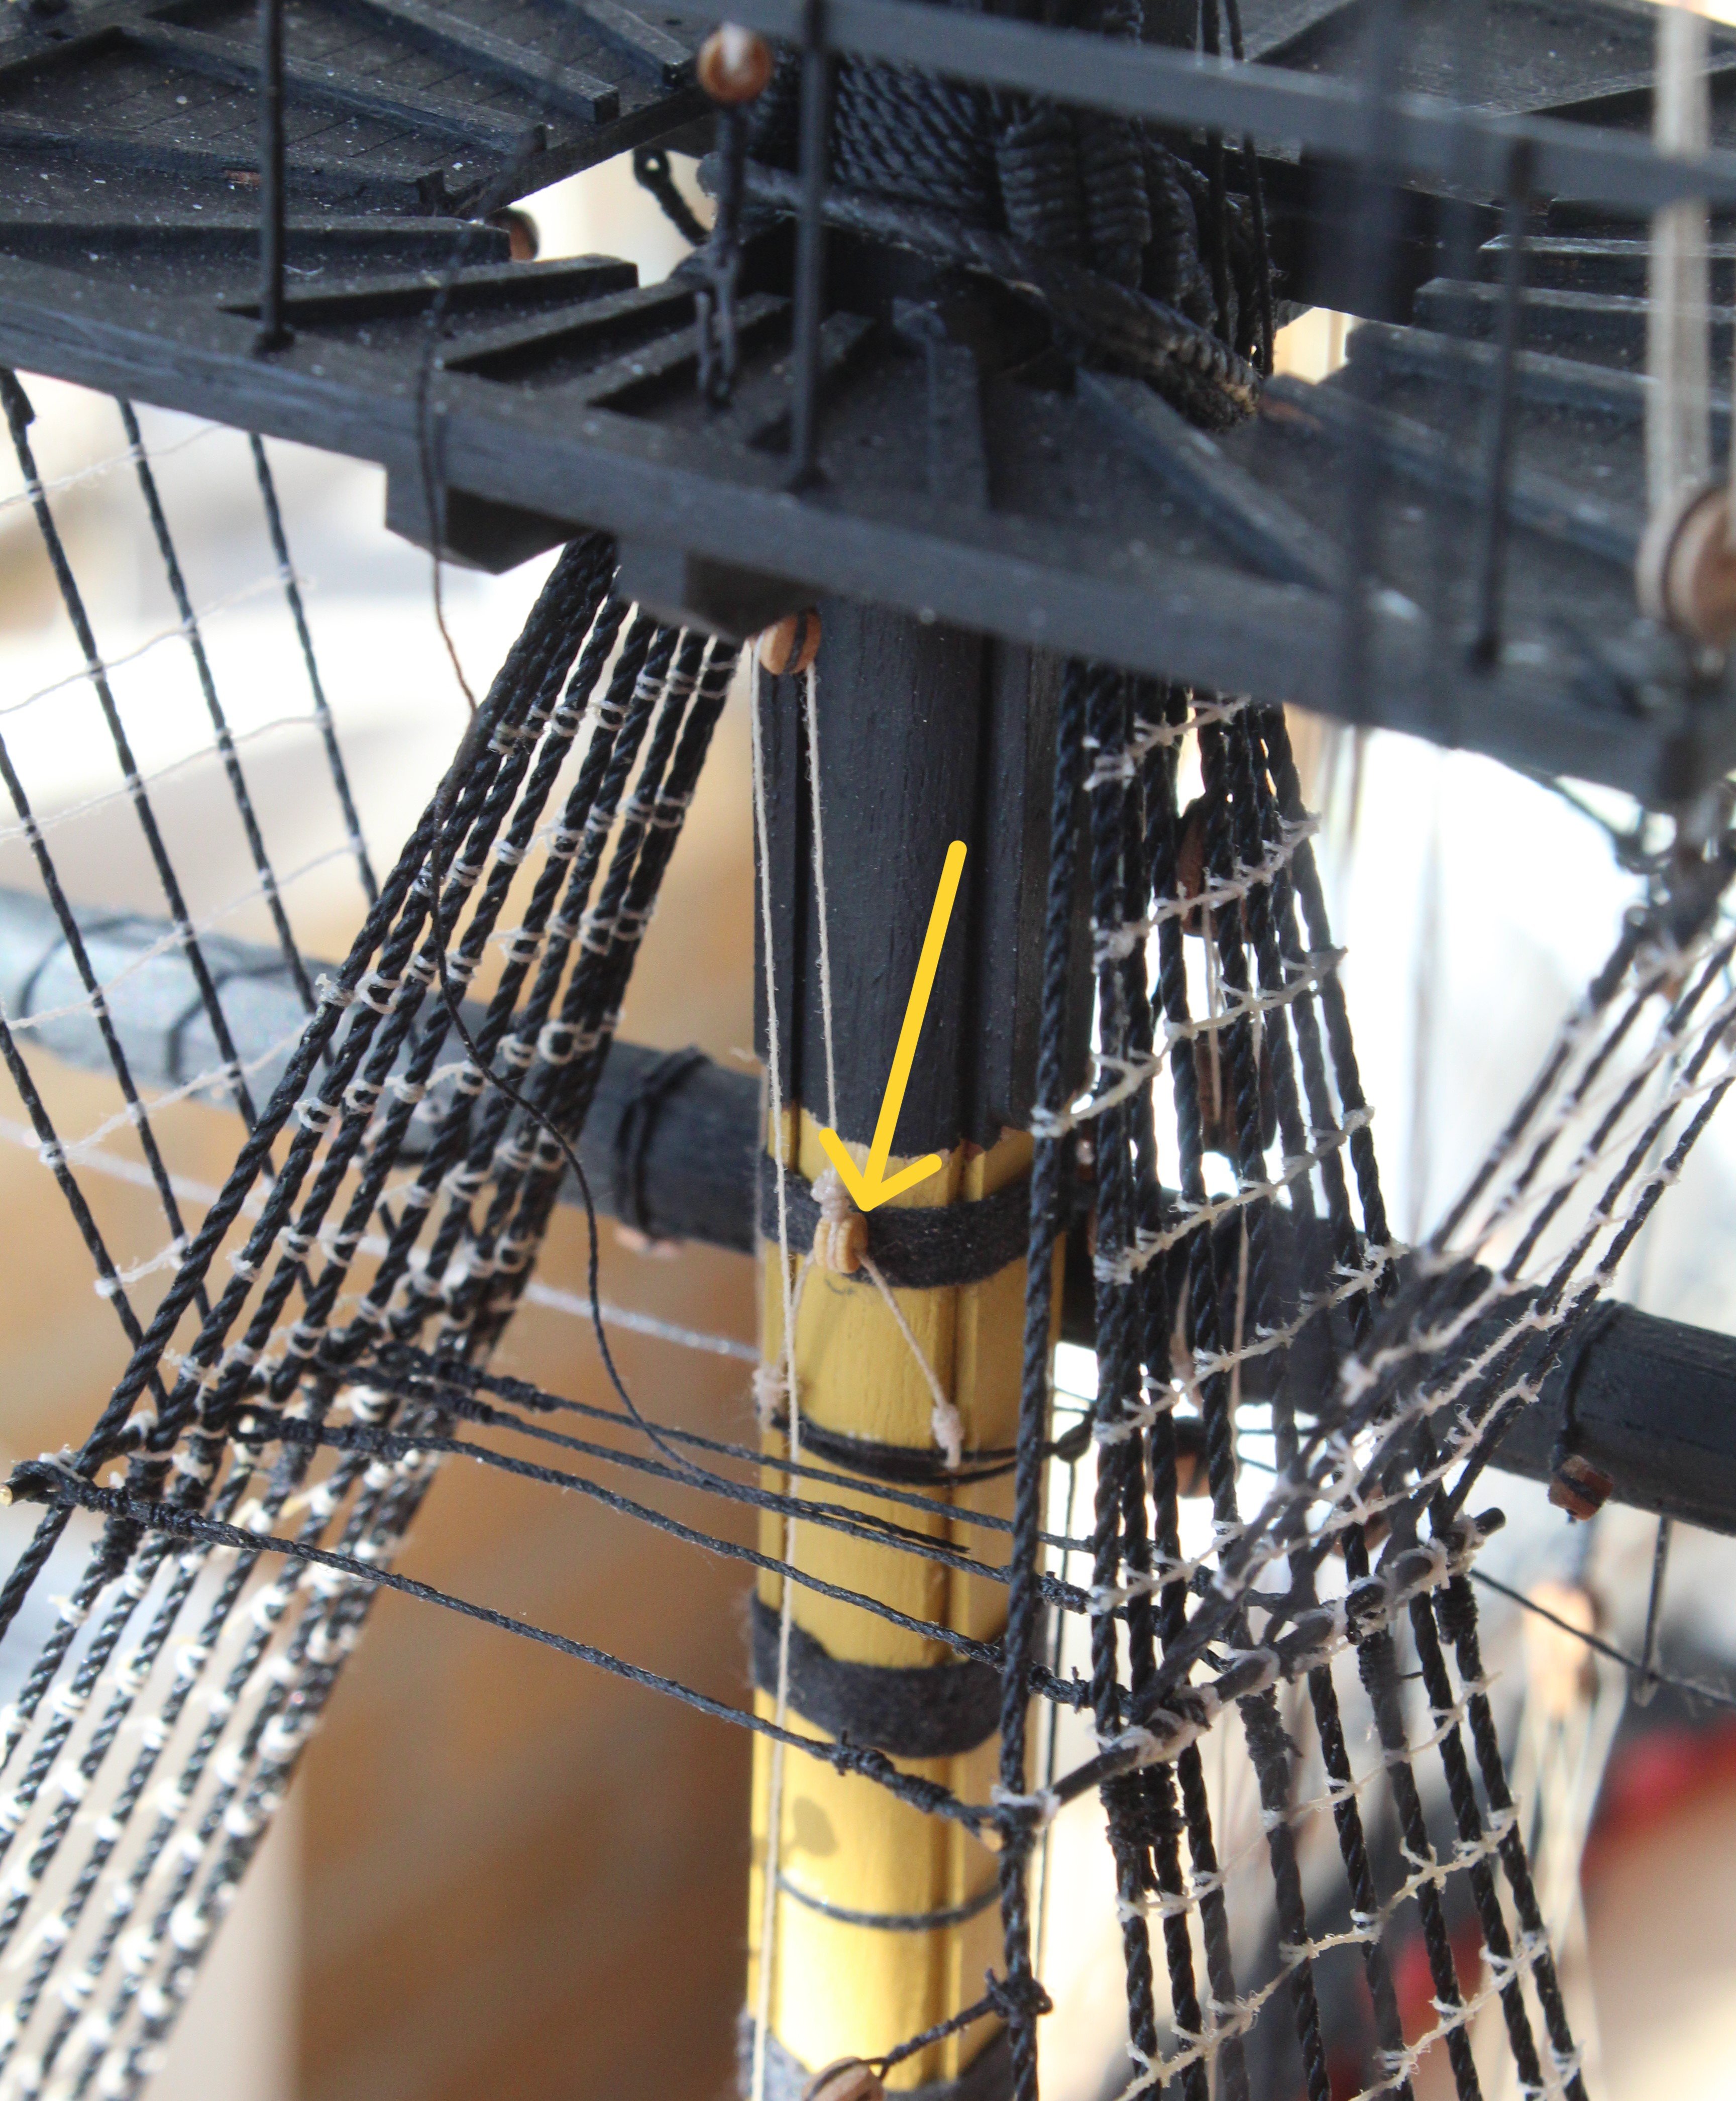
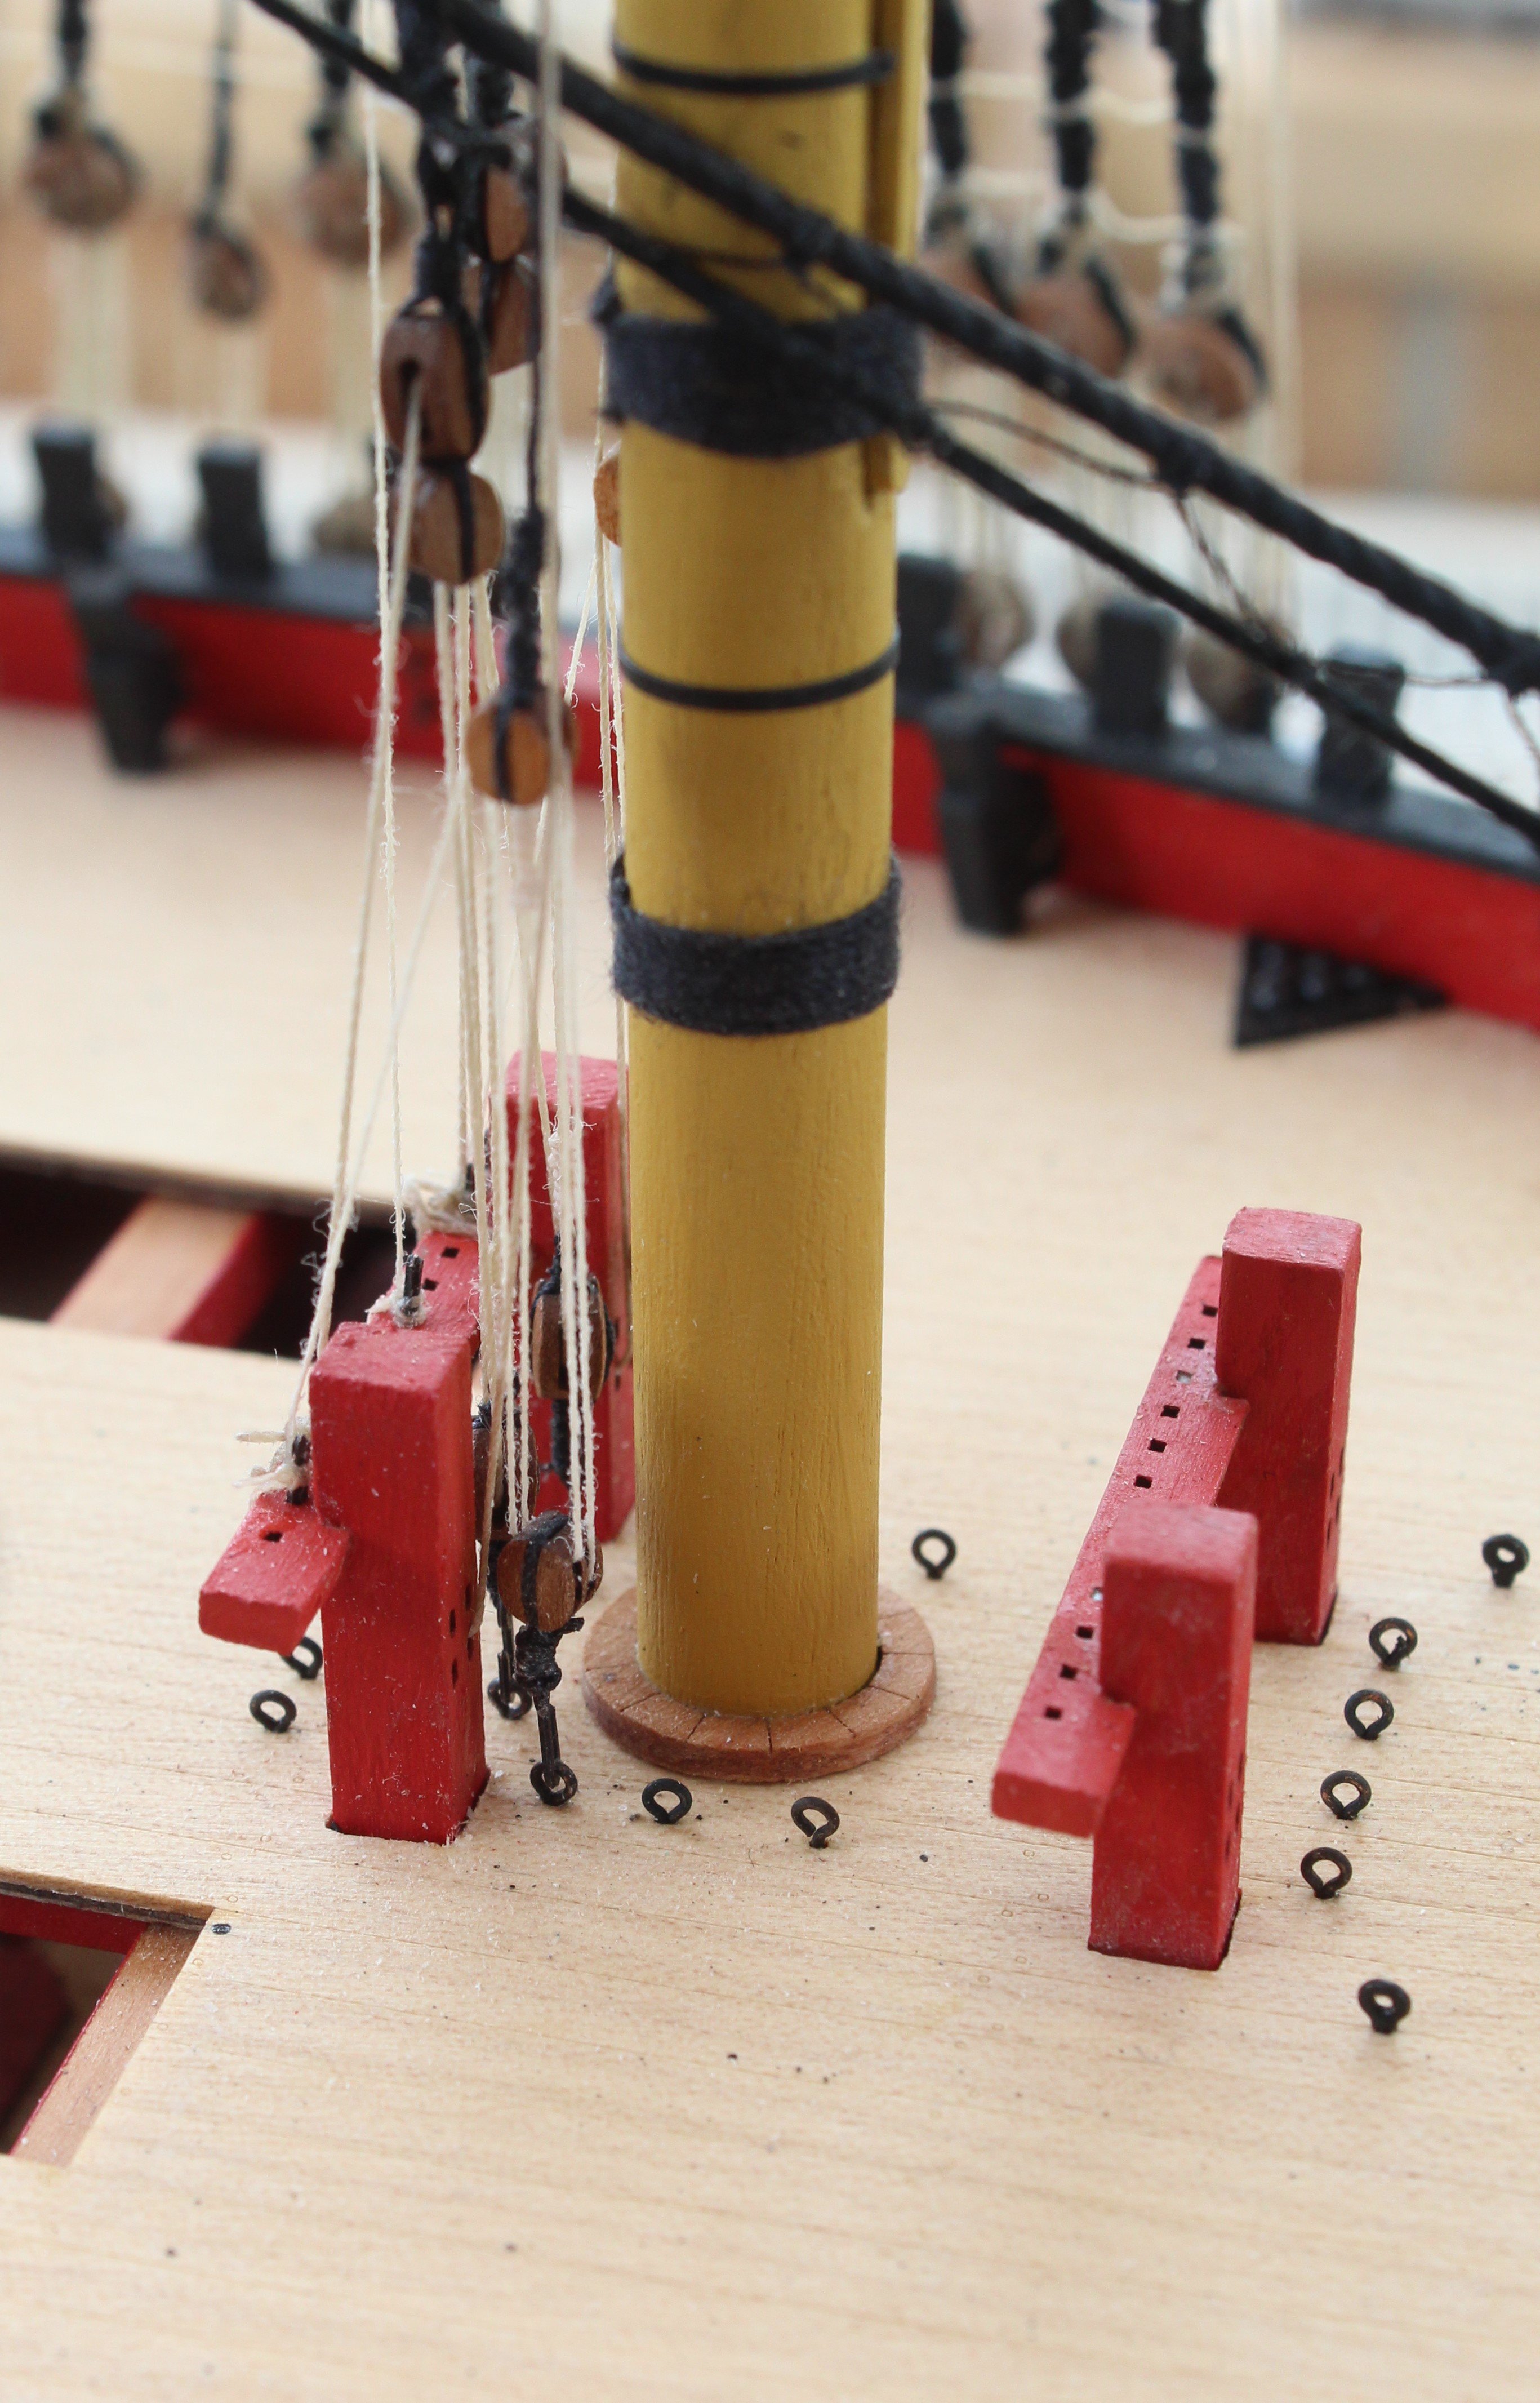
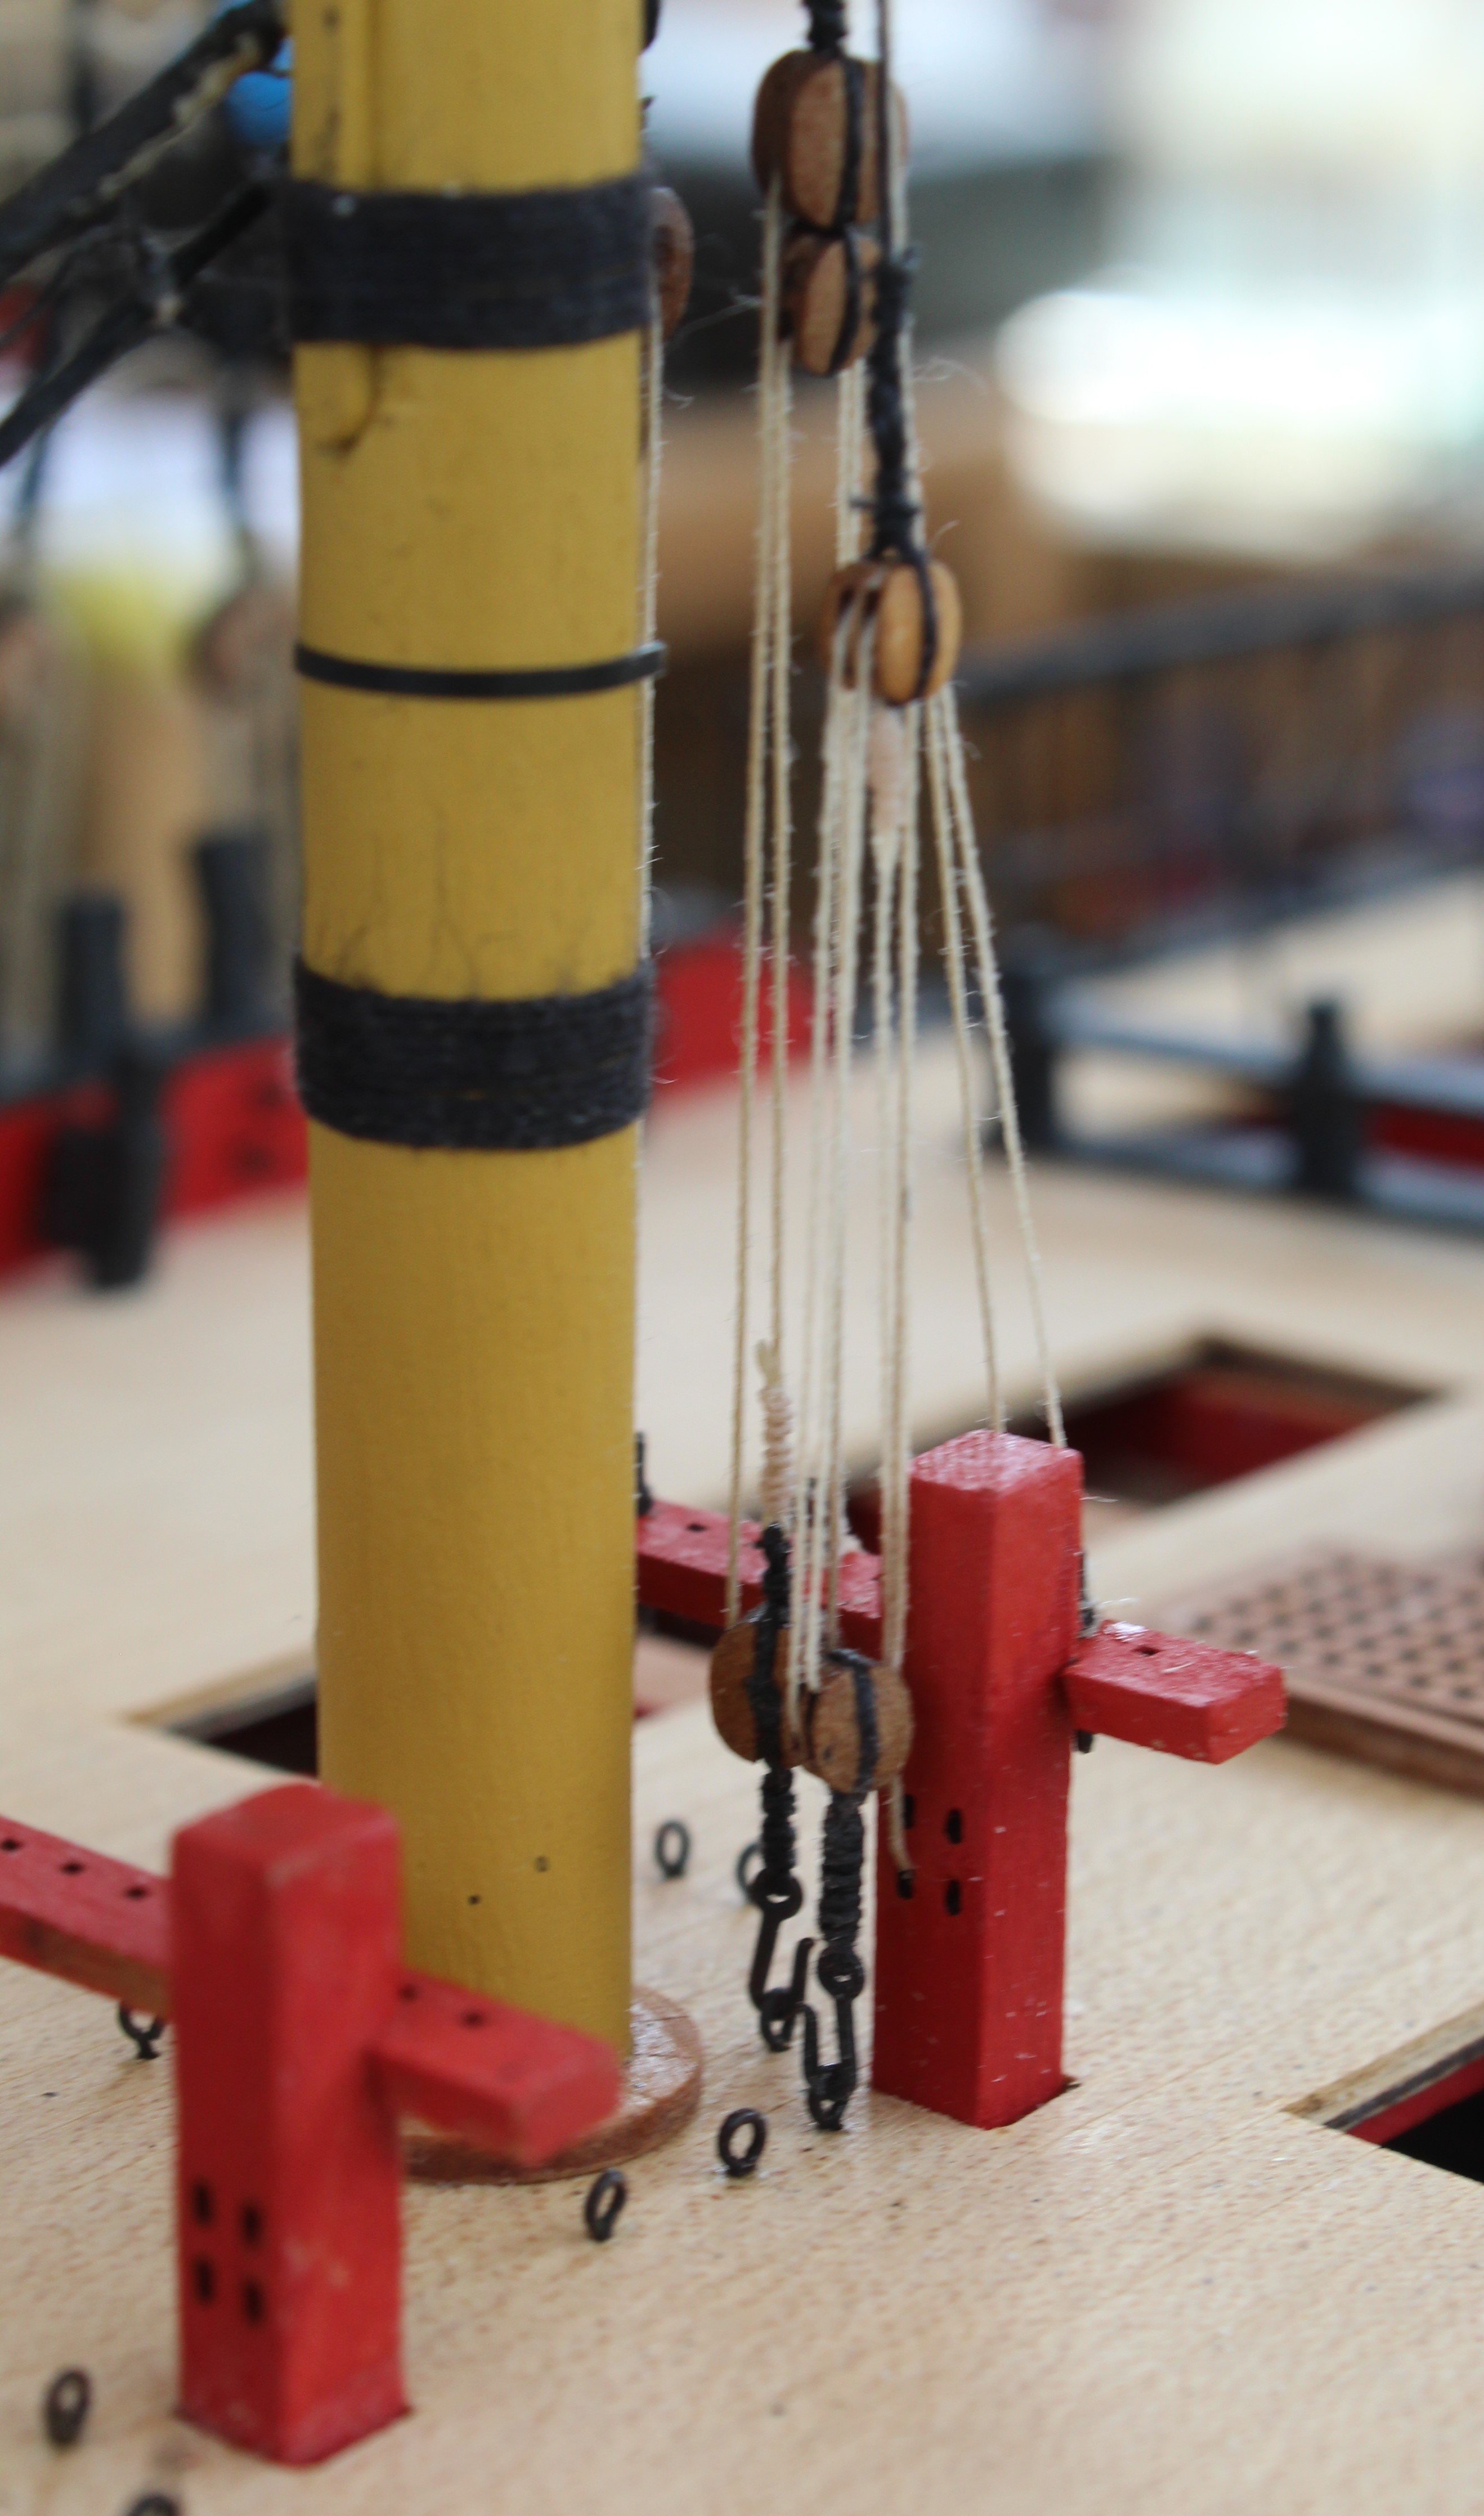
Each truss pendant were belayed to a double block. A second double block (for each truss pendant) was secured to deck eyebolts using a hook. The free ends of each inter-block rigging was then belayed to pins of the bitt rack. This arrangement is indicated by the yellow arrows in the next photo. The blue arrow shows the belaying of the nave line.
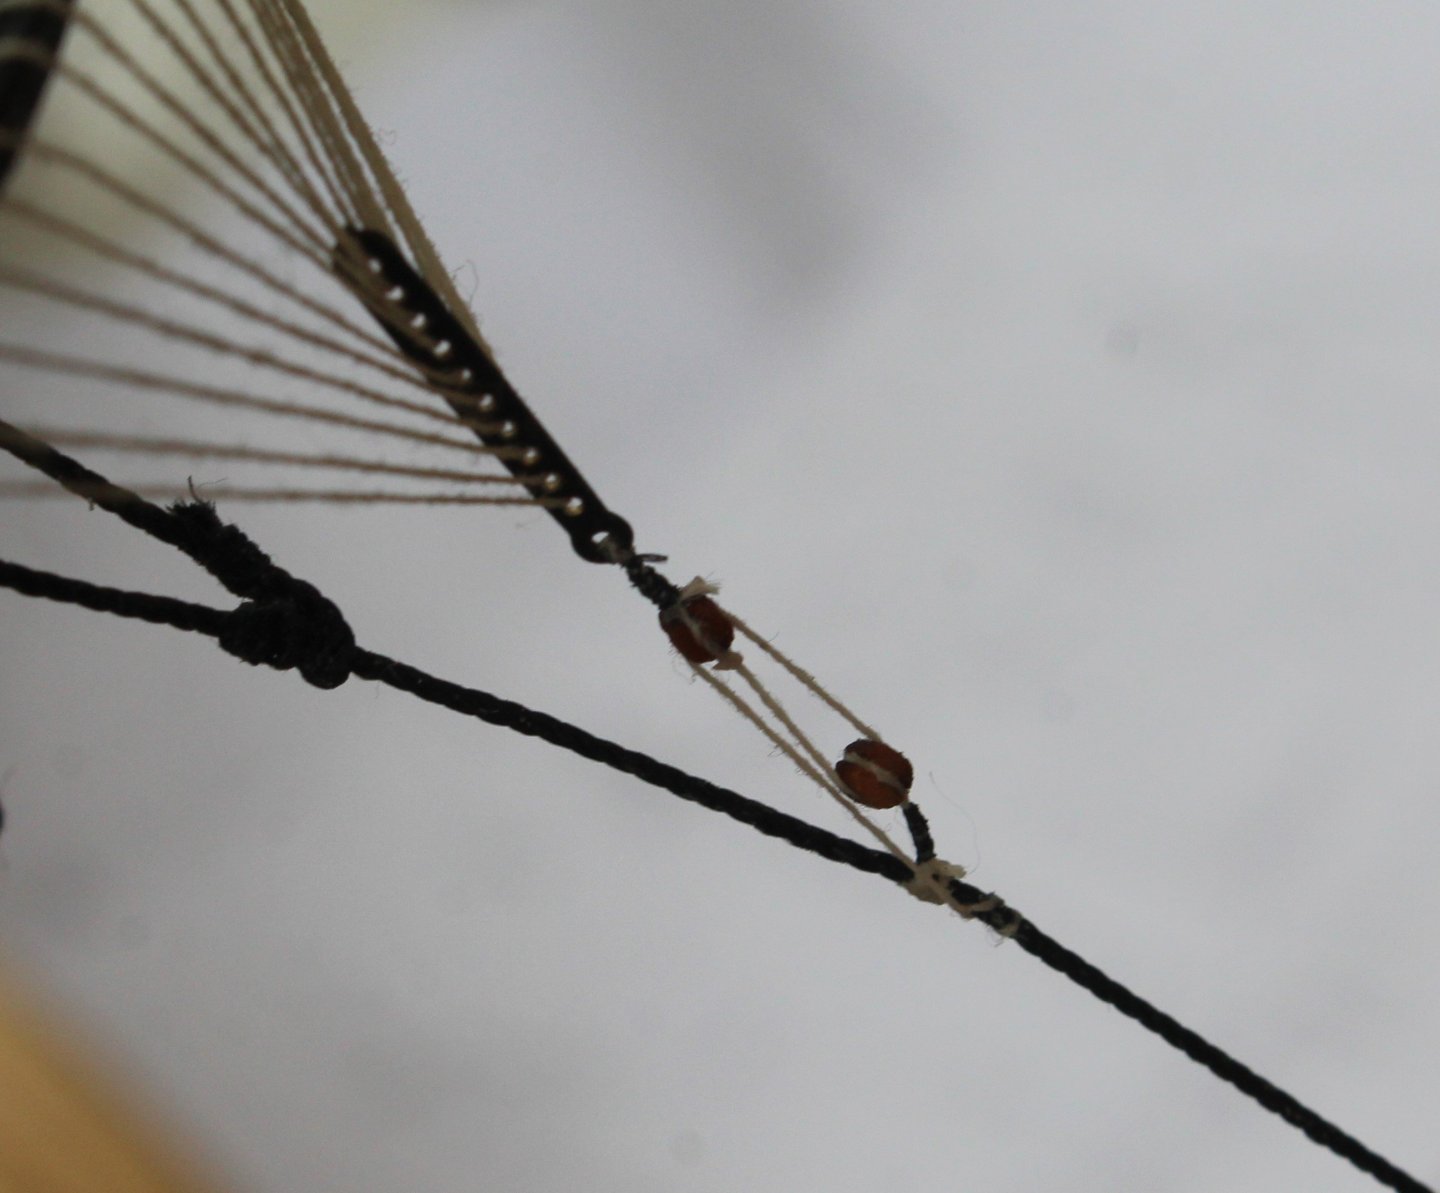
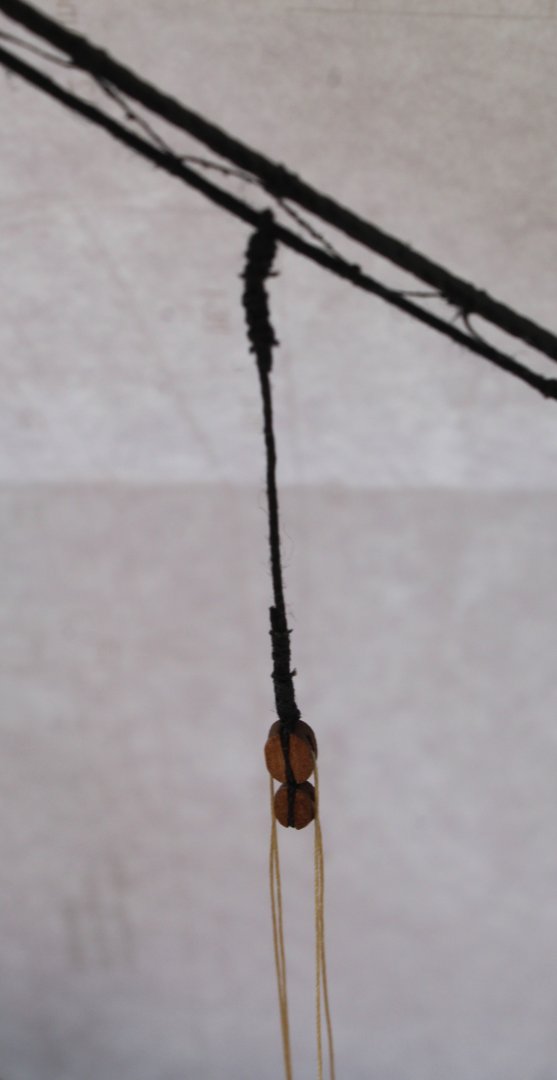
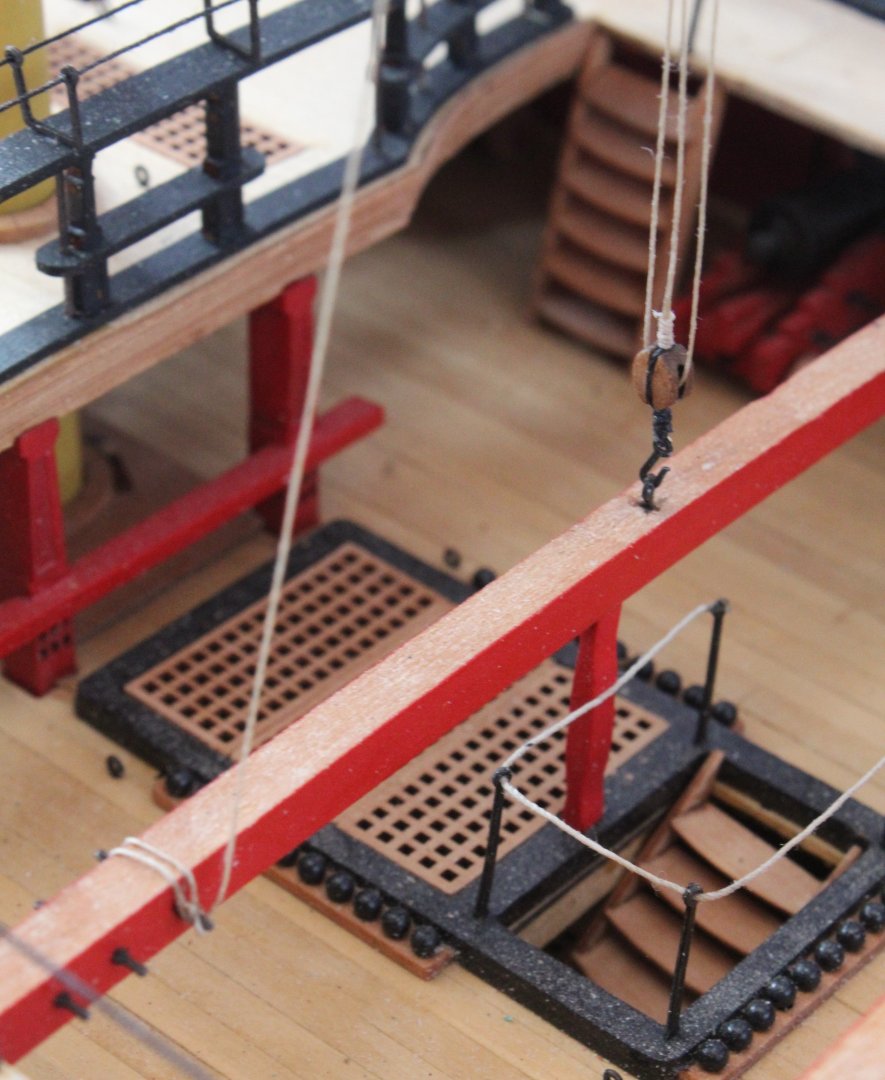
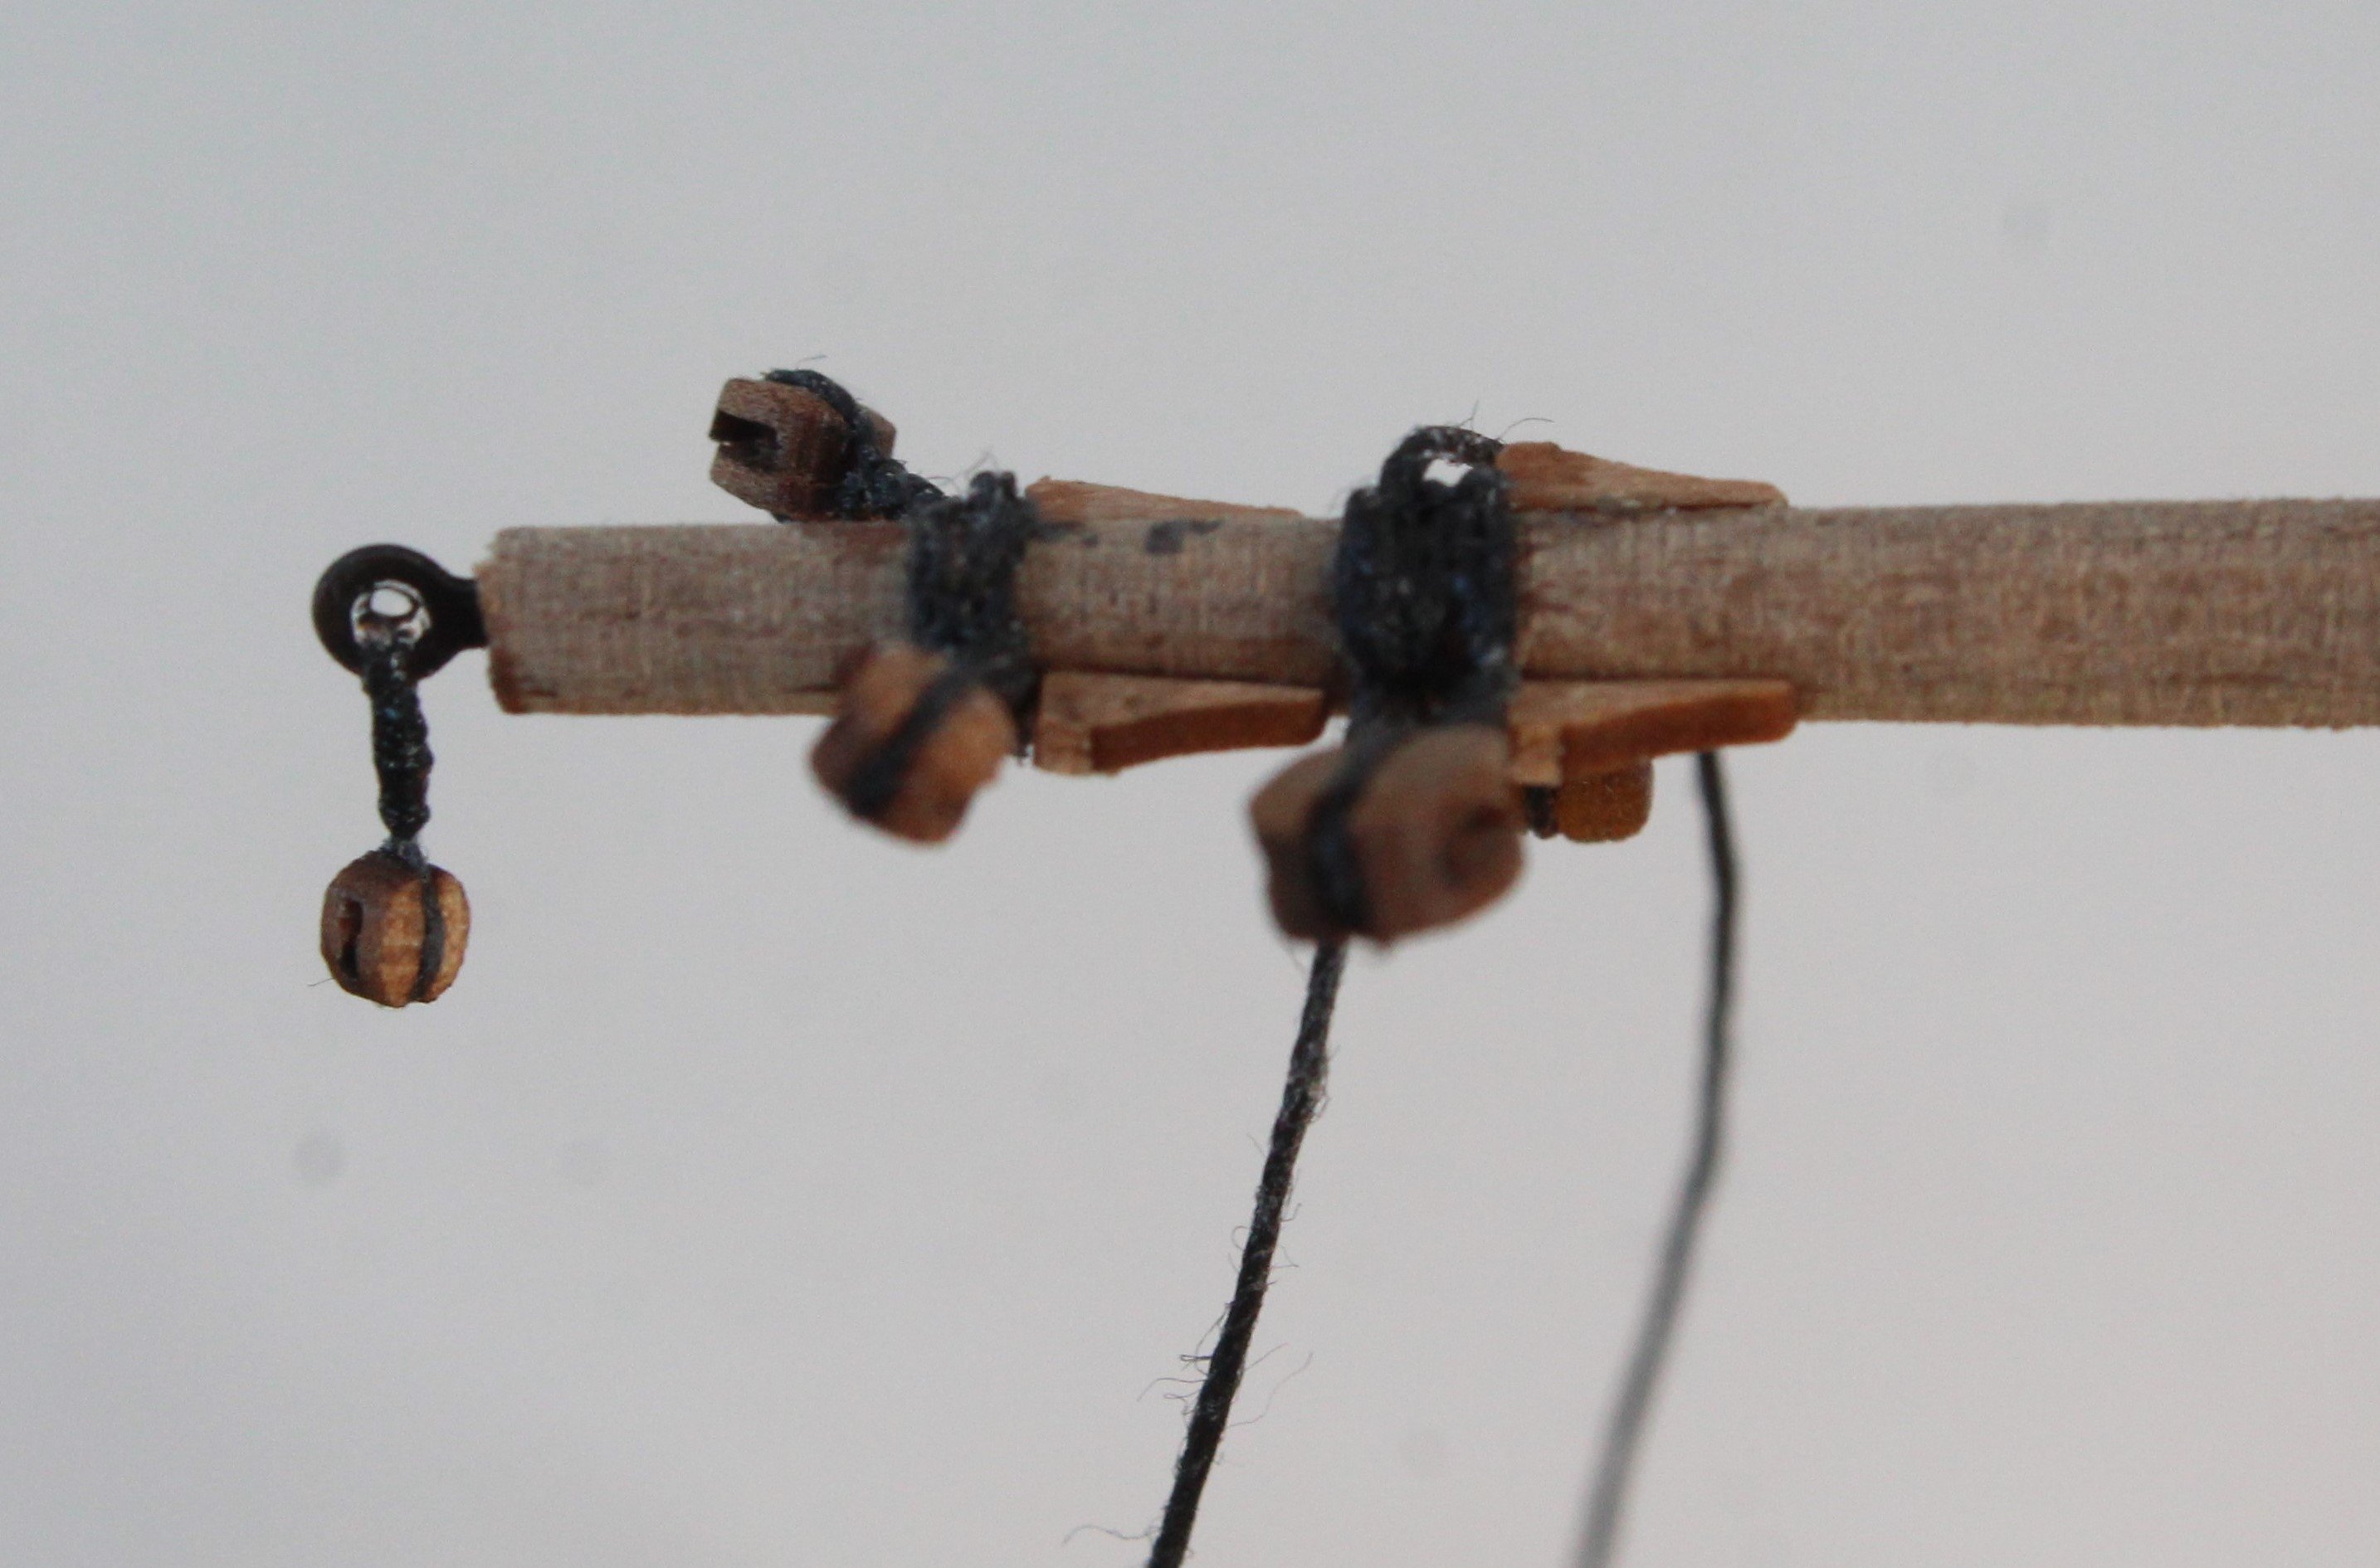
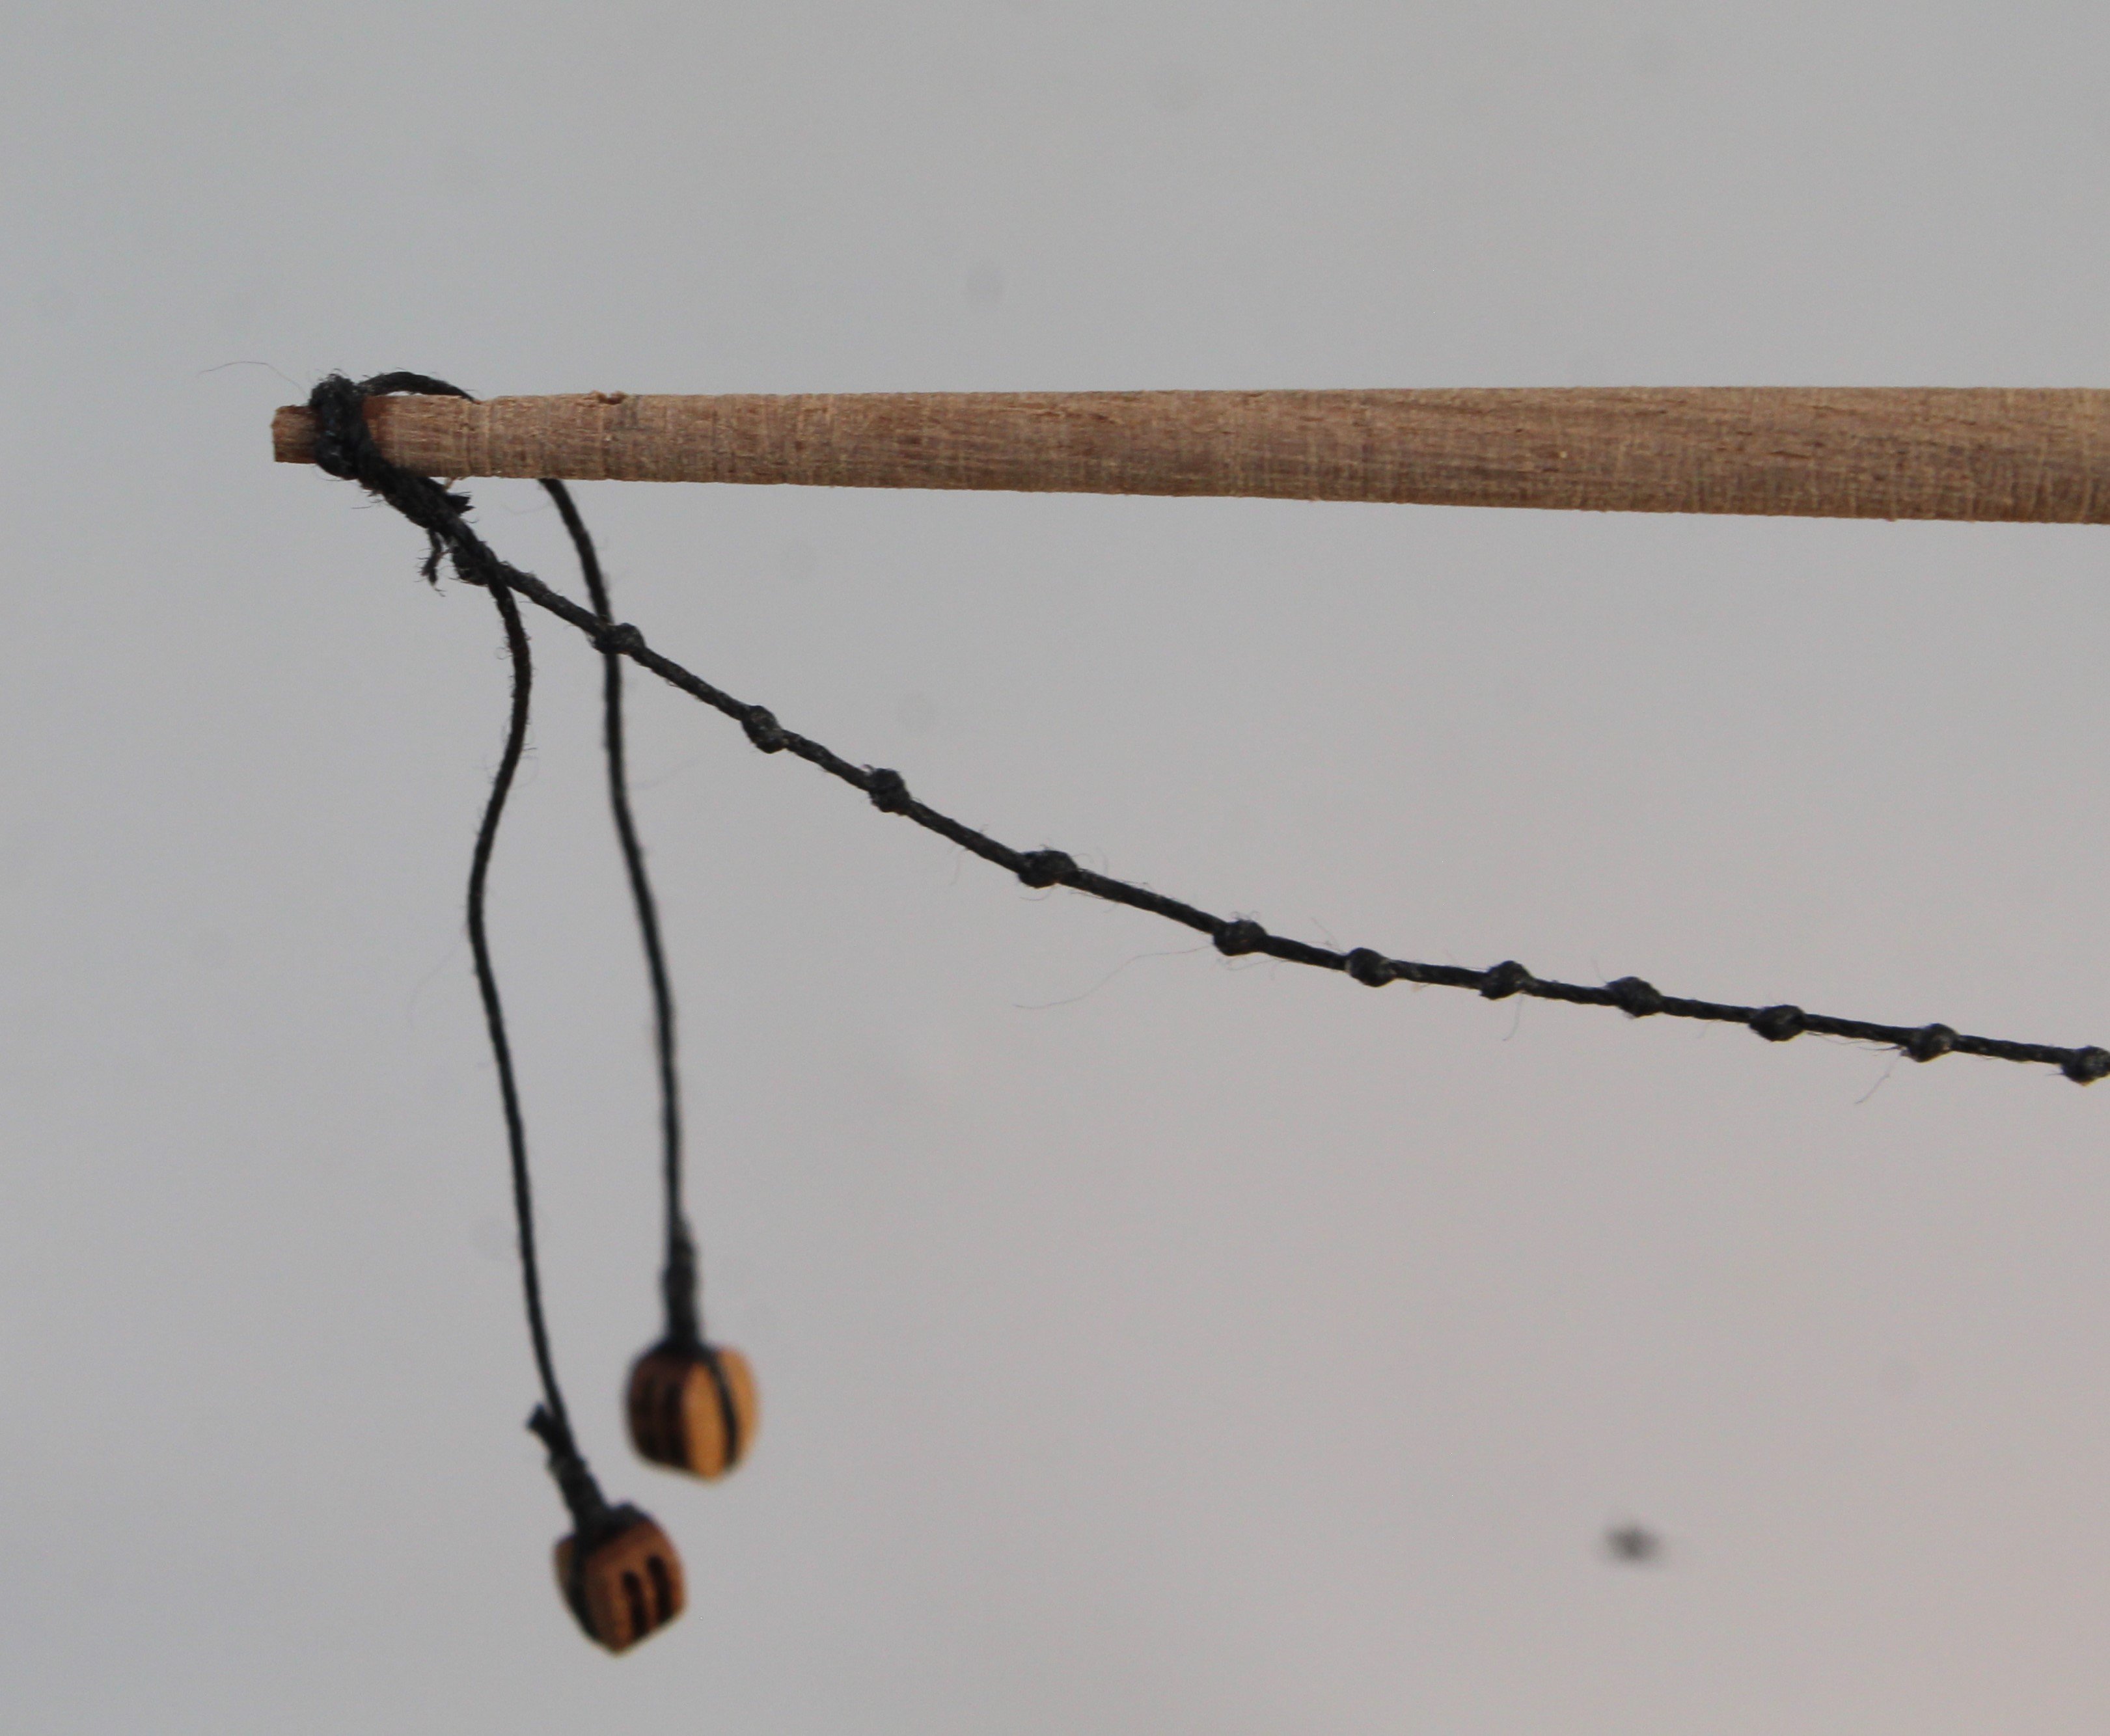
The next two photos shows the truss pendant double block arrangement.
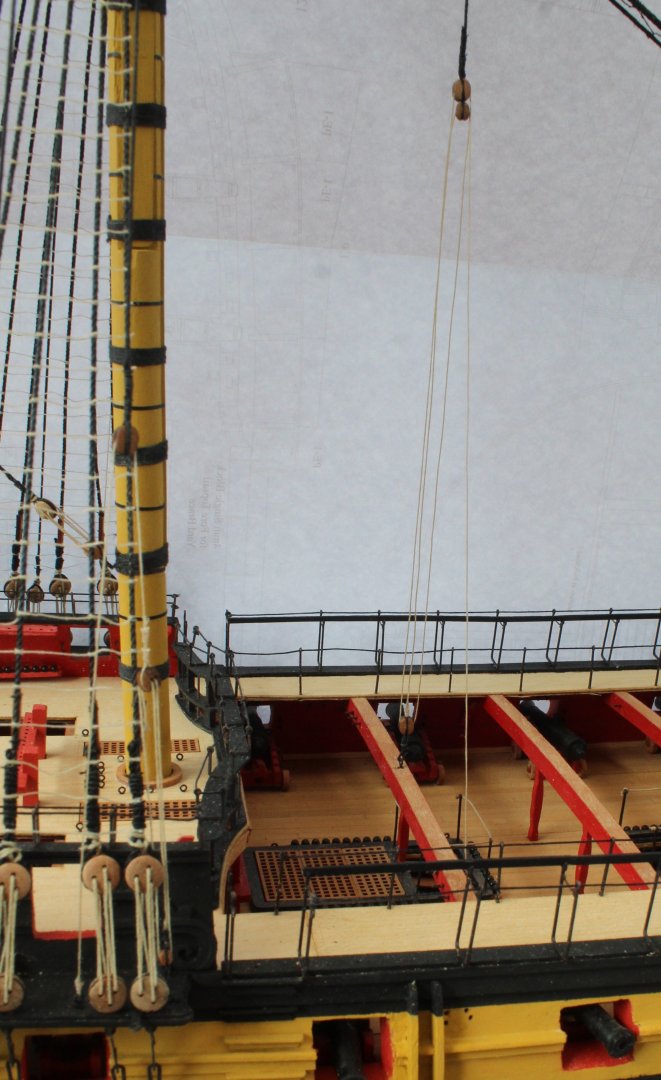
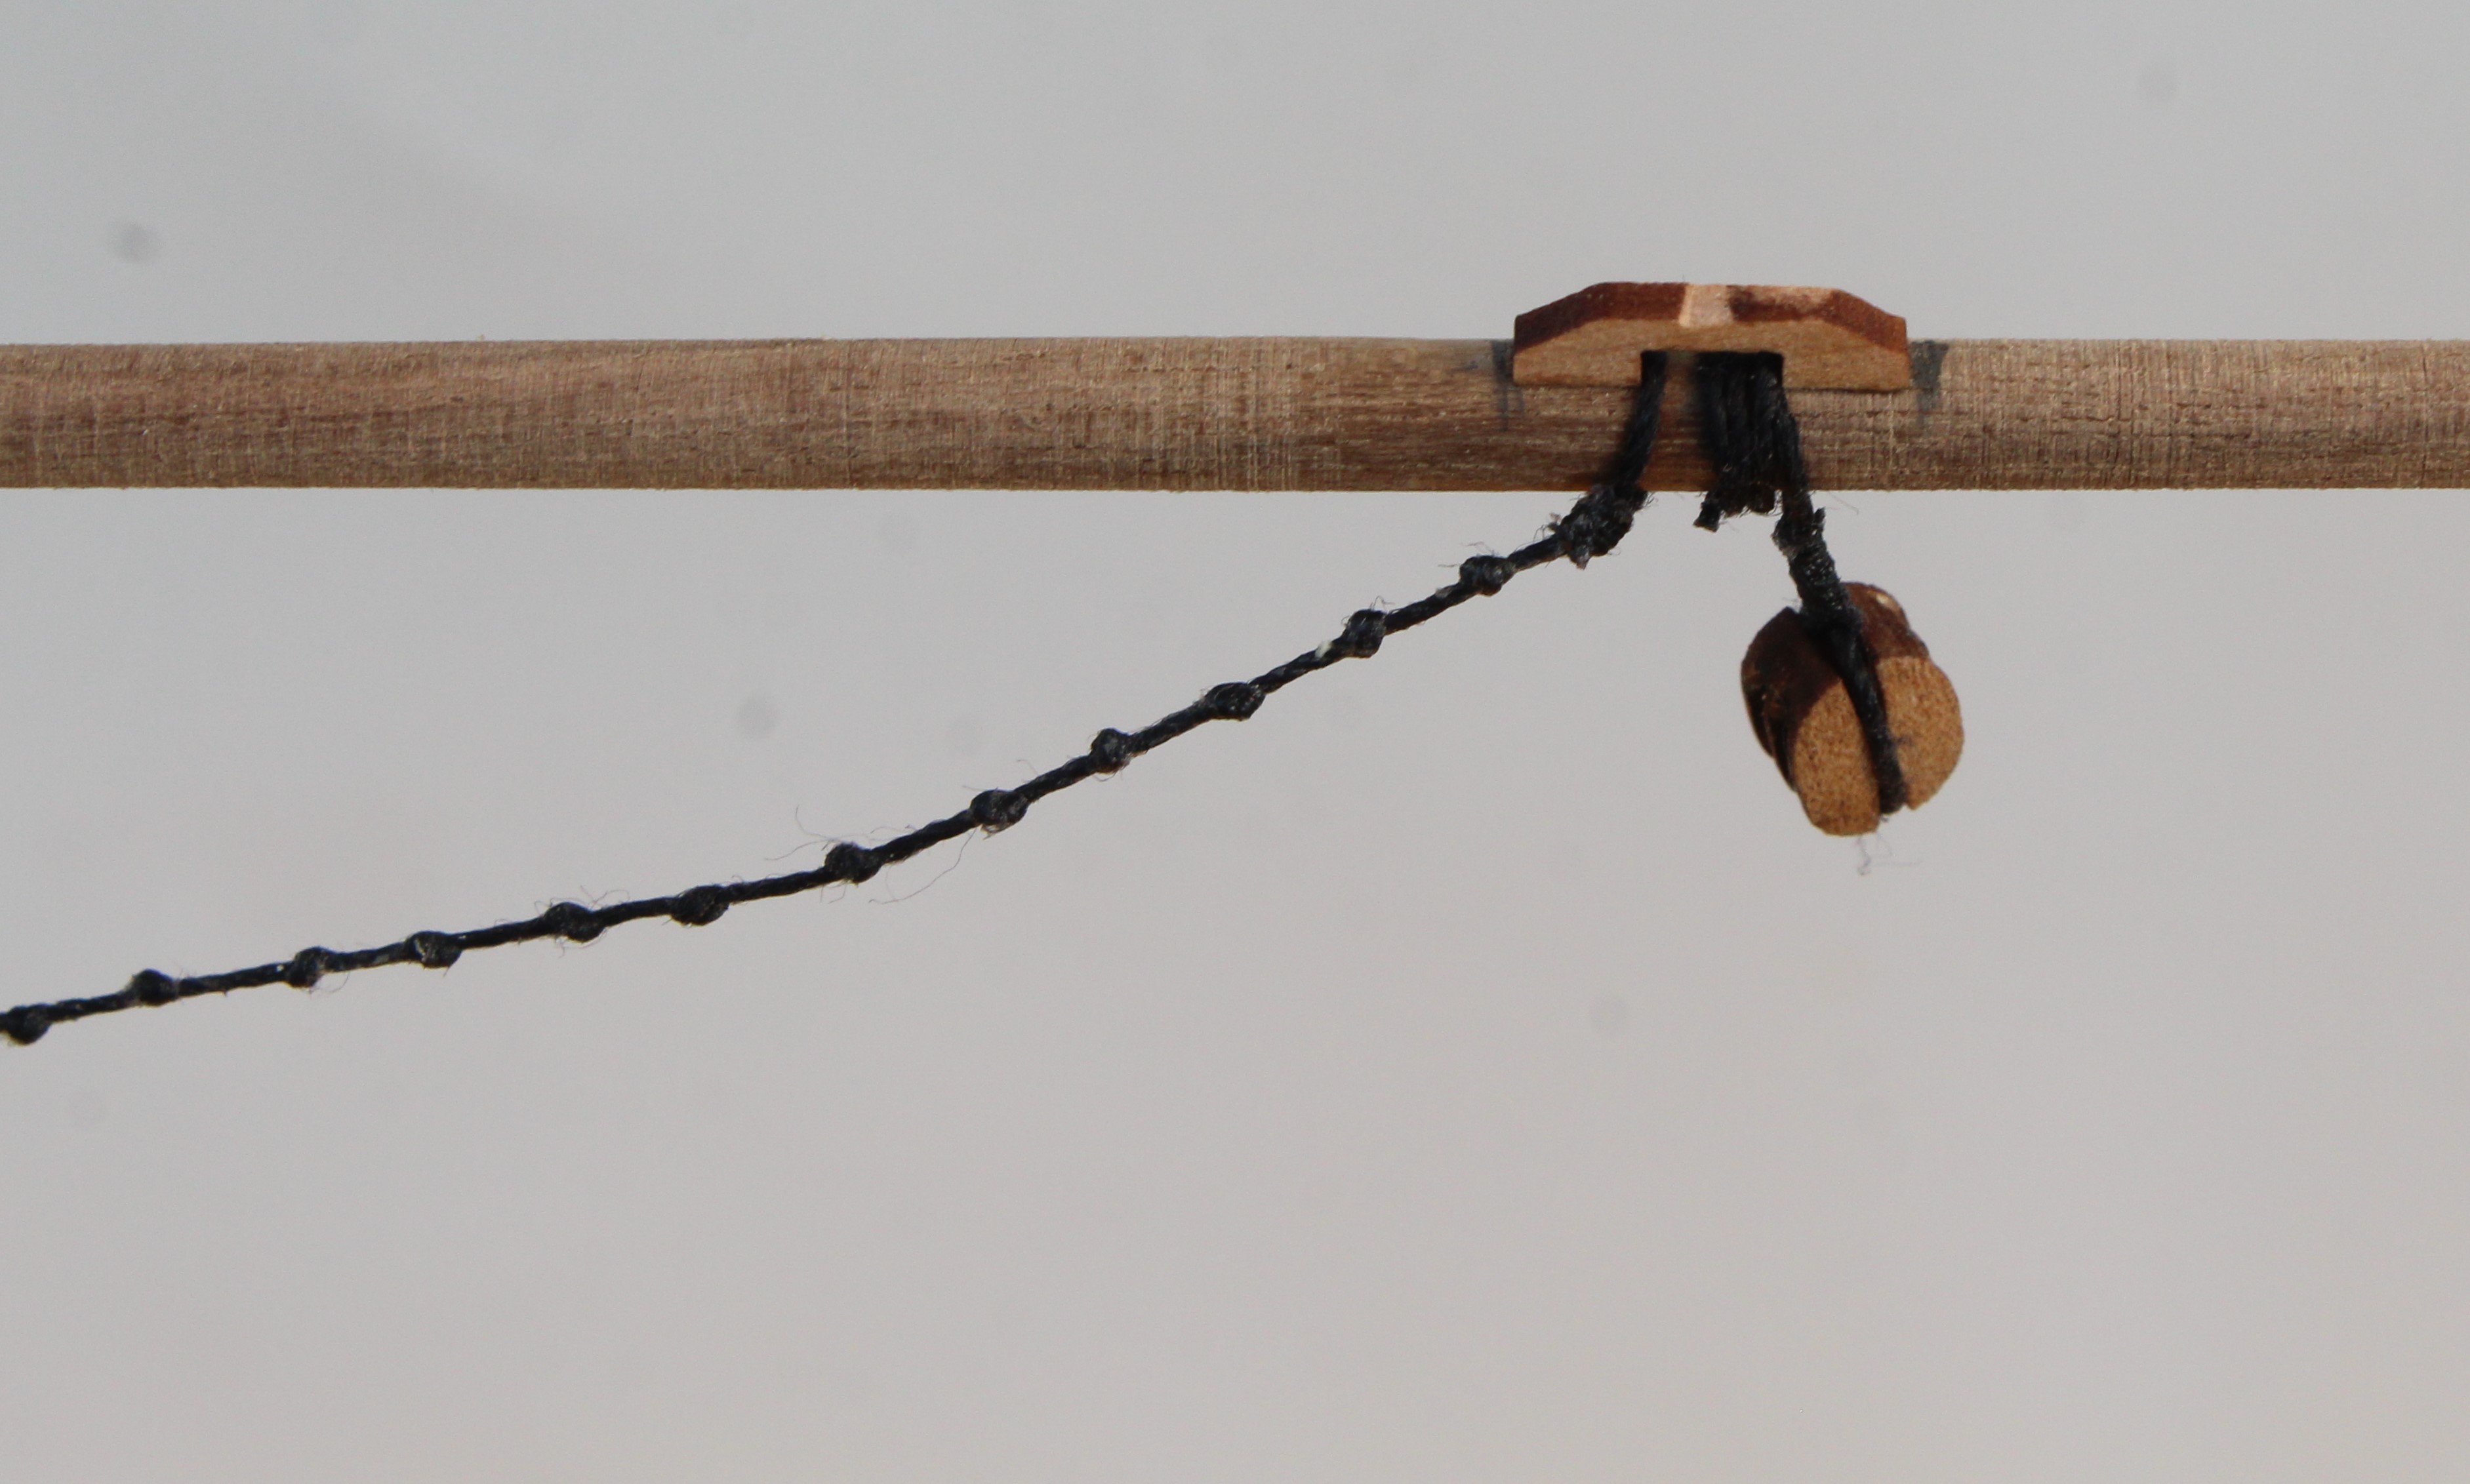
The final photo in this post shows the nave line secured to the truss pendants.
-
-
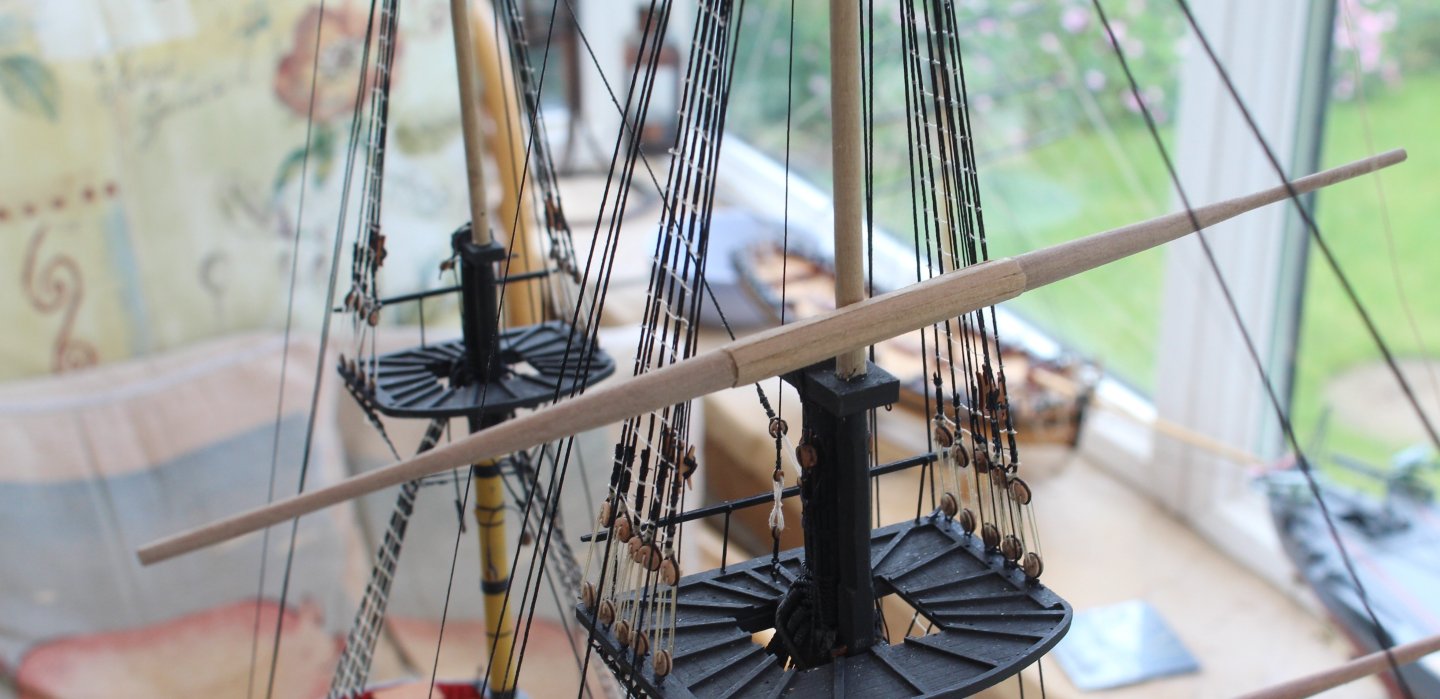
Adding Main and Mizzen Main Yards to Indy
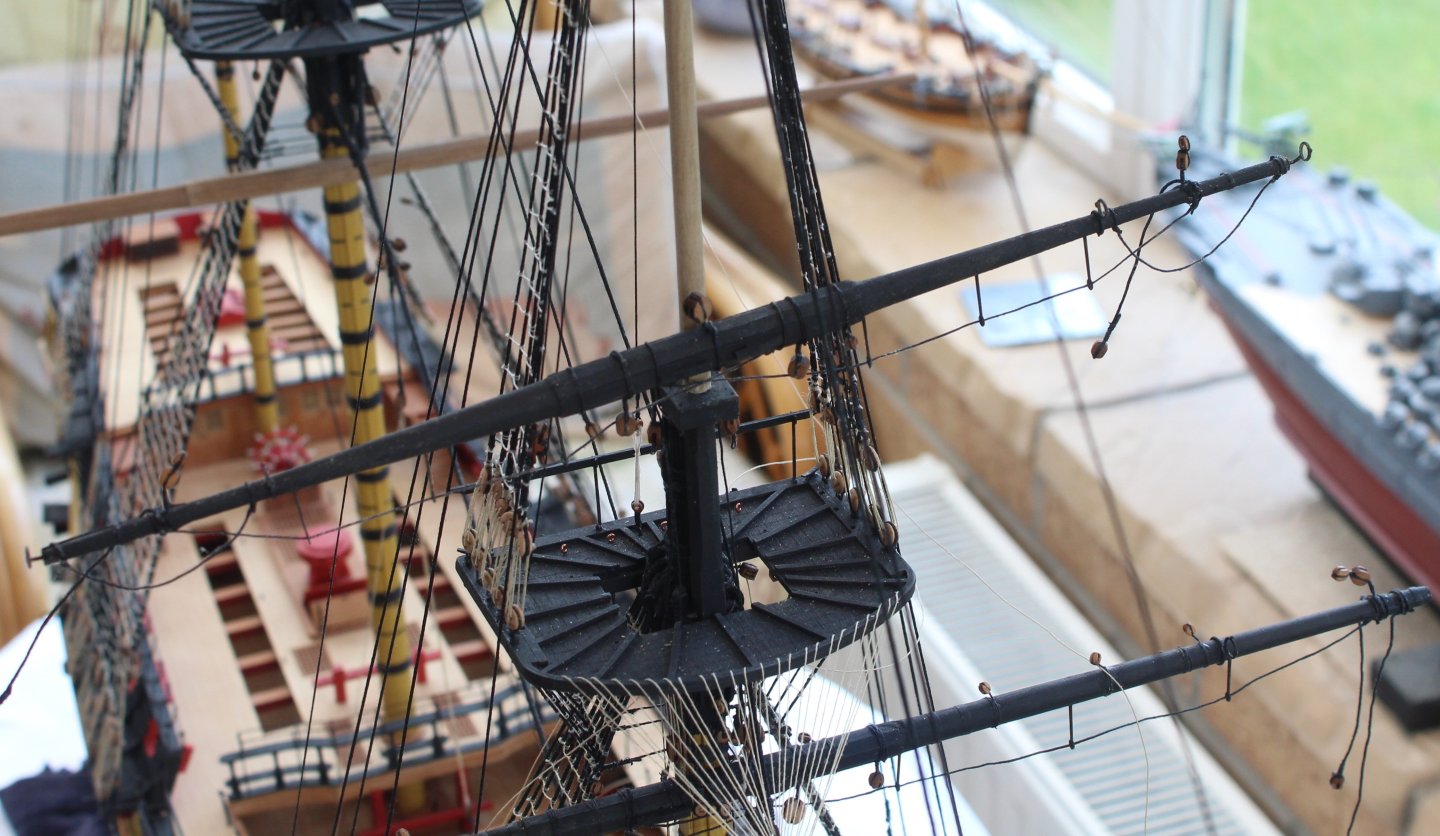
I have now painted all the yards black and have started the installation process, noting I did install the fore mainyard a few weeks ago.
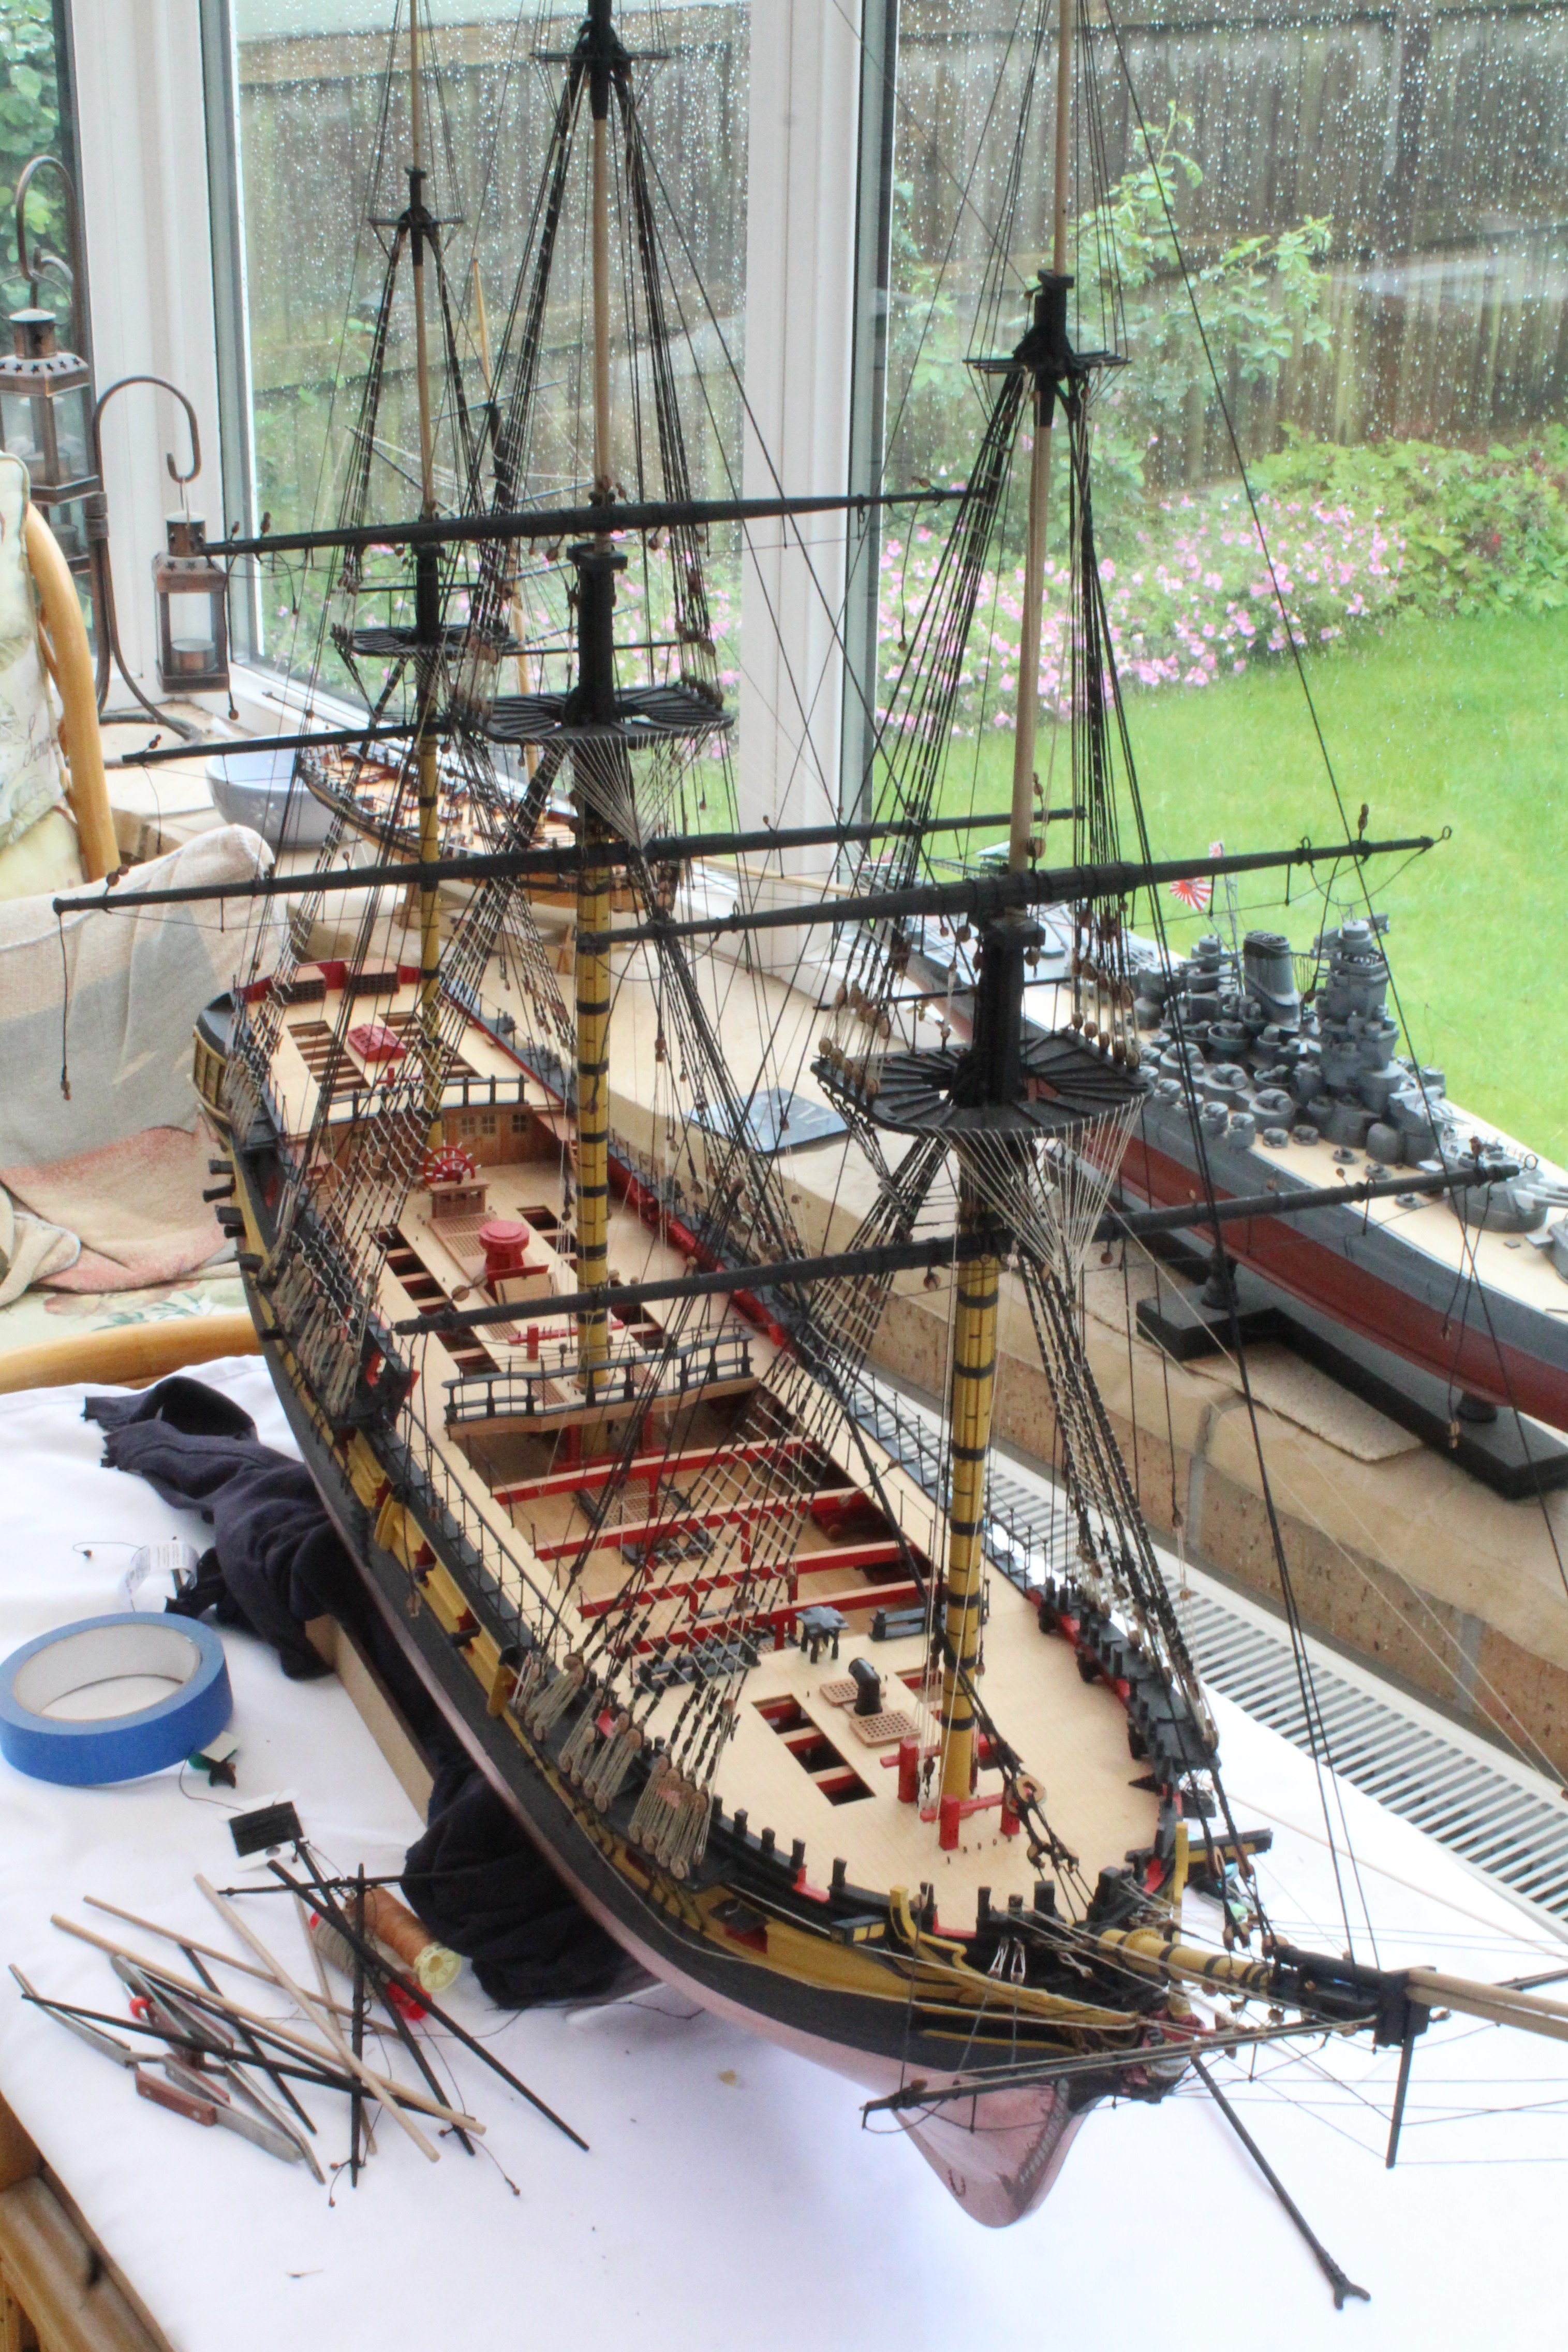
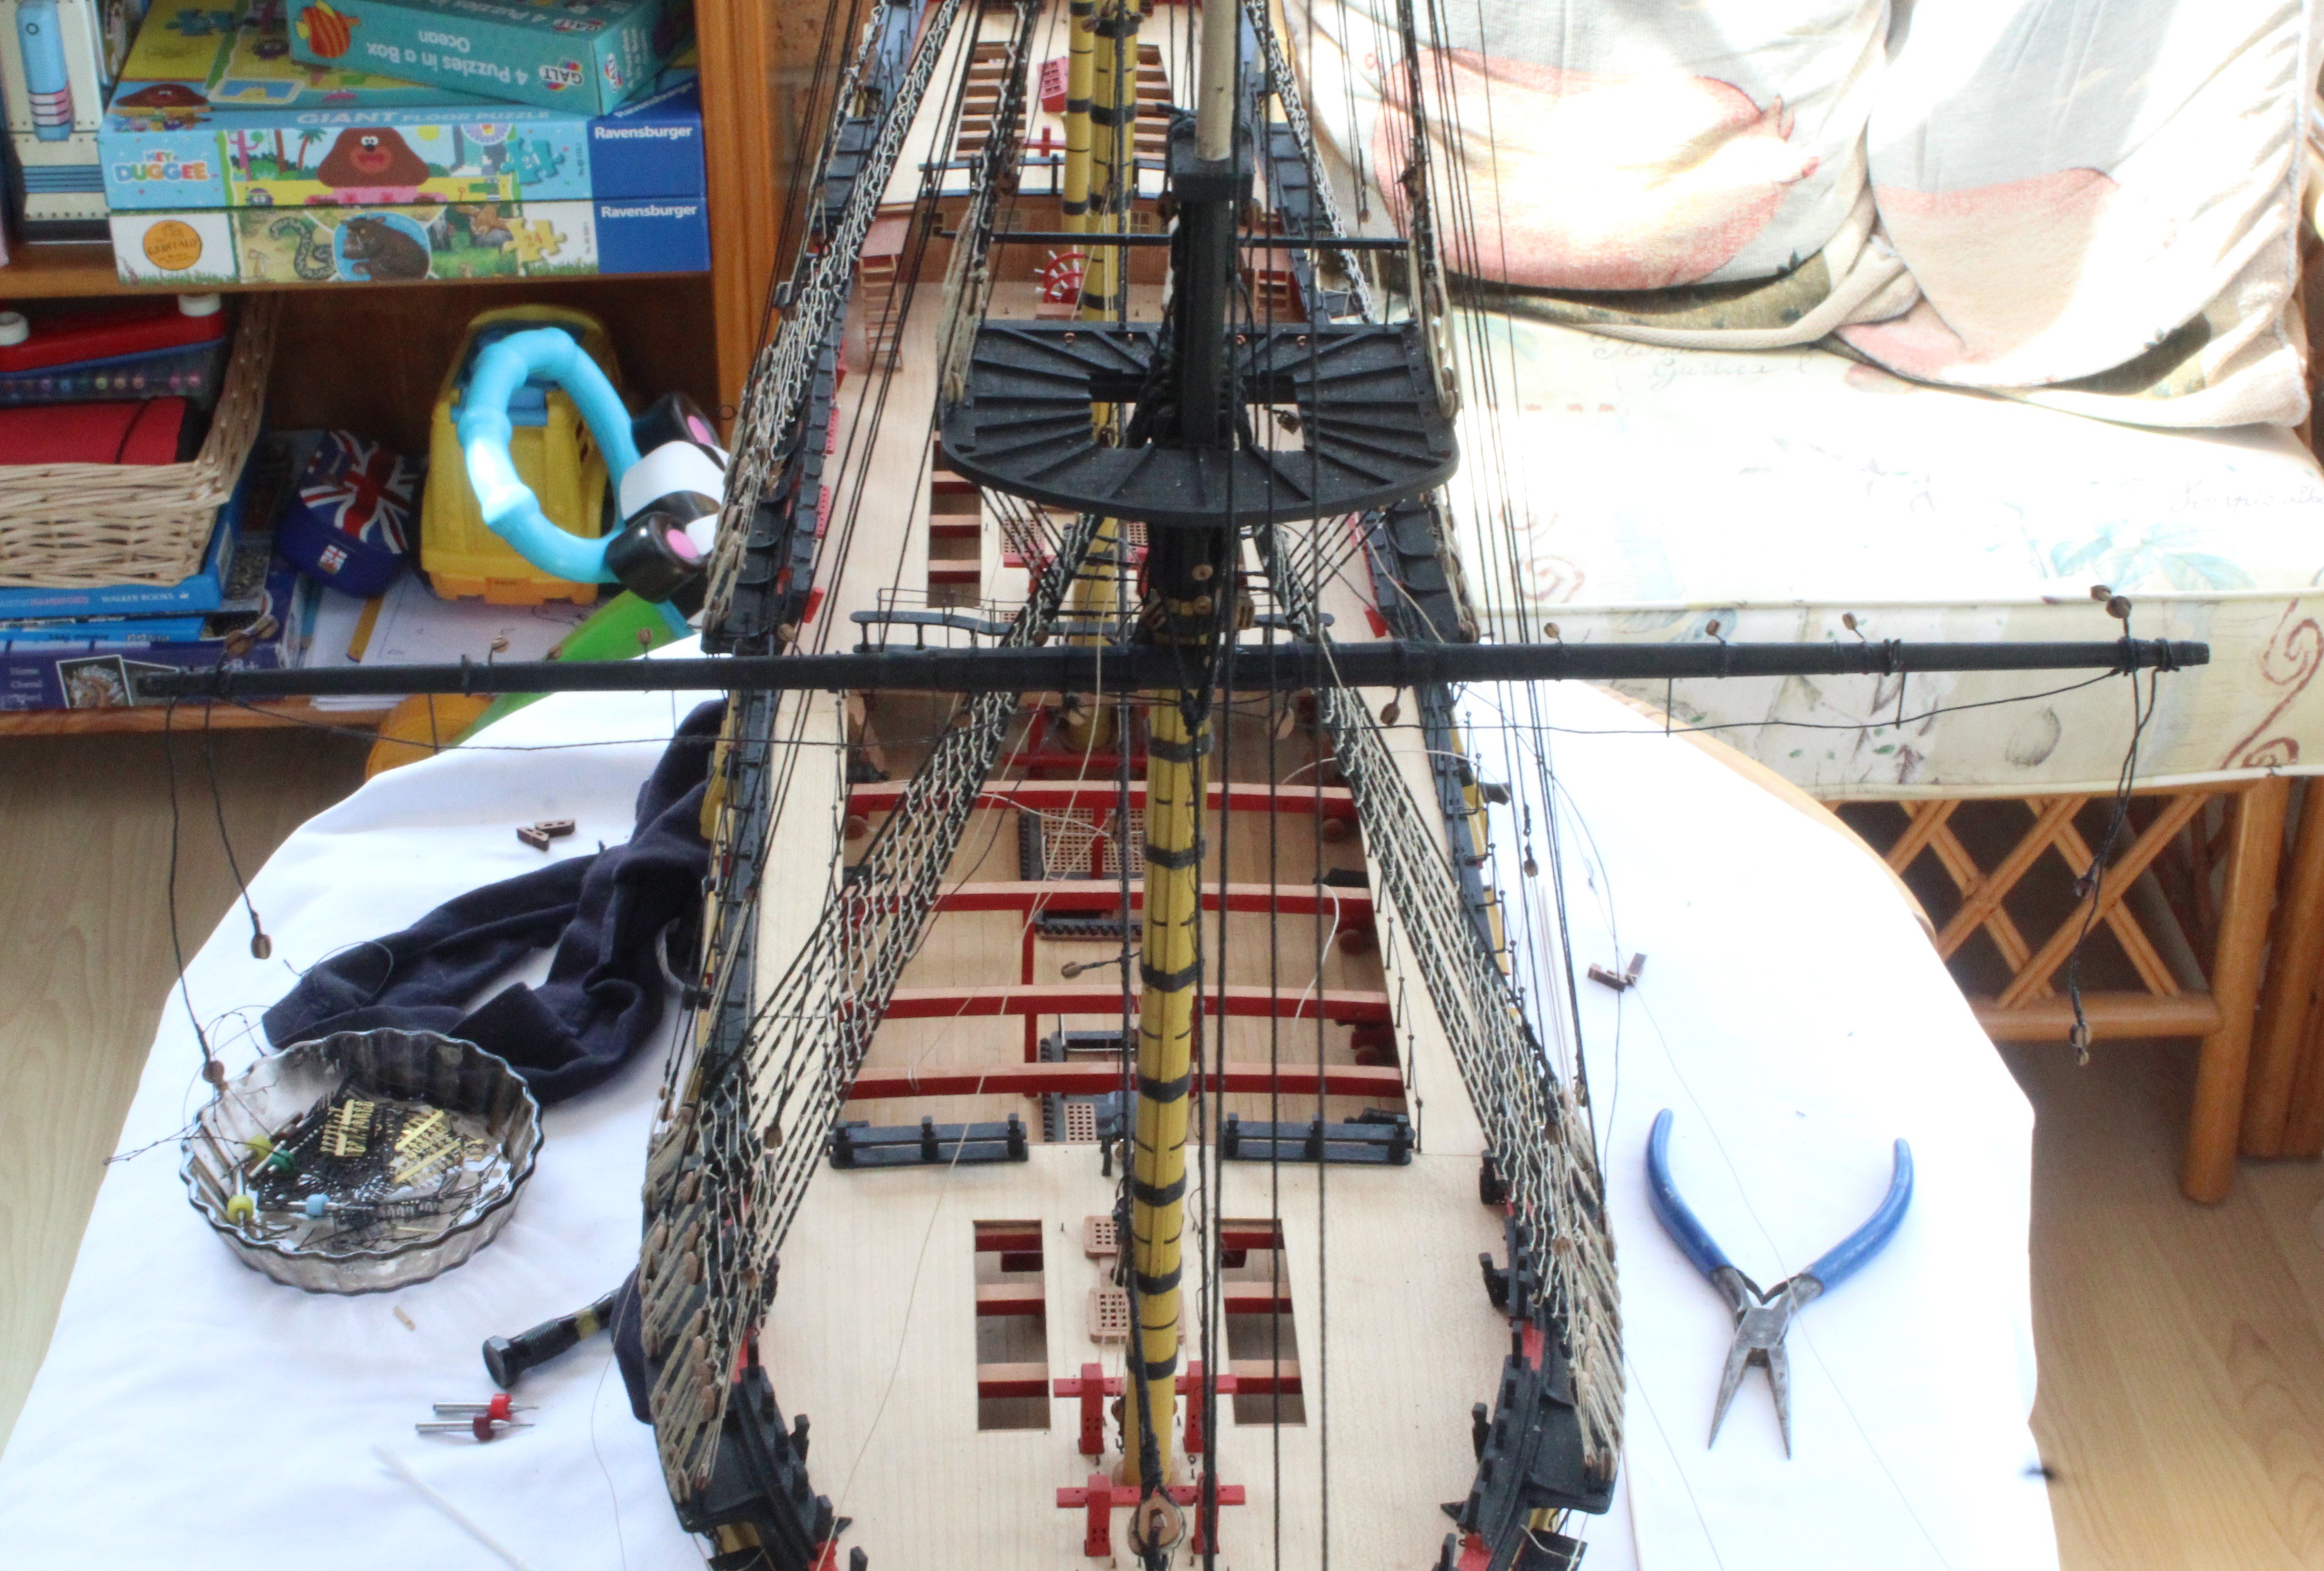
Here is a couple of photos showing the Indy with most of the yards fitted. The topsail and topgallant yards have not been secured to the masts so they are little bit lopsided.
Starting with the main mast yard I have added the rigging for the sling. The truss pendants have also been added but they have not been belayed. I have not added the jeers as yet which will be the next job.
In the next photo the main yard sling rigging can be seen.
The next photo shows the main yard nave line which has been added to the truss pendants. Again this line has not been belayed.

The next photo shows the crossyard jack, which has been added to the mizzen mast.
The next photo shows the crossyard jack sling rigging.
-
Yard Manufacture
Over the last few days I have been shaping and then adding the various PE parts, cleats and footropes to all the remaining yards. The only task now remaining, before installation to the masts will be to paint the yards black. Please see the following set of photos.
Driver Gaff
This was an interesting dowel to shape. There are two flying lead blocks and a couple of blocks secured to the driver gaff via eyebolts,
Driver Boom
There was not a great deal of shaping required for the driver boom. The most time consuming task was to make the knotted footrope.

Mizzen Topgallant Yard
This was a nice simple yard to make with a central section which tapers down to each end.
Mizzen Topsail Yard
I had a bit of a brain fart when adding the footrope stirrups and initially drilled the holes in the wrong place, as you will see in the attached photos where these holes have been filled. I will adjust the position of a couple of the footrope stirrups so they are vertically aligned.
Crossyard Jack
I had the same brain fart with regards to drilling to stirrup holes. I will also need adjust the position of a couple of the footrope stirrups so they are vertically aligned.

Main Topsail Yard
I did add thin planking trips to the central octagonal section.
Main Yard
I did add thin planking trips to the central octagonal section.
- Dave B, BLACK VIKING, AON and 11 others
-
14
-
Yard Production
Time for a quick update. Over the last few days I have been making the various yards required for the Indy. This is still very much work in progress. As I am also watching the live broadcast of the Post Office Inquiry hearing my time in the shipyard is much reduced.
My progress to date is as follows:
a) All the various rigging blocks required for all the yards have been prepared and are ready to be added
b) All the various PE parts have been gathered and chemically blackened.
c) All the fore yards have been completed. The main foreyard has been installed and the fore topsail and topgallant yards are ready to be installed
d) All the main mast yards have been shaped and are ready to be painted and fitted out with the rigging blocks, PE parts and cleats.
e) Dowels for the mizzen mast yards, boom and gaff have been cut to size and are ready to be shaped.
The following is a picture of my Indy with the Fore and Main yards attached.
The next two pictures show the fore topsail yard pinned on the mast but not secured.
The next picture shows the fore topgallant yard pinned in place but not secured.
The following two photos show the mainyard pinned in place

Next two photos show the main topsail mast pinned in place.
The final photo is the main topgallant yard pinned in place.
-
3 minutes ago, ir3 said:
I have a question early in the build. When the printed lower deck is installed, the gratings assembled, and the ladder is built, should WOP or some other coating be put on or just leave the wood bare.
Thanks,
Iran Ausley
Hello Iran
I suspect different modellers will have different methods / opinions. I tend to WOP all deck levels.
Hope that helps
Glenn
-
Preparation Blocks for Yard, Booms and Gaffs
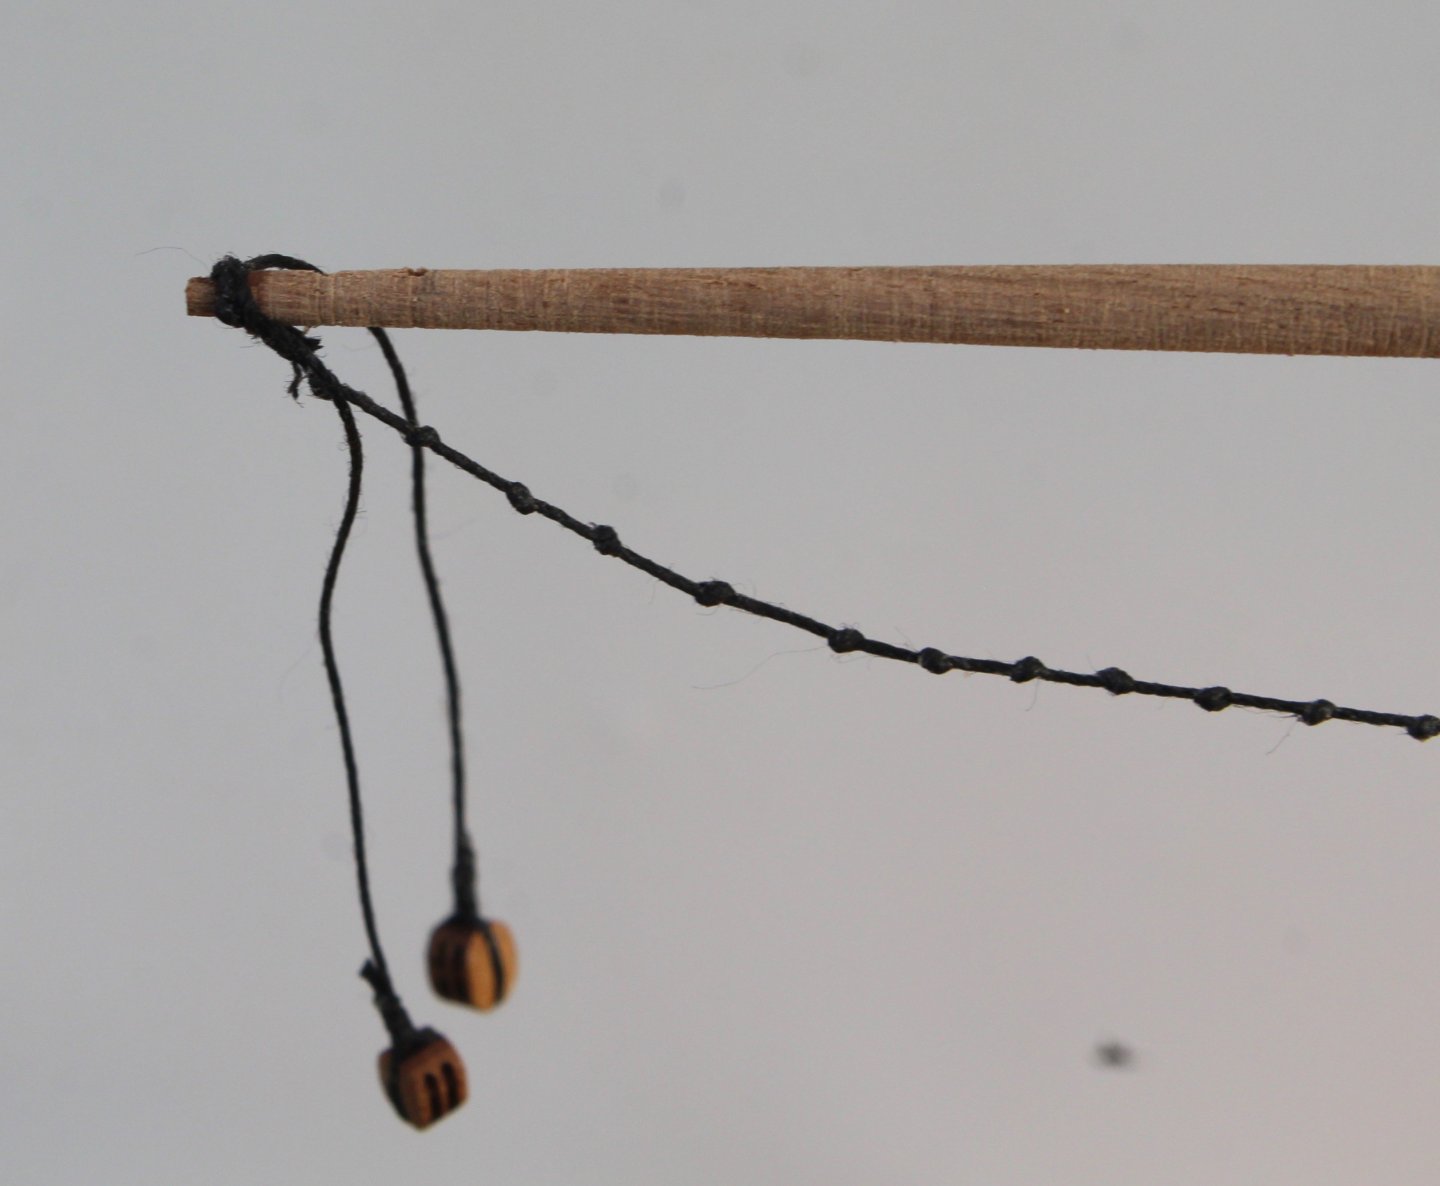
One of the more tedious and time consuming tasks for me is preparing the various blocks (and thimbles) in readiness for adding to the various yards, booms and gaffs. I still have 8 yards, 1 boom and 1 gaff to make and these will require a total of 93 blocks / thimbles to be added. I decided to prepare all the various 93 blocks & thimbles before I start work on shaping the dowels for the yards, boom and gaff. I have been doing this in short bursts over the last 5 days. I still have a few more blocks to prepare before this task is complete. As I have slightly modified the processes I use to seize the blocks so I thought I would share my current method for the braces and double block arrangements.
Braces
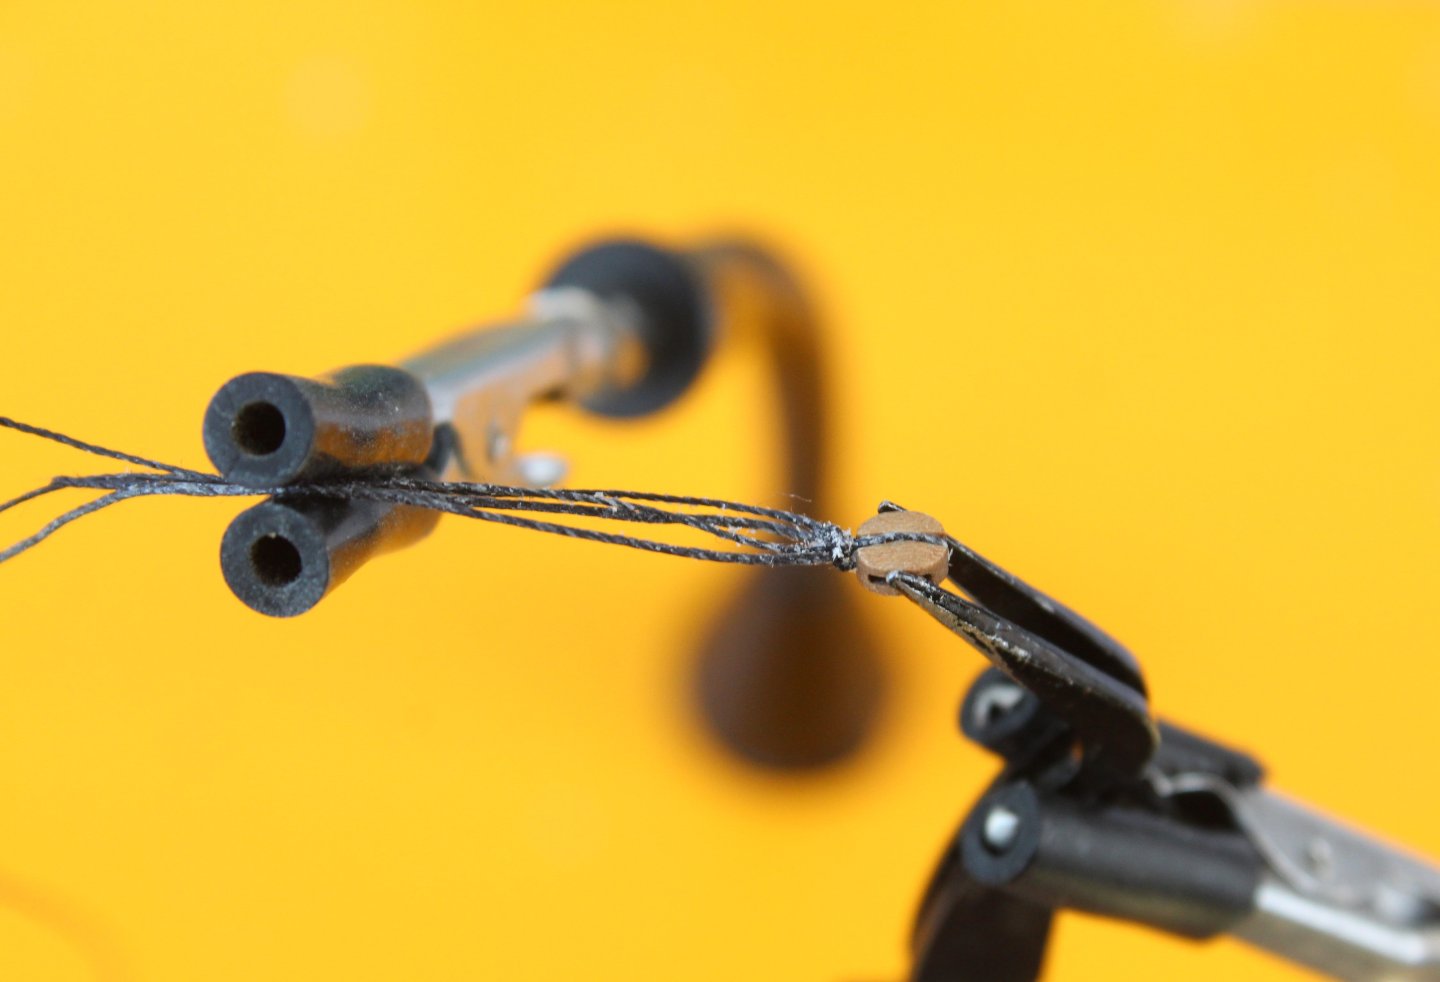
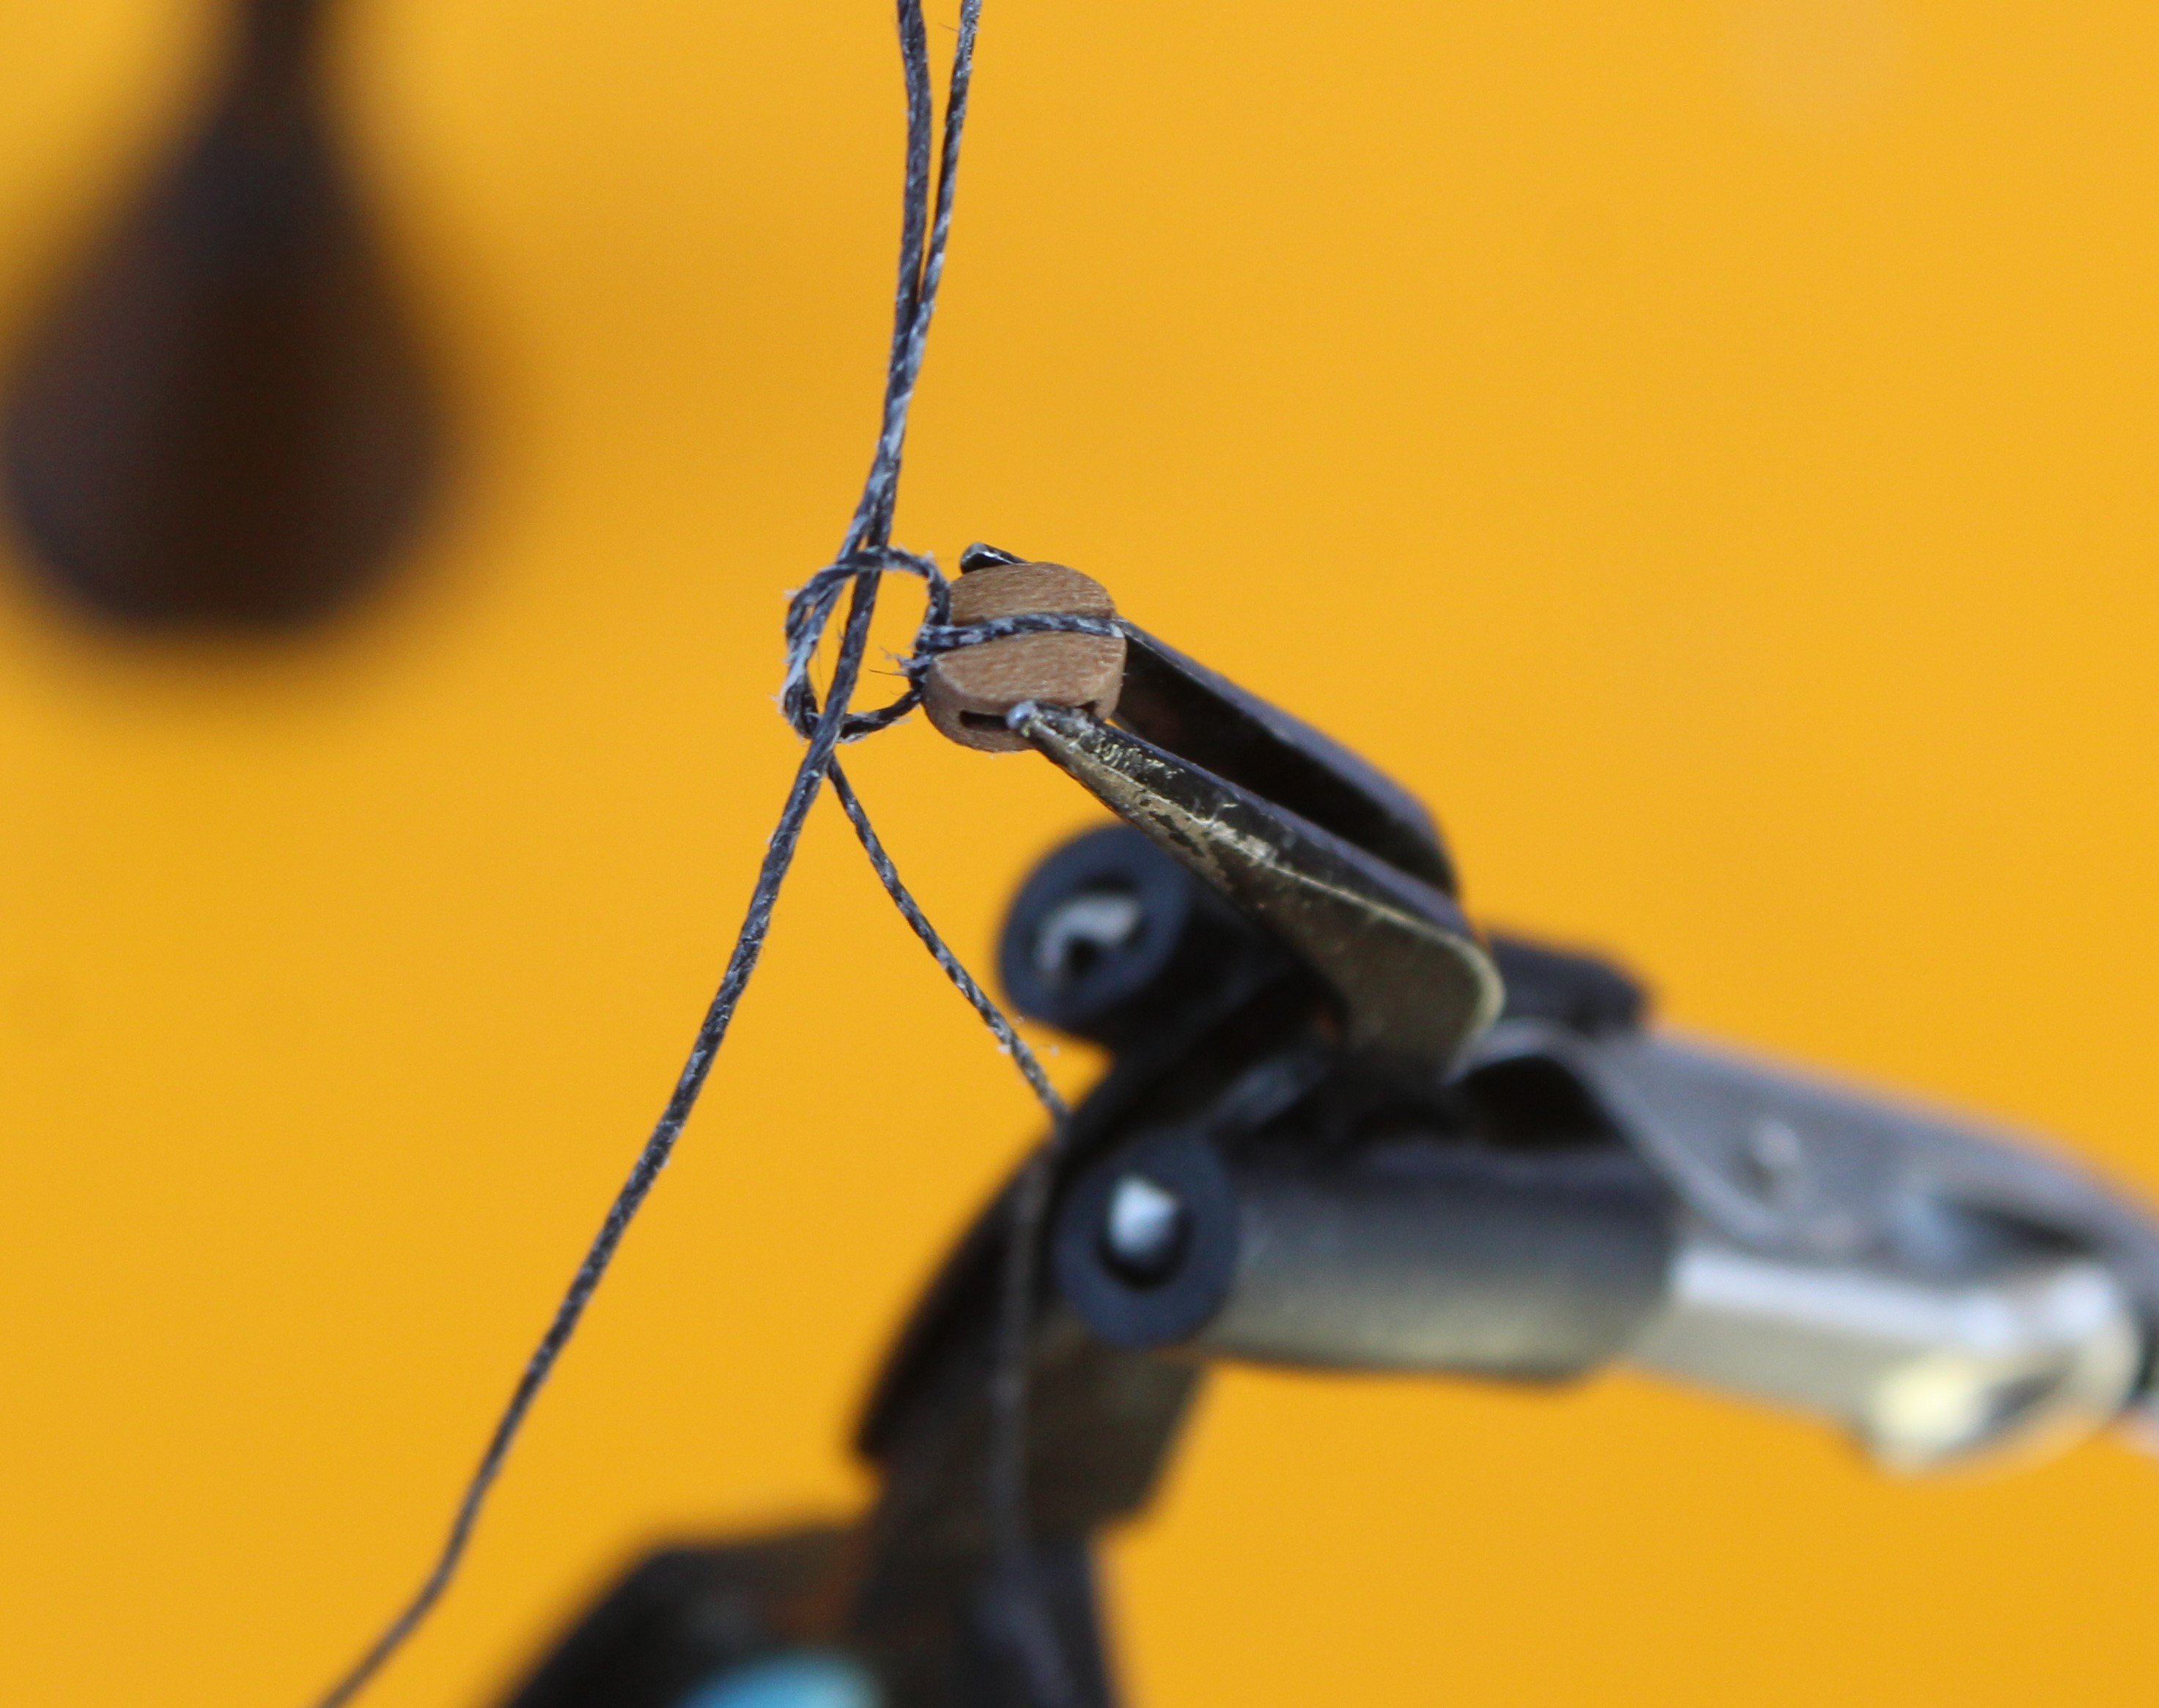
These blocks extend away from the yard with a single length of black thread, typically 0.75mm or 0.5mm. I start the process by holding the required block, a 4mm single block for this post, in the quad hands. I then wrap a short length of 0.25mm black thread around the block and secure it in place with a simple cross over knot. This is shown in the photo below.
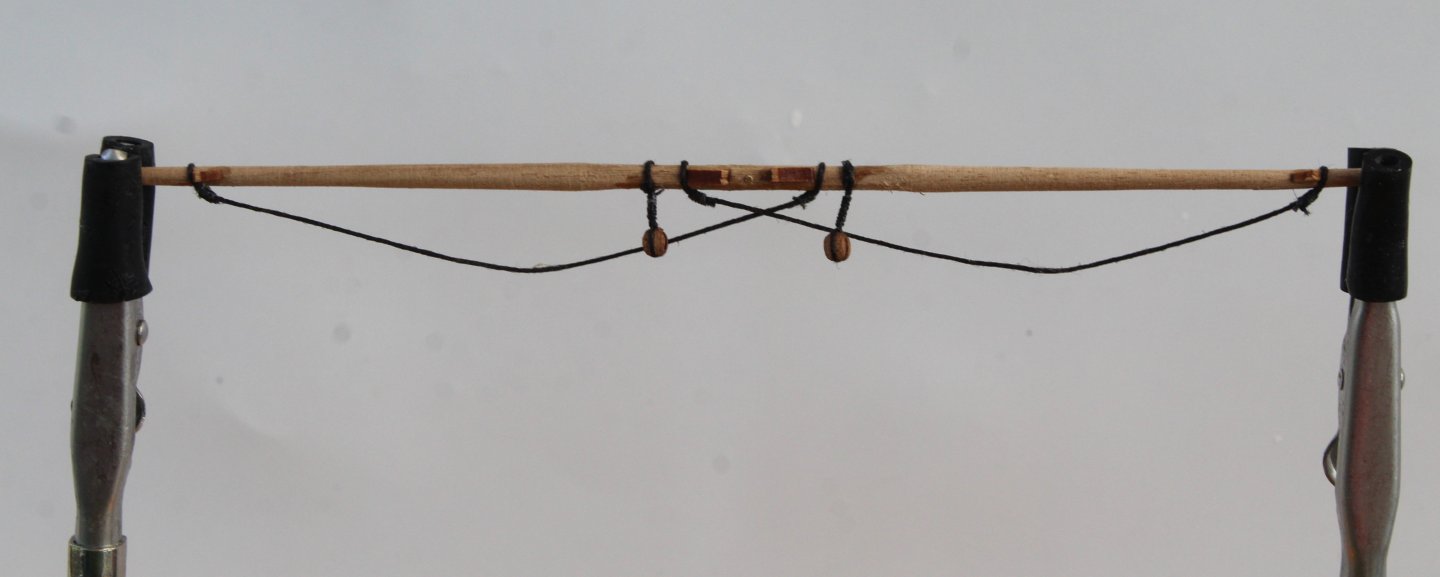
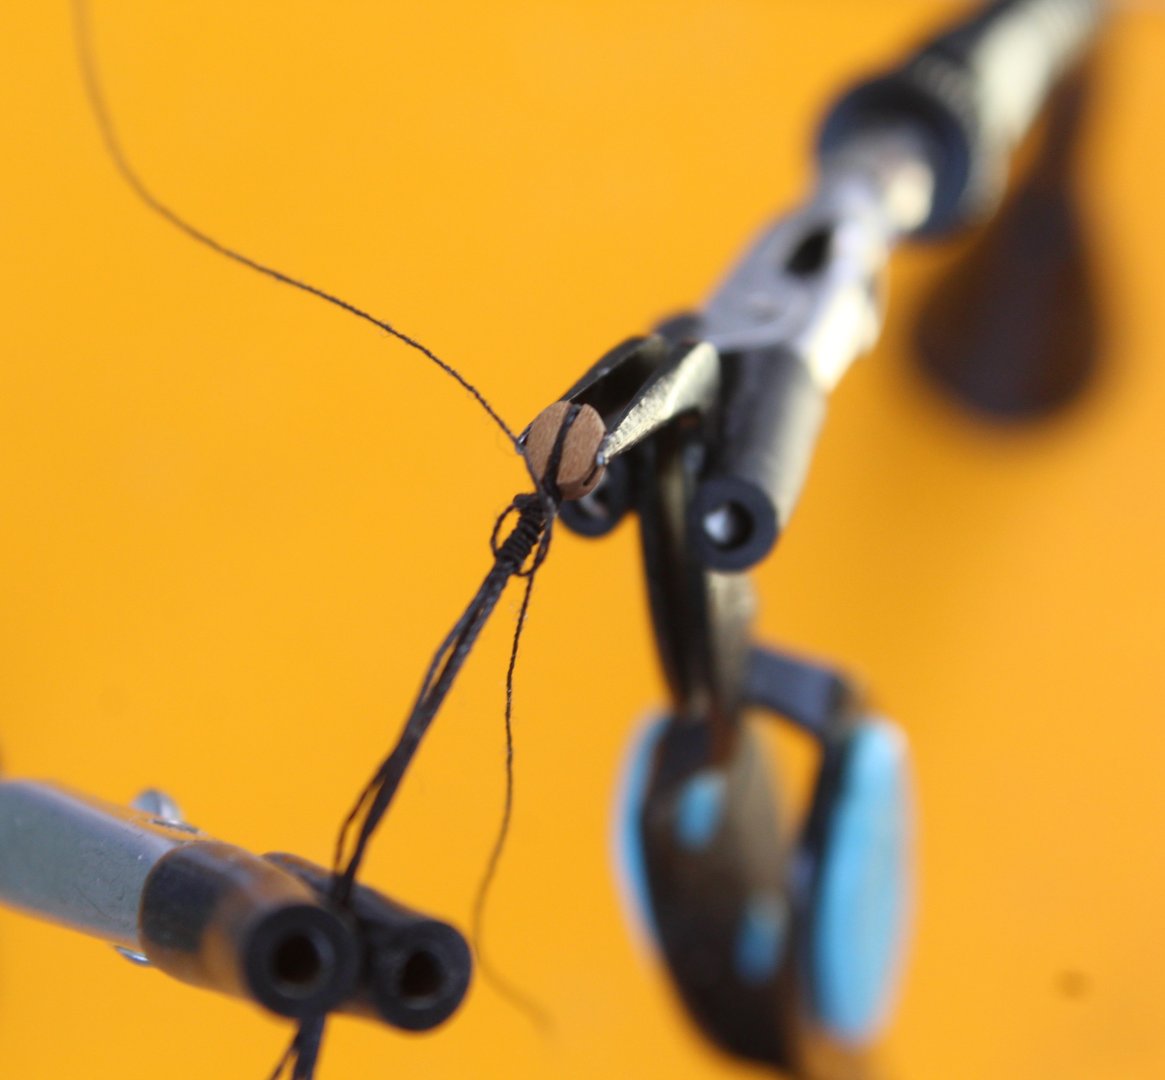
Next I start to make a second cross over knot and pass a length of 0.75mm black thread in the gap, as can be seen in the next photo.

The 0.75mm black thread is then held in place with a reef (square) knot and the threads are then held in quad hands ready to have the seizing added. I do use beeswax on the threads and once the seizing has been added I use a hairdryer to melt the wax before the ca glue is added.
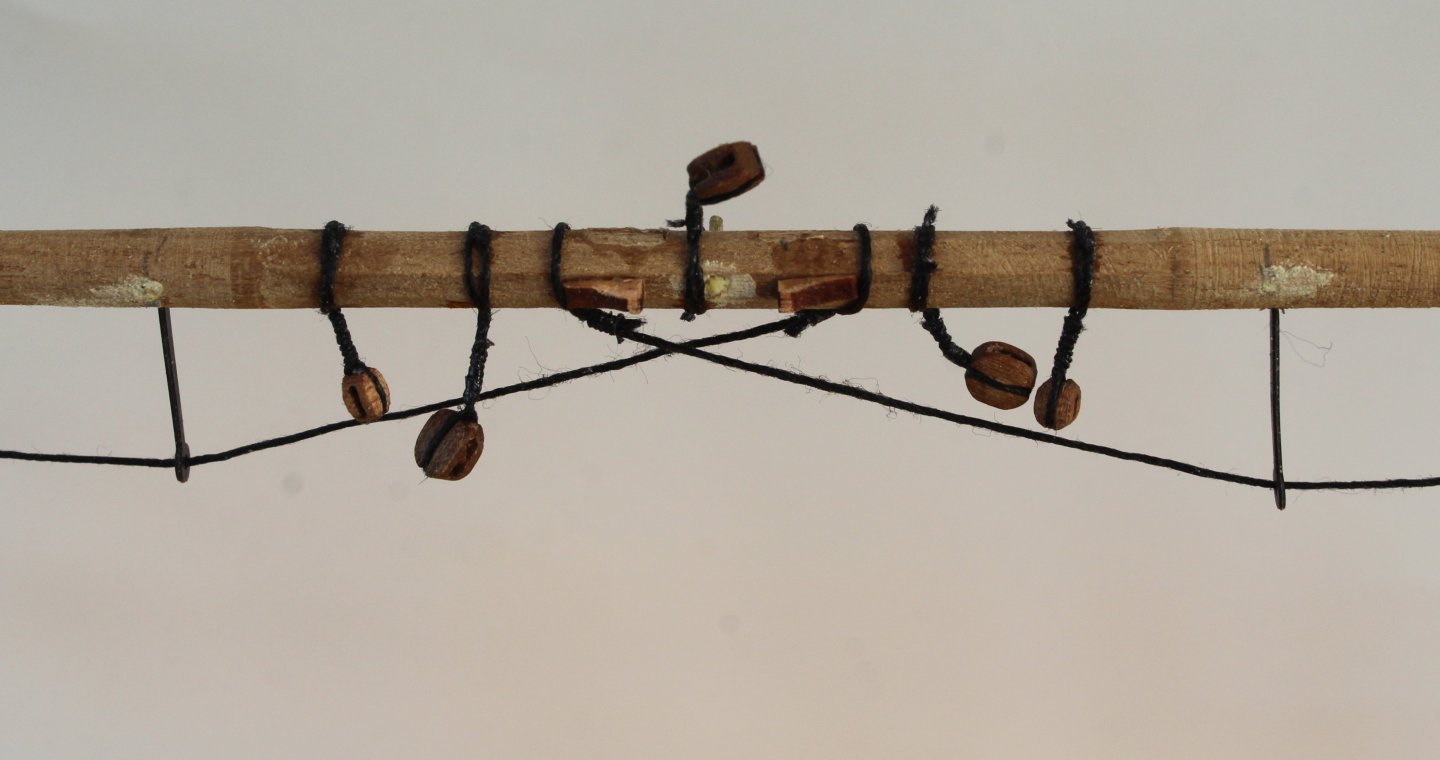
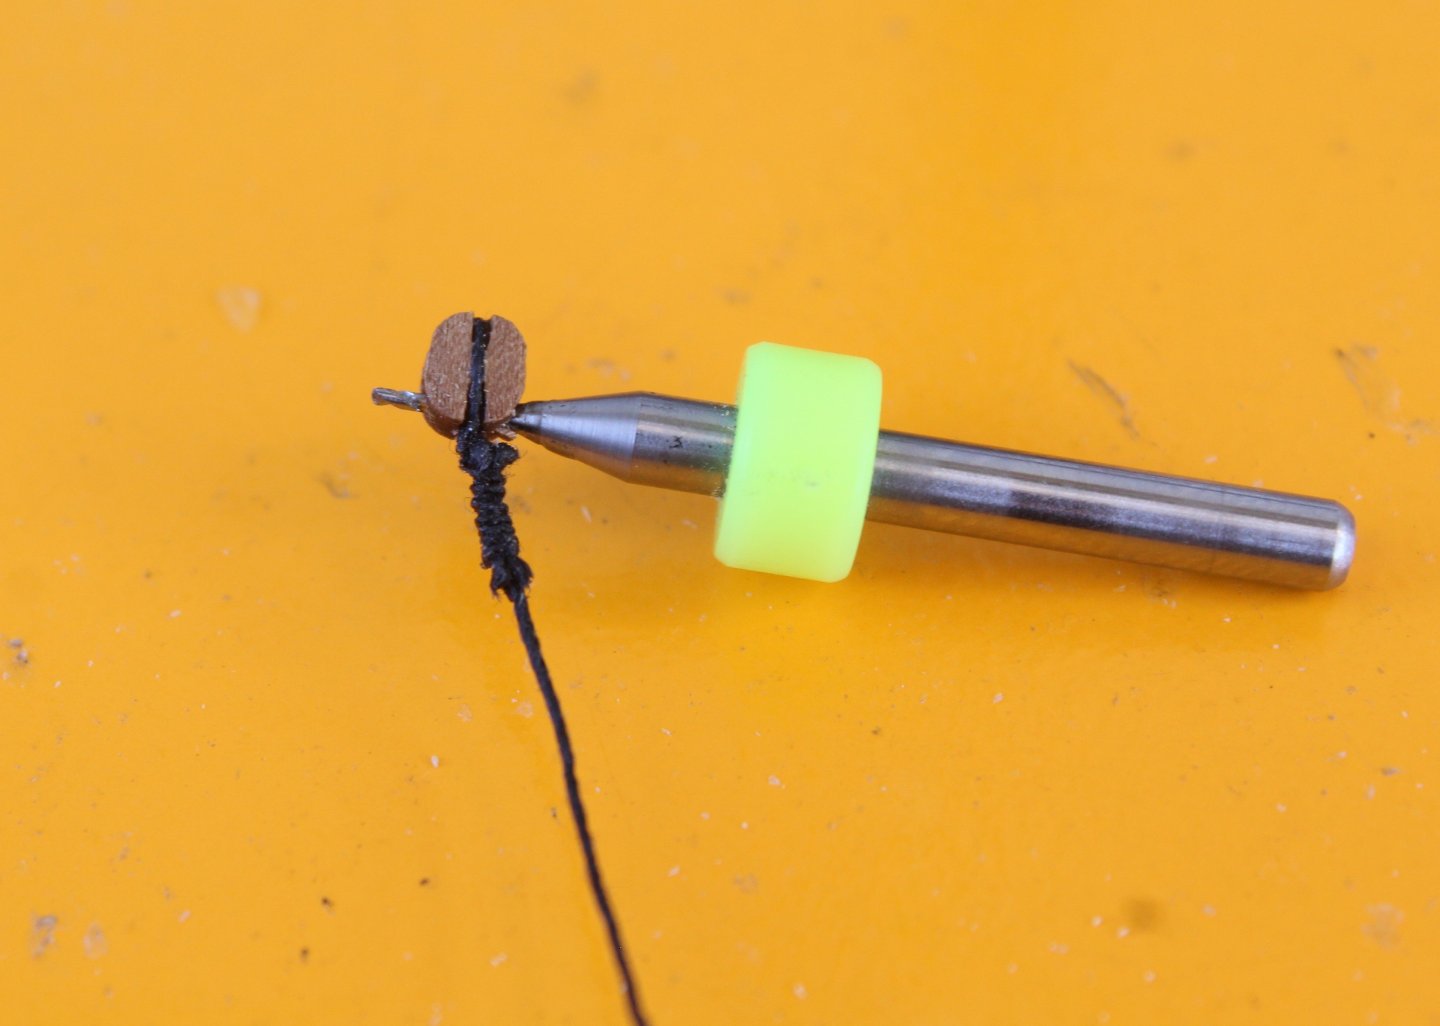
I add the seizing (0.1mm black thread) using a series of simple cross over knots, 8 on the underside and 8 on the top. In the next photo the 8th top cross over knot has been formed and is ready to be pulled tight.
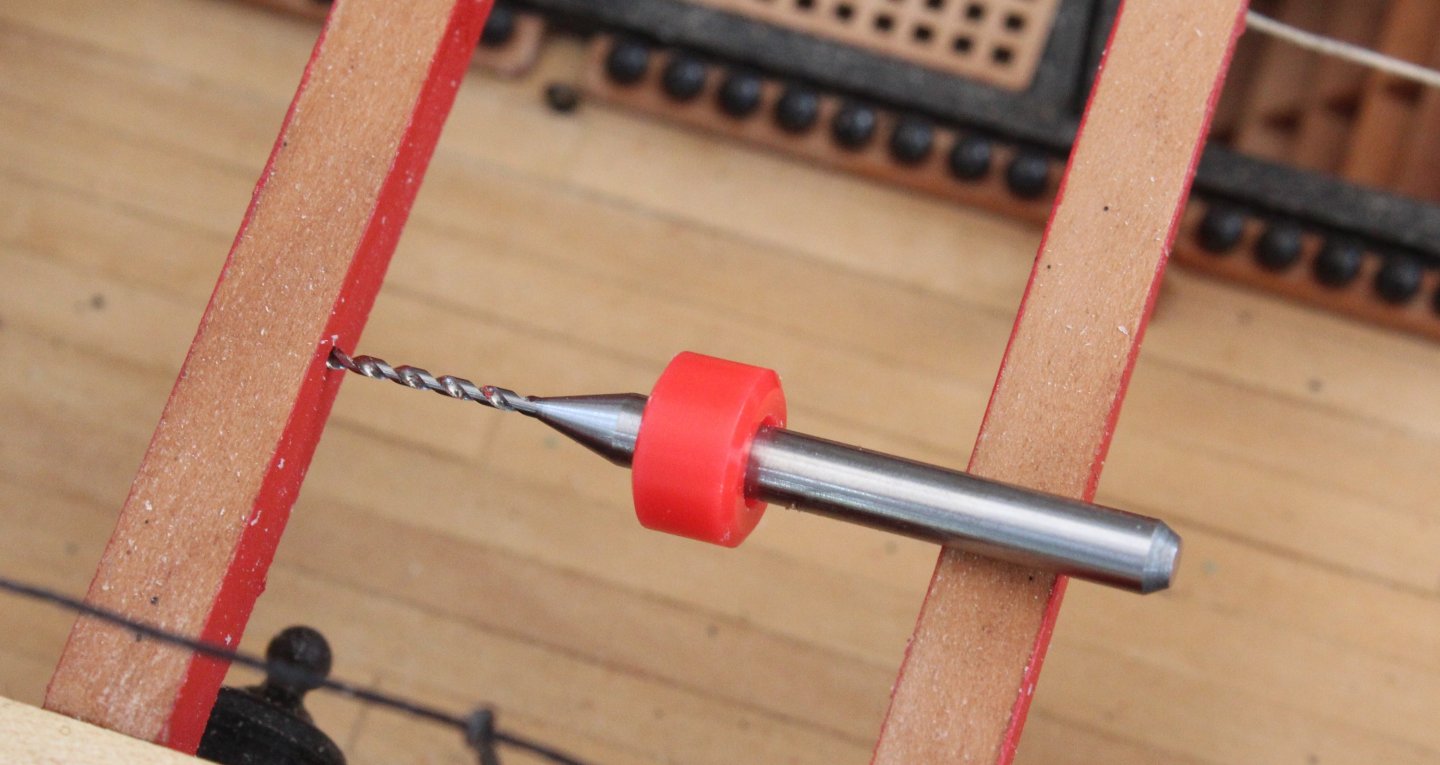
A touch of ca glue is added to the seizing and the excess thread is trimmed. The final task is run a micro drill through to make sure the required rigging thread can be fed through. The block are now ready to be installed to the yard.
Double Block Arrangement
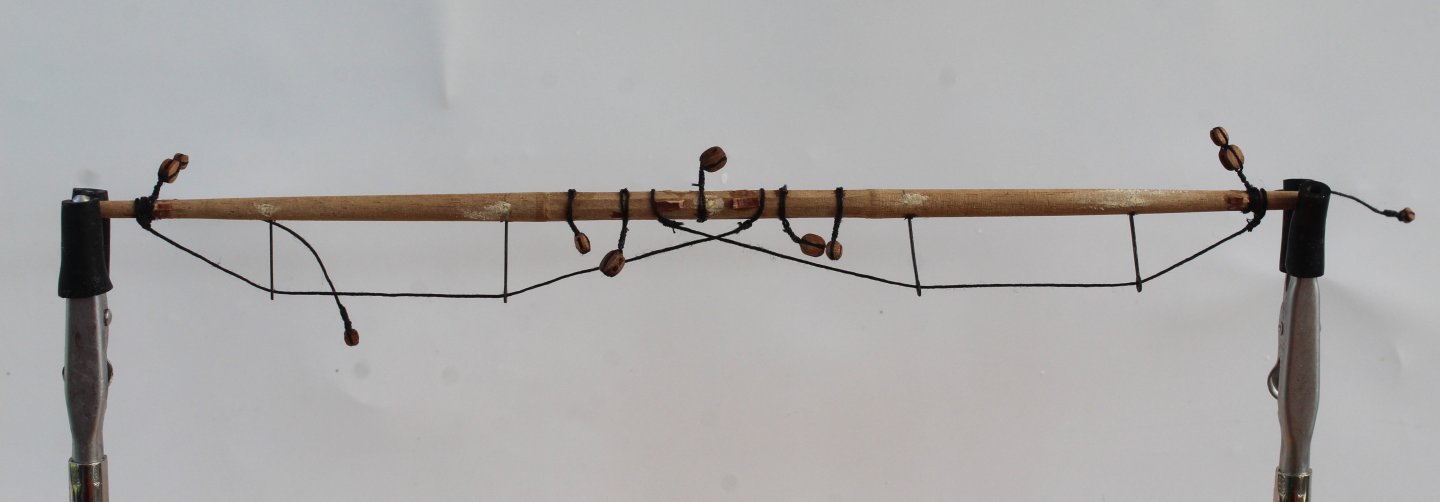
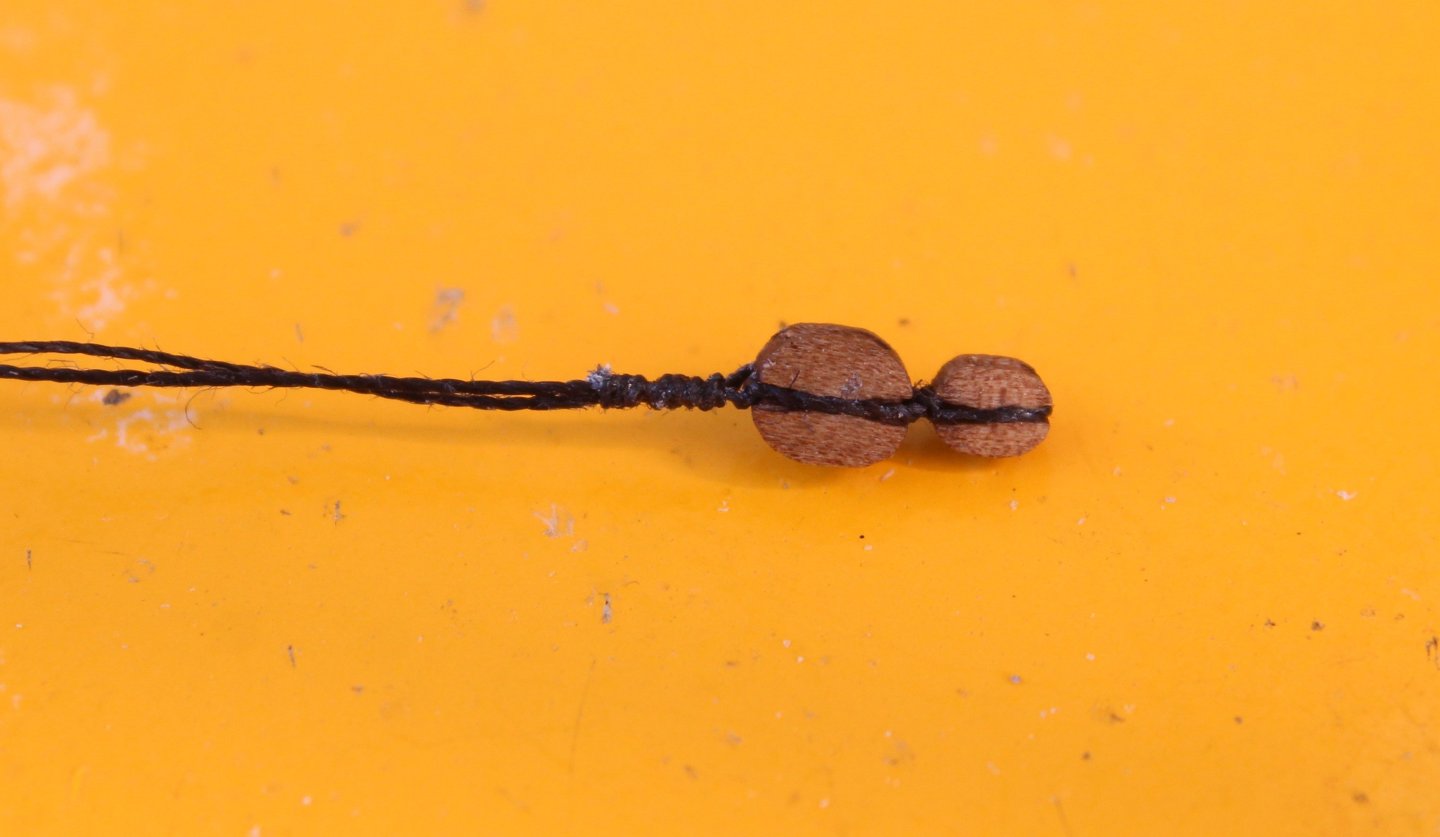
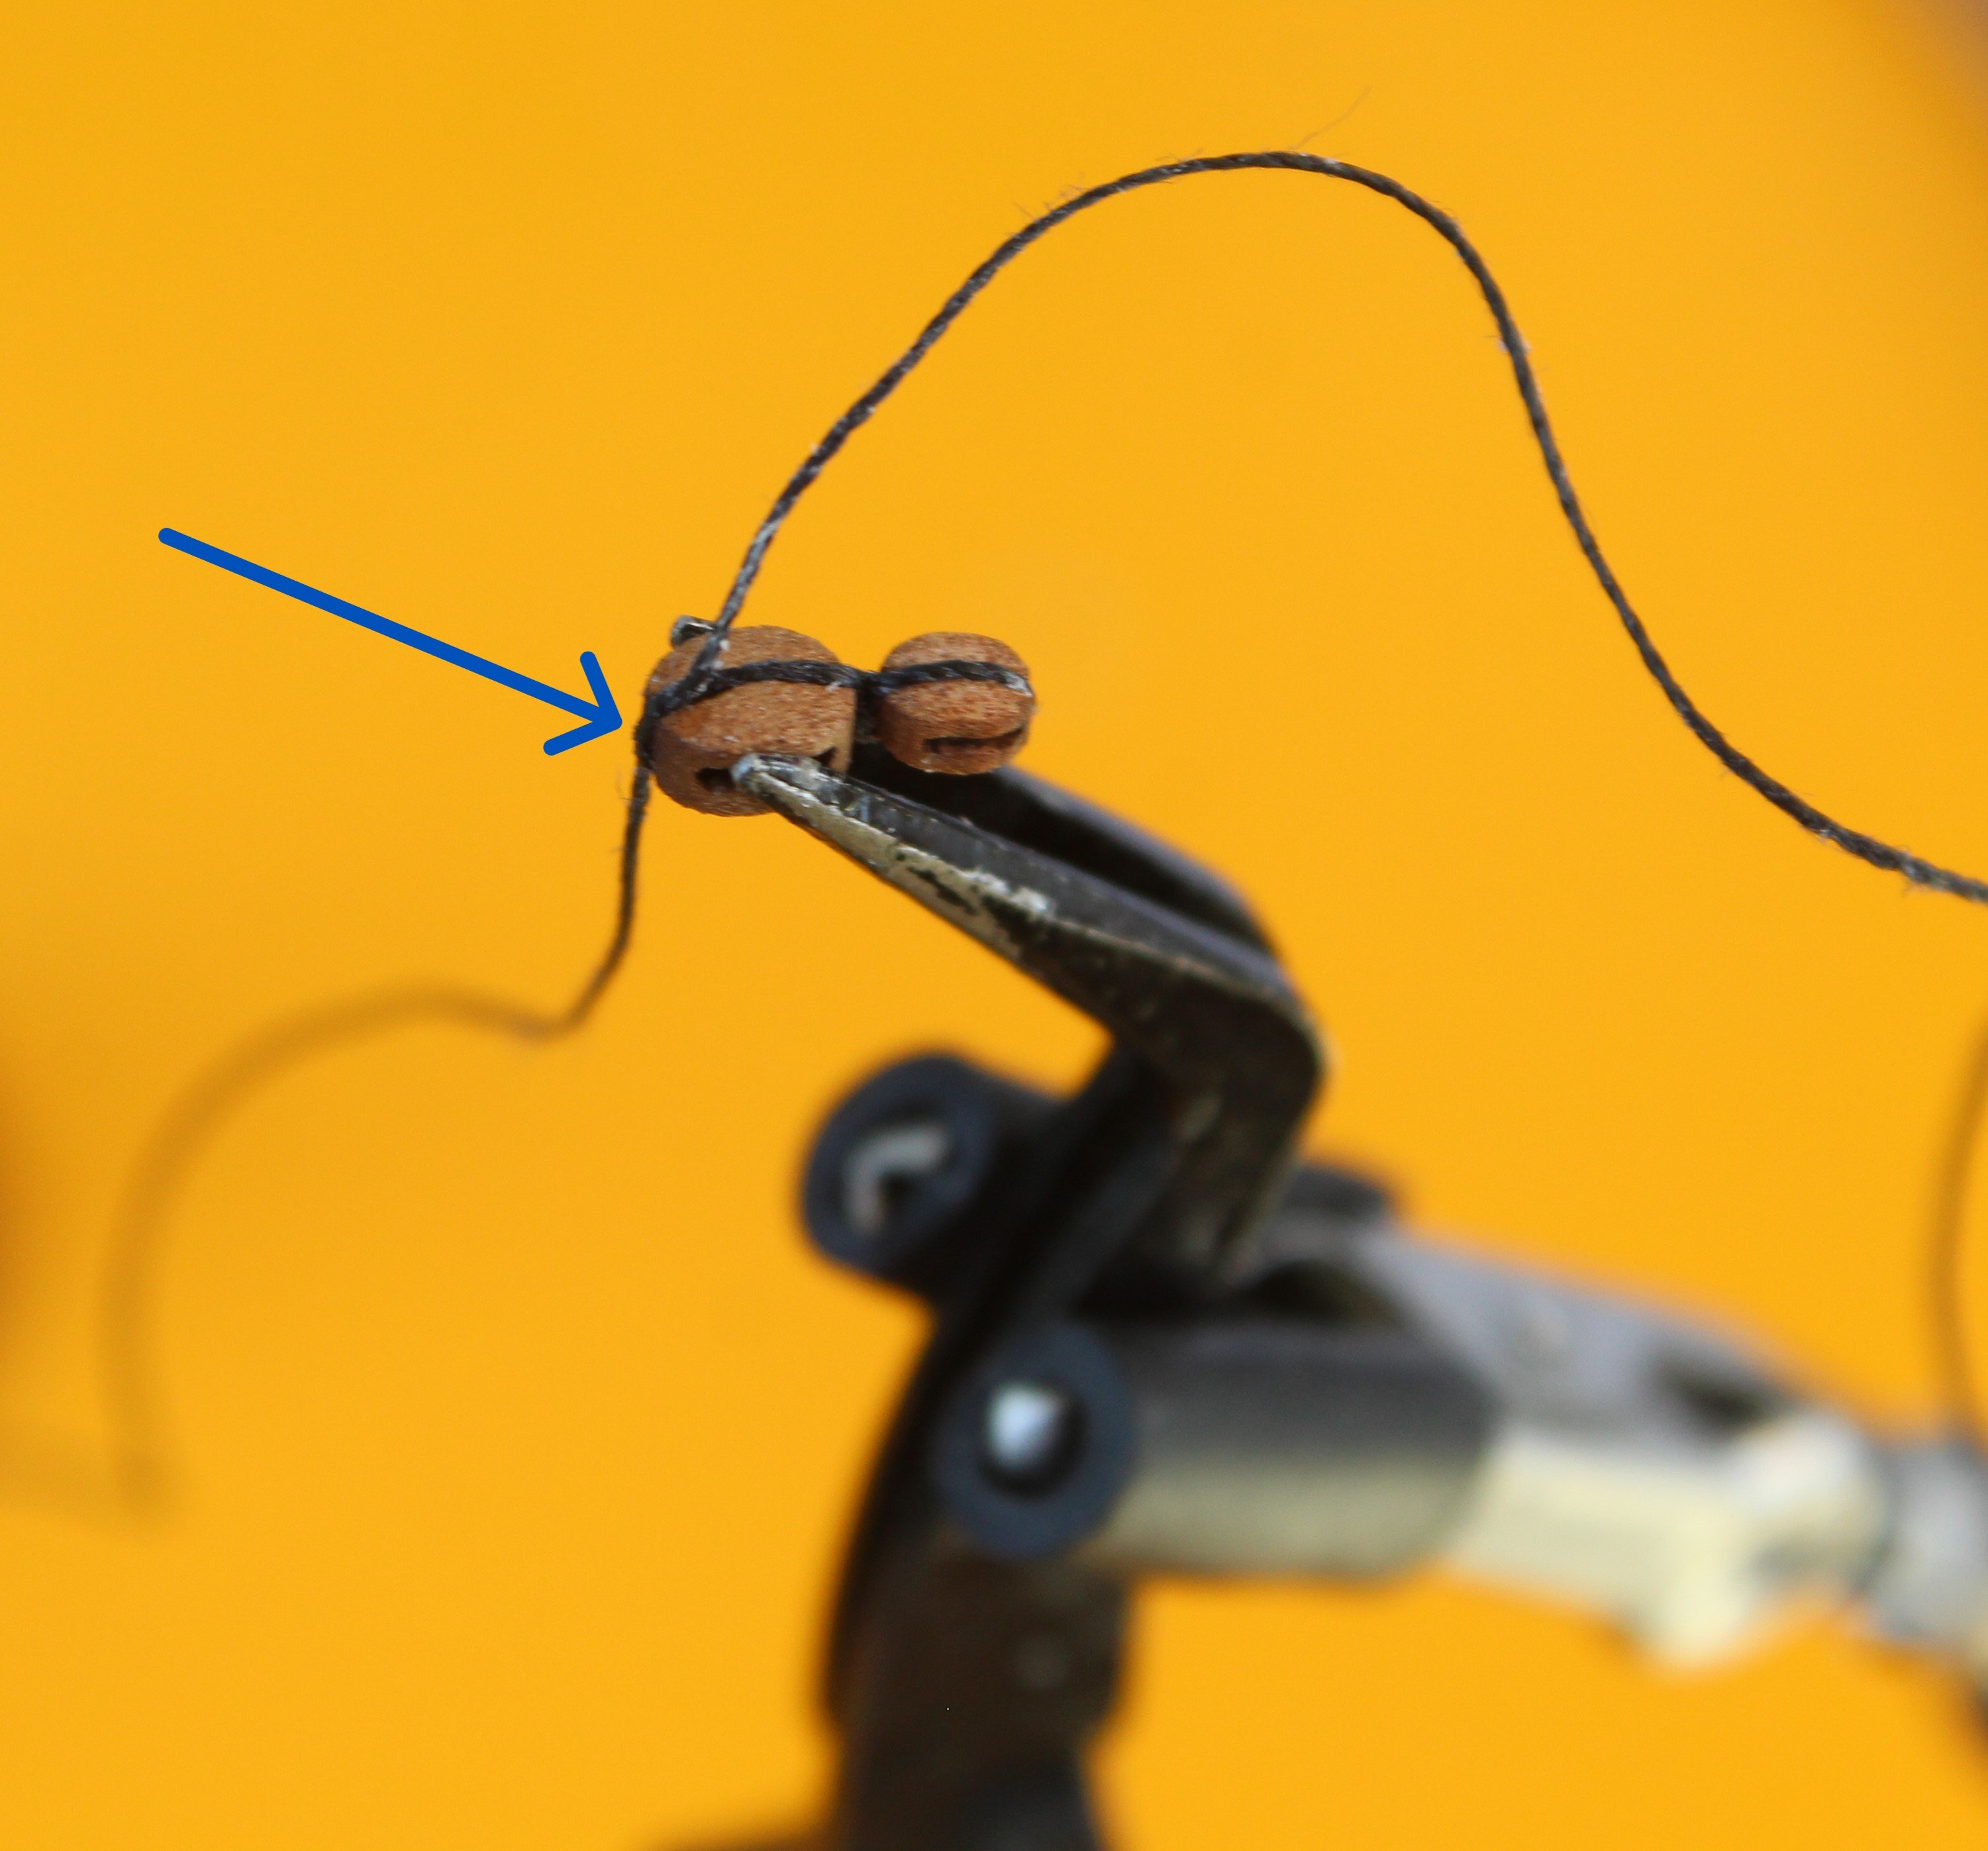
There are some double block arrangements to be secured to the each end of the various yards. I started the process with the outer block, which is a single 3mm block in the photos below. A length of 0.25mm black thread is wrapped the 3mm block and then secured in place with a reef (square) knot, as shown in the photo below.

The next (inner) 4mm single block is held in the quad ands and the 3mm single block is then positioned behind it. A simple cross over knot is used to hold the two blocks in place as can be seen in the next photo.

The free thread ends are then held in the quad hands so the seizing can be added, using 0.1mm black thread. Once the seizing is complete (using 8 x under and 8 x top cross over knots) a touch of ca glue is added to the seizing and then the excess thread is trimmed. The double block assembly is now ready to be installed to the yard.
- chris watton, Thukydides, AON and 8 others
-
11
-
8 hours ago, DB789 said:
I’m not sure when best to fit the hammock cranes and the cord between them as they’ll likely be in the way to for tying off rigging, then again I’ll need access to fit them which may be hard post-rigging.
With my Indy build I had left off fitting the hammock cranes with the intention of fitting them once the rigging was complete. However as the rigging progresses I realised access was going to be an issue, especially after I had fitted the shrouds and back stays so I ended up fitting them.
-
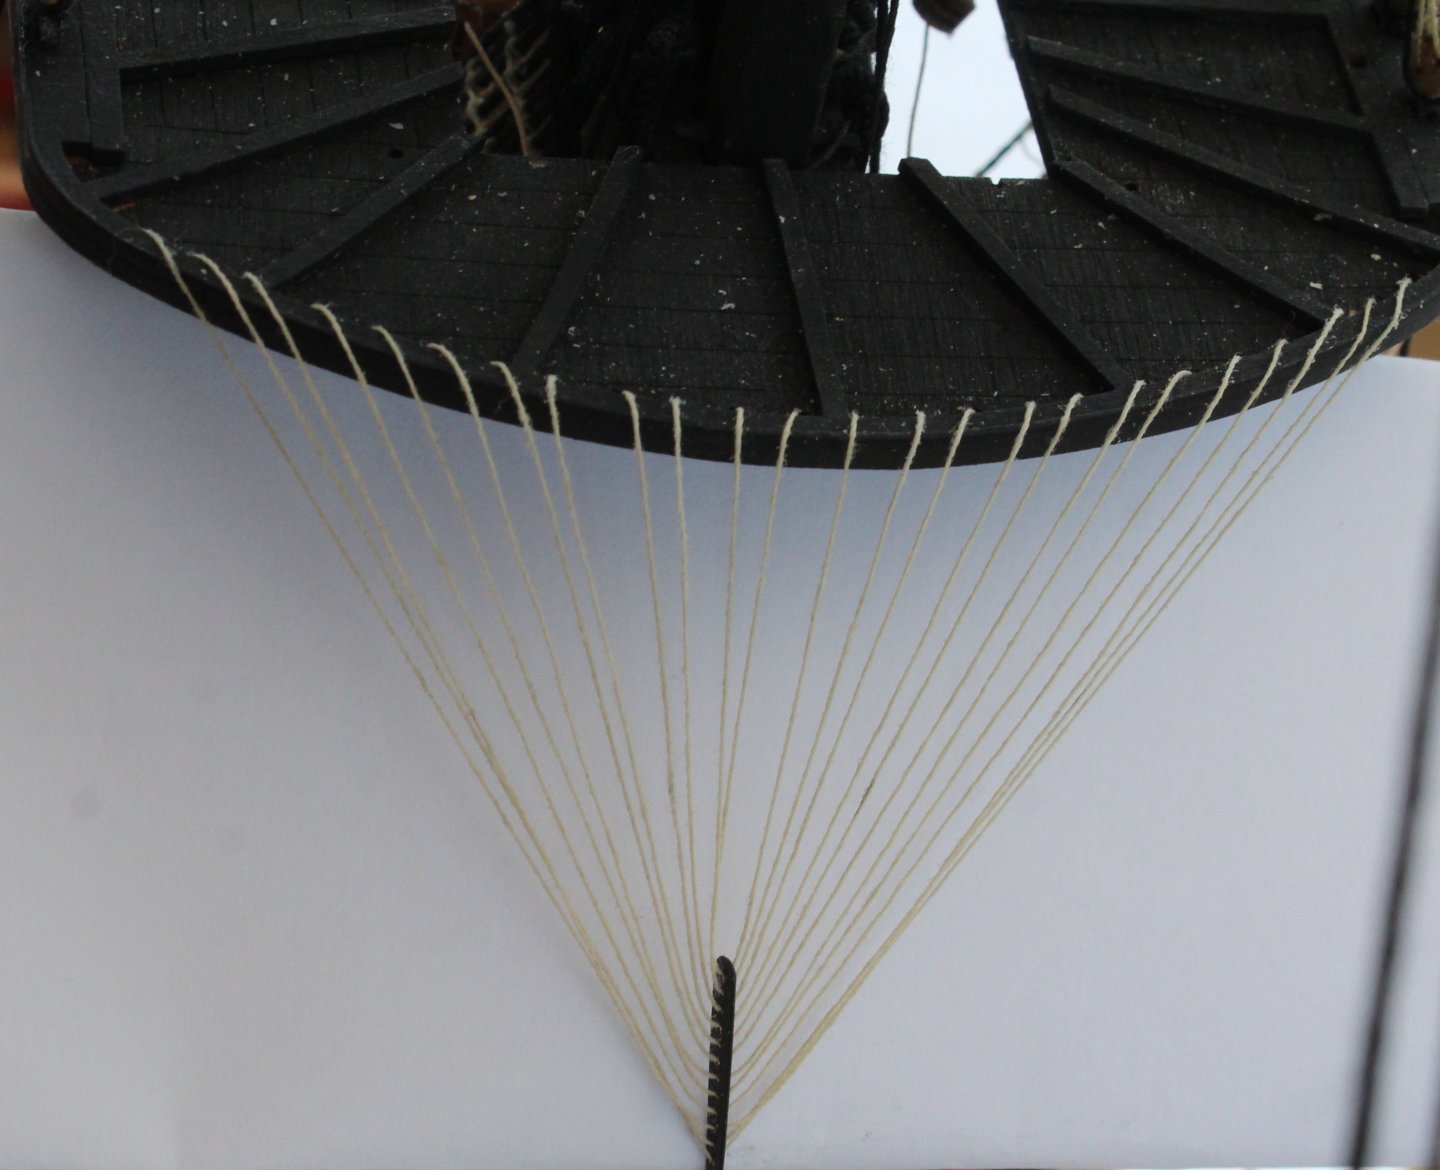
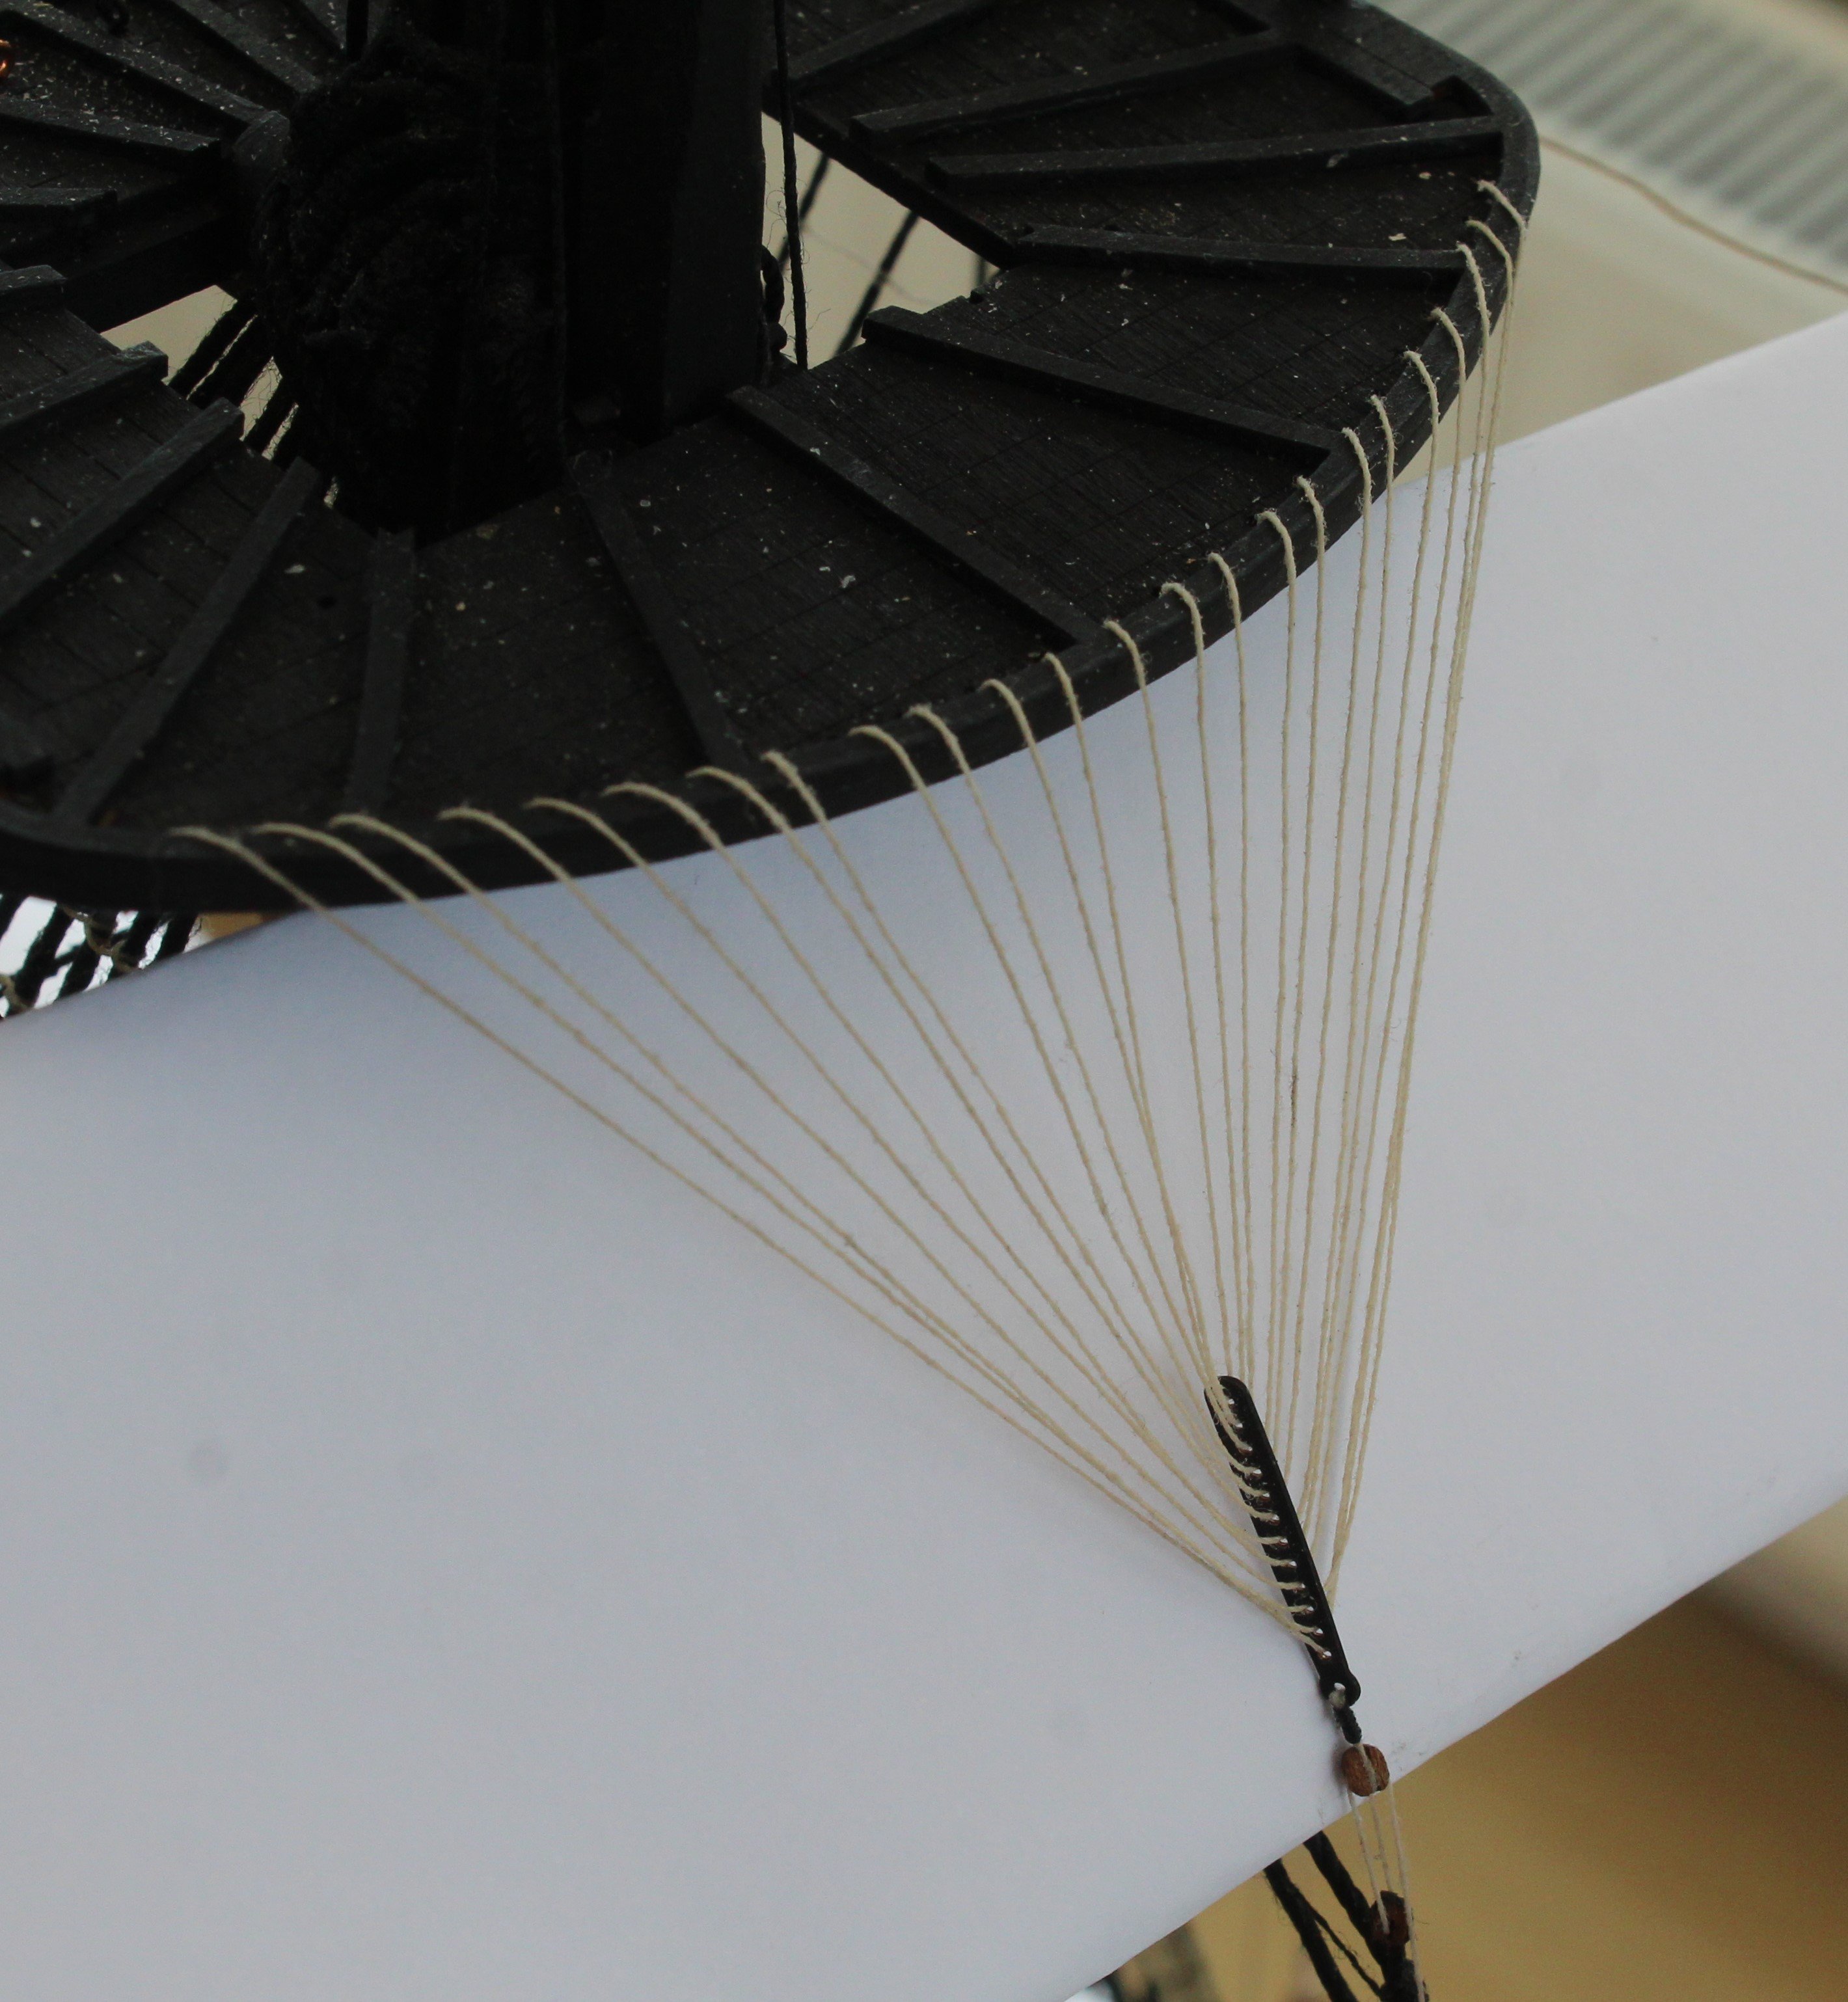
Foremast Crows Feet Rigging
Over the last couple of days I have been working on adding the crows feet rigging to the foremast.
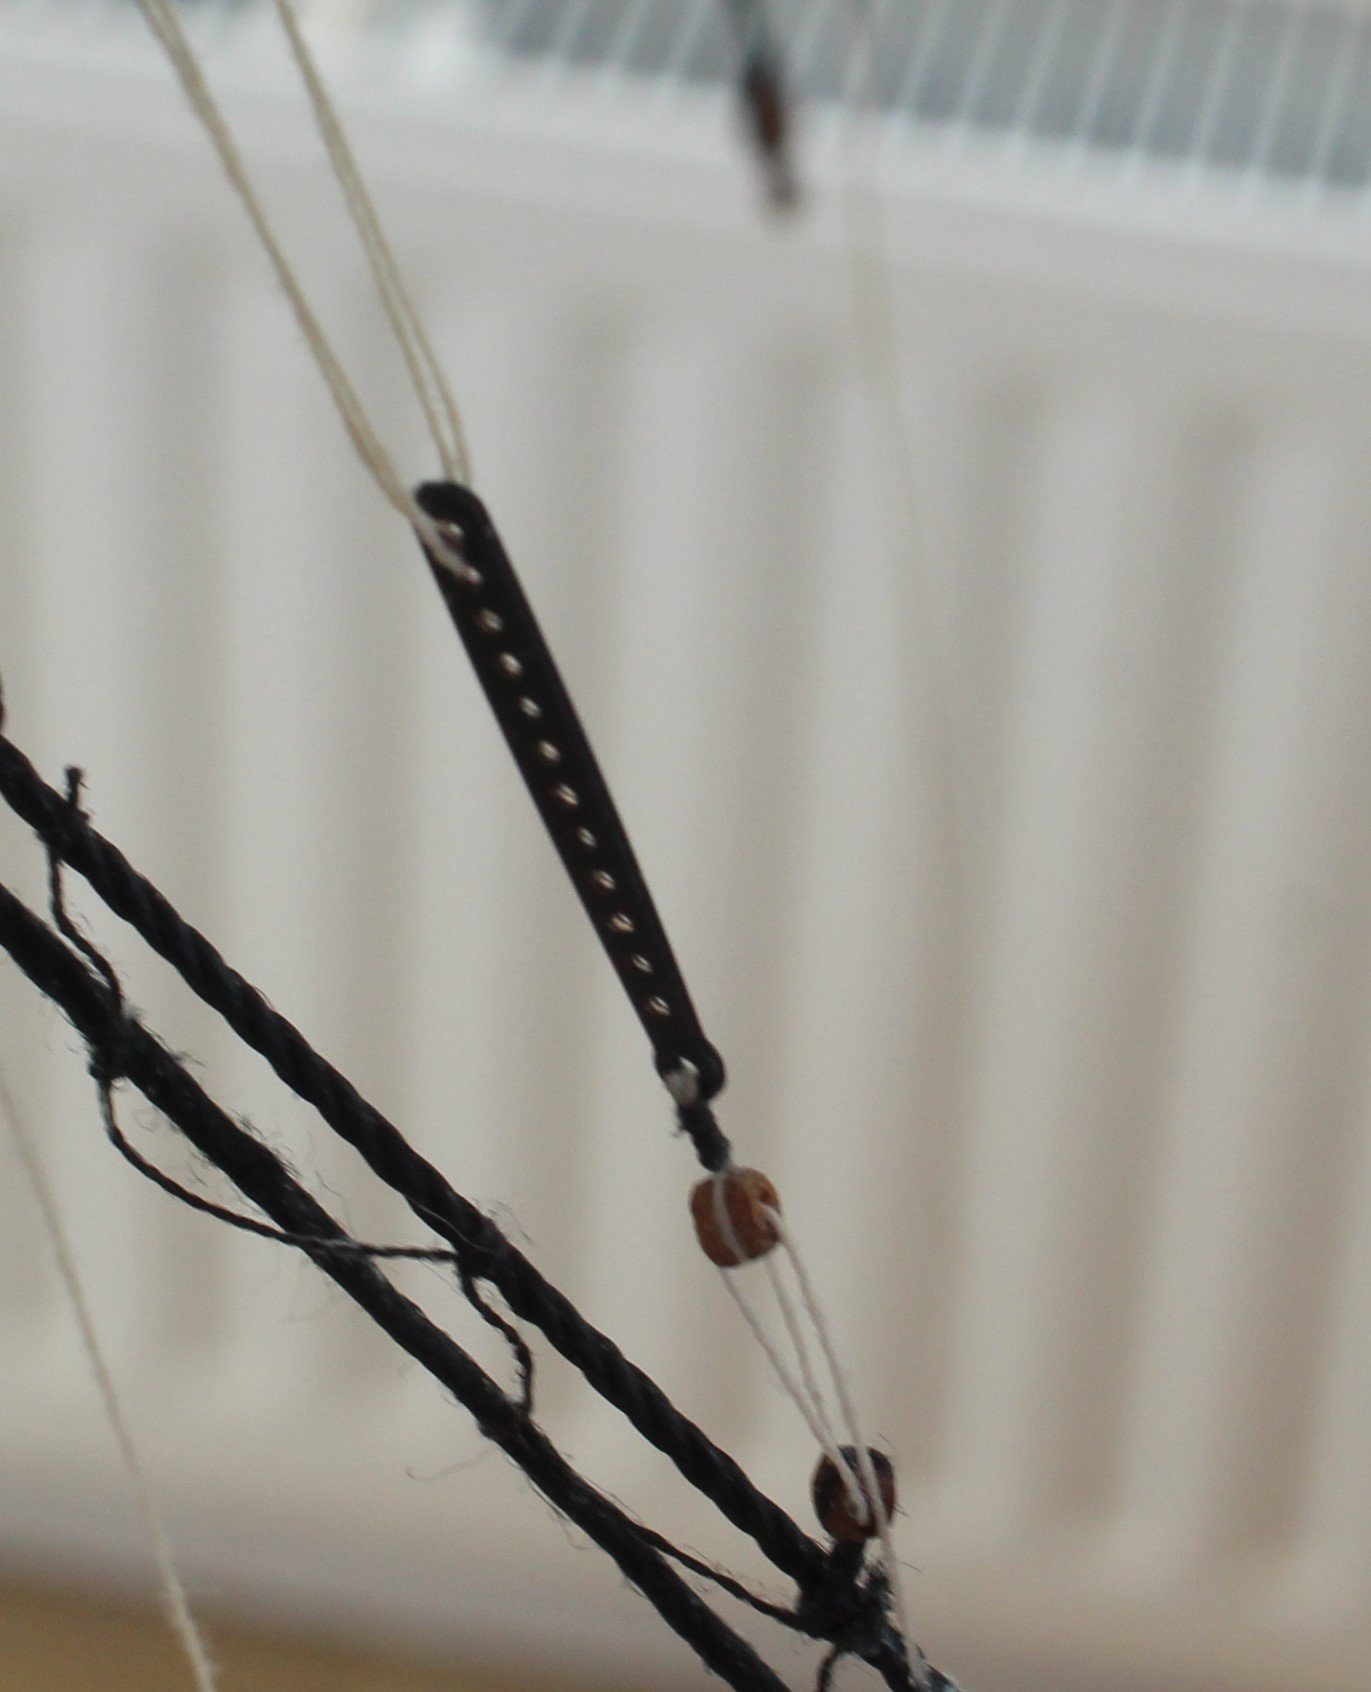
The first task was to add a 2mm single block to the top forestay.
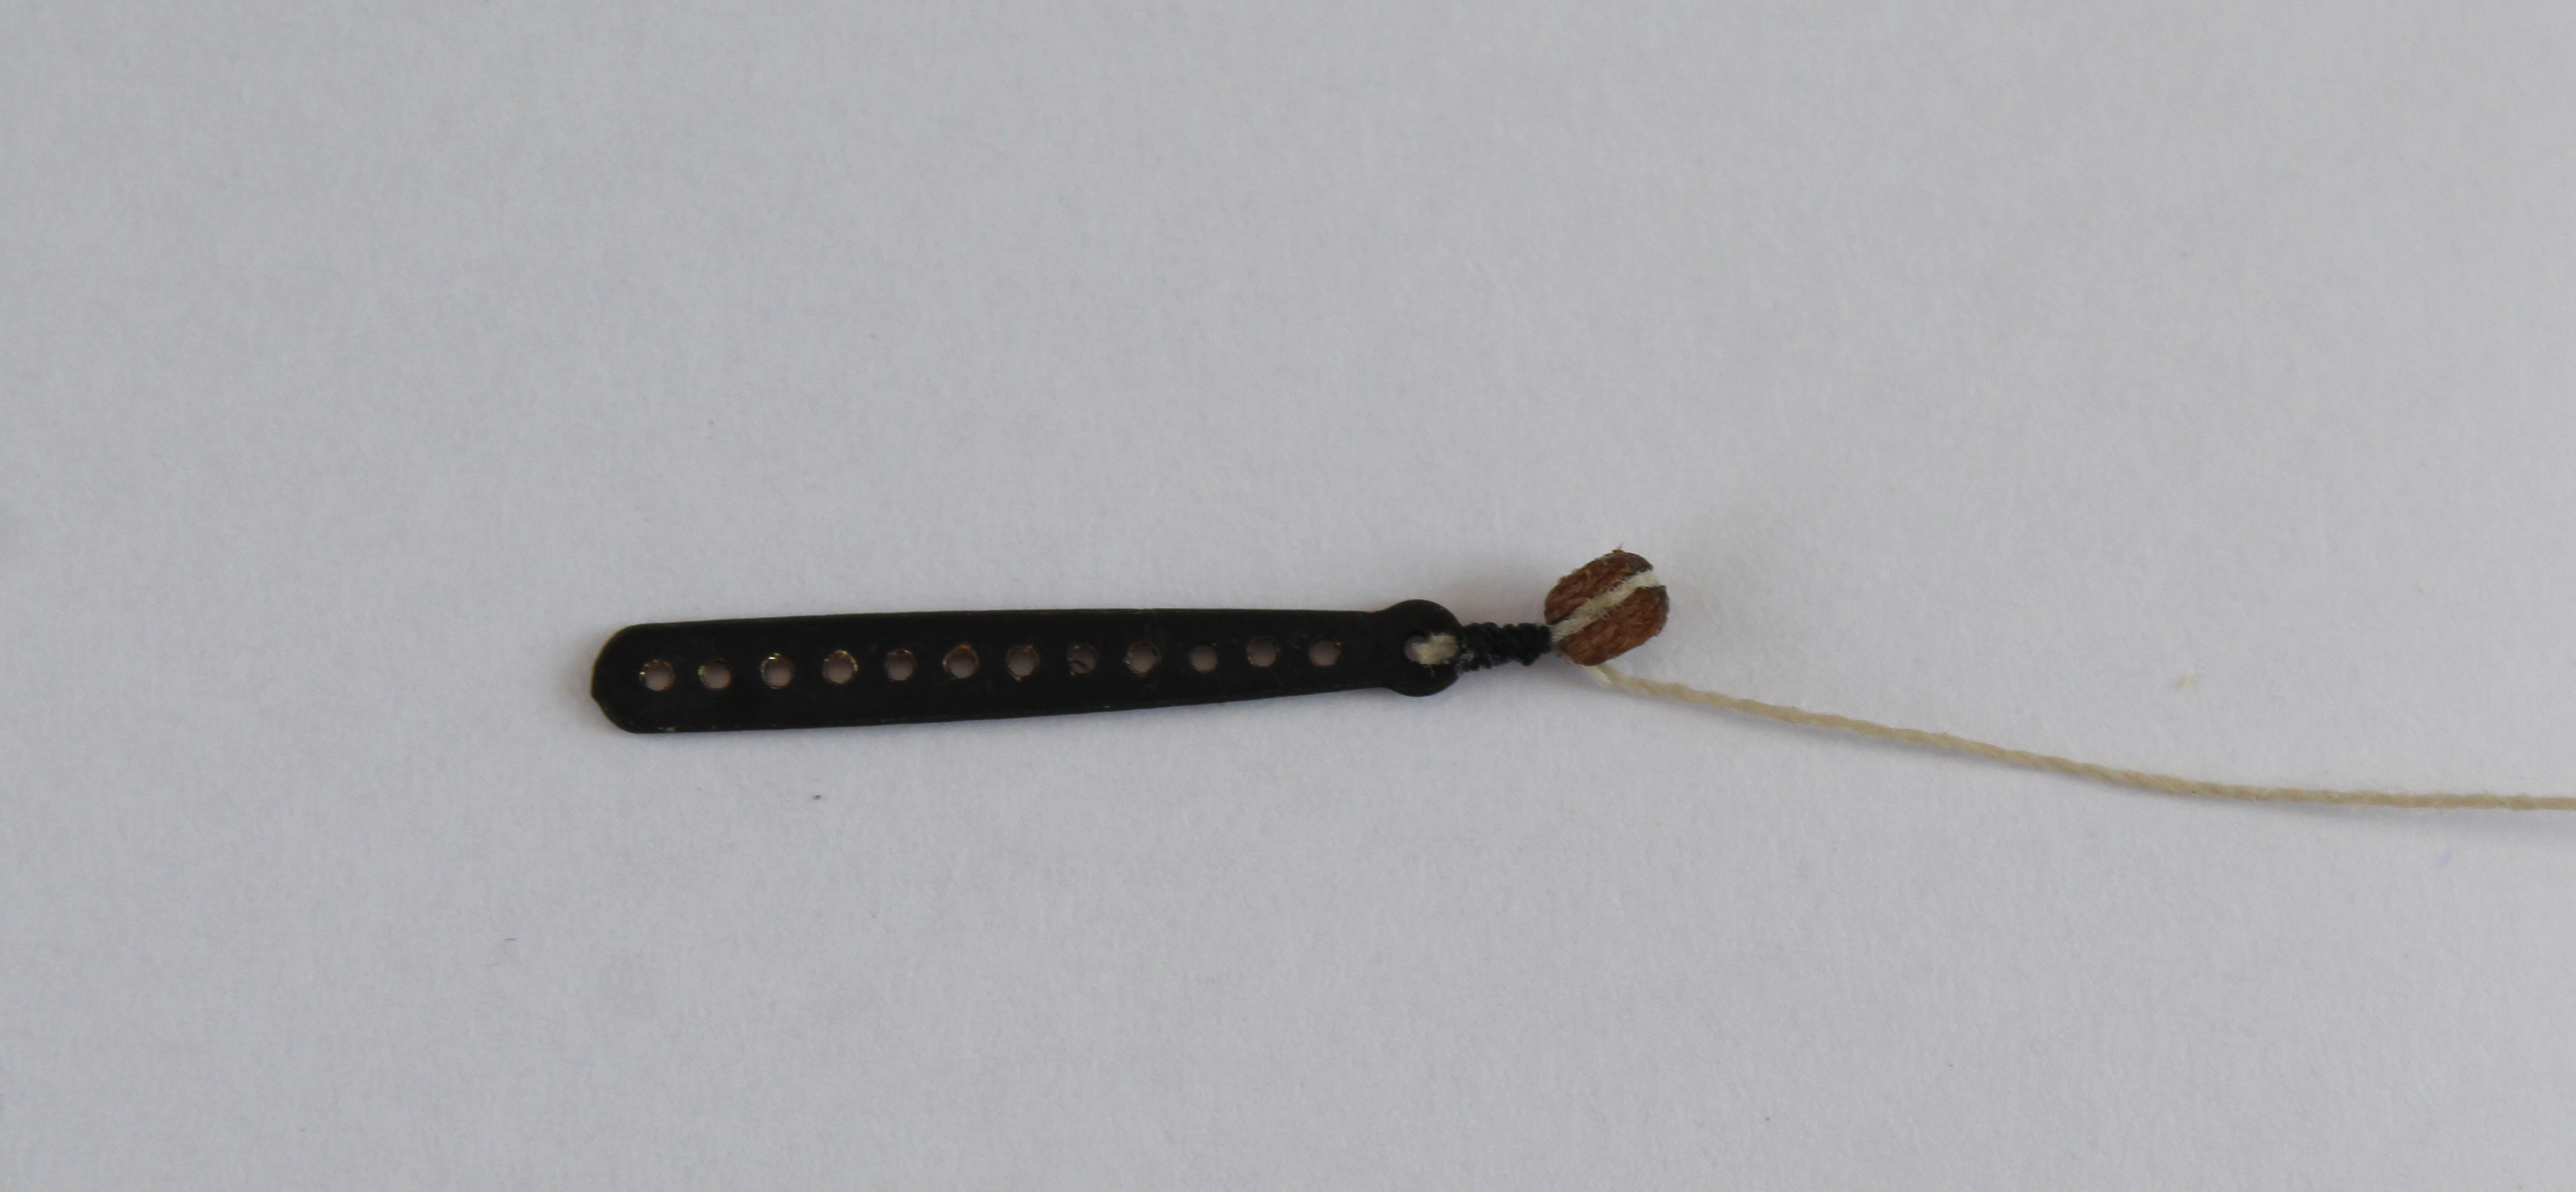
The next task was to add another 2mm single block to the euphroe.
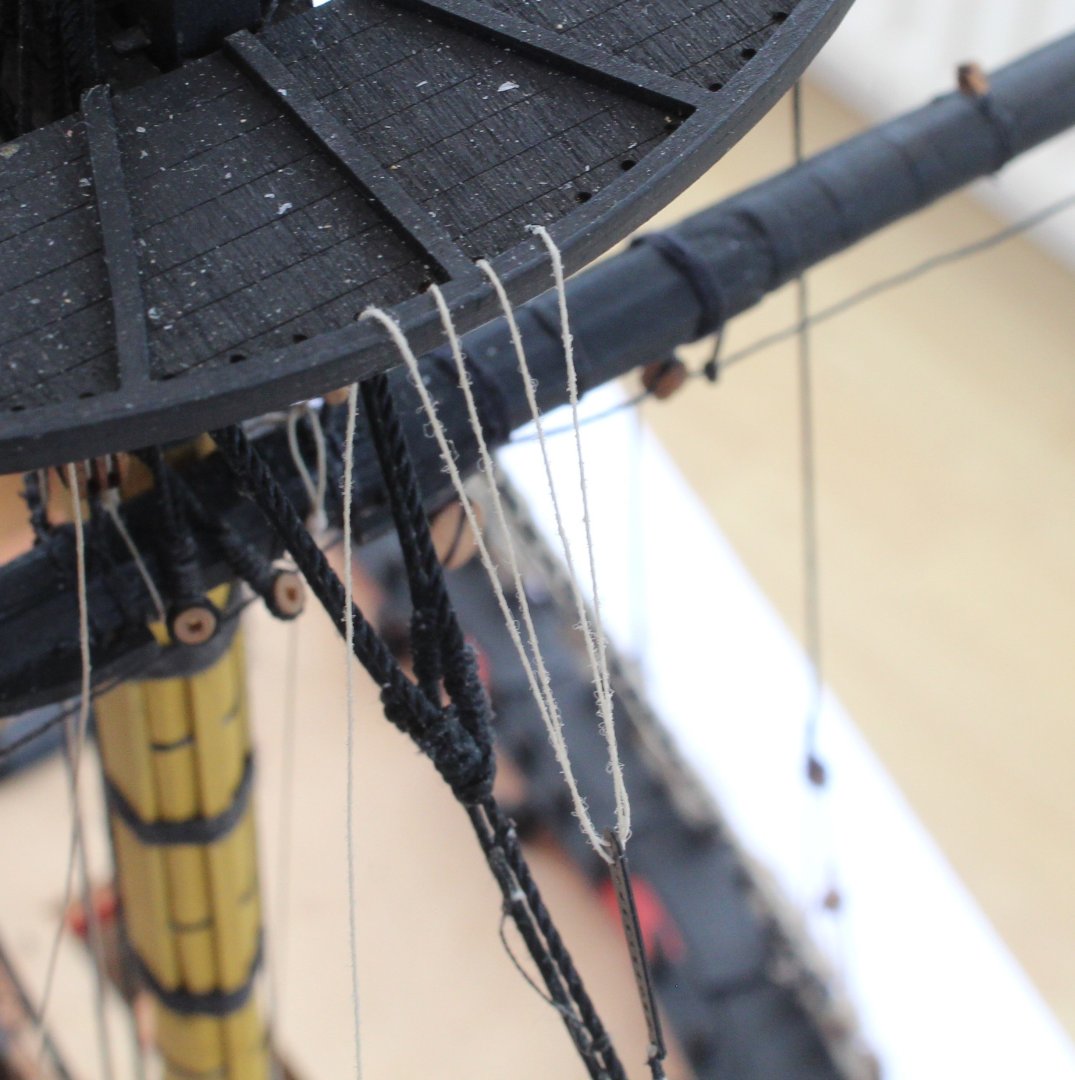
Next up was to rig the two blocks. I found it useful to use a clamp to hold the euphroe whilst adding the inter-block rigging.

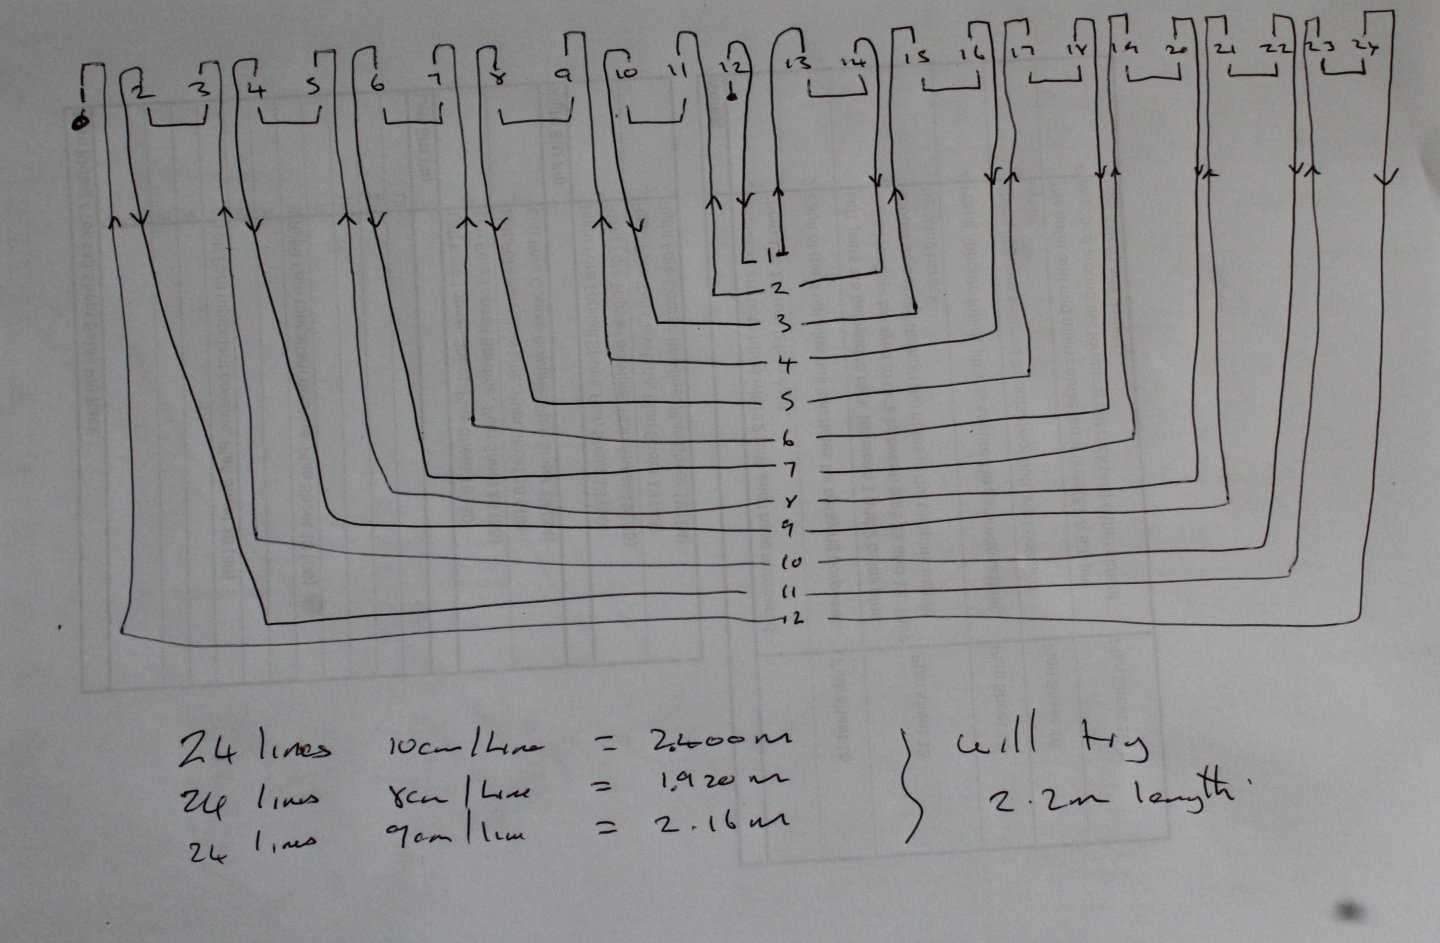
Before I started to add the crows feet rigging I did map out the required path. I also calculated the required length of thread. I opted for a generous 2.2m length but in the end a length of 1.8m would have been sufficient.
It was then a case of following the required path as the rigging was added. I have added a few photo's taken of the work in progress.


The rigging is now complete and the free end is ready to be tied off. once I have adjusted the required and applied some tension.

I used a slip knot to secure the free end. The crows feet rigging is now complete.

- wvdhee, rcweir, chris watton and 9 others
-
12
-
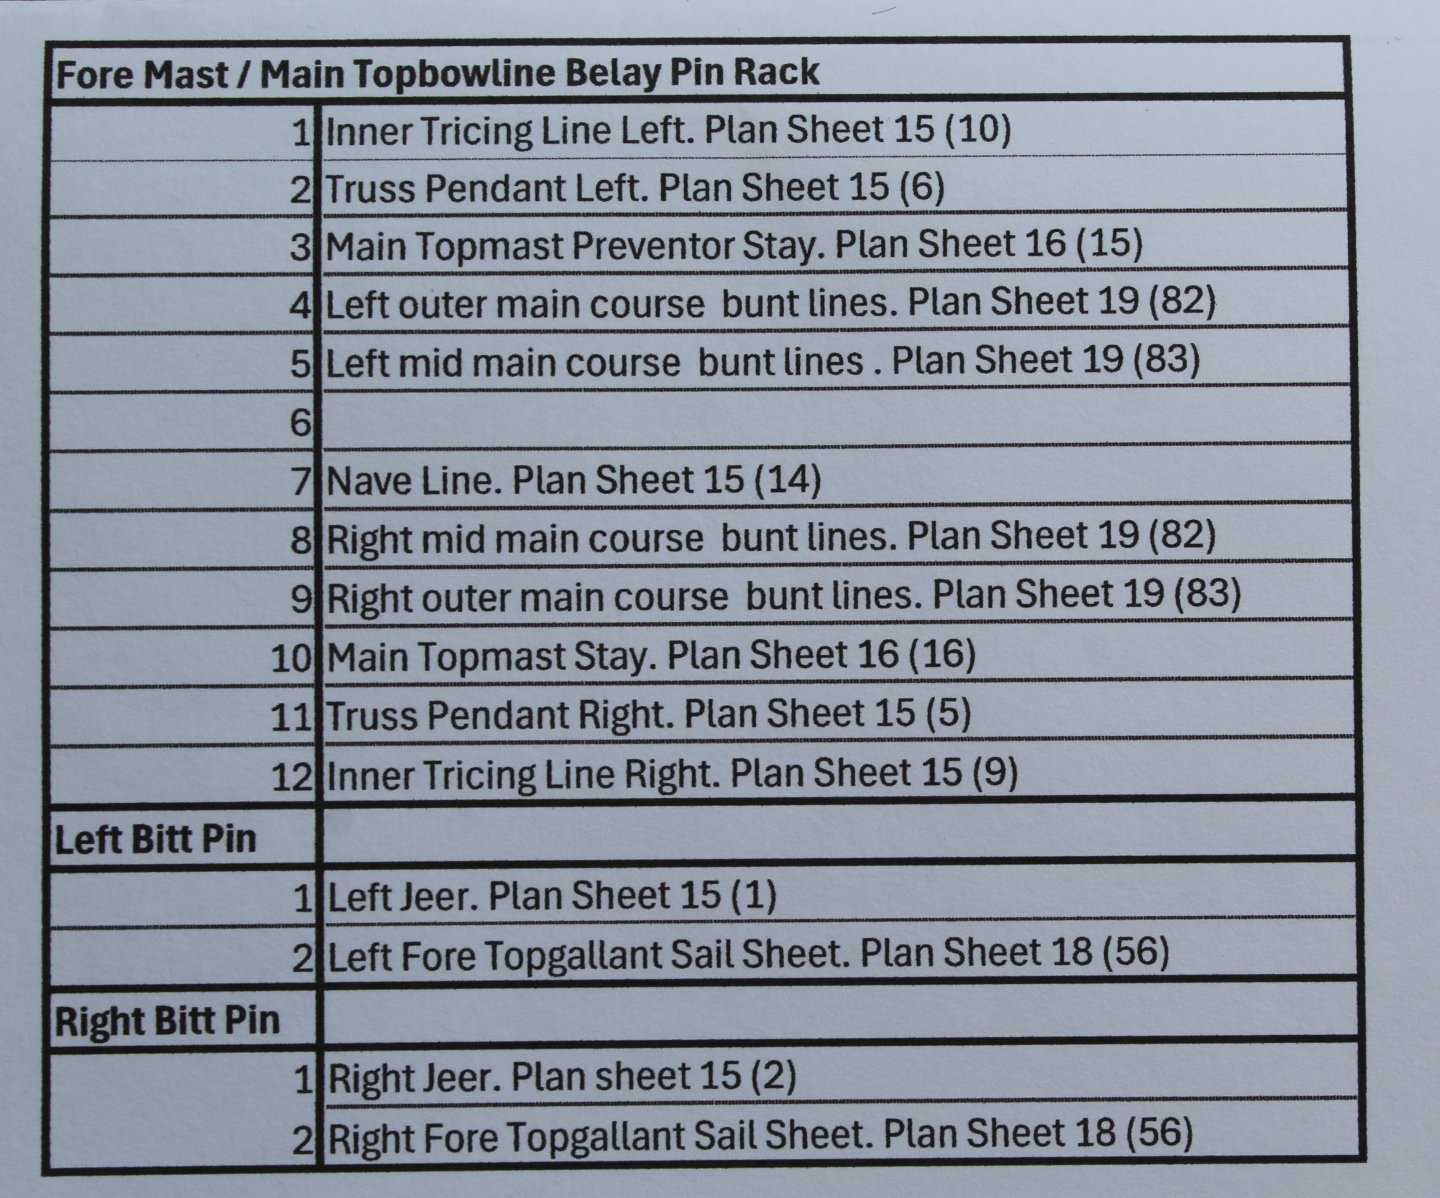
Belaying Foremast Jeers, Nave Line and Jeers
I spent some time looking at plan sheets 15 to 19 to check the various belaying points for the foremast rigging. With reference to the Fore Mast (Aft) aka Main Topbowline Belay Pin Rack I ended up allocating the belaying assignments as shown in the photo below, noting I included the plan sheet belaying reference as an aide memoir.
I did note in Longridge's book the inner tricing line is shown belayed to one of the shroud cleats, so I might revert to that option when I get round to adding that rigging.
The next photo shows the Nave Line which is linked to the truss pendents and then dropped down to the deck via a single block attached to the rear of the fore platform.
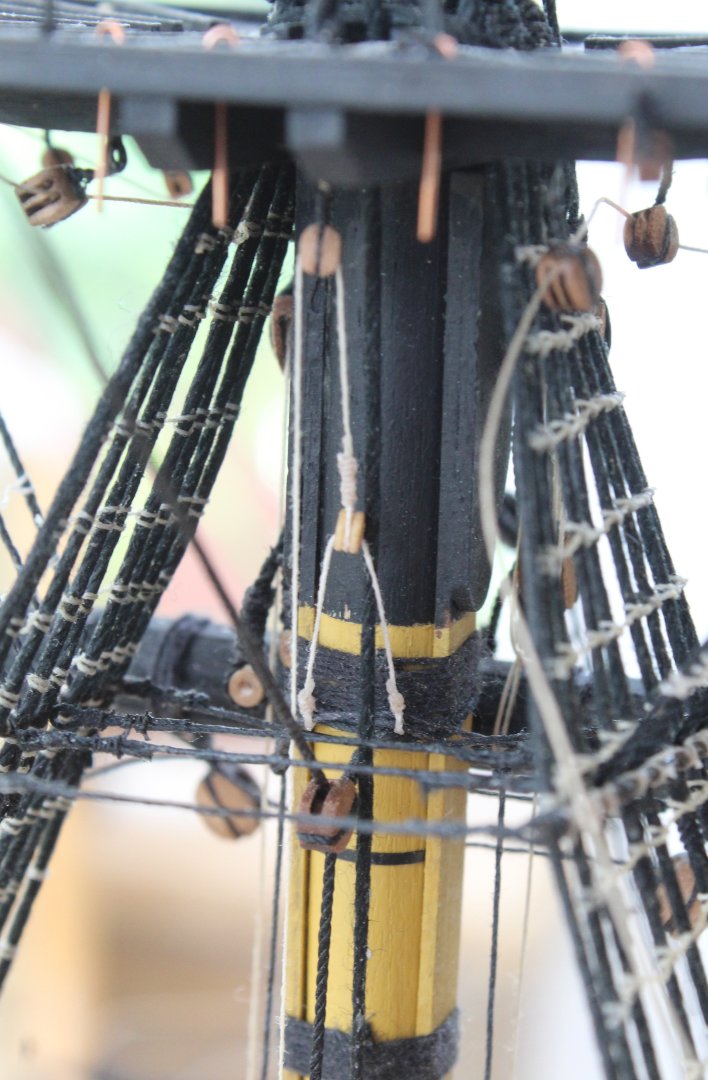
The next photo shows the jeer blocks and sling
The next photo shows the fore mast (aft) belaying rack, after the various rigging ends had been belayed. The unused belaying points will be used for the inner tricing line and the outer & mid main course bunt lines.

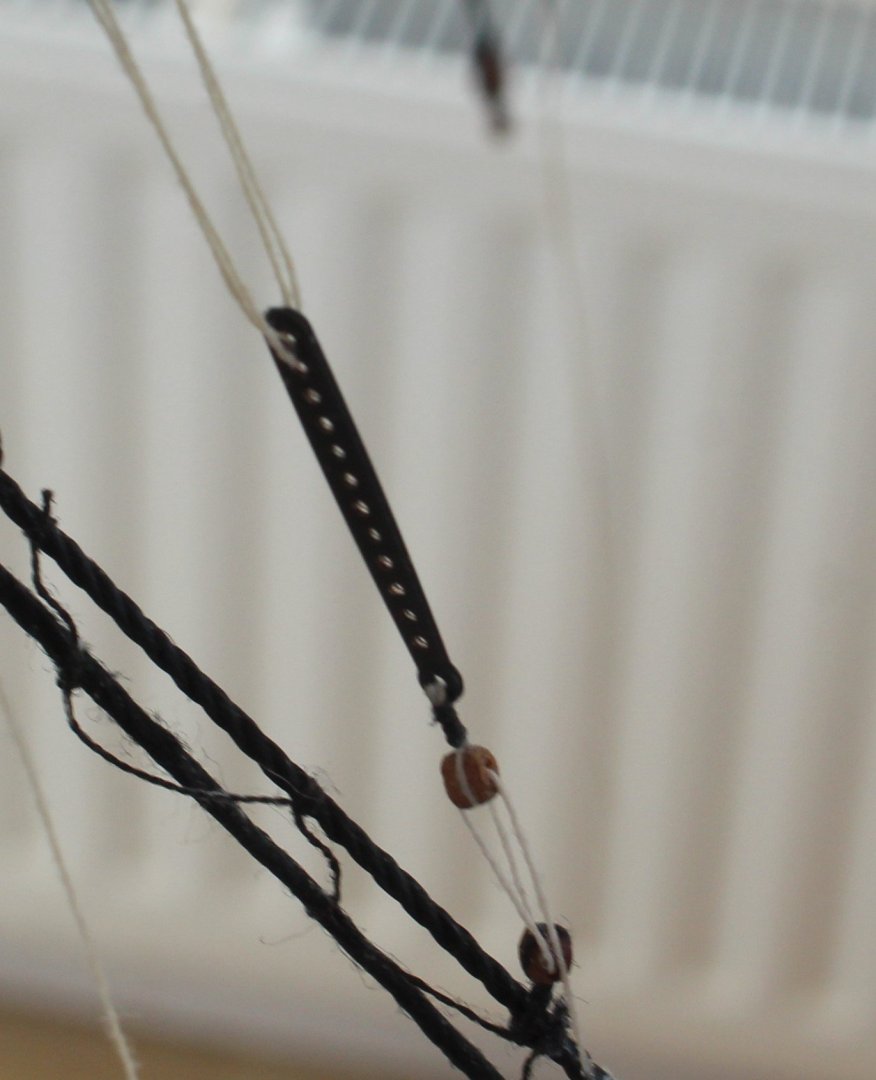
The next two photos shows the truss pendants double block belaying arrangement.

In the next photo the jeer can also be seen being fed through the lower left hole in the bitt pin.

- davyboy, GrandpaPhil, BLACK VIKING and 9 others
-
12
-
Installation of the foreyard to fore mast
Following on from yesterday's post today I was able to install the foreyard to the foremast.
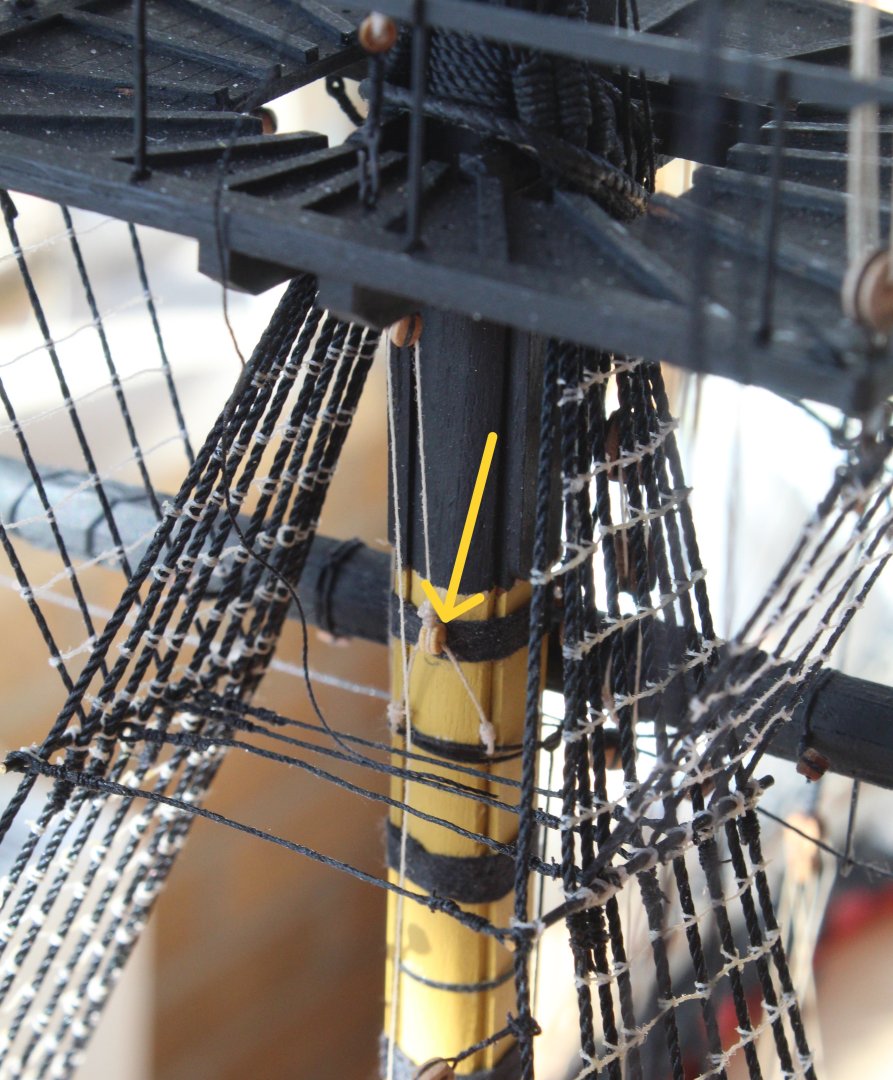
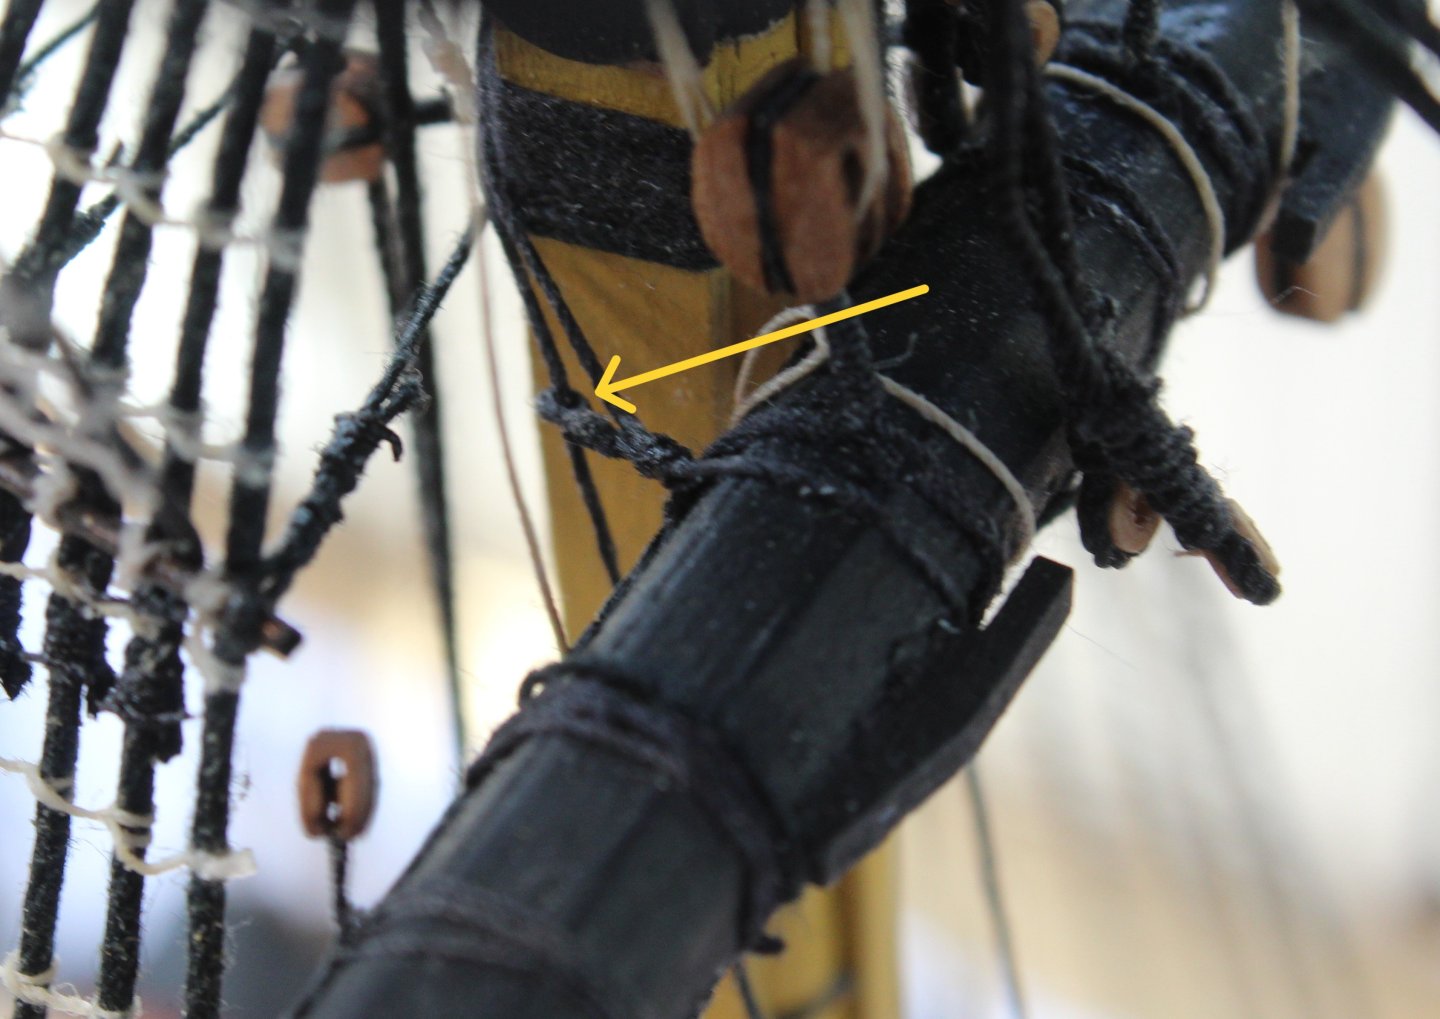
Before fitting the foreyard, and as can be seen in the next photo, I was able to redo the truss pendants so their respective thimbles were correctly positioned, as indicated by the yellow arrow. I then applied glue to the foreyard locating pin before it was added to the fore mast.

Slings
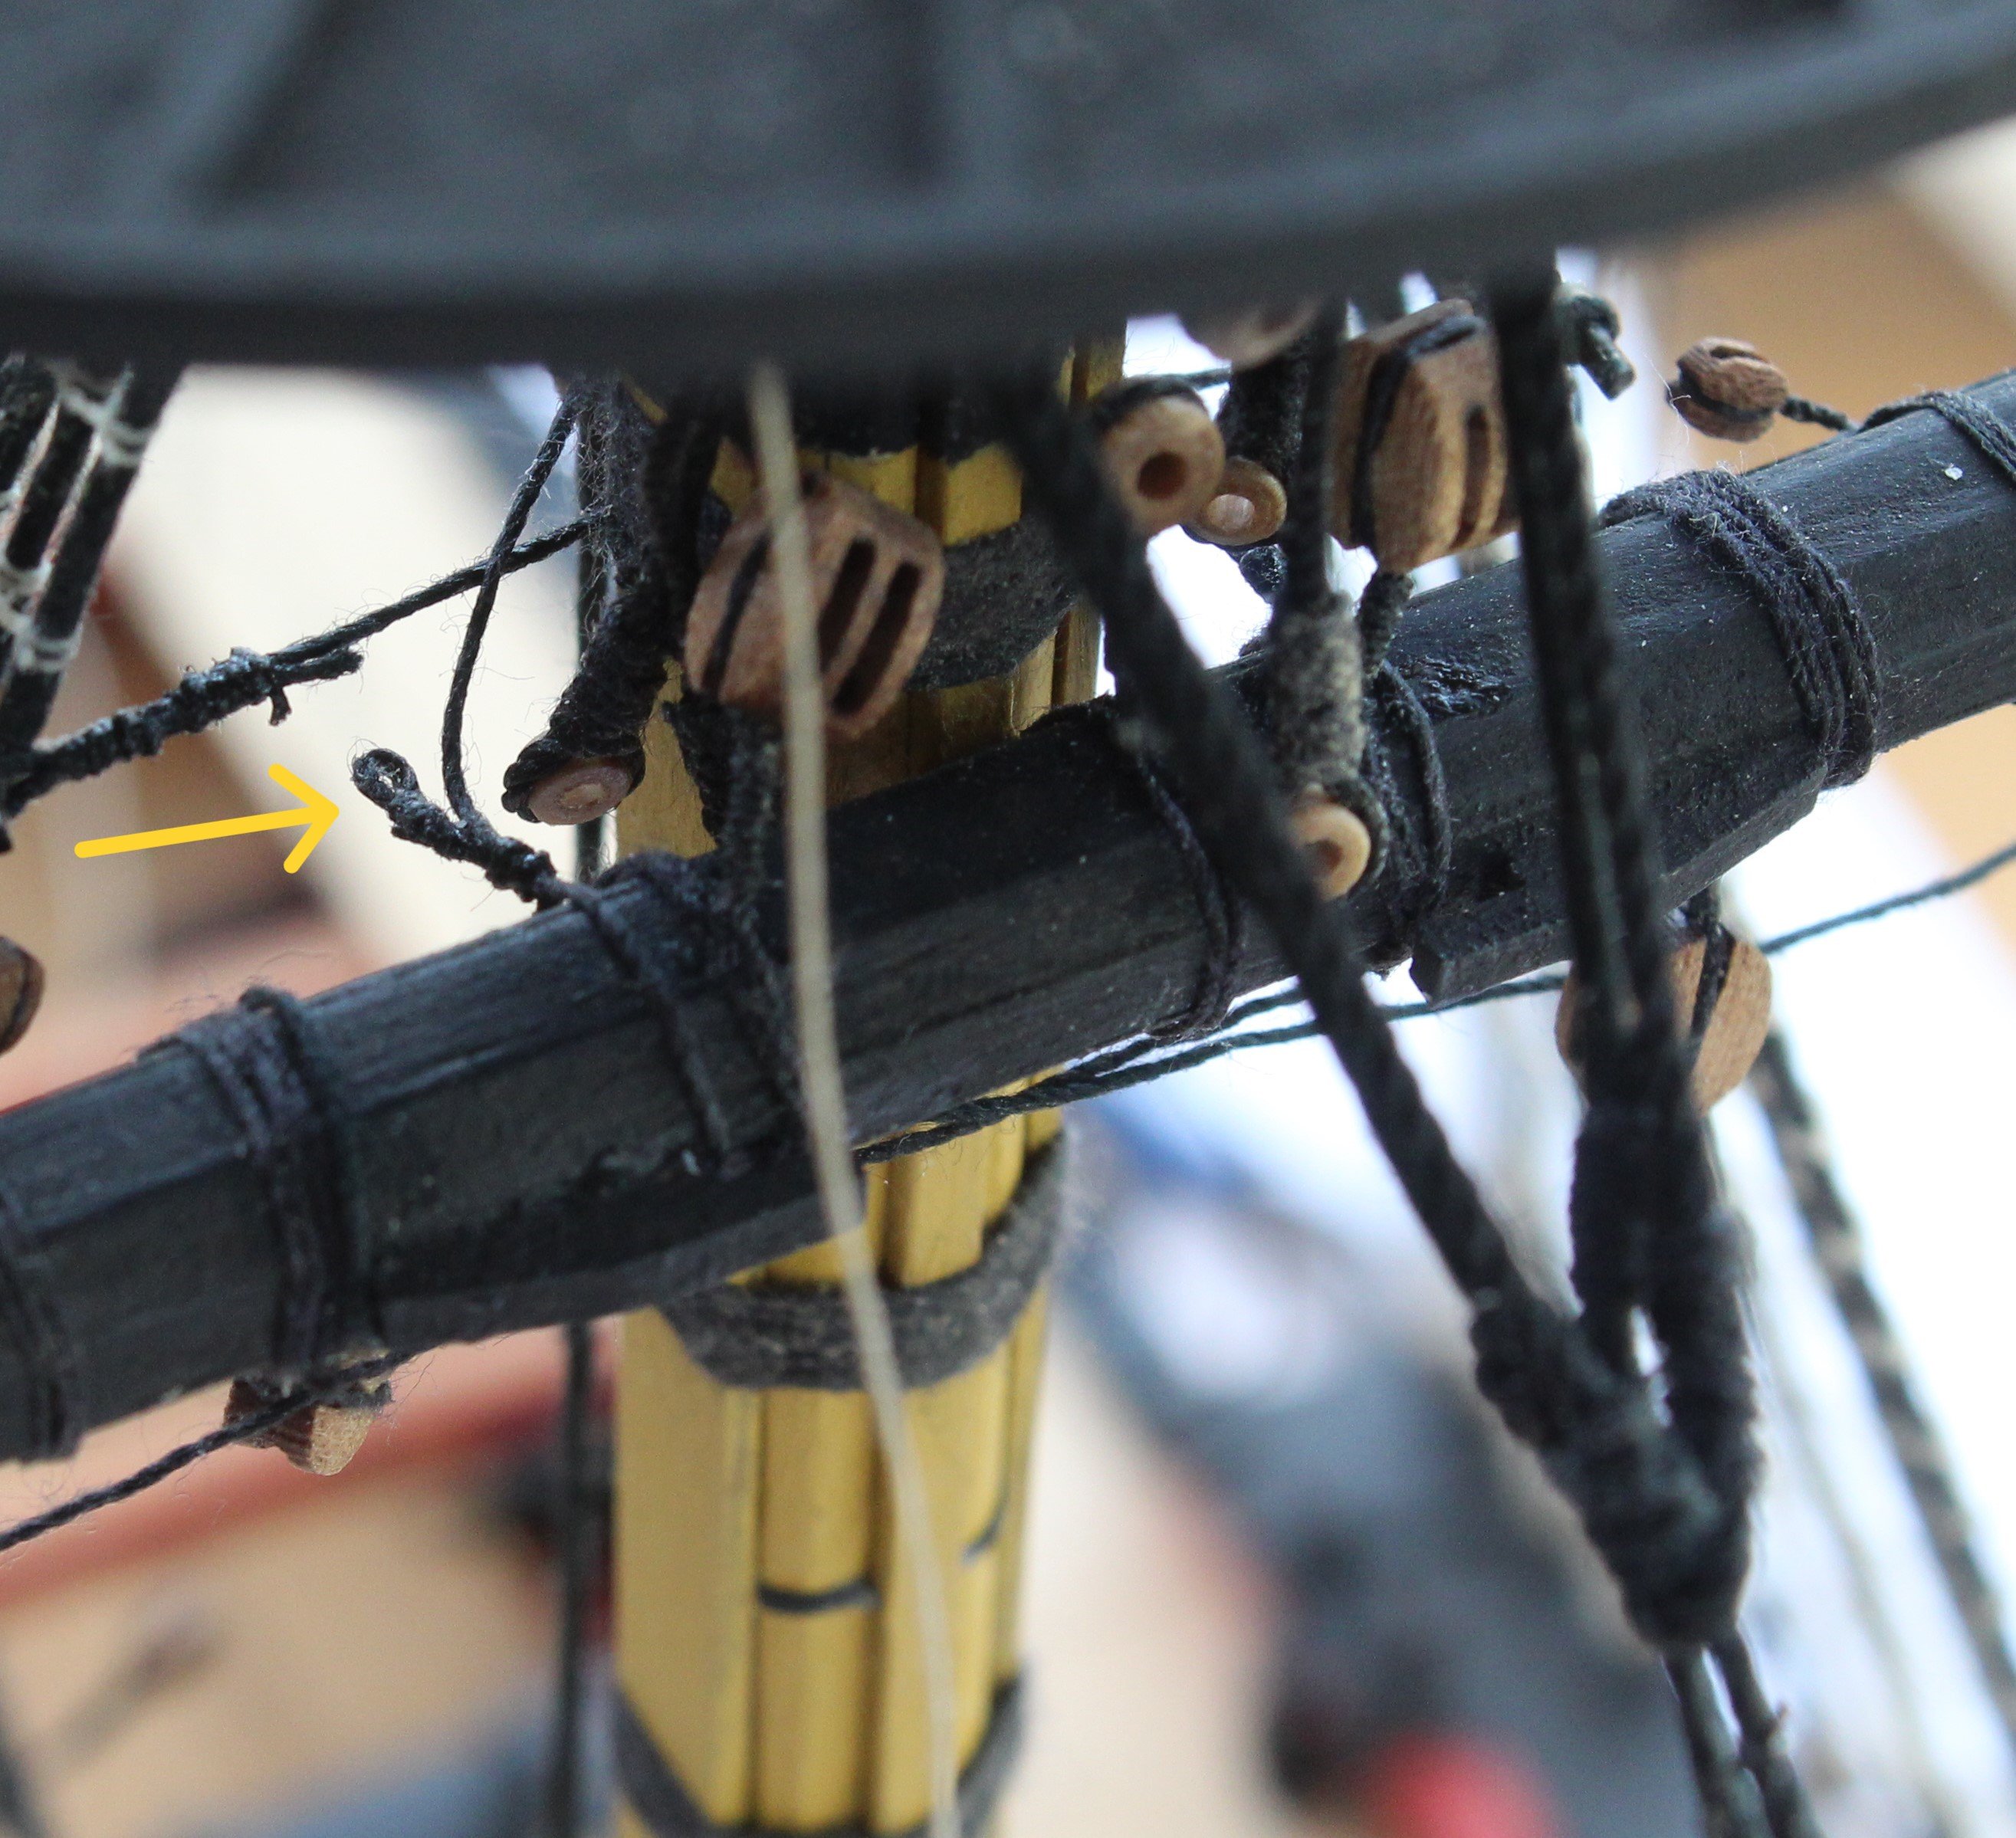
On a real ship once the foreyard has been raised to the required height it is held in place with a sling arrangement. A loop is wrapped around the central point of the foreyard with a thimble on the free end. A second longer loop is wrapped around the mast cap with a thimble on the free end. The two thimbles are then linked together. In the next photo I have added the rigging between the two thimbles, as indicated by the yellow arrow.
Jeers
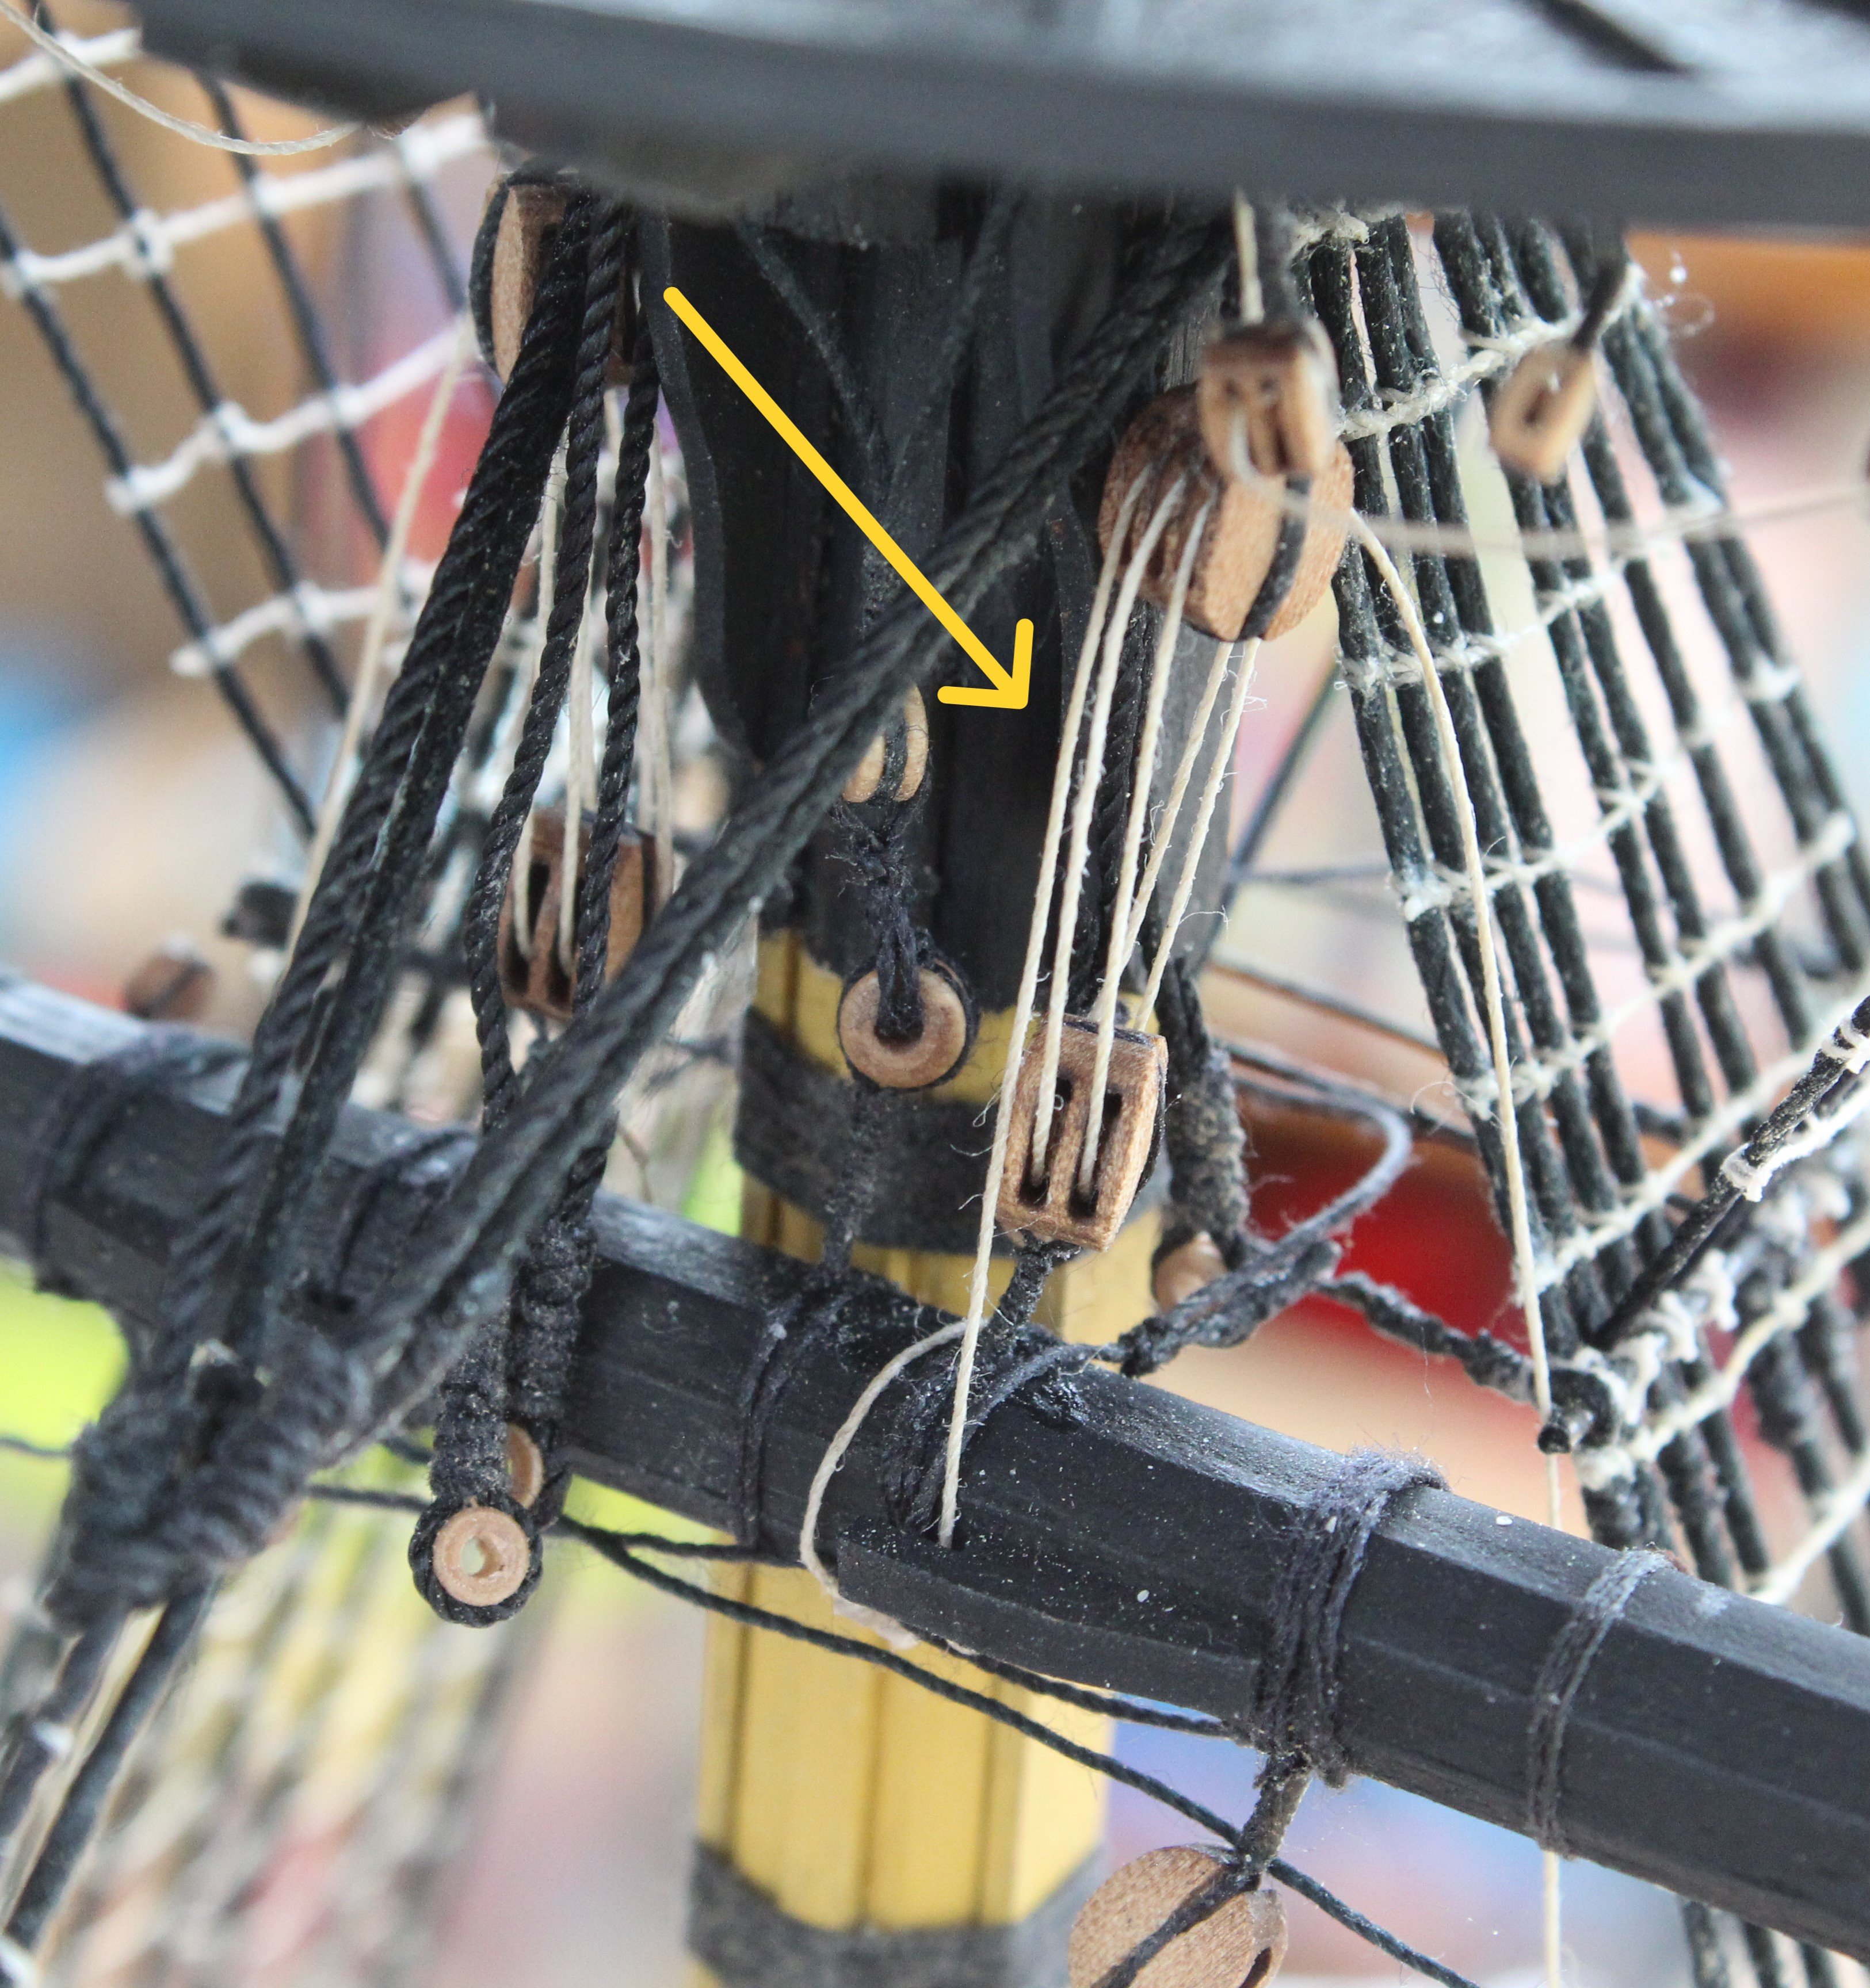
Operationally the foreyard is hoisted up the foreyard using the jeers. Two double blocks are located on the foreyard, each situated either side of the foremast. Two more triple blocks are seized to the figure of 8 wrapping around the foremast (above the platform) and they hang down, so they are positioned below the platform but above the foreyard position. The rigging between these blocks then allows the yard to be lifted up in position. In the photo below I have added the inter-block rigging, as indicated by the yellow arrow. The free end(s) are ready to be belayed to the deck using a block and tackle arrangement.

Truss Pendants
Once the yard has been hoisted, using the jeer block and tackles, and held in place with the sling, truss pendant are used to keep the yard in place with the mast. There are two truss pendant, located either side of the fore mast. Each truss pendant is looped around the foreyard and has a thimble. With the foreyard in position the each end of the truss pendants are placed behind the mast and is then feed through the other truss pendants thimble before they are belayed to the deck via a block and tackle arrangement. In the photo below you can seen one of the truss pendants has been fed through the other truss pendants thimble and is ready to be belayed via the block and tackle (yellow arrow).
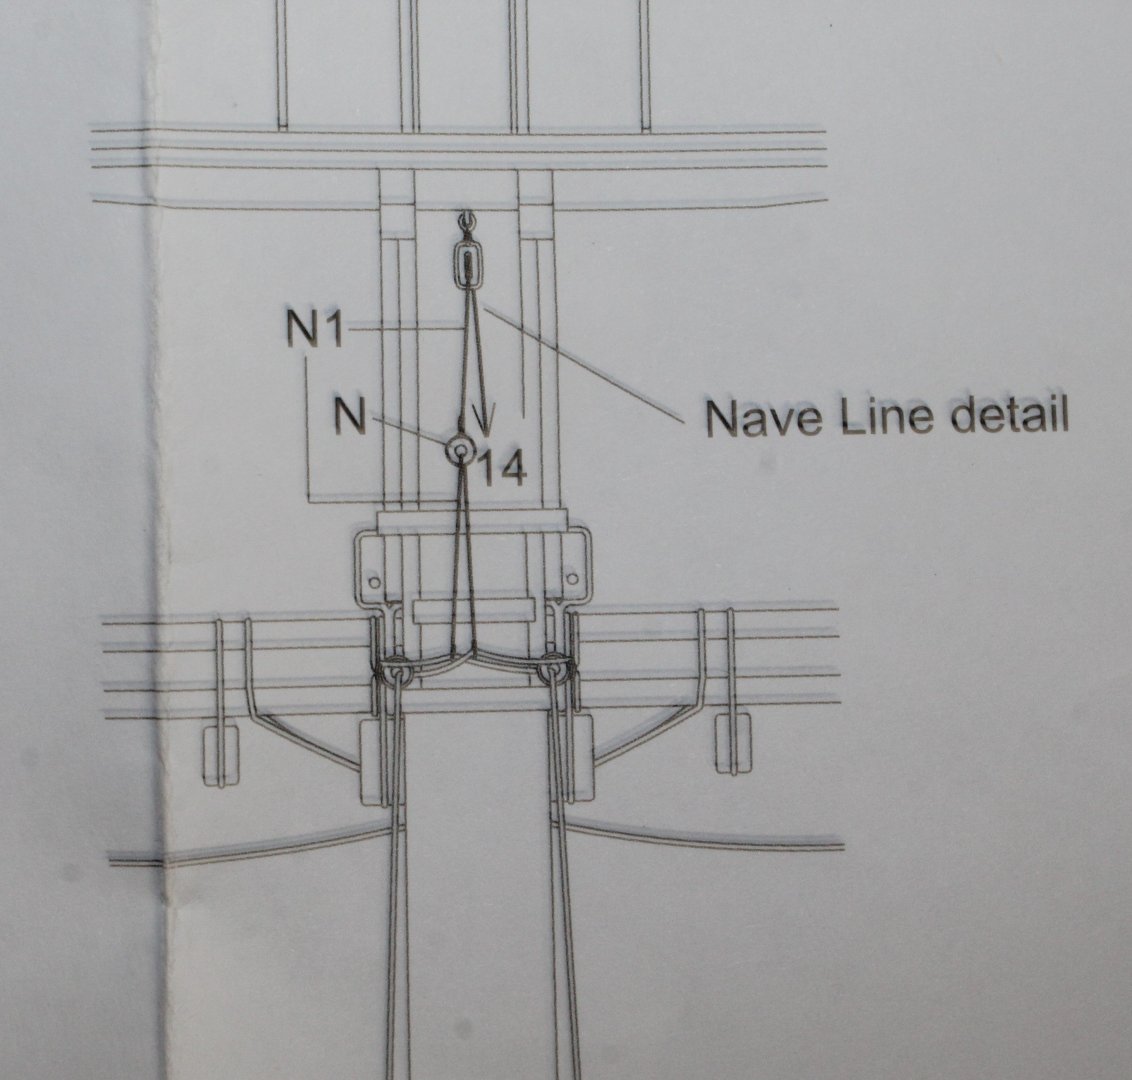
Nave Line
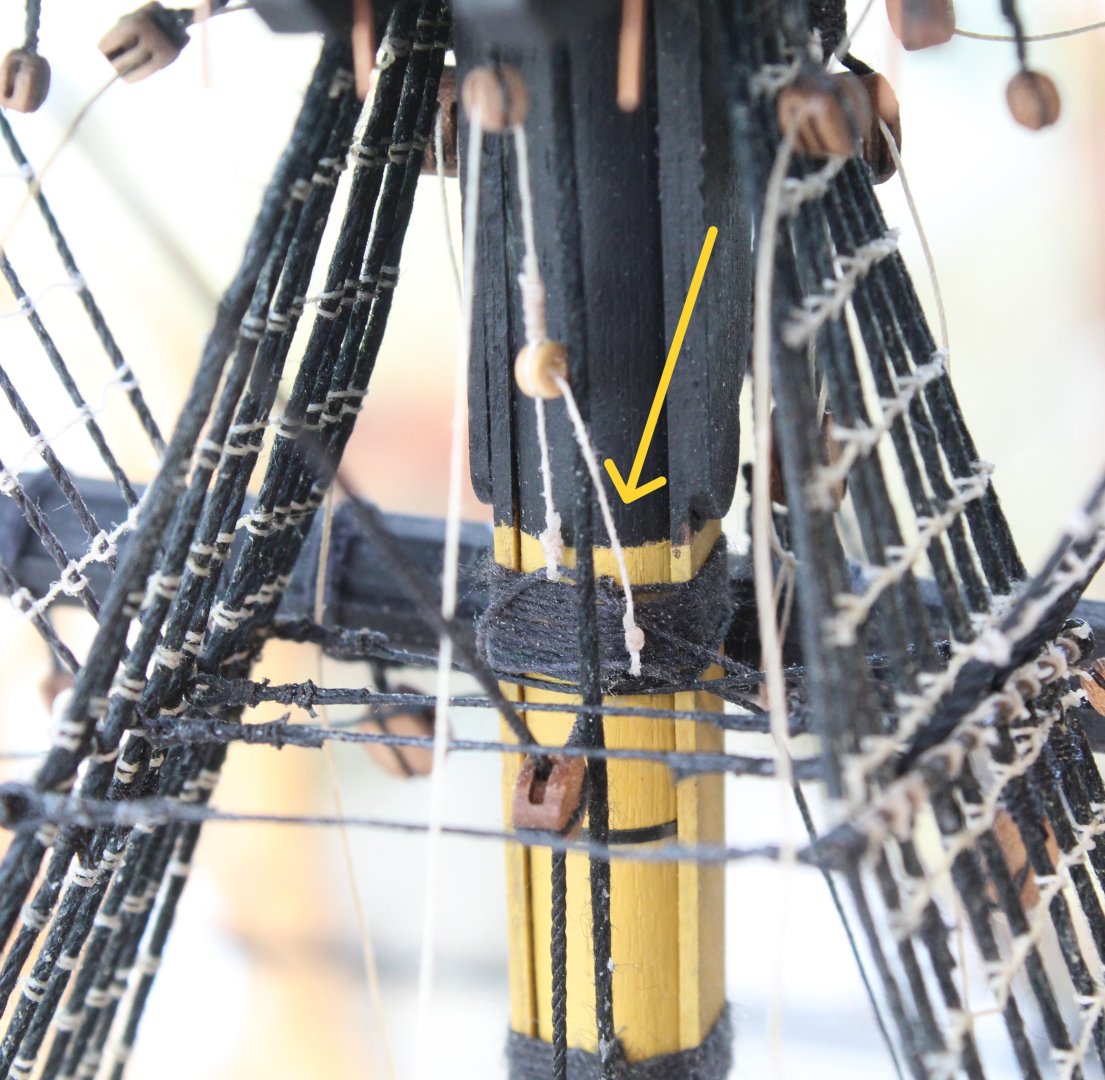
The nave line holds the truss pendants in place. A 3mm single block is located on the underside of the platform, centrally on the rear crosstree. The thread that passes through this block has a thimble on one end and the other end is belayed to the deck. A separate length of thread is passed through the thimble and each end of this thread has a thimble. Each truss pendant is fed through their respective nave thimbles, noting this has to be done before the truss pendants are fed through their respective thimbles of the foreyard. The nave line arrangement is shown in the next photo, noting the free end has not been belayed.
To conclude this post I have added a couple of photo's of the Indy with the foreyard in place.


-
Sprit Sail Yard
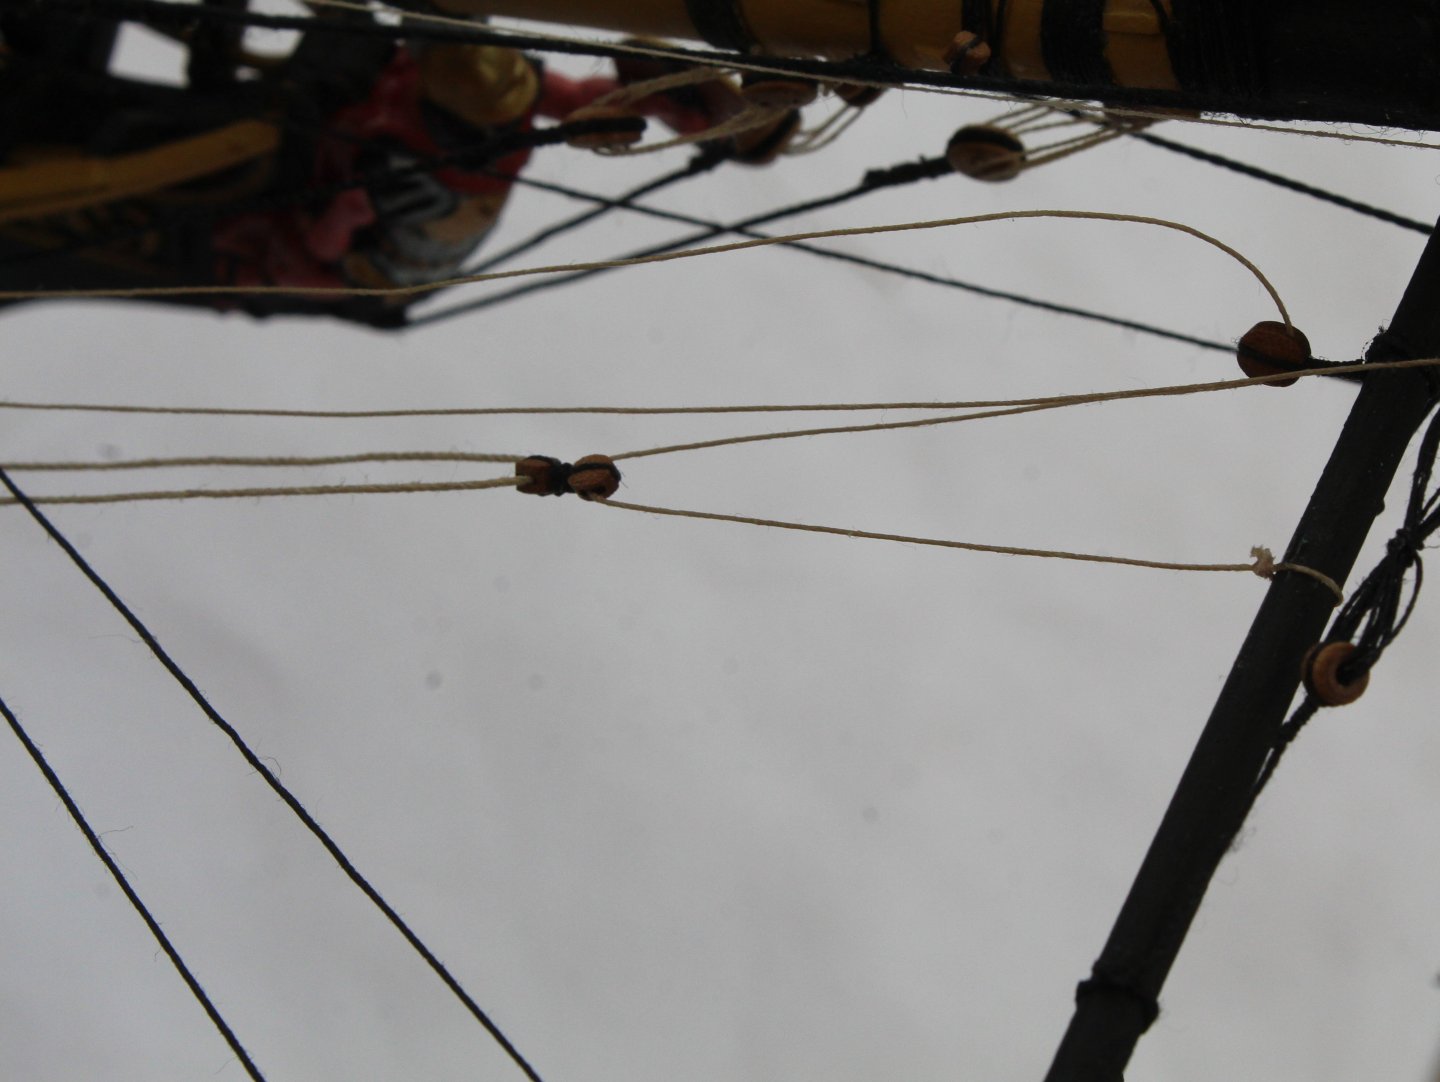
I have now run in all the remaining rigging required for the Spritsail yard but they have not been belayed, as can be seen in the first two photo’s below.
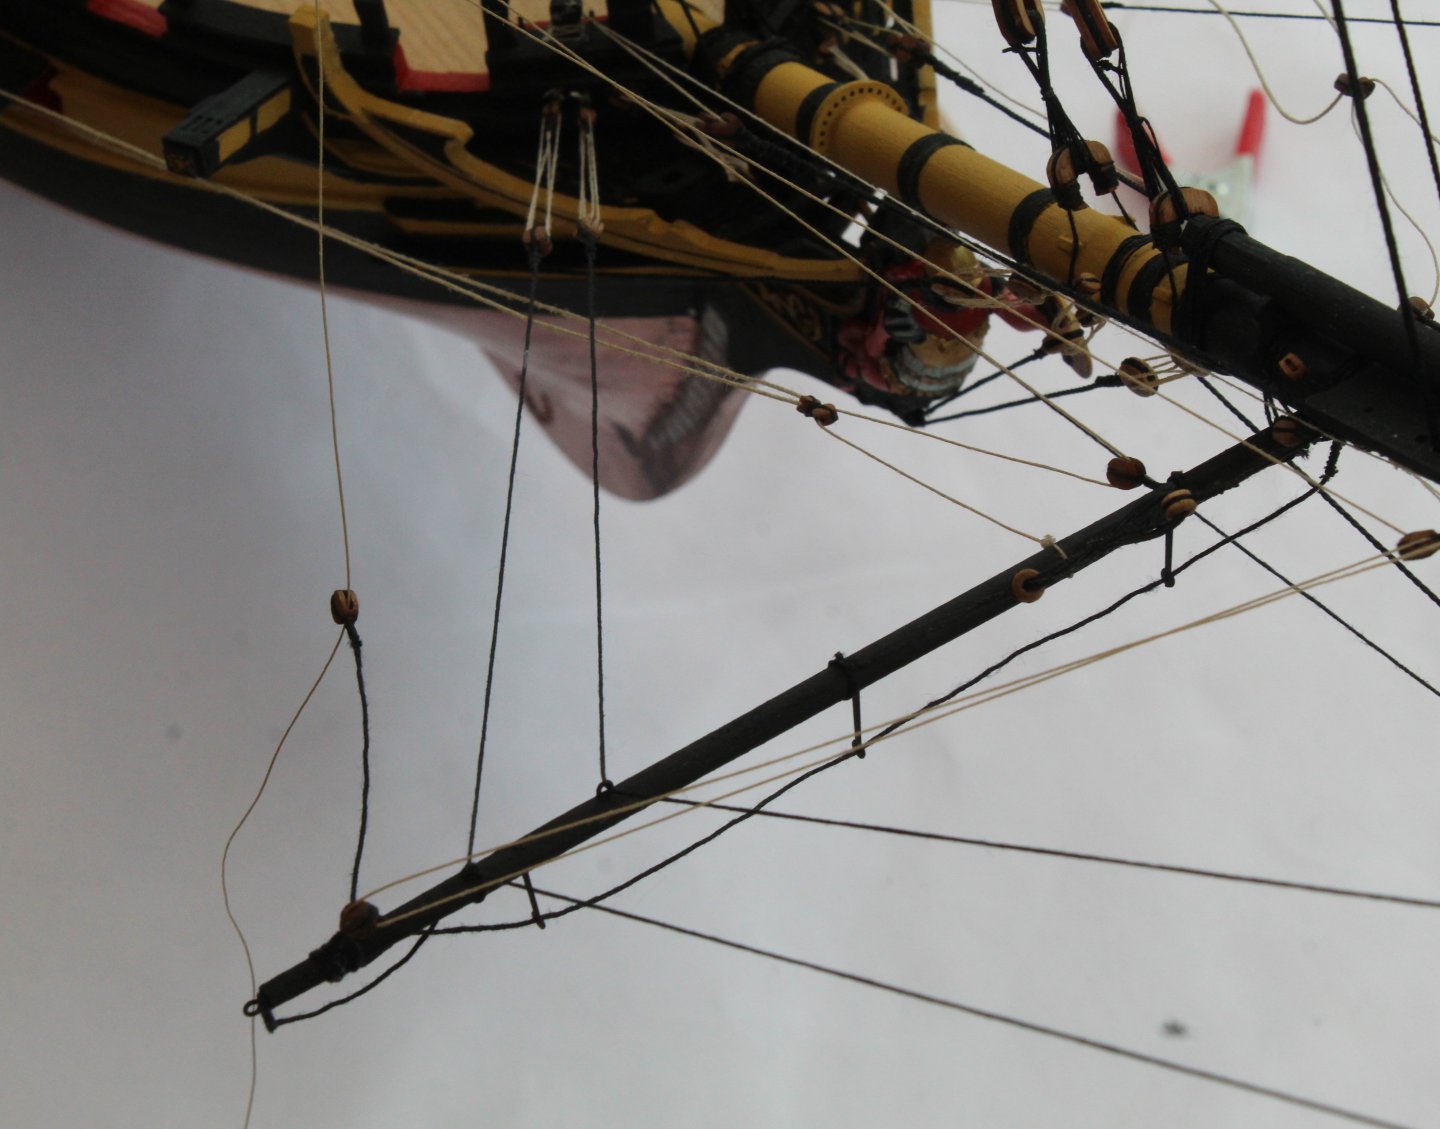
Spritsail Clew Rigging and the double block for the spritsail sheet
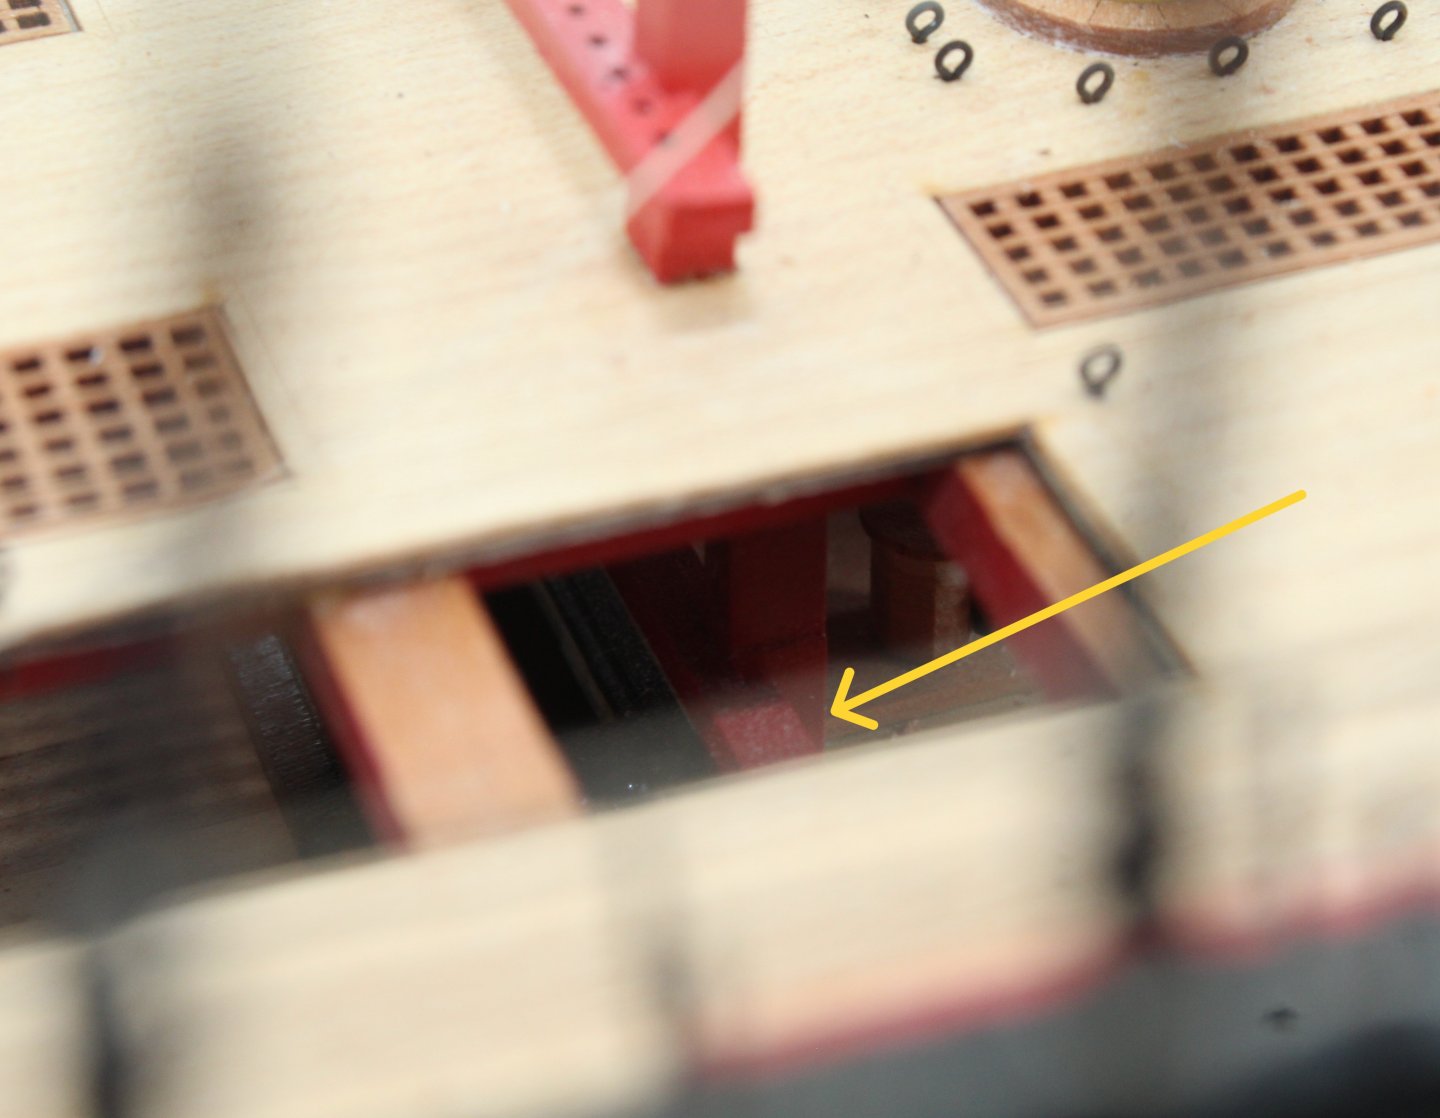
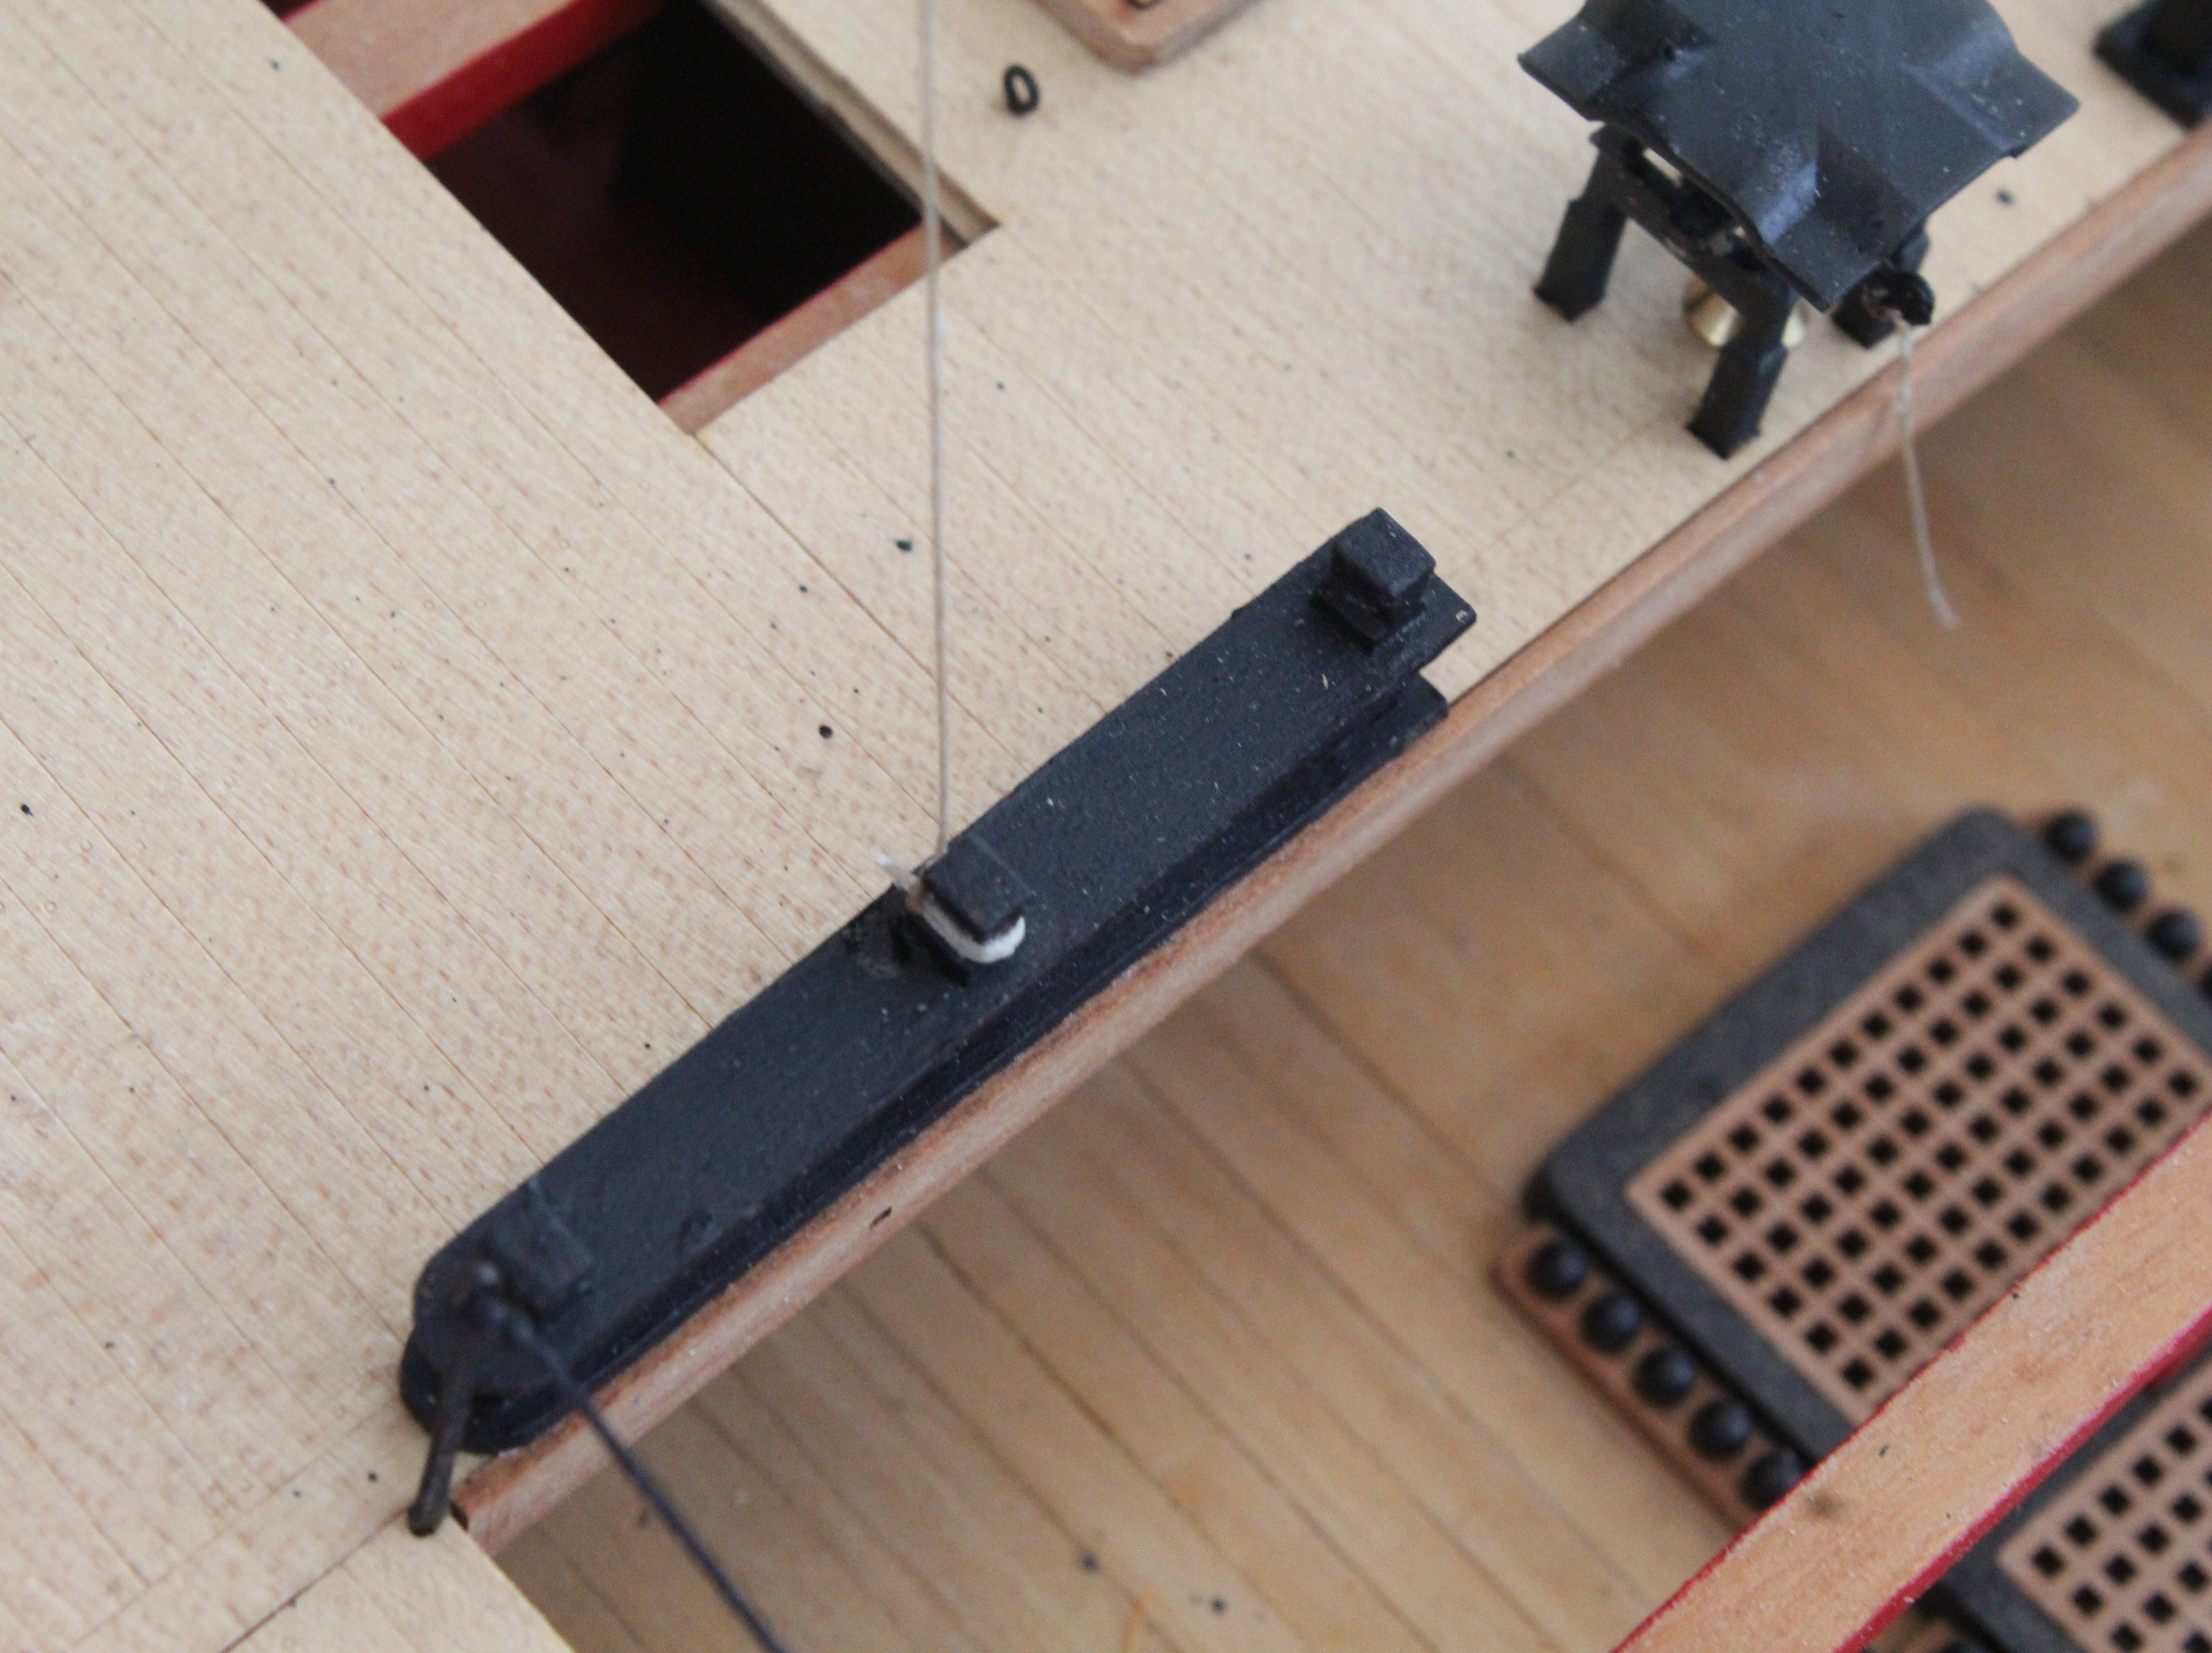
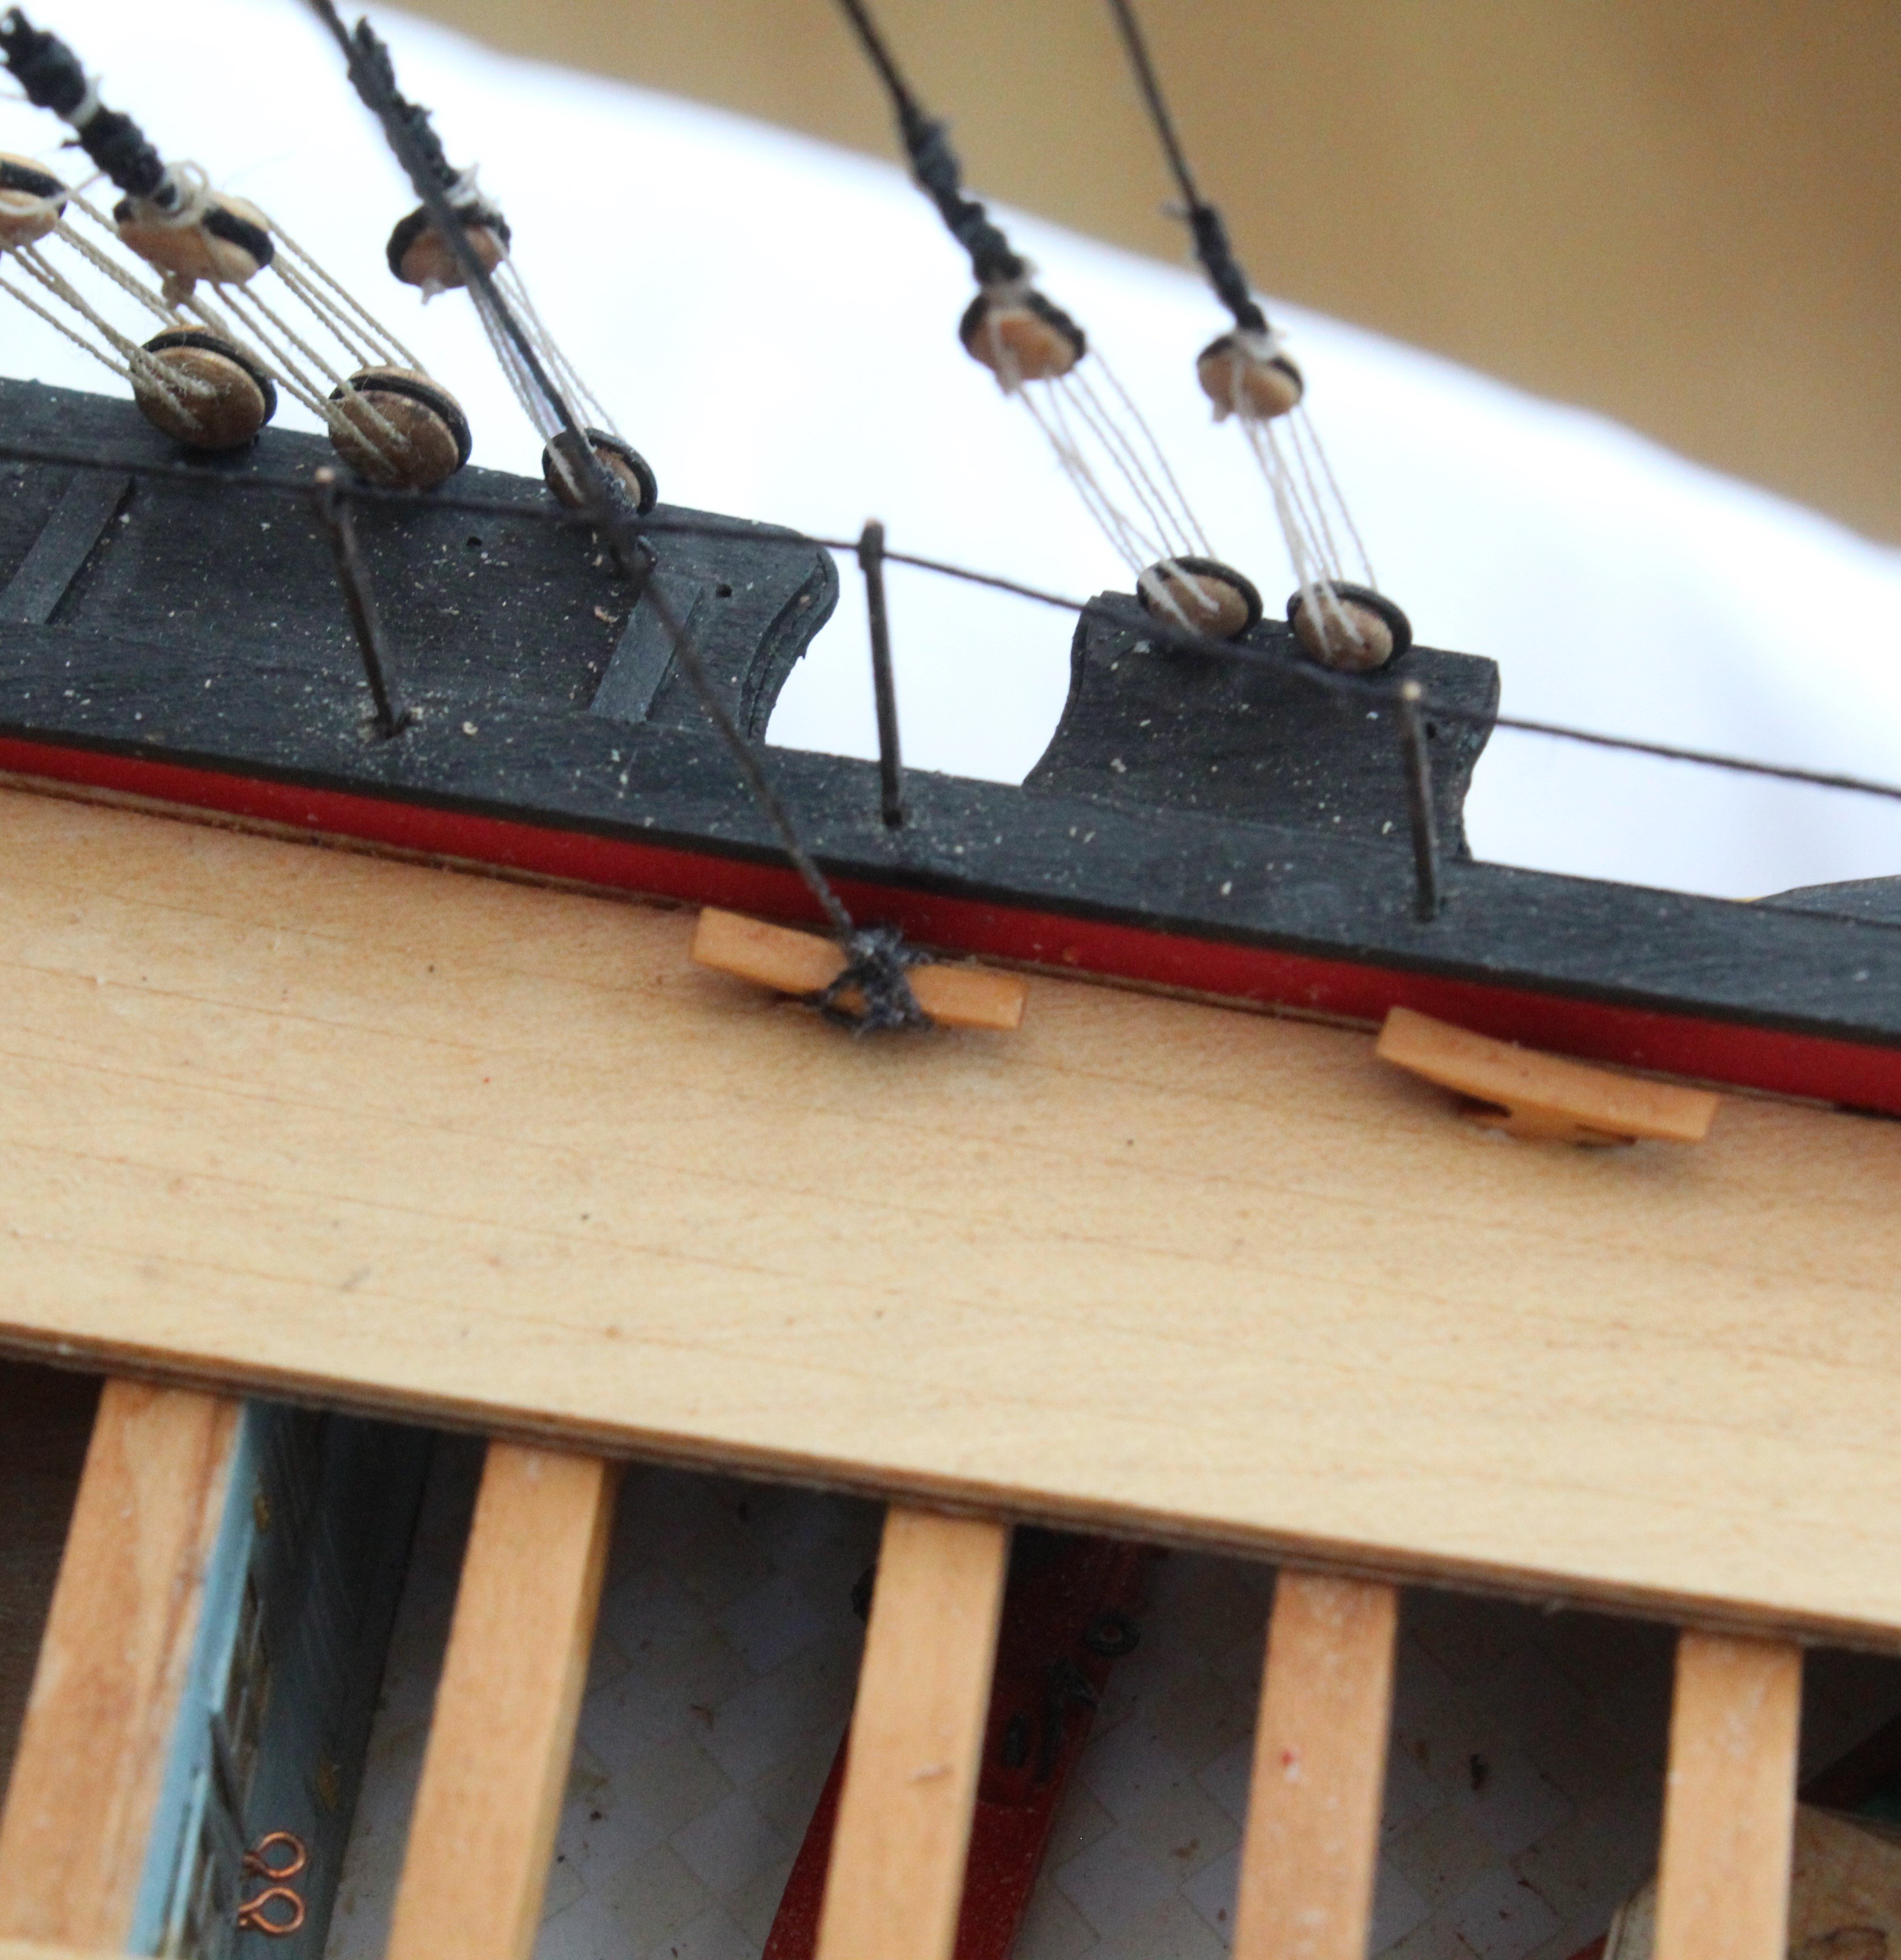
I am pondering what to do with regards to belaying the spritsail clew and sheet rigging. The spritsail clew line is straightforward as it belays to pin on rack located on the prow of the forecastle. There is a double block arrangement (as can be seen in the above photo) and one of these blocks is used for the spritsail sheet. One end of the spritsail sheet rigging is hooked to an eyebolt on the hull, just after the foremast channel. The other end is fed through a hole in the hull and is then belayed to a cleat located on the inner bulwark under the walkway. As can be seen in the photo below the thread has been passed through the hull.
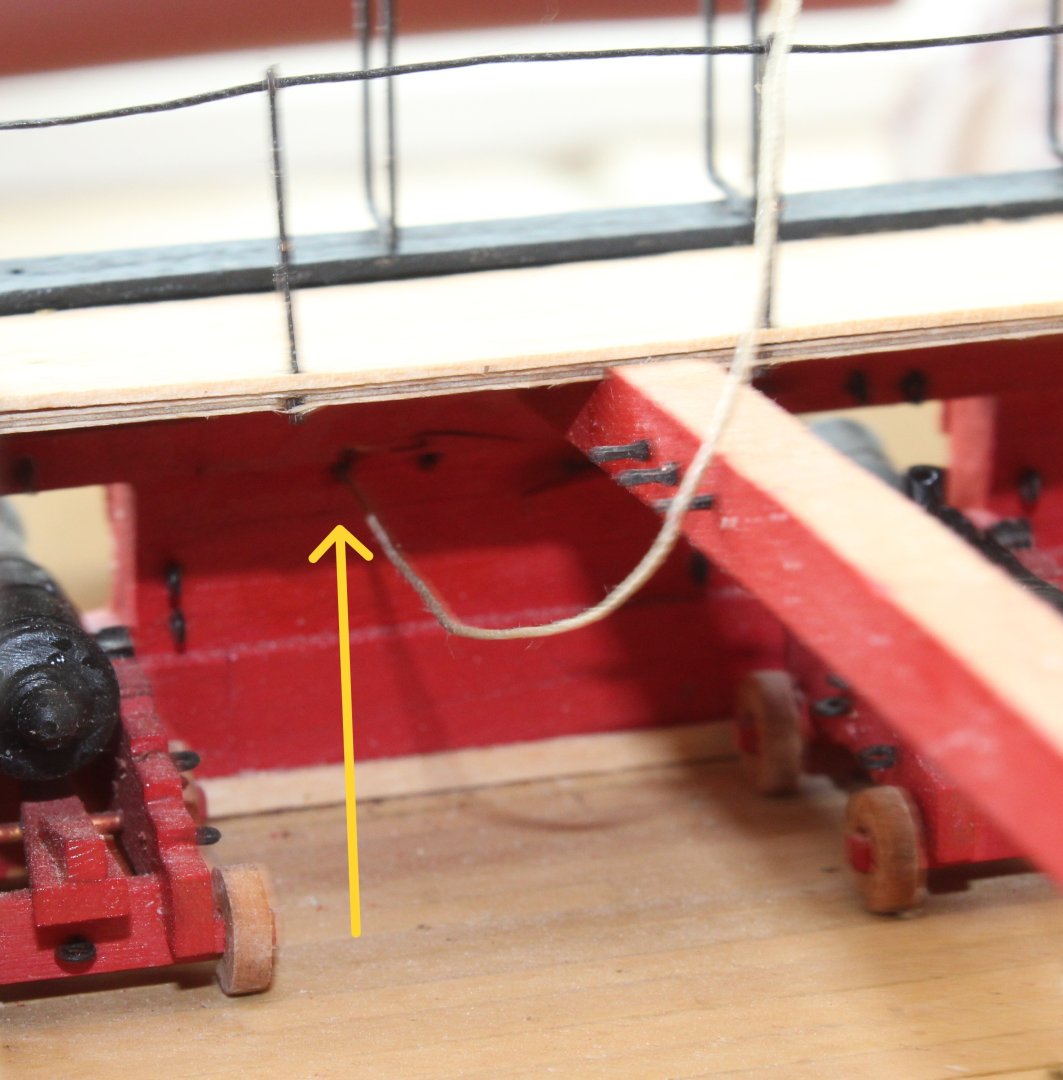
The position of the belaying cleat is shown in the next photo (out of focus). Access to this small cleat is very restricted due to the walkway and the beams.
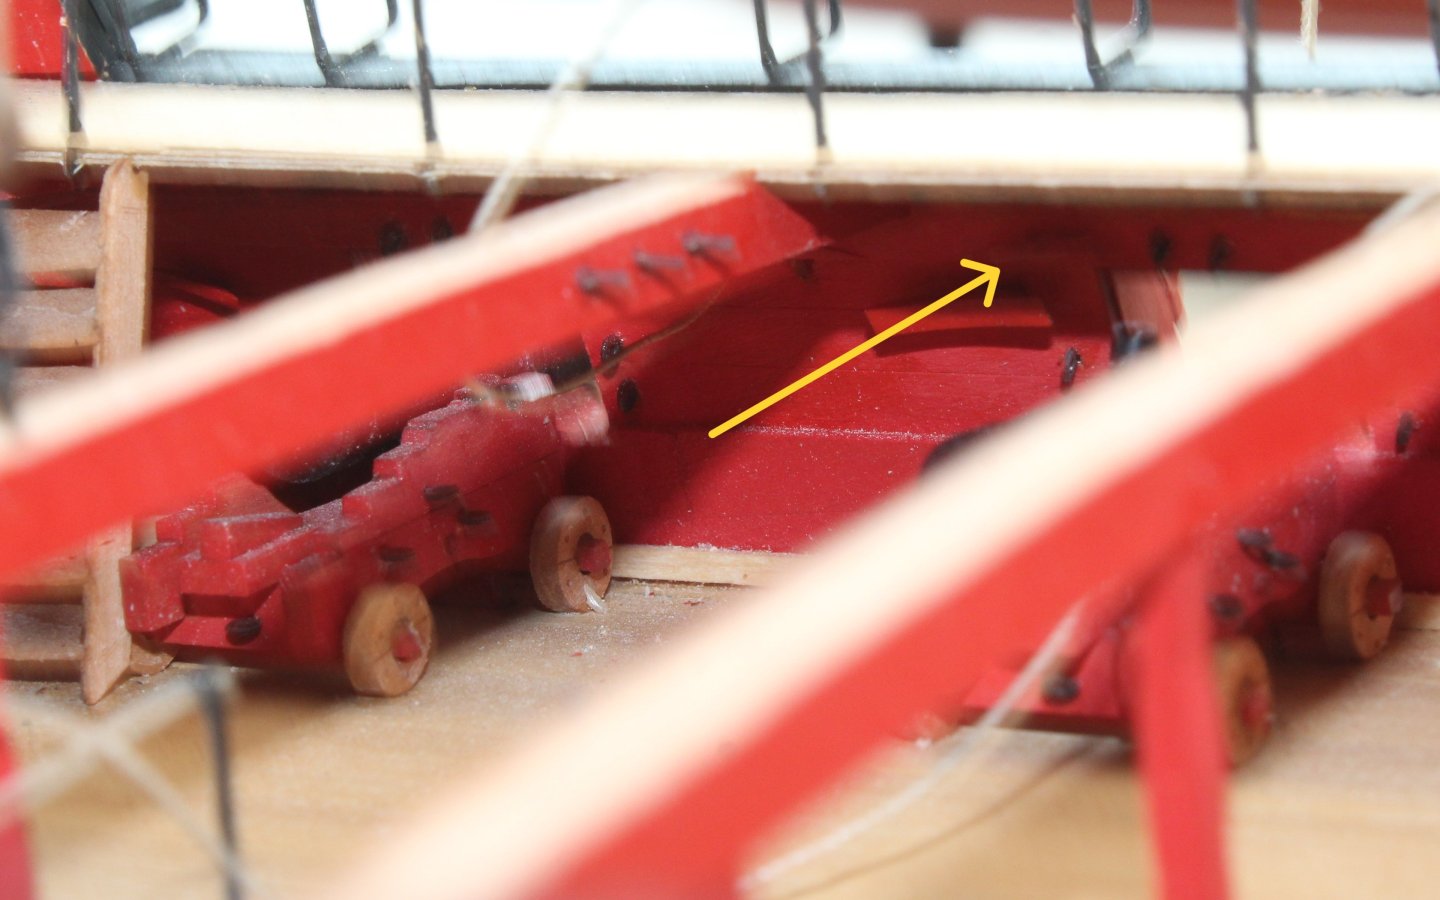
I will try to belay to the bulwark cleat but if this proves to be beyond my abilities then I will revert to a simple solution of using a knot to hold the thread in place against the inner bulwark. Given the position of the walkway and the beams this workaround solution will not, in my opinion, distract from the overall build as this belaying is not really visible.
Foreyard Installation
Moving forward I am now turning my attention to adding the foreyard to the foremast. A little bit of preparation is required before the yard can be fitted to the mast.
When looking at the truss pendants these are wrapped around the mast, fed through thimbles and then dropped to the hull for belaying via a double block arrangement, as can be seen in the attached photo
I think it will be easier to fit the truss pendants to the foreyard before installation, and with that in mind I have created the thimbles and the truss pendants are now ready be added to the foreyard.
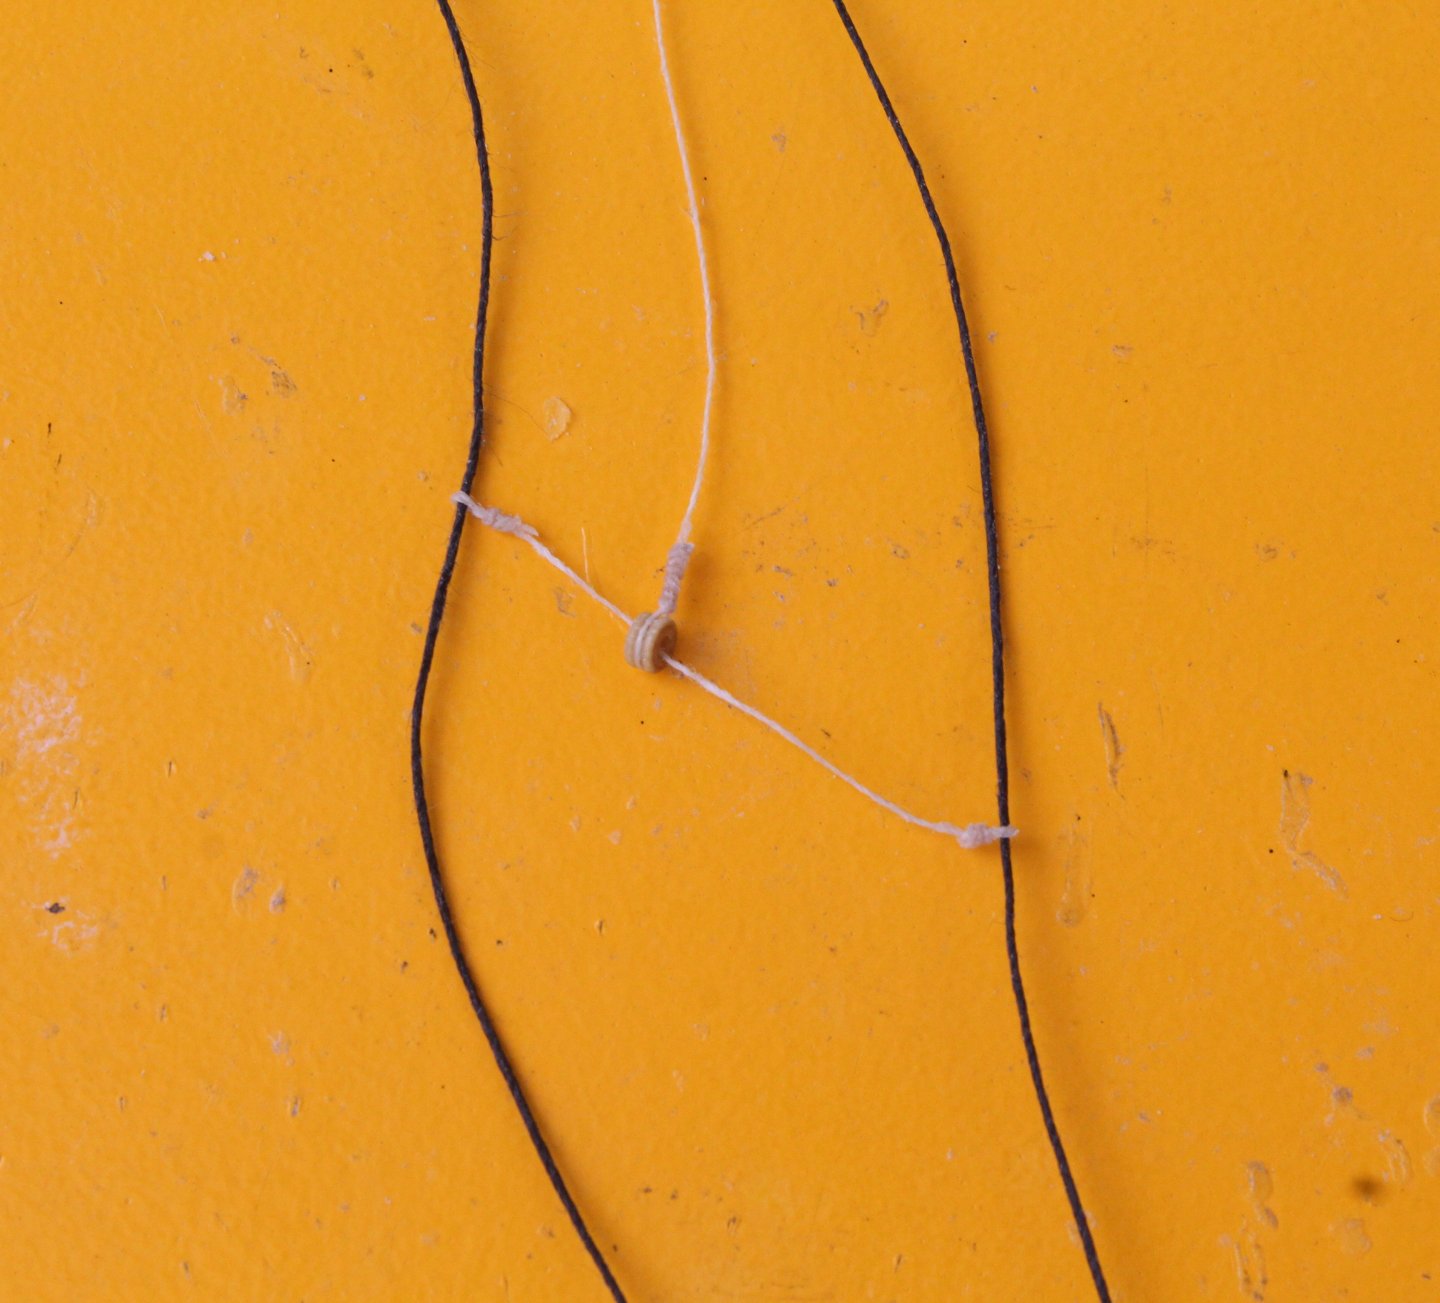
The nave line is added to the truss pendants as shown in the next photo.
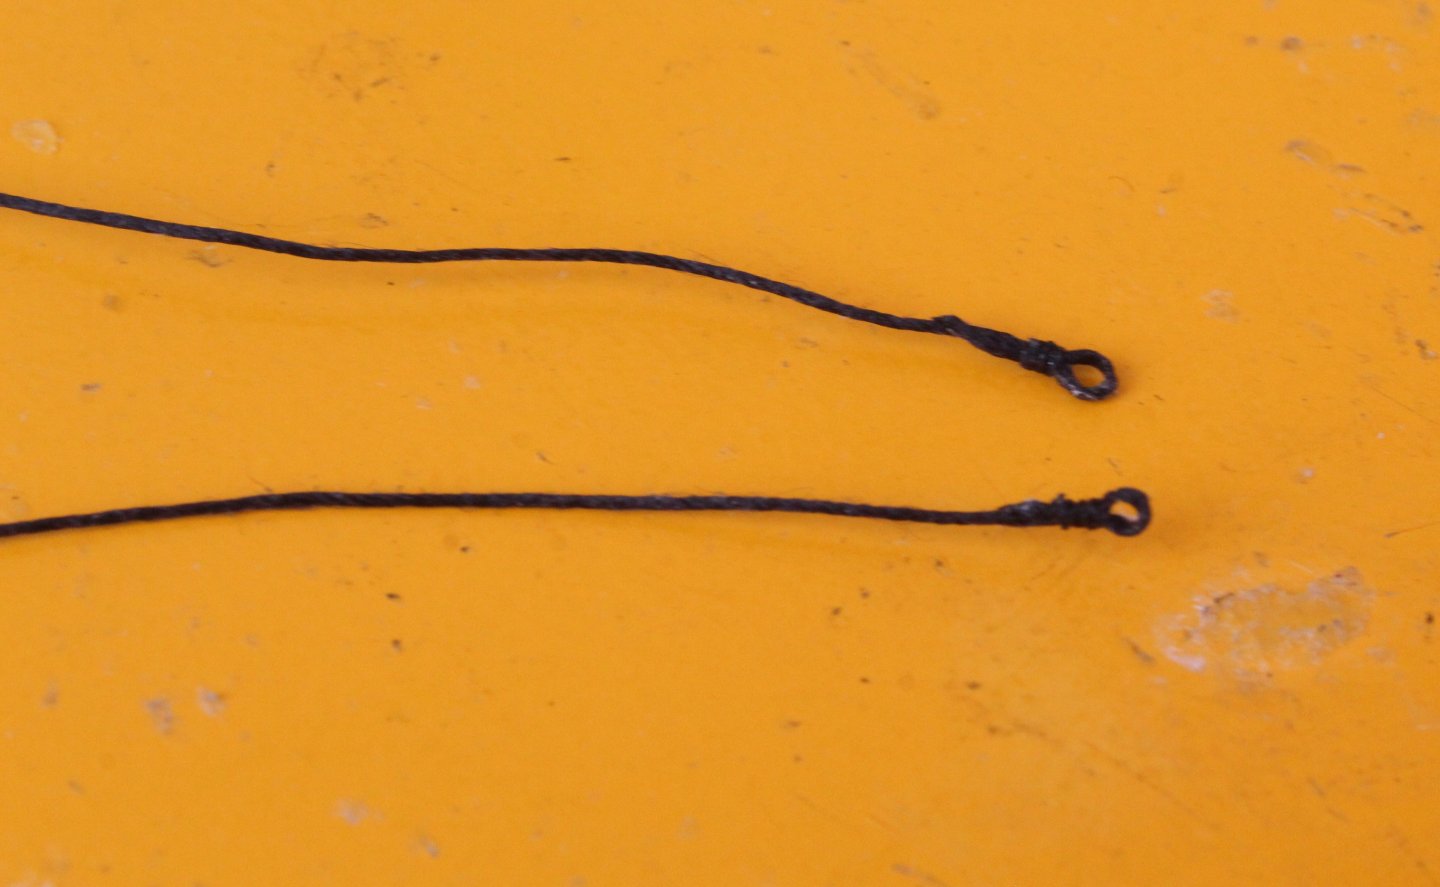
Next I prepared the nave rigging. This consists of a length of thread secured to a wooden thimble. Another length of thread with threaded thimbles on each end was fed through the wooden thimble. The nave rigging will be will be added to the truss pendants after the foreyard has been added to the foremast. In the next photo I am checking the truss pendants will pass through threaded thimbles.
Continuing with the preparation the next task was to prepare the rigging for the sling (black thread) and the two jeers (natural thread, as shown in the photo below.
The final task was to secure the truss pendants to the foreyard. Once these had been added I performed a test fit. I soon realised I made a school boy error because the truss pendant thimbles need to be position close to the yard (as per the plan sheet diagram) and not as shown in the photo below. For some unknown reason I thought (incorrectly) the thimble end would tighten up against foremast once the other truss pendant thread had been threaded and tensioned.
- wvdhee, chris watton, TJM and 3 others
-
6
-
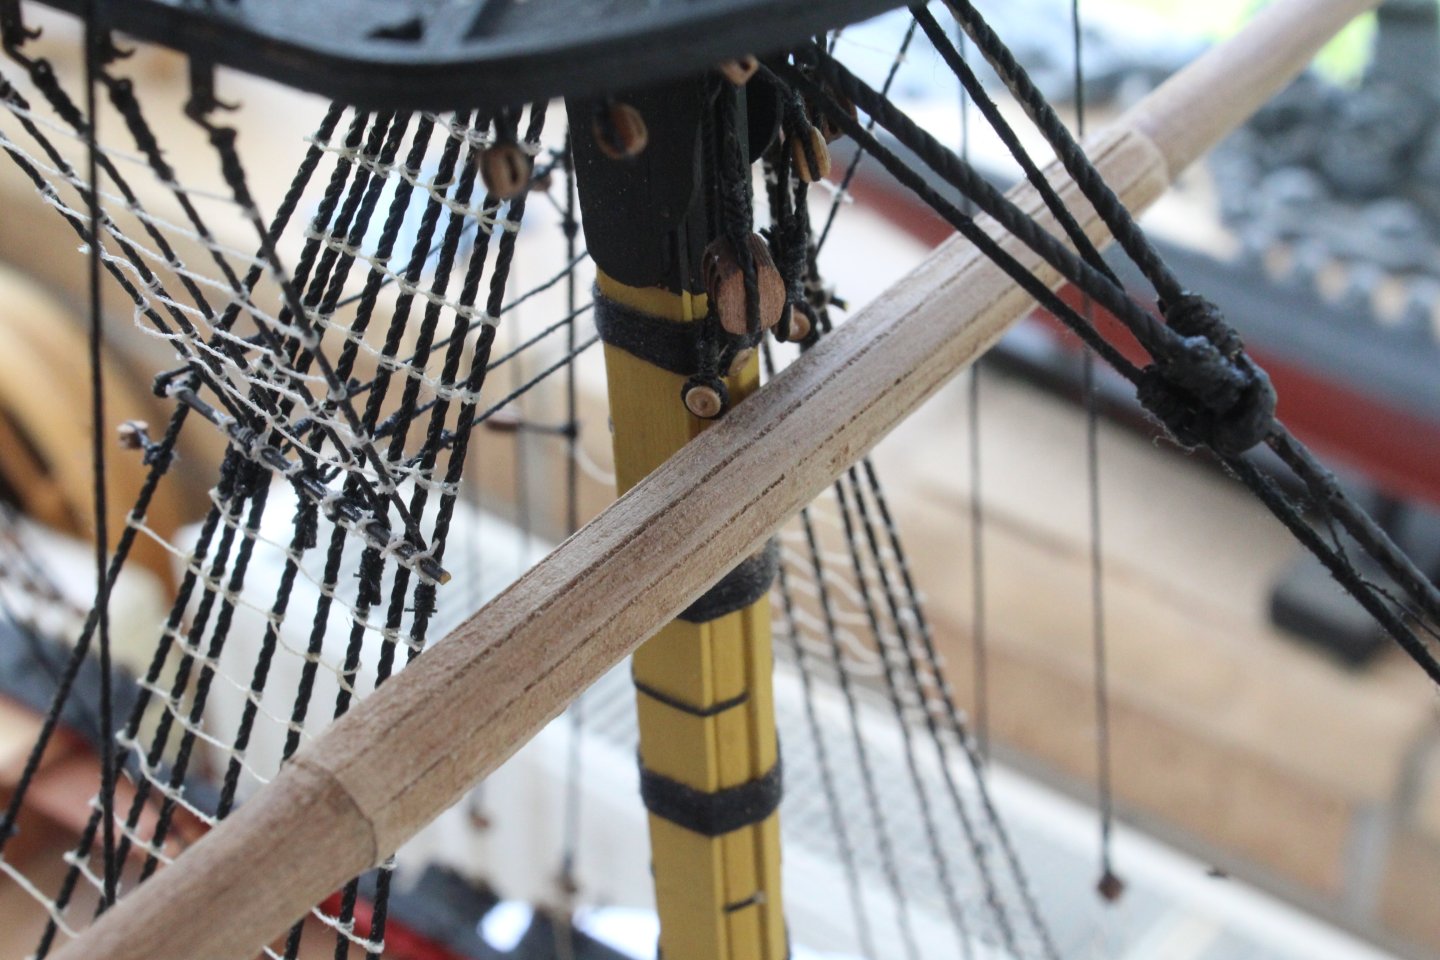
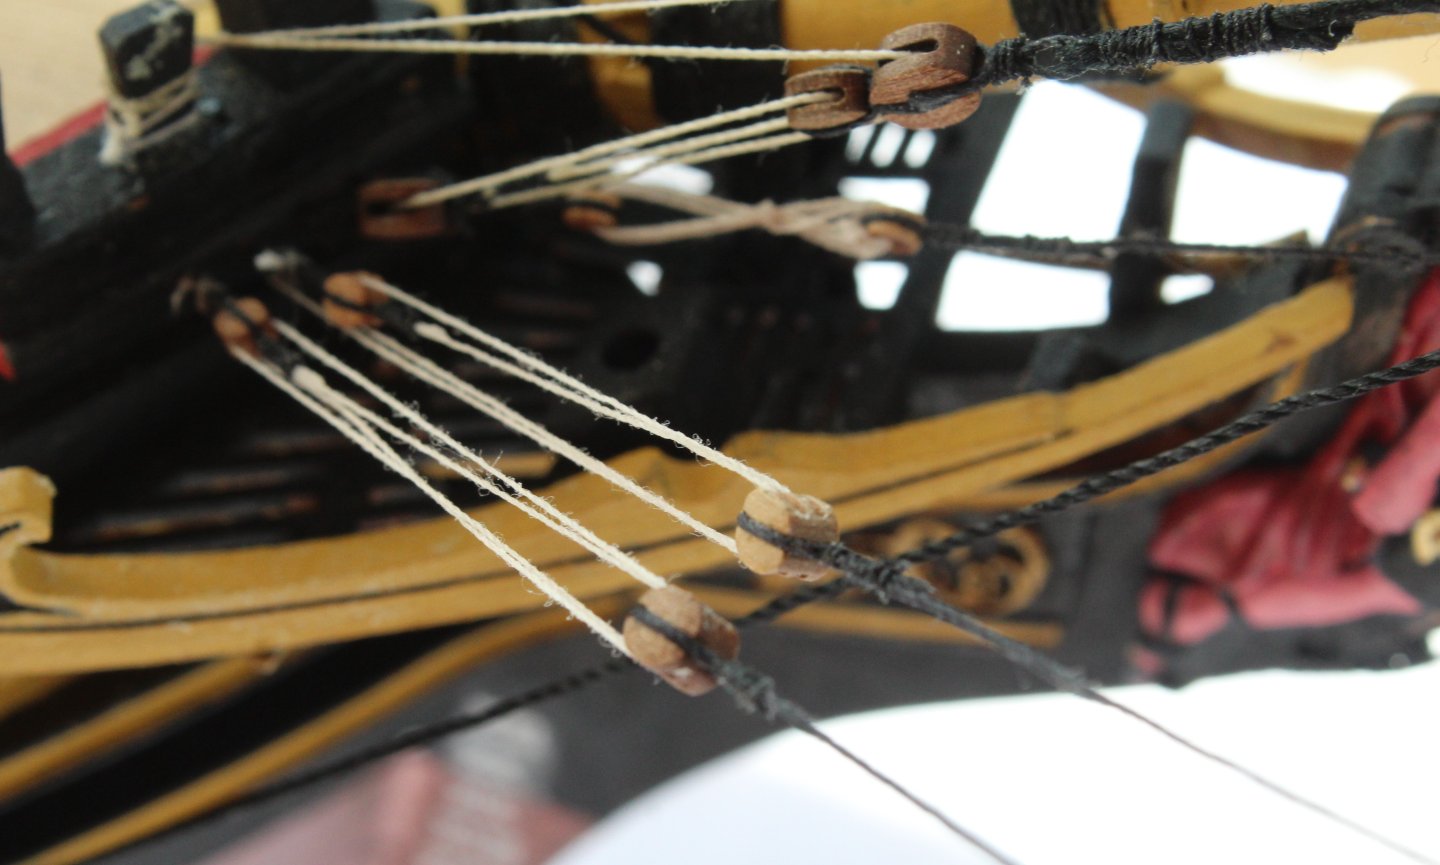
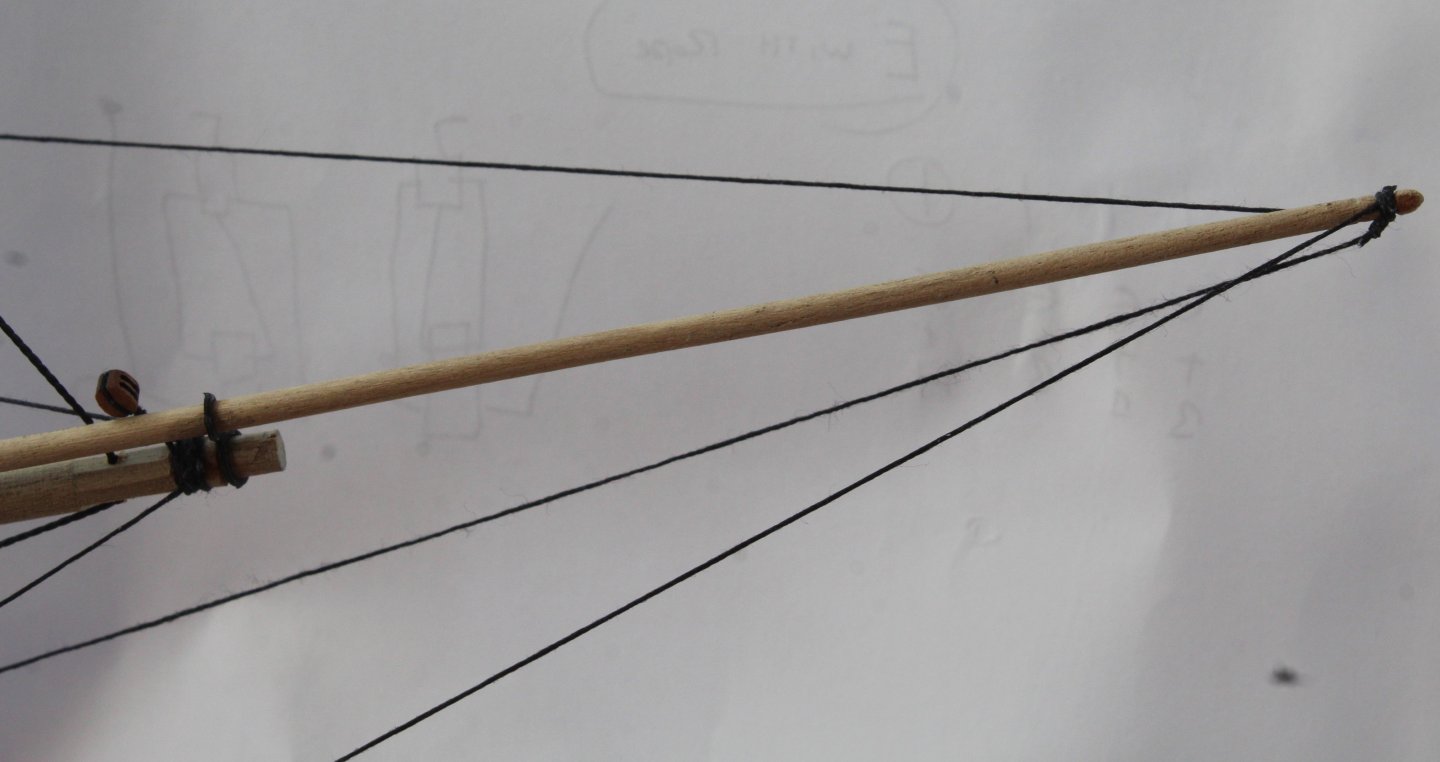
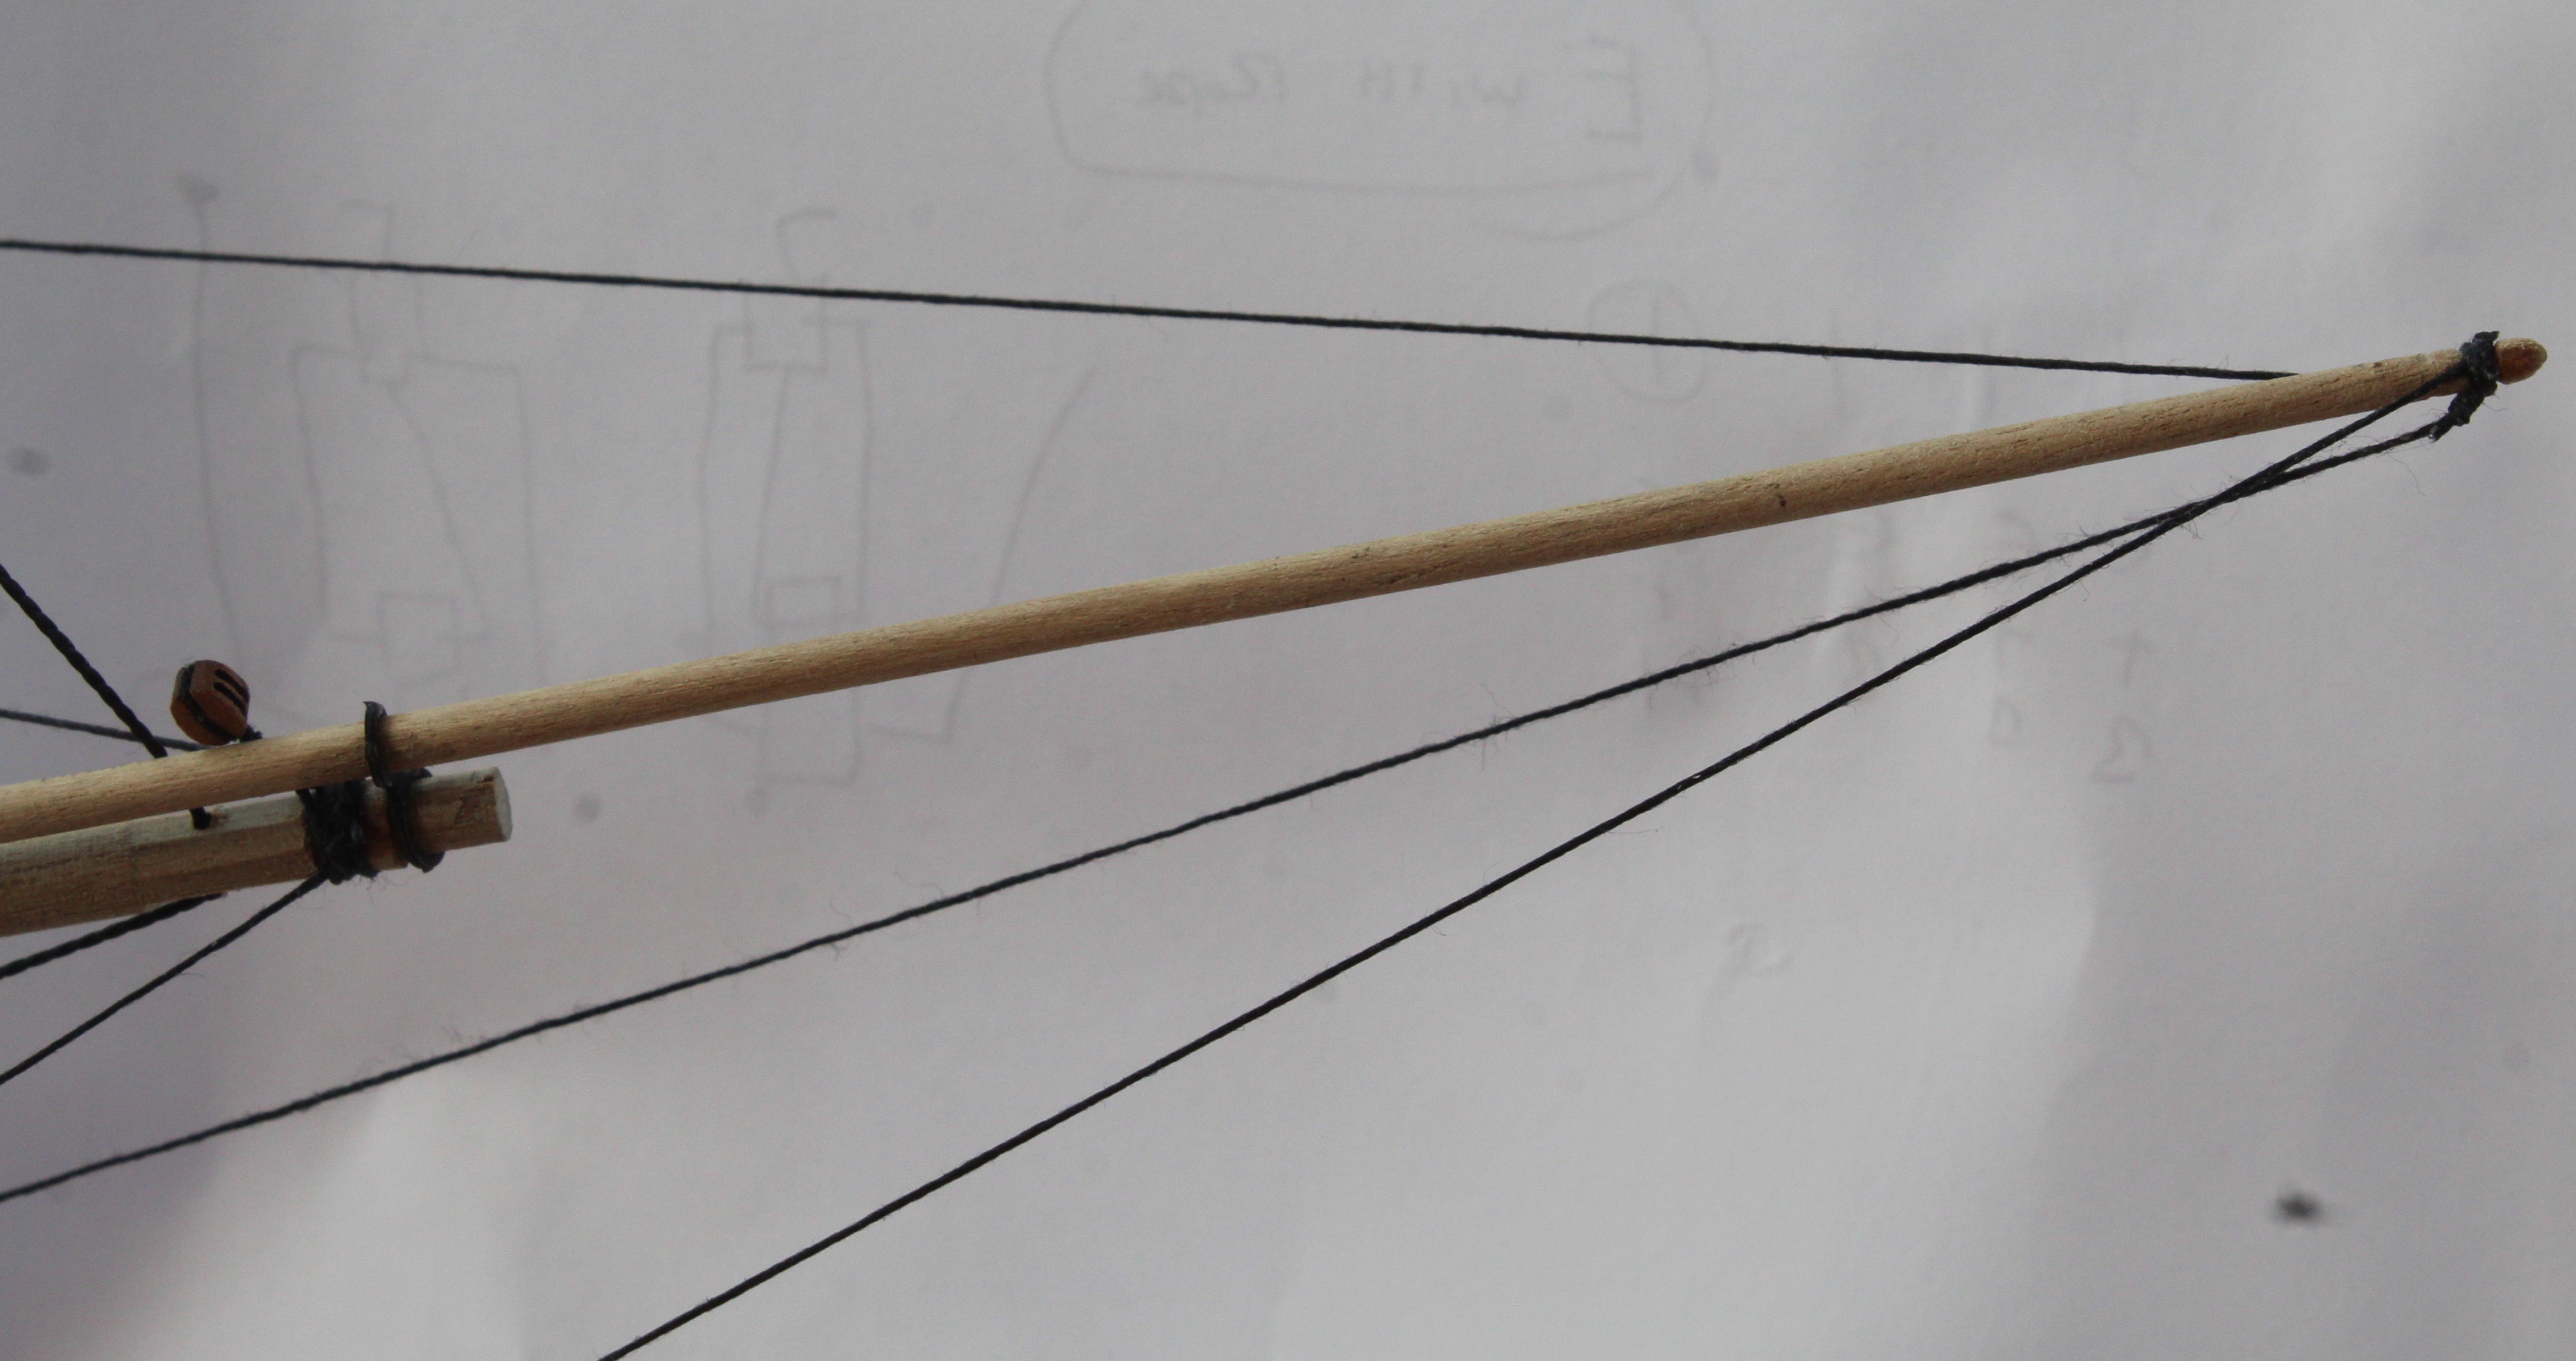
Spritsail Yard
I returned to the shipyard after a short holiday and added the spritsail yard to the bowsprit.
A locating pin was used to hold the spritsail yard in place with a touch of ca glue and was then secured to the bowsprit with black thread. I then added the spritsail yard tye rigging using a triple block arrangement and was then belayed to a hull timberhead.
Next I added the thread between the thimbles, not sure what this rigging is called.
Next I added the jibboom and the flying jibboom guy's. These pass through eyebolts on the spritsail yard and then are secured to the hull via a triple block arrangement. I have added a selection of photo's showing these guy's.

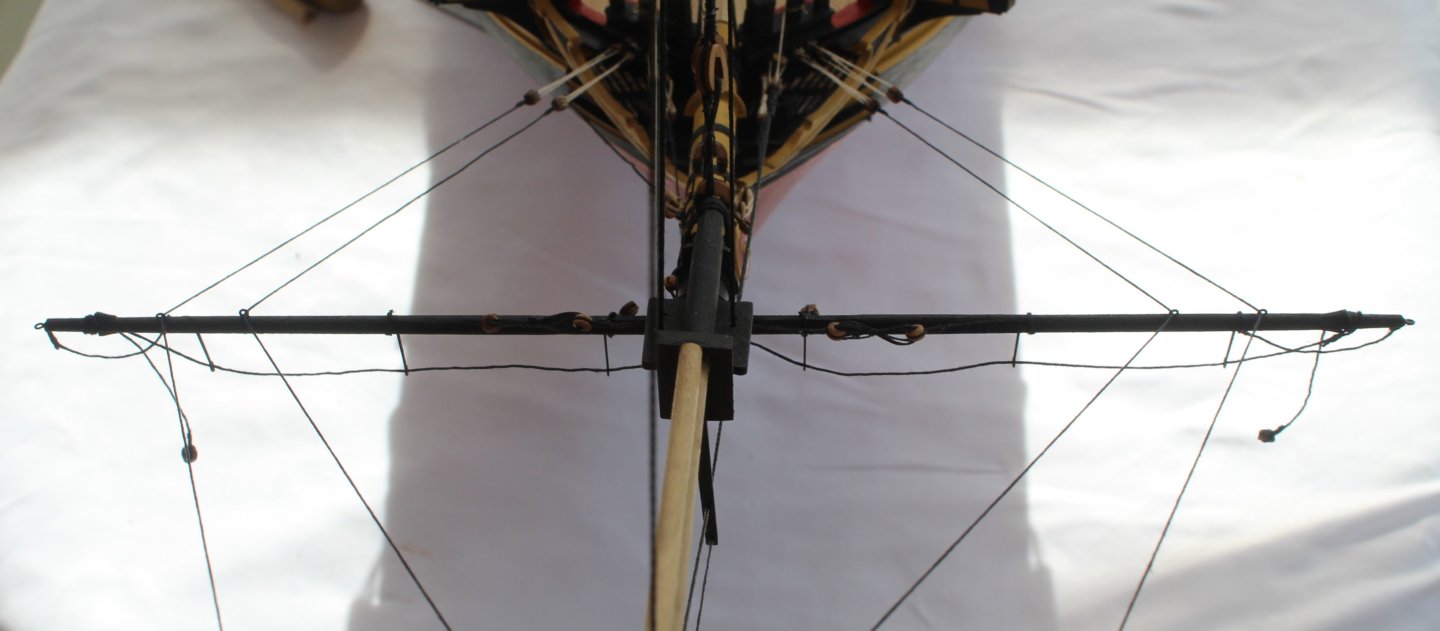
There is still plenty more rigging required with regards to the spritsail yard. Once that is complete I will move on to adding the foremast yard. You will not I have not fitted the boomkin's and I am not sure if I will fit them at the moment.
-
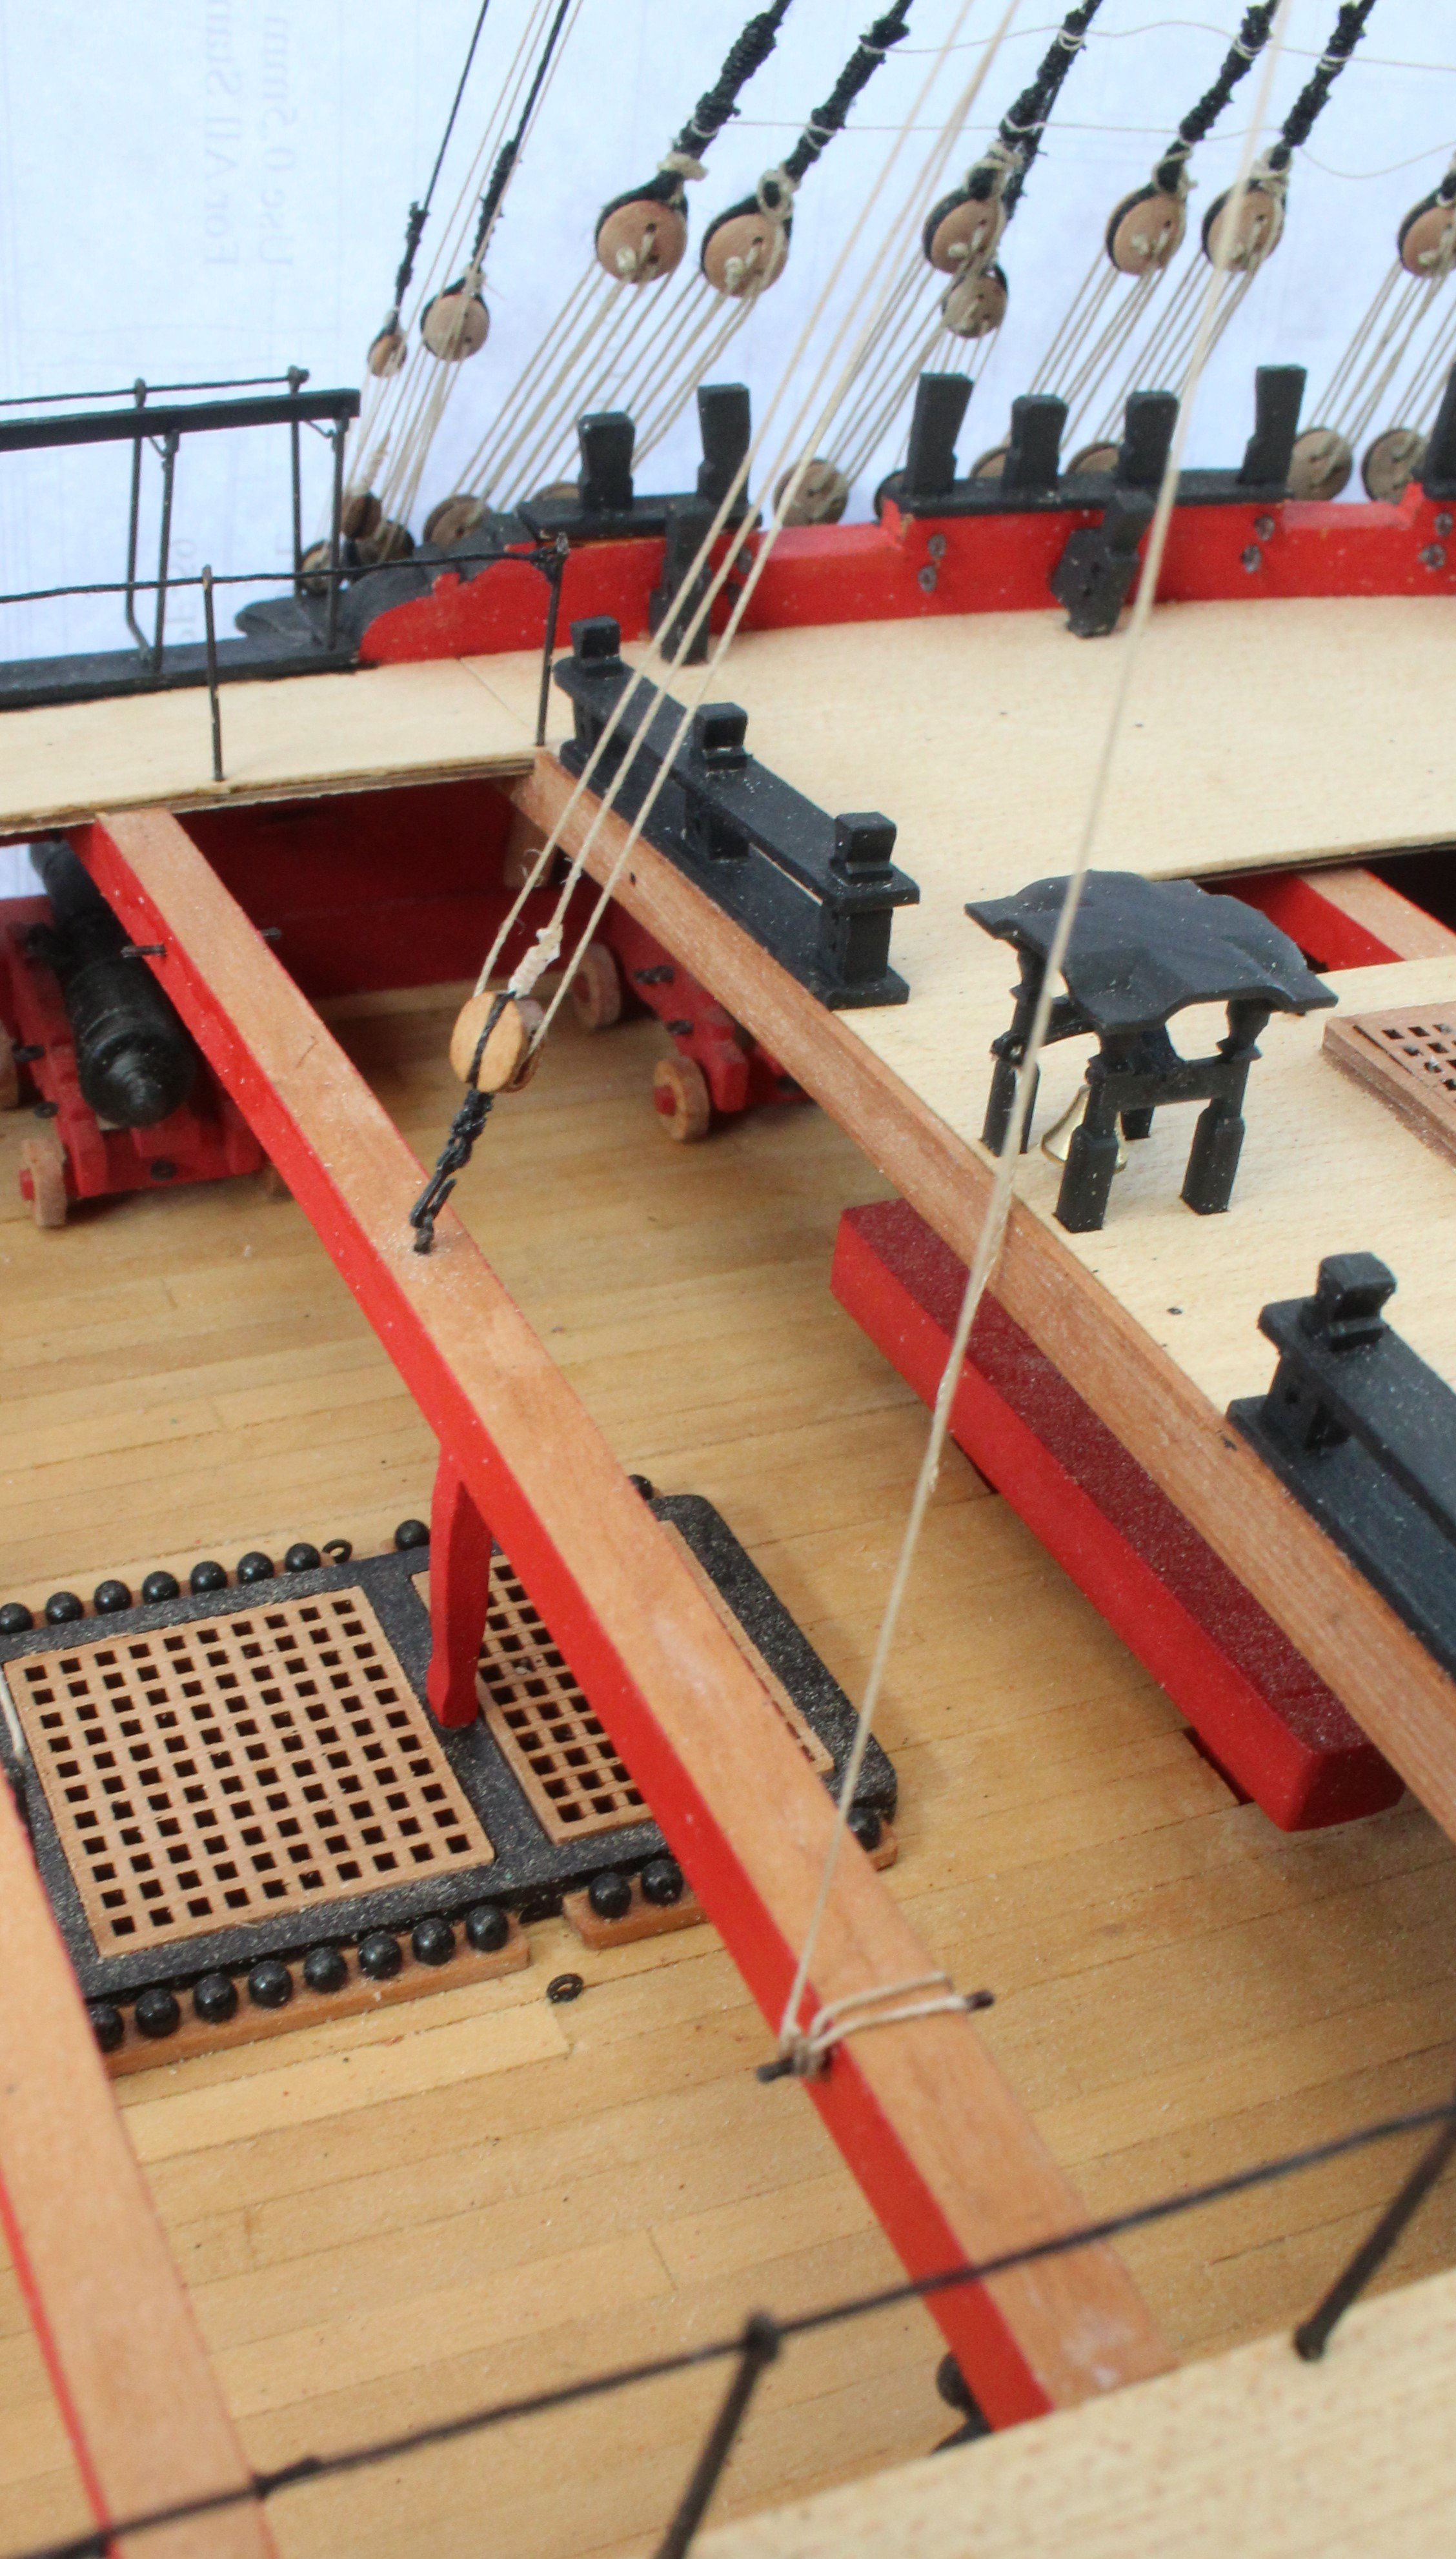
Main Stay Tackles
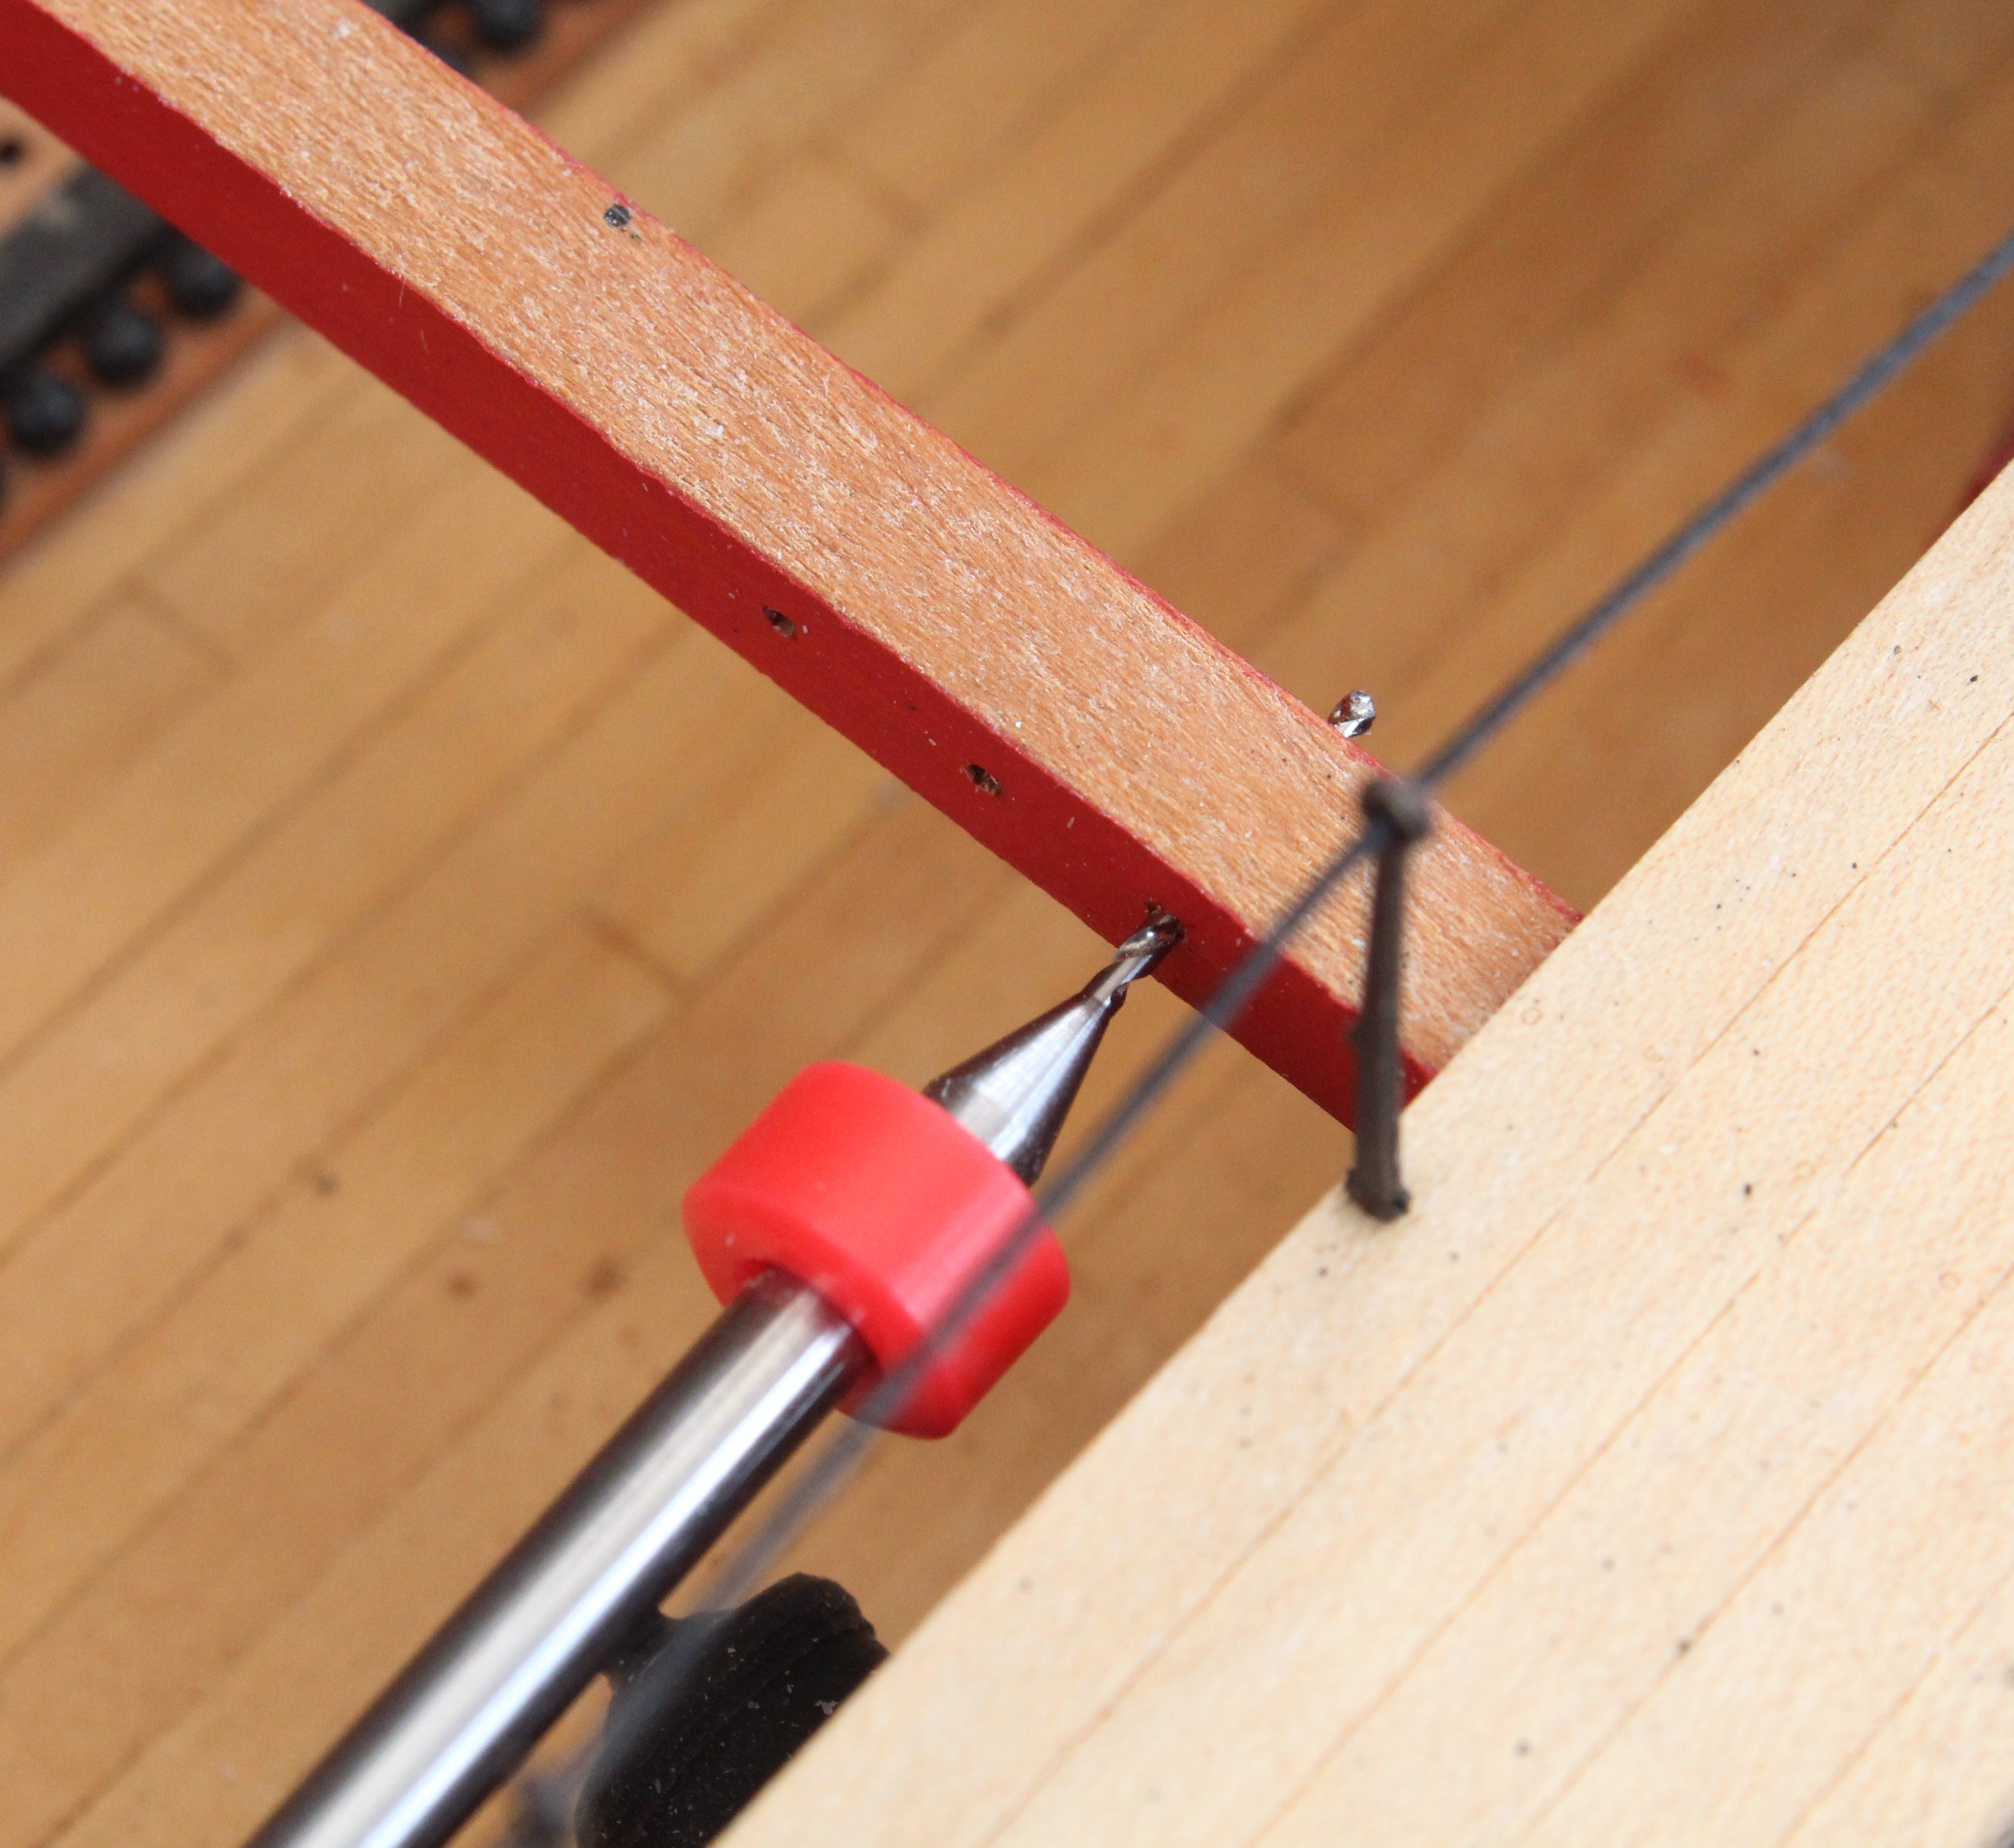
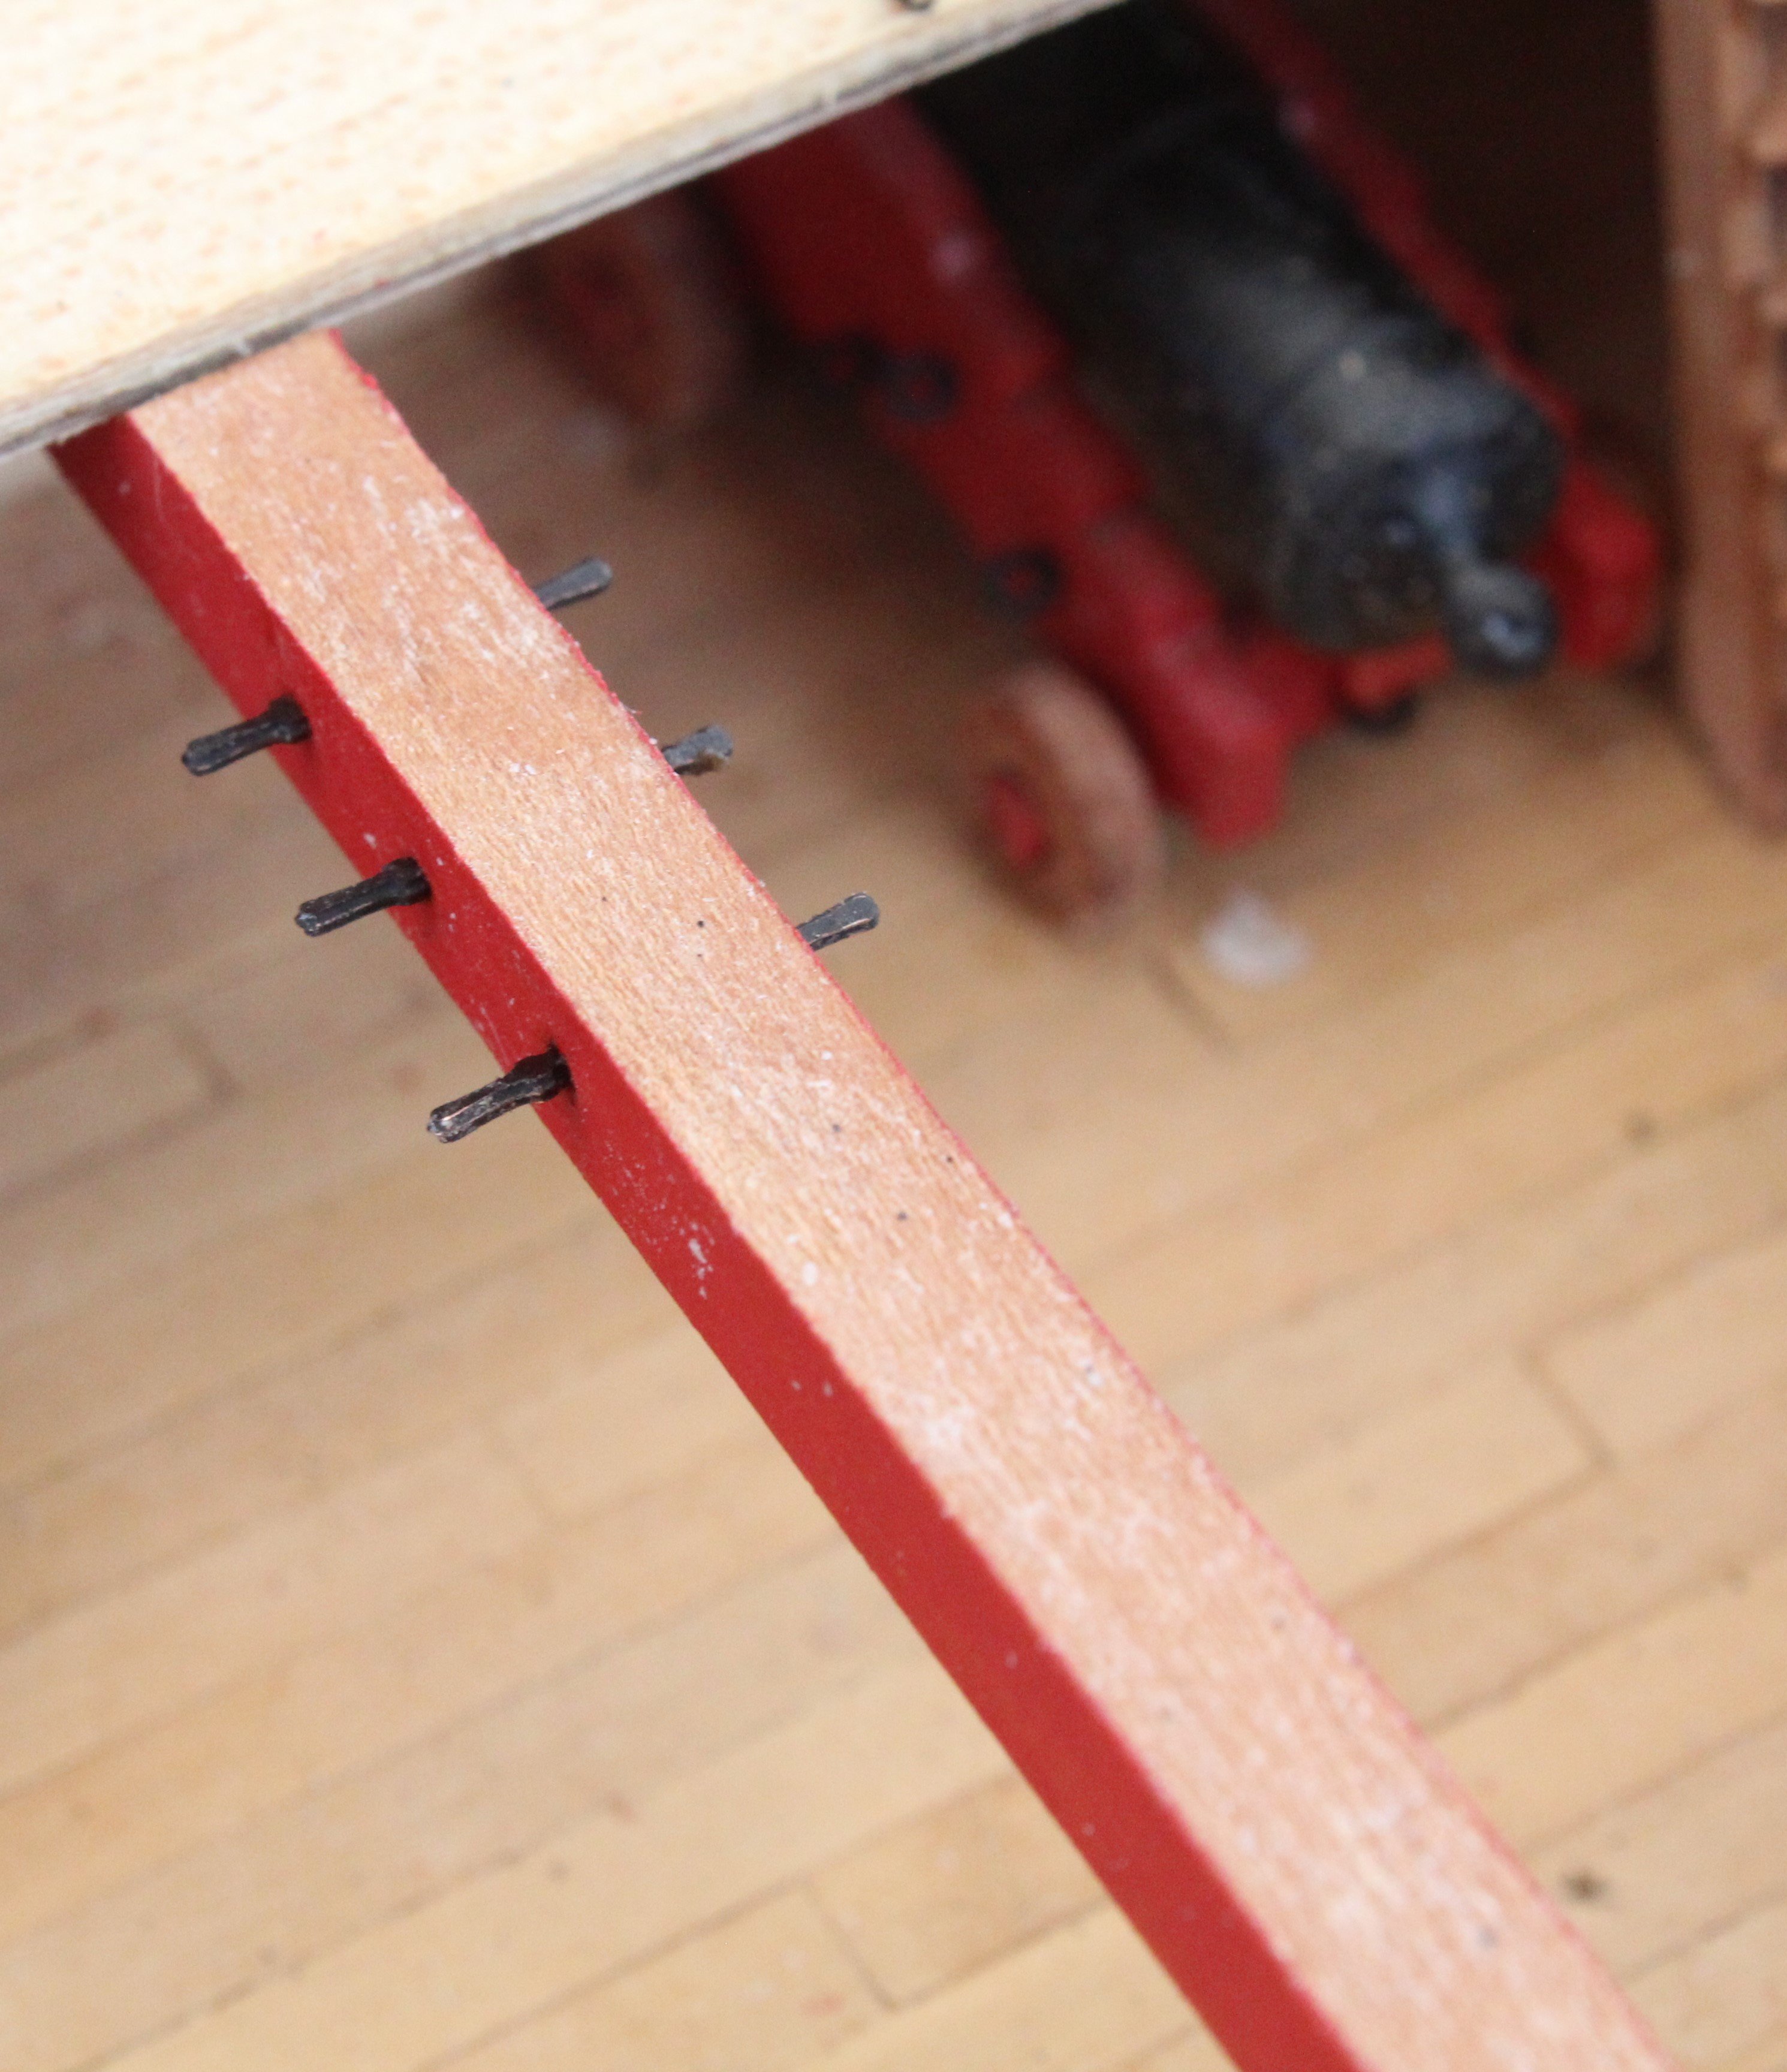
Todays task was to add the two main stay tackles. There are a number of belaying pins that need to be added to the beams, as a couple of these are required for belaying the stay tackle rigging. It would have better if I had fitted these belaying pins before the beams were installed as the locating holes needed to be opened up a tad. For the most part this was easily achieved.

One hole was a bit more difficult to open up but thankfully I was able to do it
The belaying pins needed to be trimmed so they would fit flush as are fitted to either side of the beam. Once I was happy with the test fit they were glued in place.
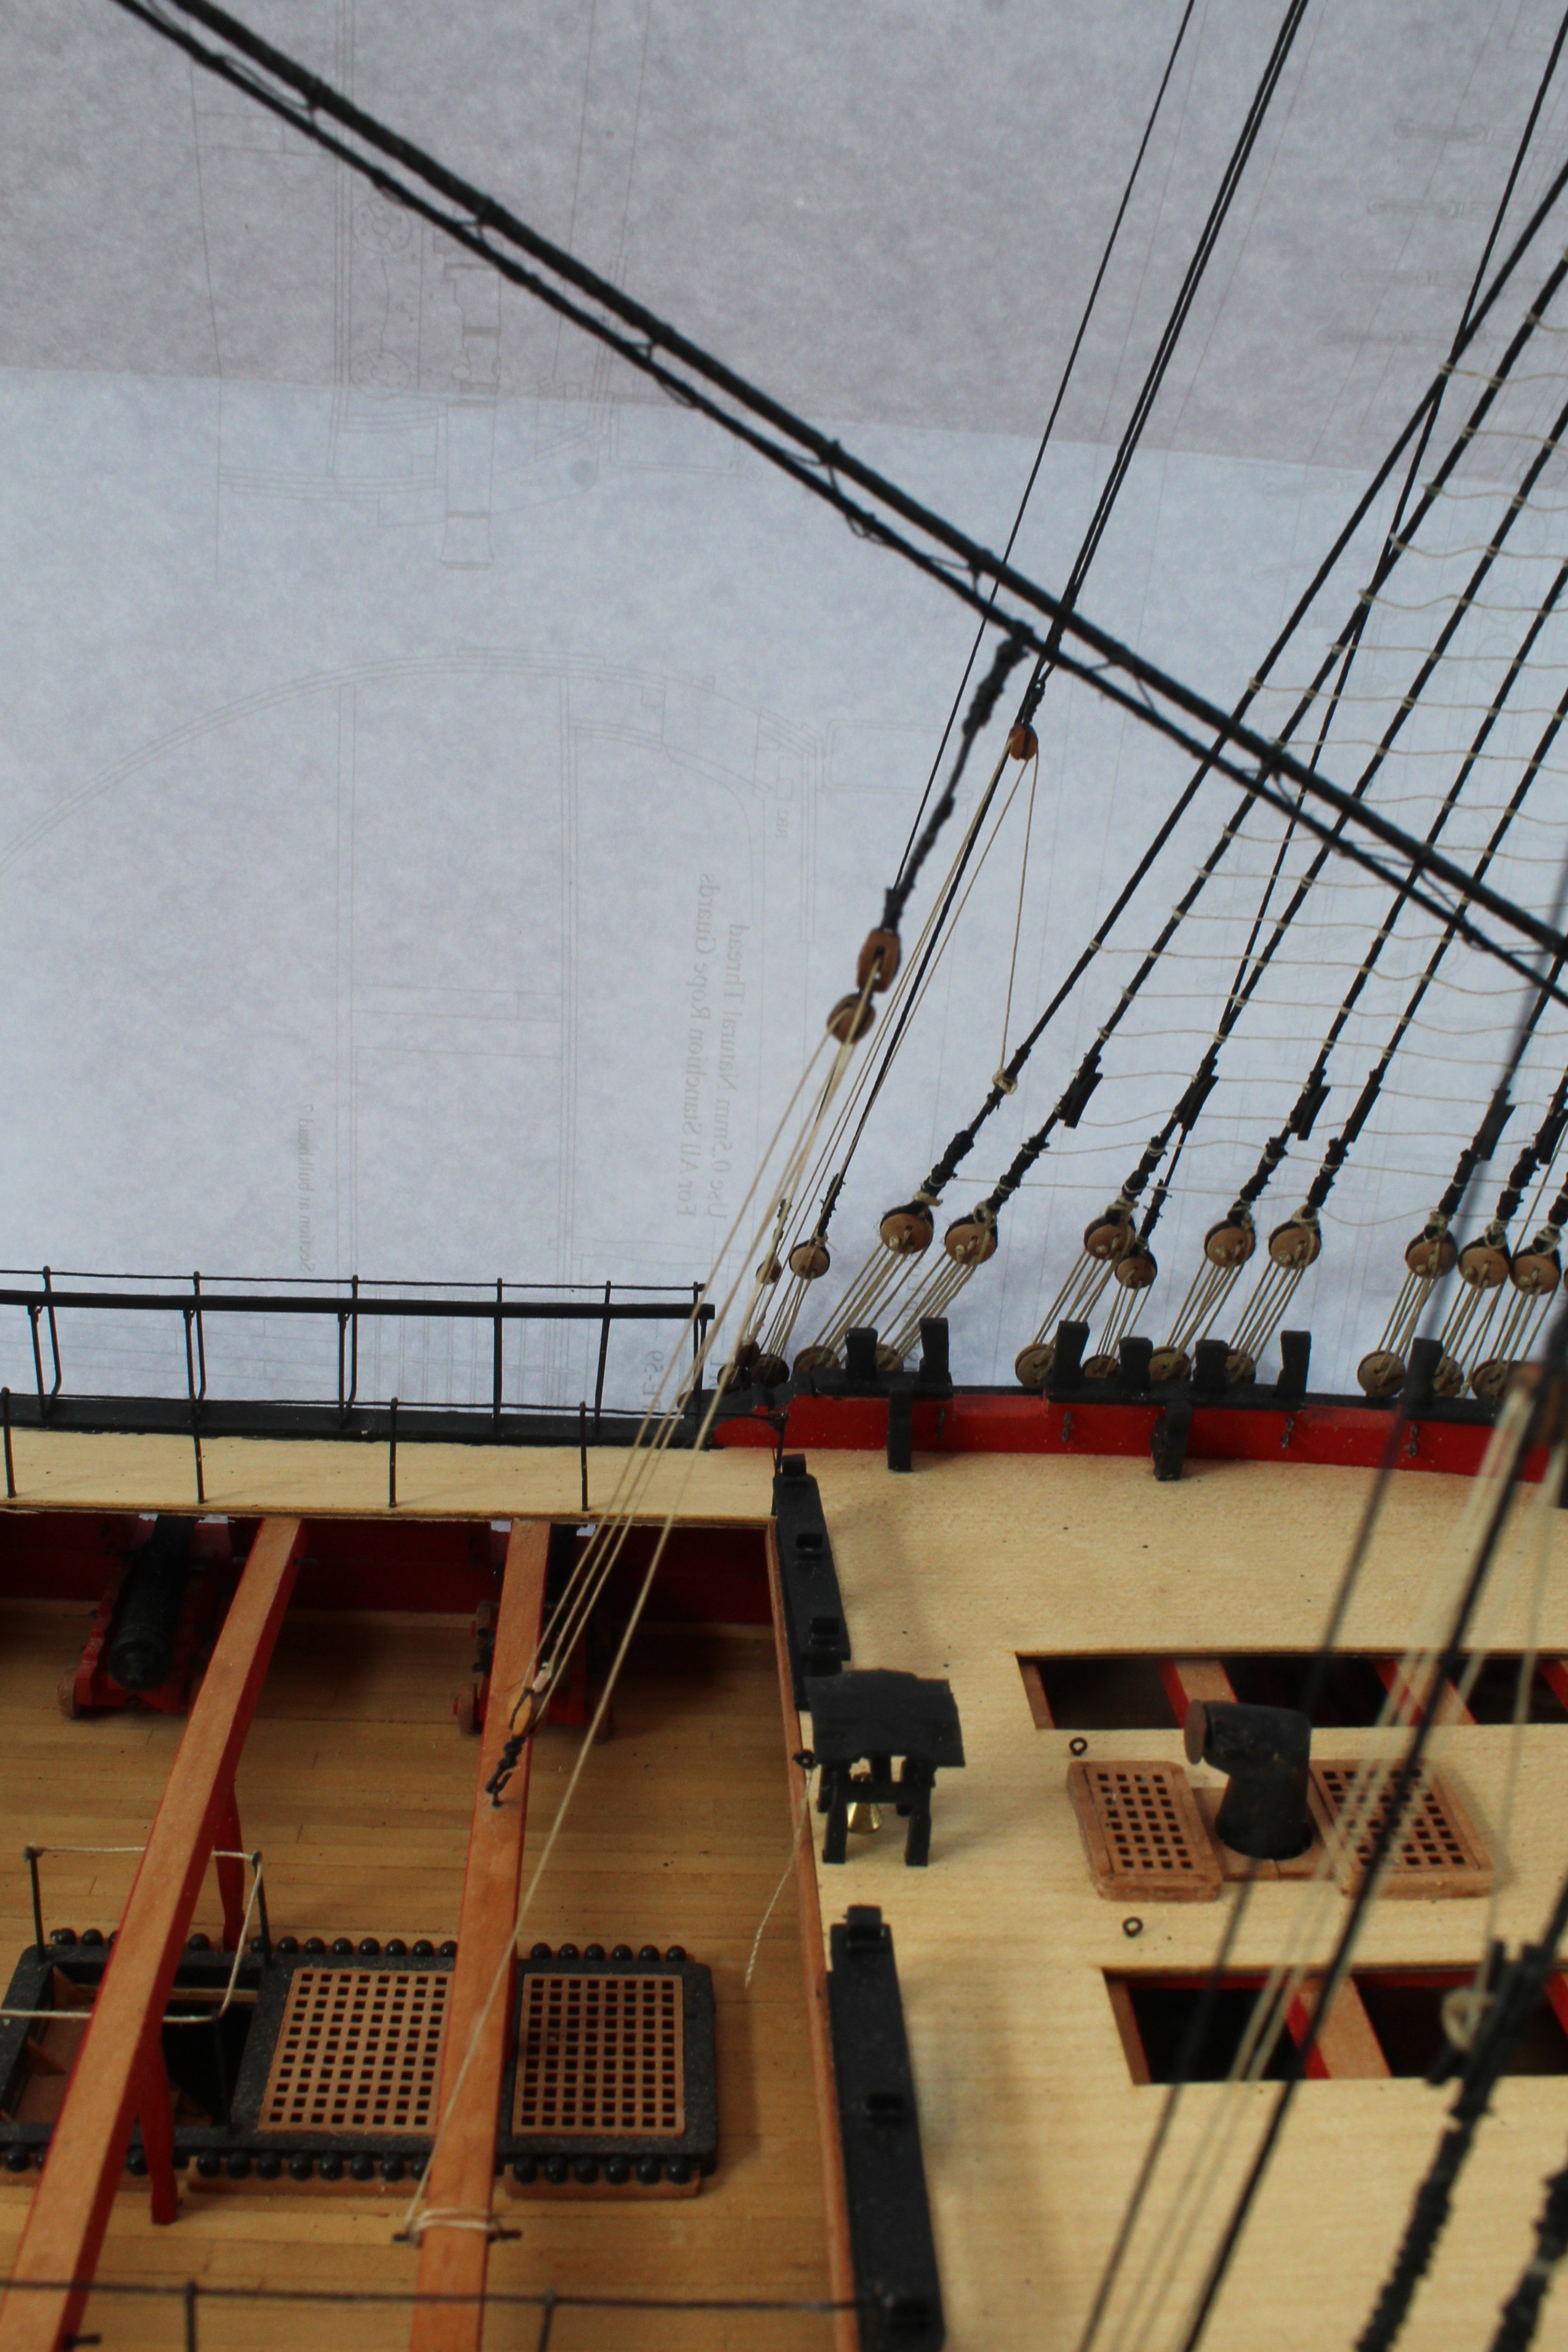
With the belaying pins in place I was then able to fit the two stay tackles. These tackles are indicated by the yellow arrow on the photo below. On reflection I should have positioned the lower stay tackle slightly higher up the stay as it is at a bit of an angle.
The first double block assembly was secured to the main stay.
The bottom block was secured to the beam with a hook and eyelet and once rigged the free end was tied to a belaying pin.
The completed first stay tackle.
The process was repeated for the second stay tackle.

- Knocklouder, davyboy, wvdhee and 14 others
-
17
-
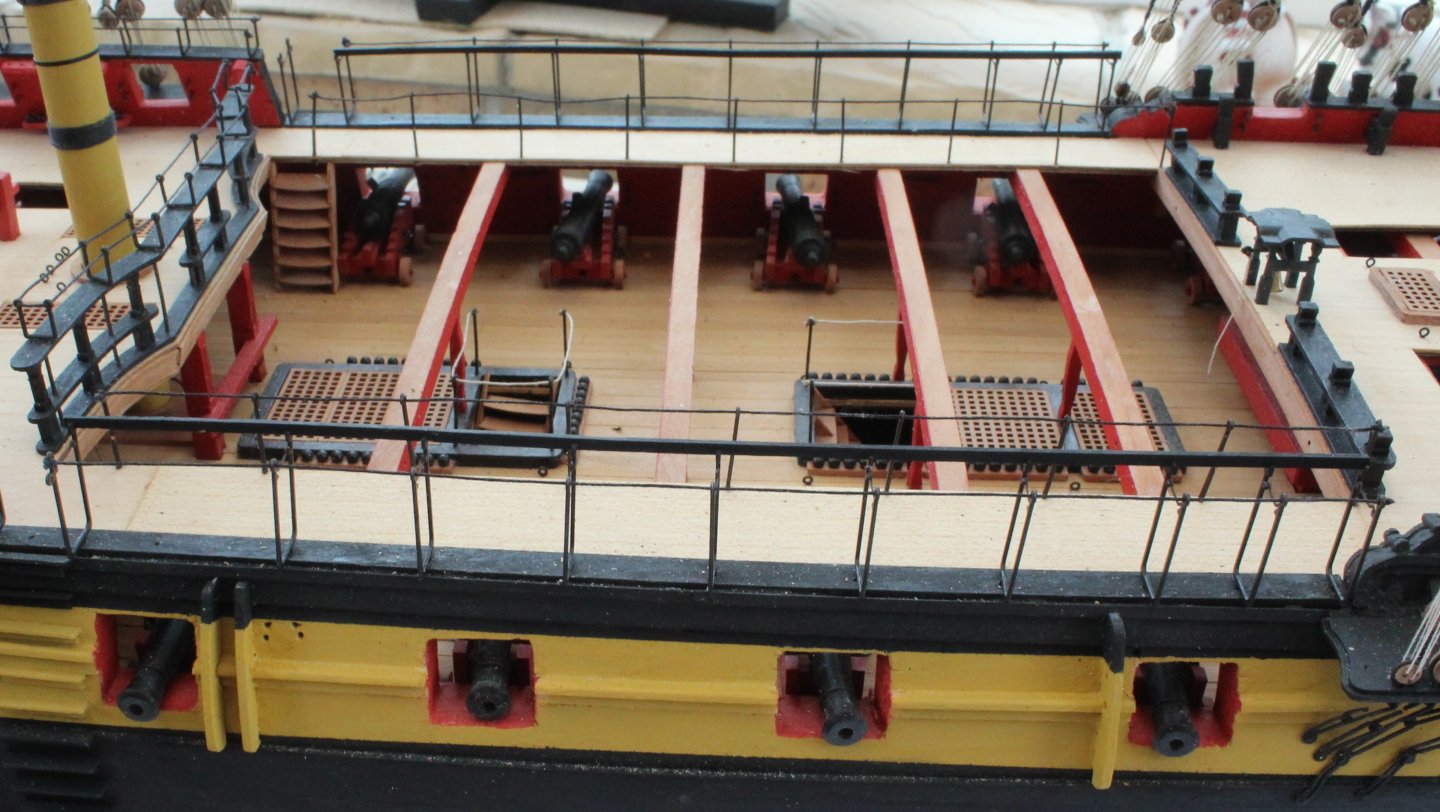
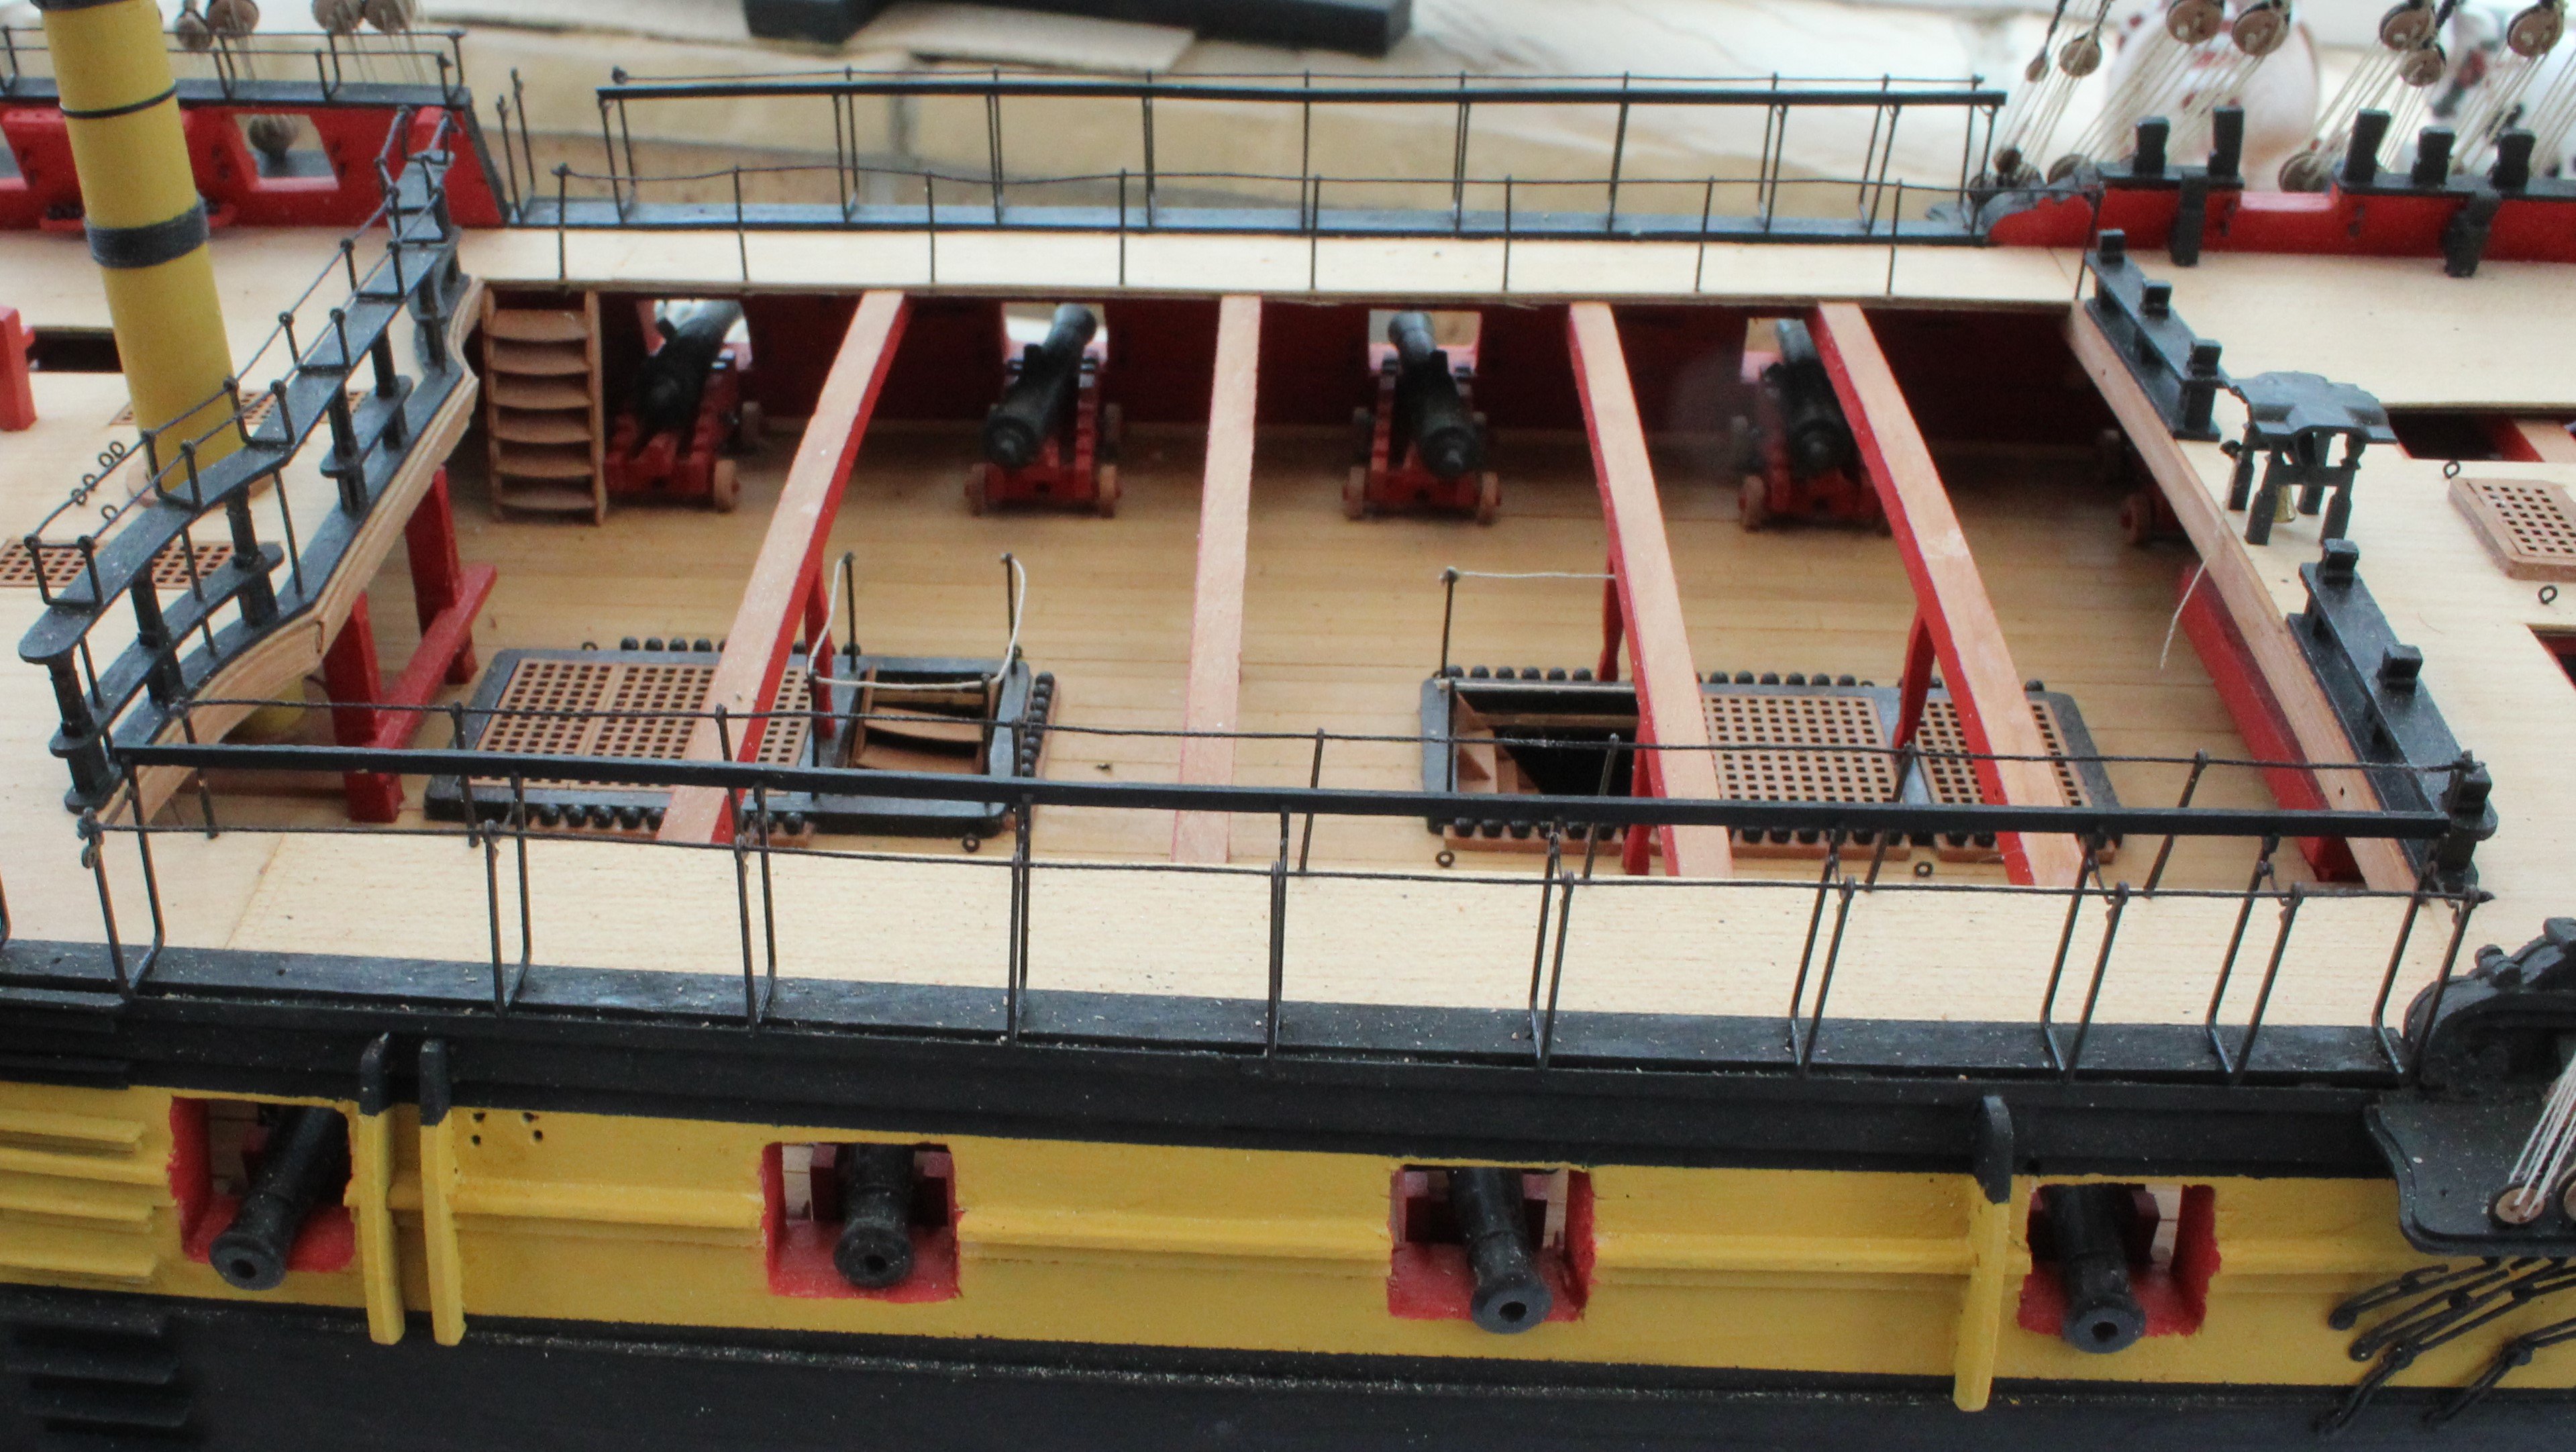
Mid Deck & Quarterdeck Bulwark Hammock Cranes and Poop Stanchions
After completing the backstays my next intended task was to add the two main stay tackles. However as I was looking at the rigging plans and the Indy to check the belaying points I noticed that I had not fitted the various hammock cranes and stanchions to the gunwales. Also I had not added the thread to the quarterdeck barricade hammock cranes.
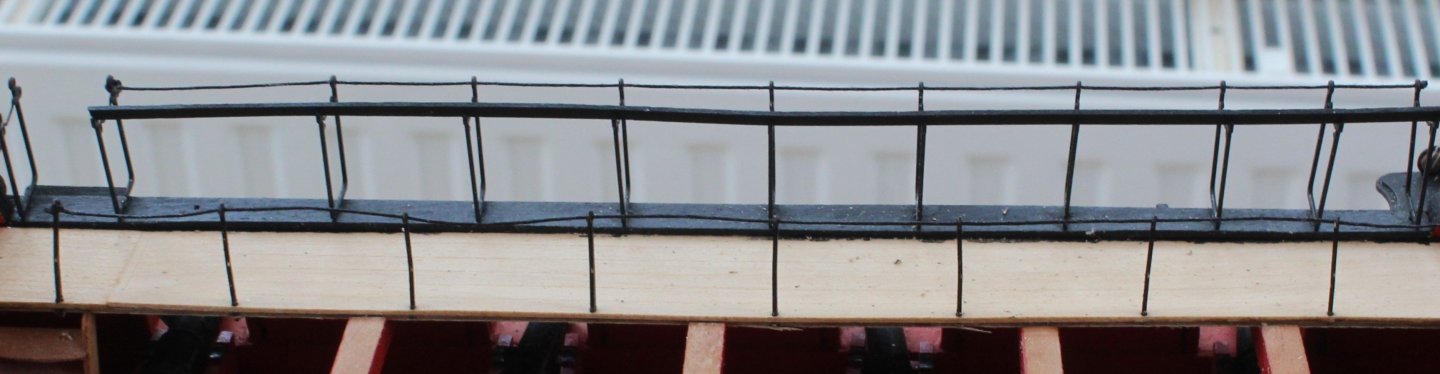
The easiest task was to add the 0.5mm black thread to the quarterdeck barricade hammock cranes. A length of black thread was cut and run through my block of beeswax. I then used a hairdryer to melt the beeswax which helped to stiffen the thread. The thread was then added to the quarterdeck barricade hammock cranes.
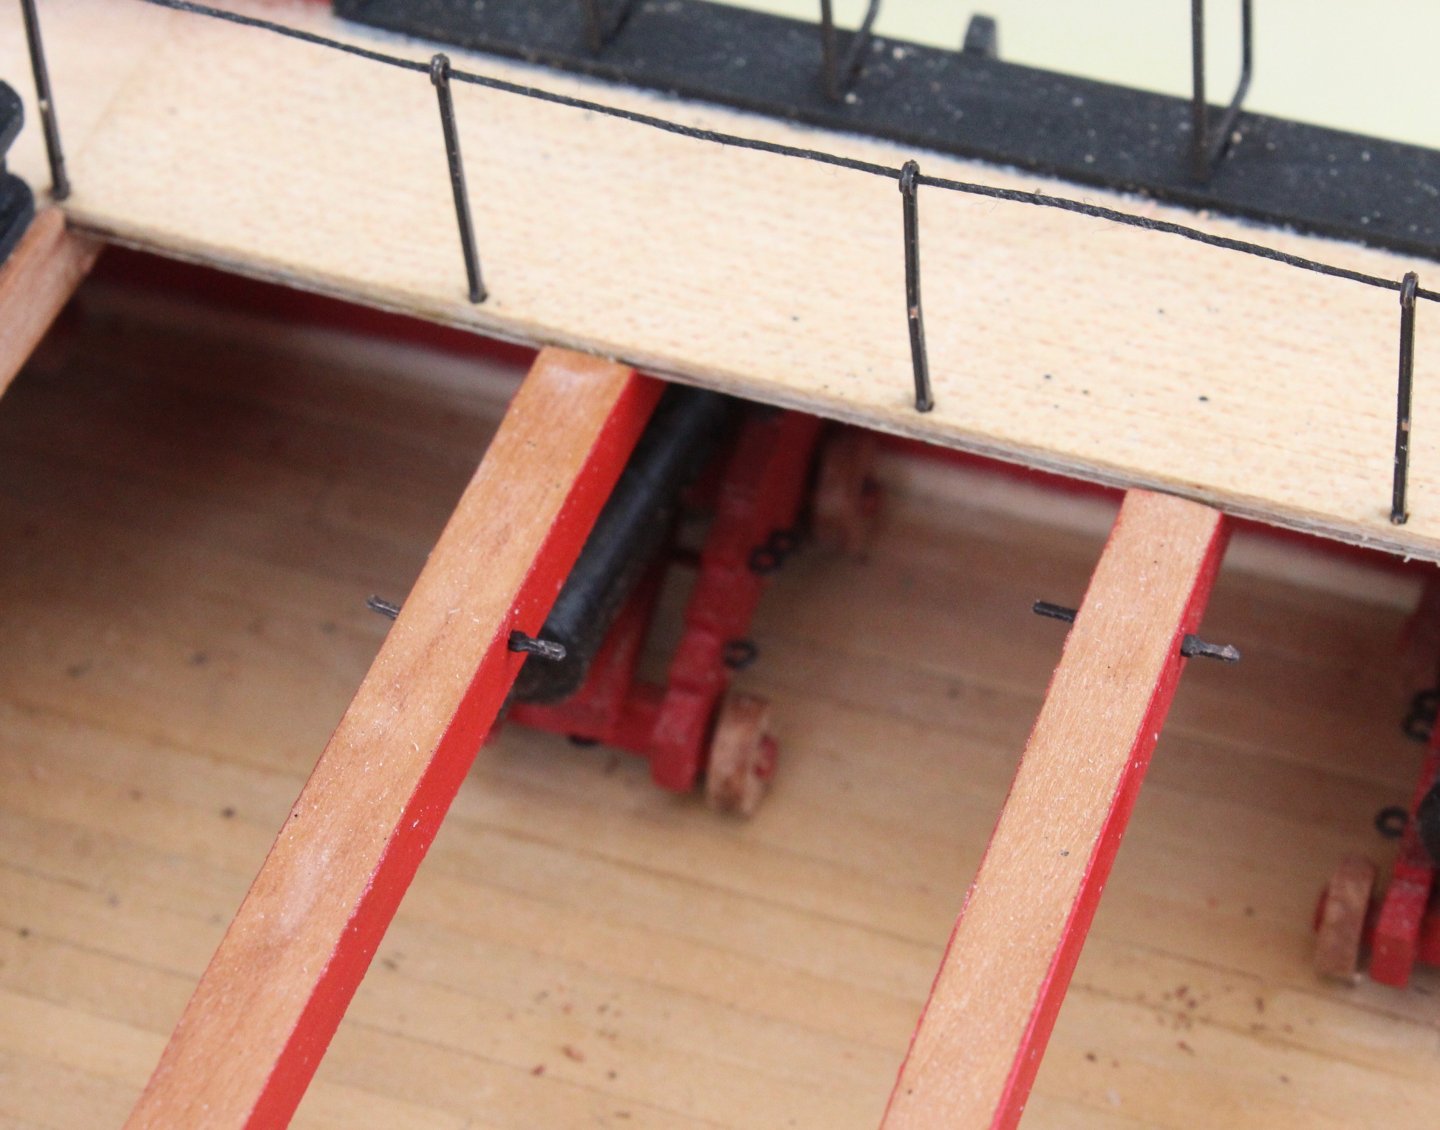
Next I moved on to the mid deck stanchions and hammock cranes. This uncovered another error with my build in that I had incorrectly fitted the mid deck gunwales, they were fitted back to front. If I fitted the hammock cranes in the holes provided the access to the Indy via the steps would be blocked. I simply added two new holes so the access via the steps was clear.
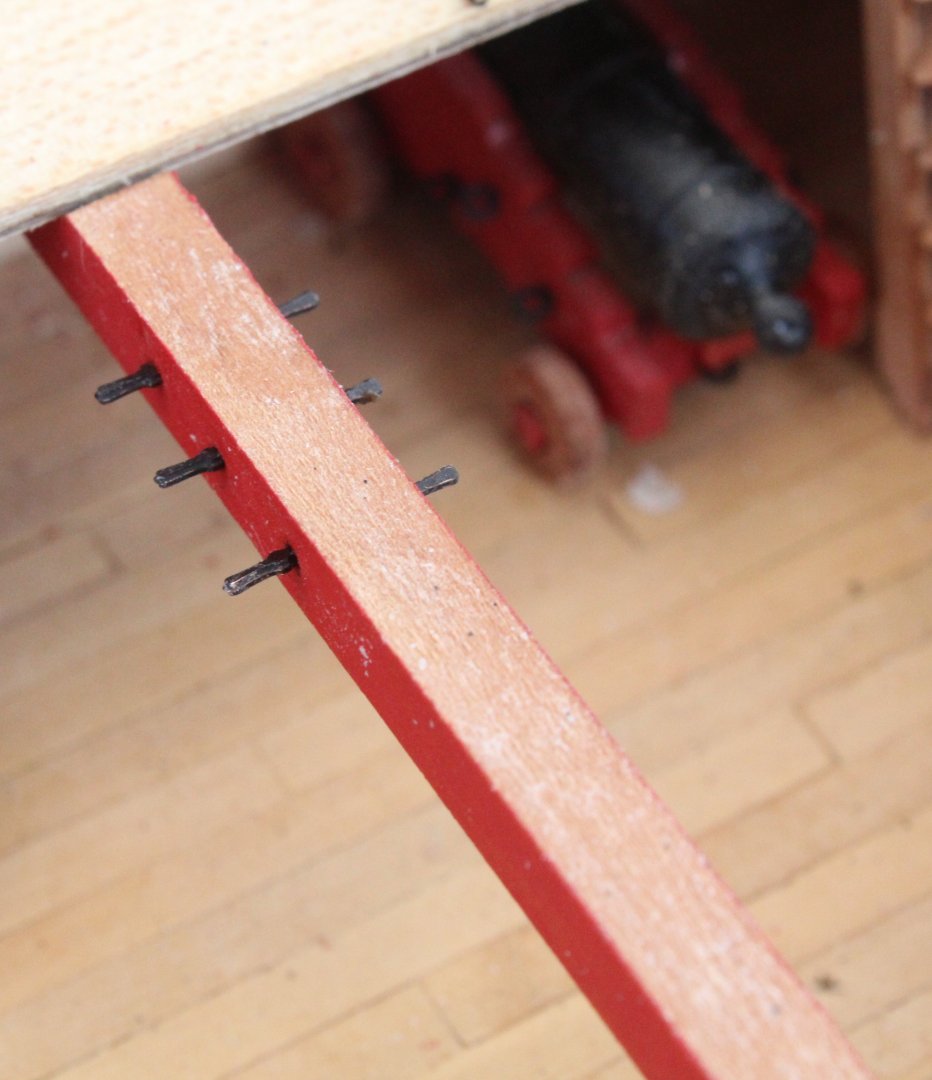
The inner stanchions were fitted and rigged first. Once they were done the hammock cranes were added. These cranes required a length of 2x1 to fitted as well as 0.5mm black thread.
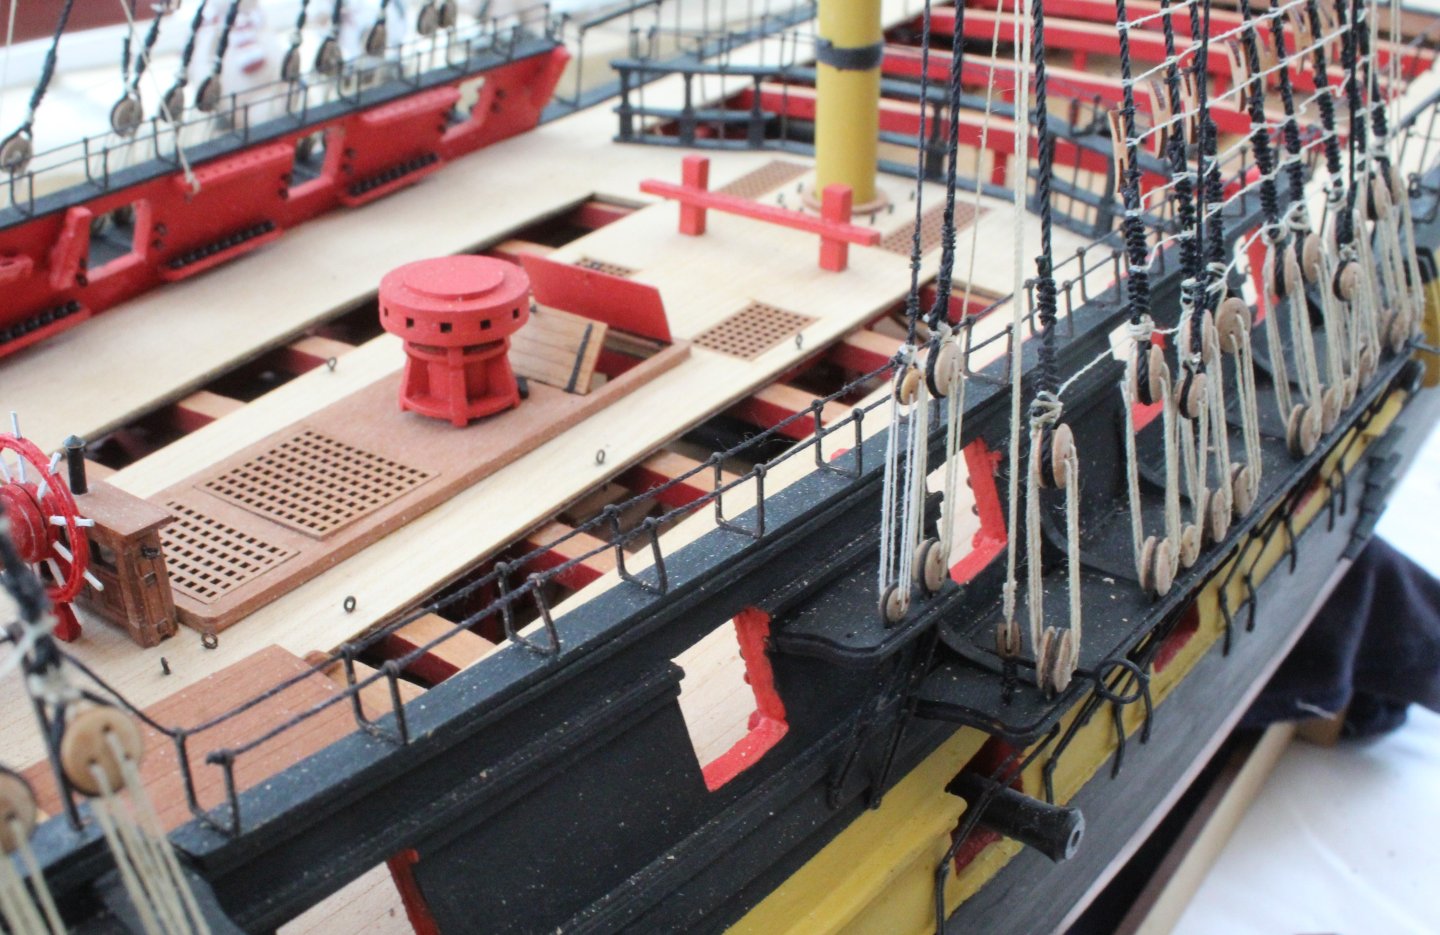
The next task was to add the Quarterdeck Bulwark Hammock Cranes and Poop Stanchions. This was a bit more difficult to do as access to the gunwales was restricted by the shrouds and backstays. However I took my time and I was able to complete the task.

I am hoping to add the two main stay tackles tomorrow before I go away for a few days so on my return I can then start work on making the various yards and booms.
- AON, Wacom, CaptnBirdseye and 12 others
-
15
-
-
-
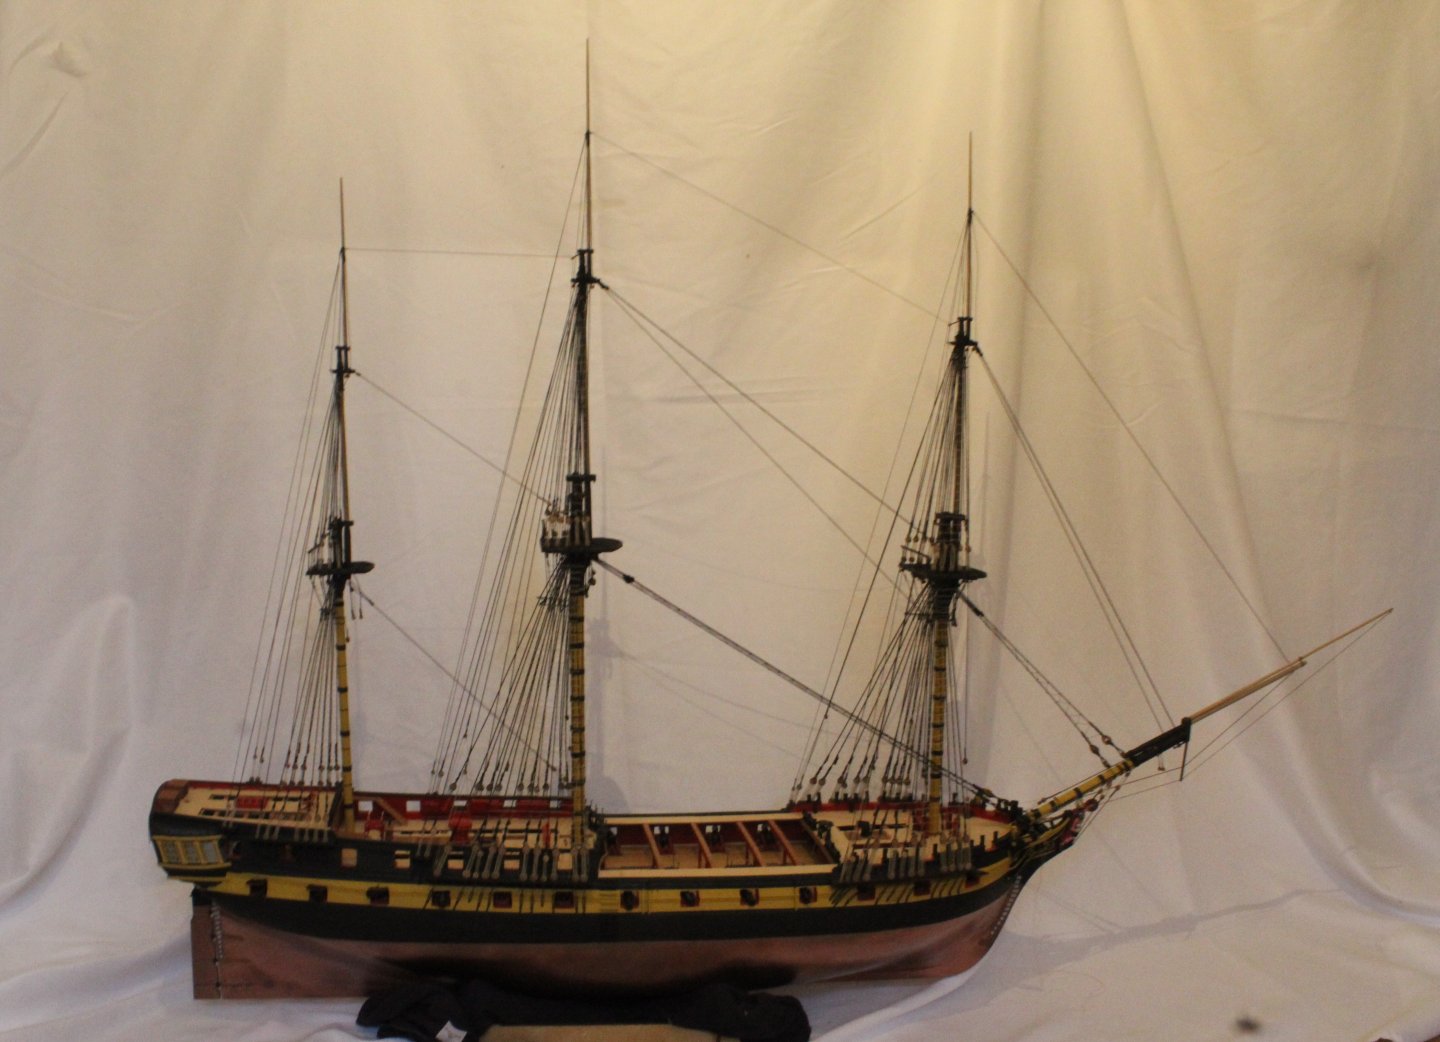
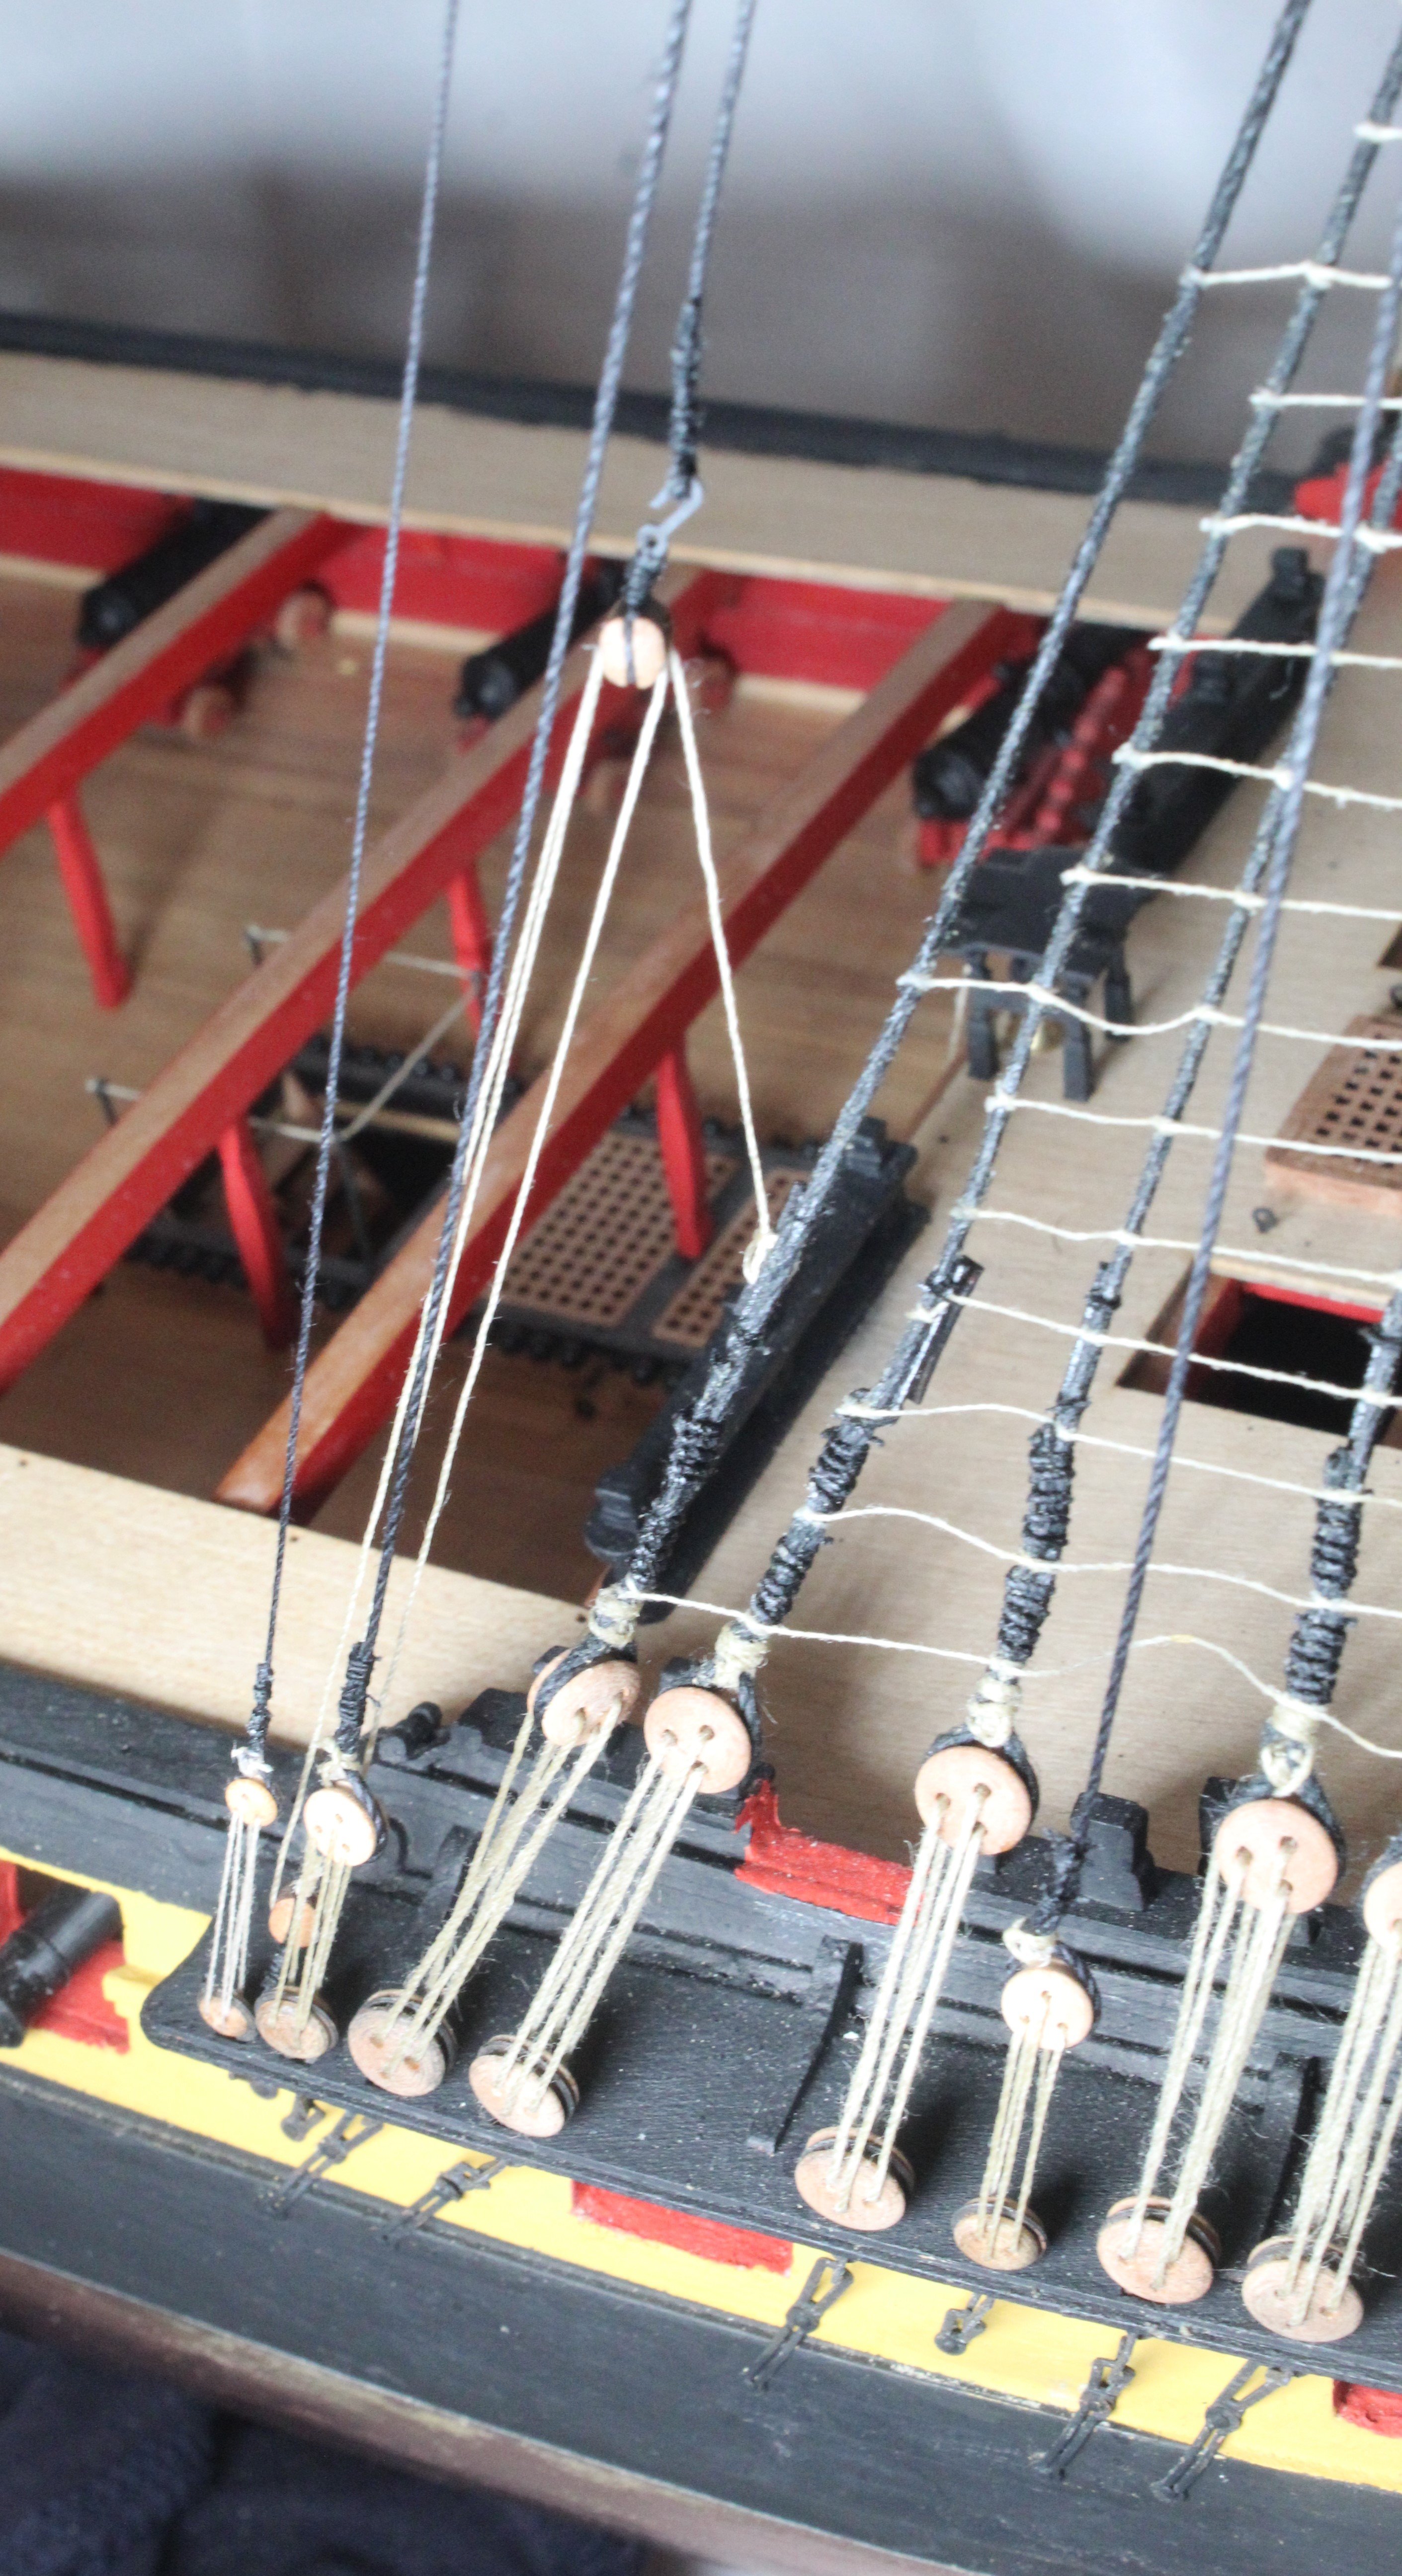
Backstays
I have now completed all work related adding the various backstays.
Here are a couple of photo's showing the current build status, they are not great photos.
The next photo shows the fore mast breast backstay.
The next two photo's show the shifting backstays and the topsail and topgallant backstays


The final photo shows the entire lower foremast with shrouds and backstays fitted.

My wife and I have booked a short holiday for next week so I'm not expecting to make too much progress before we depart.


HMS Indefatigable 1794 by Glenn-UK - FINISHED - Vanguardodel Ms - 1:64
in - Kit build logs for subjects built from 1751 - 1800
Posted
Thanks Kevin, hopefully you'll return to your Indy before too much longer.