


Glenn-UK
-
Posts
2,657 -
Joined
-
Last visited
Content Type
Profiles
Forums
Gallery
Events
Posts posted by Glenn-UK
-
-
Preparation Work – Stern Area
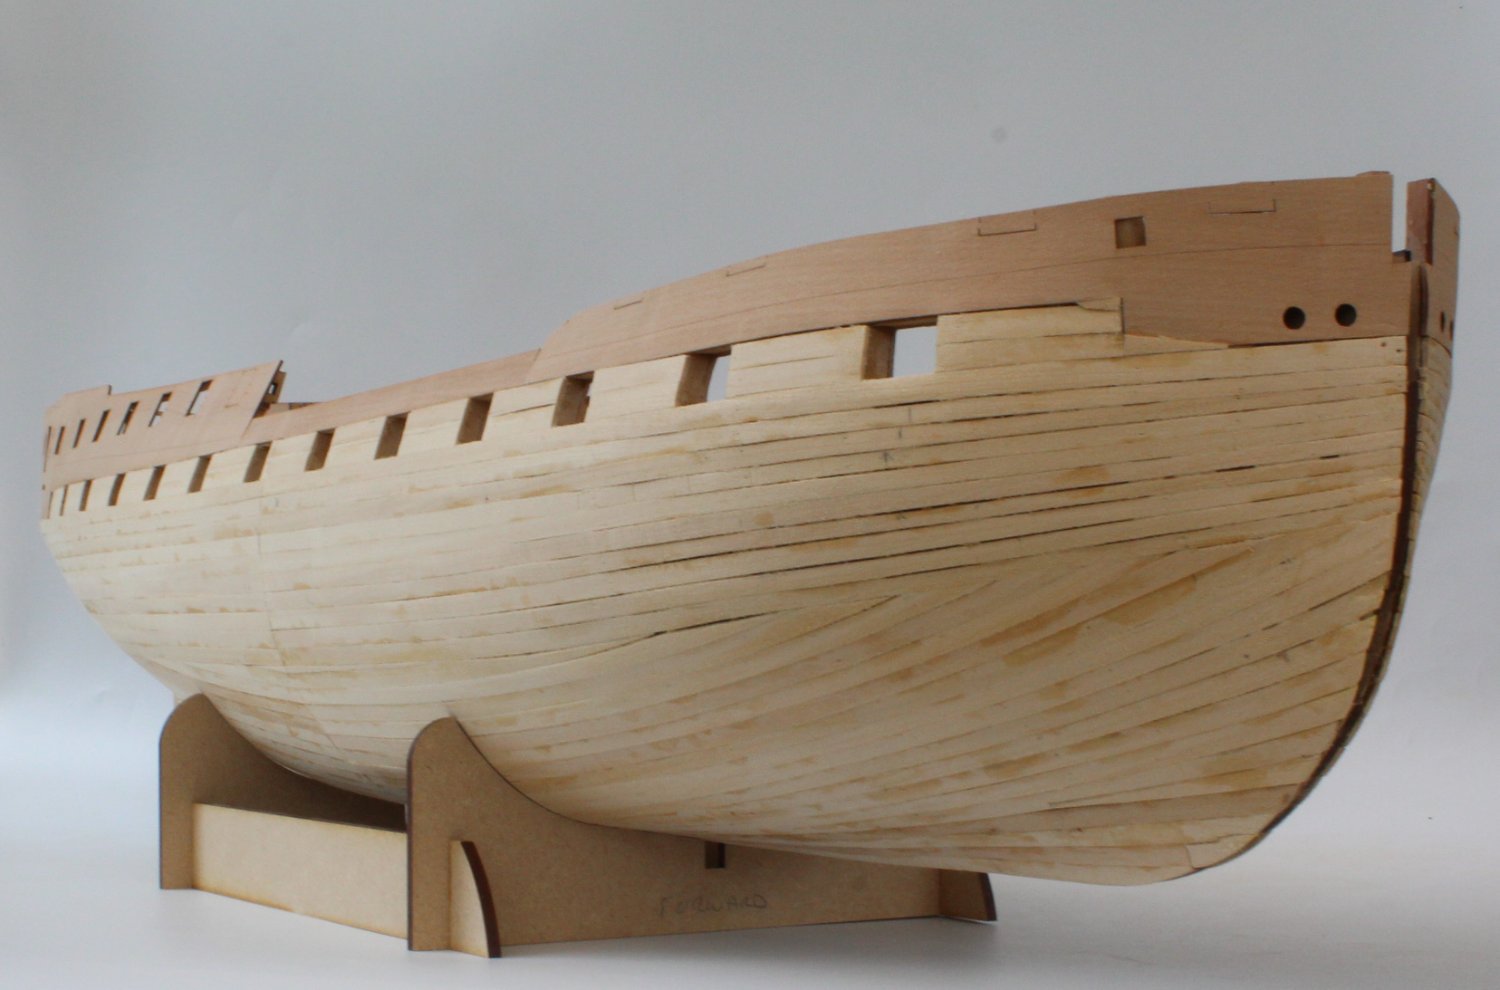
I have now sanded the hull (1st planking) to a nice smooth finish.
Before moving on to adding the 2nd planking there is a bit of preparation work such as fitting the lower stern counter. The first task was to glue the tiller bulkhead in place.
Next the rudder casing top canopy part was dry fitted. As the rear face did extend past the stern frames it was necessary to sand it flush.
I made a carboard template of the poop deck and when test fitted the back edge did not extend past the stern frame so there was no need to sand the back edge of the actual poop deck pattern.
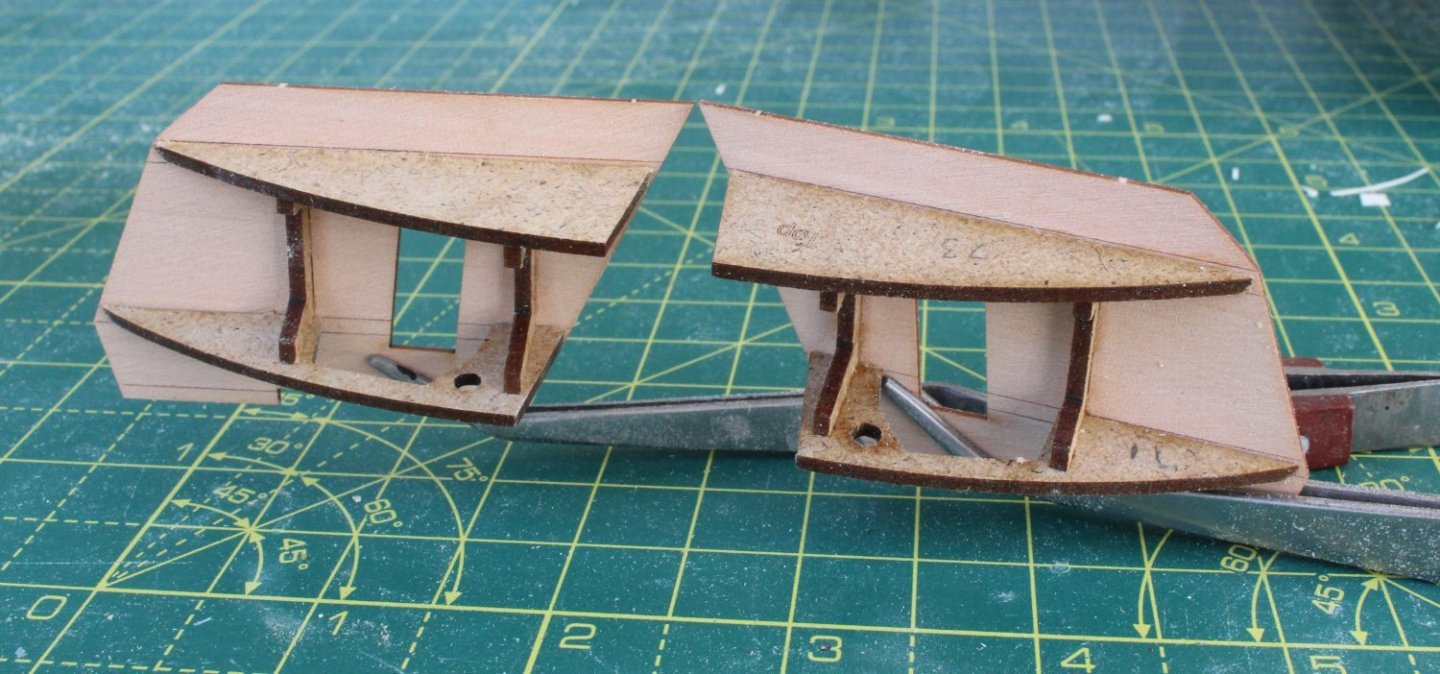
Next it was time to start to assemble the quarter galleries. The first task was to glue the two quarter gallery stool spacers.
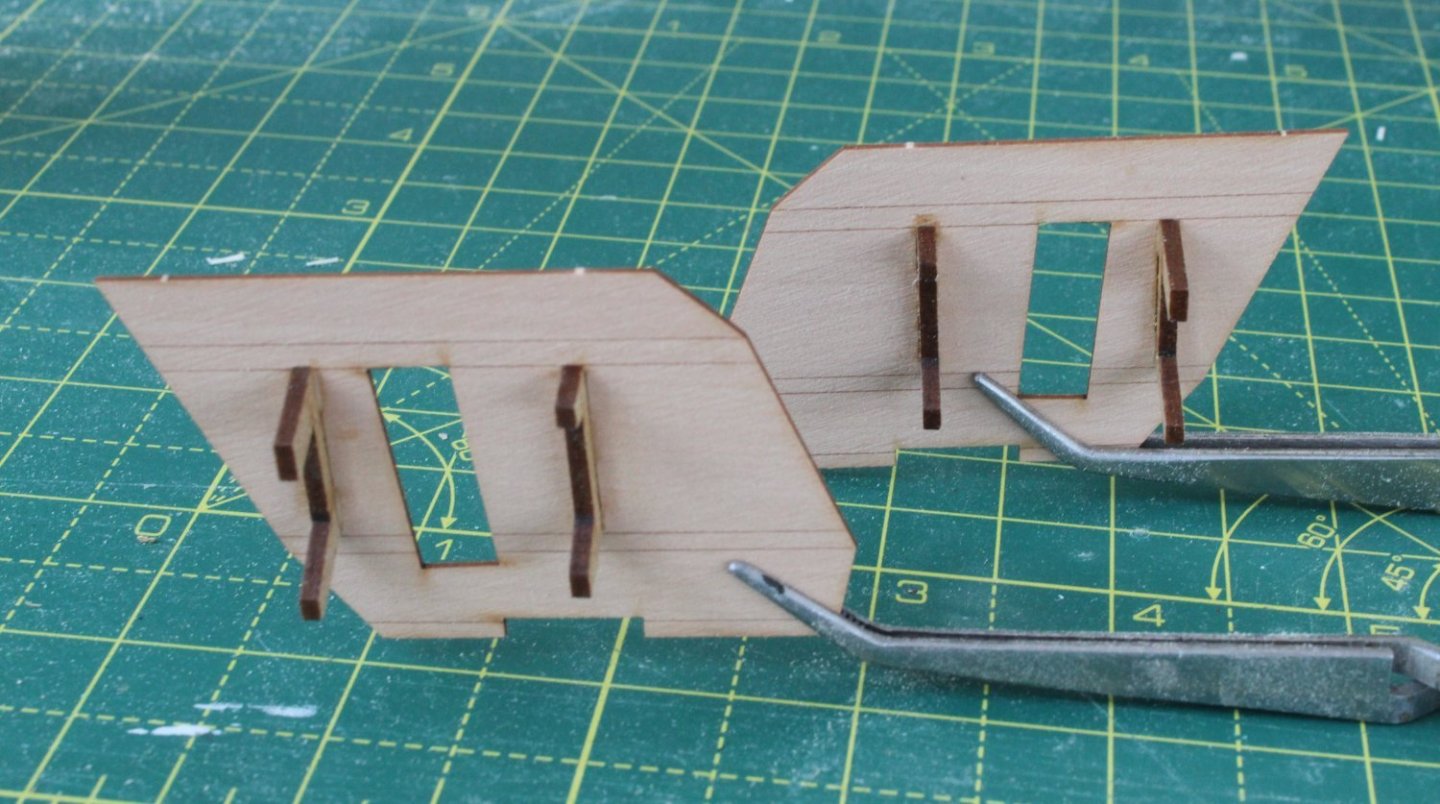
Before the quarter gallery upper and lower stool patterns can be fitted it is necessary to bevel so they are flush fitting with the quarter gallery base pattern. After checking the fit after adding a bevel the quarter gallery upper and lower stool patterns were glued in place.
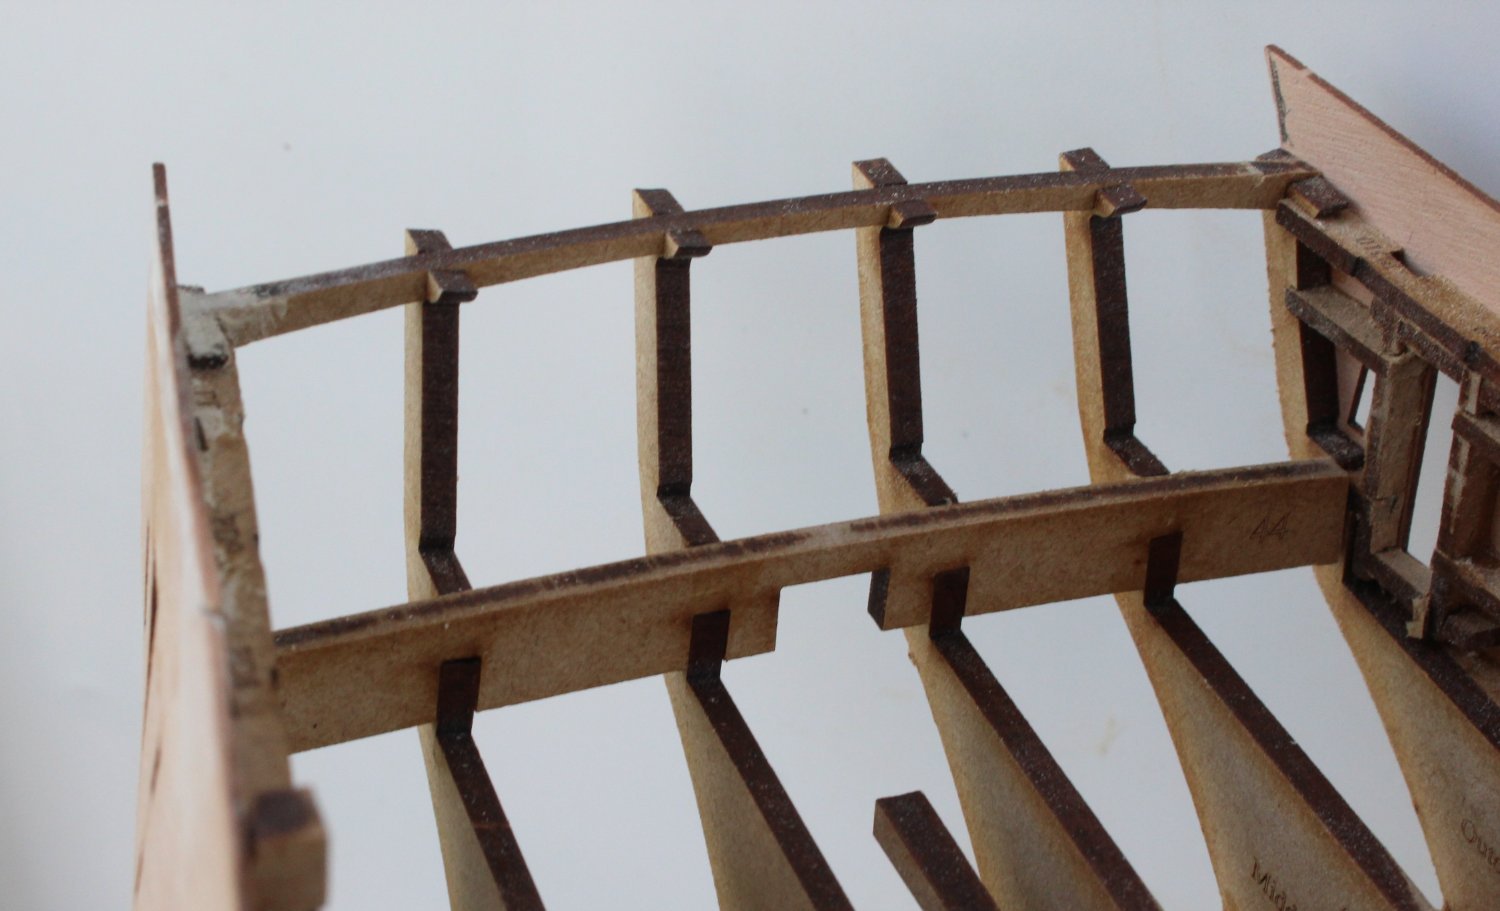
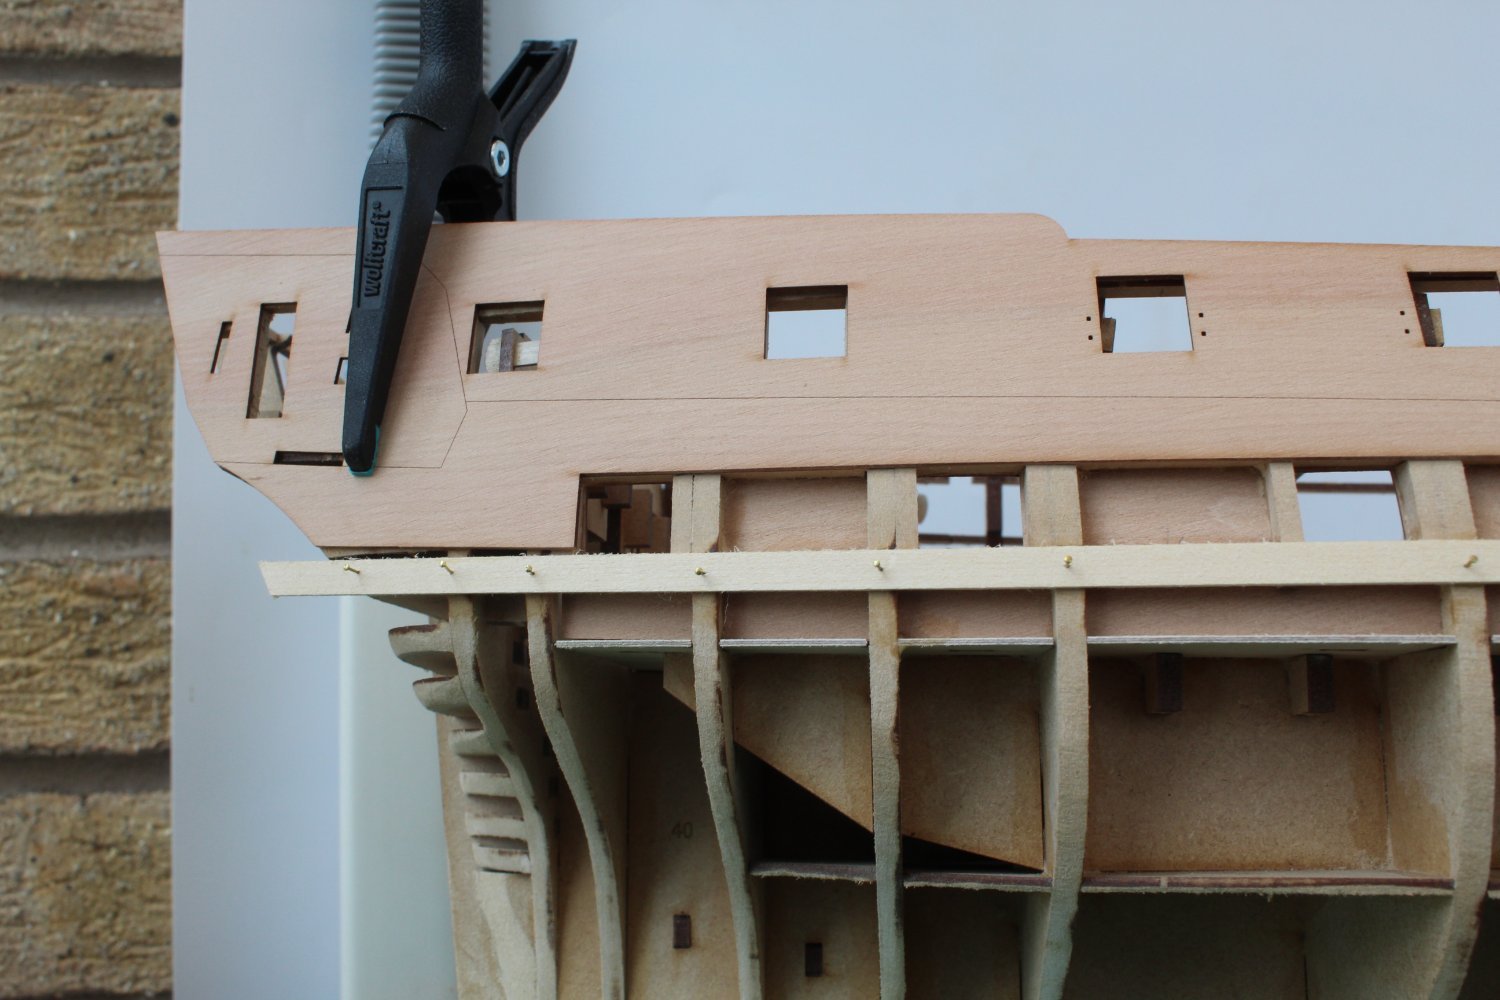
The back of the stern frame patterns has been sanded to follow the required curve. I did manage to damage the top of the right side bulwark pattern and I had to made and fit a new part. I had to use some wood filler to fill some of the gaps along the joint line.
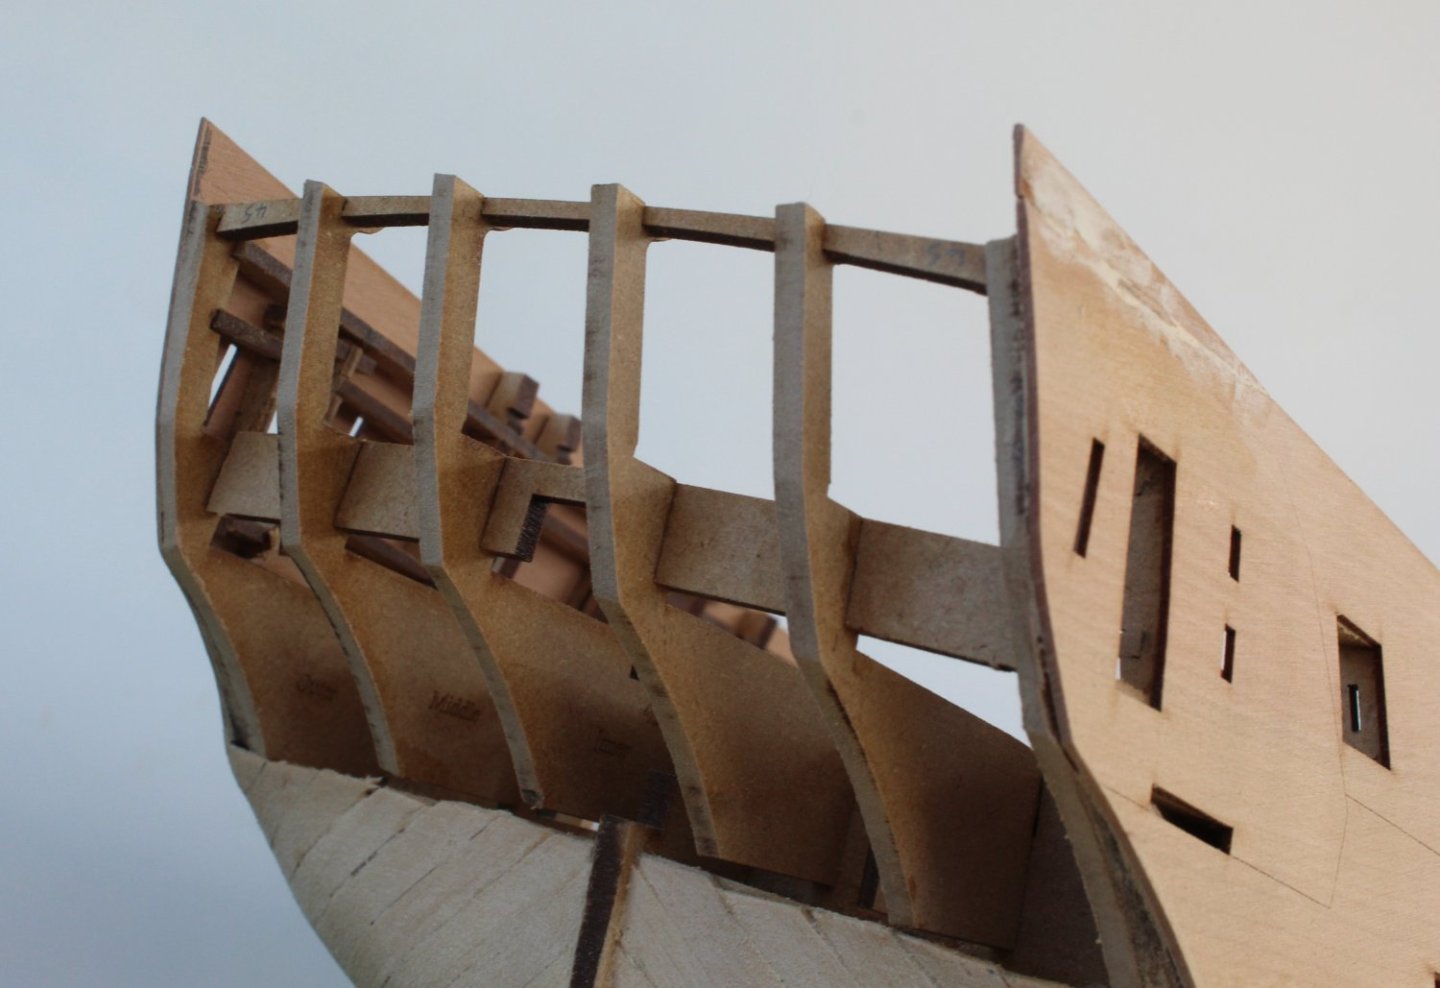
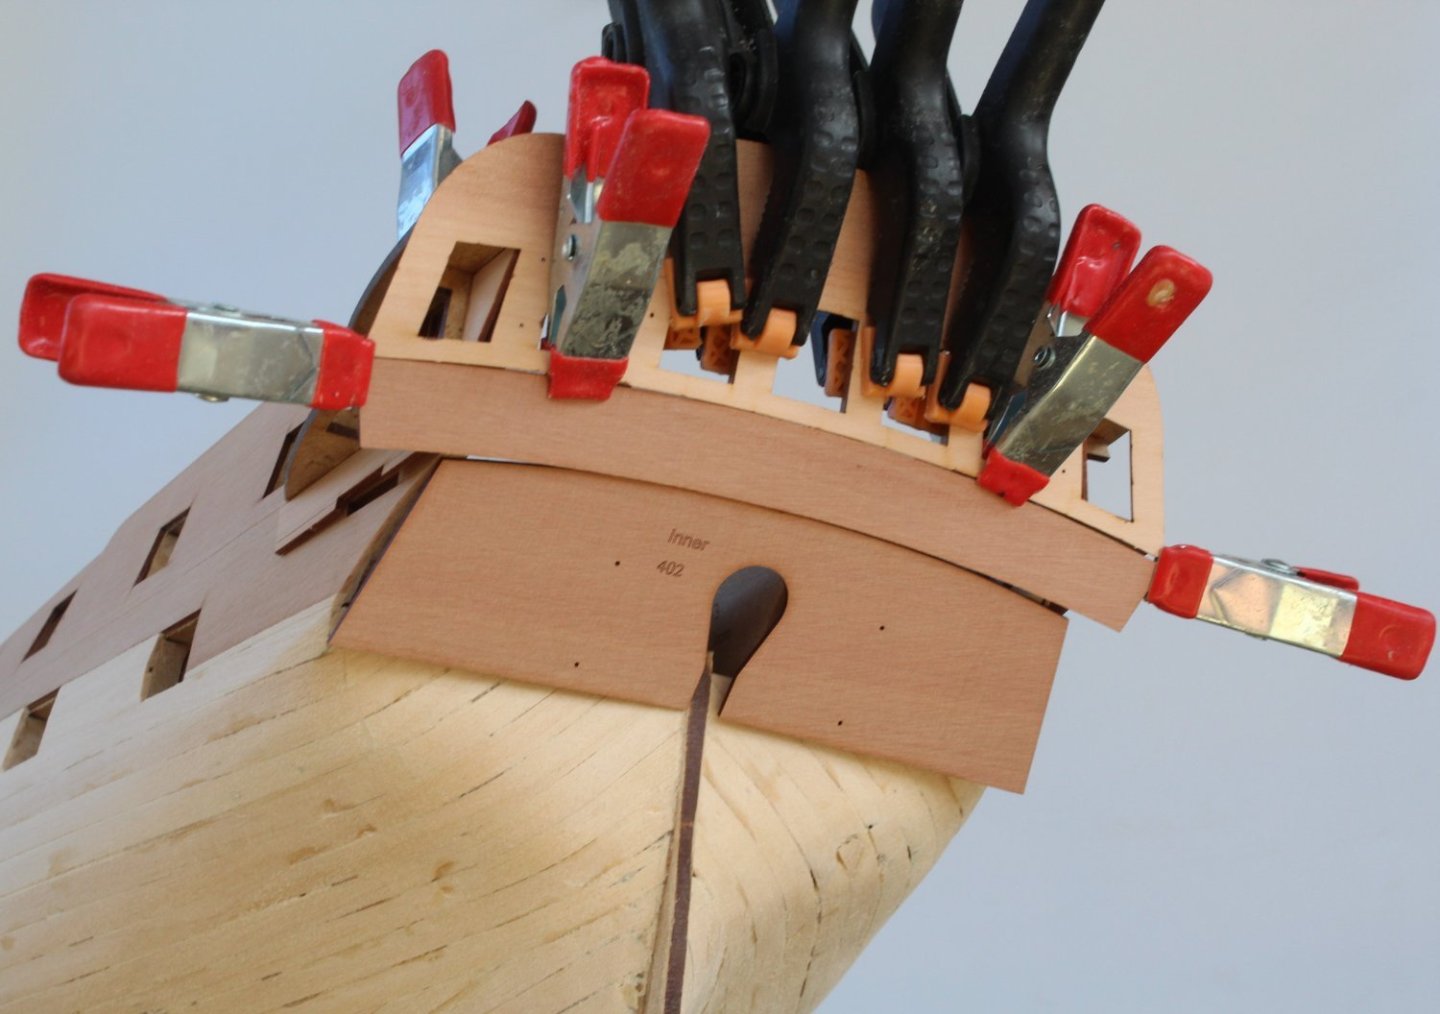
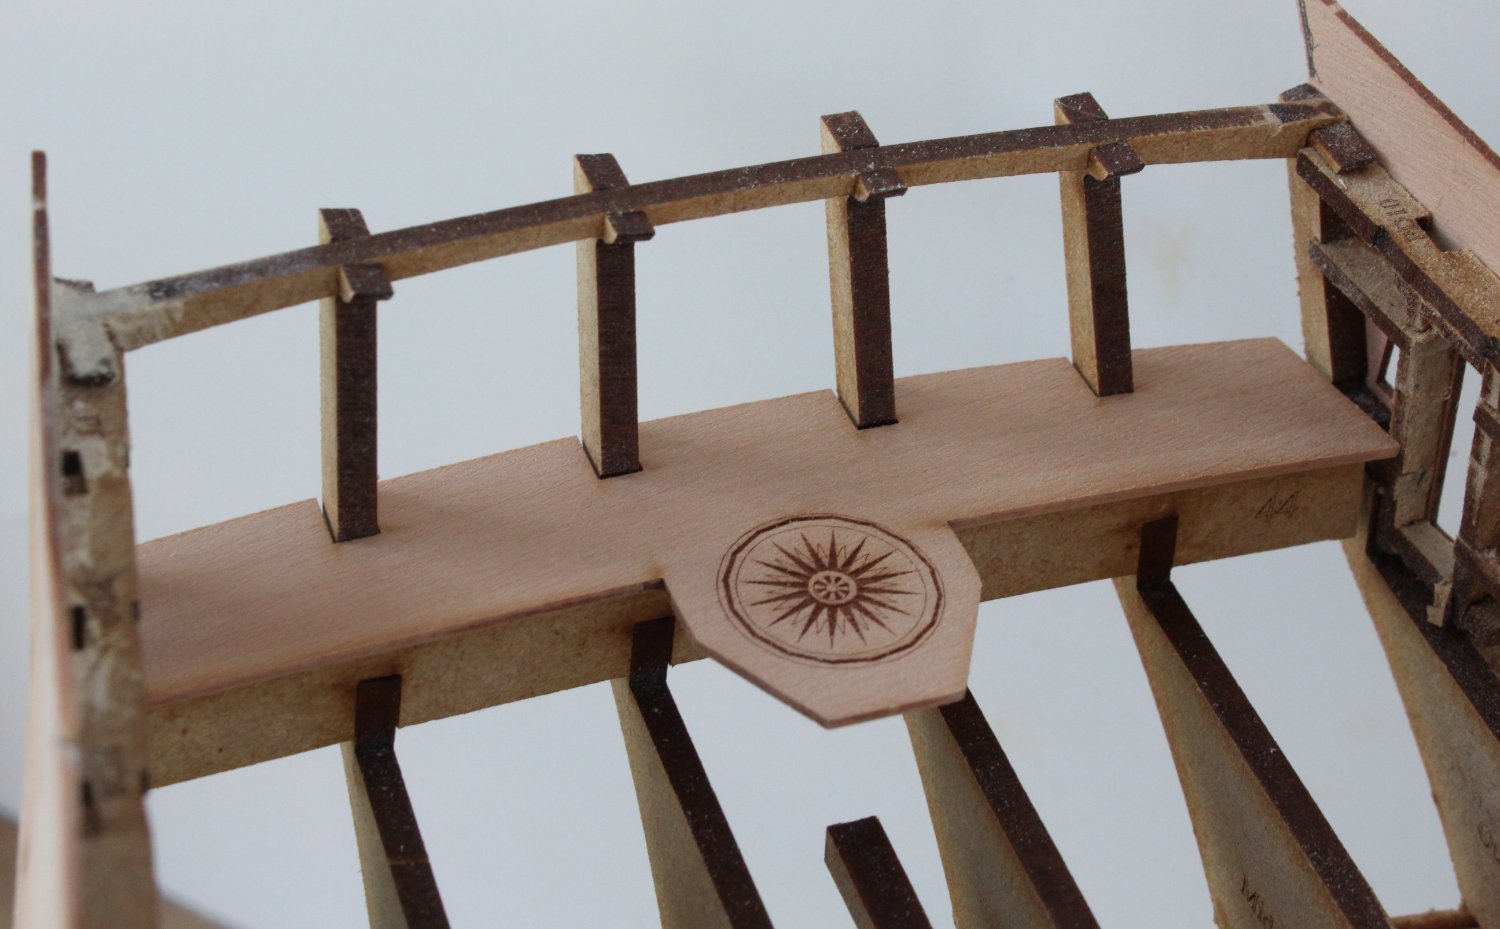
The inner upper stern counter pattern was then positioned. As per the build manual instructions the pattern was set to be approx. 2mm above the top of the bulwarks.

The quarter gallery assemblies were clamped to the hull (no glue) and it was necessary to make some minor adjustments to the position of the inner stern pattern assembly.
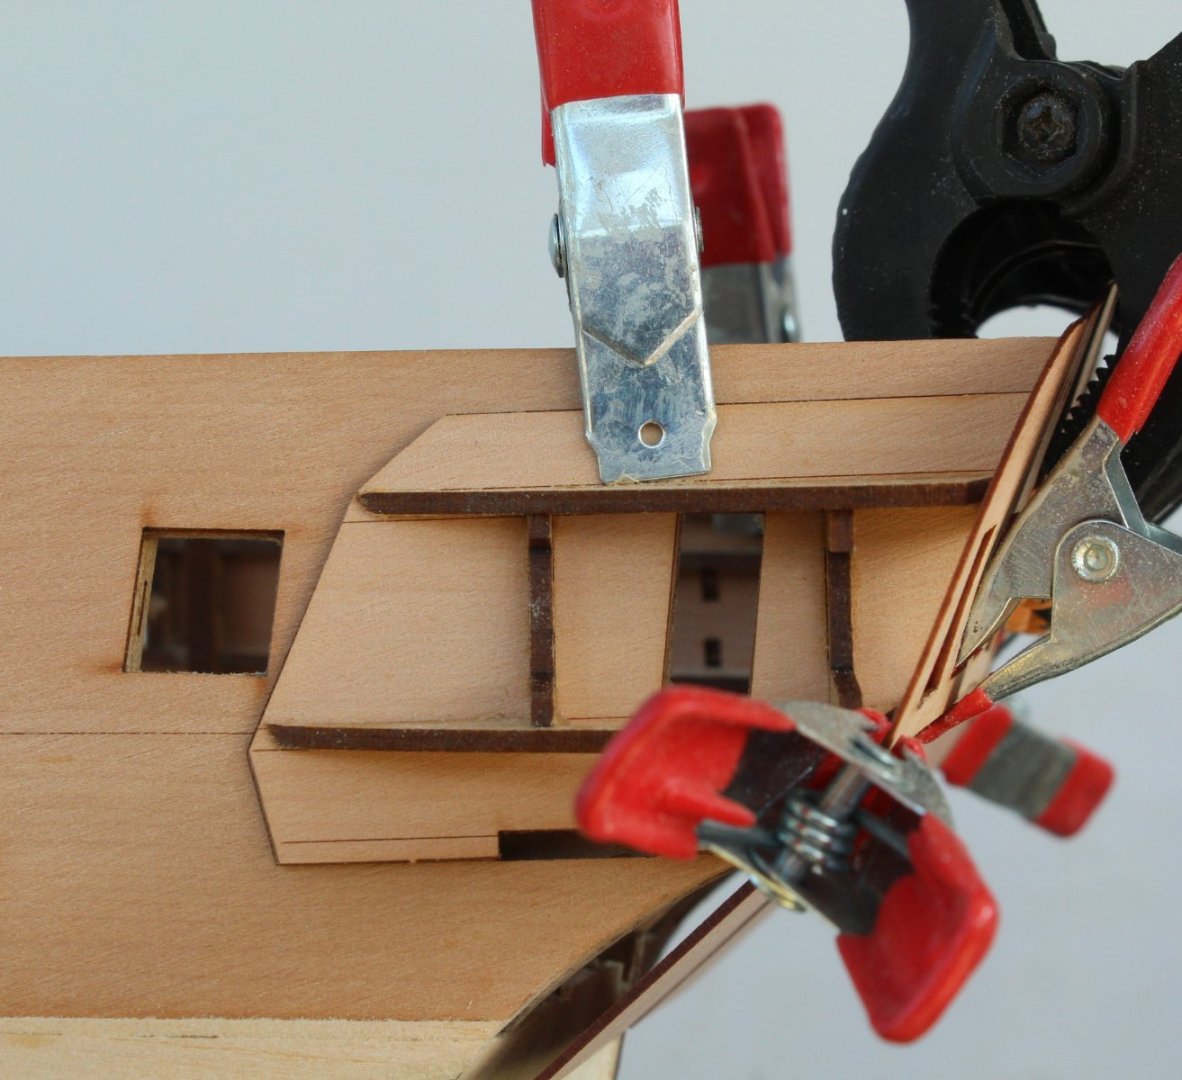
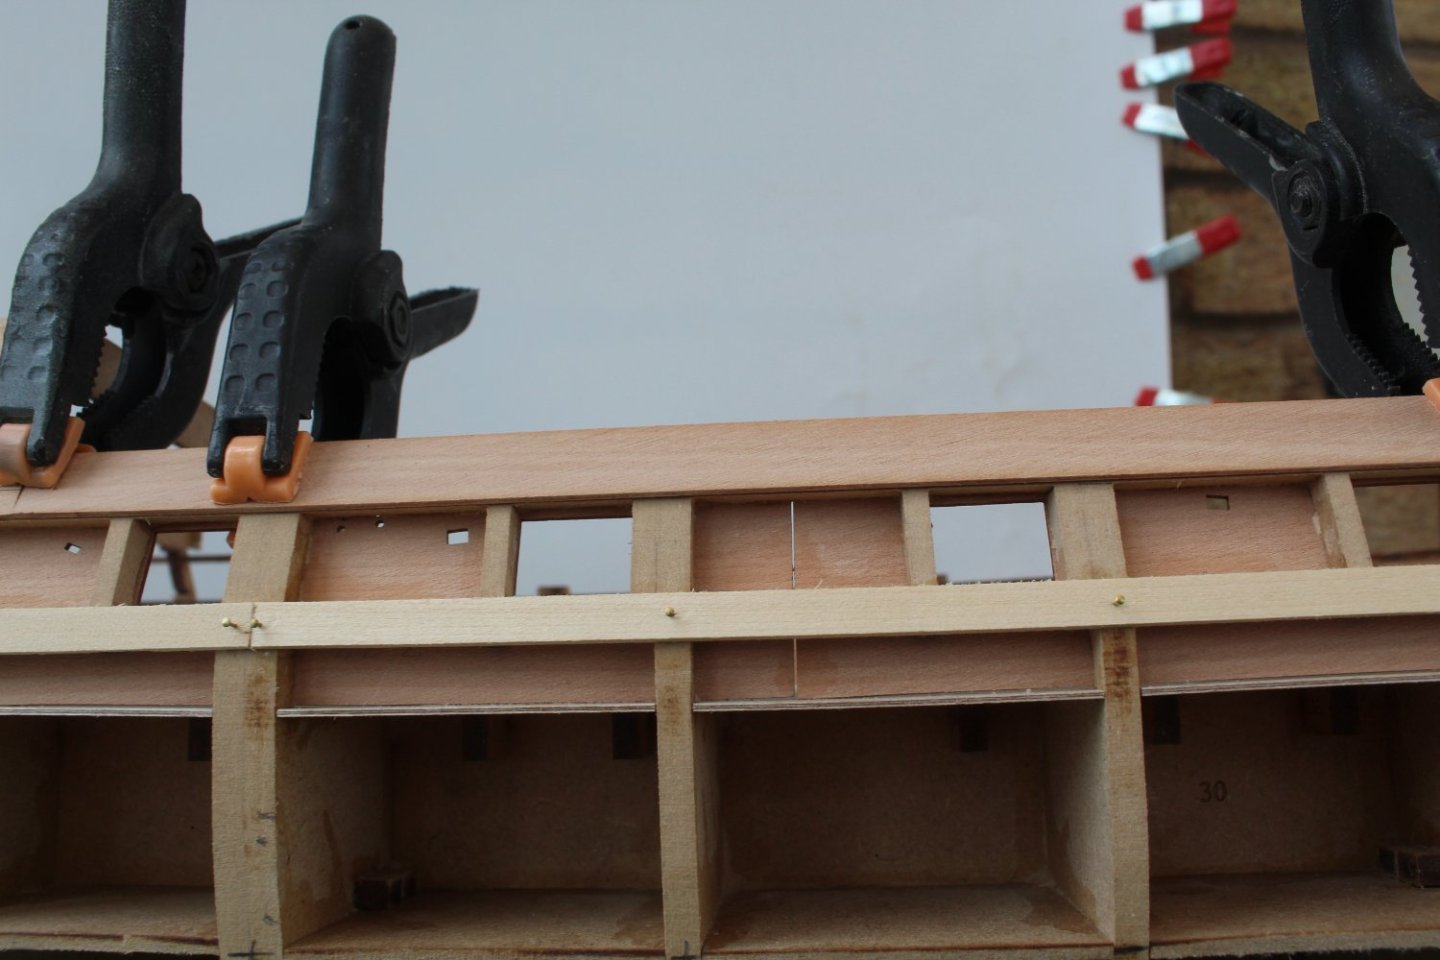
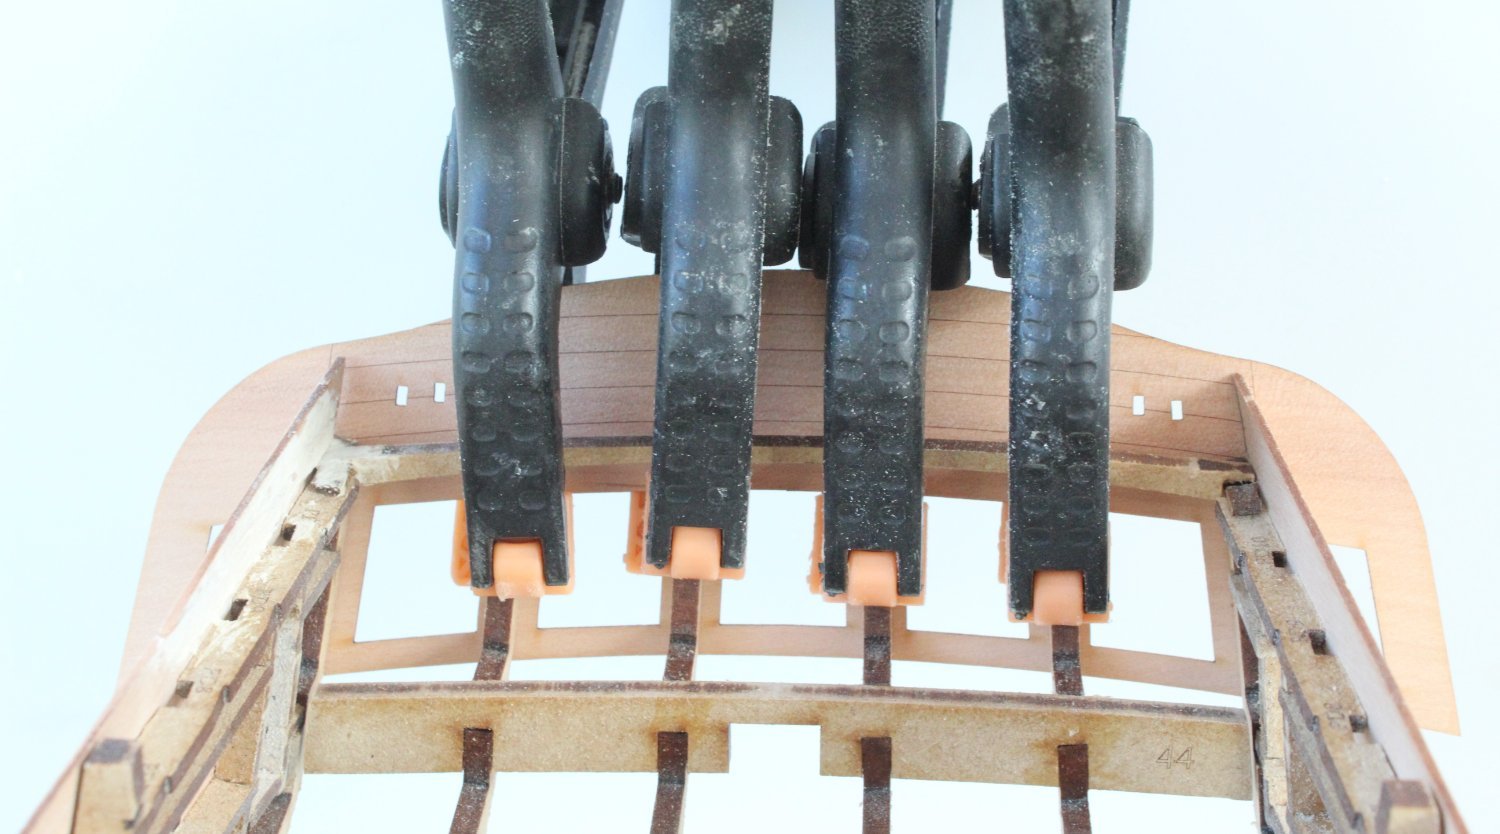
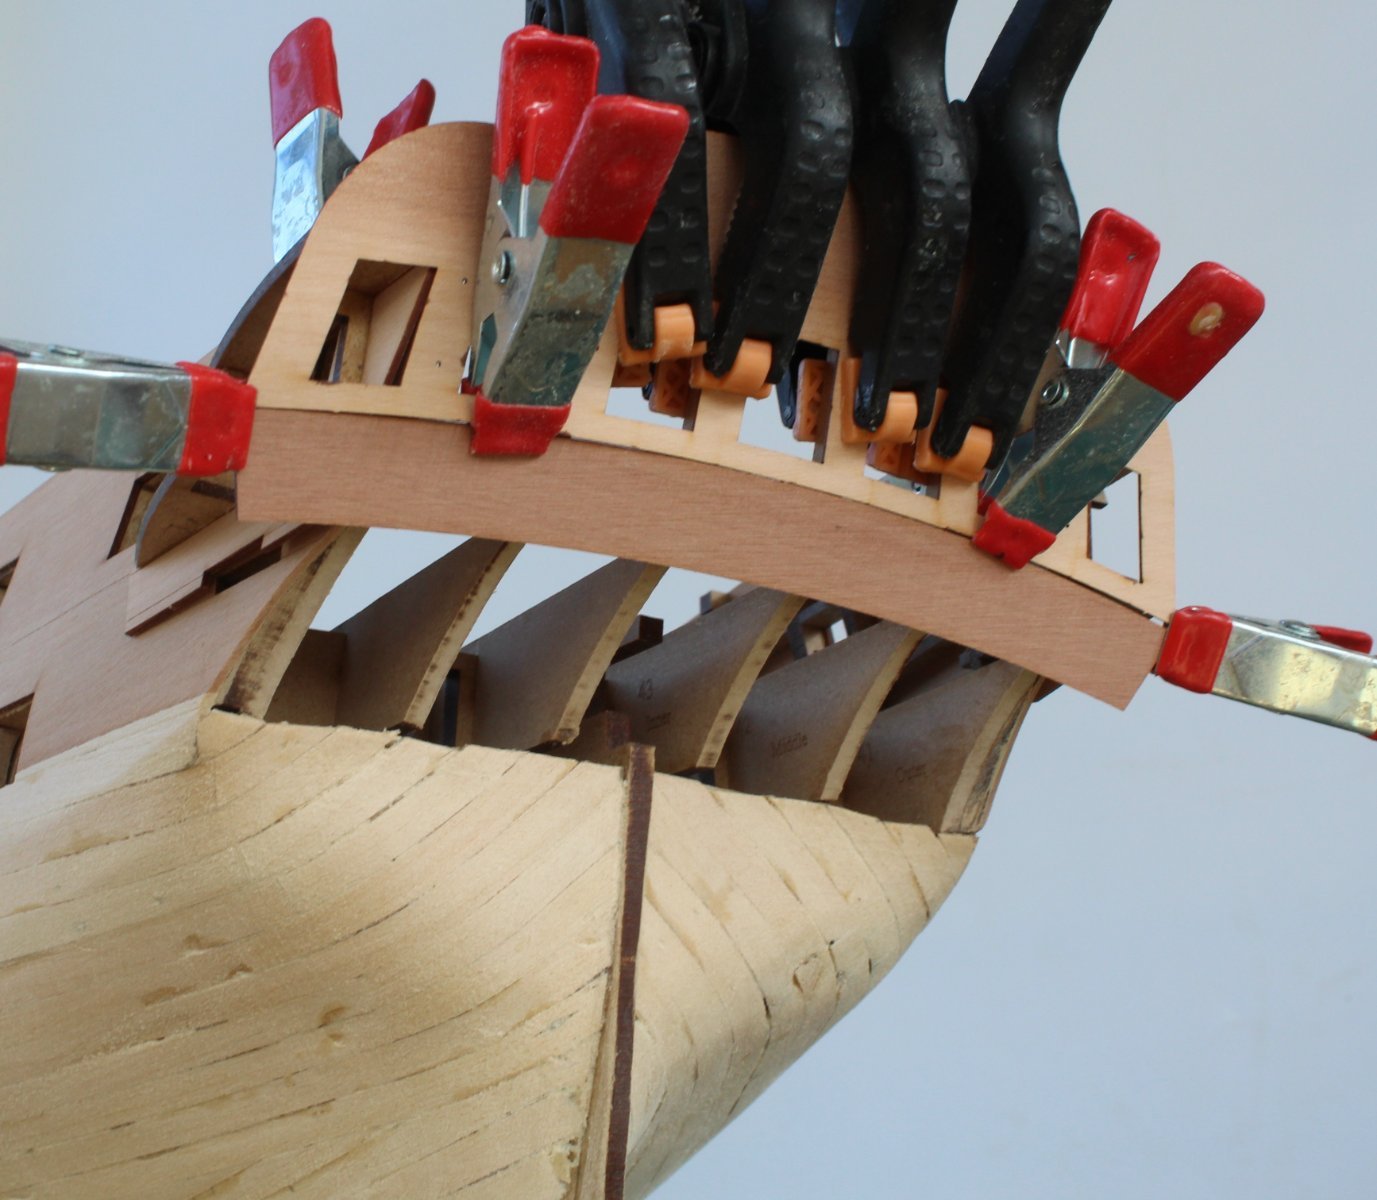
Next the middle stern counter pattern was added. In the photo below I have used some clamps to hold the pattern in place, but this pattern will be pinned in place before the position of the lower stern counter pattern is finalised.

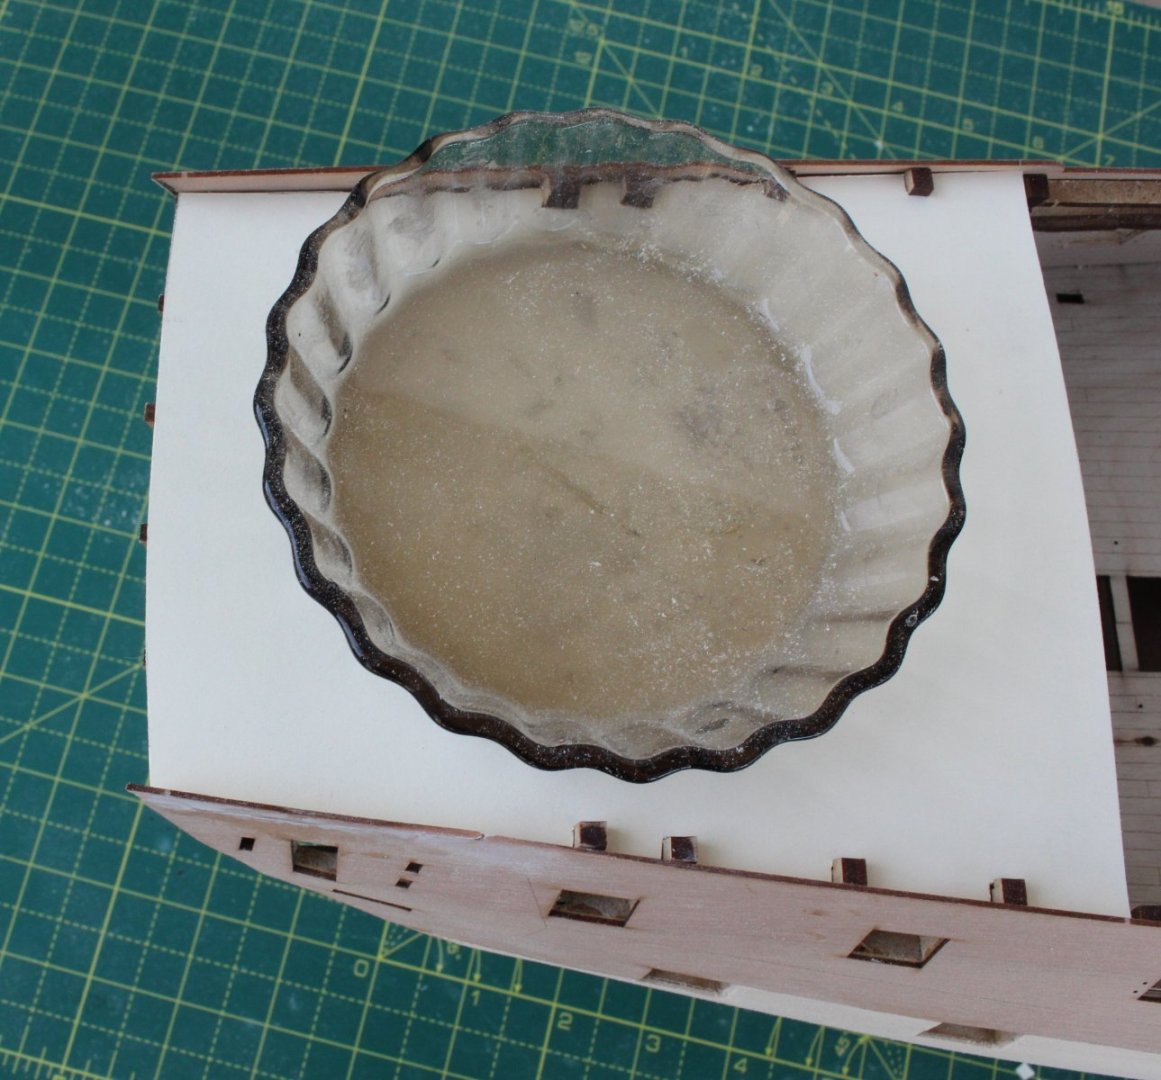
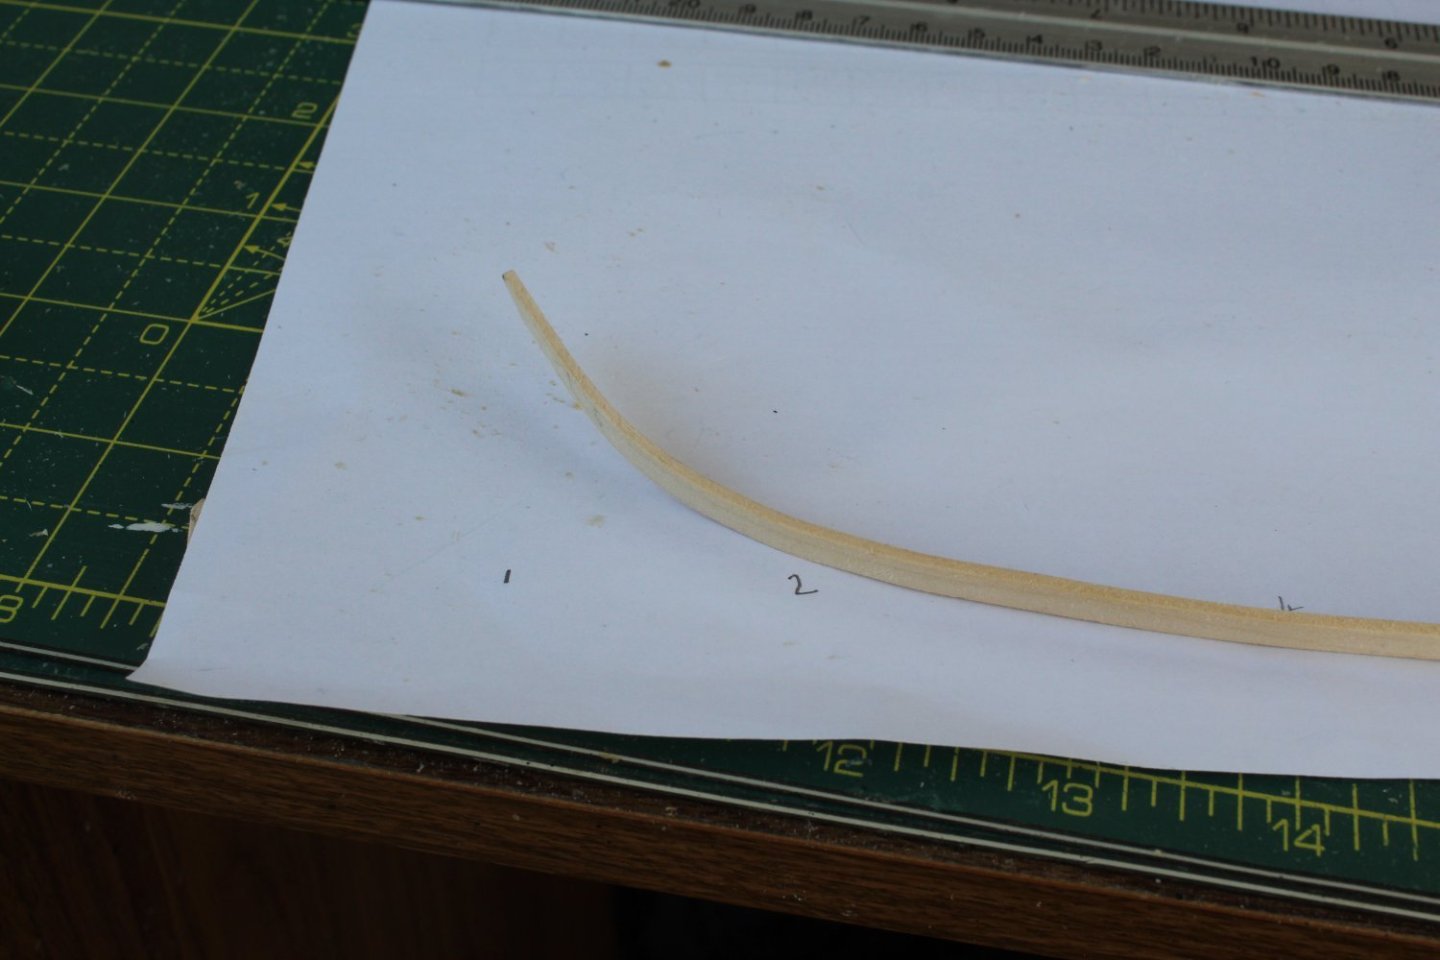
Before the lower stern pattern position can be finalised it does need to be soaked in hot water for around 30 minutes and then bent to follow the curve of the stern frames. In the picture below I have done a pre-bend test fit to get an idea of what the completed stern counter assembly would look like.
-
4 minutes ago, Kevin said:
lol i am certainly no pathfinder, just someone doing something a bit different and well out of my comfort zone, had i not been using boxwood, 2nd planking would have been finished by now
Your second planking looks good. I have found lateral bending and planking in bands takes a lot more time and effort but the end results justify the means.
-
15 minutes ago, hollowneck said:
I look forward to seeing lovely boxwood planking next! Very nice 1st planking job on this formidable task.
Thank you, I will have to excercise greater care and be prepared to take much more time when I start to add the boxwood planking. I will keep an eye on @Kevin 2nd planking progress as he is the current pathfinder for this model.
-
-
-
-
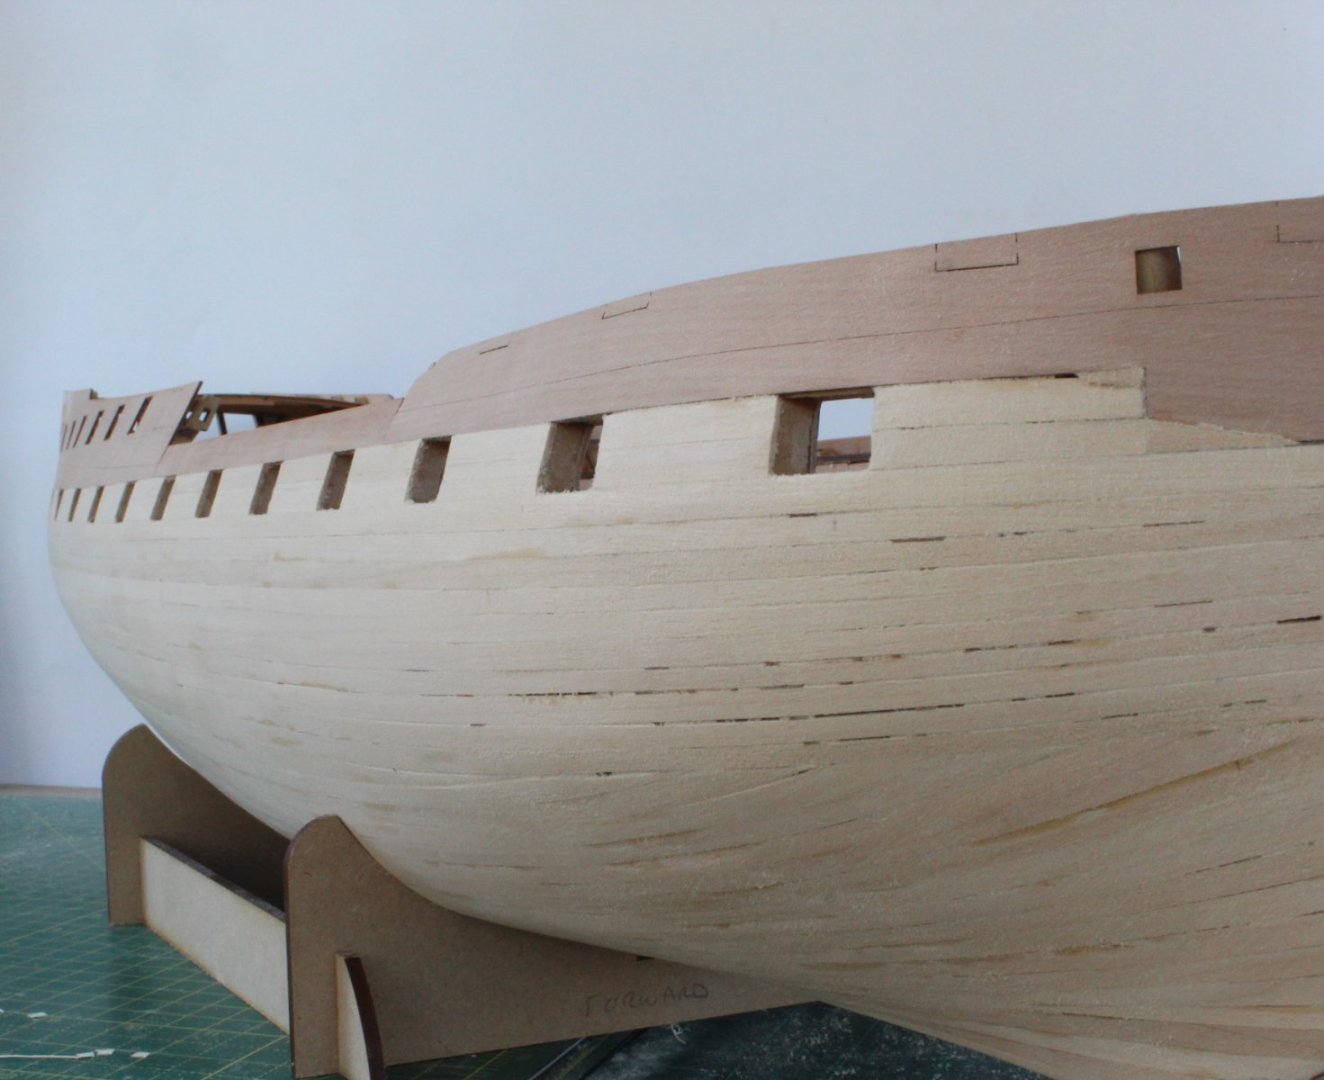
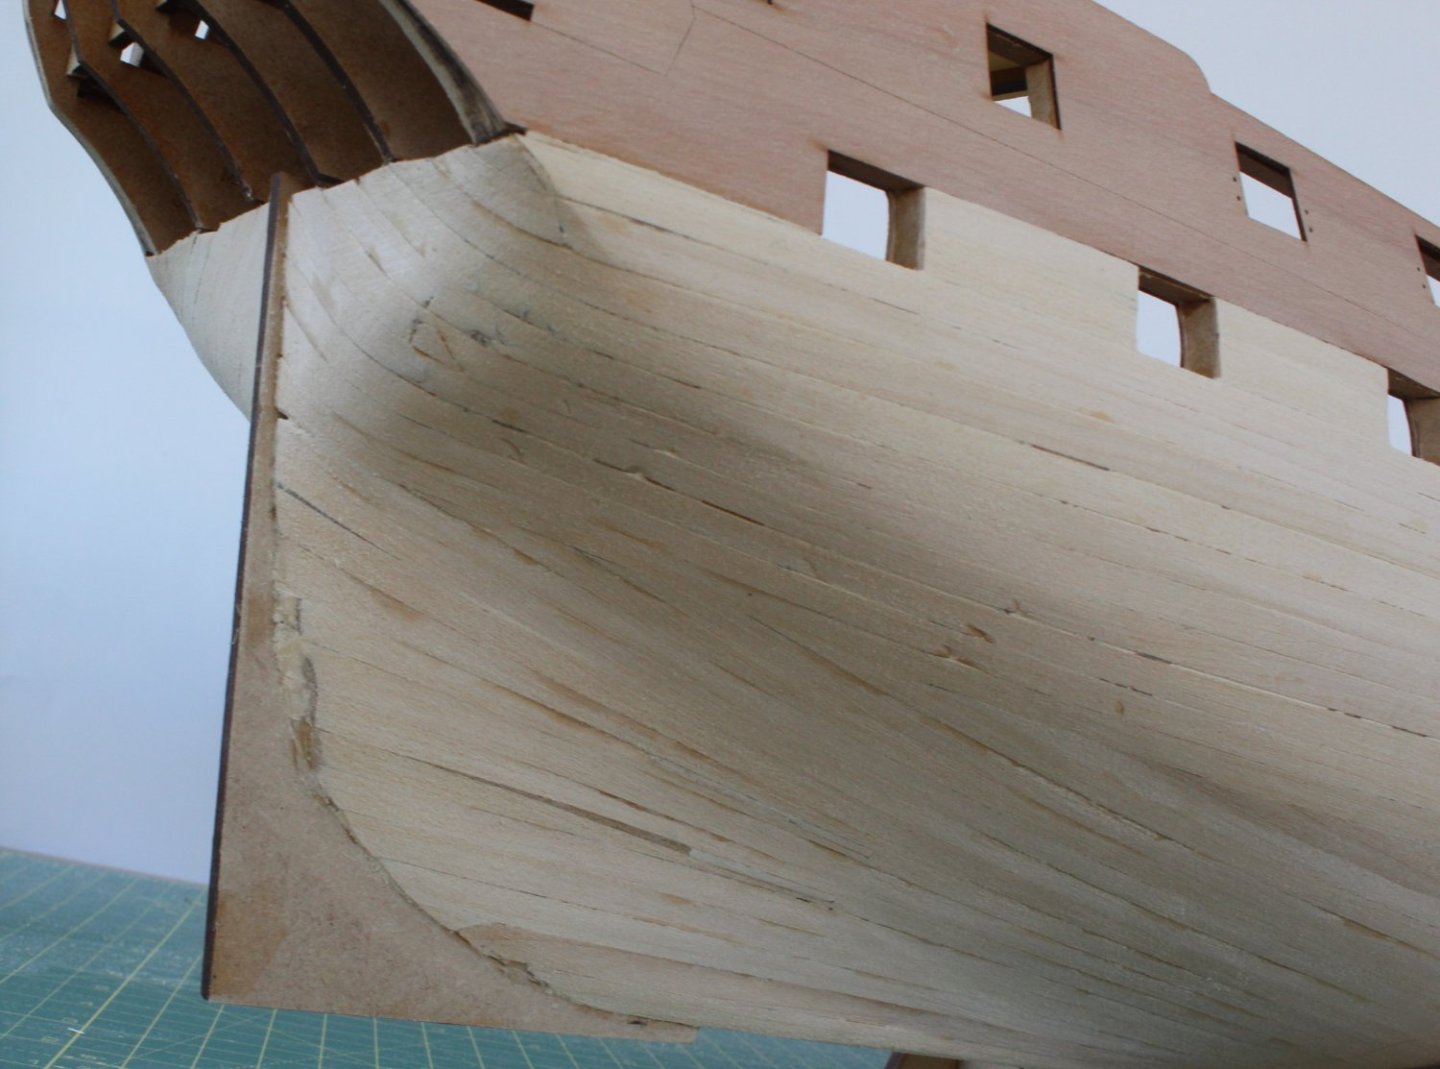
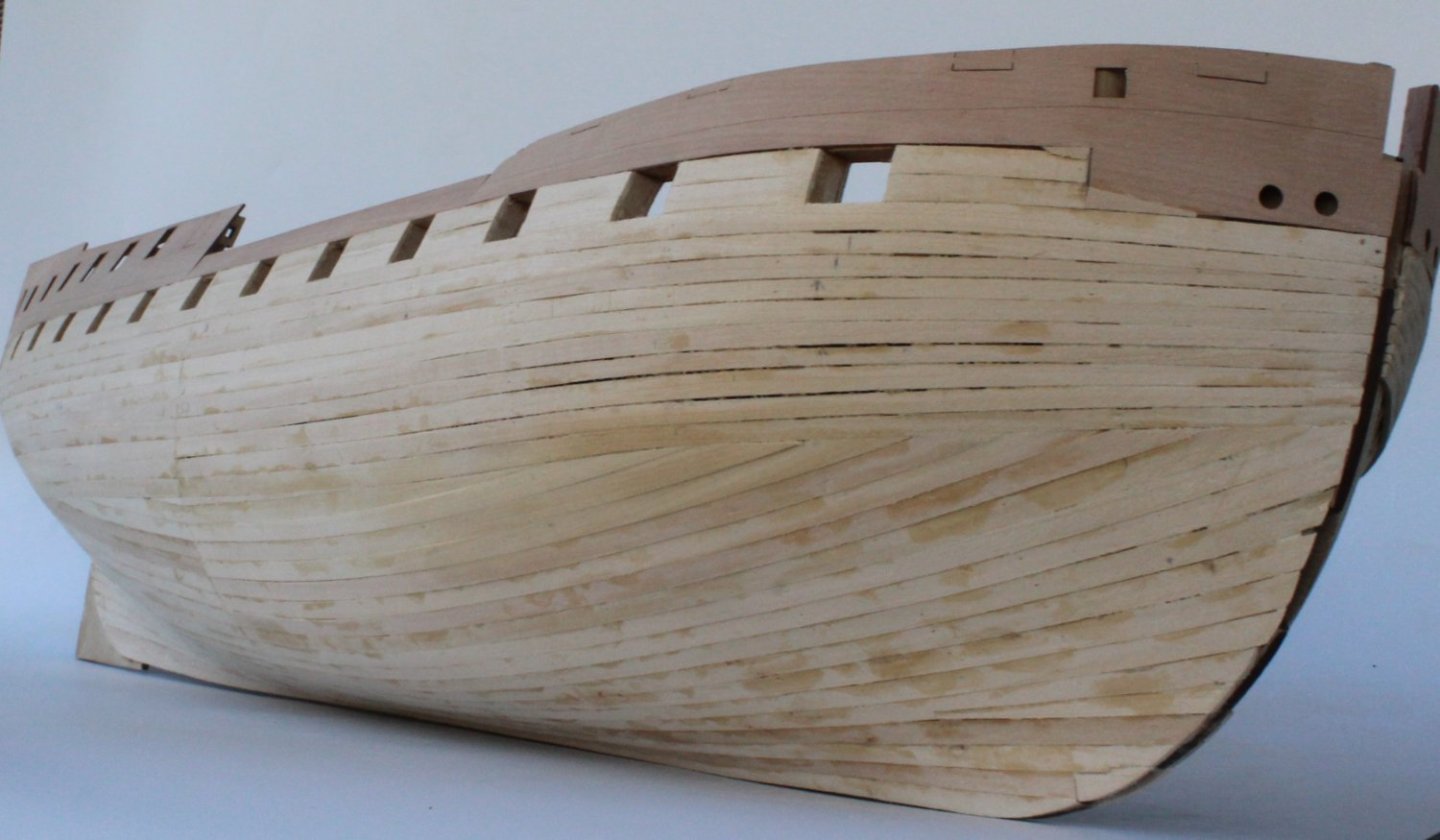
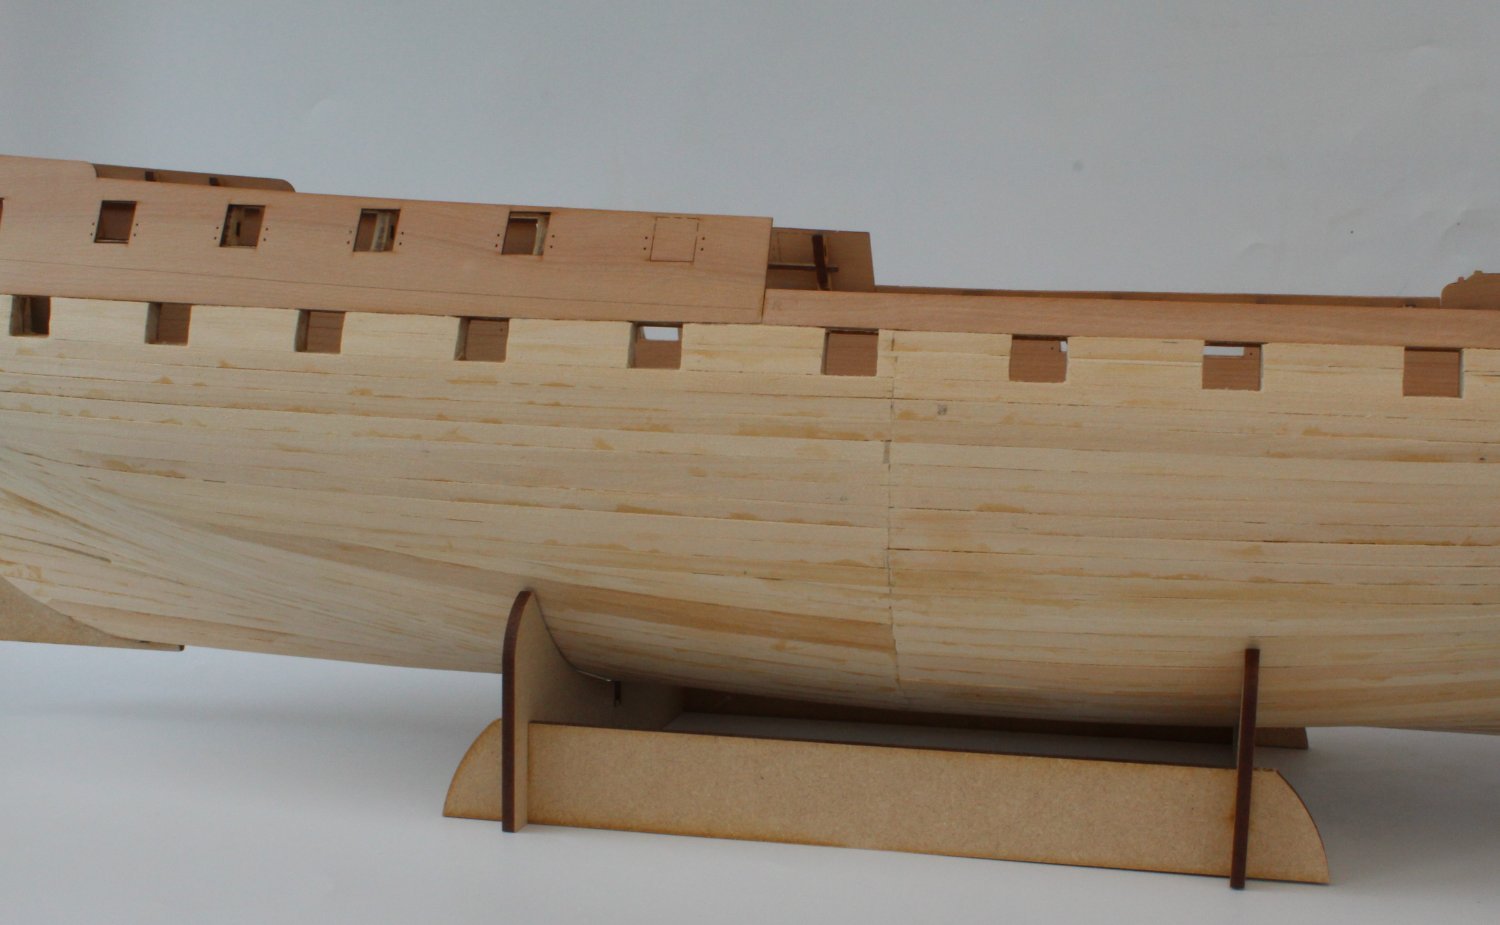
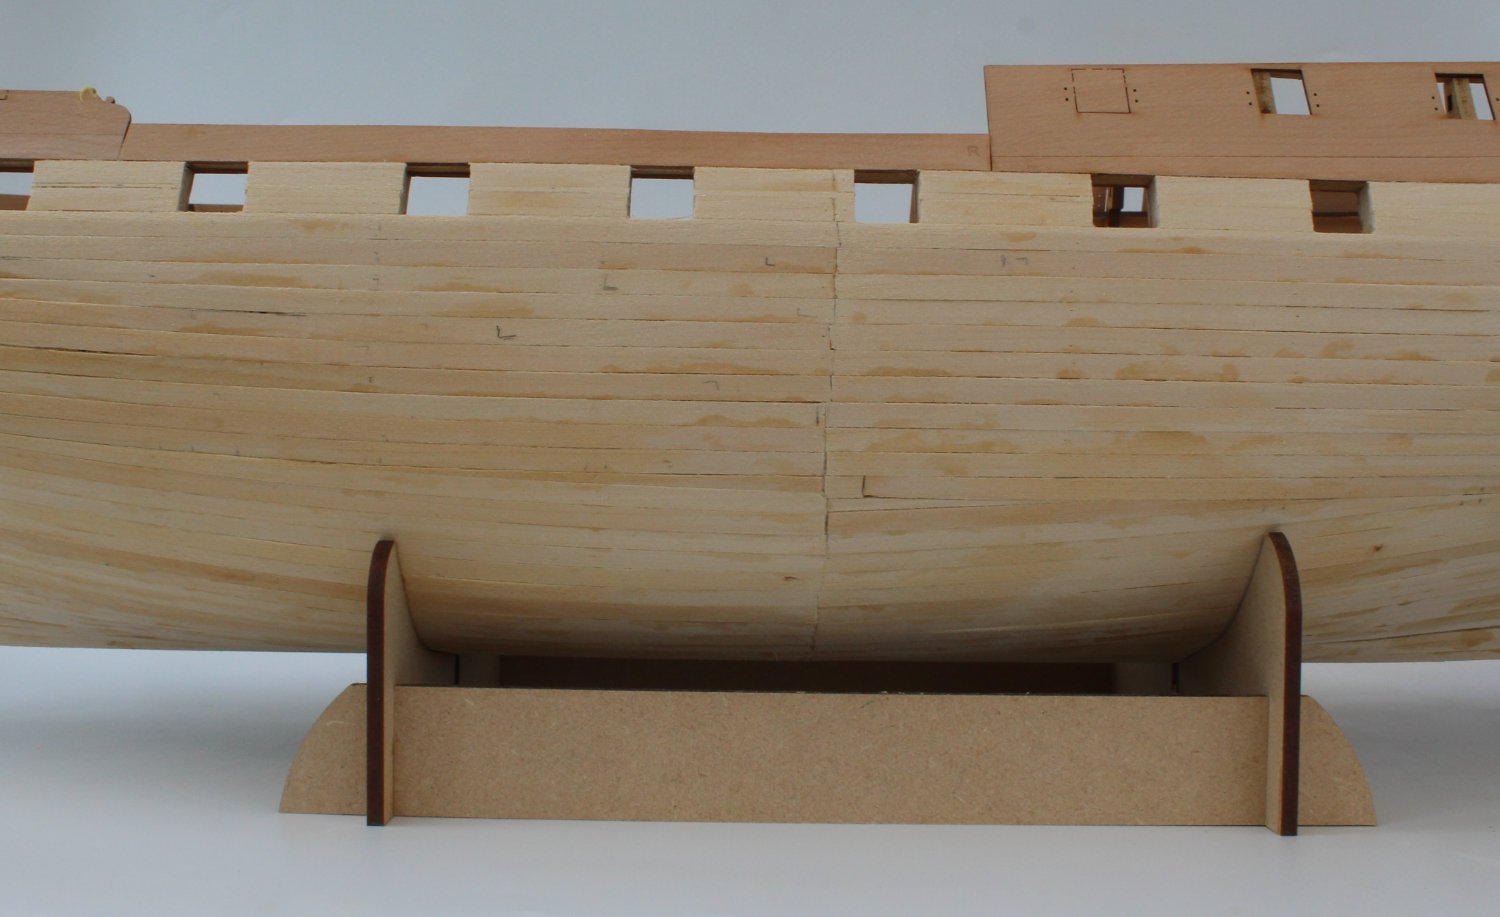
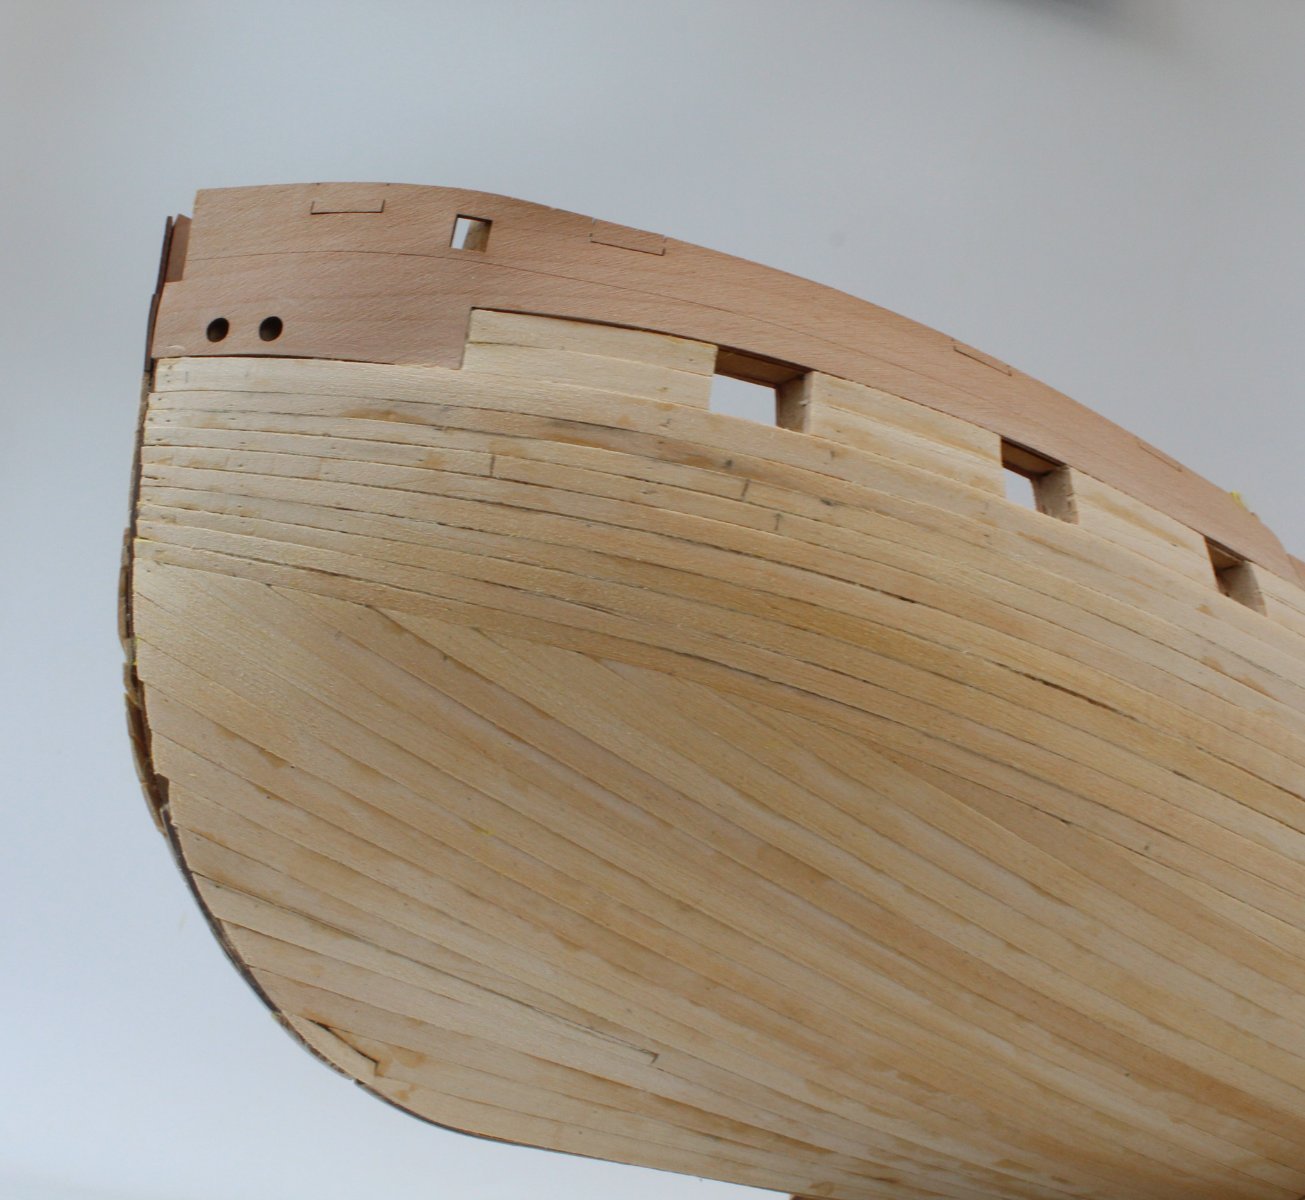
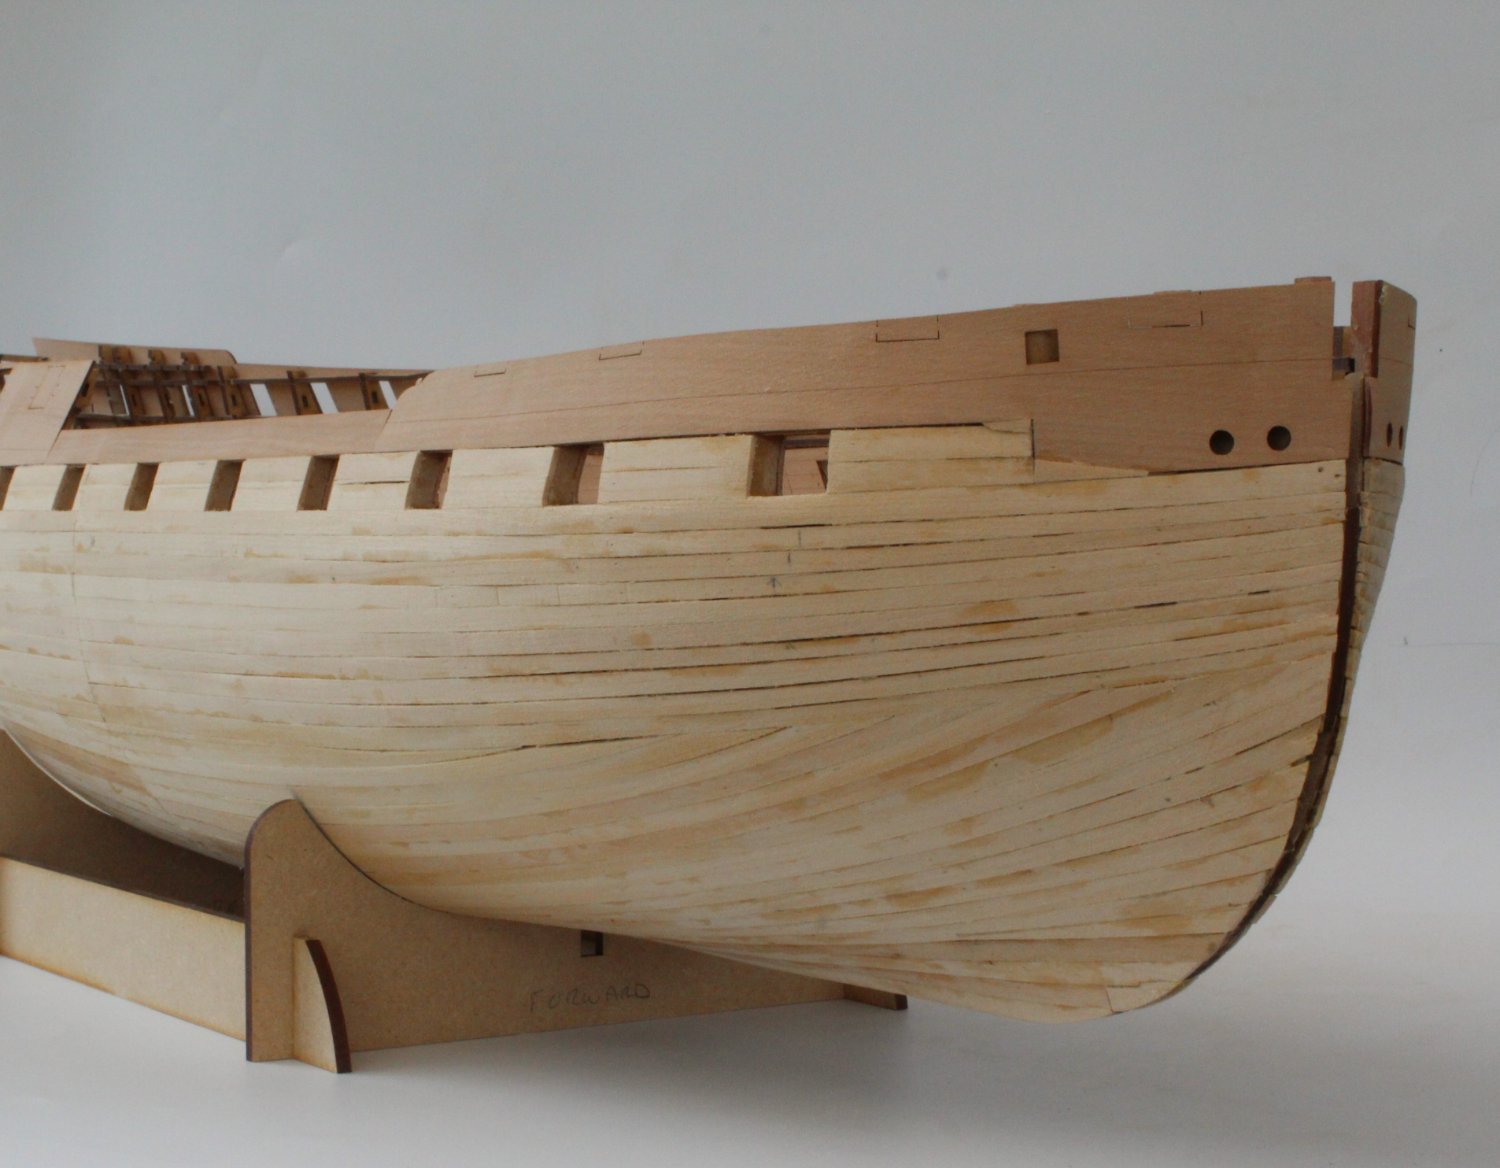
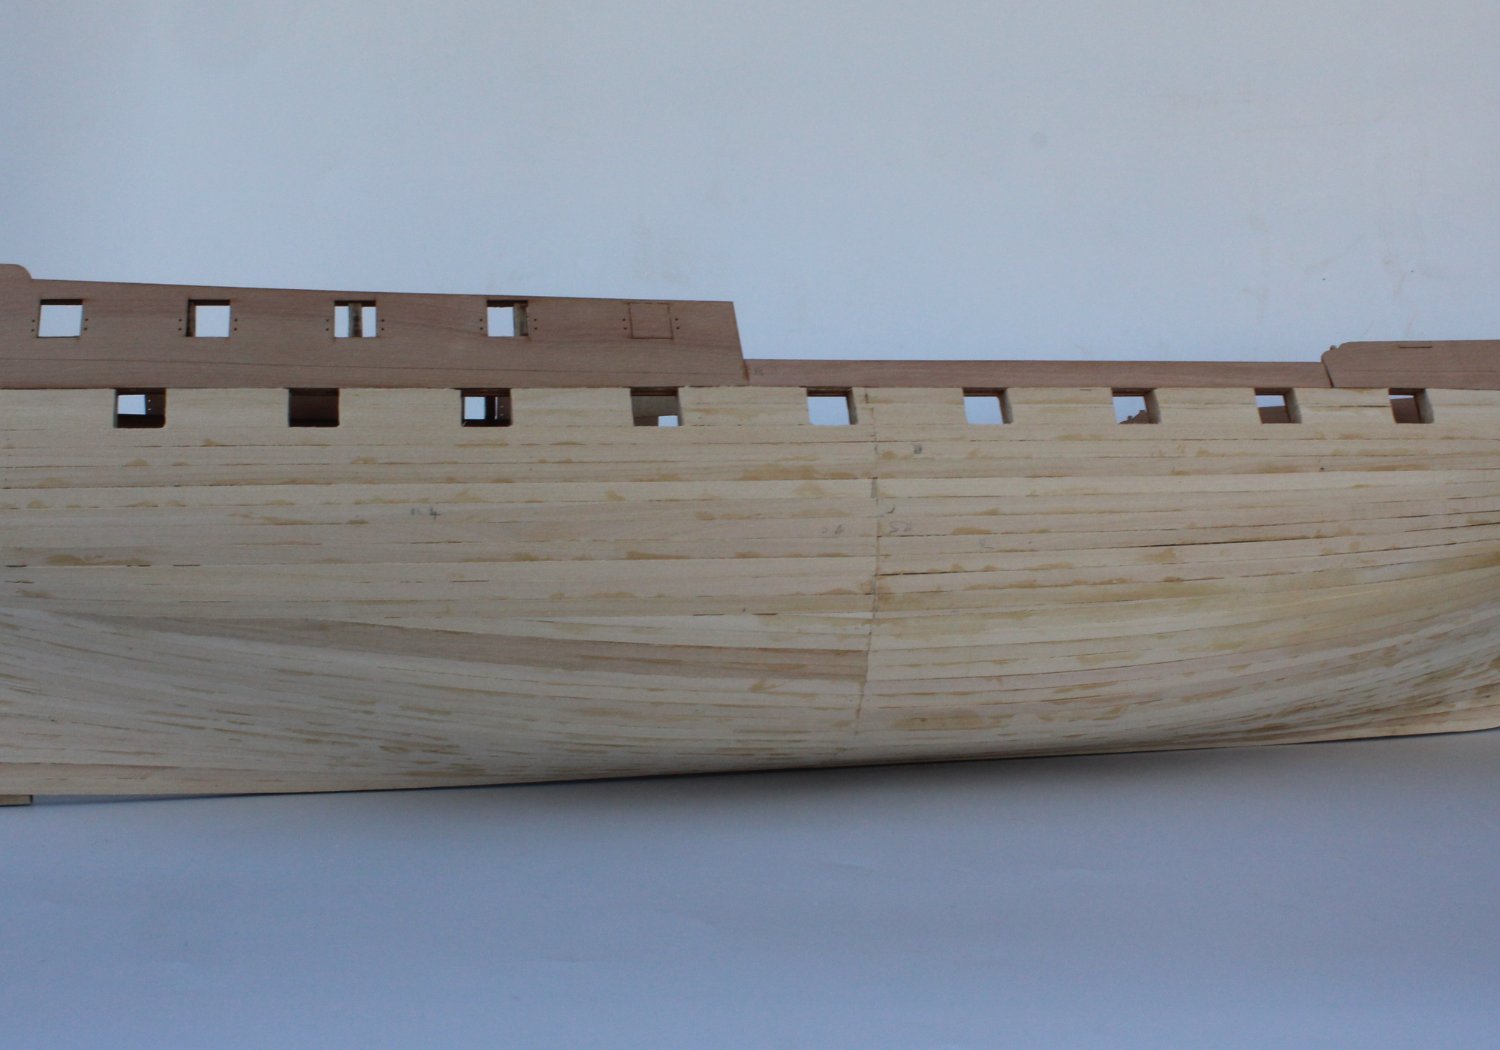
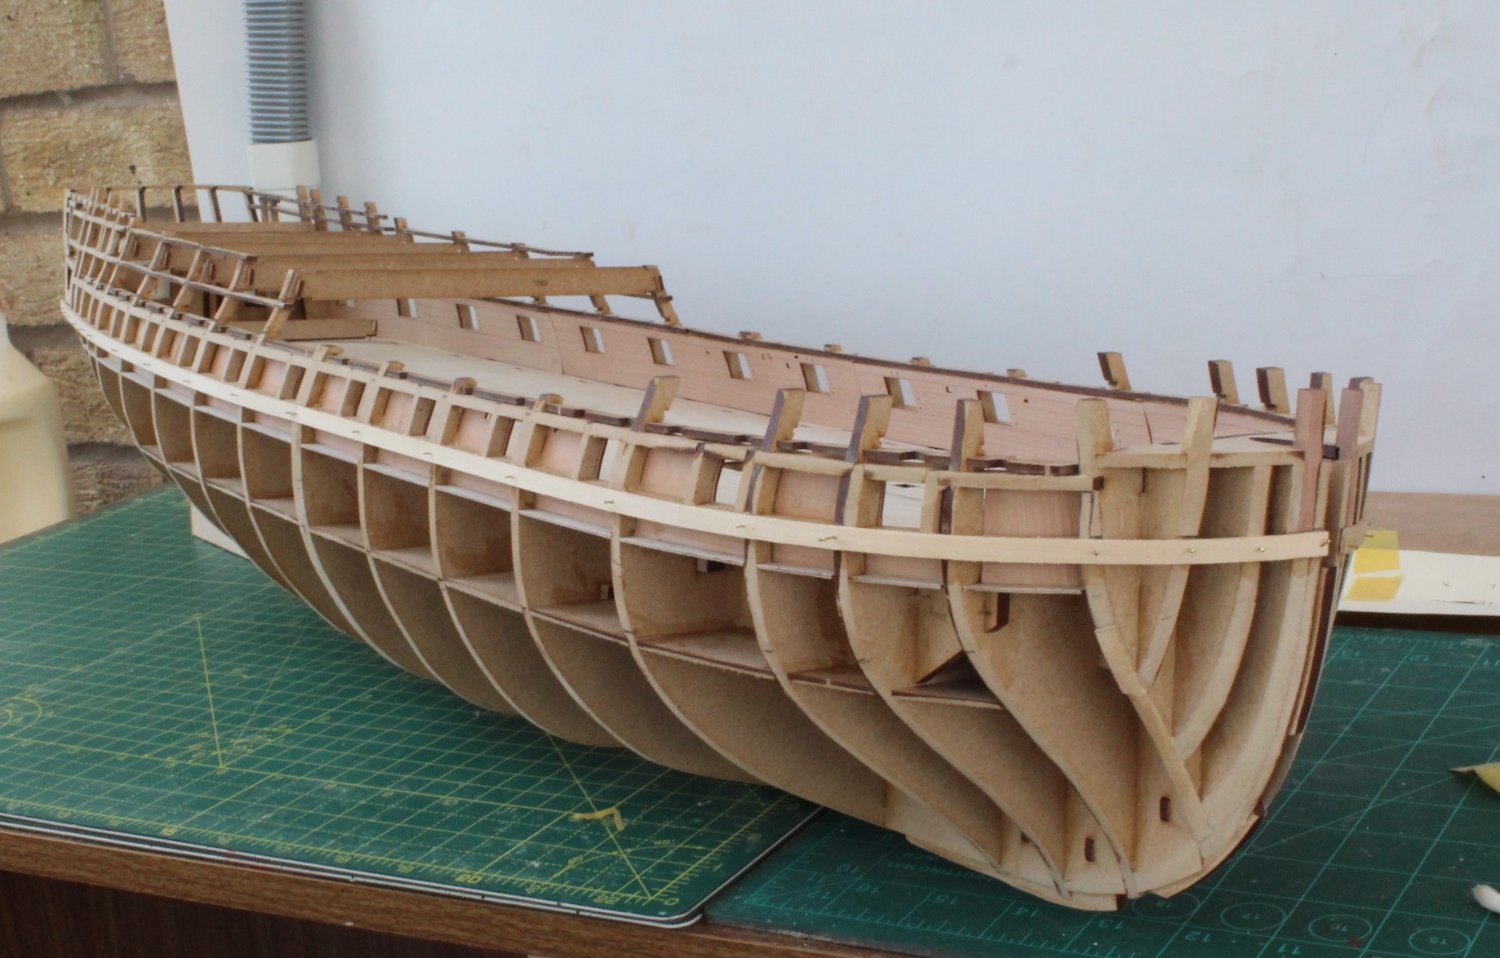
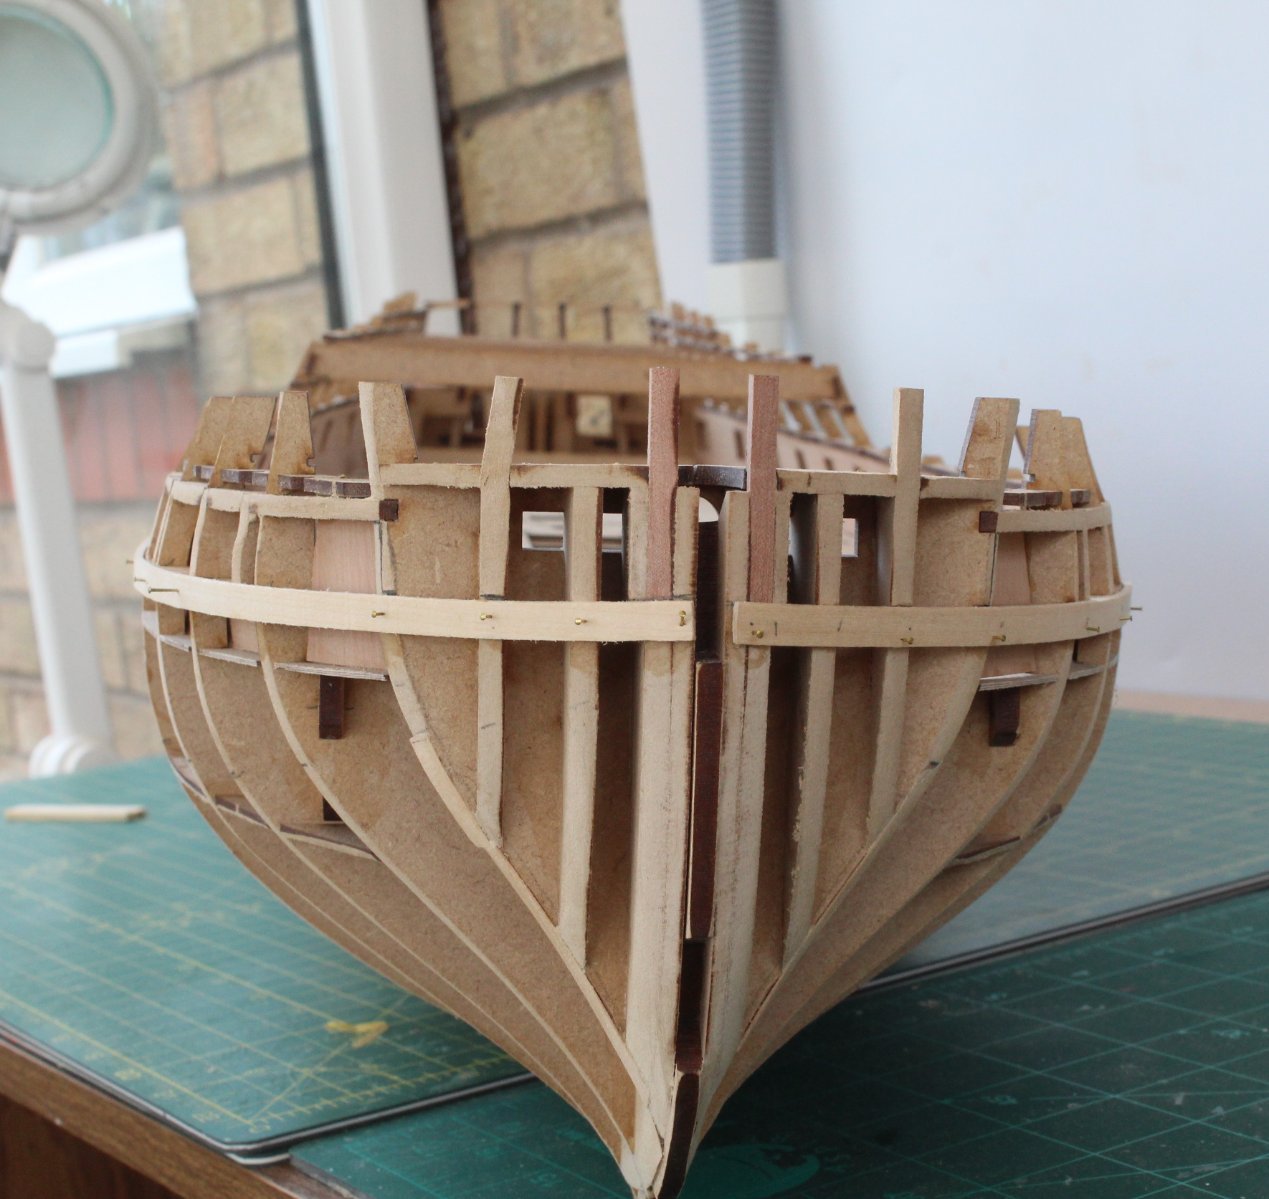
First Planking –Completed
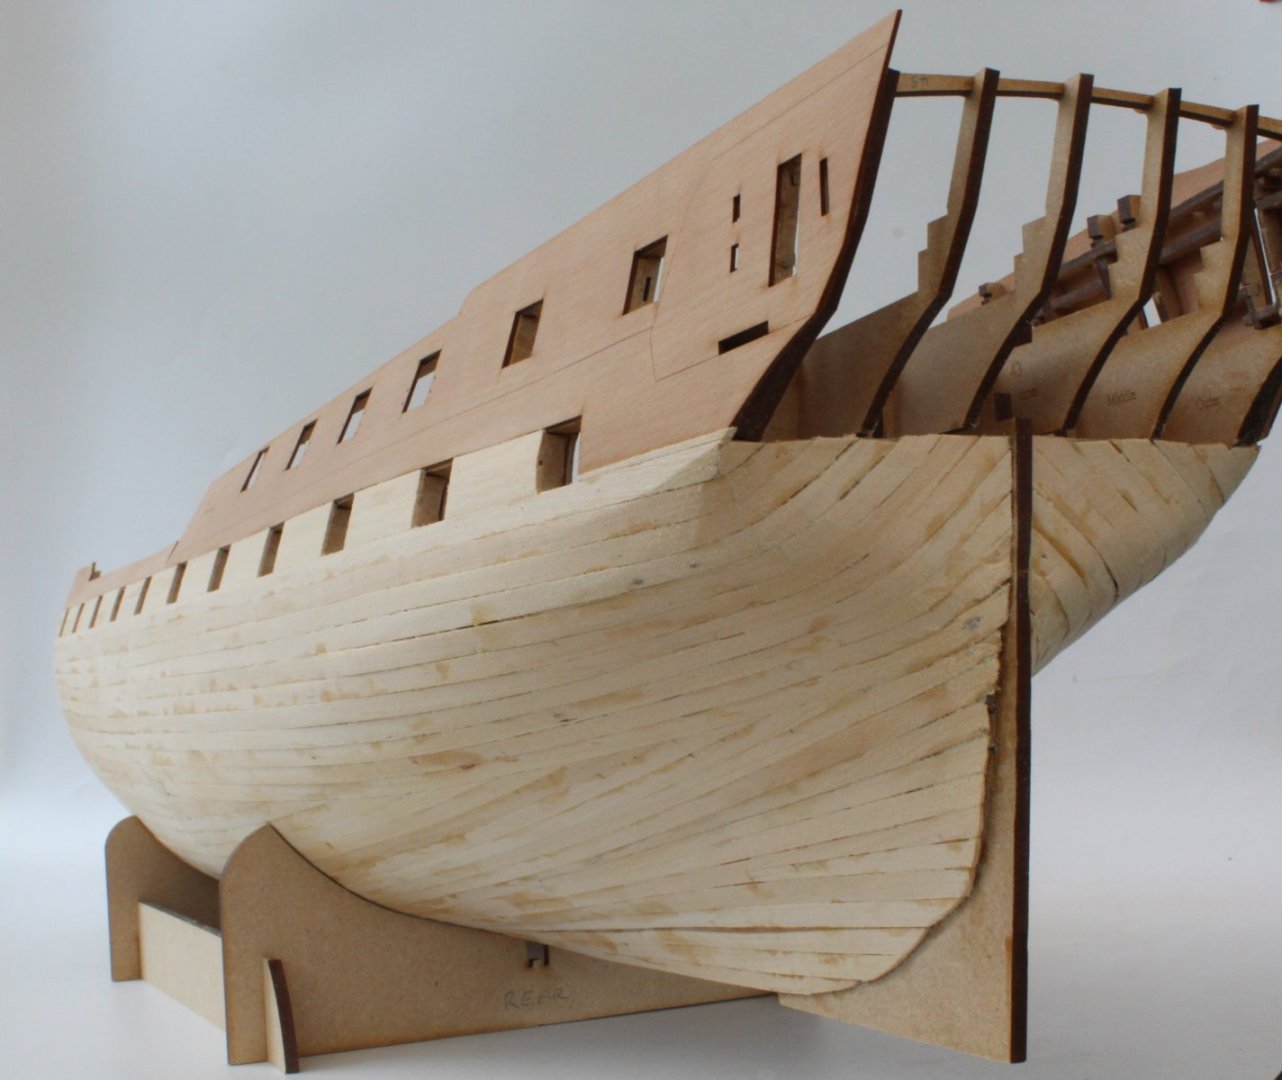
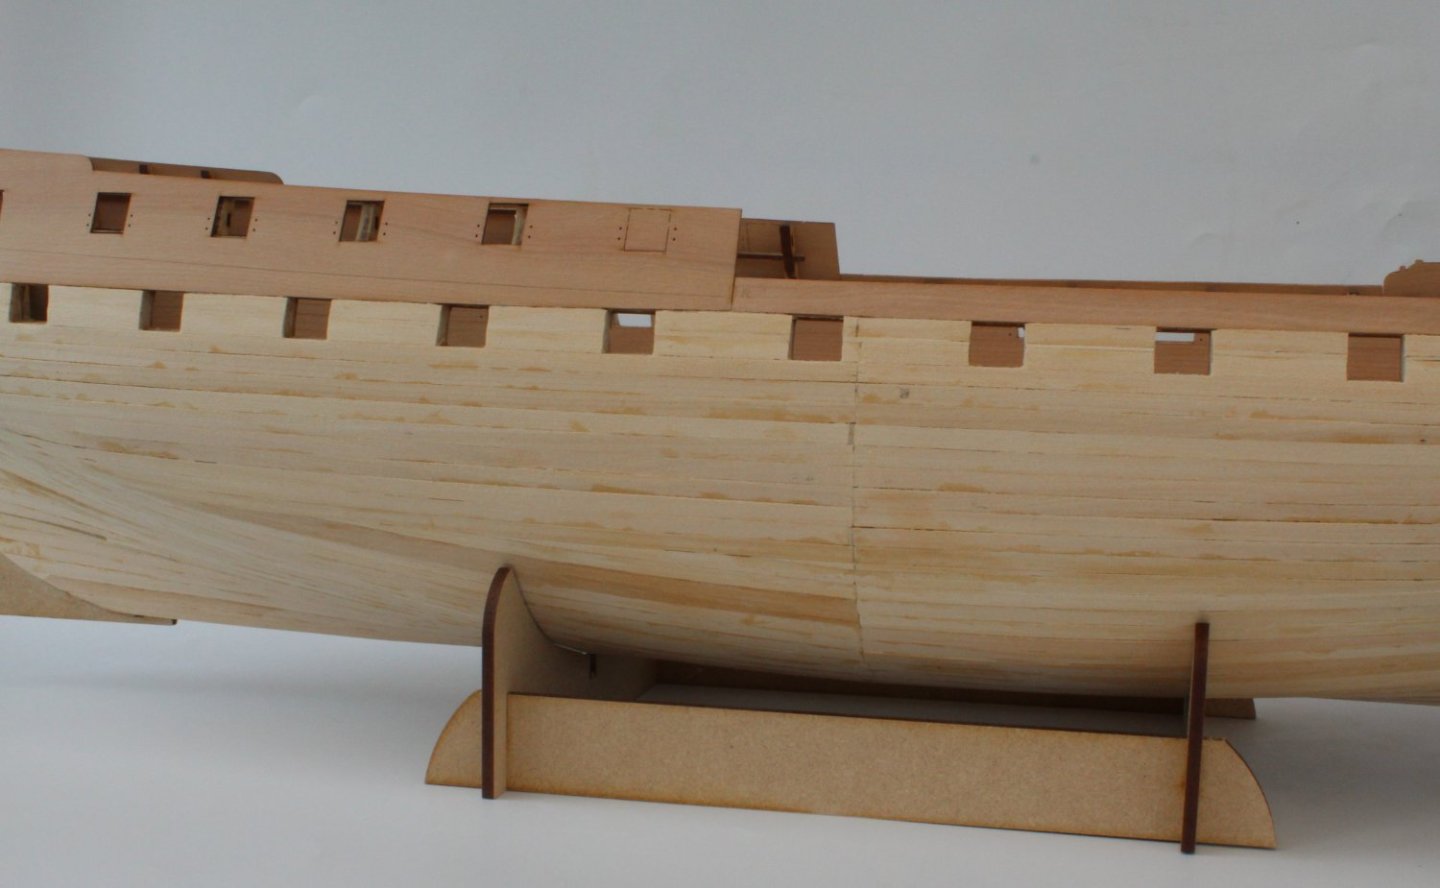
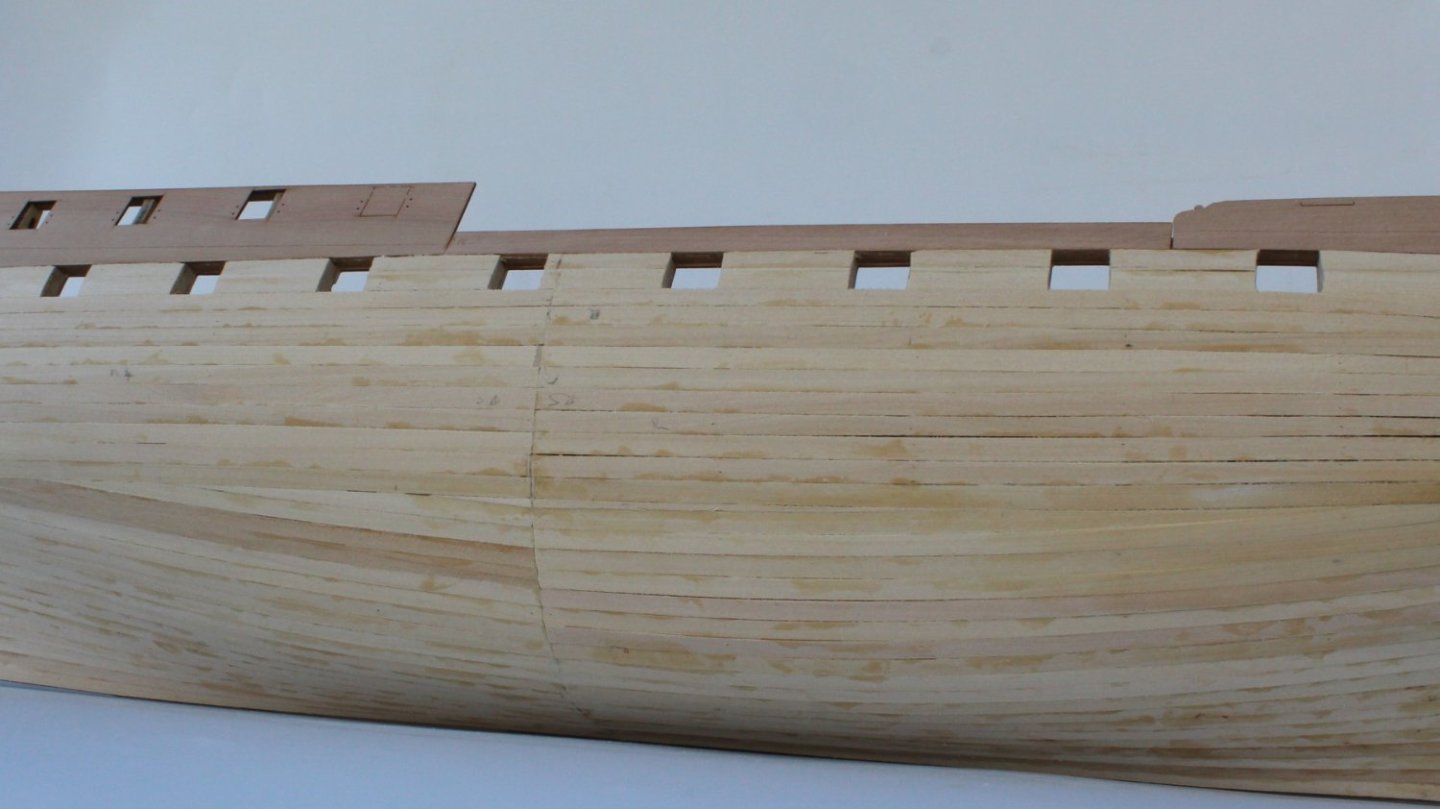
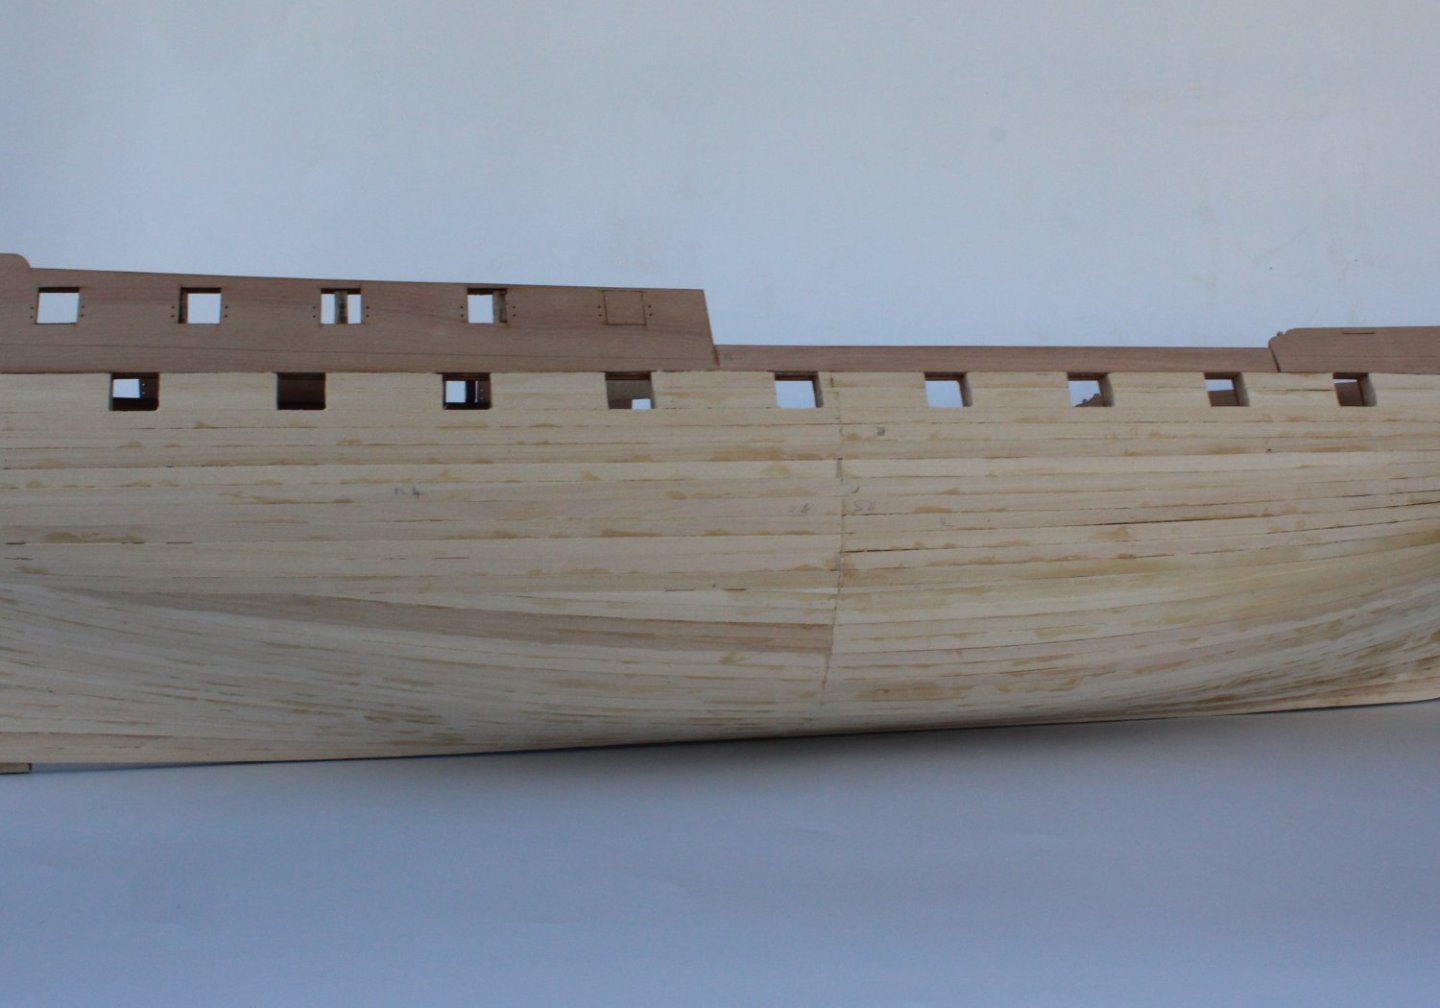
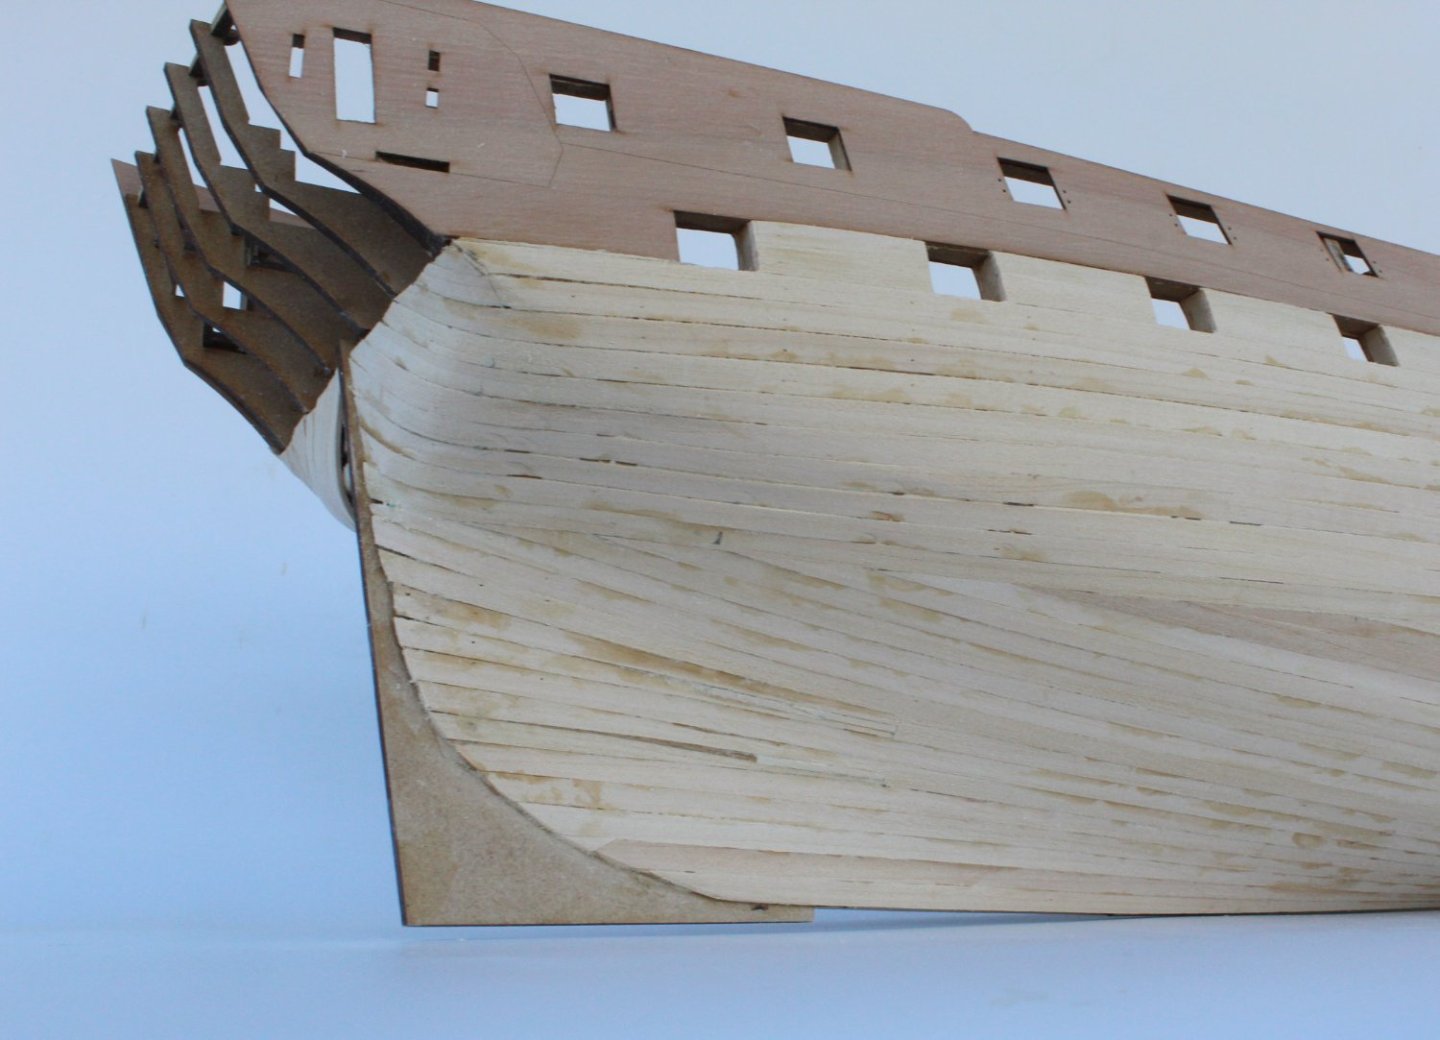
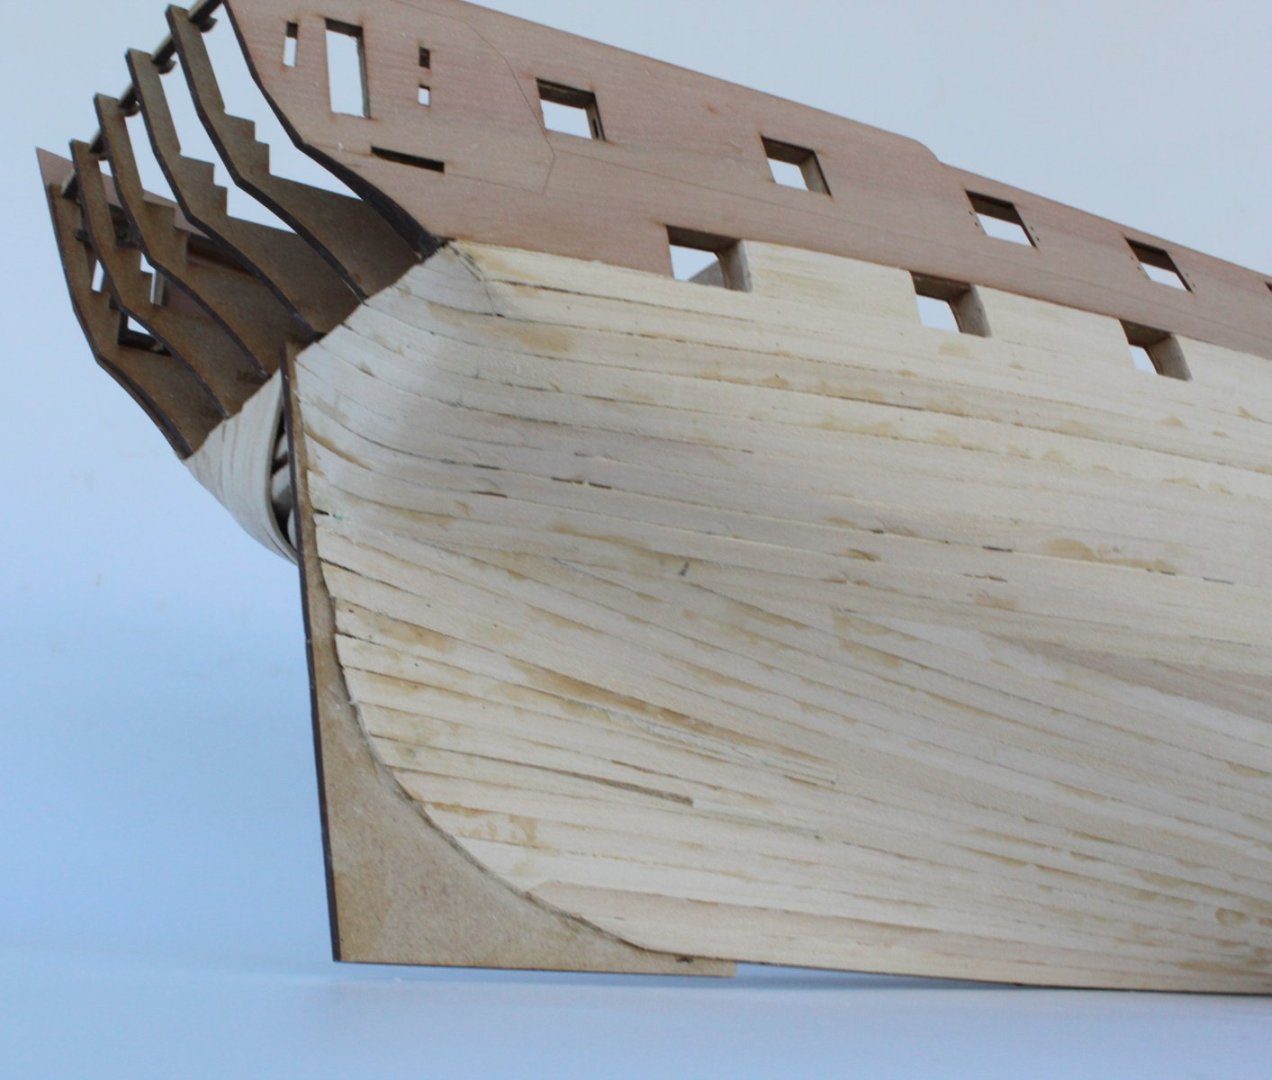
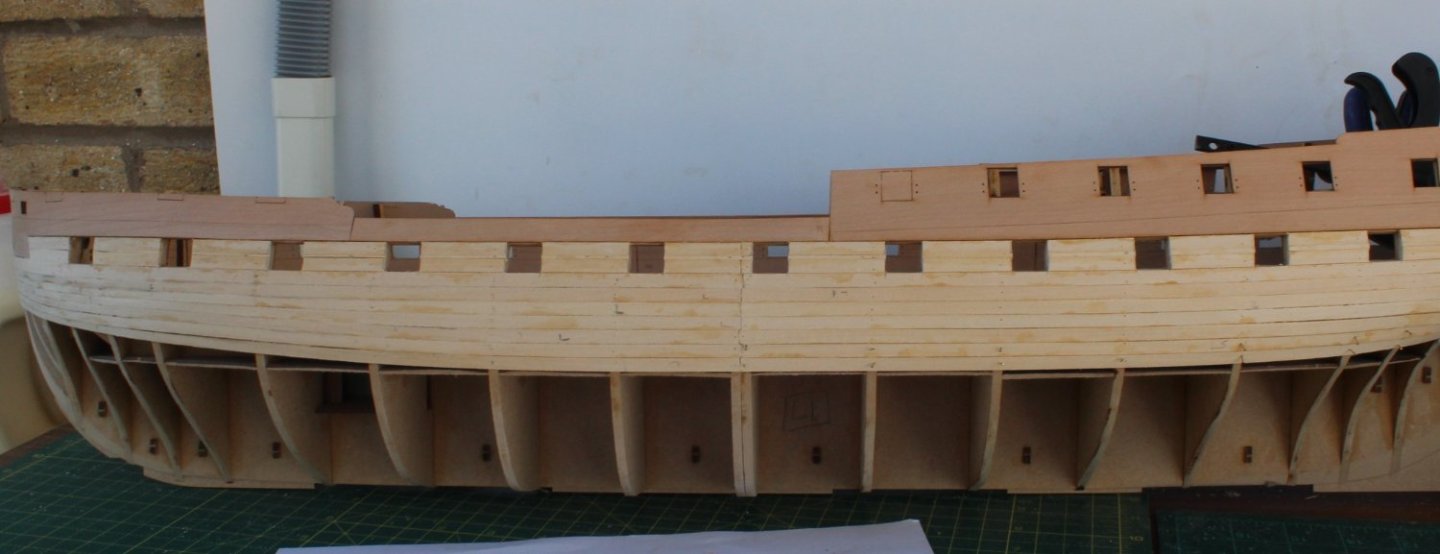
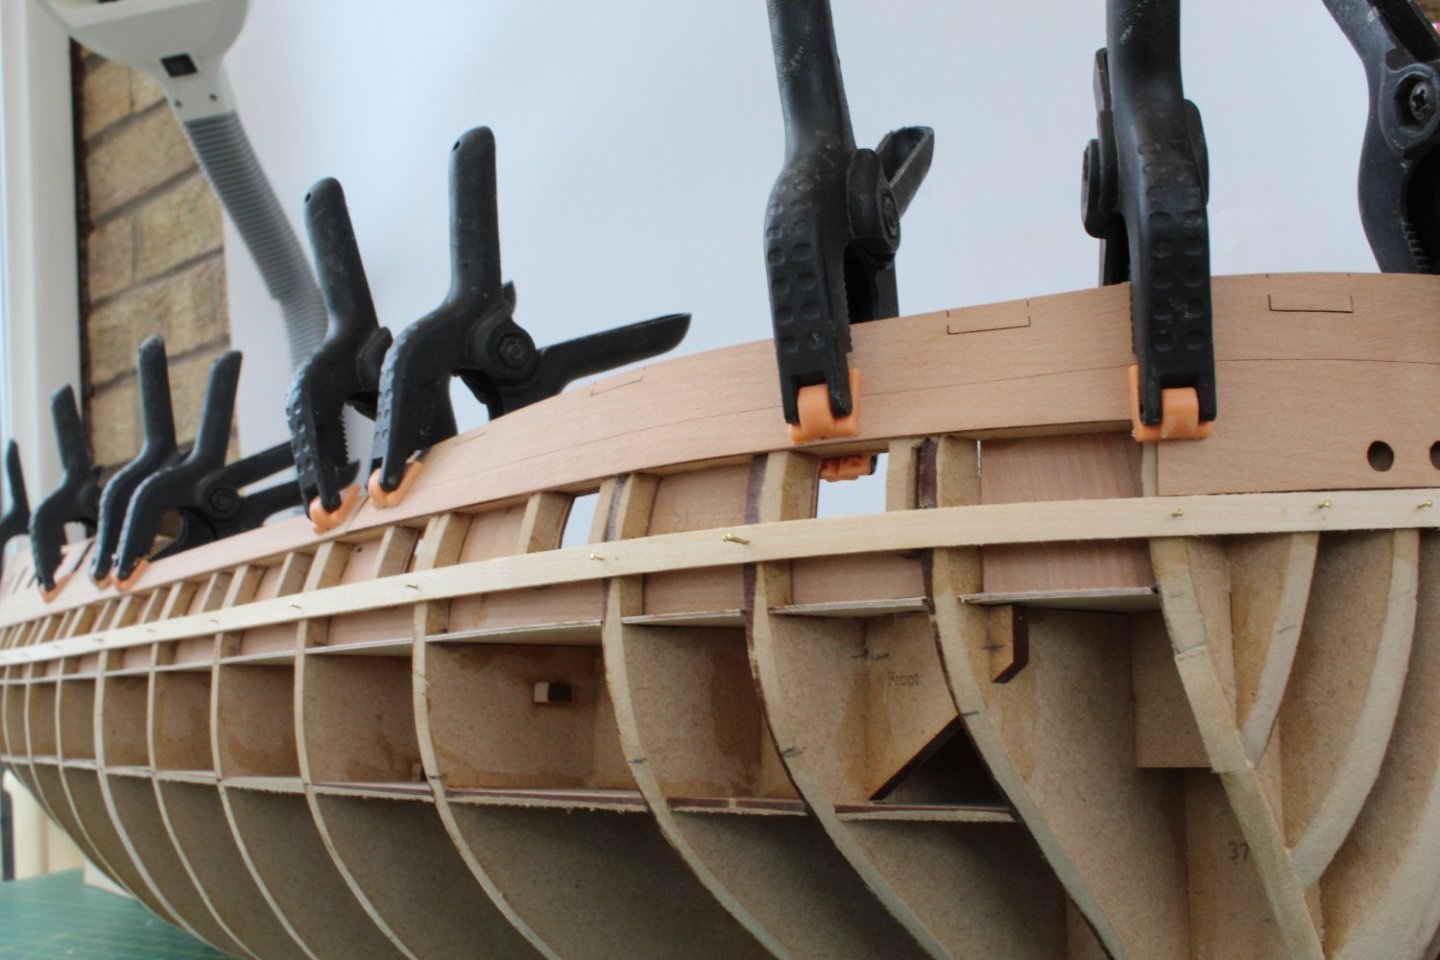
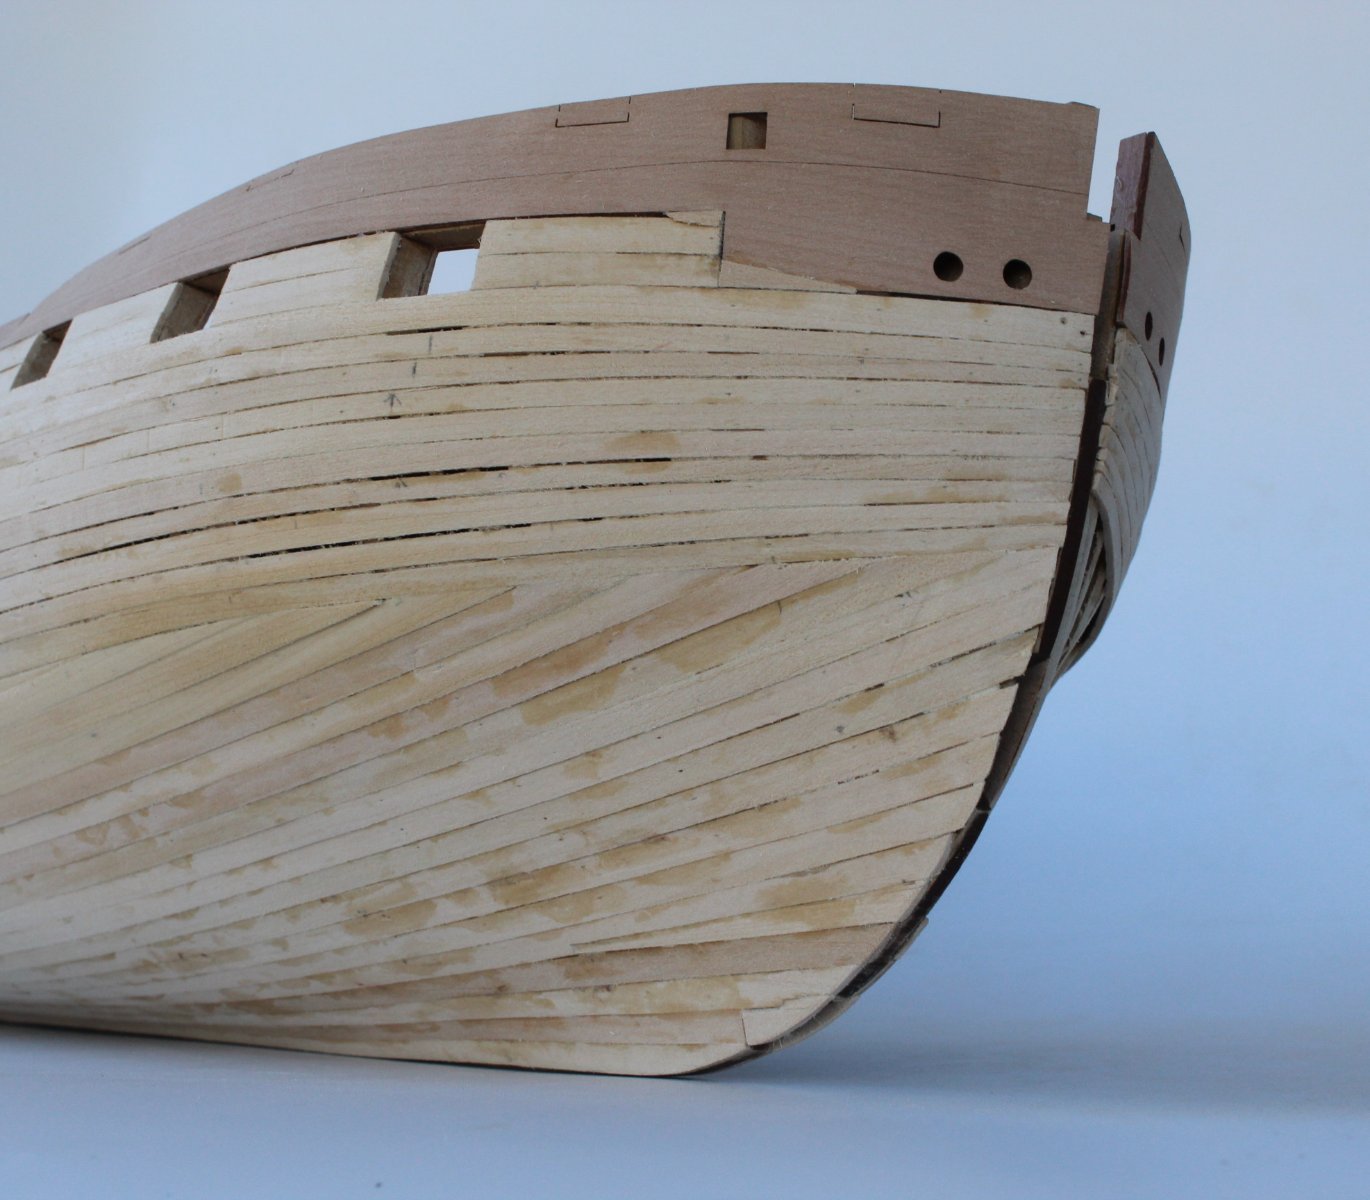
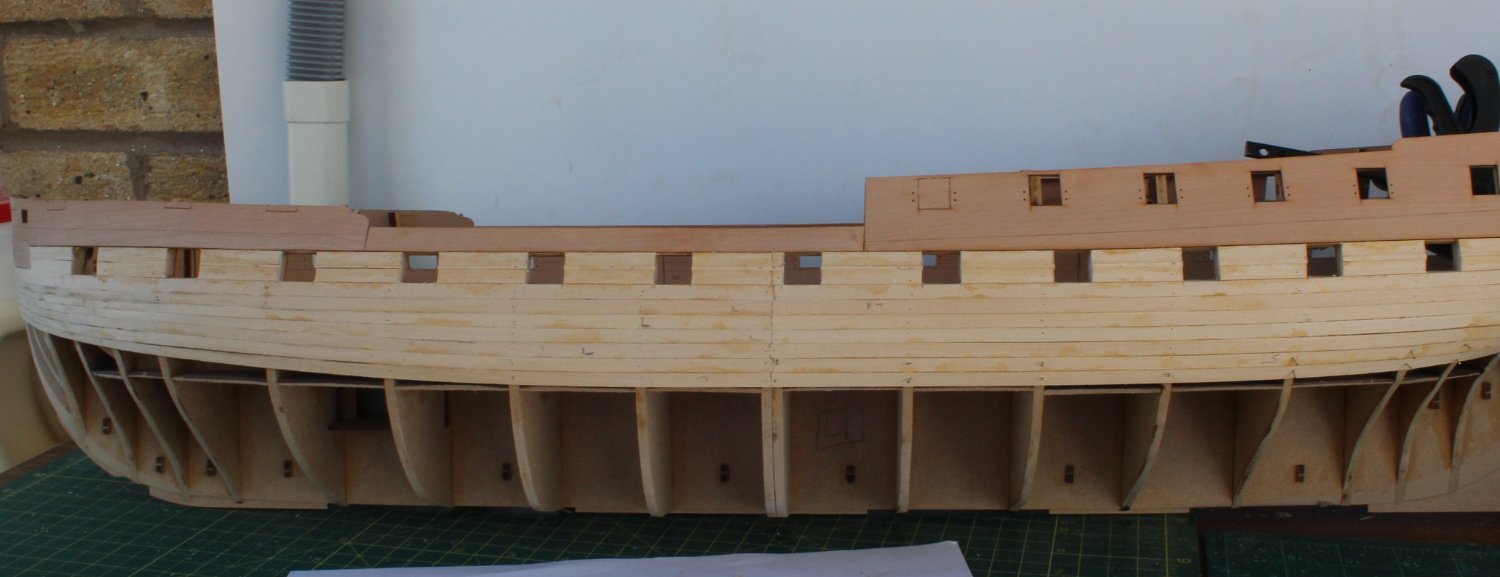
I have made good progress over the last few days and finally completed the first planking this morning. This is, without doubt, my best attempt at adding the first planking layer to a model boat. It is by no means perfect but I think it will provide a good solid base for the second planking layer.
I think using Chuck’s lateral bending method for fitting planks around the bow area really paid dividends for this build when I added the planks in the first planking band. I wish I had the patience and commitment to continue with adding the planks in banks, with lateral bends. However after fitting the garboard plank I decided to continue to plank upward from the keel. In doing so I did master the skill of adding half stealers which is something I had not done before.
I have added a few photo’s of the completed planking for your viewing pleasure.


- Rustyj, Knocklouder, Edwardkenway and 12 others
-
 15
15
-
-
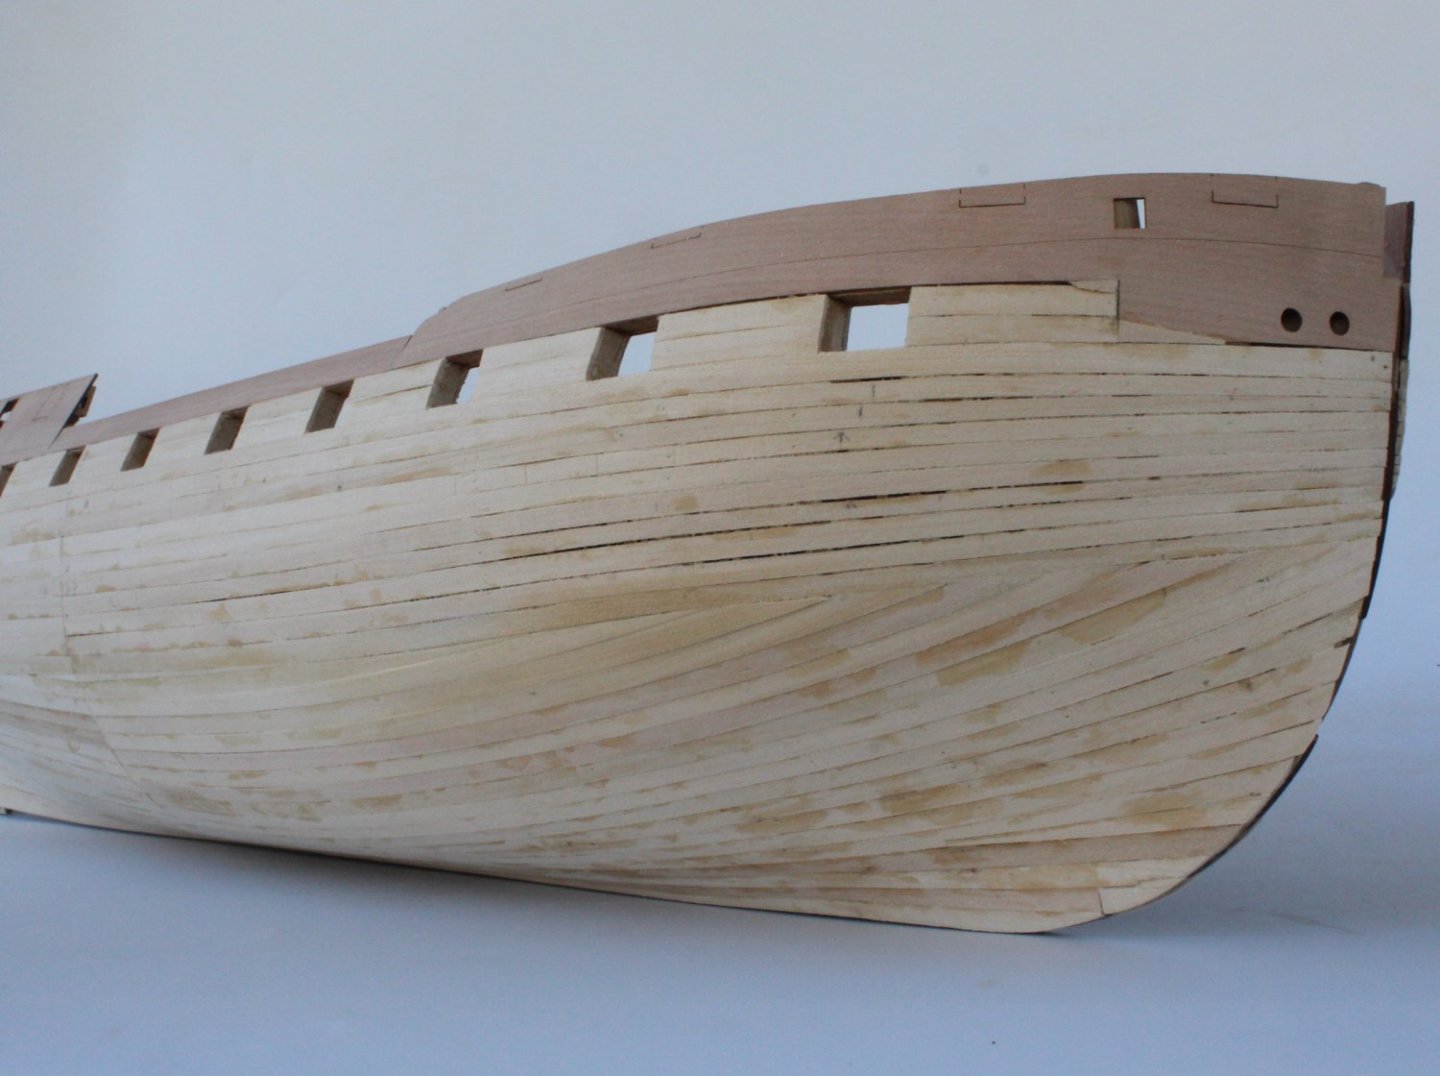
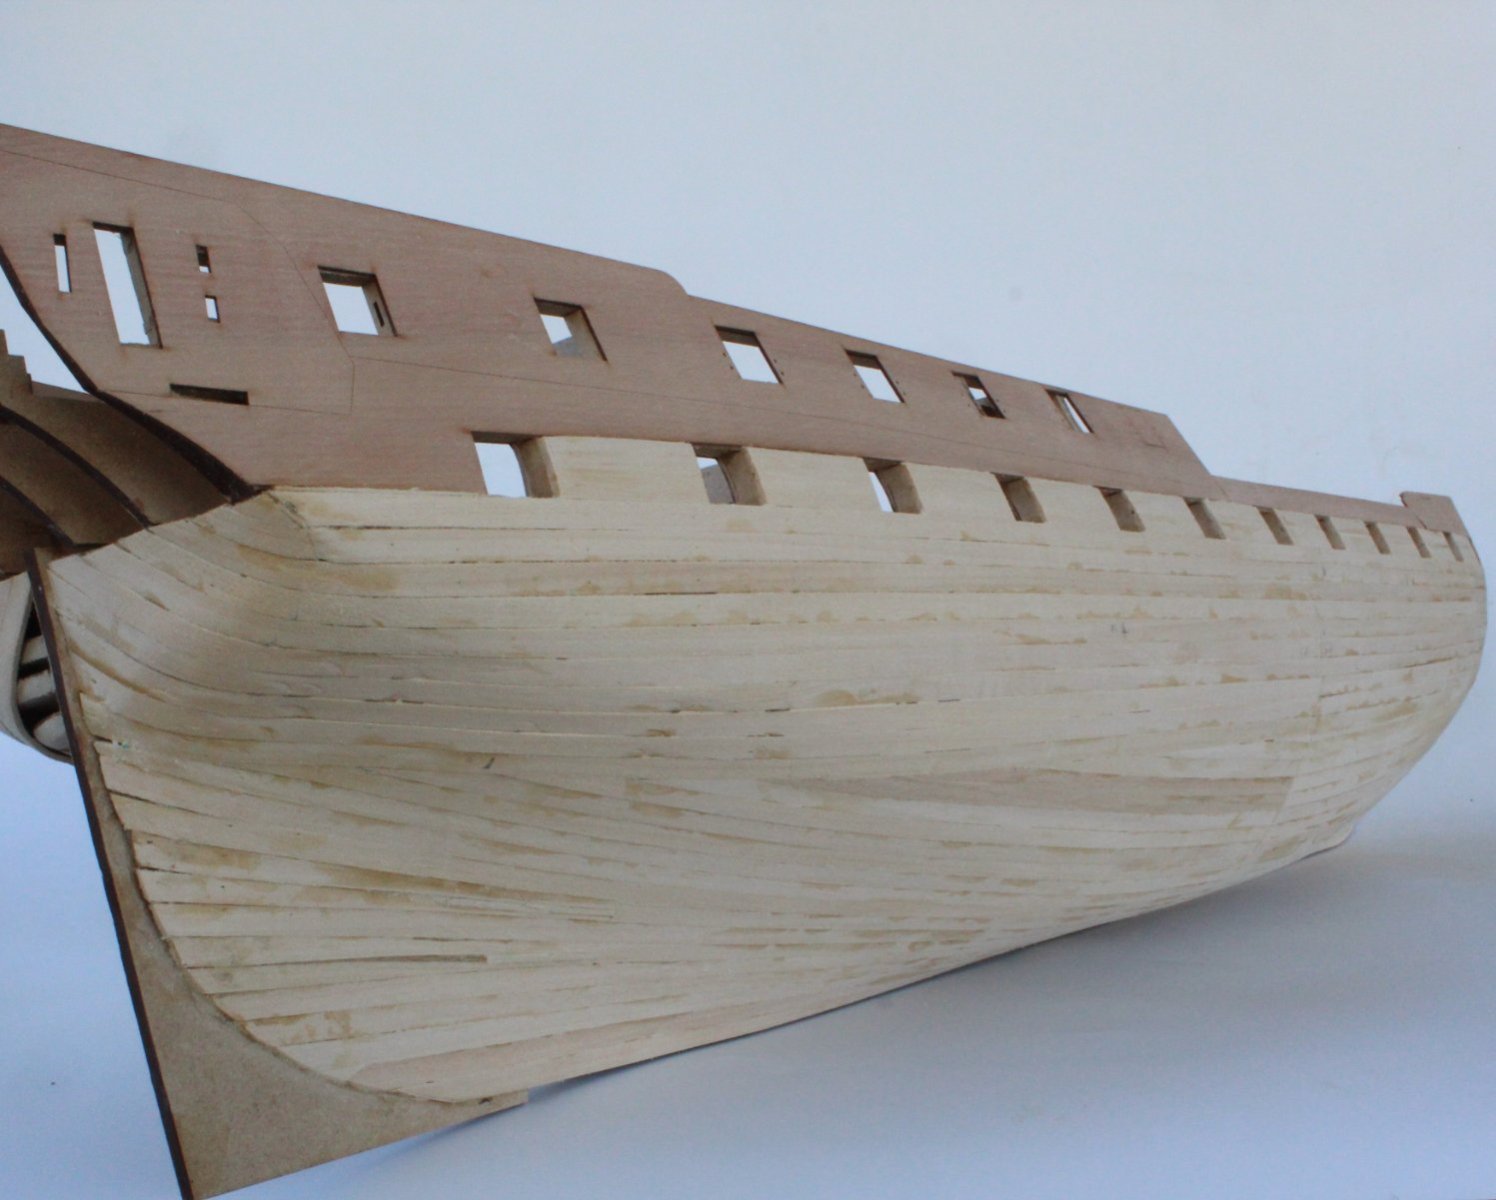
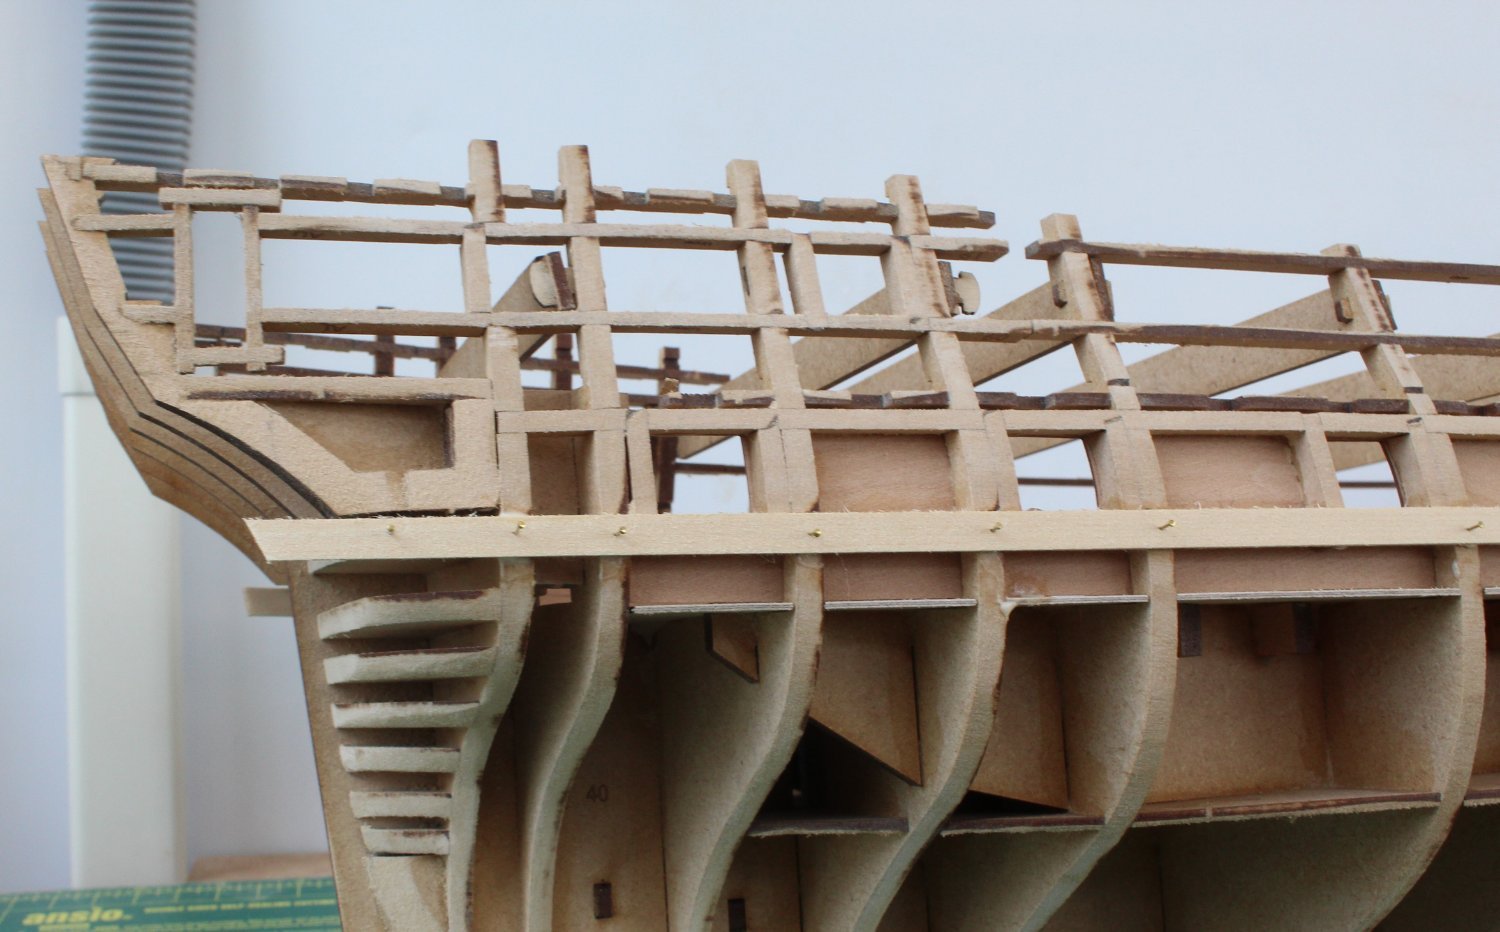
First Planking – Left Side Completed
After a few day work I have completed the first planking on the left-hand side. I decided to abandon the planking in bands and continued to plank upward.
I now have a few days more work to complete the right-hand side.
I have attached a few photos. I am really pleased with how this has turned out.


- Esap, Thukydides, KARAVOKIRIS and 13 others
-
14
-
 2
2
-
-
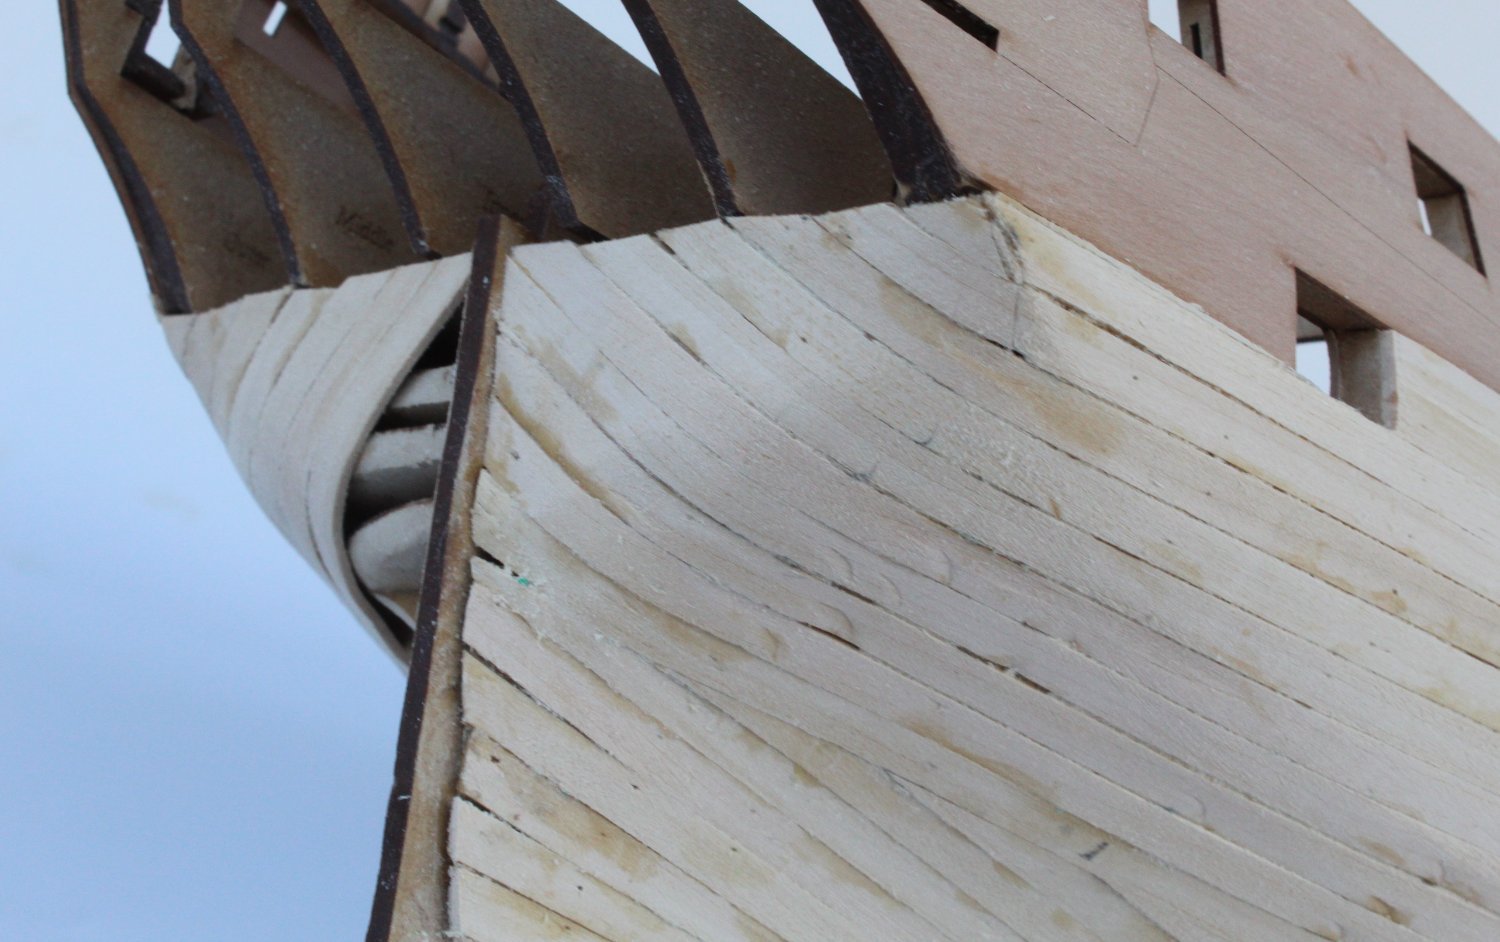
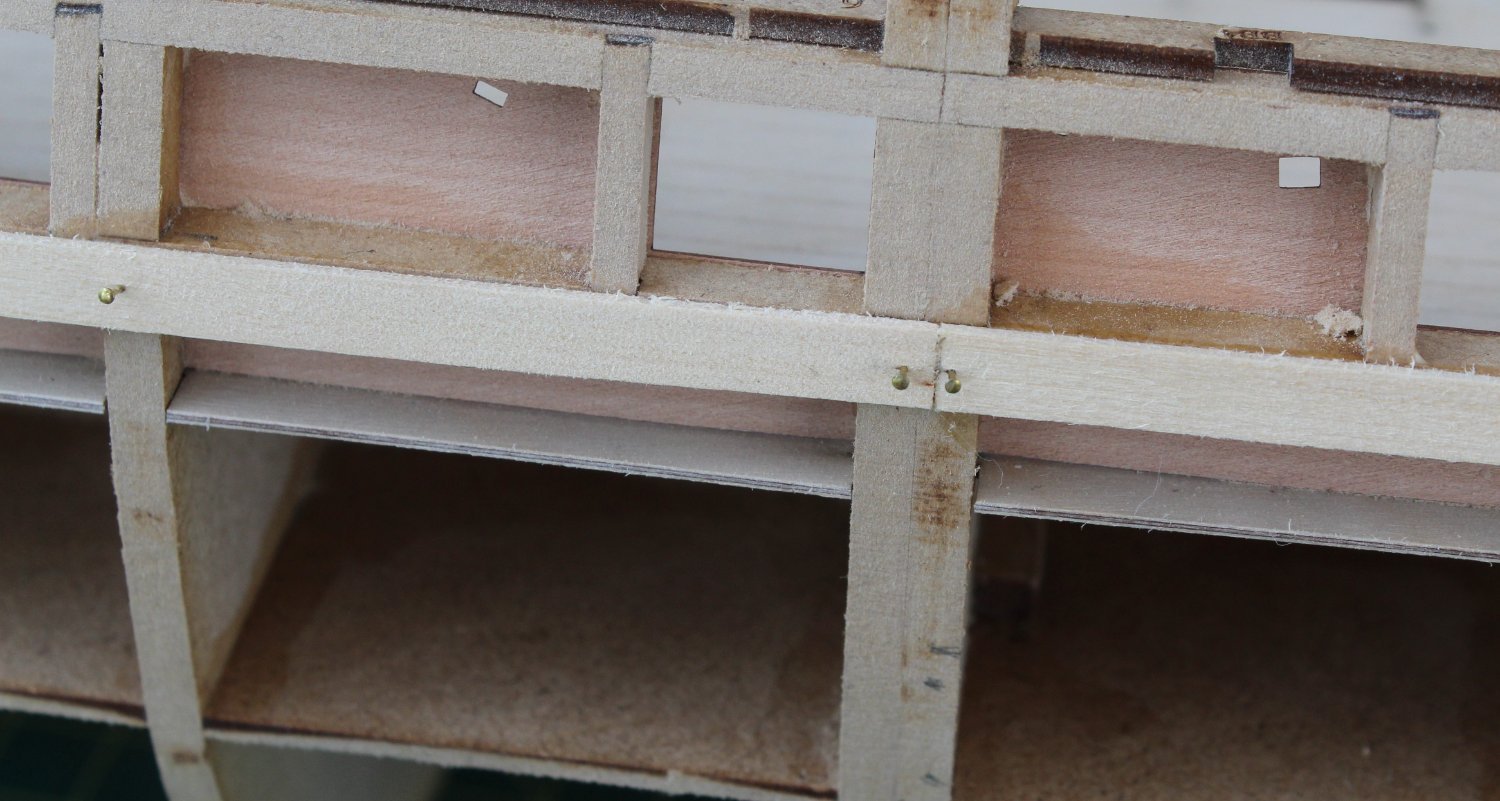
First Planking – Adding Stealers
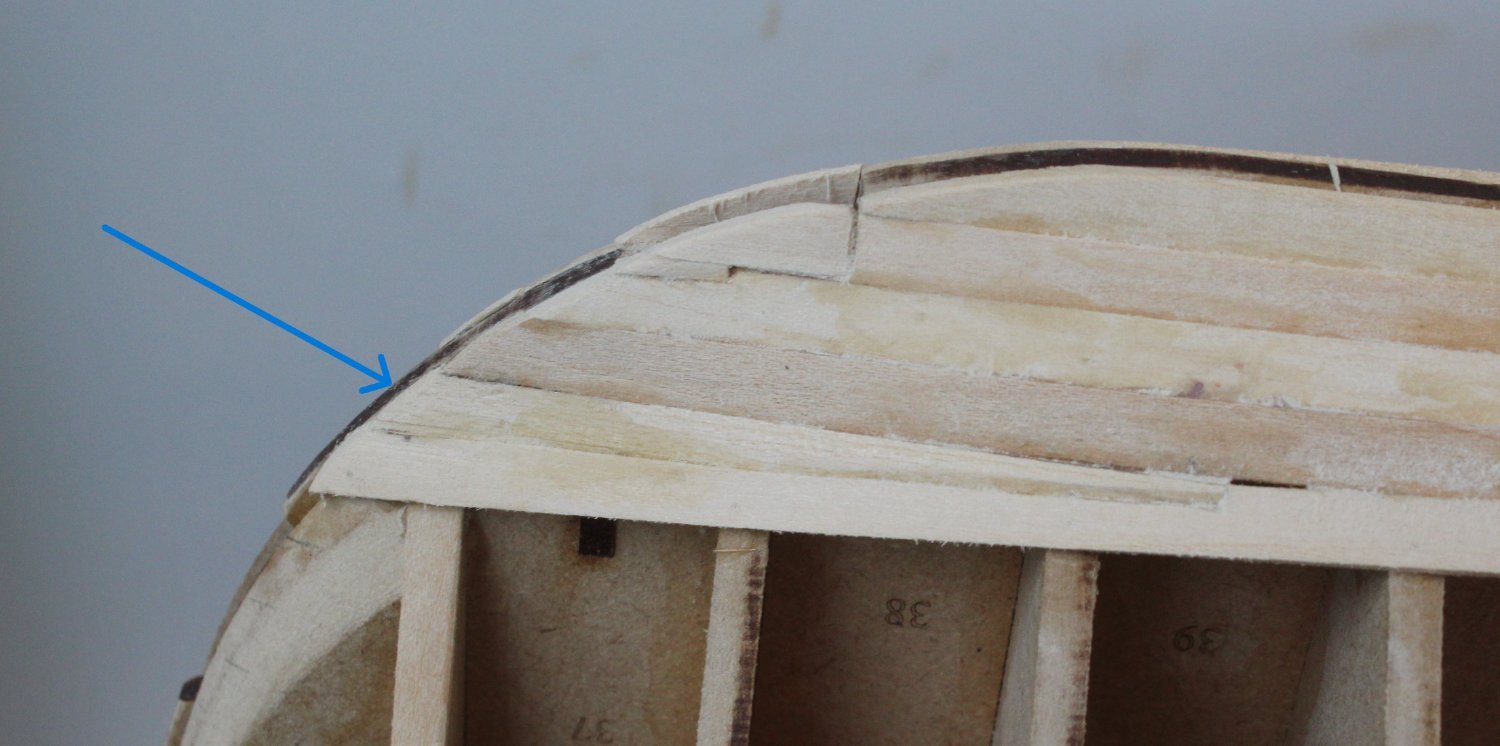
Previously when fitting a stealer I would ignore the general rule that planks never be tapered by more than half of their width and would simply taper to a point. As I continue on my model building journey I decided that I should try improve my skills with regards to fitting stealers.
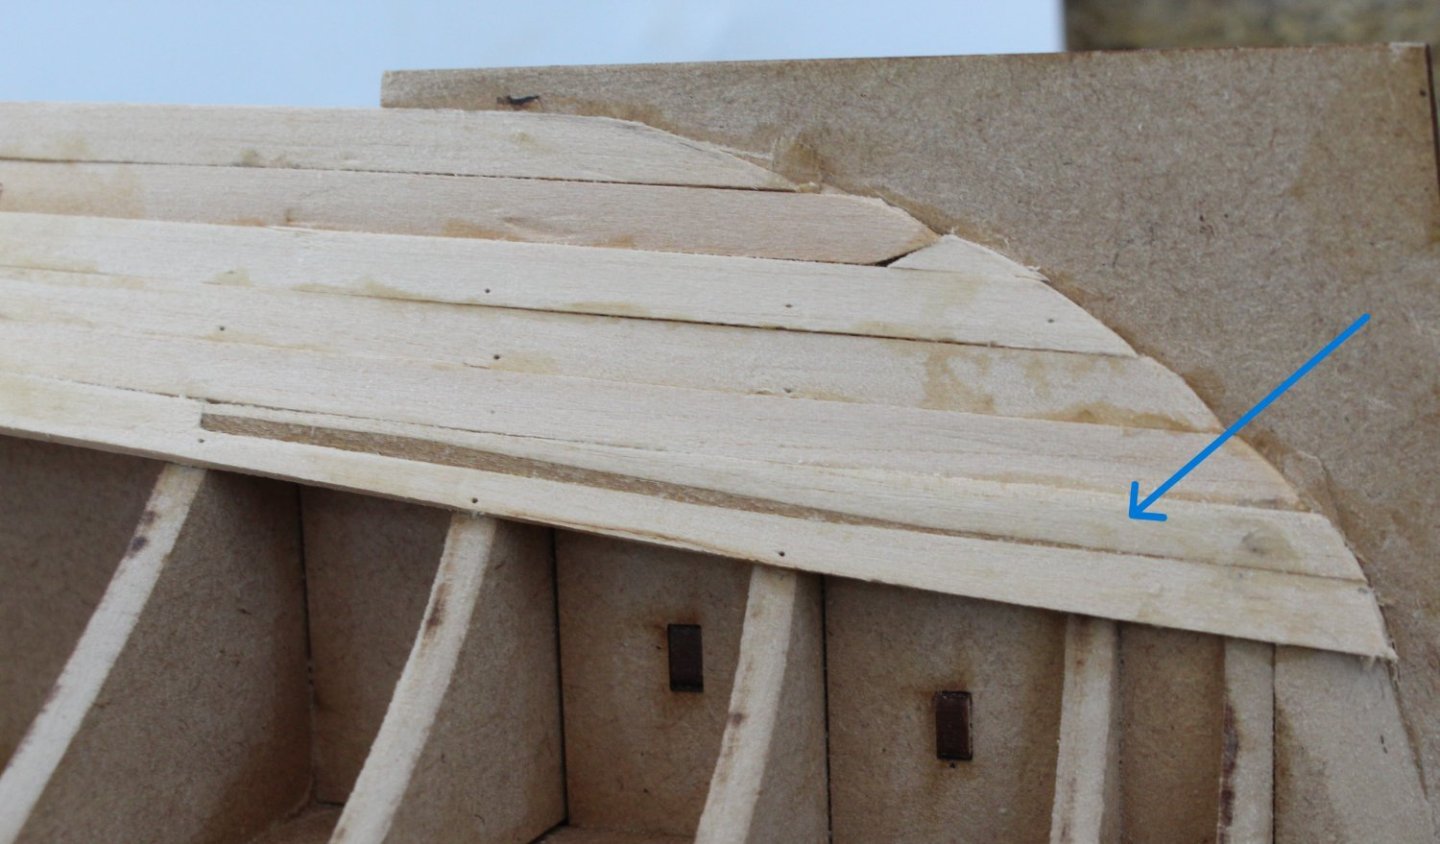
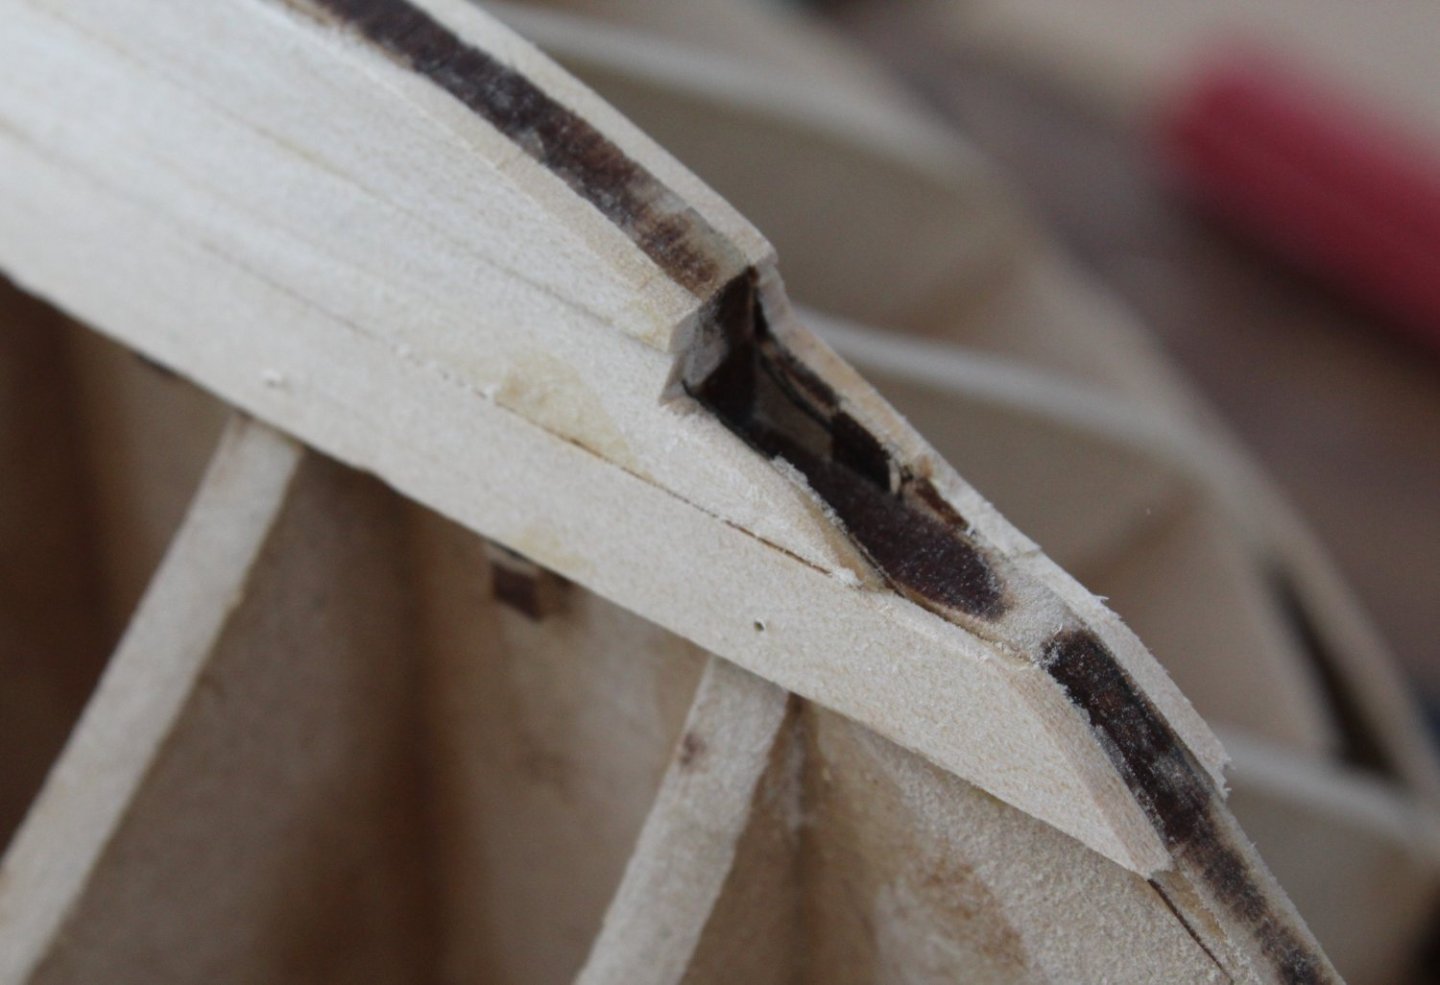
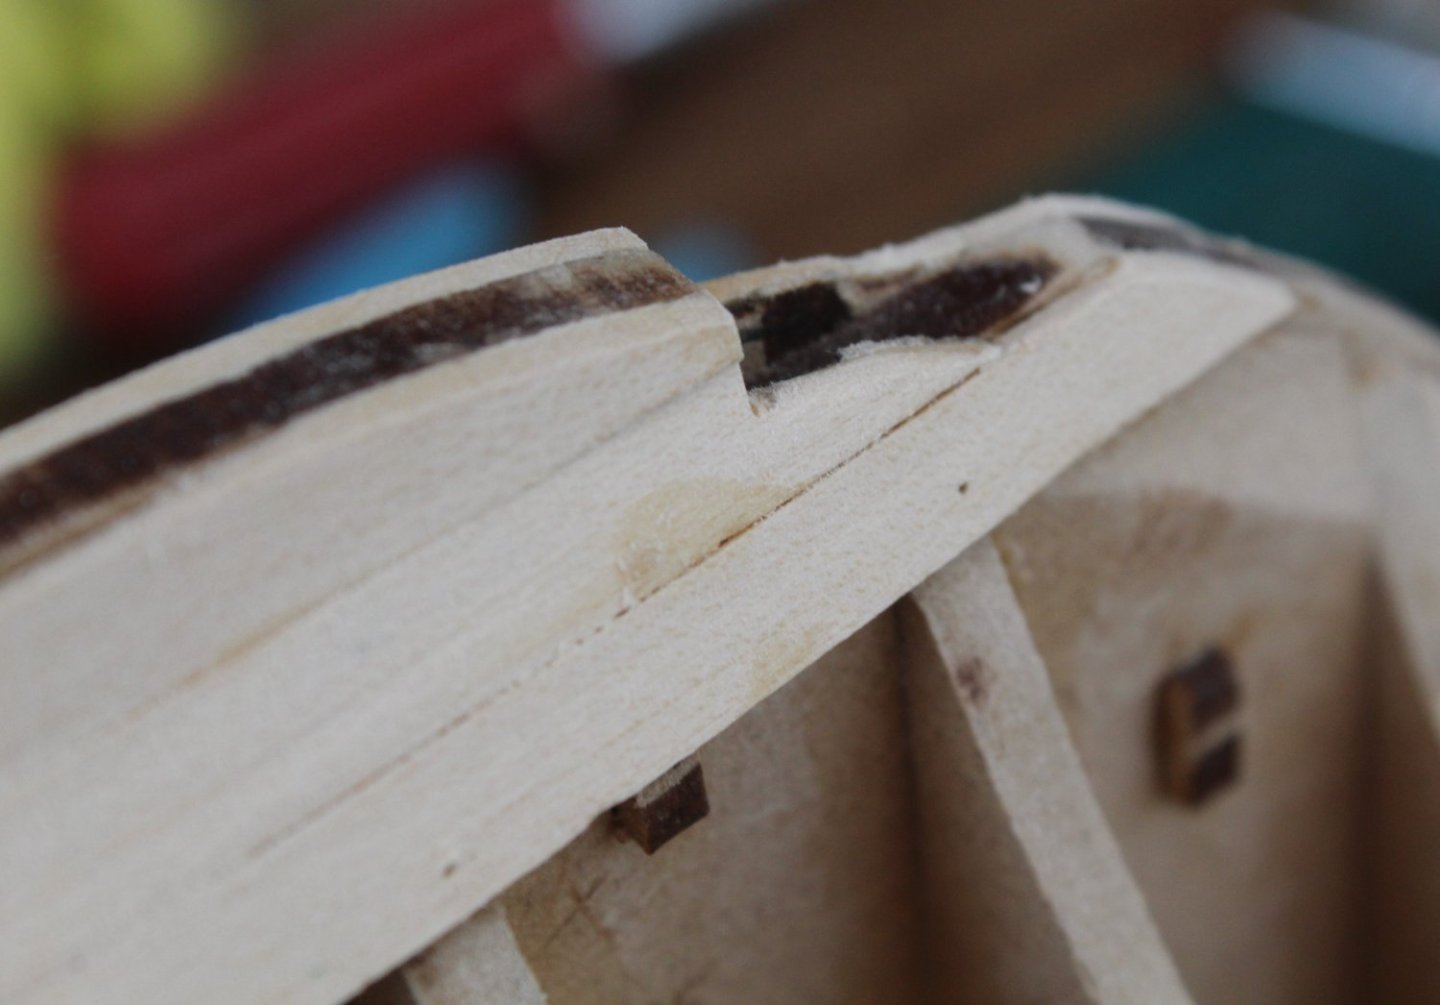
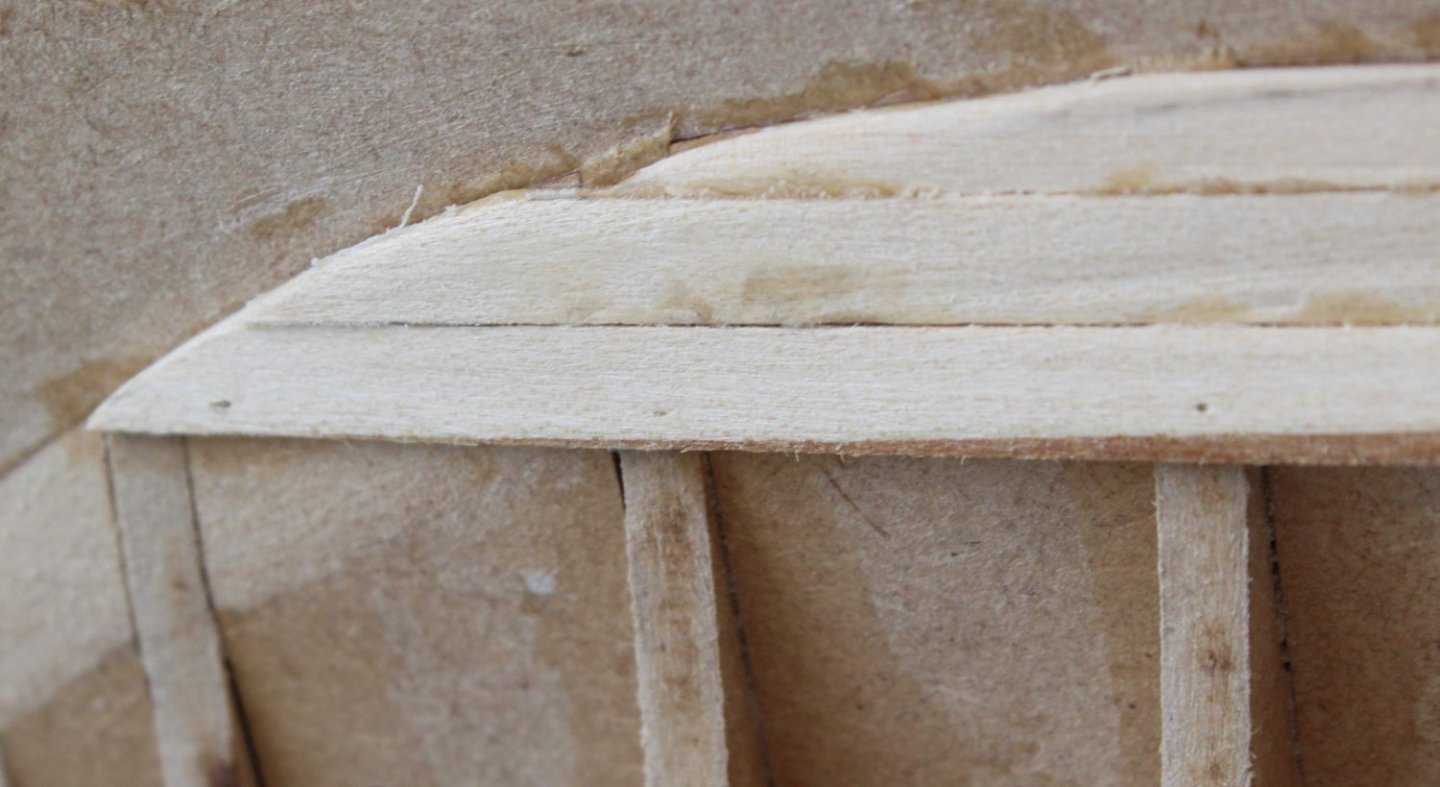
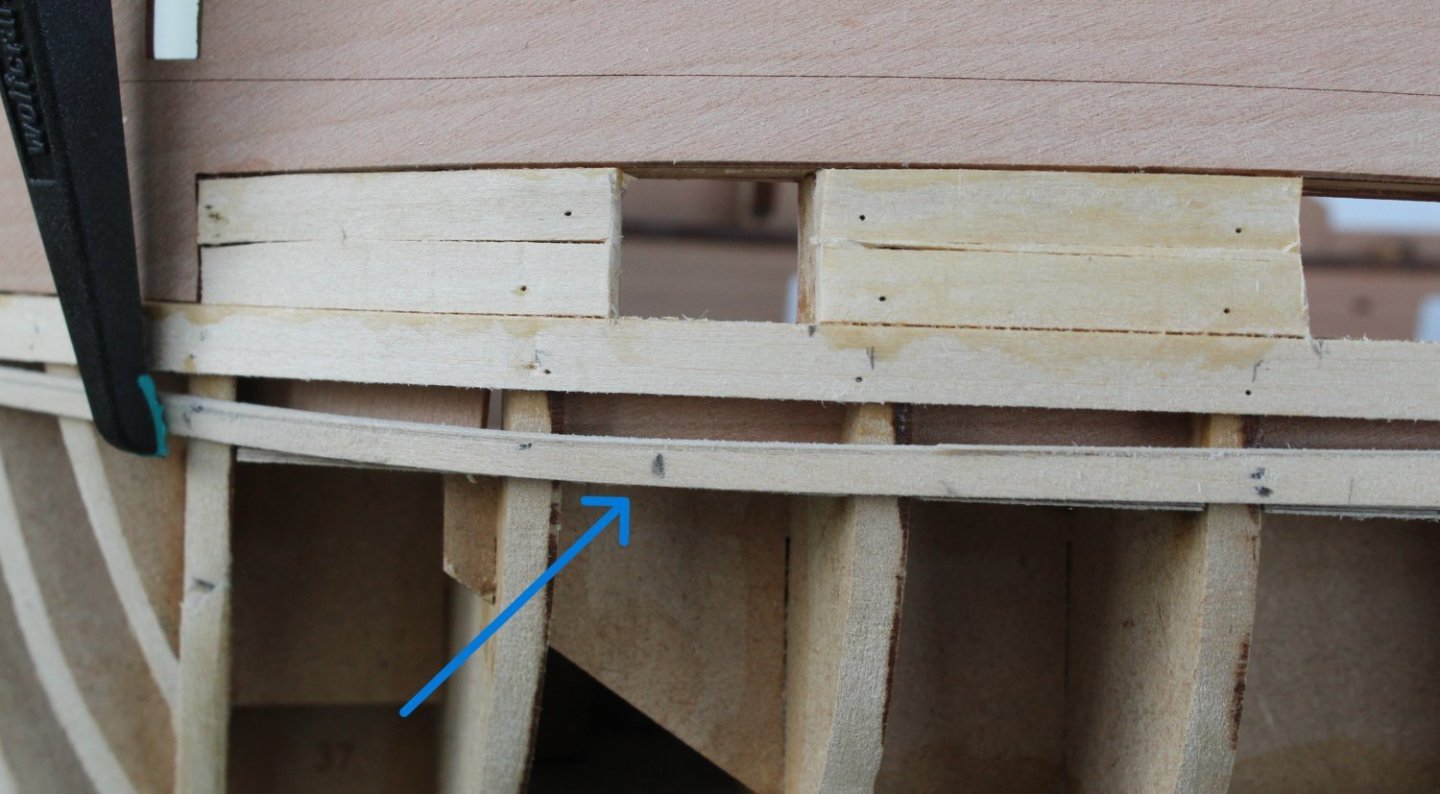
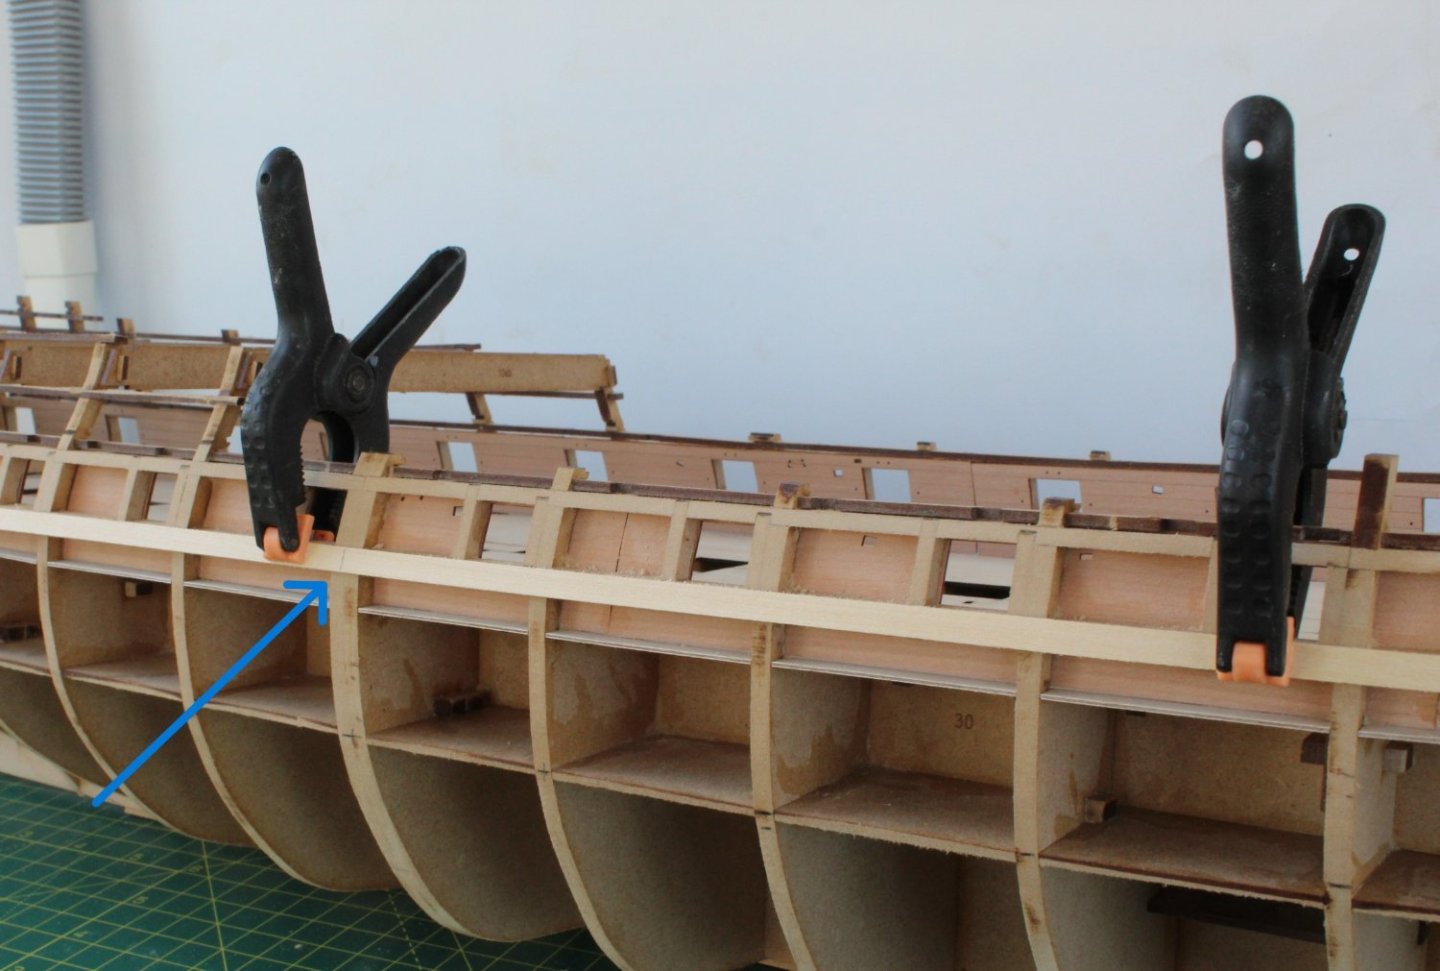
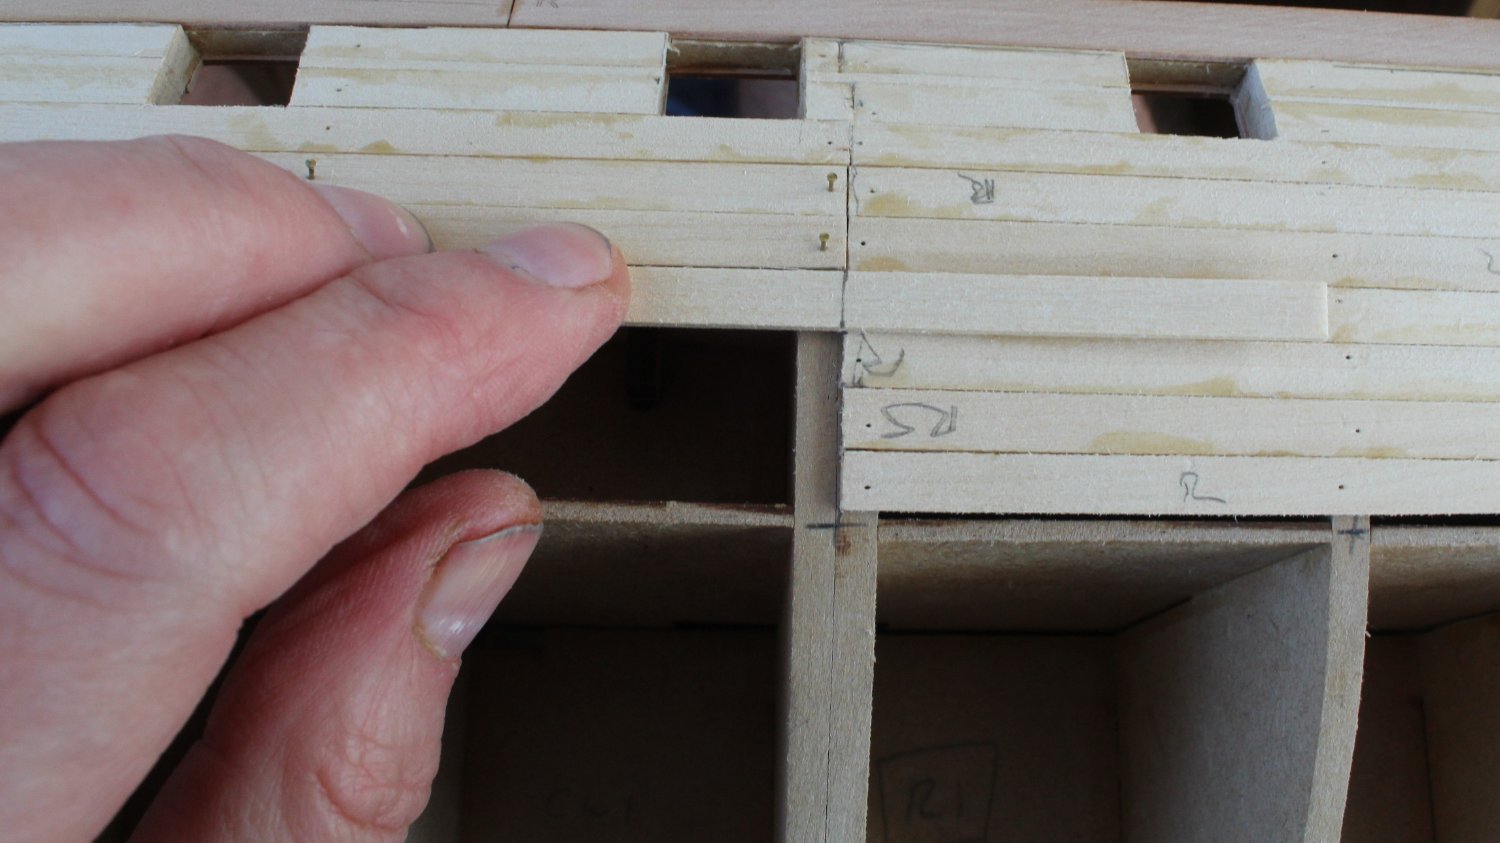
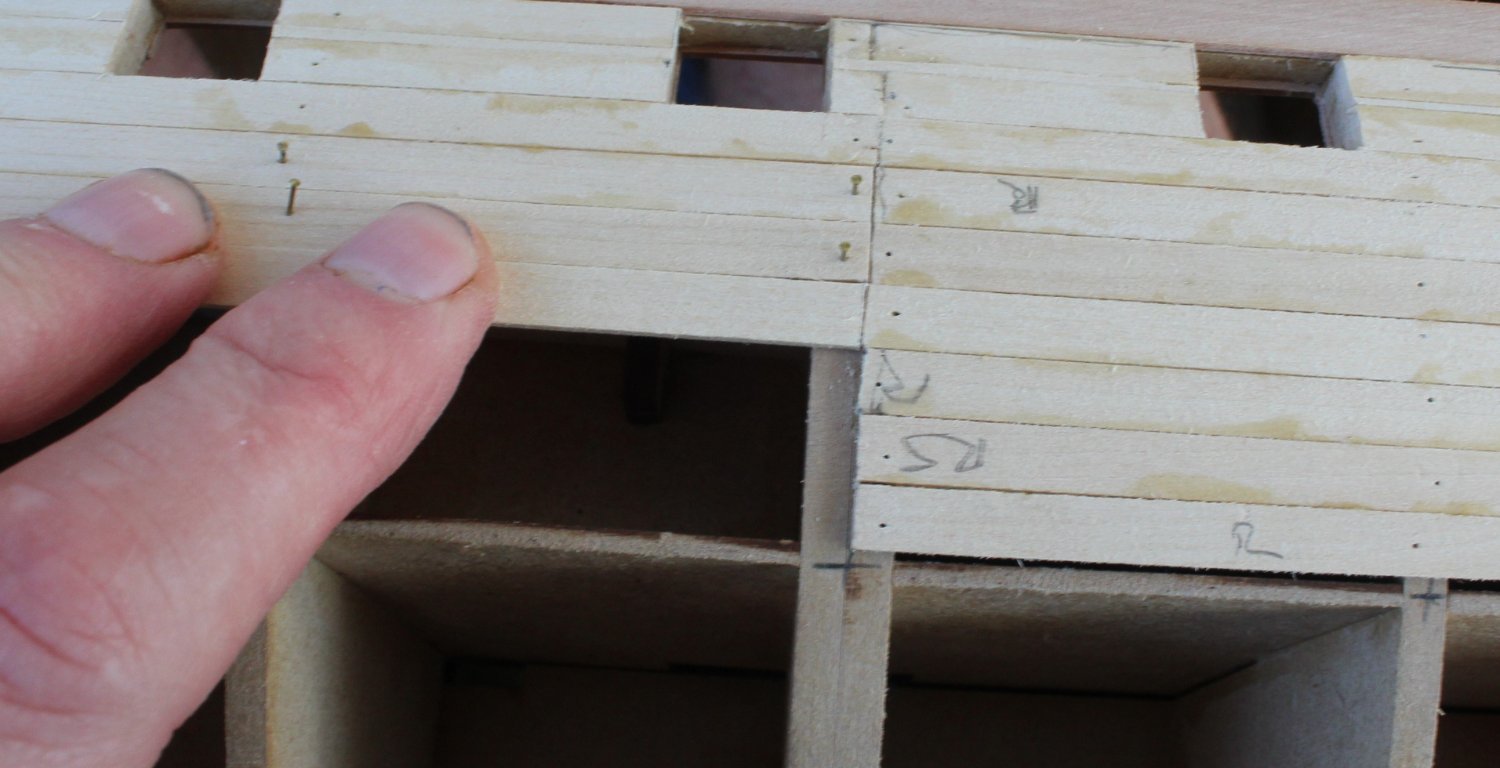
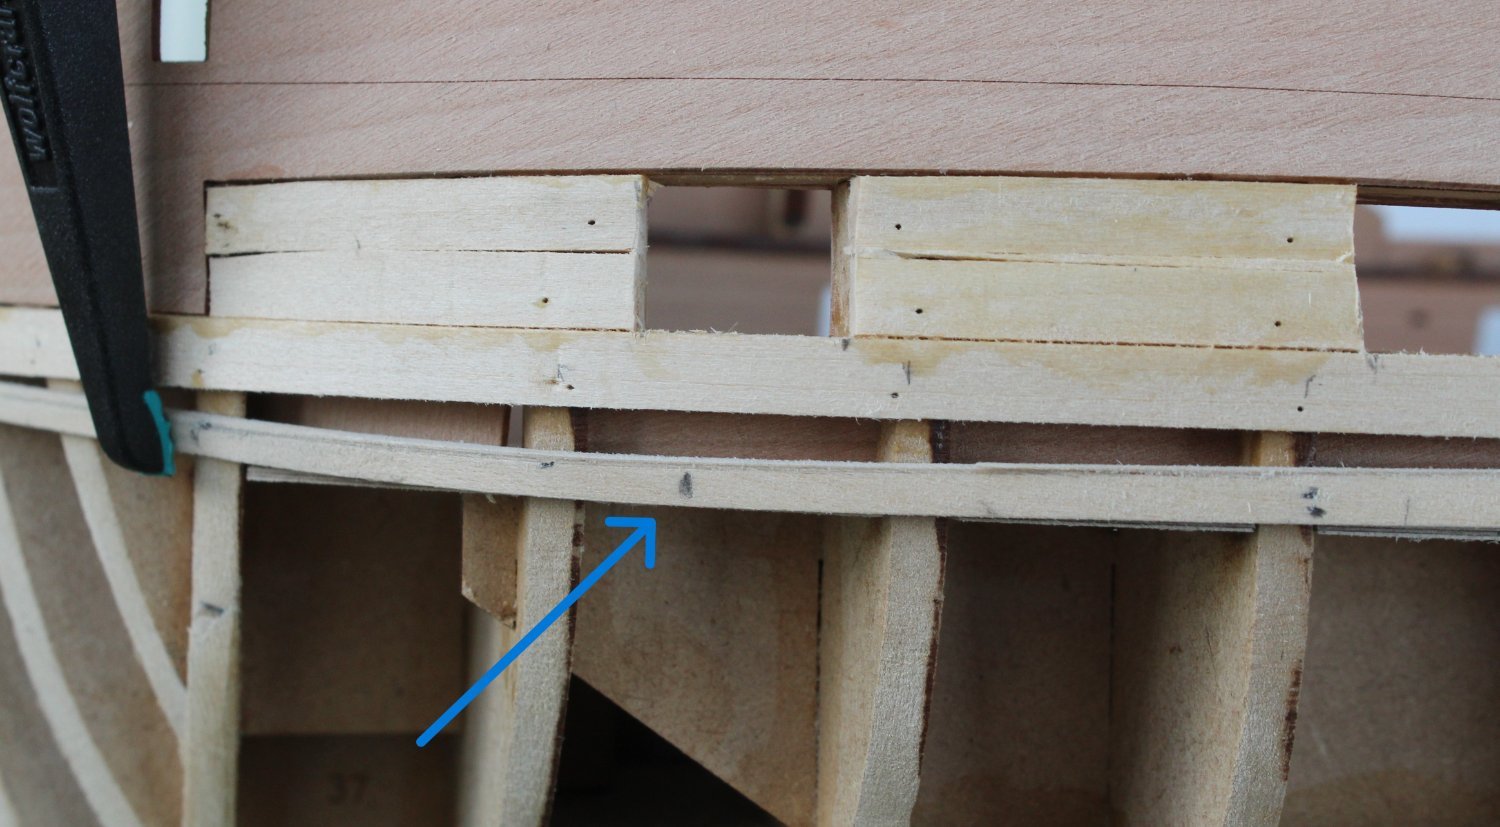
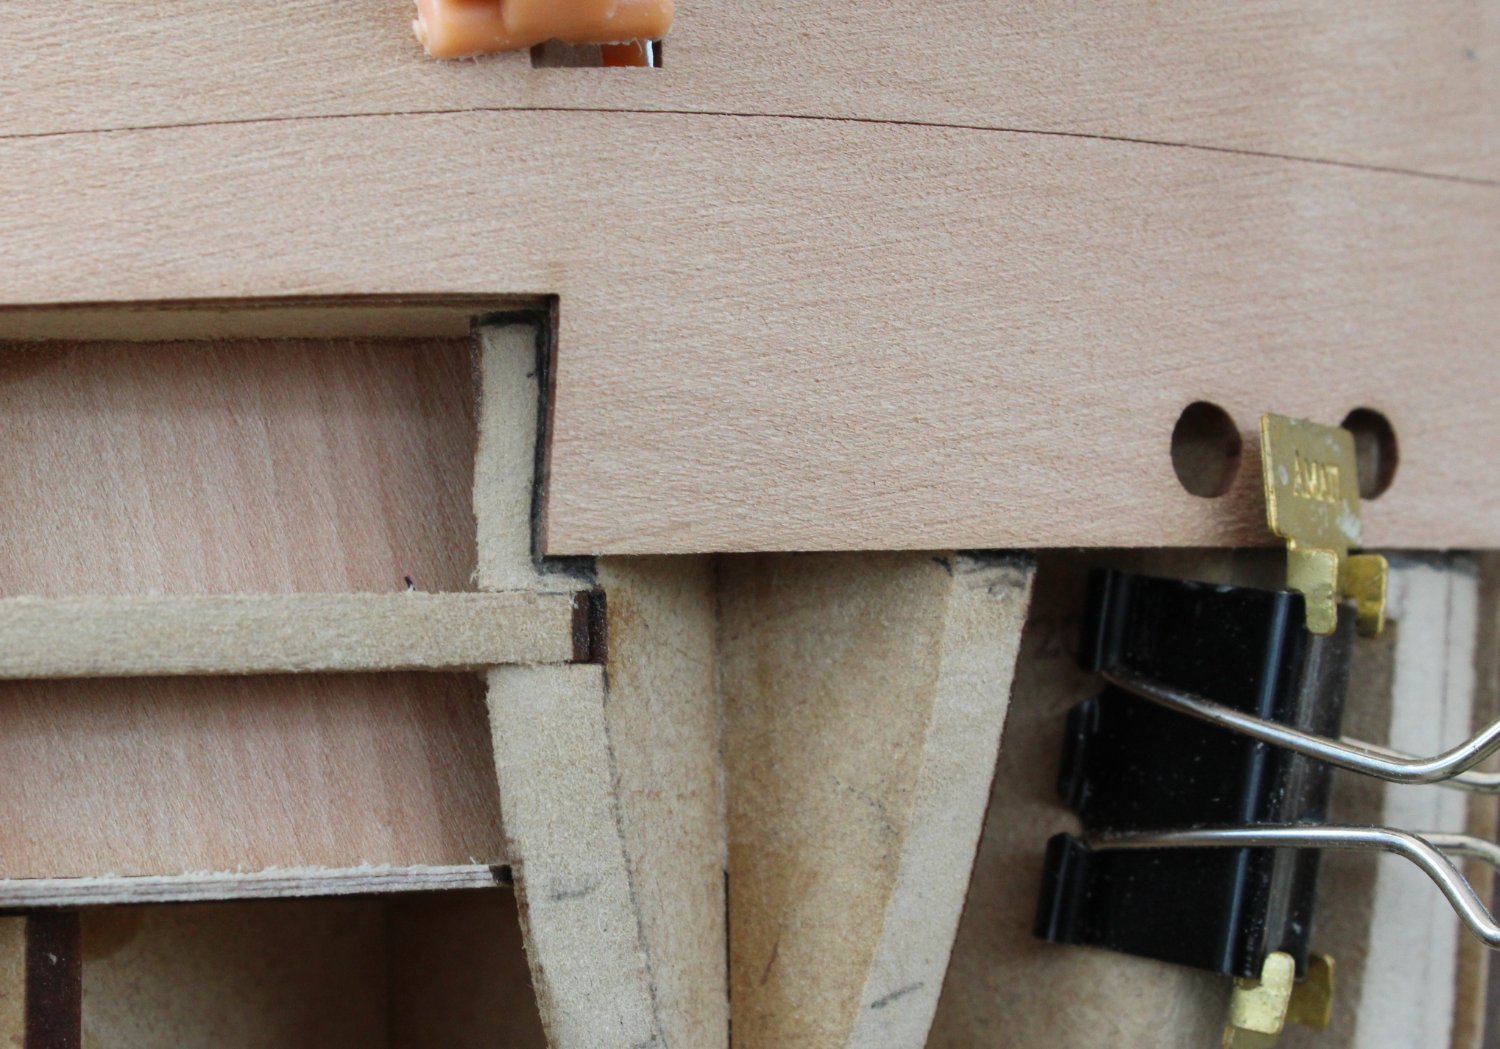
The next planks to be fitted at both the bow and stern required half stealers. Once I had determined the start point for the stealer and selected a suitable planking off cut the half stealer plank was tapered. It was then a case of using the stealer as a template to make the required cut out in the adjacent full plank to be fitted. The join between the stealer and full plank was checked and once I was happy both planks were glued in place.
This is a little bit more time consuming than a simple “tapered to a point” type stealers but does look much better The blue arrows indicate the half stealers. You will also note, when looking at the photos below, that I made a couple of mistakes elsewhere with the bow and stern section and which required some small filler planks to be added. Thankfully these errors will be covered up with the second planking layer.

- Blue Ensign, mtaylor, KARAVOKIRIS and 7 others
-
10
-
-
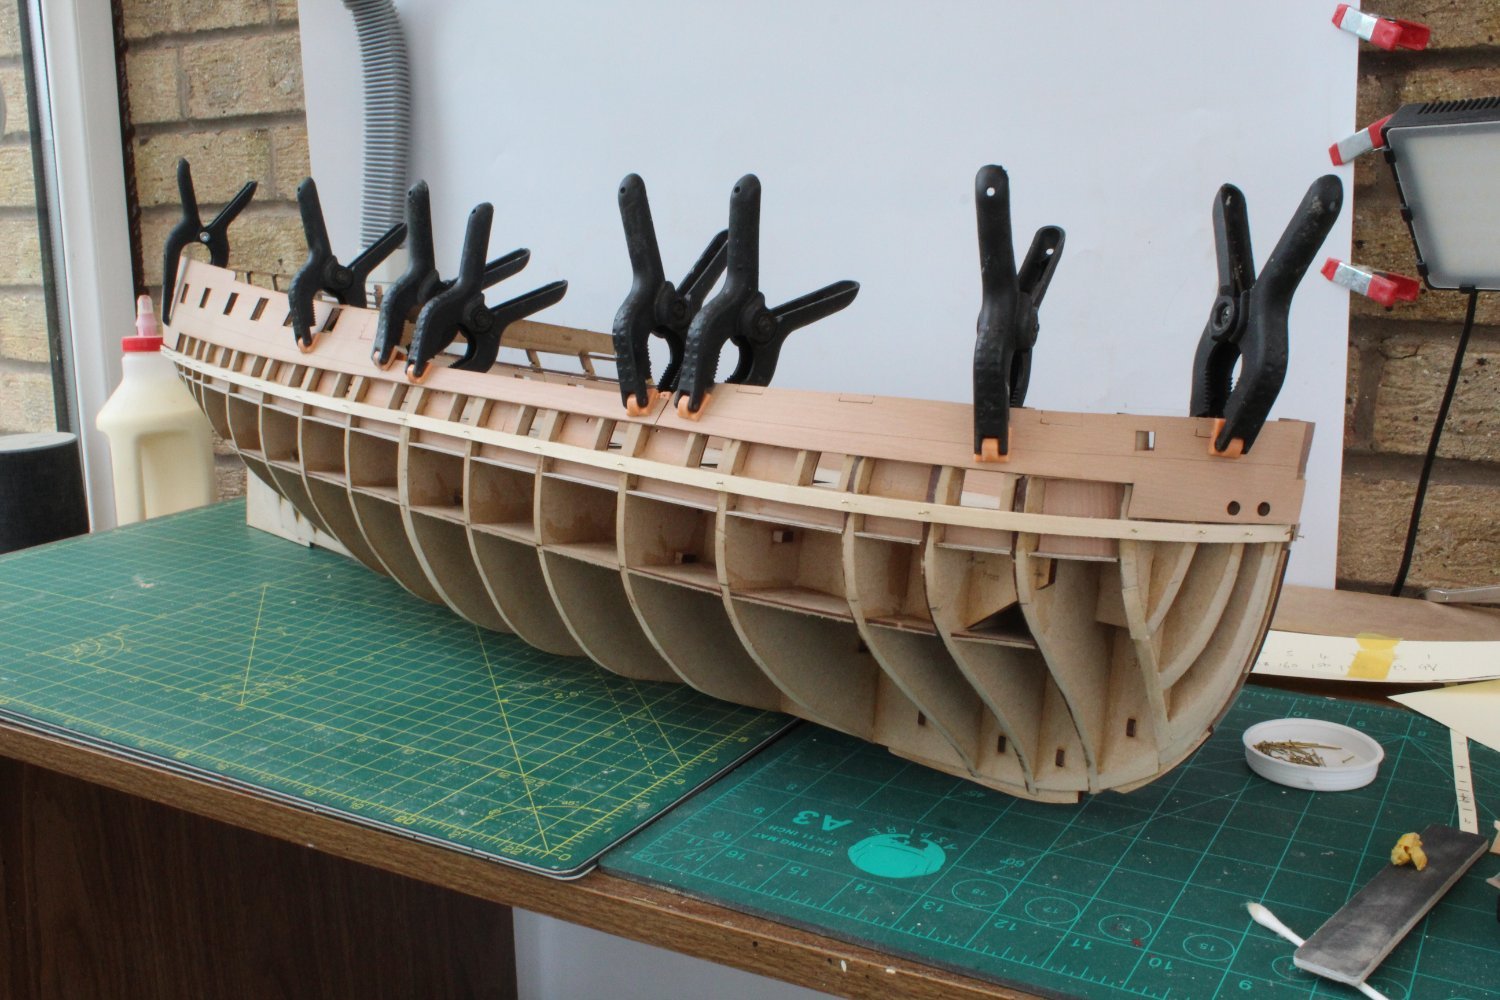
First Planking – Planking Garboard
Yesterday I had to attend to a plumbing issue as the water in our kitchen sink disposal unit was not draining away. After removing the unit and cleaning it there still seemed to an issue with the water drainage, so I ended up buying and fitting a new unit. I was therefore unable to spend much time in the shipyard.
Having completed planking under the stern counter area today I decided to add the garboard plank. I was very pleased with how the first three planks looked around the bow area.
The stern area is only being planking up to the dead area which avoid the need to taper the keel.
I am working with an inverted Indy which is resting on two spacers to stop the bulwarks resting on the work bench.
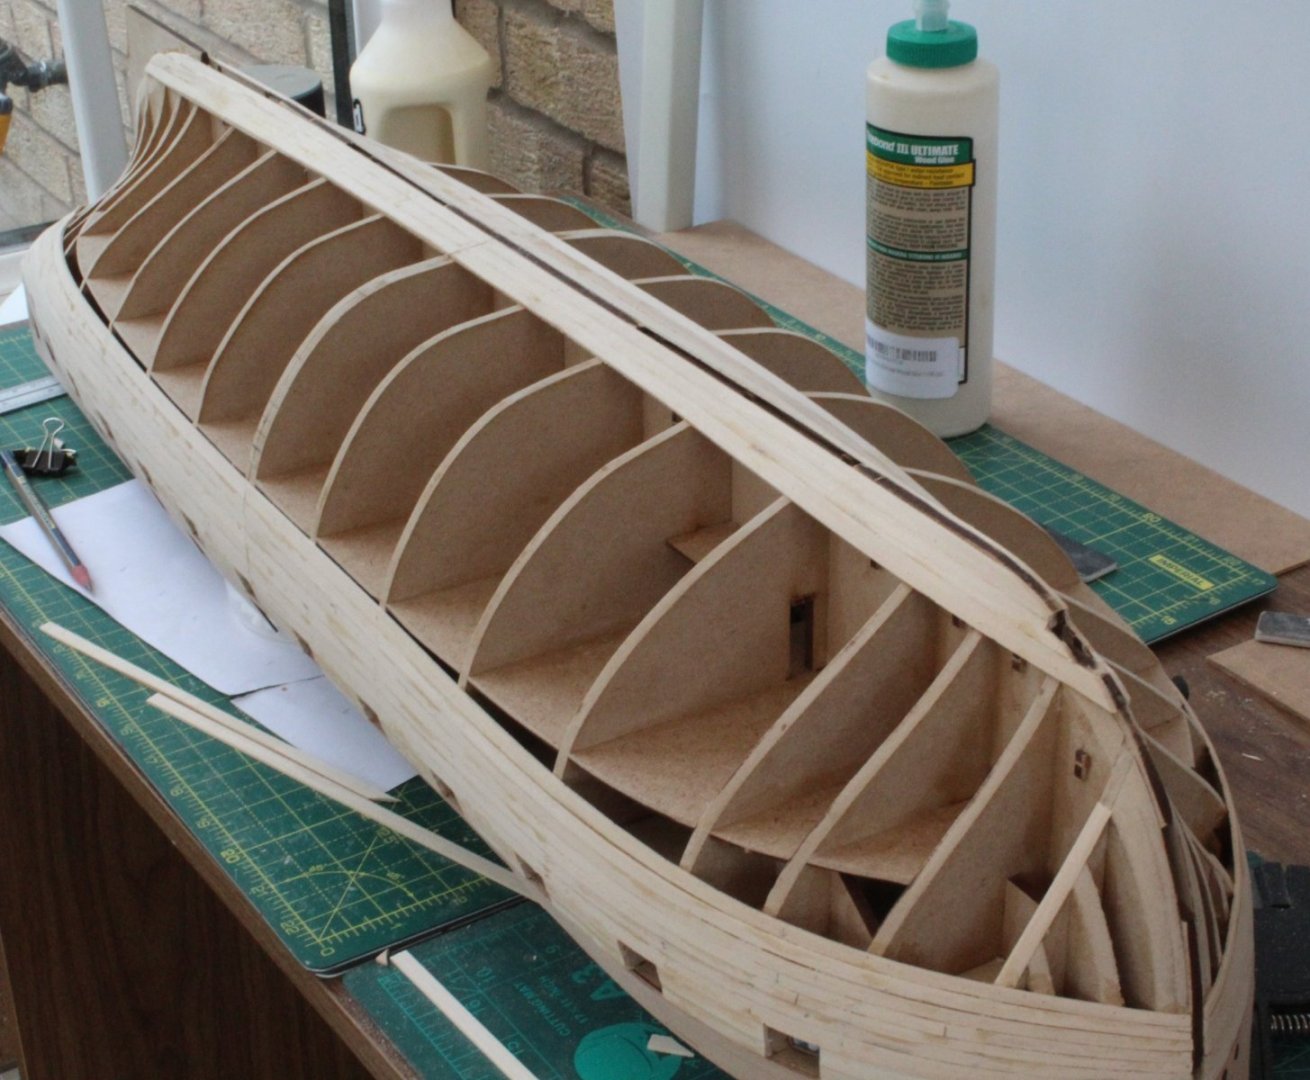
I am using pins to secure the planks to the various bulkheads However I am also using clamps to ensure the plank edges are aligned which should reduce the amount of sanding required.
-
1 hour ago, allanyed said:
I find that if you use this method with a hot air gun (any local hardware chain for less than $20) it goes faster and is MUCH easier than using an iron. It is the heat, not the water that does the trick so can be done dry or wet as you wish. Depending on the wood, I find wet is sometimes easier so soaking a bunch of planks in a piece of PVC pipe with distilled water ahead of time is a good idea. Then again, if this is hobby, not an occupation there is no need for speed. Fast ship modeling is an oxymoron if ever there was one.
Allan
Thanks Allan
I do normally work on shaping a few planks at a time. But as you say this is a hobby so I'm in no rush at the moment.
- Knocklouder, chris watton and mtaylor
-
3
-
-
1 hour ago, Blue Ensign said:
Good progress Glenn, I think it is the right approach to fit those transom stern planks aft - forward. I always form those planks from a longer length to ensure a smooth curve.
B.E.
Many thanks and I have certainly found it much easier working aft - forward.
Glenn-UK
- mtaylor, CiscoH and hollowneck
-
3
-
15 minutes ago, Kevin said:
i am debating the best way ahead to do the 2nd planking, as i have no intention of painting the hull, only the wales,
Planking in bands with lateral bends around the bow would be worth considering. I did add 3000+ copper tiles when I built Caldercraft's Victory which was a mammoth undertaking. The copper tape will be much easier to do if you decire to use it.
-
-
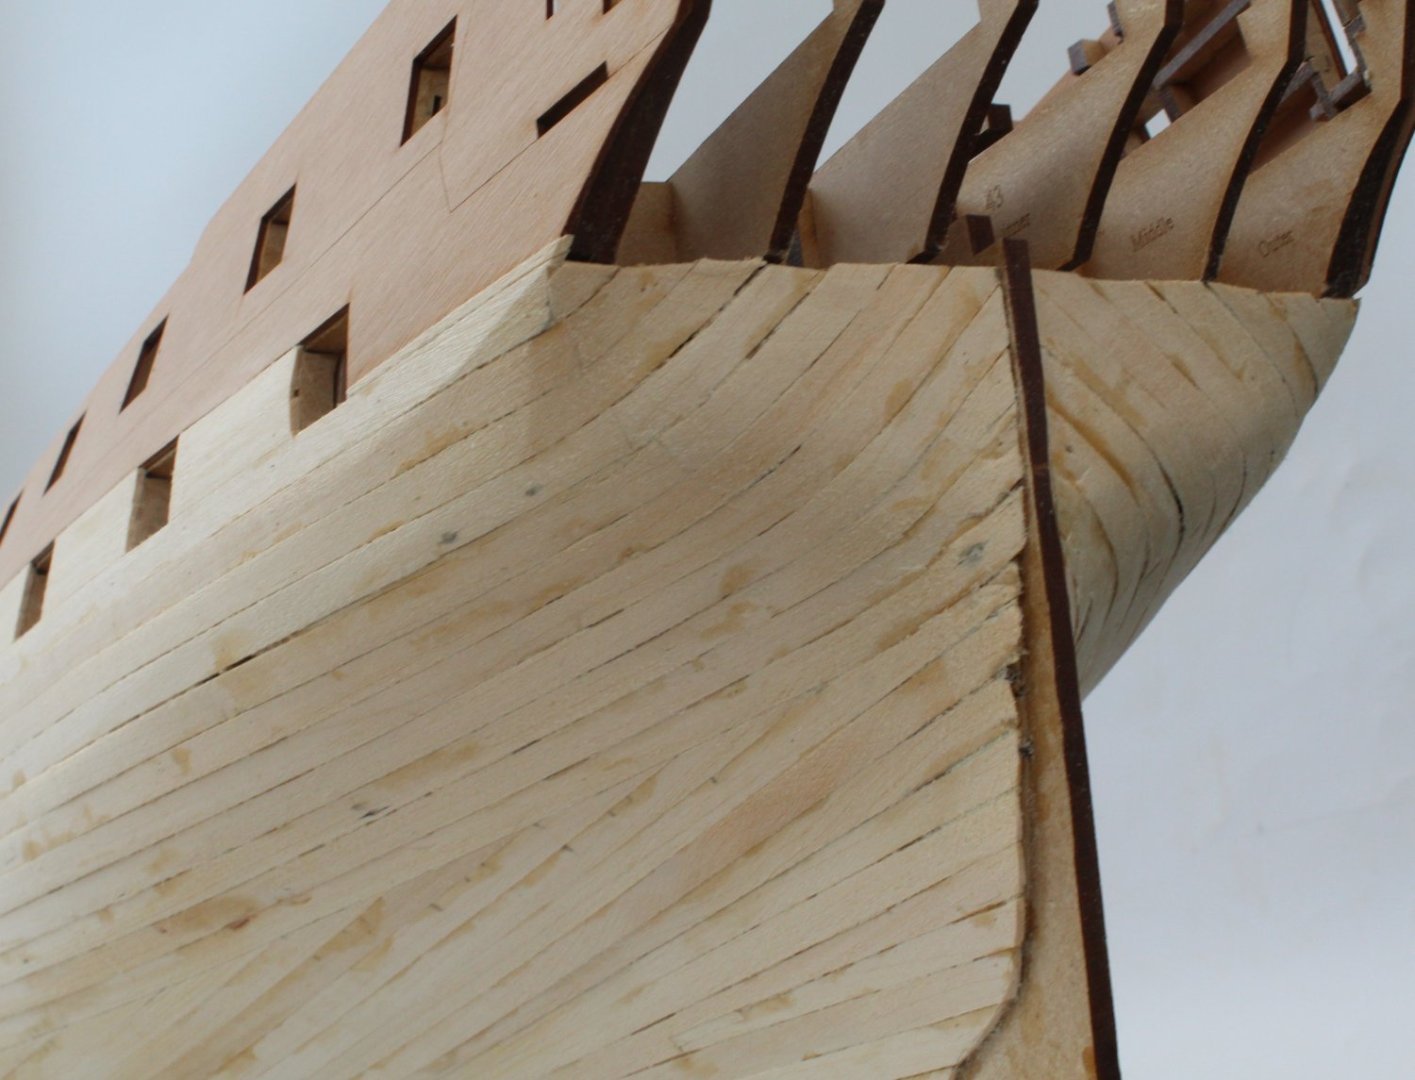
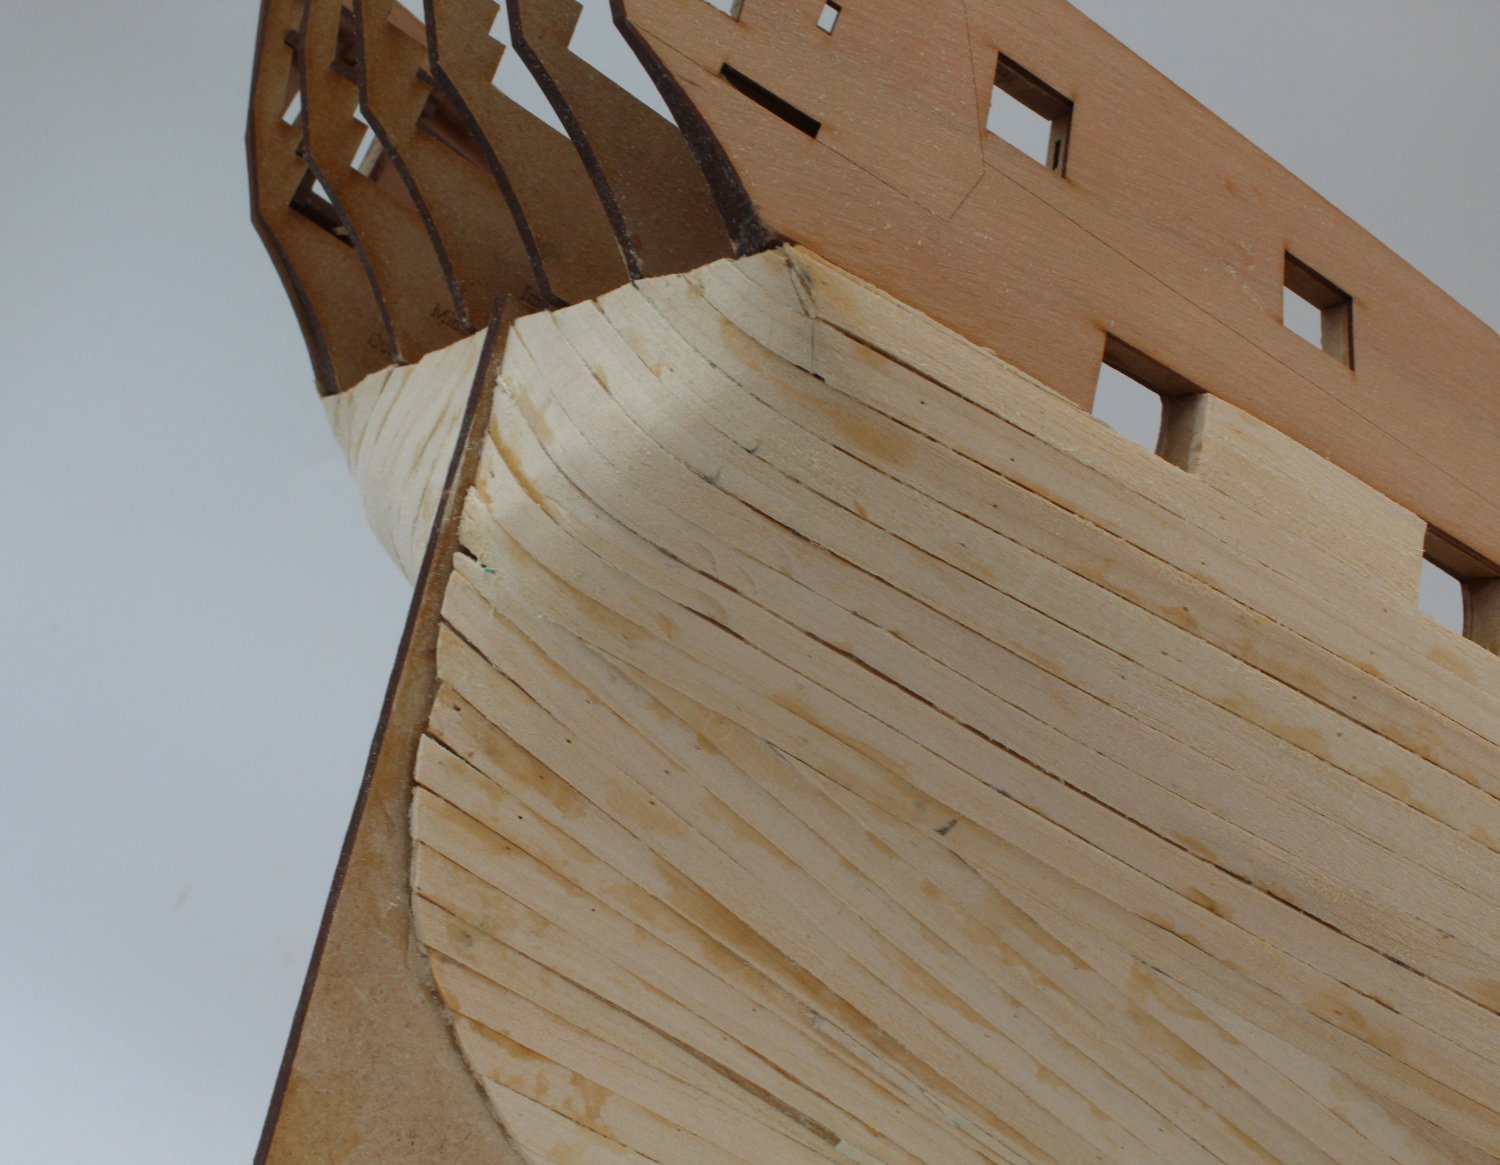
First Planking – Planking Stern Area
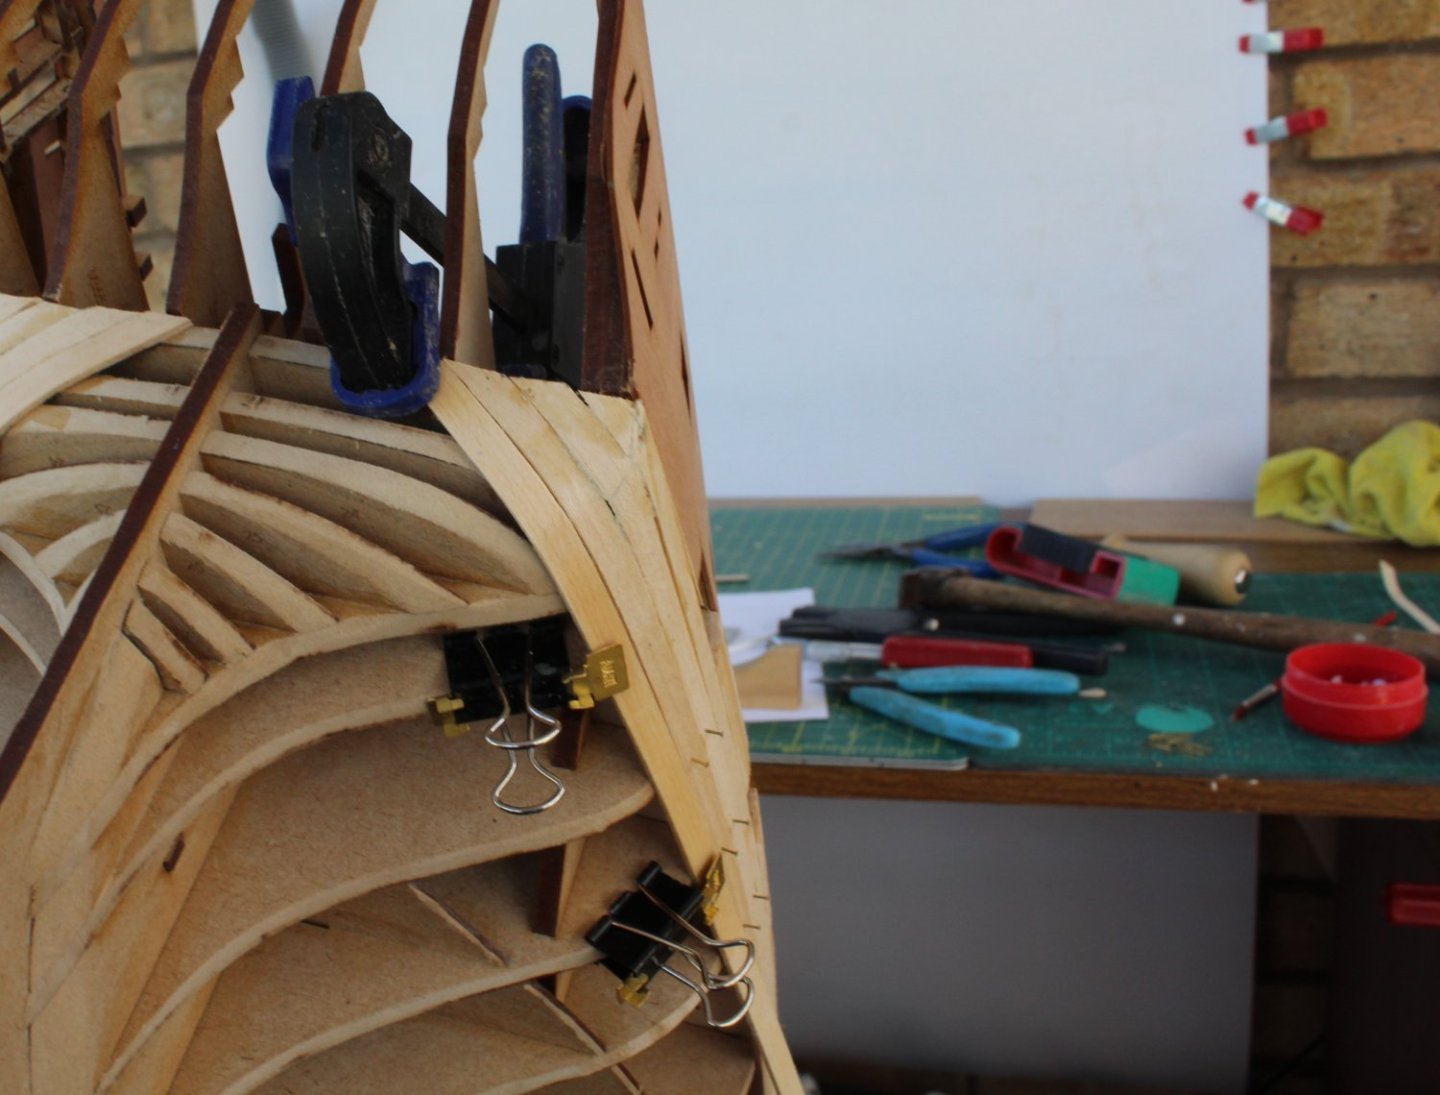
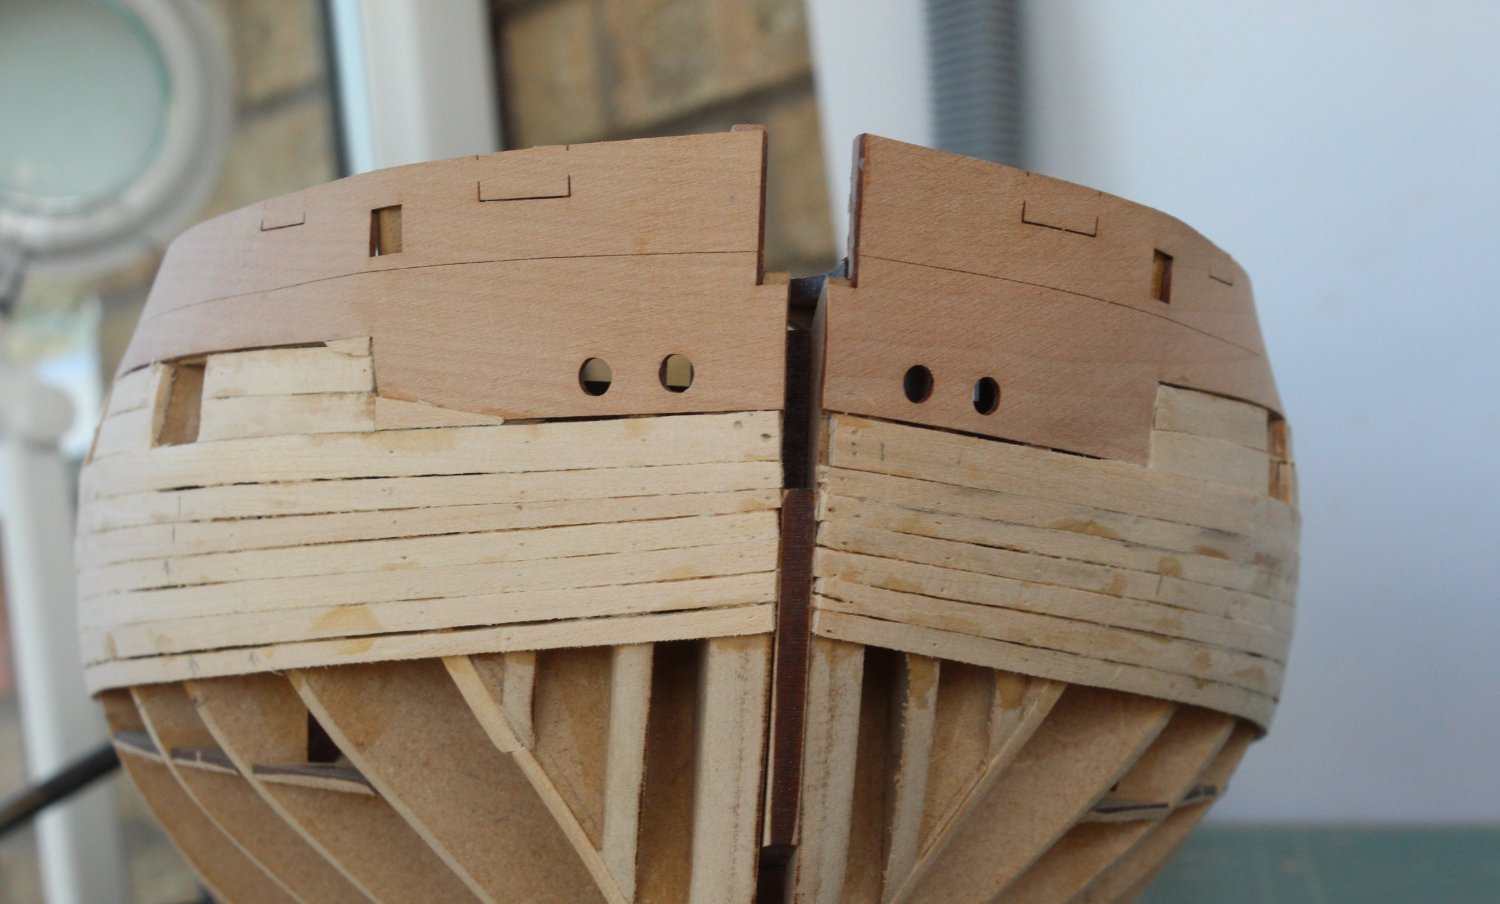
The method I used to plank under the stern counter area has evolved as I have progressed with this task. With the first couple of planks I worked from bulkhead 9 and used my plank crimping tool to add the bend around the stern counter.
I was not totally happy with the above method particularly with getting a nice smooth bend. It was also tricky to trim the end of the plank to fit under the stern frames. Therefore I decided to try working from the stern to bulkhead 9 which has worked out to be much better. The first task was to trim the plank end to the required angle.
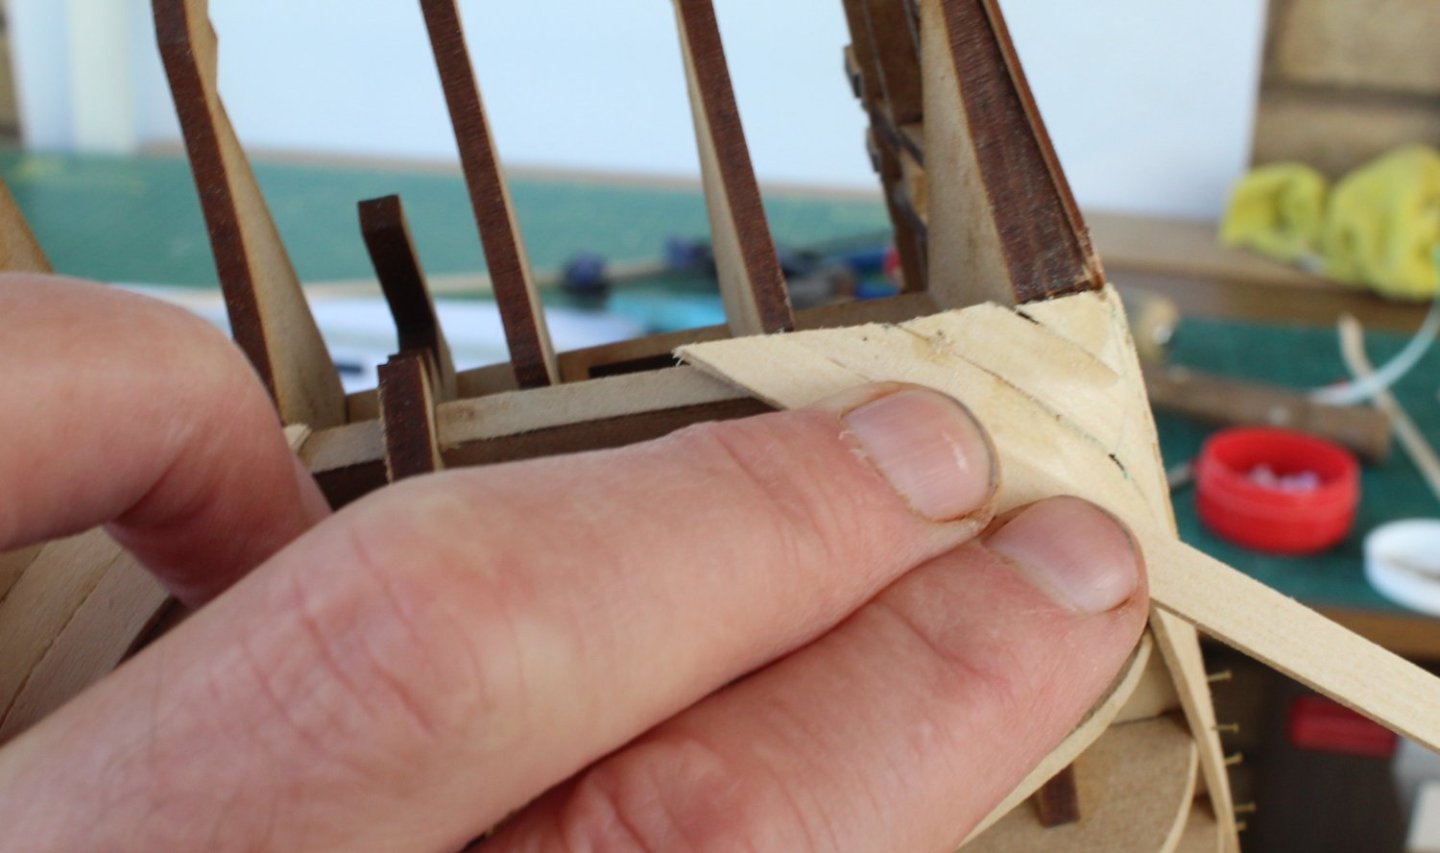
Next I marked the area where the plank needed to be bent.
I used my heated plank bender to add the required bend which did yield much better results.

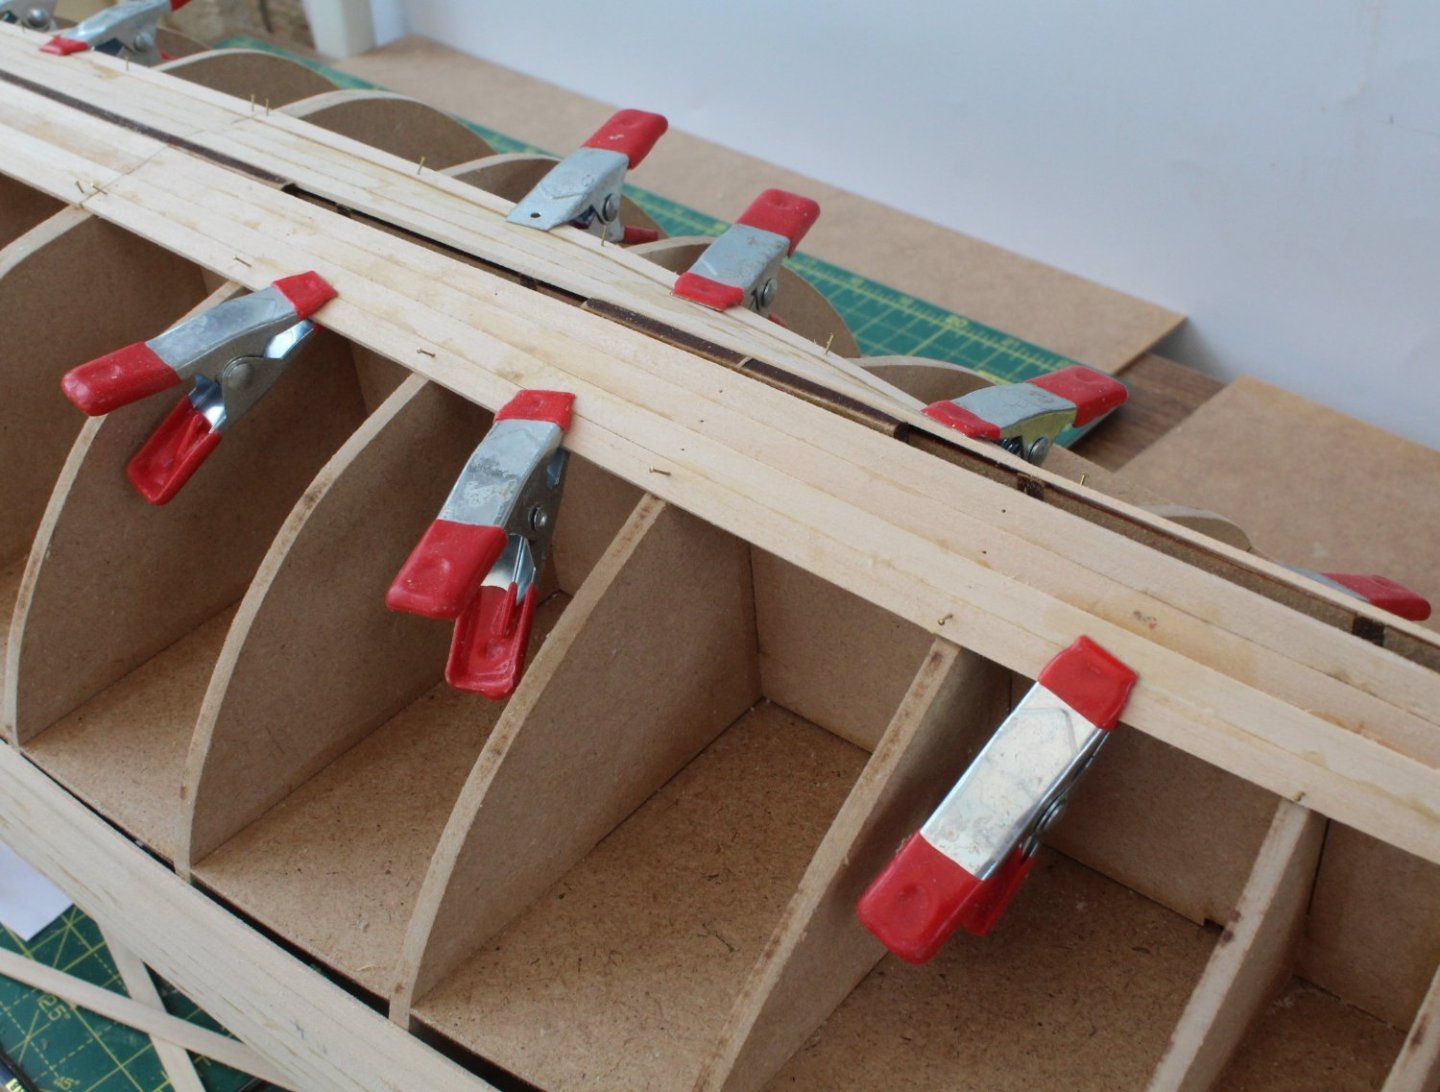
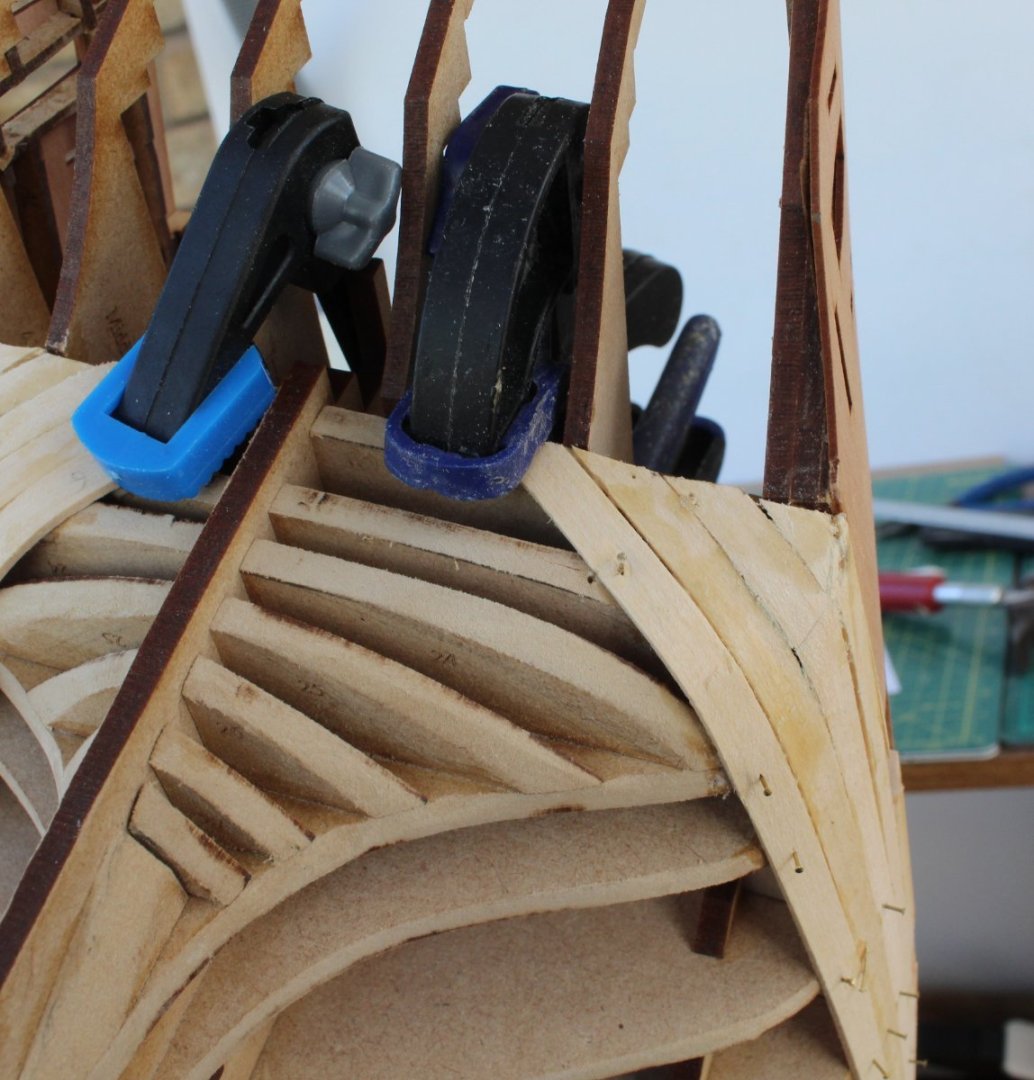
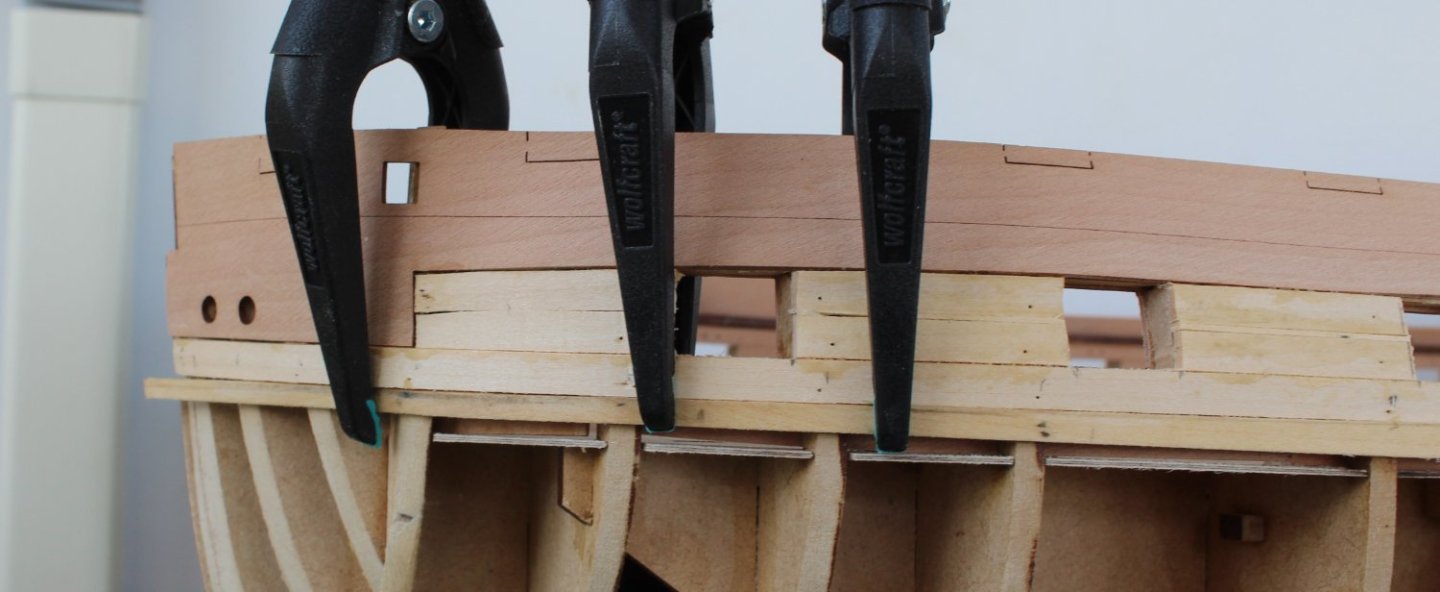
The bent plank was then clamped in position around the stern area so the plank could be trimmed to the right length at bulkhead 9. I found it beneficial to leave the plank clamped in place for a few minutes.


After one final dry fit check the plank was glued in place. I found it better to use a clamp to hold the plank in place at bulkhead 18 and then pinned the rest of the plank at each bulkhead position.
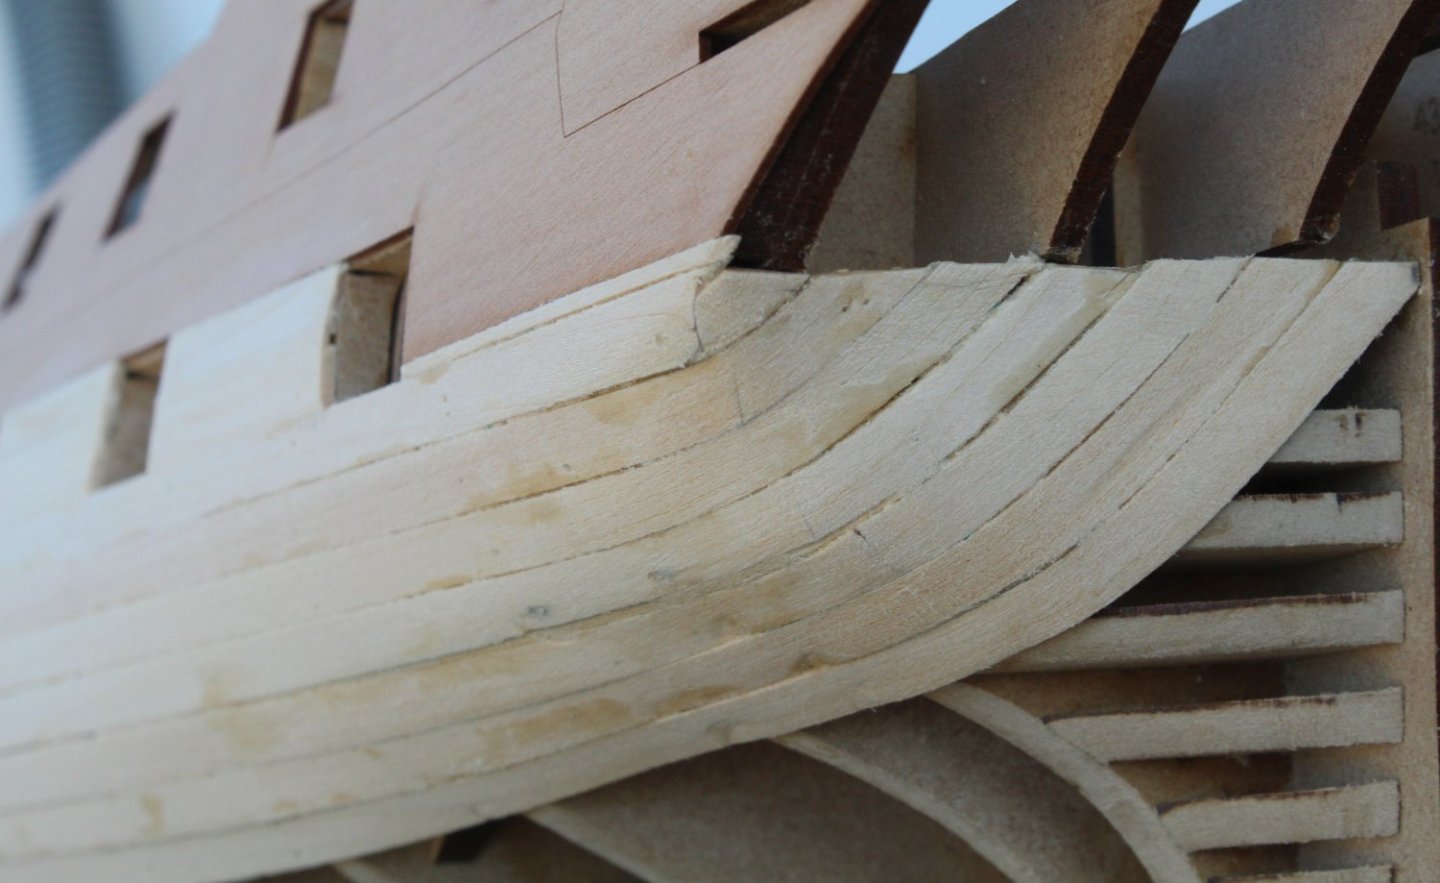
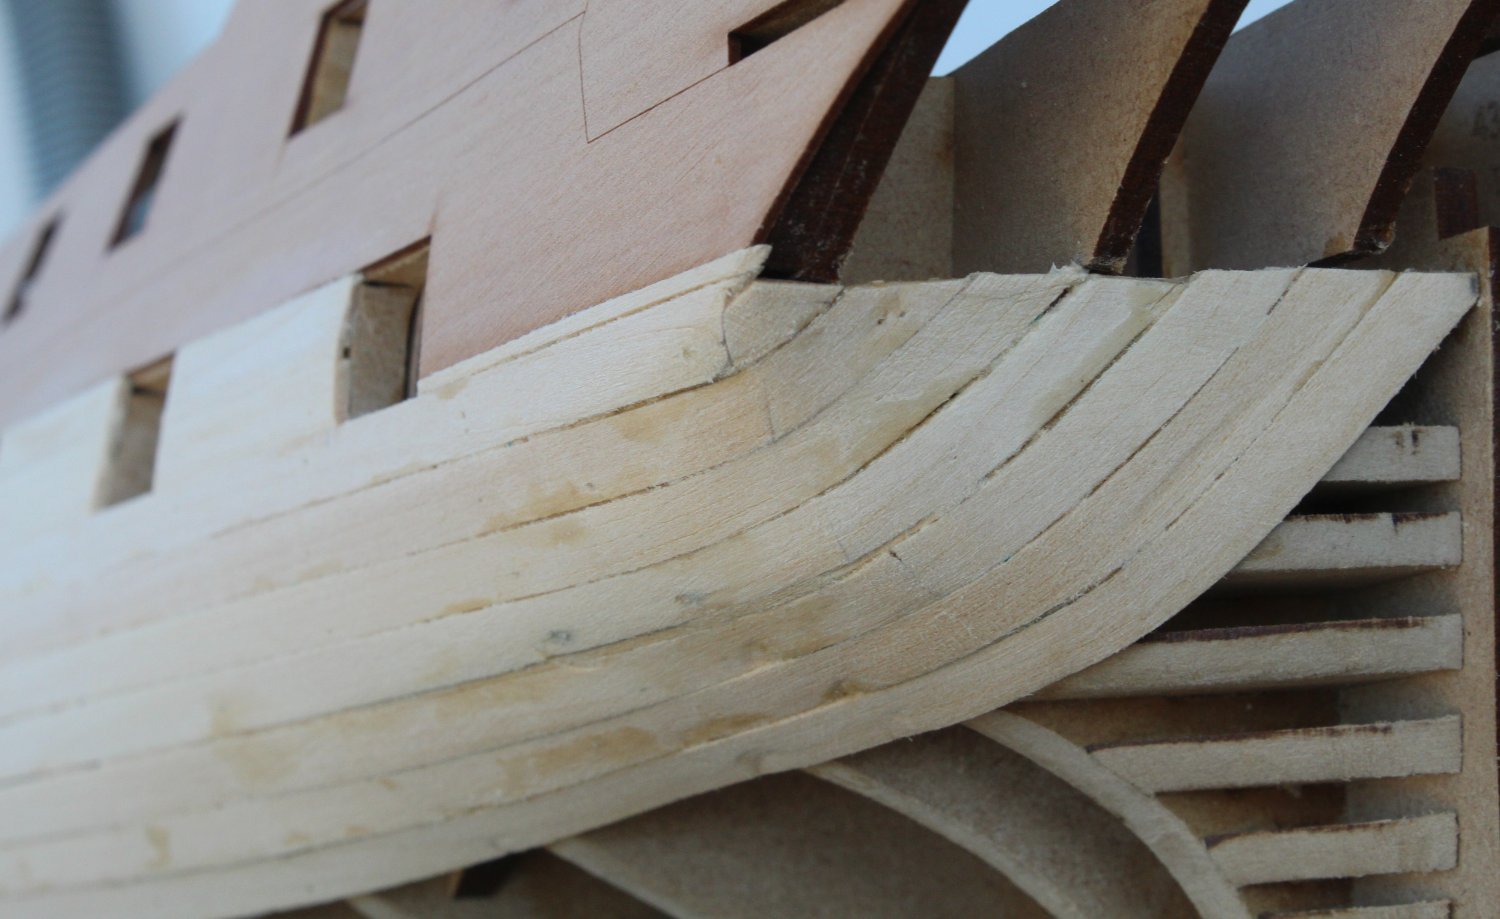
I have added 6 layers of planks. It is by no way perfect but this is my best attempt at first planking.

- Prowler901, KARAVOKIRIS, Esap and 16 others
-
16
-
3
-
1 hour ago, CaptnBirdseye said:
Glenn you can't just drop a bomb like that with no details! Hope you're going to show us all what you're upto 👍
Hello CaptnBirdseye
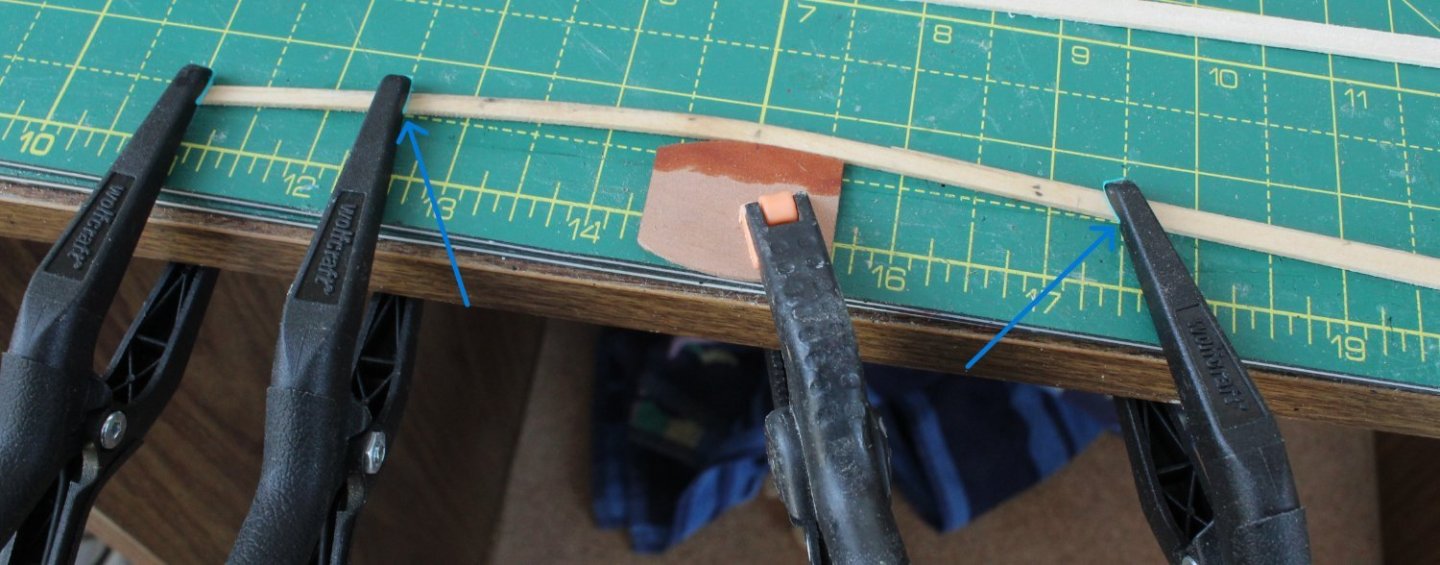
I was planning on adding more detail once I had completed the first band. I have attached a couple of photos of my double stacking method. It should be noted that the upper (outer) plank will have a slightly different bend radius. So far the method seems to be working Ok as I not aiming for perfection given this is basically a base layer which is being prepared for the final planking, which will need to be much more precise.
Photo 1 - the two planks are secured in the plank bending station. Once they have been coated with water they are left for a period of time to dry out.
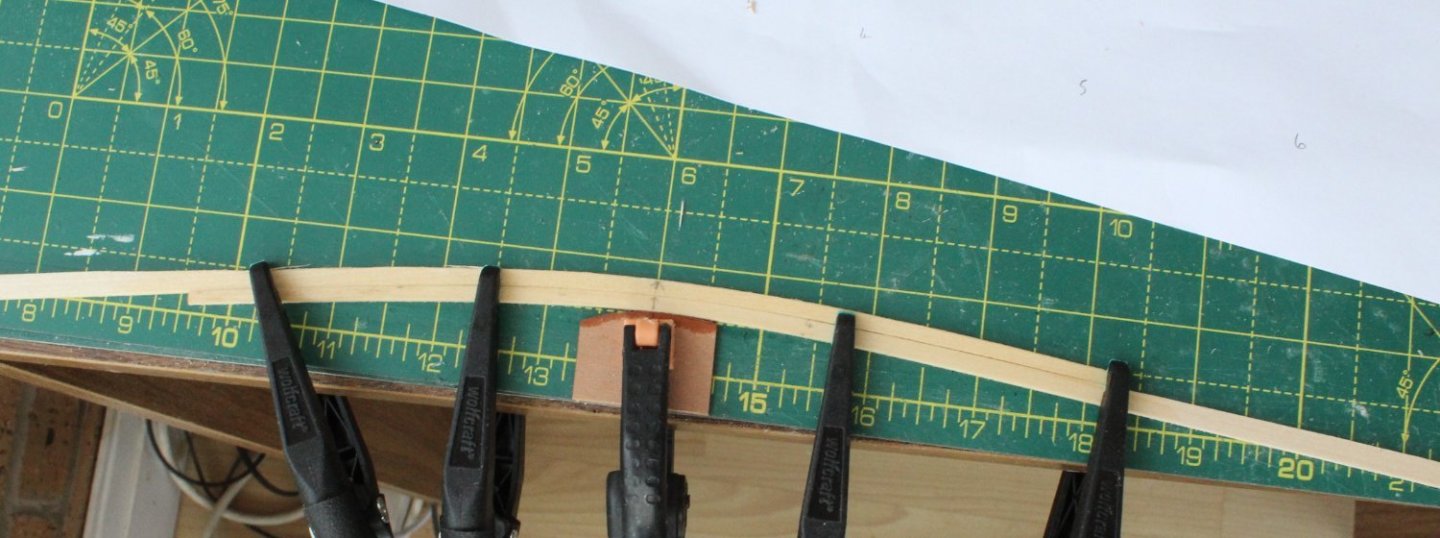
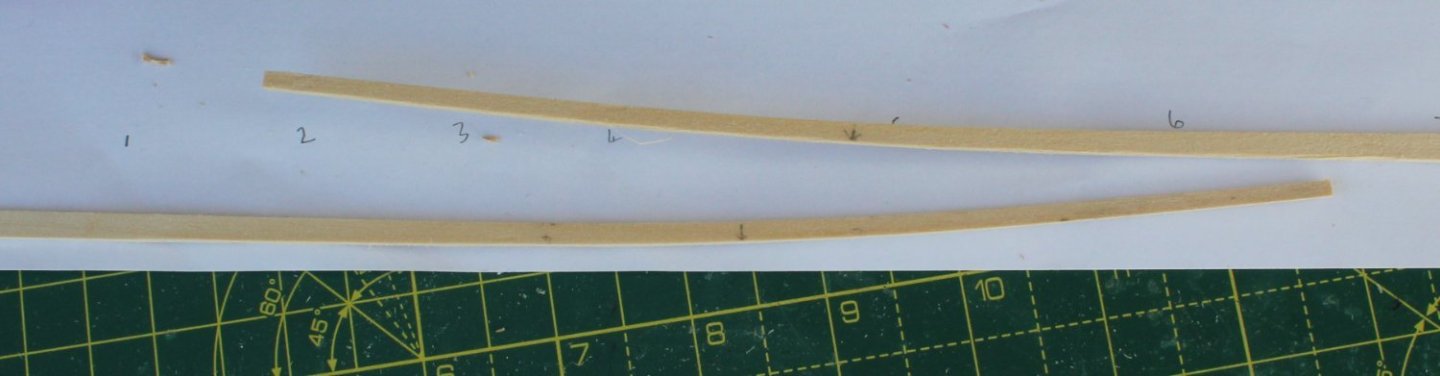
Photo 2- once the planks have been released there is a nice bend. The sheet of paper is a bulkhead template, making the marking for the tapering process a bit easier.
-
28 minutes ago, Nipper said:
Looking good!
I too used Chuck's method when planking my Sphinx. As you say, it's very time-consuming. Sometimes I only managed to fit one or two planks a day. But the time taken and careful measuring and checking meant that it was so satisfying when the plank fitted smoothly into place. So well that I soon realised that my sanding of the bulkheads left a bit to be desired. i should have spent the time and care that you did on fairing the bulkheads!
Nipper
Thanks Nipper
I am experimenting with a double plank bending station at the moment which may speed the process up a bit.
Glenn-UK
- Gus M, Oldsalt1950 and mtaylor
-
3
-
First Planking - Bow Lateral Plank Bending
The hull planking will be split in two sections. Section 1 is from the bow to bulkhead 9. Section 2 is from bulkhead 9 to the stern. This post details the method I plan to take for section 1.
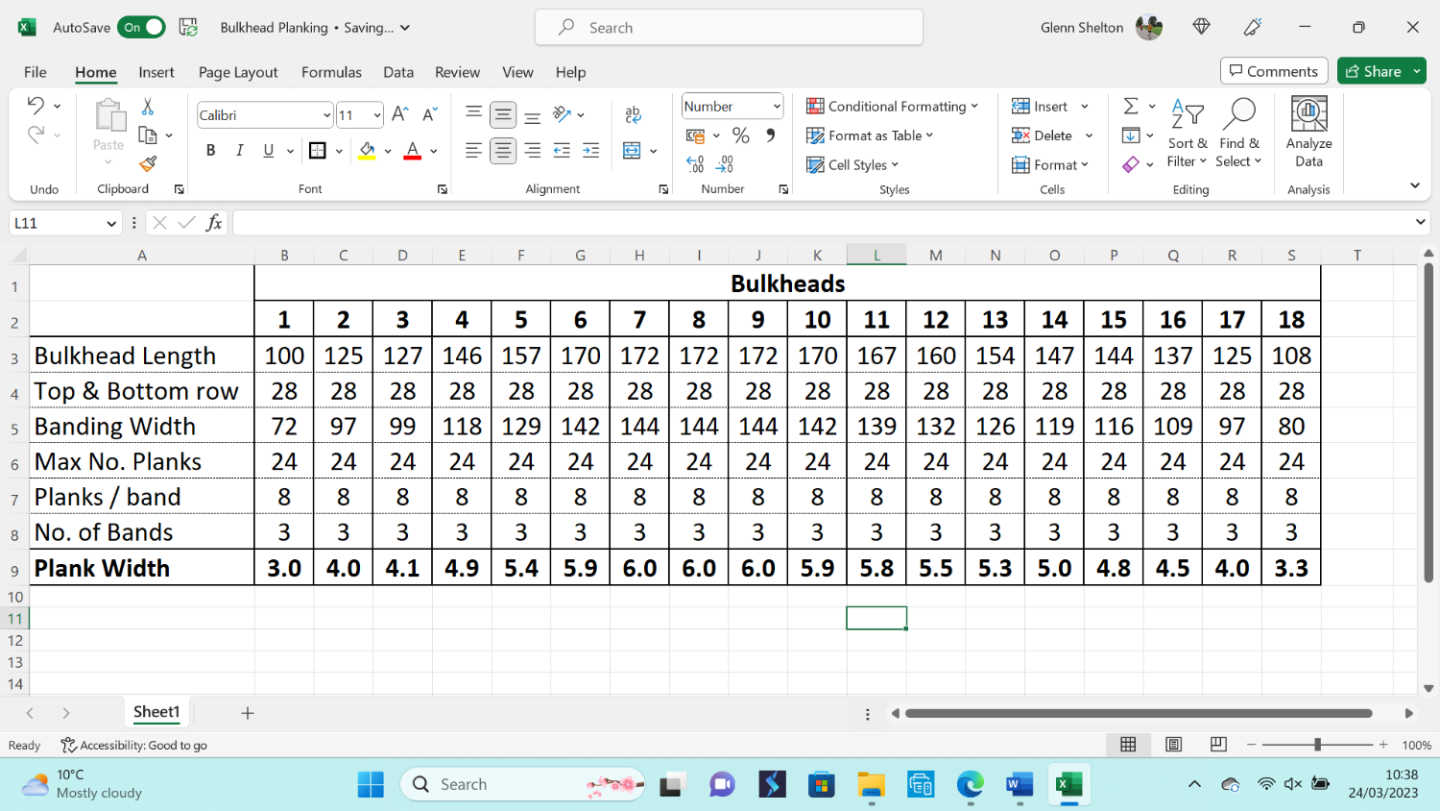
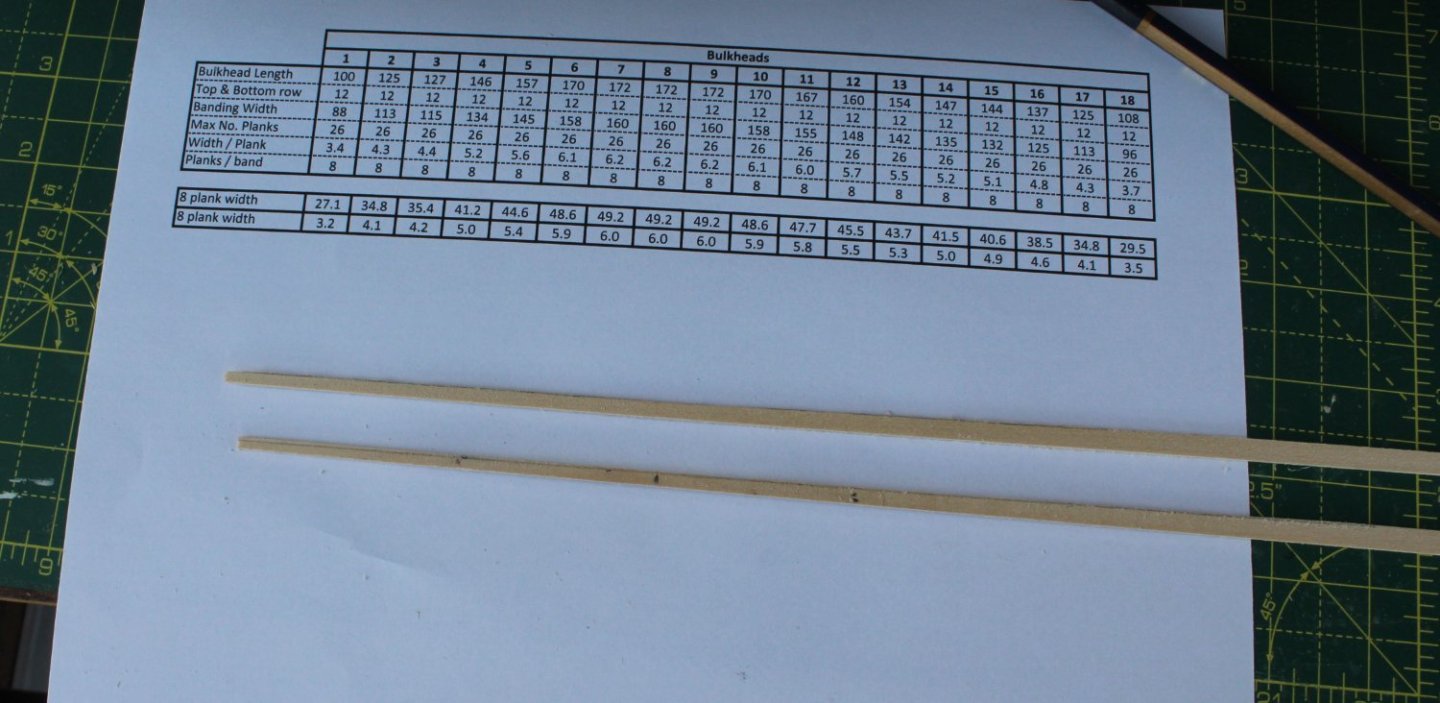
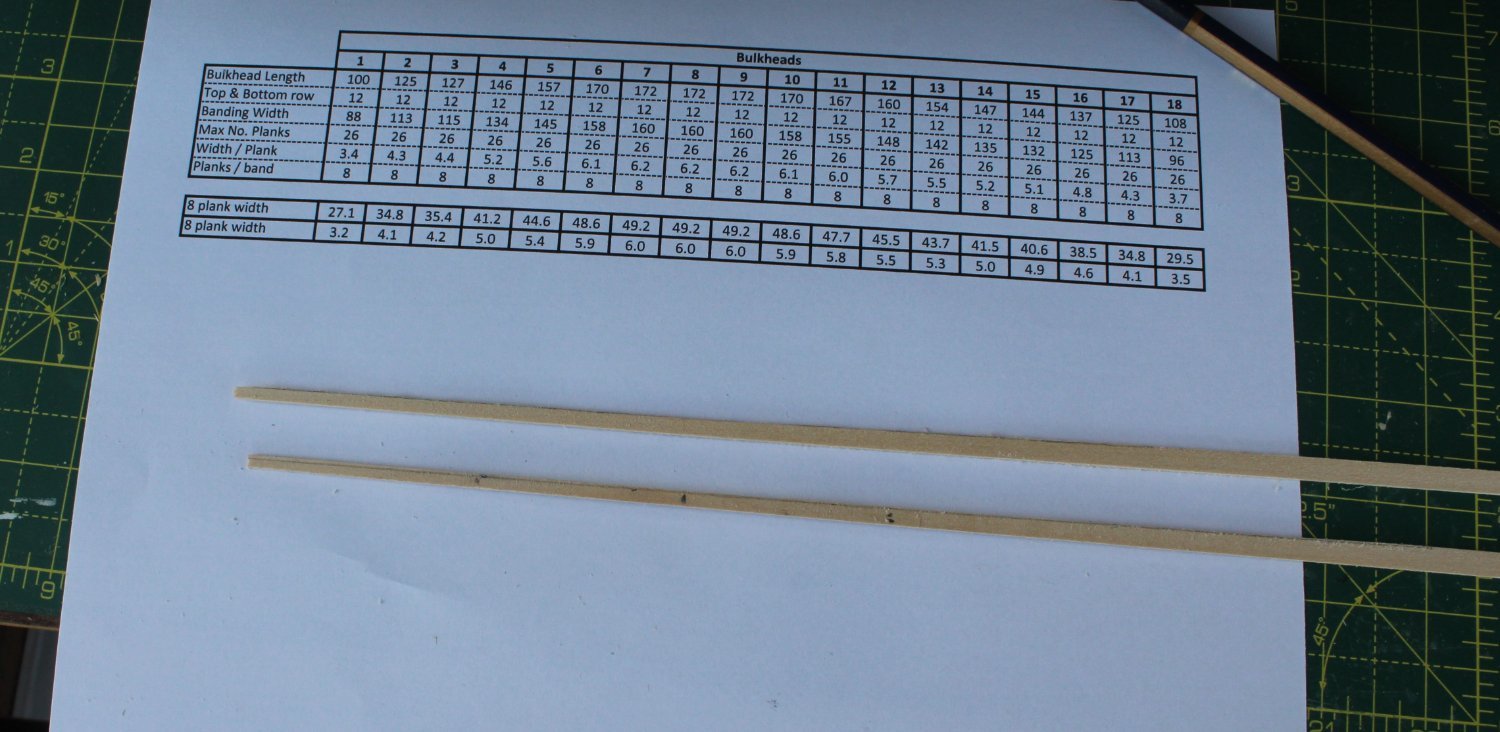
After taking some measurements of the various bulkheads I entered the data into a spreadsheet and made some calculations. I have allowed 28mm, 6mm will be from the top as the first plank has already been fitted and 22mm will be taken from the bottom. This will allow me to plank downward in 3 bands, with 8 planks fitted per band. The following picture shows my planking data calculations.
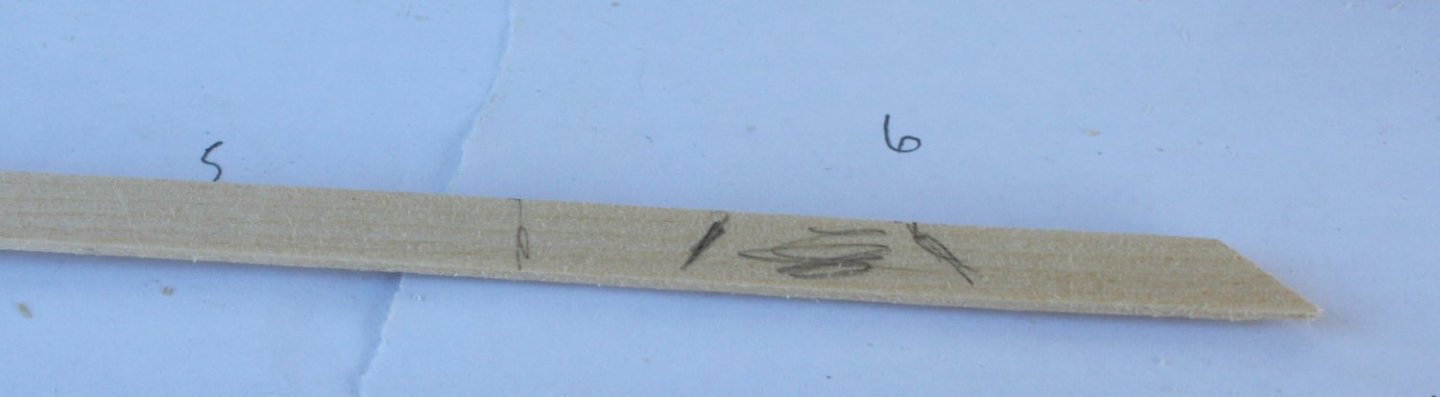
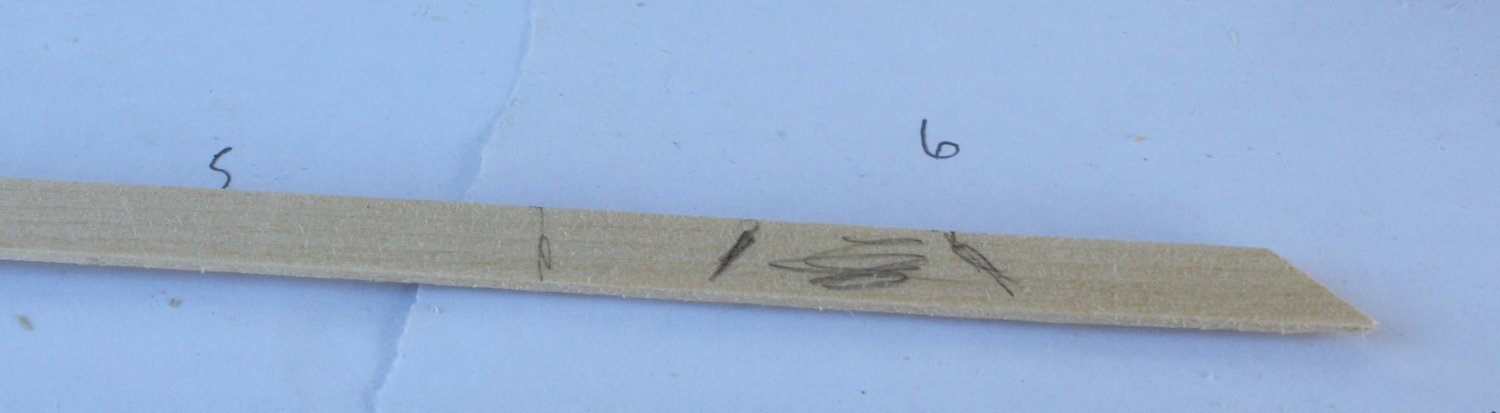
With a plank held in position around the left-hand side of the hull I marked the positions of bulkheads 1 to 9 on to the plank. I then transferred the required measurements on to the plank. I used 3mm at bulkhead 1, 4mm at bulkhead 2 and 5mm at bulkhead 4 as the main reference points. The start of the taper is halfway between bulkhead 6 and 7. With a line drawn connecting the points the plank was tapered. Using the tapered plank as a template I repeated the process for another plank which would be the right-hand side of the hull. The printout shown in the photo below was my first draft, before I updated it.
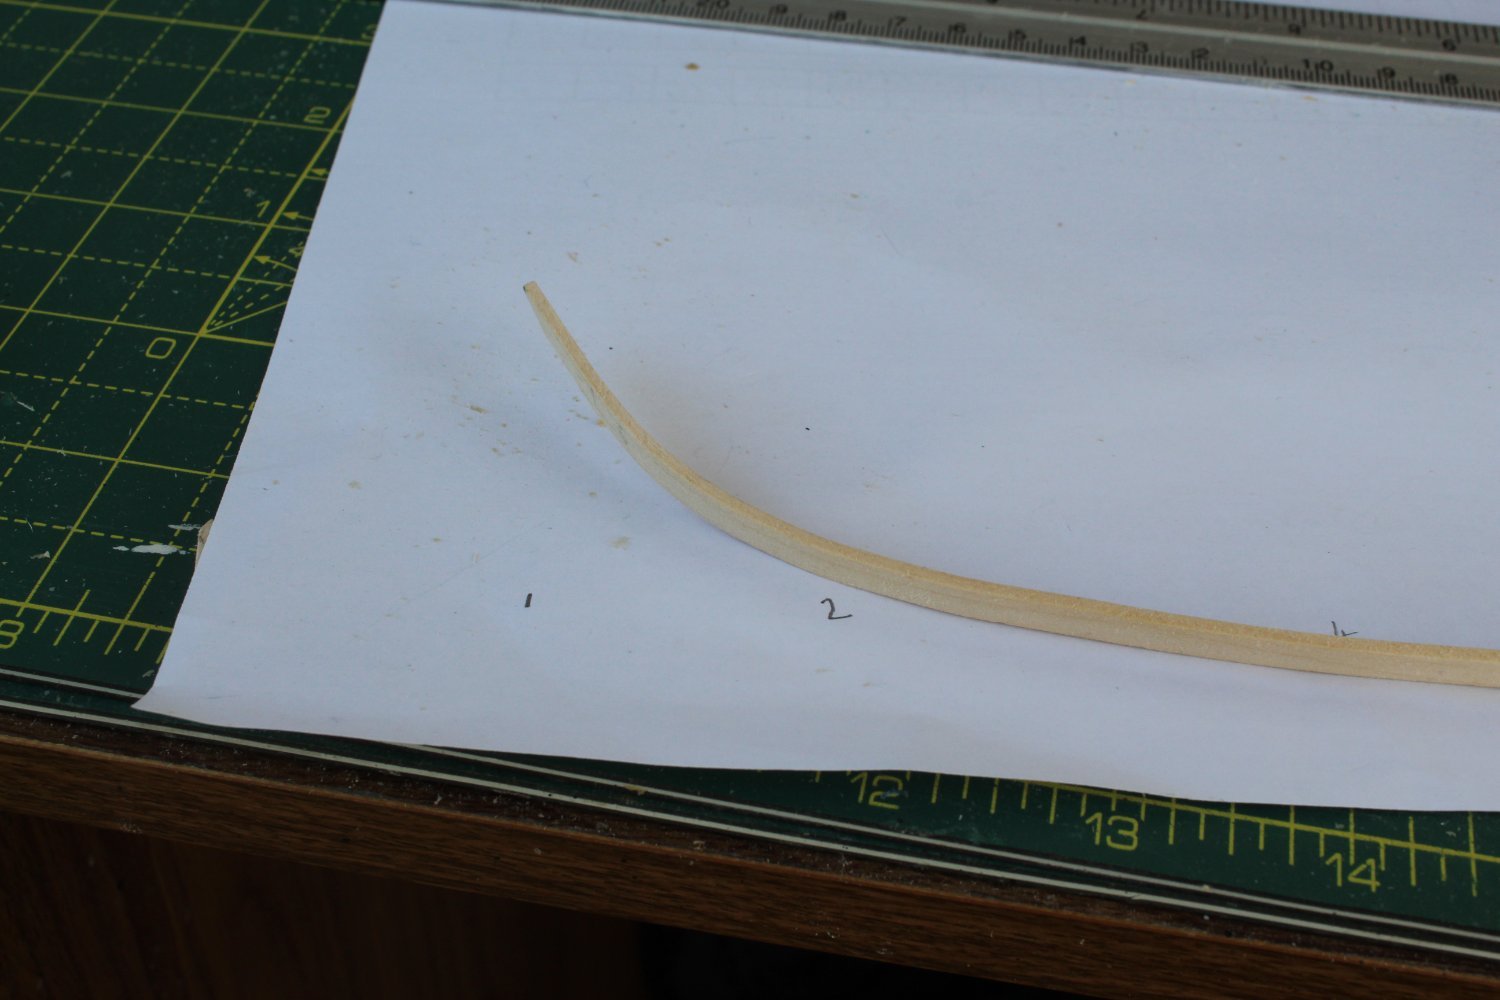
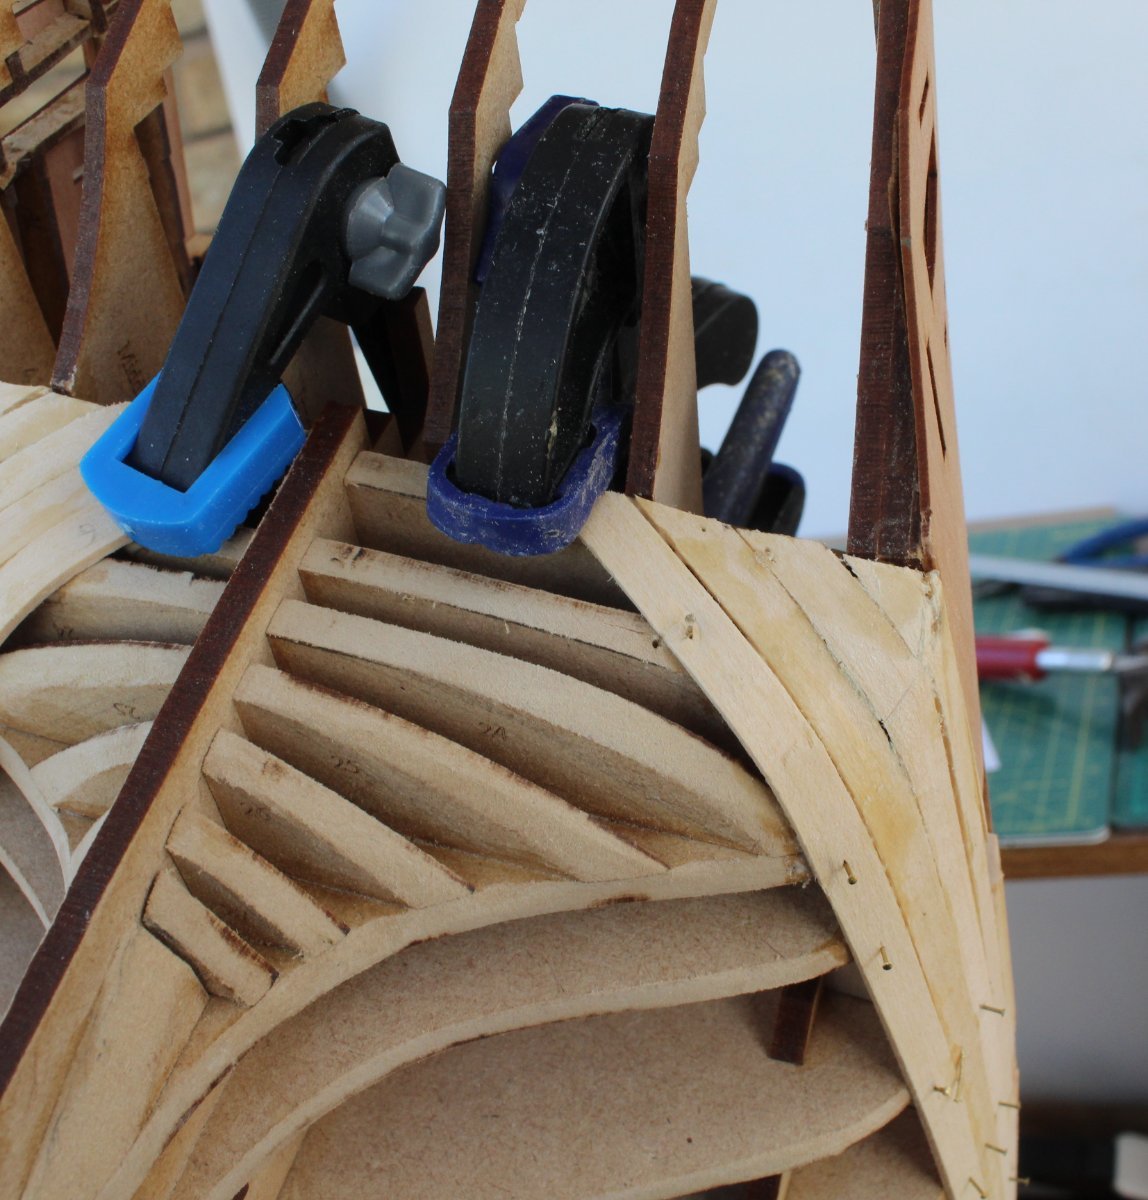
When the tapered left-side plank was offered up to the hull it looked to be a nice fit but needed a little bit of force to push up tight against the already fitted plank. The photo below shows the plank clamped in place with a natural flow. With reference to Chuck’s lateral bending method the blue arrow indicates the widest gap between the planks.
The plank was then taken to a makeshift bending station and clamped in place, with the point indicated by the blue arrow in the previous photo at the centre of the bend point. I made sure the plank had an even bend, by counting 5 divisions either side and bring the plank down to the same level as indicated by the two blue arrows.
After brushing some water on the plank heat was applied using my heated plank bending tool. When the plank was released, it had held the lateral bend. When the plank was then offered up to the hull it followed the upper plank much better and without the need to apply any force.
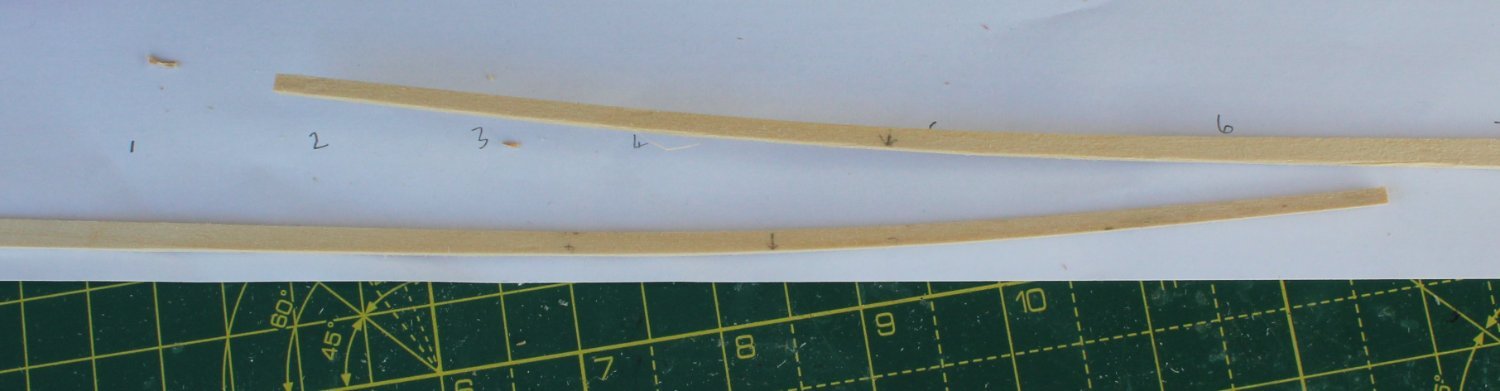
This seems to be the way to go forward, noting it is going to take quite a bit of time to plank the hull using this method. I am unsure if I will taper the planks between bulkheads 9 and 18 and will probably make tapered test plank before deciding.
-
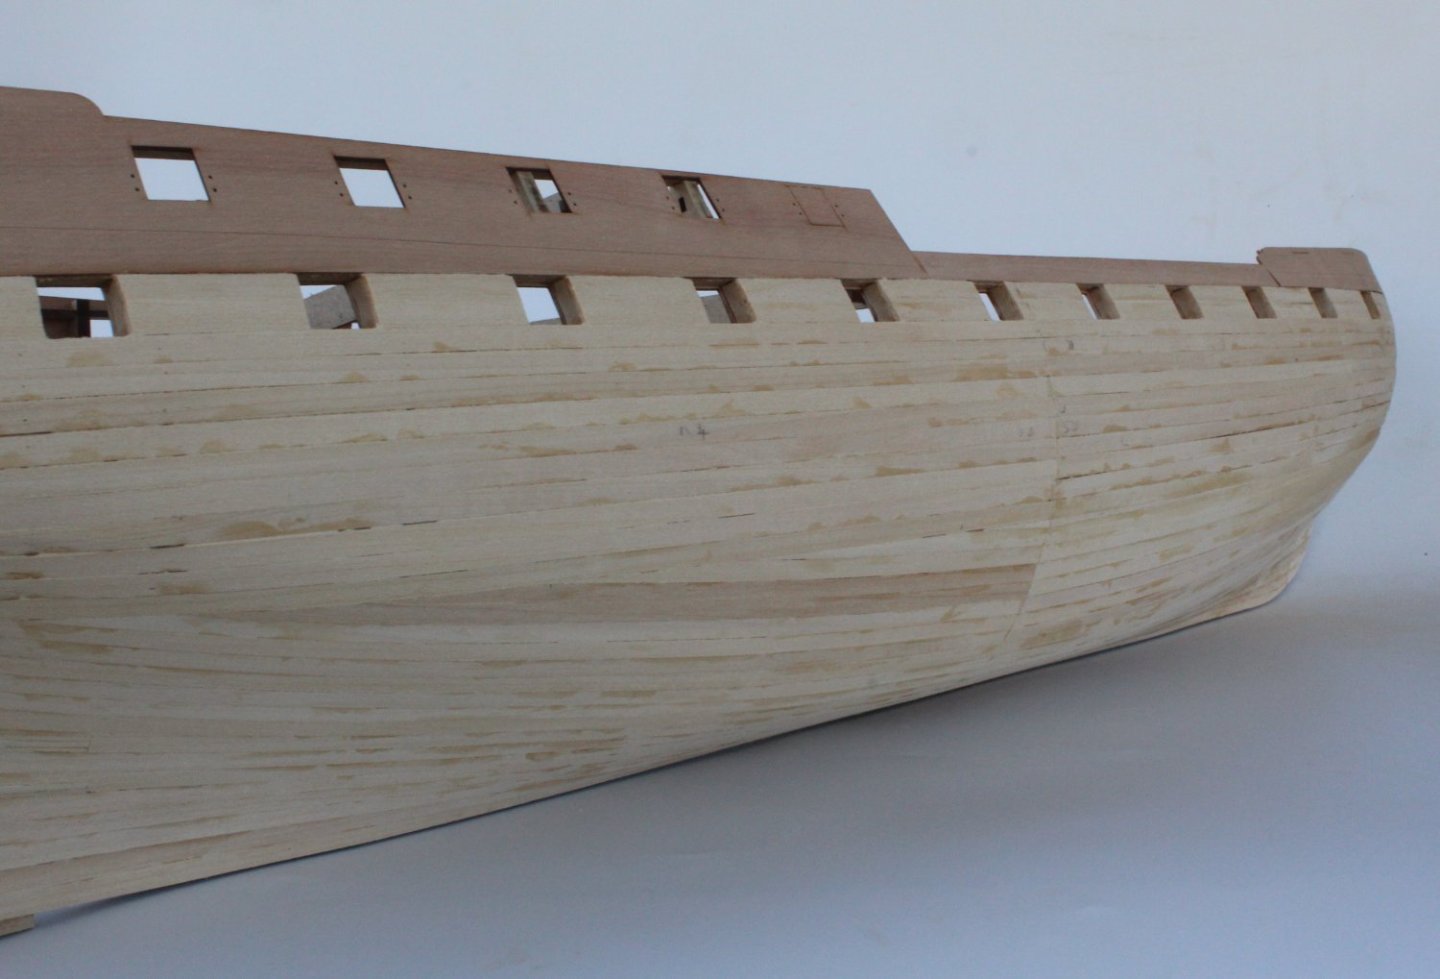
First Planking -Stage 1 The Upper Section
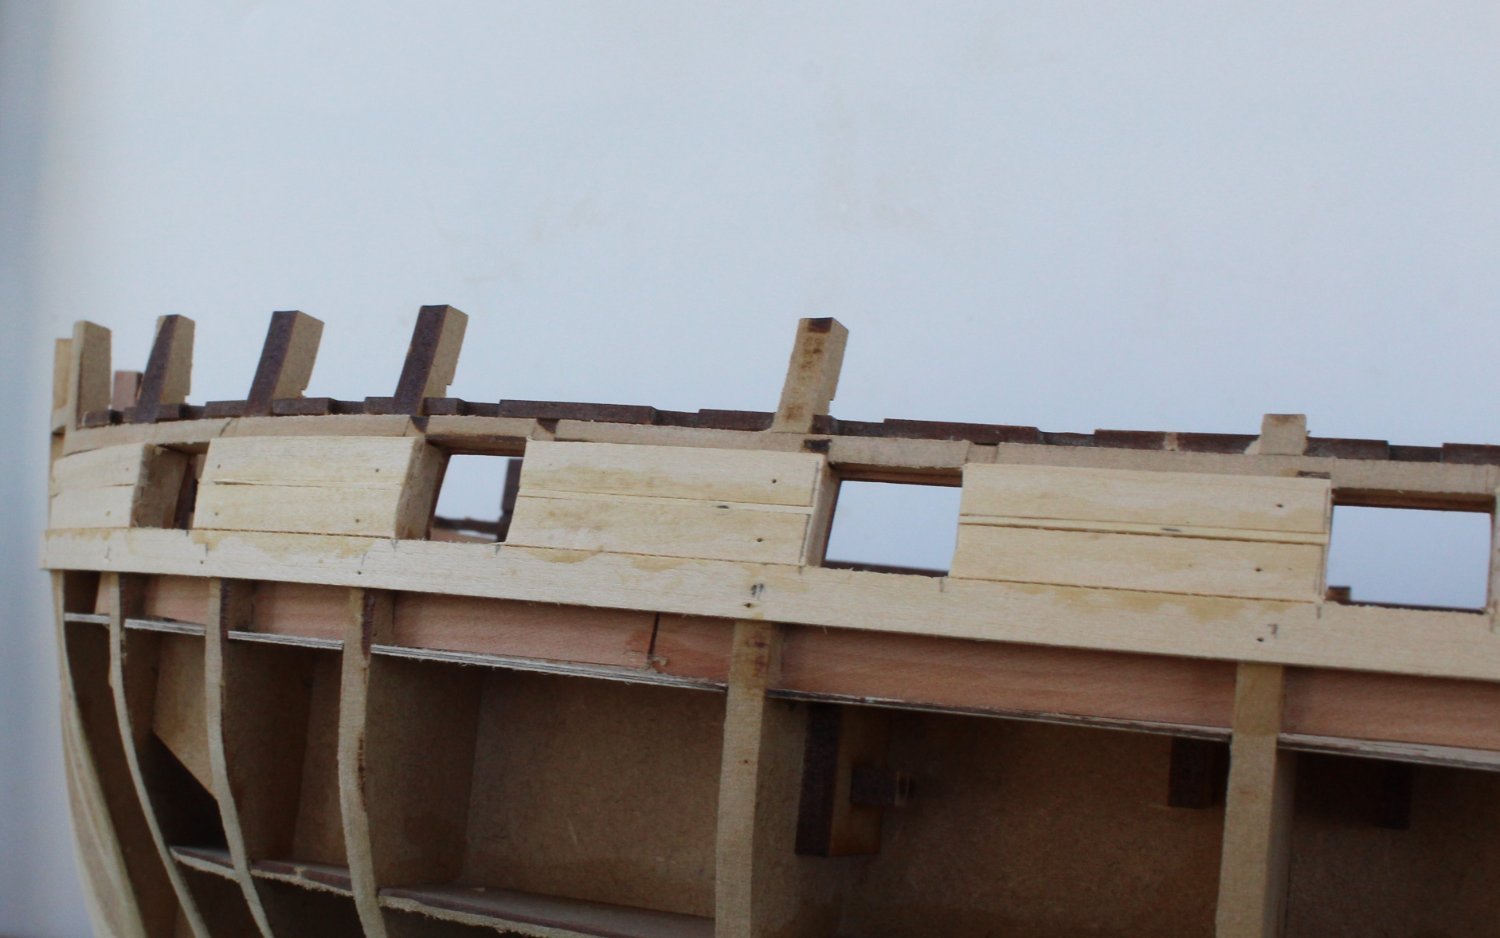
With both forecastle bulwark patterns clamped in place I carefully drew the lines where the lower plank will fit.


With the first plank held in place I marked the 9th bulkhead position, where the plank will be split, as indicated by the blue arrow in the ensuring photo.
Although the planks were flexible and could be glued and pinned around the bow section without any pre-bending I did opt to bend the plank using my crimp plank bending tool. With the bent plank clamped in place it was a great looking fit.
The first planks (both left and right sides) were then glued and pinned in place.


Somehow I loaded two pins in my pin pusher tool on one occasion.
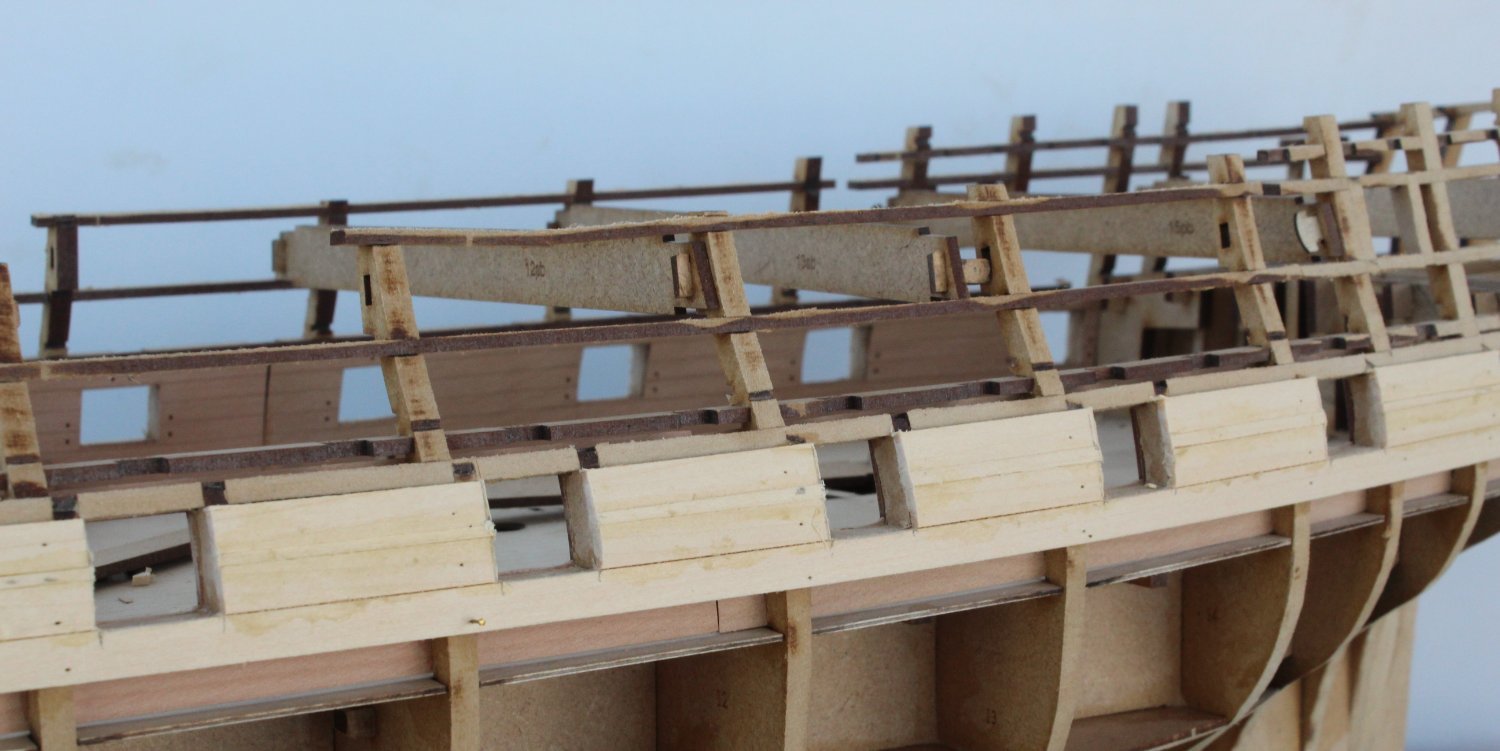
The outer bulwark patterns were then clamped in place in order to plank the area between the gun ports.

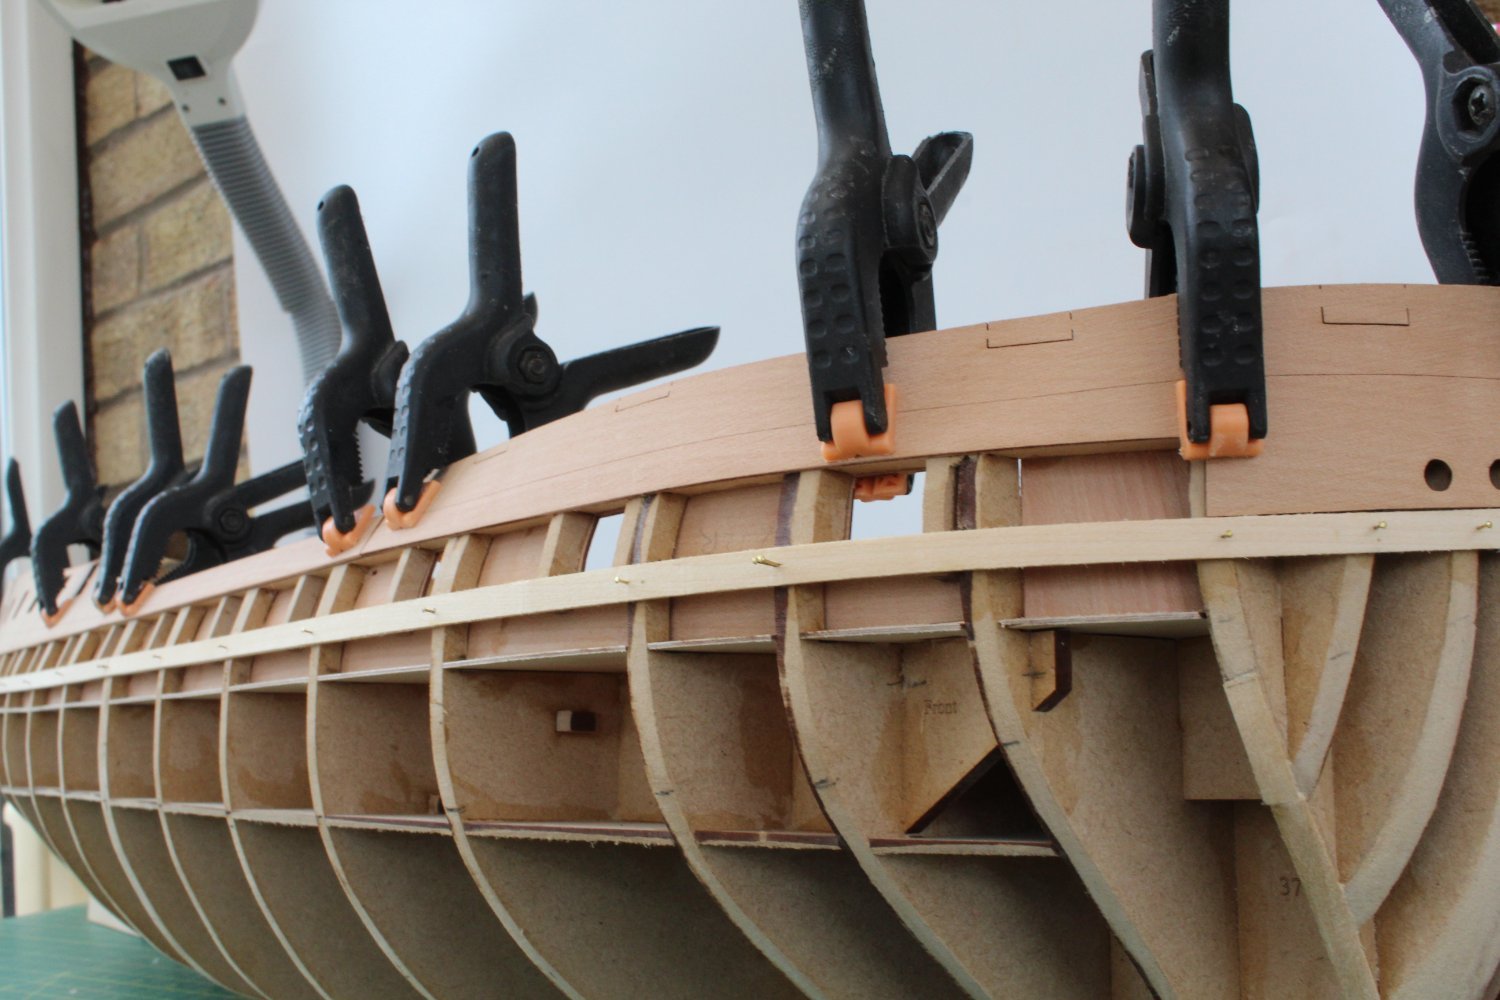
It was then a simple task to plank upward and to clear the gunport openings.


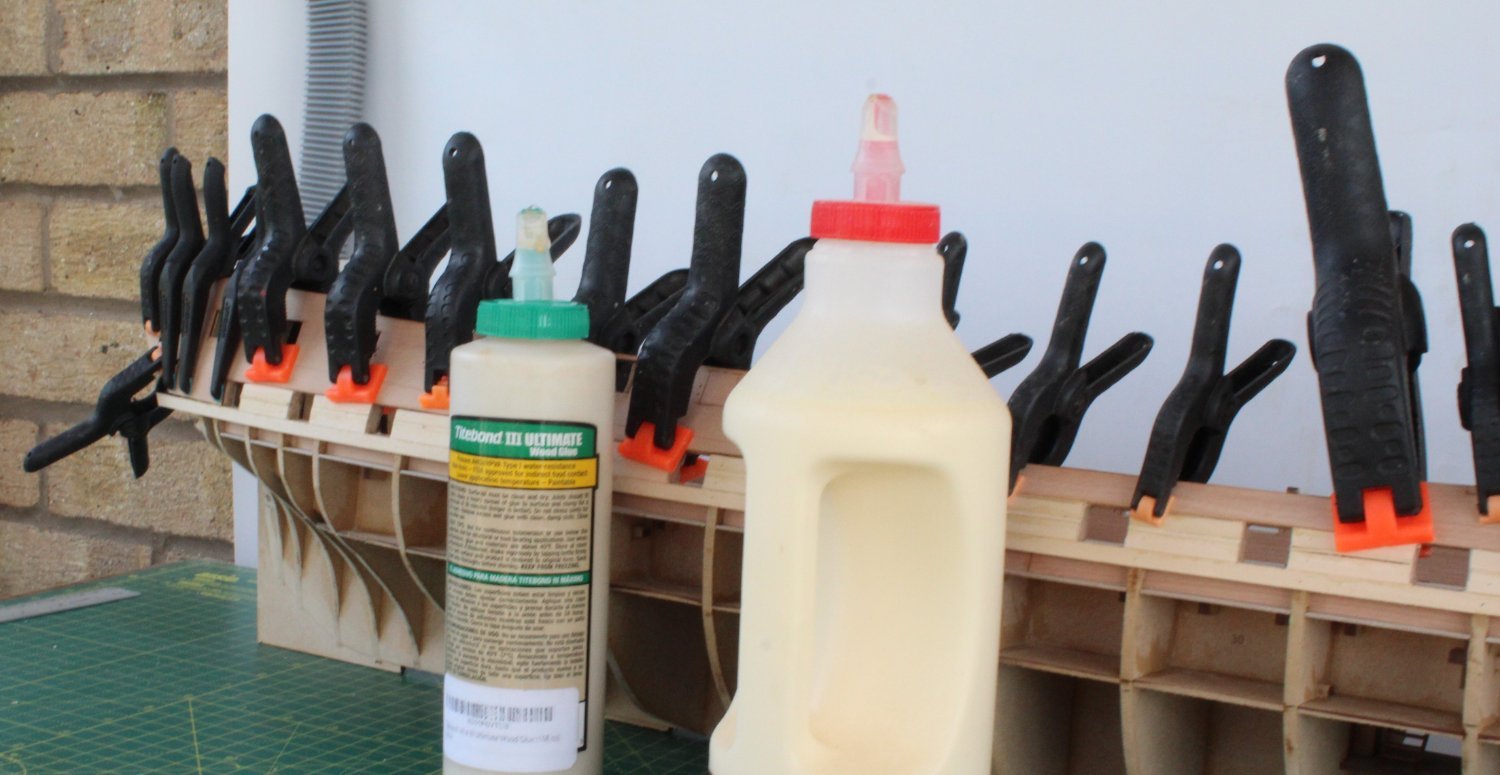
The next task is to glue the outer bulwark patterns in place. You can never have to many clamps. I used the glue bottles to keep the hull upright while the clamps were in place.
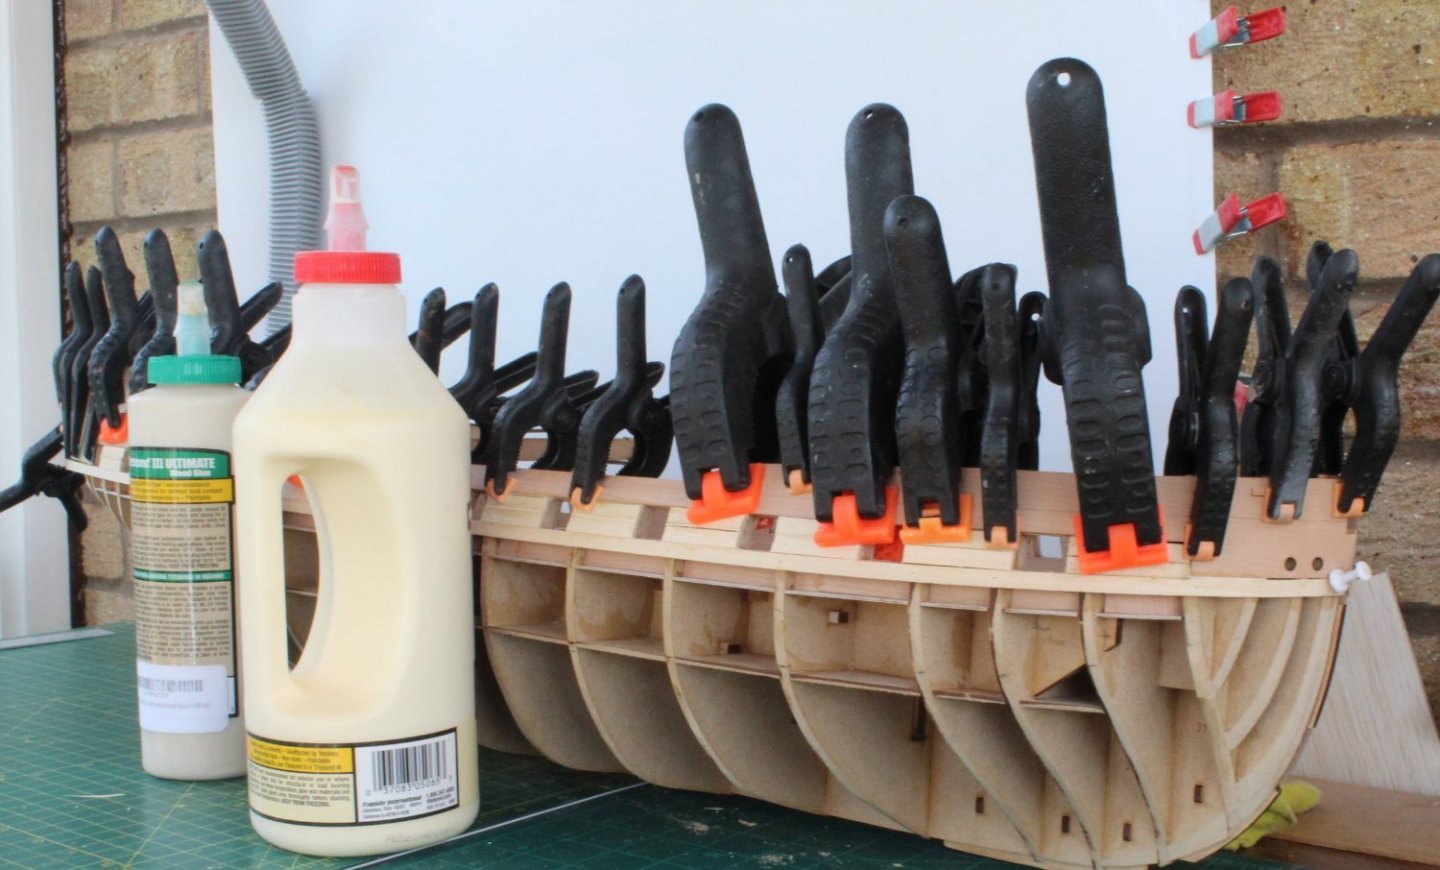

Tomorrow my wife and I are looking after our youngest grandson, so my shipyard time will be limited to about an hour during his afternoon nap time.

- ECK, hollowneck, Rik Thistle and 17 others
-
20
-
Well done on completing this milestone, the planking looks good. On your second photo did you add a stealer at the bottom of the garboard plank?
When I was looking at the garboard plank requirements I thought it would be benifical to add one at the bow end.
Goog news with the vet visit


HMS Indefatigable 1794 by Glenn-UK - Vanguard Models - 1:64
in - Kit build logs for subjects built from 1751 - 1800
Posted
Many thanks James