MrBlueJacket
-
Posts
1,314 -
Joined
-
Last visited
Content Type
Profiles
Forums
Gallery
Events
Everything posted by MrBlueJacket
-
 So we go to the next pair of deadeyes. Now the task is to make sure all the upper deadeyes are at the same level, which should be parallel to the waterline, not the deck.
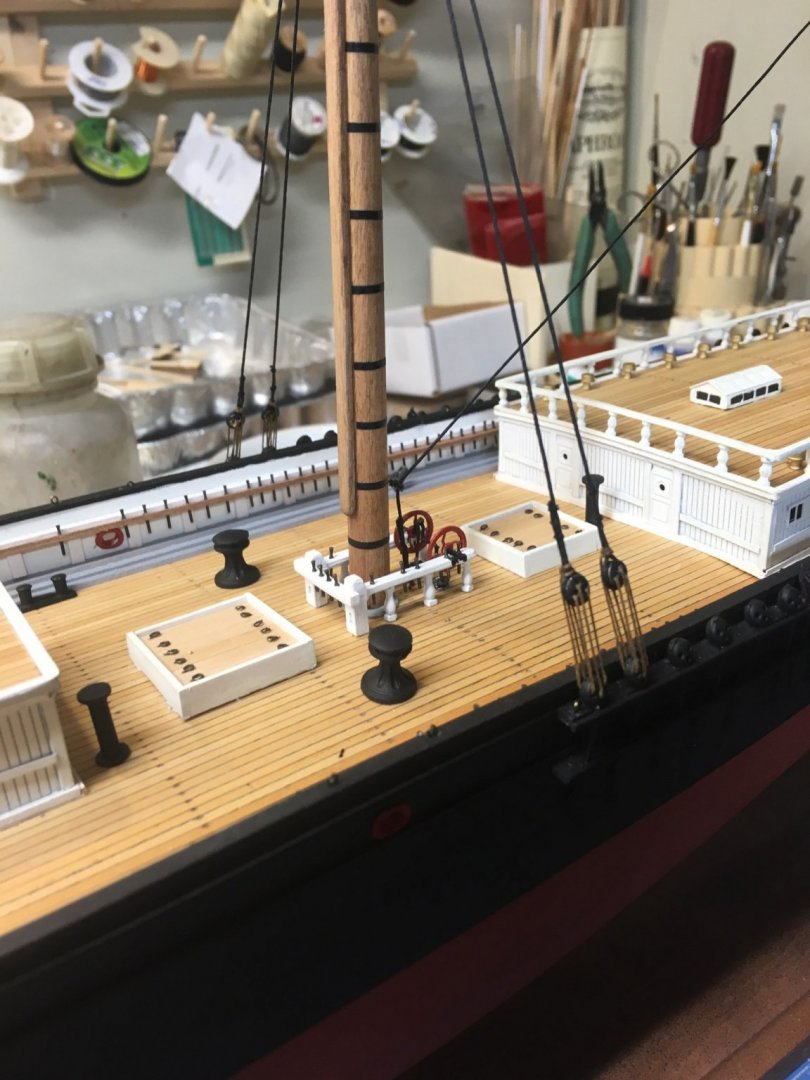
- 356 replies
-
- 11
-

-
- red jacket
- finished
- (and 1 more)
-
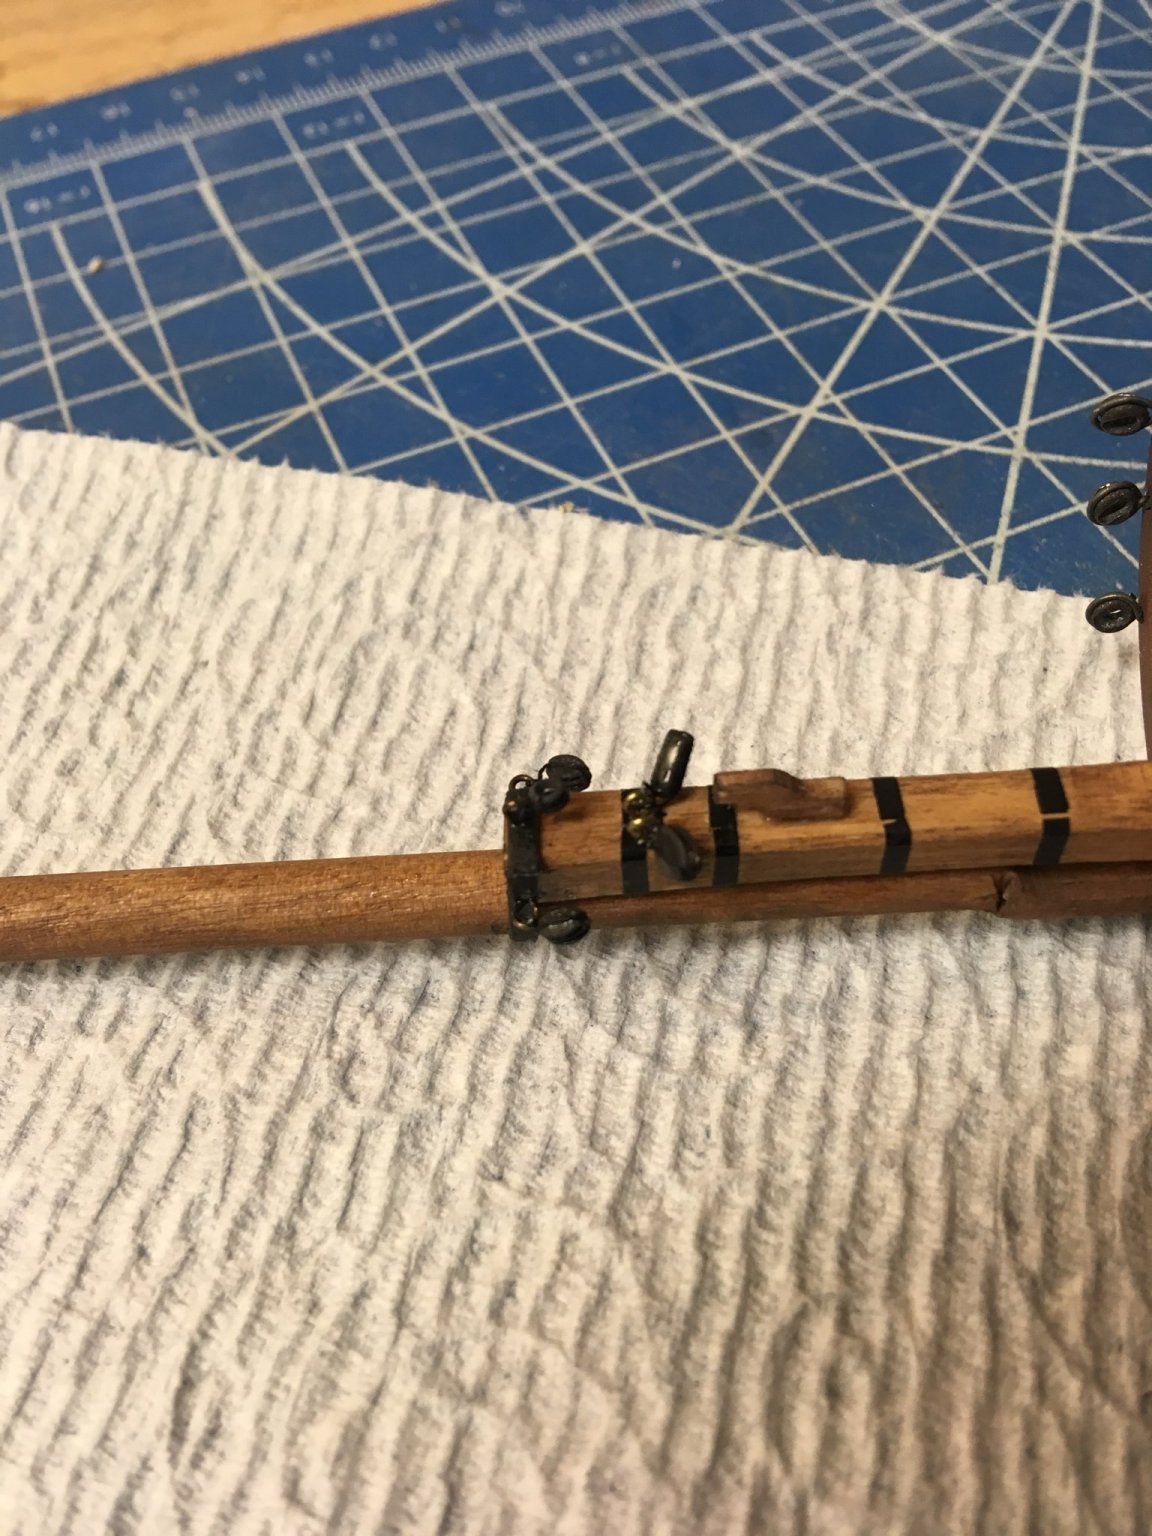
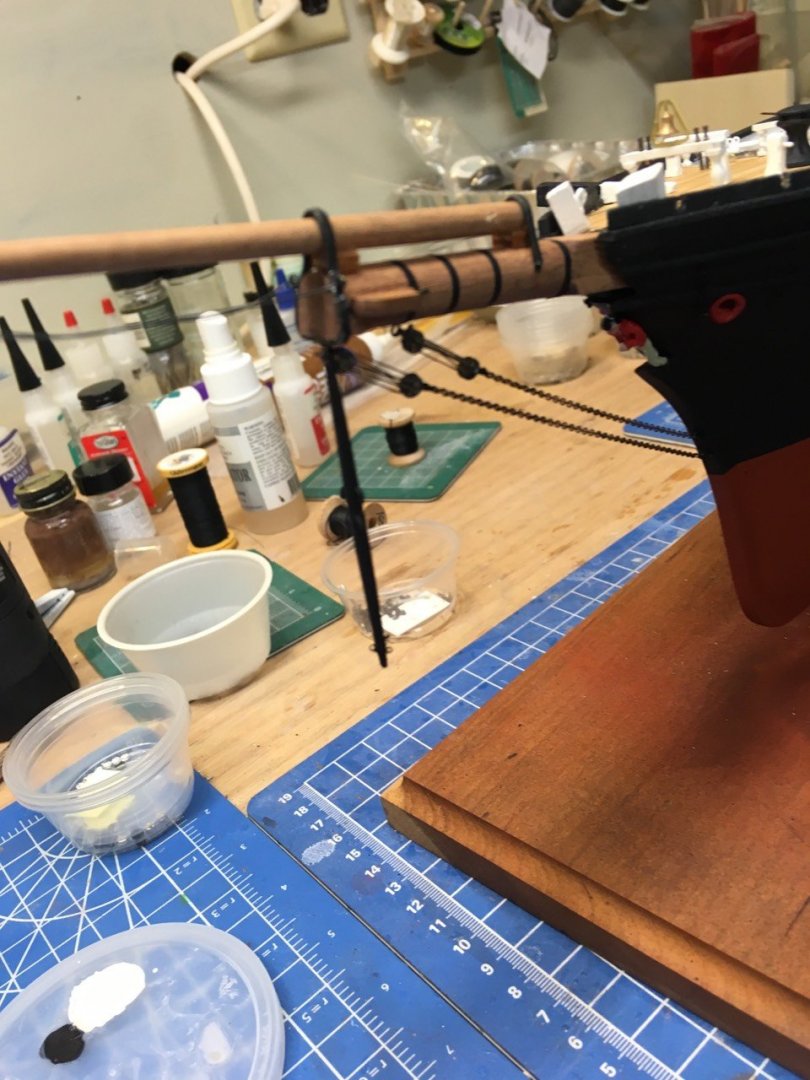
And so we begin the lower shrouds.The first shroud on each side, like the bowsprit, is critical to the alignment of the masts.Unless they are correct, the problems will mount later on. BTW, the masts are not glued in, they are held just by the rigging, like full-size practice. The lanyards on both sides are loose, then tightened up and adjusted to make the mast square before tying off.


- 356 replies
-
- 10
-
-
- red jacket
- finished
- (and 1 more)
-
Gift for 50th B Day
MrBlueJacket replied to ChrisLBren's topic in Modeling tools and Workshop Equipment
battery powered Dremel tool -
To avoid problems, we have to think ahead about what needs to go where before the other stuff gets in the way. For example, attaching the Mizzen stay would be nearly impossible after the main shrouds are installed.
- 356 replies
-
- 12
-
-
- red jacket
- finished
- (and 1 more)
-
Now starts the stepping of the masts. Here's the Mainmast being set up at the proper rake angle, as determined by the template provided in the kit.
- 356 replies
-
- 9
-
-
- red jacket
- finished
- (and 1 more)
-
Lead fittings are subject to corrosion (lead bloom) and decay, eventually turning to white powder. If they are perfectly sealed with paint, that doesn't become a problem for several decades. However, I suggest you replace them with Britannia metal fittings (lead-free pewter) - you can find probably everything you need from the fittings section of our website.
-
Mike, Since you are doing a build thread on the Notman, when it is done you will be getting 10% off your next kit you get from us. FOr the Red Jacket, that means a $63 savings. Nic
- 356 replies
-
- 2
-
-
- red jacket
- finished
- (and 1 more)
-
And this is the "money shot" - making sure everything is square and straight. Especially the martingale, it is balanced on both sides, and I had to play with the lanyards to get the tension just right.
- 356 replies
-
- 18
-
-
- red jacket
- finished
- (and 1 more)
-
This past weekend I was able to attach all 8 chainstays.

- 356 replies
-
- 11
-
-
- red jacket
- finished
- (and 1 more)
-
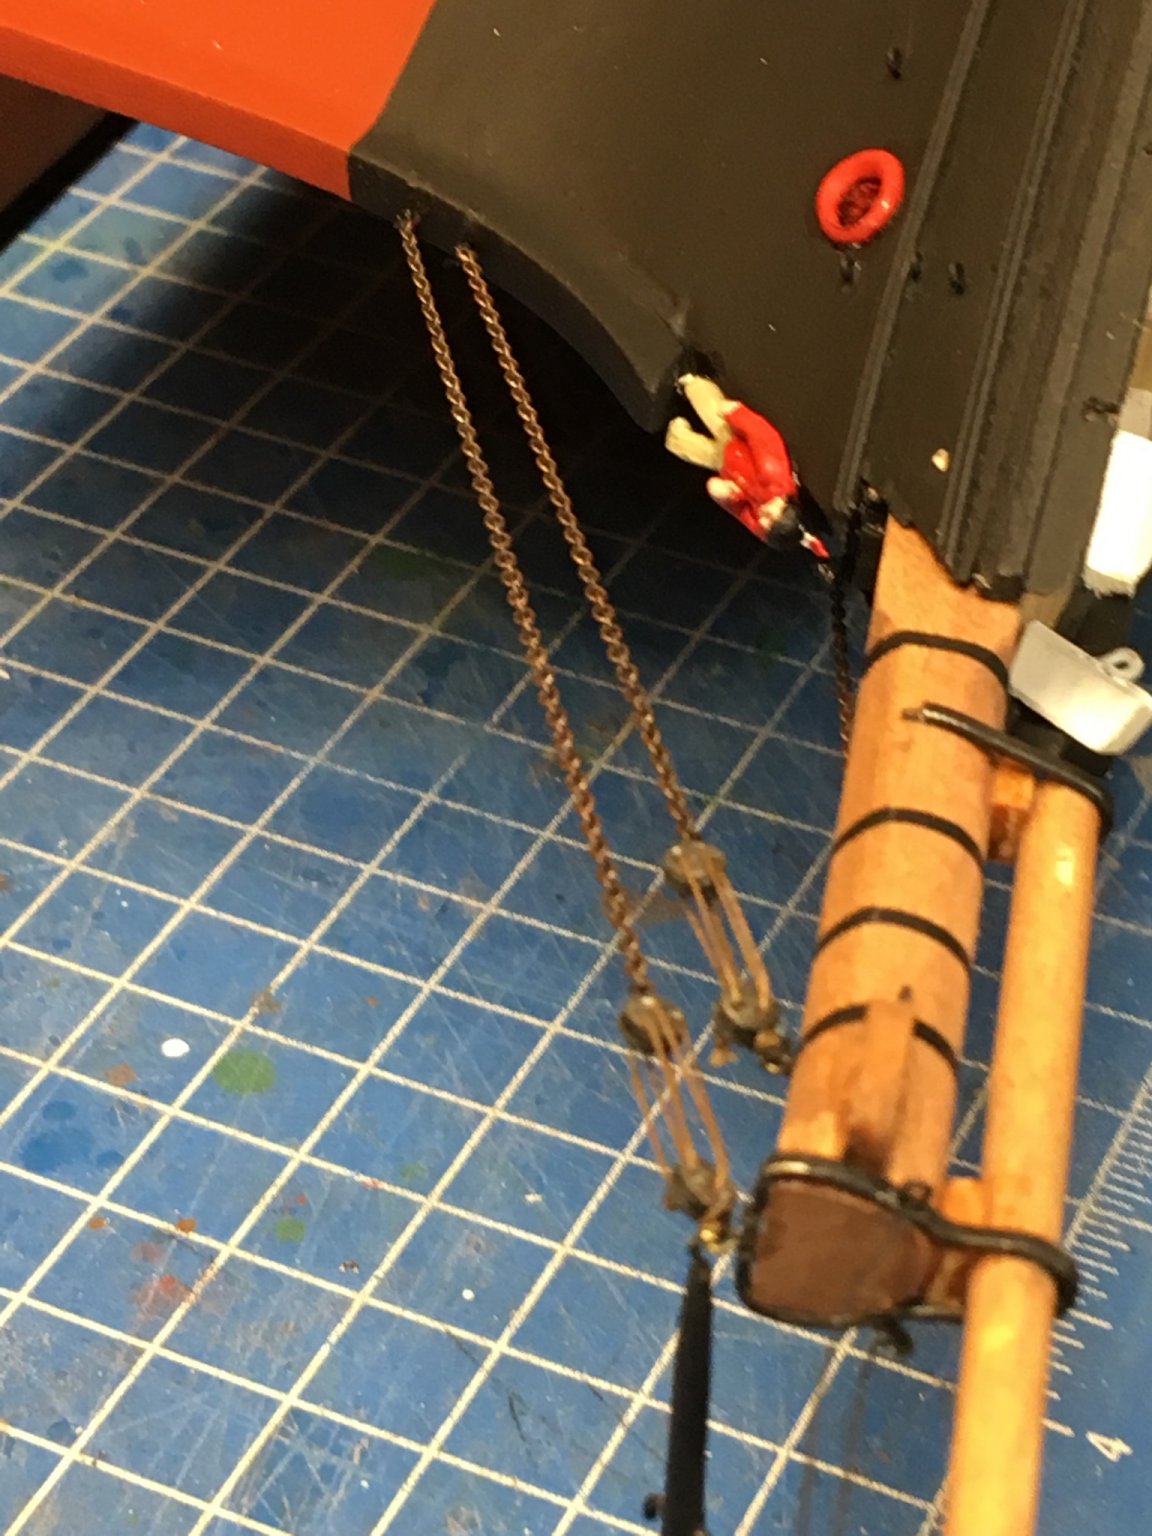
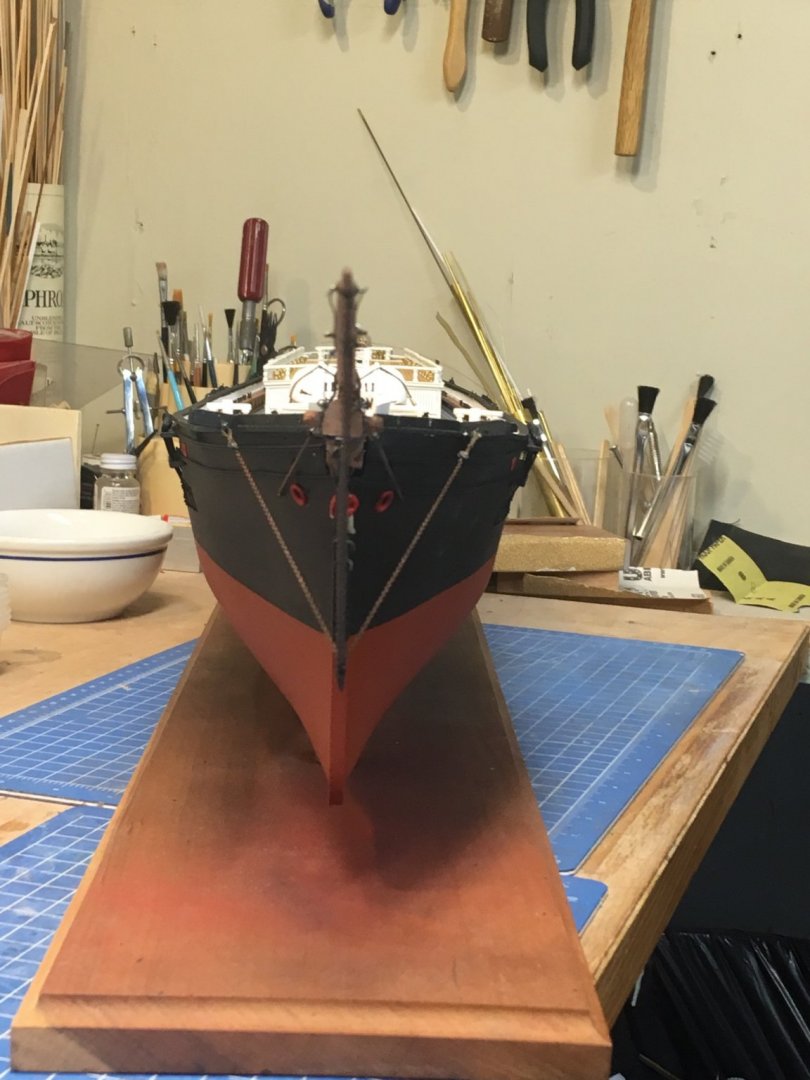
I also noticed that the bobstays were a bit loose, so I tightened the lanyards up.

- 356 replies
-
- 14
-
-
- red jacket
- finished
- (and 1 more)
-
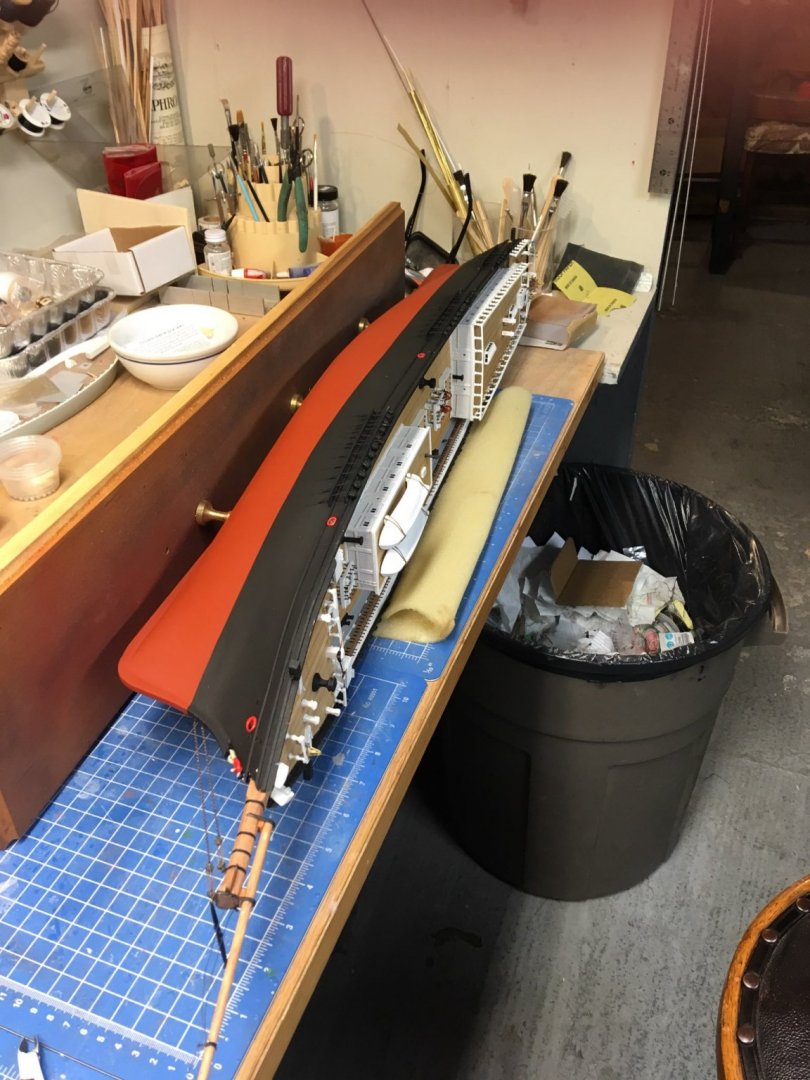
To make it easier to work on, I lay the ship on its side, with a foam rubber sheet under it for protection.
- 356 replies
-
- 9
-
-
- red jacket
- finished
- (and 1 more)
-
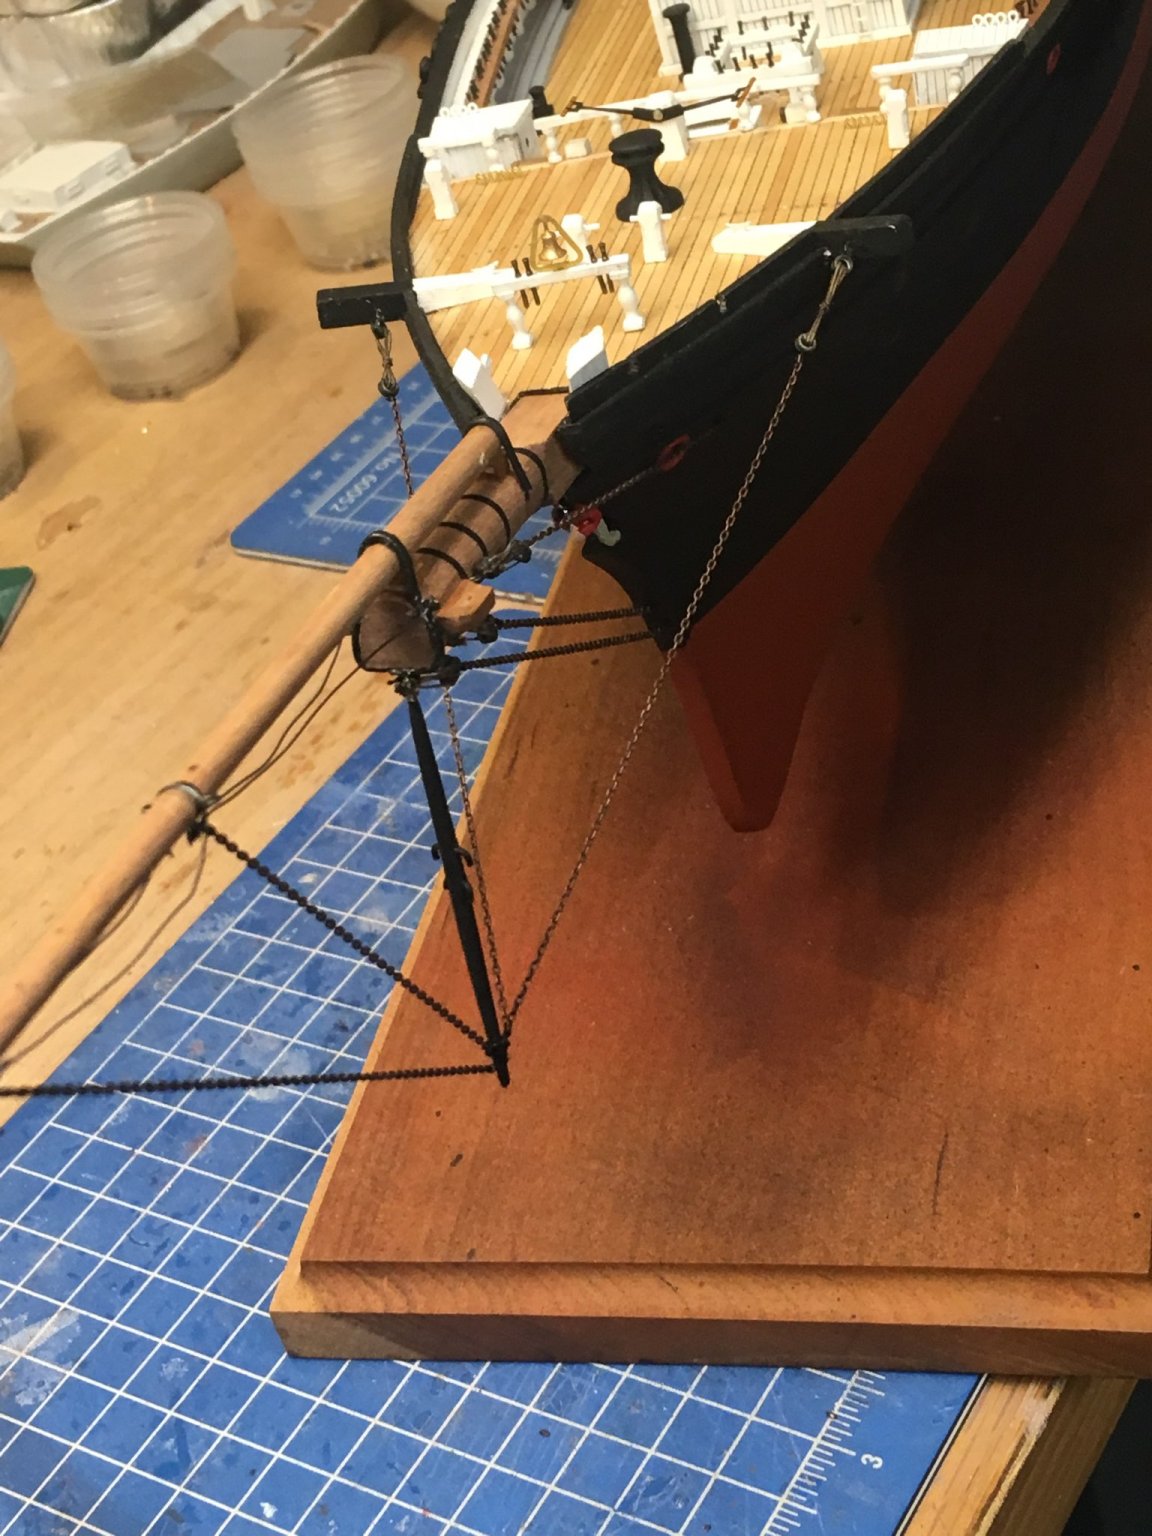
And there's a half-dozen chain stays to install. Here's the 2 bobstays.
- 356 replies
-
- 8
-
-
- red jacket
- finished
- (and 1 more)
-
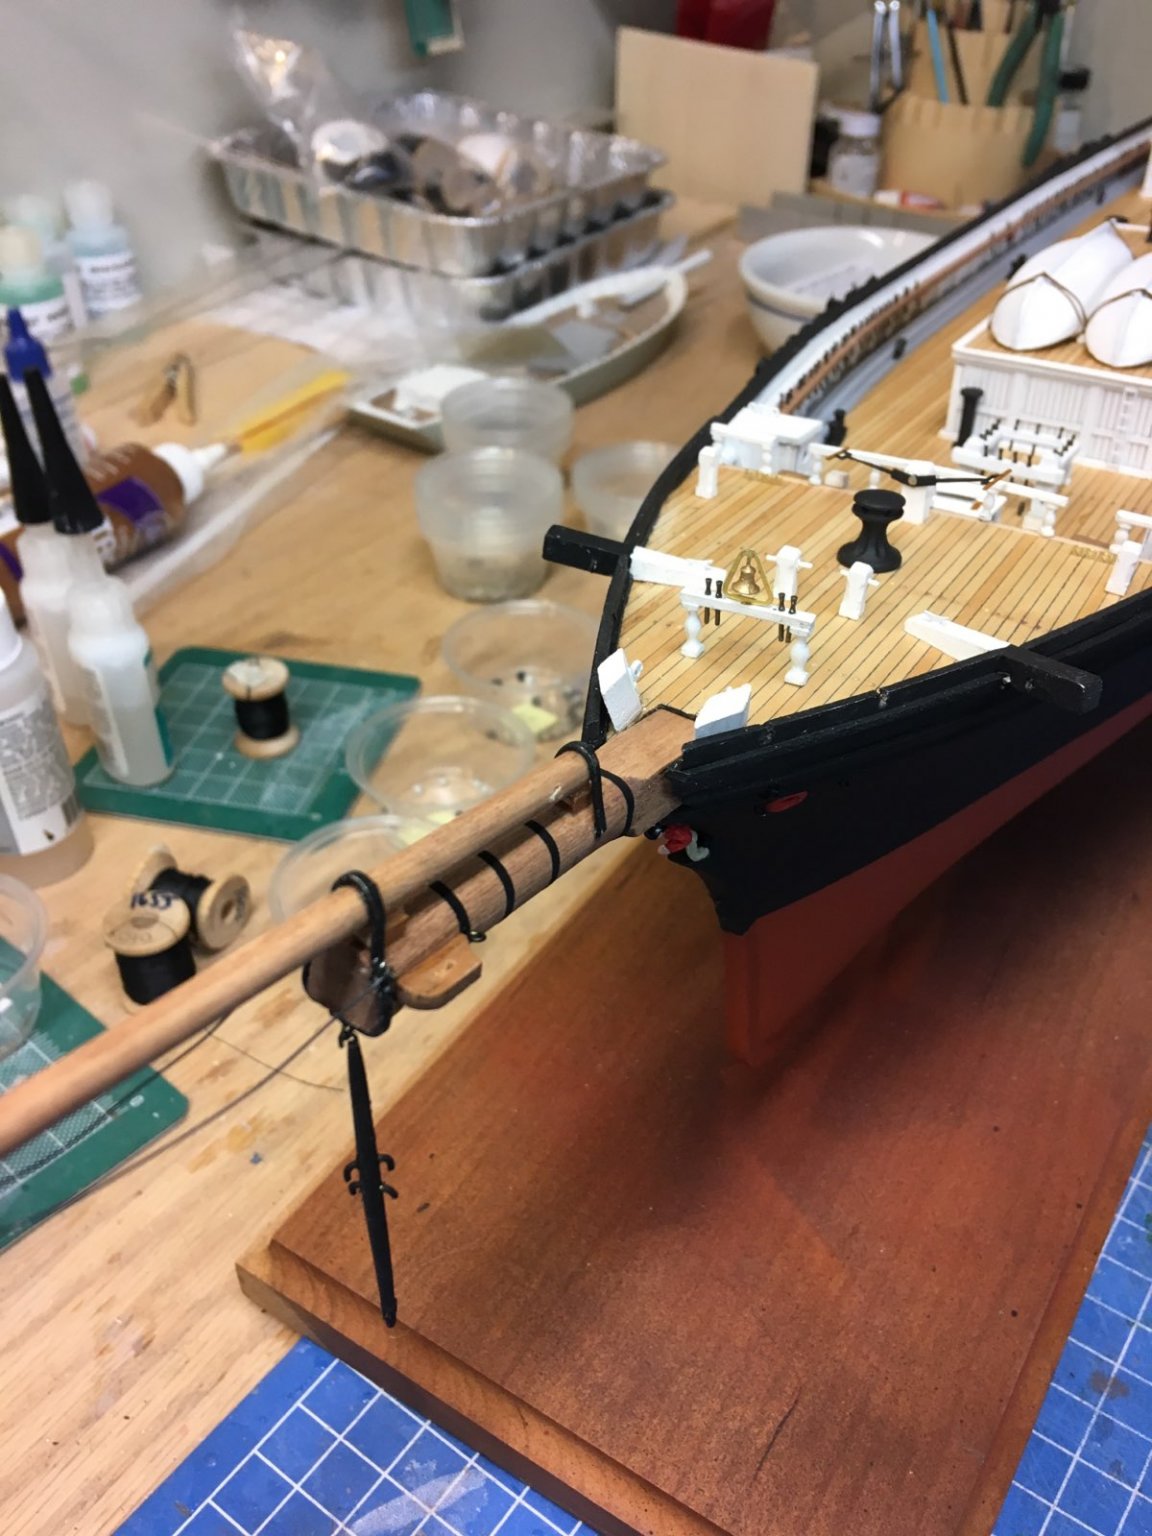
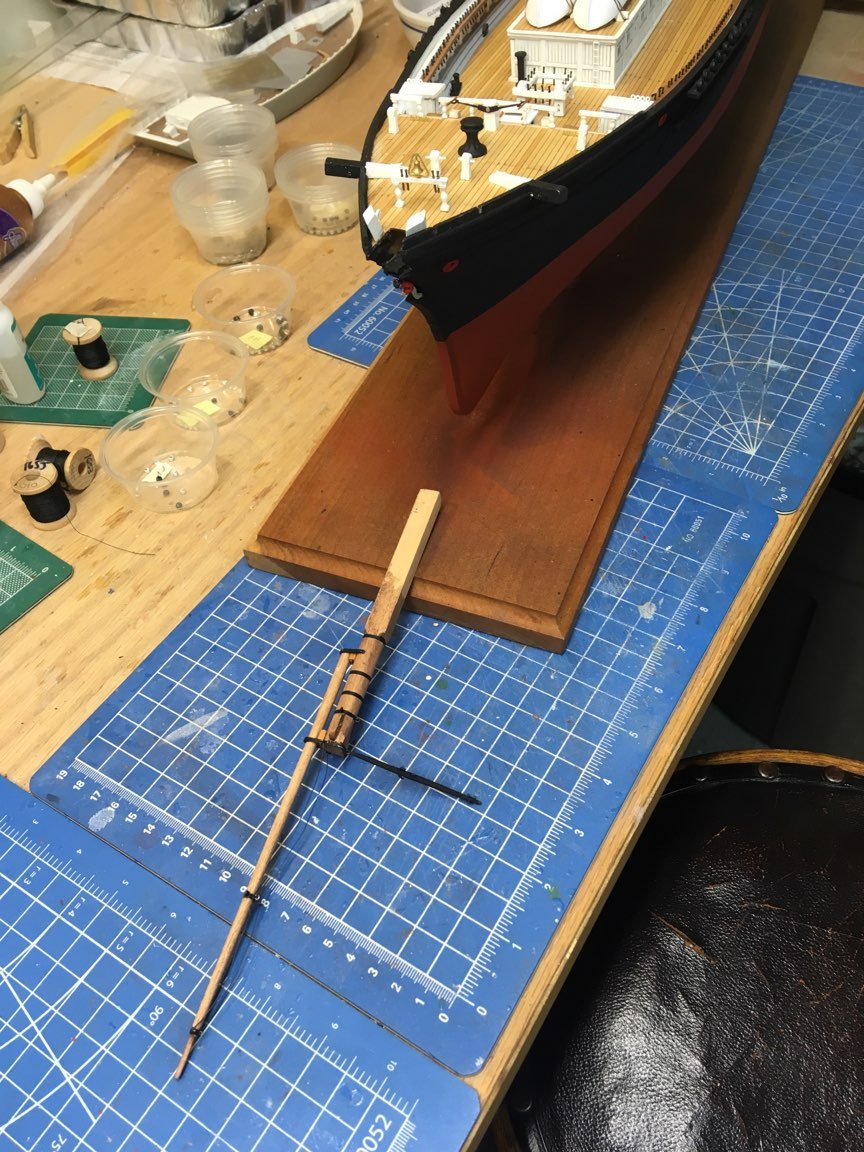
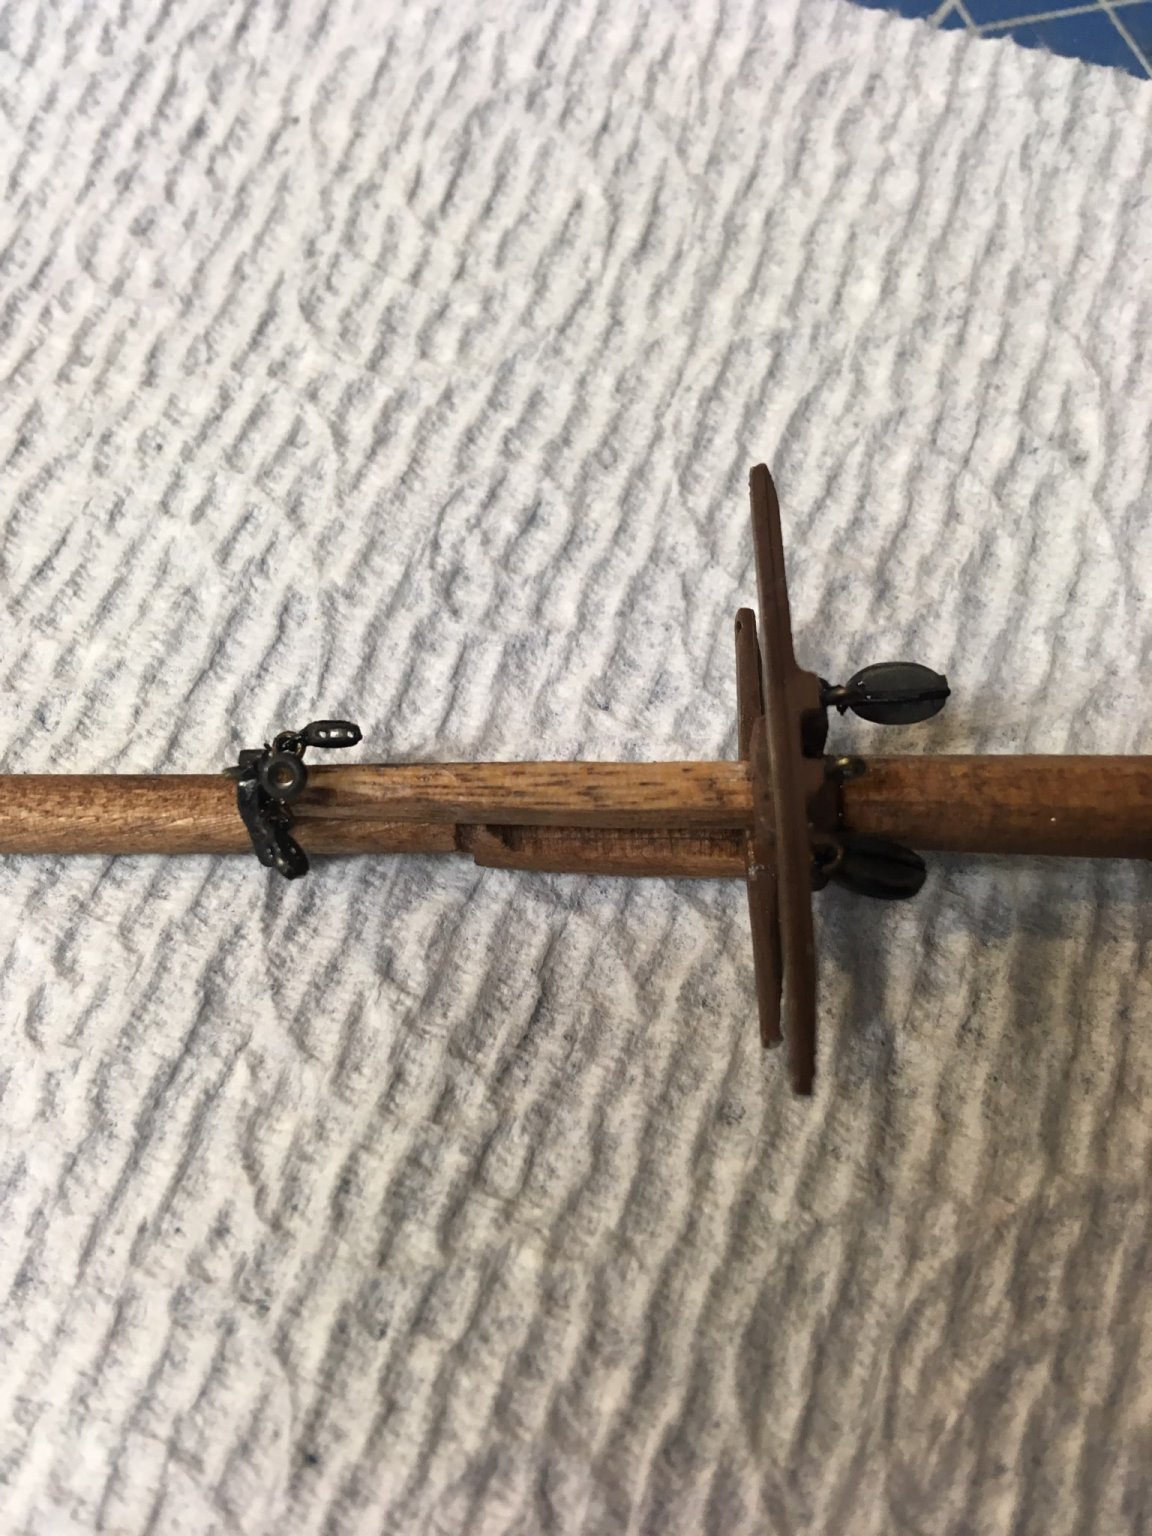
Luckily, back last February 25th, I put a stop block under the forecastle to position the bowsprit correctly. All I had to do was put some glue on the end and stick it in.

- 356 replies
-
- 9
-
-
- red jacket
- finished
- (and 1 more)
-
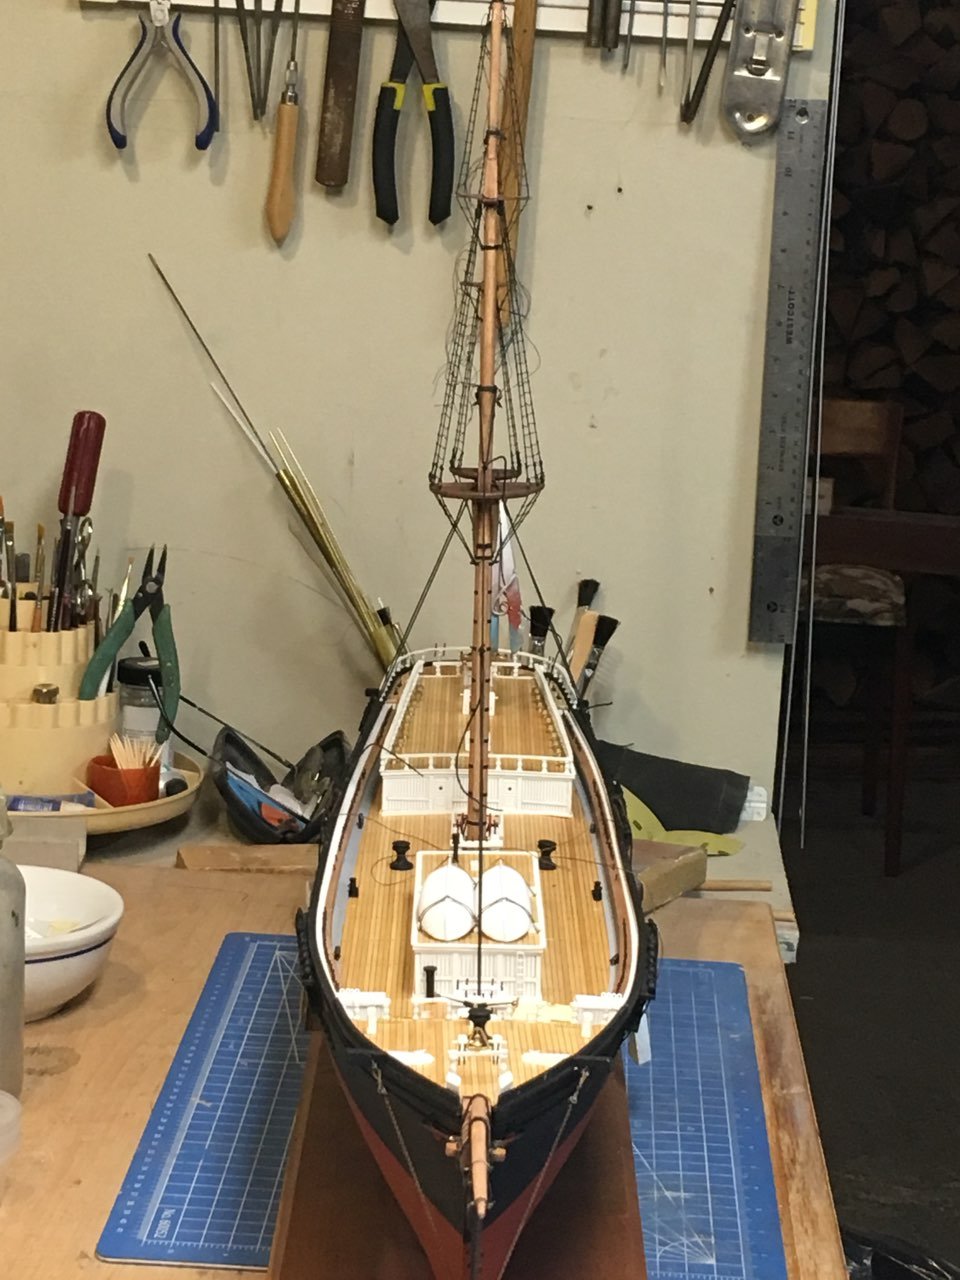
Before stepping the masts, I decided to install the bowsprit.

- 356 replies
-
- 8
-
-
- red jacket
- finished
- (and 1 more)
-
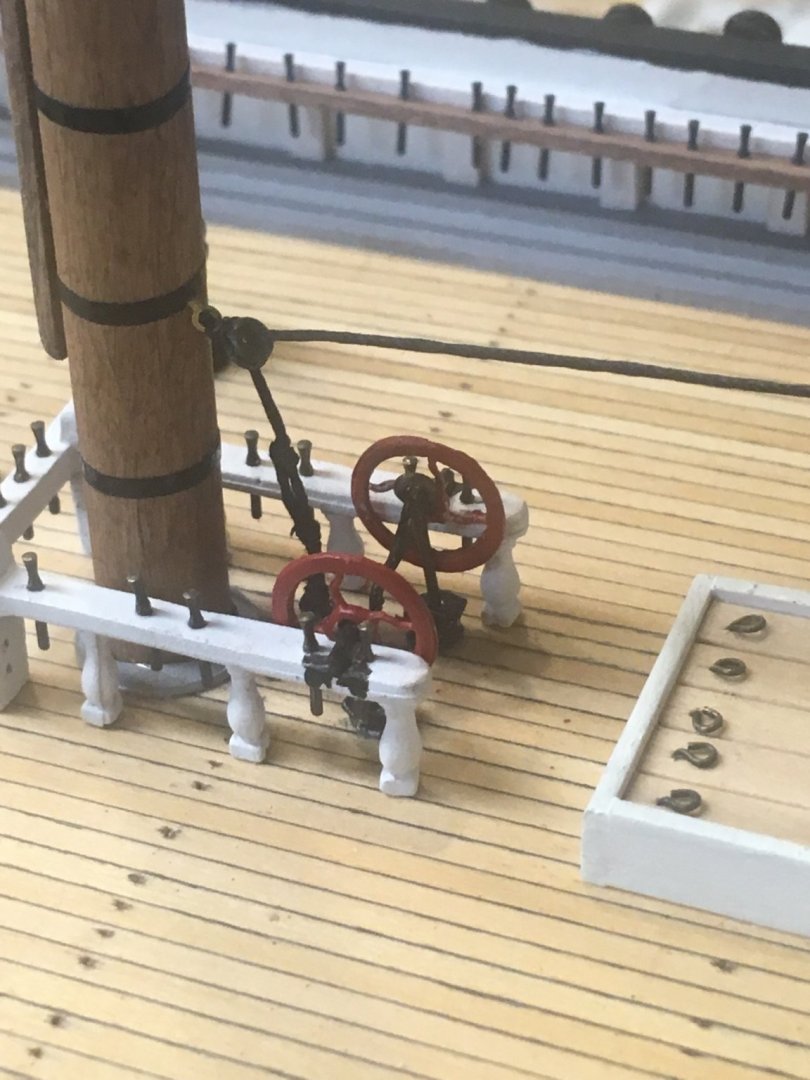
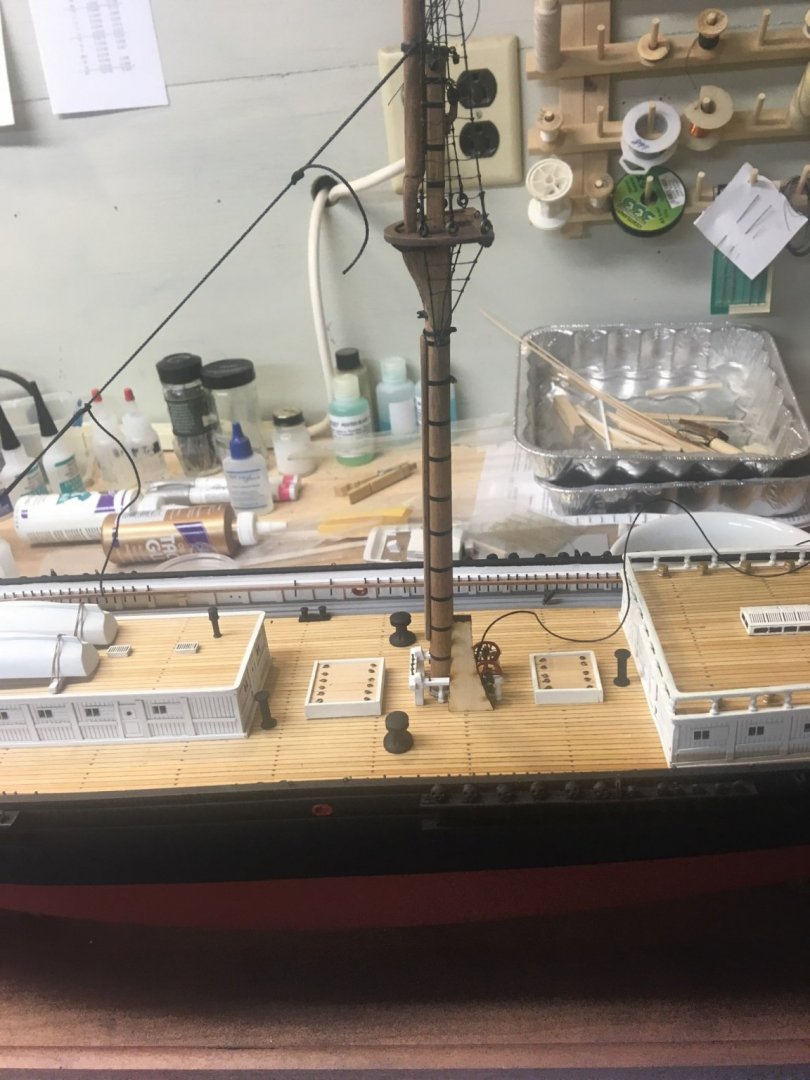
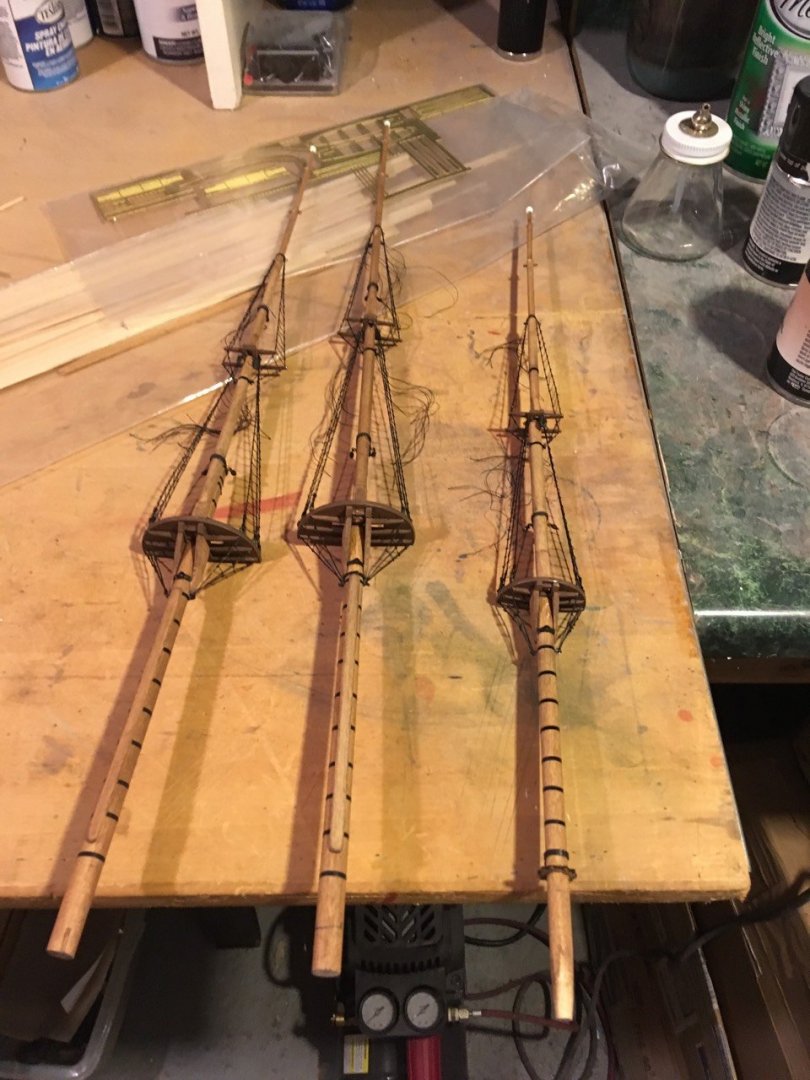
Now all 3 masts have their uppers rigged and all blocks etc installed.
- 356 replies
-
- 11
-
-
- red jacket
- finished
- (and 1 more)
-
Getting the second boat tied down was a bit problematic because the rigging line had to go under the first boat.

- 356 replies
-
- 4
-
-
- red jacket
- finished
- (and 1 more)
-
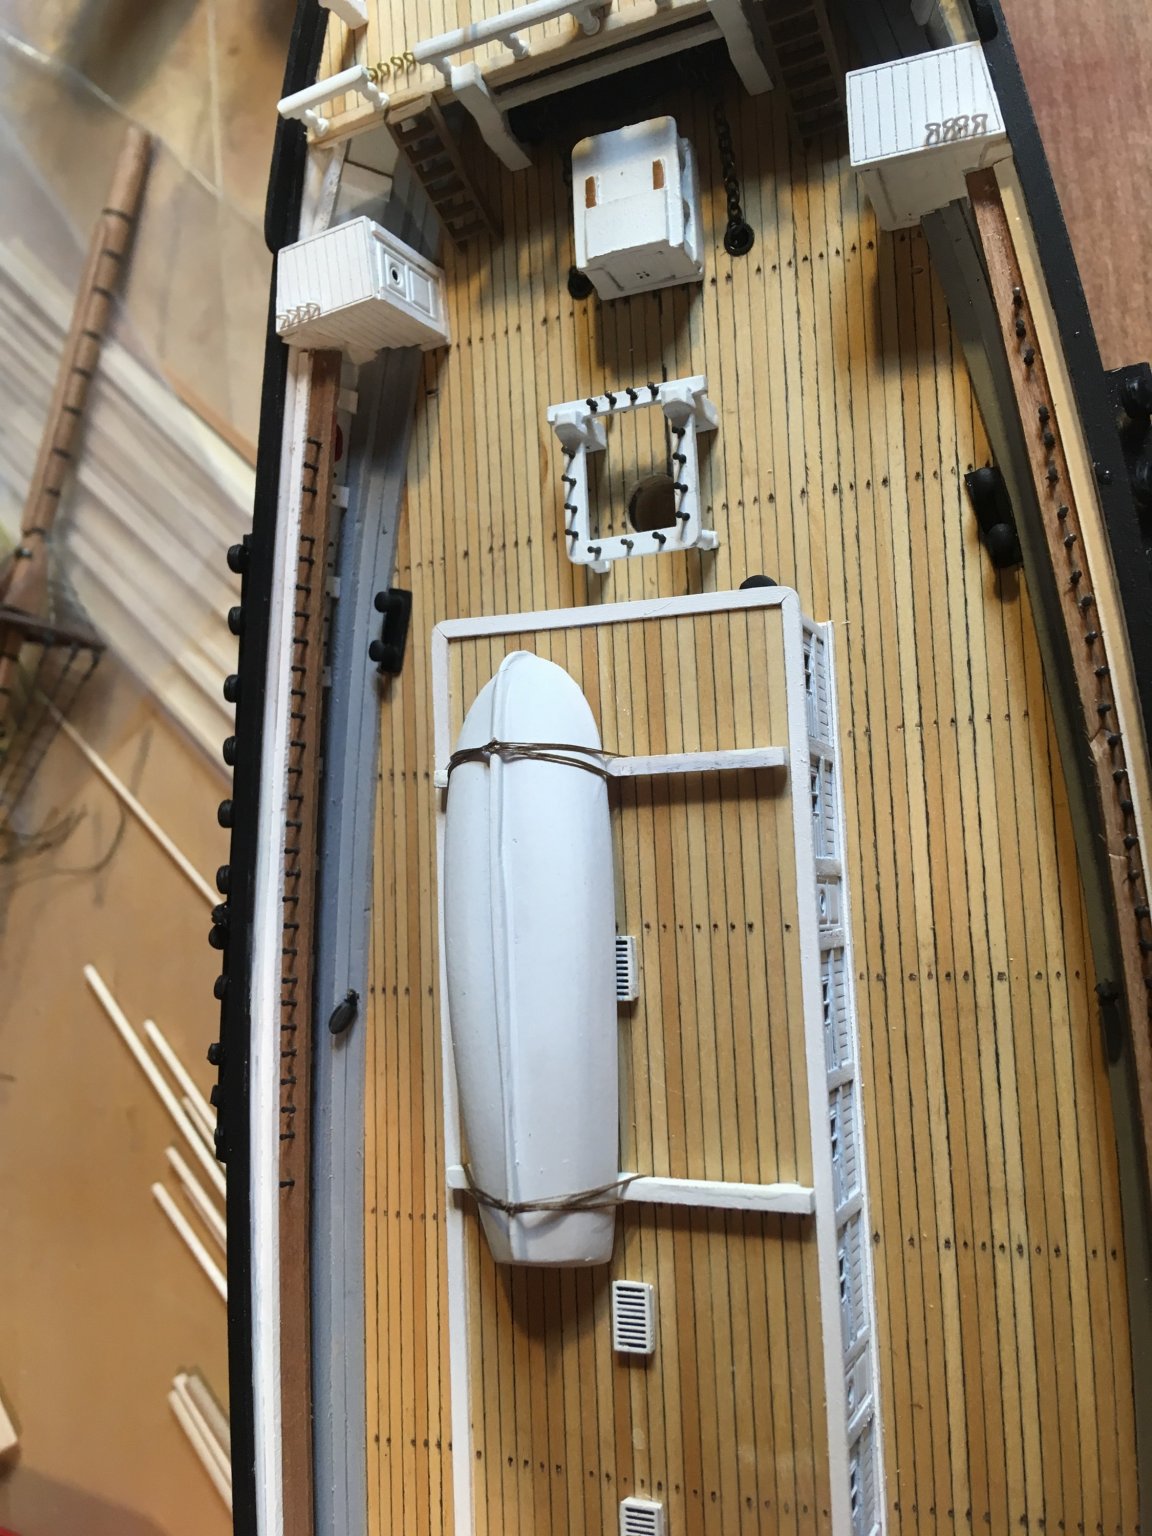
Turns out there's 17 blocks and bullseyes on the main mast. Went back and decided to finish the ships boats. A little putty and sanding, then paint.Tie it down and its done.

- 356 replies
-
- 9
-
-
- red jacket
- finished
- (and 1 more)
-
Auto glazing putty is great stuff. It is lacquer-based, so even after it dries, a little lacquer thinner will soften it.
-
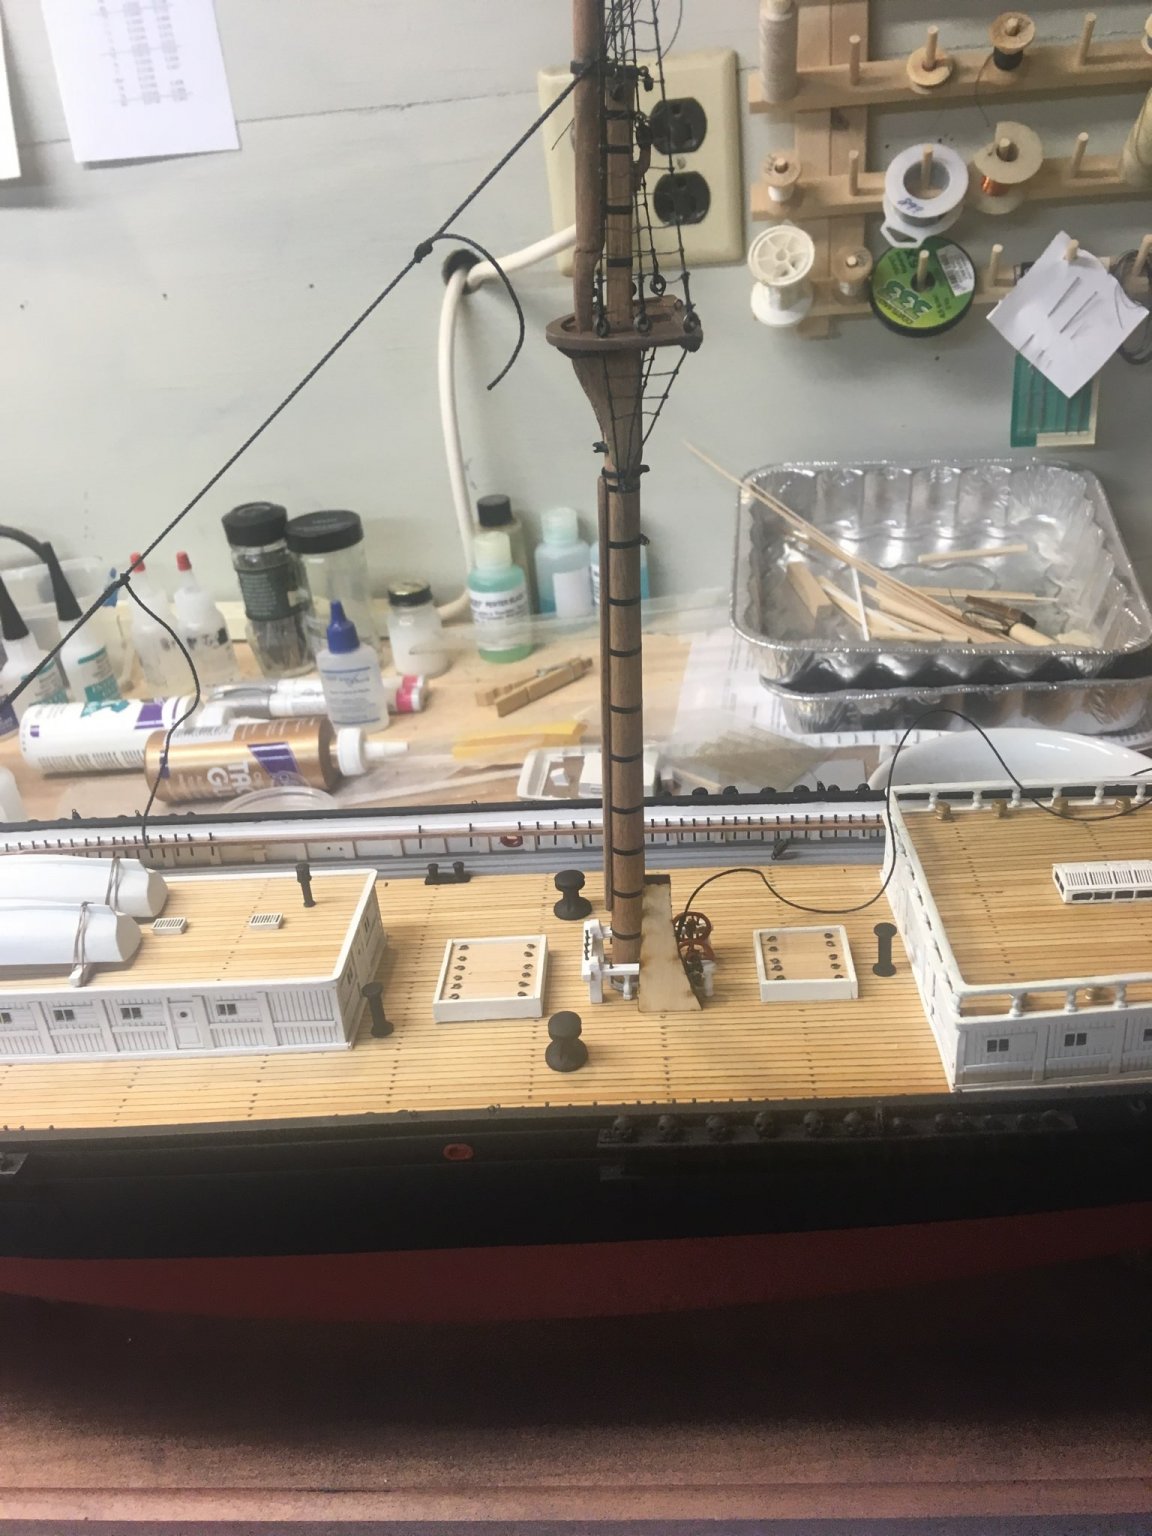
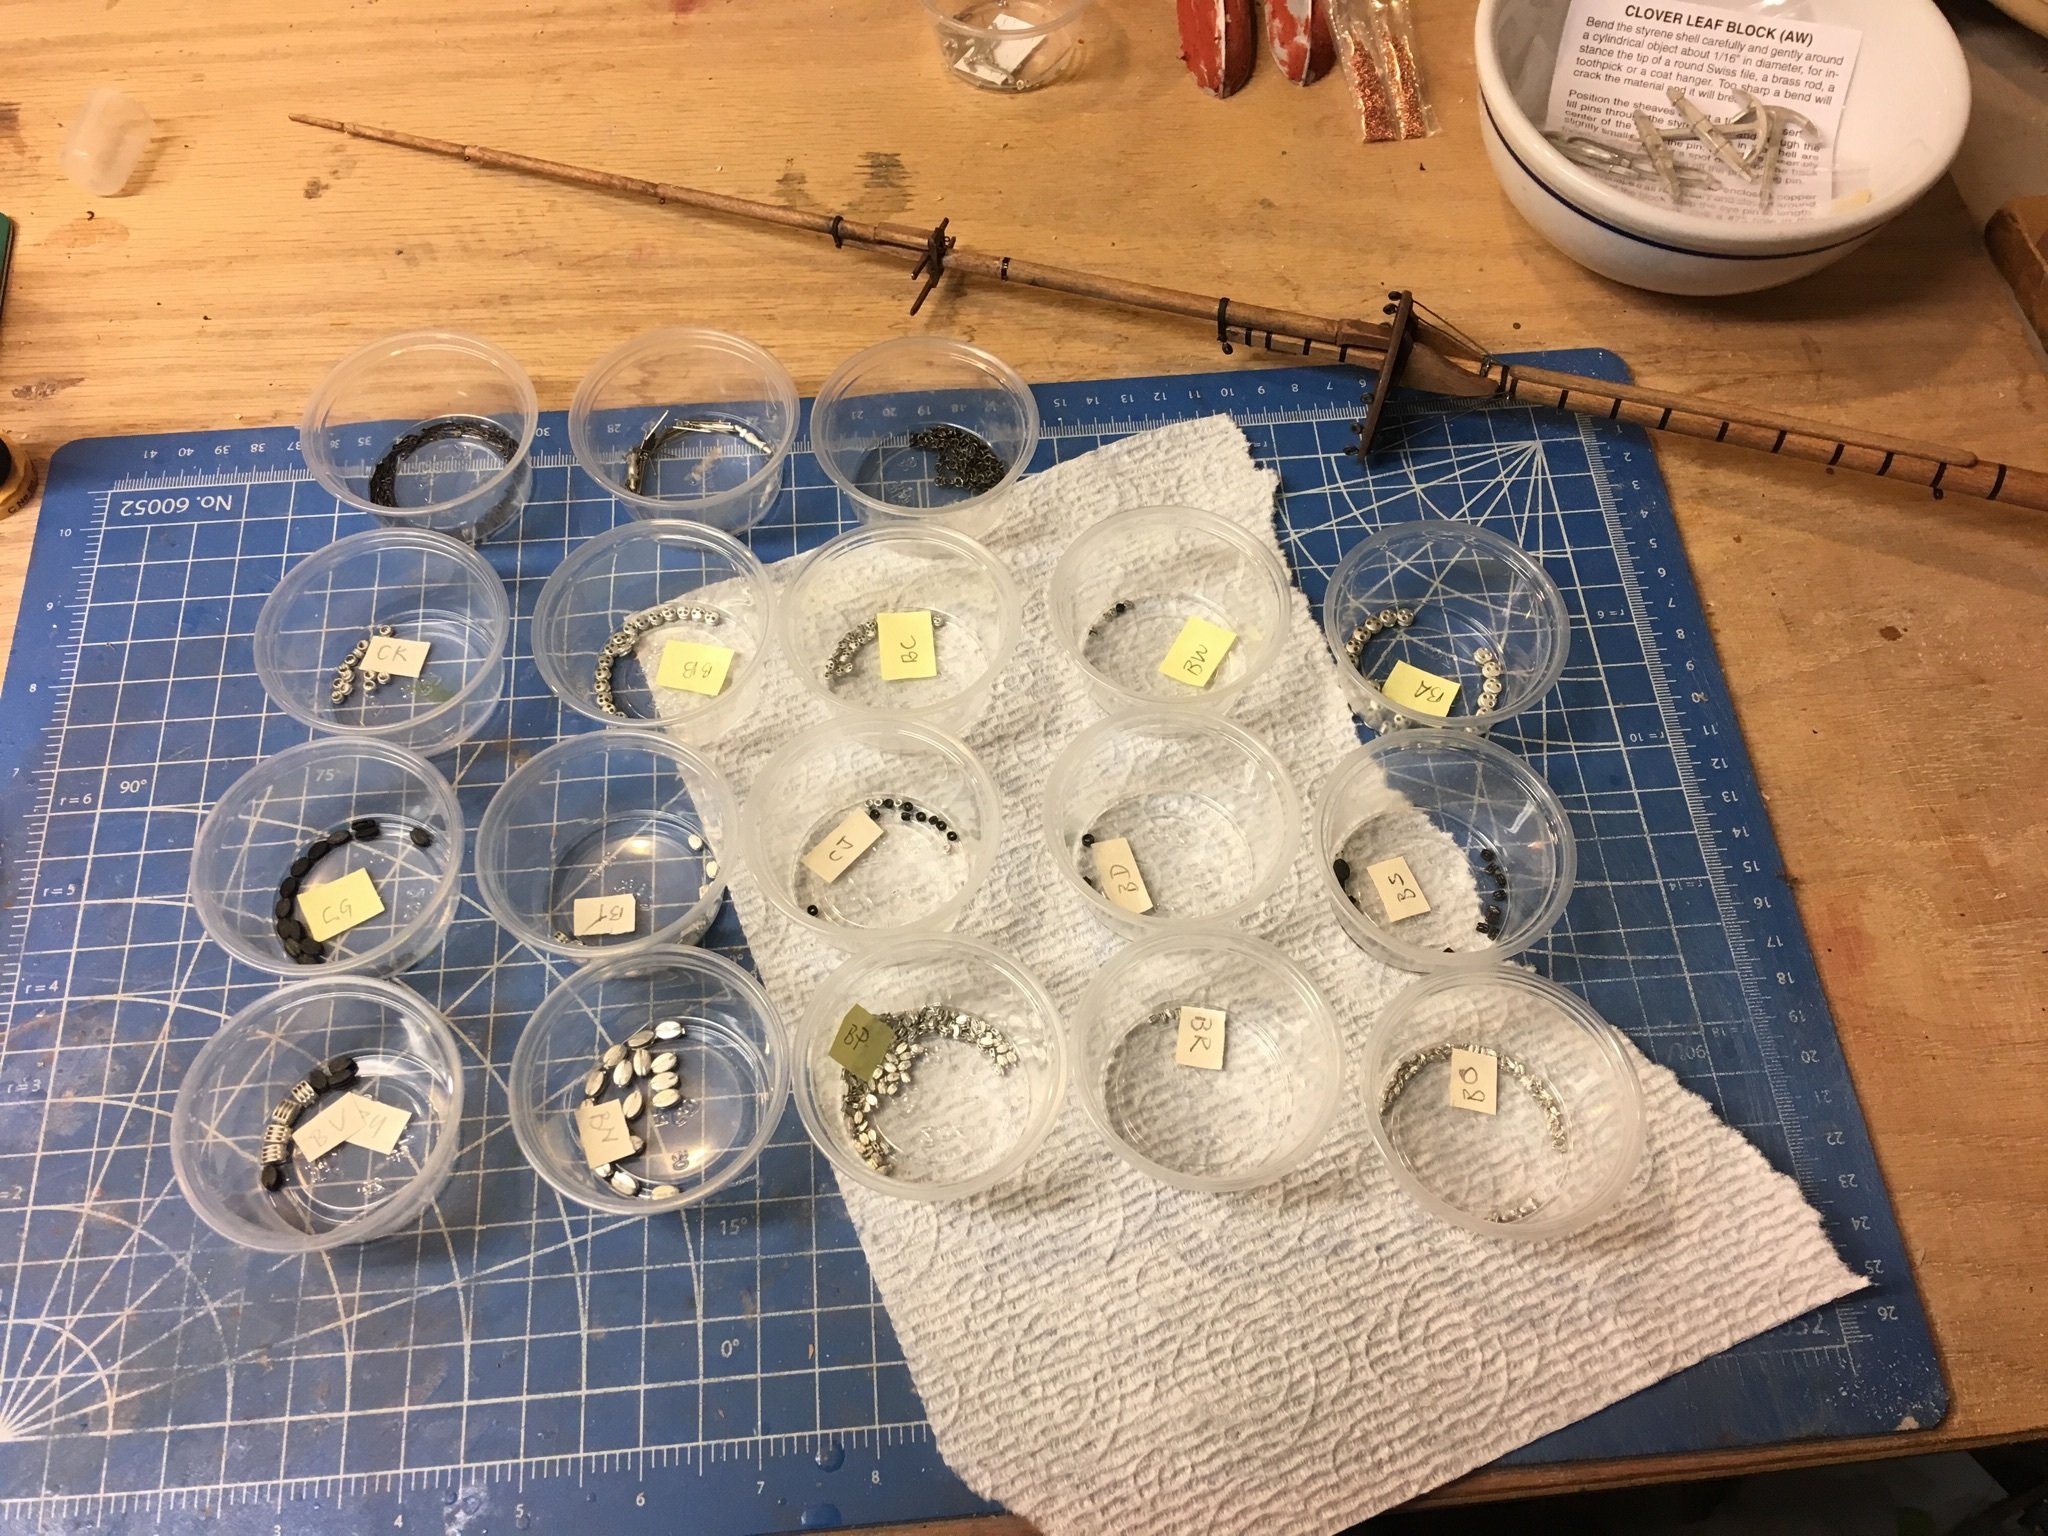
So I'm moving on to attaching the various blocks etc. to the mainmast. I decided to put each set of blocks into its own holding cup. That's quite a lot of cups!

- 356 replies
-
- 9
-
-
- red jacket
- finished
- (and 1 more)
-
Nicely finished. Don't forget, you will get 10% off your next kit purchase. Nic
-
Hi Mike, I, of course am partial to the Smuggler. The hobby store Eskader in Stockholm may have one on the shelf. Nic
-
Hi Mike, The kit comes with a sheet of scribed decking, but I substituted a sheet of glued-up decking instead. The glue is black, and makes a very realistic deck. My good wife sewed the sails for me. Nic
-
Then I guess we have a mutual admiration society going here.........