MrBlueJacket
-
Posts
1,313 -
Joined
-
Last visited
Content Type
Profiles
Forums
Gallery
Events
Everything posted by MrBlueJacket
-
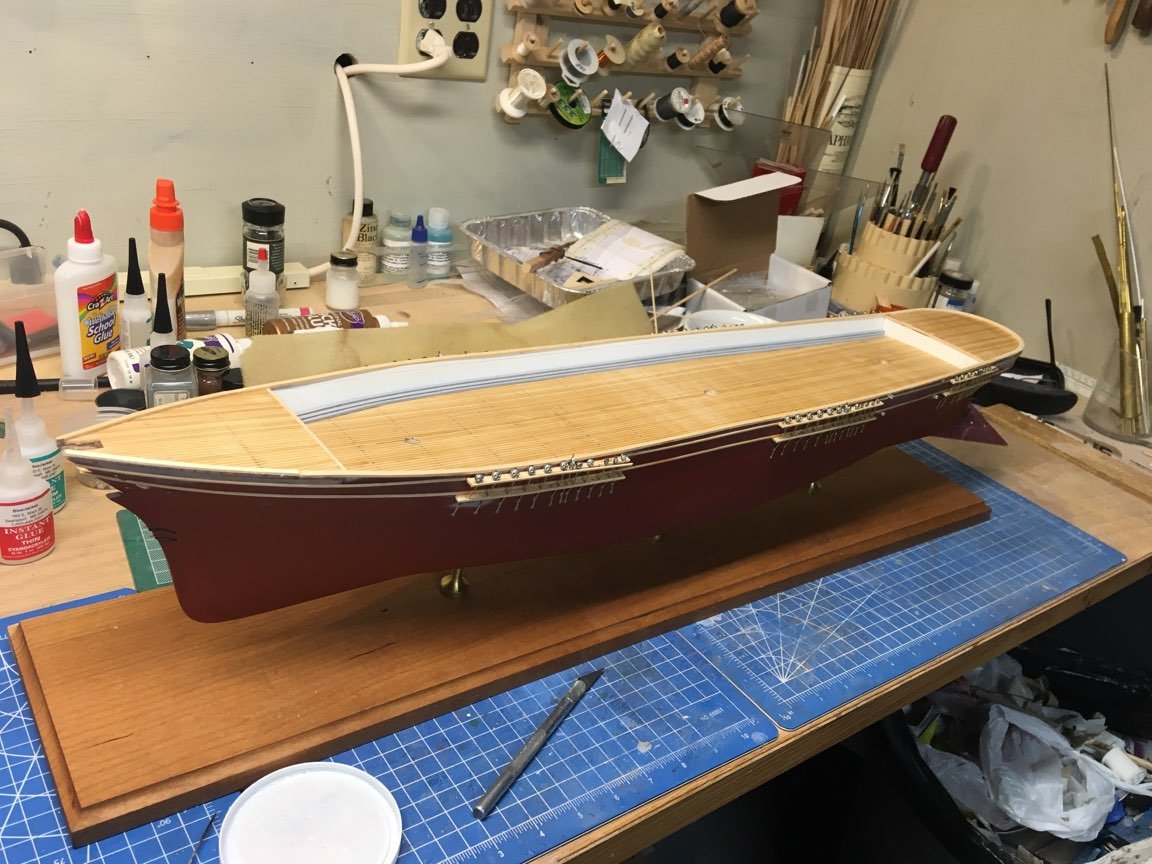
 So the masking didn't work out the way I wanted. I forgot to run a seal coat of clear after I masked it off, and the paint bled. You can look at October 2018 newsletter (www.bluejacketinc.com - newsletter archive) to see the technique. So on Sunday I re-sprayed the waterline where it bled. (*sigh*)
- 356 replies
-
- 8
-

-
- red jacket
- finished
- (and 1 more)
-
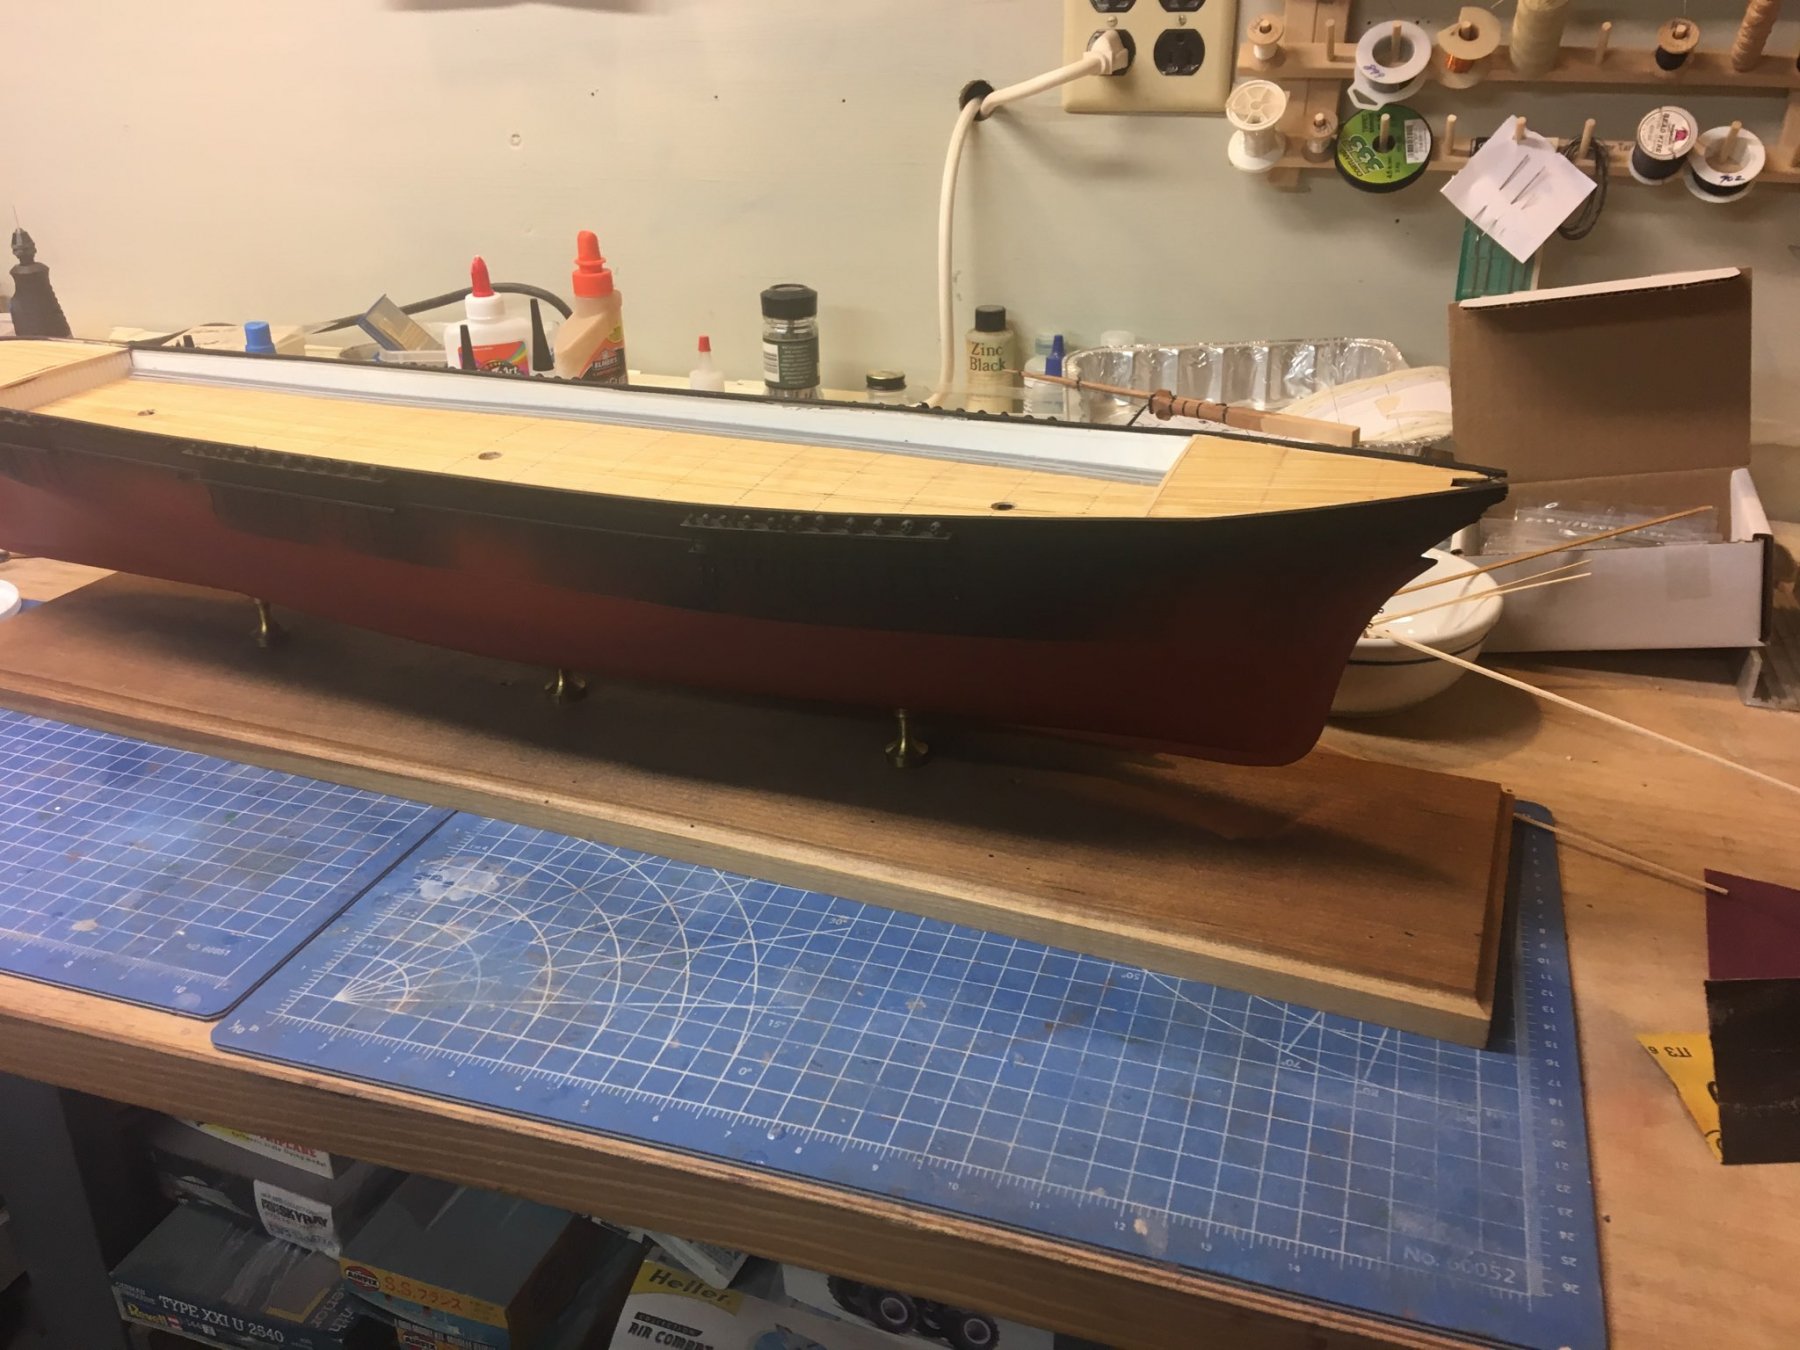
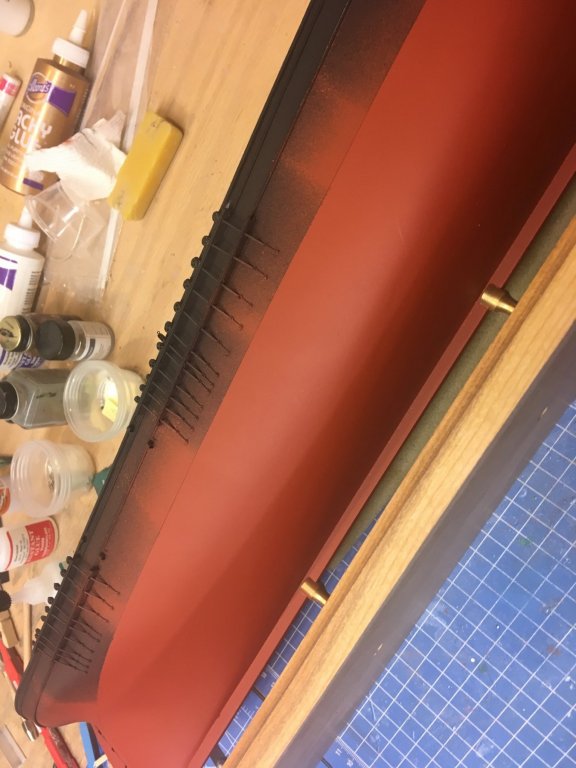
AN overall shot - next step is masking and painting the hull black.

- 356 replies
-
- 11
-
-
- red jacket
- finished
- (and 1 more)
-
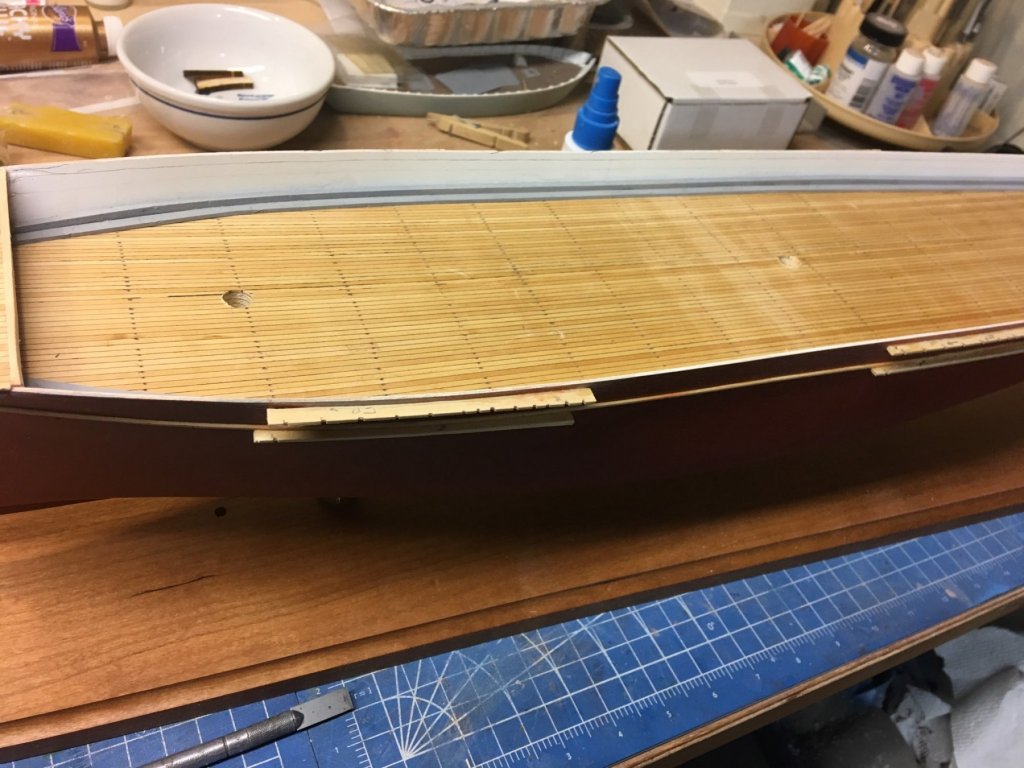
The Red Jacket instructions call for cutting the stern caprail out of bass sheet, and fitting it into place. I've always had trouble doing that, because it is difficult to get an even width. Mine always look a little "off." Taking a hint from the bow caprail on the Charles Notman, I decided to laminate it. The rail is 1/8" x 1/16" so I used 4 pieces of 1/32" x 1/16." A simple 5-minute soak in water made them pliable and I taped them around the stern overnight. The next night it was very easy to lay them down. The finished product looks nice and even.

- 356 replies
-
- 9
-
-
- red jacket
- finished
- (and 1 more)
-
Added Trawlergeek - r/c lobster boat
-
Very nice write-up. I will look into the lack of sufficient mahogany for the window frames. Nic
-
Very nicely done. 10% off your next kit is in your customer file. Nic
- 12 replies
-
- 1
-
-
- lincolville wherry
- finished
- (and 1 more)
-
Hi, PM me with your name or invoice# so I can put a note in your file to give you 10% off your next BlueJacket kit when you have completed this build. It's my promise to everyone who does a build thread of our kits. Nic
-
After that, it is put on the cap-rails, the mask off the interior and waterline, spray what remains black. Now it starts to get real fun!
- 356 replies
-
- 4
-
-
- red jacket
- finished
- (and 1 more)
-
I think the Starboard will only take 7 hours (experience)
- 356 replies
-
- 4
-
-
- red jacket
- finished
- (and 1 more)
-
So I have the port side finished, I figure about 8 hours of work.
- 356 replies
-
- 11
-
-
- red jacket
- finished
- (and 1 more)
-
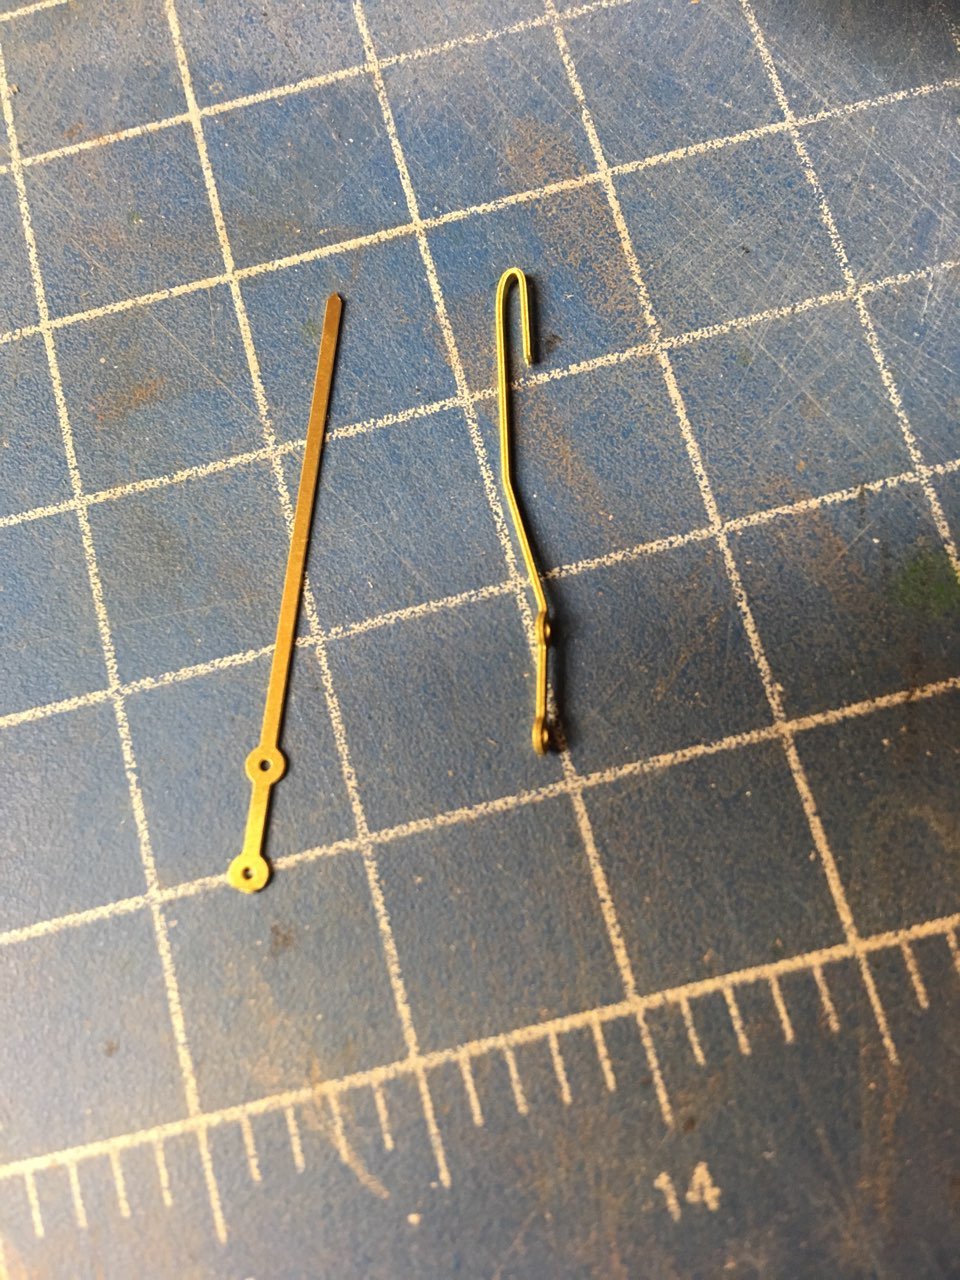
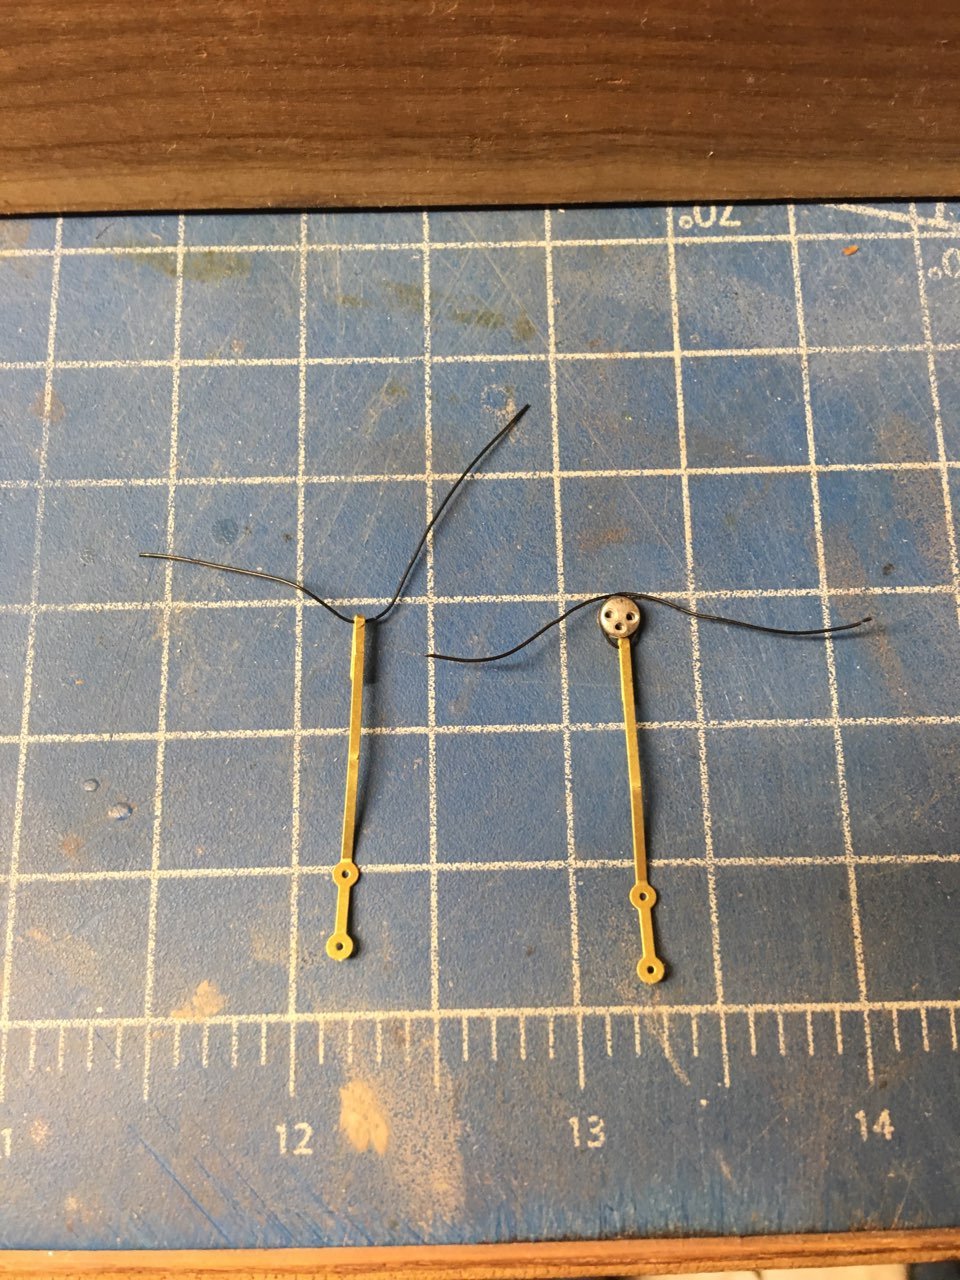
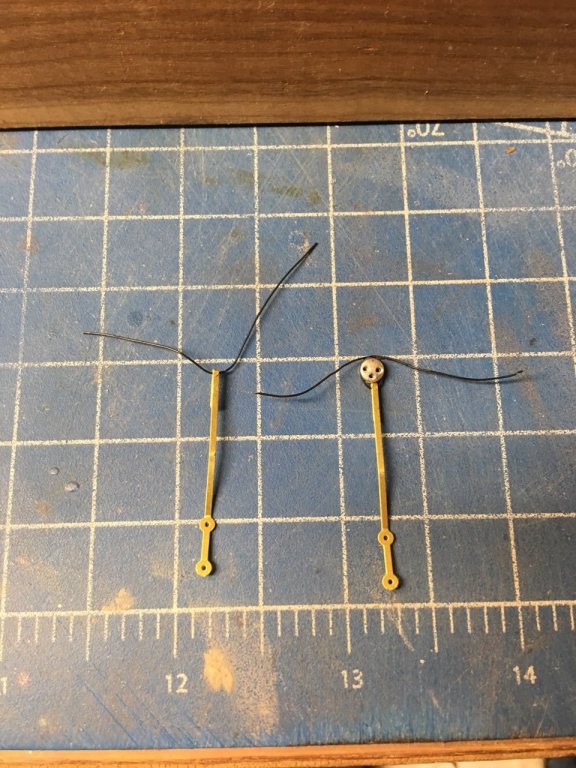
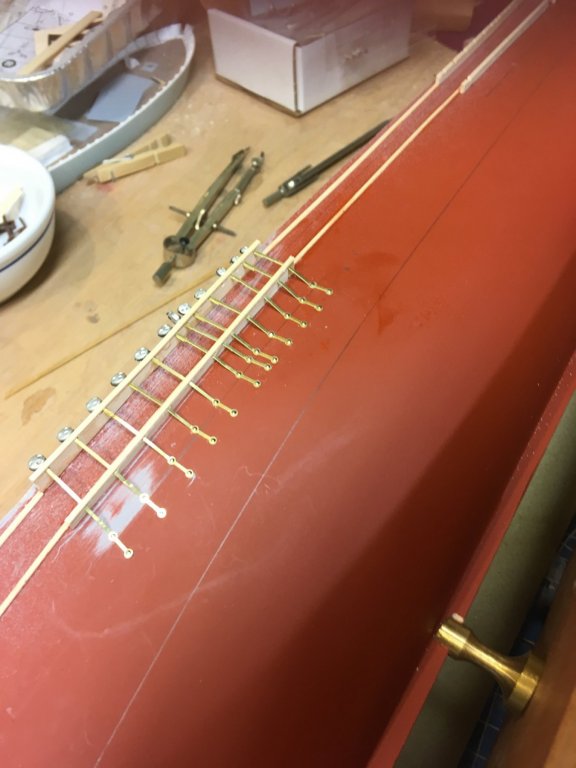
So here's how the deadeyes and chainplates come together. First you need to bend the chainplate: Then you have to put some .010 wire in the upper u-bend, crimp it in, and then wrap the wire around the deadeye, and CA glue the wire : And finally you can nail it in place with a couple of pins.

- 356 replies
-
- 7
-
-
- red jacket
- finished
- (and 1 more)
-
Actually, the first three were fun - then it just gets boring. Still, it's better than sanding a hull.
- 356 replies
-
- 3
-
-
- red jacket
- finished
- (and 1 more)
-
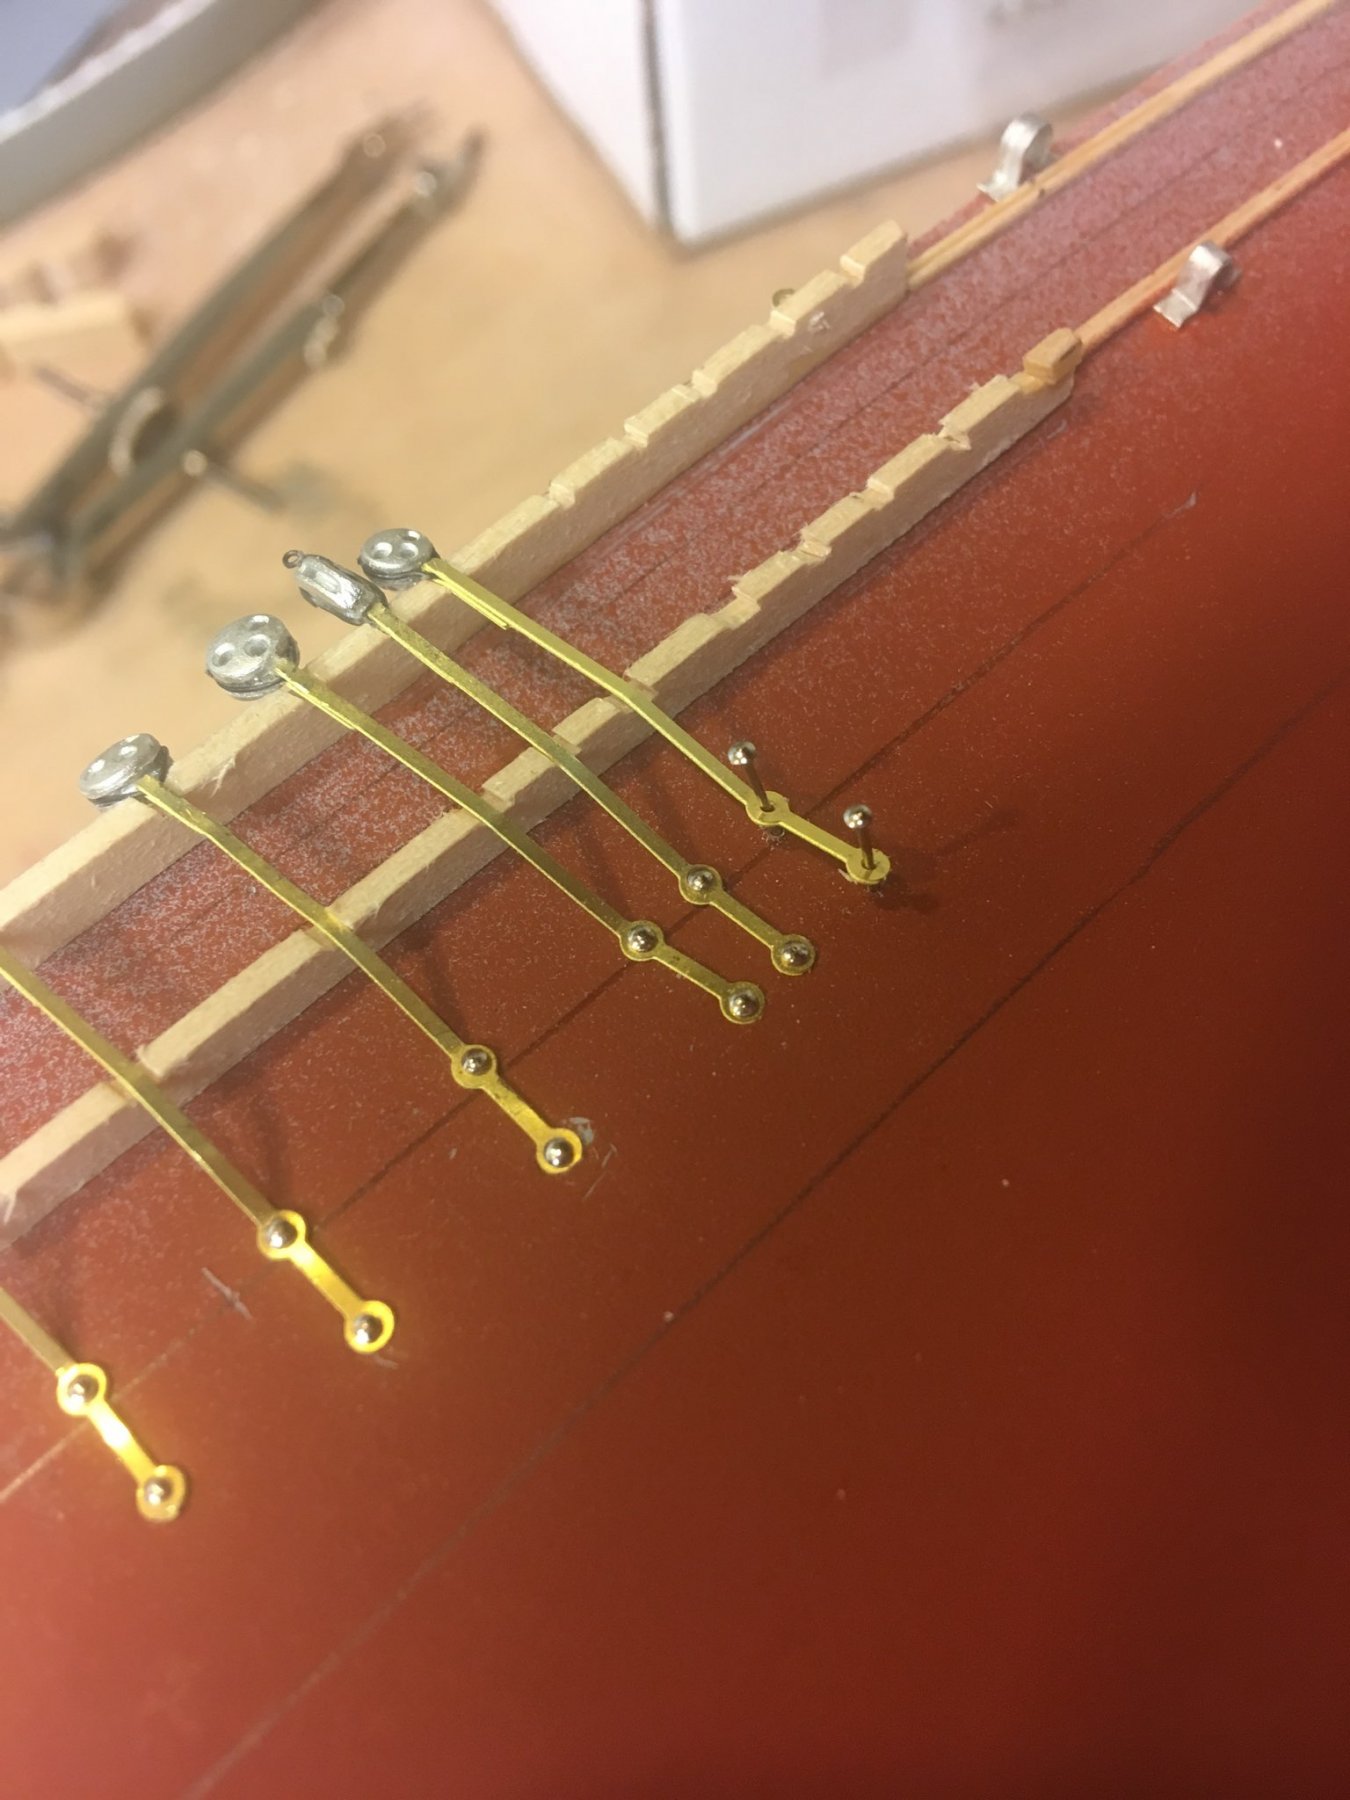
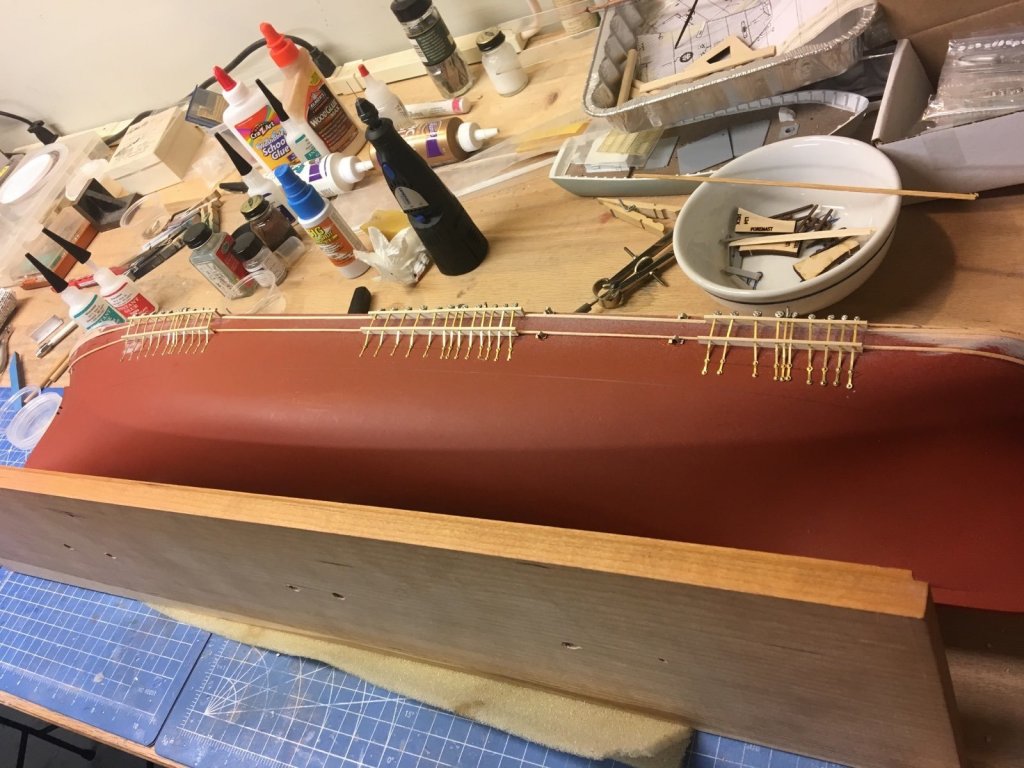
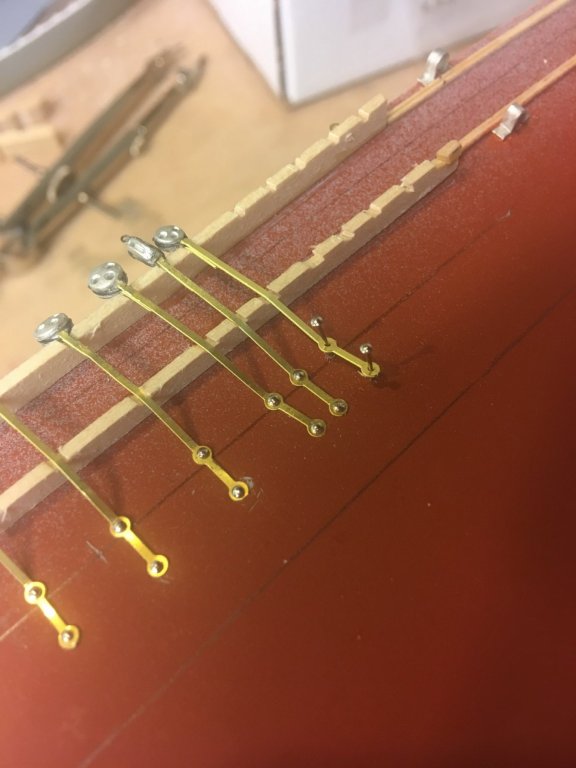
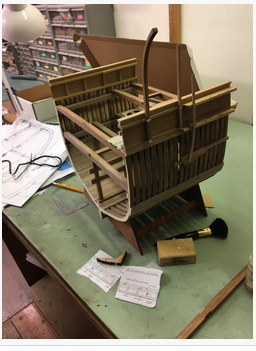
And now the very tedious part - assembling and placing the deadeyes and chainplates. The photo-etched chainplates need to be bent, then their tops formed in a "U", a wire inserted and the "U" crimped down on the wire. Next a deadeye is placed on, and the wire brought up and around it, glued in place, and the excess wire cut off. Place, drill holesd for the pins, insert, repeat 60+ times. Ugh! Here's the port fore channel finished, with the double beaded molding place on the edge.
- 356 replies
-
- 8
-
-
- red jacket
- finished
- (and 1 more)
-
Went to the Downeastcon IPMS show this weekend, so didn't get much done. Bent up the davit mounting brackets from 3/32" x 1/64" Britannia strips.
- 356 replies
-
- 9
-
-
- red jacket
- finished
- (and 1 more)
-
I'll add your name to the list of people who will get 10% off their next kit when you finish this one! Send me a PM with your actual name so I can put it in your customer file. Nic
- 19 replies
-
- 2
-
-
- yankee hero
- BlueJacket Shipcrafters
- (and 1 more)
-
Very classy looking!
-
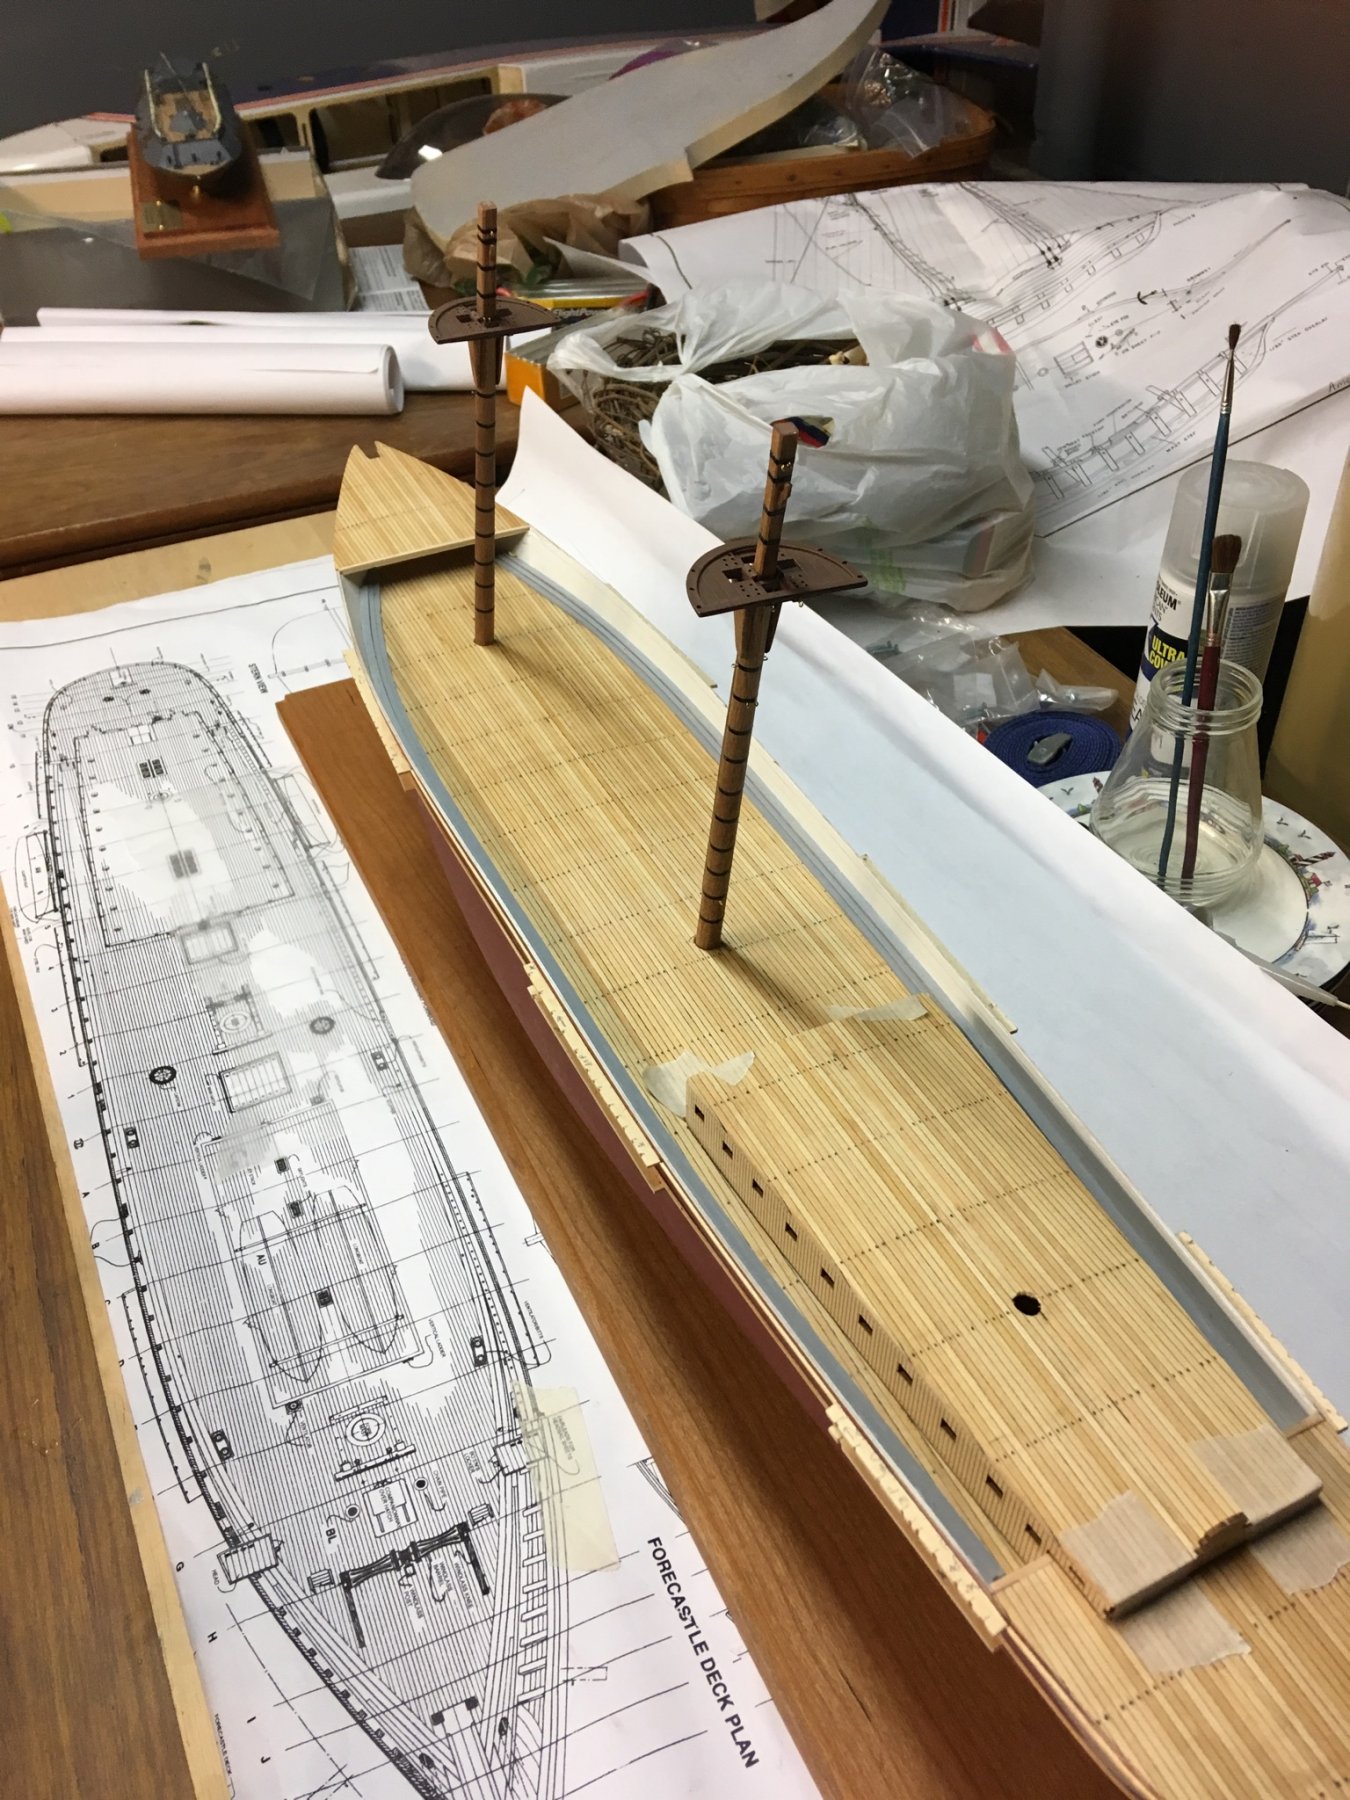
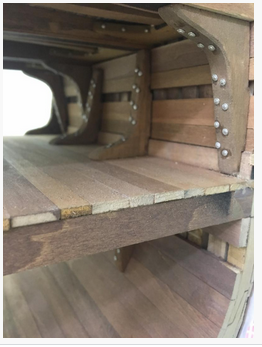
With the mainmast done, it is time to work on the mizzen. So here's the dilemma: The mizzen goes through the aft cabin roof. If i drill a hole in the deck, like the fore and main, I will never be able to line up the aft cabin roof hole correctly at a later time. So I have to drill though both at the same time. But I can't install the aft cabin yet, there is too much other stuff that needs to be done first. My solution is to do the minimal assembly of the aft cabin (sides and roof) and carefully tape it into its final position. Now I can do my drilling, then take the cabin off.

- 356 replies
-
- 10
-
-
- red jacket
- finished
- (and 1 more)
-
Working this week, the foremast is finished. Mainmast next......

- 356 replies
-
- 10
-
-
- red jacket
- finished
- (and 1 more)
-
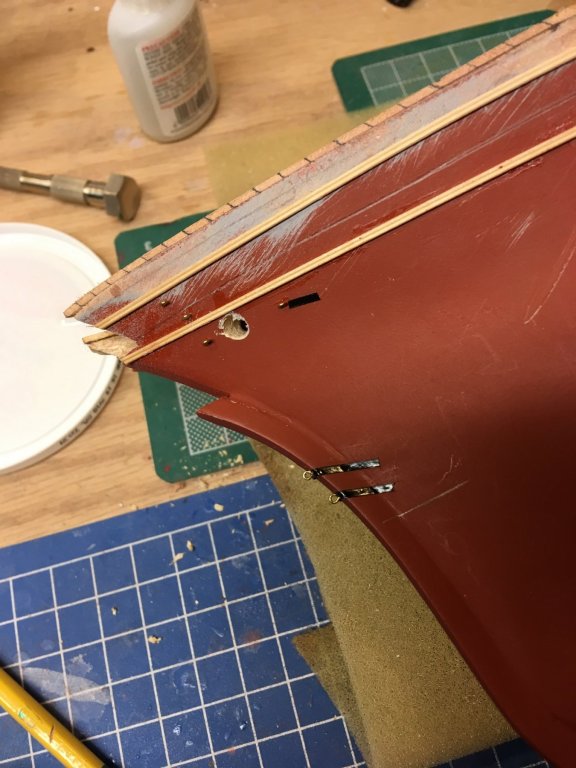
Over the weekend, I worked on the bow fitting attachment points and drilled the hawse holes.
- 356 replies
-
- 9
-
-
- red jacket
- finished
- (and 1 more)
-
Did you mean True North paints? We like them a lot.
-
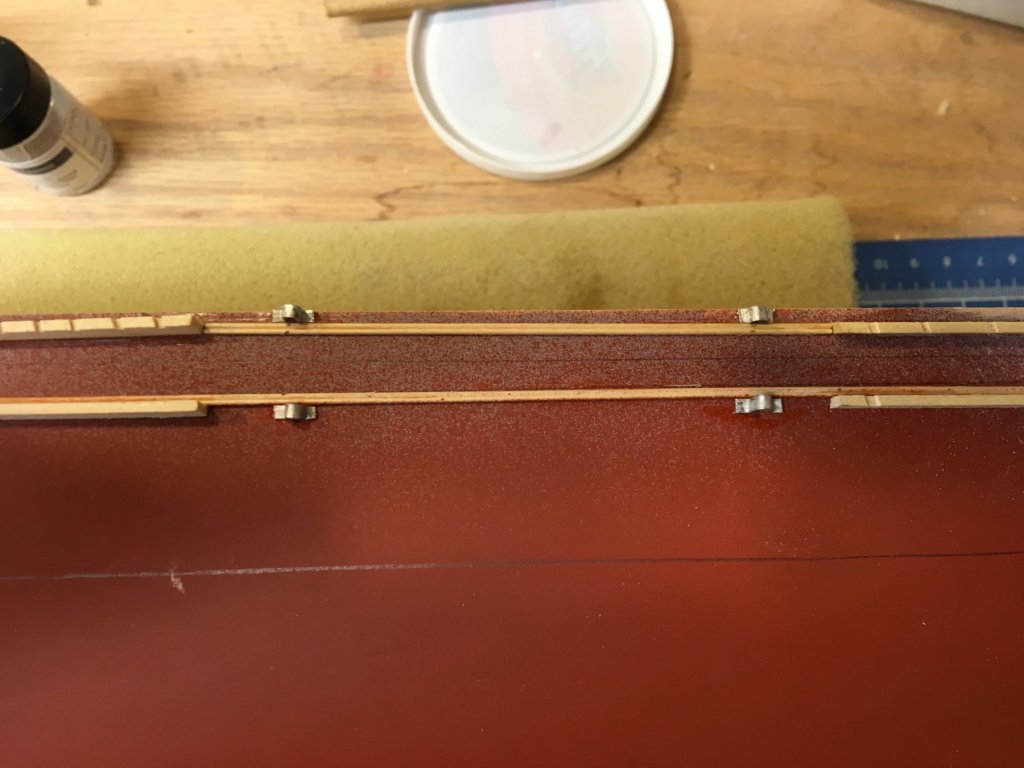
And here they are installed, and also the deadeye channels.
- 356 replies
-
- 10
-
-
- red jacket
- finished
- (and 1 more)
-
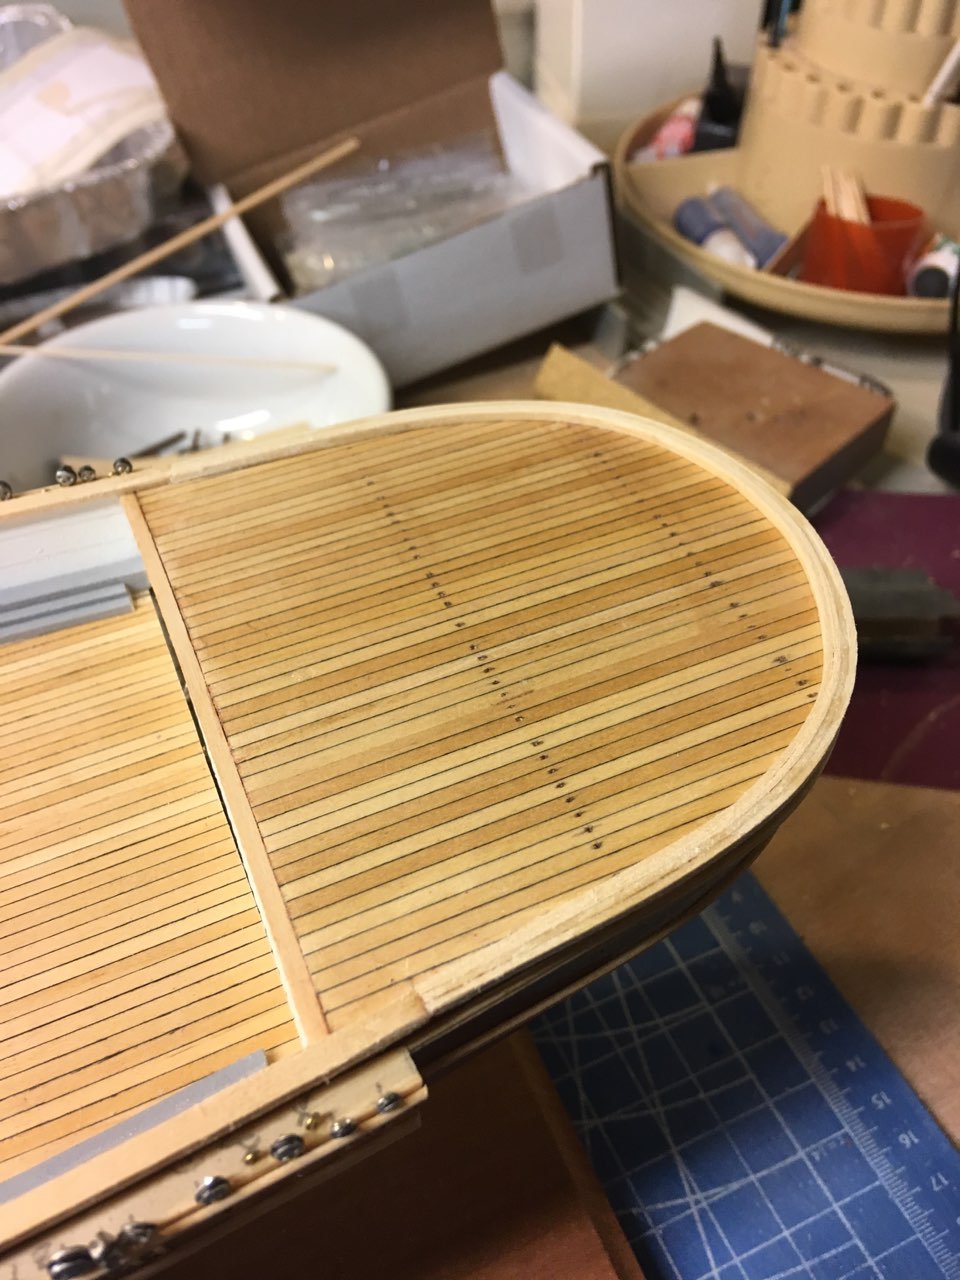
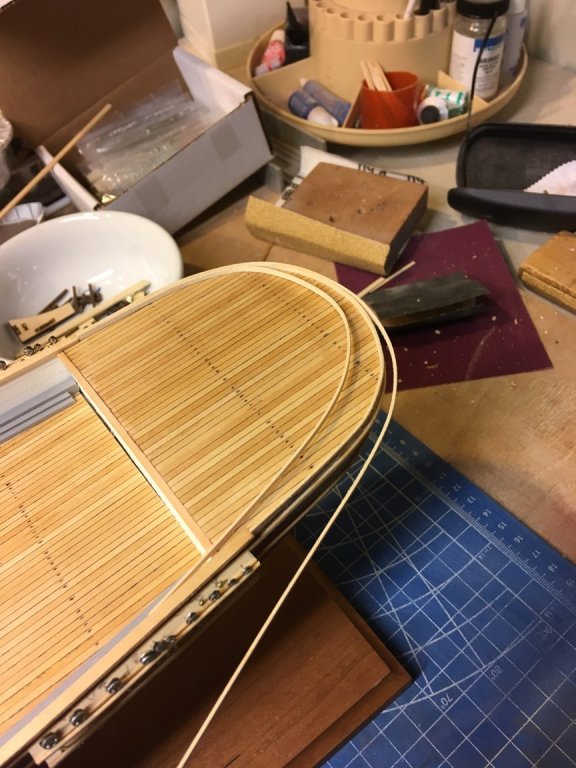
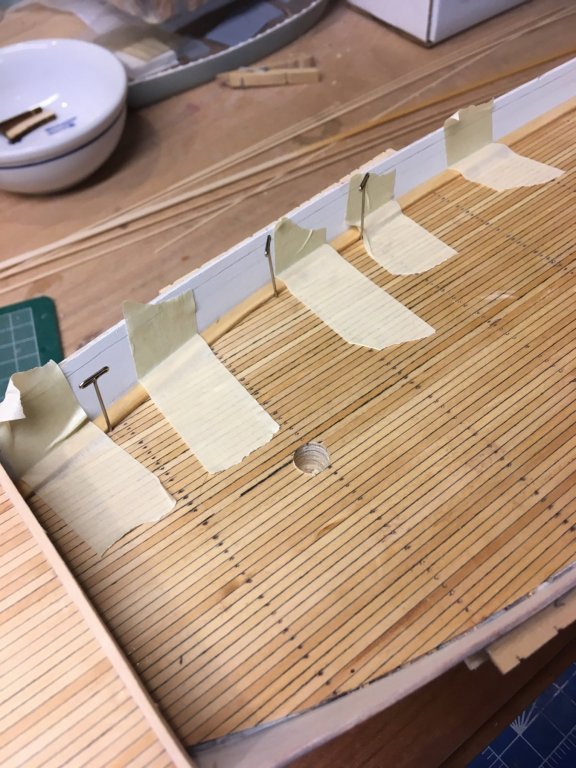
I soaked the waterway planks overnight, then pinned and taped them into position. After drying for a day, they held their shape just fine.
- 356 replies
-
- 7
-
-
- red jacket
- finished
- (and 1 more)
-
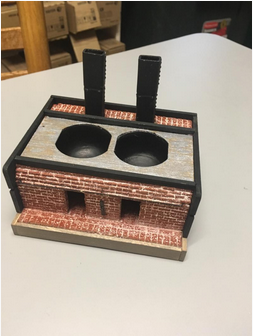
Yes i can. It is a large scale cross-section of the Morgan, at the tryworks. Scale 1/2" = 1' The modeler will build the tryworks brick-by-brick. Look for a release date of around the end of April this year.
-
Is anyone working on Bluejacket's 'Portland?'
MrBlueJacket replied to RFP's topic in Wood ship model kits
Jim bought his Portland kit in 2014, it is the revised version.