Supplies of the Ship Modeler's Handbook are running out. Get your copy NOW before they are gone! Click on photo to order.
×


Stuntflyer
-
Posts
1,196 -
Joined
-
Last visited
Content Type
Profiles
Forums
Gallery
Events
Everything posted by Stuntflyer
-
 Thank you, Anthony. Have fun with it and I look forward to following your build. Mike
 -
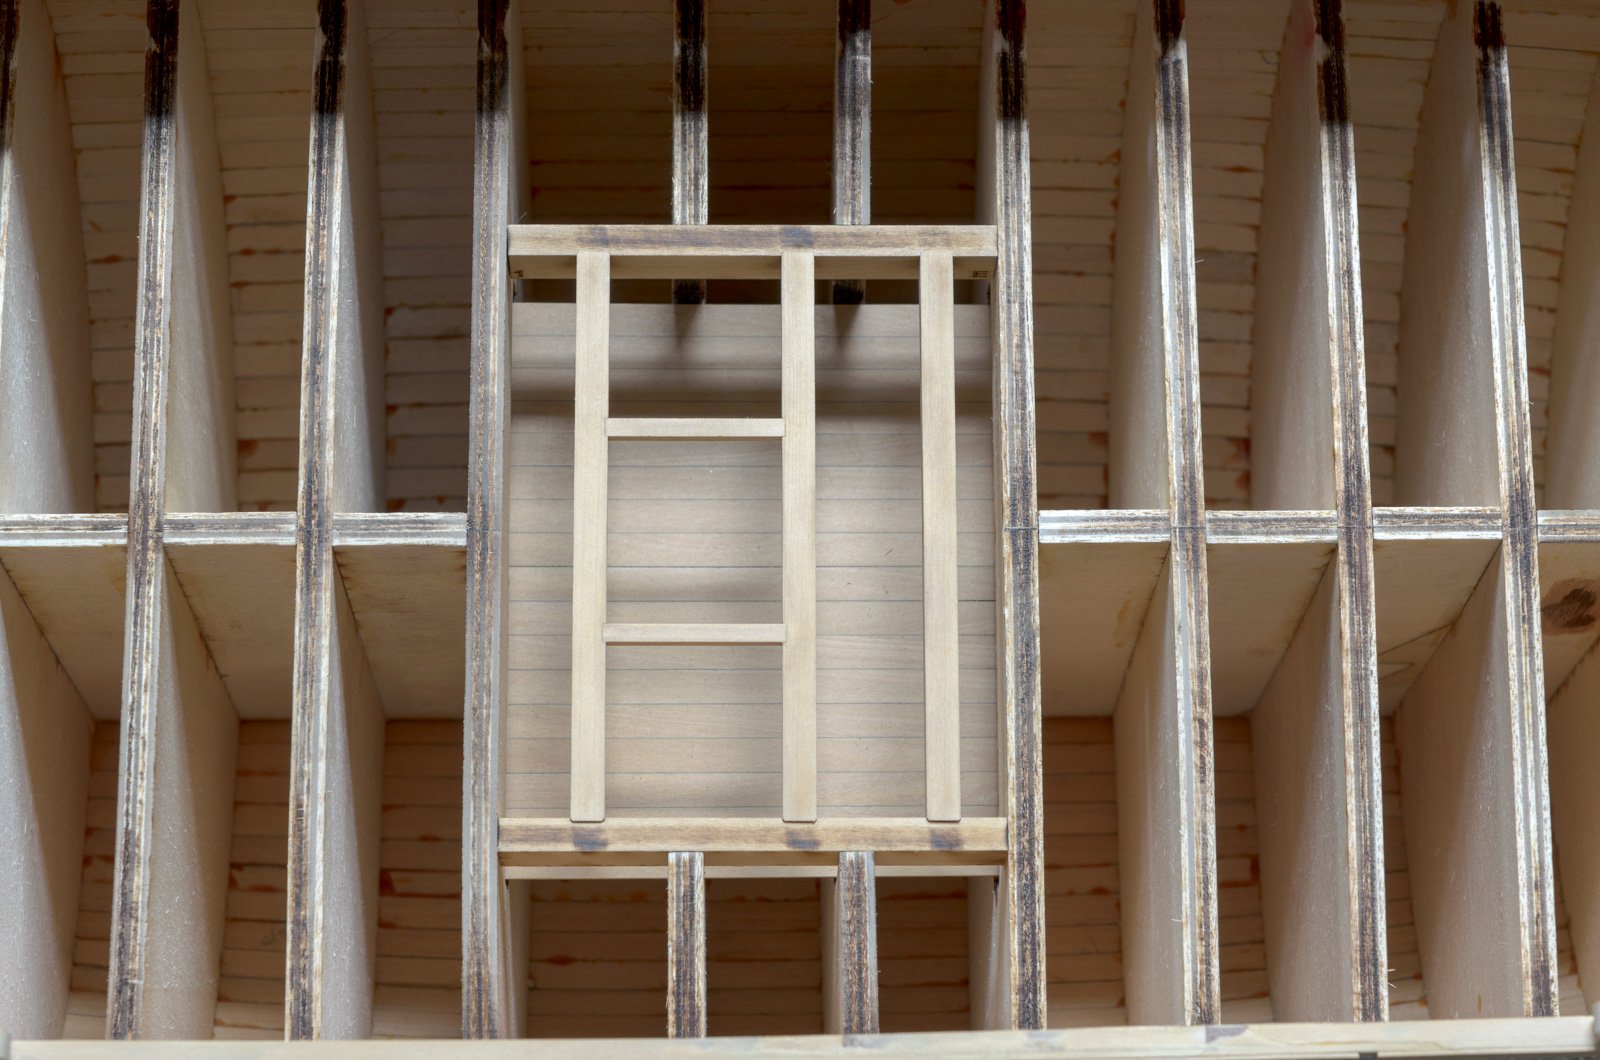
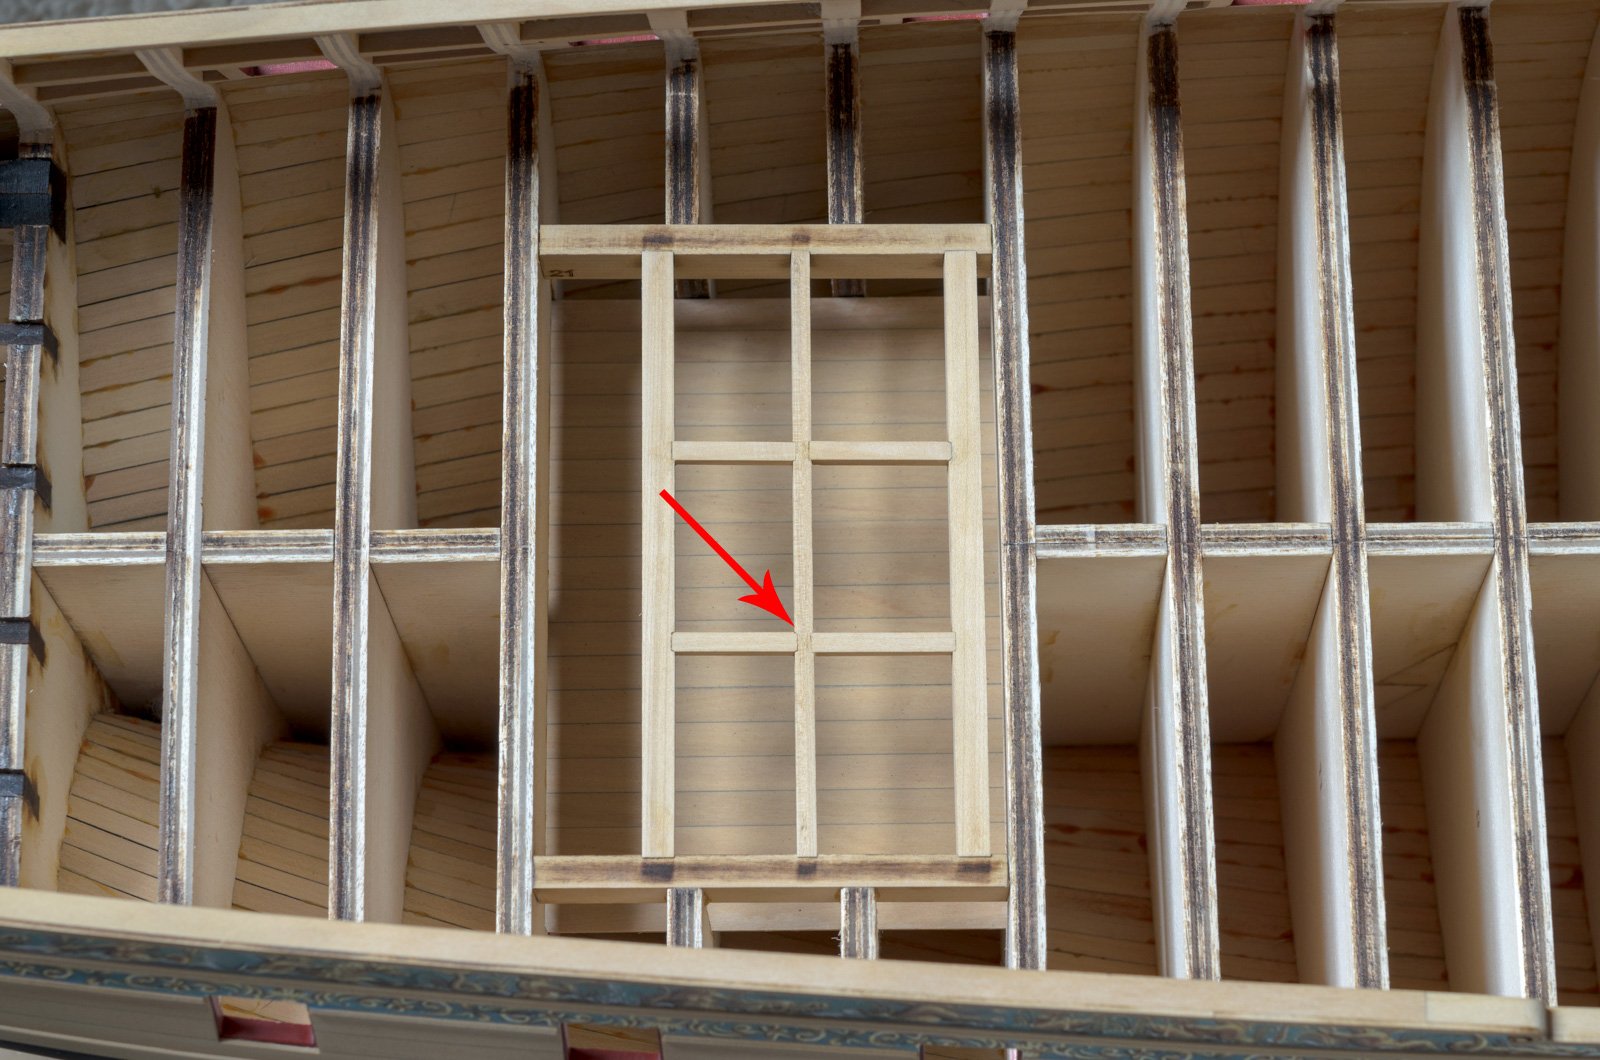
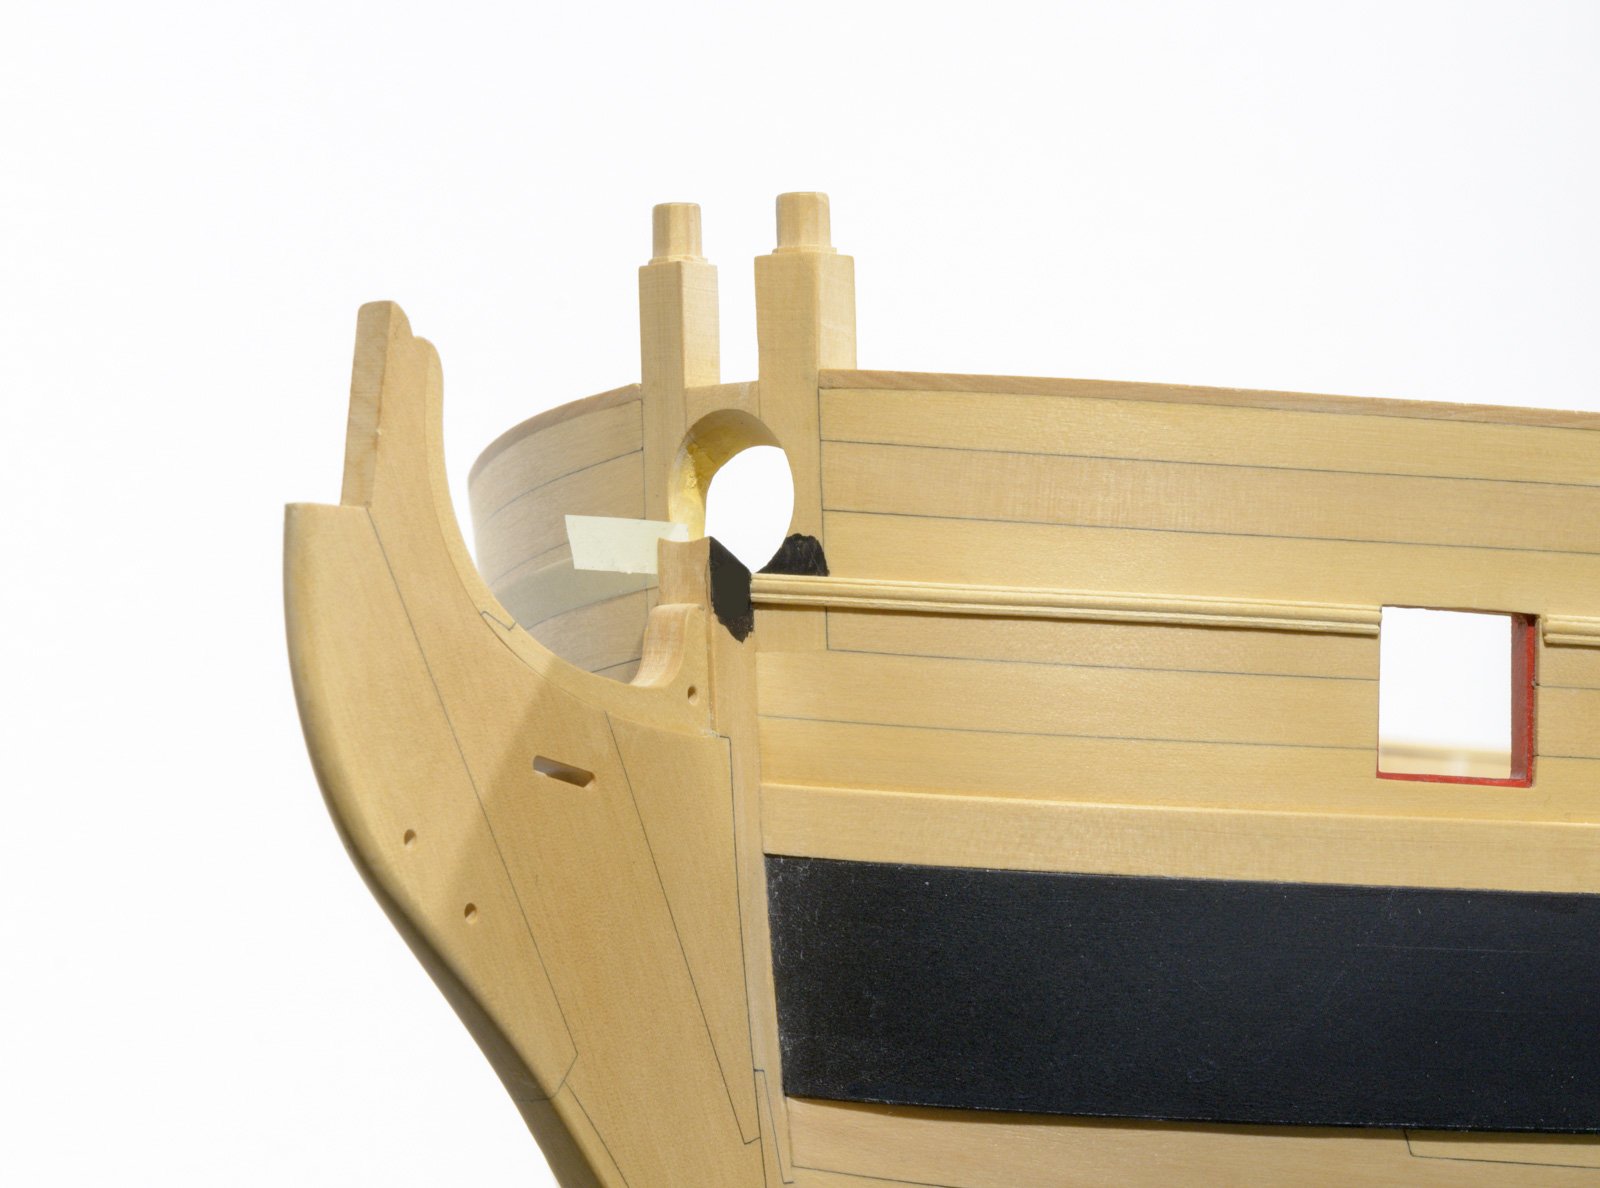
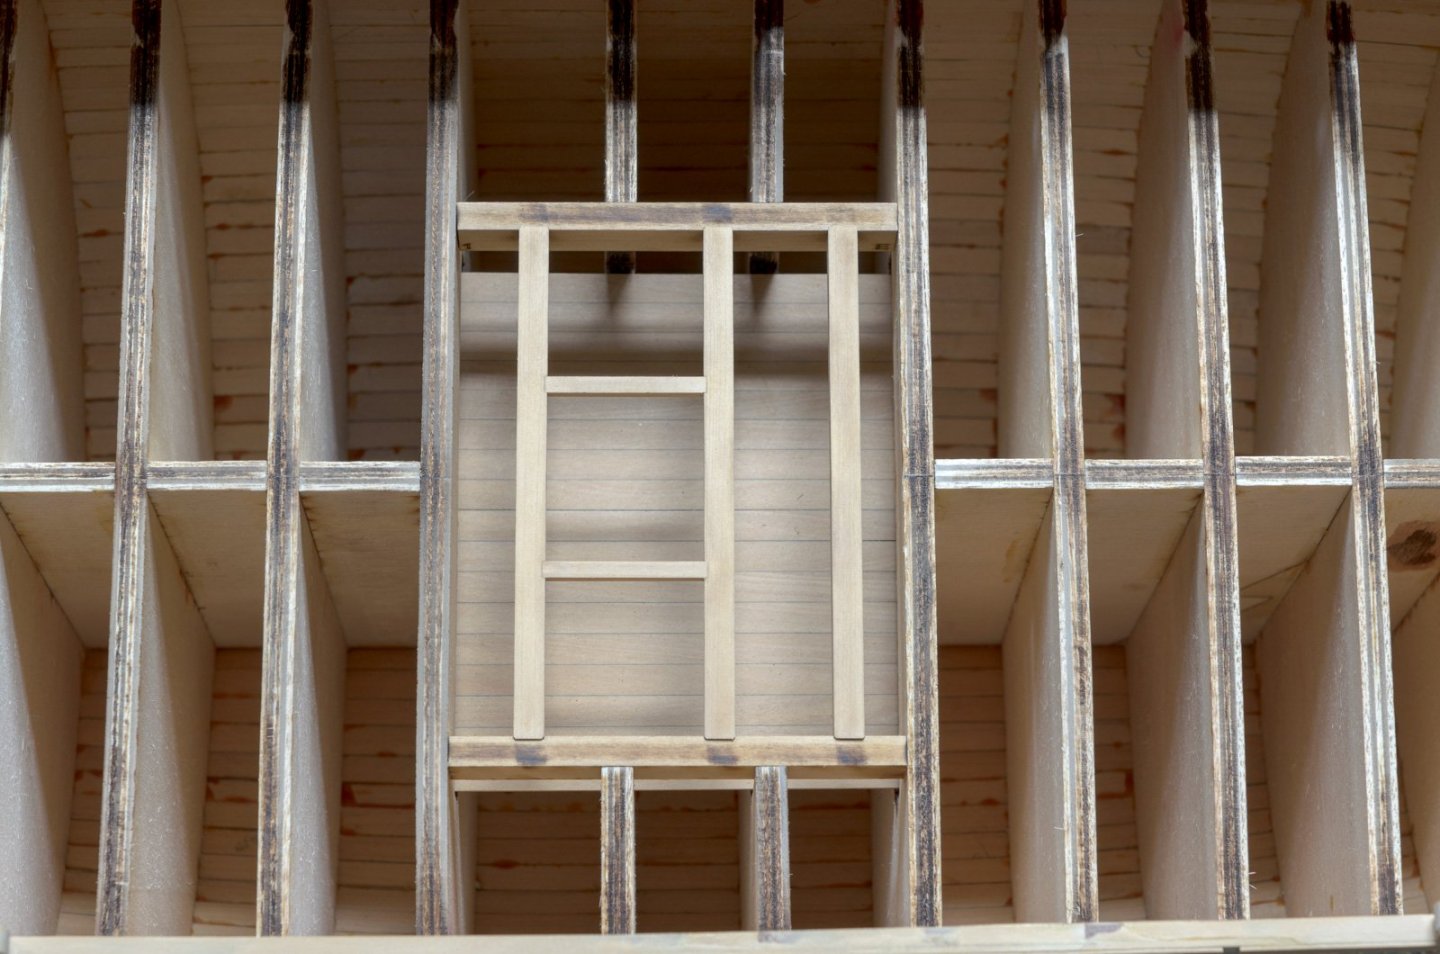
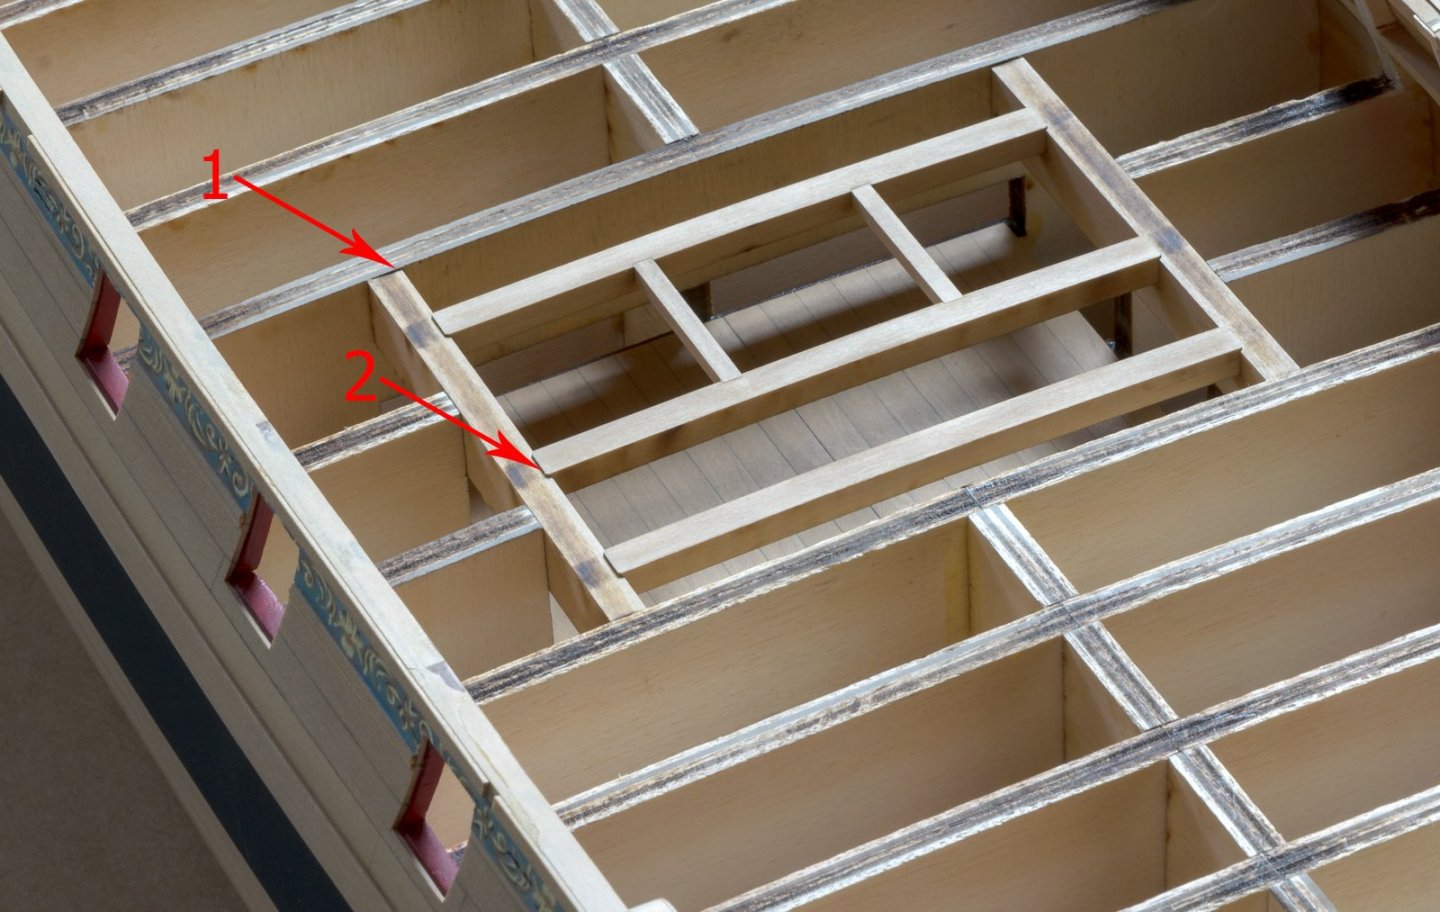
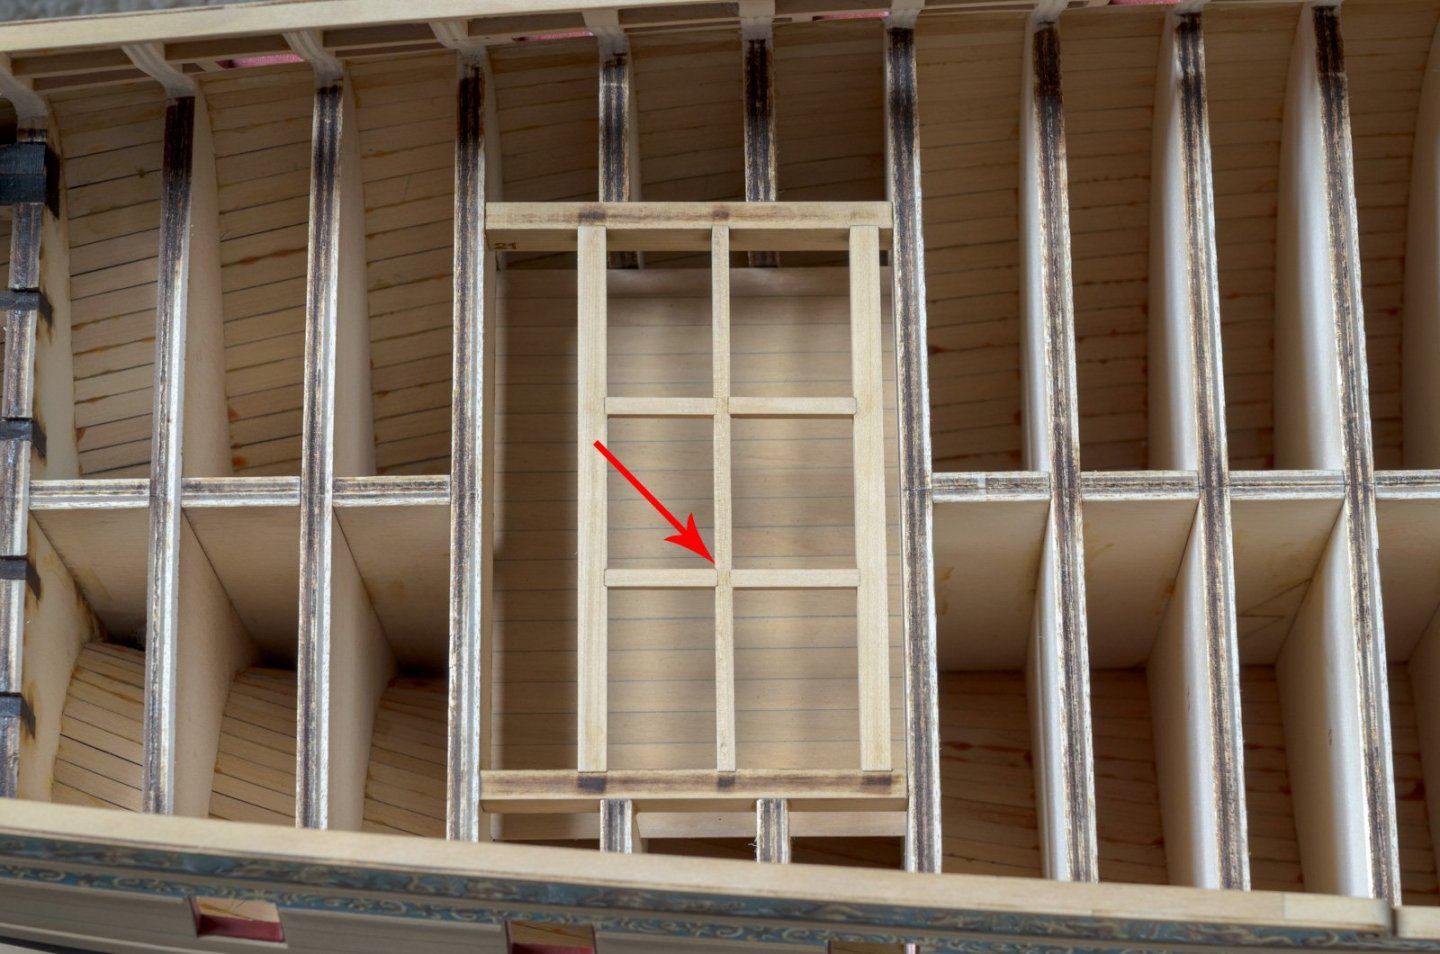
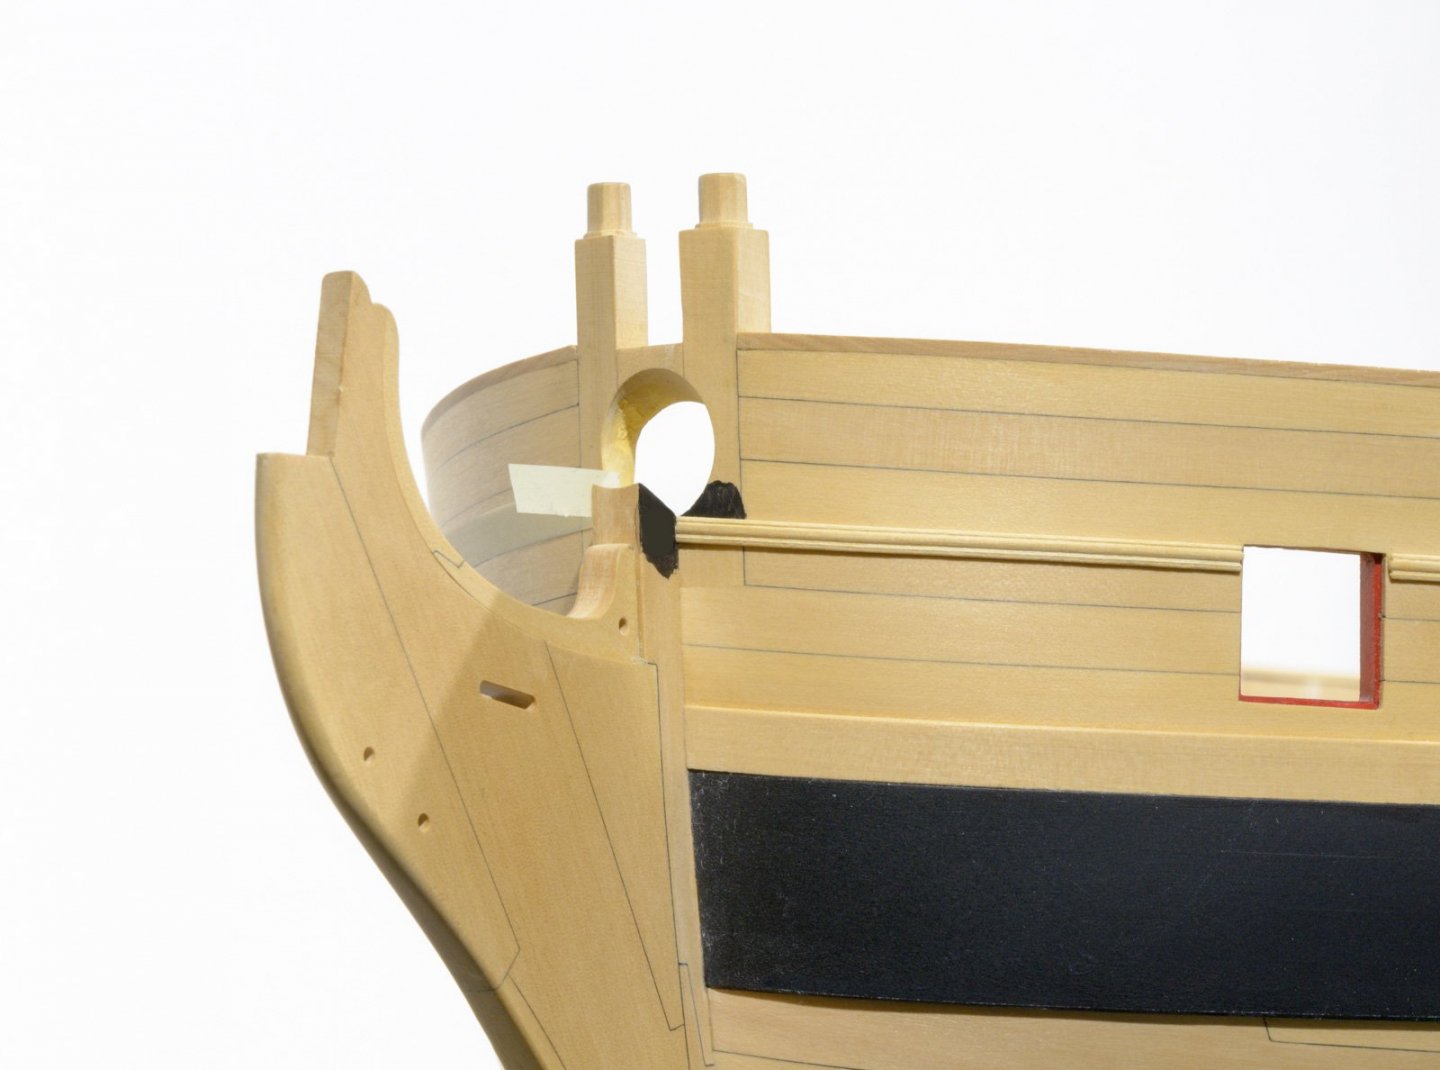
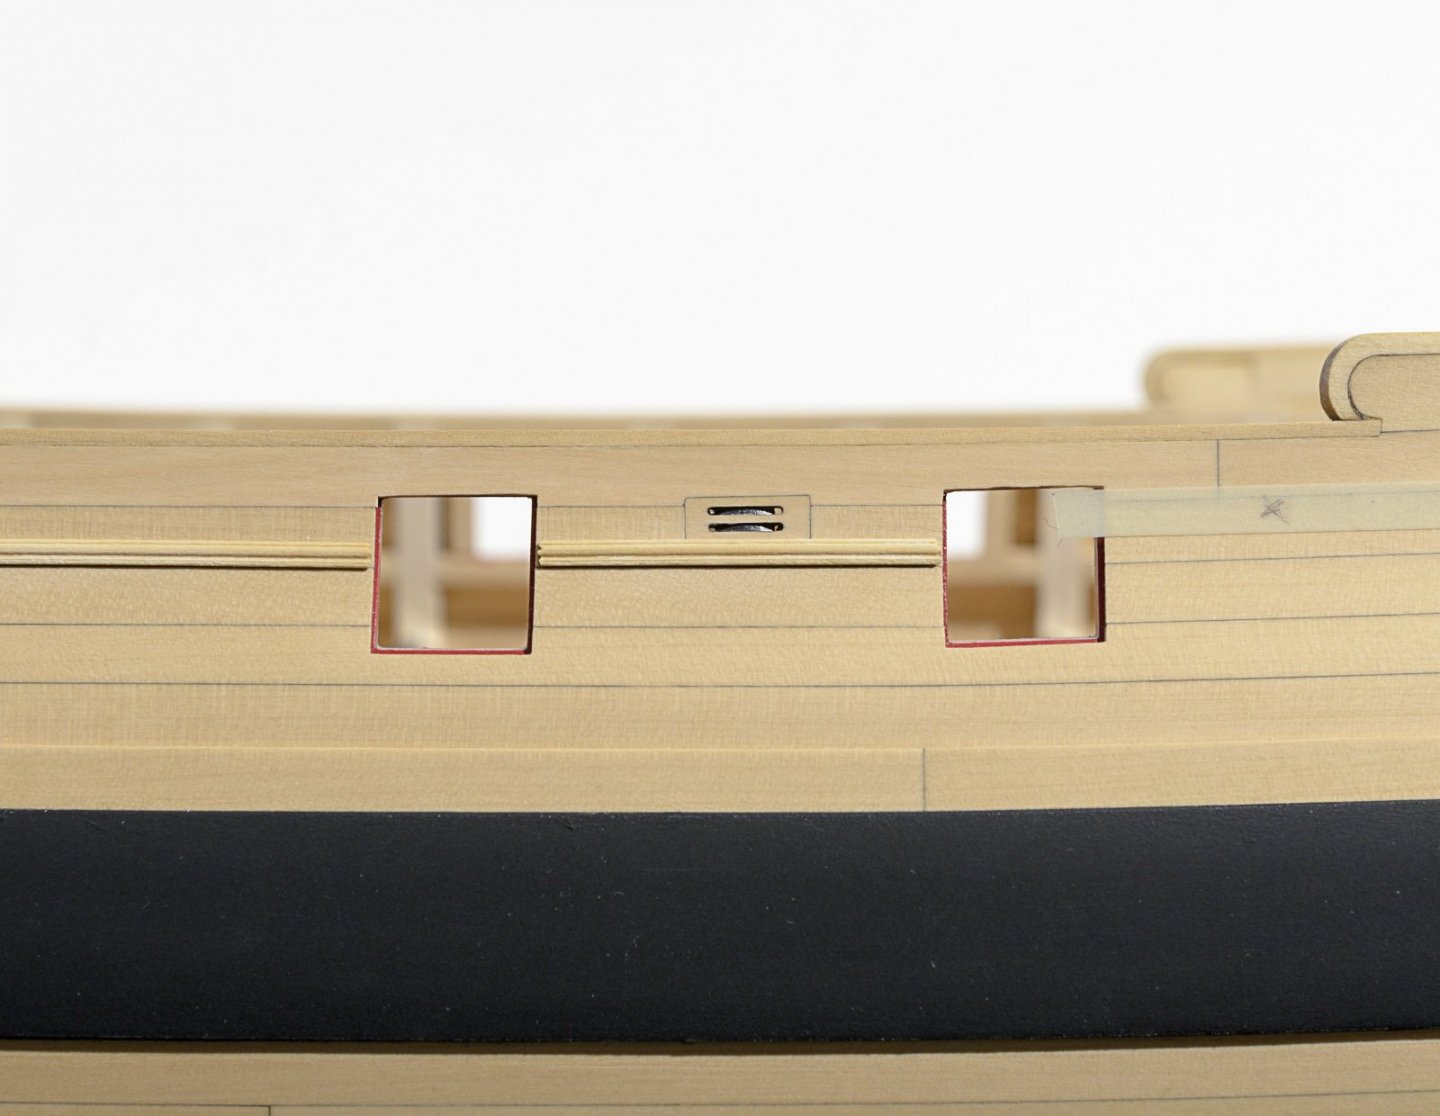
I decided to take a short break from the transom details in order to complete the framing for the deck coamings. The photos below show the completed work. The first photo is the aft framing followed by the forward framing. My frames are made from boxwood. During frame assembly I tried to keep things squared up and centered on the deck by removing material from both sides of the beam. A number of dry fits with the carlings were needed. Notice how the laser cut mortises are etched on both sides of the beam in order to line up the ledges. I would imagine that this would be a two step process and time consuming to do with the laser cutter. The beam supports can be placed slightly below the bulkheads. I recessed them less than 1/64" which saves having to fair them later. They are only needed to hold the beams and will be completely covered up, #1. When adding the beams I set them flush with the bulkheads, #2. As you can see, the beam support is below all of the pieces that need to be at deck level. Not having to chisel out the mortises was huge time saver. Another well thought out kit which leaves just enough wiggle room to achieve a proper fit. Thanks to Chuck for making this possible! Mike
- 607 replies
-
- 23
-

-
- winchelsea
- Syren Ship Model Company
- (and 1 more)
-
First planking belt: So, other than the center plank, there will be some tapering of the other six planks, dependent on the laying out? Mike
- 1,784 replies
-
- 2
-
-
- winchelsea
- Syren Ship Model Company
- (and 1 more)
-
Looking really nice! Can't wait to get there. I wonder how difficult it would be curving the deck planks with boxwood. Looks like it be just a straight taper with edge bending? Mike
- 1,784 replies
-
- 3
-
-
- winchelsea
- Syren Ship Model Company
- (and 1 more)
-
Thank you, Chuck. Yes, I used the fruitwood gel stain. No mixing of the stain beforehand. Straight off the top layer of gel that was in the can . It was wiped off immediately and I only needed two coats. Mike
- 607 replies
-
- 5
-
-
- winchelsea
- Syren Ship Model Company
- (and 1 more)
-
I've been working on a way to get a good fit with the drops. I know that no two hulls are the same, but on my ship it required some experimentation in order to get the front of the drop (tear drop) to fit tight against the hull. I tried using dry heat and manual bending which worked somewhat though not perfectly. The solution. . .? 1. Place a strip masking tape on the wales for paint protection. 2. Remove material from the drop where necessary in order to get as close as possible to a good fit. Concentrate on the back end of the drop where it intersects with the transom. I sanded mine paper thin. 3. Once satisfied, place the drop in a pot of boiling water for 5 minutes or so. 4. While the drop is still hot, place it into position. 5. While holding the back end down, press the front end (tear drop) against the hull. 6. Hold for a few minutes while the drop cools. 7. Paint the drop Yes, when gluing the drop it will still be necessary to push the tear drop against the hull, but only by a fraction of the distance required before the boiling. I think that most will not need this technique at all. For those that do, it works. Mike

- 607 replies
-
- 26
-
-
- winchelsea
- Syren Ship Model Company
- (and 1 more)
-
Small update: Things are moving a bit slowly lately, but I did manage to get some work done. I've been jumping around a bit in the build sequence which seems okay for now. Here are few photos showing where I'm at. Looking at the laser cut sheet one can see that the 5 moldings that run along the top edge of the transom are not all the same width. Only the center molding at the very top is correct. The other 4 are slightly wider and the lower edge of each needs to be reduced in width in order to match the center molding. I found that PVA glue doesn't work well for adhering the figures so I suggest using medium CA which works very well. The green paper on the transom was cut back approx 3/64" along its outer edge to allow for a gluing surface. Mike

- 607 replies
-
- 26
-
-
- winchelsea
- Syren Ship Model Company
- (and 1 more)
-
Nicely done, Matthias! Mike
-
Don, I like to use wood strips about 1/16" x 3/8" x 10". I adhere sticky back sandpaper to one side that's usually around 180 grit. Works great for doing those long stretches along the hull. For the stern and bow areas I use rounded soft-sanders. http://www.softsanders.com/products/wood Mike
- 144 replies
-
- 4
-
-
- winchelsea
- Syren Ship Model Company
- (and 1 more)
-
Looking good, Don. Take your time fairing those bulkheads and use the remaining char as a guide while doing so. There won't be much of it left after you are done. Mike
- 144 replies
-
- 2
-
-
- winchelsea
- Syren Ship Model Company
- (and 1 more)
-
Thank you all! No secret regarding the "perfect spirals". Those are laser etched by the master himself, Chuck. Mike
- 607 replies
-
- 5
-
-
- winchelsea
- Syren Ship Model Company
- (and 1 more)
-
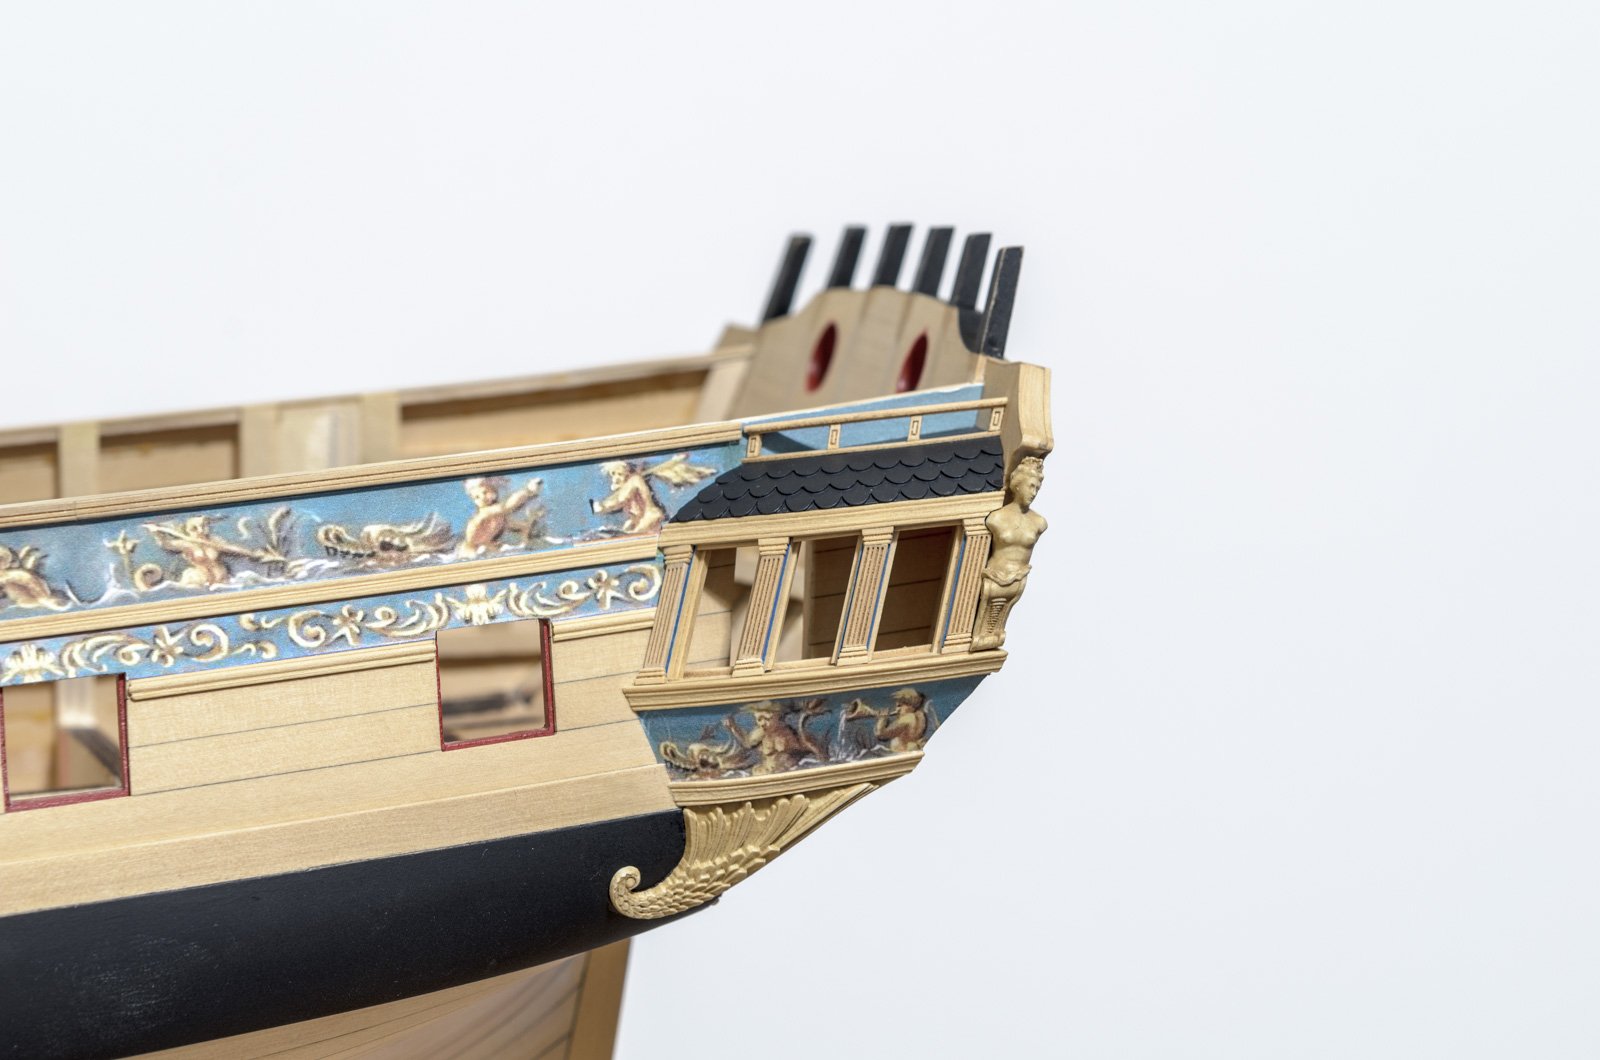
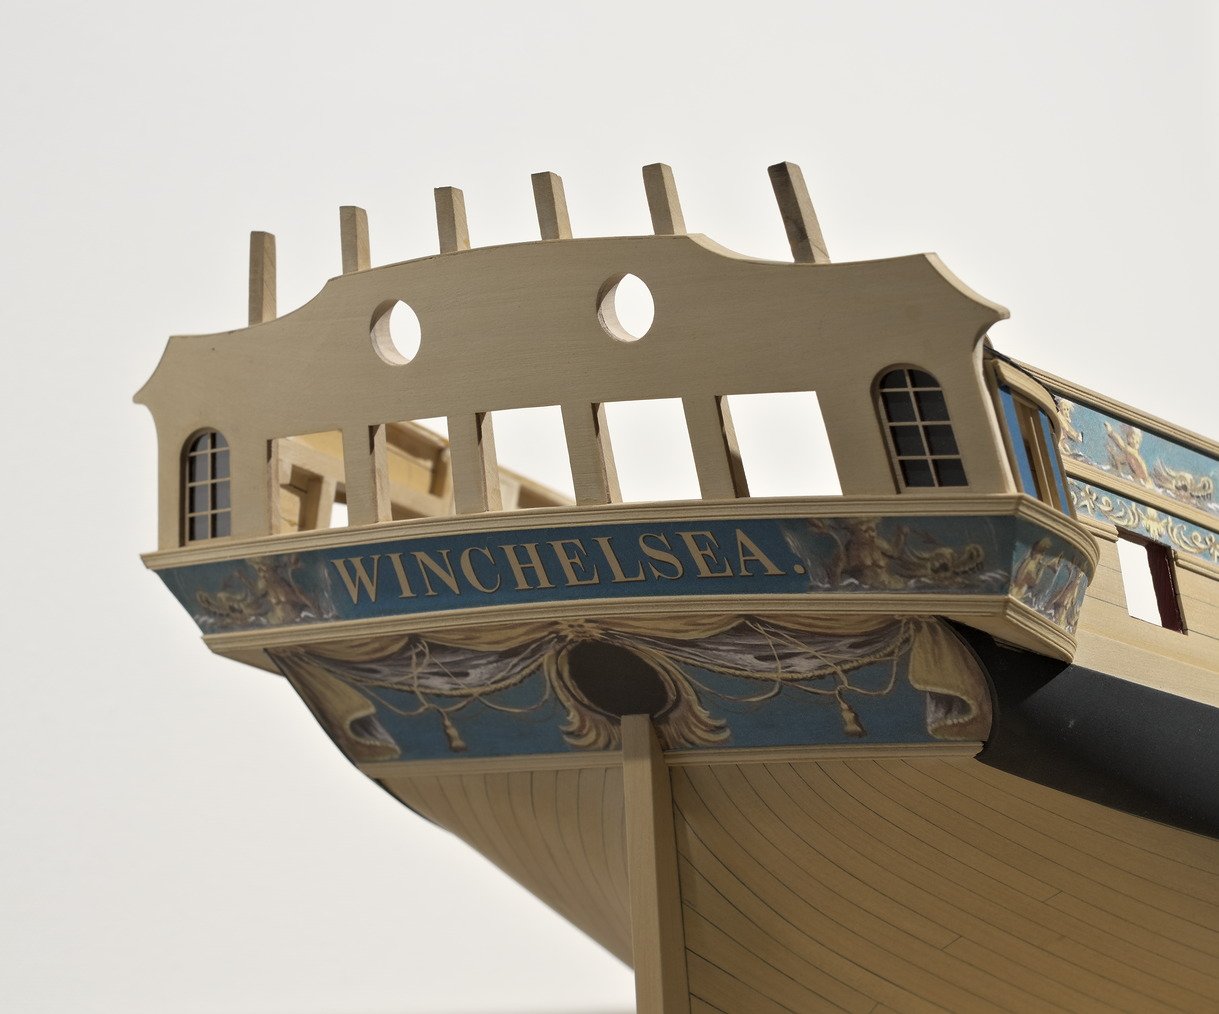
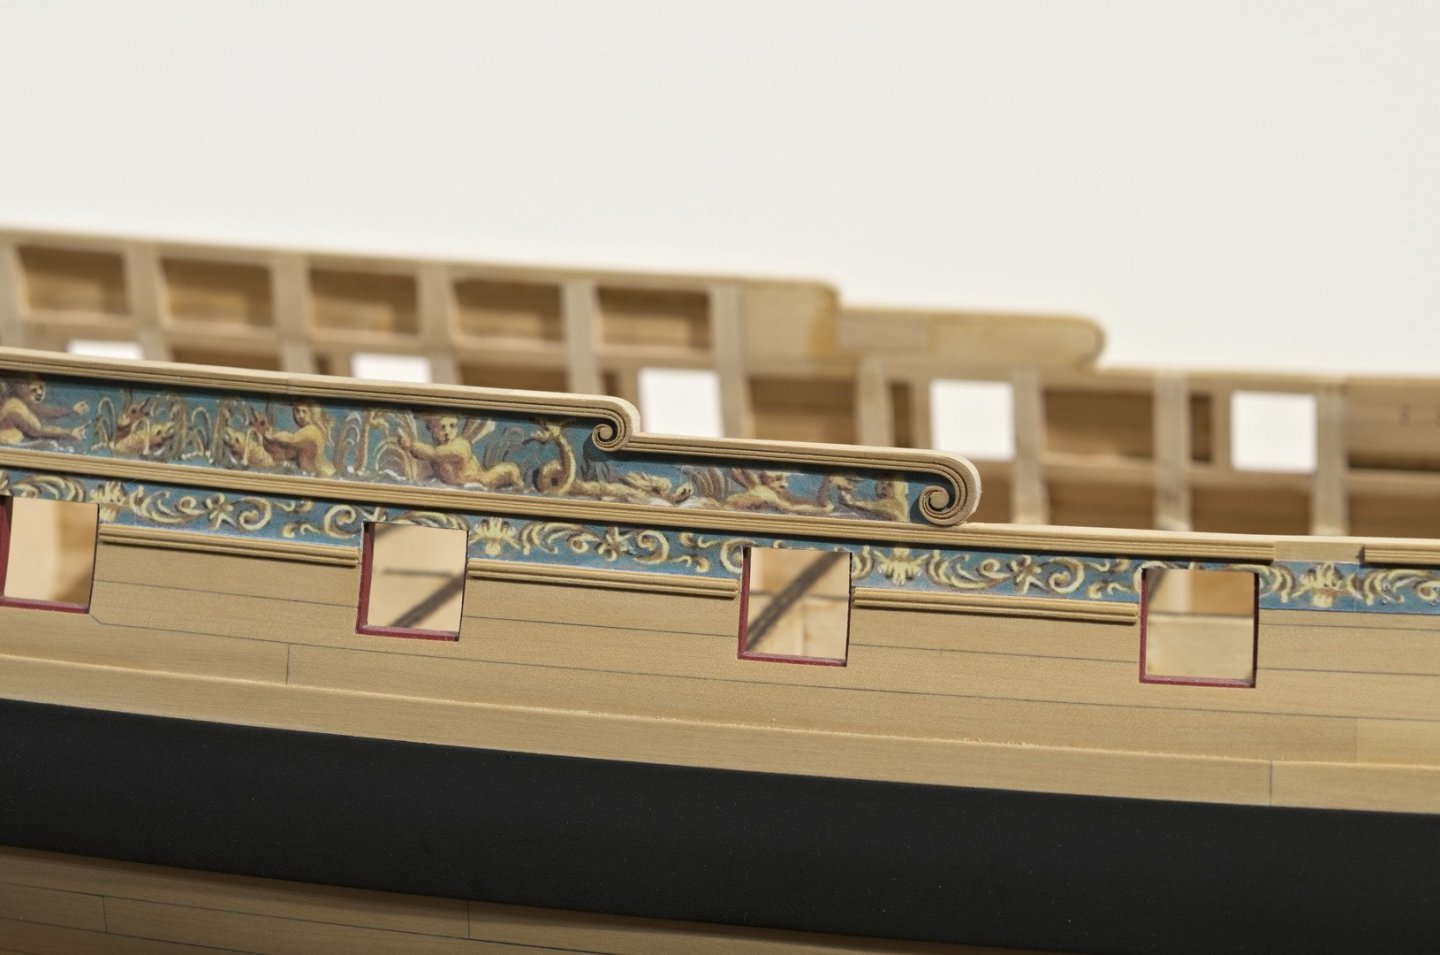
Chapter three is still a work in progress. I added the friezes to the ship. The sides of the hull were done in sequence while adding the middle molding along the waste and the laser etched molding along the forecastle and quarter deck. The QGallery roofs were painted dark gray and work has started on the QGallery columns and roof rail. The friezes were cut out with the aid of long ships curves. This worked out quite well and I can think of only one edge that had to be done by eye. For adhesion, I used the Elmers School glue stick. When using the stick, I made several passes over the frieze. I wanted to use enough glue to allow for positioning of the frieze before the glue starts to set which can happen quickly if applied to sparingly. 3-4 passes should be about right. A sharp #11 blade and a clean planking edge makes easy work of cutting the friezes around the inner edge of the gun ports, but only after the glue has dried. Here is where I'm at as of today. Mike

- 607 replies
-
- 32
-
-
- winchelsea
- Syren Ship Model Company
- (and 1 more)
-
Beautiful work there, Thomas. Your attention to detail is inspiring. Mike
-
Looking good! Keep in mind that the friezes will cover some of the planked edges at the ports. The more even (straight) the planked edge, the easier it will be to cut the frieze. Mike
-
Nicely done, Rusty! Bet your glad that's over with. Now the fun part starts, Qgalleries. Mike
- 642 replies
-
- 2
-
-
- winchelsea
- Syren Ship Model Company
- (and 1 more)
-
Looks great, Chuck! Nice to see those stern frames covered up. Mike
- 1,784 replies
-
- 3
-
-
- winchelsea
- Syren Ship Model Company
- (and 1 more)
-
Its been an interesting couple of days. I managed to get one roof sanded to shape and then I added the tiles. The first row of tiles overhangs the roof slightly and touches the molding below. Other than the last tile at the end of each row, I did not reduce the tile widths. With each row, I set the the tops of the tiles to touch each other and then angled them as needed to align into a staggered pattern with the row below. Each row was sanded paper thin at the top and reduced to about a 1/64" at the bottom. Then the next row was added. I also added the molding that sits on top. The molding has the added benefit of cleaning up the edge of that last row of tiles. I will be painting the roof black and applying some weathering powder to tone down the color. Mike

- 607 replies
-
- 30
-
-
- winchelsea
- Syren Ship Model Company
- (and 1 more)
-
Looking very good! Mike
-
Thank you very much for the kind words! I do enjoy the photography side of the build. Originally, I was shooting the photos against a beige painted wall in my apartment under 2500k incandescent. I never liked the lack of separation between the model and the background. While shopping for paint at the local Michaels store I found a 30x40 white stretched canvas. I tried using it as the background. It helped a lot especially after moving the shots to the workroom which has 3000k LEDs. Mike
- 607 replies
-
- 5
-
-
- winchelsea
- Syren Ship Model Company
- (and 1 more)
-
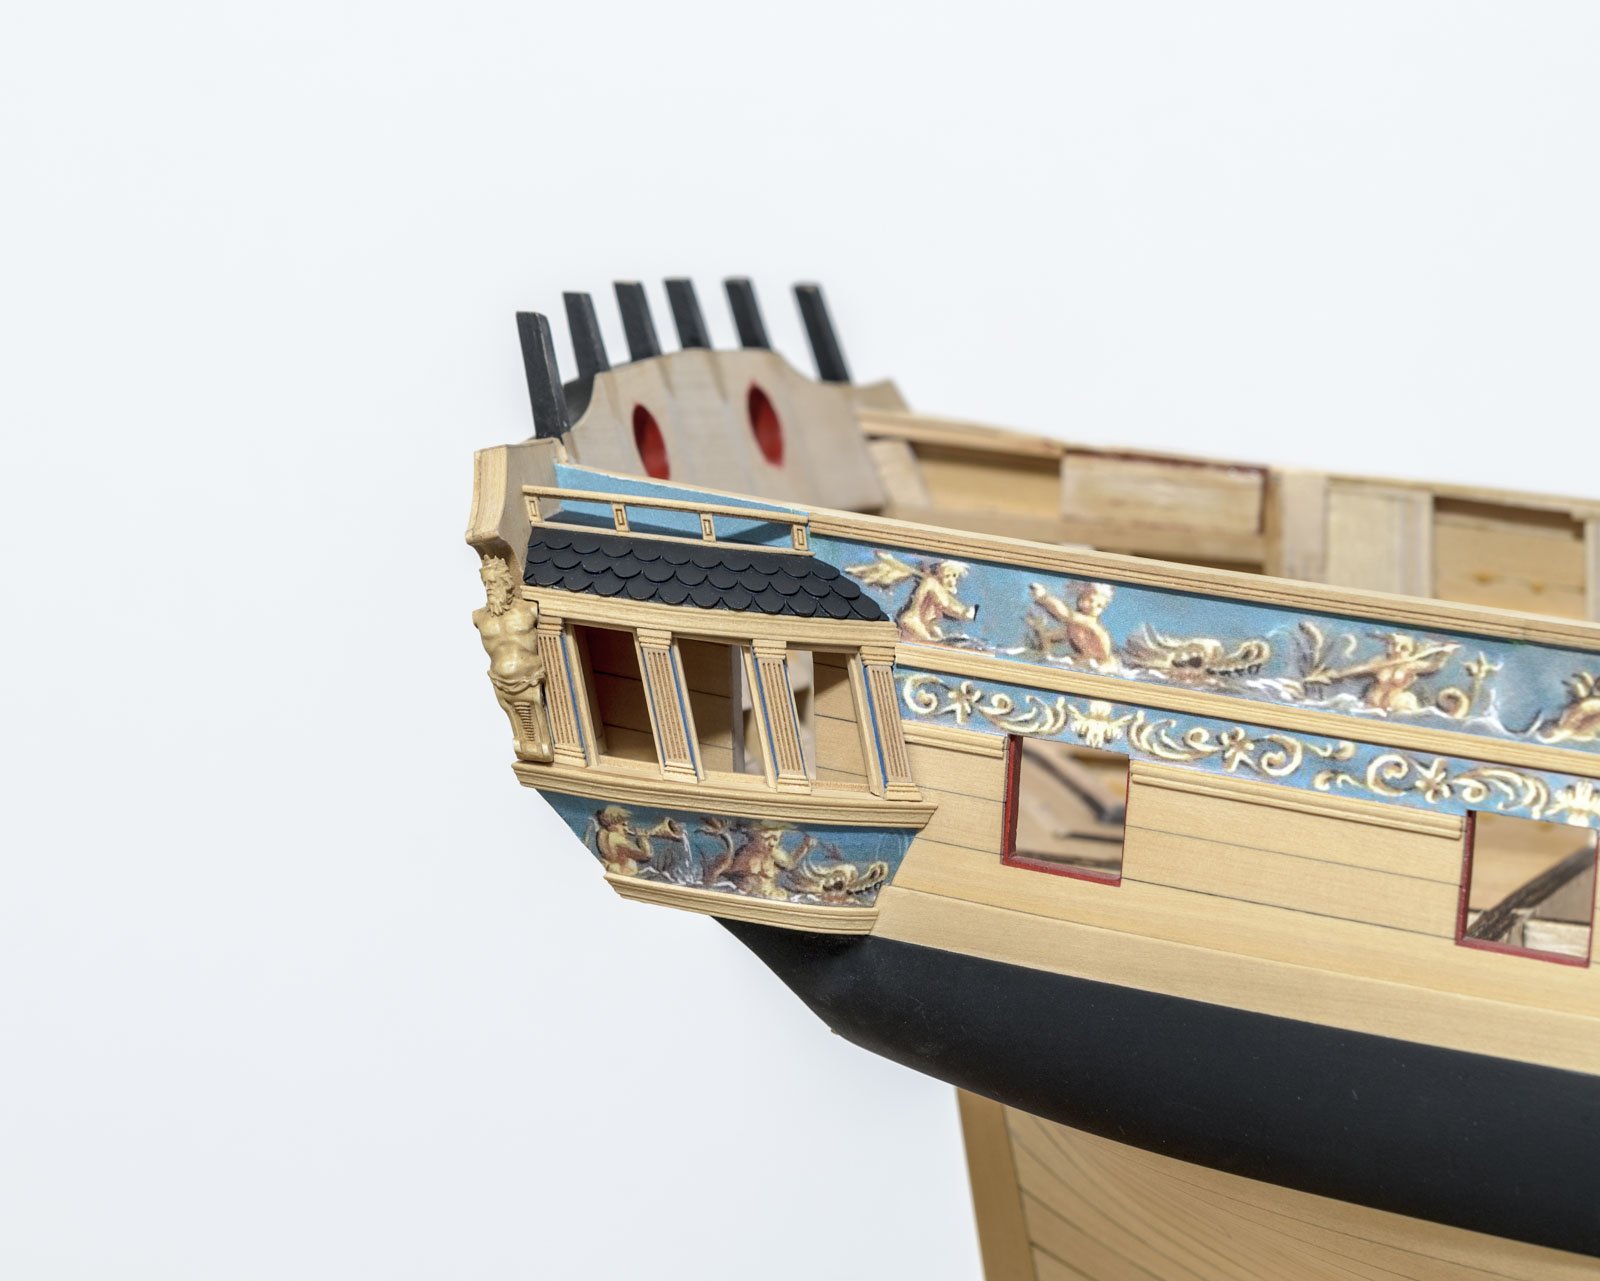
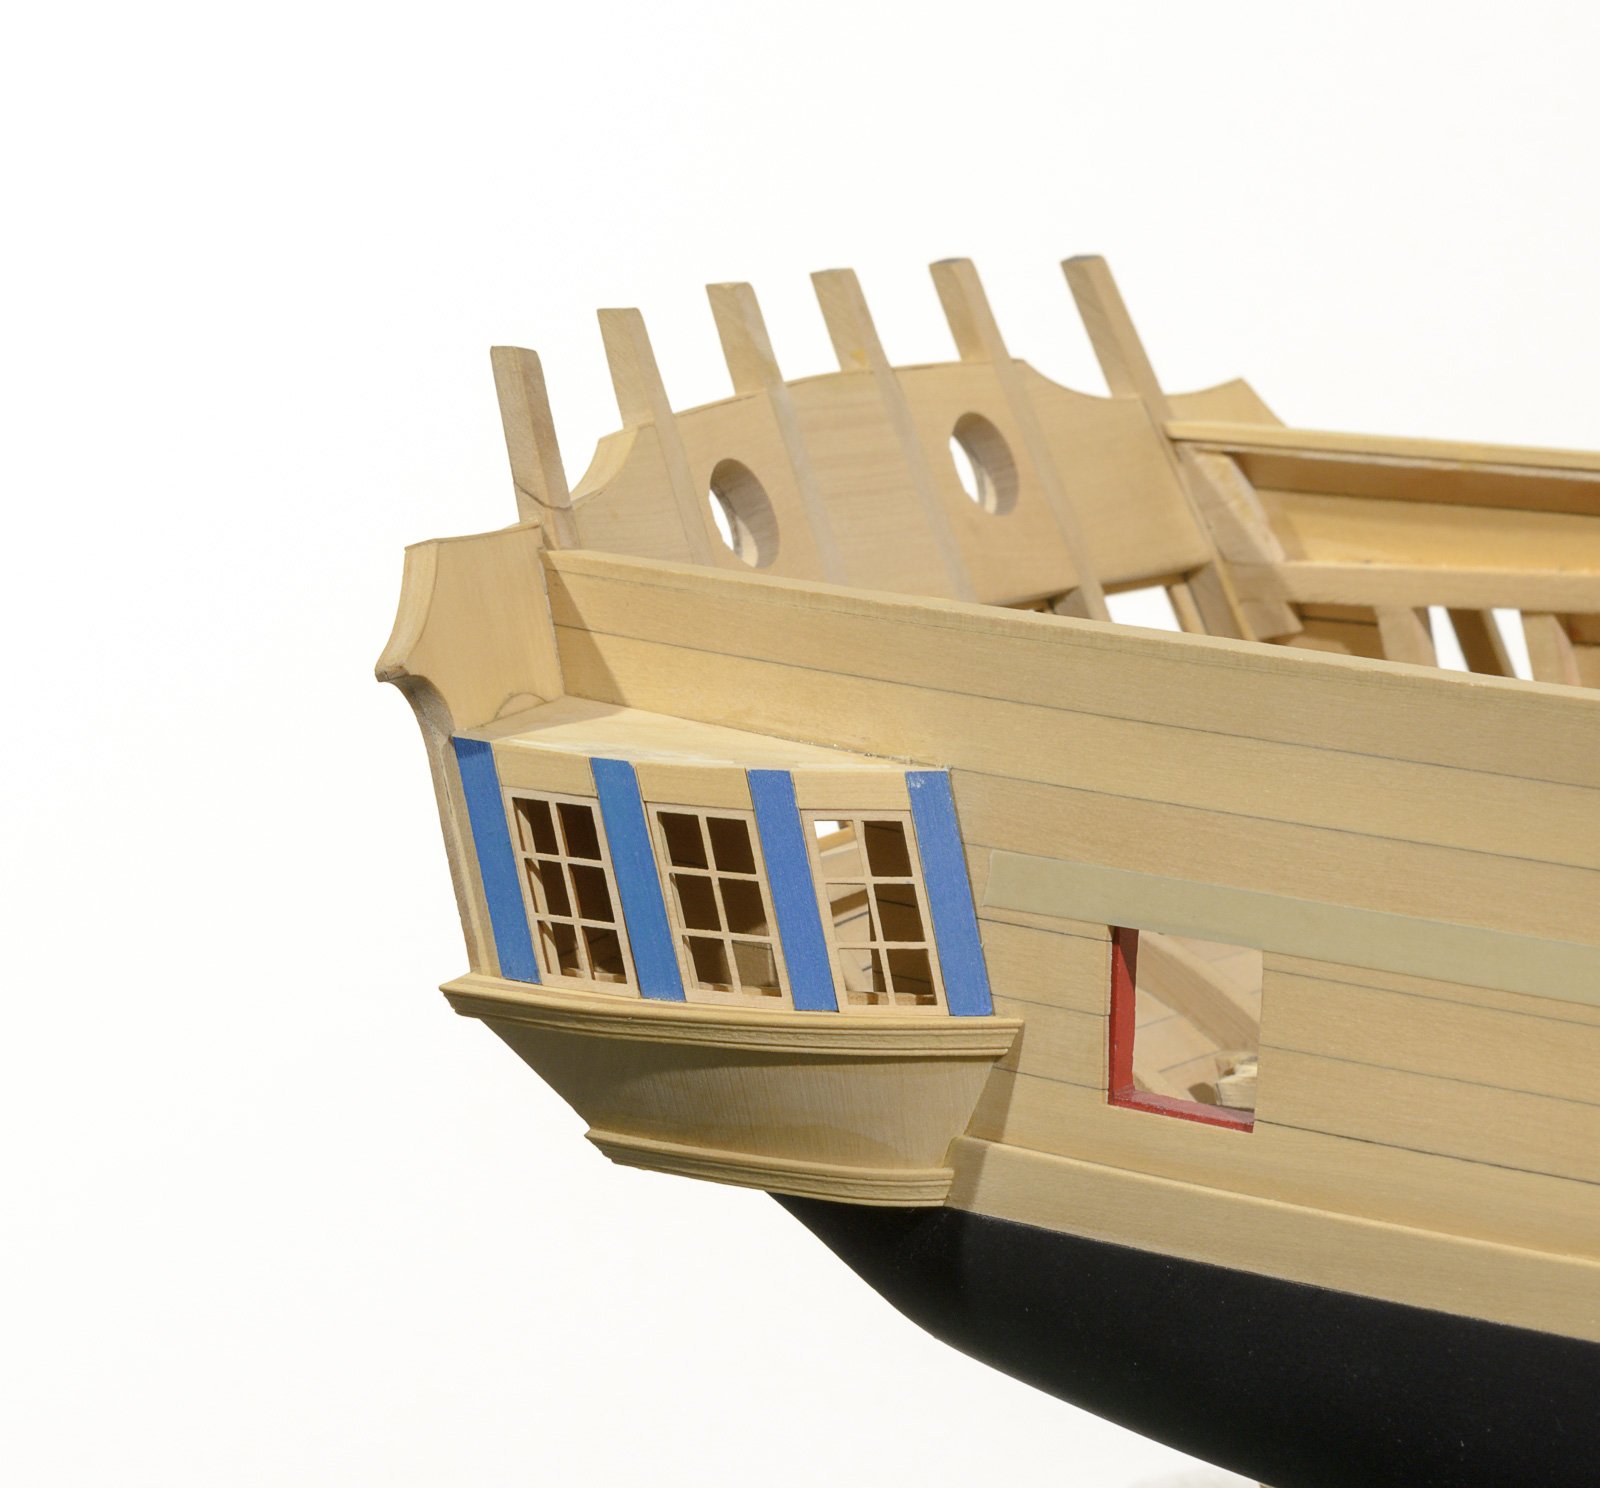
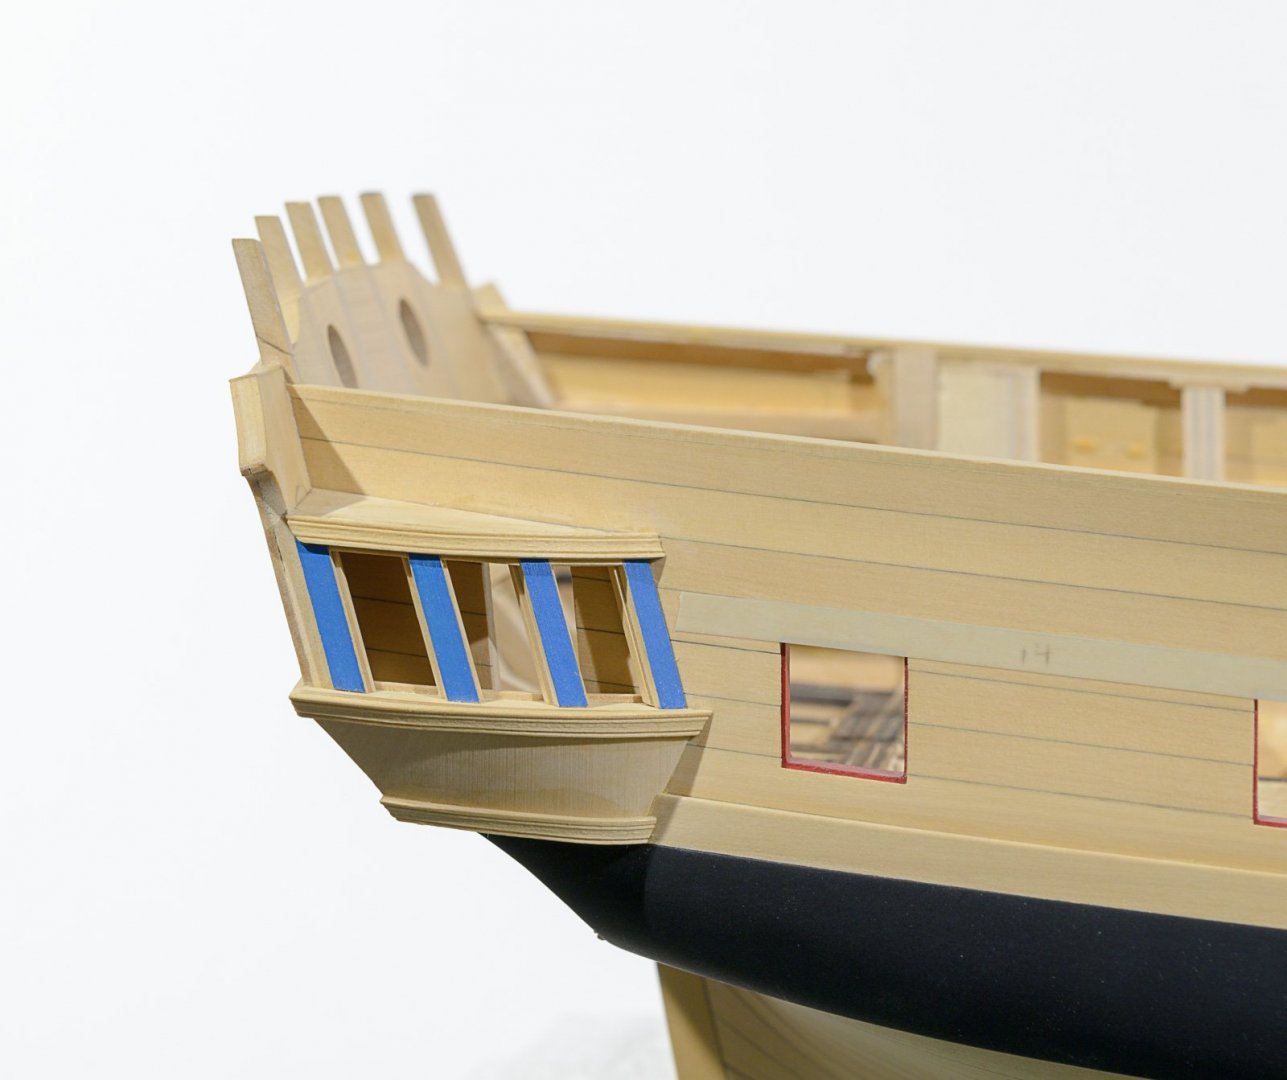
I added the moldings that sit along the upper edge of the QGalleries. I left about 1/32" of the top of each window showing below the molding. The molding is straight across the top, so the roof should fit nicely on top. I still need to cut out the aft end of the moldings to make room for the figures. Mike
- 607 replies
-
- 11
-
-
- winchelsea
- Syren Ship Model Company
- (and 1 more)
-
Just a quick update to my previous post. The bollards above the bottom molding will be painted black. To make things easier, I painted the area underneath the fancy molding before adding it. Looks like a bit of touch up is needed on the wales. Never noticed it until I saw the photo. Mike
- 607 replies
-
- 17
-
-
- winchelsea
- Syren Ship Model Company
- (and 1 more)
-
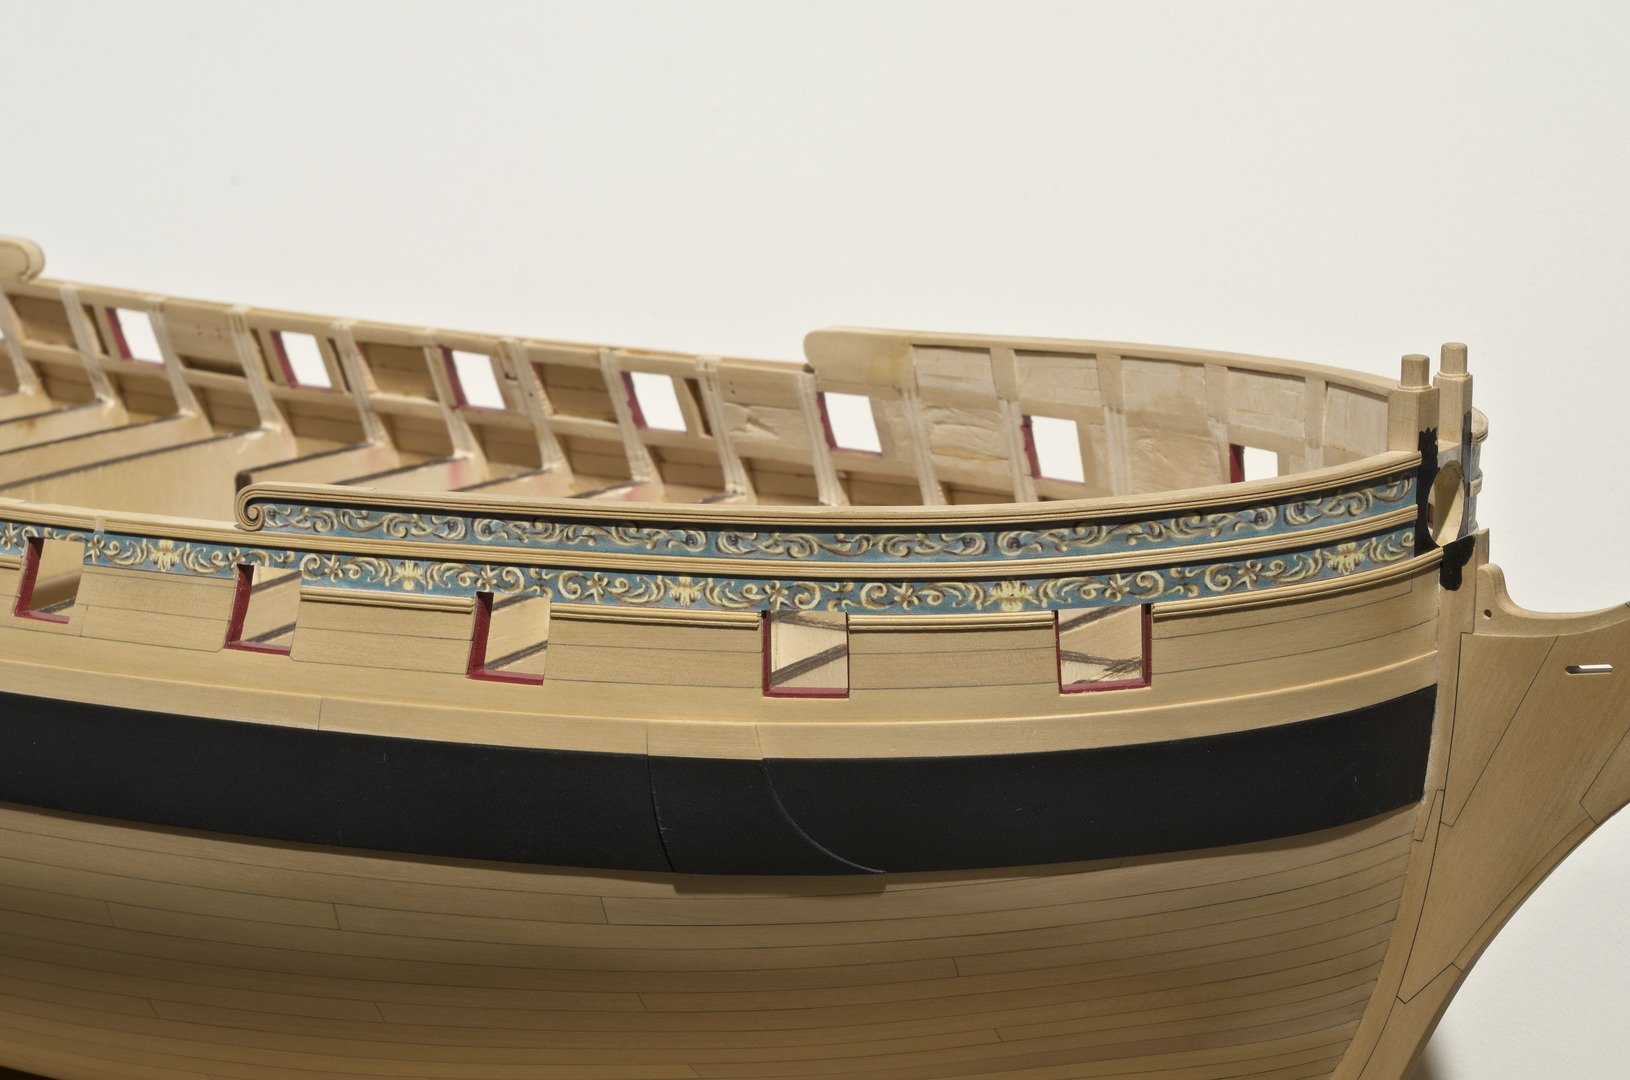
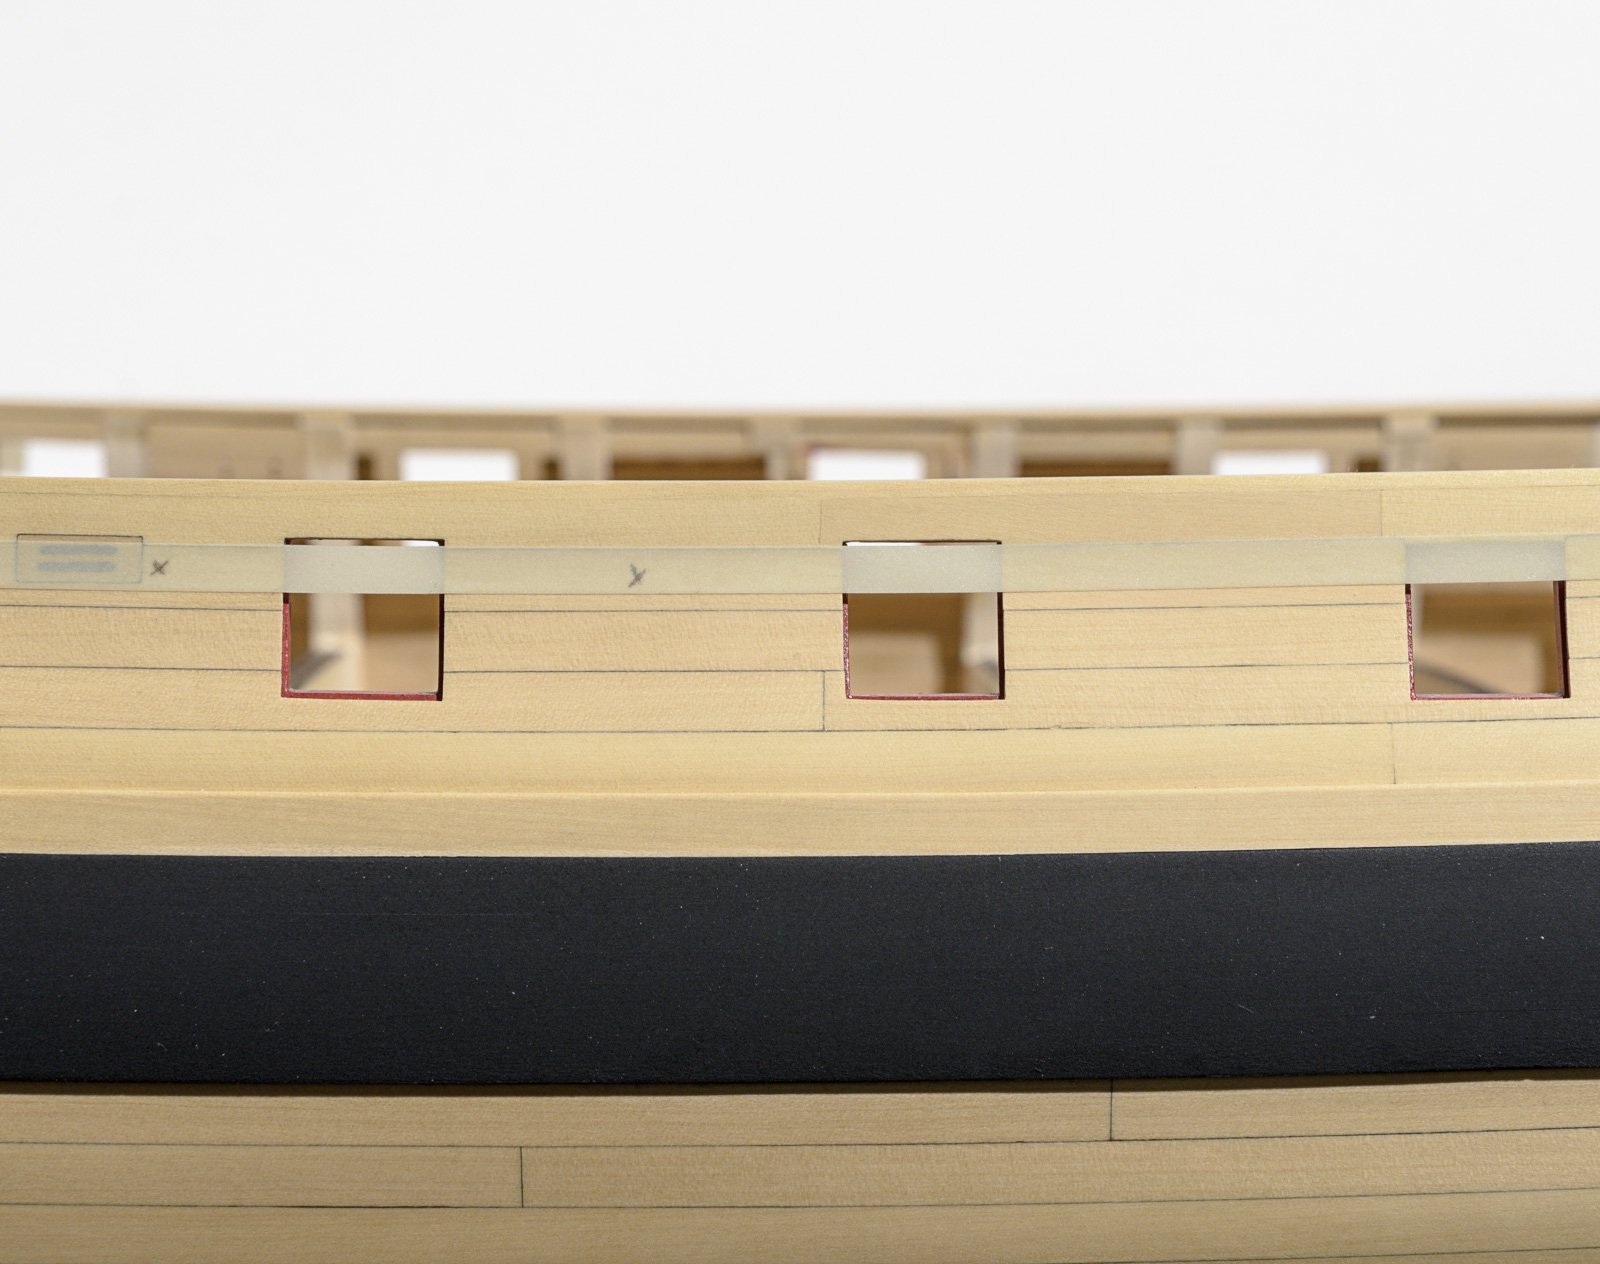
Work continues on the QGalleries with both sides at the same state. The windows were not glued in. Doing so now, along with the clear acetate behind them, would only create a dust issue later on. Better to wait. I also managed to scrape the fancy hull moldings. The tape on the hull represents the location for the top edge of the bottom molding. That's the one that runs through the gun ports. I established its position by measuring down a set distance from the shear at the waste. From there I tried to run the tape with a smooth run the entire length of the hull while taking additional measurements. The tape gives a nice edge for setting the molding into position. Once a length of molding was in place I removed the tape from that section. Mike


- 607 replies
-
- 27
-
-
- winchelsea
- Syren Ship Model Company
- (and 1 more)
-
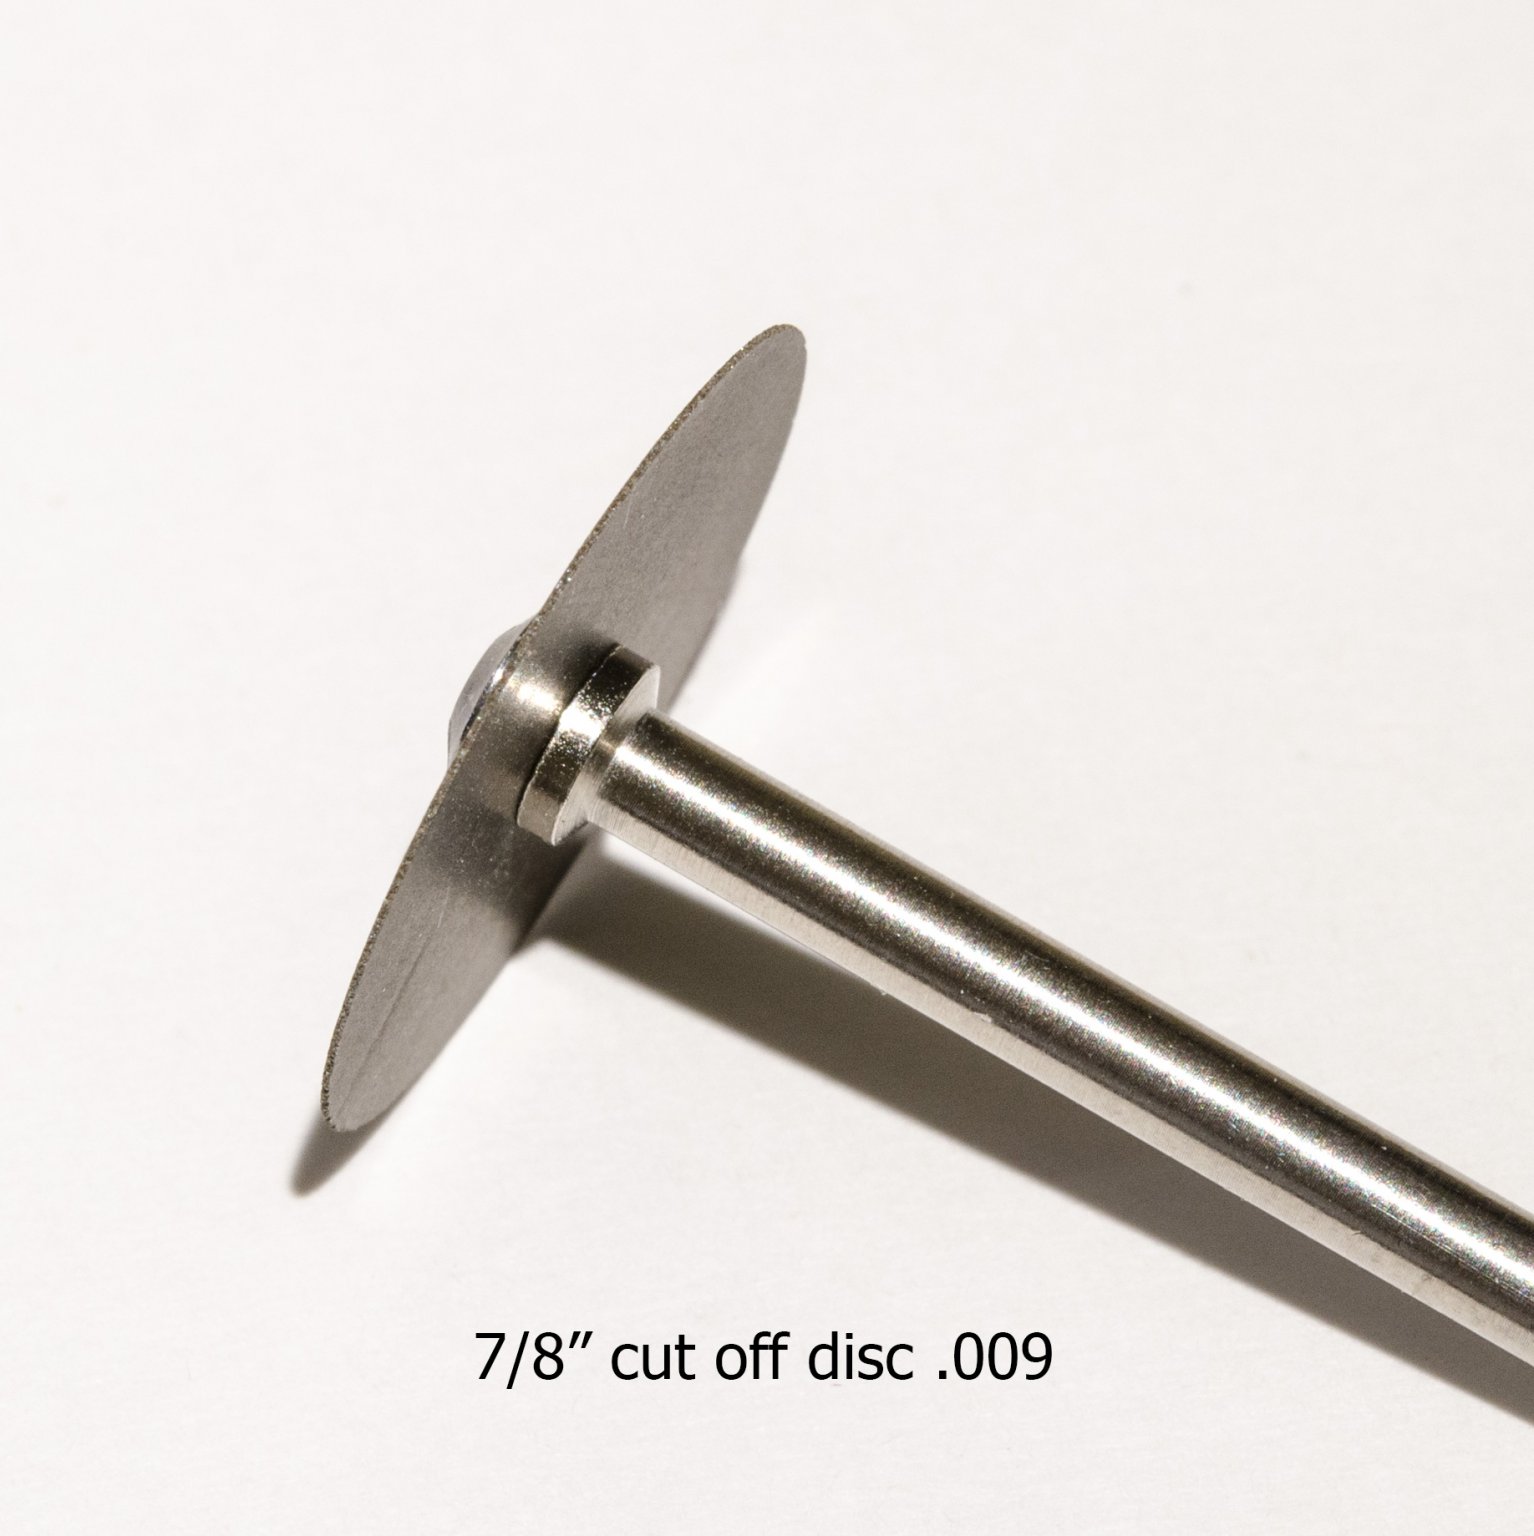
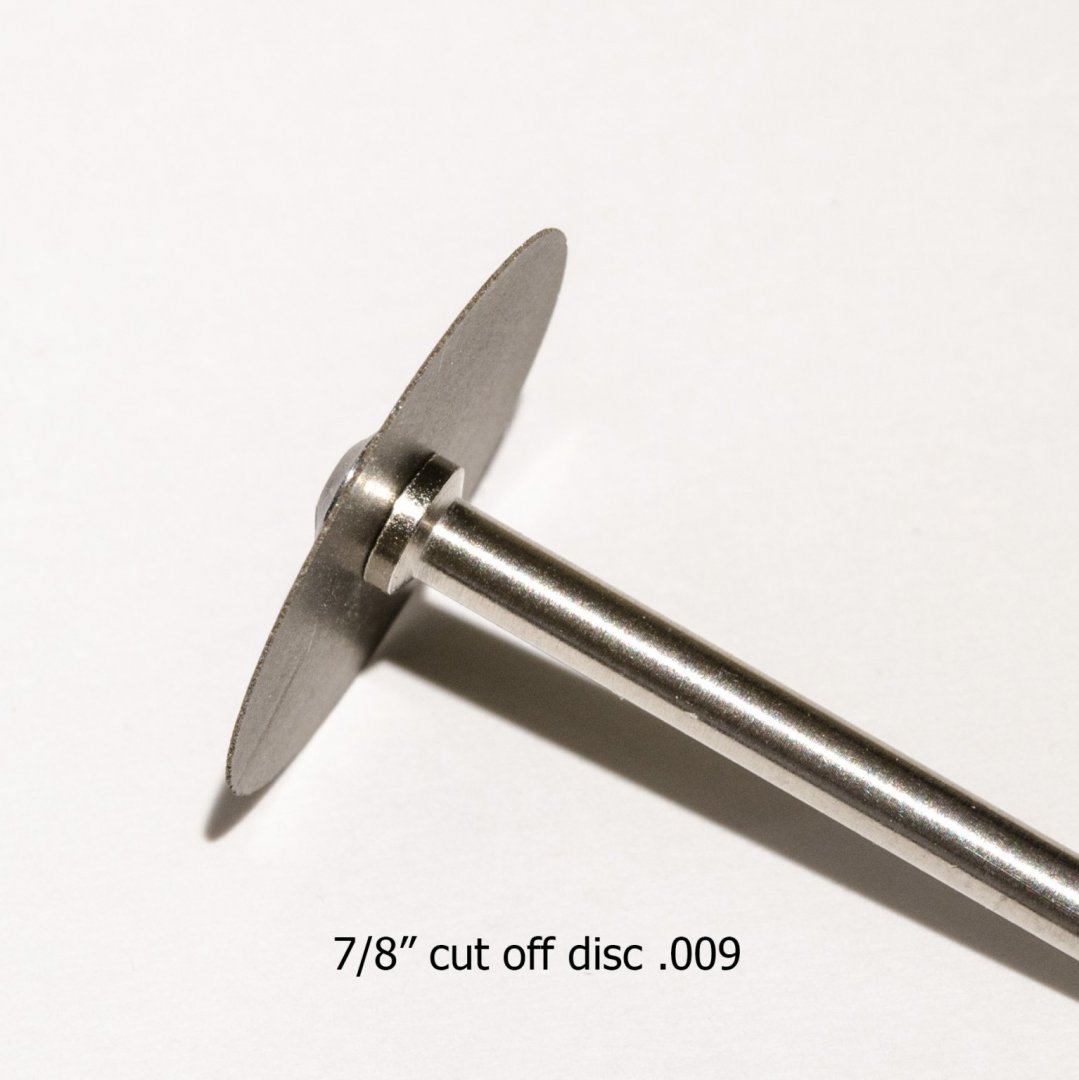
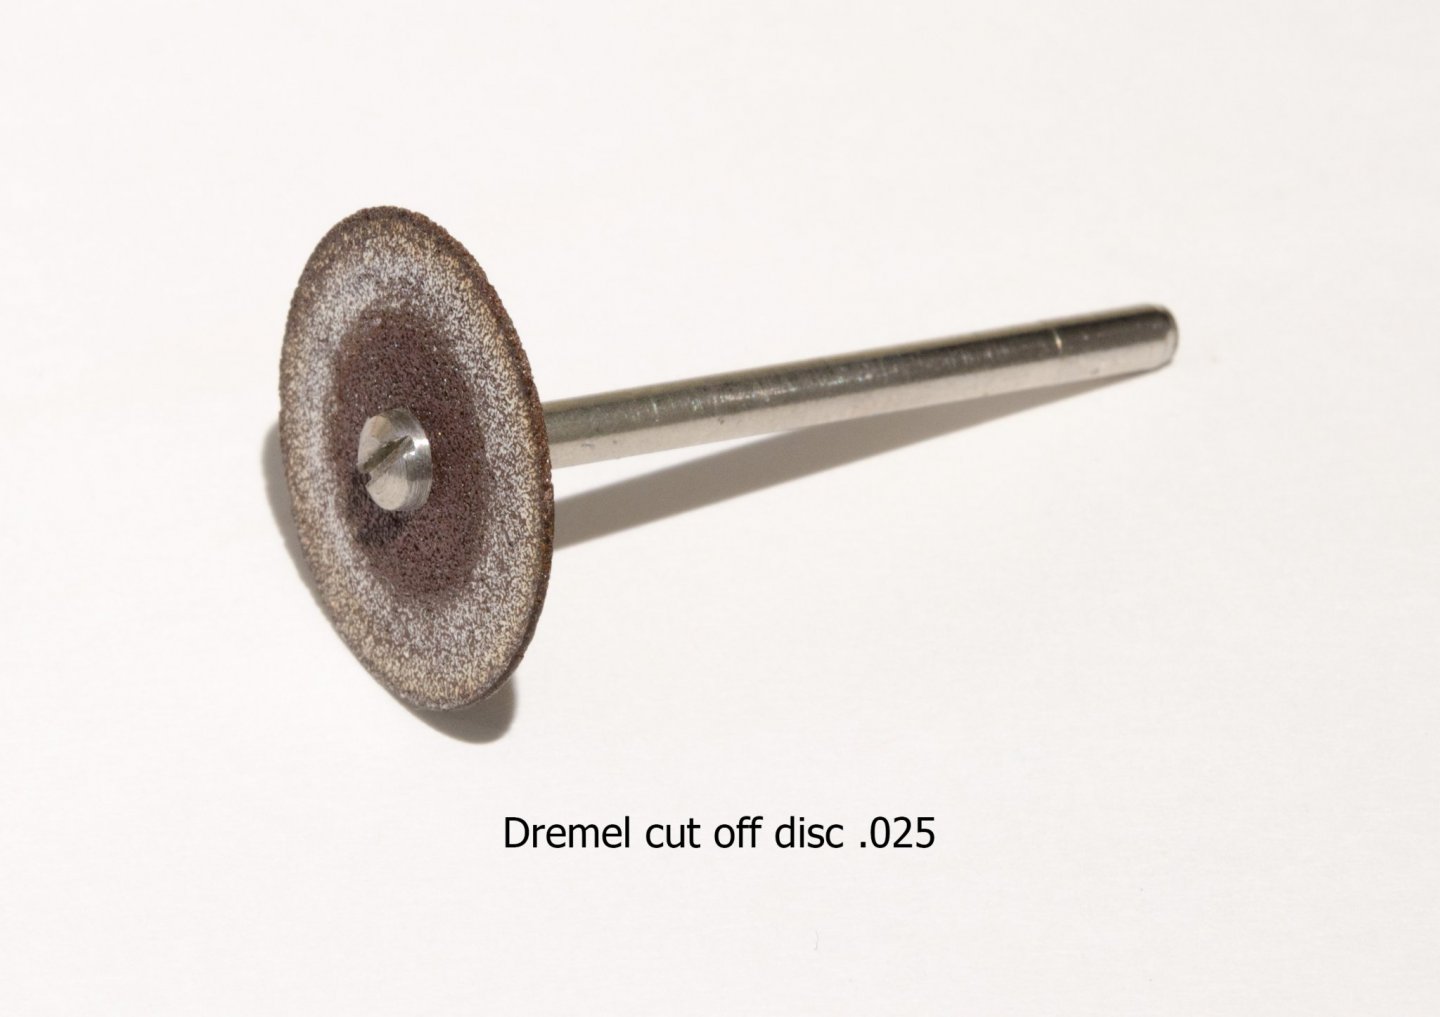
Here are the tools I used for shaping the scraper. . https://www.gesswein.com/p-3534-ultra-thin-cut-off-discs-78.aspx http://umm-usa.com/onlinestore/index.php?cPath=21_28 https://www.dremel.com/en_US/products/-/show-product/accessories/409-15-16-cutting-wheels-36-pack Mike
- 607 replies
-
- 9
-
-
- winchelsea
- Syren Ship Model Company
- (and 1 more)