Jump to content

Tankerman

NRG Member
  • Posts

    43
  • Joined

  • Last visited

About Tankerman

Profile Information

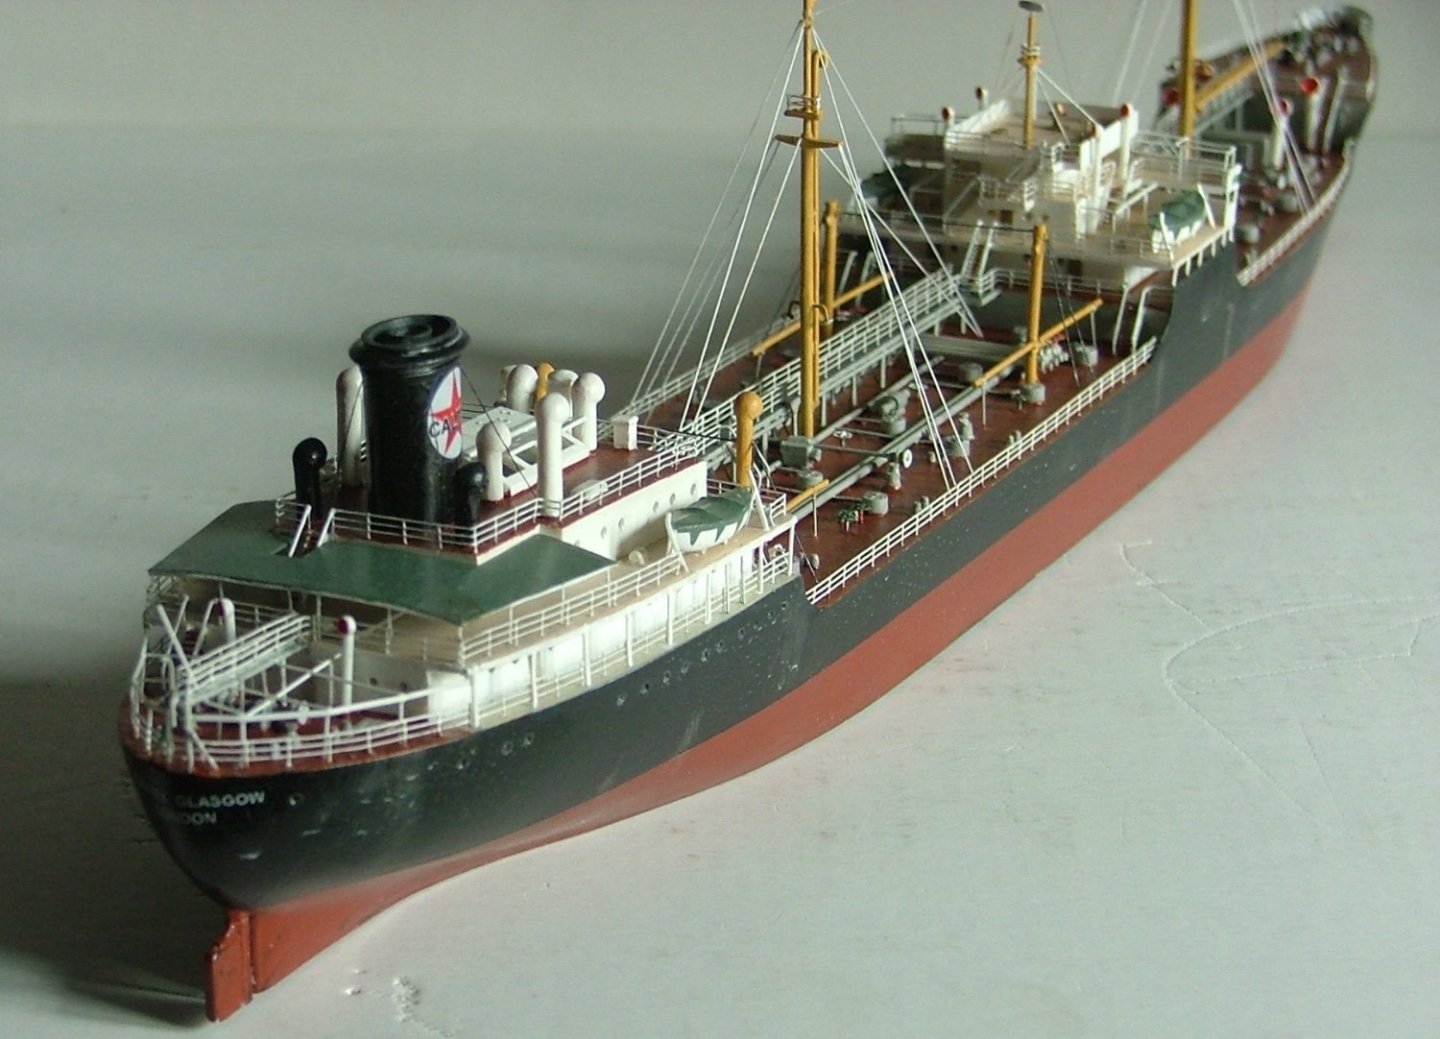
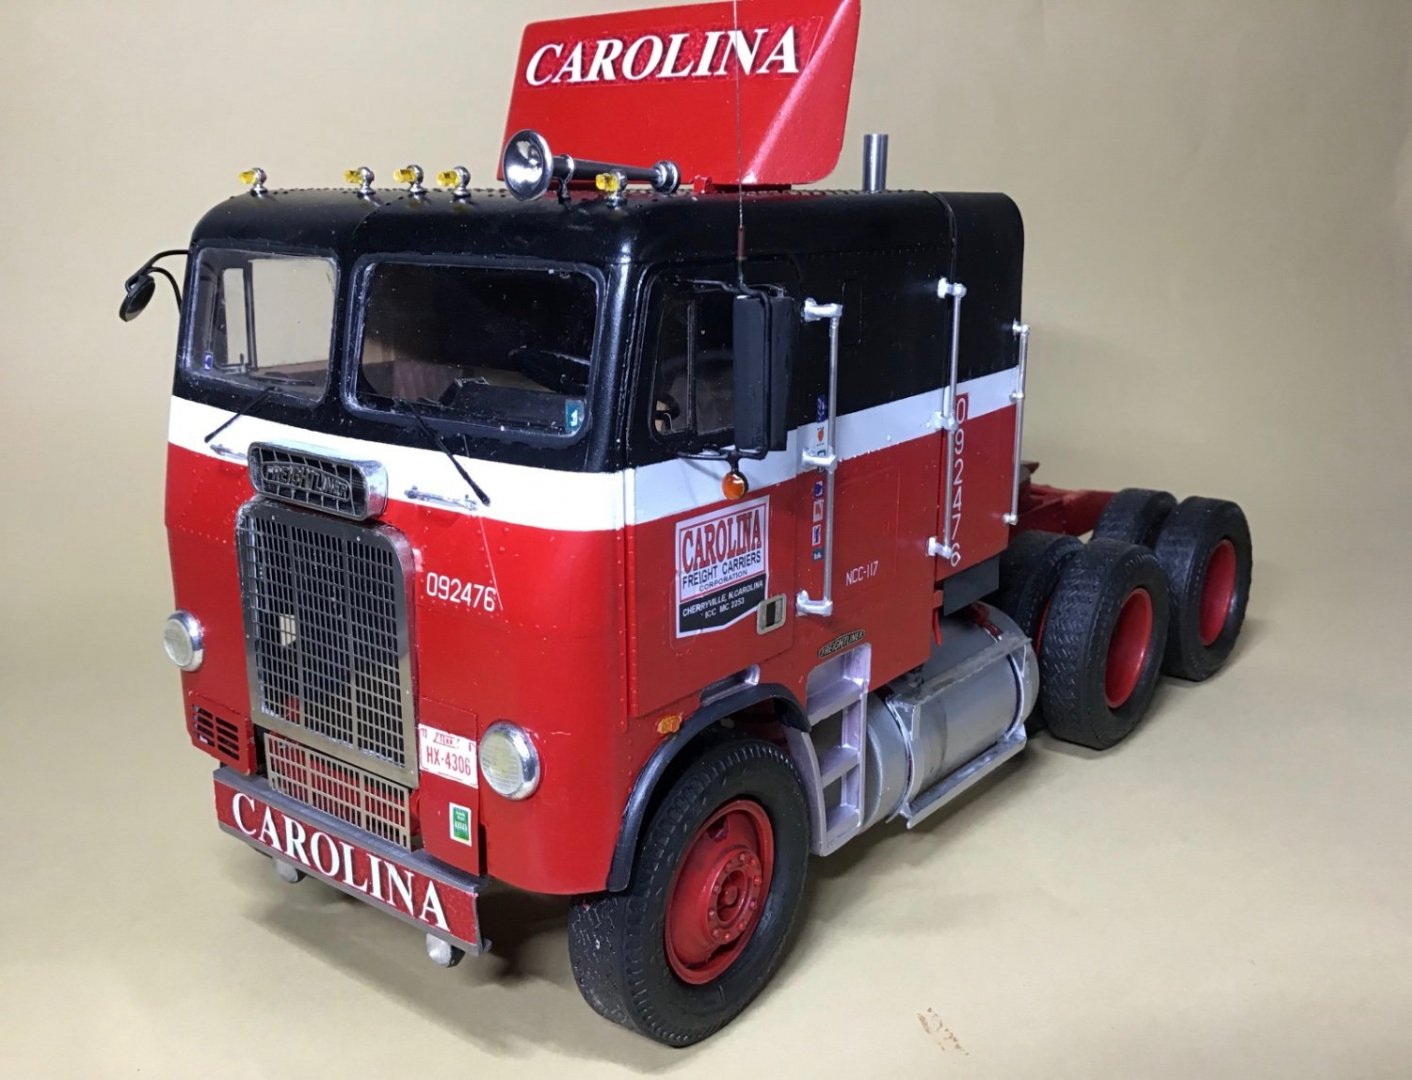
  • Gender
    Male
  • Location
    South Somerset
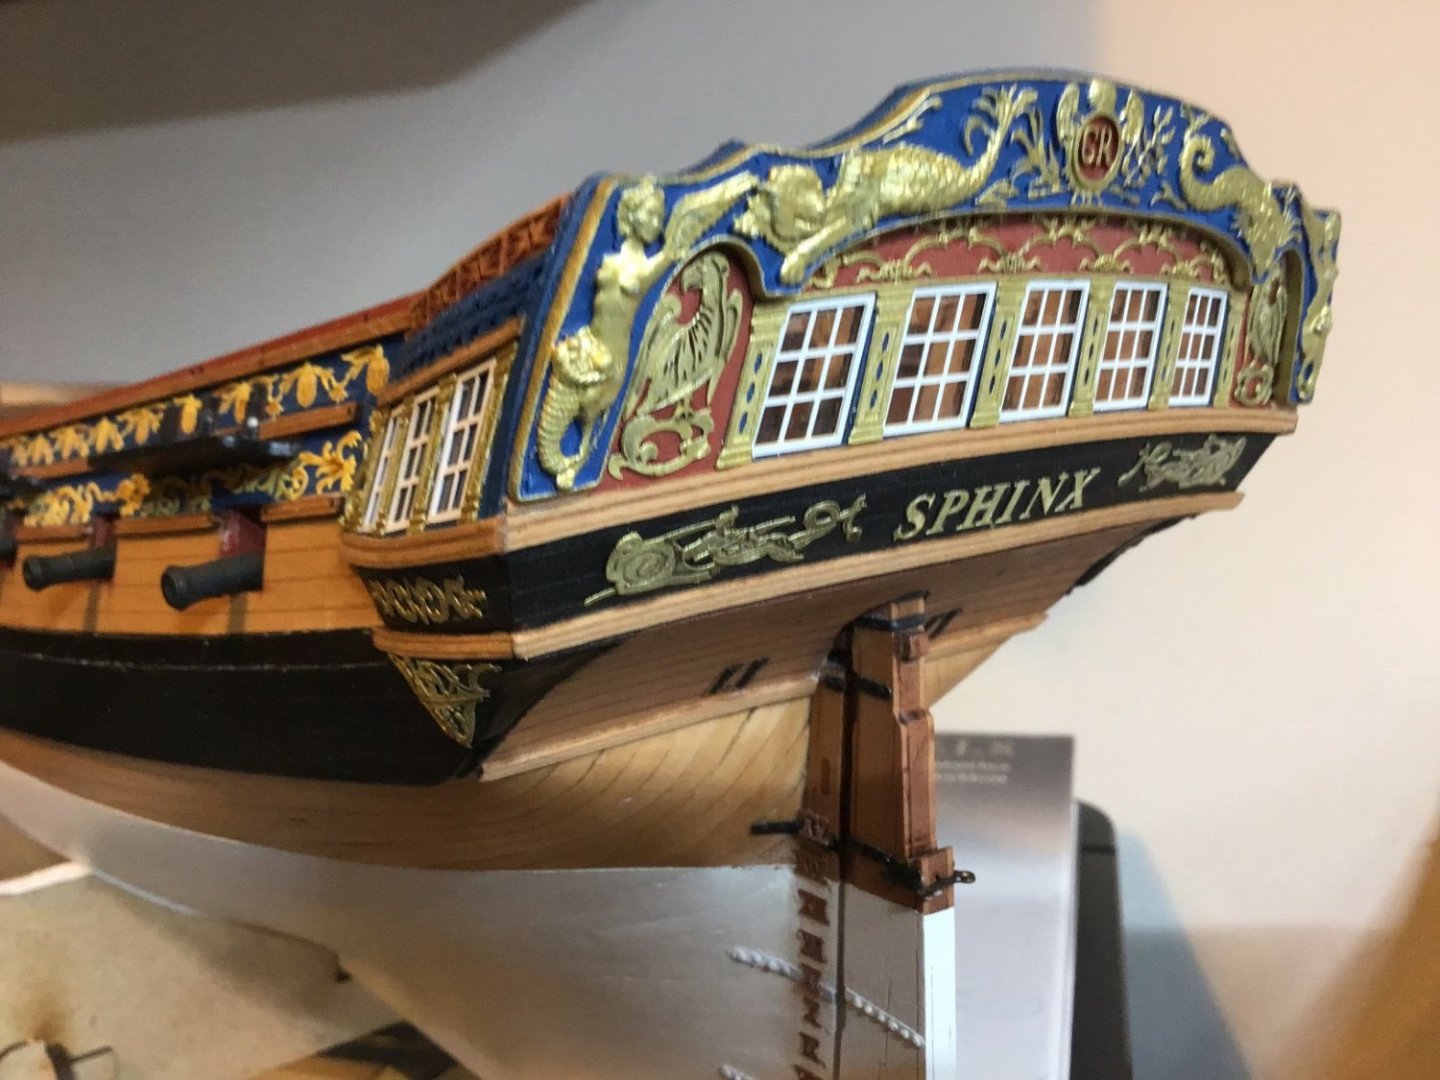
  • Interests
    Model ships, static and working radio control.
    Gauge 1 and 0 gauge model railways.
    Model Classic Sports Cars. Classic commercial vehicles.

Recent Profile Visitors

1,173 profile views
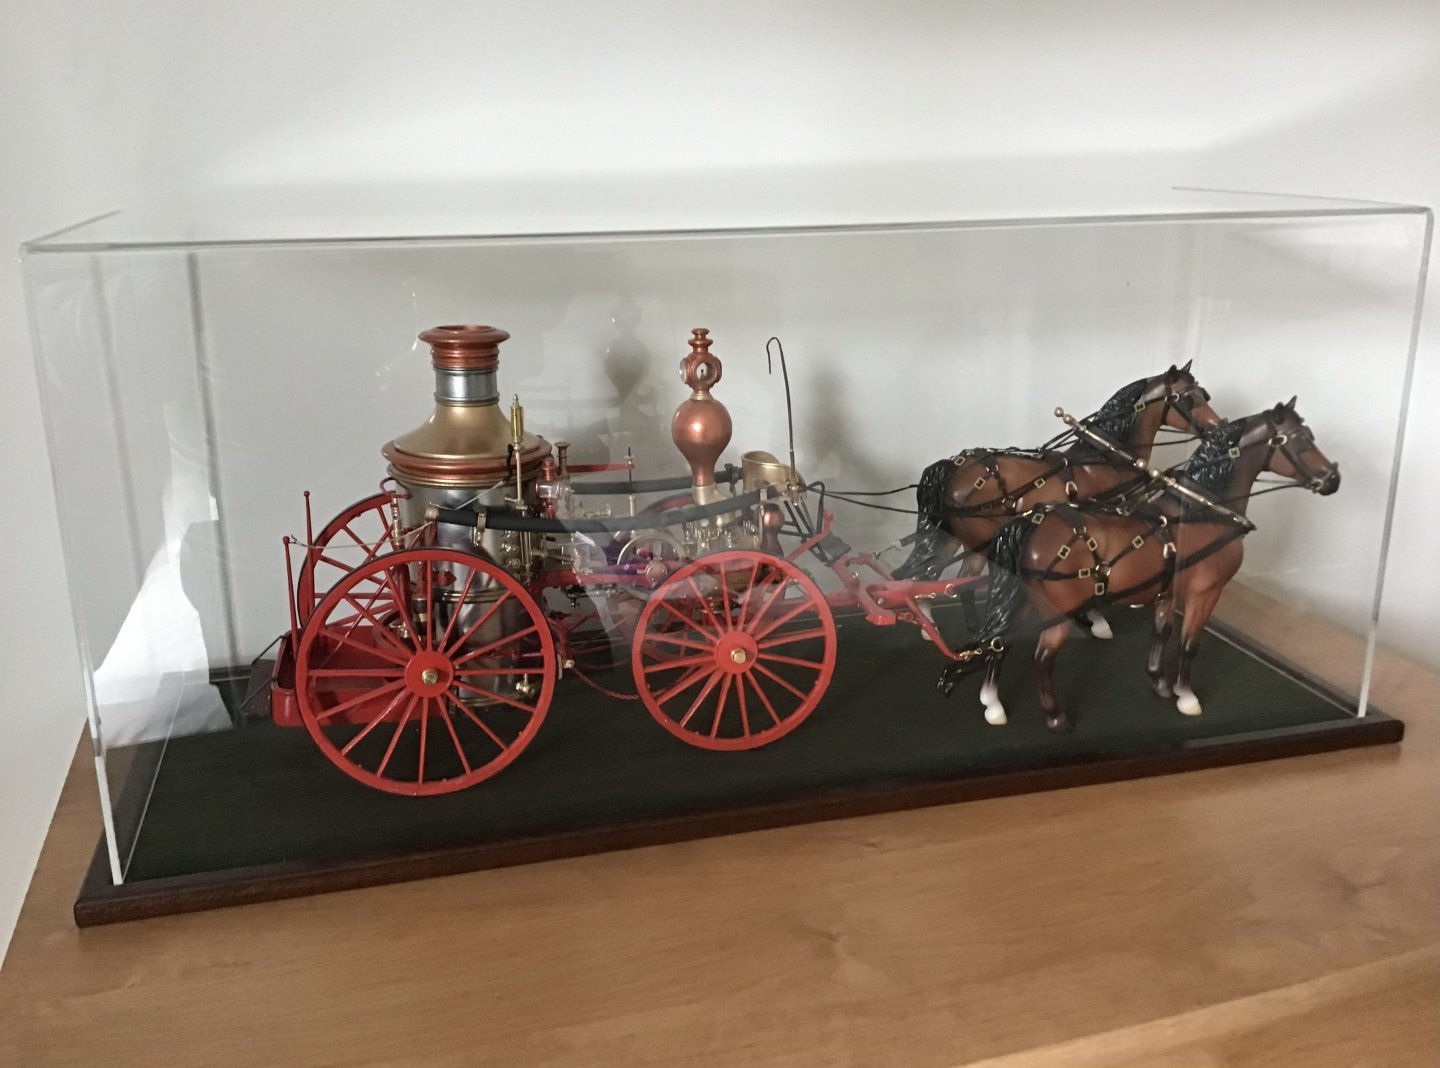
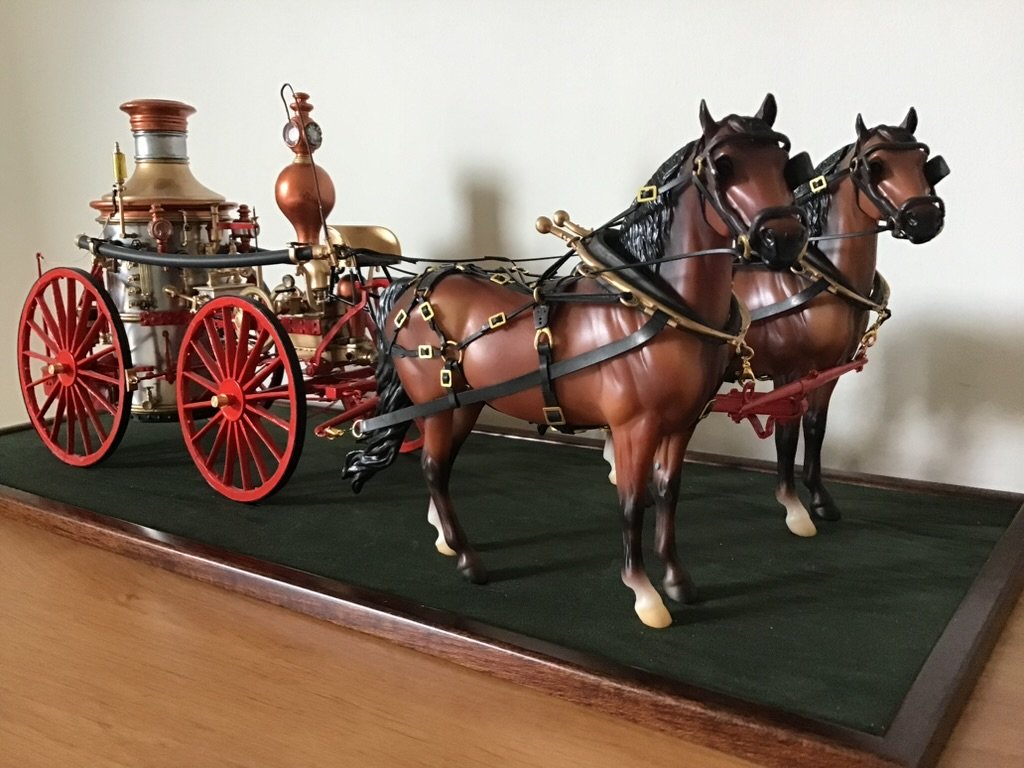
  1. Based on the photo of your Allerton Steam Pumper model in bobandlucy Concord Stagecoach build log and your description, I ordered the two-horse hitch for my Allerton Steam Pumper model which is still awaiting my attention.  (Beautiful model by the way).  I now need to find a pair of 1/12 scale horses to go with it.

    1. Tankerman

      Tankerman

      My horses came from ModelExpo but it looks as though they are out of stock, this is the company that manufactures them so you may find them elsewhere.


      https://www.breyerhorses.com/blogs/news/welcome-to-freedom-series?srsltid=AfmBOoriJ6dNF75-YN3Ev_e9LJEumRLr7otQclPFtuP3-VY-BncdTJL7

  2. This is a Model Trailways kit. After following this build log I was very interested in attempting the model myself: The kit retailed at £450 in the UK which was more than I was prepared to pay but in the New Year Sale at Model Expo earlier this year it was on offer for $200. Even with shipping and import duty it was still a substantial saving so I bought it. I always expect a lot of hard work where white metal is concerned ( unless it is a Model Factory Hiro 1/12th. car kit ) and sure enough I was not disappointed. The moulds were obviously reaching the end of their useful life and I spent many hours grinding and filing away excess metal, not just flash but huge lumps. In other places areas where the cast was missing I built up with low-melt solder and then filed back to shape. Although I was very pleased with the end result I thought a team of horses would set it off nicely, I could not find any photos to tell me if it was a 2 horse or 4 horse team. I went for the 2 horse team as the overall length would fit in the display case I had.
  3. I strongly recommend the Model Trailways Harness Kits and Horses, they really enhance the model.
  4. Deluxe Materials "Glue 'n' Glaze" is the product I have found that is better than PVA glue for glazing windows and portlights. It is similar in consistency but seems to give a better appearance.
  5. This may be of help: https://www.blundellharling.com/product/imperial-academy-architects-triangular-scale-rule-12-300mm/ Good luck
  6. I can thoroughly recommend this compressor from a totally reliable specialist supplier. It is very well constructed, quiet and very reliable. I have had a Sparmax compressor for many years and would not consider anything else. https://www.everythingairbrush.com/product/sparmax-professional-mini-piston-airbrush-compressor-2-5-litre-air-tank/ Chris
  7. Chris, I built your Agamemnon some fifteen years ago a couple of years after I retired from work and enjoyed every minute of it. Indefatigable looks like being an incredible model and I wish you every success with the forthcoming kit.
  8. Very much by trial and error wefalck, I was lucky that the red on the truck was a good match. Chris
  9. I have used this method on several of my models and show two examples below: The T2 tanker is the very old Revell kit at around 1/450th. scale and I wanted to show it as one of the many T2s owned by the company I sailed with. The company logo was downloaded form the web. The "Caltex Glasgow" and port of registry in the correct font and size ( less than 2mm in this case } were added to the file over a black background. The file was then printed on to a white decal waterslide transfer paper by 'Experts Choice' using a domestic inkjet printer. Once the ink was dry the sheet was sprayed with a clear acrylic varnish to seal it, after which the images were carefully cut from the sheet and applied to the model. The tractor unit is a conversion of the standard AMT 1/25th. kit of the White Freightliner to represent the ones operated by Carolina Freight. The logo on the door is a commercially available decal but the fleet name on the roof deflector and front bumper, the fleet number and legal lettering are generated in a 'pages' file on a Mac to the correct size and font, given a red background and printed off on white decal paper. The red print colour matched the red paint I used on the cab. I hope this helps you HOF.
  10. I ordered the sets of planking for the Trumpeter 1/200 Titanic from their store on ebay which came direct from the States, well packed in a very stout box and in pretty rapid time. Hopefully you should be able to obtain what you want without too much hassle.
  11. Having bought a jar of this to try I wouldn't be without it now, such a versatile glue. Not only the windows but all the PE and resin decoration on the stern of my Sphinx are securely attached with it.
  12. Here you are: https://www.abebooks.co.uk/servlet/BookDetailsPL?bi=30549031522&searchurl=an%3Dwilliam%2Bmowll%26fe%3Don%26sortby%3D17%26tn%3Dss%2Bgreat%2Bbritain%2Bthe%2Bmodel%2Bship&cm_sp=snippet-_-srp1-_-title1
  13. Just before I read your post I had been fitting my interpretation of the frieze decoration to my model of H.M.S Sphinx. Reading from various sources about ship decoration during the Georgian period I was not convinced that a small 20 gun frigate would have had that much gold gilt work and the frieze was more likely to have been painted in yellow or ochre paint if indeed it was decorated at all. As I wanted to include all the exquisite etched brass pattern that Chris W. has provided I decided to use a white primer followed by a coat of light yellow acrylic colour by Vallejo. When dry this was then coated in Humbrol Clear gloss varnish. The detail on the etch is then highlighted with a wash of Seraphim Sepia from the Citadel range of washes called "Shades". The photo shows the fitting of the first row of decoration on my model and I am very happy with the result. Over the next couple of days I will apply the the rest of the decoration. I hope this gives you some idea of the possible alternatives. Chris
  14. Further to your problem in post 88 and the replies from James and Chris, here are the slots to which they refer on my model,
  15. The hull bulkheads of the kit would require a lot of modification in order to fit a motor and stern shaft, as well as space for batteries and associated radio gear, keeping in mind that some access is required for maintenance. The photos show my scratch built hull frame for the motor collier, the M.V. Ballyloran. This is a 1/48th. scale model but the principles are the same and you will see that the motor bedplate and stern tube are fitted at this early stage to ensure an accurate alignment. Should you decide to build the M.V. Brockley Coombe I would recommend a book "British Motor Coasters" by Charles V. Waine which is a very complete history of this type of vessel and where you will find a General Arrangement drawing of M.V. Brockley Coombe and photographs.
×
×
  • Create New...