

Tidbinbilla
-
Posts
64 -
Joined
-
Last visited
Content Type
Profiles
Forums
Gallery
Events
Posts posted by Tidbinbilla
-
-
2 hours ago, Hsae said:
Jon,
I admire your build.
It happened to be that I am now also an owner of the USS Constitution. I inherited from a gentlemen with the obligation to finish it.Since I do not want to dishonor the builder, I was thinking to start with a cross section. To get the hang of it, so to speak.
Do you have by any chances a drawing from a cross section?
Hermann
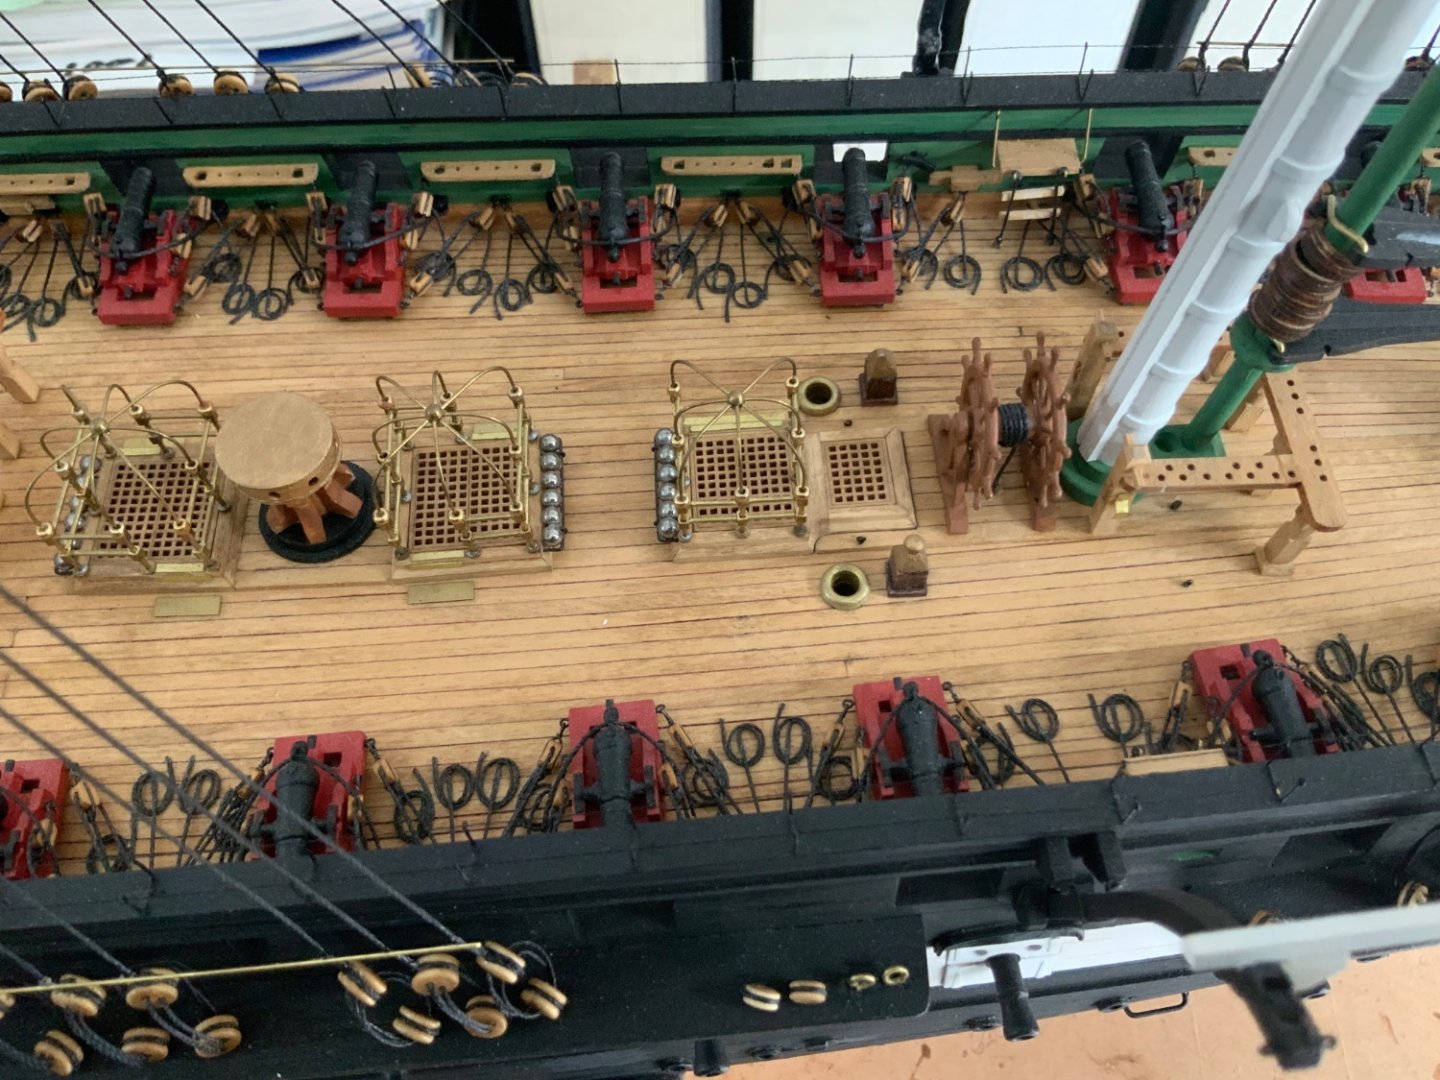
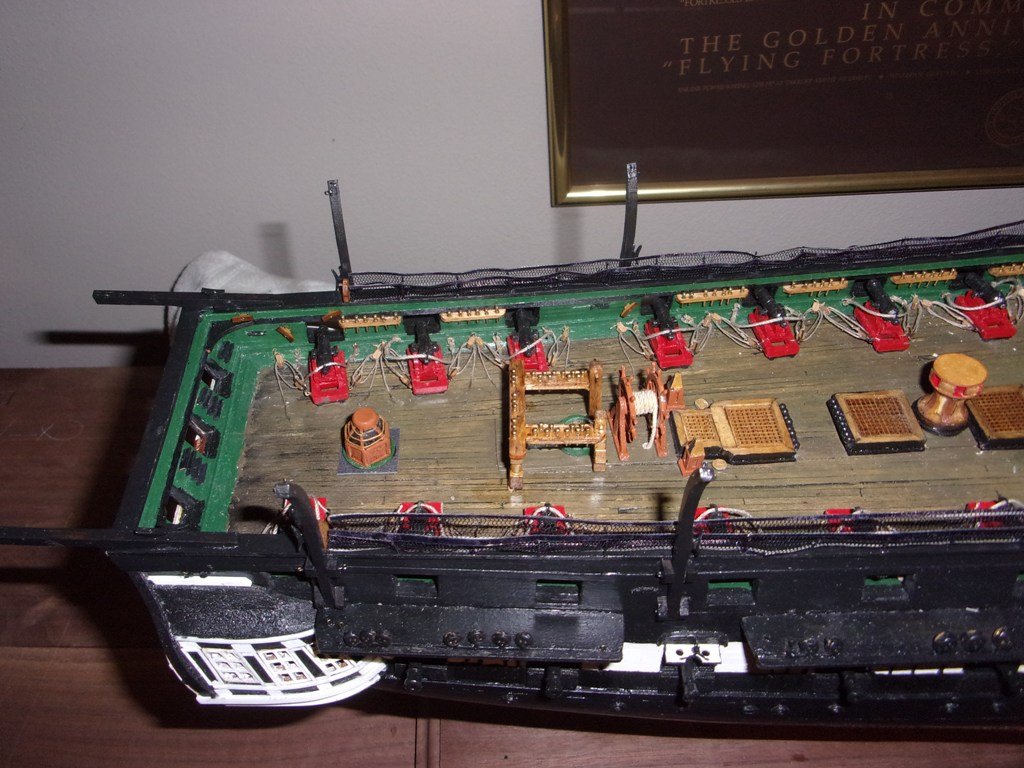
Who ever built this model did an excellent job - the deck details are amazing!!!
-
My Model Shipways kit was missing the stern eagle which they gladly replaced with no charge/hassle! Great customer service.
-
Hi Jon,
I would like to offer up another possible treatment of the hull plates. Look at my build of the Conny. In there you will see pictures and links to an easy method to simulate nails. Food for thought...
Dave
- KurtH, Nirvana, Bill Morrison and 2 others
-
 5
5
-
I hear you! If it wasn't for my jeweler's googles, I would not have been able to do all the close-in detail! I think they we on my head 80% of the time!!
-
Jon,
Bob Hunt may be right about most people not noticing the details but for the countless numbers of us who have and are building these models, that detail is greatly admired and appreciated. Keep up the fantastic work - it an inspiration for us all!!
p.s.
Upon completion of my Conny this year, I realized I found a wonderful hobby 50 years too late in life! I loved putting her together but it put a strain on my eye sight and motor skills...
-
-
You got that right about all that planking being eventually covered -up with copper. All the filling, sanding, etc will not be seen by anyone. I treated that part of my hull like it was a panel being restored in one of my antique cars. Sanded with 220, applied glazing putty, sanded with 400, then 600 grit!
-
-
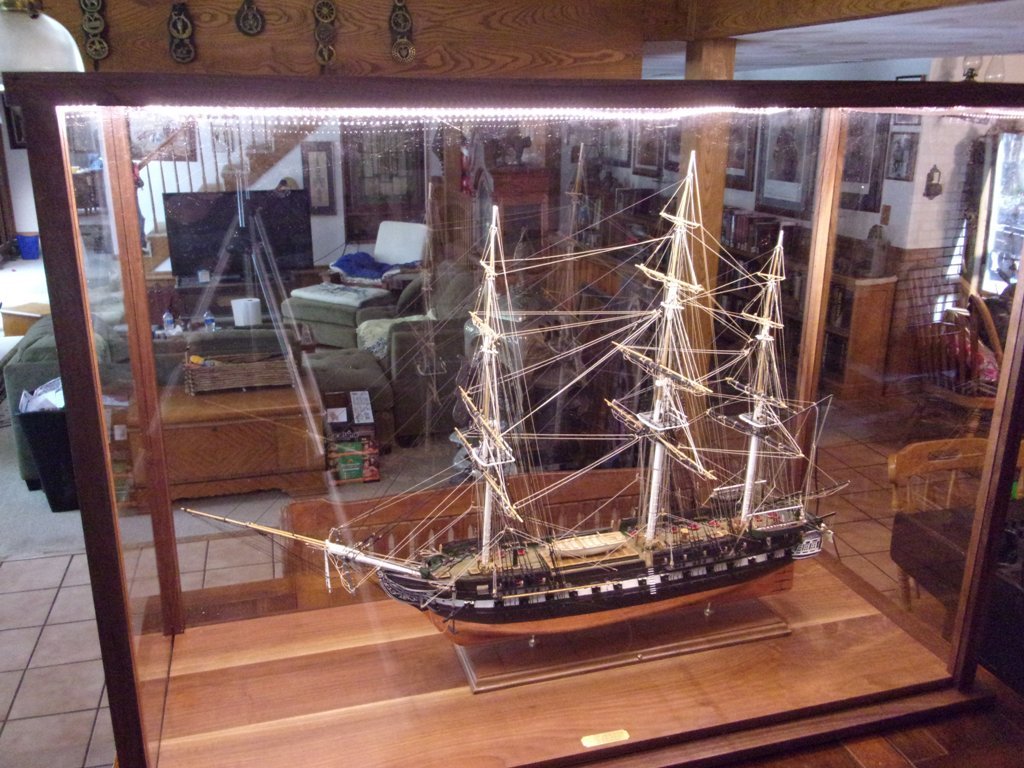
JS I followed the instructions to build the case 2 inches over exact W,L and H. I measured Height from bottom of display board.
W = 21 1/2
H = 38
L = 53 1/2
The case base was 2 inches more for W and L.
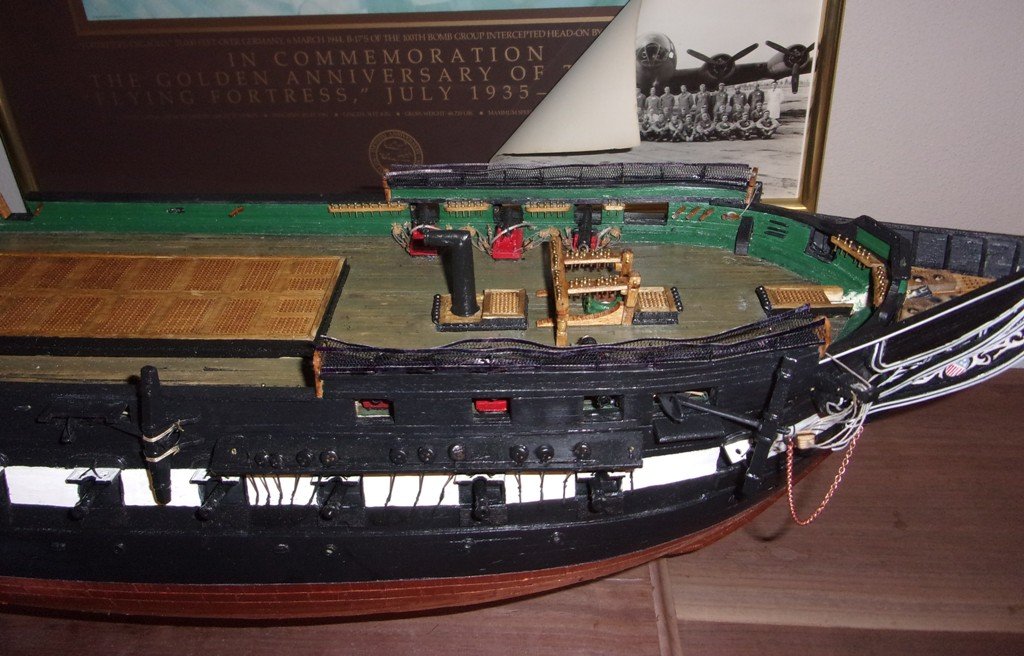
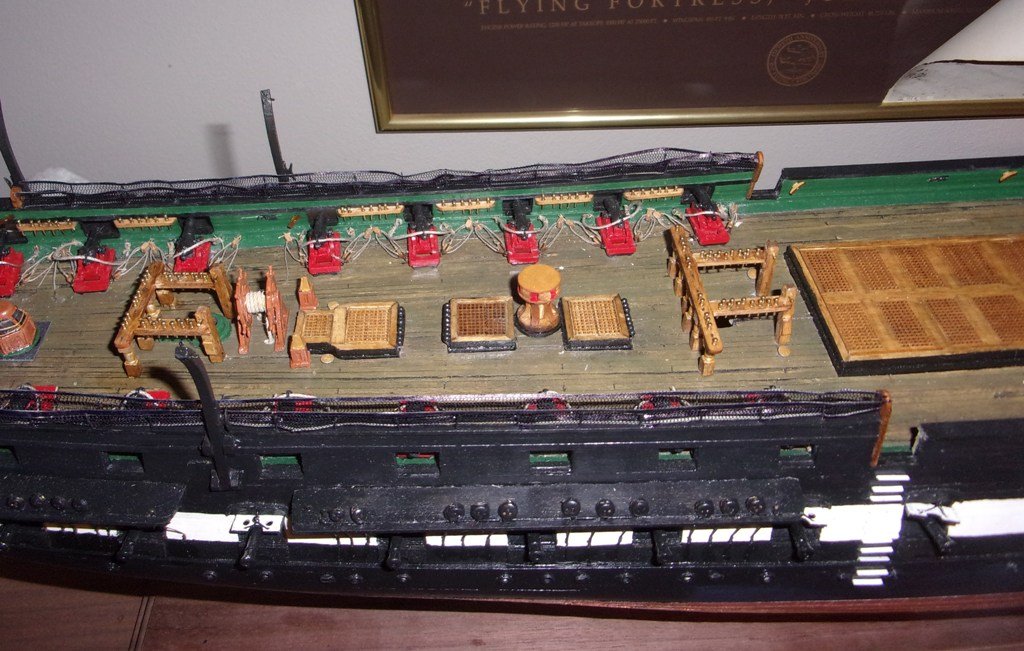
Whatever you choose to display your ship, I hope that it will show all the excellent detail you are doing on the gun deck!! Super job!!
-
As a final act, I built a display case for the ship. Used up some old, beat-up walnut that was stored in a dirty out building. After lots of gluing, planing and routing, I had enough material. Used Plexiglas and added LED lights. Now, she's all dressed up and nowhere to go - still looking for proper display place!!
Thanks again,
Dave
- usedtosail, HIPEXEC, Der Alte Rentner and 5 others
-
6
-
 2
2
-
Thanks. One of the advantages of being retired - more time than money!!!
-
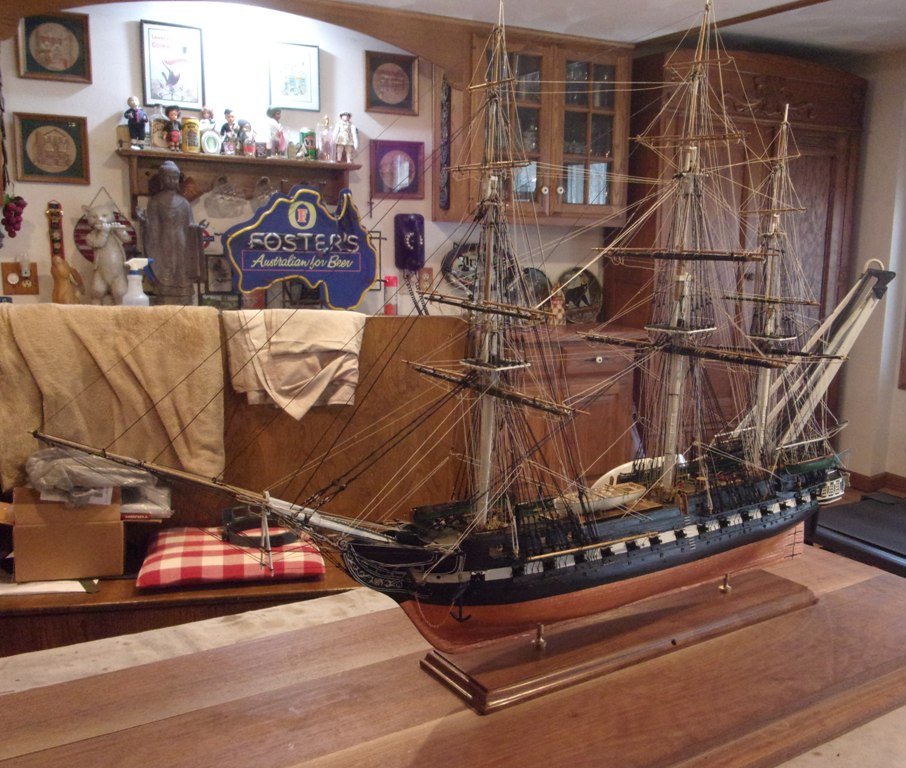
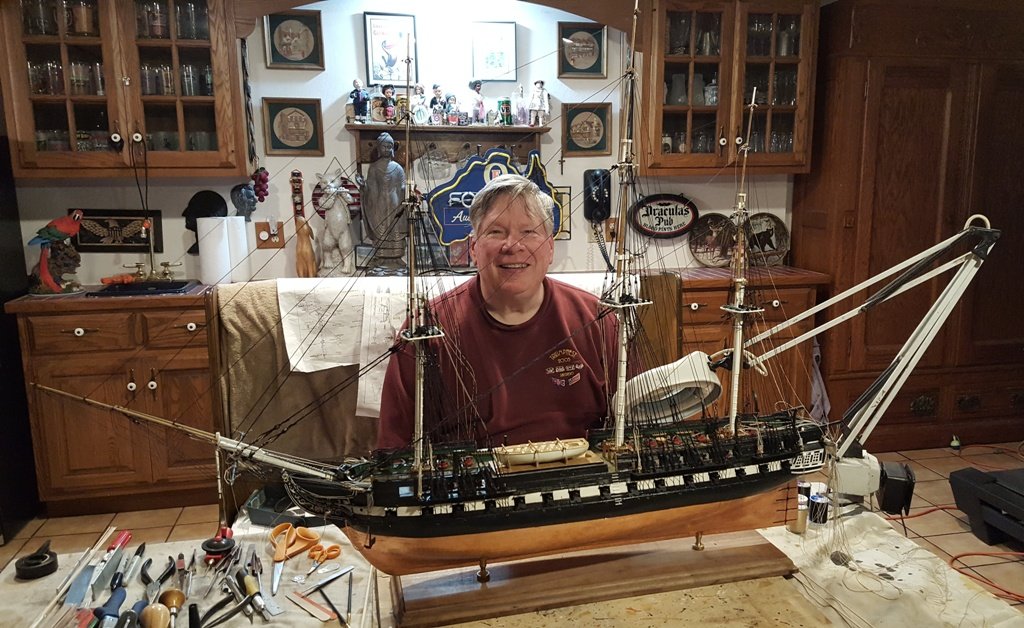
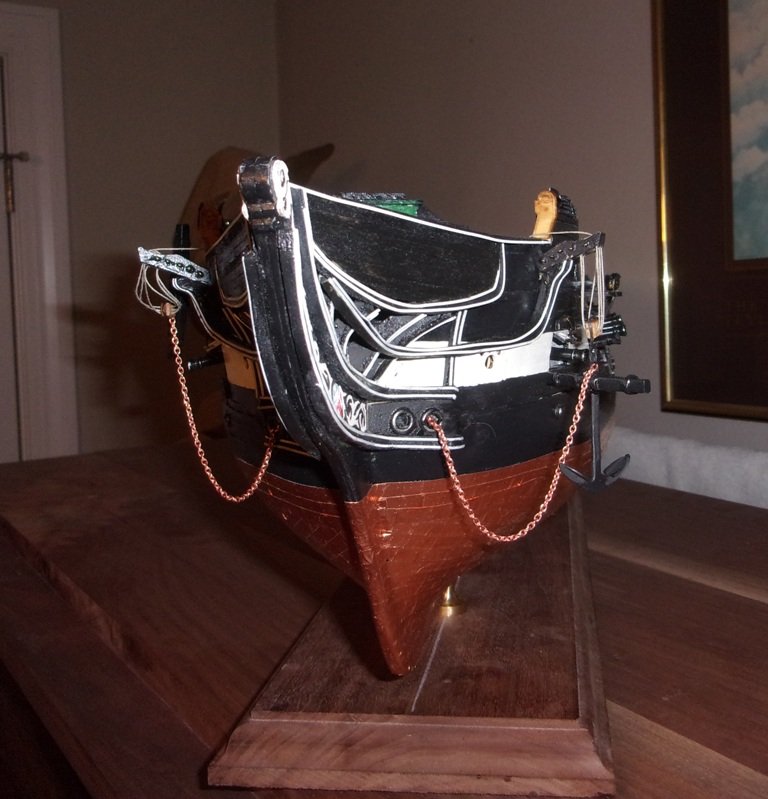
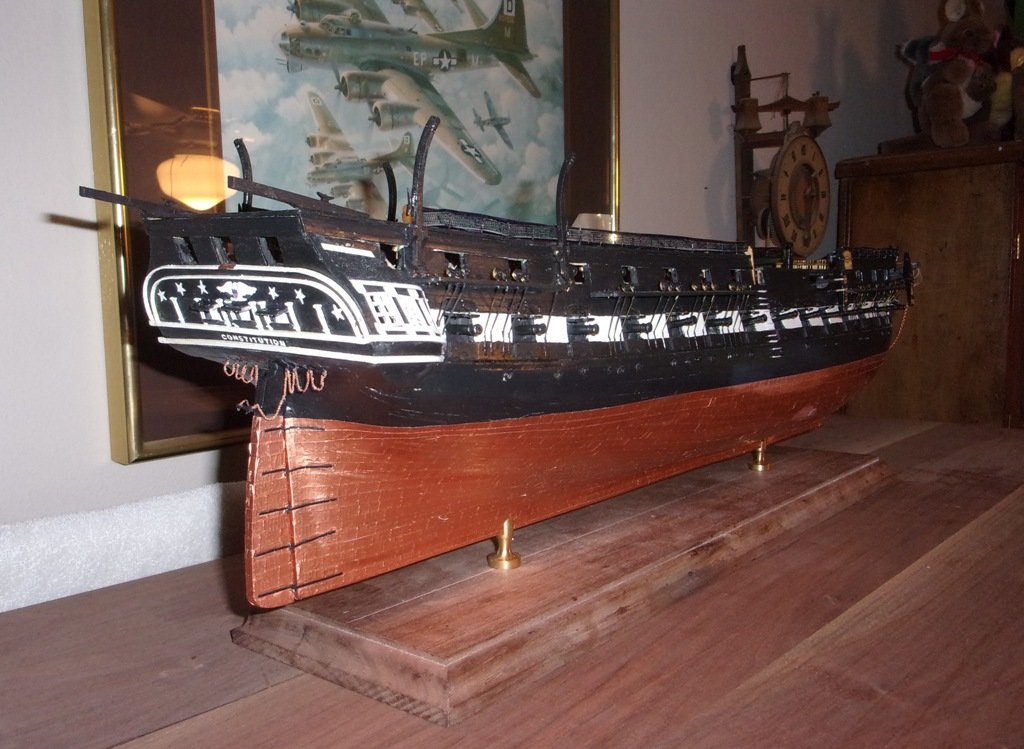
The ship is finished!! It's been an exciting and challenging 20 months. When first starting off, I never thought I'd complete it. When looking at the 8 sheets of drawings, I felt completely intimidated! But taking it slowly and one step at a time, the task was done. One thing that I did not expect was how undertaking the project would "suck all the air out of the room". After a while, it became an obsession, in a good way!
A few lessons learned:
- Robert Hunt's Practicum was well worth it, especially for a novice like me.
- I made a lot of small mistakes that most of the general public would not notice but would be easily noted by people who follow this forum. The ship will be behind glass and never in any type of public display, so I can easily live with them.
- I installed as much rigging as possible on the masts and yards before installing them on the model. It was a tangled mess at time, but in the end, much easier than trying to install line, blocks, etc. with mast/yards in place.
- I did pin the yards, boom and gaff to the masts.
- I installed my pin rails too close to the bulwarks - there wasn't enough room at times to wrap the lines around the belaying pins.
- Make really sure the fife rails are securely fixed to the deck.
- I gave all the painted surfaces a coat of semi-gloss finish - really brought the colors to life!
- I found a needle threader that feeds into a hole in the direction of travel - just the opposite of most needle threaders! It worked great in tight spaces!
- Purchasing a set of "helping hands" really proved useful.
Now its on the building the display case. The base and pillars have be made; the cover has been rough cut. Next is routing the channel for plexiglass and assembly. Photos to follow.
Thanks a million for the words of encouragement and help.
It's been a great ride!!
Dave


- usedtosail, GrandpaPhil, Brett M and 6 others
-
9
-
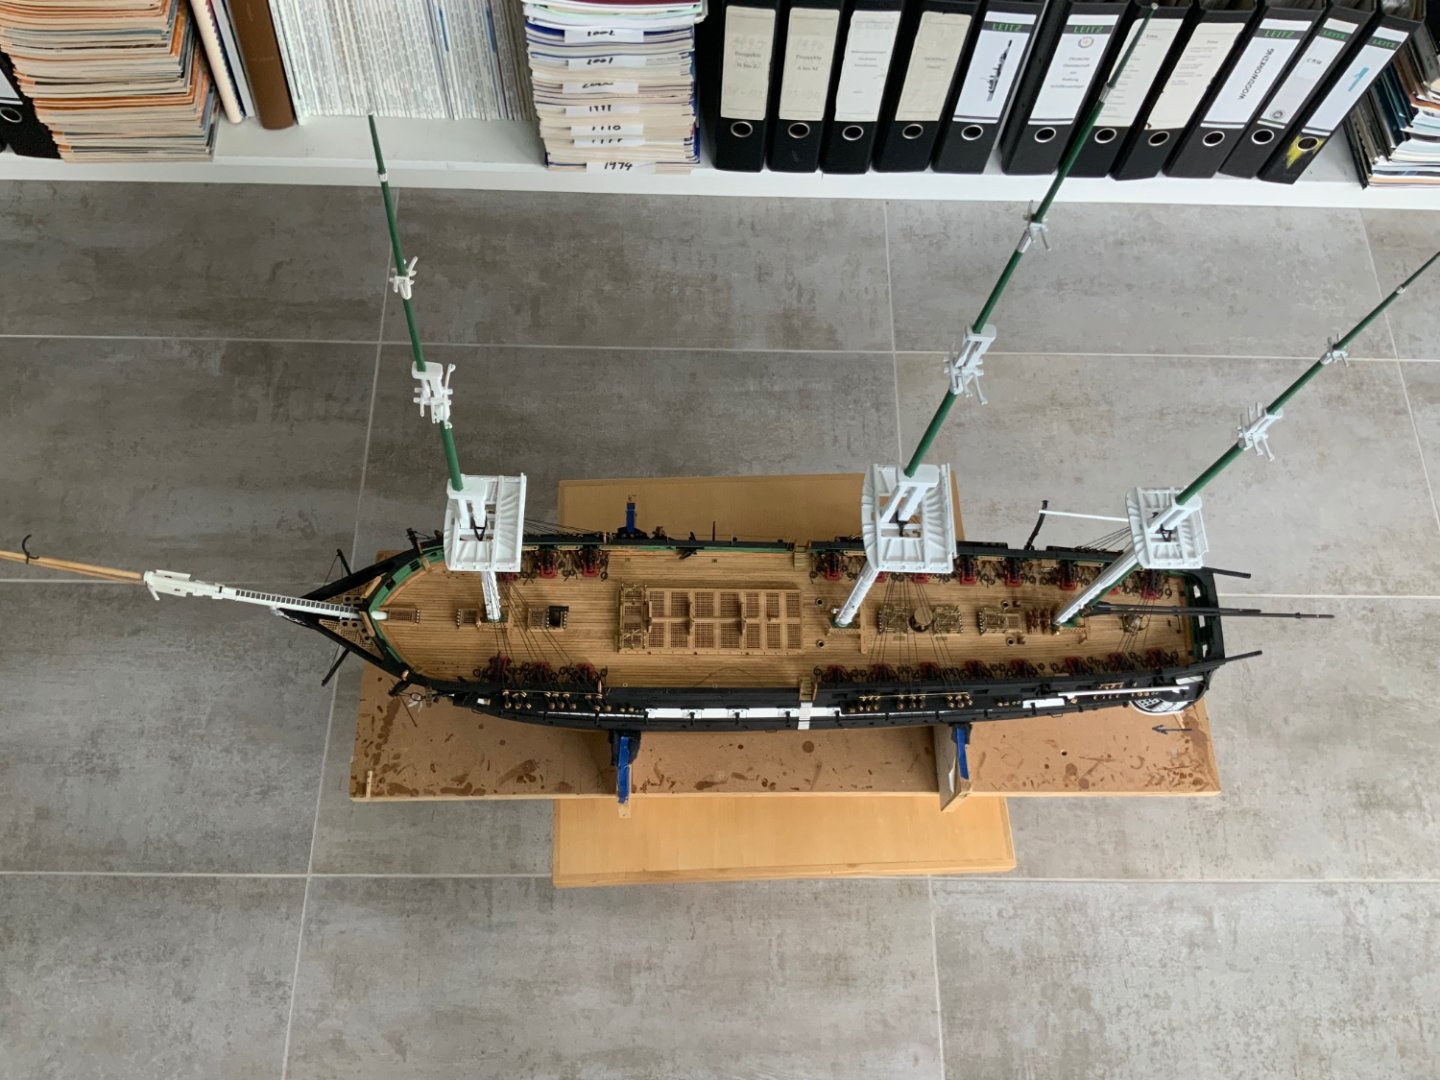
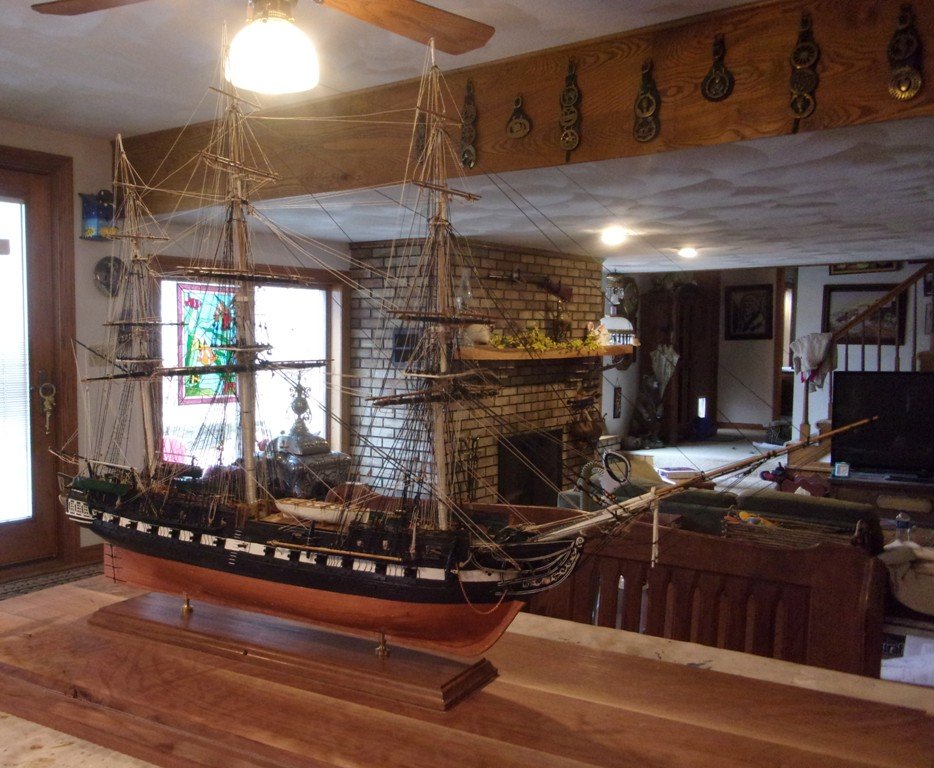
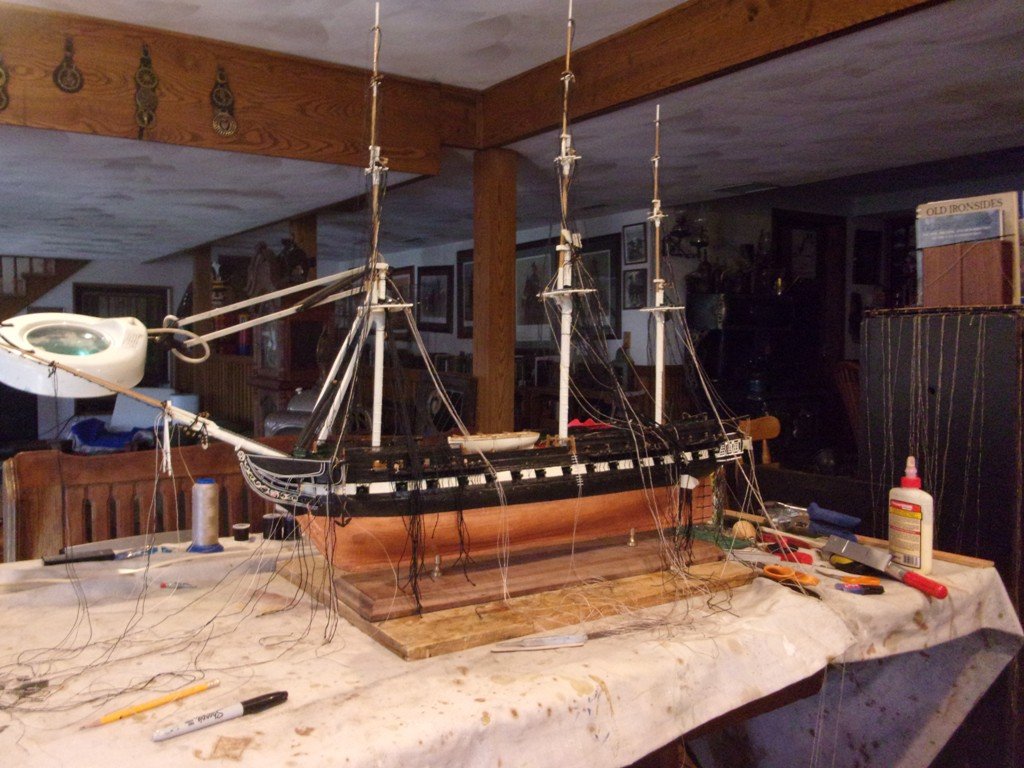
2020 has been a good year for model ship building. I managed to complete the installation of the standing rigging before year end. No real drama here - just followed the Practicum most of the time. After installing the rat lines, I think it is time to finish building the display case now that I have the actual dimensions.
Happy New Year! 202ONE!!
-
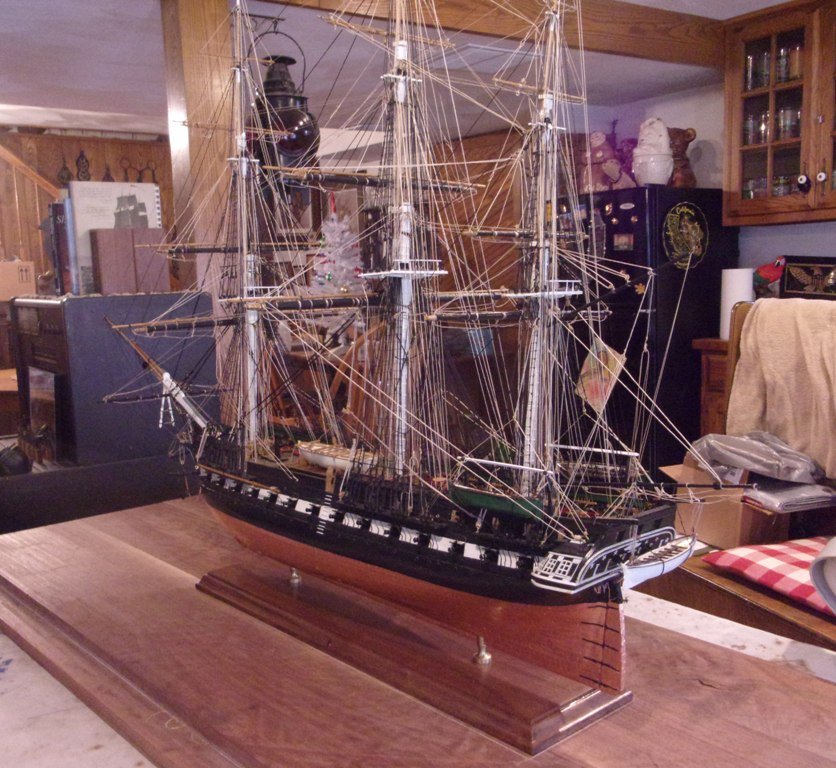
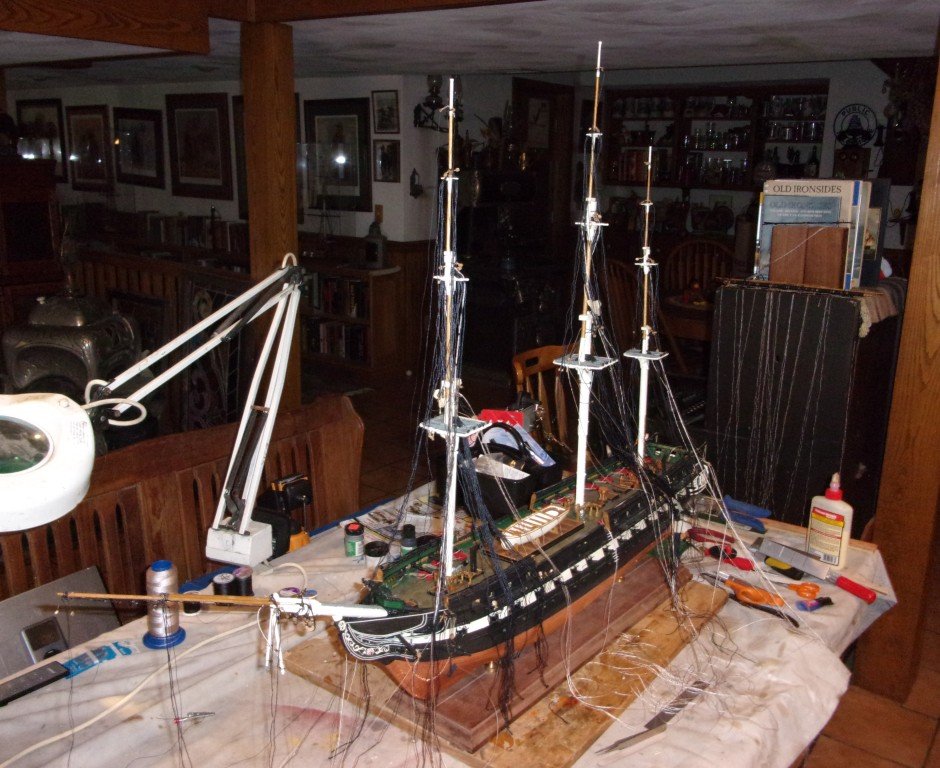
It's about time for an update. I've been able to accomplish quite a bit over the past several months. The mast and spars are complete. I decided to attach as much standing and running rigging as I can before installing the masts and yards, most due to my fear of damaging something when trying to attach something with all the rigging in the way. In the back ground you can see the "waterfall" of rigging from my yards.
Now I'm into a whole new phase. The masts are glued in and connecting up the shrouds has begun. It's fun - taking my time and plodding along...
- mort stoll and usedtosail
-
2
-
When I started building this model, I had no idea of how addictive it would become!! After completing the hull this Spring, I boxed up my workspace and moved it into the garage where it was to be stored until Fall. Well, that did not work out...
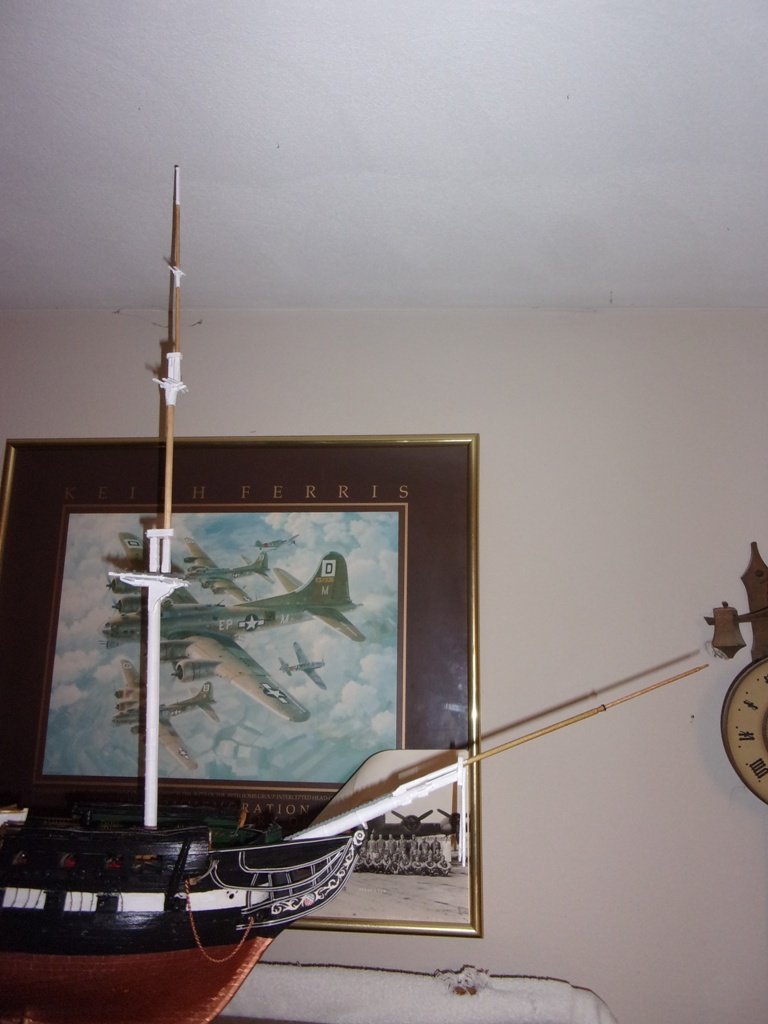
This has been a really busy summer with household chores, maintenance, etc. Well I still found time to play with the Conny! It started out small by doing one of the long boats. Then another. Then another. Then they were all done!!! Next came the foremast! While refinishing my wife's vanity, the bowsprit and jib booms got built!! Thanks to those two items, I now have a real sense of how big this model will be!! Finding some place to display will present a real challenge.
And speaking of challenges, I'm a novice at ship building. The Conny is way above my pay grade. When taking my first look at the plans and instructions, I clearly thought there was no way I could ever complete some of those tasks. But, I knew from work experience that if I keep plodding along eventually I would get there. As it turned out, some of those daunting tasks were simpler than imagined and vice versa! A big Thanks to the forum and Bob Hunt's practicum for helping get through it all!
Well, on to more fun stuff....
p.s. mast and bowsprit just set loosely in place.
- Dwight, usedtosail, Matt D and 1 other
-
4
-
Geoff, I just ran across the instructions for this model. Let me look at them and get back to you...
-
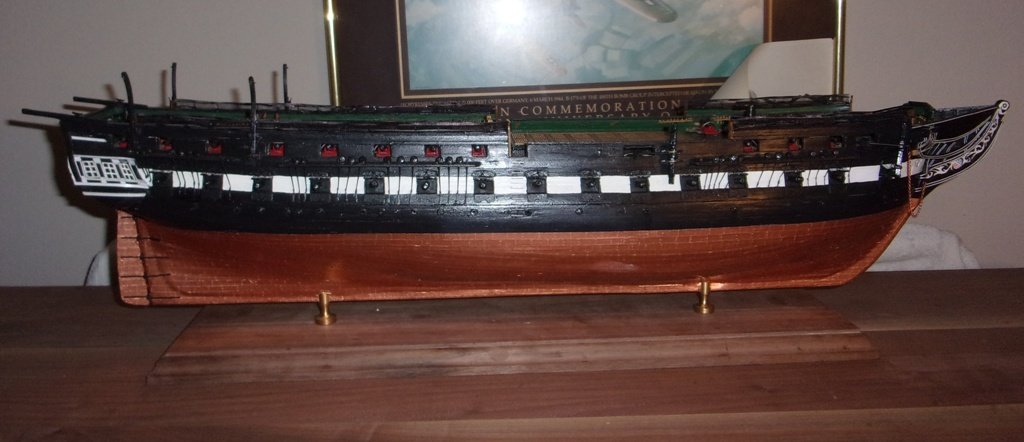
The hull is complete! It has taken just about a year to get here and it has been a most fun and interesting journey. Its been an enjoyable learning experience. Actually, I never imagined myself getting this far. This is my first full ship build and way above my "pay grade"! But, I love this ship! And, building a wooden model is on my bucket list. Of course, without the help of Bob Hunt's Practicum and fellow members on this forum, I never would have got to first base. I'm truly indebted! Now, I've put the Conny away until Autumn sets in and all the Summer activities fade away. I'll spend some time building the boats during my spare downtime. Please excuse the dust on my Conny - it will be cleaned up before putting her in the case.
You will notice, I took some liberties when doing the hull. I did have some issues with the netting that I'll have to straighten out.
- Dwight, JeffT, GrandpaPhil and 2 others
-
5
-
Jeff,
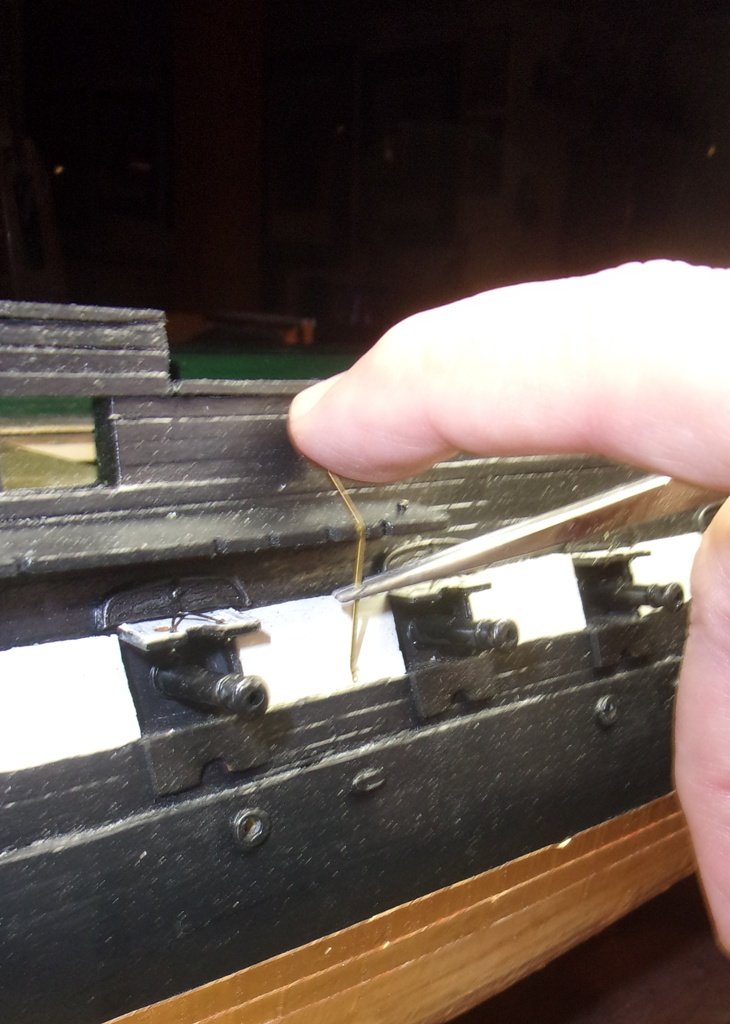
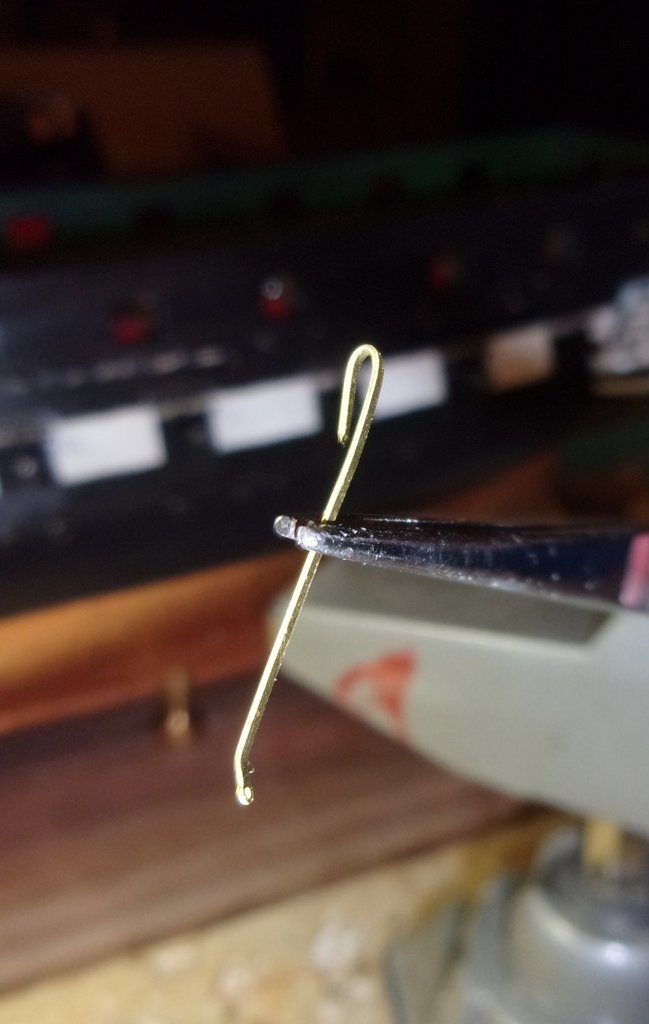
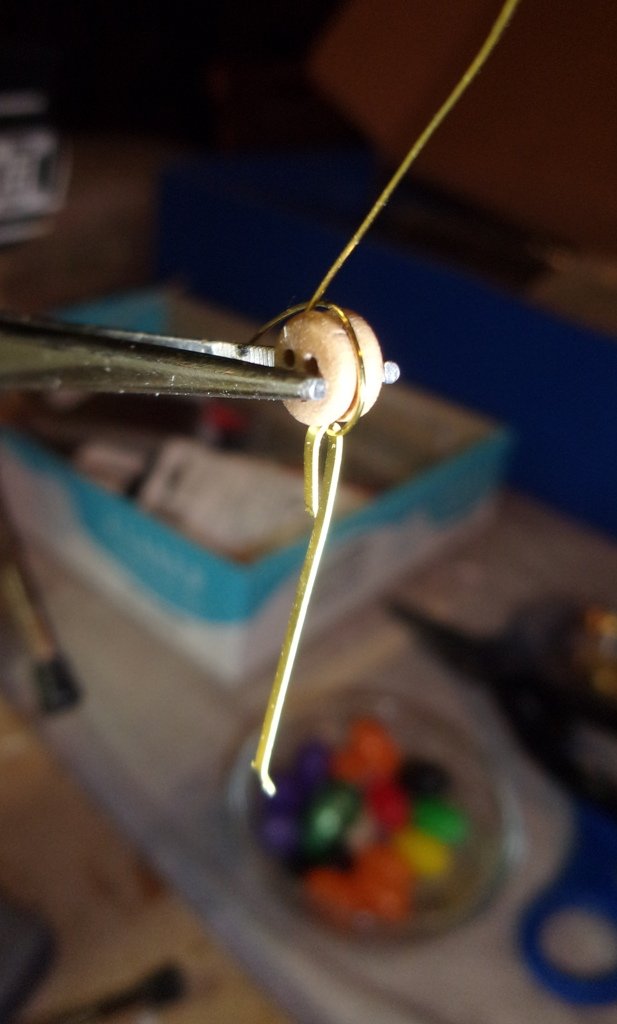
Here are some photos I took of the way I connected the chainplate to the deadeye. I trimmed the chainplate so the loop would be hidden by the channel. The photos do not show it but the loop was squeezed shut after connecting it to the deadeye. I super glued the loop to itself and the wire to the deadeye. When attaching it to the ship I glued the chainplate bottom to the ship and the deadeye/chainplate connection to the channel.
Hope this helps...
Dave
-
Hi Jon,
Point well taken. I mulled over that, too! So far, I've had no collateral damage. Once the chainplates are installed, it may be a tight squeeze to fit some of the lids...
Thanks,
Dave
-
-
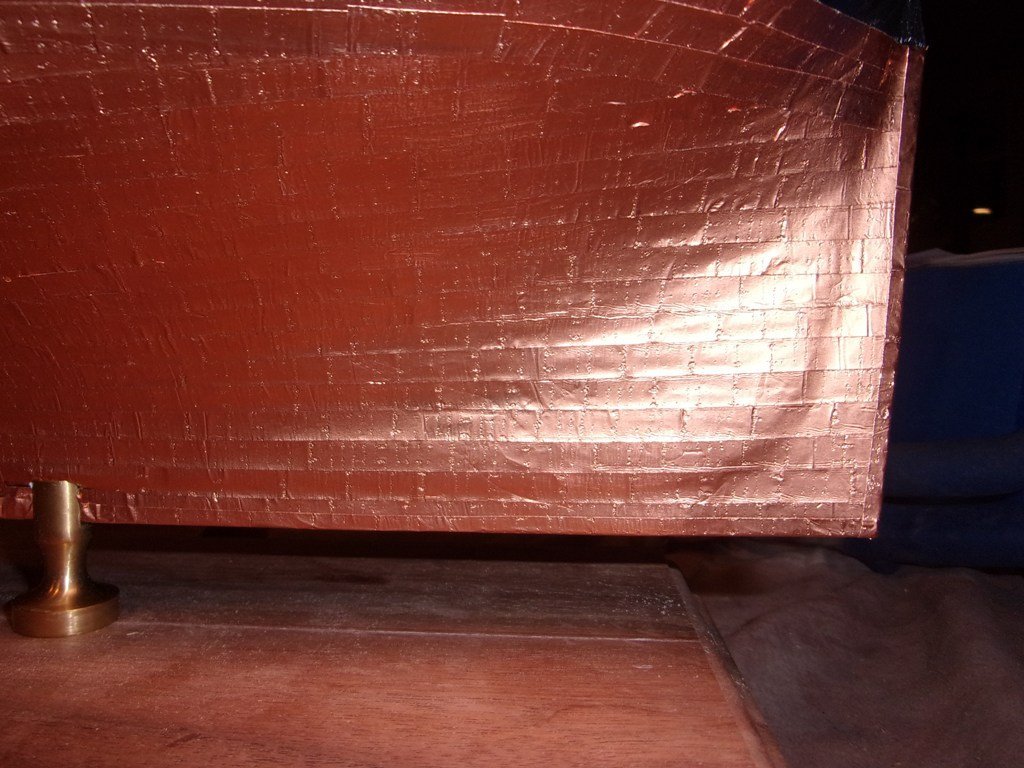
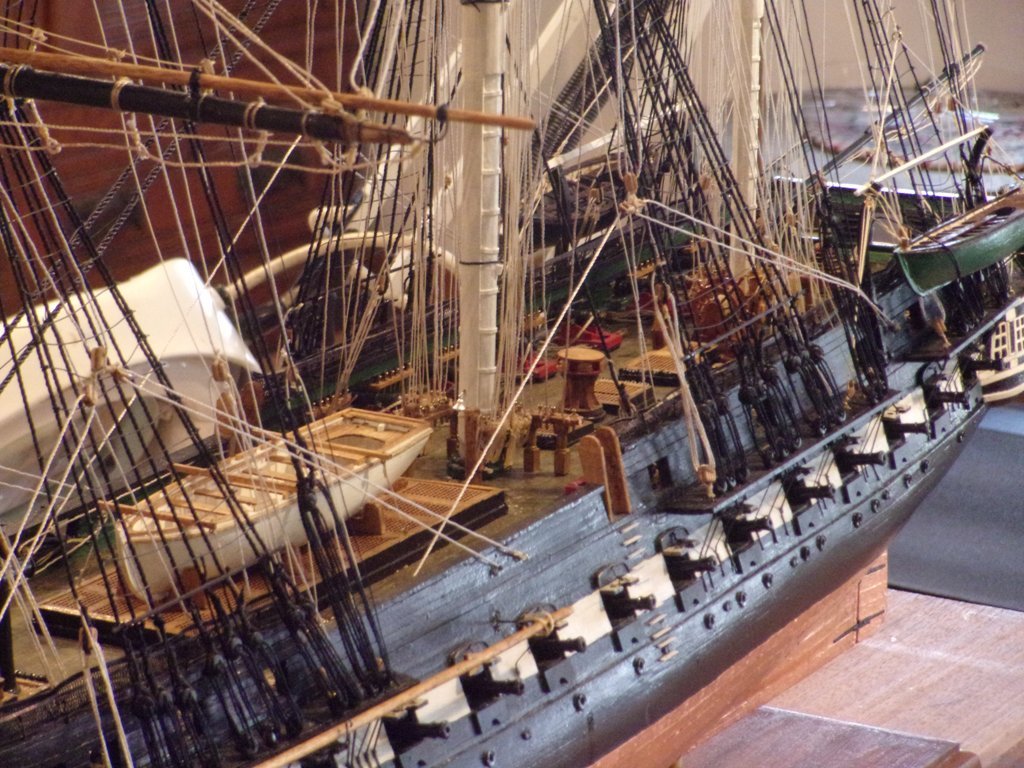
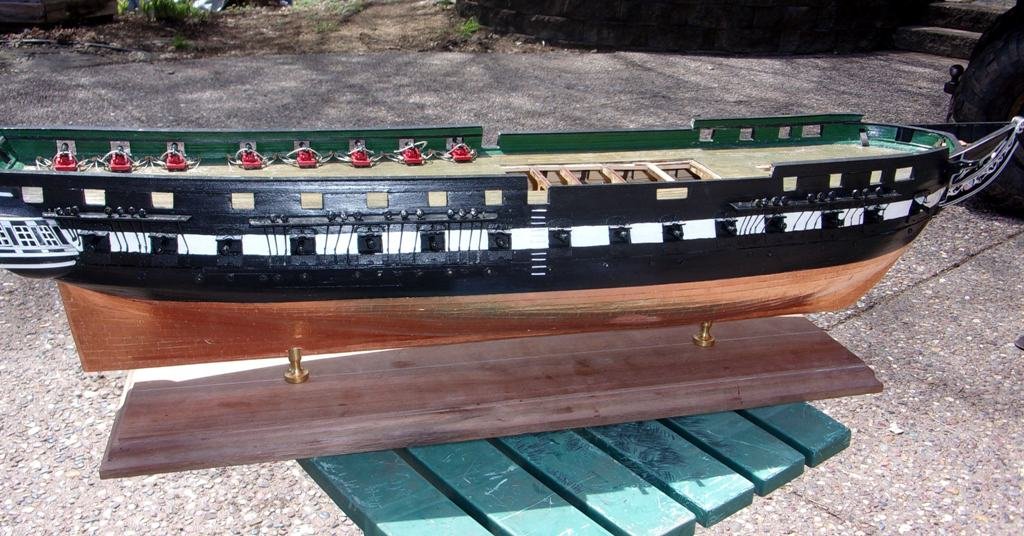
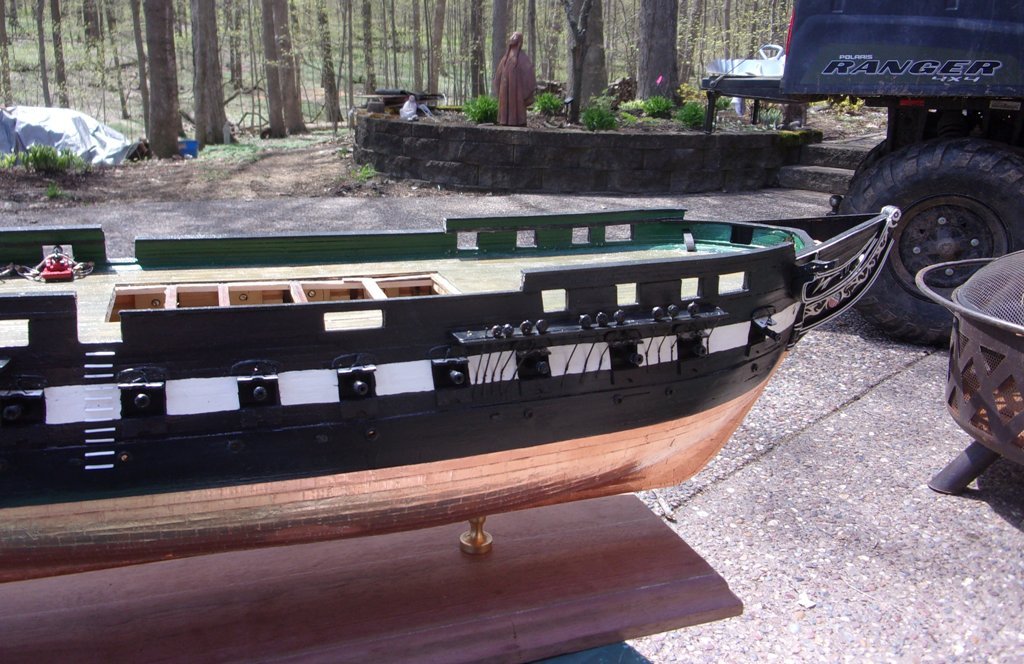
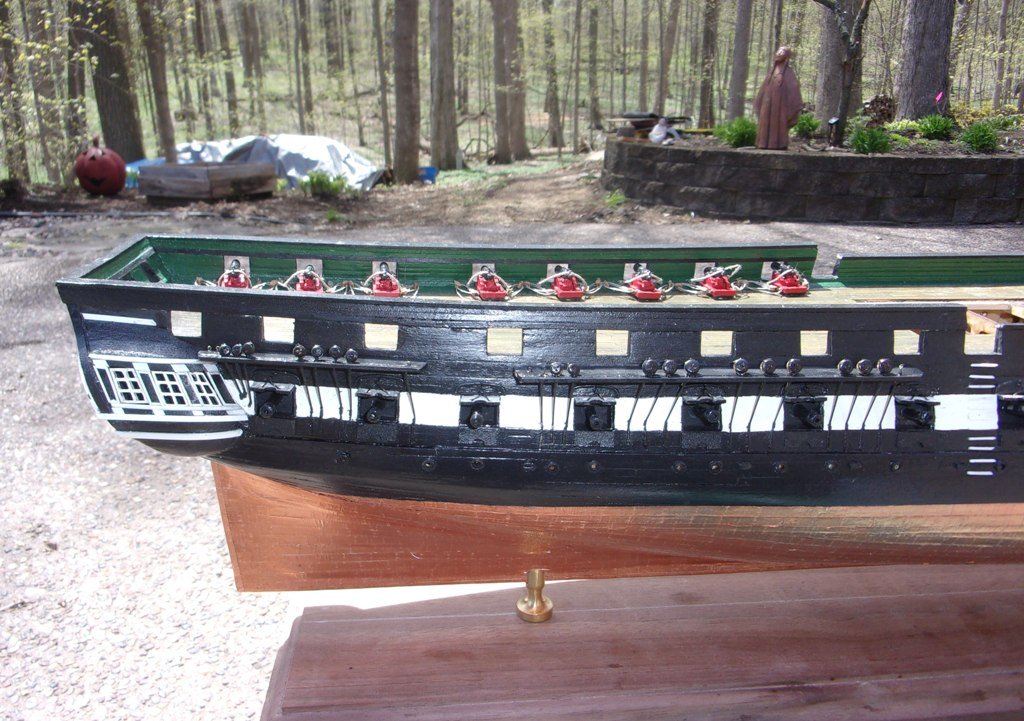
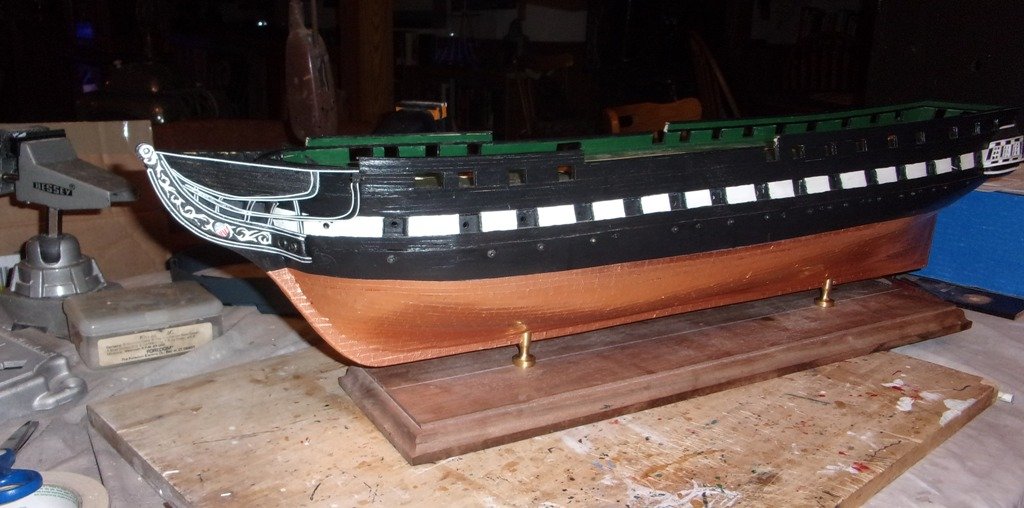
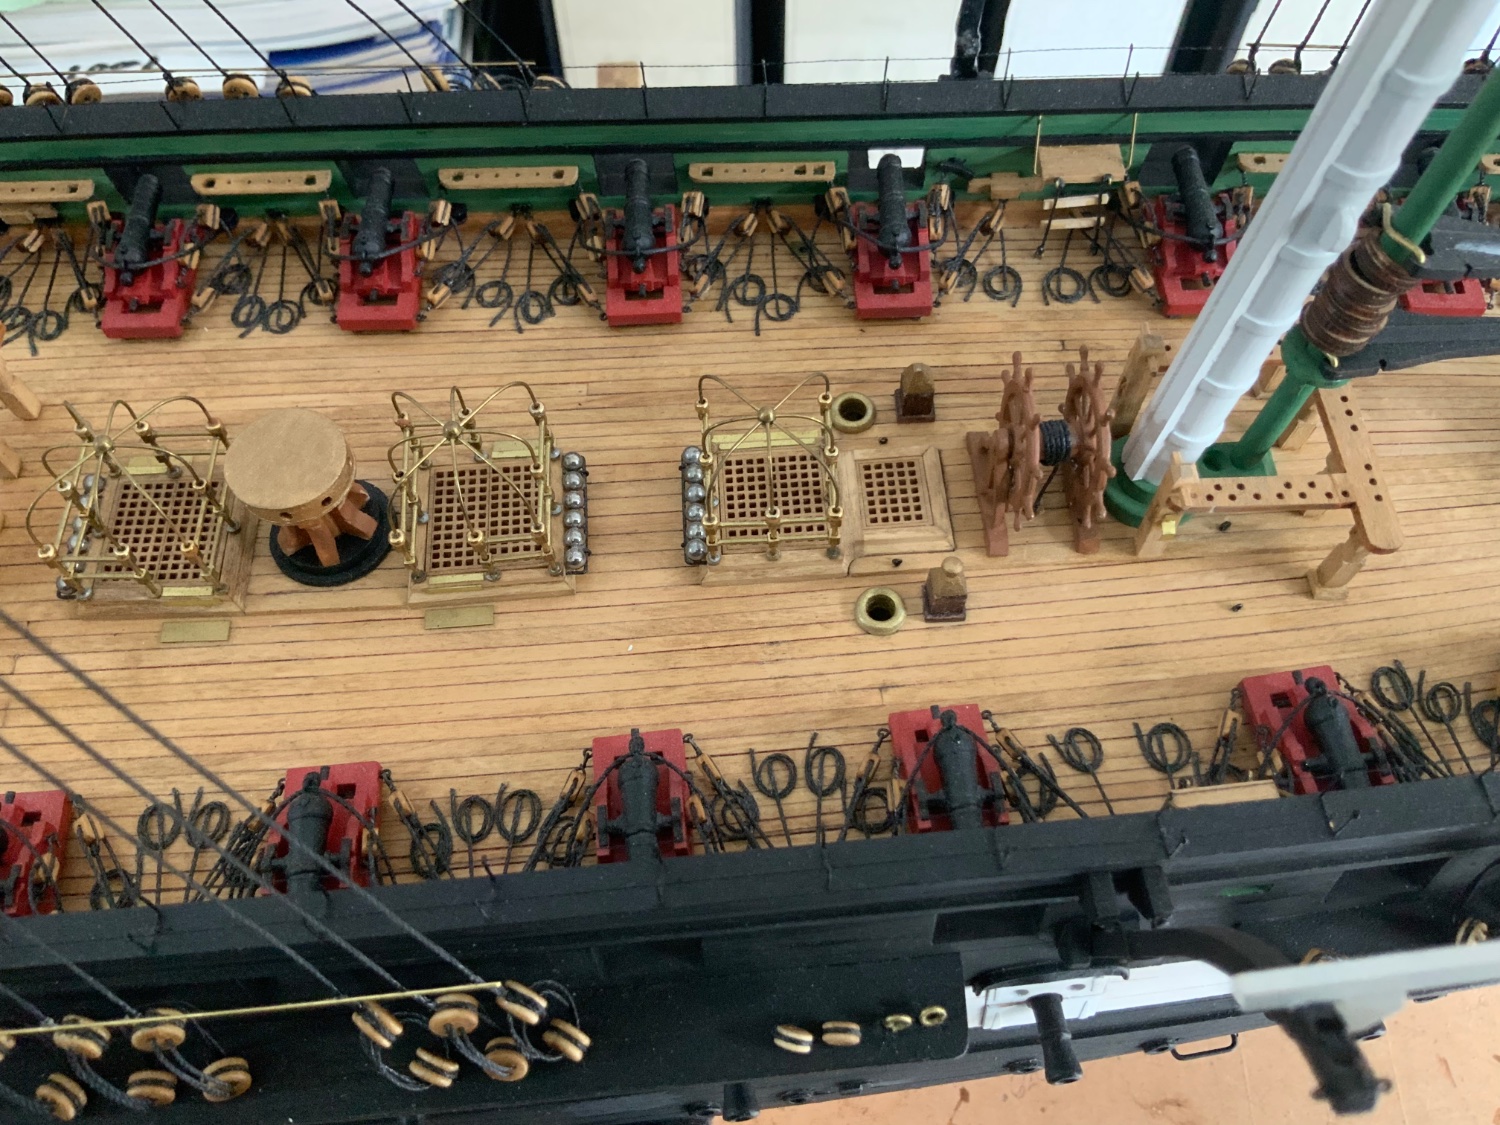
In spite of all the outside worked being done this Spring, I've managed to make some progress on the Constitution. Gun deck cannons, lids, some of the carronades, channels and chainplates are in. For the most part, I followed Bob Hunt's Practicum, except for the chainplates. After several failed attempts to solder the dead eyes to the chainplates, I gave up. Thanks to other members on the forum, I followed what they did. I set the chainplate in position and then gently bend it back onto the channel to mark the length. I looped it back on itself and threaded a length of wire through which was then wrapped around the dead eye. The chainplate and wire were then super glued. I had no luck with the rivets, so I just super glued the chainplates and extensions to the hull. I've got one side done but I'll probably do some more carronades before completing the chainplates - mix things up a little so the work does not become tedious!!!
In looking at these photos, I thought I had some natural corroding of the copper but it is just the reflection off the table...
-
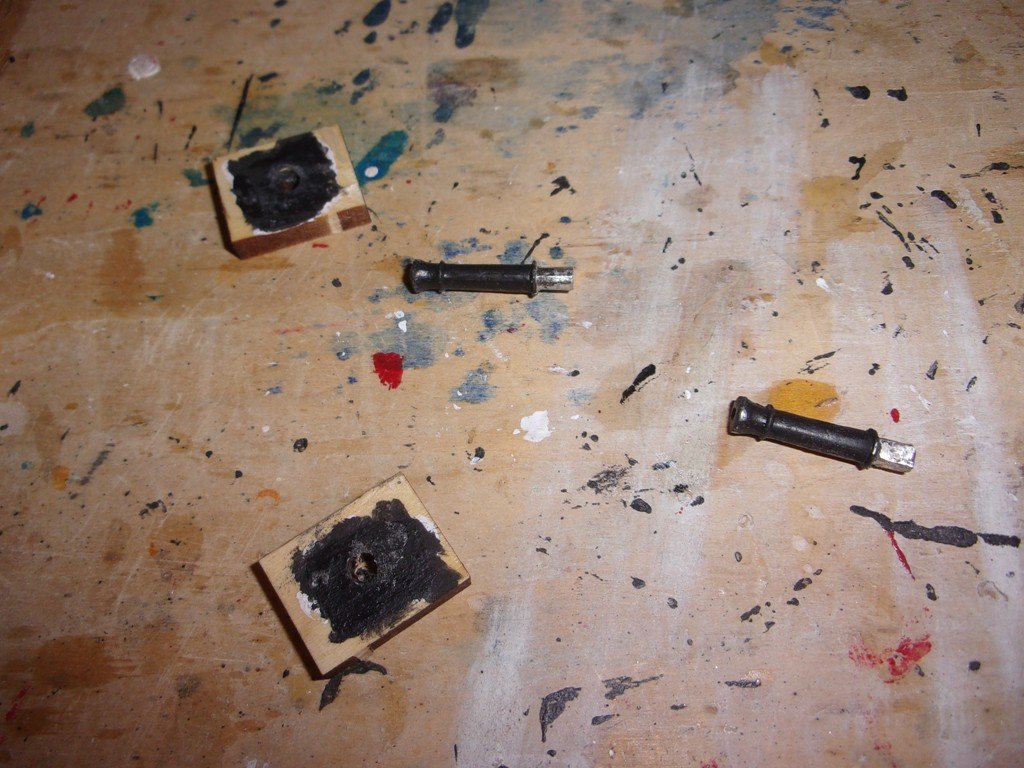
Oops!! That did not go well. Now I've got a problem to solve!! Luckily, I am having the lids closes for one port, so whatever the solution it will be behind close doors. Not so much for the other port! Something will show up I just have hid it well. I guess I should have used more glue!!
- chris watton, JeffT and J11
-
3
-
As much as I would like to take credit for this neat little trick, all accolades must go the following. Go to pages 2 and 3 to see what he did. Simple and ingenious!!
-
I finished applying the copper plating. I used a technique developed by a fellow member to simulate the nail heads. It was a simple combination of chicken wire, a drywall sand screen and an old clothes wringer. I cut off 6 inch strips of tape and ran the tape, wire and screen through the wringer! I got the precise look I wanted! A little touch up is needed and then its on to the next step!!


- JeffT, jwvolz, Duanelaker and 5 others
-
8


USS Constitution by usedtosail - FINISHED - Model Shipways - scale 1/76
in - Kit build logs for subjects built from 1751 - 1800
Posted
Der Alte,
I had never built a wooden model ship before starting the USS Constitution. Bob Hunt''s practicum was critical in me enjoying and being able to complete my build. Along with that, it was the numerous builders and their build logs that made a major difference!
Best of luck!
Dave