harvey1847
-
Posts
528 -
Joined
-
Last visited
Content Type
Profiles
Forums
Gallery
Events
Everything posted by harvey1847
-
Thanks all, learner and Christian. I´ll have to wait for the mill, no money by the moment... but it has been in my mental list for a lot of time (the mill) the sarfs and everything would be easier. I agree. Thanks for the info anyway. I do apreciate the link,. I´ll stick by the moment to use the what I have. Maybe I´ll buy a hand press drill. Do not Know now. Regards. Daniel.
-
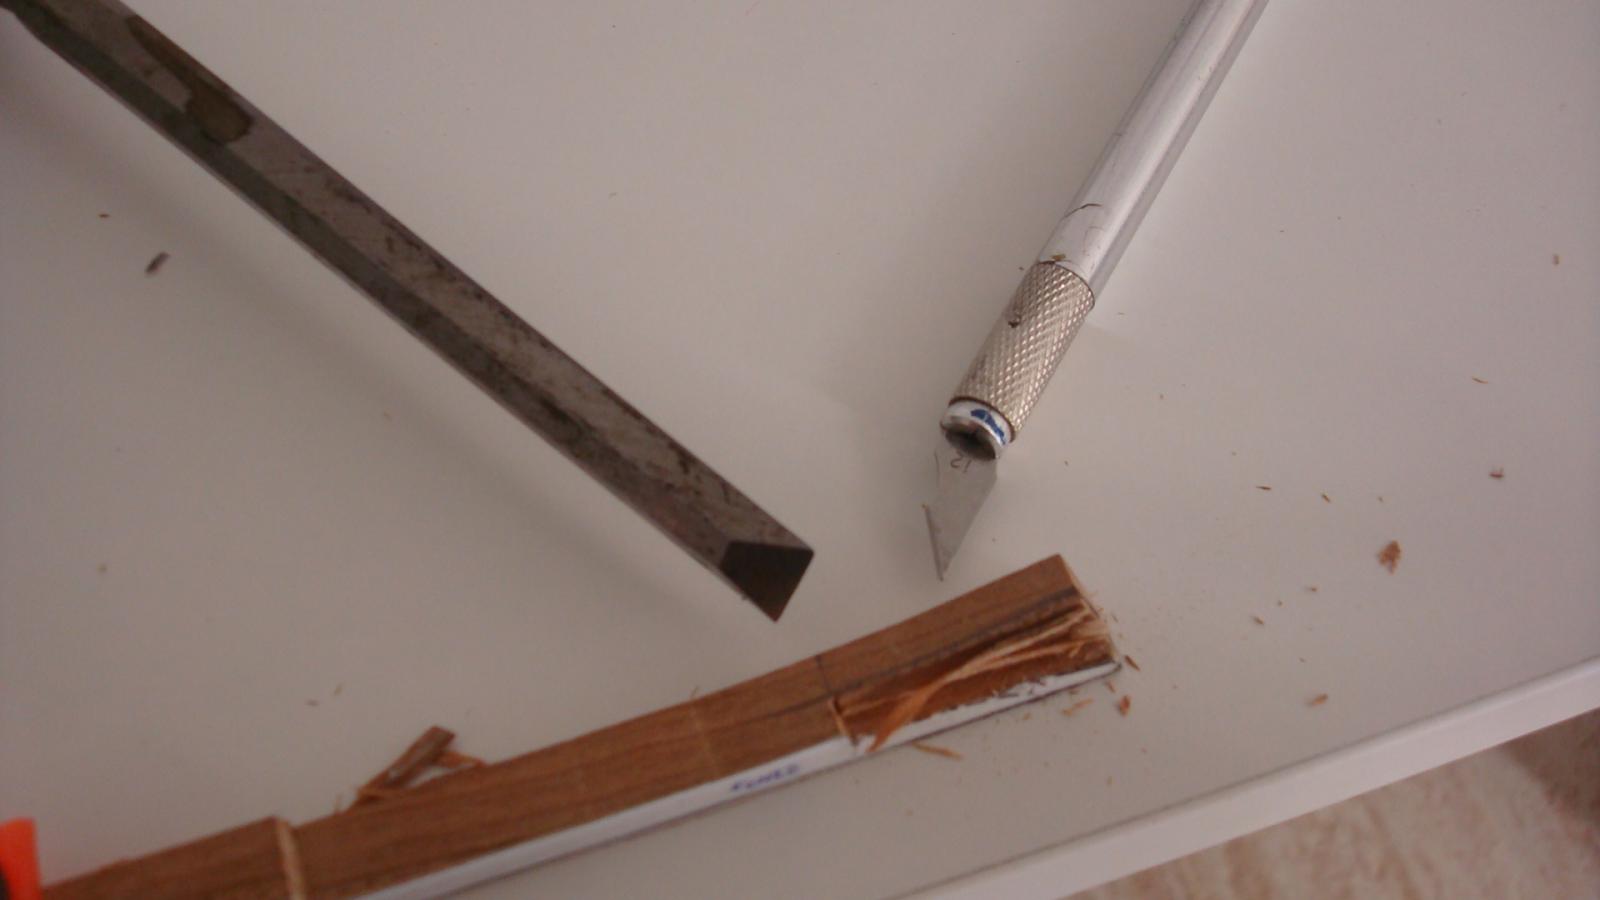
Guy, (Is this your name?) yeah it takes a while to download the files. There is a pdf list on "Trition Line's Drawings" that I posted don´t Know when but it is pretty helpful. It´s from the old MSW 1.0. I recomend you to buy lots of folders and put it together in a biger one. One thing. Why you cut straight piece #5 of the keel? the one that meets the stem where the keel actually ends. Good scarfs! Mines are crap. Daniel.
-
Nice work. Amazing how the oil change everything. How many coats you put on it? and a silly question, what kind of brush did you used? Best wishes! Daniel.
-
I am going to copy a sentence that Kelvin12 wrote in the old MSW 1.0. I´m not sure if it was his signature once but I have it printed and stick it on my wall. I laugh a lot when I read it. He manteined... " Seems women the world over don´t realize how important this building project really is. They expect us to drop everything and attend to domestic chores when this building is obviously way more important. " Regards. Daniel.
-
Hello Paddy! Nice work. One question, How you cut the blade? Did you use a dremel disc to cut the metal? Regards. Daniel
-
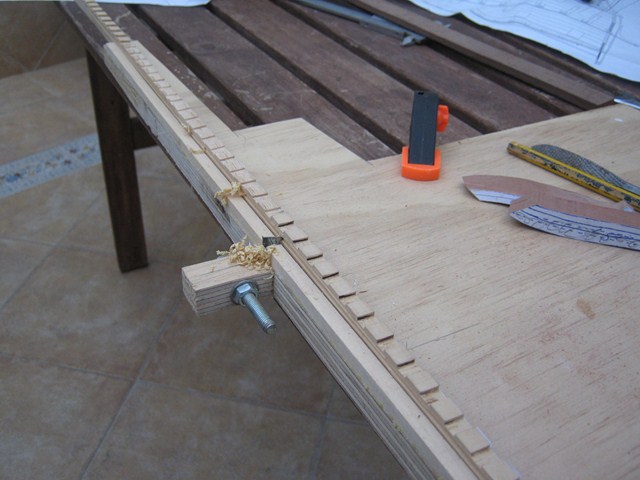
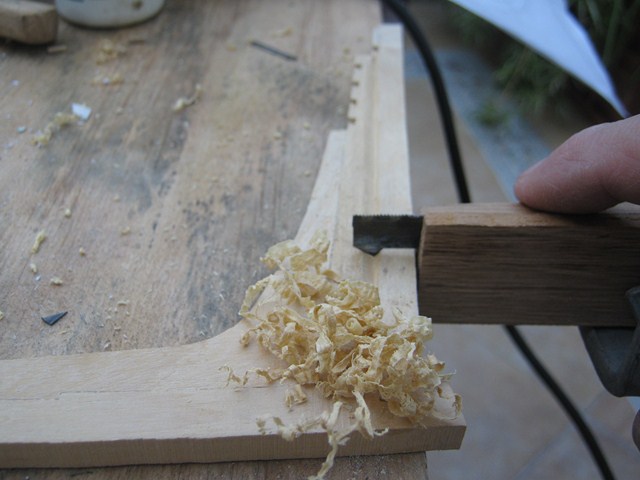
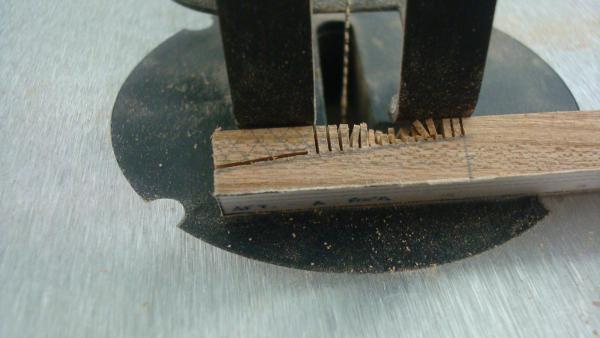
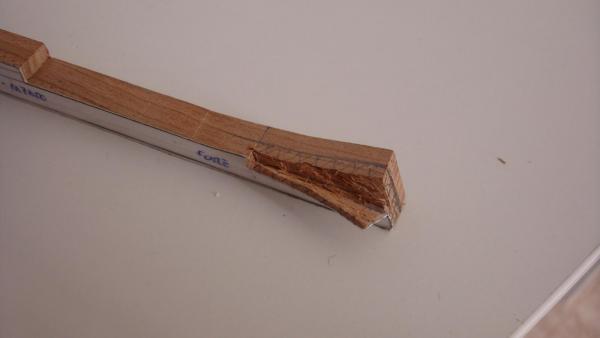
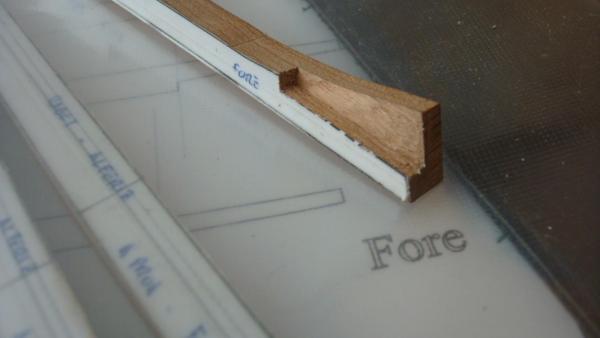
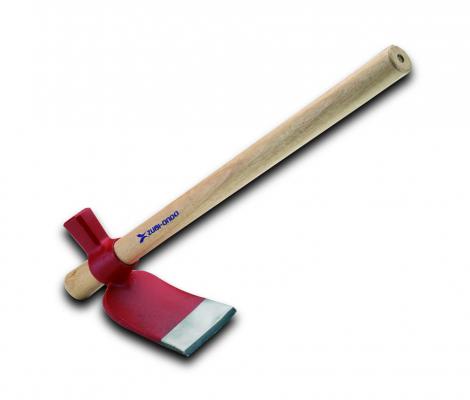
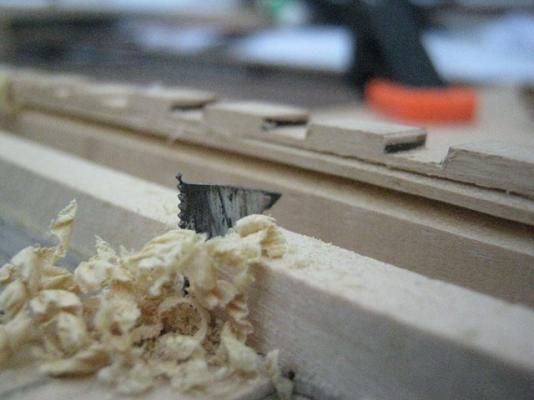
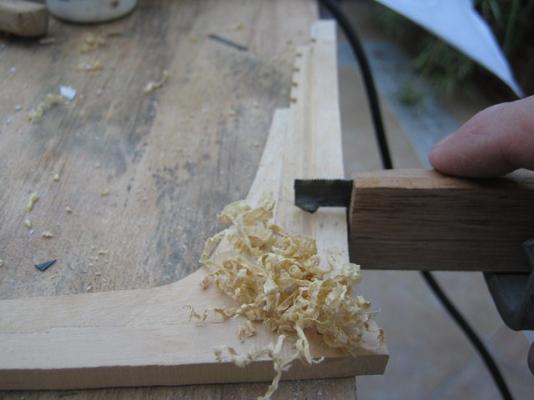
Hello all, lots of things arround have push me out a little bit from the hobby but we are all back an safe. I have inaugurate my new workshop. No more dust in the living room! My wife is quite happy now, my kids kind of sad...They love all the machines and the sound of them. Anyway Here´s where I am at. After marked the cuts on the keel pieces I started to make the scarfs. The best results were with the firs picture. I had lots of fun chiseling out the wood from piece #5. I thought that was to be quite difficult to make but with patience it came out quite nice. Here´s the result. I did not start from a square timber. I cut the different pieces from timber using the scroll saw. There´s small diferents between the pieces so I do not Know if I´ll have to re-do the whole thing. We´ll see. Pete, here is a pic of the tool I used for the joist. Mine is other brand but yes is a hand hewed. Excellent tool. Hope to post more in a while... Daniel.


-
WHAT A BLACKSMITH we have arround!! And now we are going to see a "weaver"... Congrats! Would be very nice to show us the construction of your rope machine... Best wishes Grant! Daniel.
-
Welcome aboard Aldo! I thing you are rigtht, working to 1/96 I would the stem and stern post as single pieces. Then using tracing paper or some transparent paper you can glue it to the whole piece and mark with a sharp blade or a chisel the different parts. Then you can use a pencil to emphatize the joint between and simule the caulking. Best wishes! Daniel.
-
You can always use both, Beech for the plankin and Pear for the frames. It looks like you have a lots of it. You will need it. I´m using Cherry so far for the frames and keel. Good, good luck! Daniel.
-
At 1:48 I have part from an 8mm timber. I´ll edit this tomorow. Daniel.
-
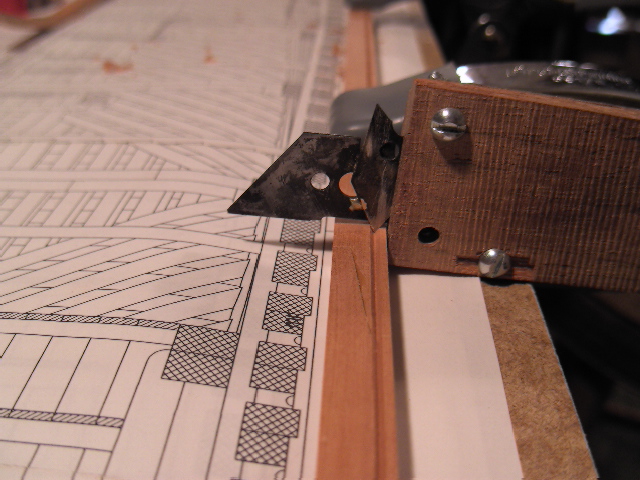
NICE TOOL indeed! How I envy you! I´m looking and looking arround here in Madrid and is impossible to get one!! I talked to David Byrnes but the shipping was too expensive for me. I´ve seen some on amazon but they do not look as fine as the one you all have... I´ll post here the pics I have got so long from other logs about the tool Joss was talking about. Since we are bunch of fellows with this practicum, could be of interest for all of us. The pics are from the old MSW 1.0. The first three one are from Cabrapente and the last one I do not remember.


-
Great job Pete! I do like the set square you have made with that round shape. It looks pretty secured with the screws and everything. It is also a neat contrast between the white layout and the wood of the frames and the keel. I´ll stay tuned for more. It´s looking good to me! Daniel.
-
Welcome aboard Learner! Nice board you have there. With rails and hand clamps... Which one is the other built you made? Can you post a link to the Gallery? Regards. Daniel.
-
Very nice cut Paddy and very nice tool aswell... Swiss made! I am much more with the idea of Joss and Cabrapente that use the same method of Joss building his Fleuron. I thing that by using that handmade tool (the blade between to pieces of wood) you ensure yourself that in both sides the rabbet is the same. Its particularly helpful when you have to make the rabbet in round pieces. It´s my opinion anyway. Good work and good luck! Daniel.
-
Wellcome Back! Yes I agree we need more full models! Sorry to hear about the hard disc... Thanks for the time to repost the old topic. Best wishes! Daniel.
-
USF Confederacy by Rustyj - FINISHED
harvey1847 replied to Rustyj's topic in - Build logs for subjects built 1751 - 1800
Really a beatyful build Rusty!! With that amount of pics there is no need to add a lot of text again. They speak by themselves. Lovely work. Daniel. -
Good luck rising the frames. Take your time. We are not in a hurry. Be sure all fits ok and that the frames are exactly in the middle of the keel and all will be fine. Hope to see more pics in a few days... Good luck again! Daniel.
-
Lovely work Toni and very good pictures. I am saving lots of them about the decks to use them as a reference on my Triton project... Best wishes. Daniel.
-
It´s amazing your exactness and precision... Changing the Knee and the Head and everything with the whole thing glued to the keel, the ribbands ... It looks like a surgery thing to me. Wordless. Just amazing again. Daniel.
-
PLEASE!! We are so alone here with the complete model...!! Glad to see you back. Daniel.
-
Happy Easter Paul and all! No modelling for me too... Daniel!
-
Really nice Rusty. I like especially the work you have done with the treenailing of the deck! They all look symetrical and in their correct place. Did you use some kind of handmade plate to mark the place of them? Keep going! Daniel.
-
Wellcome to the suffering! Very nice frames, lots of work to do! Best wishes. Daniel.
-
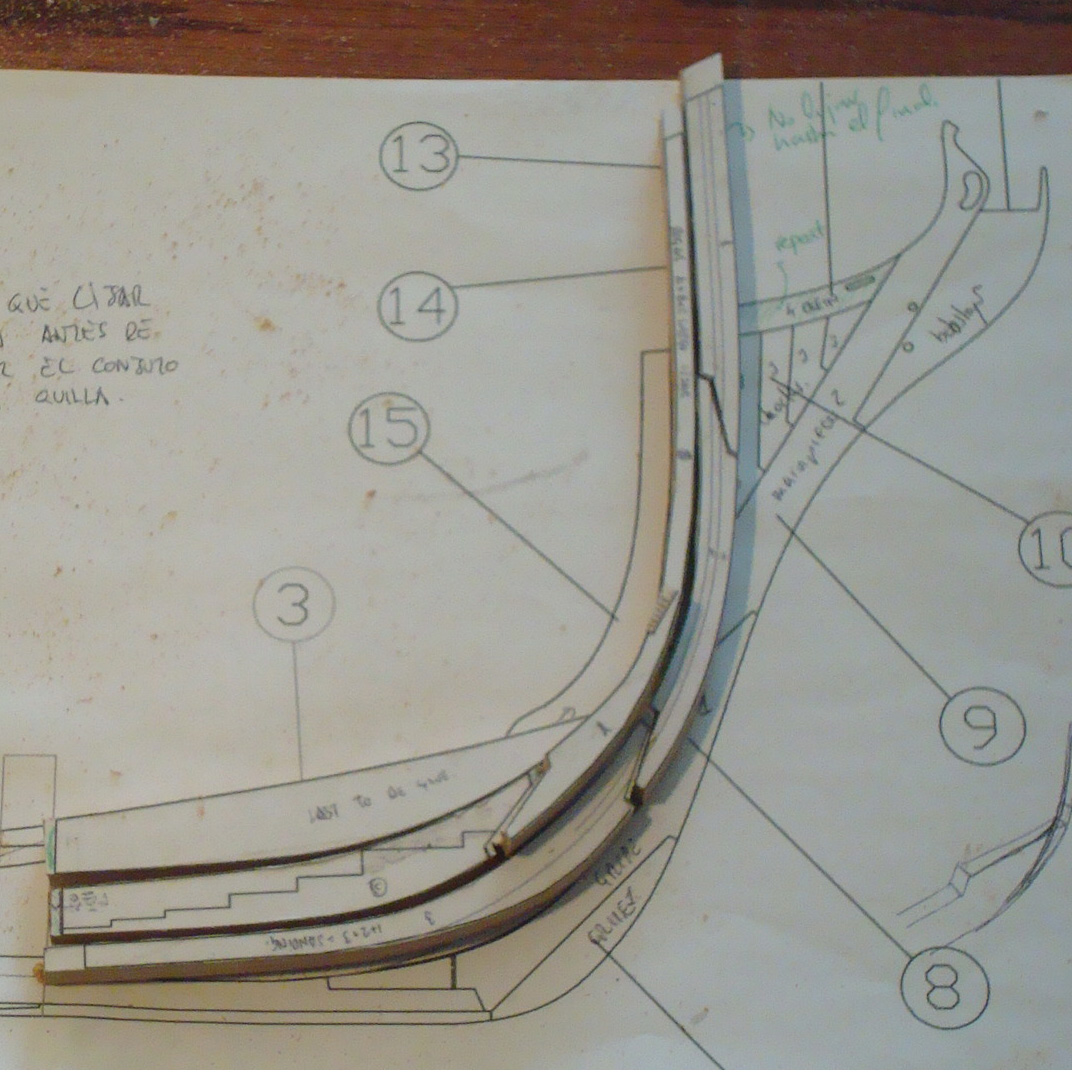
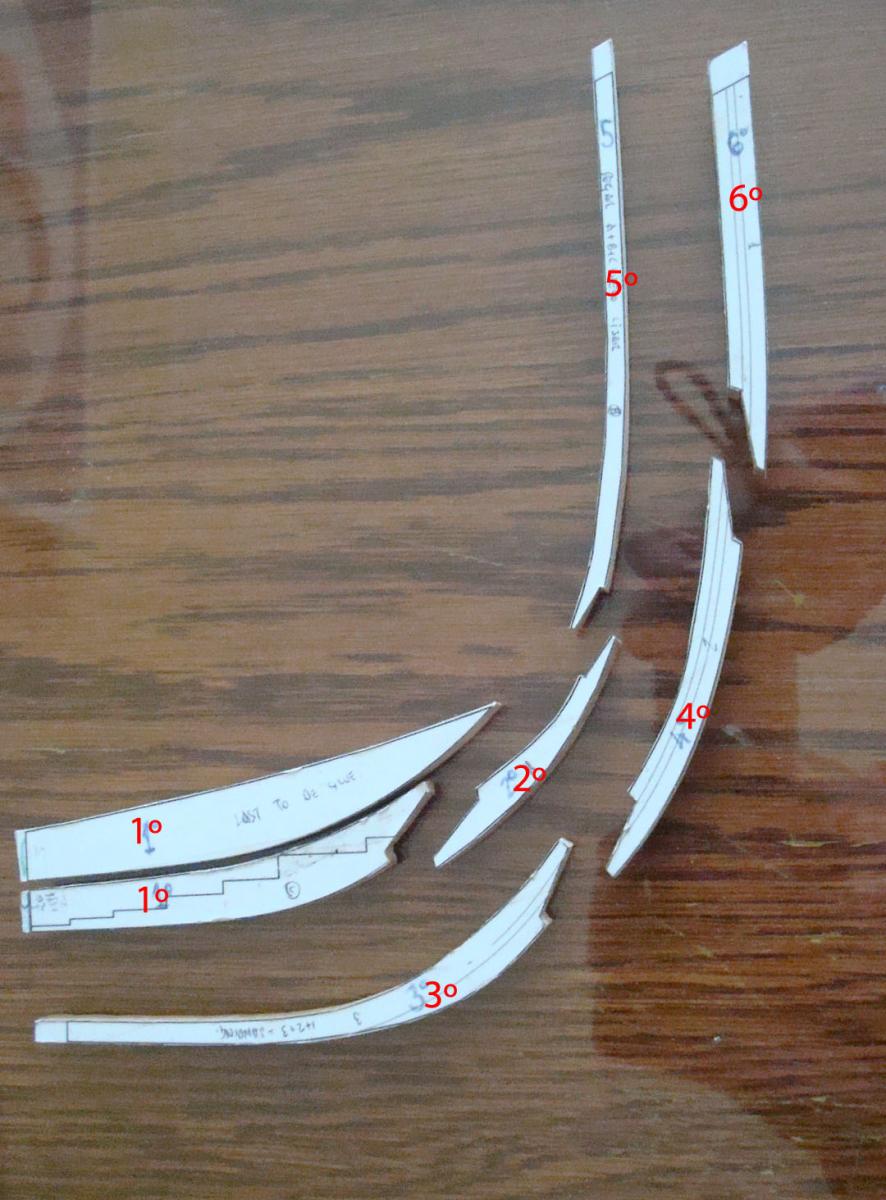
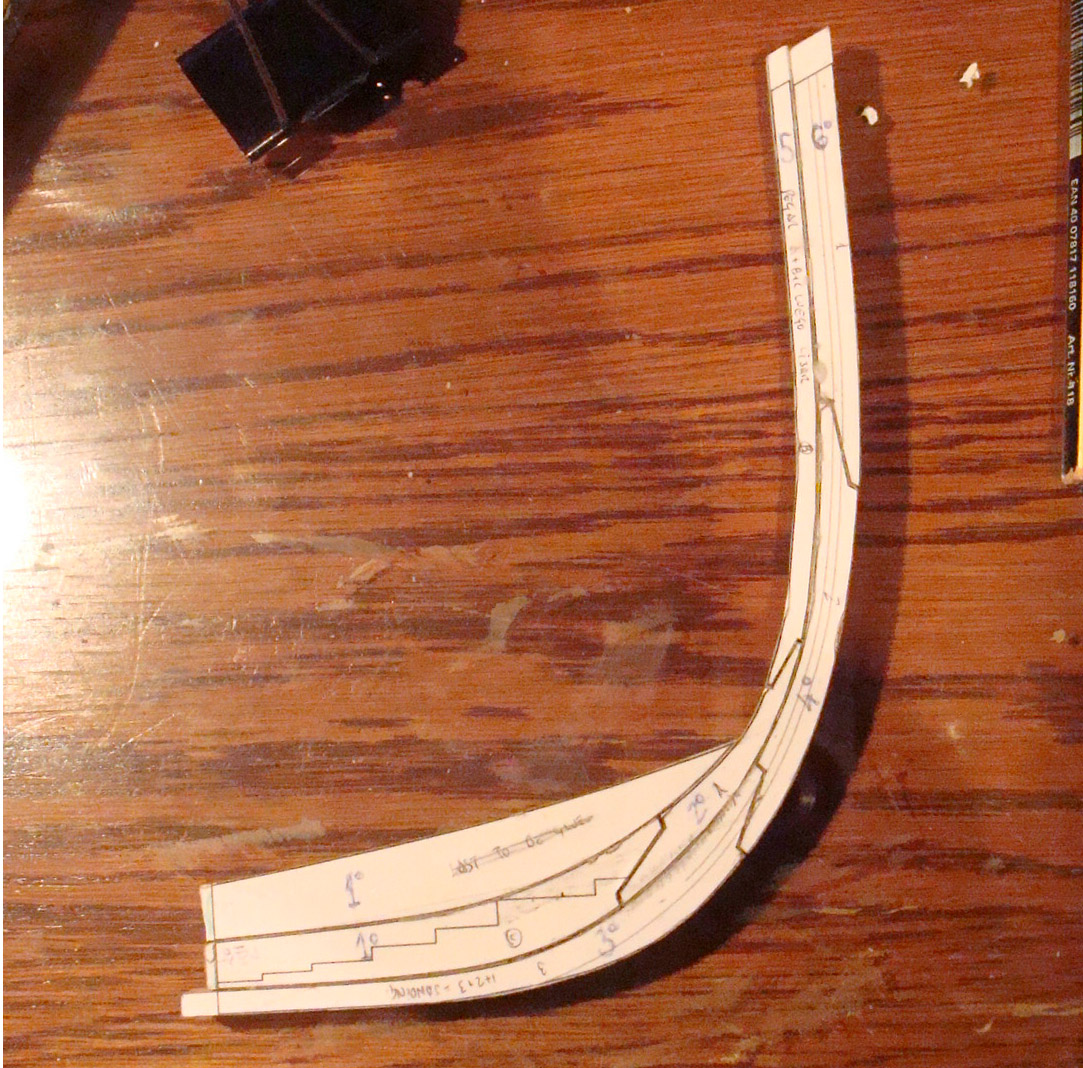
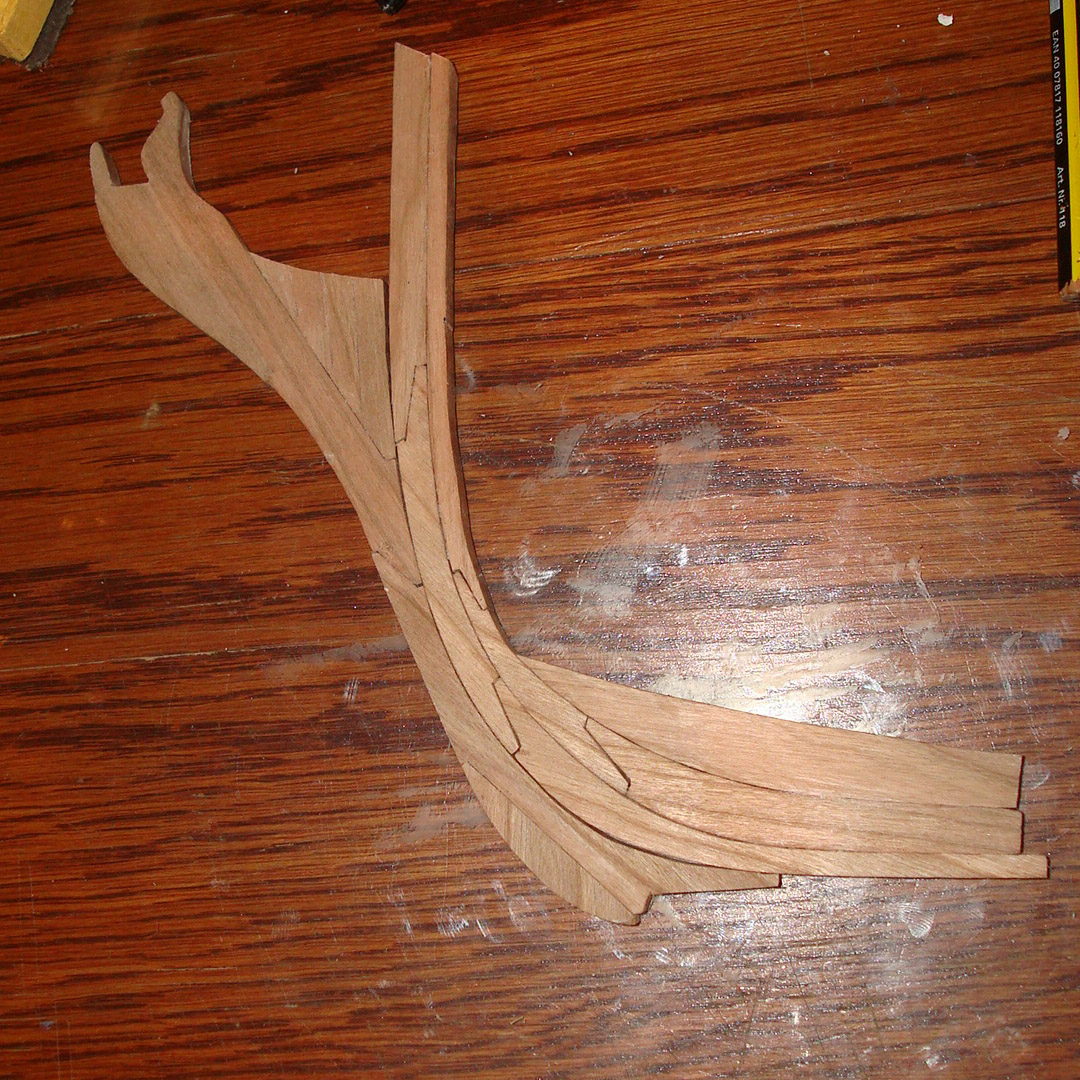
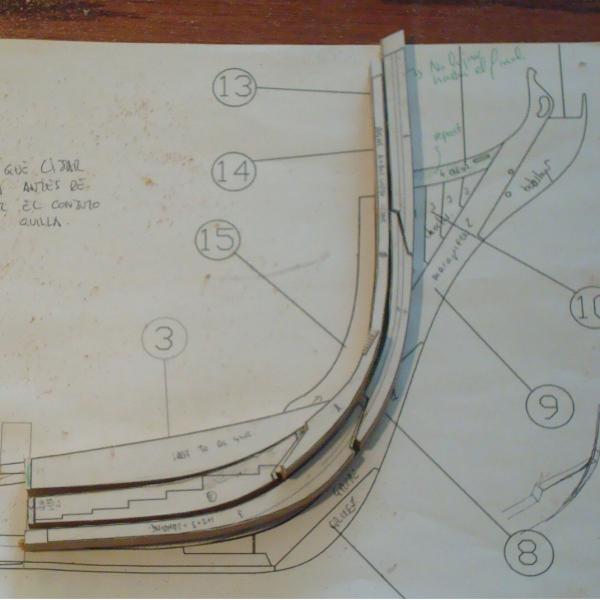
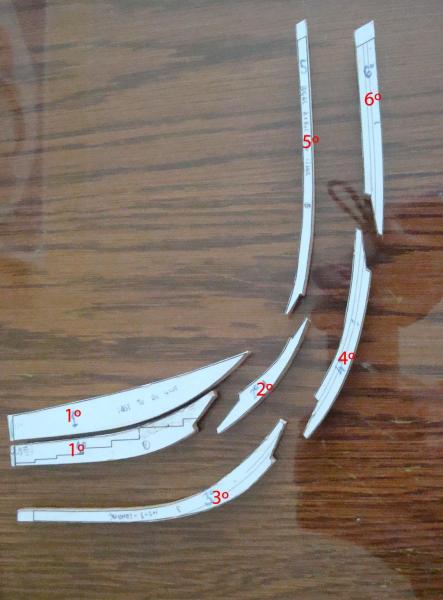
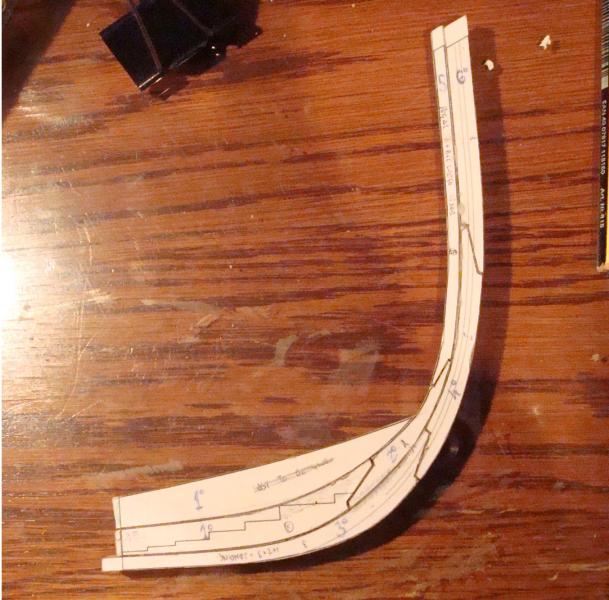
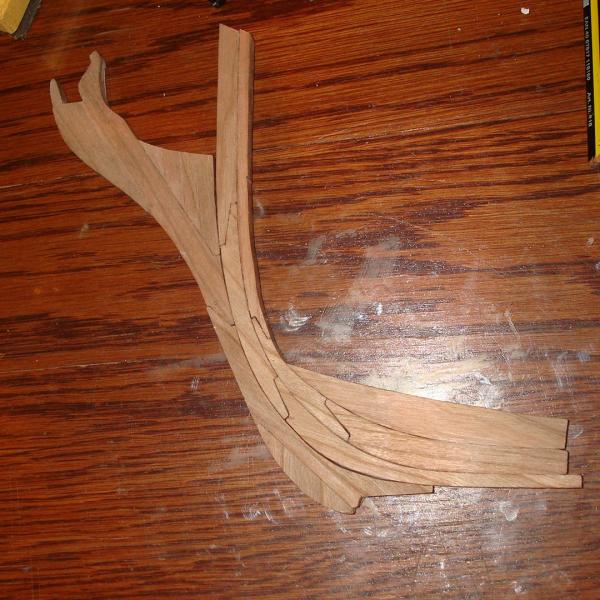
Hello All! Small progress has been done during this week. Lots of party days, Saint Joseph, Saint Patrick and now the Easter ahead. To much kids arround and too less time to enjoy the hobby. Anyway, I´ve completed the apron. First I cut the pieces as always from 8mm thick cherry timber. I´m using only cherry for the frames, keel, stern and stem. I´ll use some more wood but from time to time. Here is the order I followed gluing the different pieces. I have used again a glass surface to ensure the flatness of the pieces. Here is the result. I´m nut ungluing the paper patterns by the moment. In the other side I will use tracing paper again as I did cutting the steps on the stern. (See post # 3) Here is all the set. I have to fair a lot the whole thing. I am quite scared about how to sand the bow and the damn rabbet. How I miss the "Stickies" posts that used to be in the old MSW 1.0 snif snif... Best wishes to all and Happy Easter! Daniel.
-
HMS Euryalus by egen -
harvey1847 replied to egen's topic in - Build logs for subjects built 1801 - 1850
If I ever finish the Triton (hope so) and after looking the amount of detail of the interior work, I would like to do it again but with no frames at all. When I see the draws of the decks on the AOS series books of any ship in example I think to myself “why not to build this or that deck?” They are beautiful by themselves. The deck beams, the knees, the hatches, ledges, spur beams… One question, Have you round the deck beams or are all “flat”? Good work! I did like the way you lay down all the frames. Daniel.