HOLIDAY DONATION DRIVE - SUPPORT MSW - DO YOUR PART TO KEEP THIS GREAT FORUM GOING! (Only 20 donations so far - C'mon guys!)
×


harvey1847
-
Posts
528 -
Joined
-
Last visited
Content Type
Profiles
Forums
Gallery
Events
Everything posted by harvey1847
-
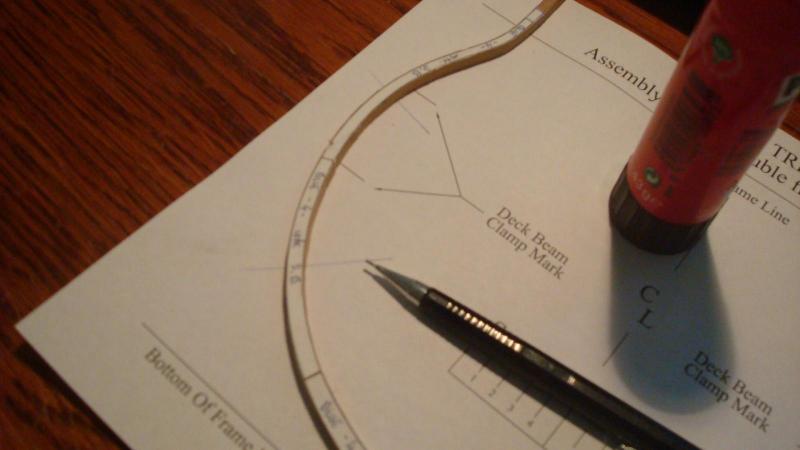
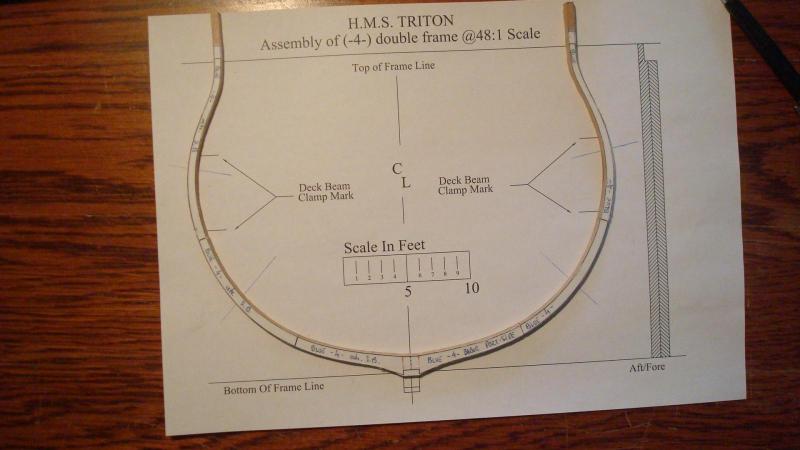
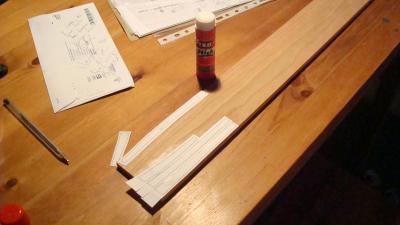
Hello Olphart! I like this jig better than the other one. I have never use a jig to assemble the frames. I glue the "blue pieces" to the assembly patern with "Pritt" or similar. What I do and I have found it very important is to extend the line where the futtoks of the red ones come together (you can see a pencil pointing the intersection line) Then with a brush and water I remove the paper and glue the "red pieces" with white glue using clamps. As you can see I leave some extrawood at the end of the frames. There will be time enough to cut it later when all the frames were in place. Good work so far and excellent workshop you´ve got there. Good luck! Daniel.

-
I do like this Blame Game!! We could all dance the gangnam style arround our logs and just blame for fun. The humor will safe the world! Since you are going to work at 1:24 and the frames on the plans are double frames... Have you thought not to add the chocks between the several futtocks of the frame? See the pic attached from Bryan Lavery´s "Nelson´s Navy". Enjoy the journey! Daniel
-
Superb work and a pretty good expalanation about the issue of the flag. I still can not believe the whole thing is being made up out of card board! It´s amazing. Which tool you use to bore the circular windows? They all look straight ans aligned. I guess there must be lots of them with different diameters. Do you use some kind of extrusion hand made press? I´ll keep watching! Daniel.
-
Glad to see yo back too... Can not wait to see again the superp work of the antennas. I have a question, it might be silly. The main structure, the turrets and everything of the upper structure is made out of 1mm board and then you cover it with plastic card? Good luck! Daniel.
-
Thanks to reposting back your log. The treenailing and the wales is a master work piece byiself. Best wishes! Daniel.
-
ancre Le Fleuron by cabrapente - FINISHED
harvey1847 replied to cabrapente's topic in - Build logs for subjects built 1501 - 1750
Wow Cabrapente! Glad to see your log back the pics of the amount of patterns glued to the glue scares me. Bienvenido! Excellent work. Daniel. -
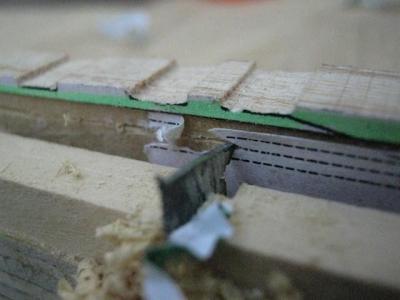
Nice work so far 42rocker! Are you going to use pine wood for the frames and everything? The grain is quite wide. Here are some old pics from cabrapente showing how he make the rabbet. I think the result is impresive but he use cherry wood with a closer grain. Keep going! Daniel.

-
Thank you very much for the explanation, I was wondering about this since years and years... Wood work! Daniel.
-
Very nice Rusty. I do remember your log. I got a few questions, just three,,, .- TREENAILS: For the treenailing did you use the Byrne Drawplate or you sand a piece of boxwood? Link to the Byrnes Drawplate. http://www.byrnesmodelmachines.com/drawplate1.html?id_mm=0219MM352526 .- CAULKING: How you did it? Did you use black ink with white glue or paper? The result is very clean and neat! .- FINISHING: Did you paint the frames before plank them interior and exteriorly? What paint, oil did you use? Thanks very much! Glad to see there is so many builders back to the cross setion...Let´s see how many come back to the complete model. I miss a lot Randy, Wang, bubblehead,John and much more... Happy day! Daniel.
-
Thanks Remco! Daniel.
-
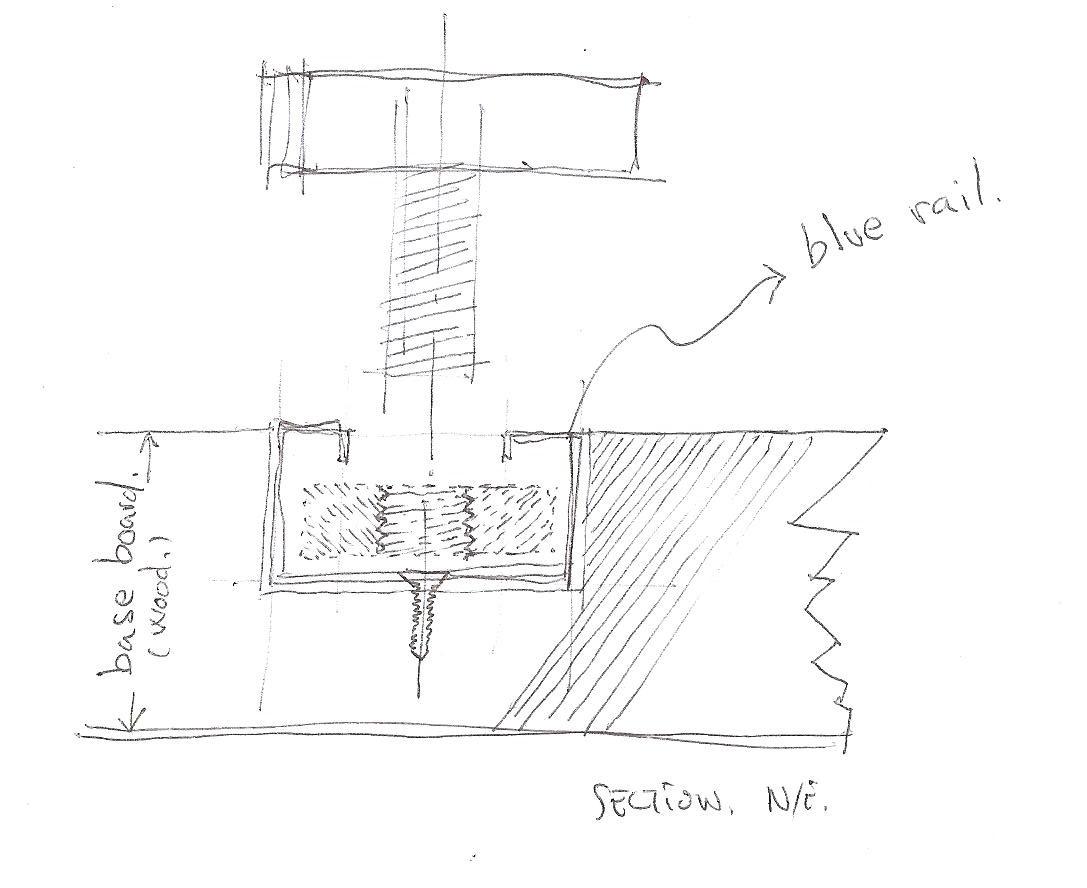
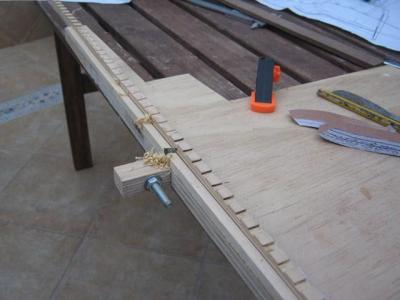
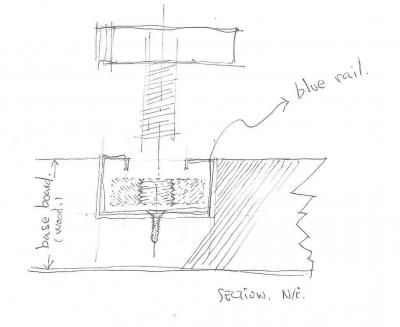
Hello Mark, I have attached a pic that illustrate my question about the, I´m going to call it "blue jig". Can you post the pic about the clamp, how you put it into the board...etc.?? That is the one I´m wondering about. The blue rail one Daniel.
-
Good morning Remco! Can I ask you to explain your "treenail technique"? How you get so small pieces of wood in diameter and the wood you used for them. Is amazing to see the framing process on your log. It used to be a topic about this. Thanks and good week to all! Daniel.
-
Glad, glad, glad to see your log after these days. Amazing, glorious, incredible. What an extremely effort for you to rebuild your log...!!! Best Whishes! Danniel.
-
JIG QUESTION. Good Morning Mark! Now that we´re all re-starting the logs can I ask you to explain how you built the second Jig. The one made like Ed did. If you could make a sketch on paper it would be fine. I am wondering about theclamps inside that blue aluminum rail. The bridge is a great to meassure distances, deck beams, gun ports... Thanks.
-
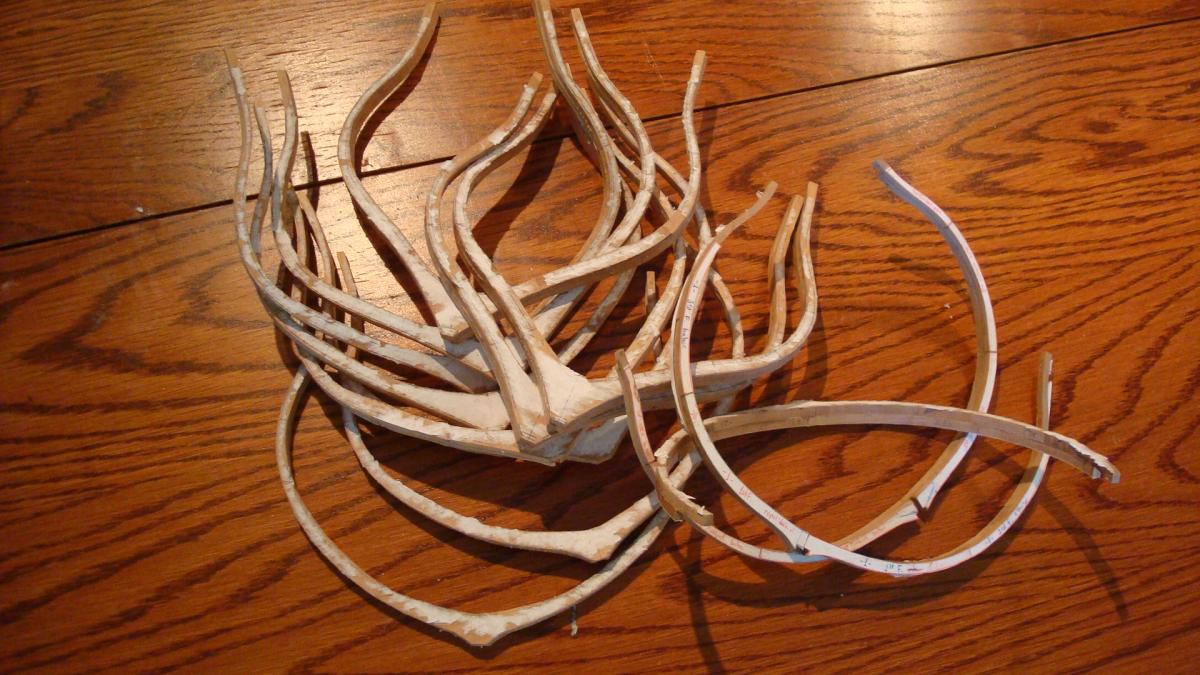
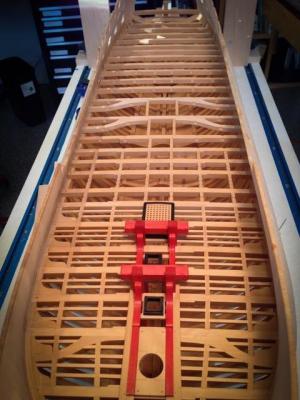
More frames coming...

-
Glad to see you back! I got hooked on MSW thanks to your Bellona like two years ago when I was attempting to build it out of the AOS book. Regards. Daniel.
-
Congratulations! Well done. Your log is a reference for me. Daniel.
-
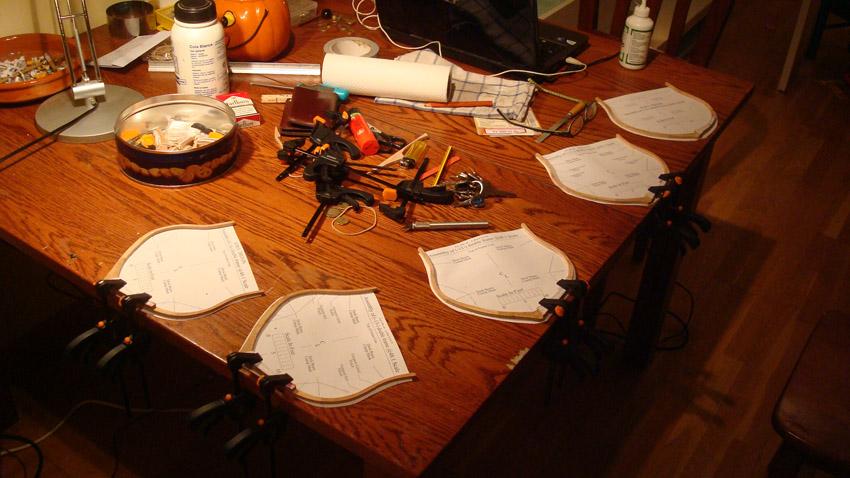
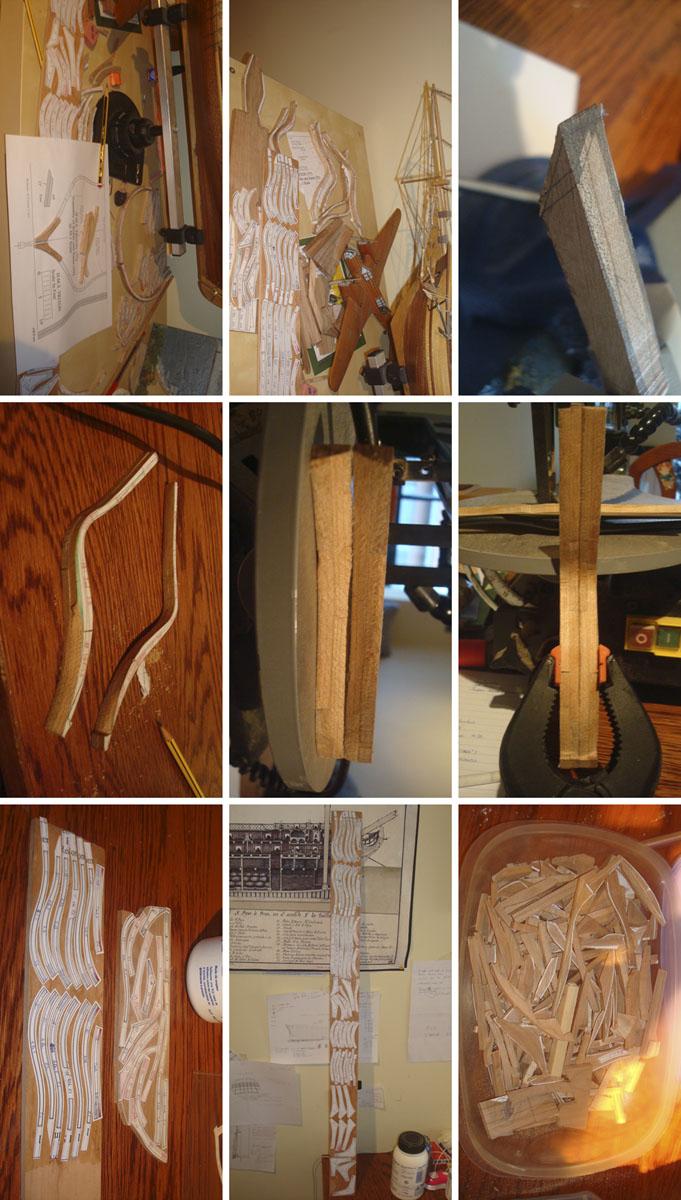
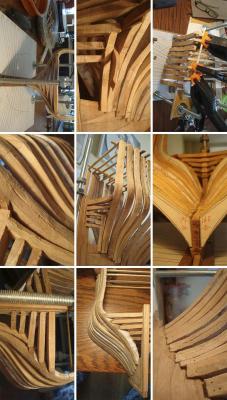
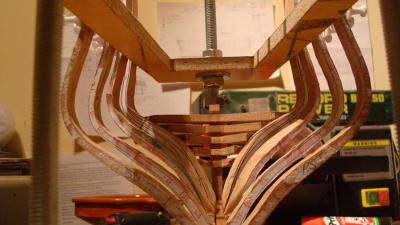
The hardest frames have been #28 and #27. I repeated twice #28 and maybe I´ll have to repeat the portside fame again. As you can see only #27 is shaped an beveled… we´ll see if I have to repeat this too. I will follow what Druxey said to me as the Bible: “If I can recommend not getting too enthusiastic about bevelling the frames before erecting them. It is an unpleasant surprise when fairing up the hull later to discover you took a little too much off earlier!” The rest of the frames were pretty easy to fit. I am using a ribband to understand more or less the shape of the hull. Have a good weekend. Let´s rebuild our logs!! Daniel.

-
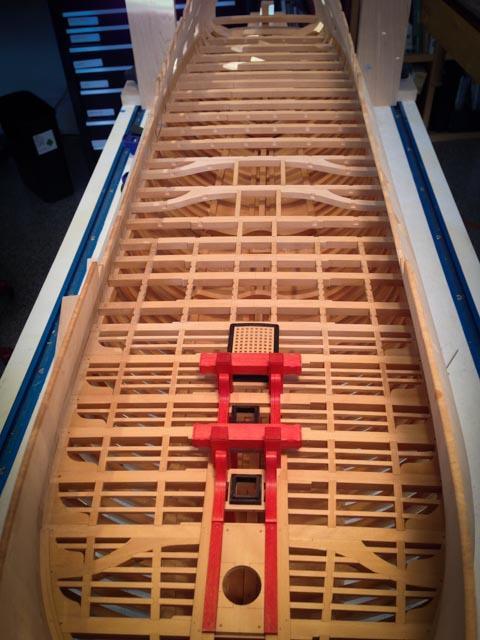
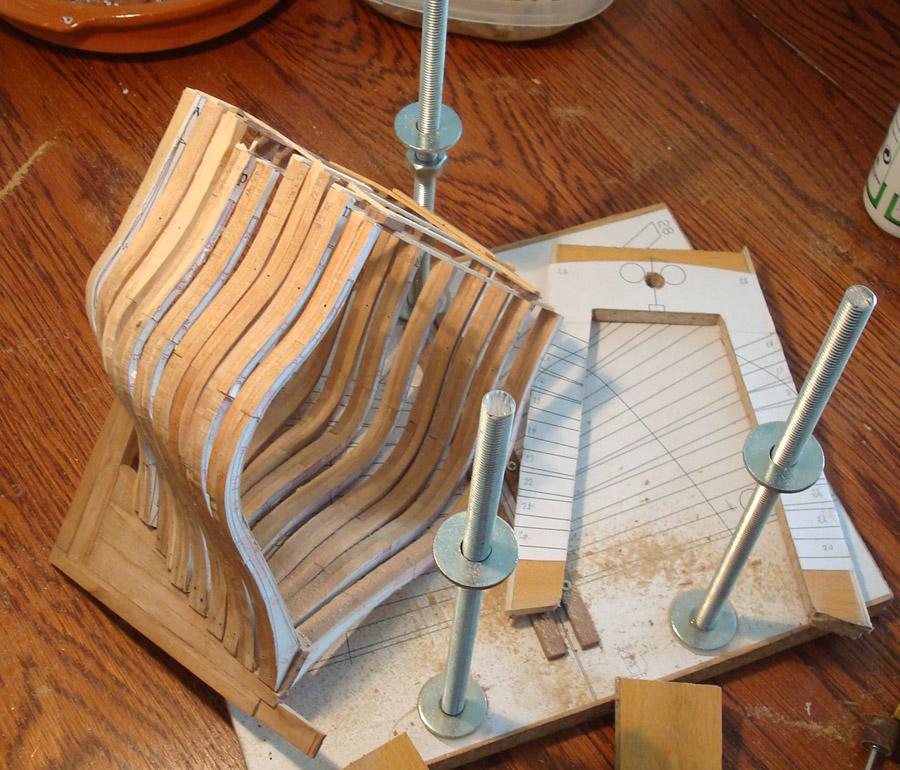
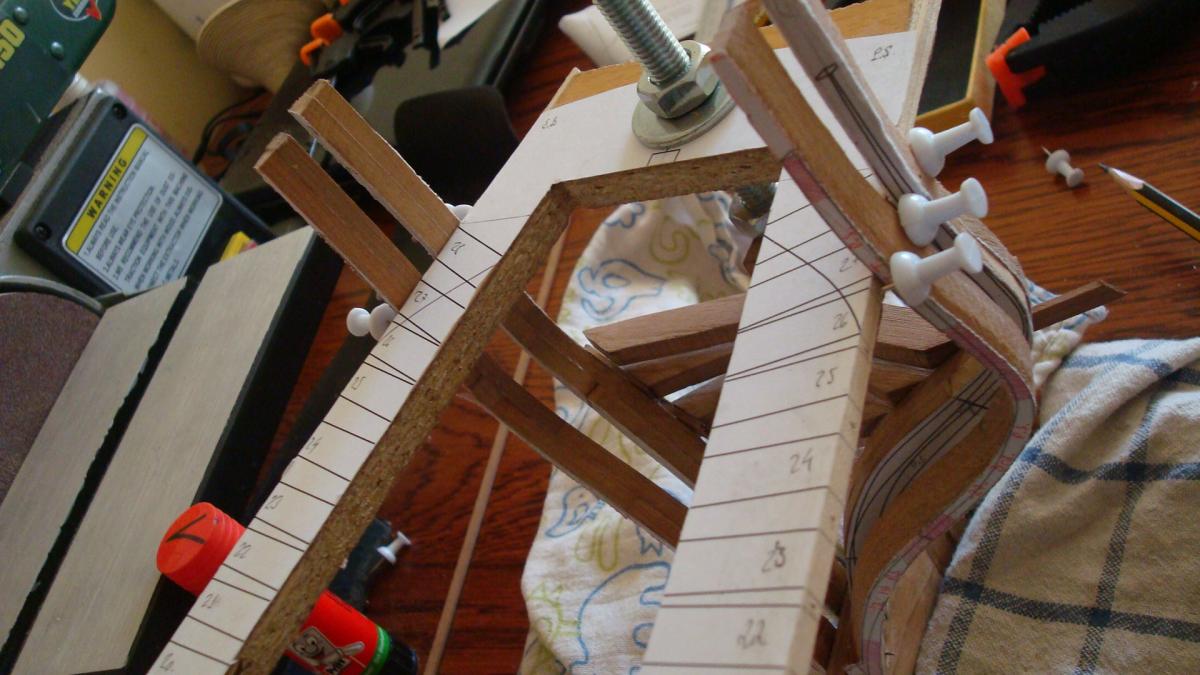
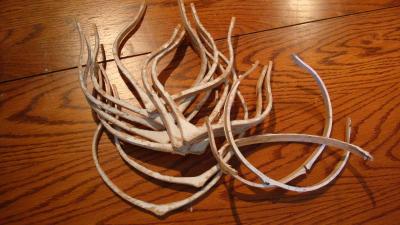
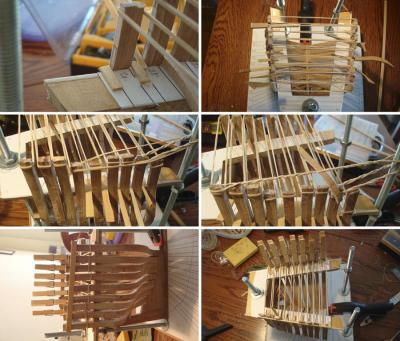
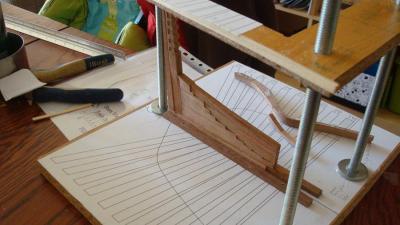
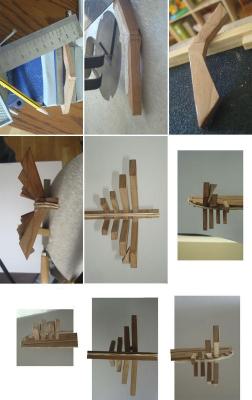
Hello Again. It has happened again. As Randy advised me I did bevel too much frame #28 so I have had to redo both. More scrap pieces to the sack. But I am happy because I am at last building something rather than being cutting and sanding day and day. The JIG has been very helpfully so far… I do not Know how I am going to get rid of it cause it won’t come out by itself. I have glued already frames #28,#27,#25 & #23. And tomorrow I hope to complete the whole thing. I´ll write some more explaining the process. Here are some pics…

-
I have glued all the patterns to the cherry wood till #20 so during next weeks I will be just cutting and cutting lots of pieces. That means I will be out for a while. I´ve also done the stern Jig.

-
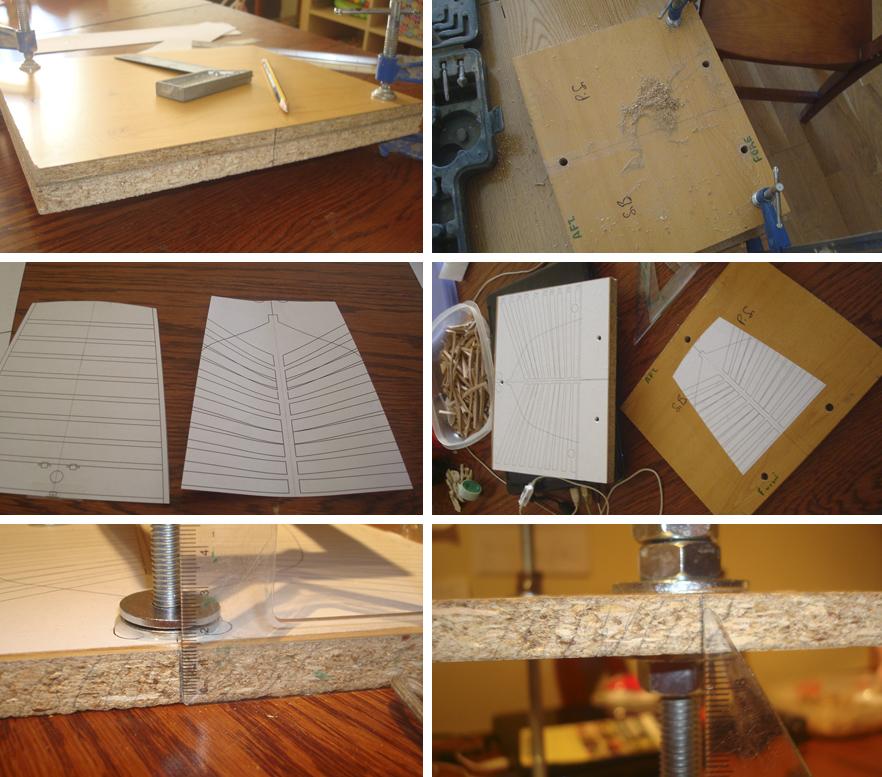
Filling tramsons.
-
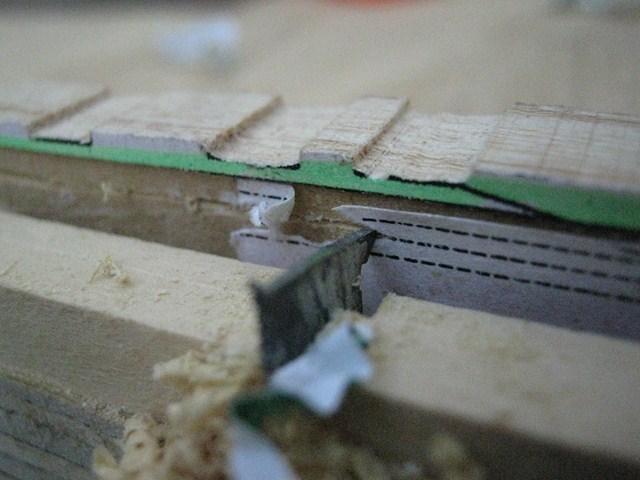
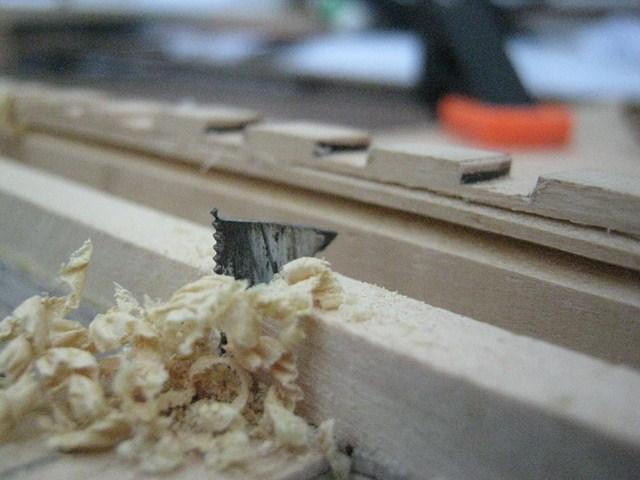
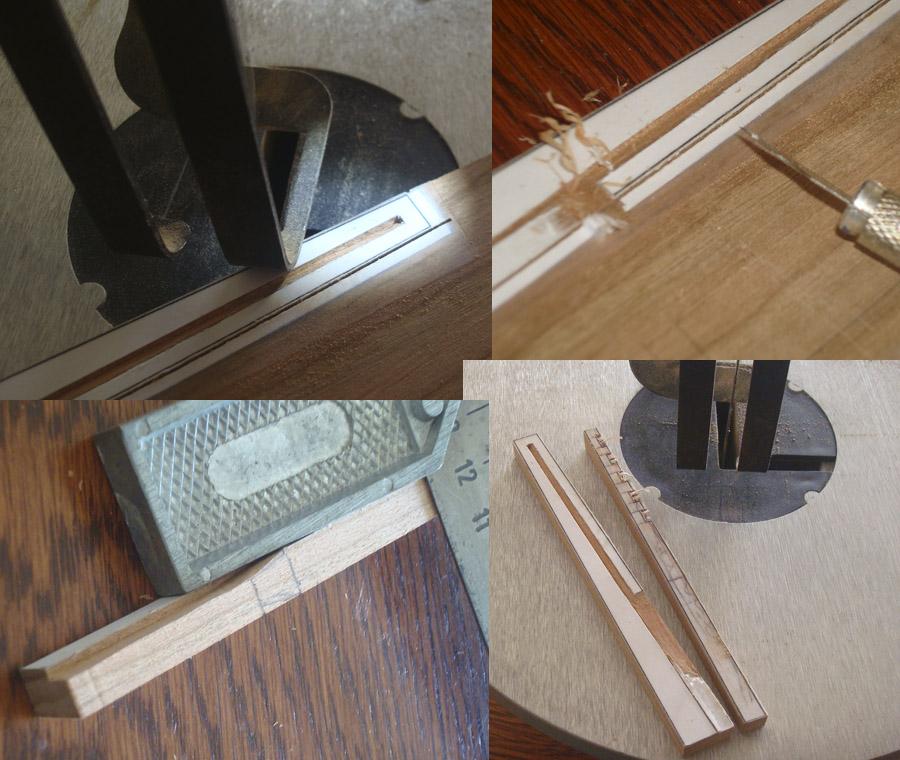
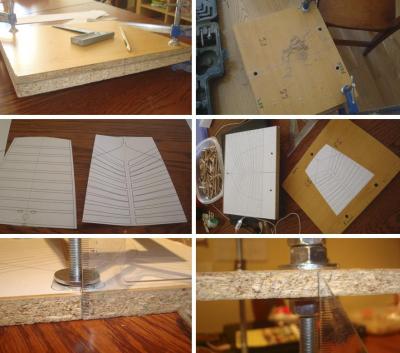
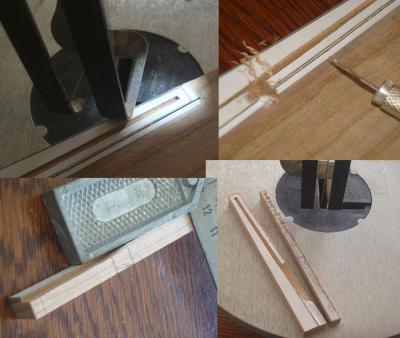
Hi everyone! I think this might be the shortest post I put on. I am just happy to been accomplished at least two of the filling transoms #4 & #3. I have repeated four times #4 and twice #3. Fingers cross. My intention is to put some kind of rising keelson fronting the inner post and the five transoms. It´s my intention, another thing is if I will be able to do so with the tools I have right now. The pics show how I fail treating to finish the FT#3 by itself. I founded that sanding and chiseling it before been cut from the whole piece of wood was easier. The piece is quiet weak. I have also bevel a little bit the inner post to “receive” the filling transoms. Daniel.

-
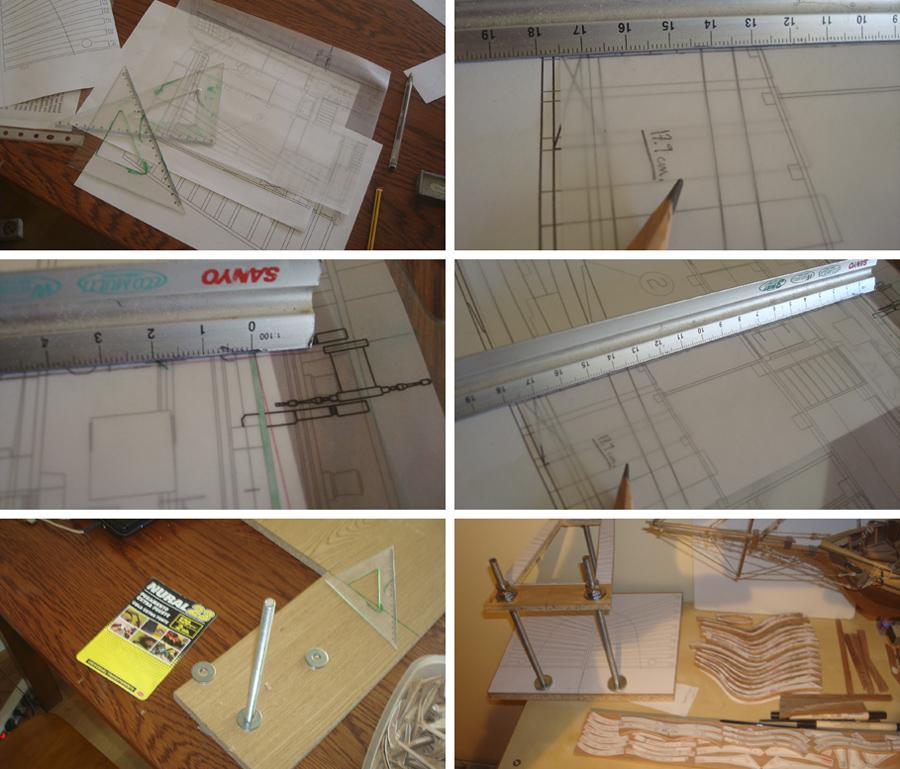
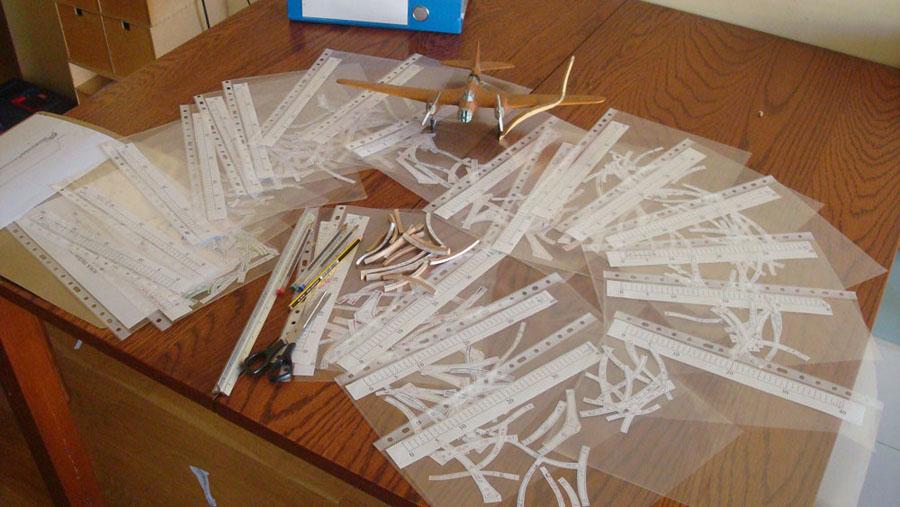
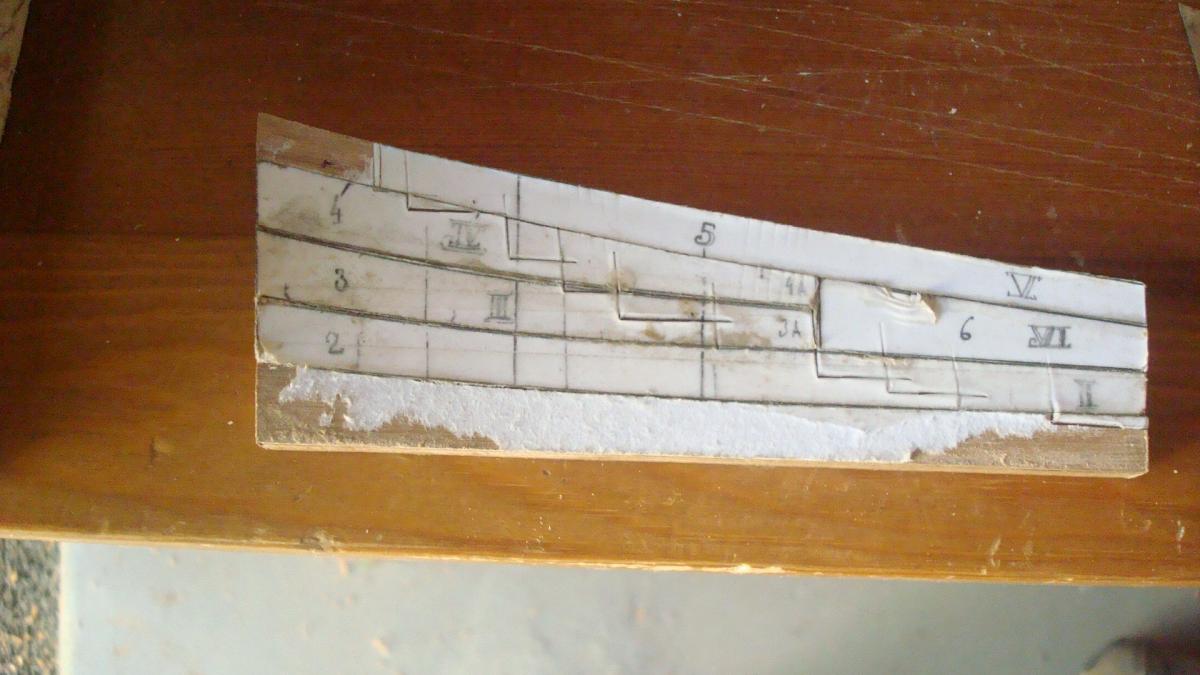
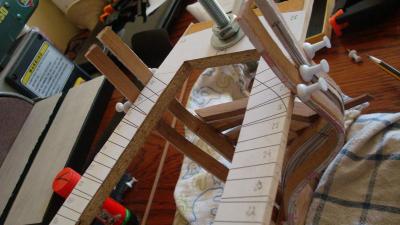
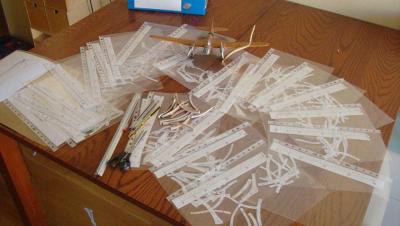
Hi everyone! I´ve decided to cut the patterns for the frames abaft. It takes a while to print them, write on them and cut them all with the scissors. I am using transparent folders to keep them all in order. In every folder I cut and keep the scale with the number of the frame. I use it to write on it the pieces I have to repeat (too much wood eaten by the scroll saw i.e.) or the frames I am not sure that are been cut properly. I am always trying to leave at list 0.5mm of wood out of the cut line to be sanded lately. It has taken me till frame #12 to realize the thing about “blue” and “red” lines Mark was talking about. Red lines are forward (“a proa”) and blue lines abaft (“a popa”). Therefore I assume that looking at our plan the right hand side is the portside (“babor”) and the left is the starboard (“estribor”). This can seem pretty obvious to you but for me It´s been a pain in the neck. Not to mention I am a little bit dyslexic. Right, left, left, right … Best wishes to all. Daniel.
-
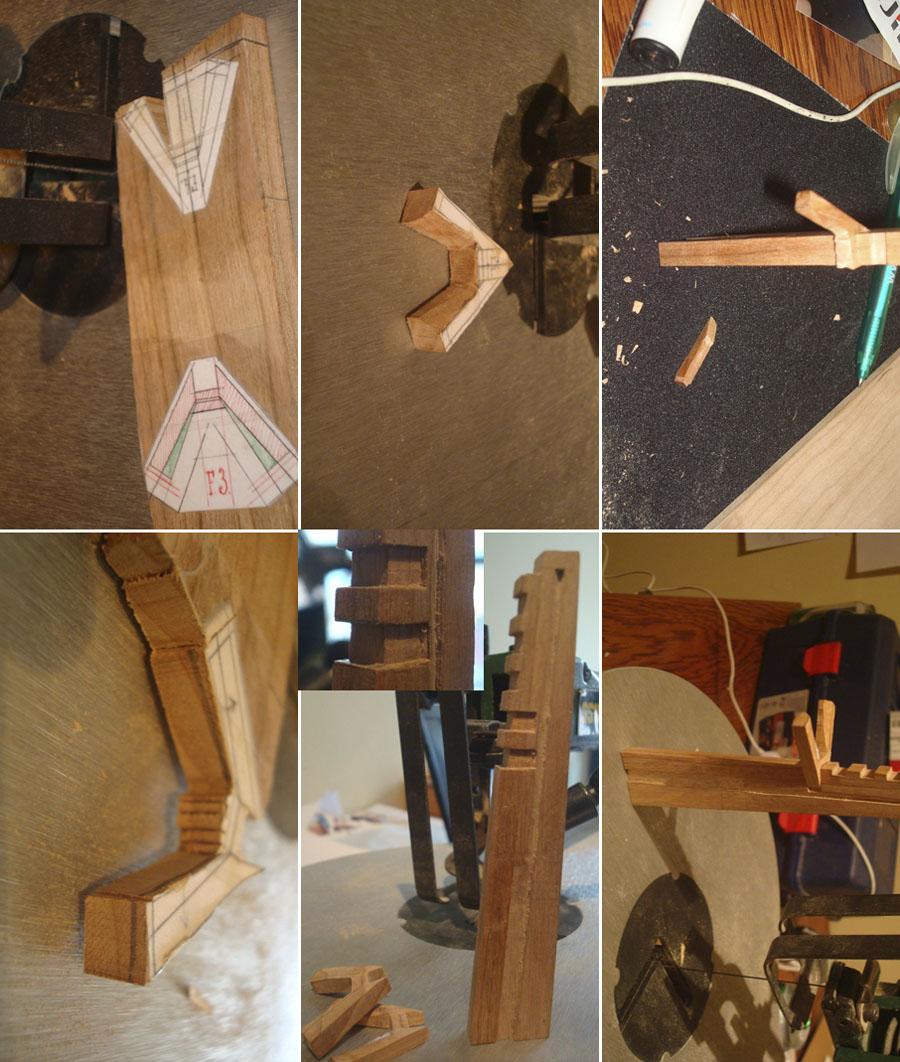
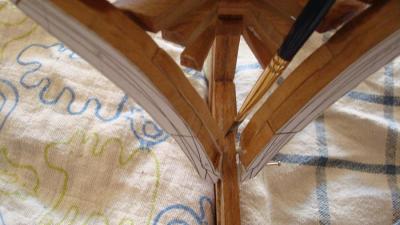
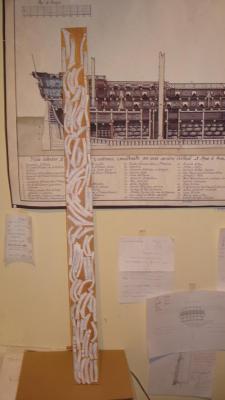
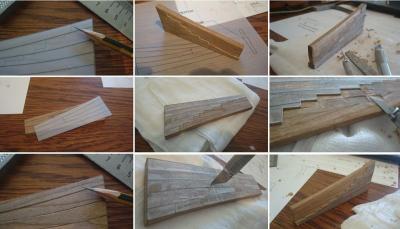
DEAD WOOD + INNER POST: 05/12/2012 Hi every single soul around! Lots of things have being made during these days. I have finally “recover” de Aft deadwood piece and start to make the steps for the aft cant frames. With the pattern glued to the starboard was easy to cut the steps, for the other side, the portside, I printed out again the same pattern but I have used tracing paper (vegetal paper) in order to copy the same lines in the other side. I have marked with a pencil the lines at the top and the bottom to be sure that this pattern is symmetrical to the other side of the deadwood. I have chiseled the perimeter of the piece of wood, like if you are modeling a piece of stone. Doing this you assure yourself not to remove too much wood than it is necessary. I have work very carefully while chiseling the wood with X-acto blades out of de Aft deadwood in order to make the step cuts….like someone said once “the wood you chisel out, never comes again” Meanwhile I am cutting several frames to just relax myself. Hope to finish at least the stern for the end of the year… Best wishes. Daniel.

-
I´ll start by putting some pics and I will edit them later. I have saved most of the literature in word but I´ll try to resume and cut some of them. Let´s see. Congrants Sinan to see you back, come on and go for the planking...! Regards, Daniel.