HOLIDAY DONATION DRIVE - SUPPORT MSW - DO YOUR PART TO KEEP THIS GREAT FORUM GOING!
×


Maury S
-
Posts
1,490 -
Joined
-
Last visited
Content Type
Profiles
Forums
Gallery
Events
Everything posted by Maury S
-
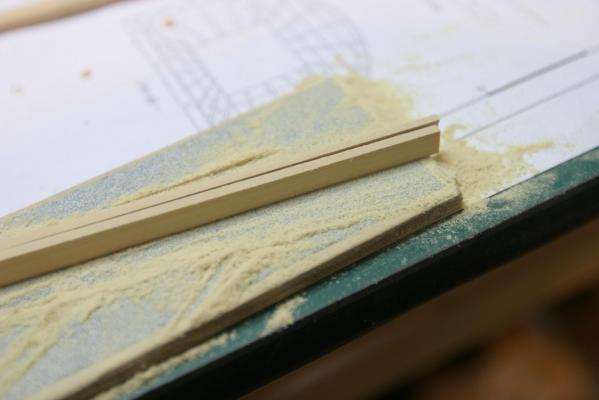
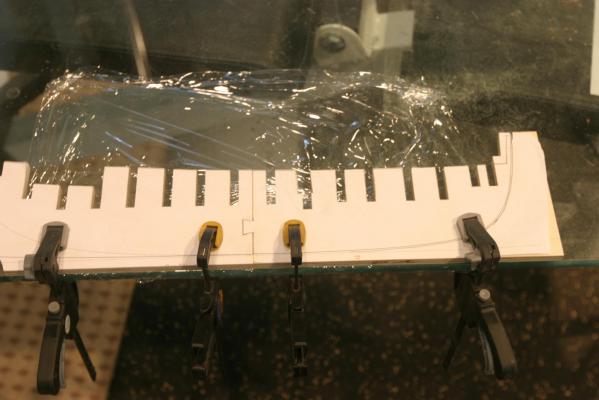
 Thanks Chuck. The next step is to cut and glue the rabbet. Sizing was easy on the thickness sander. I boiled the fore half for a while then clamped it in place against the spine to get the shape. After completely drying, I glued and clamped in place. Now I have to wait for more wood to proceed to the keel, so I started on the windlass. http://modelshipworld.com/index.php/topic/9519-windlass-for-cutter-cheerful-148-by-maury/ Maury
 -
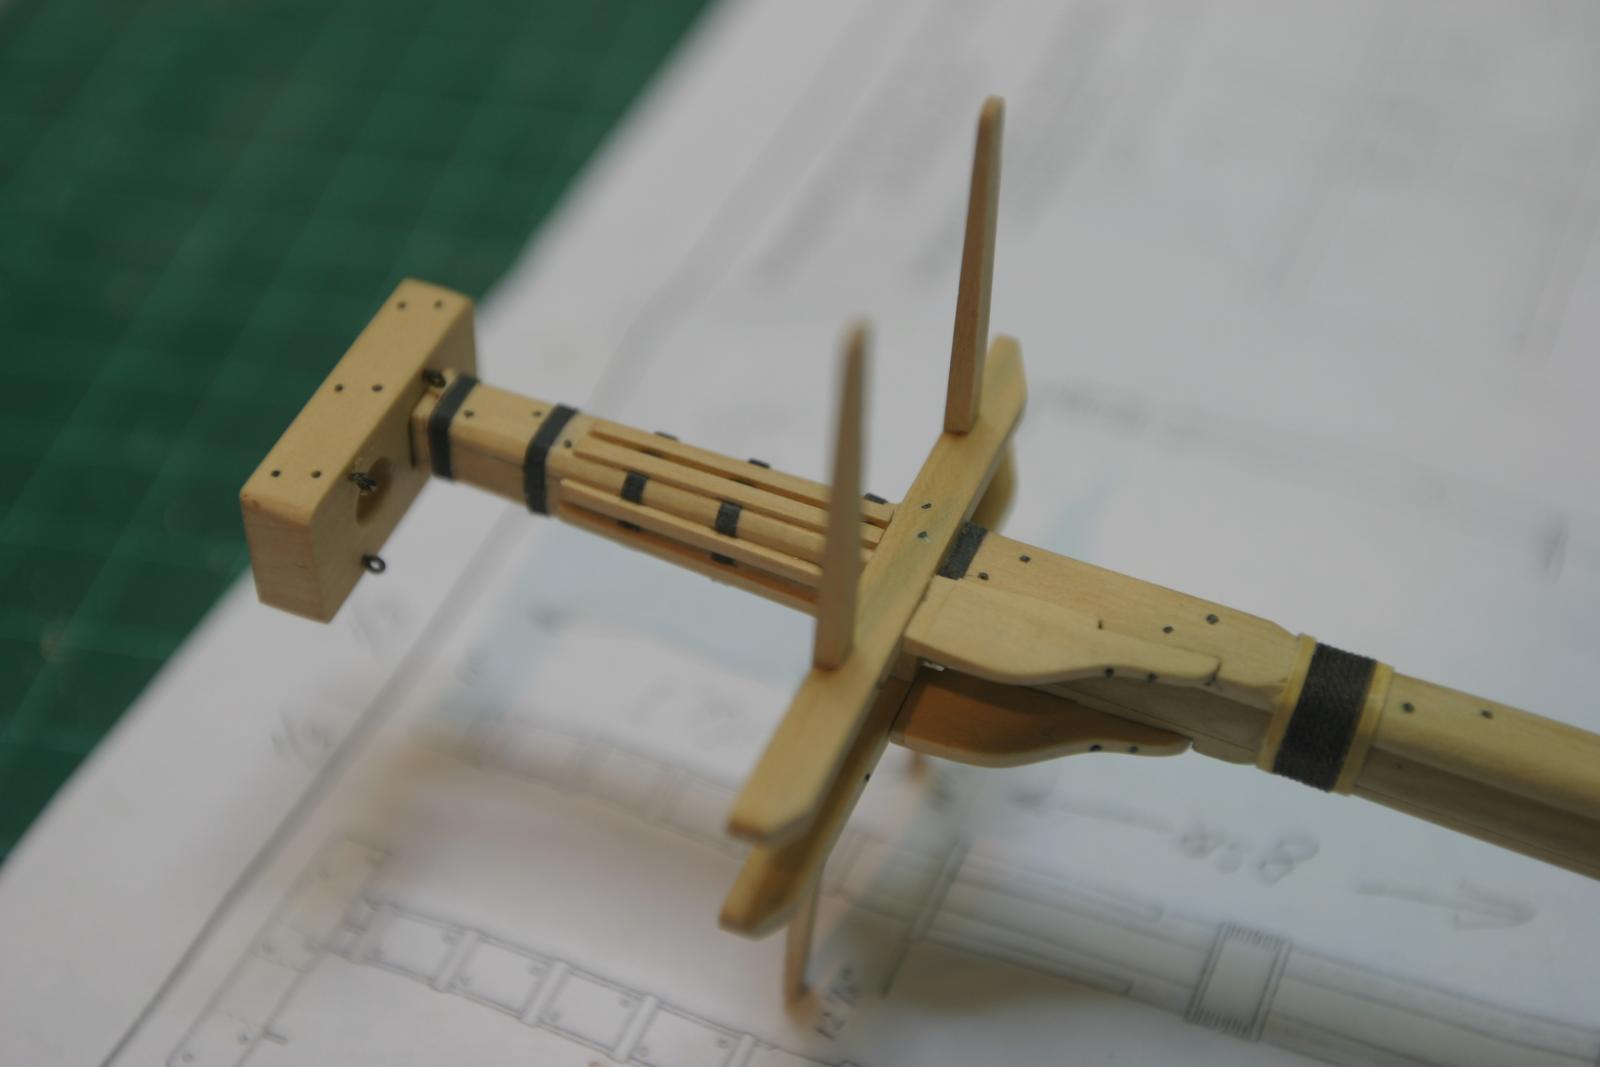
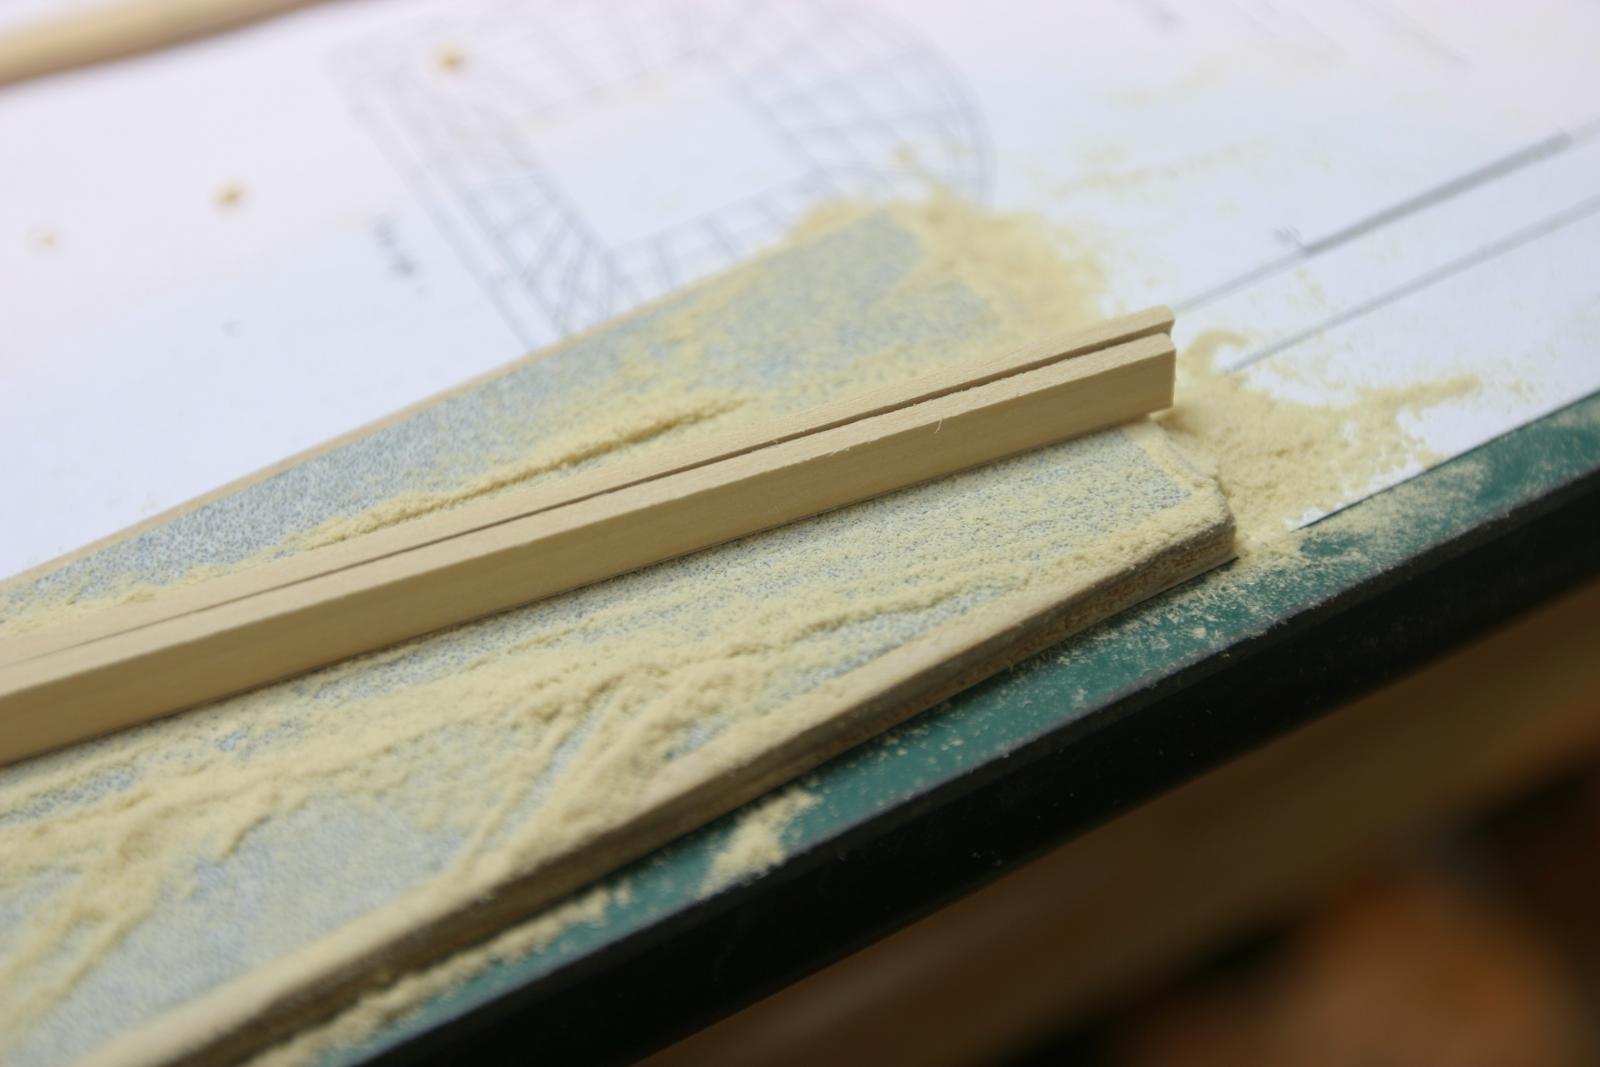
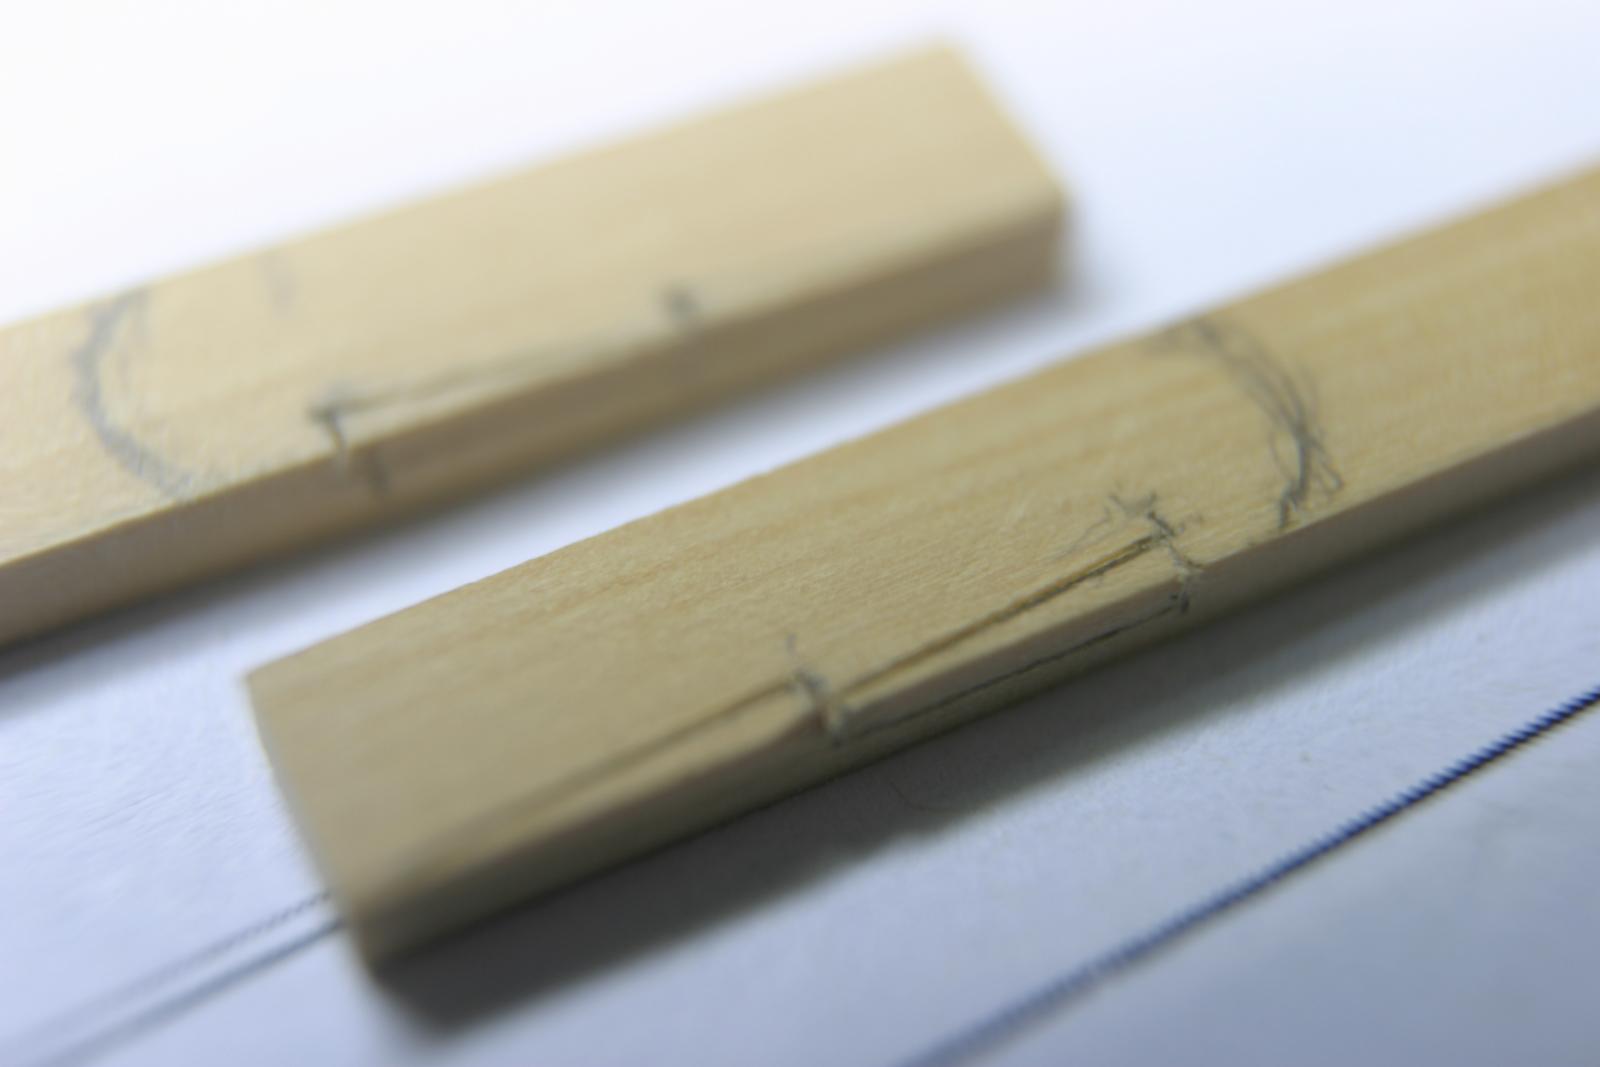
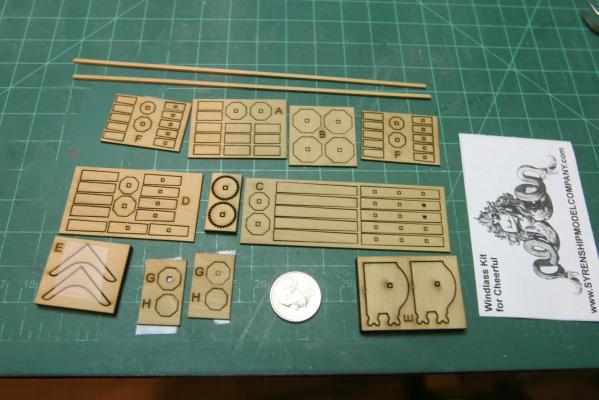
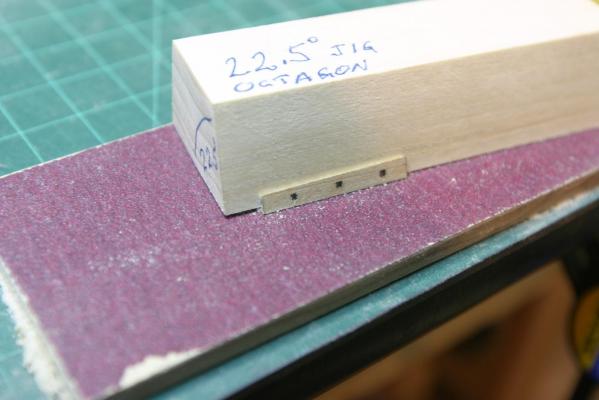
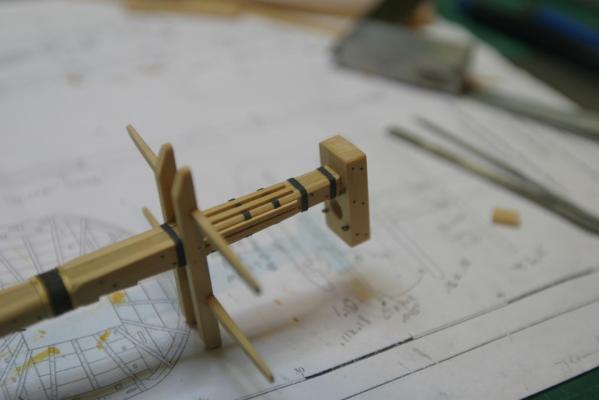
While waiting for more lumber to continue with Cheerful, I ordered the windlass kit from Chuck. It's very neatly organized and the pieces (50 +) are very small. The most impressive pieces IMO are the sprockets. I could never do them from scratch with the tools I have. For the sides of the barrel parts, the instructions just say to bevel them. I need to be more precise if I want it to look anywhere near as nice as Chuck's illustration. I cut a jig from some scrap to the exact angle of the eight pieces (22.5 degrees). For those interested, each angle for an (any) sided piece is determined by dividing the number of sides (8) into 360 degrees = 45. The bevel on each piece will be half of that number = 22.5 degrees so that when they mate, you get 45 degrees. By holding the barrel sides against the jig while moving it back and forth over a sanding stick results in the exact 22.5 degree bevel. I sanded them down to just being able to see the laser char on one edge, but when assembled, they were just a hair too wide. I think you have to sand to the point where the char is just no longer visible. Once sanded, I rubbed a pencil along the inside angle so I could see to line up when gluing to the octagonal end pieces. I started with section "C" as it is the largest part of the barrel and best for ramping up the learning curve. Holding the little pieces is tough. Maury
-
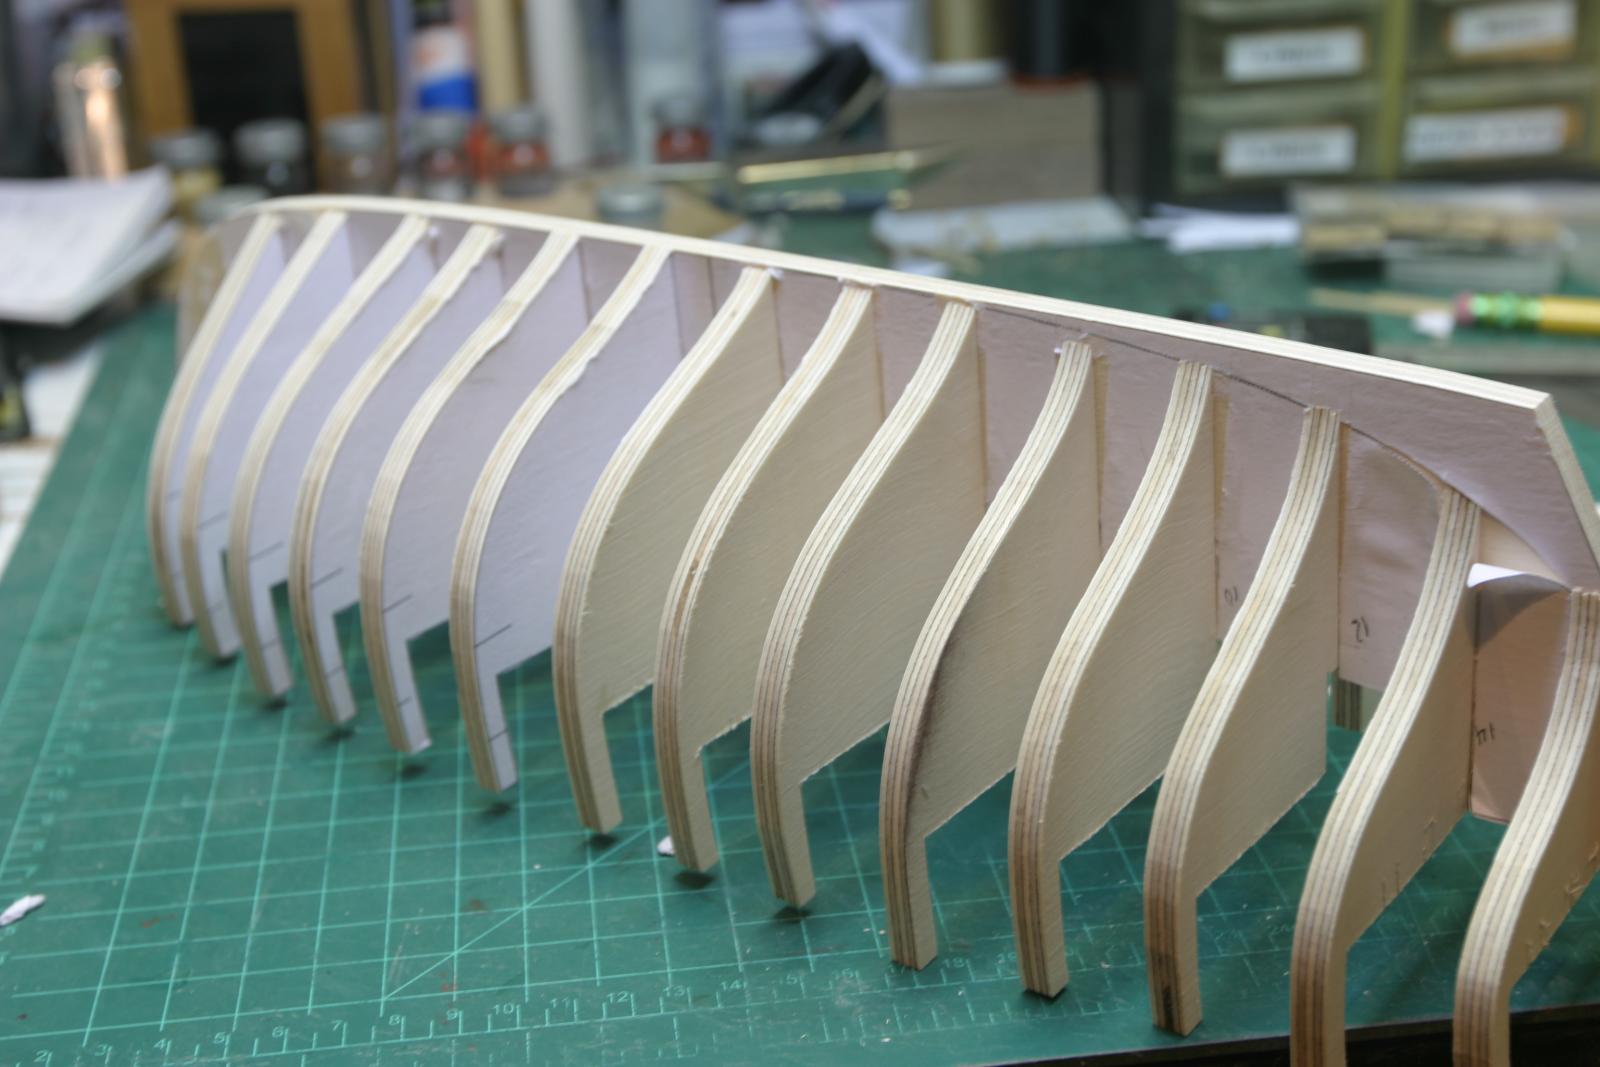
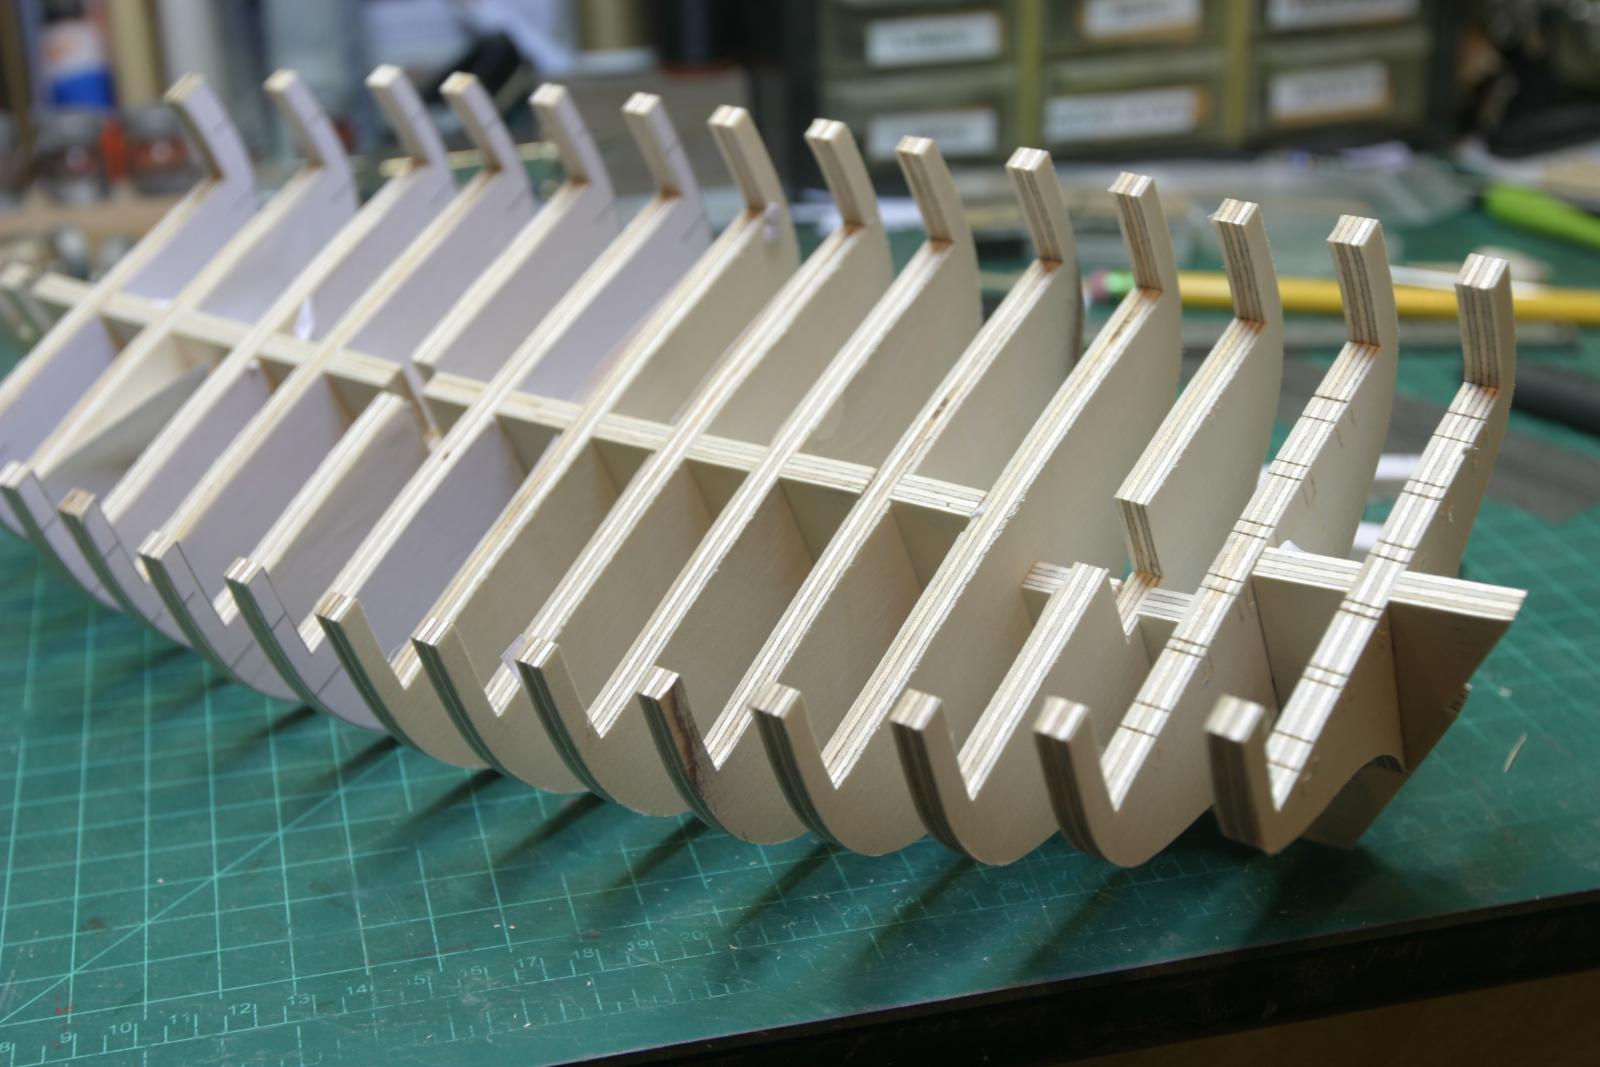
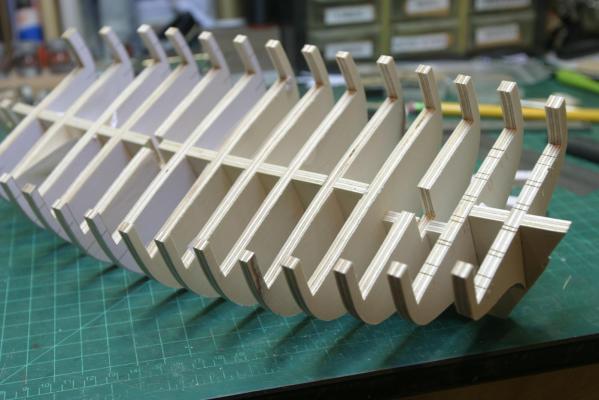
I thinned the BHs and spine to 1/4" and test fit them. Only one needs to be shifted a bit. I'm lining up the wales markings as my guide. They can be seen on the BHs where the patterns are still glued on. Maury

-
Ed, Your balance of painted and unpainted areas will look great. Maury
- 3,618 replies
-
- 1
-

-
- young america
- clipper
- (and 1 more)
-
Fearsome dragons! Nice job Toni. Maury
-
Chuck, Thanks for the comments. I just downloaded the files. Plenty to read through before proceeding. For the amount of Ply, am I missing something? Everything fit on a 12" x 48" piece. Maury
-
AWESOME! Maury
-
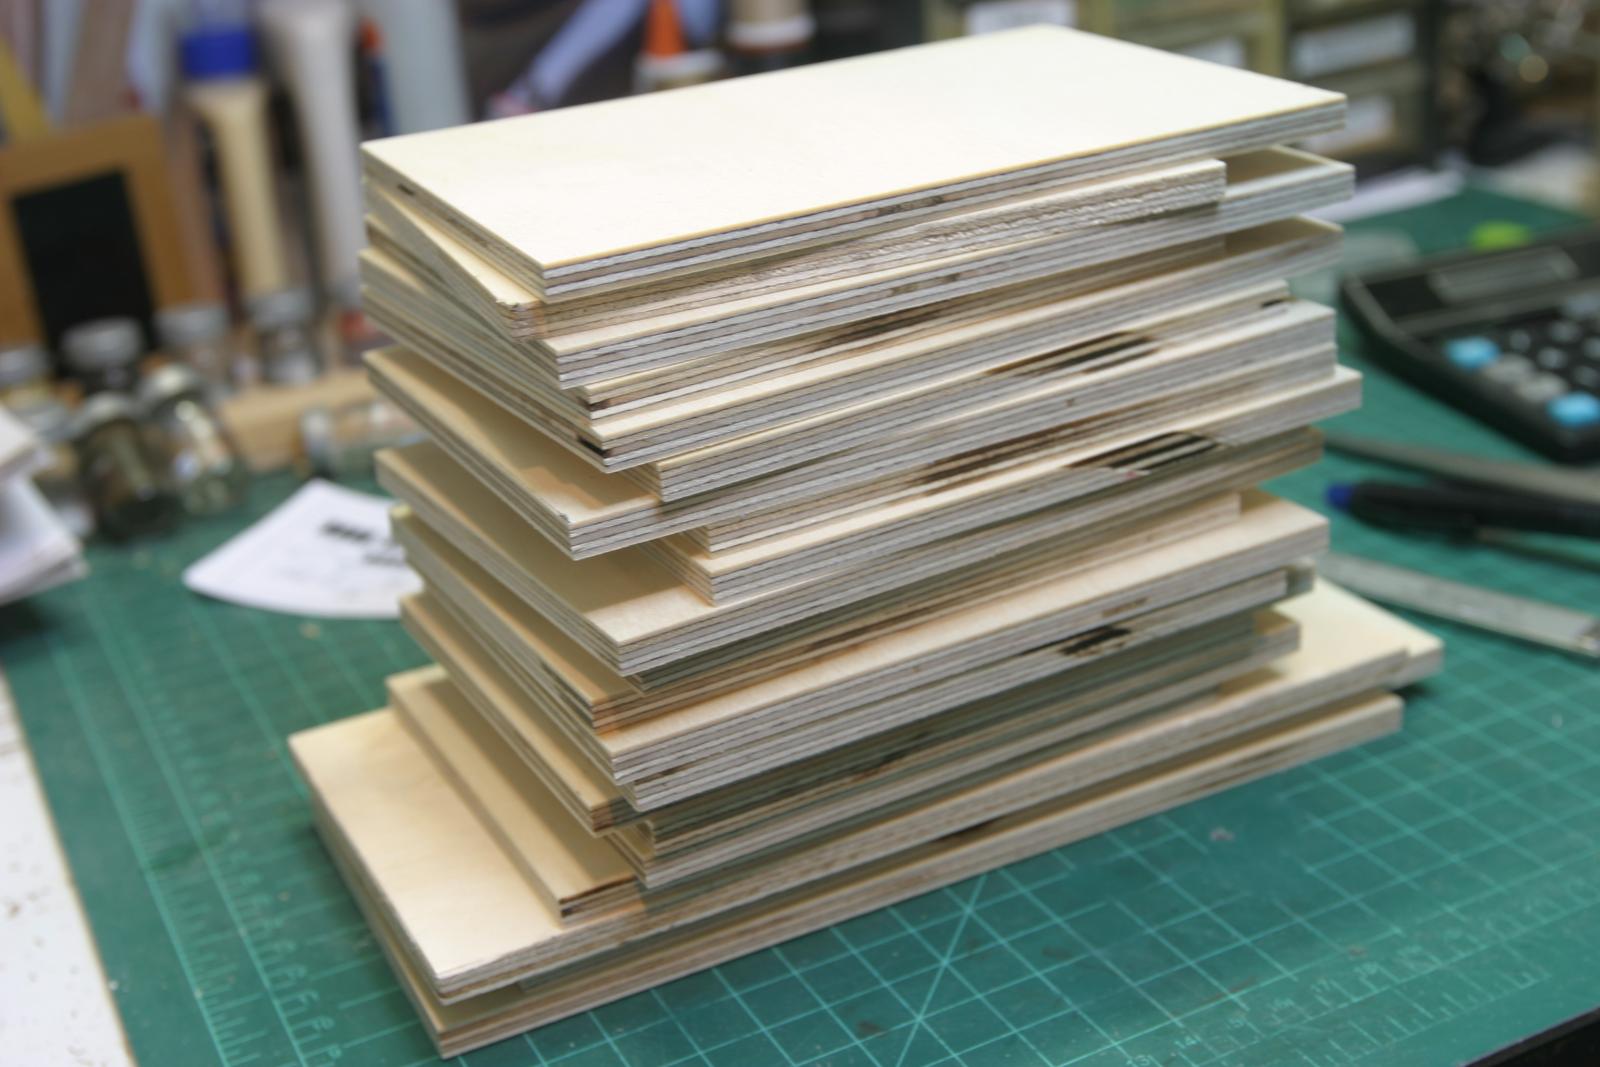
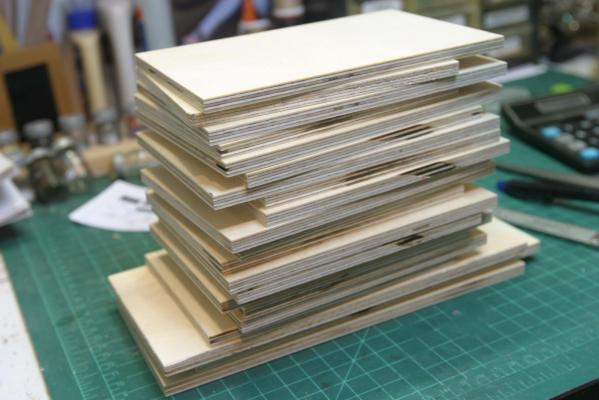
OK, next problem. The plywood is still too thick (measures .255 - .257"). After cleaning up all the slots, everyone of them is too narrow and they were cut to the outside of the lines. Trying to open them up to accommodate the thicker plywood is asking for a disaster (alignment side -to-side). Back to the thickness sander for all the pieces. Since I want to leave the patterns on, all the sanding will be on the back side. One of the five plys will be thinner than the other outer one but that should not be an issue. Those without a thickness sander are going to have to adjust slot sizes to the thickness of the wood. Chuck may want to add a comment on how to do that without impacting the wrong parts. Maury
-
A second model: no wonder it's taking so long . I see you're using lots of bulkheads. Lots of processes. I really like that about your books. Maury
- 3,618 replies
-
- 2
-
-
- young america
- clipper
- (and 1 more)
-
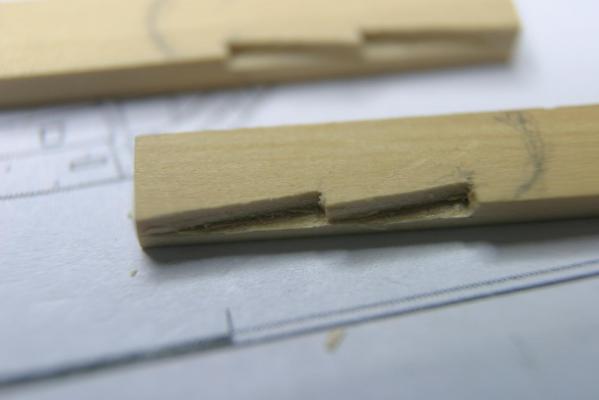
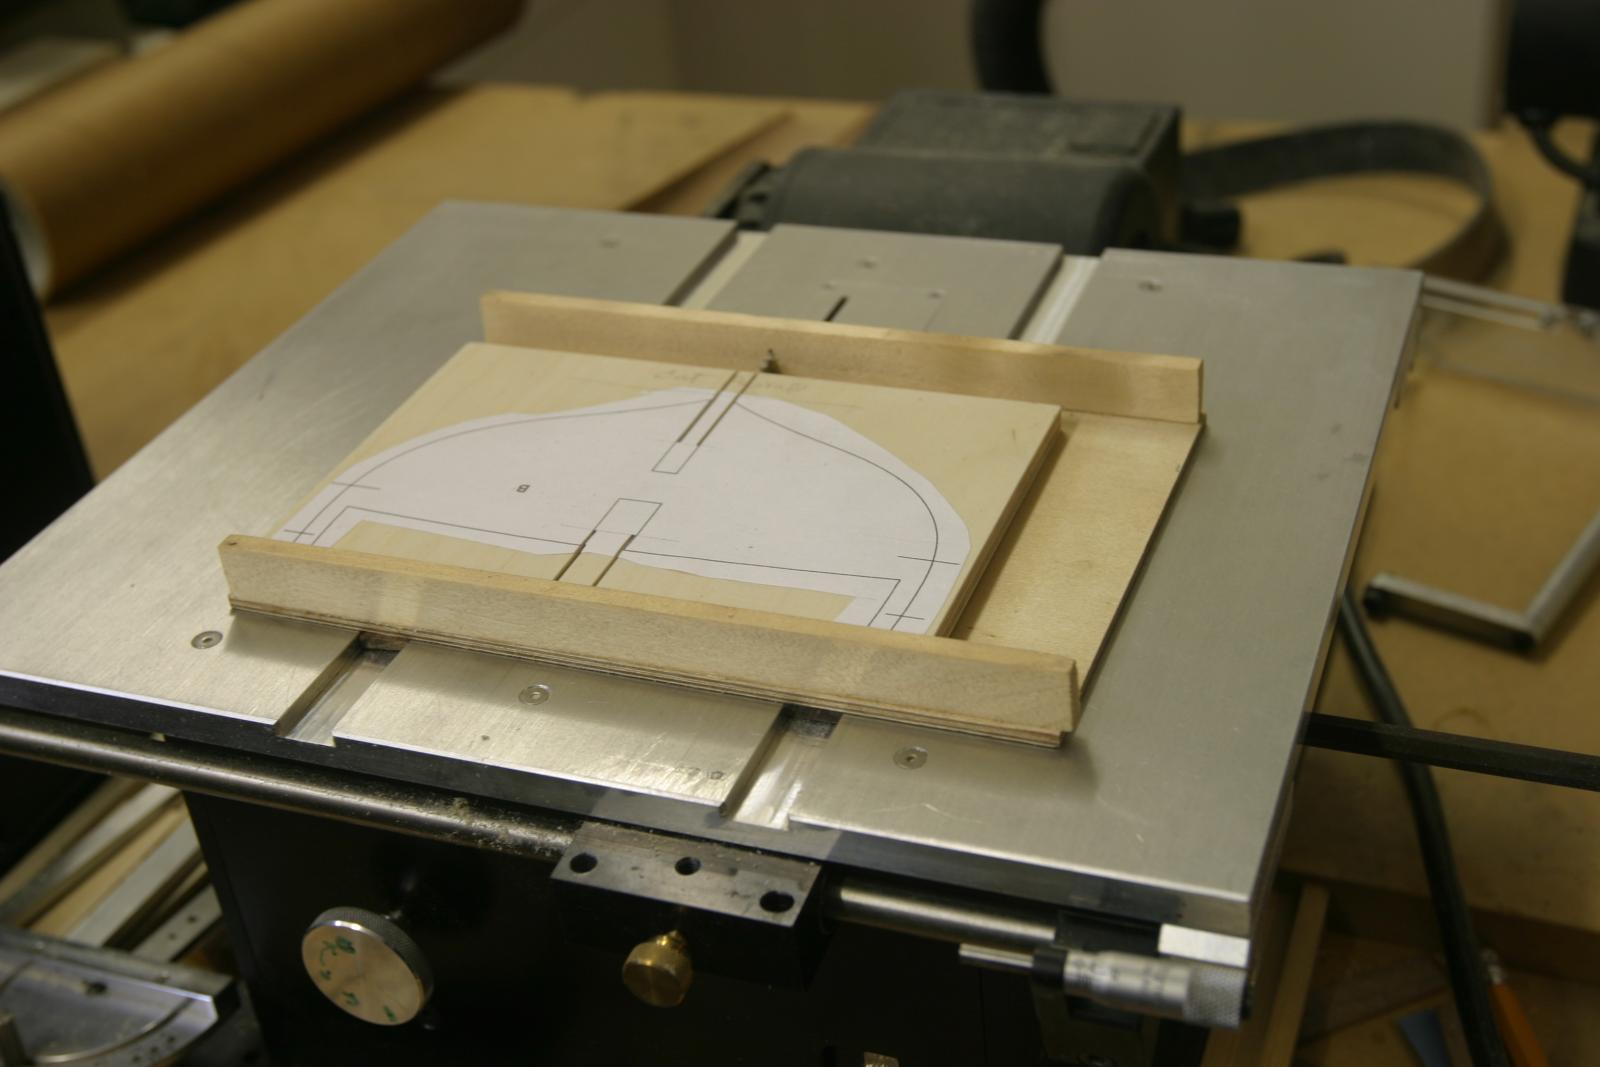
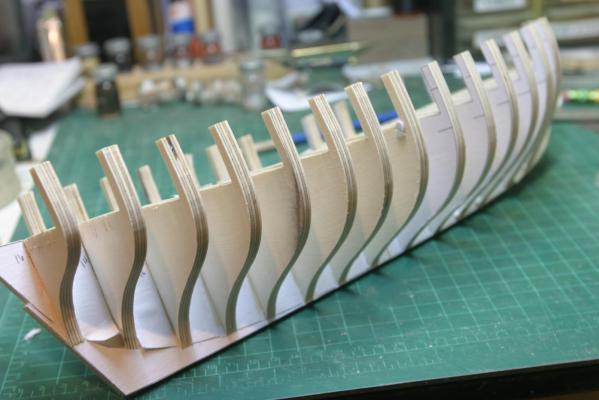
More work on the spine and bulkheads. I cut the sides of the slots in my table saw sled. Careful not to cut past about 1/2" from the end of the slot so the back side of the cut does not go past the end of the slot. All the slots were cleaned up on the scroll saw then sanding sticks. I have some 120 grit paper glued to a 1/4" square stick so the bottom of the slot is square with the sides once sanded. I rough cut the outside edges of the bulkheads and started on the spine, then decided to leave the bottom of the spine blanks in place 'til I lined up and joined the two pieces. So far the most challenging was the dovetail joint holding the two pieces of the spine together. The joint is tight and the bottom line is straight. I'll finish up rough cutting the spine and bulkheads and then start sanding the edges on the spindle sander. Fairing is going to be harder than Chuck experienced since his bulkheads were all perfect from the laser cutting. Maury
-
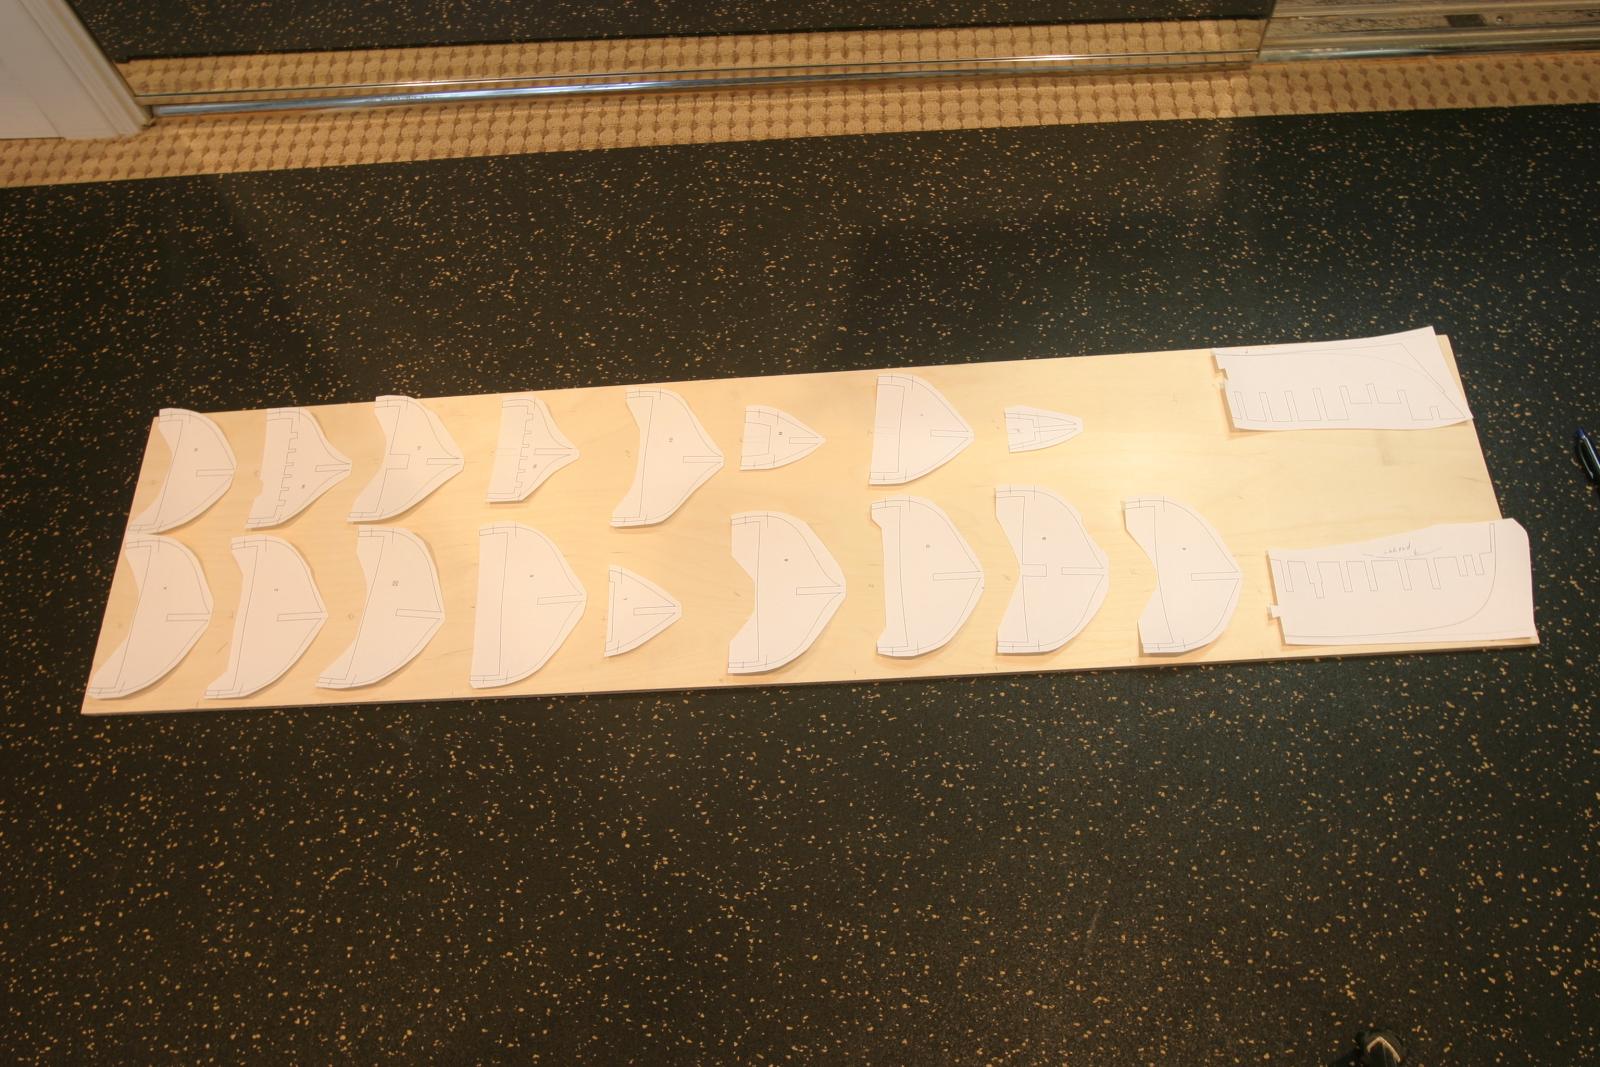
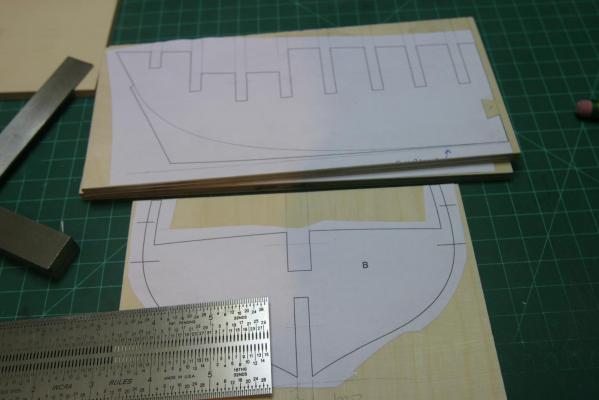
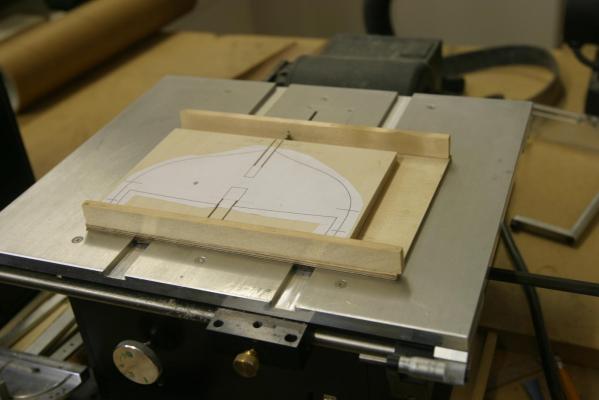
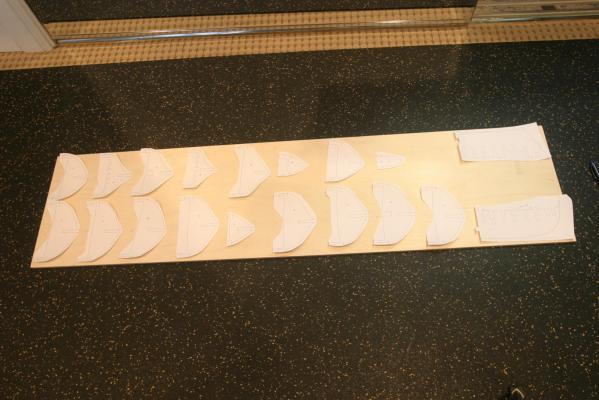
This is from Chuck's new set of plans for the English Cutter Cheerful. While I'm waiting for the next update for my Echo Section, I ordered the plan set. I like the lines of the ship and since there is only one mast, I'm even happier. Aside from Chuck's long boat, I've not done any POB models, but since she will be fully planked, why not. Chuck puts almost as many bulkheads in as some stylized POF models out there. First up was buying the plywood for the spine and bulkheads. Lots of it in hobby shops and on line. ALERT: You only need one sheet of 12" x 48" quarter-inch material. Every piece easily fit with plenty of leftover material for fillers, etc. See pics. The material that I got is slightly over-sized so I'll run it thru the thickness sander before gluing on the patterns. Another tip on working with plywood. The good side should be UP cutting on a table saw. Use blue painters tape over every line to be cut (on both faces of the plywood) to prevent any tear-out. And use a good 80 TPI blade. There is not a chip on any cut I made so far. Cutting the slots for the bulkheads (B/H) over the spine will be critical. It's easy for Chuck with his new laser cutter, and careful layout is important if you're doing it with a saw. First off is determining a 90 degree line between the B/H slots and and the tops of the frames. I cut the patterns out by carefully cutting a line across the very top of each B/H pattern. Once the patterns are glued on each blank with the top edge flush with the edge of the plywood blank, I can use that side in my table saw sled to get a perfect 90 degree slot. For the spine (which has a curve to the bottom), I used the bottom of the plan sheet as a square reference to the slots in the spine. Maury
-
Mast from Admiralty Models Workshop
Maury S replied to Maury S's topic in Masting, rigging and sails
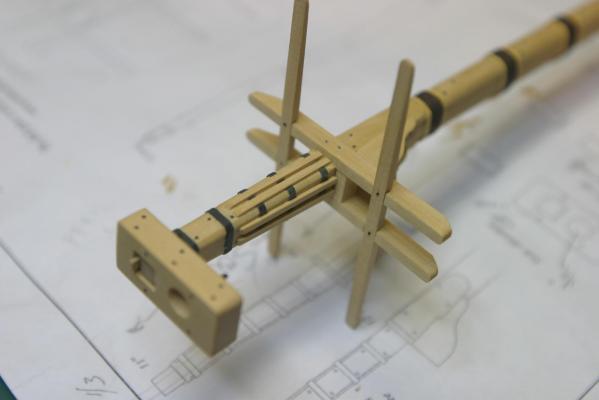
Finished. I carried the bolt pattern all the way down the sides of the cheeks. Trestle and cross tree line up. I put a wedge in the cap holding it to the top of the spindle visible on the last pic. Final coat of matte water based poly. Maury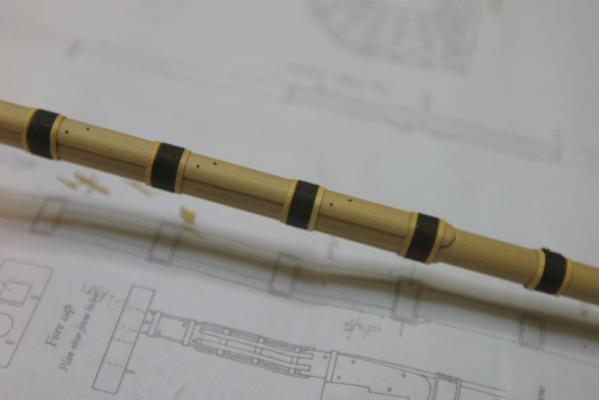

-
Mast from Admiralty Models Workshop
Maury S replied to Maury S's topic in Masting, rigging and sails
As I'm adding the finishing touches, I have a question for those in the know. The plans show bolts thru the cheeks at the very top but nothing below. Were they bolted thru the mast spindle all the way down to the lower edge of the cheek? Maury -
Mast from Admiralty Models Workshop
Maury S replied to Maury S's topic in Masting, rigging and sails
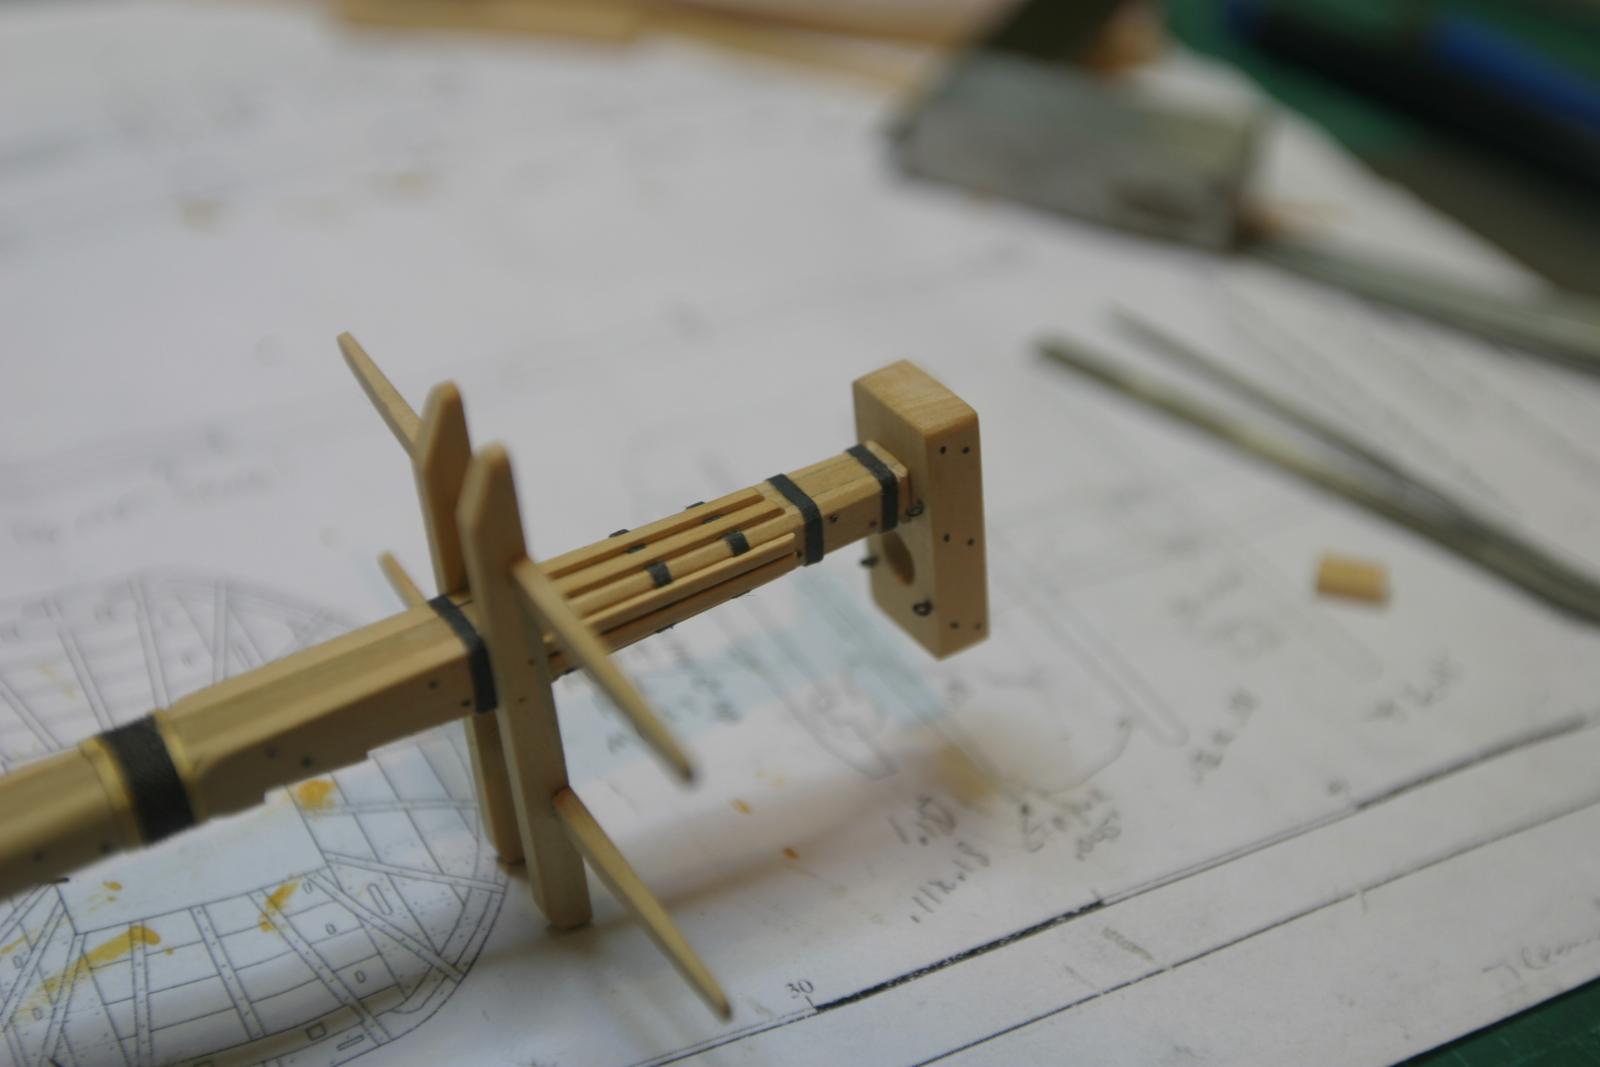
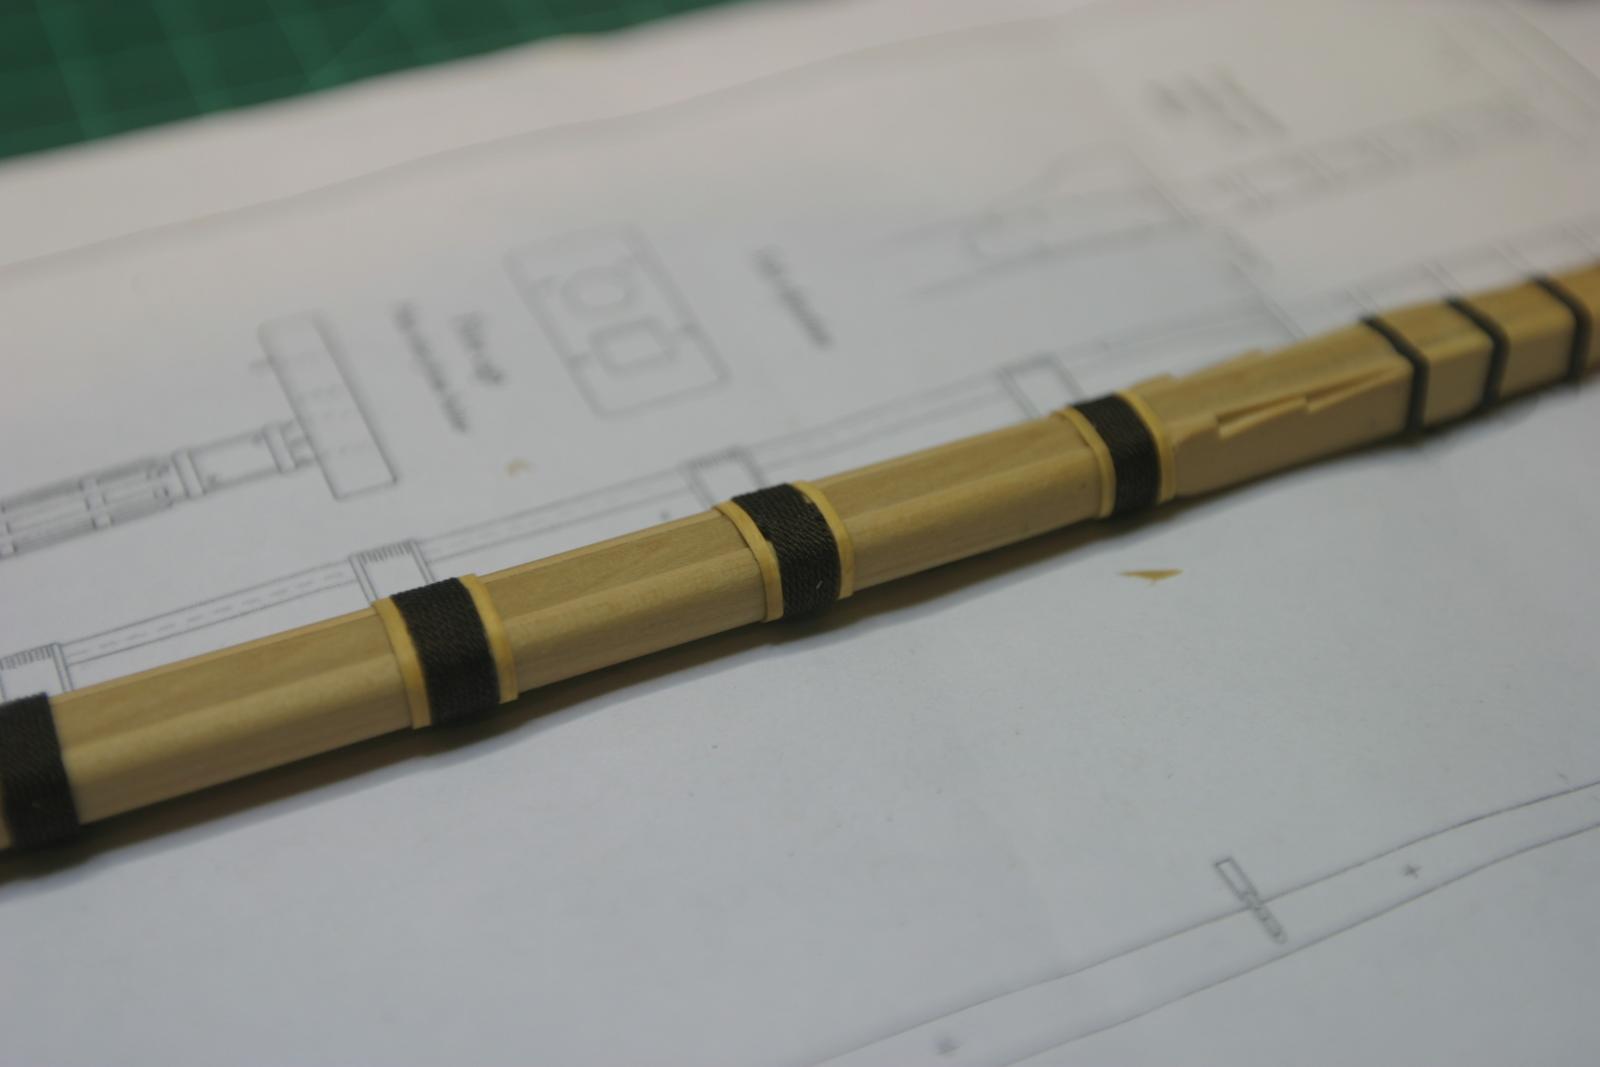
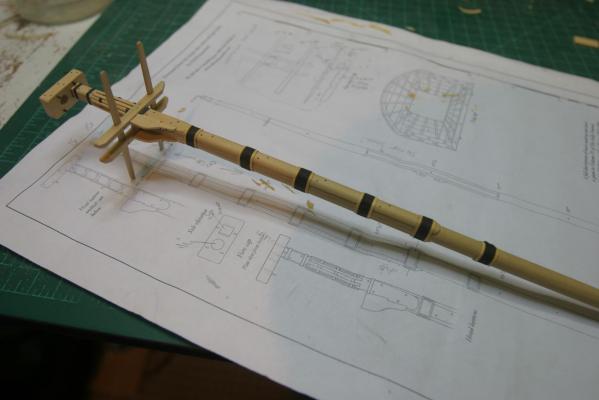
Some more time on the mast in the last few days. The mast bands are black acid-free paper. They will be painted with an "Iron Black" paint. The battens are filed out to allow for them to fit over the mast bands. Two on each side, clamped while glue dries. Cap drilled, simulated bolts installed and the eyebolts made and installed. The mast tree parts were sanded to thickness and cut on the Byrnes table saw. Interlocking notches carefully laid out and cut. Bolt holes drilled. The cross tree notches were cut last after the trestle trees were held in place against the mast top. Getting close to the end. Some more bolts need installing and the bibs need attaching. I'm not sure if I'll build the platform. Maury


-
Danny, I assume you cut the plates to size after the deadeyes are installed. Very consistent. The served shrouds look great under the macro lens. Maury
-
I love it. Very nicely done. Looking forward to the final plans. Maury
-
Toni, Very nice. Thanks for sharing everything along the way. Maury
-
Mast from Admiralty Models Workshop
Maury S replied to Maury S's topic in Masting, rigging and sails
I mixed Yellow ocher, some orange and white...not right. Second Mate gave me the proportions she uses for flesh tones including some green. Eventually it came close enough. Thin strips of a piece of a manila folder and the first three bands are done. I'll touch up the joints with a dab of paint.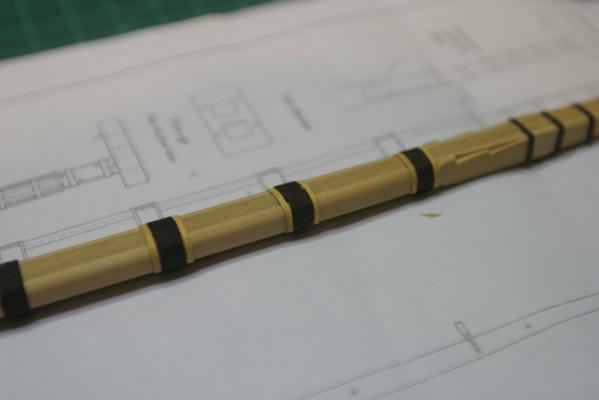
-
Mast from Admiralty Models Workshop
Maury S replied to Maury S's topic in Masting, rigging and sails
thanks, Druxey -
VERY nicely done! Maury
-
Mast from Admiralty Models Workshop
Maury S replied to Maury S's topic in Masting, rigging and sails
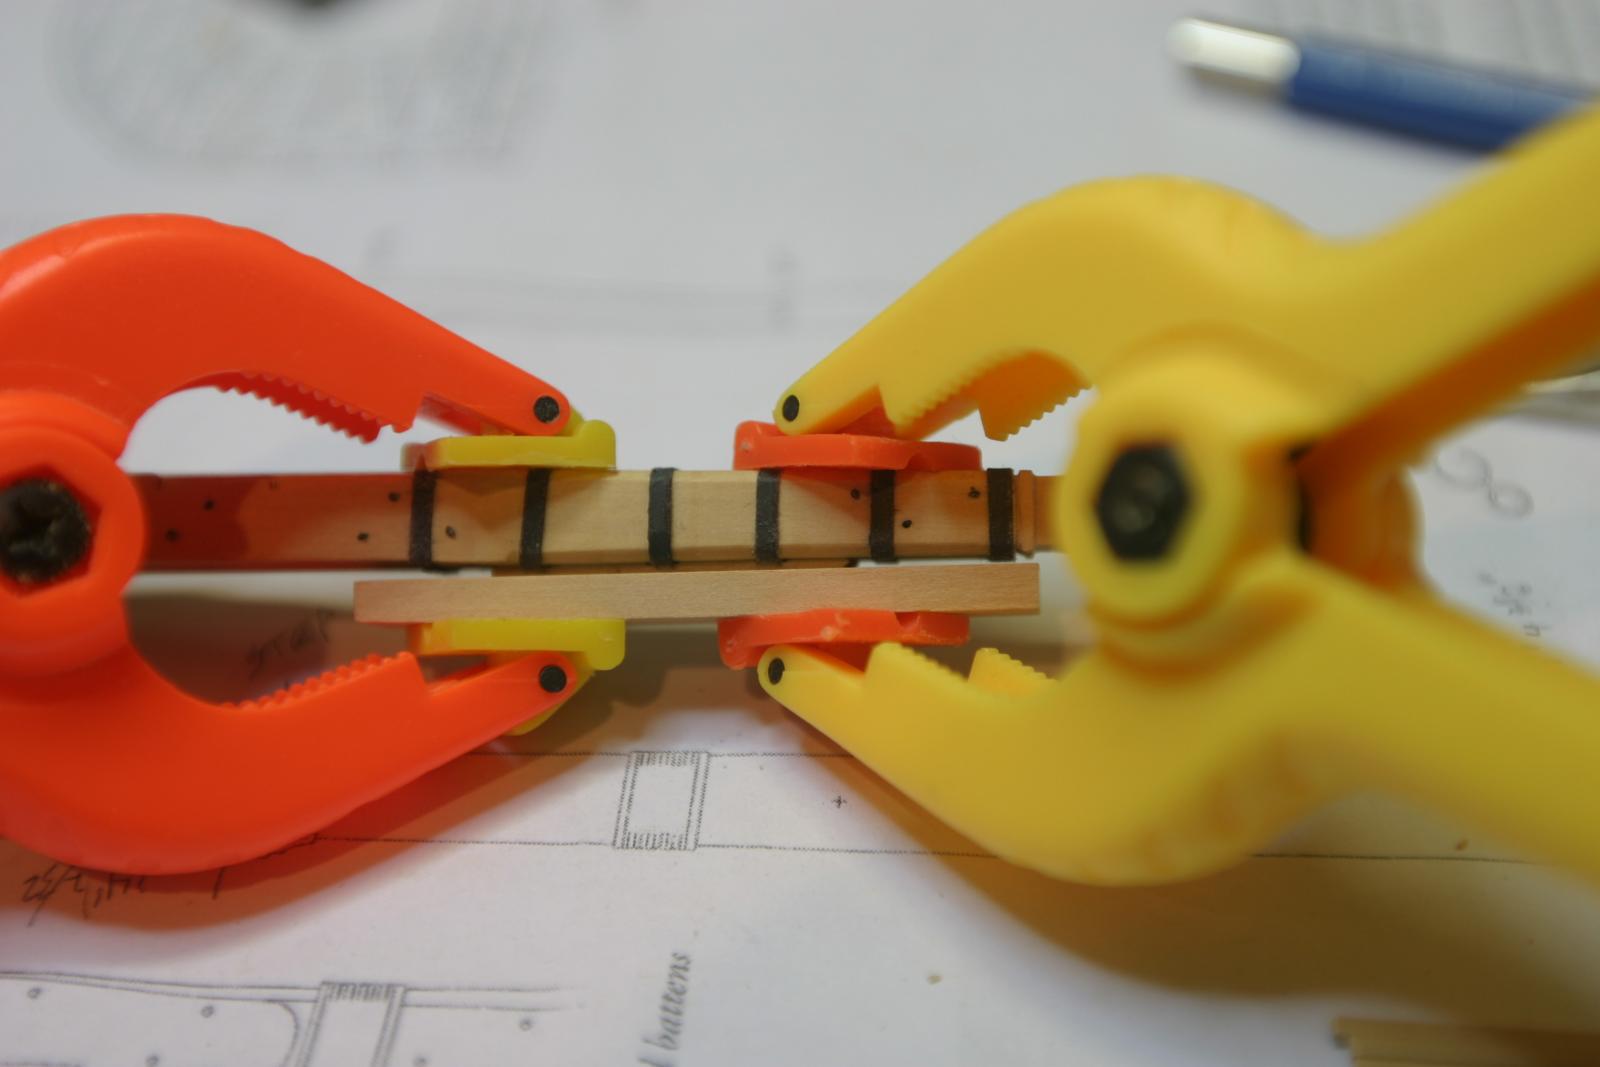
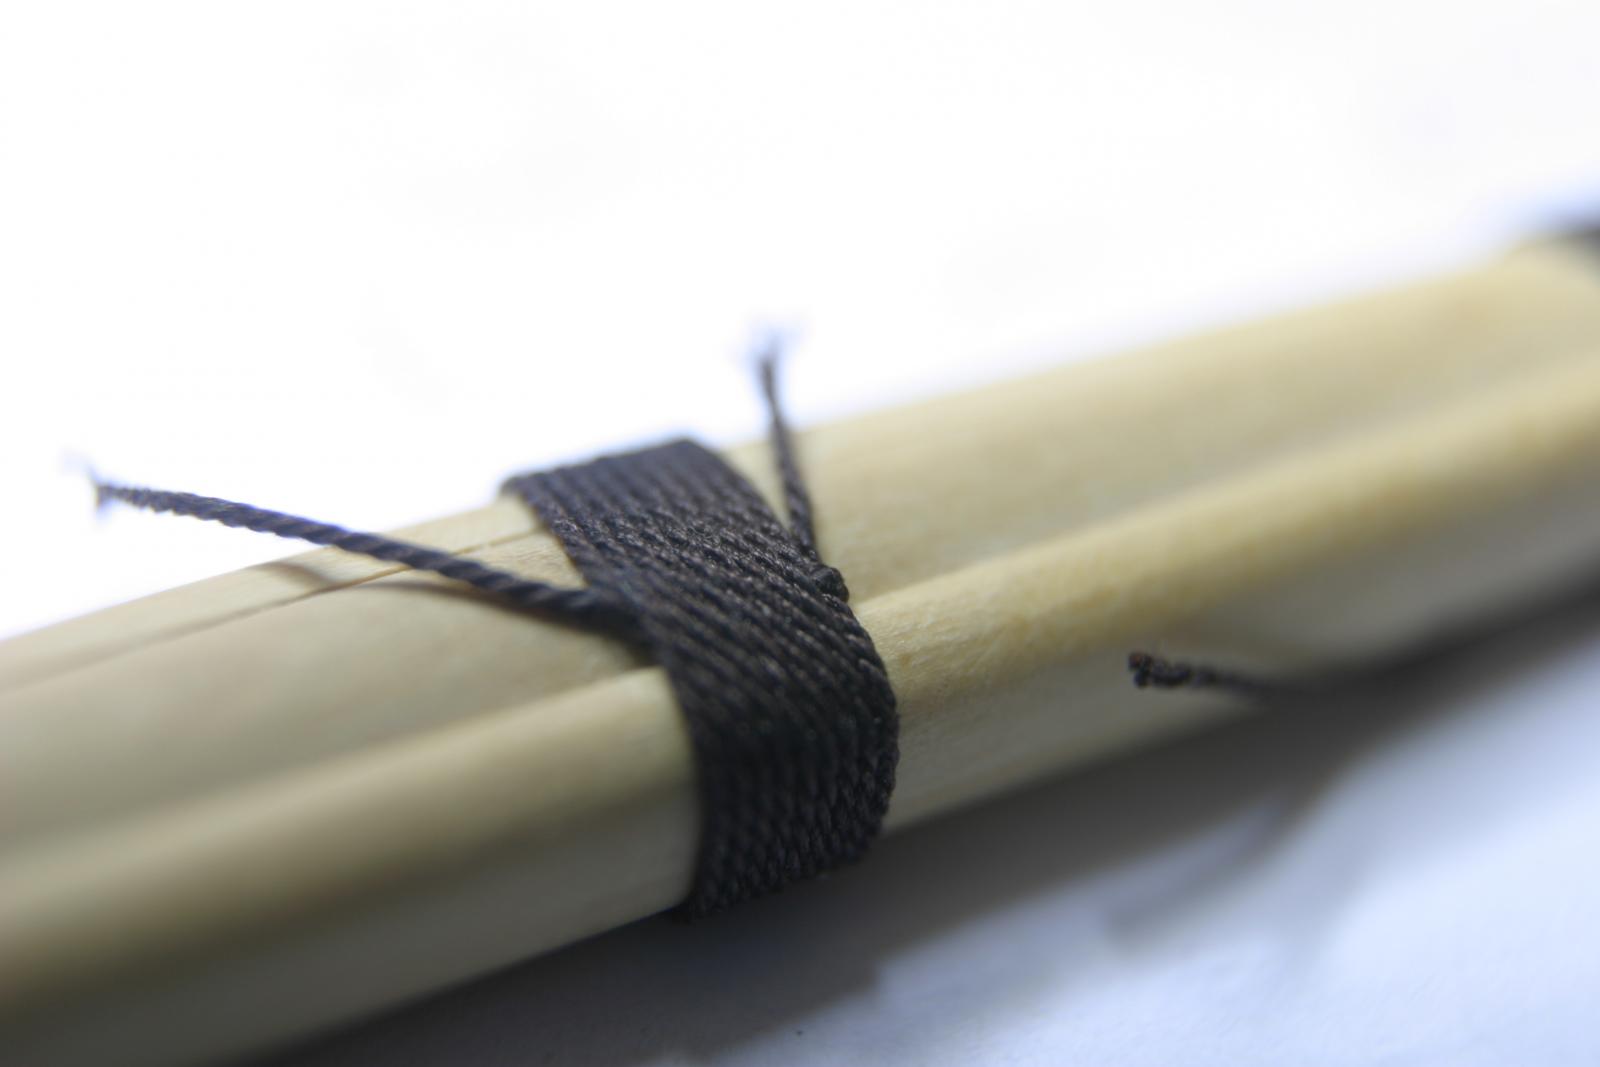
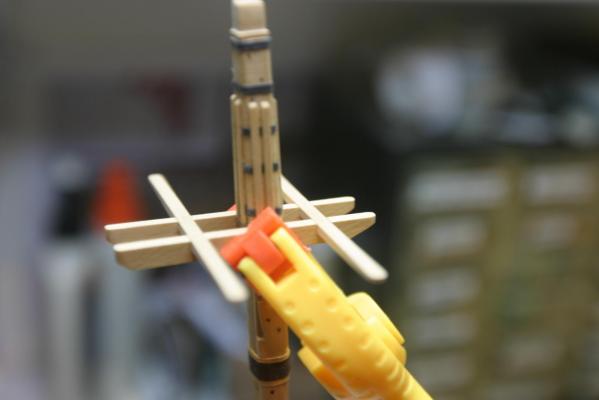
The head of the mast has been built up (timbers added to each side) and tapered to the appropriate lines. The seams were highlighted with soft pencil lines to simulate tar. I tried using copper for the bands, but once formed to shape, they could not be slid up over the top for soldering so I reverted to (acid free) paper. I used the same paper I used for tarring the keel on the Echo section. I still may paint them with the "Iron black" I have (if it's not dried out). I started on the wooldings. First one took a little work holding the first wrap in place, but the next two went smoothly. Three more to go. I used Syren Ship Model Brown line (.018"). That's very close to the 2 1/2" diameter line called for in the instructions. Still trying to figure how I'm going to make the wooden bands above and below the wrapings. I have some chisel shavings I've cut down that may work, or I could sand a wood strip down to .0312" square and steam / heat bend it around the mast. David used card stock painted to match the Costello Boxwood but I think it might be more difficult matching the color with my limited supply of acrylics. Does anyone have any suggestions? Maury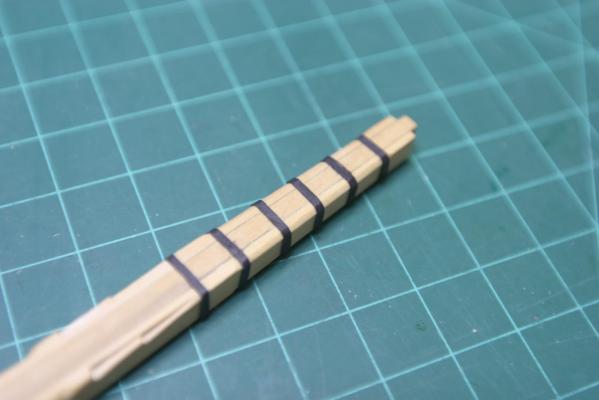

-
Mast from Admiralty Models Workshop
Maury S replied to Maury S's topic in Masting, rigging and sails
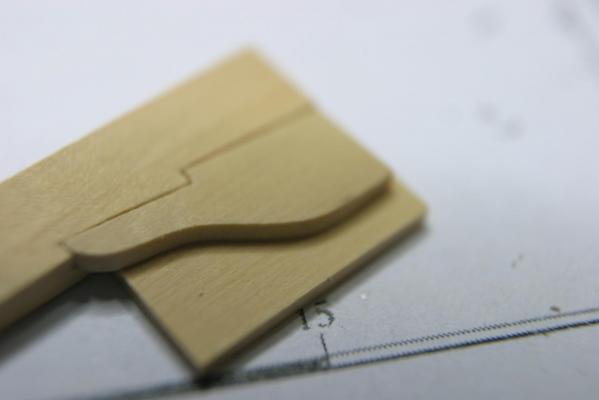
Bib and cheek mated. I'm building up the head of the mast, then they will be tapered to the plan dimensions. Maury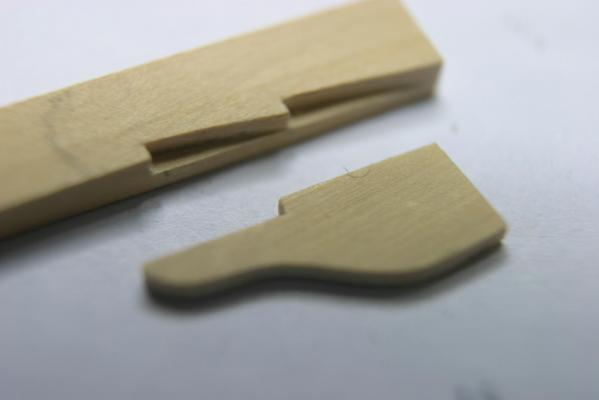
-
Nice tops Danny. Maury
-
One of the things I learned at an Admiralty Models workshop is that your pencil and chisel have to be VERY Sharp. That turned out to be much sharper than I imagined. I now put the chisel to the sharpener (Veritas) after a few hours of cutting, or when ever there is any resistance to the cut. Blades are inexpensive. Change frequently. Maury
-
Mast from Admiralty Models Workshop
Maury S replied to Maury S's topic in Masting, rigging and sails
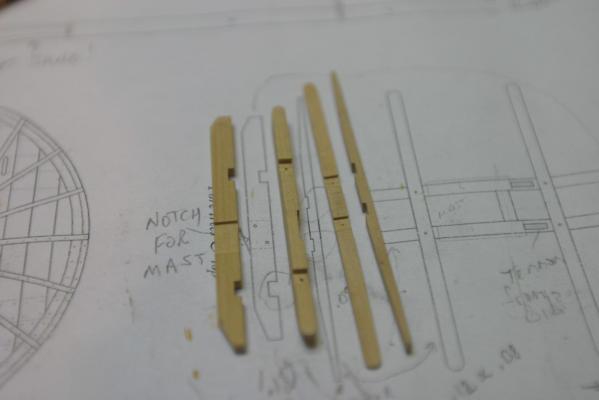
The cheeks are tapered in both dimensions. Chiseled close to the line then finished on a sanding board. The notches for the bibs are cut carefully with a #11 blade (pic. out of order). I cut these before installing the cheeks as I had more control for the detailed cut on a flat surface. They got cleaned up with a swiss file (not shown). Maury