Maury S
-
Posts
1,490 -
Joined
-
Last visited
Content Type
Profiles
Forums
Gallery
Events
Everything posted by Maury S
-

Mast from Admiralty Models Workshop
Maury S replied to Maury S's topic in Masting, rigging and sails
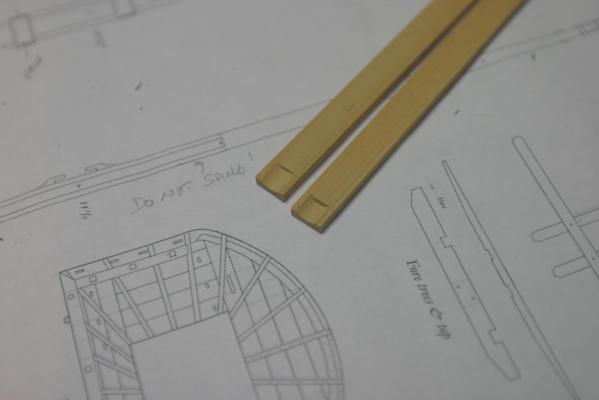
Cheeks: I did this in a different order than presented. First I cut the concave underside at the bottom of the cheeks since there was more "meat" to hang onto. I do not have a good gouge of that shape, so I marked off the arc by holding the cheek up against the shoulder cut in the mast, set the length of the cut and shaved it out with a very sharp 1/4" chisel, working from the outer edge in to the center. Once close, I sanded to clean it up. Next is tapering, both the length and width. Maury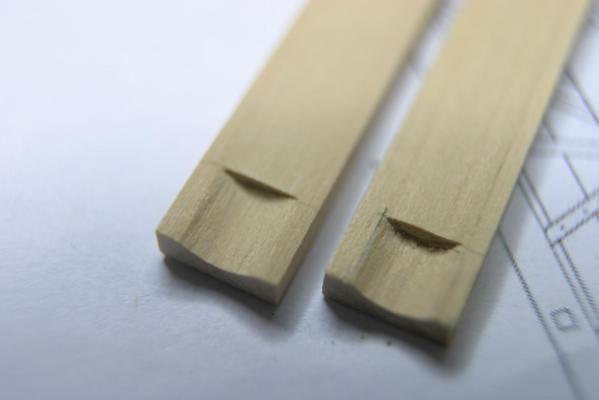
-
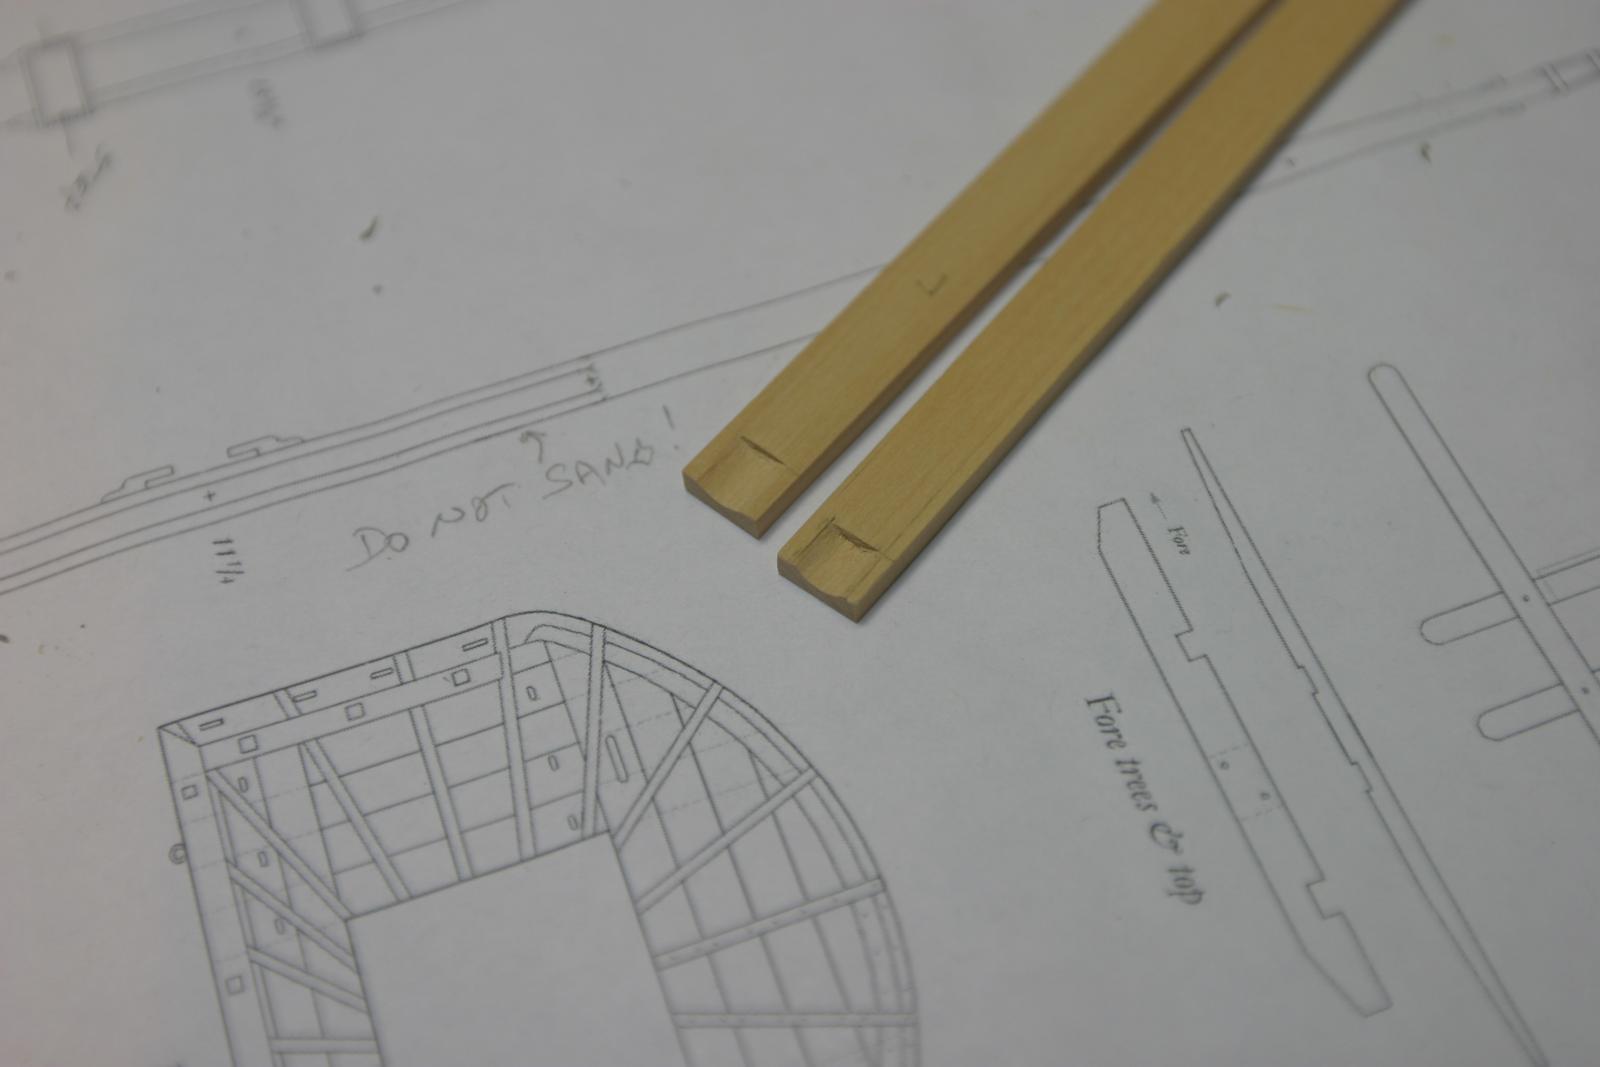
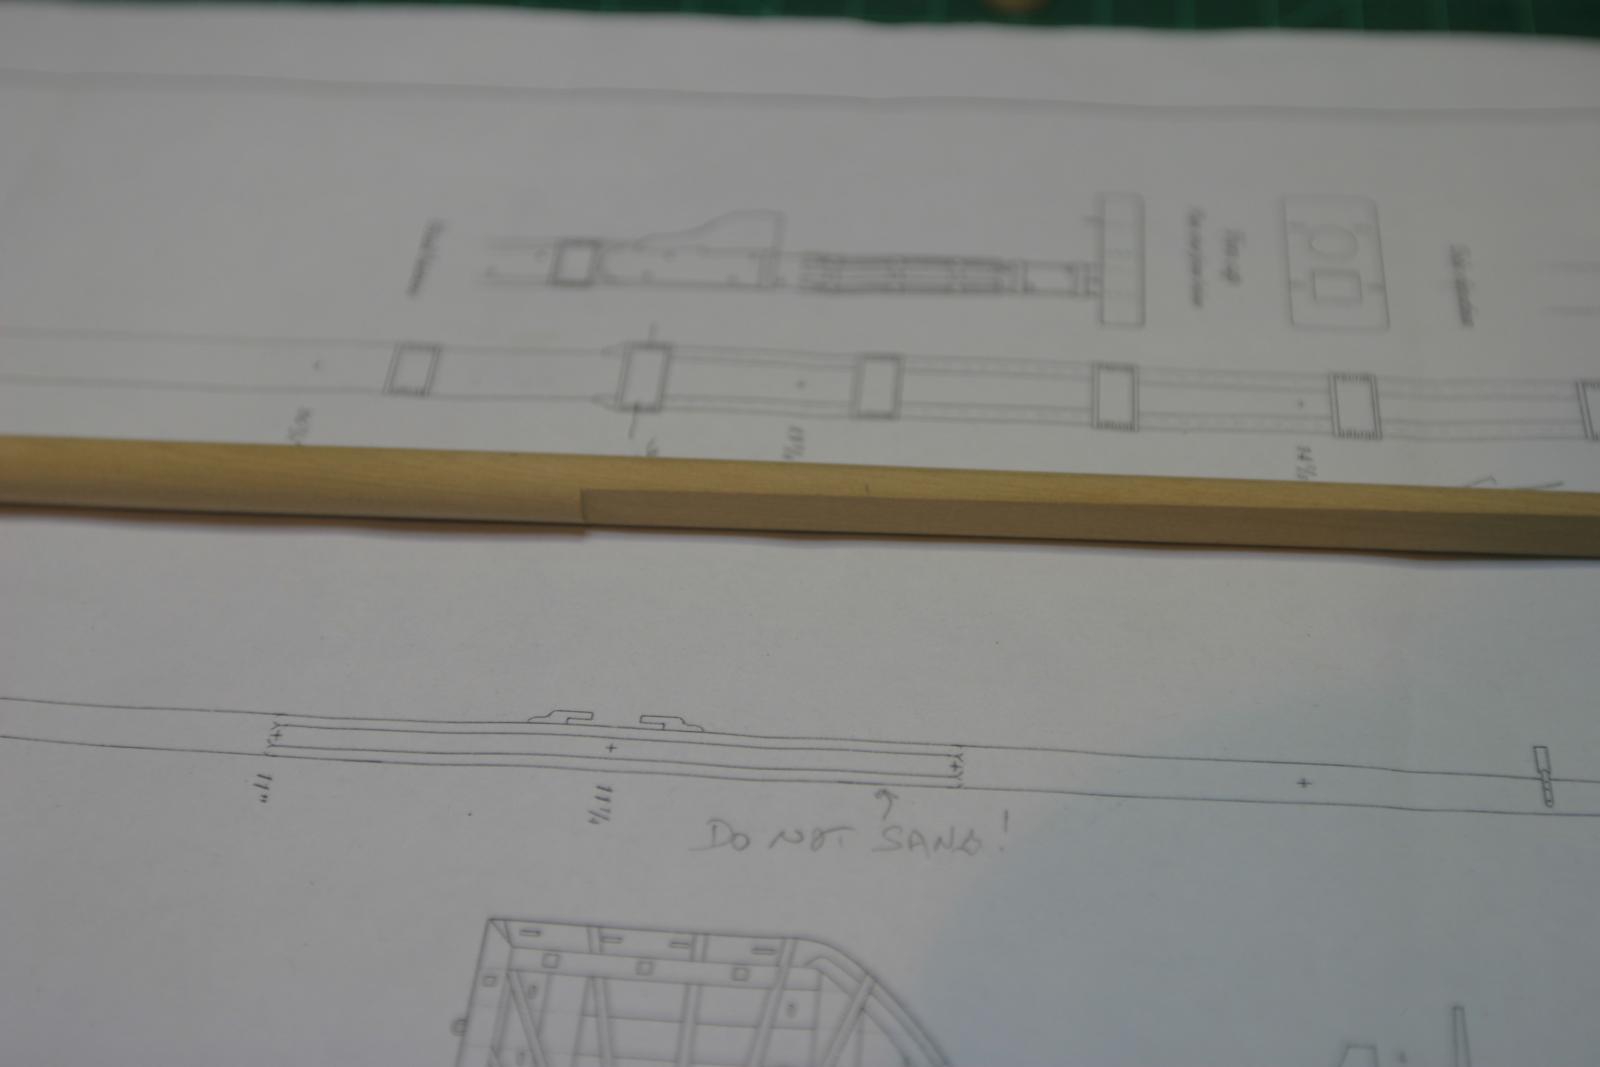
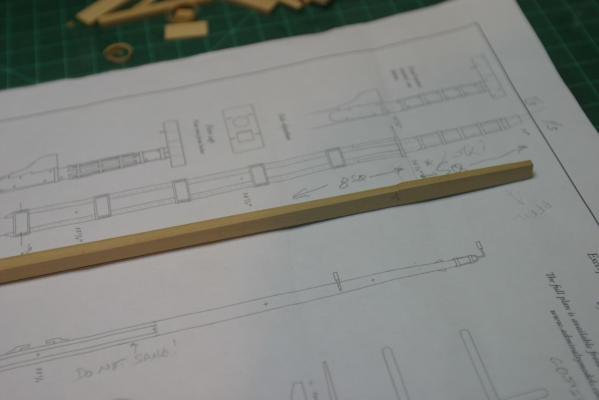
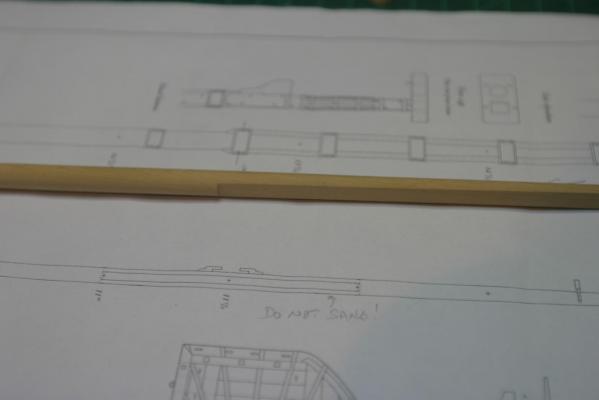
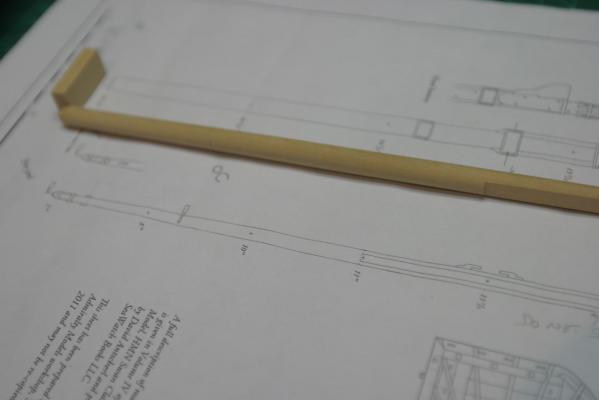
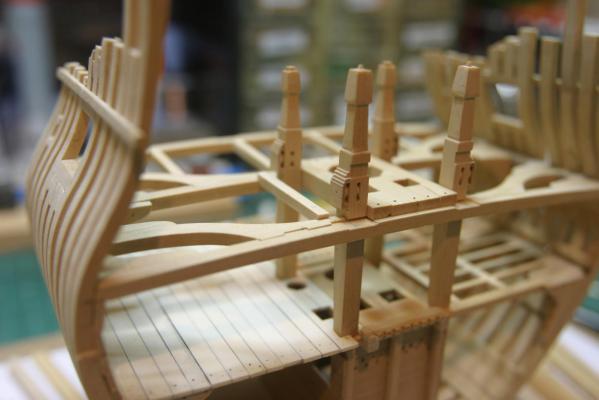
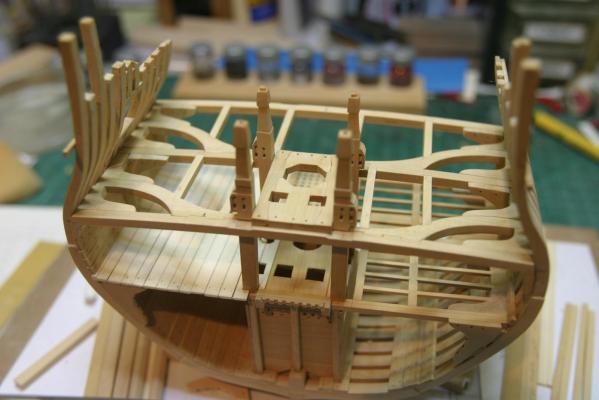
I started this at the workshop back in 2011. While waiting to get more updates on the Echo Section I pulled this out to finish it. The shaping from square to eight sided to round and tapering was done at the workshop. First three pics show status from then. You can see the top tapered and the shoulders for the cheeks. Next step is the Cheeks. Maury
-
Echo by jml1083 - 1:48 - Cross-Section
Maury S replied to jml1083's topic in - Build logs for subjects built 1751 - 1800
Very clean. Good start. Maury -
Echo by Maury S - FINISHED - Cross-Section
Maury S replied to Maury S's topic in - Build logs for subjects built 1751 - 1800
This also might be a good time for me to break out the partially completed mast from the 2011 workshop. Those spars were from TFFM so everything goes together. My skills are better than when I started that project. My patience is greater as well. Maury -
Ed, Along with everything else, you're teaching us about patience. I can't wait for the next installment. Happy Thanksgiving to all. Maury
-
Echo by Maury S - FINISHED - Cross-Section
Maury S replied to Maury S's topic in - Build logs for subjects built 1751 - 1800
Thanks Greg. I think I'll work on the little cutter until you folks are ready. -
Echo by Maury S - FINISHED - Cross-Section
Maury S replied to Maury S's topic in - Build logs for subjects built 1751 - 1800
More reading of TFFM indicates the outer planking should go on before the port linings go in. Waiting on further instructions from Greg. Maury -
Echo by Maury S - FINISHED - Cross-Section
Maury S replied to Maury S's topic in - Build logs for subjects built 1751 - 1800
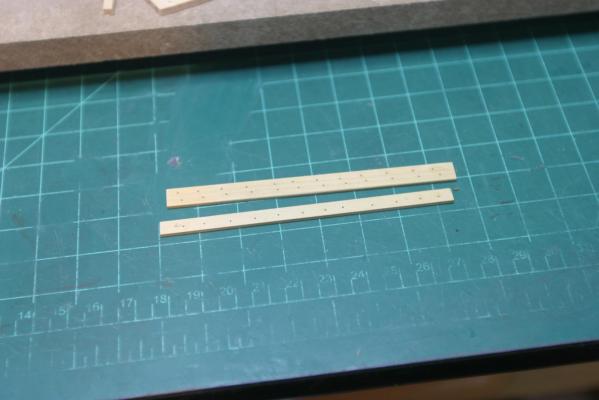
Thanks for all the likes and comments. I'm using TFFM vol. II to get an idea of the next steps. Seems the port liners have to go in before the spirketing. Like the spirketing on the lower deck, I cut and beveled the pieces to size and then I marked each frame location and pre-drilled the bolt holes. The upper strake is slightly wide so it will finish flush with the port liner, and if TFFM comments apply here, there is a bevel to the top edge of the upper strake so that it is horizontal rather than square to the frames (as they tumble in). After a coat of matte poly to prevent staining, I rubbed in some darker wood putty to simulate bolt heads or treenails. For the port liners, I think I'm going to use holly so it will stand out from the box. I don't know yet how much reveal I should leave on the outboard side, so I'm at a stopping point for now. Any thoughts or comments? Also, TFFM says the sweep ports were similarly lined...very small pieces. Maury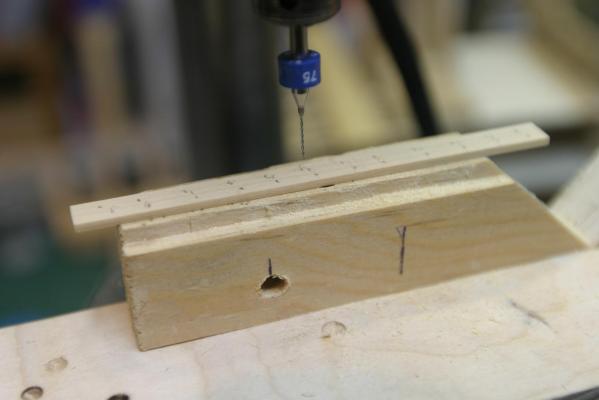
-
Dan, Mine are 1.5". Maury
-
Echo by Maury S - FINISHED - Cross-Section
Maury S replied to Maury S's topic in - Build logs for subjects built 1751 - 1800
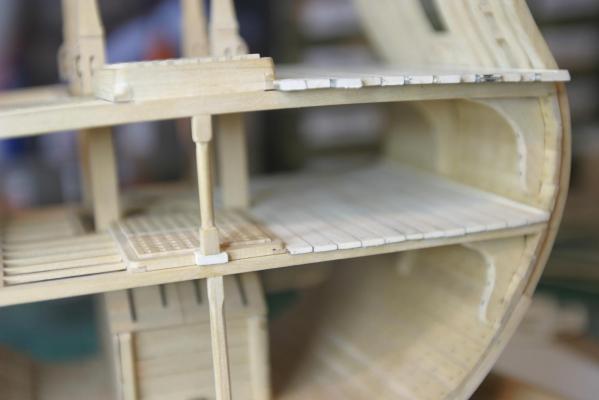
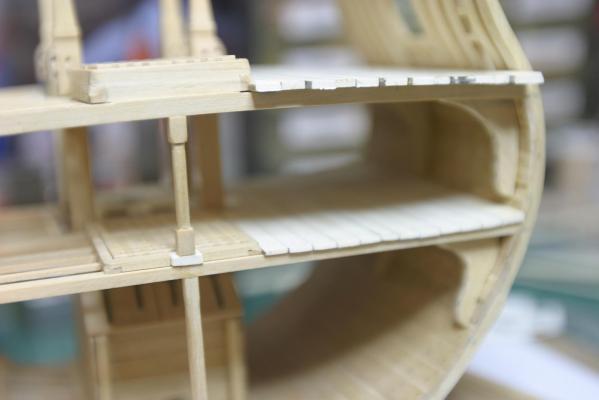
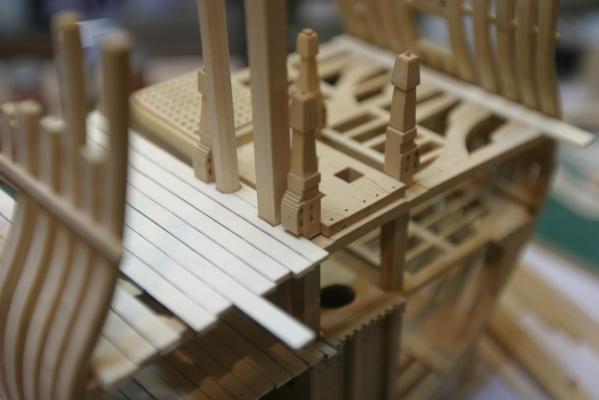
Upper deck planking installed. I'll simulate subtle treenails put a coat of matte poly on and ready for the next installment. Next to getting the chocks in the framing, this section was the biggest challenge. Learned more and got more patient. Maury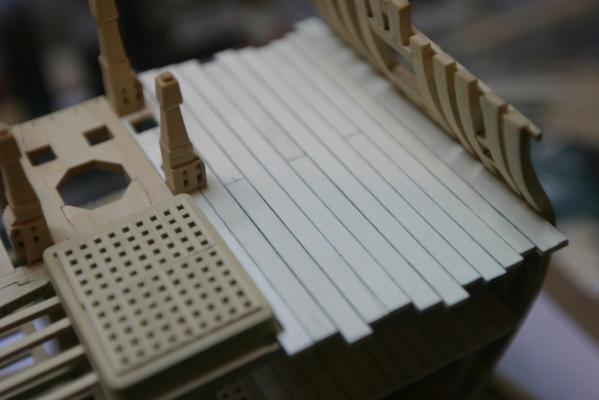
- 324 replies
-
- 19
-

-

-
Ed, I have used Firefox as a default browser on Win 7 and found no problems. Maury
- 3,618 replies
-
- 1
-
-
- young america
- clipper
- (and 1 more)
-
The instructions / illustrations for Chuck's 18c Longboat are pretty clear on the subject. Lots of posts with plenty of pictures. Maury
-
Echo by Maury S - FINISHED - Cross-Section
Maury S replied to Maury S's topic in - Build logs for subjects built 1751 - 1800
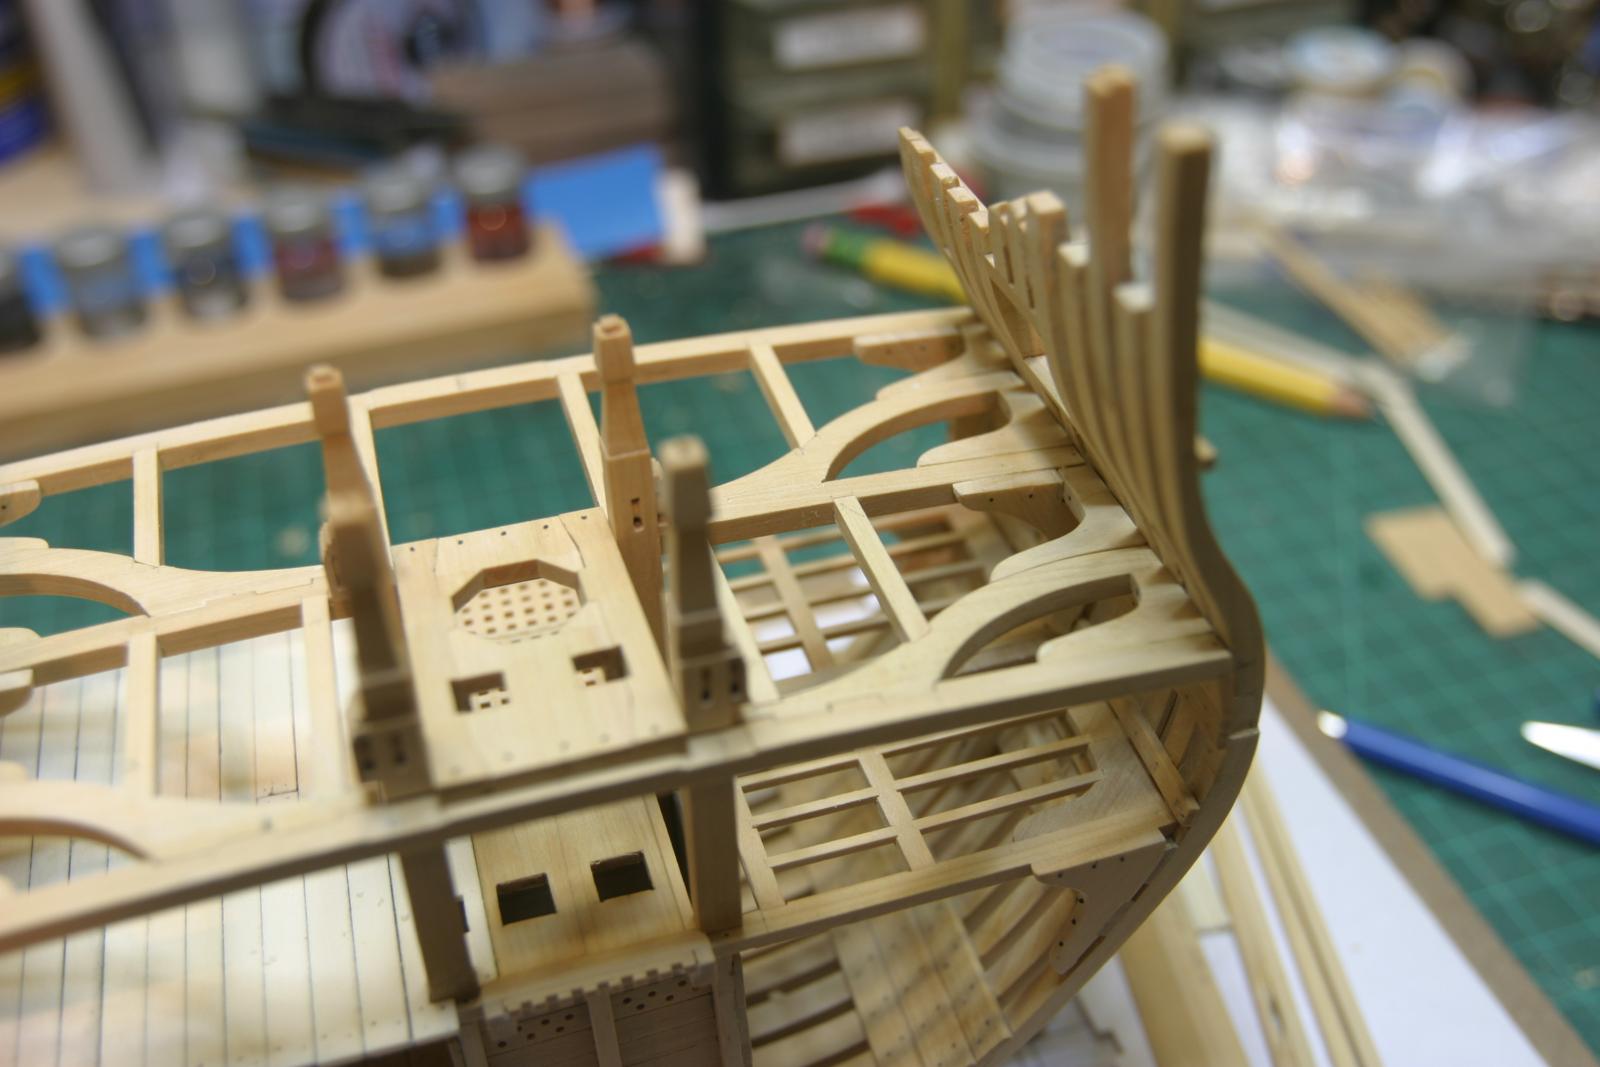
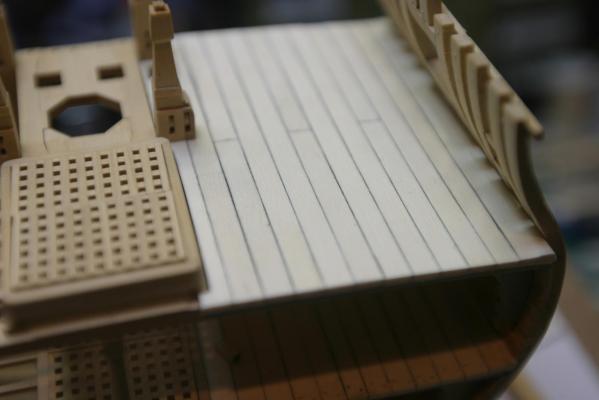
Druxey & Greg, I sectioned the hanging knees on the aft lower deck beam. Since the ceilings only go to the frame, the knees would really just hang out there. I think I'll just omit them. Thanks for your comments! Test fitting the deck planking around the partners carling. Using the pattern again to line up the elm tree and pipes. I'll caulk around the holes (with wood putty). I think this is as good as a fit I can manage. Cutting an octagonal hole is a challenge. Thanks for all the "Likes". Maury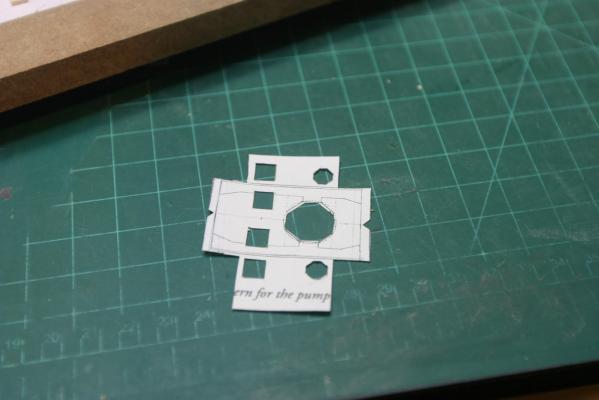
- 324 replies
-
- 11
-
-
Echo by Maury S - FINISHED - Cross-Section
Maury S replied to Maury S's topic in - Build logs for subjects built 1751 - 1800
Druxey, If I install the knees, they will abut the aft side of the beam, but be hanging out from the inner planking / ceilings (which were finished flush with the frames). I can run the deck planking far enough to cover the top of the knee, but it would still be hanging out vis-a-vis the the side / frame. I'm just not sure if it will look right that way. Maury -
Looks great. The ends of the tuck are very clean. The holly was a great choice. Maury
-
Echo by Maury S - FINISHED - Cross-Section
Maury S replied to Maury S's topic in - Build logs for subjects built 1751 - 1800
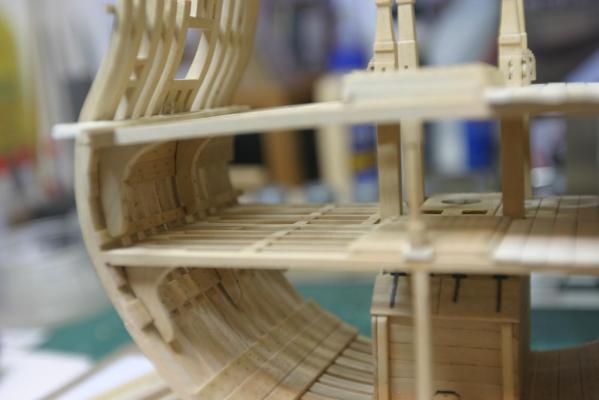
The ledges are done. Those that land on the arms take a great deal of care to get all the angles correct. The hatch frame is not attached yet. I made the waterway by cutting a bevel from a sheet on the Byrnes saw, cut to approximate width and thicknessed on the Byrnes thickness sander and finally cut to final width. I then ran the piece over the blade set at a 1" cut several times to bring the one side to the 3" thickness. The planks are 3" x 10". As the planks line up, only two or three will need minor tapering. Figuring the planks closest to the enter line / partners takes special care where the pumps come through the deck. I still have to decide if I install the hanging knees behind the aft beam. If so, I will extend the planking to the edge of the knee, not the beam. Any thoughts? Maury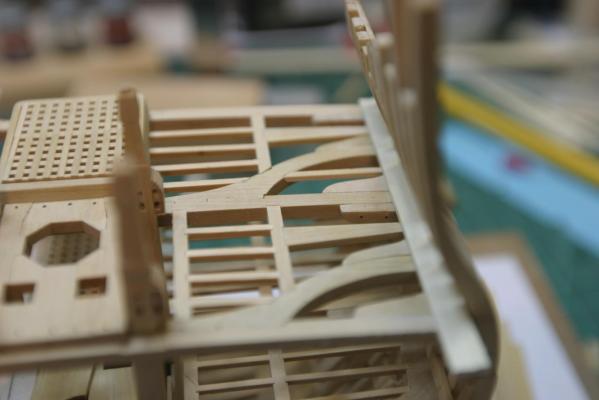

- 324 replies
-
- 11
-
-
Chuck, Double planking? Wales only? Maury
-
George, Museum wax is used to keep objects from moving / tipping over. A few little dabs on the bottom of a vase or other object will keep it from moving (someone jostling a case or minor earthquake), yet it is not permanent. I would not use it like we do beeswax. Maury
-
Chuck, She's going to have very sweet lines! Maury
-
Echo by Maury S - FINISHED - Cross-Section
Maury S replied to Maury S's topic in - Build logs for subjects built 1751 - 1800
Below are pictures of sanding the bevel in a carling and an early test-fit of same. Sanding, test fit, sanding, test fit until it is flush with the beam. For the carlings intercepting the beam arms (at an angle), I mark the angle and cut that first, then cut the bevel with a chisel. The opposite square end is then cut to size and sanded to the bevel. All the carlings are installed. Now on to the ledges. Maury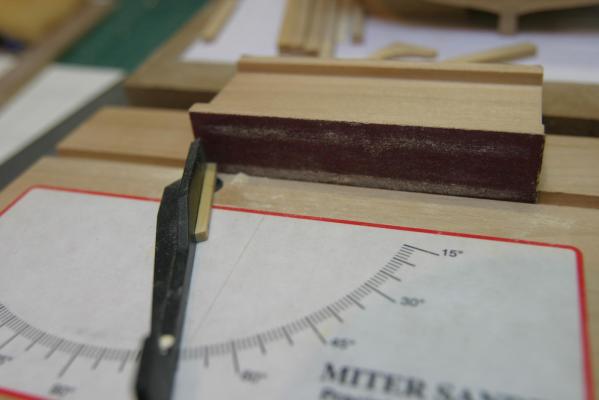

- 324 replies
-
- 13
-
-
Echo by Maury S - FINISHED - Cross-Section
Maury S replied to Maury S's topic in - Build logs for subjects built 1751 - 1800
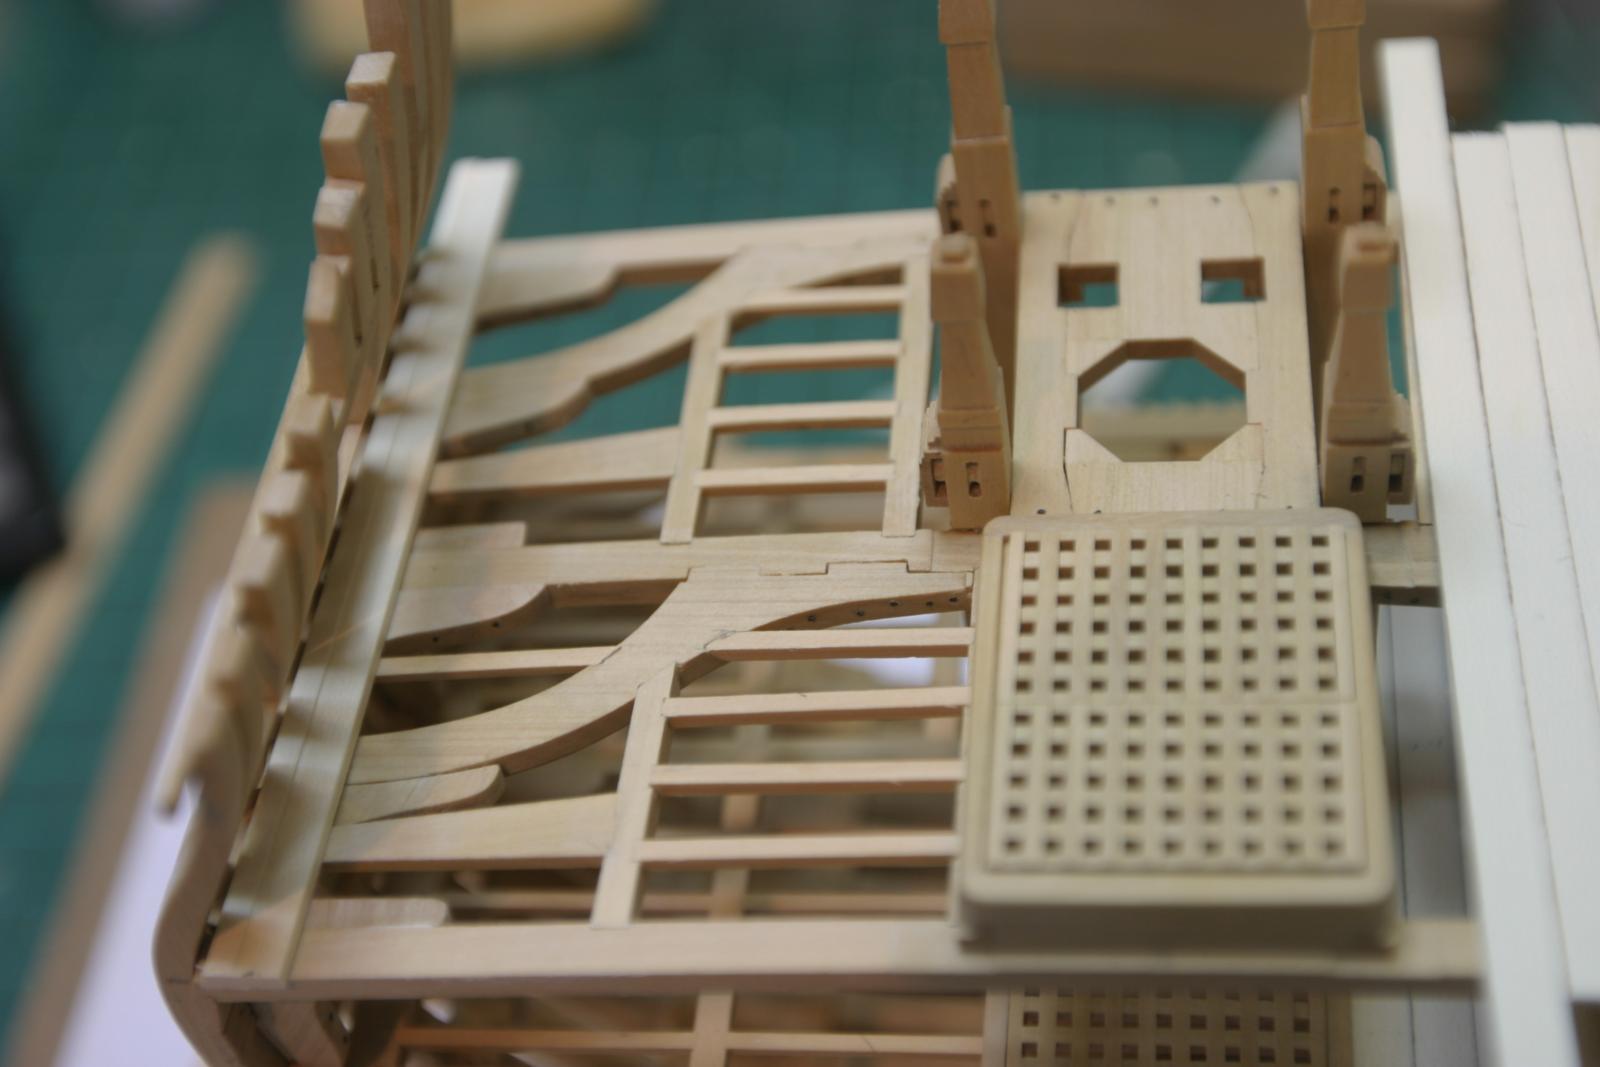
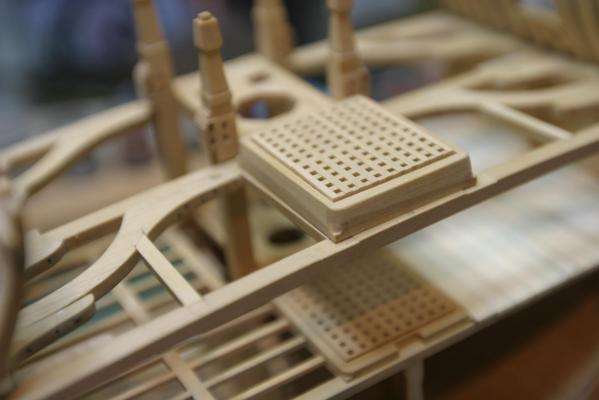
While waiting for the glue to dry on the carlings, I finished the gratings and the frame. The gratings are assembled in a jig to hold the notched pieces while the battens are installed. I rubbed bees wax on the jig before inserting the pieces so the diluted white glue would not stick to the jig. I used a curved dentist pick to pry the pieces from the jig. Once assembled and dry, I used the circular sander to trim the two pieces to size to fit into the frame. The frame is 6" x 12" with a 2" x 2" shoulder cut out to support the ends of the gratings. The frame was tapered to 5" at the top after assembled and dry. Corners rounded down to the 3" level (for the deck planking). The two pieces of grating are not equal. One is 7 pieces long and the other is six so they fit properly into the frame. The two assembled grates were attached to my thickness sander SLED with double sided tape and run thru several times taking off just a hair of the battens each pass until flush. It is not permanently installed yet as the ledges need to be installed between the carlings. Next up the carlings between the mid and aft beams. Maury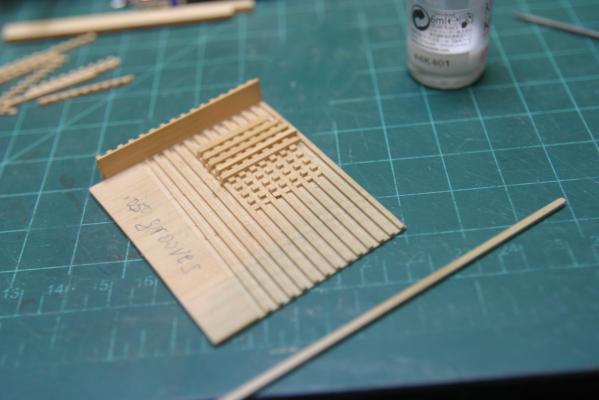
- 324 replies
-
- 10
-
-
Echo by Maury S - FINISHED - Cross-Section
Maury S replied to Maury S's topic in - Build logs for subjects built 1751 - 1800
Lining up the intermediate carlings: The plans locate the outer carling 49.5" from the inner carling. That's 1 1/32" at scale. Beam arm and beams are marked at this point. Using the carling as a guide, the other edge is marked so the mortise can be cut. Same method as the lower deck carlings. A score is made in the arm and beam on both sides of the carling as a stopper point. Then using a #11 blade, cut to both sides and cleaned up with a sanding stick. One end of the end of the carling is sanded to a 75 degree bevel to fit in the beam notch, then marked to approximate length. The other end is then sanded (a little bit at a time) until it just fits into both notches and is flush with the tops of the beams. Maury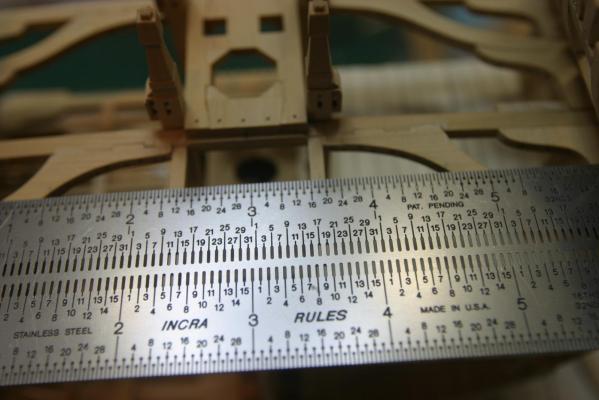
-
Beautiful contrast with the Holly. Maury
-
Toni, Nice table. Where did you get it? Maury