


Javlin
-
Posts
1,444 -
Joined
-
Last visited
Content Type
Profiles
Forums
Gallery
Events
Posts posted by Javlin
-
-
-
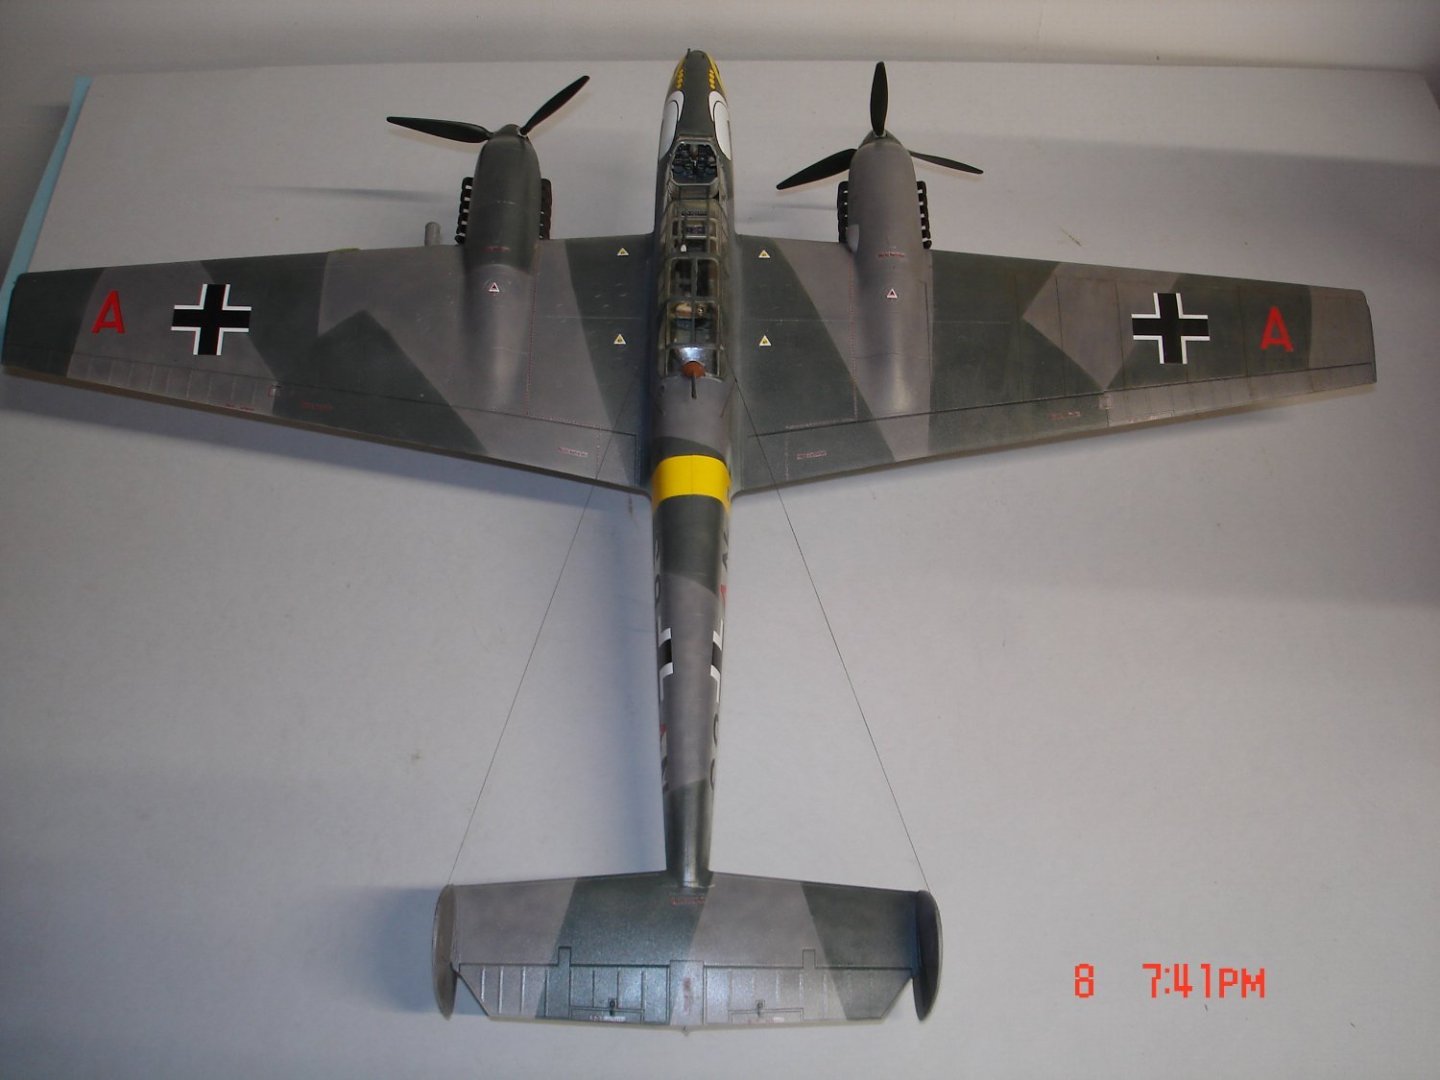
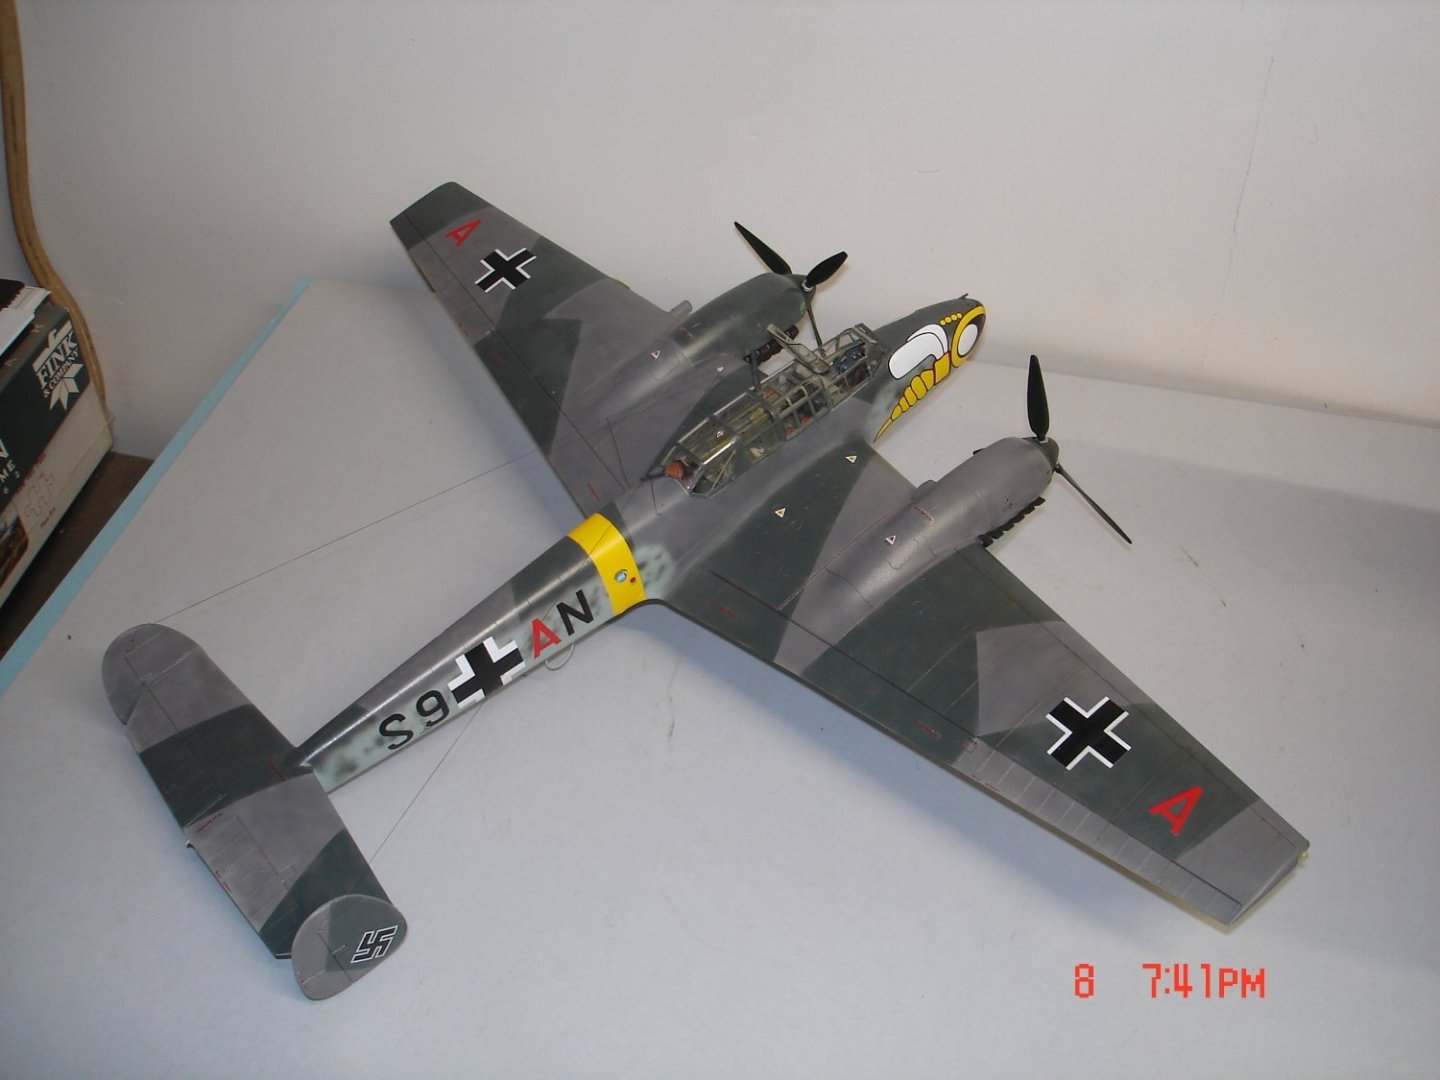
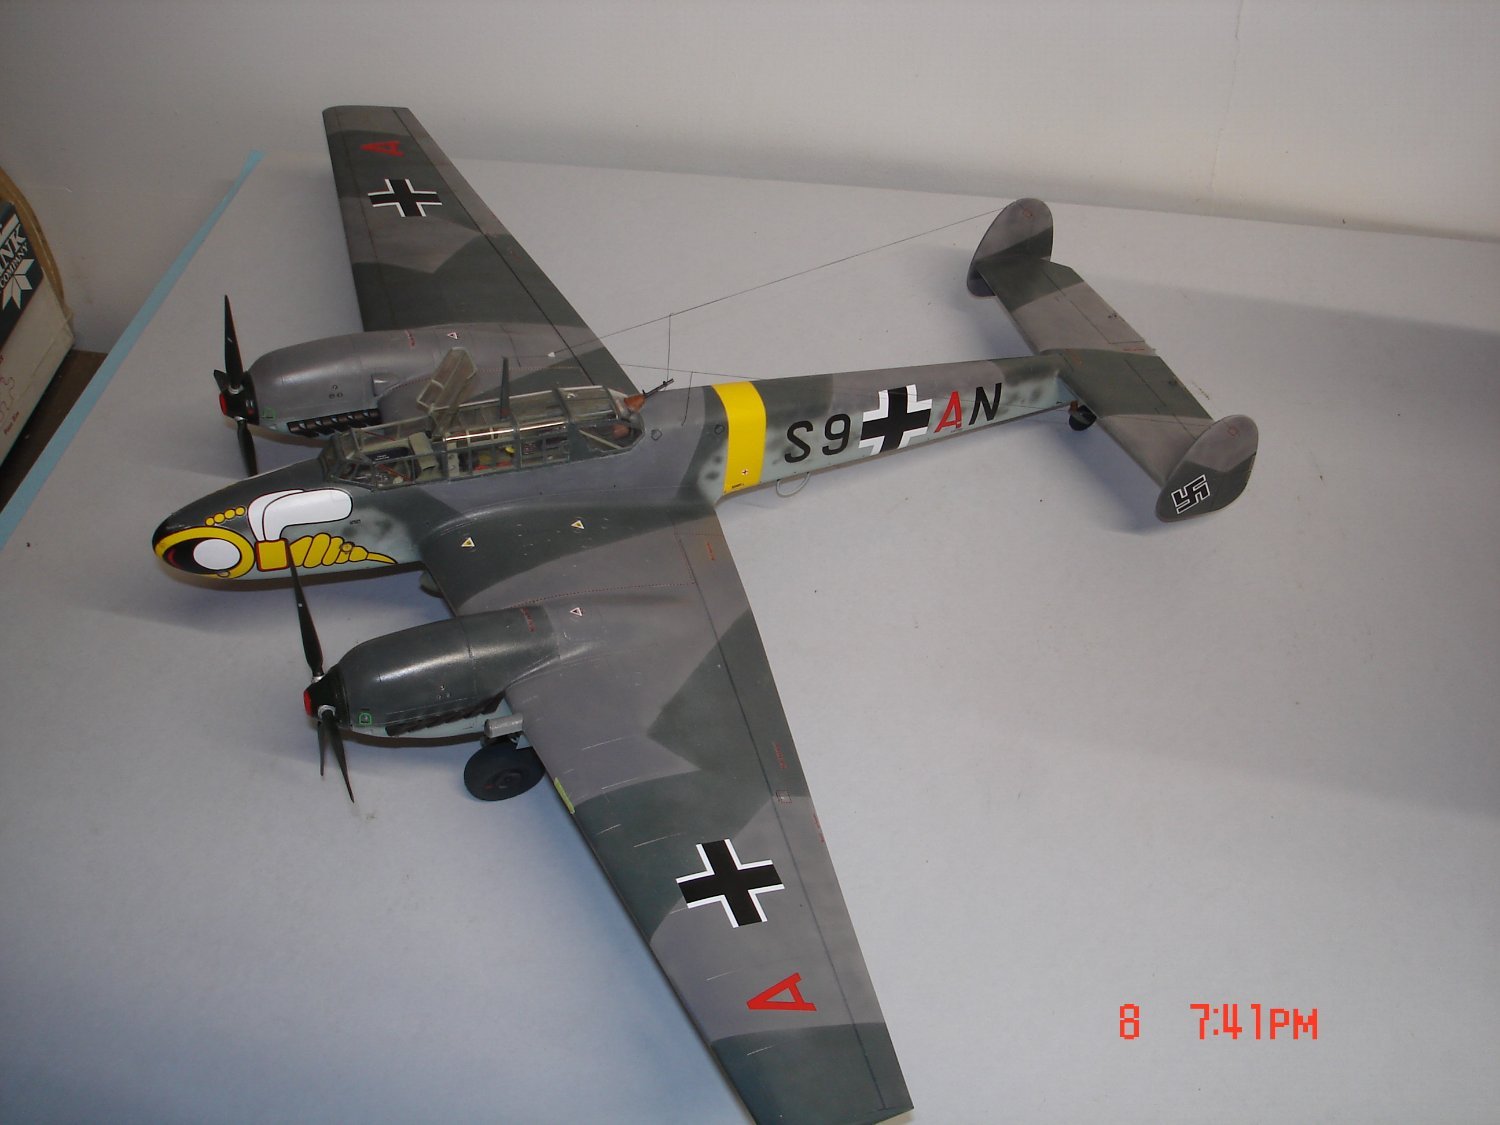
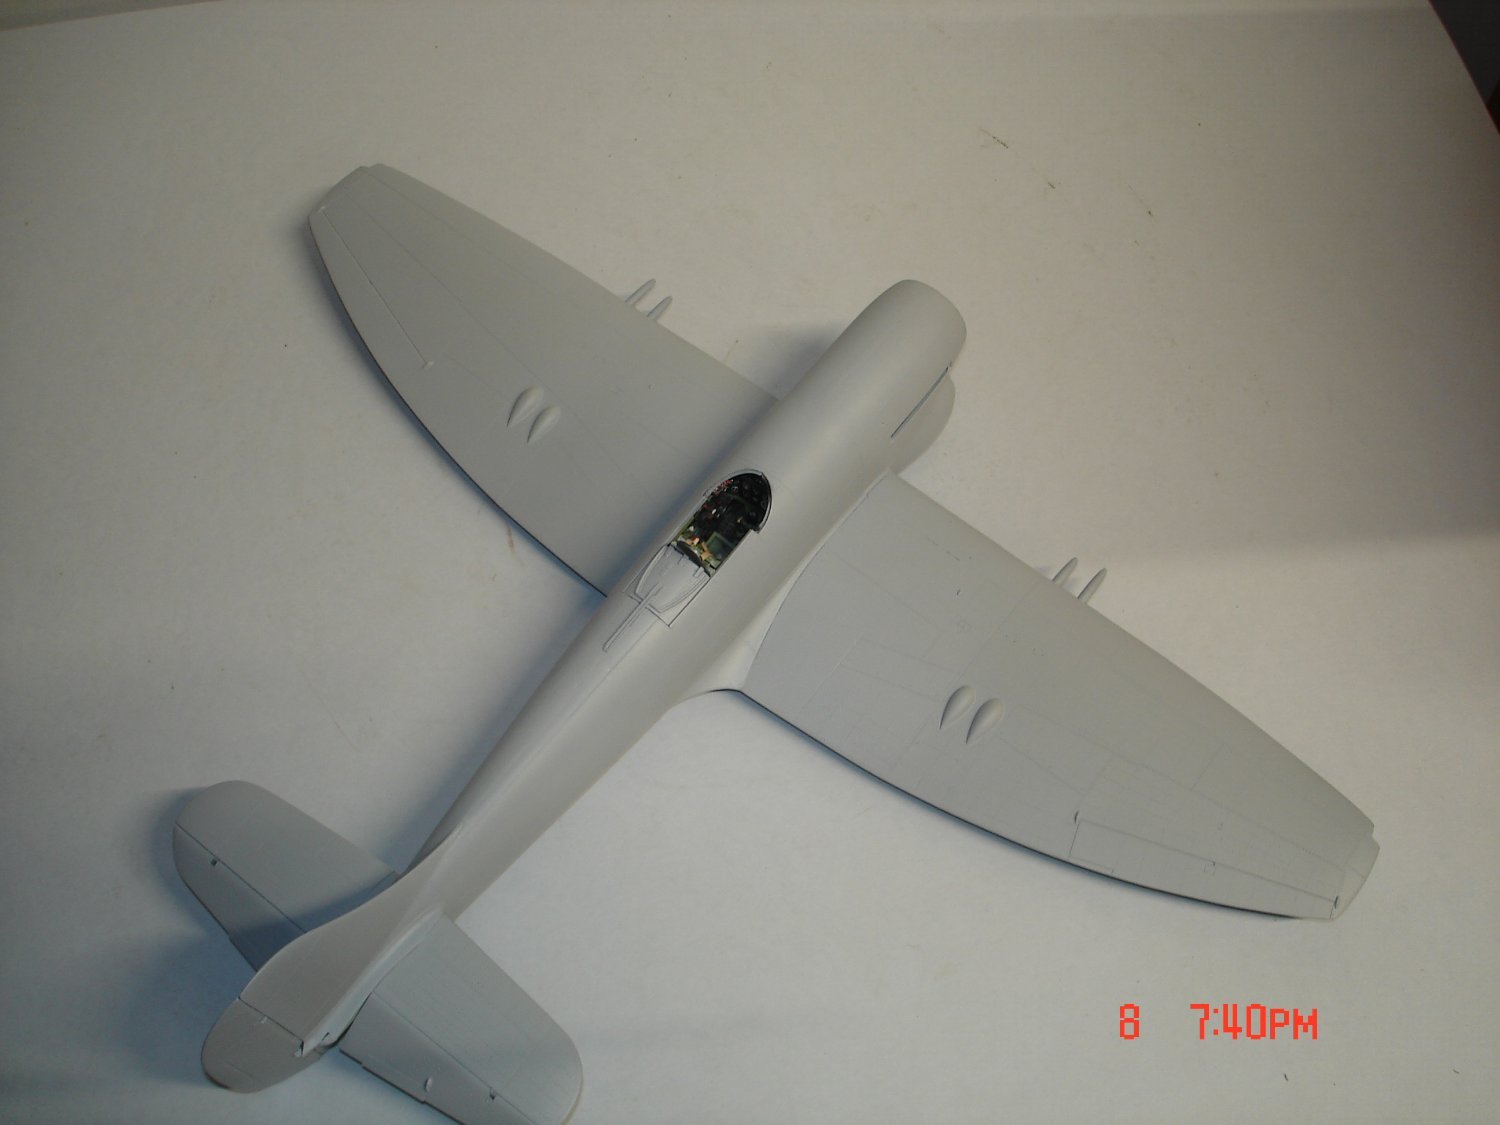
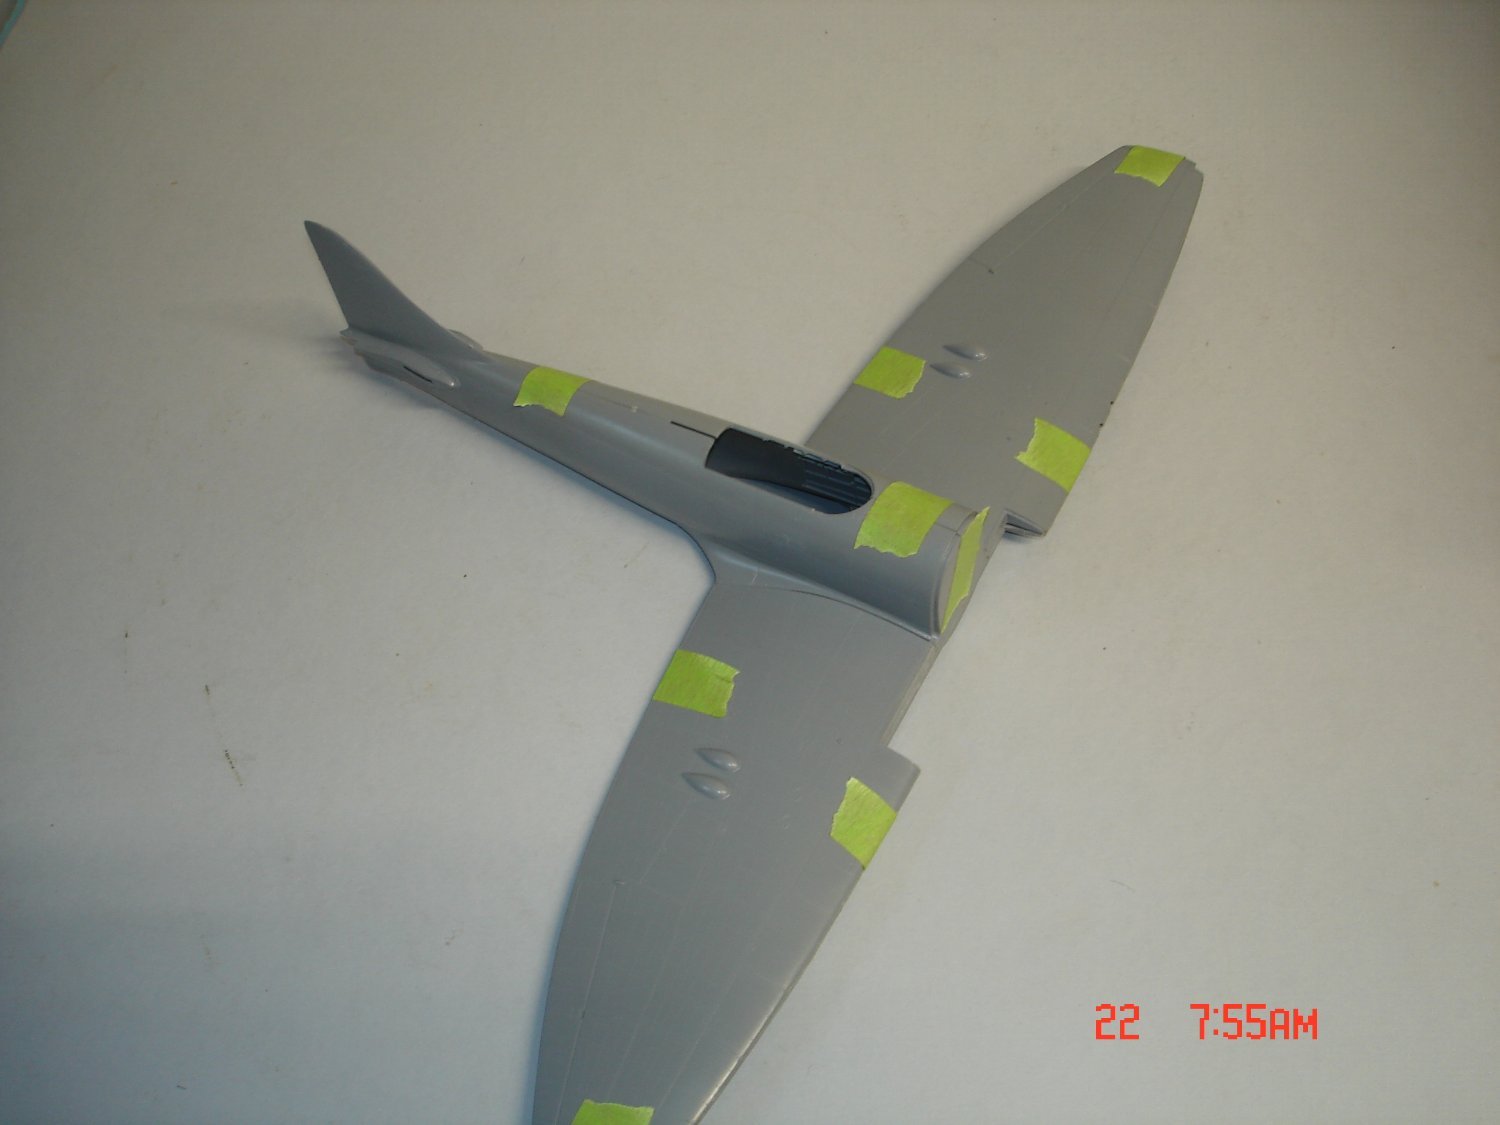
Getting close to finish on this one might notice a little panel line work on the outer R/wing don't know if I proceed
 The antenna is done and those ASK decals for the swastikas are thin and brittle 4 to get 2.
")

-
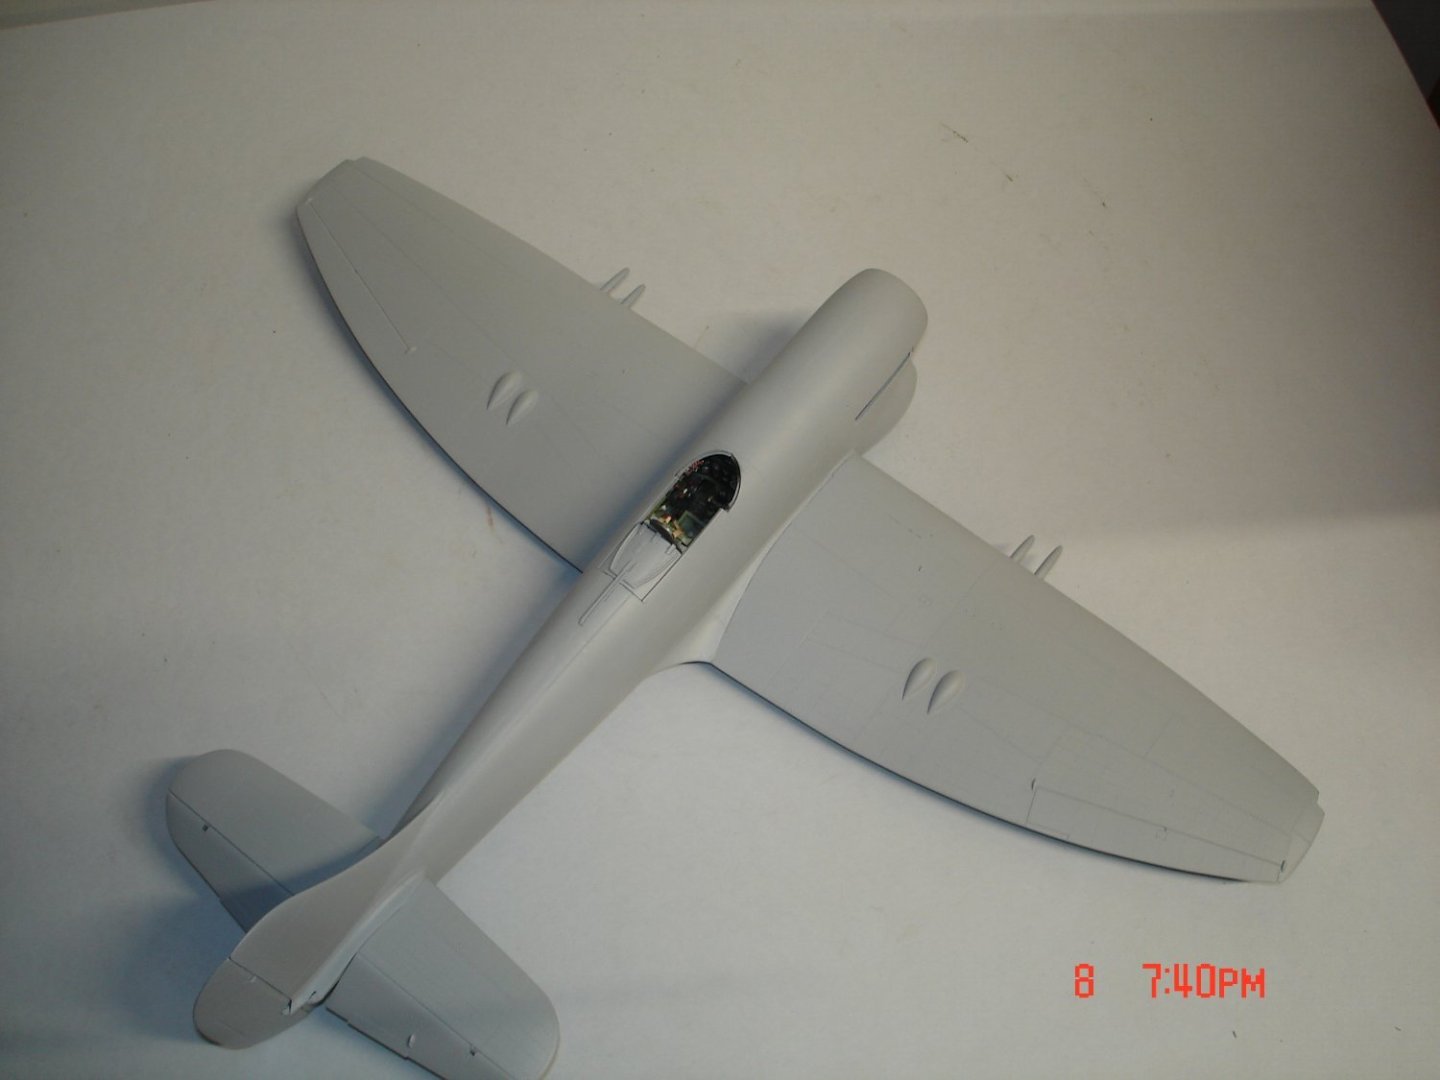
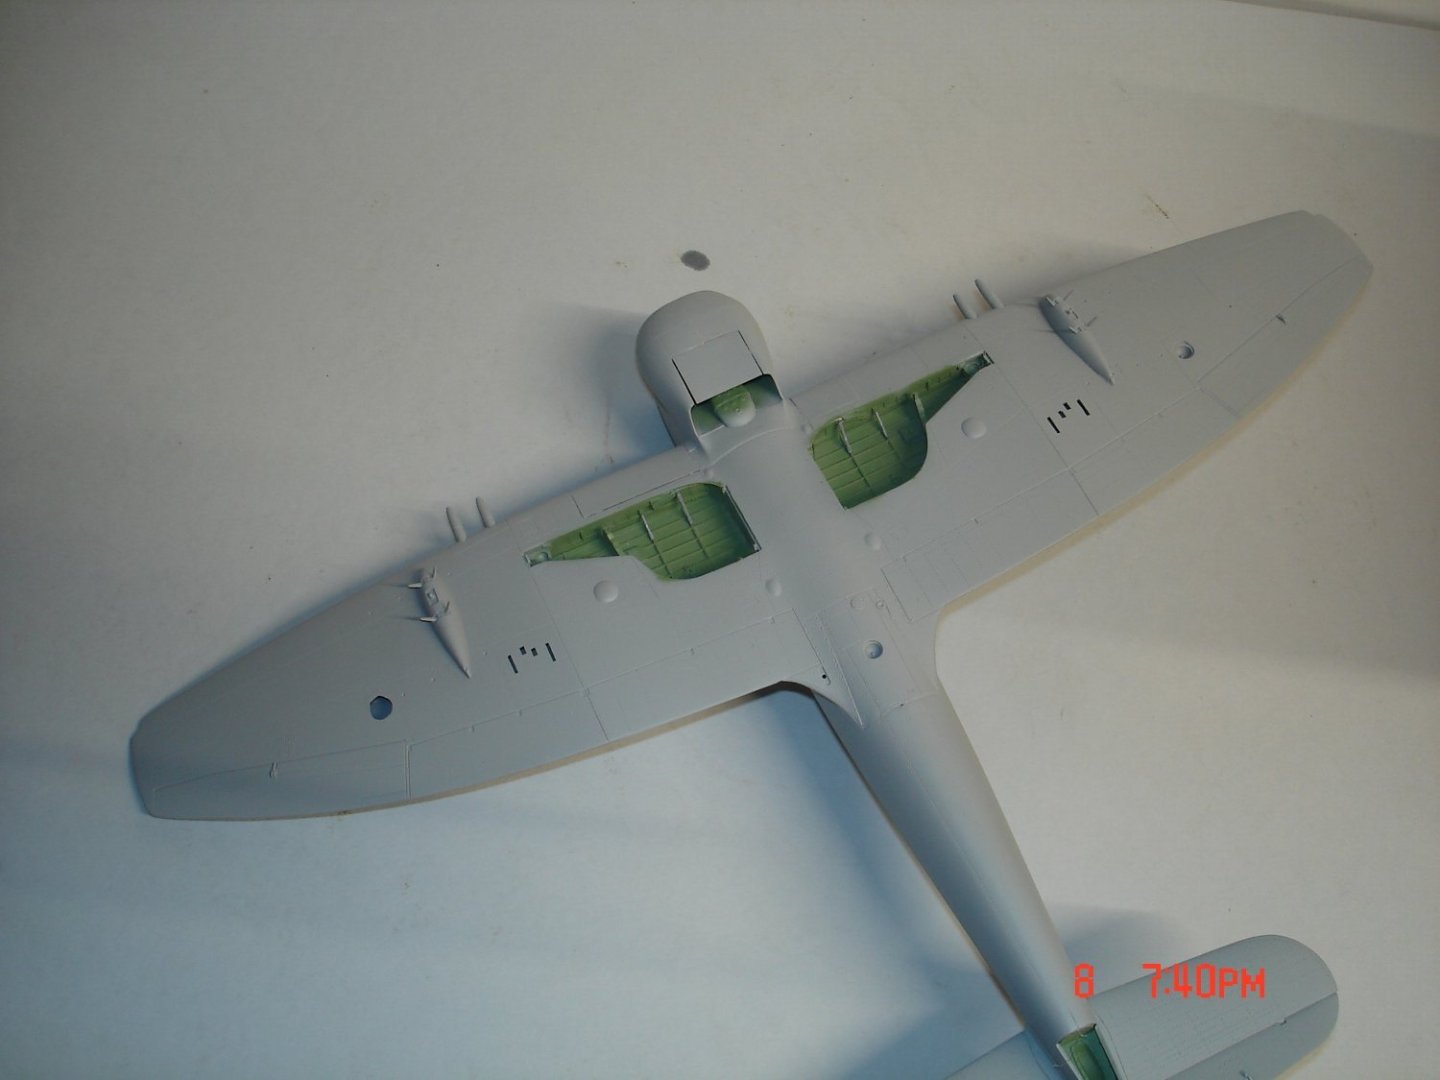
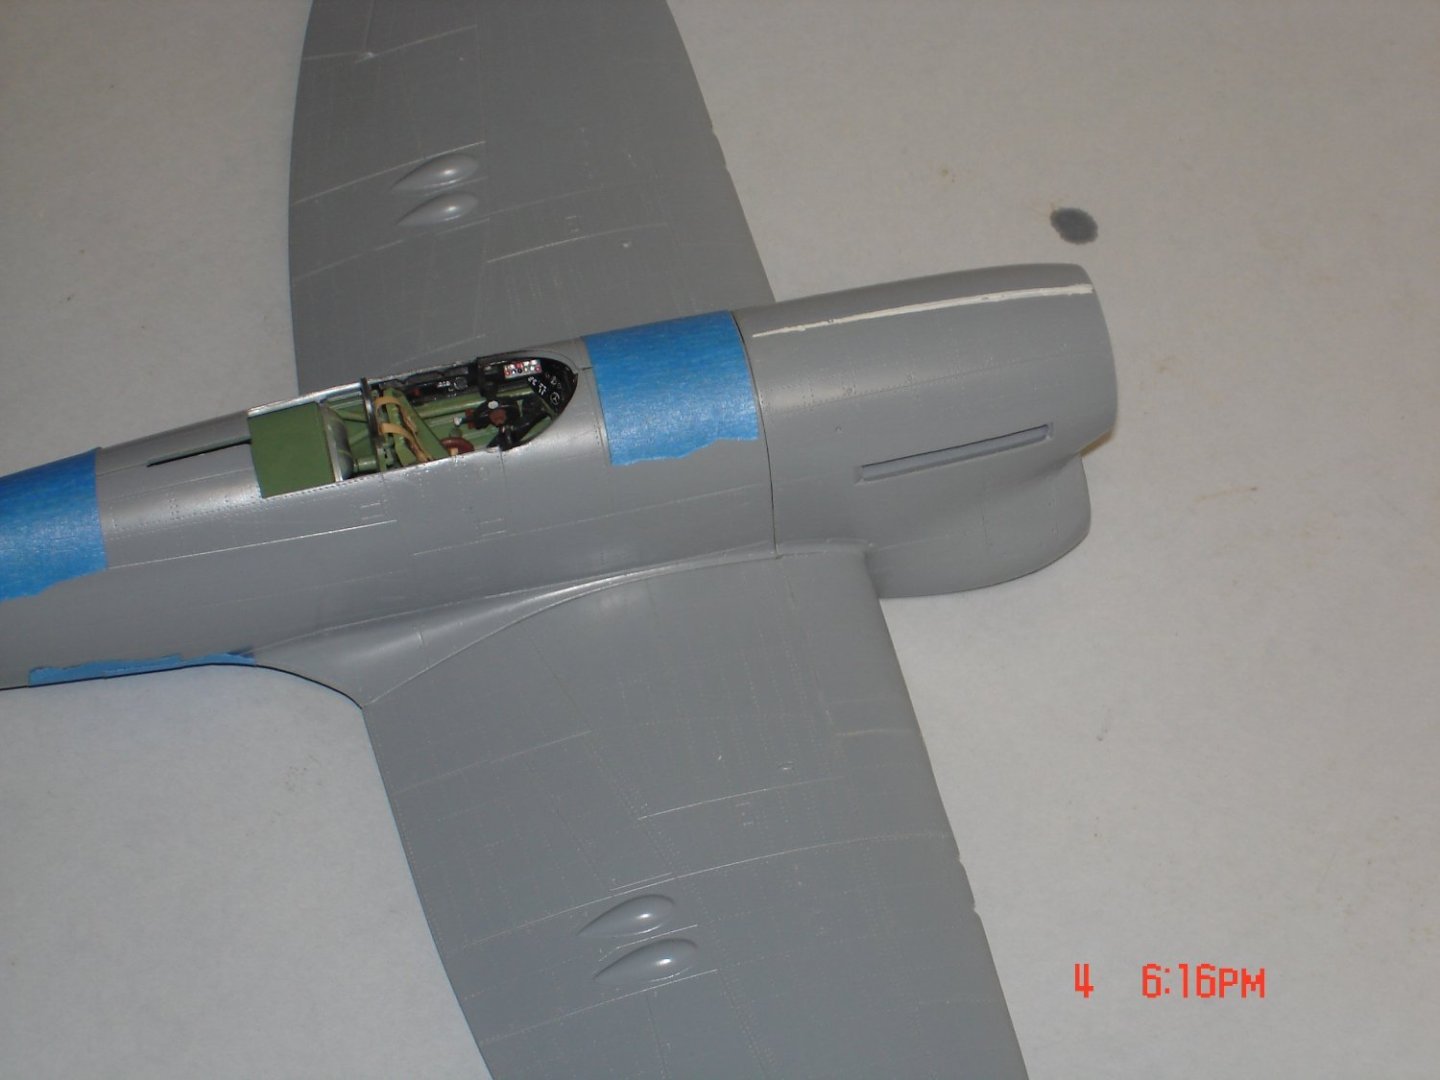
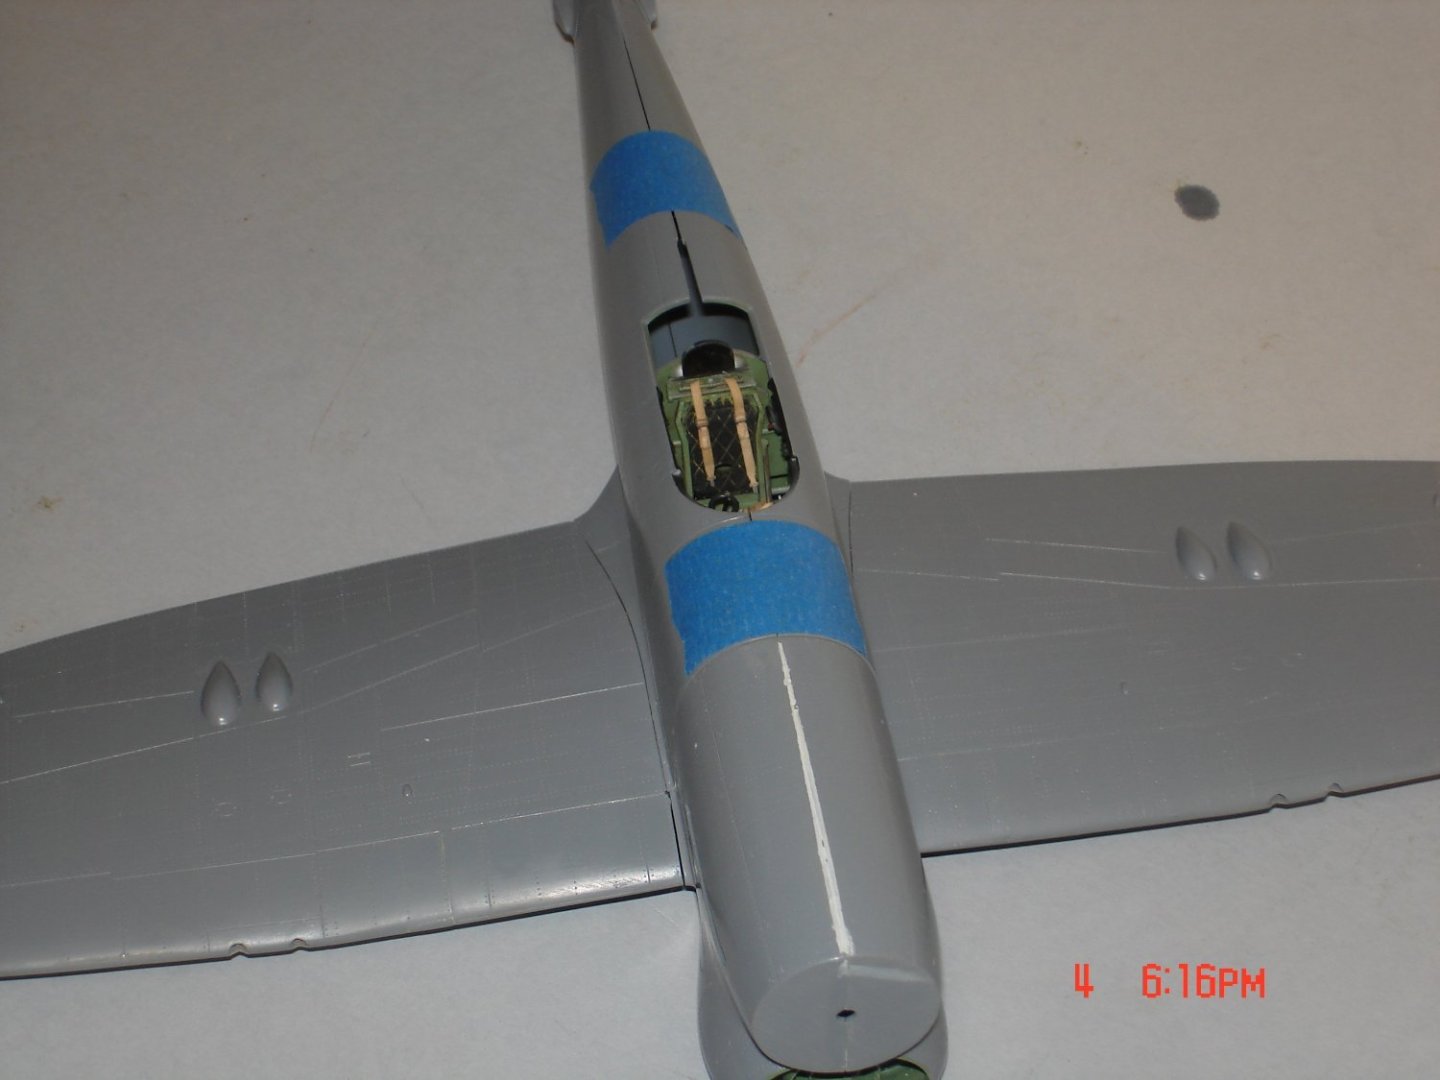
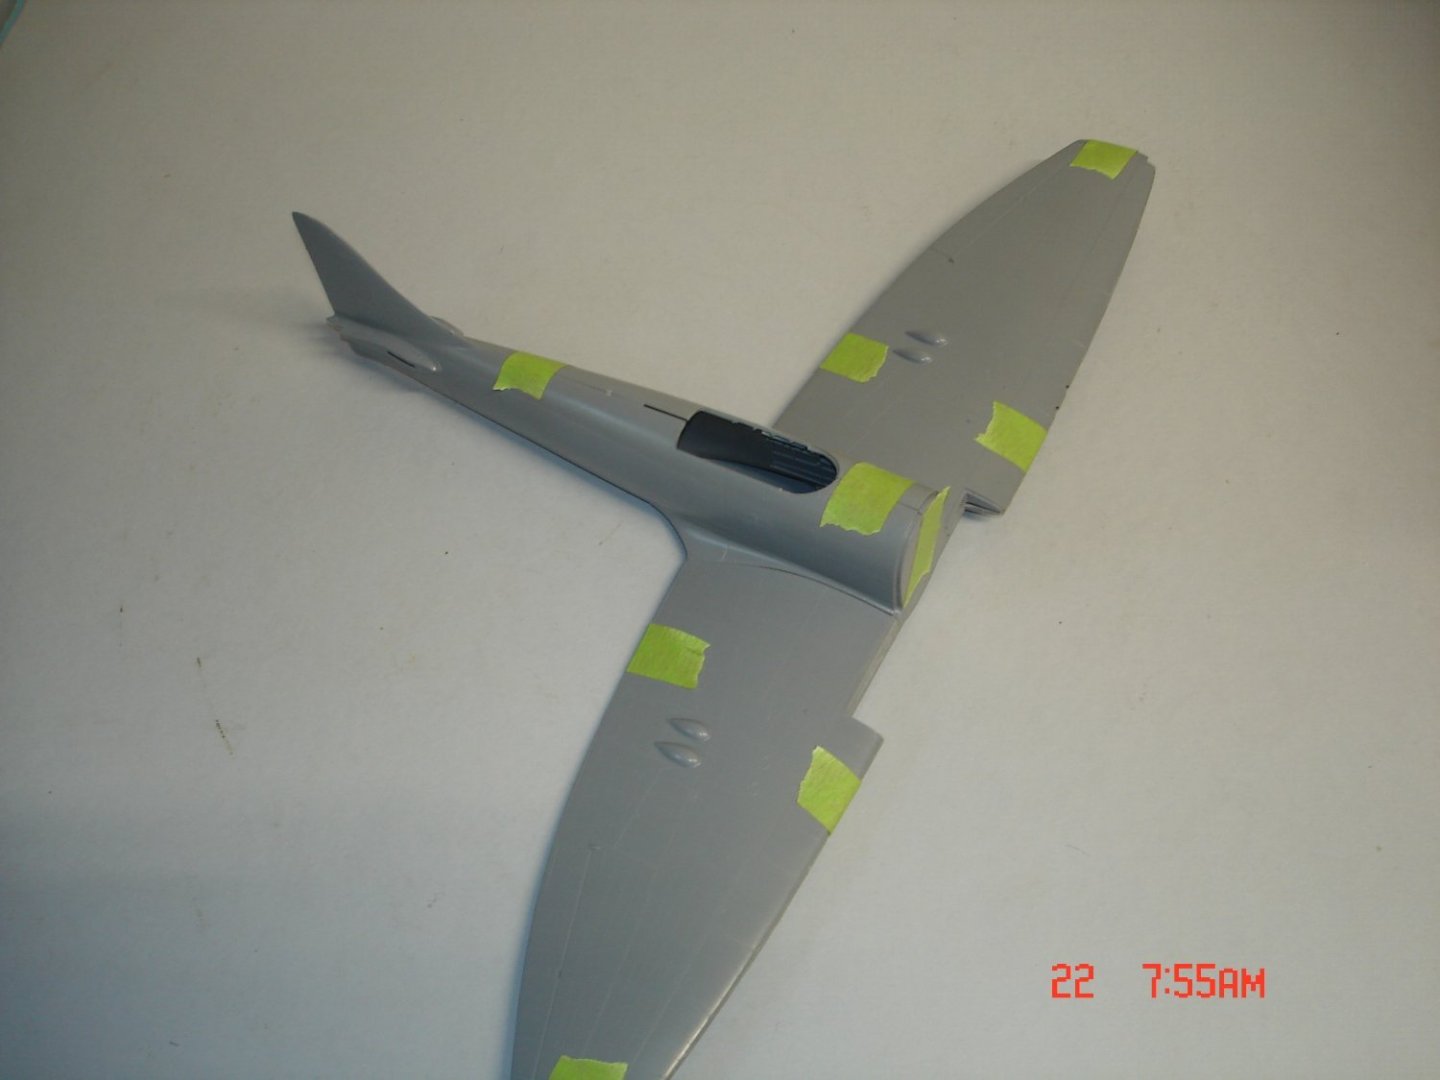
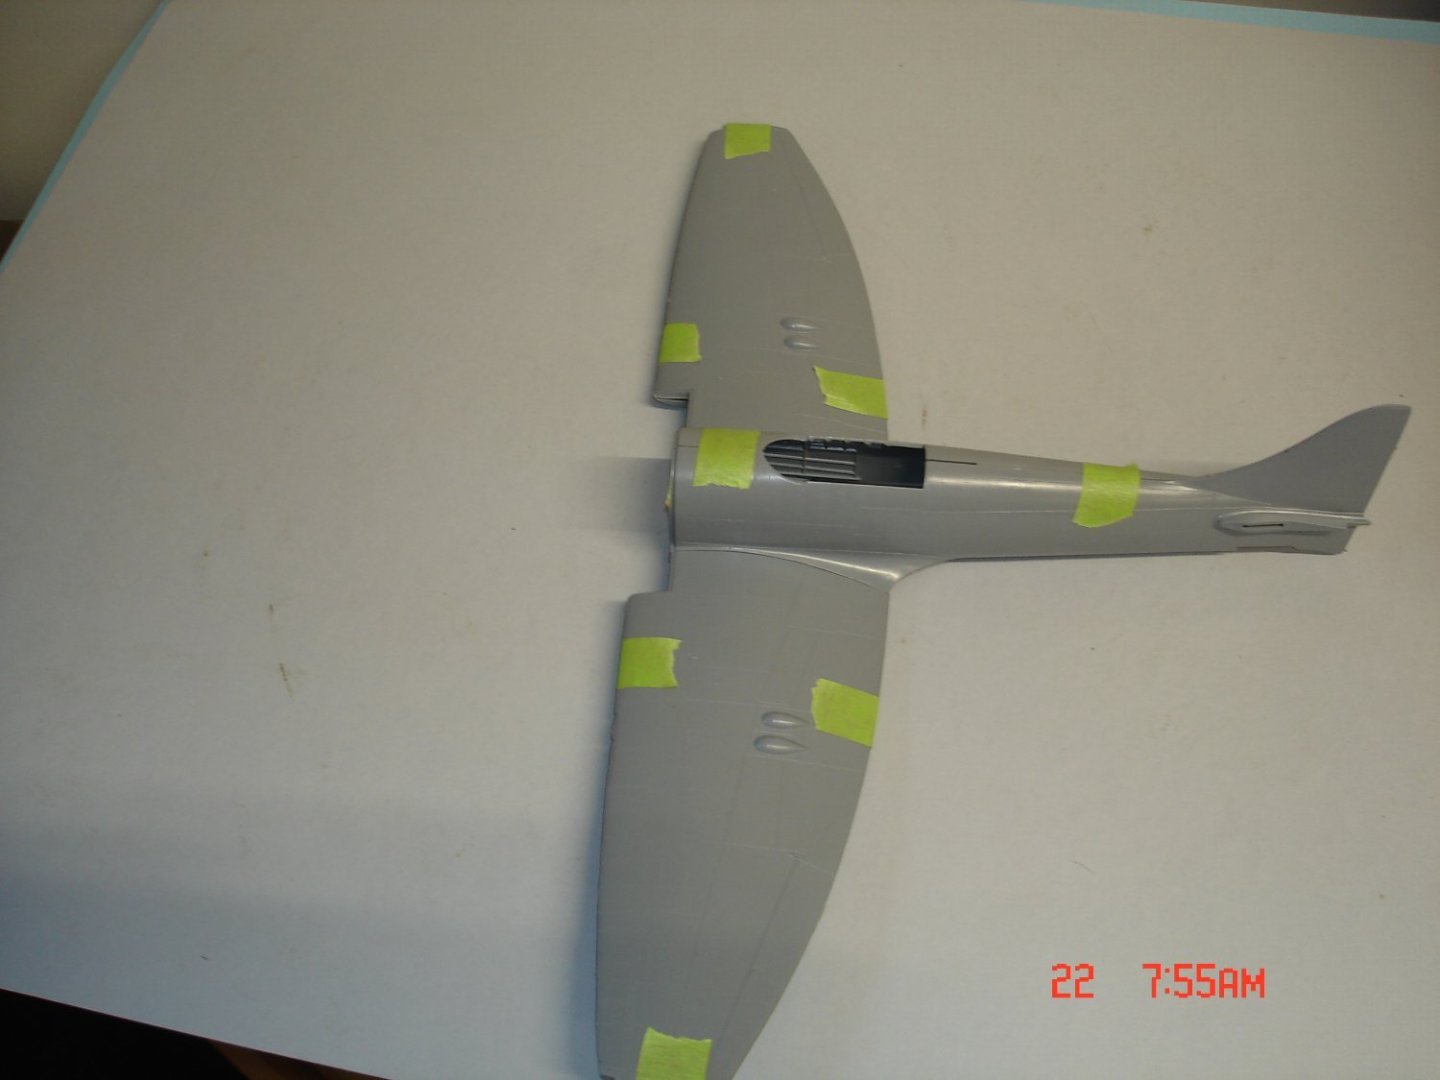
The primer has been applied was very little filler was needed the biggest area was were the lower wing met the fuse underneath a piece of .020" card stock was inserted and sanded.I had a little step between at the wing root R/side figured do more than good going after it.
- mtaylor, realworkingsailor, CDW and 9 others
-
 12
12
-
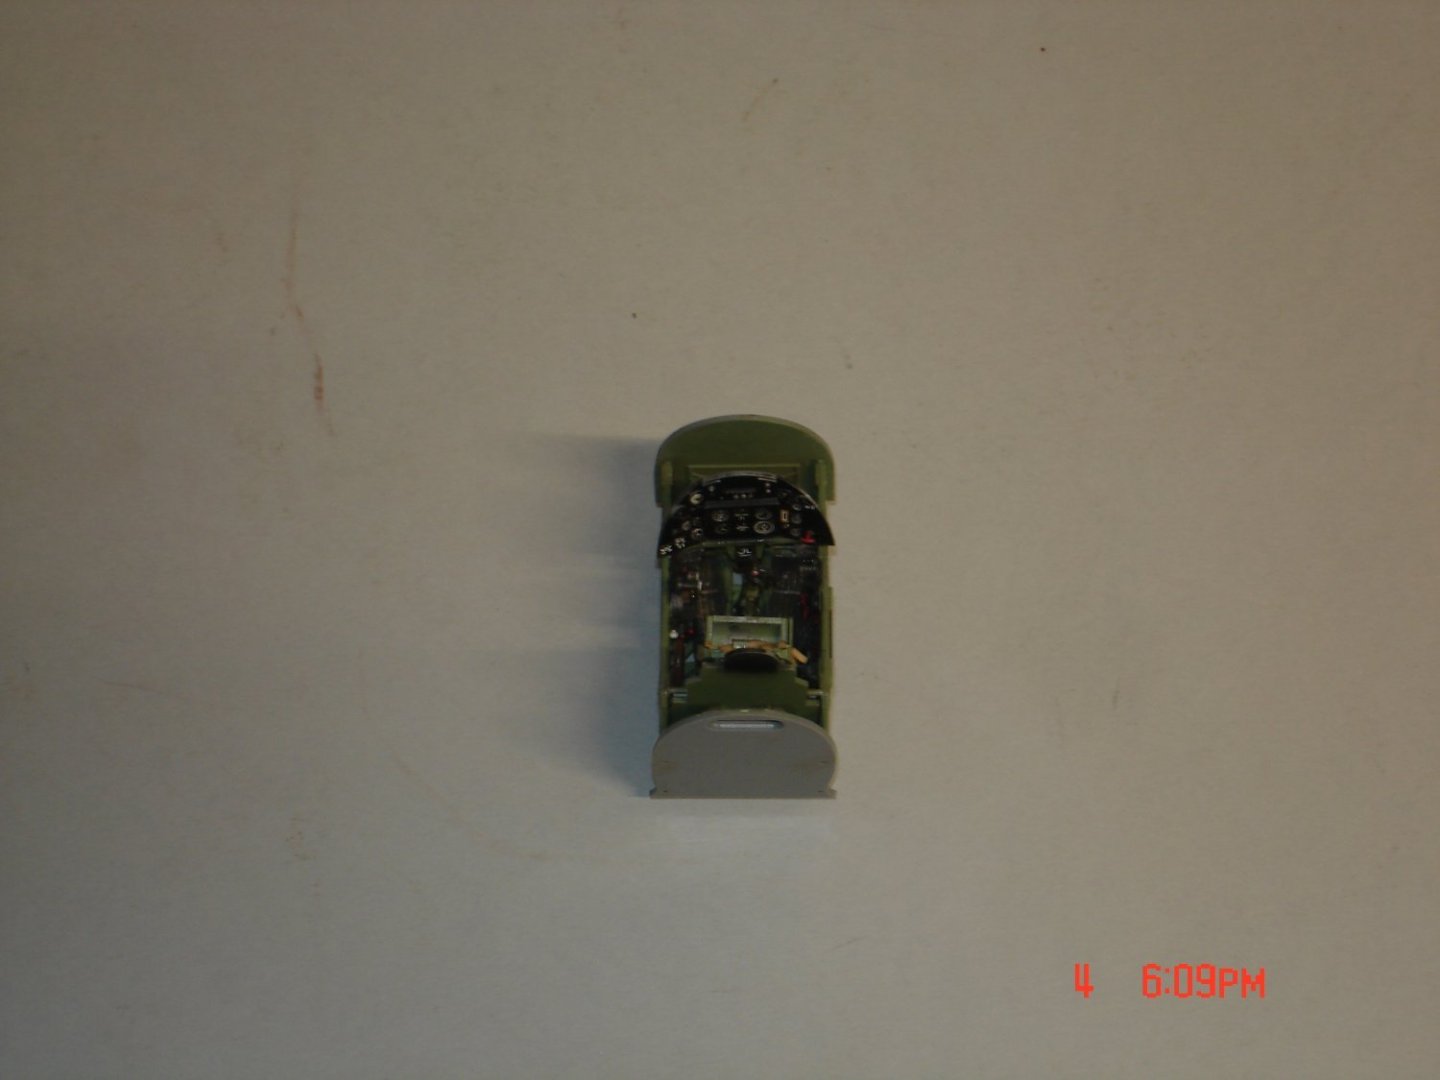
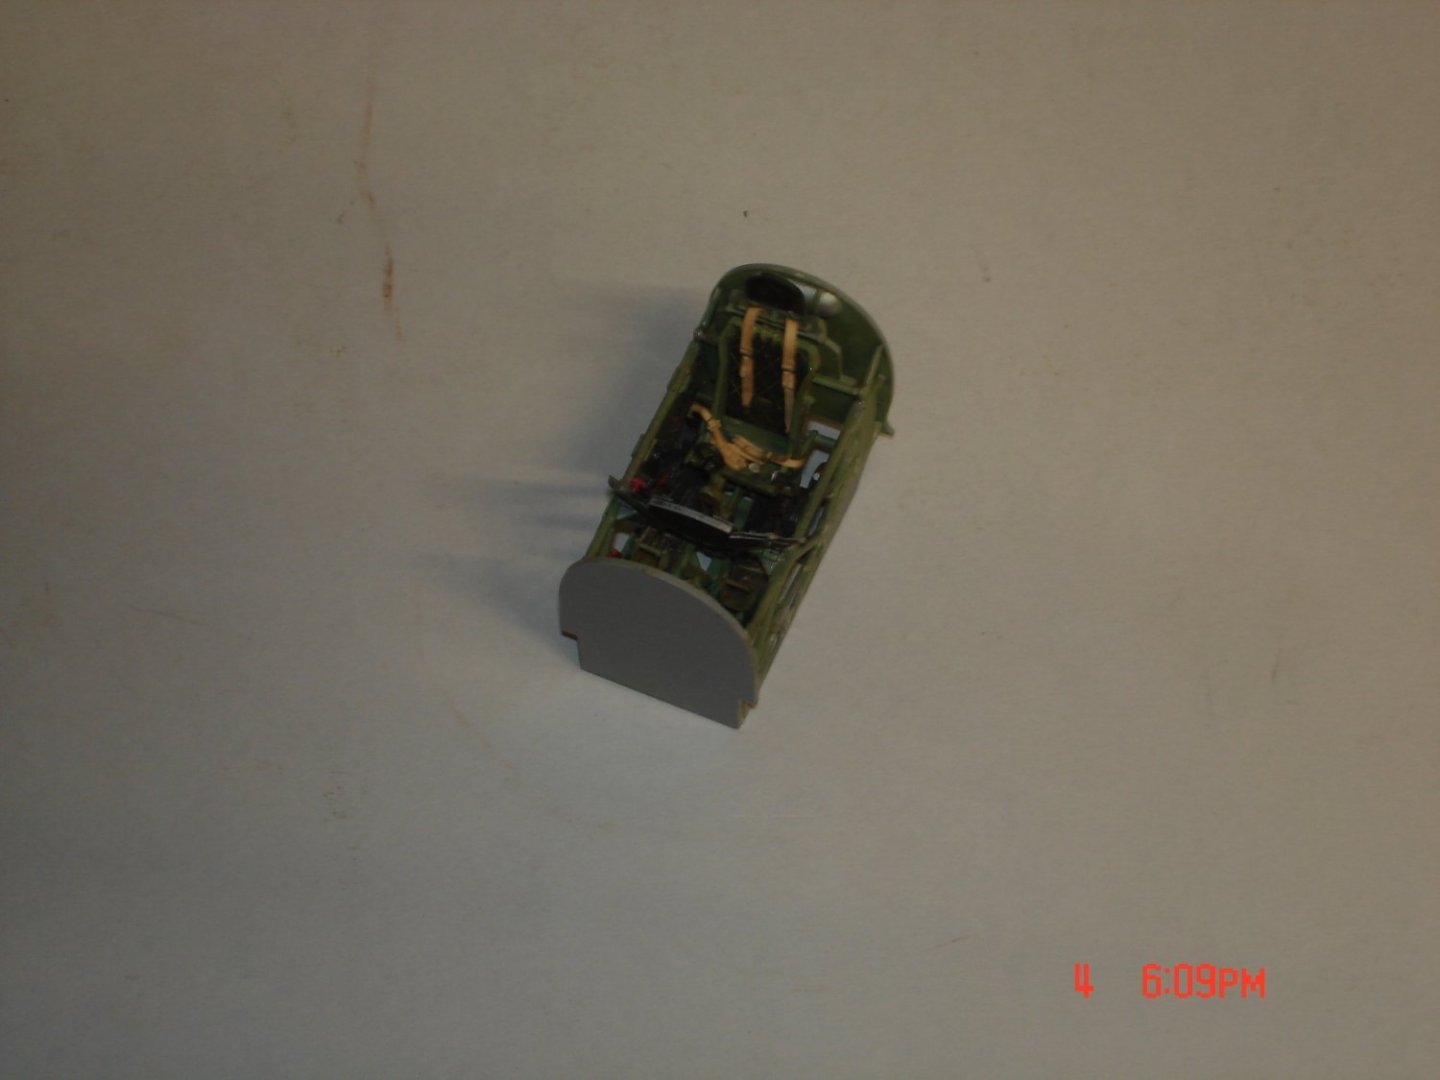
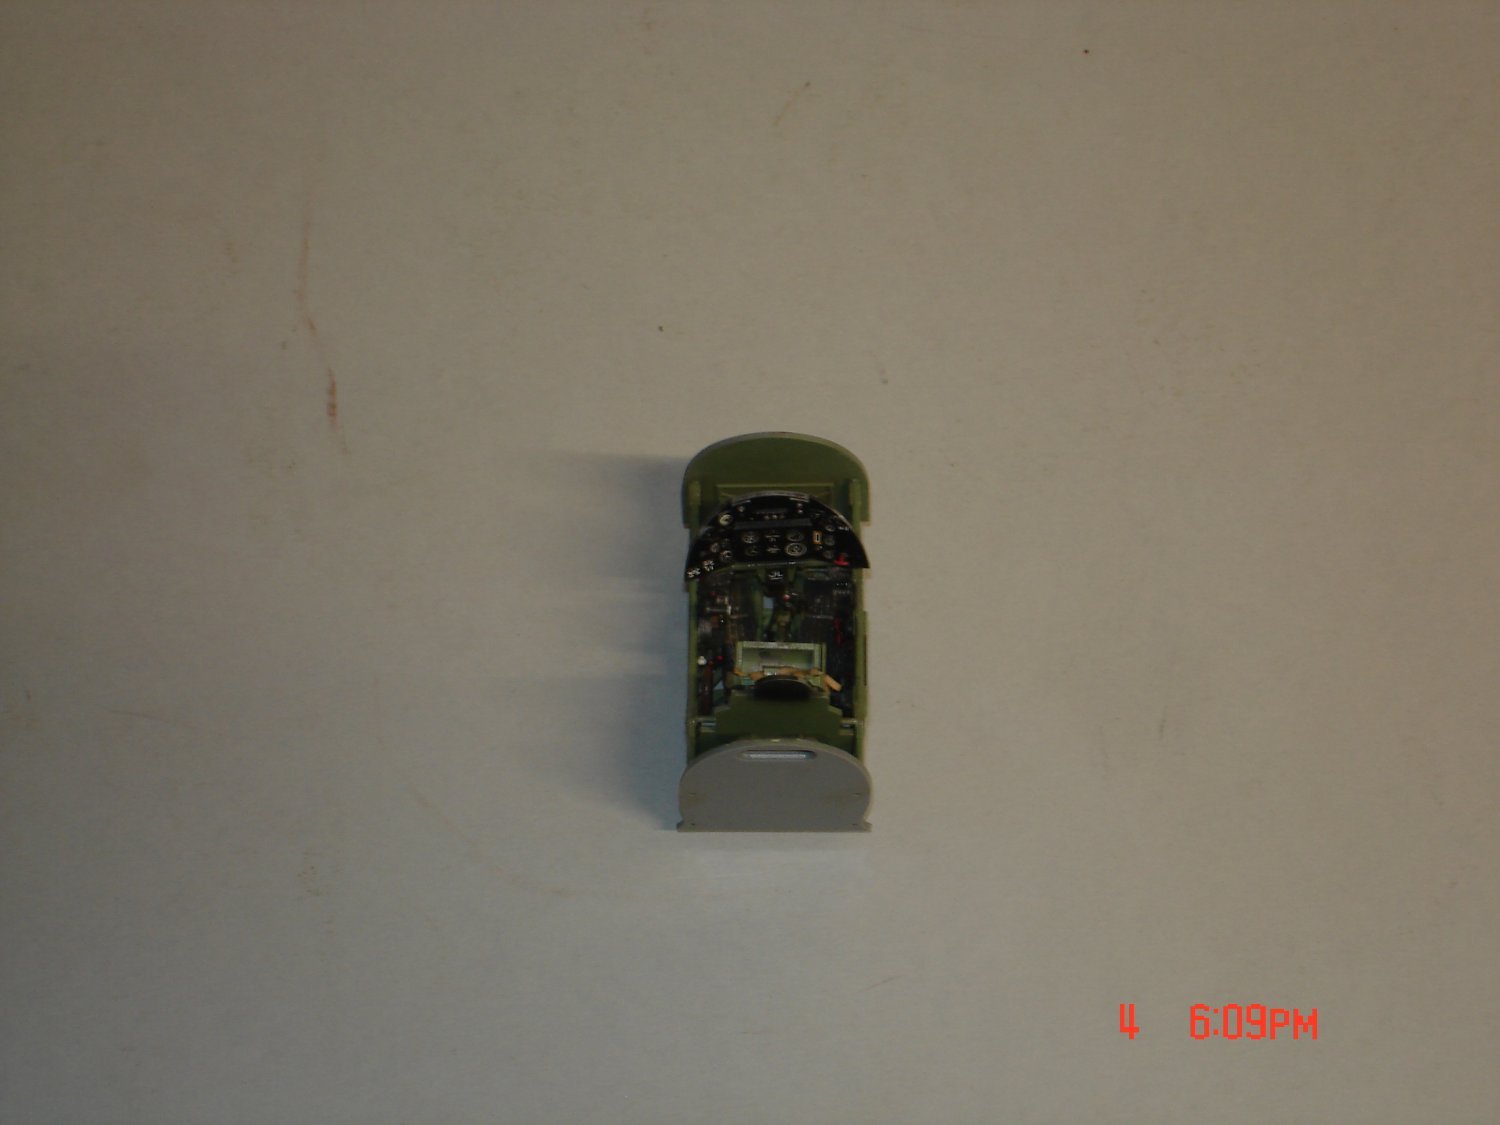
The copit is complete and let me tell ya building the seatbelts well let's be Nice a chore with Quinta on the scene that skillset was weak.The belts are RB Productions with a little of Tamiya dust applied.The very rear bulkhead while tight it opened the fuse outwards tightened up the fuse/wing seam even more so me likey.I am trying to loosen the bulkhead right behind the seat with the plate it's off to the right maybe 1/32' if that WD40 and Acetone were mixed and lightly applied no luck may just live with it.
The nose to fuse is just about as good as it gets she has had her challenges "Yes" but I have kinda enjoyed them abit.That's all for now guys got to put in a little more work tonight on her.

-
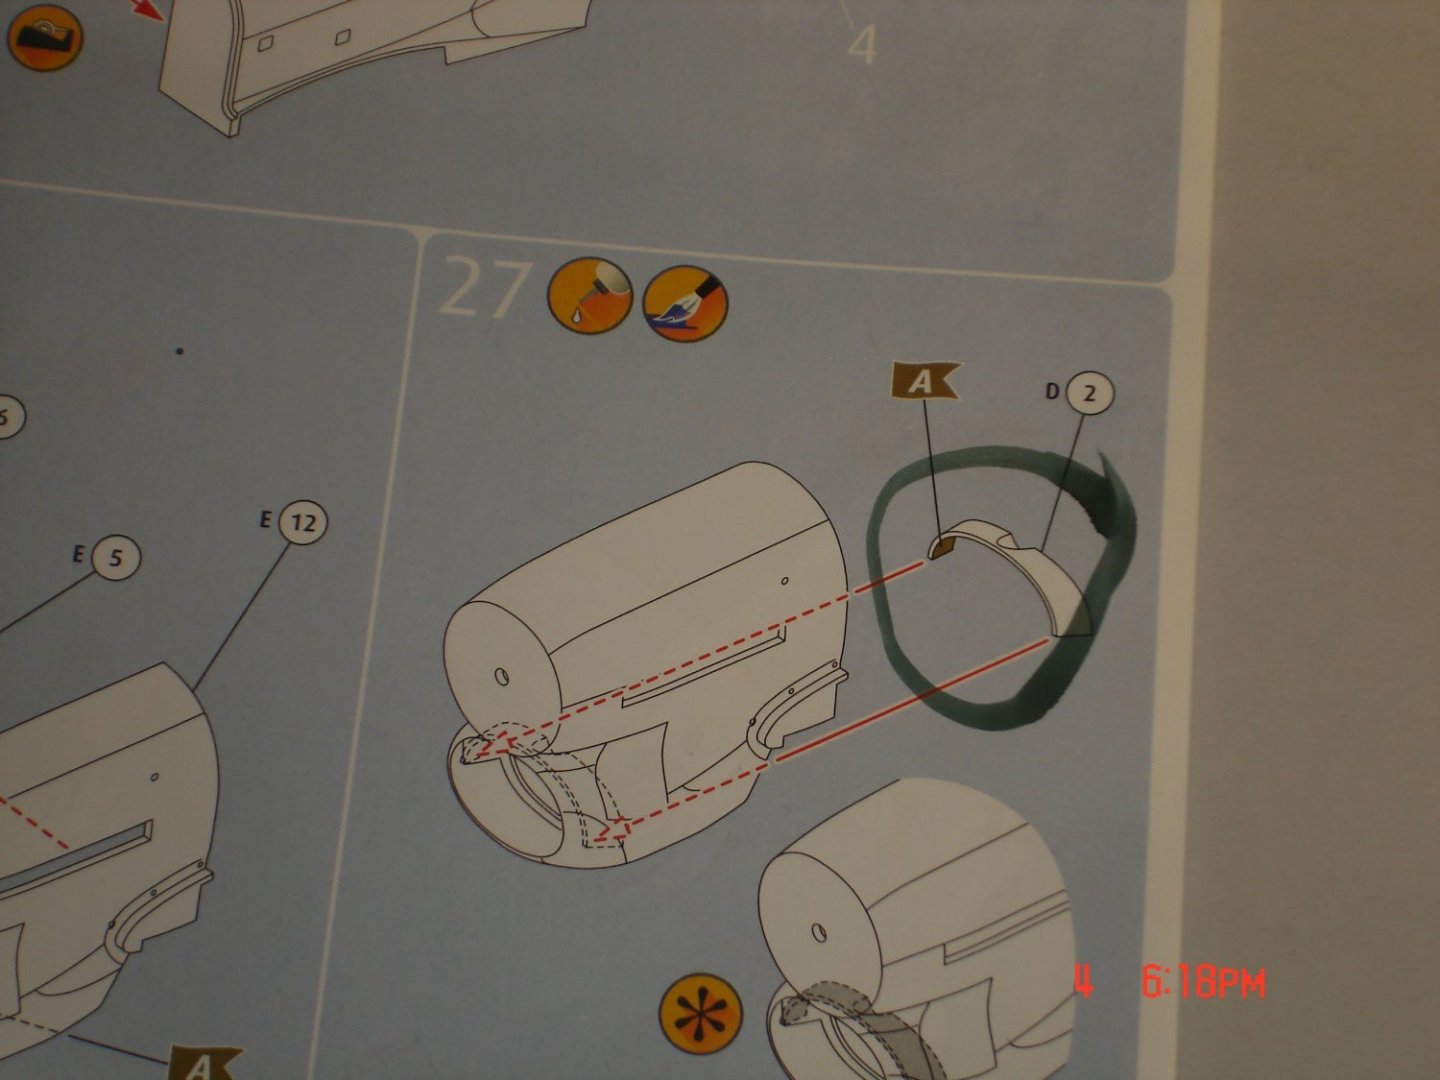
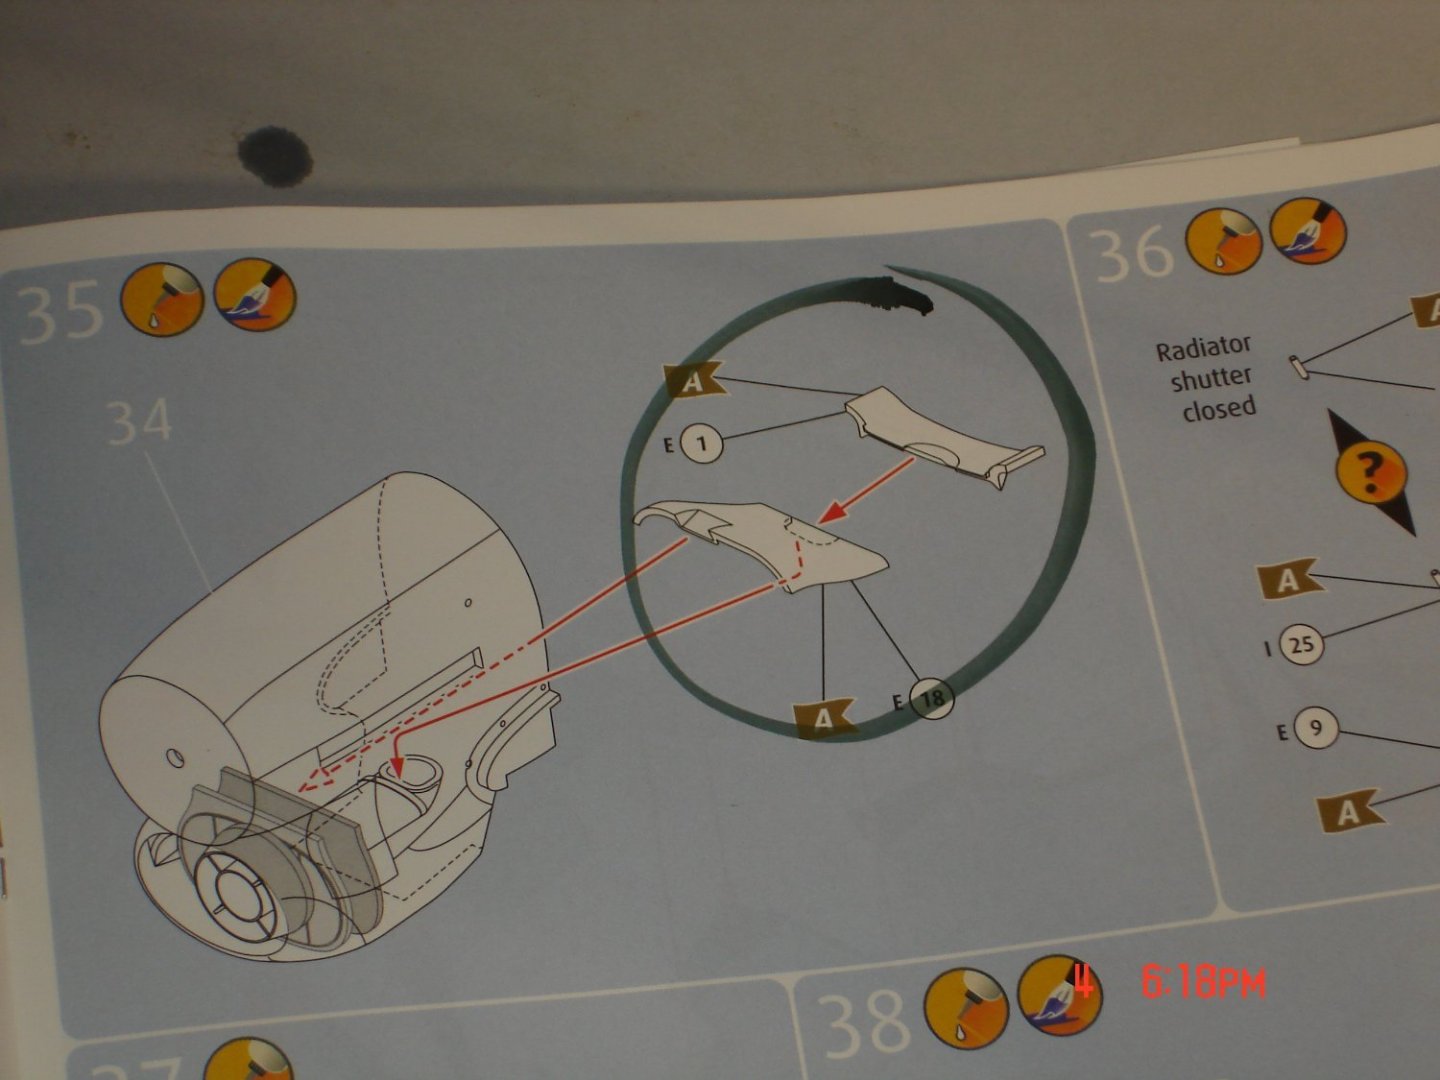
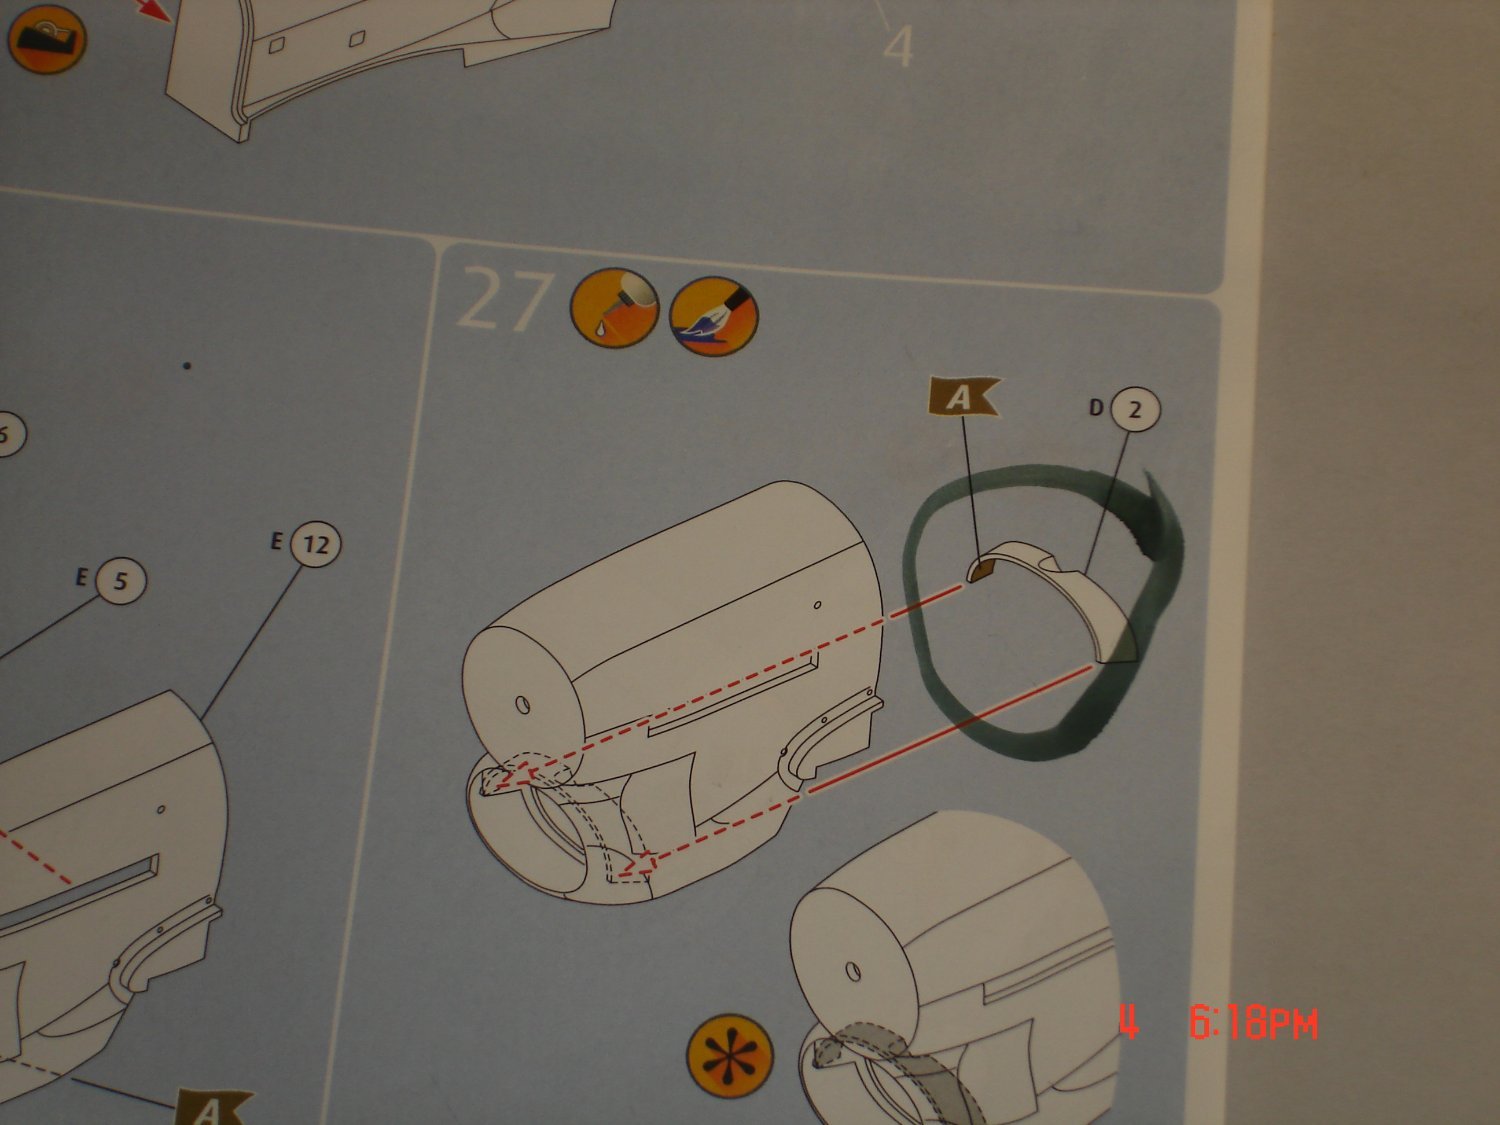
My first post tonight is going to be about procedure and Don't Forget the Part!.I was building the nose and having some issues wondering why is was such a PITA getting part H9/H43 and H10/44 to get a good alignment within the nose cavity?I continued to build I built up E2/E3 but did not glue in yet I went an grabbed E1/E18 part of the lower fuse and front wingroot while providing a roof inside the nose...it was about 1/32" off coming out the back of the nose.I had to file E1 and sub-assembly #34 accordingly all because I forgot to install D2 in the nose which would of aided on a positive blocking plate for H9 and H10.Just a heads up it works this is one part of the build you follow the instructions to the T.I got it all worked out just extra work for me.

-
Not a fast paced site by no means Craig but a good set of fellas some quite talented like Mike and Rob for two.
")
-
4 hours ago, CDW said:
What is our sister site?
- Egilman, Old Collingwood, mtaylor and 2 others
-
5
-
46 minutes ago, CDW said:
Your build thread is turning out to be an excellent tutorial. I too have this kit waiting in my stash, so I am hanging on to every detail you are providing. It's not a shake and bake kit from what I see you going through.
On our sister site Peter was having issues with the insertion and I guess the alignment of certain aspects of the LG's themselves I think anything the Eduard's 1/48 I bought may help?
-
Info for those that might stray down the path of a Tempest from Mr.Edgar Brooks one of those guys sadly missed and had the answers for many.Color changes coming.
Before its restoration, I saw the RAF Museum's Tempest, when it was at Cardington, and the wells were green, legs and door interiors were silver.
Edgar
- Canute, mtaylor, Old Collingwood and 3 others
-
6
-
-
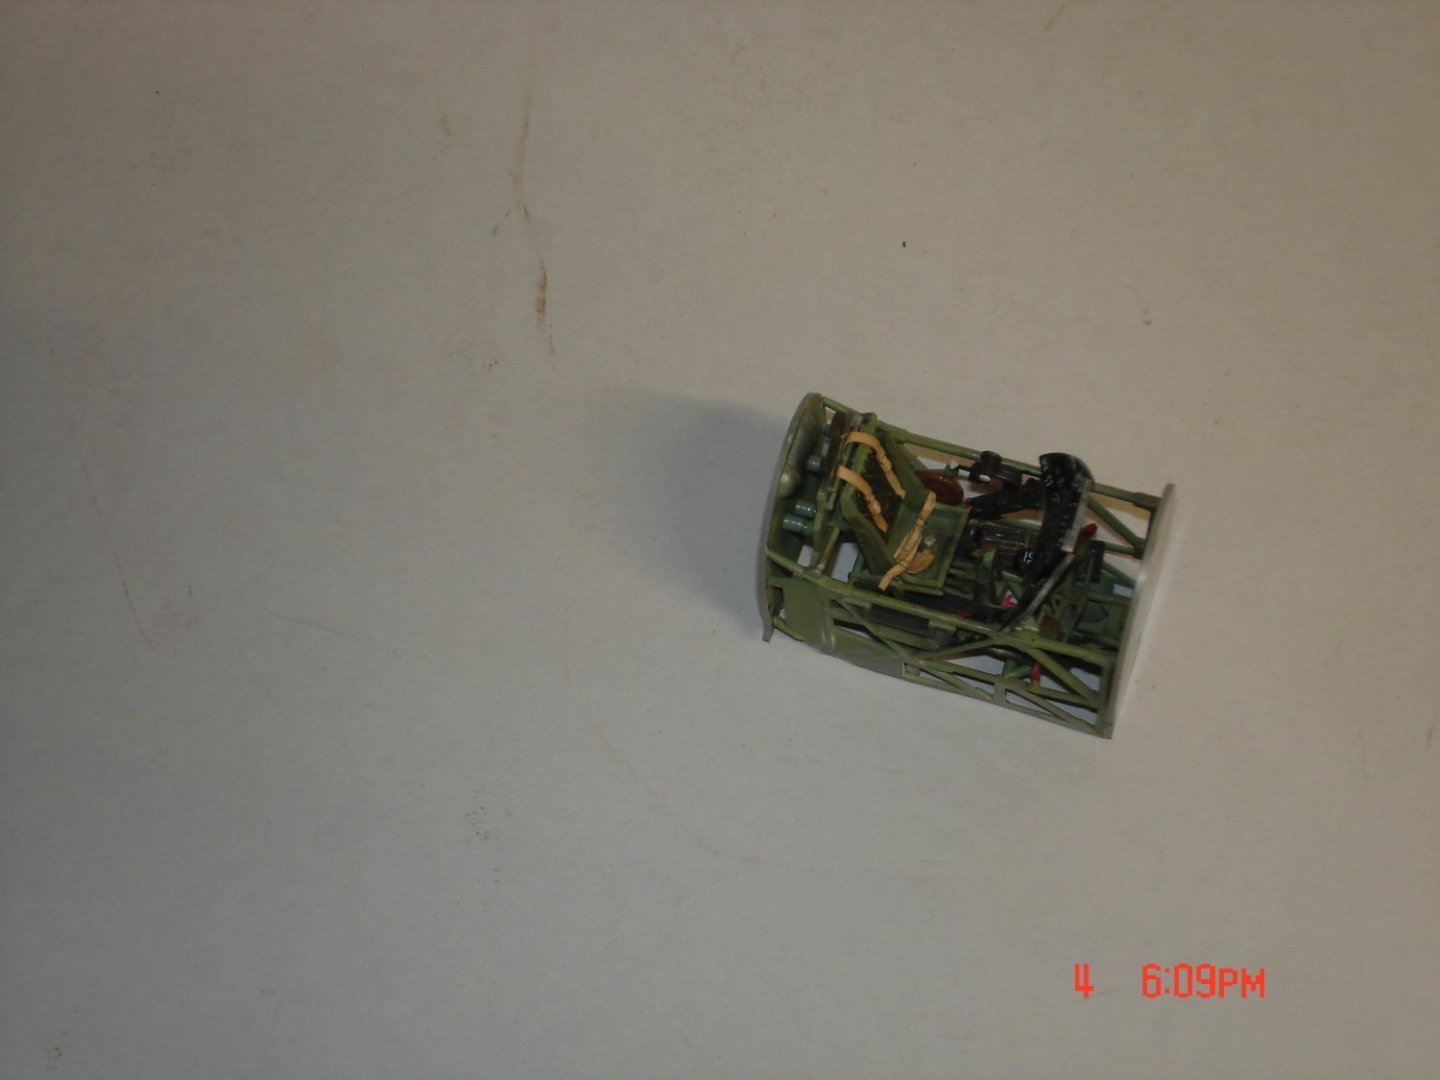
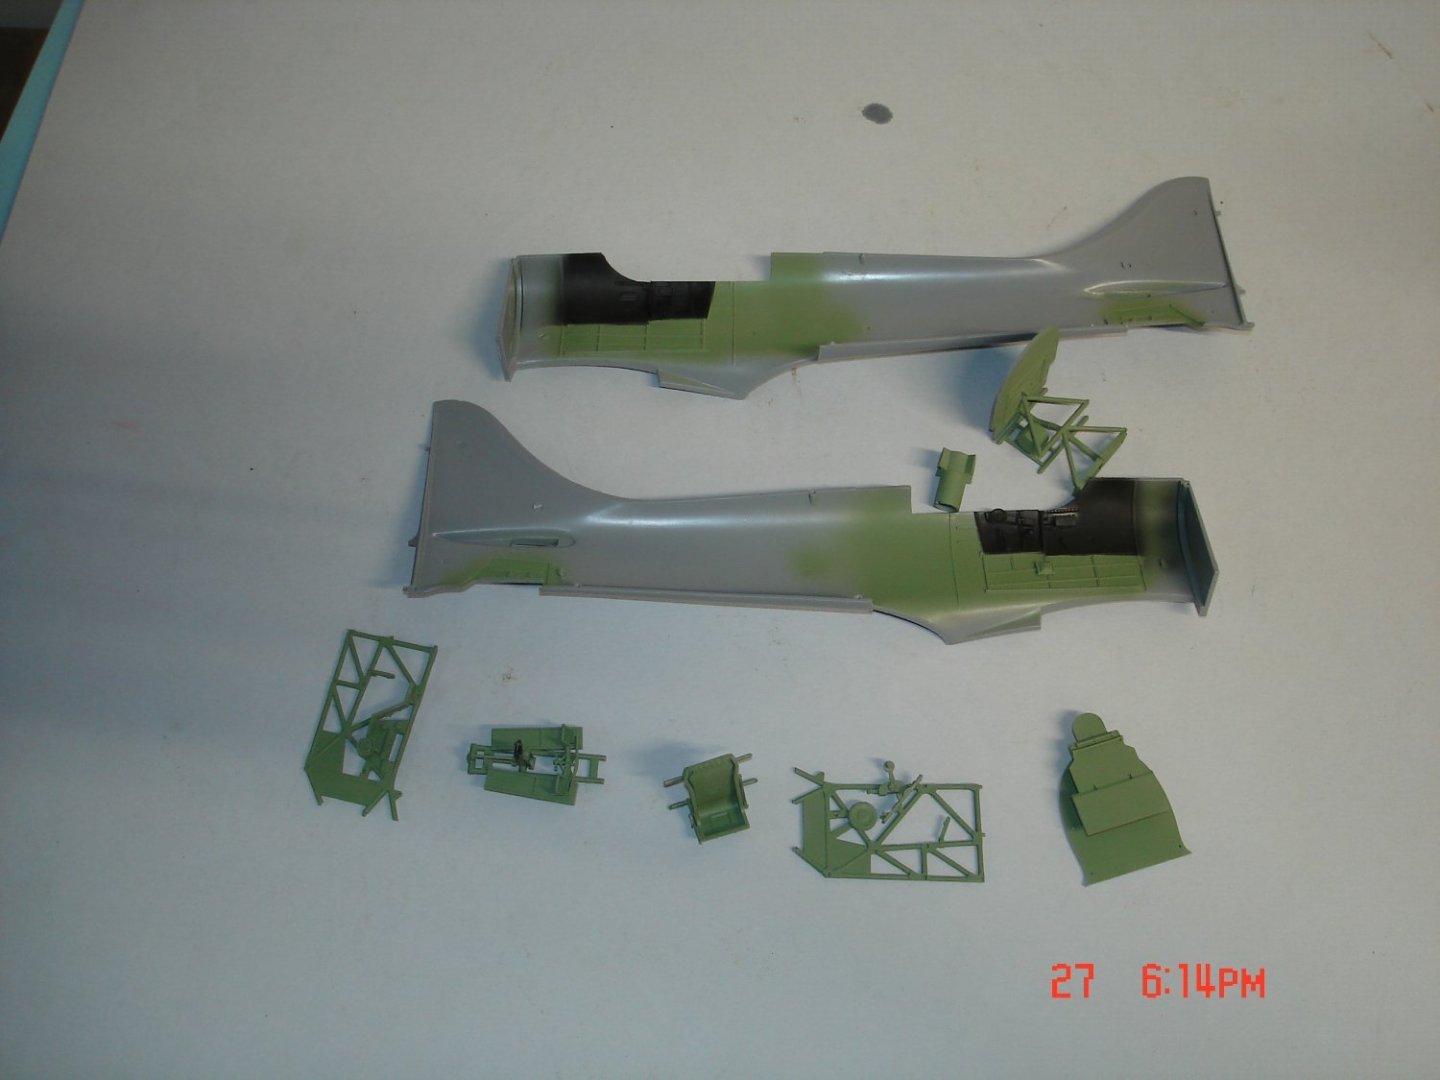
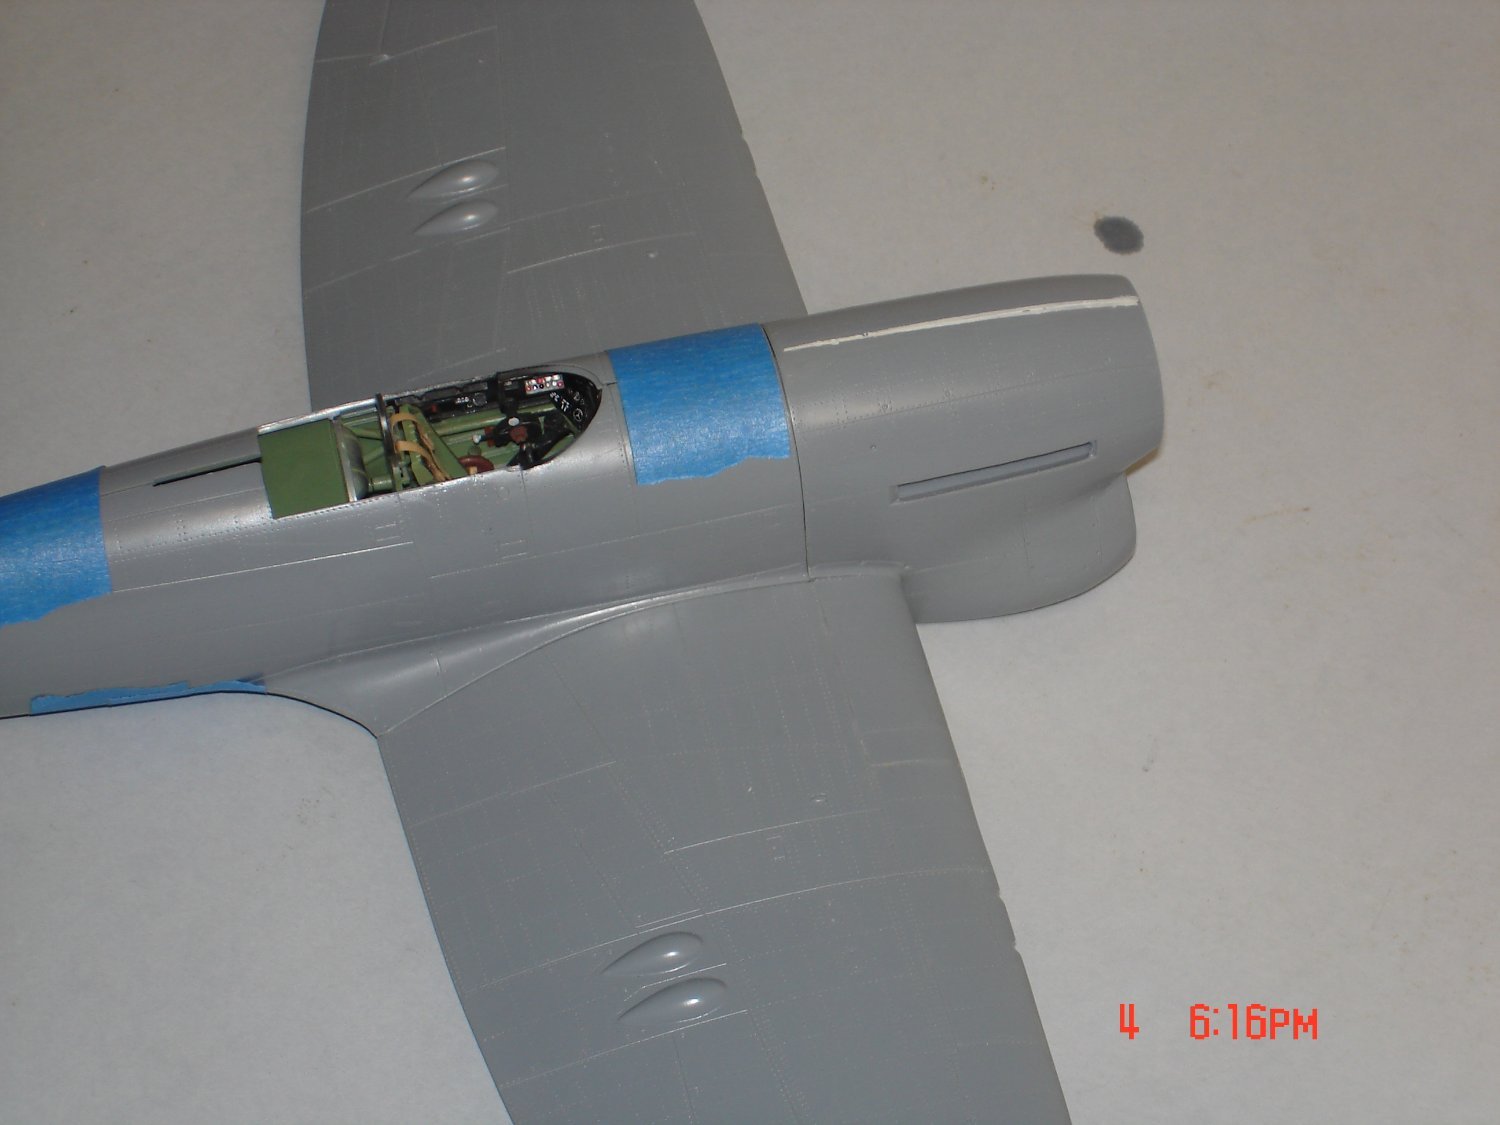
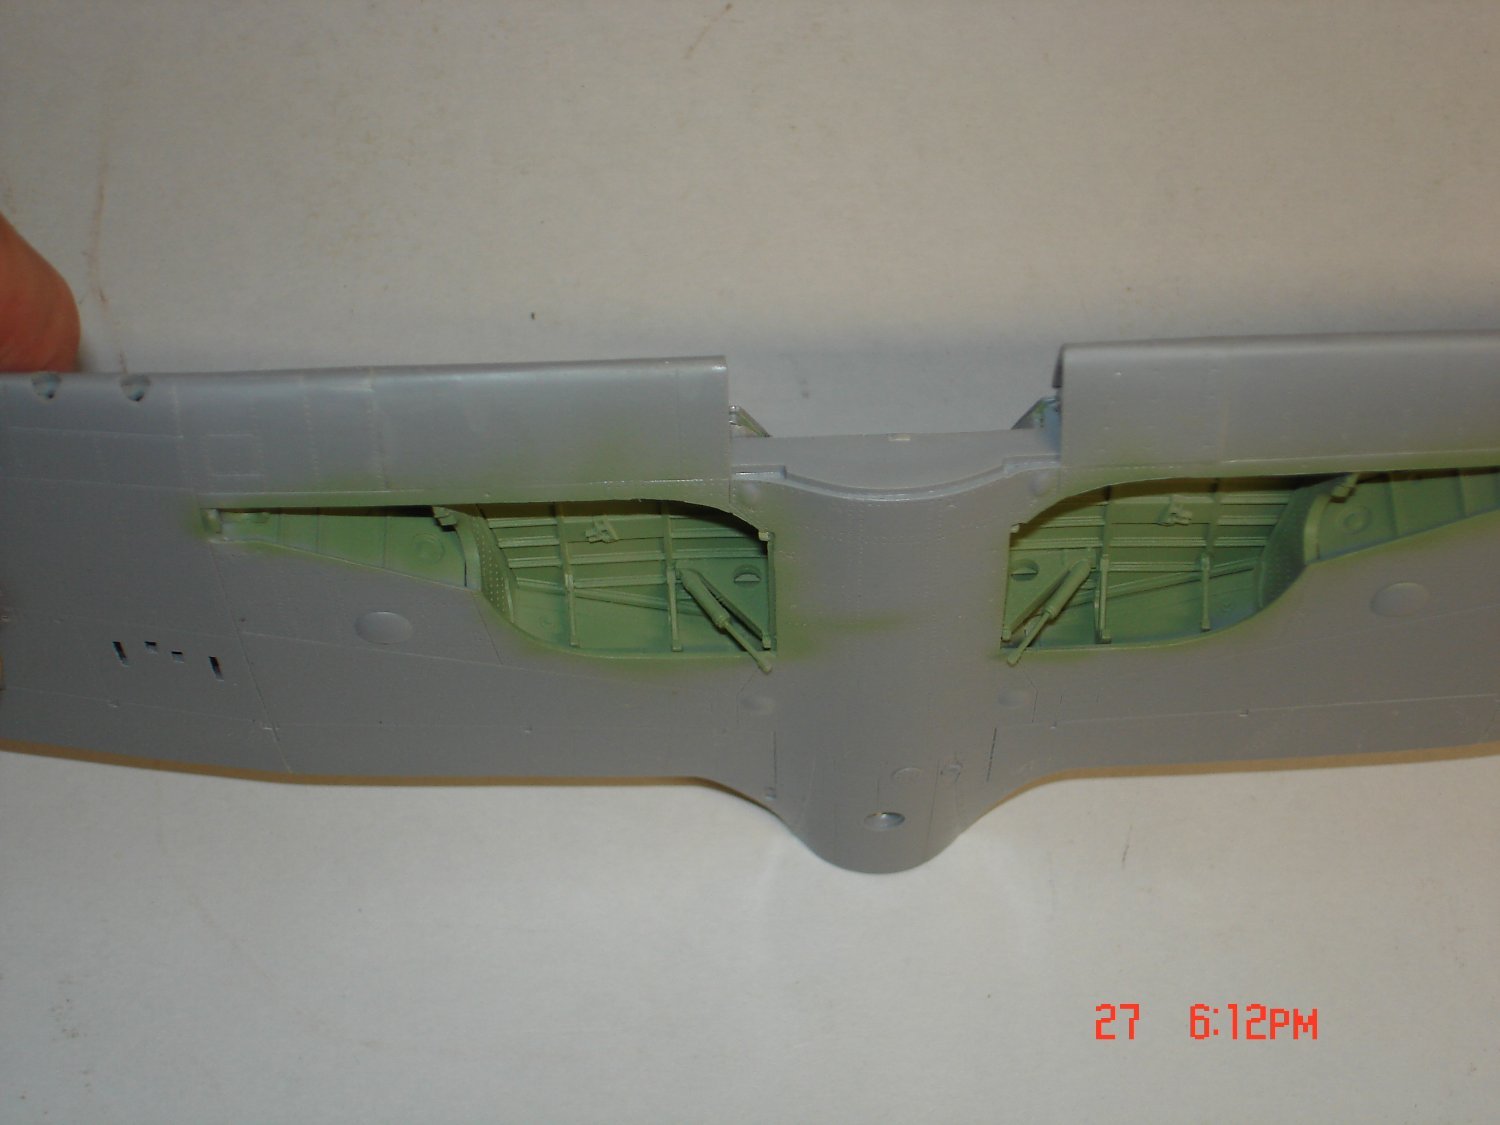
I have gotten past what has made a few put this kit on the SOD.The WW's in my instructions had you build them outside the wing and insert them afterwards screwy plans angles involved.The next issue I heard of was once the copit was inserted failure of the fuse to slip into the wing?I did encounter that but took me 30 minutes of grinding/sanding to overcome the obstacle.One has to grinding/sand the the very inner WWs that encounter the copit tubing and sand the outside of the tub some.I have my seatbelts coming from Eduard tomorrow with some others for Japanese and MkIX with a book.I will finish the 110 soon enough just find the challenges of this limited run kit interesting.

- realworkingsailor, Canute, Egilman and 8 others
-
11
-
On 5/31/2023 at 3:18 PM, RGL said:
Is the CA old?
Tension and OLD glue will take time to much.
-
19 hours ago, ccoyle said:
The parts came from the same sheet, too, so it's kind of weird. But the difference is not as noticeable as it was for the GPM Hellcat kit, so I won't complain
Chalk it up to damage some time ago new panel/paint.

- Edwardkenway, Jack12477, mtaylor and 5 others
-
8
-
looking very good Craig I take it the wing fit has already been explored?
-
-
I got to stop on this one waiting on belts from SB usually keep them around but only have the Sutton in the stash as far as Brit stuff goes.I am not very good at dirtying stuff up it's what you get.Back to the 110.
After seeing the photos will tidy it up some here and there.
- Old Collingwood, yvesvidal, hof00 and 8 others
-
11
-
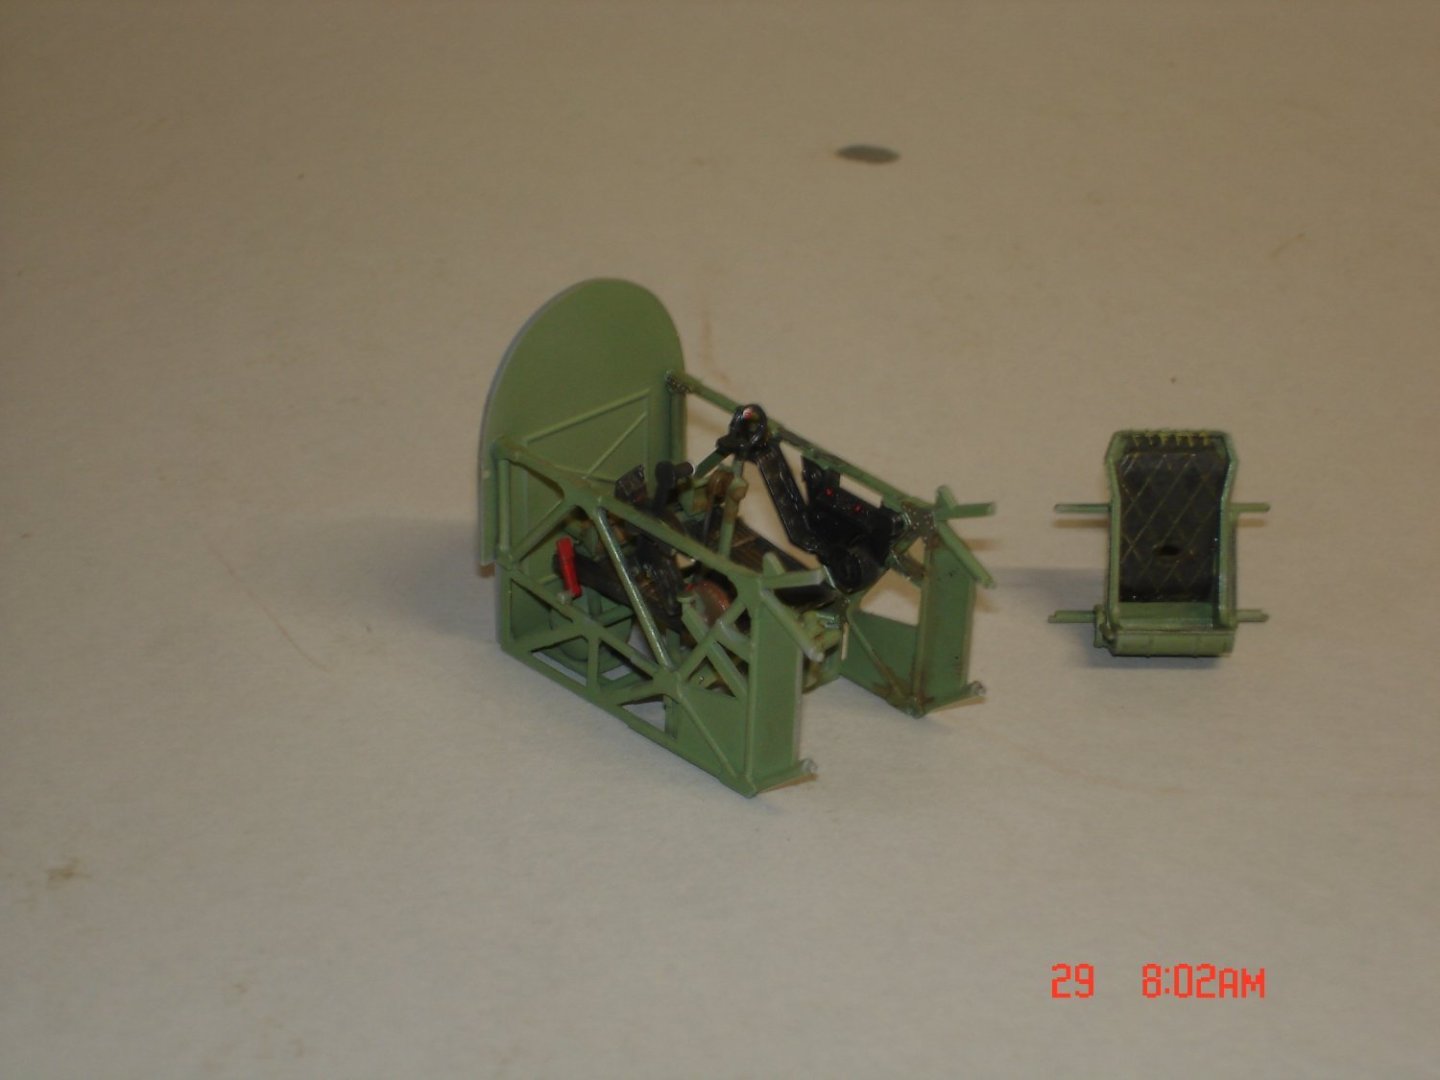
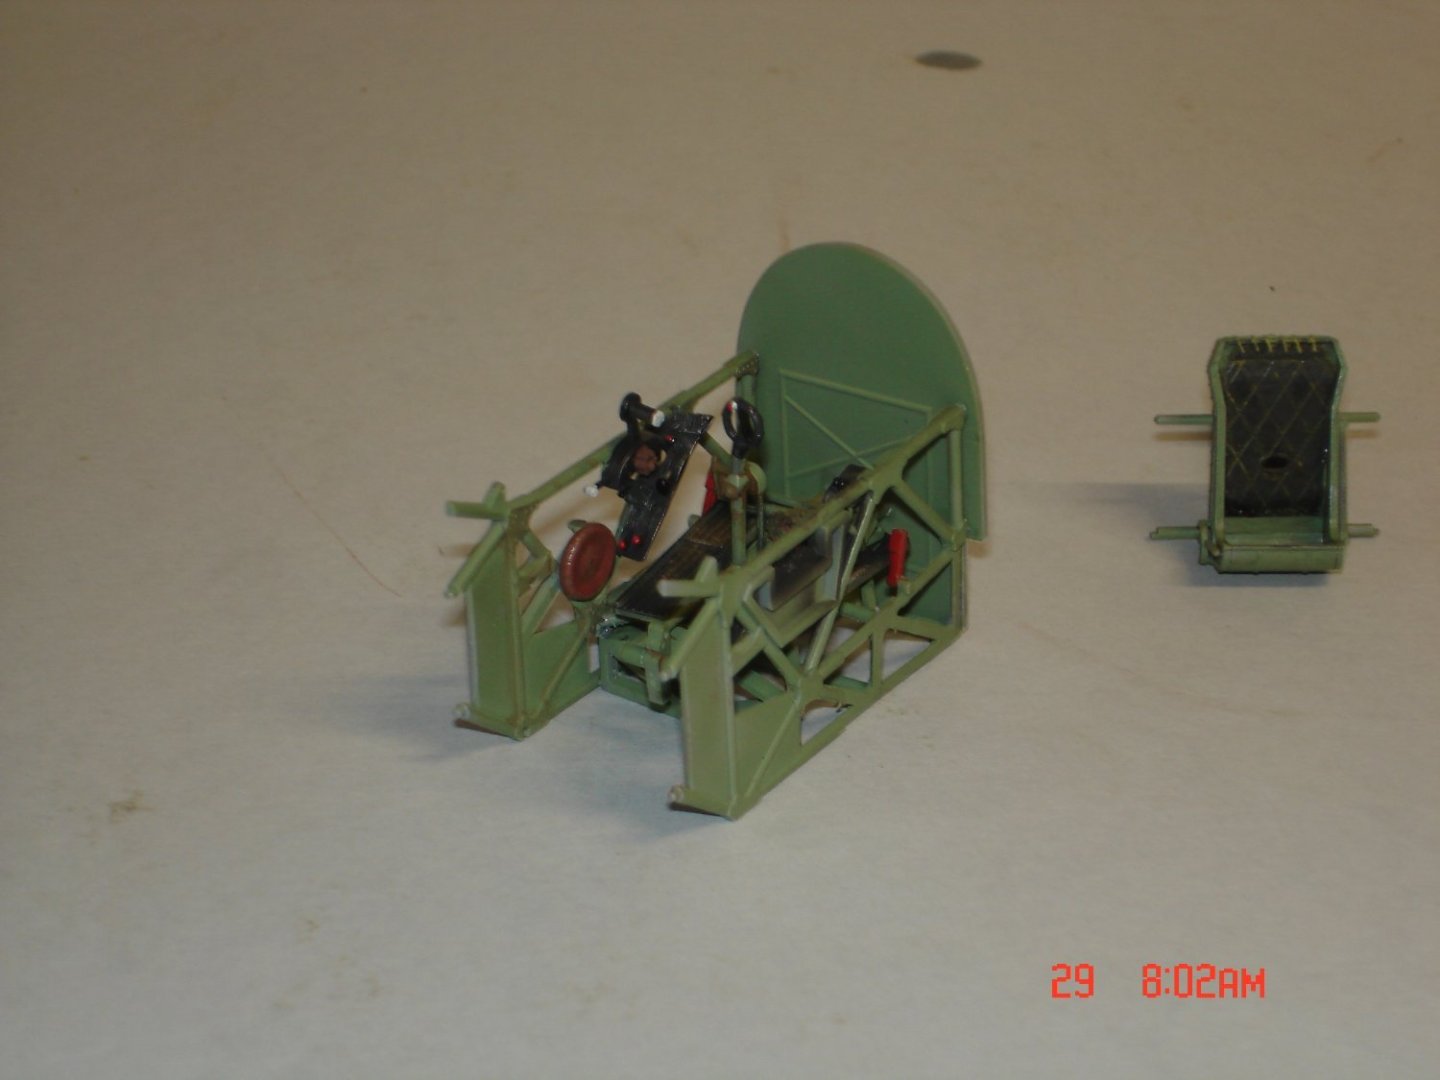
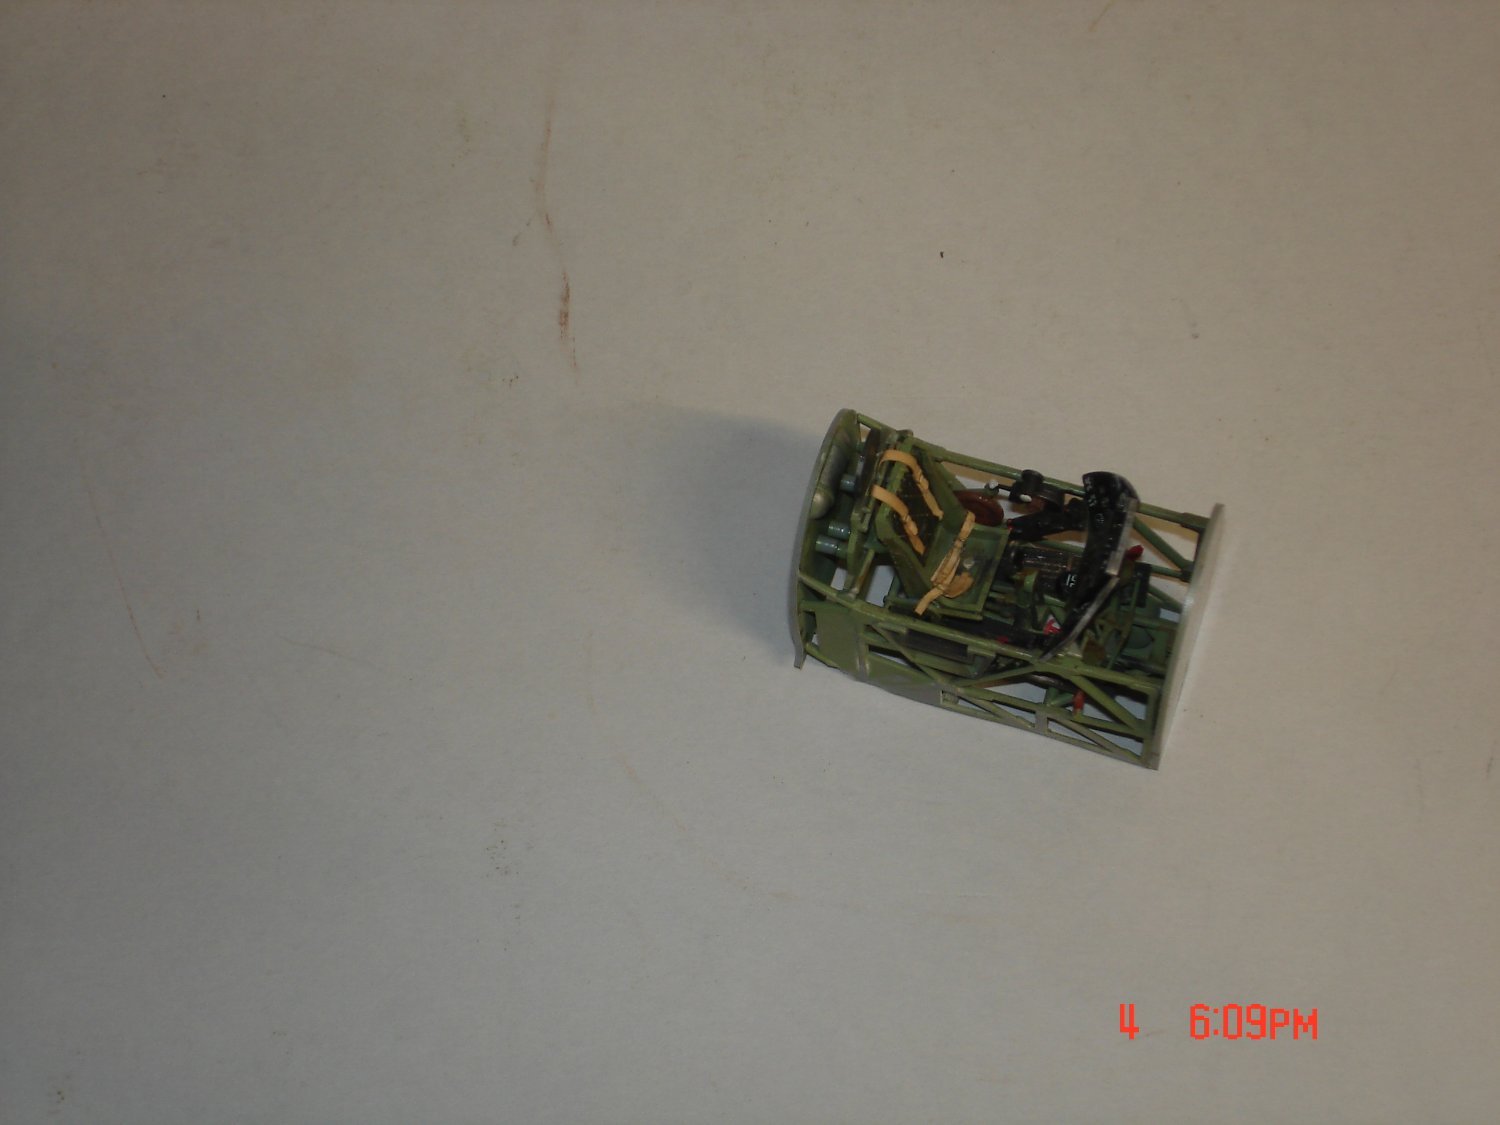
Reached out a little more EG to a friend in the UK since Mr. Brooks passed a few years ago but the friend passed photos of a wartime crate for me.I am going to add that the handle to the joystick looks brown maybe with the bottom being black that holds it to the stick.The reflector gunsight while SH/Revell says black the mounts are either IGG/Silver a change there?This is a Typhoon
Hi Kevin,
Wartime Tempest and Typhoon were normally matt black down to the elbow-level tubular frame, and Cockpit Grey Green below this.
All of the tubular framework was most often dull silver, although in the photos below ( a Typhoon cockpit) they appear to be the Grey Green.
The heel boards could be silver or matt black, probably scuffed.
The back and head armour was matt black, as was the area under the canopy, with the seat normally in dull silver.
Hope this helps,

-
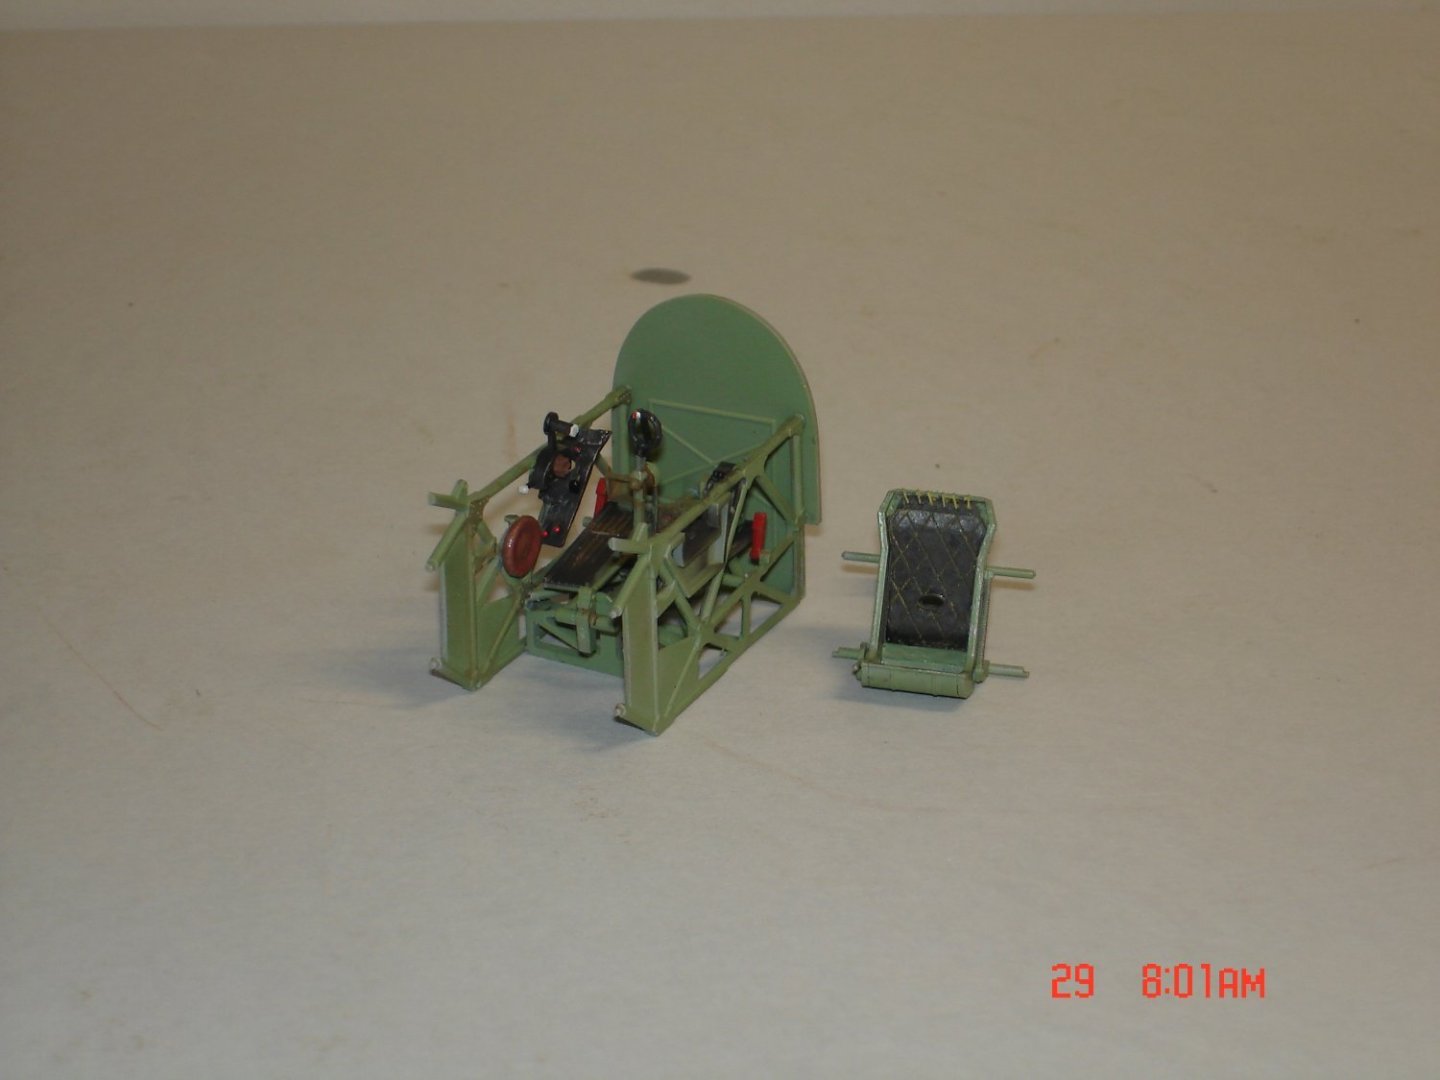
Thanks EG I think I will stay green seems they came both ways according to some readings and the opinion of Edgar Brooks.....A good rule of thumb with Typhoons and Tempests is that everything below the elbow was interior green, except for the tubing underneath the instrument panel, and everything above was black, including the inside of the windscreen. Don't forget that the Tempest didn't have a visible gunsight, the graticule was projected on the armourer glass.
Then another chimed in were these after war crates? ....Hi Edgar and fellow Tempest enthusiasts,
A few years ago, maybe around 1995, I was at the RAF Museum, and was given permission to extensively photograph both the Typhoon and Tempest V, including access to the cockpits via stepladder.
Both cockpits were obviously unrestored. Both cockpits were completely black. Tubular framework, floorboards, seat, consoles, interior of fuselage skin panels.... everything.
The gearbay on this Tempest is IGG as Edgar says, and the gearbay on the Typhoon is Sky. I suspect the original color of the Typhoon wheelwell was IGG. The Typhoon was incomplete and had to have a new radiator and spinner (weird looking though it is, and badly in need of a more accurate replacement) made in order to display it. The airplane was externally repainted at the time is was readied for display. The gearbay was most probably overpainted at this time as all hoses, fittings, etc. are all overpainted sky.EG what I did notice in the CM pics is that even the backing to the seat was green

-
I have been trying to get as much done on this while waiting two weeks to get my order from SB's the USPS temporarily lost my order in Kansas
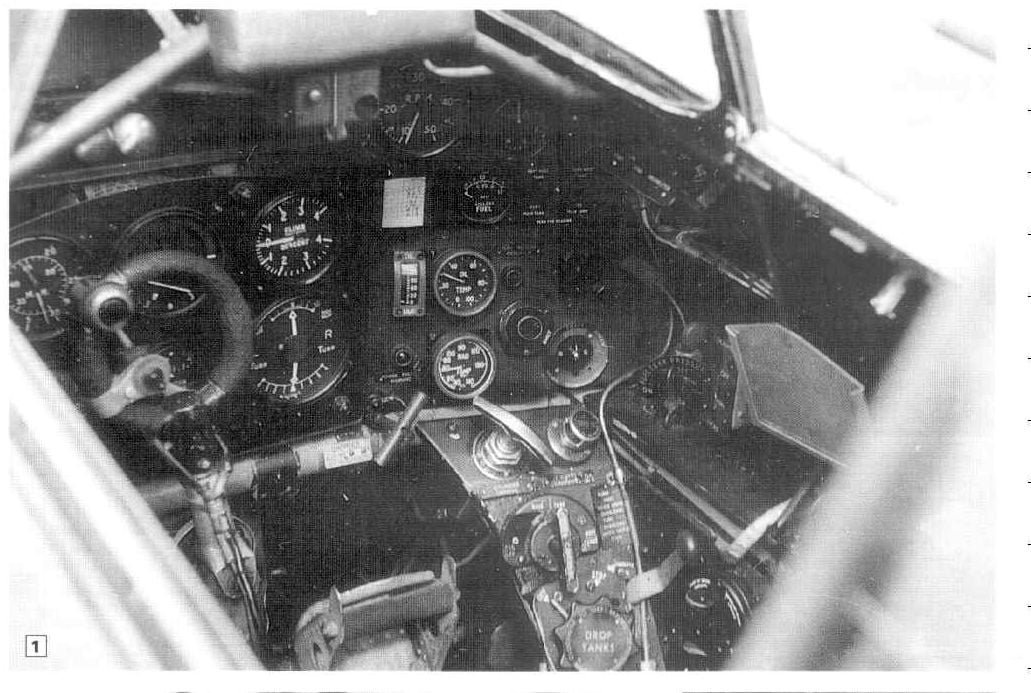
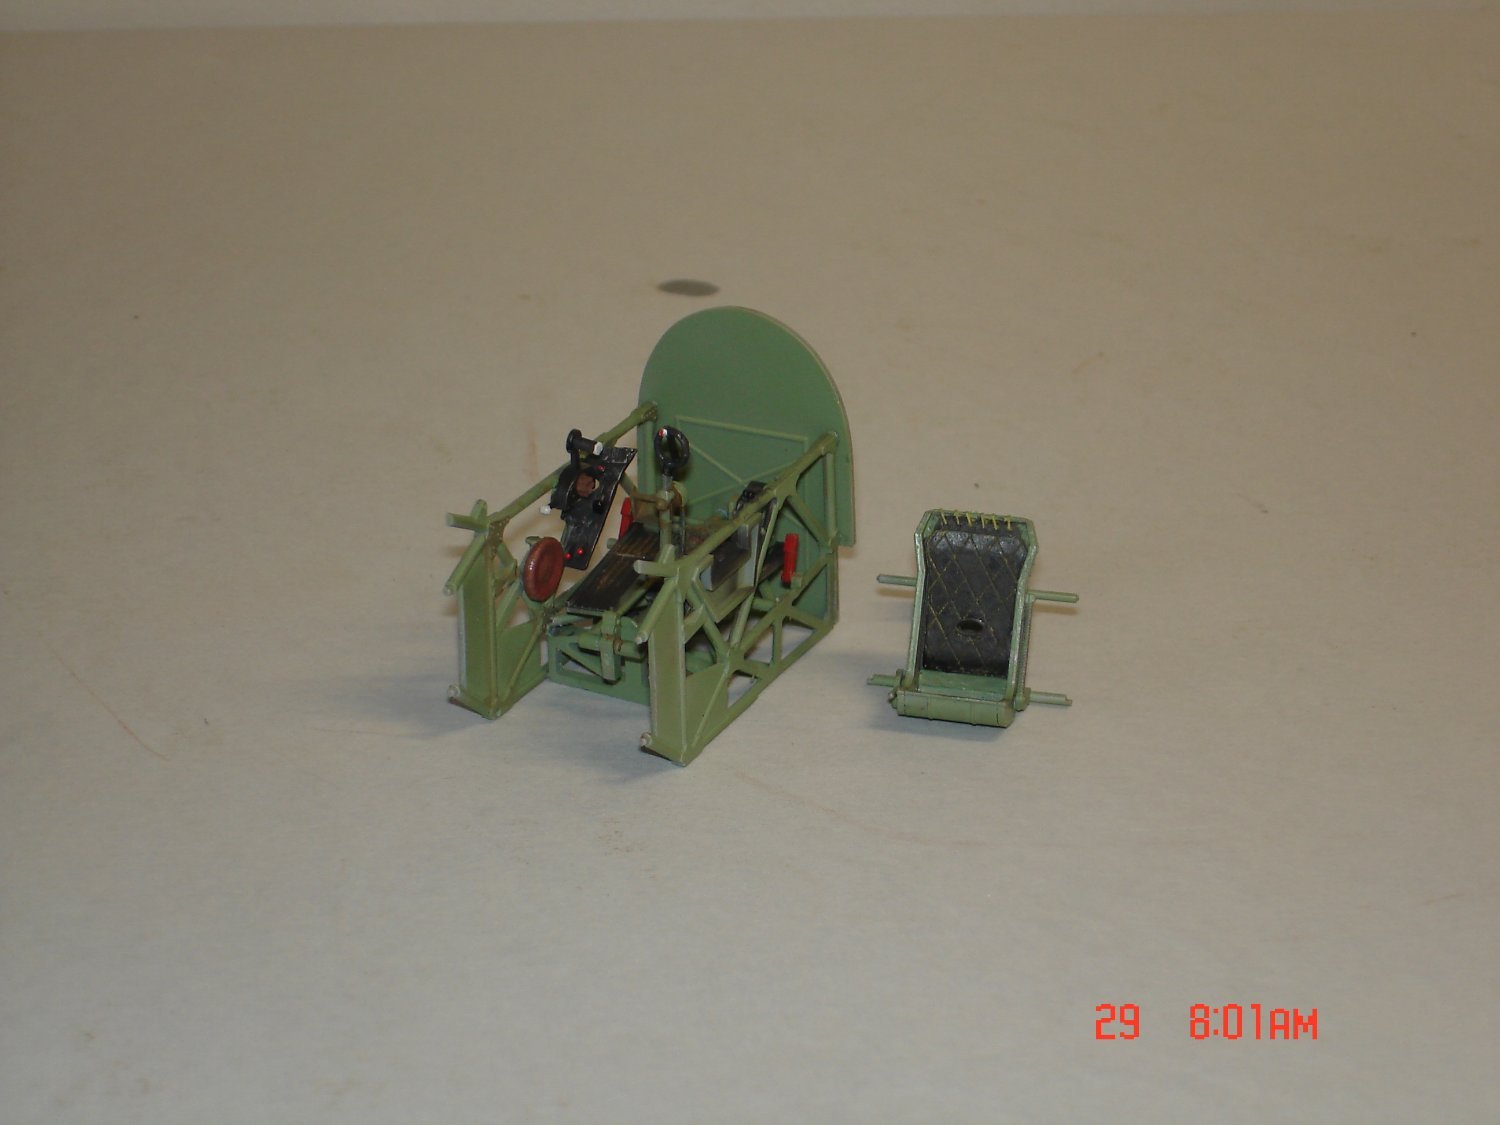
 I am just building sub-assemblies as I feel fit bouncing around and Limited Run kits seem to require that the instructions are not the best.I eliminated what might of been a couple errors for me by looking ahead and pulling that procedure into the now.I used a semi-gloss black on the sidewalls and all panels/boxes will be a NATO Black and will NBlack the console on the tubing with the airbrush and tidy up the green with a brush.I need to track down some good color pics of the copit for better clarity.Dan you made this happen


-
-
10 minutes ago, GrandpaPhil said:
Nicely done!
Thanks Phil I think she goes to the Northshore Model Contest in June.
- GrandpaPhil, mtaylor, Canute and 1 other
-
4
-
-
-
40 minutes ago, Landlubber Mike said:
Awesome Kevin, looking forward to this one!
Thanks Mike some say now it's the fuse to wing joint after the innards are added looks 100% OK to me W/O the innards.So I have started on the innards alot of this maybe work out having good info.
- DocRob, yvesvidal, Old Collingwood and 7 others
-
10


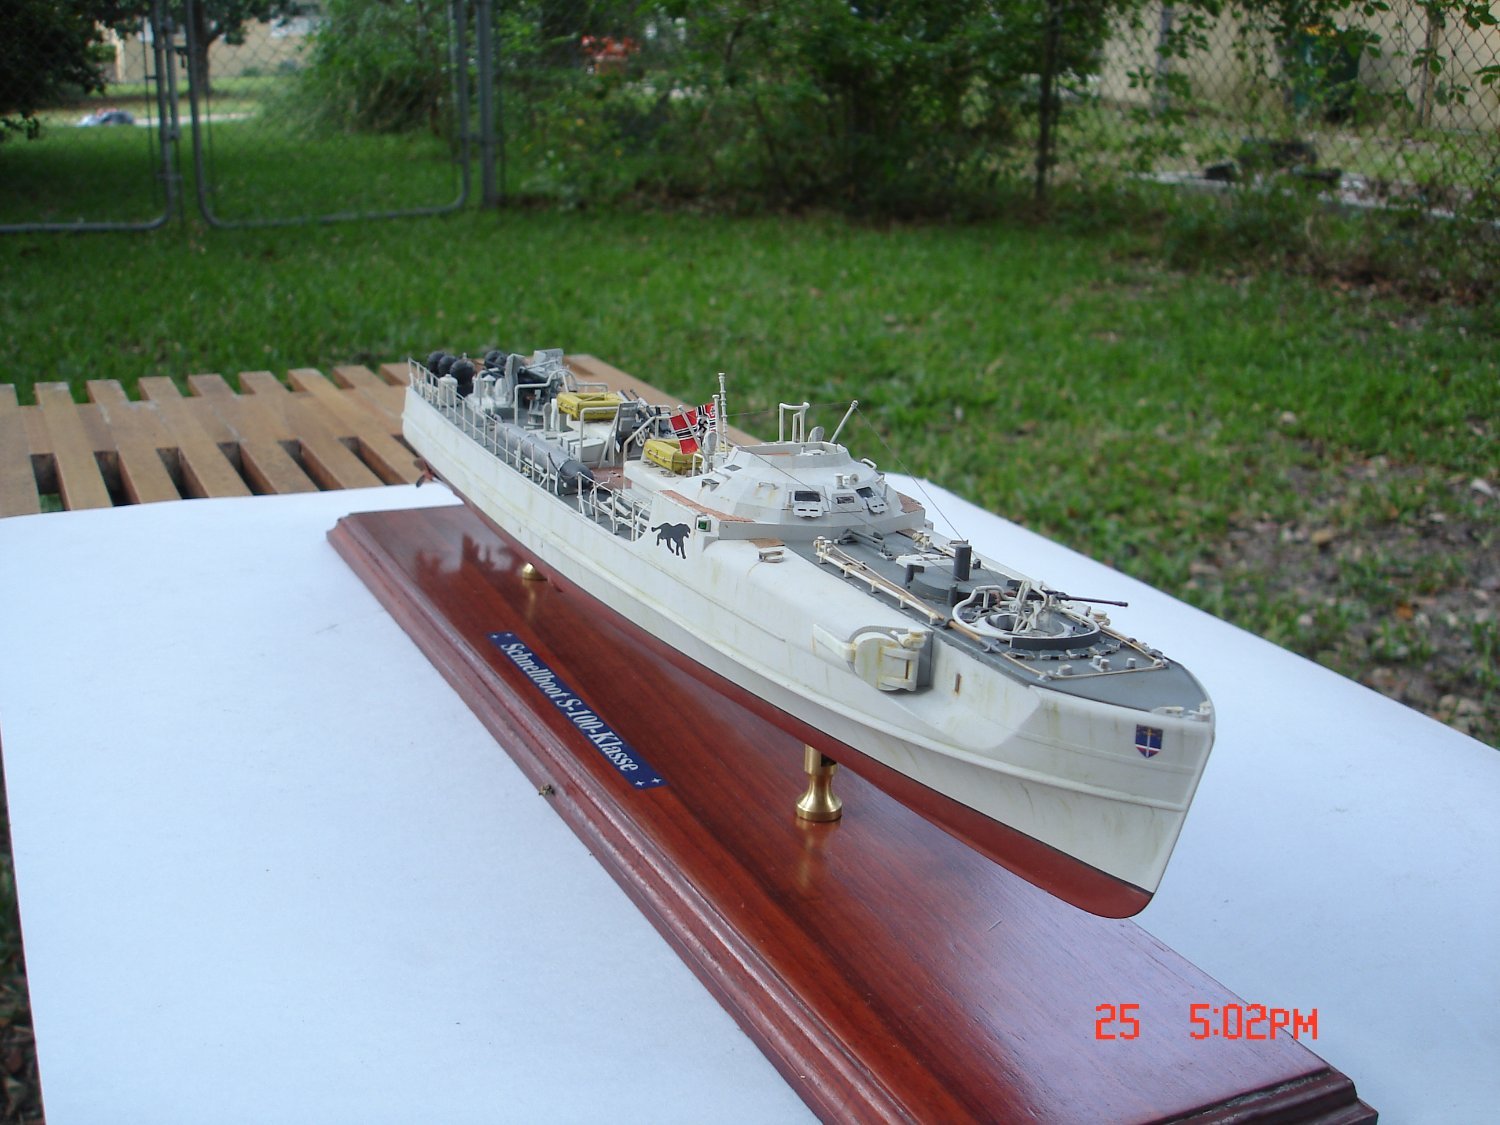
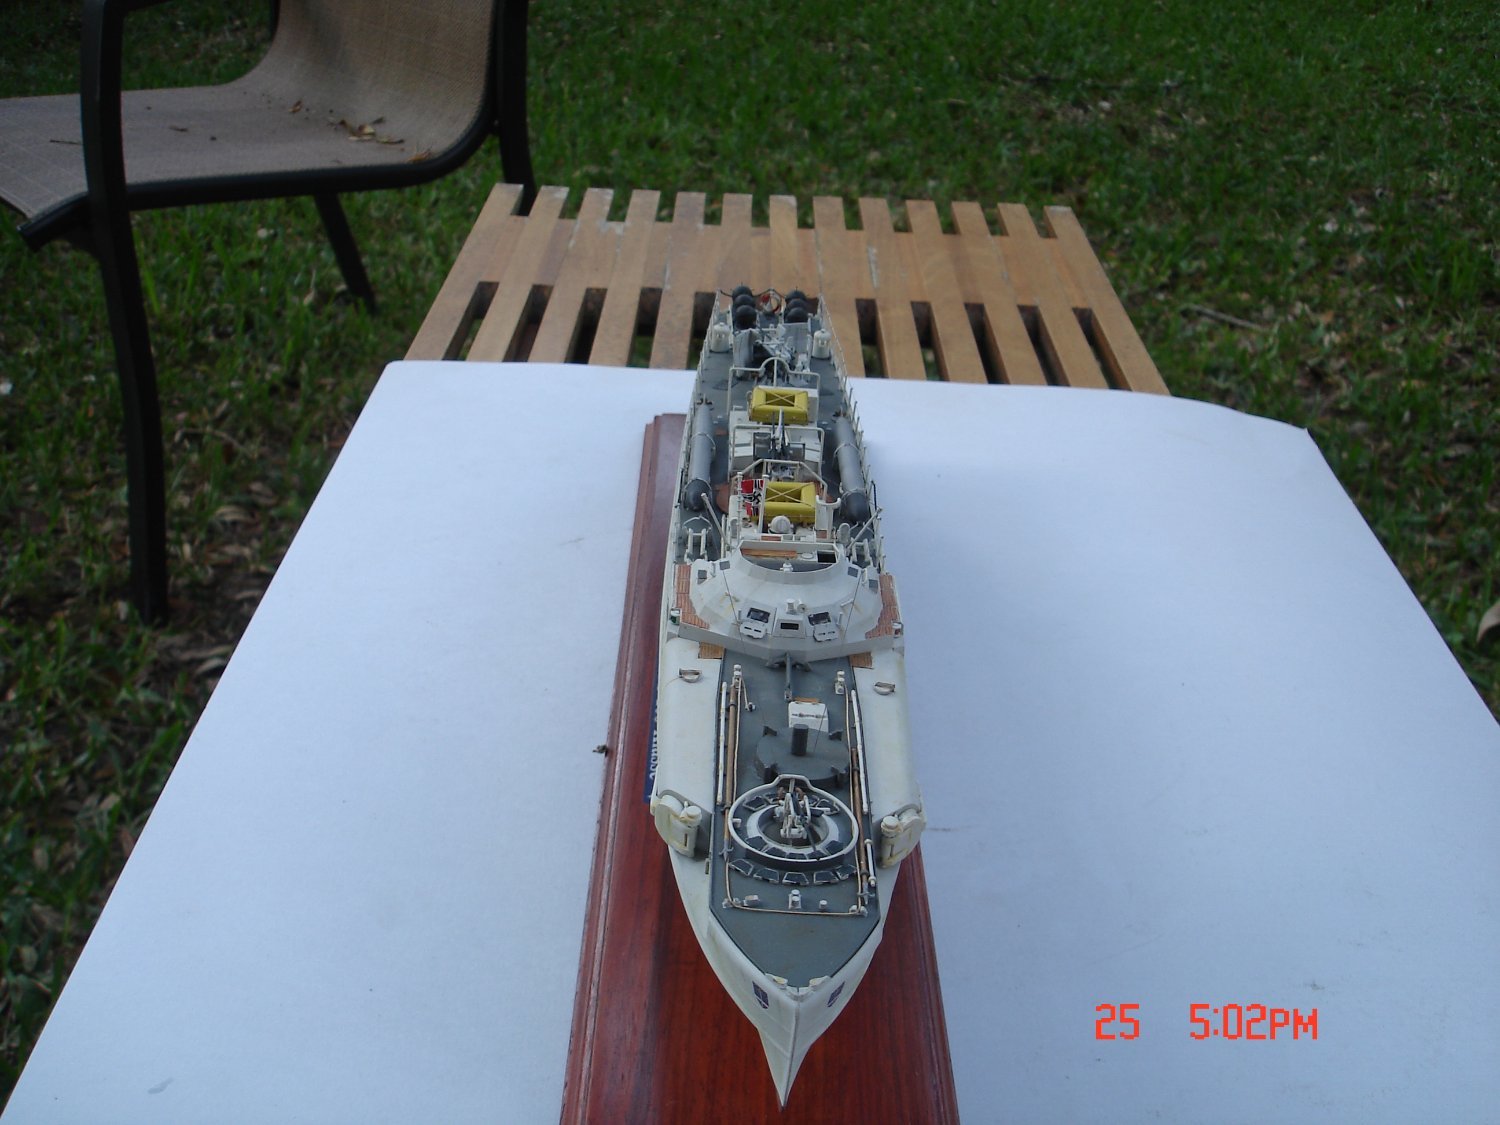
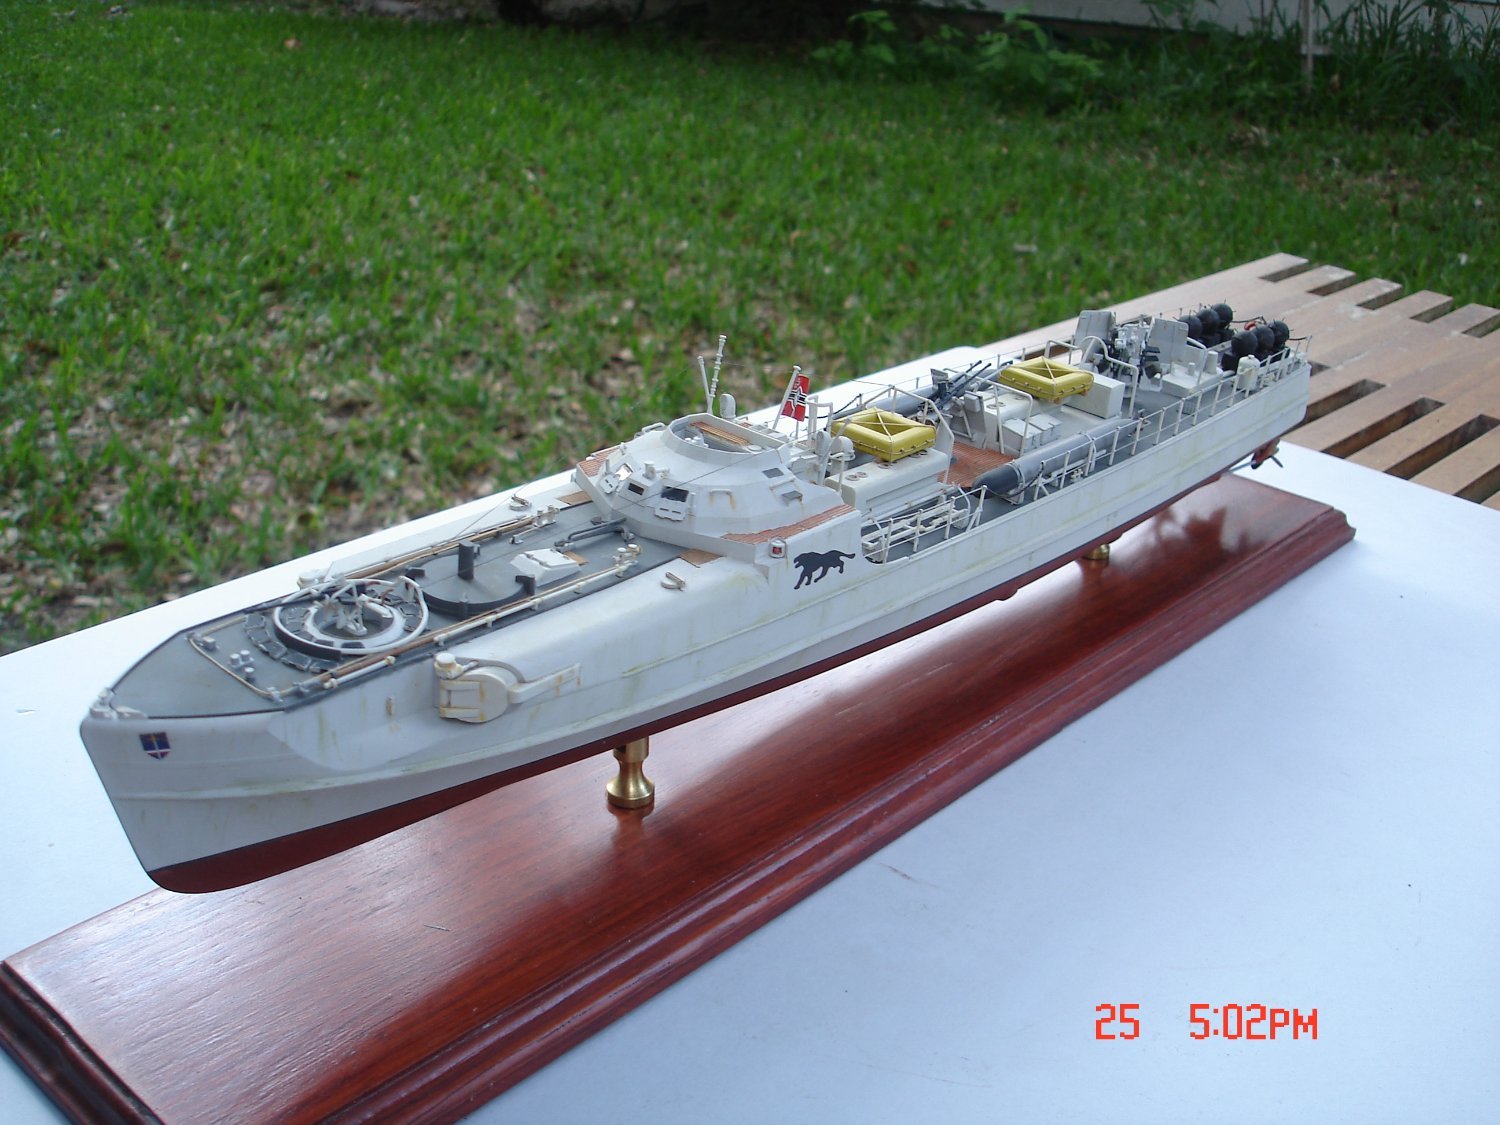
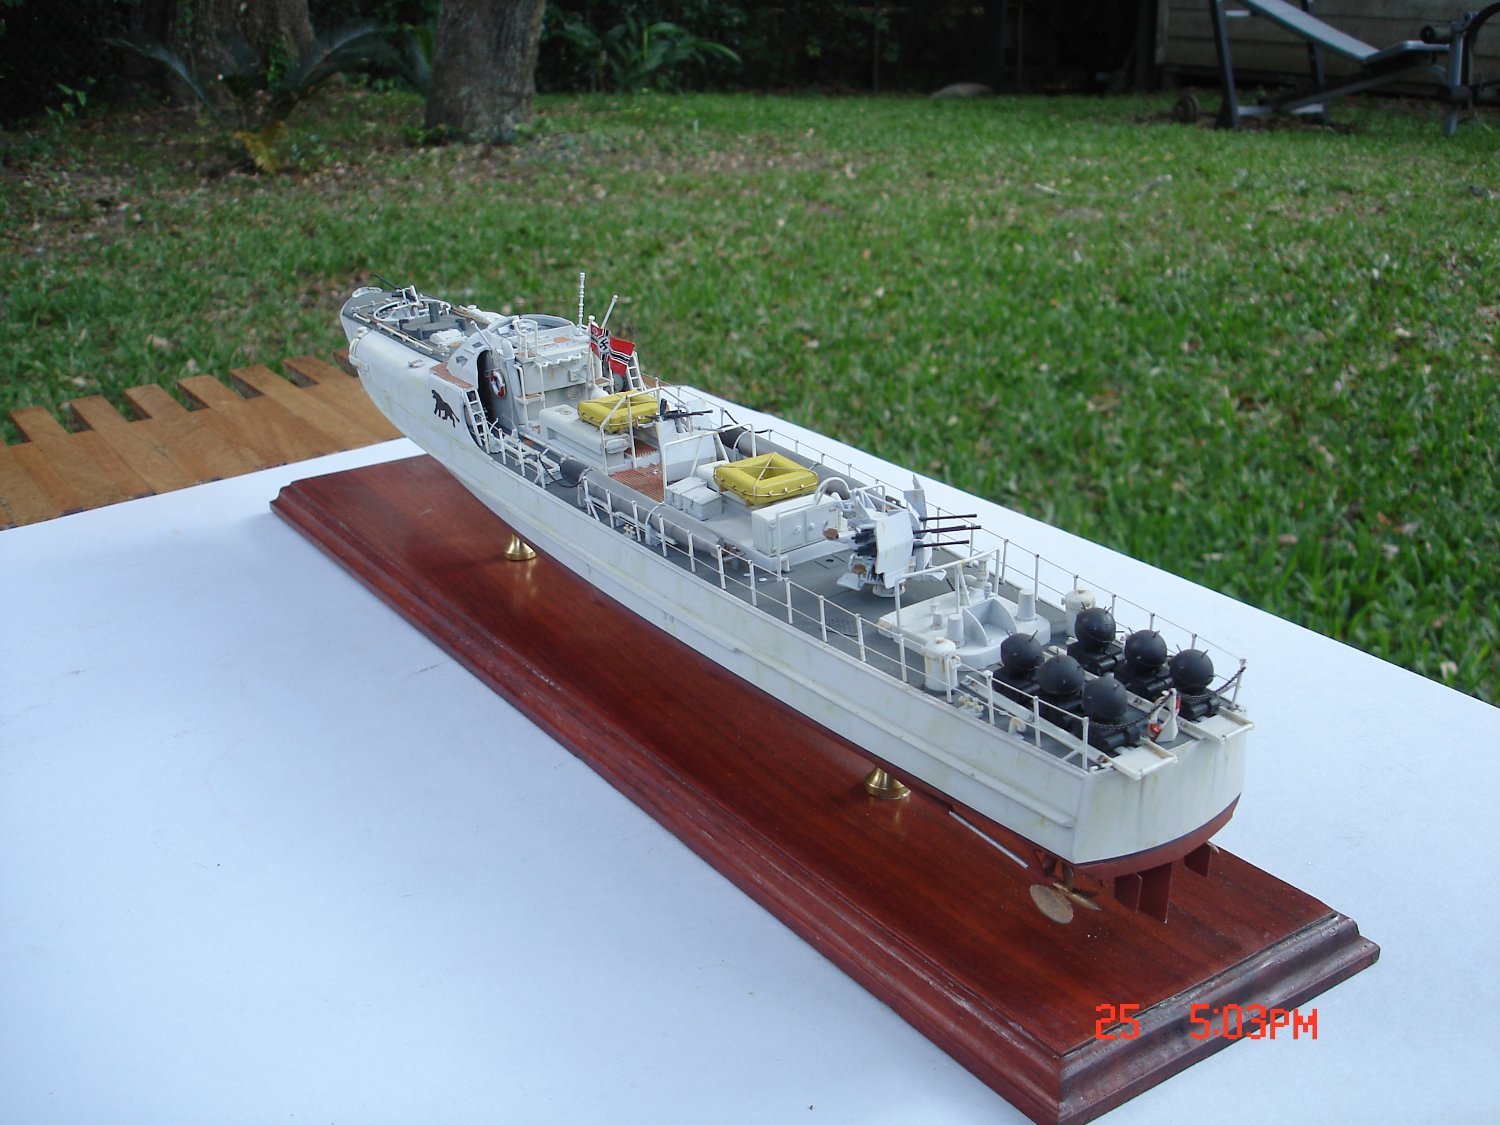
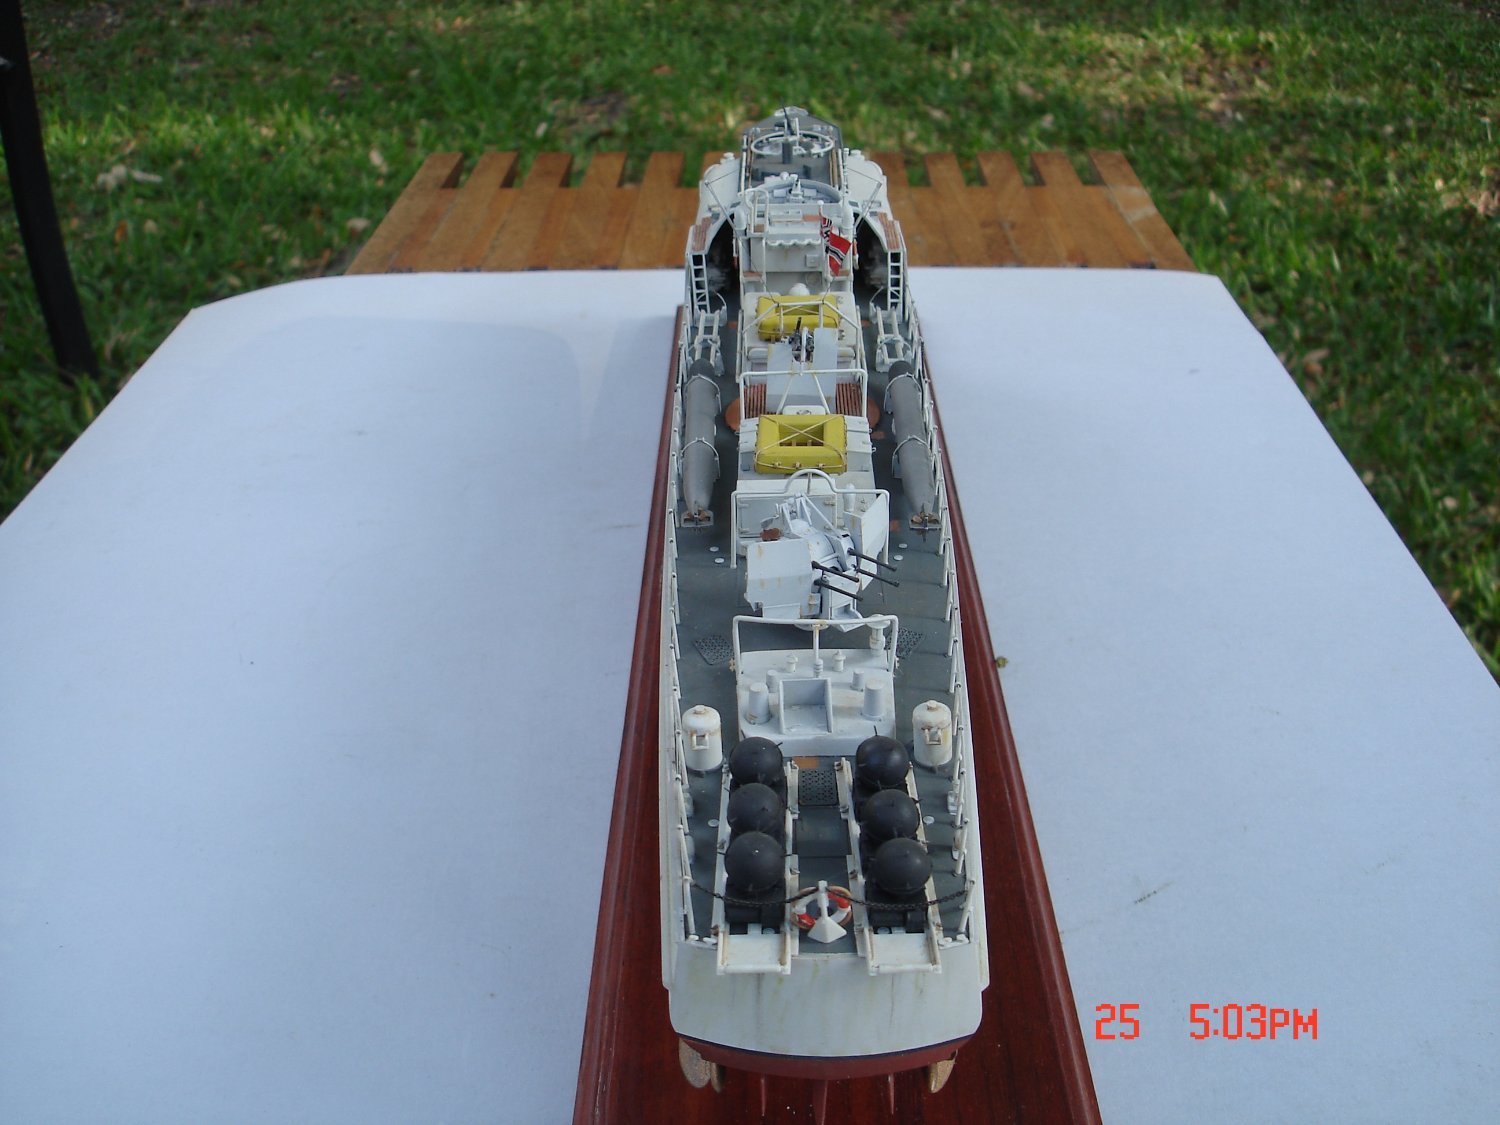

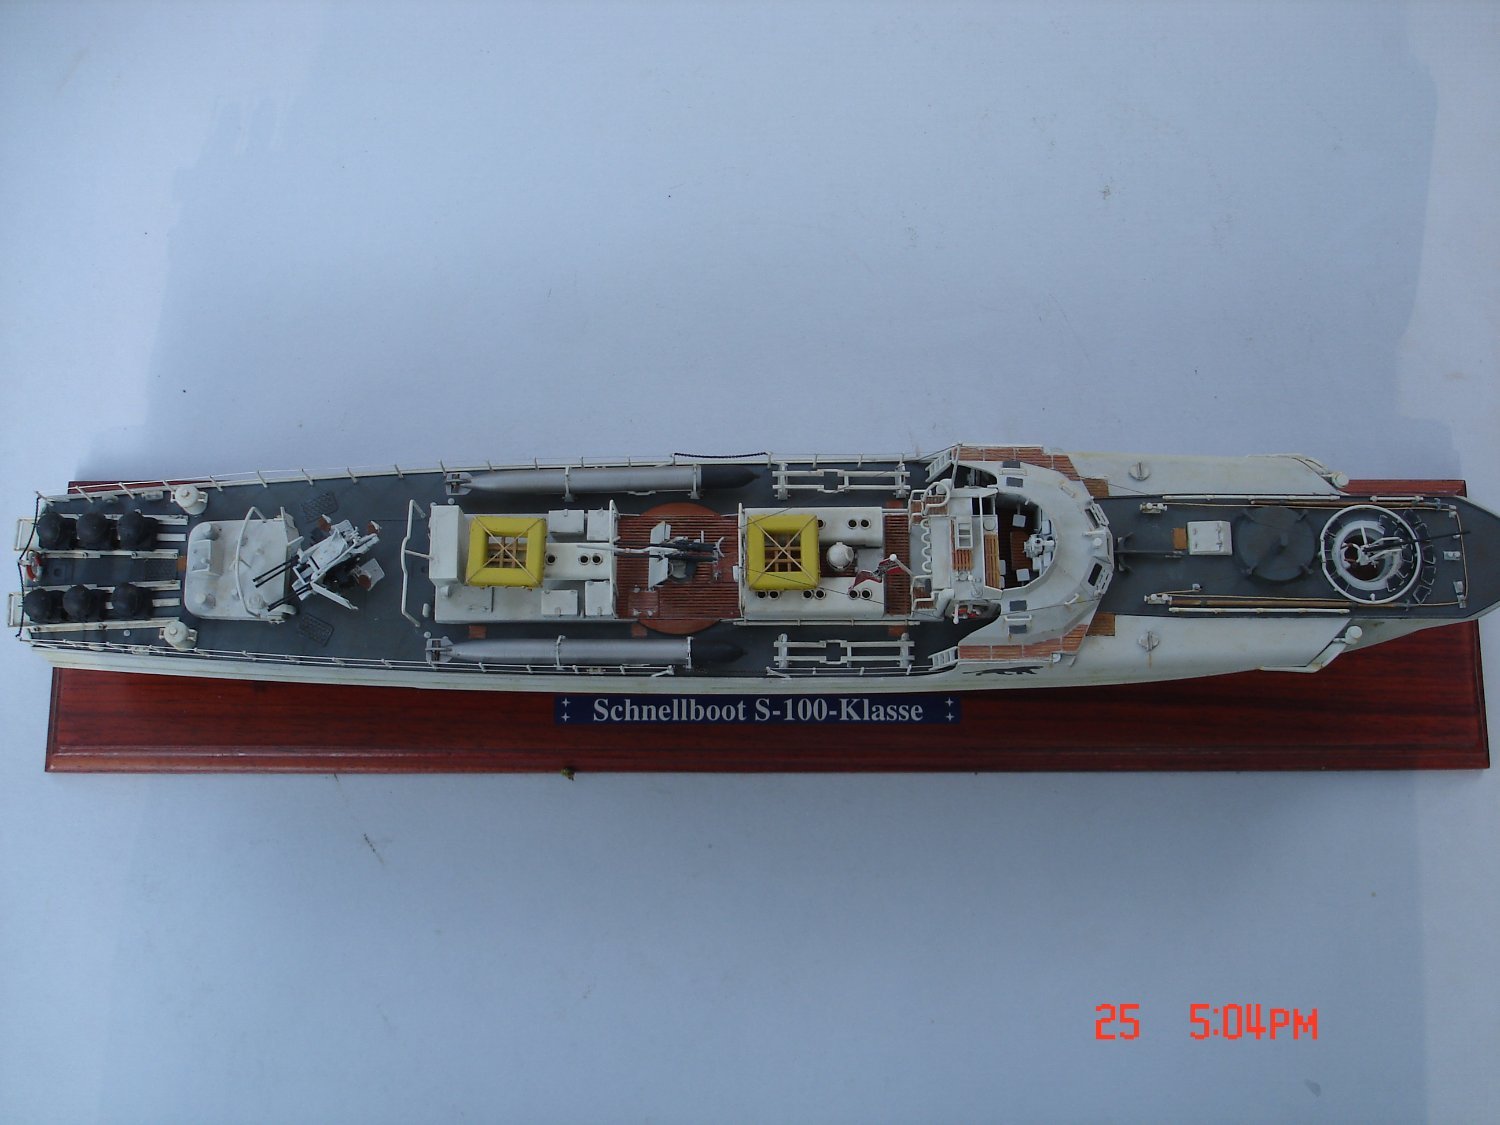


S-100 by Javlin - FINISHED - Revell - 1/72 - PLASTIC - Schnellboot
in - Kit build logs for subjects built from 1901 - Present Day
Posted
She got 1st place with some competition")