HOLIDAY DONATION DRIVE - SUPPORT MSW - DO YOUR PART TO KEEP THIS GREAT FORUM GOING! (89 donations so far out of 49,000 members - C'mon guys!)
×


Shipyard sid
-
Posts
1,106 -
Joined
-
Last visited
Content Type
Profiles
Forums
Gallery
Events
Everything posted by Shipyard sid
-
 Greetings Jerry Well this is is very smart indeed. The final photo looks really good, showing off the sleek hull and the reflection on the rigging. Well done young man. Best regards DAVID
 -
Greetings Robert Yep I got to agree with Glennard and Paul, the pillars can be a bit awkward to fit. I used sideward tweezers ( or whatever they call them ) and as paul said slow setting glue. Looks like I also missed the rope handrail. Still cracking work. DAVID

-
Hello glenn Well things are looking good now. Seems you are really enjoying yourself. Well done. But slow down !!!! DAVID
-
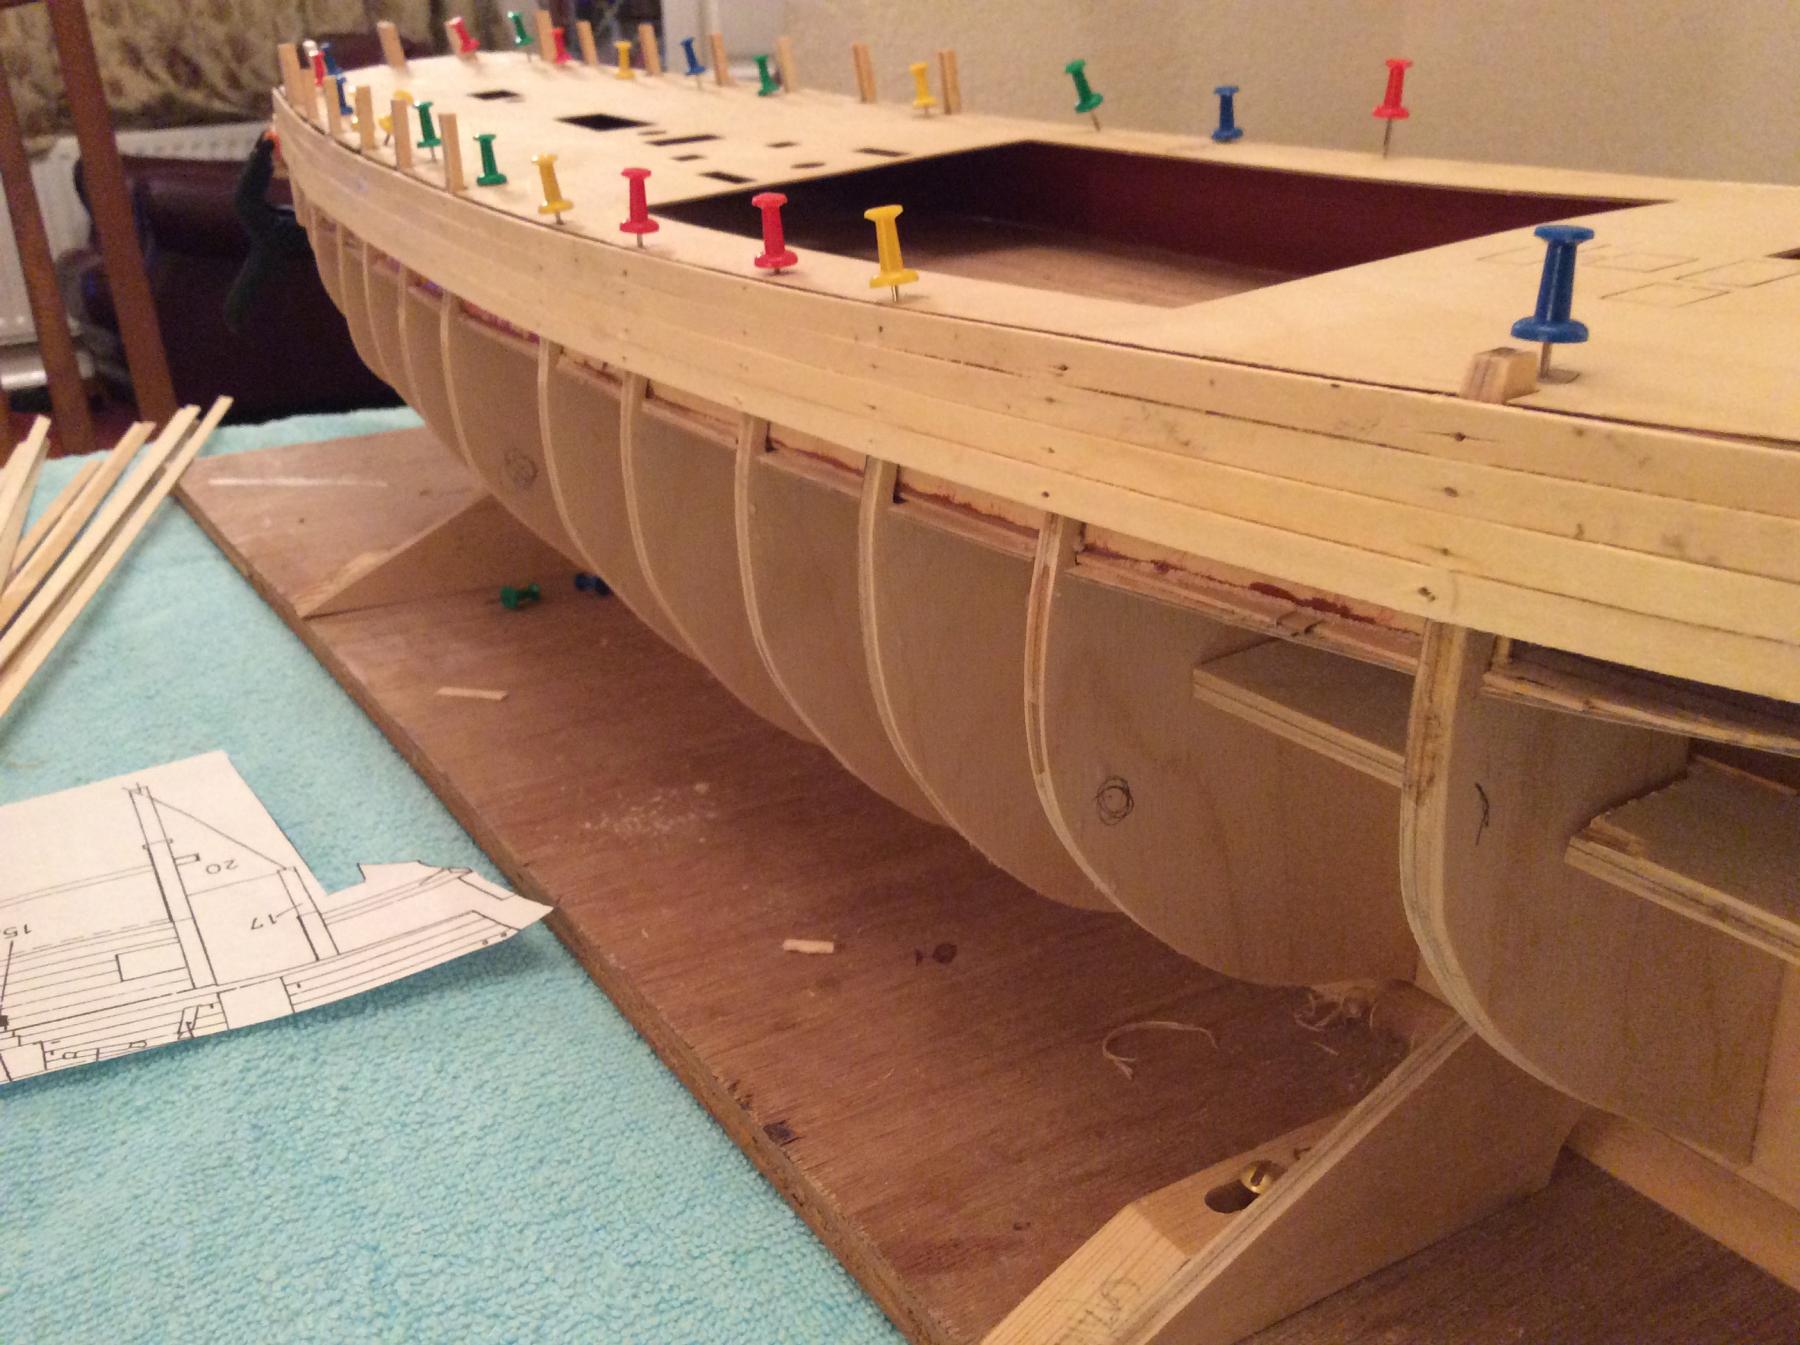
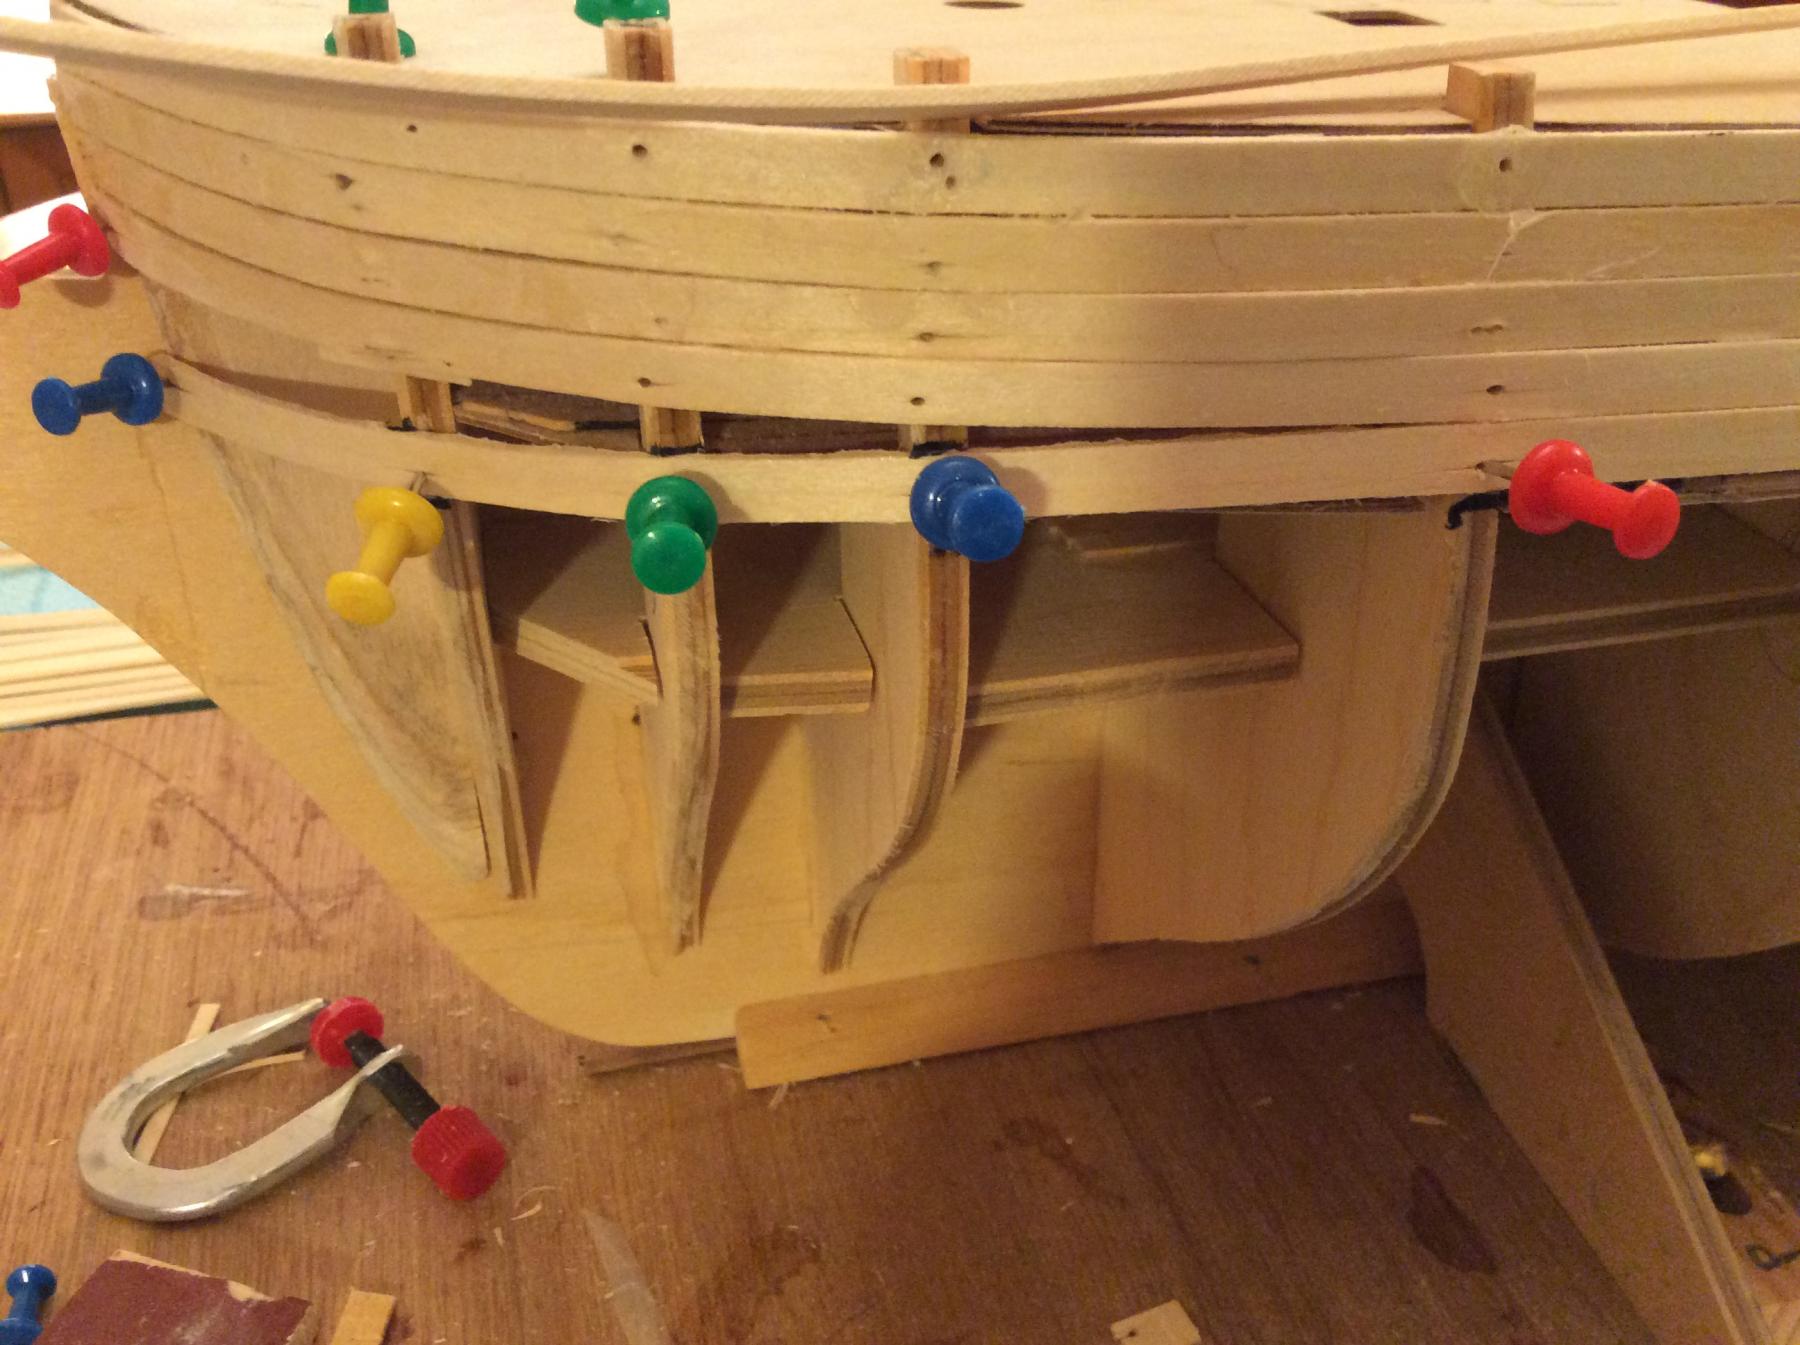
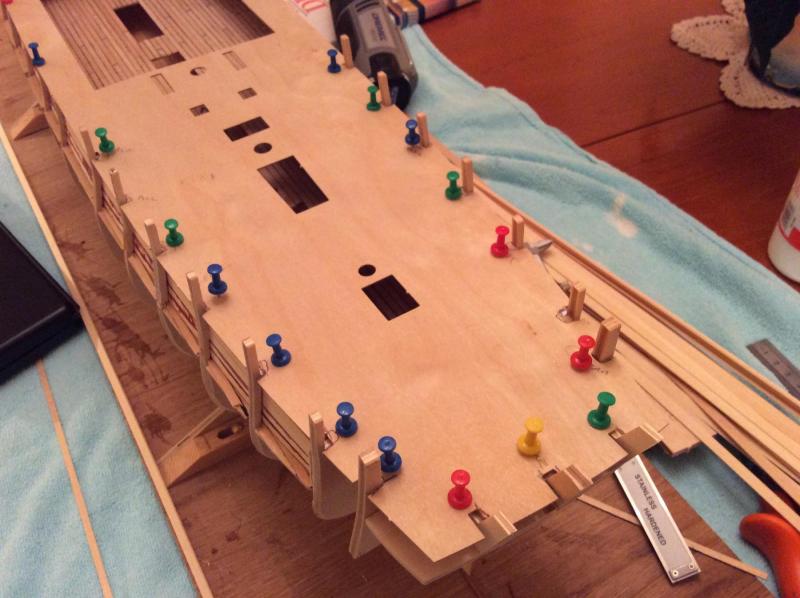
Greeting all And here we go with the first planking. As you can see I have planked down four strips and now started letting the strips run in a natural curve, with the strip running easily and flat on the bulkheads with no pressure. You can see what happens at the bow when you add the third and fourth strip, the strip is being twisted into place leaving gaps between the strips, and the strip is also not landed flat on the bulkhead leaving gaps between the bulkhead and the strip. So we now need to add stealers later. I bet none of you chaps have ever twisted any planks into position. Anyway, it's going good, with the first plank pretty level with the top deck, although it isn't on the photos as the deck has been loosened off a few times. So this is were I am at the moment. Jason I don't know what I am going to do at the keel yet. Any way thanks for all your likes and comments, here are a few photos Regards DAVID


-
Hello Heinz. Stunning work,as it has been throughout your build . I know as do many others, the size of those buckets. And how you have managed to paint them so well is amazing. Just keep enjoying yourself. Regards. DAVID
-
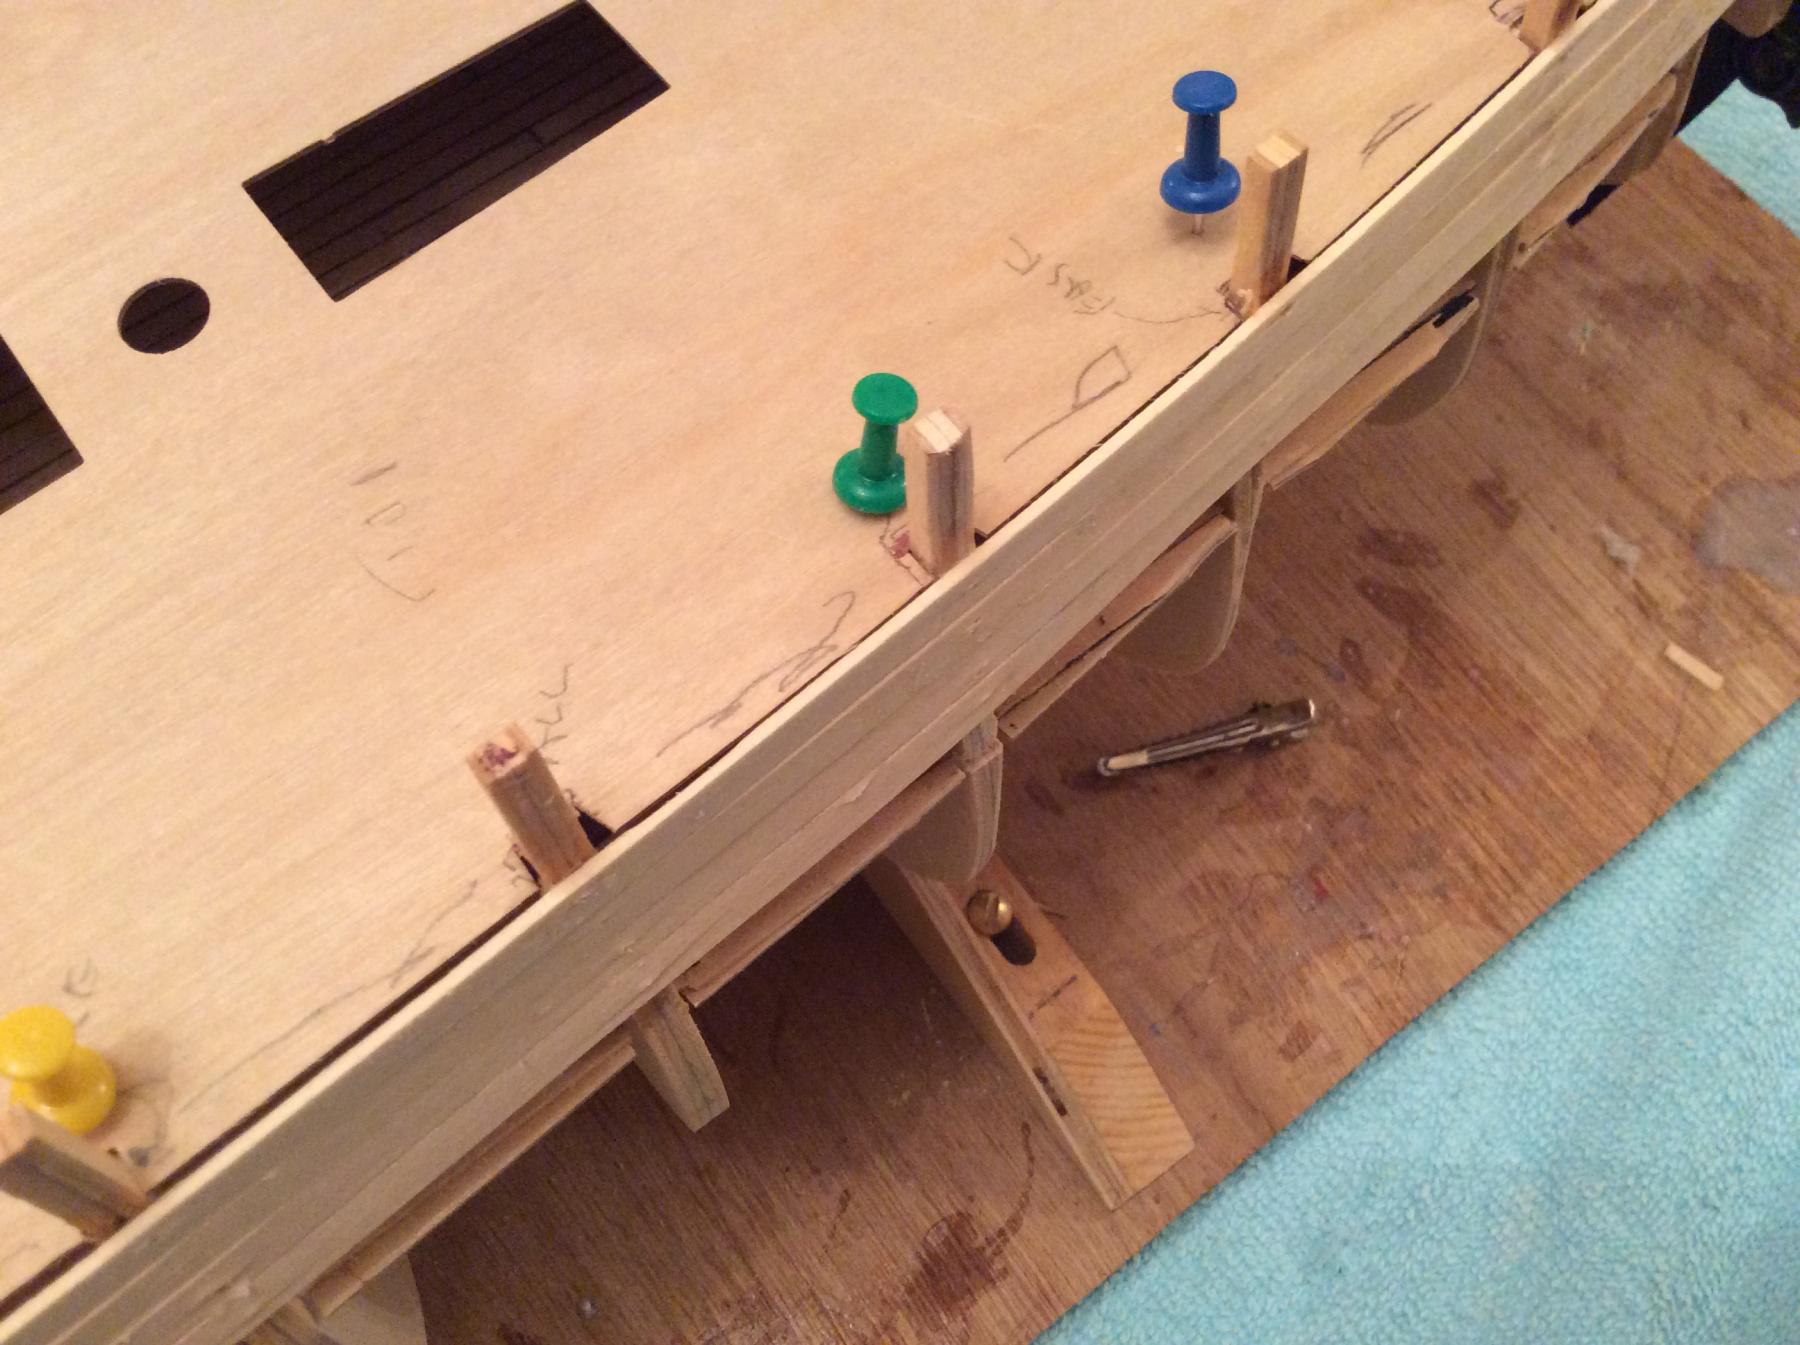
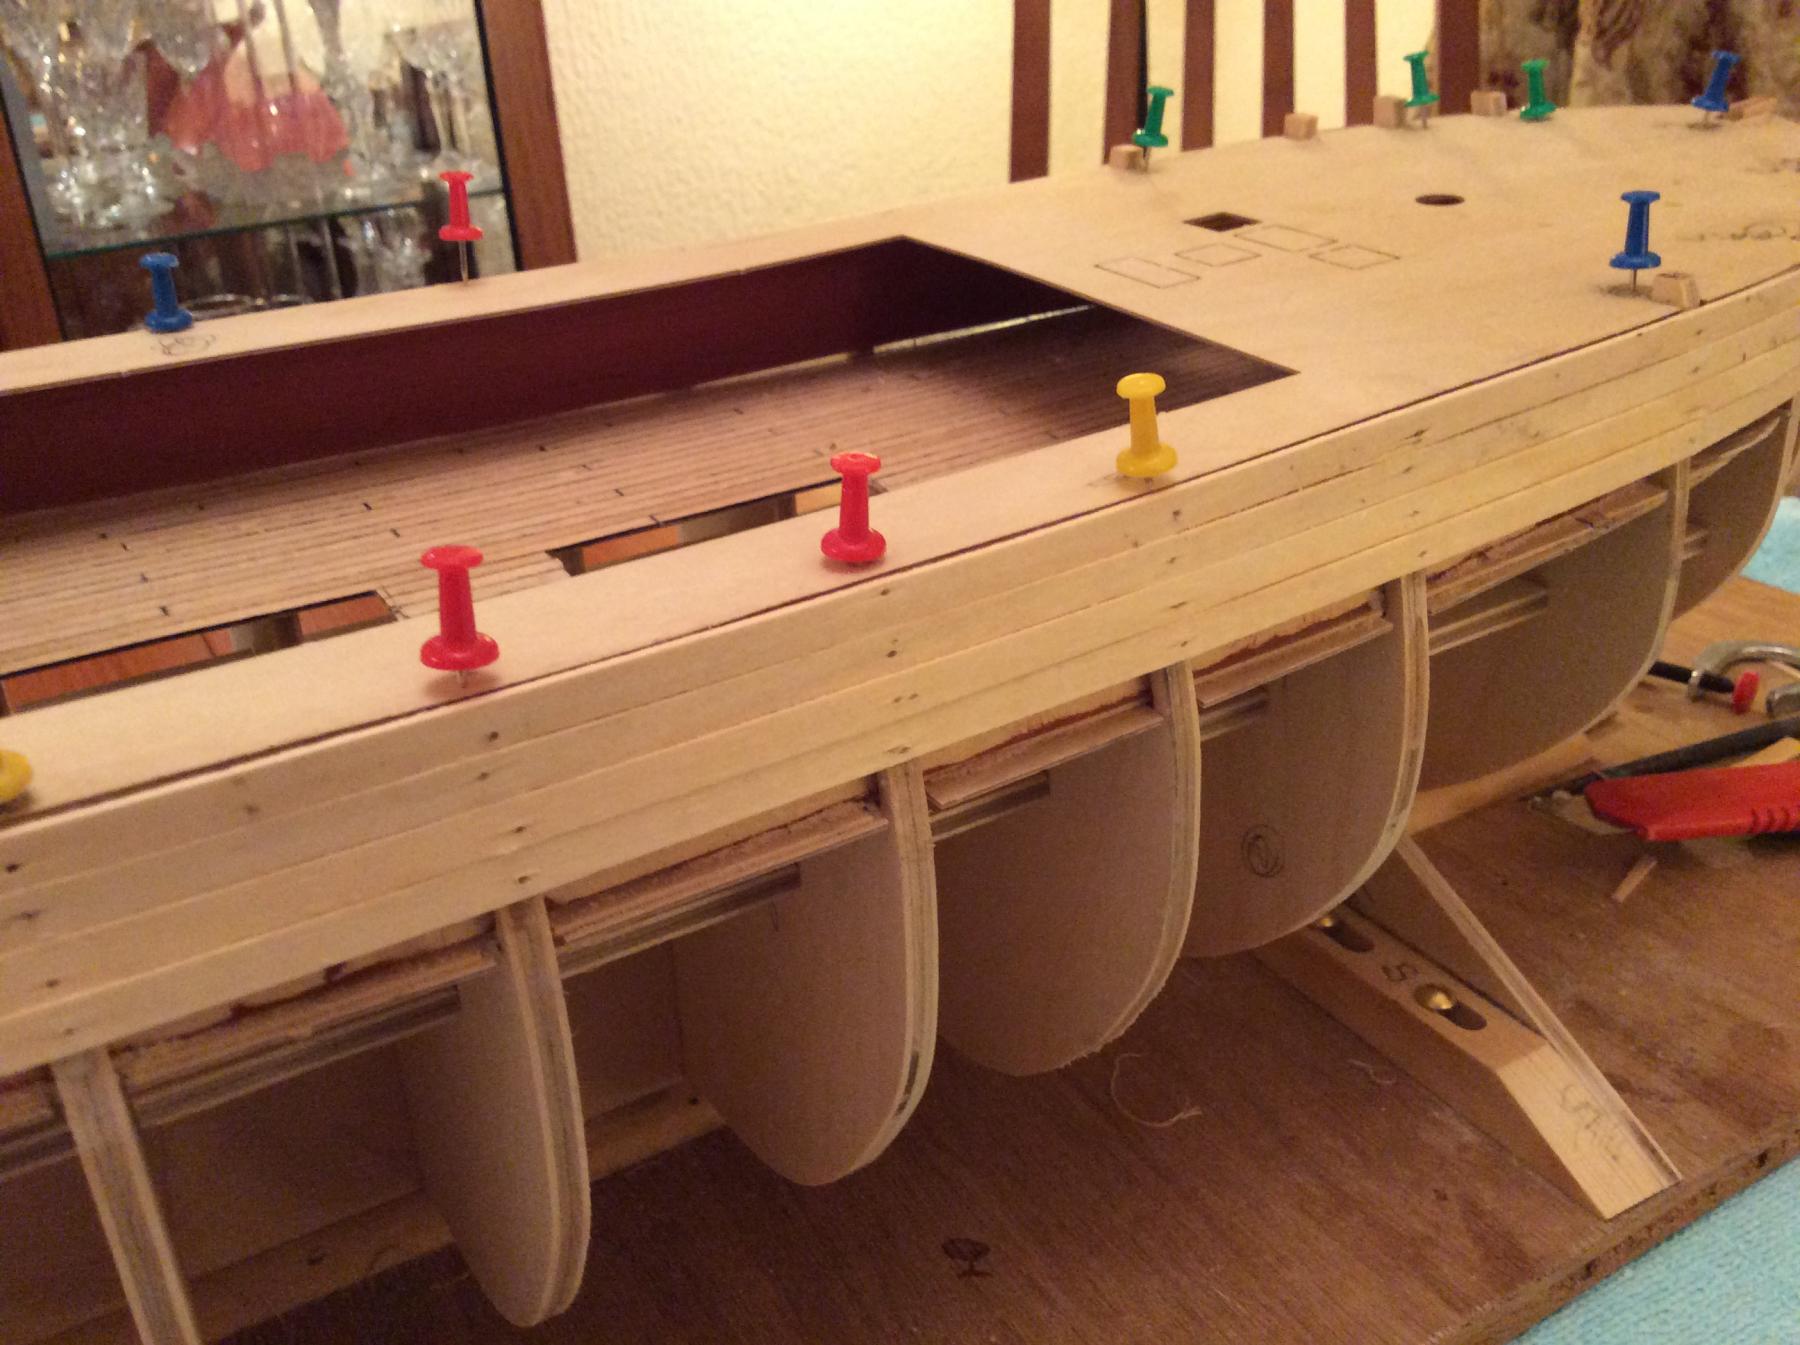
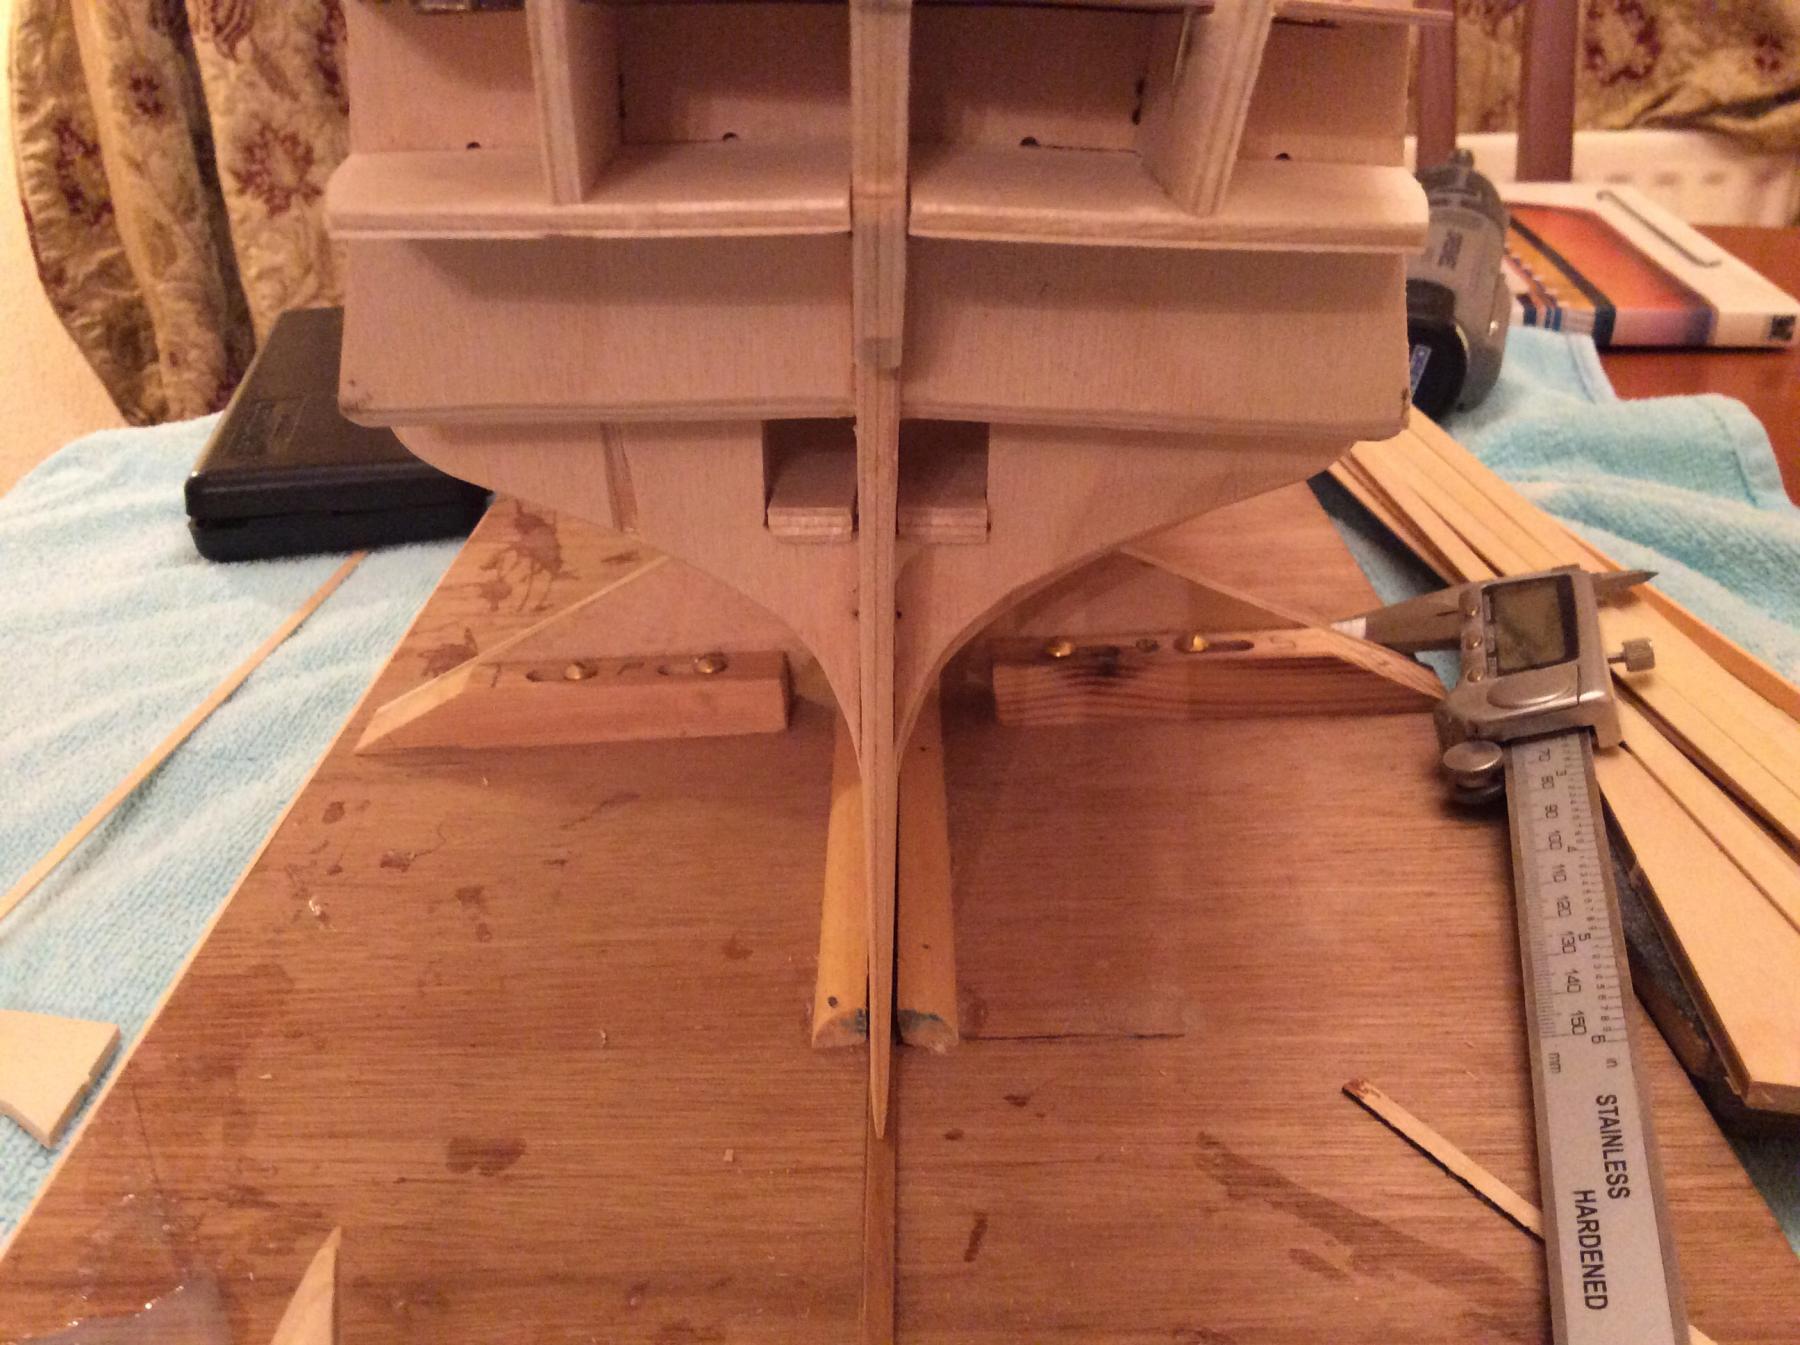
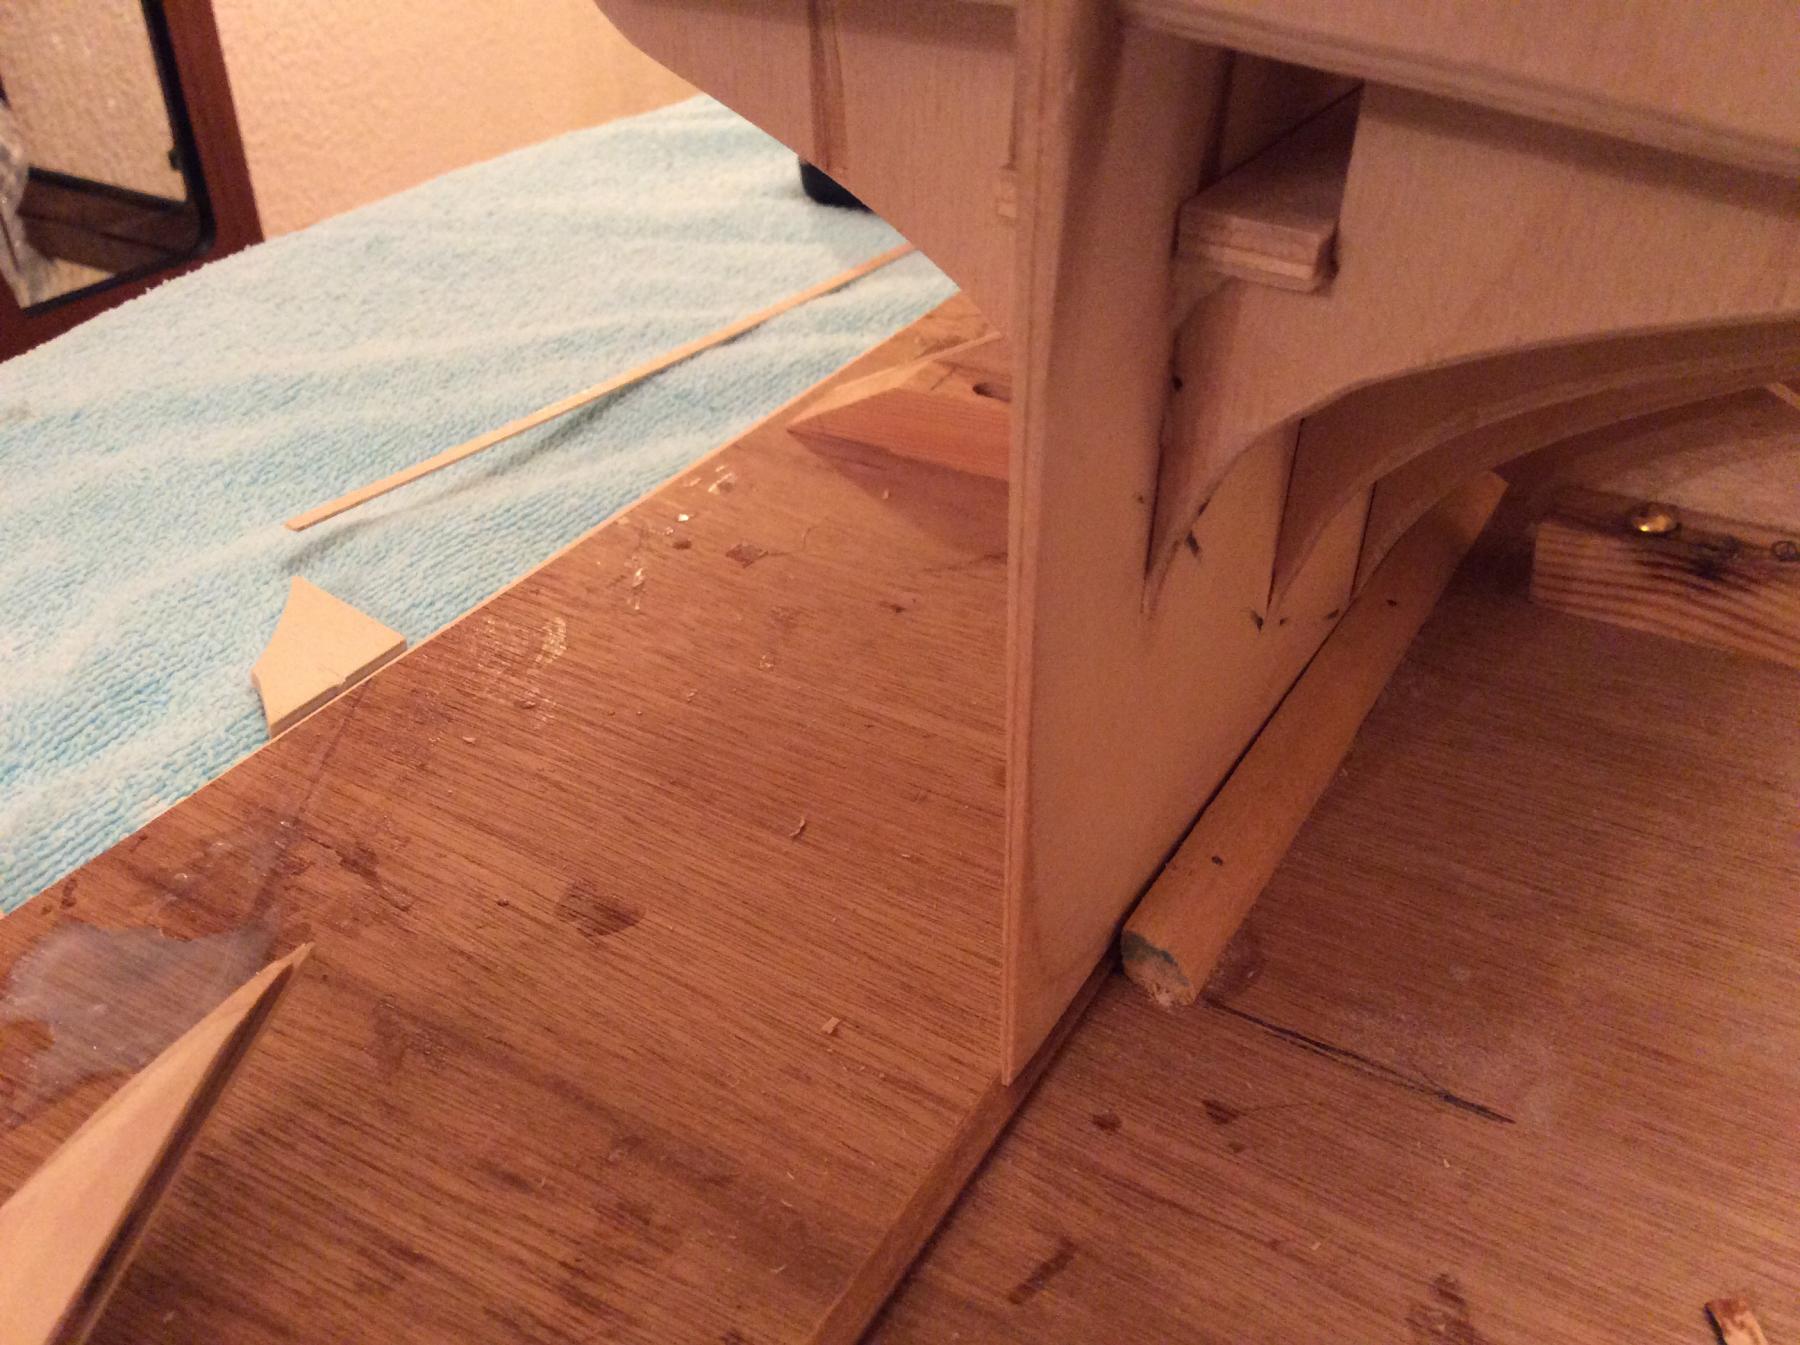
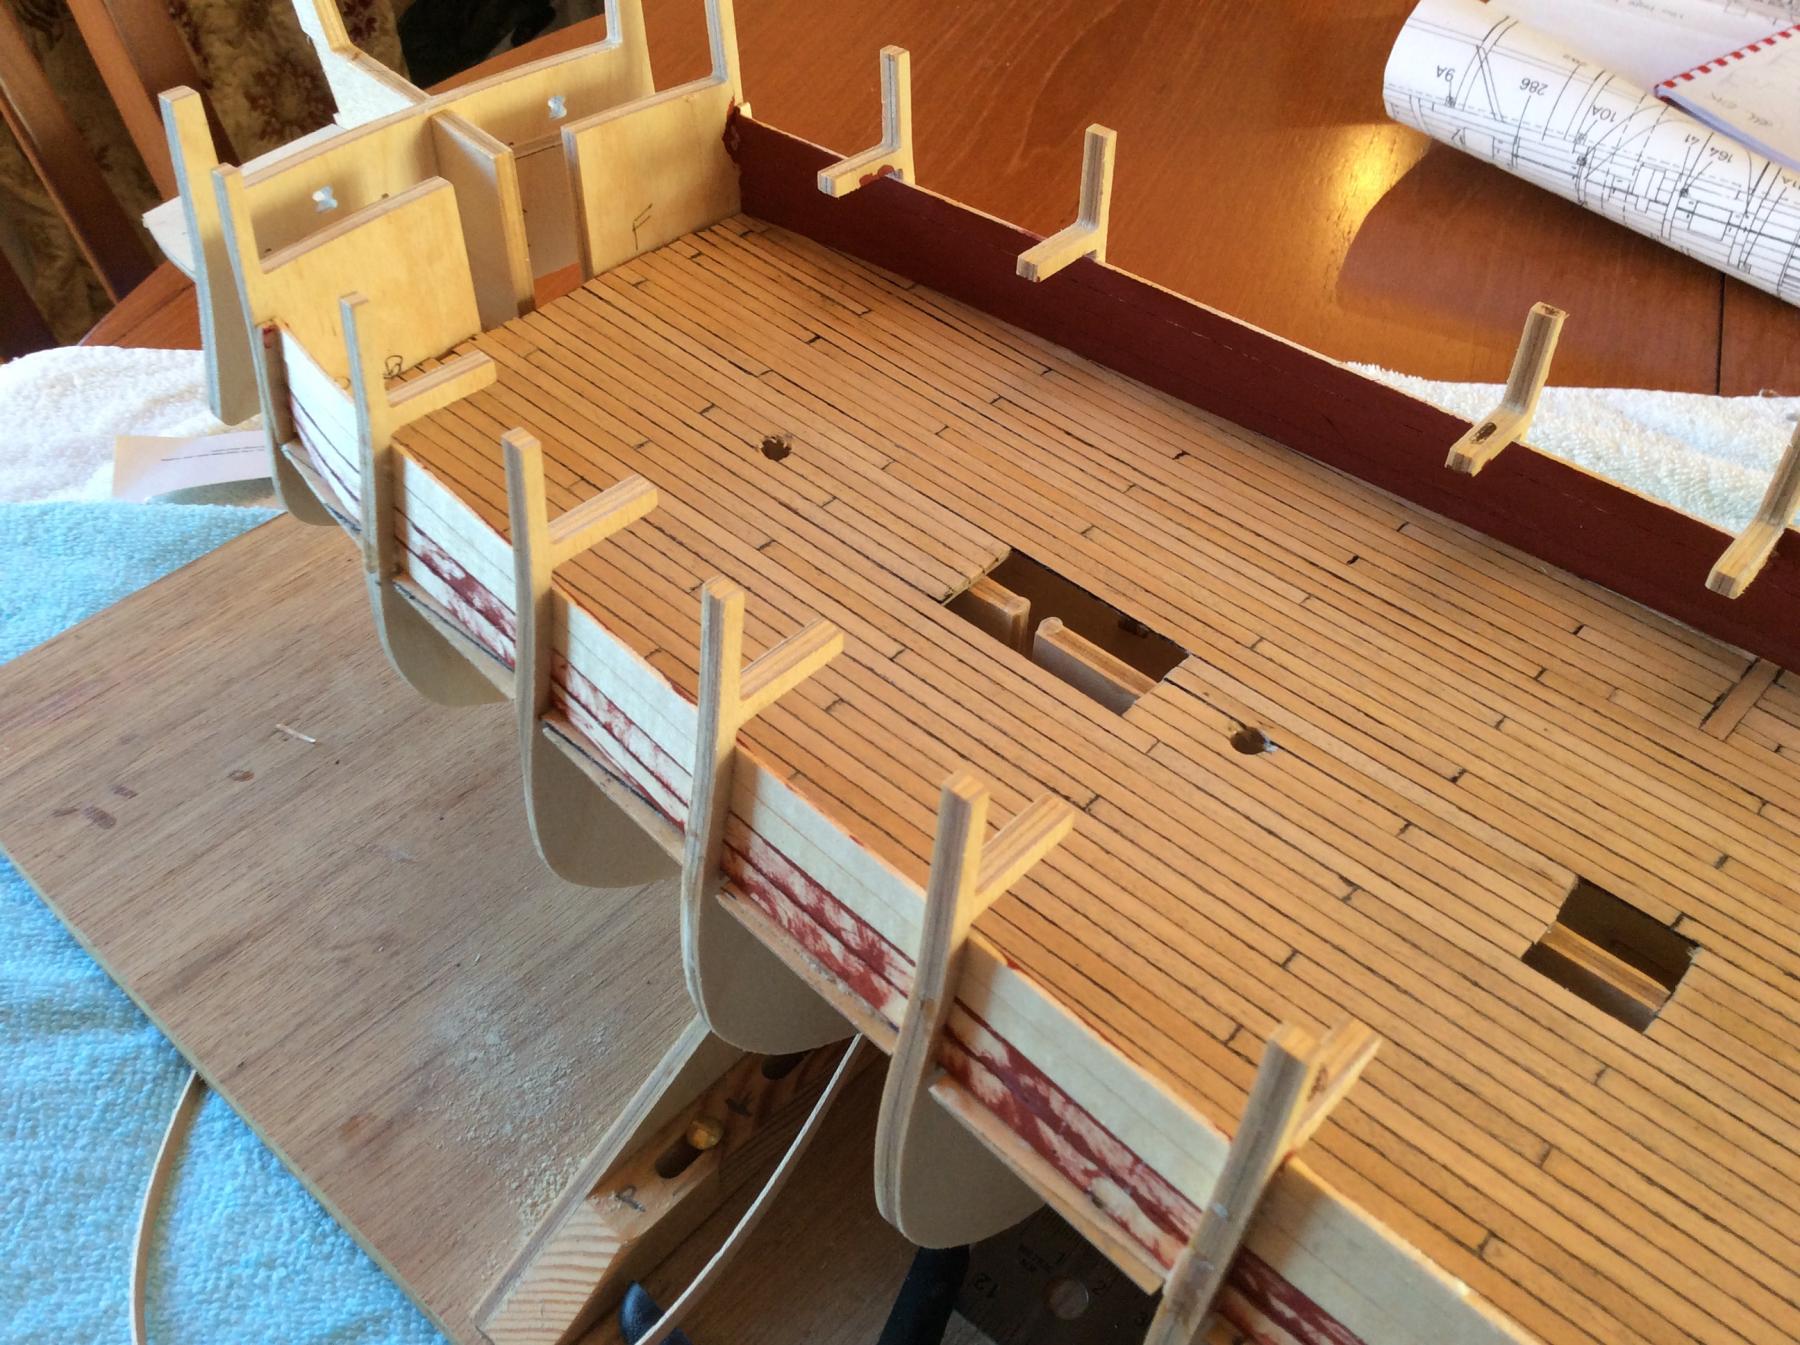
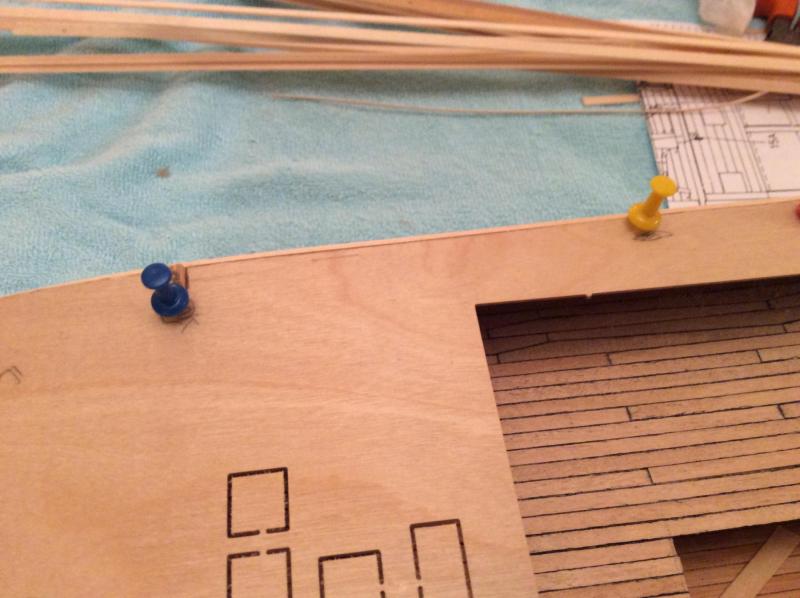
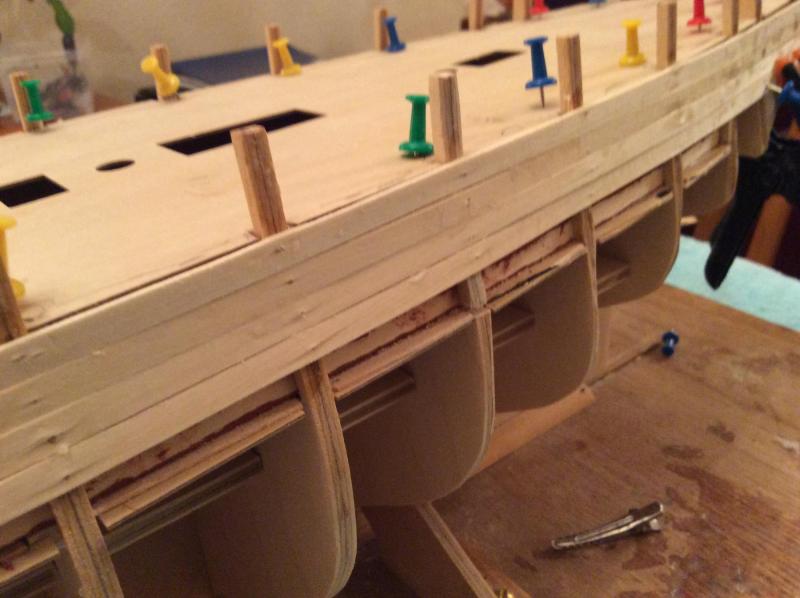
Greetings all Thanks for your comments and likes. Well I have got a bit more work done on the Diana, as it has not been worth venturing out at times with the bad weather we have had. The top deck is pinned in position and the rudder wil be tapered. As you can see I have already tapered the sternpost area, which we all know should have been sorted before any assembly work. The taper is slightly over 2mm at the base, and needs reducing at the top slightly, but I can easily sort that when I need to, at the planking stage, when I can tidy it up. I am about ready to start the first planking, but as you can see some of the bulkhead runs need be sorted which I will do as I go, just checking with strip which I find works for me. Well wish me luck, and I shall be back in a week or two or three. I have taken a few photos to give you an idea what the stern post taper is like, but it is very awkward to achieve a decent view, which could be with the lamination of the ply. Thanks a lot . Regards David


-
Hello Paul Well there you go Paul. I have to agree with Heinz and Robert. Take your time, we are all enjoying it. DAVID
-
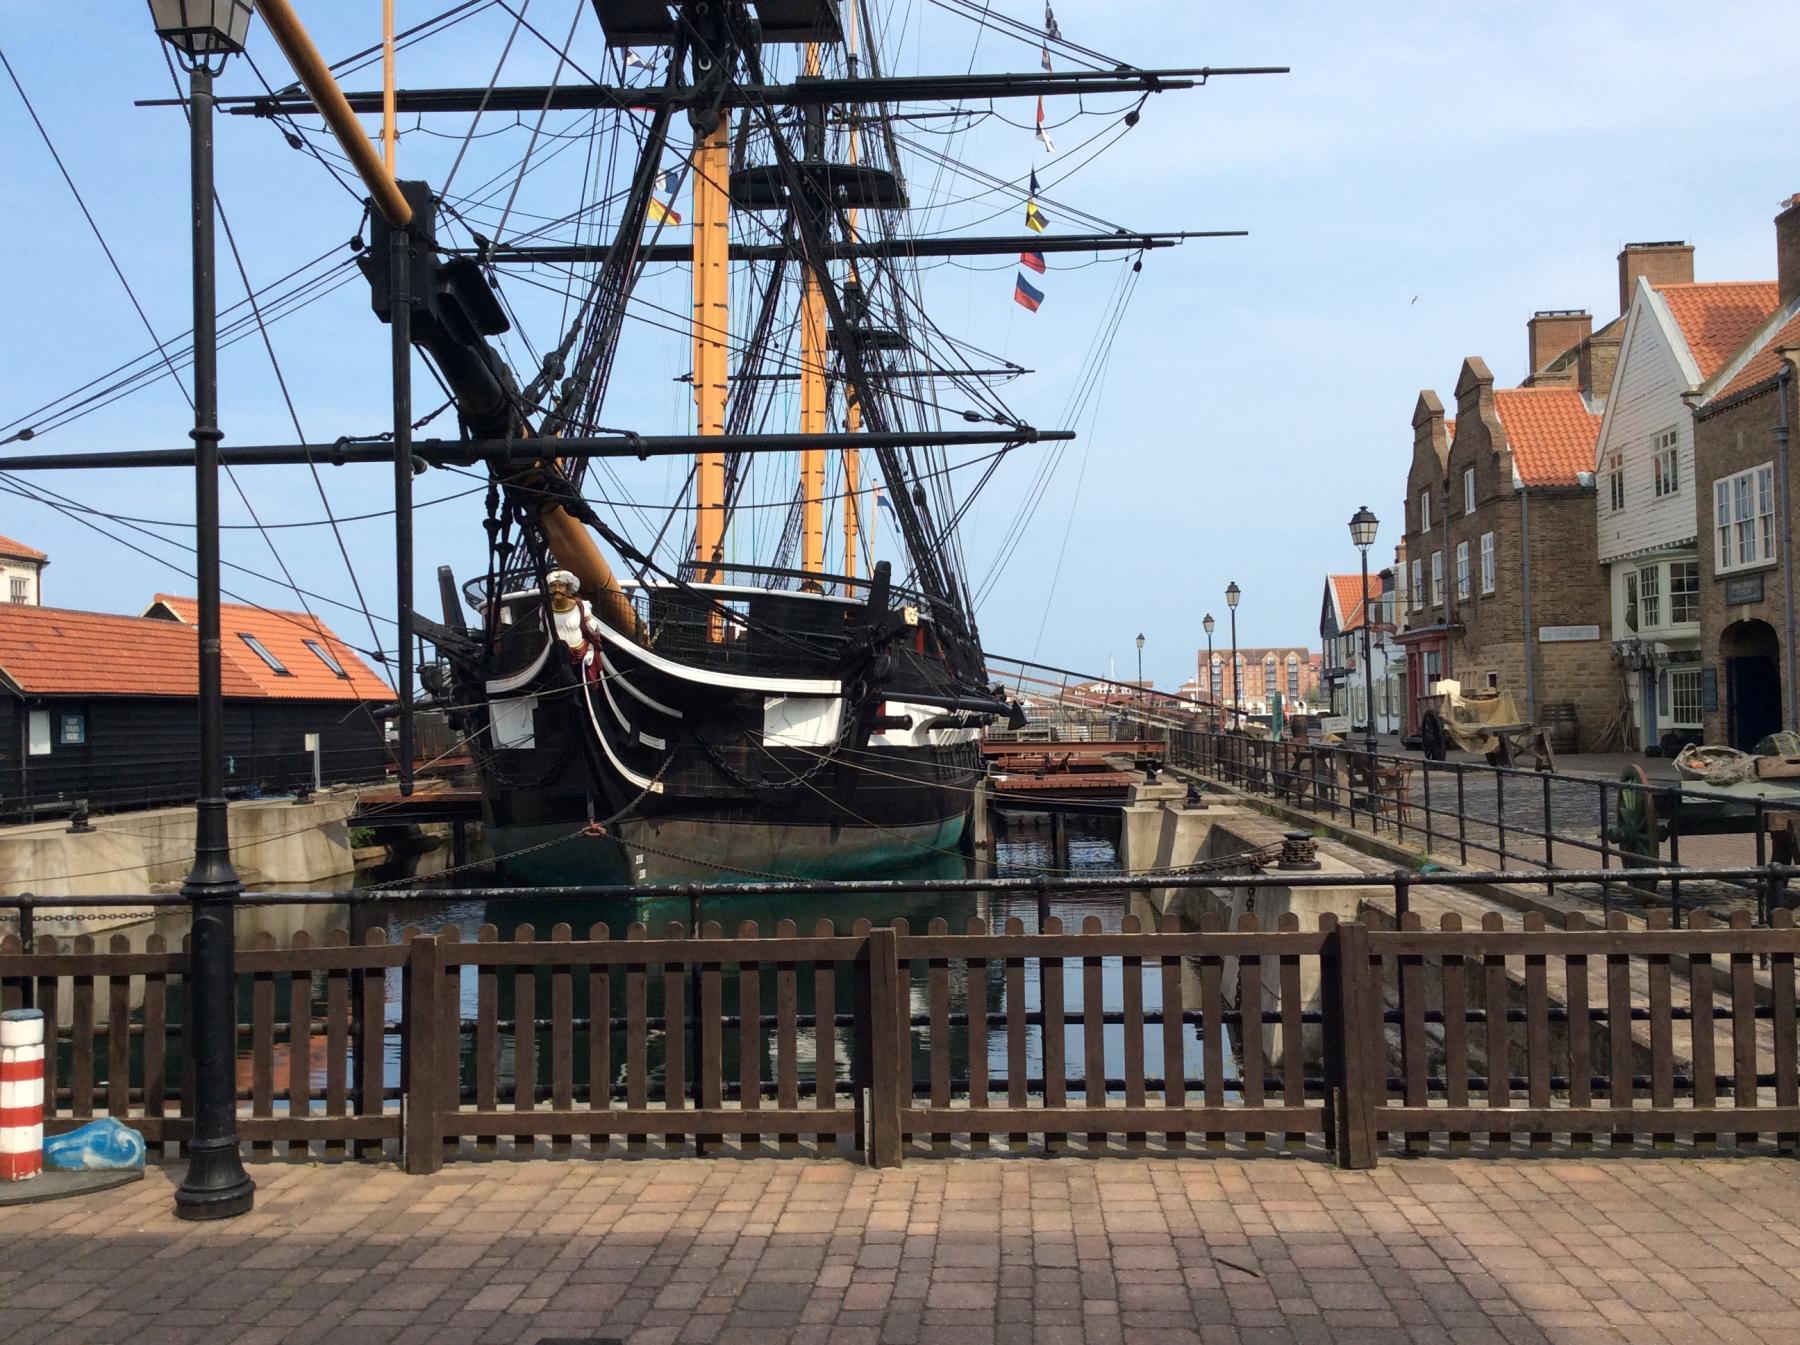
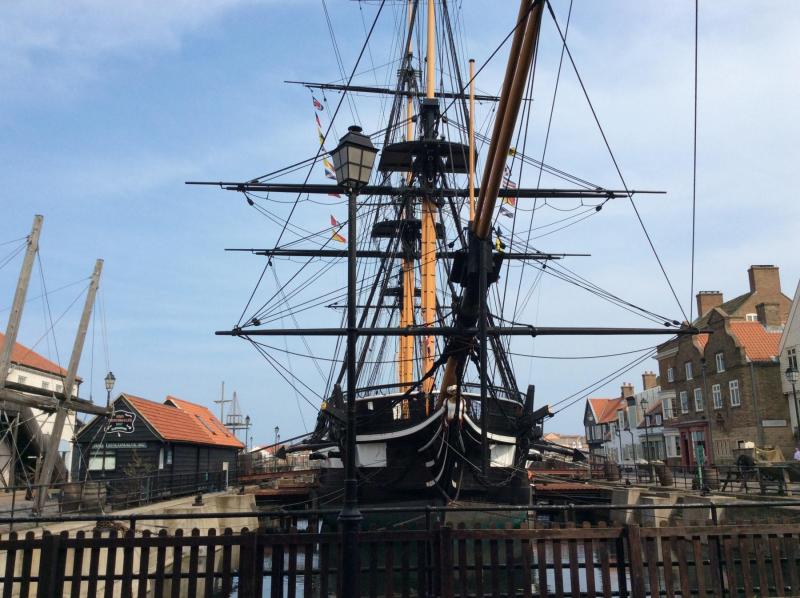
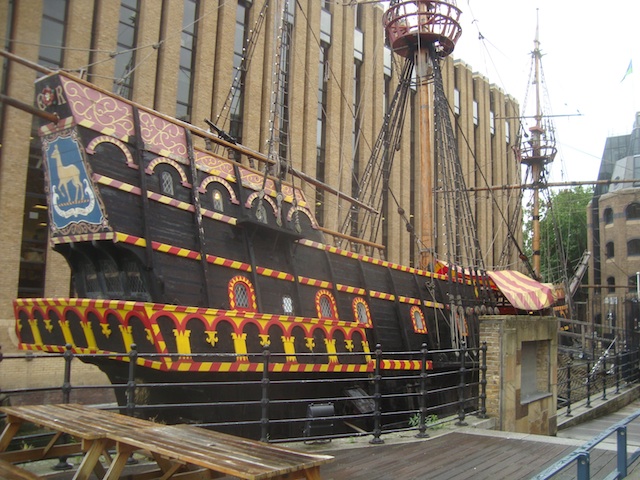
Greetings young man Hope you are both keeping well. Well I thought it was time to peruse the log of your latest build, which I believe is number five not including the Cutty Sark, which I have been down to see three times this year, and also been around it once since it's restoration. It's more or less a straight tube run from my sons in Edgware. The National maritime museum is only ten minutes away from the Cutty Sark and really worth visiting. Any way it's good to be back and see how thing are going. So you will soon finish your bluenose which has gone really well, as have your previous builds. So what is next?? I must say I am a little perplexed as to why you are building your bluenose on the floor. Is it to stop you dropping it ?? What does also concern me a bit, is I hope you don't think the bluenose is submarine. Anyway keep up the good work and take care. I will catch you later. Best wishes. DAVID, Photos HMS Trincomalee, Hartlepool. Golden Hind London .


-
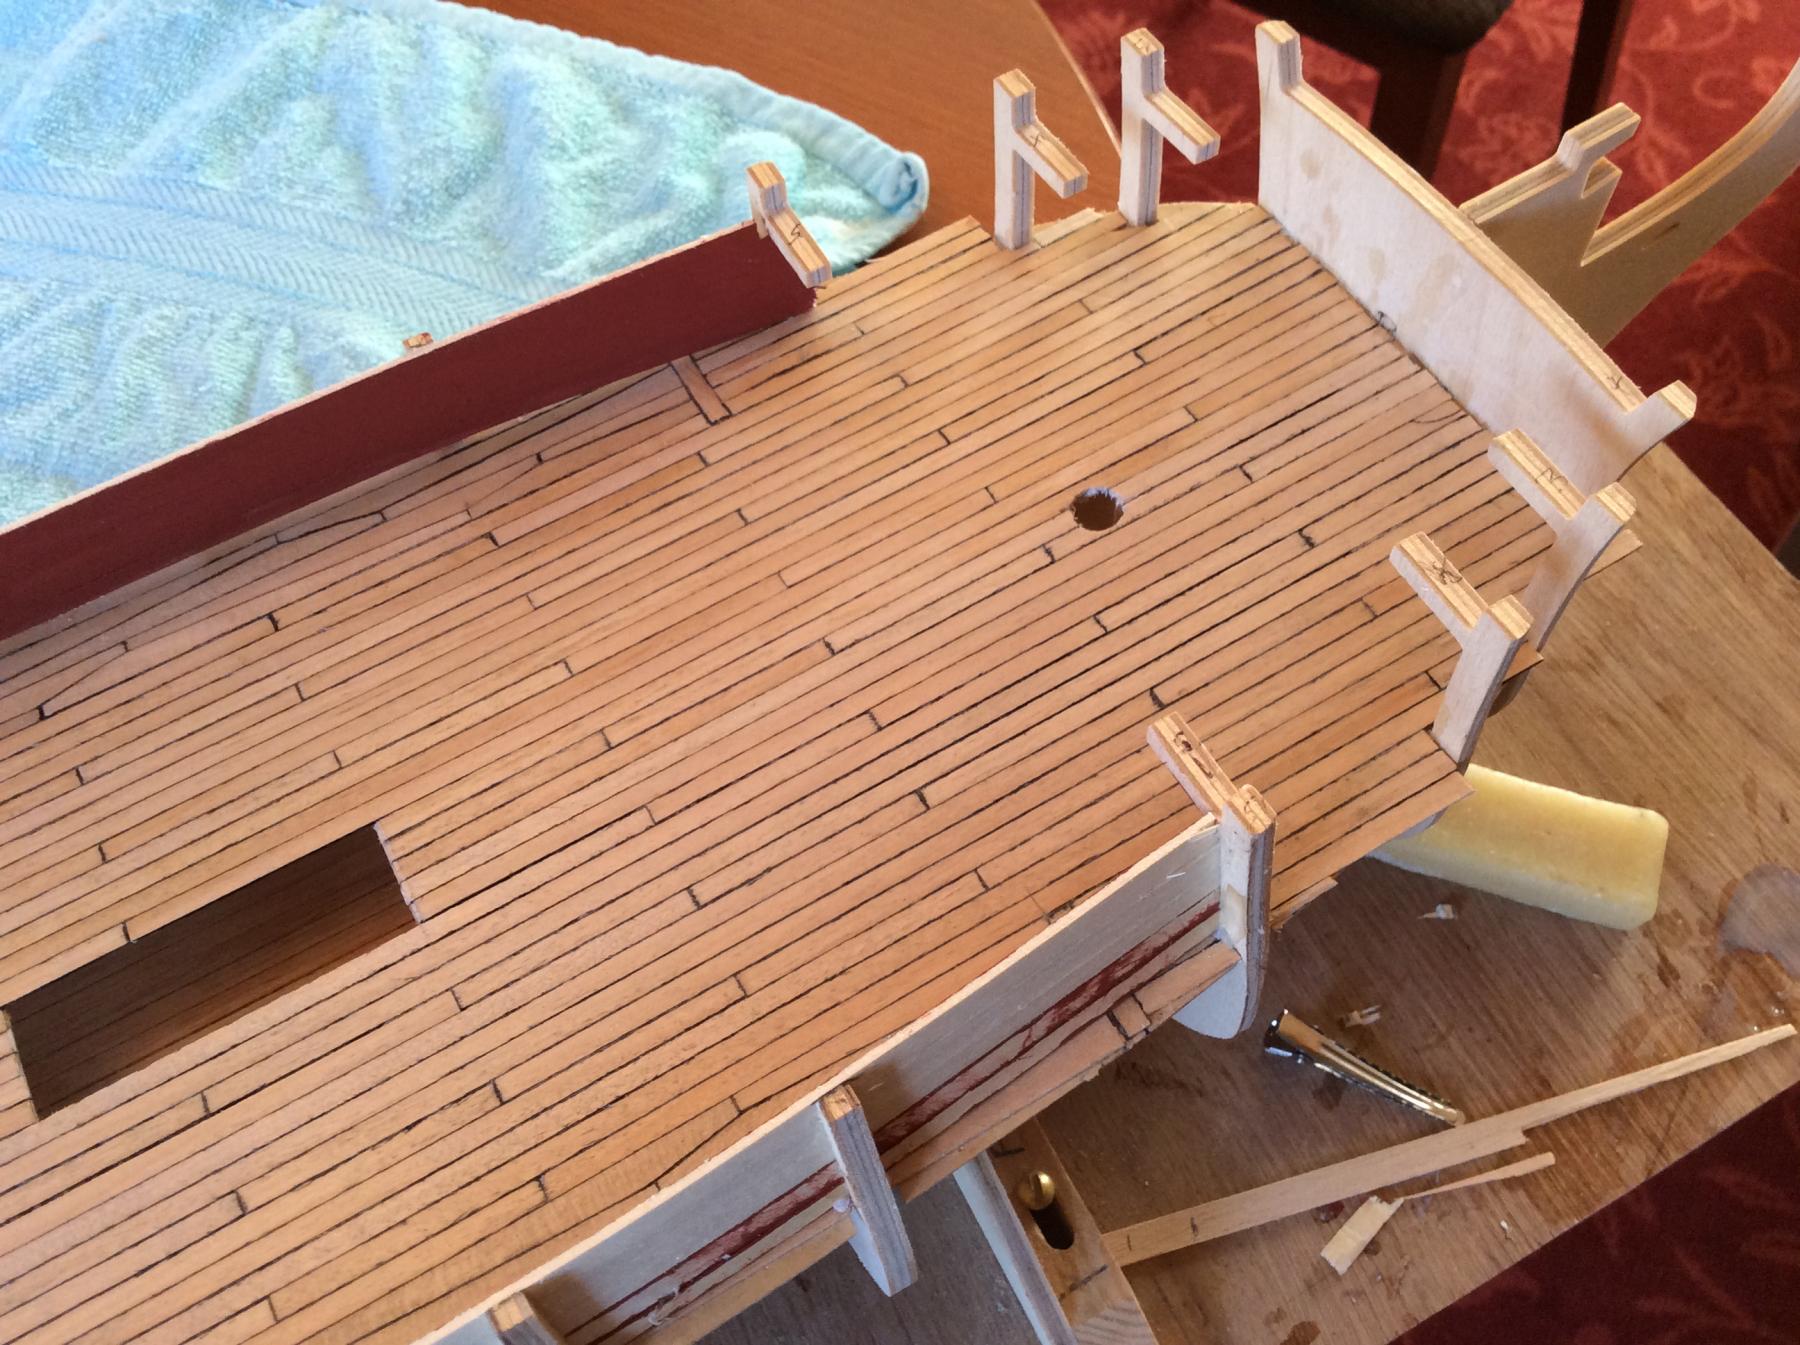
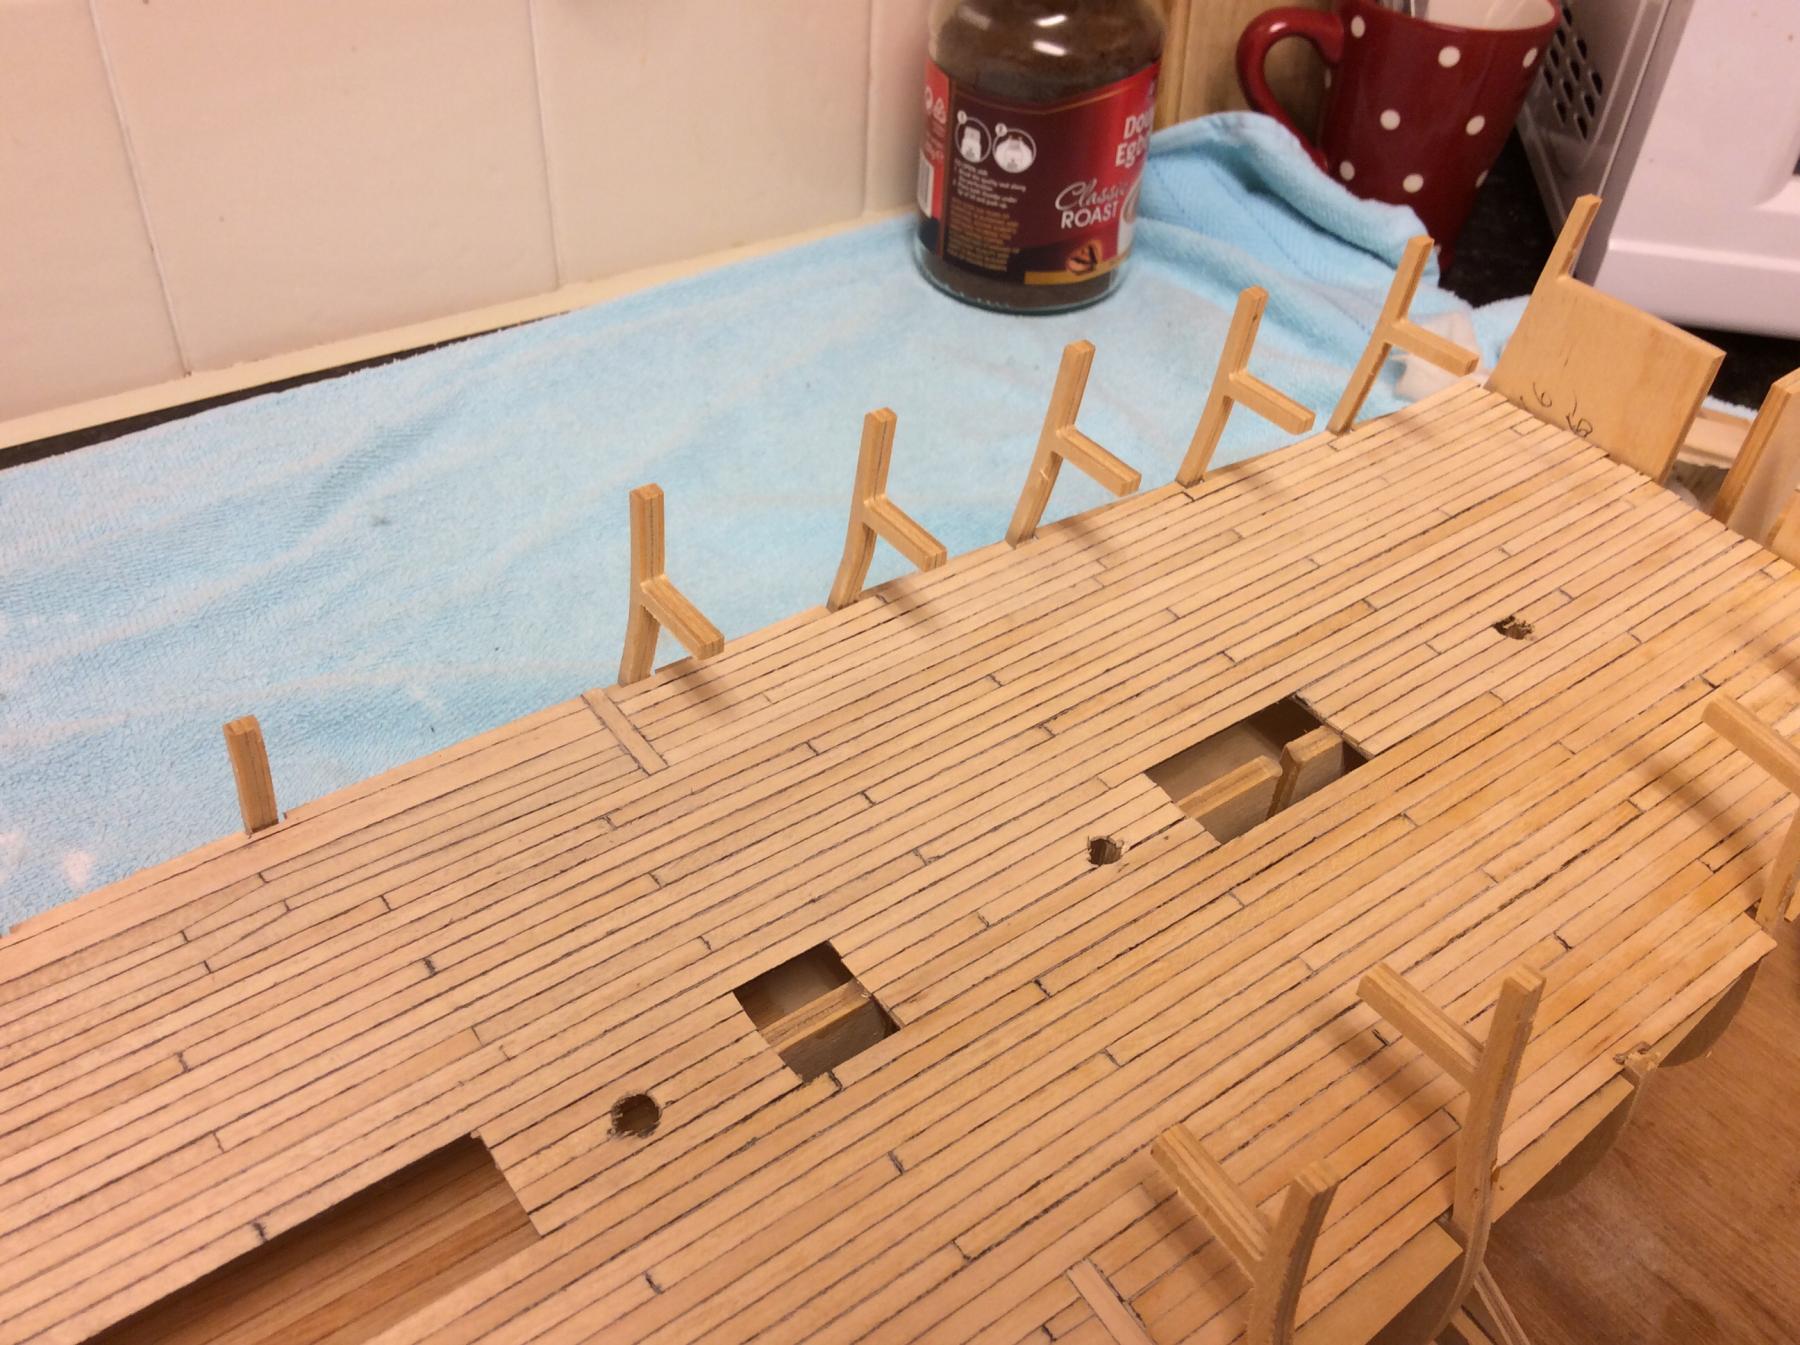
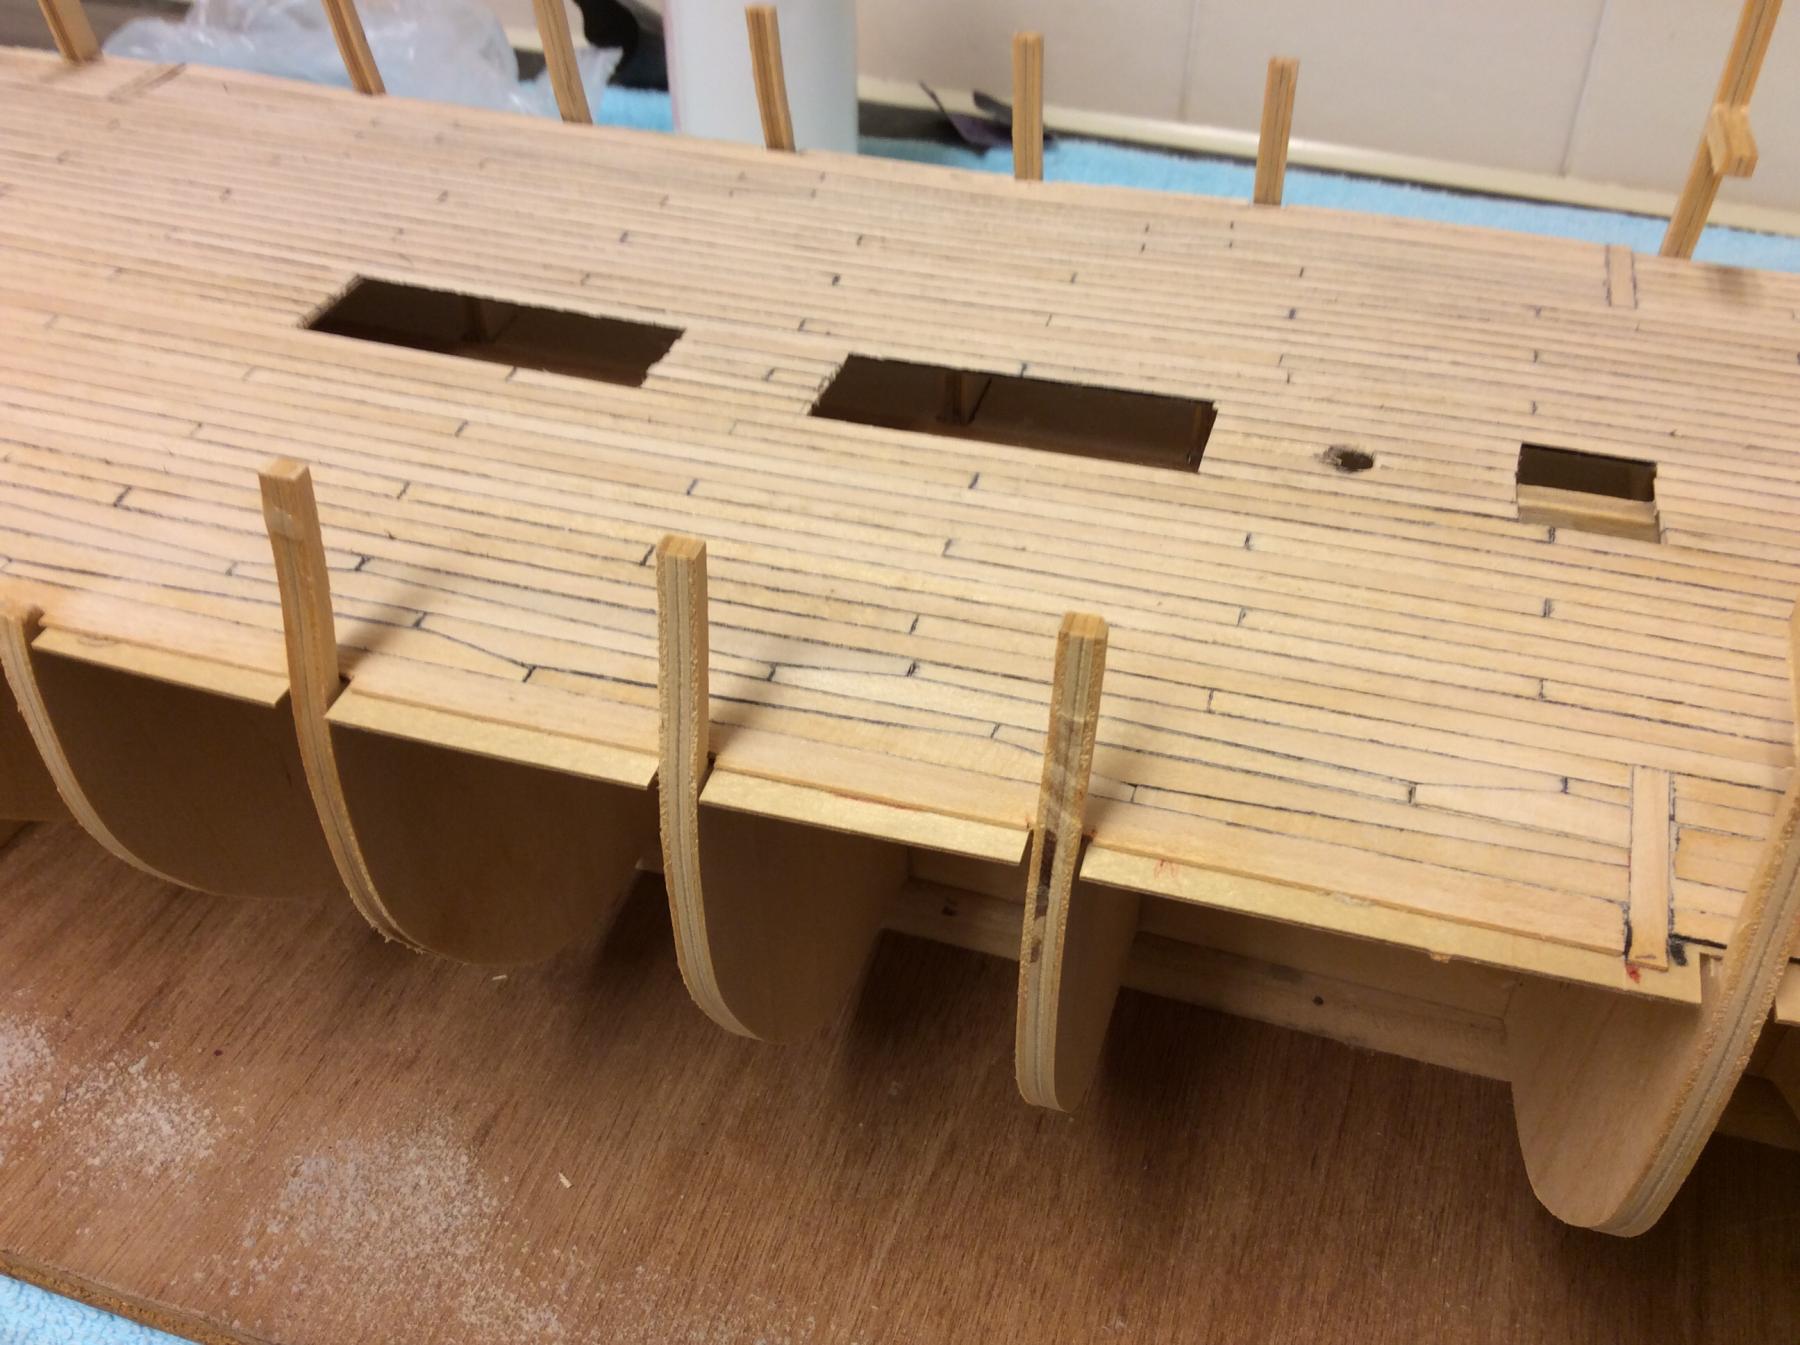
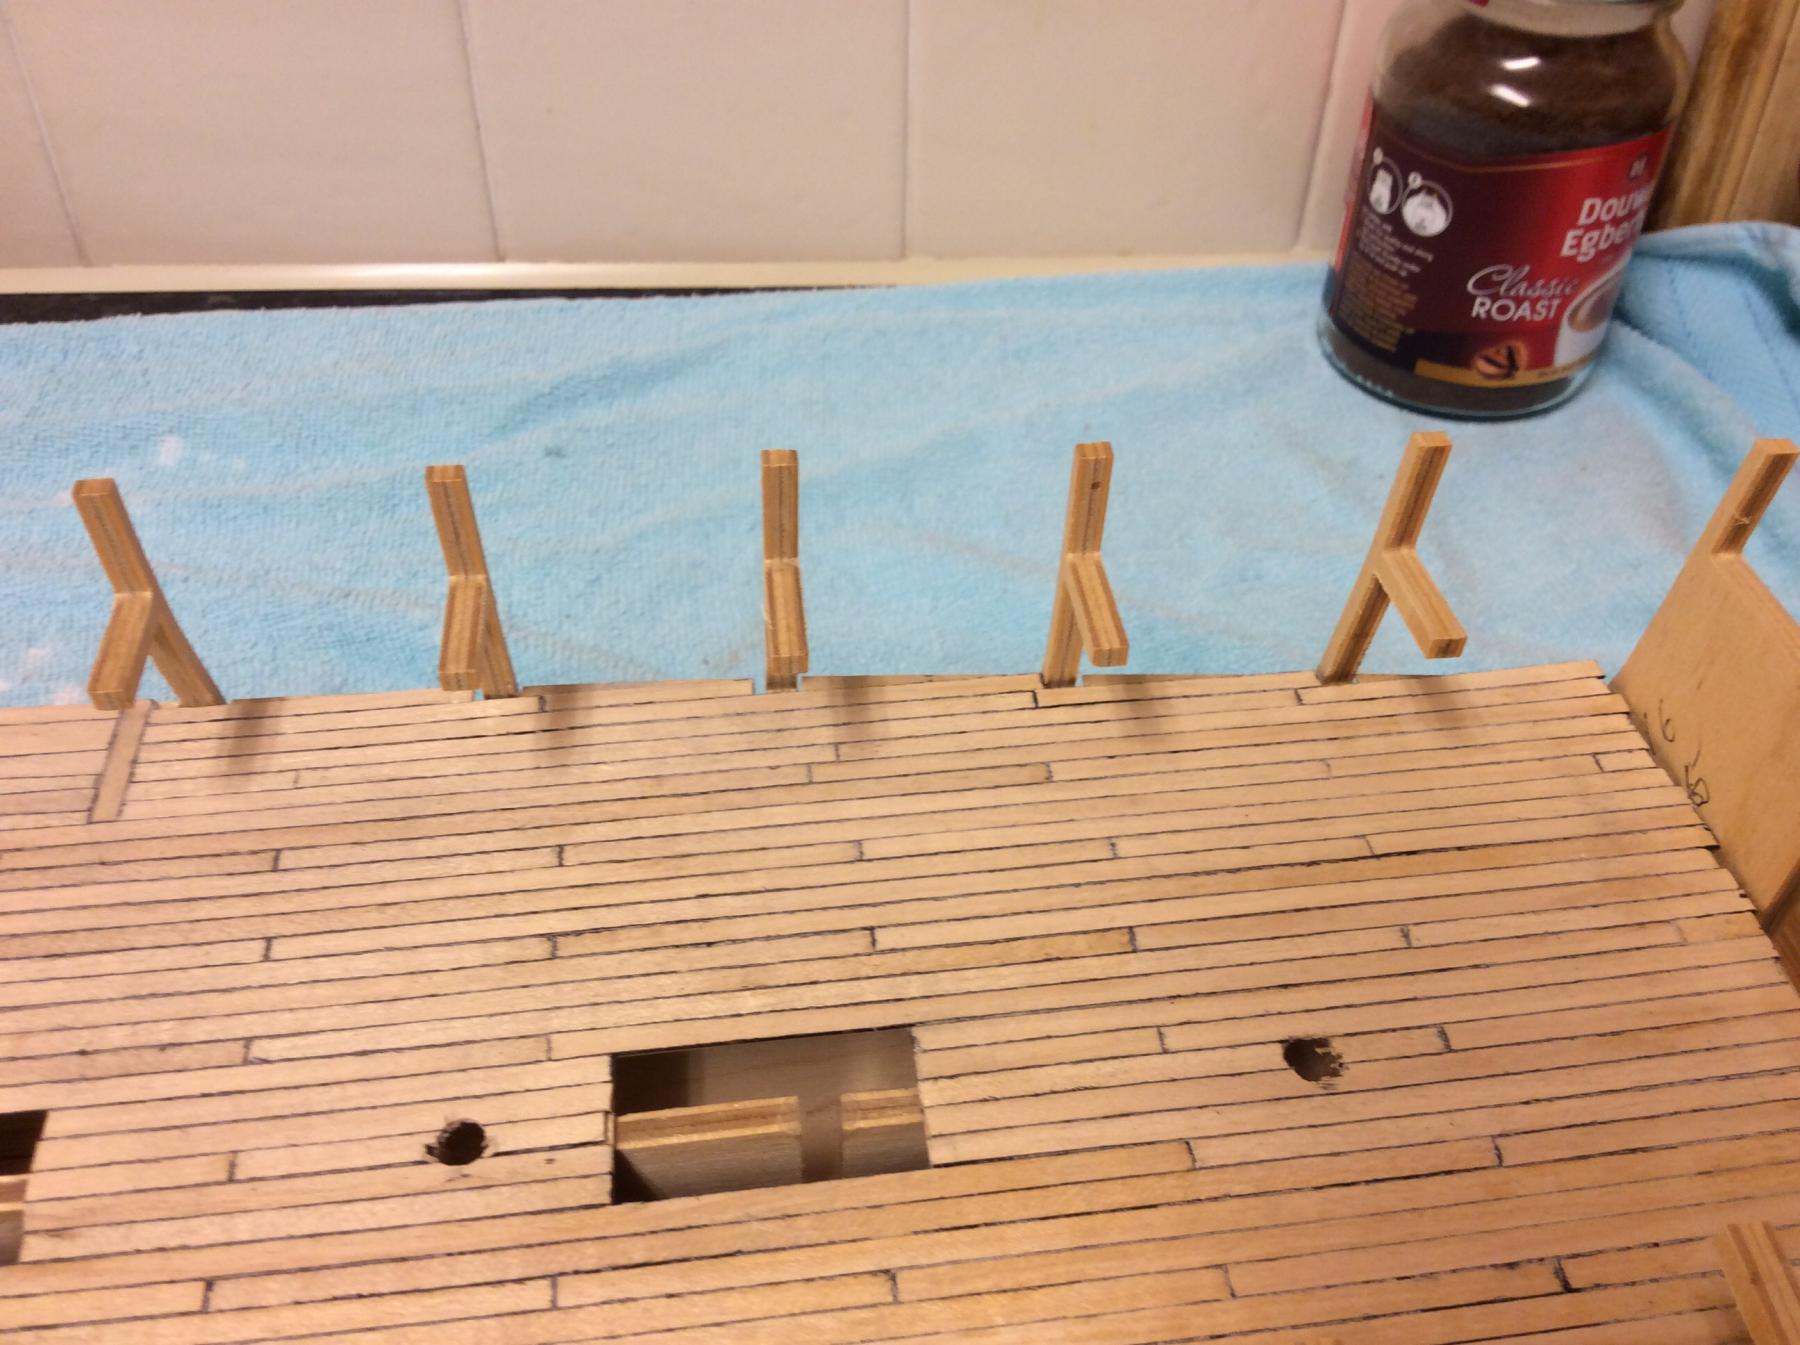
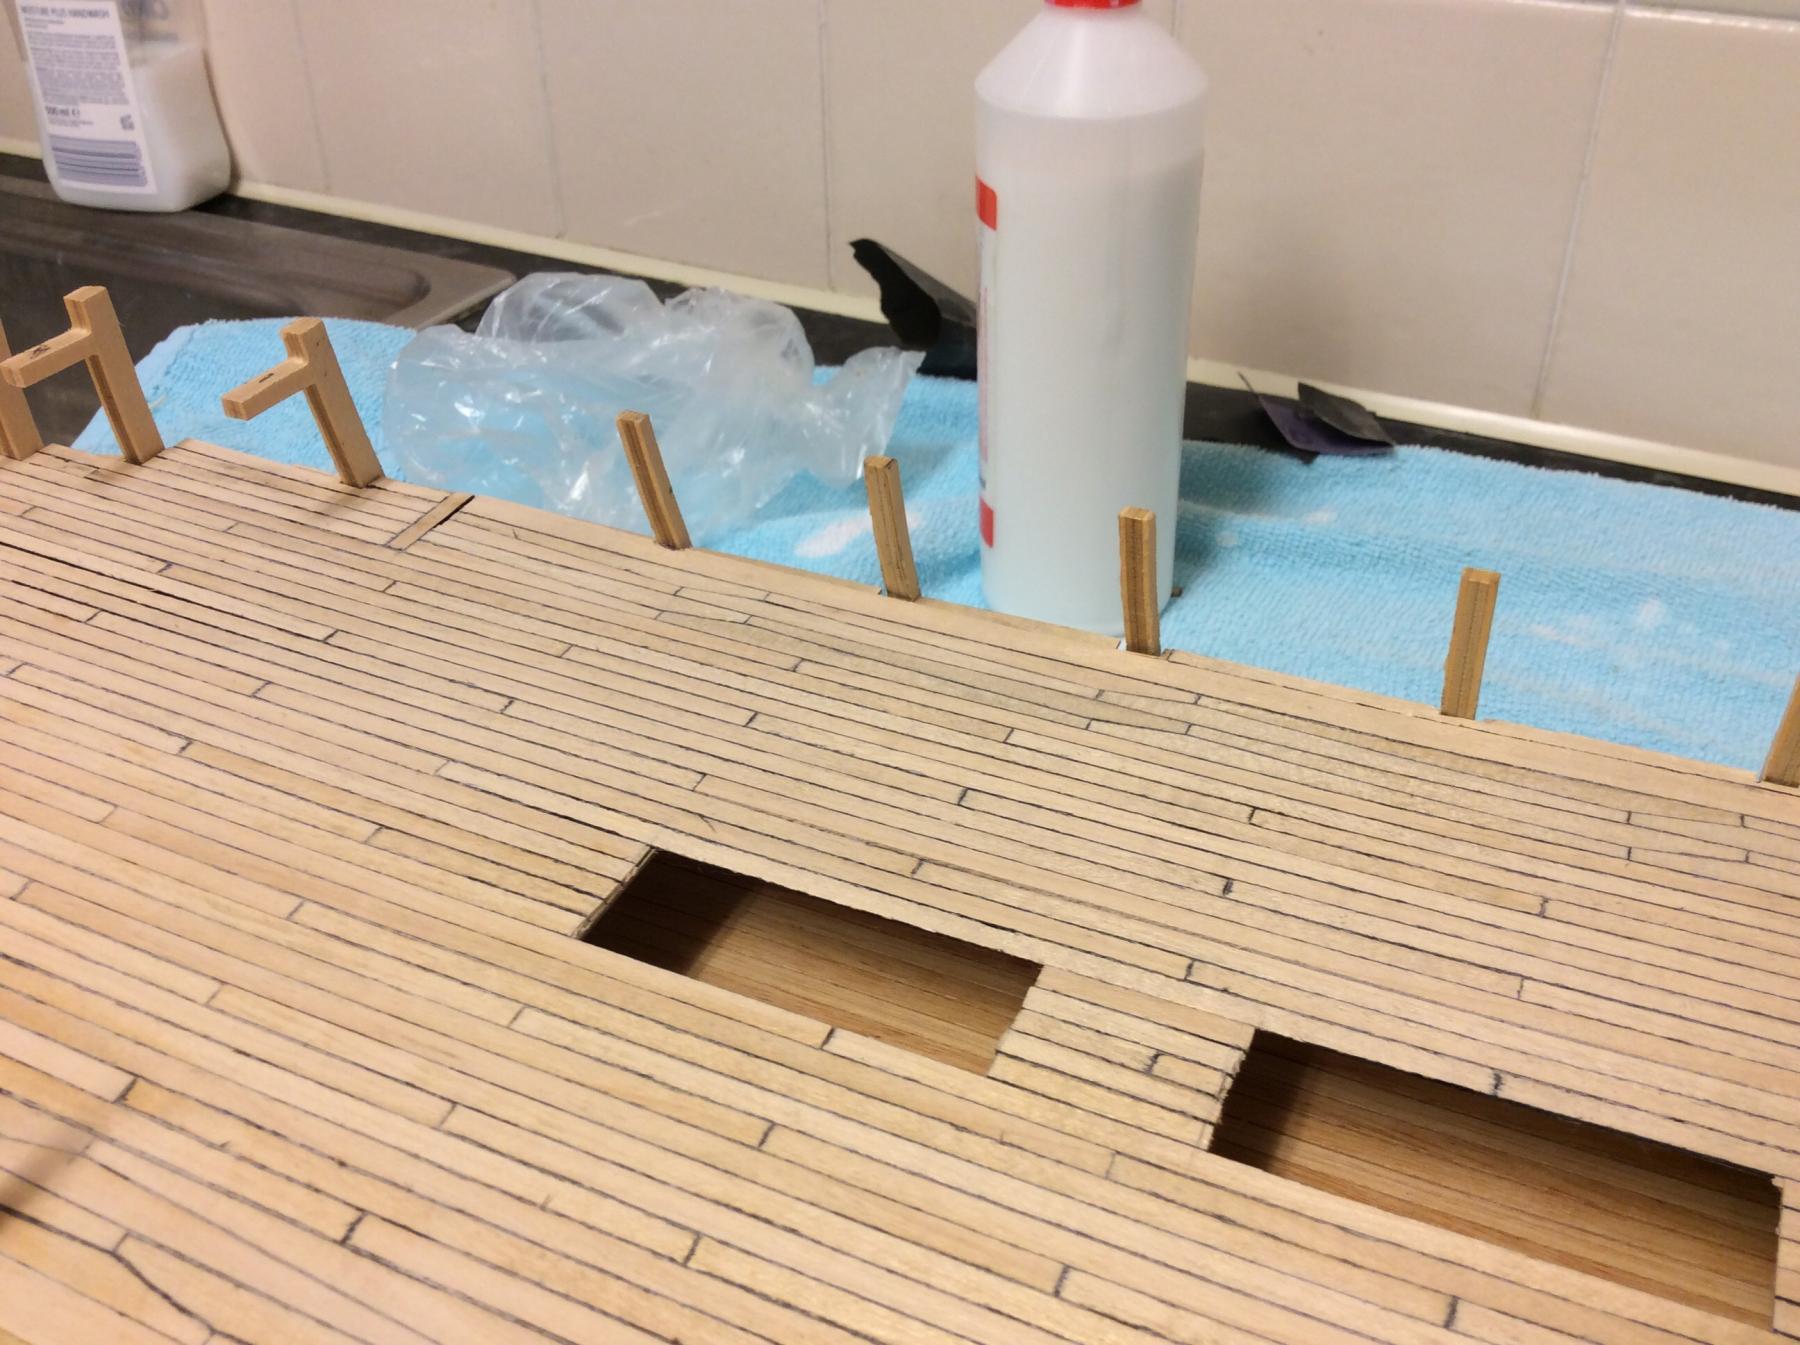
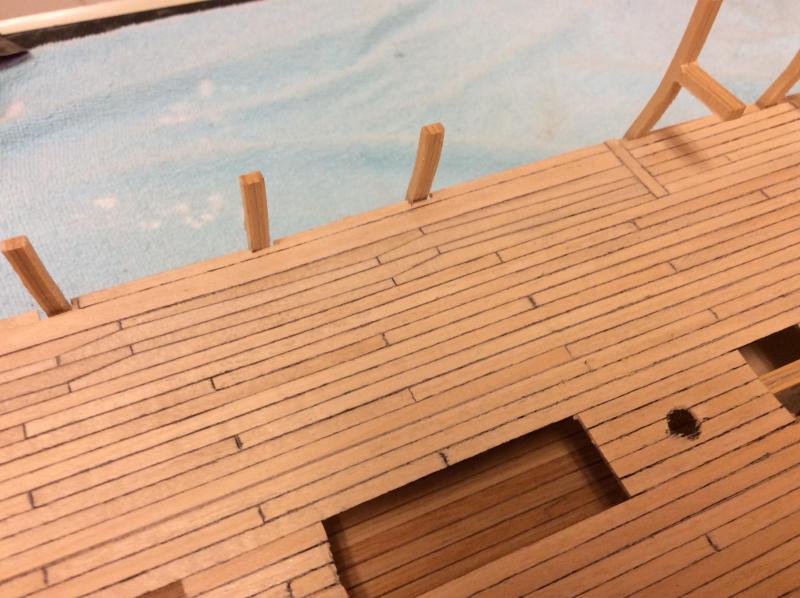
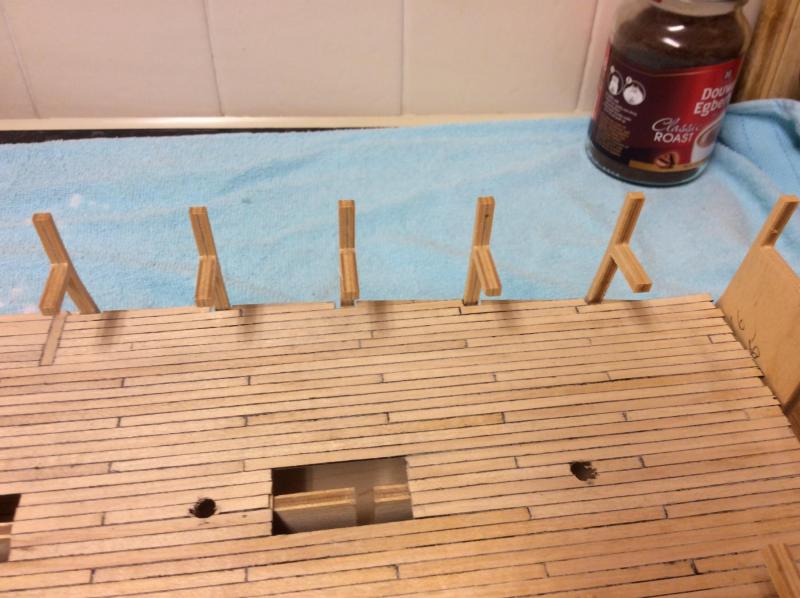
Greetings all Well I am enjoying this build now, after my long layoff, and things are going pretty well. I have completed all the work necessary on the gun deck for now, apart from fitting one broken off upright which needs sanding to the correct shape to follow the curve of the planking. And now I need to temporarily fit the top deck before starting the first planking. The bearding line will firstly need to be sorted, so to taper the rudder or not is the question. I am still not sure what to do. Could anybody tell me how many plan sheets I should have, as I have six, and thought there was one showing all framework assembly ( the bulkheads and stern fitting etc) which may of gone missing, so I do not have any picture of the complete assembly framework shown in the first photo. Anyway thanks a lot for viewing and all your comments, and here are a few photos of my progress. DAVID


-
Greetings Paul Only just found your build. It's going like a dream. Just keep enjoying it. Yep when you are in doubt refer to Gil, you cannot go wrong. Well done DAVID
-
Greetings Jerry Hello young man. It looks like you are enjoying yourself on this build, and it is all looking splendid. I posted yesterday on my Diana log, and sent you a pm last week.. keep enjoying your build and I will catch you later. Regards DAVID
-
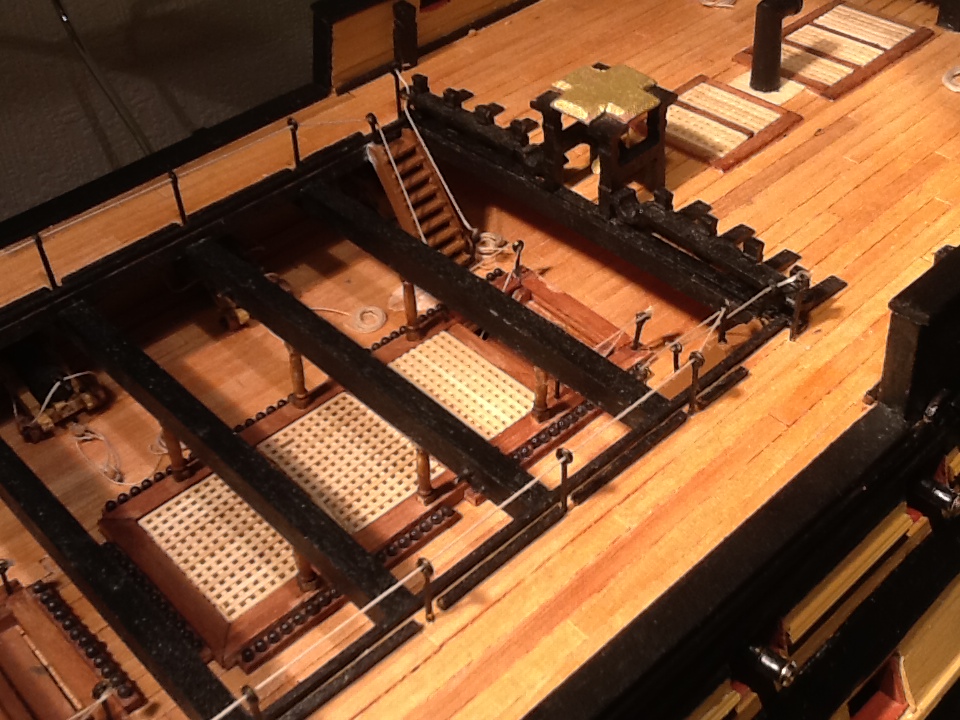
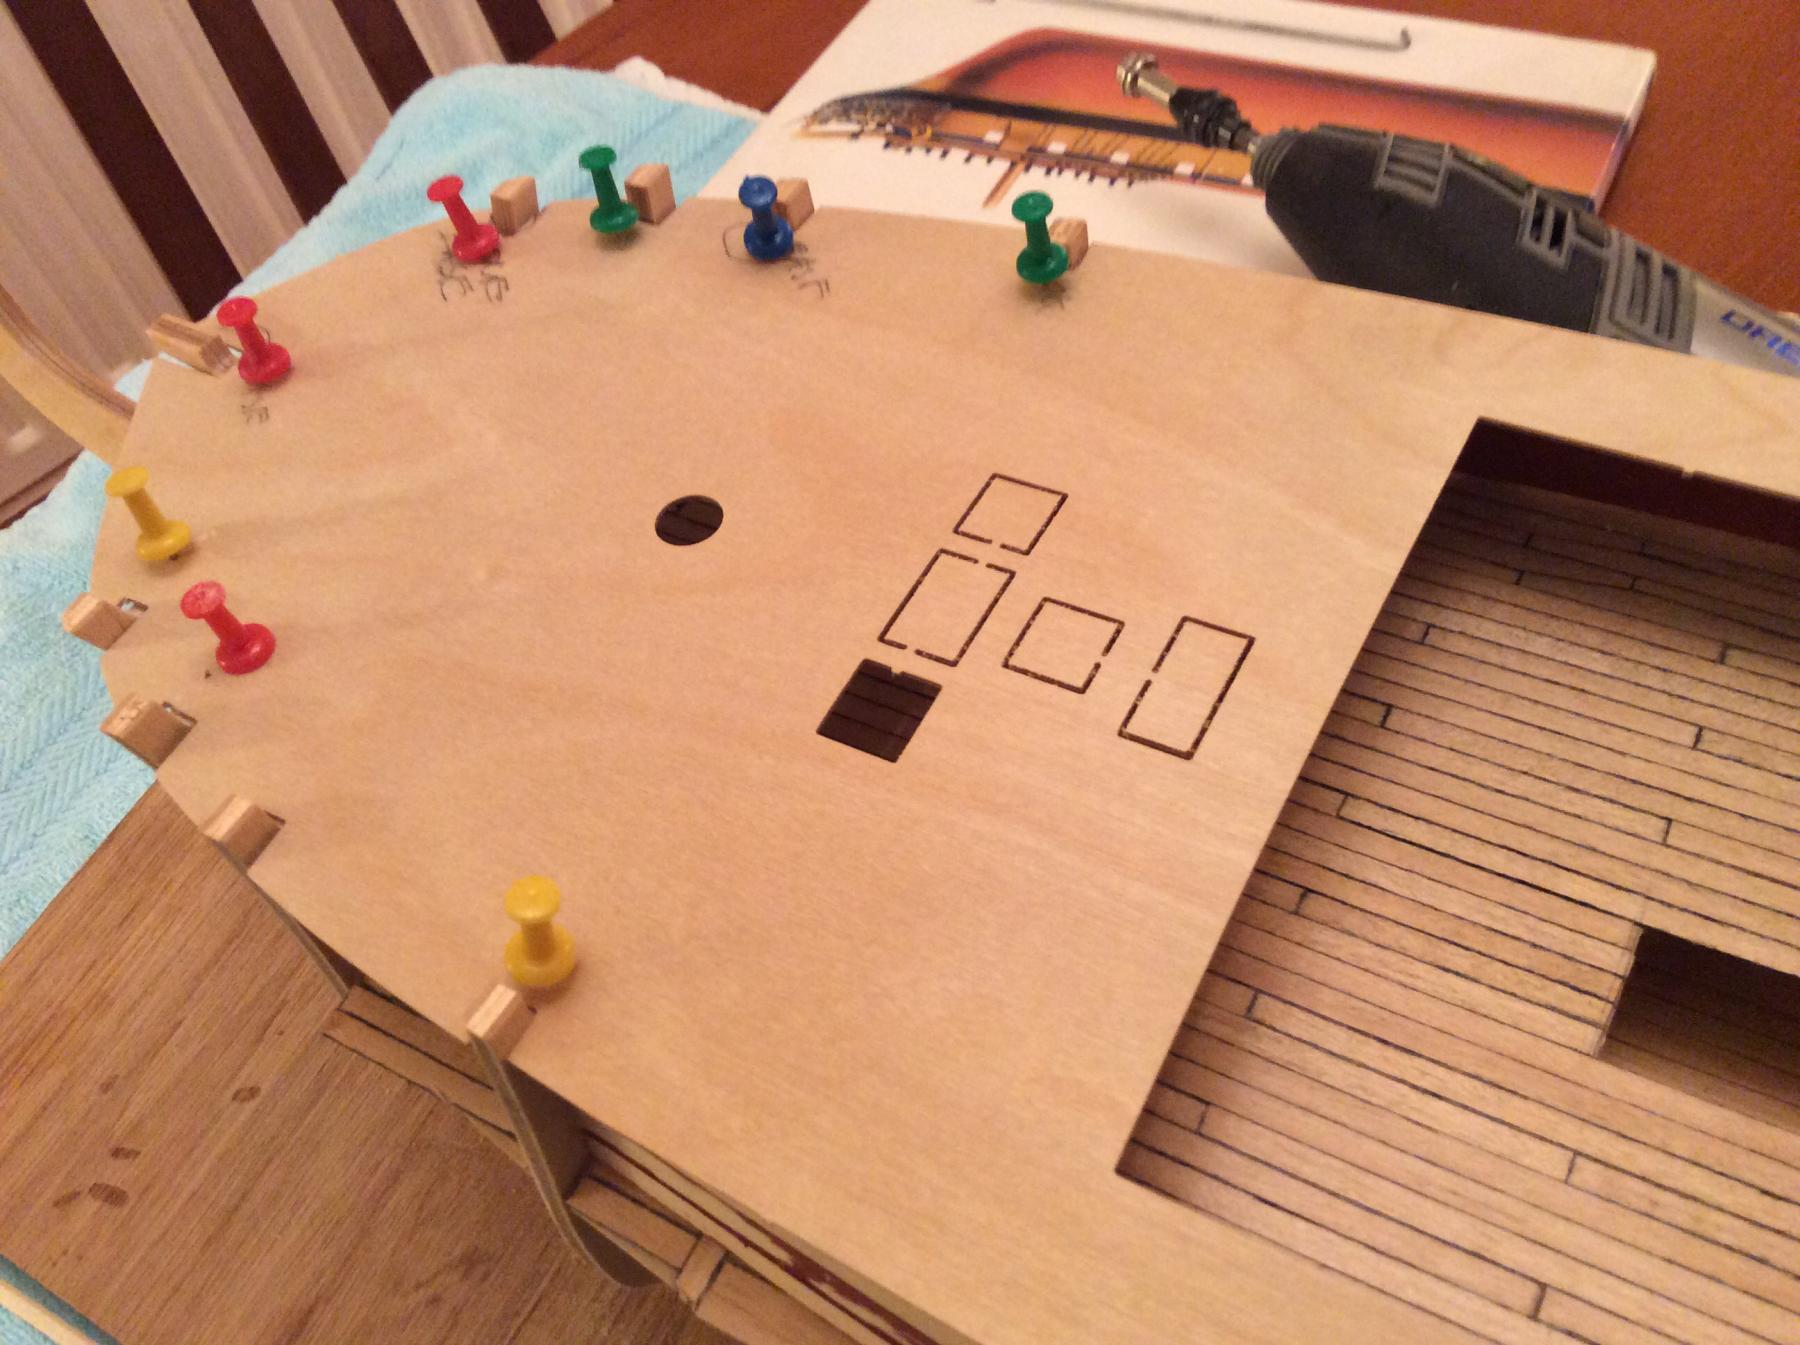
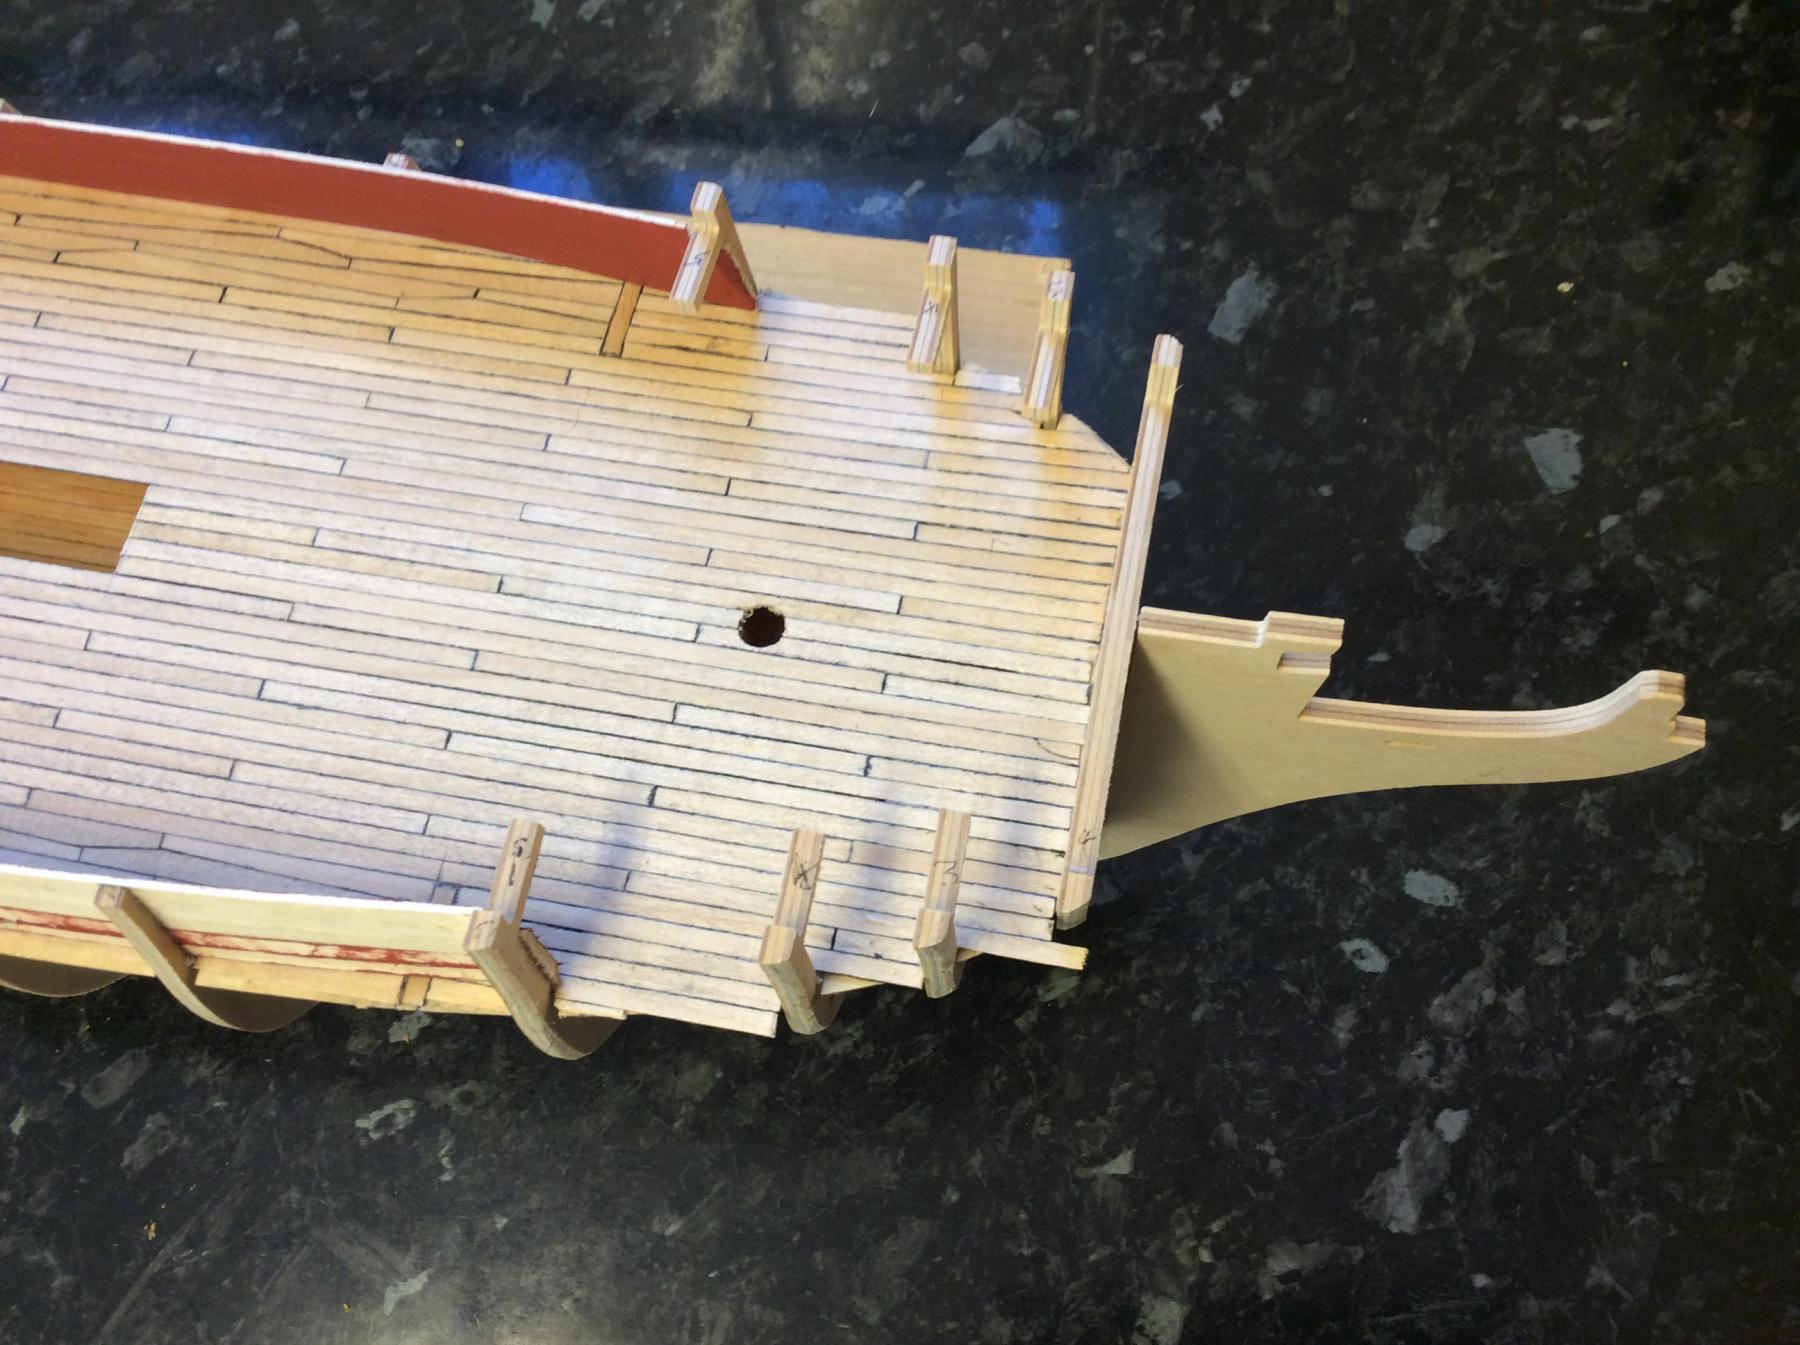
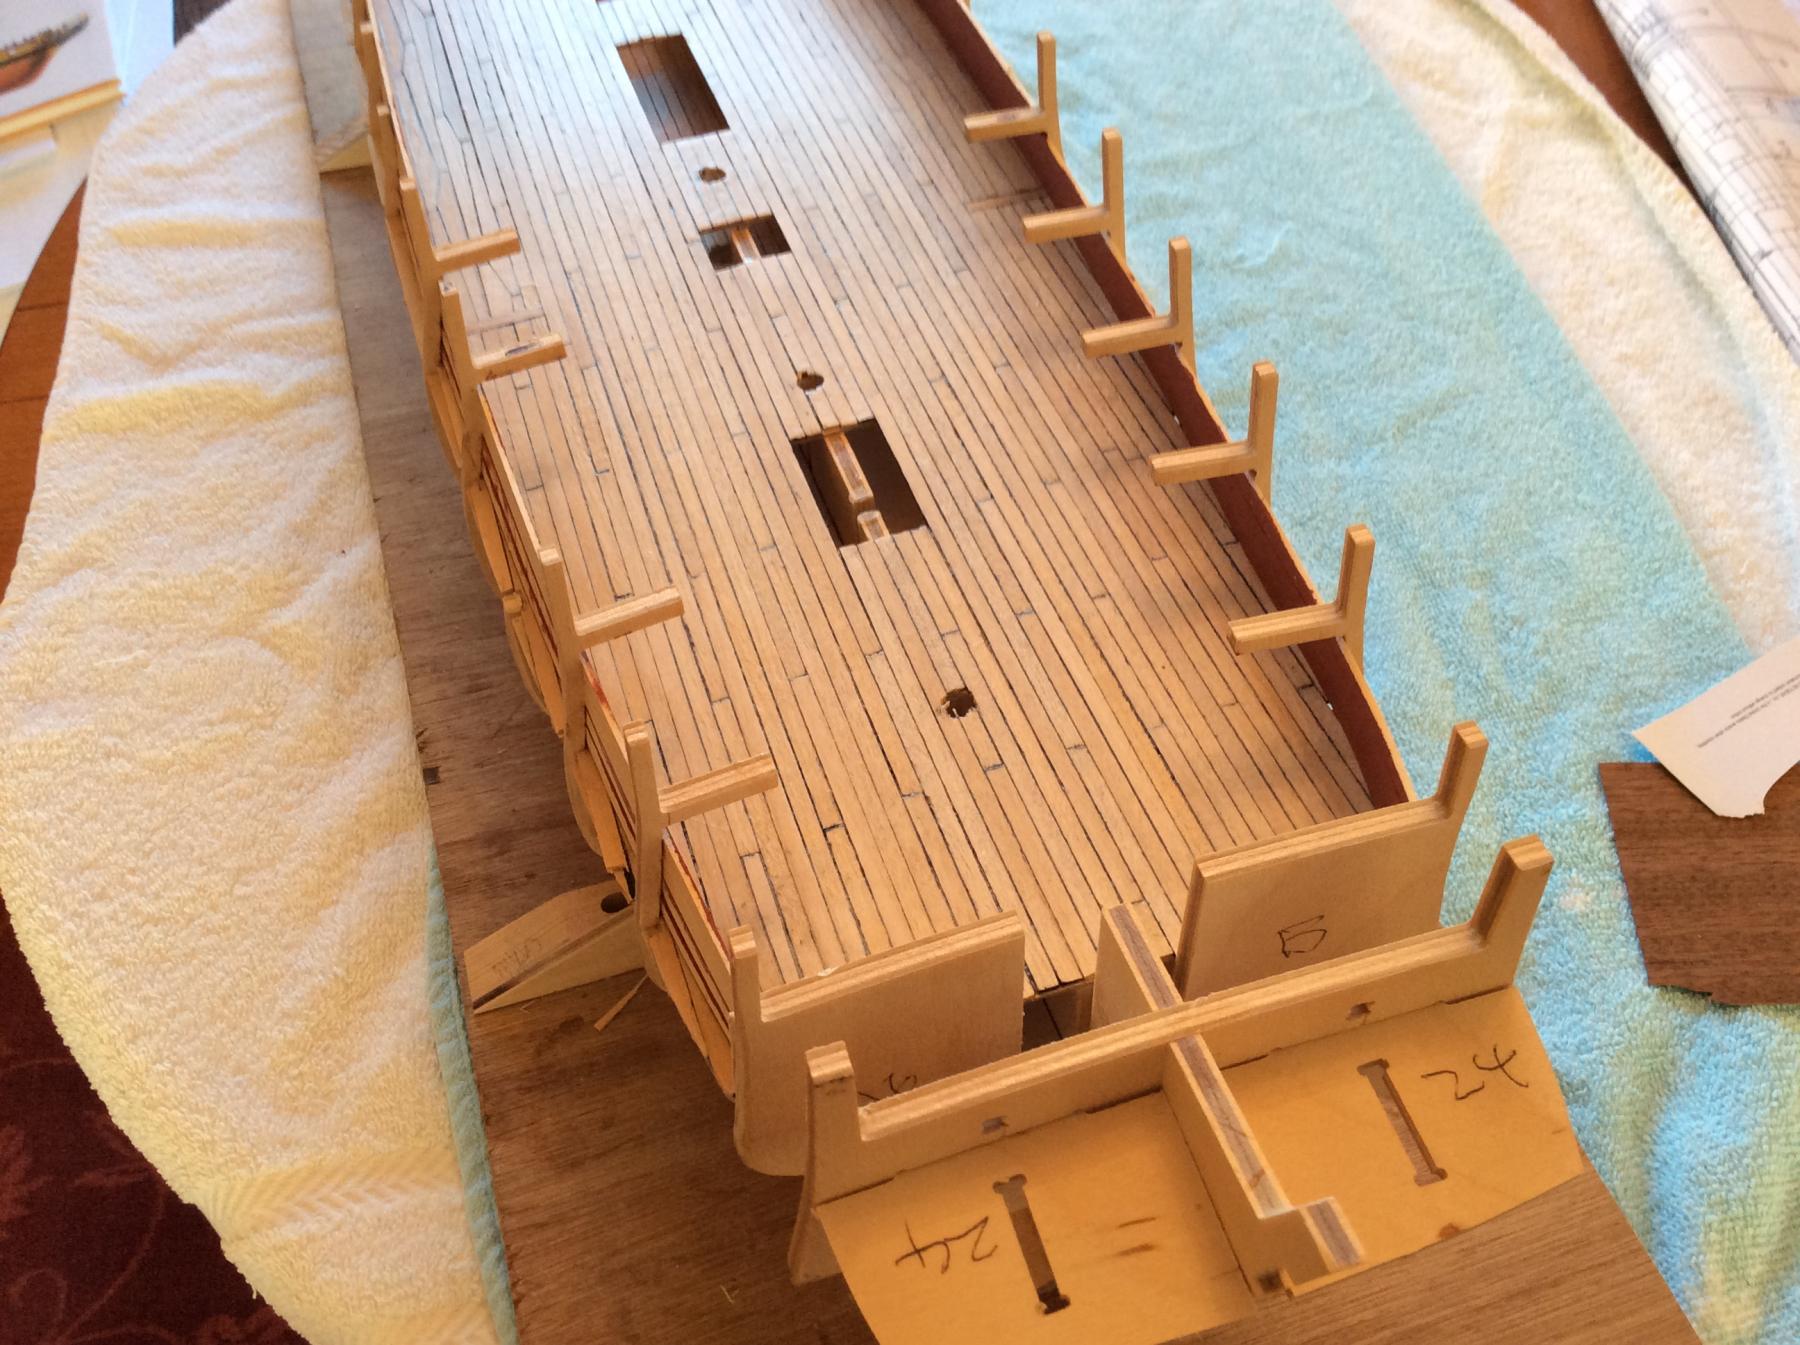
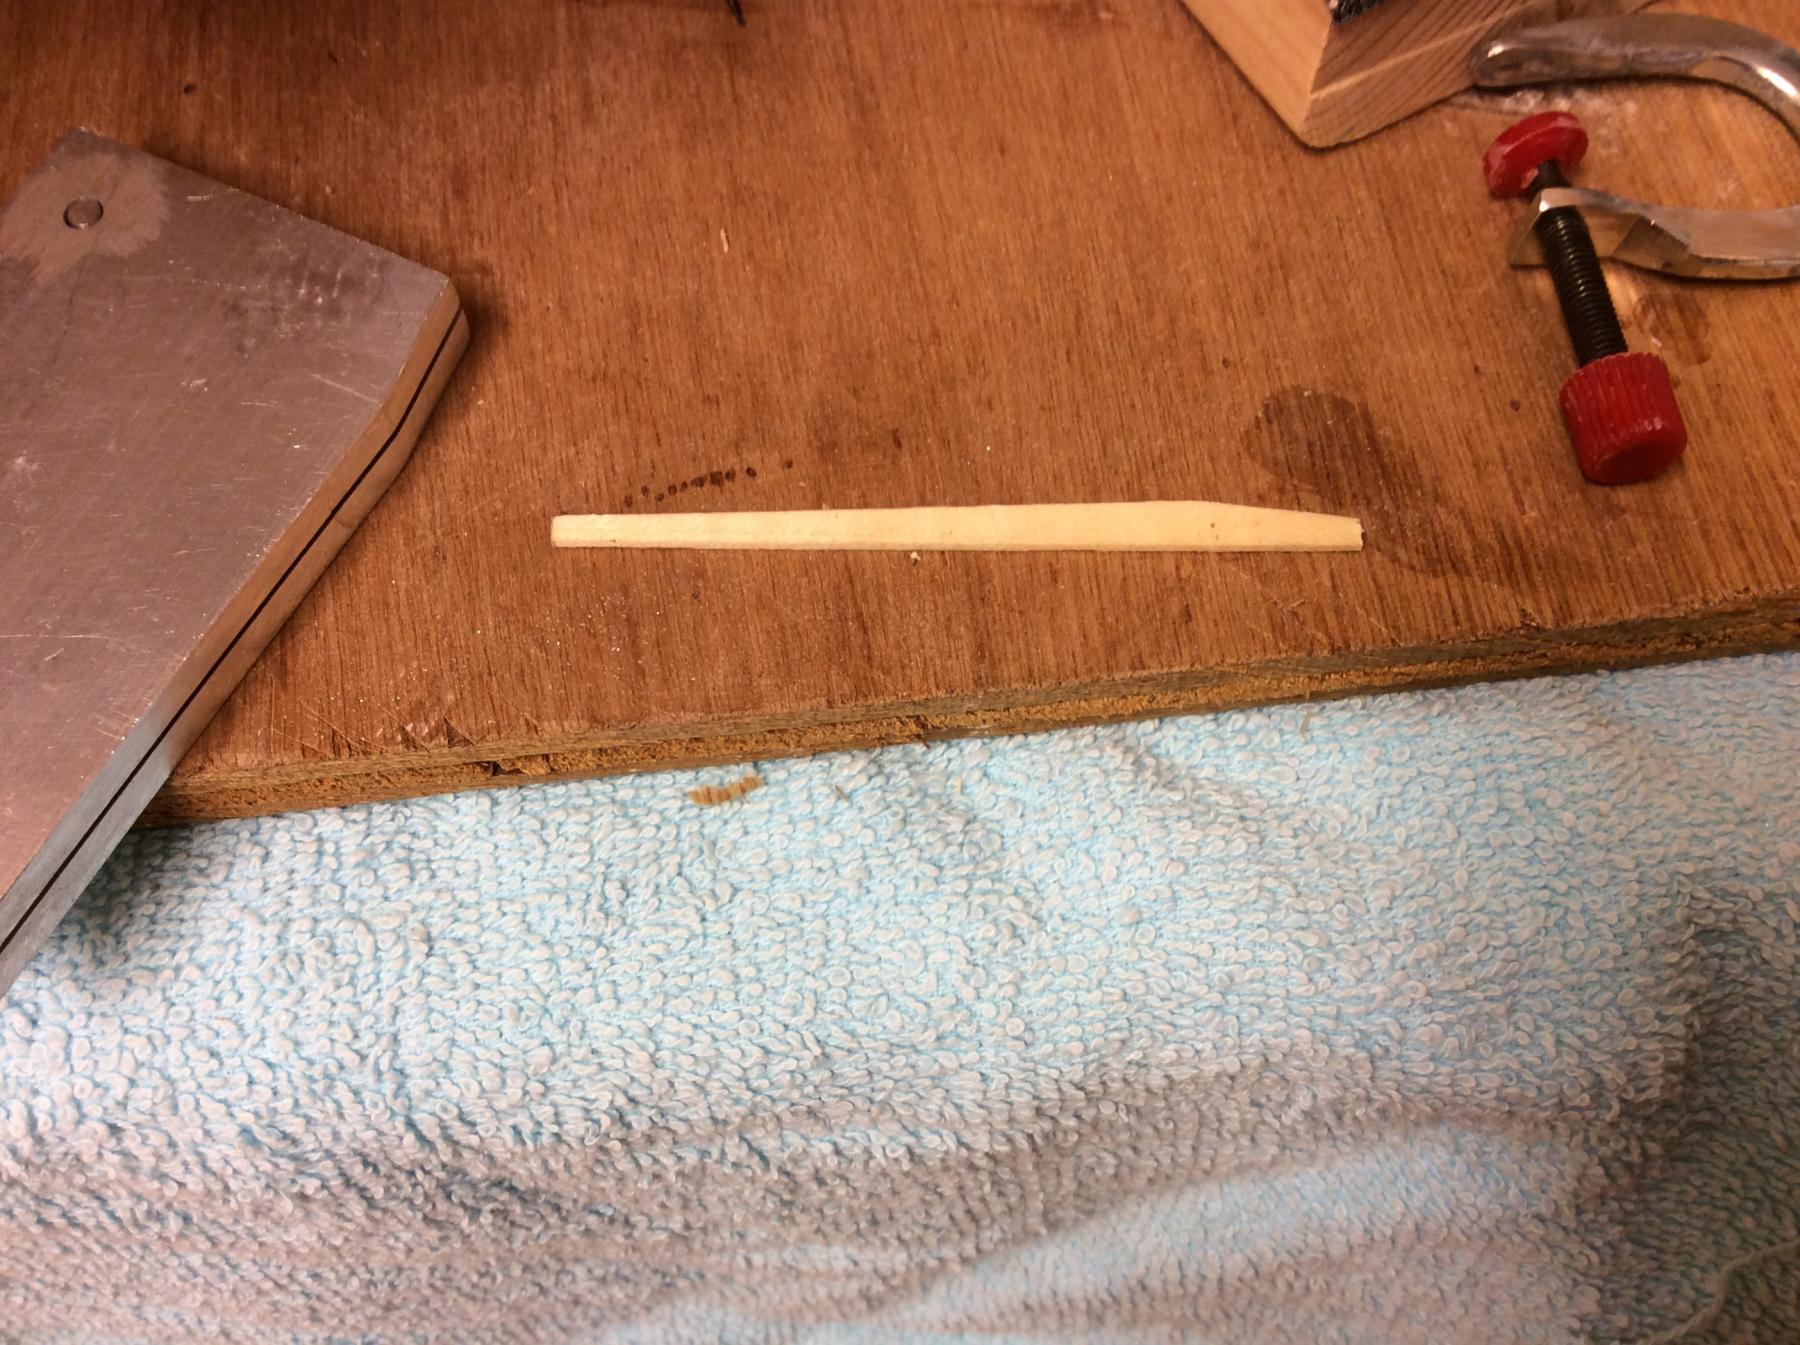
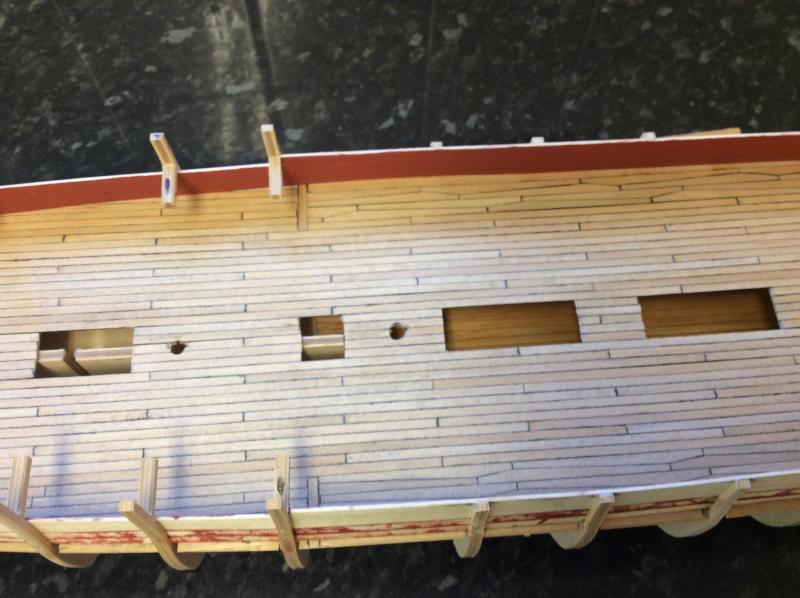
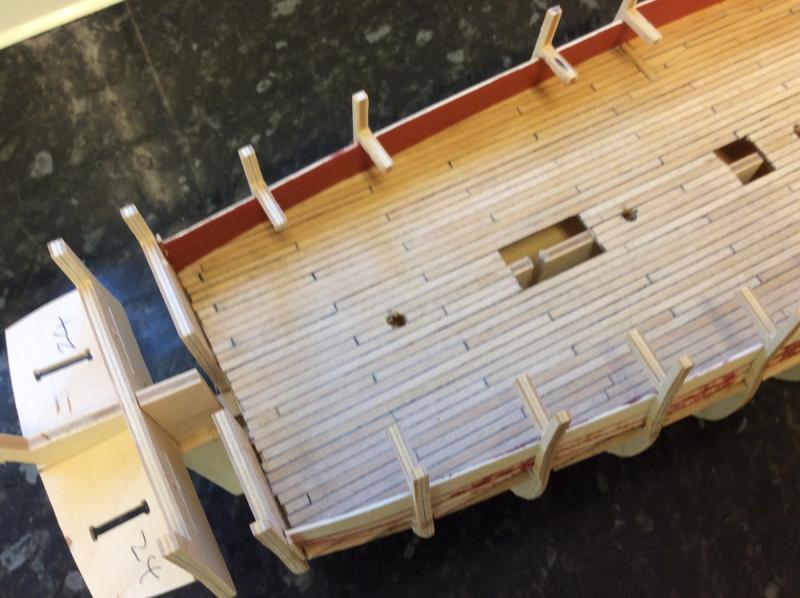
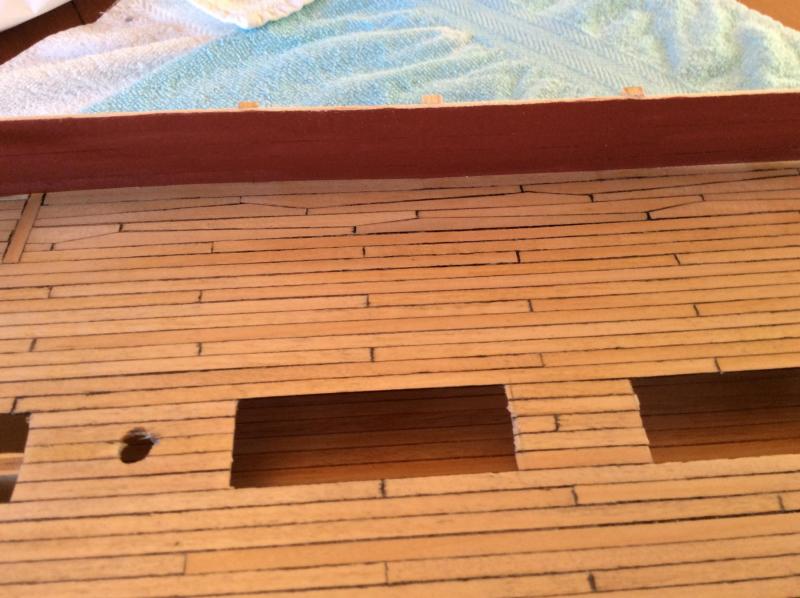
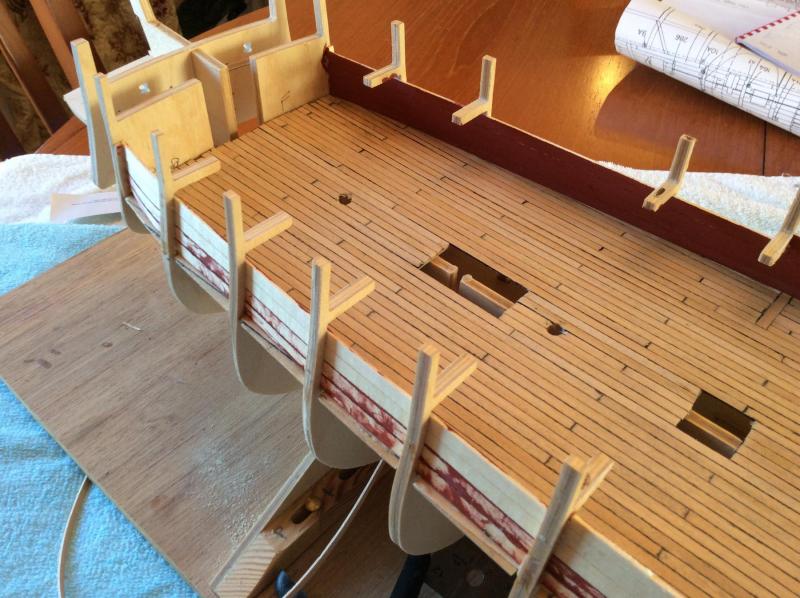
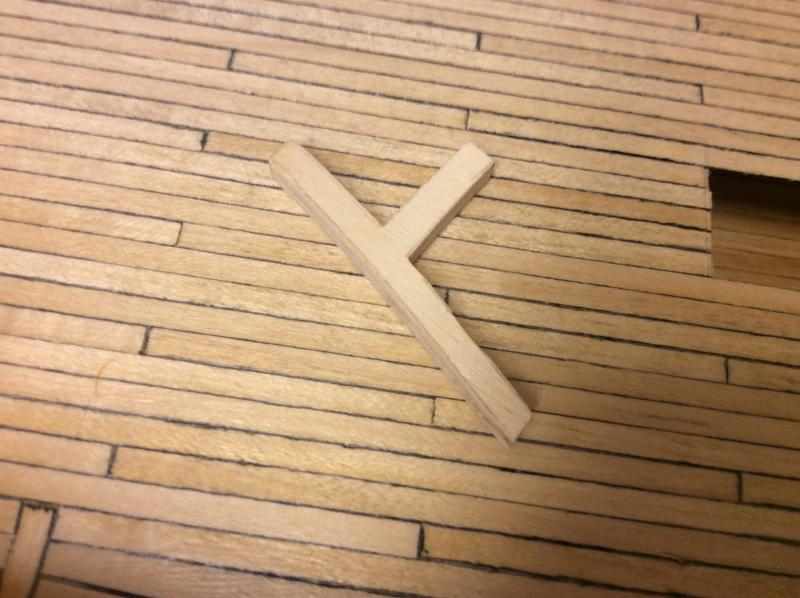
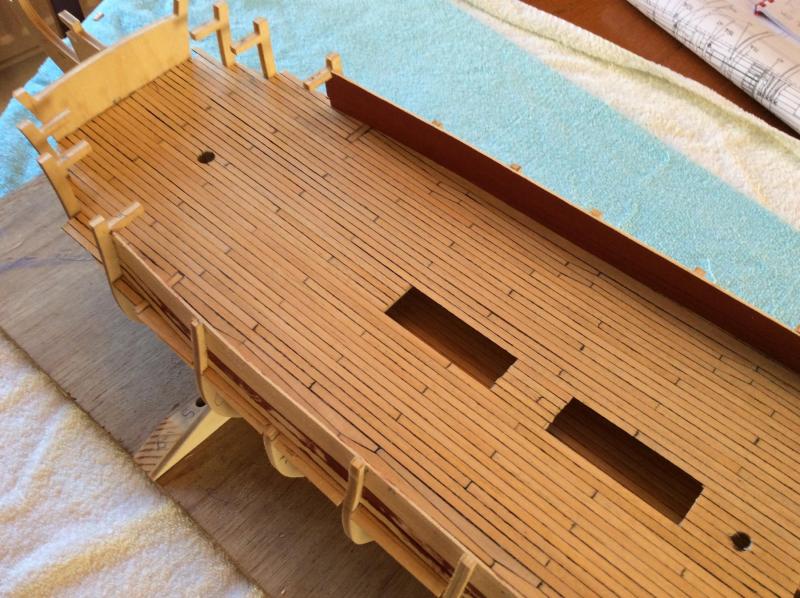
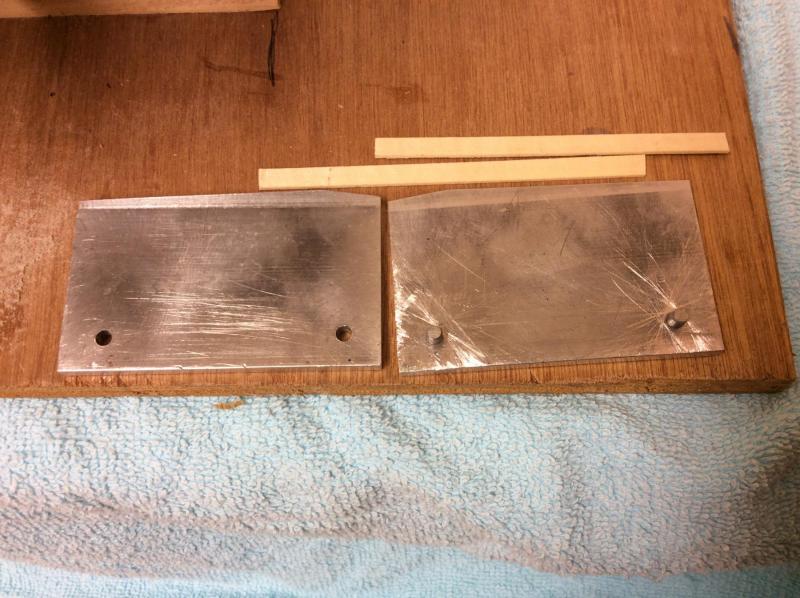
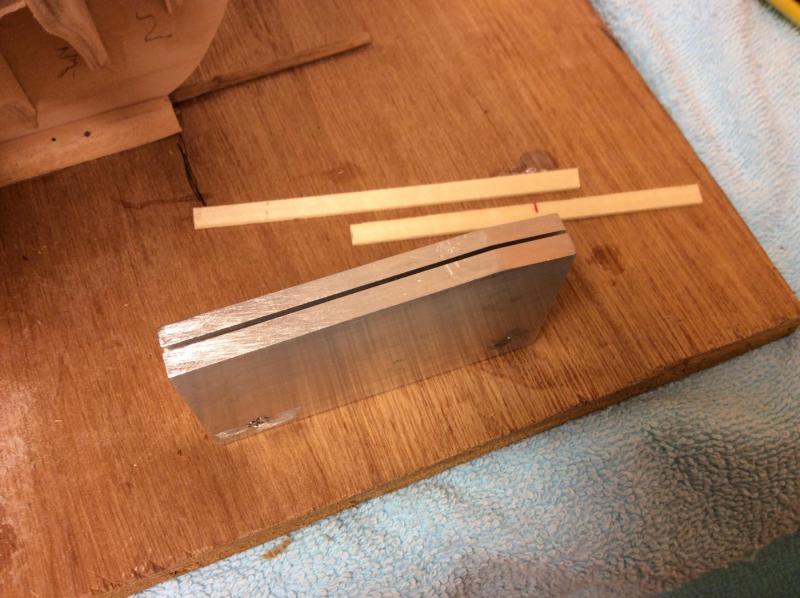
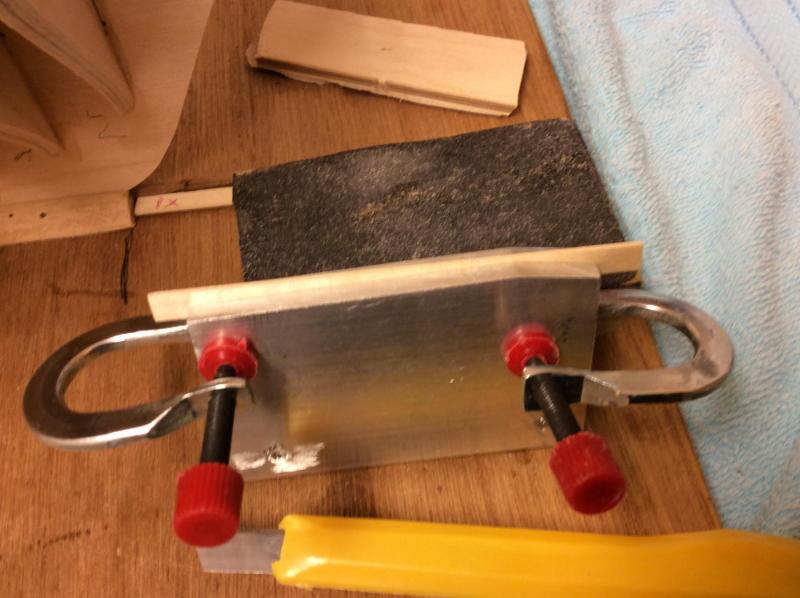
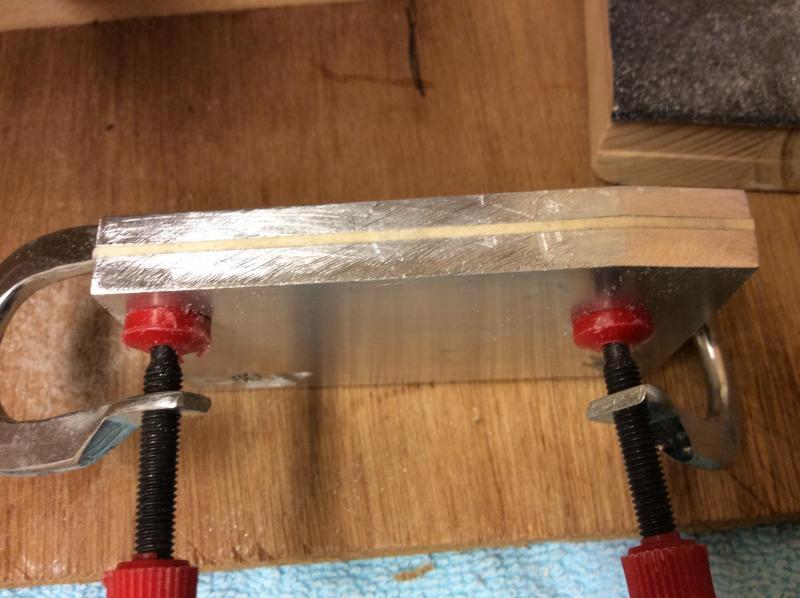
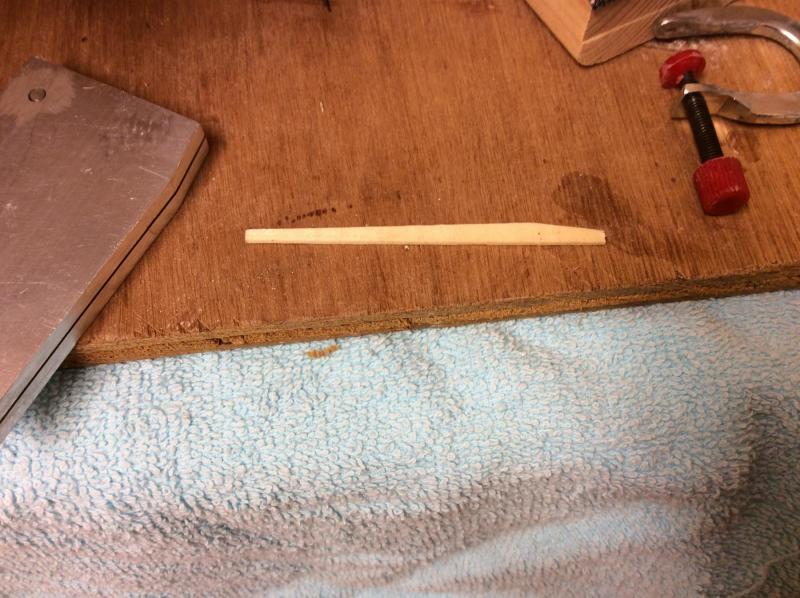
Greetings all Well I am back after being absent for about fourteen months to restart my Diana. Firstly I would like to thank the members who have kept in touch over that period. Ok I have at last completed the planking of the gun deck, and after a coat or two of clear matt varnish and repair of two bulkhead uprights, I shall fit the inner wall of the gun deck. But sadly I have forgotten to reduce the keel thickness at the stern!!!! This is one thing you often advise builders to do before any frame assembly as you all know. So that needs to be also done. I have added a few photos of the deck planking which is decent apart from bleeding on some plank ends, so I will need to get that sorted before any future deck planking. I have added some photos showing a former for the want of another name,which a friend made for me for producing the butt planks. The planks which were designed by Ray on hes Diana gun deck, were he shows how he produced them and also gave the dimensions. As you can see the shape of the plank is milled into face of the plate to a depth of approx 0.50 mm and strip is clamped in between the two plates. The strip is then cut away with a craft knife and Bobs your Uncle. So if any of you members are building the Diana or intending to purchase the kit, let me know when you reach the planking stage, and I will post it to you and you can also pass it on yourself. Anyway it's good to be back . Here's a few photos thanks a lot. DAVID


-
Greetings Robert I have only just returned after a long absence and spotted your build. Well as I suspected nothing has changed at all. The same quality continues. Yep you are doing a cracking job. Clever clogs spotted your mistake in no time at all, or so I though. I thought one set of your stairways was the wrong way around, until I went through all the victory logs, and found the only ones wrong were mine. Continue the excellent work DAVID
-
Greetings rich there are no doors on the entry port. It's all looking good, well done. DAVID
- 414 replies
-
- 5
-

-
- caldercraft
- victory
- (and 1 more)
-
Greetings Ian. It's coming along fine, with excellent planking, and lots of good advice. Just keep enjoying it, well done Ian. DAVID
- 191 replies
-
- 2
-
-
- victory
- caldercraft
- (and 1 more)
-
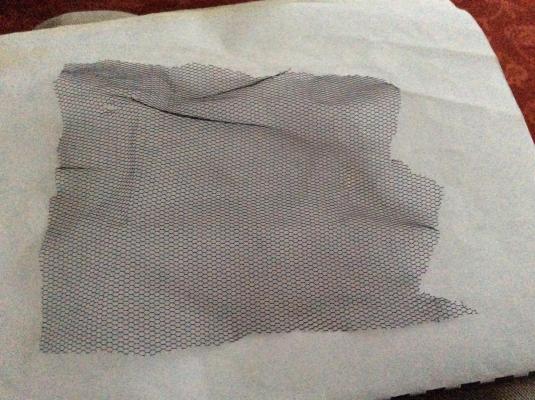
Greetings RIch This is what i was advised to use, which you may have seen mentioned on other logs. It's called tulle and is used for the likes of wedding veils. You might find it at. FABRIC LAND It costs about £1 a sq metre. DAVID
- 414 replies
-
- 2
-
-
- caldercraft
- victory
- (and 1 more)
-
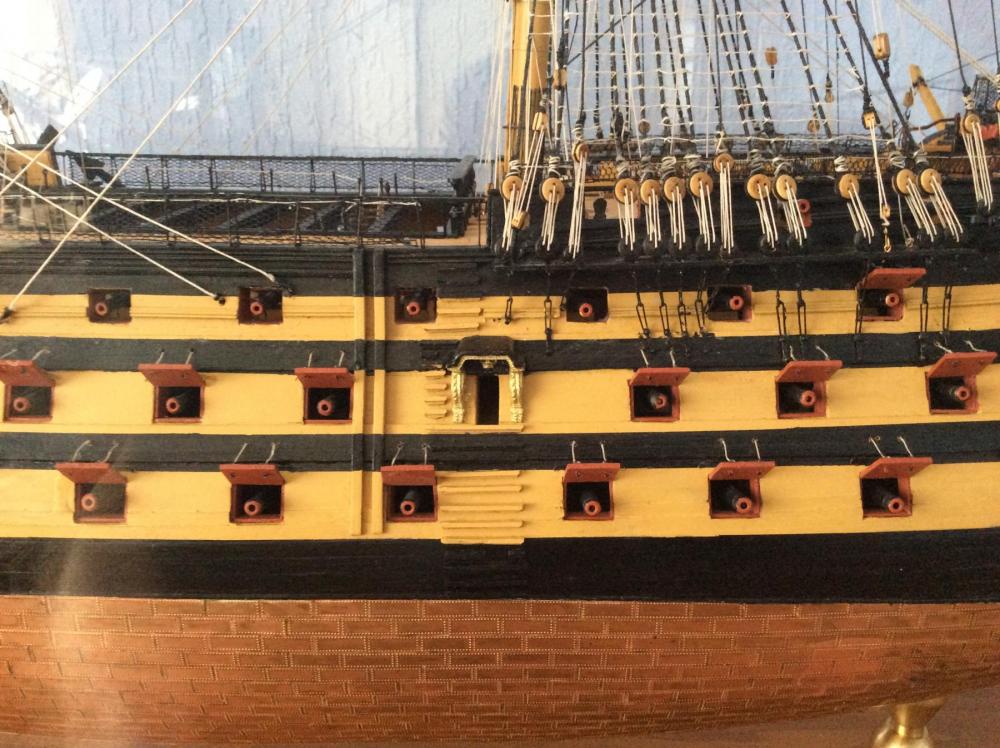
Hello rich The area you point out I guess is infront of the snatch block. Part number 125 ( main rail timber head) fits in front of the snatch block, and the plank sheer part number 380 fits between the timber heads as does the fife rail. See page 28 -29 the beakhead capping assembly, photo 25&26. The fife rail assy part 405 tucks up to inside face of the timber head The timber heads need to be shaped. DAVID
- 414 replies
-
- 2
-
-
- caldercraft
- victory
- (and 1 more)
-
Greetings Heinz Wonderful build, We often hear it, but we have something special going on here. Your work on the stern and galleries is exemplary. Well done Heinz, just keep enjoying it DAVID
-
Greetings Charlene Mine was whiter than that!!!!!, it was so white I got sent out to replace the ice cream !!!! Good luck with walnut planking, keep it very neat above the copper tiling, just take your time and enjoy it...DAVID
-
Greetings Charlene Planking is no prob, it does not matter how it looks now. Once it's smoothed off neatly using filler, the second planking will be easy as beds onto the smoothed surface. My first planking was so bad someone asked me were the ship was. I told him it was behind the filler. David
-
Greetings Ian Don't use primer at all on the finished first planking. Use filler, but Only on any low point areas, and small gaps. Of course you can use PVA and CA were you think it helps. Most builders primed the hull after the second planking before adding the copper plates, as it gives a nice clean an clear surface to work on if you follow. Others will also give you advice, which you will never be short of during your build. Well done Ian, it's looking good. Take your time and simply enjoy it. DAVID
- 191 replies
-
- 3
-
-
- victory
- caldercraft
- (and 1 more)
-
Greetings Dominic The 1x16 walnut will tend to split along the grain when you cut it. Put CA on the strip before you cut it to avoid the splitting. You will find that a lot of the walnut parts will break up when you remove them from the sheet. For example parts 193 , 191, 192, 132 to name a few. So CA them first.DAVID
-
Greetings Ian Don't worry about your first planking. It will all be ok once you use filler and smooth it all off. You will find the second planking is easier, as the planks bed down onto the first planking. I found that I did not have great deal of in filling to do. Take your time and enjoy it. DAVID
- 191 replies
-
- 1
-
-
- victory
- caldercraft
- (and 1 more)
-
Hello Dominic Are you saying the inner bulwarks are not level through the gunport???? If so your inner bulwarks are to high you need to remove material from the base of the bulwarks to level them with the outer gunports before fitting them. Are the inner ports highest ???? DAVID
-
Greetings Gary As ever, and as expected, wonderful progress. It looks like the rudder and gunport lids are in sight. Cracking build Gary. Just keep enjoying it...DAVID