Shipyard sid
-
Posts
1,106 -
Joined
-
Last visited
Content Type
Profiles
Forums
Gallery
Events
Everything posted by Shipyard sid
-
 Greetings Mark Well we are going back a long time here !! I Remember it well. I have just had a look through a few years of your log, and the work is very good, especially the rigging which is excellent. I am supposed to be building the Caldercraft Diana, but it has been waiting a few year for the second planking to be finished, as I myself have not been around for a while. Anyway good to see you again, and my best advise is as always just take your time and enjoy it. Regards David
 -
Greetings Mort Cannot see you needing much advice on your build, with all the encouragement and advice you have given to other builders over the years. Good luck with your build. I reckon you will have more than a few followers. The only advice I can give you is the usual, Take your time and enjoy it. Best regards DAVID
- 60 replies
-
- 2
-

-
- victory
- caldercraft
- (and 1 more)
-
Greeting Patrick Four years on and still no dam dust !!!!!!! Welcome back. I have only just returned with my Diana. Well there’s not a lot to say is there?? It’s all been said. Simply Brilliant. Only one concern, slow down a bit, don’t rush it!! Best regards DAVID
-
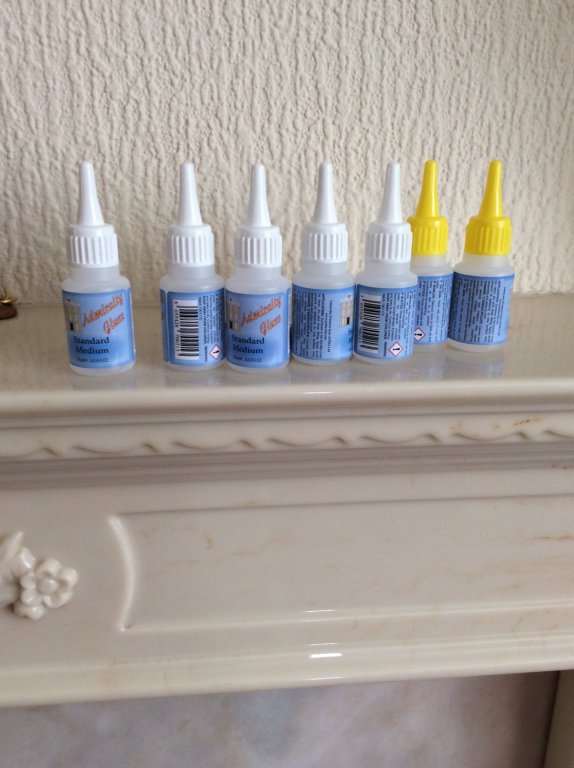
Hello Peter Not done any work on it for a while, but started again yesterday when I seen your post. Just this morning received seven super glues from Cornwall model boats. My planking is a shambles, so I will need them ! And I will definitely not post any photos apart from these four until sanding and filler is applied. If you cannot see the ship on my next post it will be behind the filler.good luck with your build. I don’t know if you have started a build log, let me know if you have. Less haste more speed ?? Doesn’t seem to work for me. Best regards DAVID


-
Greetings Well done, exellent work throughout your build. Just keep enjoying it. Yes it’s looking really good. regards David
-
Greetings Kevin What do you reckon Kevin ?? Doesn’t it look good ? The rigging really sets it off. Take your time and just keep enjoying it. DAVID
- 1,319 replies
-
- 4
-
-
- caldercraft
- Victory
- (and 1 more)
-
Hello max
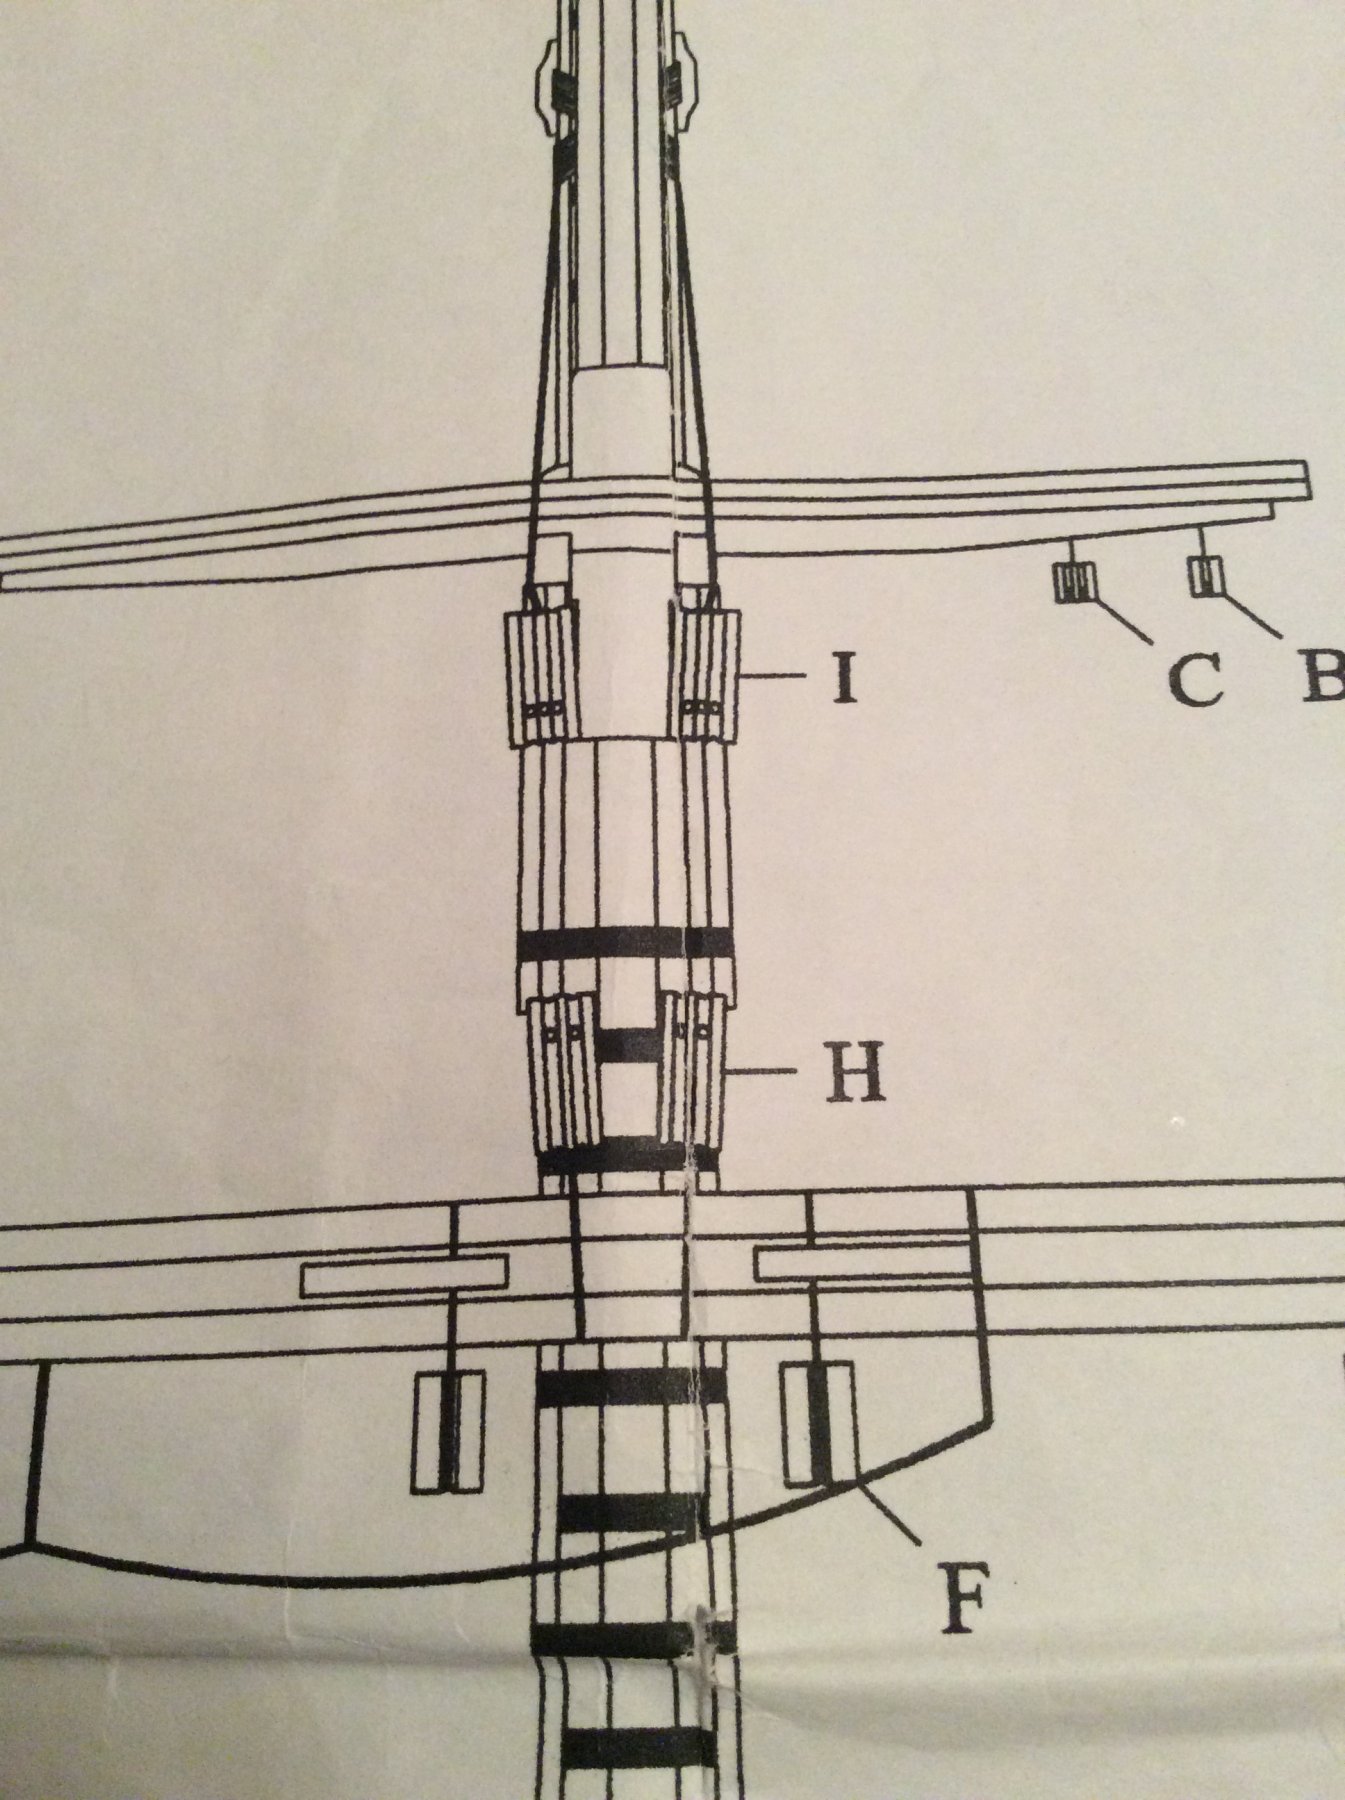
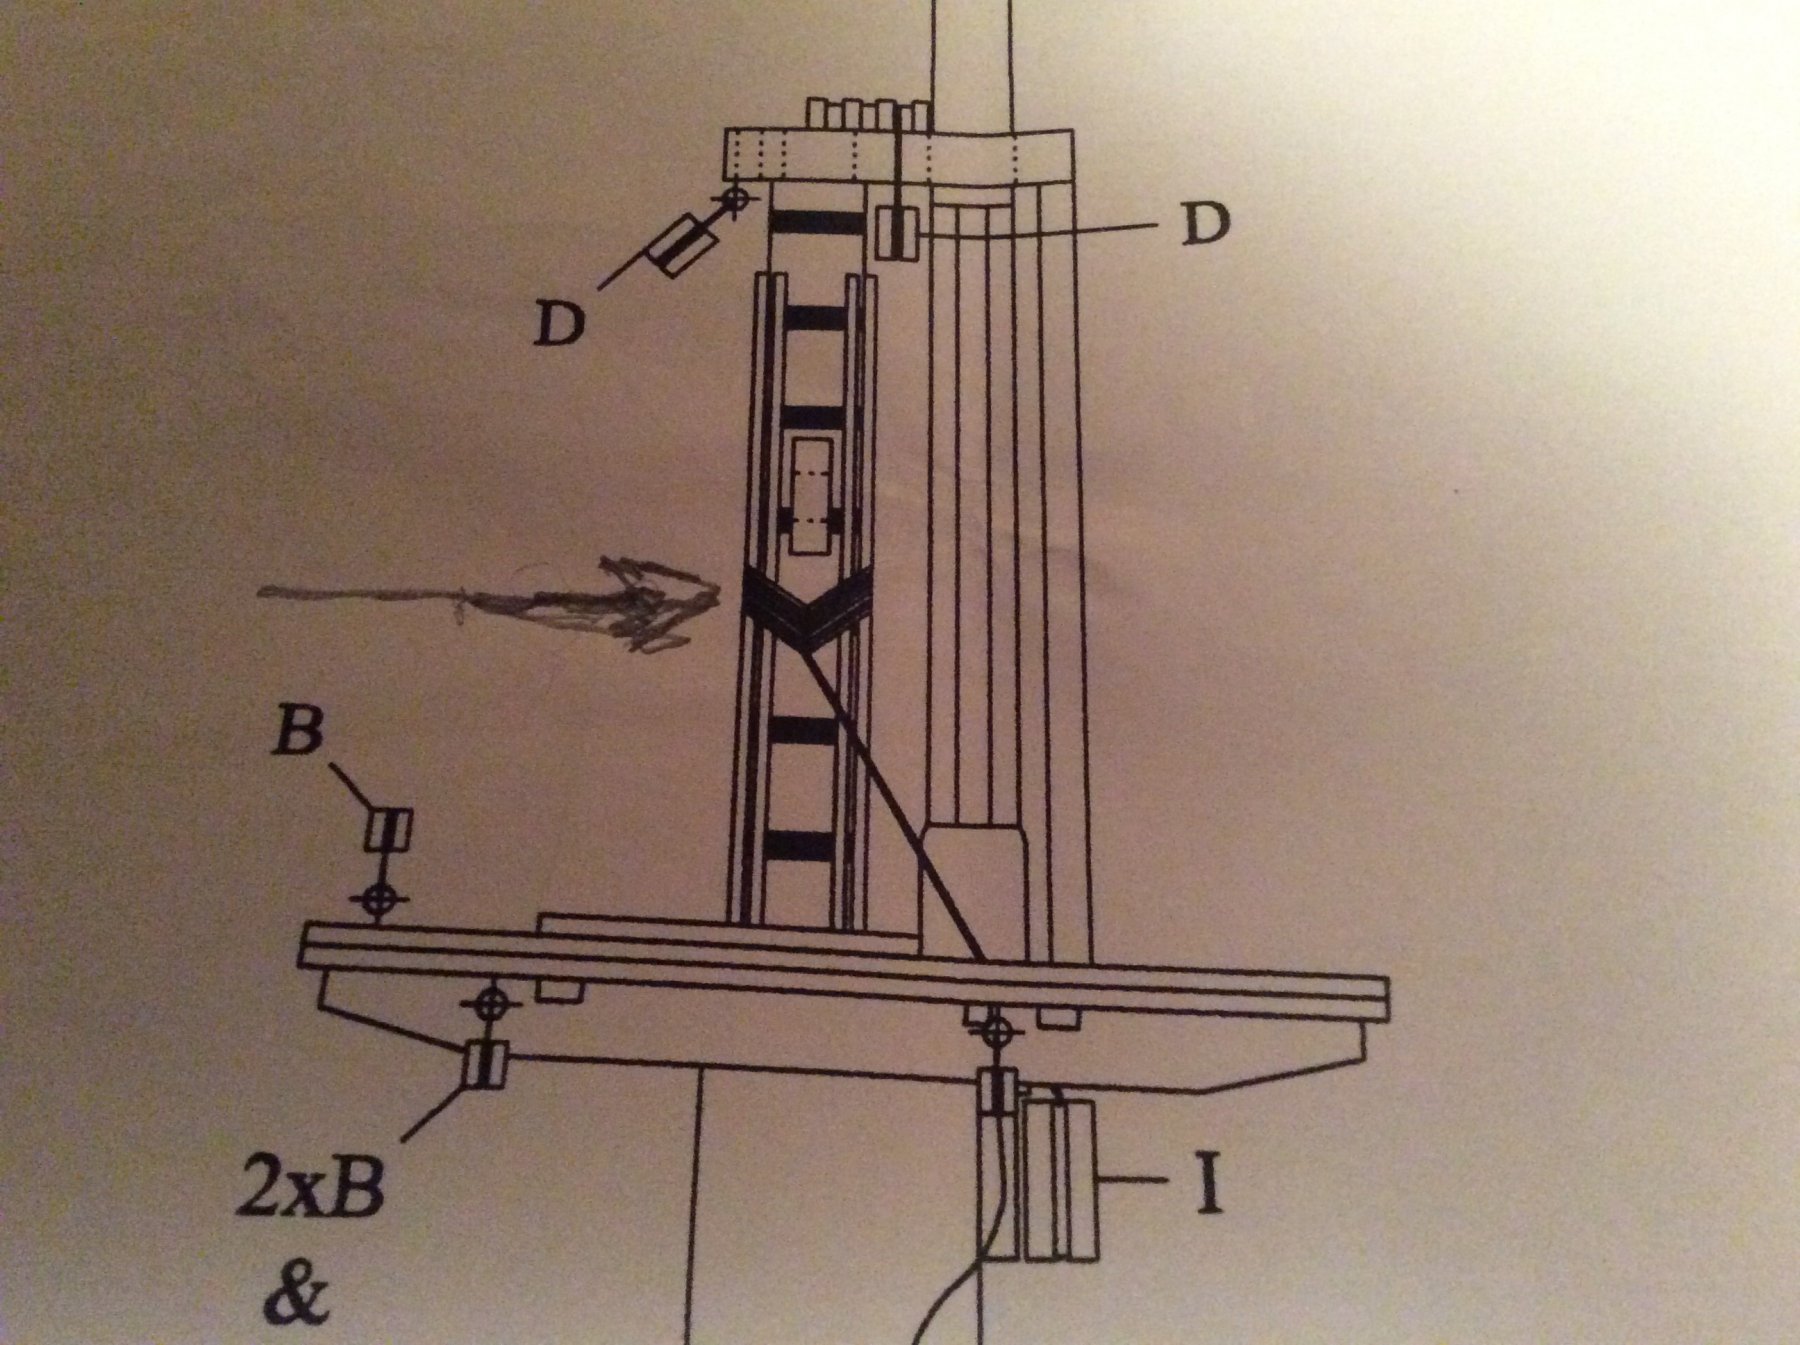
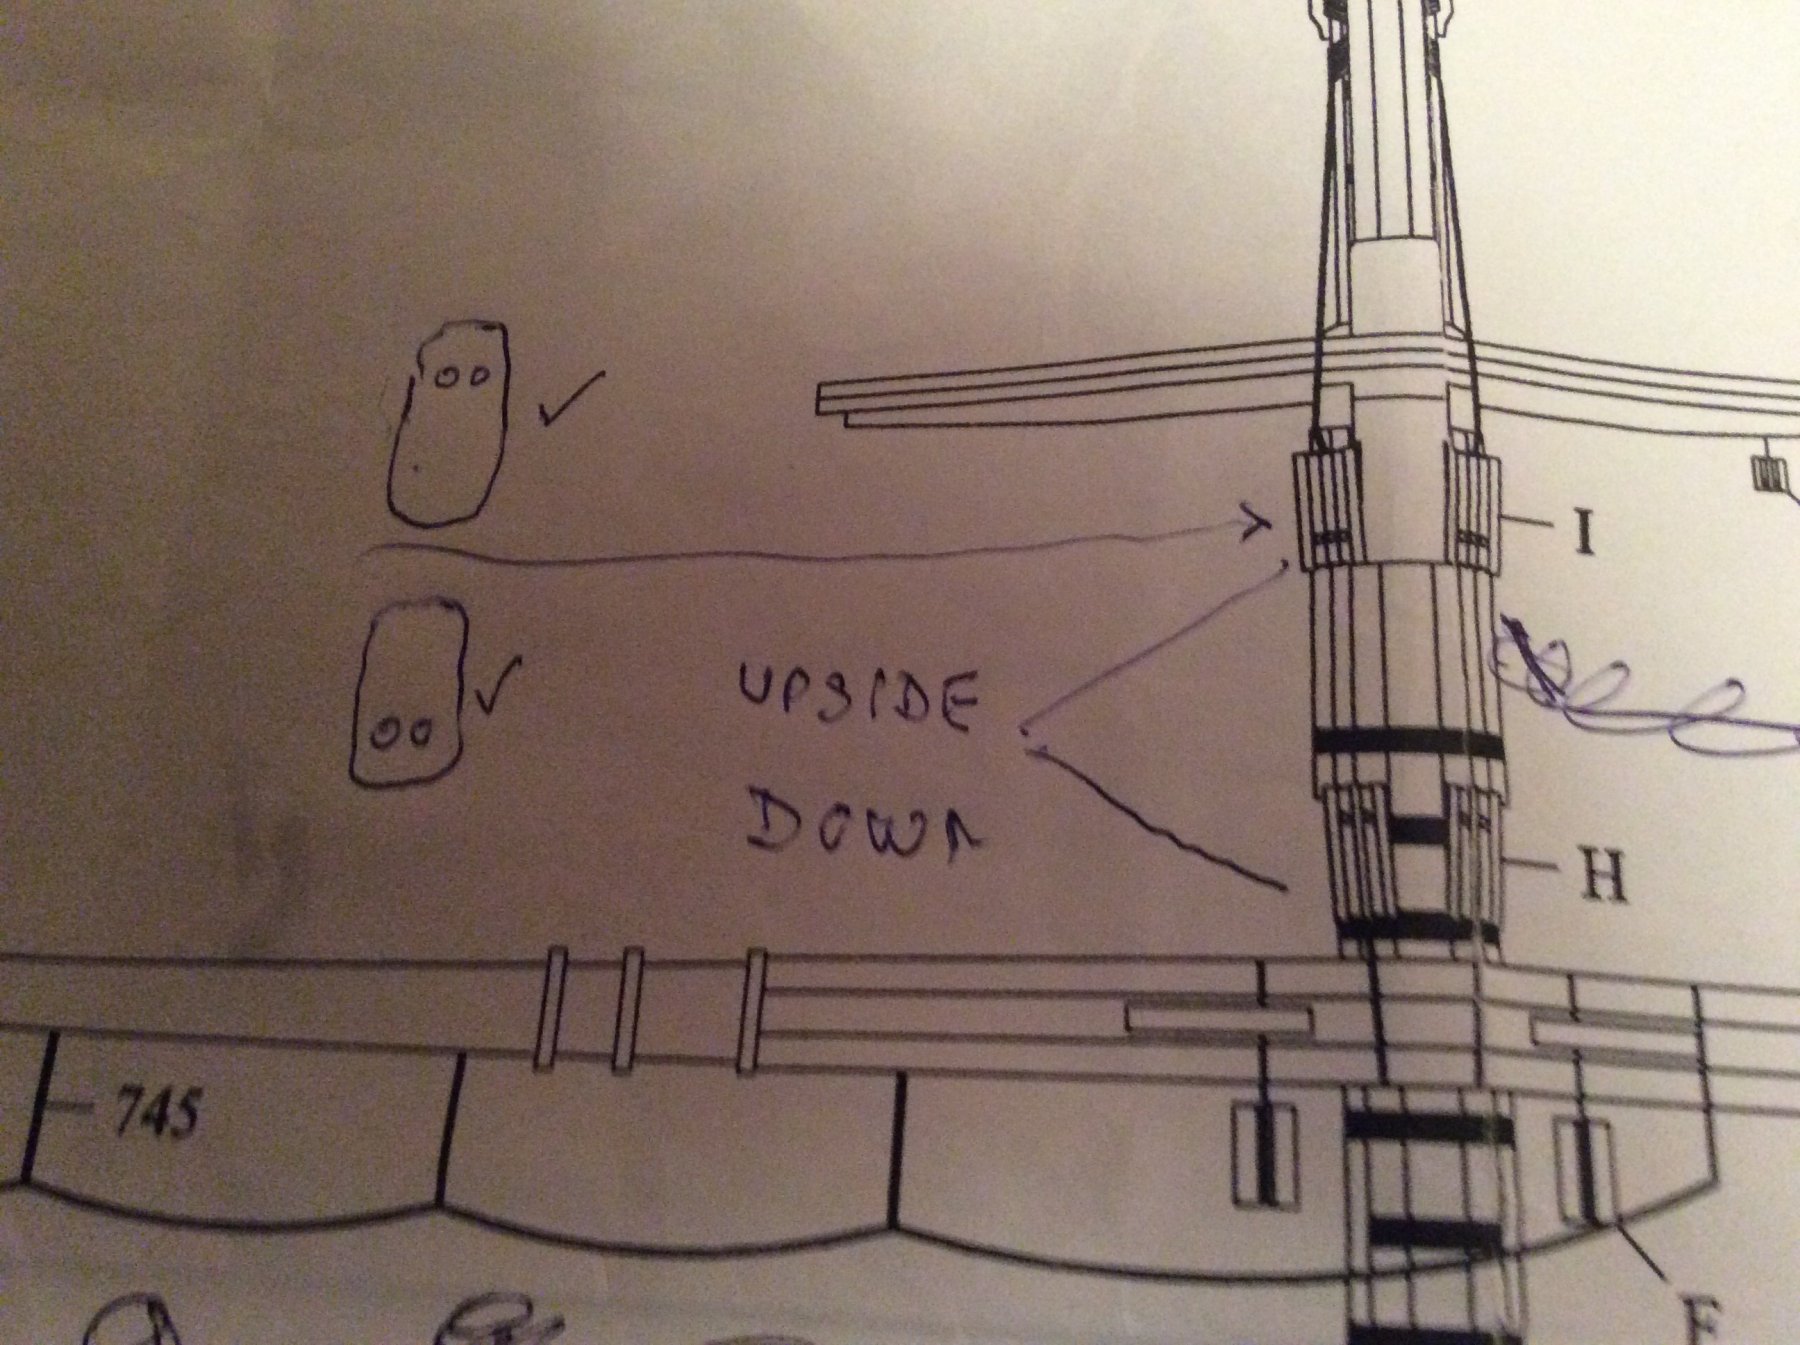
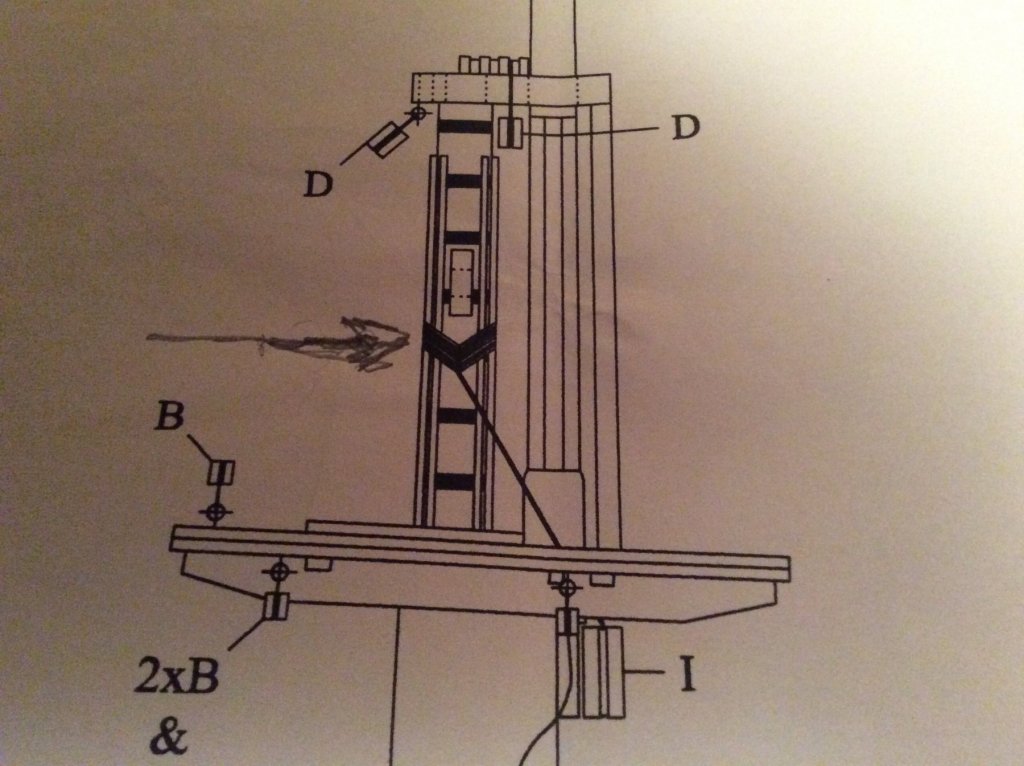
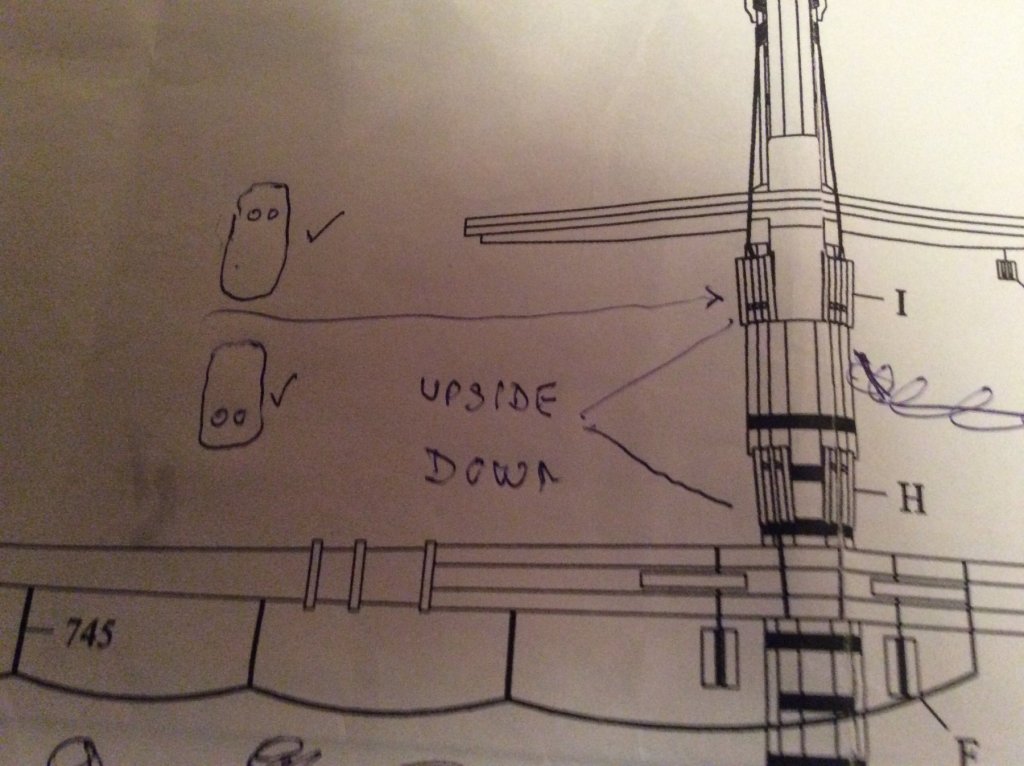
Info for you.... before you fit the main and fore match in position go to plan sheet nine. Main mast, Then plan ten for fore mast
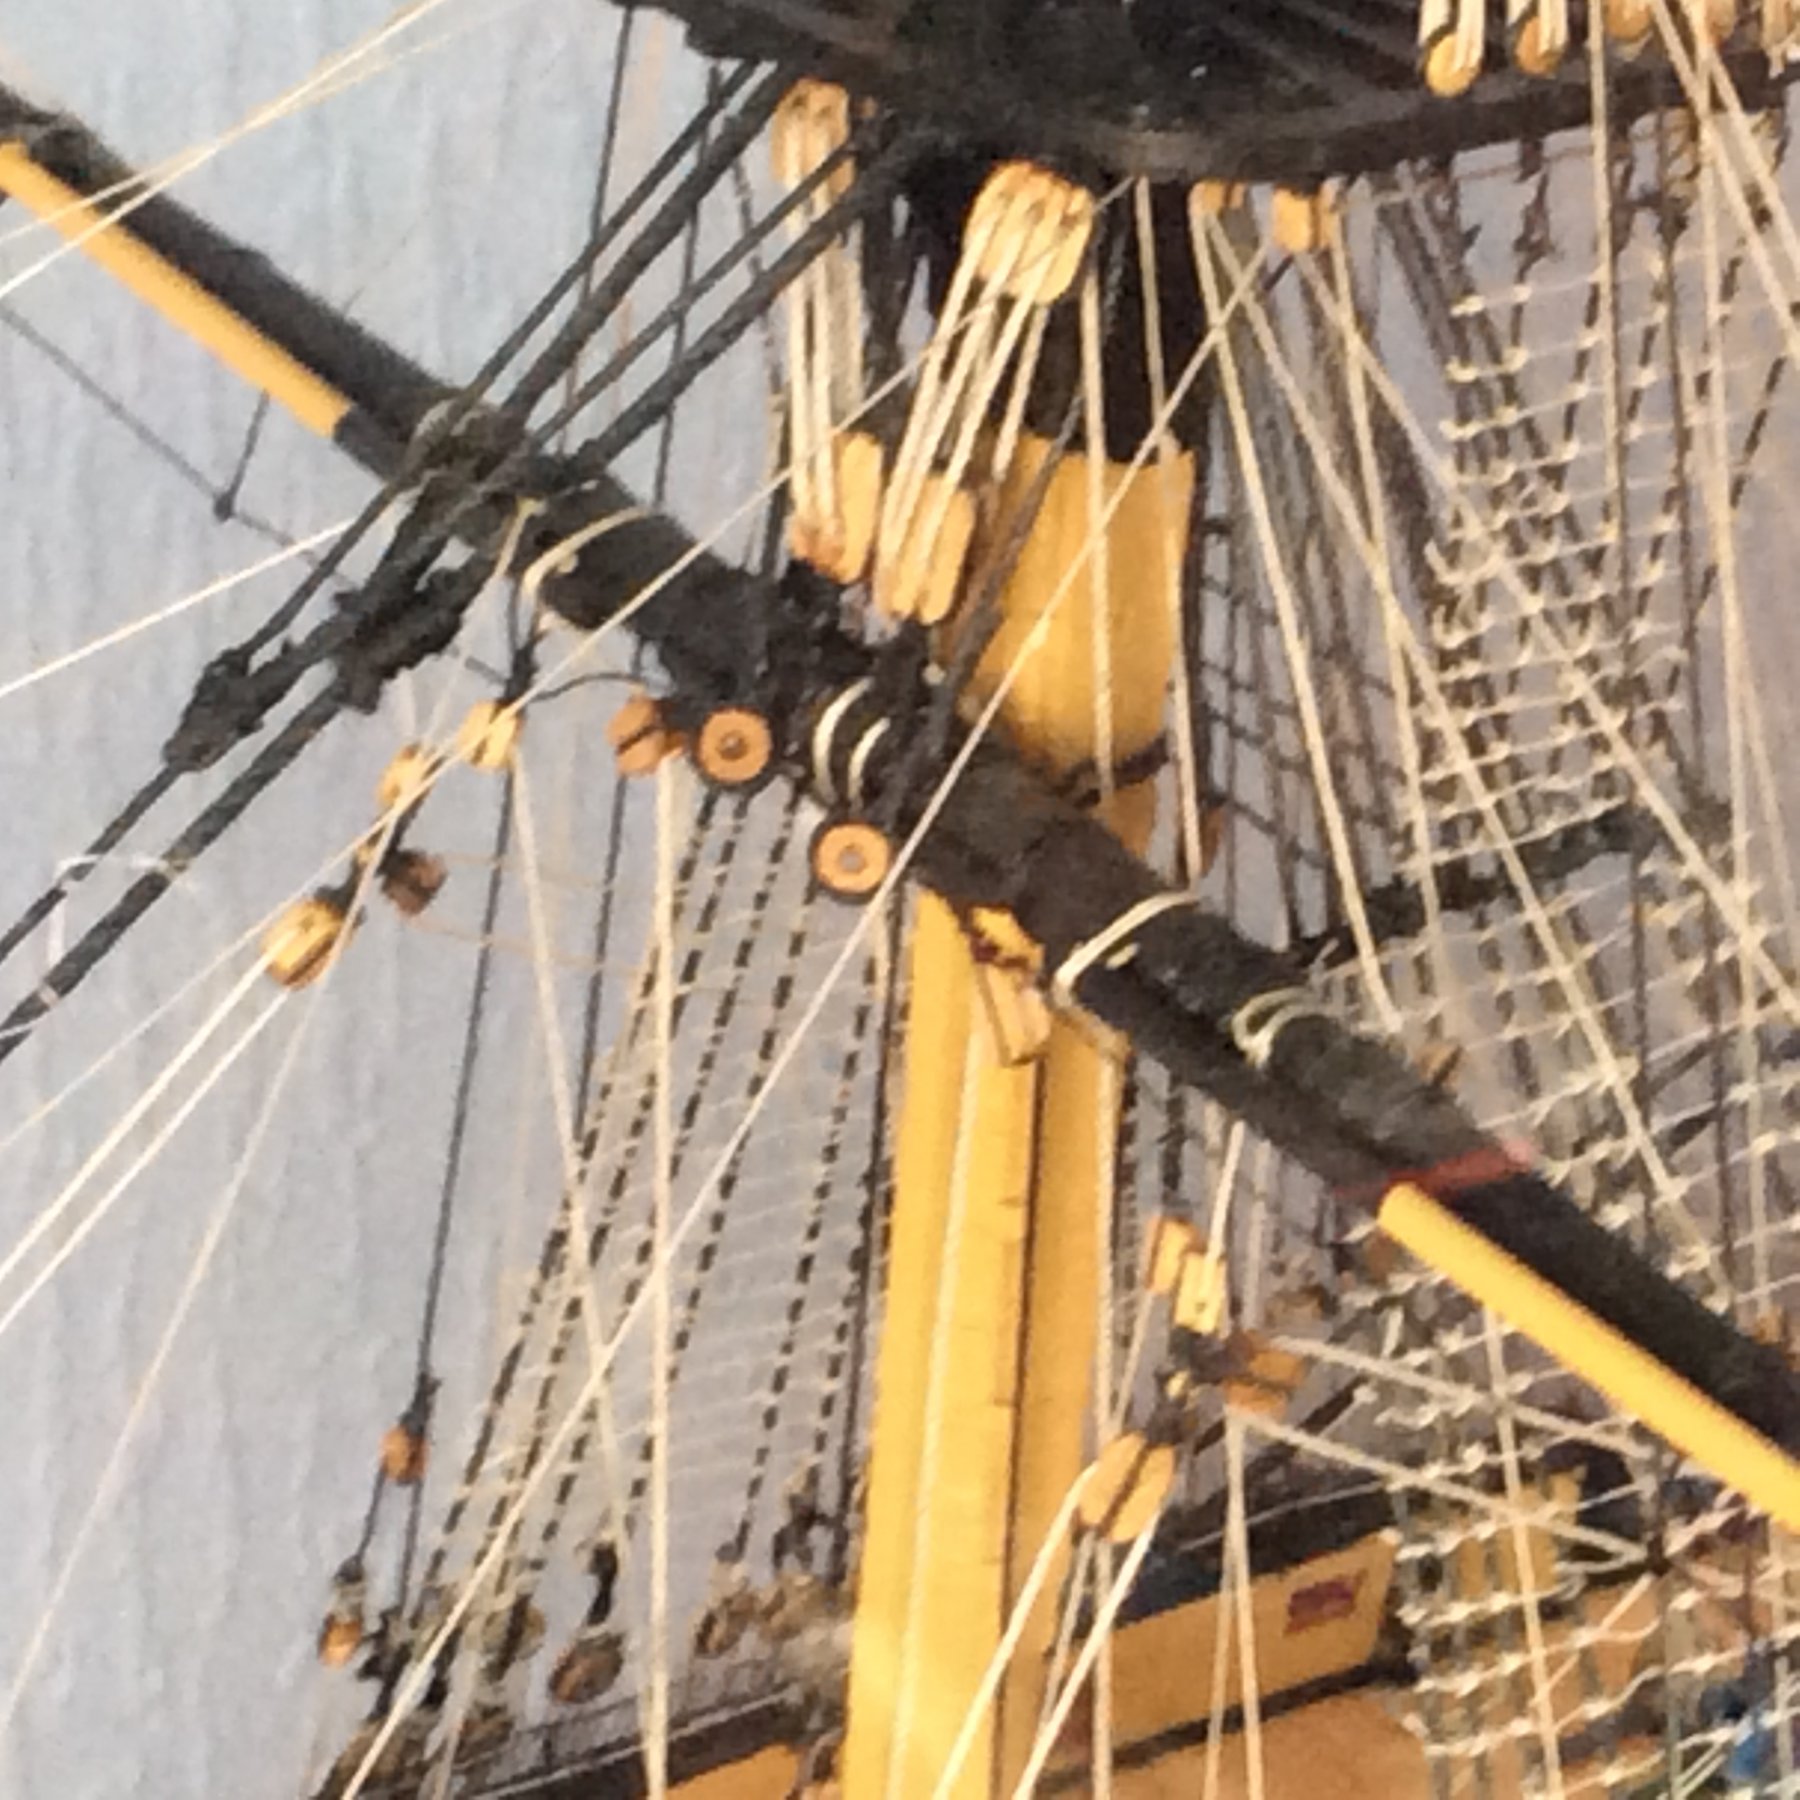
See the upper jeer blocks. ( I )Fit them in position now. Fit the thread onto the jeer block.
Go to the side elevation (right Hand side of the drawing) and you will see
how the rigging on the block runs under the tops. ( platform ) then fits onto the V shaped rigging thread which runs around the mast about 4 or 5 times. Fit the V shaped thread to the mast as shown.
next fit the rigging thread from the jeer block to the V shaped thread.
The jeer block should hang about a. Quarter of an inch below the tops (platform). The instruction in the manual tell you to fit the jeer blocks a lot later on in the build which is not easy at all.
The lower jeer block as you know is fitted to spar, and the blocks will be joined up when the spar is fitted. Also notice the jeer blocks ( upper and lower ) on the drawing are both upside down on the drawing. The drawing is wrong. Let me know if you don’t understand. Regards DAVID

-
Greetings max It’s good to see you about again. You are doing really well, it’s coming on a treat. Looks kike you had no problem with the masts, and going to find the spars pretty easy. Are you still unsure about the rigging ? I keep saying this, but I found the rigging one of the best parts of the build. Just keep enjoying it. Get plenty of rope coils around the deck and belaying points now, as you will not be able to access some of these areas later when your running rigging gets in the way. Best regards DAVID
-
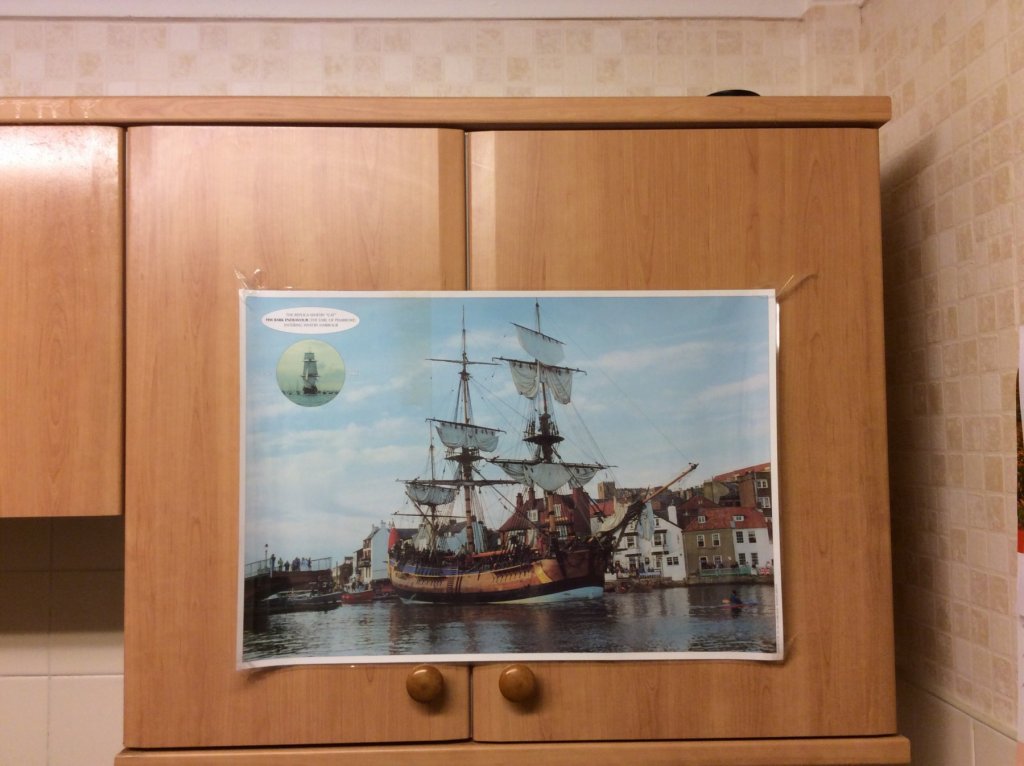
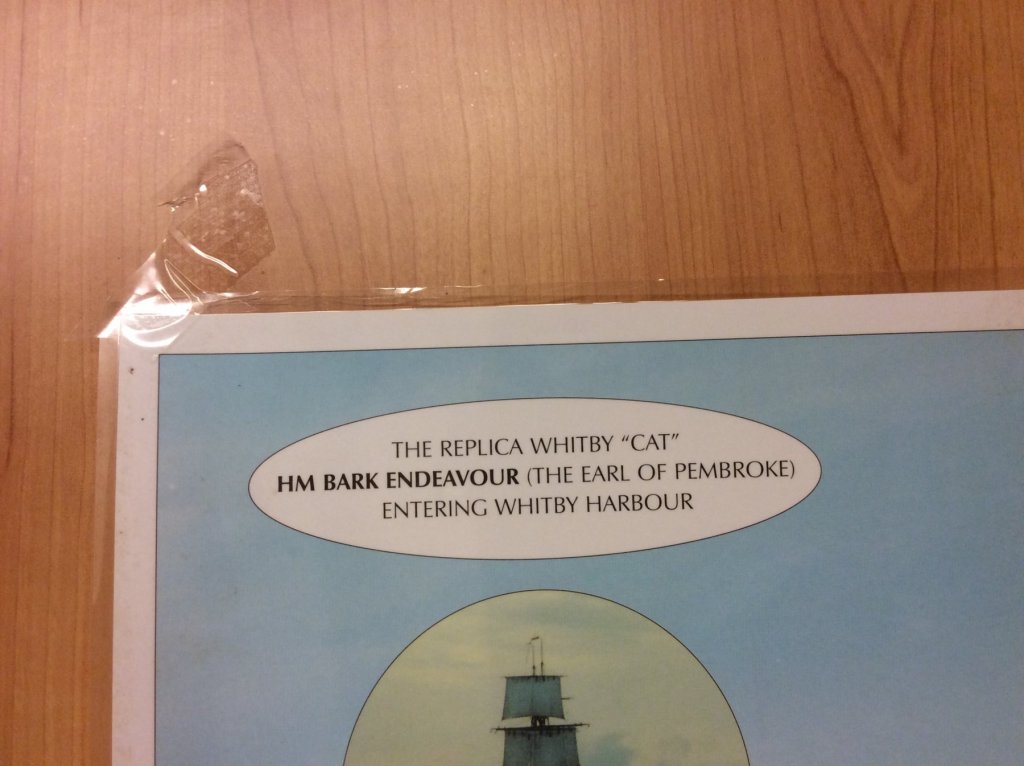
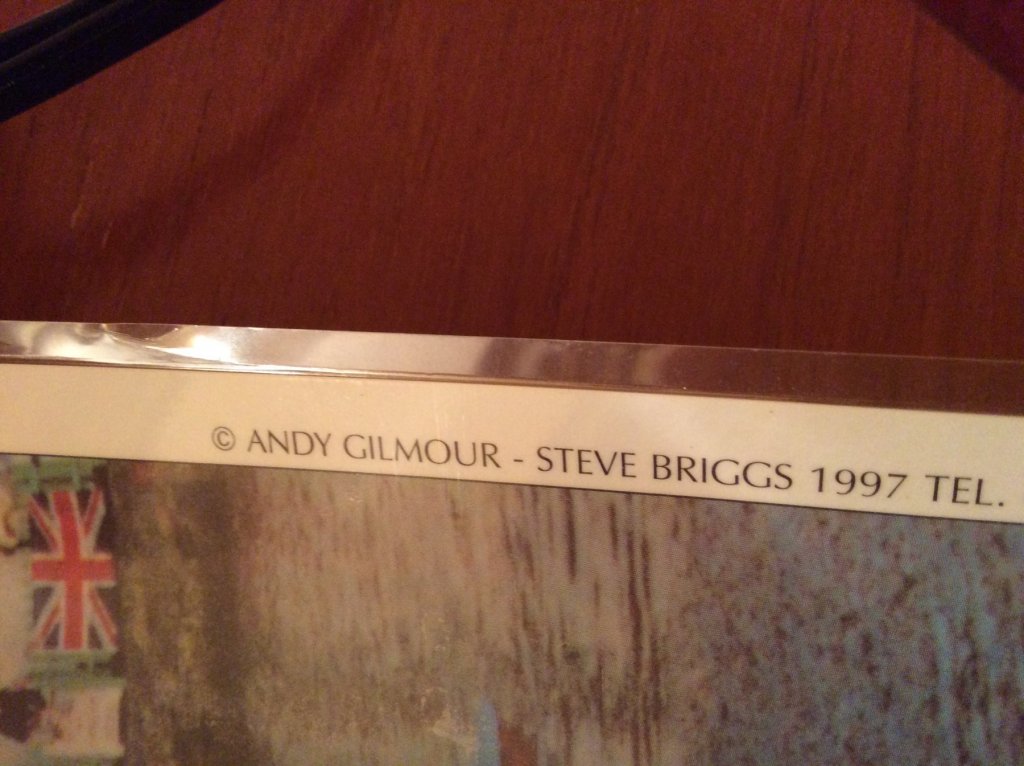
Greeting from England
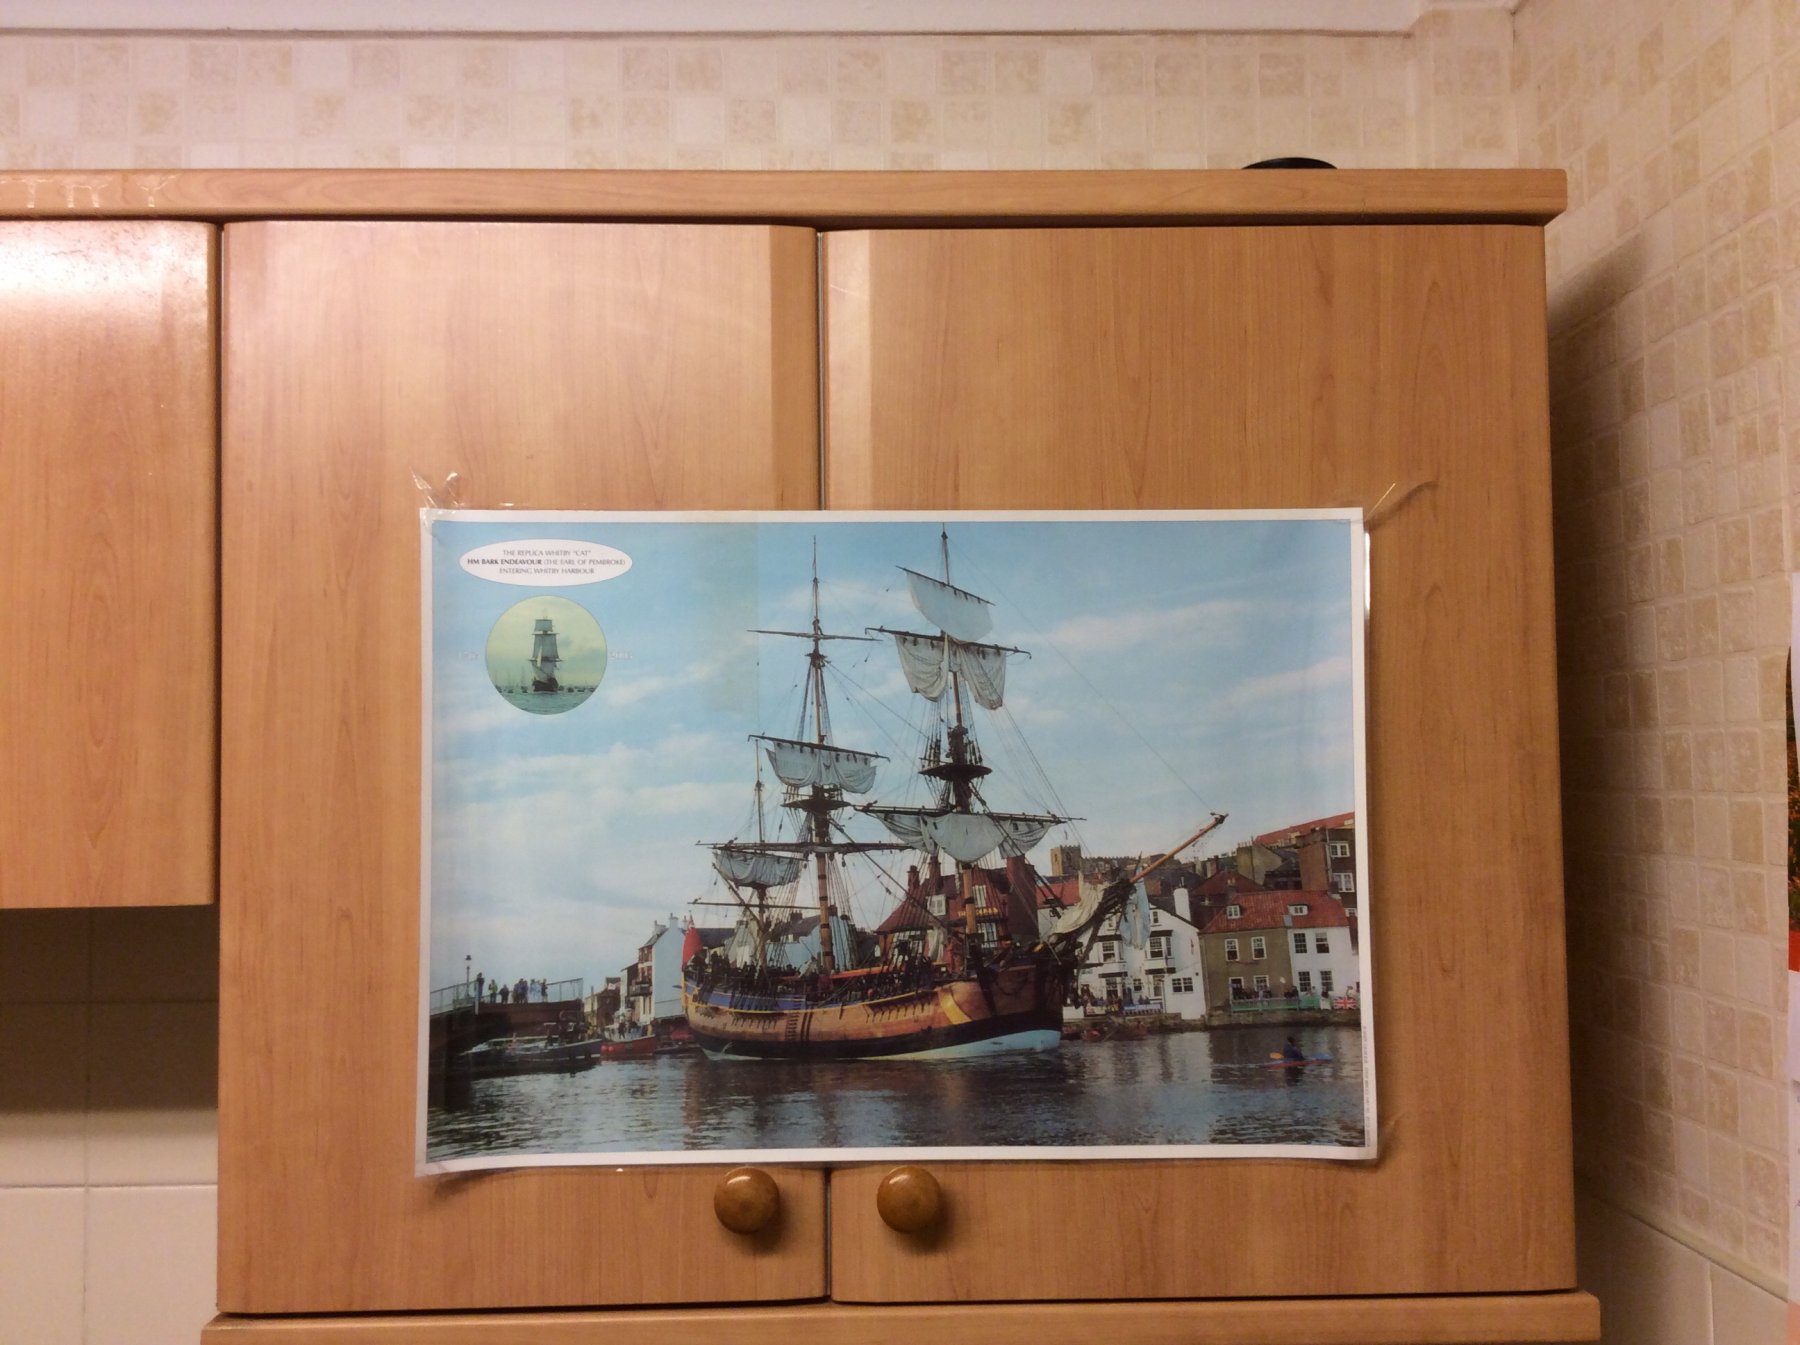
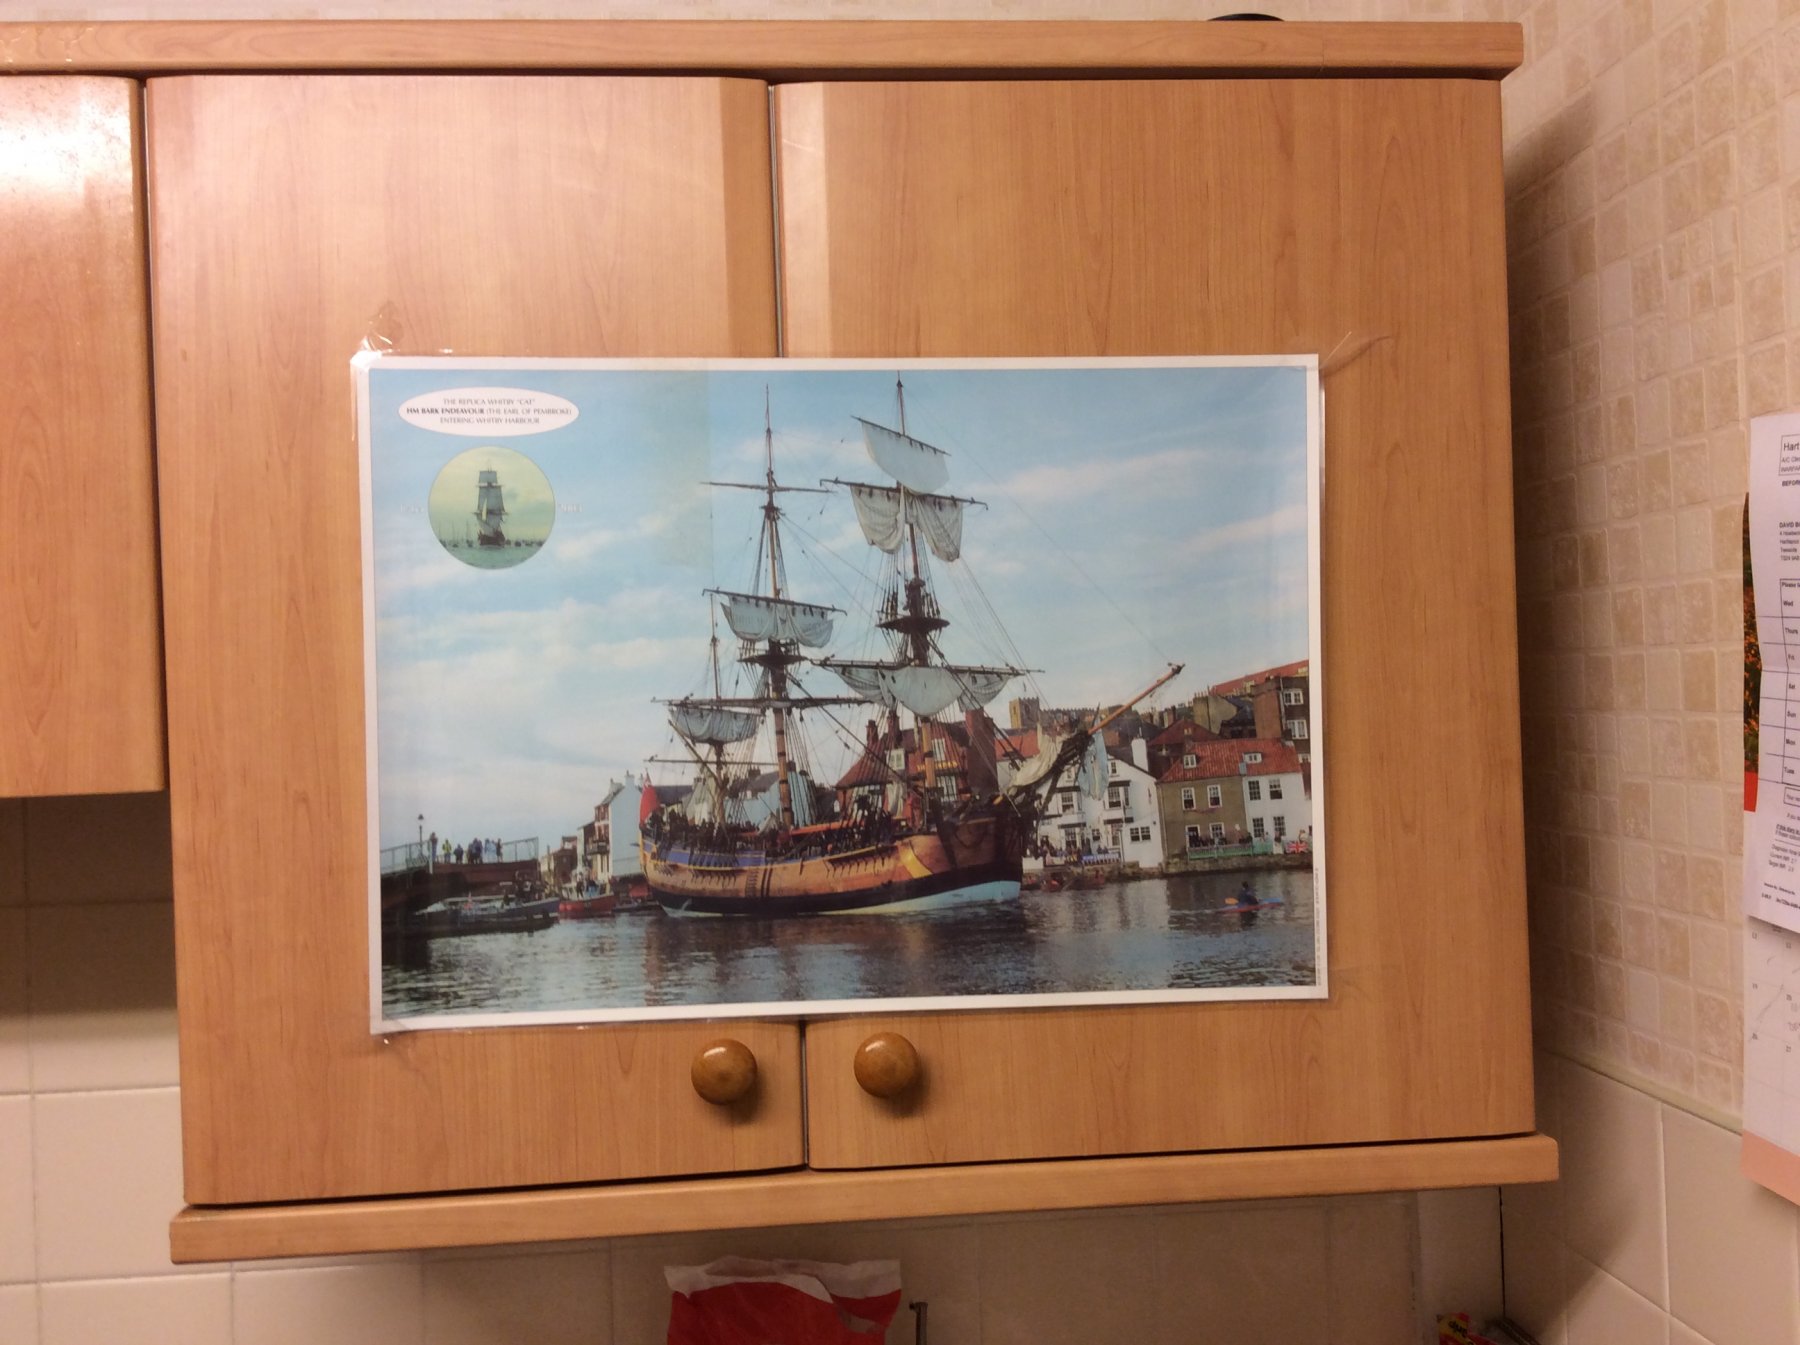
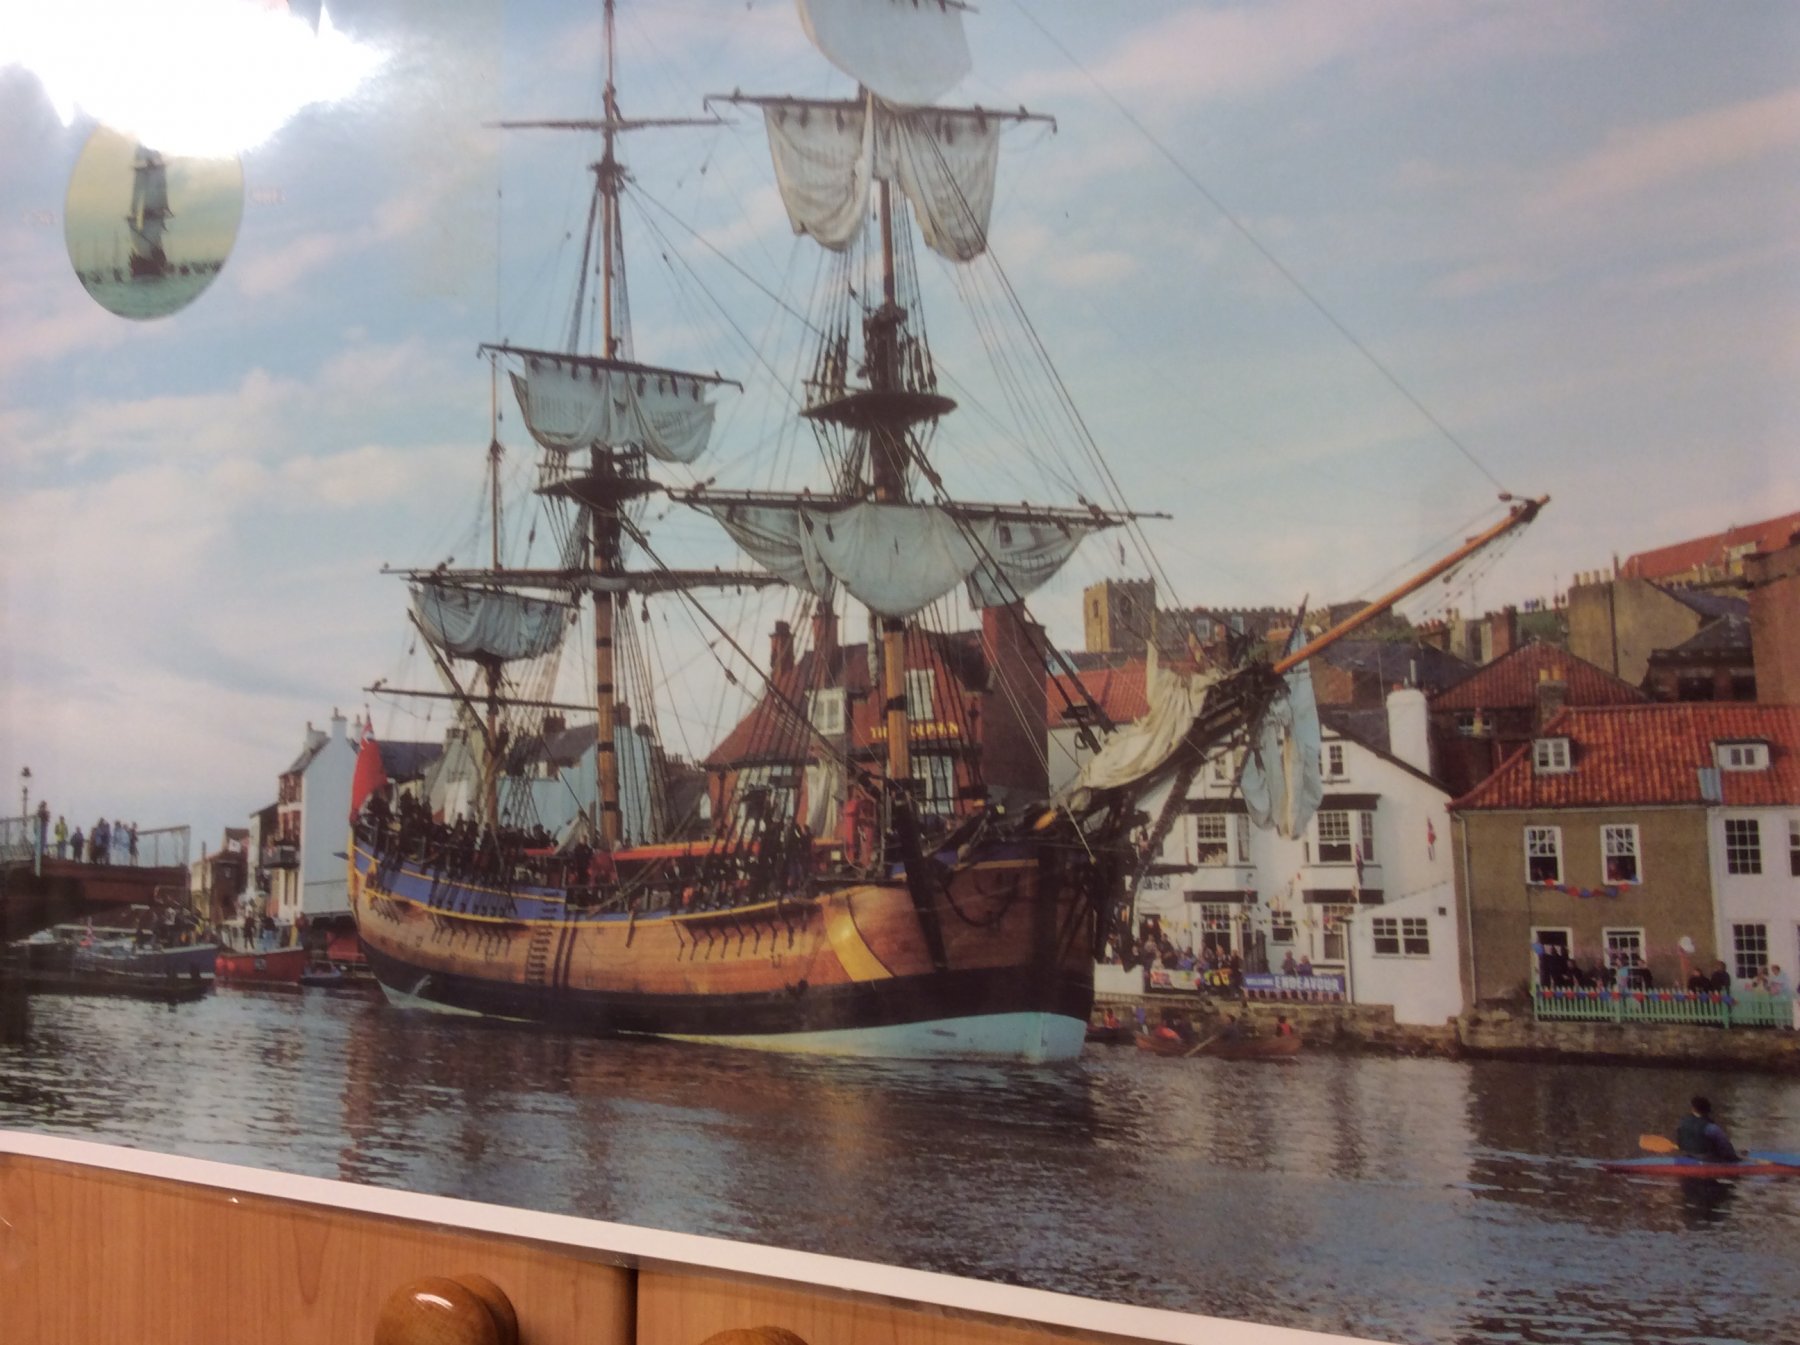
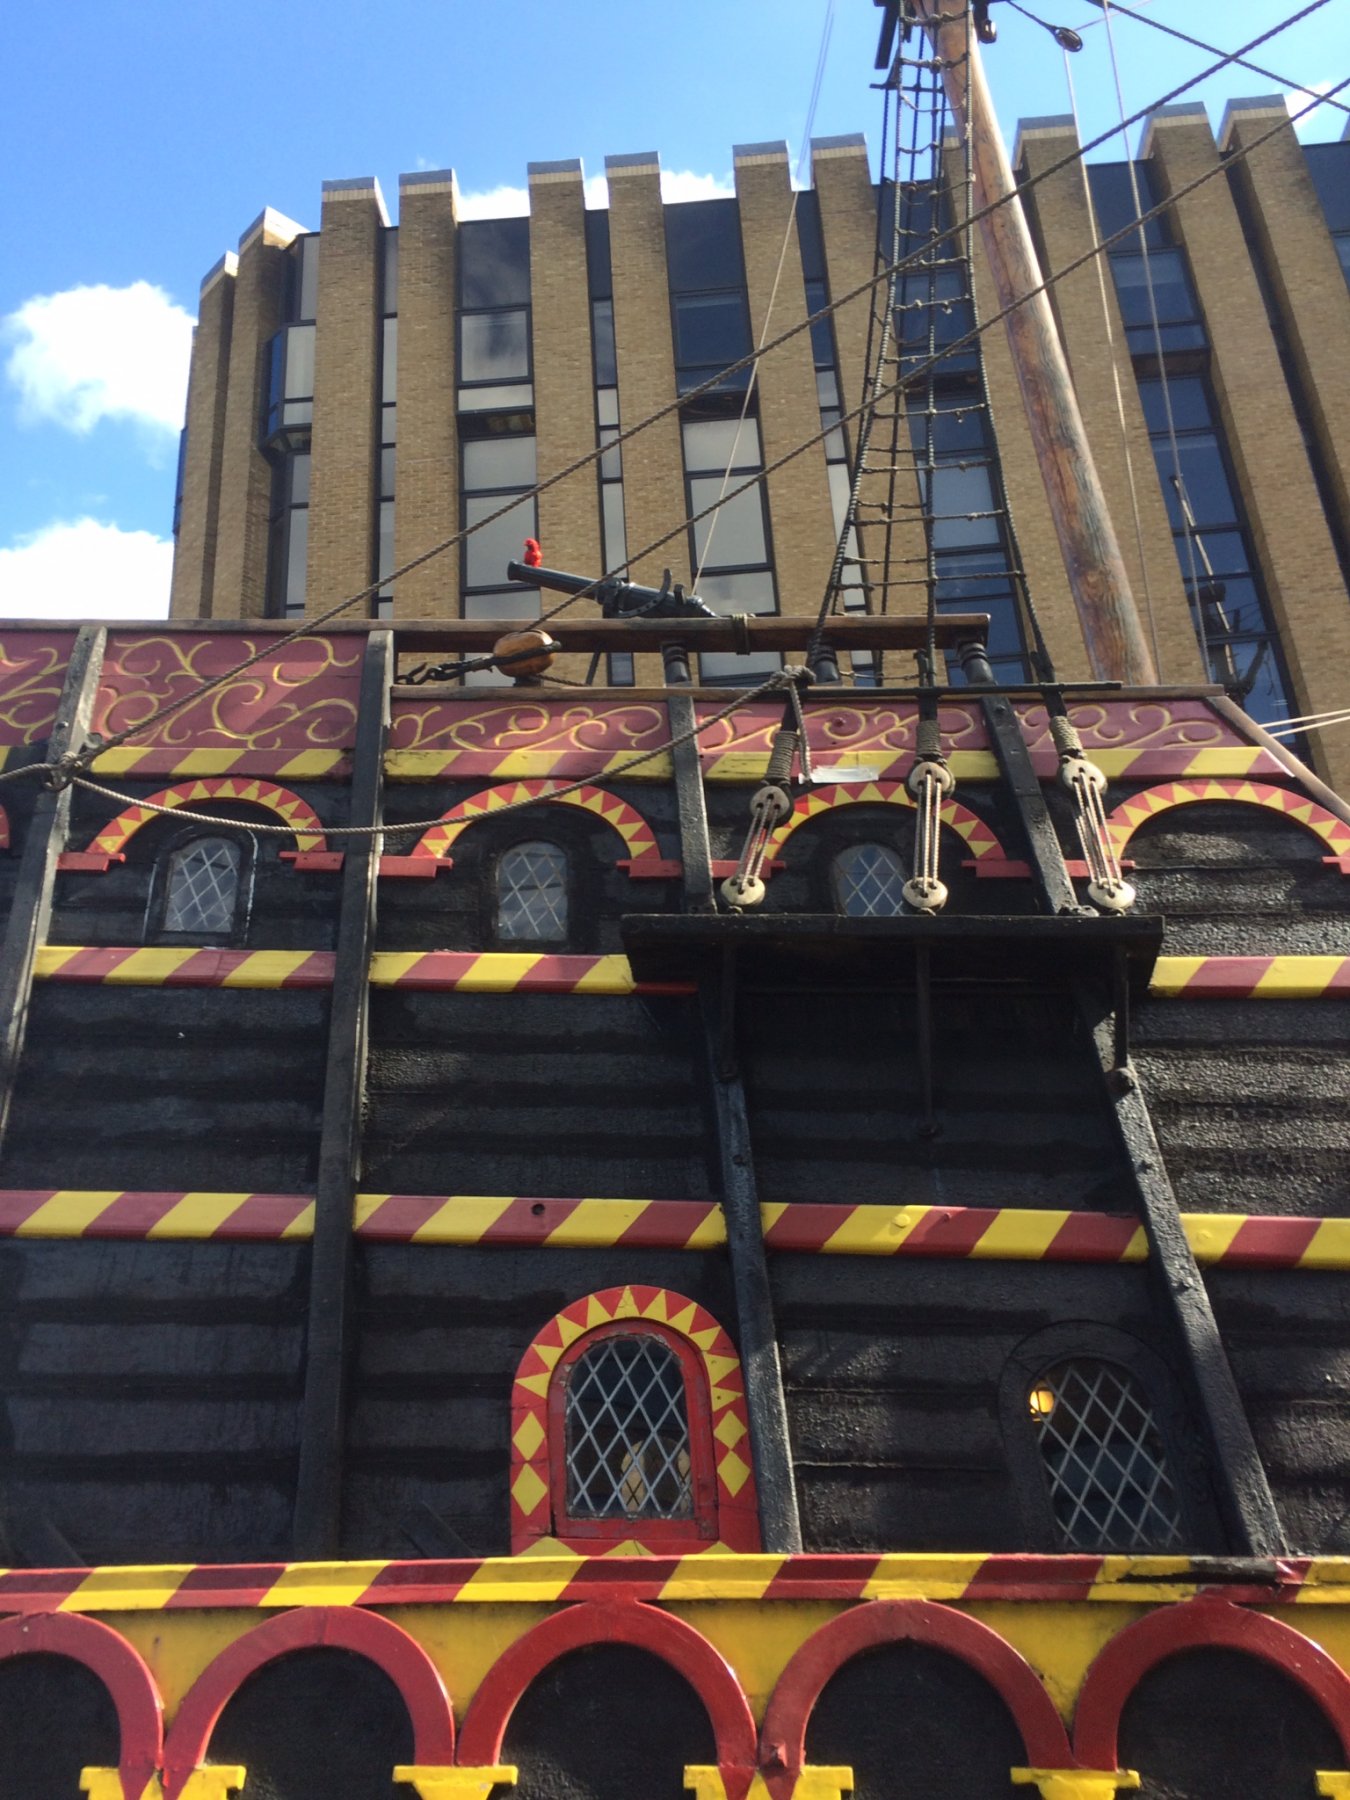
My friend has had a clean out in the house, and came across this photo of the Endeavour( replica ) sailing into Whitby Harbour, it looks like the photo was taken in about 1997. The photo is in perfect condition and is laminated. Knowing you are building the Endeavour, I thought you might want the picture. I do not want anything for the photo, but I will post it to you if you tell me. The size of the photo is 24 inches x 17 inches and I think it will look excellent framed, especially behind your Ship. Just let me know. Best regards DAVID. Shipyard Sid . Here’s a few photos.
davidburke1944@yahoo.co.uk


-

Hello David,
I want to get over to Whitby to see the Museum there, have a good look about the area.
The photo looks quiet realistic doesn't it.
As for your offer to send the photo over, thank you very much.
I'm not sure how I'm going to display the finished ship ? Been through a few moments, nothing definite.
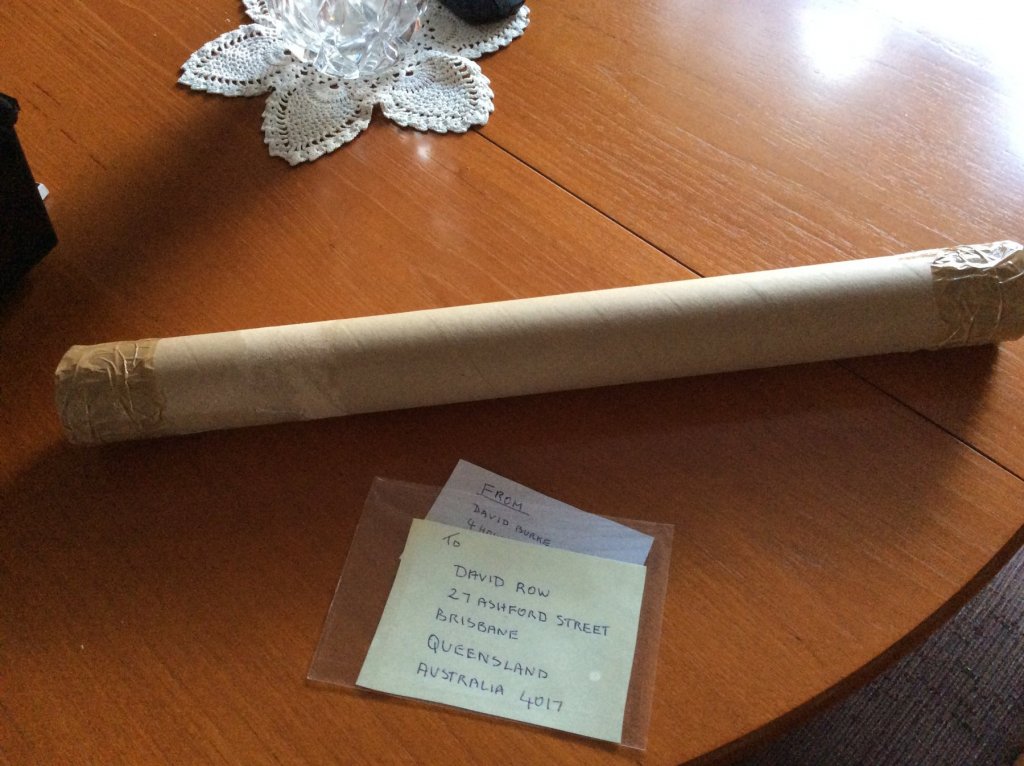
Not sure what it costs to send a 24x17 inches size ? to Australia. Would you roll it up into a cylinder ?
If it doesn't cost much, be happy to get it. If a lot, I would send money to you somehow.
Address:
27 Ashford Street
Brisbane
Queensland
Australia 4017
Many Thanks
David Row
-
Greetings Dave
I have sent you the photo in a cylinder as you presumed. There is also a small guide from an exhibition I went to see in the British library in London a few month ago, which was about Cooks voyages.You should receive the post before Xmas as the last posting date for Australia from the UK is Monday10th. Forget about the postage it’s no problem.The photo looks like it taken around 1997. Anyway it’s on its way. Have a cracking Xmas.
Best regards . DAVID
-
-
Greetings Robert It’s all been said, it’s simply something special. Keep enjoying it. Regards DAVID
- 527 replies
-
- 2
-
-
- caldercraft
- victory
- (and 1 more)
-
Greetings
So I can understand clearly, ( as I am a bit thickish) can you tell me we’re you are ( not somerset !!! ) in the rigging manual (page number) and which plan sheet you are using now regarding the leech lines. Regards
DAVID
-

Good morning, lol I'm in Somerset
I'm doing the fore mast lower yard with the 3 smaller blocks either side, the lines come from the tie off points through the mast top aft, then through the forward blocks and to the blocks on the yard its self, they don't go any further unless sails are attached, they just look like a knot has been tied on the line to prevent it being pulled back through hope you and family are OK?
-
Hello Kevin
Seems something went wrong with my posts. Was not not sure what you meant by a knot stopping the rope pulling back through the block.
I am with you now, leech lines running under the top and through the double blocks to belay on rail b29 or b30. Keeping my eye on you in case you revert back to plastic !!!!!. LOL. Onward to the coils !!!! Just keep enjoying it. Best regards DAVID
-
-
-
Hello O.C Looks like some ones building an house boat ? Could this be a first? Regards DAVID
-
Greetings Kevin Well done it’s coming on fine. Cobwebs soon !!! ( Paracetamol works) Yep cracking work. Best regards DAVID
- 1,319 replies
-
- 4
-
-
- caldercraft
- Victory
- (and 1 more)
-
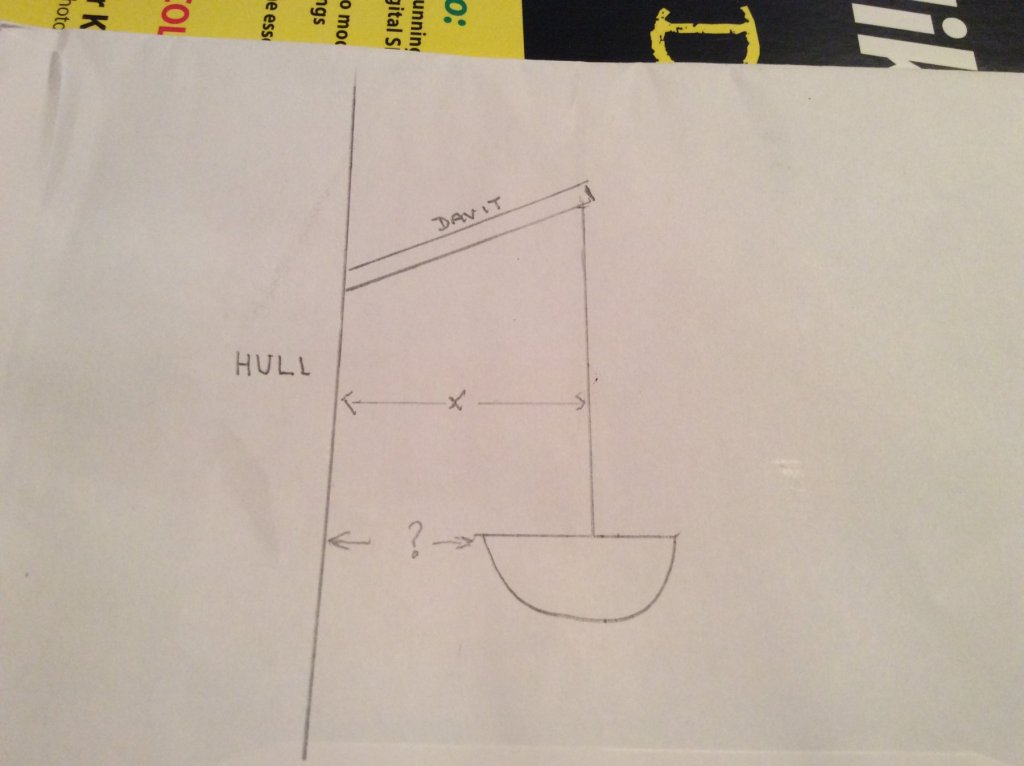
Greetings jerry Coming back on Marks question, here’s an idea. I agree our davits are about 2 and a quarter inches long, the sergal model is a smaller ship by about three and a half I think. My idea is if he determines how far he wants he’s small boat away from the hull of the ship (?) then adds half the width of he’s little boat, the measurement will be (x) . Then draw a vertical line up from that distance which represents the rigging, he can then determine the length of the davit he wants by adjusting the angle of the davit. Well it was an idea !! Regards DAVID I cannot find he’s build log.
- 900 replies
-
- 1
-
-
- victory
- caldercraft
- (and 1 more)
-
Greetings Kevin Yep well done with the spars, looks like they will soon be done. And onto the running rigging !!! The best bit. Don’t forget the rigging gets in the way of all the coils you are going to fit around the deck. That sail is to big. Keep up the good work . Regards DAVID
- 1,319 replies
-
- 4
-
-
- caldercraft
- Victory
- (and 1 more)
-
Hello Yon
How are you. It’s a long time since I had seen you on MSW. I hope you are keeping well. I myself have only just returned and restarted my HMS. Diana after a long period. My wife passed away 3 years ago and I more or less stopped my build, but I have been told by friends over and over again that I should restart my build, as that is what she wanted me to do before she passed away. It would be nice if you just have a look around MSW now and then and add a few likes and comments. I miss the Victory build days, and it would be nice to see you back on your build and I could pull up a chair to watch your progress. Come on blow the dust off it. You take care, best regards DAVID
-
Hello Dkuehn
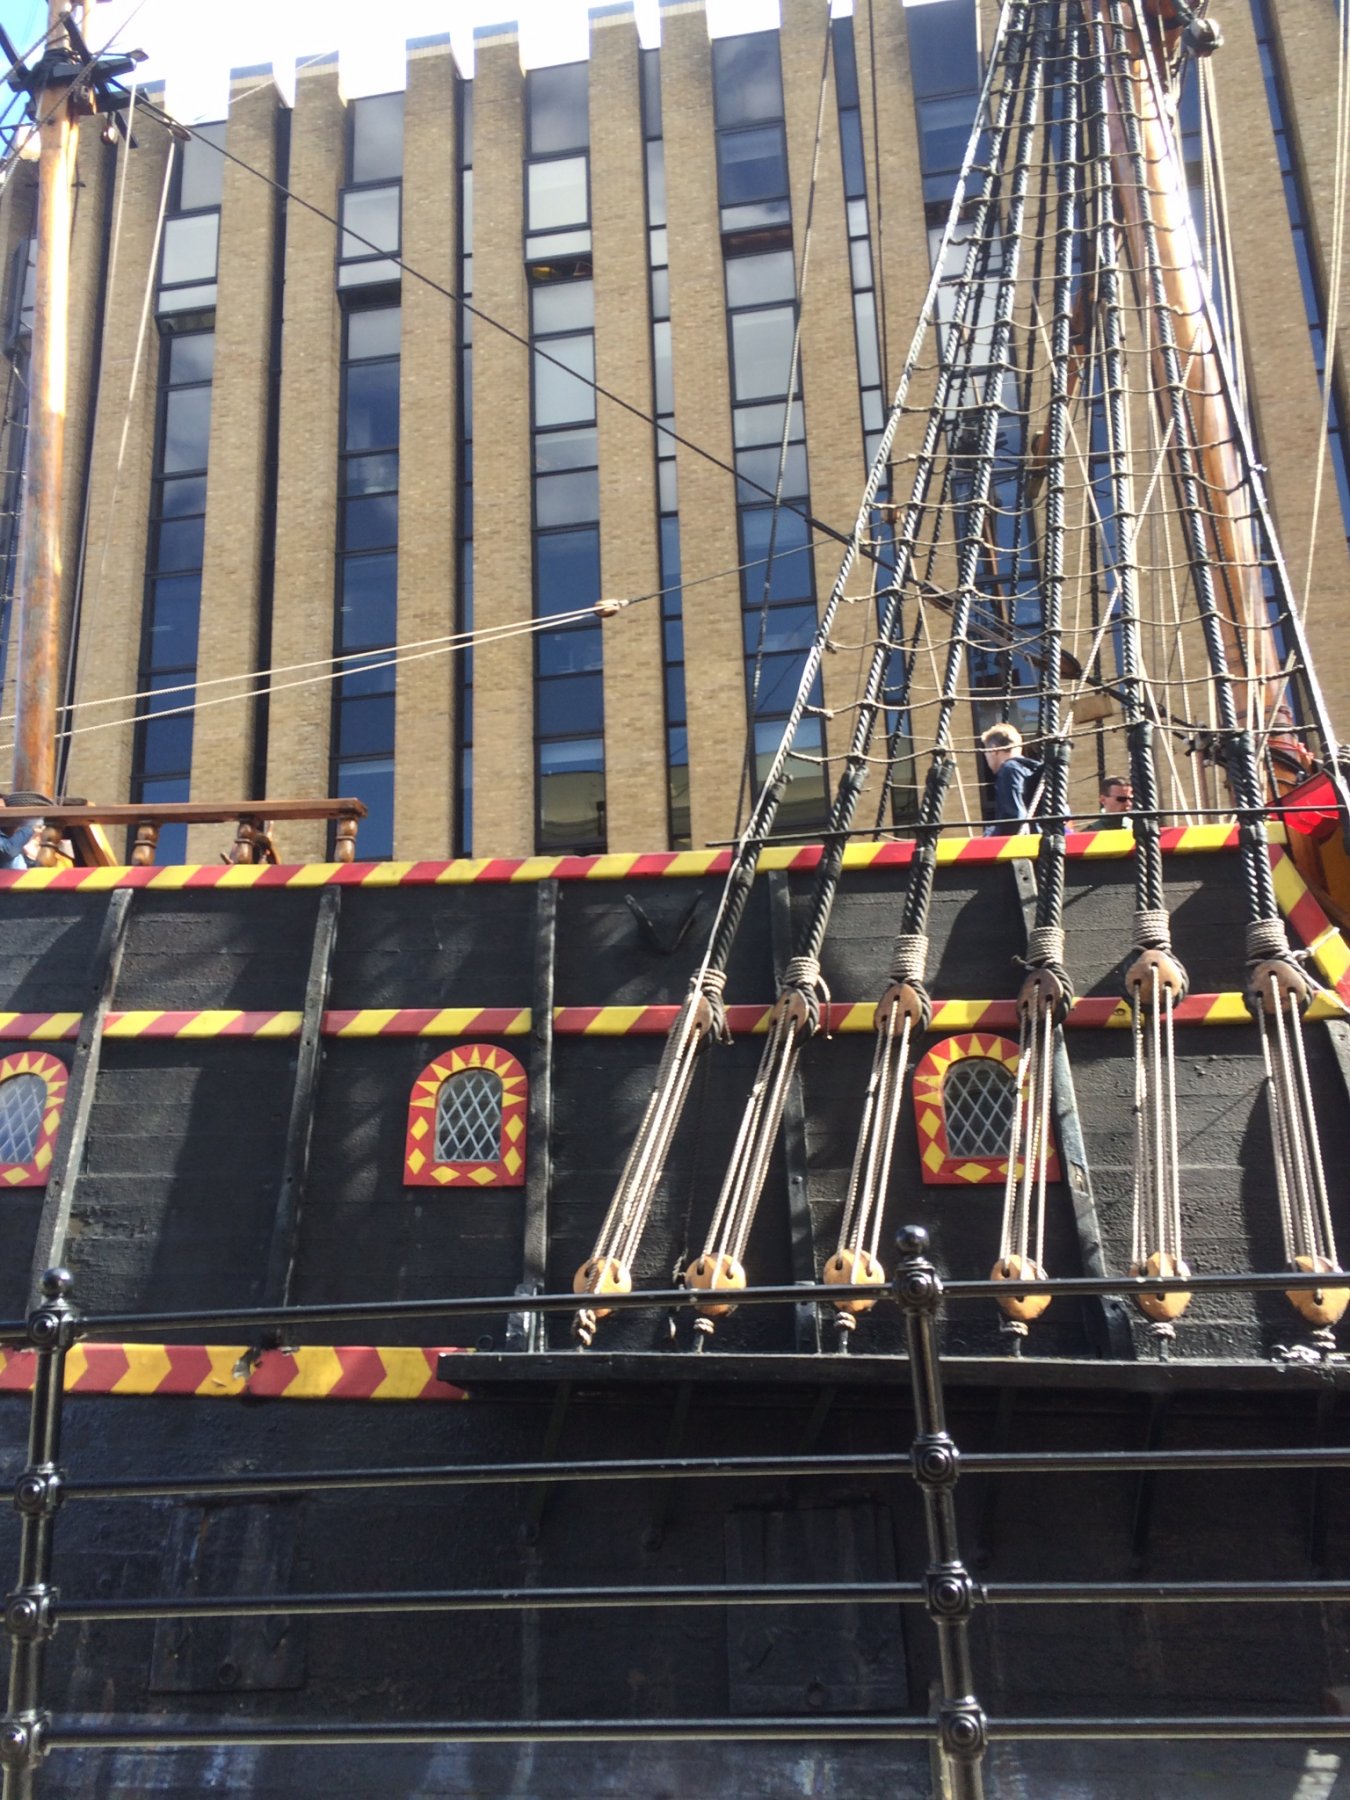
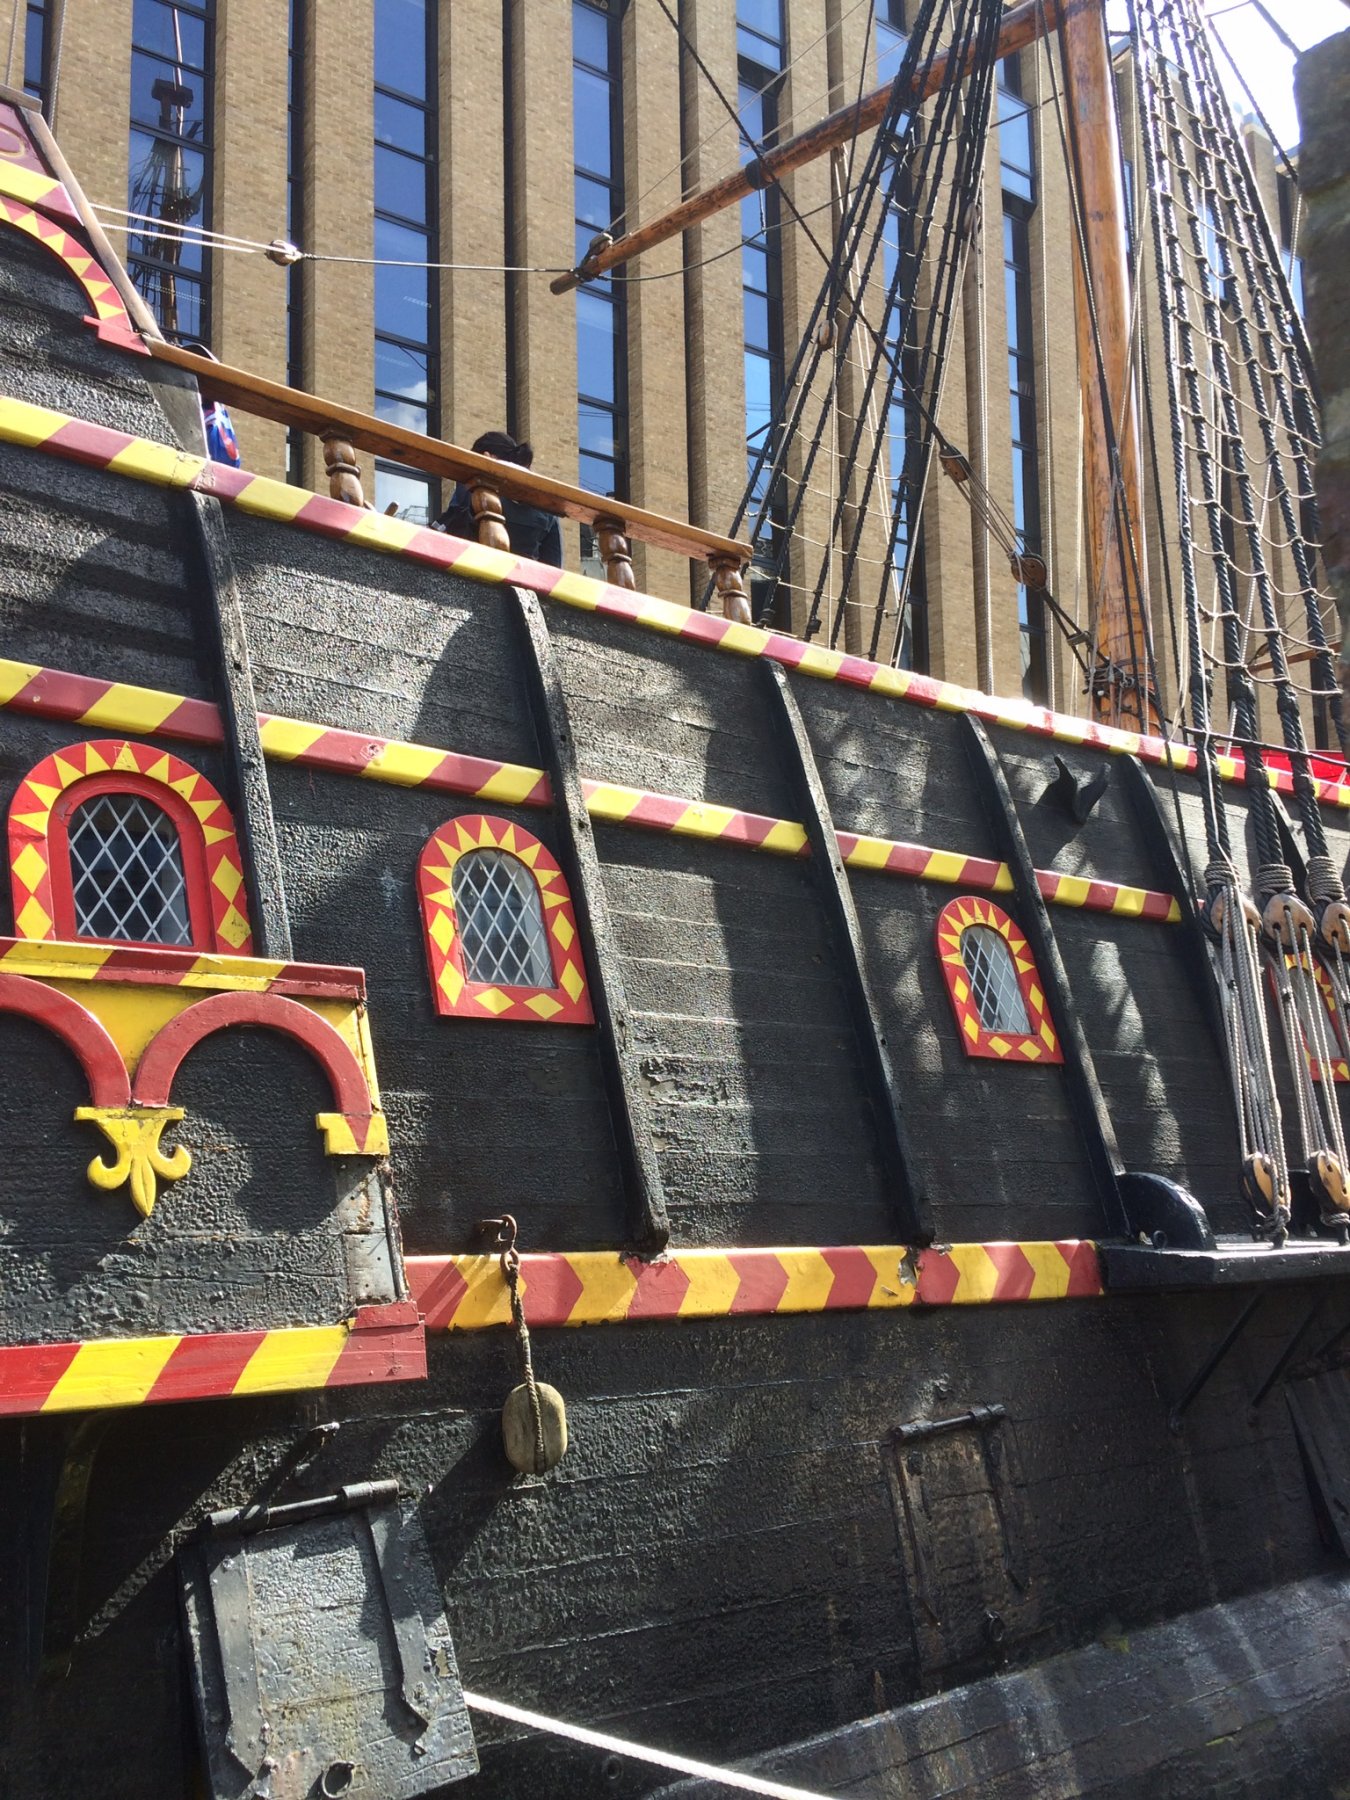
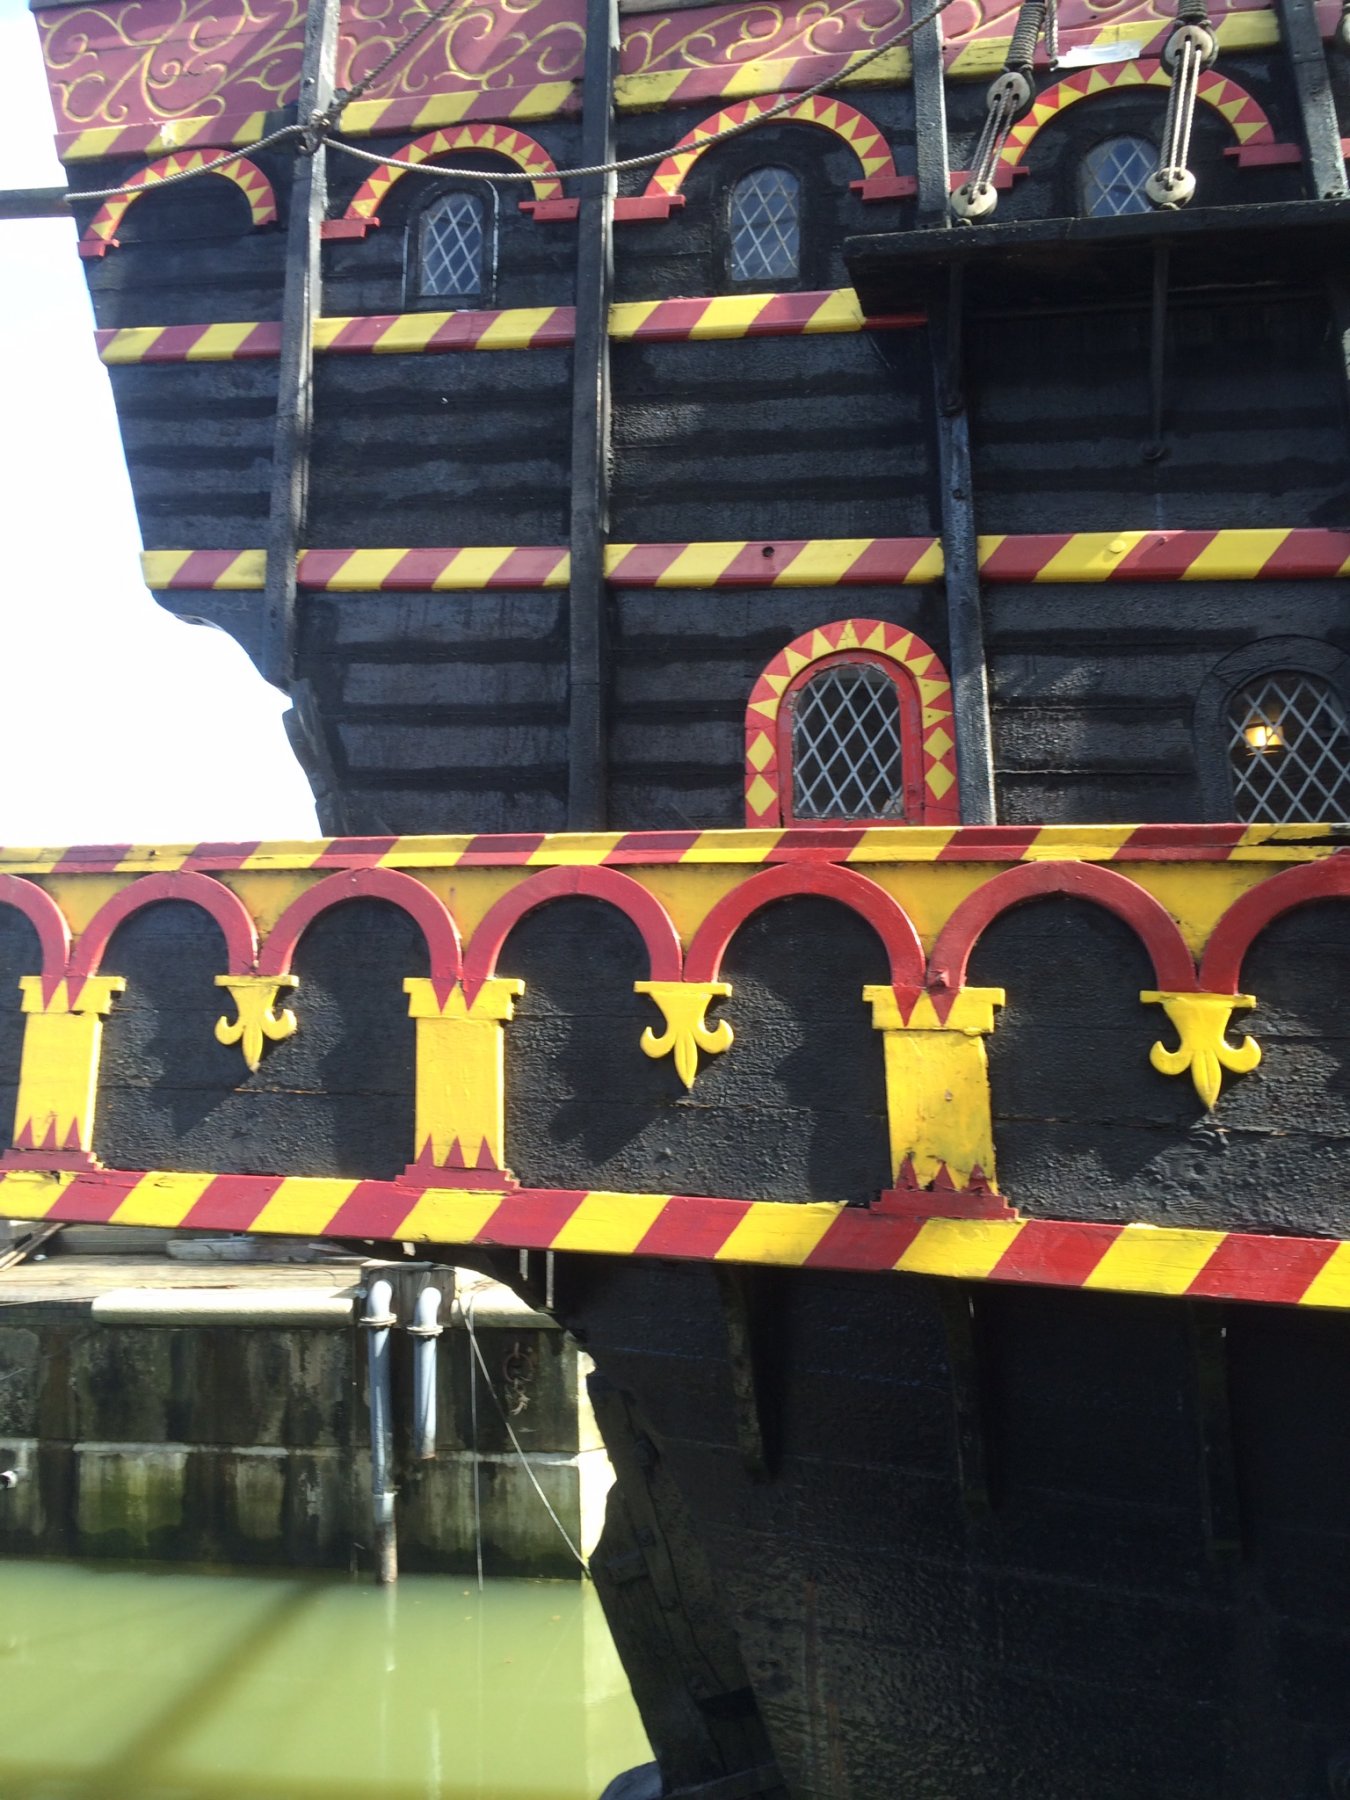
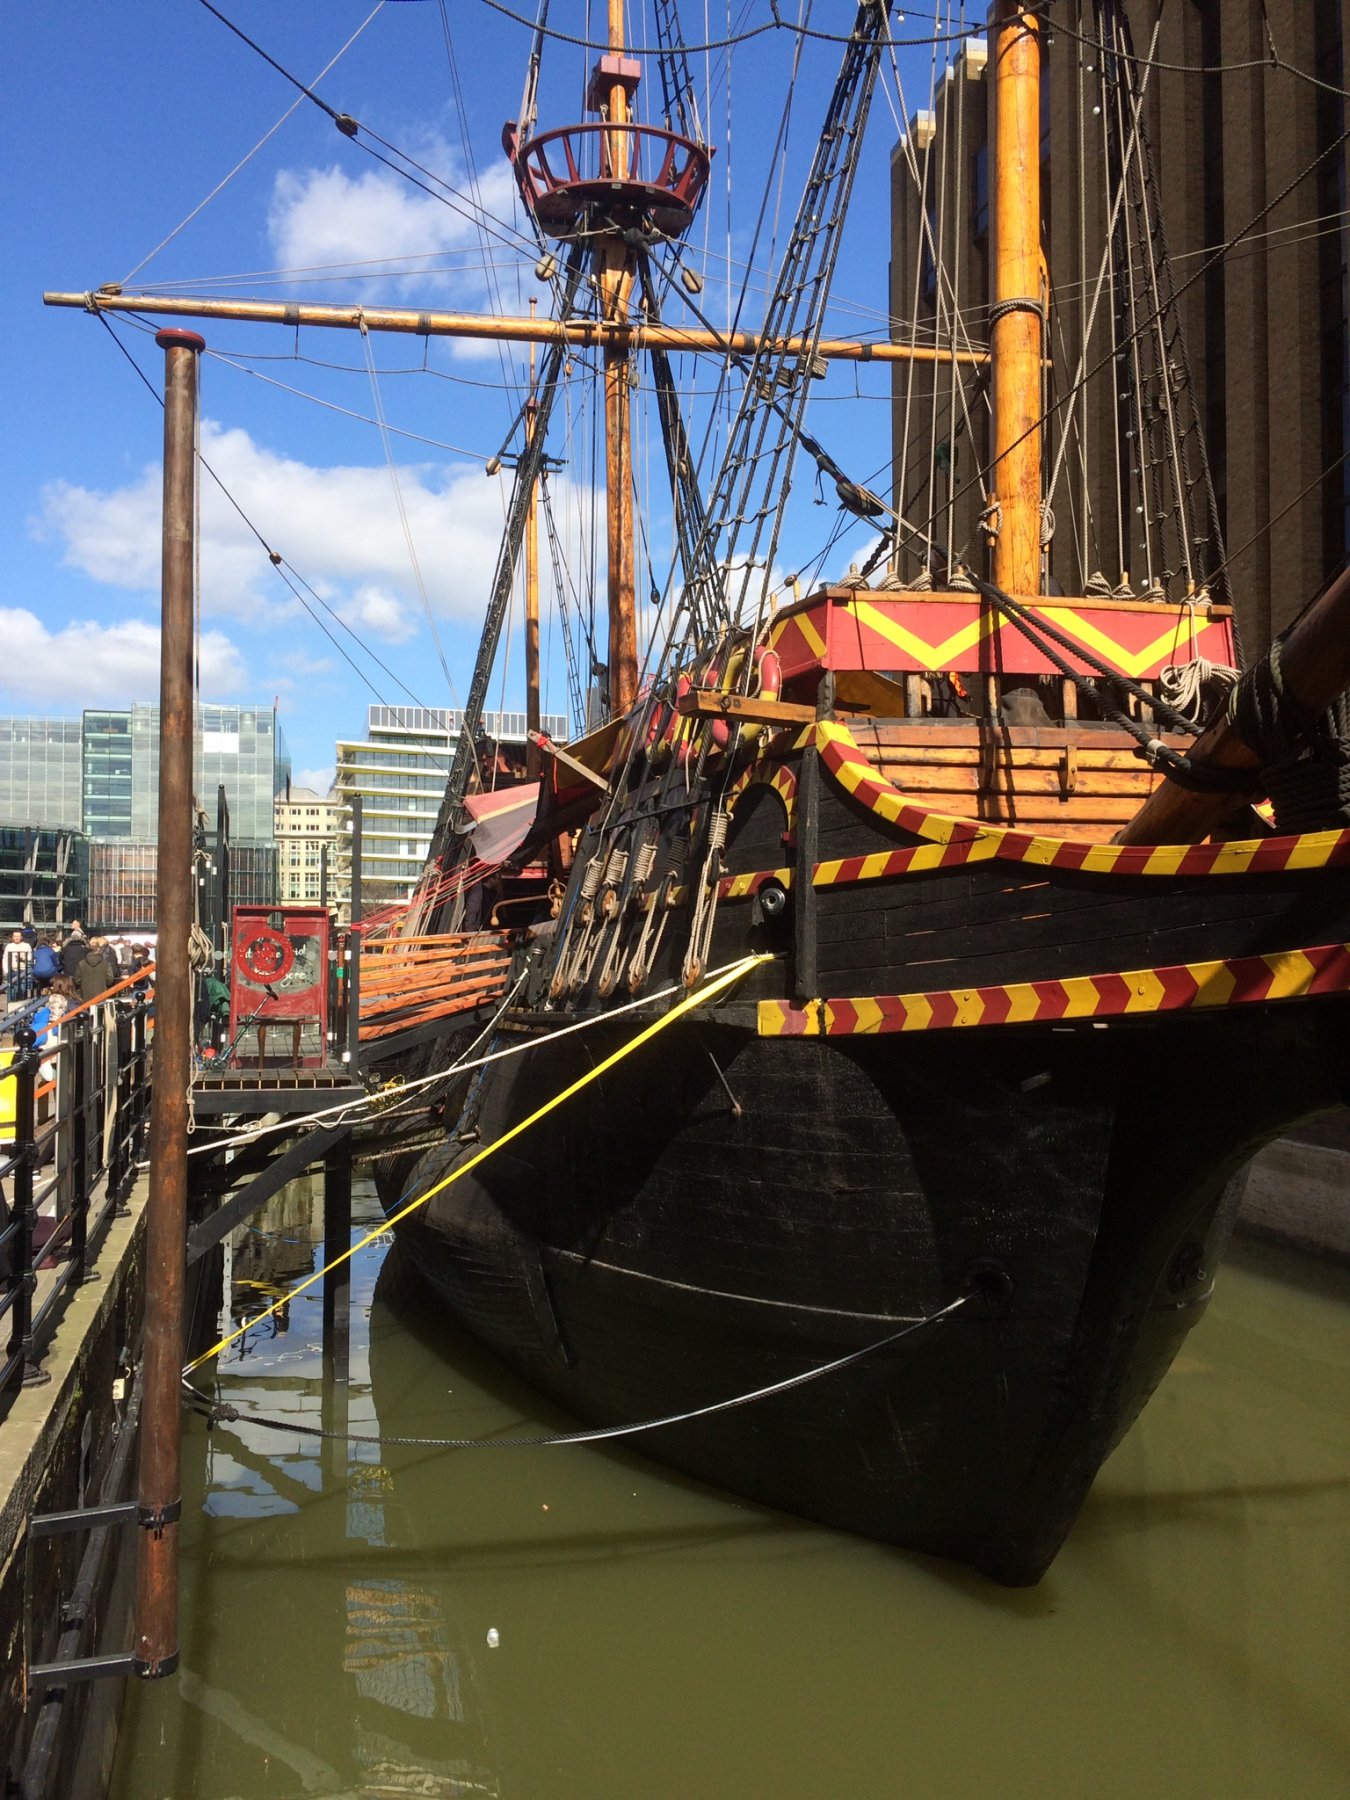
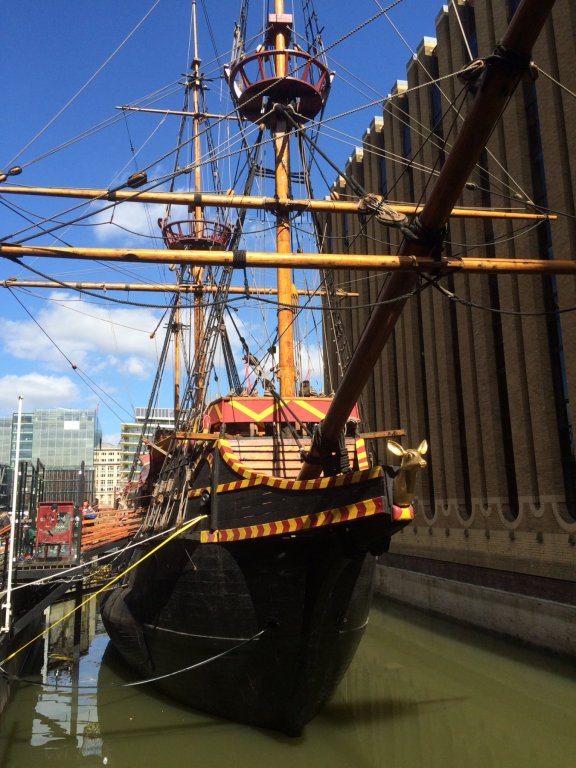
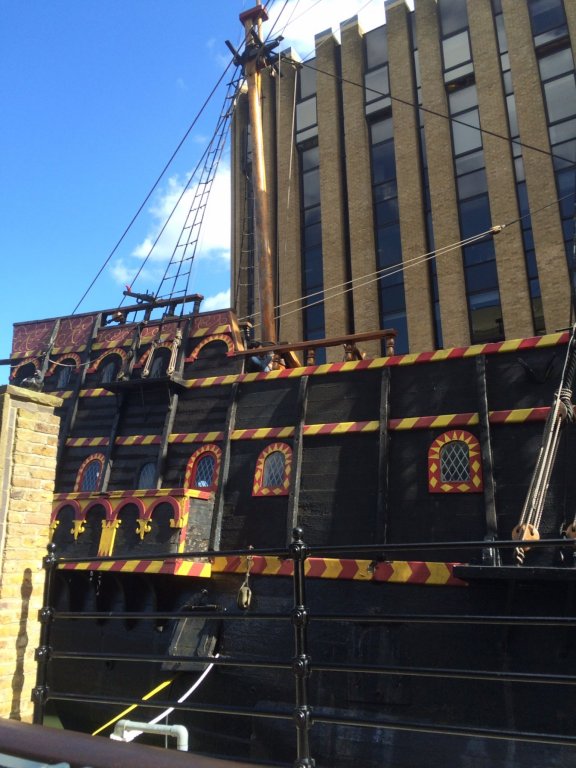
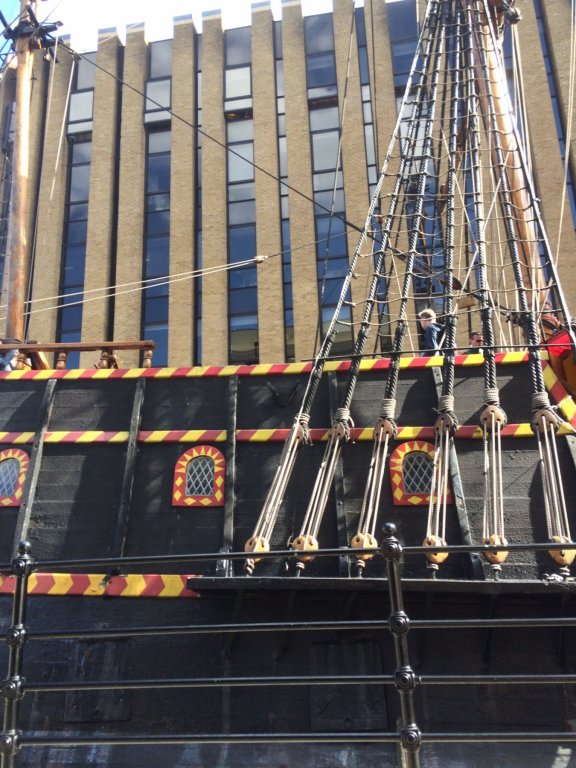
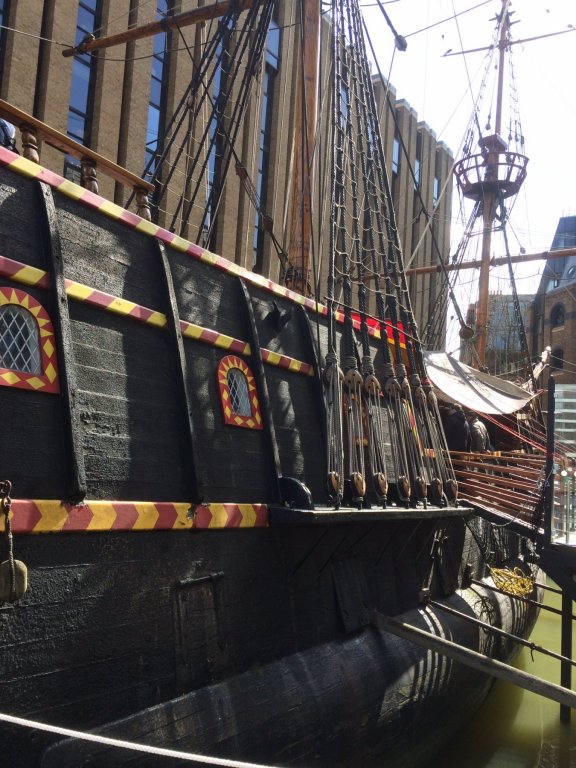
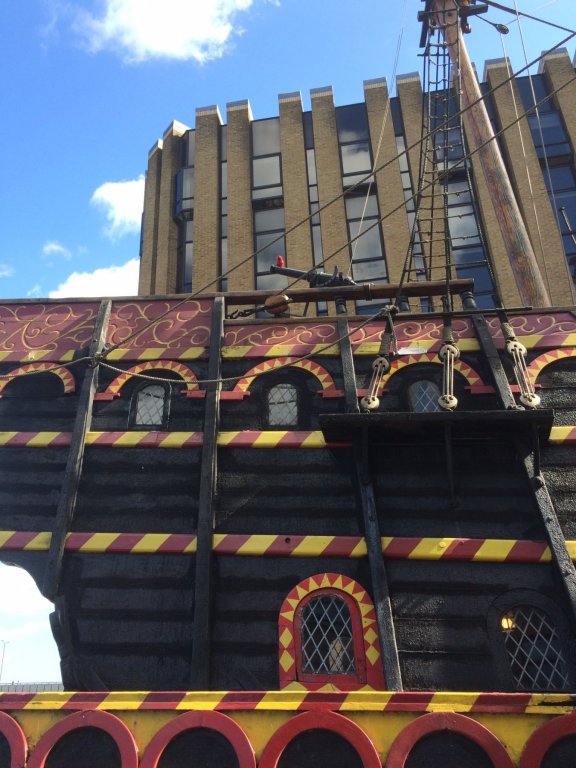
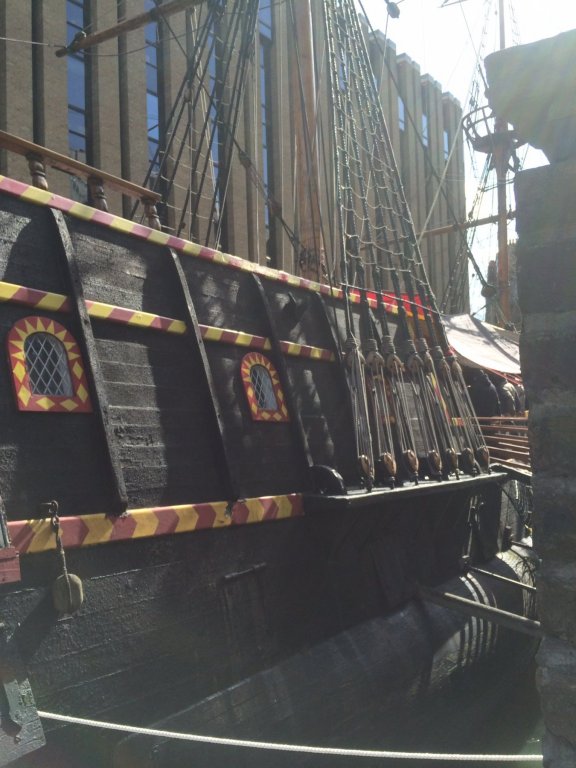
I have just been looking through your log and the ship is looking good. I go to see the replica of the Golden Hind in London about once every two month when I go down to see the Cutty Sark, and visit the national maritime museum. I know it’s a bit late now, but here are a few photo showing along the hull. It’s hard to take photos of her as she is always surrounded with visitors. Maybe they will help with any painwork you do. Regards DAVID


-
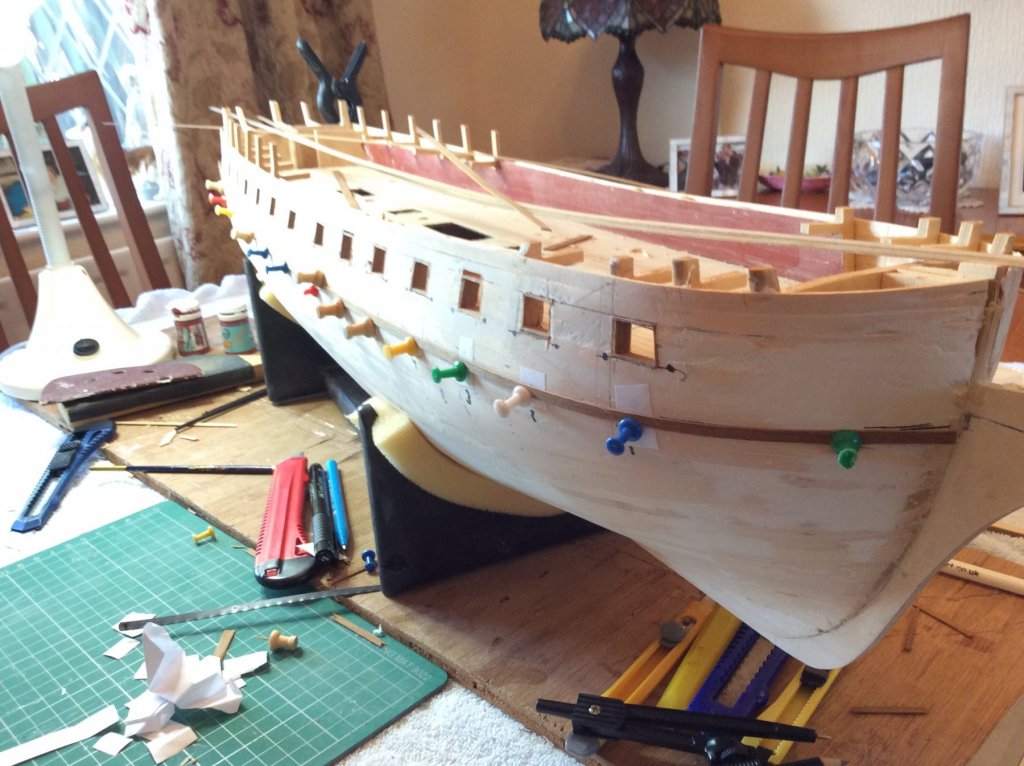
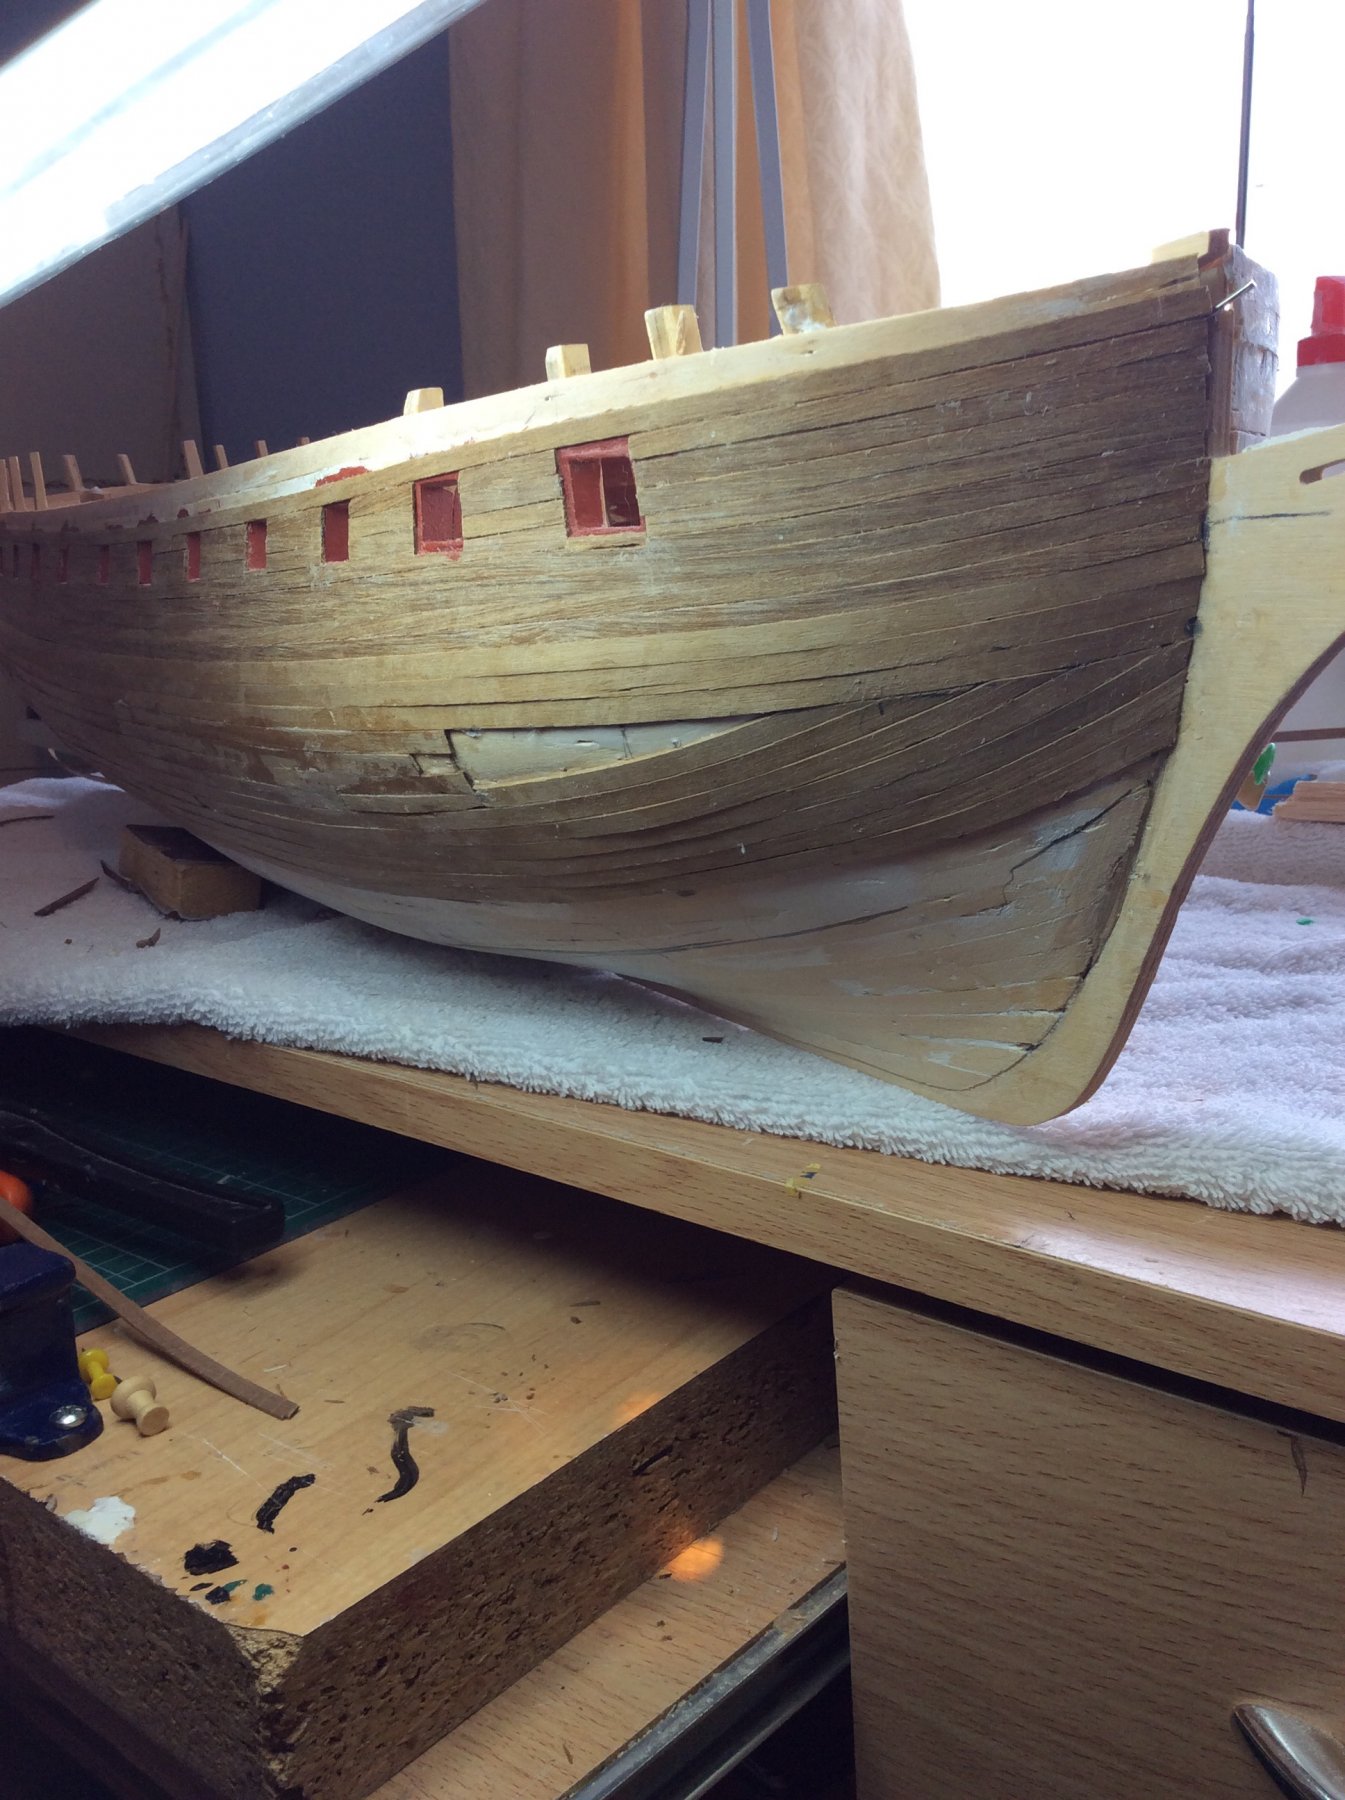
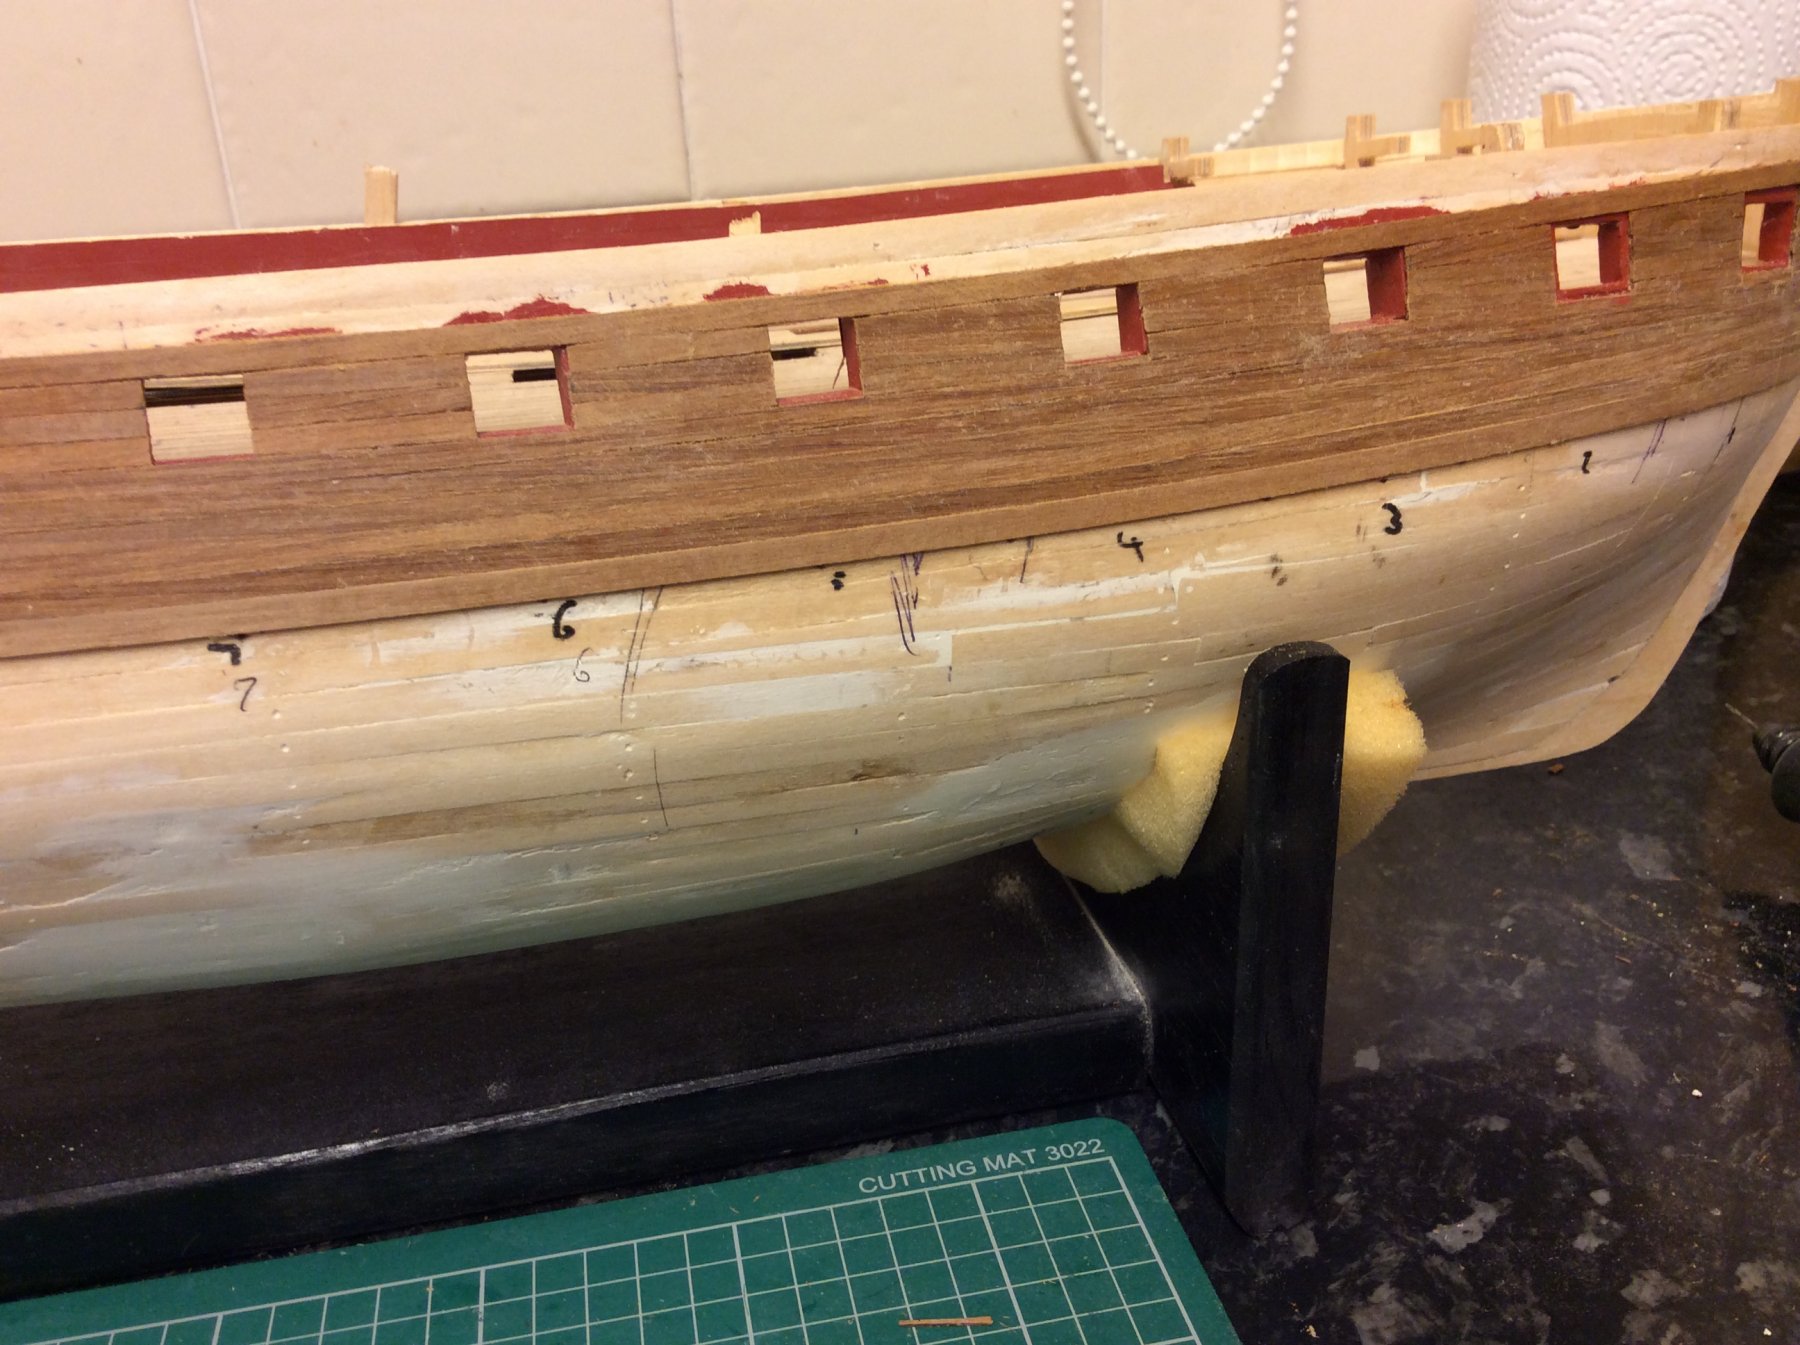
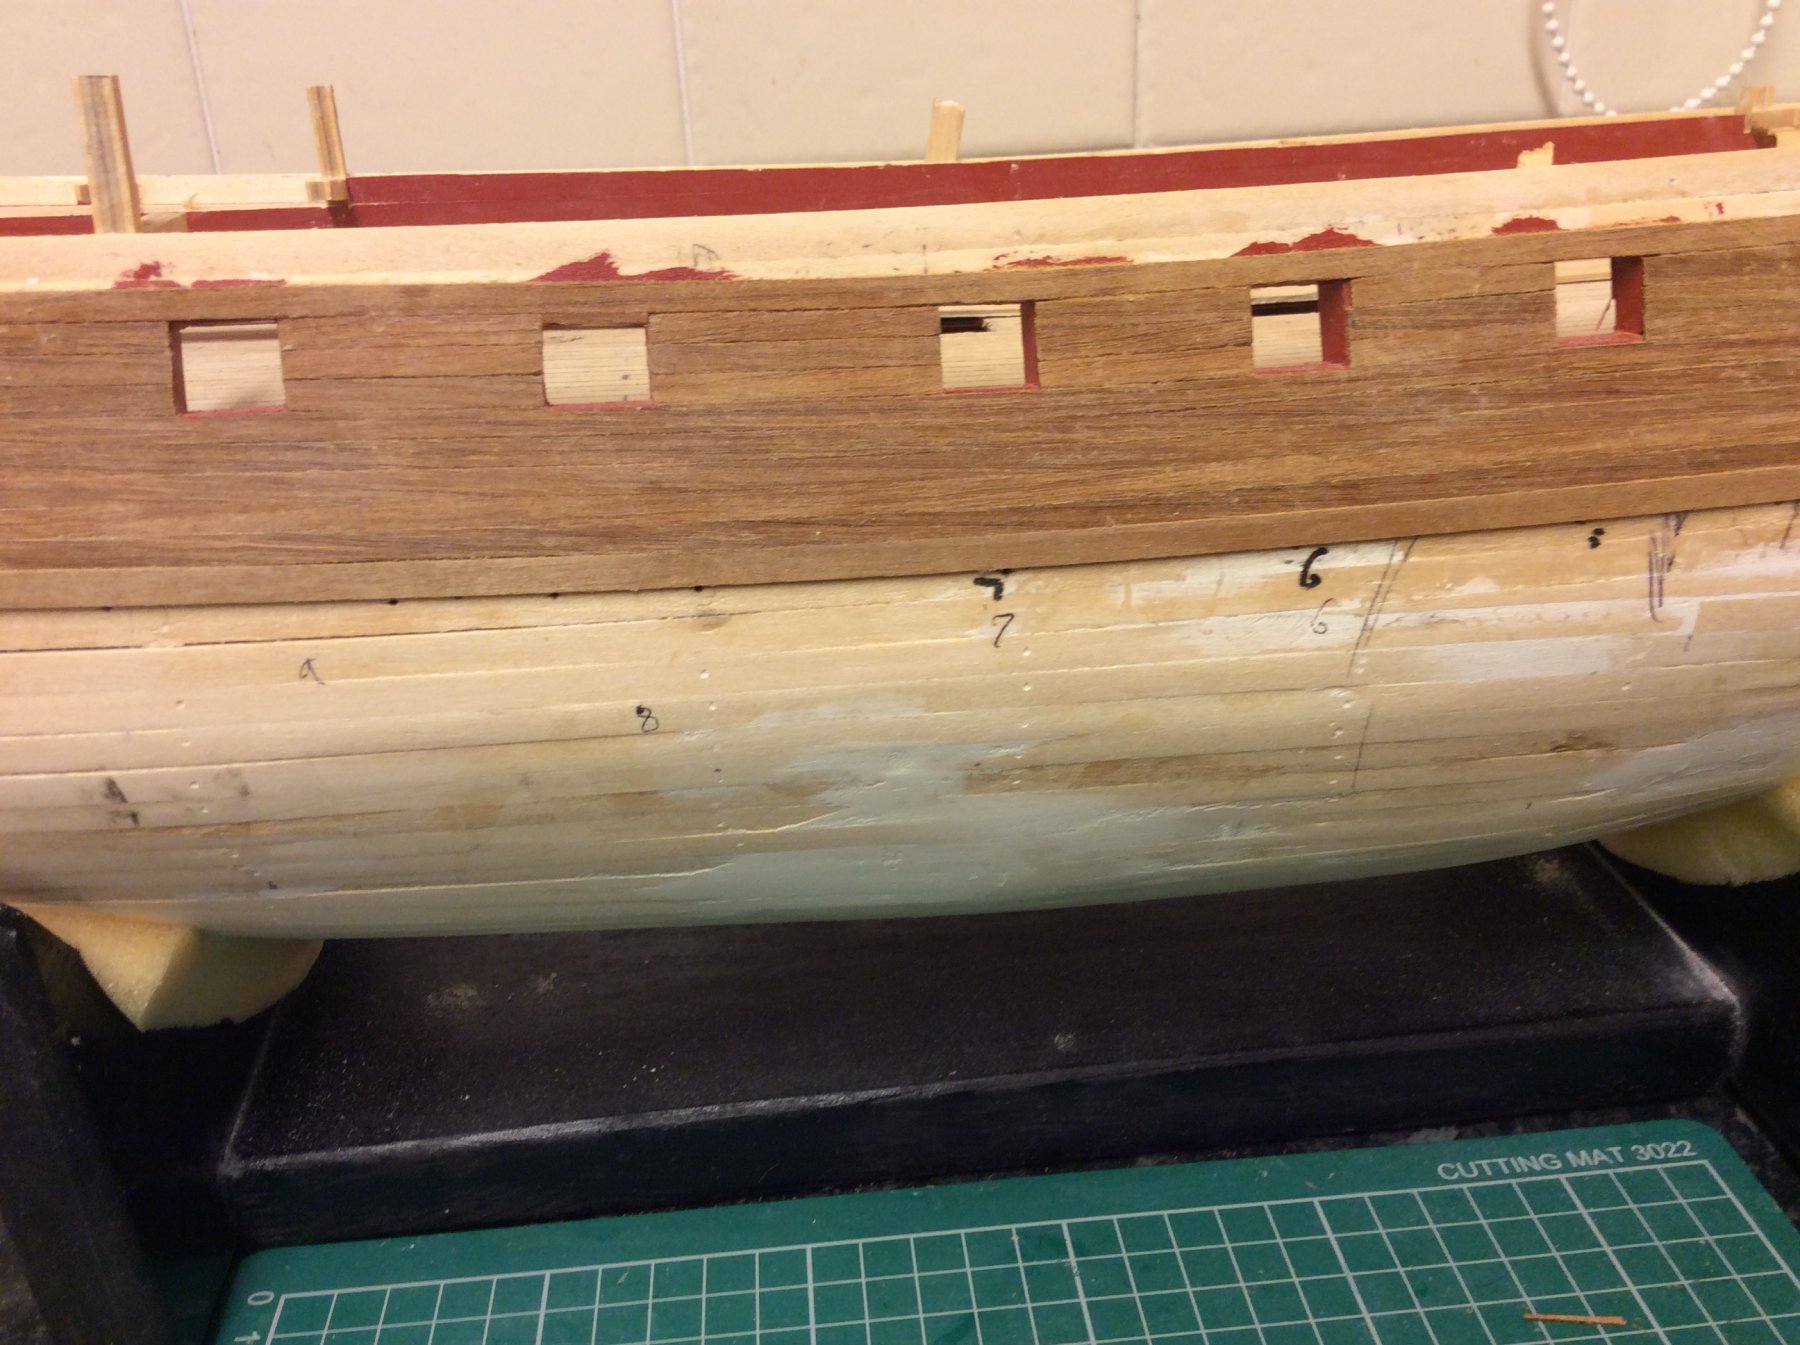
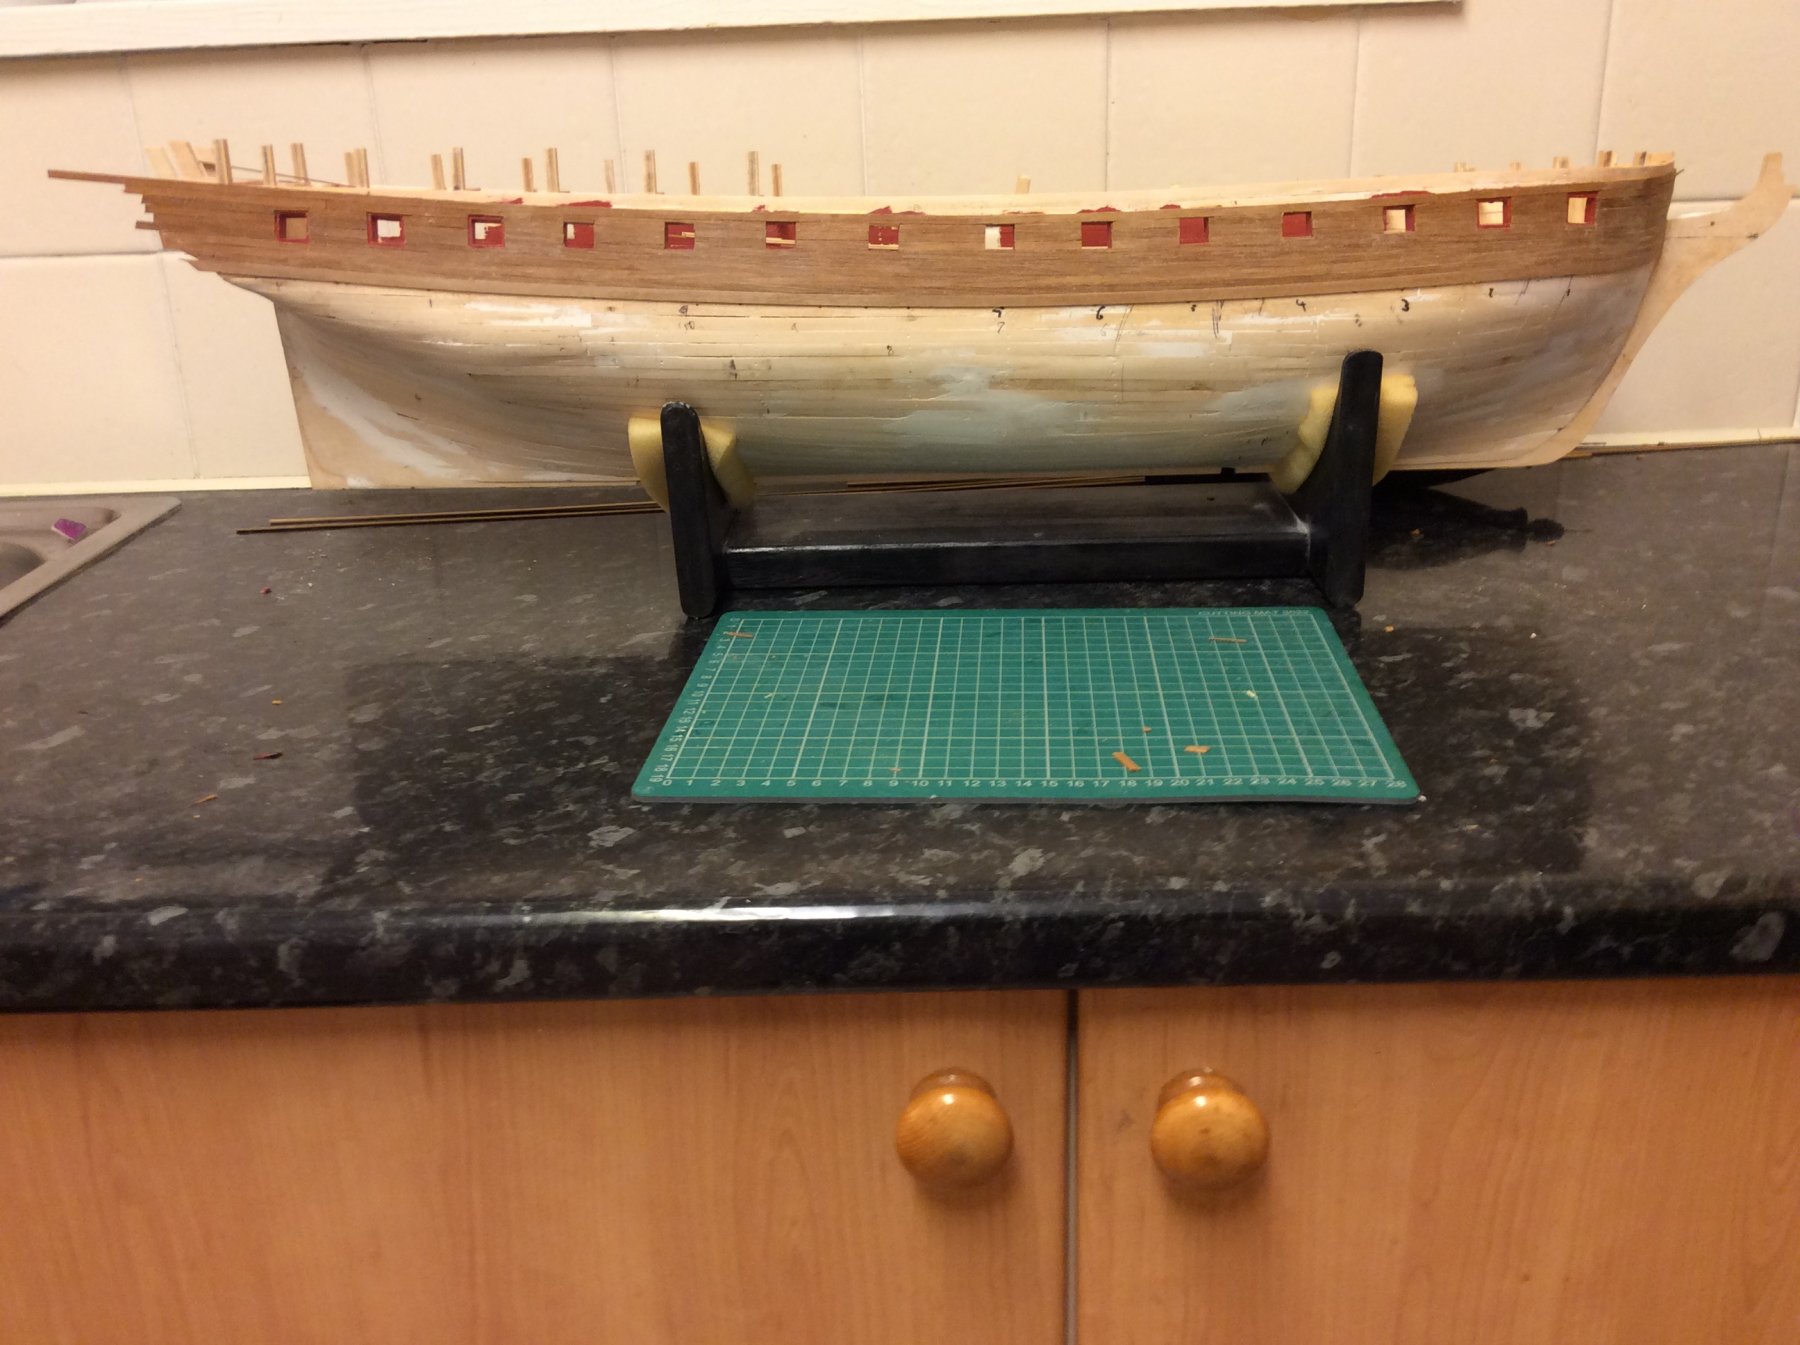
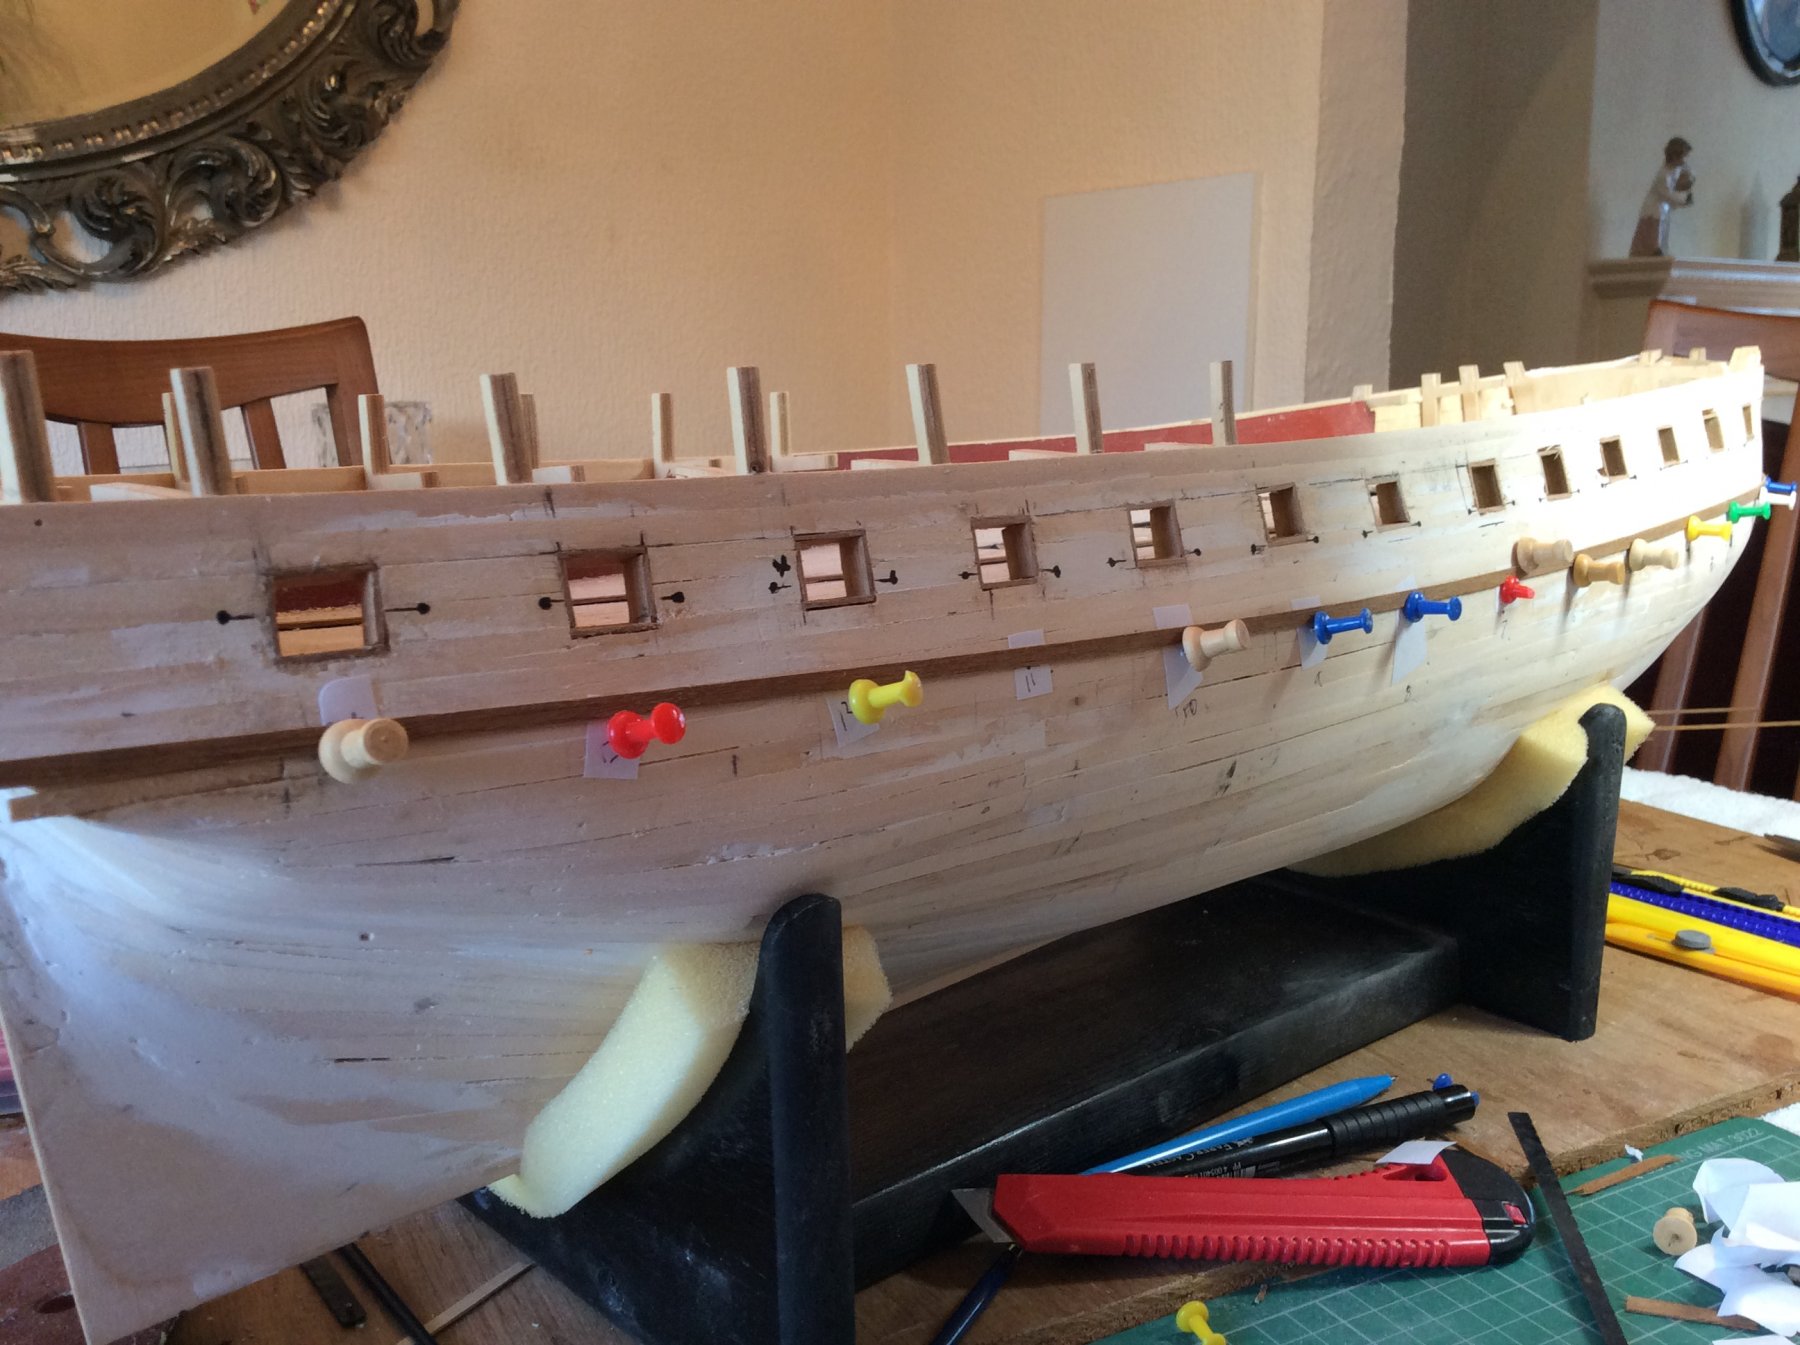
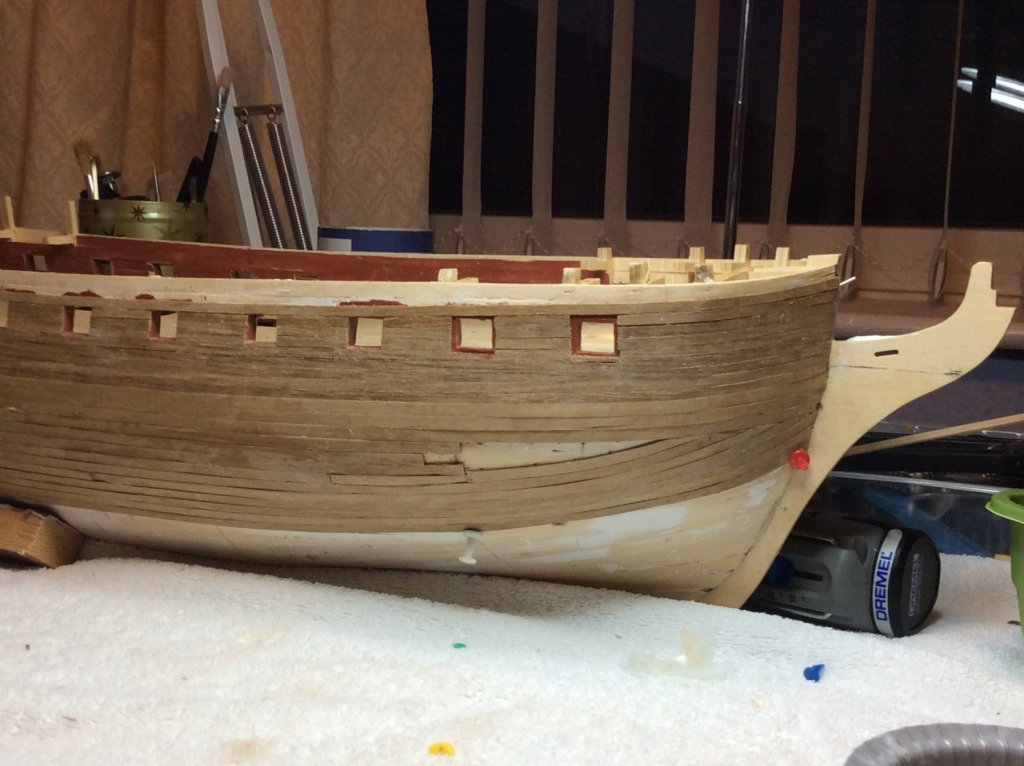
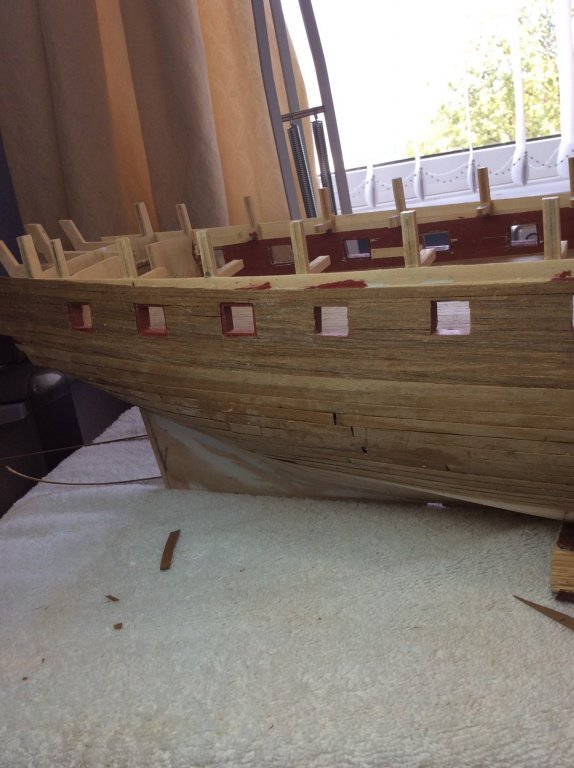
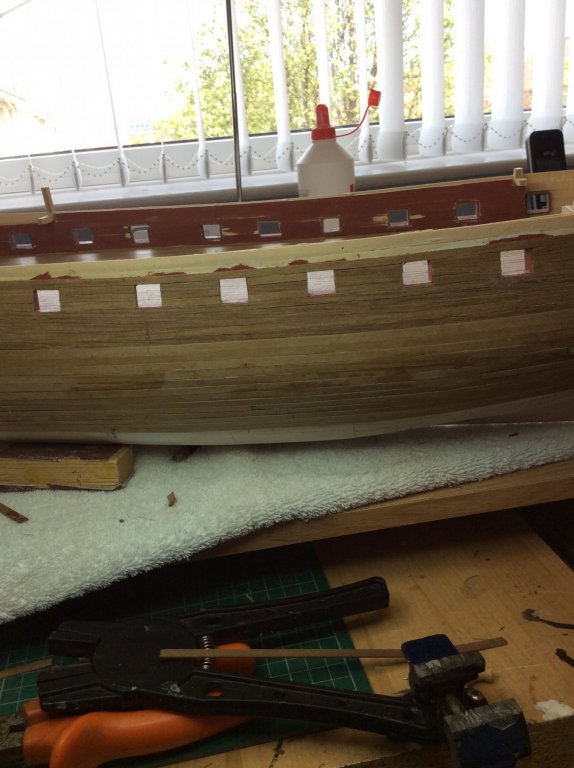
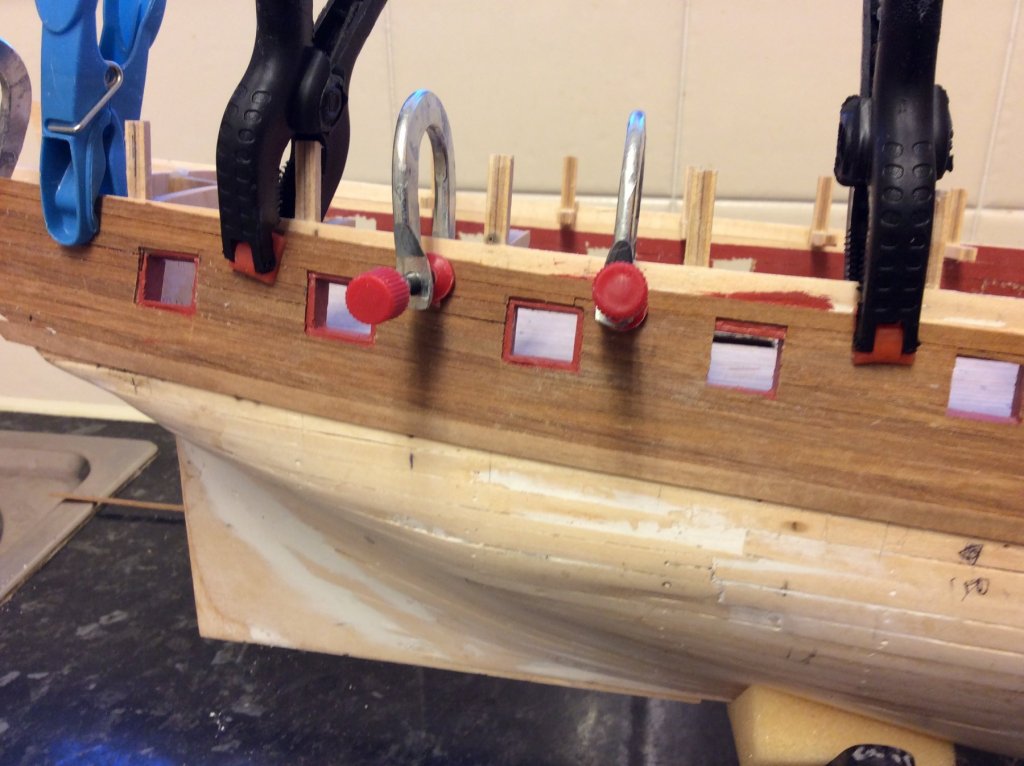
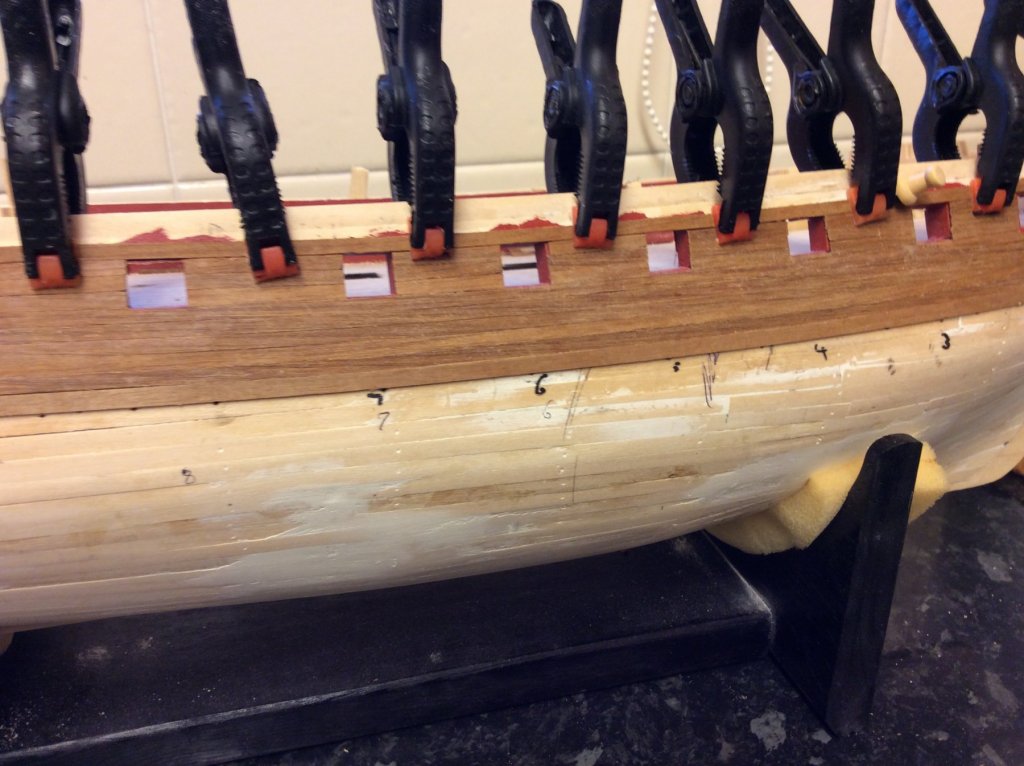
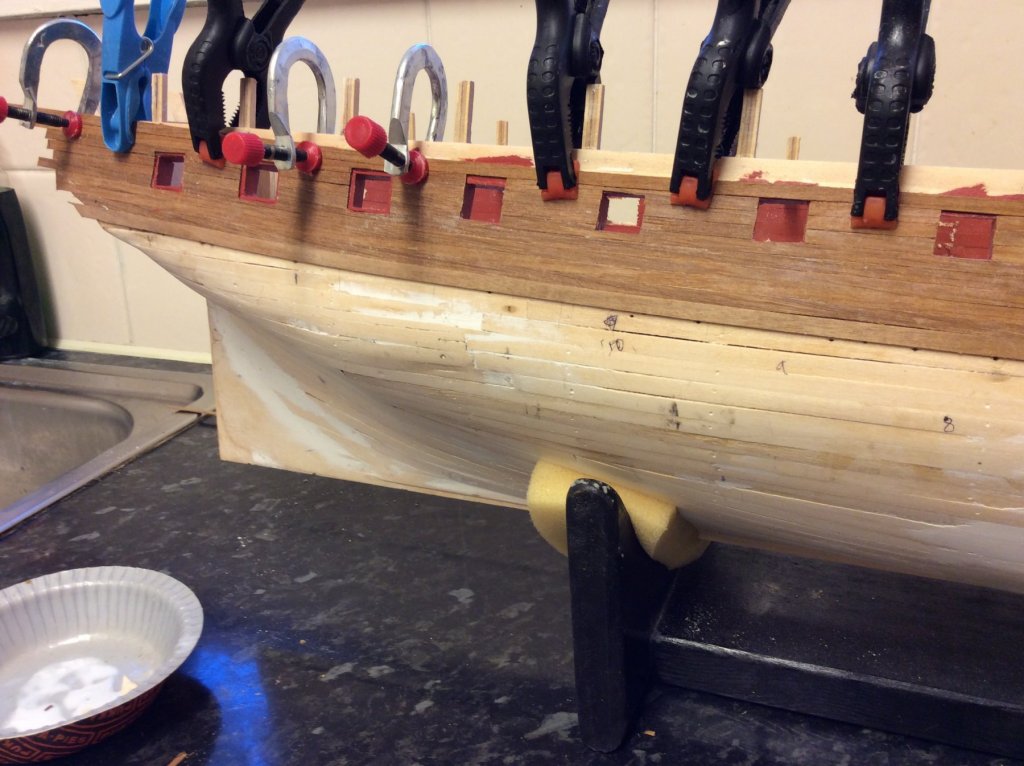
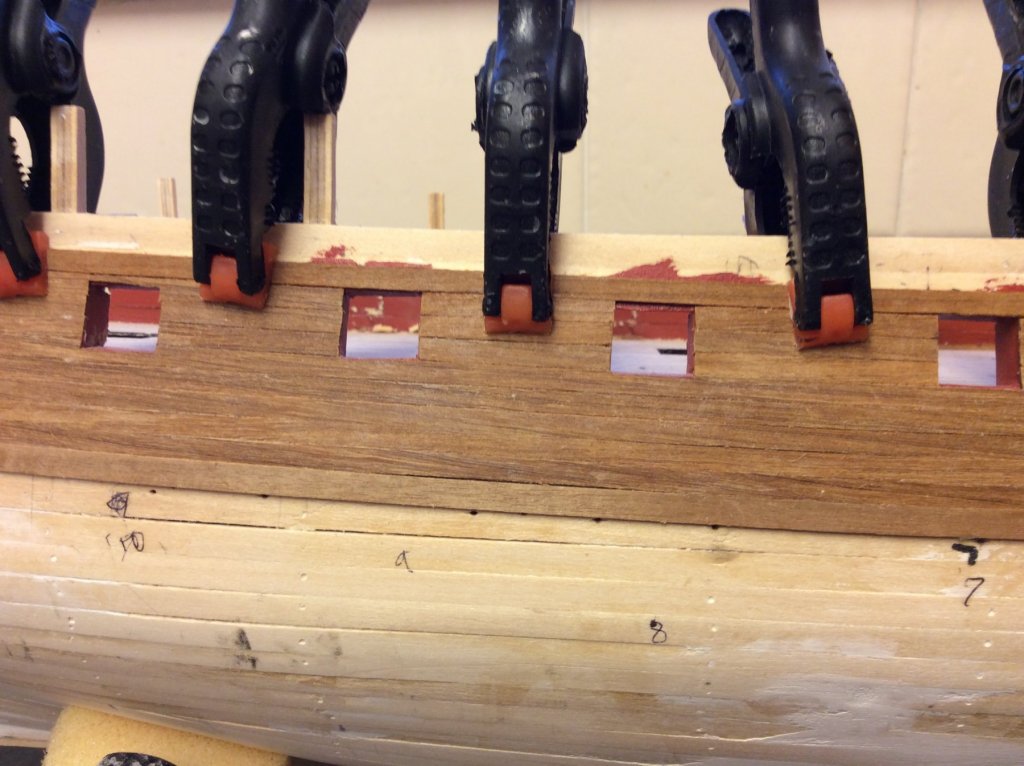
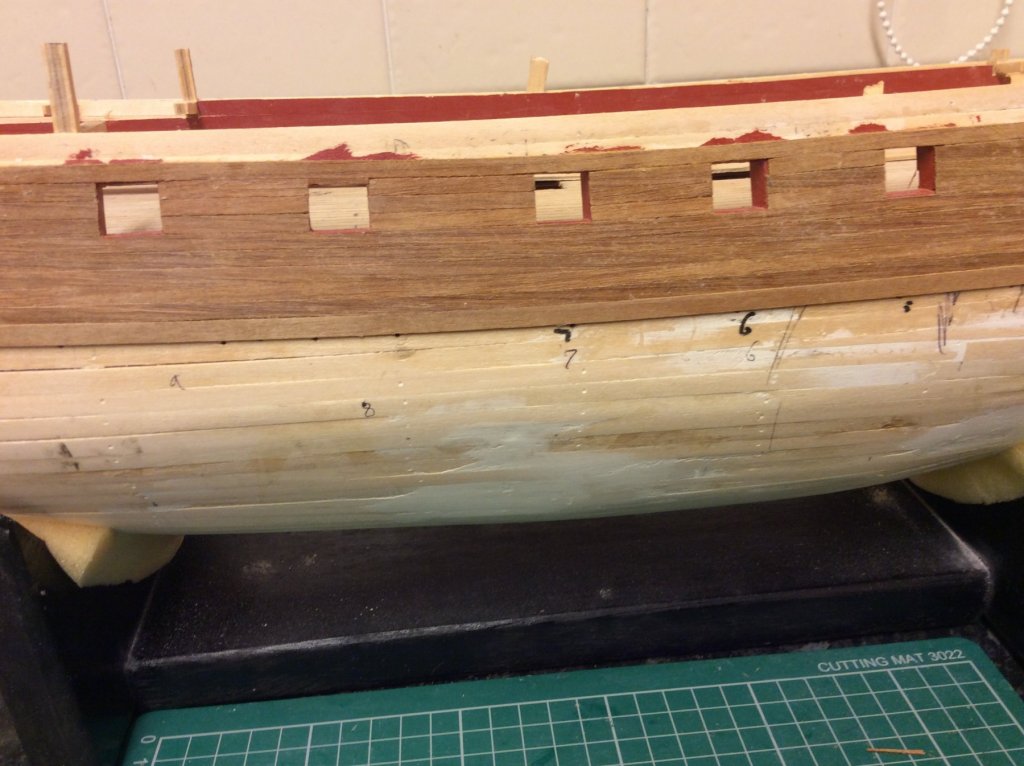
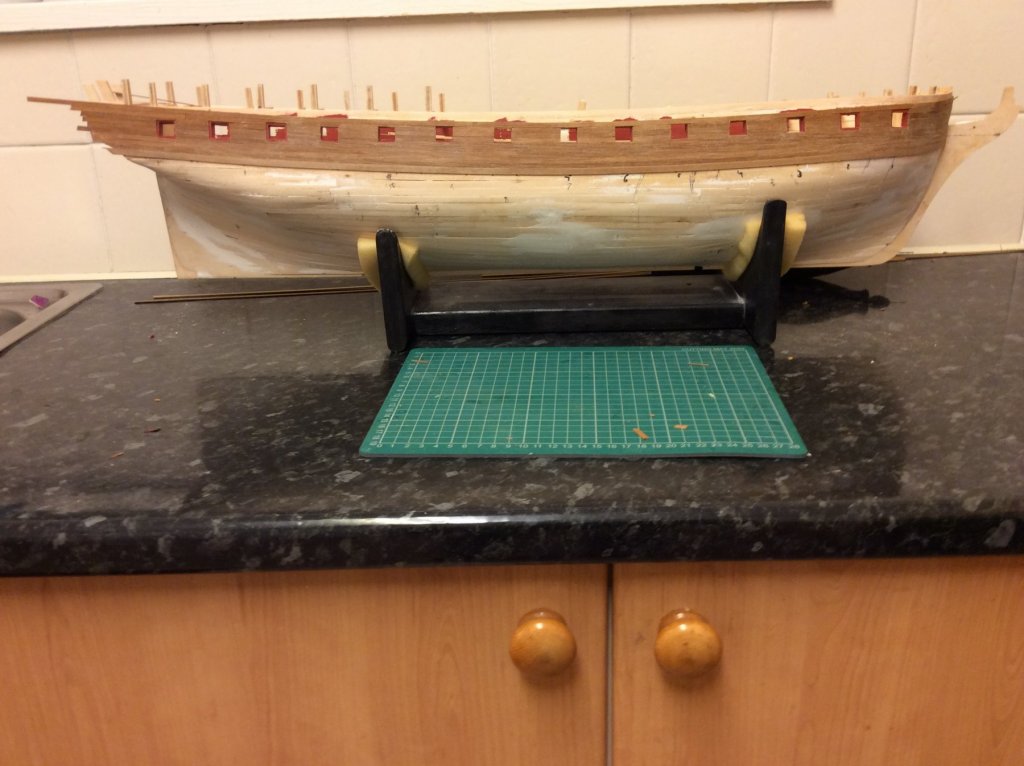
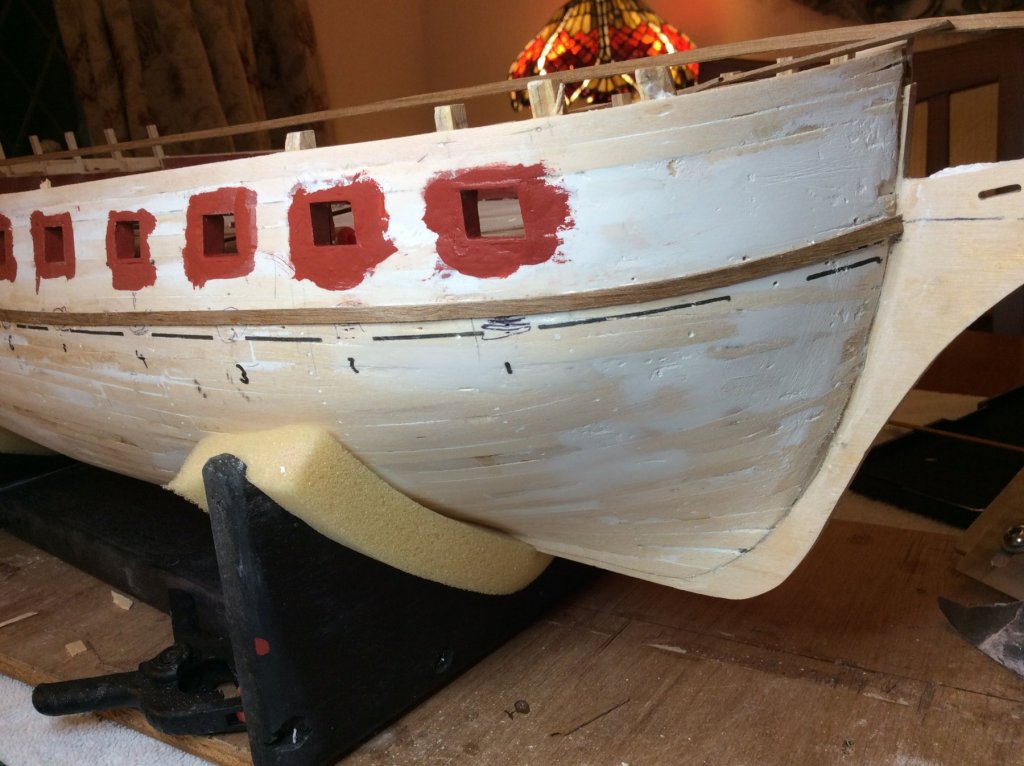
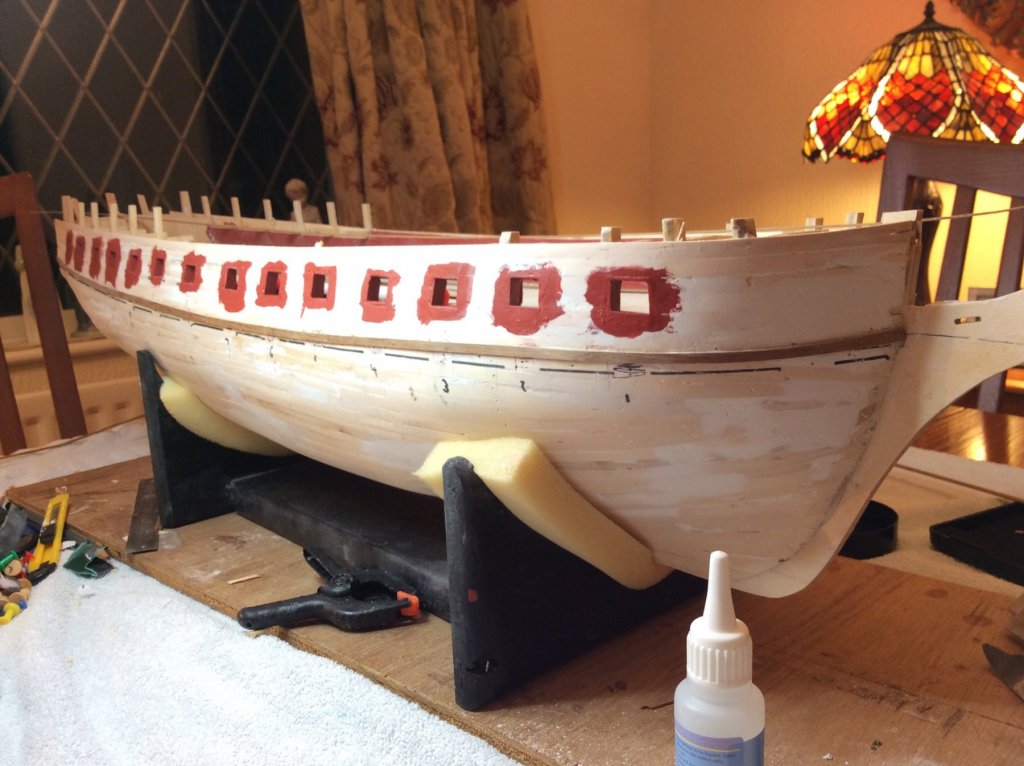
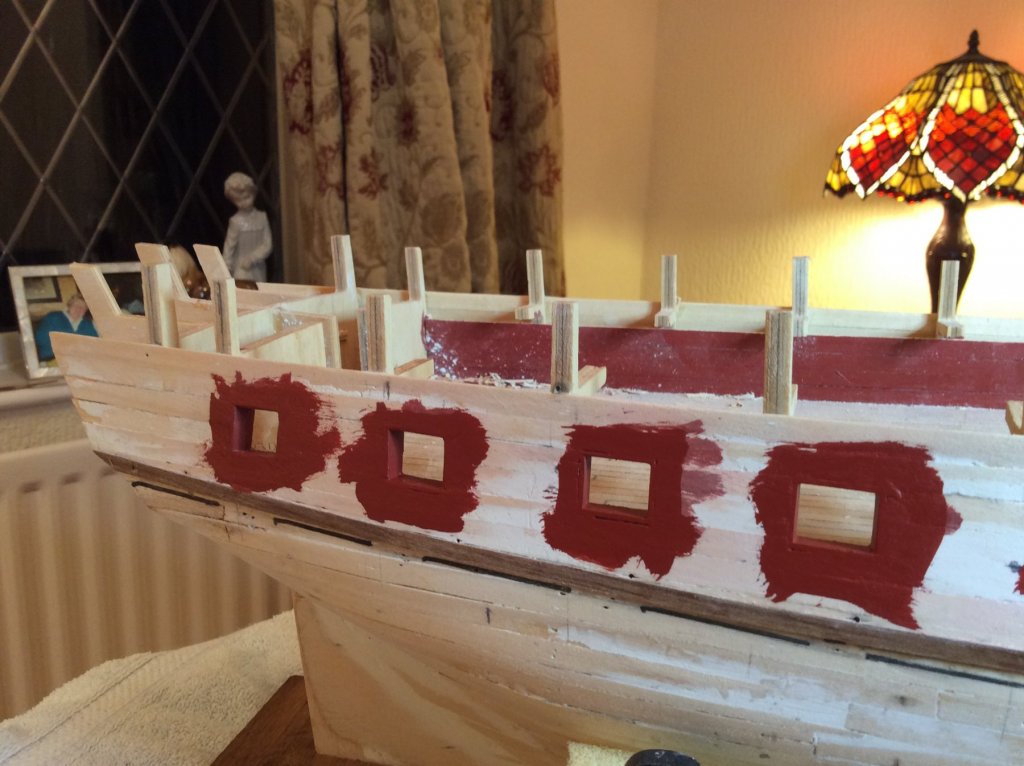
Greetings all Thanks for all your comments and likes. I have sorted the run of the wale out, hopefully, and then moved on to the port side to start cutting out the gunports, but I got a bit cheesed off with them. So I have returned to the starboard side and started fitting the planking above the wale. Things have gone pretty well and I am happy with my progress, apart from the run of the planks above the ports which are not as horizontal as they should be, so I will see how the planking will look later in the build, as I did not intend to paint it. I think I have gone as far as I should go with the planking, and will return to the gunports on the port side and then plank up the same as the starboard. I have posted a few photos and as I said I am pretty happy with it. The gun ports still need tidying up especially the five with lids. Anyway that’s me for now, wish I was planking down the hull. Thanks a lot DAVID

-
Greetings kevin Well there you go, it’s coming on really well. Yep my favourite part of the build. Take your time and just keep enjoying it. Best regards. DAViD
- 1,319 replies
-
- 3
-
-
- caldercraft
- Victory
- (and 1 more)
-
Well done OC yes it looks really good on display, I will tell Glenn later, I am sure he will be impressed. What next?? Cracking job DAVID
-
Greetings all Well I have moved on to the port side and started on cutting out the gun ports which is going well. But! Alas I have a bit of a problem on the starboard side. Remember what Jason said in a post or so ago “ the line of the wale is visually important “ It certainly is!! The wale guidance strip is well out of line. It is so obvious, and It had been fitted for more than a day before I noticed. I don’t think correcting the mistake is cheatable, so I shall rectify the fault when the gunports are sorted. Might be cheatable by then 😋. Regards DAVID..
-
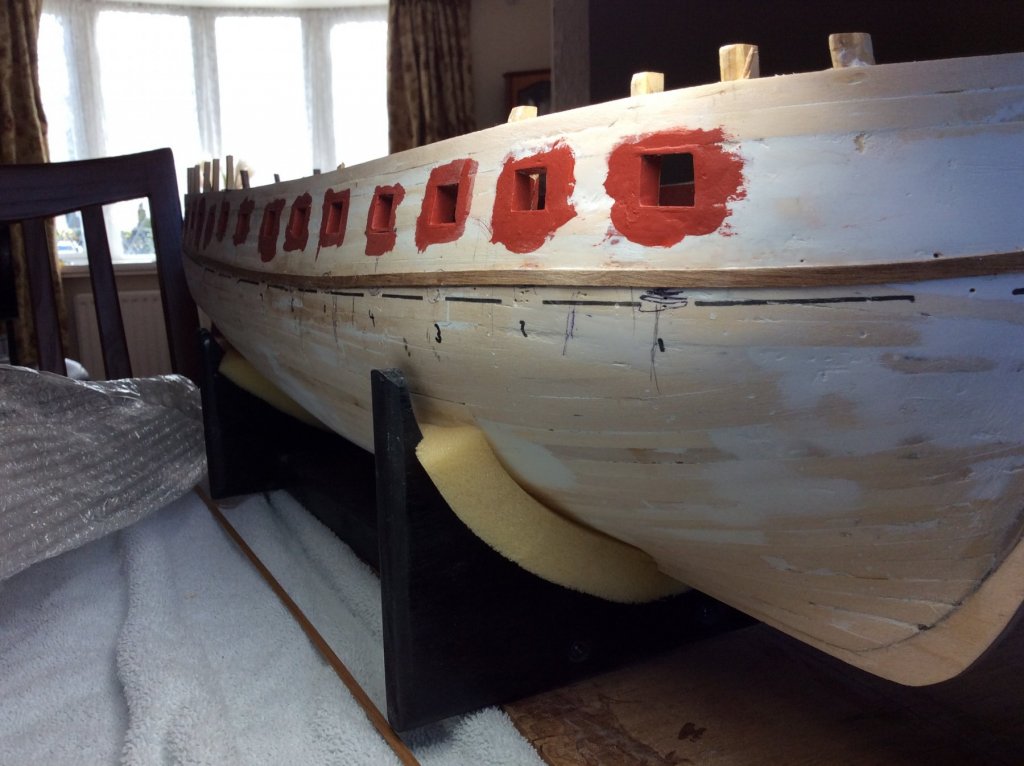
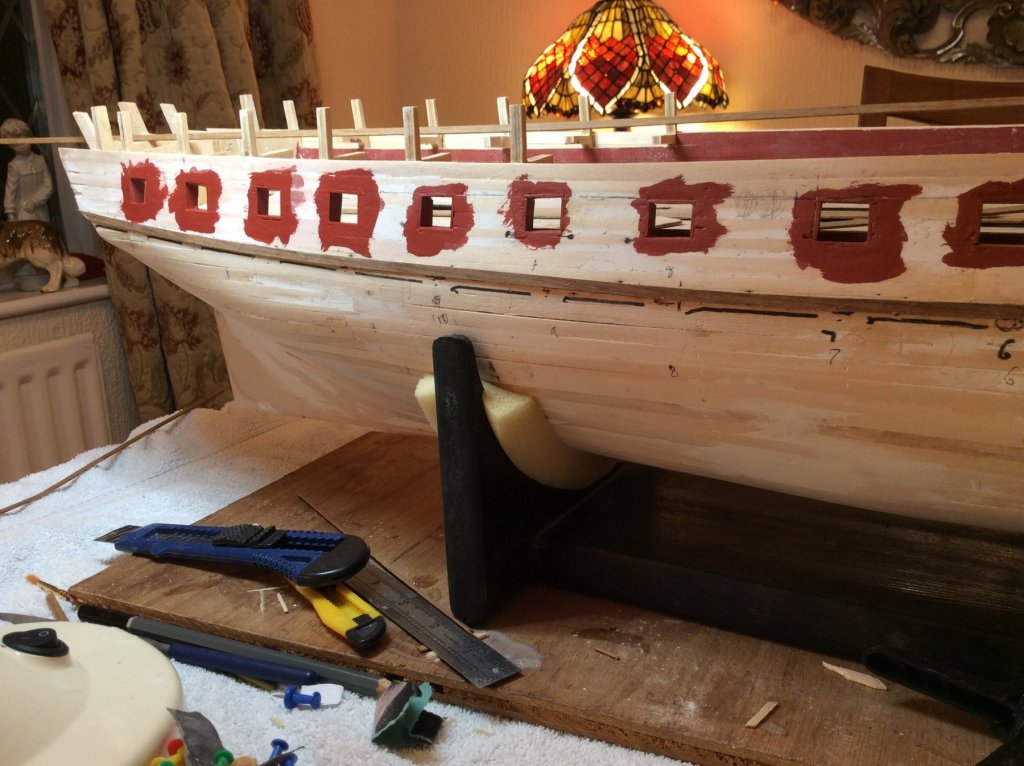
Greetings all Thanks a lot for all your encouragement, help and likes. Well I am happy with how things are going now, at last. I have tidied up all the gunports and added the position of the wale line. The plank I have fitted is the first strip above the wale line. The gunports are not perfect because of my poor work cutting them out. Anyway I will now fit a couple more planks up towards the gunports, and then start cutting out the port side gun ports. Which should keep me happyish for a week or two. Once again thanks a lot DAVID
-
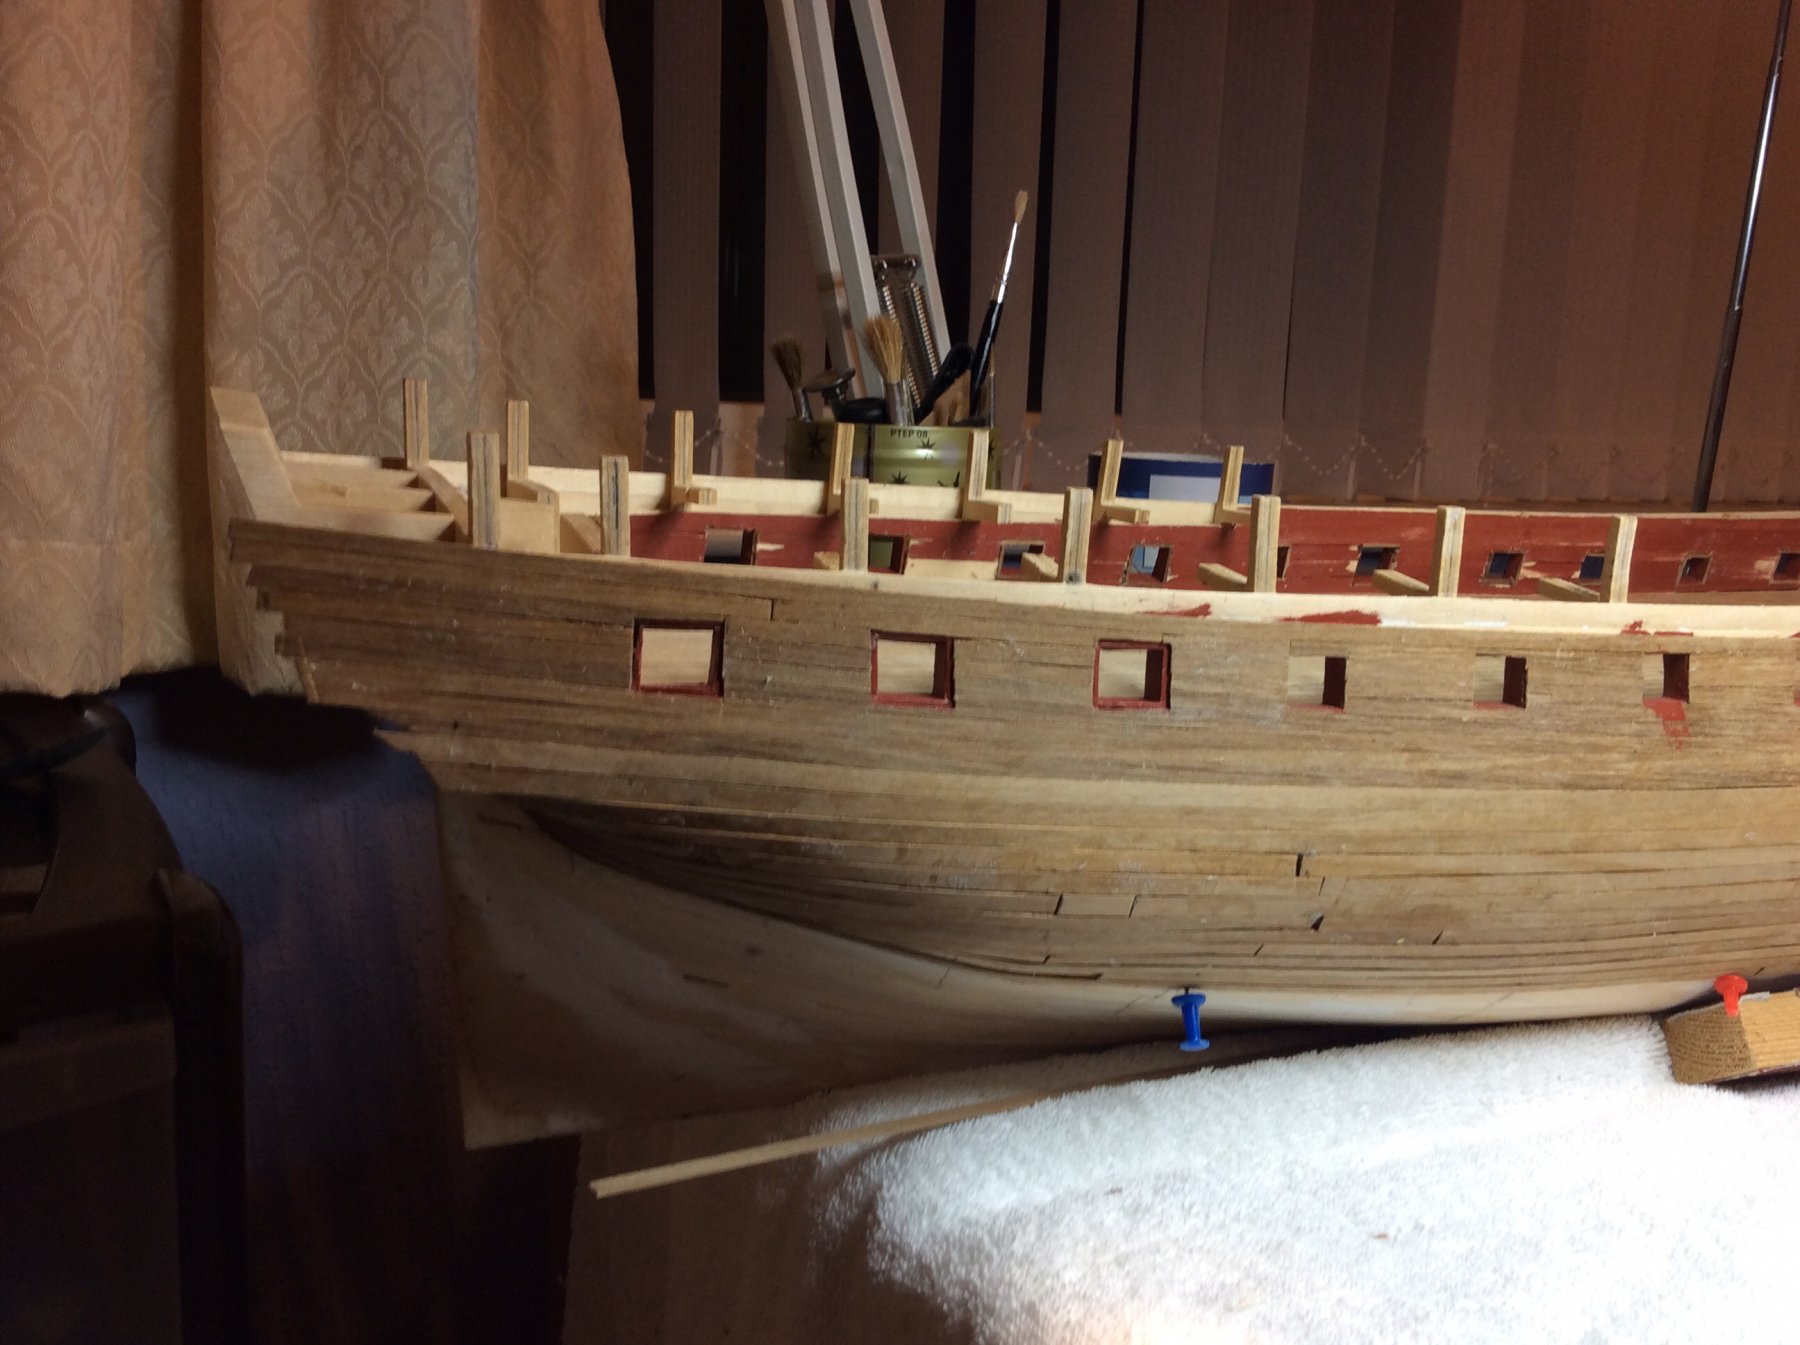
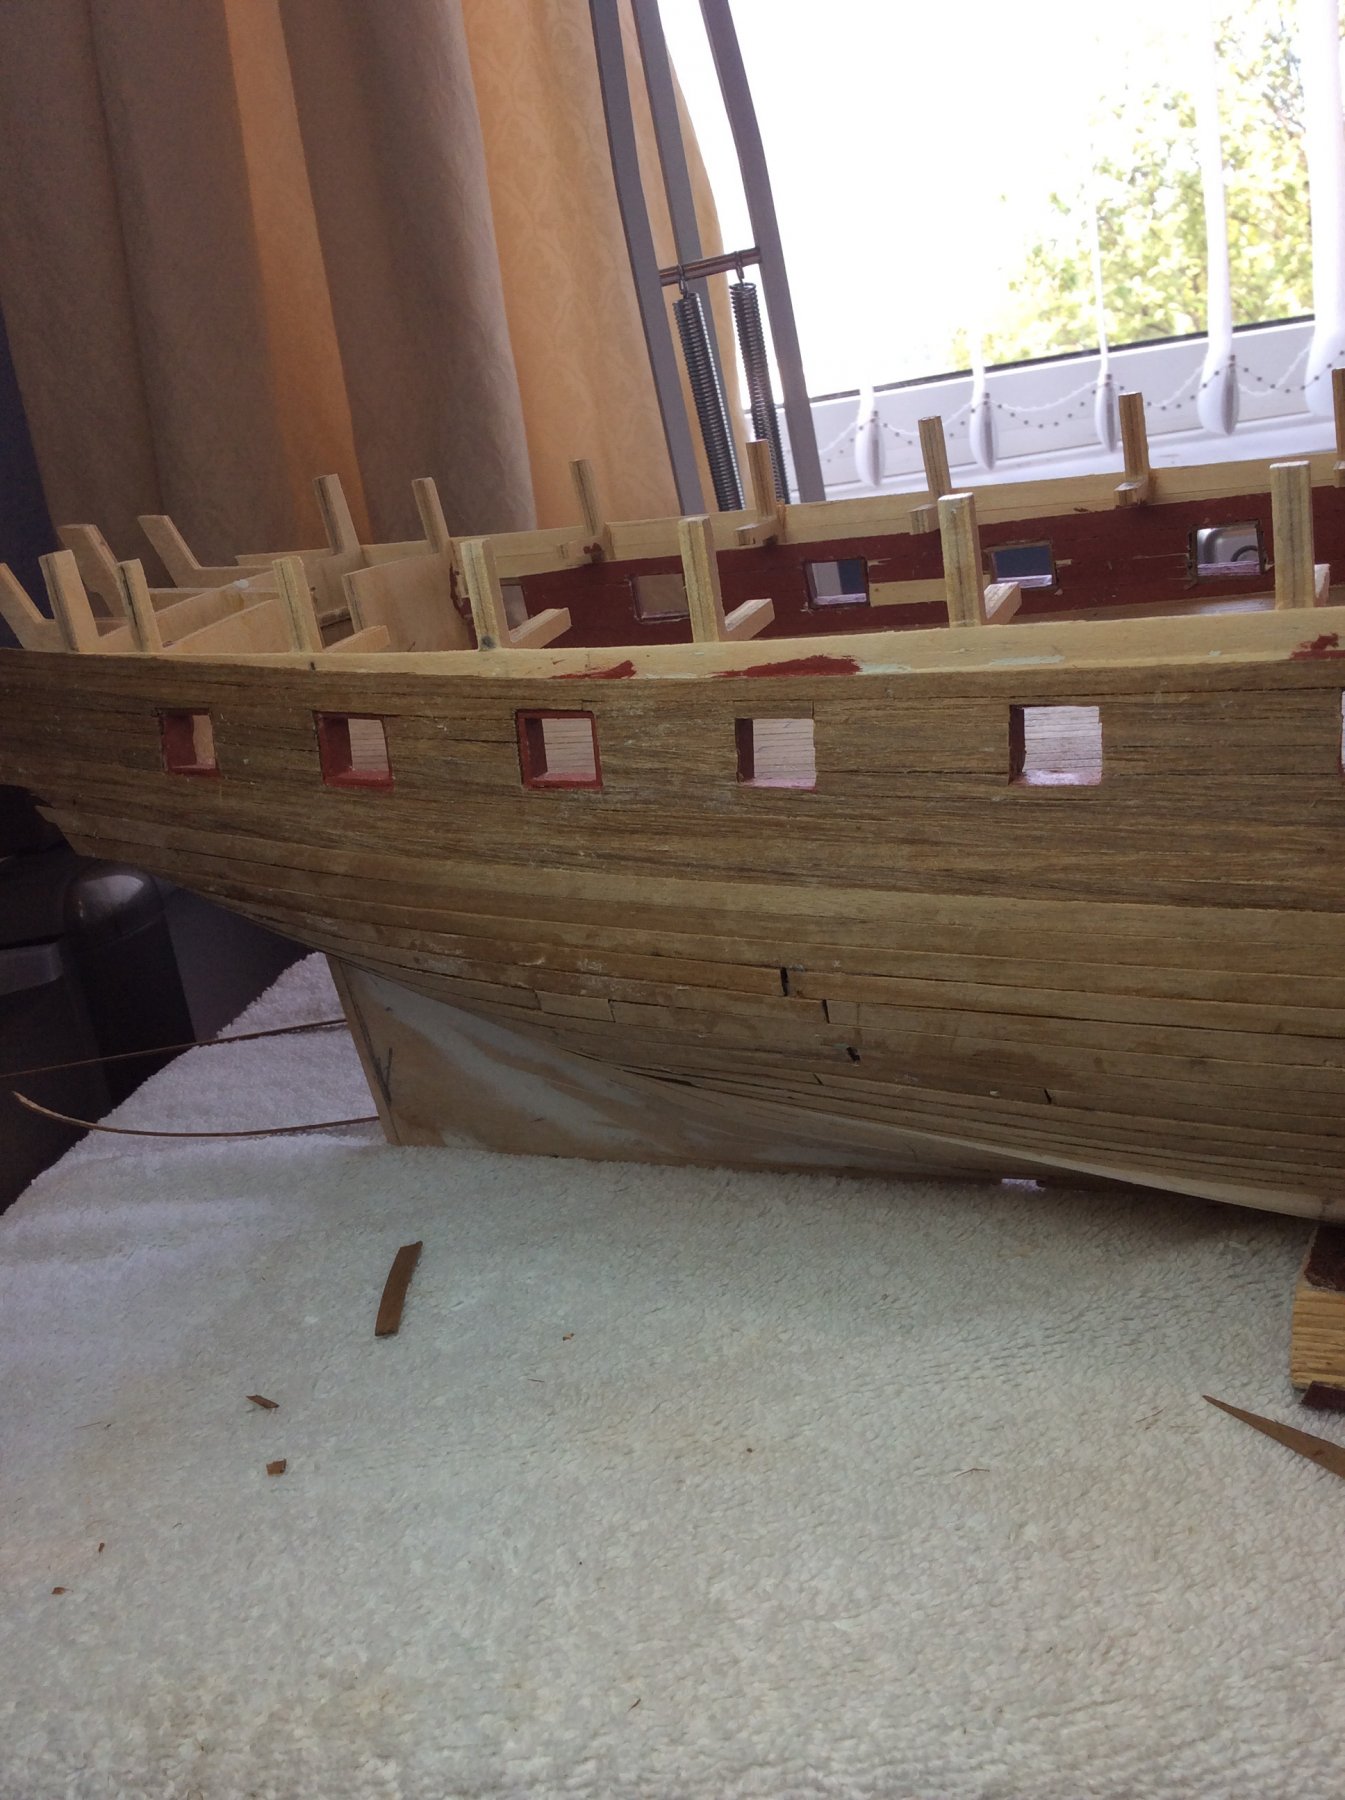
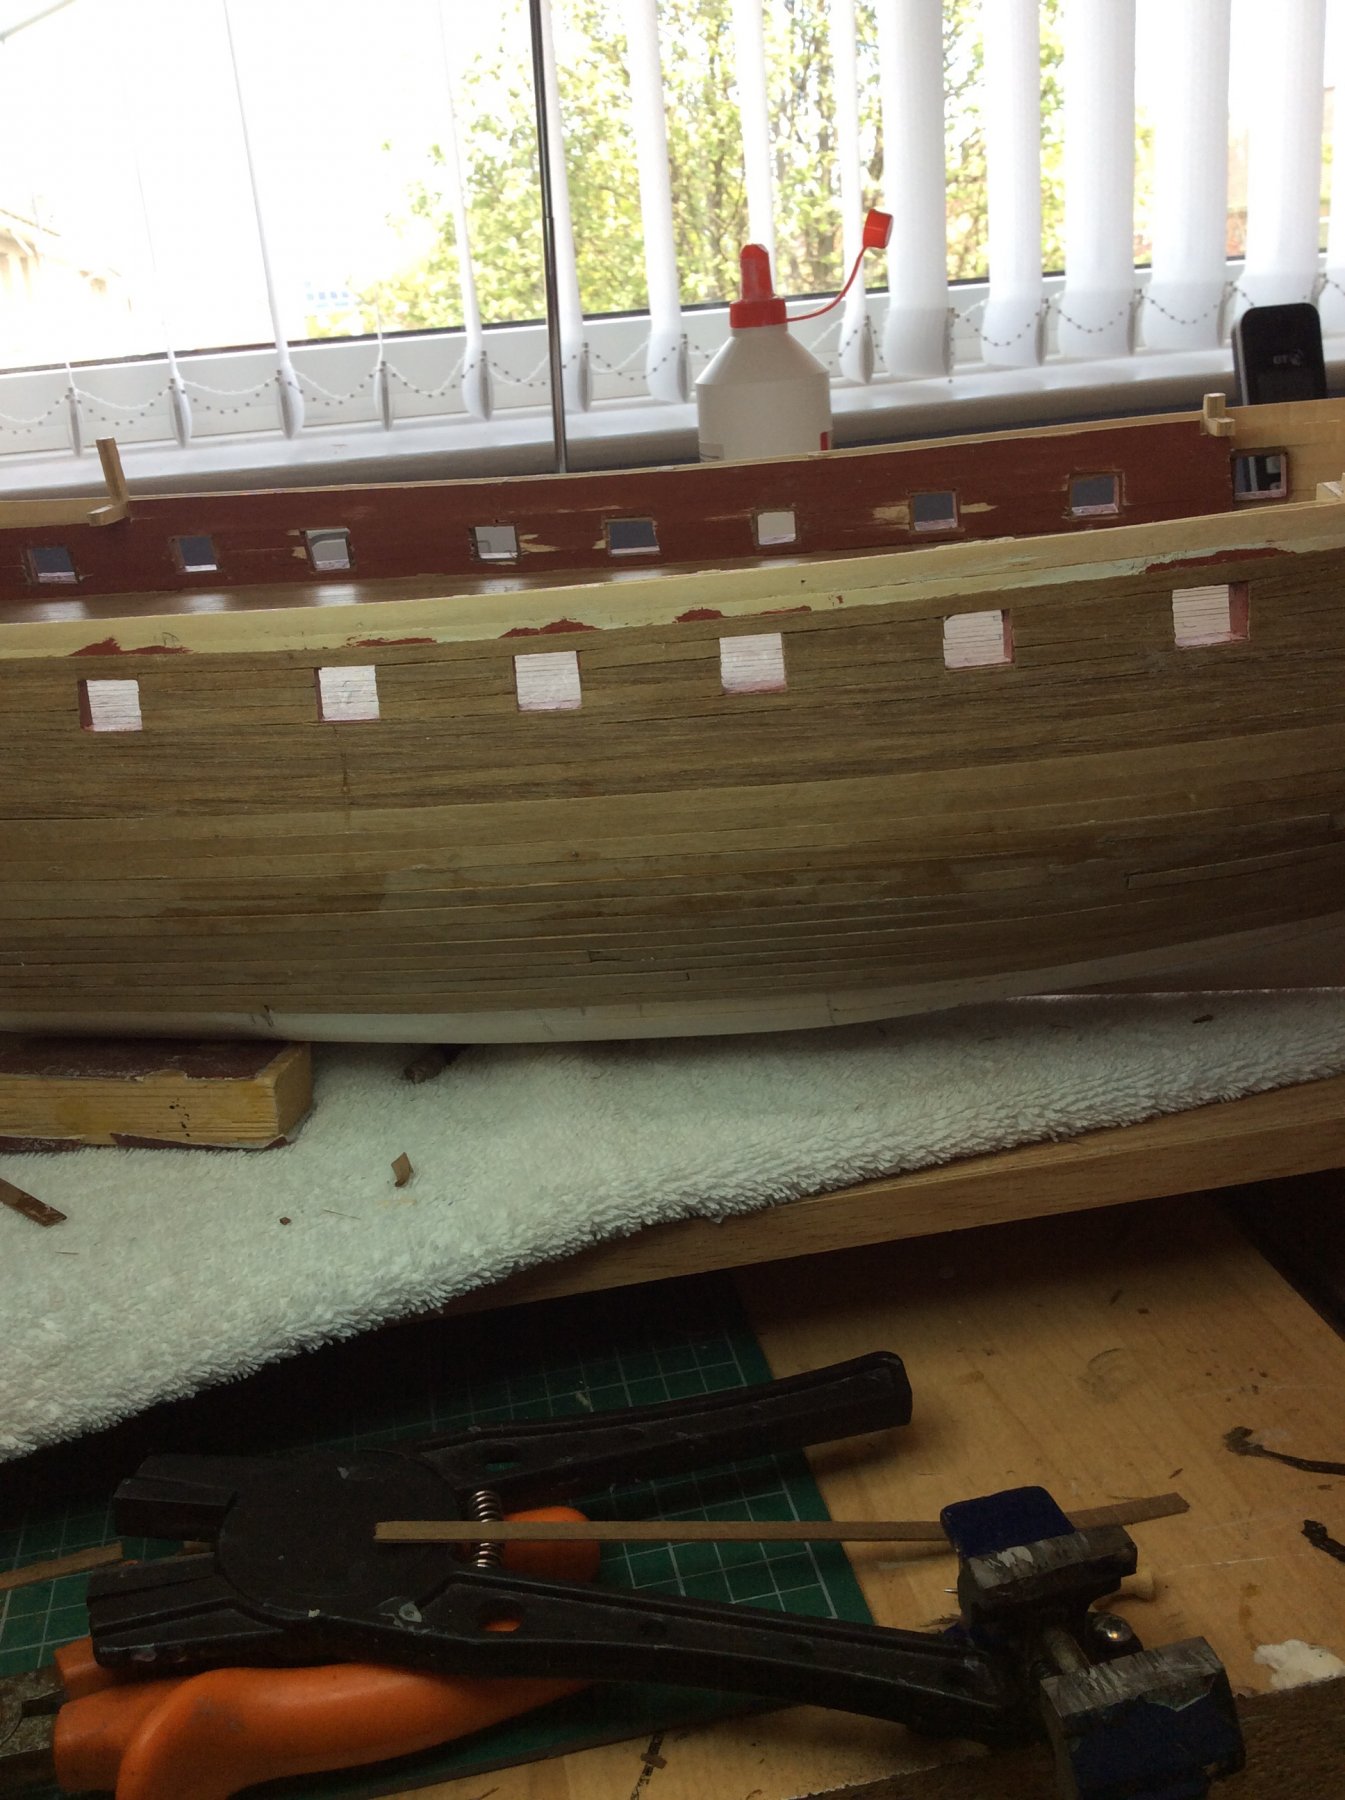
Greetings all Here I am again with my lump of junk needing advice on the second planking. I have set the run of the wale using the gunports as a guide. What I need to know is we’re you can see how the planking will run along the dots on the gunports, will that be satisfactory. I need to hide these gunports. best regards DAVID