HOLIDAY DONATION DRIVE - SUPPORT MSW - DO YOUR PART TO KEEP THIS GREAT FORUM GOING! (89 donations so far out of 49,000 members - C'mon guys!)
×


AON
-
Posts
2,866 -
Joined
-
Last visited
Content Type
Profiles
Forums
Gallery
Events
Everything posted by AON
-
 it was easier (mentally) than I thought it was going to be.
 -
Summer is over and time to get back to my build. I had added a few more frames but I had a number of issues... 1. My top deadwood piece was forgotten and when I put it on I hadn't made it to the chiselled out thickness so I've been notching my frames to fit... I compromised. 2. My stem/stern posts were not held snuggly and as I added frames the assembly shifted. I added felt pads to snug things up last week and noticed my frames were outboard of proper alignment by as much as 3/16 inches = 12" to scale... both sides! 3. I've been assembling my frames on a pane of glass with my template below and last week someone mentioned distortion though the glass. I've torn all frames out back to the transom and I've removed two braces below the transom pieces. I've chiselled the top deadwood to proper thickness. The posts are held snuggly. I've installed all braces and will be starting over making new frames. I've retired the glass pane and will try slipping my template into one of those transparent plastic page protectors and build on top of that. I'll post again when I get back to where I was. Hope everyone this side of the line had a wonderful summer and got outside.
-
Derek, I believe that after a full day at the office errors in the shop are unavoidable. Going slow and being extra diligent hasn't worked for me. You need a table with adjustable height. It has been a god send for me. I also find my tilting model section very useful in reaching inside of and under the outside of the aft bent frames. You'll have to drop by one weekend to see what I'm talking about. That is an invitation to see, chat, have a coffee, tea or something with a bit more spirit! Bring the admiral along... mine will be here. You missed an opportunity yesterday afternoon at the Marine Modellers of Niagara meeting... it was at my home. You should have developed a cough and left work early. Alan
-
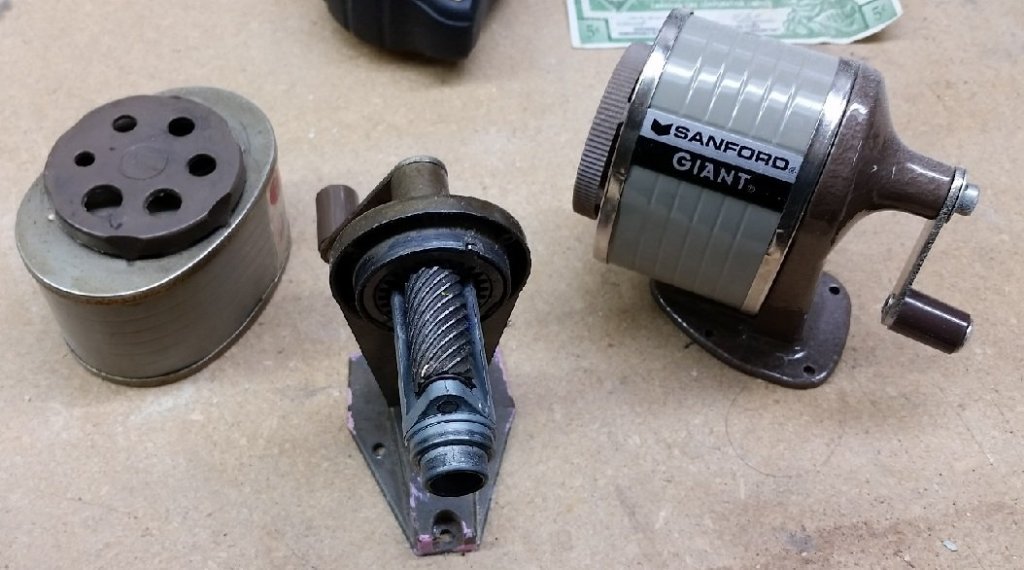
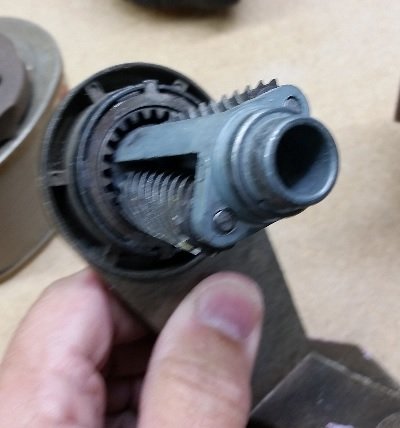
I acquired two old pencil sharpeners and while looking them over I suddenly saw a ropewalk conversion project in my future. Seems all it needs is an addition to the hub end to connect the three lines. This will not be for some time but thought I'd share the idea and would appreciate any comments. pencil_sharpener_1.mp4
-
would you consider taking orders to make cabinets for others? beautiful job.
- 968 replies
-
- 7
-

-
- hahn
- oliver cromwell
- (and 1 more)
-
I purchased a copy of this book in 1972 when I was on working at the boatshed at HMCS Quadra. I believe it was $40 which was a lot of money back then. We used it that summer to create ornamental paddles with parachute cord and a slew of fancy knots. I am sad to say someone valued it more than I (a few years later) as it "walked away".
-
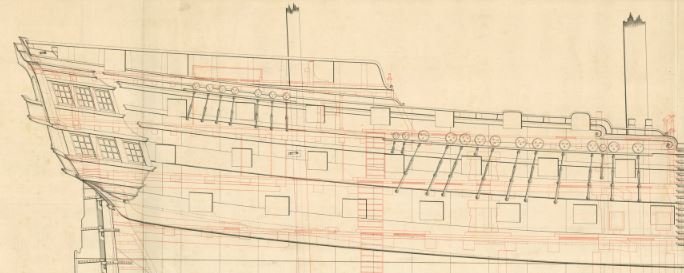
no need for the additional photo of the v-notch as I found a good one on Page 80 post dated July 22 thank you Alan
- 3,618 replies
-
- 2
-
-
- young america
- clipper
- (and 1 more)
-
thank you very much. This photo and explanation is very much appreciated and have been printed for one of my very soon side projects. (we have the wood!) I feel I might be asking too much but can I see an end view of the top jig with the v-notches?
- 3,618 replies
-
- 3
-
-
- young america
- clipper
- (and 1 more)
-
seeing it again in this post I have got to say I absolutely have to make one of those cam lock table top holder devices
- 3,618 replies
-
- 7
-
-
- young america
- clipper
- (and 1 more)
-
I was told or read some time ago that artists of the time made their sketches on site with quite a bit of detail missing and finished the paintings back in their lofts adding details as they deemed fit or recalled. Of course paintings now are done similarly with one difference. The artists take dozens of digital photos to help them remember the details.
- 366 replies
-
- 4
-
-
- bellerophon
- victory models
- (and 2 more)
-
I just posted on the wrong forum... and deleted it. will try again. There is no way of know exactly how she looked as built. I've looked at sketches and paintings, even as a prison hulk, and the detail is not there. (edit: I should mention that sometimes the details disagree) If you should find something please send me a copy or link to it. The Elephant and Goliath were built in the same time frame as the Bellerophon. I intend to build her with the railings as without them it seems incomplete and less graceful.
- 366 replies
-
- 4
-
-
- bellerophon
- victory models
- (and 2 more)
-
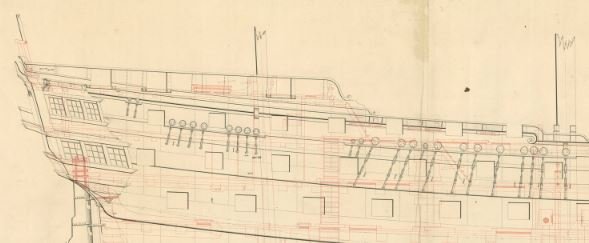
Good morning Peter following are both the Elephant and the Goliath that were built at the same time as the Bellerophon. One has the railing over the gunports, albeit different from you post. The other is open. Both are somewhat different from your posts. These are from the NMM.
- 366 replies
-
- 6
-
-
- bellerophon
- victory models
- (and 2 more)
-
Mike I understand and agree completely. I have two logs here of cherry wood that I have been eyeballing and keeping out of the fire heap for 2 years. If you can do it so can I! thanks. Alan
- 968 replies
-
- 5
-
-
- hahn
- oliver cromwell
- (and 1 more)
-
video 2? where would I find that?
-
We all see "the light" after the fact. (pun intended) Possible marrying slots may have reduced the weight by eliminating the blocks. Thinner would definitely lightened it. Is it too late to regroup? I can see you have got some expense invested in it already.
- 968 replies
-
- 4
-
-
- hahn
- oliver cromwell
- (and 1 more)
-
30 November 2018... and counting.
-
The summer sun might be more of a distraction but there will definitely be periods where I cannot venture into the bowels of my dwelling to spend time in the play room as I will need to avoid dusty environments. Getting old is a bummer.
-
Some bad news yesterday at my eye checkup. Apparently my eye problem is "re-occurring"... yes it is back. I will possibly need regular injects forever. On average the time frame is 5 years. Some "seal up" permanently quicker than average. Only time will tell. Next injection is on the 20th of this month.
-
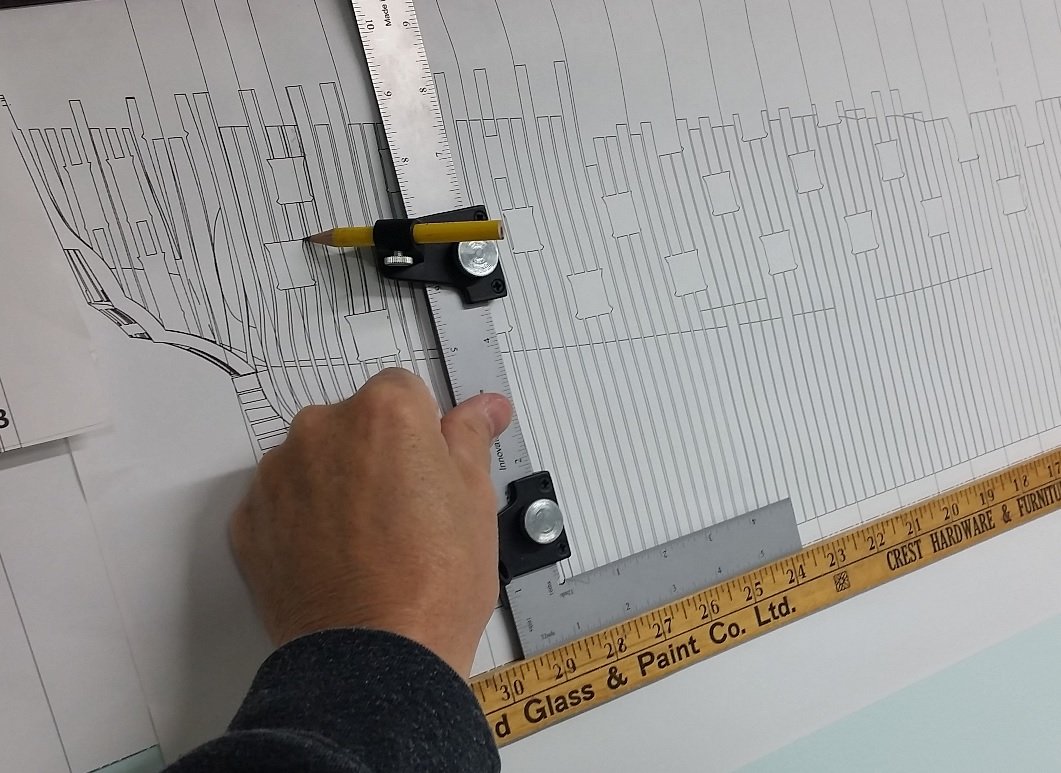
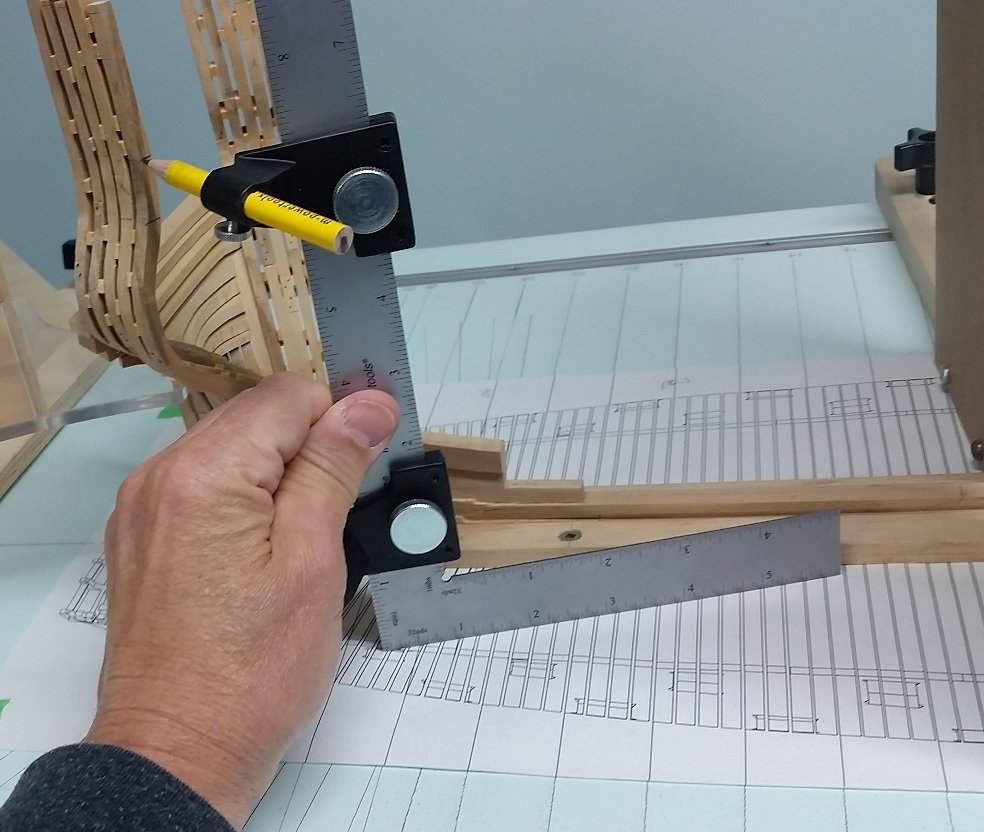
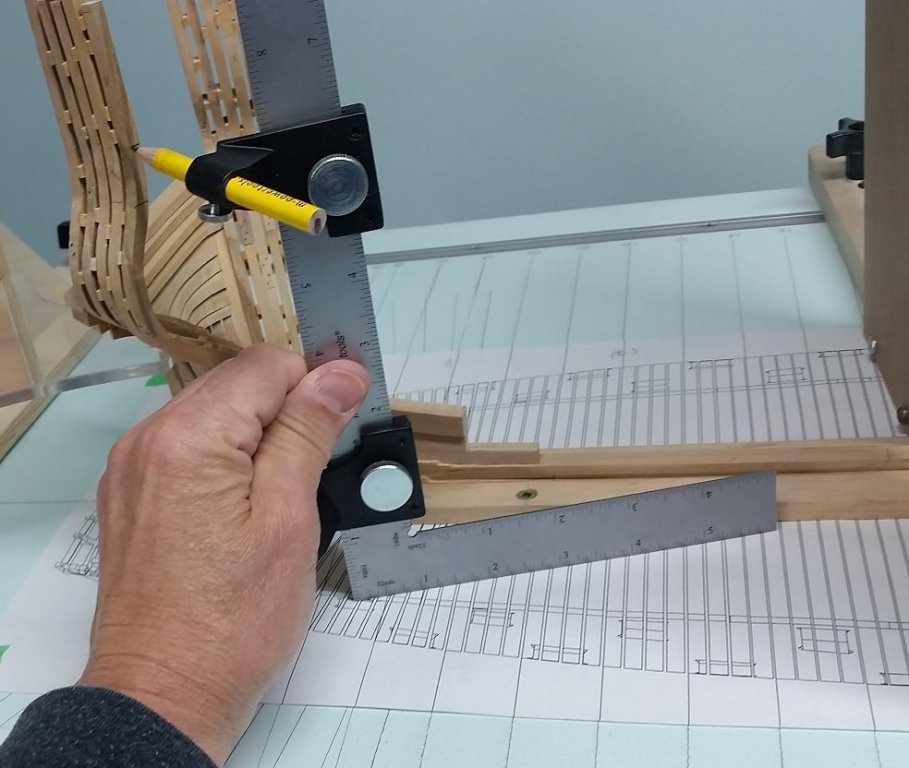
I will try cutting the next one off the model. The transfer device was purchased in 2011 from Elite Tools (about $20). It is a flat lying trammel set that attaches to any rule or square. My drawing is on the wall so I tacked an old wooden yard stick at zero elevation and set it on that.
-
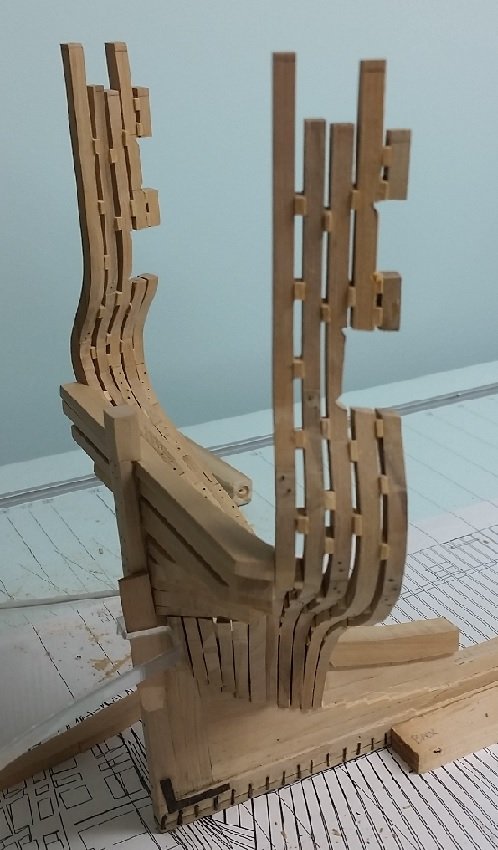
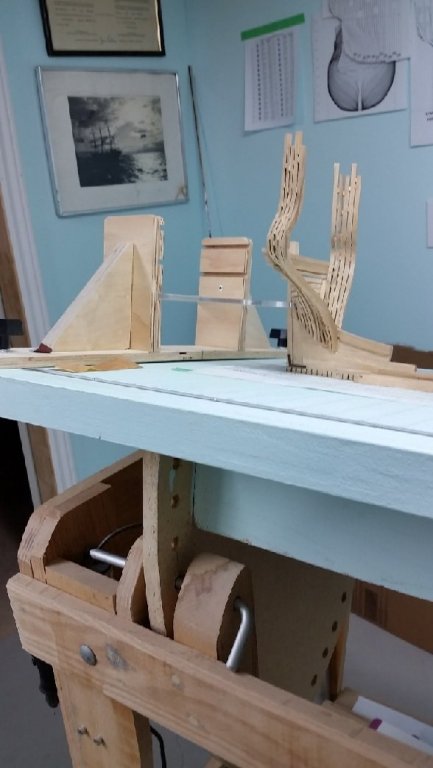
I installed all the chocks, checked my gunport height markings and then cut the gunports out as one side was exposed and I could get a saw blade in there. I did make a wooden gunport opening template that the outline was traced from. I will have to rethink the way this is done as the assembly is not the strong and wobbles as the saw teeth grab in. I can see some advantages to building upside down with the head of the timbers glued to the building board. I buggered my next frame that would be installed and will have to remake it to move forward.


-
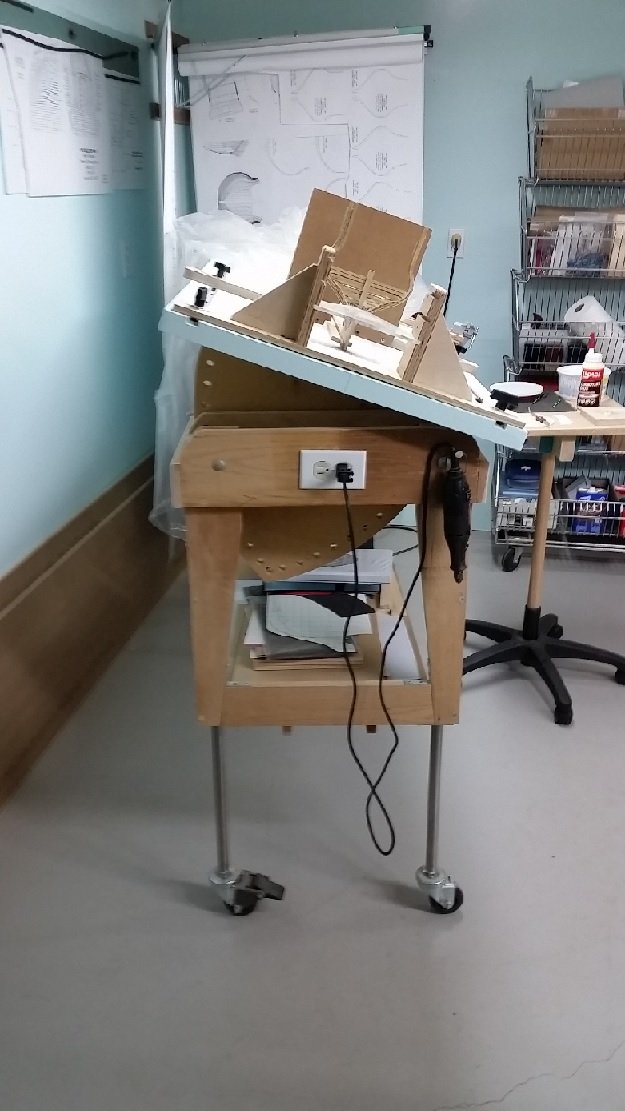
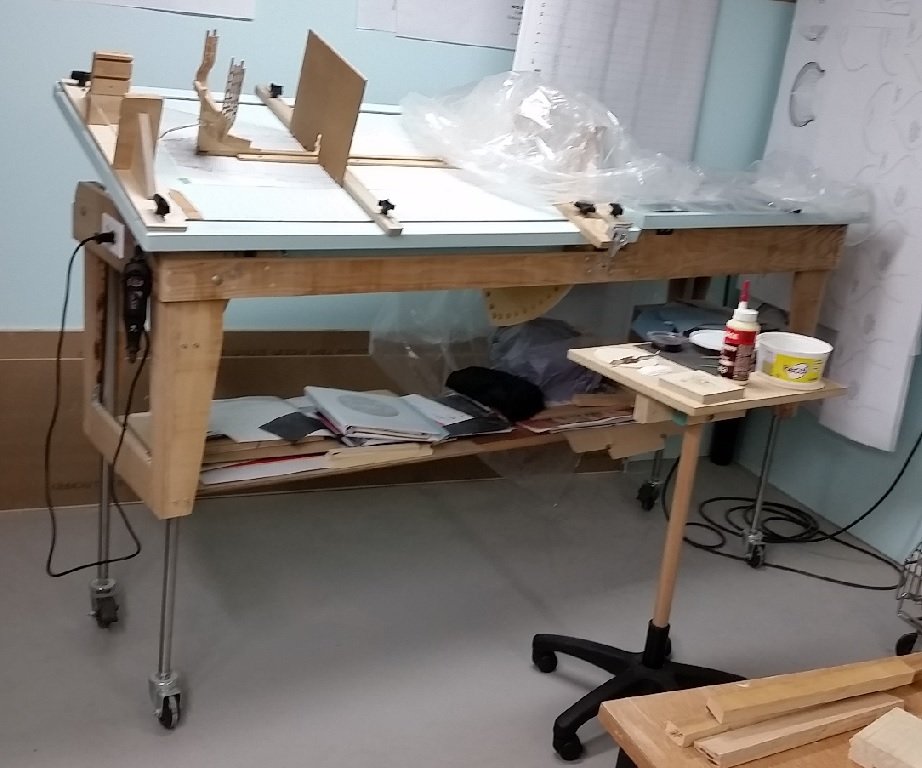
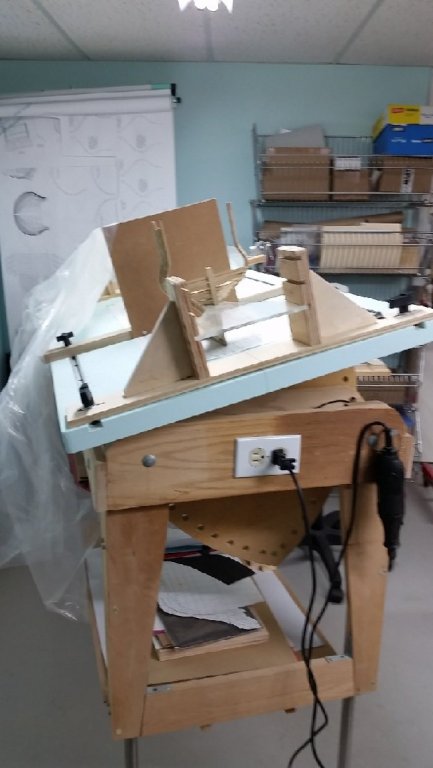
Adjustable height table.
AON replied to Ulises Victoria's topic in Modeling tools and Workshop Equipment
Lift tables are fantastic for modeling. Lee Valley Tools has just offered a kit. I had built my own having solicited ideas on this forum I opted for wheels to make it mobile so I could walk around it and a section of the top that the model is being built on tilting up to 60° forward and backwards so I could more easily access the underbelly of the frames and the inside. Links below in my signature line to my table and my very early stage build. If you go to the near the end of my posts in each you will see the end result as built and being used. -
good morning Don that is a mere 20° it will go to 60°
-
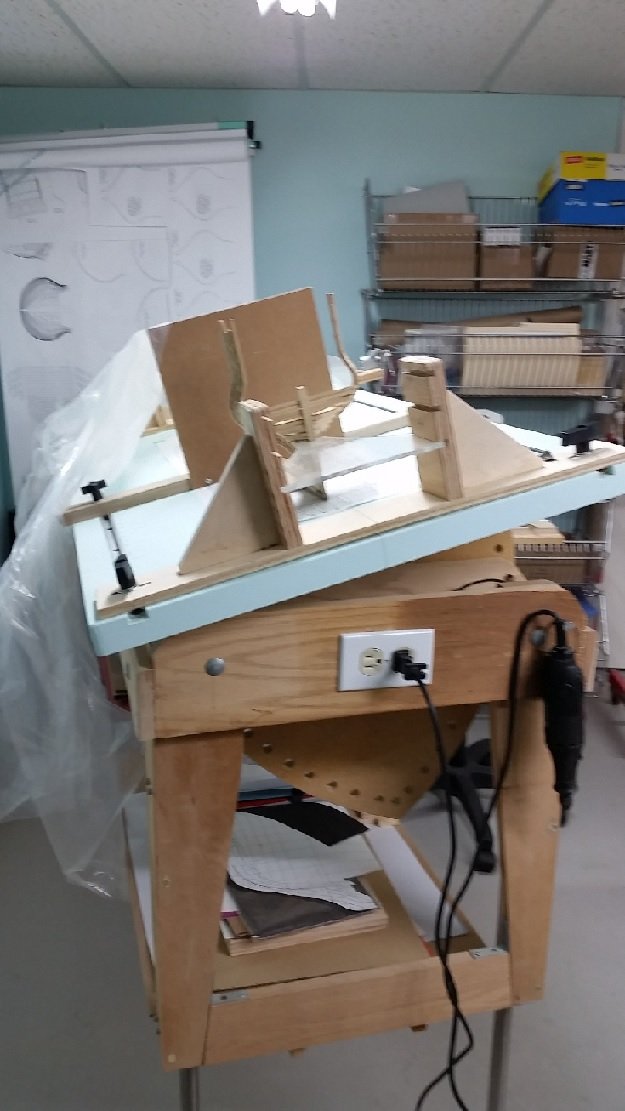
I've been away for a few months busy with work around the house, spring yard work, dethatching the lawn (what a delightful time that was). My needles are done and my eyesight seems normal, no need for a magnifying glass to read print anymore. I had been down to the playroom during my absence from the forum but that was for unrelated items except for my reclaiming the rolling base of a broken office chair to make a mobile side table for modelling that you'll see in a photo below. I am back to fitting chocks between frames and those located on the underbelly are easier inserted from above and inside. To do this comfortably I lowered my modelling lift table and tilted the table top. This work wonderfully. I am so delighted I built my modelling table with these options. I have two frames on the go in assembly and they both get thicker in their sided dimension at the gunport. I've decided to build these as normal and add the thickness to the area needed after... but before glued to the deadwood. Hope to post this in the next week or two.

-
I subscribed to Woodsmith Tips and got a link to this and many other useful tips http://www.woodsmithtips.com/2017/05/04/?autostart=true&utm_source=WoodsmithTips&utm_medium=email&utm_campaign=12478
- 1 reply
-
- 2
-
-
I was taught 3rd angle projection, views unfold like the sides of a box. When I get views made opposite to what my brain thinks makes sense it takes a moment to recognizre it and then a bit longer to plug into thinking backwards... like driving on the wrong side of the road even though the steering wheel is right there in front of me as a constant reminder.