Search the Community
Showing results for tags 'Artesania latina'.
-
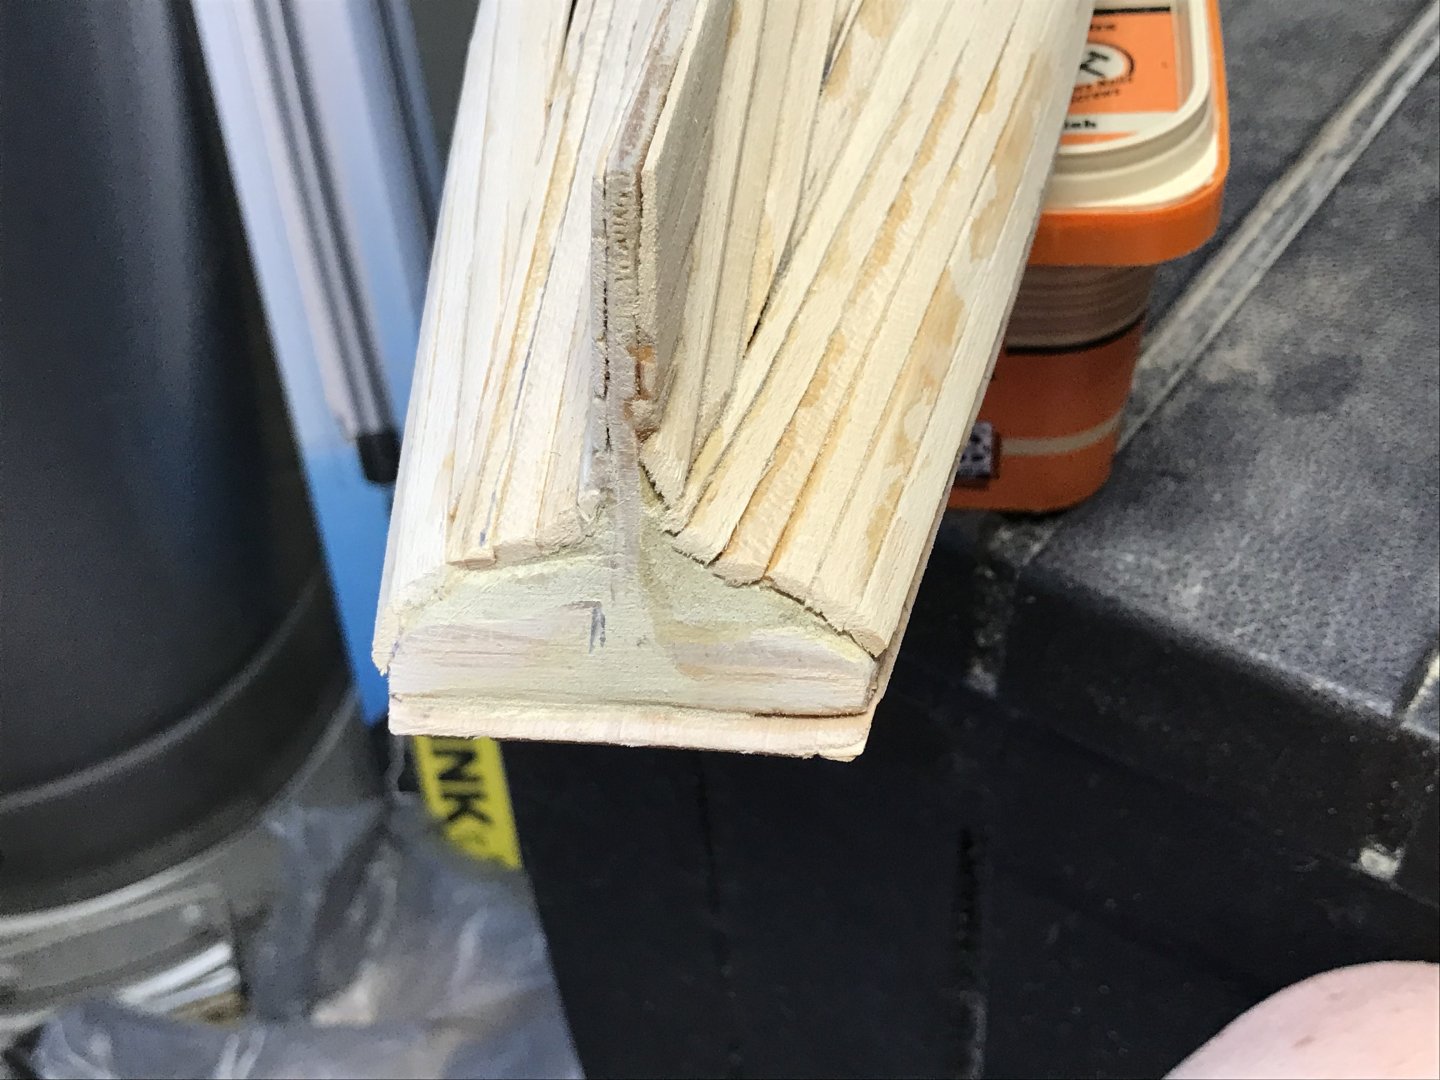
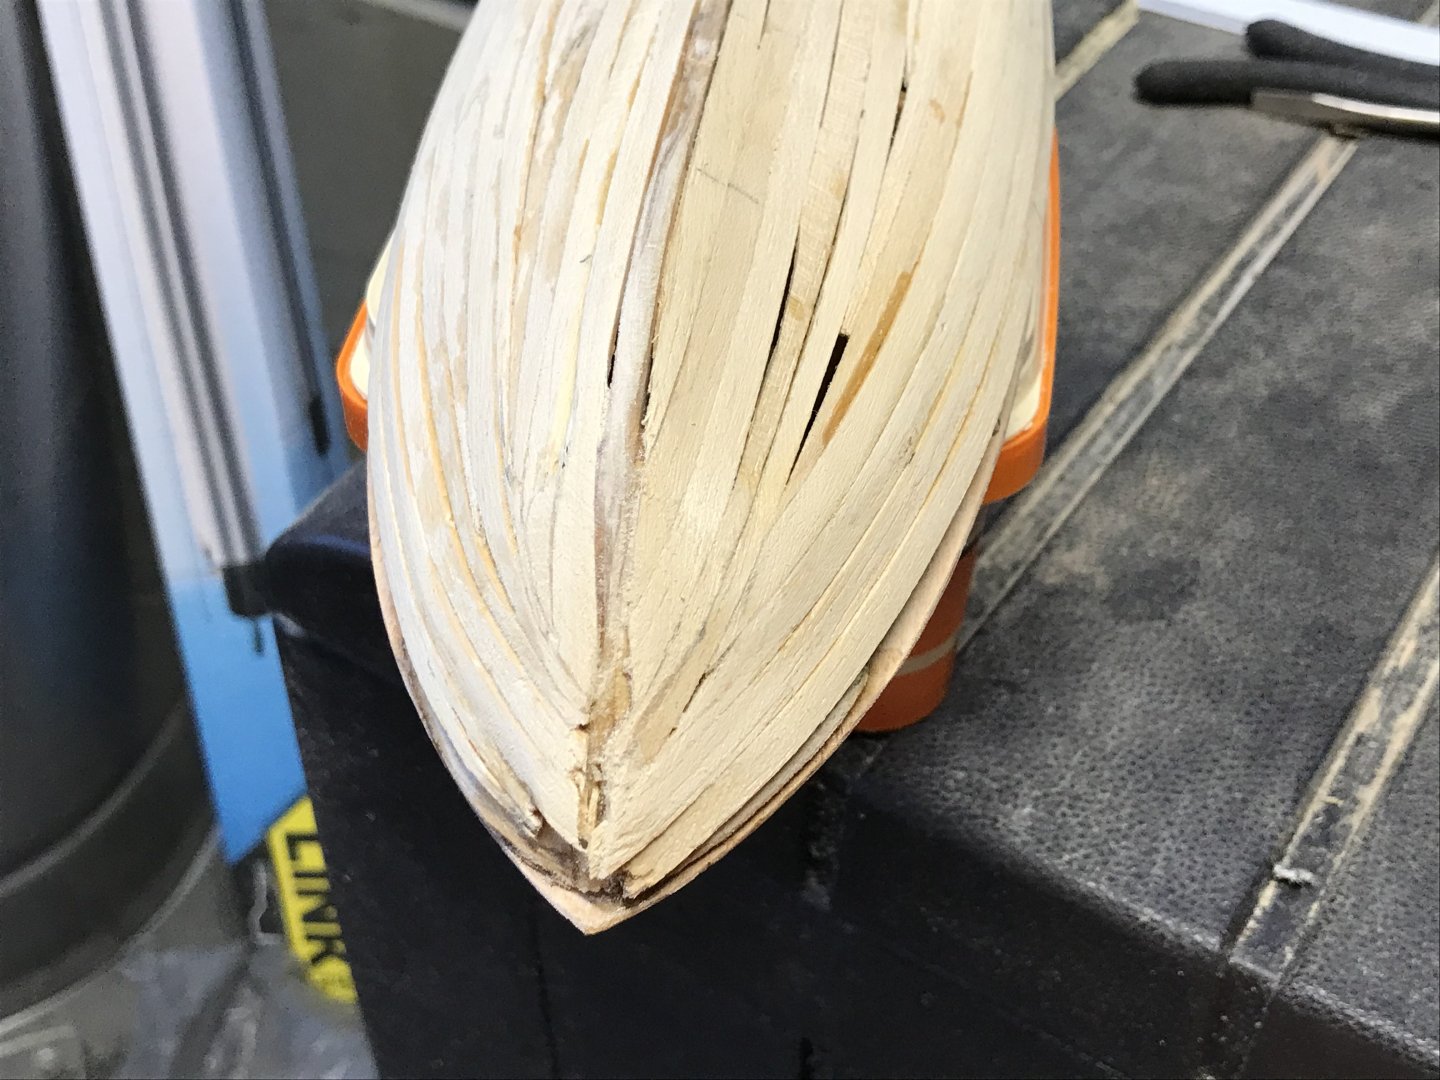
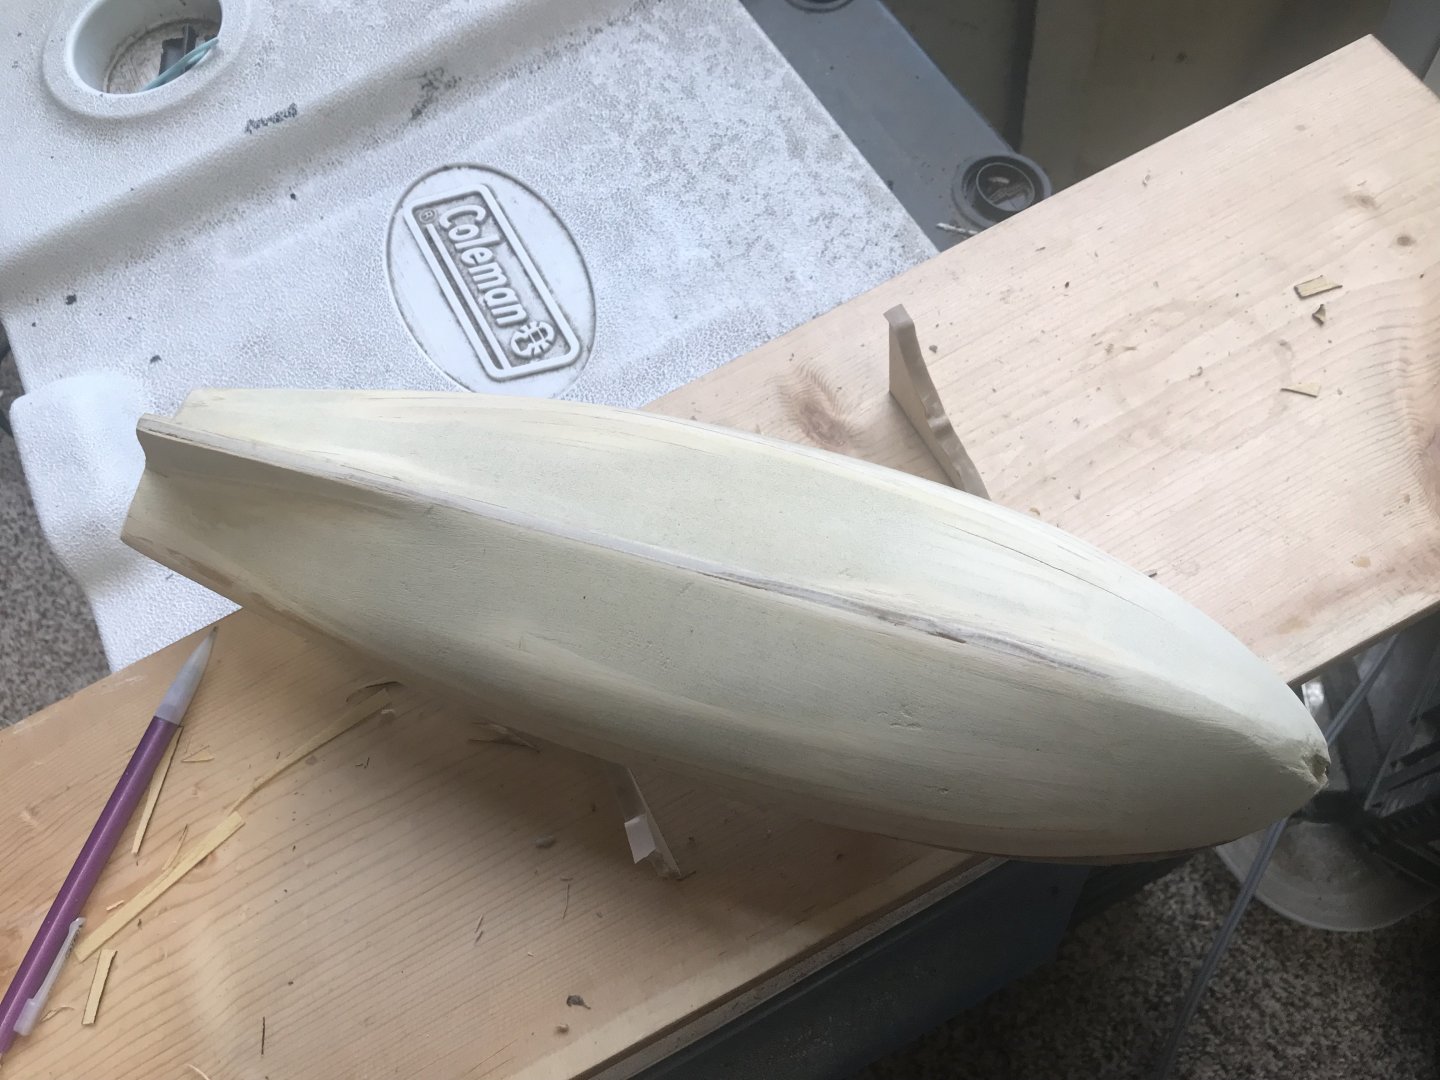
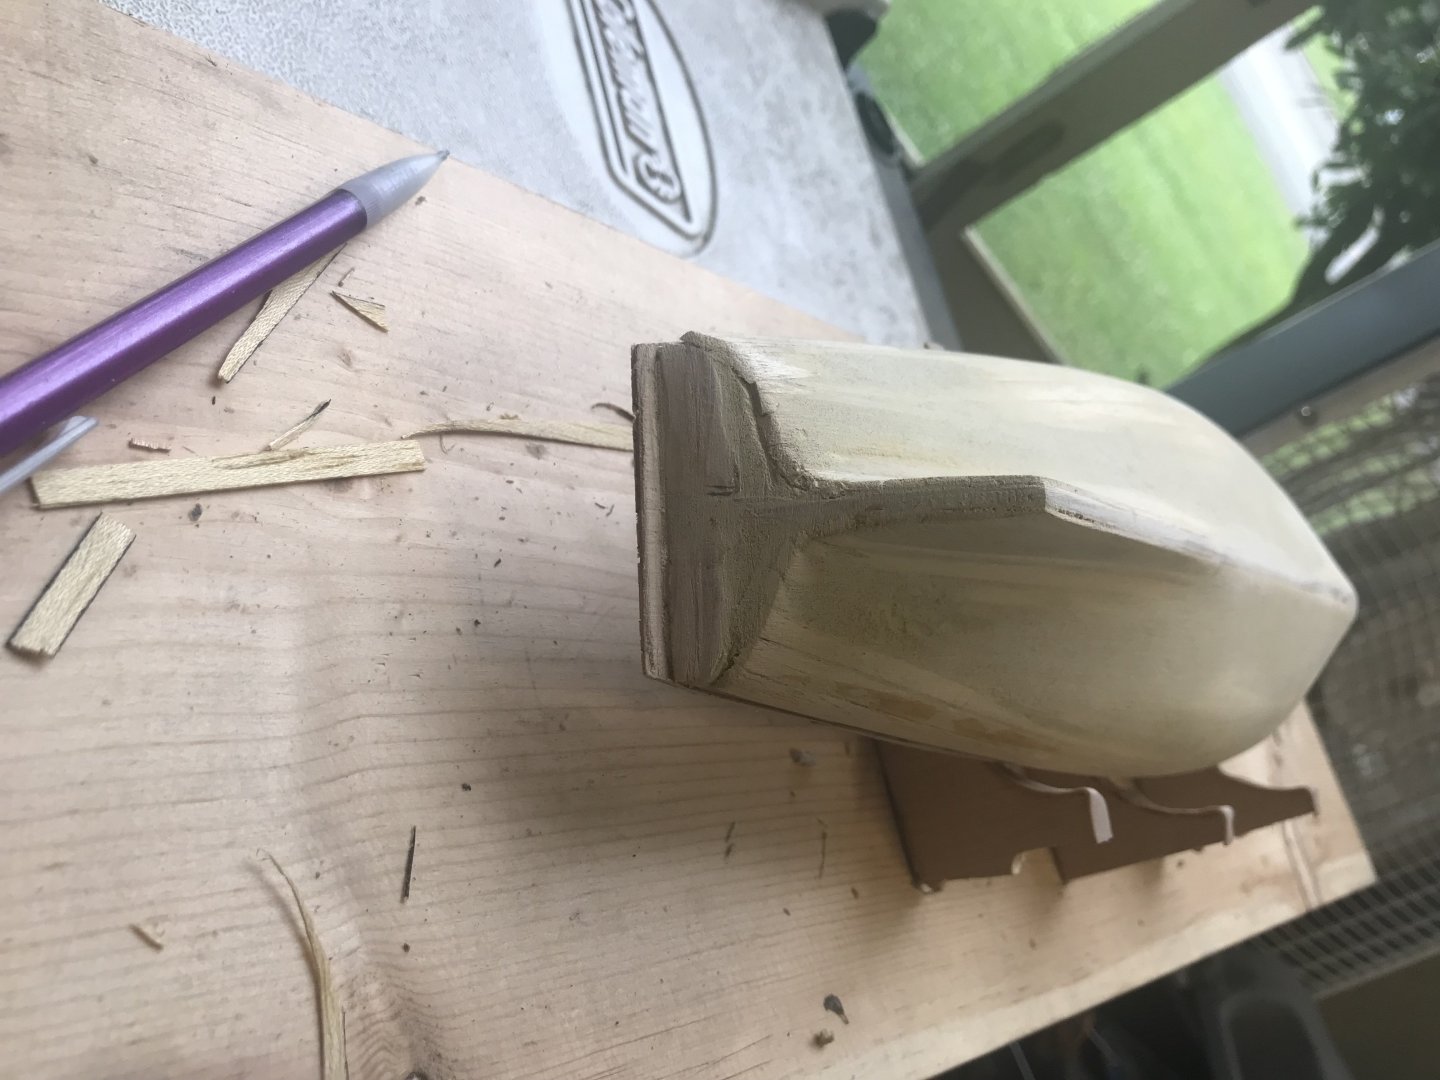
 It is an understatement to say that I have never done this before. I found the model at a flea market for $20. it sat in my basement workshop for 6 months before I even opened the box. Having never worked on a wooden model, I’m sure I’ve made every mistake possible. It wasn’t until I hit my first snag that I started looking online for help. I still think the instructions were written for a master builder. Too many important facts left out. I didn’t know to bevel the hull planks, so I improvised with Gorilla wood filler.
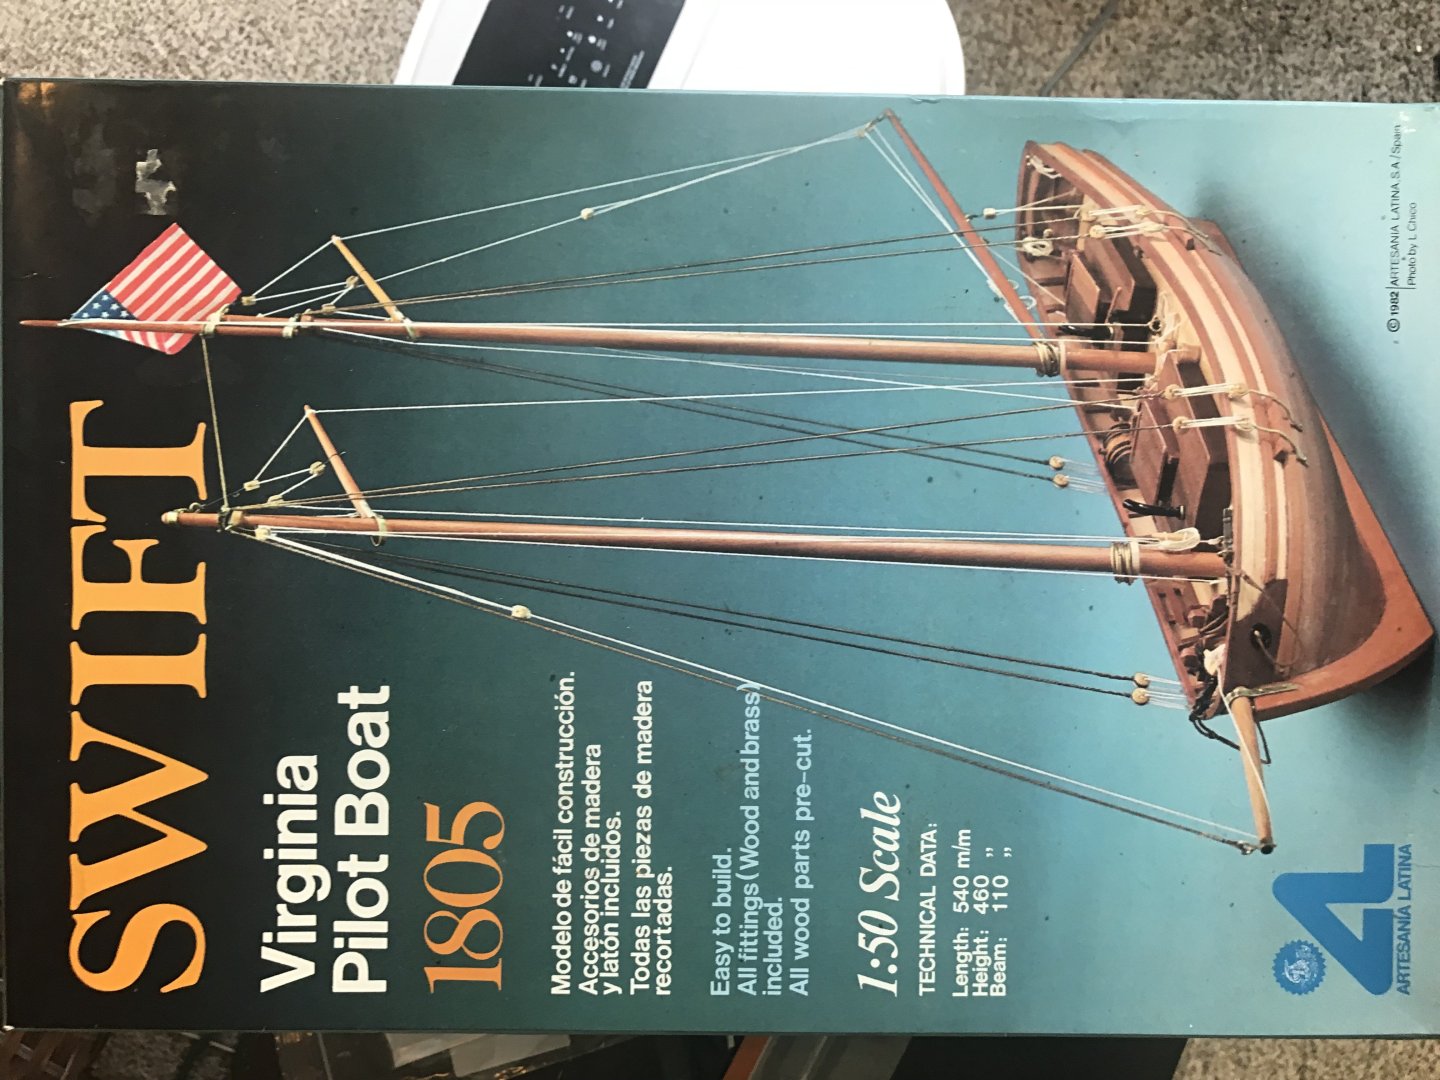


- 16 replies
-
- 4
-

-
- Swift
- Artesania Latina
- (and 1 more)
-
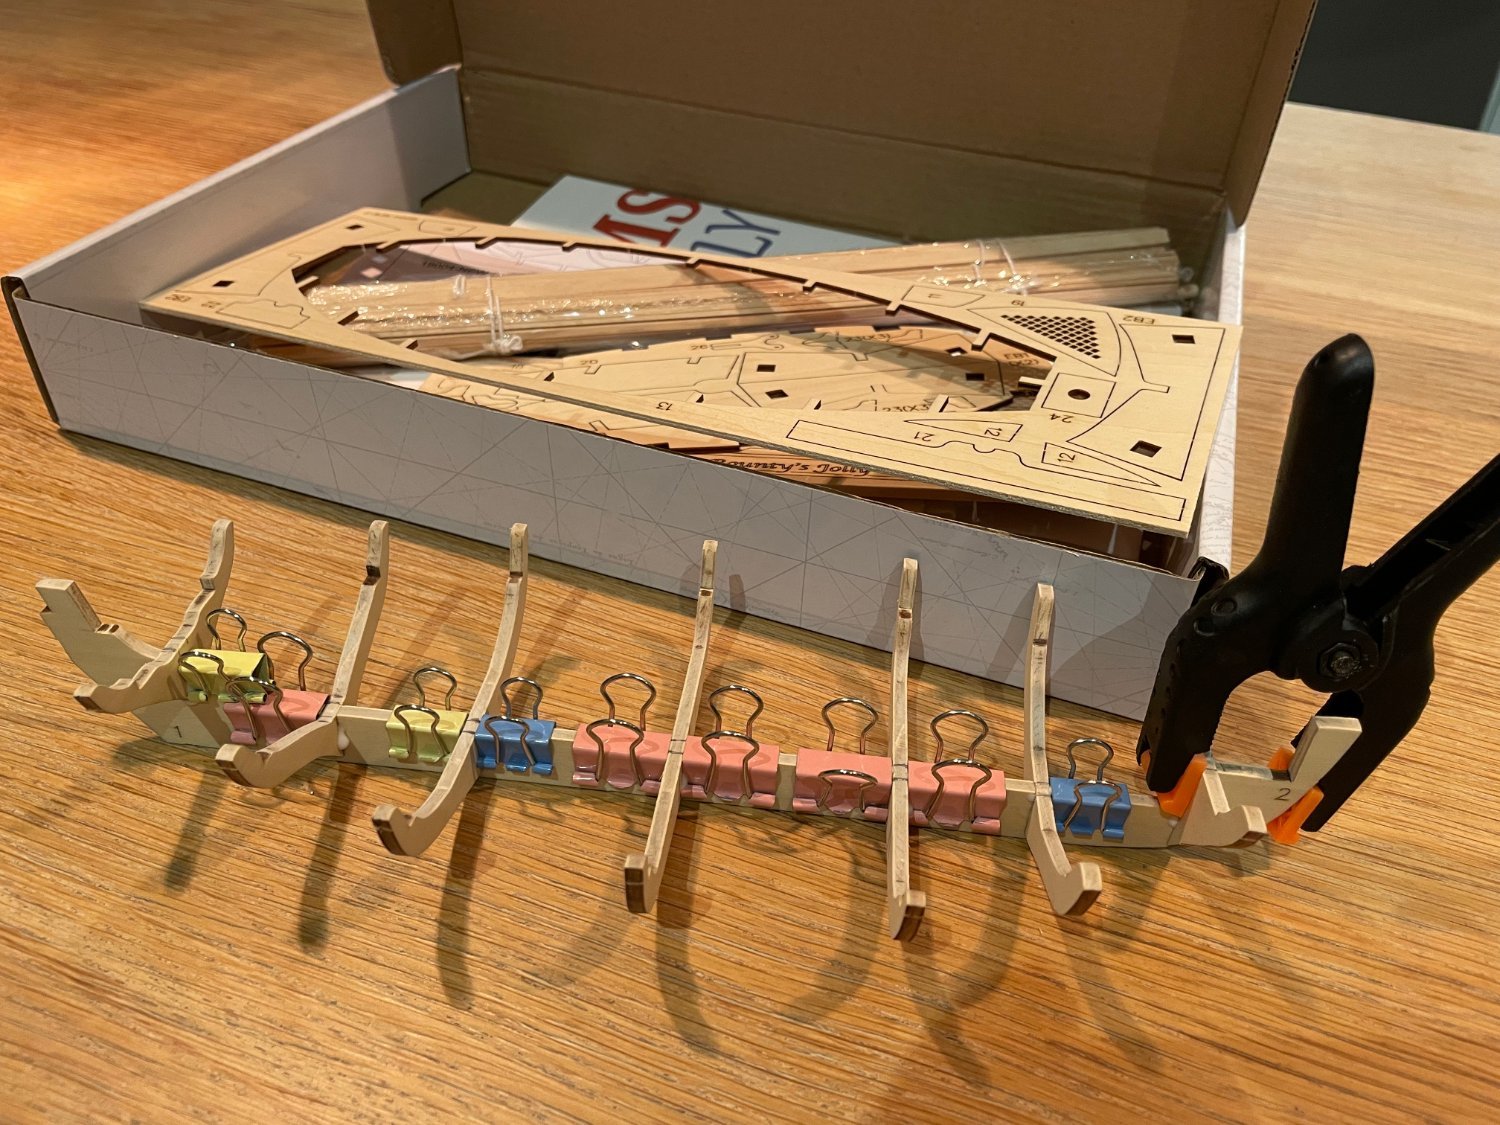
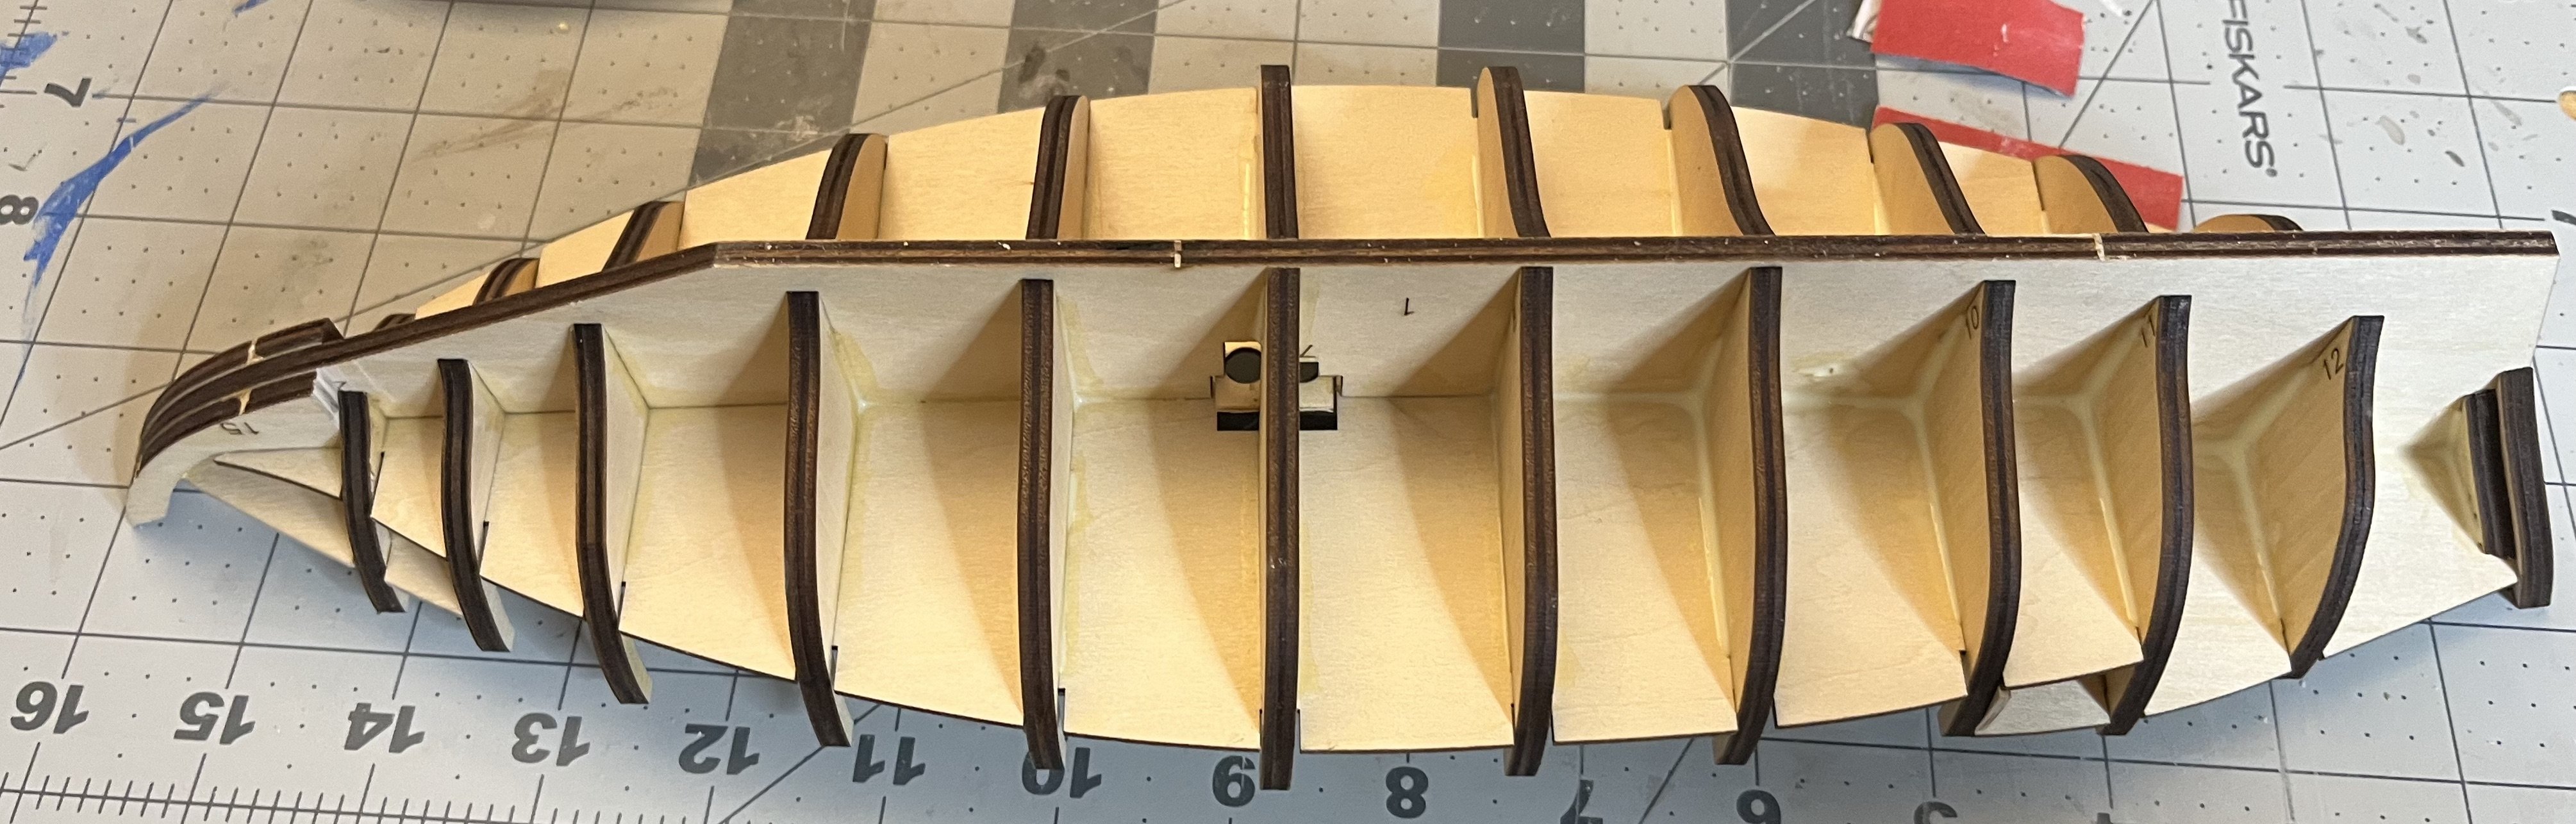
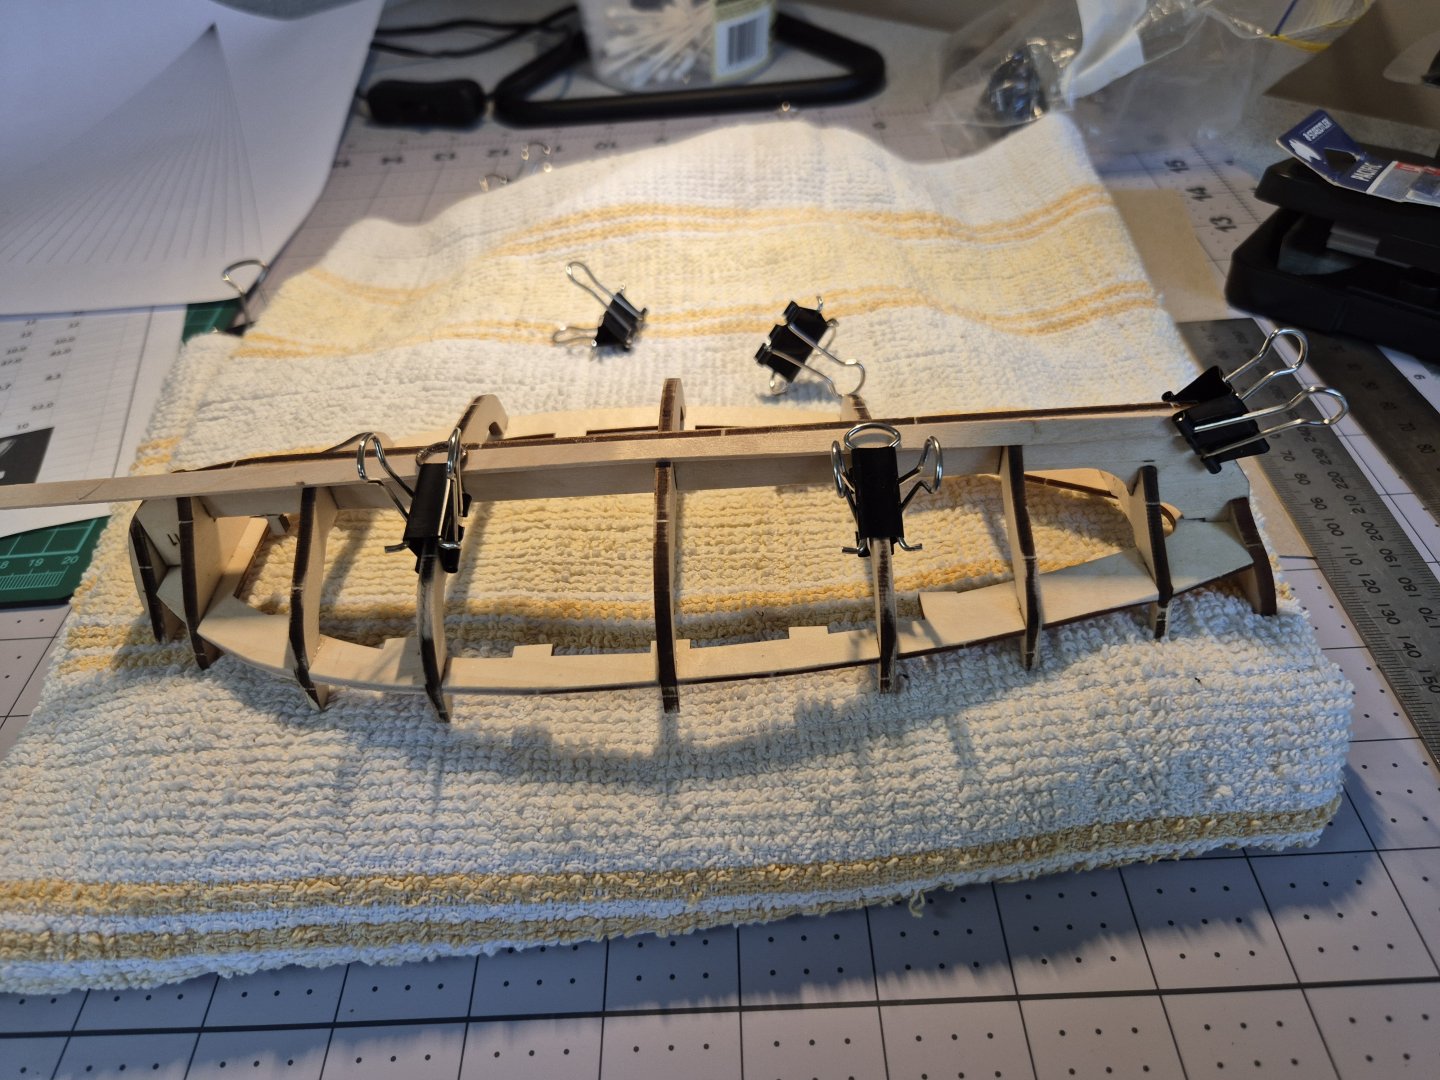
 As the title says, this is my first boat build. I ordered the kit and received it just before Christmas. This is the latest kit, so should not have some if the issues of the older kit that have been well documented. Have been reading and researching. Really lucked out with this kit as there are a quite a few build logs. Has proven to be very valuable and interesting reading and viewing. So far have put the frame together and have just installed the first plank. Definitely need to get a PC with a big screen into the hobby room! Am not that great at taking photos but want to document the process as I go. One question I have is about 'fairing". How do you know if you have sanded the frame enough? Have not really found anything that shows what the fairing is trying to achieve. Be good to see a before and after comparison. I spent a lot of time researching how to plank, and found some great articles and videos which helped enormously. Initially wasn't sure if I needed to to get a plank bender but decided to at least start with soaking in hot water and then put it in place and clamp it down. This worked really well though I did take a week to get this first plank to the right shape! I also decided to ignore the instructions in the kit for planking as they use filler pieces and following the advice of many am attempting to plank according to the experts. What I did discover with this first plank is how difficult it is to fix the plank at the bow. Very little area to bond the plank to the frame. I also found that I had to sand the first two frames at the bow to get the plank to sit nicely against the keel. None of the logs I looked at seemed to mention this so I just hope that it was the right thing to do. I have also decided to plank all of the starboard side first. This way any mistakes can be hidden if I display the port side only. That is assuming I don't make to many mistakes on the port side!
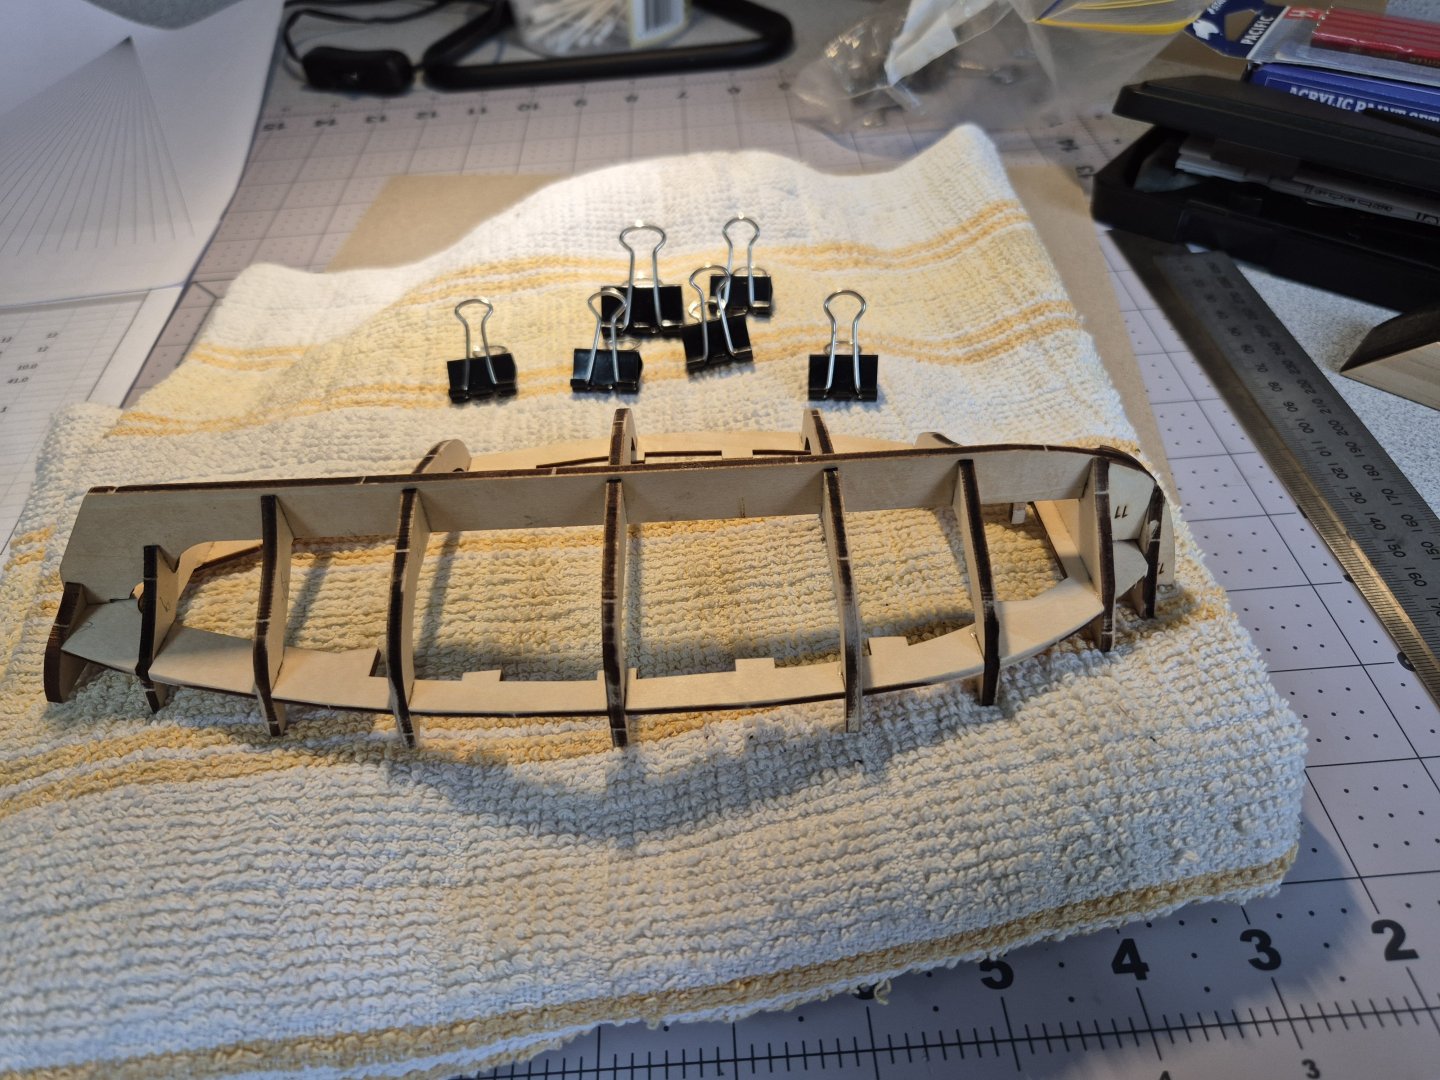
- 23 replies
-
- 3
-
-
- bounty jolly boat
- Artesania Latina
- (and 1 more)
-
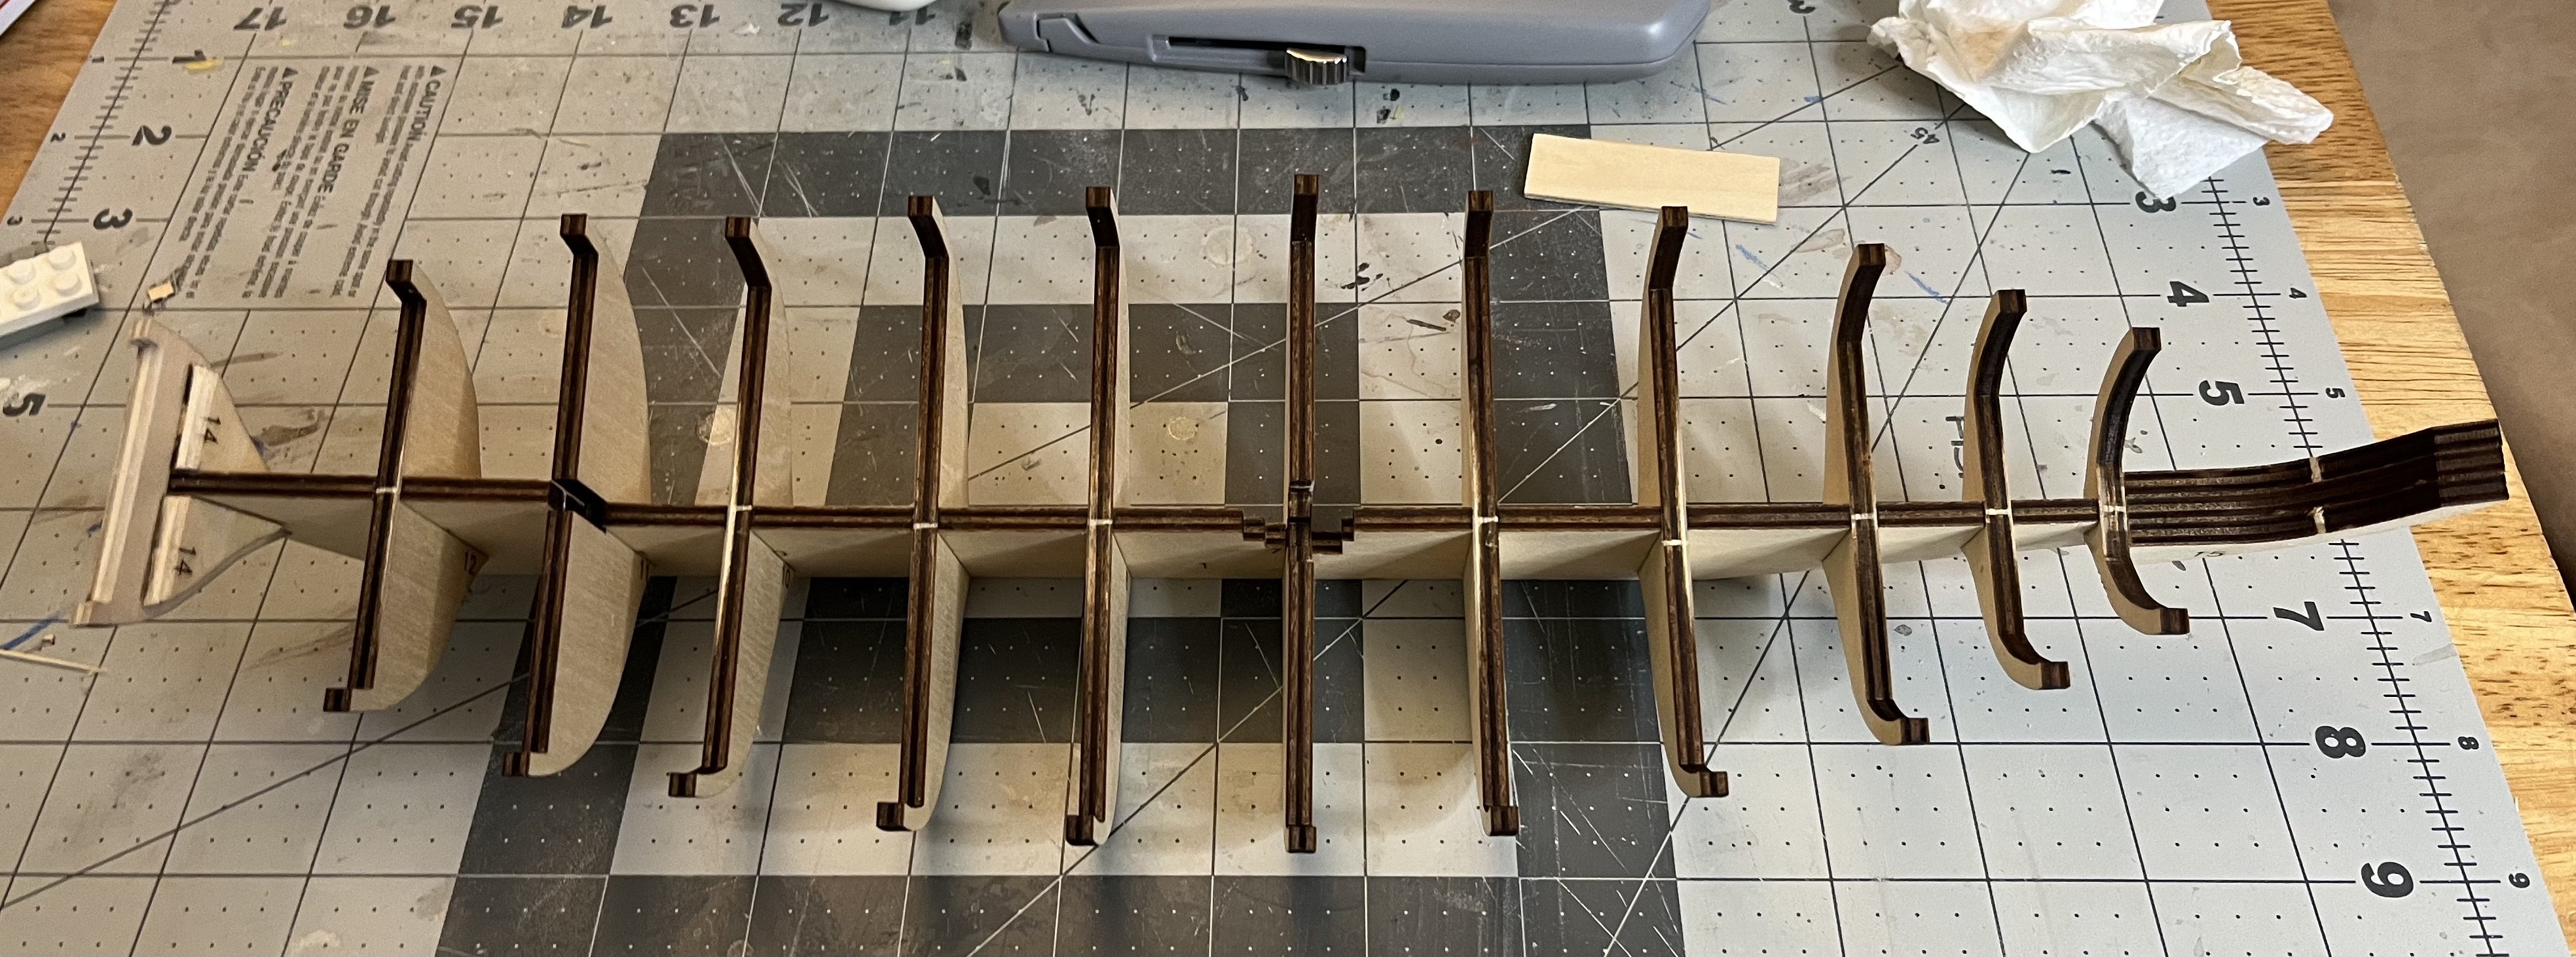
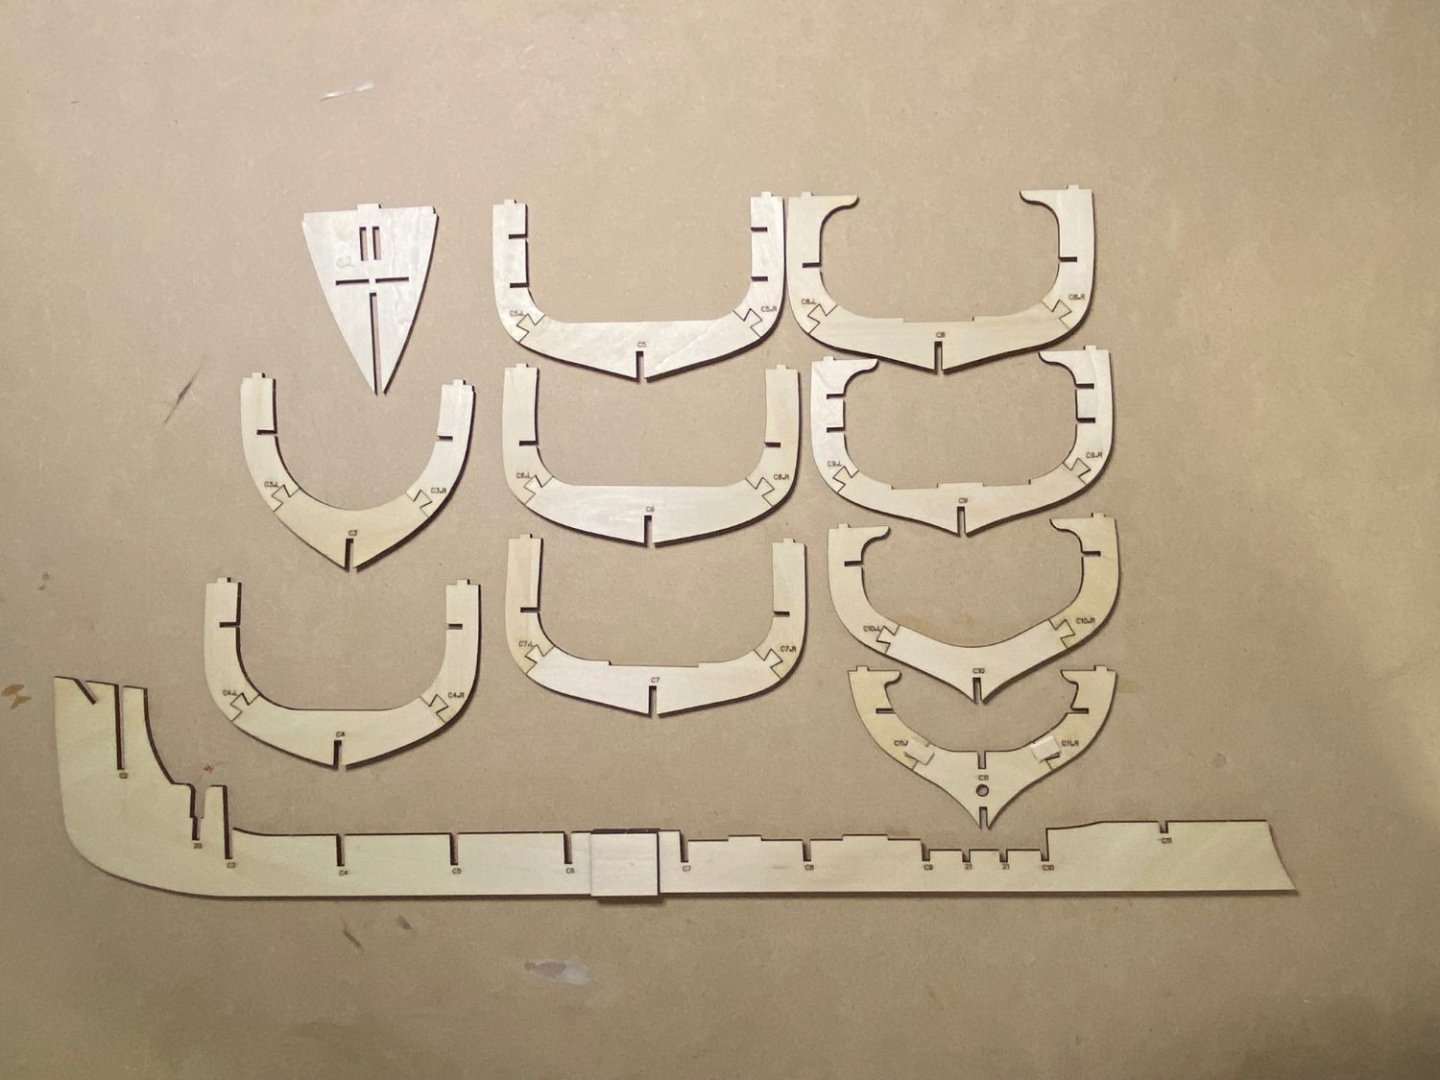
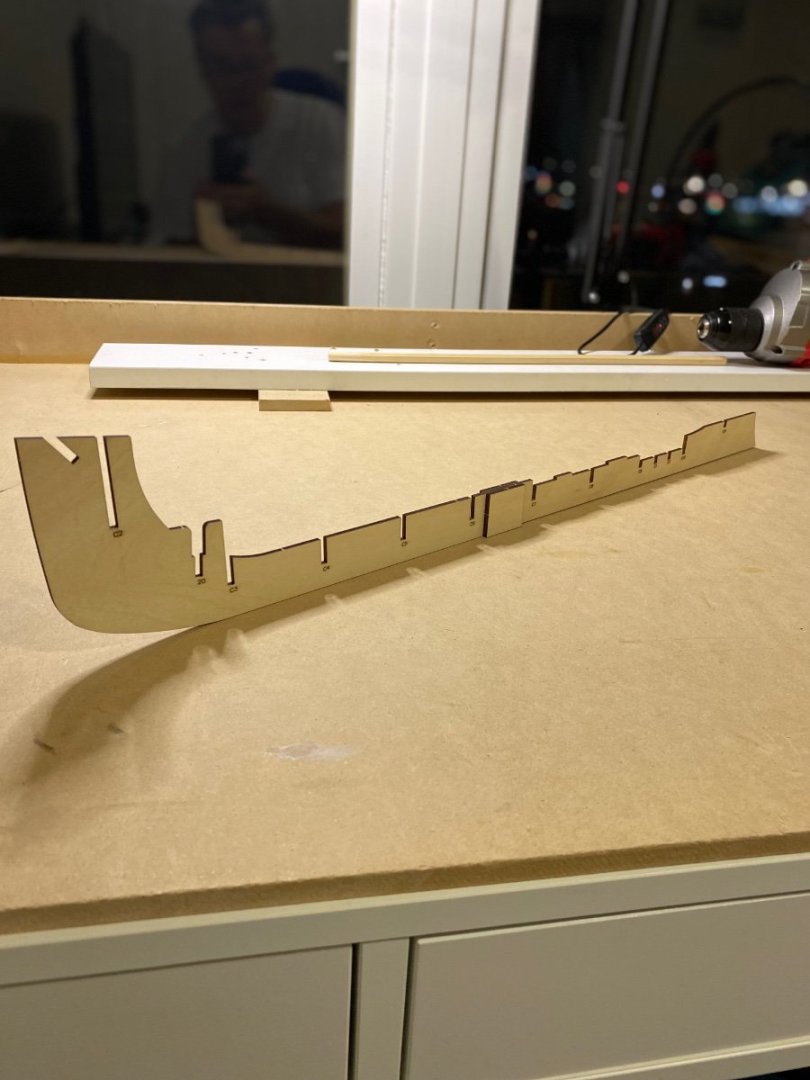
 I have started my second build, the Sanson Tug. There are no instruction included with this kit, it is done through You Tube videos, 18 in total. The 3 piece frames and keel are all glued up. The dove tail joints are all a bit sloppy so reinforcement was added to one side. I will add the frames to the keel next and add the longitudinal braces. #11 frame is very loose so special care will be taken.
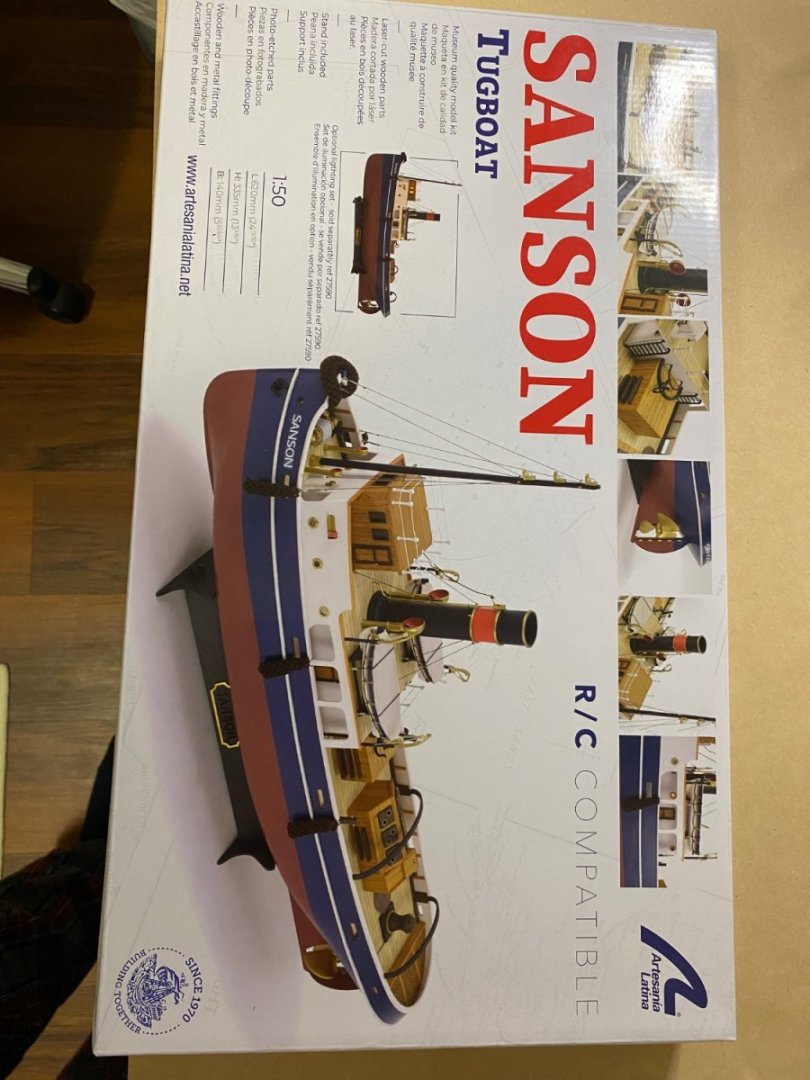


- 60 replies
-
- 8
-
-
- Sanson
- Artesania Latina
- (and 1 more)
-
 #1 Posted November 12, 2023 1:84 Santisima Trinidad – Trafalgar 1805 The Santisima Trinidad (full name: Nuestra Señora de la Santísima Trinidad), was a Spanish first-rate ship of the line with 112 guns. This was increased in 1795–96 to 130 guns by closing in the spar deck between the quarterdeck and forecastle, and to 136 guns around 1802 (plus 4 small guns on the poop), thus creating what was in effect a continuous fourth gundeck although the extra guns added were actually relatively small. She was the heaviest-armed ship in the world when rebuilt and bore the most guns of any ship of the line outfitted in the Age of Sail. She was built at Havana, Cuba, to a design by Irish naval architect Matthew Mullan (domiciled in Spain under the name Mateo Mullán), originally intended as a ship of 112 guns. He died on 25 November 1767, and the construction of the ship was continued by his son, Ignacio Mullán. and the ship was launched in March 1769 and completed in August 1769 as a 116-gun three-decker. She was considerably larger than her British contemporary Victory and somewhat bigger than the French Bretagne. Commanded by Francisco Javier Uriarte and the flagship of Rear Admiral Baltasar Hidalgo de Cisneros, she took part in the Battle of Trafalgar on October 21, 1805, as part of the combined Franco-Spanish fleet. Due to her great bulk, her helm was unresponsive in the light winds on the day, contributing to her ineffective service in the combined fleet's cause. Her great size and position immediately ahead of the fleet flagship Bucentaure made her a target for the British fleet, and she came under concentrated attack by several ships. She lost her mast and eventually surrendered to the Neptune; a 98-gun second rate commanded by Captain Thomas Fremantle. She was taken in tow by the 98-gun second rate Prince but was eventually scuttled by her British captors northwest of Cádiz.
 -
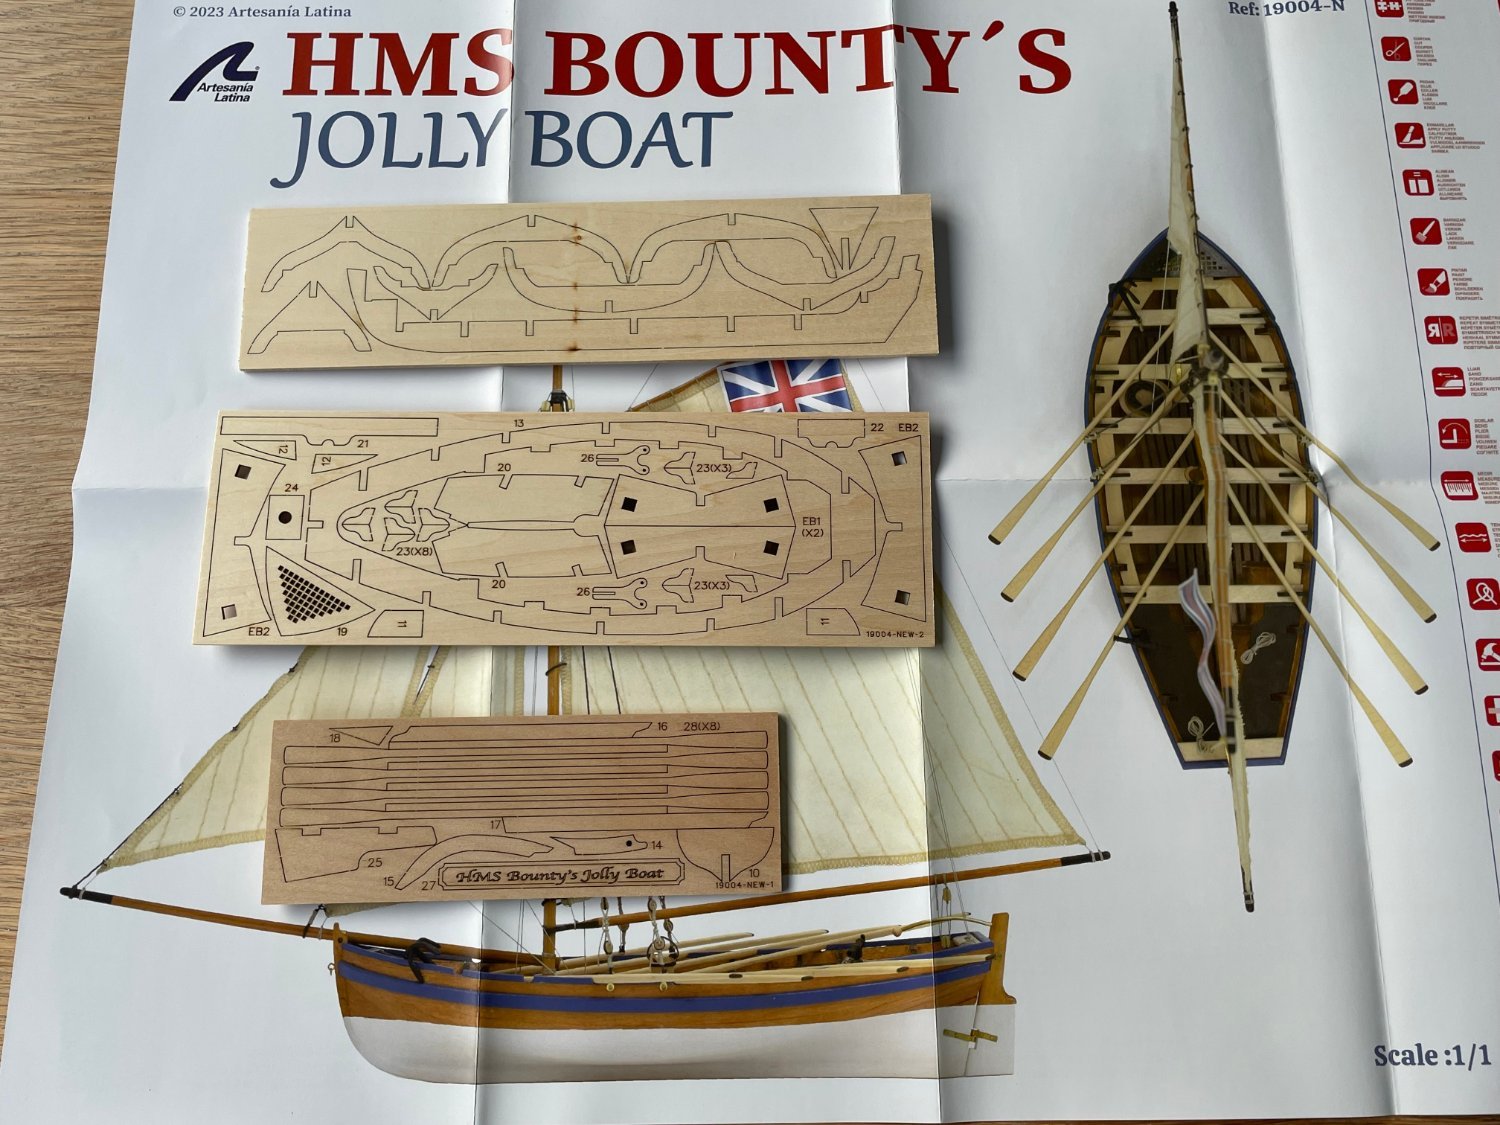
 Hi all This is my first entry on this site, after skulking around and exploring for a few months. I have done two models before, both Artesania Latina beginner models: La Provençale Bateau de Pêche (Mediterranean Fishing Boat), and I have just finished Endeavour's Longboat. Both these models took a number of years to complete, but now I'm retired I can (hopefully) give more time to this. For me, the key element in choosing a kit (after difficulty level) is the attractiveness of the finished model. I know historical accuracy is very important to many of you, but it is not that important to me; I have read with some interest the ongoing discussion around the accuracy of AL's HMS Supply kit but it was not an issue that influenced my choice. I liked the colour scheme - what can I say? I'm as deep as a teaspoon when it comes to my decision-making processes! I ordered the kit direct from Artesania Latina, and it arrived safely at my house in Australia less than a week later. Top marks, AL! First thing of note: there are no written instructions. Instead, the instructions are on YouTube in a number of 10 minute videos. I will let you know how this goes. My computer is in the same room that I build the model, so it poses no practical problem. I unpacked the kit, and carefully went through the parts list. This is on the back of a printed poster-sized 1:1 photo of the finished model. The parts list has a photo of the part, and its number - no name - and it was tricky looking through the parts and matching them to the photo. Two very small parts were missing - I could not really tell from the photo what they were - but I have sent an email to AL giving the part number and requesting replacement. I watched the first video all the way through before beginning the model, and it mentioned using a Caulking Jig (to be purchased separately) and providing a catalogue number. Unfortunately neither the latest printed Catalogue (provided with the kit) nor the online catalogue list this Jig, so I also included in the email a request for information about whether this item is still available. I sent the email two days ago; I will let you know how I go. I have now had two days work on the model and the photo below shows how it is going - very early days, and I work slowly. So far, the video instructions are fine. We will see how it goes. There is no printed rigging plan, which makes me nervous, but we shall see how it pans out.
-
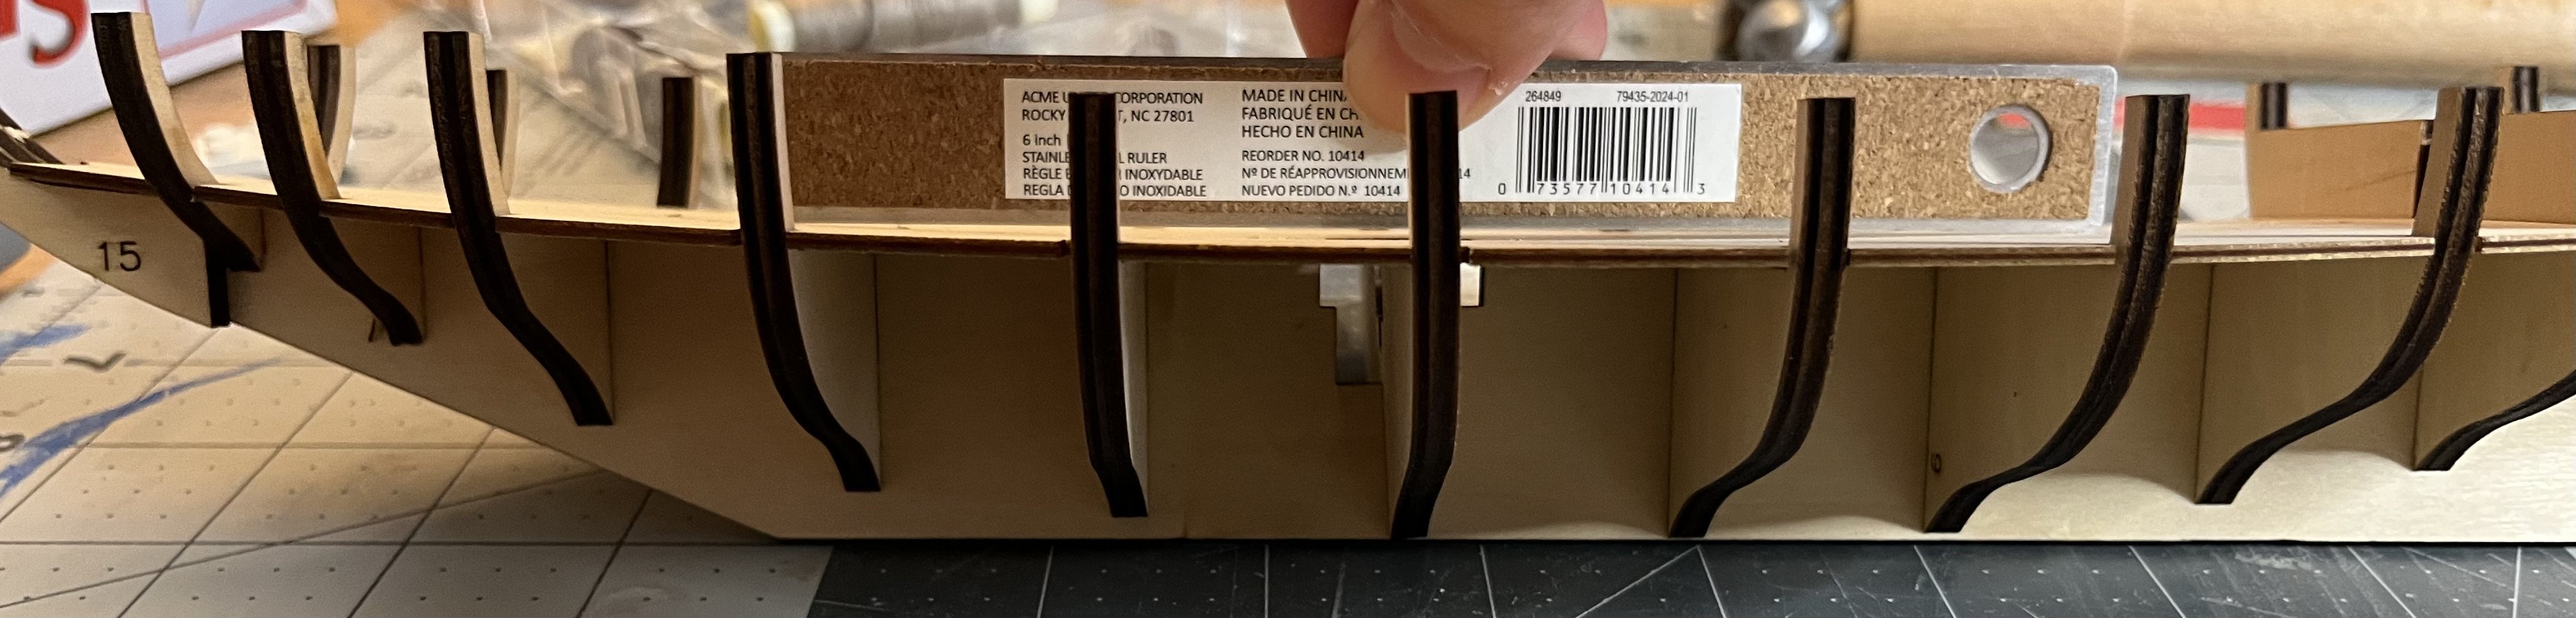
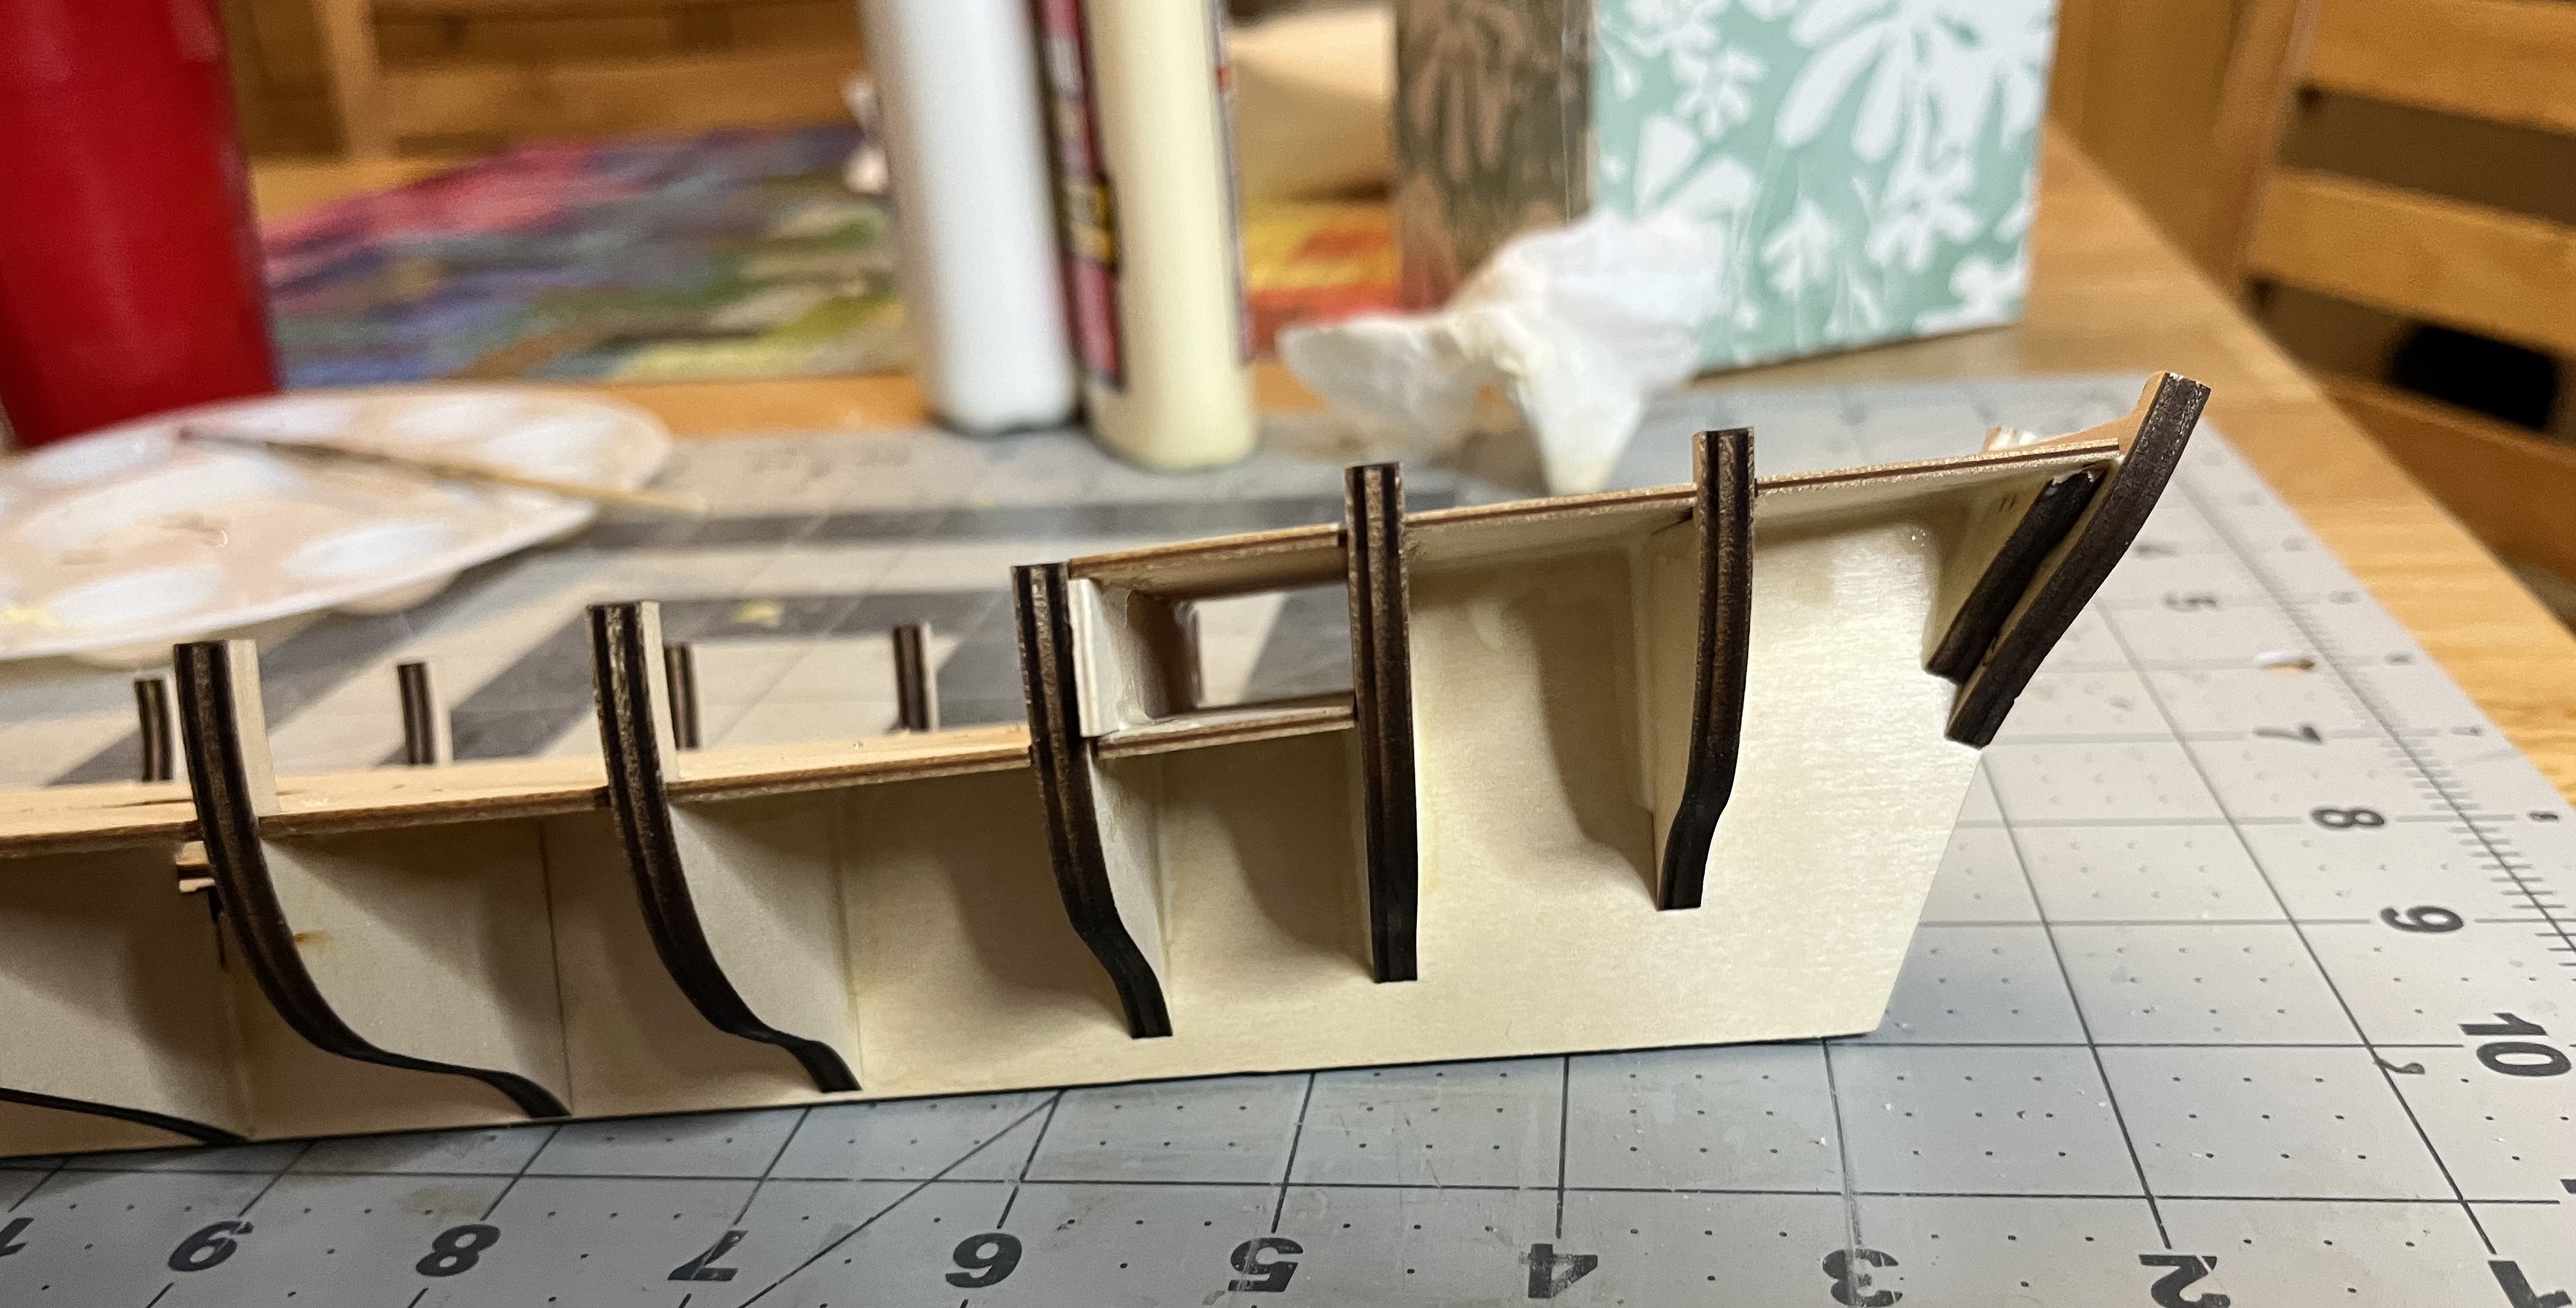
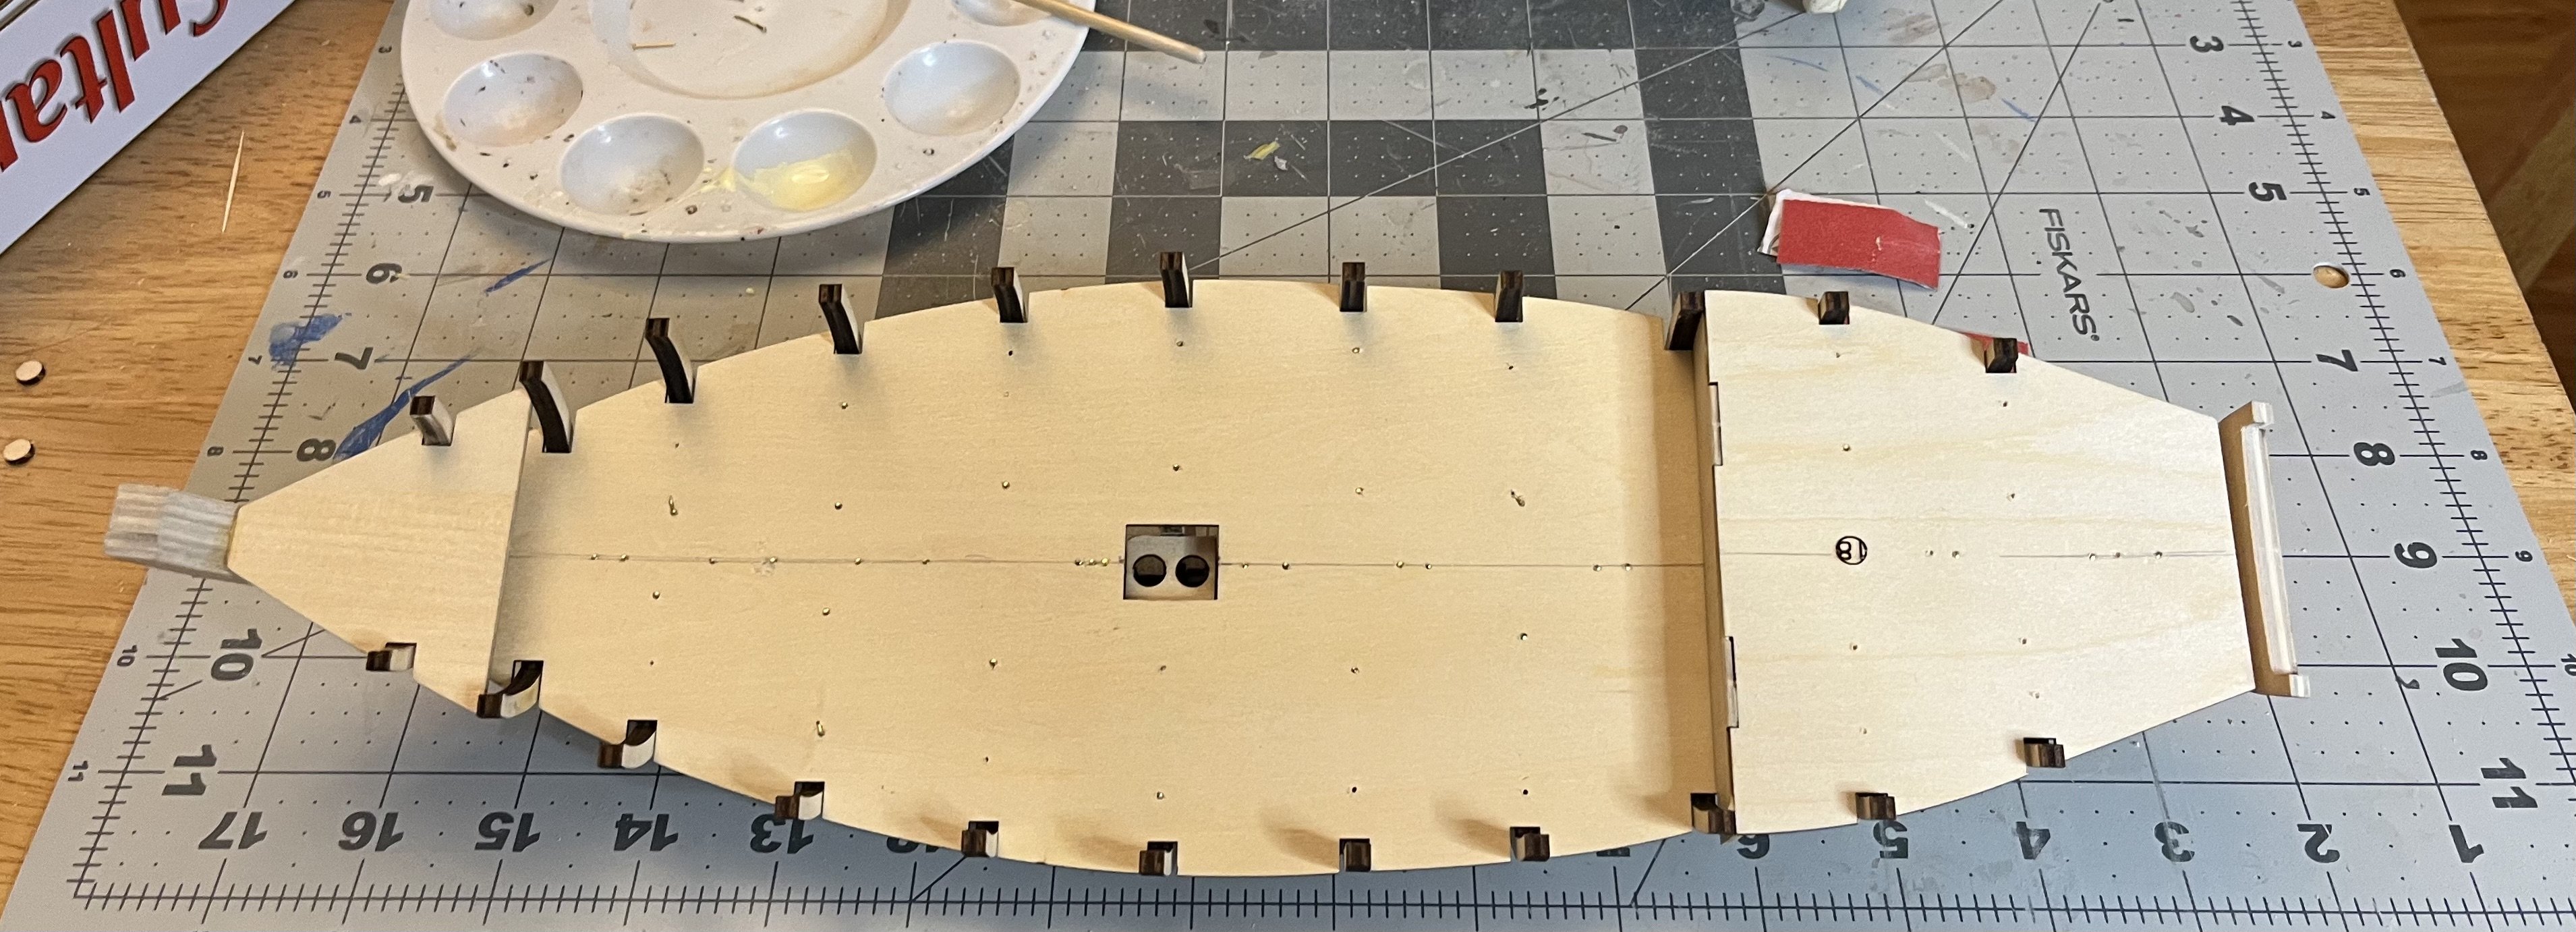
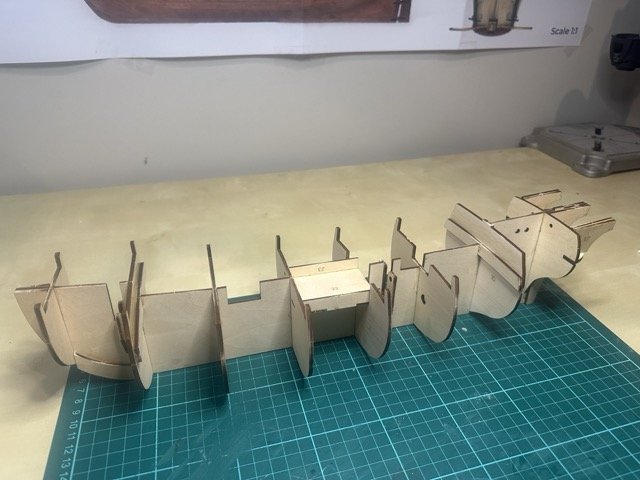
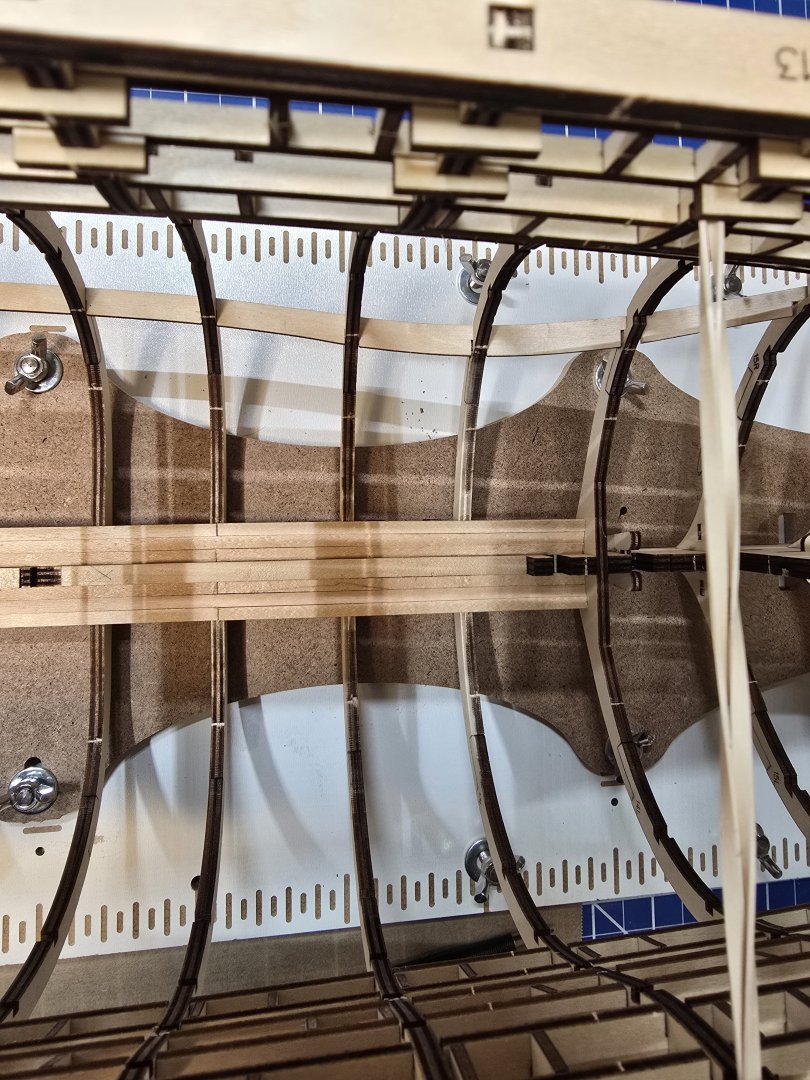
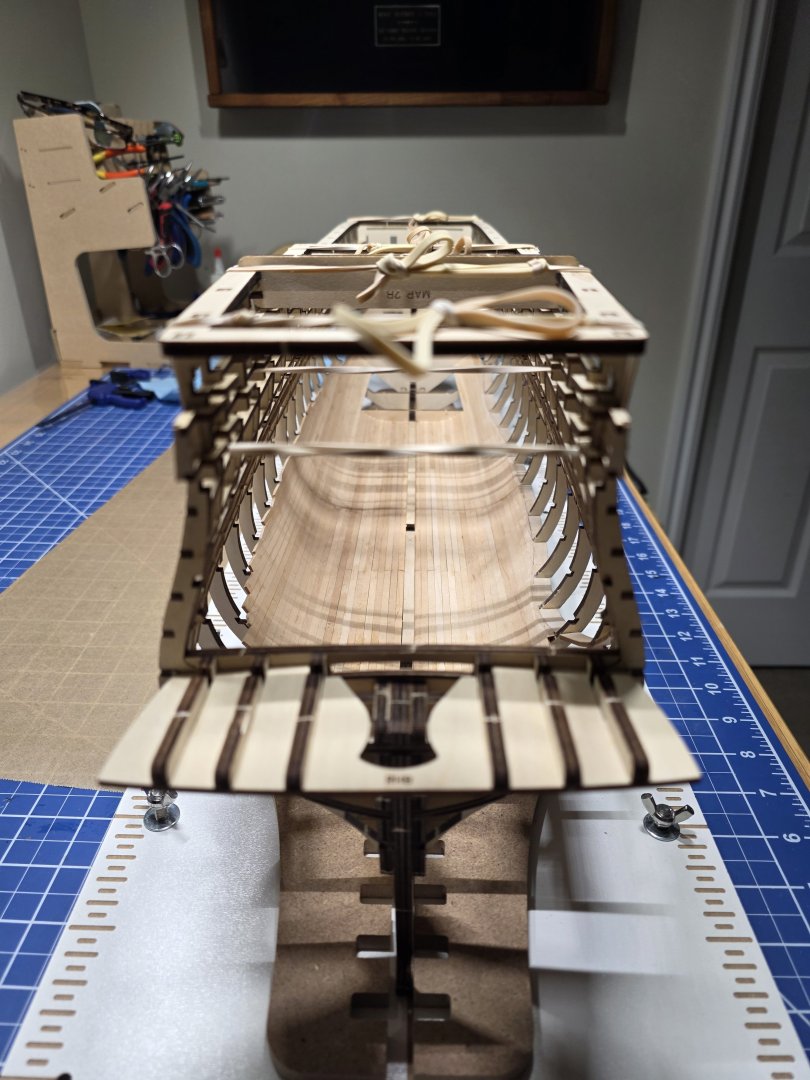
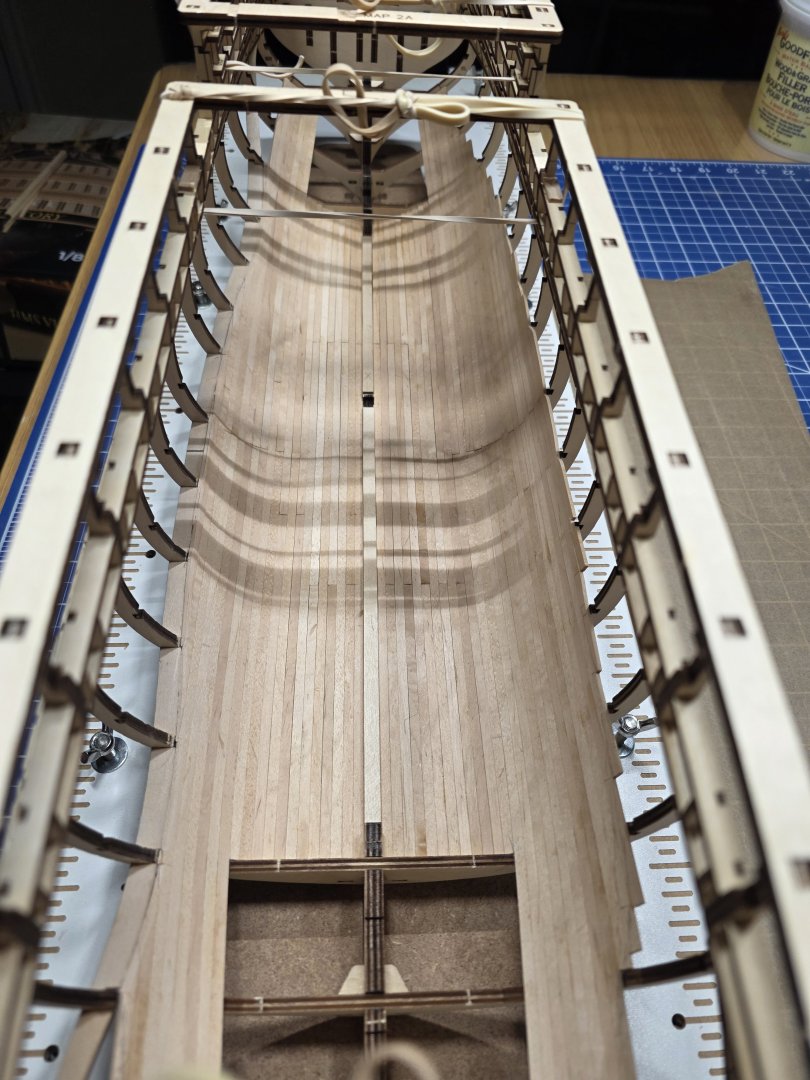
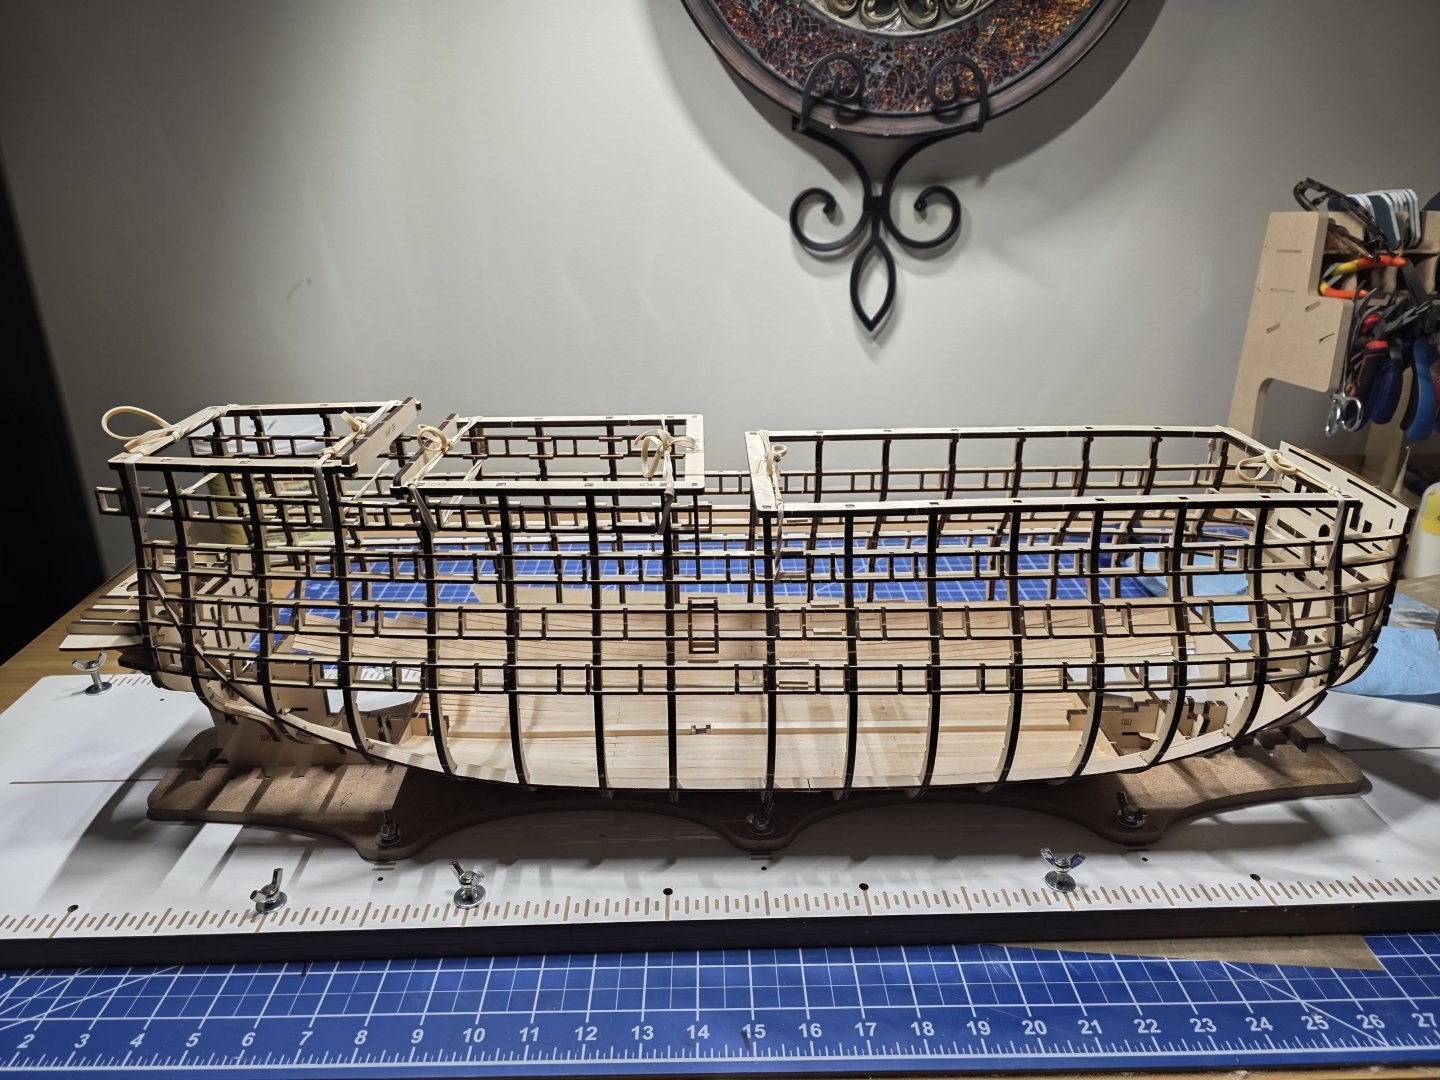
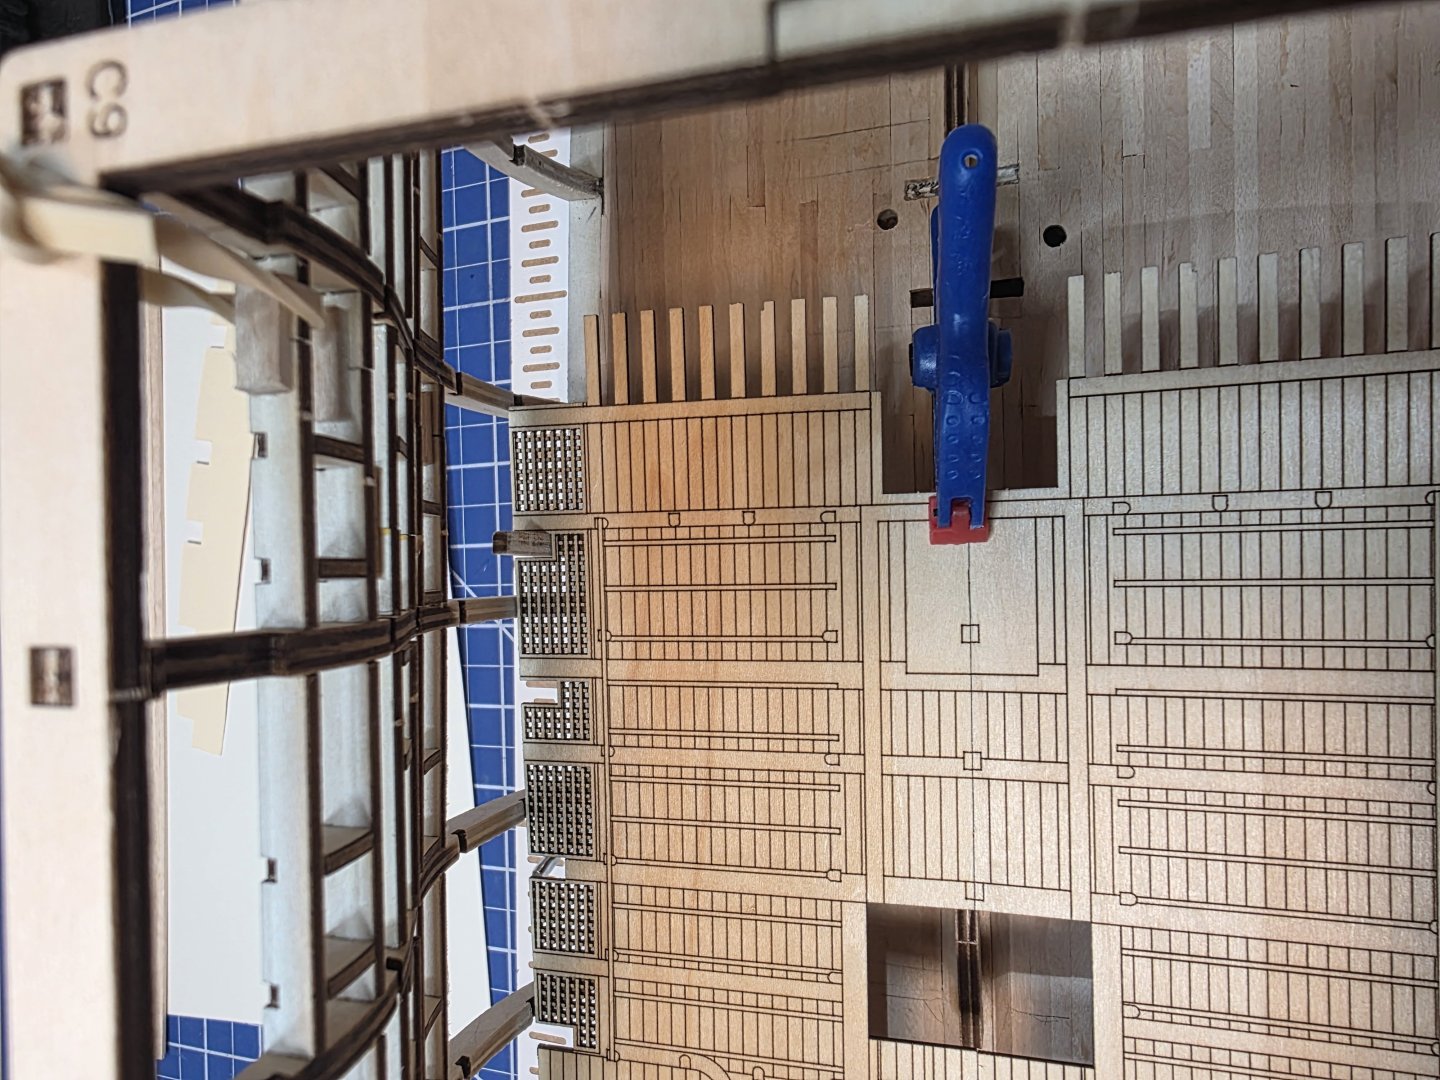
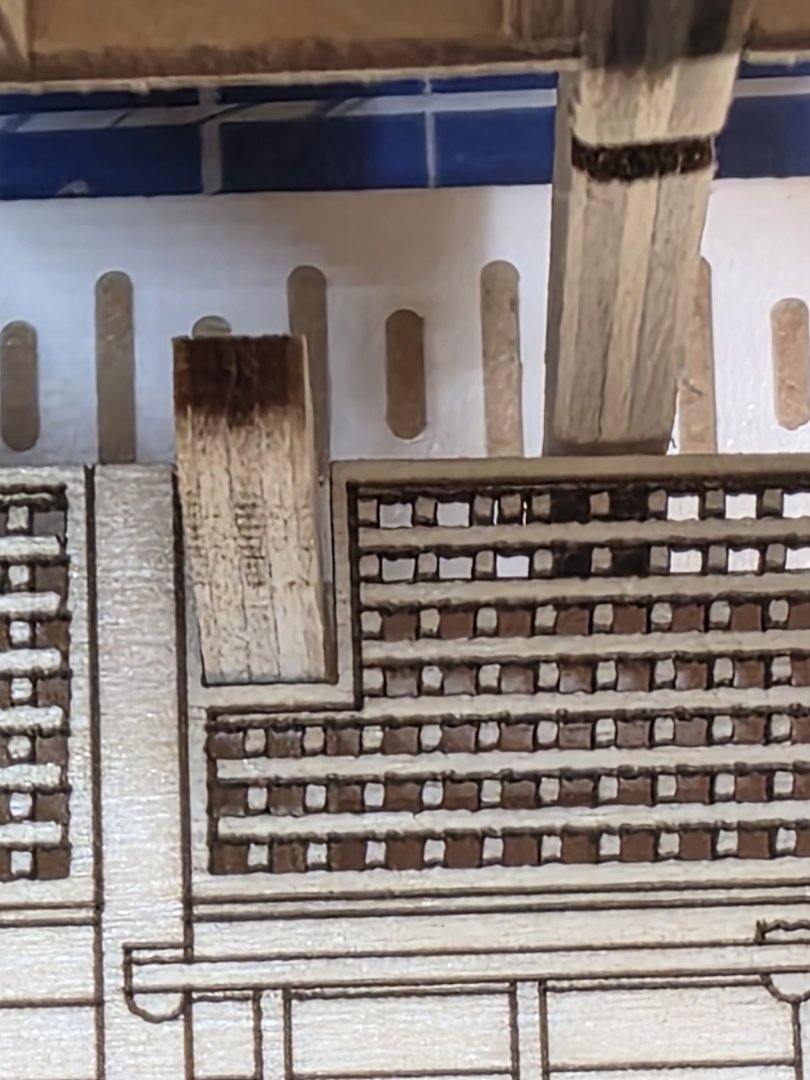
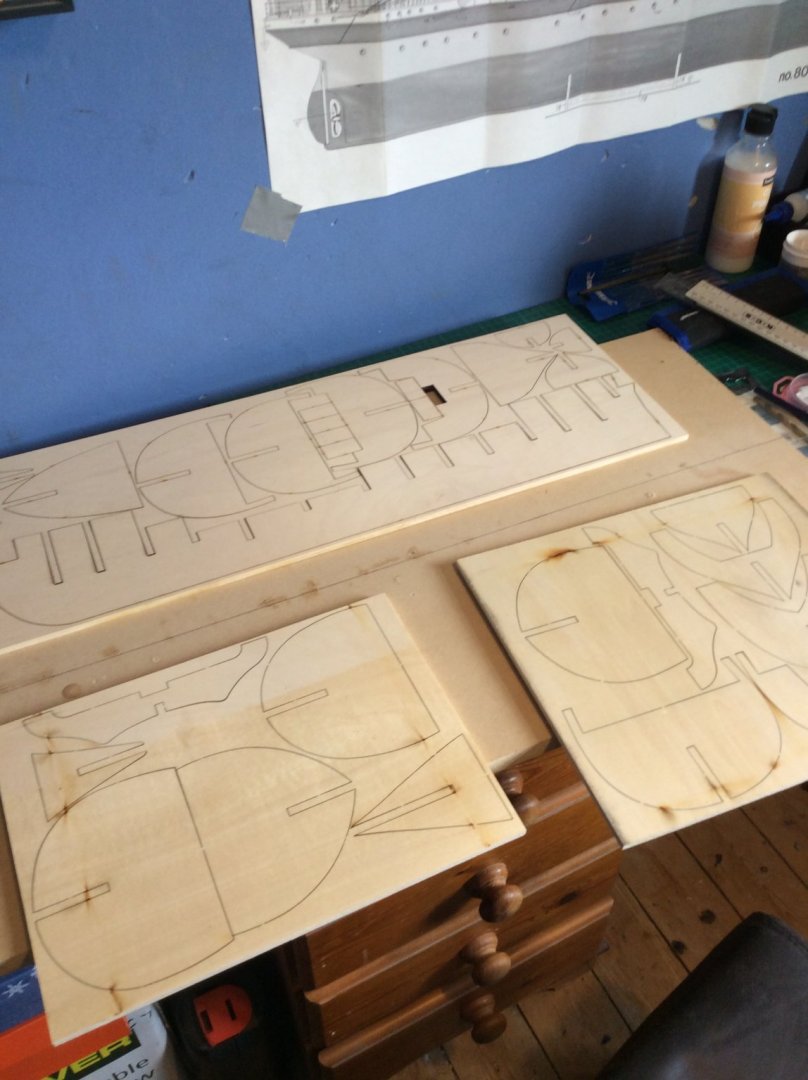
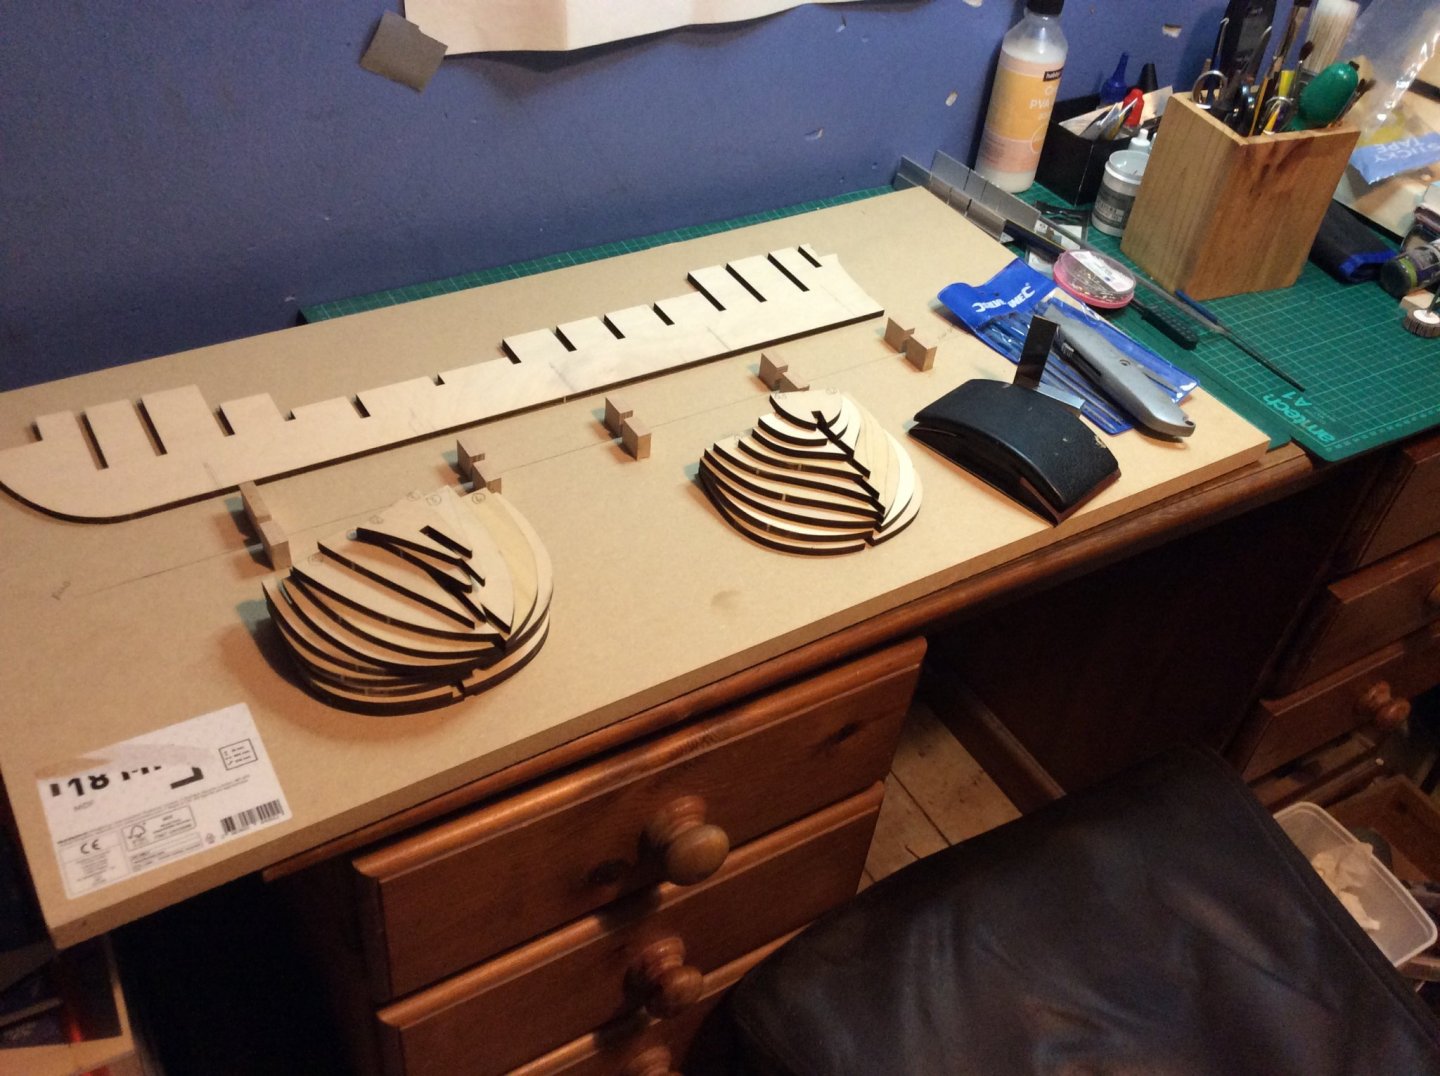
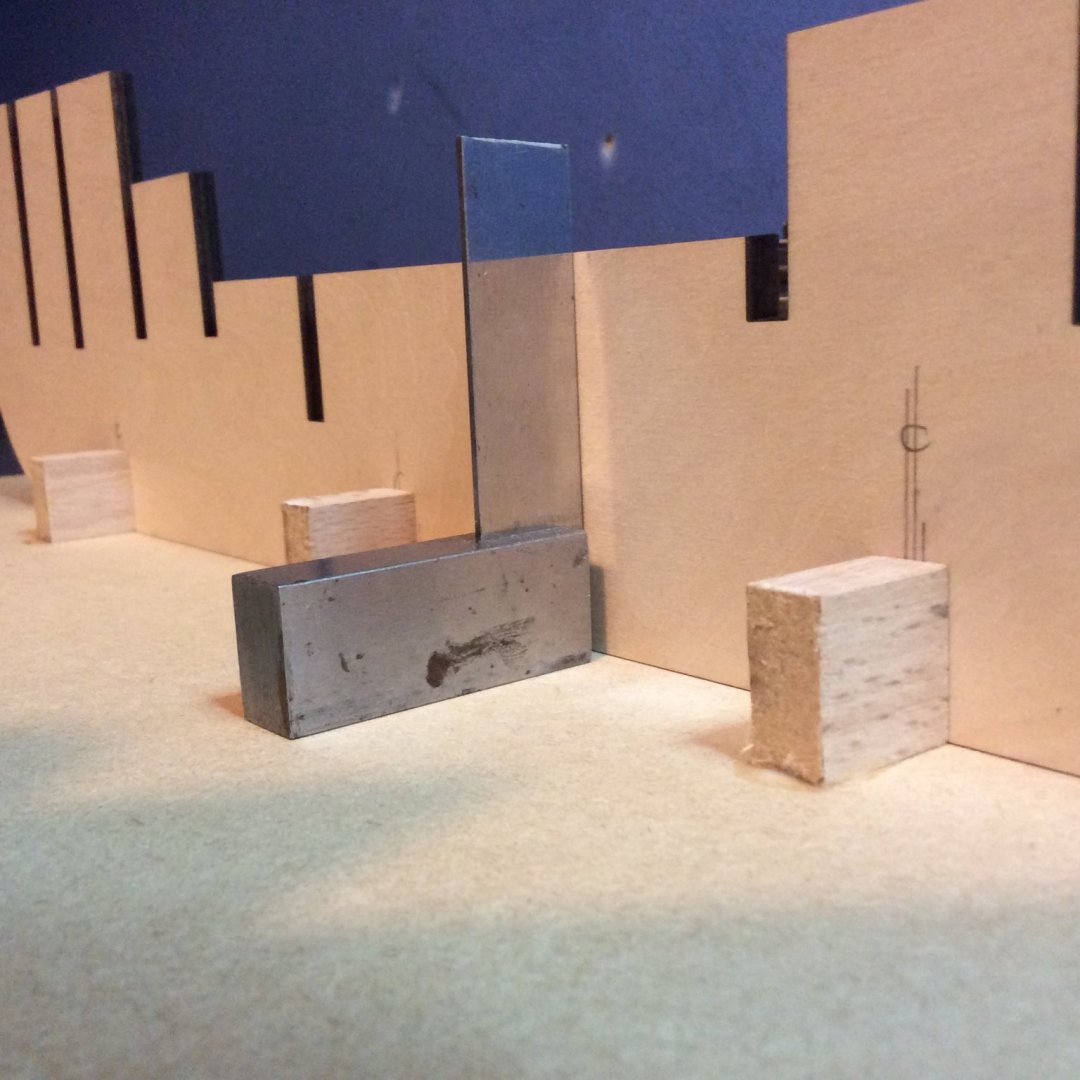
 I have decided to take a shot at building this kit. This will be a test of my vision but I'll do my best. I have an opinion on a few things that I may state but its just my opinion. First of all, this is classified as an elite level kit by AL. My take is that this means that you need elite skills to build it and so far I believe that to be the case. The videos are great but they don't offer any insight on some things you need to pay very close attention to. This kit is complicated and requires a bit of scratch building to finish. I really think that a kit like this should have written instructions (my opinion). You must think far ahead before completing a step and I don't recommend following the order of construction in the videos. This is critical when installing the inner frames. It would also have been nice to have drawings to scale for a build like this, particularly of the hold area. The hold drawing is virtually useless for lack of a better way to say it. There are templates provided for the various structures that you will need to build. The first thing I did was glue these templates to a piece of cardstock with an Elmer's glue stick. They are too floppy otherwise. Also, in the video, they will have you glue a bunch of planks together to make a sheet to cut the parts from. I'm not doing it that way. I'm gluing just enough planks together to create a specific part as needed. I think there will be less wasted wood that way. In addition, in the video, the builder is gluing the planks on top of a sheet of paper creating a mess to clean up on the back of the planks. I'm doing this on top of a piece of parchment paper. The glue will stick but pops loose from the paper easily with no cleanup needed. And very conveniently, I can see that the builder is cutting out the parts with a laser cutter. I don't have that convenience. On with the build: Assembly of the hull is pretty straight forward and now in addition to the videos, you can use the written instructions for the full hull version to help you along. I do love this hull assembly method. The inner hold planking isn't too difficult but does require some thought on getting the planks to clear the bulkheads at the bow and stern as seen in the videos. The videos would have you glue in the mast step after finishing the planking but I left the mast step out for a reason that you will see in a minute. I live in a very arid environment so a lot of parts are warping badly. I was able to straighten the hull using the build board and then the planking holds it. Here is where things get interesting. In the videos, they have you draw a line using a provided template to position the inner frames. If you do this and nothing else, you will have big problems later. Specifically with installing the orlop deck (is that right?) pictured here. The frames must be positioned perfectly in order to fit this deck. You have about 1/2 mm of wiggle room all the way down the length of the ship to play with. If the top of the frames are off by more than that there will be troubles. The first thing to think about are these decks and how they will fit. The deck is assembled from 4 pieces. Mine didn't fit lengthwise or across the width. I suggest dealing with this before assembling anything in the hold. This required some fairing of the inside of the bulkheads to fit across the width. I didn't want to take anything off the decks in either direction on the length because of the various structures that are sitting on top of this deck. I do think my most forward bulkhead was slightly out of alignment top to bottom (not a kit problem, just my eyes). I ended up chiseling away some of the thickness on the hold side of the bulkhead to get the decks to fit lengthwise. I am using the orlop deck as a template to align the top of the bulkheads ad as you can see, there is very little room for error, almost none. The videos don't address this at all. I'm using the template provided in the kit to align the lower part of the frames and the paper template for the walkways. This why i didn't glue in the mast step.
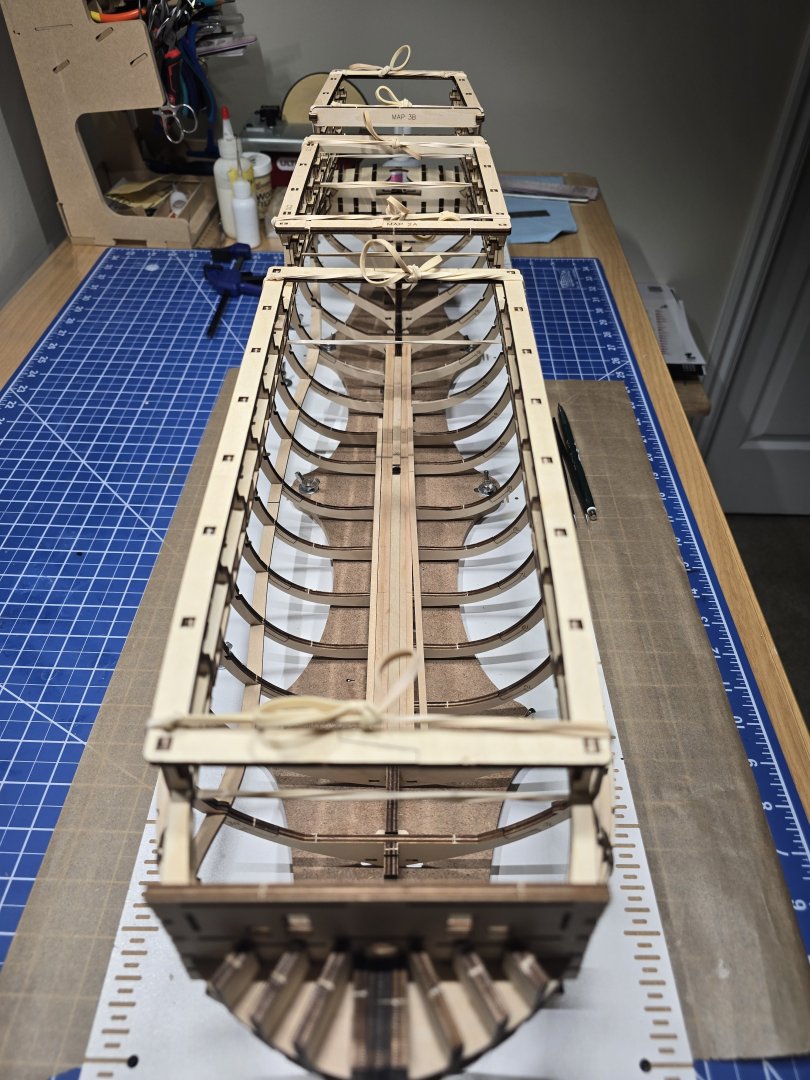


-
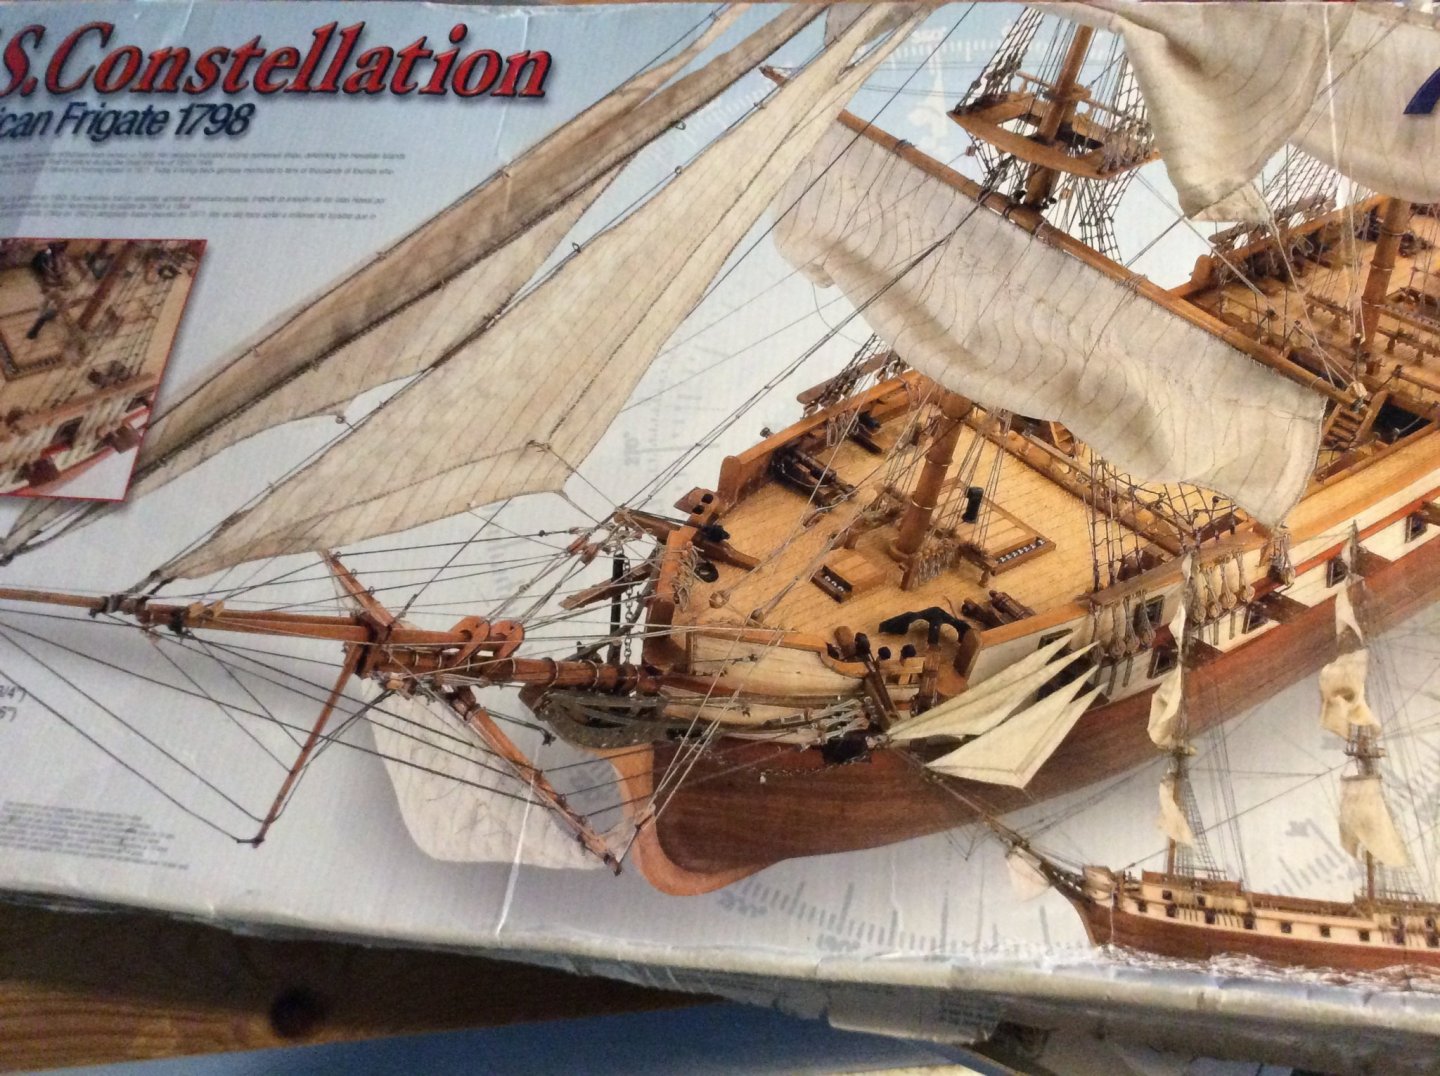
 Hi Everyone, i’m still very new to this site and am a little confused on how to get started with a build log i’d like to share. This isn’t my first build, i’ve made a few in my time this would be my 5th wooden ship kit. I’m still a novice at building them but the more i do the better they get. This is the first time i’ve started a log on any site so not sure what to expect. I’m hoping to pick up a few tip on improving many aspects of my work. To my latest build the USS Constellation by Artesania Latina. I’ve spent the the last few week researching this ship, i did find that the ship herself has changed over the years from her original 1798 form. Don’t think i’ll do much in the way of kit bashing but keep her to the ship George Washington commissioned. I have noticed a few things i’d like to change though for starts the guns look way over sized for its 1/84 scale. I did order some 30mm brass gun barrels from Poland but got a message today saying that all internal post was suspended to at least the end of March because of the Coronavirus. I’m also looking to do something about the gallery windows which are cast metal and basically just painted black and stuck in the stern of the ship, not very realistic. Anyway i’m looking forward to any replies i may get and look forward to hearing from other members and hopefully we can all enjoy this build. Until next time....
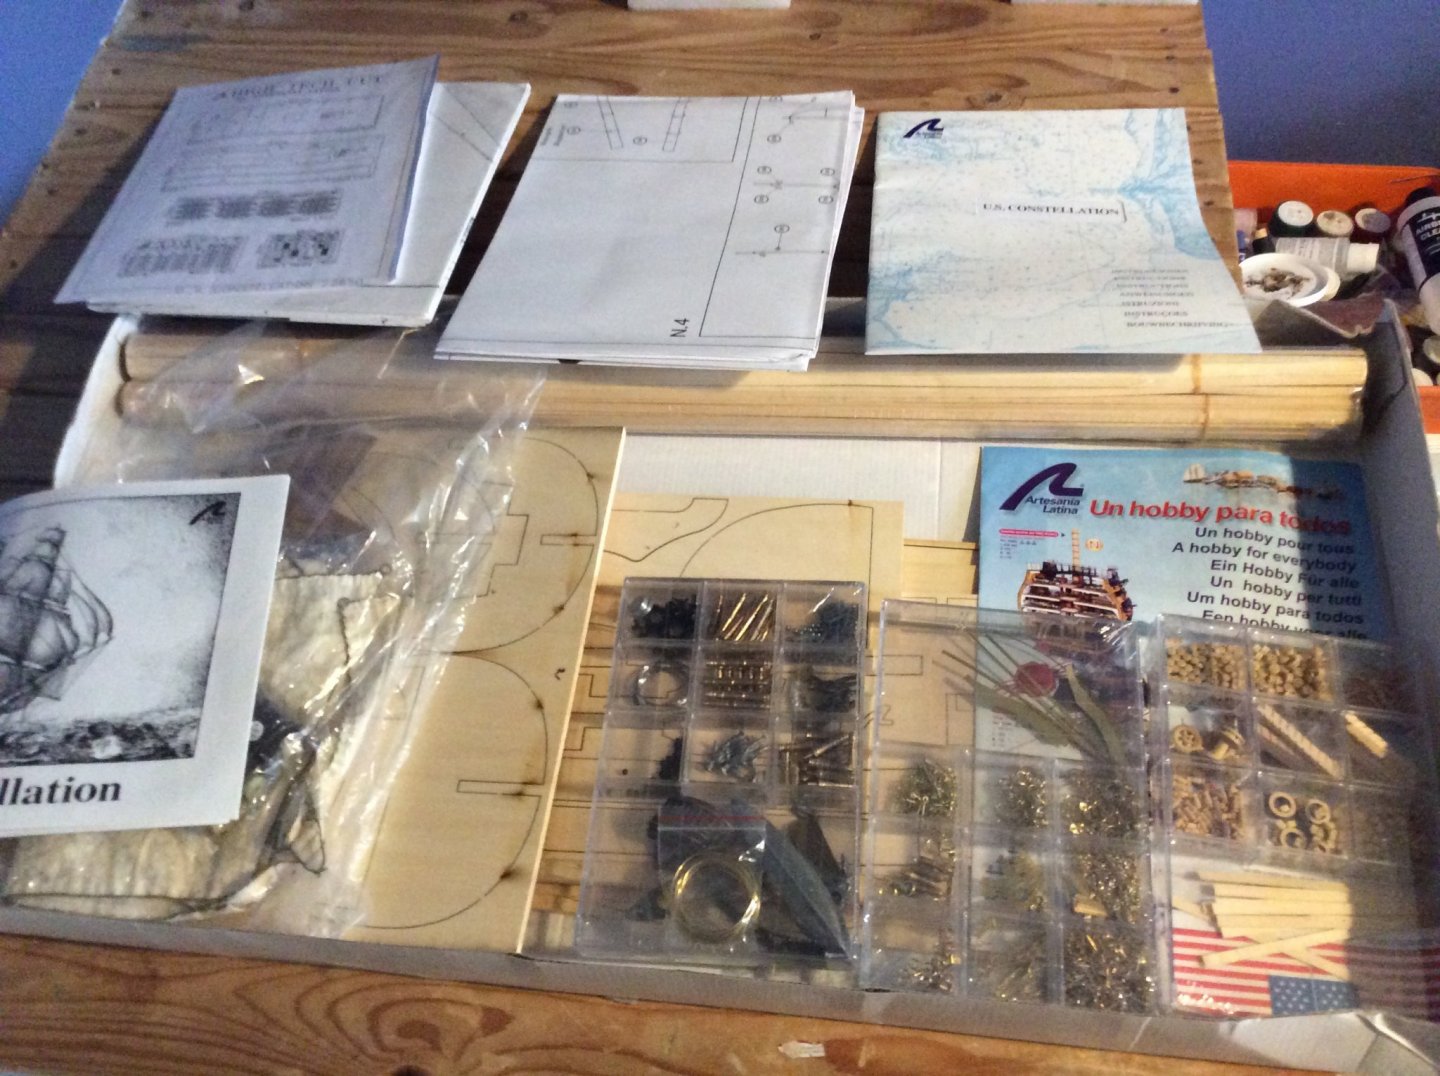


-
 Hello MSW. I am starting my AL Constellation kit I purchased from a fellow MSW member. As a newbie, I followed many of the build logs for a while and found them to be full of great ideas and advice. Hopefully, someone will benefit in the same way from mine. Cutting to the chase, I opened the box and did a parts list inventory... which took way longer than I anticipated. The way AL set up the parts list was "interesting" with regards to all the strips of wood. Instead of having a list of what should be in the box, i.e. 30 strips of this and 40 strips of that, you need to go through all 446 parts. Each part that was made from the various wood strips was listed with its approximate finished size. So if you needed 10 pieces of a part that were 30mm long you would have to measure off 300mm from one of the supplied strips. Unless you want to spend days checking everything it is a virtually impossible task. I would imagine someone at AL has already done this so why not supply a general what's in the box list along with the detailed list already given? I didn't bother checking the wooden strips, just the individual pieces. There were a few items that came up slightly short in the count like some deadeyes, blocks, belaying pins and some other minor things that can be picked up on-line or at a local hobby shop. What did surprise me is that there were no chains at all for the anchor and stern decor. No biggie, picked that up at a dept. store. Here is what was inside. Reviewing the instructions, it is a good thing I have an engineering background. They are somewhat vague but there are a lot of pics to go by. Then probably the most important part of the kit... the bubble wrap. I plan on taping it to the wall behind my chair so when I bang my forehead into the wall for doing something stupid it won't hurt so much!! My next step will be to set up my work area and create a fixture to squarely secure the keel while I start the framing (bulkheads). As with any project, if the frame is not right, the rest will follow as such.
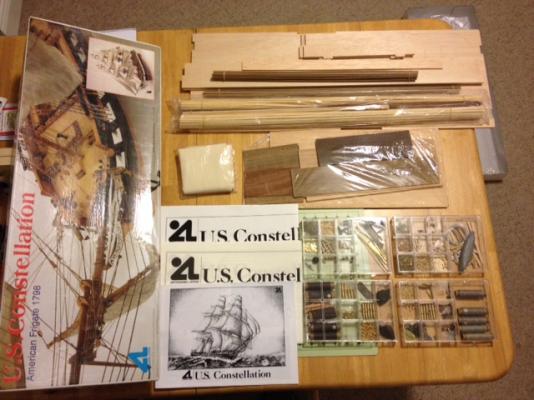


- 212 replies
-
- 5
-
-
- constellation
- artesania latina
- (and 2 more)
-
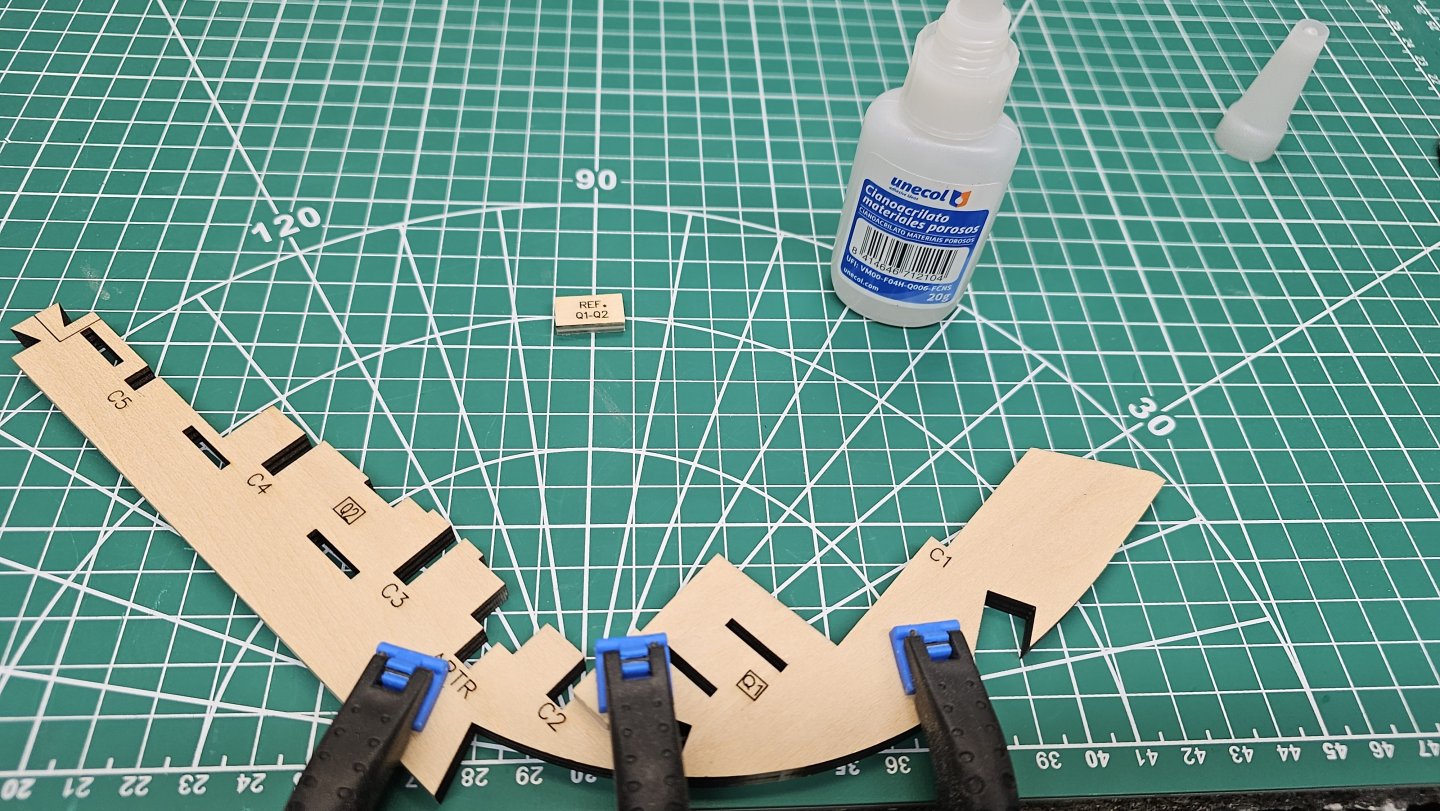
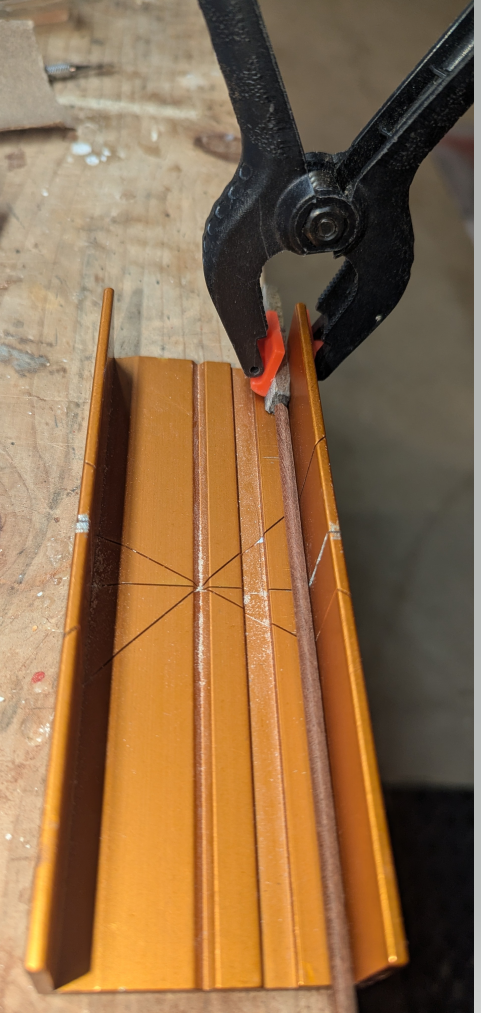
 And so it begins! Greetings all. This will be my log for Artesania Latina's HMS Victory Anatomy version. It will be a fairly straight by the book build, I may modify a few things as I go but will note any changes I make. I have bought the LED set to go with it but passed on the figures, I personally don't like how figures look on a model. This is quite a short entry just to get started, moving forward I will most likely post after I complete each section of the video instructions, which I like but would prefer written/pictorial instructions to accompany them, but I digress. So first step was assembling the bow section to the first part of the false keel. The glue I bought from AL with the kit seems quite slow curing, so I've ordered a kicker for future use. When placing the bracing piece, after the first side had taken hold enough for me to move, for the other side I used some of the future bracing pieces to lift the two keel pieces off the desk so I could clamp the bracing piece(s) I'd just glued. (Pretty certain I could have found a shorter way of saying that, hmm) Historically (when it comes to ships) I never complete a build end to end, I usually swap projects, but for this one I intend (time will tell on this) to complete this one end to end. Thanks for popping by, As a side note, I feel the need to note this as I have in the past been (rightfully) judged: I tend not to read through others' logs and/or comment. I simply don't have the time for one (I have young kids, two of whom are Autistic) so my free time is quite limited at times, but also being Neurodivergent myself I literally feel stupid commenting praise or otherwise on others work. I know that sounds utter madness, my head is a very strange place at times. Please don't think bad of me for it.
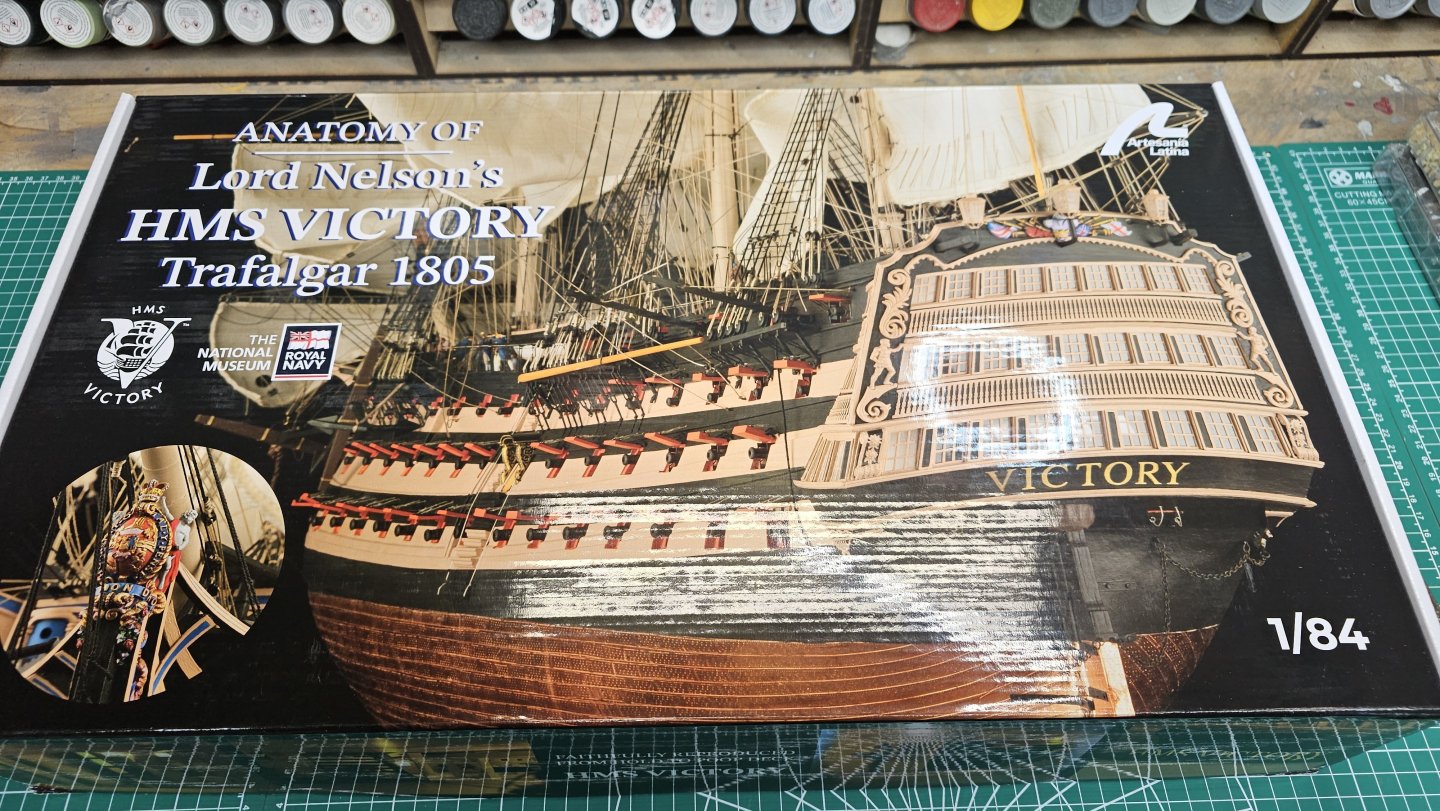

-
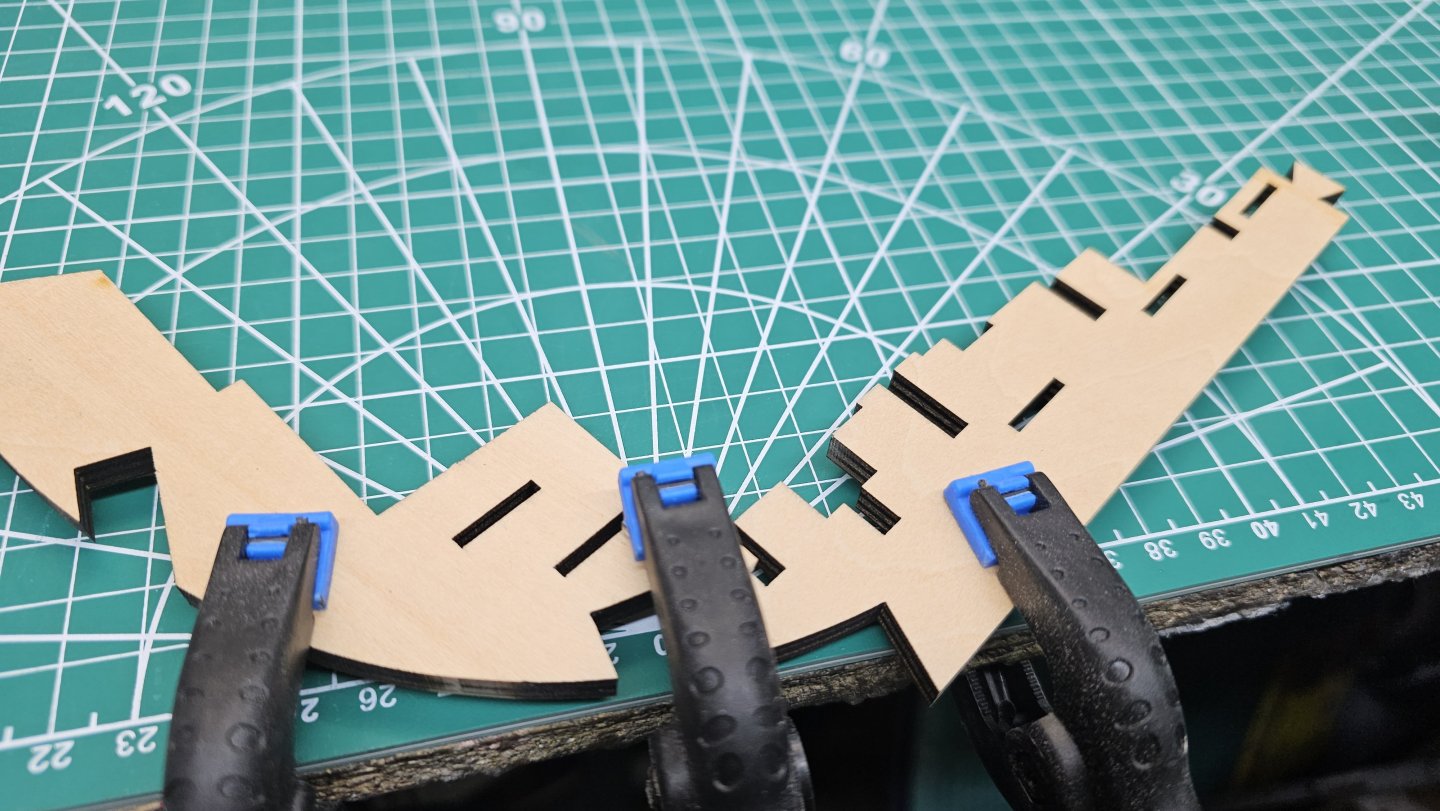
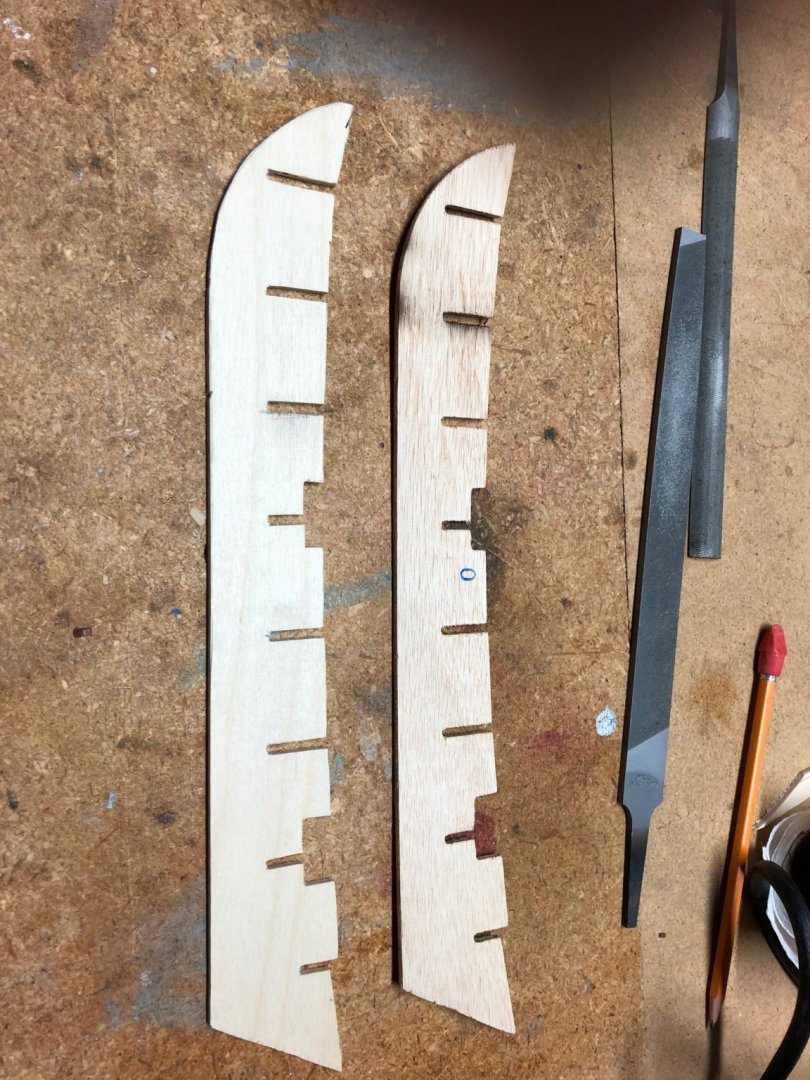
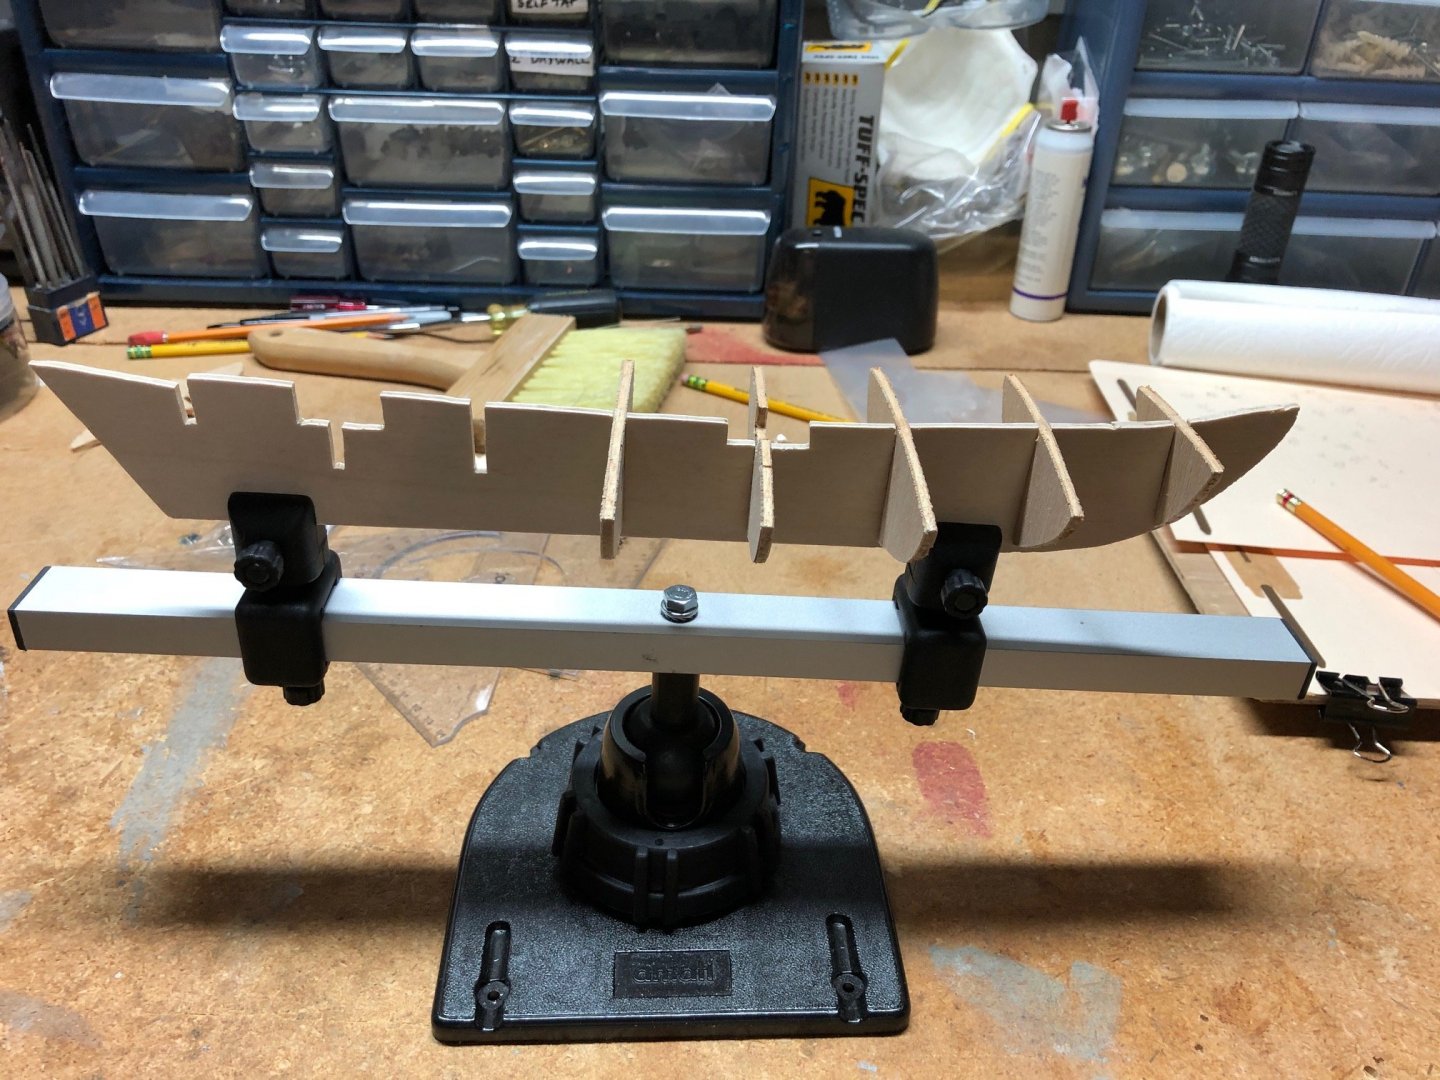
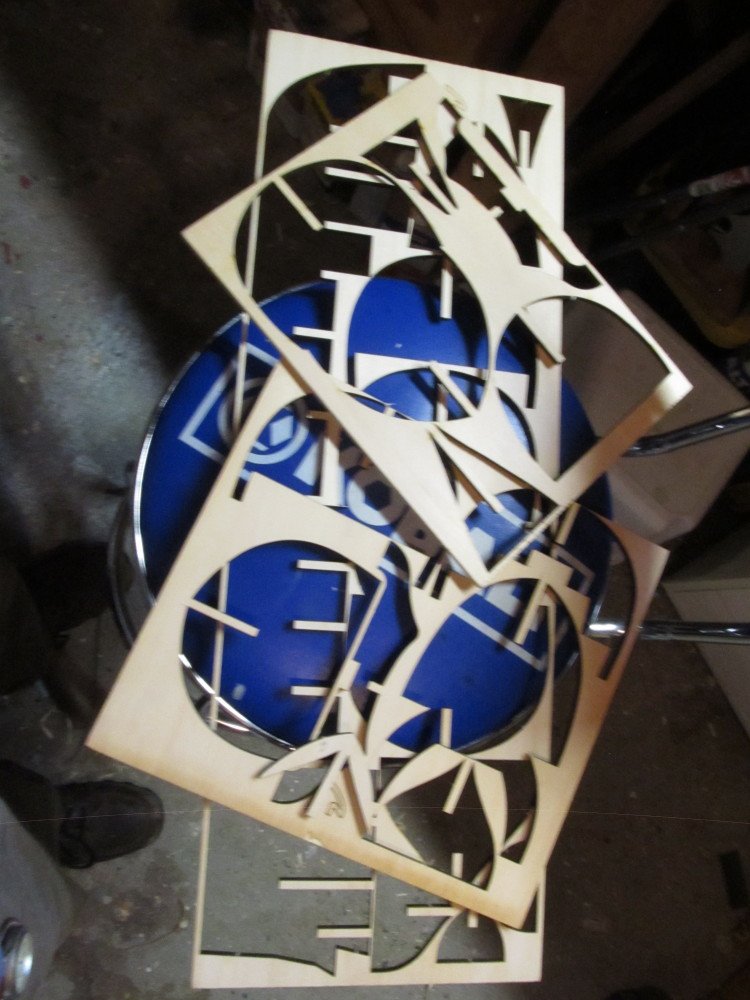
 The Swift is my first wooden boat build, so I’m a newbie. I appreciate any suggestions, advice or input from you more experienced builders. I used to build plastic and wood aircraft models as a kid, but that was more than 50 years ago. Now that I’m retired, I have really been looking forward to building models again, particularly ship models. I’m hoping I can maintain my enthusiasm through the trials and tribulations ahead. When I first opened the box I noticed that the false keel was warped. I know for my reading (the kit directions, “Ship Modeling Simplified,” by Frank Mastini, and various articles in this forum) that it is essential to get the false keel and bulkheads perfectly aligned. So I posted questions on the Building, Framing and Planking forum about this issue, and got some good advice. Mtaylor suggested just cutting a new false keel, and both he and michael101 talked about inserting spacers between the bulkheads and clamping them to straighten out the keel. The more I looked at the false keel, the more I realized that the most obvious warps were right on the bulkhead cut lines. See attached pictures. So in the end I ordered some plywood of the same thickness and I have now cut the new false keel. It’s quite straight and I’m quite happy with it. I have begun fitting (but not gluing) the bulkheads. Obviously I’m just getting started. I really appreciate the availability of these forums because I’m convinced I’m going to need lots of advice.
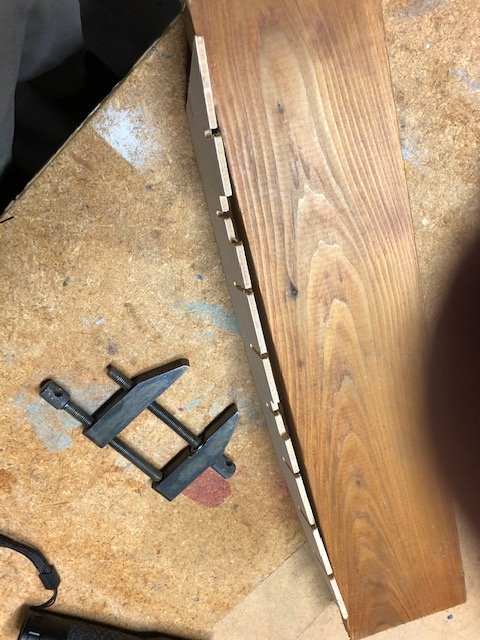

- 18 replies
-
- 3
-
-
- artesania latina
- first build
- (and 1 more)
-
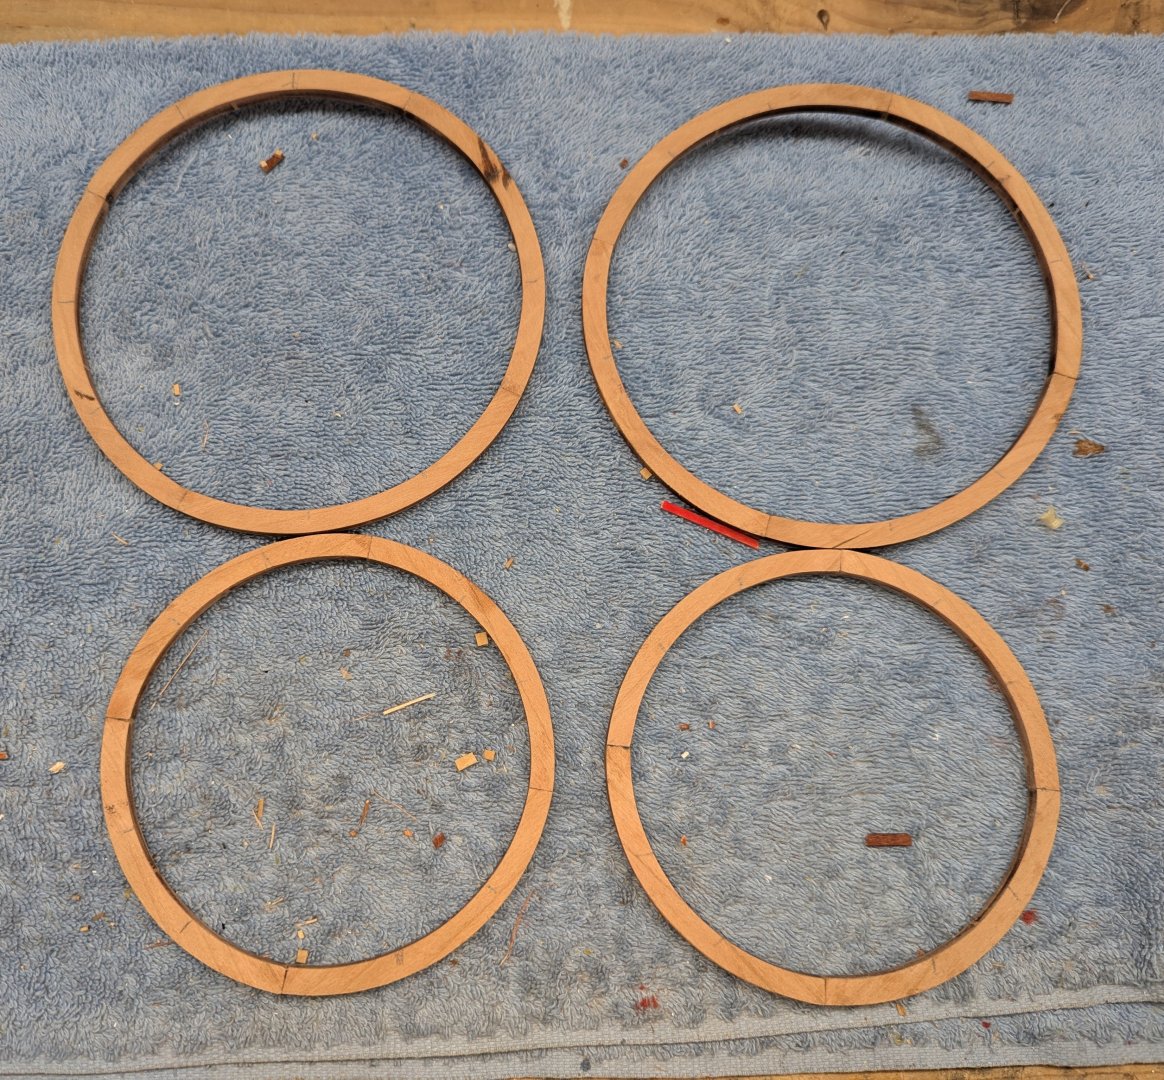
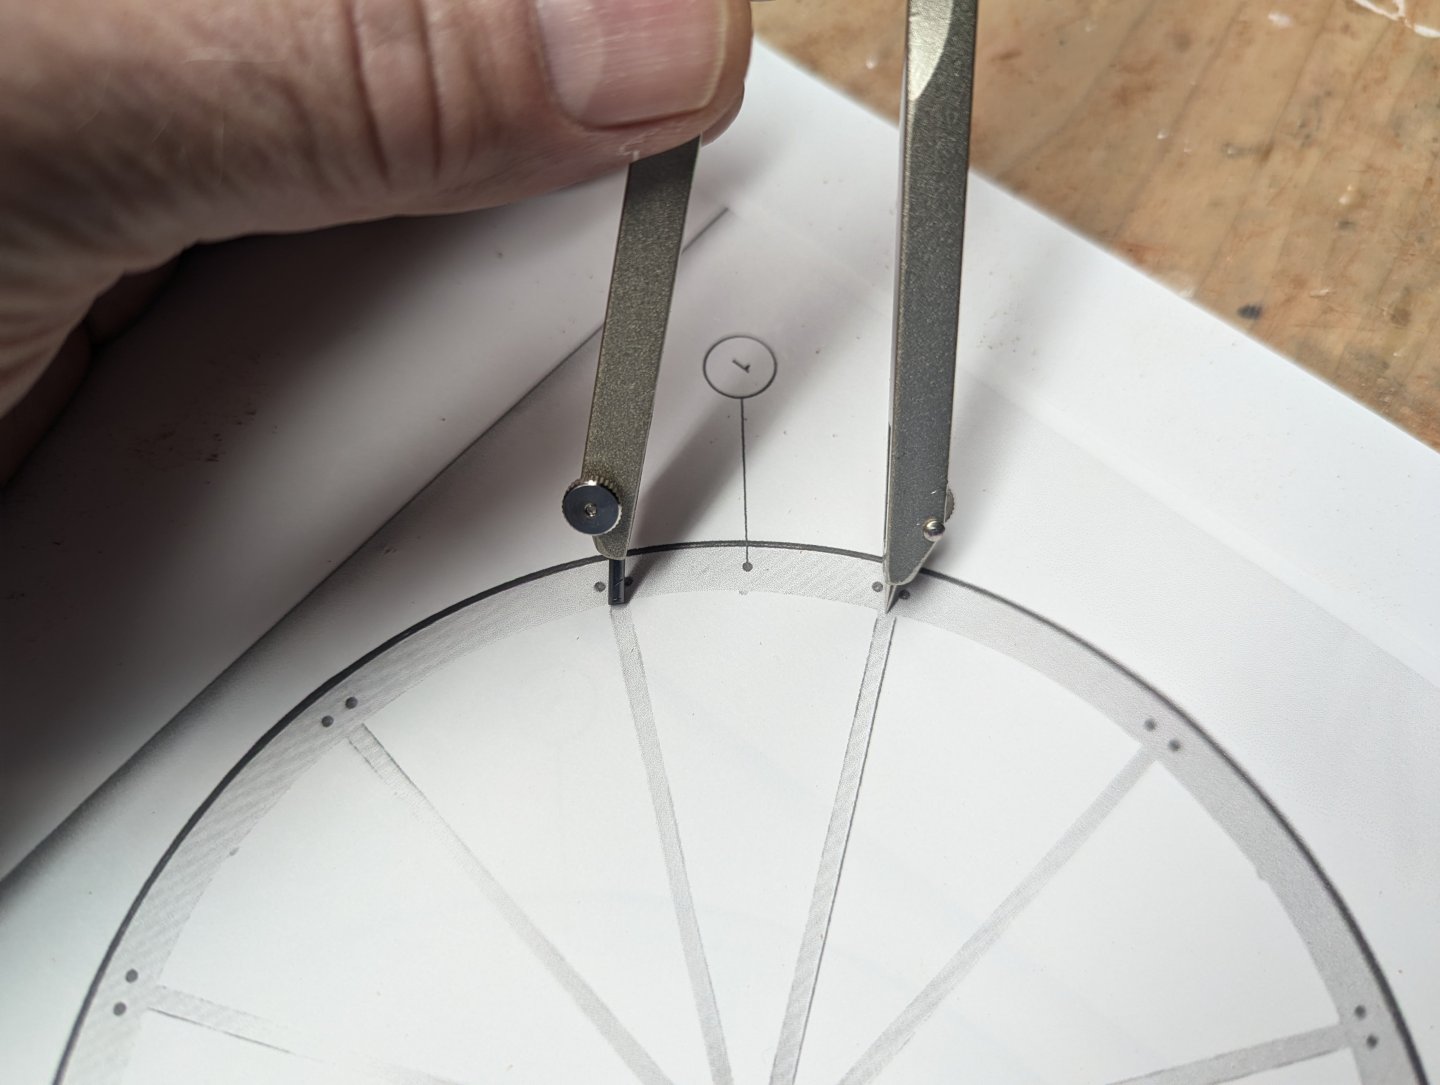
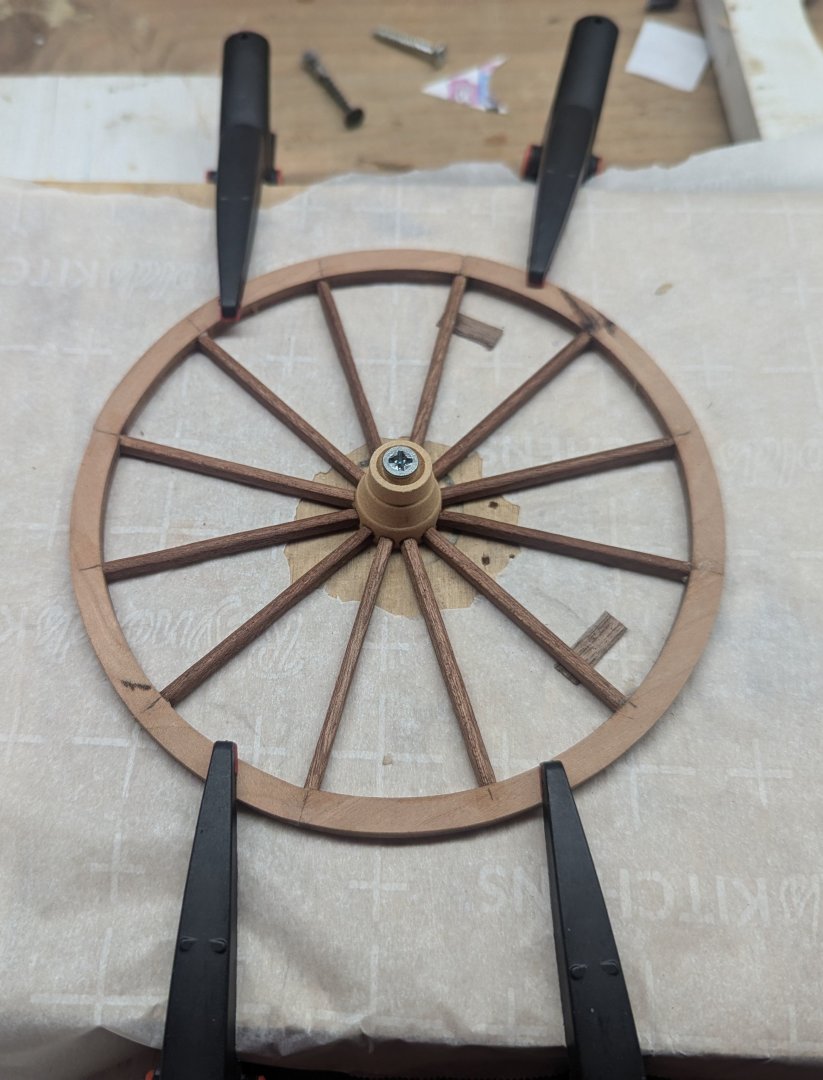
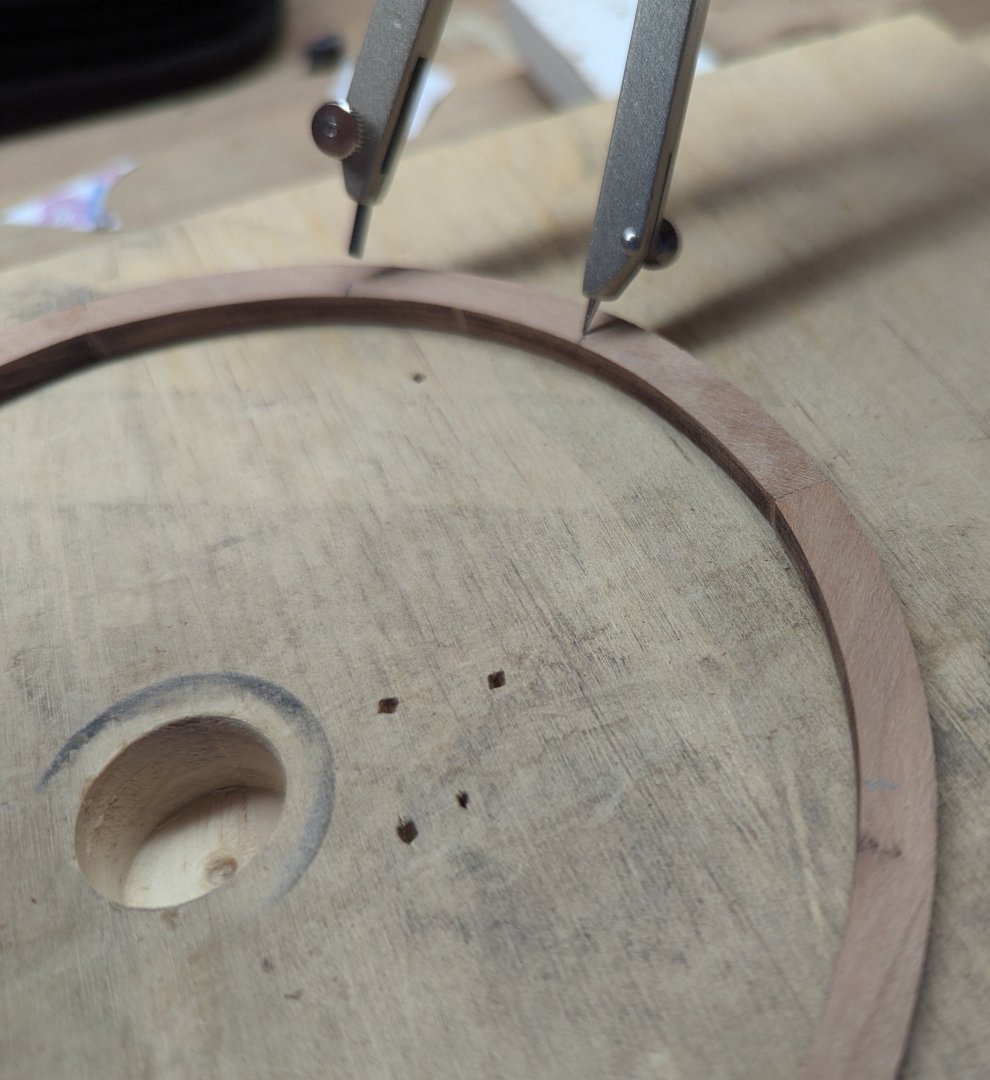
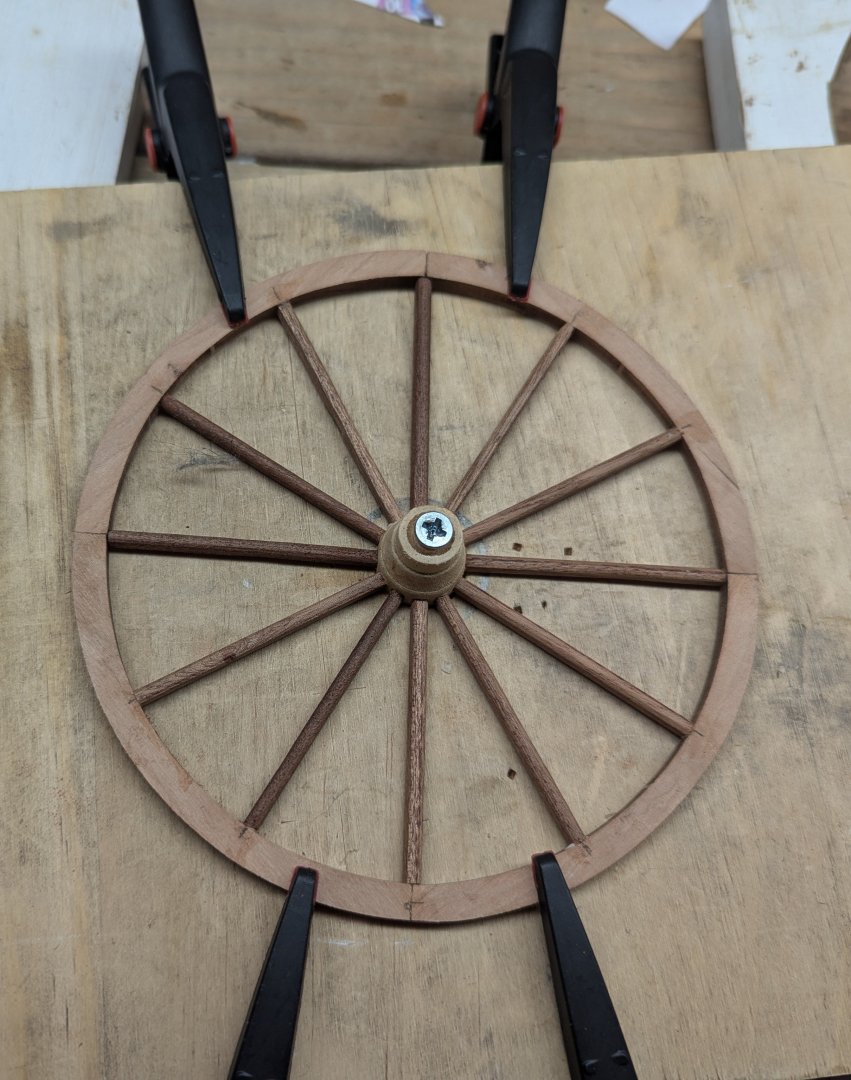
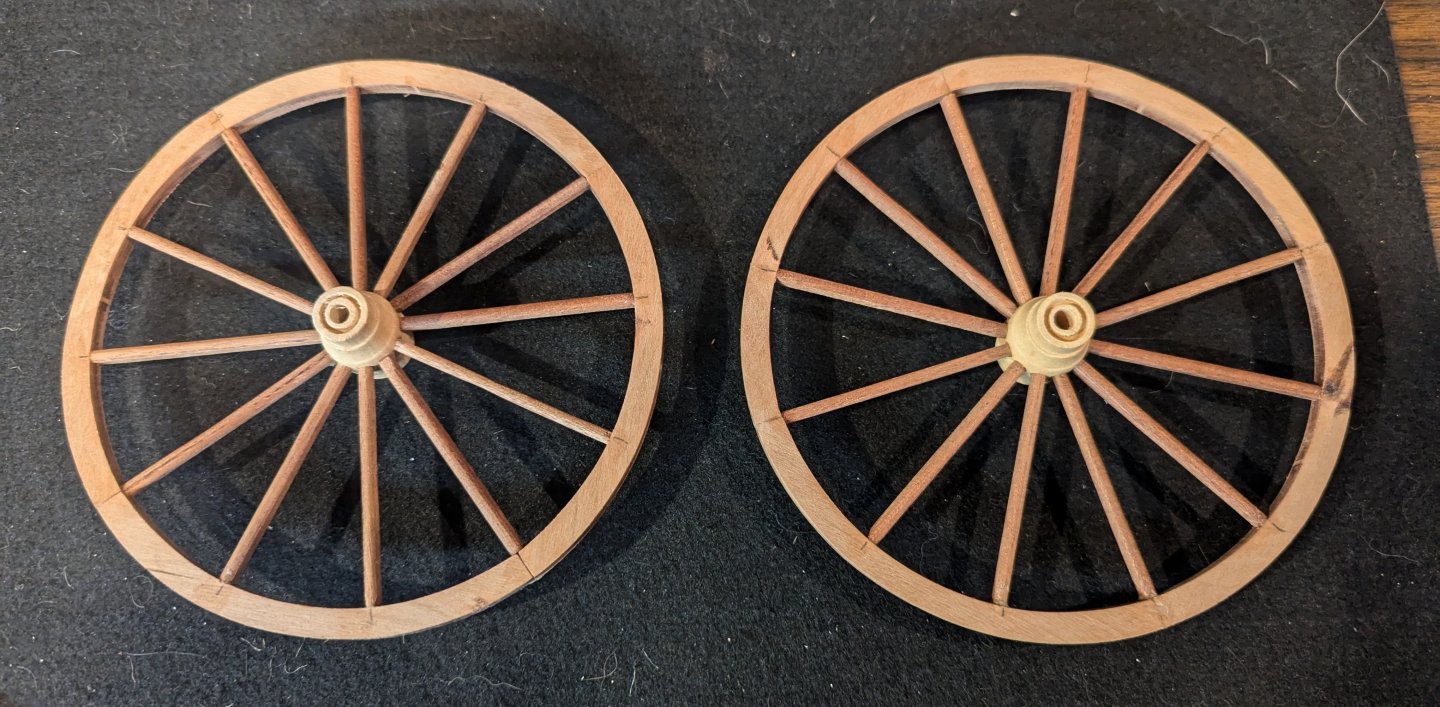
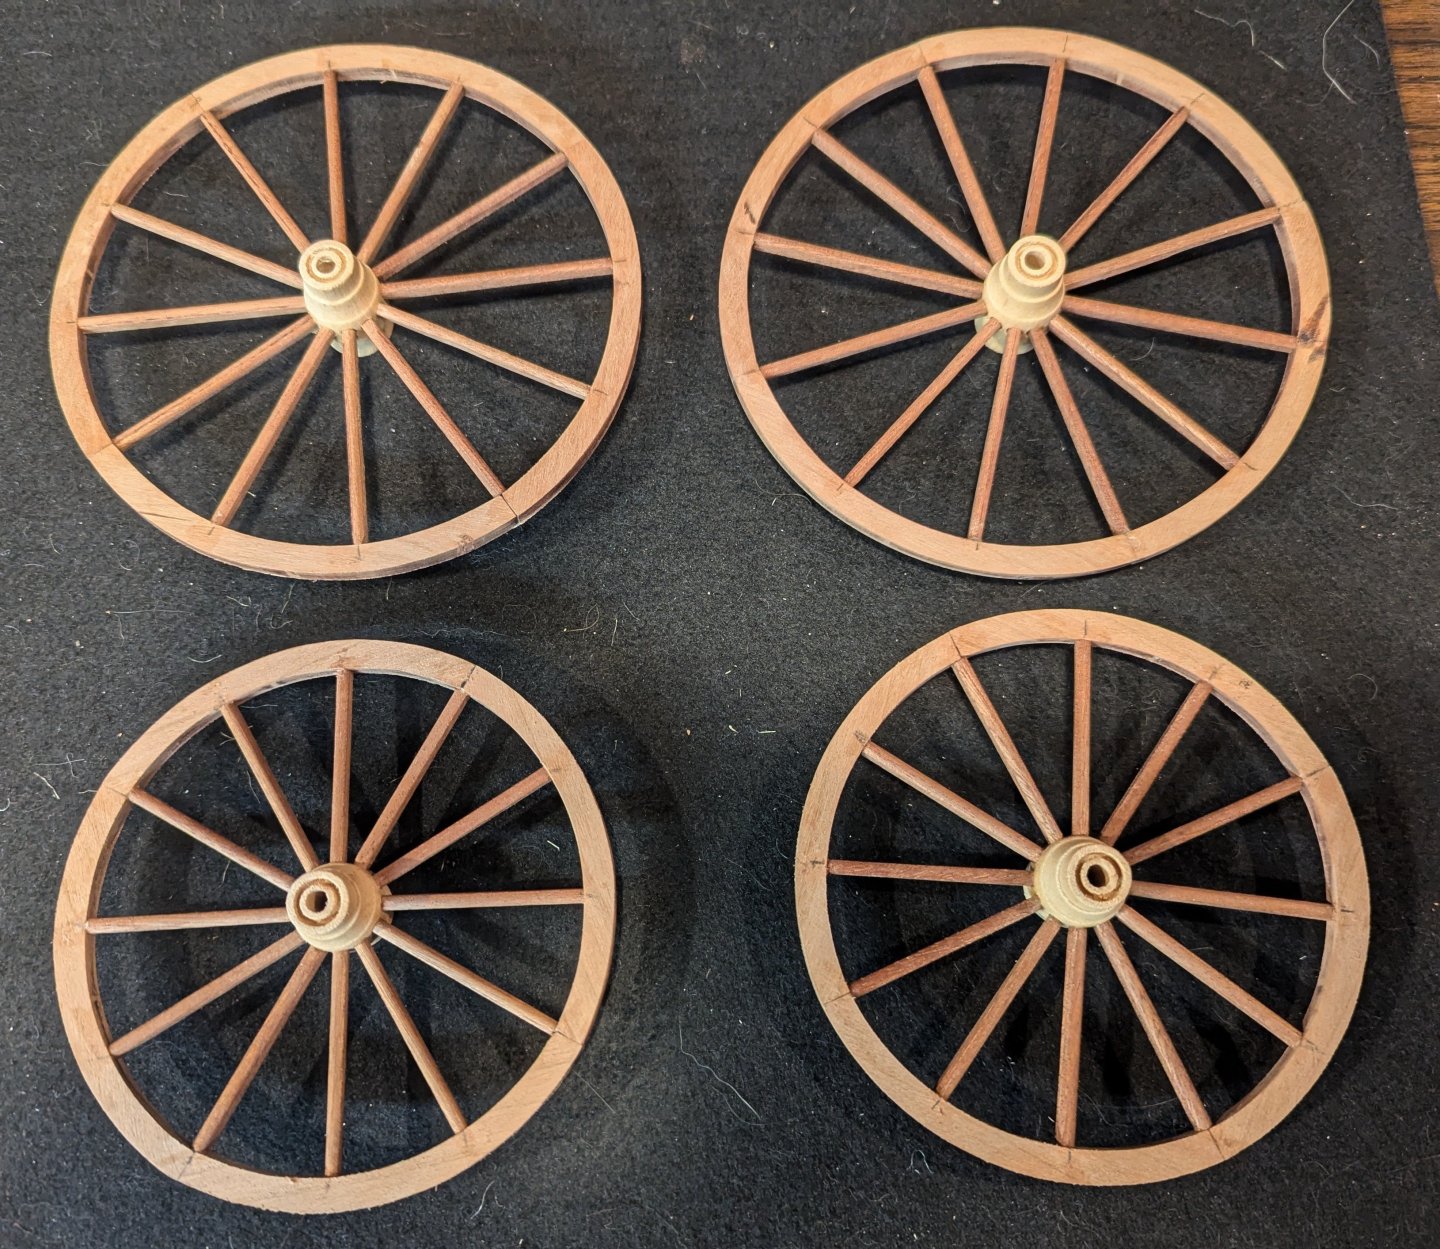
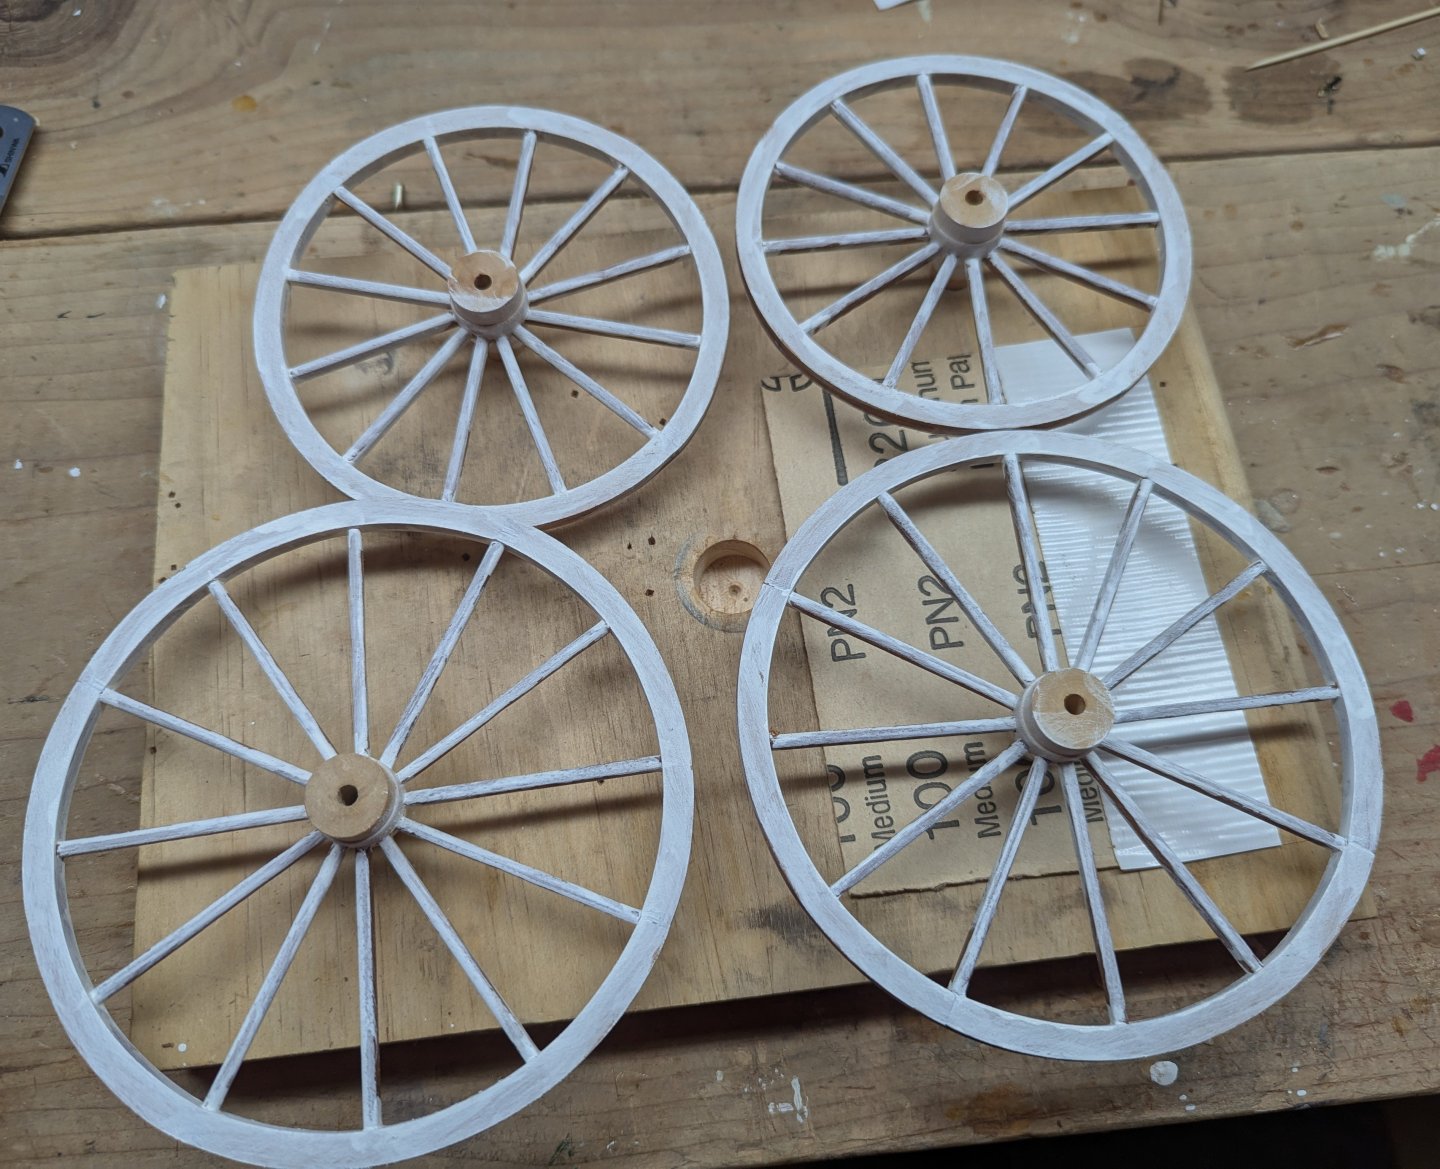
 I decided to take a break from ship building and try a "non-ship". In this case I selected the "Stage Coach 1848" from Artesania Latina. I choose this one over other stagecoaches do to it's 1/10 scale. A little bigger than the other stagecoaches and I (having fat fingers) I like the larger scale models. For those of you that want to follow along, this will be a very slow build. It will get completed, but I am not a very active model builder. I work on them as time permits, so it is going to take some time. I would suggest checking back every 2-3 weeks or so for an update. Starting in, the first step is to build the four wheels. More or less a pretty straight forward task. Assemble the wheel rings - four pieces each In order to add the spokes, it mentions to use the "full size" diagrams to place the spokes. Problem is, and this just be the diagrams in my particular model, the full size diagrams are not entirely accurate as to the spoke placement. Notice in the two pictures below the spacing between some of the spokes are not the same. So if you lay the spokes via the diagram, the spaces between spokes will not be accurate. The spokes are made from 4x4mm strips flattened (by sanding) on two of the sides and then cut into 69mm lengths (for the large wheels) and 48mm lengths (for the smaller wheels). The spacing between most of the spokes are the same, so by using a compass, it is easy enough to find a correct size that will go all around the wheel. Once you know the accurate space between spokes it is easy enough to go around the wheels and mark where each spoke is to connect to the rim. For easiest spoke placement, I would suggest cutting a circular hole in a piece of 1" board to insert the wheel axle. From there the spokes will lie flat on the board and can easily be glued into the axle and onto the wheel rim To insure each spoke is the exact same length, use a stop on the saw box. It will save a lot of time and insure each spoke is the proper length Adding the spokes to the smaller wheels and to the larger wheels end results prior to painting After a little primer After paint and before adding the trim


-
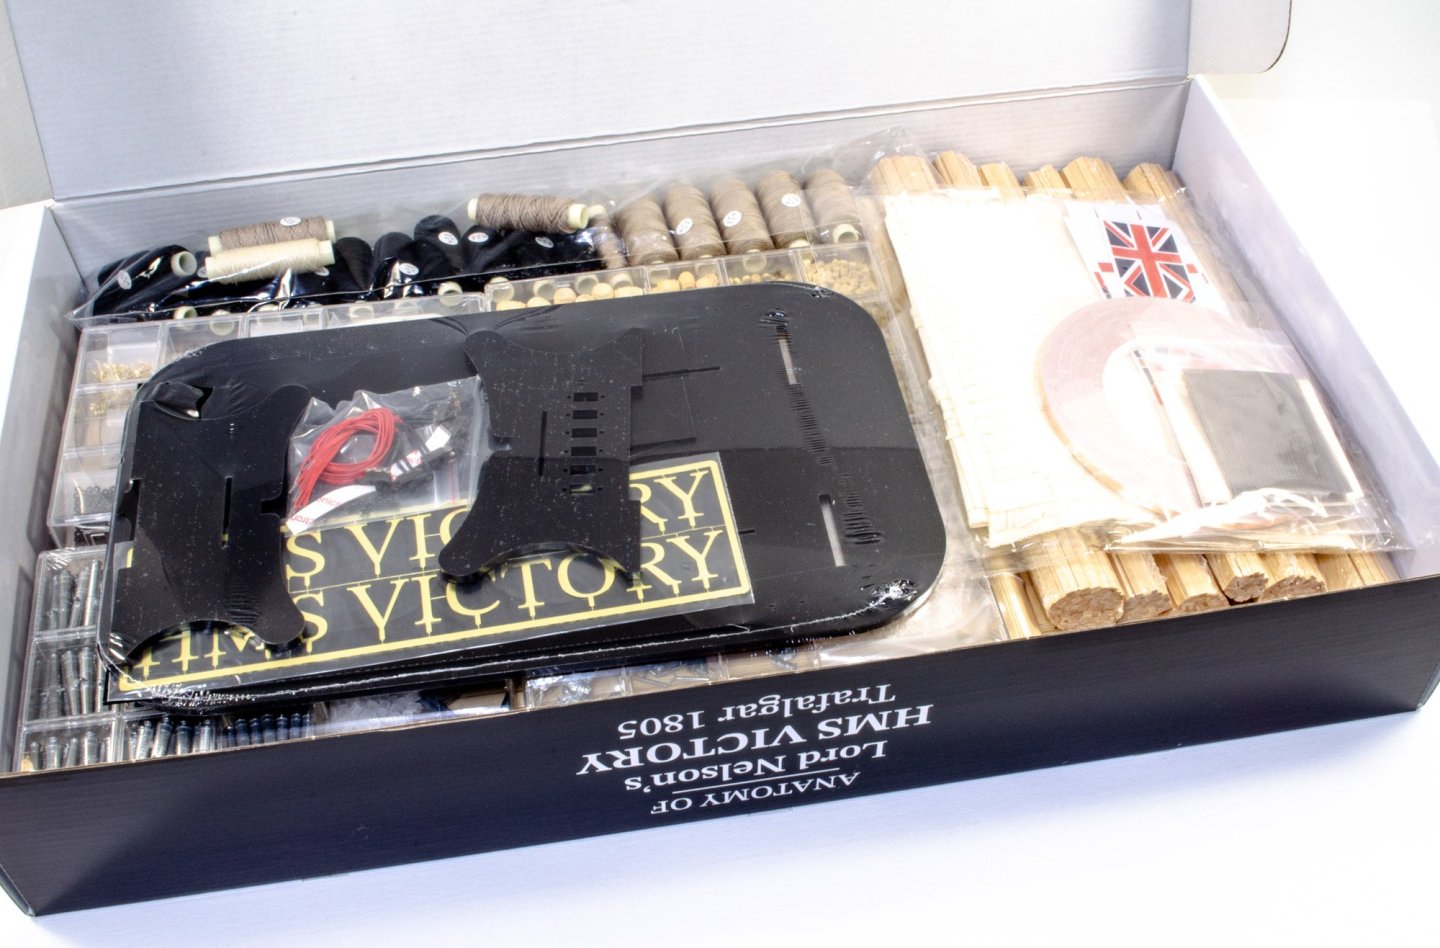
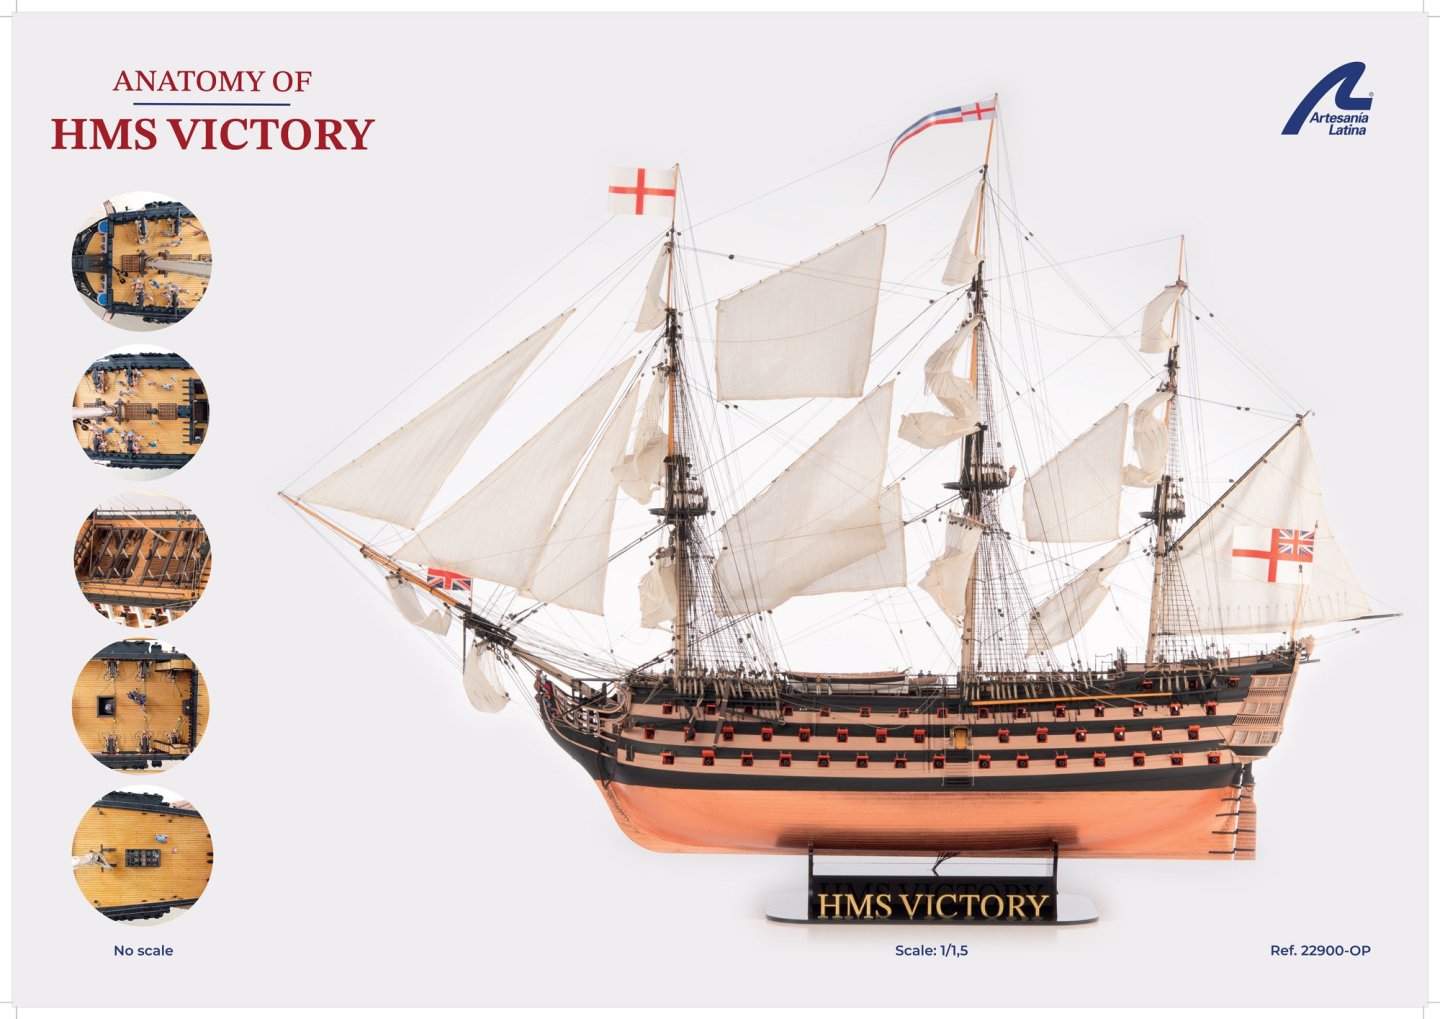
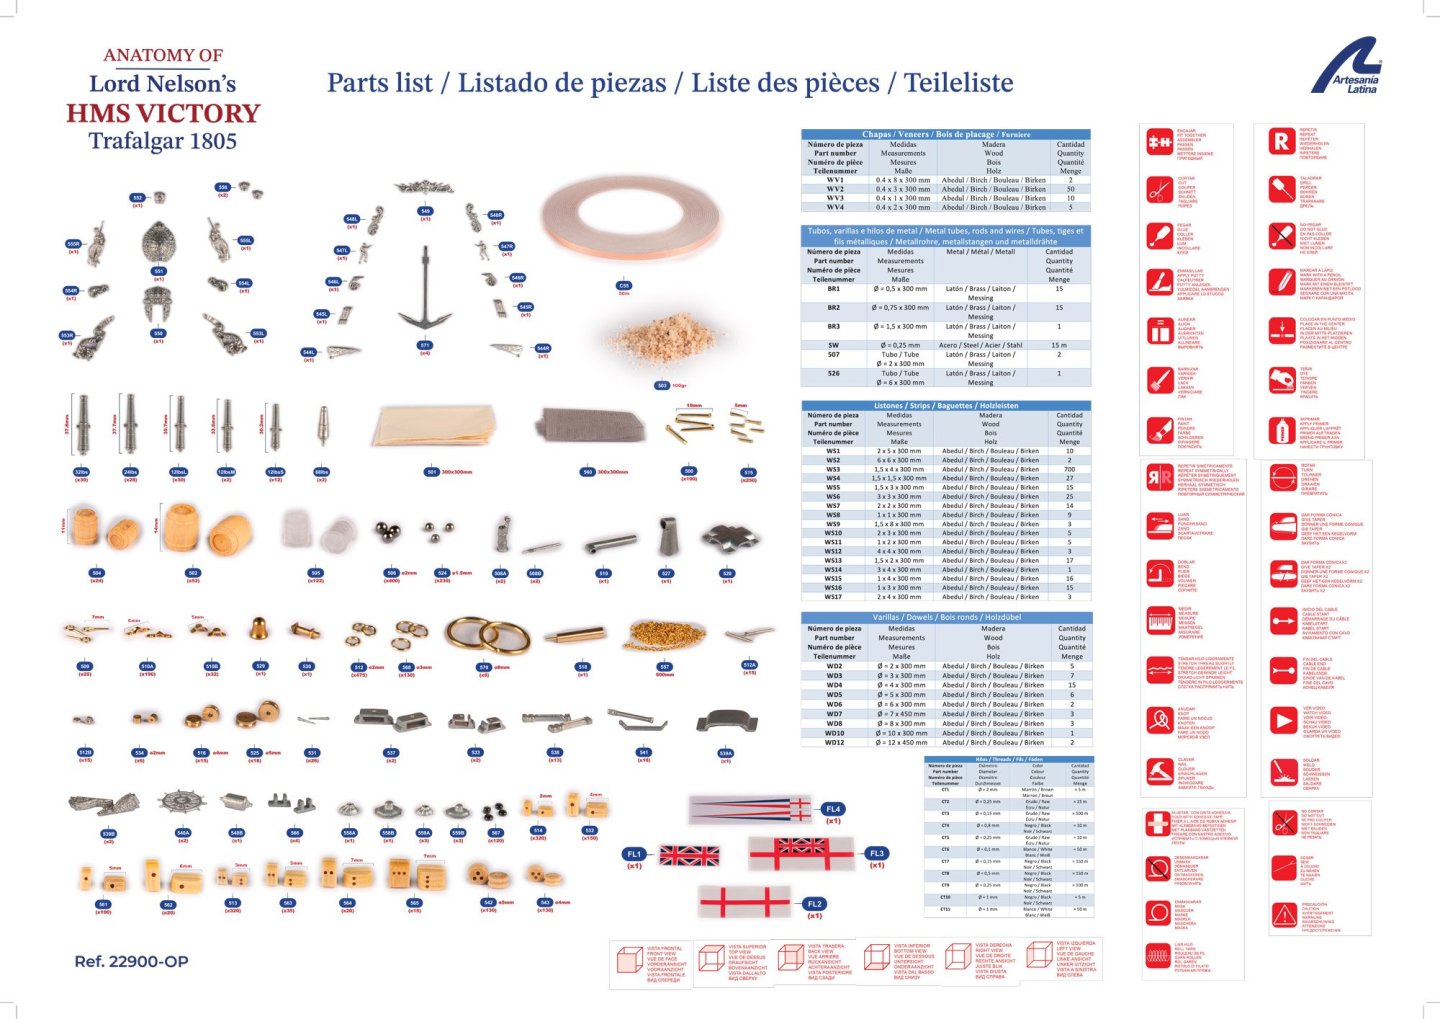
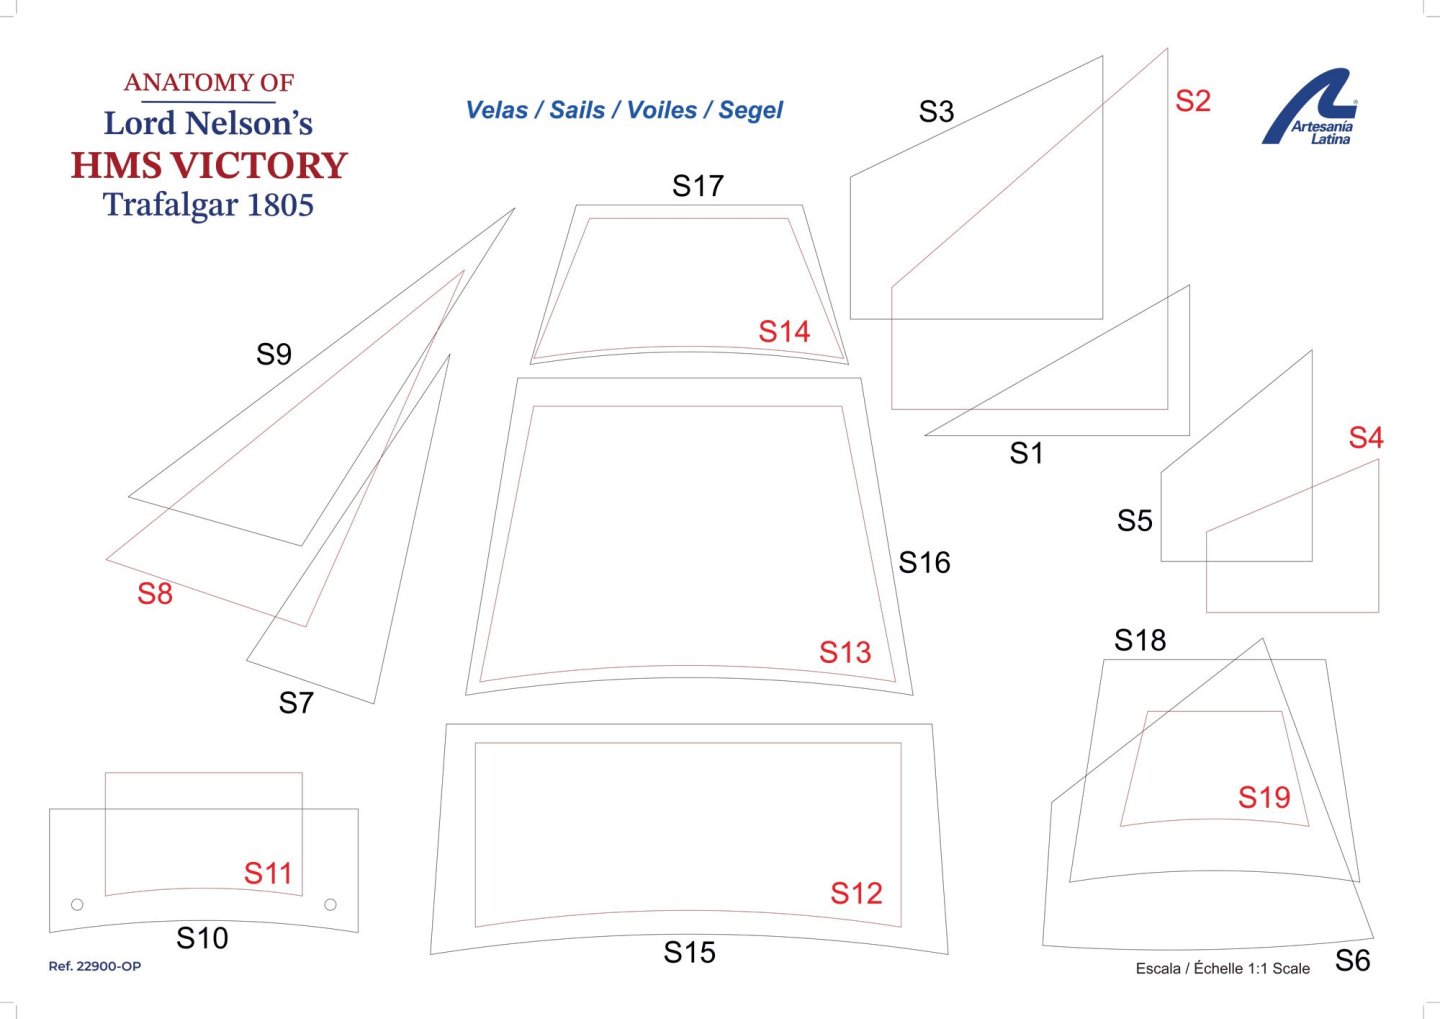
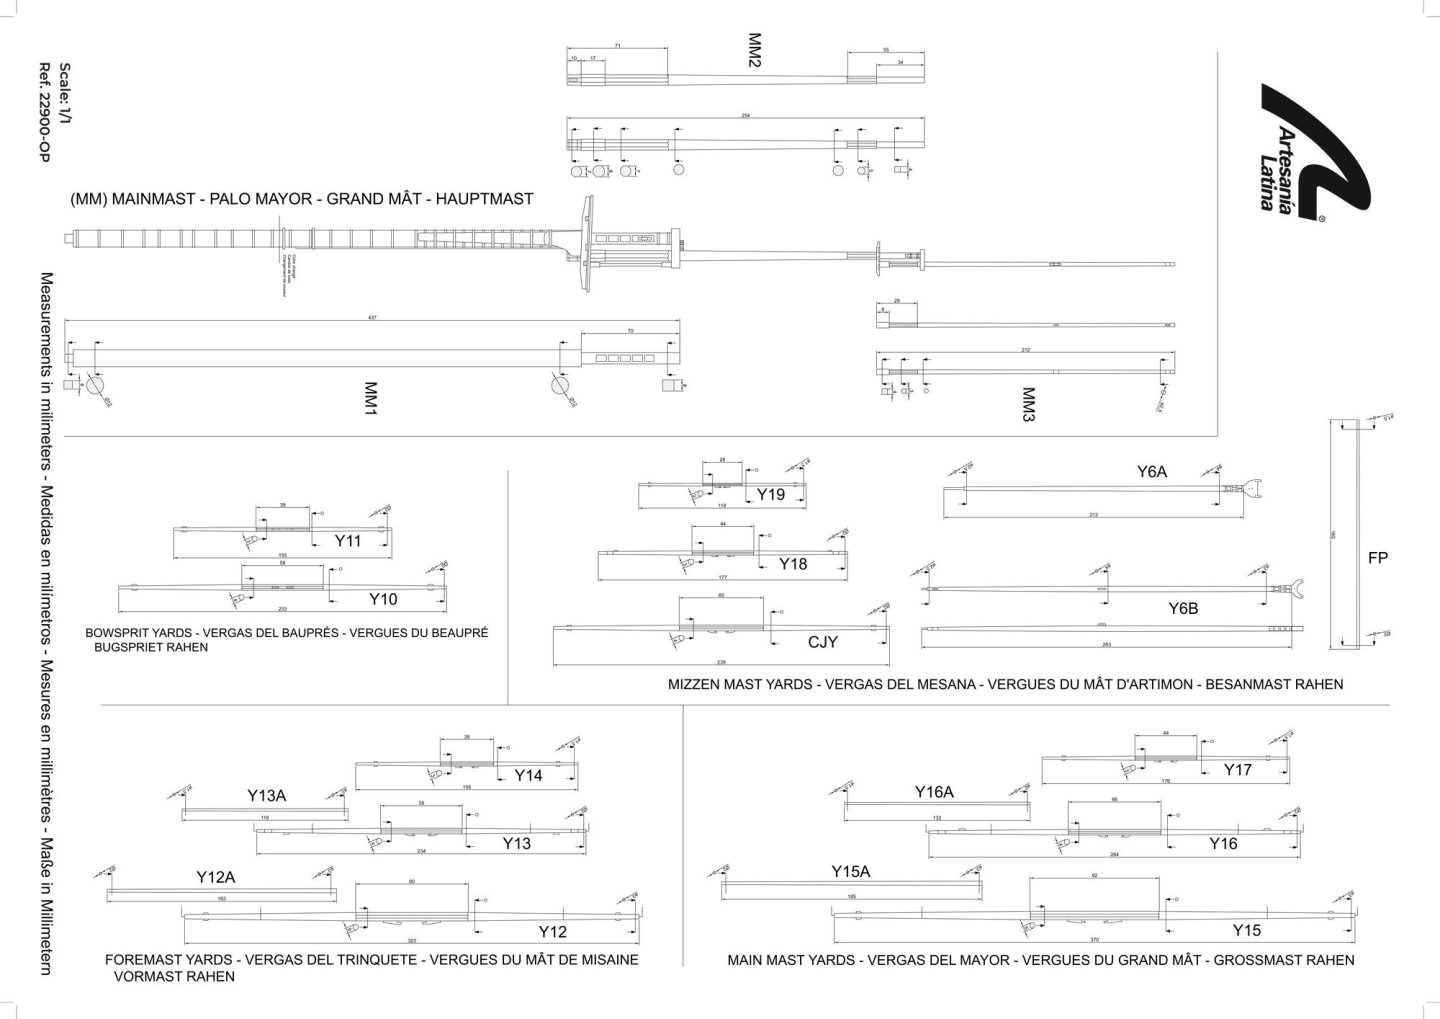
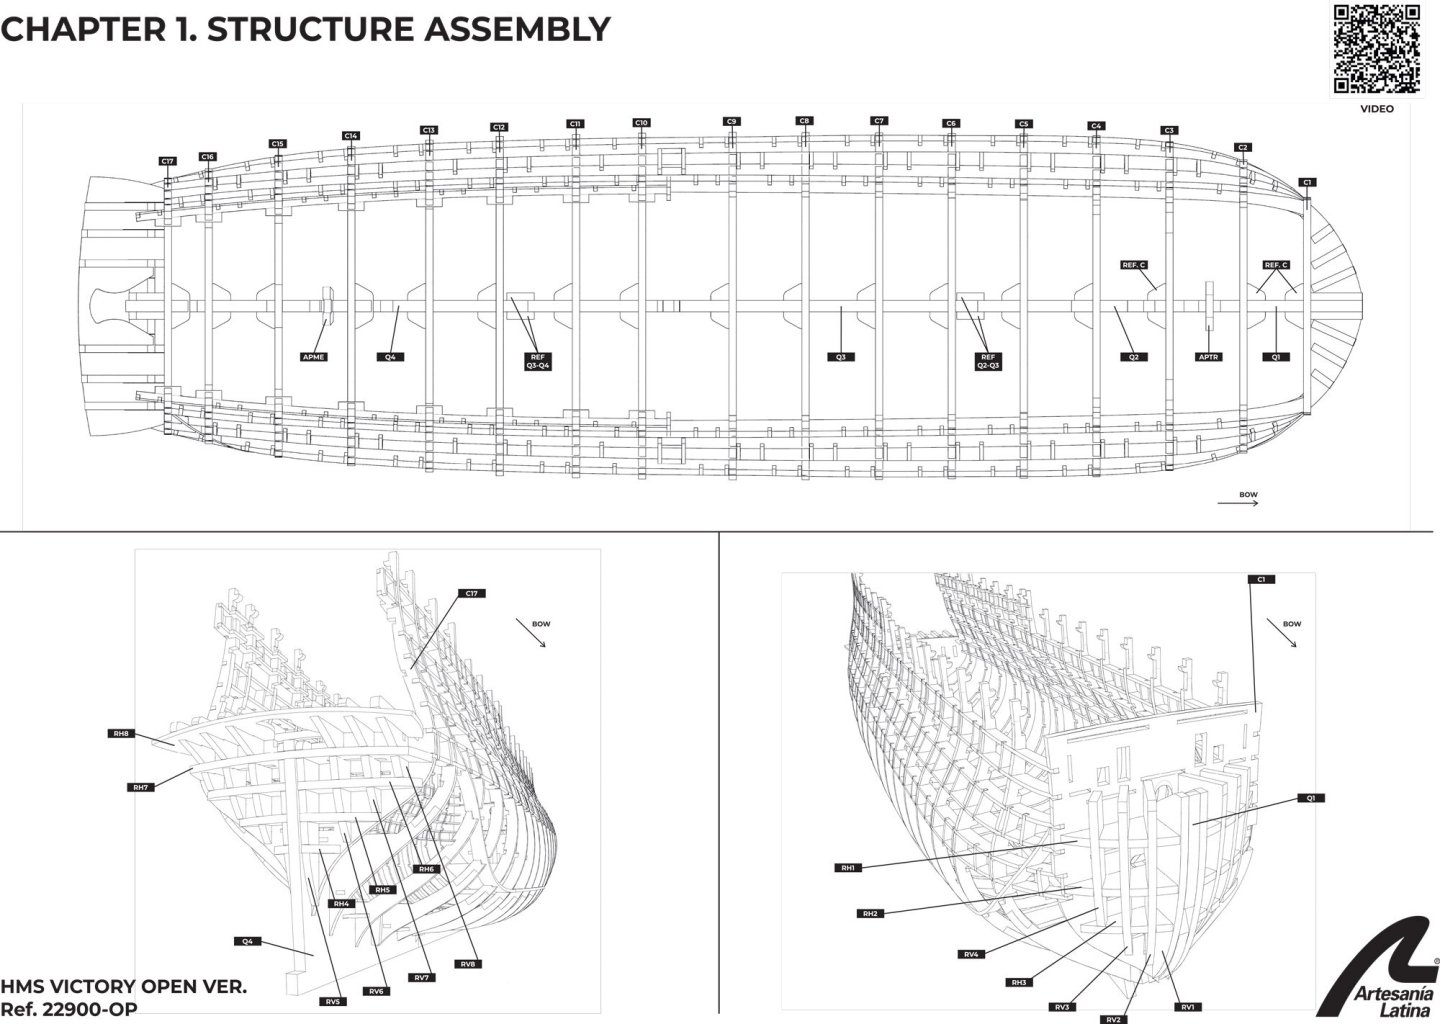
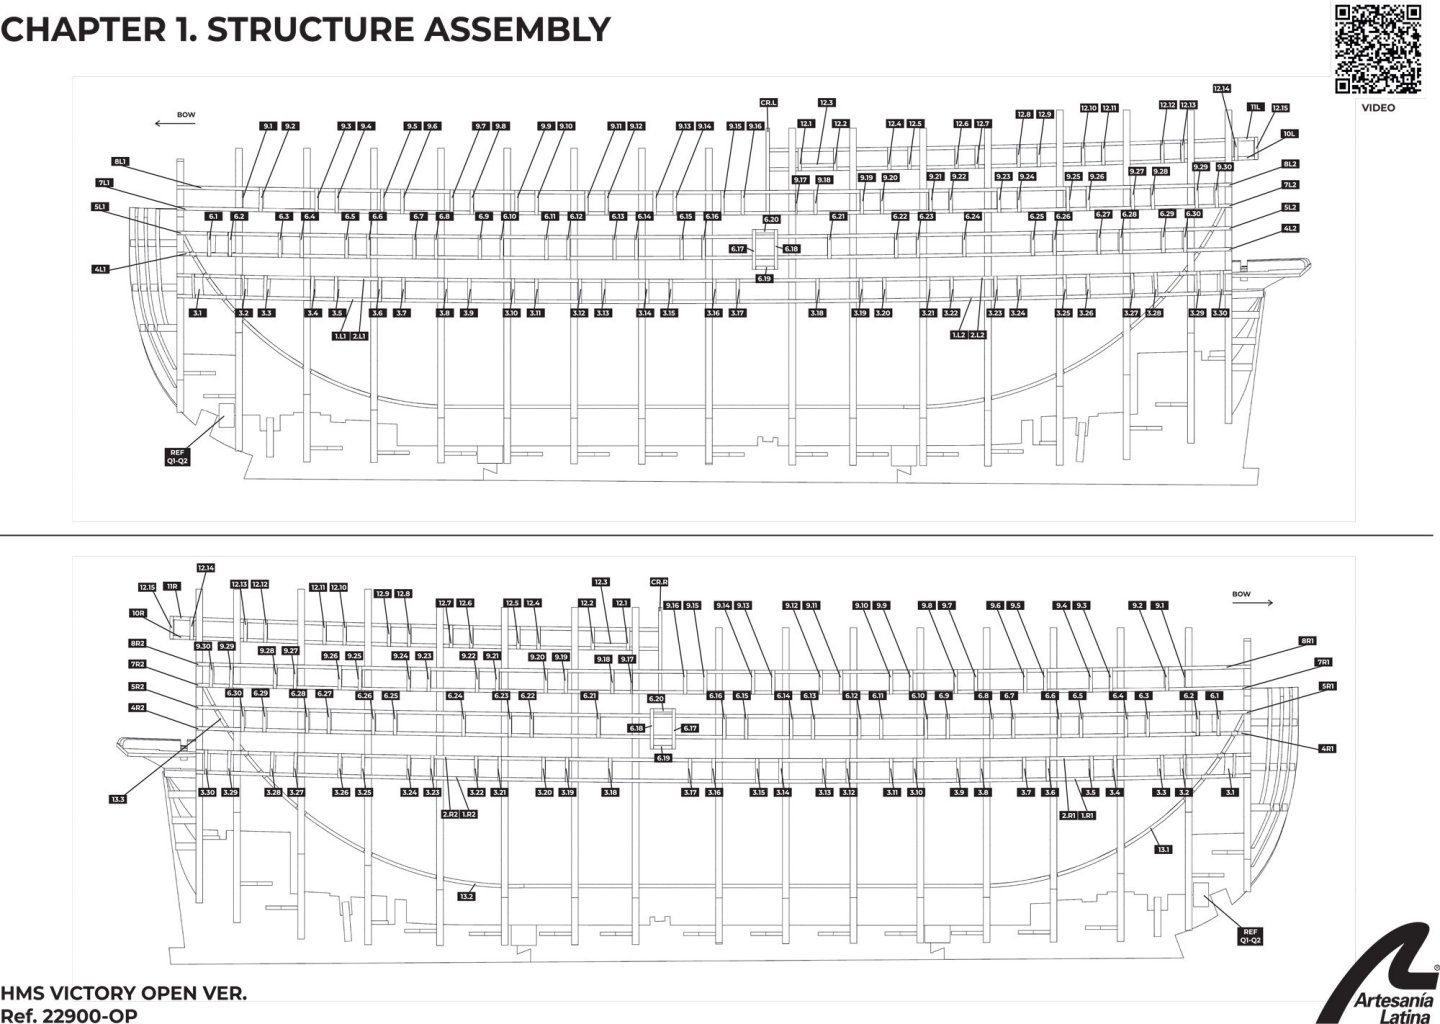
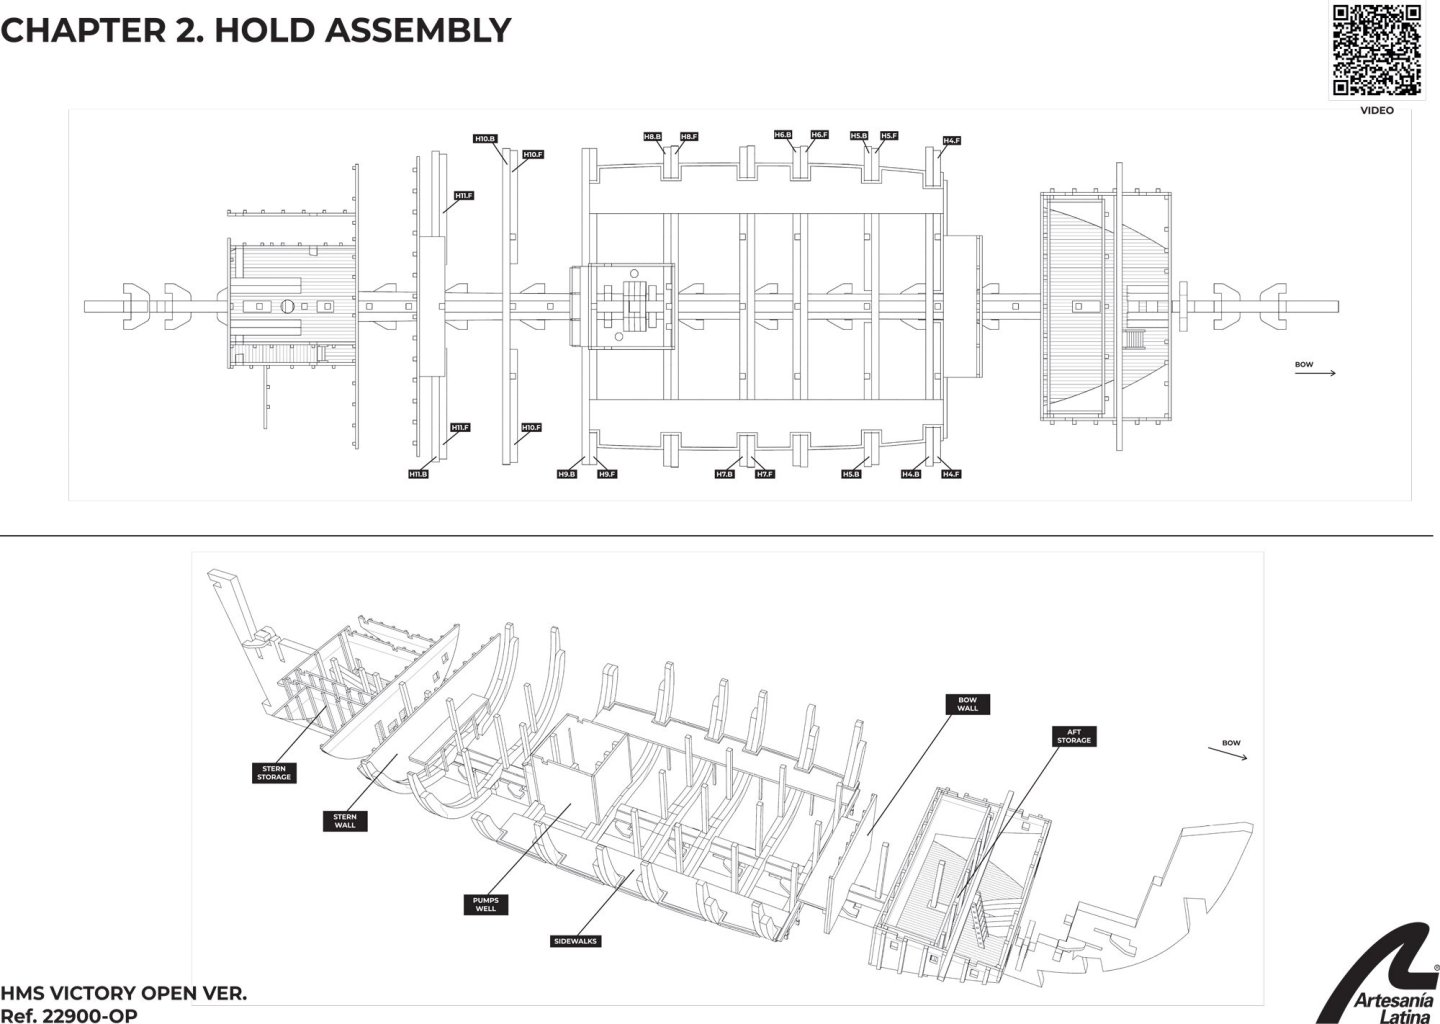
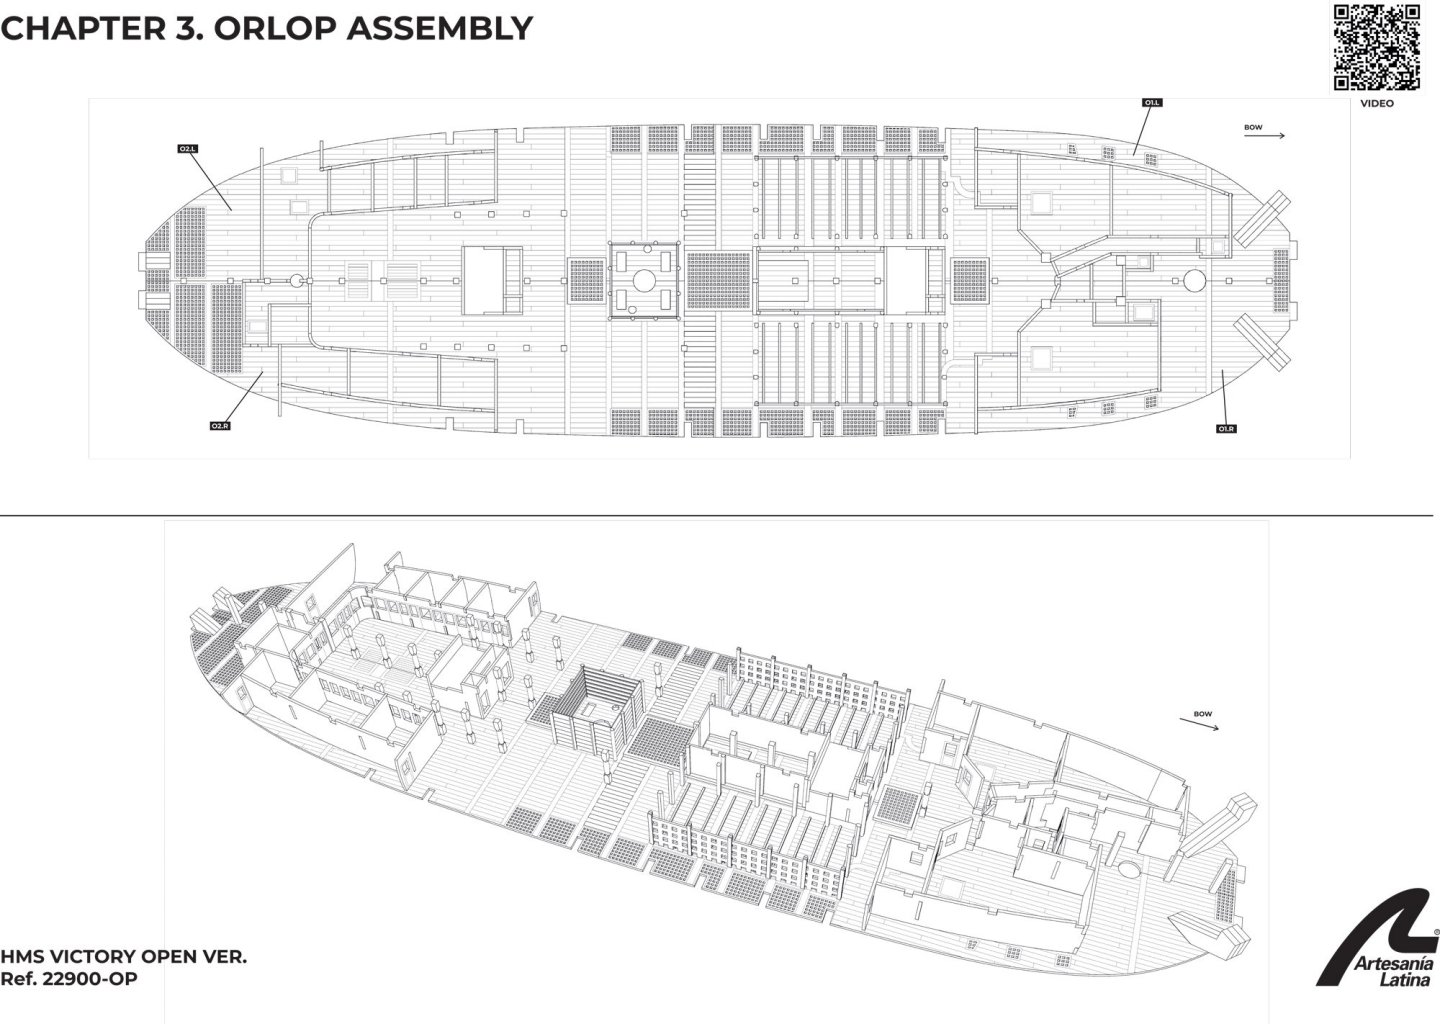
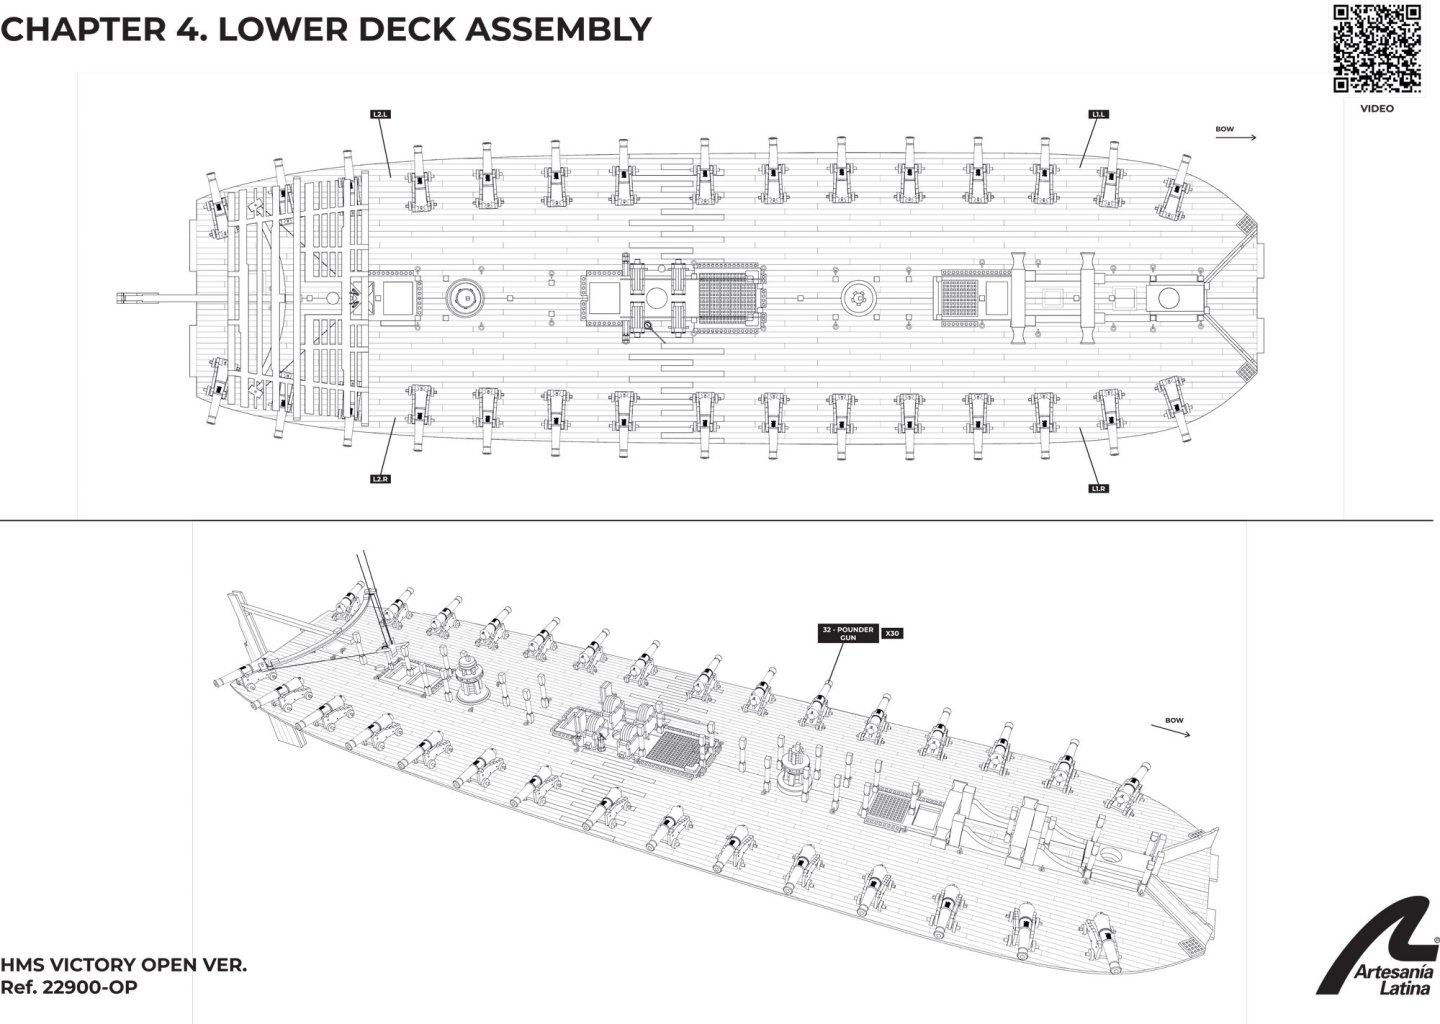
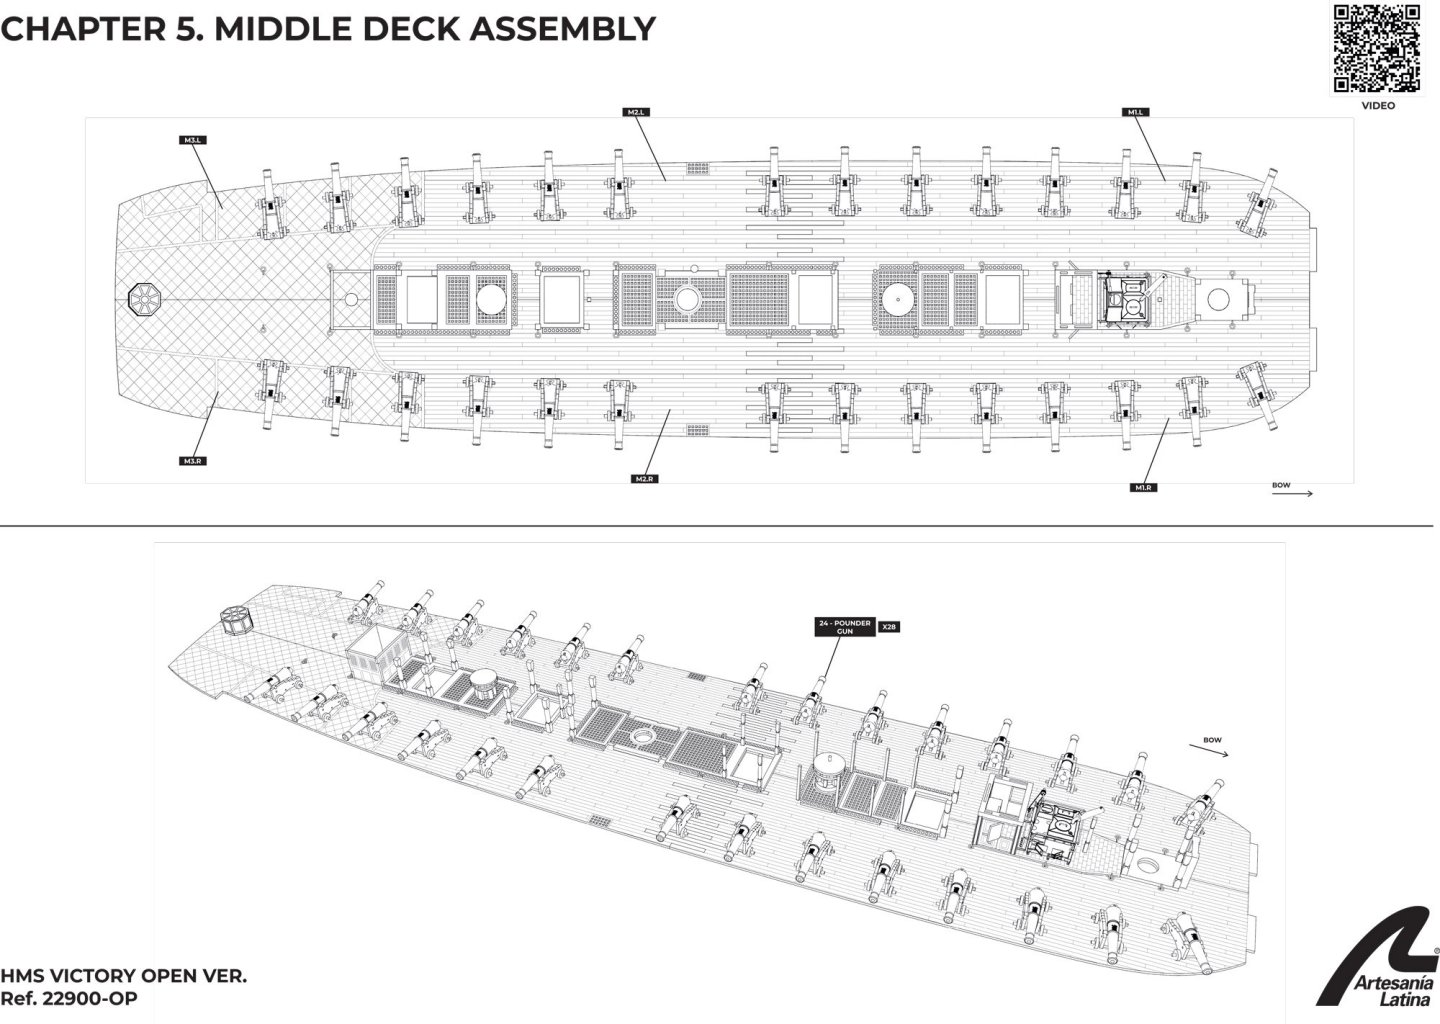
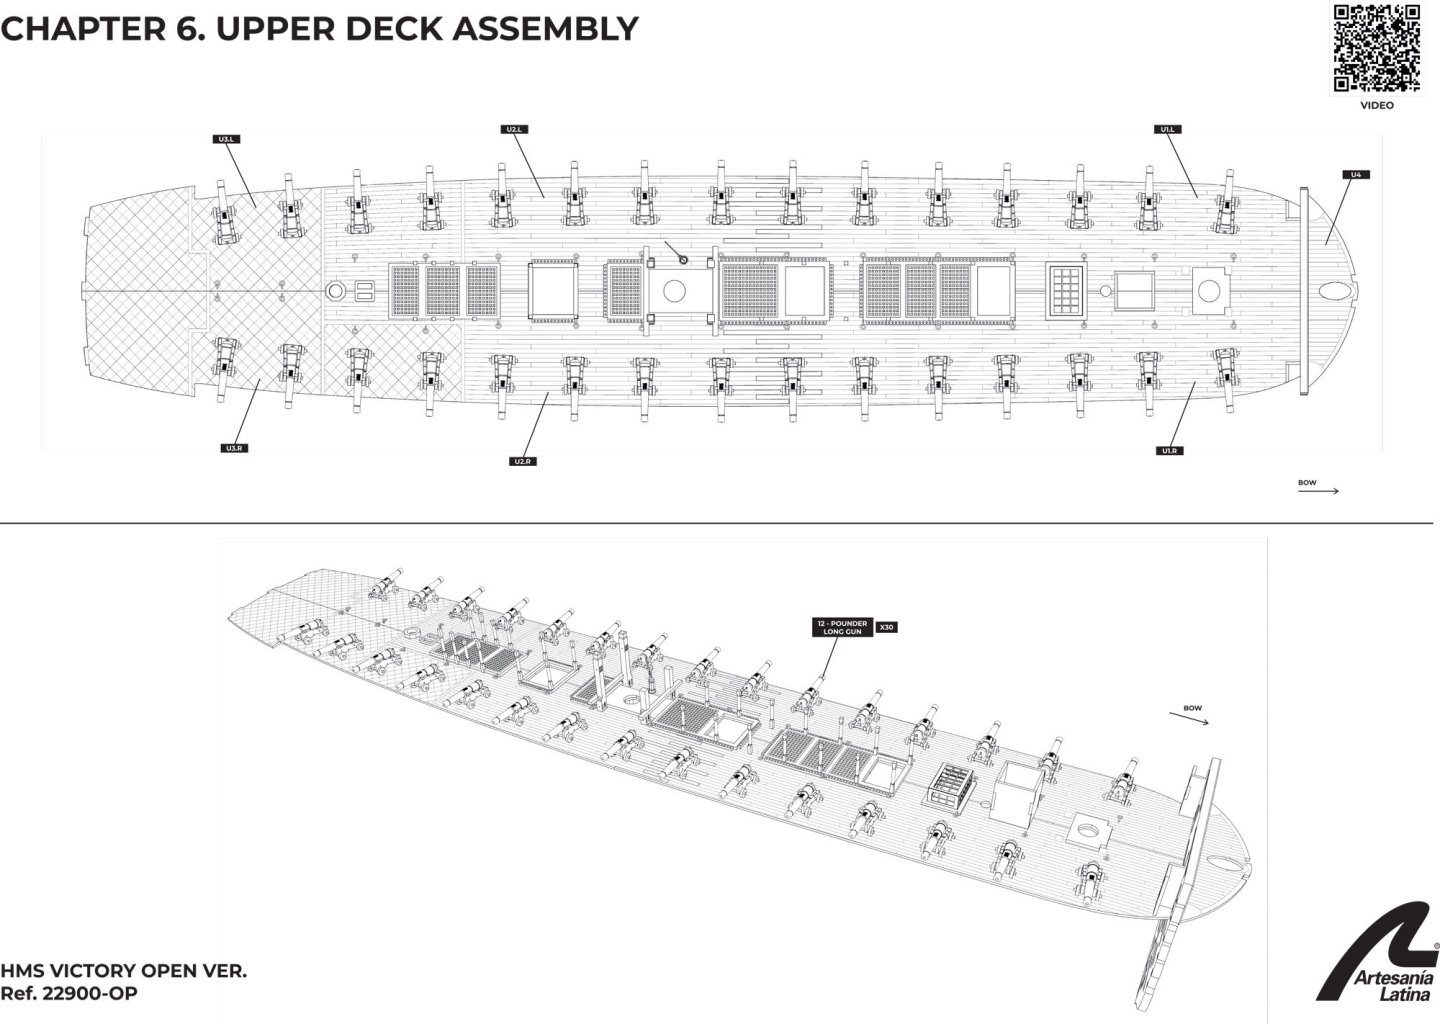
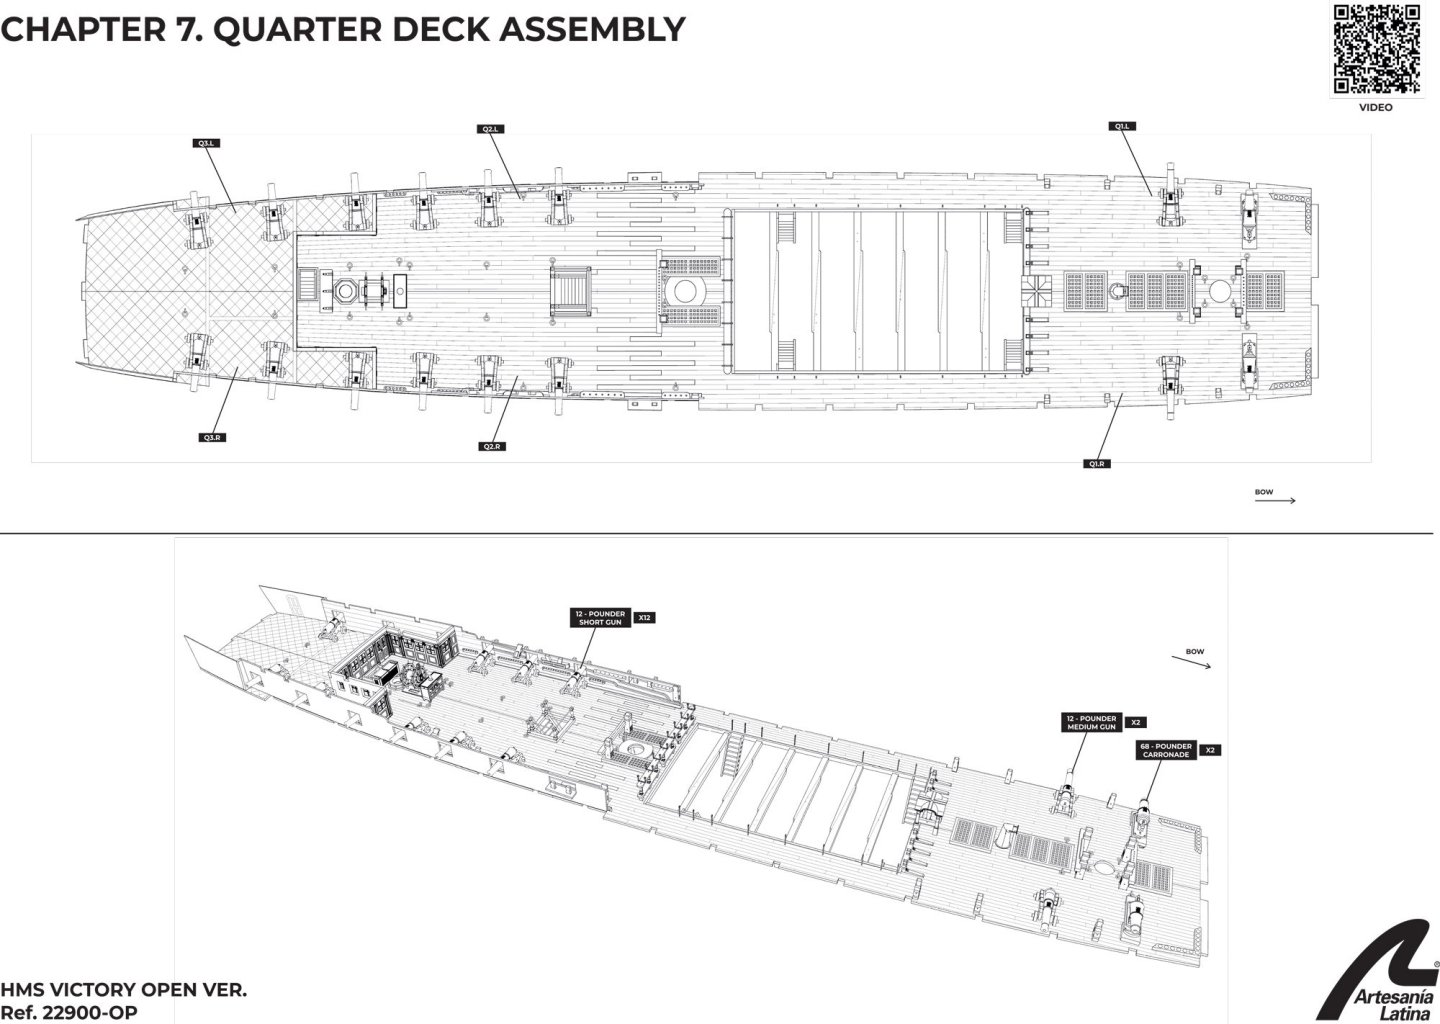
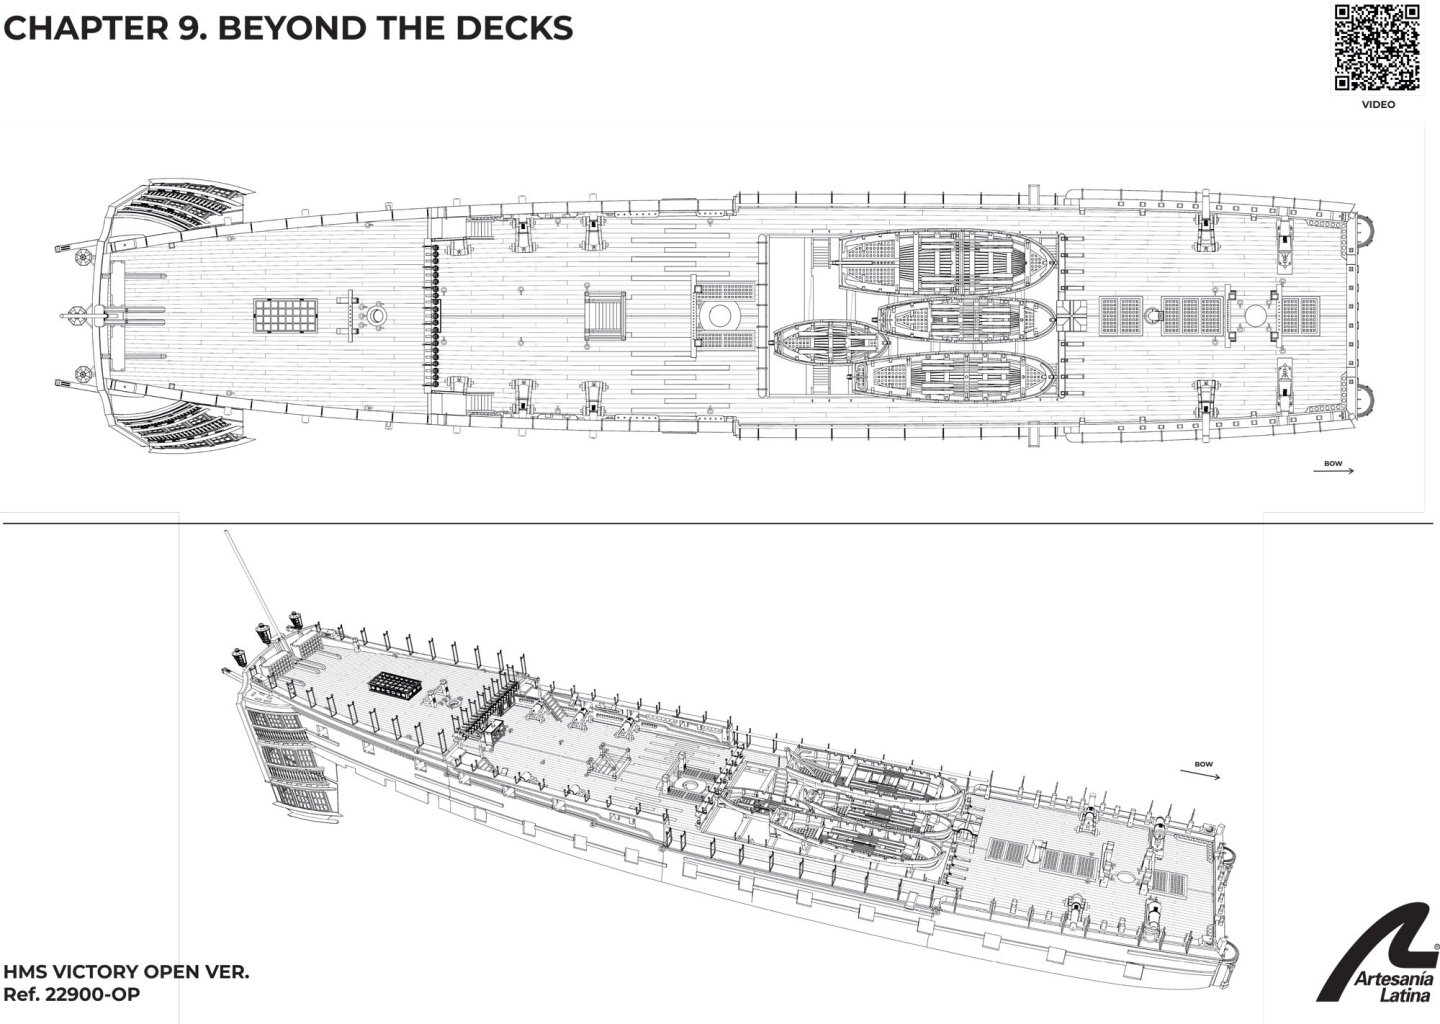
 1:84 HMS Victory Trafalgar 1805 – ANATOMY Version Artesania Latina Catalogue # 22900-OP Available from Artesania Latina for £1140 HMS Victory is a 104-gun first-rate wooden sailing ship of the line. With 246 years of service as of 2024, she is the world's oldest naval vessel still in commission. She was ordered for the Royal Navy in 1758, during the Seven Years' War and laid down in 1759. That year saw British victories at Quebec, Minden, Lagos and Quiberon Bay and these may have influenced the choice of name when it was selected in October the following year. In particular, the action in Quiberon Bay had a profound effect on the course of the war; severely weakening the French Navy and shifting its focus away from the sea. There was therefore no urgency to complete the ship and the signing of the Treaty of Paris in February 1763, meant that when Victory was finally floated out in 1765, she was placed in ordinary. Her construction had taken 6,000 trees, 90% of them oak. Victory was first commissioned in March 1778 during the American Revolutionary War, seeing action at the First Battle of Ushant in 1778, shortly after France had openly declared her support for Britain's rebel colonies in North America, and the Second Battle of Ushant in 1781. After taking part in the relief of Gibraltar in 1782, Victory, and the fleet she was sailing with, encountered a combined Spanish and French force at the Battle of Cape Spartel. Much of the shot from the allied ships fell short and the British, with orders to return to the English Channel, did not bother to reply. This was her last action of the war; hostilities ended in 1783, and Victory was placed in ordinary once more. In 1787, Victory was ordered to be fitted for sea following a revolt in the Netherlands, but the threat had subsided before the work had been completed. She was ready for the Nootka Crisis and Russian Armament in 1790 but both events were settled before she was called into action. During the French Revolutionary War, Victory served in the Mediterranean Fleet, co-operating in the occupation of Toulon in August and the Invasion of Corsica between February and August 1794. She was at the Battle of the Hyeres Islands in 1795 and the Battle of Cape St Vincent in 1797. When Admiral Horatio Nelson was appointed Commander-in-Chief of the Mediterranean Fleet in 1803, he hoisted his flag aboard Victory and in 1805 took her into action at the Battle of Trafalgar. After 1824, she was relegated to the role of harbour ship. In 1922, she was moved to a dry dock at Portsmouth, England, and preserved as a museum ship. She has been the flagship of the First Sea Lord since October 2012. Abridged from Wikipedia The kit Well, we already had one Victory kit this year, from another Spanish manufacturer, with a skeletal theme, so we definitely weren’t expecting this ANATOMY version from Spanish company, Artesania Latina. Quite a few jaded modellers decried ‘yet another HMS Victory’, but this one promised to be different…by Artesania themselves. Working with a nod to Artesania’s old ‘Anatomy of HMS Bounty’ kit, revised around 10 or 11yrs ago, this kit was quite unexpected, but promised to offer the modeller a complete interior hull model, with every detail from the lowest ballast and orlop deck, through to the smallest details on the gun and upper decks. The represented scale was a little unusual too, not being a run of the mill ‘72 or ’64. Artesania chose to release their kit in 1:84, which is a tad larger than the other release from this year. This kit is presented in a robust and glossy top-opening box which is specific to this release. The sides are adorned with images from the inside of the completed ship, and they do point to what appears to be a model with a very realistic interior. Artesania has also designed the model so that a complete lighting set can be installed, and indeed they have also released such a set of flickering lights to be fitted in this model. I have that set here and will post something about this later on. Now, instructions. This is quite early to touch on this subject, but at this point I will tell you that this kit has no paper instructions. The only paper aspects of this kit are a large and colour sheet showing the completed model, and a series of exploded maps and deck plans (there are some paper guilds and templates too). Artesania has instead created a series of videos which that have posted on their YouTube channel. As I write this, there are approaching THIRTY videos available, with a final number which is supposed to be around NINETY videos! I have watched all the videos so far, giving me an idea about how this model is to be built. A lot of effort has gone into showing the minutiae of the build, as it should, part by part. The videos are concise and easy to follow, but if you’re not used to building by video, it’ll have to be something you’d need to get used to. The interior aspect of the model does necessitate a different style of construction, right from the outset. At this point, I’ll give you some text from AL, explaining a little more about this kit. I’ve highlighted the completed dimensions: “The new Anatomy version of HMS Victory, the legendary 18th and 19th century British ship of the line, Lord Nelson's flagship and sailing's most celebrated ship, is an impressive and majestic wooden naval modelling kit for expert modellers. The model is completely faithful to the original ship as she fought at the Battle of Trafalgar and includes full interior detail on all decks, visible through the open right side of the hull. This model is officially licensed by the British National Museum of the Royal Navy. Assemble your 1:84 scale wooden model of the Anatomy of the HMS Victory, our extraordinary model of the 18th and 19th century English ship of the line. Its construction system using false keel and frames brings the assembly of the miniature closer to the construction of the real ship. Once built, it measures 1,202 mm long, 470 mm wide and 805 mm high -875 mm with the base. This Anatomy will allow you, while assembling the model, to examine in depth the construction and structure of the ship, as well as the very high level of detail. The model kit contains thousands of pieces of high-precision laser-cut board, hardwoods, brass and cast iron. As well as copper lining for the hull, cotton sails sewn and ready to be placed and a wood working base. Not forgetting the beautiful methacrylate base with the name in gold to display the model once finished. In order for this fantastic Anatomy of HMS Victory to be a completely faithful model of the original replica, we recommend... First, paint it with your Specific Set of Water Based Acrylic Paints (277PACK11) sold separately. Secondly, to add your two 1:84 scale figurine sets, also sold separately, which will be available soon: Royal Navy (22900F1) y Sailors 1700-1815 (22900F2). And finally, illuminate the ship for even more realism with the 122 sail effect lights of the HMS Victory Model Ship LED Lighting Set (22900-LED).” As I’ve already said, this kit is very heavy. The shipping weight to the UK was around 10kg, albeit some extras were added, but it does give an idea of the weight of the product. Artesania put the parts count of this kit at around 10,000, so there's plenty enough to satisfy a modeller who likes a long term project. As it would be beneficial to show you the contents of the printed material before the actual timber, this is what we'll look at right now. Instructions As I've already said, Artesania are providing the actual instructions as a series of videos. You can find those HERE. However, you will need a series of profiles and maps which show the layout of the decks etc. These are provided in the kit, as well as those card templates you'll need for installing the wales etc. Plans are included for the masting and sails too. To be continued....
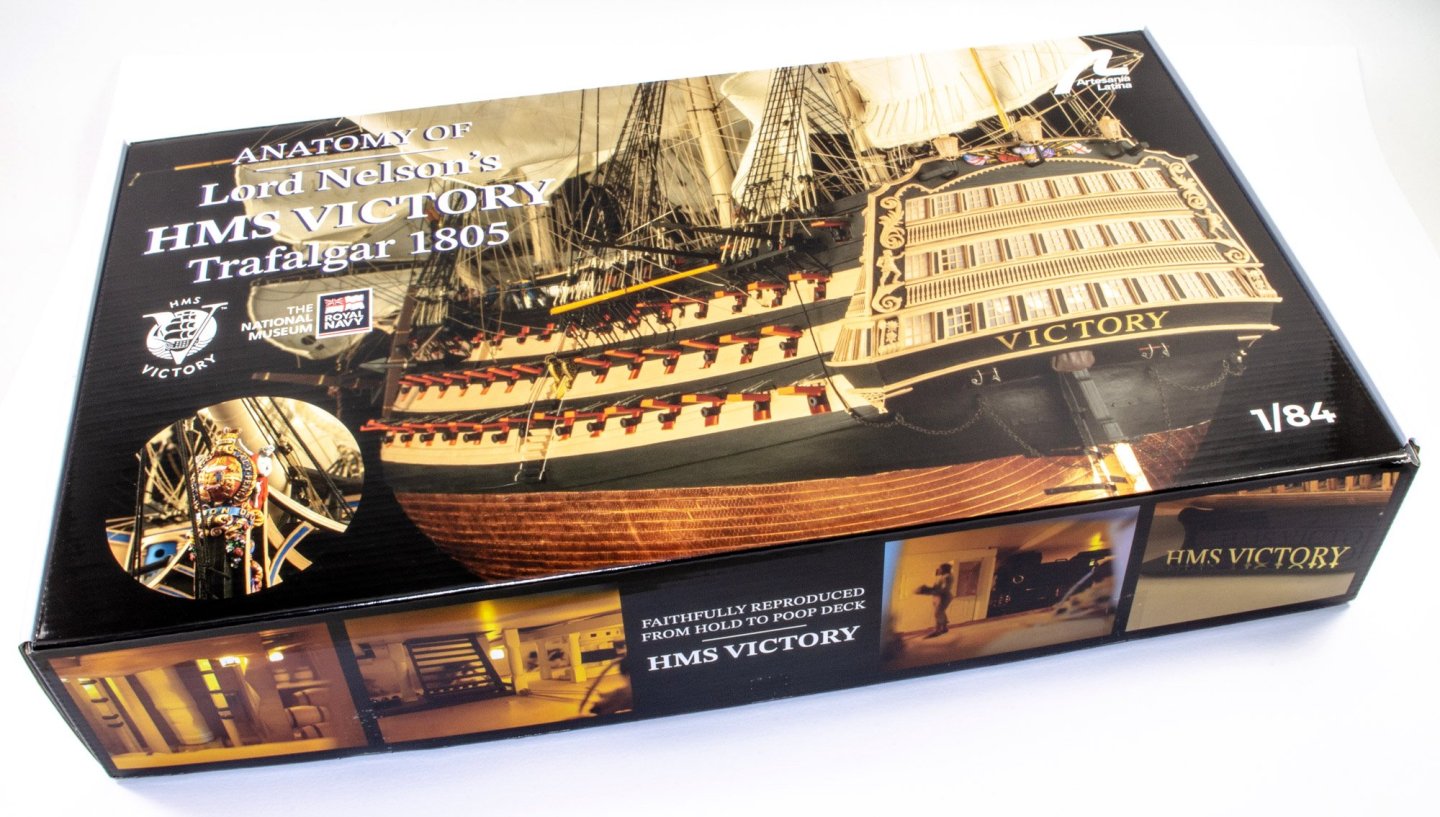


-
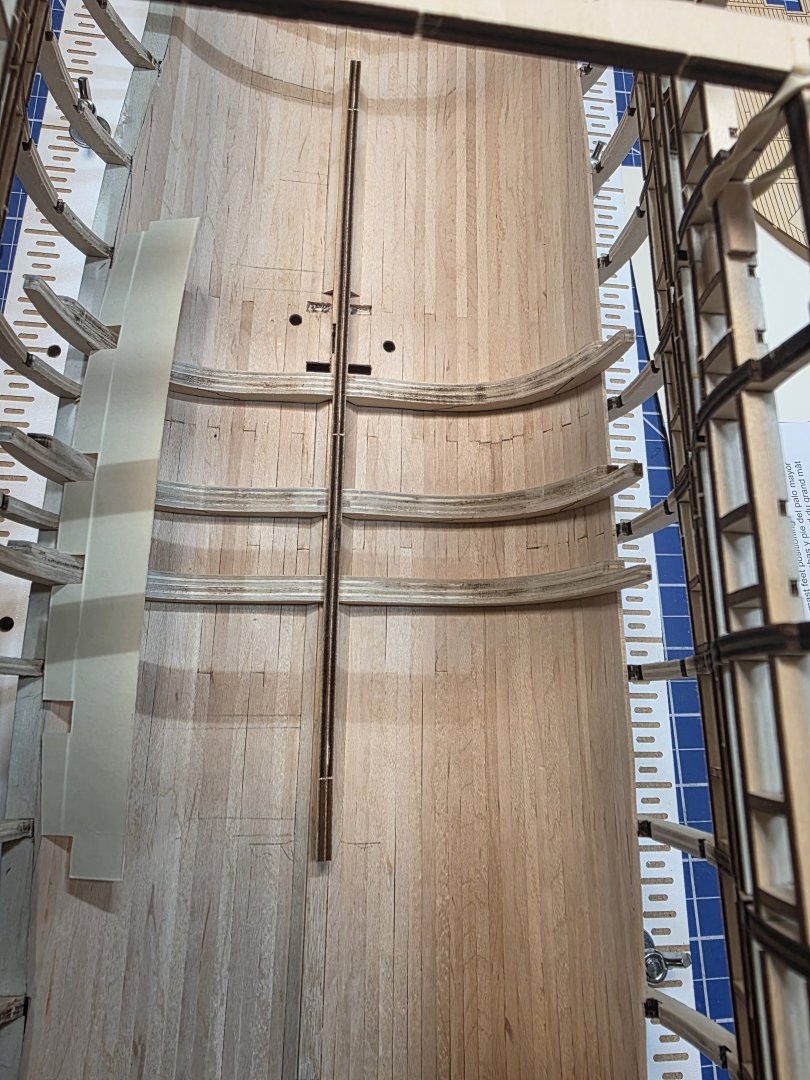
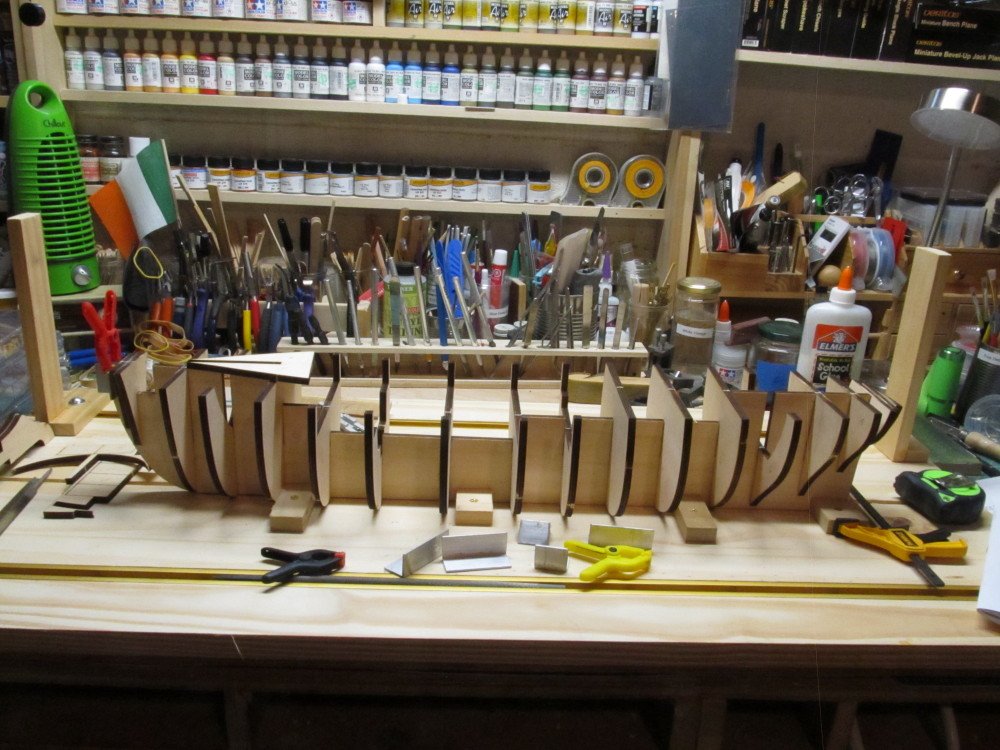
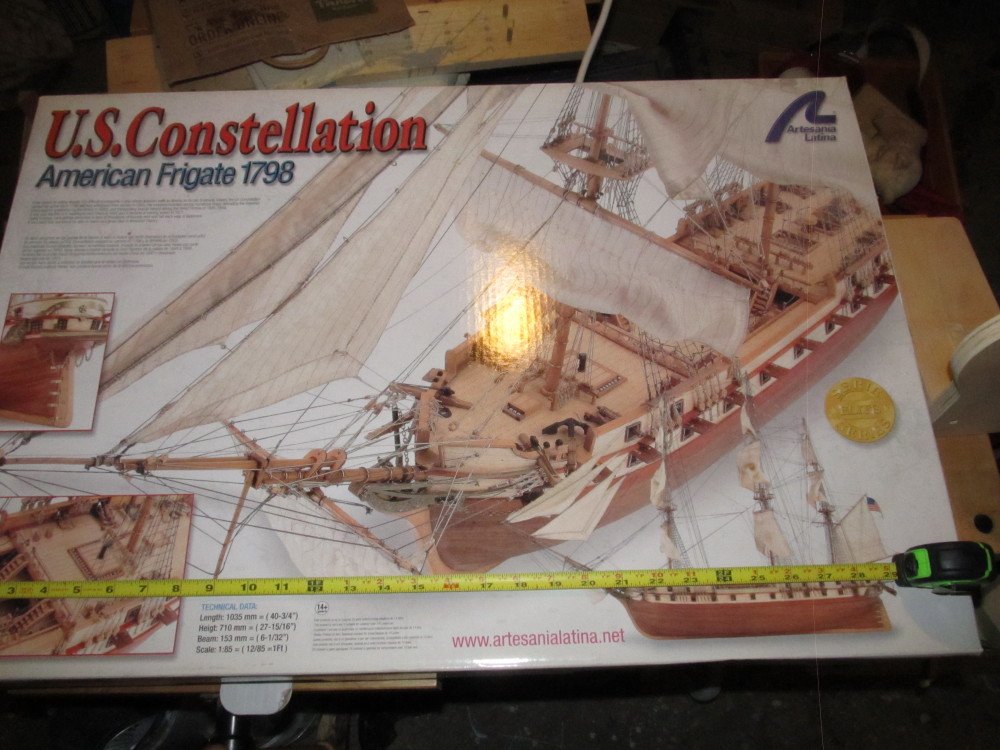
 For my next ship build I decided to finally drag the Artesania Latina US Constellation kit out of my stash and start building it. It was given to me by a good friend as a birthday present 9 years ago and has languished on the shelf since then; partly because it was intimidating, but mostly because I did not have the work space big enough to set it up and build it and lastly I did not know where I would display it once built - still don't but that will be dealt with later on. Even the box it comes in is huge and intimidating. I first constructed a build board that will hold it. Unfortunately I routed a groove along the centerline of the board to hold the keel but when the keel sits down in the groove the bulkheads don't seat fully, so I set it flush on the board and screen small cleats alongside the keel to keep it upright and straight. Some startup photos are below: So far I have dry fit all the bulkheads, sanded them as needed and am now slowly gluing them in place use small pieces of aluminum angle to keep everything perpendicular to the false keel. At this point everything is just dry fit
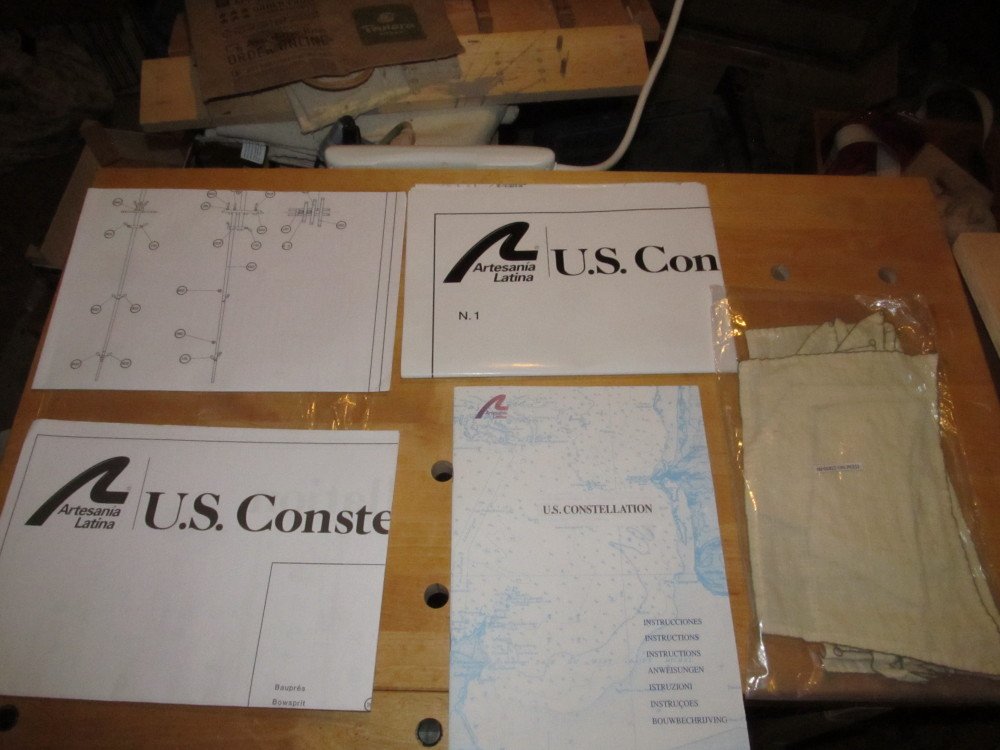

-
 Welcome MSW to my Swift log. This is my first wooden ship model. My only other model ship was the USS Arizona, which suffered an inglorious fate by an M-80 after being stepped on (by my sister I think, but she never fessed up). I'm no Amish furniture craftsman, but I know my way around tools well enough to jump into this hobby. My first attempt was going to be the USS Constitution - 1:76 (MS2040). Fortunately it was backordered (Christmas gift from my pop). After previewing the 80 or so pages of instructions, I thought it prudent to start with something a bit easier. I chose the Swift 1805. So here we are. Initial thoughts: Upside: Upon opening the package, I was surprised (and a bit relieved) to see a good mix of "laser cut" wood, along with a bunch of neatly tied lumber and well packaged miscellaneous parts made of metal, wood, or string/line, and pre-cut sails. I say relieved because, being new to this hobby, those parts are less intimidating than seeing neatly bundled stacks of wood in various forms. The parts were all present and in good shape (no excessive warping), seemingly detailed instructions existed, as did a DVD (!). I've found that there are several versions of this model. This one does not have the 2nd lower false deck. Downside: The DVD and instructions. The instructions and other videos (tips on painting, shaping the masts, etc) were available on a DVD. It's probably expected that wooden ship kits would be lagging with technology - especially given that this kit was a 2016 version (it's actually pretty cool how timeless the actual models are). I had to dig up an old family laptop that had a DVD drive, to print the instructions (that presented it's own set of issues). Once printed, the instructions appeared to be very robust, until I realized that rather than extensive details, I had about 2 or three ambiguous sentences presented in about 20 different languages (the Italian to English translator was no master linguist). The illustrations were also a bit lacking (for a beginner). General Build Thoughts: I didn't think I'd create a build log, because of the time (I barely have enough time to work on the Swift), but I'm trying as I can. As I start this log, I'm currently working on creating the door hinges (completed the planking of the hull and deck, and the first of the hatches, pics to be uploaded). As I progress with Swift, I've found that the instructions were typically just vague enough to somewhat confuse me, but left enough general direction for completion via a YouTube search, or a great online group, like this one. I also have come across some instruction errors (for example, the parts needed for the hatch cover). However, they've been easy to spot and remedy, and it seems there are enough spares provided (with planking and bundled wood). The Swift is not hard, but presents a lot of challenges which are exacerbated by its scale (small) and shape (curvy). A lot of my build was slowed by lacking the appropriate tools. I was quick to order things I needed but many were on back order. Being a big believer in the right tool for the job, waiting for backorder fulfillment stalled my build significantly at first - I never realized how many different clamps were available 🙂 I find this hobby to be a problem solving effort. Each section is akin to a new problem in need of a solution. The tools, keel, bulwarks, fairing, planking, painting, hatches, hinges... all take some time to asses, plan and solve. At first I found it to be a bit of PIA, but I find myself enjoying the problem solving aspect more and more. I often find myself running out to my girls upon completing a particularly fun/tricky build ("check out this planking!"). They are polite and make believe they enjoy it too 🙂 [I'll update my build periodically (I'm not retired and have young kids). I'll catch up my log with my build and plan to complete both].

- 111 replies
-
- 5
-
-
- Swift
- Artesania Latina
- (and 3 more)
-
 Well kids, the journey has started. This my first "real" ship. My first was just a small boat to get a feel for things. I learned that near enough is not good enough, it has to be exactly right, and if it's exactly right, then that's near enough. The first thing I noticed when opening the box was a distinct lack of instructions. I suppose they can't include precise instructions because of the many different way of doing things. I'm sure I'll be relying heavily on the very knowledgeable members of this forum. Firstly, I dry fitted the bulkheads to the keel. There were a few that were too low so I had to build them up a bit. There were a couple that were too high and needed to be sanded back a poofteenth, but it has to be right. Today I glued in the first bulkhead, squared it up with aluminium angles. Looks good so far. I have a question regarding strengthening the bulkheads. I read here that a member had trouble when he put blocks in to strengthen everything he pulled the keel out of alignment. Another member had a problem with the blocks when he was planking. Presumably the blocks got in the way of the planking clamps. Is it necessary to strengthen the bulkheads? They are only 3mm thick. Thanks everyone, I'm really looking forward to this.

-
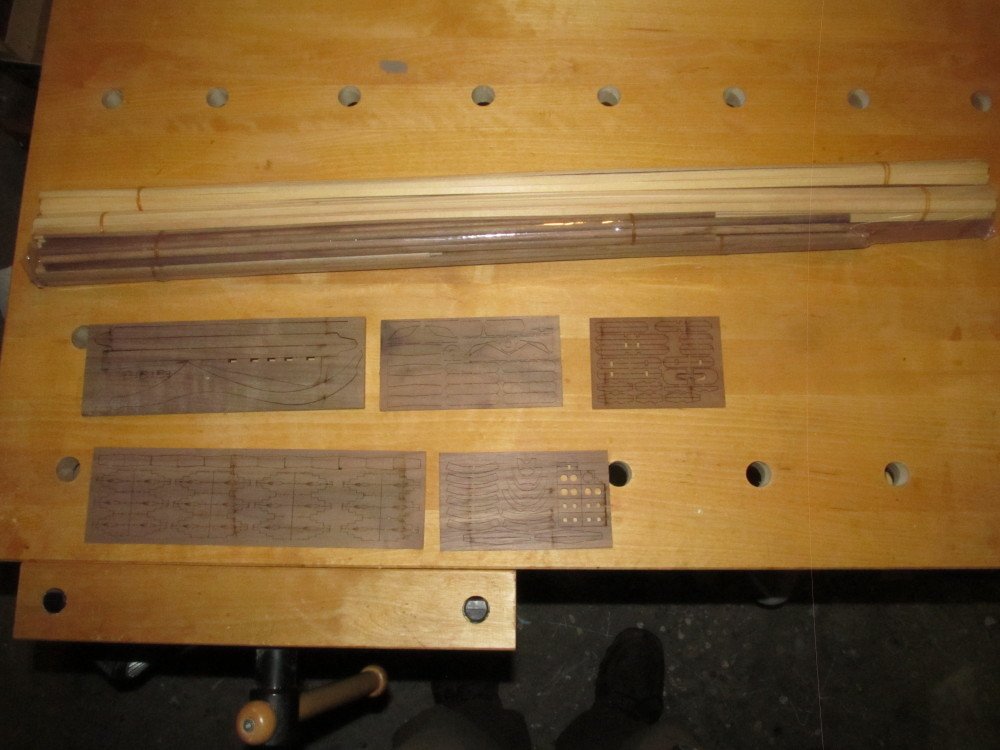
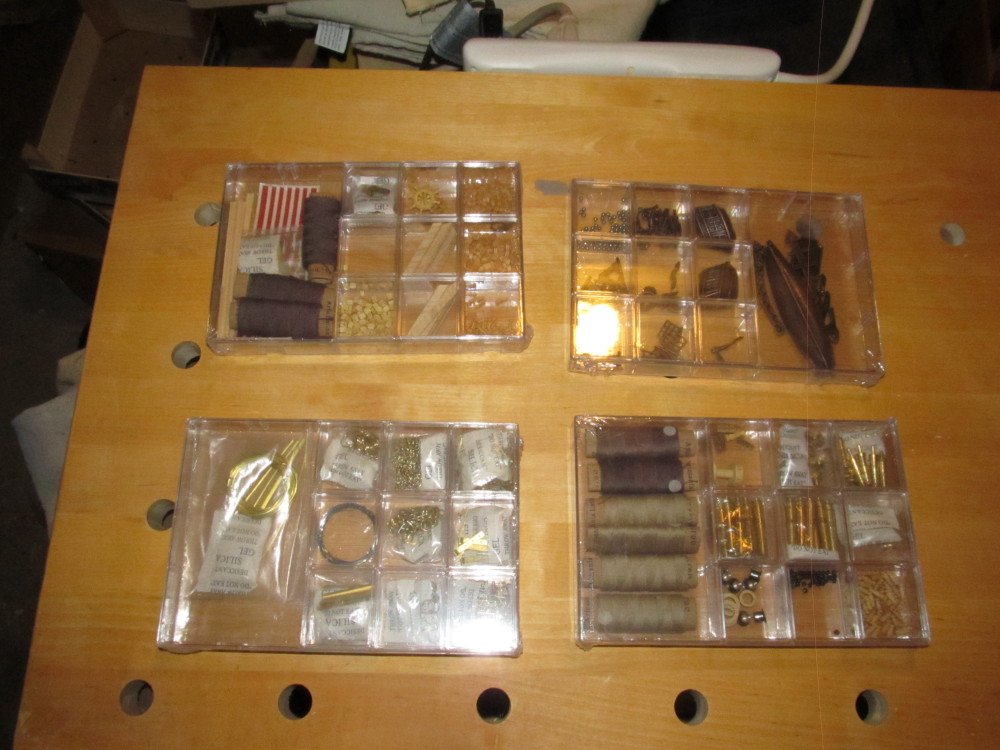
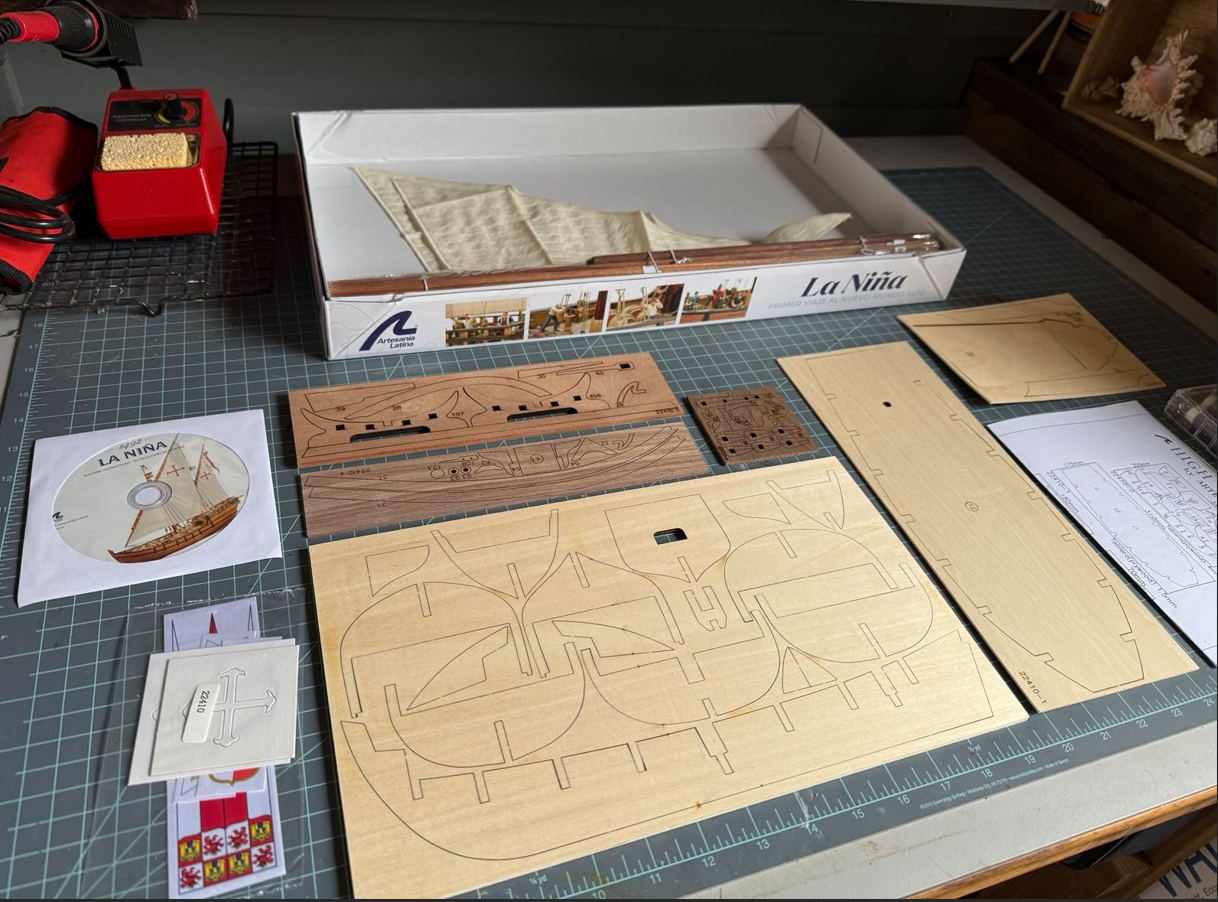
 Well, here we are—my first dive into ship-building, and the package just landed on my doorstep today! I’m a total rookie in this hobby, so here’s my unfiltered take straight out of the box. I’ll be honest: I was a bit underwhelmed by this kit. From what I’d gathered online, some builders used to get a detailed 1:1 scale ship plans—nothing like that here, though. Zero. Just a single sheet listing the panels. No paper manual, no basic “here’s your stuff” checklist. Instead, they threw in a CD. A CD! In 2025? My PC doesn’t even have a CD drive. Guess I’m stuck digging around online for help. The parts themselves? Mostly solid, though one panel showed up with a slight bend. And the sails? They came folded with obvious creases, when they could’ve just been laid flat in that big box. Anyway, before I dive into the build, I’ll try to find a list to confirm I’ve got all the pieces. Once that’s sorted, I’ll be documenting this whole adventure here—bumps and all. I’m counting on you veterans out there to toss me your best tips, fixes, or any upgrades to make this ship shine. Let’s do this!
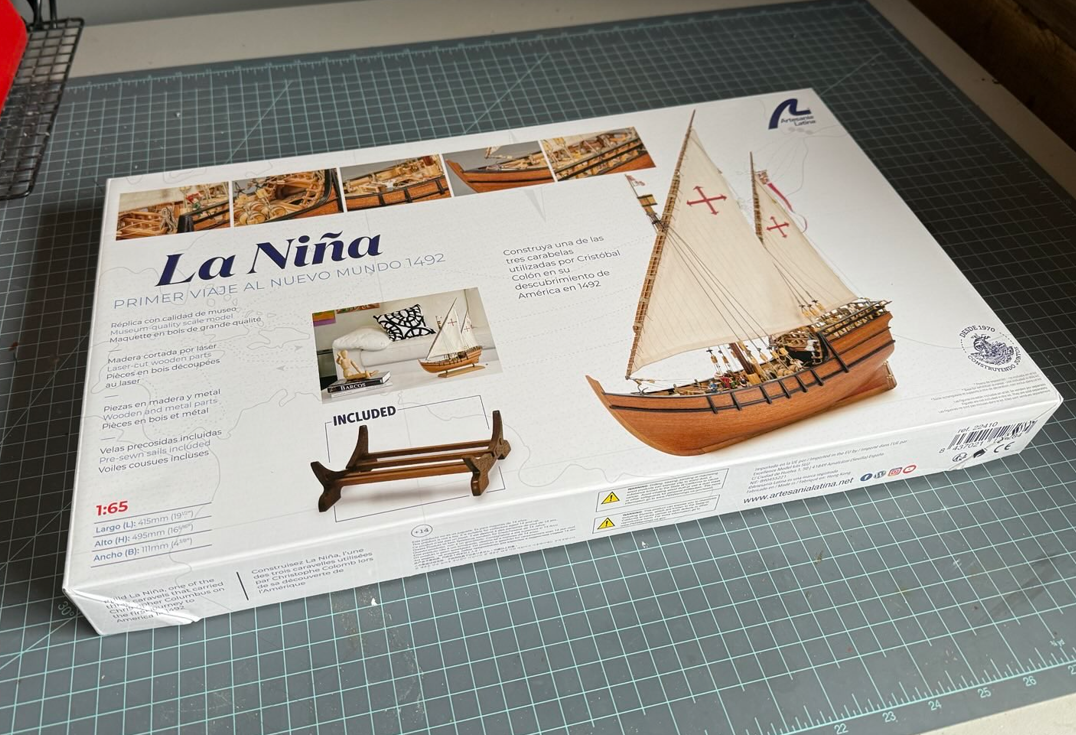
- 47 replies
-
- 1
-
-
- La Nina
- Artesania Latina
- (and 1 more)
-
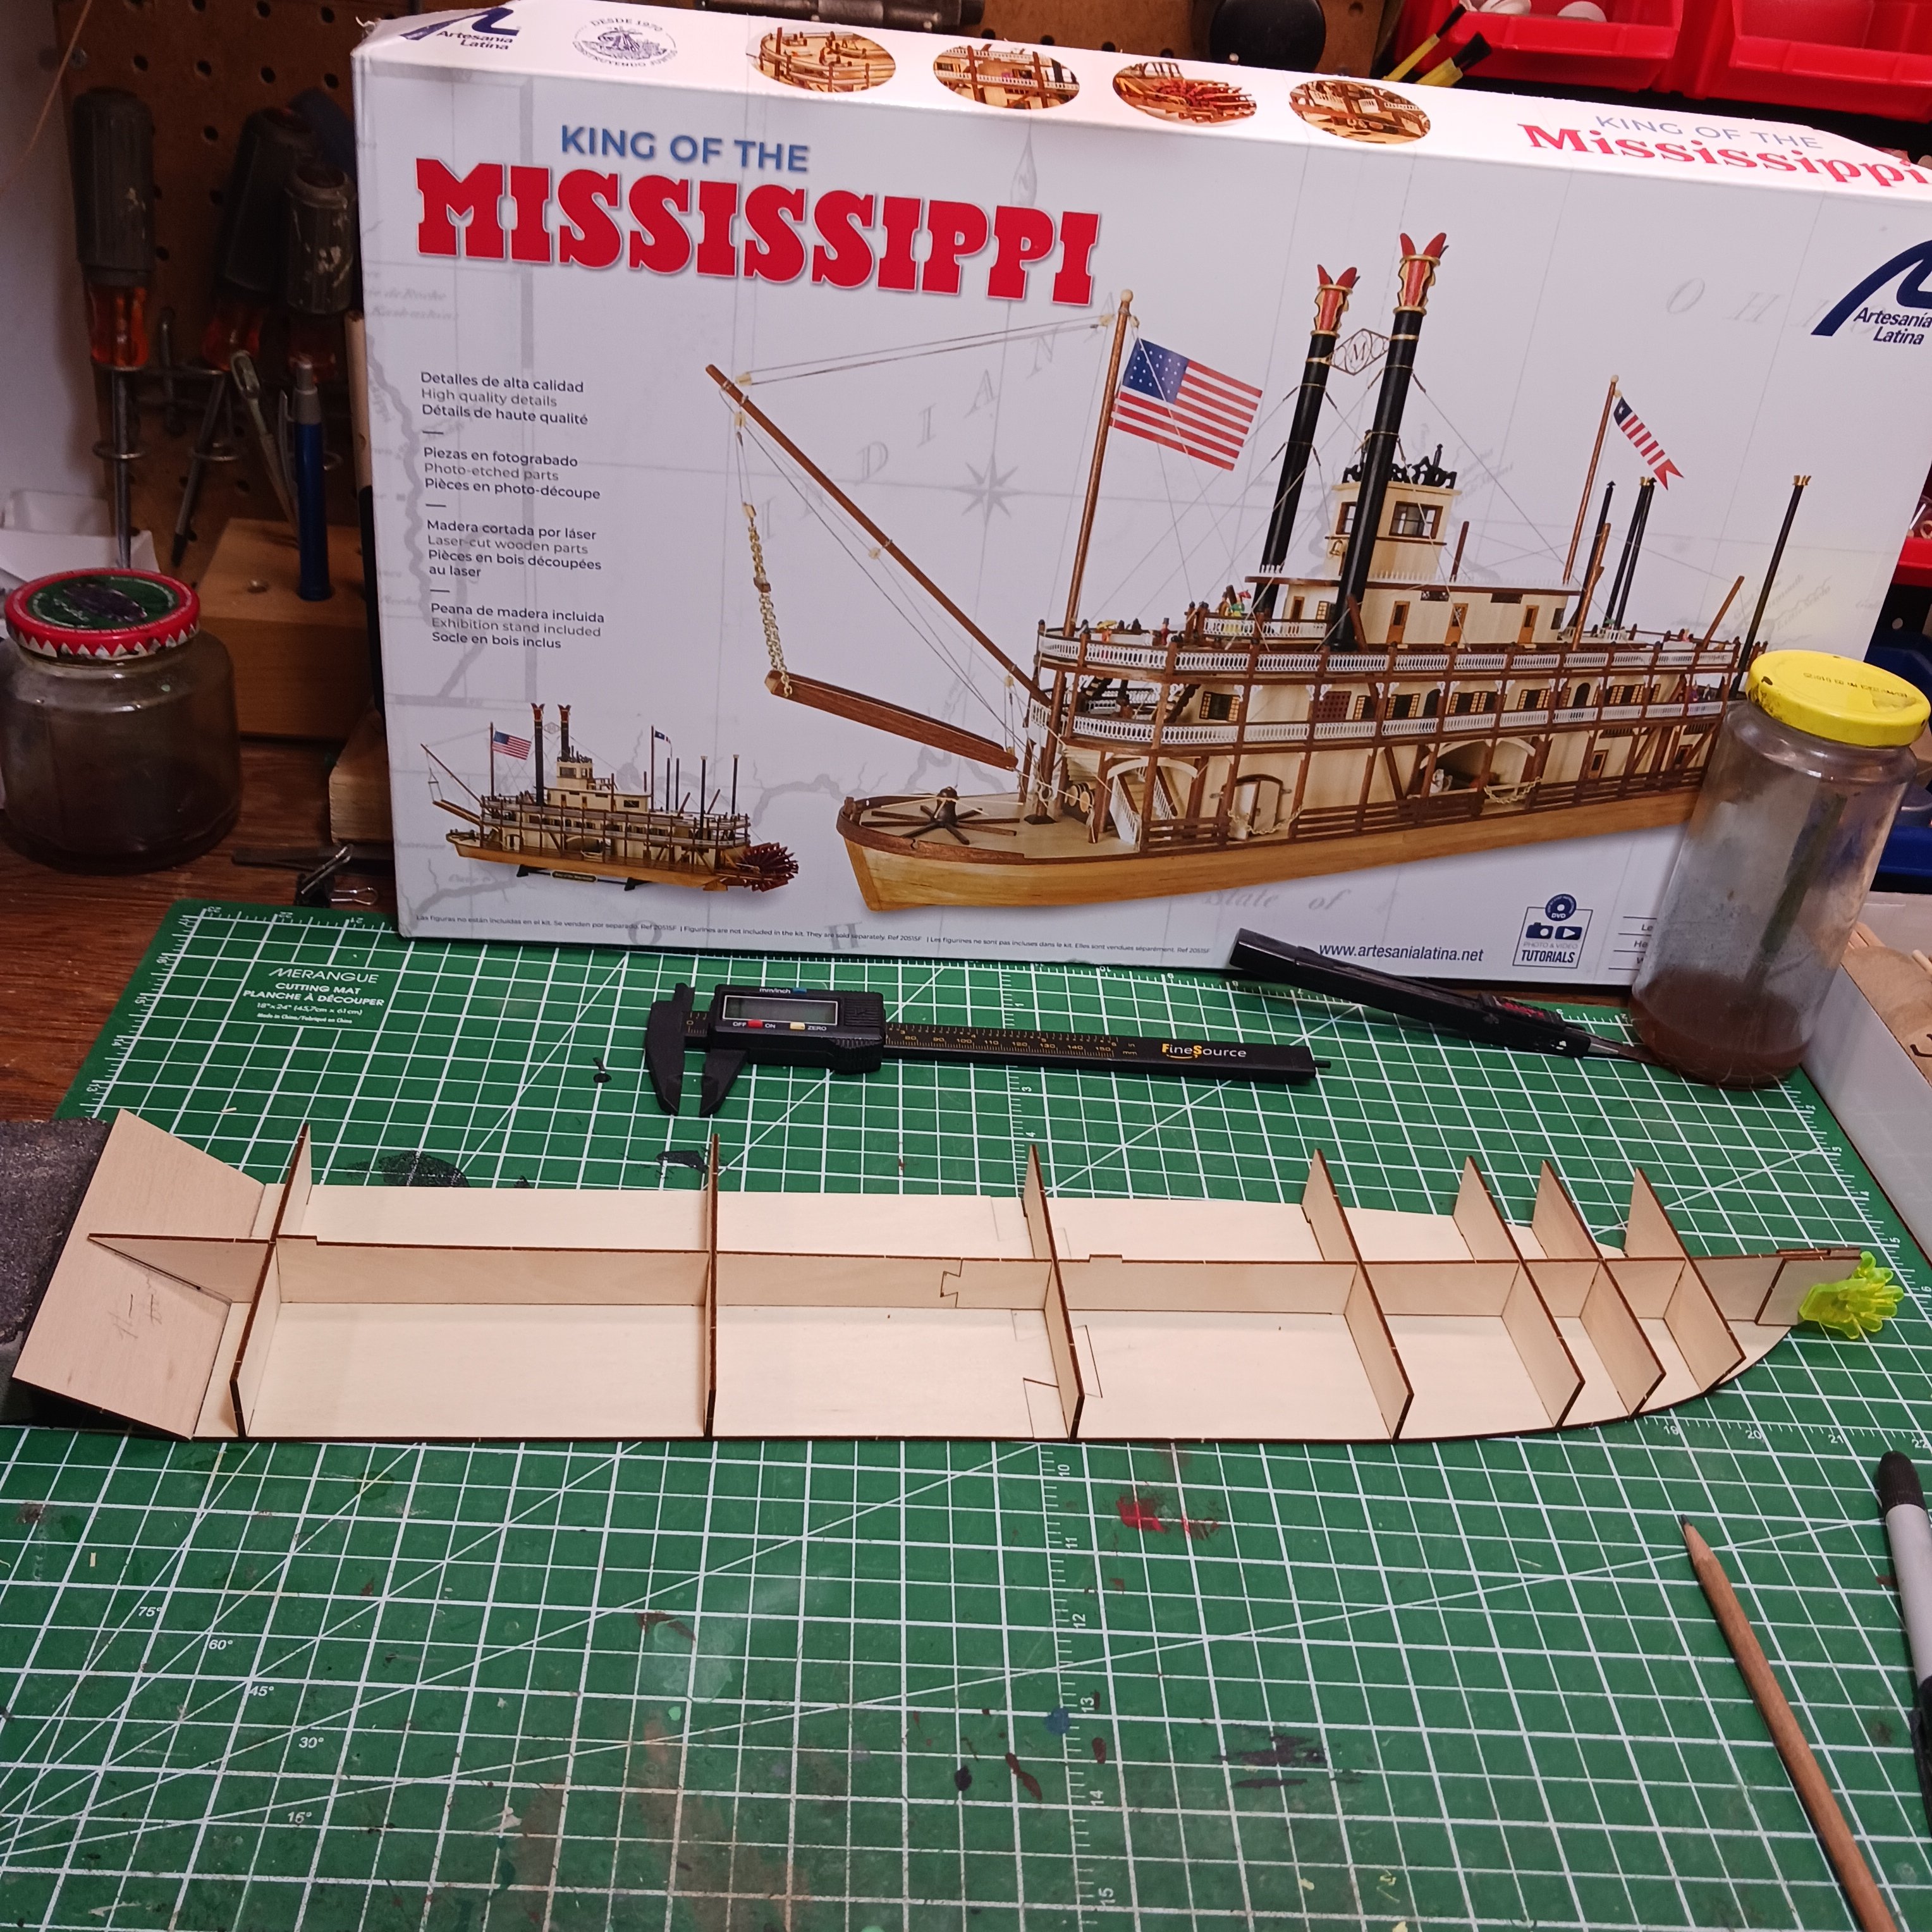
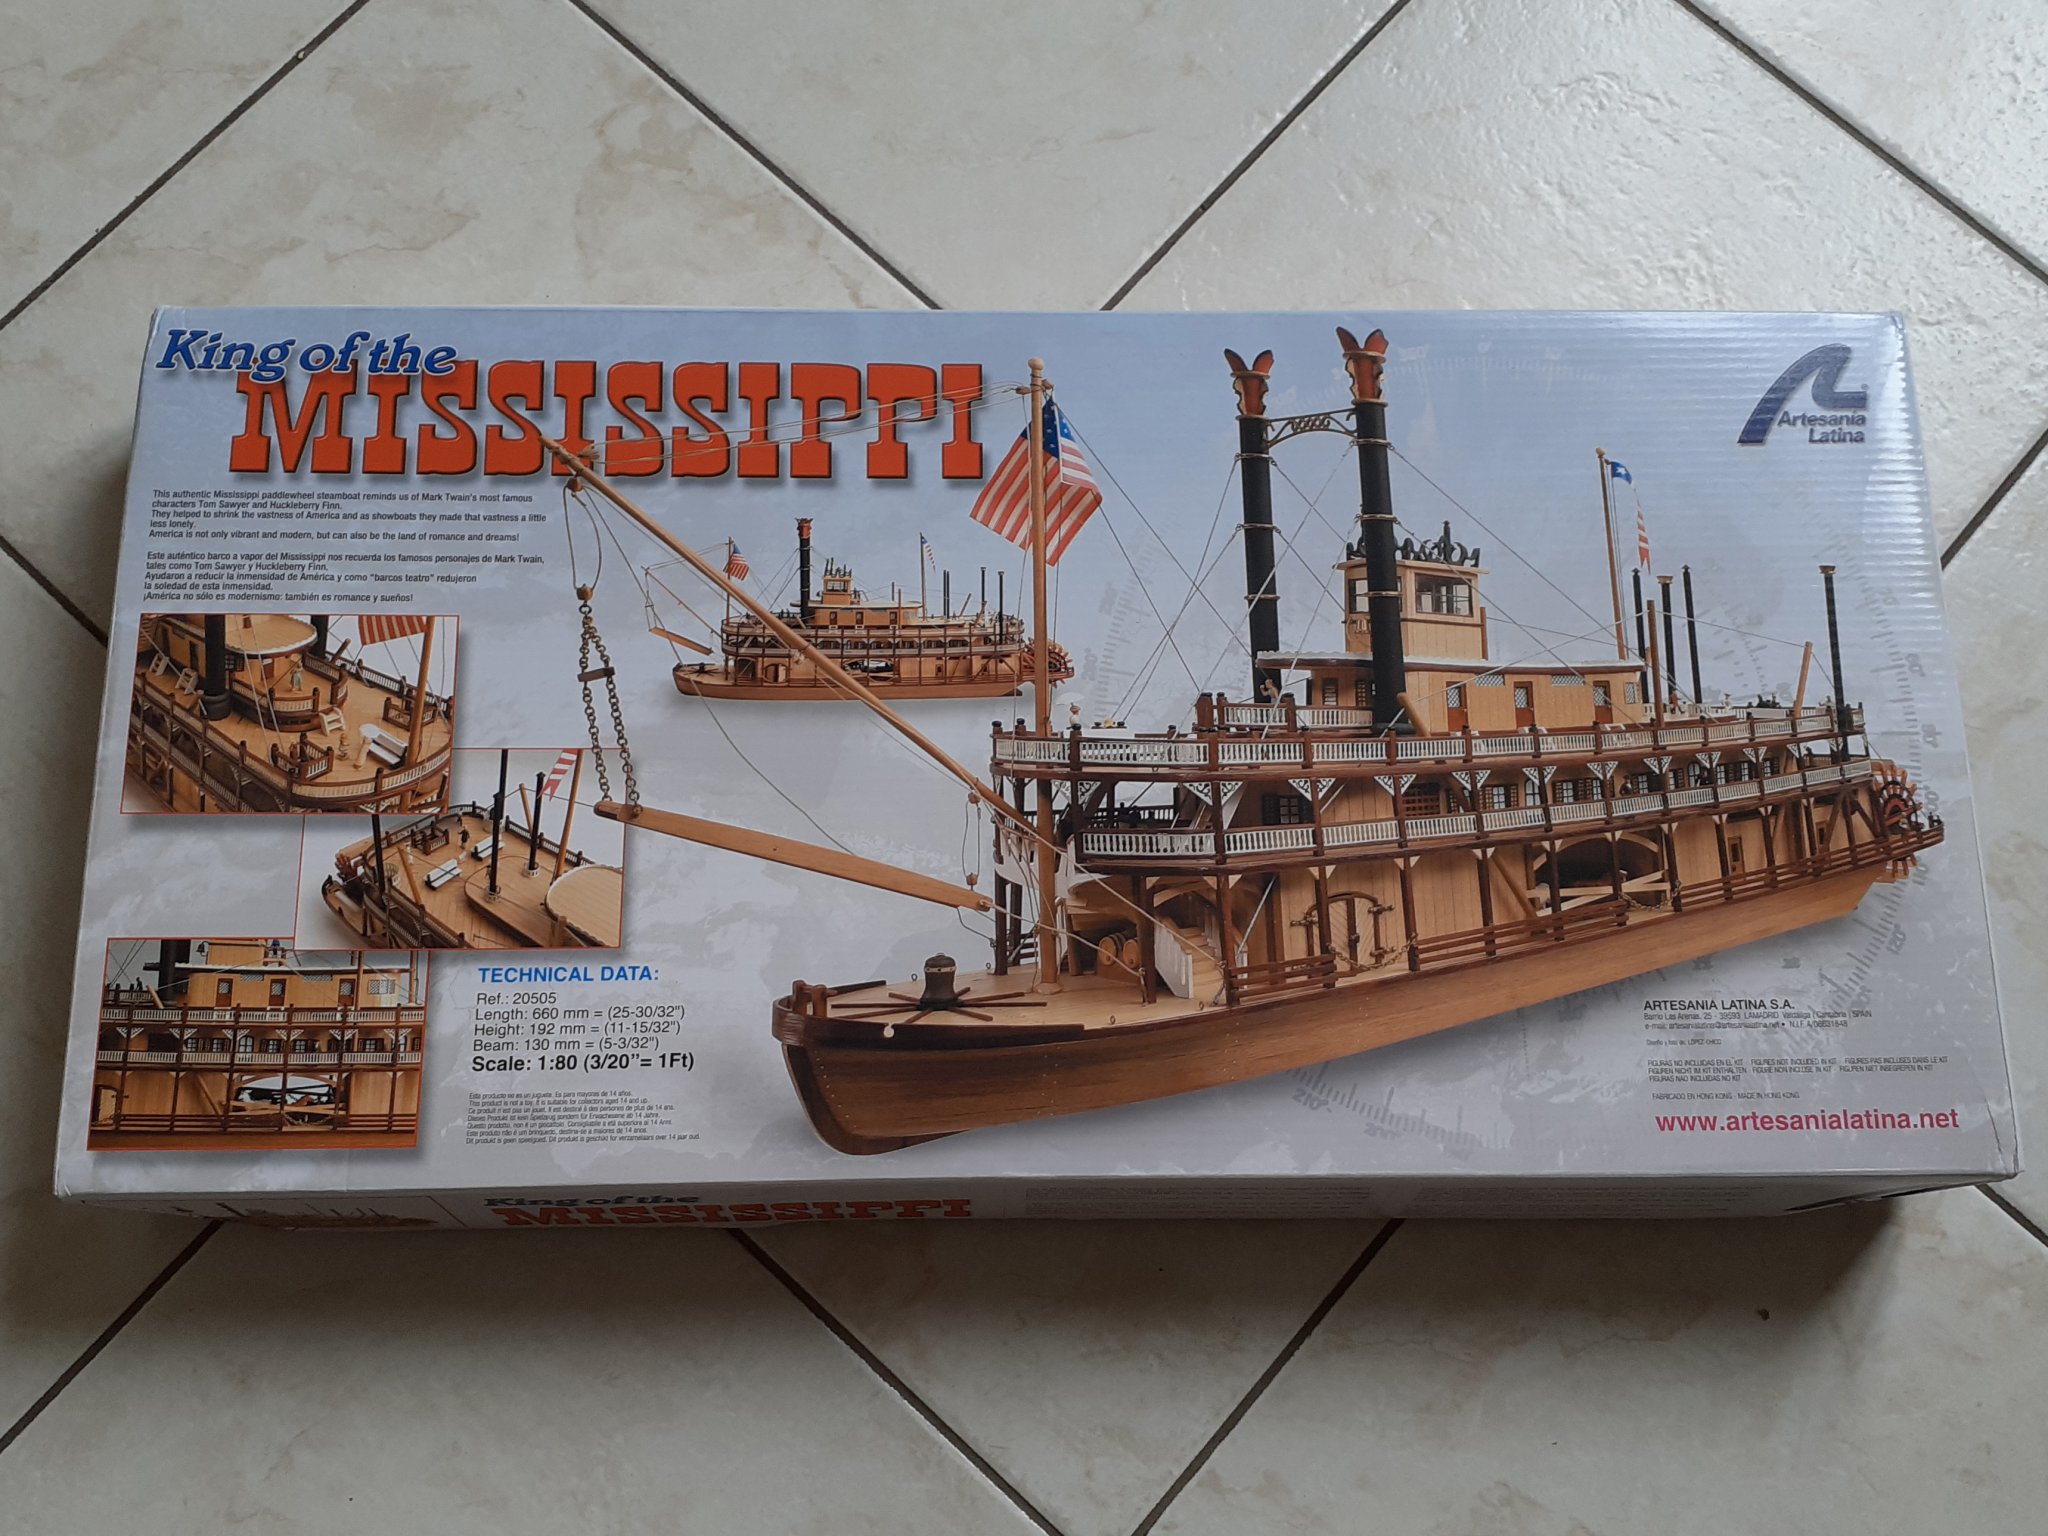
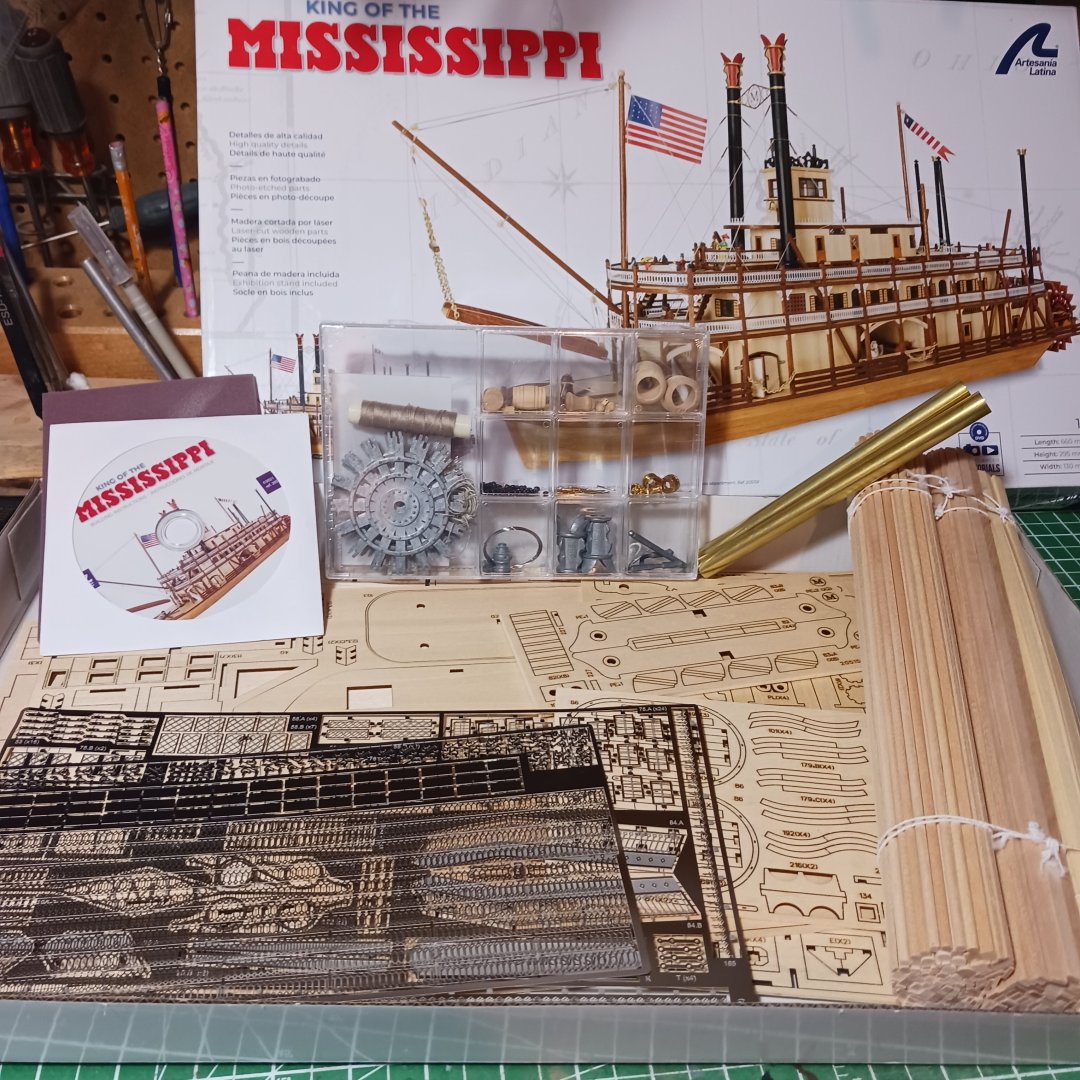
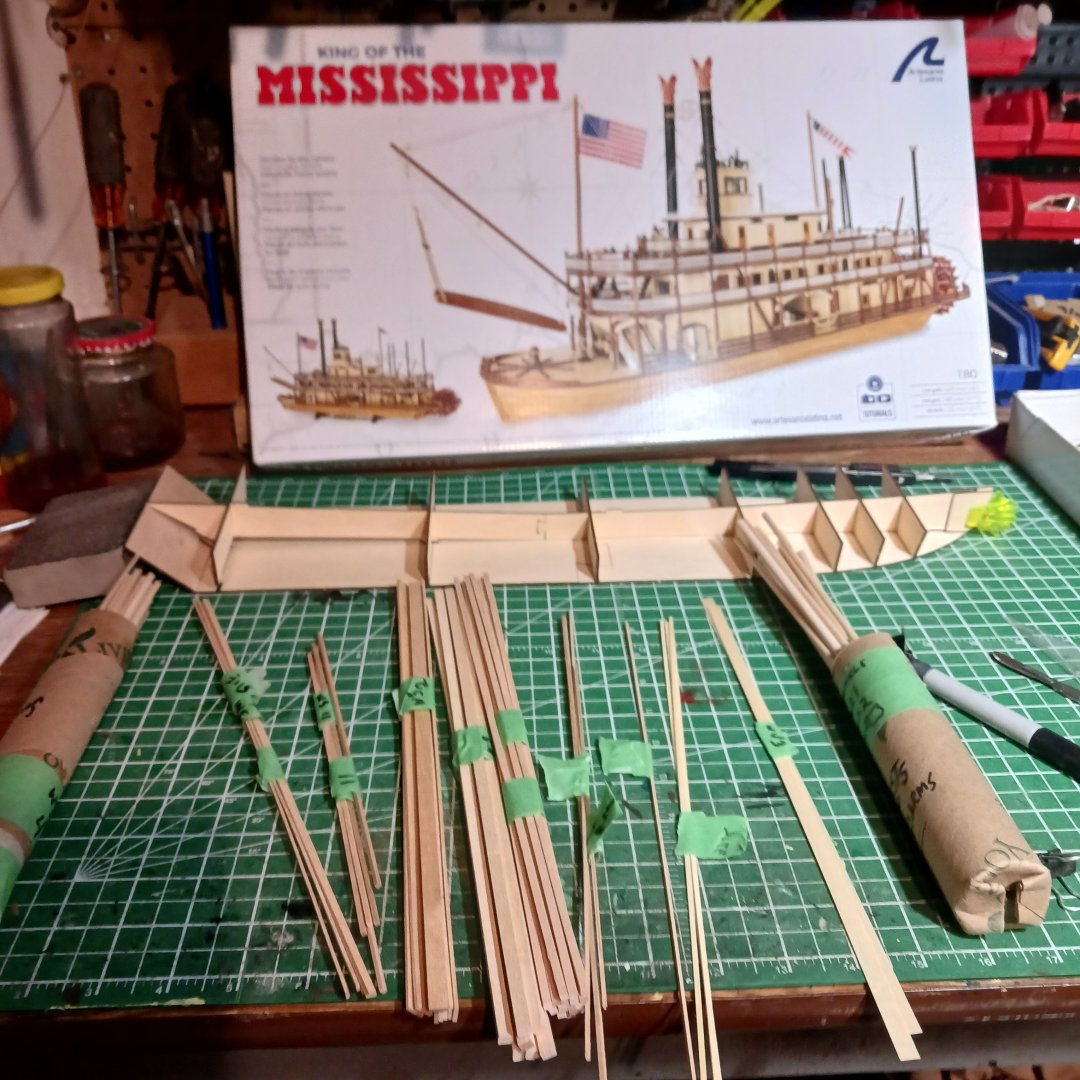
 Last night May 24,2024 I open the box of my latest build. The king of the Mississippi by Artesania Latina. I was hoping that the instructions were better than the last several ships that I have done. But in fact, they are worse 😕. You only get a CD to install on your computer. It does show you how but with no part numbers, and three bundles of wood, you have to figure out what size and separate them all. The C D comes with a paper that says there are mistakes on it. And you have to go download the correct way. Plus no part numbers makes it hard to follow along. I found this diagram for the wood planks. It helps. I almost put it all back in the box and said I am selling this and buying a Dutchess of Kensington by Cris Watton of Vanguard Models. I just have to finish this one and I can buy it lol. If it was not for the fact that I will get lots of help here on MSW, all the King of the Mississippi logs here show how it is done. So I decided ,I want a river boat to add to my collection and I am up for the challenge. But if anyone wants to send me some info on part numbers, I will gladly appreciate it. Even the instructions as well. And for my first change to the plan , I have lots of walnut planking left from previous builds that I am going to plank the bottom with that because no one will see it but it will look nice. Then I will have enough planks for sure. So now it is time to start glueing the hull together. I will square up all the bulkheads and flip it over and start the planking. Tally Ho on to my next build, wish me luck, I am going to need it on this one. Lol 😆. Bob M.
.thumb.jpg.285aab2af9461fde5633cc620416d162.jpg)

- 85 replies
-
- 11
-
-
- King of the Mississippi
- Artesania Latina
- (and 2 more)
-
.thumb.jpg.5a33ce11c7bd2c0f448734dd2e7ea95b.jpg) Hello fellow modelers! This log is about my first ever model, the Bon Retour from Artesania Latina (AL). Even though this kit is designed as an entry level/beginner kit, i have found that it is NOT the case. I have read other posts commenting on how poor the instructions are, how blurry the photos in the instructions are and how little to nothing is explained about rigging. I can confirm it is true, so if youre looking for a kit to start, i wouldnt recommend this one. Try an easier kit, like "La Provençale", from Artesania Latina, or "Lancha del Capitán San Juan de Nepomuceno", also from Artesania Latina. Or even the HMS Bounty Jolly Boat! if youre still convinced to try out this kit, you can ask me anything you want, i will gladly help you with whatever i can. Being my first kit ever, i wanted to start with something small, to practice for when i get to something bigger that requires a lot more experience. I am sure a keen eye will spot mostly every mistake i made, butoverall i have learned a lot from this kit, and even more from you, guys, as a community. You have been of invaluable help in times of need, and i can't thank you enough. Thats why i dedicate my first ever build log to you, community of modelshipworld, for your wise words, deep knowledge and kind attention. Thank every single one of you. Anyway, lets get into the build log! Hugo Bosque Arenas Beginner modeler 07/10/2020
Hello fellow modelers! This log is about my first ever model, the Bon Retour from Artesania Latina (AL). Even though this kit is designed as an entry level/beginner kit, i have found that it is NOT the case. I have read other posts commenting on how poor the instructions are, how blurry the photos in the instructions are and how little to nothing is explained about rigging. I can confirm it is true, so if youre looking for a kit to start, i wouldnt recommend this one. Try an easier kit, like "La Provençale", from Artesania Latina, or "Lancha del Capitán San Juan de Nepomuceno", also from Artesania Latina. Or even the HMS Bounty Jolly Boat! if youre still convinced to try out this kit, you can ask me anything you want, i will gladly help you with whatever i can. Being my first kit ever, i wanted to start with something small, to practice for when i get to something bigger that requires a lot more experience. I am sure a keen eye will spot mostly every mistake i made, butoverall i have learned a lot from this kit, and even more from you, guys, as a community. You have been of invaluable help in times of need, and i can't thank you enough. Thats why i dedicate my first ever build log to you, community of modelshipworld, for your wise words, deep knowledge and kind attention. Thank every single one of you. Anyway, lets get into the build log! Hugo Bosque Arenas Beginner modeler 07/10/2020- 17 replies
-
- 3
-
-
- artesania latina
- bon retour
- (and 2 more)
-
 Having just finished a very simple rowing boat model as my first build, Midwest’s Dinghy, this model will undoubtedly be more challenging. It is single lay plank-on-frame hull, so I am painfully aware that I have little scope for correcting mistakes if the planking goes wrong, unless I decide to fully paint the hull (which I may do, have not decided yet). The Bounty Jolly Boat kit by Artesania Latina has been around for a while, and there are plenty of build logs on this forum, which I have read with great interest and will undoubtedly be very helpful in my own build. However, Artesania Latina has renewed the kit this year, and there is a number of differences to the old kit. This appears to be the first build log for the new kit. A first change in the renewed kit is the box (see image below). The older kit is still available for sale from some retailers, so if you want to make certain you are getting the newer kit, make sure you get the kit with number 19004-N, not the one with number 19004. I have found the instructions for the older kit online, allowing me to compare the old and new kit. The new kit is very similar to the old one but there are some differences. An oft mentioned problem with the old kit was that some of the sails where much larger than on the plans. That problem appears to have been remedied. The new stand, now being of the ‘cradle’ type, is different from the old one. The new kit includes a grapple, which appears not have been included in the older version. The inside front of the boat is now covered by a grid, which is also new. The plywood that the false keel and bulkheads are made of is of a different style than in the past, looking more like solid wood with a thin veneer on it than ‘traditional’ plywood. This makes it less visibly ‘fake’ when seen from the side, which makes for a cleaner build where the plywood sides are visible. The oars are now in one piece, requiring rounding of the shaft; in the old kit, blades and shaft were separate. I am sure there are more differences, but these are the ones I noticed so far. One significant difference is in the instructions: an instruction booklet is no longer provided. Instead, the instructions are provided digitally. This means you either have to print the instruction booklet yourself, or to use the digital document directly. Since the instruction booklet is quite thick, I opted for the latter, meaning I have to make sure to have a charged tablet or laptop near my model shipyard (=my kitchen table). This sounds less convenient than the older, printed, colour instruction booklet and, in some ways, it is. However, the new instructions are truely excellent. They are super detailed and much more extensive than the old ones. Virtually every little step is giving its own photographic explanation, leading to an instruction booklet of eighty A4-sized pages, with on average six photographs per page (see image below for a sample page). It leaves very little to the imagination, which is excellent for a kit aimed squarely at beginners. I was very impressed. No one-to-one scale plan drawings are provided, only a one-to-one scale photograph of the completed model, but that should not be a problem given the excellent instruction booklet. This print, plus all the contents of the kit, can be seen on the photo below. The front of the box mentions multi-media instructions, that is, an online build video. Such online videos do indeed exist for some of the other renewed beginner kits, but not for the Jolly Boat, at least not yet. Maybe Artesiana Latina is in the process of creating it? A six-colour paint set is available as an extra purchase. I started the build today, by removing the false keel and bulkheads from their sheets. All the parts were straight and came out easily. I sanded the laser burn from the edges that would be visible, for aesthetic reasons, but not on invisible edges because I have read elsewhere on this forum that the laser burn does not affect the strength of the glue bond – hope I have understood that correctly. The bulk heads fit easily into the false keel, perhaps even too easily. There is a degree of wiggle room up, down, and sideways. To ensure that the bulkheads were perpendicular to the keel in all relevant directions, I used foldback clips (as shown in the photo below). Will leave the white carpenter’s glue to set overnight and continue with the hull tomorrow.
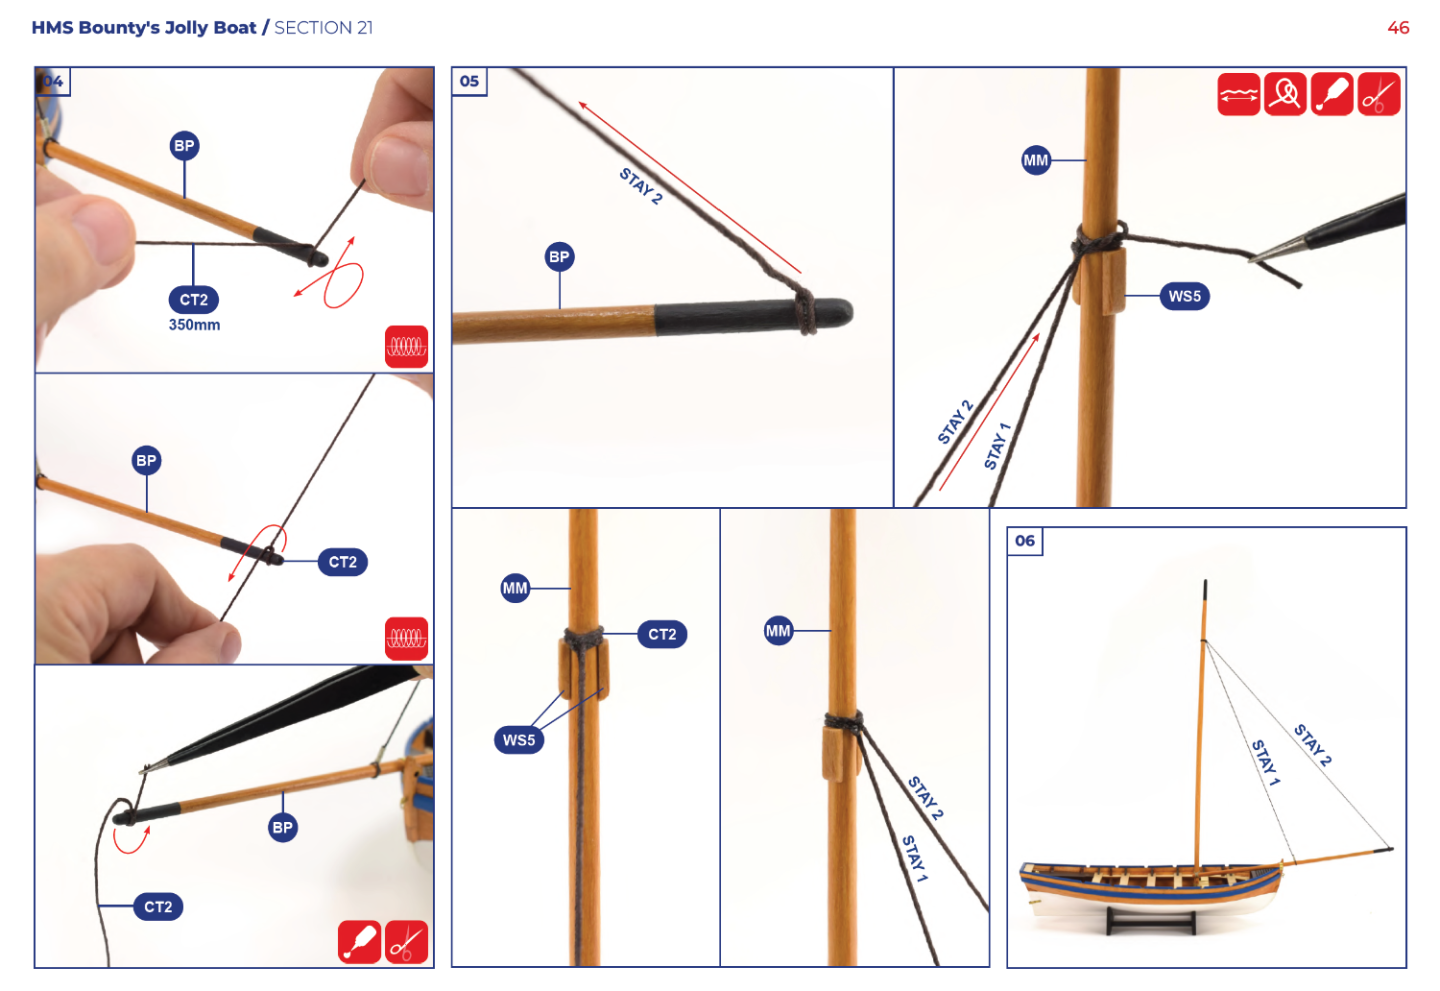


- 33 replies
-
- 6
-
-
- Bounty Jolly Boat
- Artesania Latina
- (and 1 more)
-
 Bonjour,j’en suis à mon deuxième projet après le Bluenose, j’attaque le Bounty si vous avez des conseils , je prend tout ce qui m’aider à progresser
 -
 I haven't finished my latest project, Victory-Corel, and as I wanted to embark on something new this year, I decided to pull Artesania's Hermione from the shelf....a very promising kit. Upon opening the box and unpacking its parts, the high quality is evident from the first glance
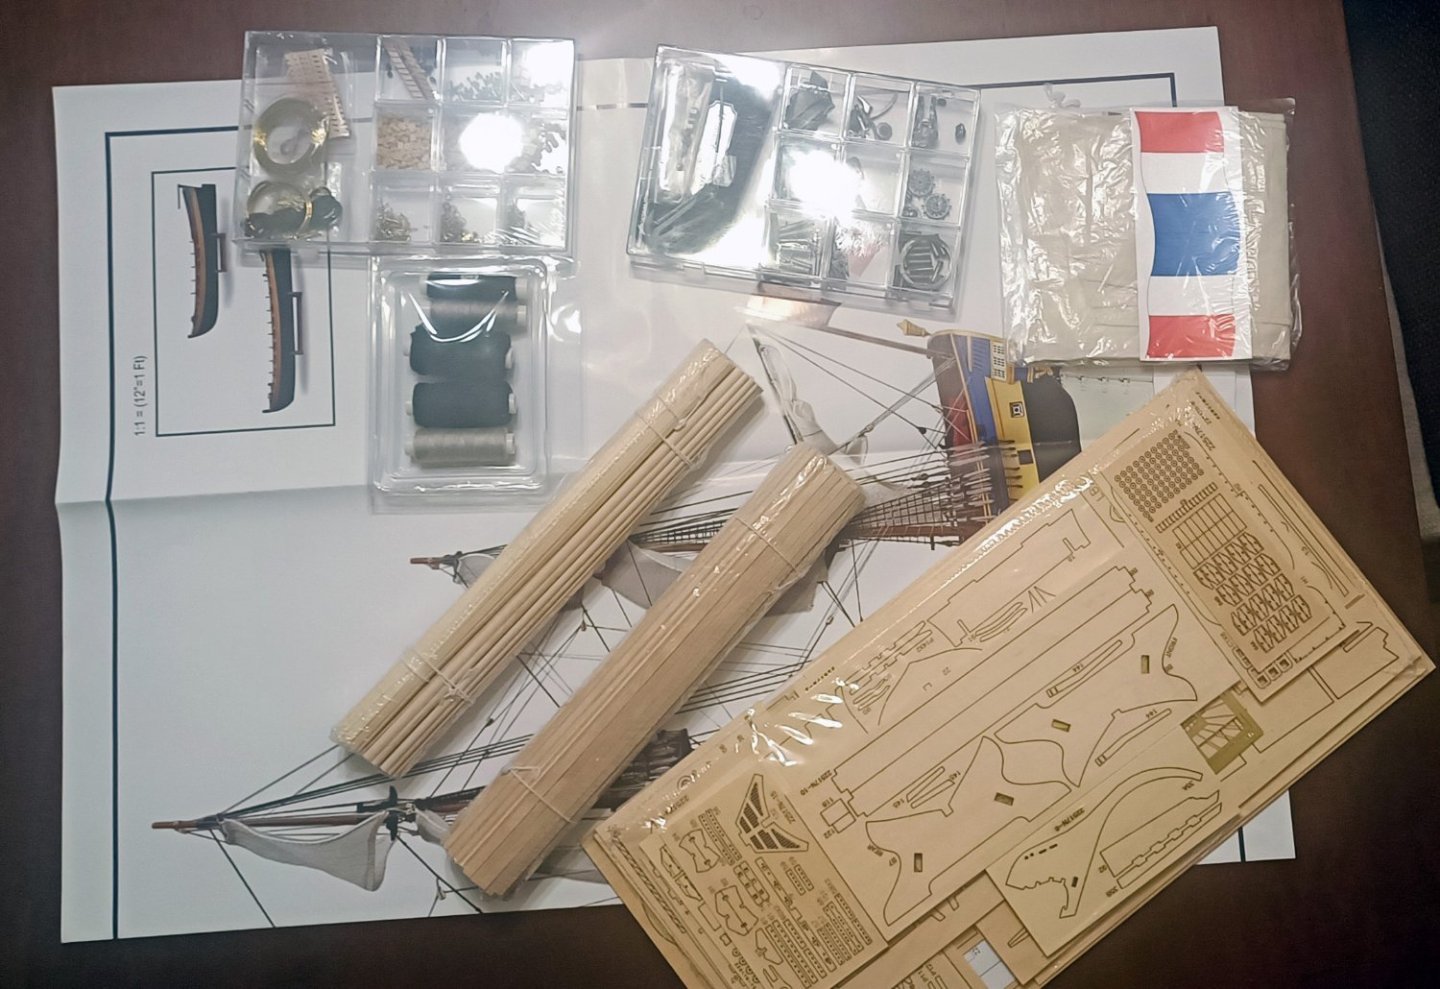
-
 The dhow seems to be quite the important boat historically, however I haven't found a whole lot of information about how dhows are constructed. Most of the information about the dhow is about their importance to trade and the cultures that used them. The range of the dhow extended from the Red Sea to the the Indian subcontinent. According to Wikipedia, Dhows likely originated in India 1400 years ago, but are now more common in the Red Sea with most being built in Yemen. A kit review can be found here. As far and the build, the kit starts in a pretty standard way. The false keel bulkheads seem to be very precise in their shape and cutting. In previous builds I would remove the char from every edge. That resulted in bulkheads that were loose and needed to be carefully aligned. By not removing the char, the bulkheads fit quite well and everything was mostly square. Two bulkheads, 2 and 8 needed a little adjustment to square up. The stern bulkhead, number 13, is supposed to have two support pieces added. As they are shaped, it appears that they should line up with the stern bulkhead's lower edge. The problem with that is that they don't line up with the false keel. I lined up the the support pieces so that the false deck will sit on them and beveled the edges so that they would be level. The instructions in the next steps show that the supports will line up with the bulkhead after faring, so I will see how this lines up. It seems like an excessive amount of wood to remove. Stem supports were also added. Basic deck pieces were added and nailed down. The nails are necessary and useful because there is a slight concavity to the deck. Once the false deck pieces are in place, the instructions call for gluing along every edge to secure everything in place. The next step will be faring the hull after the glue dries.
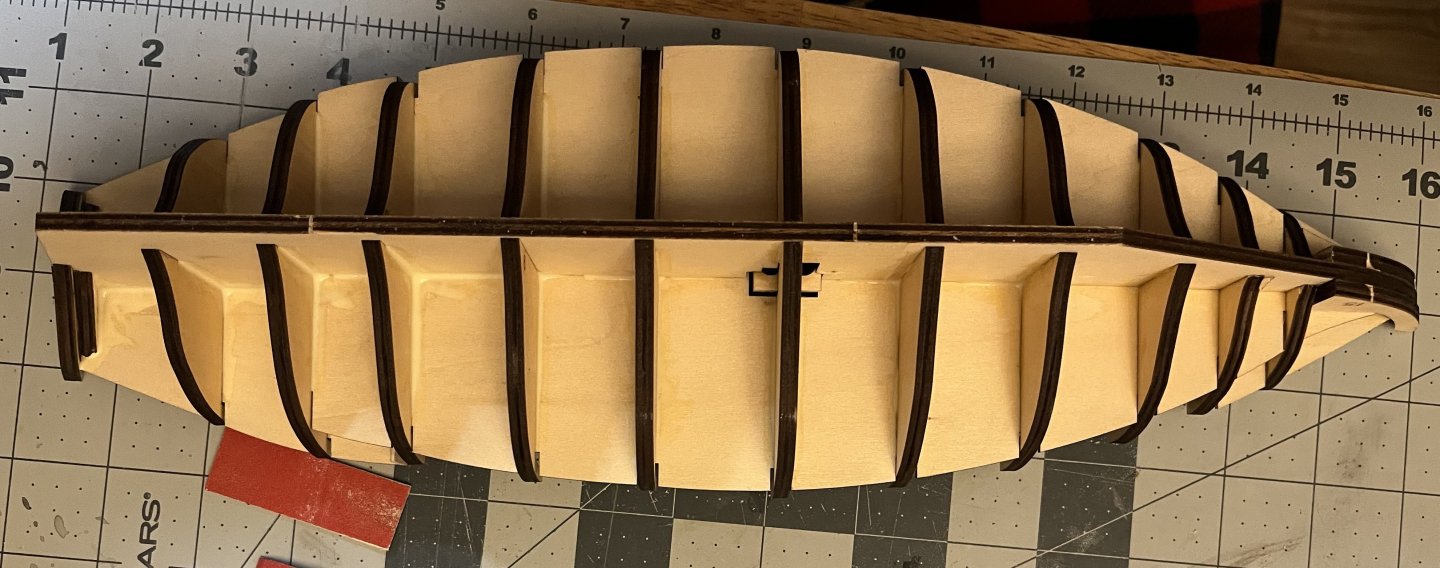
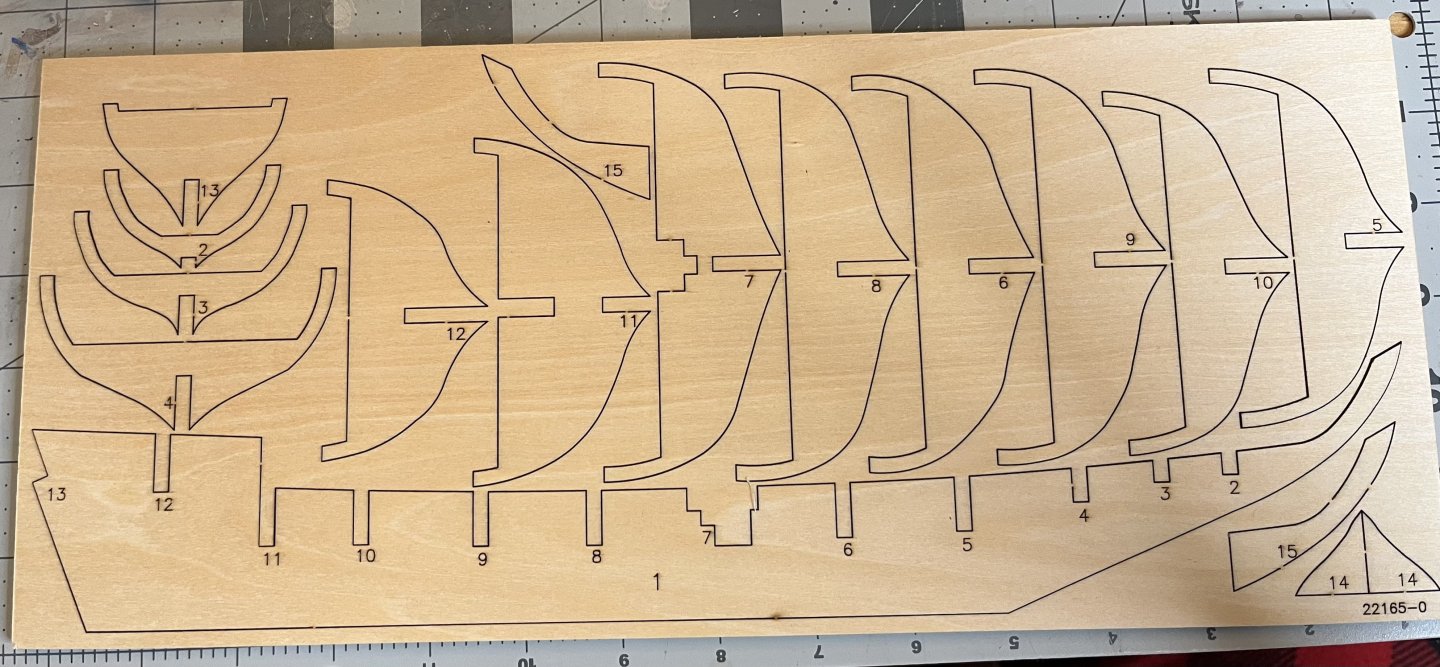


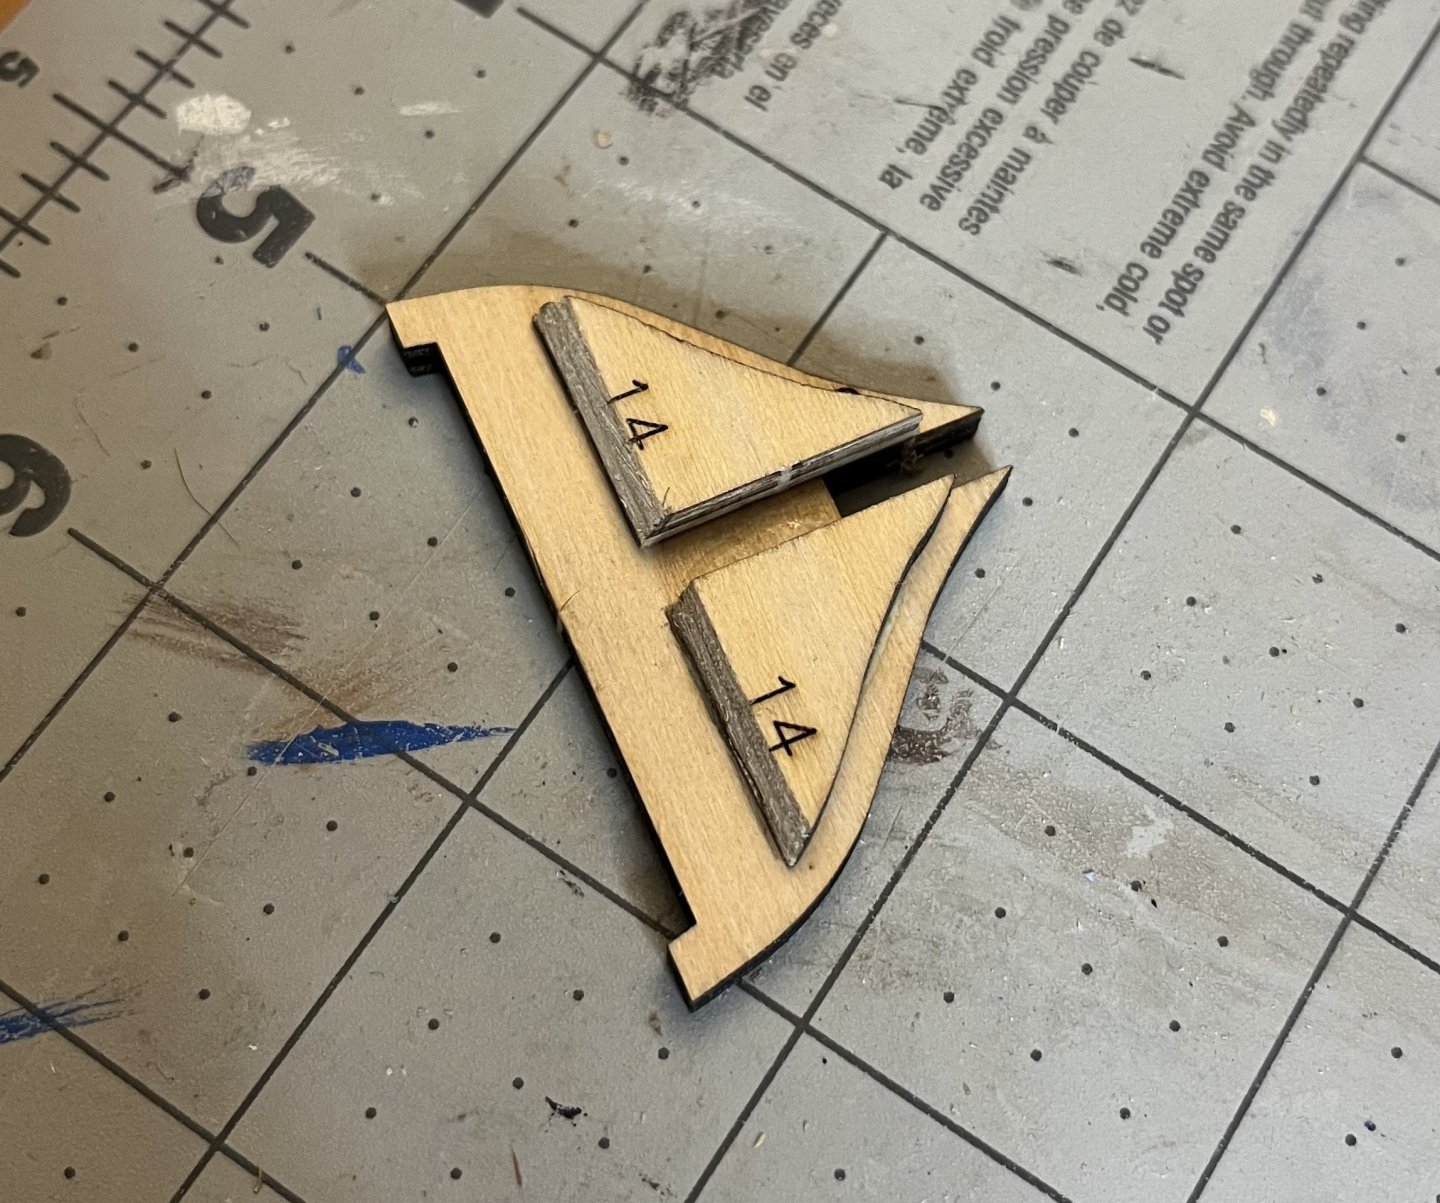


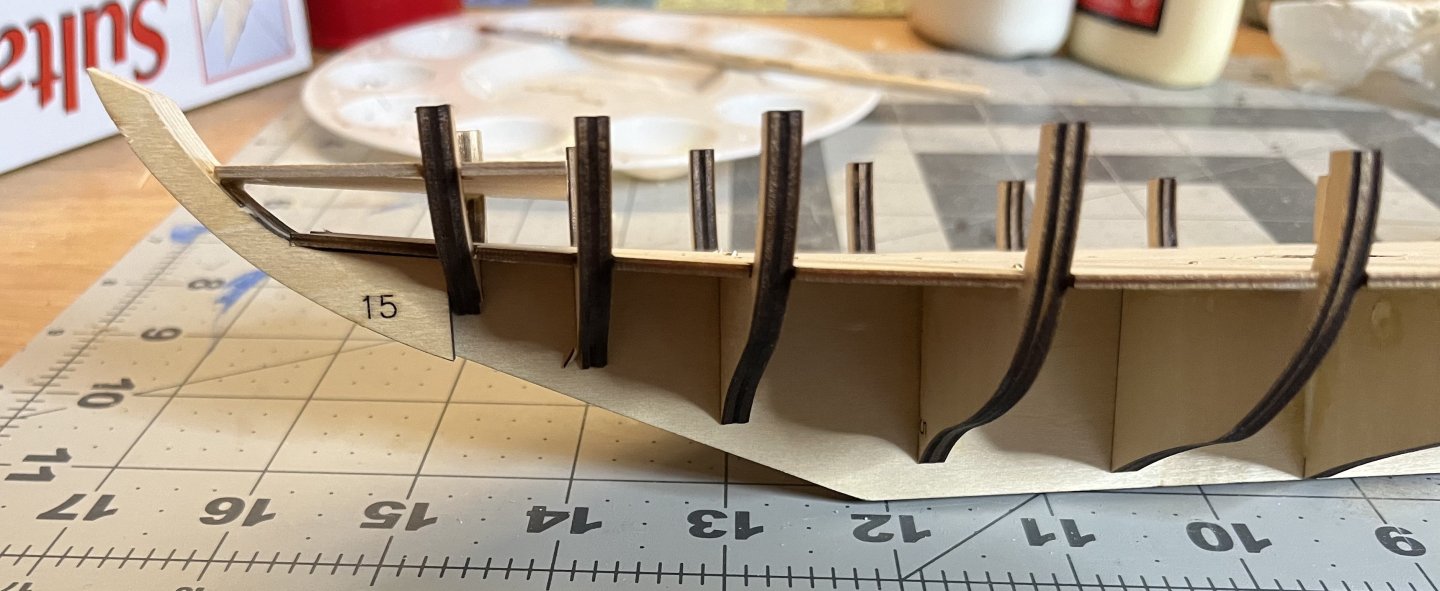
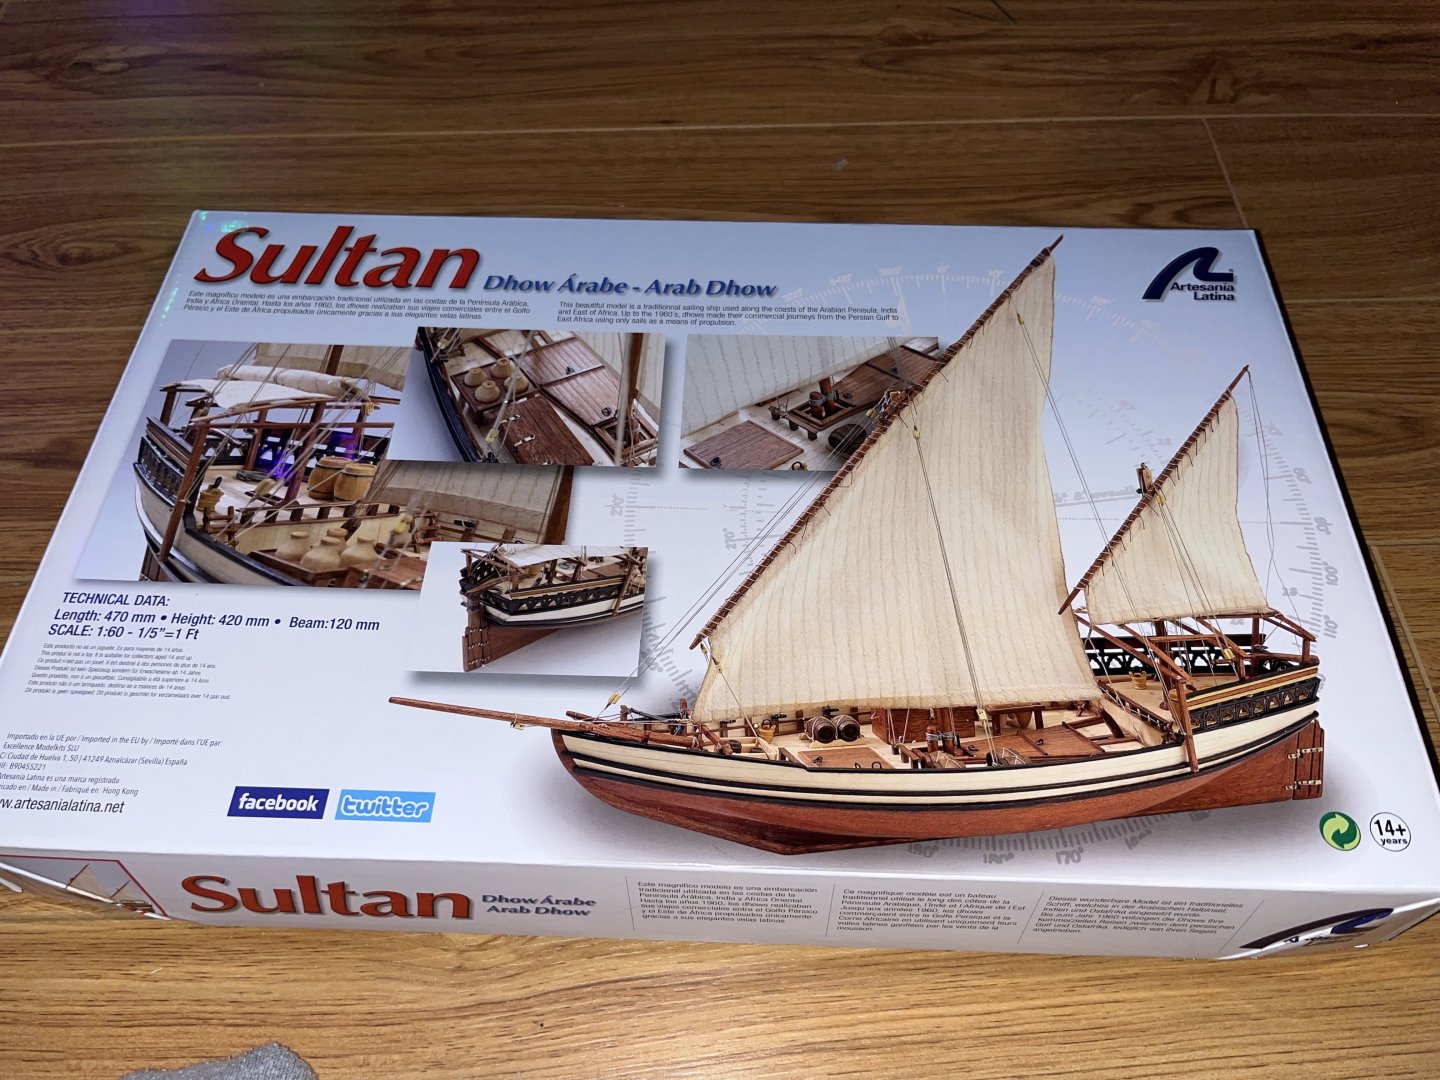
- 28 replies
-
- 8
-
-
- sultan
- Artesania Latina
- (and 1 more)
-
 As I've mentioned to others here, my girlfriend has been dropping hints about this model for quite some time. So while she's away at her parent's place this week, I took the opportunity to exercise my Amazon Prime rights to get a kit in hand ASAP. So without further delay...
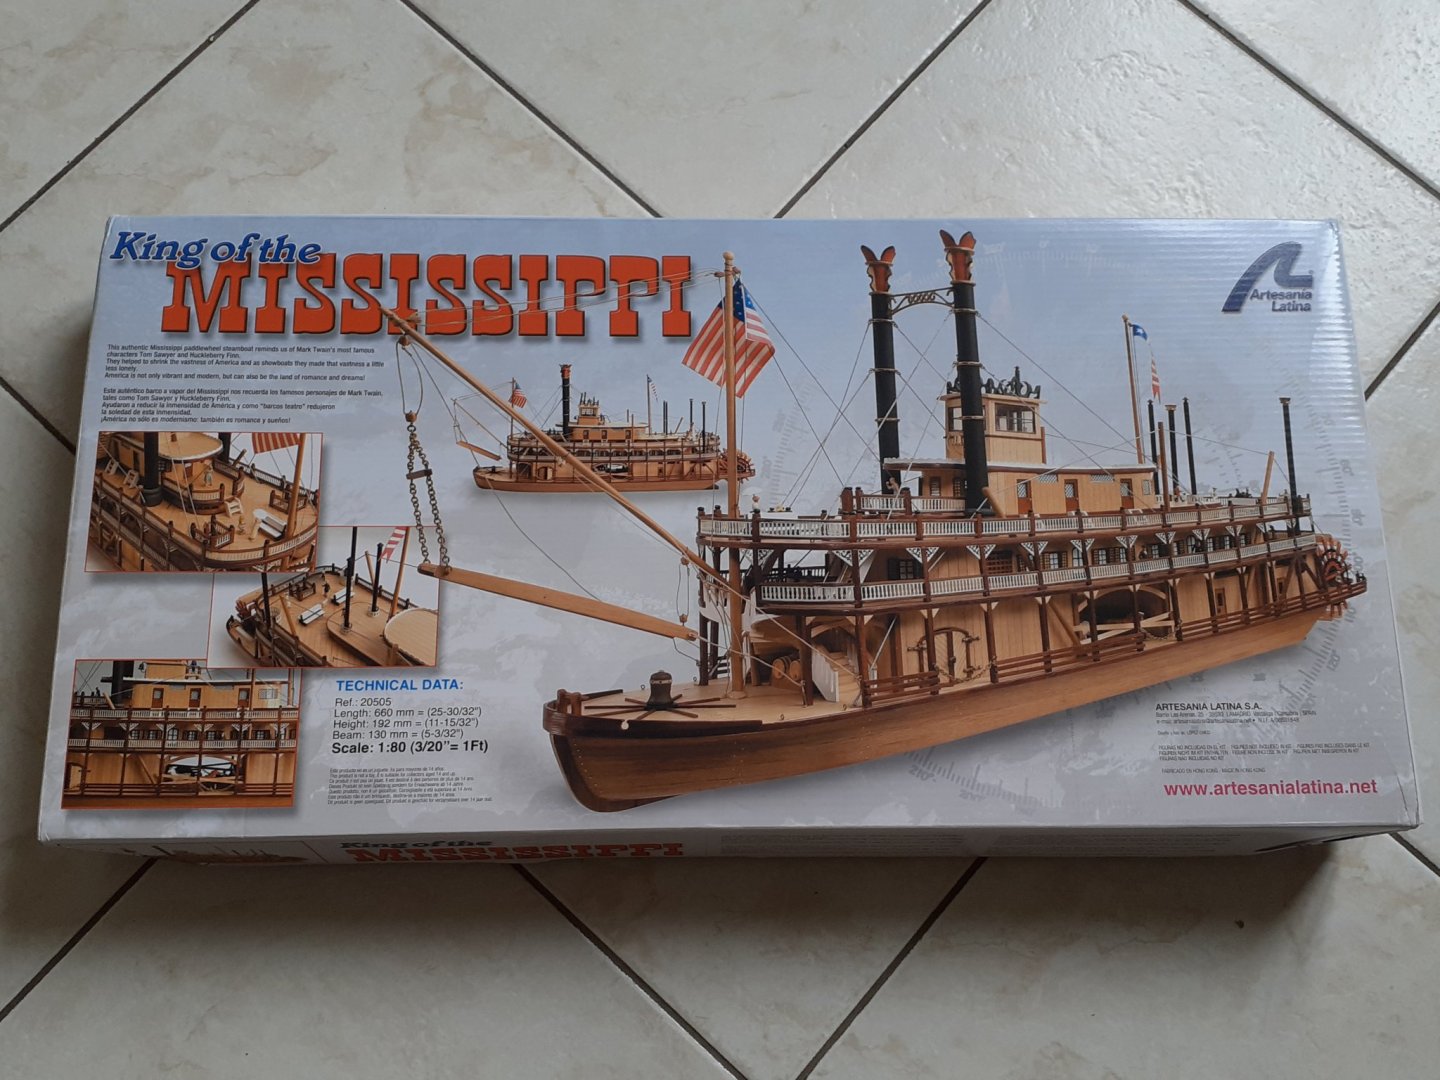
-
 I started the kit from Artesania Latina as it shows quite interesting and beyond what I have done so far. Because there are videos on the internet with the construction steps, what I will post on this blog will only be when I find something interesting or add something that is not included in the kit. For start, I decided to nail the boards to break up the monotony of the decks simulating the nails with fishing line. What a tiring and arduous task, but I finished it successfully. And as soon as I finished it, it occurred to me that I have 6 more.😱
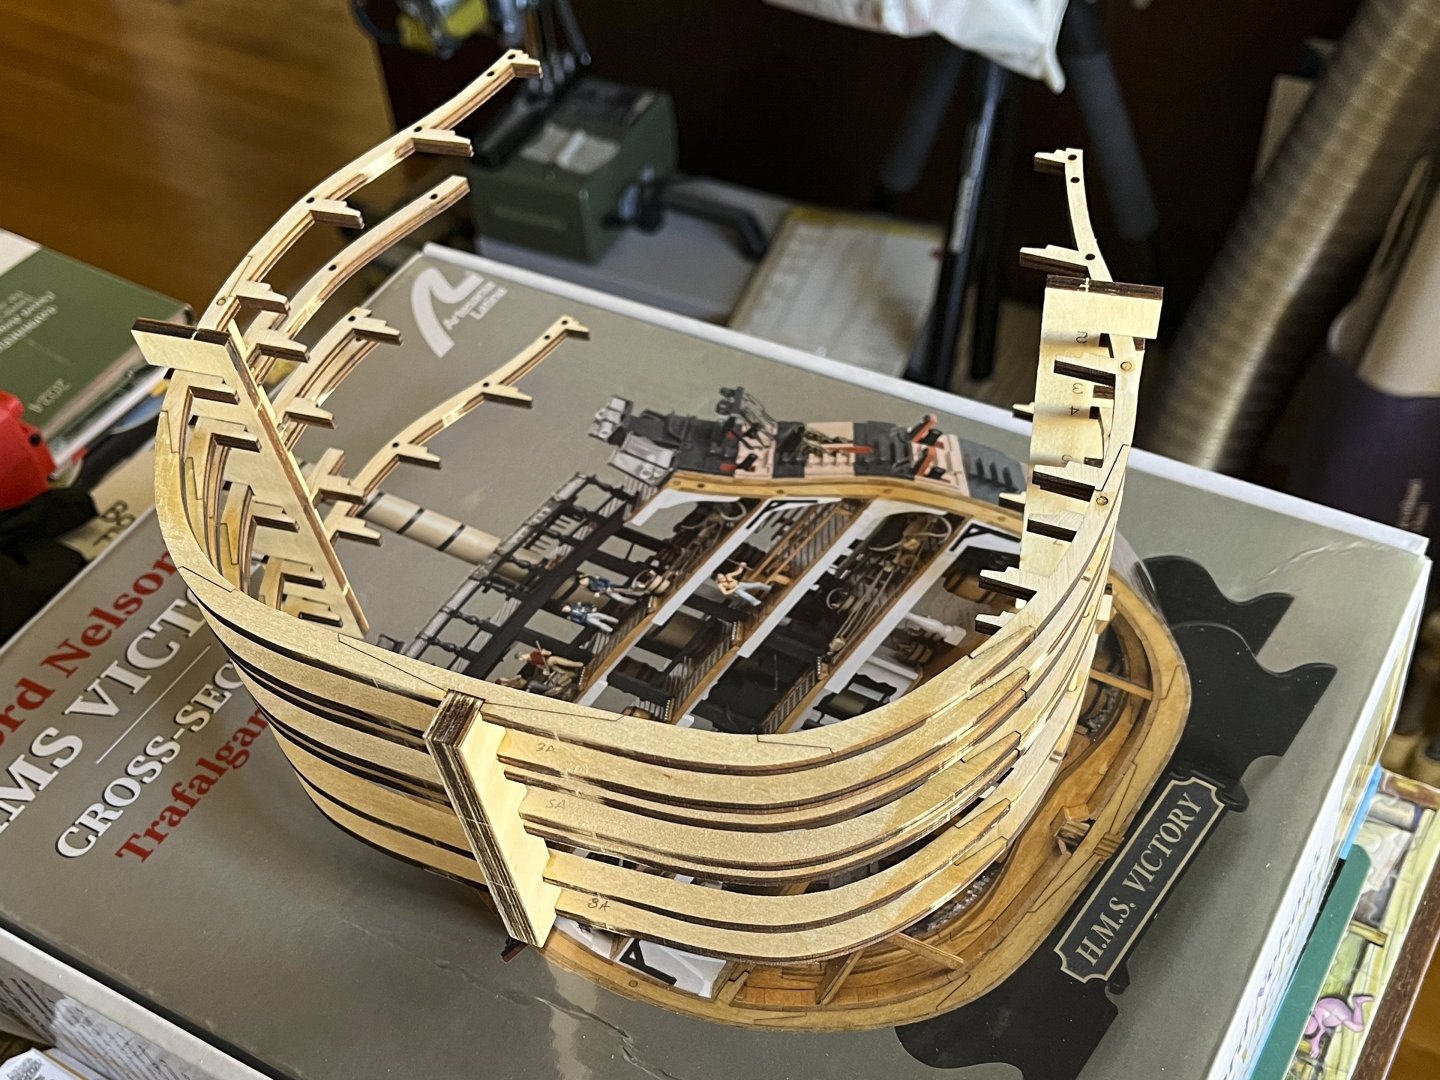
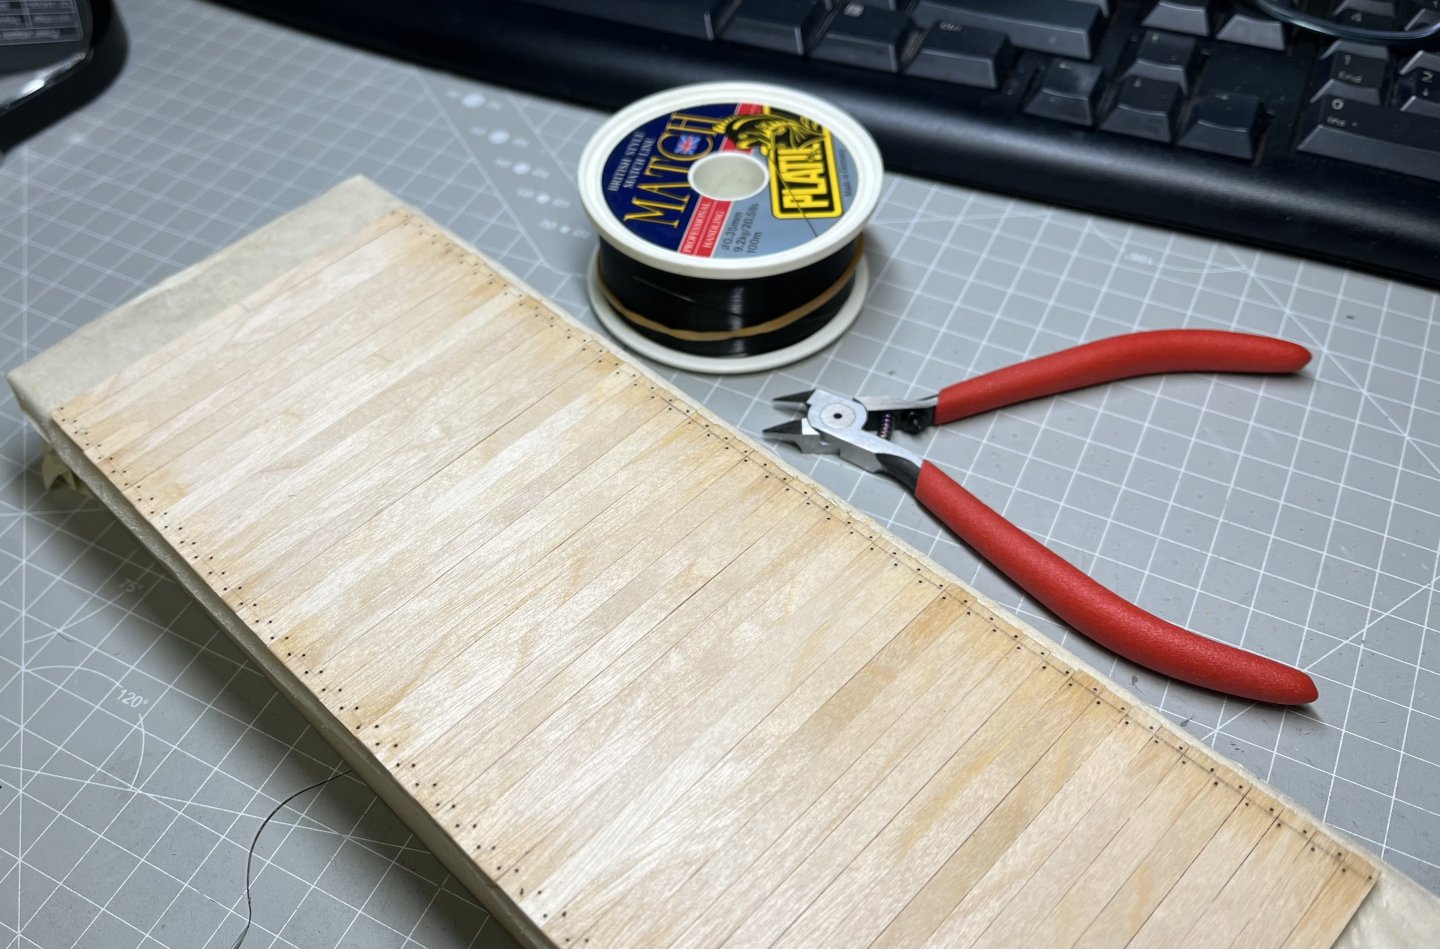
- 7 replies
-
- 4
-
-
- Victory
- cross-section
- (and 1 more)
-
 Was on the fence about making another build log since my last one was 5 years in the making....anyways here it goes....
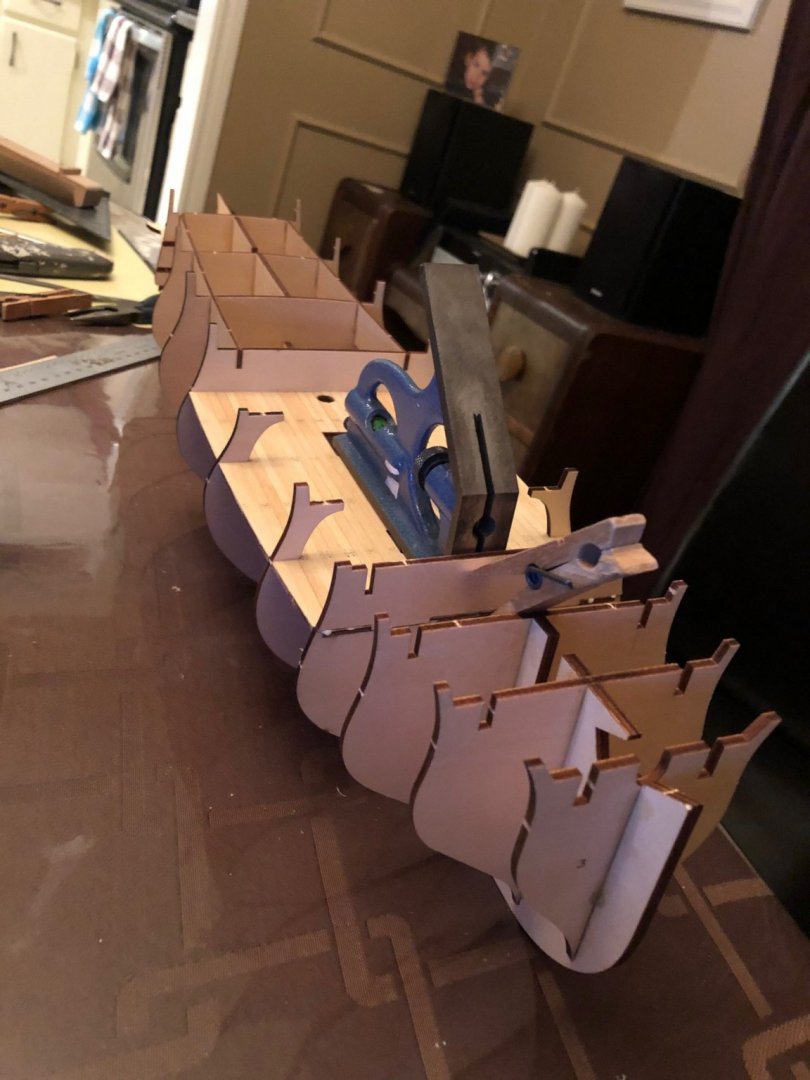
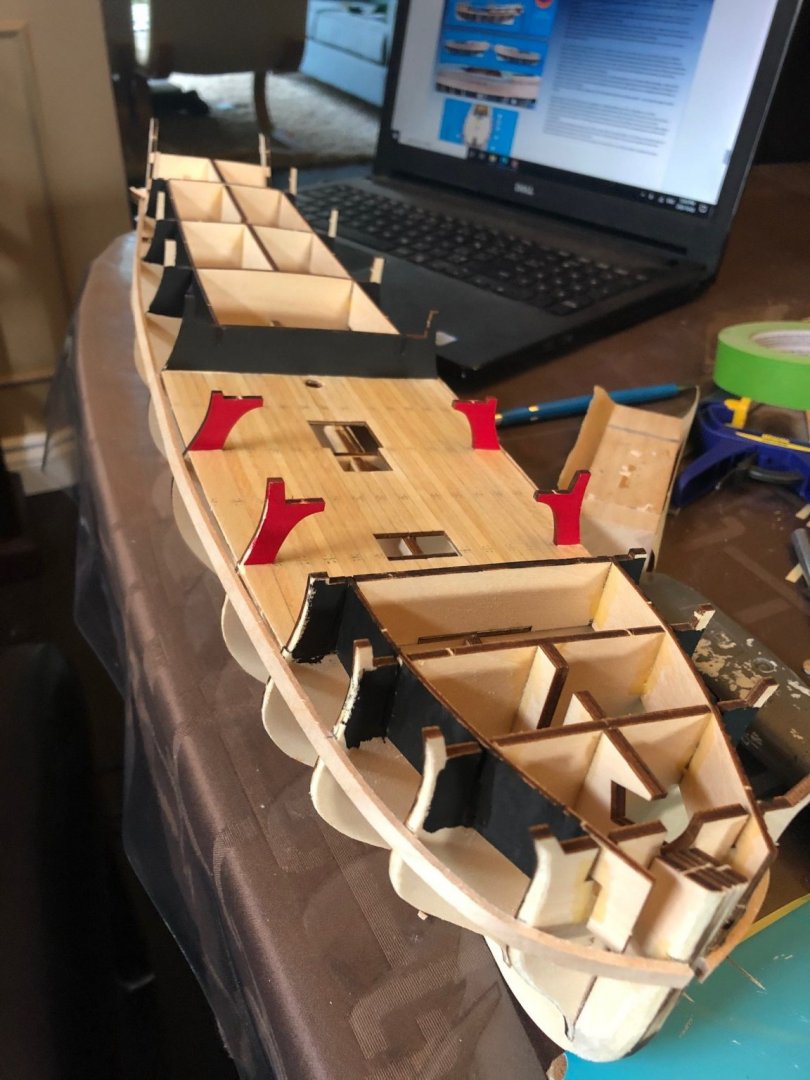
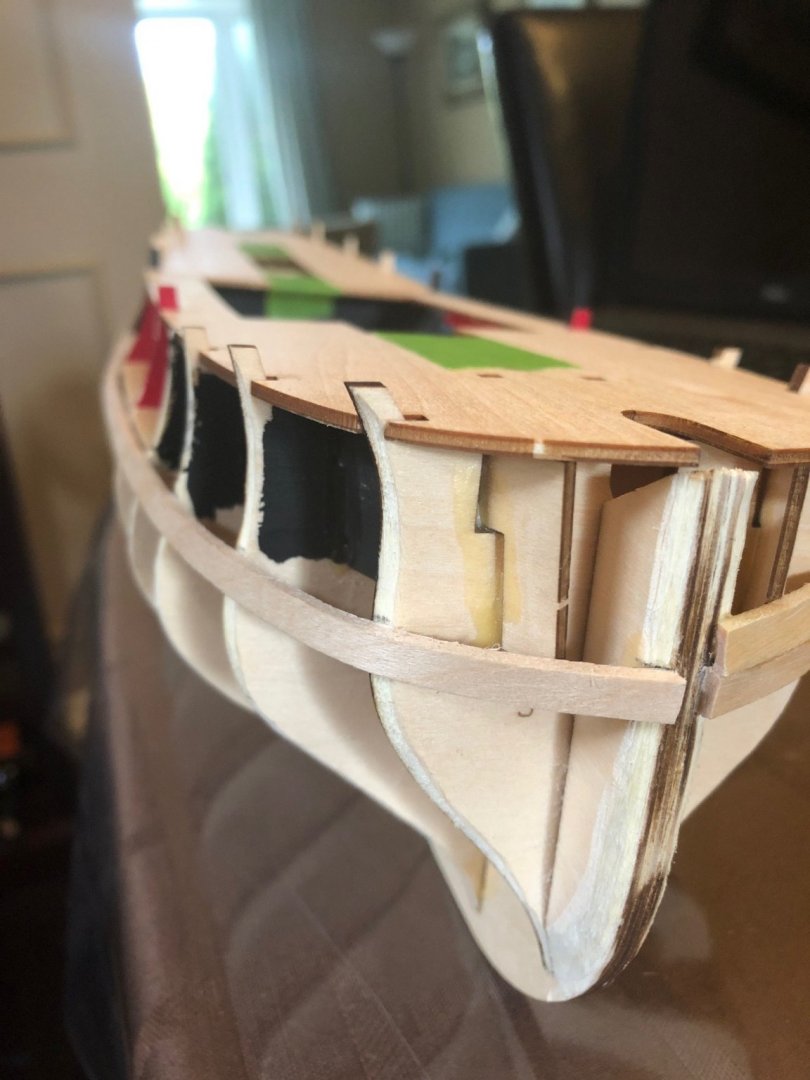

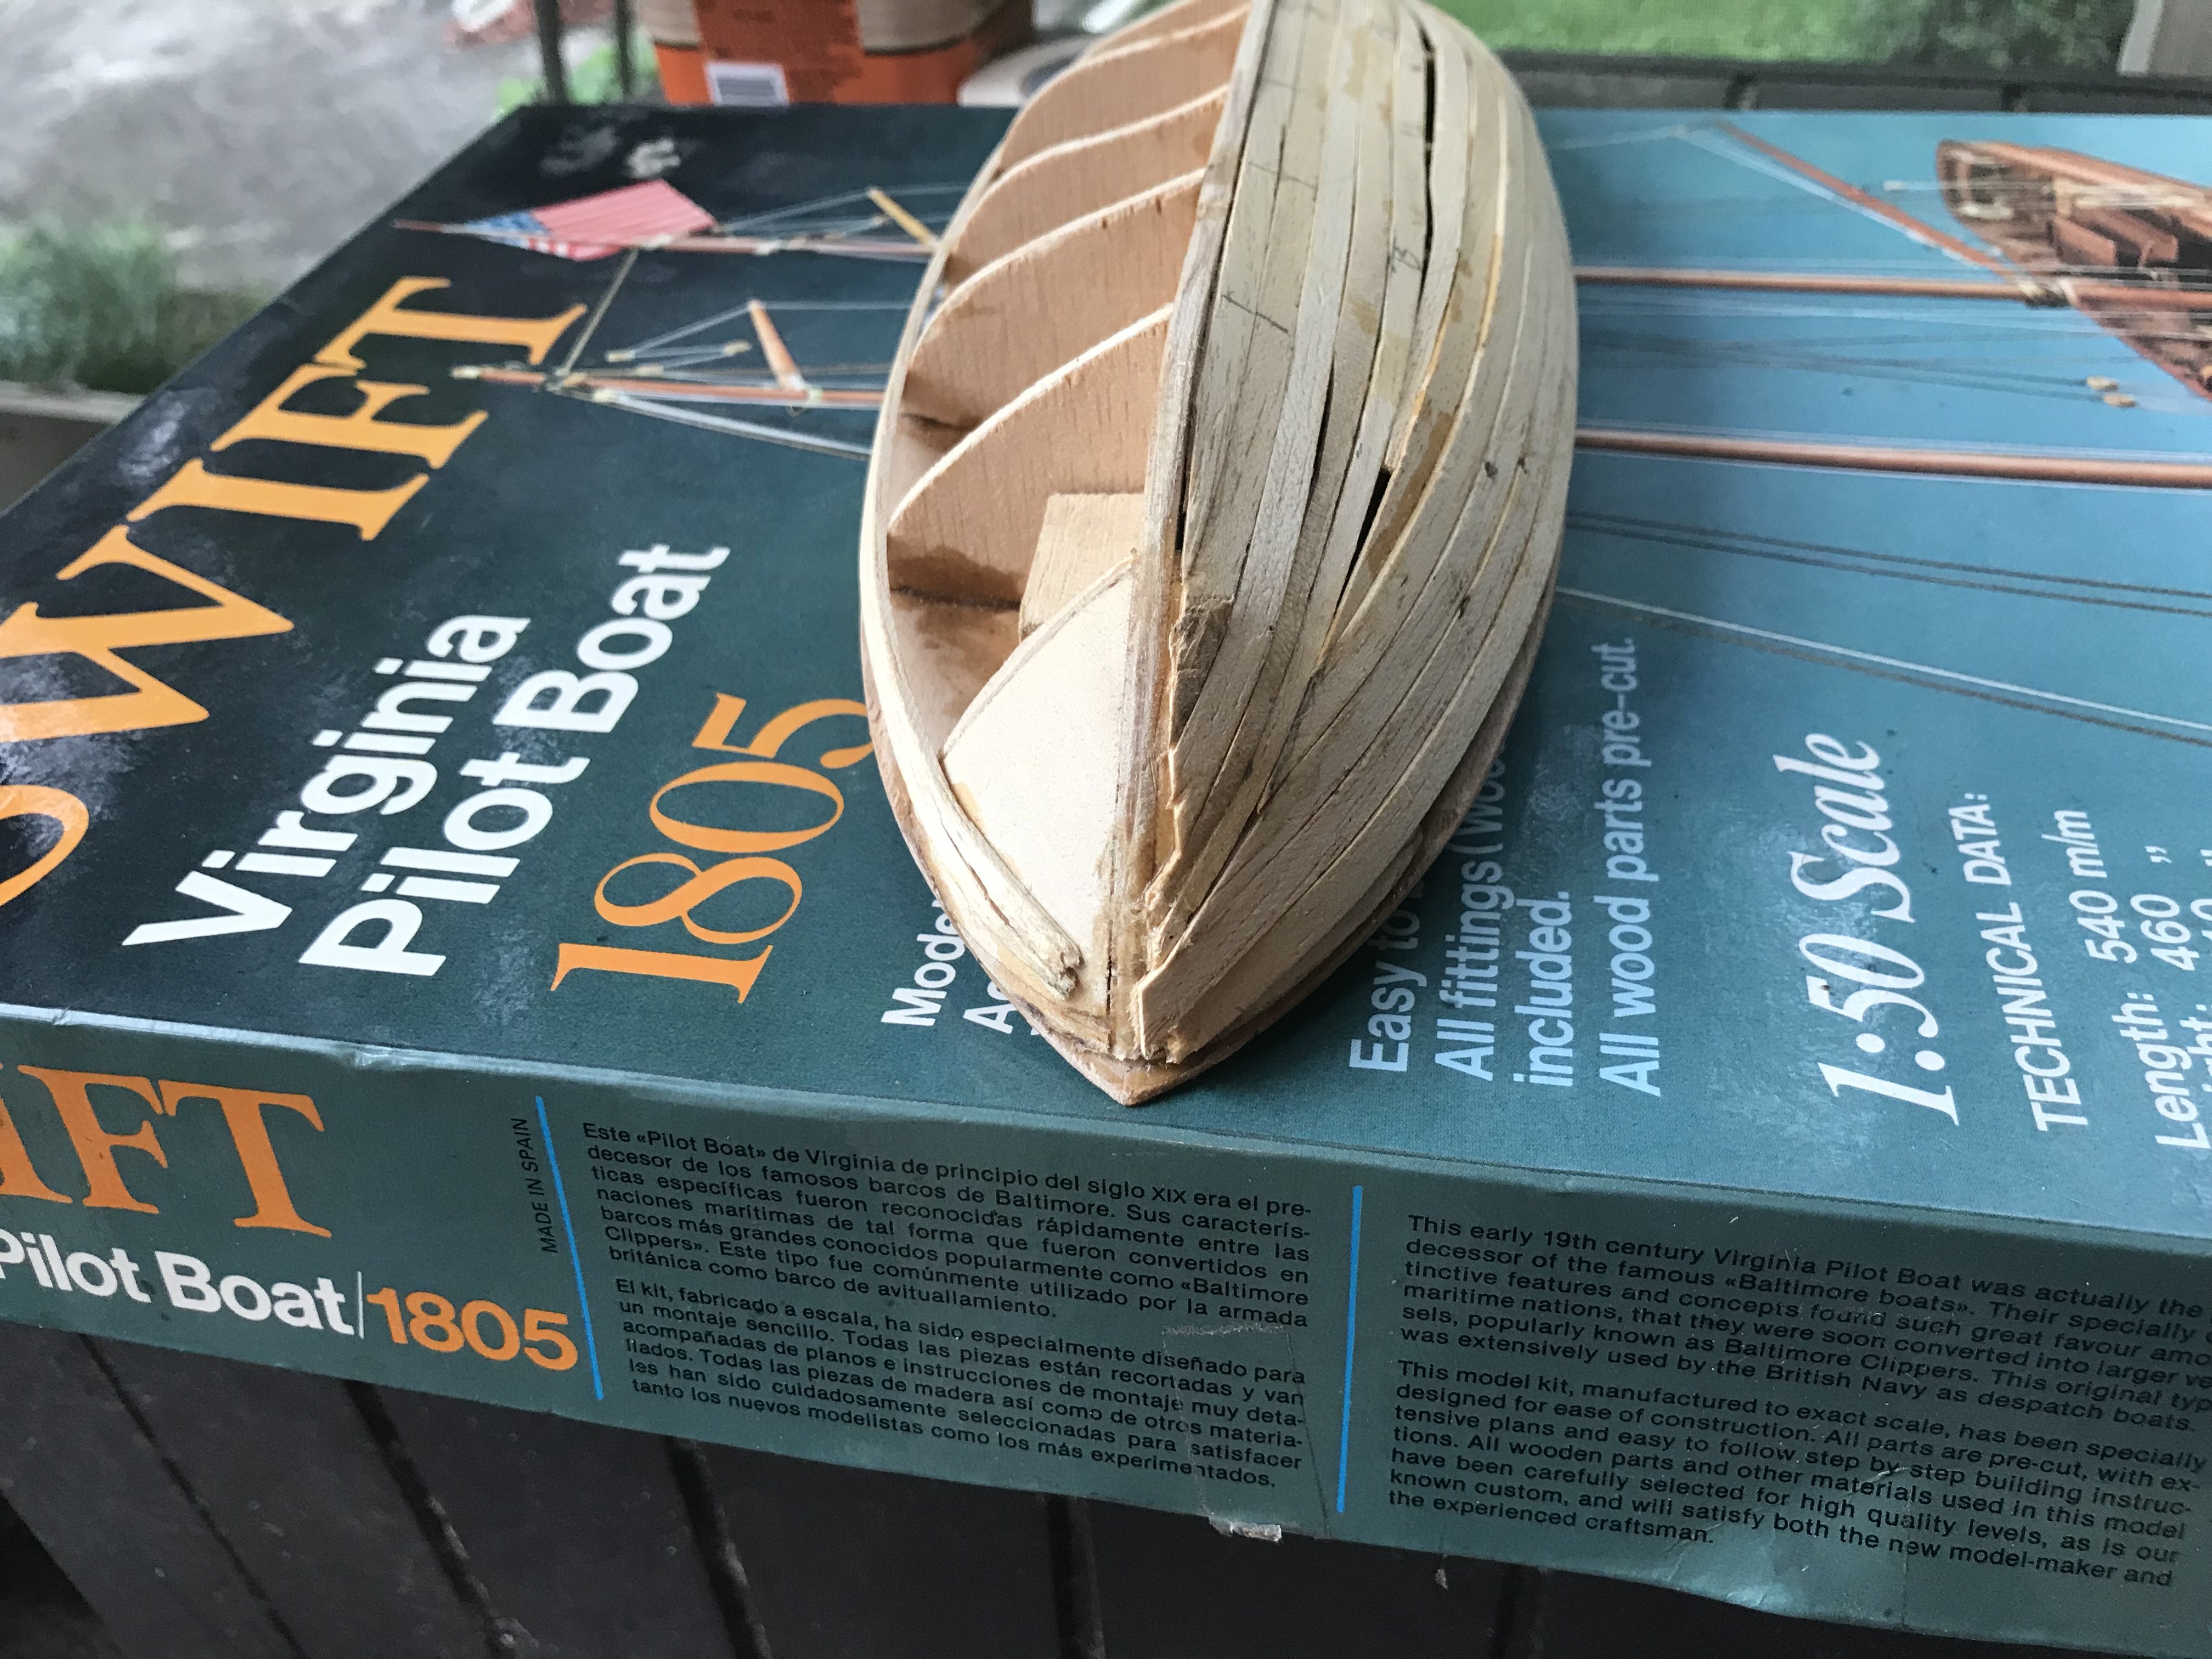

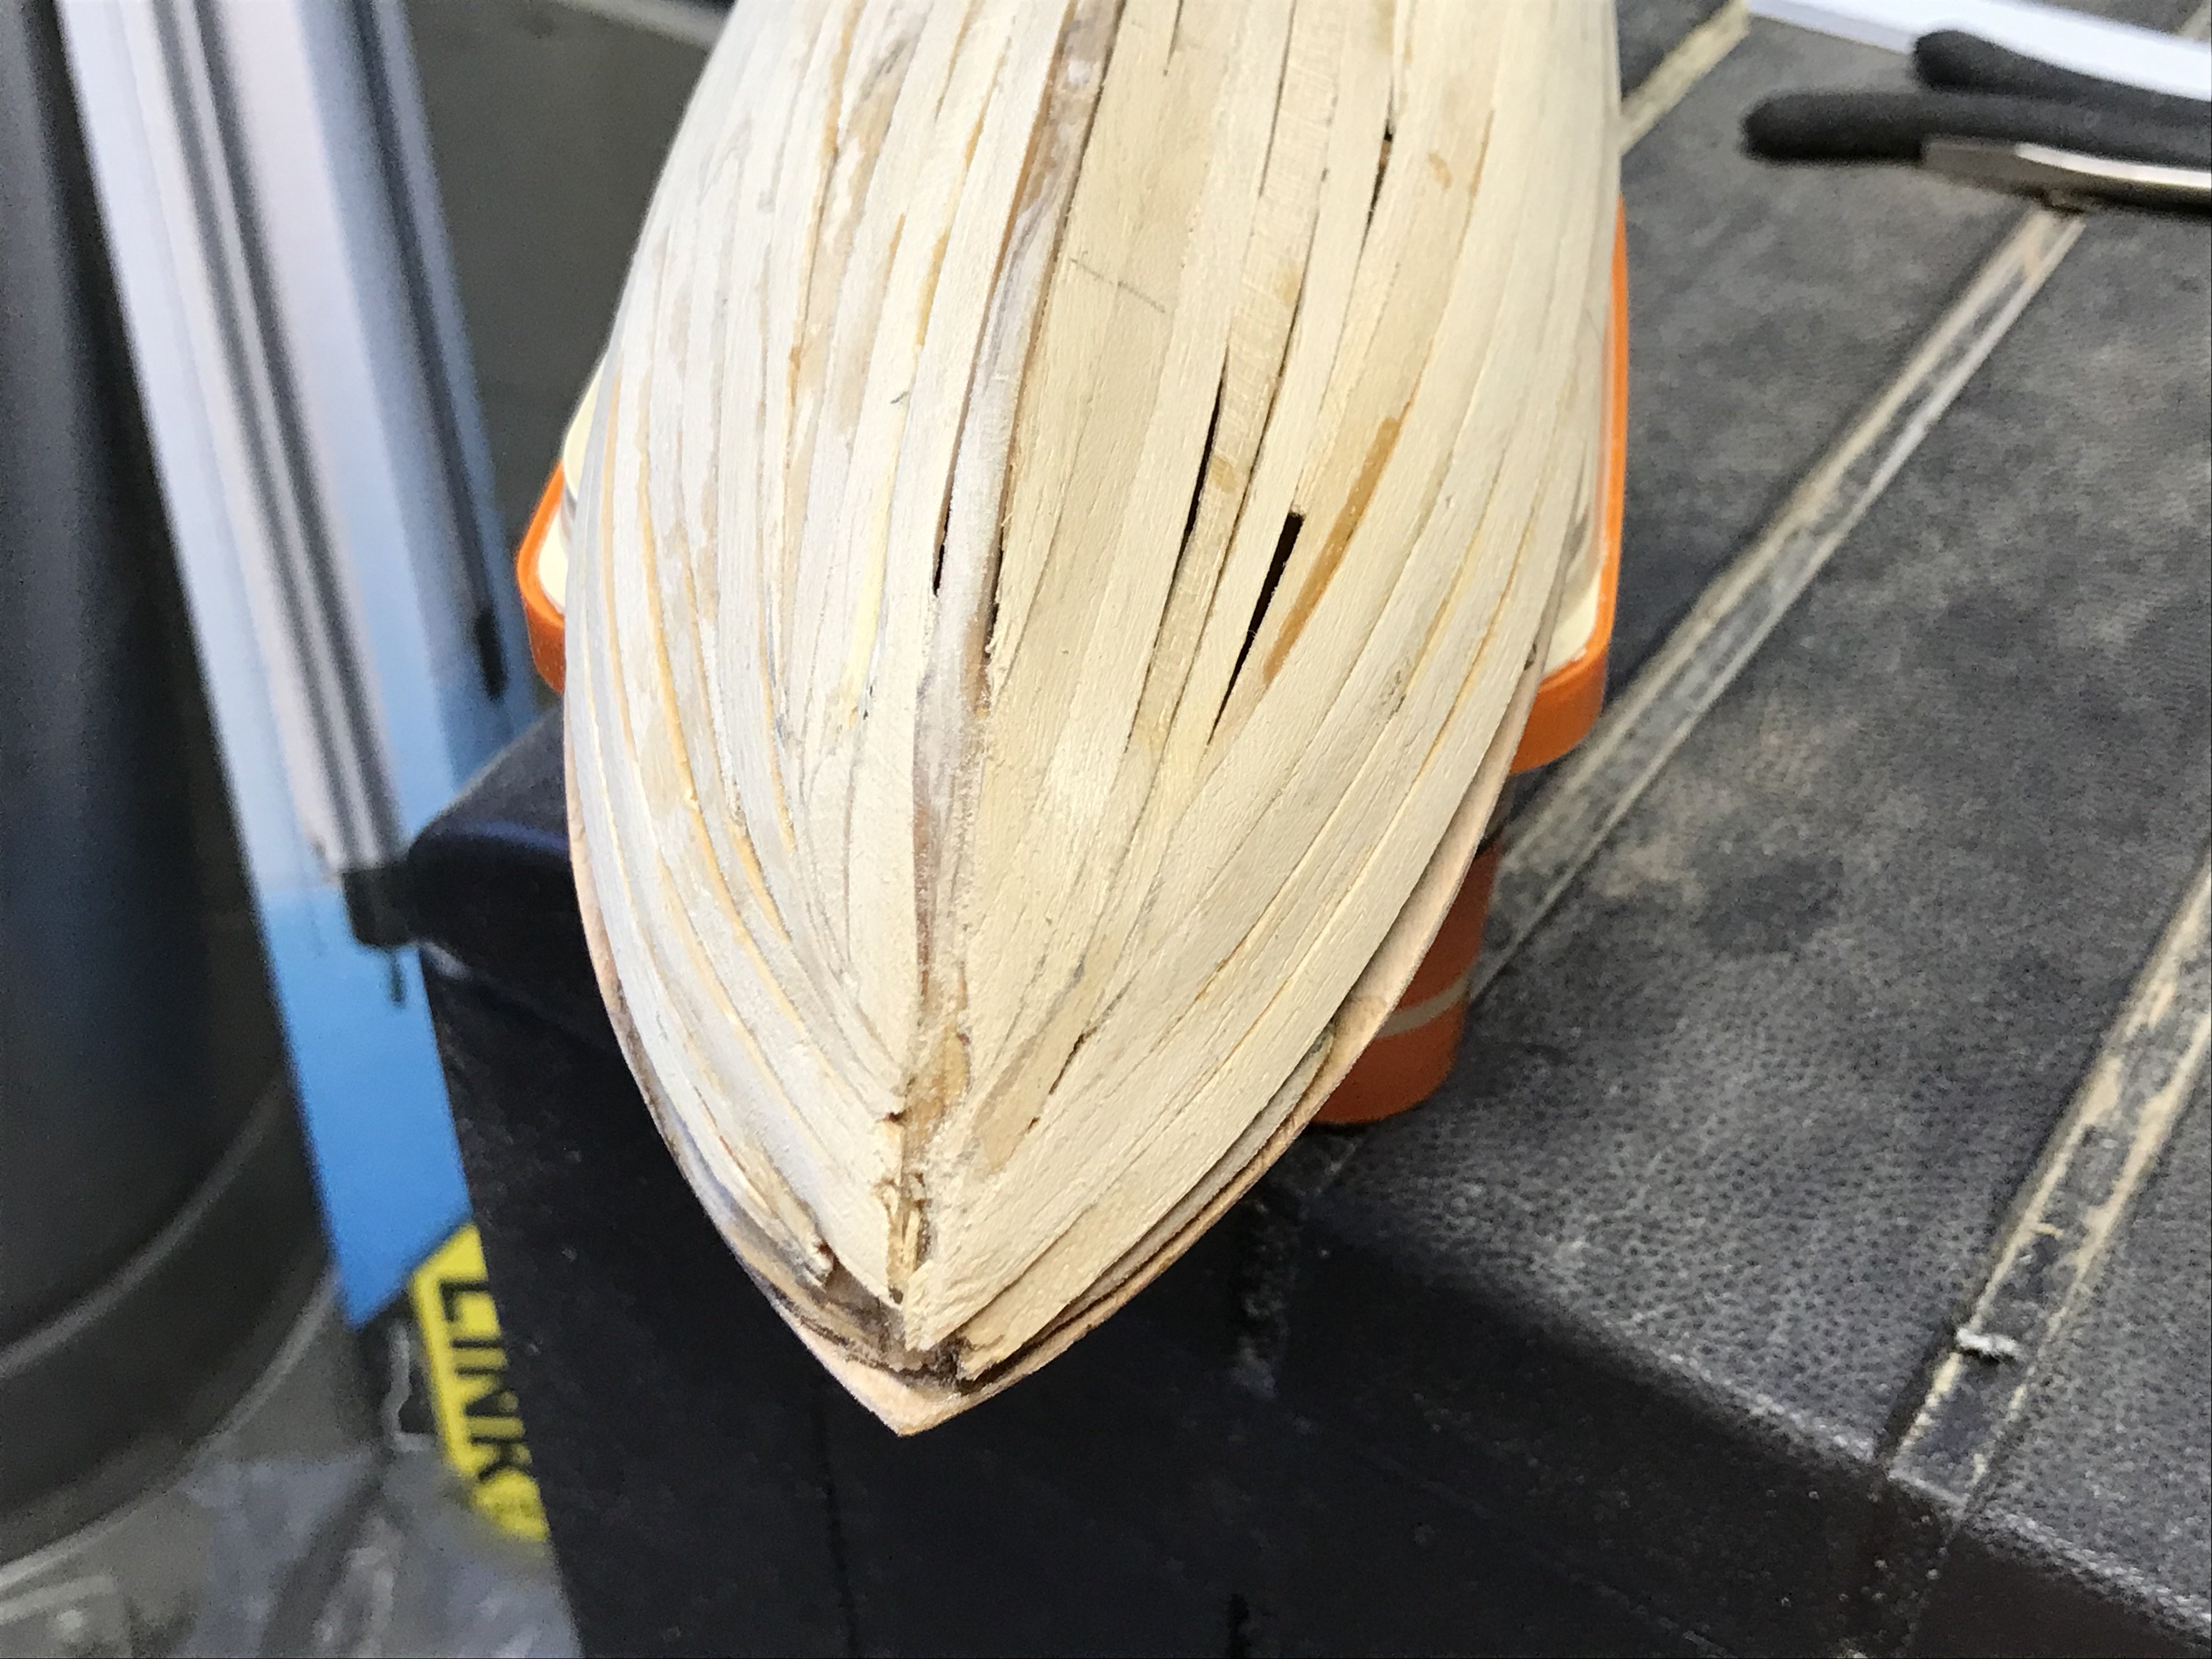
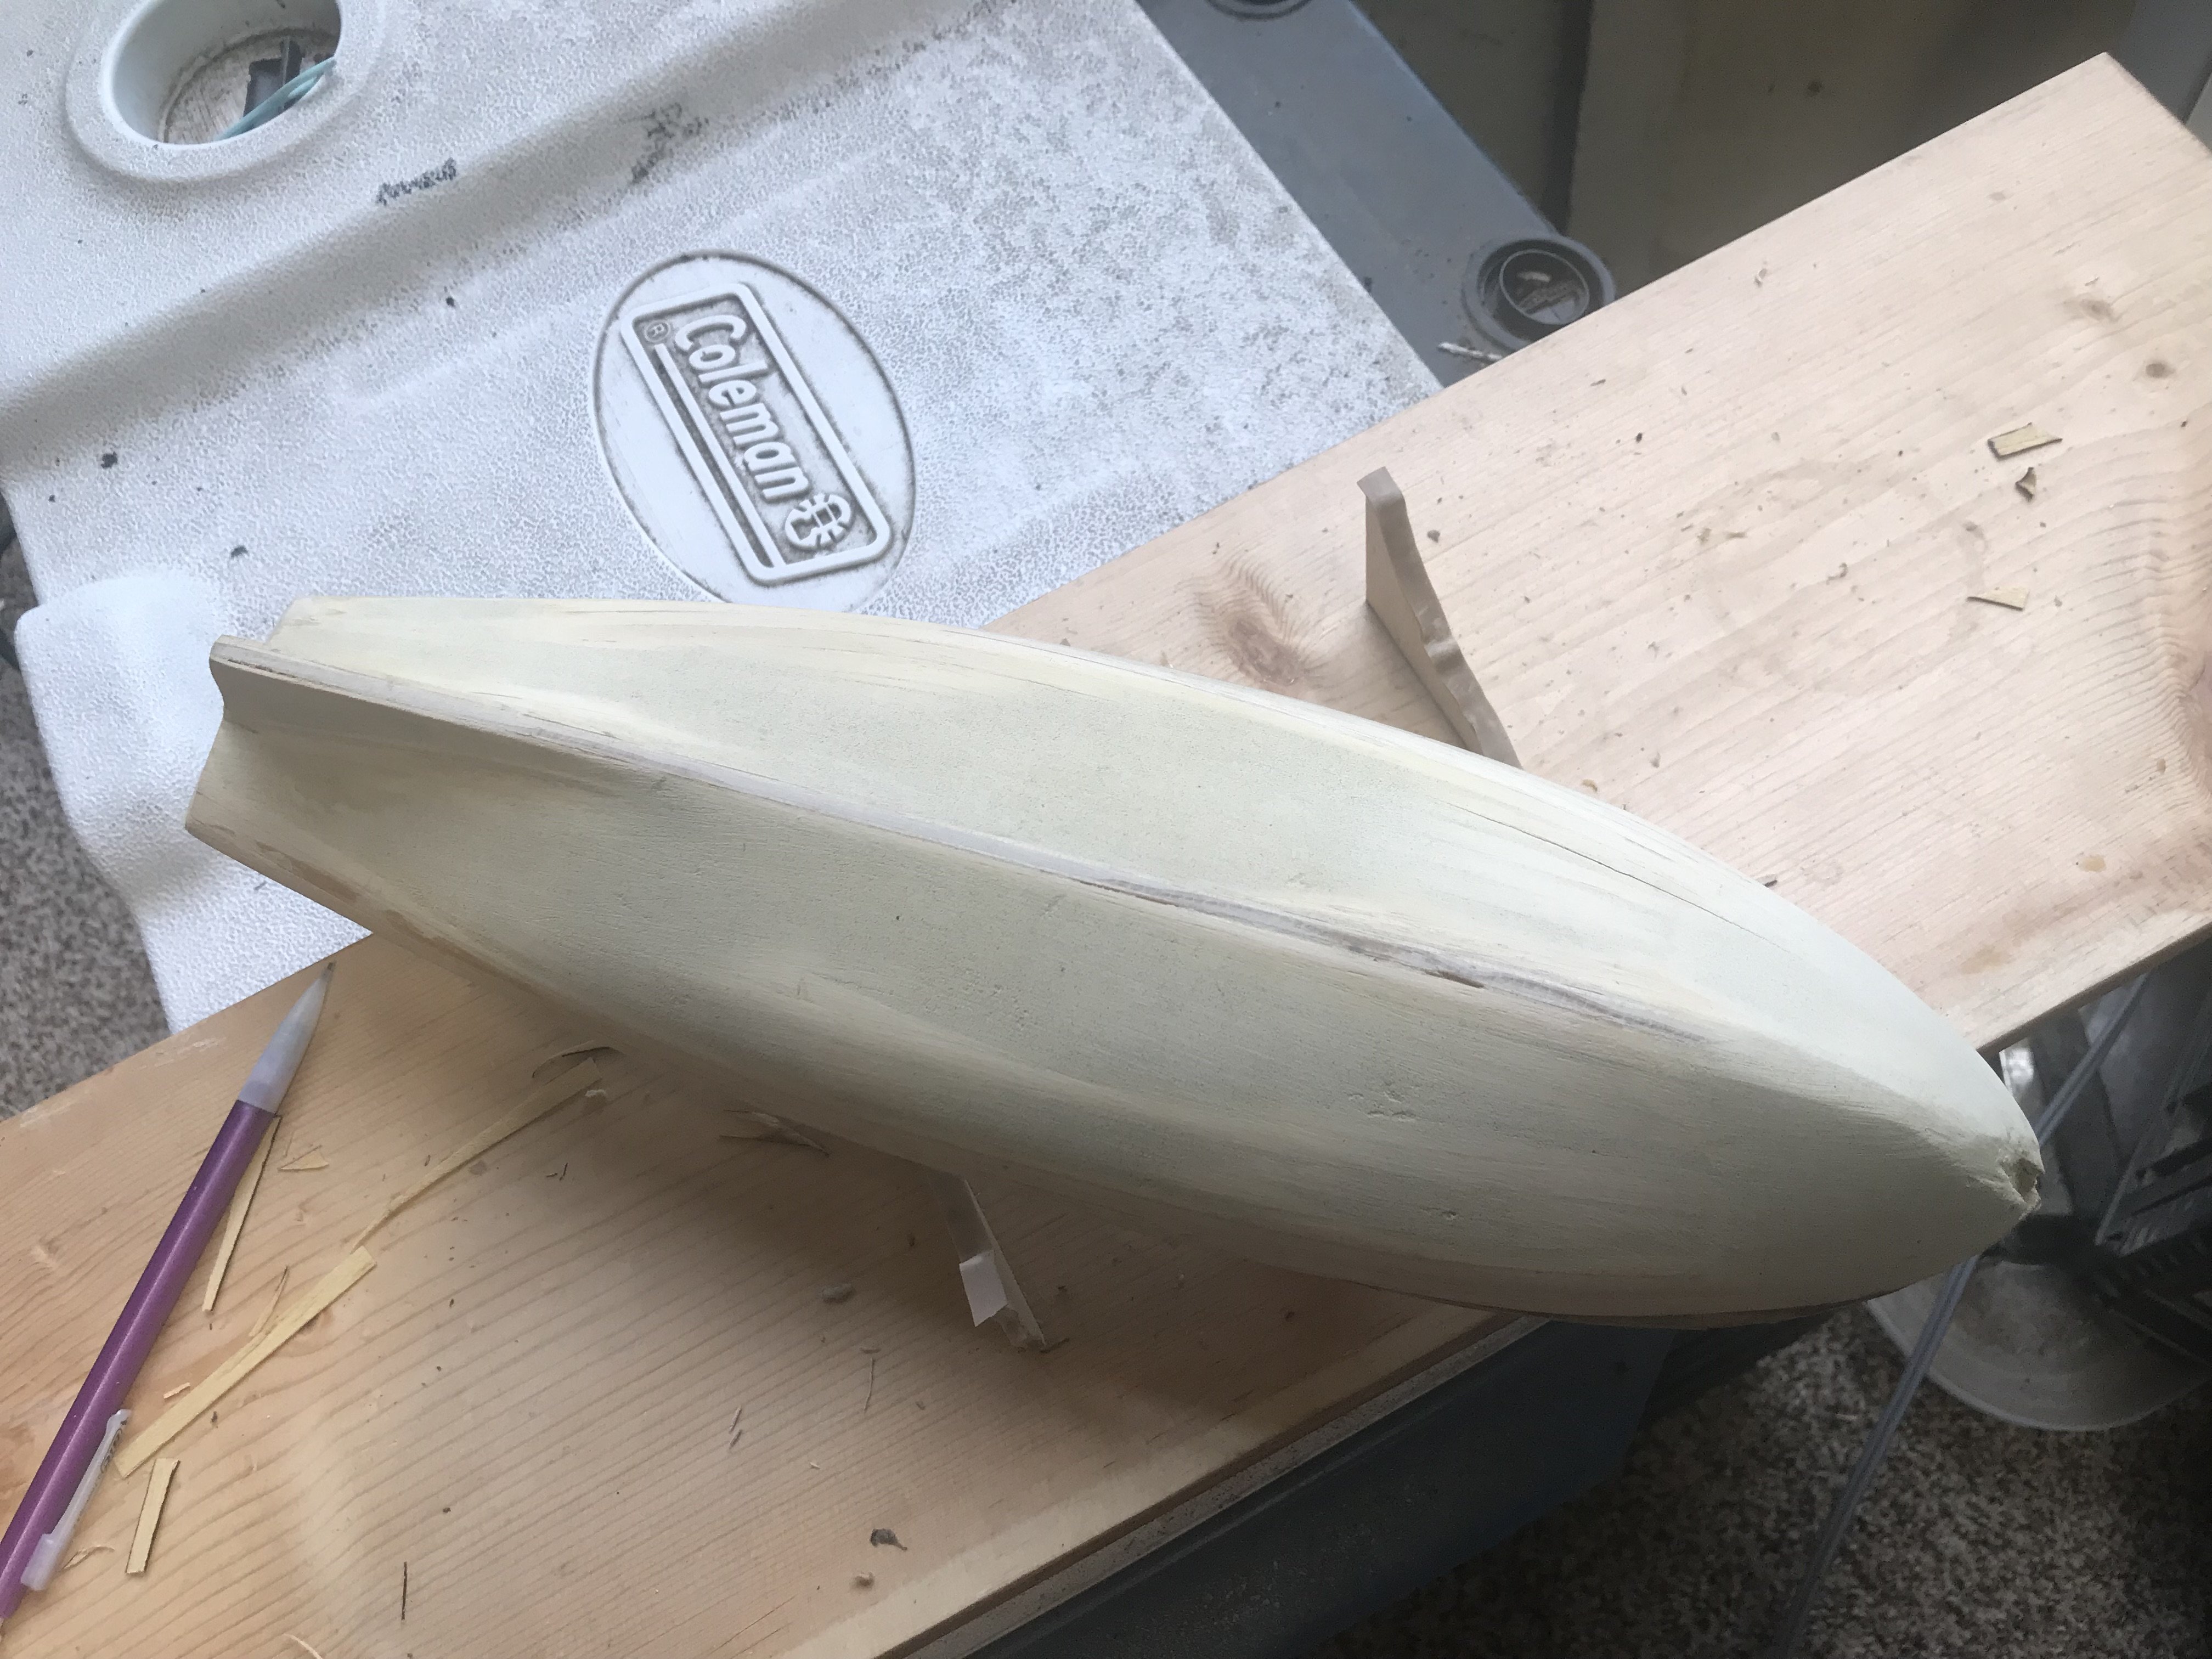


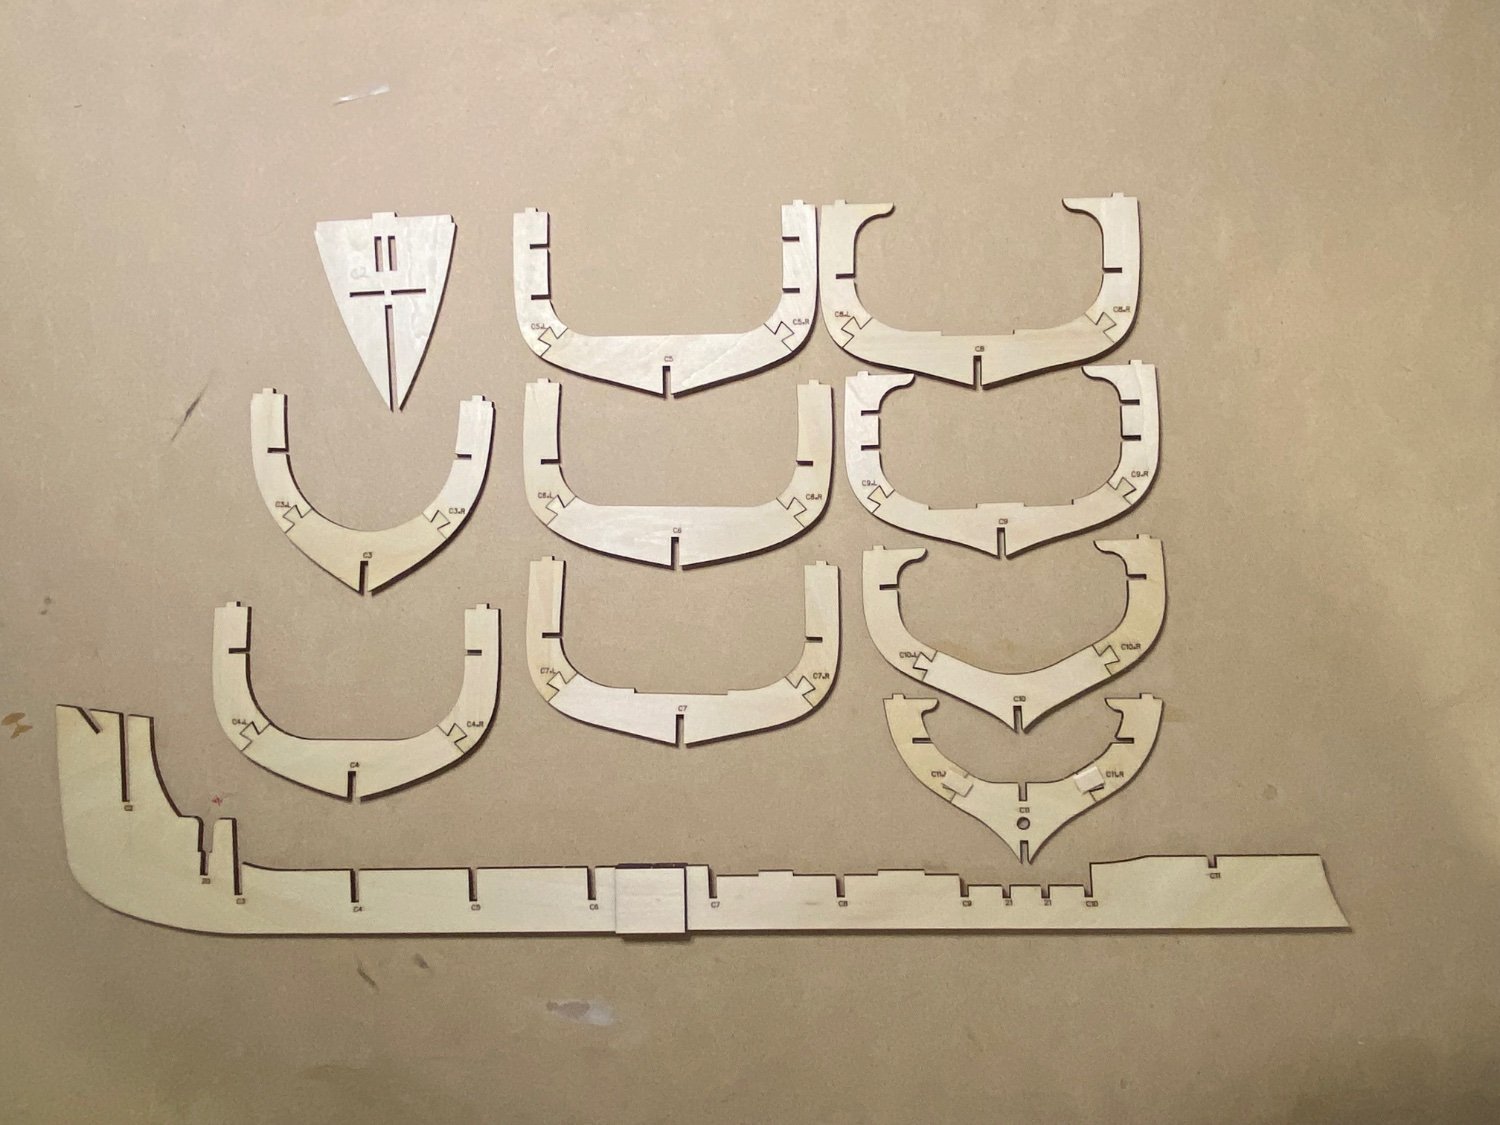
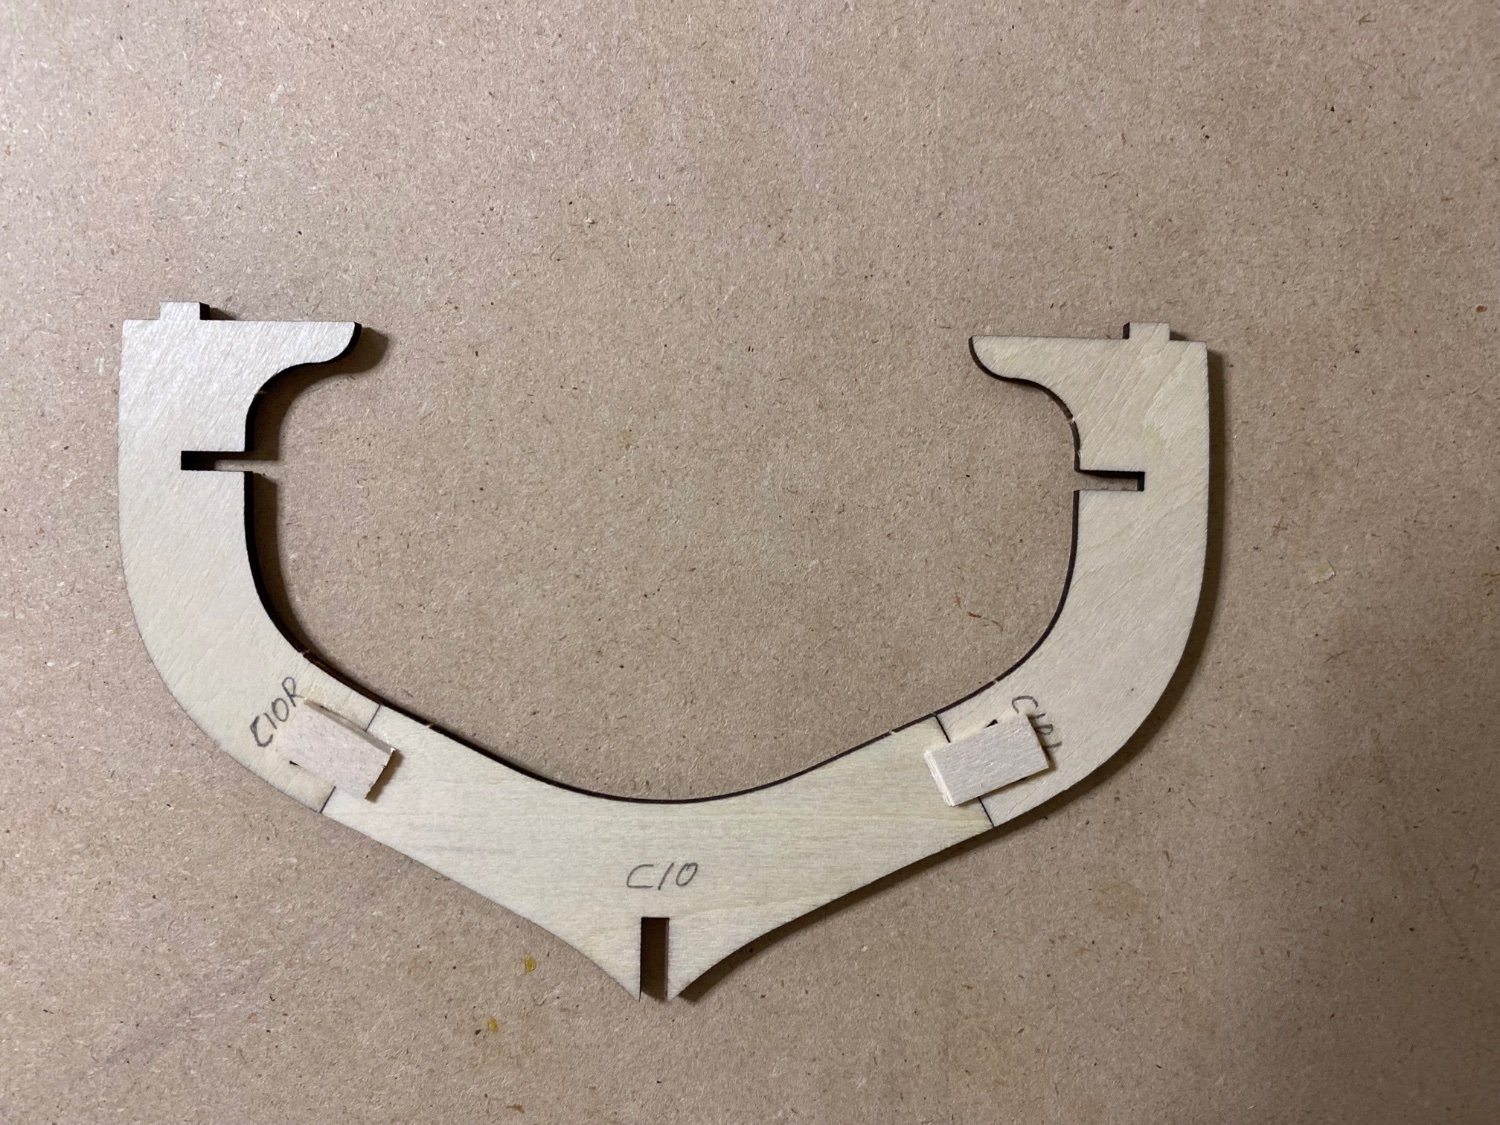
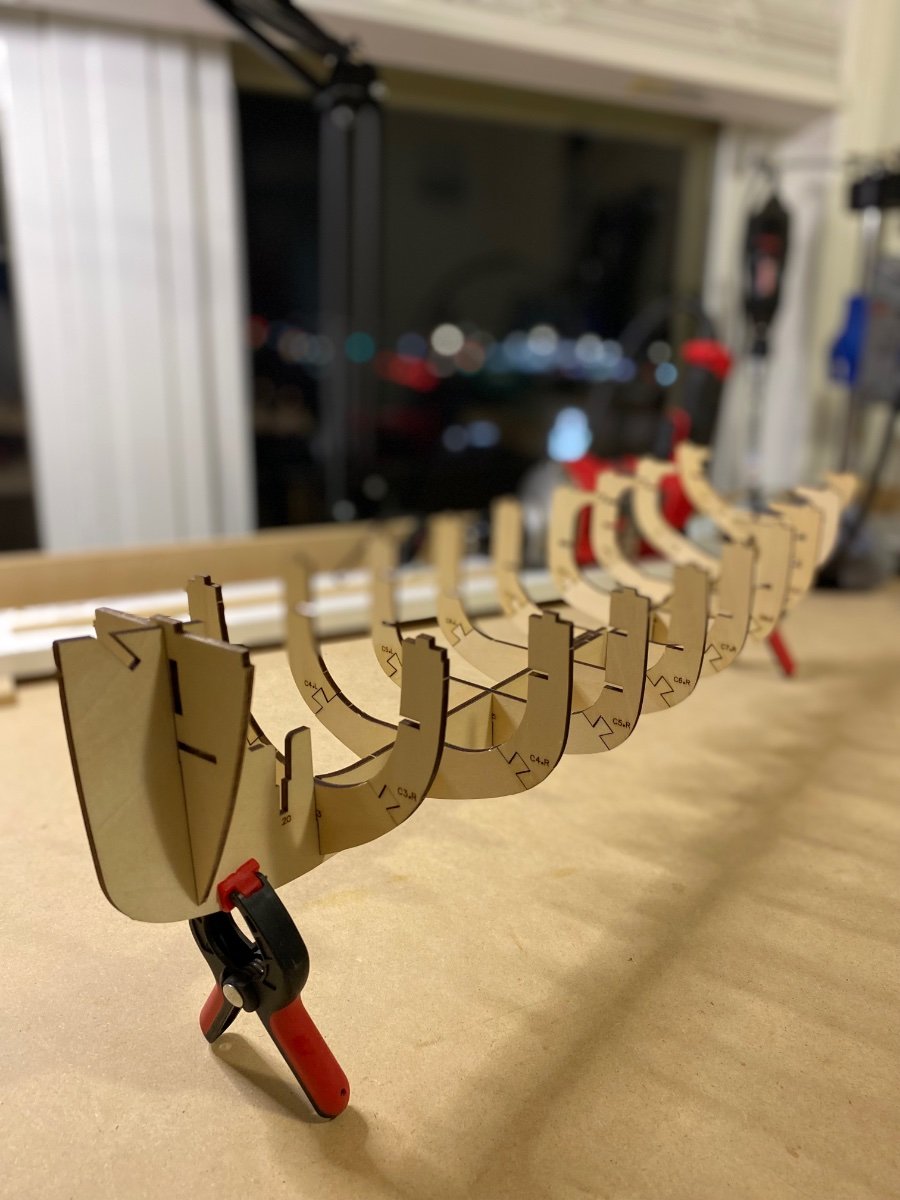
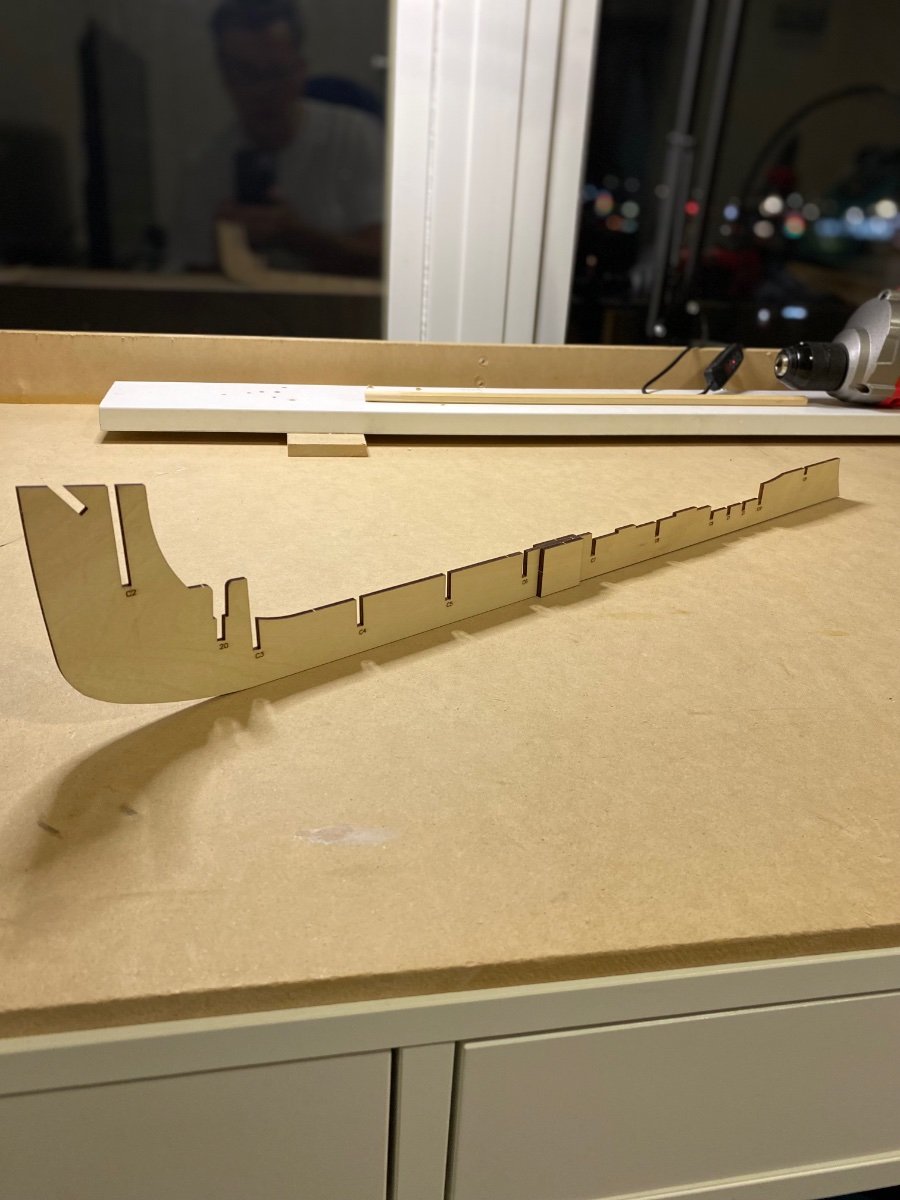


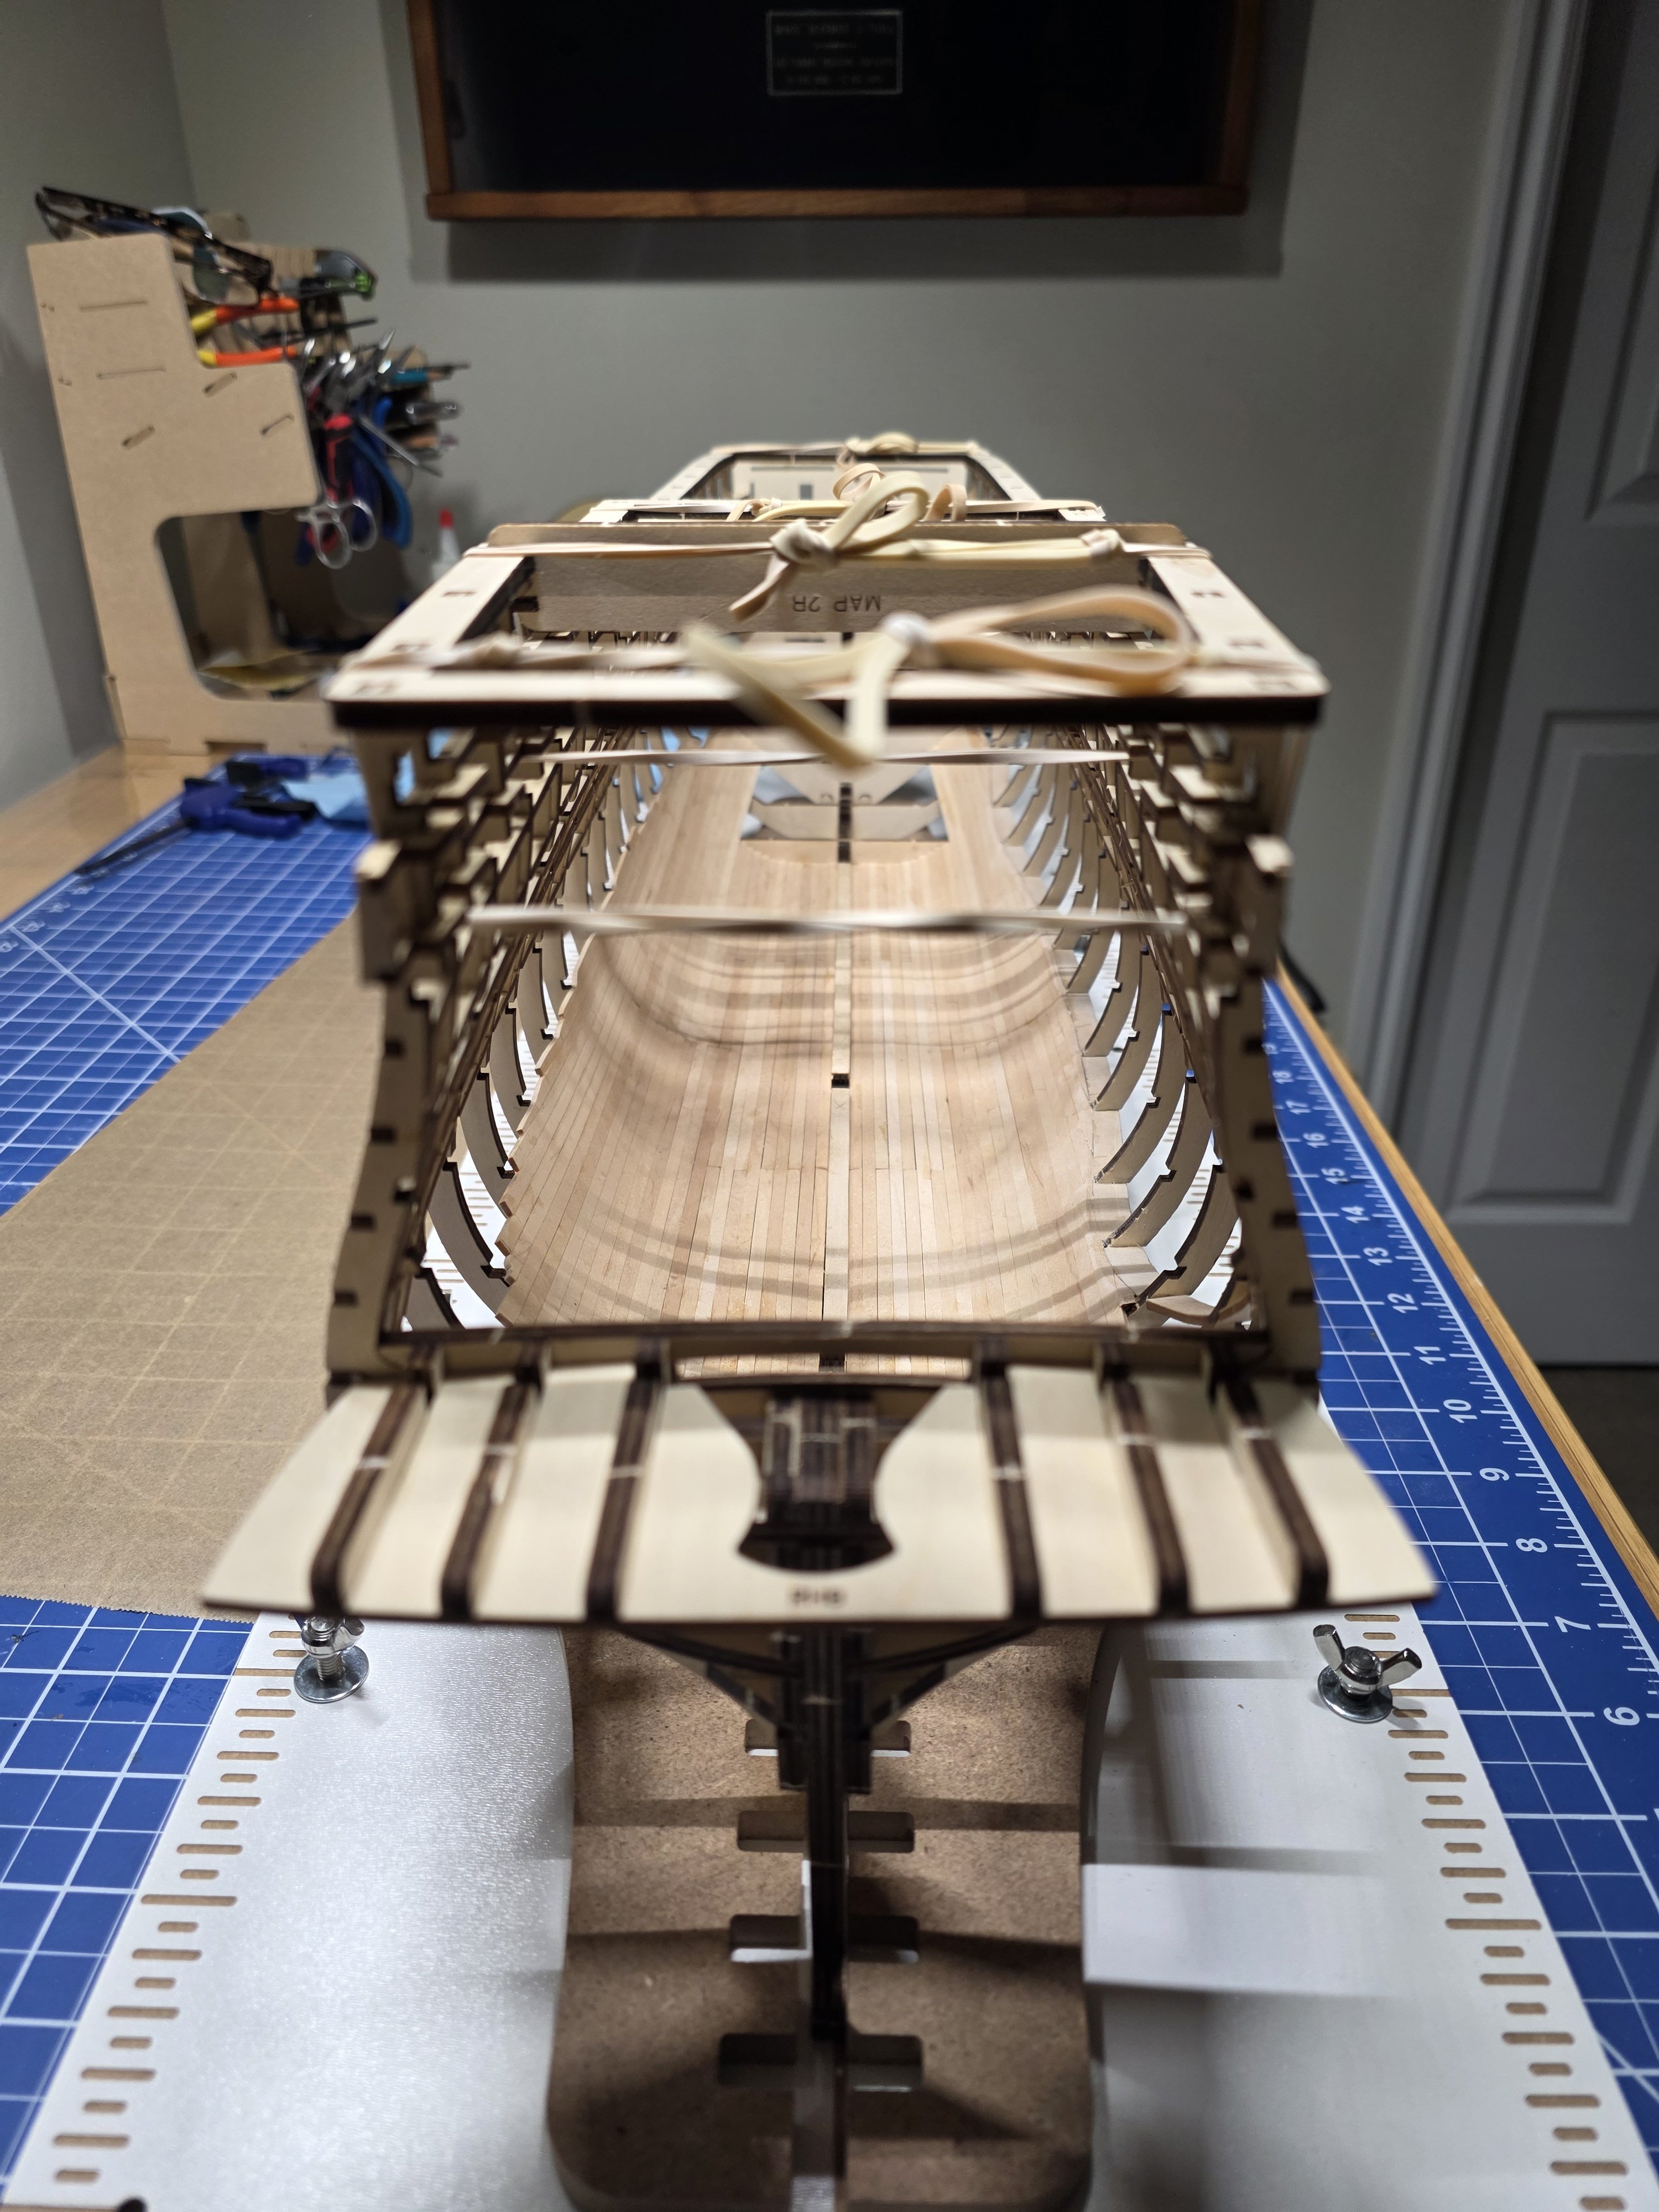


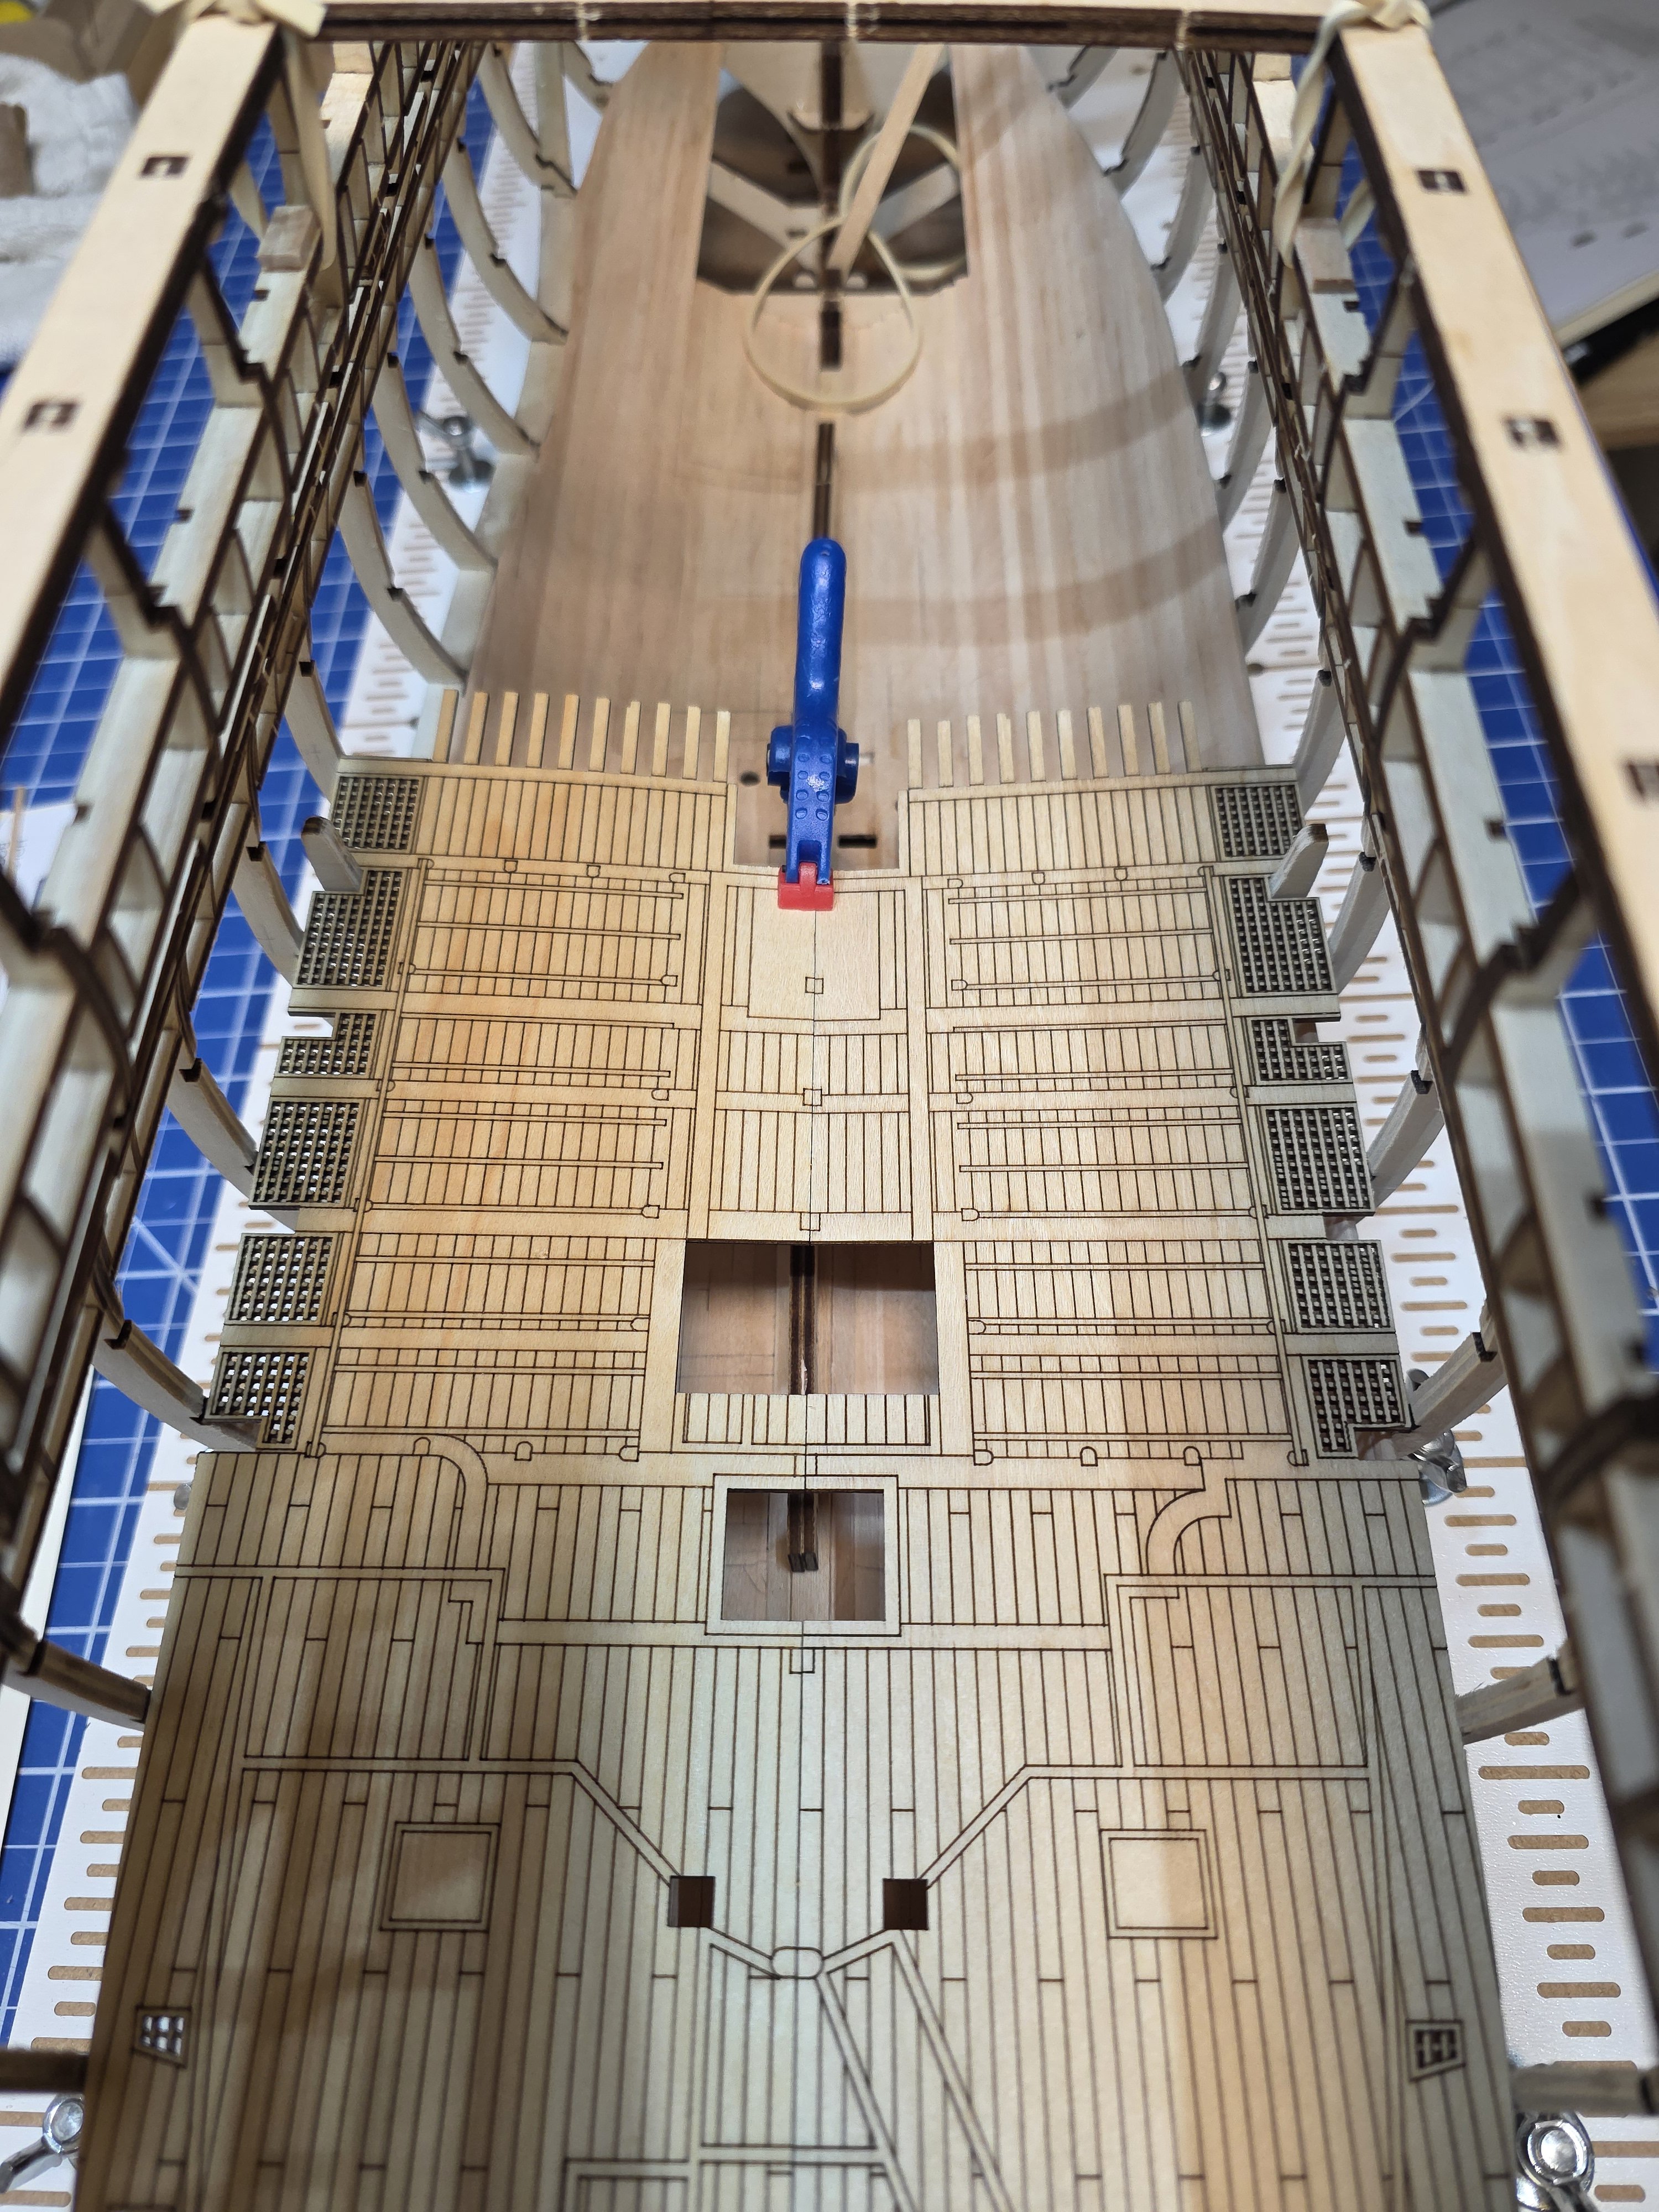


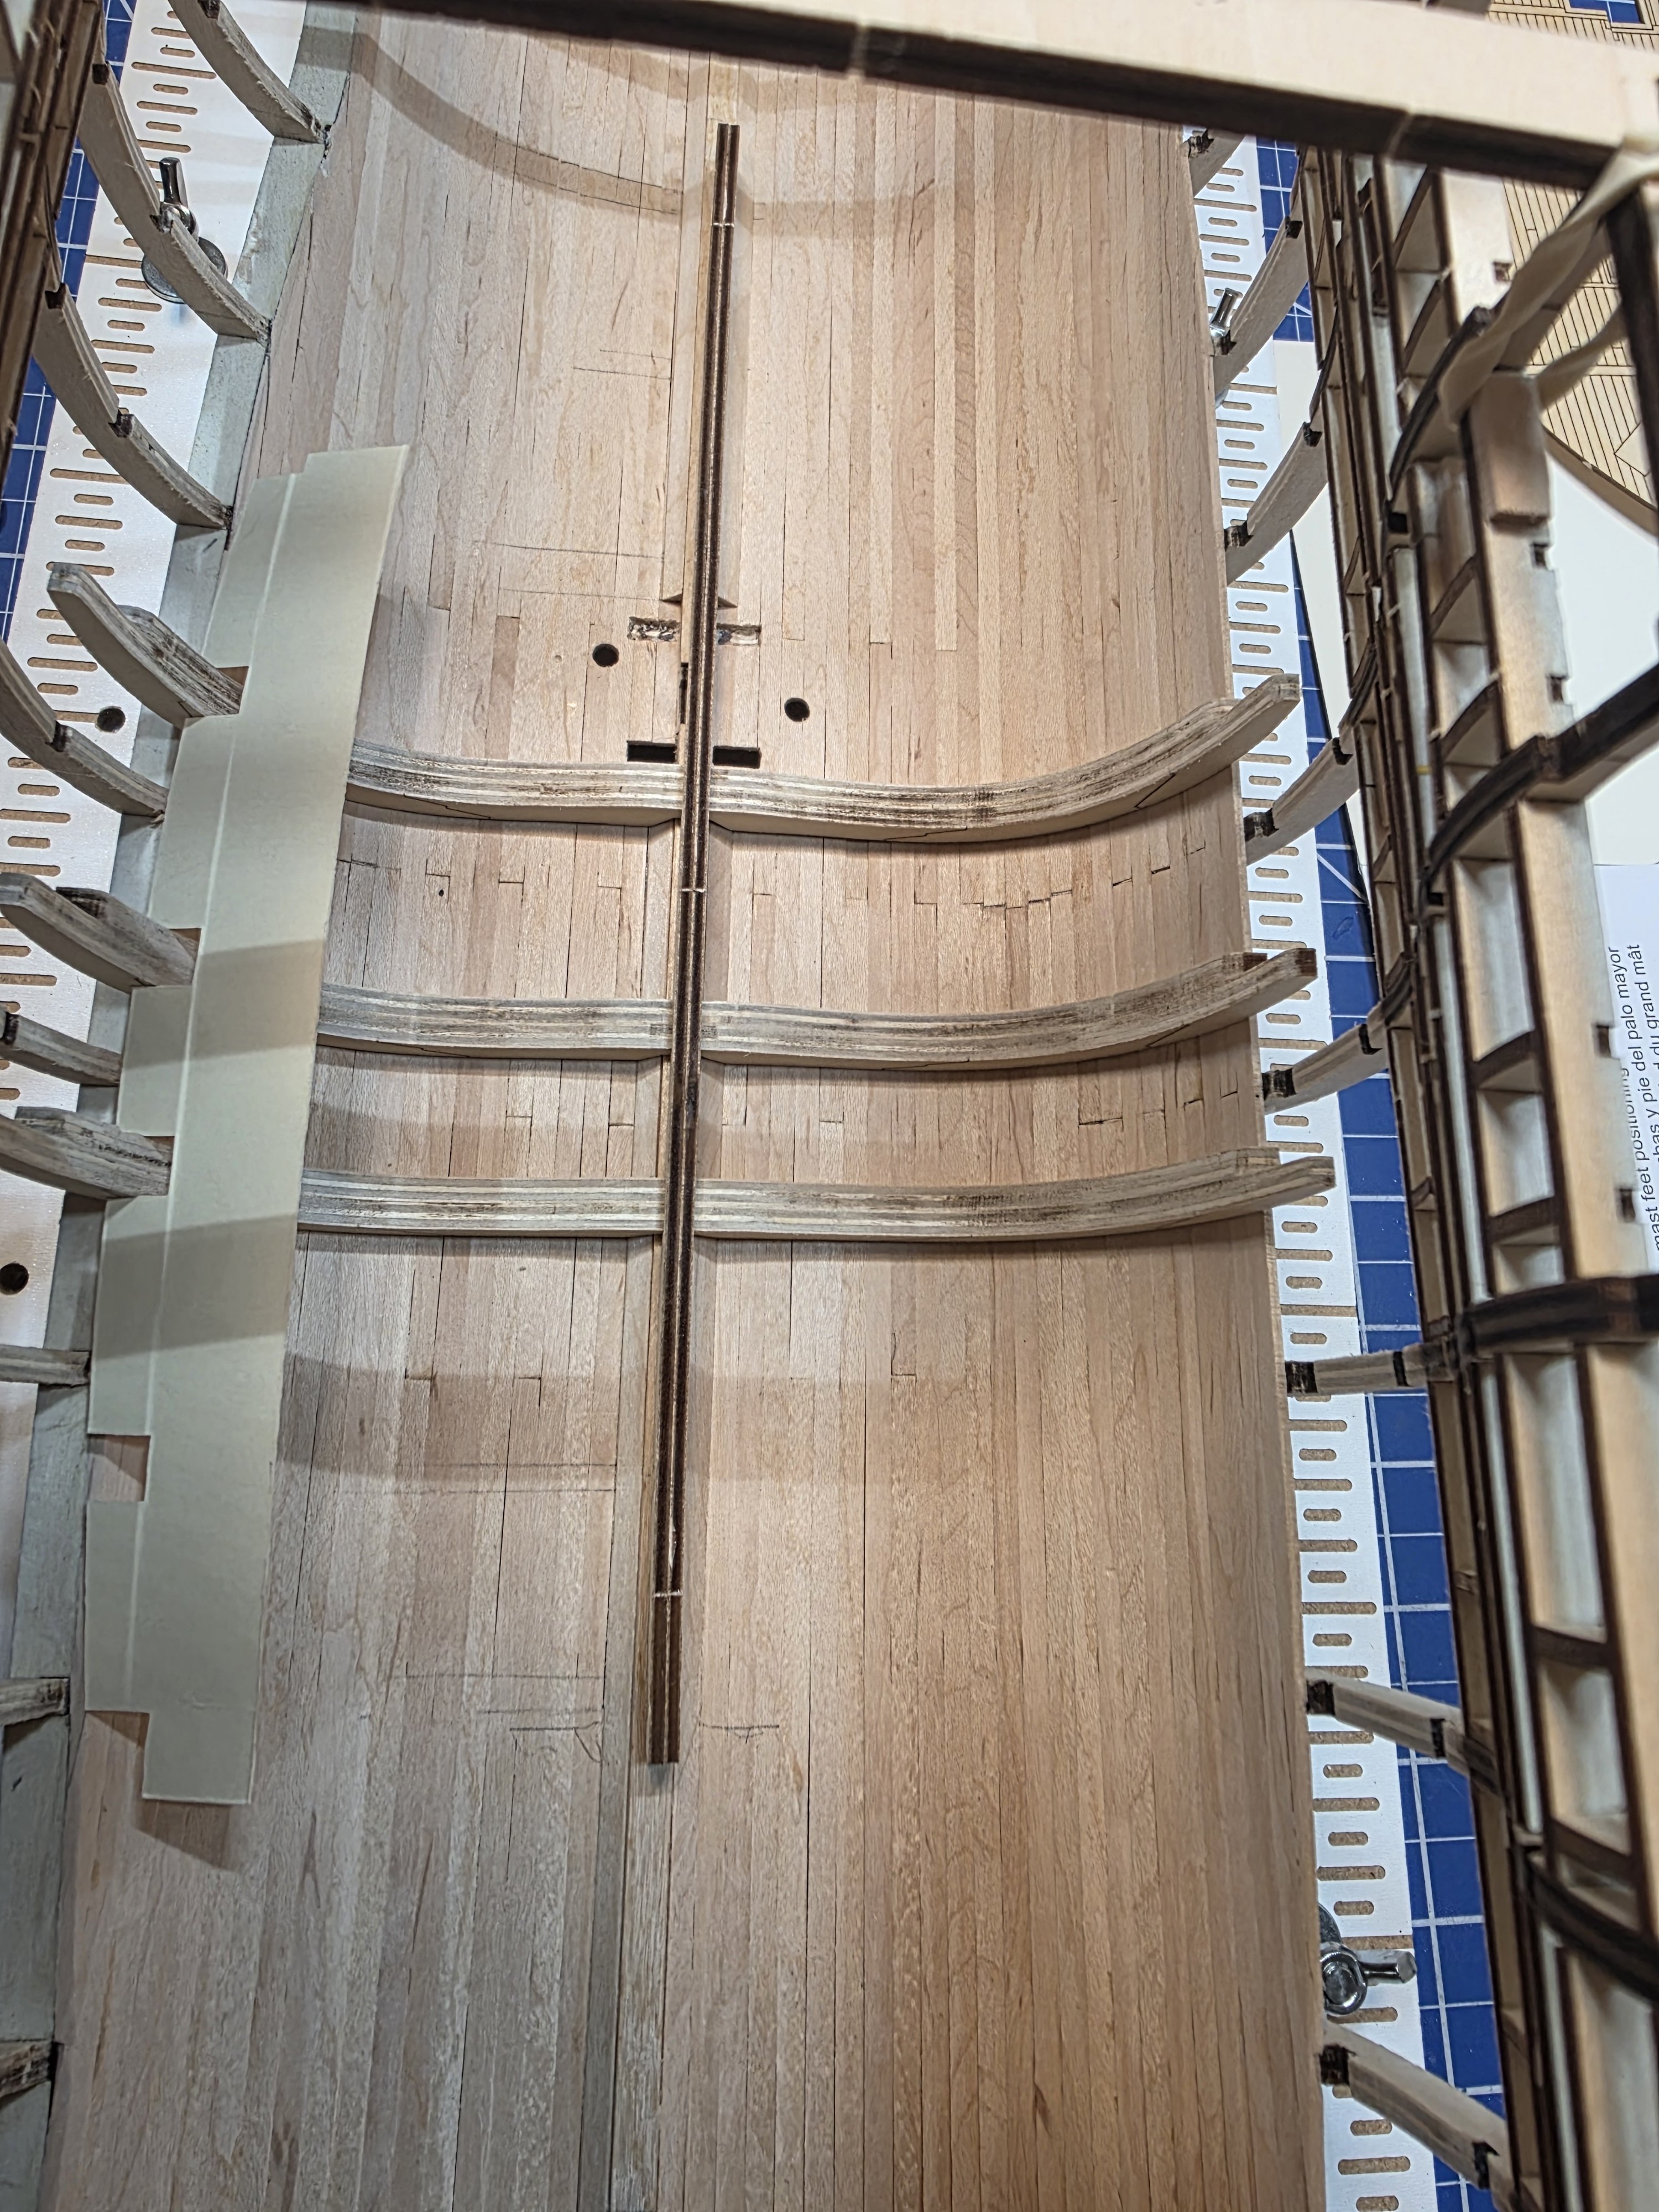
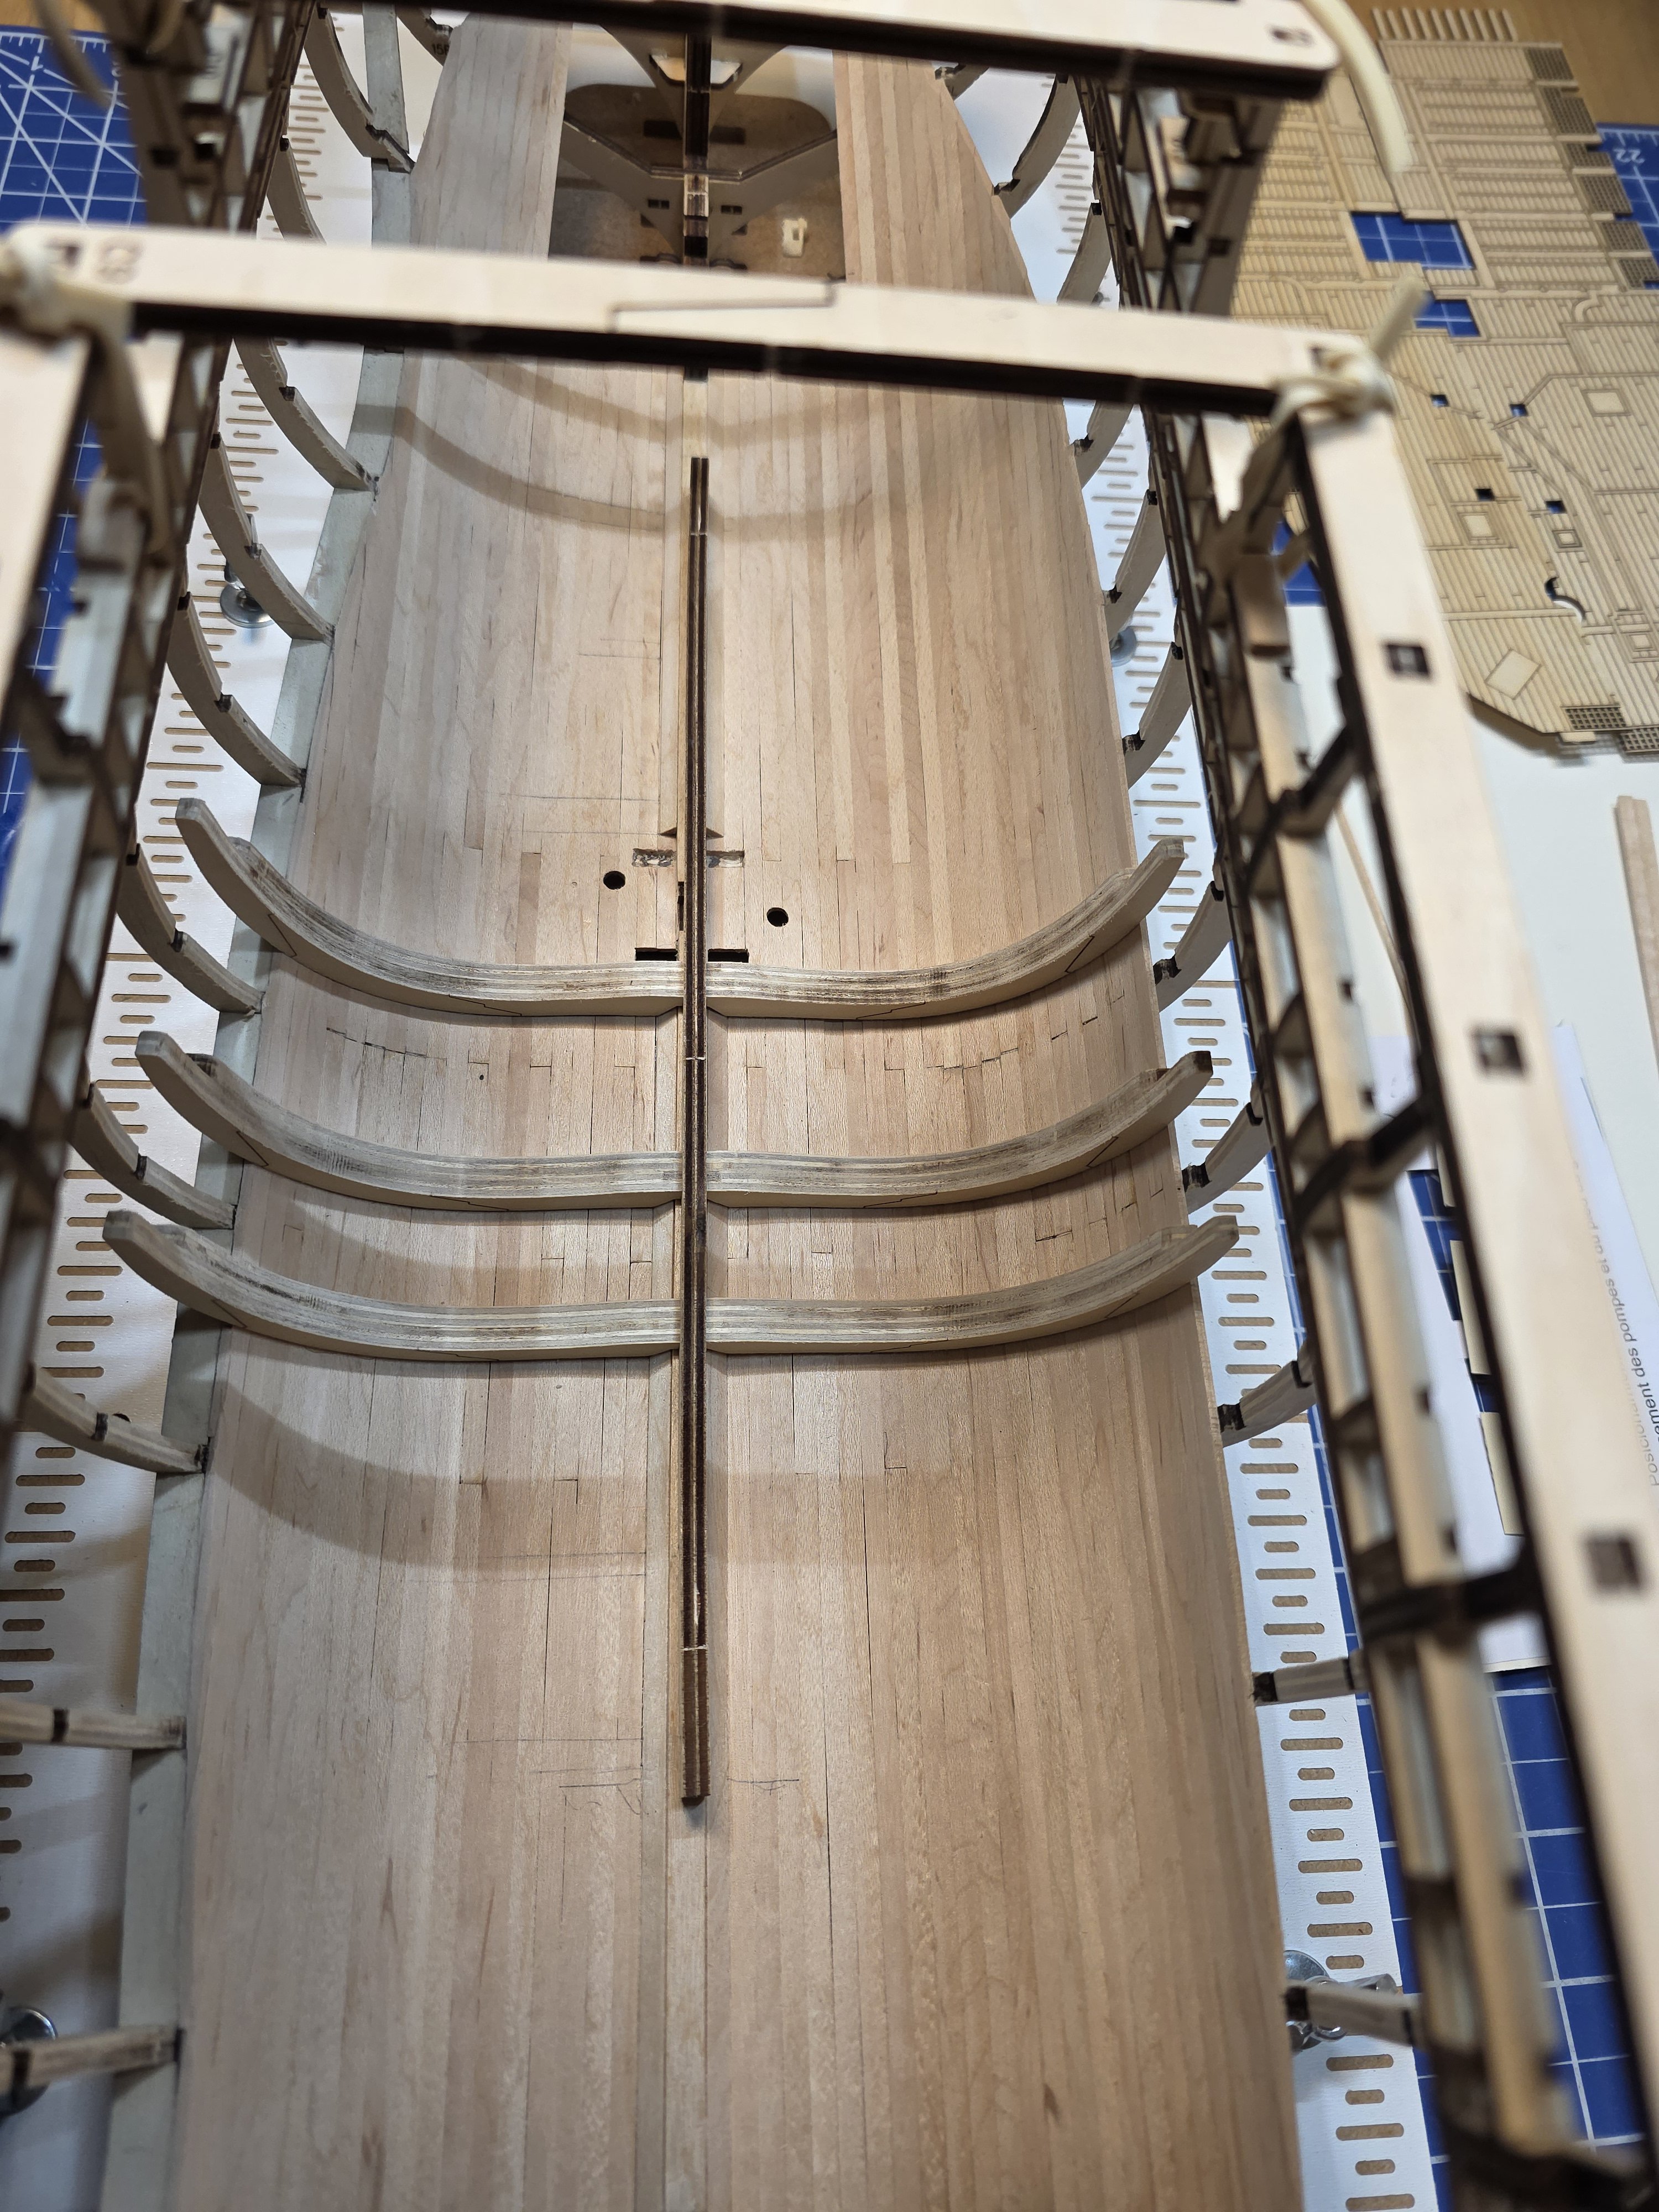

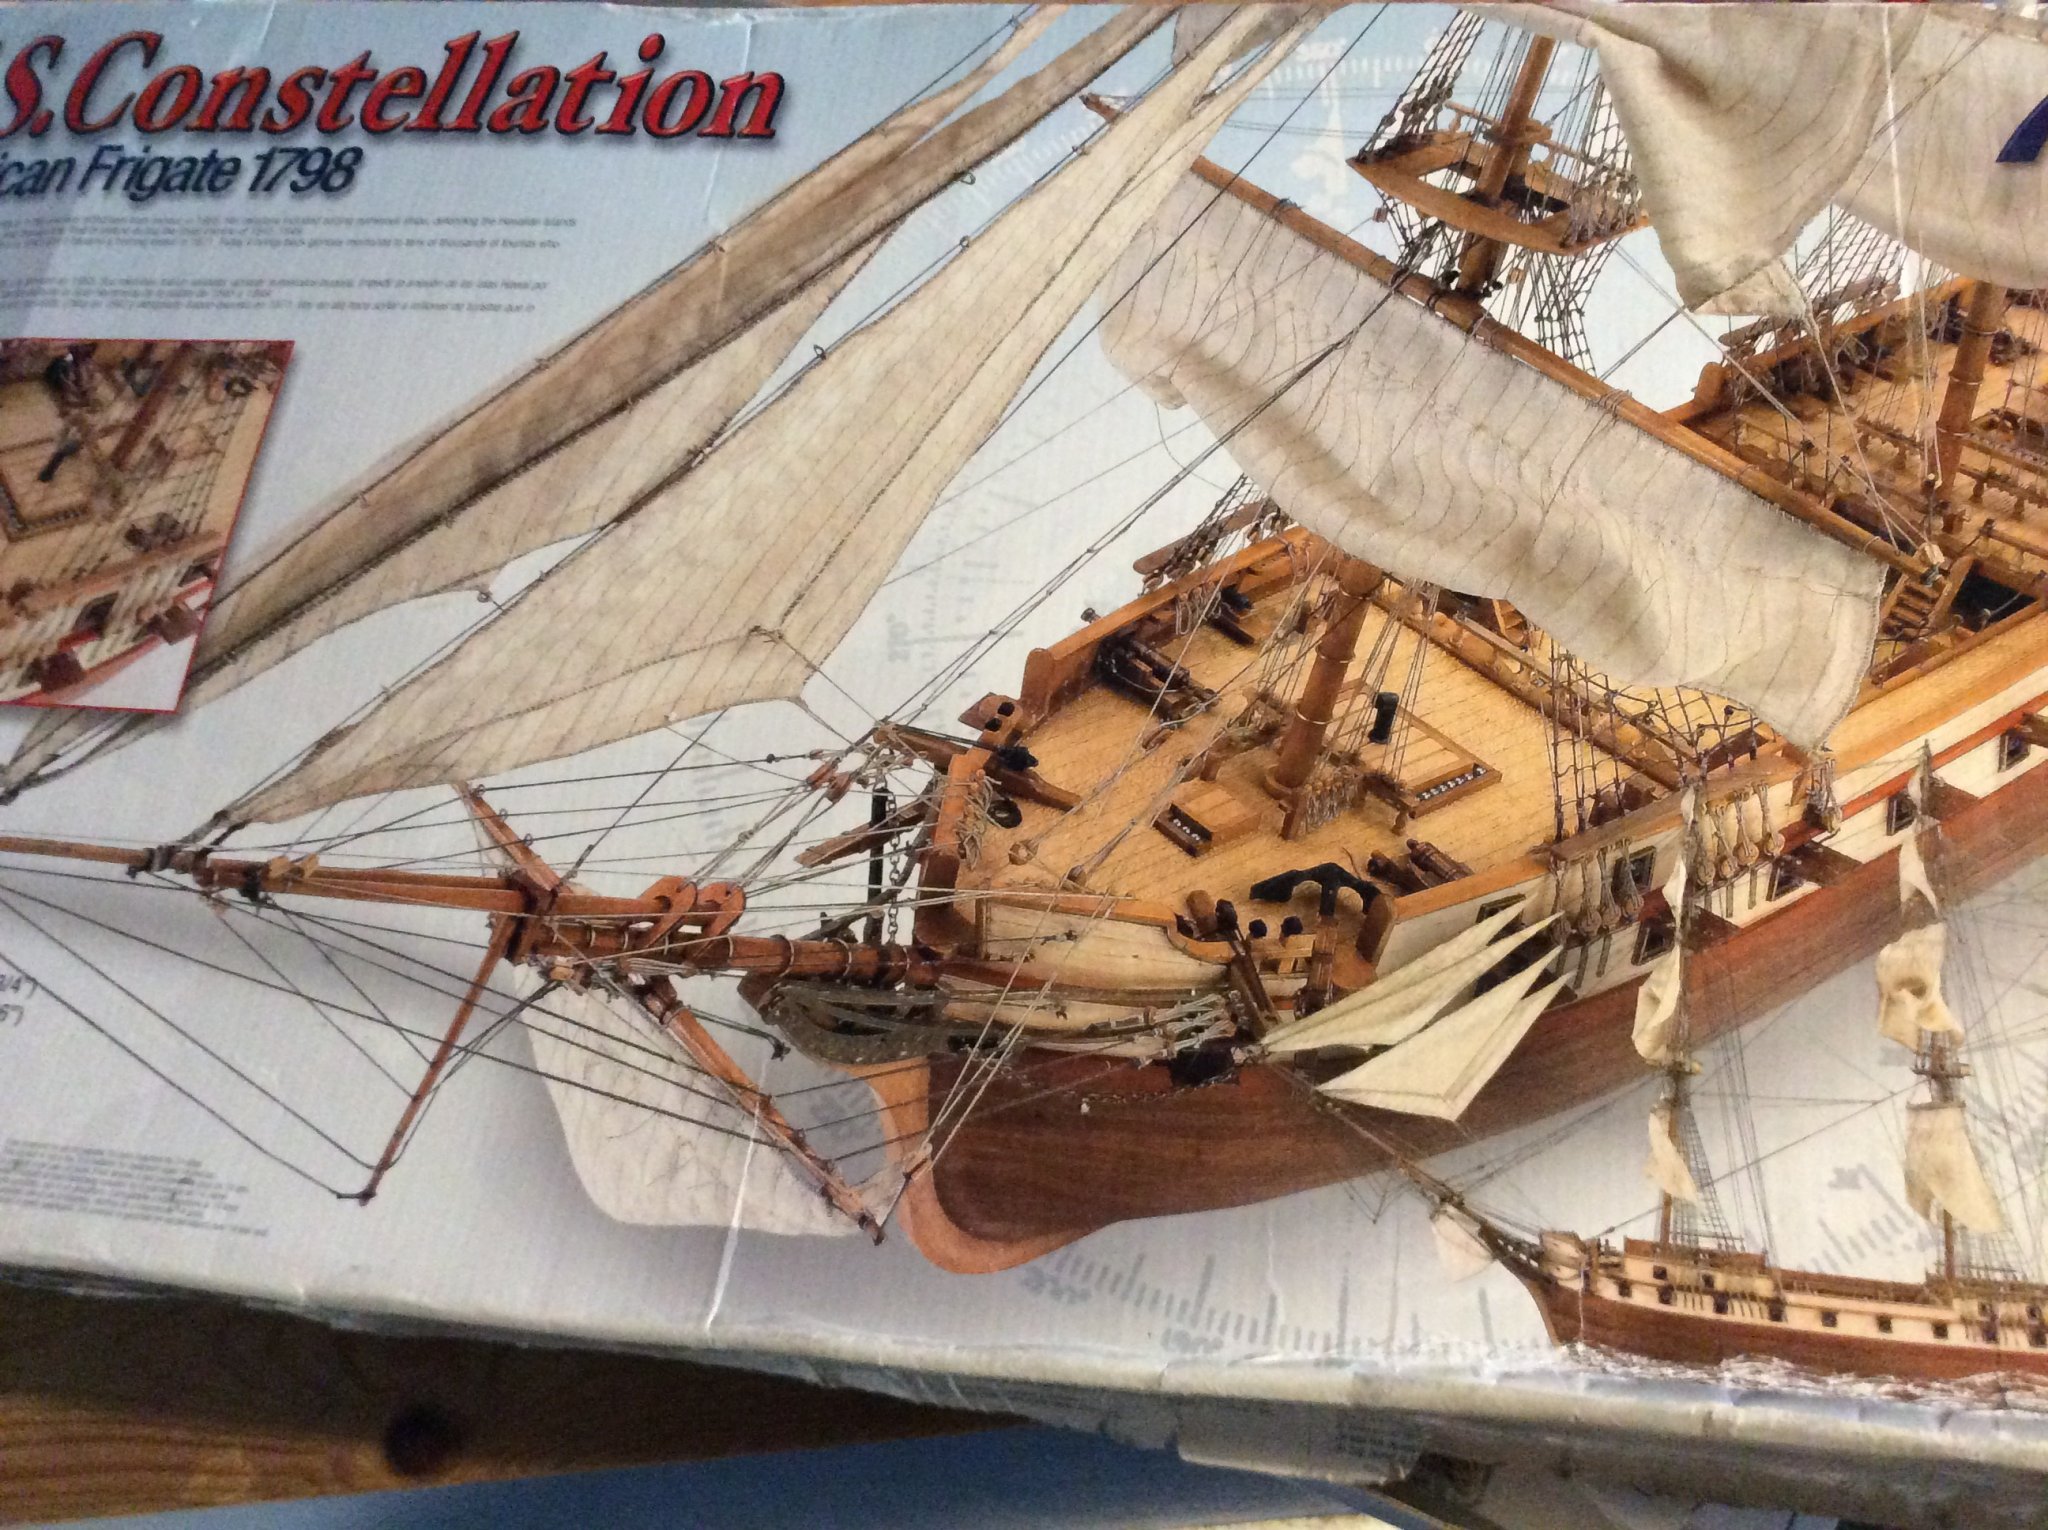
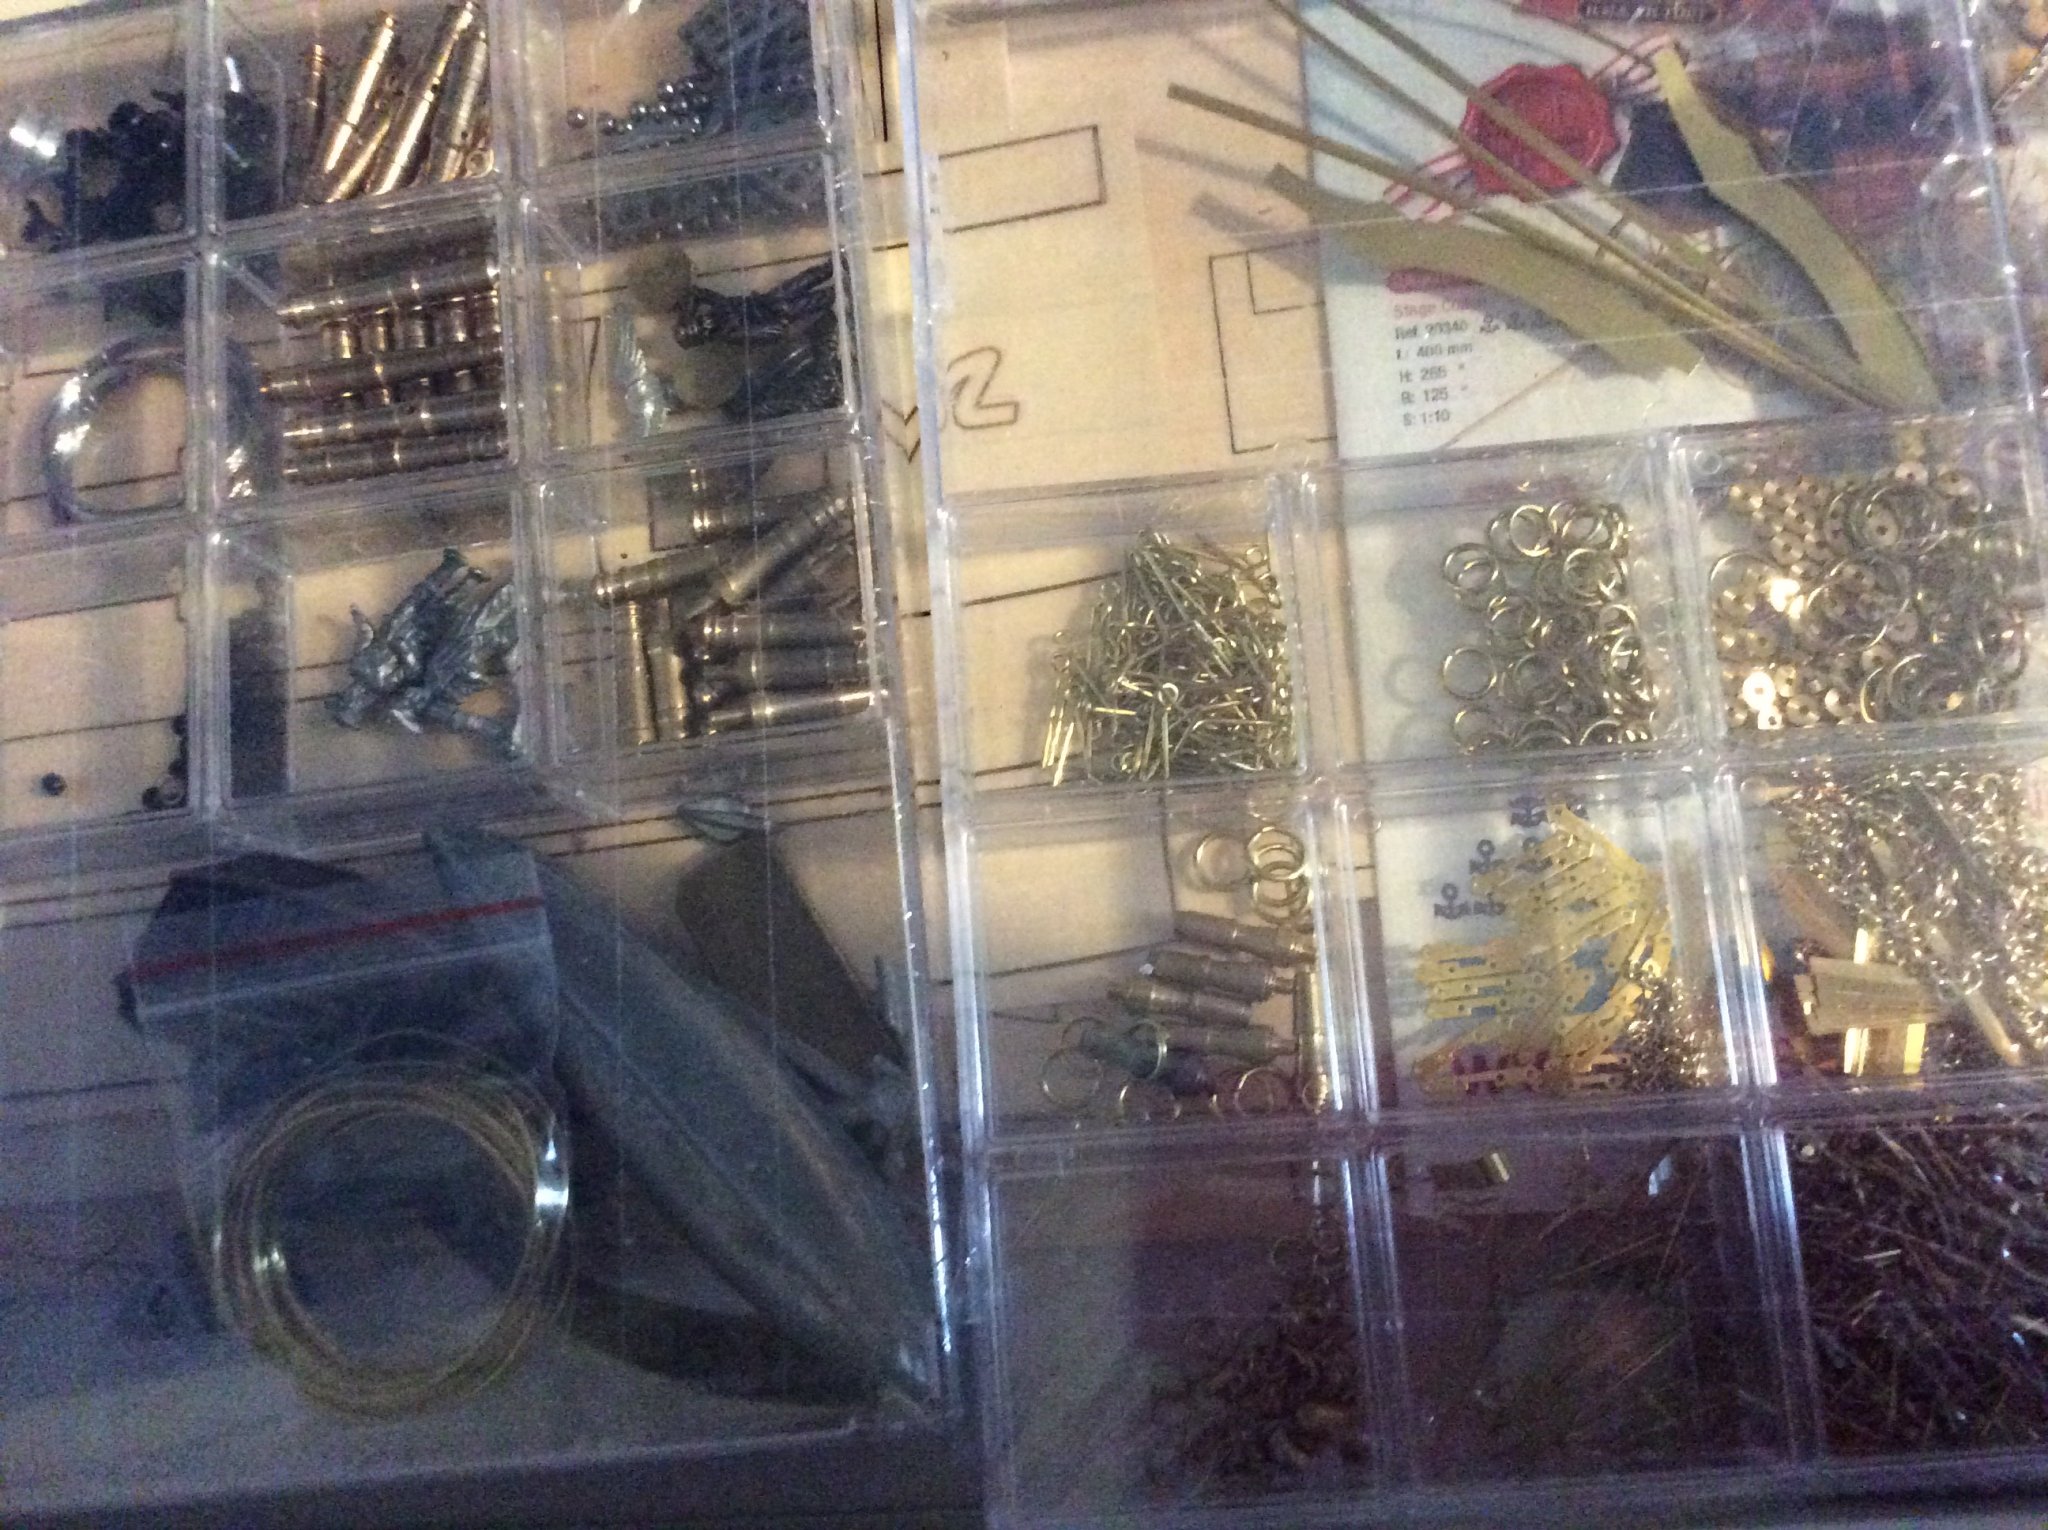
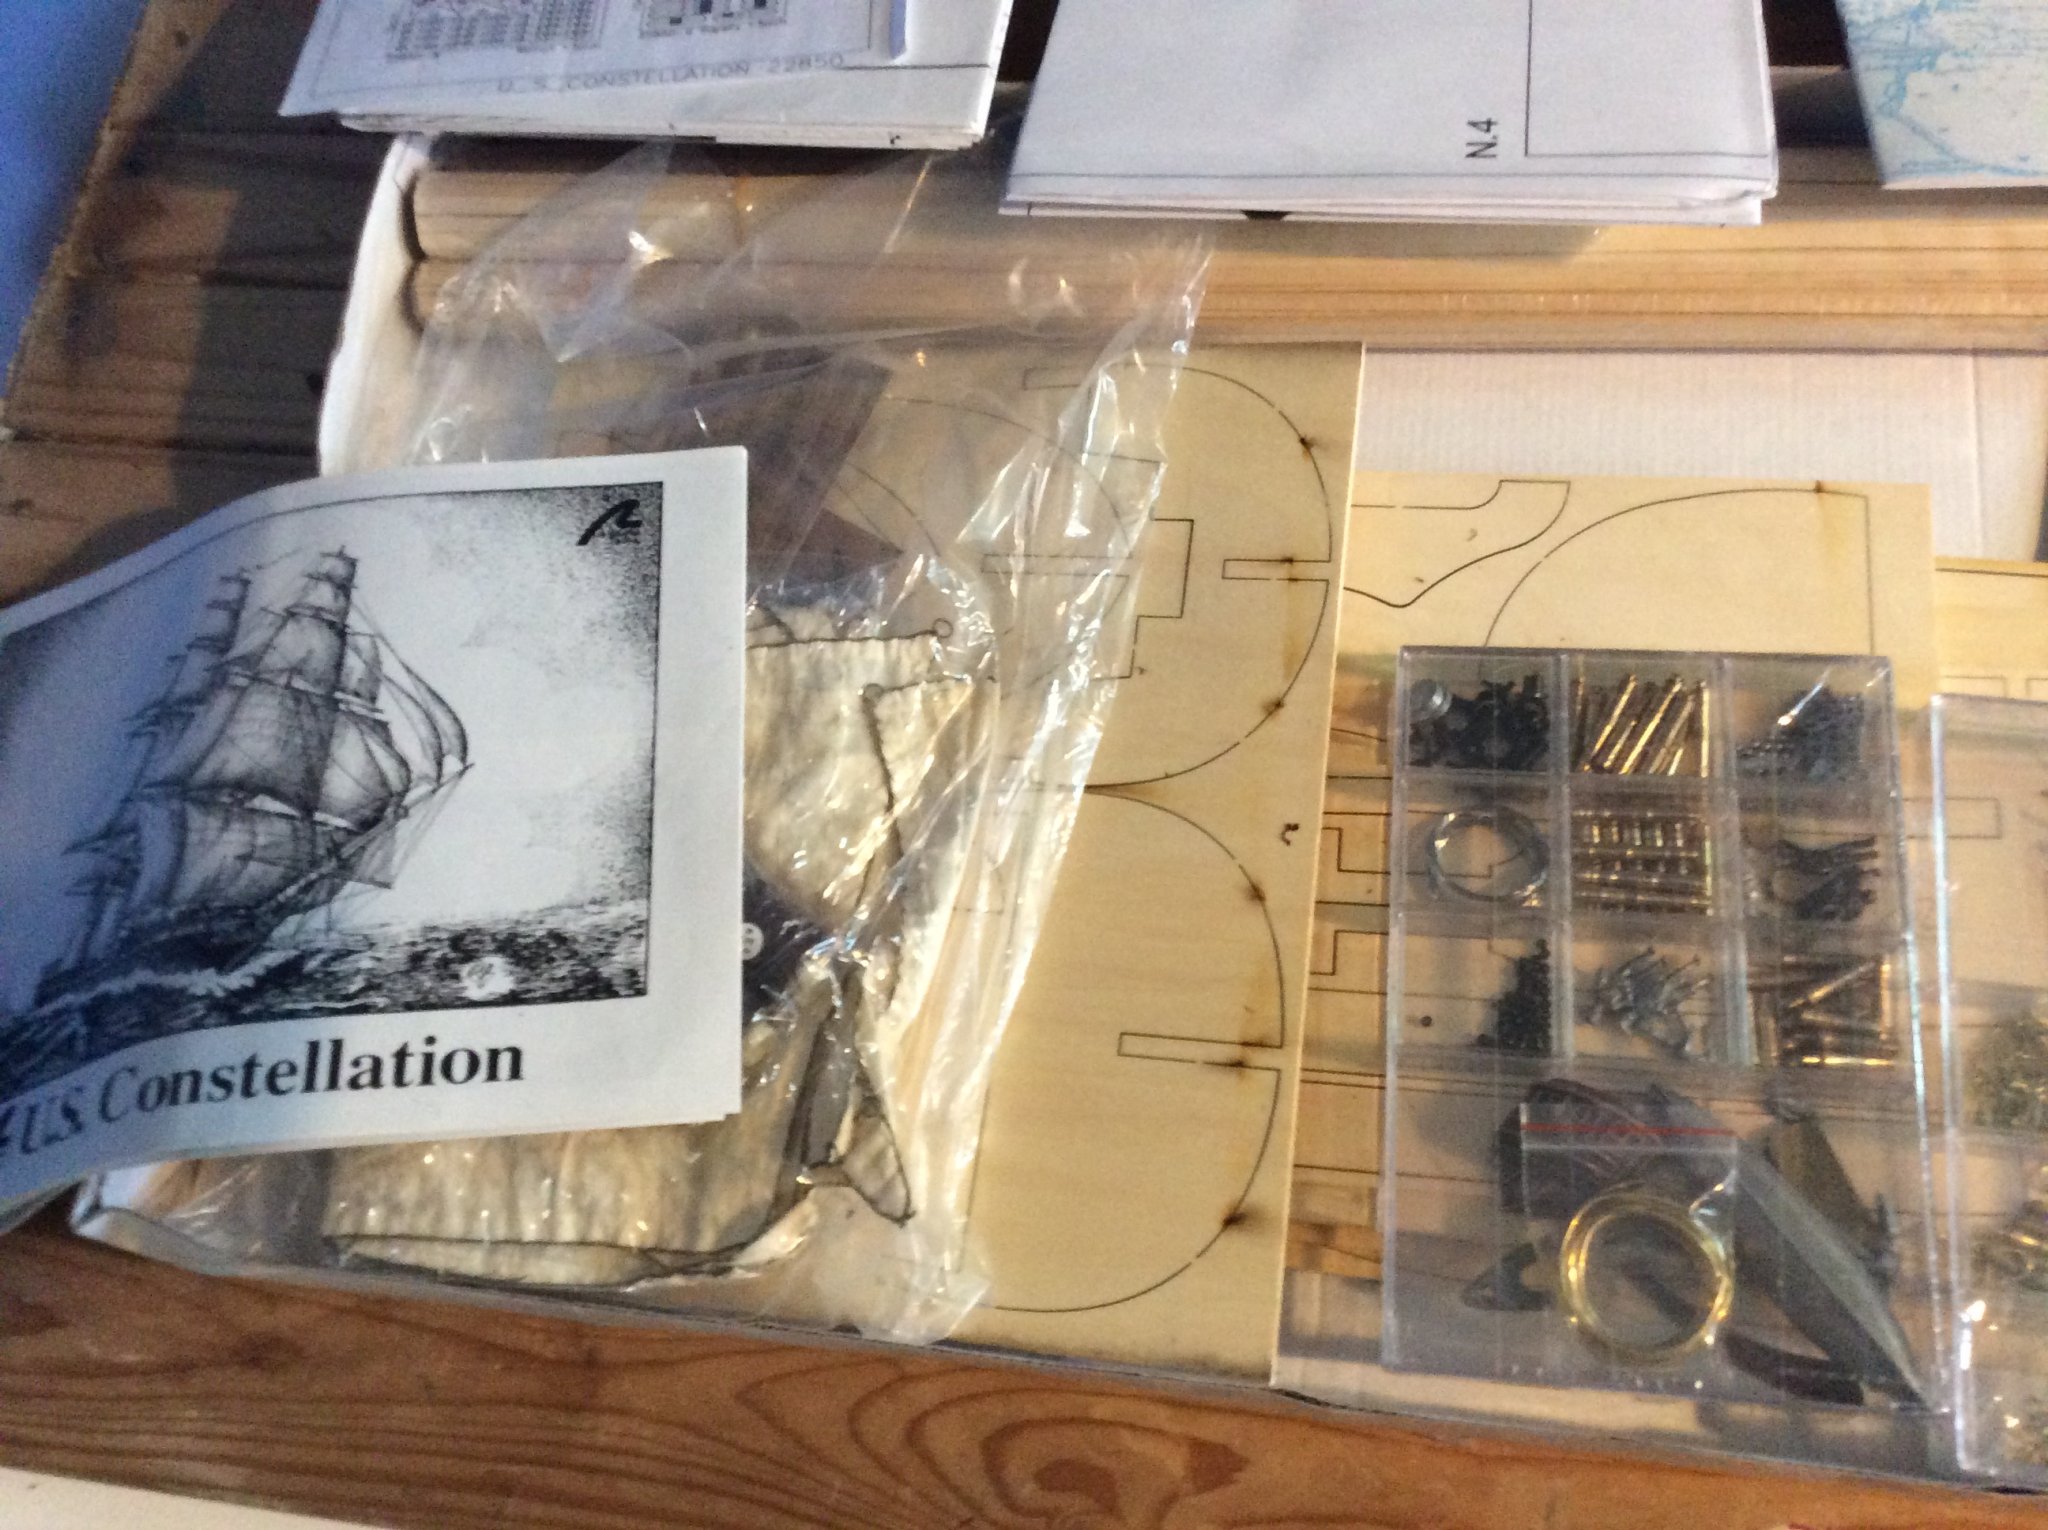


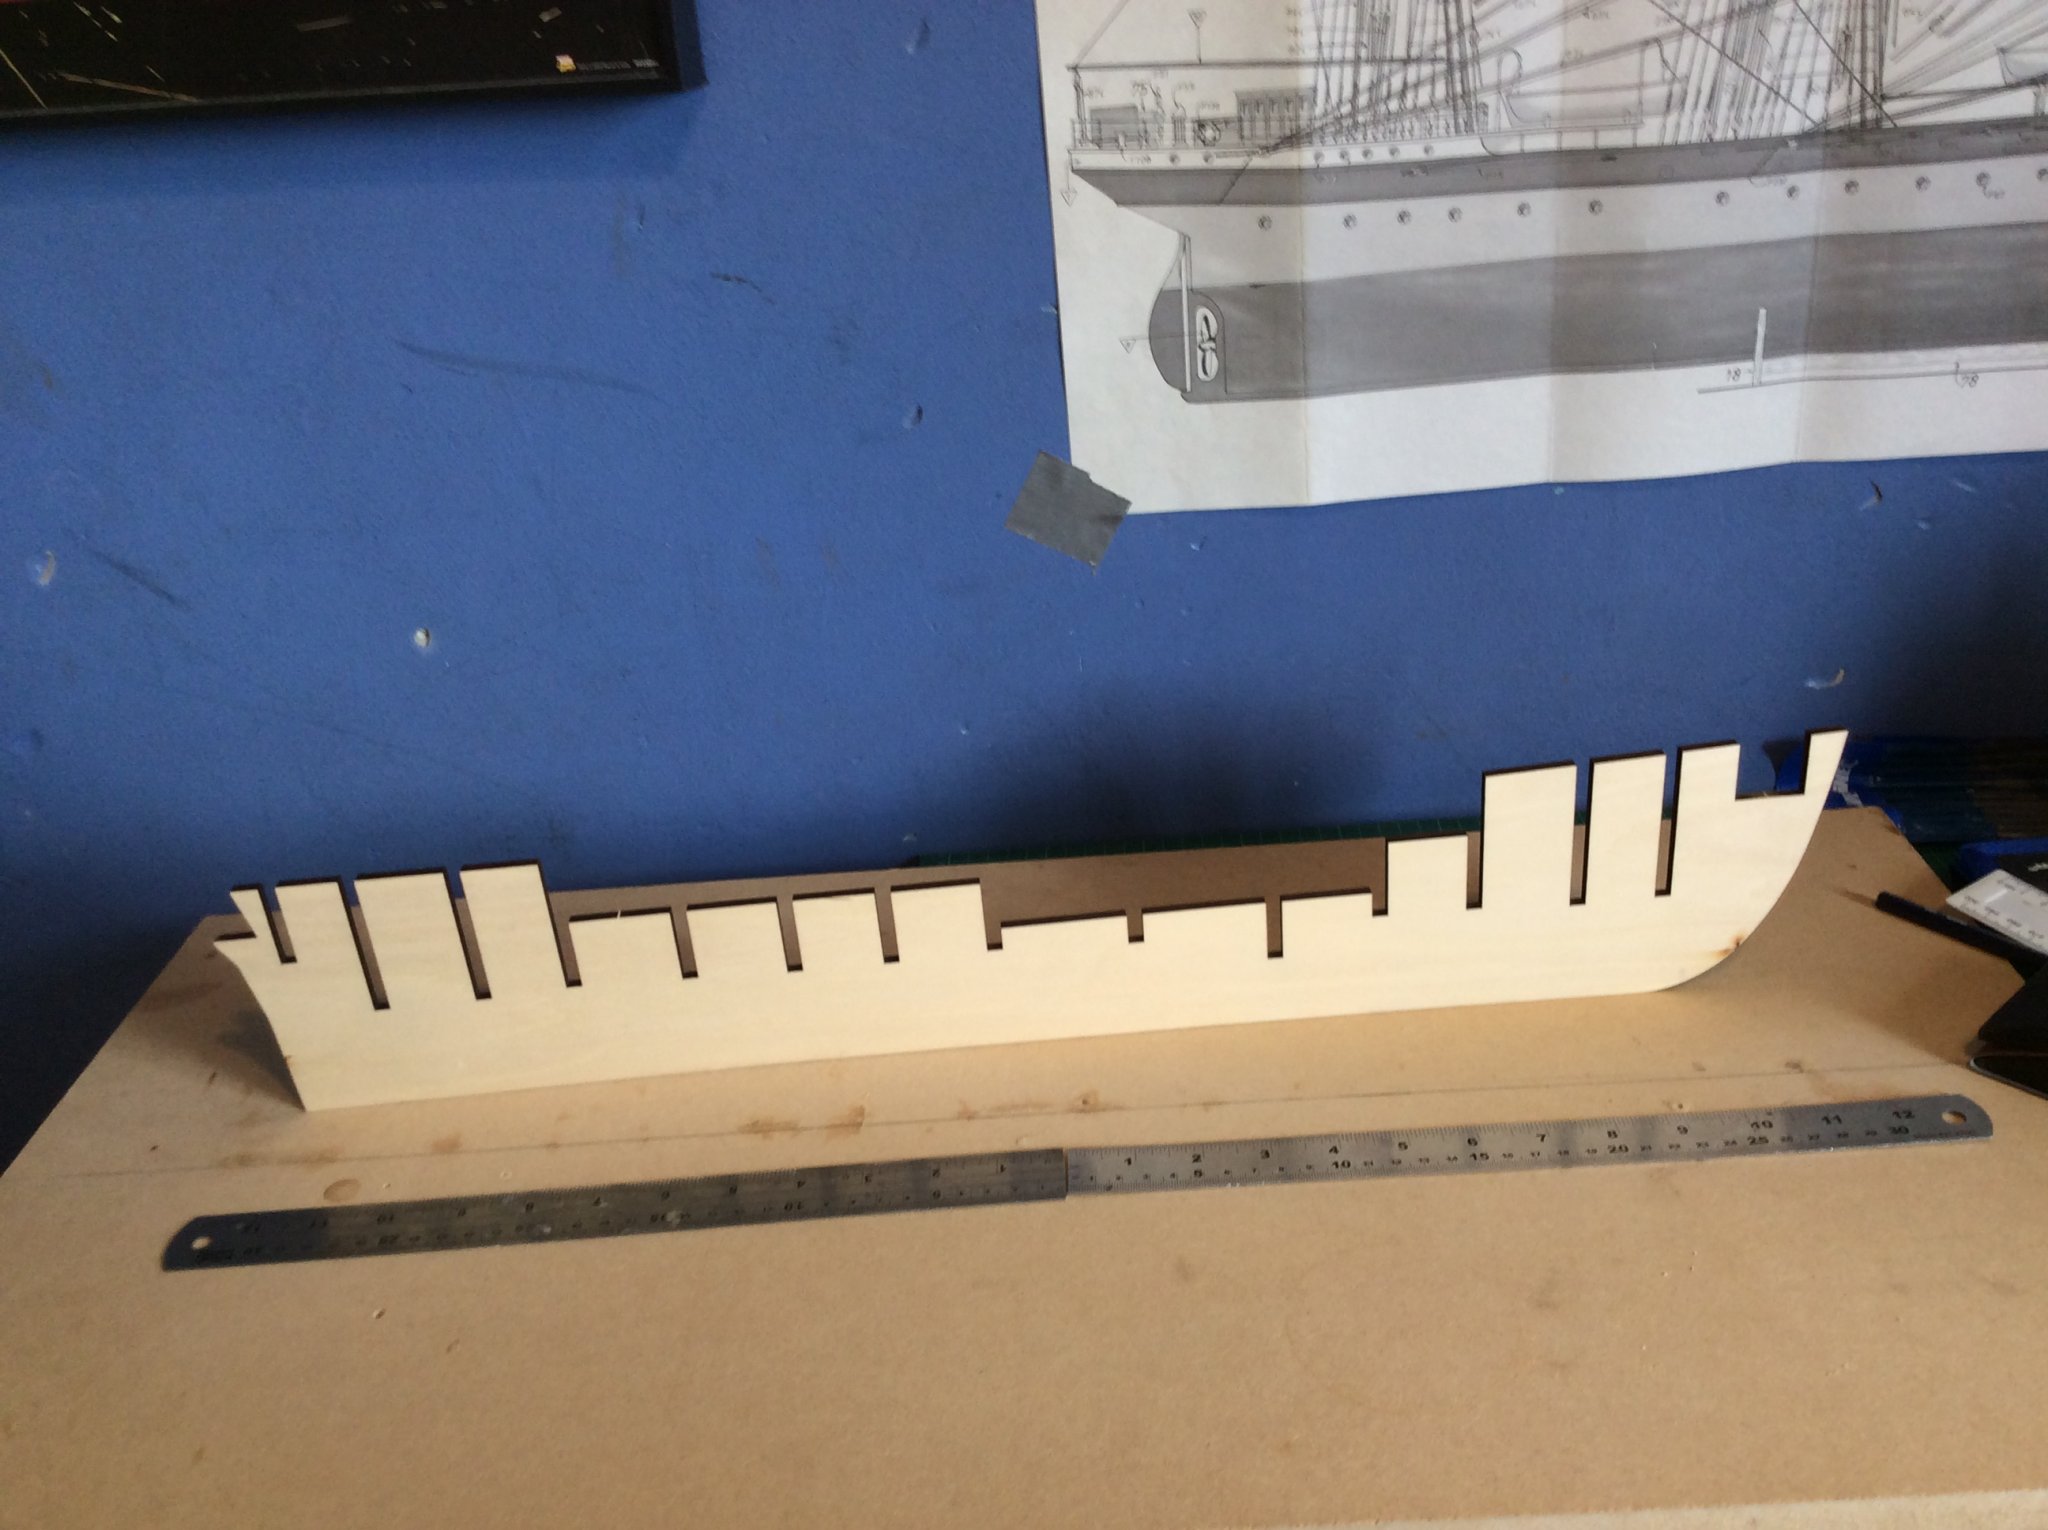


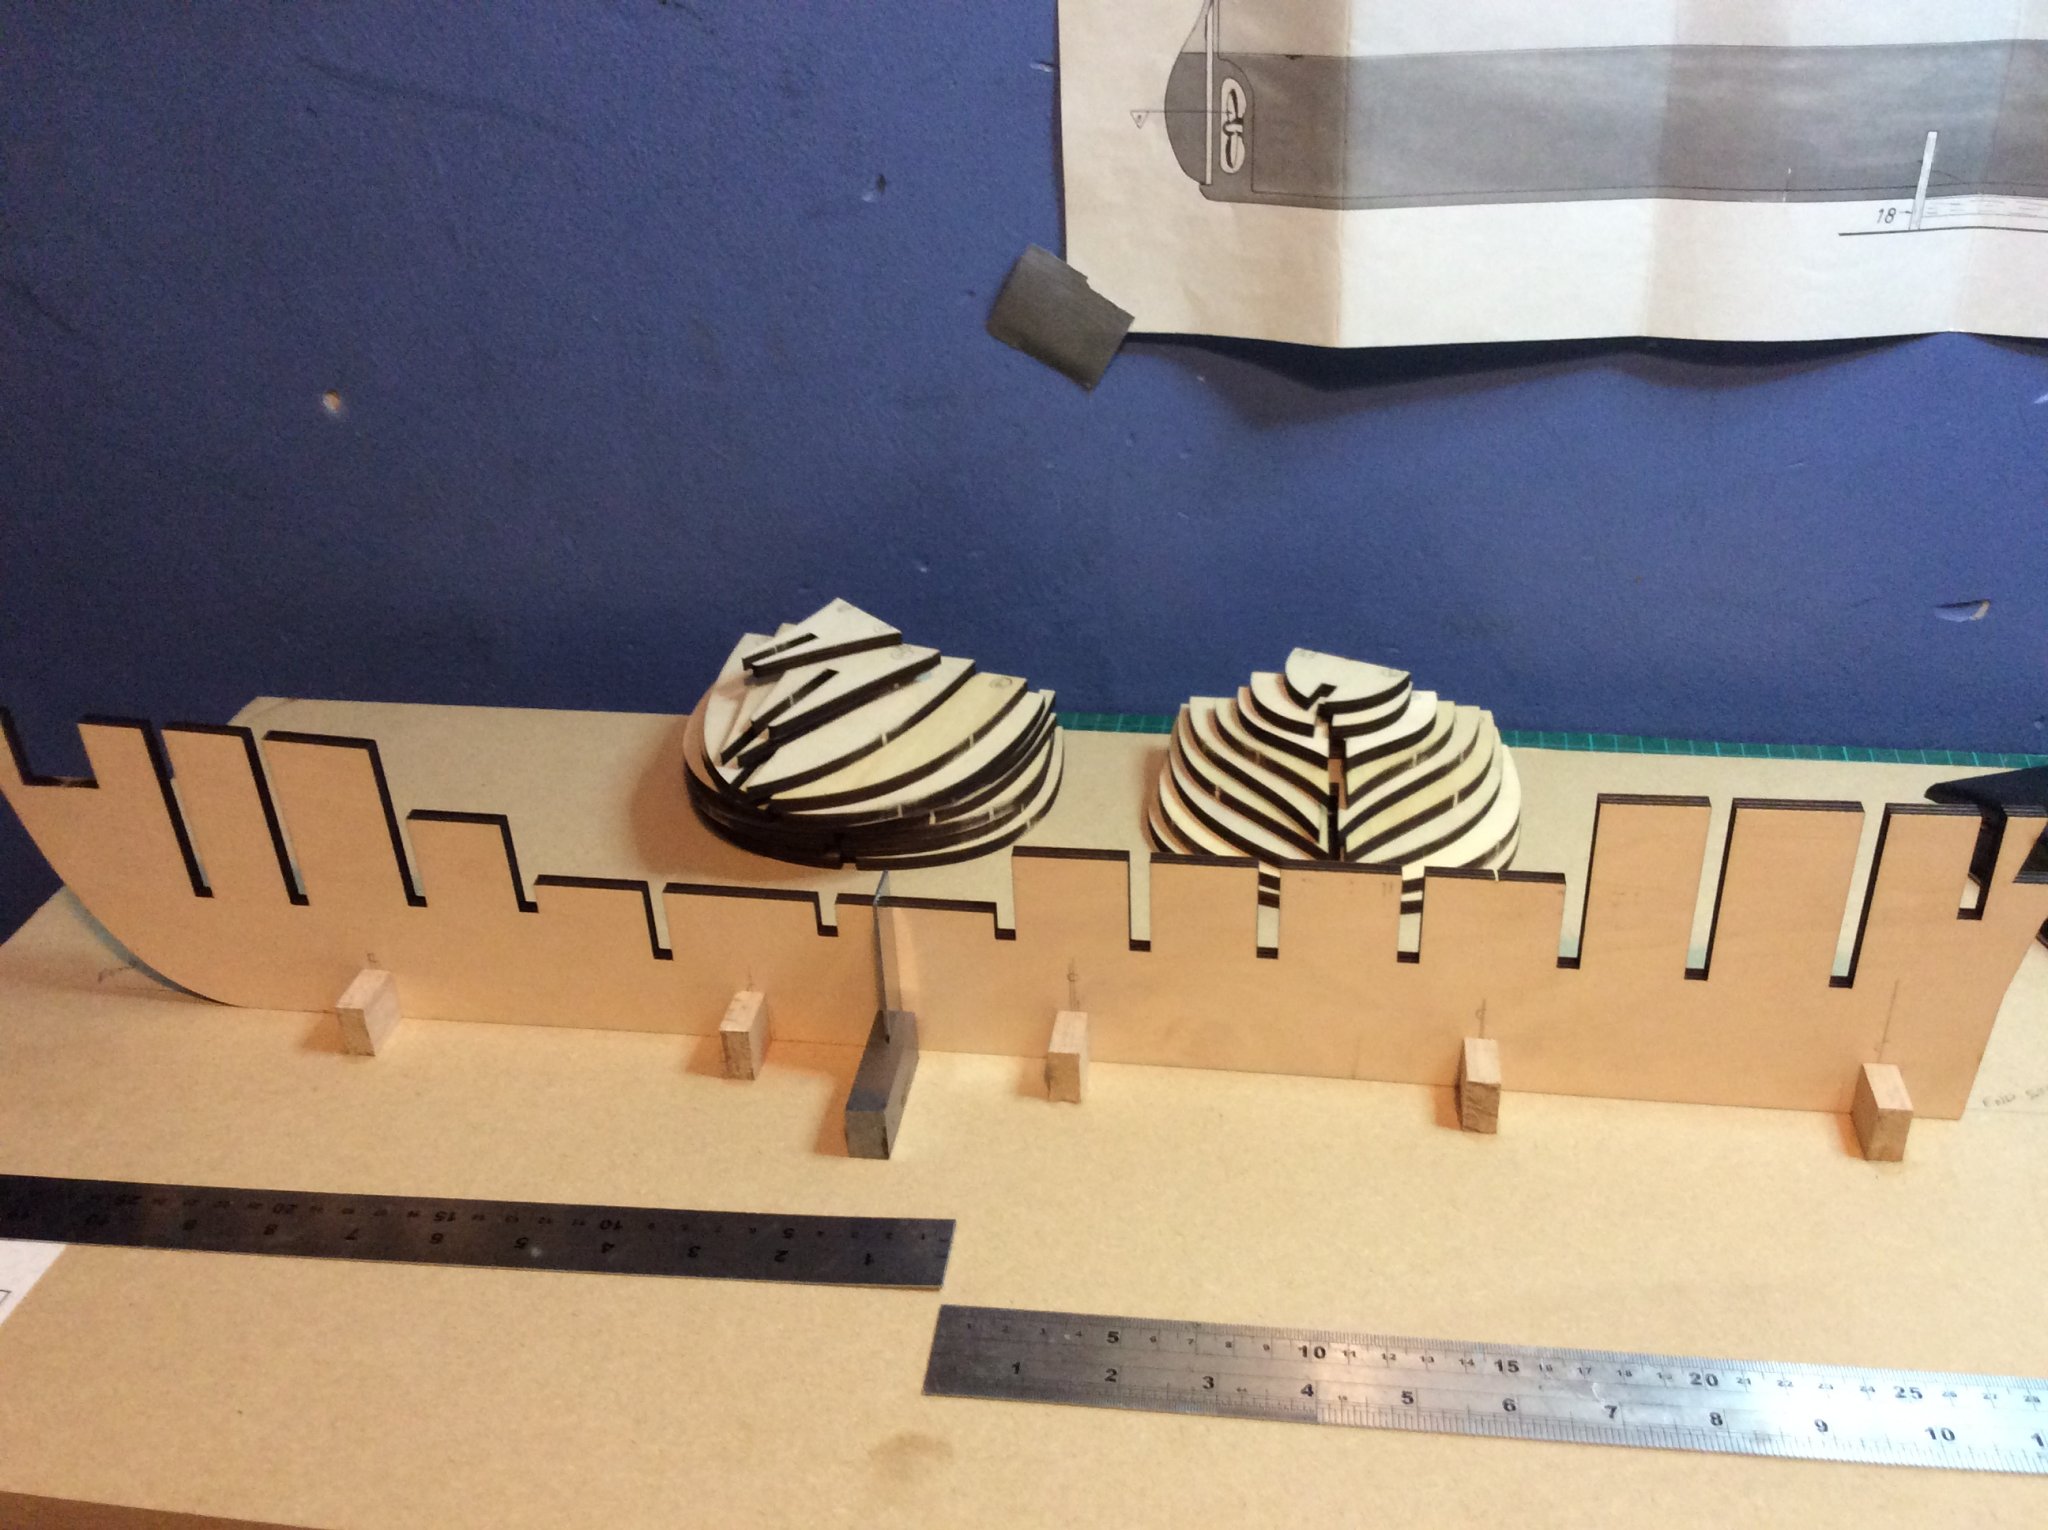

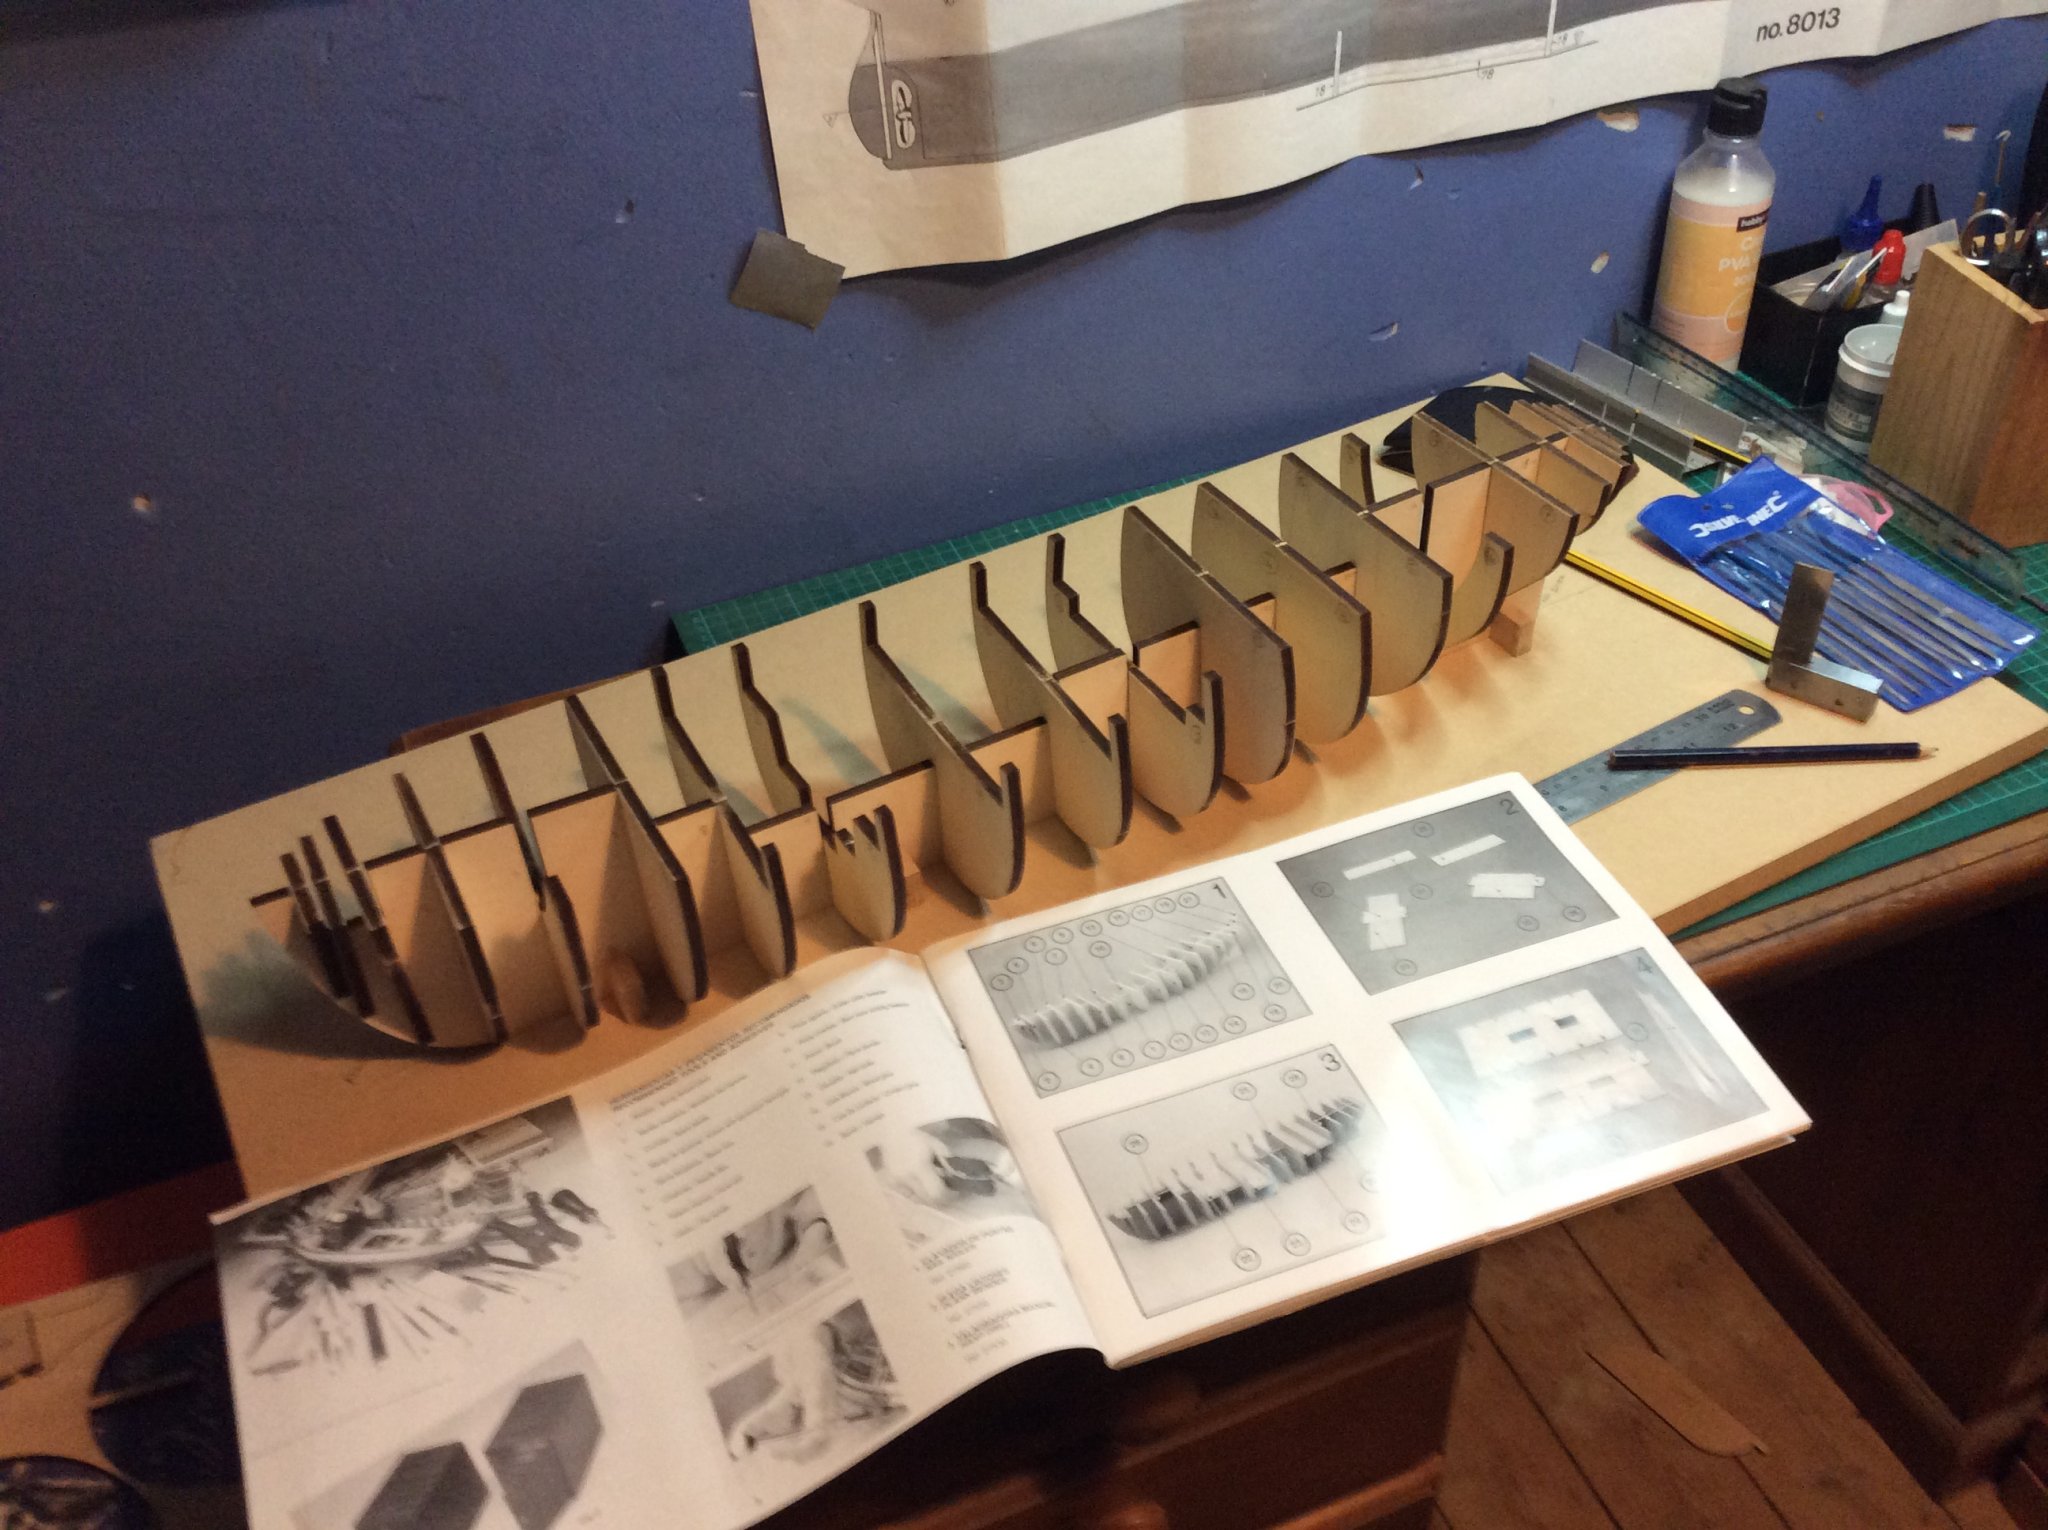

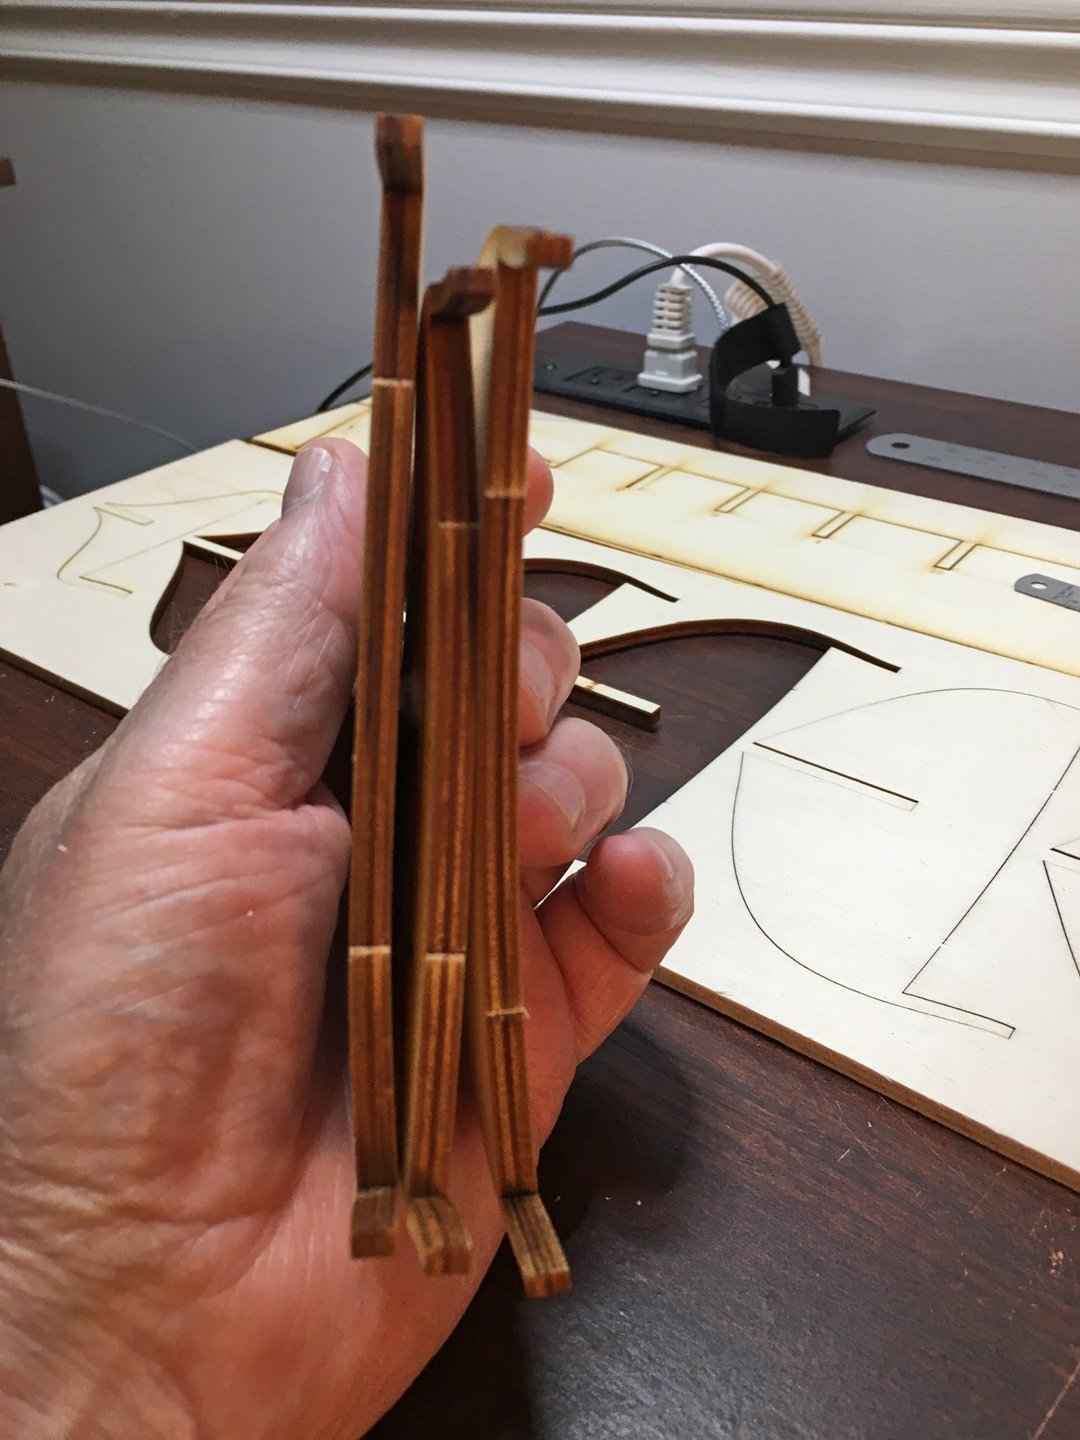

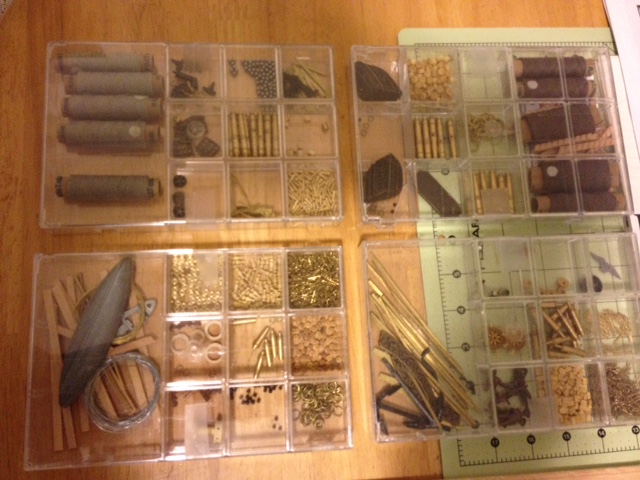
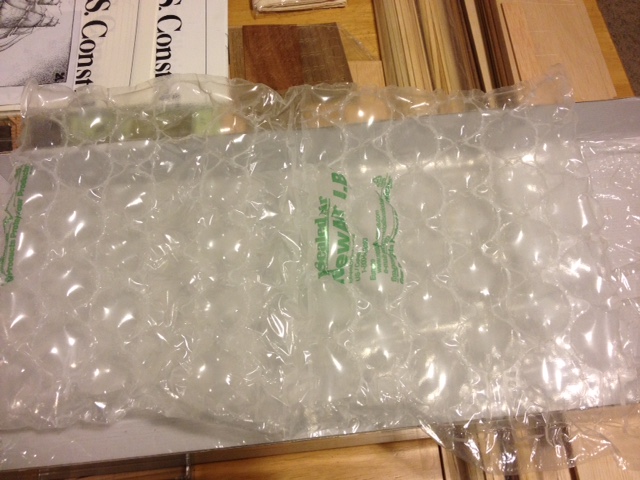

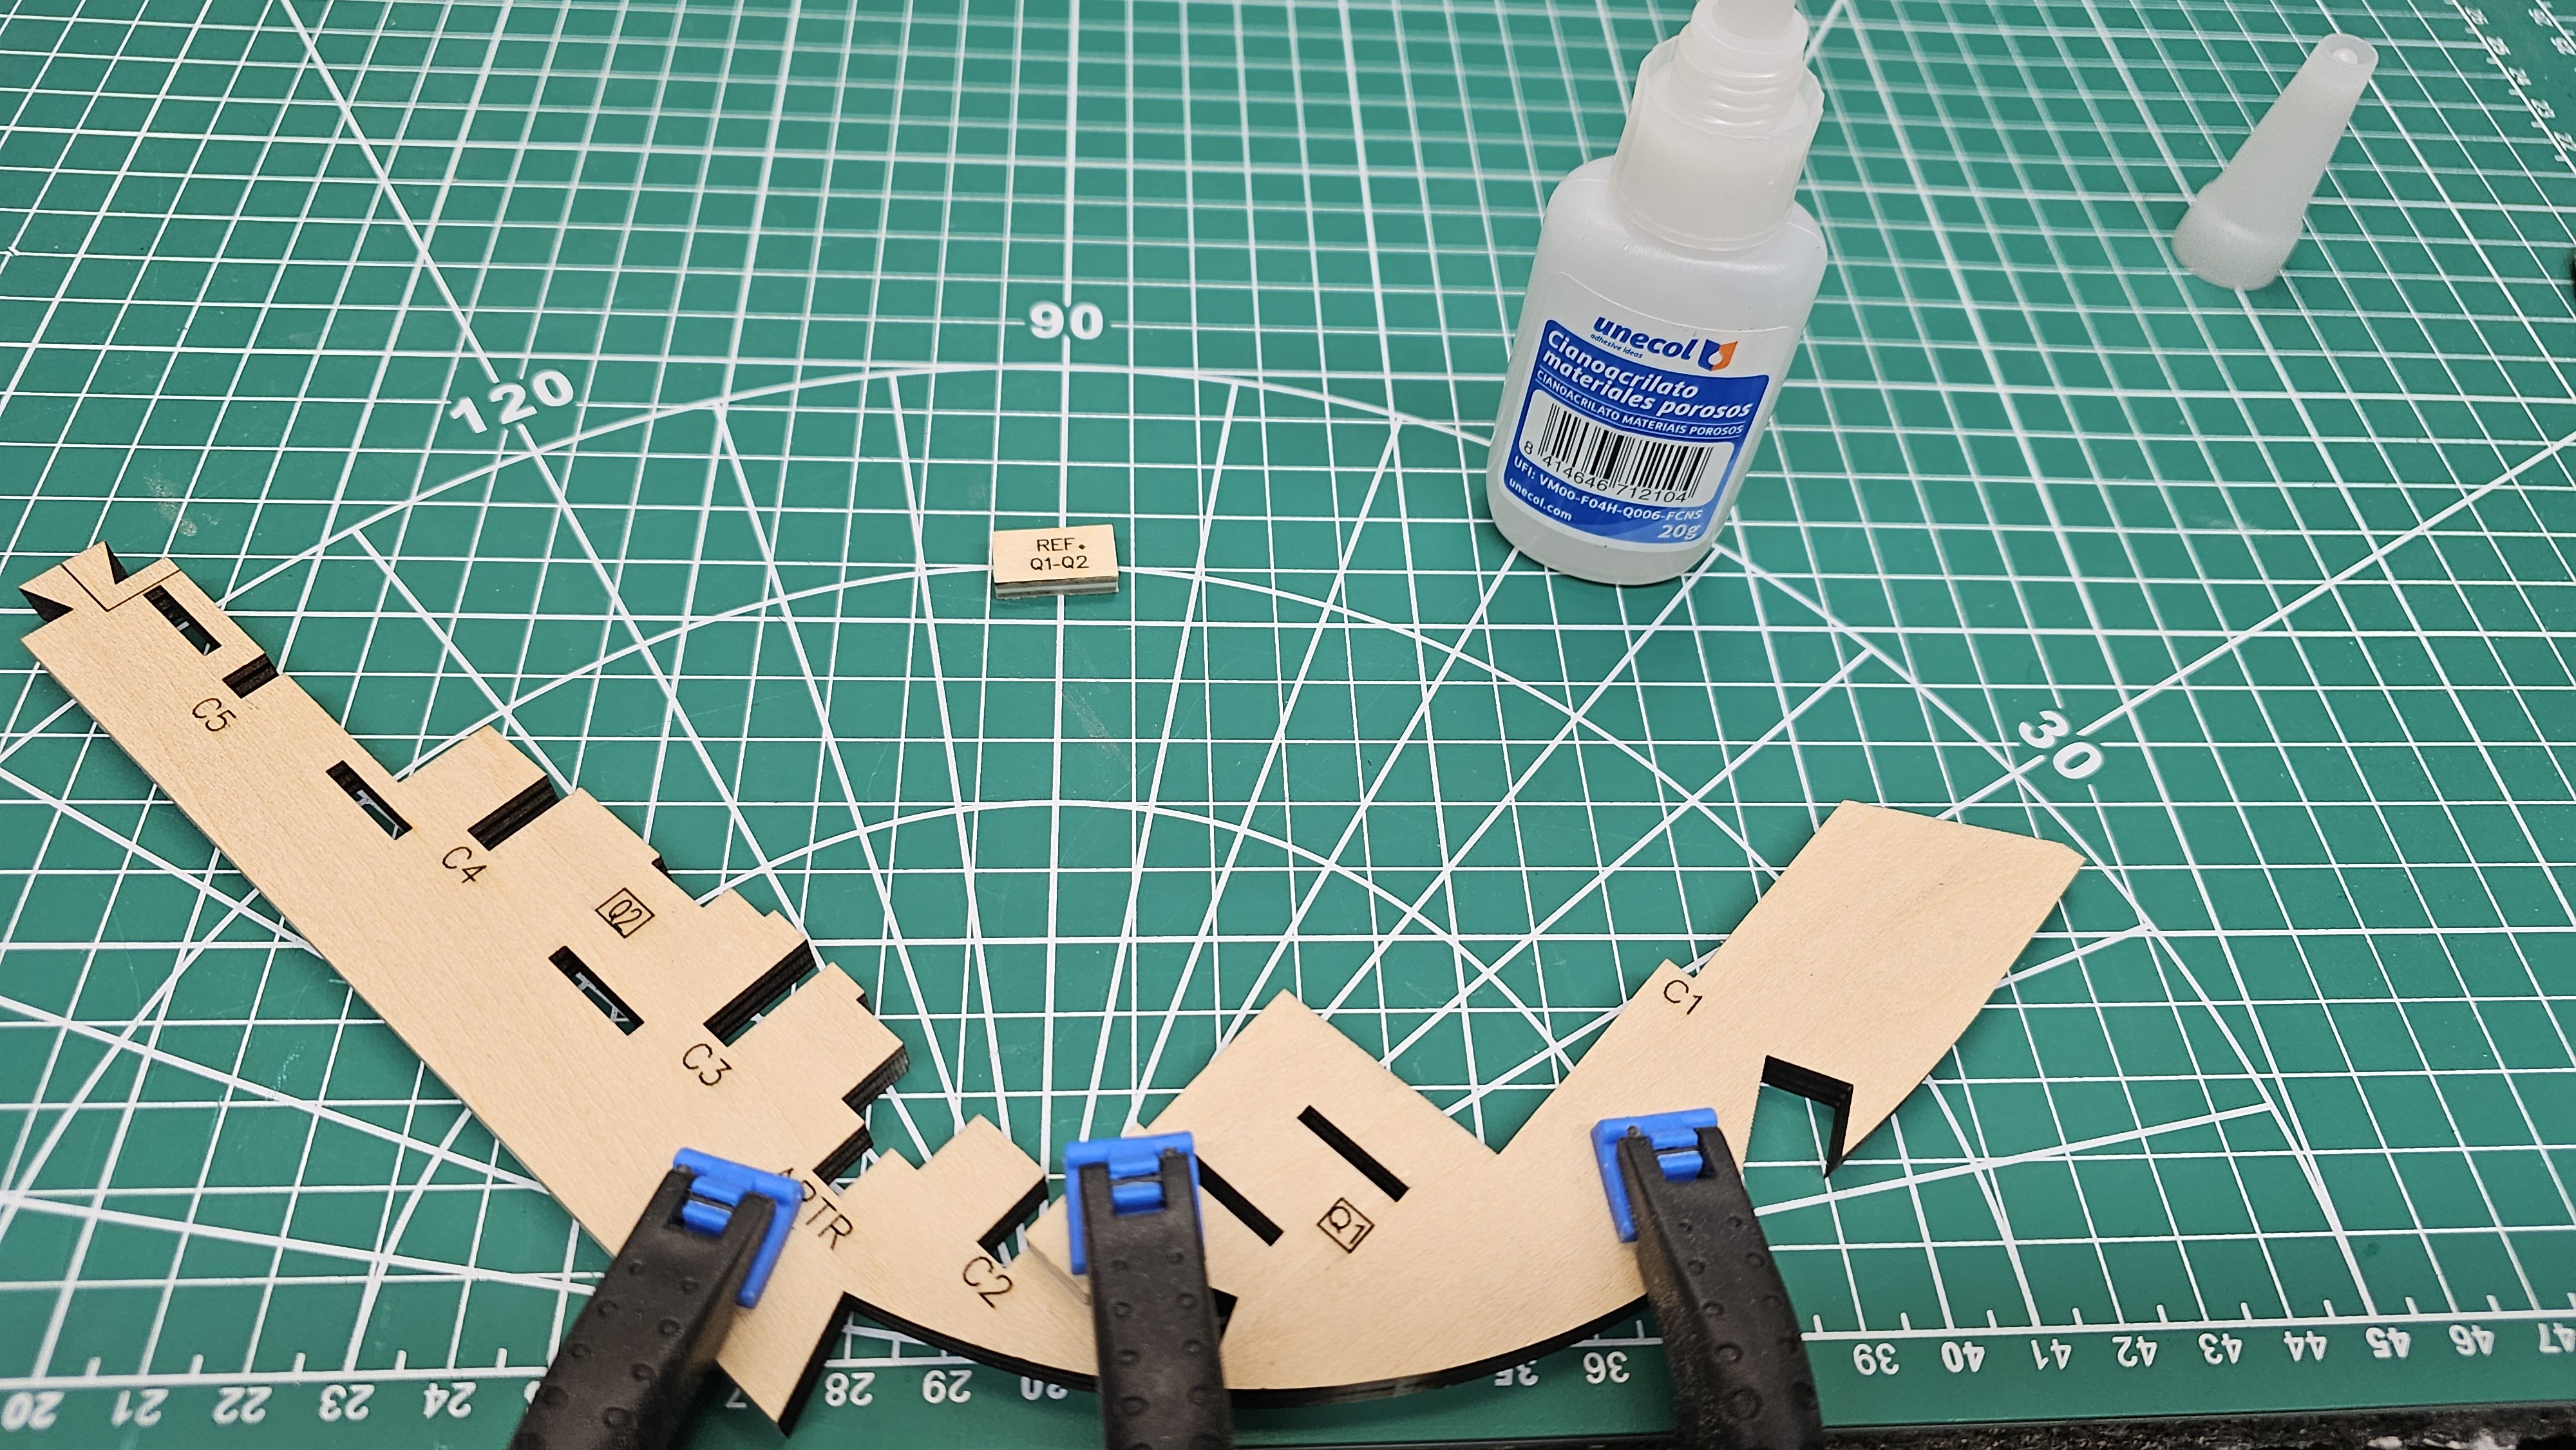
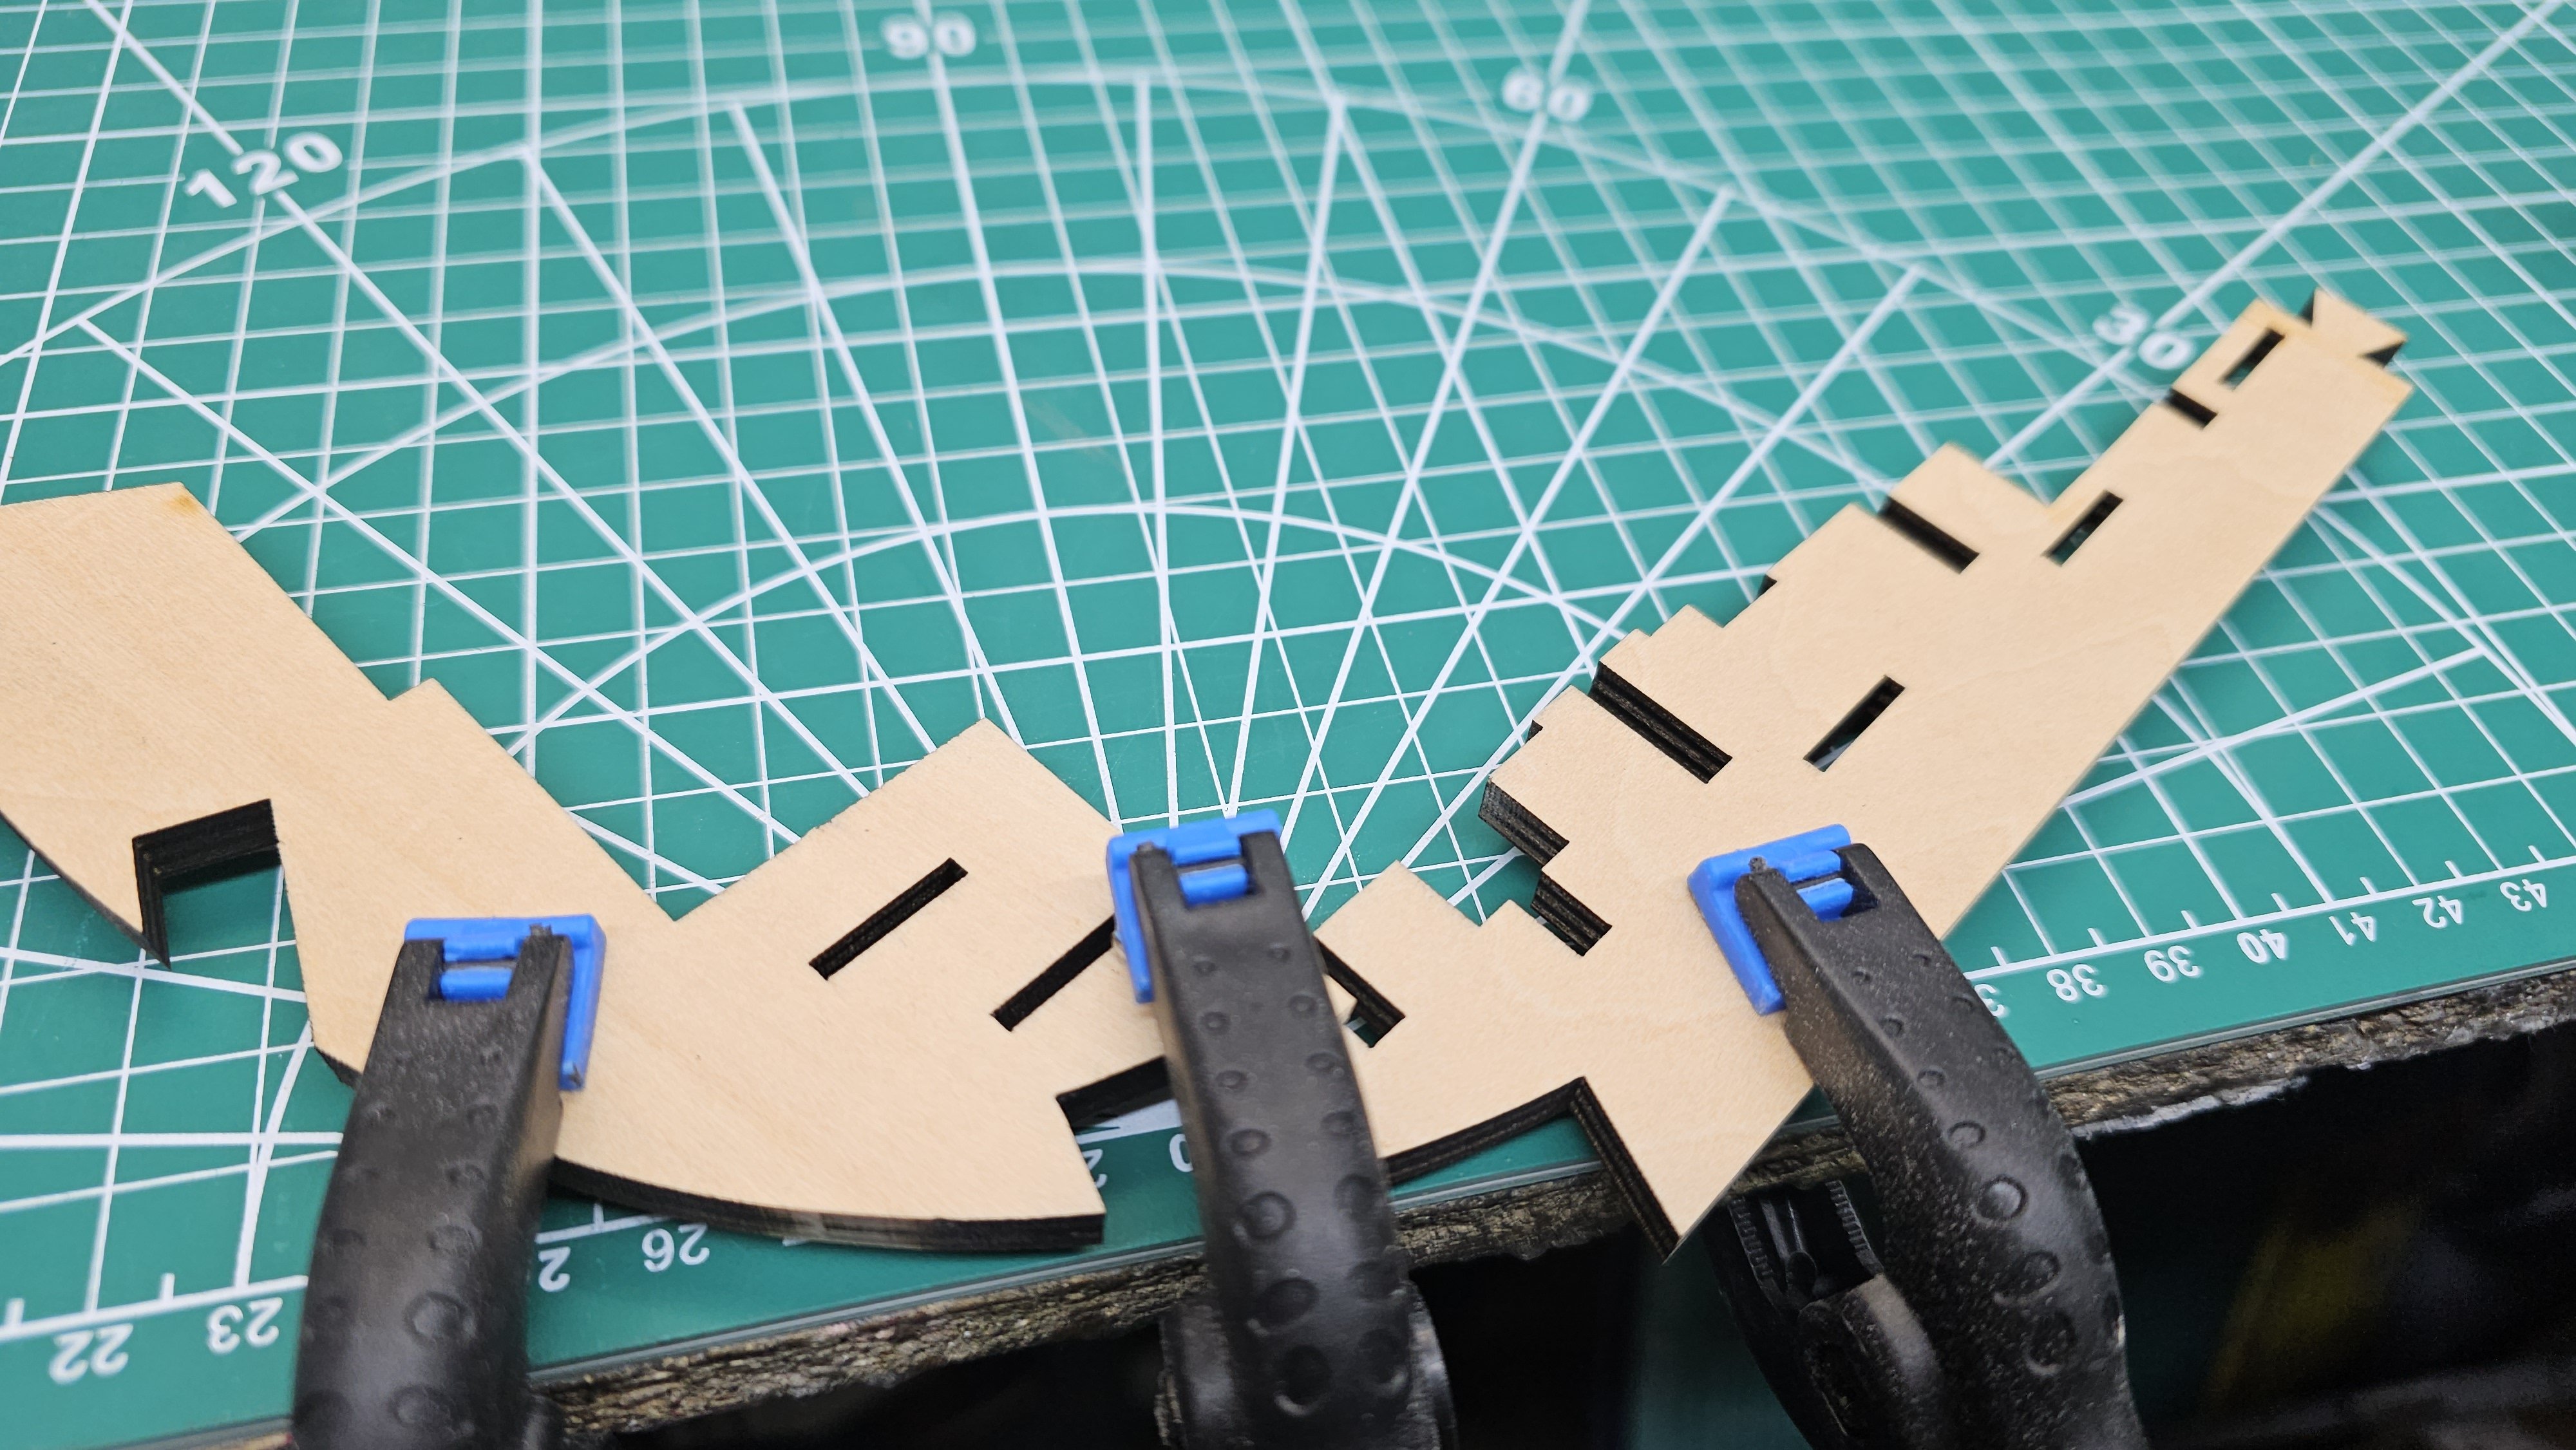
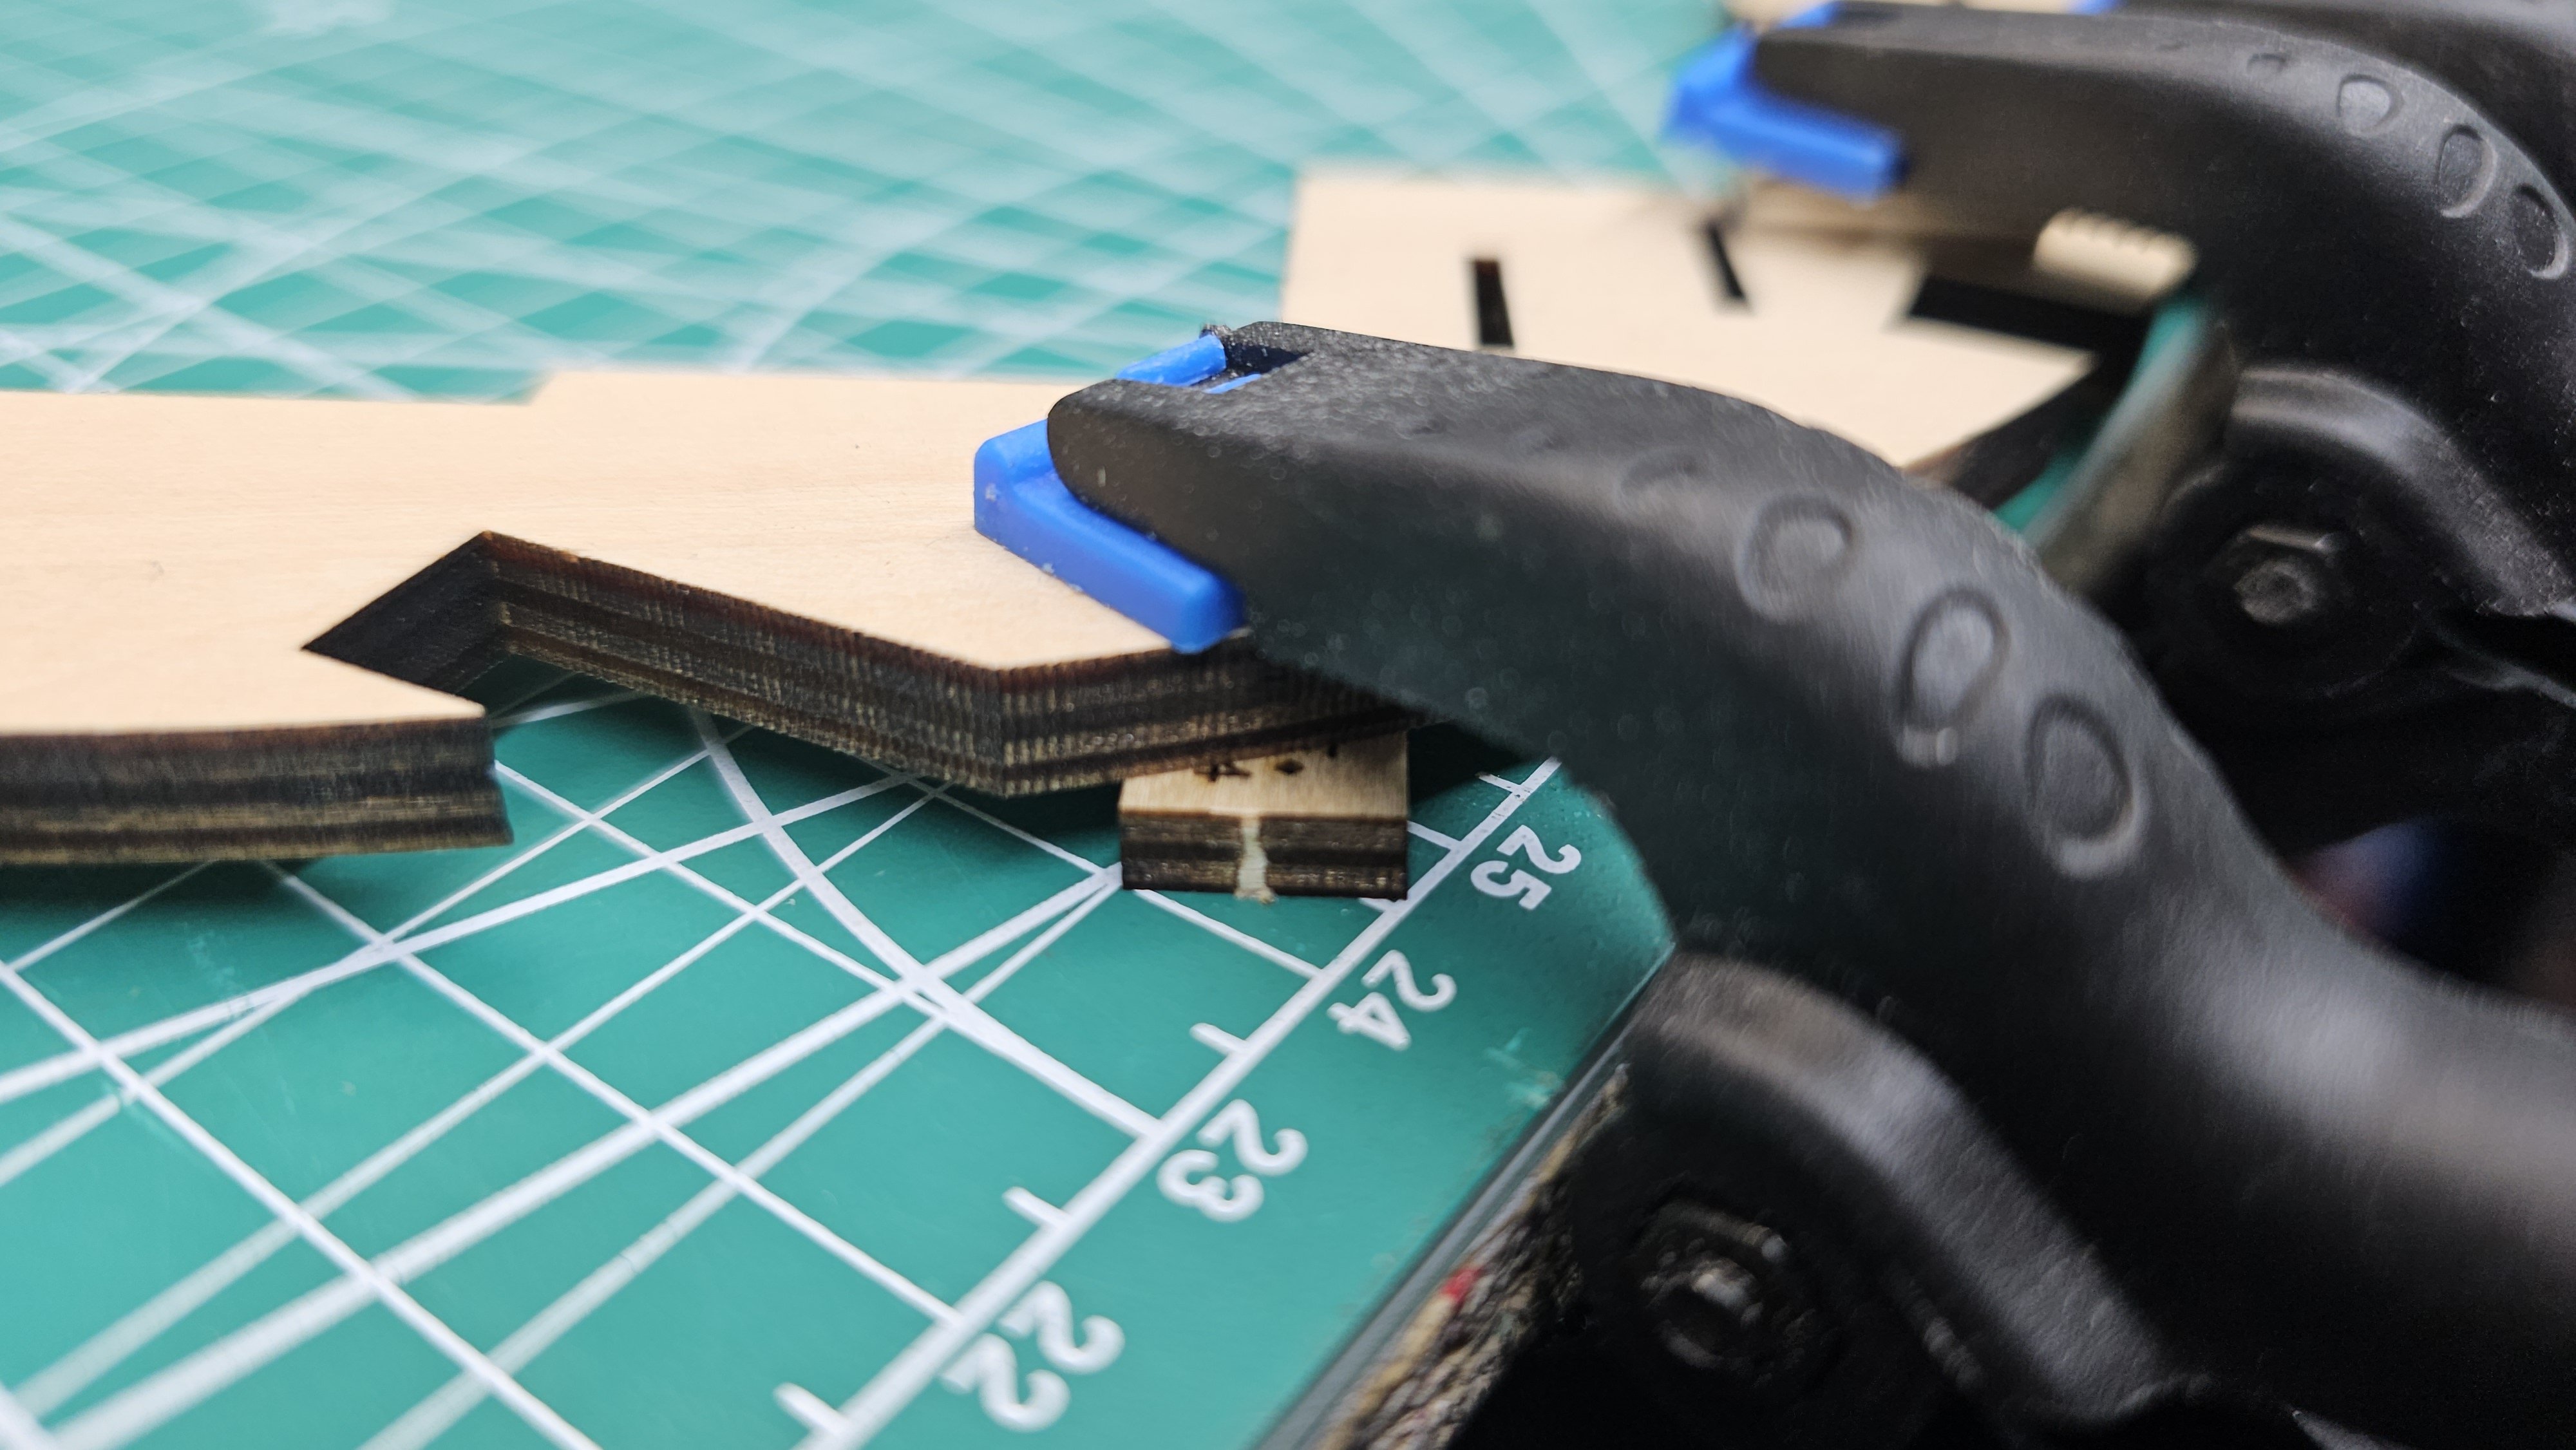
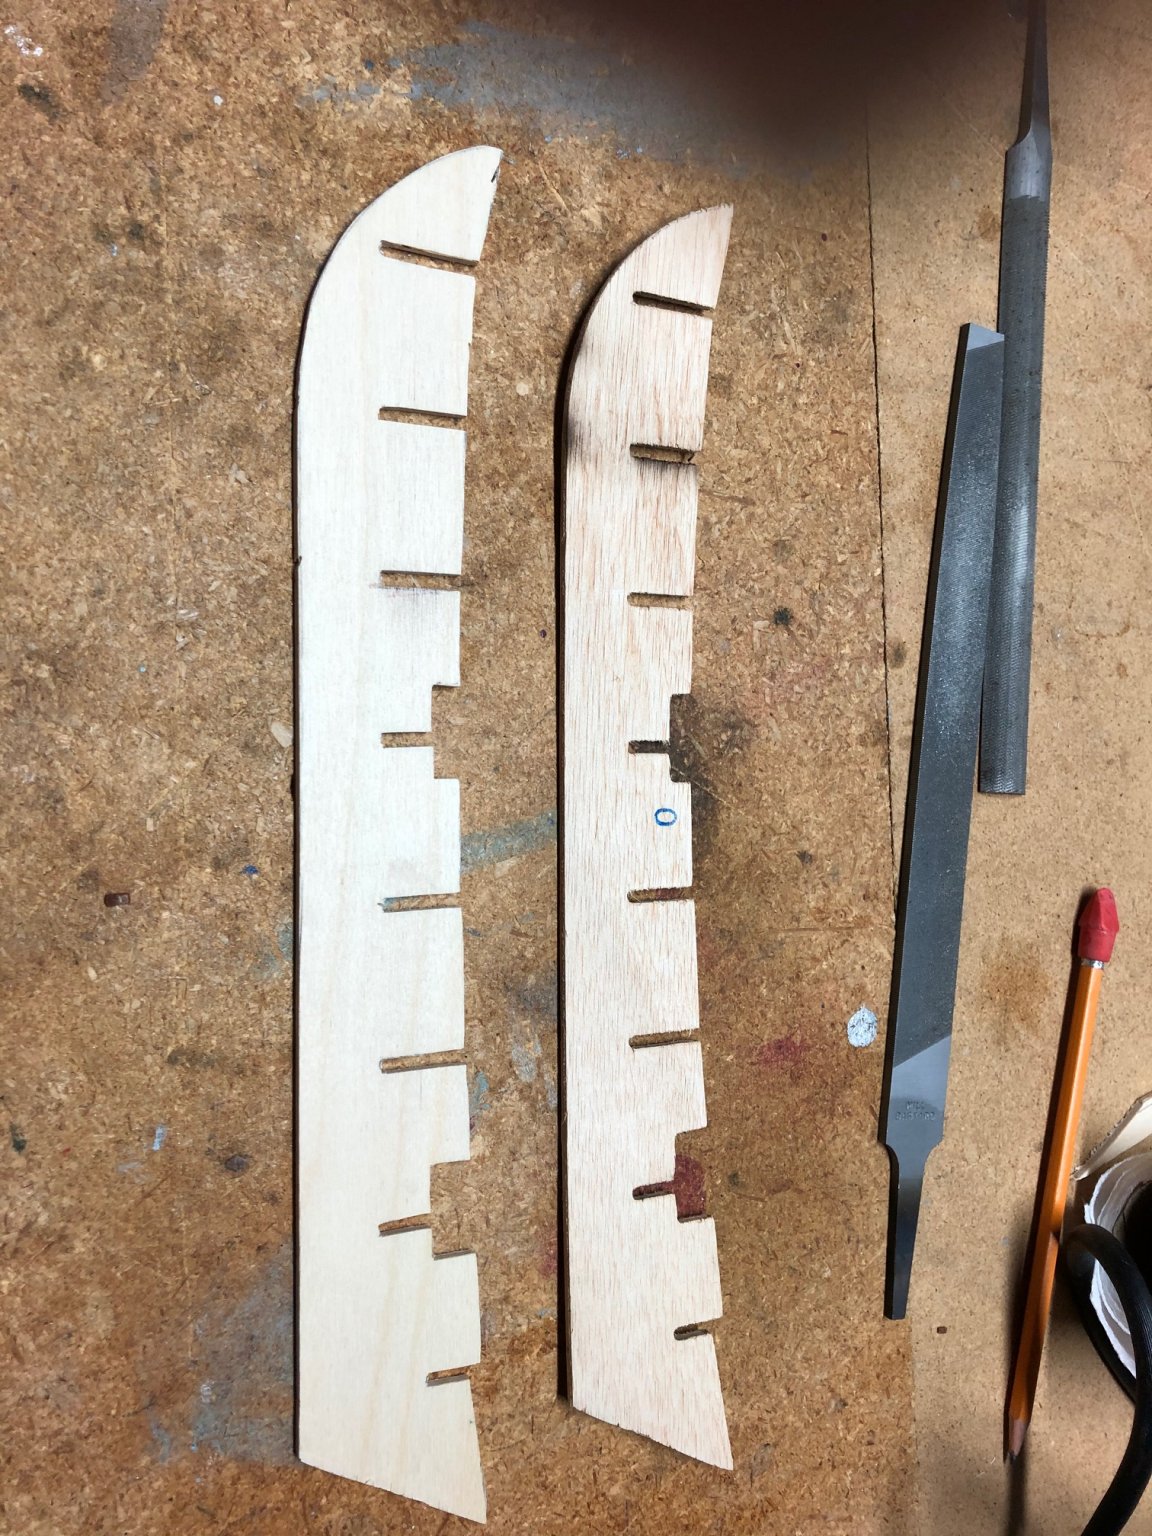

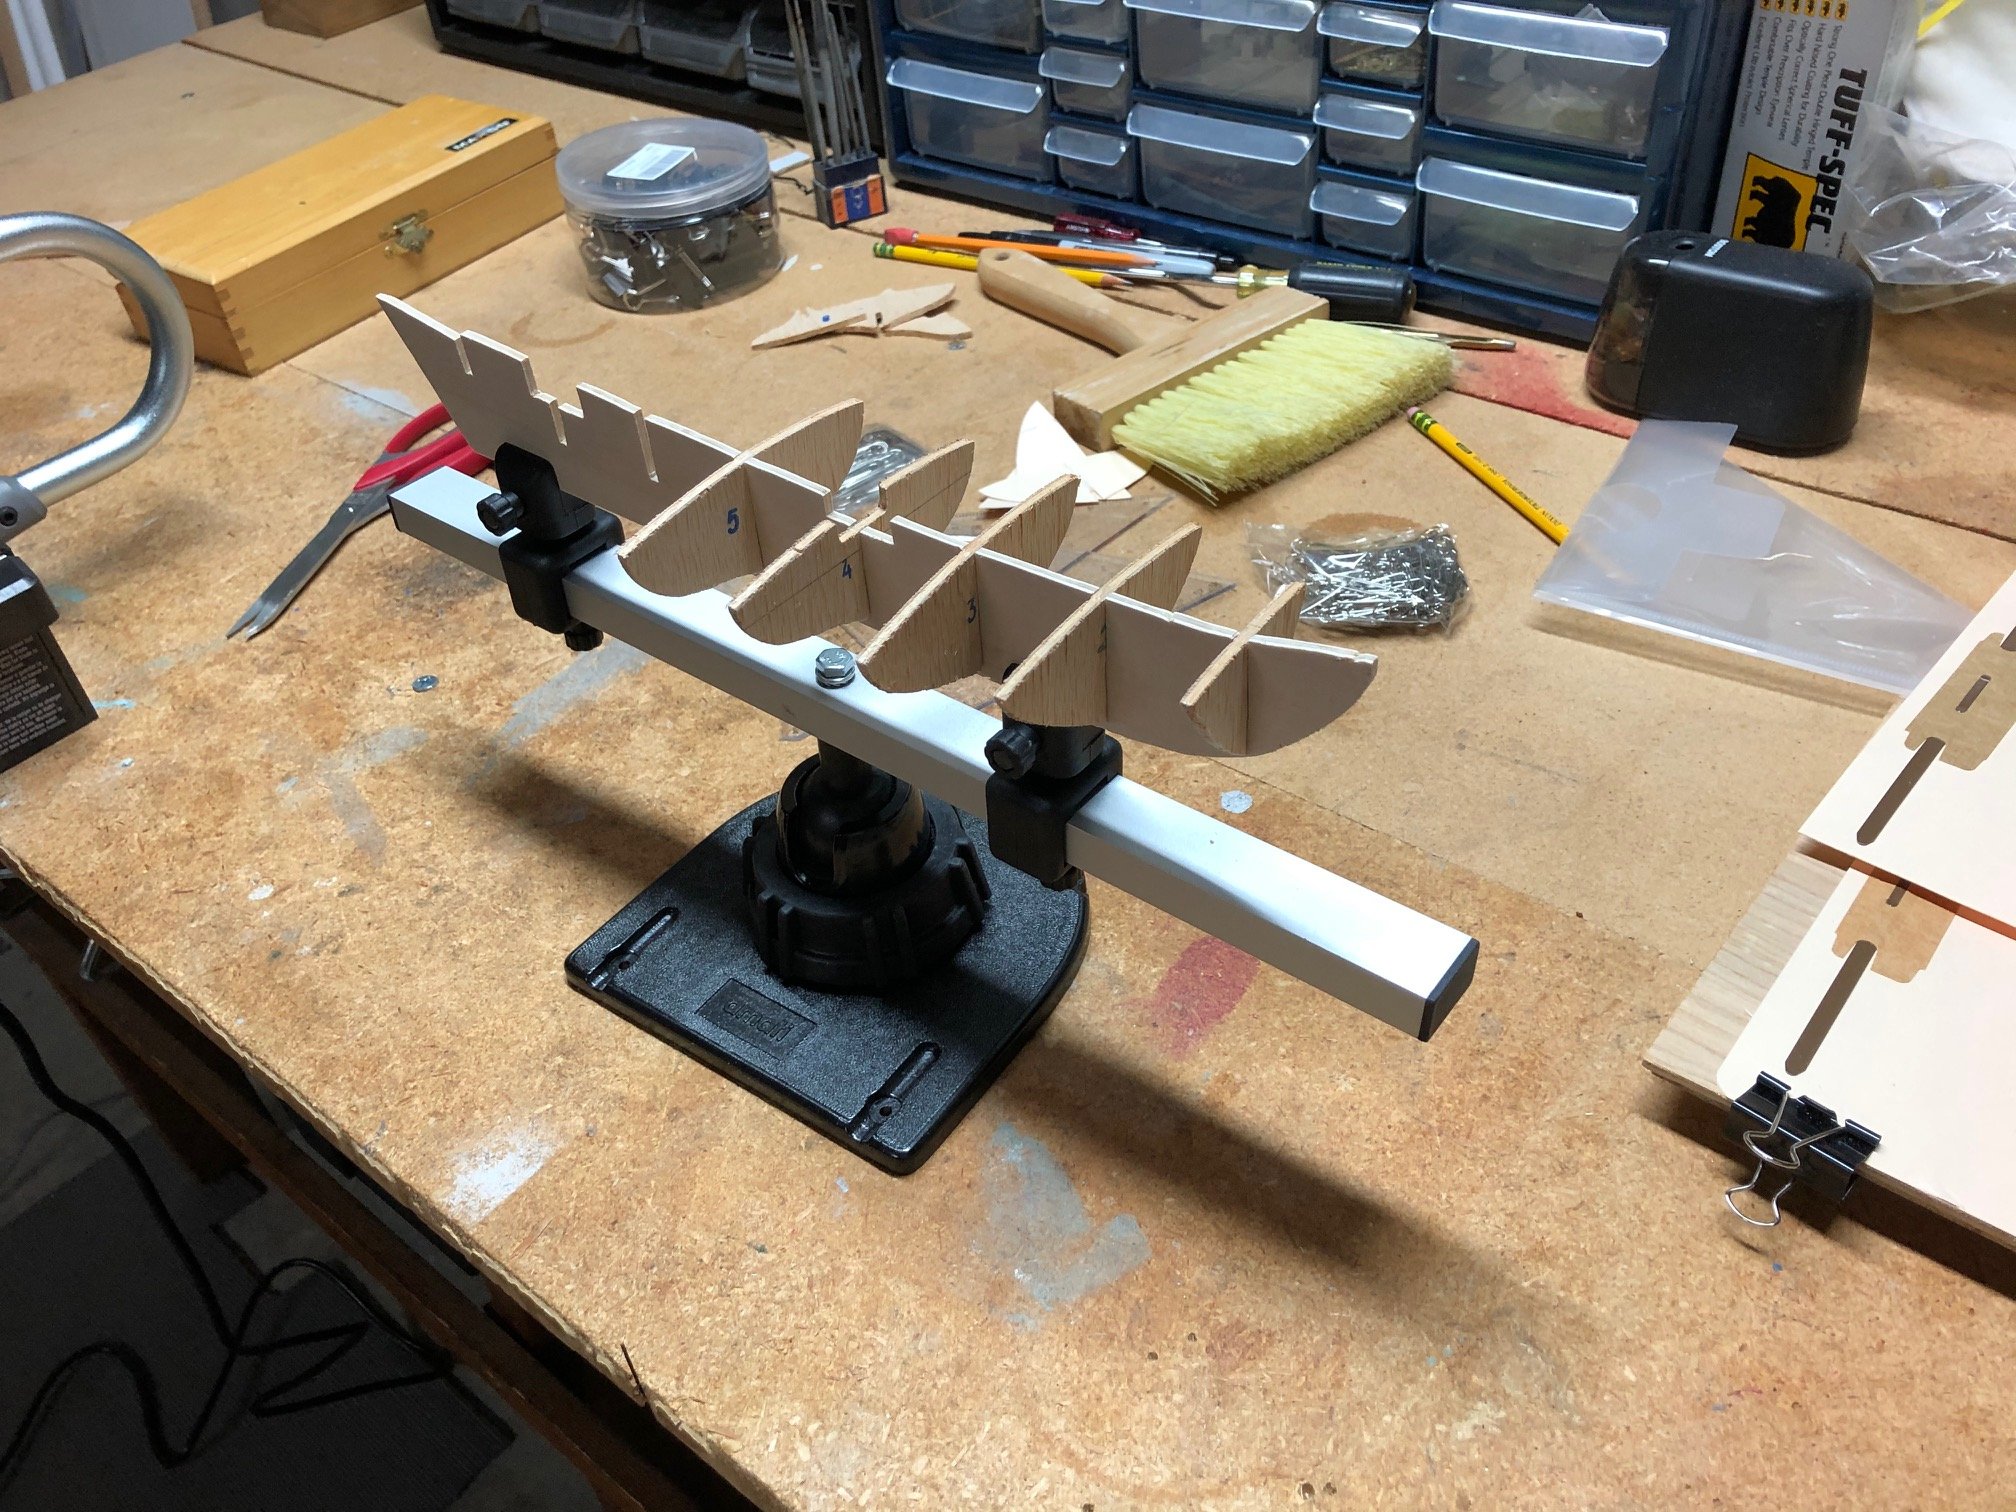
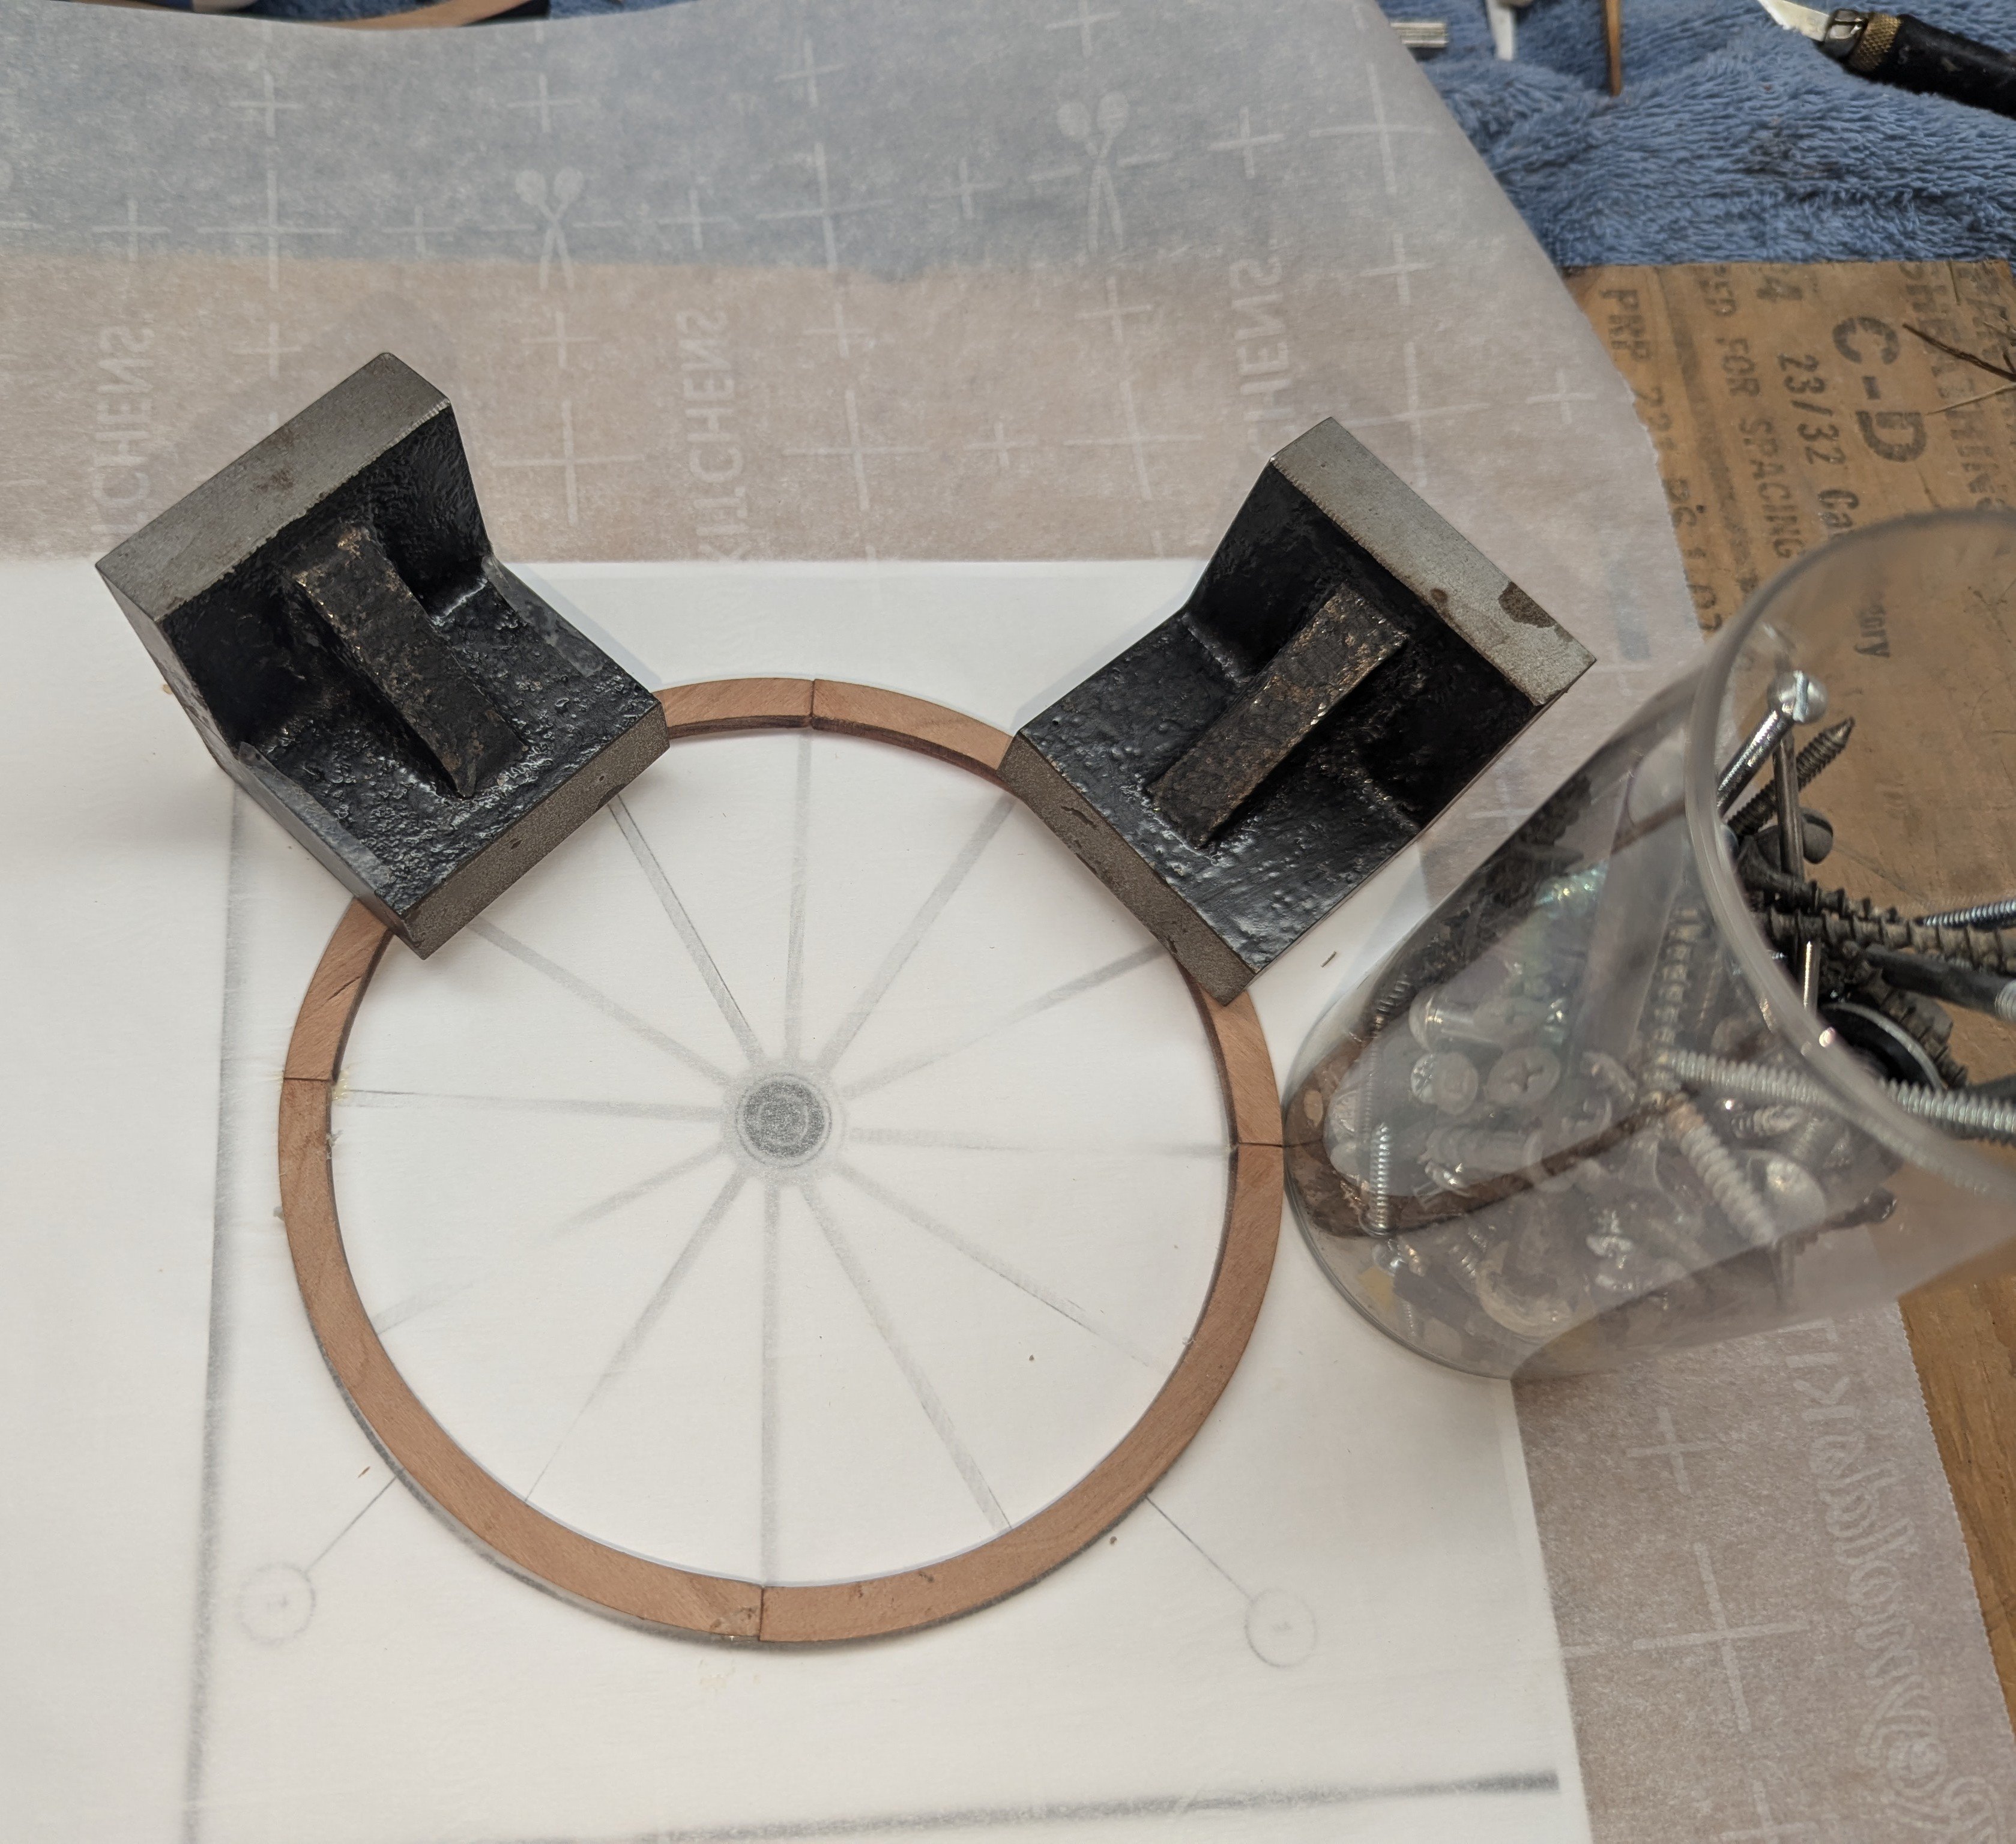
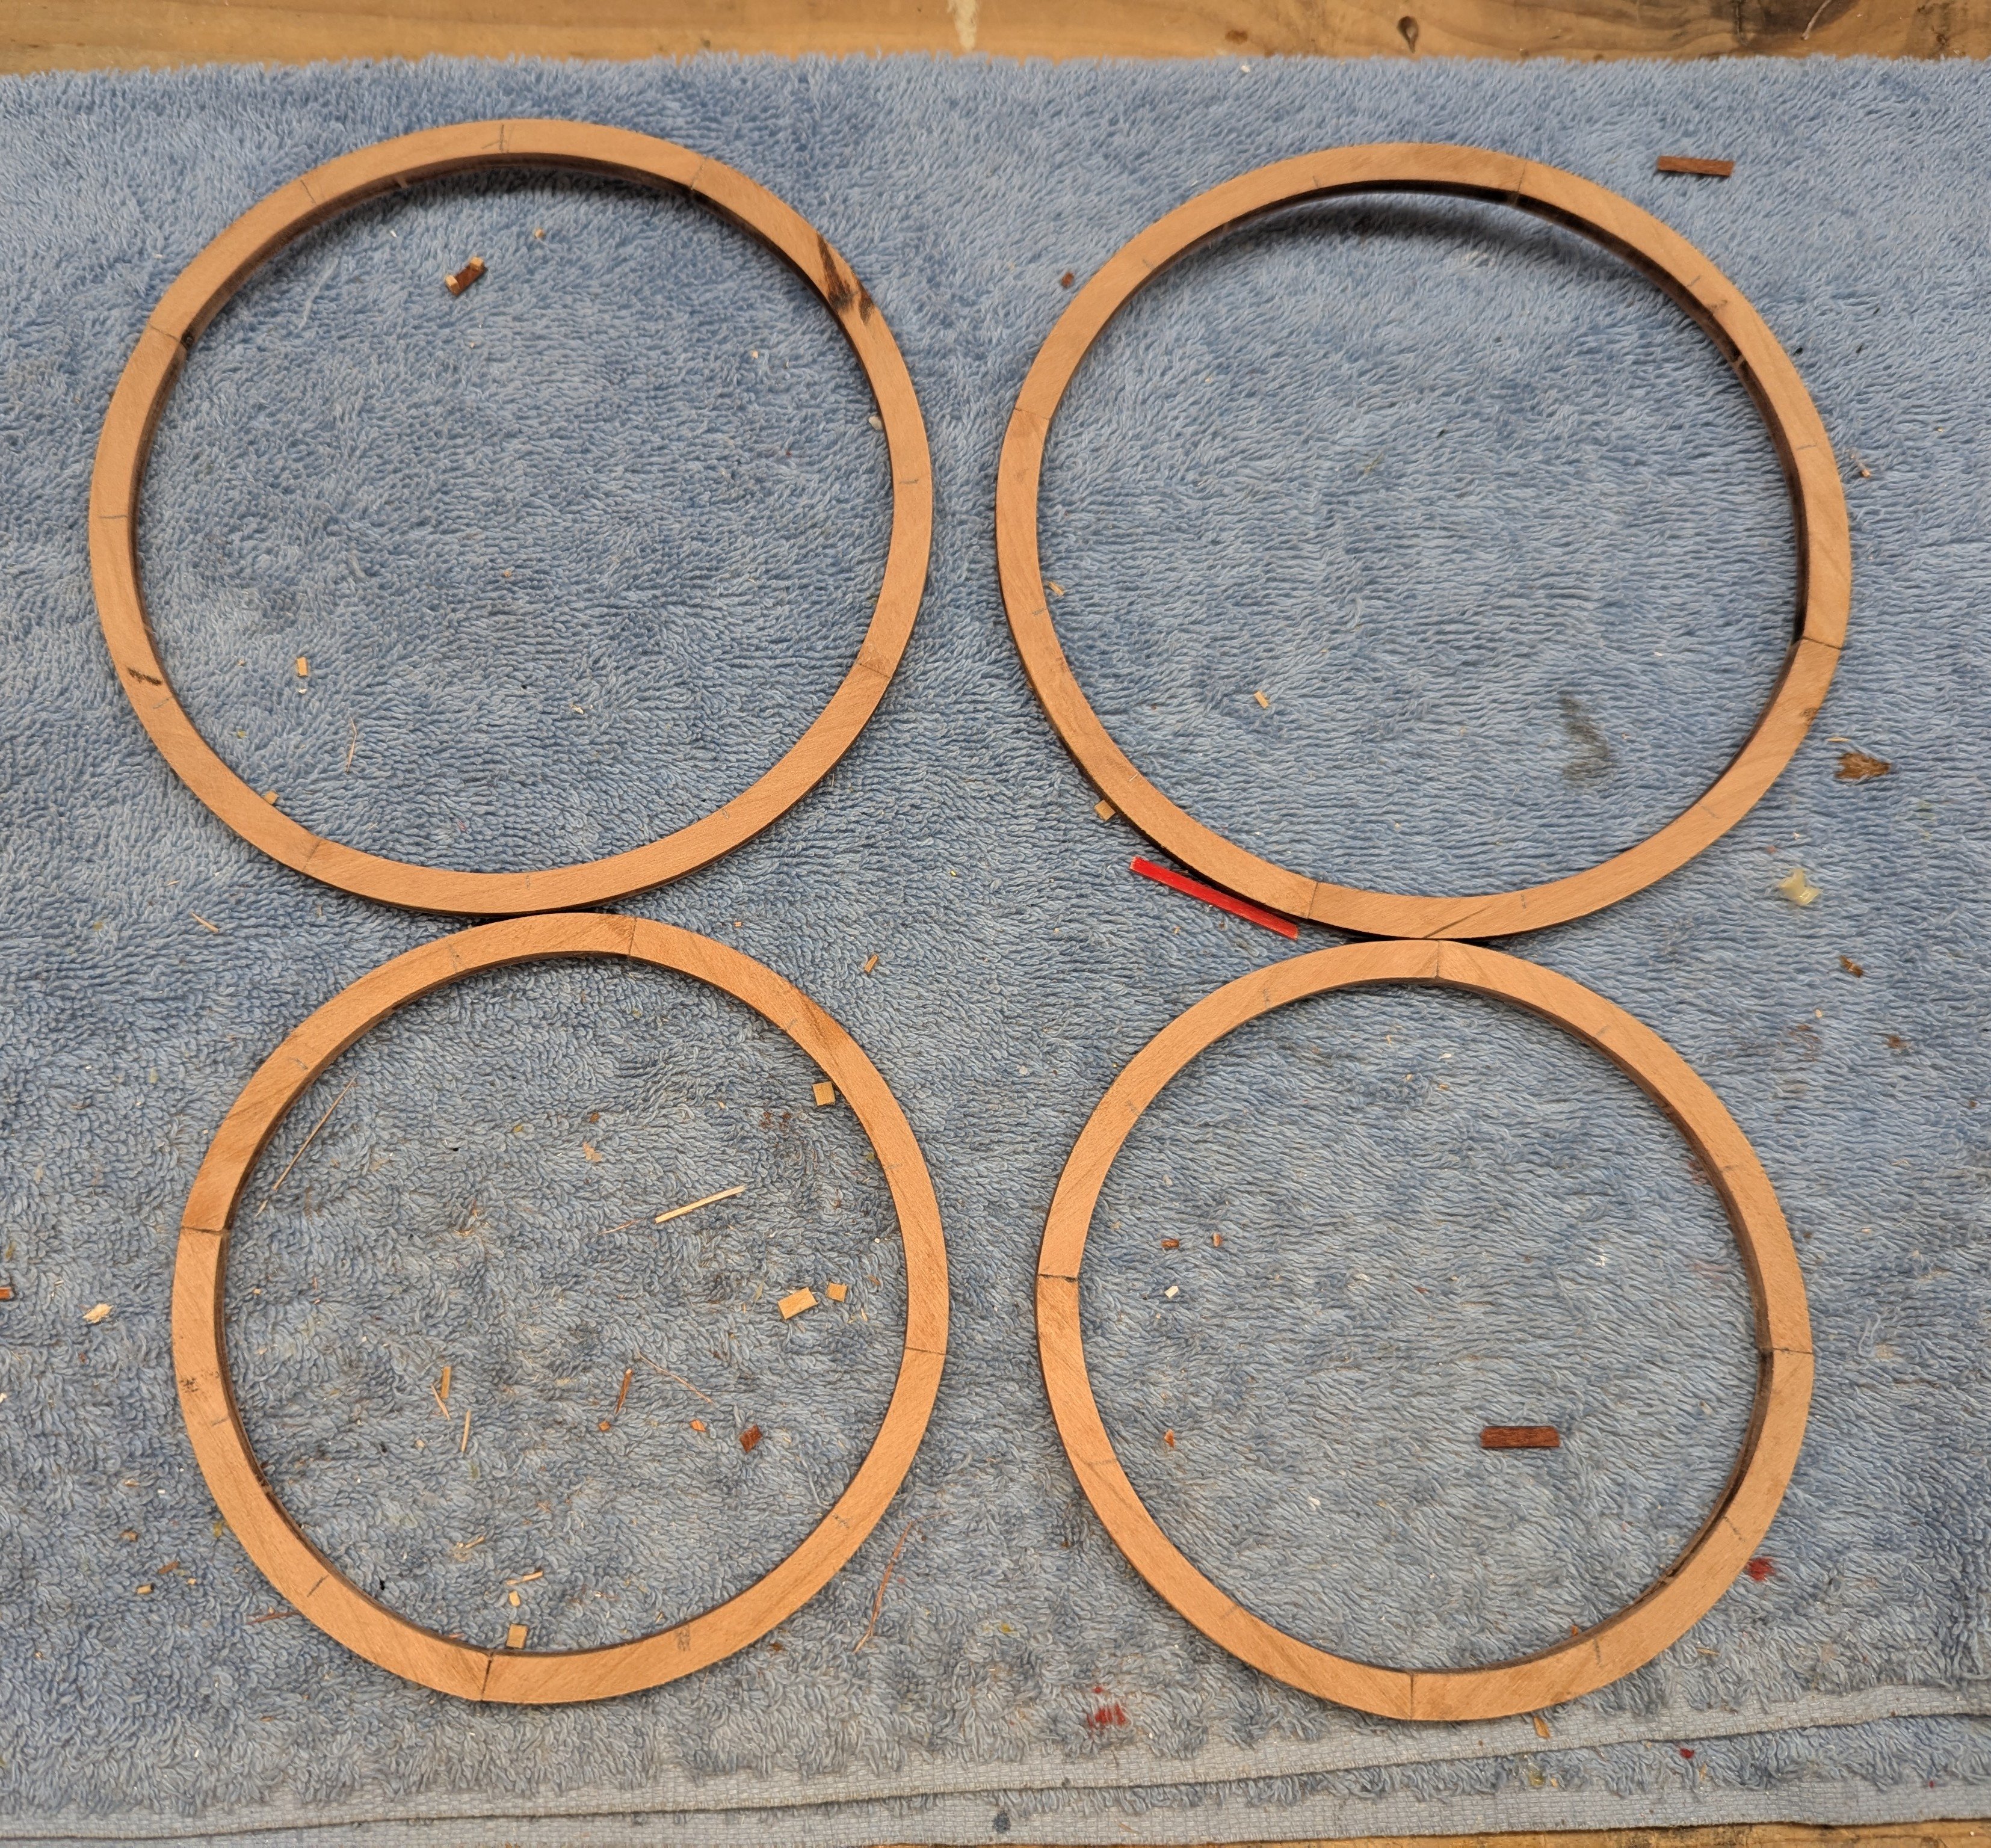
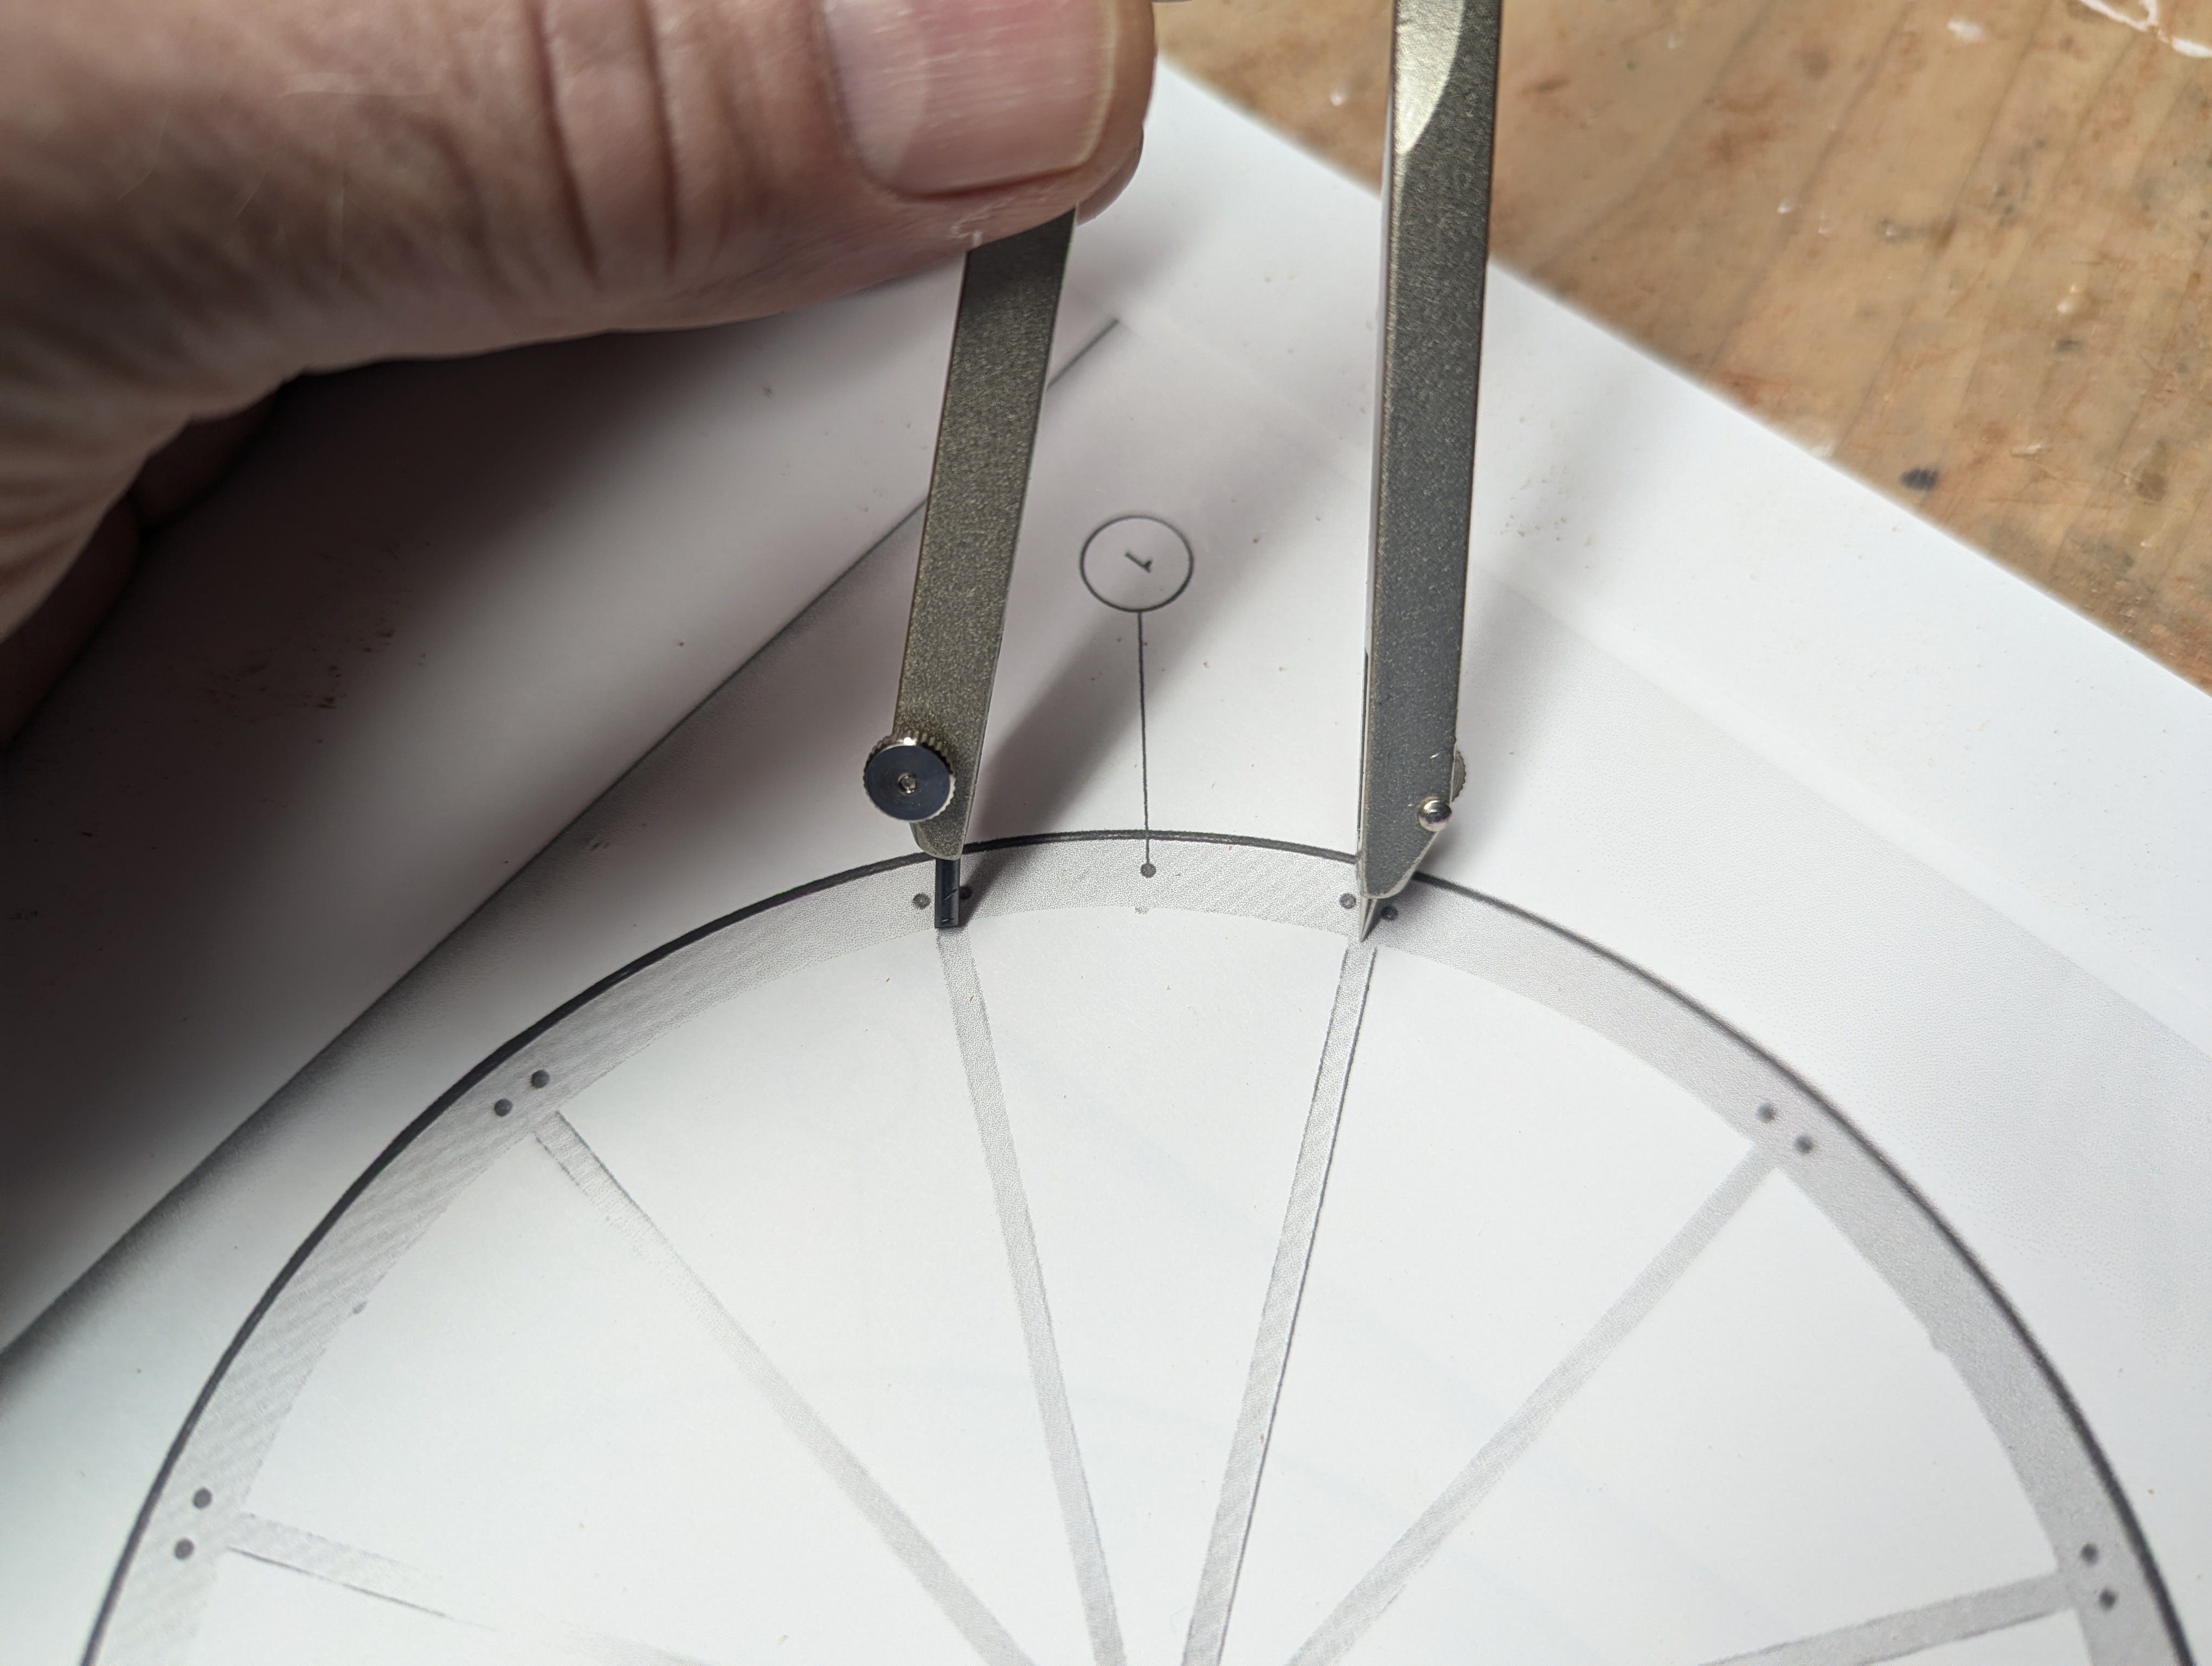
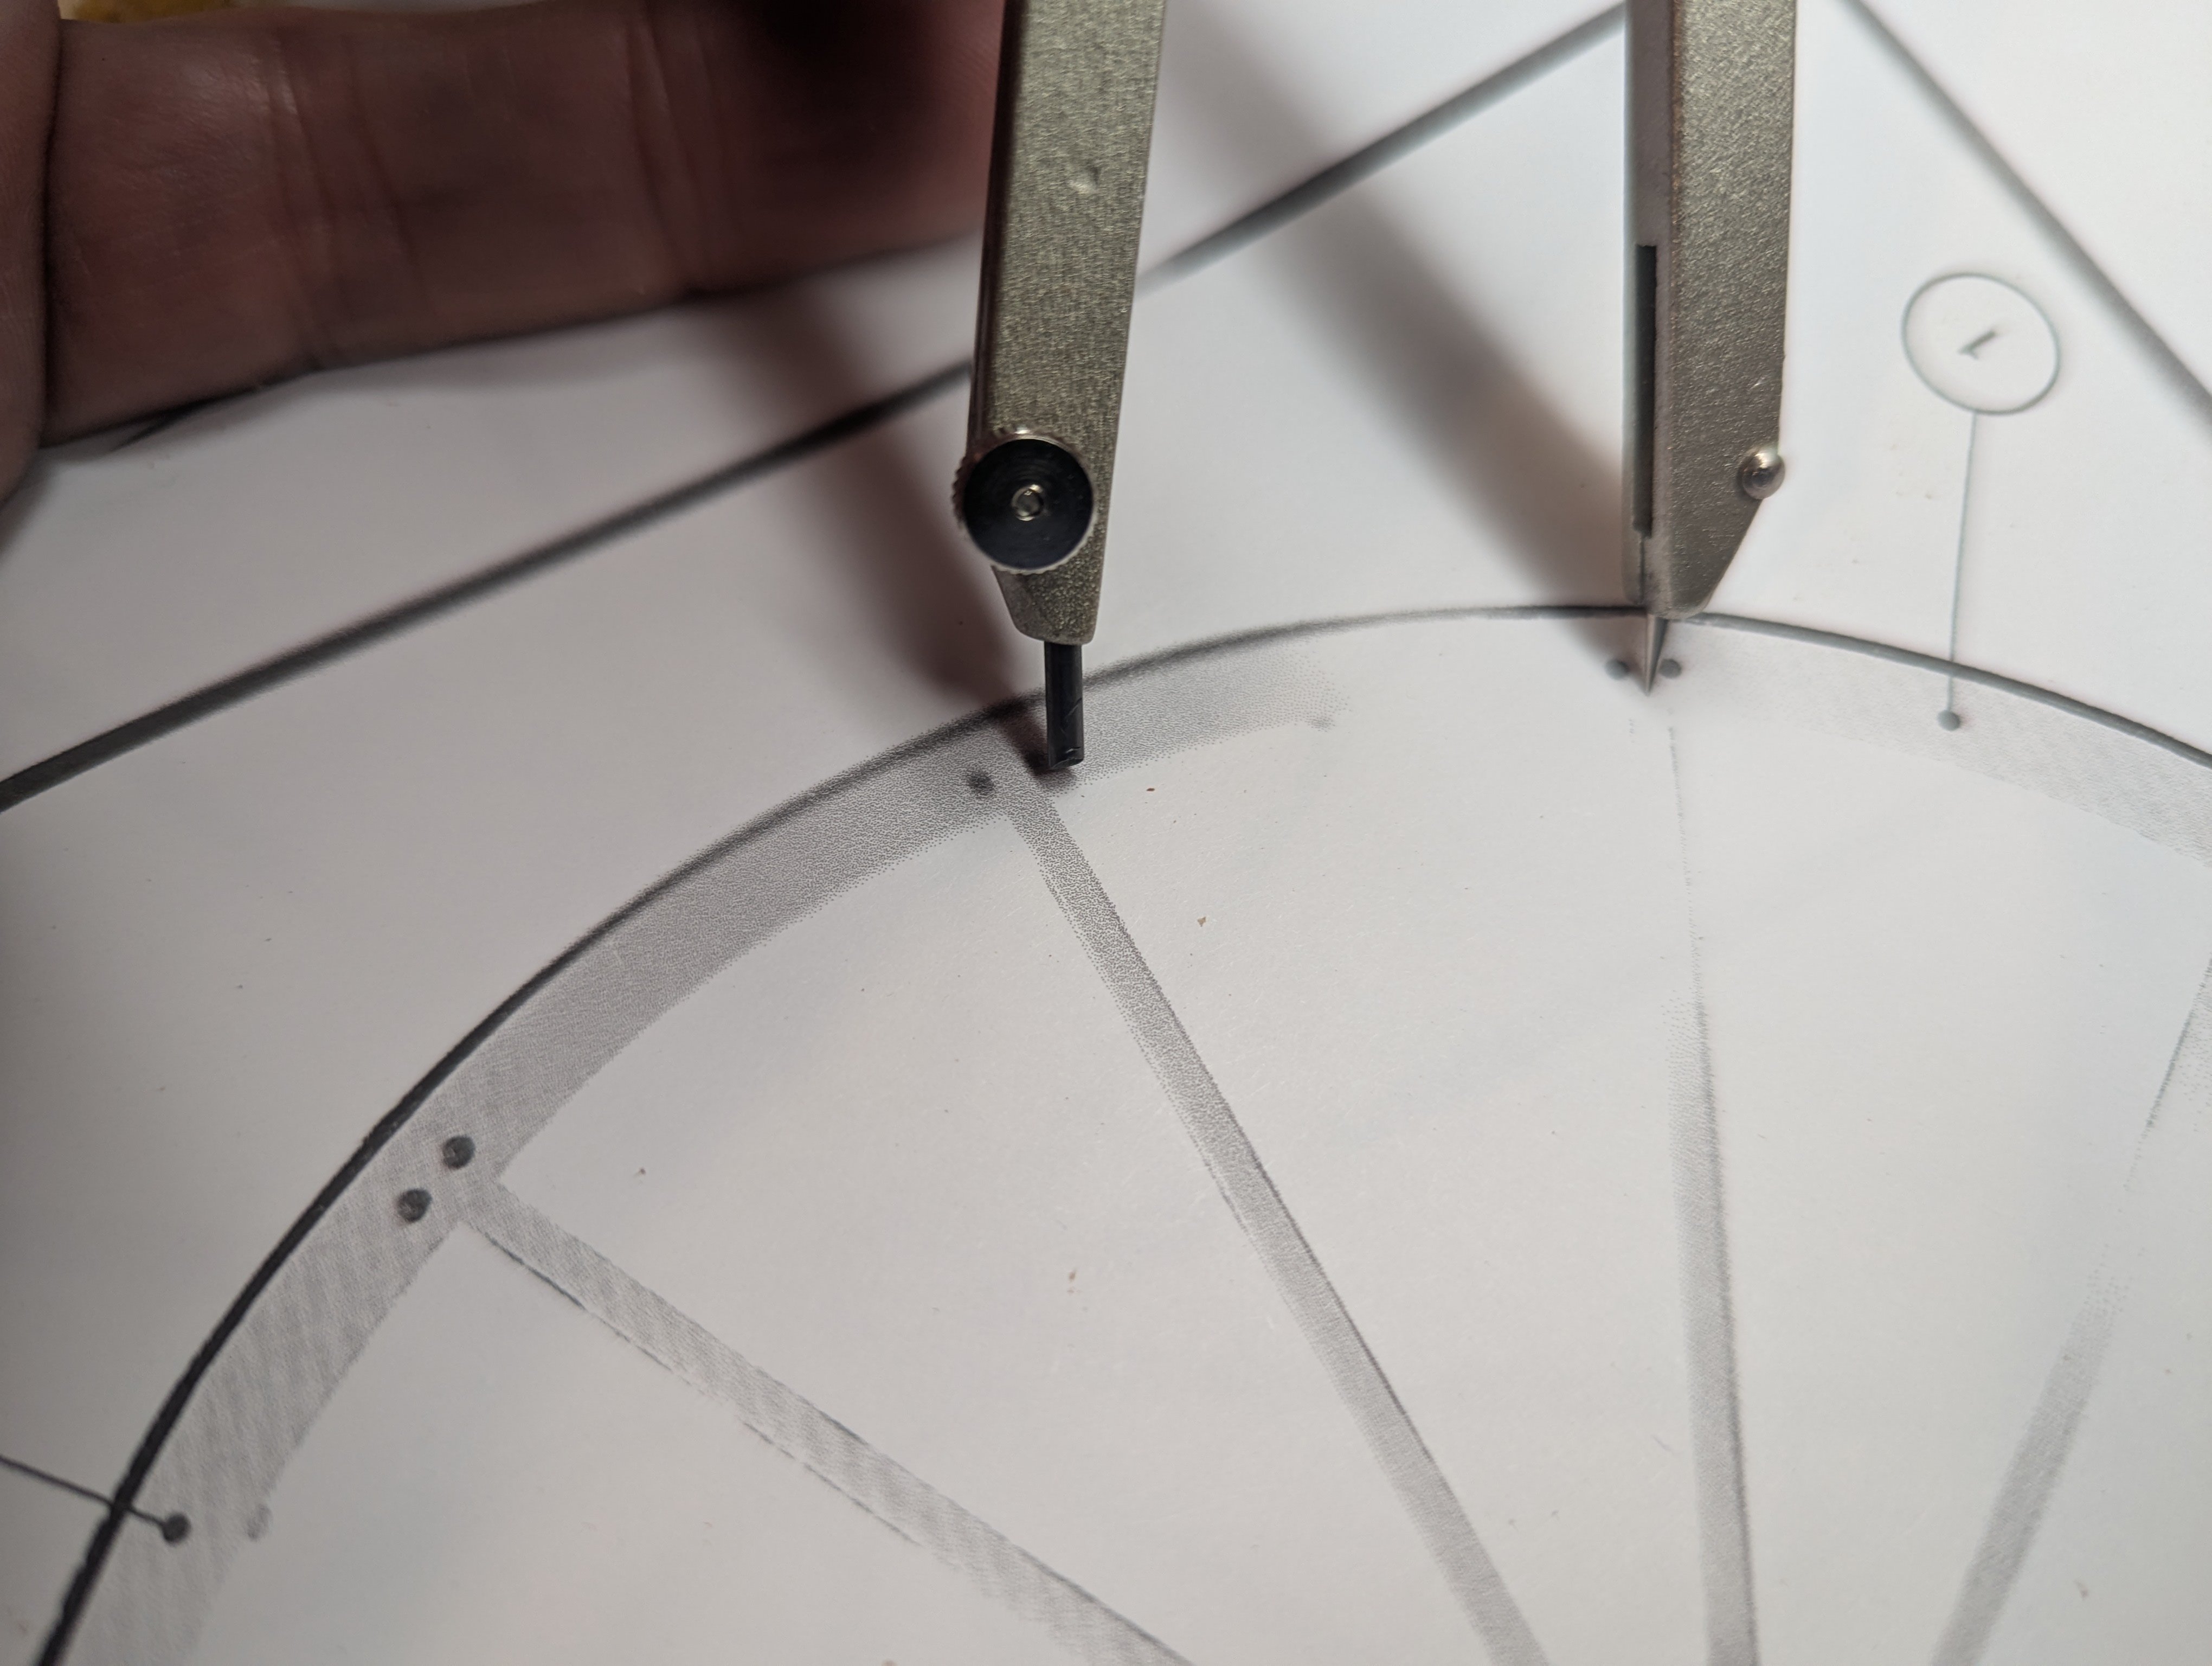

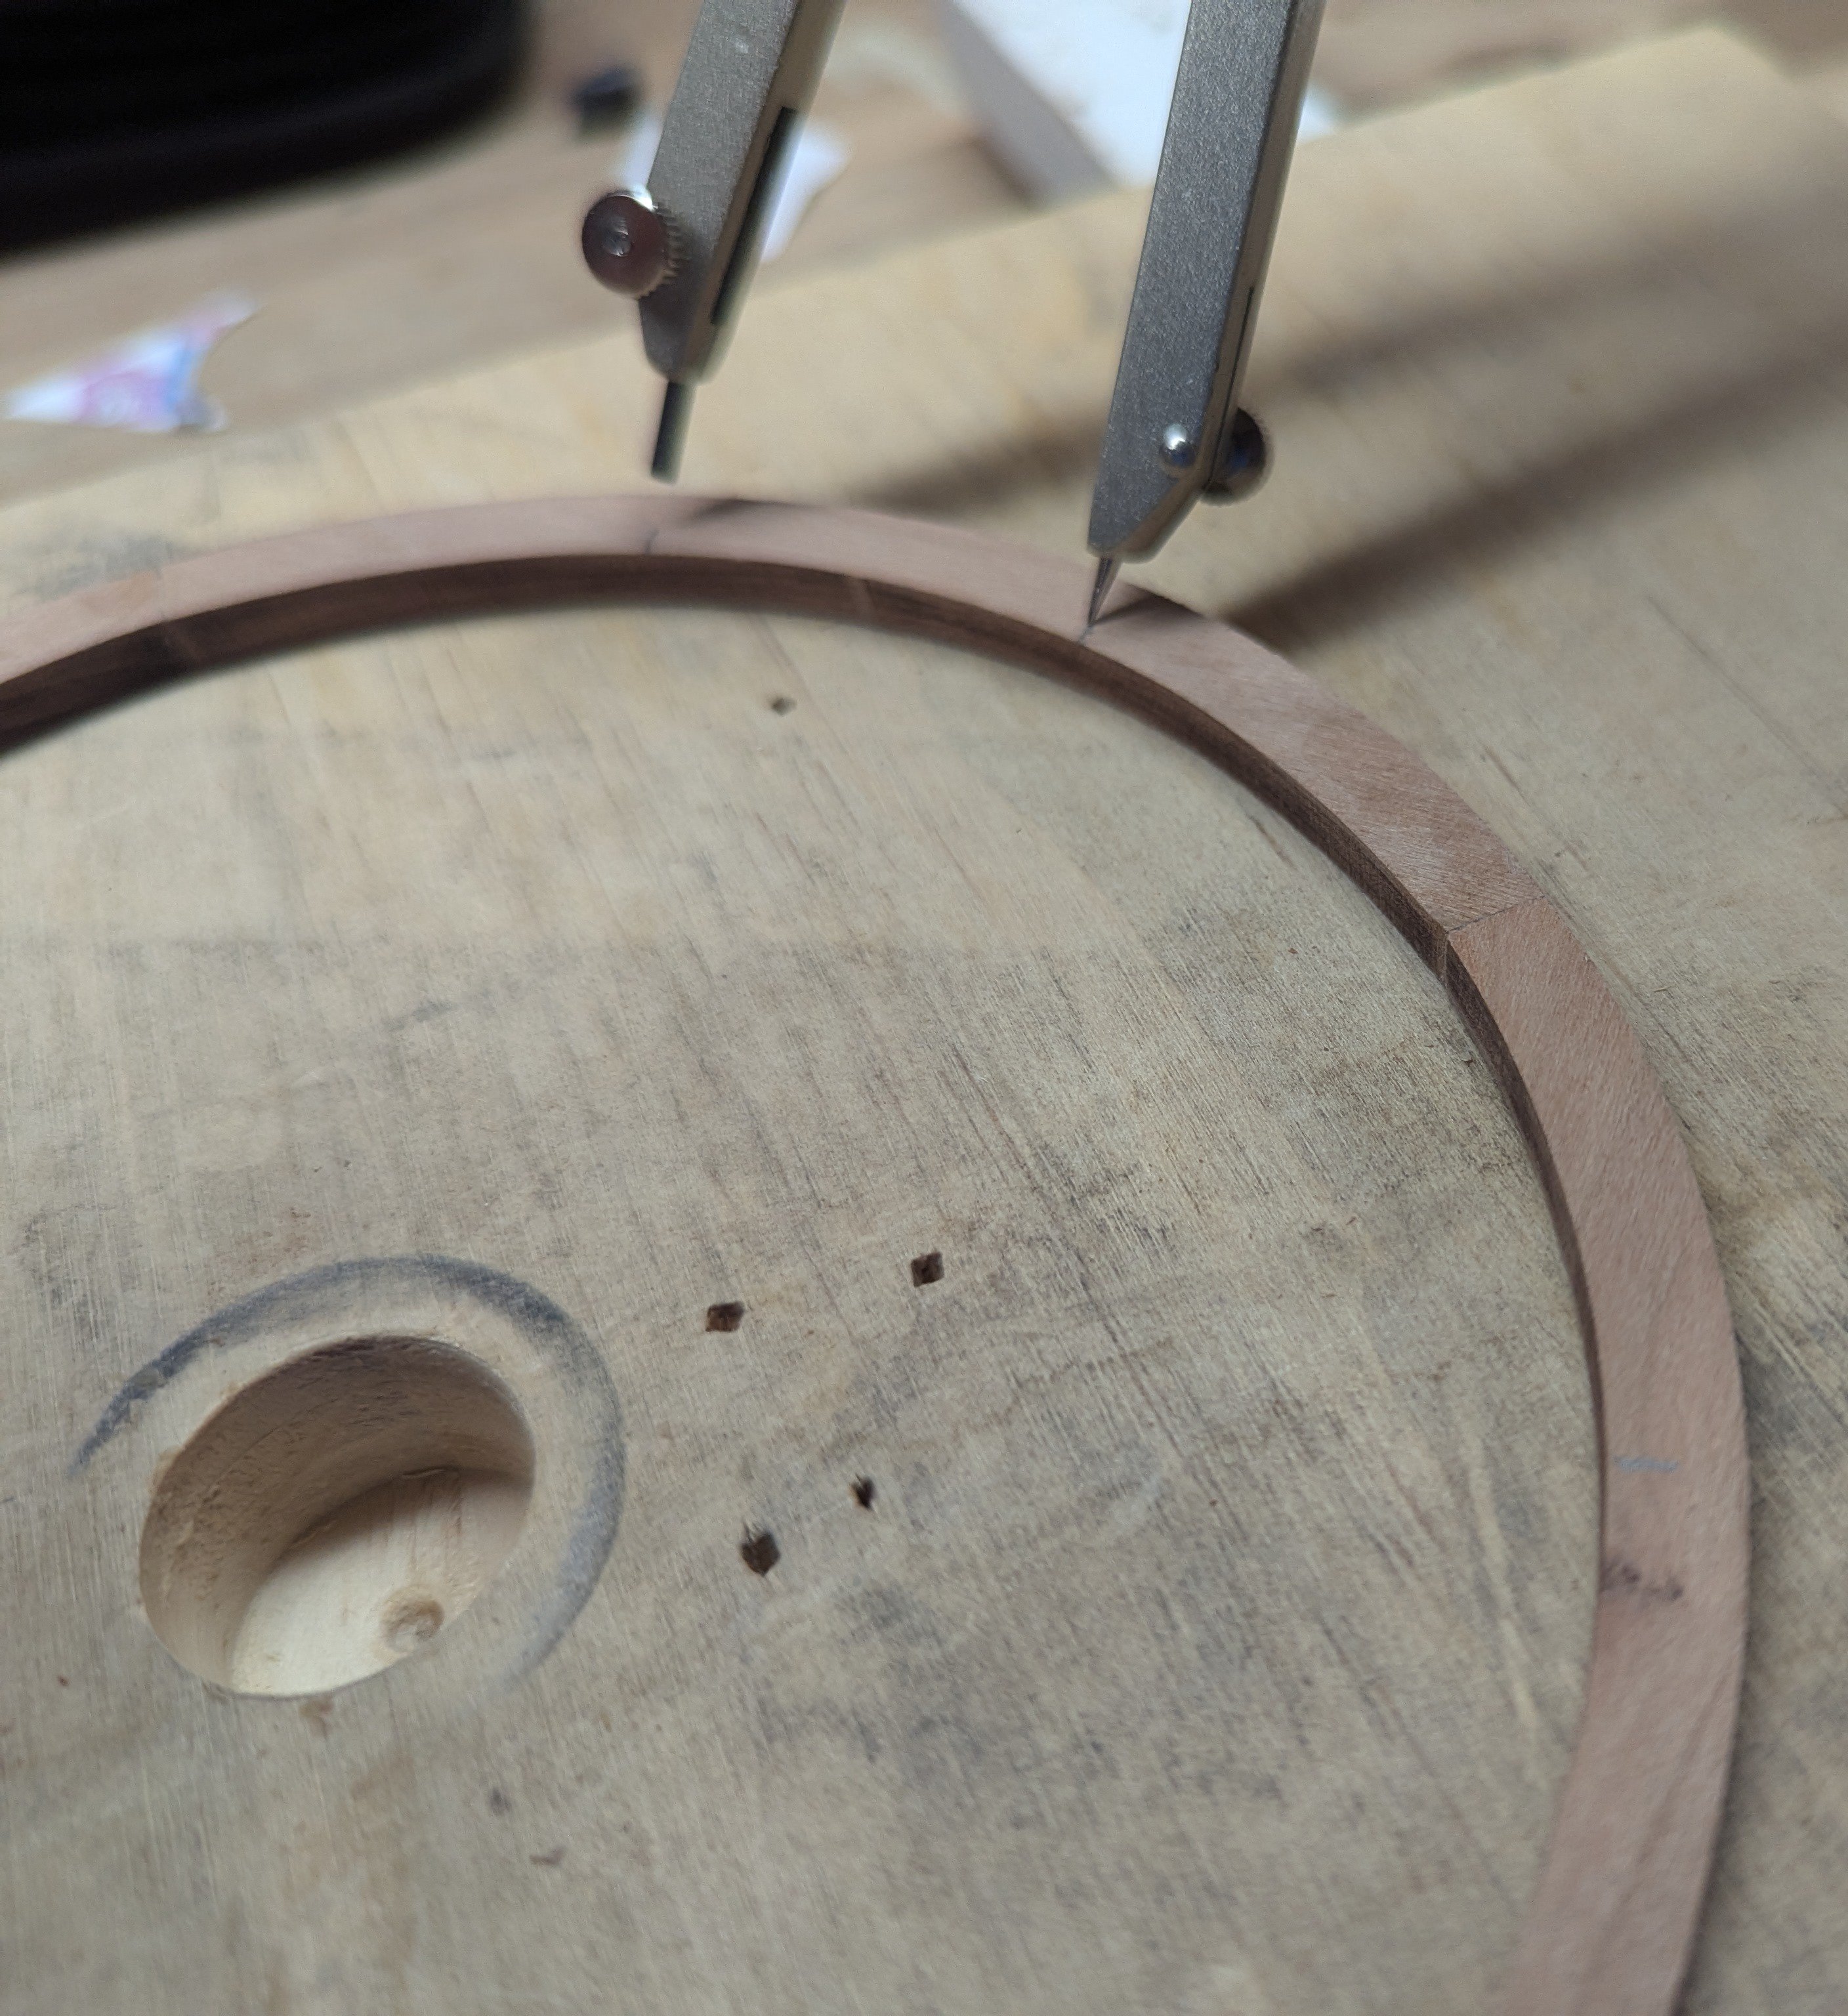

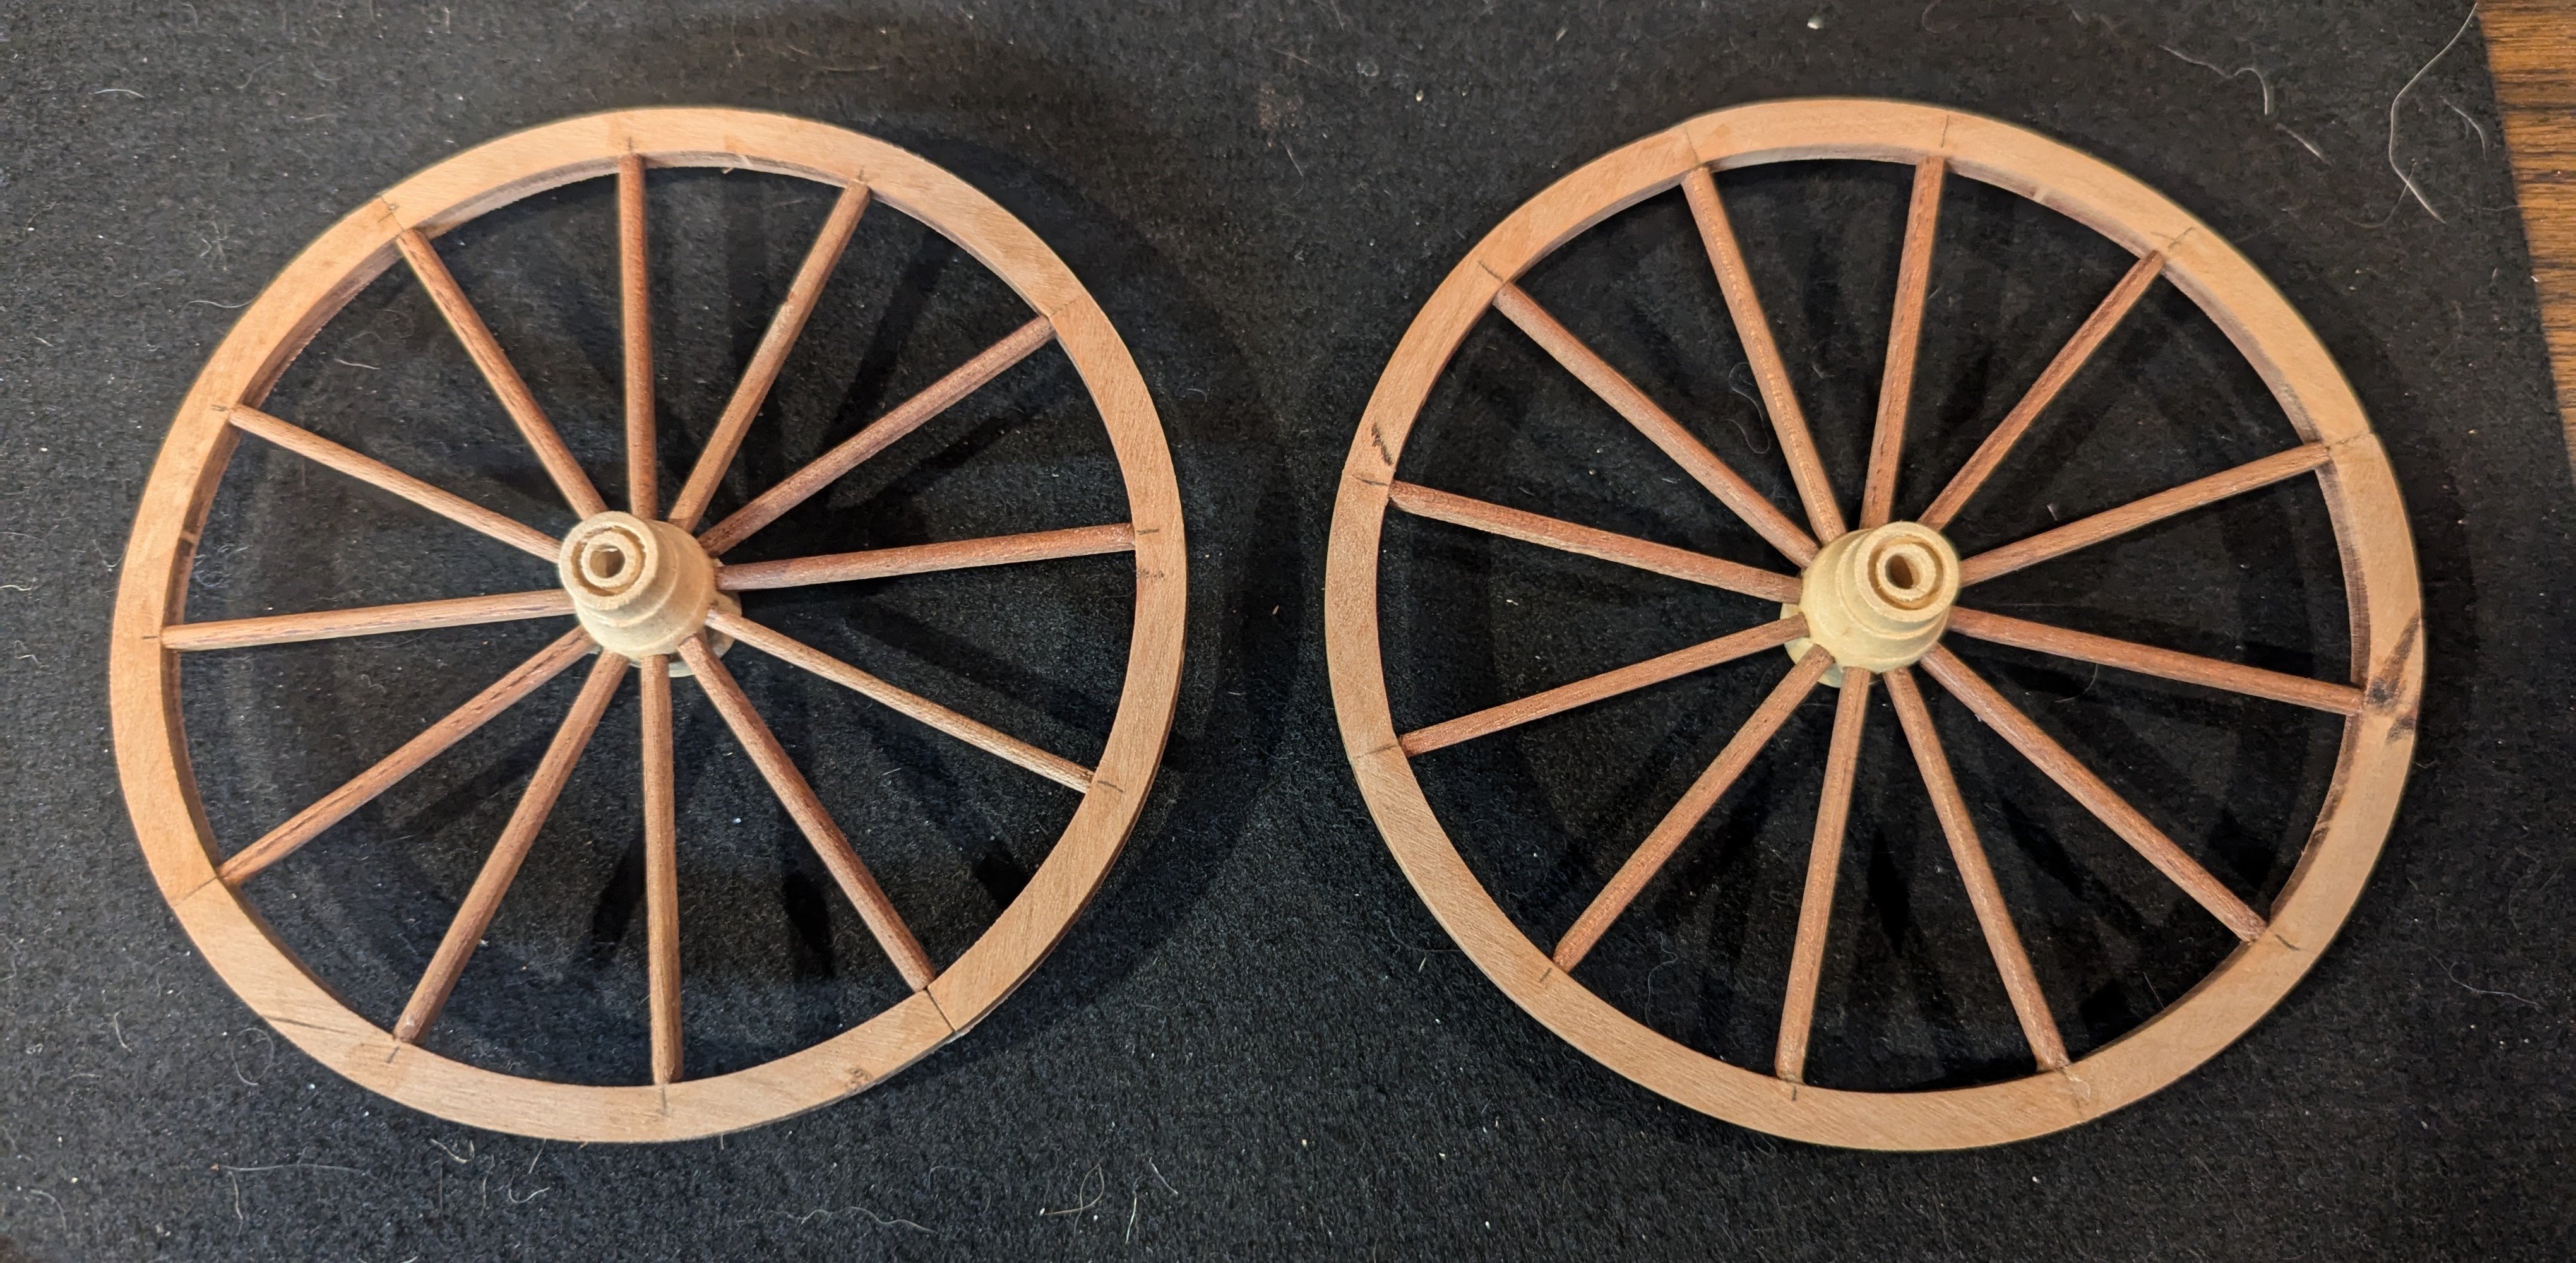
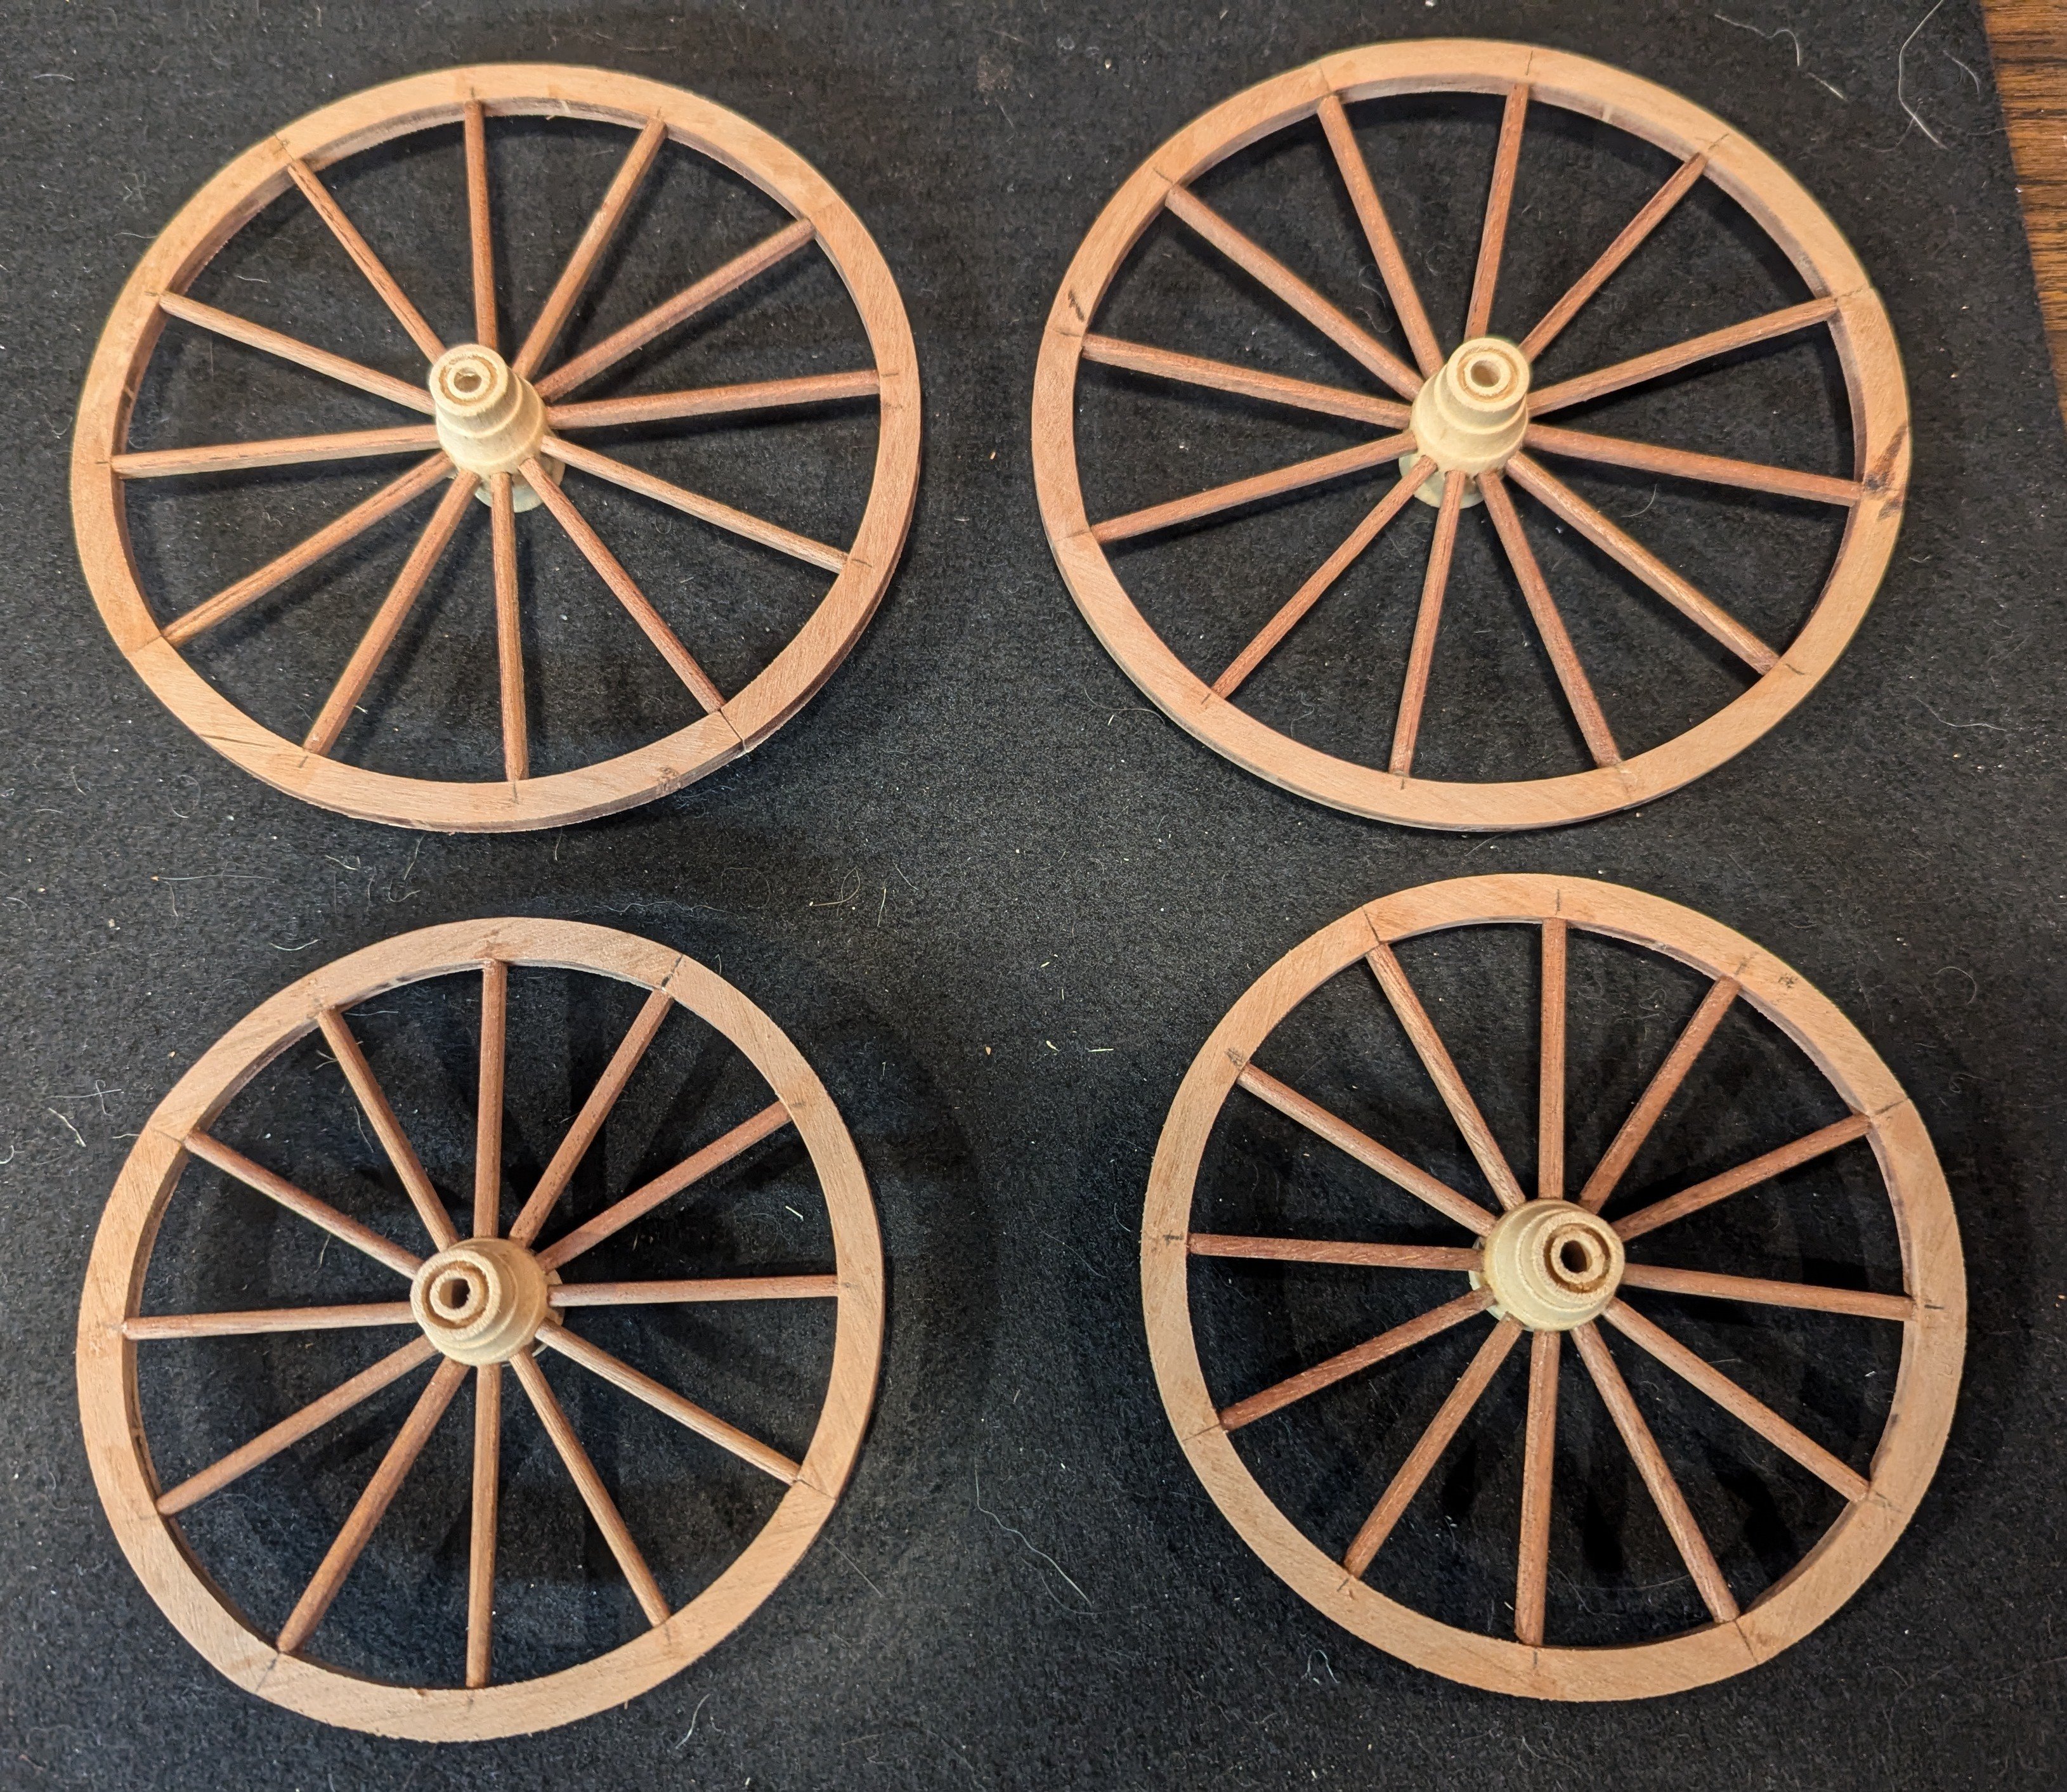

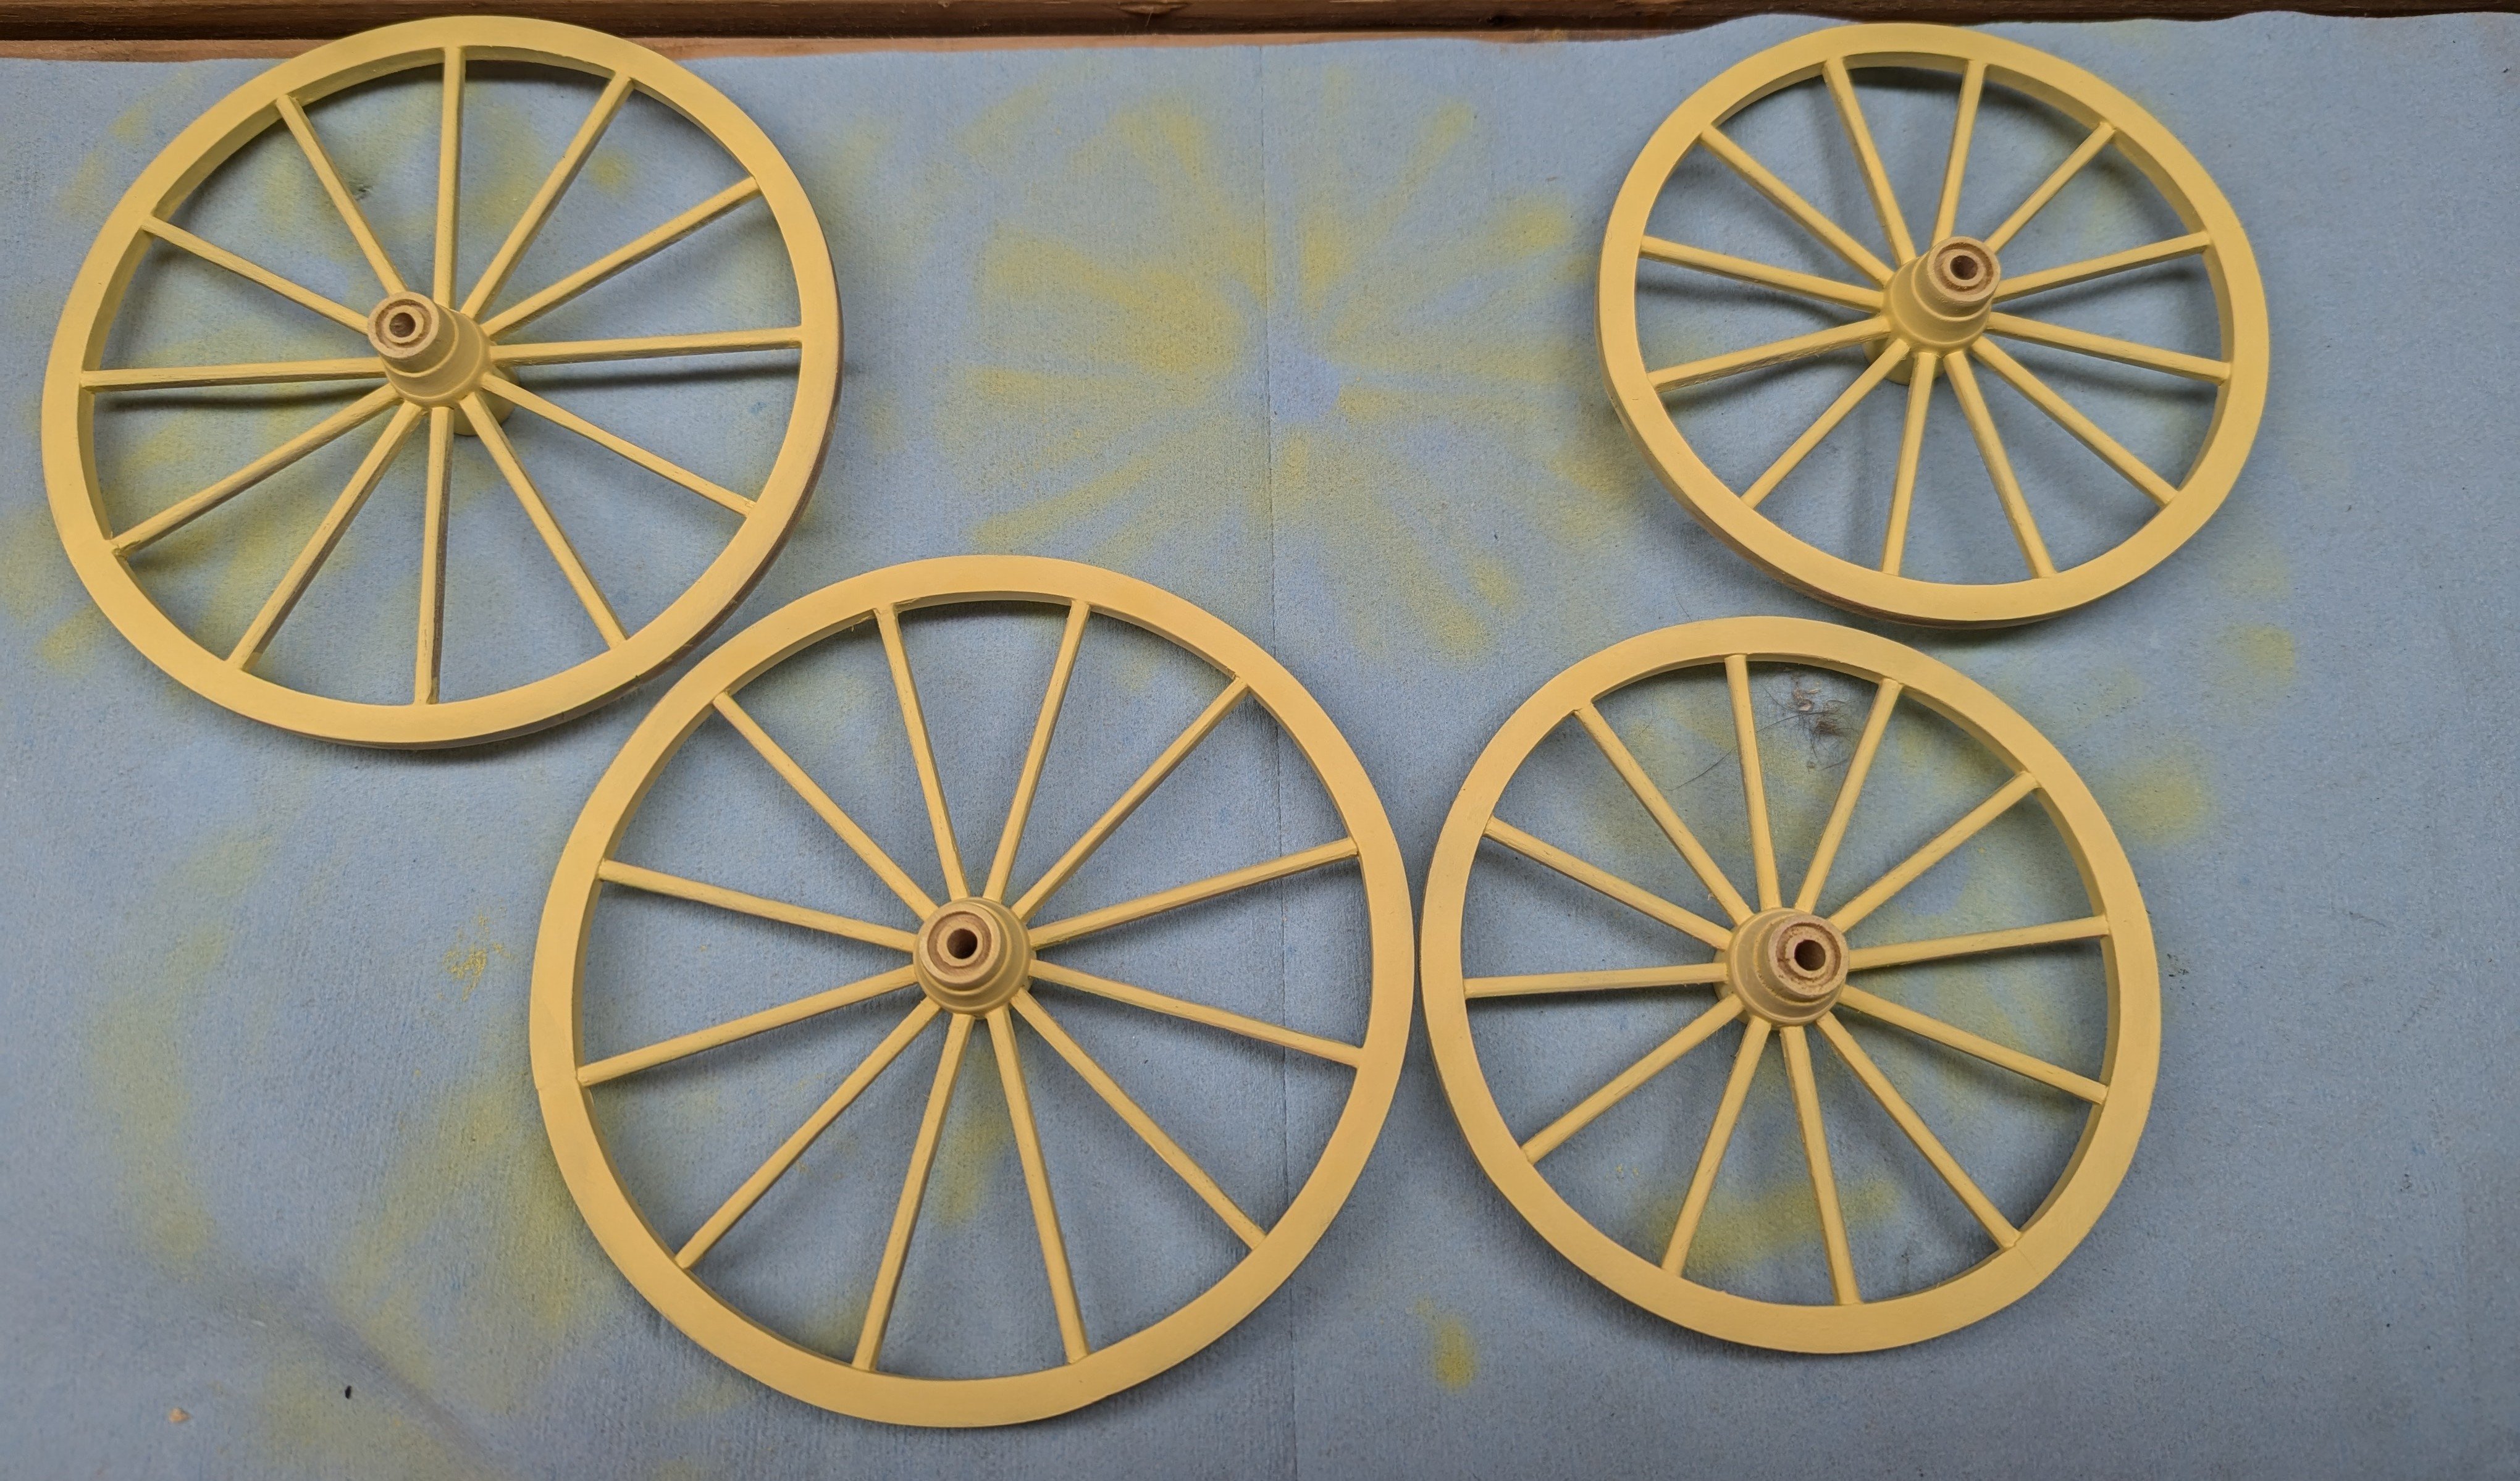
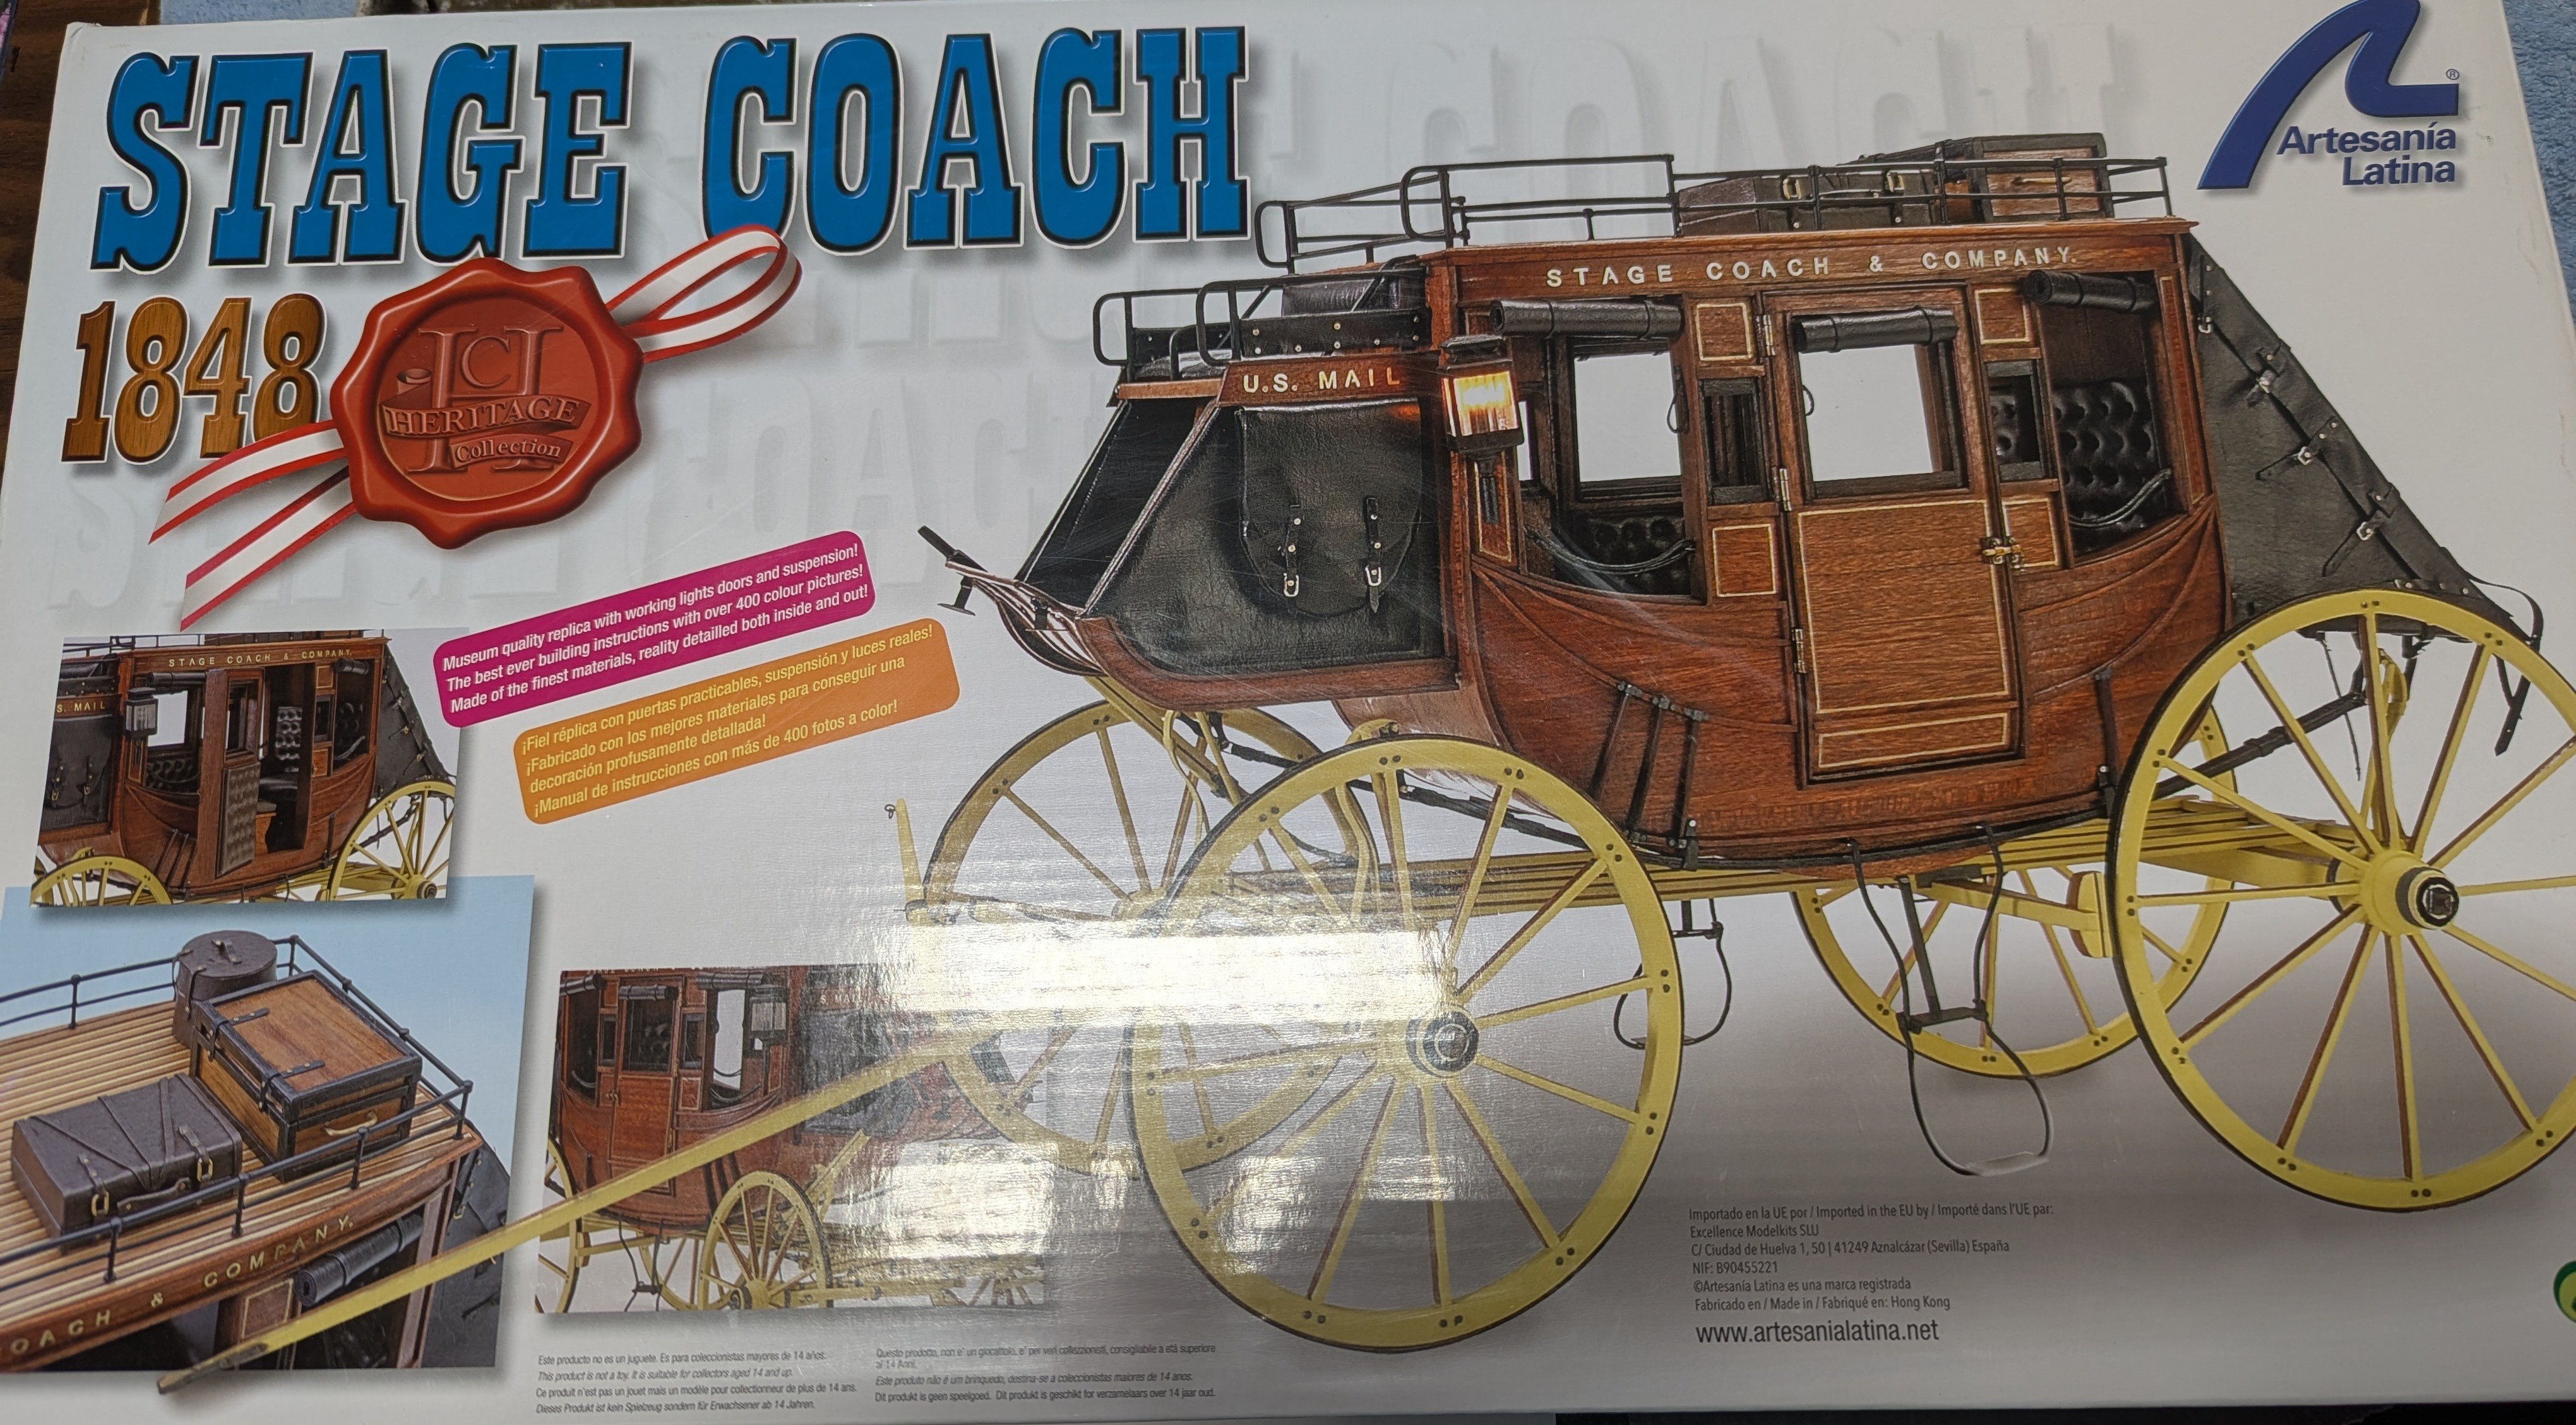

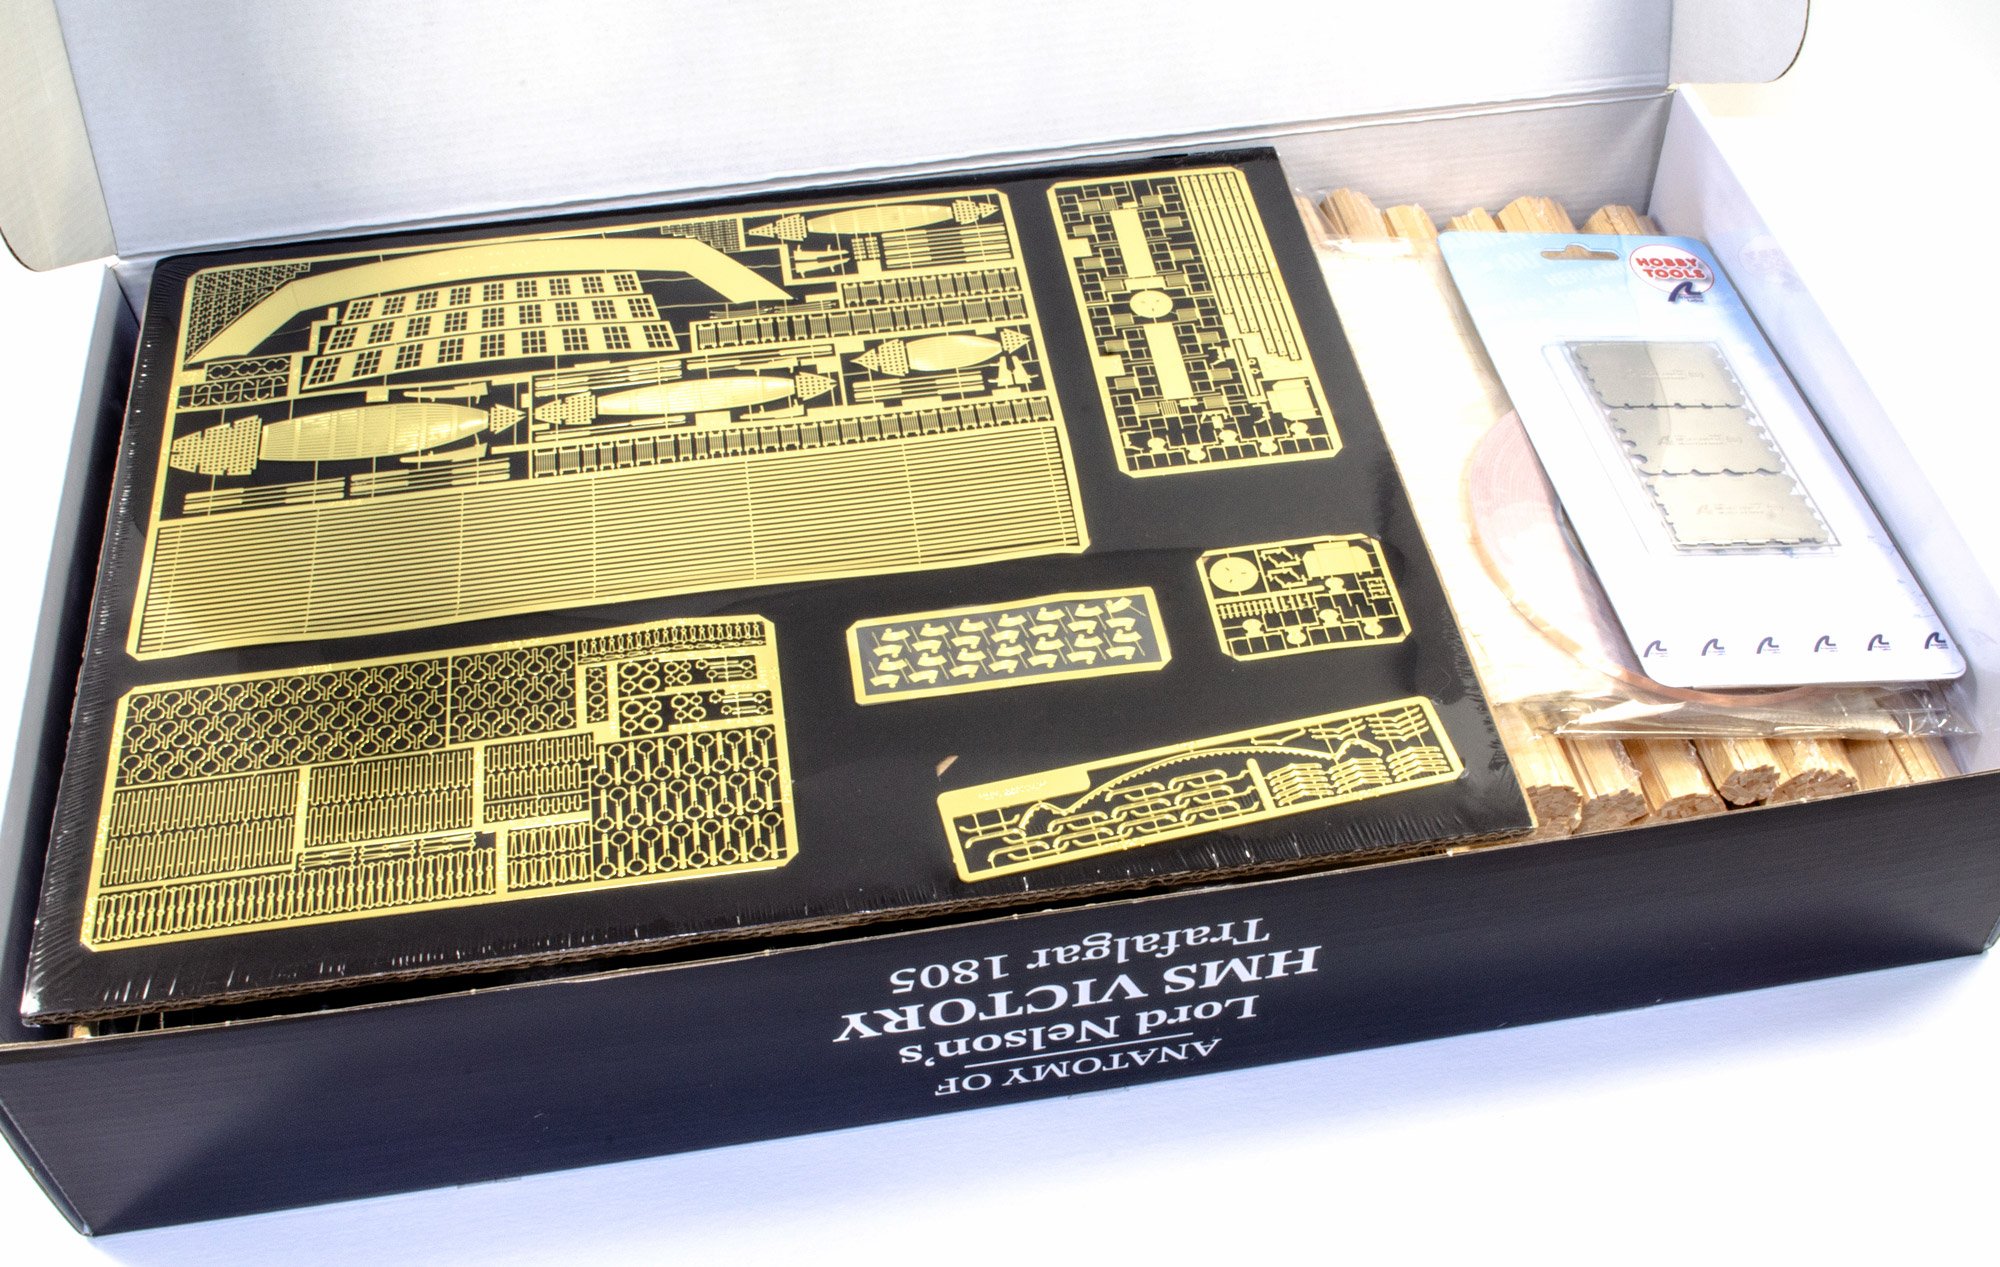
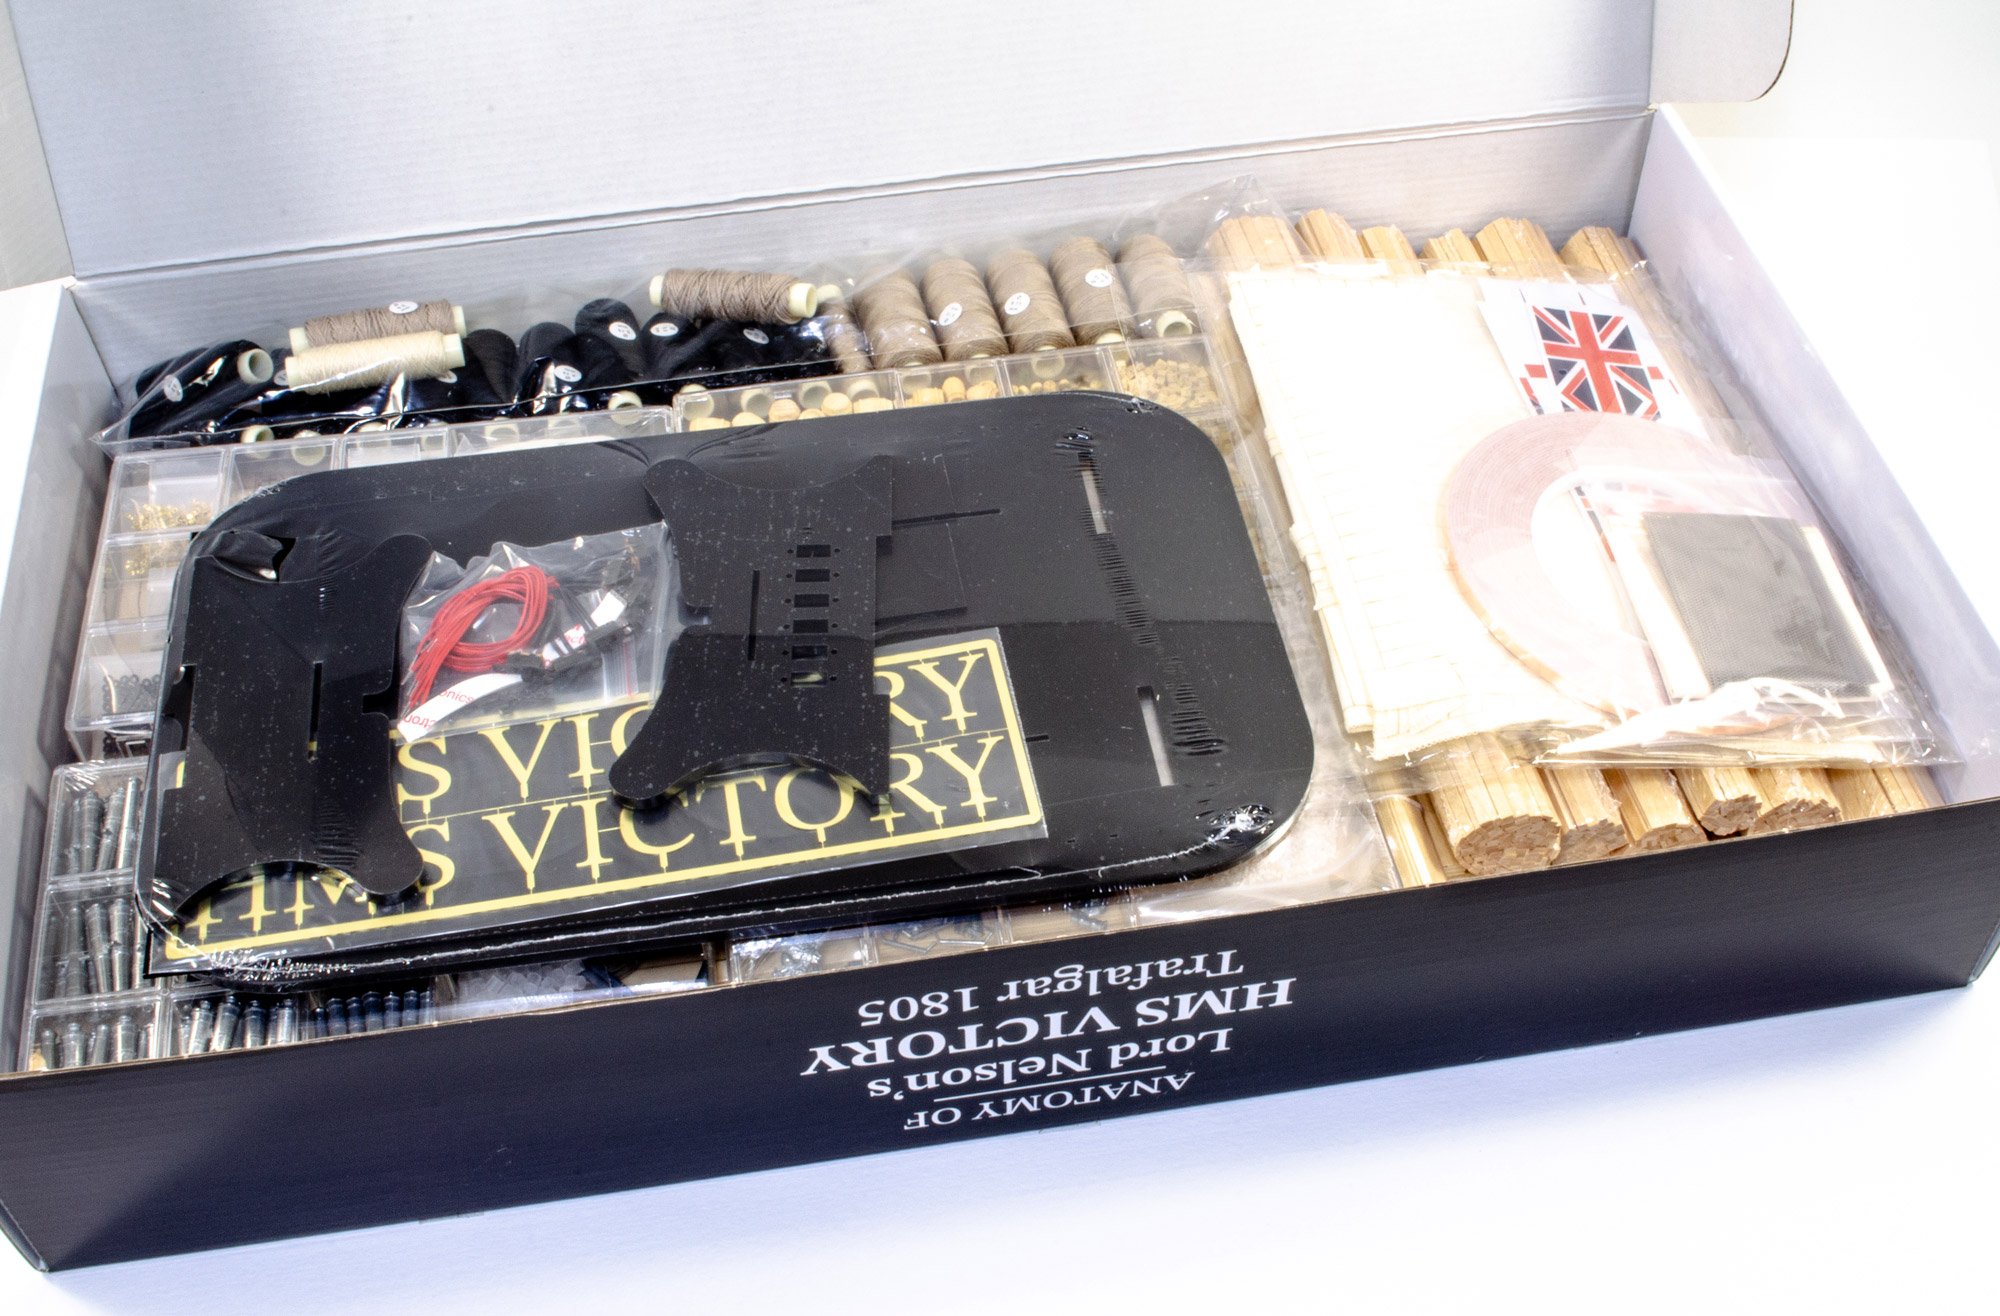
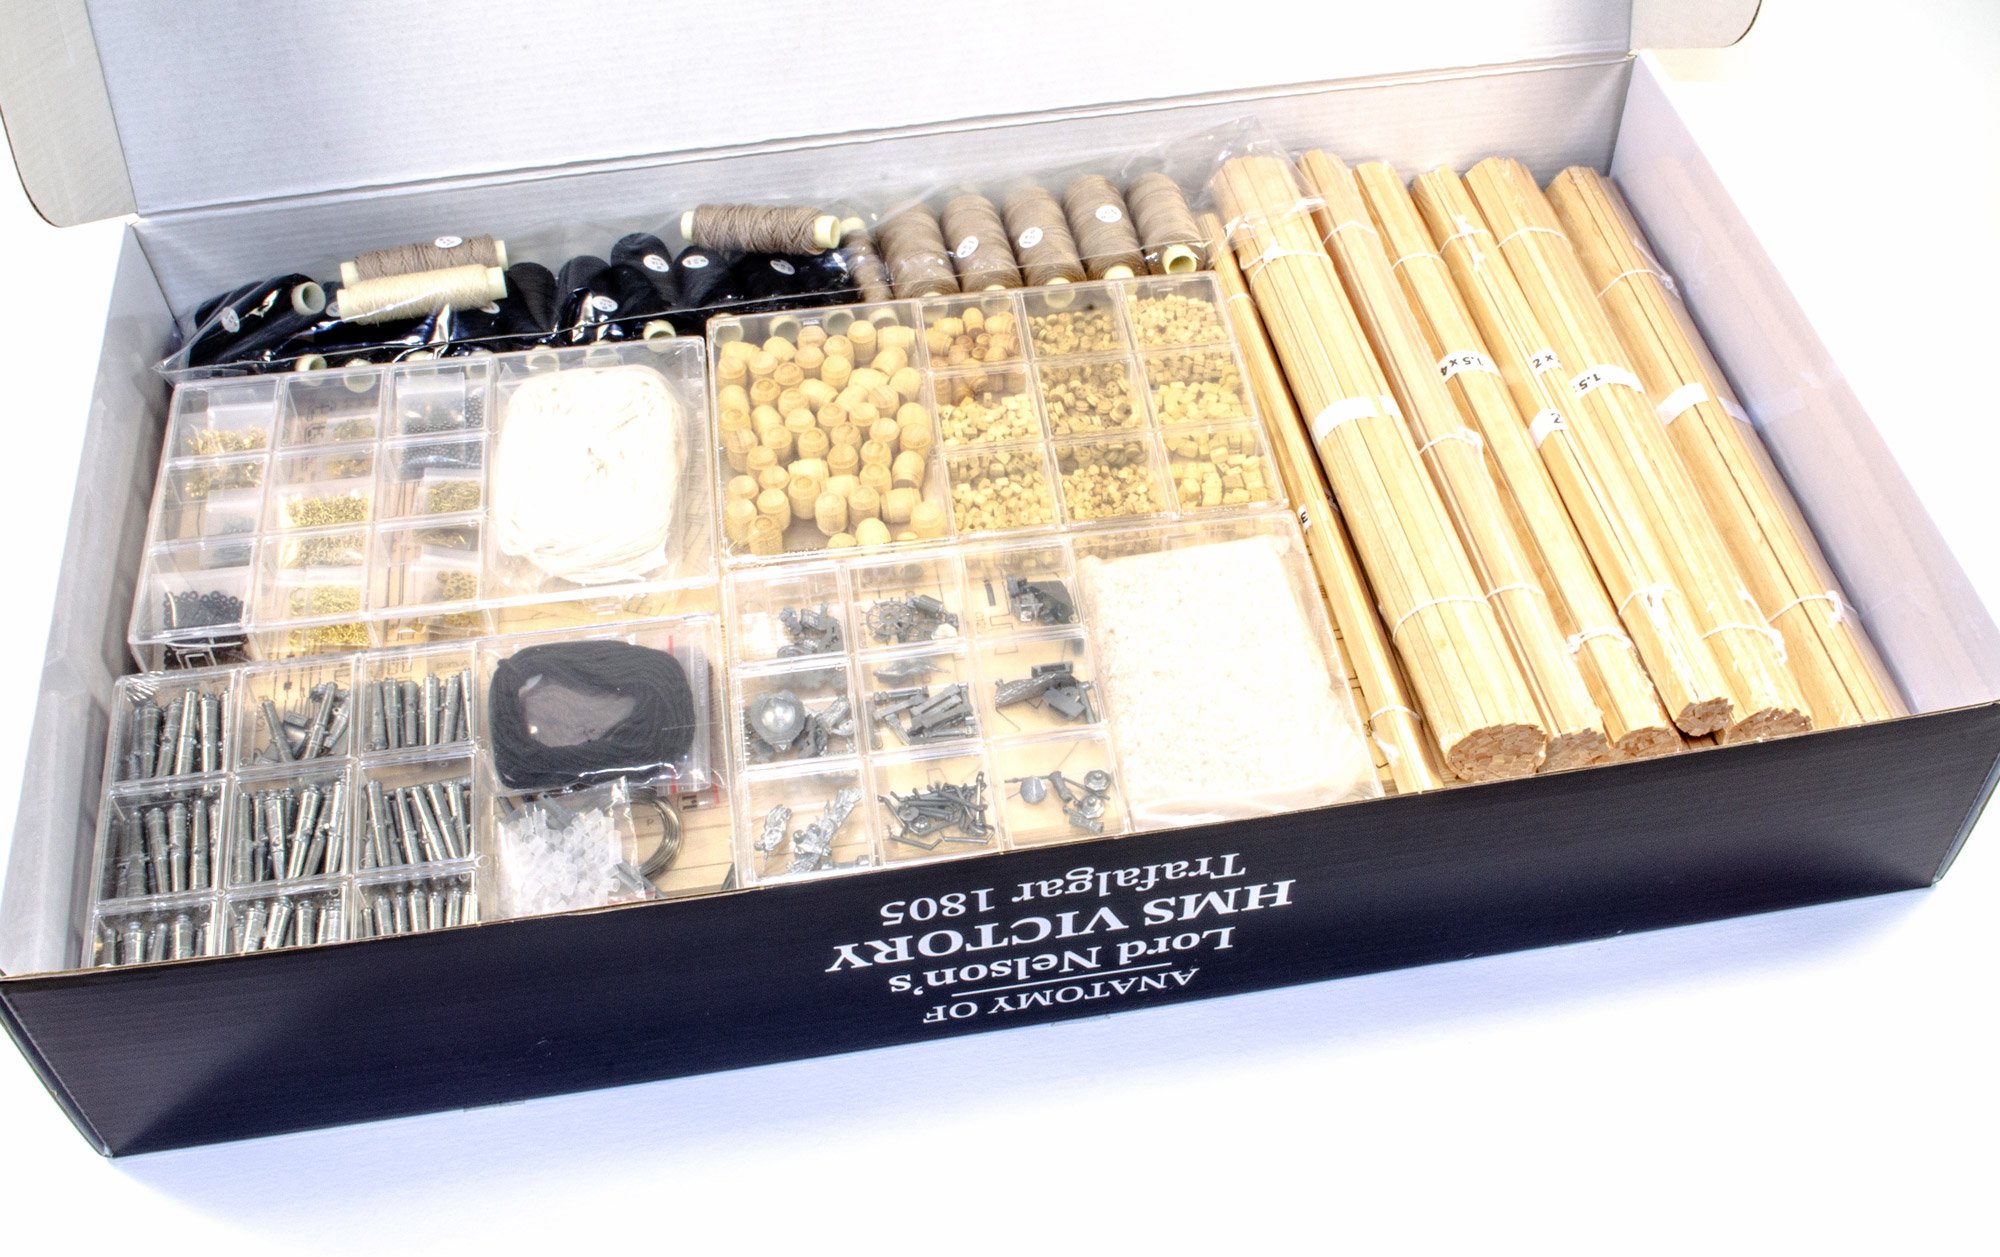
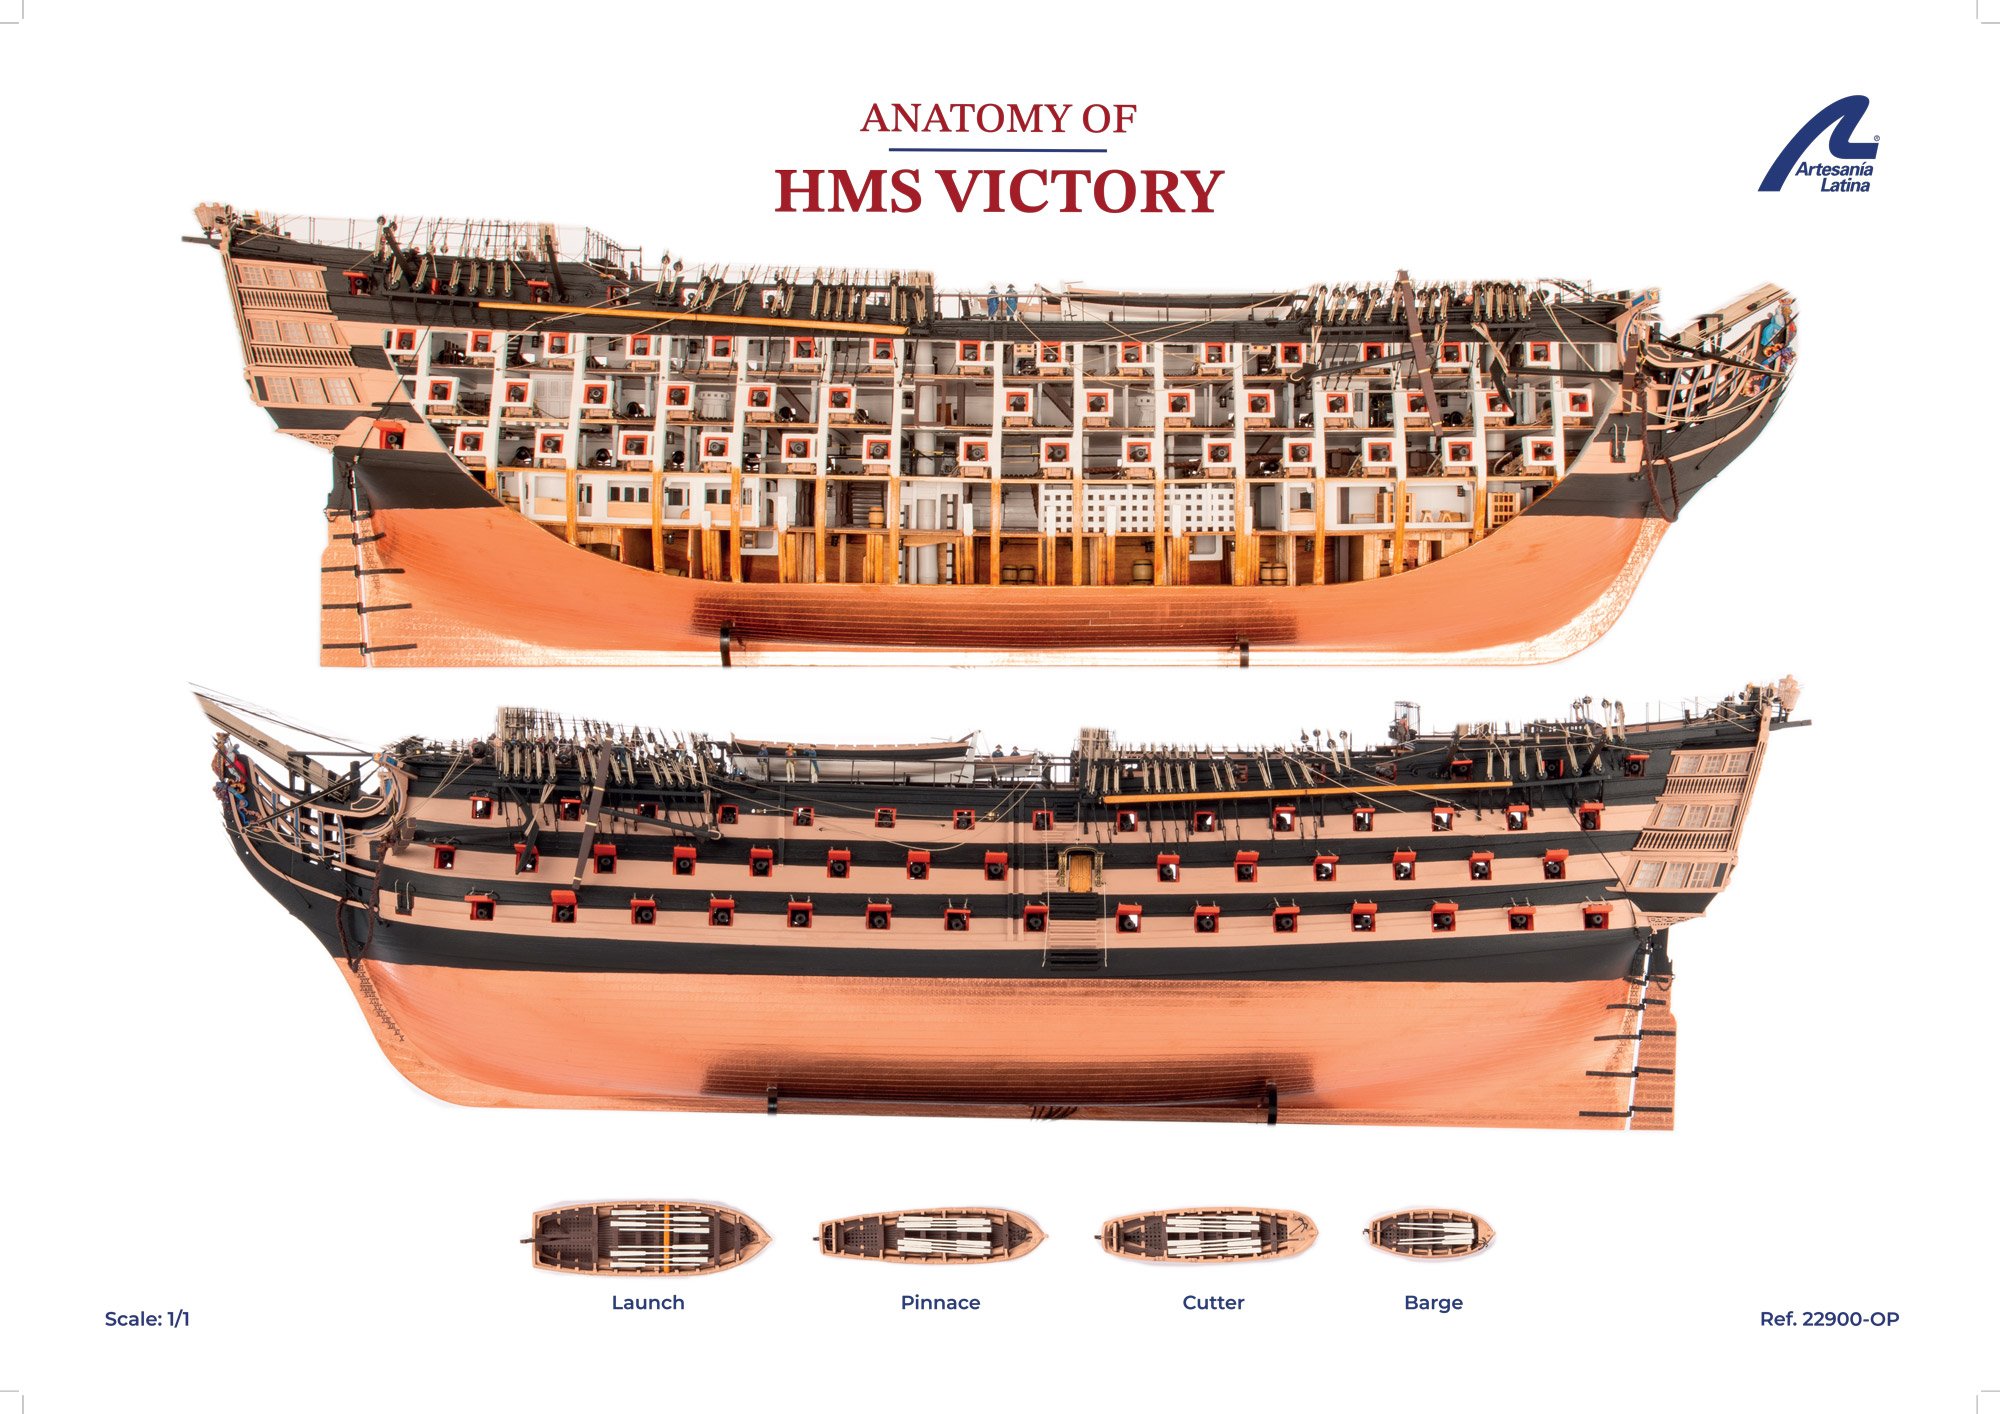


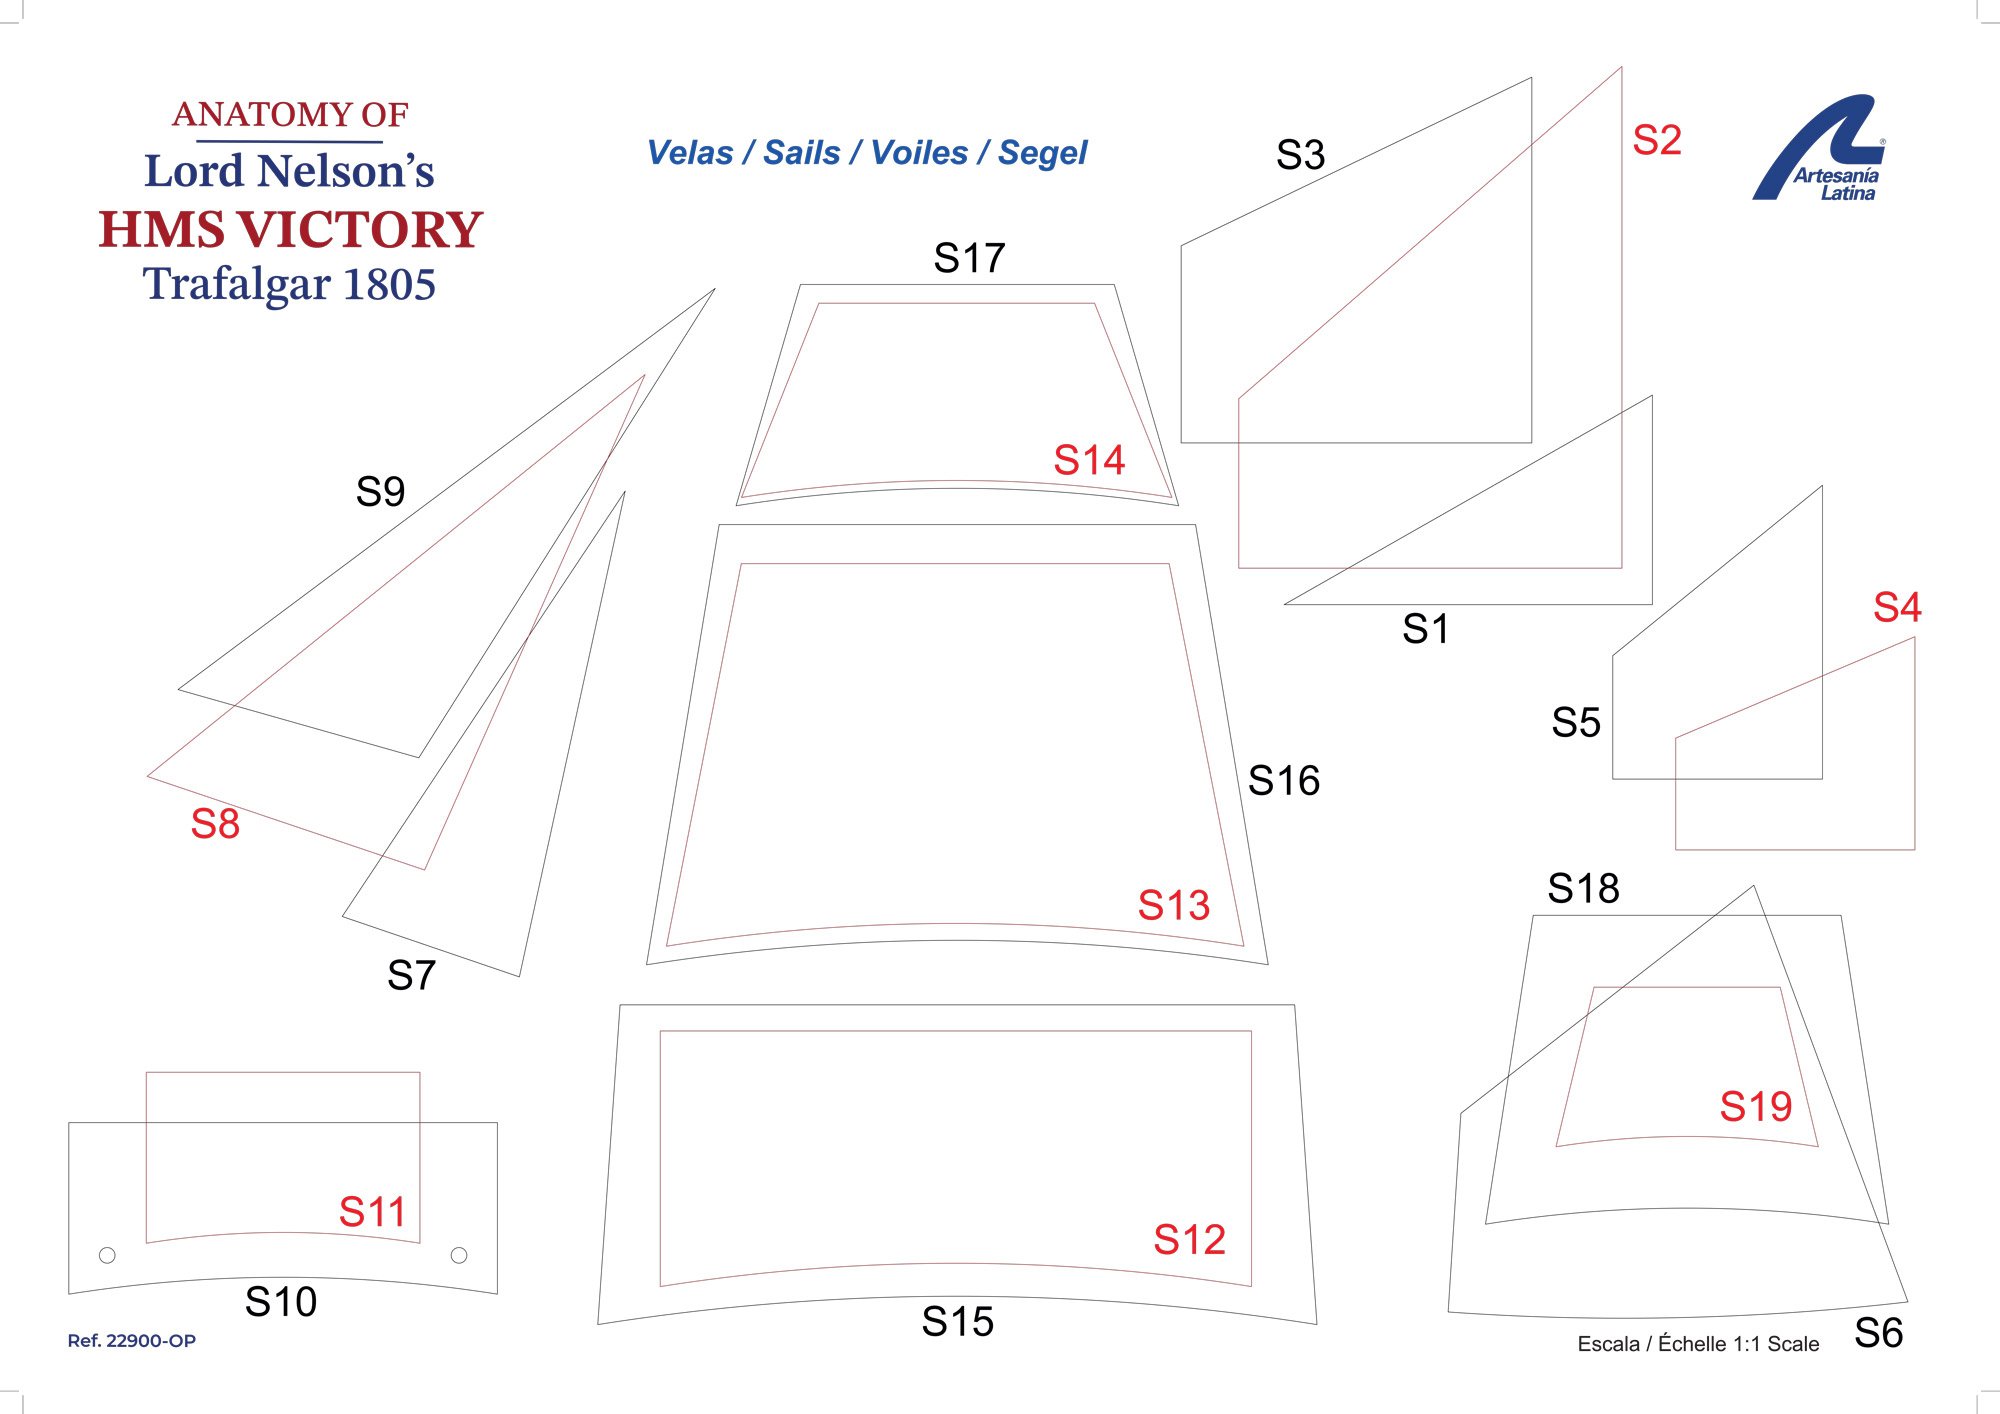
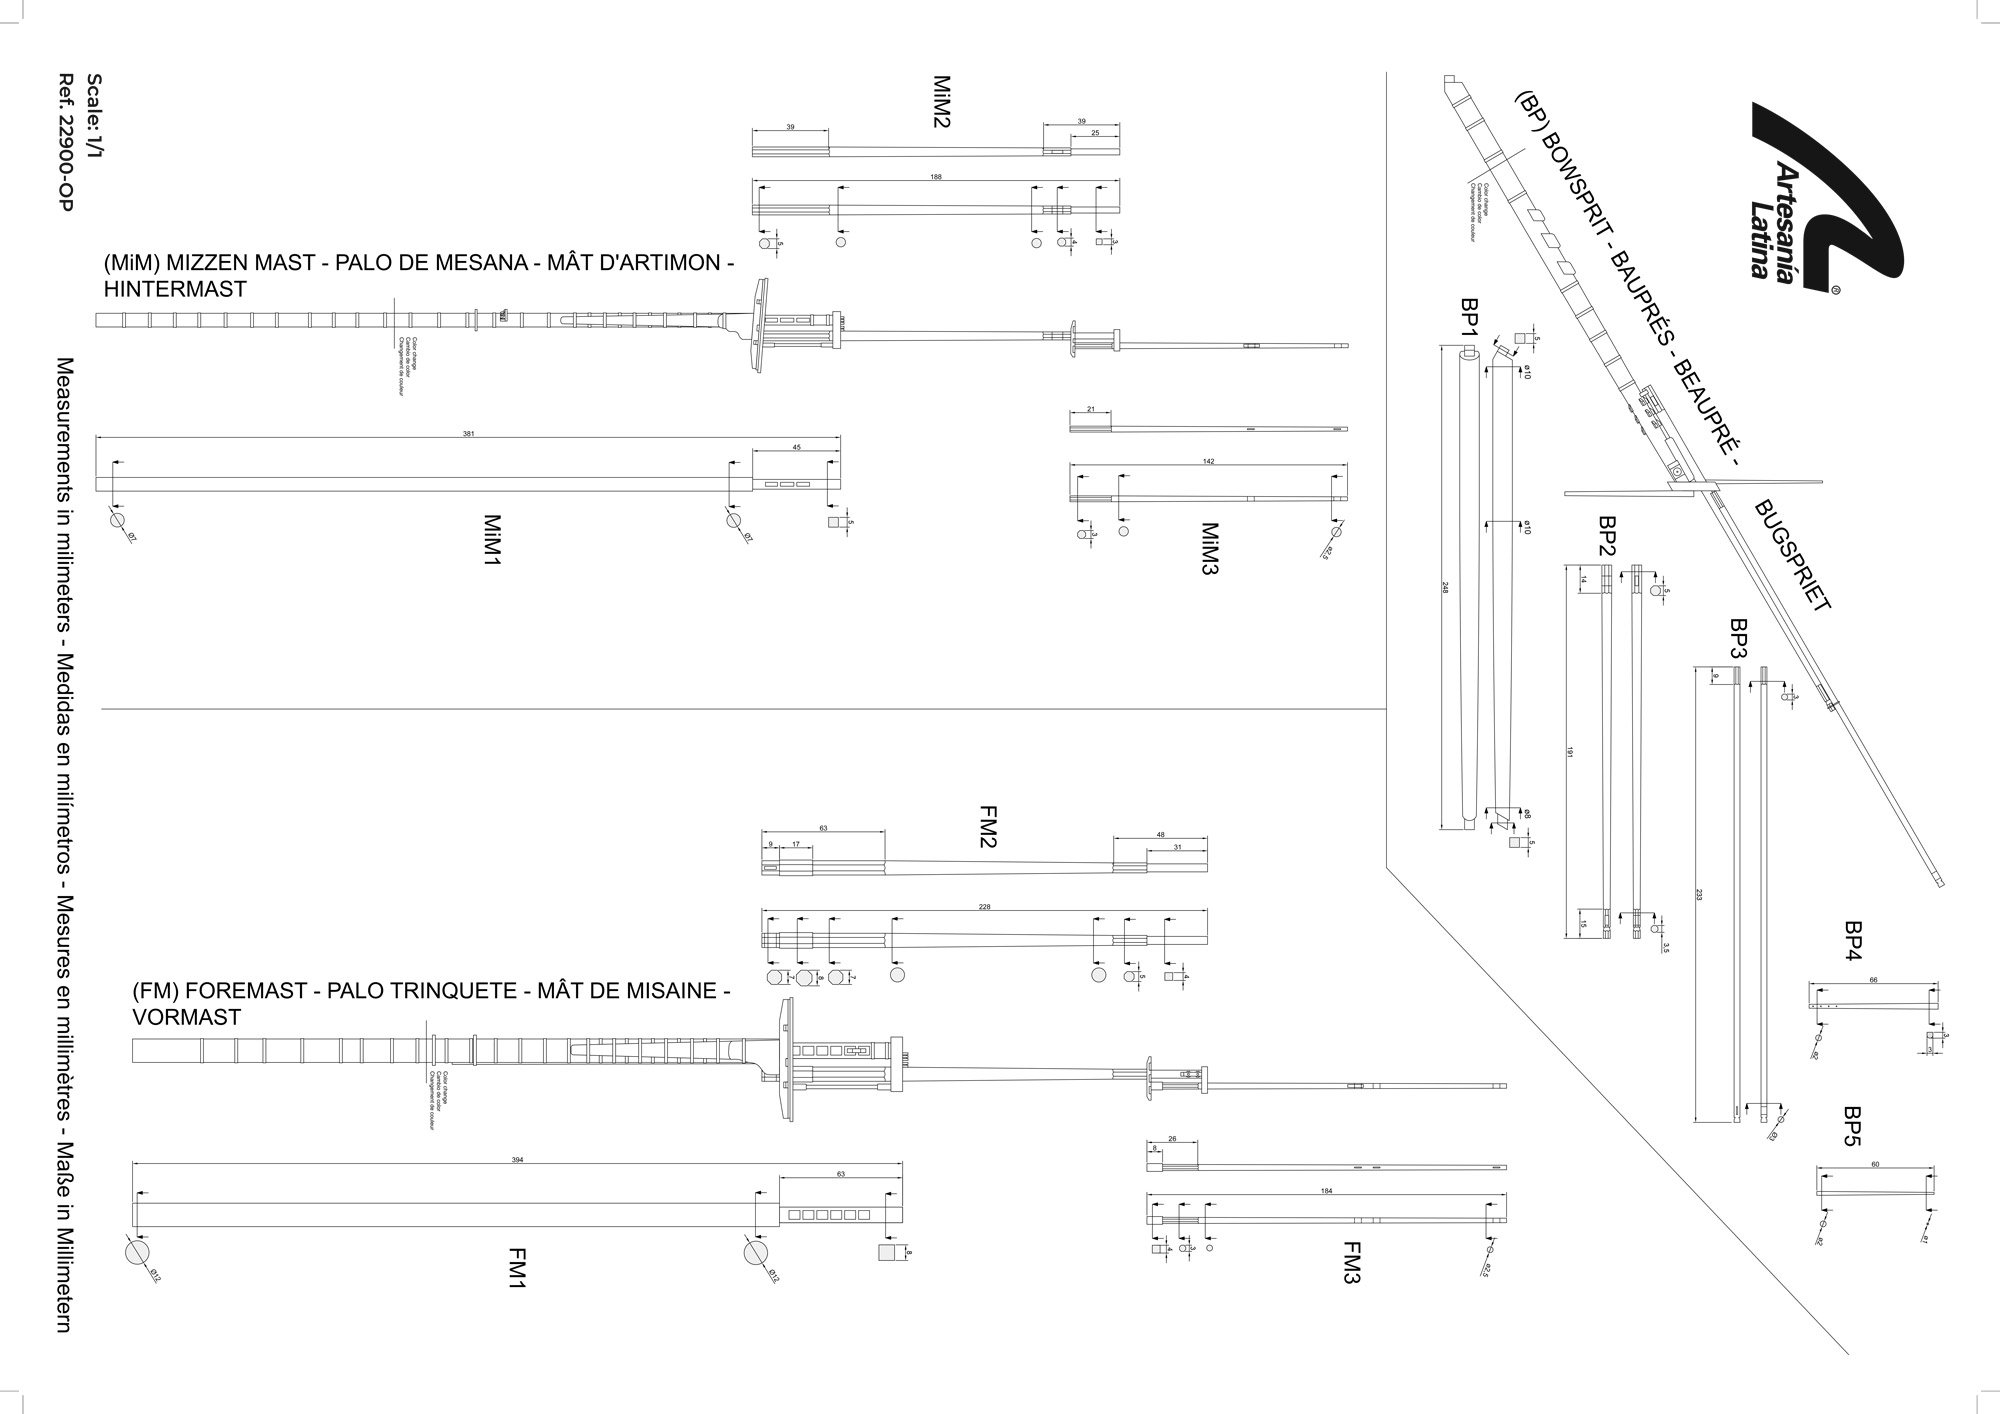


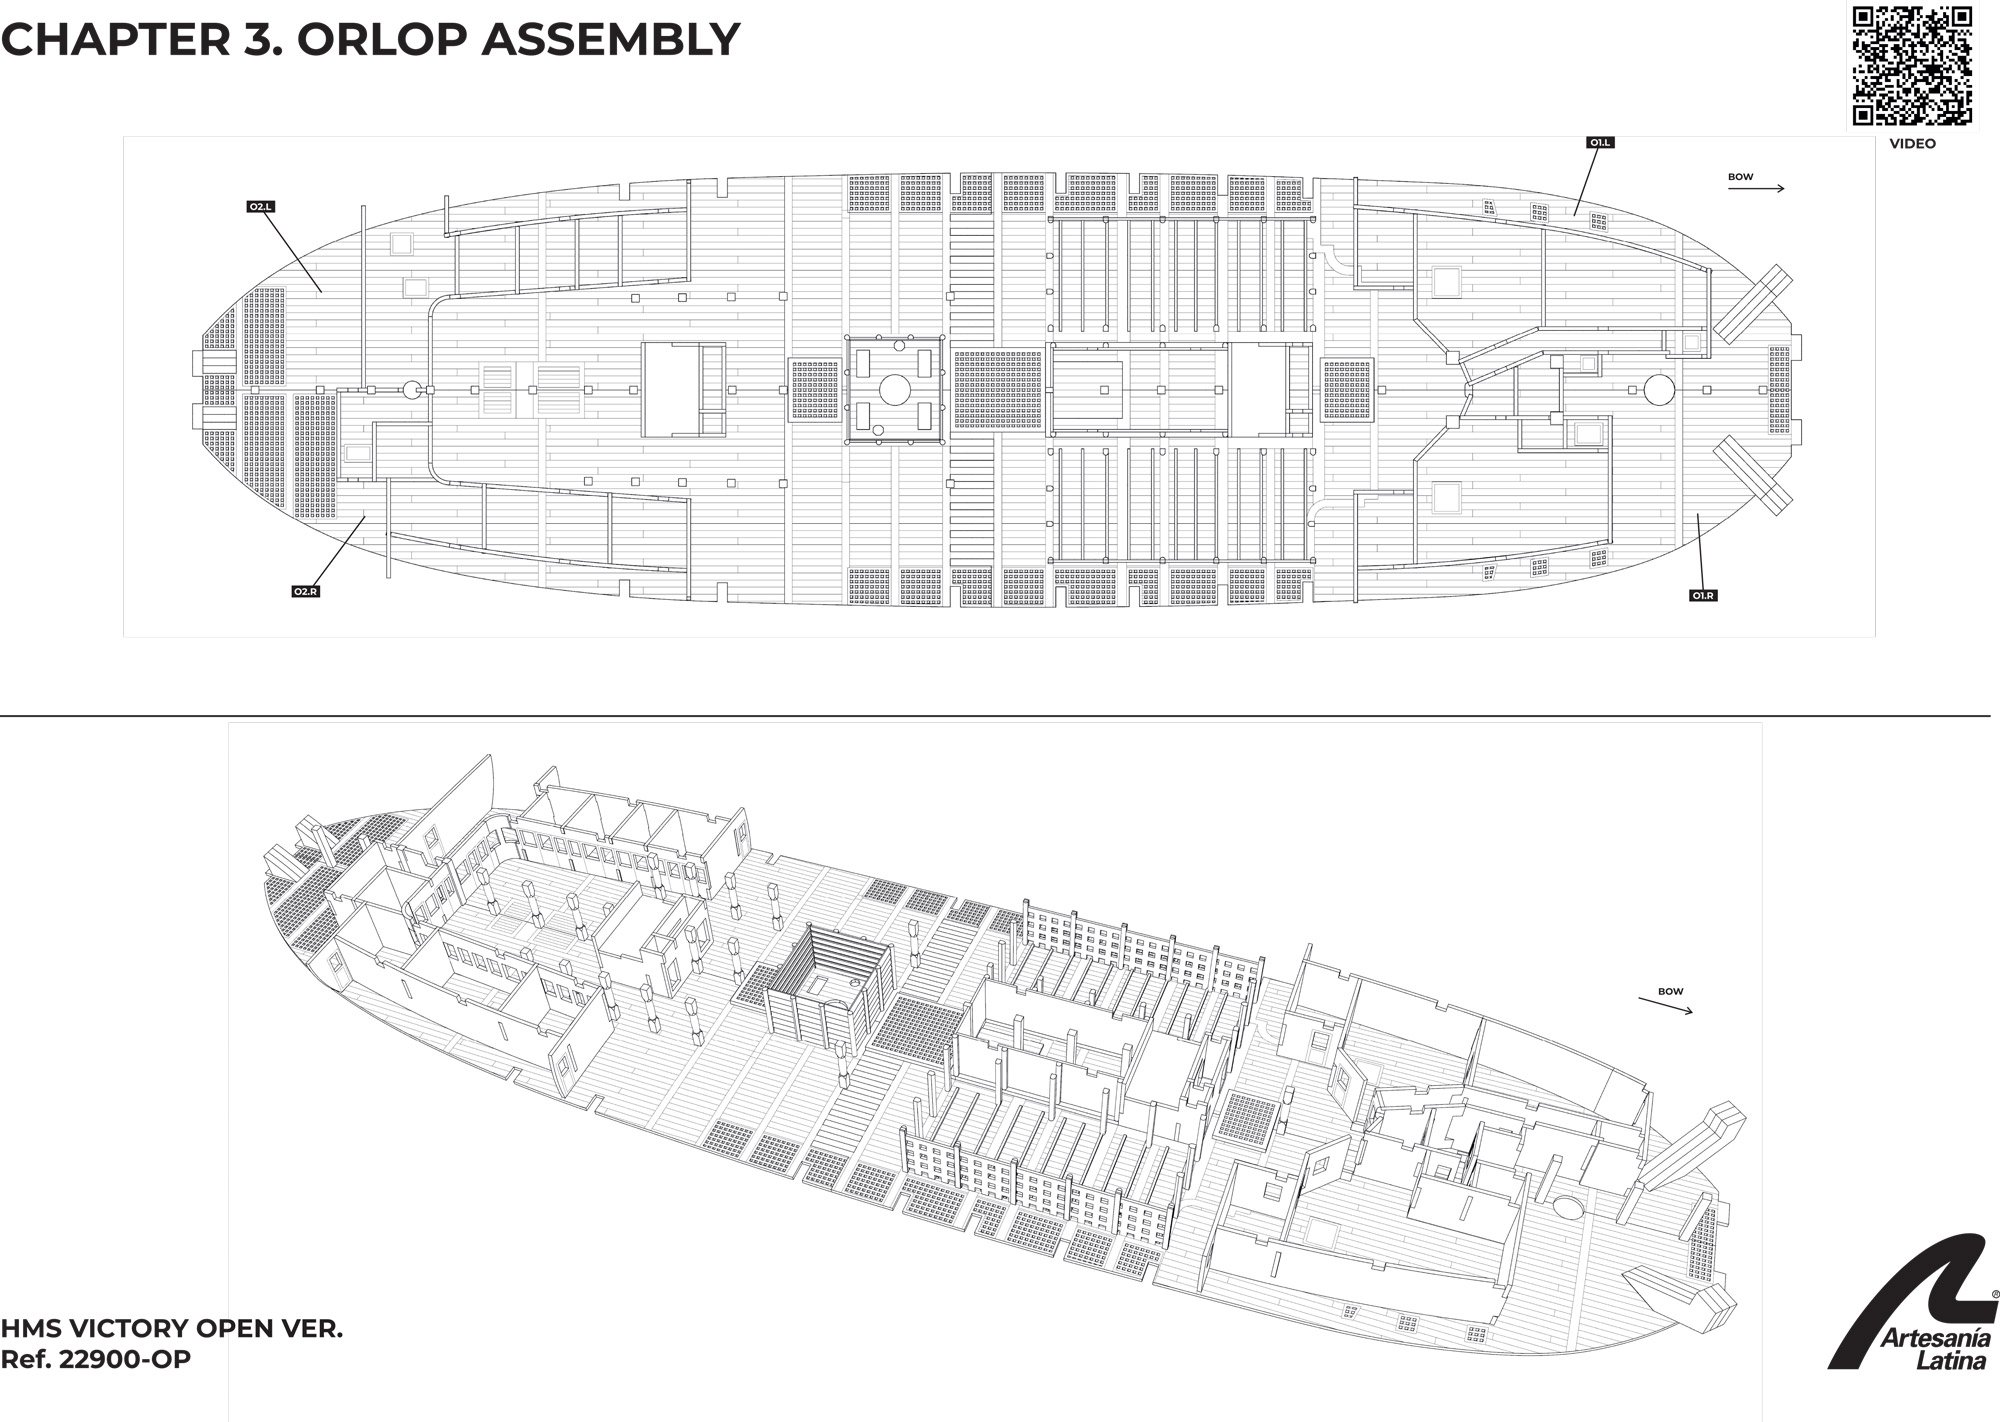
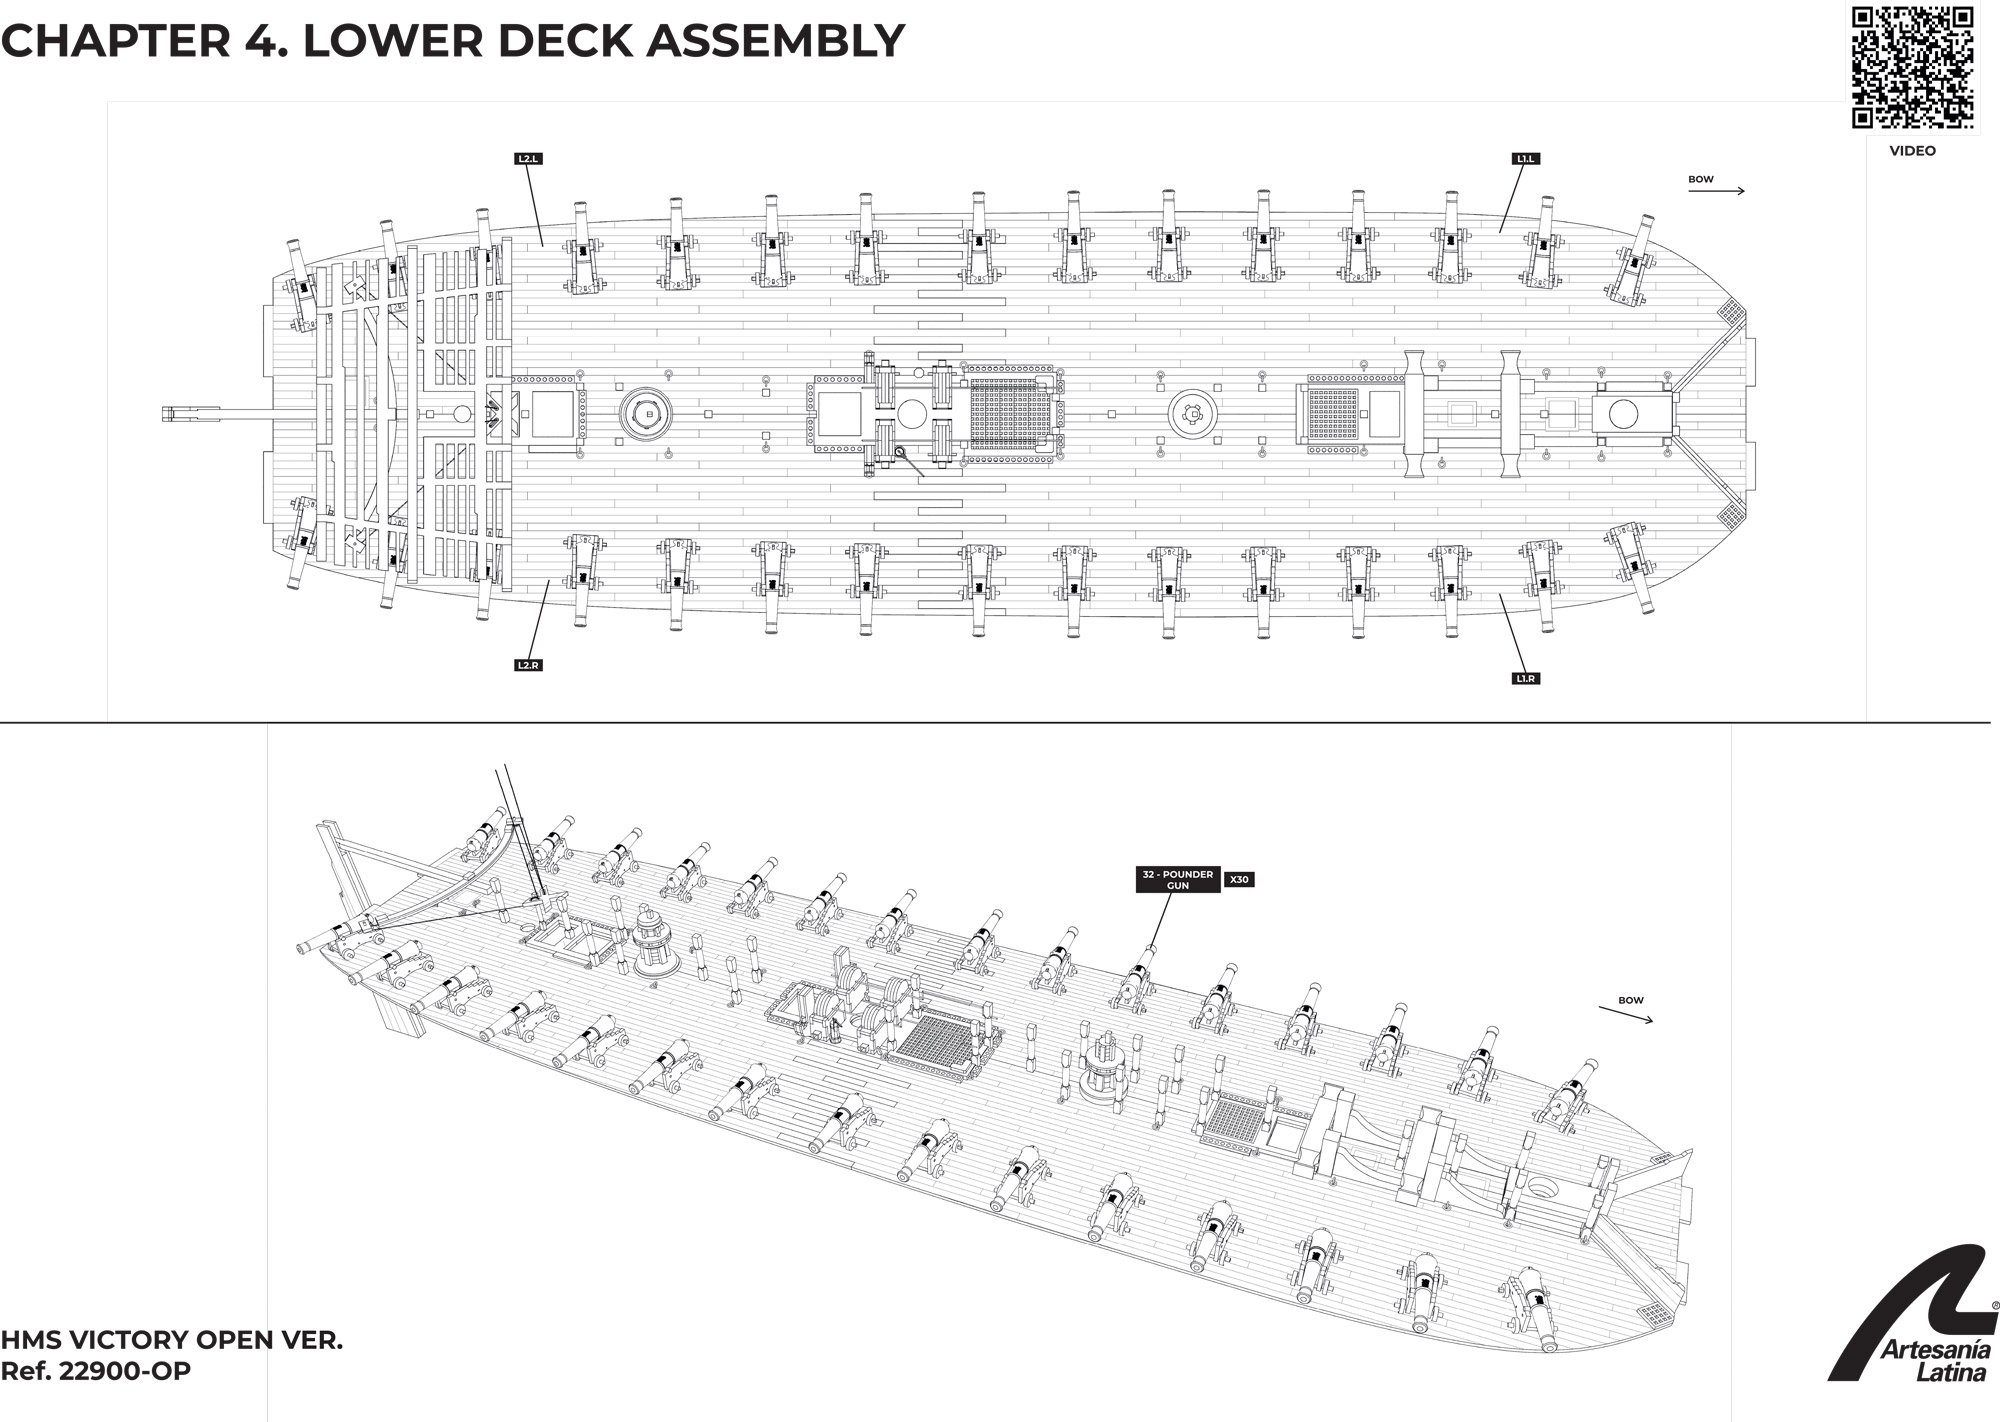
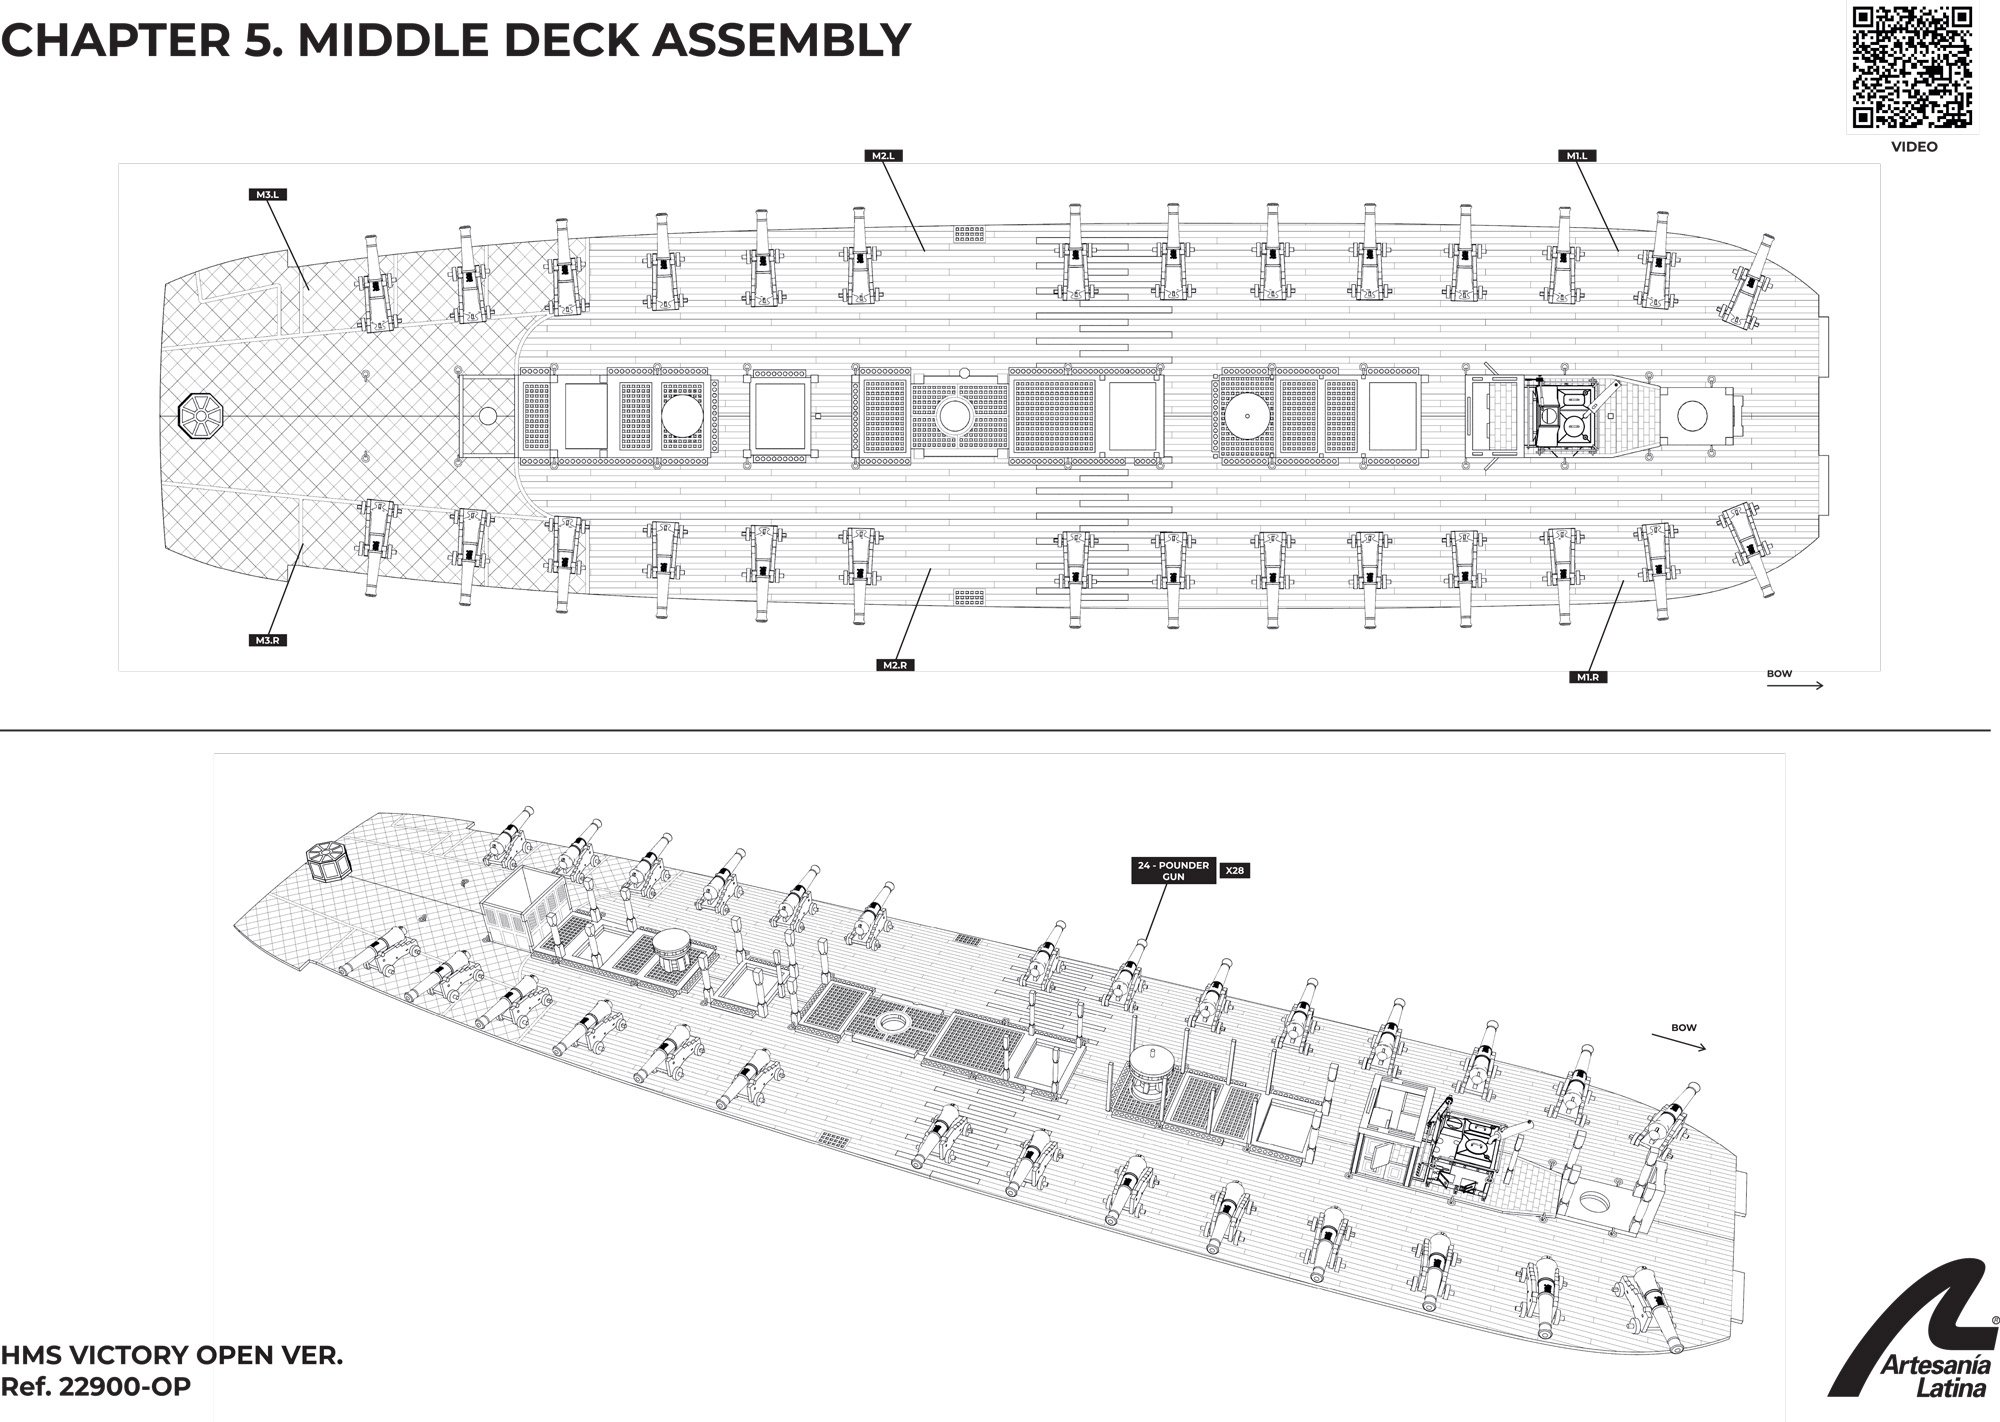
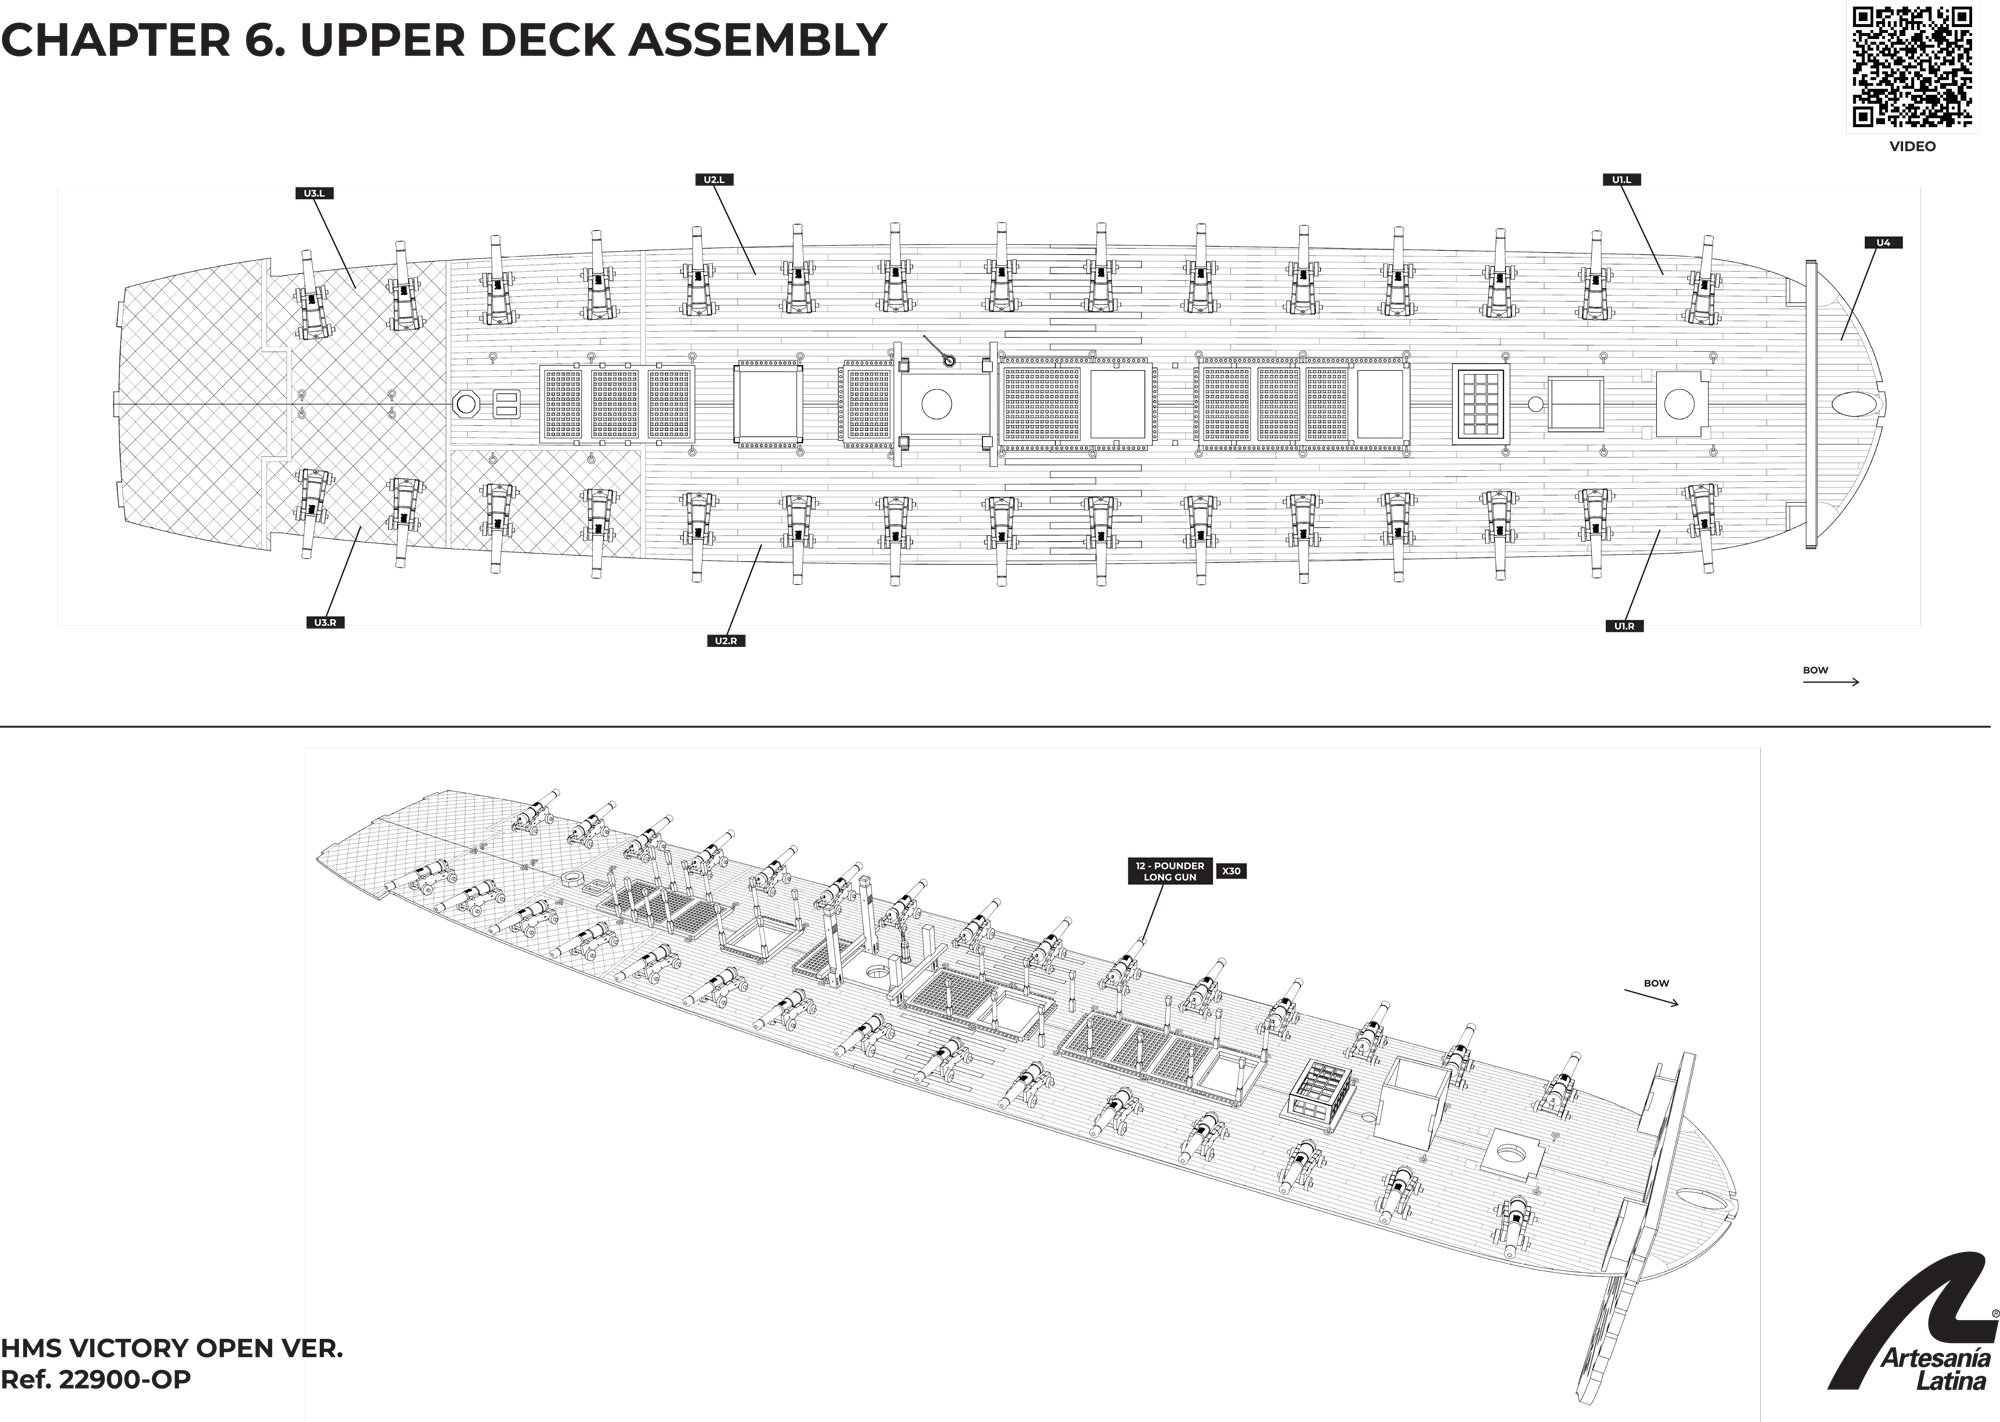
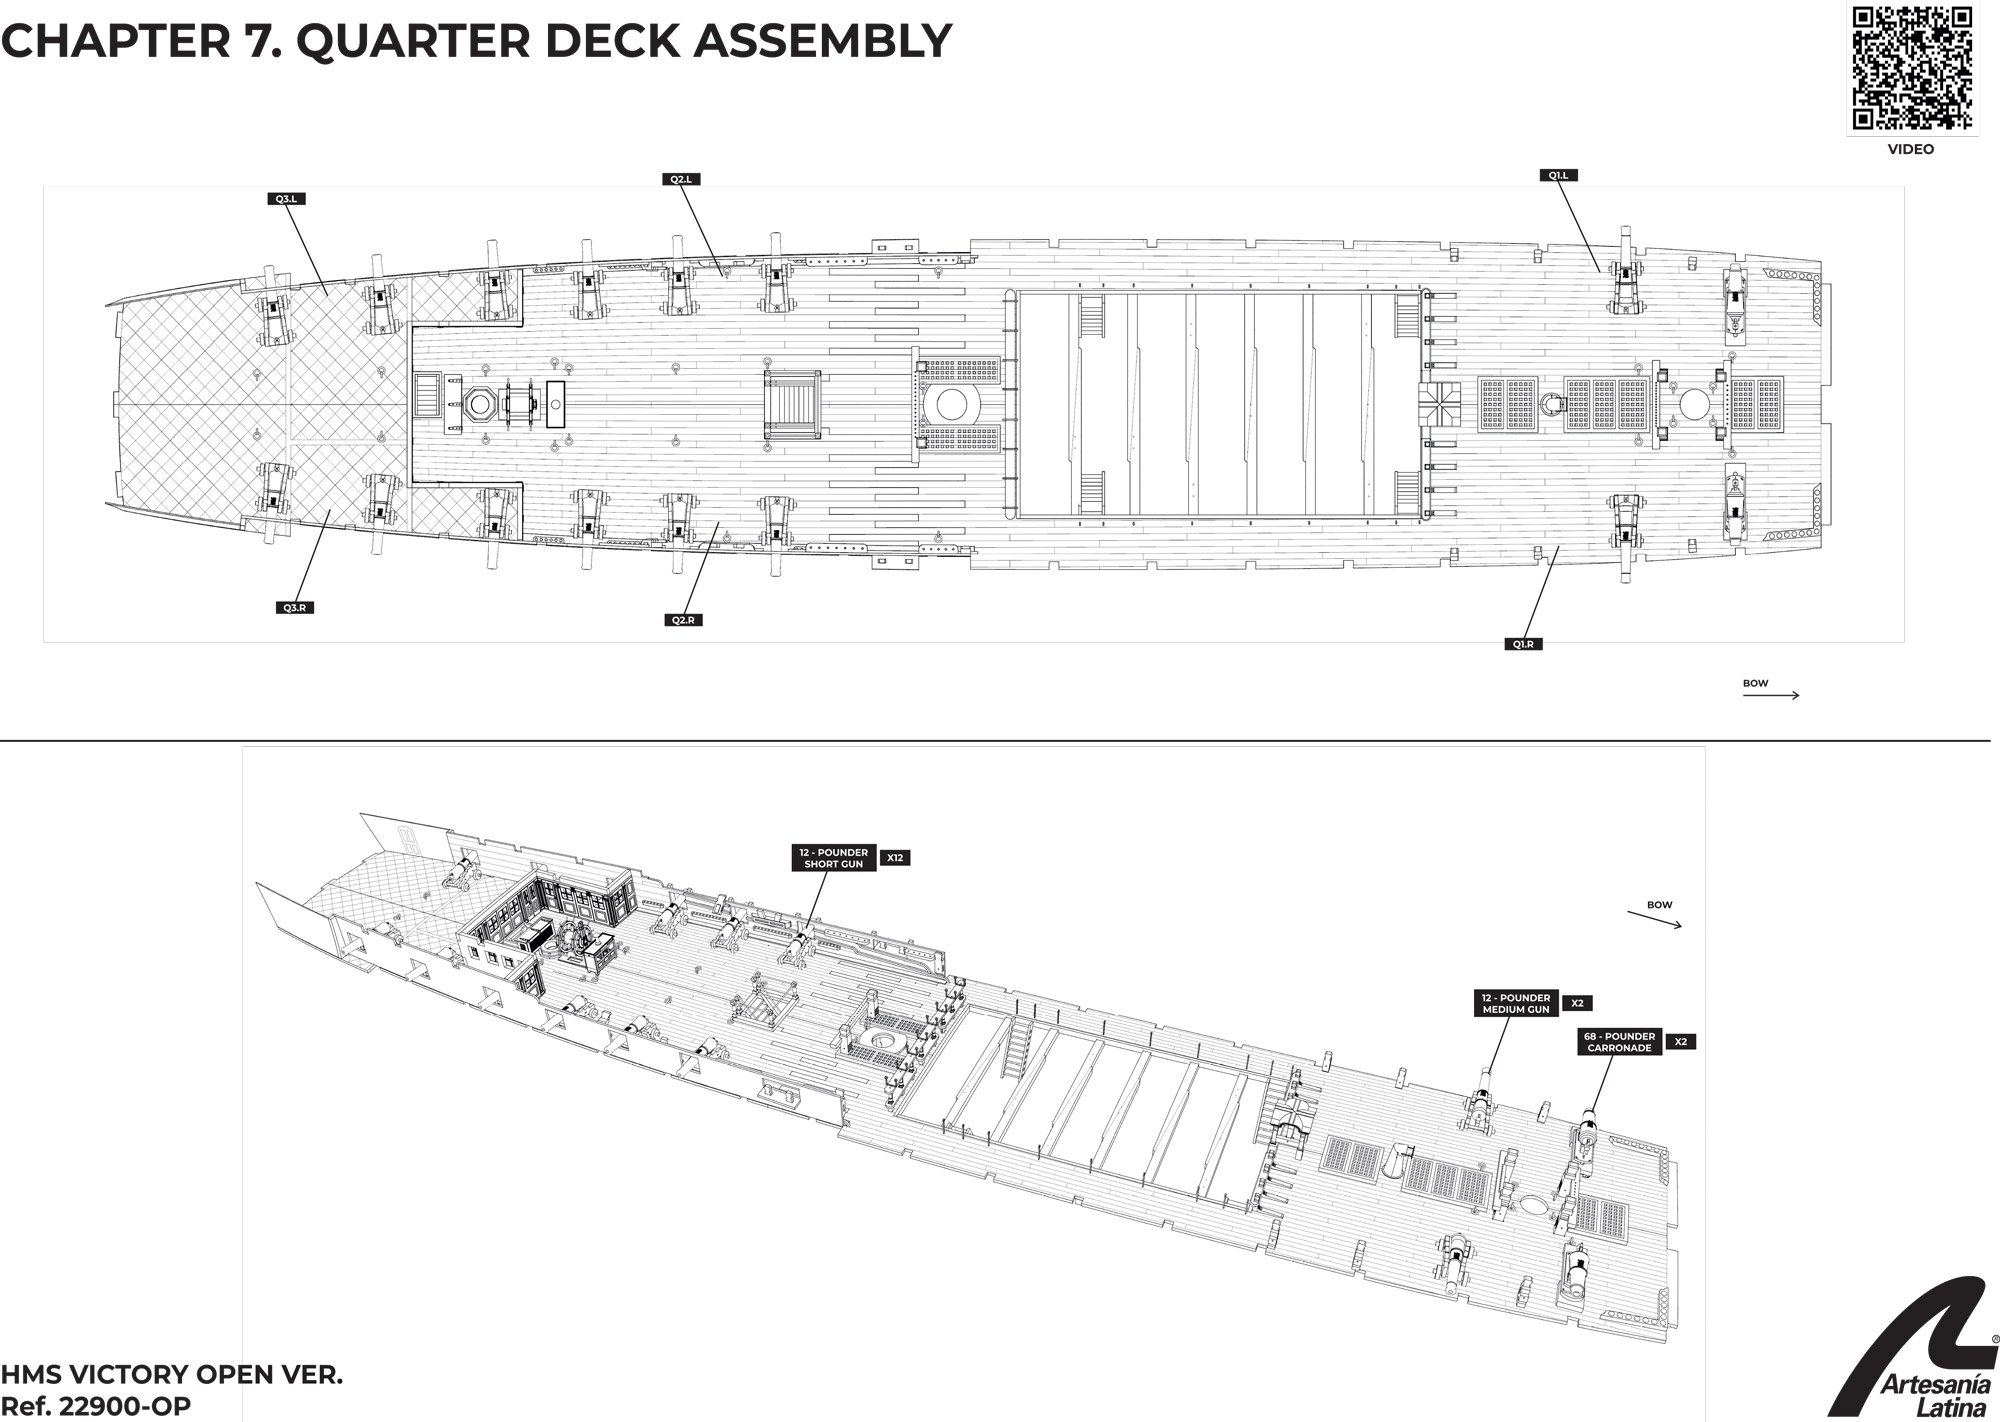
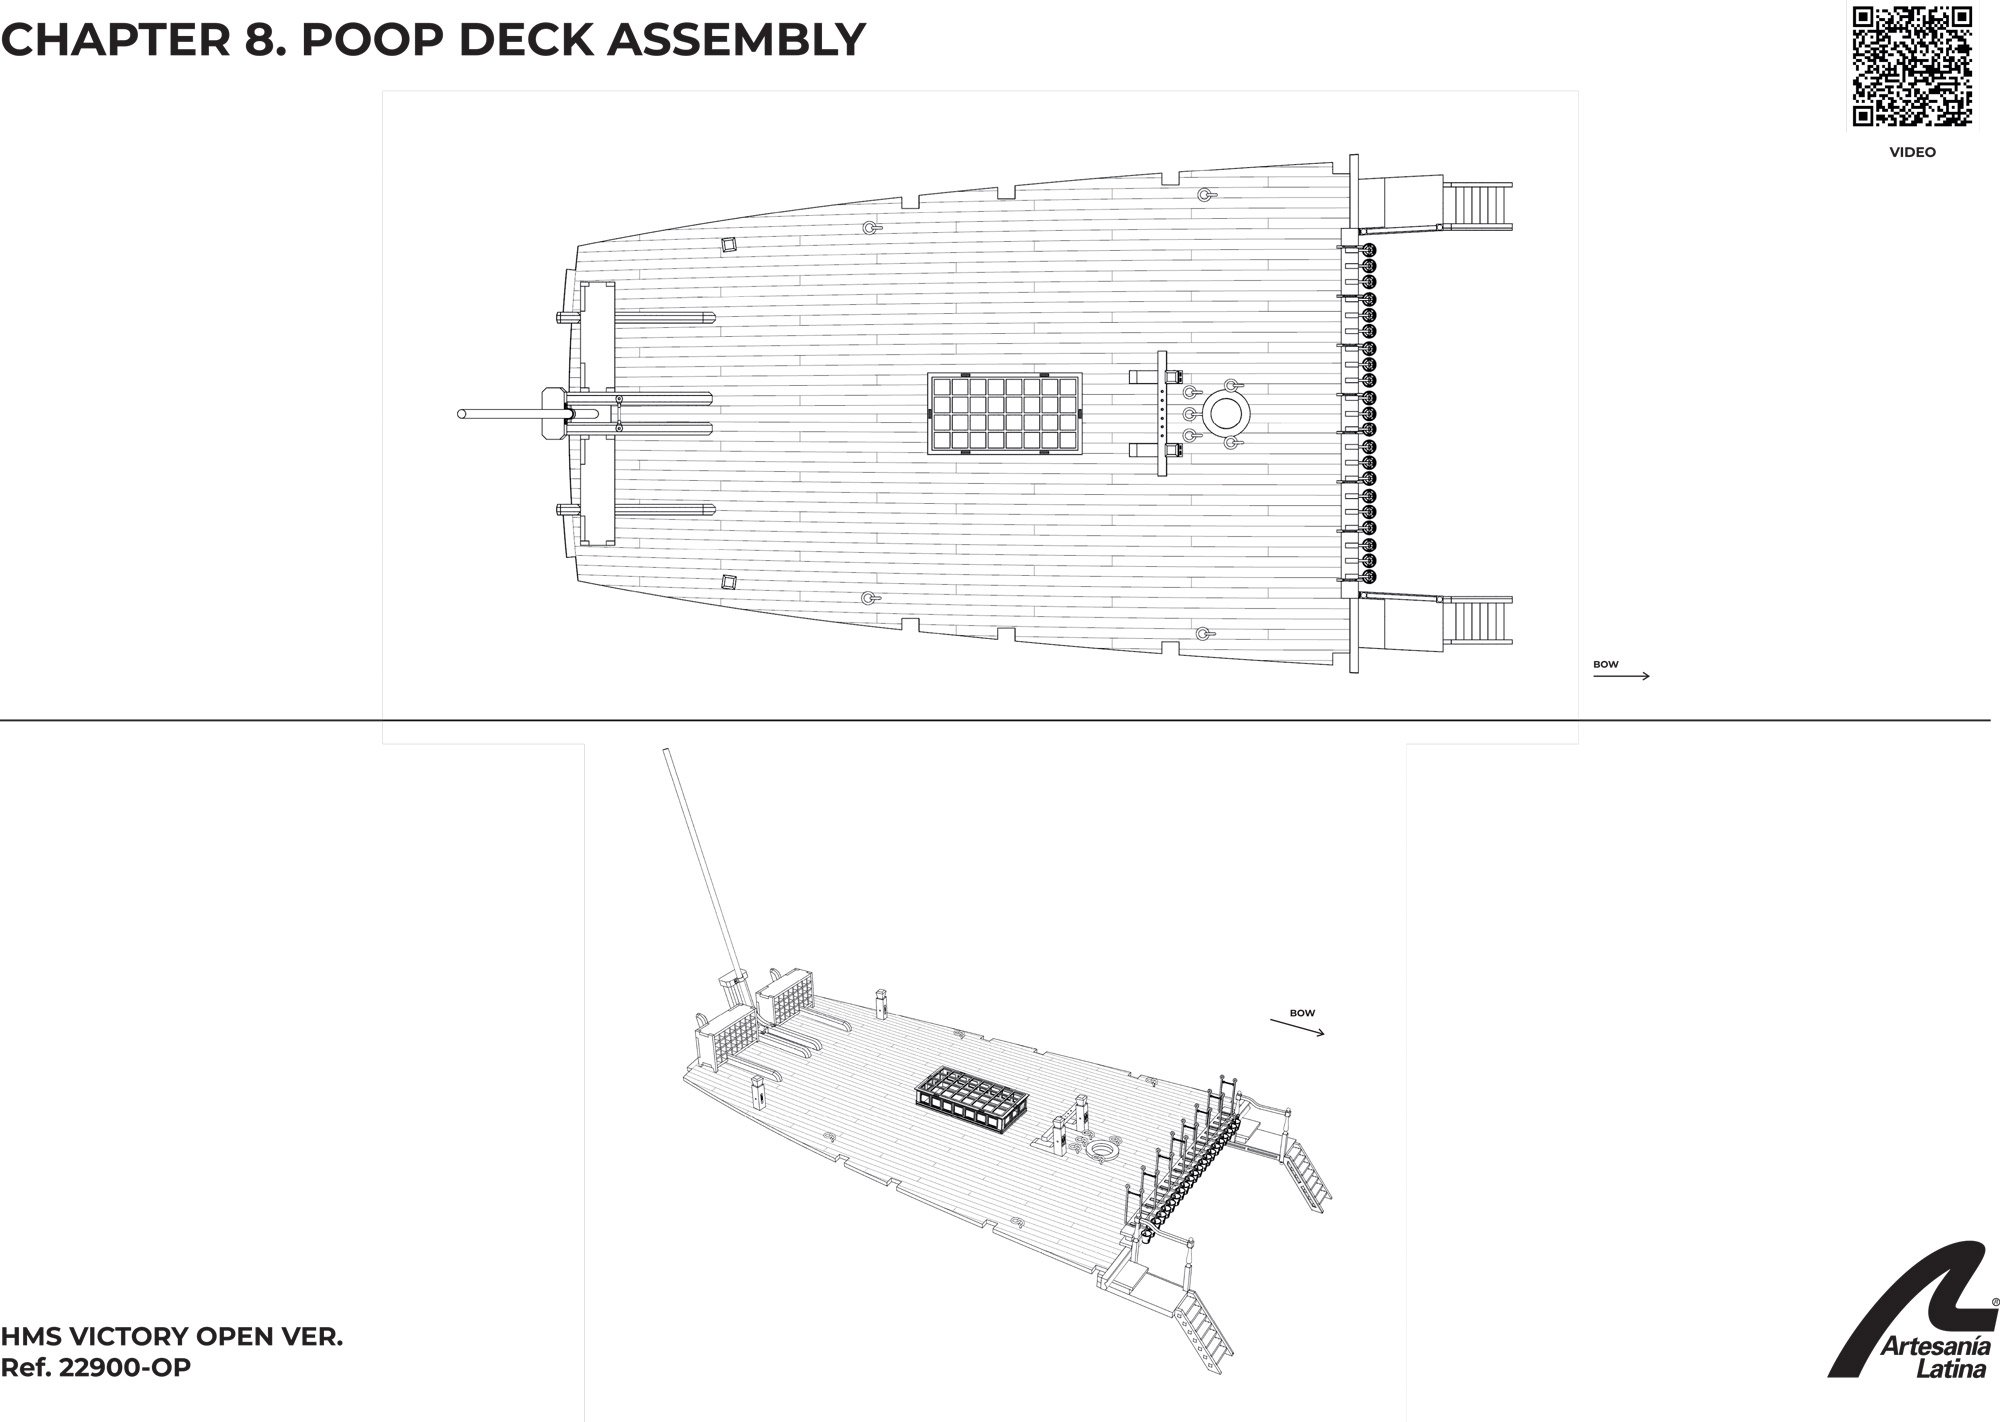
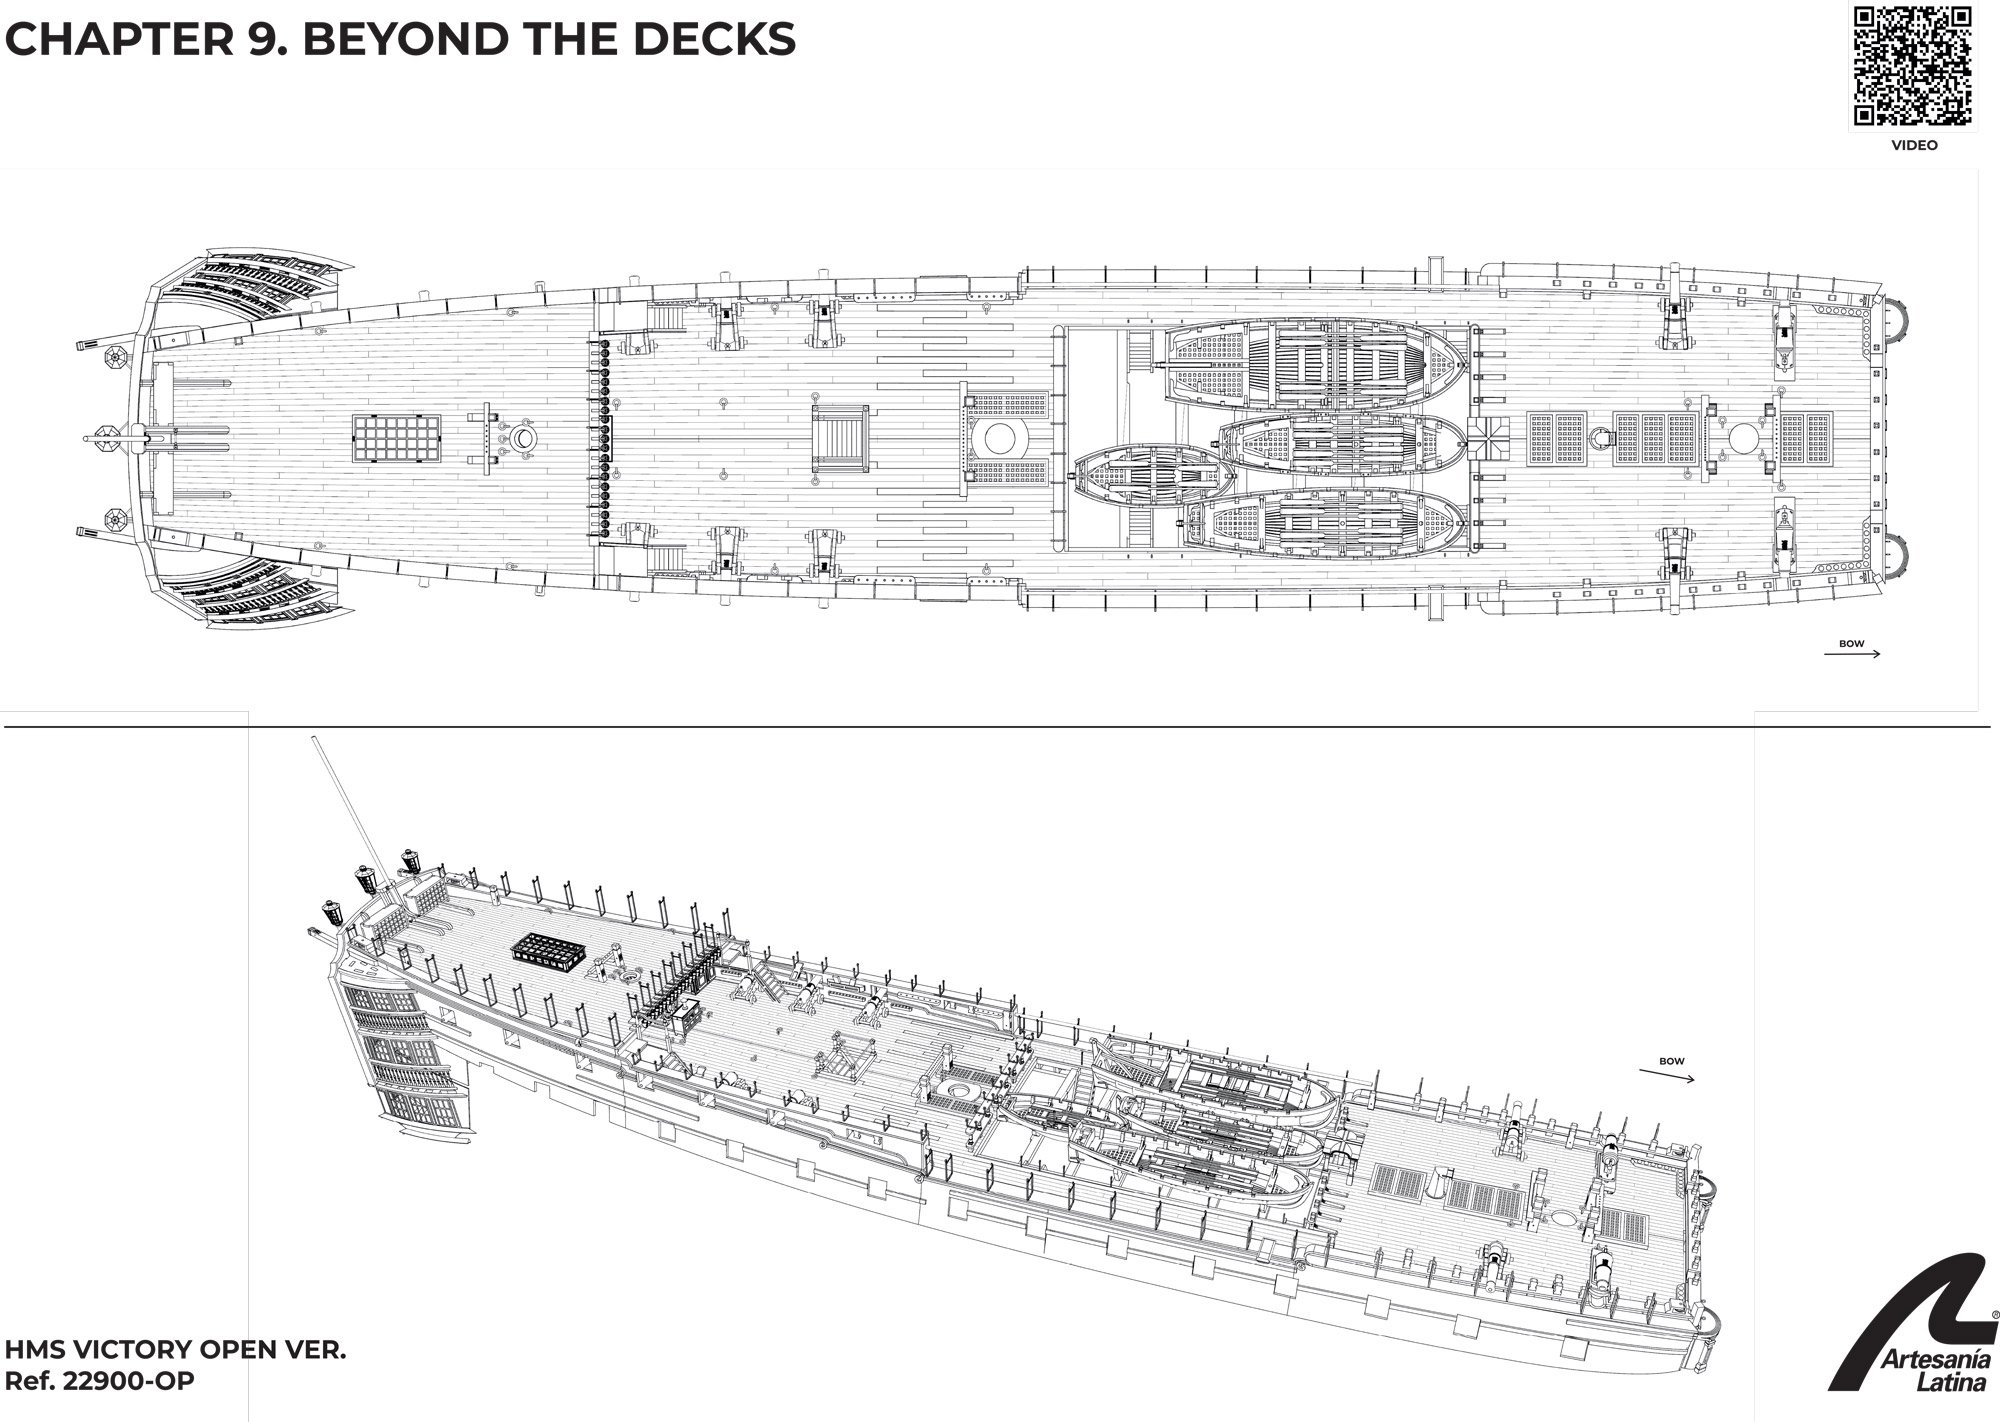

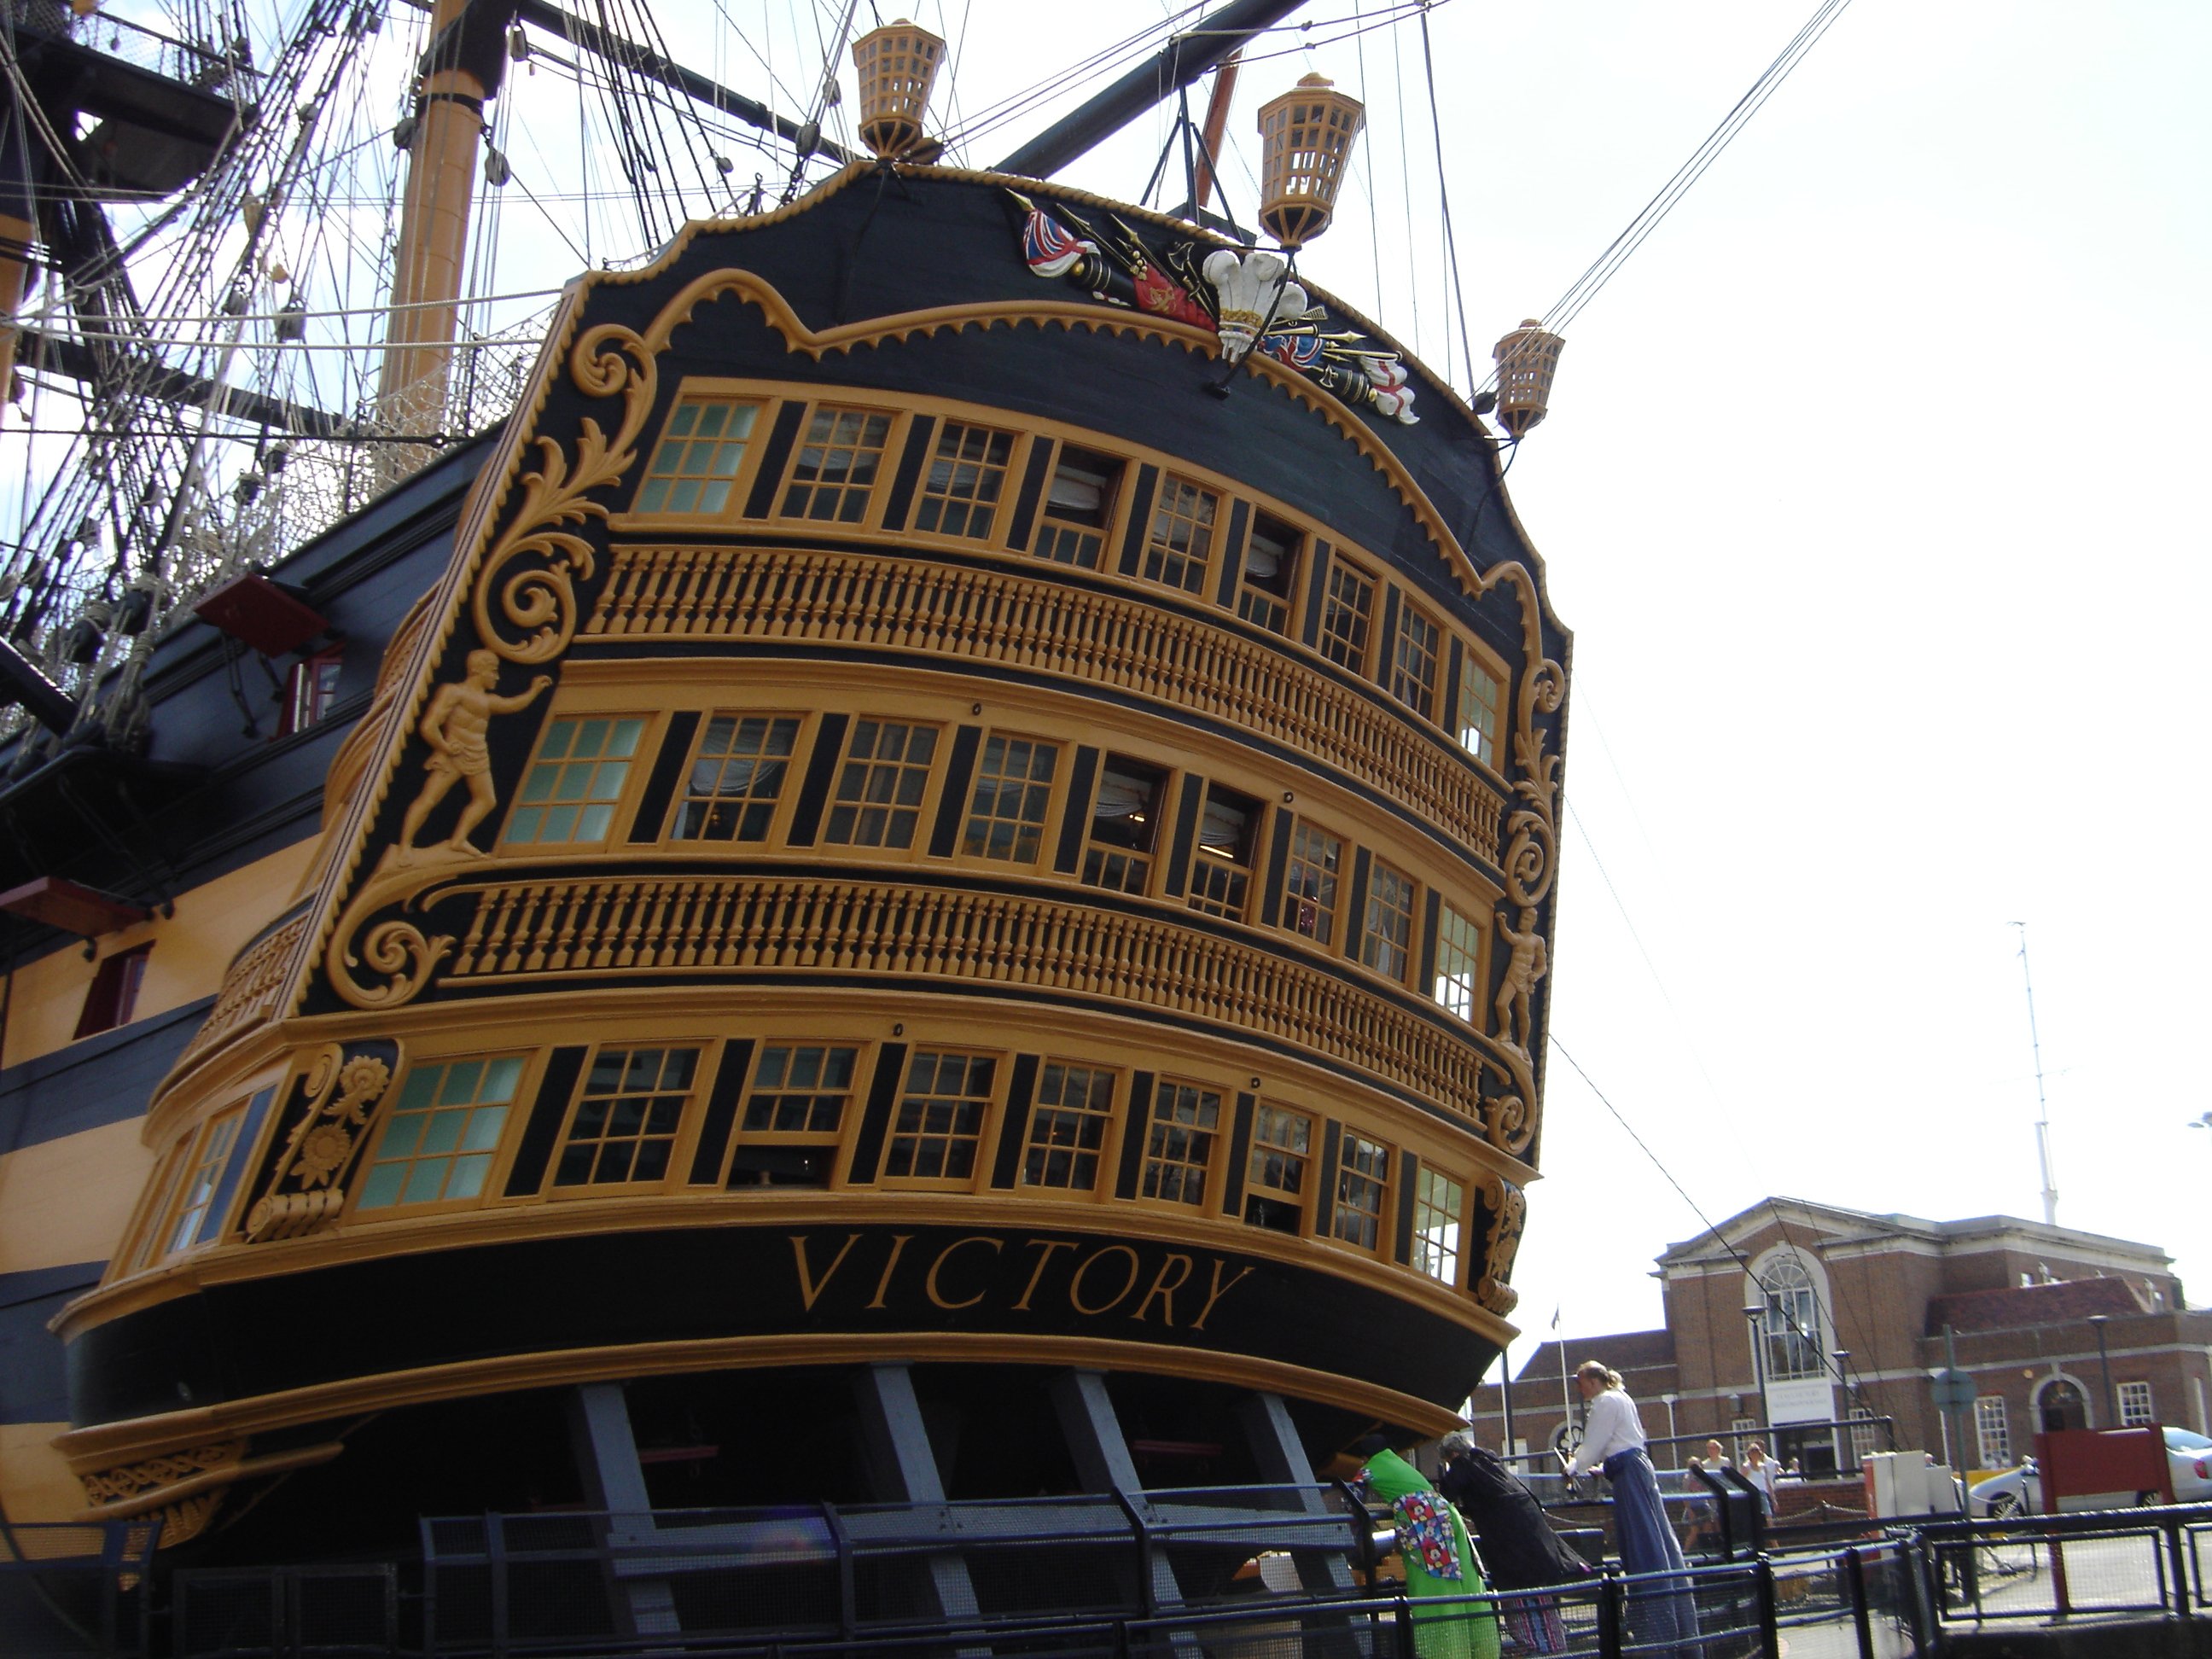


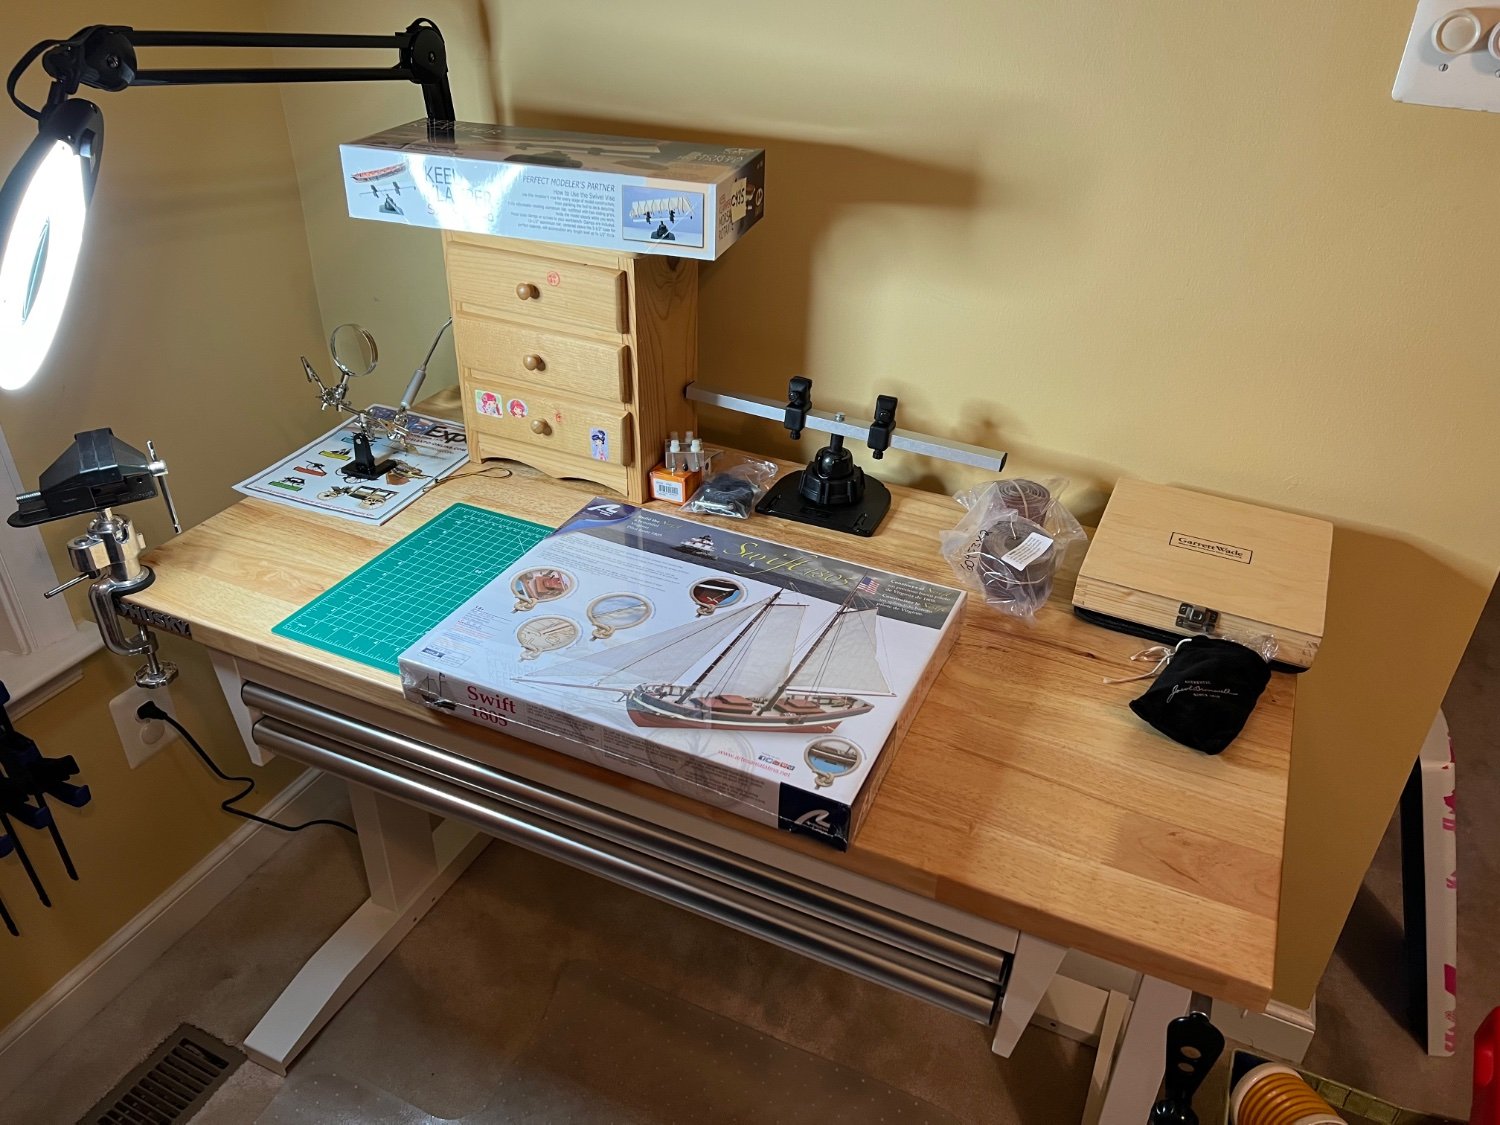
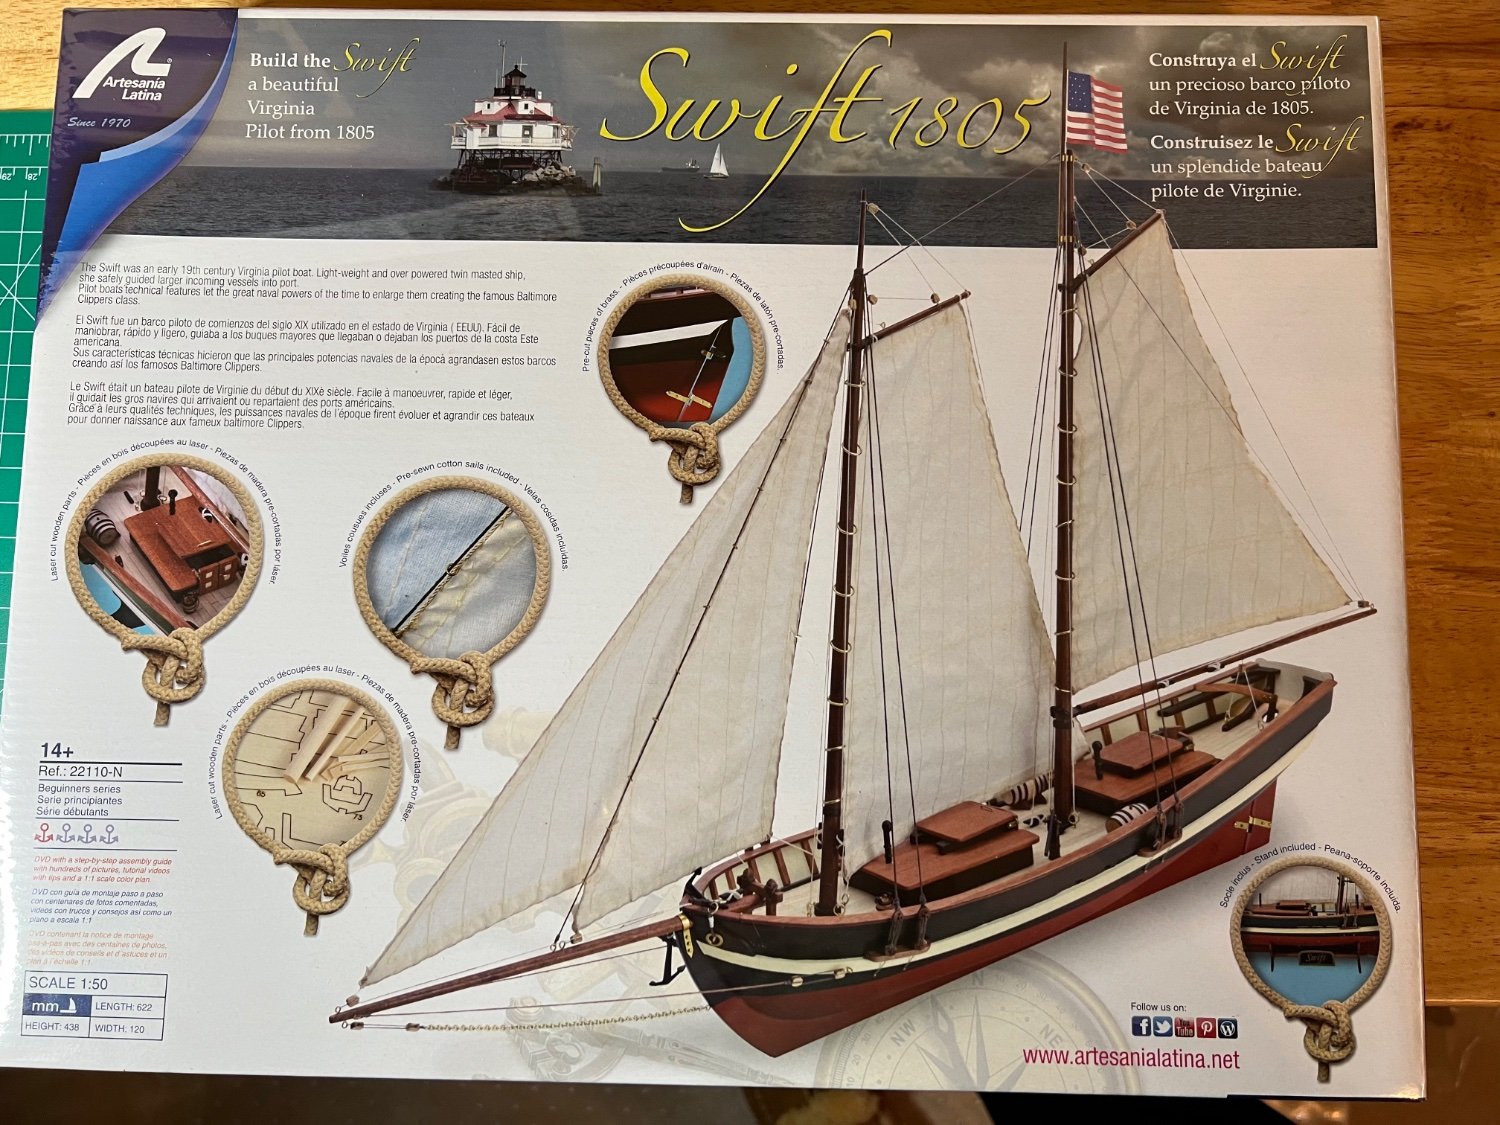
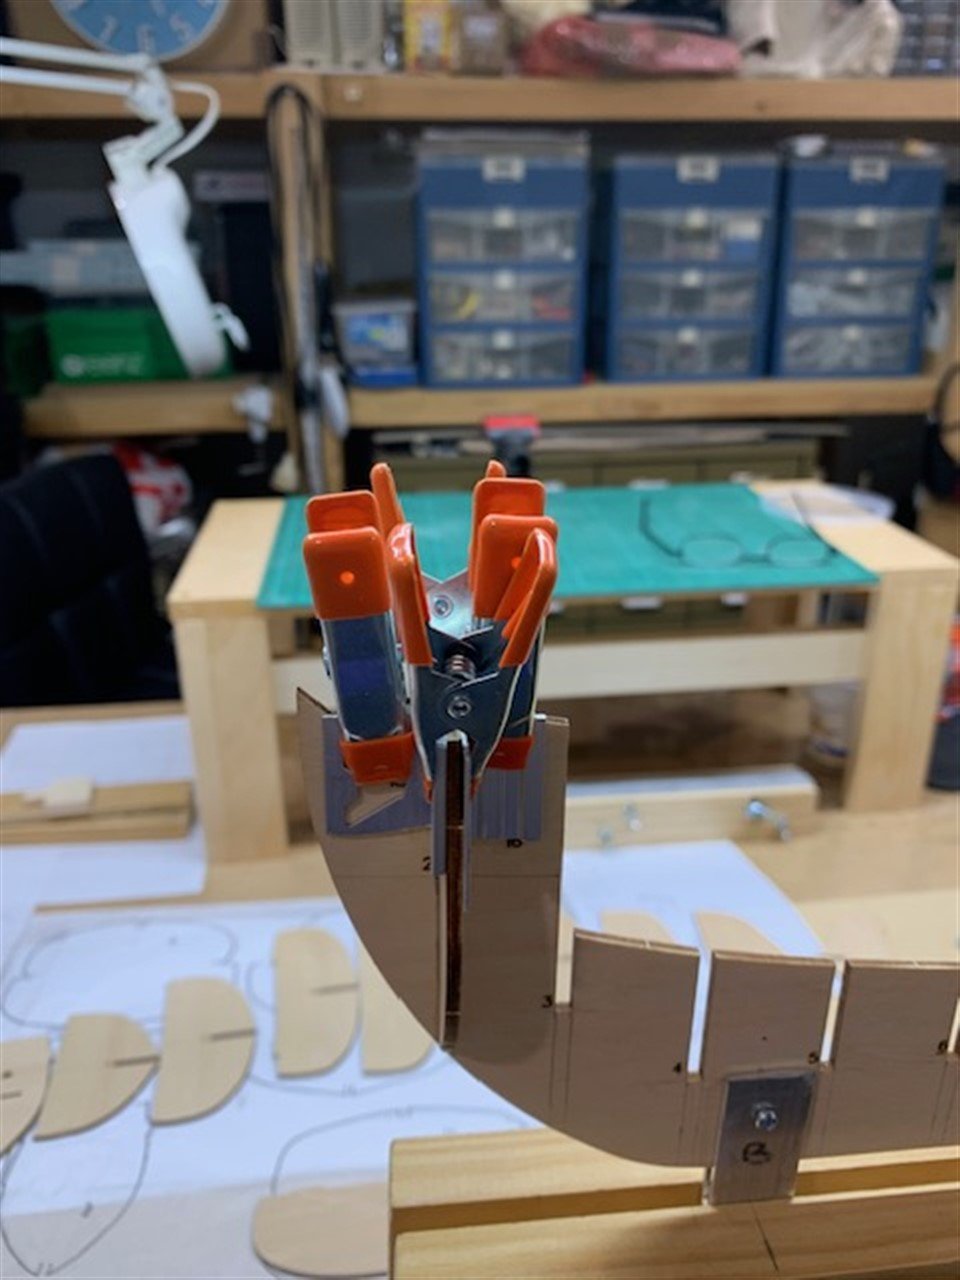
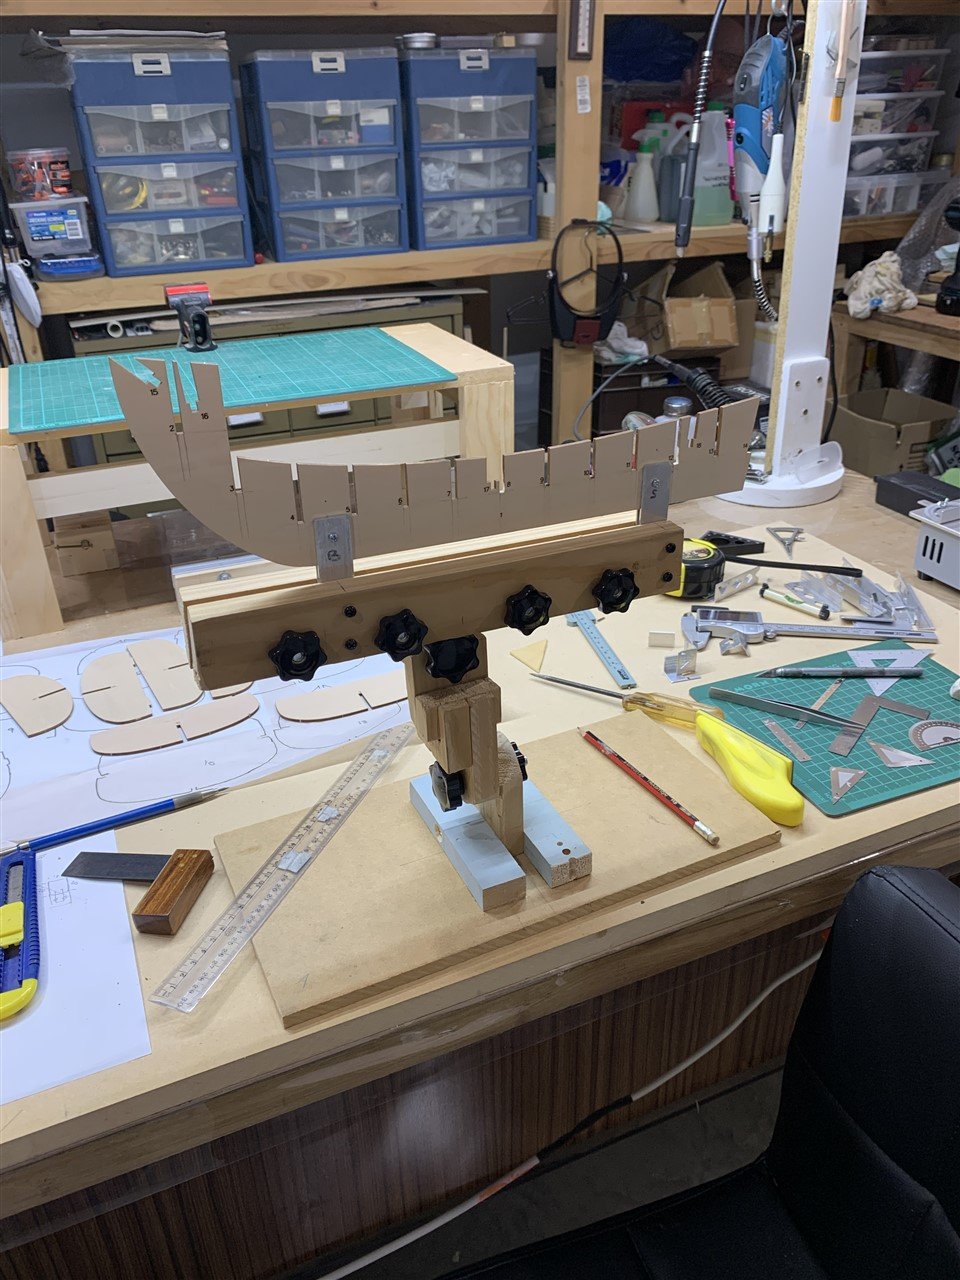
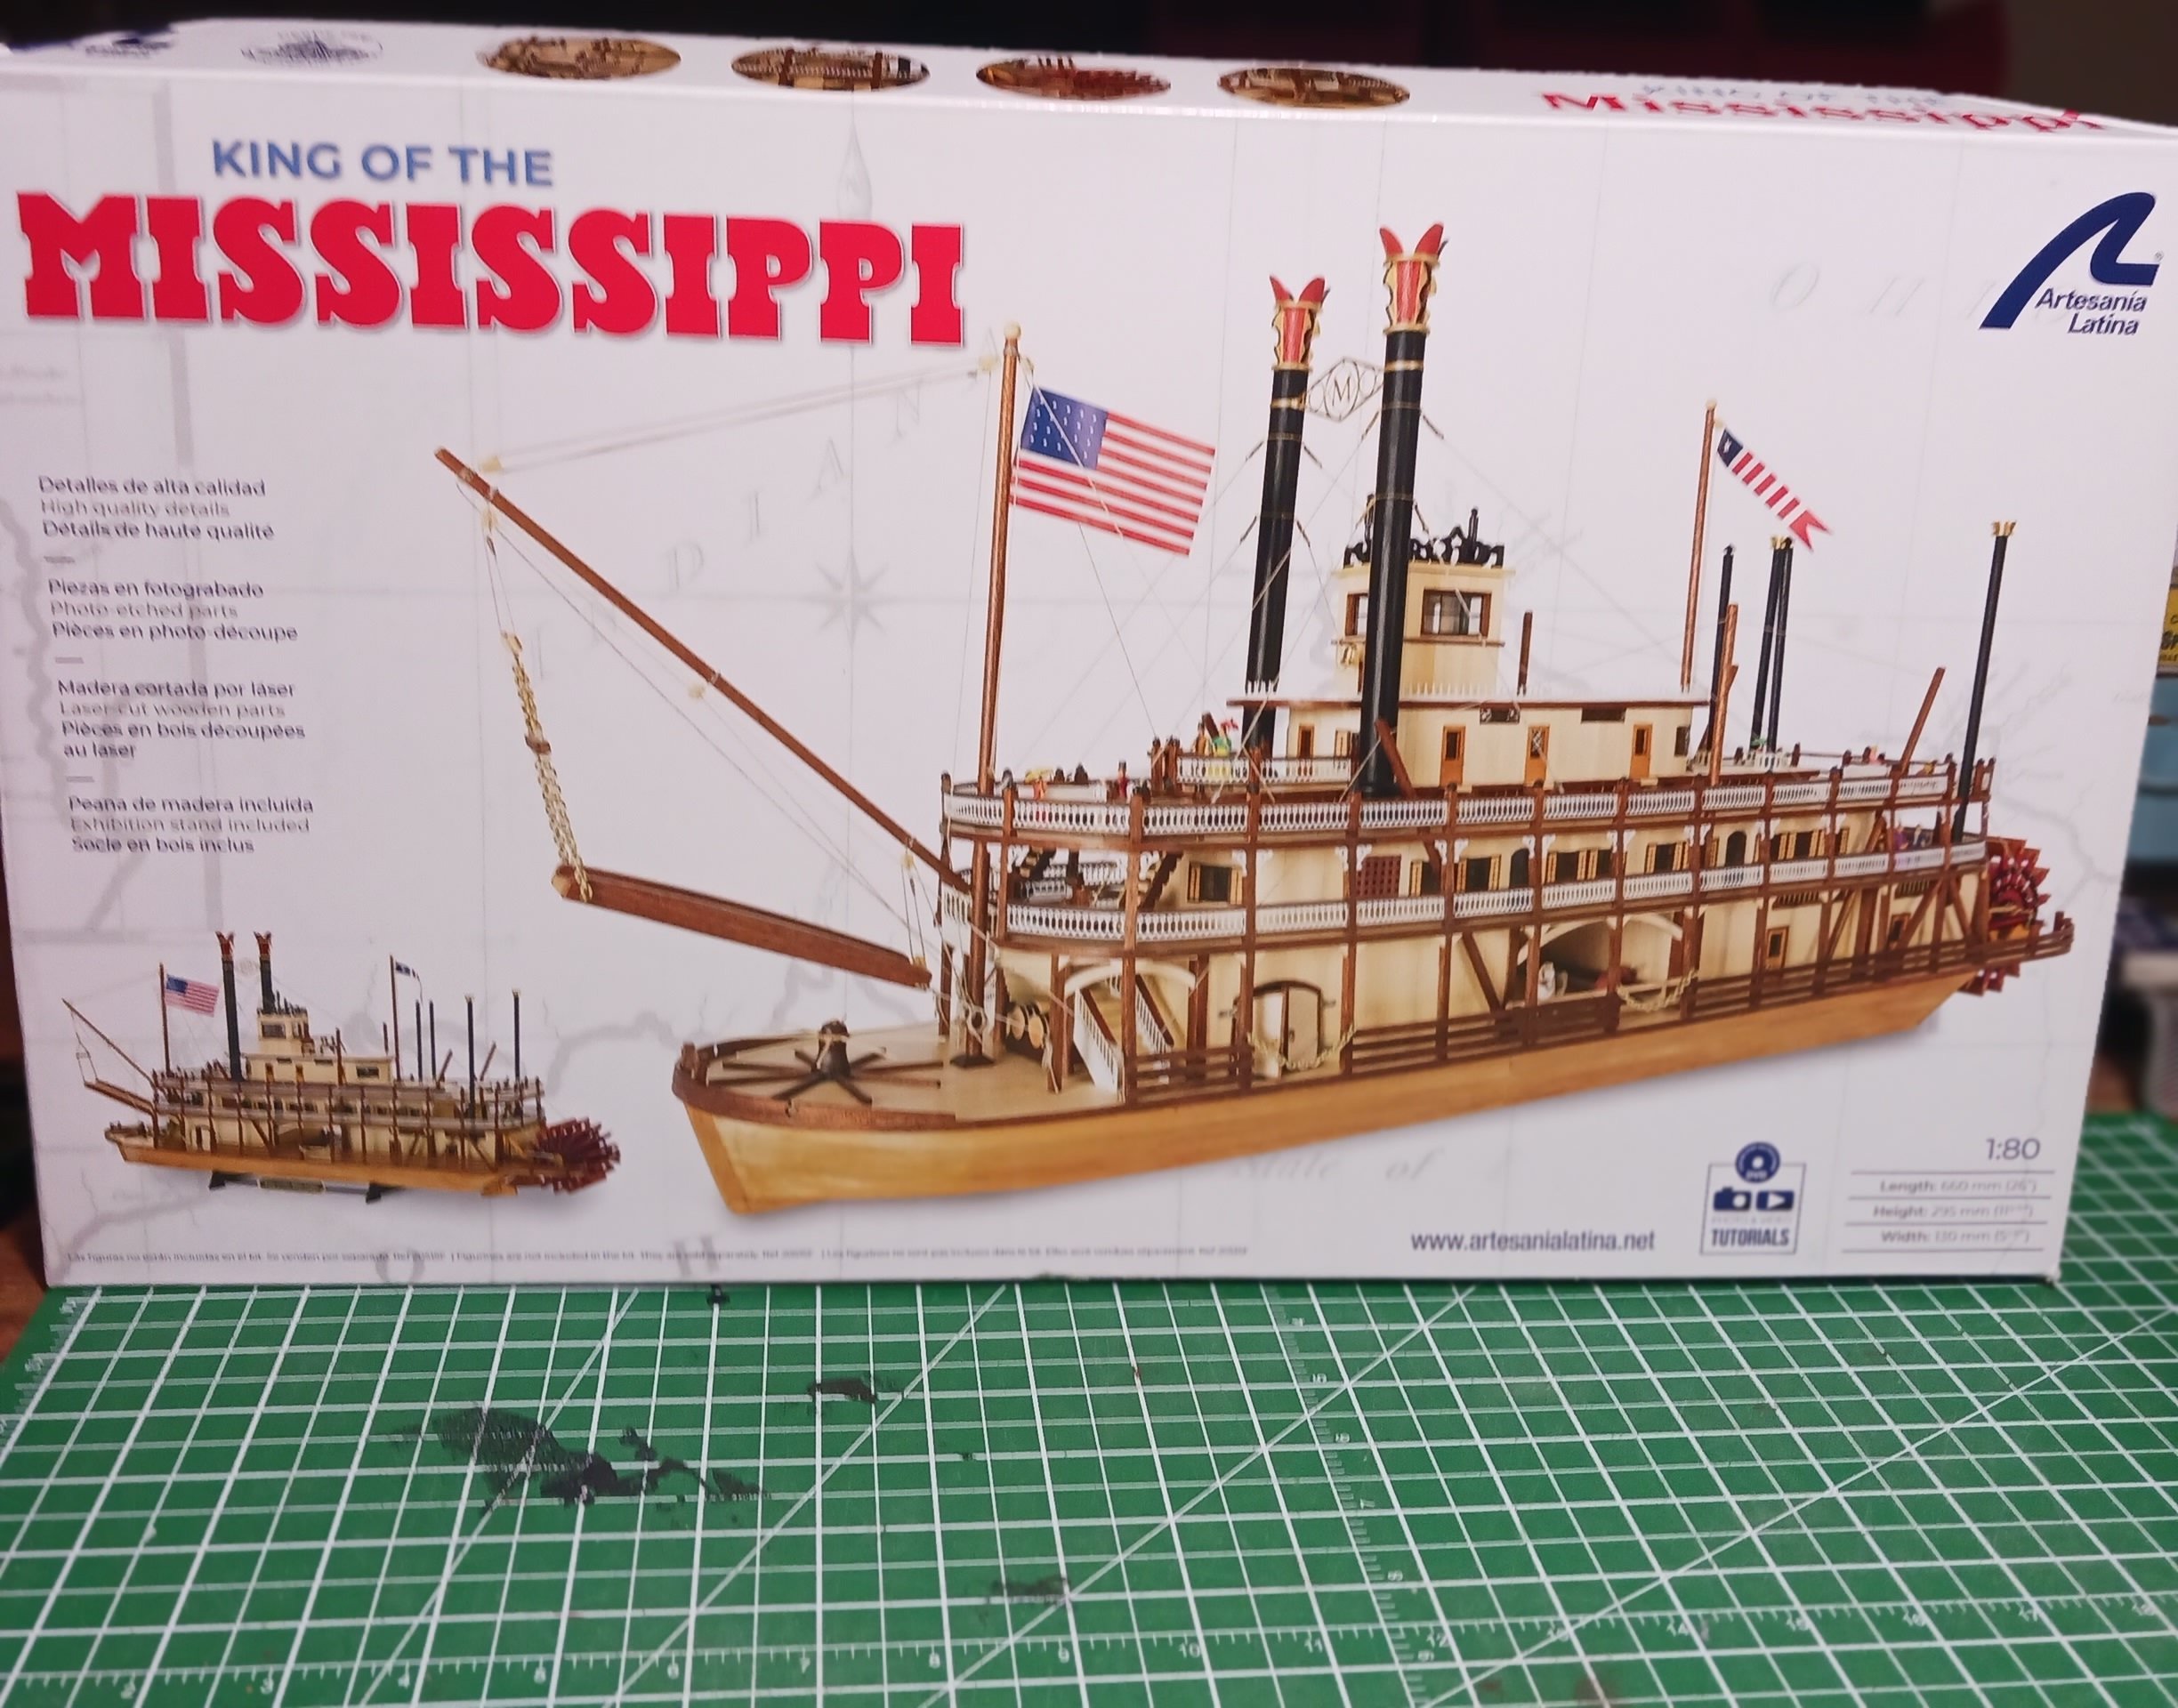

.jpg.8c403b6de8338d2ea35b6d498680e593.jpg)