All Activity
- Past hour
-
 Knocklouder reacted to a post in a topic:
Bluenose by Knocklouder - Scientific Models/Billing Boats - two-for-one build
Knocklouder reacted to a post in a topic:
Bluenose by Knocklouder - Scientific Models/Billing Boats - two-for-one build
-
 Looks good, Bob. Better to back up and make another run at things instead of trying to plow through and make yourself miserable.
- 26 replies
-
- 1
-
-
- Scientific
- Billings Boats
- (and 1 more)
-
 Keith Black reacted to a post in a topic:
Bluenose by Knocklouder - Scientific Models/Billing Boats - two-for-one build
Keith Black reacted to a post in a topic:
Bluenose by Knocklouder - Scientific Models/Billing Boats - two-for-one build
-
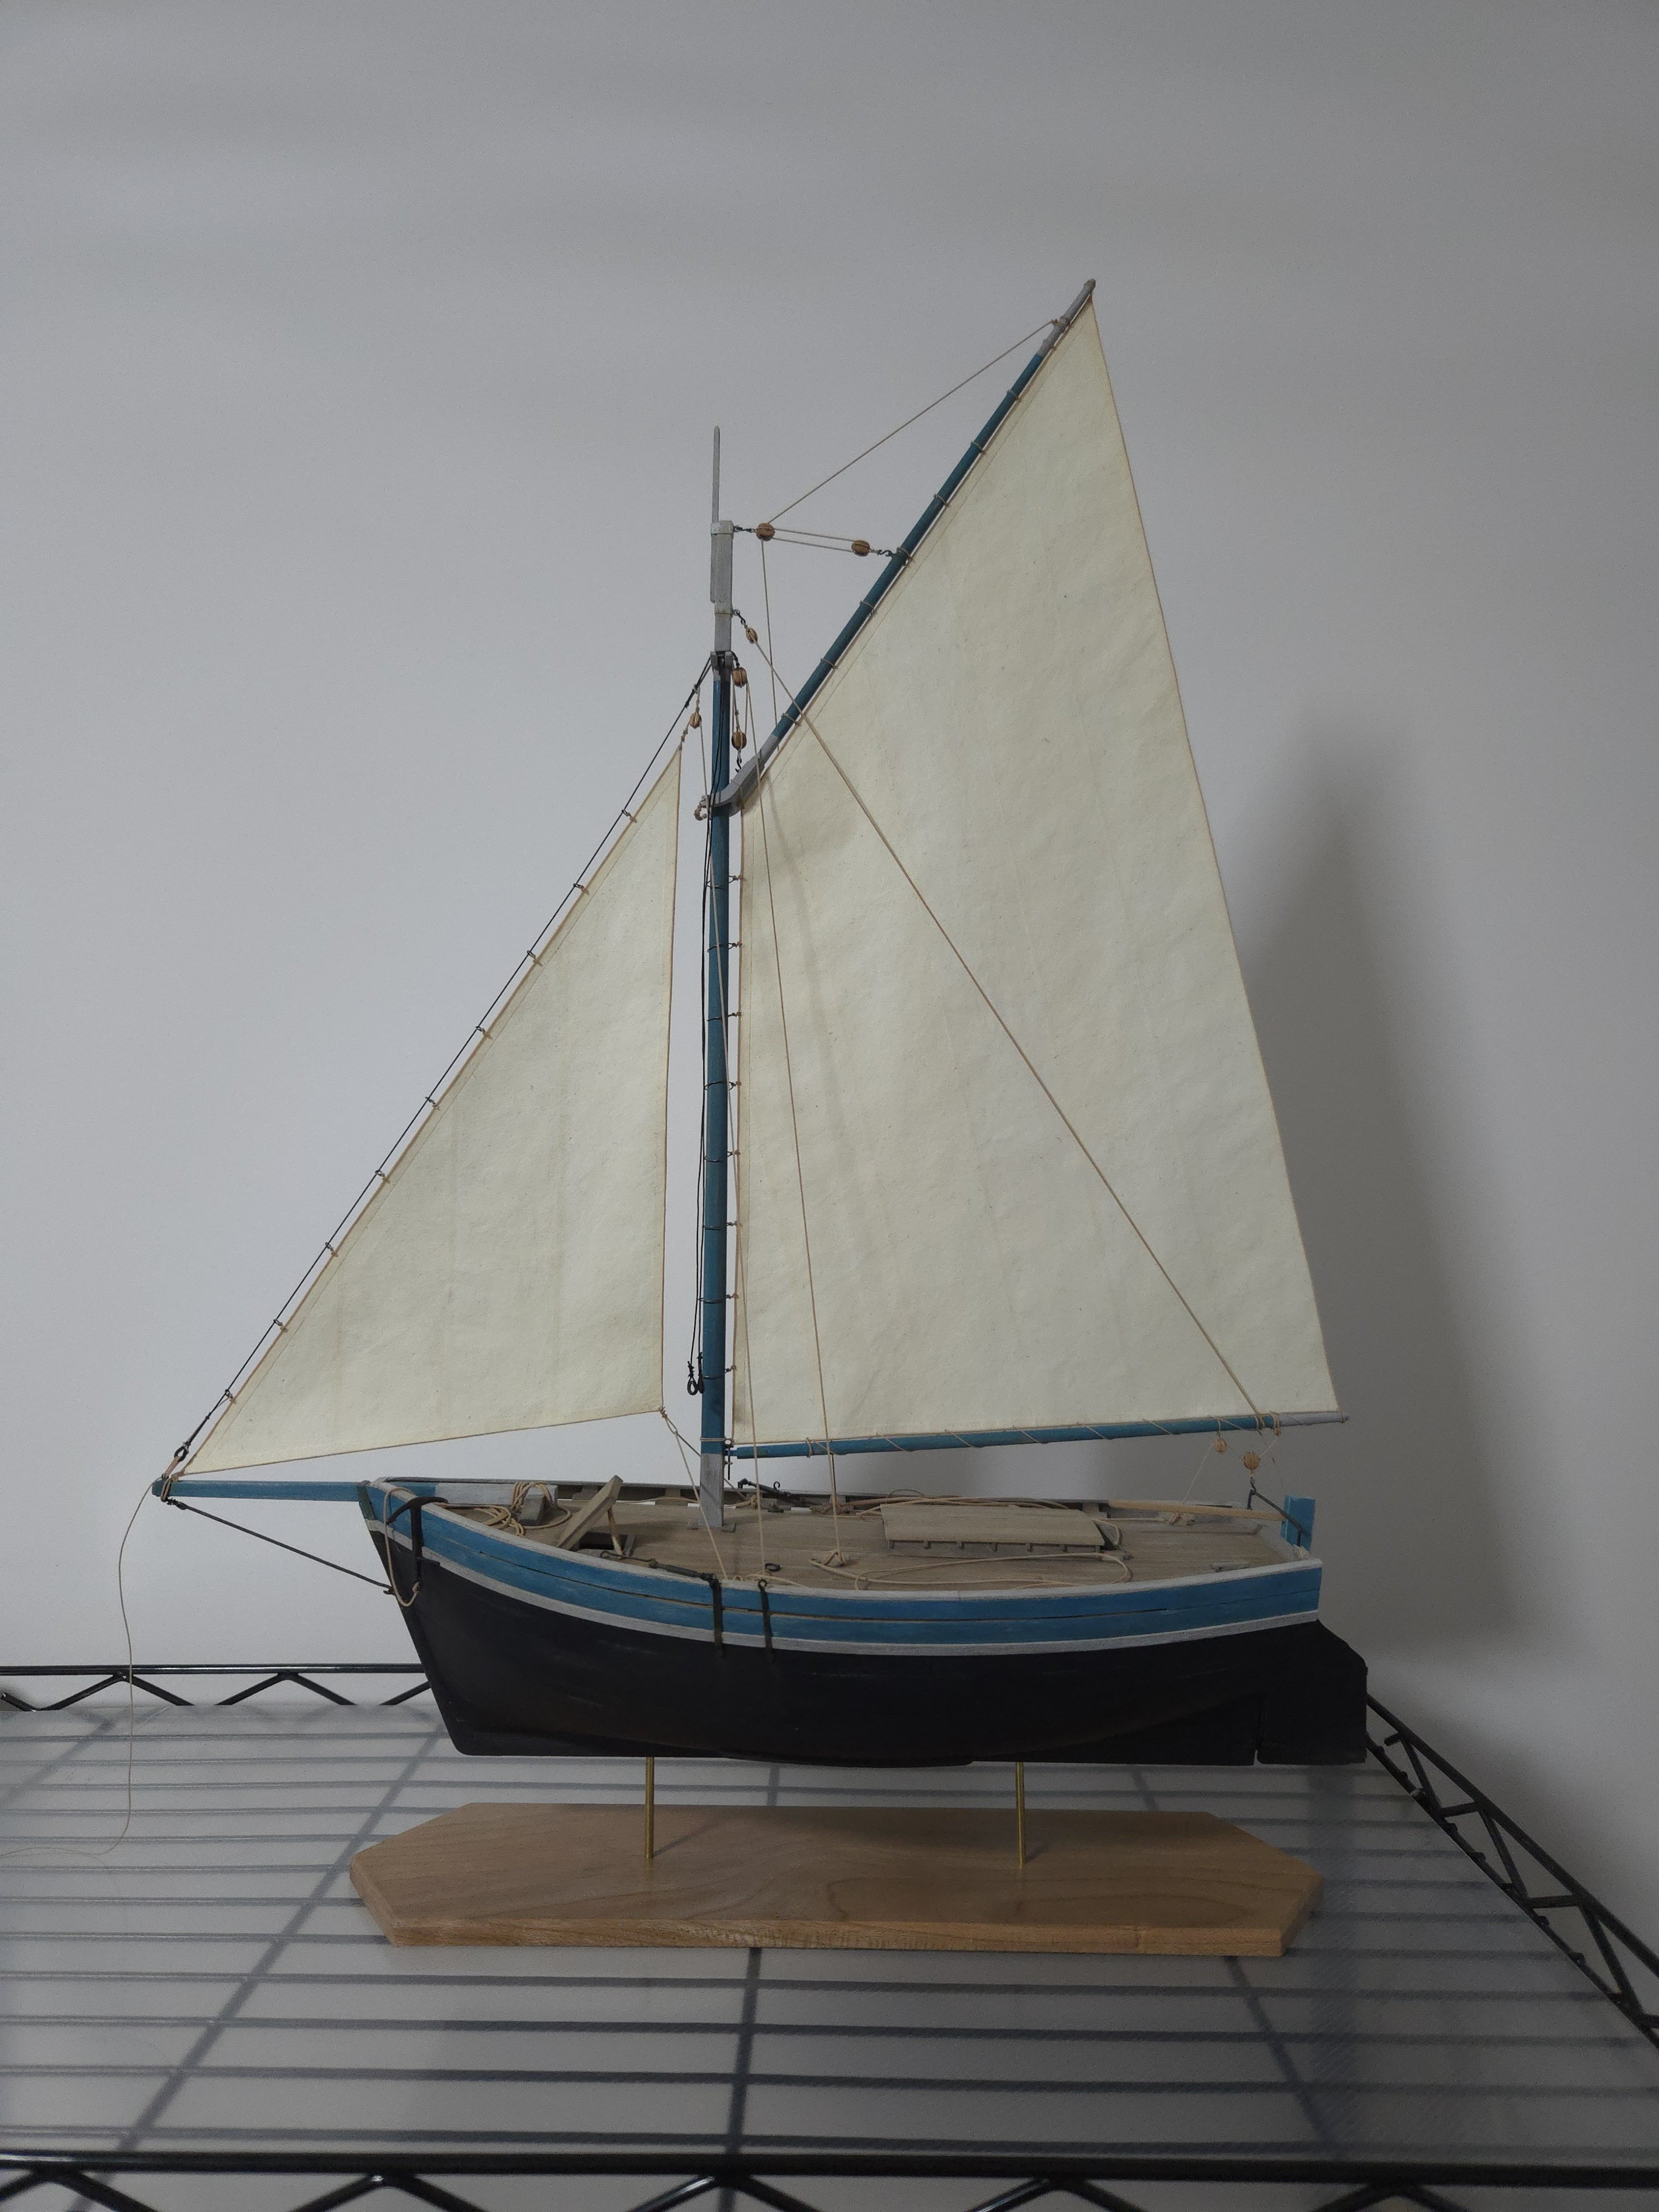
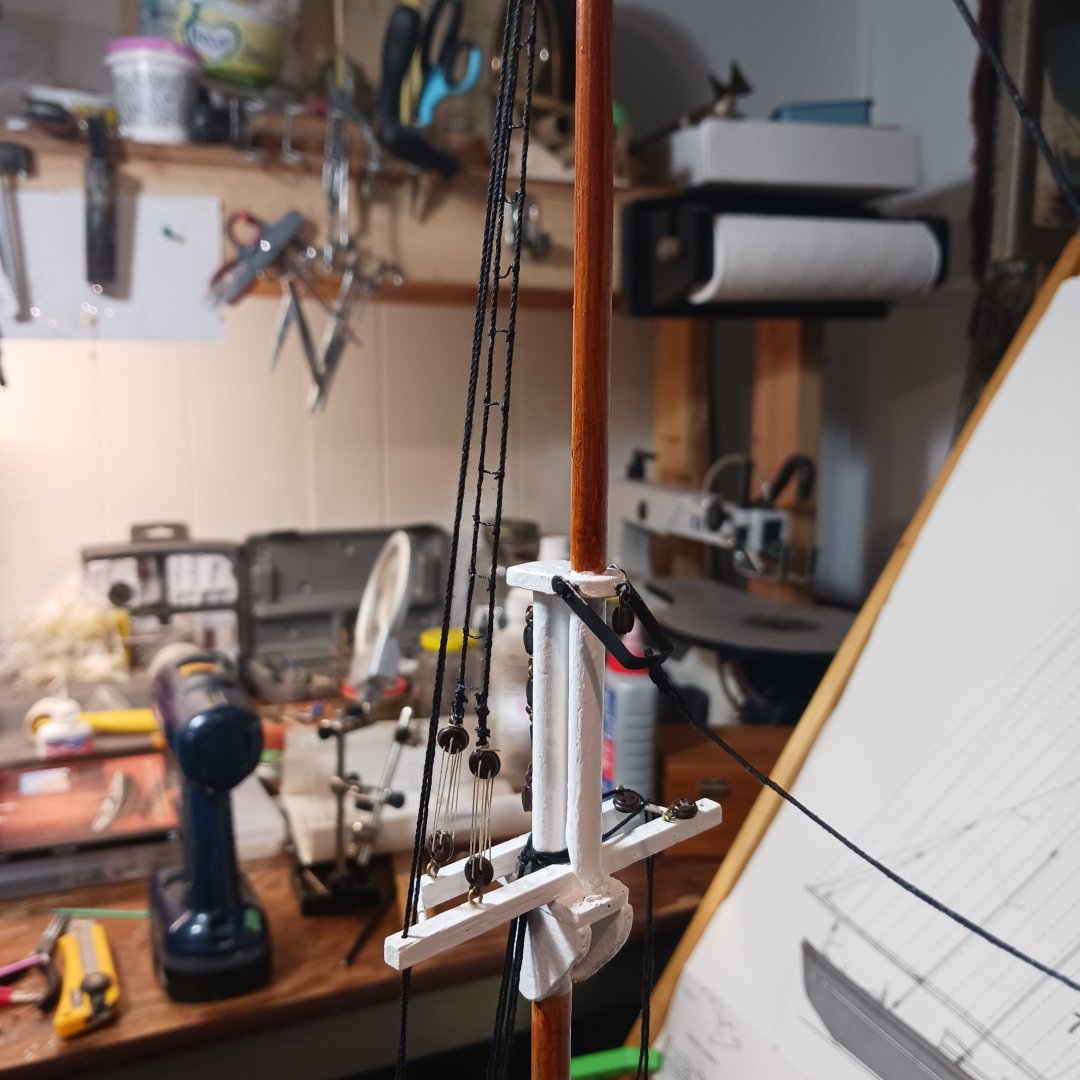
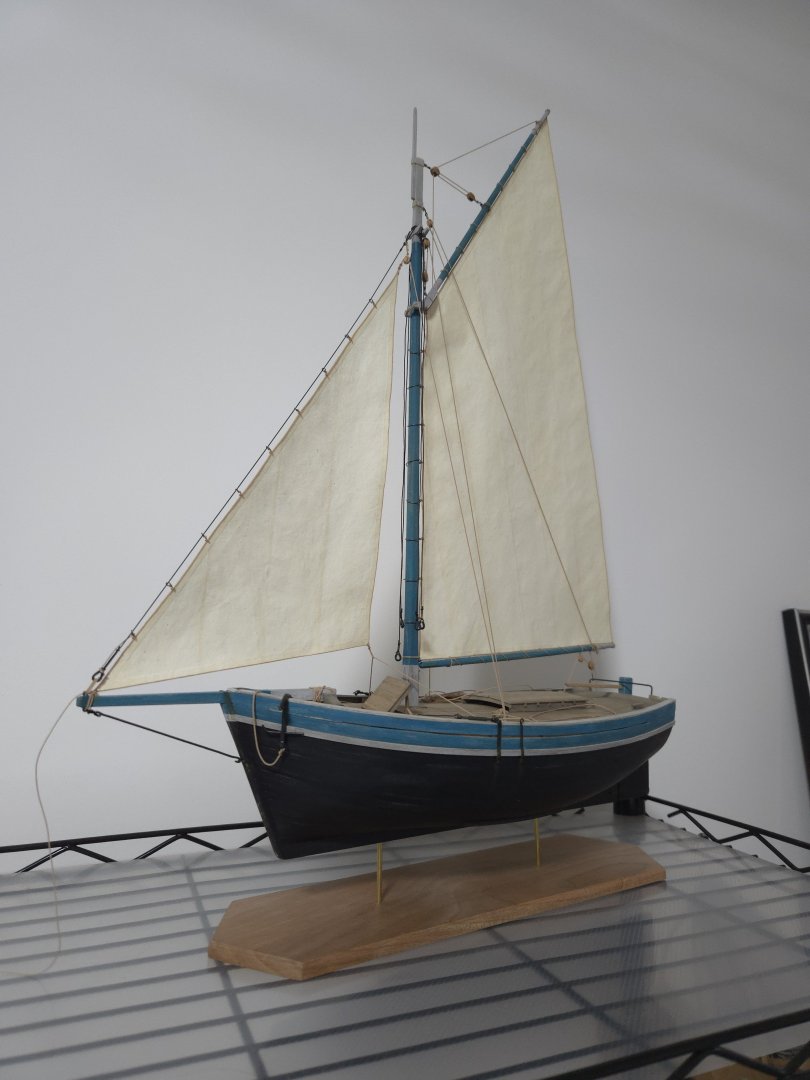
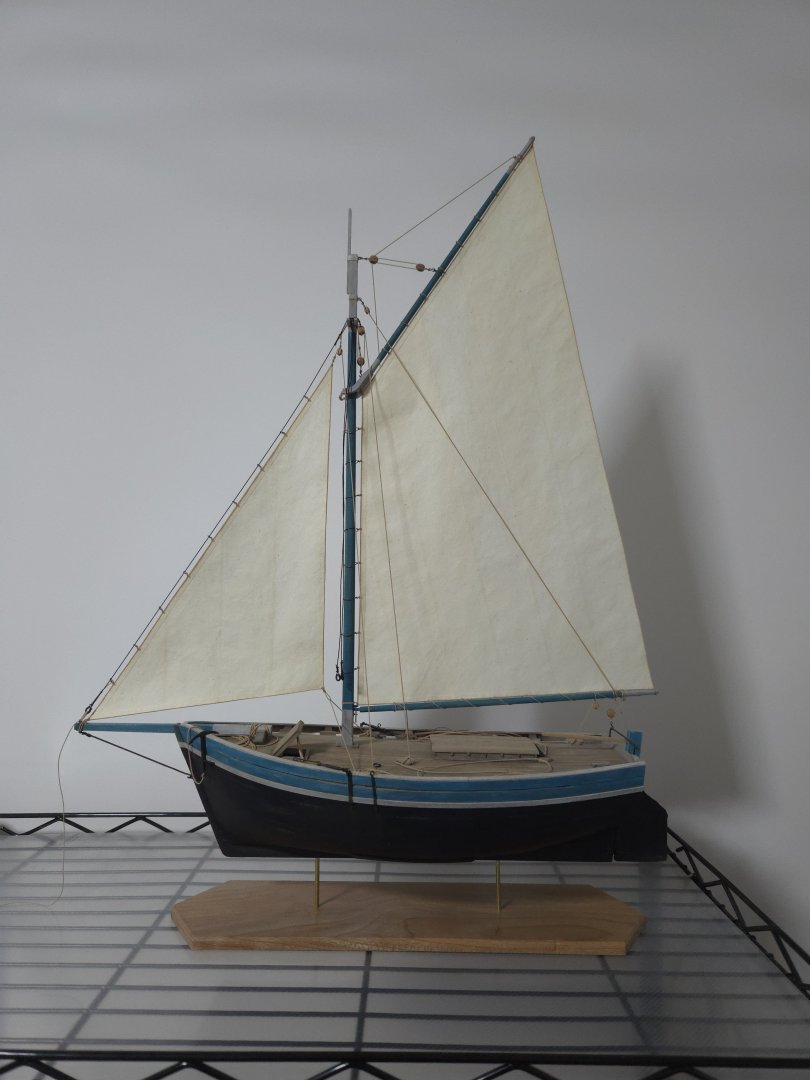
She's looks so sharp, Jacques. It's great to see the mast set with the sails deployed. .
-
 Keith Black reacted to a post in a topic:
Lancha Chilota by JacquesCousteau – Scale 1:32 – Chilean Coasting Sloop
Keith Black reacted to a post in a topic:
Lancha Chilota by JacquesCousteau – Scale 1:32 – Chilean Coasting Sloop
-
Keith Black reacted to a post in a topic:
America 1851 by Caferacer - Mamoli - Scale 1:66
-
Keith Black reacted to a post in a topic:
Flying Fish by Rick310 - Model Shipways - 1/96
-
Keith Black reacted to a post in a topic:
Herzogin Cecilie 1902 by Jim Lad - Four Masted Barque
-
Keith Black reacted to a post in a topic:
Plan pages ruined - looking for Mantua Victory sheets 3, 4, and 5
-
gak1965 reacted to a post in a topic:
Flying Fish by Rick310 - Model Shipways - 1/96
-
Pitan reacted to a post in a topic:
HMS Portland 1770 by Trussben - Portland Scale Ship Co. - 1:48 - 50 gun 4th rate
- Today
-
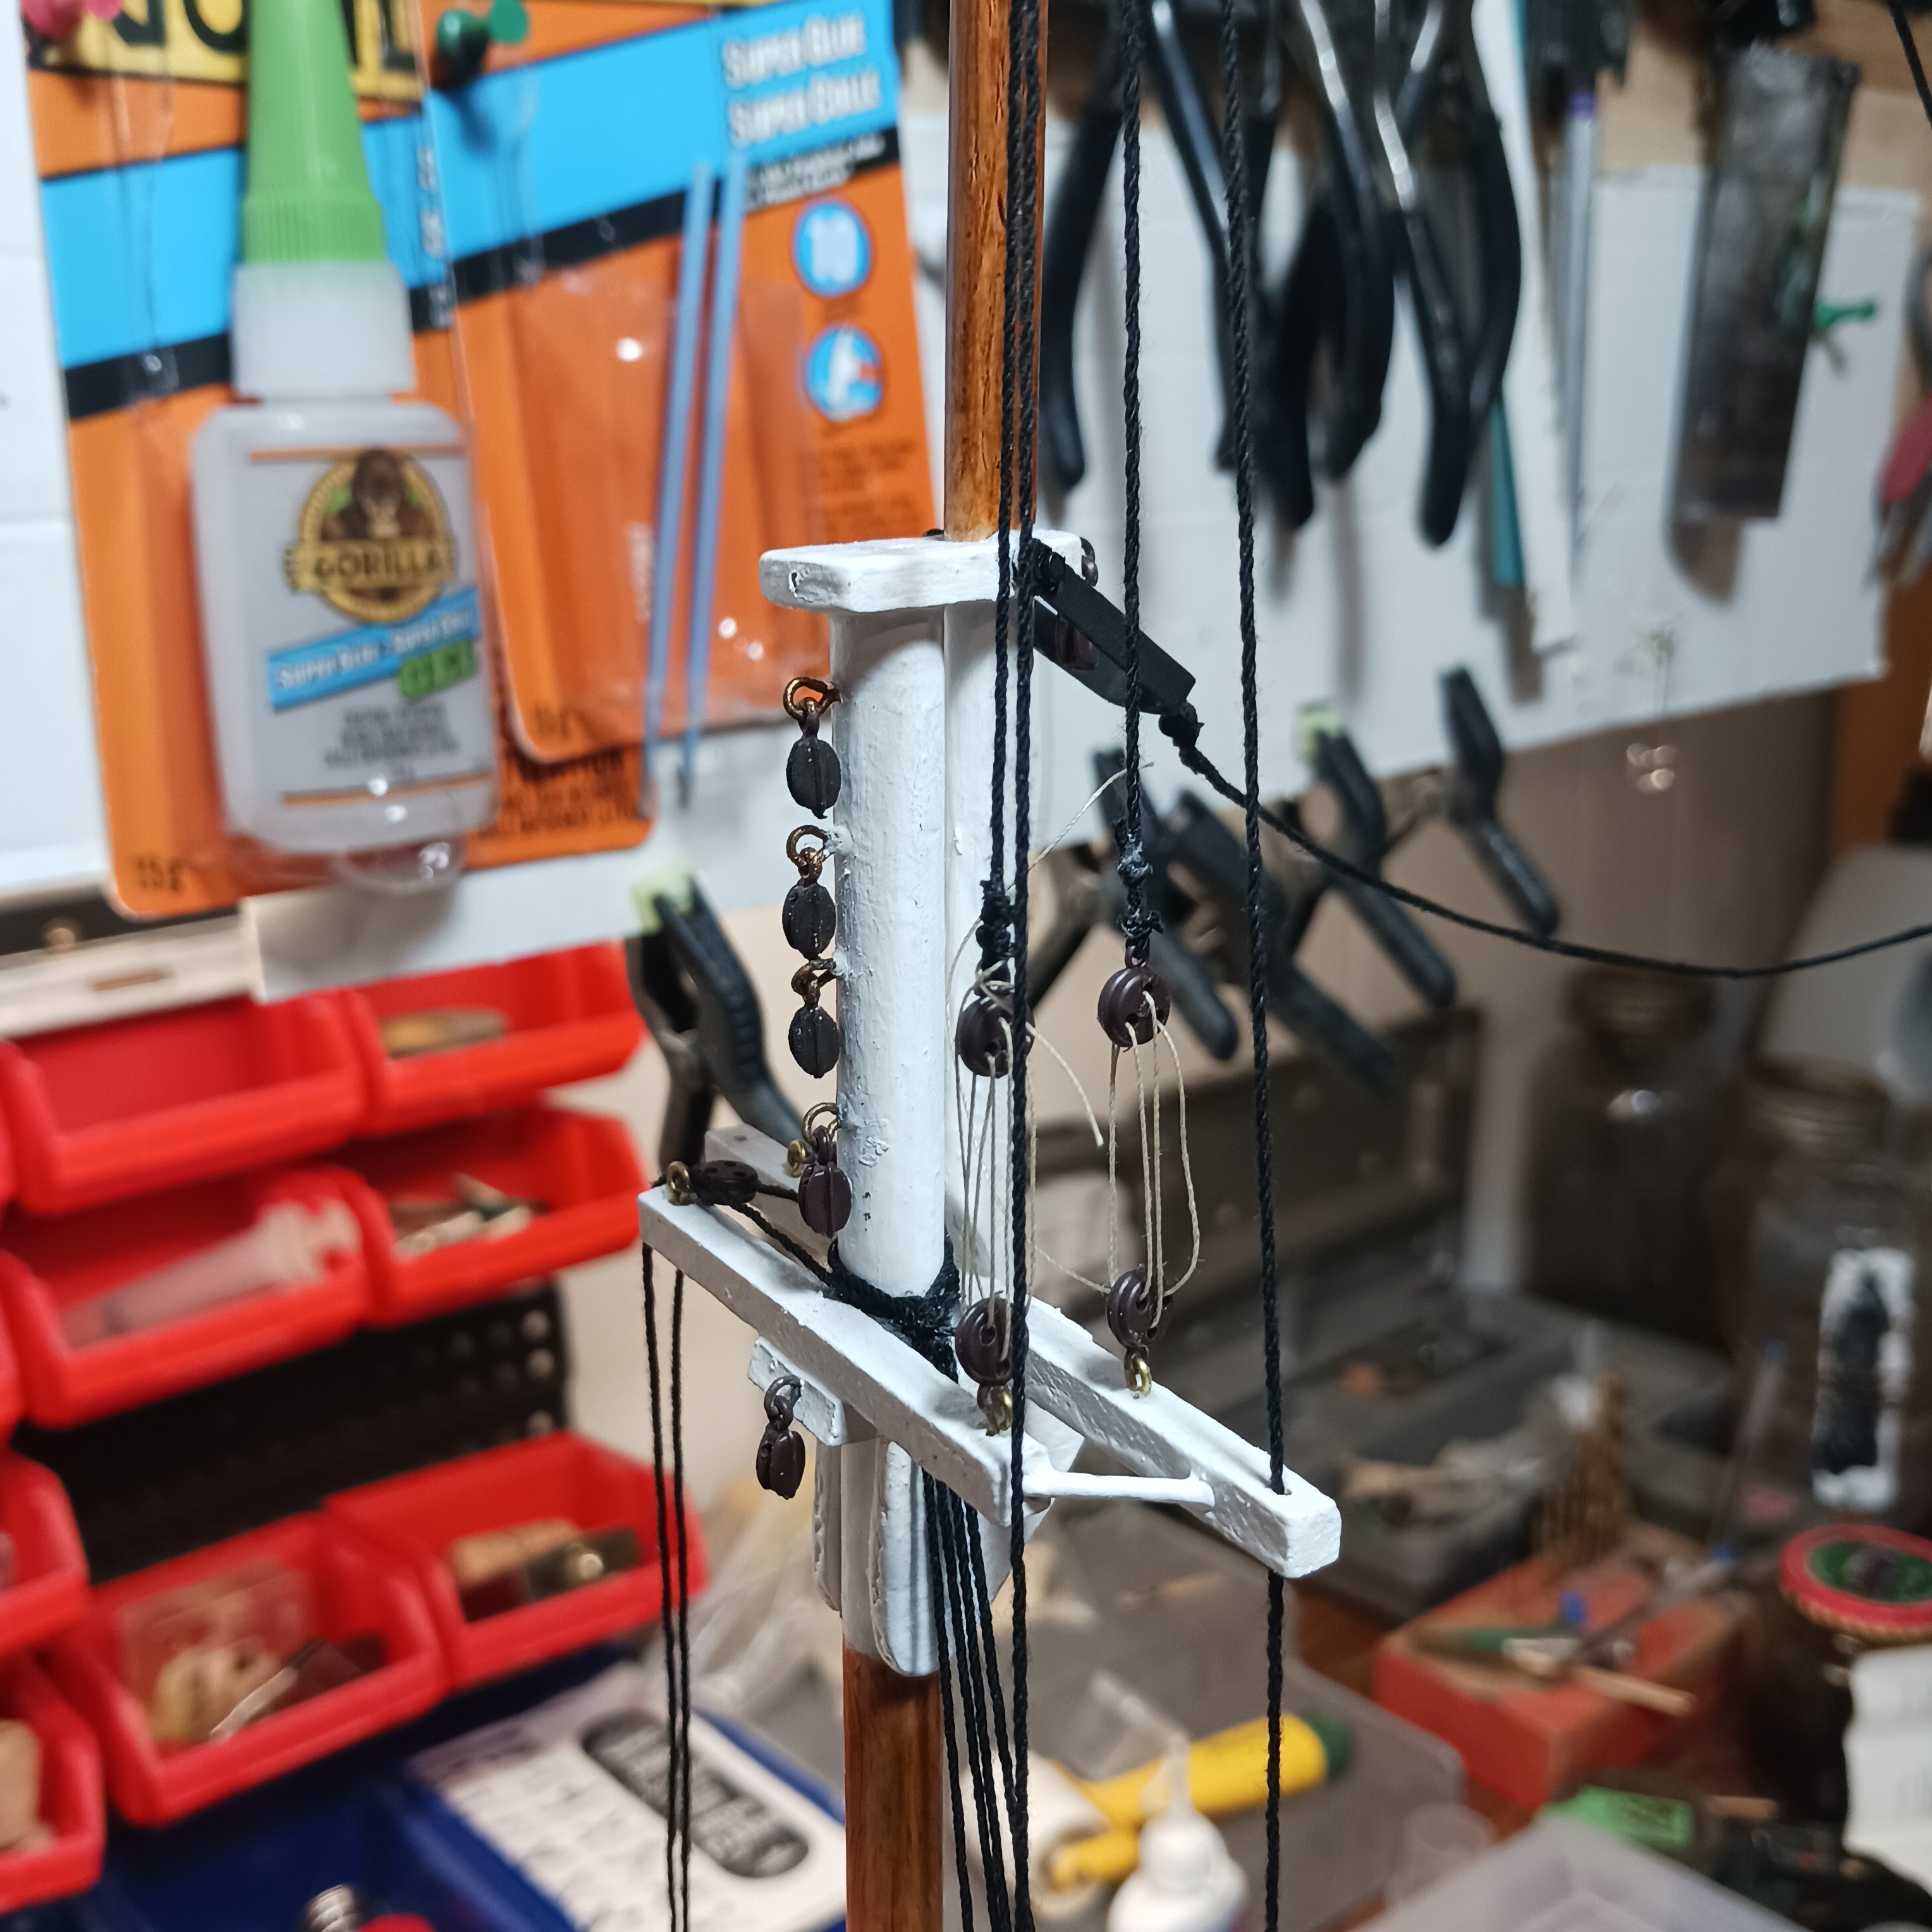
 Work on the lower deadeyes was painful, the plastic deadeyes have to go in a piece of brass and crimped on. I broke four, but Rodney has a box full of these , no shortage here. Lol. I have the holes for the rest of the blocks but will install them latter. In my haste to get'er done I, after the upper ratlines were done I tied the stays. Now I will have a hard time with the lower ratlines. Freddie said just take the back stay off, and then you will have lots of space. Looks that way, I will remember to do all the ratines first before the stays as I go forward. Freddie is looking over the plans for the Scientific, he says let's finish the Billings Boat first because there are too many numbers and different sizes for everything and it too confusing, and it doesn't take much too confuse me these days lol. So, we will consider the idea, it is so much fun building a schooner, I may look for another one to do latter. Rumor has it that there is a ship in the mail headed my way, Freddie says I am the luckiest guy he's ever meet. Lol. I will let you know when it gets here. . Back to the ratlines, my happy place . Thanks for looking in. Knocklouder FFBI 🚢
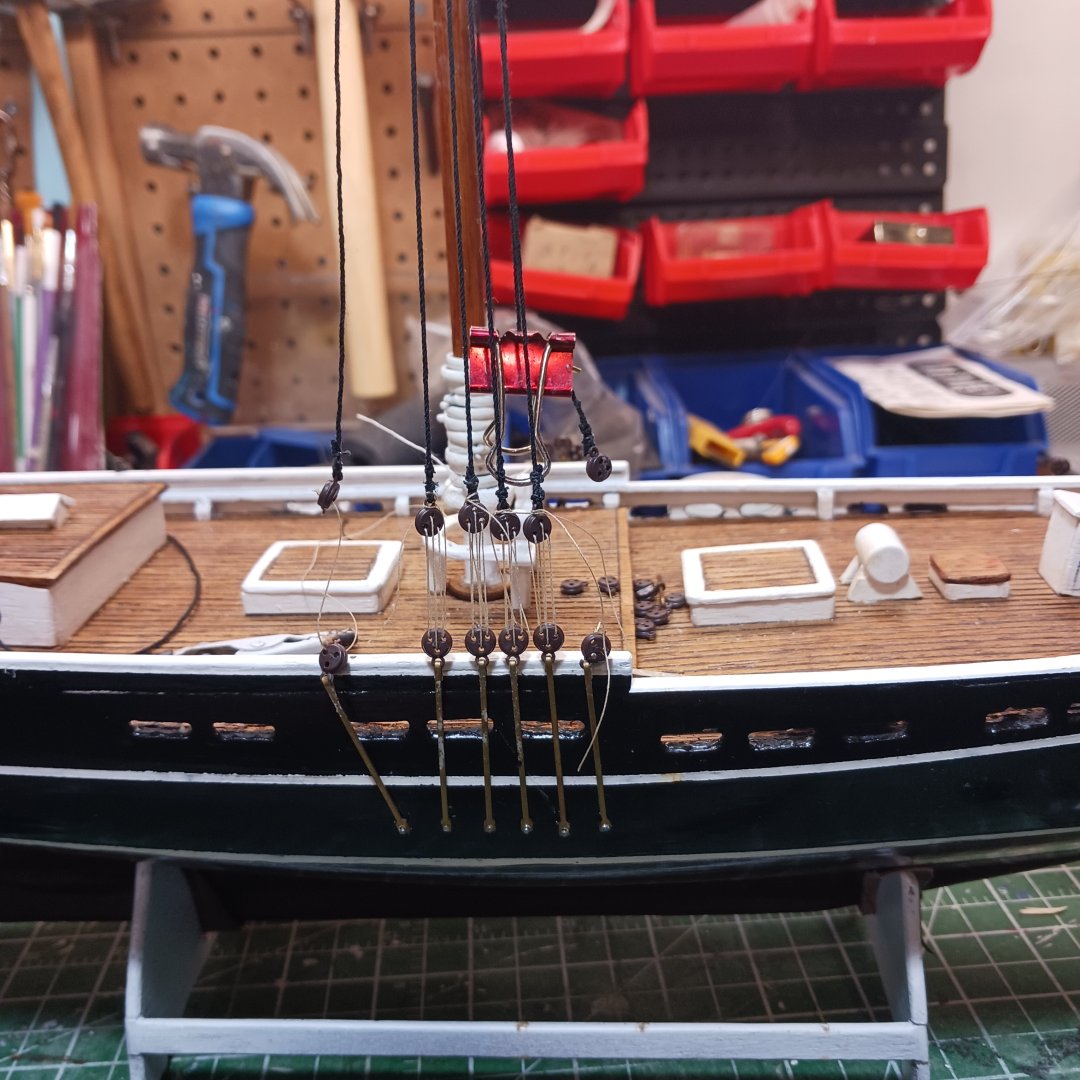


- 26 replies
-
- 1
-
-
- Scientific
- Billings Boats
- (and 1 more)
-
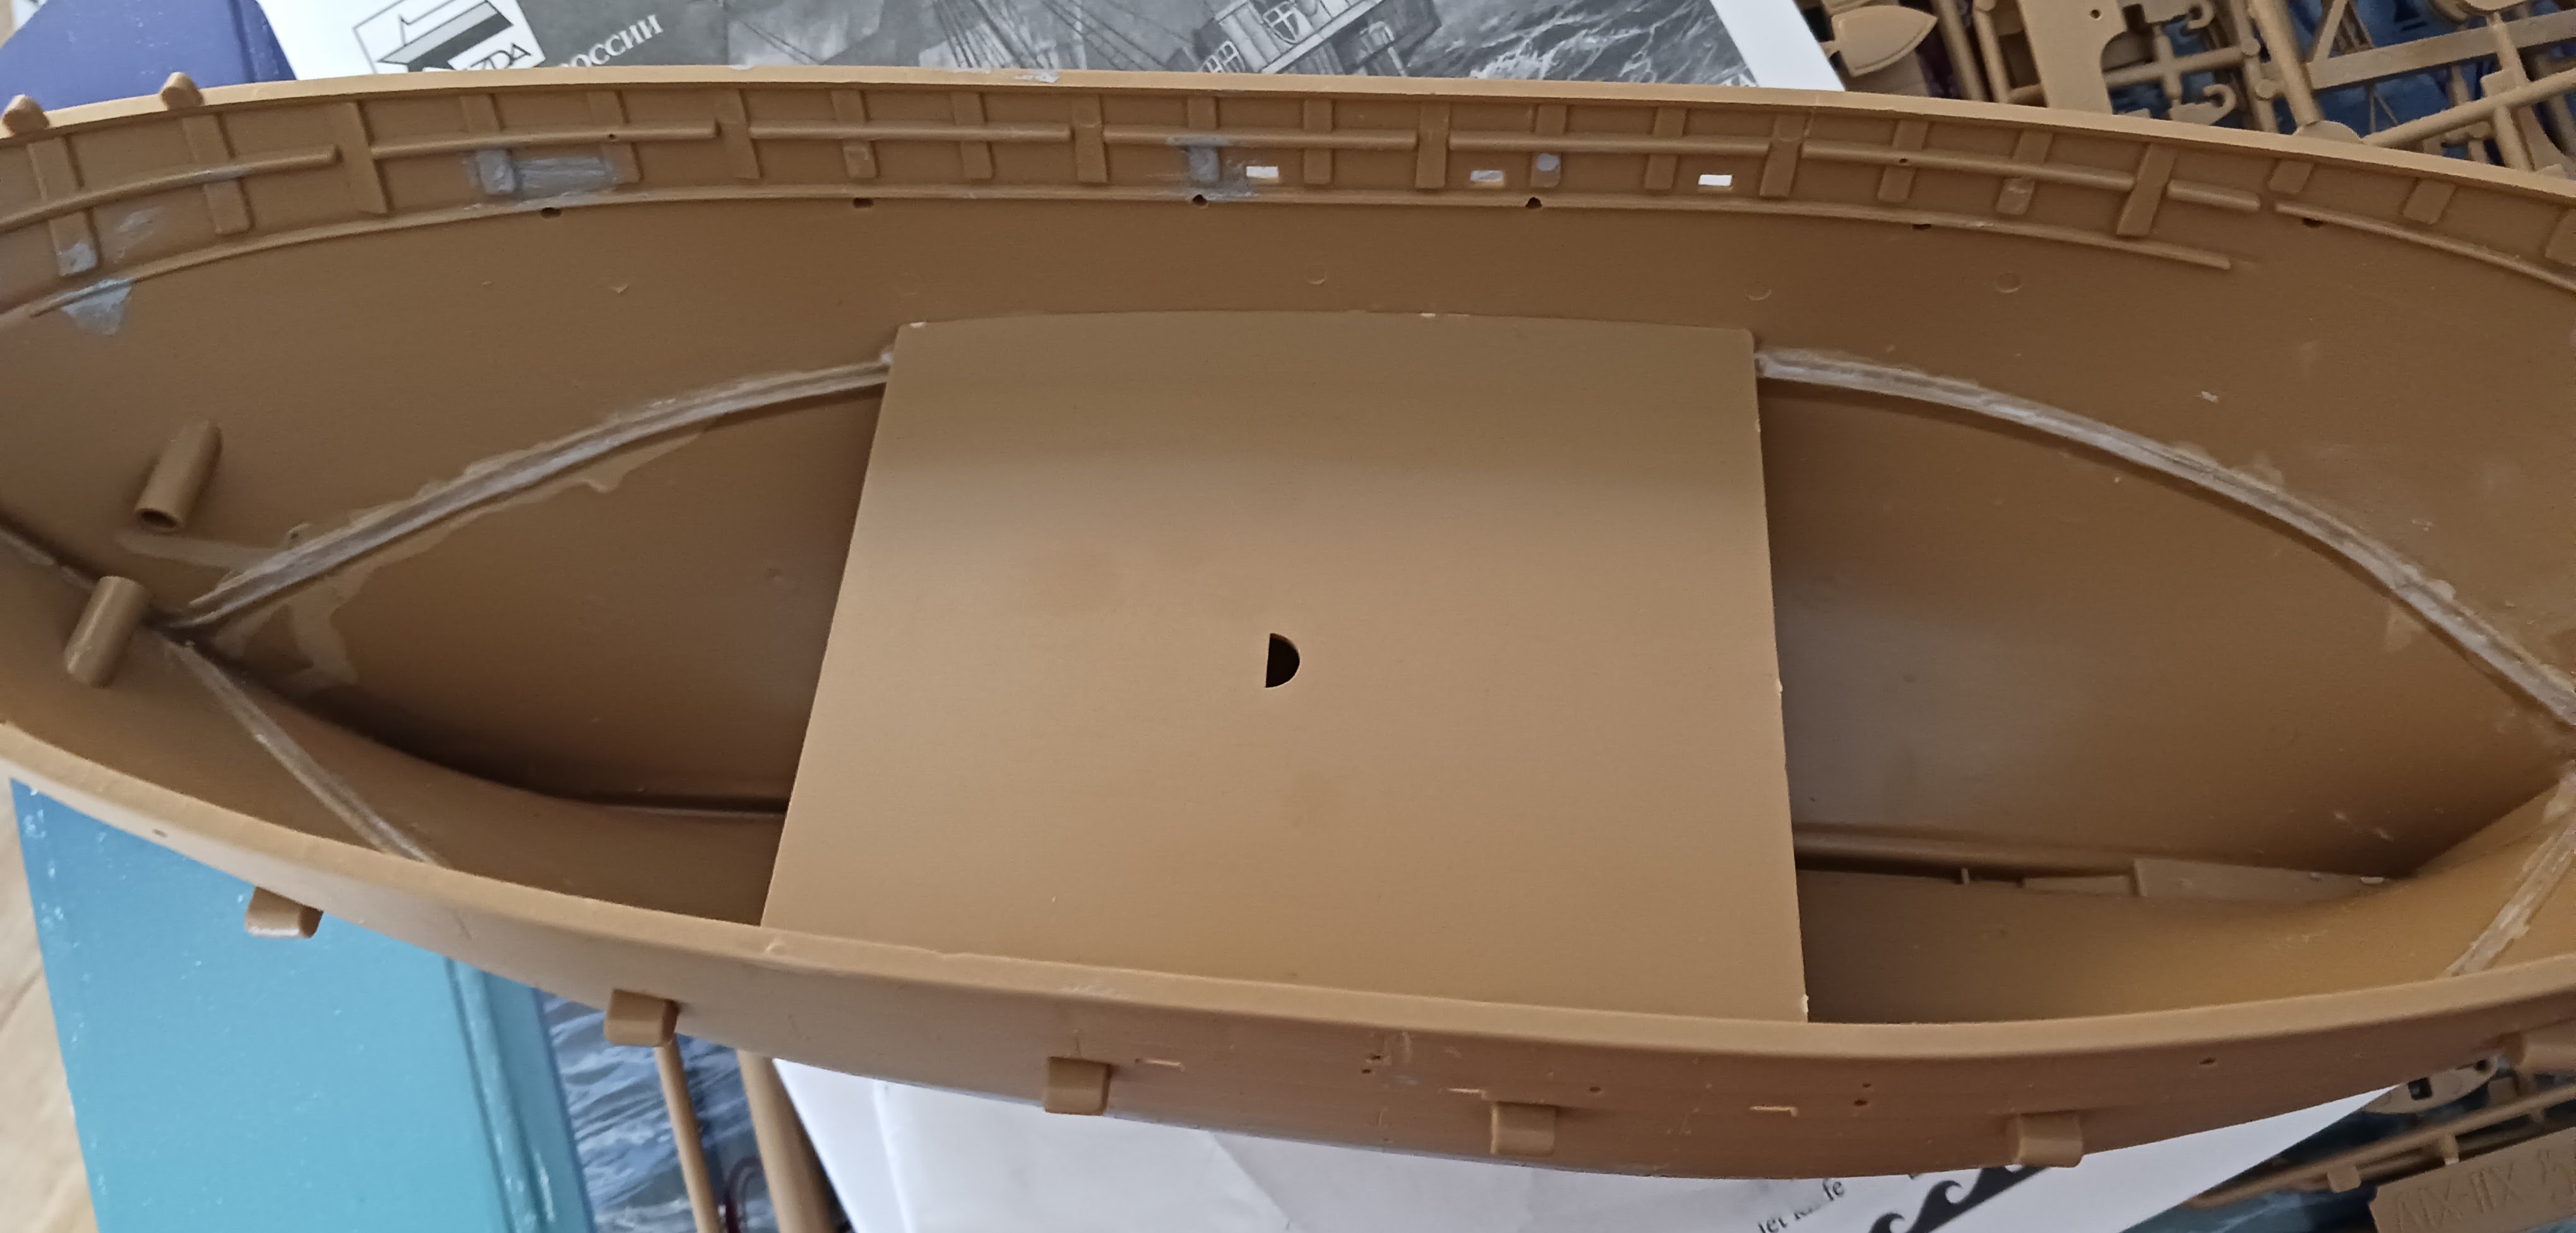
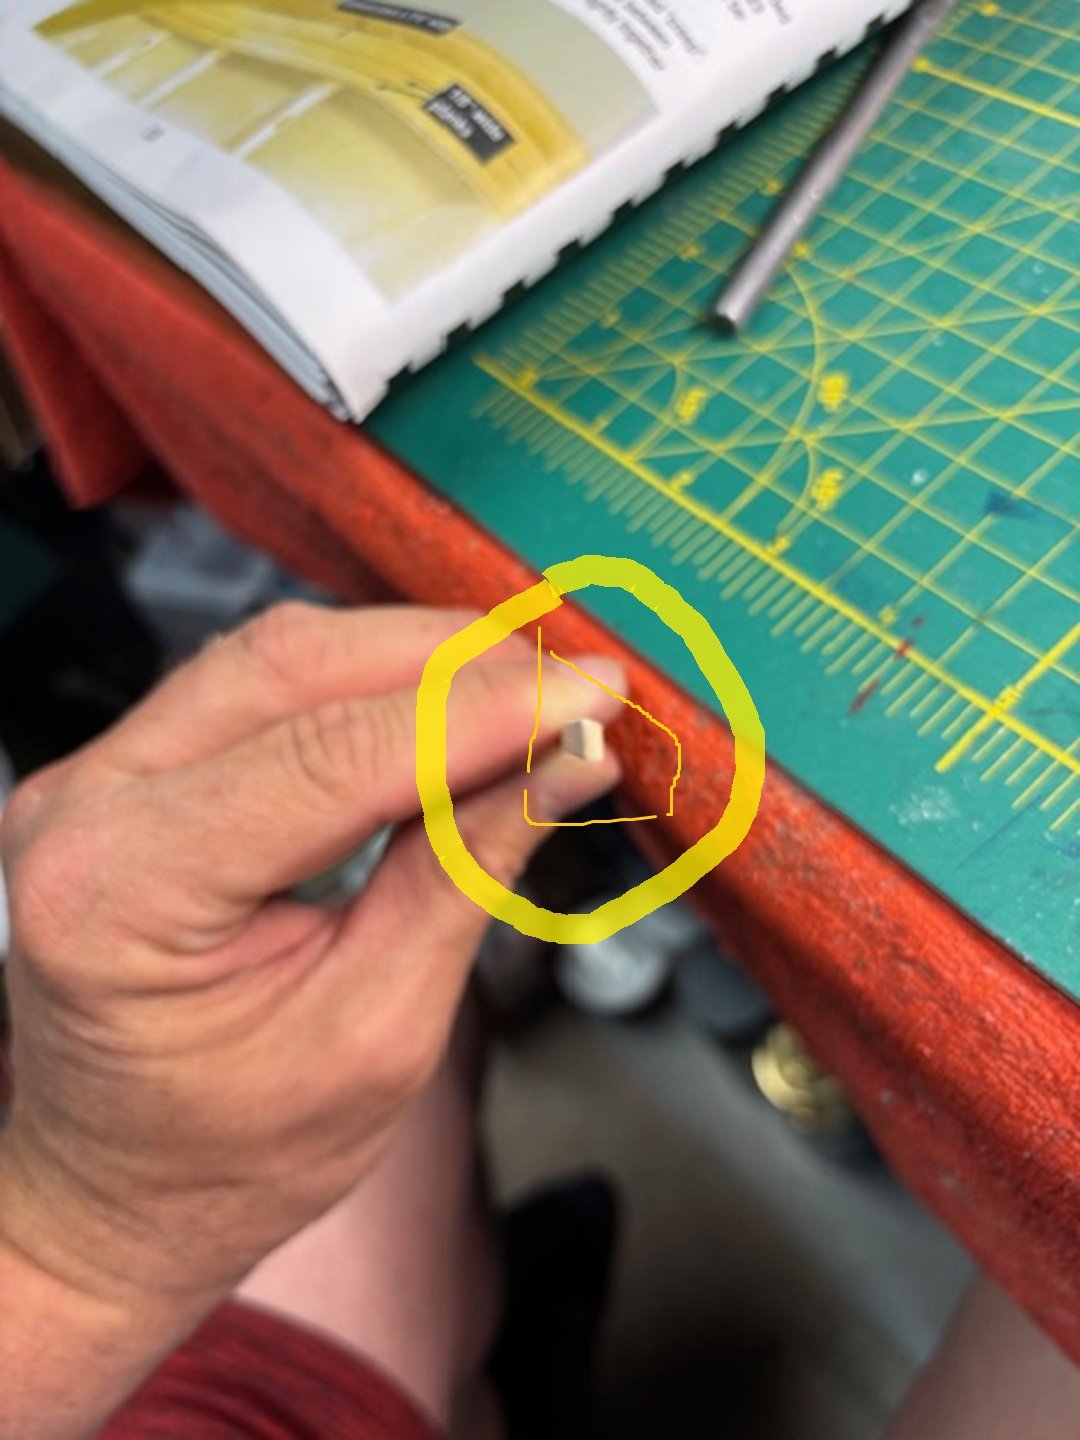
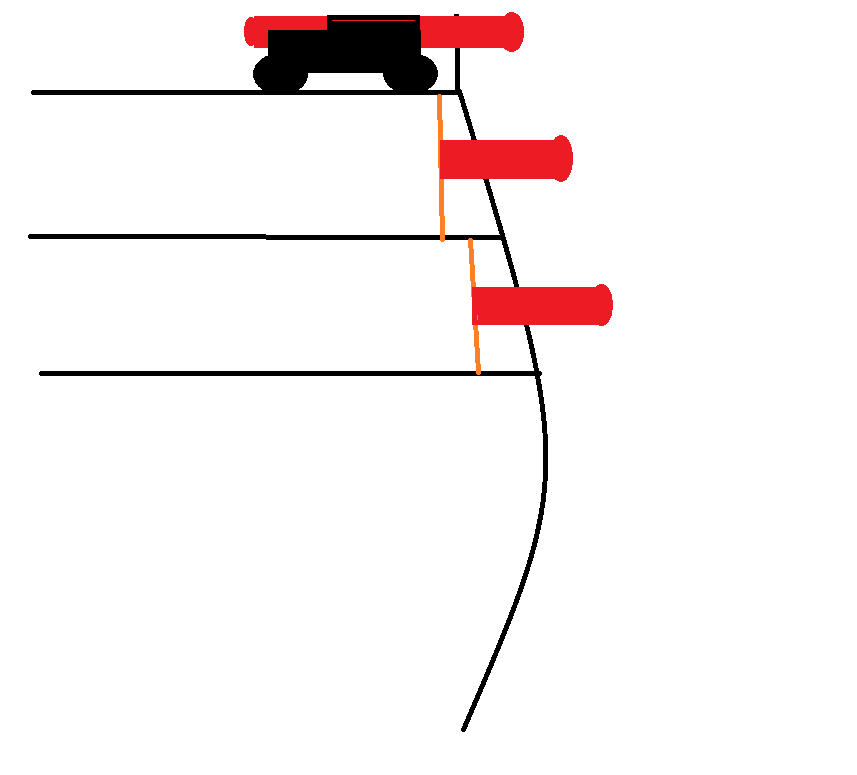
 Week 3 update: added 3 more strakes of planking on each side of the ship, sanded and blackened the cannons, finished shaping the stern gallery base, made the glass panels for the gallery, and started working on the transom. I was working my way down the main deck when I realized I couldn't tell quite finish planking the stern without the transom and gallery base in place. So I started making them instead of continuing planking. It looks kind of rough right now as balsa wood was not very happy with being sanded and I had to use a bunch of wood filler in the gaps joining the three balsa pieces. Should look better after the wood filler dries and I sand it smooth and paint it. Bending these pieces also proved to be a challenge, as they would not bend no matter how much I soaked and steamed them with soldering iron so I just superglue and wood glued them on to the balsa wood which was much easier to bend instead. According to the instructions and other build logs of this ship on this site, the cannons below decks are just glued straight into the hull planking with black paint being used to simulate the firing ports. I really do not like this idea and much rather cut out the gun ports and create a small recess for the guns to stick out from, to create a sense of depth. To achieve this, I plan to add a second inner layer of planking (probably using just whatever junk wood or plastic I can find, since it will be painted black anyway) behind the first layer, close to the waterline and above, which will serve as the base for the guns to stick out from. However, since the brass guns parts provided for the guns below deck are very short and only shows the protruding parts away from the ship, I need to get a sense of how far they would protrude when they are above deck, with the carriage shown. Here is a picture of what I have in mind, the inner second layer I plan to add is shown in orange. All this is to say I have decided to create at least a few guns assemblies for distancing the inner layer planks to mount the stubby guns. I first blackened the guns with some brass ager, but then I decided I really do not like the sharp edges around the bore of the guns and sanded them to be more rounded and smooth with a rotary tool and then blacked them again. Next up: carriage assembly for distancing.
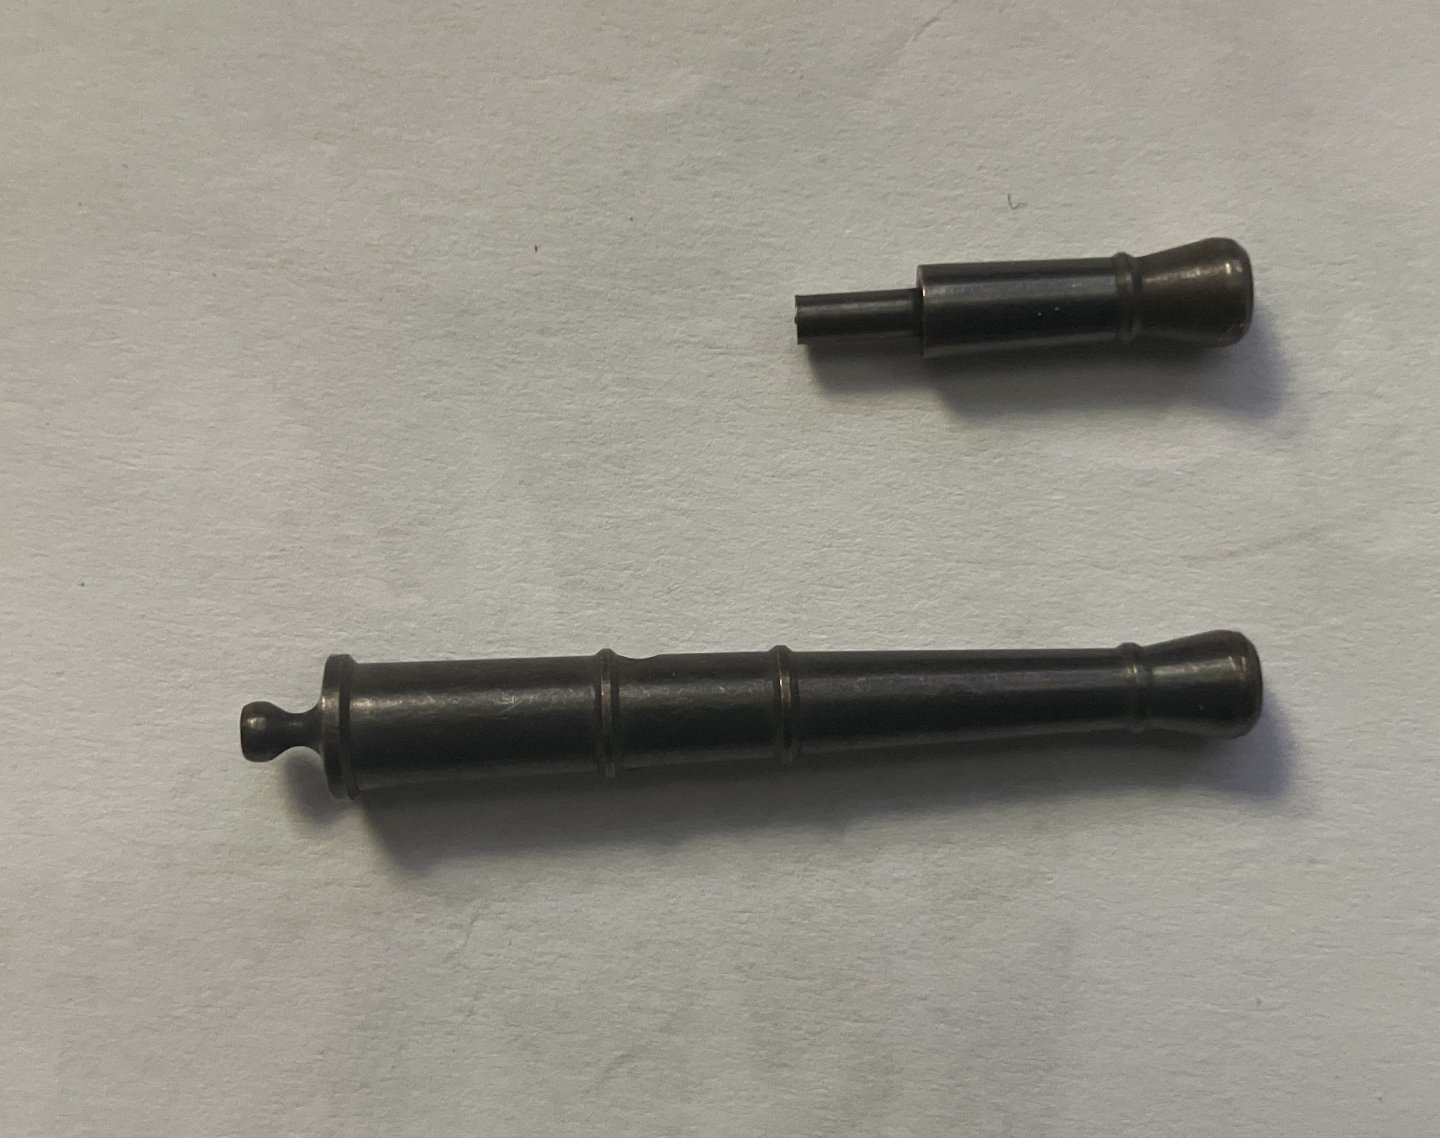
-
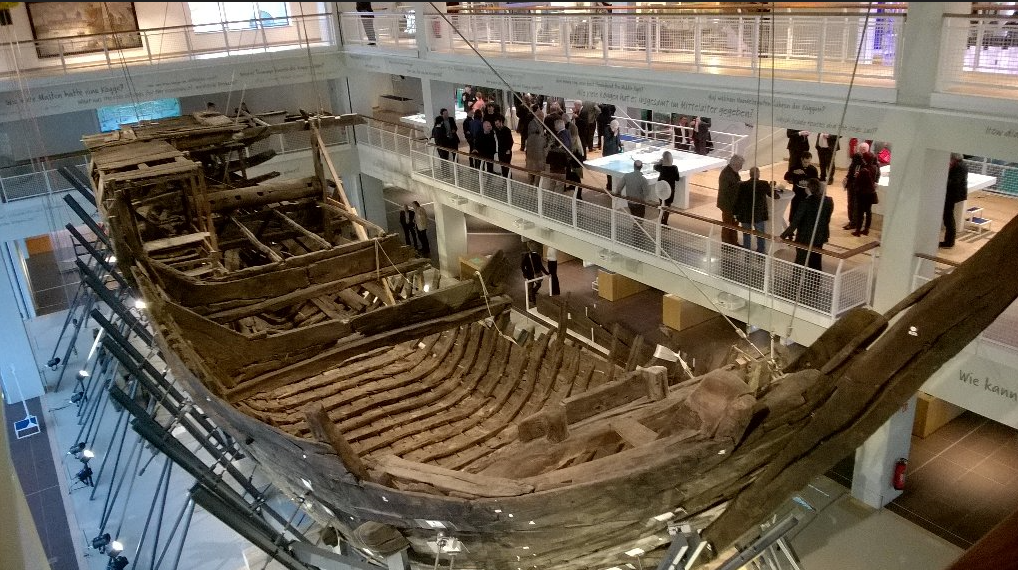
 The Bremen Ship has a mounting for the capstan on the sterncastle deck. No one knows how it was used. My ship has a capstan at the fore to weigh the anchors and a windlass at the aft to raise the yard.
 -
Here's what we have to work with as far as the hull is concerned. I can already think of a few things we need to do to the hull before we can even start in earnest. Firstly, I intend to fill the holes for the futtock riders, as they aren't present on the Stralsund Ship. We will keep the smaller riders at the fore and aft (although not on the Stralsund Ship) as they will be used as sheaves for the sheet and tack lines. One really egregious thing Revell did is have the modeler attach the shrouds to the futtock riders, although that system isn't present on the ship from the Elbing Seal (1350) which the ship is based on. We're going to add a short stringer across two of the deck knees in order to anchor the shrouds. The second thing that needs to be done is to remove those crappy excuses for timberheads at the bow and replace them with scratchbuilt card alternatives.

-
Hi Paul and welcome. I had a similar experience back in 2015 (I think), though I had built a few wooden boats/ships before. But on a trip to Maine I stumbled across the Bluejacket shop and made a u-turn just like you. I did not buy anything that day, but ordered the Swampscott Dory after I returned home.
-
I have a counter-point regarding your assessment about the planks. The entire Northern Tradition is descended directly from viking vessels, and furthermore, without much evidence from the Bremen Cog, I also think the planking question remains unsolved. Bjorn Landstrom seems to argue throughout the cog section of "The Ship" for the traditionally-laid parallel plank approach. His book, however, was written a year prior to the discovery of the Bremen Cog. Another point is that the Stralsund Cog is closer in time period to the Nef than it is the Bremen Cog. You could expect a few things like planking and rigging to be more similar to nefs than they would be to later cogs. That's almost like using the Bremen Cog as an authoritative source for a model of a ship from 1480, which you can't really do. I might go the heart route when it comes to the shrouds and stay. I'm already going to be doing a bunch of scratchbuilding for this project; I'm not building an entirely new deck. You should definitely follow this, as your input will be more than helpful as it usually is.
-
Jeronimo reacted to a post in a topic:
LE CENTAURE 1783 by Jeronimo
-

Greetings from Washington state, USA
catopower replied to Paul B.'s topic in New member Introductions
Welcome, Paul! I built the Swampscott Dory a loooooong time ago, the latter part of the First Age, I think. That's a beautiful boat. I was even thinking of building another one after all this time. I recall mine ended up with a slight twist in the hull. Not noticeable at all from the side. But, when you look from the ends, you could see it. Hope to see yours either in progress or finished, or both! -
Steve, I love your model and it's stylish appearance. Prince de Neufchatel was always one of my favorite subjects. Hope to build her someday. In the meantime, I'll just stare at yours!
-
 I have to admit to being a bit lost at sea for the last 6 weeks. Spars and rigging are a far greater challenge then I expected. With no plans I am floundering. I have resolved to rig what I understand and hold off on what i don't. An example of an issue is the jibboom inhaul and outhaul. I know they exist and were used. Do they stay rigged or only when they are needed? Serving. So much is served. At 1/58 scale do I need to serve the lines for my first build, or is an appropriate diameter line 98% of the battle? Anyway, I have built out the bowsprit according to Lever. Spritsail yard according to Chapelle. So a little progress anyway. (Open to any thoughts here!) Gammoning the bowsprit and rigging the bobstays is coming next.


-
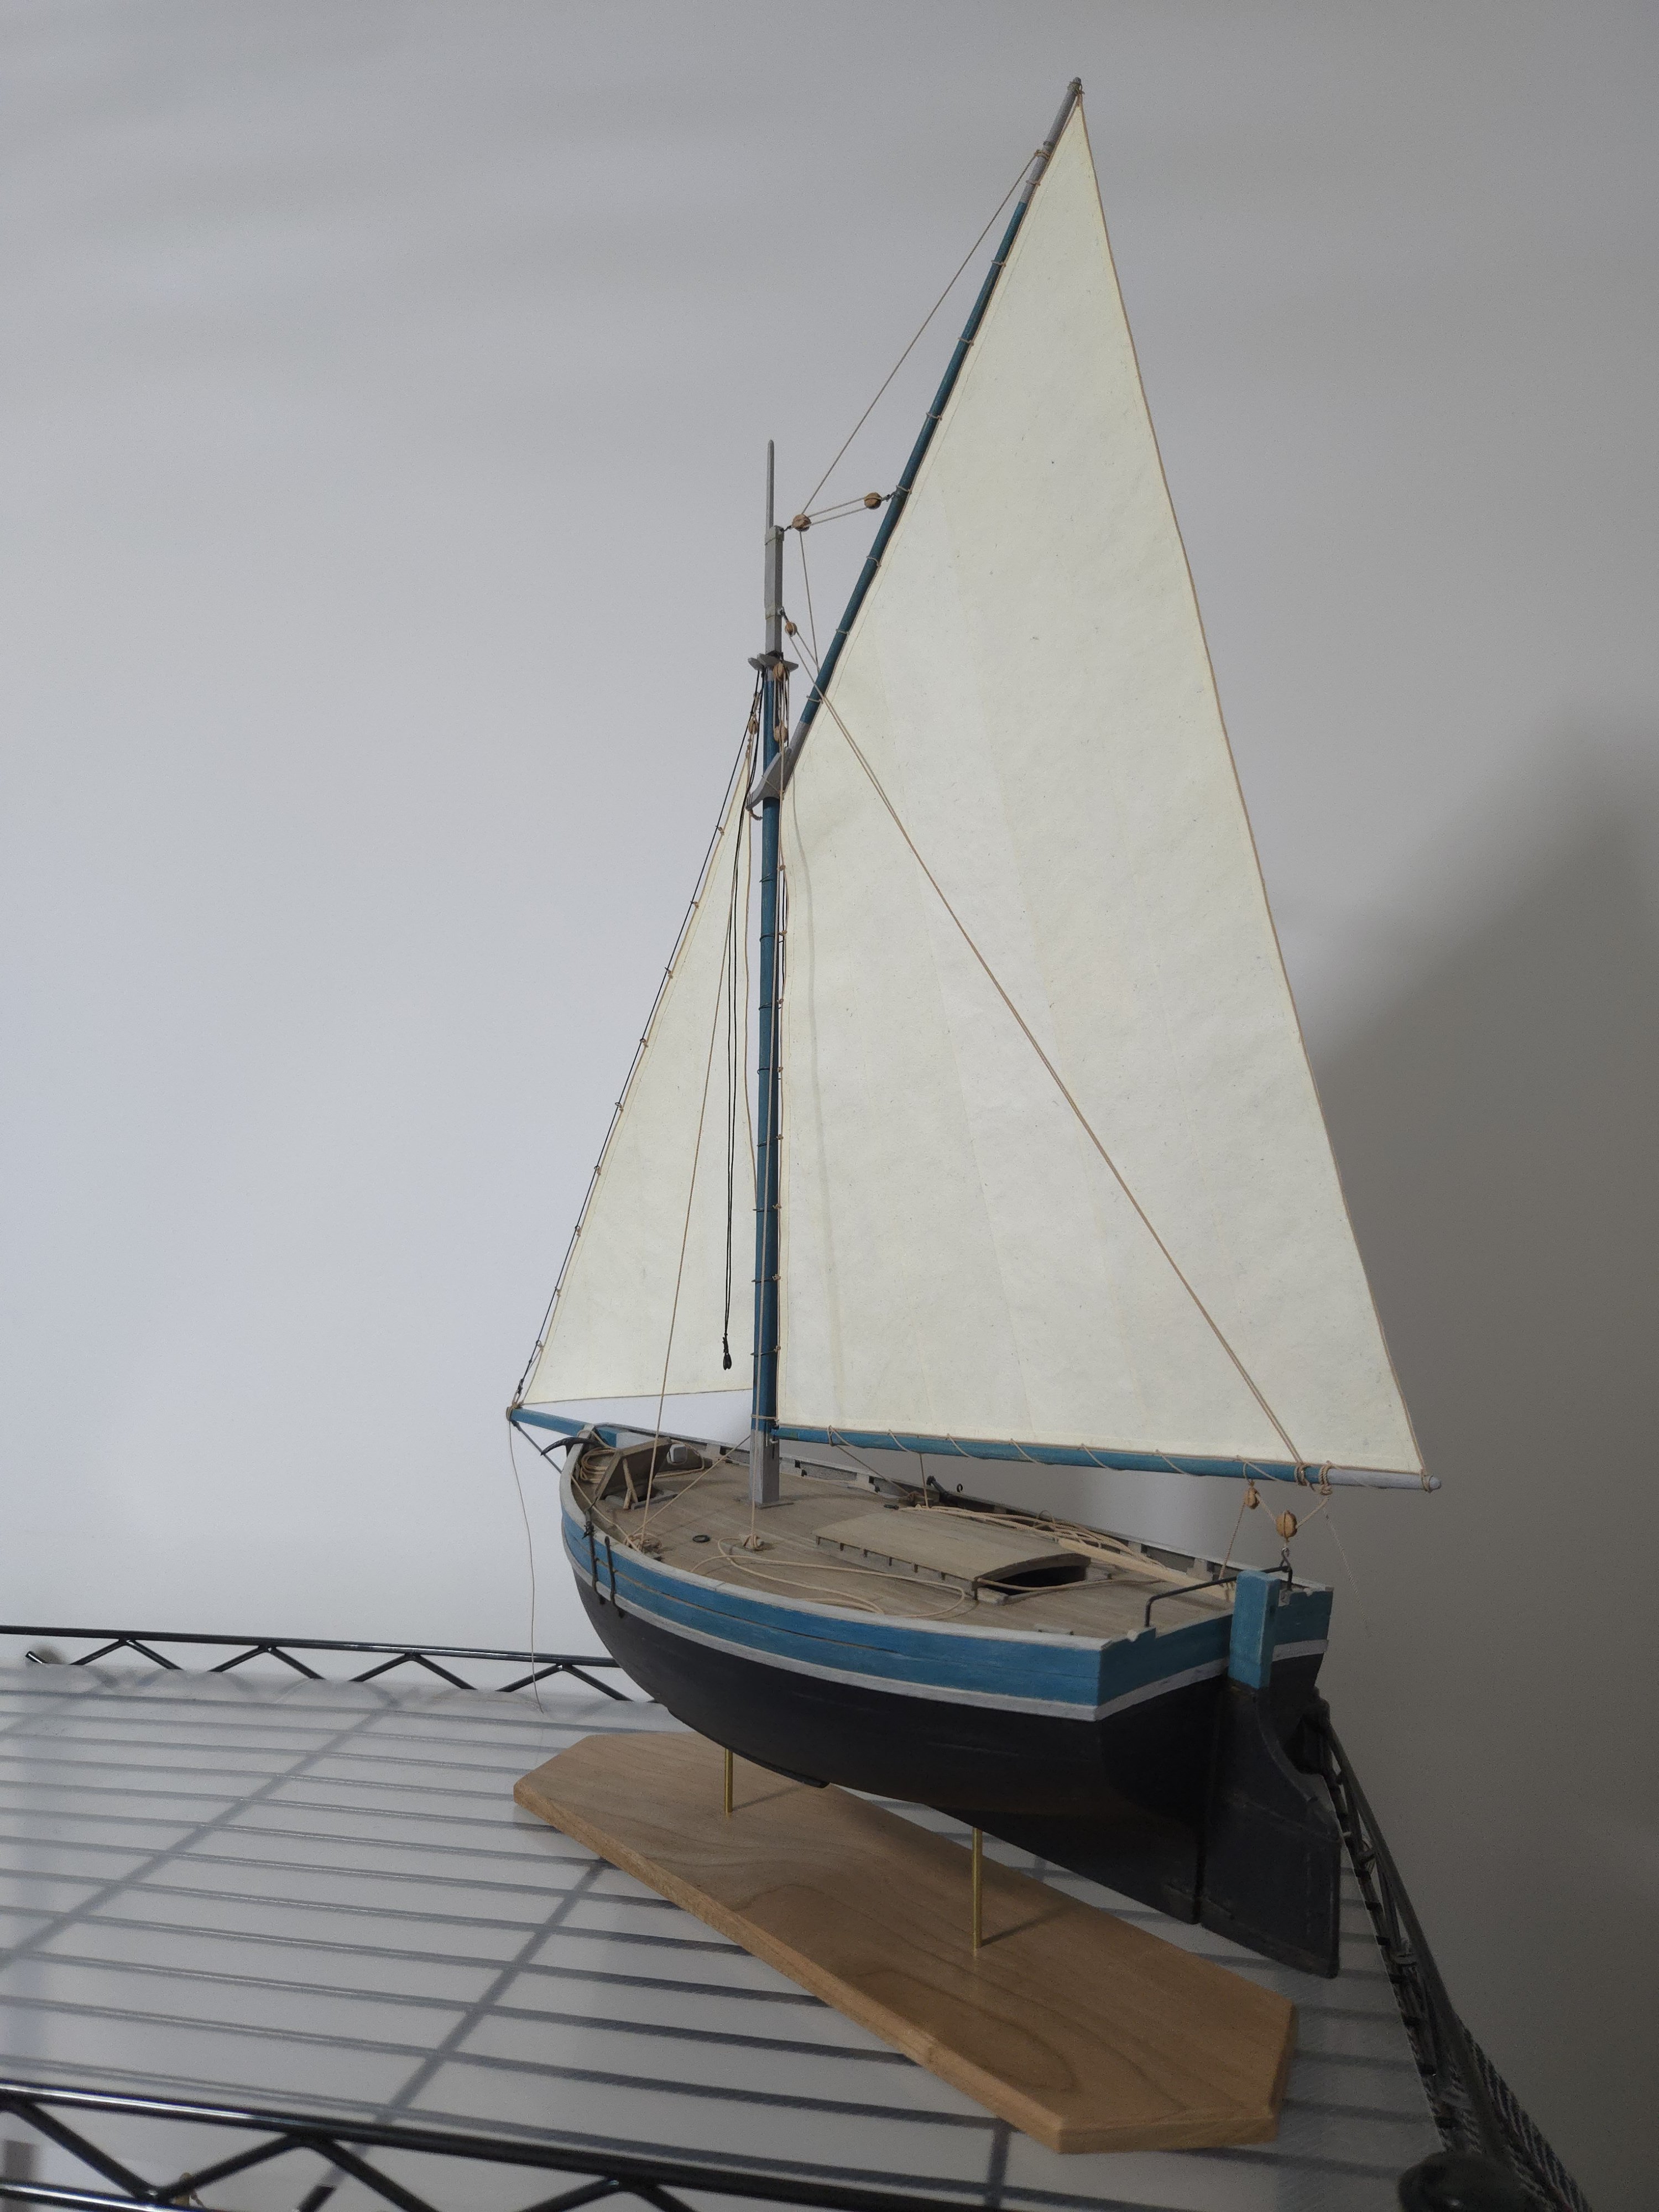
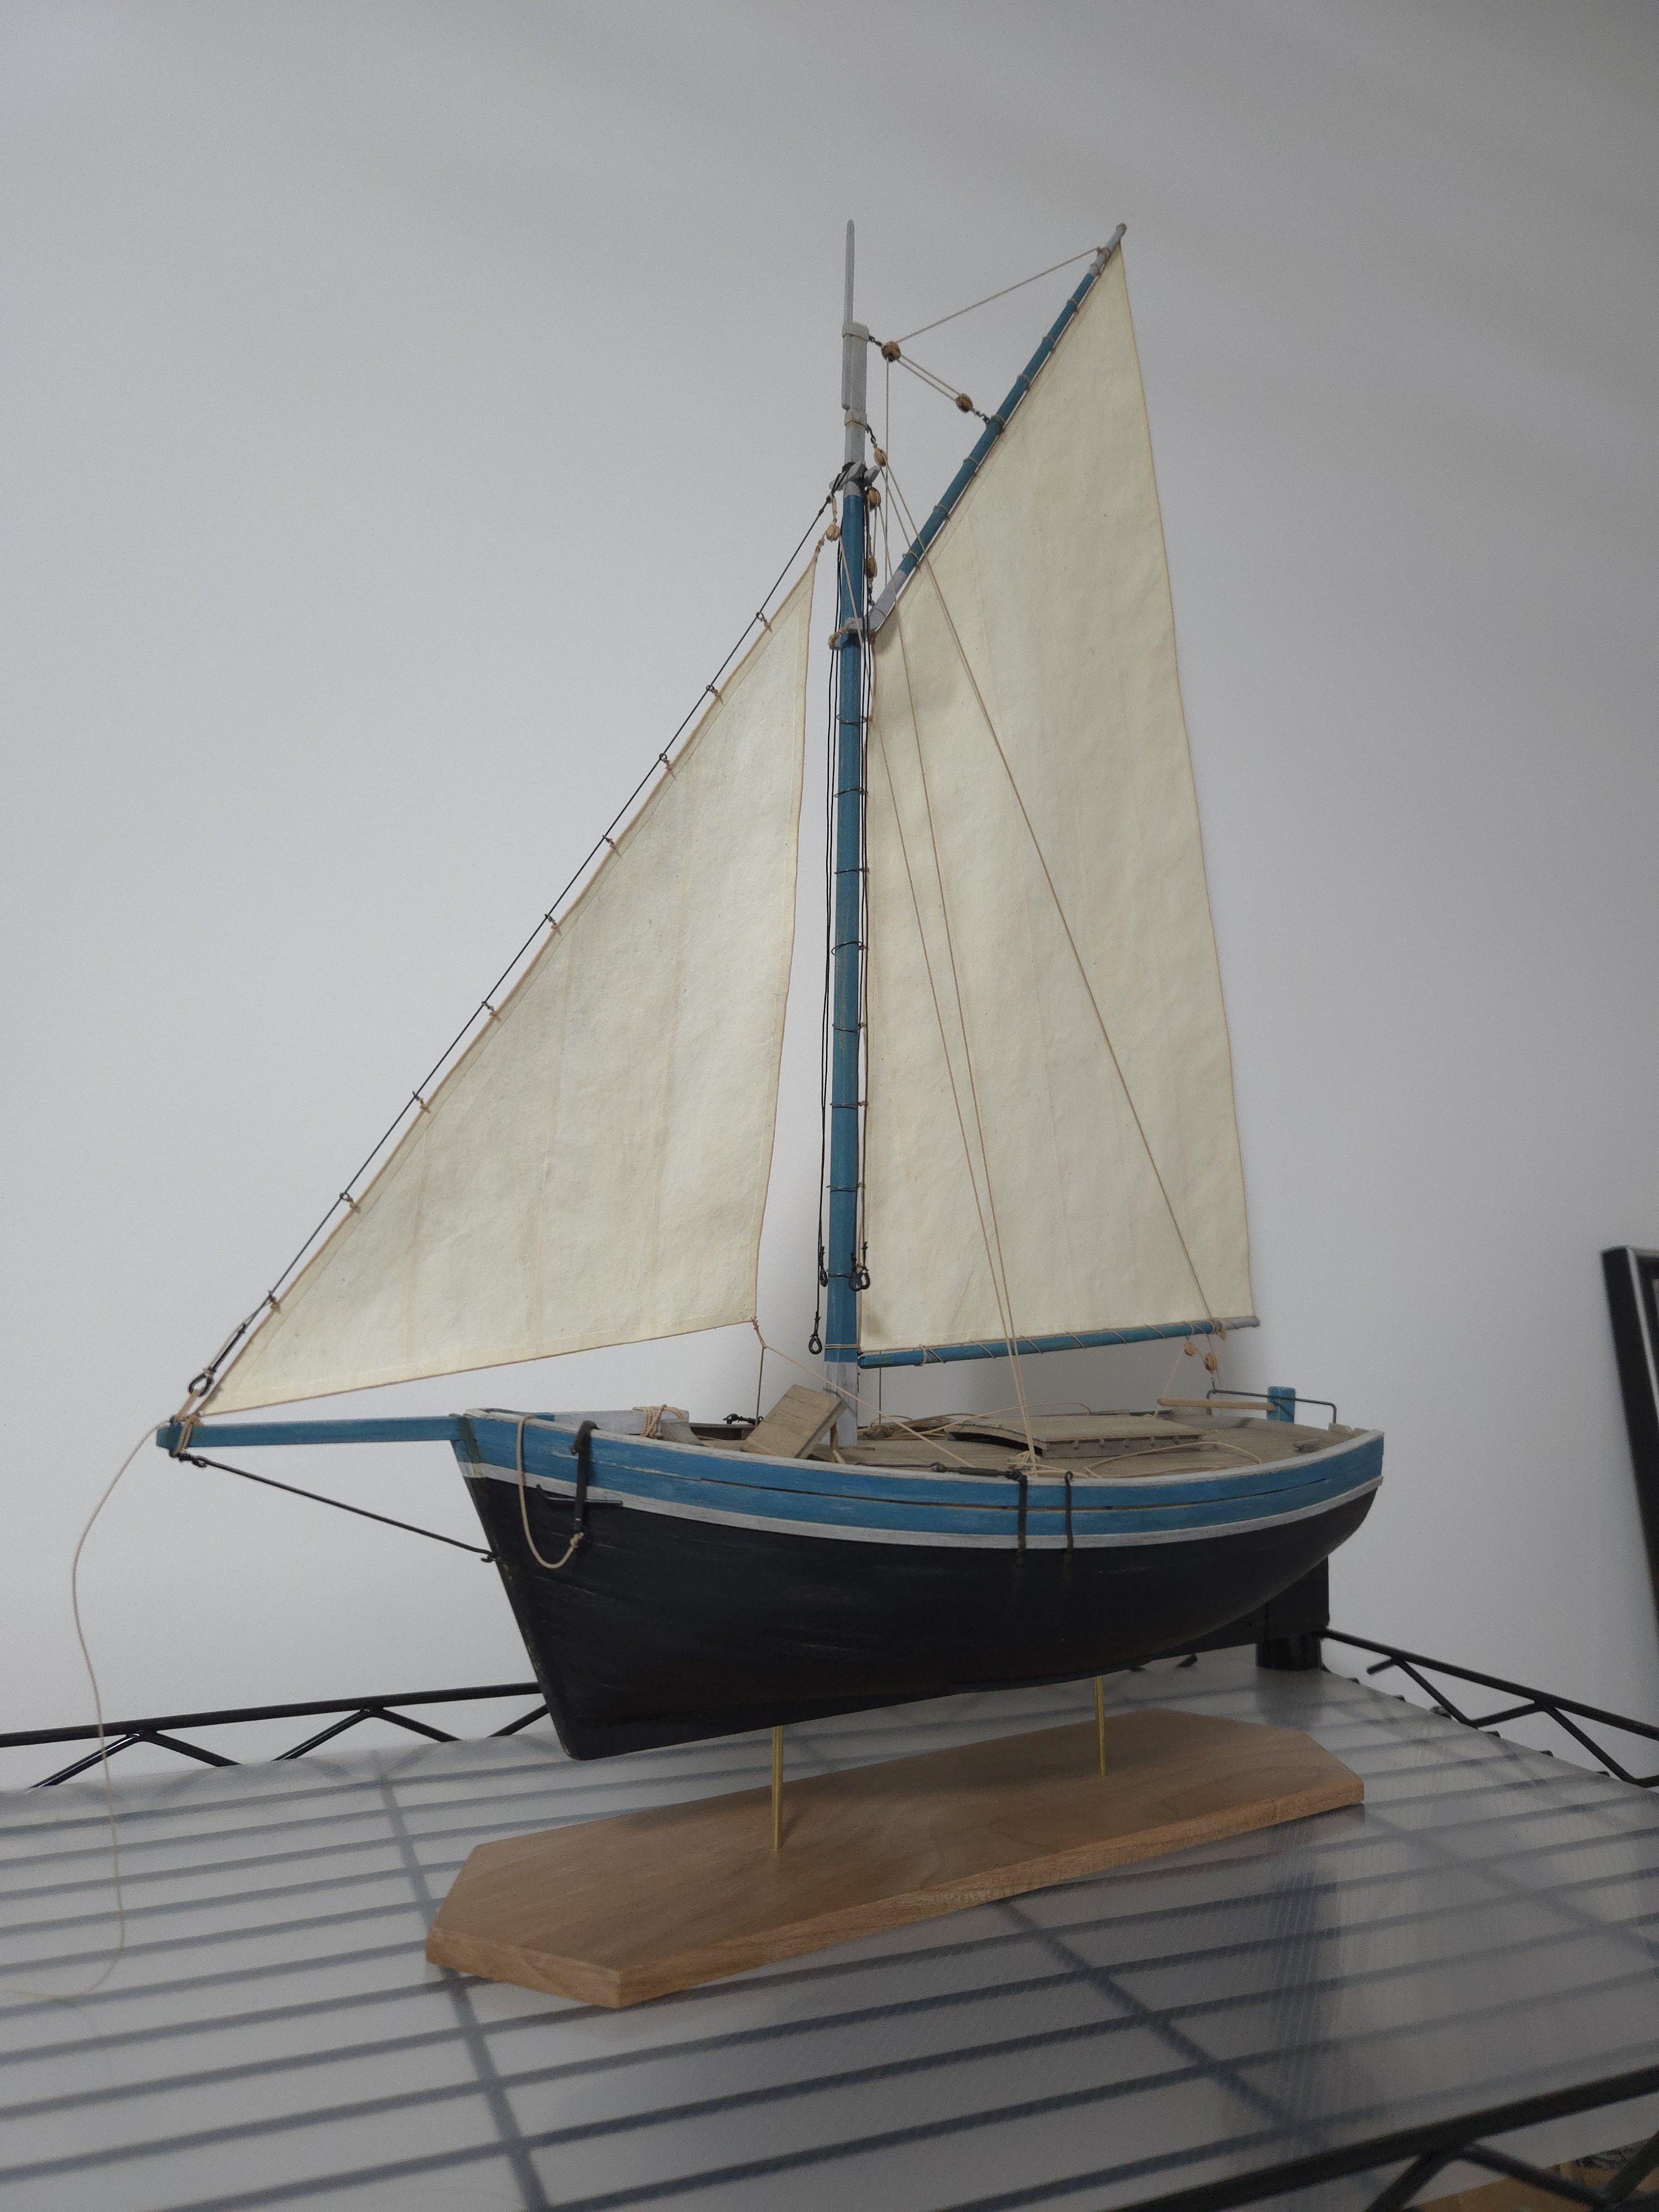
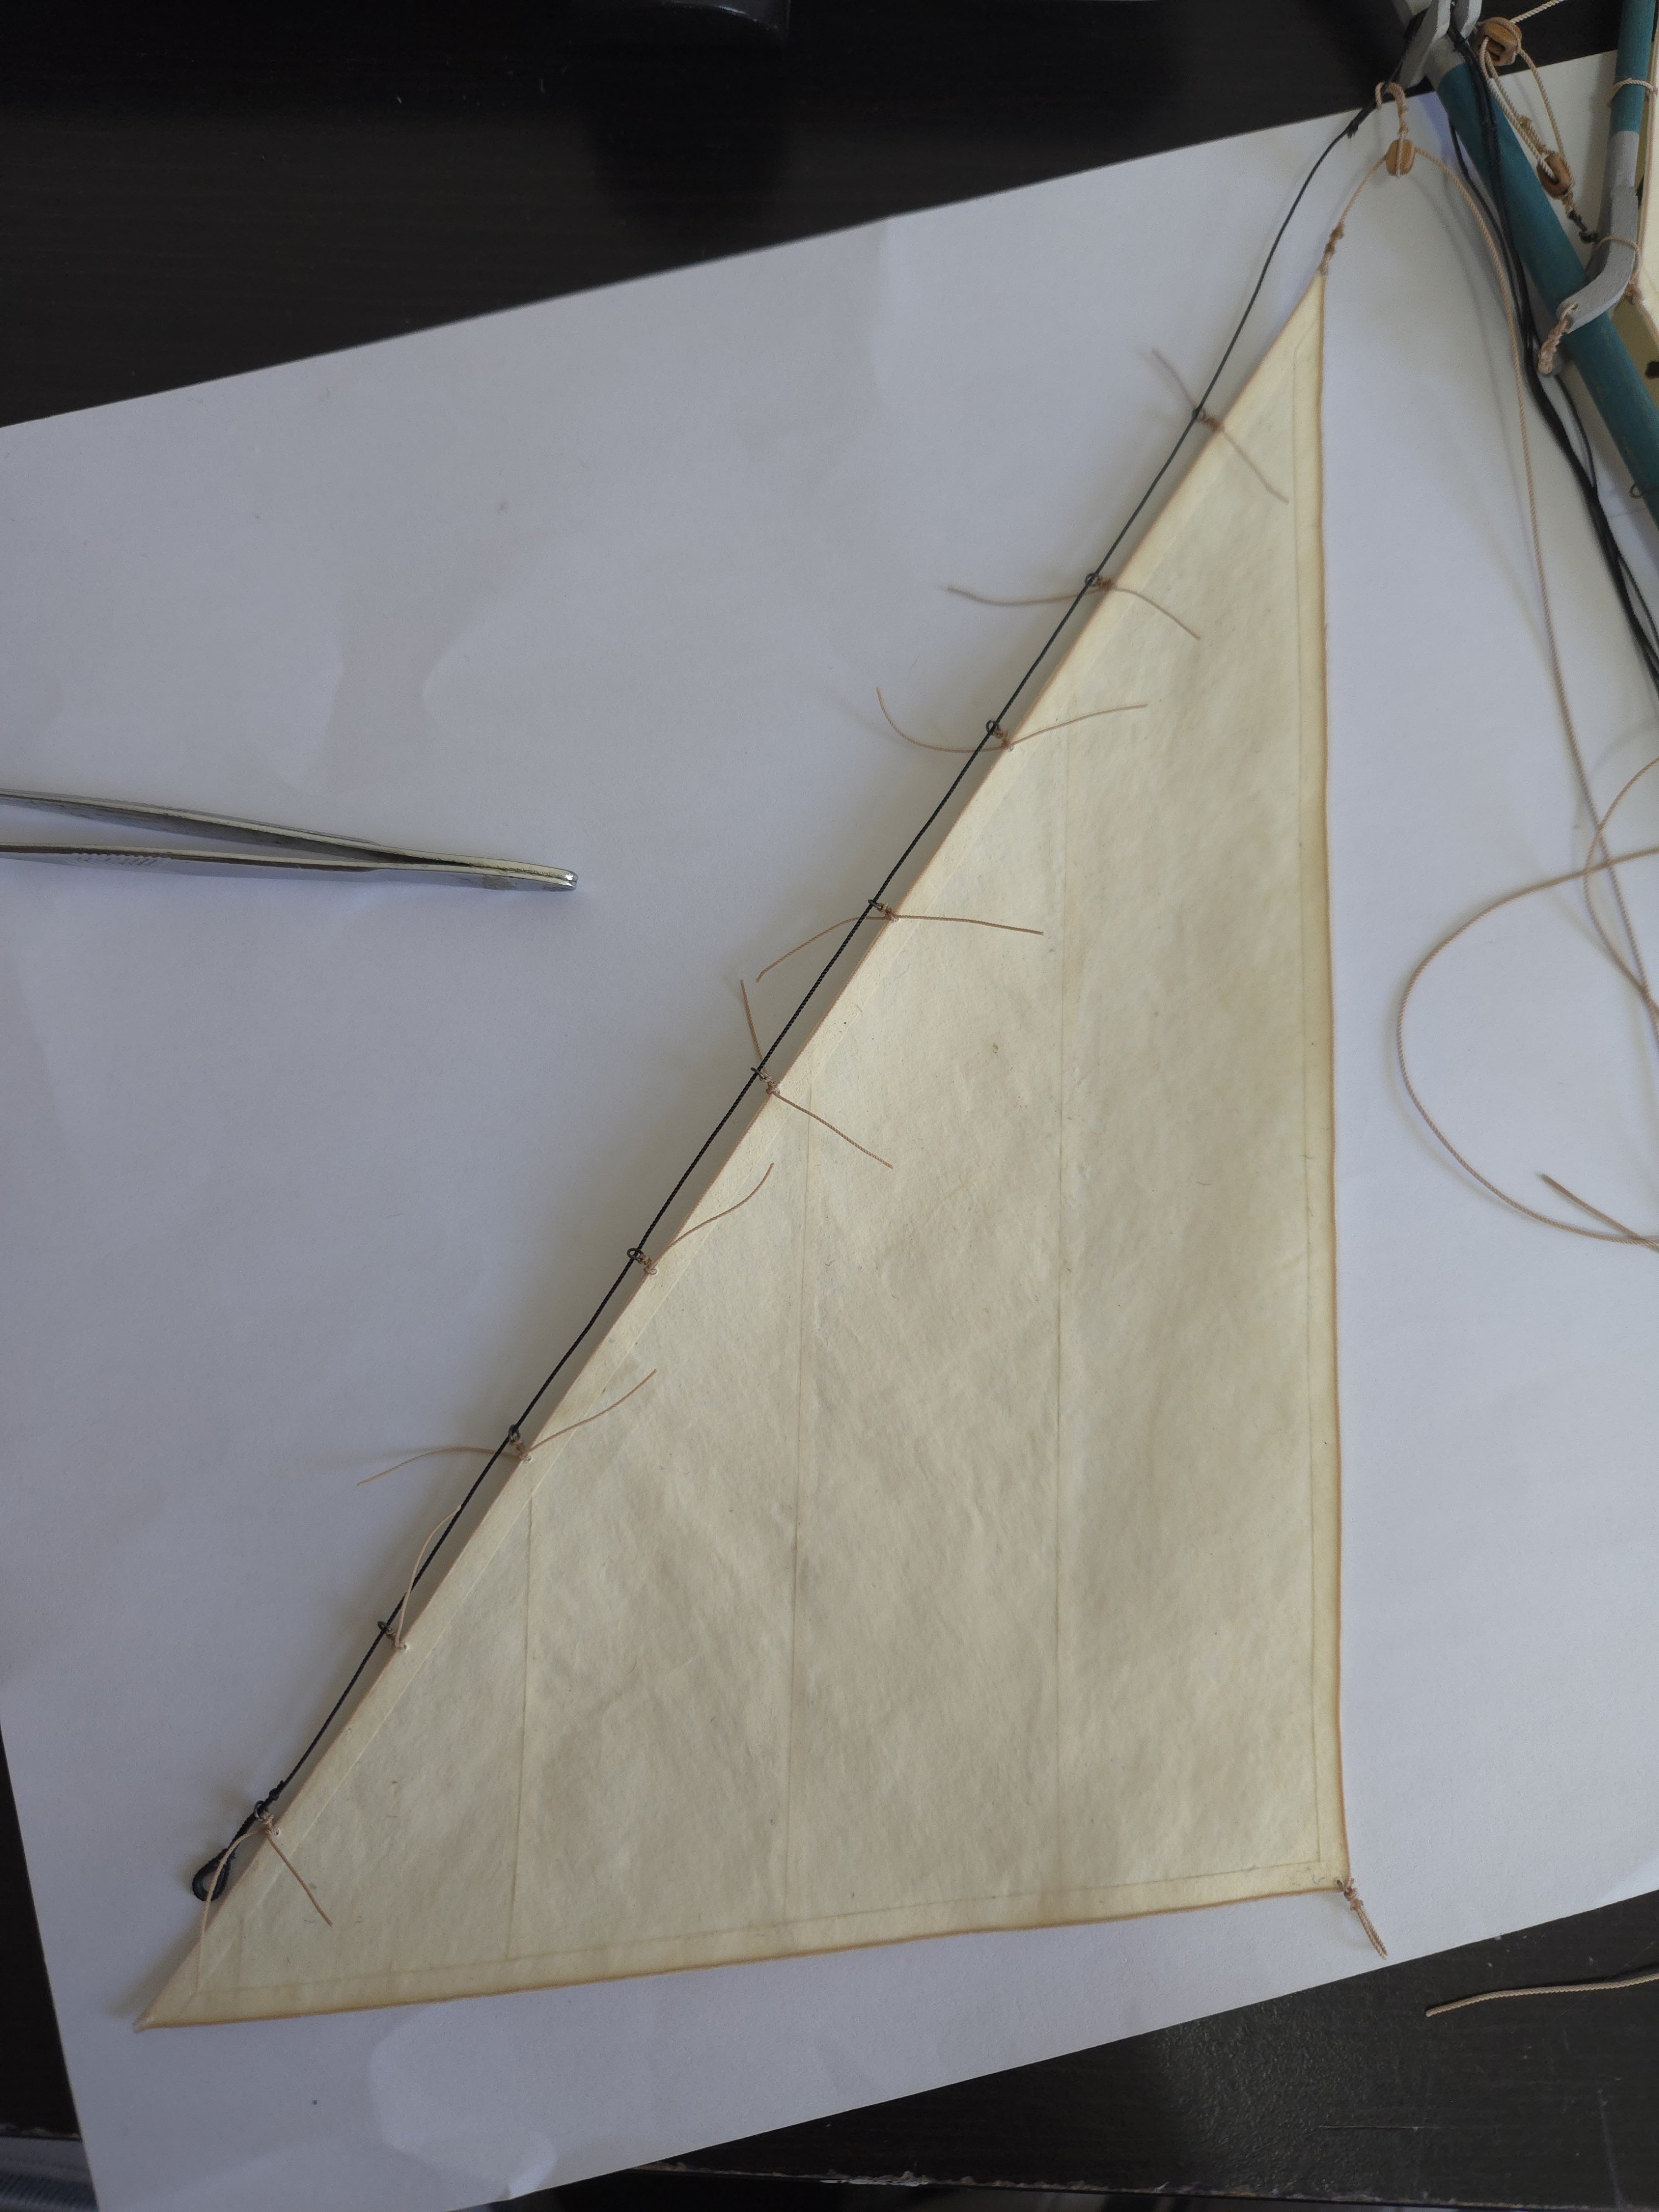
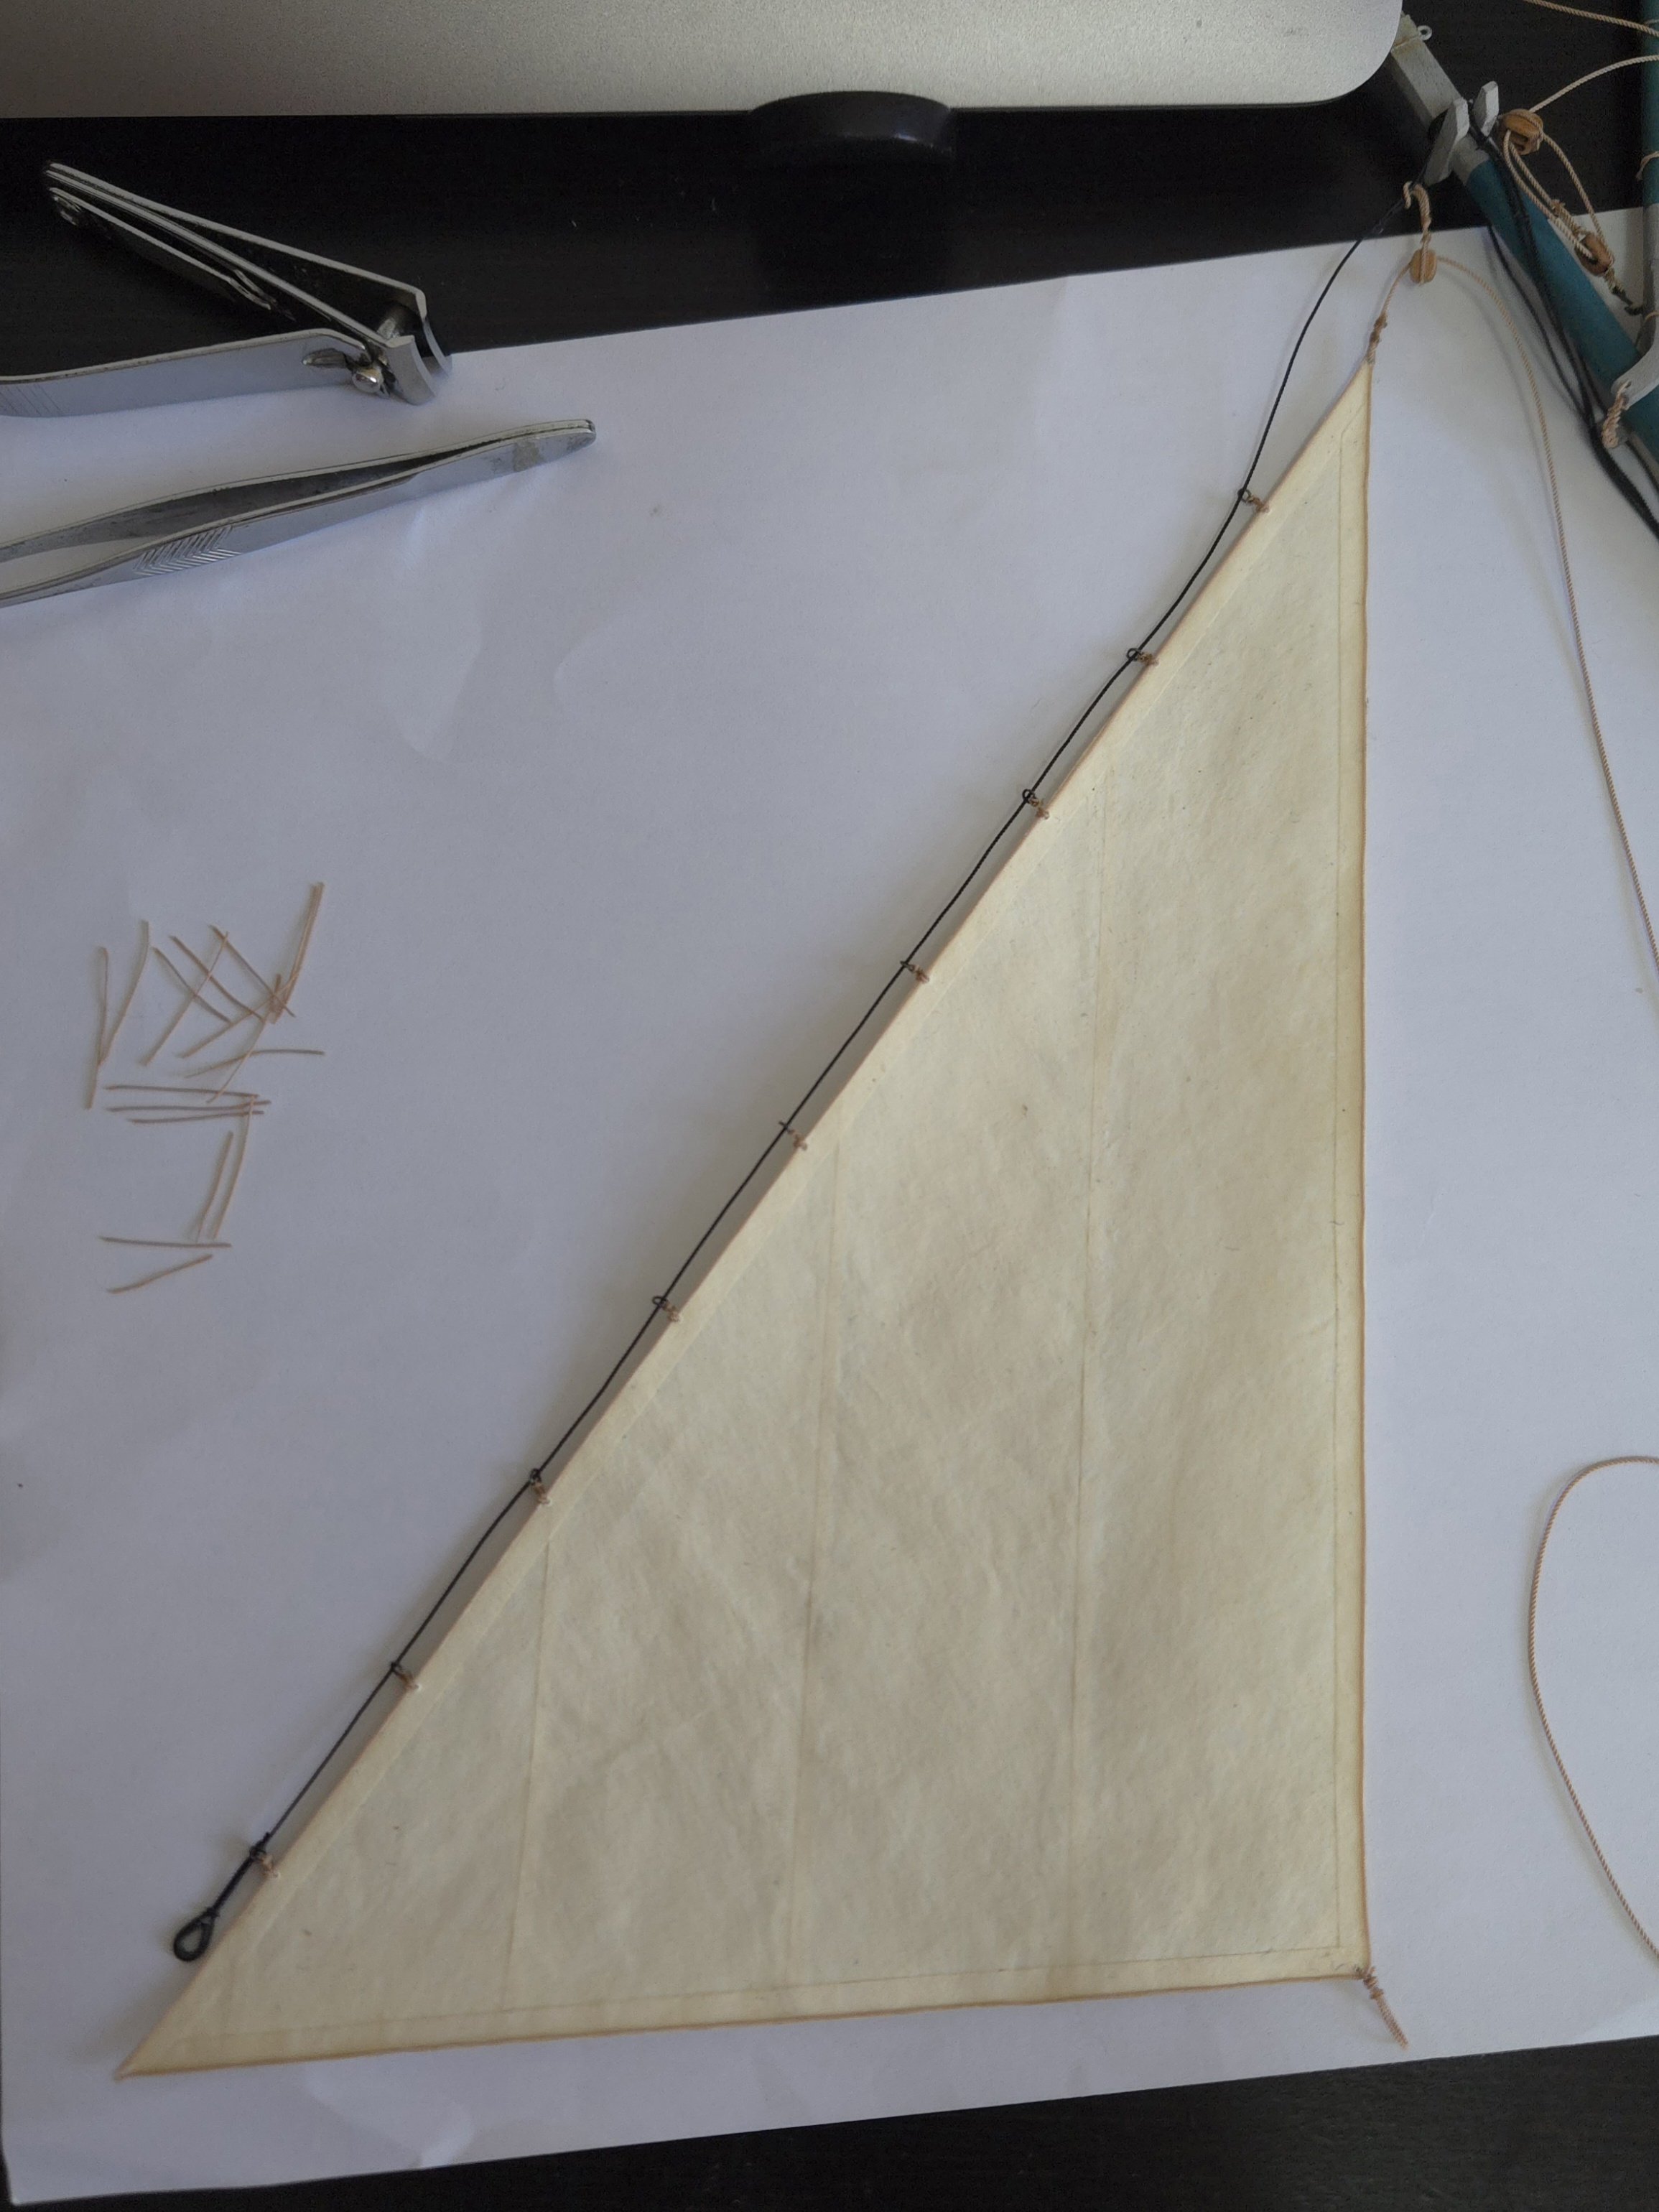
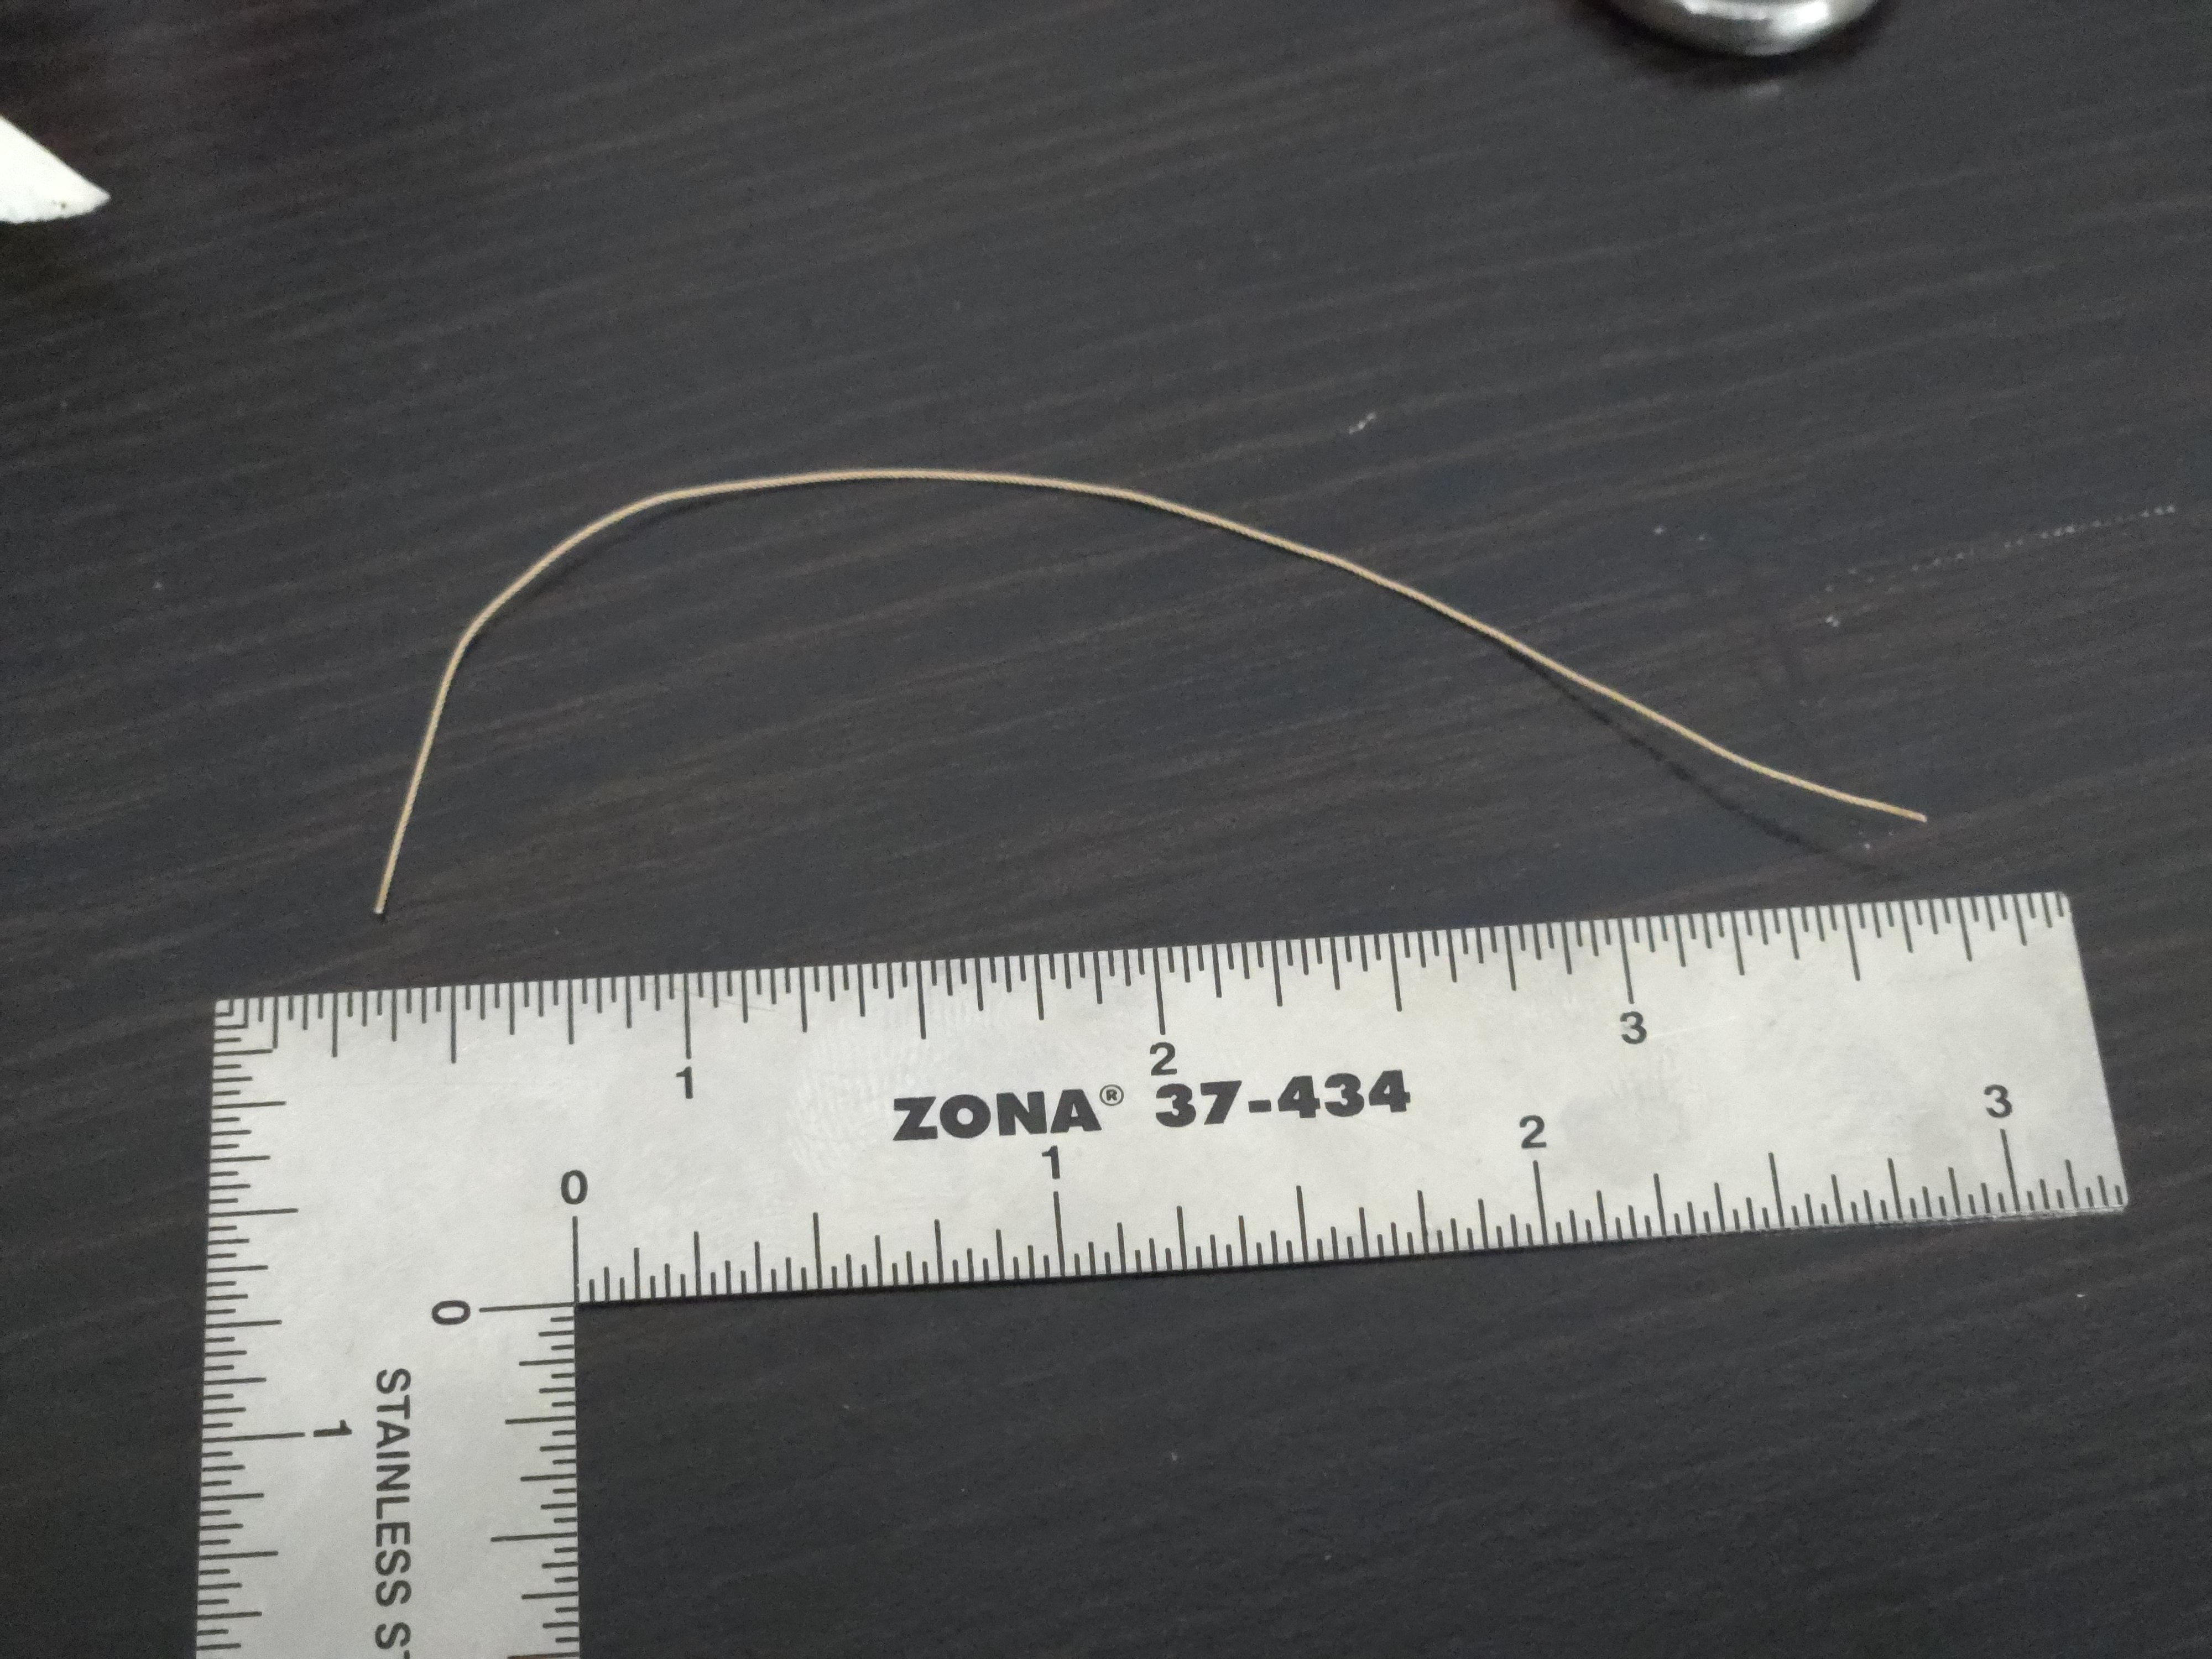
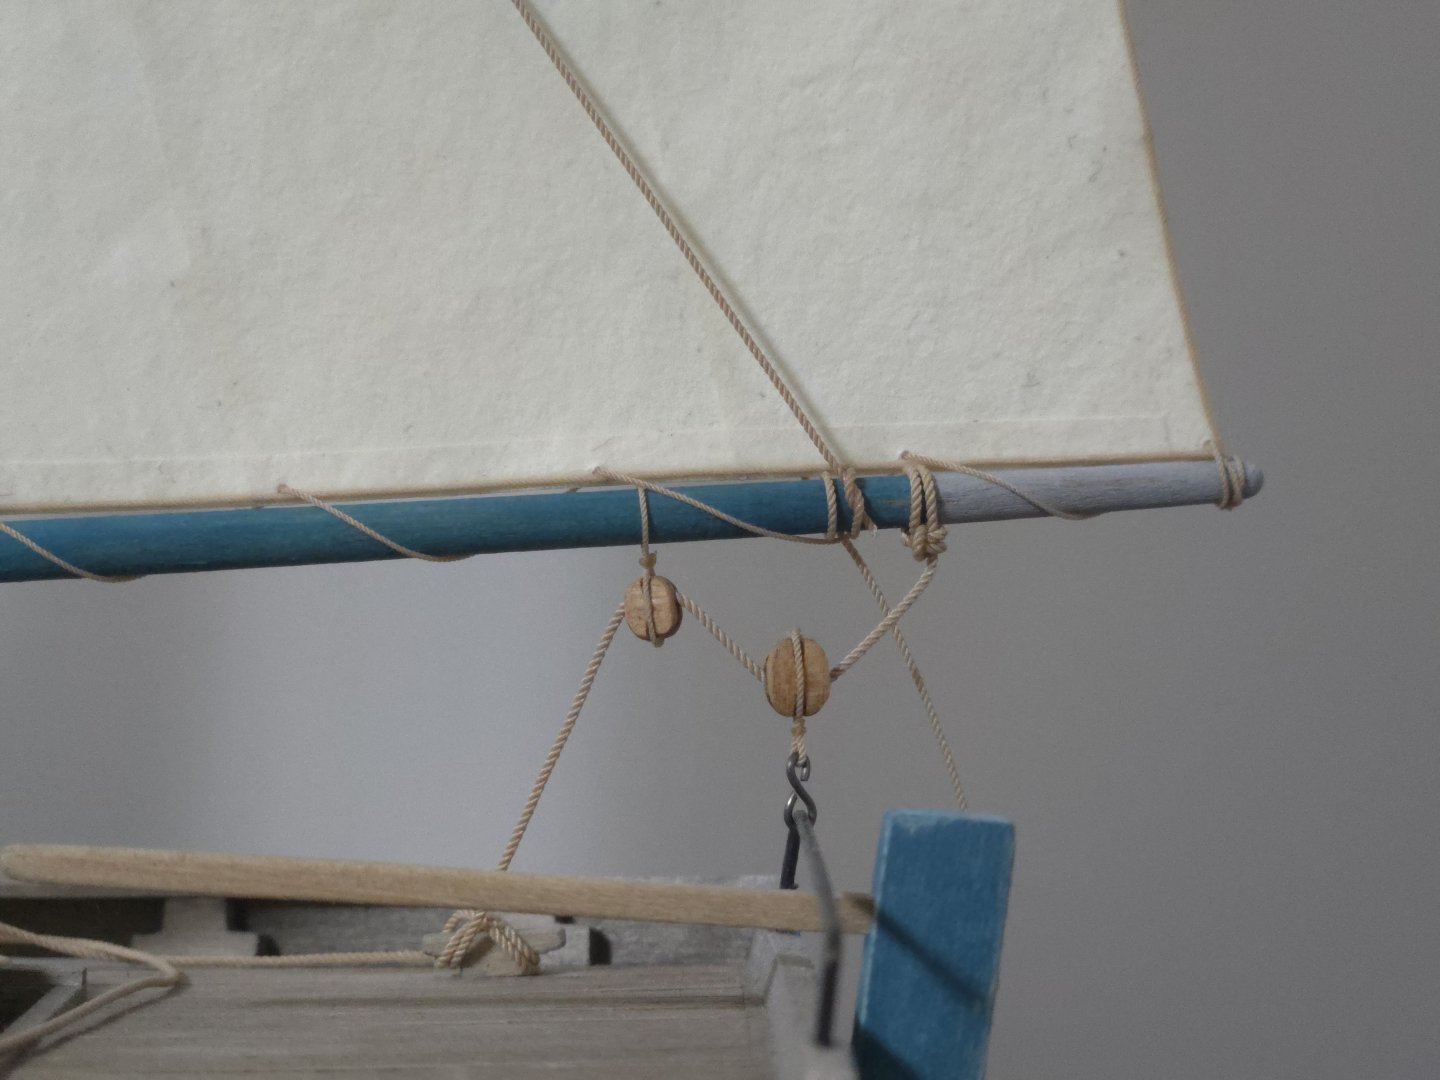
 Bending the jib to the forestay was a little tedious but nothing too difficult, just a lot of tiny knots. I was lucky that they all turned out all right. After finishing, this was the total amount of .35mm rope that I had left: After getting as much set up off the hull as possible, it was finally time to step the mast. This was a very exciting step, as I finally got to get a good look at the model with sails in place. After looking at quite a few photos and other build logs and the like, I did my best representation of the lanyard joining the forestay to the bowsprit. I also tied off the tack of the jib, the rope for which, following photographed examples, wraps around the bowsprit (I threaded it through the lower eyebolt to make doubly sure it would stay in place, although this aspect wasn't very clear in photos). For now the lanyard has been left long, so I can adjust it if I need to. For the lifts, I ultimately decided to go with the .5mm rope instead of. 45mm. I think it definitely looks better, but I'm still debating whether the mainsheet should be cut off and swapped out for one made of .5mm rope instead of. 6mm, I feel like it might just look a little too bulky. One end of the lifts (which, following photos, are simply tied around the boom, rather than being fixed to a cleat or something) has been left long for now so that I can easily tighten it if the line starts sagging as it stretches. At the moment, the line is all very long and just loosely piled on the deck. I need to figure out a convincing way to leave it--they definitely didn't use neat coils on these vessels. I also need to tie off the shrouds with lanyards, although this might make more sense to do after finalizing the running rigging so that I have more room to work. I have to admit that I'm very pleased with how this build is coming along. Thank you very much to everyone who has added a like, left a comment, answered questions, or otherwise offered support on this model.
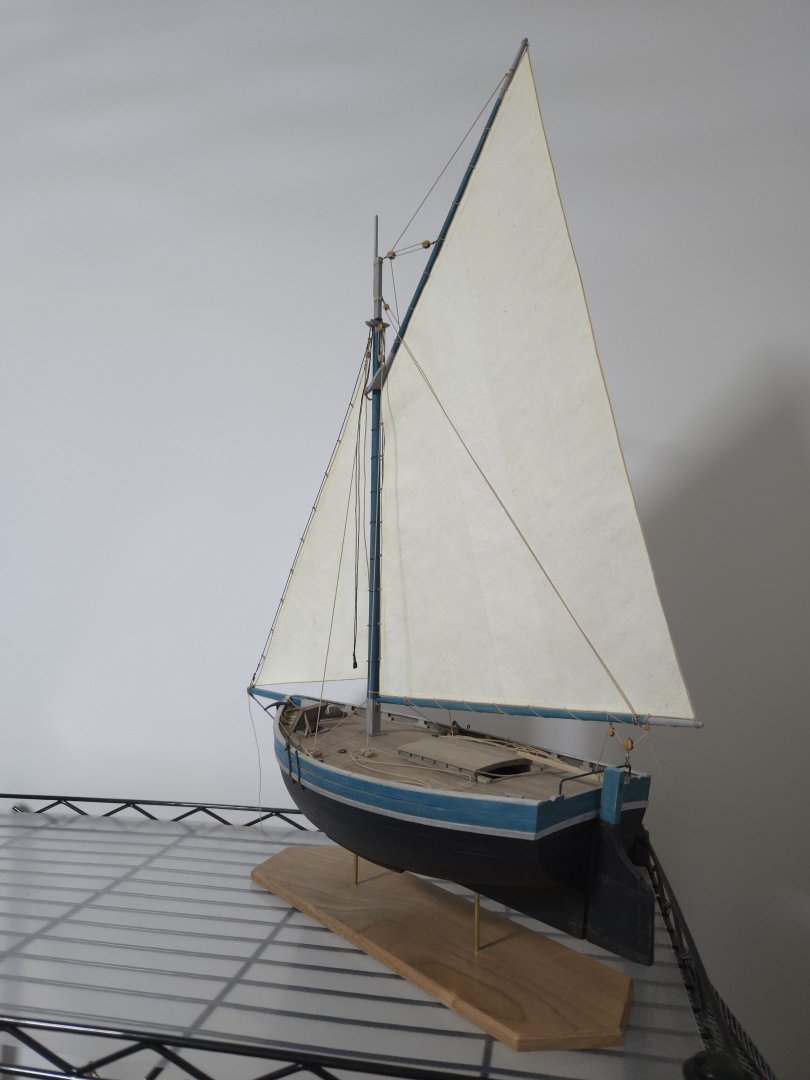


- 288 replies
-
- 1
-
-
- Chile
- Latin America
- (and 5 more)
-
 Interesting question. I was actually surprised to find true deadeyes as early as 1380 - I hadn't thought they'd been developed by that time, and contemporary illustrations (yes, I know they're not necessarily reliable) don't show them at all. I'm afraid you'll have to decide for yourself whether the Stralsund cog had them. Regarding deck planks, I doubt that the Viking method of planking was also in use further south - certainly the framing is completely different. The only planking apparently found on the Bremen cog was on the afterdeck, and its side to side, not fore and aft. The orlop(?) deck beams can also be seen, and they are oriented such that the planking would also be side to side. I don't think the through-beams can be relied upon as a gauge of the planking direction, as the attached photo shows - they don't seem to have any relation to the planking. Personal opinion, however - in the absence of any evidence to the contrary, I would be quite happy with the idea of the main planking running fore and aft. Steven
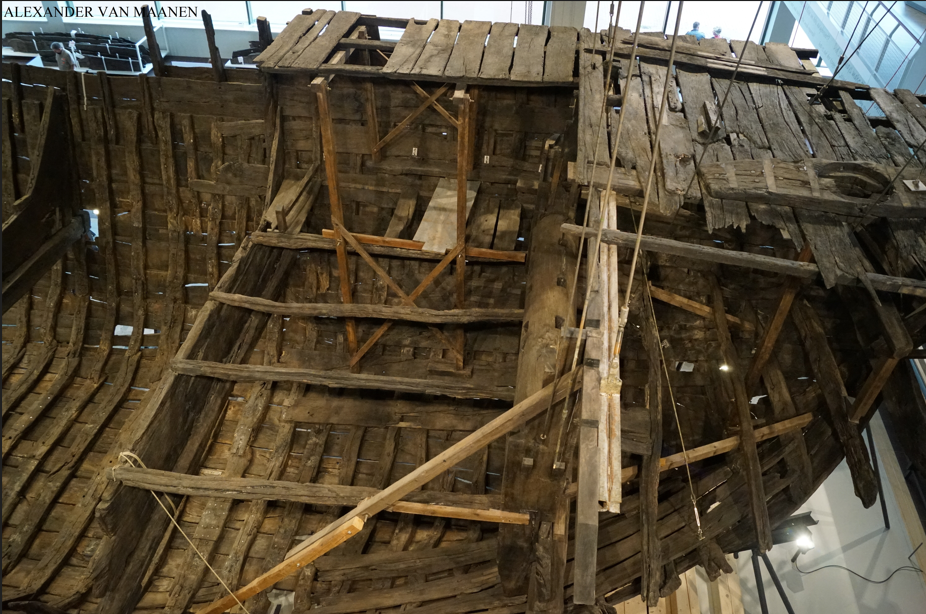
-
Whining ended yesterday. Today it’s back to work. I don’t have any varnish to train th plywood walnut, so I decided to go ahead and plank th inside of my homemade bulwark.

-
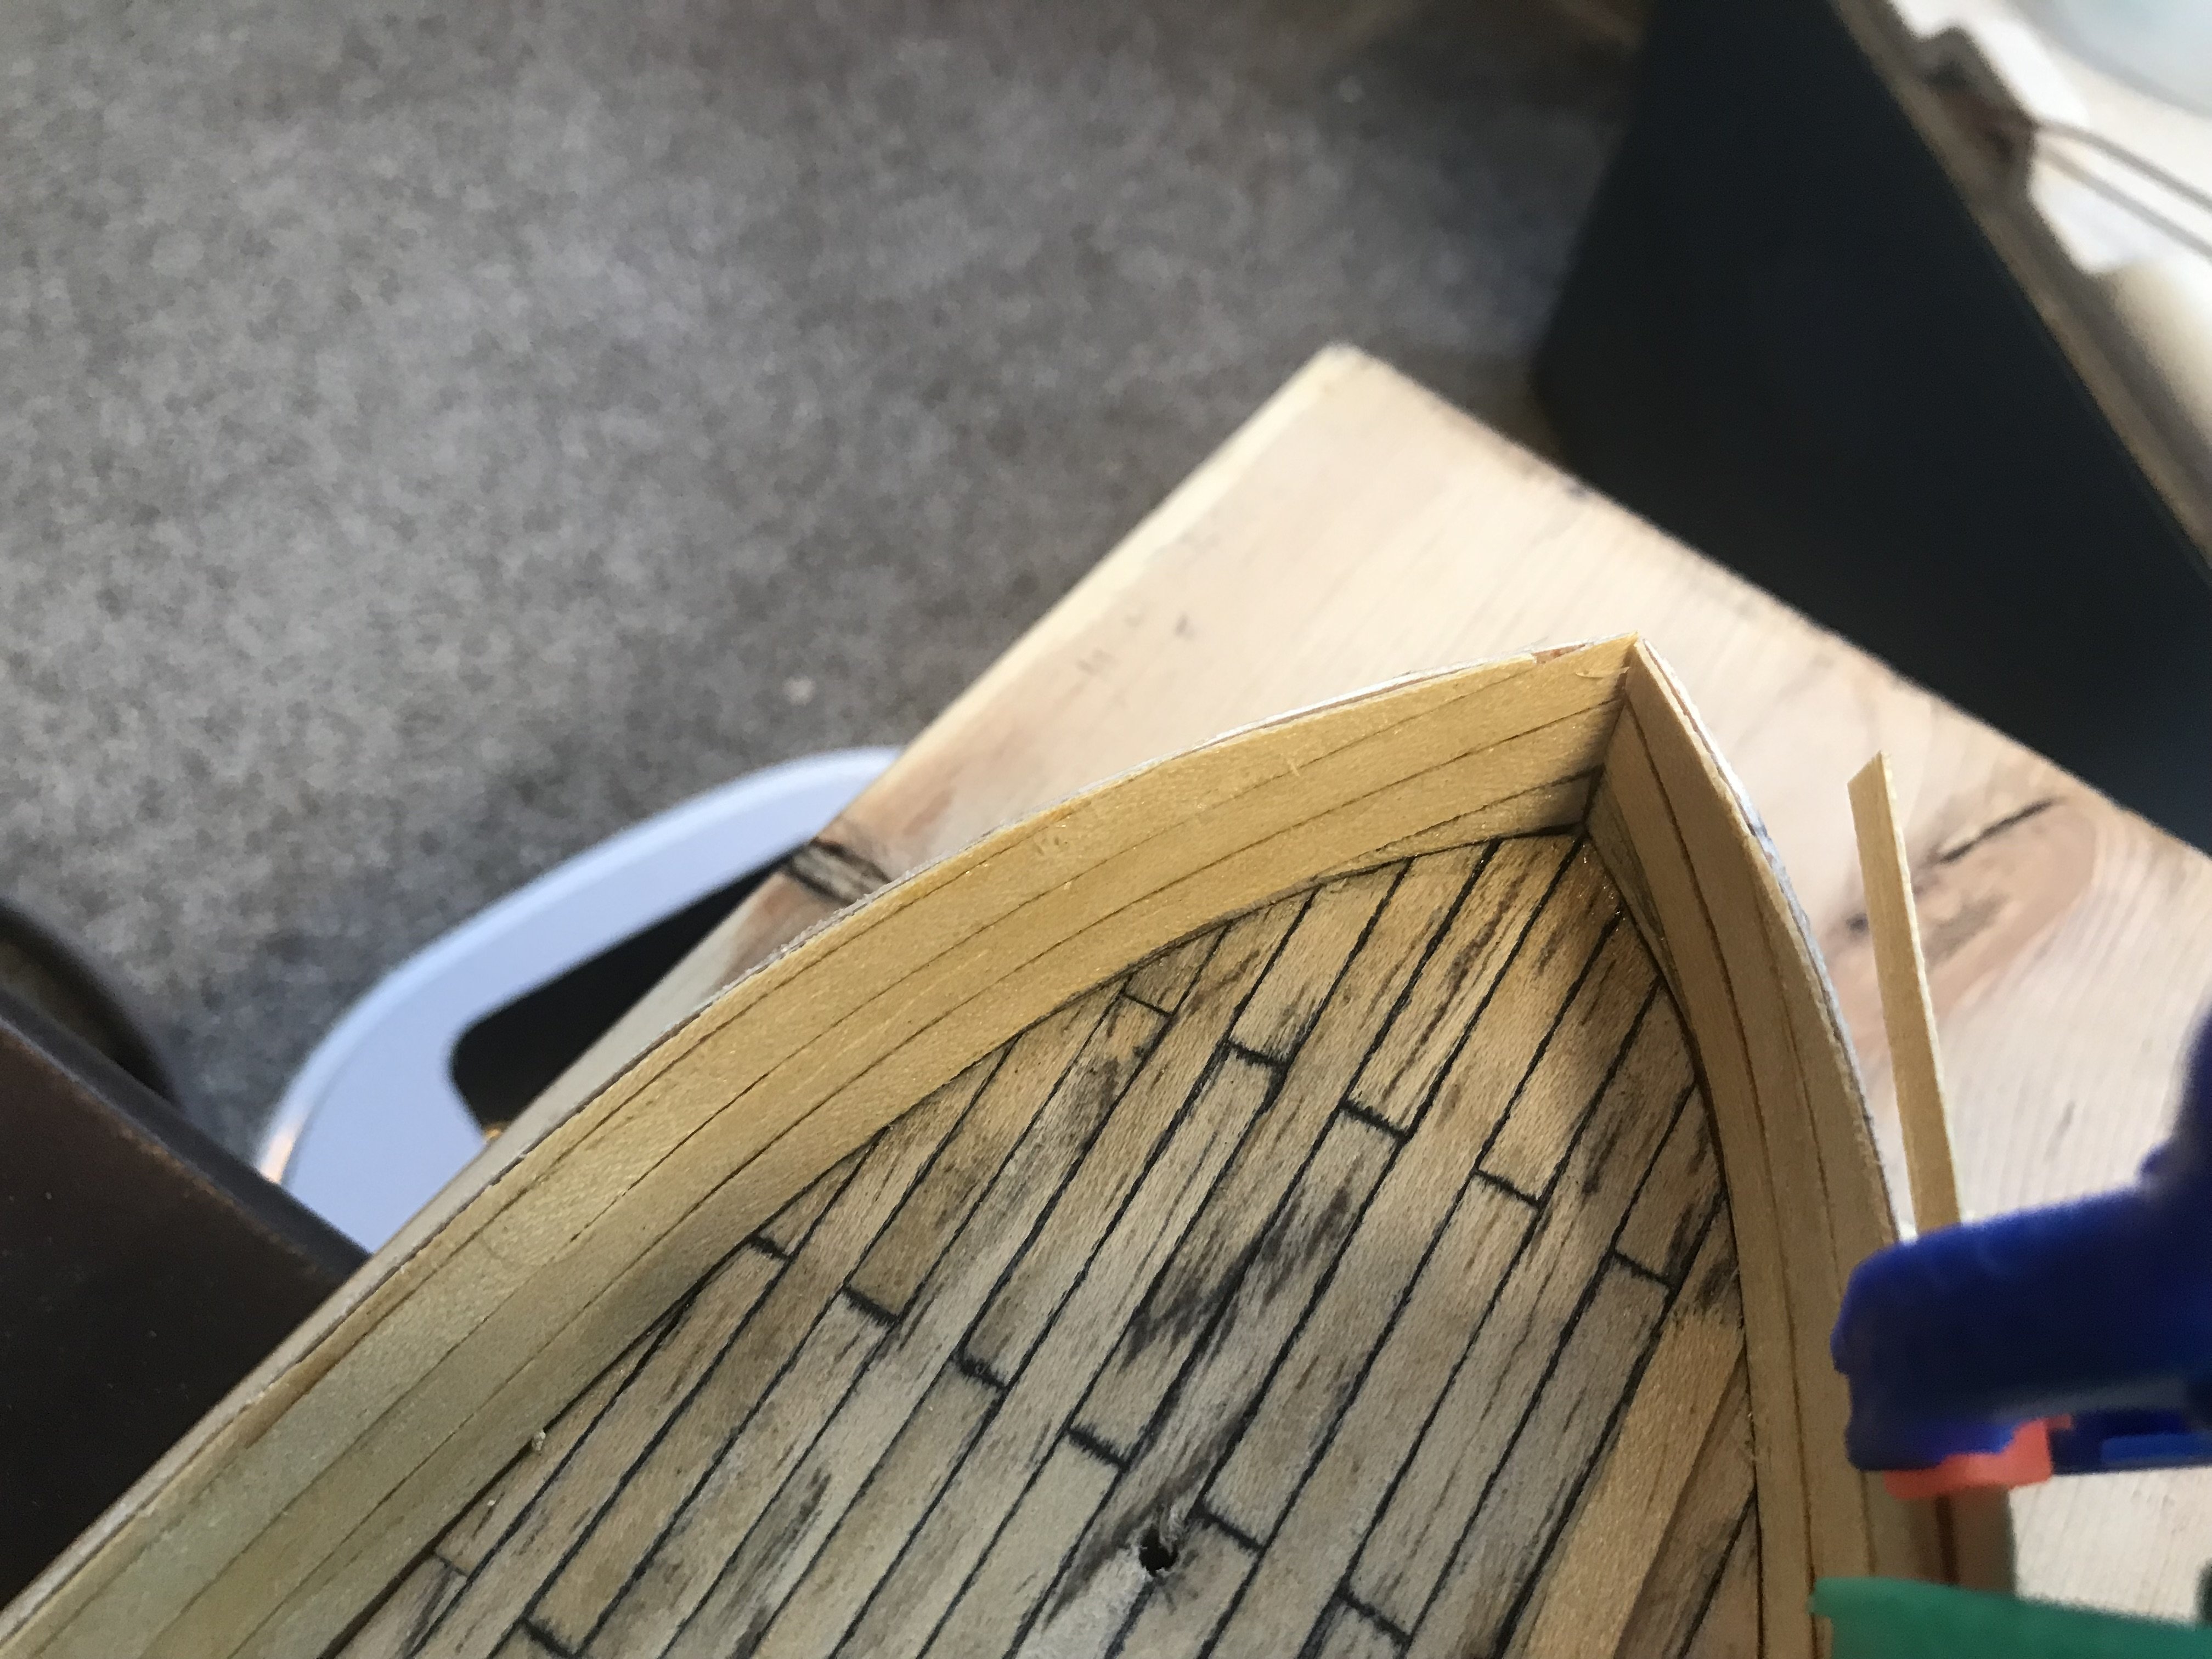
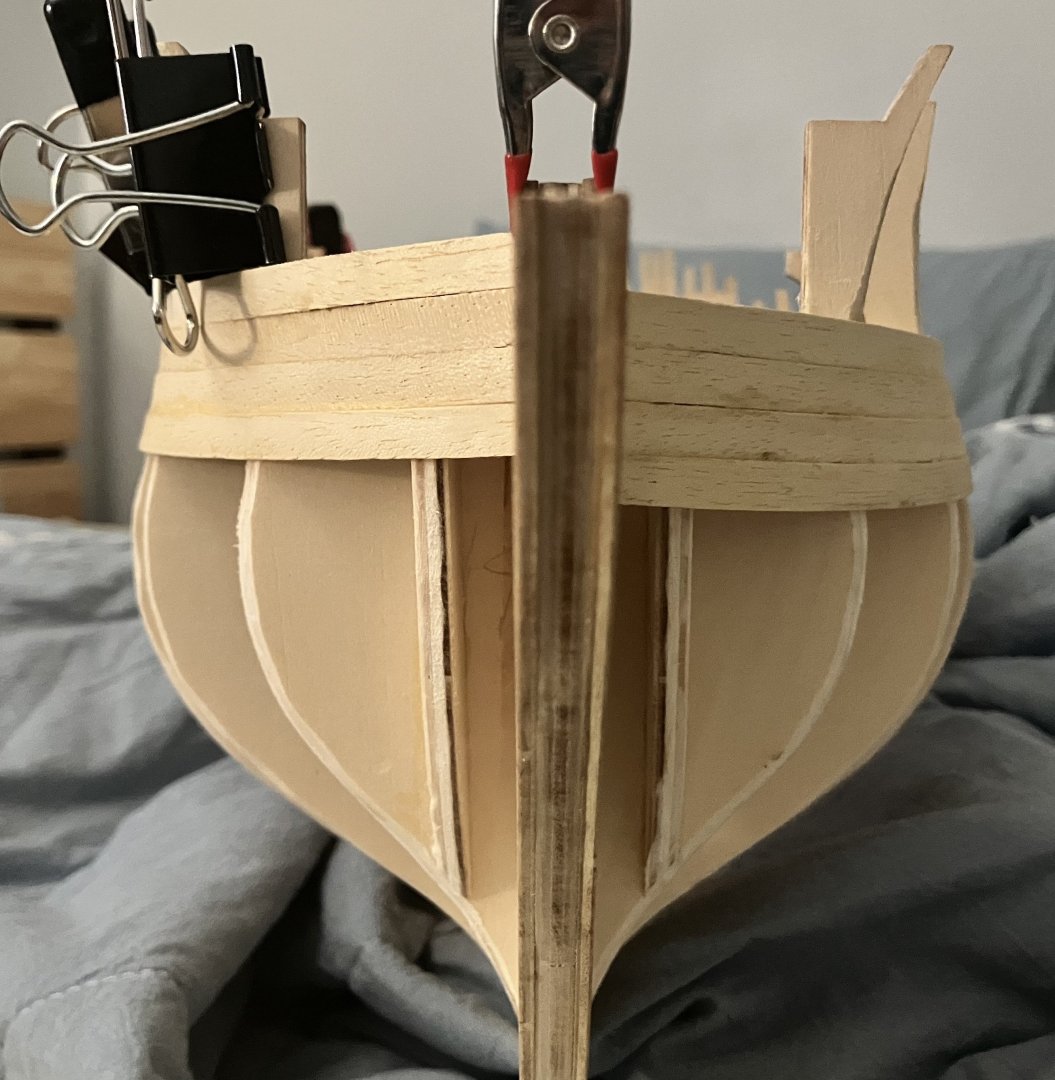
 Bouncing around a little, while forming some of the top planks around the stern, I planked the fore deck. Old t-shirt material works well for clamping, much better than rubber bands in my opinion, especially since you can easily control the tension and get a lot of coverage. Seen in the back the material is not just holding the plank flush with its lower neighbor, but holding it to the curve.
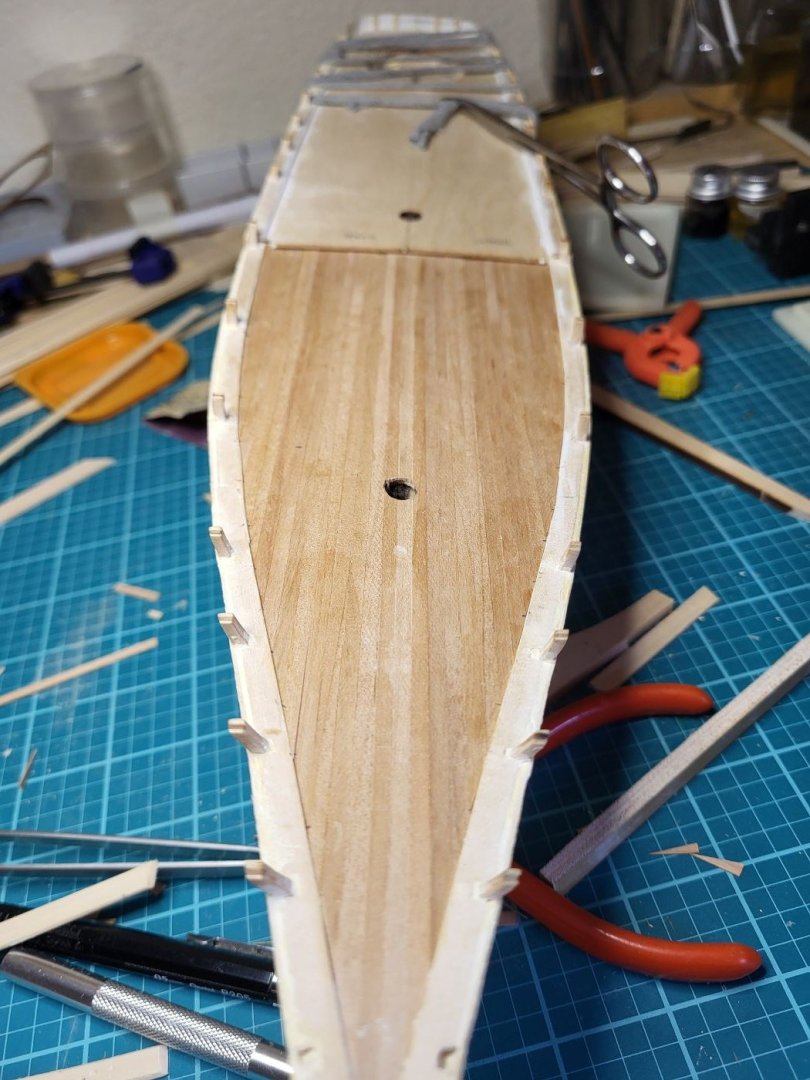
-

Greetings from Washington state, USA
GrandpaPhil replied to Paul B.'s topic in New member Introductions
Welcome! - Yesterday
-
Welcome aboard!
-
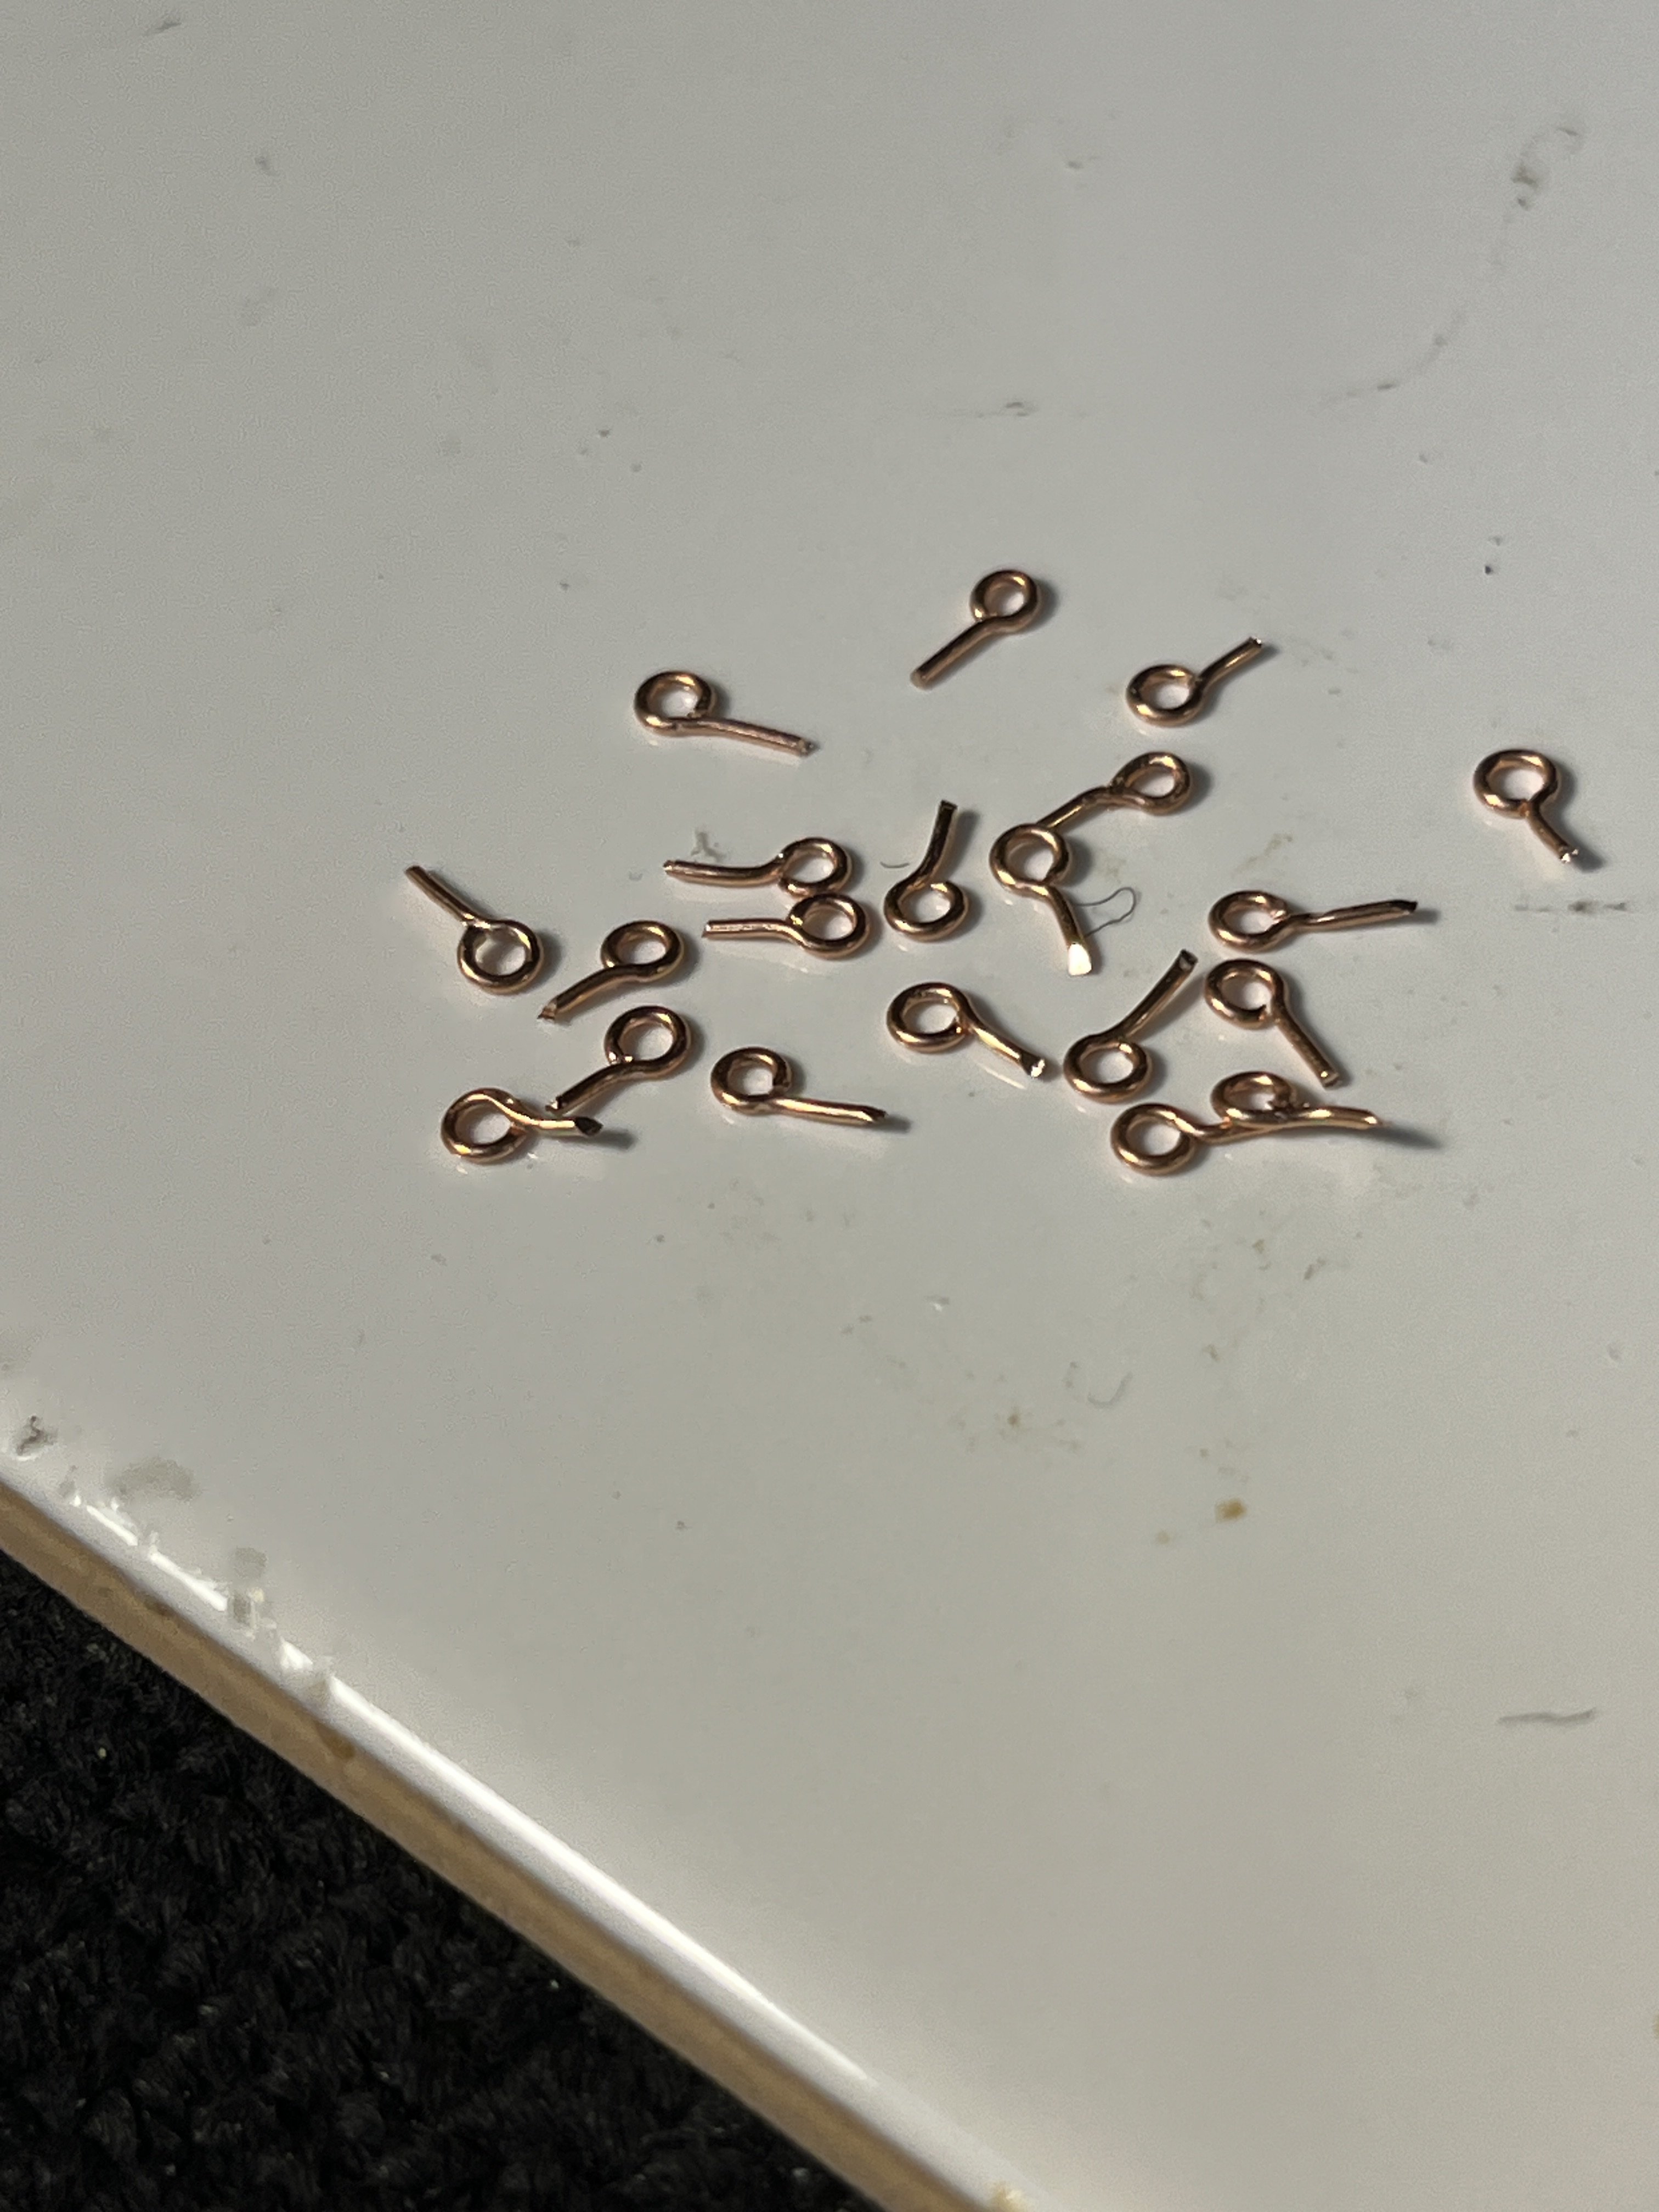
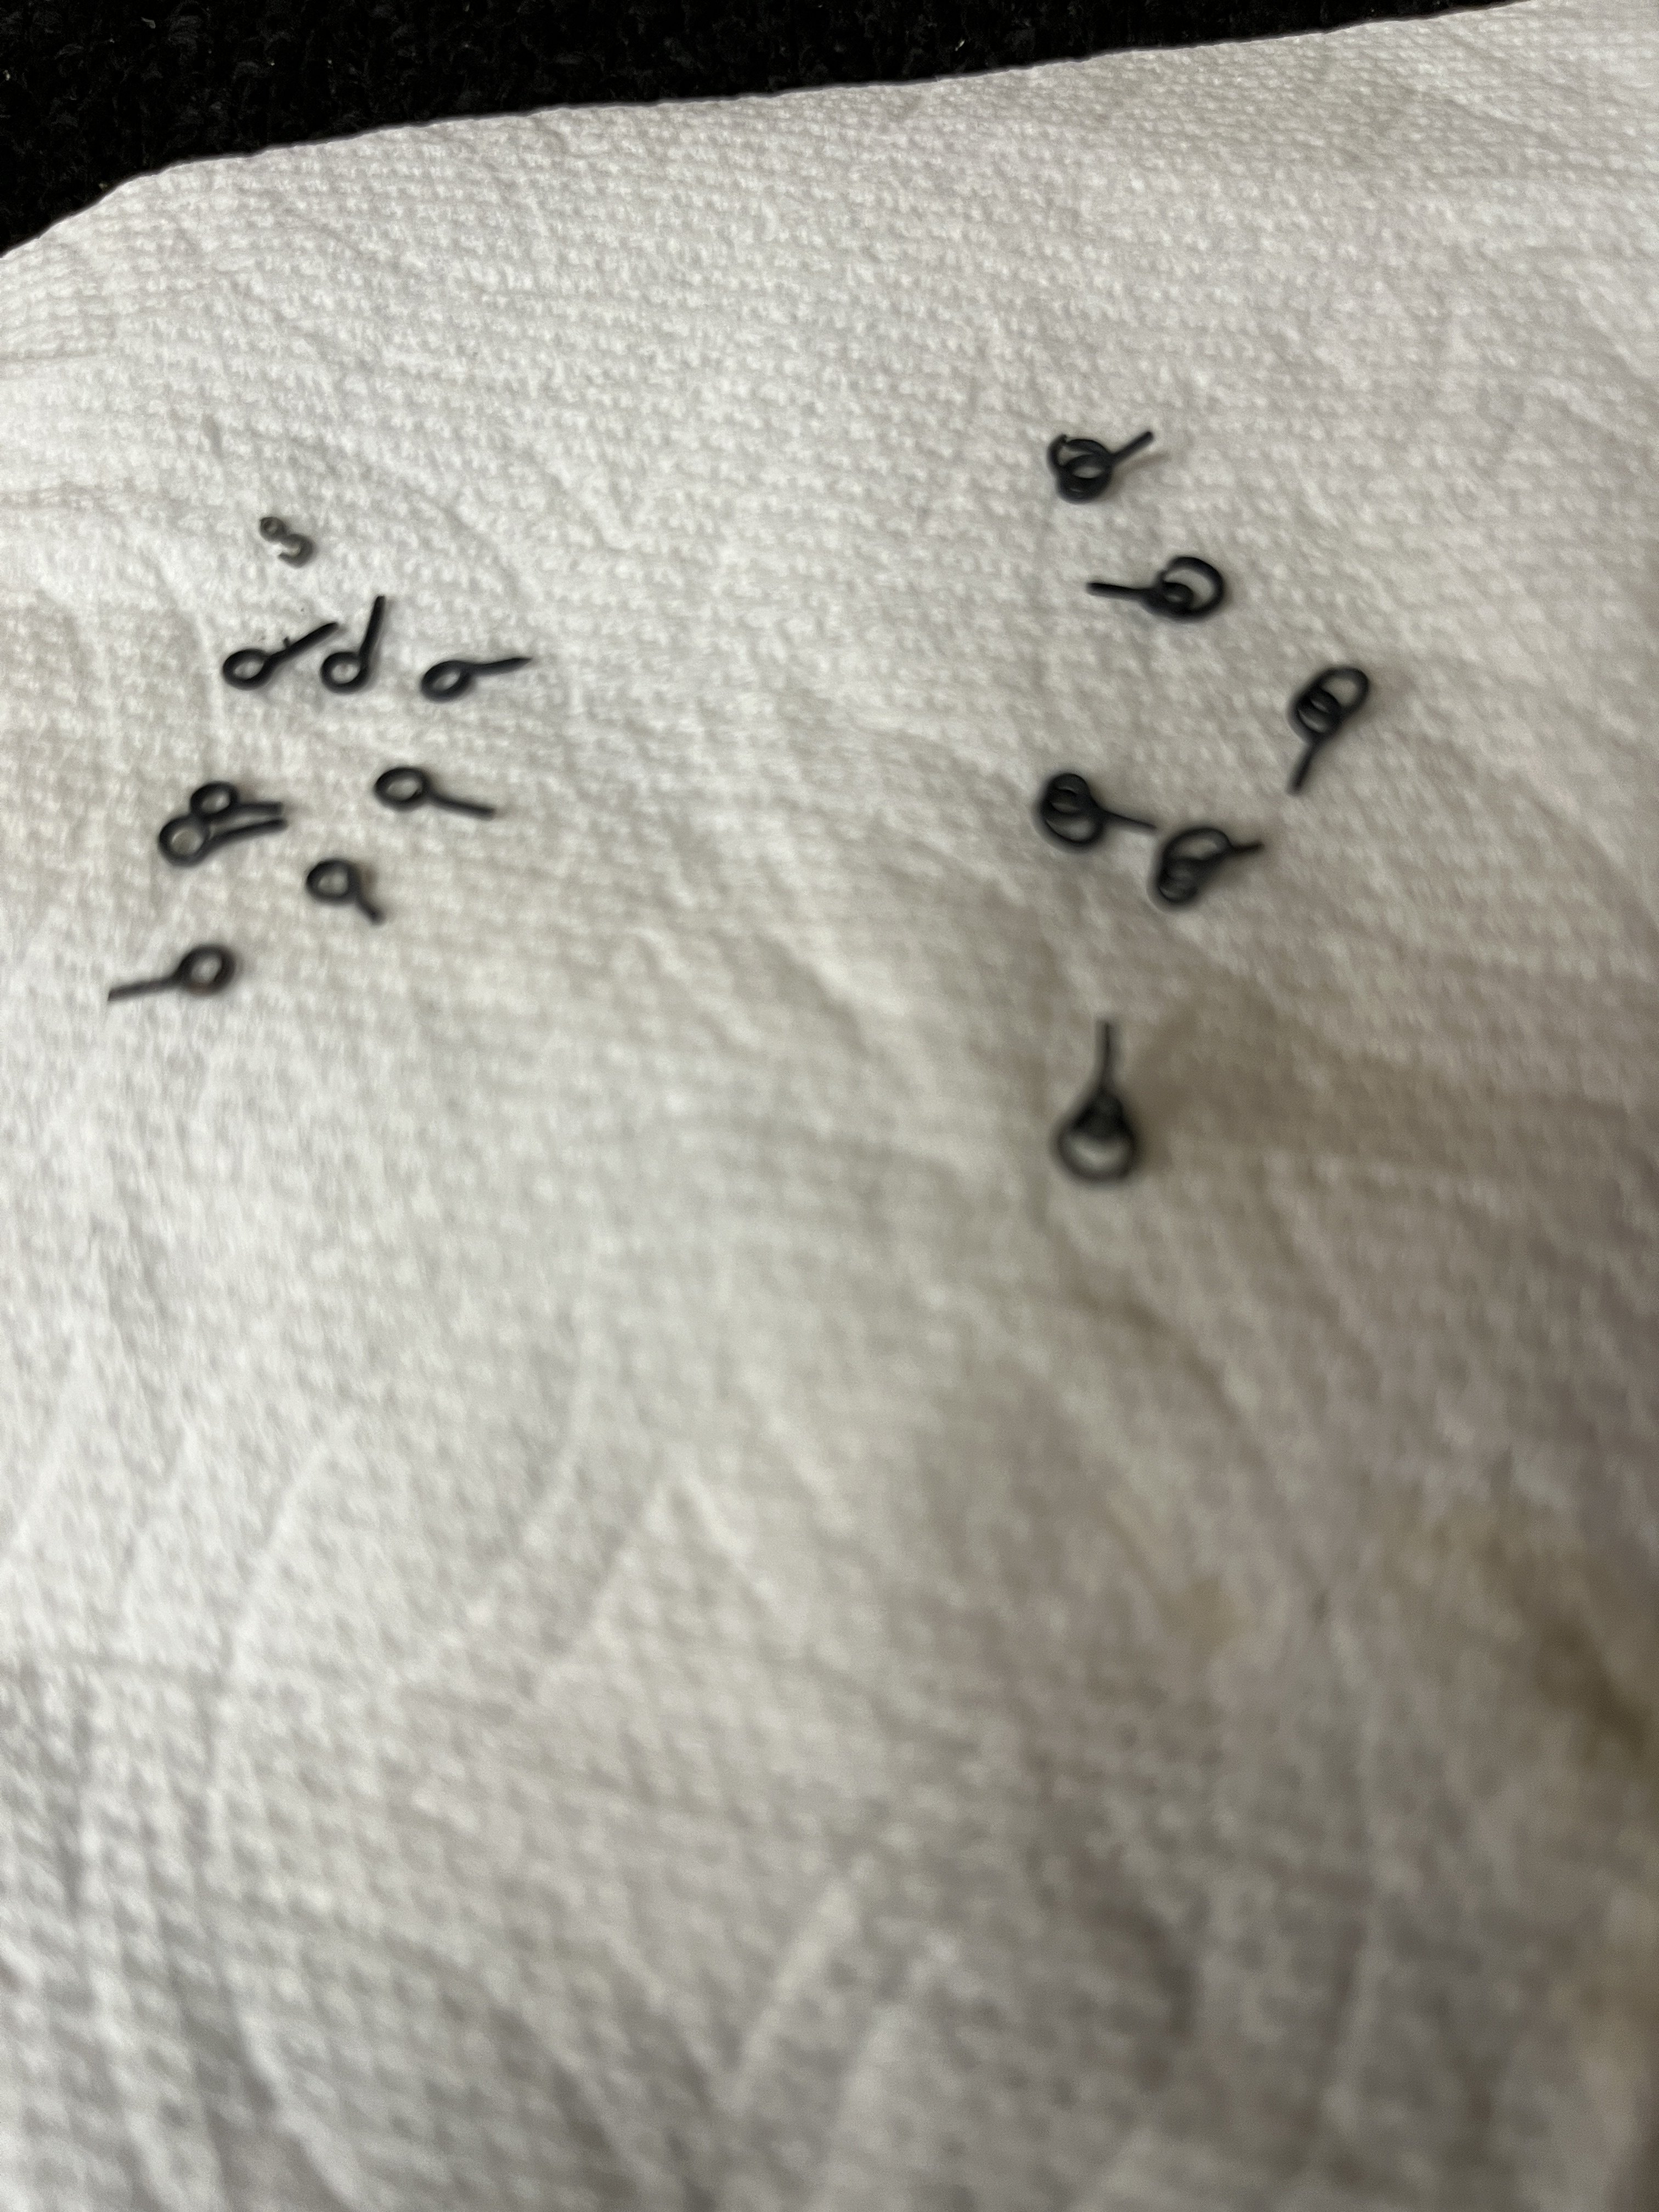
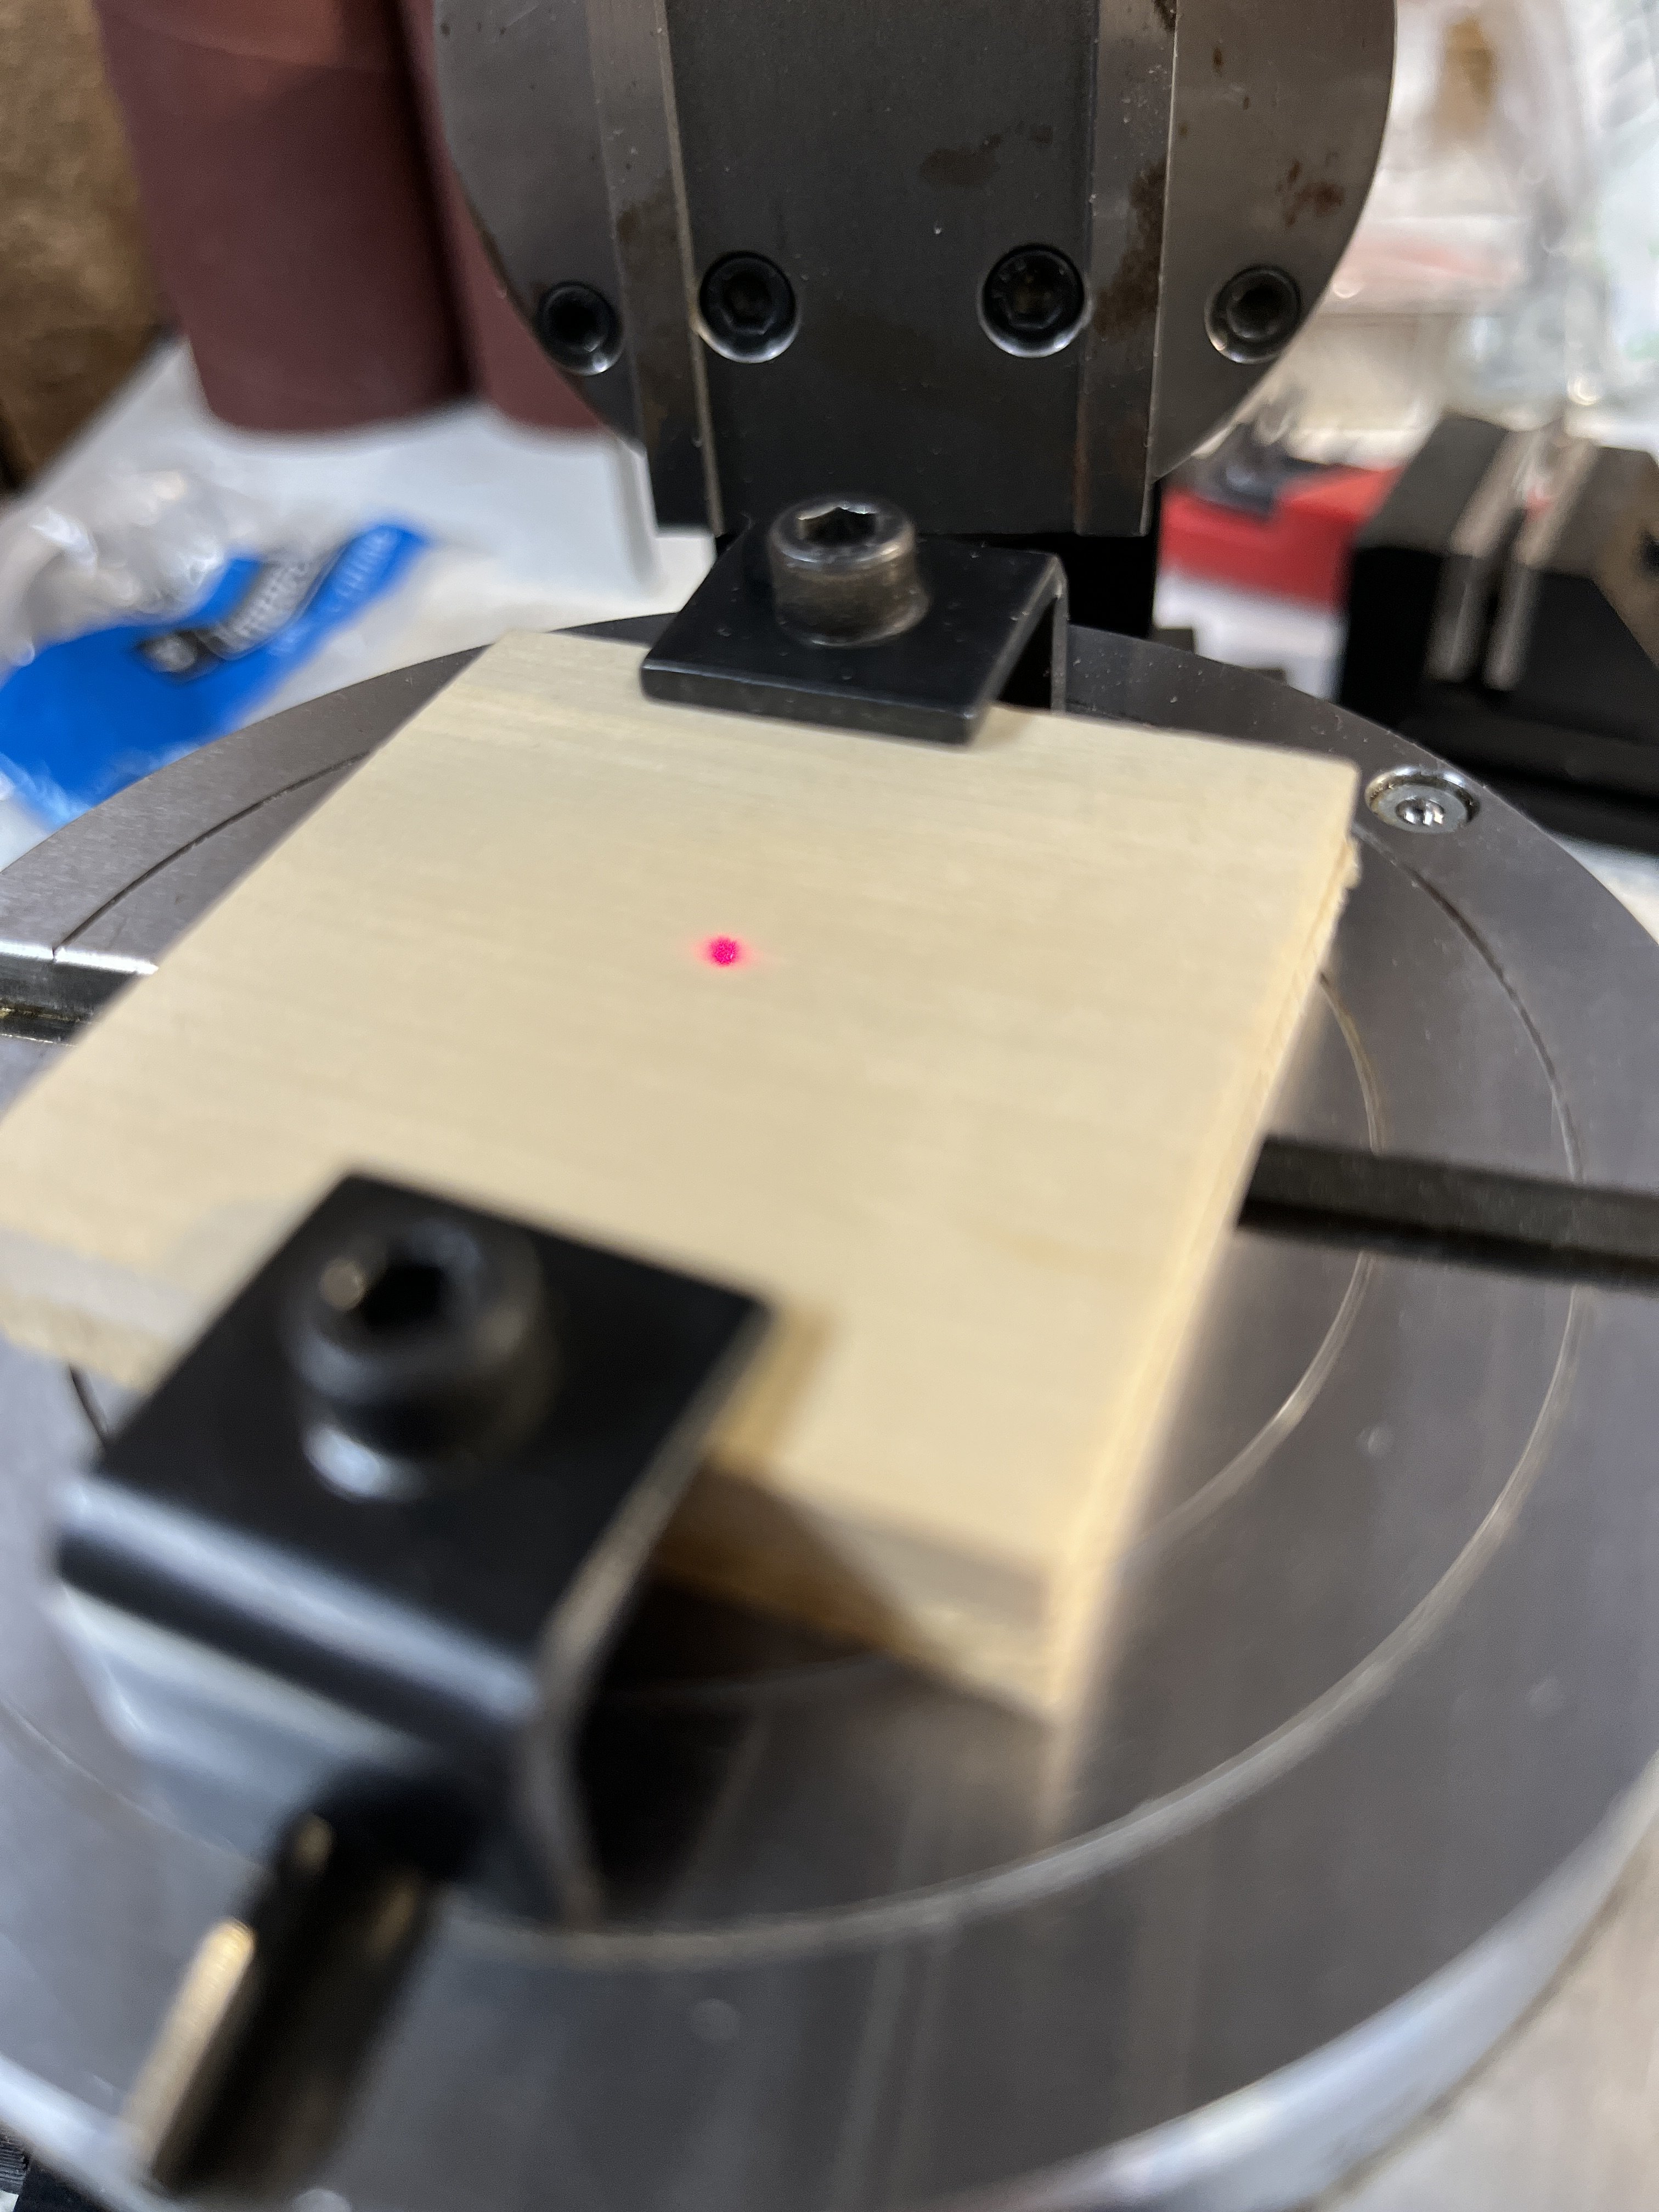
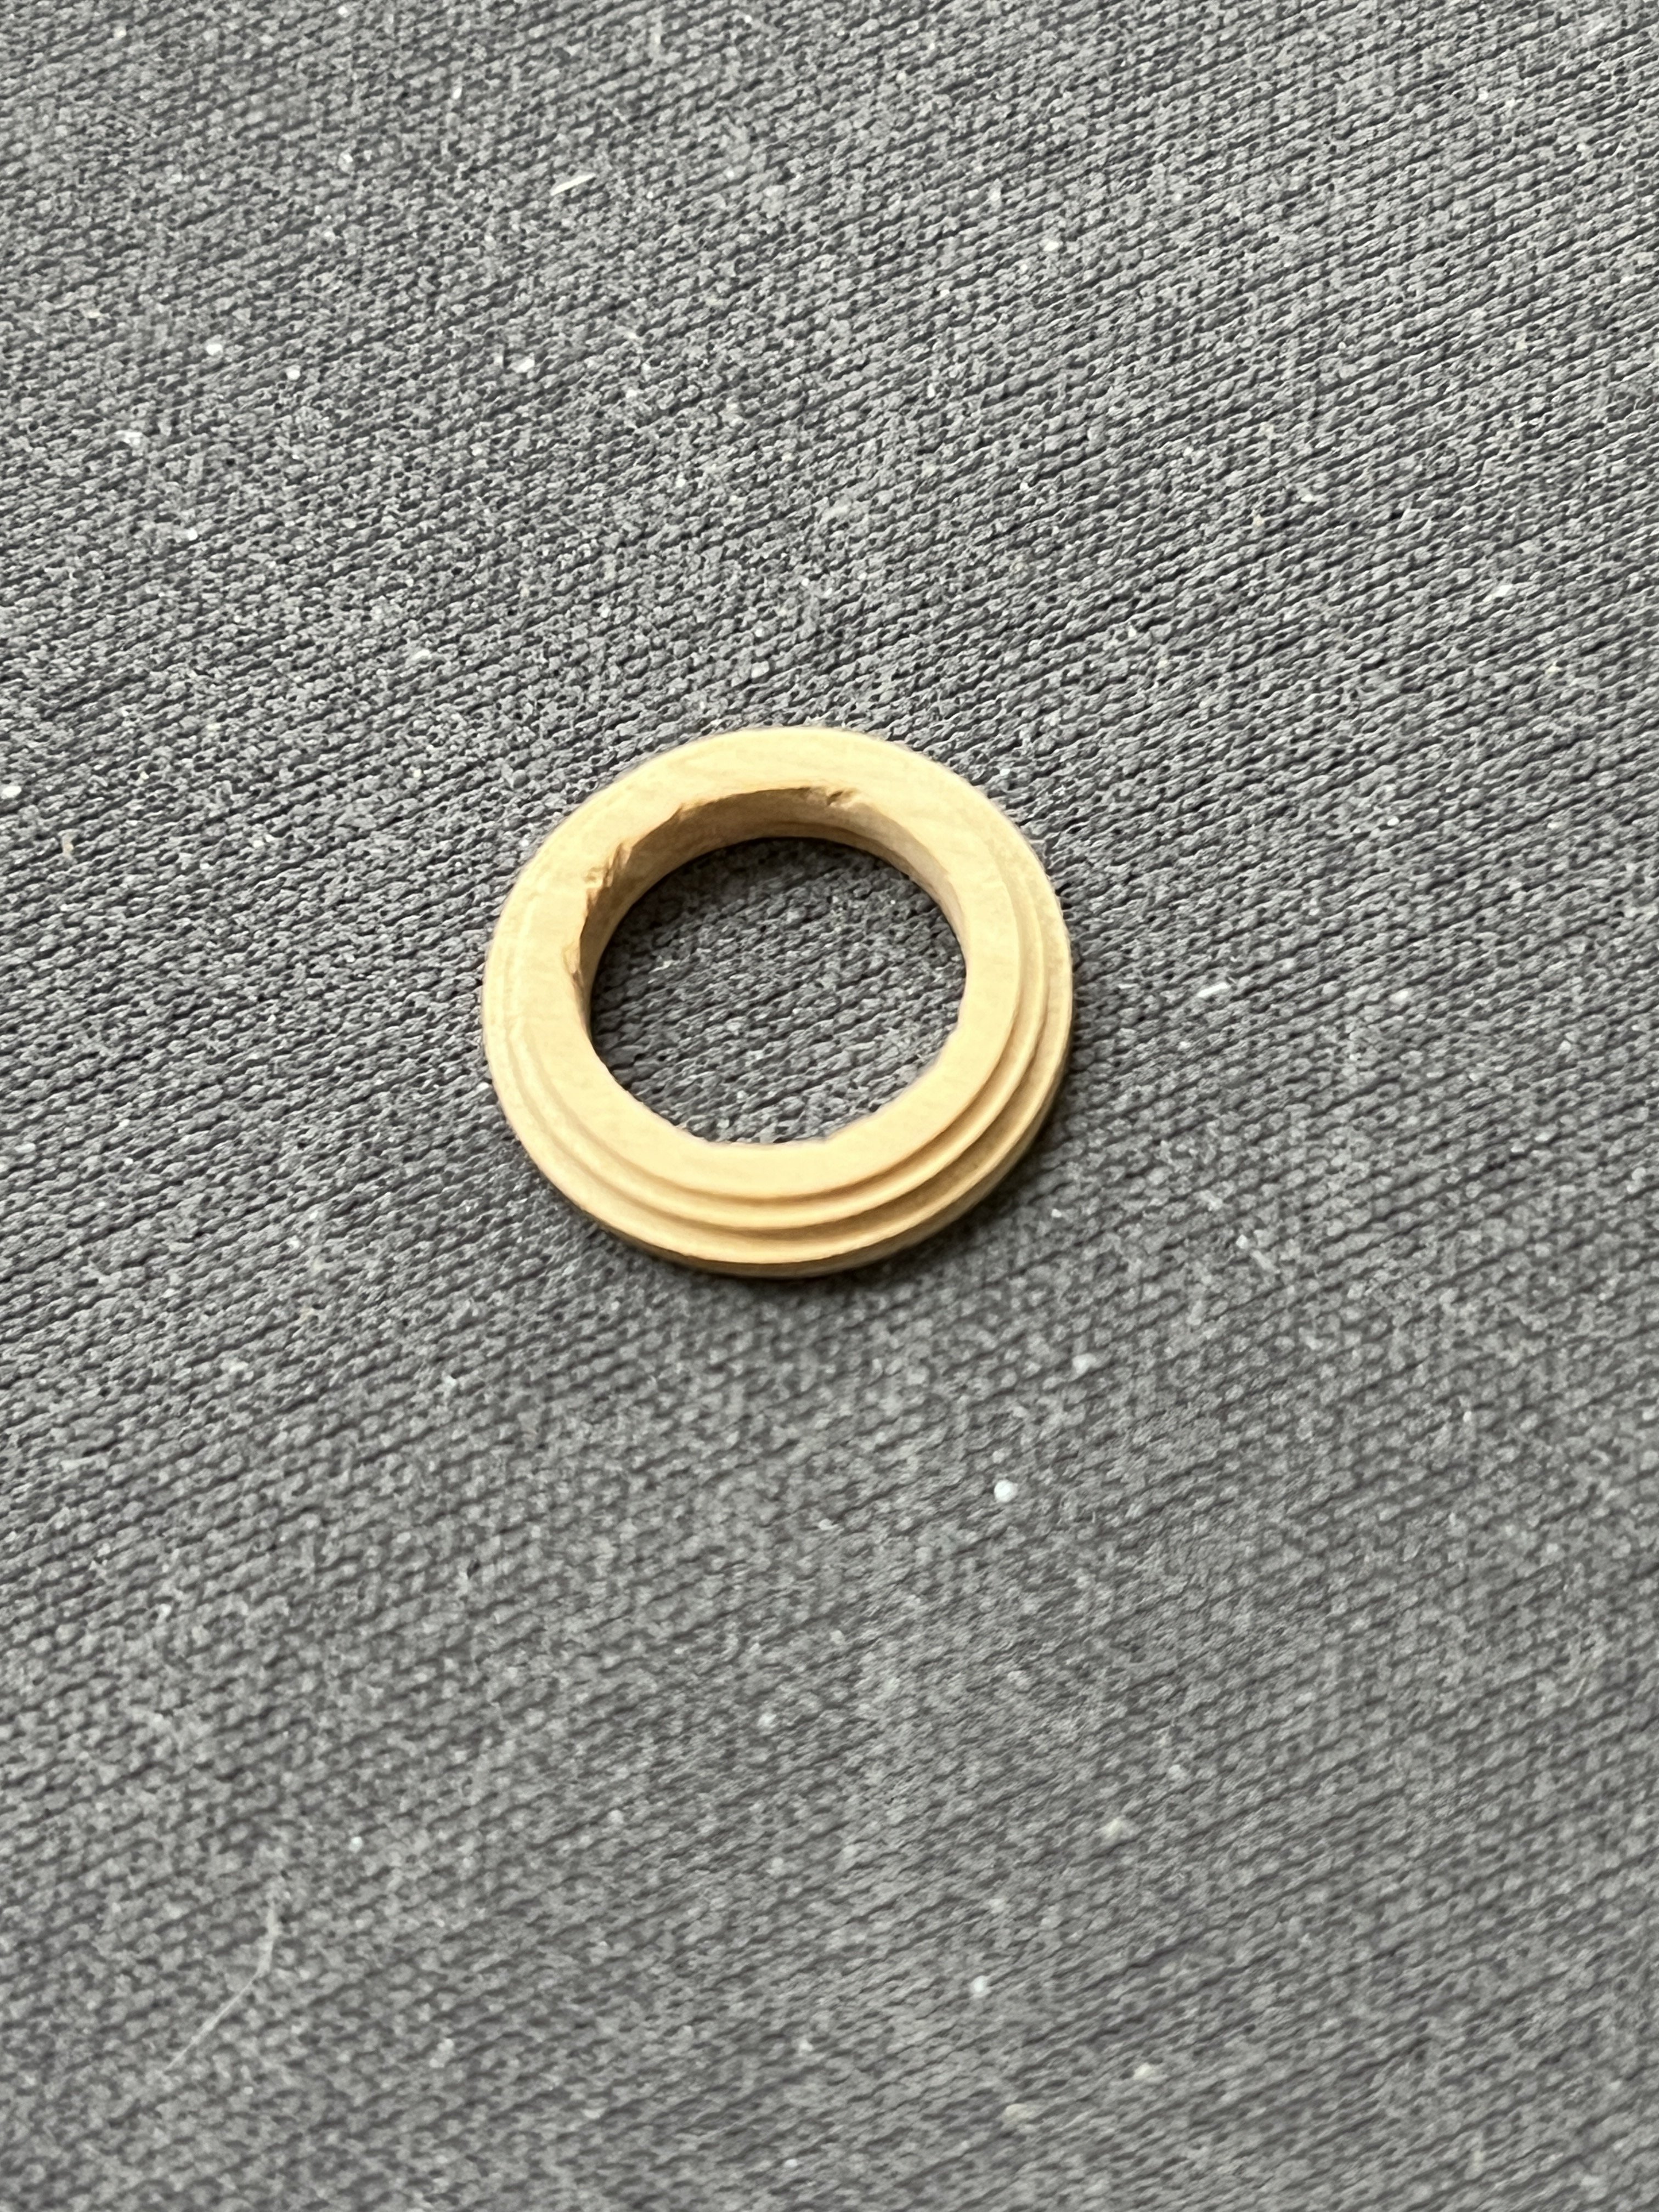
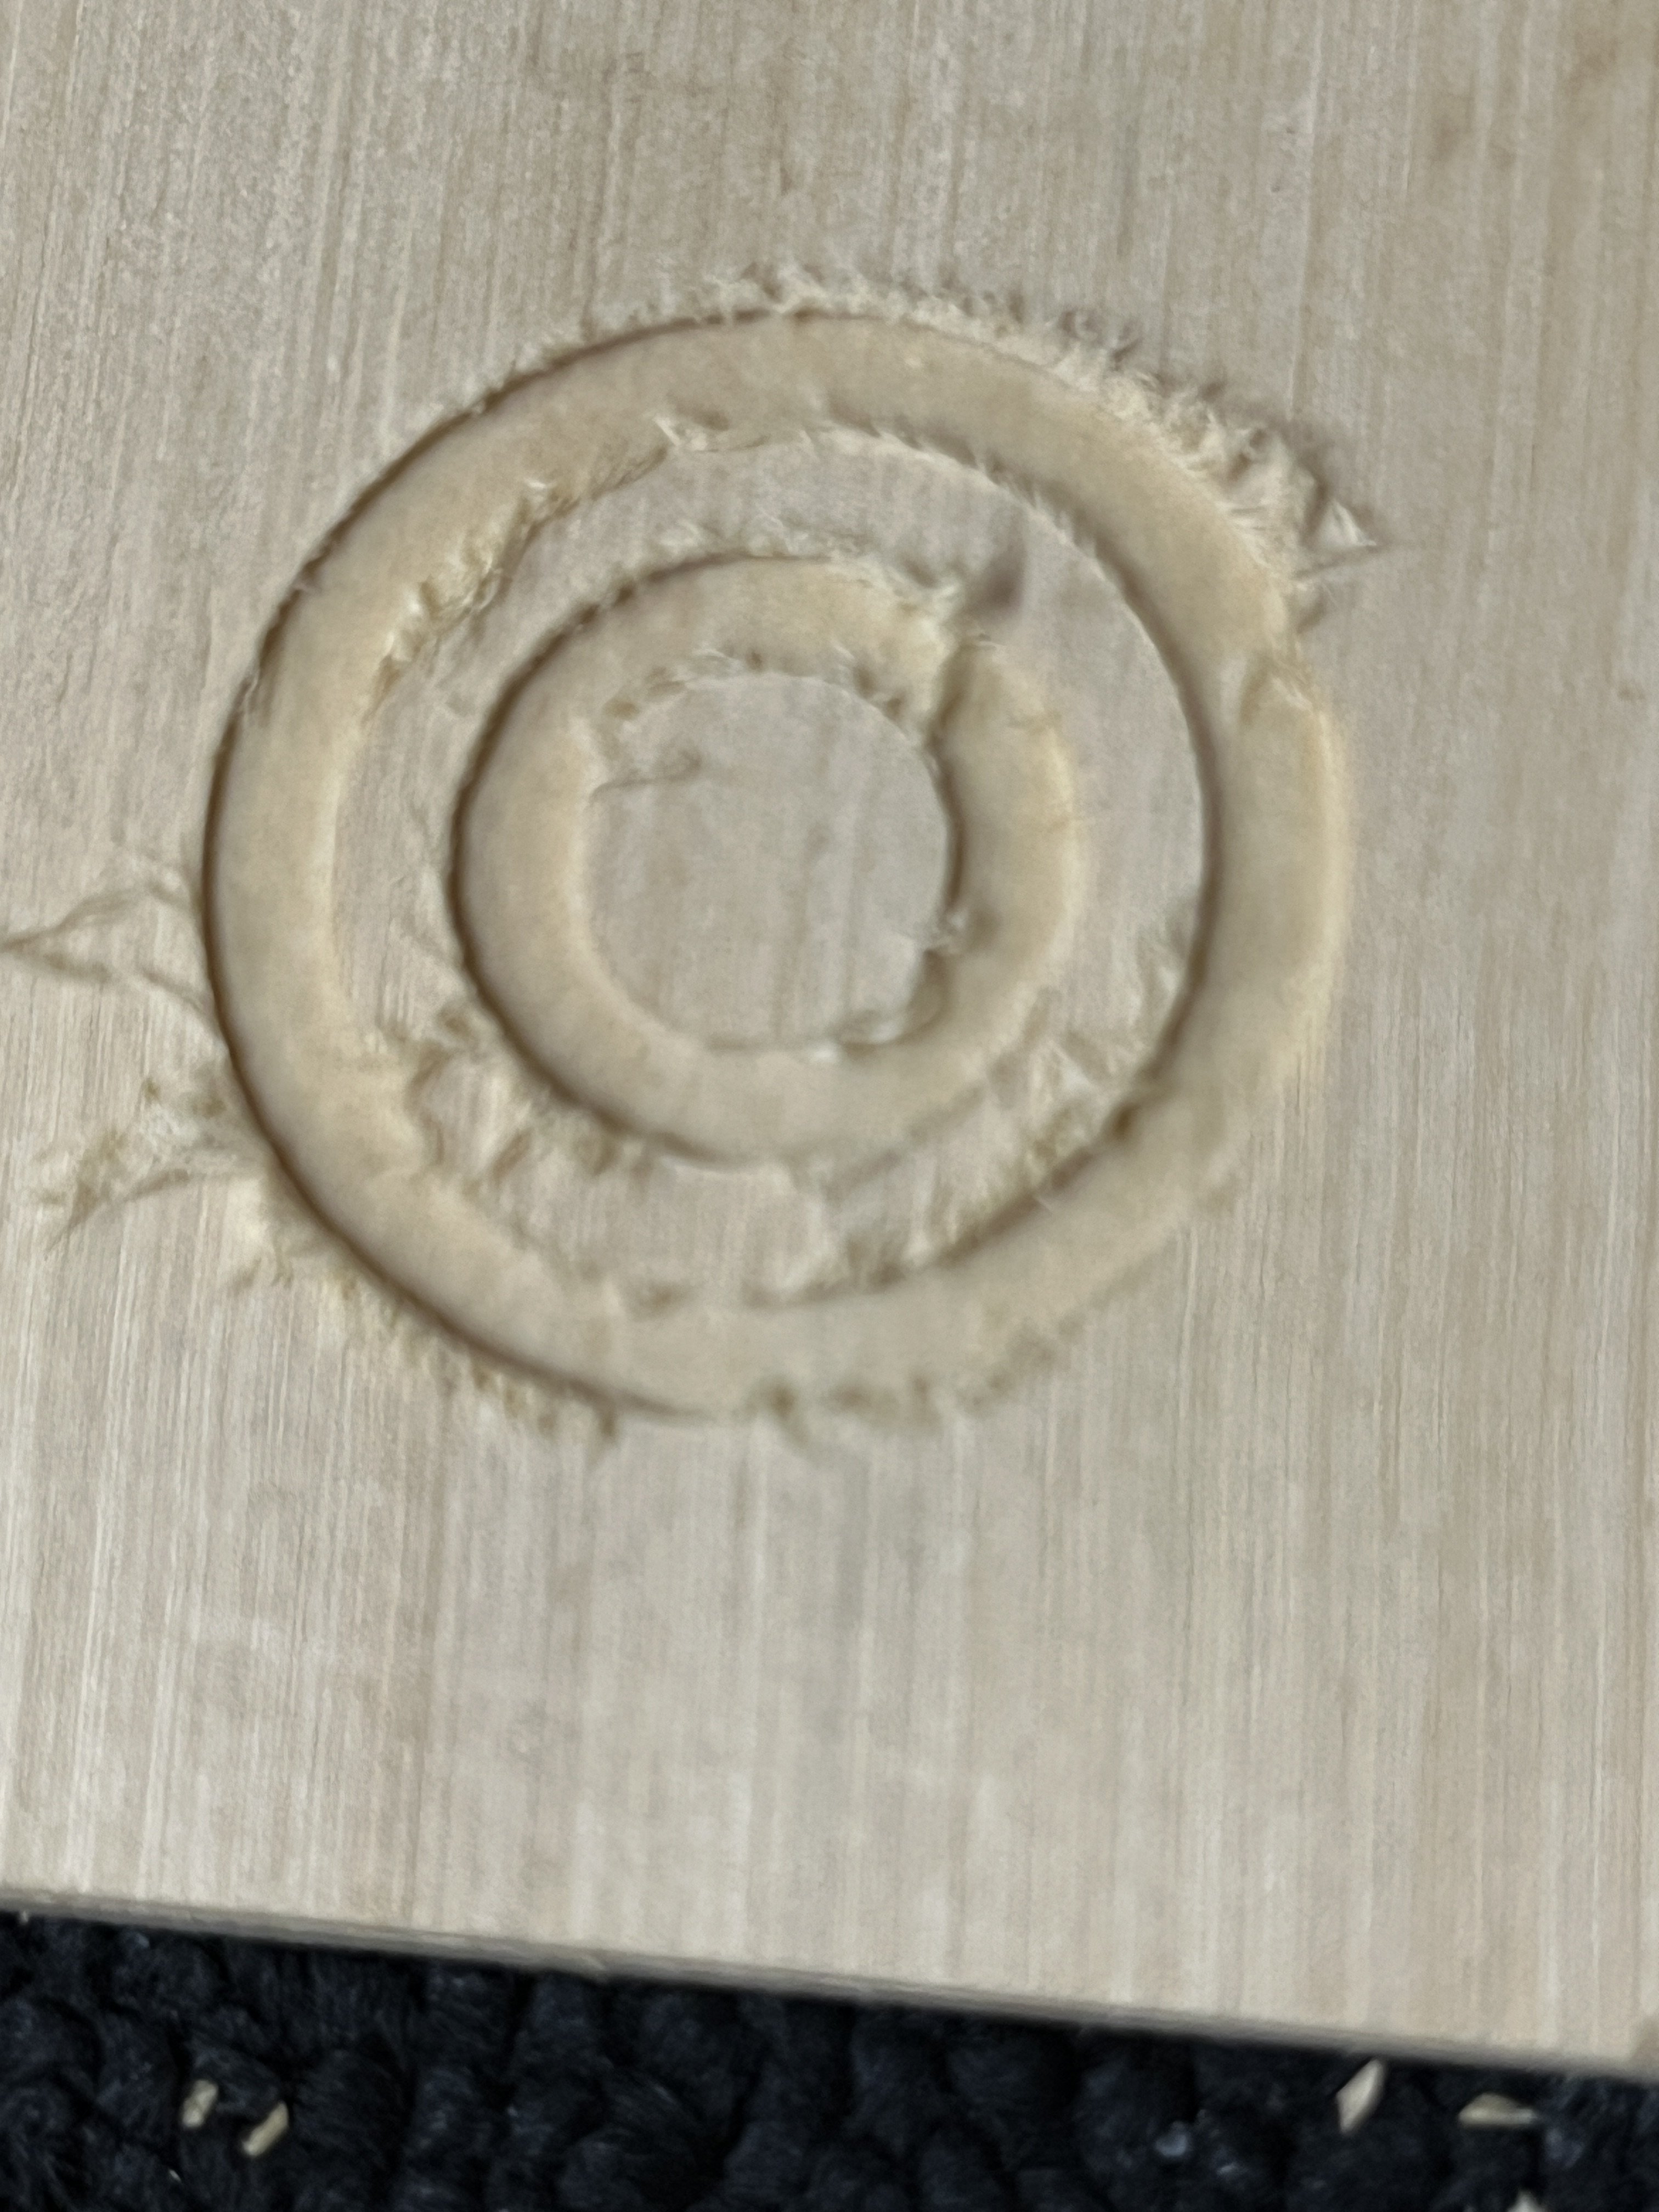
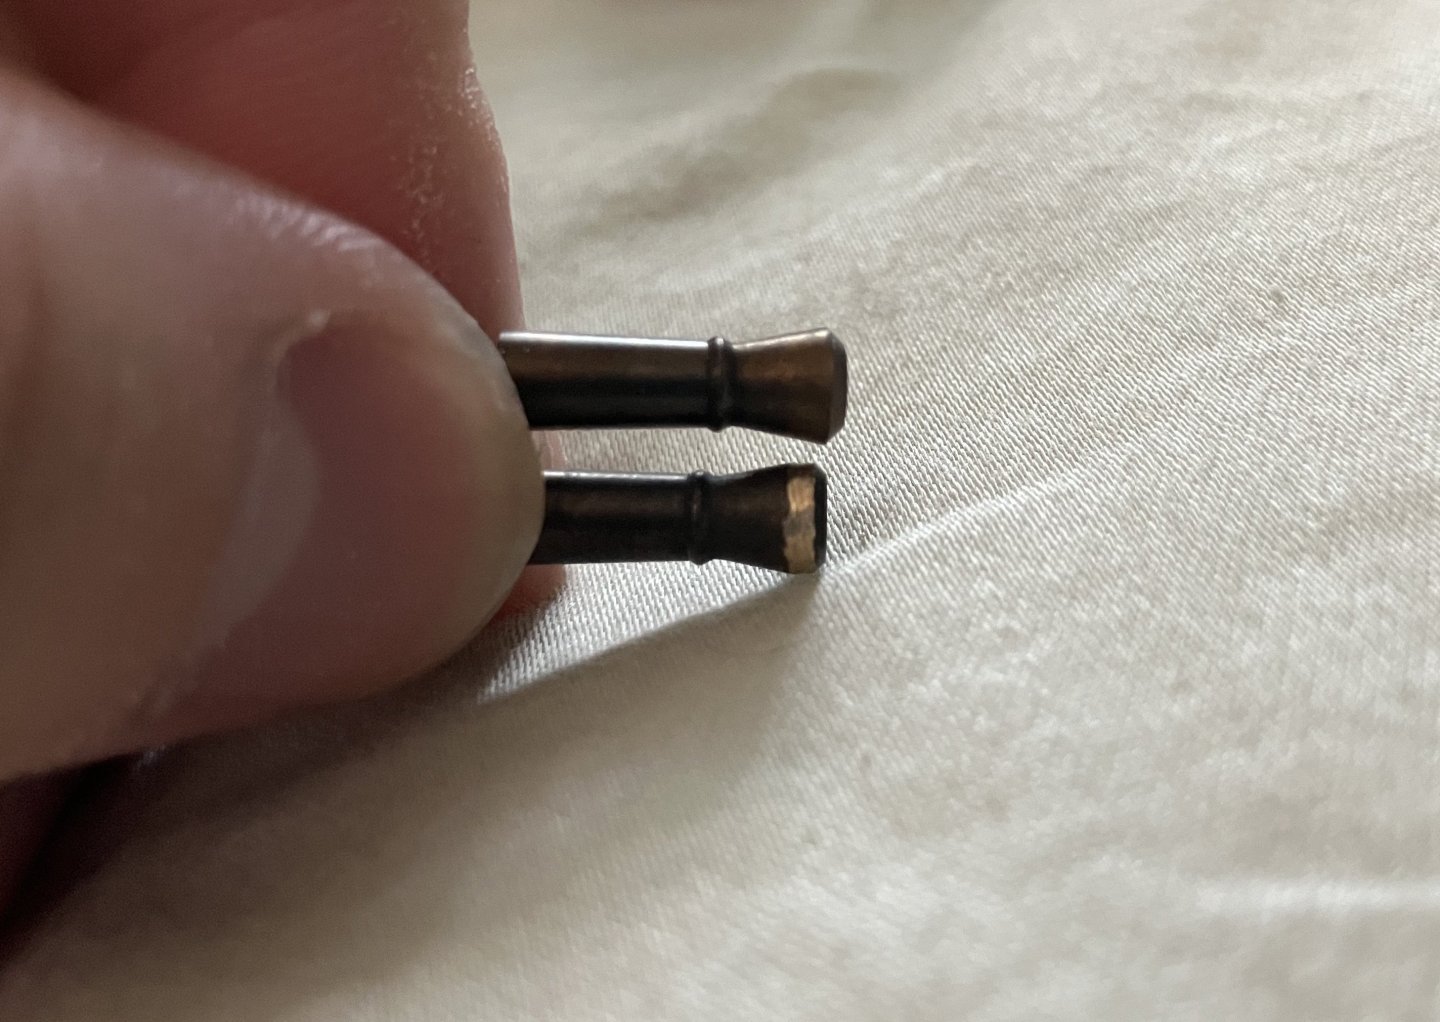
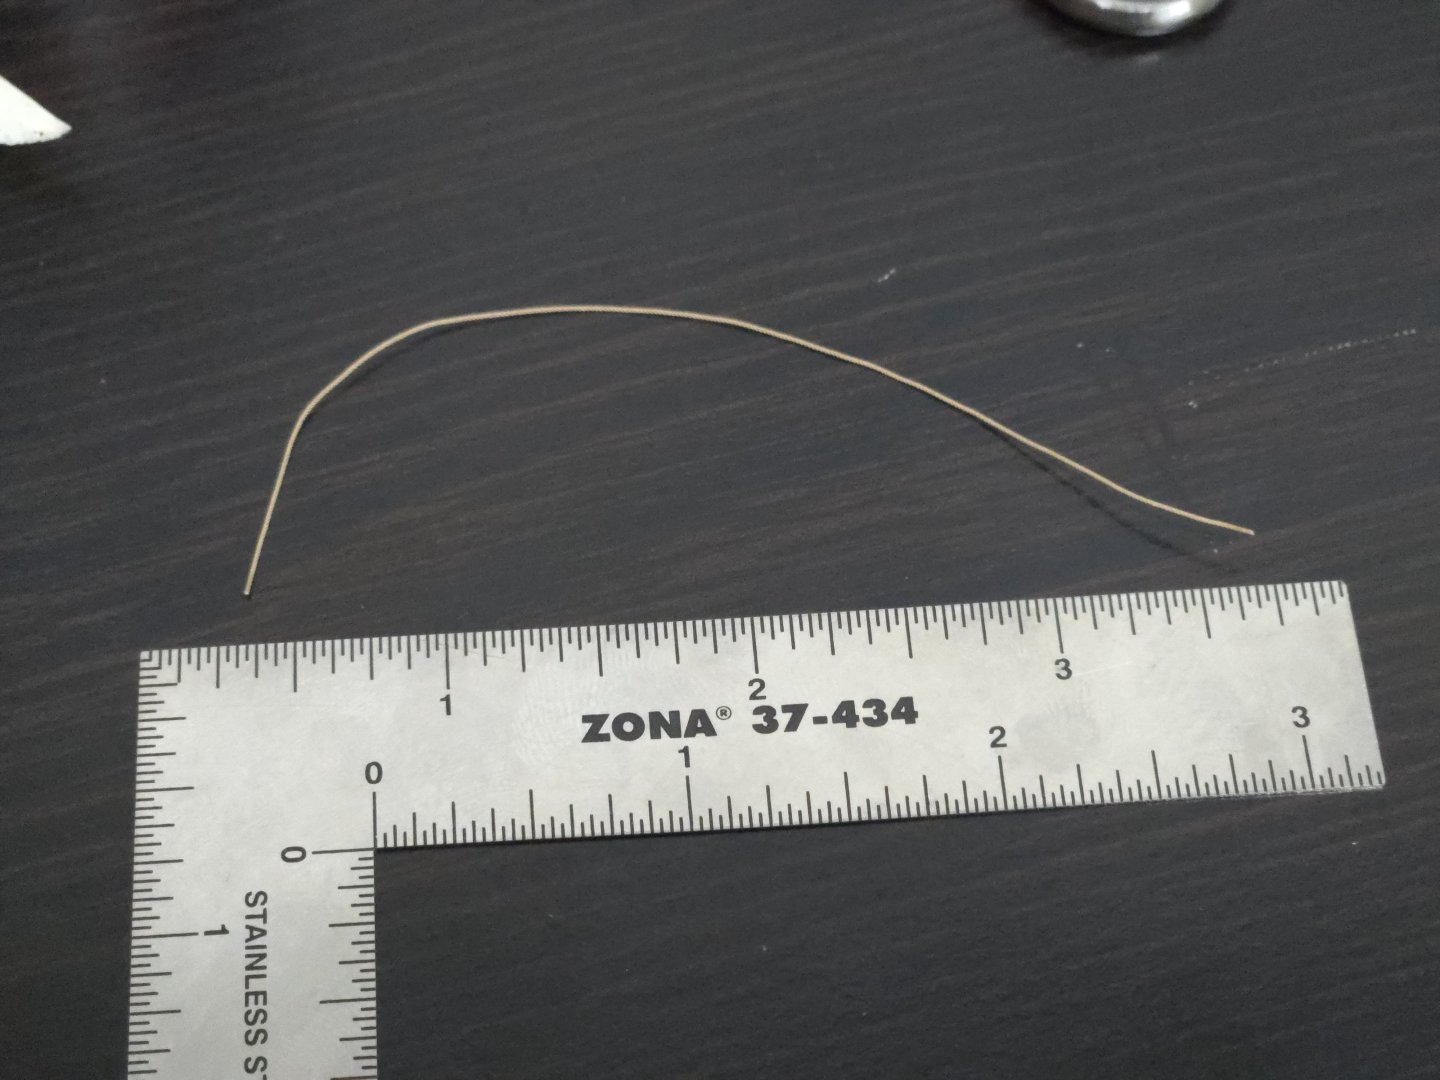
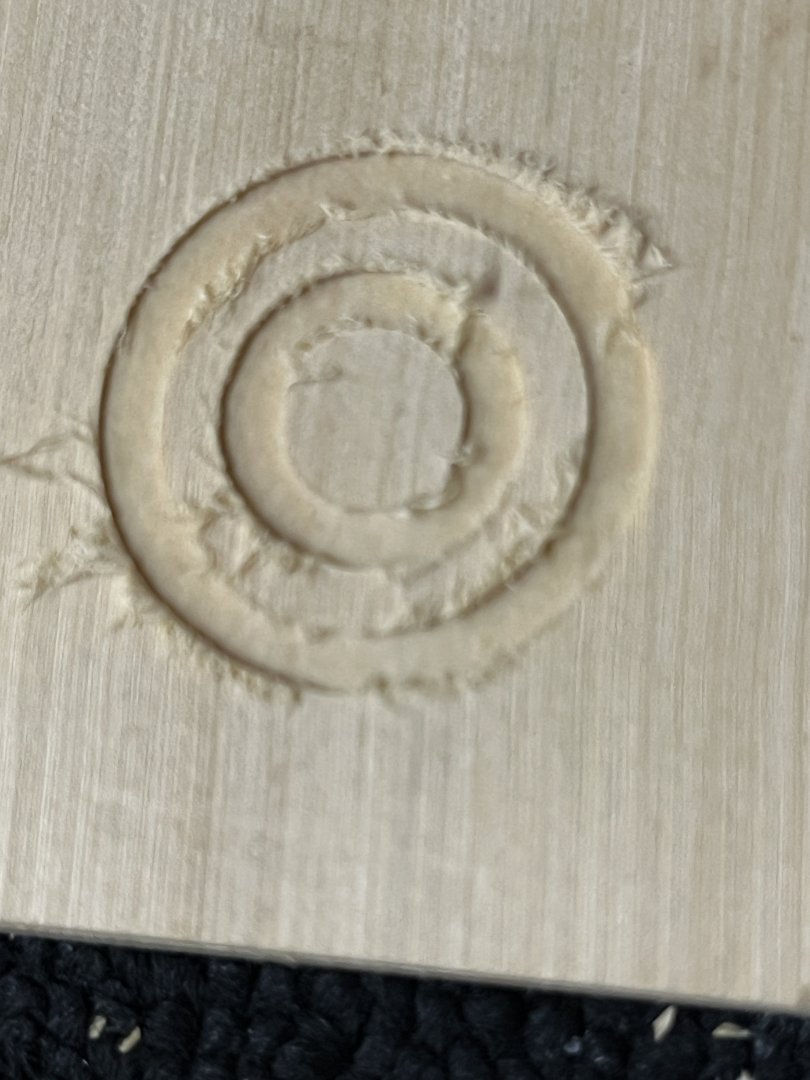
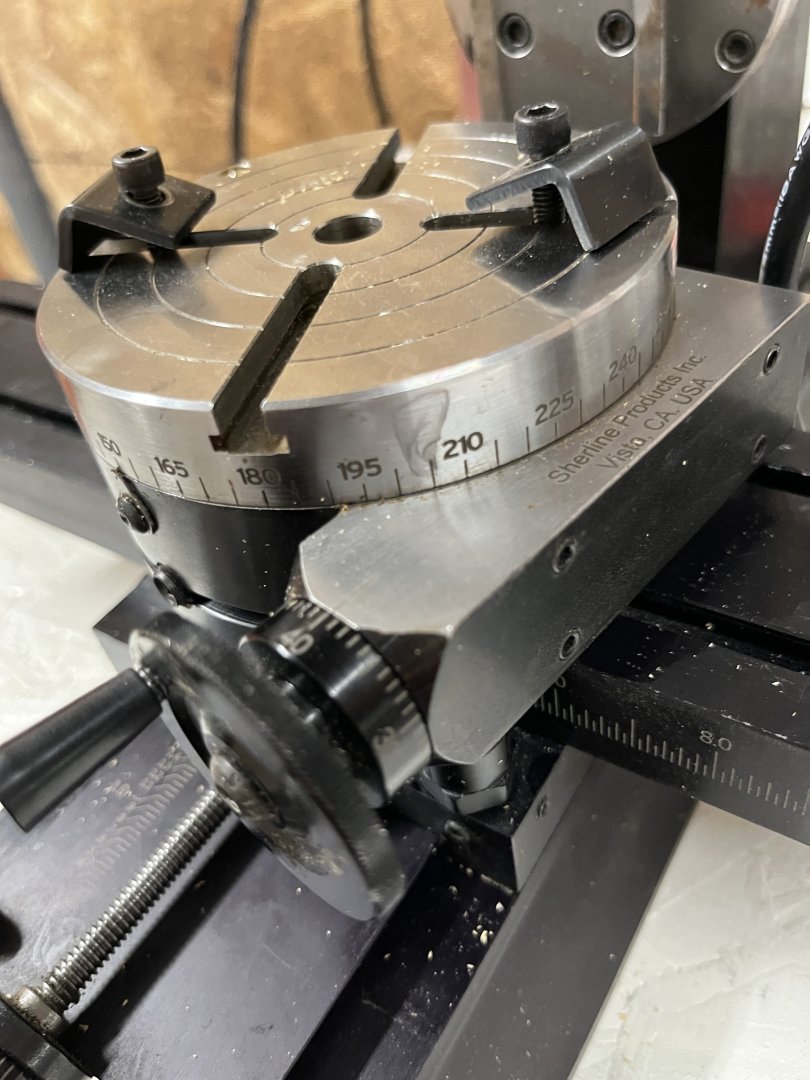
 Good Morning on July 6 and it's been too long between working on the model and posts. I spent some time making the deck eyebolts using the same technique as before by silver soldering the rings closed. This afternoon will be spent plating the parts black and ready to put on deck. I had forgotten that in my notes the eyebolts had been etched and cleaned in the ultrasonic so that they were ready to plate. Sitting on towel to dry After looking at others methods to make the mast coat I decided to use my mill with the rotating table. My first attempt using Alaskan Blue Spruce was not successful as the softness of the wood just left fuzzy edges so out came boxwood. Using my rotating table mounted to the mill to cut the circles for the coat. I2mm boxwood wa used for the coat. The boxwood was not thick enough so I glued two pieces together with opposite grains for added strength. Using school glue as it makes a strong joint and can be easily remove with water. Mounted the wood was a simple process as you would on all mill beds. A 3mm end cutter was used to cut the circles. The hardest part was calculating the radii as 3mm is .118 so much drawing and calculating making sure I had the correct inside and outside diameter. Getting steps on the outside was simple after cutting down the depth and raise the cutter and with a smaller diameter. These are the finished mast coats, I made two for emergencies, prior to wipe on poly The little chips on the top will not be seen one I sand the mast coat to the correct height. Using my rotating table was a wonderful learning experience and I have many ideas of how to use the great tool in the future.


-
 Thanks Jared, you’re doing a great job on your model also! Rick
- 314 replies
-
- 1
-
-
- Flying Fish
- Model Shipways
- (and 1 more)
-
Hi Paul and a warm welcome to Model Ship World, it is a friendly place where you can get answers to your build questions. Greetings from a place half way between Seattle and Portland.
-
 Mike- the Conference was in April in New London, CT. About 6 hrs from here.
 -
 Incredible workmanship on this build. You’ve done an amazing job. Would you consider making the .stl files available for others to print their own upgrade components?
 -
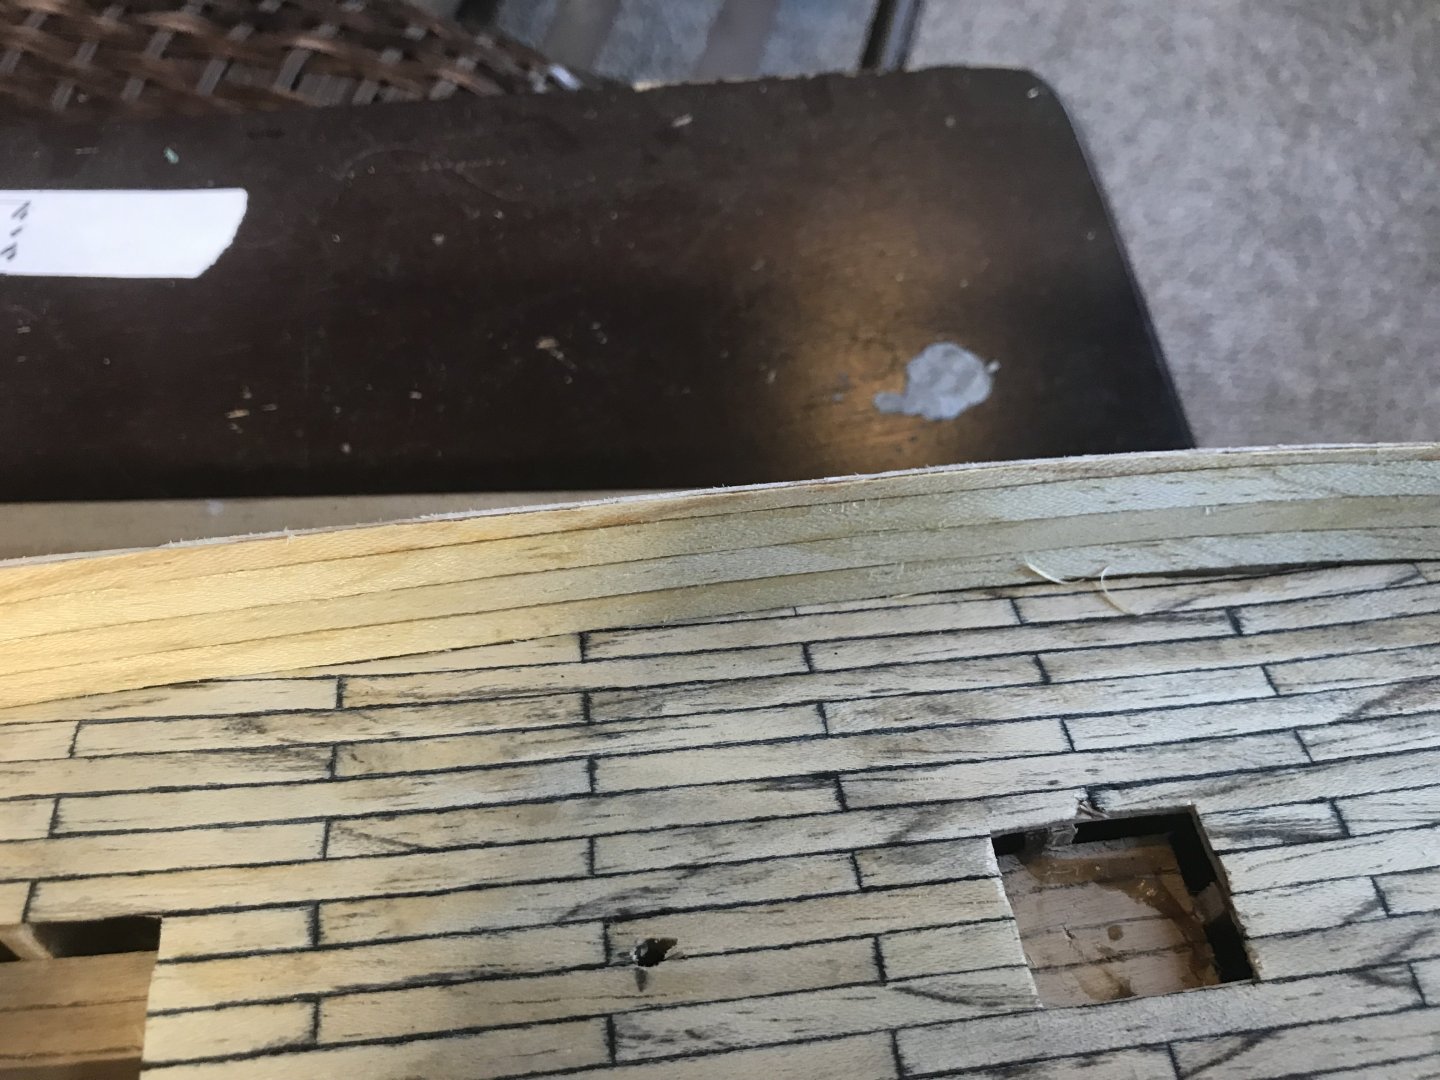
 I keep moving forward. Thought I'd add this one post while working on the planking. Not sure if others to this, but I have found that as the ribs start angling down to the keel, right where that angling starts, that if I bevel the top inside of the plank, that it fits better against the previous wood plank. But that's just me. Thought I'd share.