Search the Community
Showing results for tags 'constitution'.
-
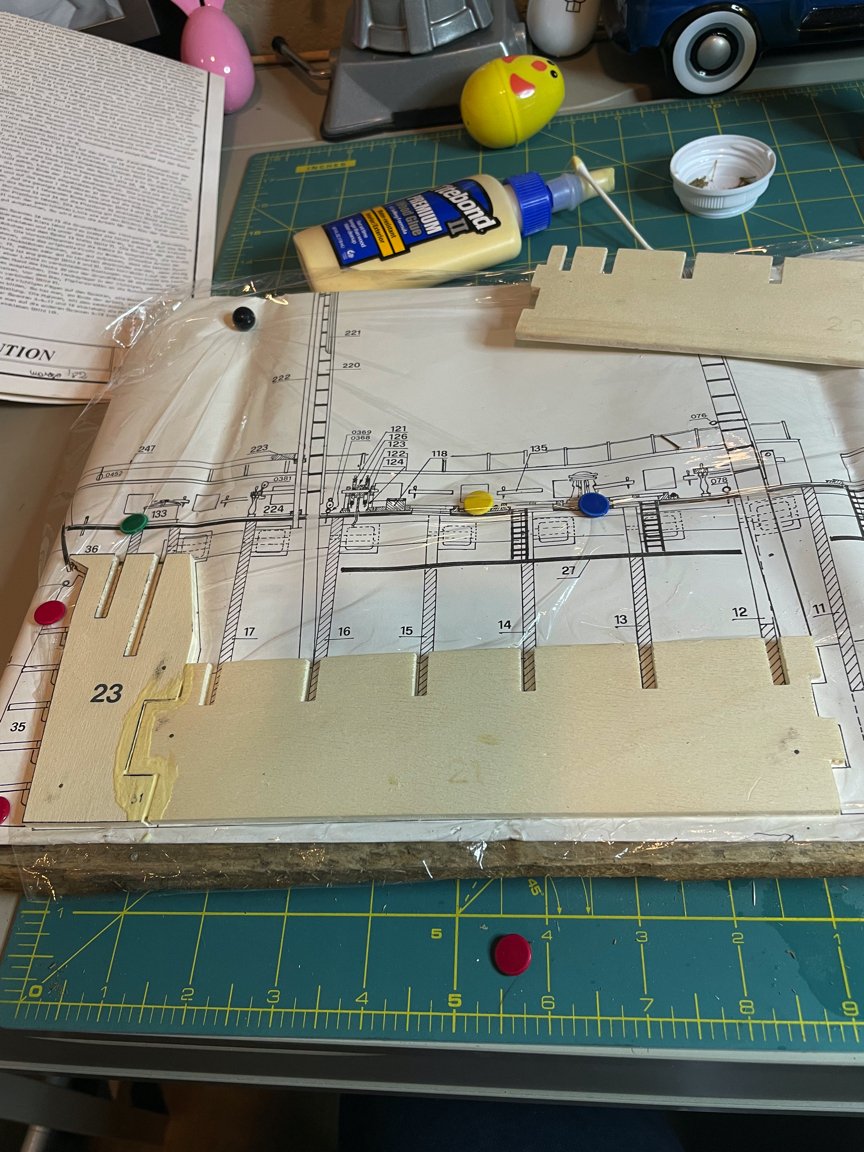
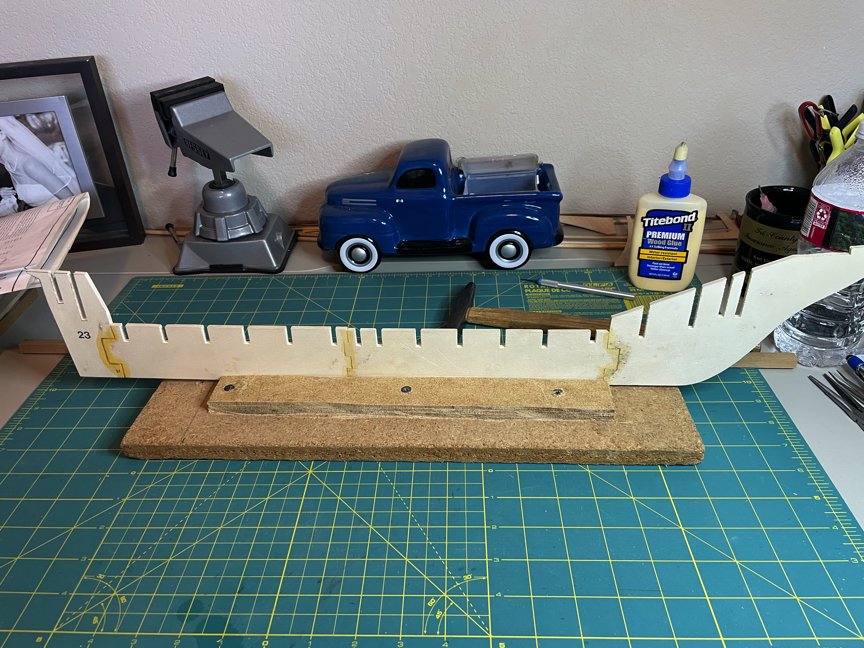
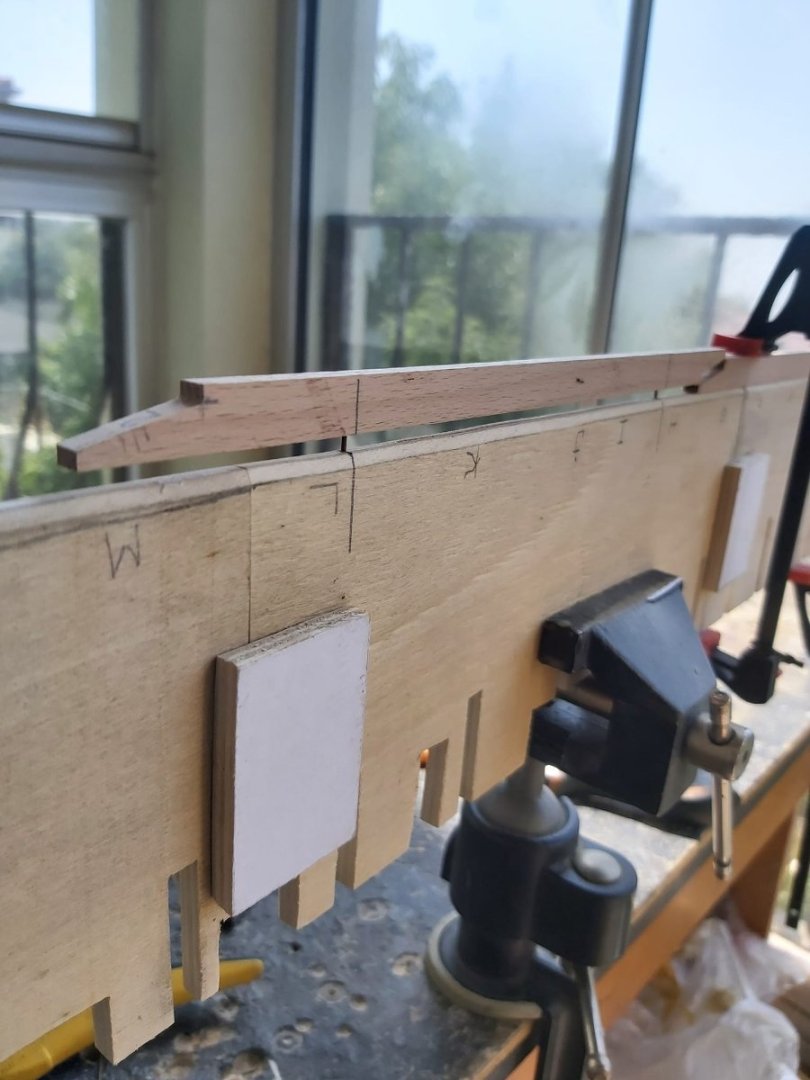
 If you read the new members section, you will read a little about how I came about this kit and into ship building. This will be my second ship, the first being an A-L Victory. I was given both kits by a neighbor who found them among the belongings of his sister's home after she was admitted to a memory care facility. Neither kit had been opened. I have been reading posts on this site and learned a little about Mamoli kits. I recall one post saying Mamoli kits were no longer produced because of a factory fire. I know nothing about this brand, but it is what I have been given, so that is what I will work with. I have noticed there are very few full Mamoli Constitution builds on the site, mostly were cross-section builds, so that must have been a more popular kit. I only found one Mamoli Constitution full build that was completed and have studied it thoroughly. I have also viewed many other Constellation builds for tips and ideas have have started following some builds. I am hoping to show what the Mamoli kit has it in and how the ship goes together. The kit contains one 4' X 4' sheet with full size drawings on both sides. There are eighteen 2' X 2' panels (9 sheets, printed on both sides) of instructions in four languages. I am hoping this build will be of interest to those who are building the Constitution from another maker, if nothing else but to show the difference in kits. I am new enough to the hobby that I probably will not be going off-course too much, rather focusing my efforts on understanding the enclosed plans and following the assembly instructions. I will seek advise where plans are lacking and will always appreciate comments. Today's photos are assembling the keel. The keel came in four sections. It was suggested to lay out a board and tack the full-size instructions to the board, which I did. I then laid down some clear wrap over the instructions so I could not get glue on the paper. The board was to nail the keel to while the glue dried so it would dry perfectly flat. I used yellow glue at this point because I knew it would not show after other parts were added.
-
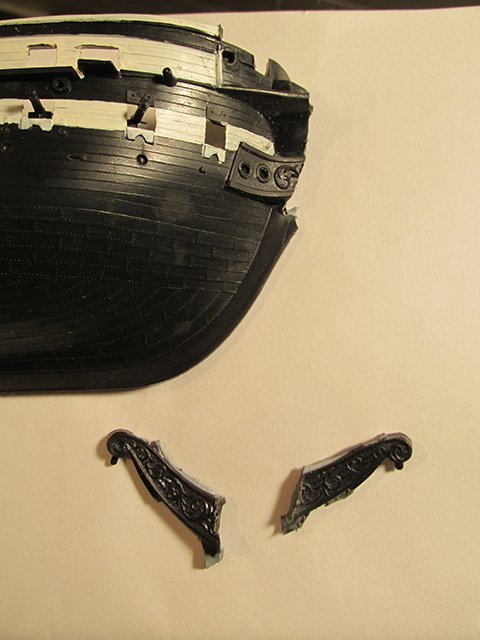
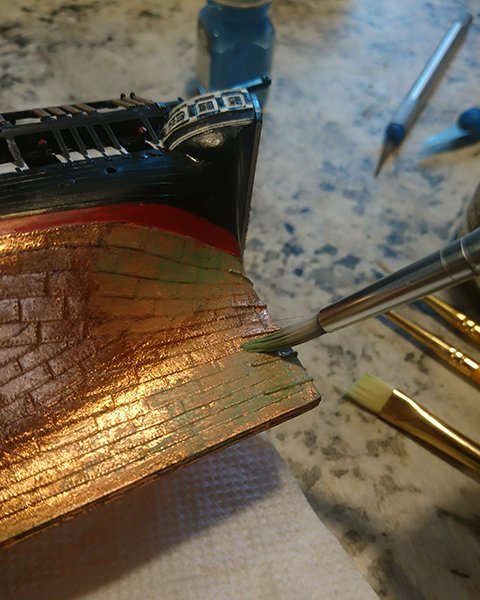
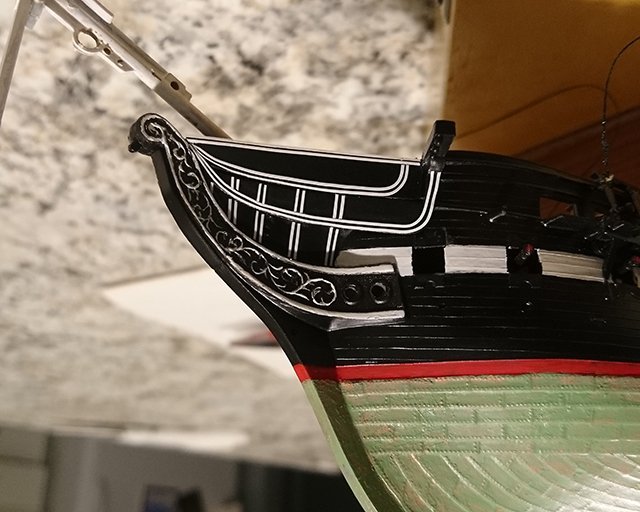
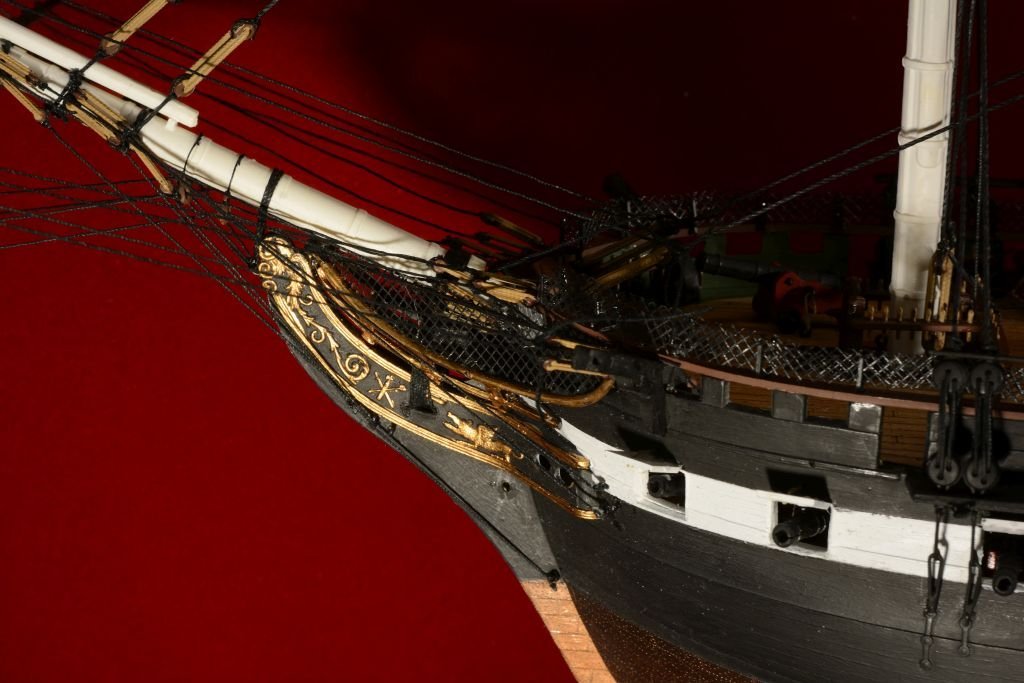
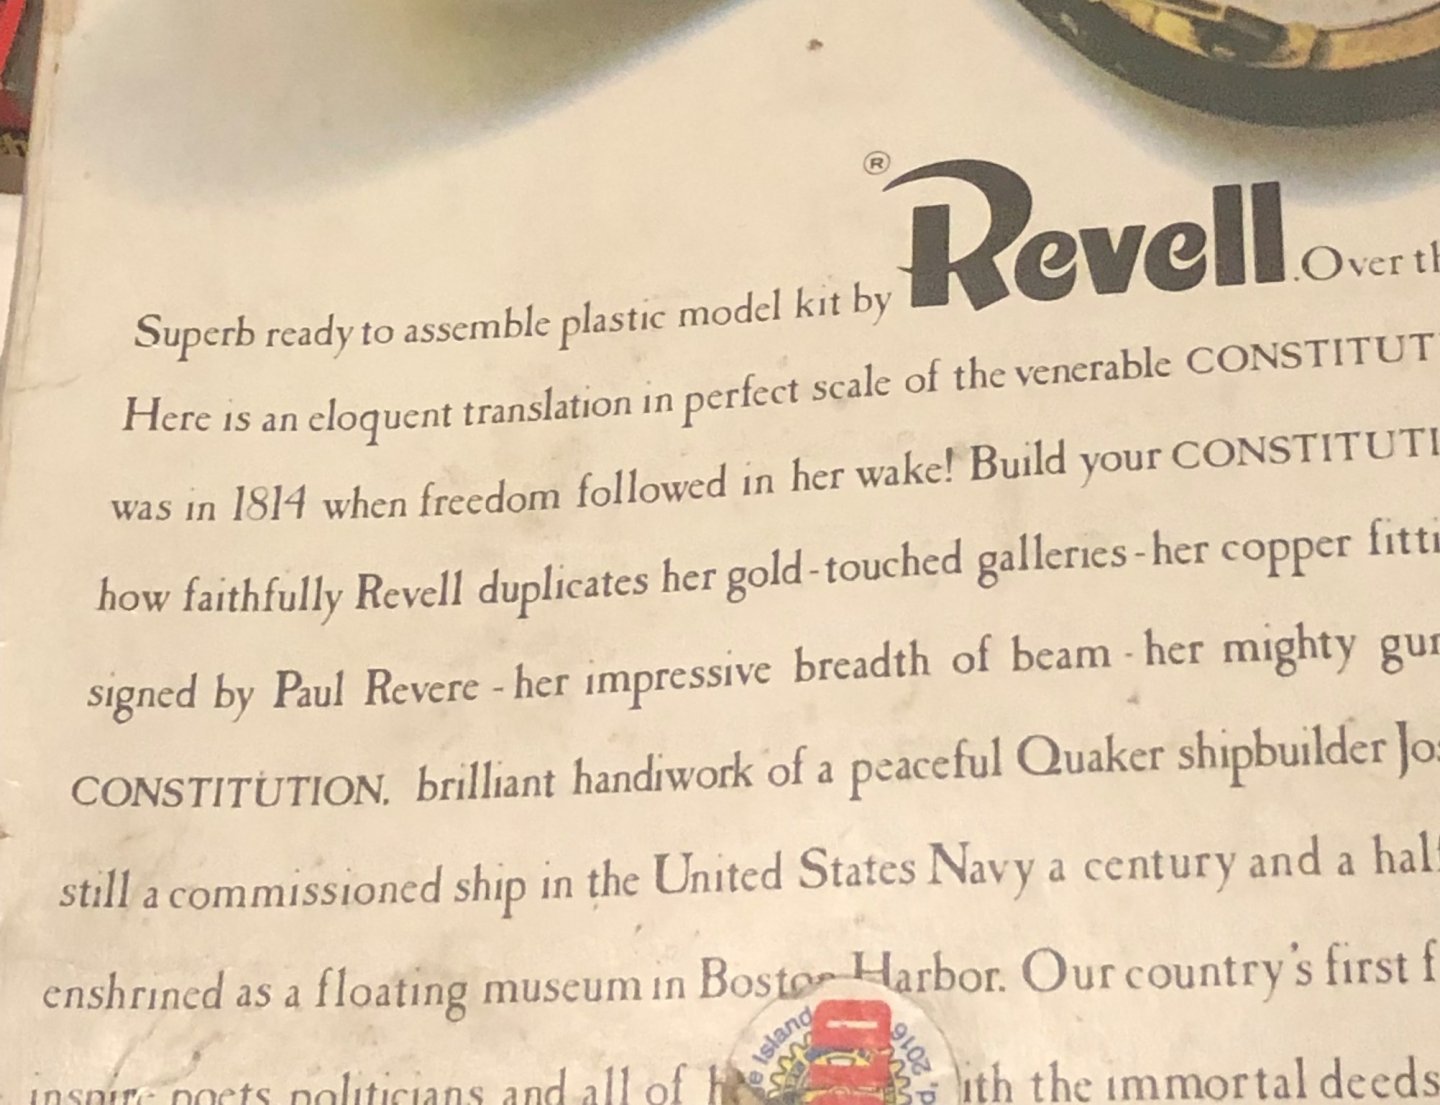
 Hello, everyone! I've been quietly reading these forums for some time and finally decided to chime in with my own build. Others' build logs have been a huge source of information and encouragement for me during the build process, so I hope this log can be of some benefit to others. I worked on this kit for a week or so about nine years ago, and only picked it up again this year. It's my first model kit I've built as an adult and first ship of any kind (Although as a teenager, I painted the hull of the larger 1:96 kit from Revell, then immediately gave up). I also started with zero knowledge of ships, so this whole thing is a learning experience. Much of the work I've done recently has aimed to undo or improve mistakes I made when I first started. One of my biggest mistakes was choosing to modify anything at all, as this slowed the process and made me feel daunted at various points. As a beginner, I regret spending so much time tweaking this kit instead of progressing through multiple kits over the years. Still, I'll mostly focus on modifications here because that's what I've most closely documented. These first photos are from 2015, so some of this is more retrospective. My earliest record is of hastily assembling the hull and deck and painting various details. I tried replicating the paint of the real ship, which lead me to notice differences in the bow and other details. I couldn't figure out why the model had a figurehead, which lead me to research that interesting history. At this point, I should mention that I had two of these kits to work with. Both were purchased at Goodwill totaling less than $5, so I recklessly decided to sacrifice one in an effort to make the bow section more closely resemble the real ship in its current state. Even though I had already installed the boomkins and metallic anchor thread, I ripped everything apart and temporarily ruined both kits. I cut off part of the stem from the donor ship far enough down so that it would extend to roughly the correct height when reshaped and attached to the working model. A bit of jump, but here's the result. I tried filling the gaps with Tamiya putty but you can still see the seam where the two pieces meet and the decorative relief doesn't match up. The other white details were made using thin strips of masking tape for curves and covered with acrylic sealant. The whole endeavor still misses the mark for accuracy, but it makes the bow more recognizable in profile, which I count as a success. At some point, I also lined the hull with real copper leaf but didn't like the look of it and painted over it with green. I think this was because most of my reference photos showed the ship in dry dock.
- 2 replies
-
- 1
-

-
- revell
- constitution
- (and 1 more)
-
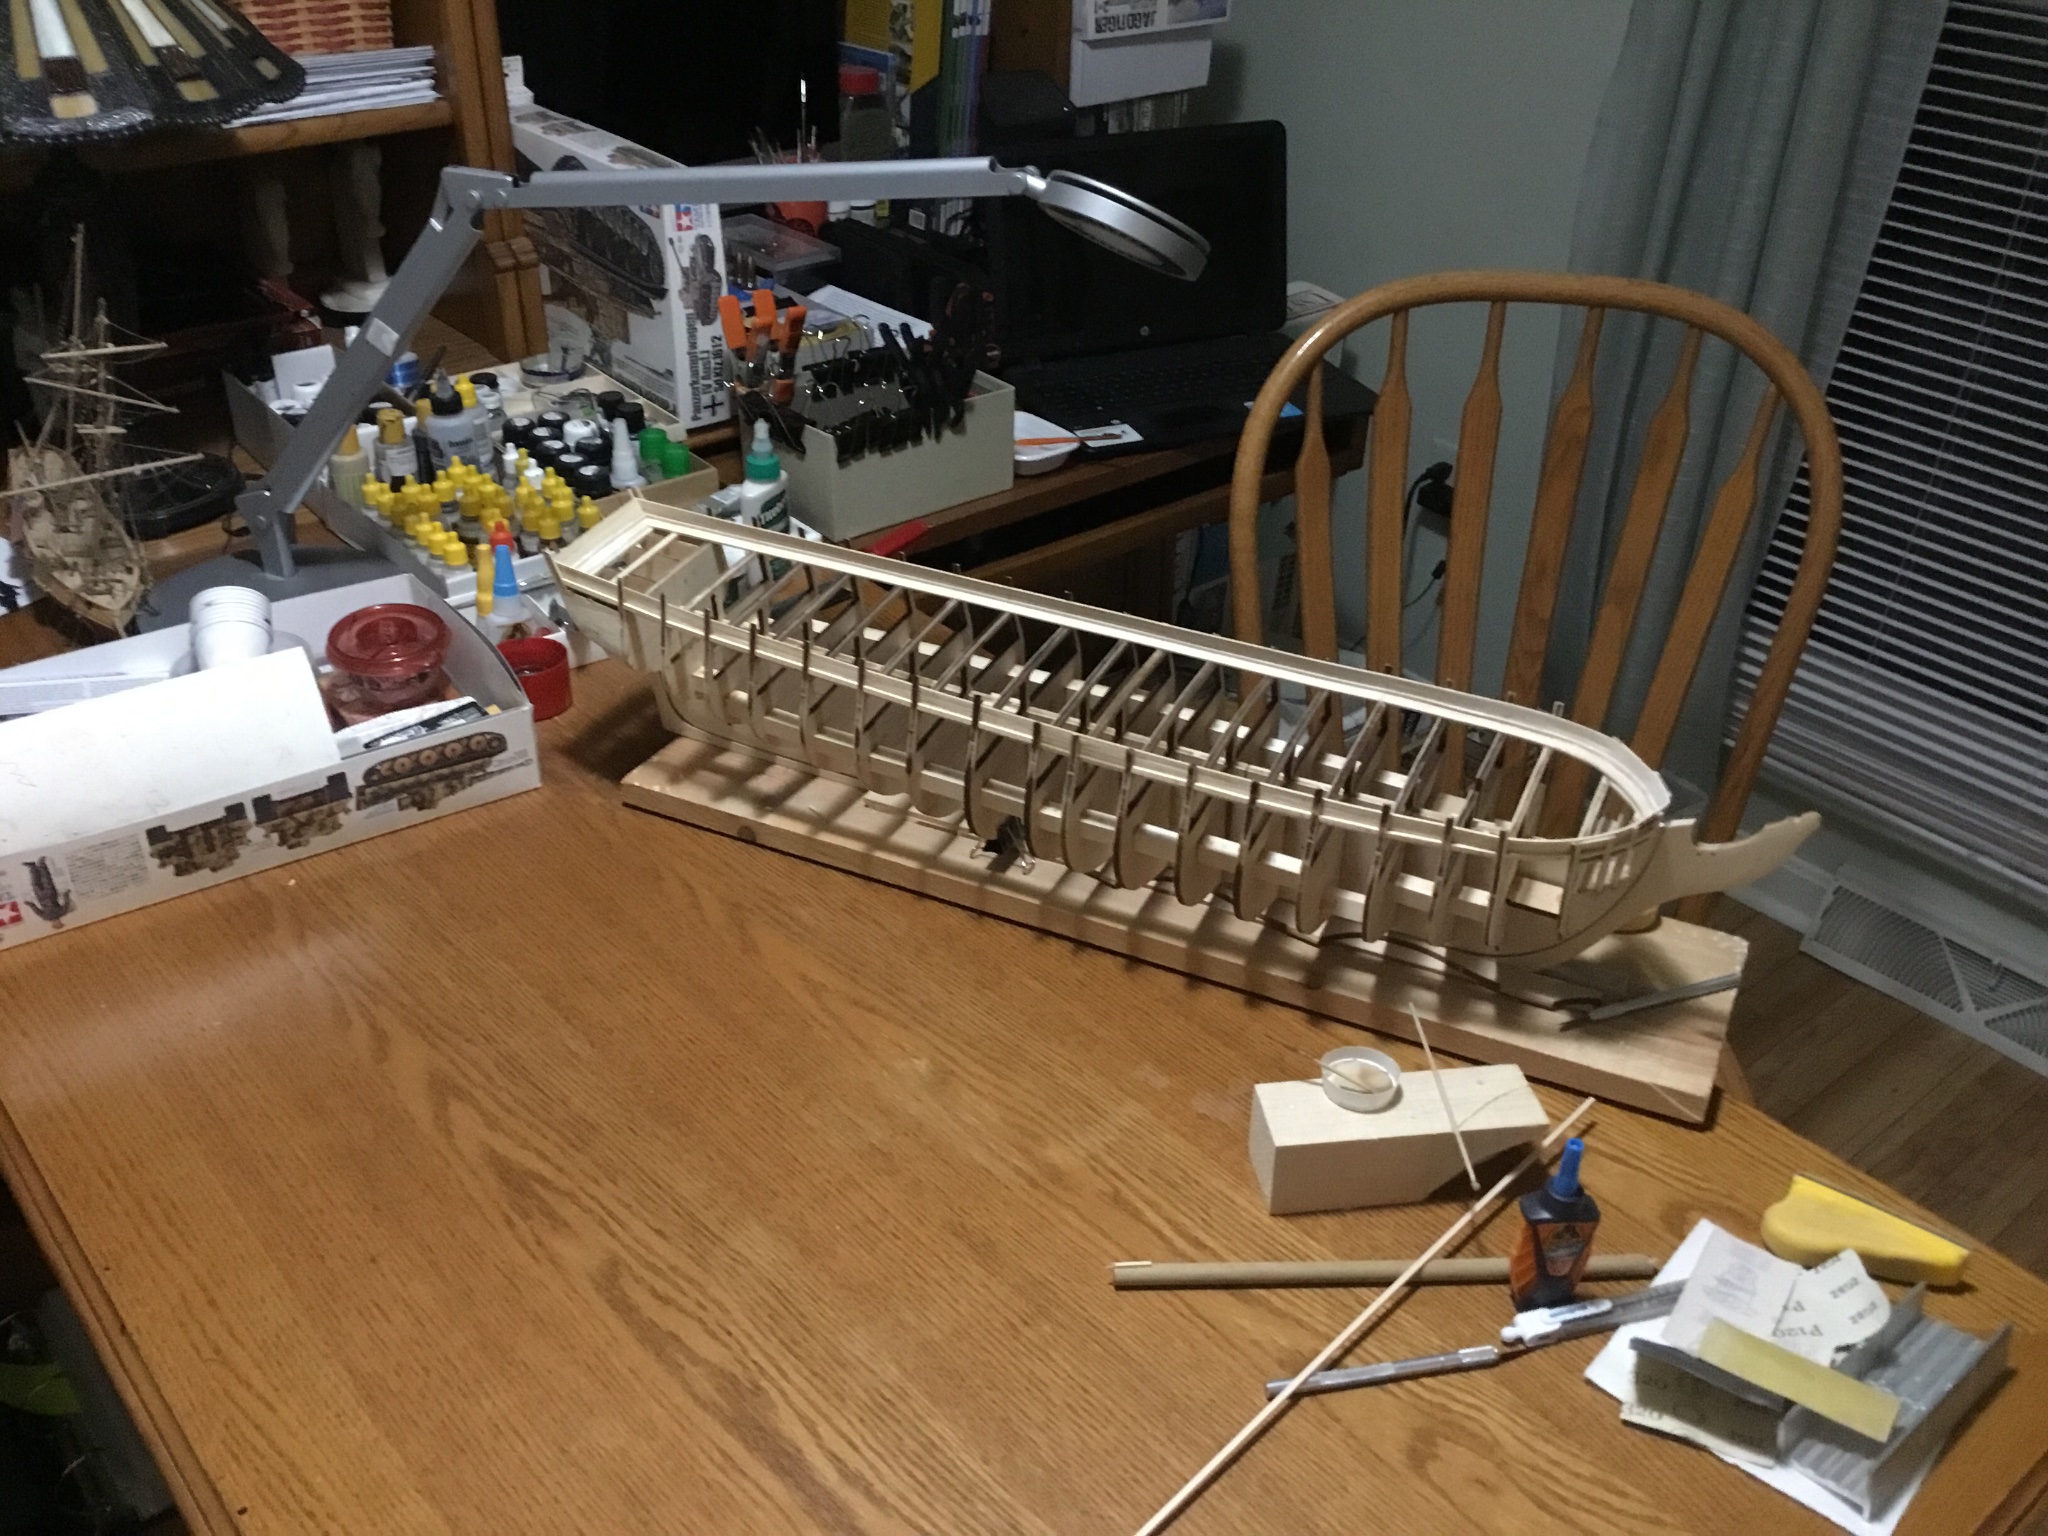
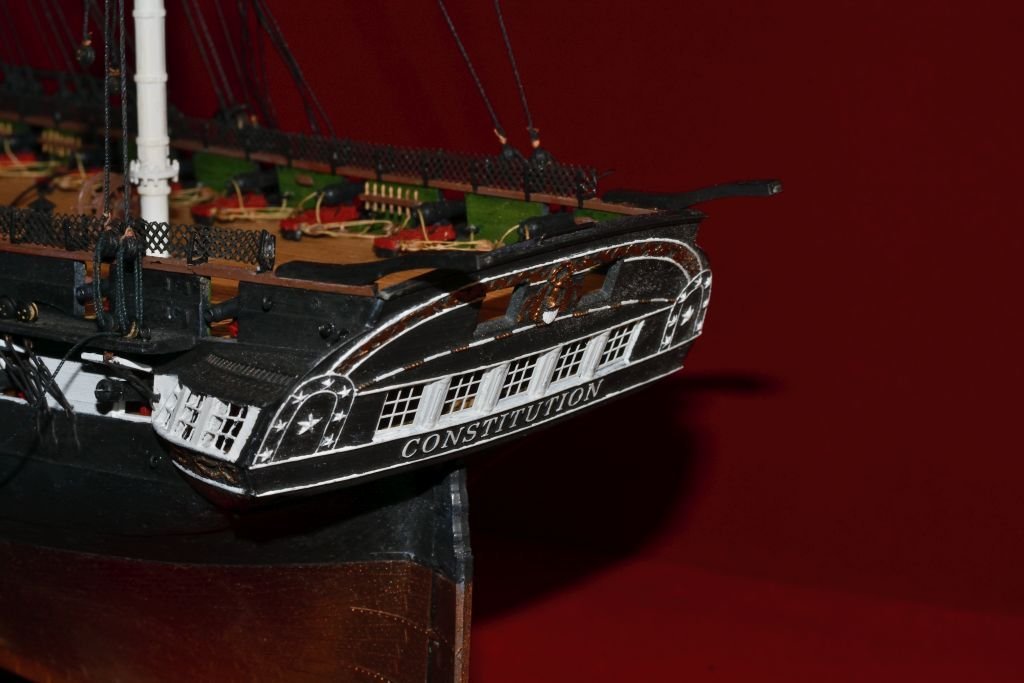
 Welcome to my USS Constitution build log. This is my second wooden ship model. I completed the Artesania Latina 1808 Swift model a little over a year ago (which just reminded me to close out that build log). My first attempt was going to be this USS Constitution (1:76 MS2040) kit. Fortunately it was backordered (Christmas gift from my pop), because after previewing the somewhat limited pages of instructions available online - I realized that the build would need to be based almost entirely on the 8 or so architect style giant plan sheets. That was out of my league, so I thought it prudent to start with something a bit easier. I chose the Swift 1805. Having completed the Swift, I took some months to complete a "Mayberry Street Miniatures" doll house project with my daughter. And then it was time to begin the Constitution. To set the stage, I am an extremely novice woodworker. I had gotten in a bit over my head with my Swift project (especially the rigging), but was quickly able to work my way out of any problems with a lot of thought, creativity, and help from the great modelers on this site. For me, this hobby is a series of challenges to be solved, often requiring the learning of a new skill - and new tools 🙂. This build log will be of most interest to newer modelers, but may offer a few chuckles or familiar memories for the old(er) salts. Given the complexity of the model, the sparse instructive guide, and the 8 detailed build sheets, I chose to follow Bob Hunt's practicum (fancy term for instructions). I ordered Mr Hunt's "Sophomore Course: USF Constitution" (a CD with 12 Chapters), with a photo CD add on (about 1,000 pictures of all stages of the build). The practicum was exactly what I needed, unfortunately, it didn't contain anything pertaining to masting and rigging. So if you think you'll need help with anything above the deck, you should consider ordering Mr. Hunt's "Sophomore Course: USF Constitution, Masting & Rigging" (6 chapters and an additional photo CD). I've printed the first 3 chapters so that I'm able to look ahead. I also refer often to the sheet plans, as well as the supplied kit guide. The kit itself is chock full of goodies. Though I'm a bit surprised at how small some of the cannons and rigging parts are - they seem to be significantly below scale. I inventoried the entire kit for parts, but found the effort to be surprisingly helpful in familiarizing myself with nautical terminology. I'm not going to provide a run-through of the kit, but suffice it to say, I found it worth the money (even though it was a gift!). There are very few things you can buy today that will provide years of challenge, entertainment, and a beautiful result for under $600 (retirement is a long ways off, so I'm working on this after work, and between sports and school events). I'll be updating as time permits, which means my updates will usually be backfilling my progress. I look forward to any comments and suggestions! Cheers! Andre
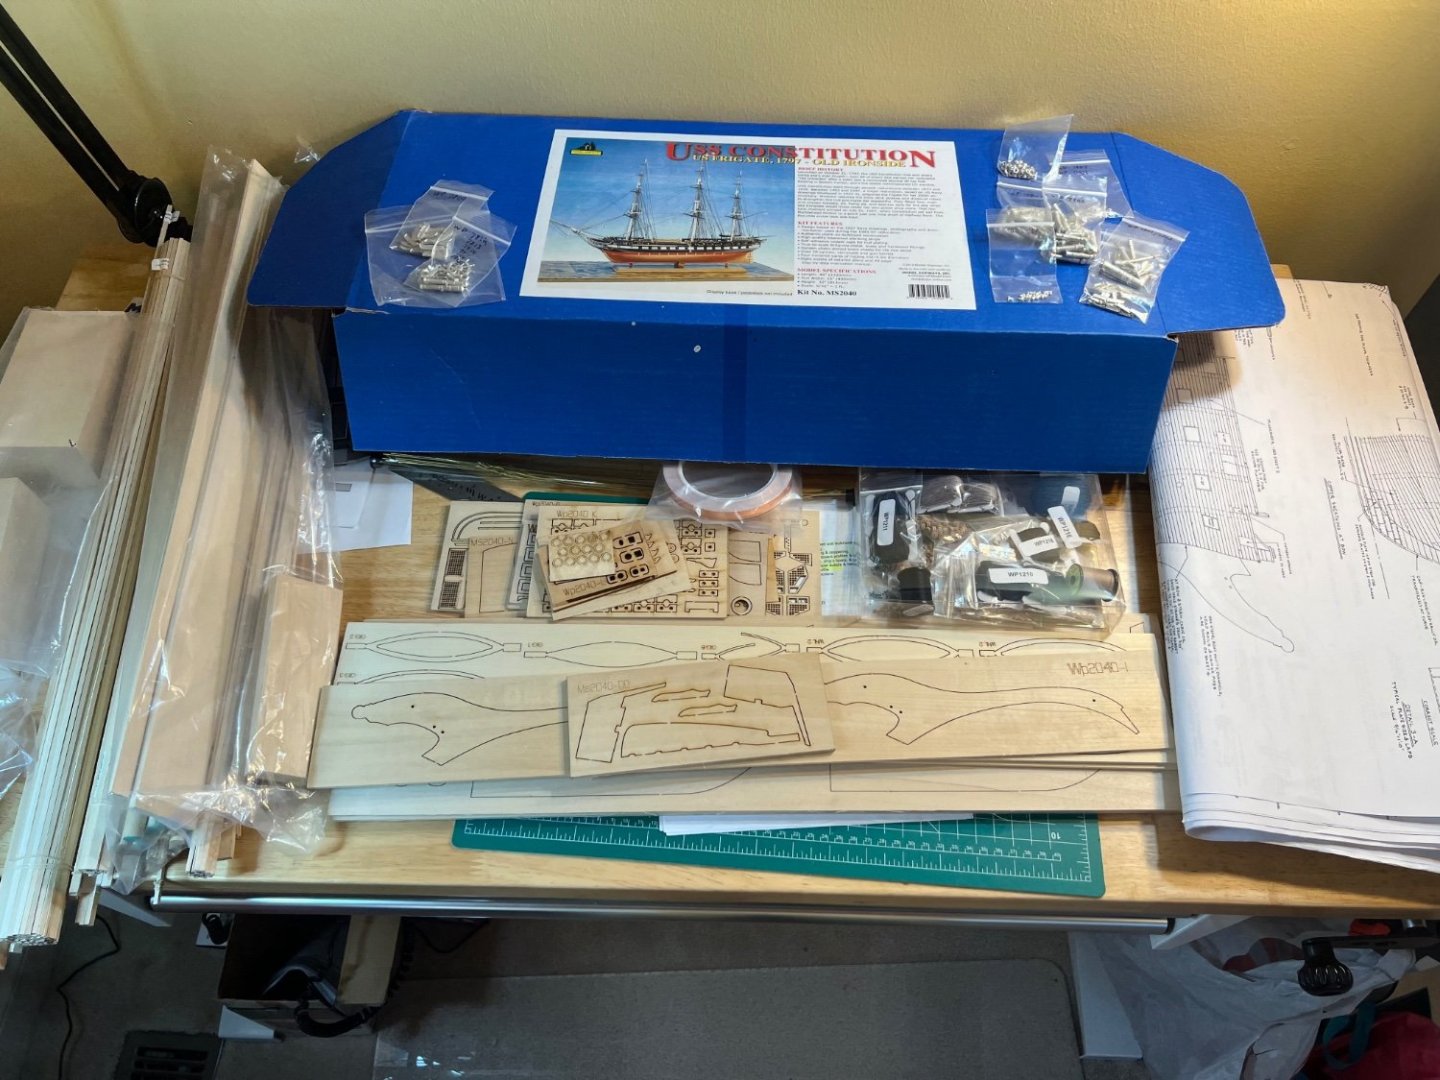
-
 My first attempt at a wood ship I usually build 1/32 plastic WWI and WWII aircraft and some armor. I’ve found it very fun so far. O2
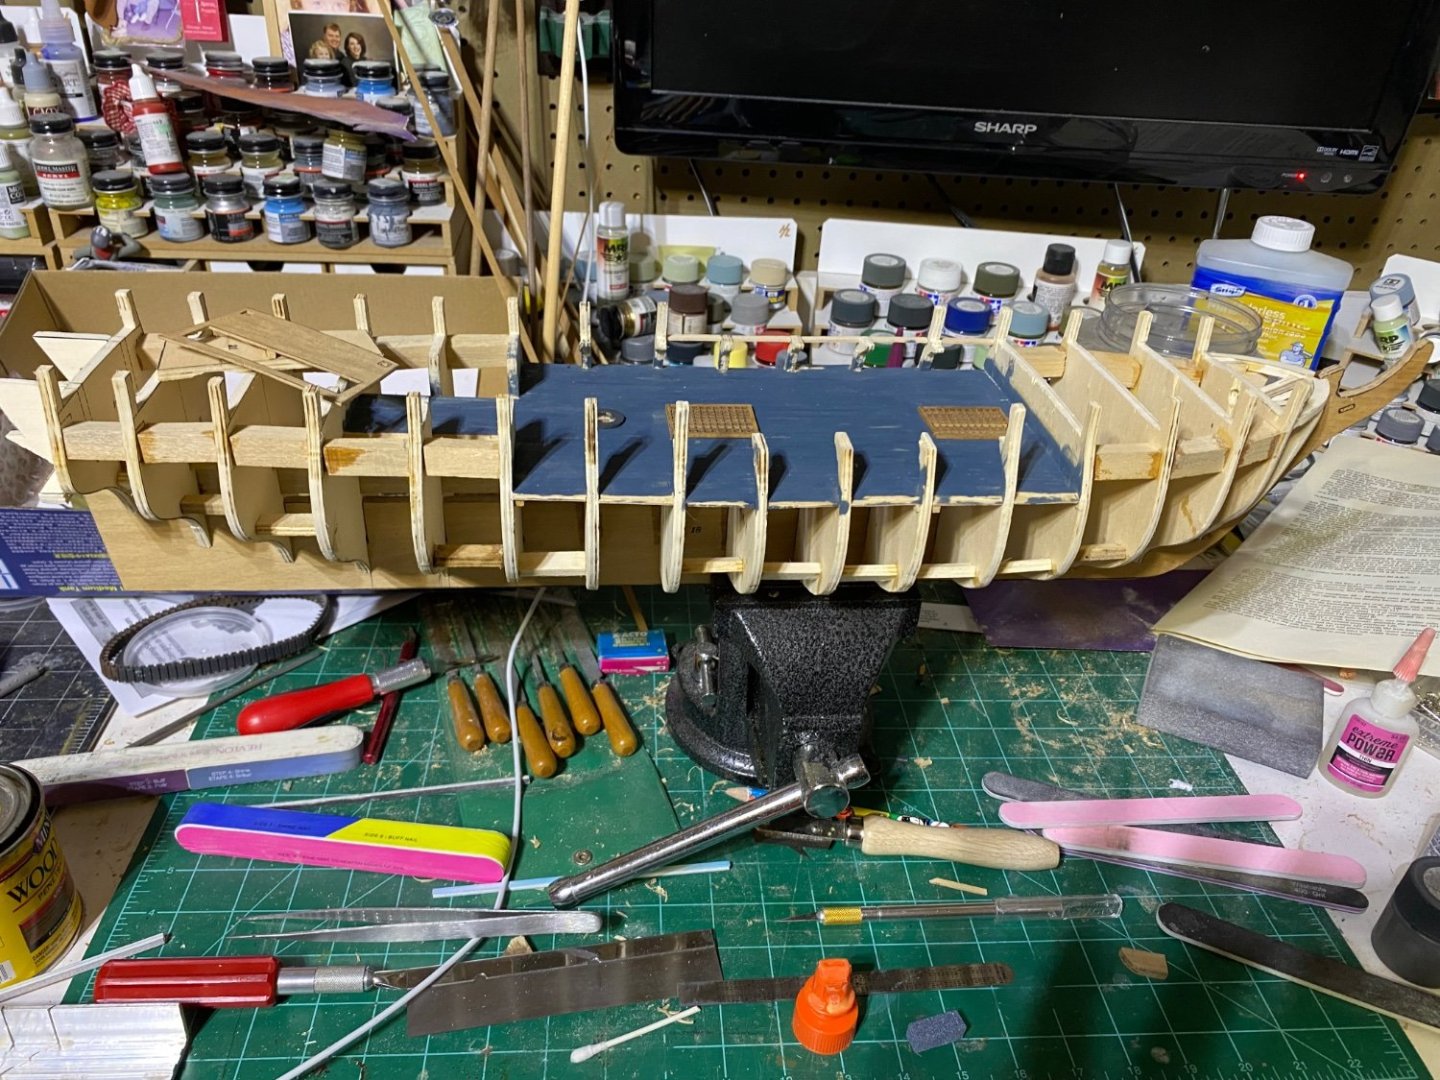


-
 Yikes, I goofed. I don't know how I set this build log up in the wrong era. I couldn't see a way to move from one era to another, so I deleted everything I could. I'll try setting up the build log again tomorrow - hopefully in the right place. sorry...
 -
 I got this kit from Børge. Børge is a member of this forum and built the Dragon. His wish was always to build the Constitution one day. Due to illness, he is no longer able to build. A few weeks ago we visited him and his wife in Norway and he gave me this kit and asked me to build it. I am very happy to comply with this. As a result, the Victory and Duyfken are on hold until the Constitution is finished. I'm going to do my best to build a beautiful ship. My guide for this build will be the build log from Tom aka usedtosail. Sjors
 -
 Hello friends. I am here again with my new project 1:76 scale USS Constitution model. Of course, it will be a build from scratch again. While making the model, I will use the Constitution book as well as the kit plan of Model Shipways. Model Shipways' kit does not include gun deck details, but I will add the gun deck and its details to my model. My current thought is to make full rigging equipment except sails, but I don't know what the time will show us because it will be a long-term project. Again, as always, I am open to constructive criticism, comments, suggestions and recommendations.The pictures show what I have done so far and I'll continue to share as I progress. Kind regards.


-
 I have made the commitment to proceed with this build. Not without a lot of trepidation. I have not been a model builder, I have been a wood carver for 25 years, and have taught wood carving for the last 10 years. I needed a change of pace. Last year one of my carving students, a talented 11 year old, wanted to build a boat. Together we built the Mare Nostrum, it was not perfect but it was a success and has given me the courage to do this build. Due to an accident I only have limited use of my right hand. But I have made compensations that enabled me to carve. Realistically, I had to recognize that my limitations are such that I will not be doing any but minimal rigging, although I may attempt to complete the masts. I have read almost all of the other build logs of the USS Constitution by other members and have them all bookmarked on my computer. To begin, I have decided to follow the path of JSGerson and to build whale boats and pennace first. If I was not able to finish those then I would not have spoiled the kit for someone else. Unlike JSGerson and others who decided to build out the gun deck, I have decided that when I finish the small boats I will build the gun deck as set forth in the plans. Unlike Gerson I have not acquired the naval plans or Hunt's practicum and will instead rely on the numerous build logs here and the guidance of its members. I have ordered the styrene and the 1/32 basswood needed for the small boats. I have a 25 year collection of carving tools including the latest high tech rotary hand-pieces with a large assortment of micro bits and cutters. I will forego the pictures of the kit contents and will begin with pictures of the pieces cut out for the small boats. I did manage to get them removed with only one minor break that was easily repaired with CA. My only camera is my cell phone. I will start with the pictures of my carving studio where the construction will commence. I look forward to working with all interested and hope I will be able to continue to get young people involved in he hobbies related to working with wood. My past carving students assisted me in the building of my new studio and we look forward to using it for years to come.
 -
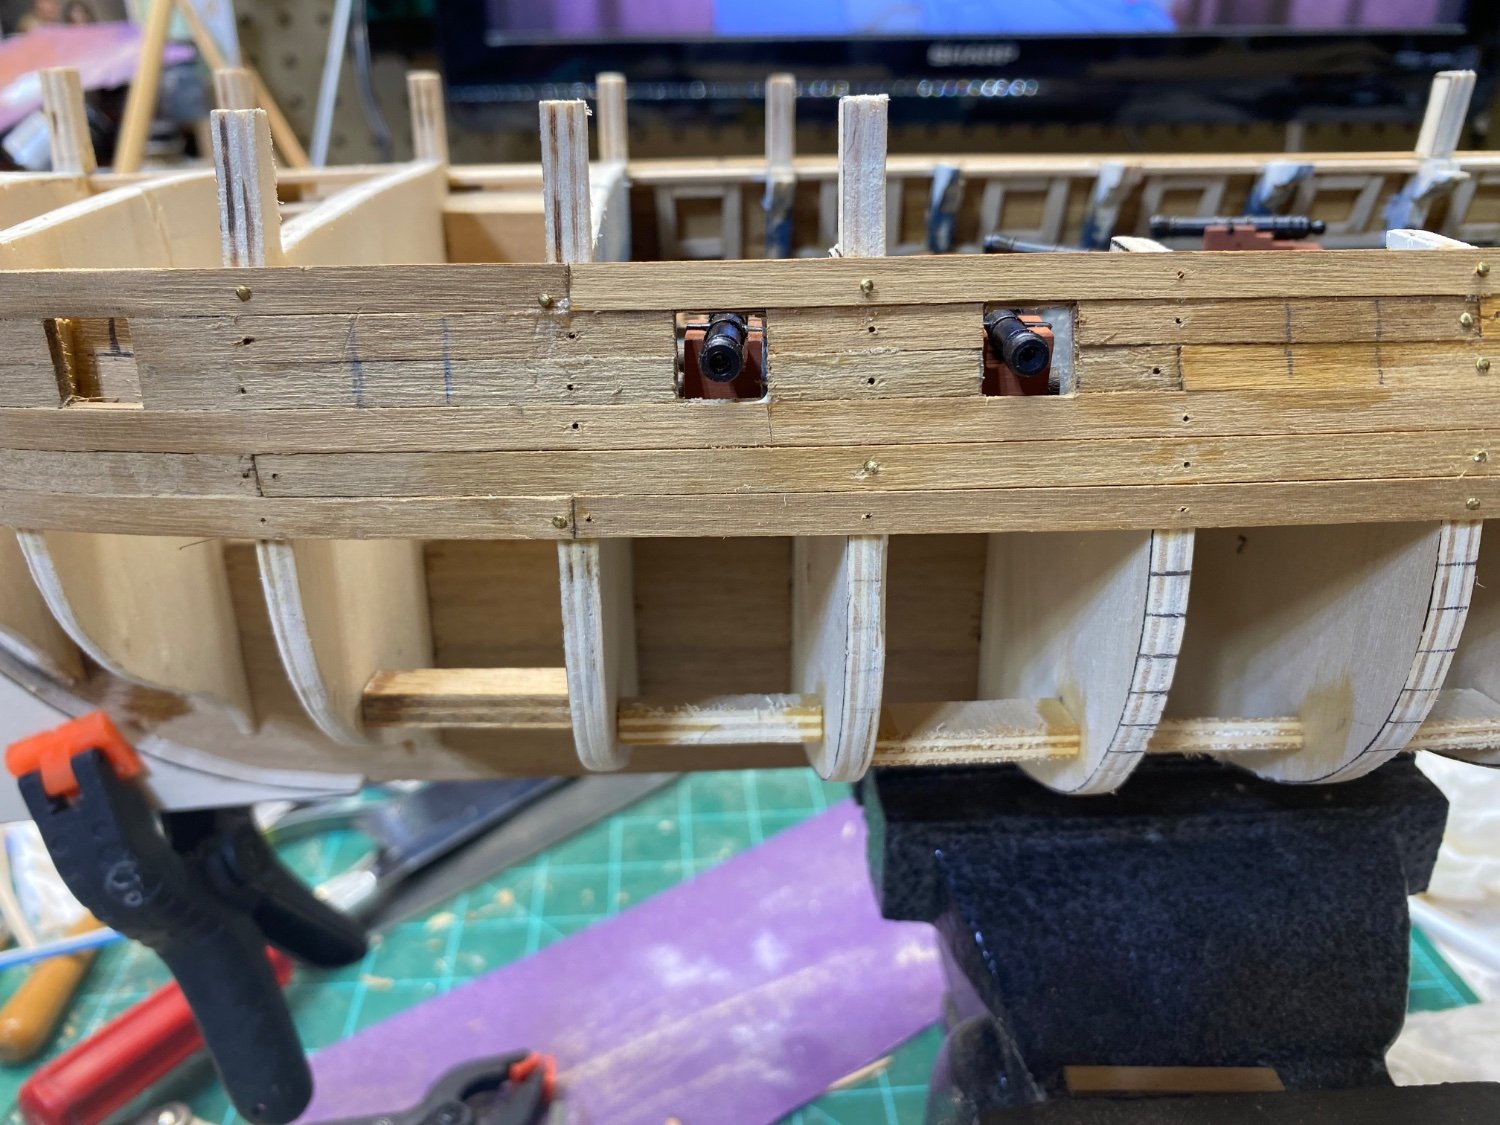
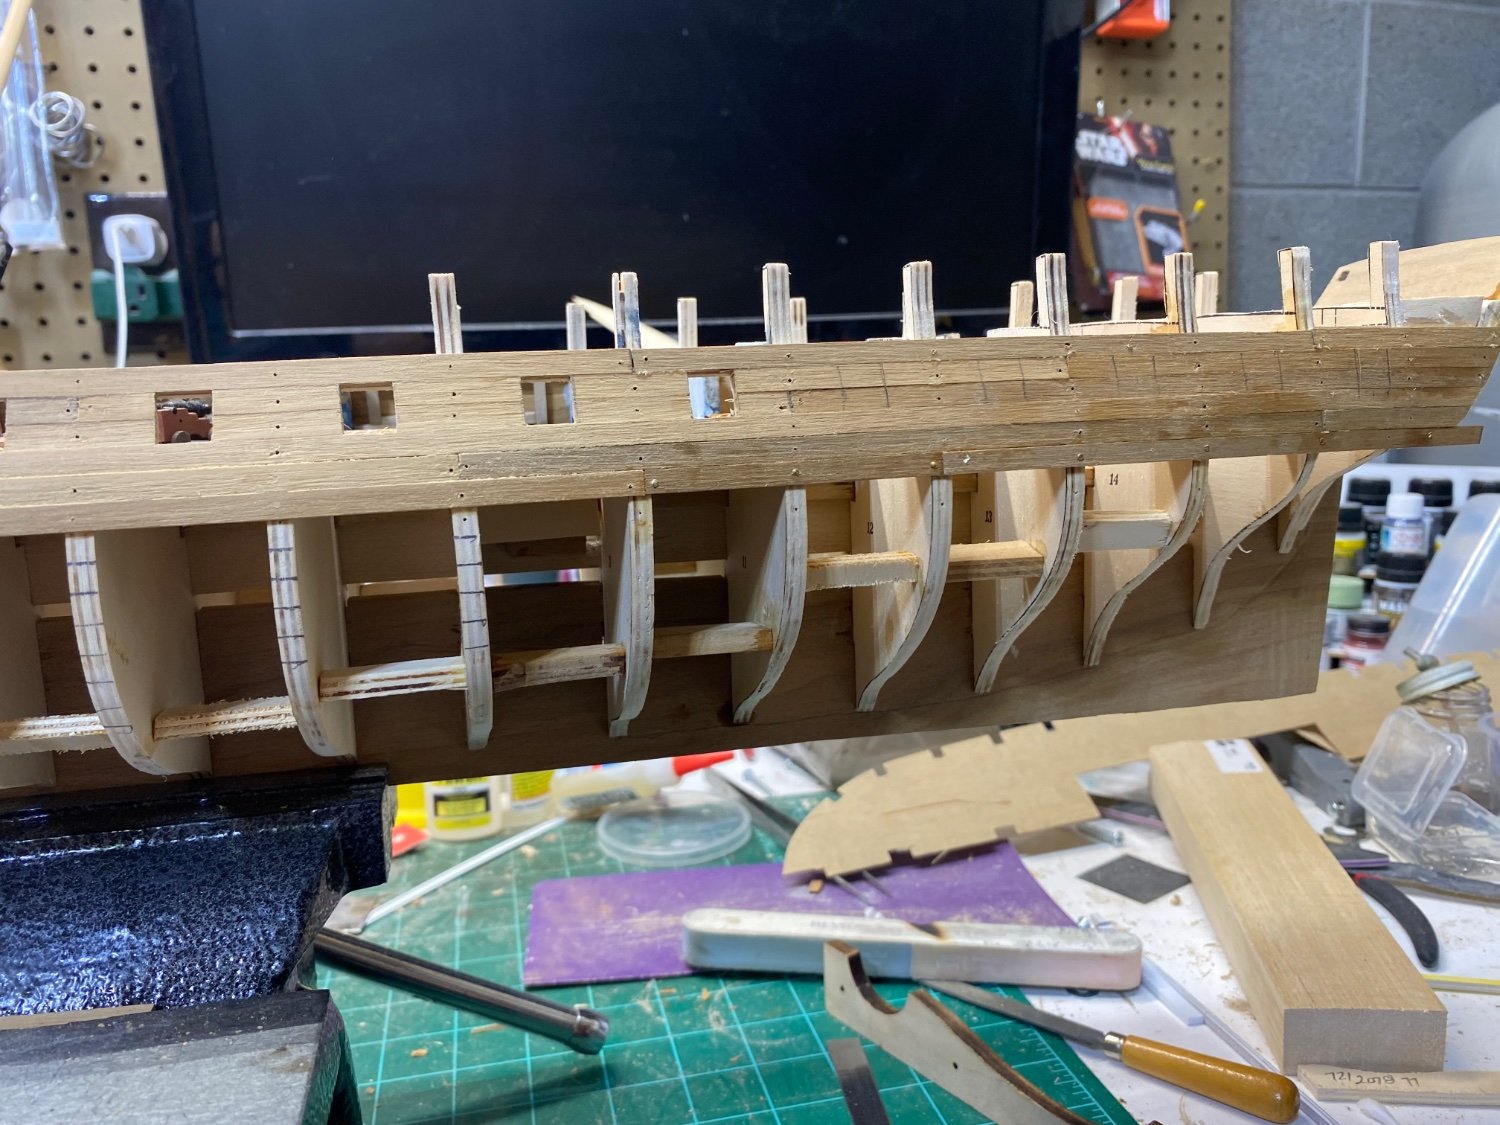
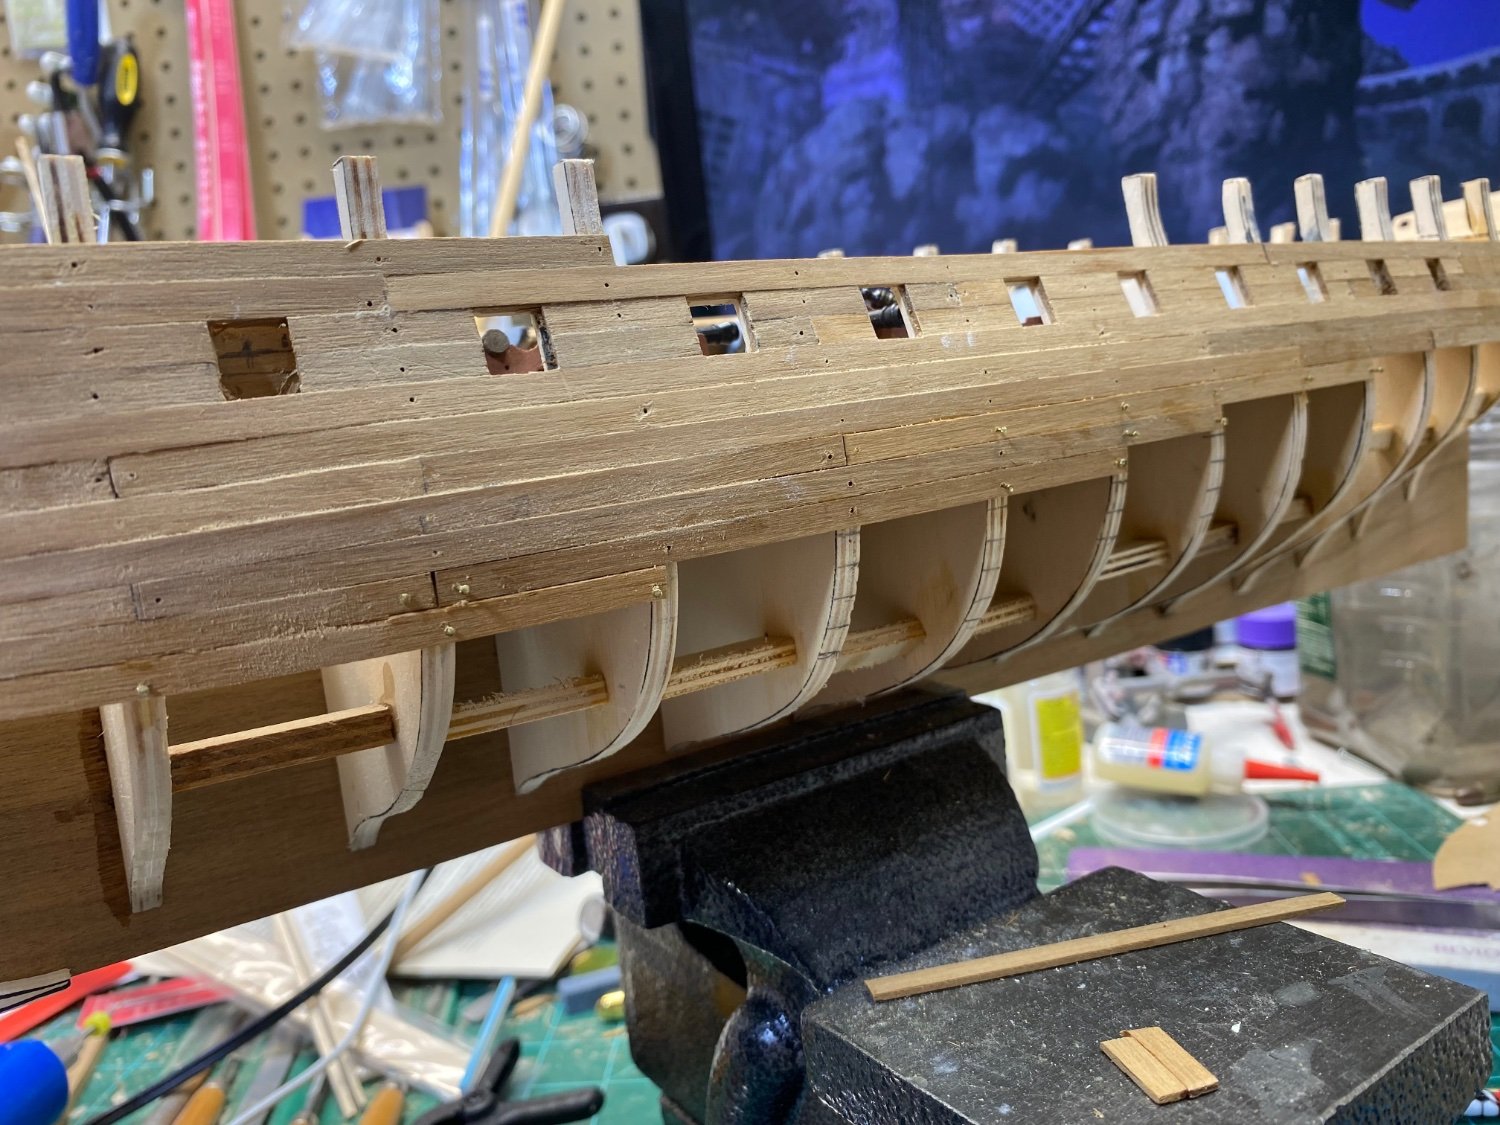
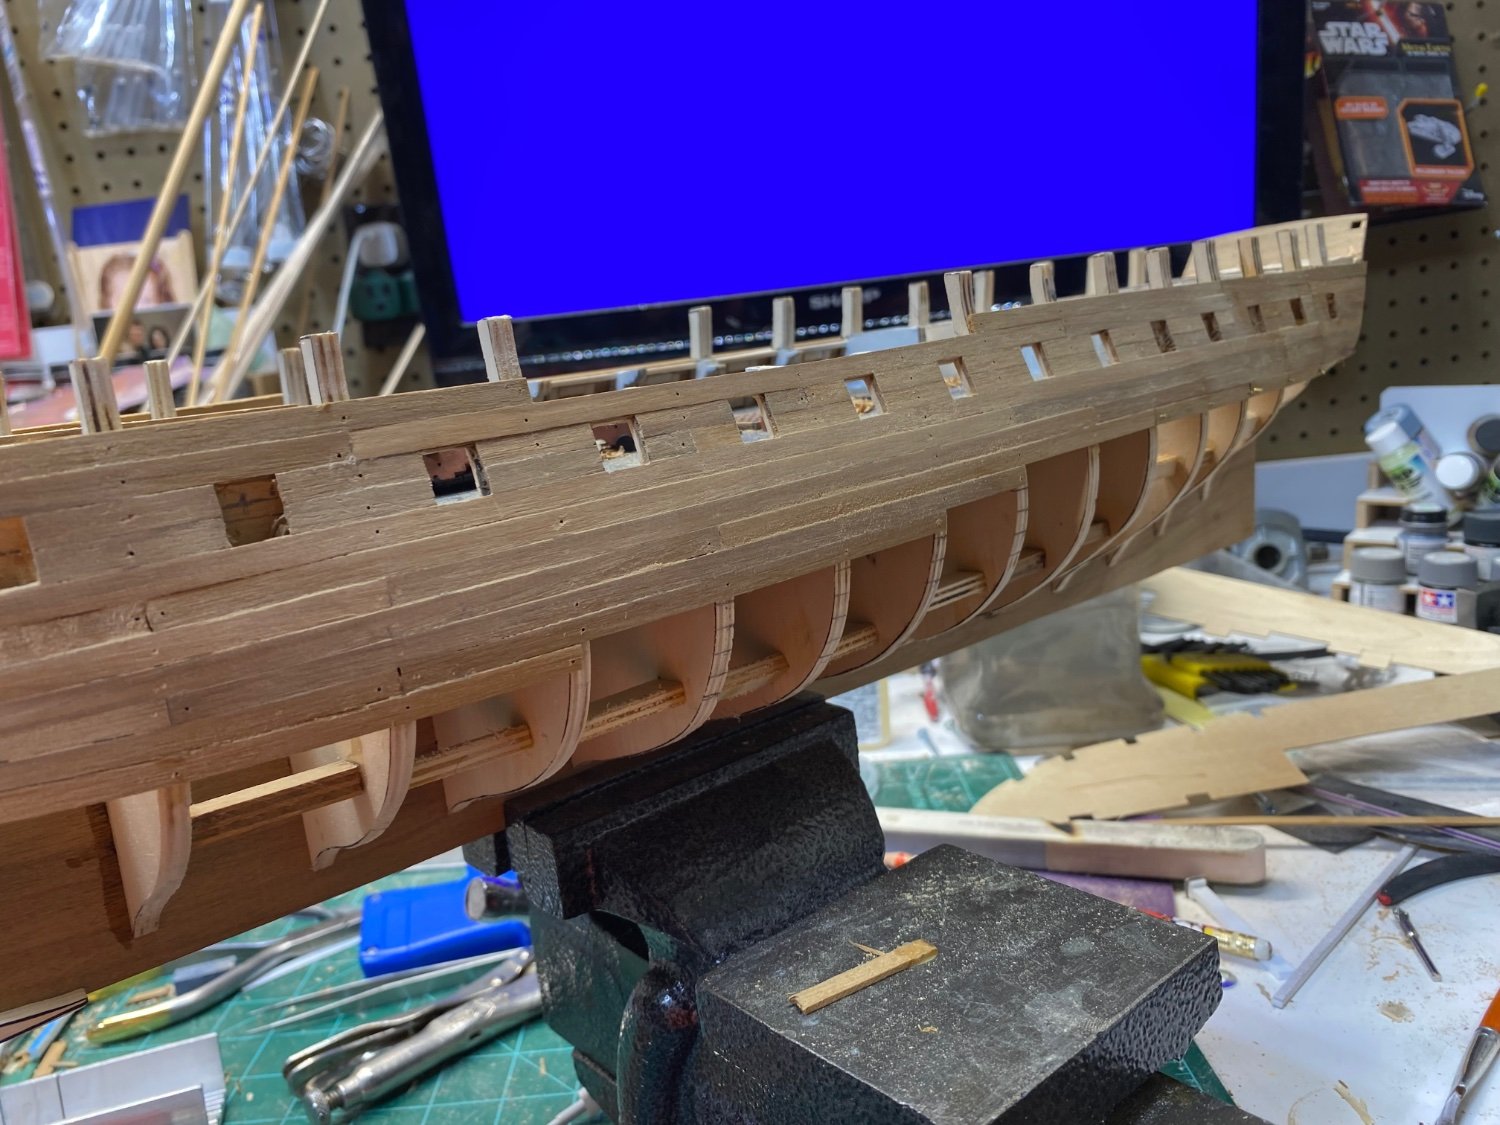
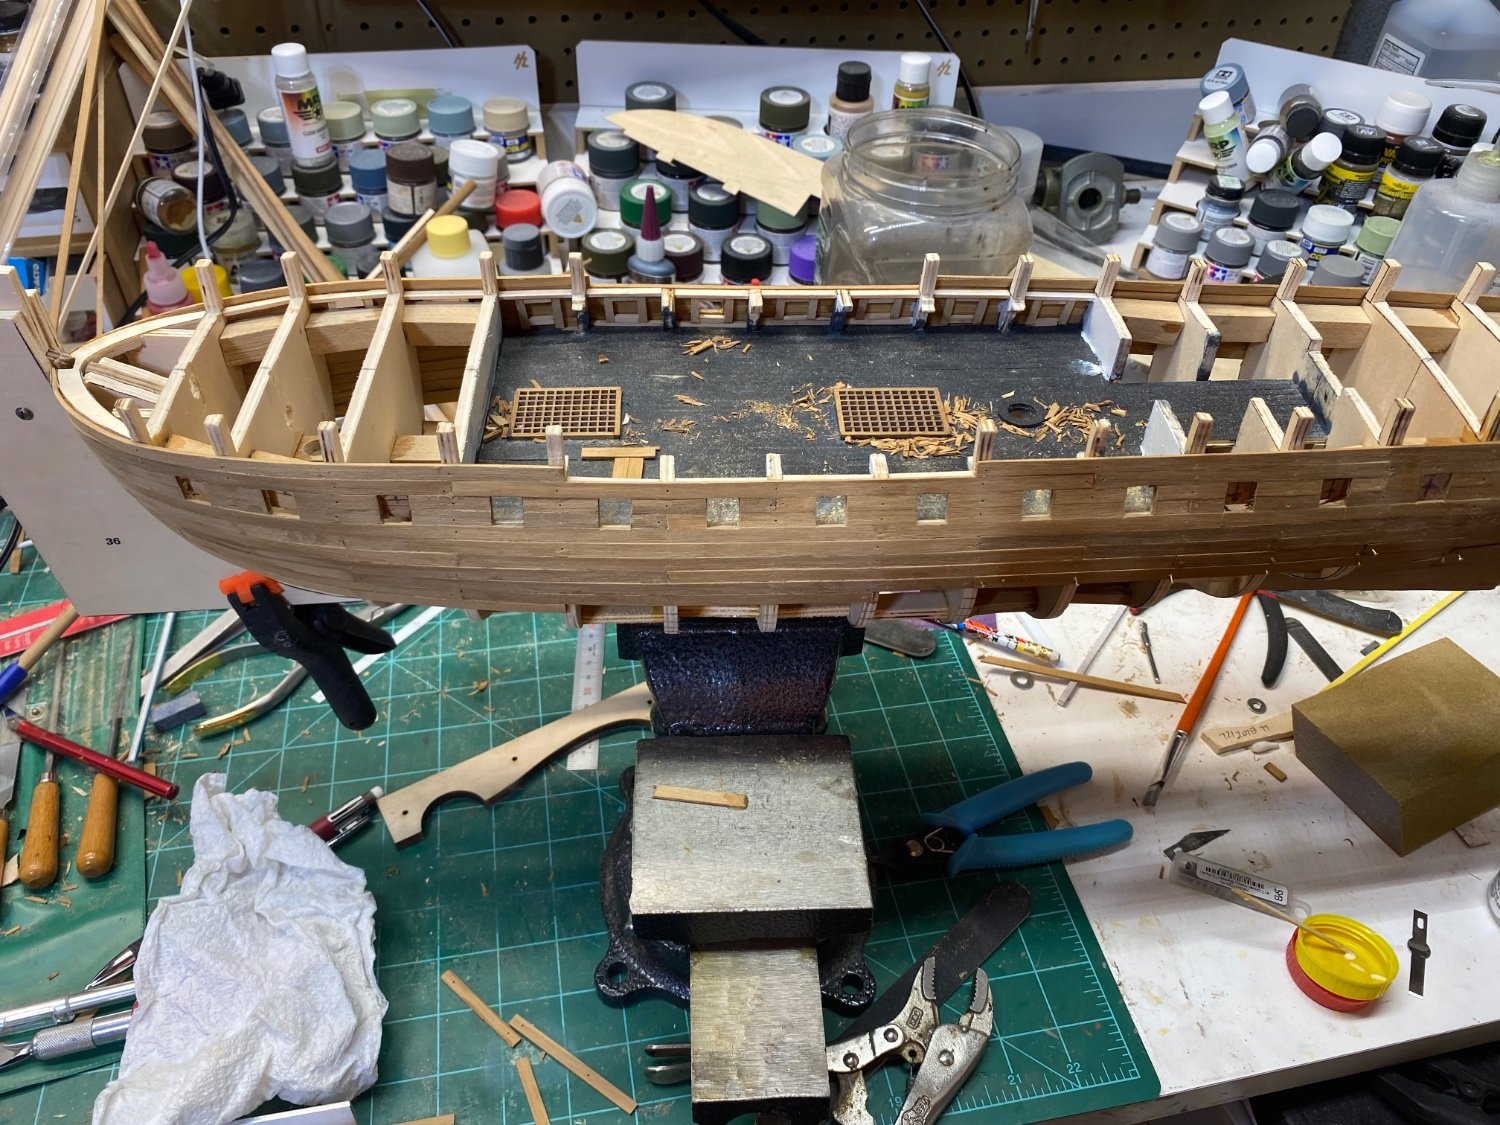
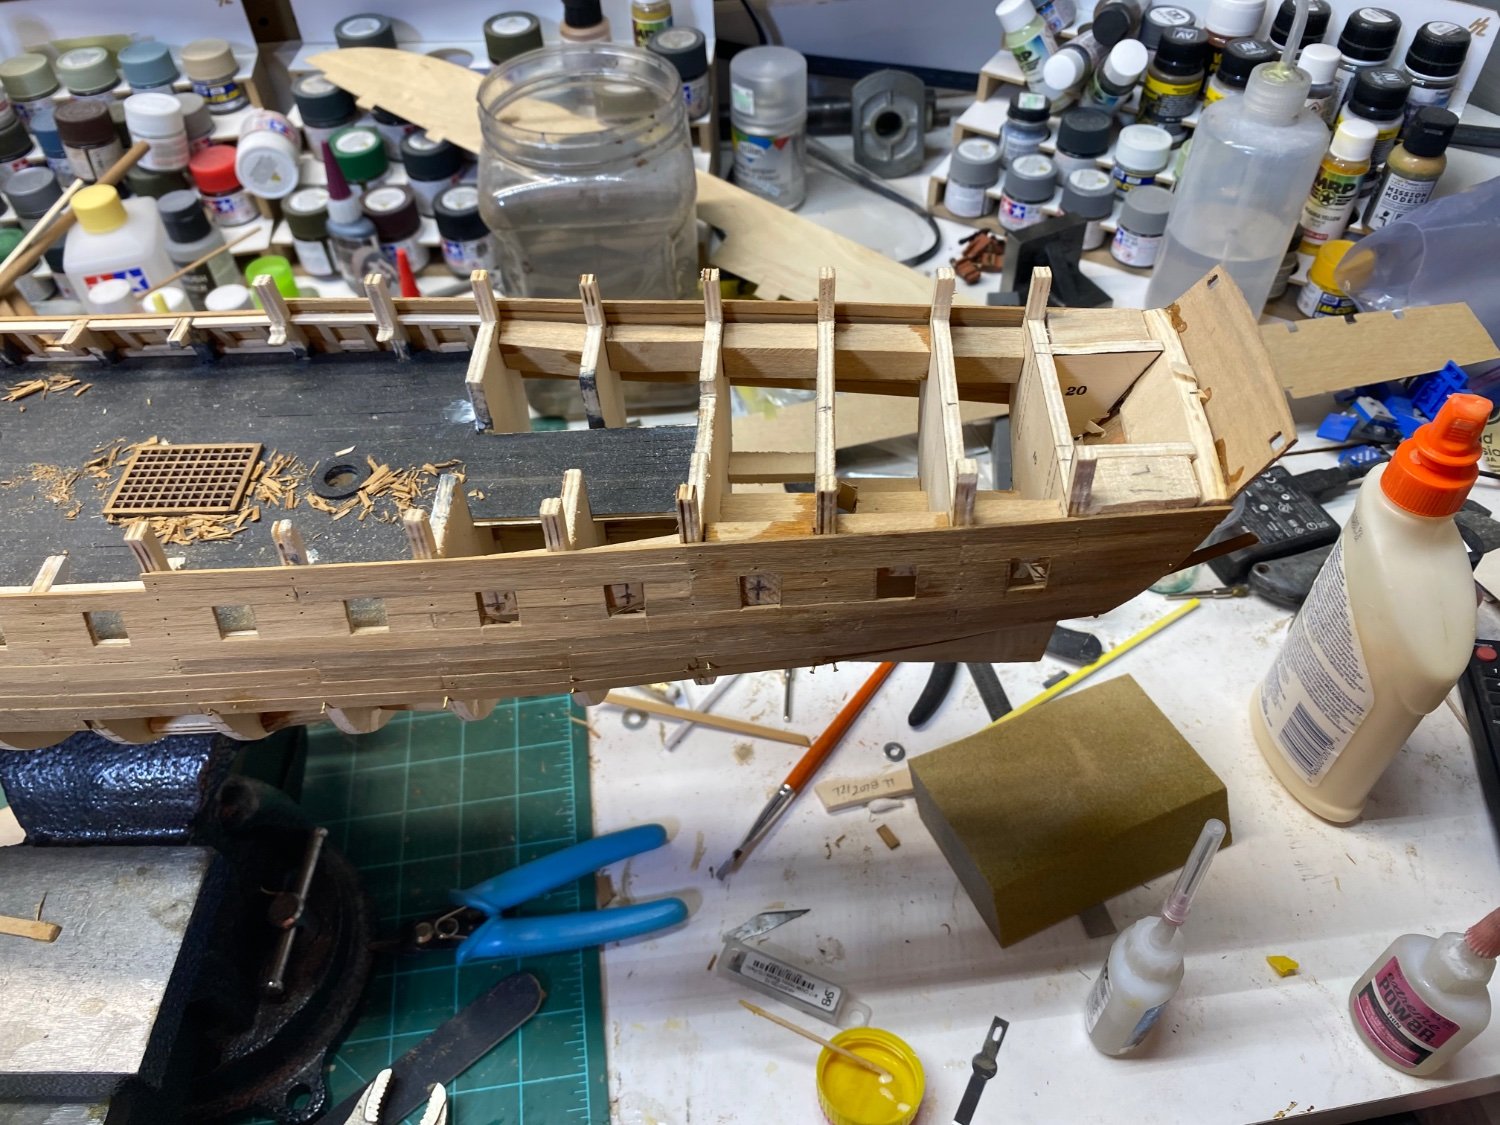
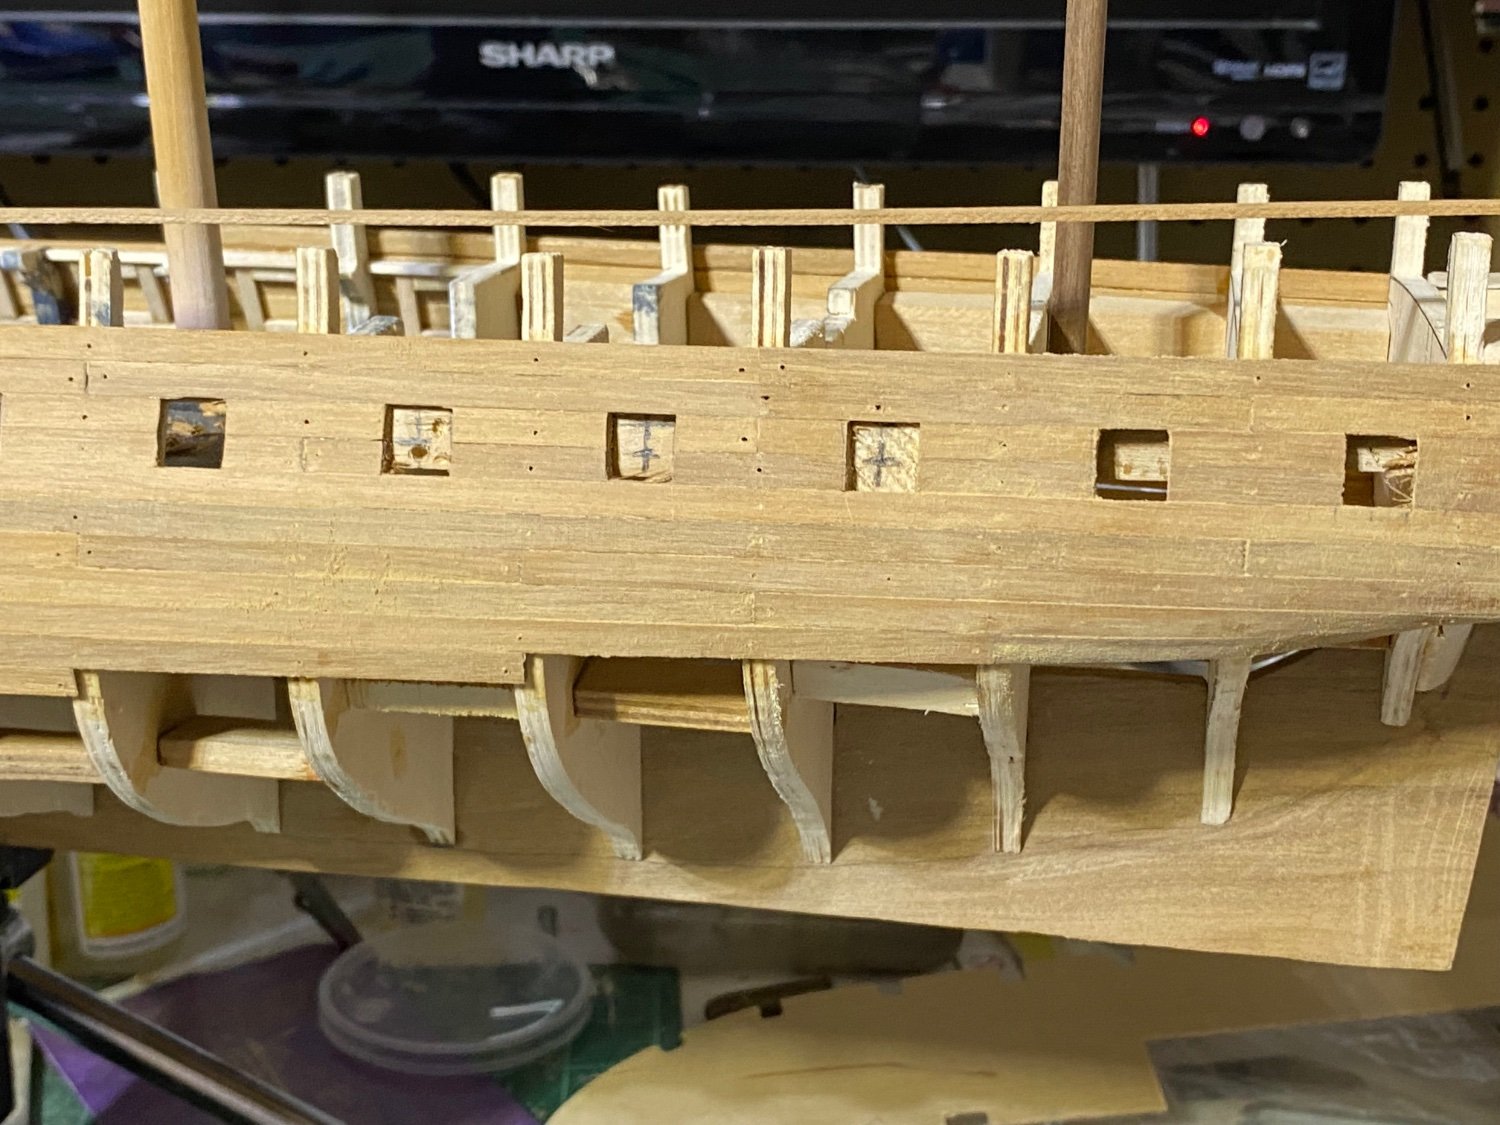
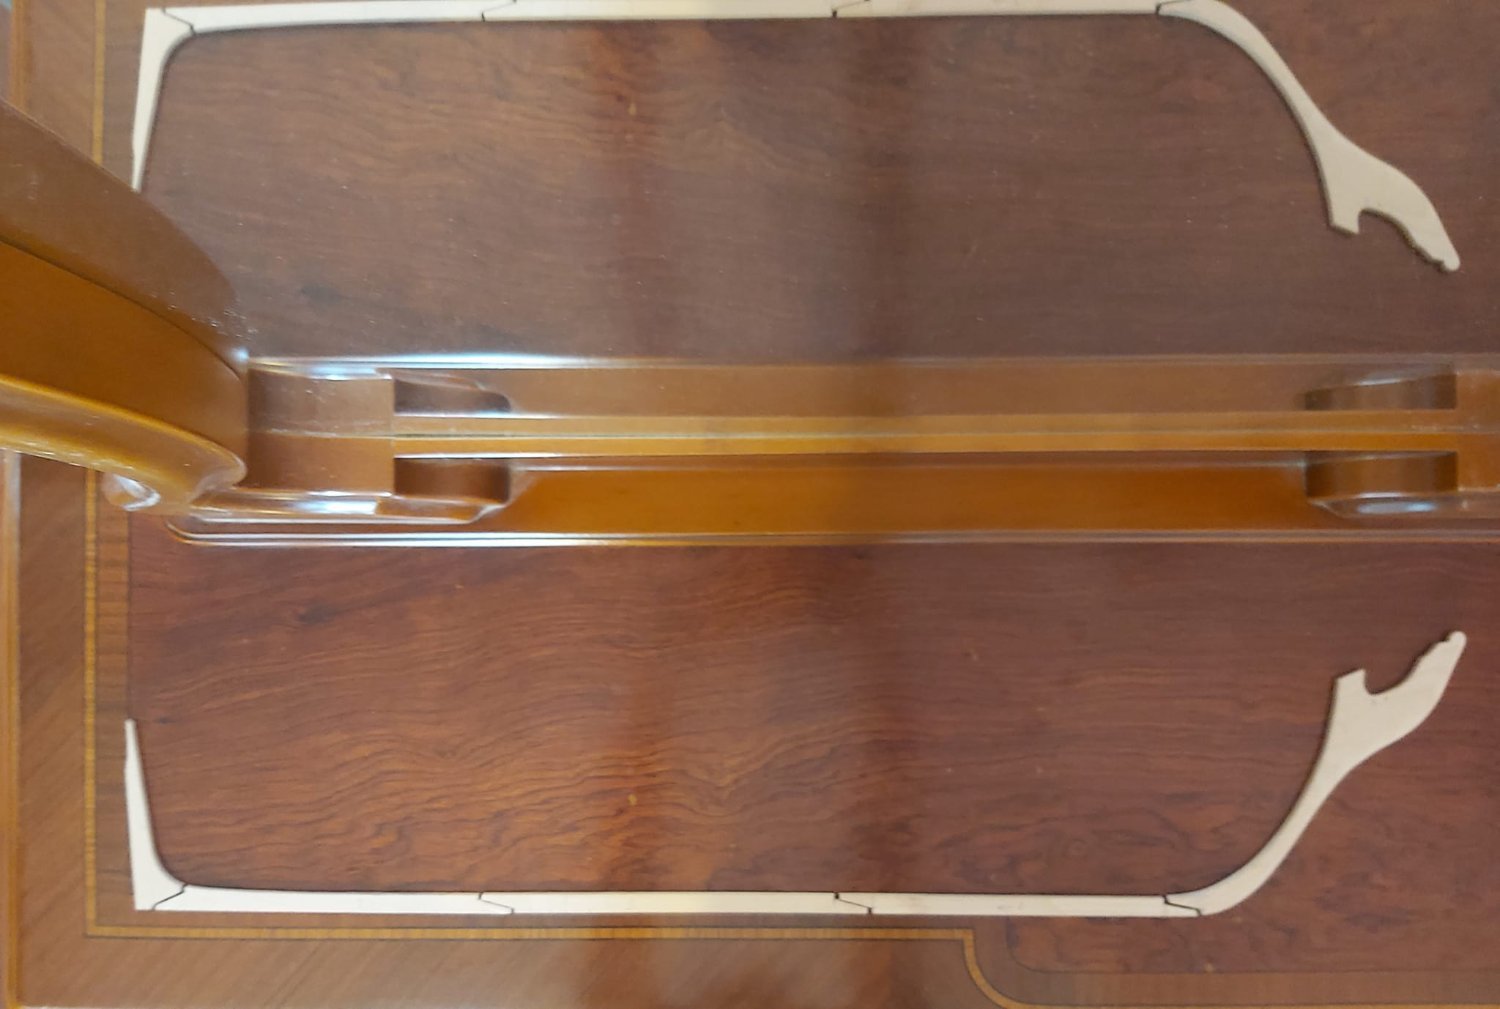
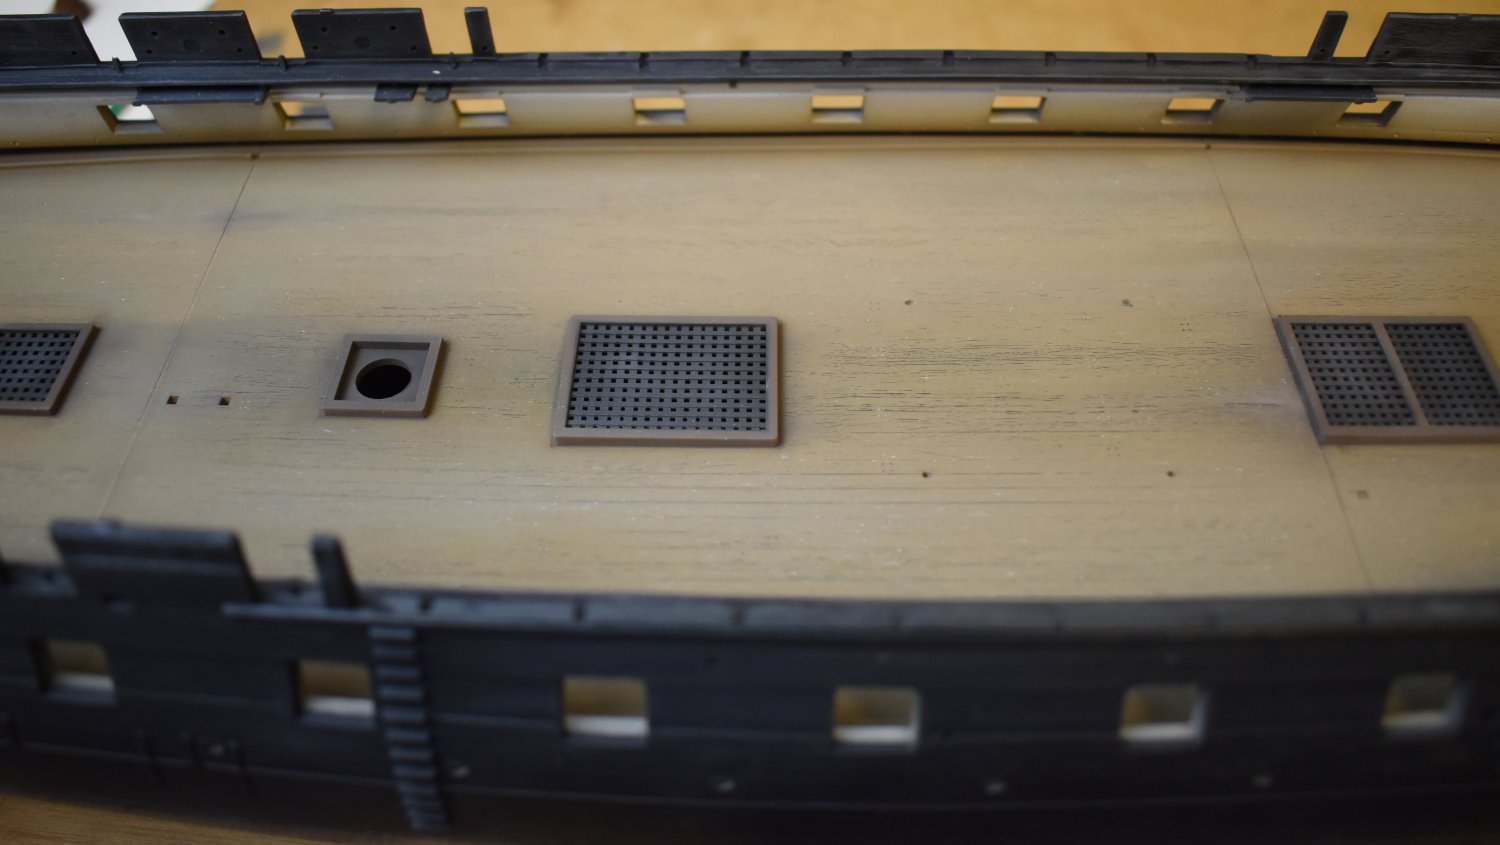
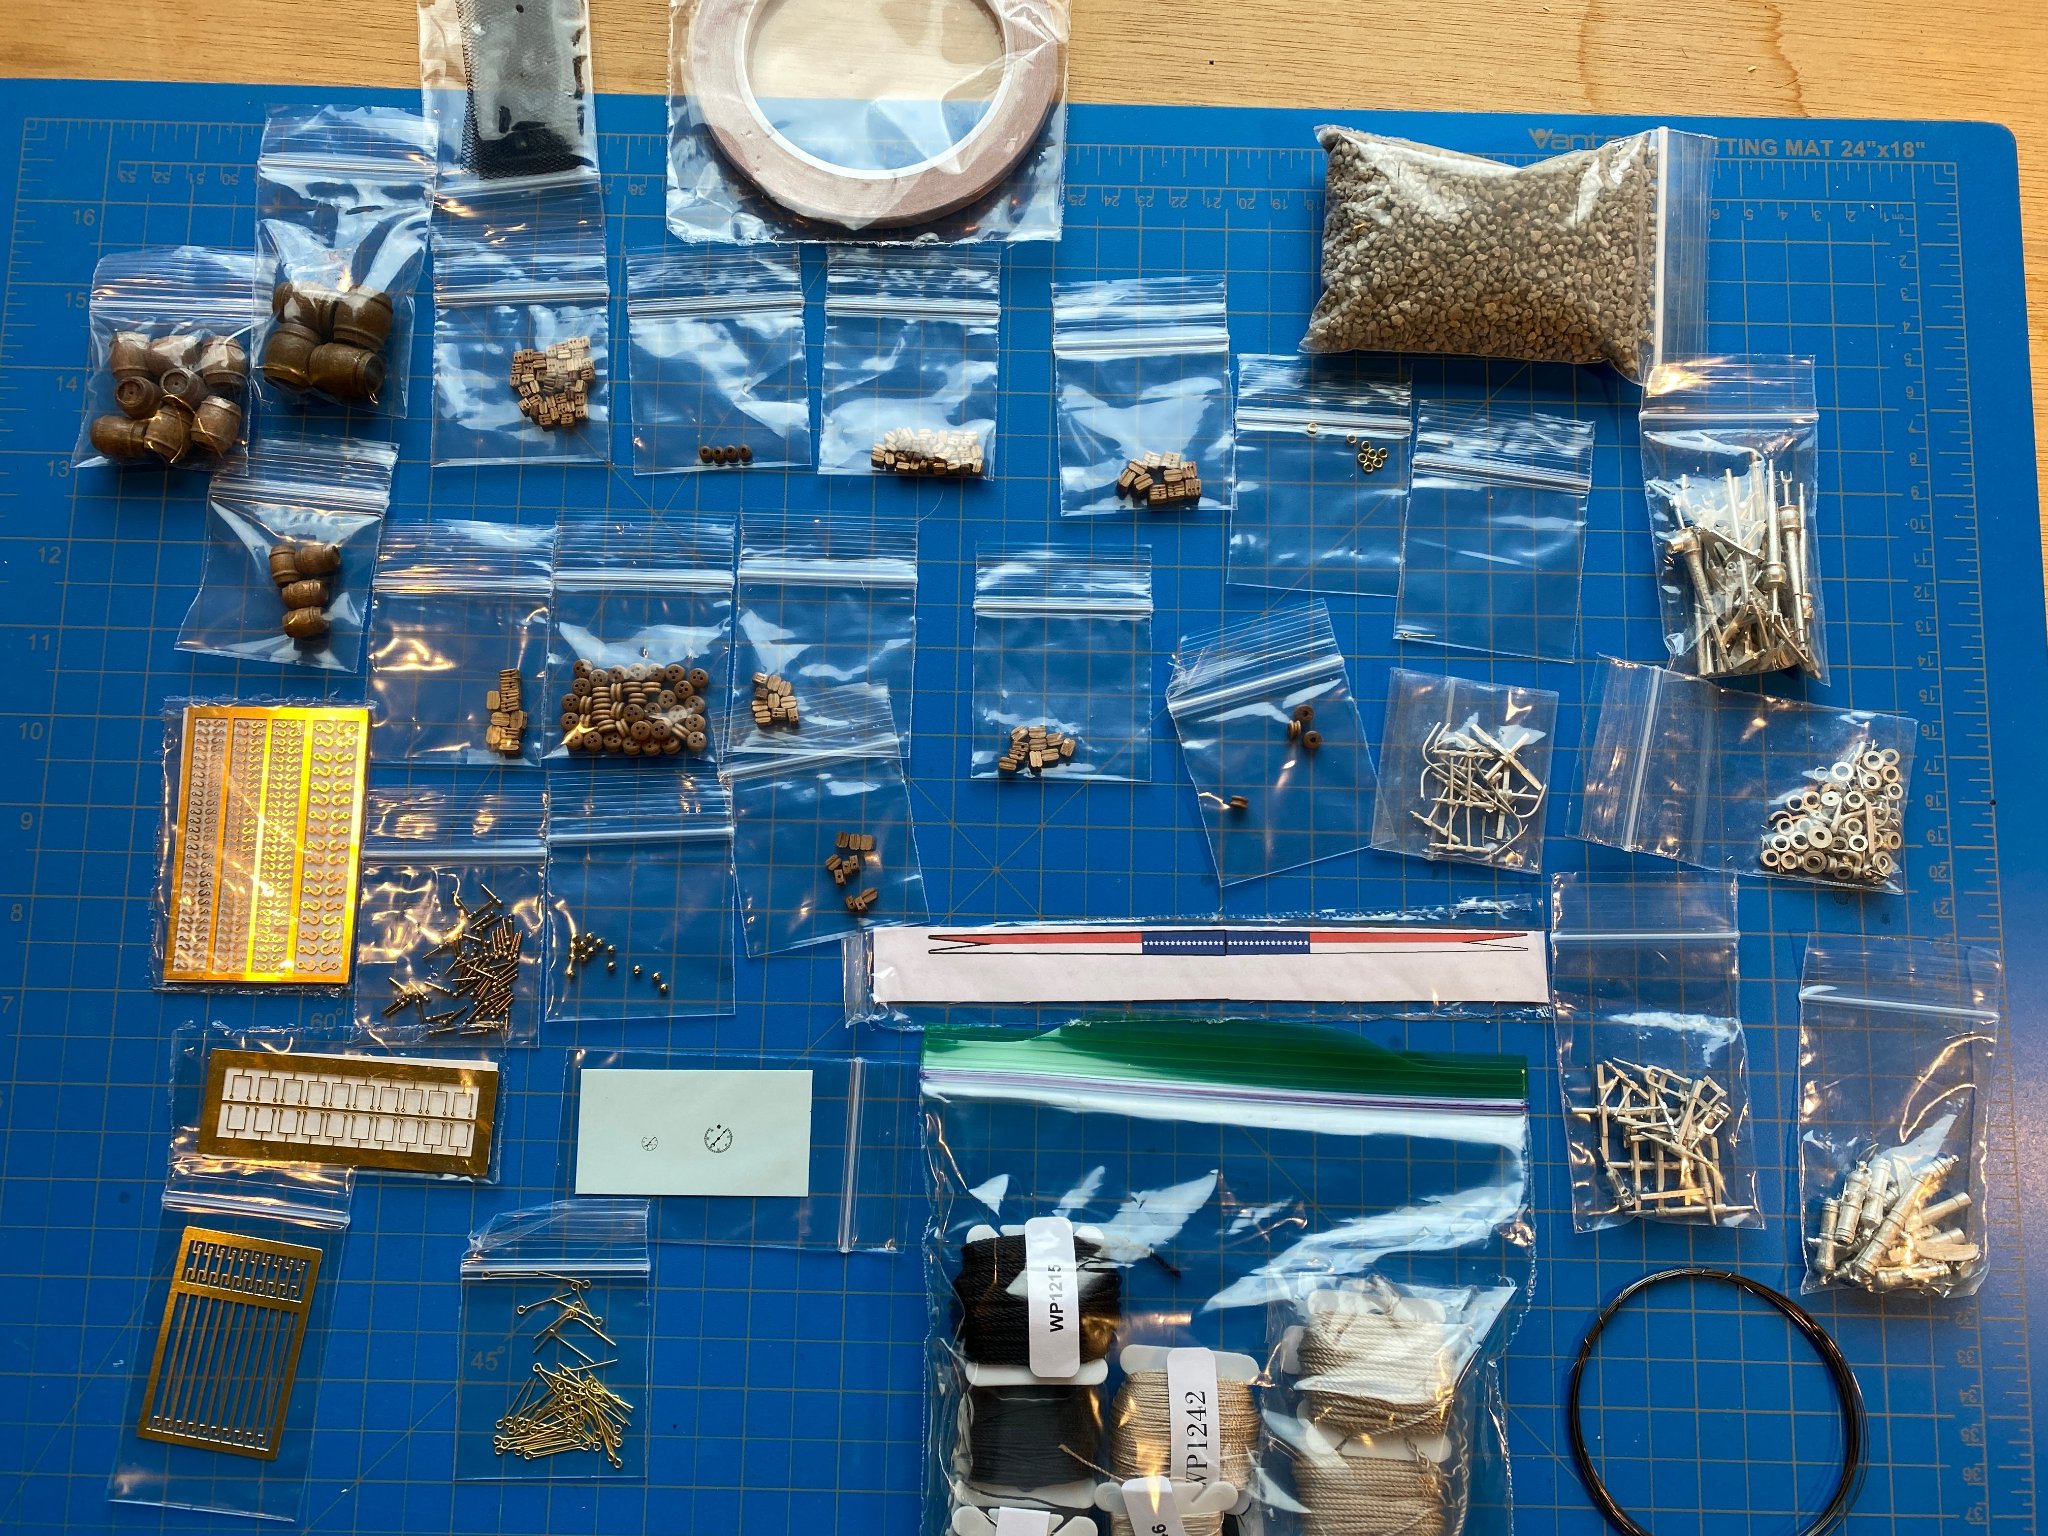
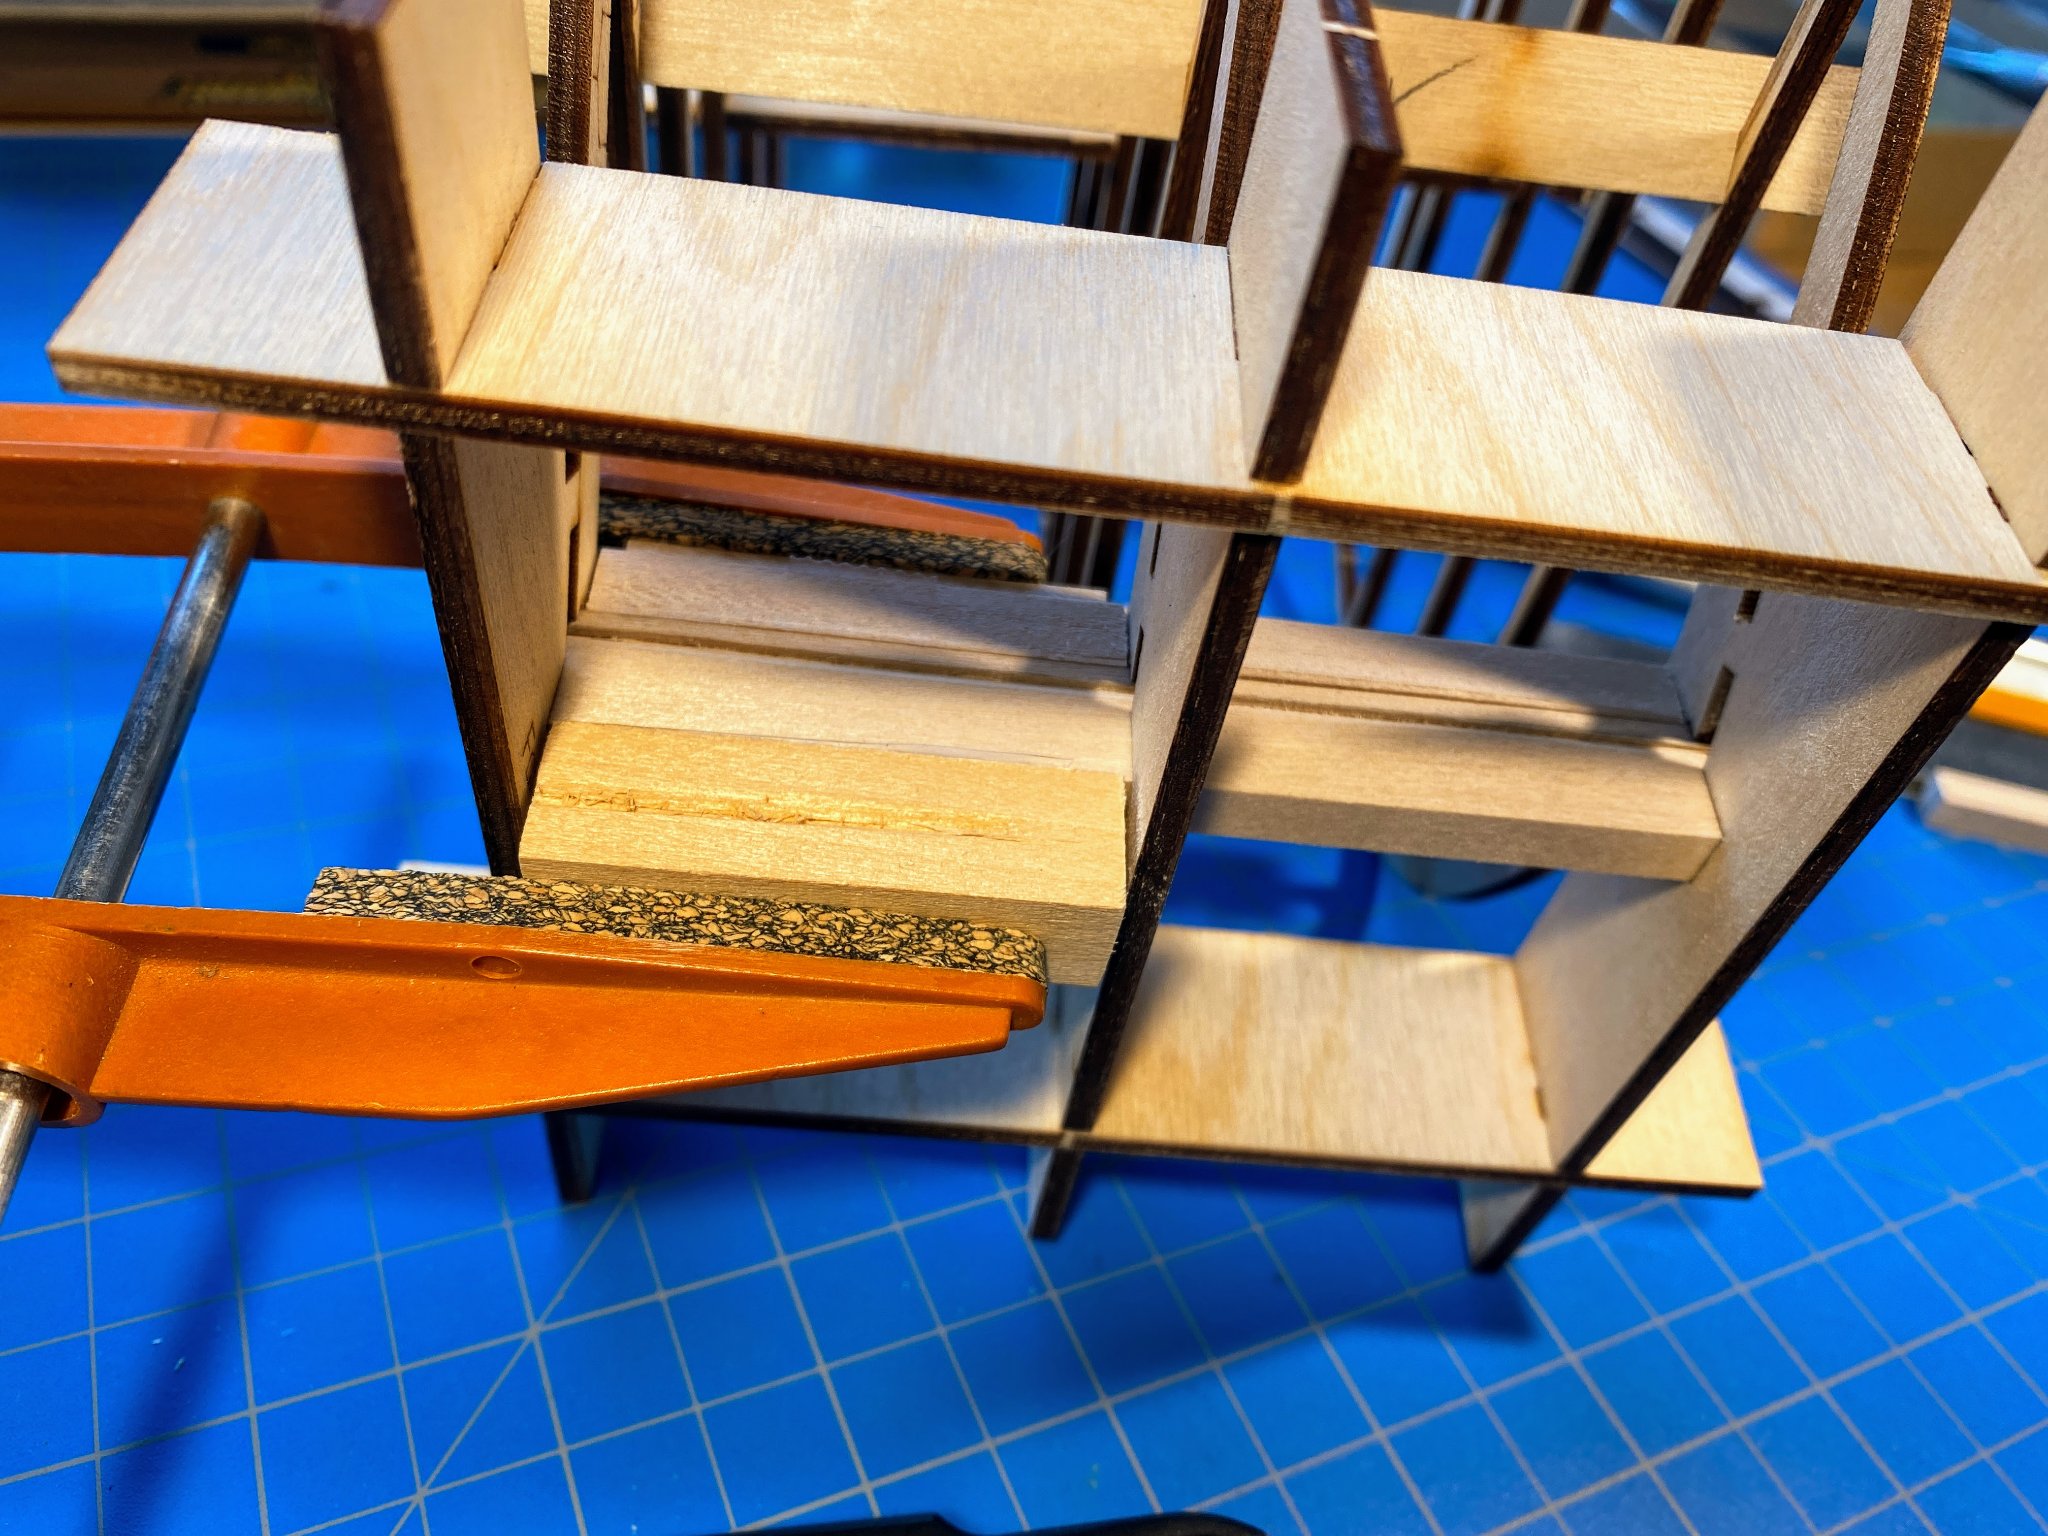
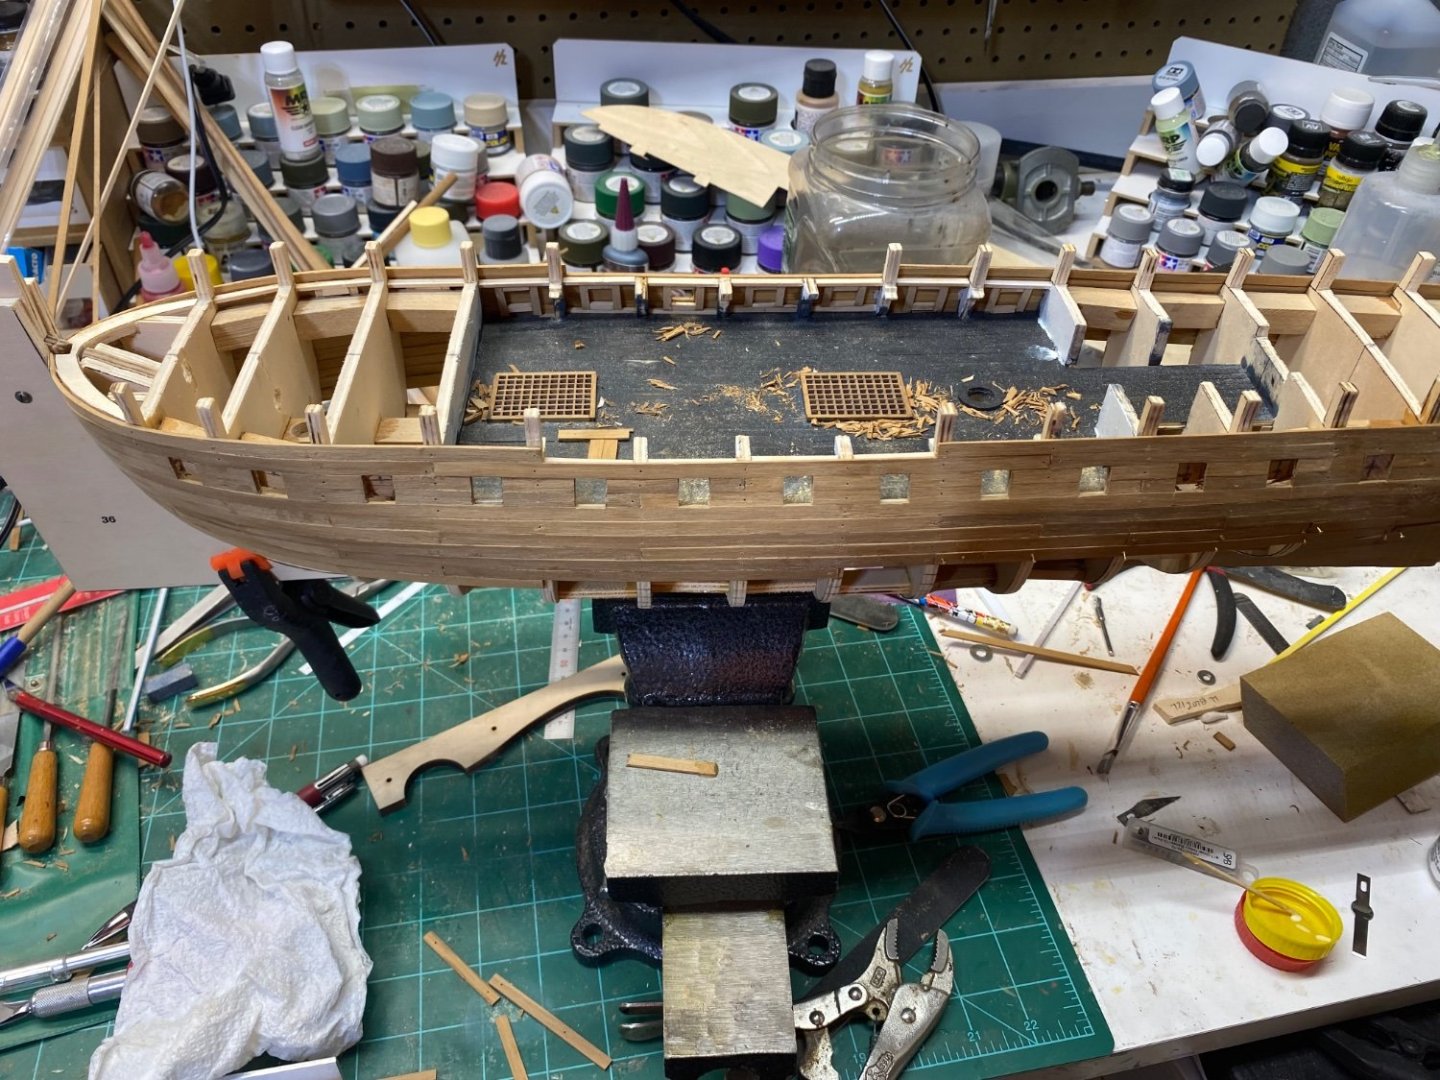
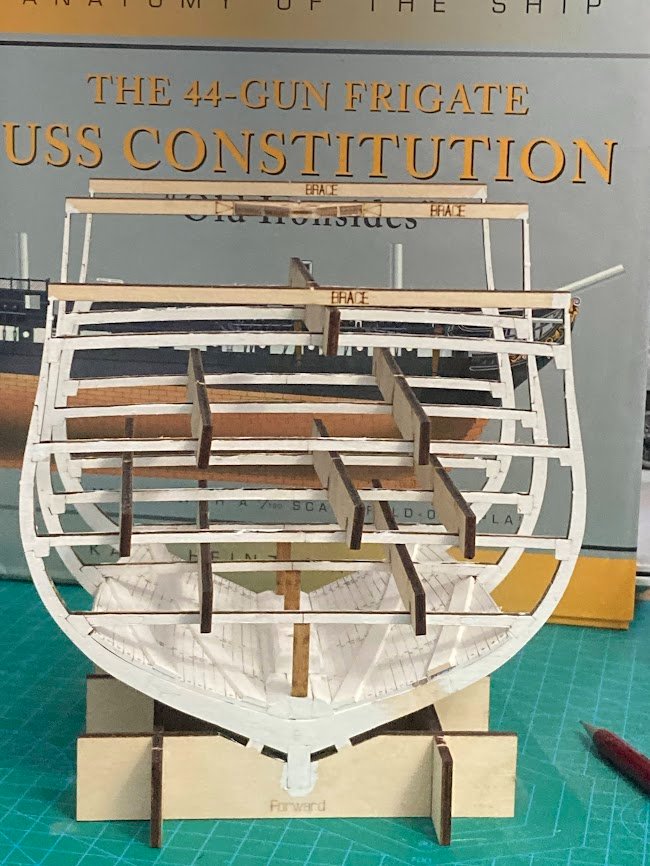
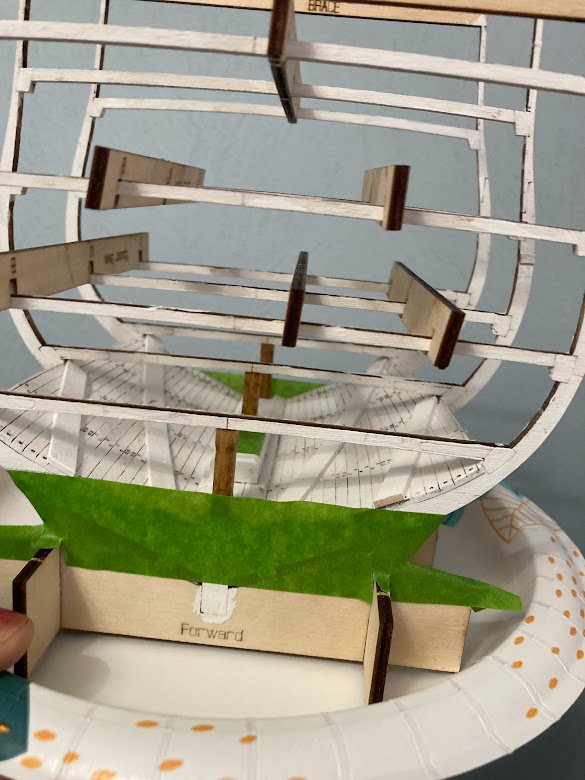
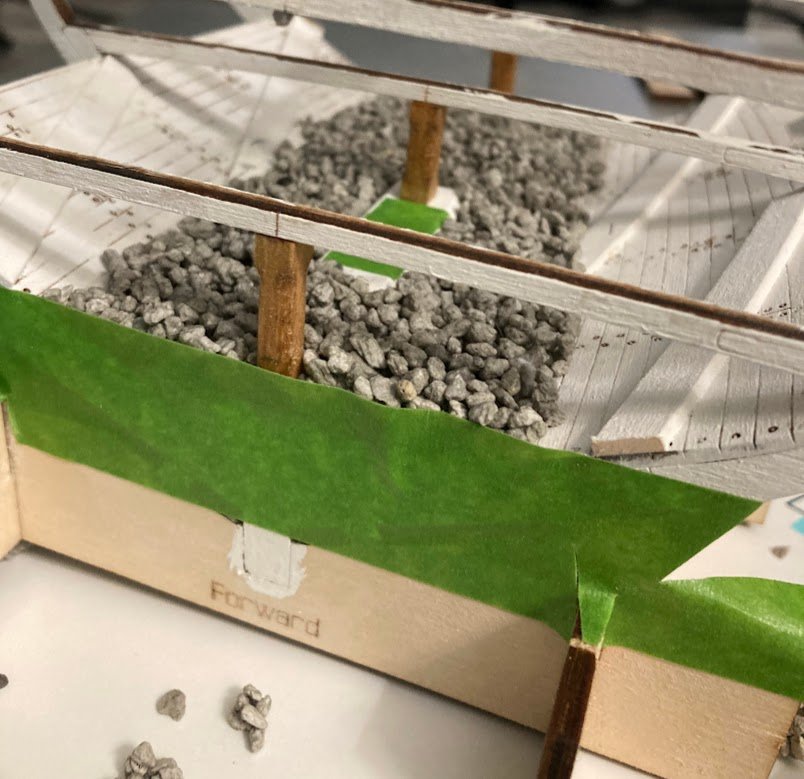
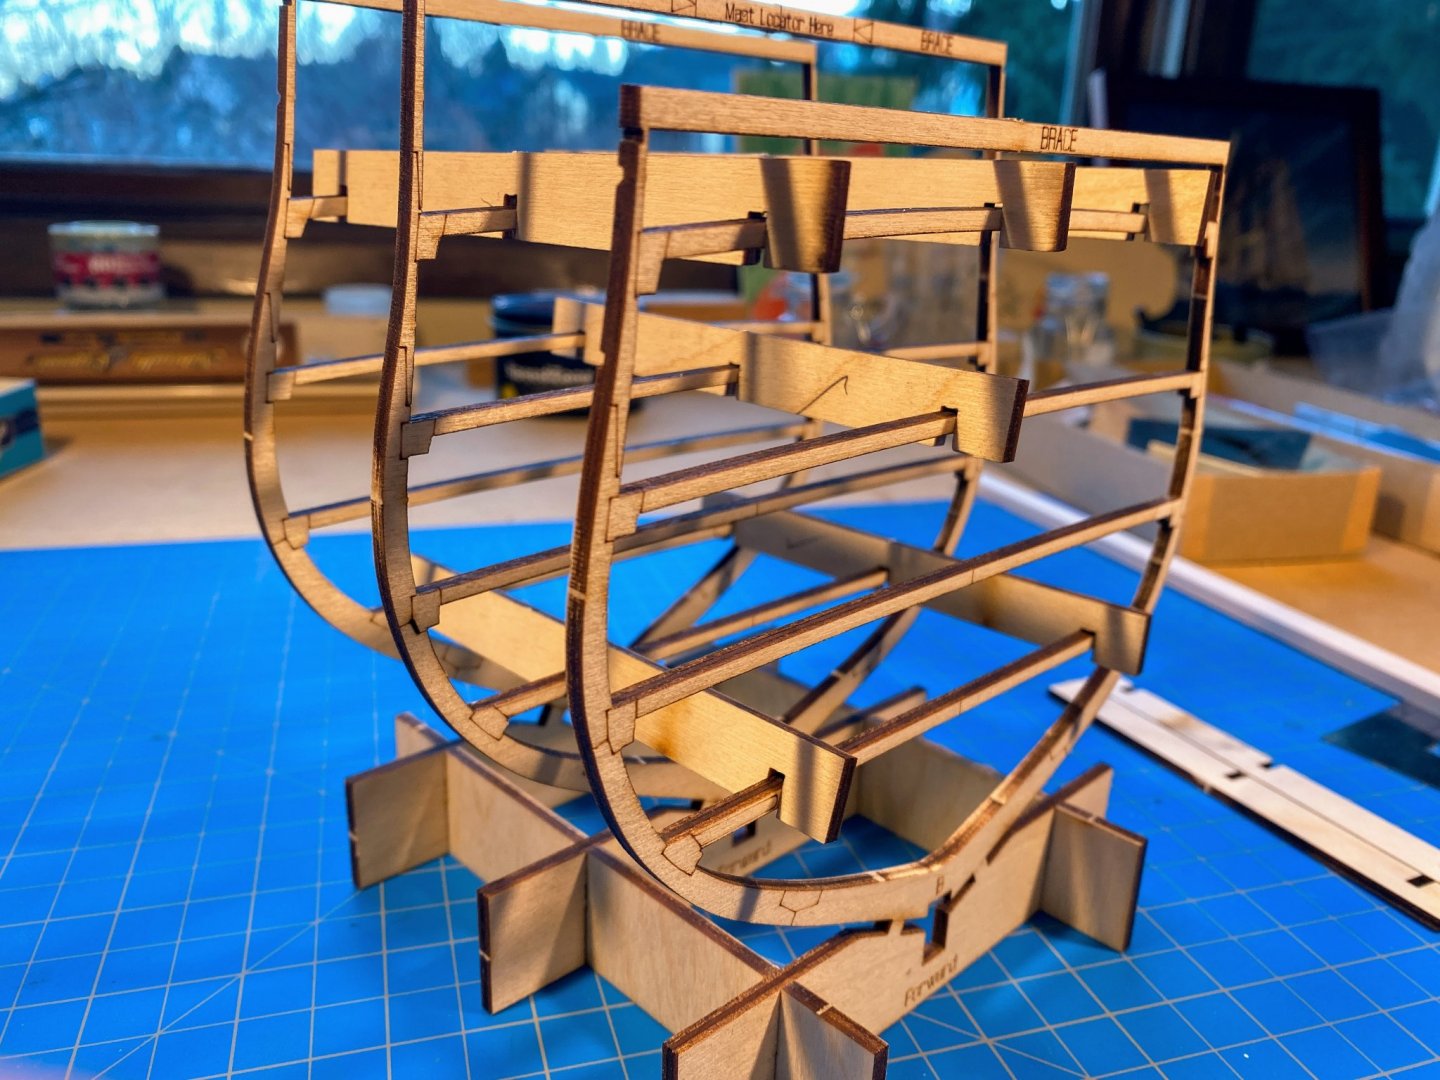
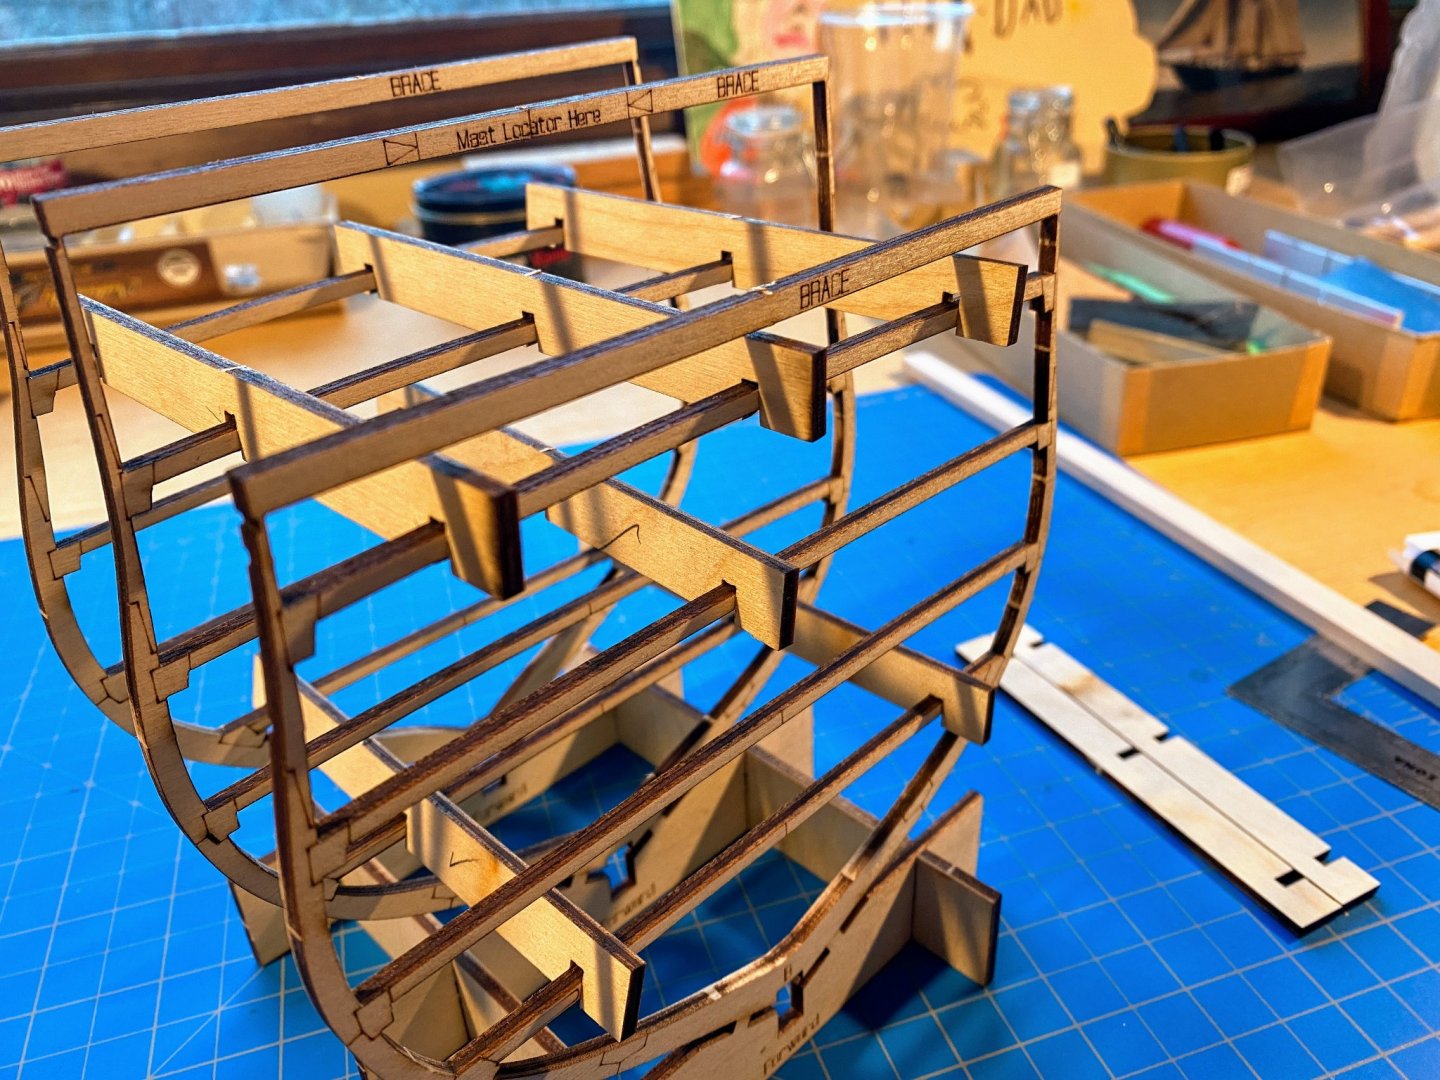
 About 2 months ago I got the itch to continue my nearly fifty years of model boat/ship building by adding a cross section model of the USS CONSTITUTION to my fleet. A few Google searches pointed me to this site and the build logs by TomCulb and UnixGuy. After reading through their build threads as well as Model Shipways online instructions I ordered the kit from Amazon. I'm really looking forward to the detailed standing and running rigging. Fortunately my kit had no missing parts. I made sure the brass etched gun port hinges were included. On to the build. I'll offer up some tips and minor alterations. I have quickly come across the challenge of the differing years documentation as well as a few errors in the kit instructions. Overall the quality of the sheet goods and laser cutting is excellent. Basic frames, Keel, Mast Step, and hold walls. The hold walls installed without the need to wet or use heat. Nice tight joints. Mast Step and Limbers per instructions Ready for gravel ballast Based on the top of the mast step I extended lines out to the forward and aft frames to establish level lines for the tape. This helped to a=ensure the gravel bed was level and not under or over filled. Based TomCulbs report of dripping glue I did place the model on a paper plate and I also drained excess water on paper towel prior to placing in the hold. Very pleased with results - level bed and not a single loose pebble when inverted. I will not install the barrels until the outer planking is complete. This will also allow good visibility when installing the pump suction pipes into the hold.
.jpg.e79f1cb9841e44f14d50aa2d85d943a1.jpg)
.jpg.44365f5956bda8ffea3e1cc51e945ca3.jpg)
- 18 replies
-
- 4
-
-
- Constitution
- Model Shipways
- (and 1 more)
-
 Hello. This is my third experience with the iconic Revell kit, counting myself as a youngster watching my Dad build his back in '69 - '70. I've spent about two years off and on working on it to this point. When finished it will be a waterline display, with sails furled at anchor. First photos of this build log start at the point where I had the gun deck airbrushed and installed.


- 41 replies
-
- 3
-
-
- Constitution
- Revell
- (and 1 more)
-
 Good Day everyone. This is a build I start a few days ago. It’s a little slow going working with what I got, but not looking to completing it that soon. I have a lot to learn and believe me the questions will come. I have read a lot here on this forum over the last few years and can’t believe what gets turned out. These ships look beautiful, a work of art when you all complete them. Maybe in a few years I’ll have something to be proud of.
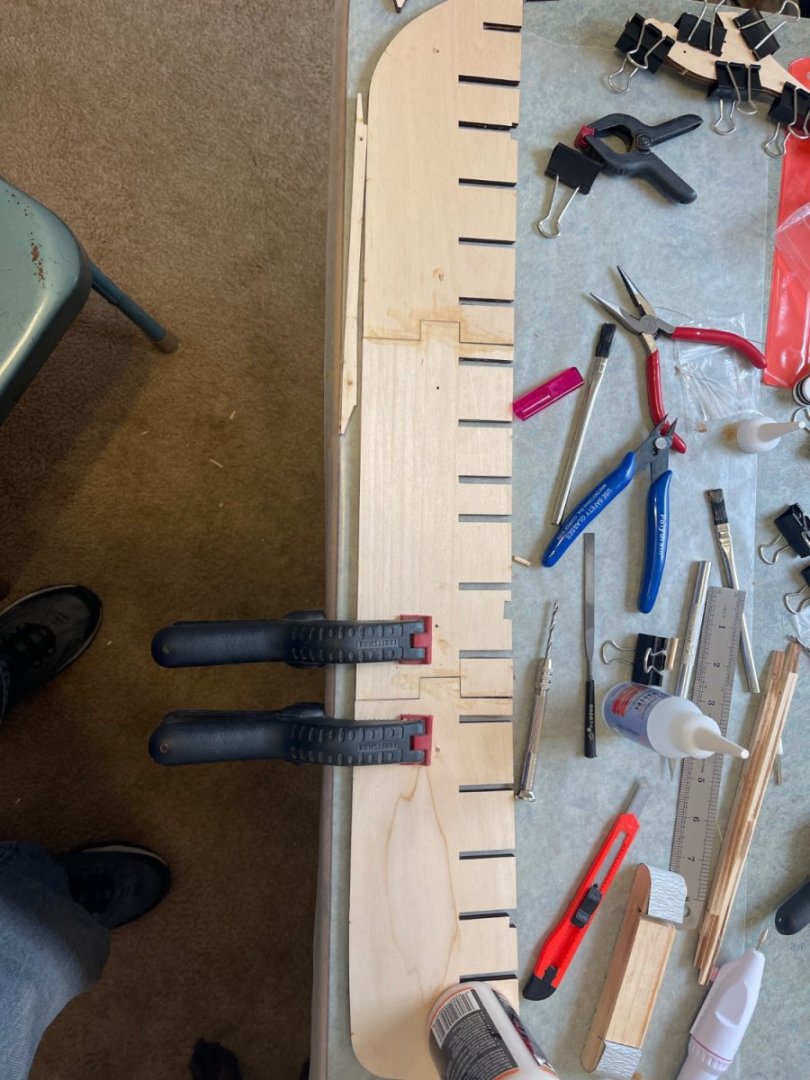

-
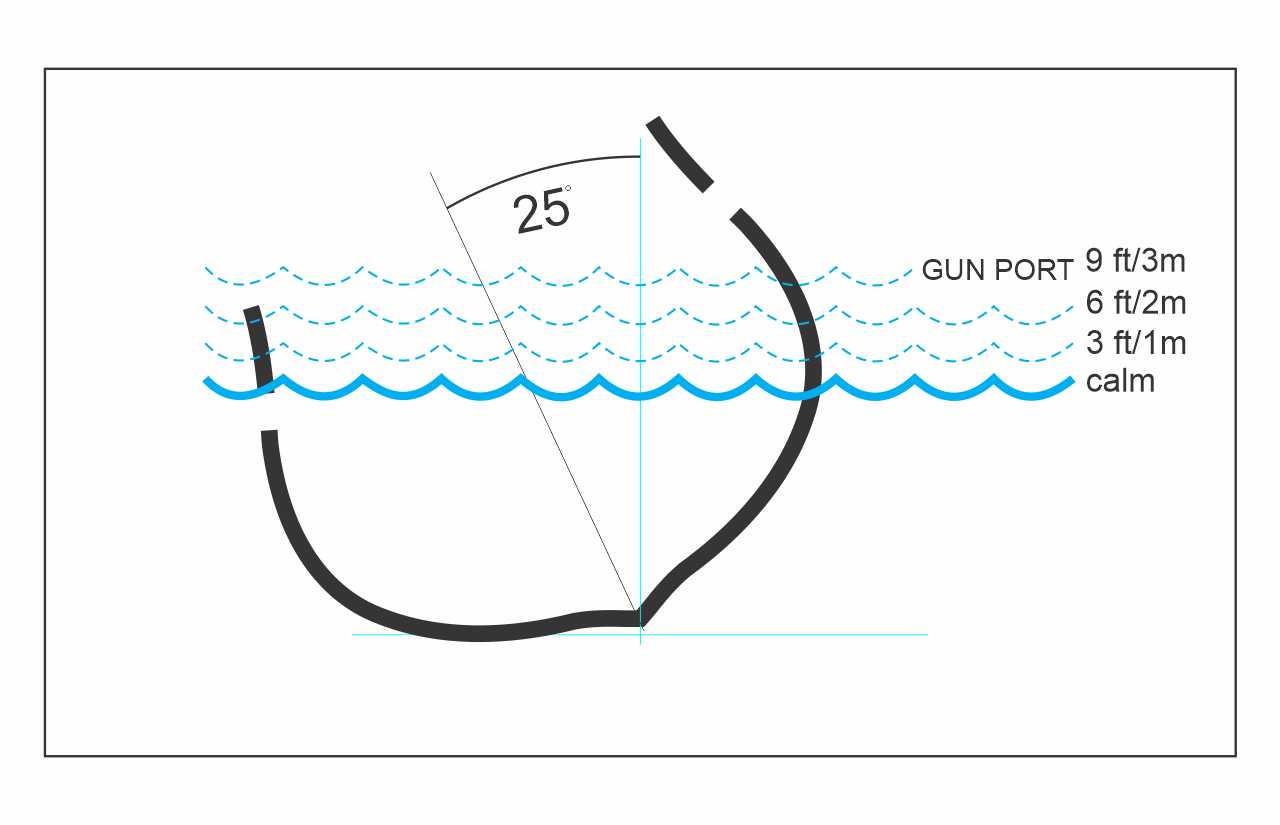
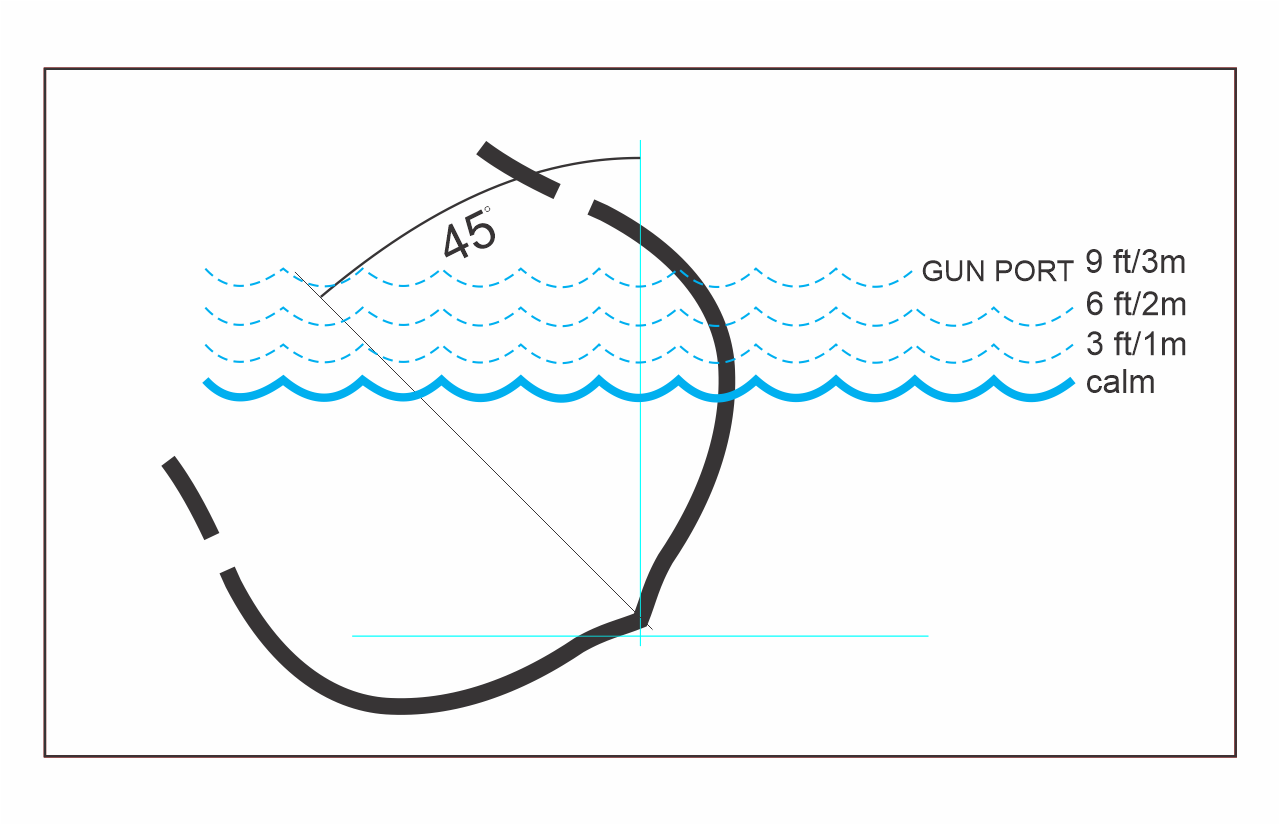
 I grew up on Cape Cawd so my first major sailing ship model has to be “Old Ironsides.” Decades ago I worked aboard Mayflower II at Plimoth Plantation and know just enough to be dangerous... I’ll depend on the fine folks here and various books for wisdom. I think I can get a lot of detail from the Revell plastic kit. I’ll use the Hull model as the major info source because, despite problems (questions?), it is a primary source. I do have an “odd area” on the model I don’t trust: gun ports. Gun Ports I traced the plans and did a little heel experimenting (see images below). Quantum Sails website says it’s best to keep the heel to 20-25 degrees. Sailing forums say the sweet spot is 15 degrees. These are not Age of Sail vessels but still offer interesting info. The National Weather Service says Atlantic swells are frequently two and a half meters/yards, often higher in rough weather. “Very rough” is defined as starting at four and a half meters/yards. Looking at the diagram images I conclude that the ports must have been blocked from inside and cleared to run out the guns. With hundreds of crew it wouldn’t be more fiddly than hoisting ports with tackle and making fast. It seems impossible not to somehow close off the ports. I will build with no port lids (except for the bows) and assume manual stowage. The Gun Band The log says the yellow ochre was painted over in white April 7, 1811 (until 1814). I’m not a forensic historian but it doesn’t seem like a mystery. White it is. Inner Bulwarks and Trim Green like Hull, white on the Gun Deck. The Deck I’ve seen some very impressive builds on this site with plastic decks that really look like wood. I’m excited to try the painting method. I also have an idea to tackle the deck seams: “finger combing” or removing the ends of half the planks and adding in new strips. Copper Bottom The Hull model bottom hull is green (with no red waterline). I’m guessing it represents copper plating. Some modelers have said copper only oxidizes in air, but there are photos of Constitution in dry dock with a very green, verdigris patina on the copper all over. And similar photos of other copper bottomed ships - Splotchy green over copper it is. Ships boats (Whaleboats/Cutters/Gigs) I heard one is quite short so will have to lengthen it (more pain than buying a resin one but cheaper!). And a million things I’m forgetting.
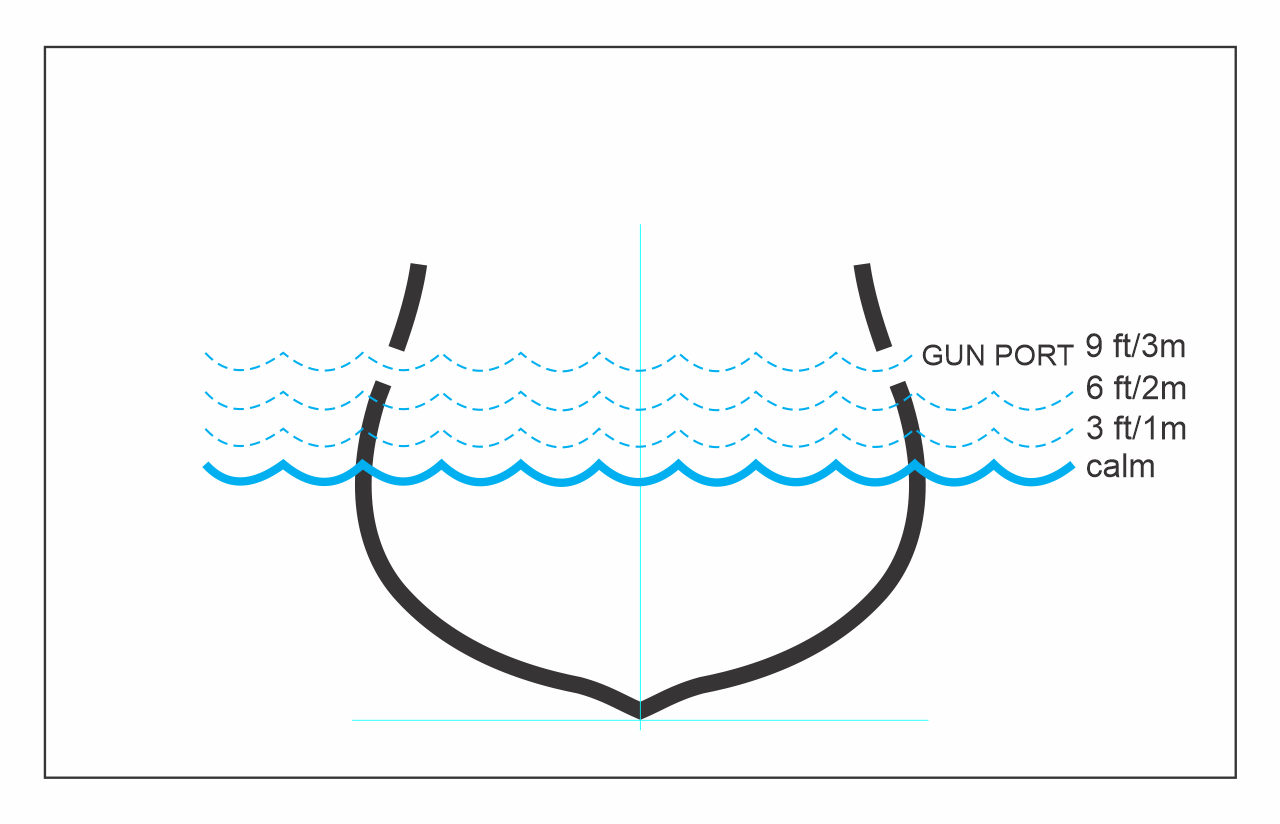
- 8 replies
-
- 3
-
-
- Constitution
- Revell
- (and 1 more)
-
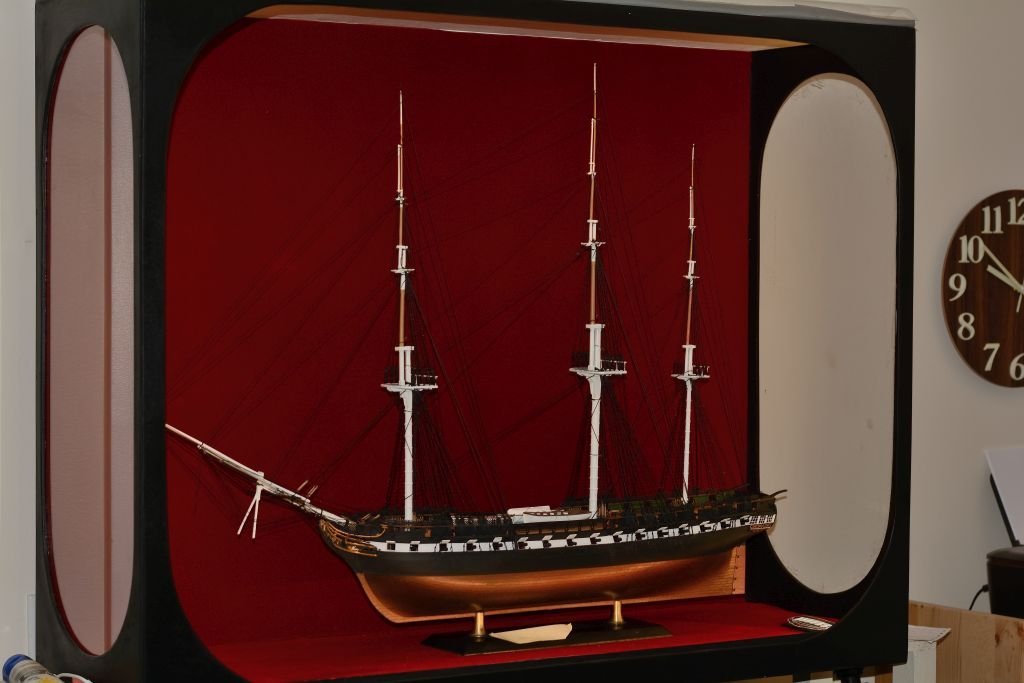
 it's just a keep in touch log.... am doing the constitution at the moment...thought you'd get a kick out of the fact that i can clip on the two different sterns with magnets....my first effort in trying to paint plastic...hopefully i can do better on the sr....you won't believe, this thing has cost me $2000 cdn. so far, with all the sails and addons from the czech rep.....plus building the case.... just building what i like, not what's politically correct 🙂...use netting at the bow and changed the windows on the side stern galleries....a bit messy but will clean up and touch up later...wish i had learned about scoring the window frames on acrylic, instead of building them out of wire........so difficult to solder...... i couldn't tolerate tying all those ratlines, my neck and shoulders couldn't handle it at my age, so i made a jig....placed it over the shrouds, and tacked the contacts with gorilla ca.....still trimming to do... ha...i made the case too narrow...forgot about the stud sail boom, especially on the main mast....will have to shorten it, even thought the yards are on an angle....par for the course for me....the front glass will slide off to the left to easily change the stern gallery....covering with acrylic plastic for now...easy access..... now for the sails and running rigging....huff an puff

-
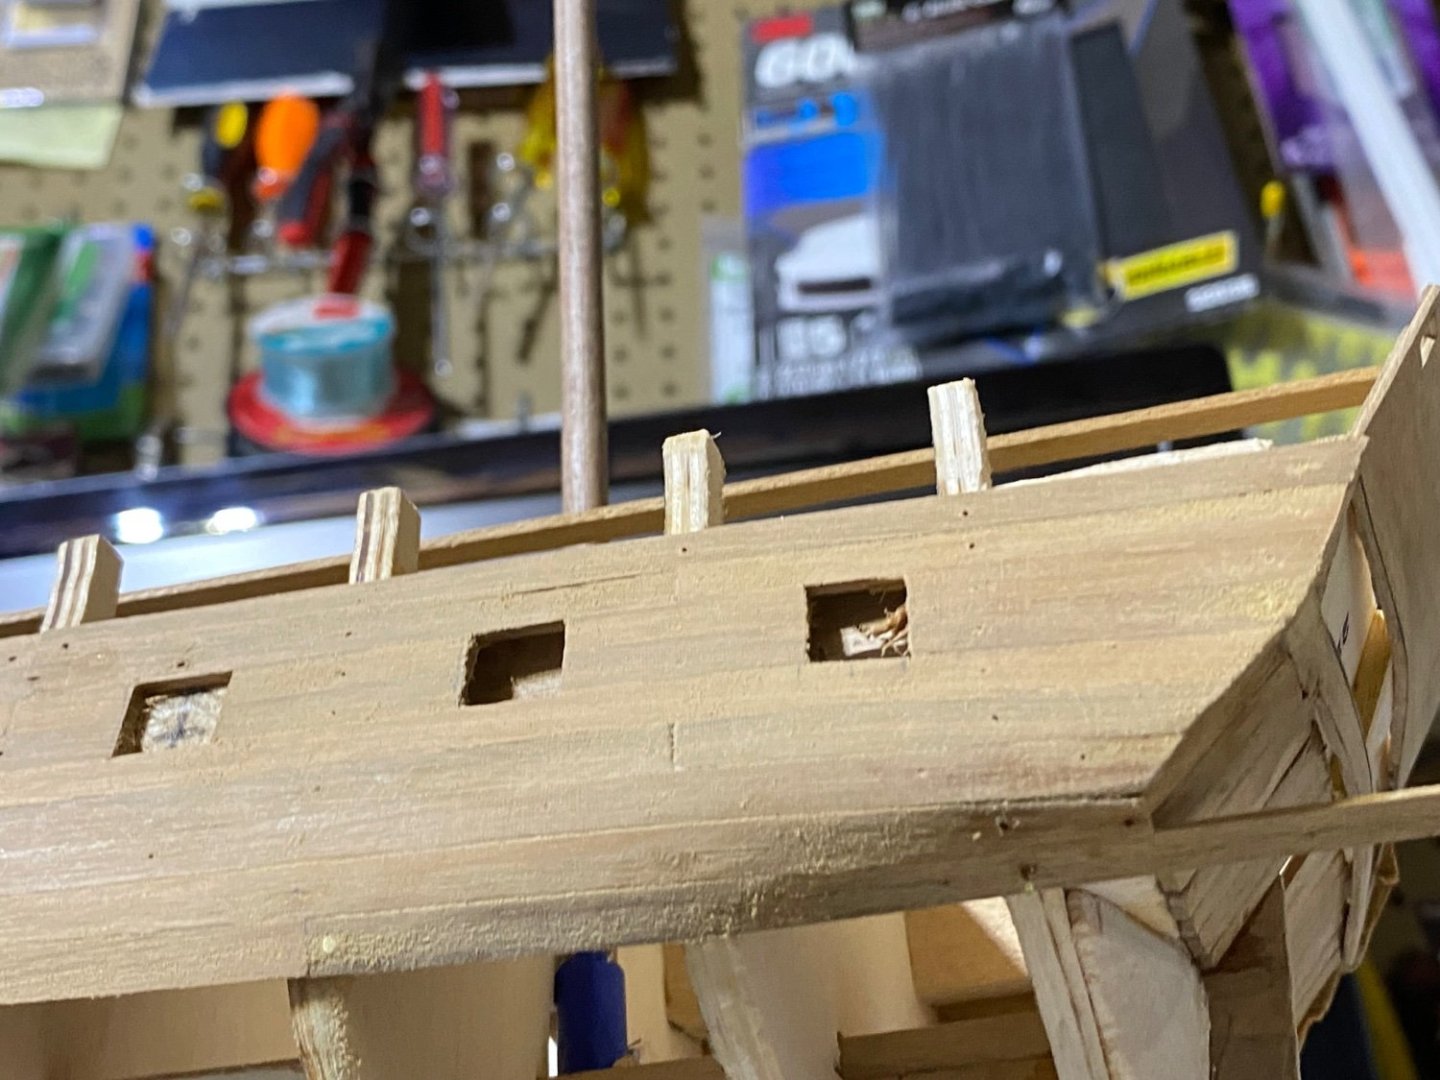
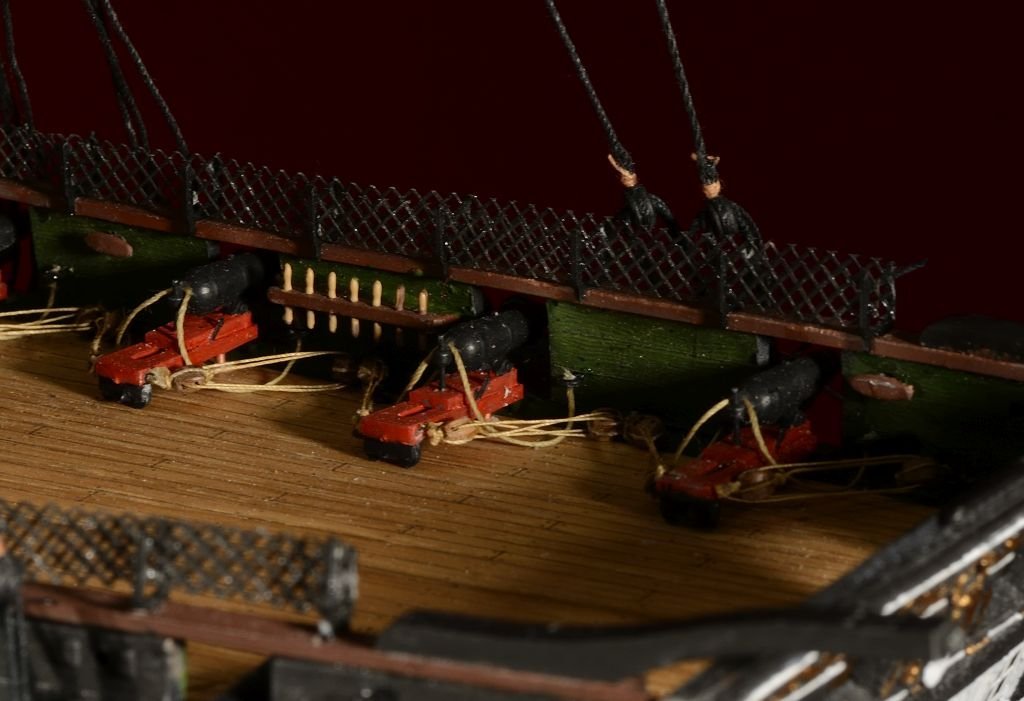
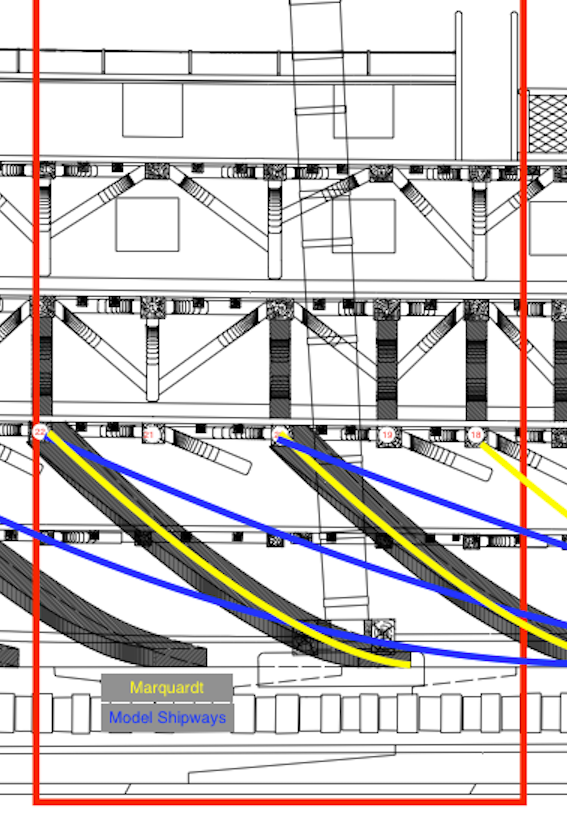
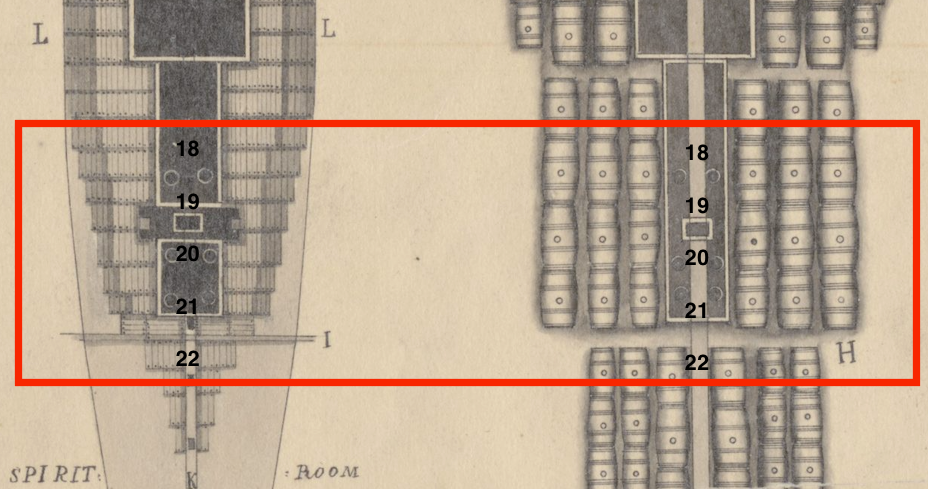
 INTRO I don’t have a proper box-opening picture, but I didn’t decide to join a forum and post the build until I had already started. This is only my second ship model. My first was Model Shipways’ Bluenose II that I completed in 1994. I started a couple others along the way and lost interest, or I wasn’t satisfied with my workmanship and abandoned them. So far, I’m very much enjoying this kit. I could have completed the model already but continue researching documents, plans, and photos as I go in anticipation of another build. The materials seem to be very good quality though I only have a few data points for comparison. Incidentally, I have seen many builds of the Mamoli cross section, but only one of Model Shipways’ kit (Tomculb’s build). In addition to the manual, I have a copy of Marquardt’s USS Constitution, Magoun’s The Frigate Constitution and Other Historic Ships (1st Ed.), all the downloadable resources from the USS Constitution Museum, and various other documents and pictures from the Internet. BASIC HULL FRAME STRUCTURE The initial framing and main hold construction were straightforward. The 96-page manual with color photos of the build is very instructive. There are three plywood frames with the “bow” frame corresponding to the half-beam aft of beam 17, the “main” frame to beam 20, and the “stern” frame to beam 22. Beam numbering corresponds to a 1992-1996 restoration diagram. MAIN HOLD I painted the hold white, thinned with a little water, which seemed to do a good job of whitewashing while preserving the wood grain. This was followed with a scribe along the seams and a very diluted gray wash to bring out some of the details. I’m not sure I like the Model Shipways water-based paints. They’re very thick, I find them difficult to properly thin, and though I enjoy the easy cleanup, I believe the solvent based Floquil paints I used on the Bluenose II to be superior. (I just read that Testors discontinued the Floquil line in 2013.) I have some questions/comments about the main hold. I am not critiquing the model. I want to build the model again or maybe scratch build the same cross section in the same or larger scale and have questions on details not included in the kit. This area is proving difficult as I haven’t found any pictures. Diagonal Riders The diagonal rider angle appears too acute relative to the keel compared to any drawings I have seen. I read that the 1797 diagonal riders were removed in 1820 and then new ones installed in the 1992-1996 restoration so maybe that is where the discrepancy originates. Marquardt illustrates an approximately 40-degree angle from the keel with riders terminating at beams 18, 20, and 22 for the original riders and current photos and illustrations show about the same or greater angle, but shifted aft and terminating at beams 20, 22, and 24. The photo of my model shows the instructed placement (~20-degrees). The second photo is the 1992-1996 restoration diagram with Marquardt diagonals overlaid in yellow and Model Shipways in blue. Ballast I understand that most ships were brought into trim at this period using pig iron ballast and kentledge, but that in September 1813 John Tilley had seventy tons of pebble ballast delivered to the ship. What I’m not certain of is if it would be evenly distributed in the hold as pictured in many models. Some of the illustrations depict what appears to be a structure around the bilge pump tubes and main mast, perhaps with hatches to allow traveling the length of the ship’s hold? The illustration also depicts no ballast or stores directly on the keelson. Shot Lockers? Marquardt depicts two shot lockers; one would be near the model’s bow frame at beam 18 and the other forward of the model’s stern frame at beam 21. Are there any representative illustrations or pictures of these shot lockers? How was the shot retrieved? Spirit Room? Other illustrations show a forward bulkhead for the spirit room. Are there any illustrations or pictures of this area? Would the only difference in this room and the main hold be the type of stores kept there? Limber Holes and Limber Boards? Marquardt shows a limber gate on either side of the keel. Other illustrations also show a limber plank (waterway cover) on either side of the keelson. Would the bilge pump tubes terminate into this waterway? What I like: Quality of materials including the barrels and gravel. 96-page instruction manual also available online. 30” x 40” full-scale drawings included What I would change: Increase diagonal rider angle to match Marquardt’s. Questions: Were there structures in the main hold around the bilge pump tubes and/or main mast? What did the shot lockers look like and how was shot retrieved (e.g., hinged top)? Did the limber planks remain uncovered and accessible underway? Was there a dividing bulkhead on the Spirit Room?
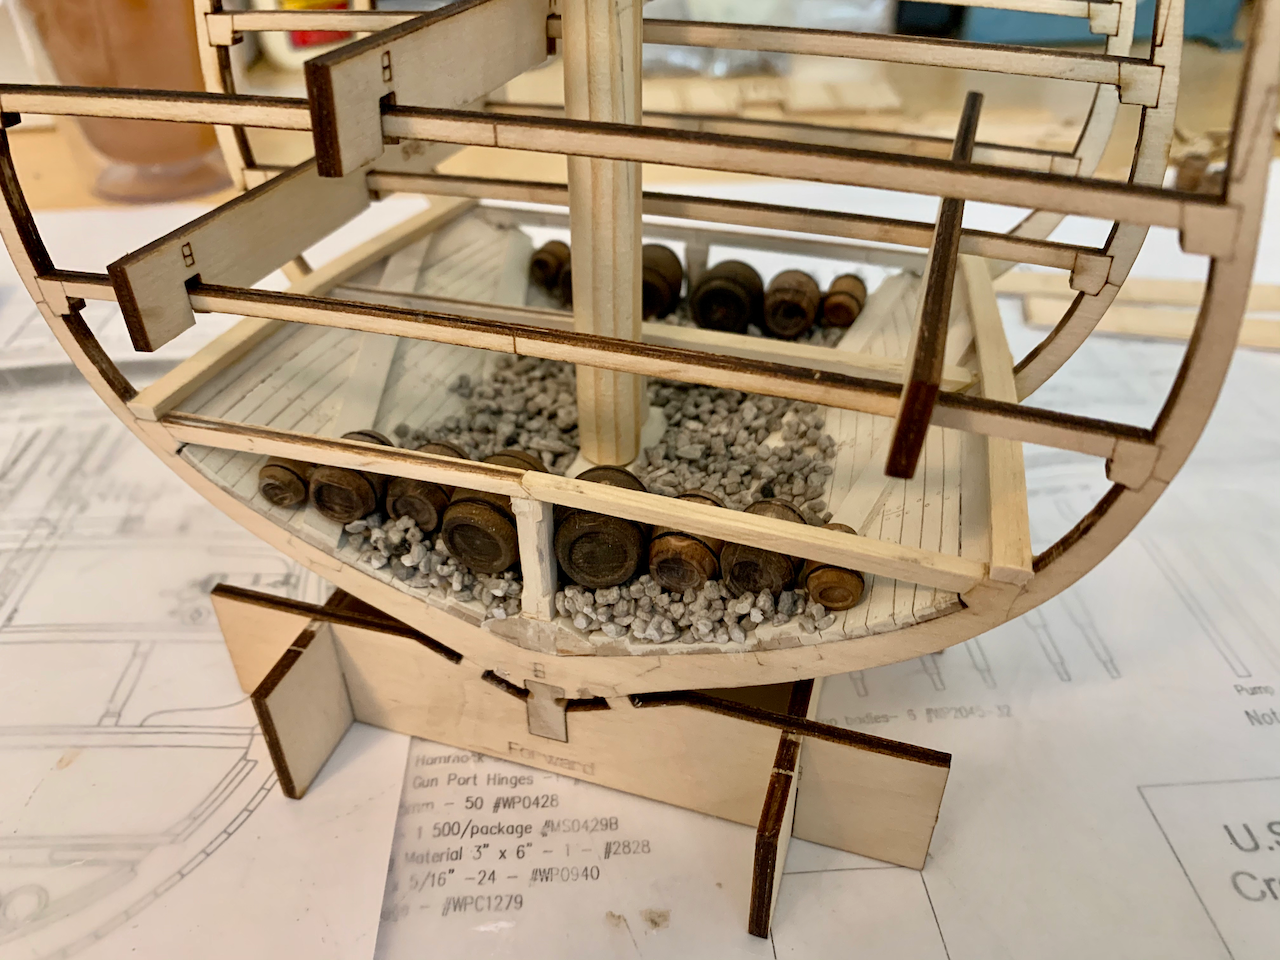
- 25 replies
-
- 2
-
-
- Constitution
- Model Shipways
- (and 1 more)
-
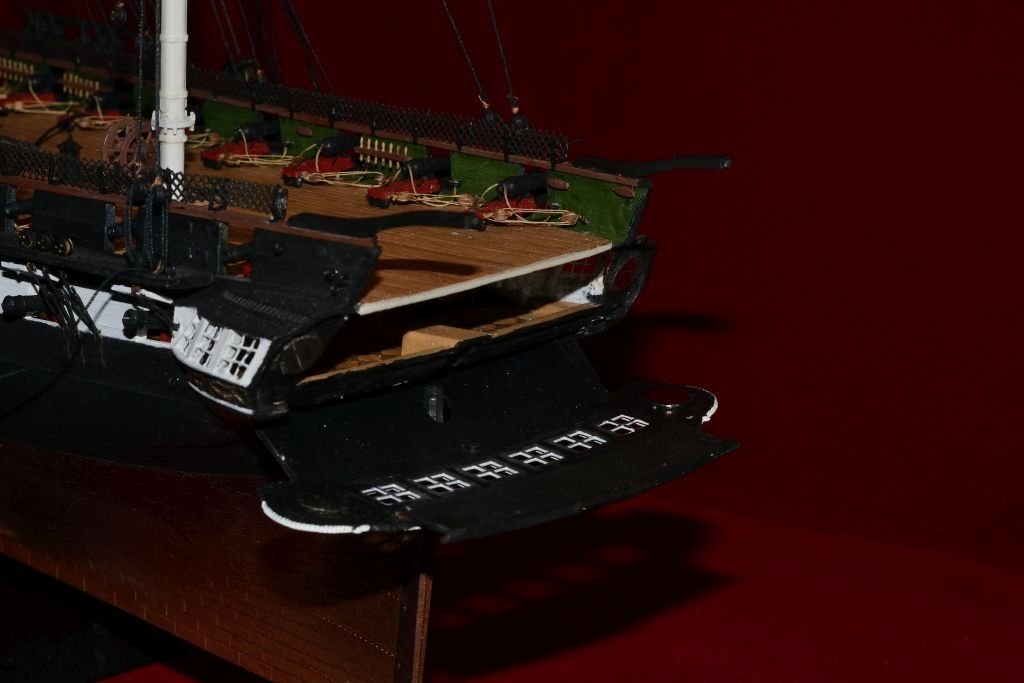
 Welcome to the Jungle! Attentive observers had already discovered the hull of the USS Constitution in my shrubbery for some time. But who now expects a FITZCARALDOOOO downhill is wrong for the time being, it actually goes on in a civilised way The kit has been lying around for quite a while, as it is really great in many aspects, such as the hull, but in others it does not fully meet its own claims, especially with regard to the guns. What could be more obvious than to choose these guns after the purchase of a new printer and to program them in a contemporary correct way. The results were promising ... ... and with a little colour quite convincing ... ... especially compared to the originals from the kit. Grandpa, what big fingers you have!
- 53 replies
-
- 11
-
-
- Revell
- Constitution
- (and 1 more)
-
 Captain's log: First model ship build, not going to end up a historical representation but my own dream boat. Upon opening the box, I knew it was the right first build for me, I love a challenge and an easy build would have bored me to the art. Upon starting the build I was confirmed (I chose to ignore the 3 booklets dedicated to rigging). Upon getting to the rigging, I second-guessed my initial appraisal. Upon attempting the rigging I was confirmed yet again, and Understood how I scored such an awesome deal at the local goodwill, and this poor vessel then sat in my closet for over a year. I have now committed to finishing this beast of a project.
- 35 replies
-
- 3
-
-
- Constitution
- Revell
- (and 1 more)
-
 This is my first time logging a build. I bought an model of the Constitution on-line at an auction for $60.00 minus shipping. My whole thought was to build the Constitution at a point of one of her famous battles during the war of 1812. When I got the box and opened it much to my horror that once more Revell took some liberties' with it mold process. There is some major differences of their idea of what the Constitution looked like during the war and what the Anatomy of the ship USS Constitution puts out. I will not give up the ship to a few errors but will push through them and show you what I have done to correct them as well as from time to time ask for advice.


- 8 replies
-
- 3
-
-
- Plastic
- Constitution
- (and 2 more)
-
 I have just accidentally deleted my entire build log. I thought I was deleting one post rather than the whole thing. I must now redo the entire log. This is most distressing, but at least I have the opportunity to make improvements in what I did. Fortunately I still have all the photos that I used. Unfortunately, all the likes, comments, and photos that were posted to my log by other MSW members are lost. Work on this will commence this afternoon. Unless the moderators object, I will do a series of posts, rather than try to do the whole thing in one. I plan for each post to be on a particular topic, or phase of construction.
- 110 replies
-
- 3
-

-
-
- Bluejacket Shipcrafters
- Constitution
- (and 2 more)
-
 Motivation - My interest in Constitution goes back to when I was 10 years old. My uncle bought me a 22” Revell model of Constitution – it had a record in the box that that described the highlights of Constitution’s history which I nearly wore out while my dad built the ship for me. I don’t know what ever happened to the model, but I have a photo of it completed (see below). Seeing that photo inspired me in 2020 to purchase the kit off of **bay**, and upon finishing it (see below), I began thinking in larger terms – what about a wood ship model? So here I am, 18 months later, having obtained a Model Shipways kit of Constitution, and having taken some time with the Lowell Grand Banks Dory, Norwegian Sailing Pram, and 18th Century Longboat kits to get some basic experience in wood ship modeling under my belt. I have no illusions of matching the outcomes of the model masters I’ve seen on this site, but I won’t hurry the build along. As I turn 60 next month, my thoughts turn to finishing Constitution before I’m done with this world, and who will get it after I’m gone (I love the picture of xken’s son’s family with his – I hope for similar interest from one of my sons…). Details Modeling Constitution from 1812 prior to Guerriere Battle, possibly before “The Great Chase”. - Stern fashioned after Hull, Revell, and Bluejacket models - Billet Head & Trailboards fashioned after Hull, Revell, and Bluejacket models - 30-Gun gun deck – no bow chase/bridle ports - 24-Carronade spar deck + 1 bow chaser - Ships Boats – Captain’s gig & cutters in the davits, undecided about the hatch for now. Model Examples I will follow - Isaac Hull Model (Peabody Essex Museum) - Revell 1:96 Model - Bluejacket Model - Others as depicted on Model Ship World Modeling Resources - Model Ship World builds – many - Model Ship World model techniques - various Books & Papers Resources – this list will grow as the need arises - A Most Fortunate Ship – Martin - All Sails Up and Flying – Eriksen - Anatomy of the Ship – Marquardt - Constitution Close Up – Martin - Constitution Practicum – Hunt - Rigging Period Ship Models – Petersson Plans and Misc Resources - USS Constitution Museum – Modelers Resources - US Navy - Bluejacket Models (undecided) - Historical Paintings – difficult to sort out for accuracy Photographs - A “bazillion” online images and videos One thing that is somewhat discouraging is the number of attempts at this model that have apparently been abandoned. I have no doubt that every one of you who set it aside in the end started out with much enthusiasm as I carry today. Only time will tell. I do have a life beyond modeling - wife, children, and grandchildren. Oh, and work. Therefore you won't see progress moving along at a quick pace. However, if you stick with it, so will I. Looking forward to the ride... Midshipman 3/c (Ret) Bob
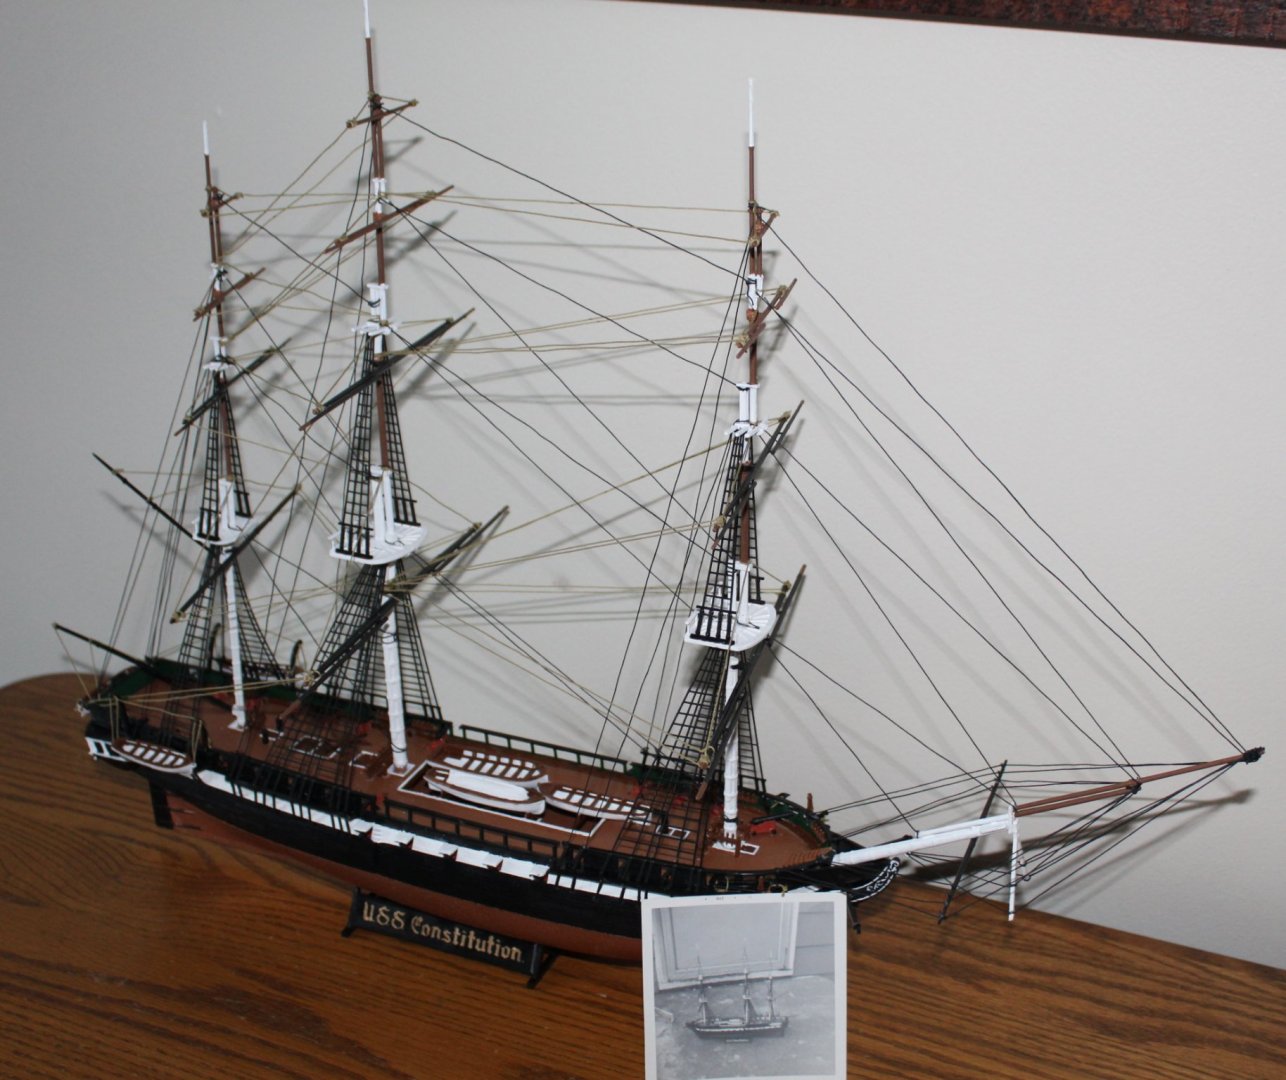
-
 First some background... I started this build in 2004 using Bob Hunt's practicum so my build will continue to use the practicum. About 6 months into the build Bob was looking for someone to mill wood for his new kit business and that was the start of HobbyMill. So the kit has laid idle for 17 years while I did HobbyMill and eventually relocated to Phoenix from Cincinnati. This is also my first build so I'm making all of the typical mistakes of a newbie. Over the years I've had the privilege to observe so many great builds and learn from the commentary on this site so I was a little intimidated to post a log. However, after spending some time lurking here recently and the wealth of information that I have received, I decided to try to give something back...even if its just all of the mistakes that I'm making. Lessons Learned: Modeling is a lot harder than milling wood Don't wait 17 years between steps in a build Once I figure out how to upload some pics, I'll start my build. Unfortunately I must have deleted some of my early pics from 2004 so we'll start from where we are today. Jeff
 -
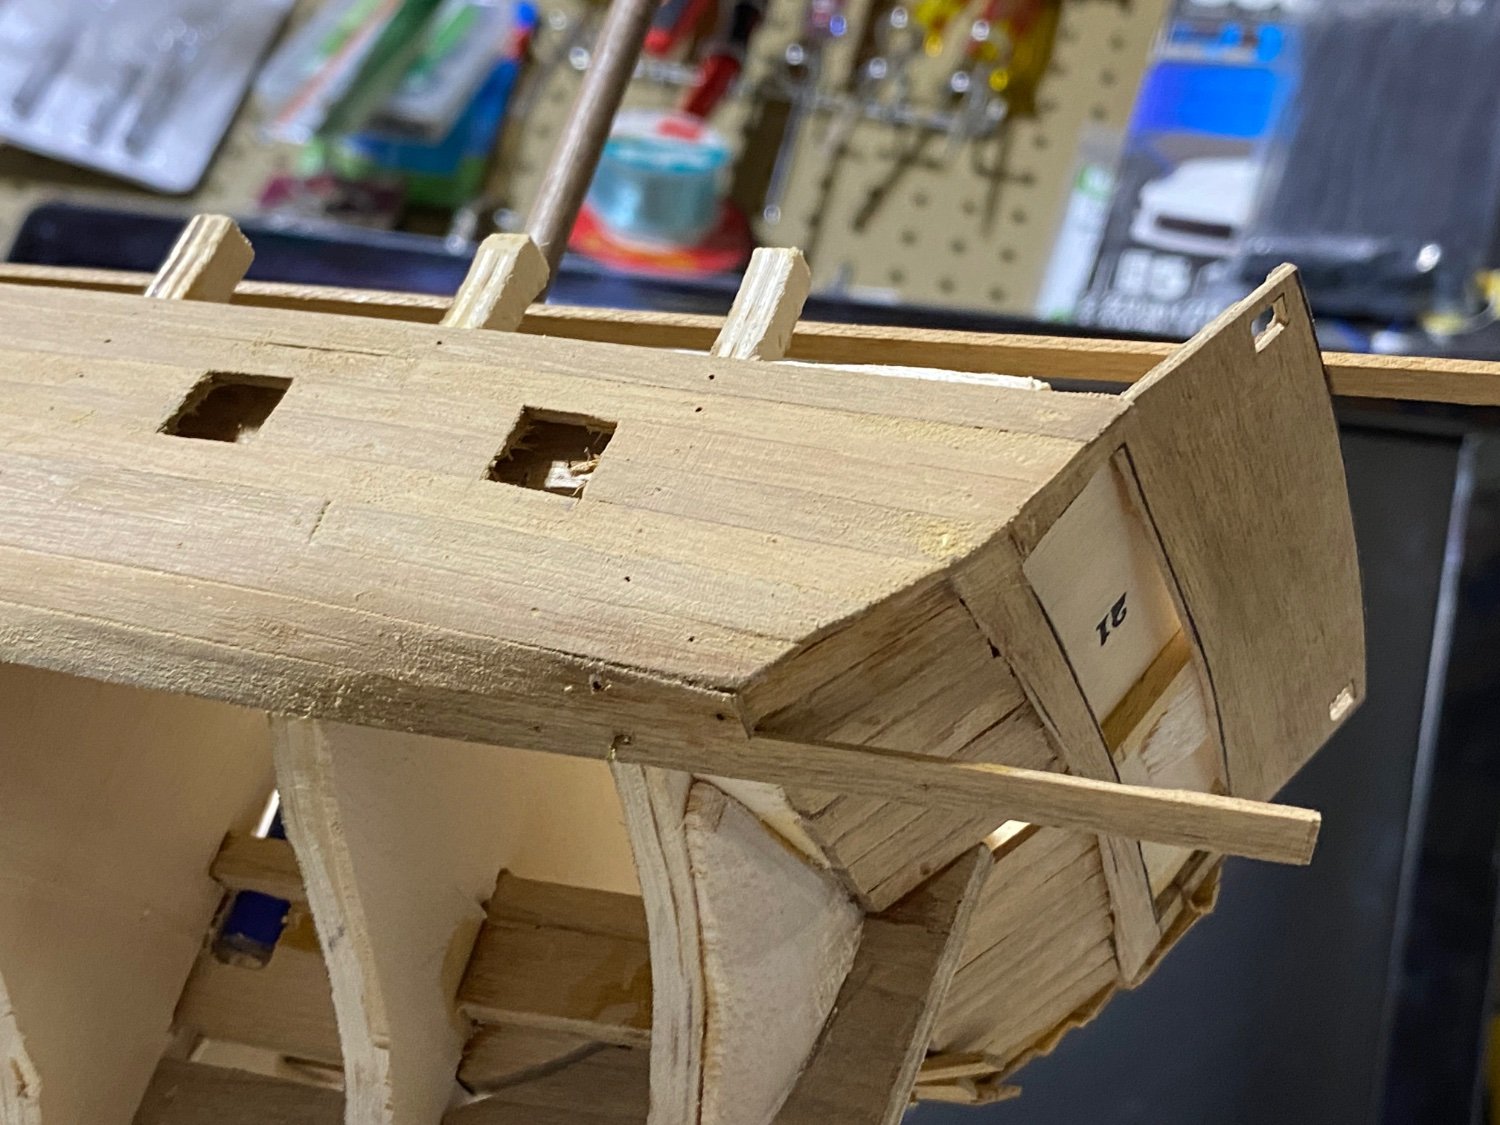
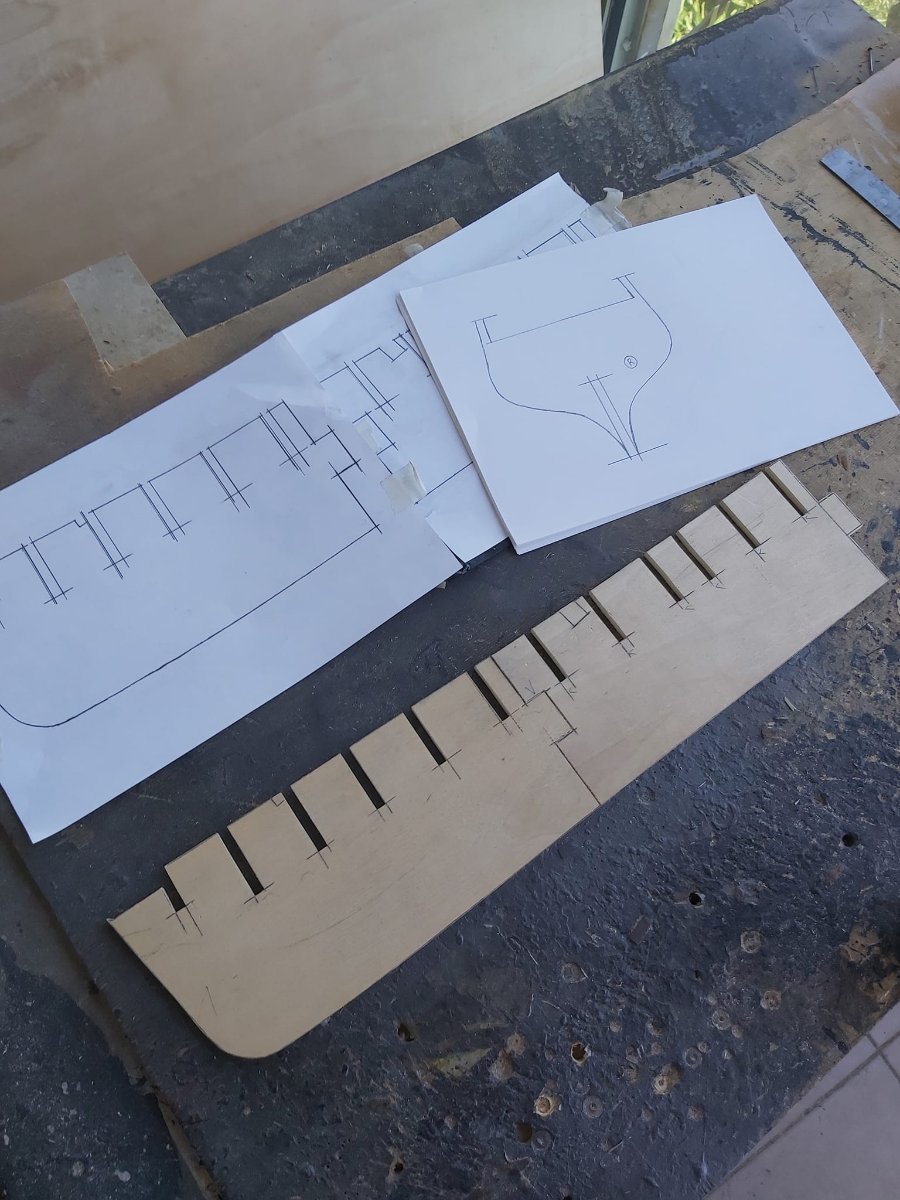
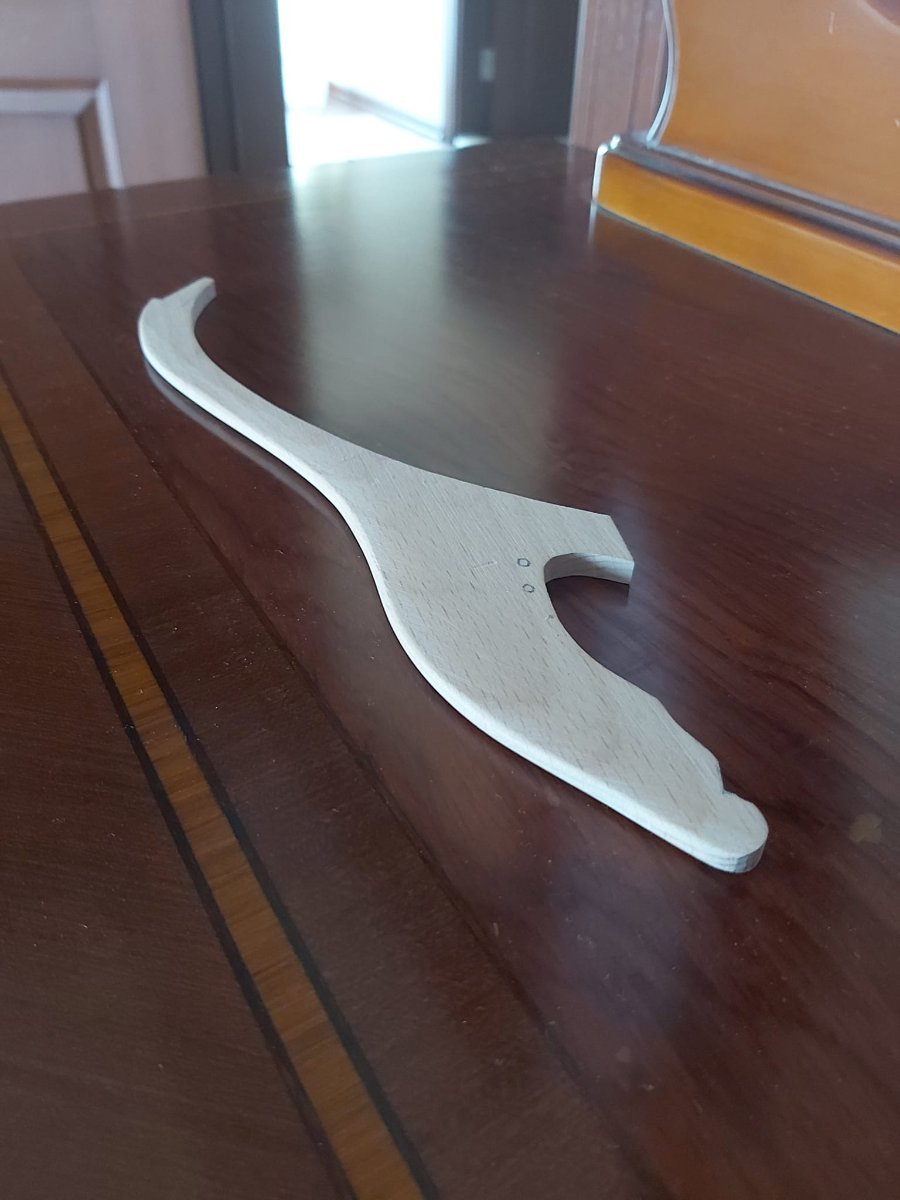
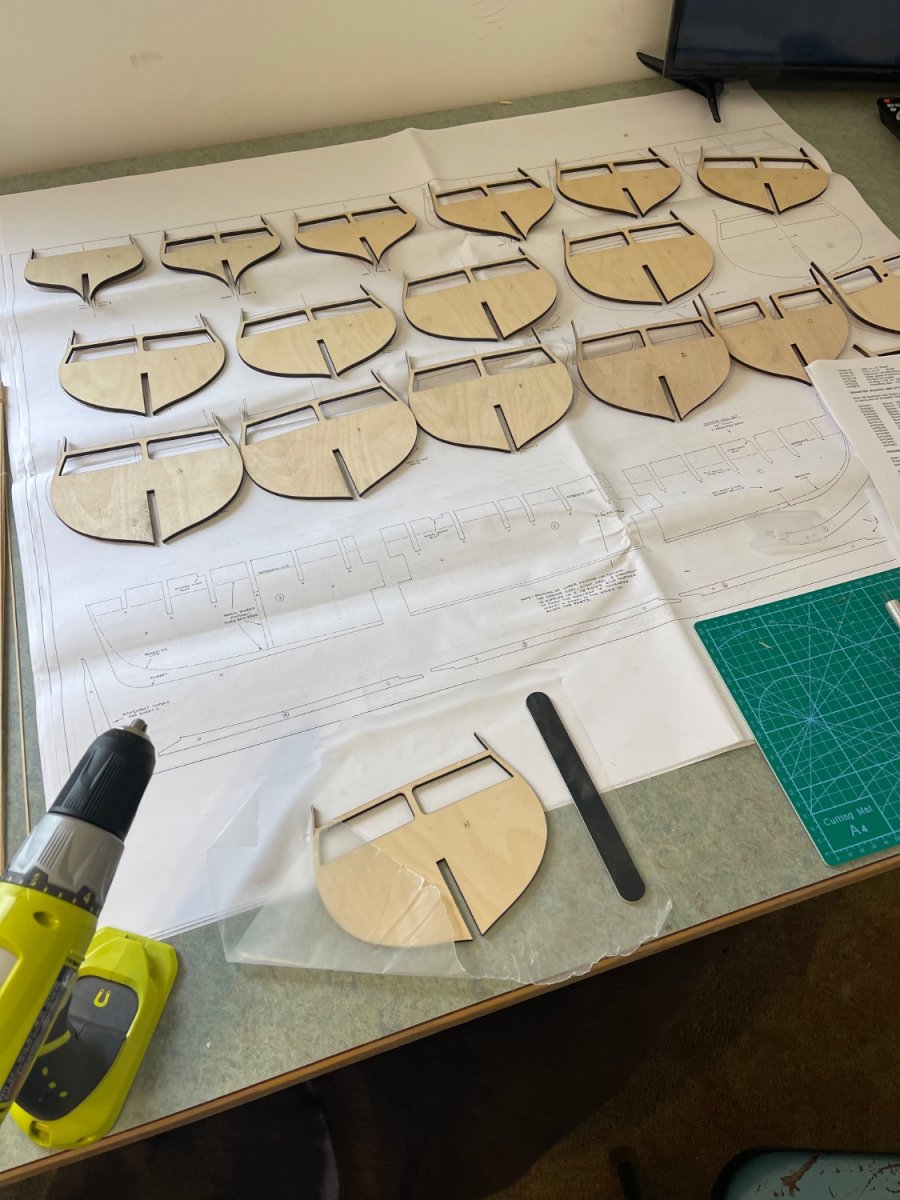
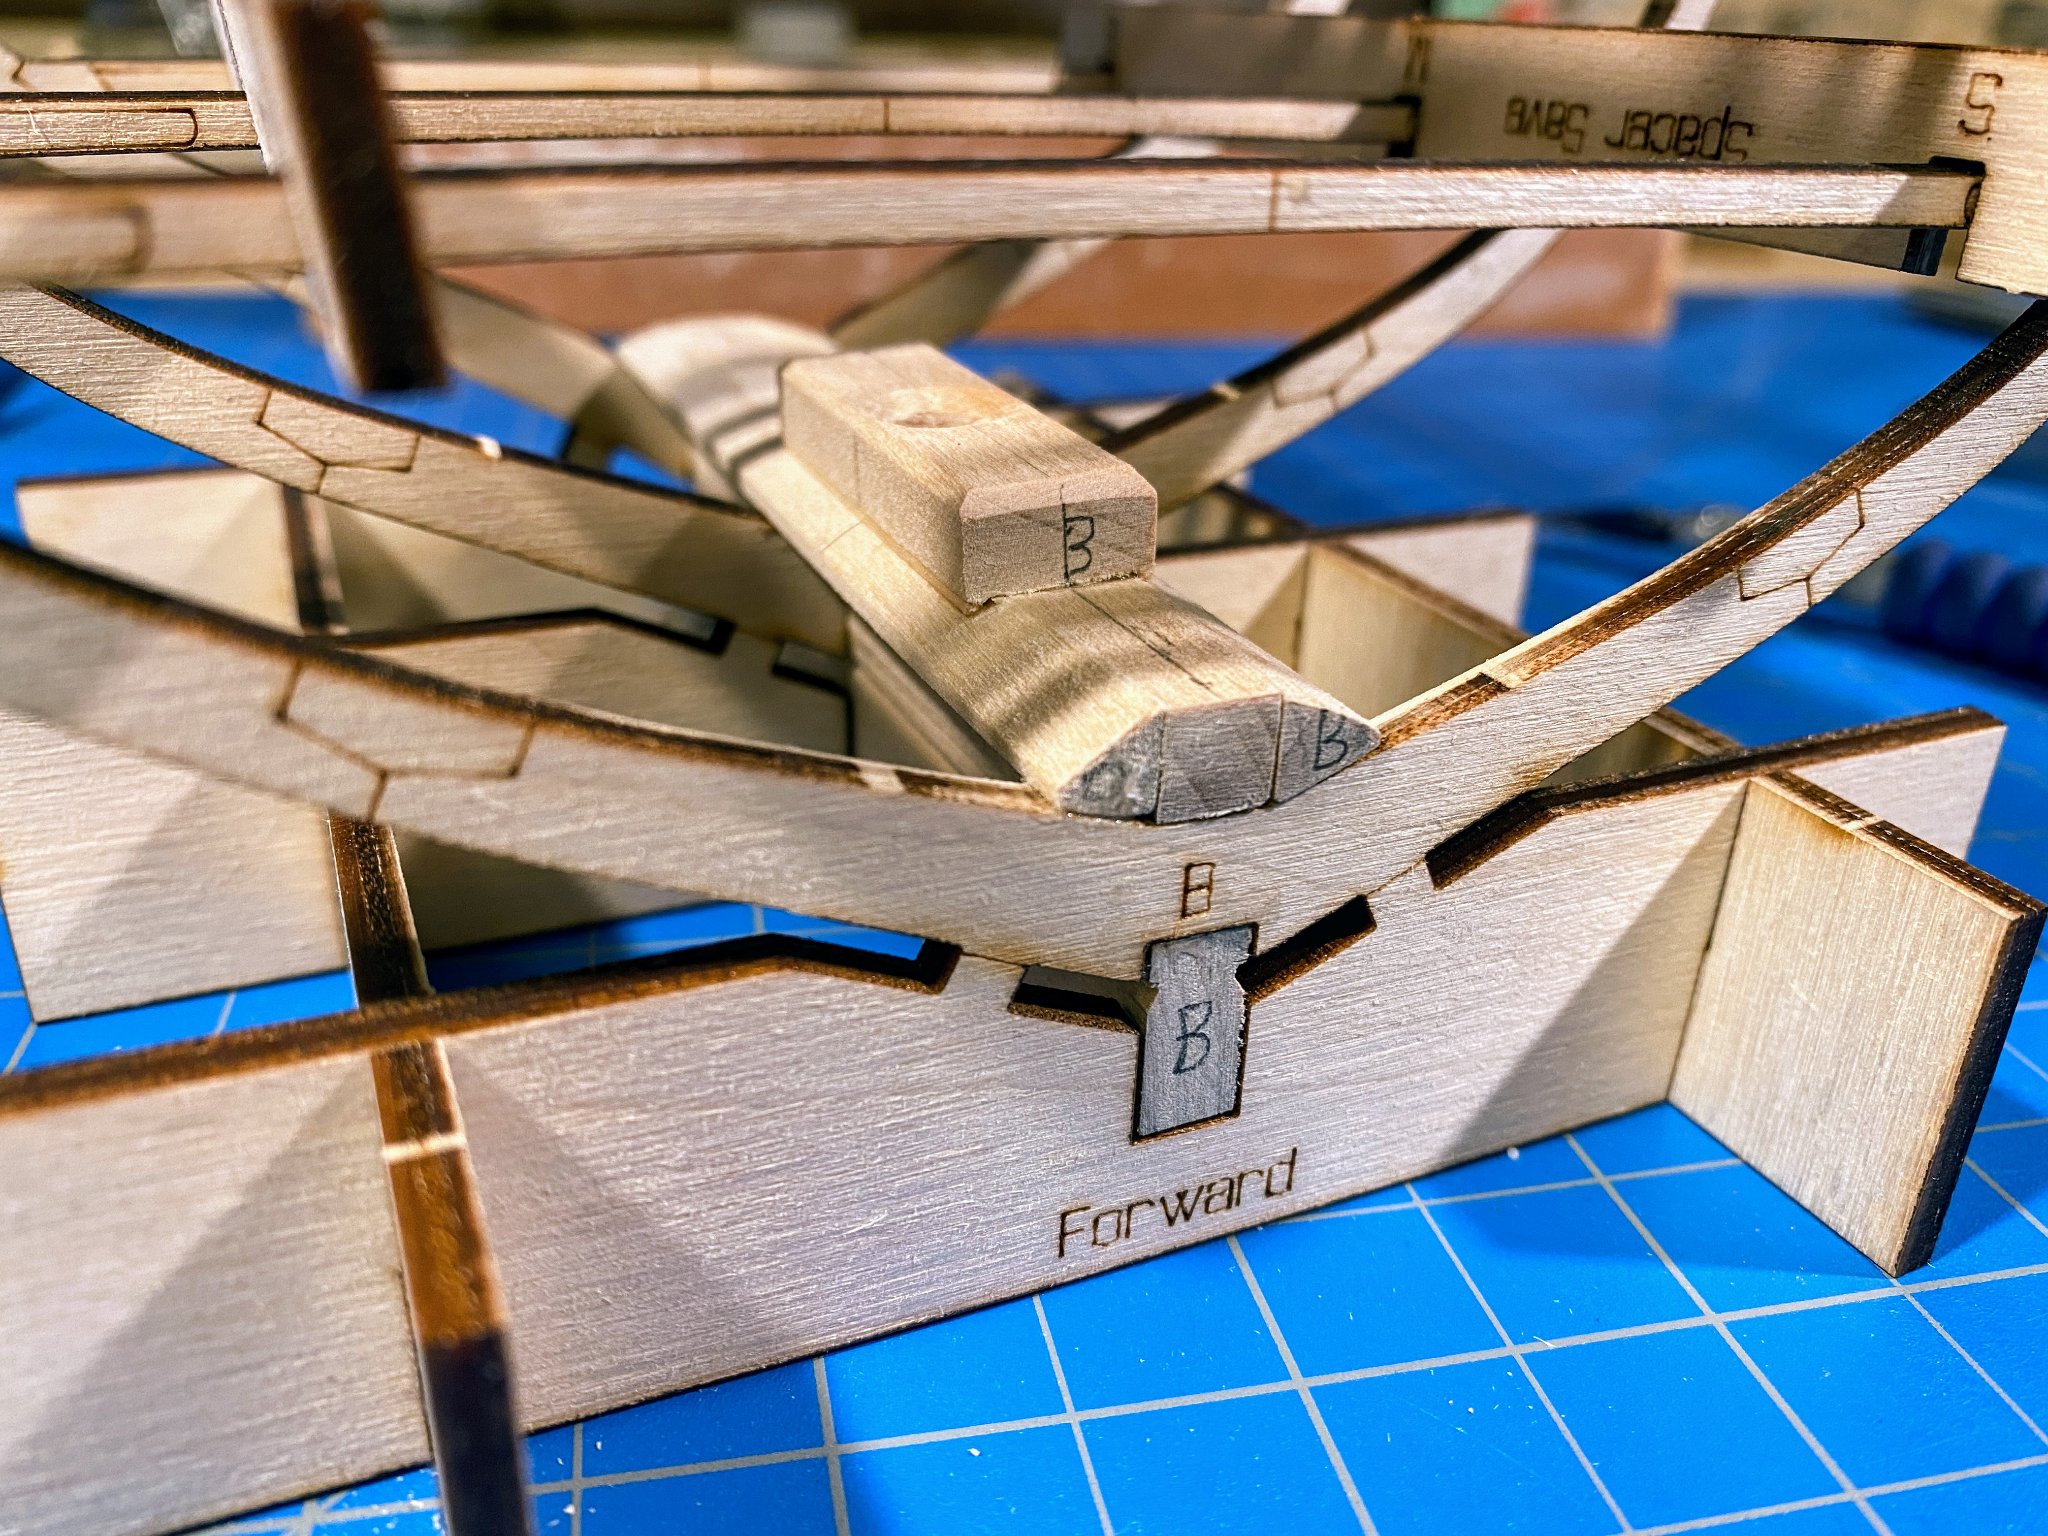
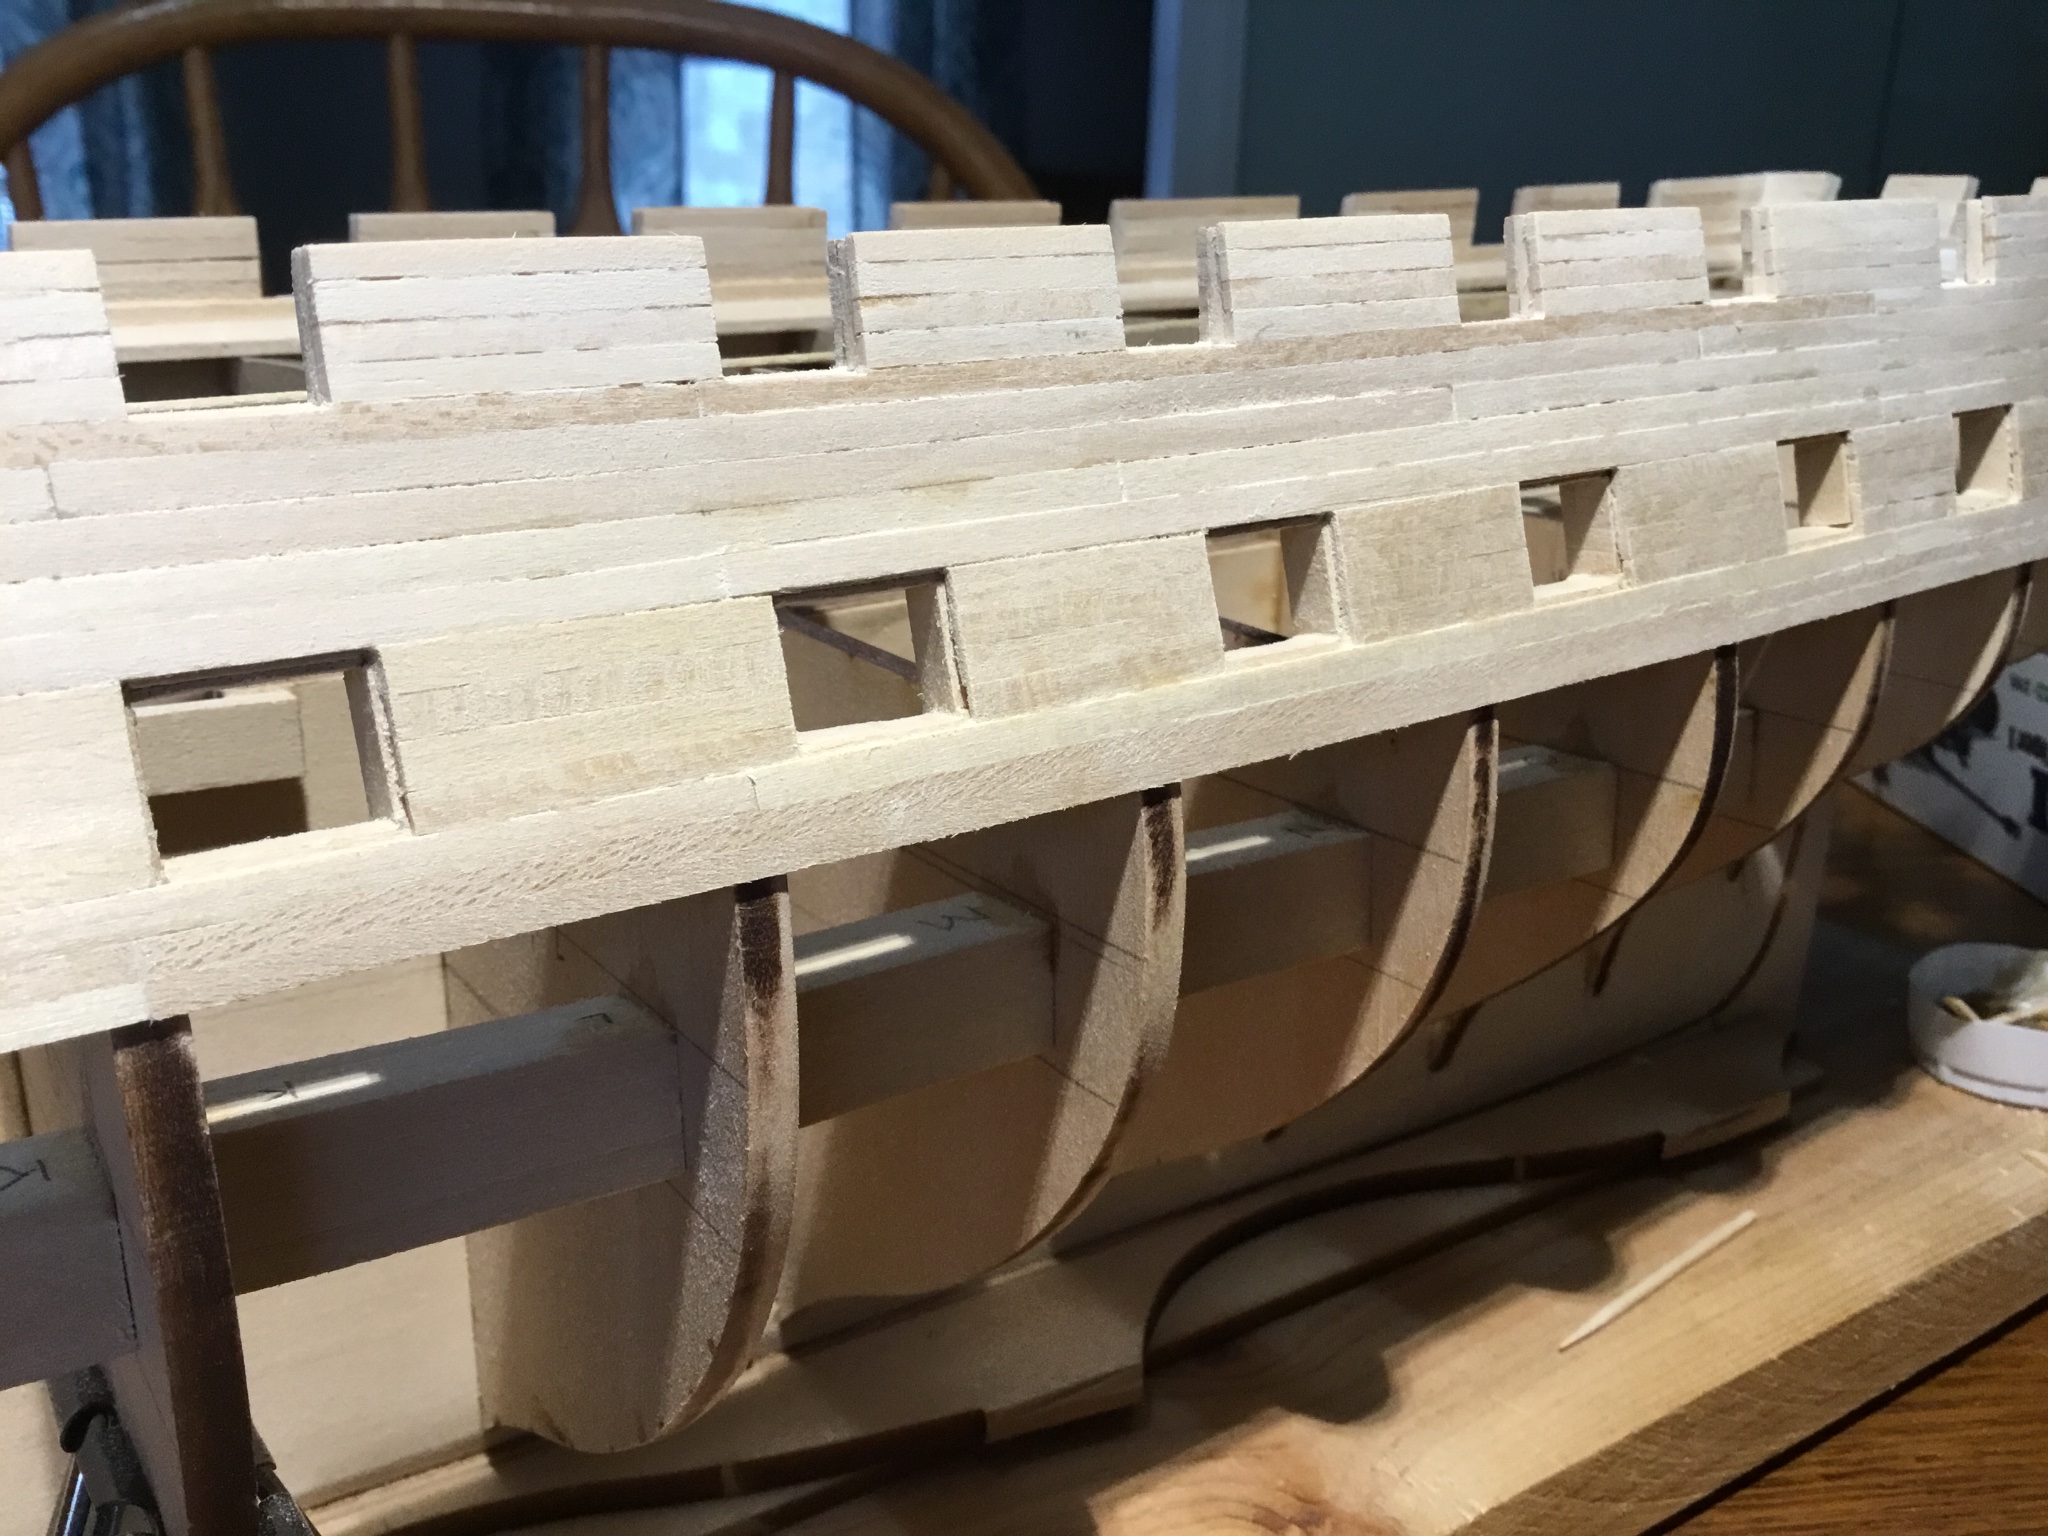
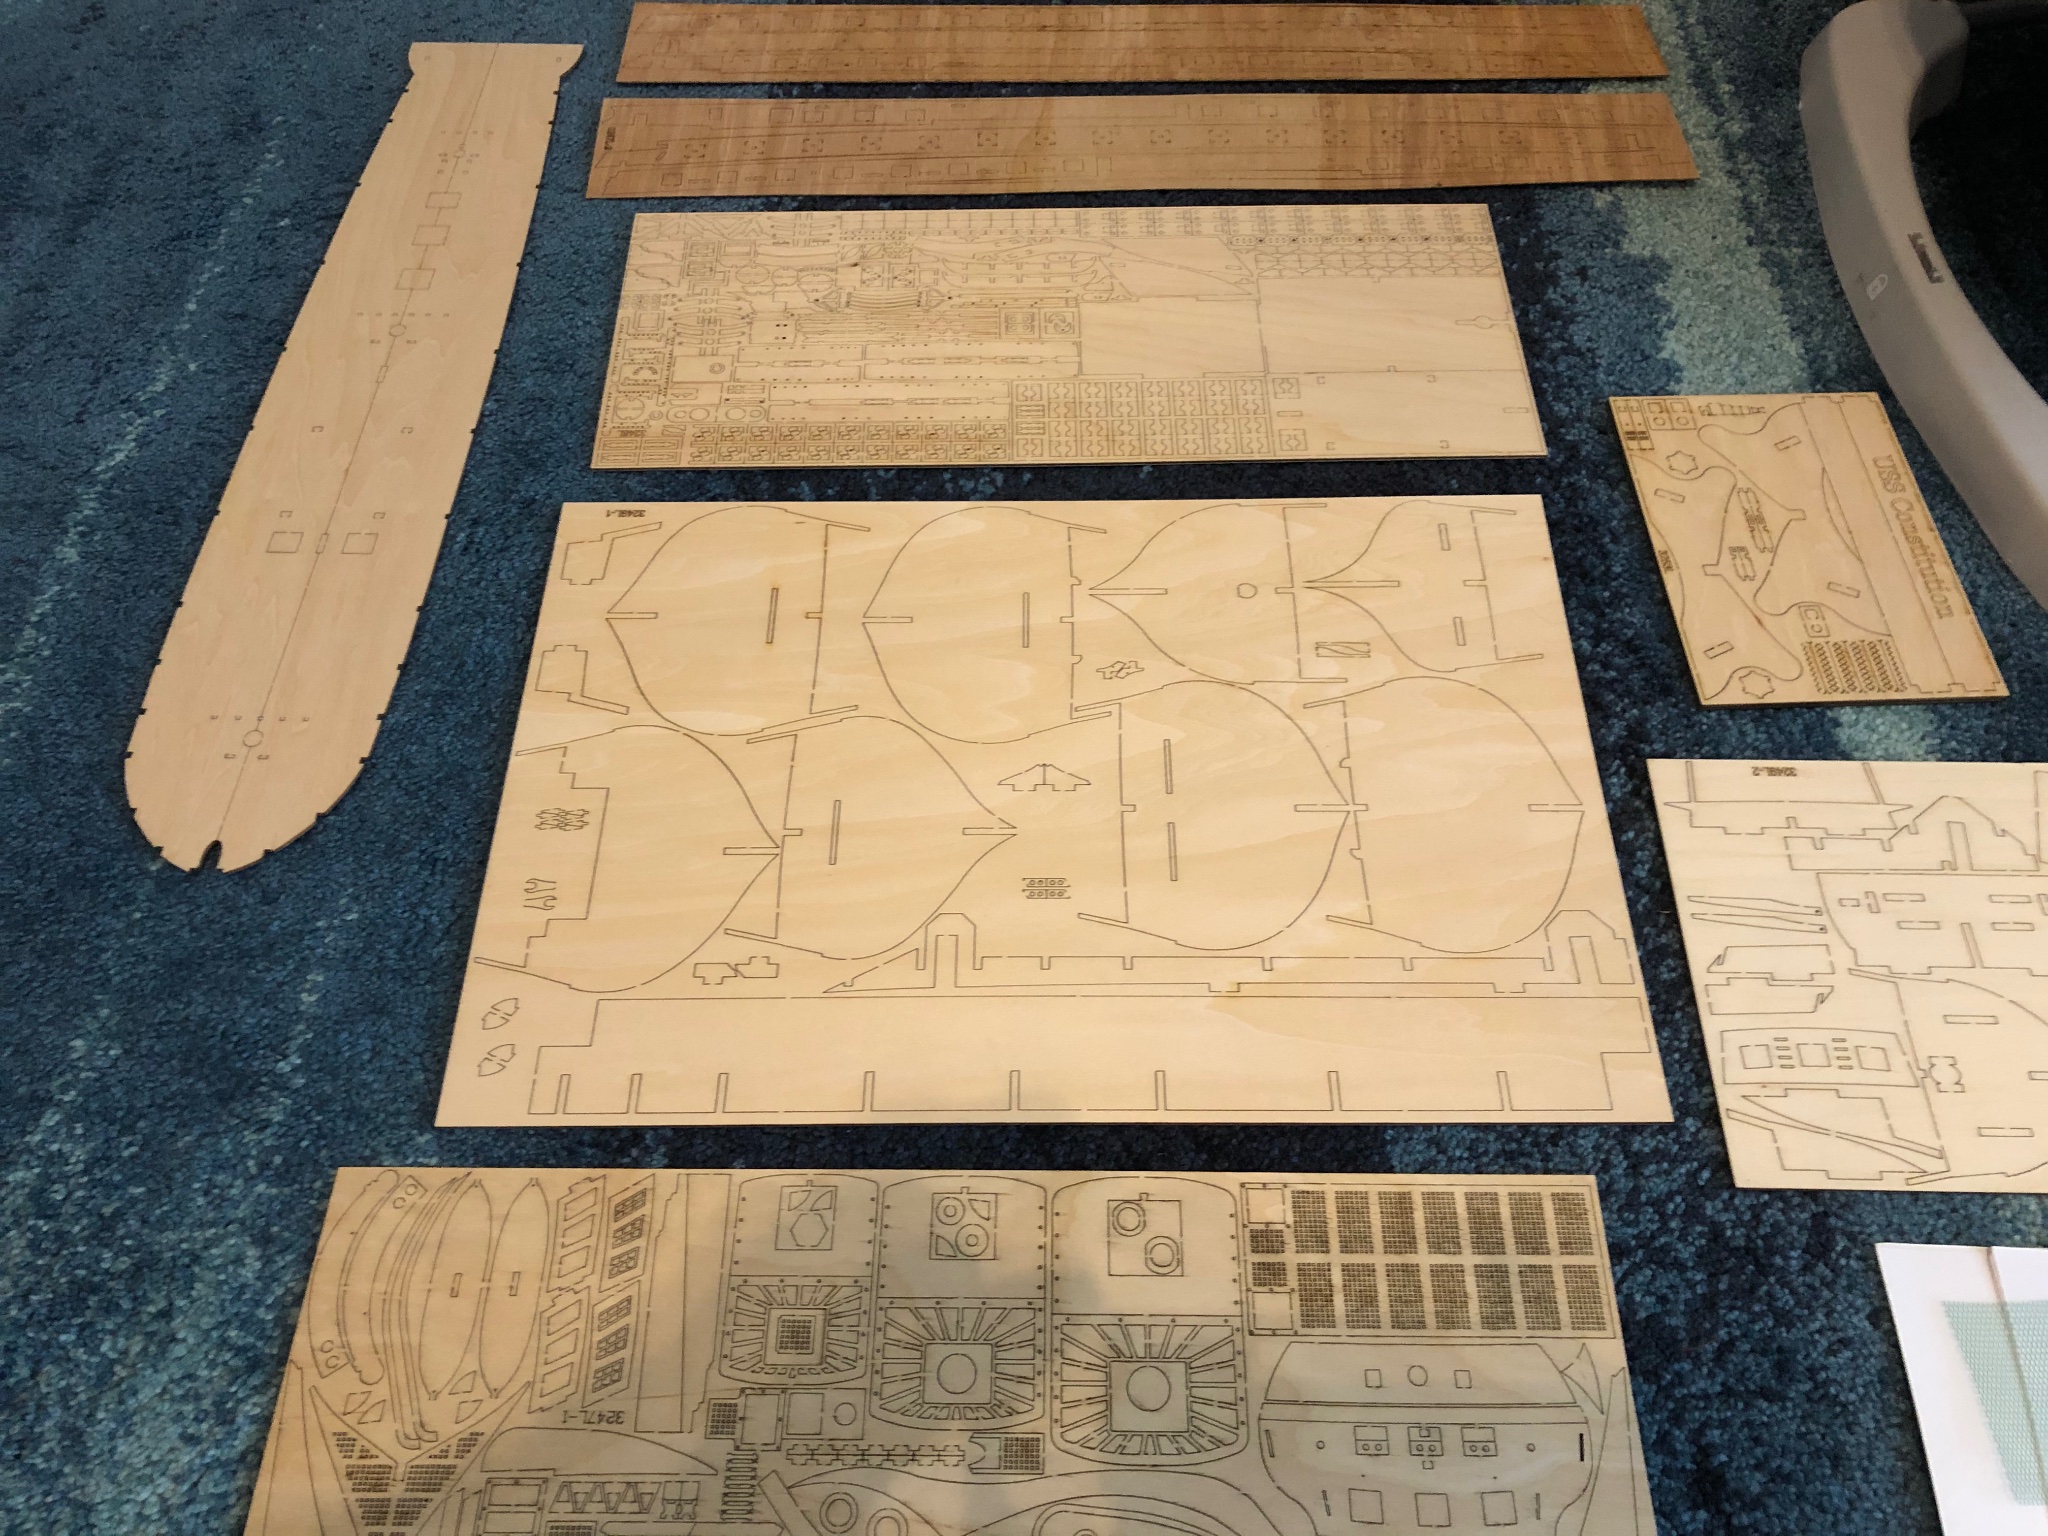
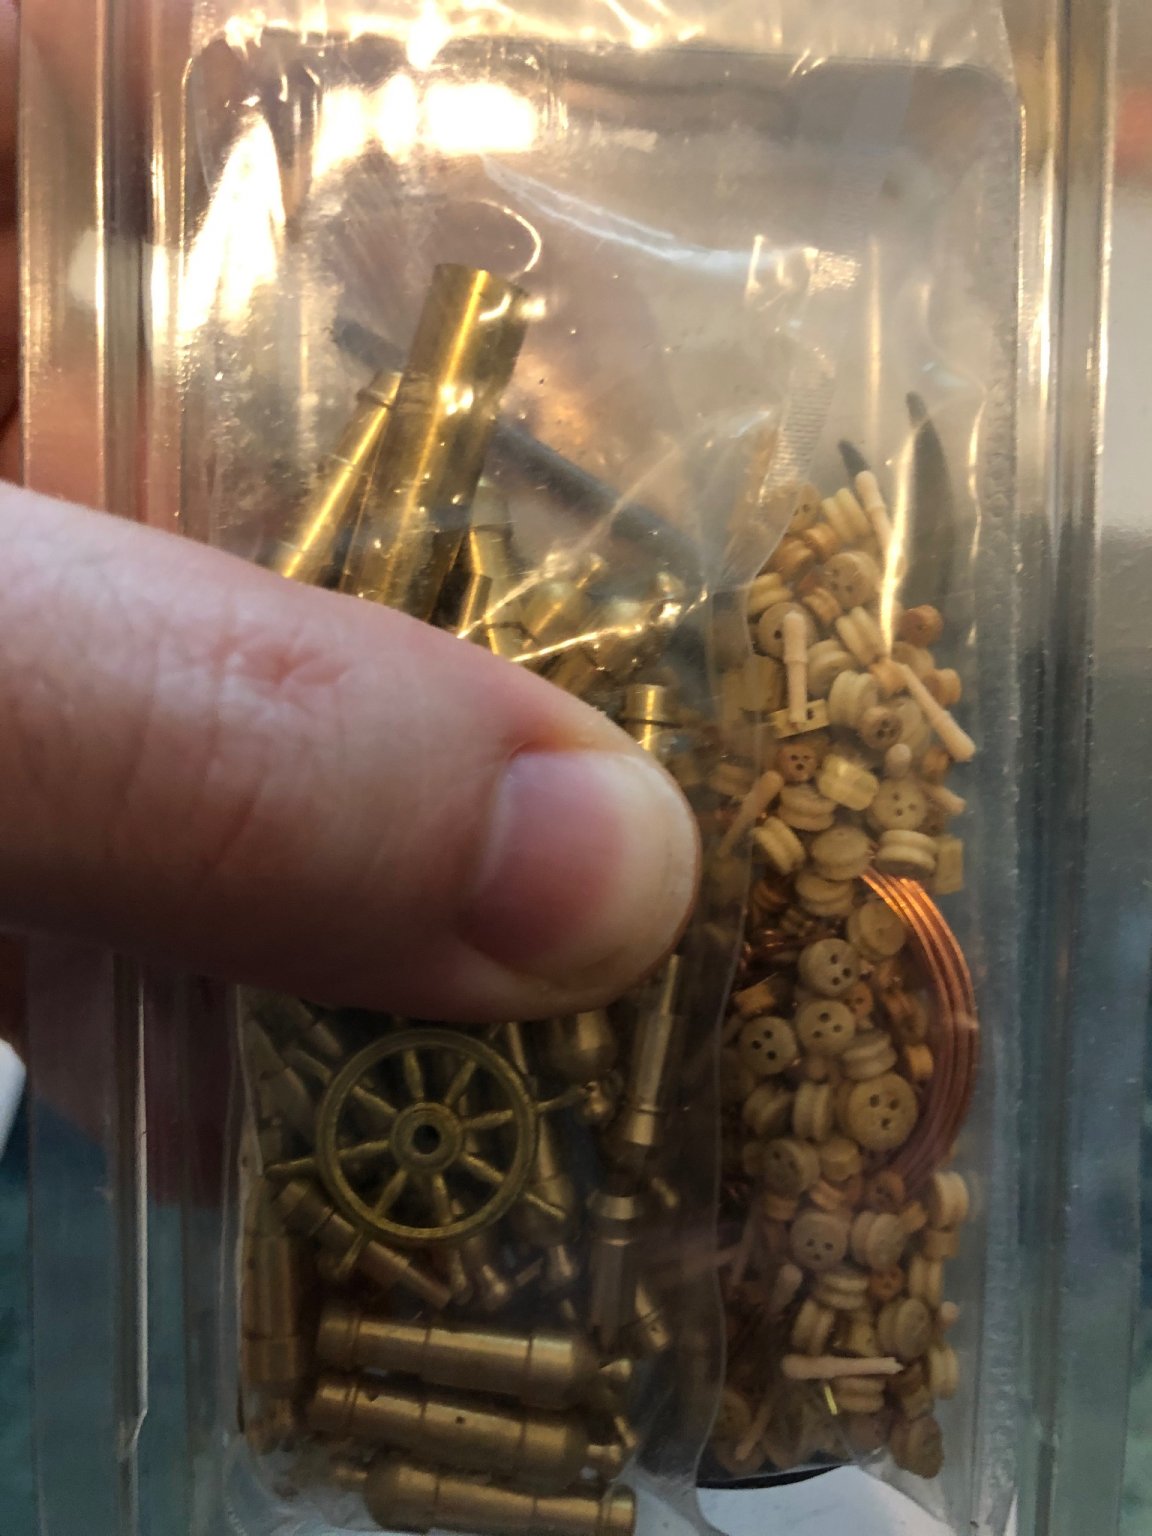
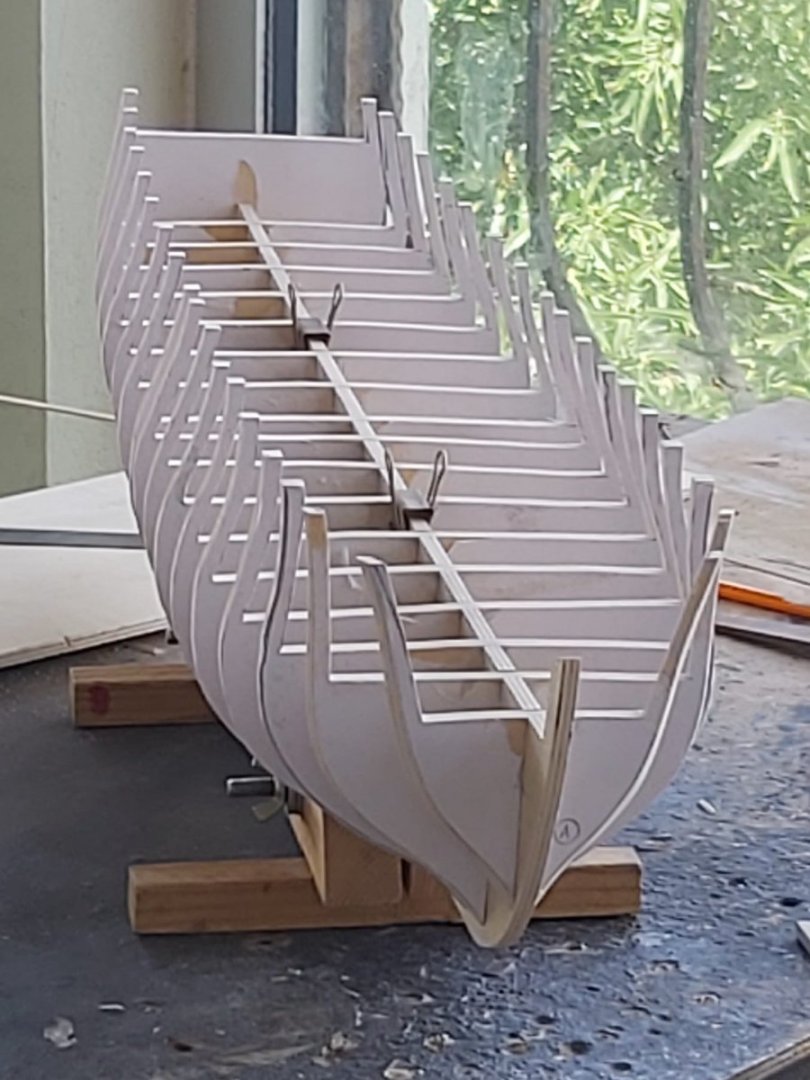
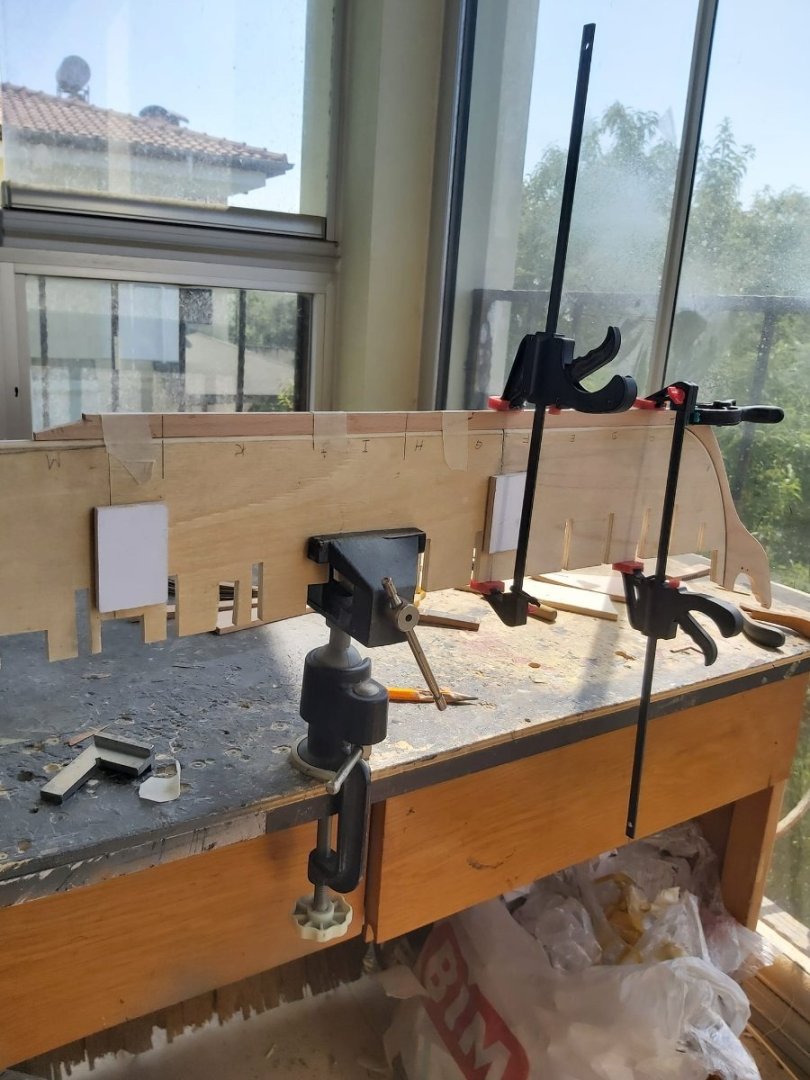
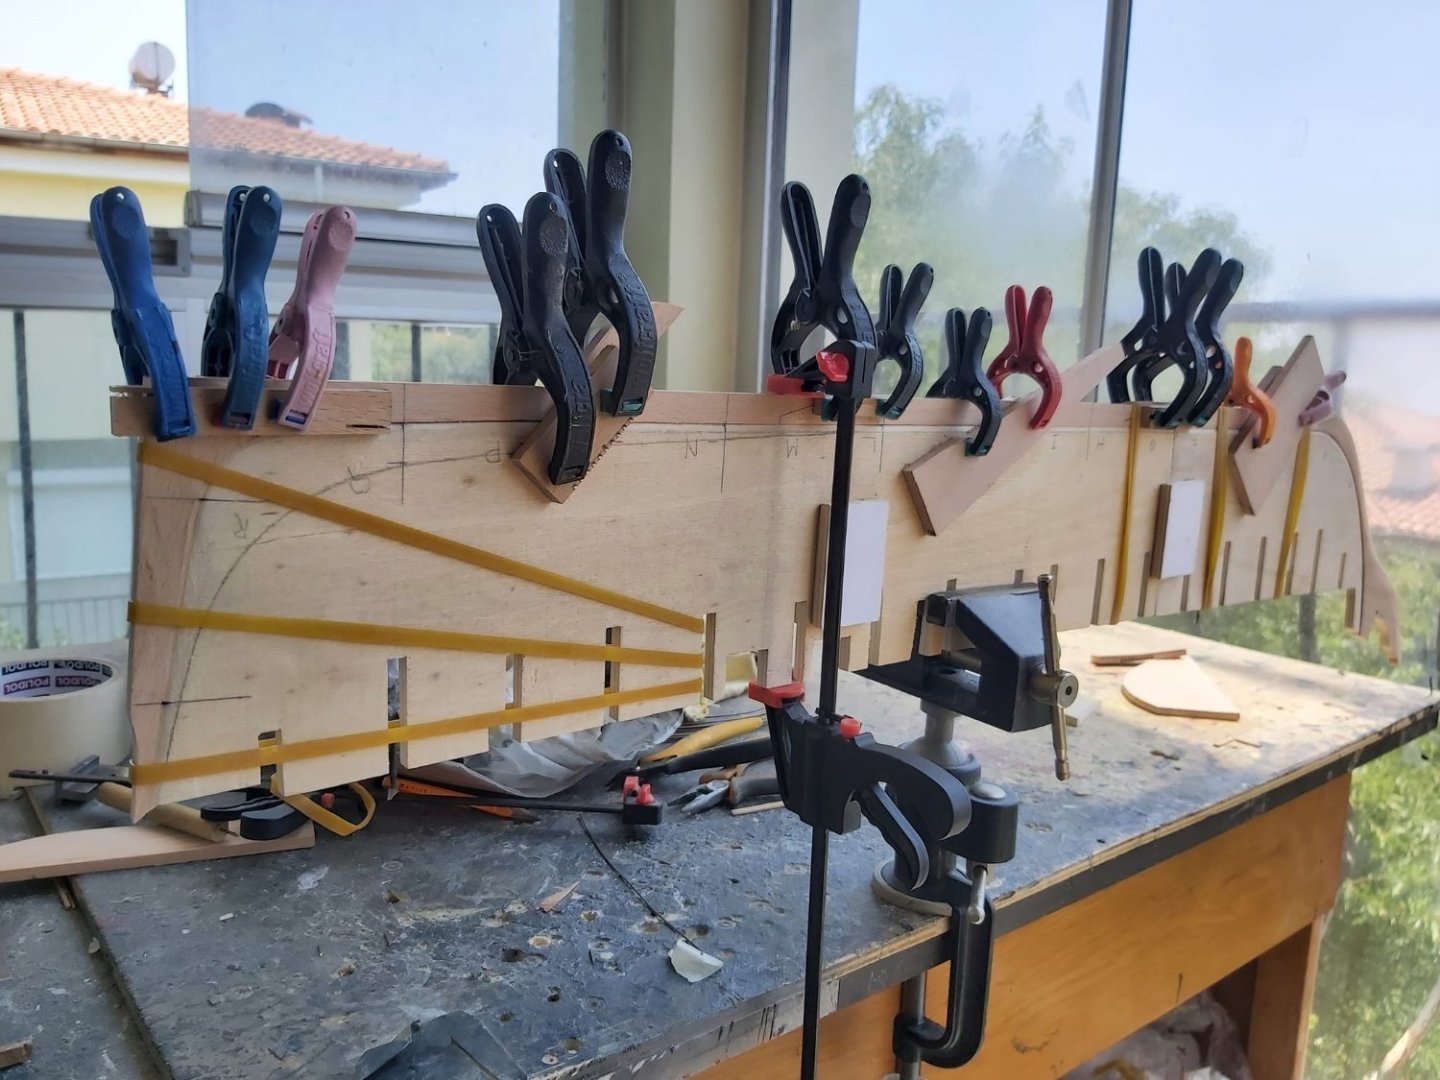
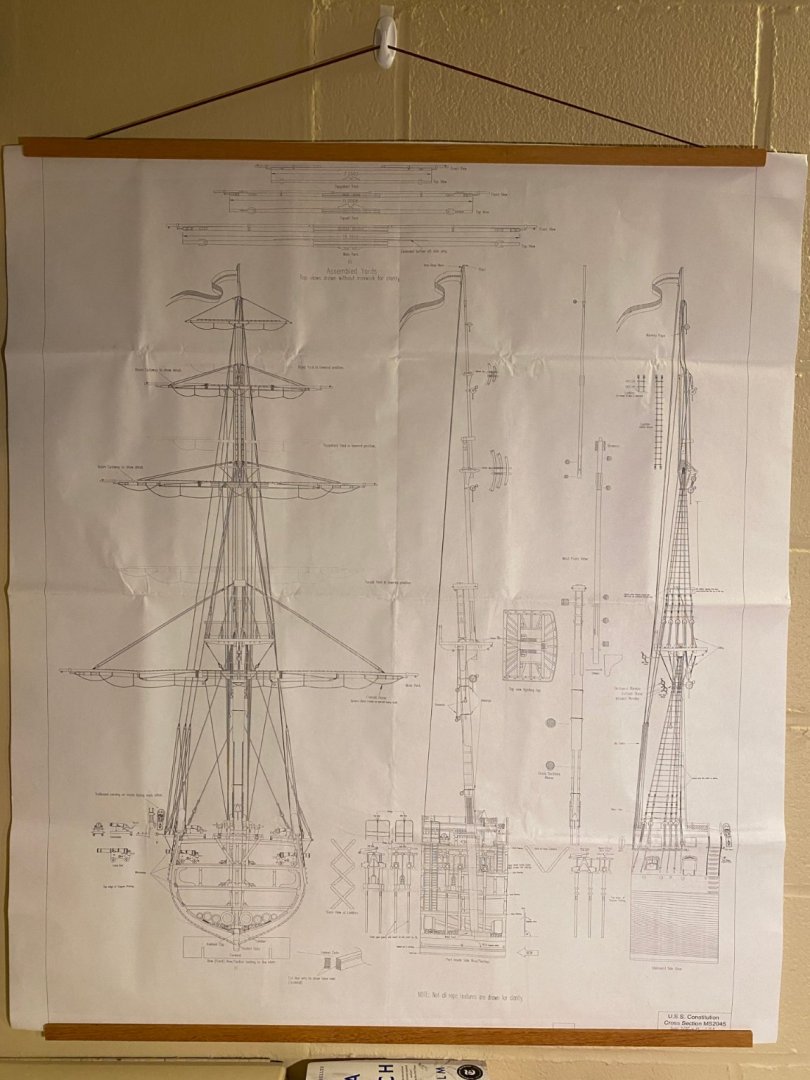
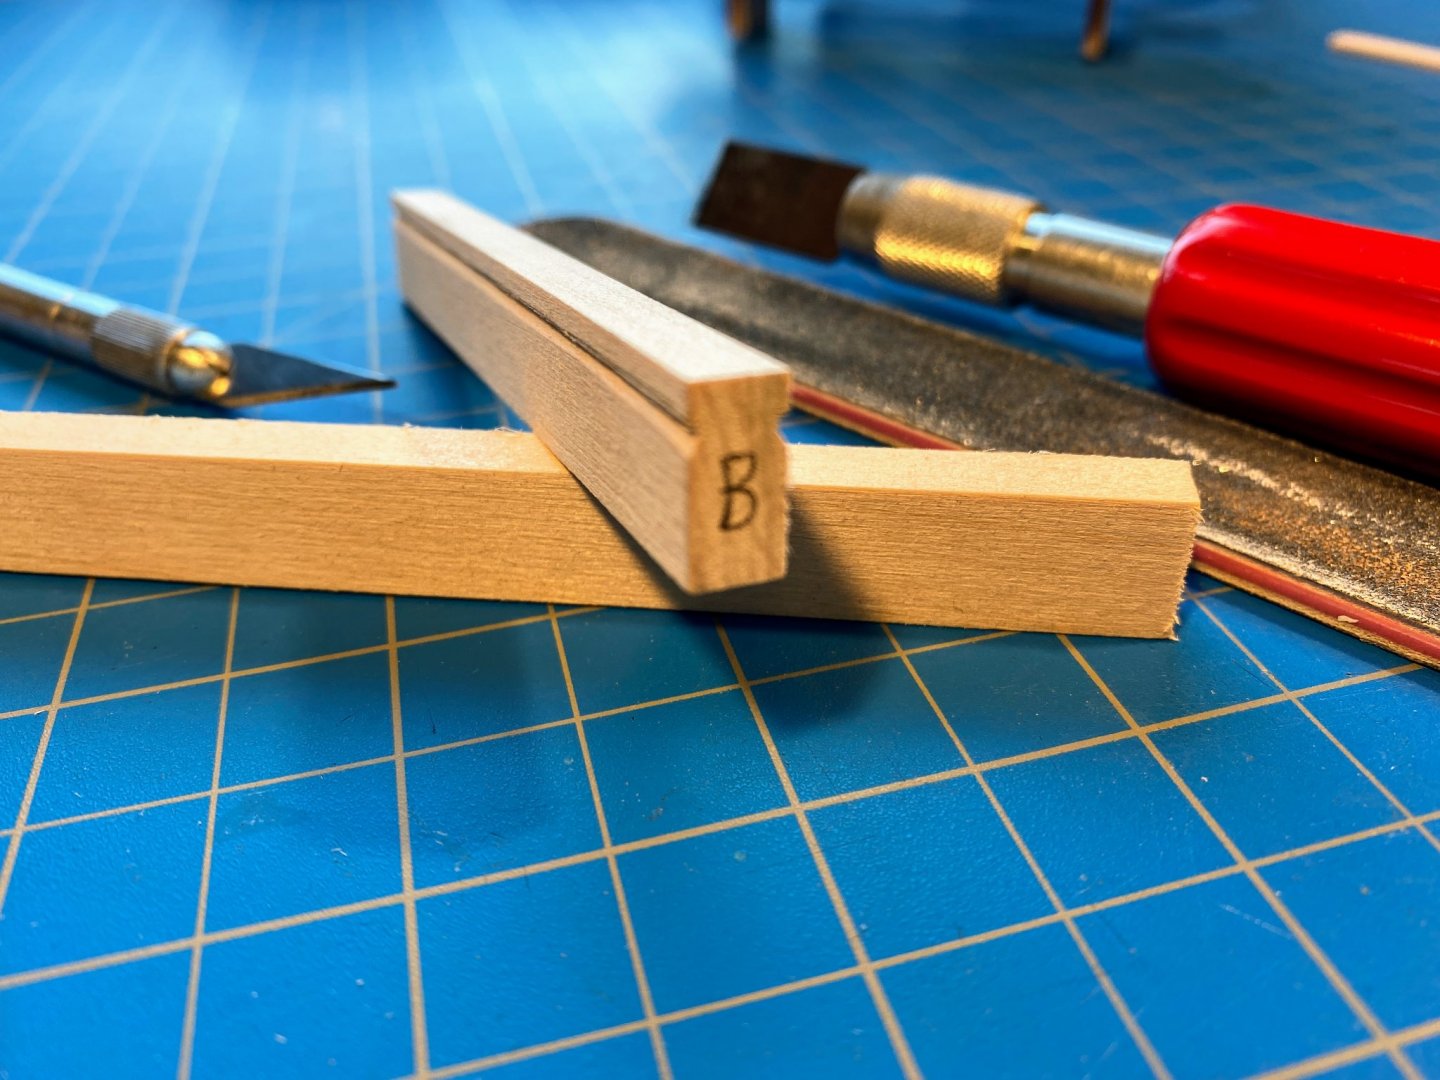
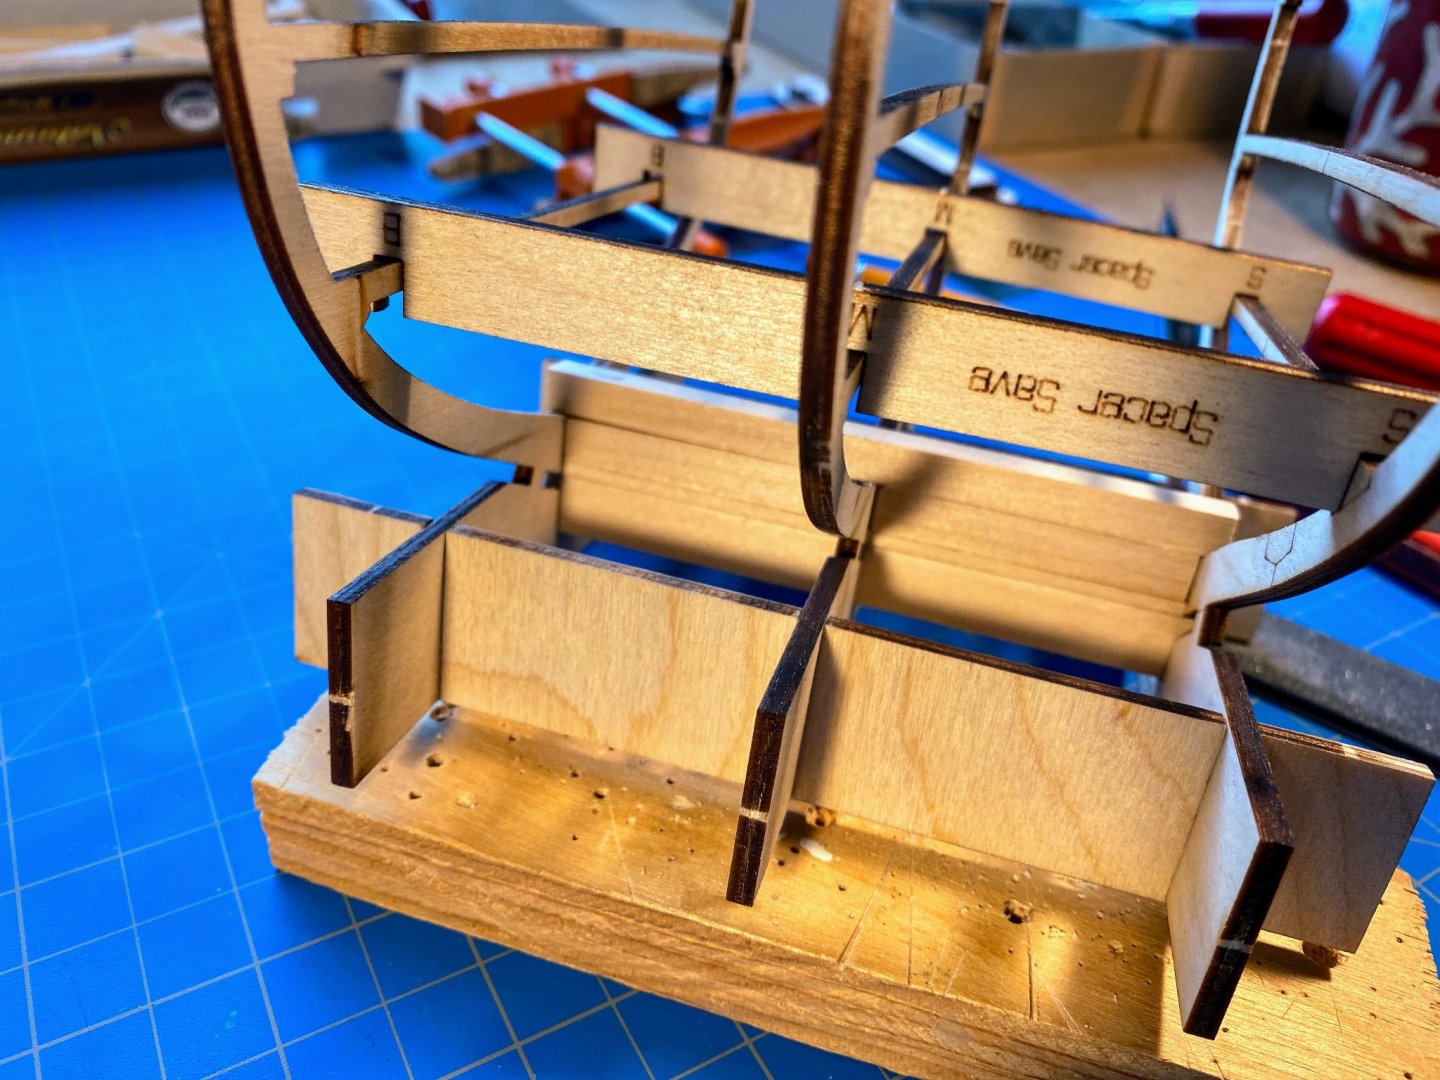
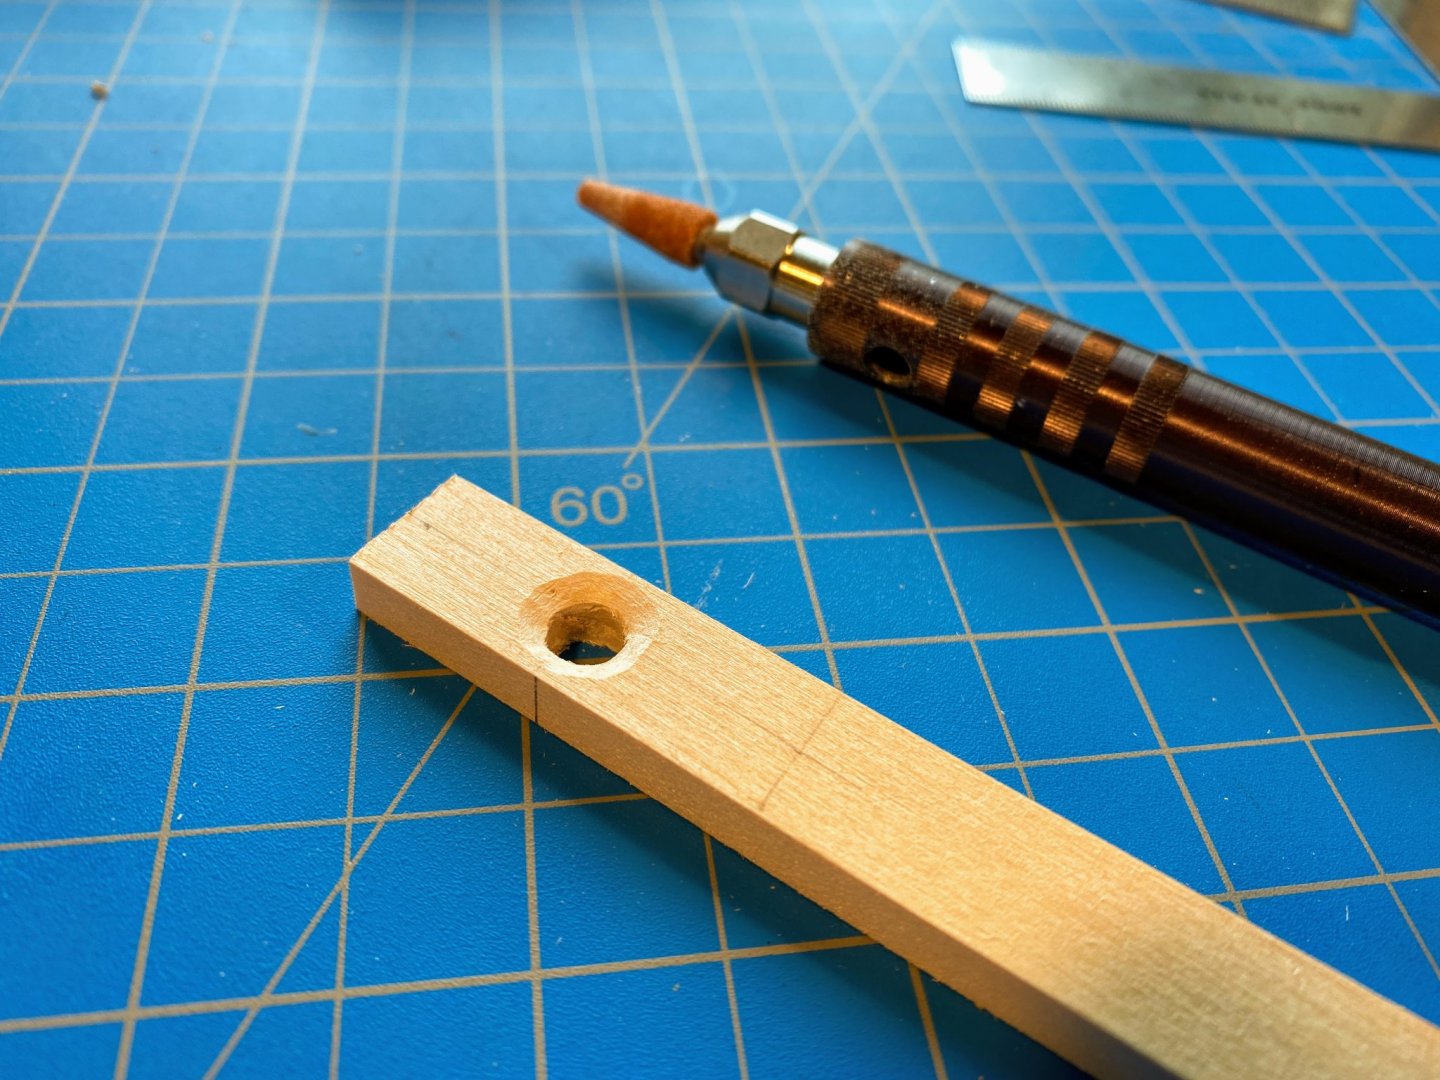
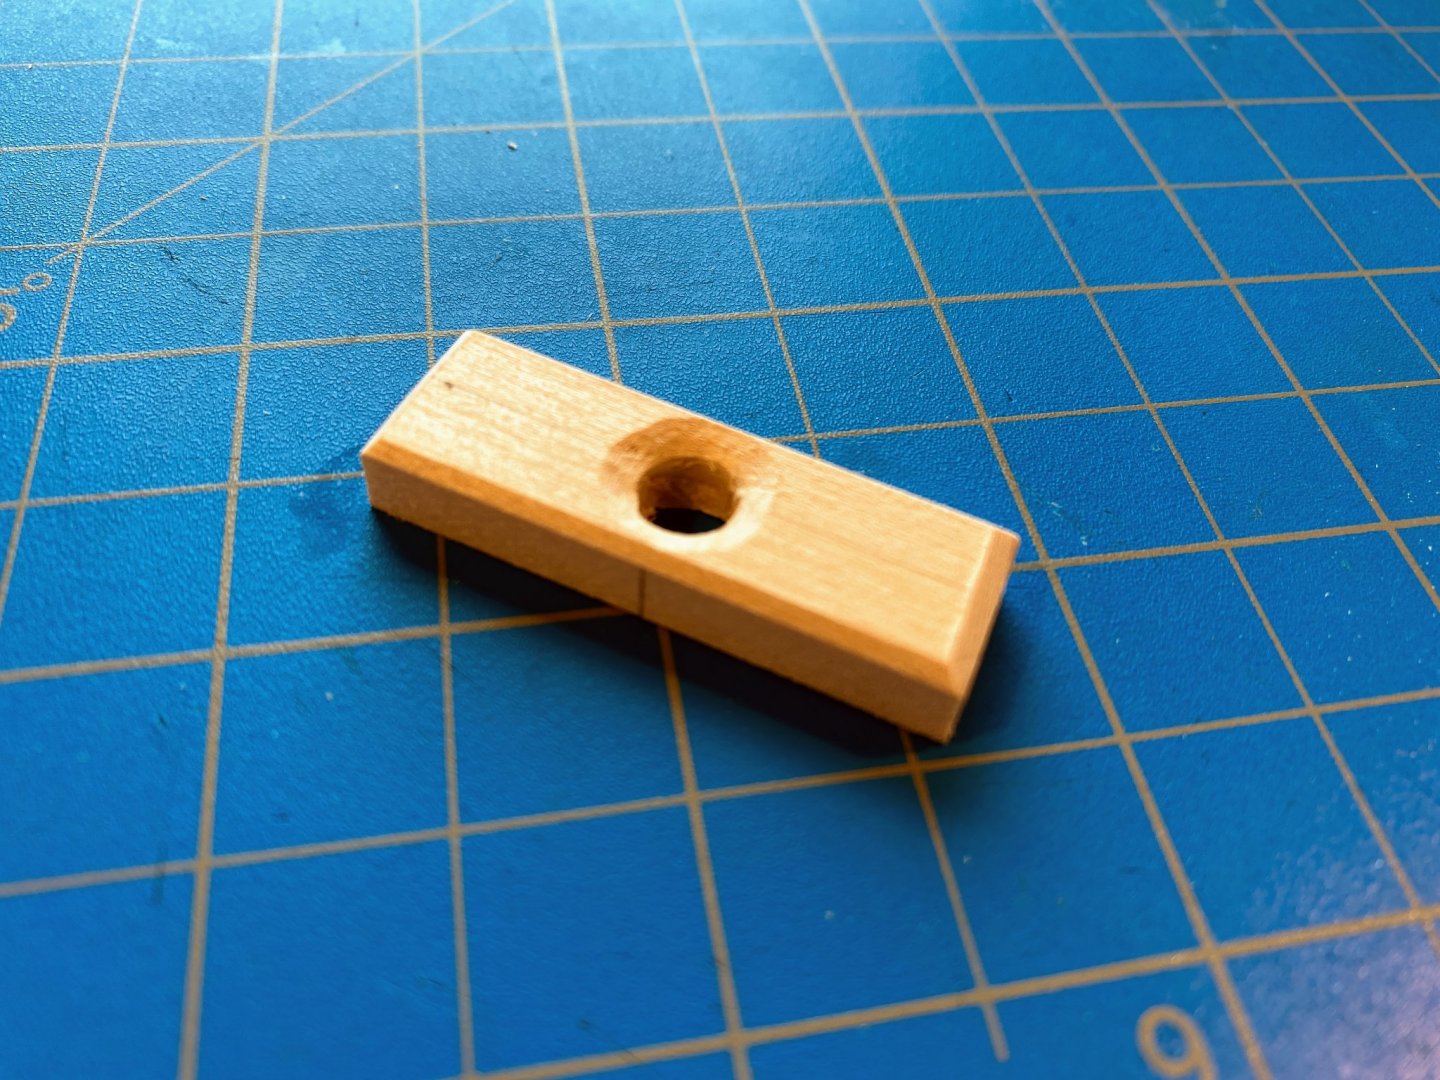
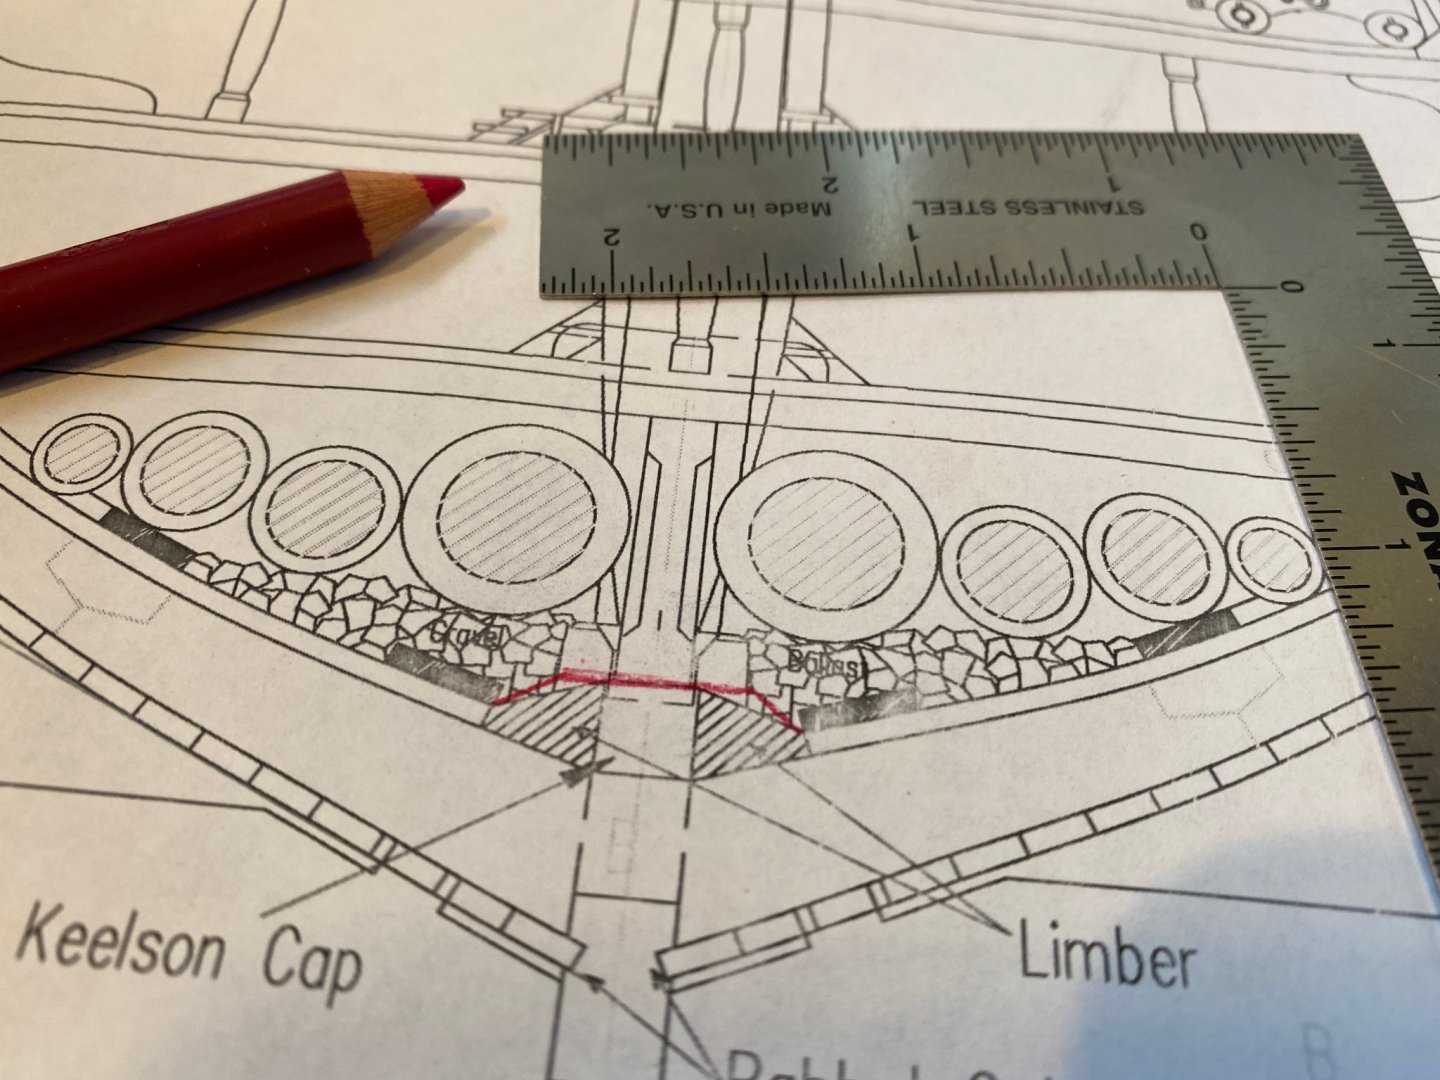
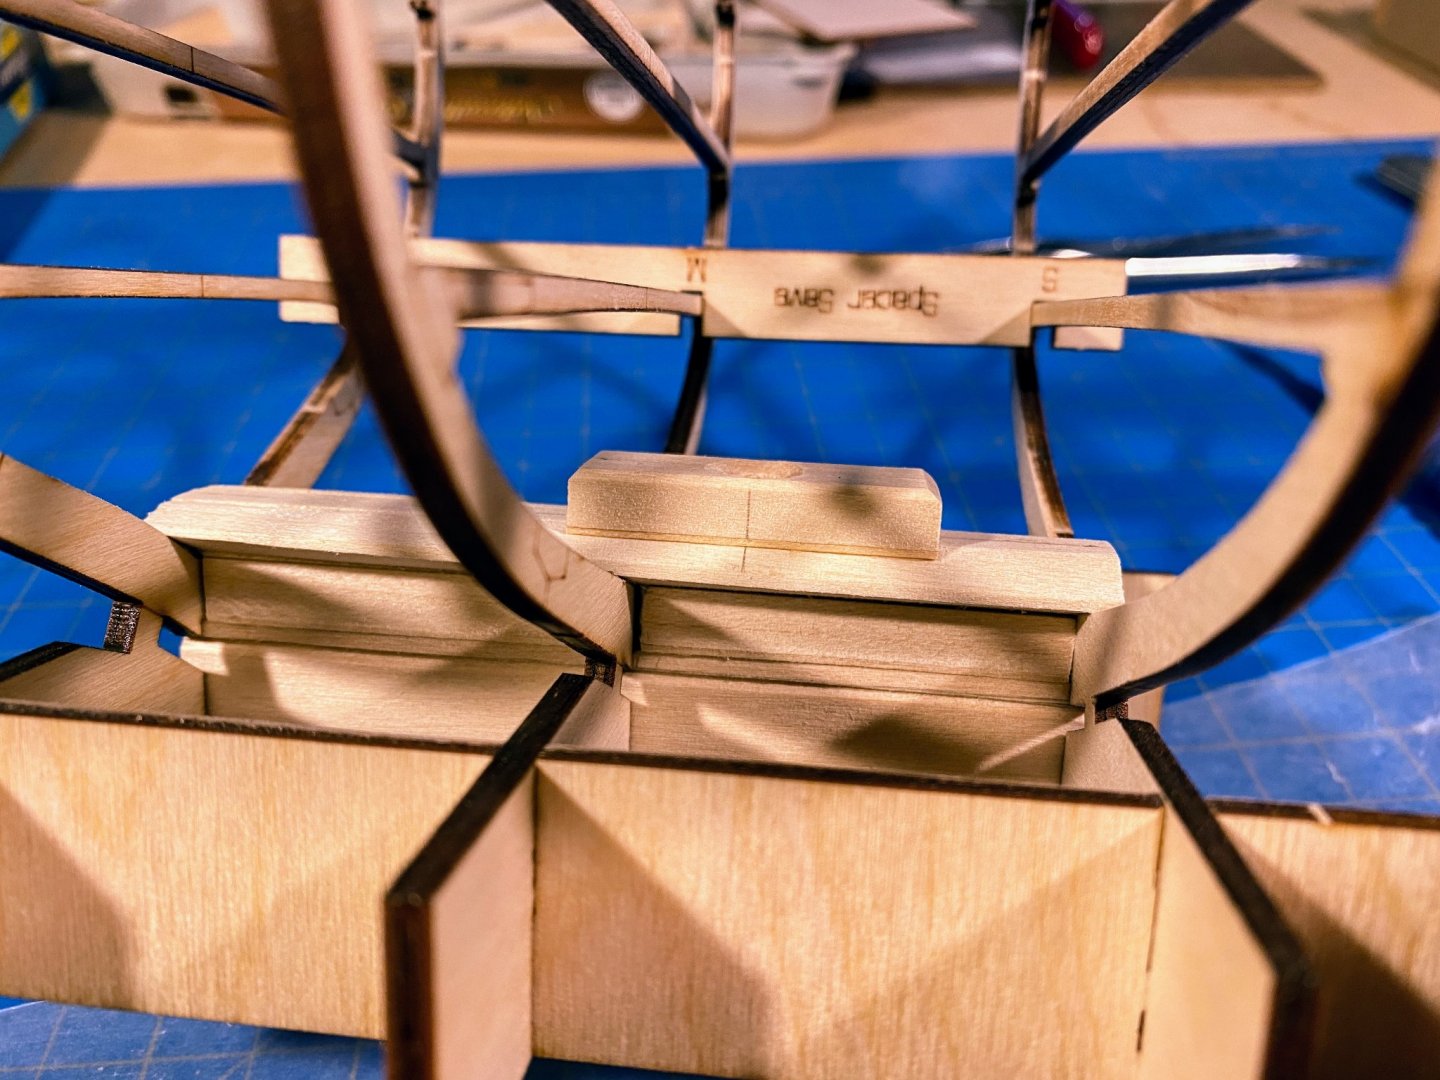
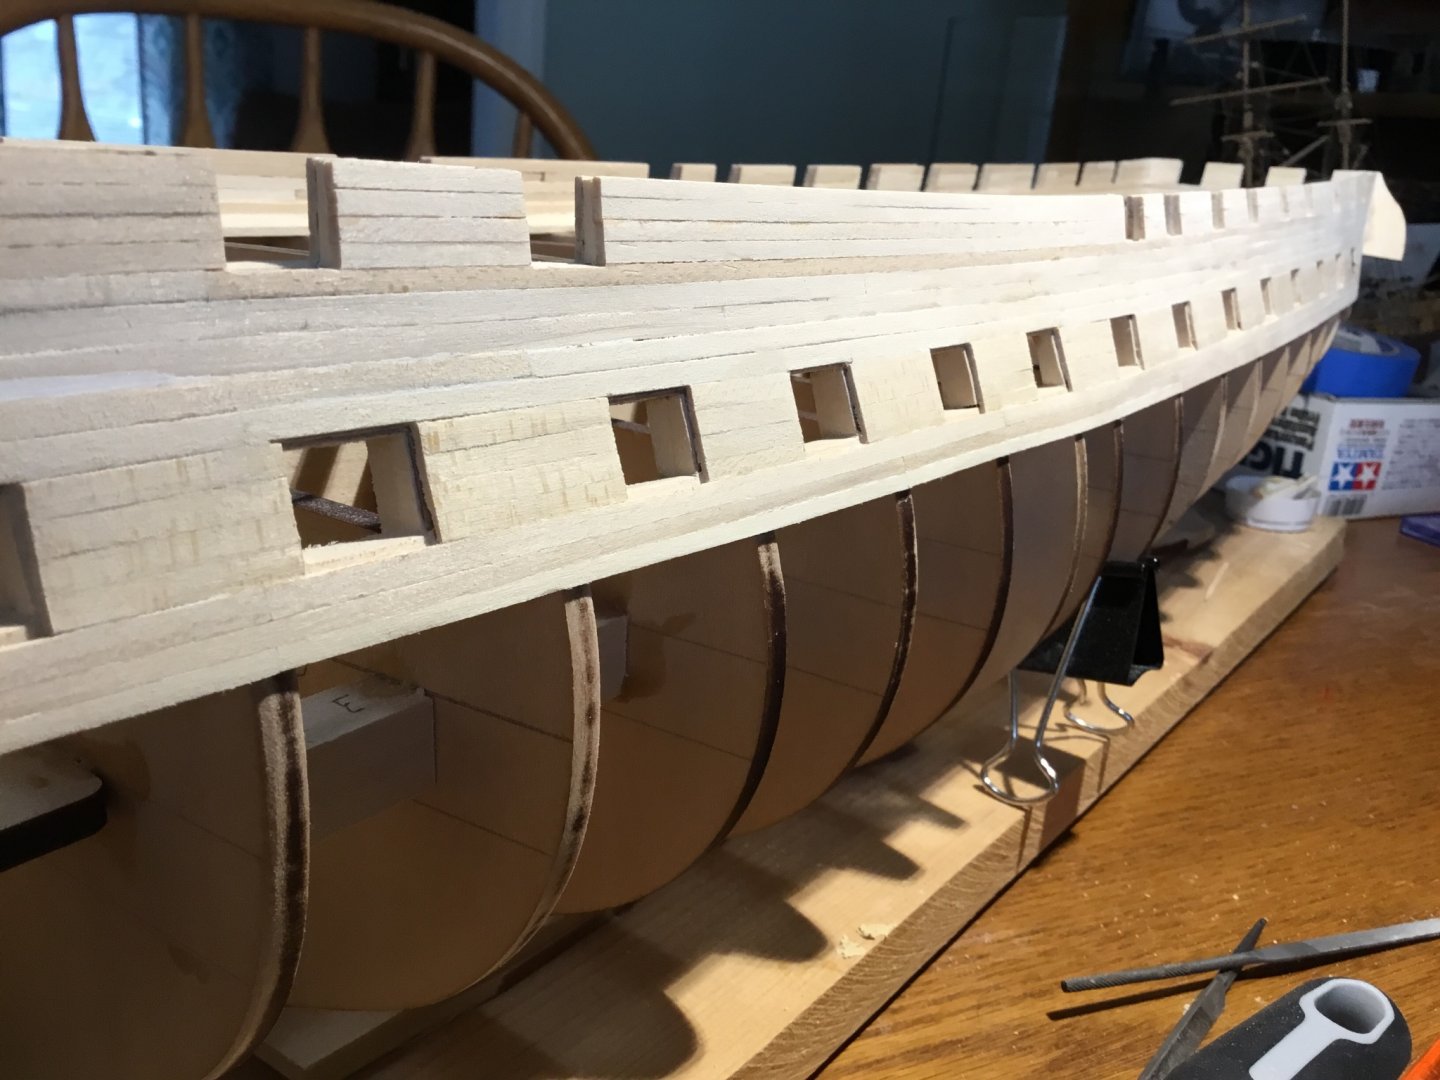
 As far as I know this is the first log on this site for Model Shipways’ cross section of the USS Constitution. I bought the kit last summer, when I think it was pretty newly released, and when I was about midway through my Spray build. I have never done a cross section, and I was attracted to the novelty (for me), the detail, and the fact that I wouldn’t be spending many months simply building a hull. So far I am not in the least disappointed. Upon opening the relatively small densely packed box I soon realized this was not going to be a simple, quick build. There are five sheets of plans (although only two are really plans; the smaller three show the location of the hundreds of laser cut parts as laid out on their sheets of wood as well as some photo-etched brass fittings). The two plan sheets are three feet by almost four feet (that’s a two foot ruler in the photo of them laid out on my floor). I found a couple poster hangers on Amazon and hung them on the wall to better view them. The fittings are extensive, as is the number of laser cut wood parts. The only thing that seems underwhelming in volume is the number of wood strips and dowels, but that kind of makes sense for a cross section. The really amazing thing for me are the instructions. Almost 100 pages, with an average of 3 or more color photos per page! As with most Model Shipways kits, the instructions can be downloaded as a pdf from their website, which makes choosing an appropriate build a lot easier. With instructions this voluminous, it is helpful to have them on a computer and able to be searched, if there is a specific issue you want to look ahead about (as I mention below). First step is to cut out the three frames, or what I might have called ribs, which are the skeleton of this part of the hull. The laser cut pieces are securely attached with a minimum of tabs, and the laser cutting is sharp, precise and complete -- well done. All three parts are attached to a building stand, that will be cut off later in the build. Two lengthwise pieces connect those stand parts, and the slots all need to be sanded so they fit. I made those connections quite tight, as they will not be disassembled for quite some time. Eight additional crosswise laser cut pieces (identified as spacers) are provided to connect the frames and to keep them a precise distance apart at the level of each deck. These will be moved around a bit from time to time during the build, and I sanded their slots so they are a little looser. The instructions assign six of them to what seems like a random distribution among the orlop, gun and spar decks (there is also a berthing deck, which for some reason gets none of these spacers). Interestingly, I haven’t found anywhere in the instructions or the plans where the deck names are expressly identified, but it is pretty easy to figure out by looking ahead at the pictures in the instructions (orlop, berthing, gun and spar, from bilge to sunshine). Assembling and gluing the keel (which needs a rabbet cut in it), the keelson pieces, and the keelson cap is all quite straightforward. The instructions suggest, and the pictures show, writing “B” on the bow end of the keel to assure that it is properly installed. That struck me as a bit odd, until I realized that the three frames vary fairly significantly in shape and that things are not symmetrical for and aft. No big deal as to the keel, but a good habit to get into when dealing with other pieces later in the build. The slot in the frames for the keel is a loose fit, and I used a couple of rubber bands to press the keel up against the frame when gluing it in place (careful to glue it to the frame and not to the building stand). A mast step is then made out of a 1½” length piece of the remaining ¼” x ½” strip. To avoid chewing up the soft basswood with a large bit, I drilled the ¼” hole for the mast by starting with a ⅛” bit and working my way up to ¼” with the three or four intermediate bits I own. I then chamfered the hole with a Dremel tool. Note that I did not cut the mast step off of the ¼” x ½” strip until I had finished all of this -- it’s nice to have something to hang on to when working on a piece like this. Limbers (I had to look up the nautical definition) on either side of the keelson cap are shaped from ¼” square strips. Here the change in shape of the hull fore and aft makes shaping them a little like shaping a propeller. The instructions complicate that quite a bit by having the limbers slope up to the base of the mast foot where the two intersect, but the plans show the mast foot simply continuing straight down on each side to intersect with the limbers. In one of the photos below I tried to draw in red what the instructions direct. I chose to follow the plans instead, and added a 1/16” strip to the bottom of each side of the mast step to fill the gap between it and the limber below.
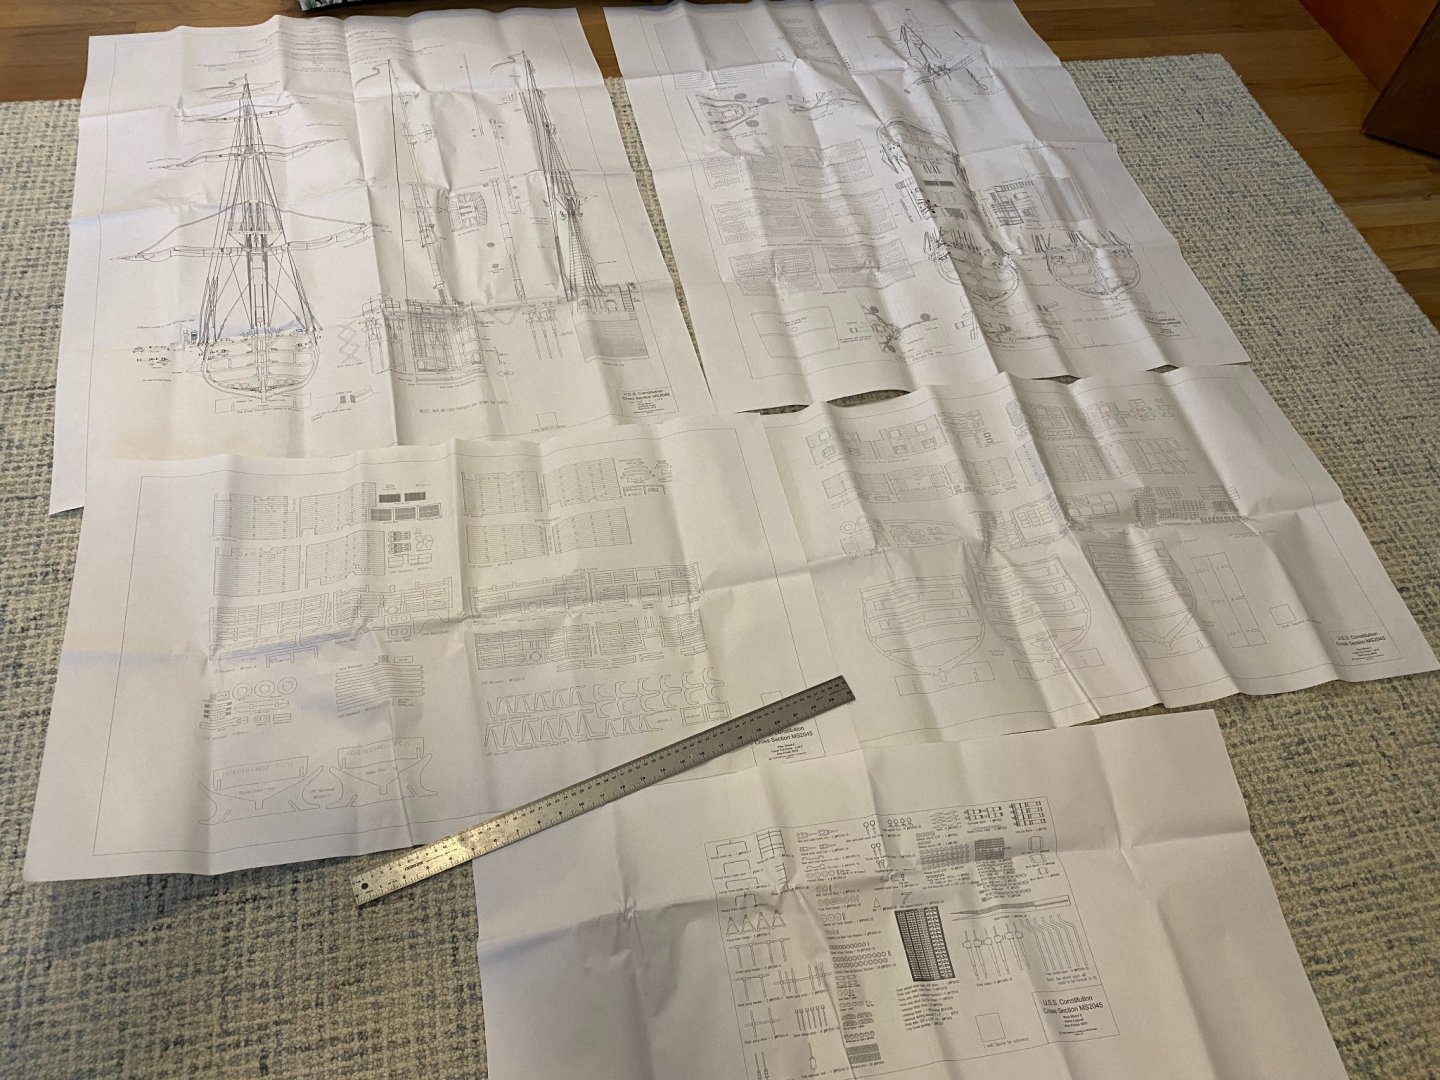


- 162 replies
-
- 14
-
-
- Model Shipways
- Constitution
- (and 2 more)
-
 Hi folks. My name is Avi Deitcher, finally starting my build log. "Old Ironsides" is my first build. I went camping up in Maine with my wife a very long time ago (Toddy Pond, for those who know the area), long enough that it was a year before our first kid, who recently finished college. On the way back, we stopped for a break and wandered into a store that had my jaw open the whole time, BlueJacket. I have wanted that Constitution ever since, and my wife just surprised me with the model. It took a few weeks of going through the manual, including pulling out my old copy of "Sea of Words" to remember what half the terms meant (half being generous, more likely ¾ 🙂 ), slowly figuring out what paints to get, where to get tools, whether or not to get the topside planking and copper plates, not to mention going through the parts list. I needed calipers to tell which wood part is which! I finally am just about ready to get started. To make things more interesting, I live in Israel, so while some of what I need is readily available here, not everything is. I have an order from a local modeling place that arrived yesterday (he imports Vallejo paints and some tools), Amazon UK coming next week (mostly tools and sandpaper) and one from BlueJacket (planks and copper, etc.). Heading off today to the copy shop to make copies of the profile so I can cut it and start to shape it. I have been looking especially at @KHauptfuehrer's amazing log here (who kindly responded to some of my questions in thread; I hope I stopped before really hijacking it), @jfinan's here (I really like your idea of staining the topside planks instead of painting them, and staining them before gluing them on), @JSGersonkindly welcomed me in the thread and linked to Ken Forman's build and Bill Edgin's build. So many capable and helpful people here, I really am looking forward to this. Yes, I know the build is likely to take me years; I work full time doing technology business consulting. I will post some initial pictures soon.
 -
 I decided to do a build log on my constitution, I wasn’t going to at first but decided to go for it. It’s my second wooden ship build, the first one was a little over 15 years ago. Just a small artisan Latina kit that I don’t even remember the name of. After looking at a lot of the ships built on here I don’t think mine can compare to the level of most on here, my skills aren’t that good but I really enjoy building it. I’ve been following bob hunts practicum for the most part. I started around December of 2020. I didn’t take too many pics as I went along because I didn’t plan on doing a build log but I’ll put up what I have to this point and try to keep up from here on. Here are my pics in no particular order and thanks for looking.
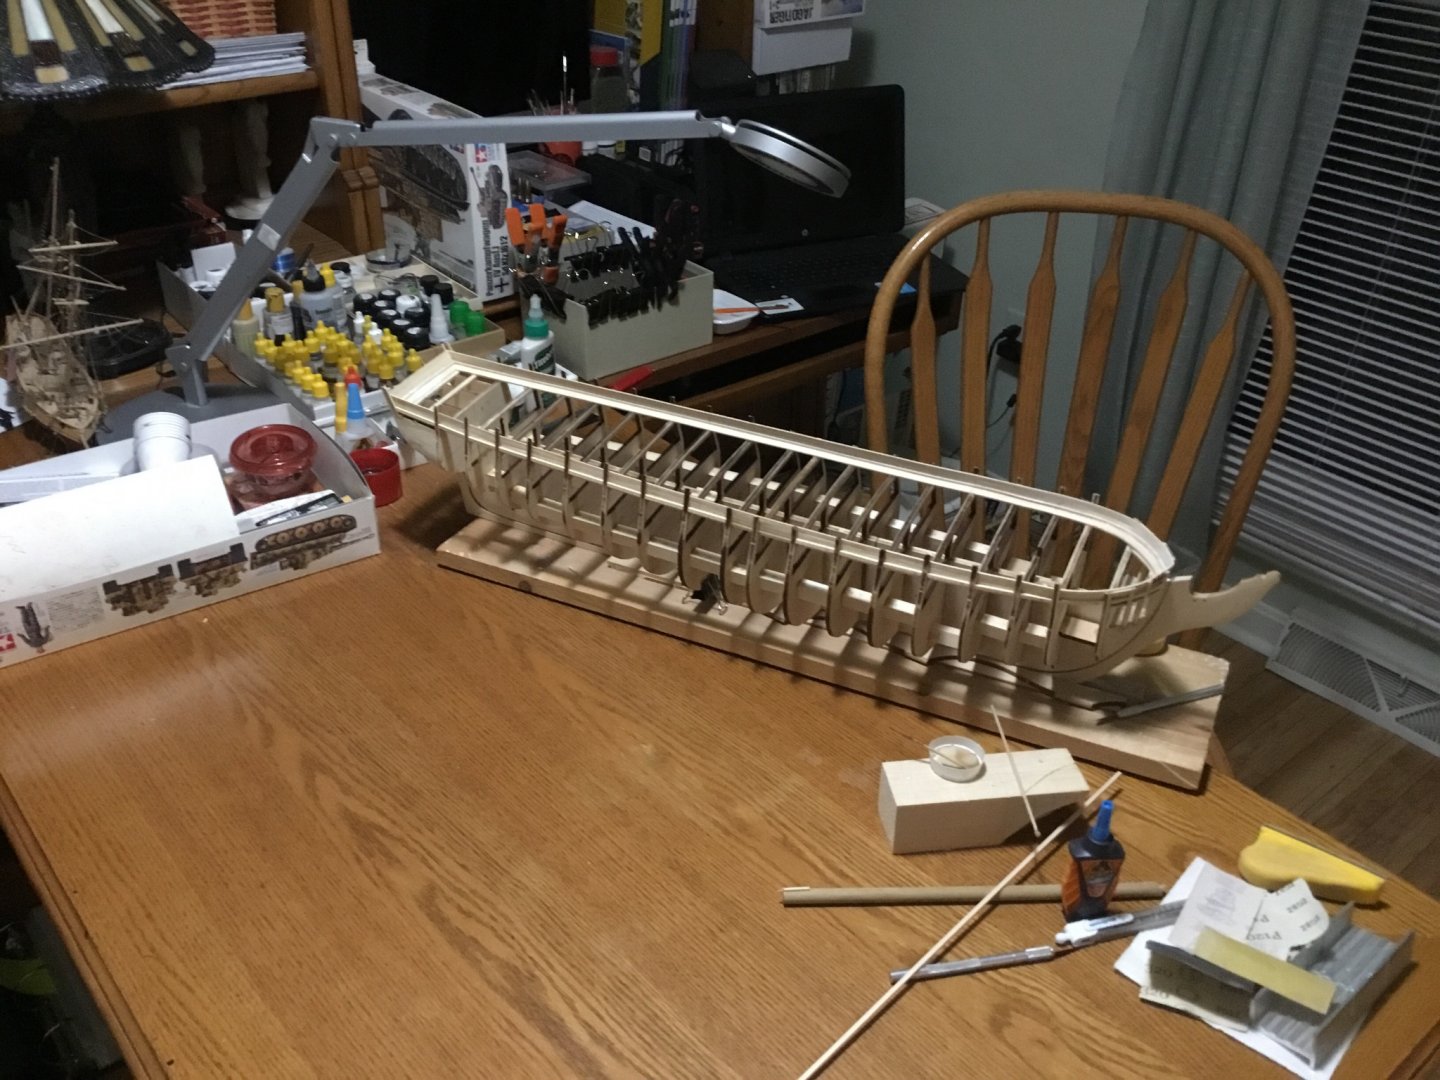


-
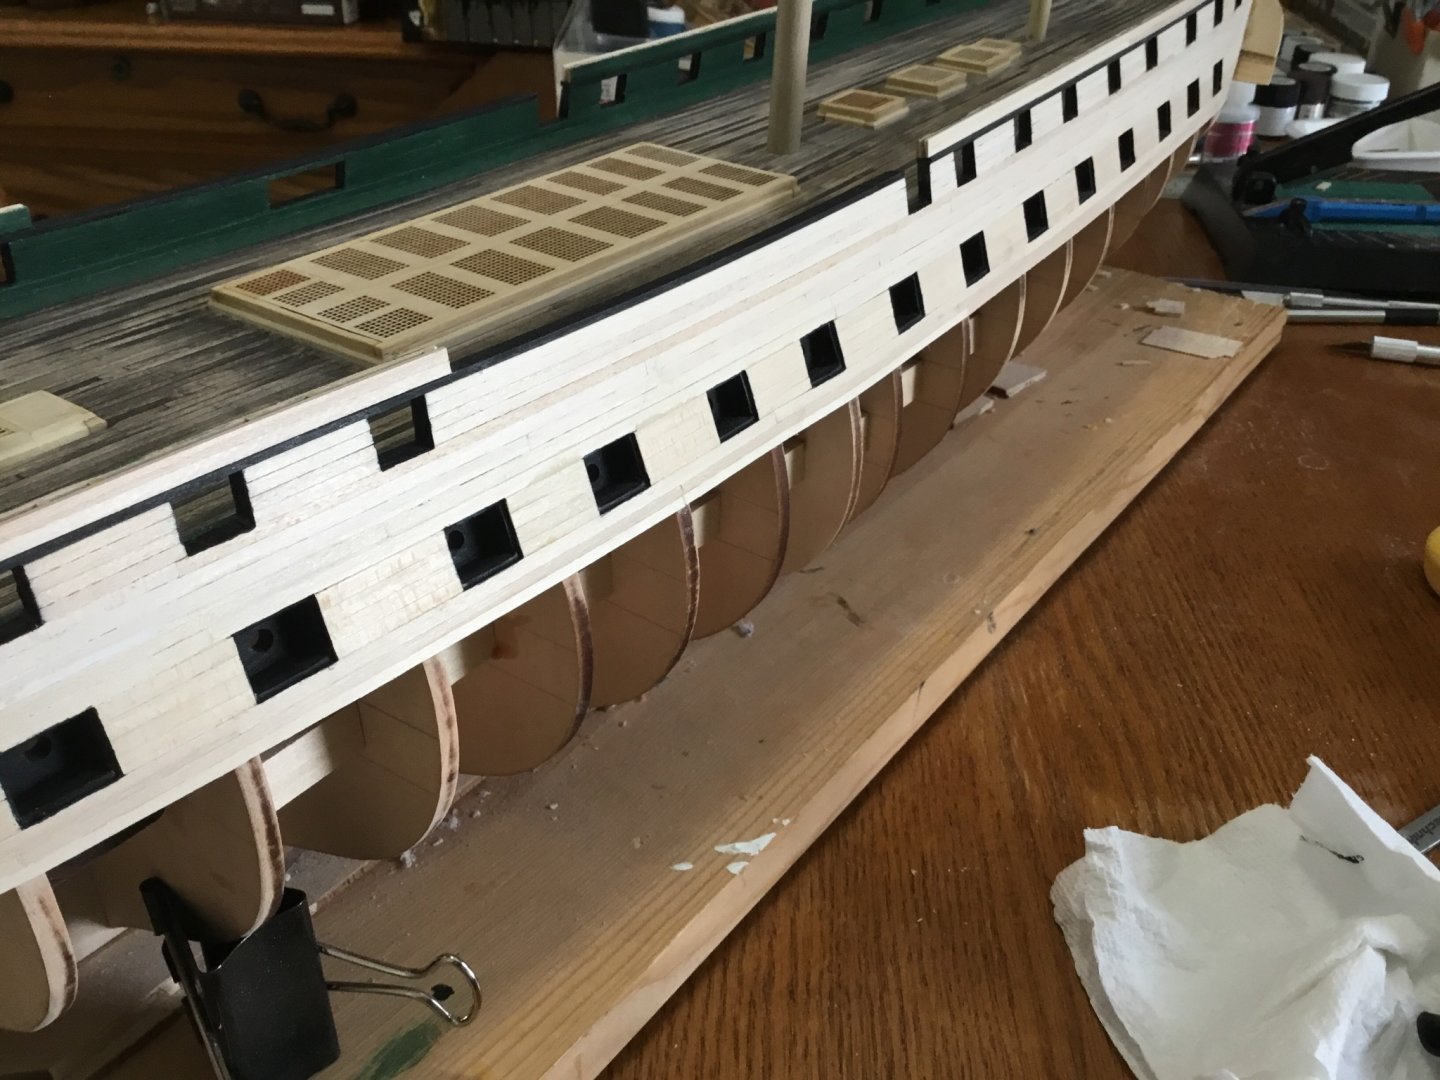
 Good Evening, I am writing this build log to chronicle my second ship build from Billings Boats, and altogether. I received the ship model as an early birthday gift, and could not wait to get started.
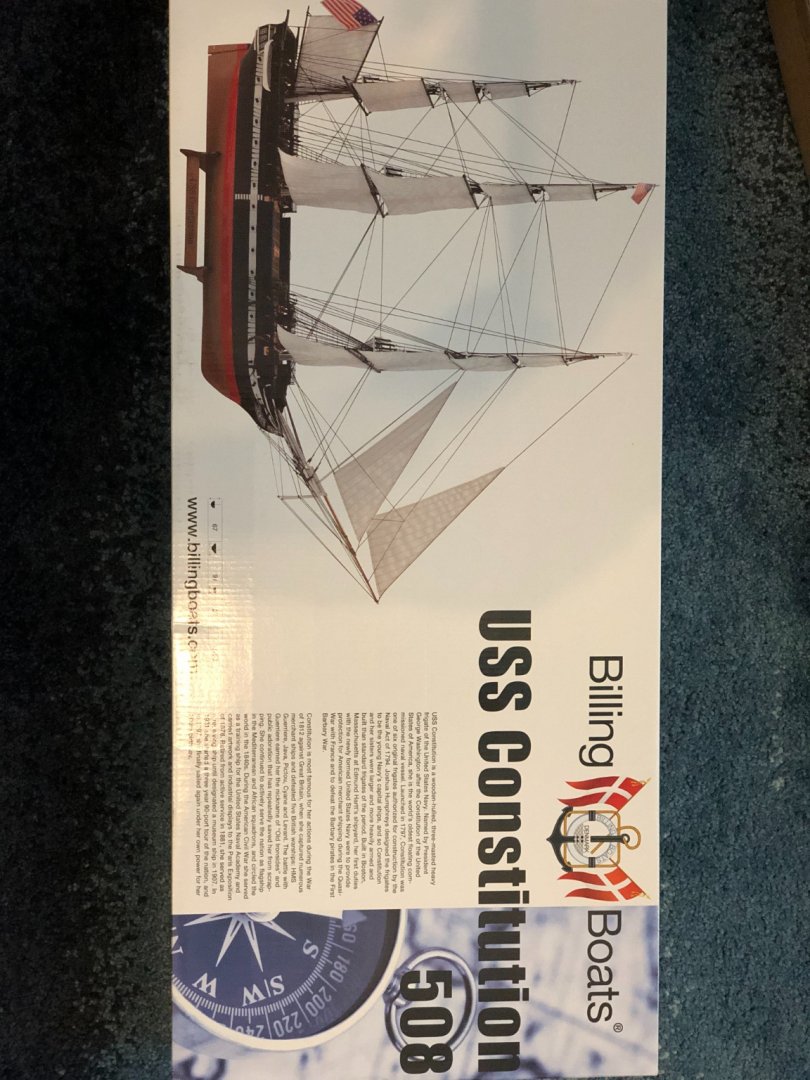


- 88 replies
-
- 1
-
-
- Constitution
- billing boats
- (and 1 more)
-
 1. Constitution - Superfrigate of the many Faces - A tribute to the Basses Years ago I got this nice book by William Bass and his wife in which they describe their findings and their reconstruction of US Frigate Constitutions "Second Phase" as they called it. The years after launch and Quasi War with France - and before the War 1812 - the times of Preble and the Barbary War. Since I saw this beautiful book which was published privatly and therefor did not get the audience it deserves, I did fall in love with this beautiful ship! The Basses based their reconstruction mainly on Felice Corné´s paintings done in 1803 (Side view) 1805 (?) and 1807 (Battle of Tripolis). This one for shure you all know very well. Its - as far as we know by today - the very first visual description of Old Ironsides - done by Felice Corné in Summer 1803 most likely. The Basses did brief investigations even on which viewing angle the artist must have had for his sketches and they could prove that Corné did do really intensive studies of his object. But isn´t the ship a beauty here? Ochre gun strike, no bulkward on foredeck, single dolphin striker, open galion and - that impressive Hercules. Nevertheless, as we will see later: this interpretation causes headaches (at least in my little brain). Here now one of the Tripolis Paintings: Source: https://www.mainememory.net/artifact/6155 You can increase the image if you click on the picture on the Maine Historical Societies Homepage (link). Look at that beautiful lines, the two yellow stripes above the gun deck - and note the position of the channels on the lower of those lines: and here the beautiful Stern of the ship in its early phase: She was a beauty in ochre and black, some white, yellow and maybe a bit gold? .. and a thrilling sight with all that guns! In my eyes the ships earlier appearance is of much more grace and elegance than in her later designs. Fortunatly the real ship is getting closer and closer to that design again with the restorations since Tyrone Martin started that process. But maybe the most beautiful sight she must have been as she was planned: with complete open bulkwards - just as Humphrey intented her to be: Nevertheless: my plan is to rework and pimp the beautiful Revell kit which is ment to show her 1812-15 configuration - but which has some "errors" in it and which does not totally fit to her 1803 appearance. And this 1803-4 appearance - before leaving to the Mediterean Sea - that is my goal. I imagine by now a situation in which the ship is about to be fitted out for sea - maybe some weeks before the above shown departure of the ship takes place. Still with only long guns on the quarder deck... This build will be the very first for me since about 35 years. I was doing a Cutty Sark 1/144 (without proper rigging and bad painting) and a very nice Spanish Men of War in 1/72 - this time with Revell instructed but fully rigging (boy was I proud !) .. So I need to re-learn during the build all the needed techniques. Oh, I was mistaken: I started some years ago the build of the Revell Charles W. Morgan - but the "rush hour of life" did stop that efforts. Now, in times of Corona and possible loss of job I believe I need a time out for some hours a week from crazy daily hectic .. and "if not now, then when?" shall I start with this beauty. I hope you join me in my efforts and I am open for any advice and hint. Thanks for watching me.
- 6 replies
-
- 5
-
-
- constitution
- revell
- (and 1 more)