Search the Community
Showing results for tags 'constitution'.
-
 I got this kit from Børge. Børge is a member of this forum and built the Dragon. His wish was always to build the Constitution one day. Due to illness, he is no longer able to build. A few weeks ago we visited him and his wife in Norway and he gave me this kit and asked me to build it. I am very happy to comply with this. As a result, the Victory and Duyfken are on hold until the Constitution is finished. I'm going to do my best to build a beautiful ship. My guide for this build will be the build log from Tom aka usedtosail. Sjors
 -
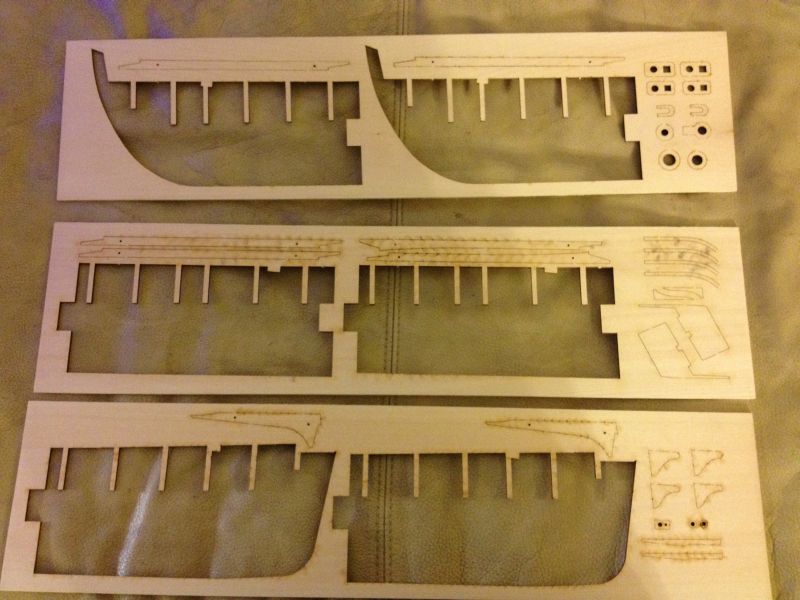
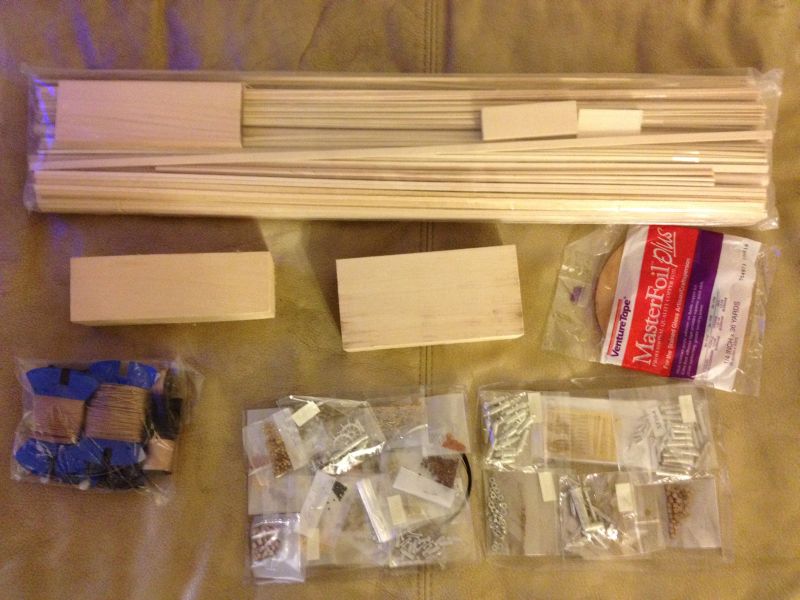
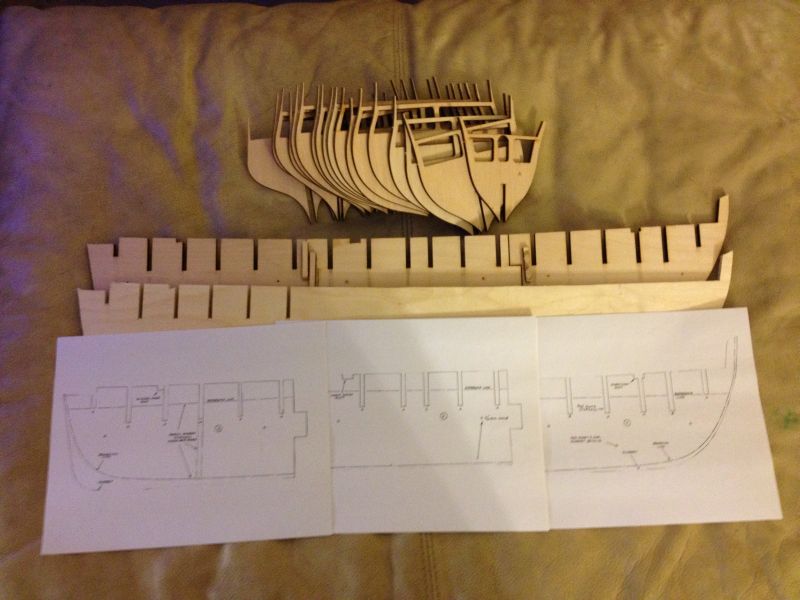
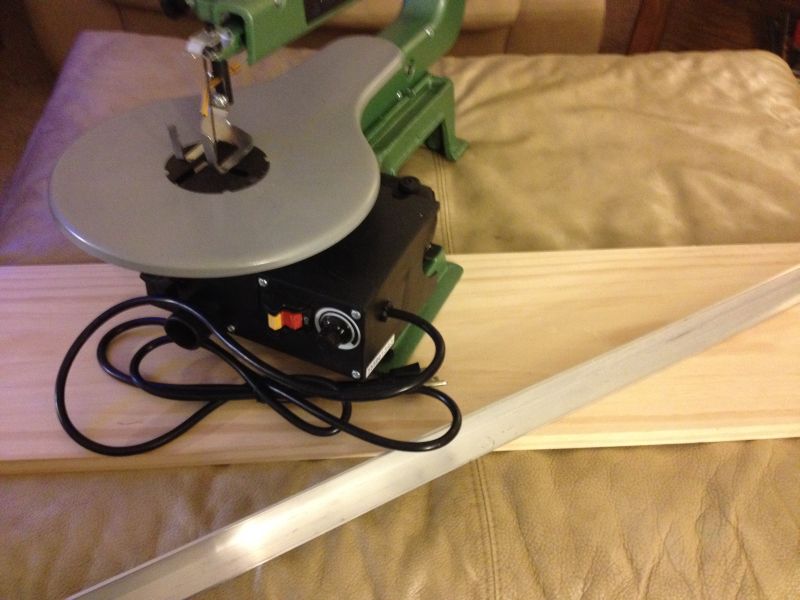
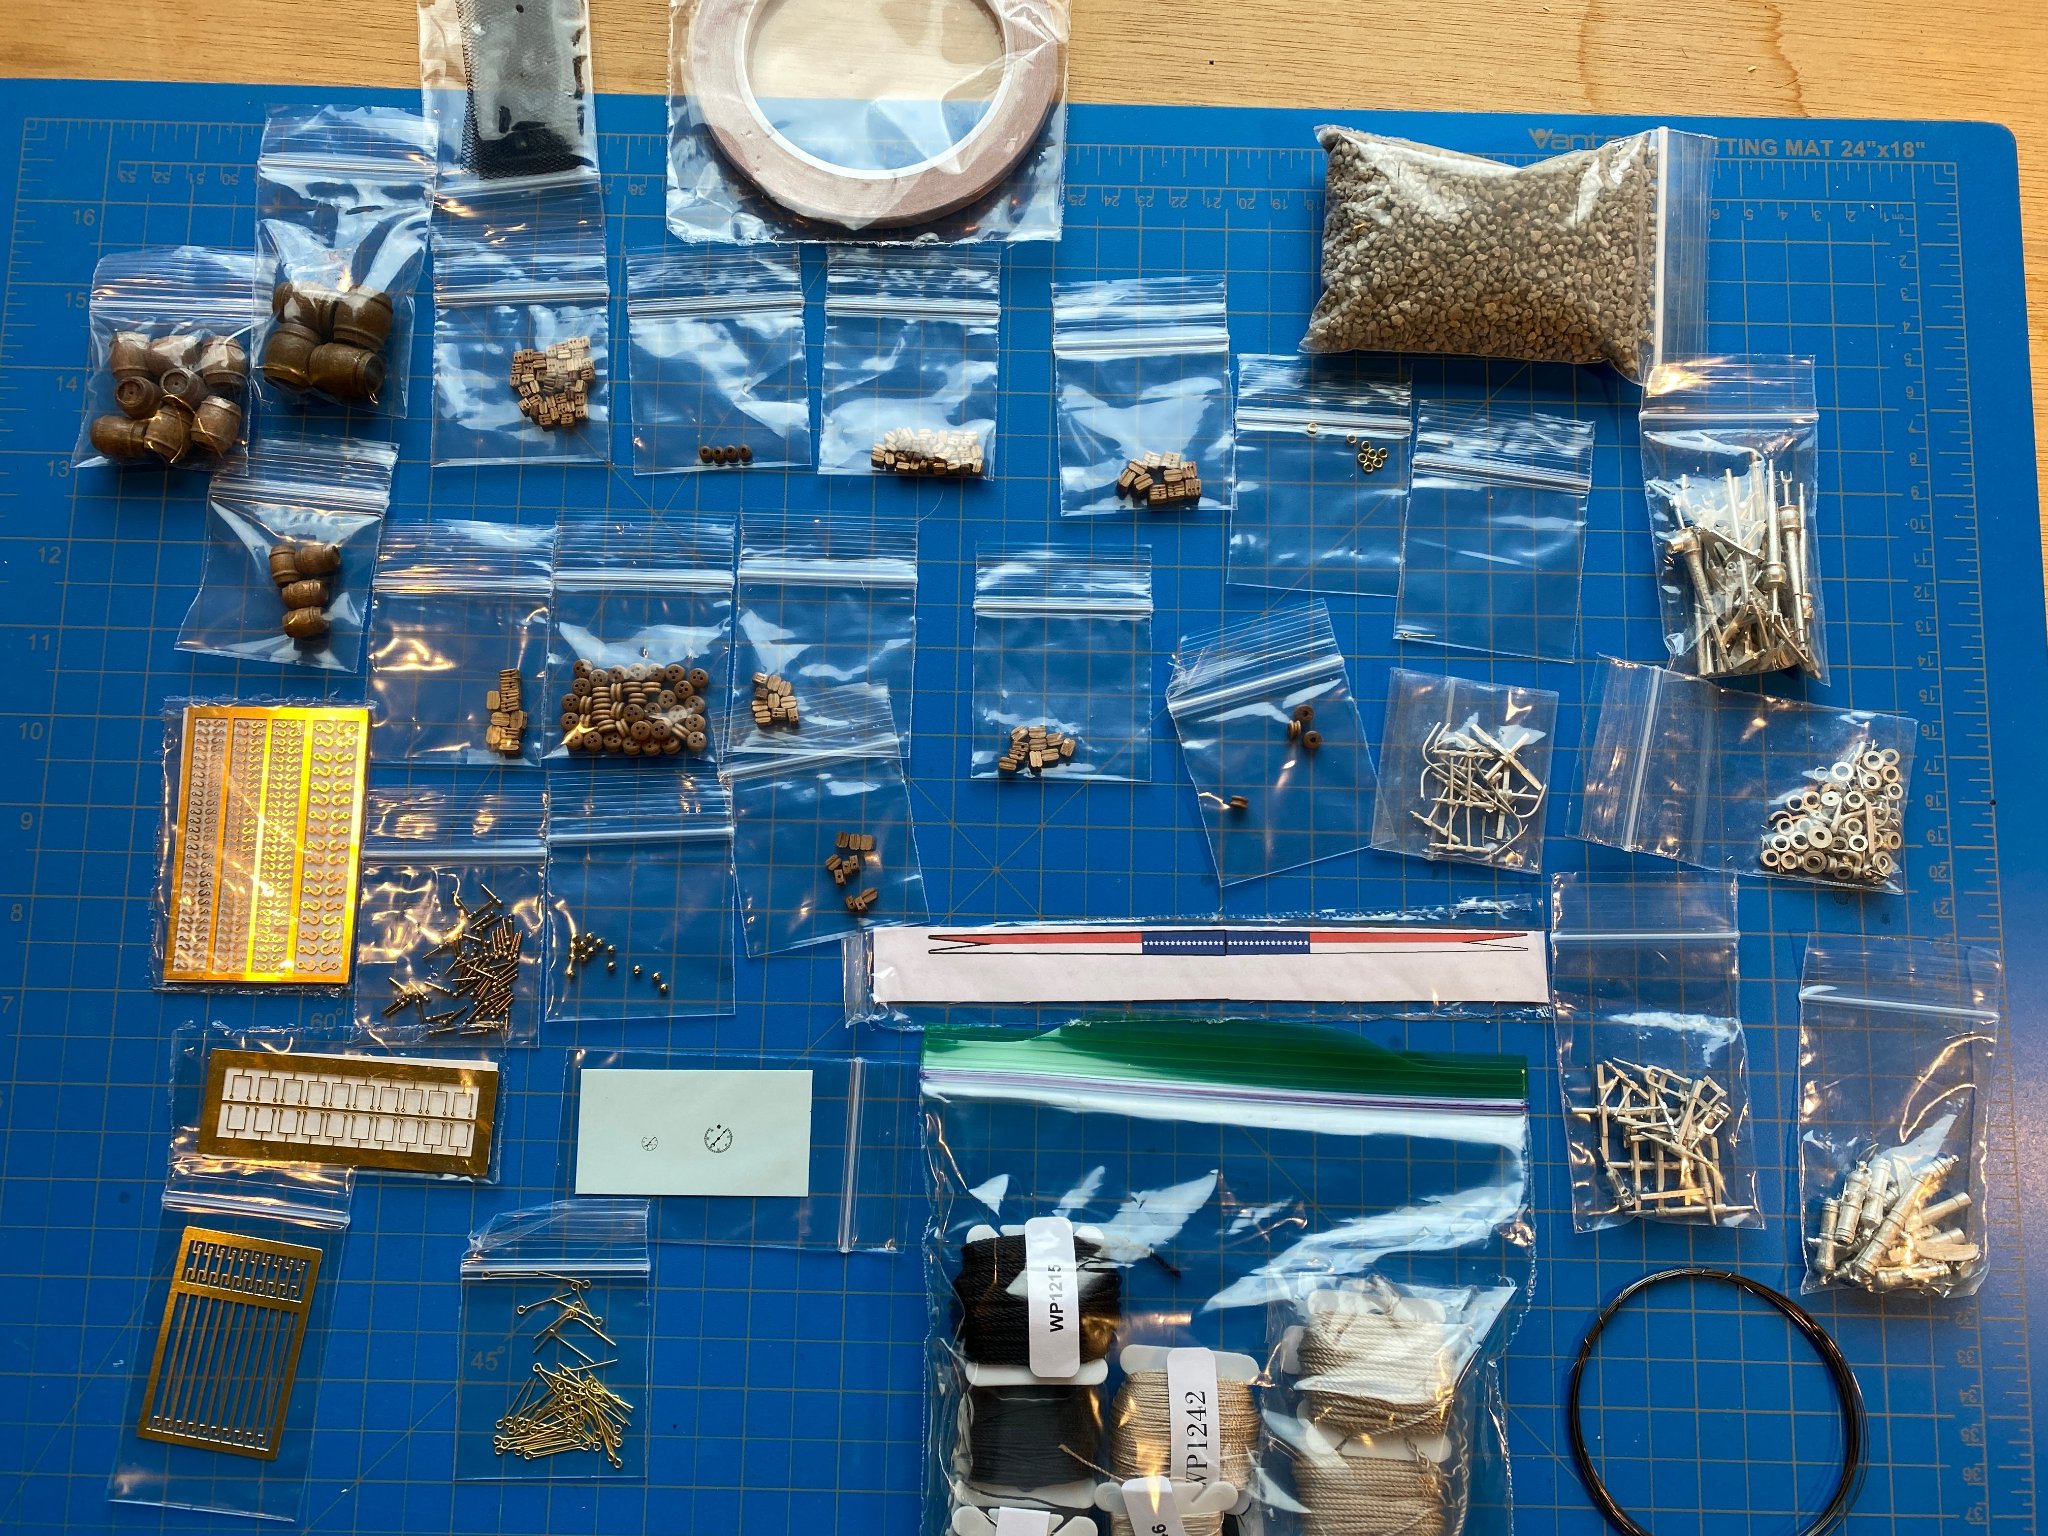
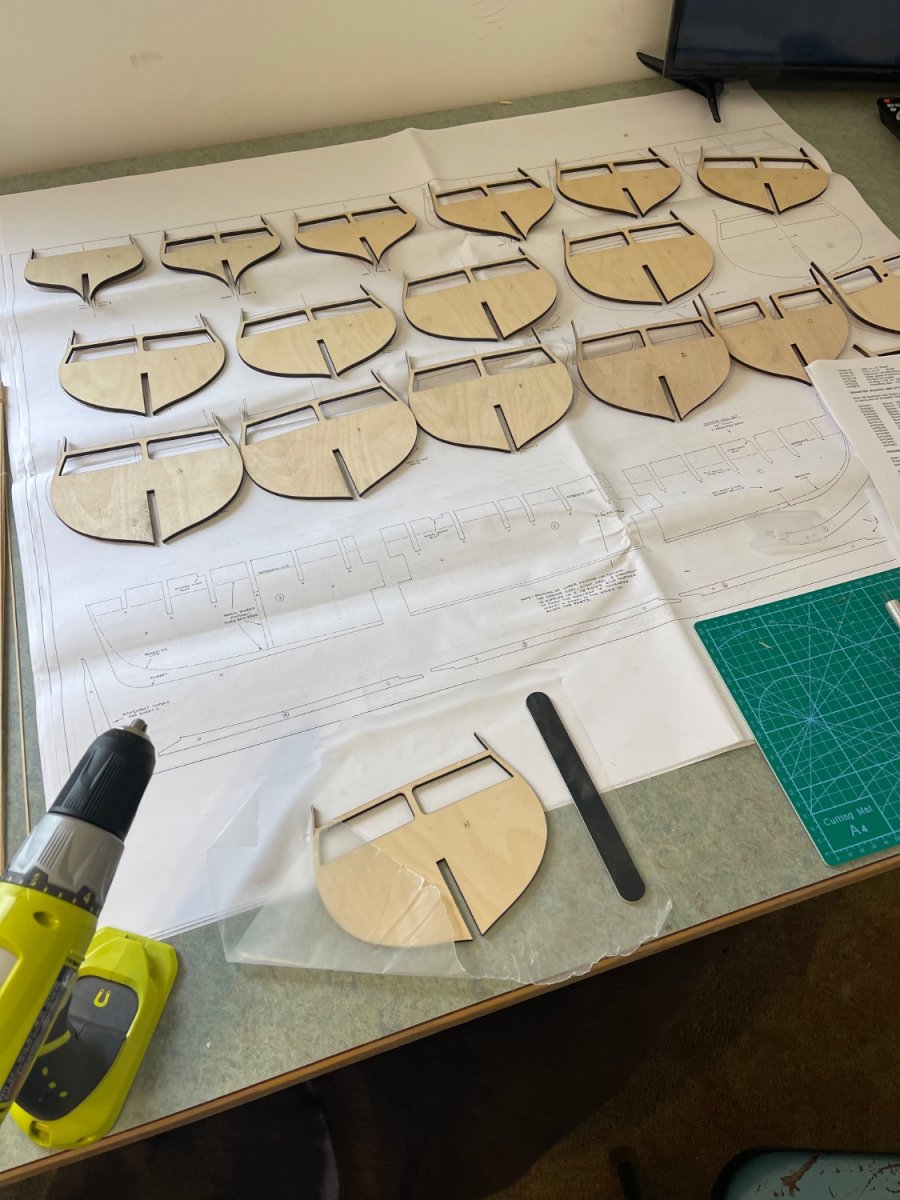
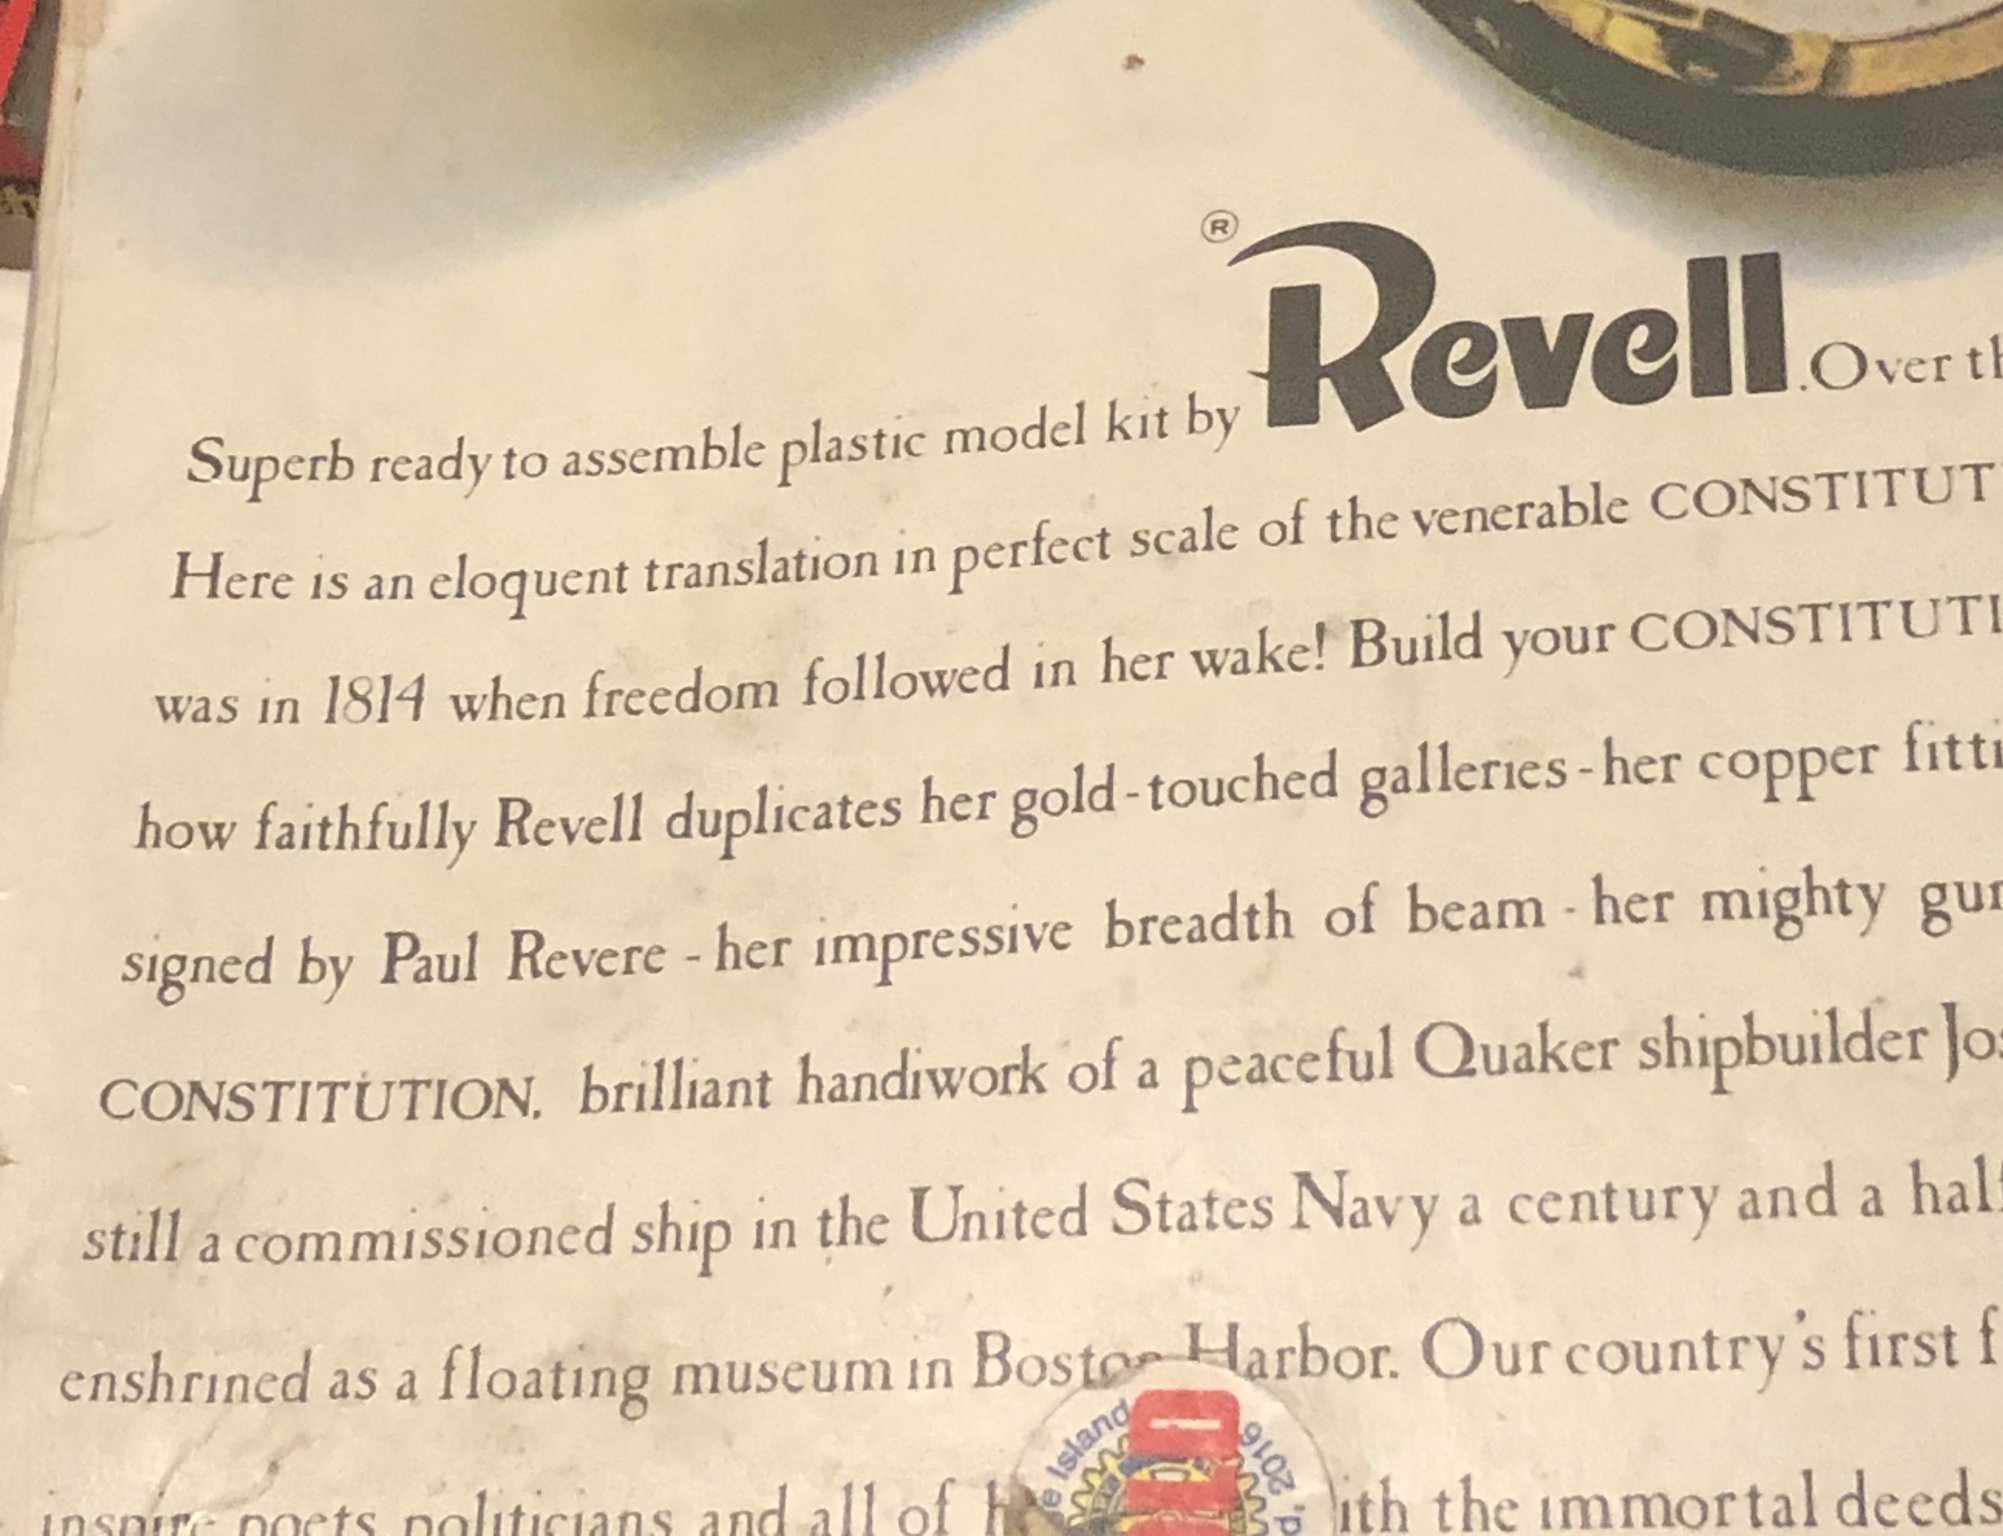
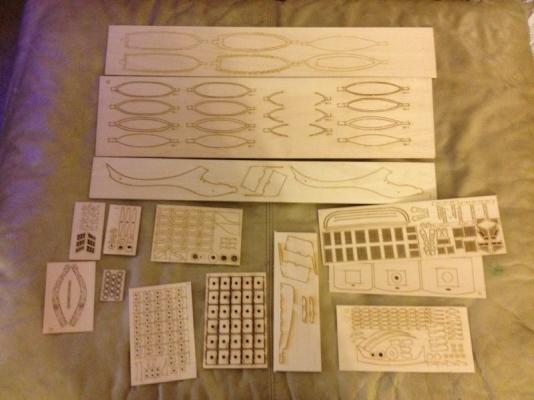
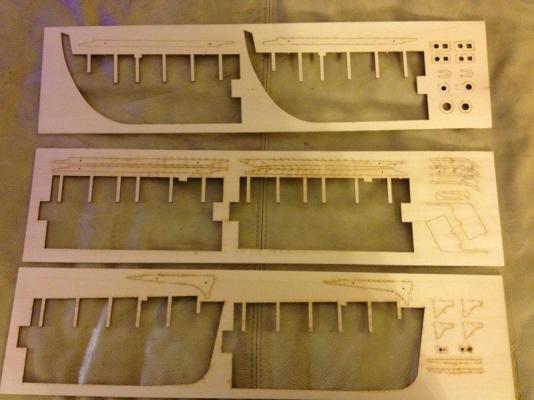
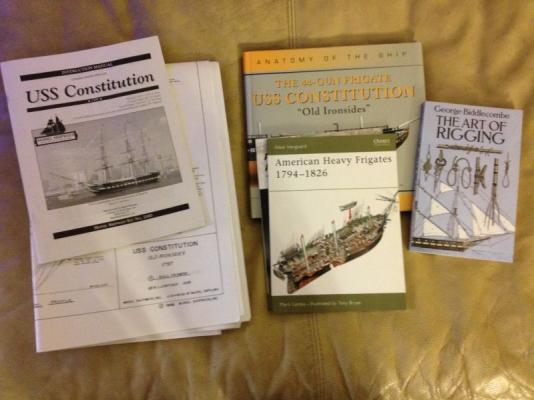
 Hello to all. I have completed Niagara and am moving on up in the scope of building difficulty. I have chosen The Constitution for my next subject because I fondly remember building Revell's version of her years ago and I have always been in awe of this ship. I know we have quite a few of her being built at this time so I'm sure you're asking "What's going to be different here?" Like a few of the others, I'd like to show a full gundeck with rigged 24 pounders. I'd also like to incorporate some of the bulkheads and cabin details. Plans to light her up below-deck are also on the table to attempt to show off some of this detail. Part of my plans on the gundeck also include the installing the knees and riders. Now you may be asking "Why? Most of this will be completely covered by the spar deck" I'm doing it because I'll know it's there and I'd like to try my hand at seriously bashing a kit before the possibility of scratch building. I have not yet fully determined the time period I would like to model, but I have been giving some thought to modeling her as she was when she was new with the Hercules figurehead. The biggest headache with that time period are that the details of her configuration are even sketchier than how she was in 1812. My plans are all negotiable until I get to her stern anyway, so here goes..... I photographed the typical box contents and a few resources I'll studying. The last picture is of the main building board materials and a new toy. You may also notice that one of the pics has two false keels. I didn't like the feel of the one that came with the kit so decided that I'd make my own out of 1/4" ply basswood. This build is going to take forever as I plan on making many pieces from scratch and am ordering many aftermarket items like new 24 pounders (if anyone has any ideas where I can get these in turned brass, I'd be indebted to them), new 32 pound carronades (see above parenthesis) and some boxwood deck planking material. As always, thanks so much for looking in and all of the wonderful support this site has to offer.
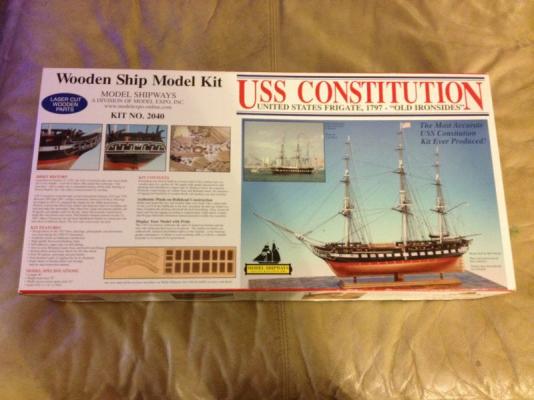


-
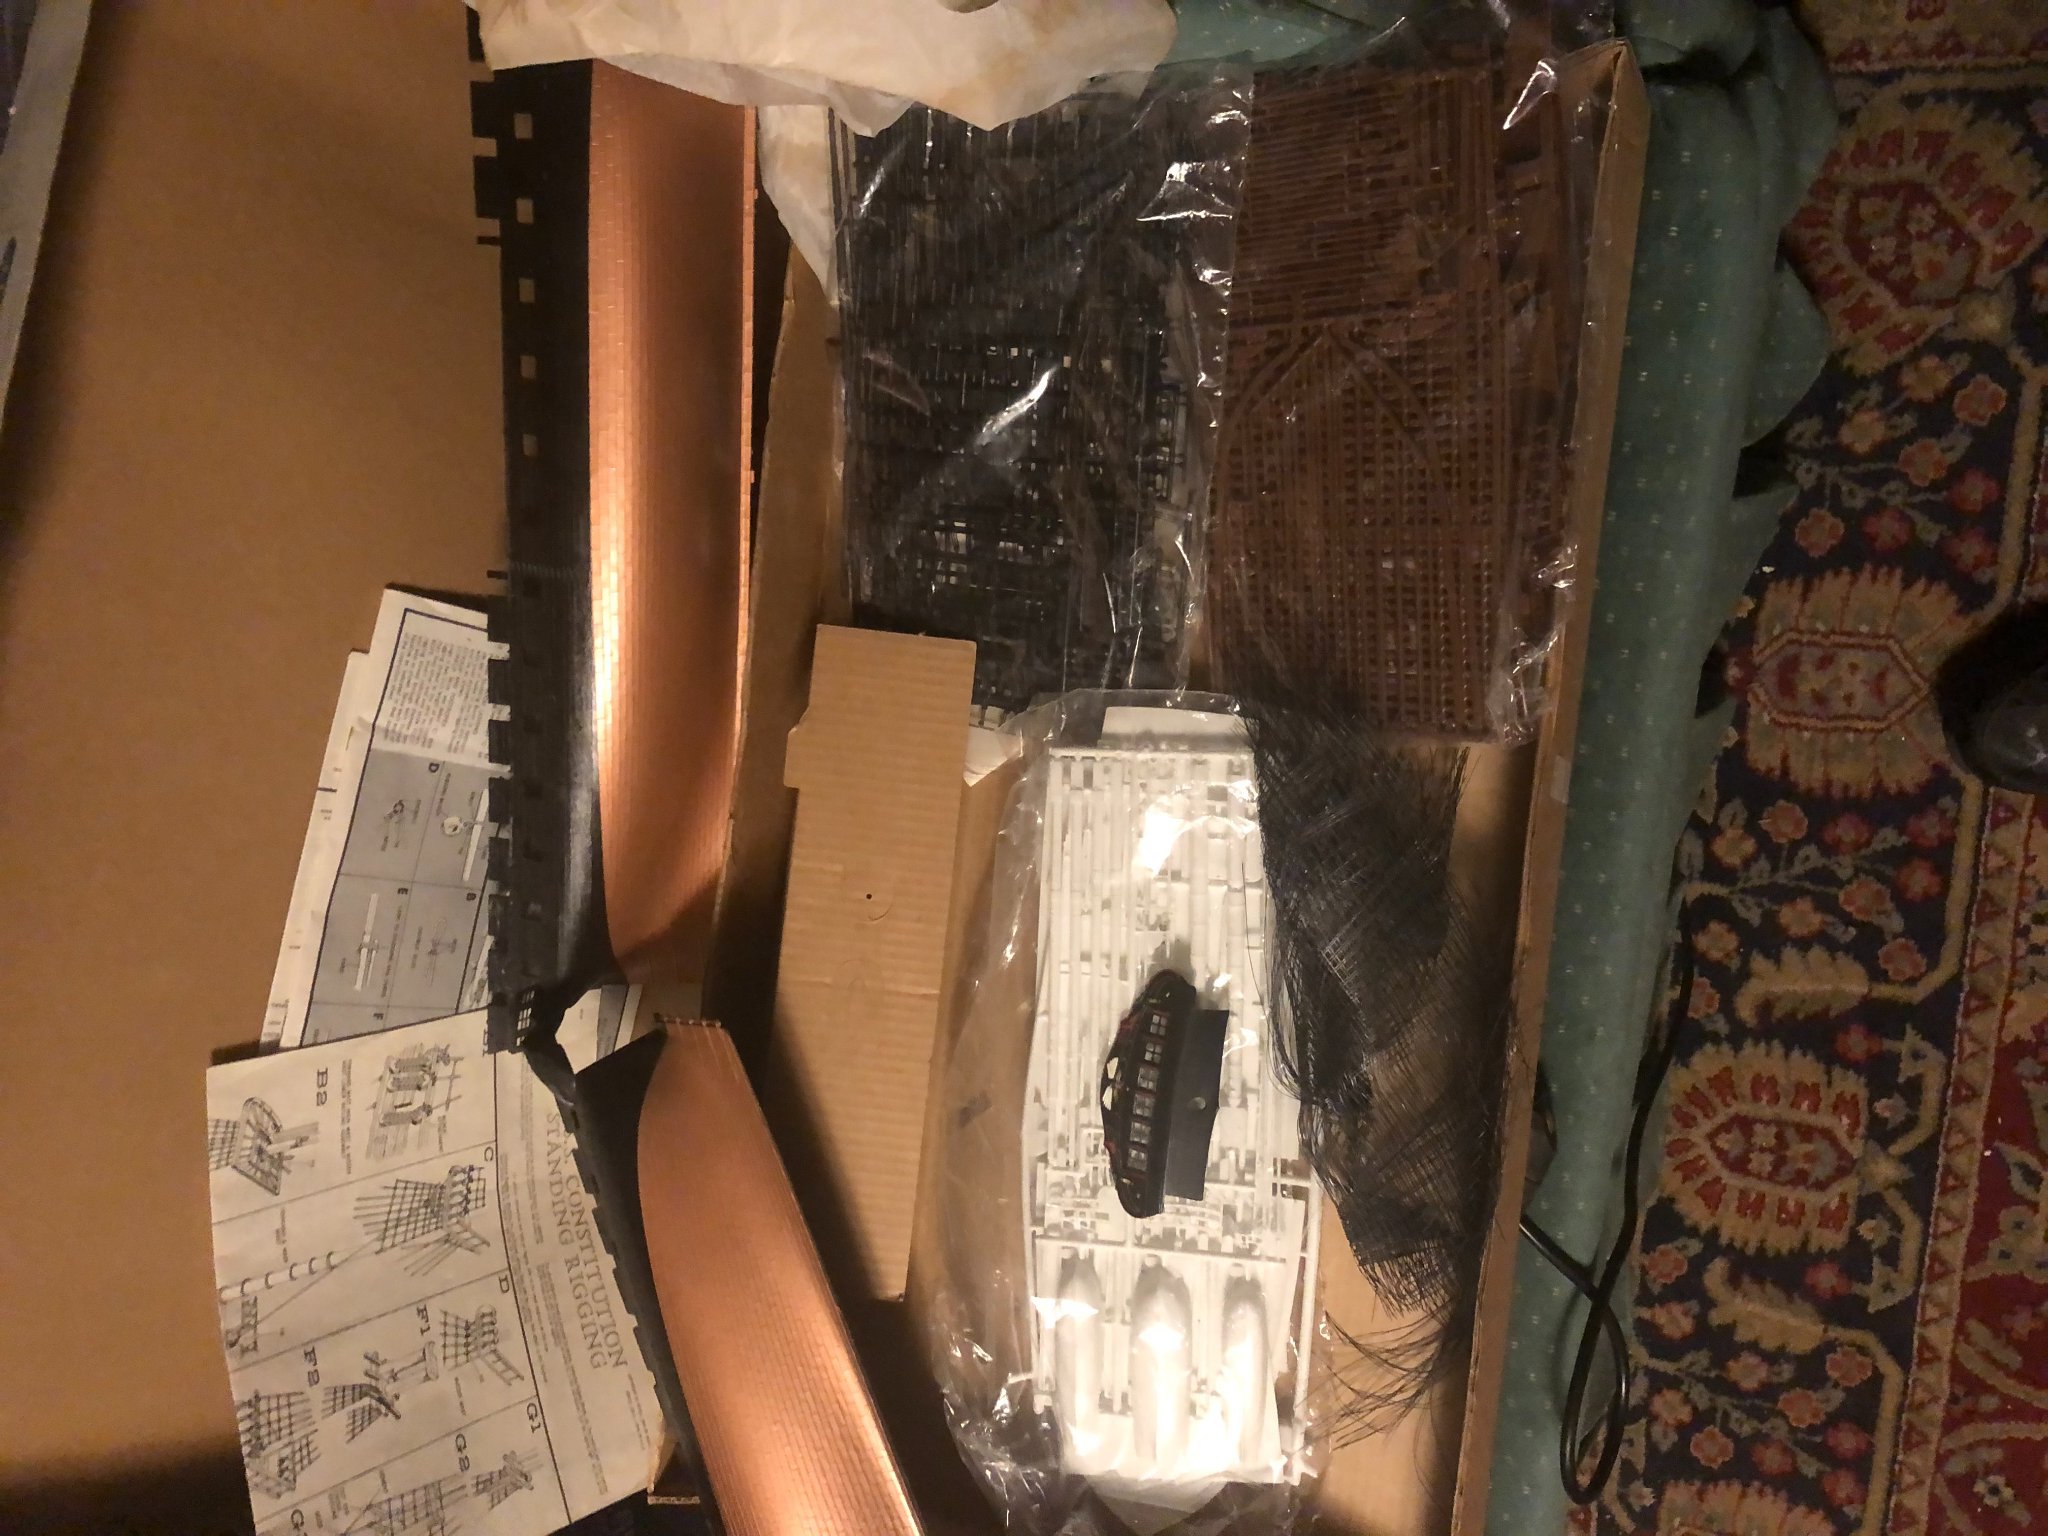
 My Constructo USS Constitution wooden ship kit is in the mail. This will be my very ambitious second build. My first build was a Virginia Pilot Boat 1805 ( see Gallery post) that I found very challenging never having done any thing like that in my life. As hard as it was...I loved the challenge. It was like playing chess...I had to stay three moves ahead so as not to get trapped. As good as the plans were, they were far from perfect, so I spent a lot of time looking at pictures and finally on sites like Model Ship World. I'll keep you all posted as I make progress. Hipexec
- 1,755 replies
-
- 2
-

-
- constitution
- constructo
- (and 1 more)
-
 Hello! I have built a variety of things over the years - starting off with aircraft, tanks etc. I have however been bitten by the ship bug! I have a part completed model of the Titanic (Minicraft 1/350 scale) to which I have added LED and fiber optic lighting, a lot of scratch building of smaller vents etc and photoetch - it's a work in progress at present. Following the receipt of a shiny new Revell Constitution I have been bitten by the bug. I have started owrk as follows (and I'll get pictures posted up soon): Gluing and cleaning up all the cannons - this did take a long while! Cleaning up gun carriages (correct terminology? - if not please enlighten me). Some of the wheels on these were rather poor and almost all had mold lines, or mold mismatch to a greater or lesses extent. I decided to sam the outside of the wheels flat and replace the "axle" in the center of the wheel with plastic rod. Gun deck - joined the three parts together using plastic on the underside, unsuring upper surface at joins is level across the joins. At this stage I have some questions which I would love some thoughts on: Decks - I have sanded the surface of the decks smooth and and contemplating what is the best way to replicate the deck. The alternatives I have in mind are as follows: 1. Scribing lines for the planks. 2. Wood veneer (holly perhaps?) cut into planks 3. Thin plastic sheet appropriately pained in slightly different shades cut into planks My inclination is towards the third option and I will maybe experiment with this and see what it looks like but I would really like the thoughs/suggestions of others on here. I am also curious on where I could put my hands on a plan of planking on the deck, any areas where planking was wider etc, Also what the width of planks on the decks was. Planning on retaining the plastic masts only where they can be reinforced internally with metal to avoid future bending. Smaller masts etc I plan on replacing with either brass tubing (sizes can be had which can be slid inside each other to represent taper - I Used this approach to replicate the masts on the Titanic), or alternatively with wood. If wood - any suggestions on the best product to use, and where it could be purchased? One of my general questions is where can I get a better understandign of sail ship terminology, especially as it relates to masts and rigging? I have reviewed a lot of the builds I can see on here and I will be shamelessly applying some of their good works - imitation is the sicerest fom of flattery after all. I especially like the approach take by force9 to his build. I'll try to get some pictures of work do far pposted shortly. Thanks for looking and for any comments of the questions I have above. Stuart
 -
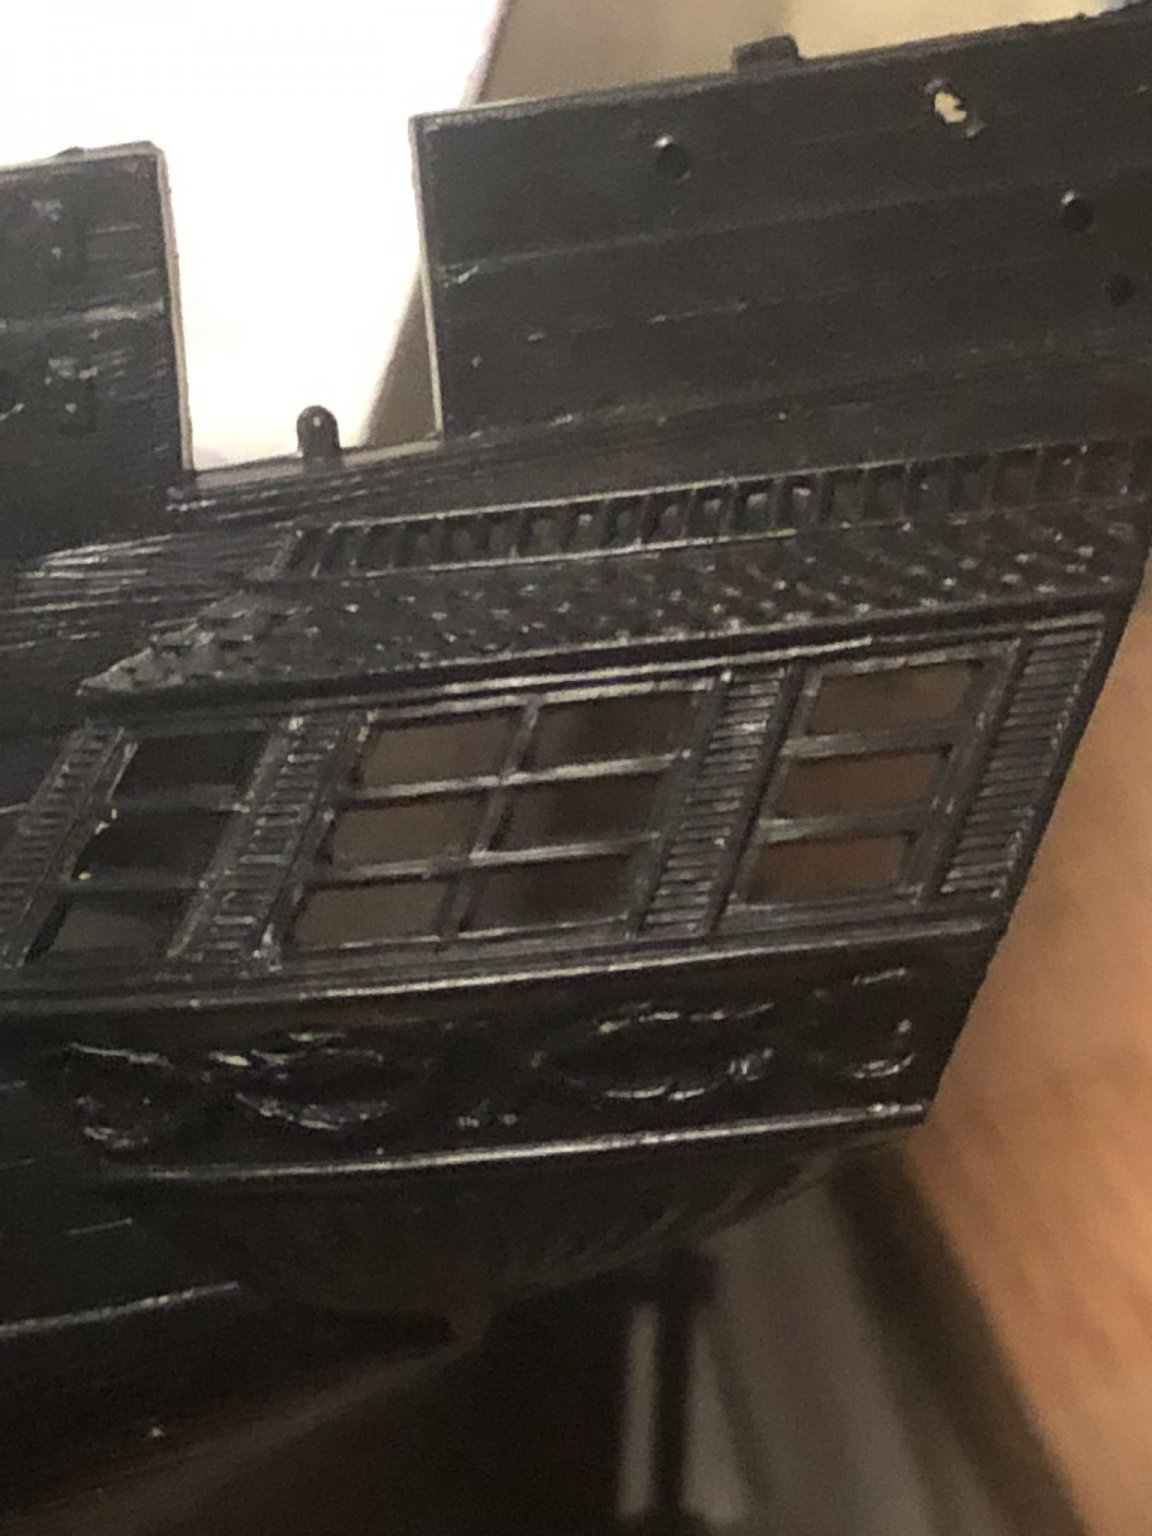
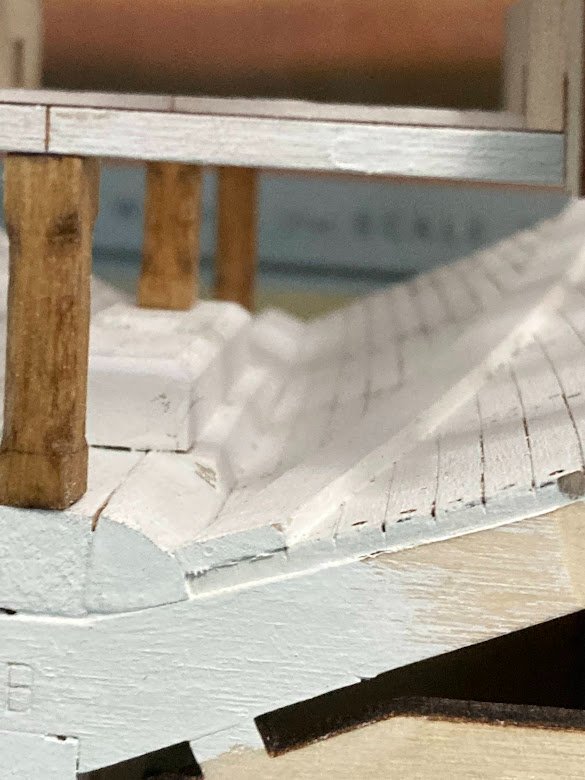
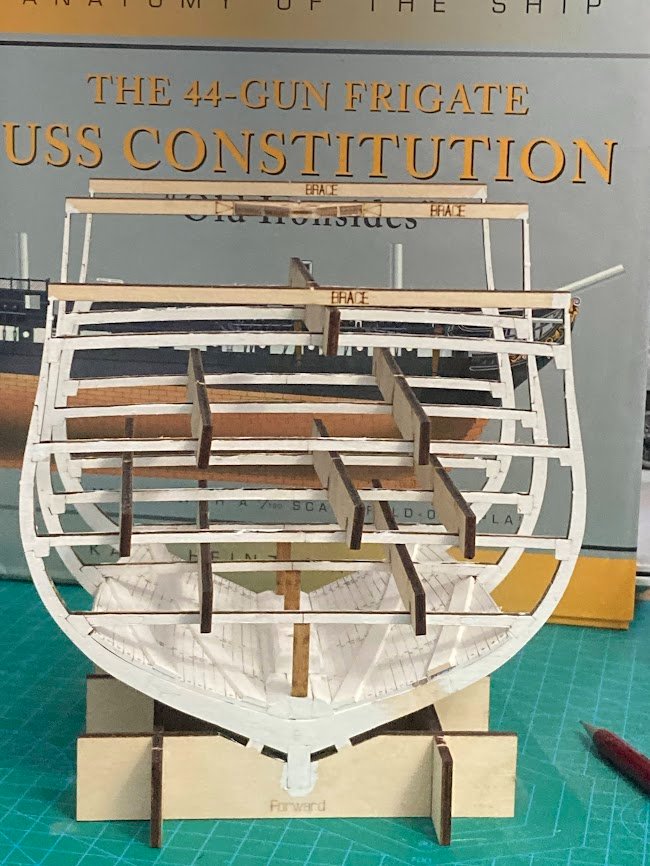
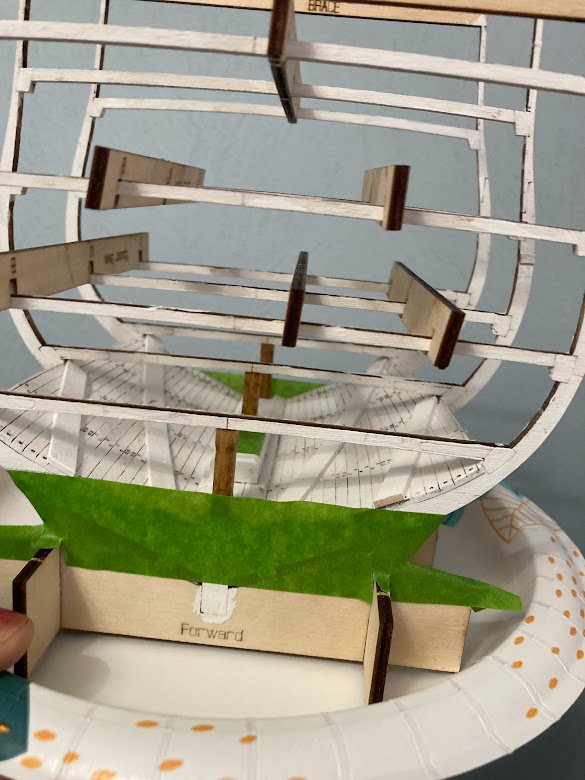
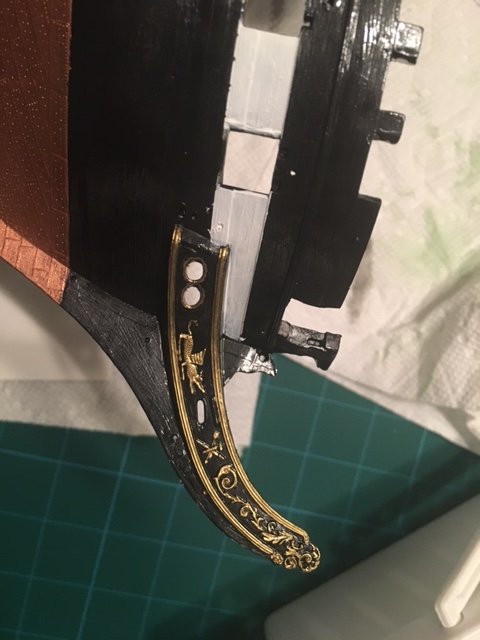
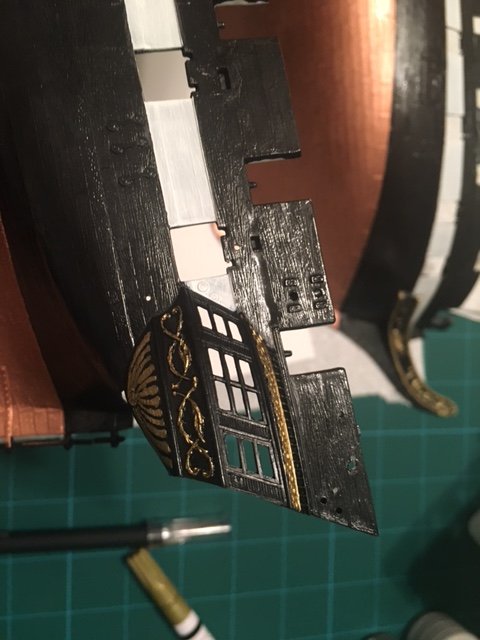
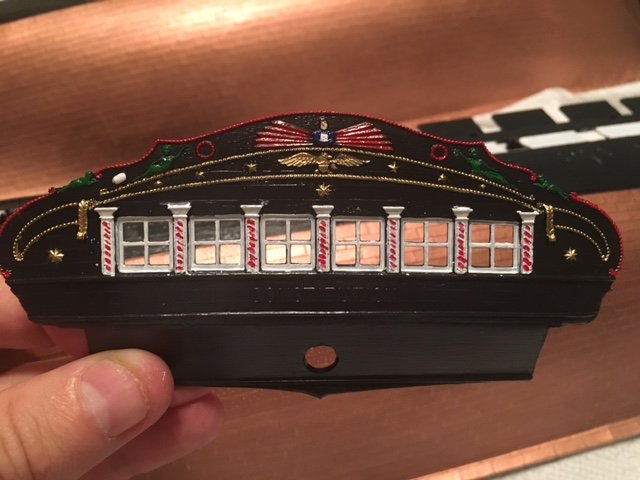
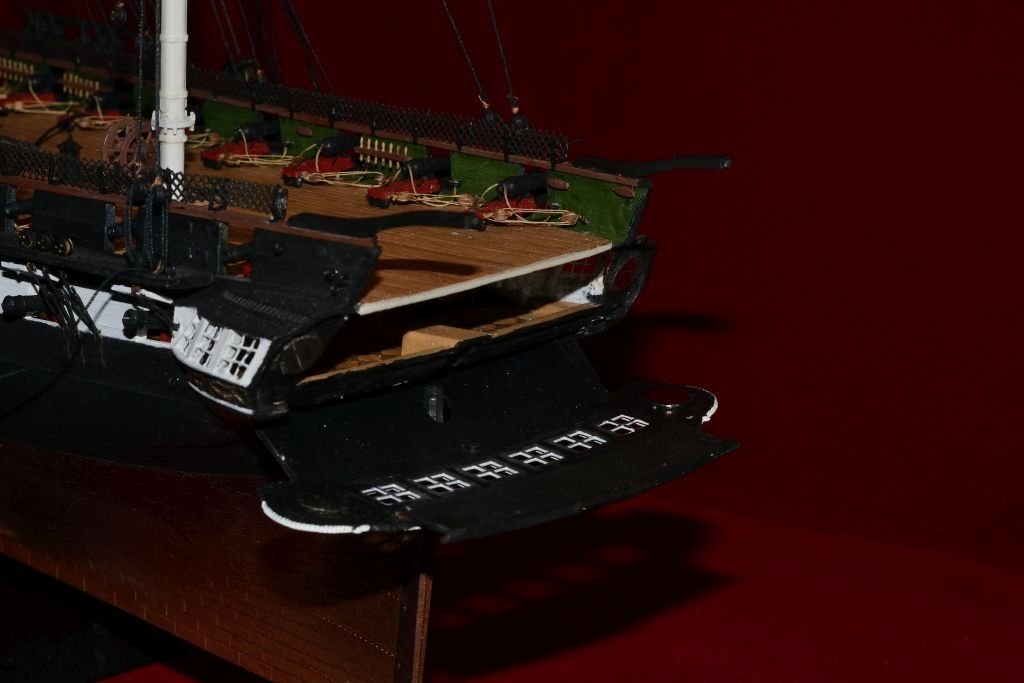
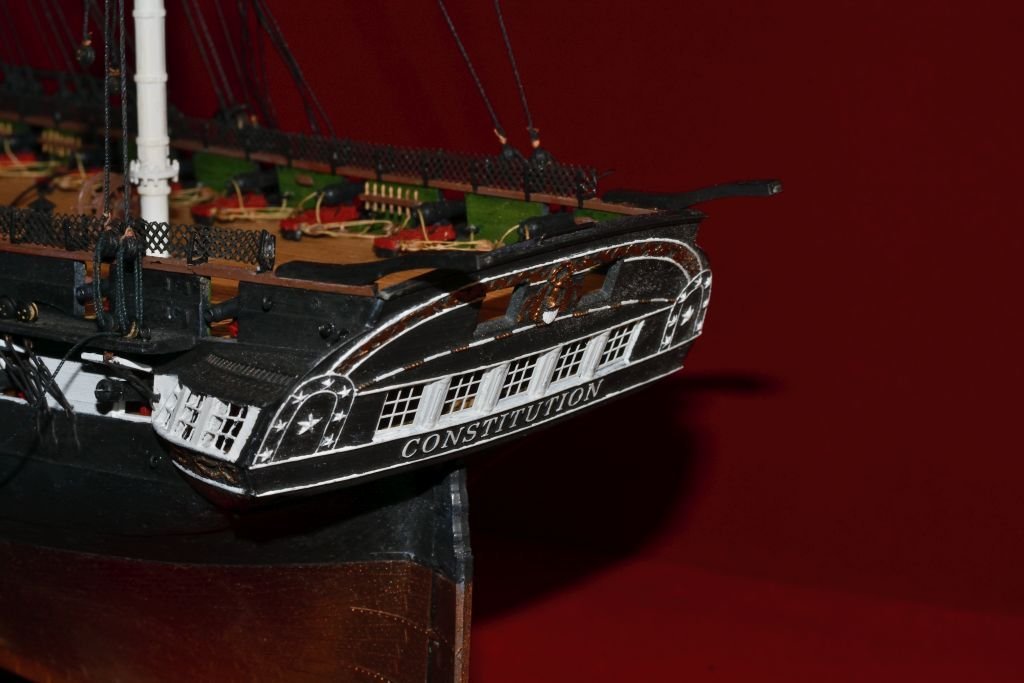
 Hi All - I posted years ago before the site renewal last spring. It's been a few years, but I'm back at it, so I thought I would post a few "as is" images and start from here. It's modeled after the book "Anatomy of the Ship The 44-gun Frigate USS Constitution" by Heinz Marquardt. I know there is some controversy over the window counts, the style and the design as she sat in 1812, but I really liked the 5 window design, and in a few books, it referenced 5 windows on the stern, so that's what I'll do. All of the kit plans have been replaced by the images, drawings and references in the book, so i'm trying to make it true to Heinz's drawings and ideas. I like they way it's coming out.

-
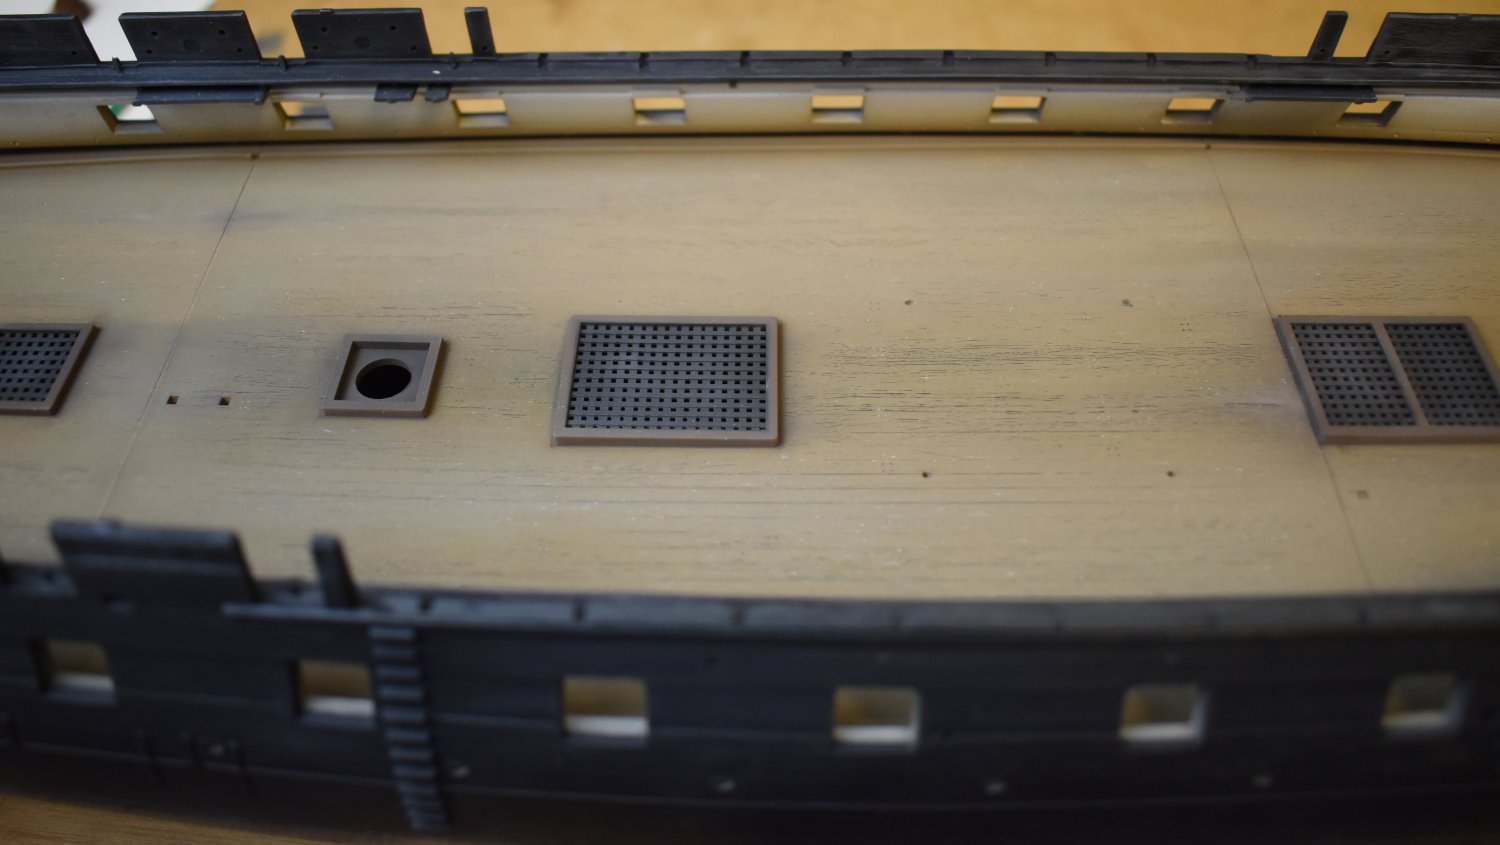
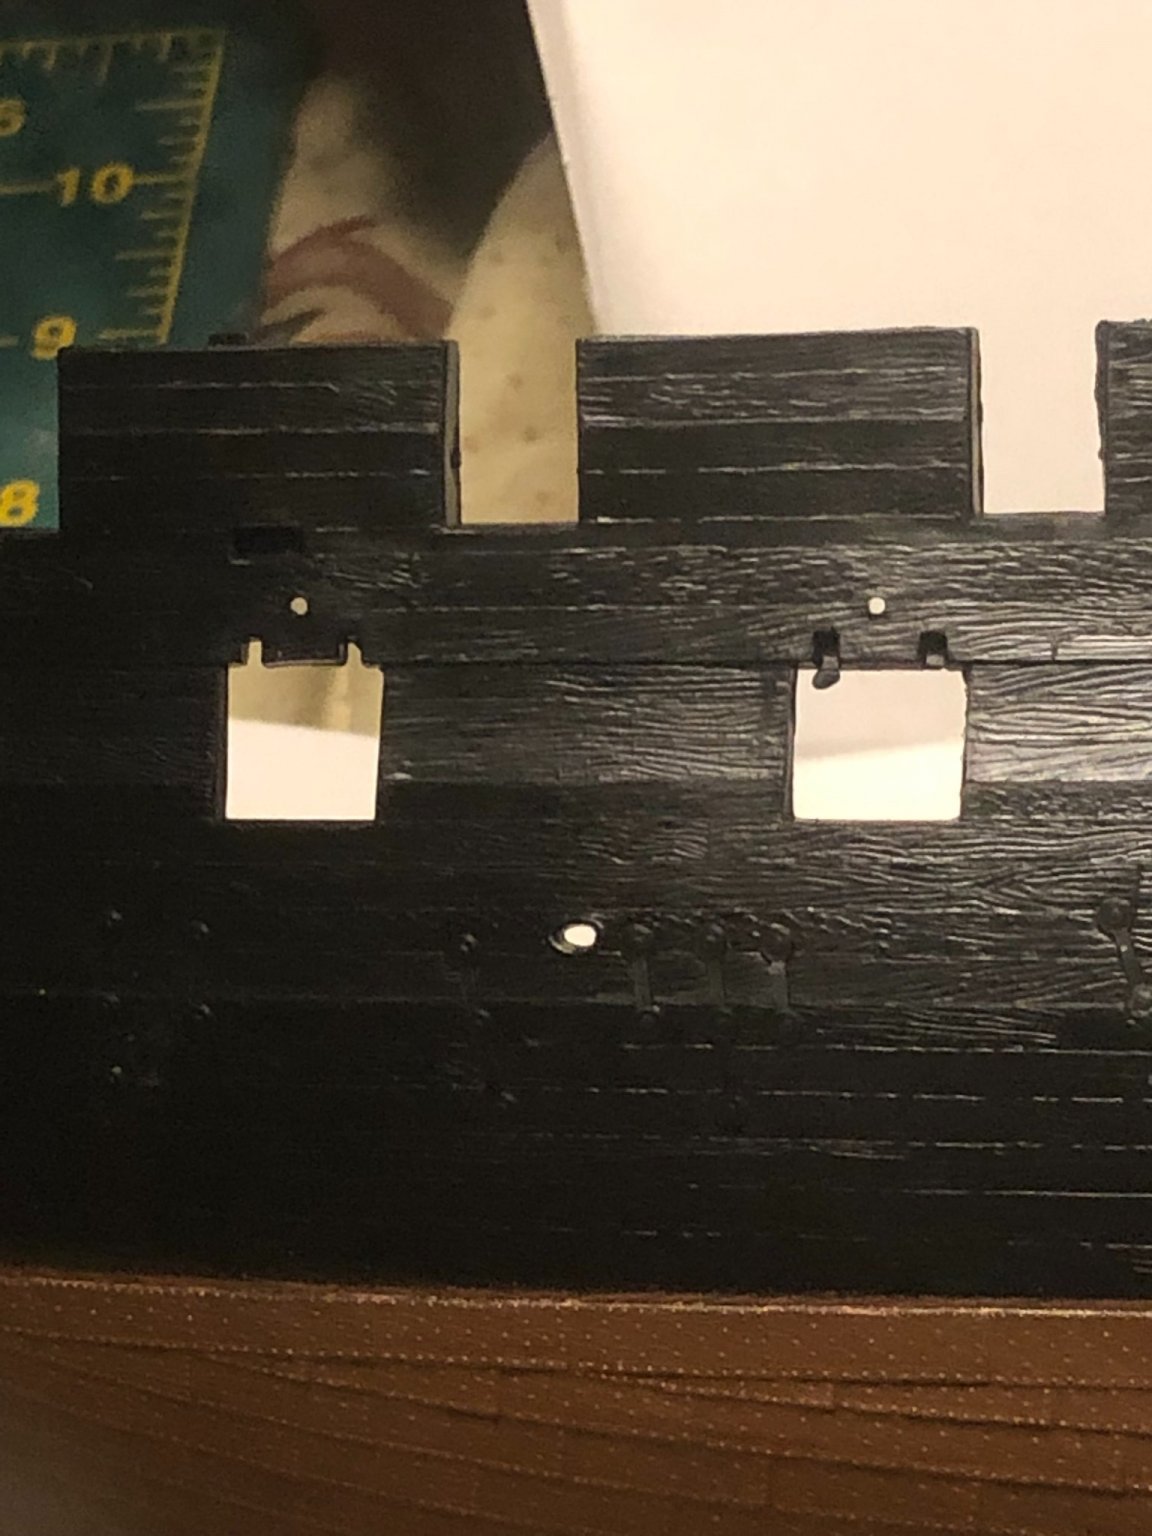
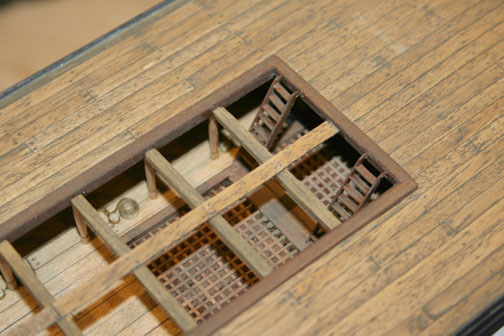
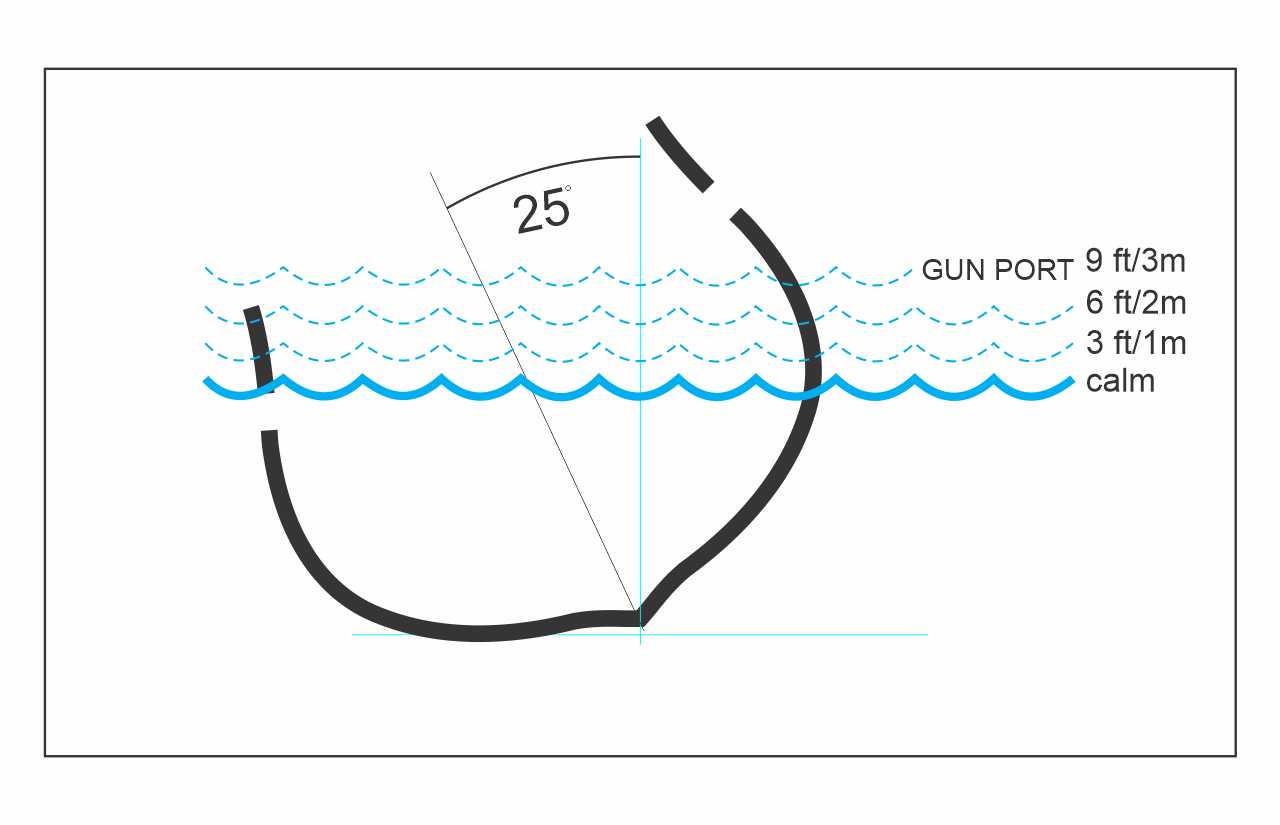
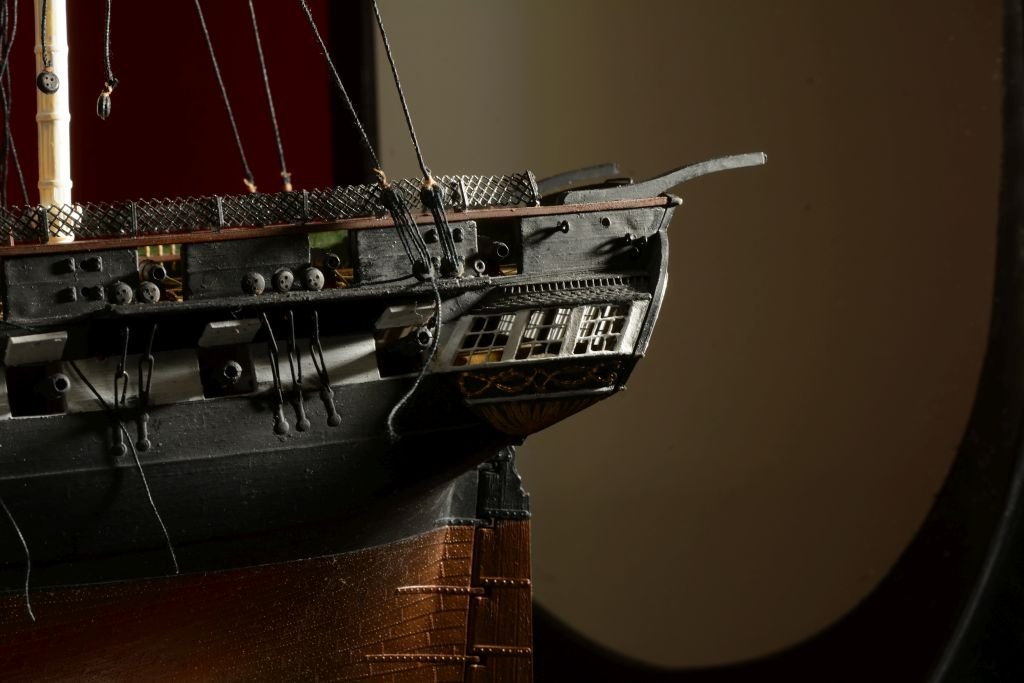
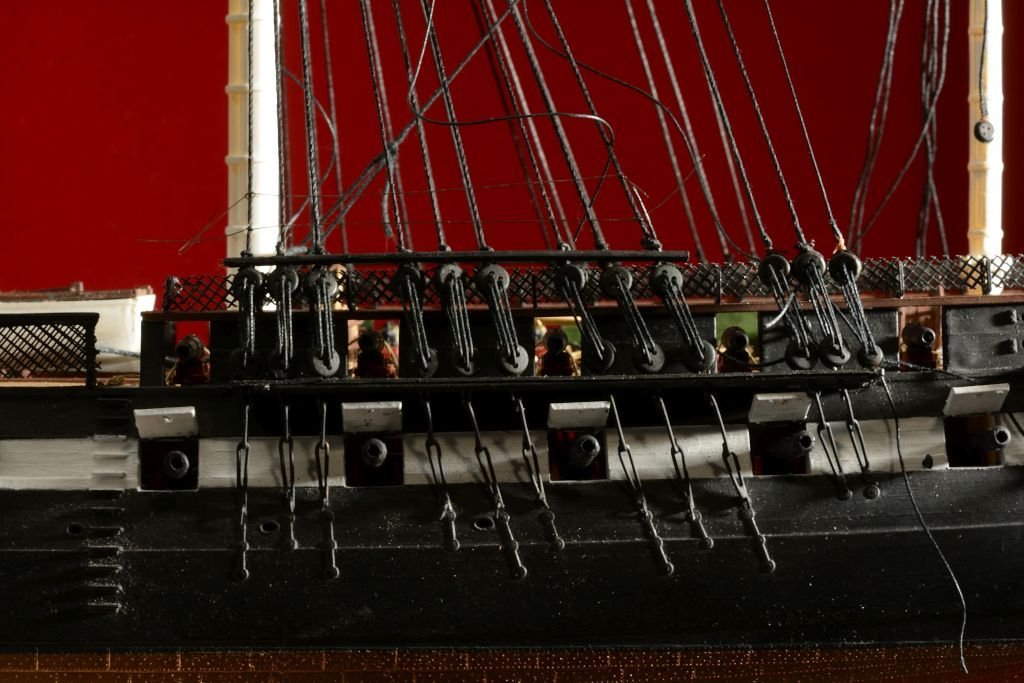
 I grew up on Cape Cawd so my first major sailing ship model has to be “Old Ironsides.” Decades ago I worked aboard Mayflower II at Plimoth Plantation and know just enough to be dangerous... I’ll depend on the fine folks here and various books for wisdom. I think I can get a lot of detail from the Revell plastic kit. I’ll use the Hull model as the major info source because, despite problems (questions?), it is a primary source. I do have an “odd area” on the model I don’t trust: gun ports. Gun Ports I traced the plans and did a little heel experimenting (see images below). Quantum Sails website says it’s best to keep the heel to 20-25 degrees. Sailing forums say the sweet spot is 15 degrees. These are not Age of Sail vessels but still offer interesting info. The National Weather Service says Atlantic swells are frequently two and a half meters/yards, often higher in rough weather. “Very rough” is defined as starting at four and a half meters/yards. Looking at the diagram images I conclude that the ports must have been blocked from inside and cleared to run out the guns. With hundreds of crew it wouldn’t be more fiddly than hoisting ports with tackle and making fast. It seems impossible not to somehow close off the ports. I will build with no port lids (except for the bows) and assume manual stowage. The Gun Band The log says the yellow ochre was painted over in white April 7, 1811 (until 1814). I’m not a forensic historian but it doesn’t seem like a mystery. White it is. Inner Bulwarks and Trim Green like Hull, white on the Gun Deck. The Deck I’ve seen some very impressive builds on this site with plastic decks that really look like wood. I’m excited to try the painting method. I also have an idea to tackle the deck seams: “finger combing” or removing the ends of half the planks and adding in new strips. Copper Bottom The Hull model bottom hull is green (with no red waterline). I’m guessing it represents copper plating. Some modelers have said copper only oxidizes in air, but there are photos of Constitution in dry dock with a very green, verdigris patina on the copper all over. And similar photos of other copper bottomed ships - Splotchy green over copper it is. Ships boats (Whaleboats/Cutters/Gigs) I heard one is quite short so will have to lengthen it (more pain than buying a resin one but cheaper!). And a million things I’m forgetting.
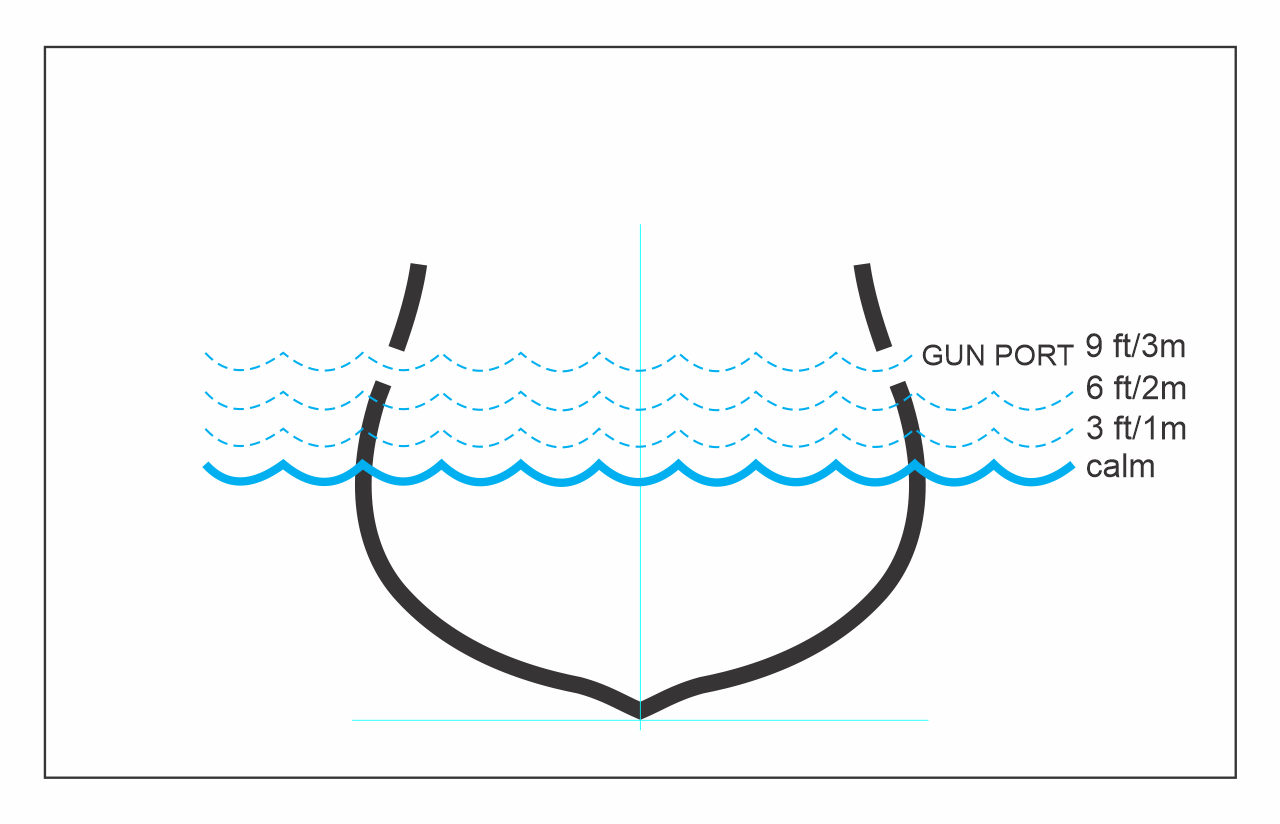
- 8 replies
-
- 3
-
-
- Constitution
- Revell
- (and 1 more)
-
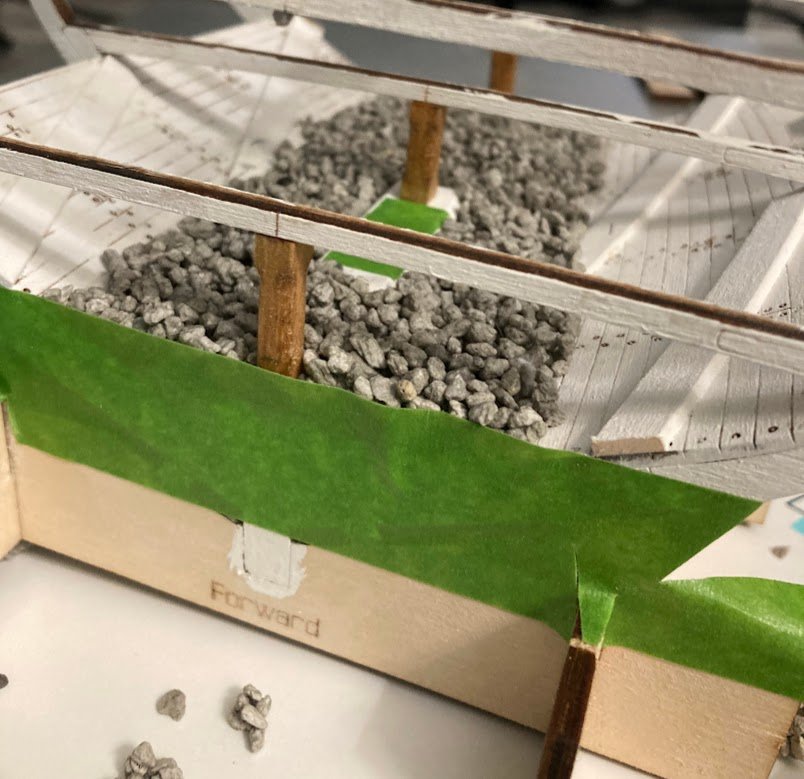
 About 2 months ago I got the itch to continue my nearly fifty years of model boat/ship building by adding a cross section model of the USS CONSTITUTION to my fleet. A few Google searches pointed me to this site and the build logs by TomCulb and UnixGuy. After reading through their build threads as well as Model Shipways online instructions I ordered the kit from Amazon. I'm really looking forward to the detailed standing and running rigging. Fortunately my kit had no missing parts. I made sure the brass etched gun port hinges were included. On to the build. I'll offer up some tips and minor alterations. I have quickly come across the challenge of the differing years documentation as well as a few errors in the kit instructions. Overall the quality of the sheet goods and laser cutting is excellent. Basic frames, Keel, Mast Step, and hold walls. The hold walls installed without the need to wet or use heat. Nice tight joints. Mast Step and Limbers per instructions Ready for gravel ballast Based on the top of the mast step I extended lines out to the forward and aft frames to establish level lines for the tape. This helped to a=ensure the gravel bed was level and not under or over filled. Based TomCulbs report of dripping glue I did place the model on a paper plate and I also drained excess water on paper towel prior to placing in the hold. Very pleased with results - level bed and not a single loose pebble when inverted. I will not install the barrels until the outer planking is complete. This will also allow good visibility when installing the pump suction pipes into the hold.
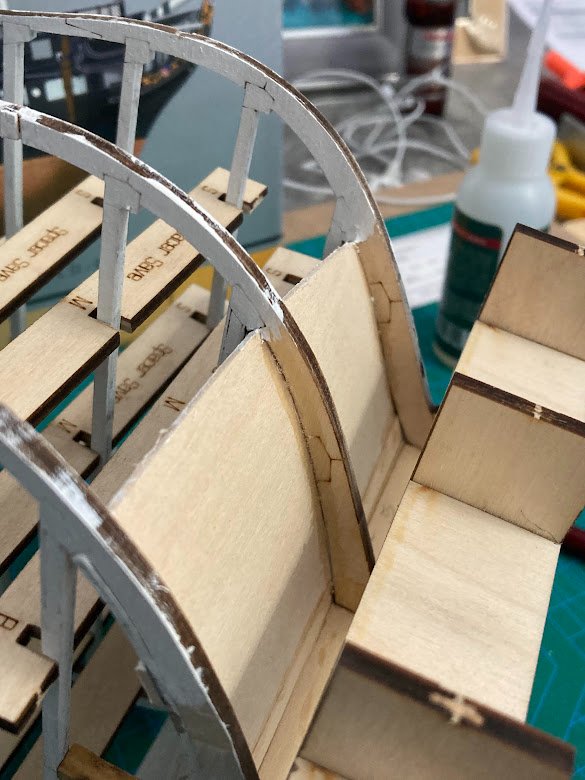
.jpg.e79f1cb9841e44f14d50aa2d85d943a1.jpg)
.jpg.44365f5956bda8ffea3e1cc51e945ca3.jpg)
- 18 replies
-
- 4
-
-
- Constitution
- Model Shipways
- (and 1 more)
-
 Hello. This is my third experience with the iconic Revell kit, counting myself as a youngster watching my Dad build his back in '69 - '70. I've spent about two years off and on working on it to this point. When finished it will be a waterline display, with sails furled at anchor. First photos of this build log start at the point where I had the gun deck airbrushed and installed.
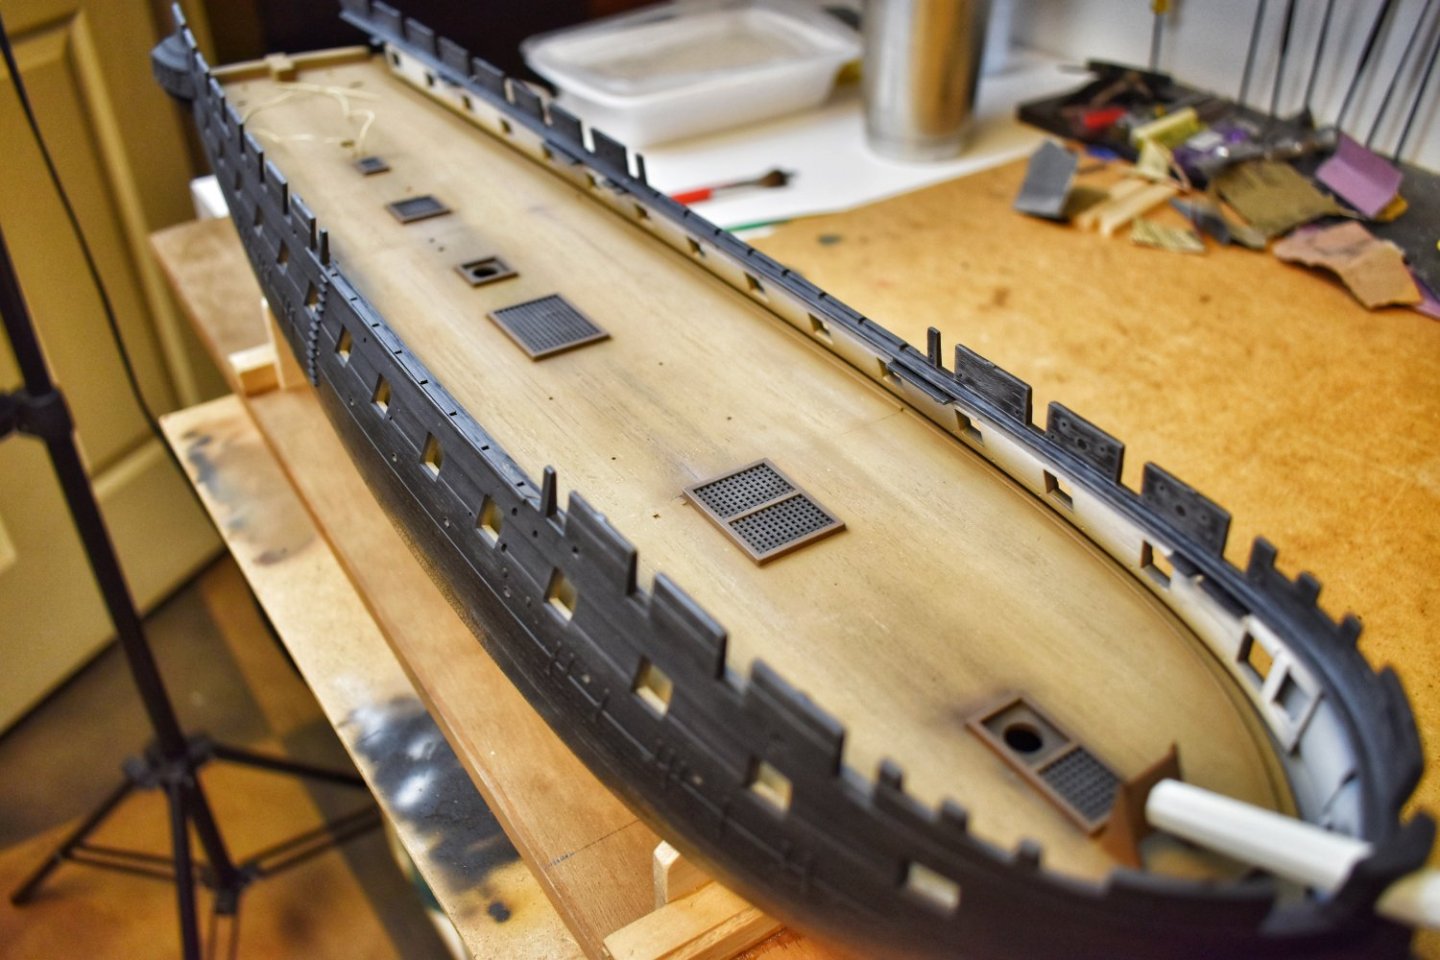


- 41 replies
-
- 3
-
-
- Constitution
- Revell
- (and 1 more)
-
 Hello everyone, I recently purchased the Modelshipways Constitution (MS 2040) and hope to keep it rolling along. So far so good.
-
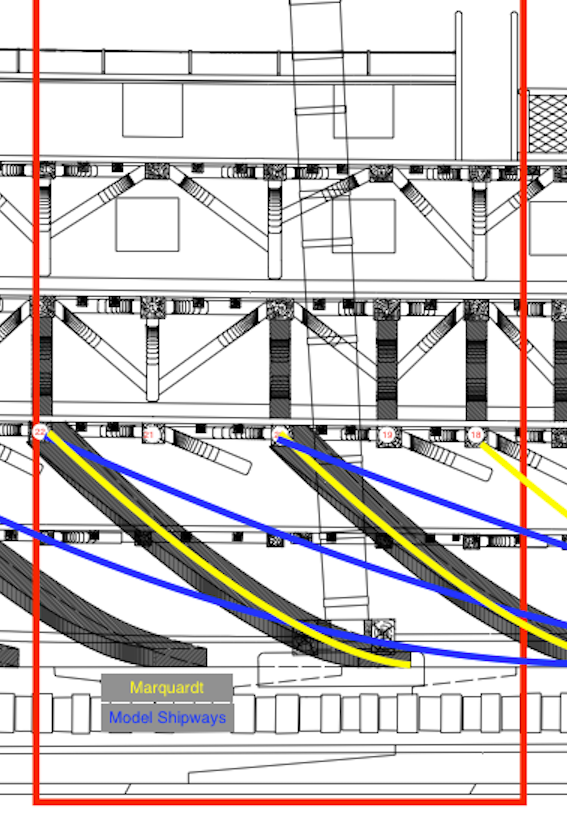
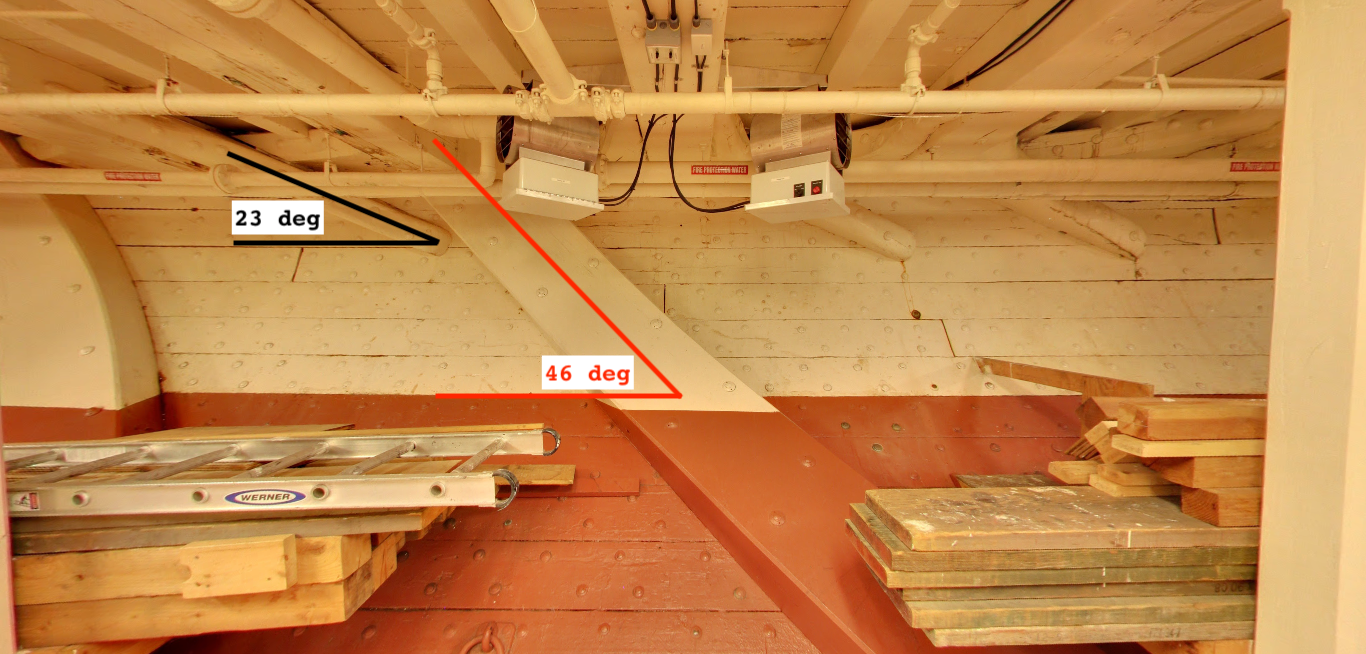
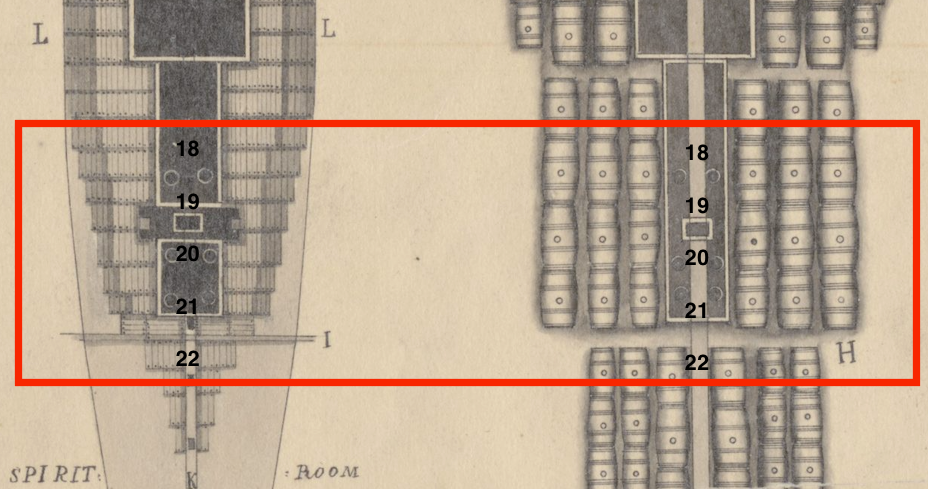
 INTRO I don’t have a proper box-opening picture, but I didn’t decide to join a forum and post the build until I had already started. This is only my second ship model. My first was Model Shipways’ Bluenose II that I completed in 1994. I started a couple others along the way and lost interest, or I wasn’t satisfied with my workmanship and abandoned them. So far, I’m very much enjoying this kit. I could have completed the model already but continue researching documents, plans, and photos as I go in anticipation of another build. The materials seem to be very good quality though I only have a few data points for comparison. Incidentally, I have seen many builds of the Mamoli cross section, but only one of Model Shipways’ kit (Tomculb’s build). In addition to the manual, I have a copy of Marquardt’s USS Constitution, Magoun’s The Frigate Constitution and Other Historic Ships (1st Ed.), all the downloadable resources from the USS Constitution Museum, and various other documents and pictures from the Internet. BASIC HULL FRAME STRUCTURE The initial framing and main hold construction were straightforward. The 96-page manual with color photos of the build is very instructive. There are three plywood frames with the “bow” frame corresponding to the half-beam aft of beam 17, the “main” frame to beam 20, and the “stern” frame to beam 22. Beam numbering corresponds to a 1992-1996 restoration diagram. MAIN HOLD I painted the hold white, thinned with a little water, which seemed to do a good job of whitewashing while preserving the wood grain. This was followed with a scribe along the seams and a very diluted gray wash to bring out some of the details. I’m not sure I like the Model Shipways water-based paints. They’re very thick, I find them difficult to properly thin, and though I enjoy the easy cleanup, I believe the solvent based Floquil paints I used on the Bluenose II to be superior. (I just read that Testors discontinued the Floquil line in 2013.) I have some questions/comments about the main hold. I am not critiquing the model. I want to build the model again or maybe scratch build the same cross section in the same or larger scale and have questions on details not included in the kit. This area is proving difficult as I haven’t found any pictures. Diagonal Riders The diagonal rider angle appears too acute relative to the keel compared to any drawings I have seen. I read that the 1797 diagonal riders were removed in 1820 and then new ones installed in the 1992-1996 restoration so maybe that is where the discrepancy originates. Marquardt illustrates an approximately 40-degree angle from the keel with riders terminating at beams 18, 20, and 22 for the original riders and current photos and illustrations show about the same or greater angle, but shifted aft and terminating at beams 20, 22, and 24. The photo of my model shows the instructed placement (~20-degrees). The second photo is the 1992-1996 restoration diagram with Marquardt diagonals overlaid in yellow and Model Shipways in blue. Ballast I understand that most ships were brought into trim at this period using pig iron ballast and kentledge, but that in September 1813 John Tilley had seventy tons of pebble ballast delivered to the ship. What I’m not certain of is if it would be evenly distributed in the hold as pictured in many models. Some of the illustrations depict what appears to be a structure around the bilge pump tubes and main mast, perhaps with hatches to allow traveling the length of the ship’s hold? The illustration also depicts no ballast or stores directly on the keelson. Shot Lockers? Marquardt depicts two shot lockers; one would be near the model’s bow frame at beam 18 and the other forward of the model’s stern frame at beam 21. Are there any representative illustrations or pictures of these shot lockers? How was the shot retrieved? Spirit Room? Other illustrations show a forward bulkhead for the spirit room. Are there any illustrations or pictures of this area? Would the only difference in this room and the main hold be the type of stores kept there? Limber Holes and Limber Boards? Marquardt shows a limber gate on either side of the keel. Other illustrations also show a limber plank (waterway cover) on either side of the keelson. Would the bilge pump tubes terminate into this waterway? What I like: Quality of materials including the barrels and gravel. 96-page instruction manual also available online. 30” x 40” full-scale drawings included What I would change: Increase diagonal rider angle to match Marquardt’s. Questions: Were there structures in the main hold around the bilge pump tubes and/or main mast? What did the shot lockers look like and how was shot retrieved (e.g., hinged top)? Did the limber planks remain uncovered and accessible underway? Was there a dividing bulkhead on the Spirit Room?
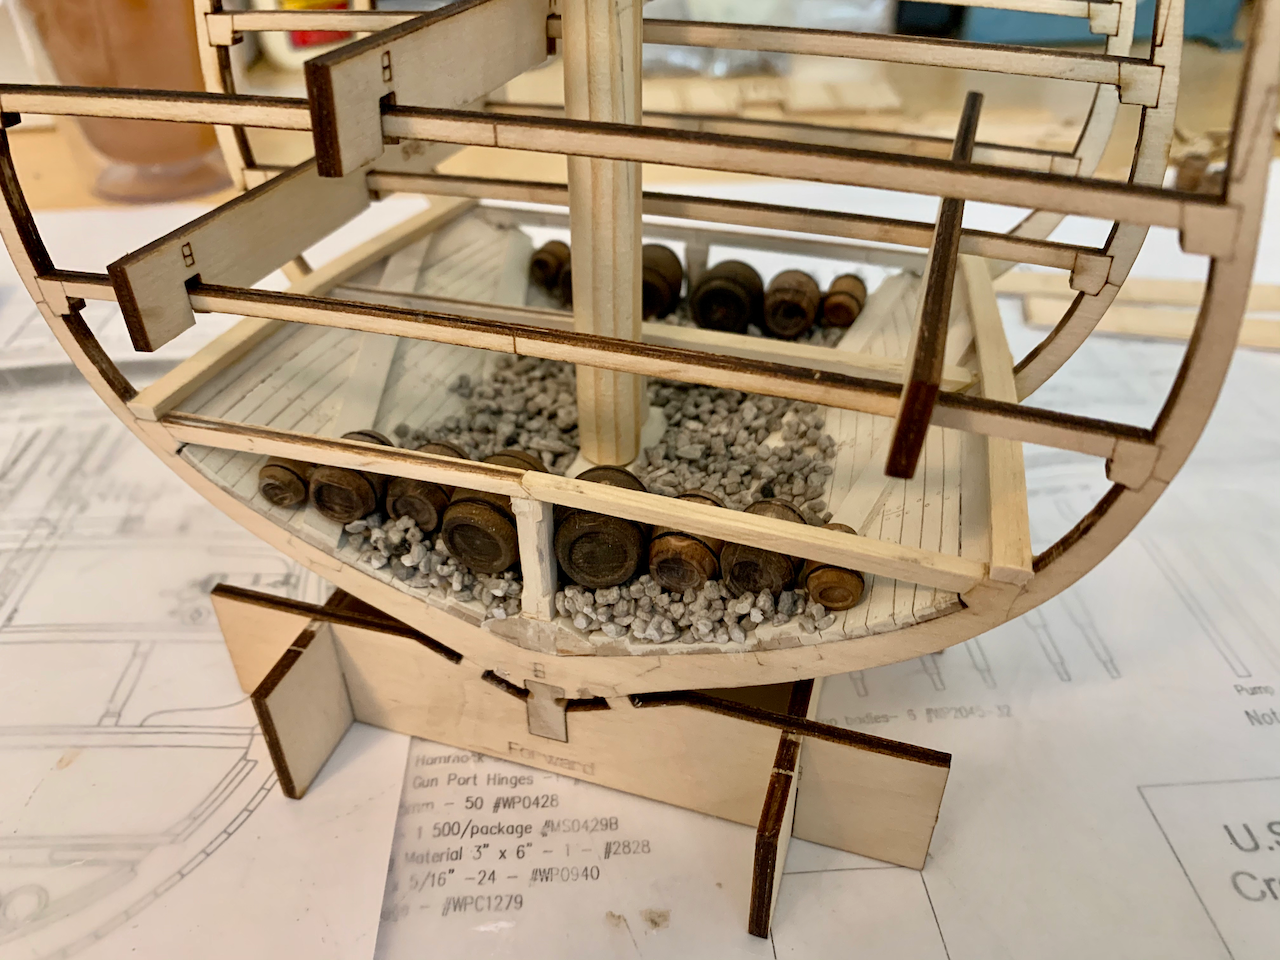
- 25 replies
-
- 2
-
-
- Constitution
- Model Shipways
- (and 1 more)
-
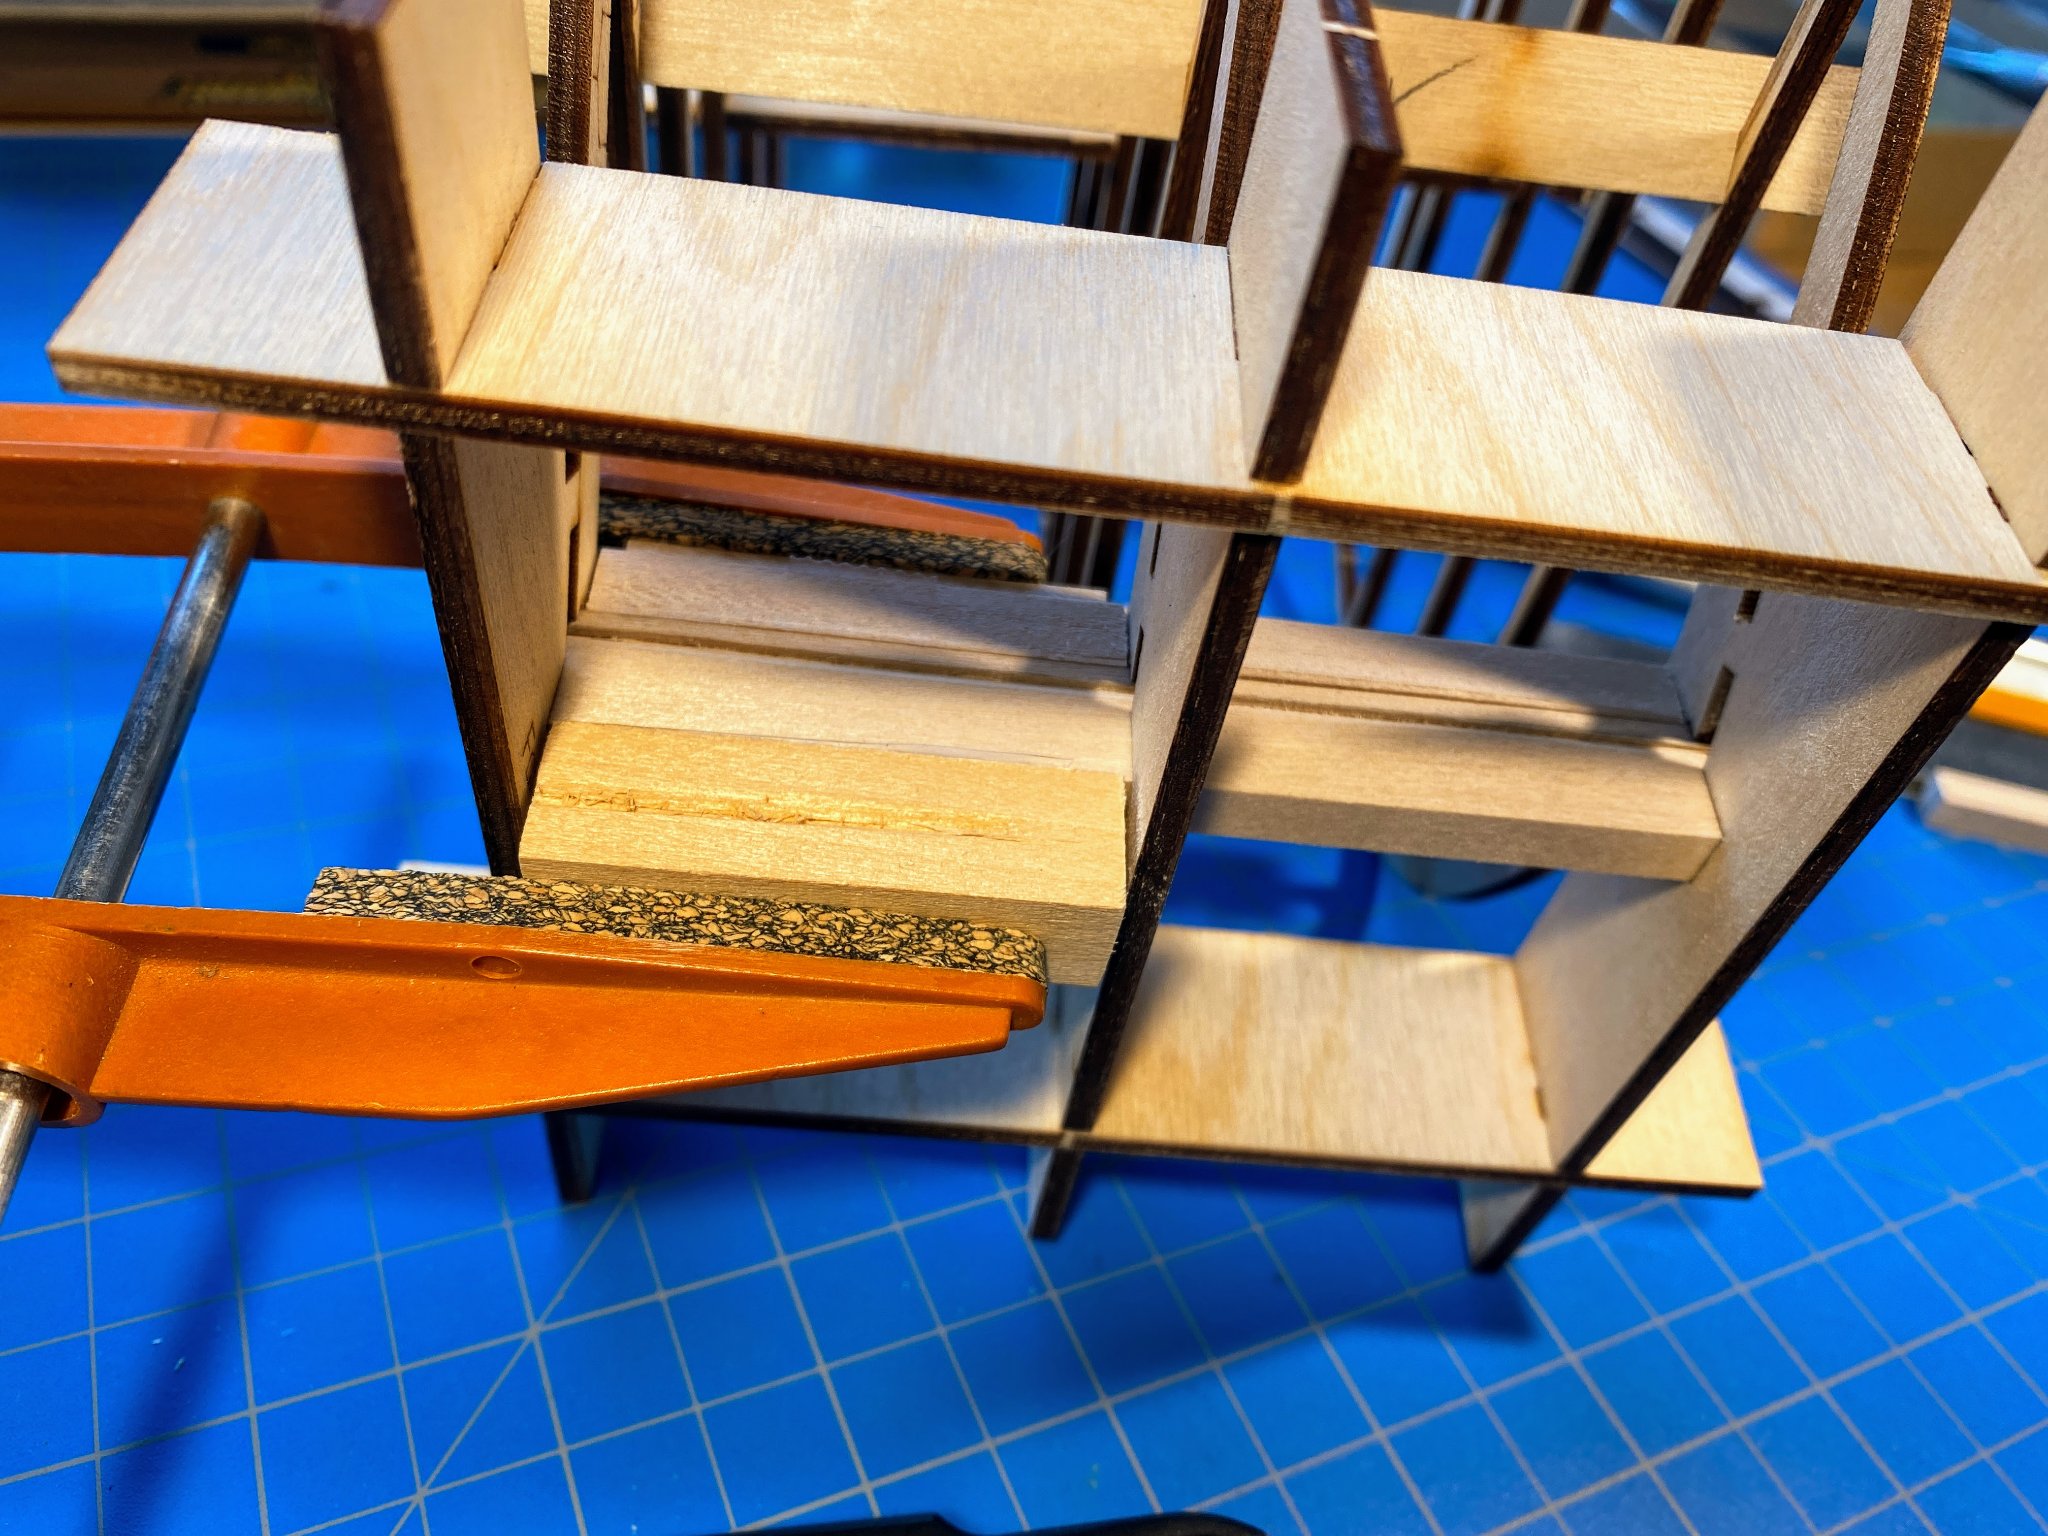
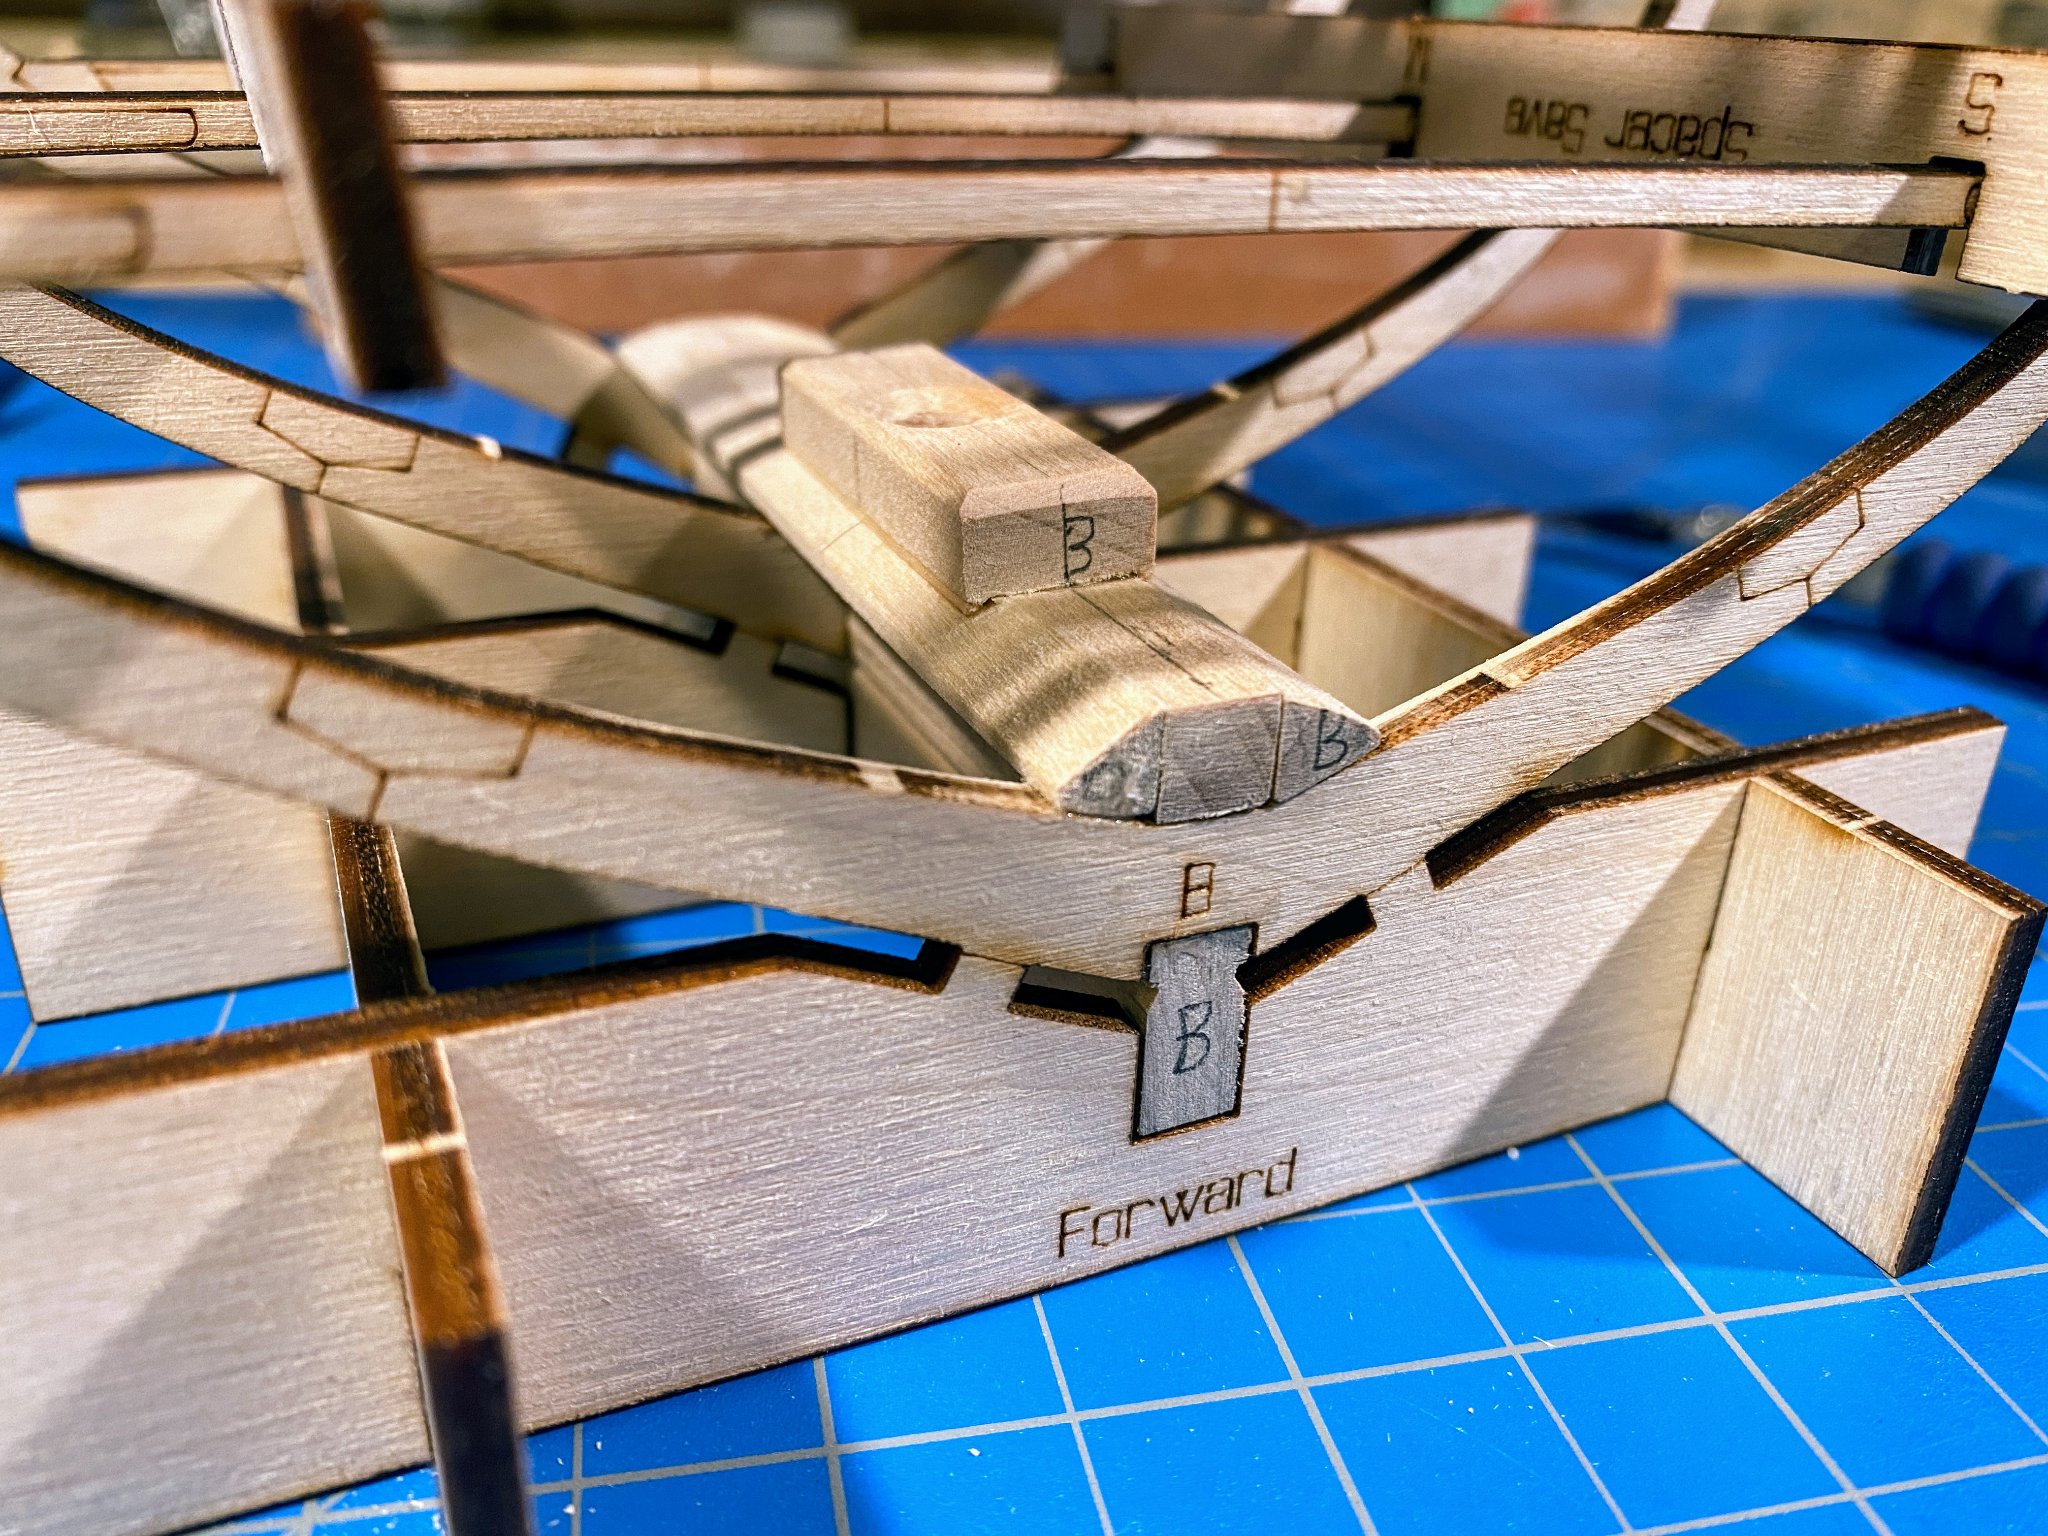
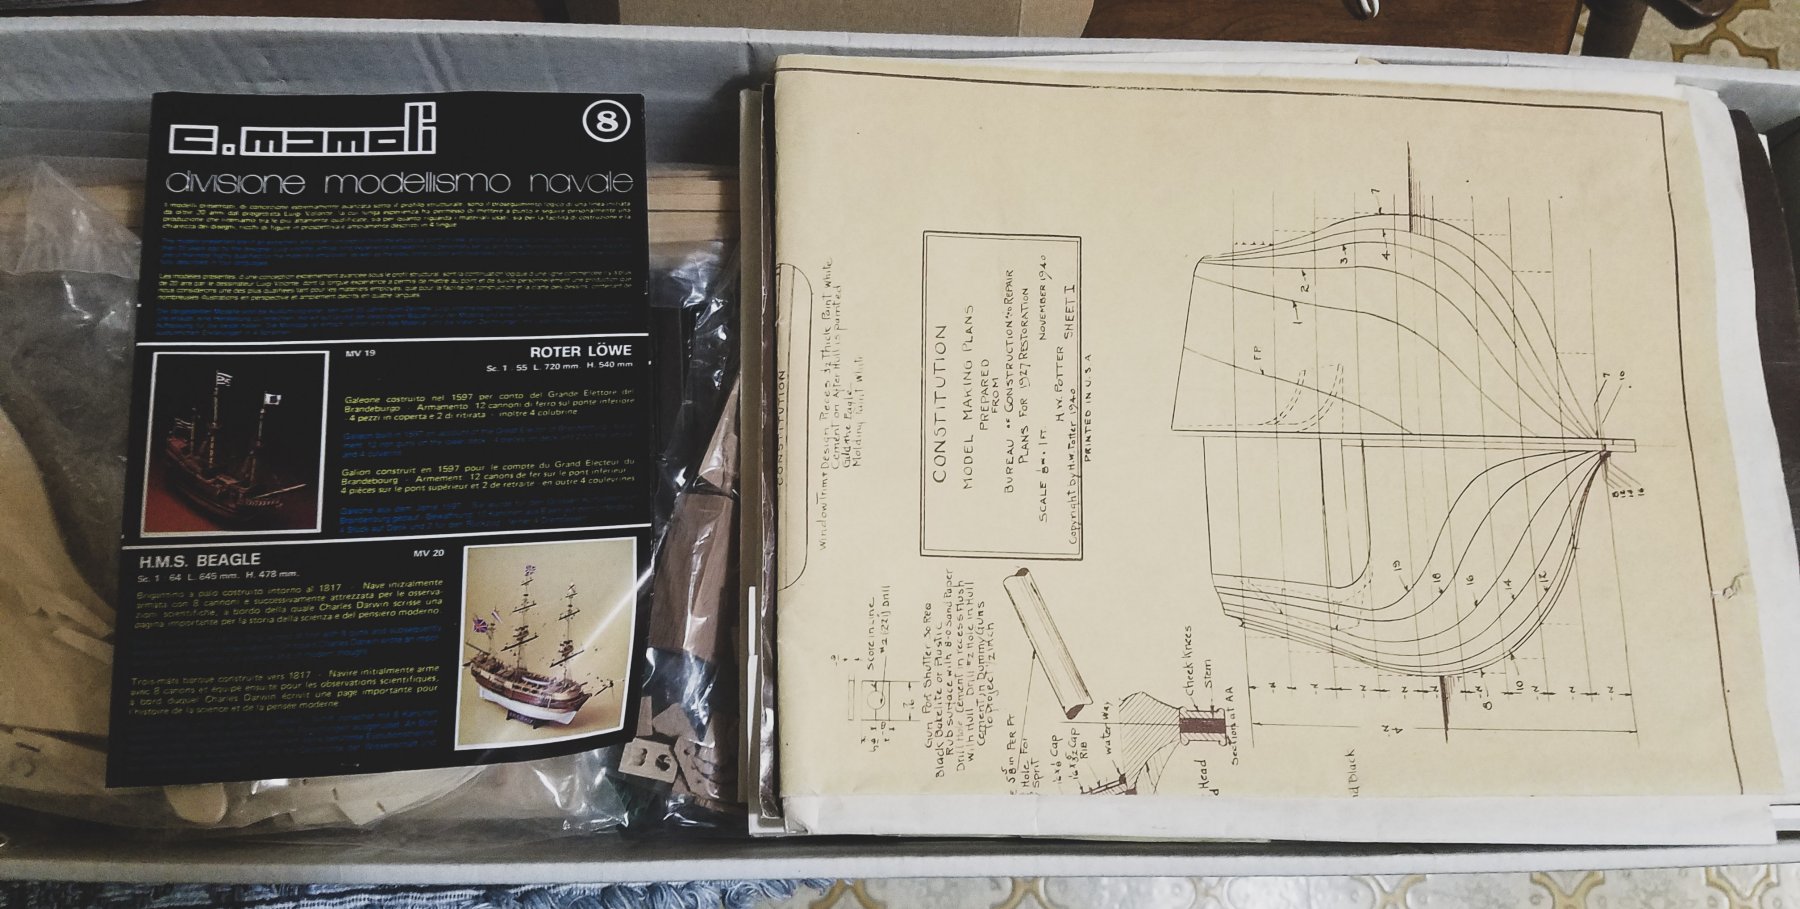
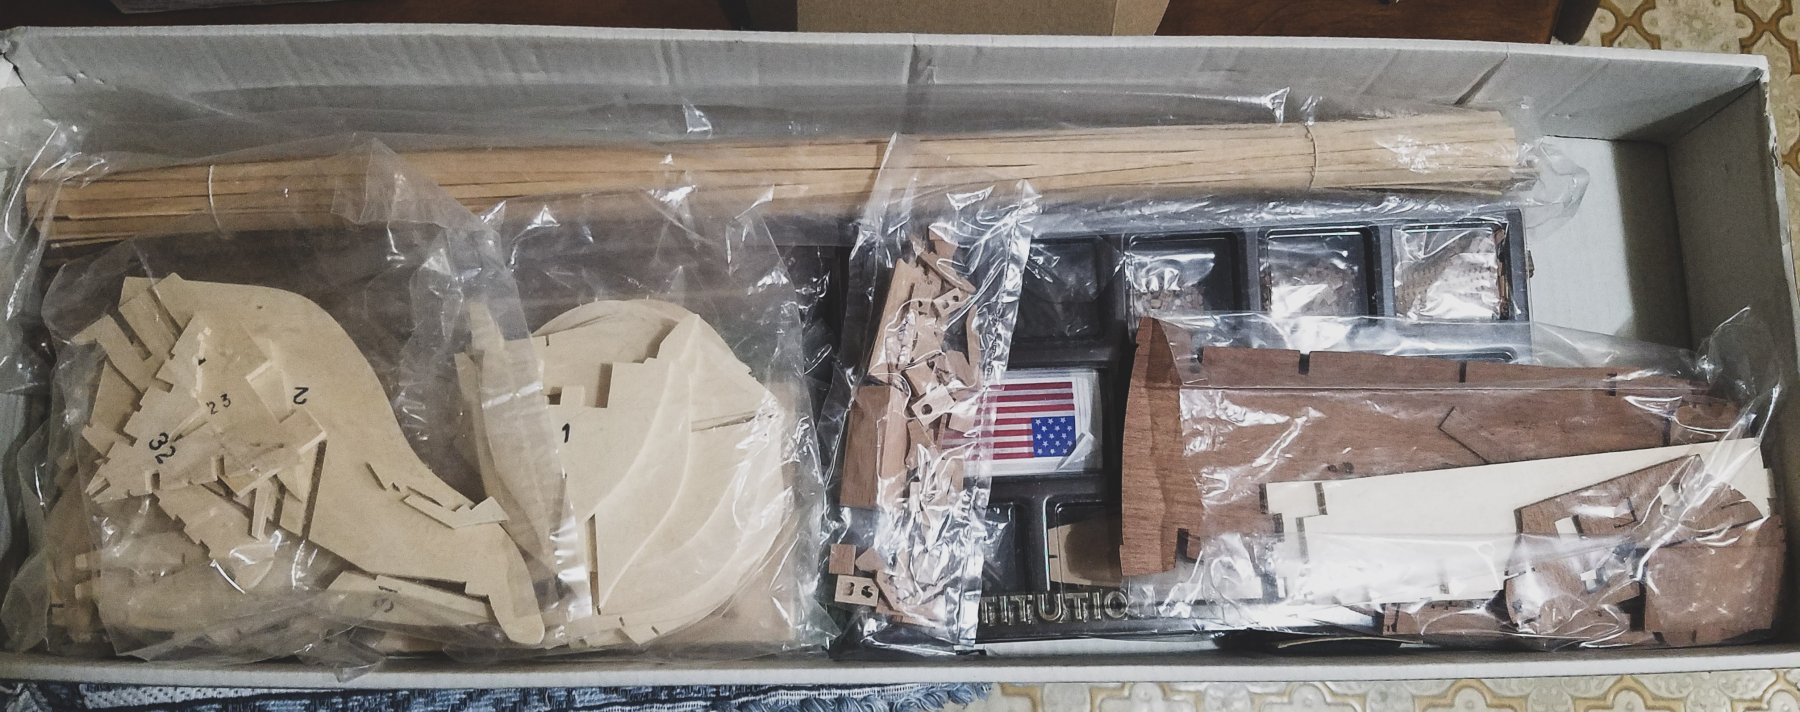
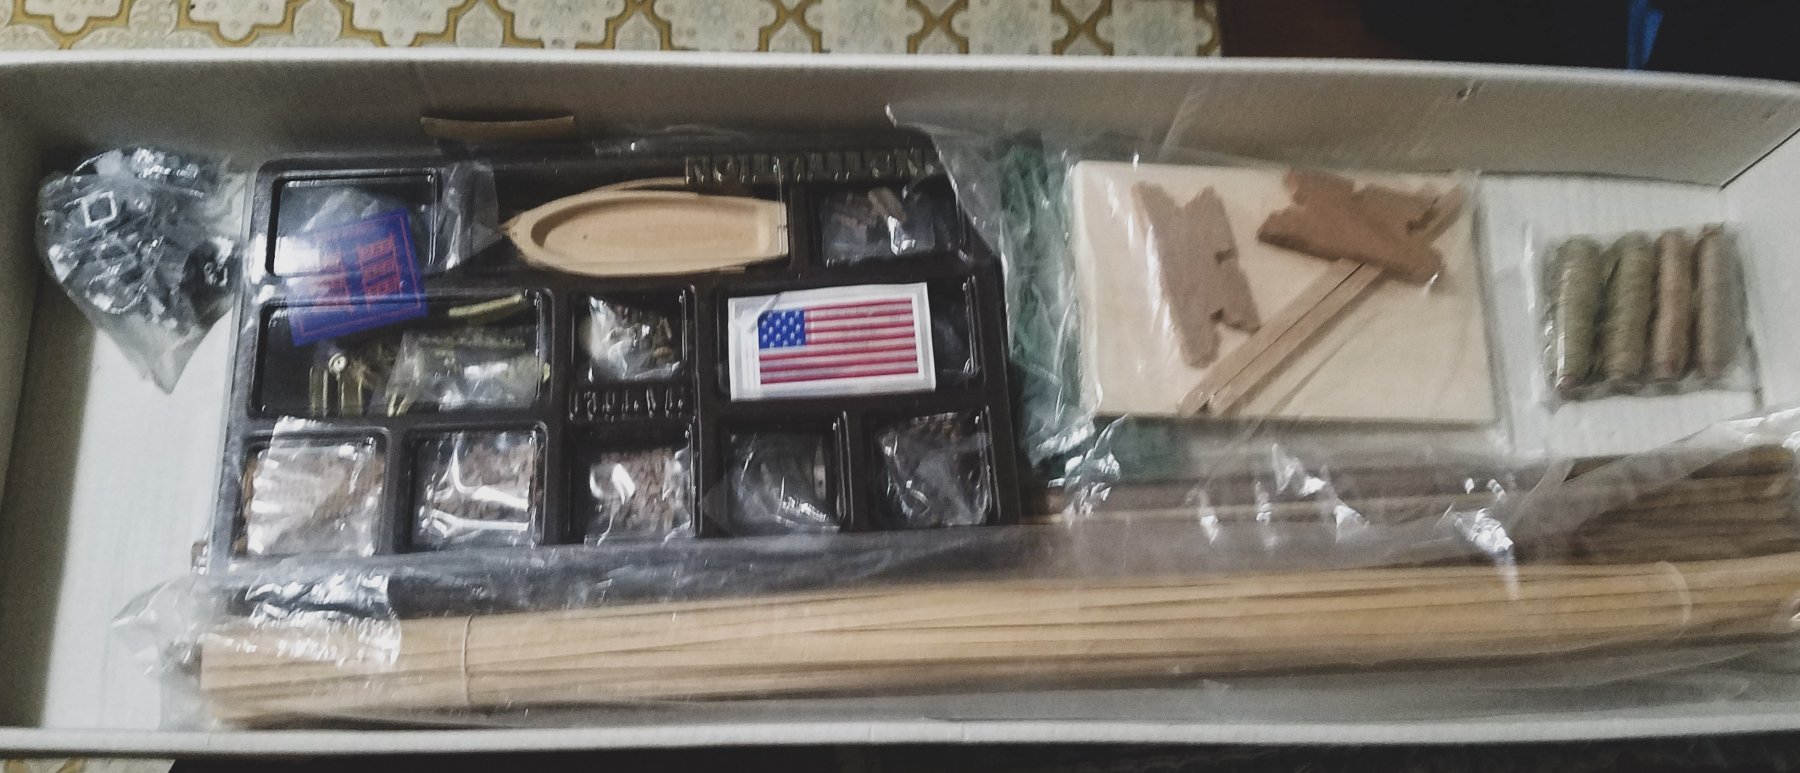
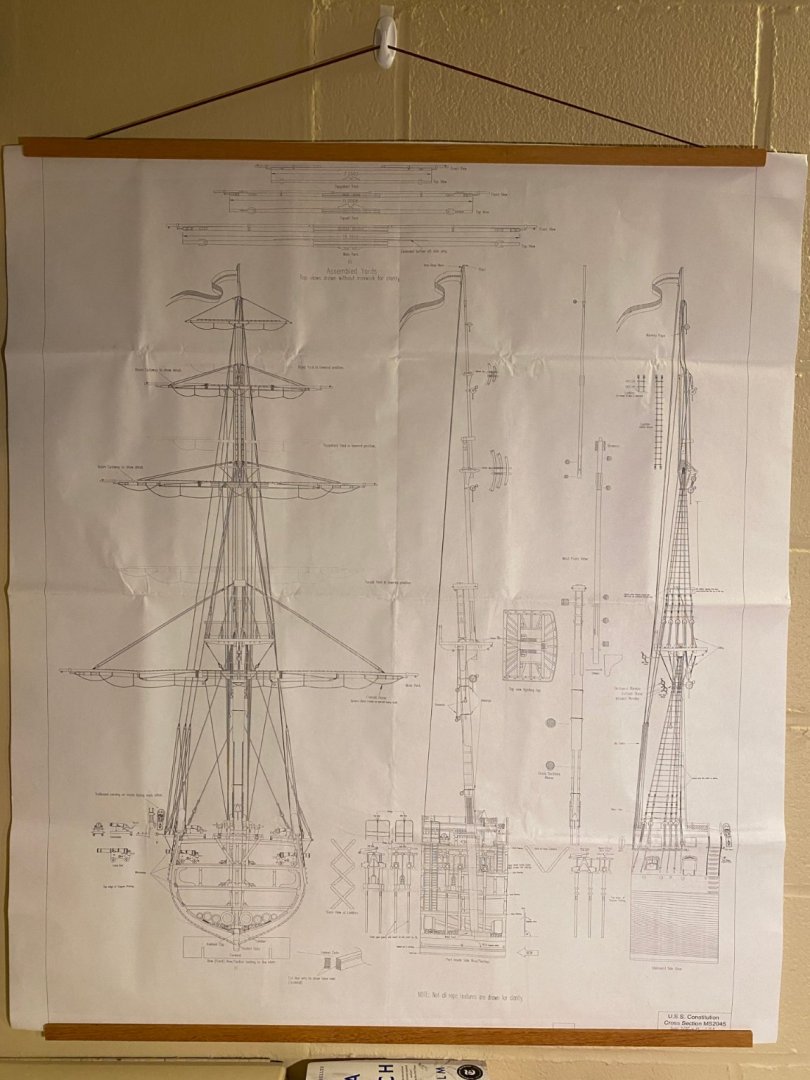
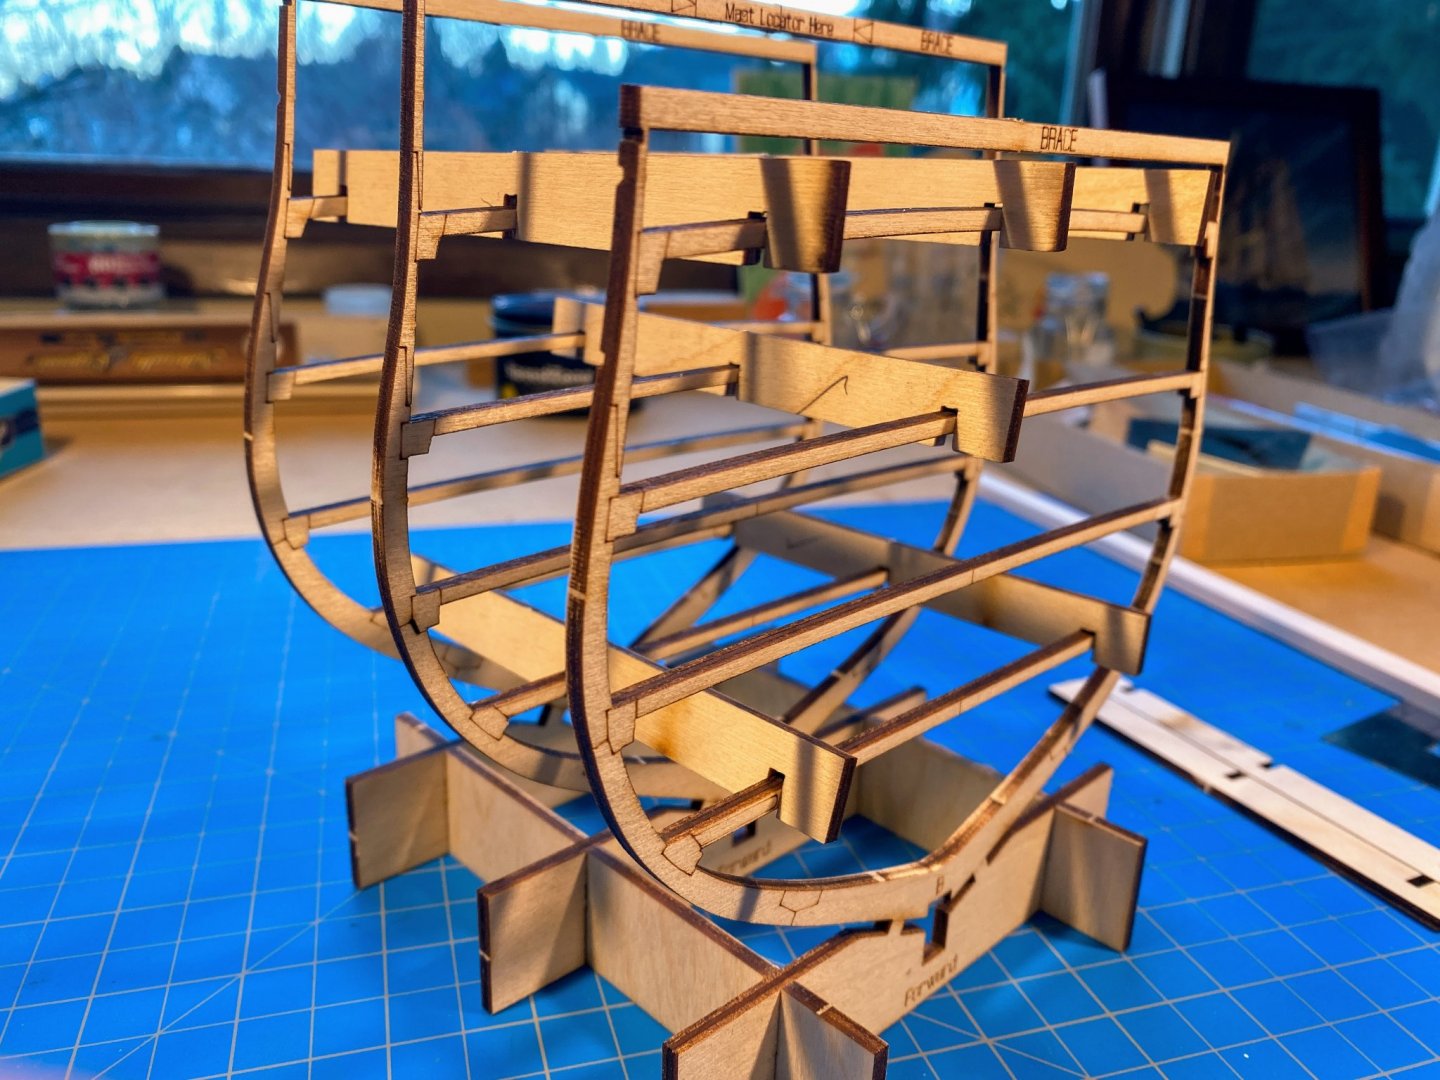
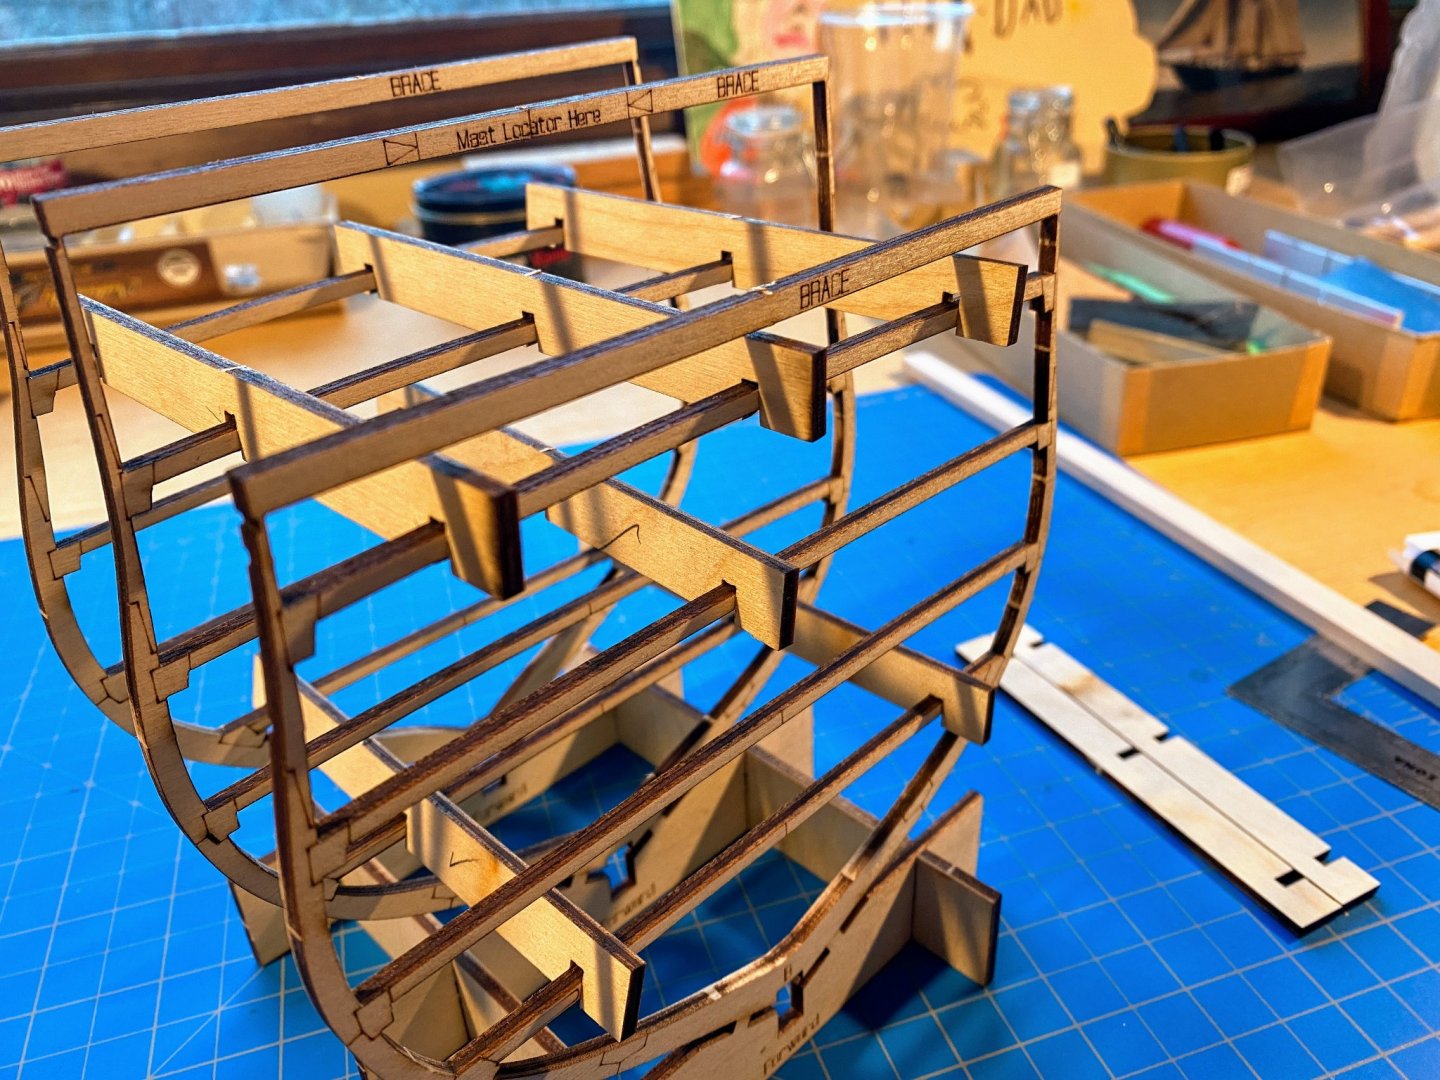
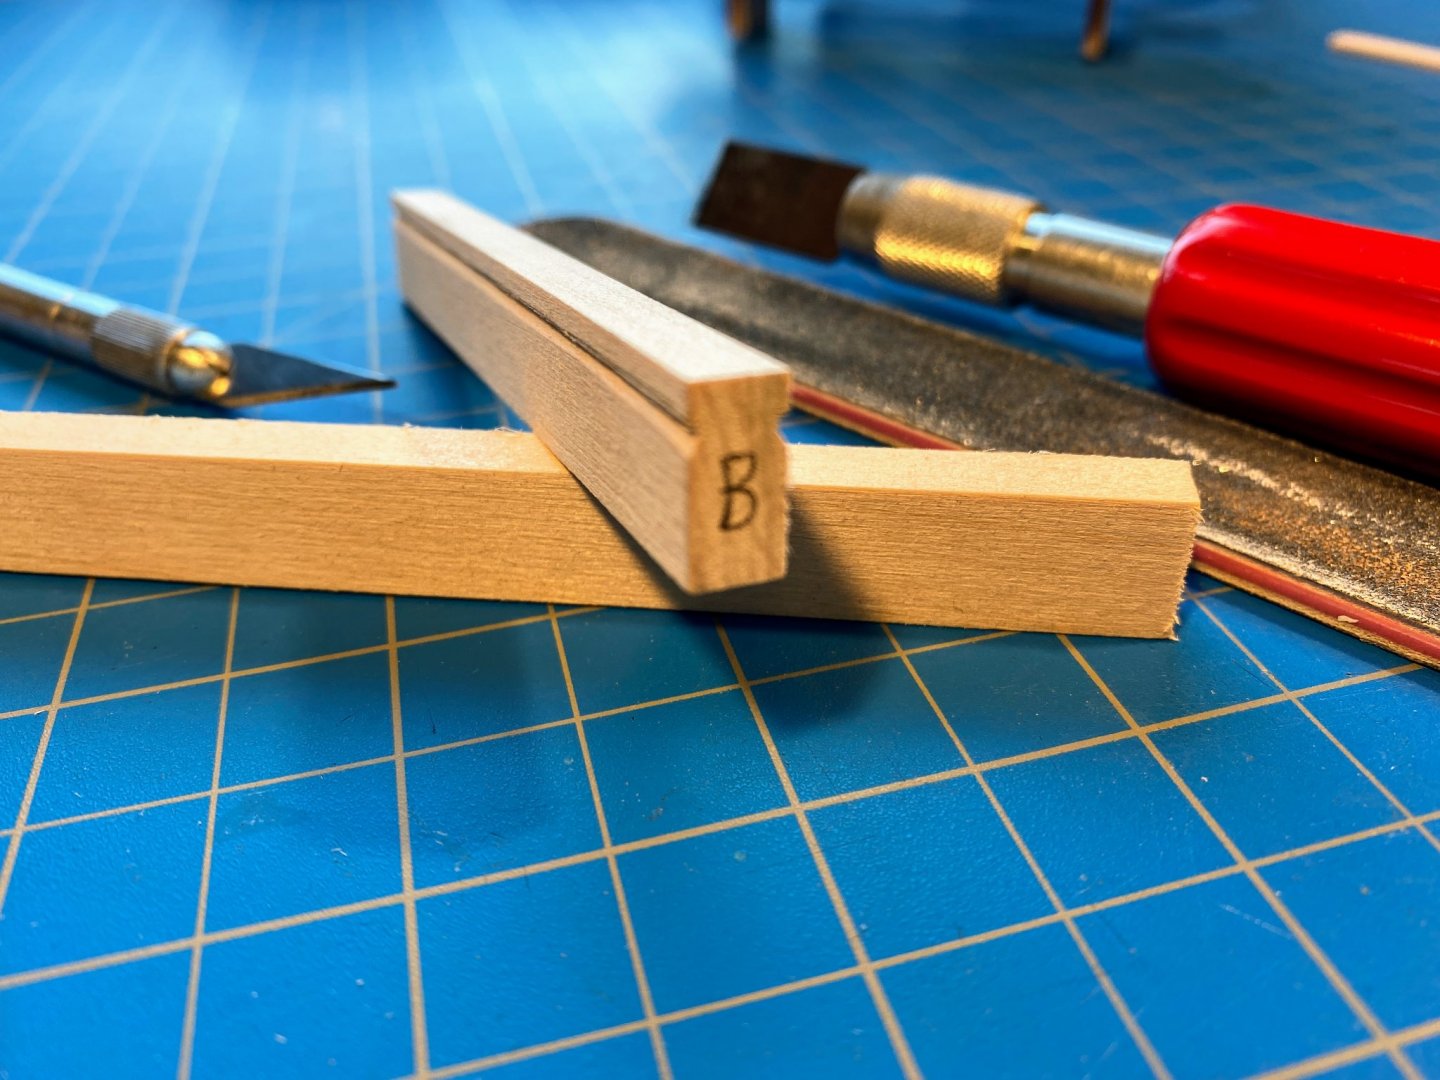
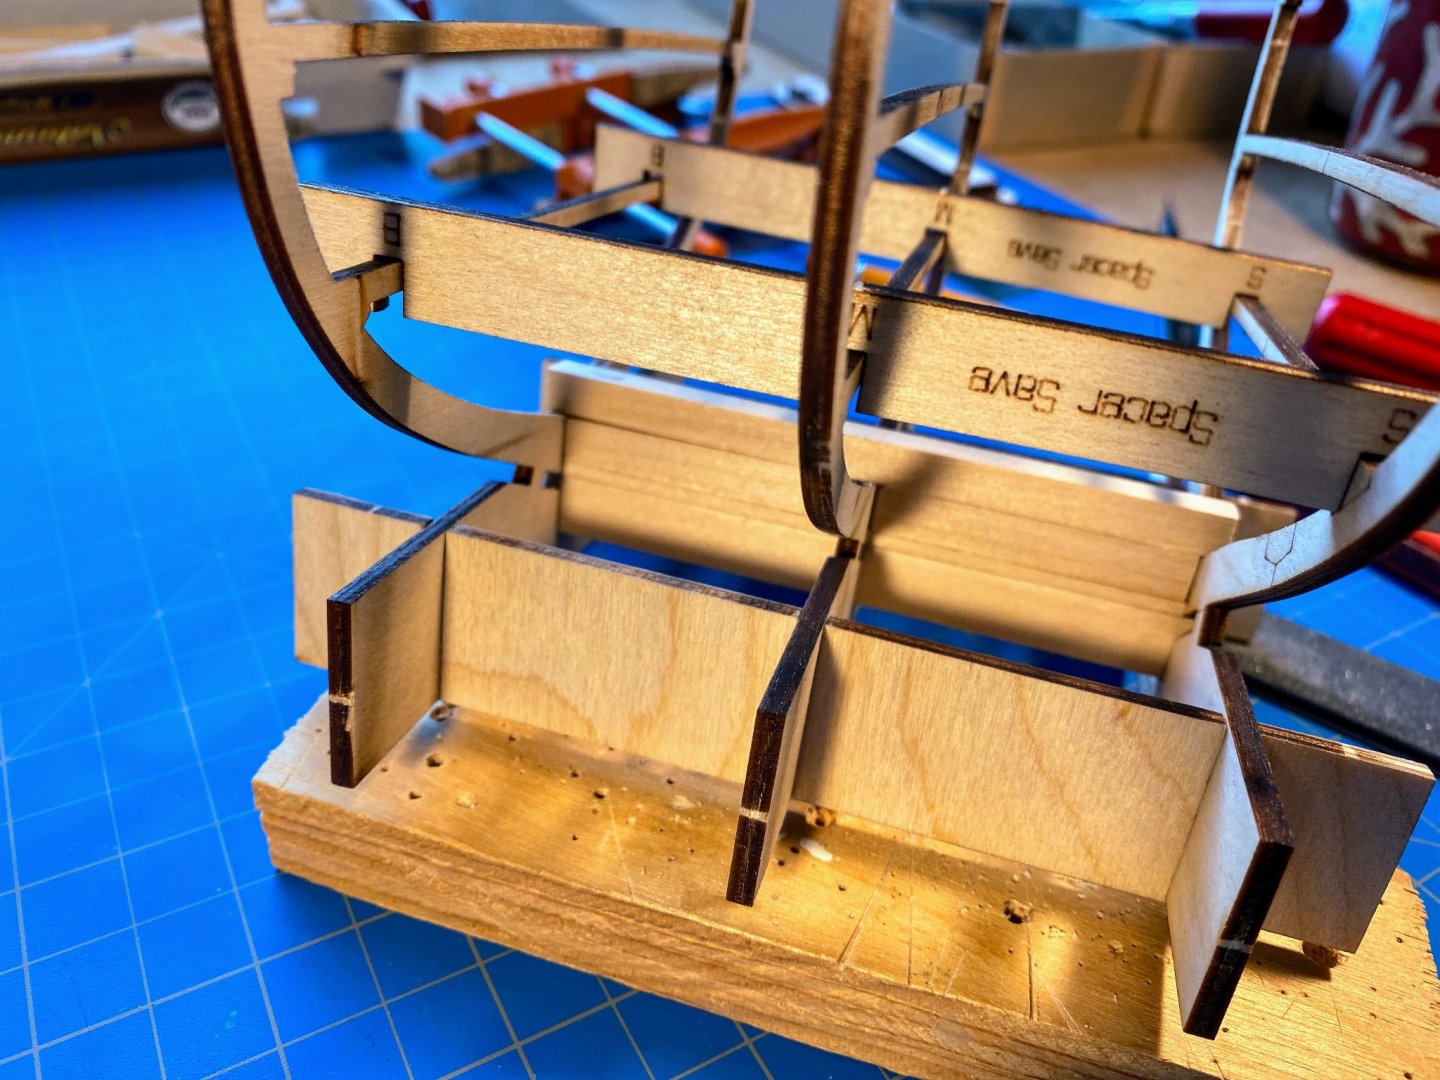
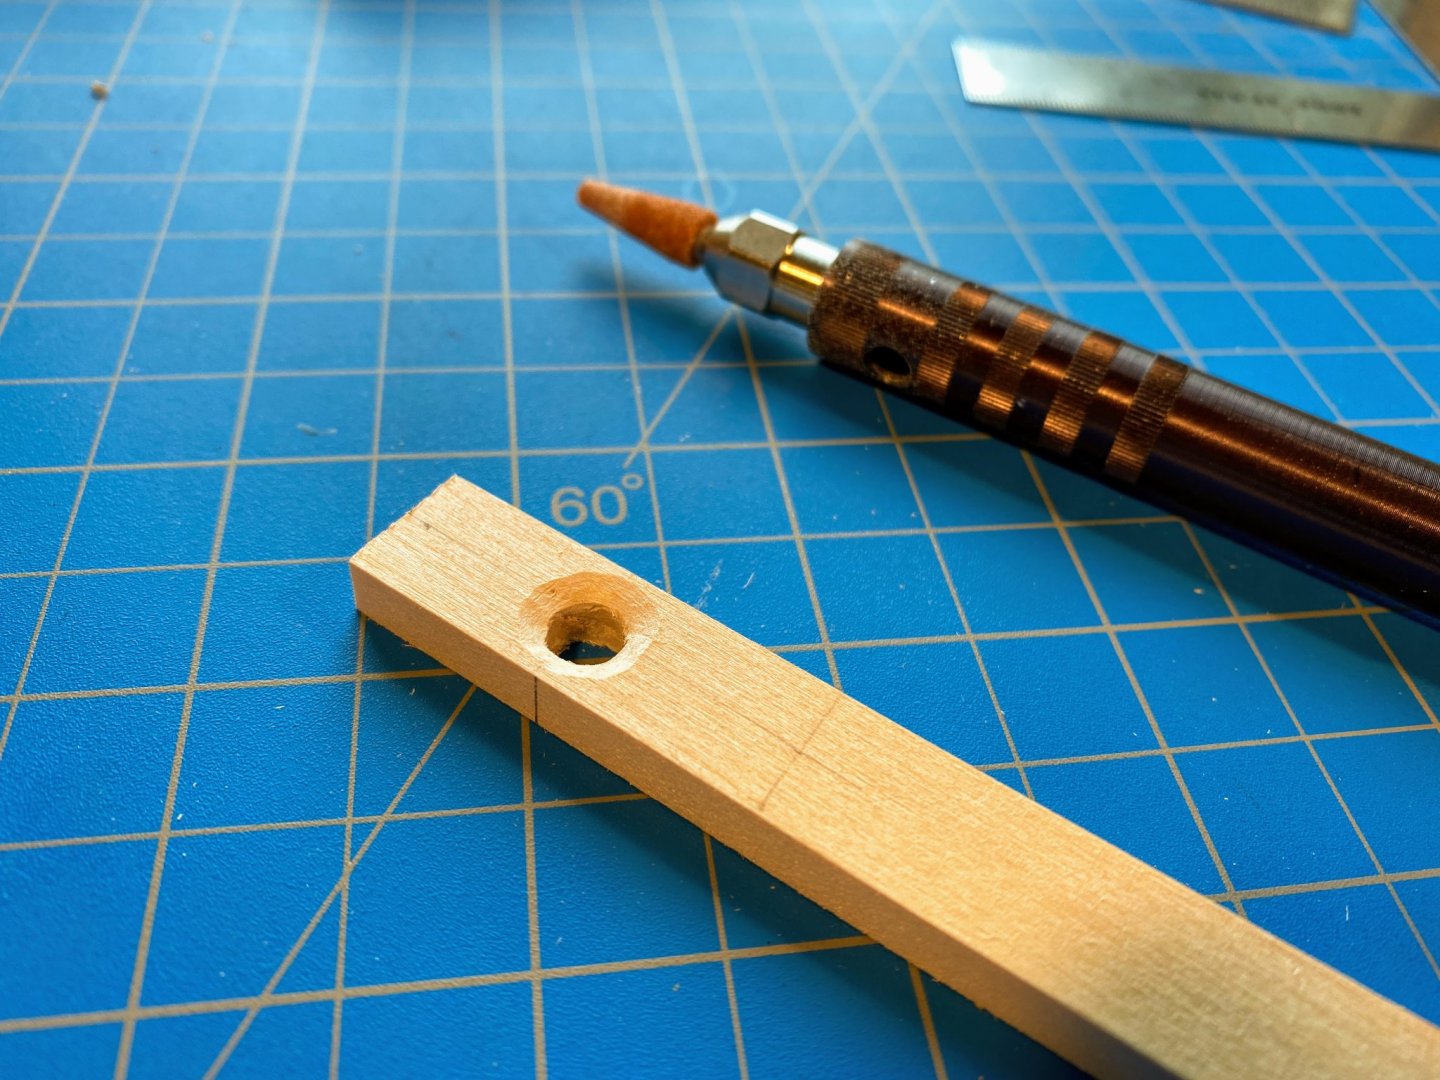
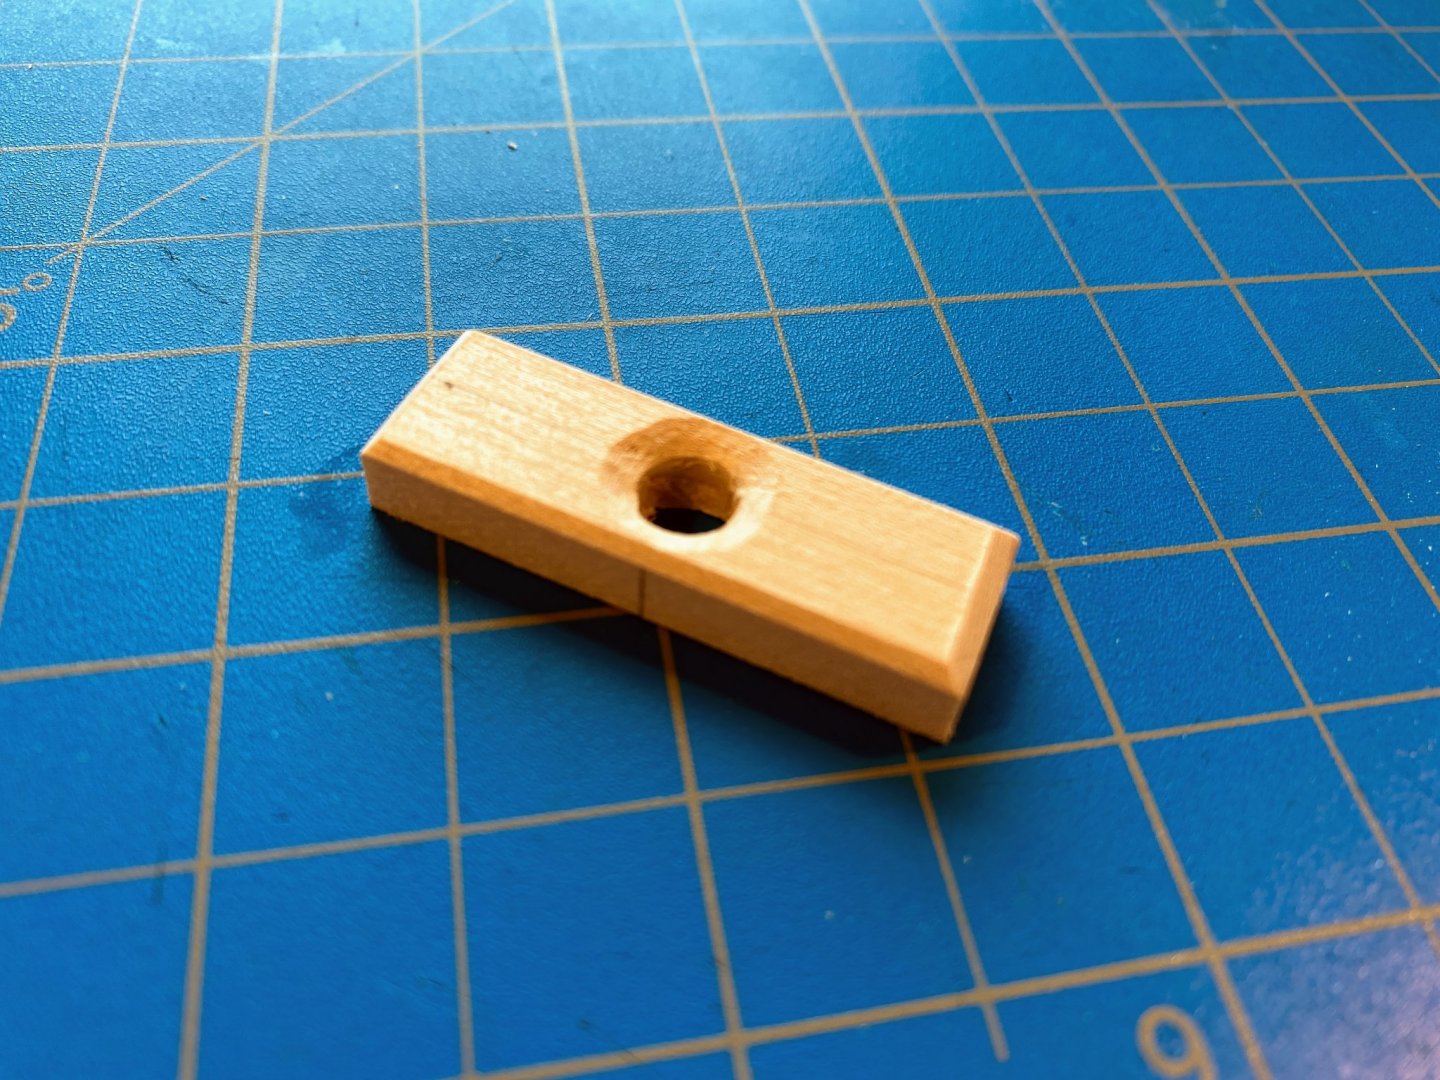
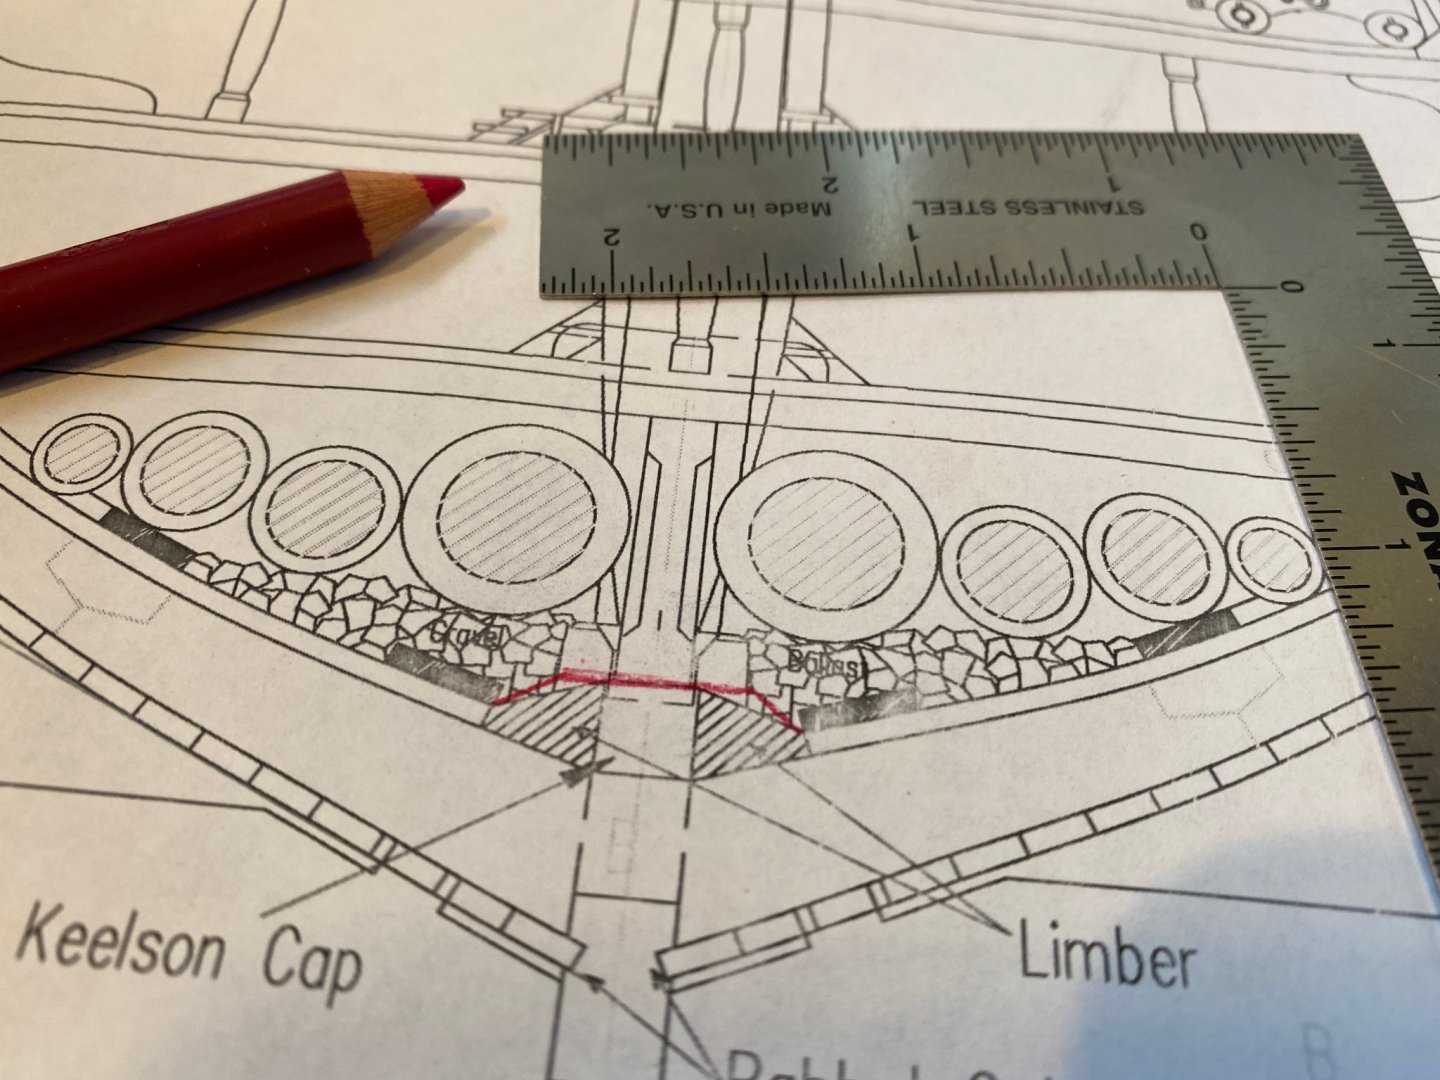
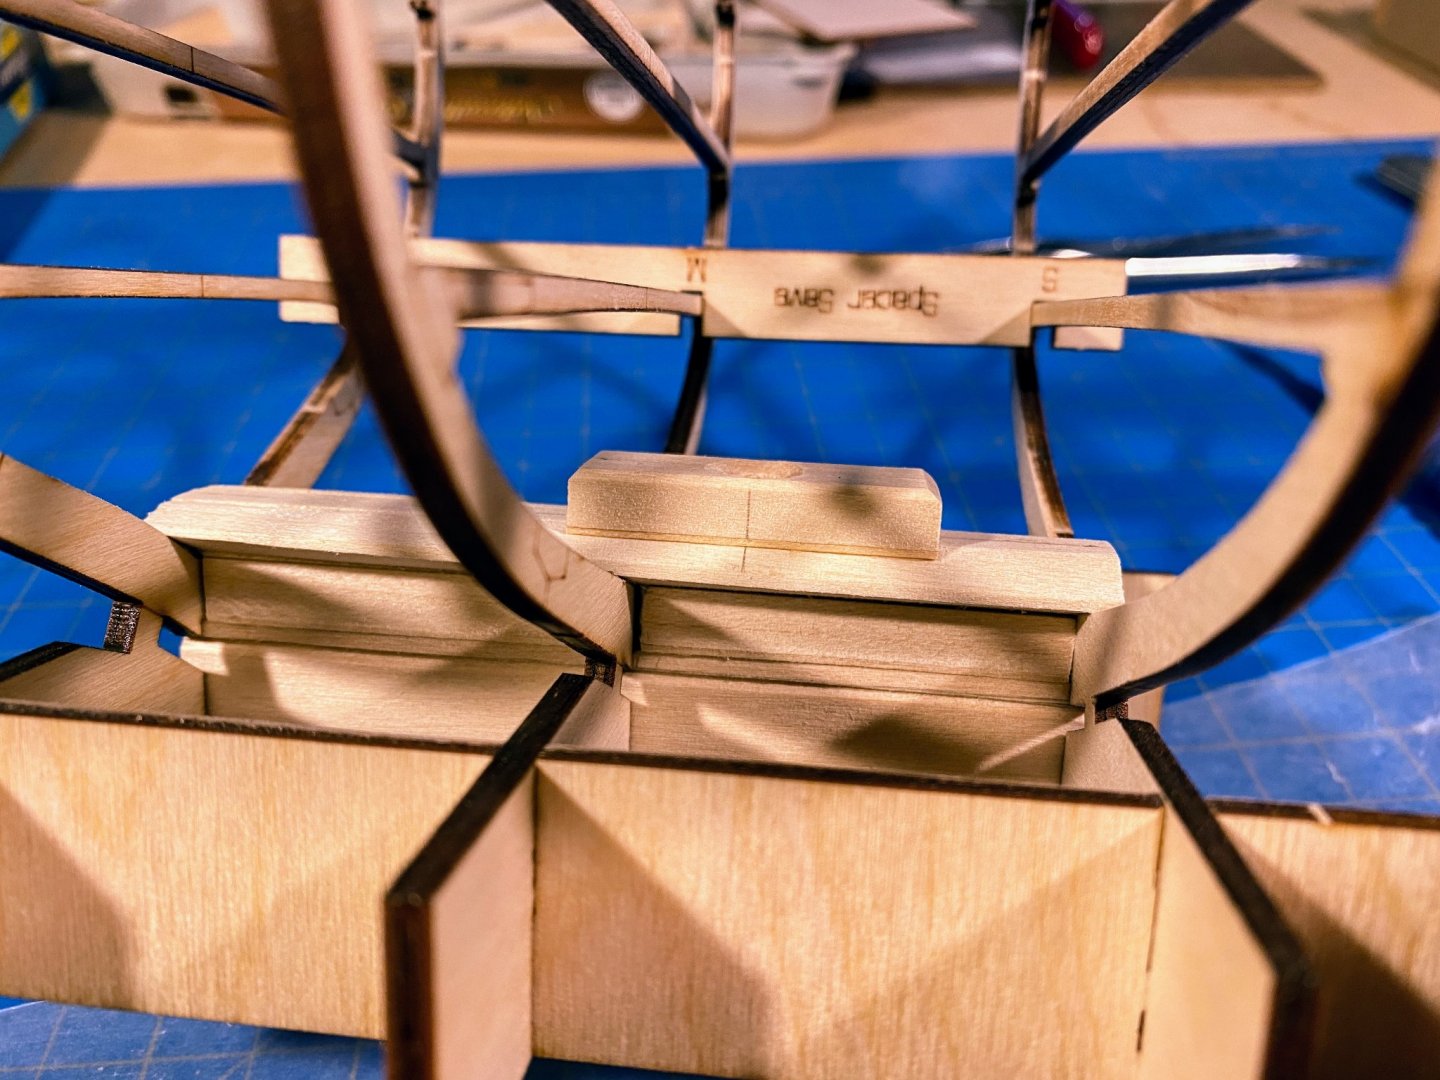
 As far as I know this is the first log on this site for Model Shipways’ cross section of the USS Constitution. I bought the kit last summer, when I think it was pretty newly released, and when I was about midway through my Spray build. I have never done a cross section, and I was attracted to the novelty (for me), the detail, and the fact that I wouldn’t be spending many months simply building a hull. So far I am not in the least disappointed. Upon opening the relatively small densely packed box I soon realized this was not going to be a simple, quick build. There are five sheets of plans (although only two are really plans; the smaller three show the location of the hundreds of laser cut parts as laid out on their sheets of wood as well as some photo-etched brass fittings). The two plan sheets are three feet by almost four feet (that’s a two foot ruler in the photo of them laid out on my floor). I found a couple poster hangers on Amazon and hung them on the wall to better view them. The fittings are extensive, as is the number of laser cut wood parts. The only thing that seems underwhelming in volume is the number of wood strips and dowels, but that kind of makes sense for a cross section. The really amazing thing for me are the instructions. Almost 100 pages, with an average of 3 or more color photos per page! As with most Model Shipways kits, the instructions can be downloaded as a pdf from their website, which makes choosing an appropriate build a lot easier. With instructions this voluminous, it is helpful to have them on a computer and able to be searched, if there is a specific issue you want to look ahead about (as I mention below). First step is to cut out the three frames, or what I might have called ribs, which are the skeleton of this part of the hull. The laser cut pieces are securely attached with a minimum of tabs, and the laser cutting is sharp, precise and complete -- well done. All three parts are attached to a building stand, that will be cut off later in the build. Two lengthwise pieces connect those stand parts, and the slots all need to be sanded so they fit. I made those connections quite tight, as they will not be disassembled for quite some time. Eight additional crosswise laser cut pieces (identified as spacers) are provided to connect the frames and to keep them a precise distance apart at the level of each deck. These will be moved around a bit from time to time during the build, and I sanded their slots so they are a little looser. The instructions assign six of them to what seems like a random distribution among the orlop, gun and spar decks (there is also a berthing deck, which for some reason gets none of these spacers). Interestingly, I haven’t found anywhere in the instructions or the plans where the deck names are expressly identified, but it is pretty easy to figure out by looking ahead at the pictures in the instructions (orlop, berthing, gun and spar, from bilge to sunshine). Assembling and gluing the keel (which needs a rabbet cut in it), the keelson pieces, and the keelson cap is all quite straightforward. The instructions suggest, and the pictures show, writing “B” on the bow end of the keel to assure that it is properly installed. That struck me as a bit odd, until I realized that the three frames vary fairly significantly in shape and that things are not symmetrical for and aft. No big deal as to the keel, but a good habit to get into when dealing with other pieces later in the build. The slot in the frames for the keel is a loose fit, and I used a couple of rubber bands to press the keel up against the frame when gluing it in place (careful to glue it to the frame and not to the building stand). A mast step is then made out of a 1½” length piece of the remaining ¼” x ½” strip. To avoid chewing up the soft basswood with a large bit, I drilled the ¼” hole for the mast by starting with a ⅛” bit and working my way up to ¼” with the three or four intermediate bits I own. I then chamfered the hole with a Dremel tool. Note that I did not cut the mast step off of the ¼” x ½” strip until I had finished all of this -- it’s nice to have something to hang on to when working on a piece like this. Limbers (I had to look up the nautical definition) on either side of the keelson cap are shaped from ¼” square strips. Here the change in shape of the hull fore and aft makes shaping them a little like shaping a propeller. The instructions complicate that quite a bit by having the limbers slope up to the base of the mast foot where the two intersect, but the plans show the mast foot simply continuing straight down on each side to intersect with the limbers. In one of the photos below I tried to draw in red what the instructions direct. I chose to follow the plans instead, and added a 1/16” strip to the bottom of each side of the mast step to fill the gap between it and the limber below.
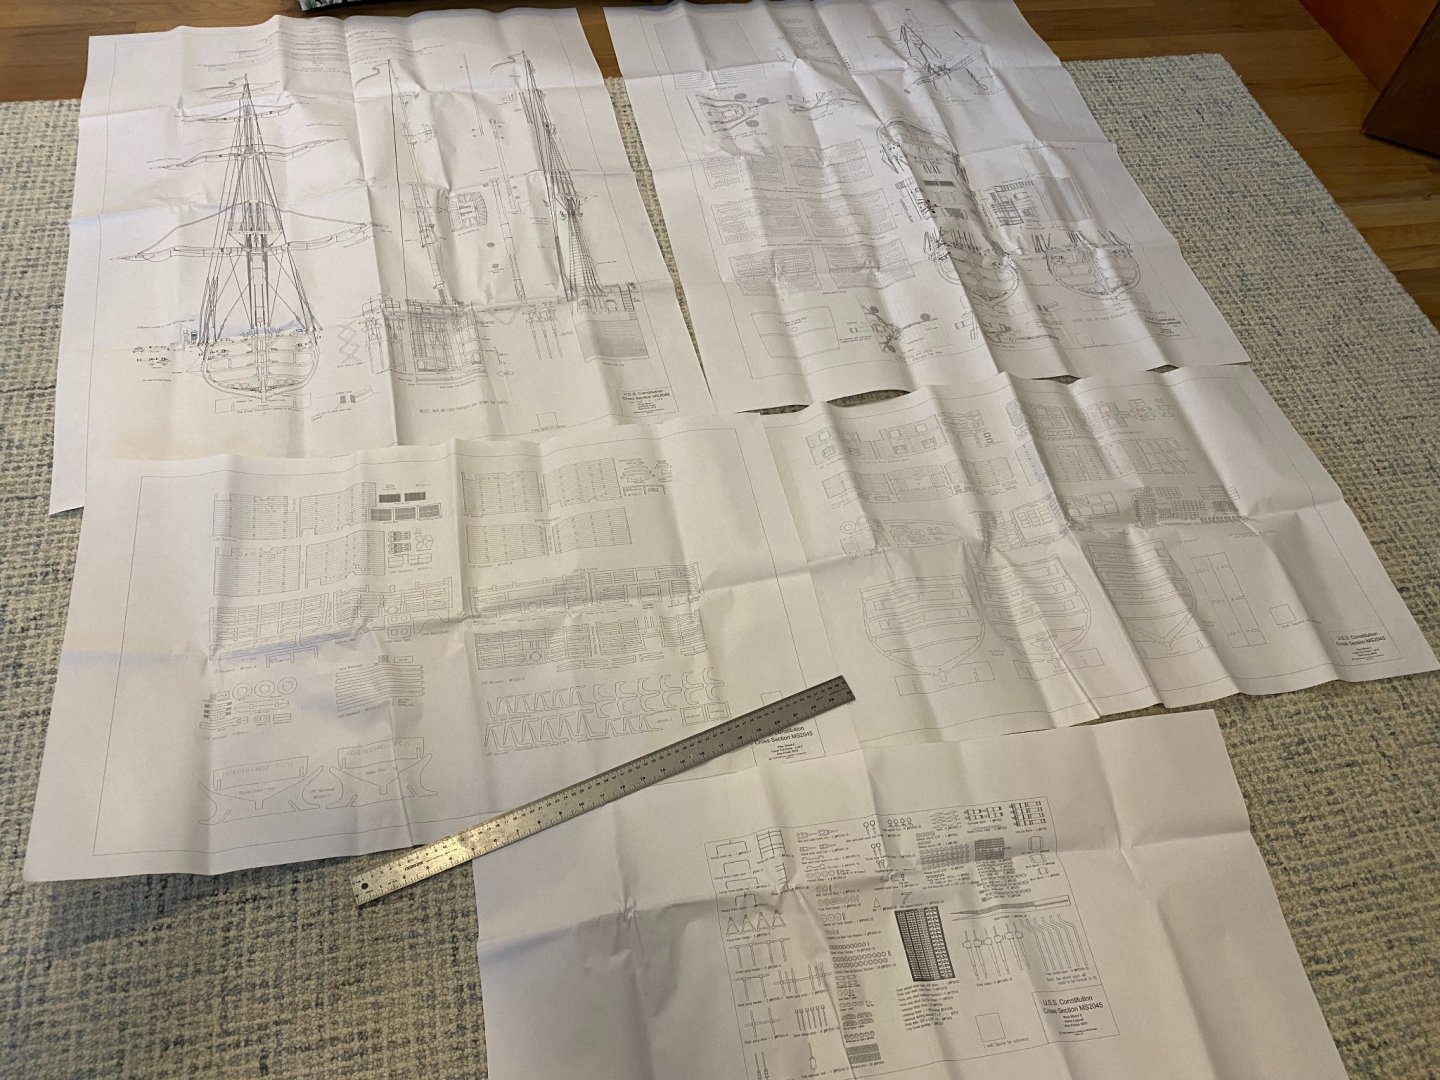


- 162 replies
-
- 14
-
-
- Model Shipways
- Constitution
- (and 2 more)
-
 First some background... I started this build in 2004 using Bob Hunt's practicum so my build will continue to use the practicum. About 6 months into the build Bob was looking for someone to mill wood for his new kit business and that was the start of HobbyMill. So the kit has laid idle for 17 years while I did HobbyMill and eventually relocated to Phoenix from Cincinnati. This is also my first build so I'm making all of the typical mistakes of a newbie. Over the years I've had the privilege to observe so many great builds and learn from the commentary on this site so I was a little intimidated to post a log. However, after spending some time lurking here recently and the wealth of information that I have received, I decided to try to give something back...even if its just all of the mistakes that I'm making. Lessons Learned: Modeling is a lot harder than milling wood Don't wait 17 years between steps in a build Once I figure out how to upload some pics, I'll start my build. Unfortunately I must have deleted some of my early pics from 2004 so we'll start from where we are today. Jeff
 -
 I'm at the very first stage of the build of Blue Jacket's Constitution build. Unlike Model Shipway's plank on bulkhead construction seen here in other builds, I opted for this semi-solid hull build. I say "semi" as although the focus is not on hull construction but on detail in the gun and spar decks. Despite having some experience with Blue Jacket ( i built the Portland several years ago) I have already had a few questions swiftly answered by the good folks at Blue Jacket. This is far from a "cut it out and glue it together" build. I'm looking forward to the challenge. Stay tuned.
- 104 replies
-
- 9
-
-
- constitution
- BlueJacket Shipcrafters
- (and 1 more)
-
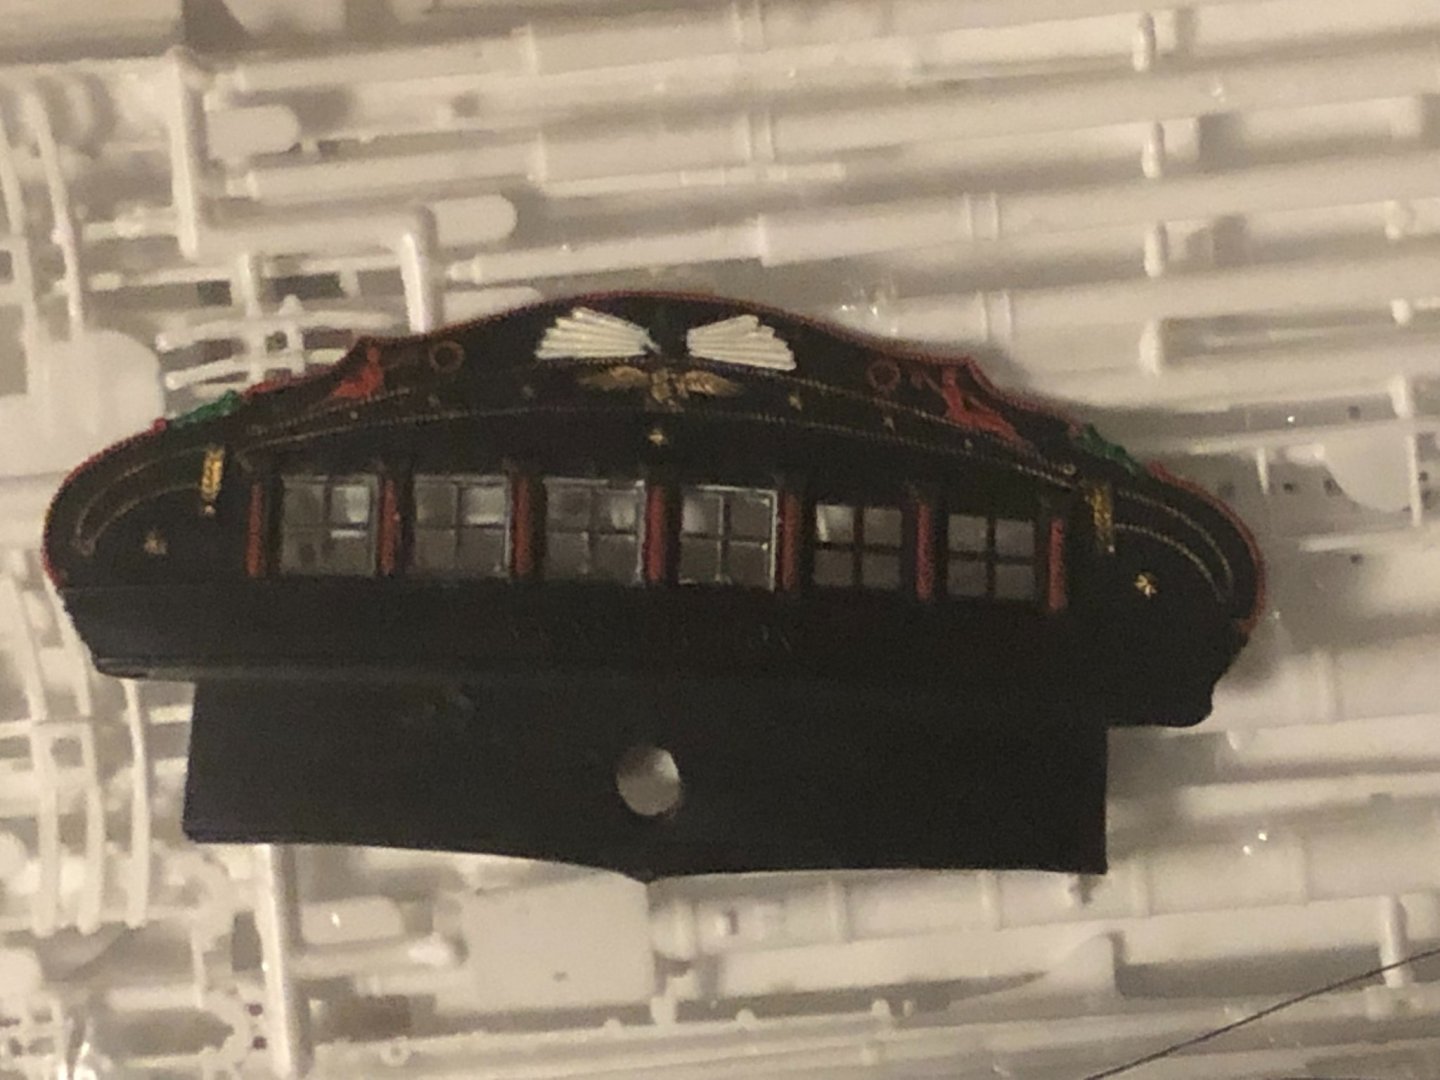
 I have never done this (a build log) before, but from what I've seen, one of the best ways to get advice is to have a build log as a forum for discussion! I have in the past built model cars, but I recently, after a good 20 of years of nothing, decided to get back into it, and then I decided to try my hand at a ship! I built the 1/150 scale Revell USS United States. And I absolutely loved it! I have now decided (perhaps foolishly) to tackle the 1/96 USS Constitution by Revell. So I dove in earlier this week from the beginning, painting the hull. I have that mostly complete, still needing to paint the interior, and I've hit the detail areas on the bow and stern as well as on the cabin. Here are my pictures so far. I used a paint pen from Hobby Lobby for the gold and some of the white for the small detail, but a small brush and a toothpick for the other small parts. What I struggled with was the bulwarks color. I have decided to go with a darkish green, similar to what is on the current real life ship. I don't know why Revell wants it white, but I'm rebelling! I have been unable to mix a satisfactory green, so I'm buying some paint today. I am very nervous about this ship build because it's a hefty task for someone like me with very little to no experience. Also super excited. Hopefully the community here will be as awesome as it appears to be! My next task once the hull is complete is going to be an attempt at creating a weathered wood look on the deck. I have seen some vague references to doing this, but I am going with trial and error. If anybody has any input, please let me know! What I've done is grabbed varying colors of brown from light to dark, and I'm going to try to layer them. To be continued!
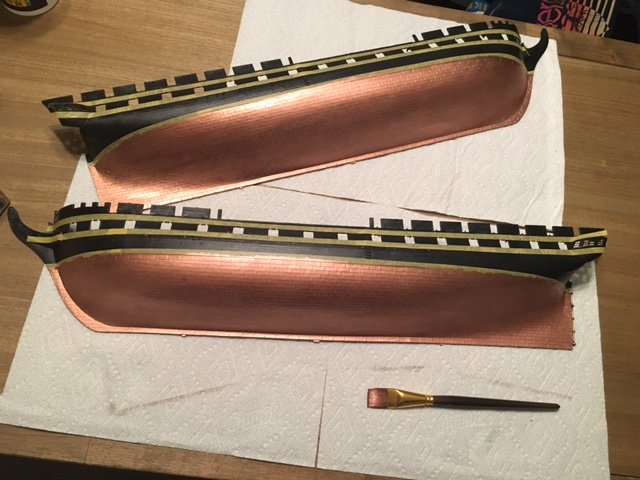
- 105 replies
-
- 8
-
-
- constitution
- revell
- (and 2 more)
-
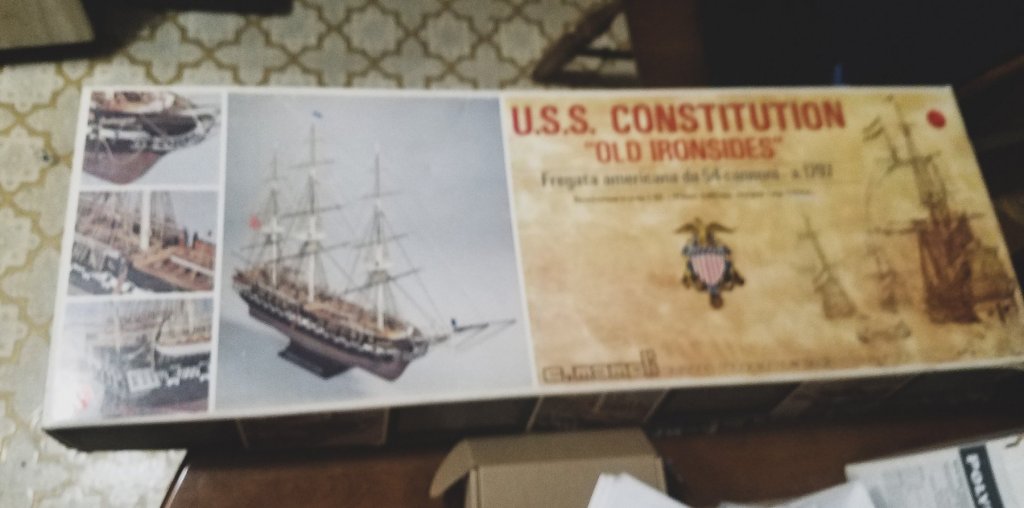
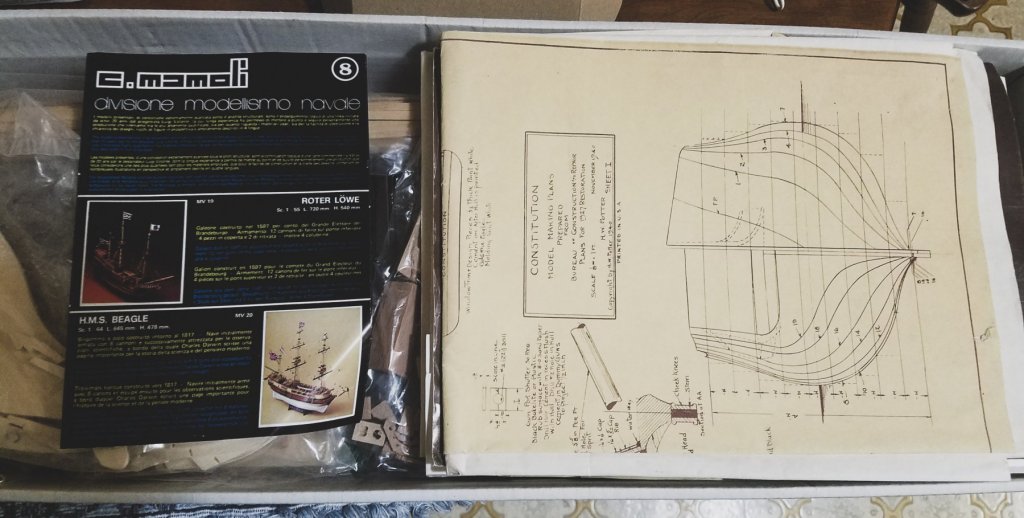
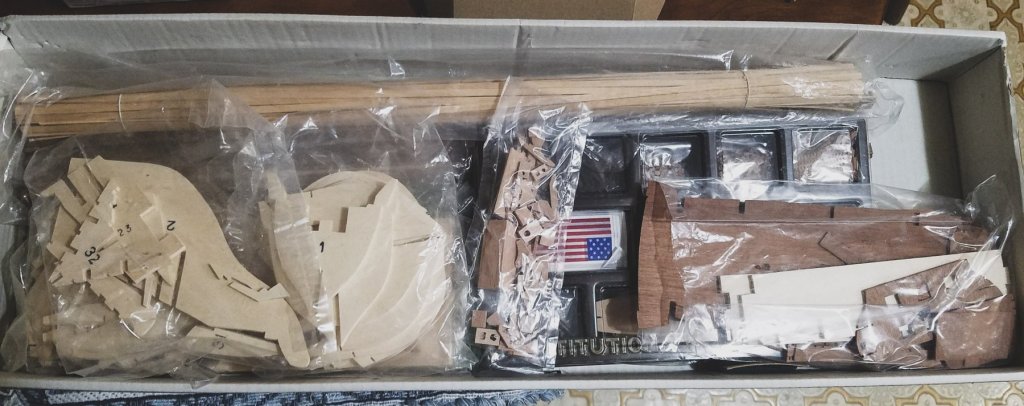
 Greetings all! My first post is to display the find that brought me here. I found this kit in a thrift store down the street. They wanted $100 for it, but gave me a military discount! I was thrilled, since I have been to see the ship when I was on a business trip in Boston. It really made an impression on me. I enjoyed the museum. I learned about the time during a storm when the ship came loose from its lines and was swinging around on its remaining moorings. It swung into the modern steel warship moored next to it and did extreme damage to it, while taking only scratches itself. An amazing ship, undefeated in battle (even if it required her crew to man the boats and tow her out of the doldrums.) My background in making stuff is mixed. Plane models as a kid, home repair, car modifications, machining, and extensive gunsmithing. I have never done anything more detailed in wood than a pinewood derby car, but I'm ex-military, and believe I can follow a manual. Looks like everything is here. We'll see!

- 23 replies
-
- 2
-
-
- constitution
- mamoli
- (and 1 more)
-
 Good Day everyone. This is a build I start a few days ago. It’s a little slow going working with what I got, but not looking to completing it that soon. I have a lot to learn and believe me the questions will come. I have read a lot here on this forum over the last few years and can’t believe what gets turned out. These ships look beautiful, a work of art when you all complete them. Maybe in a few years I’ll have something to be proud of.

-
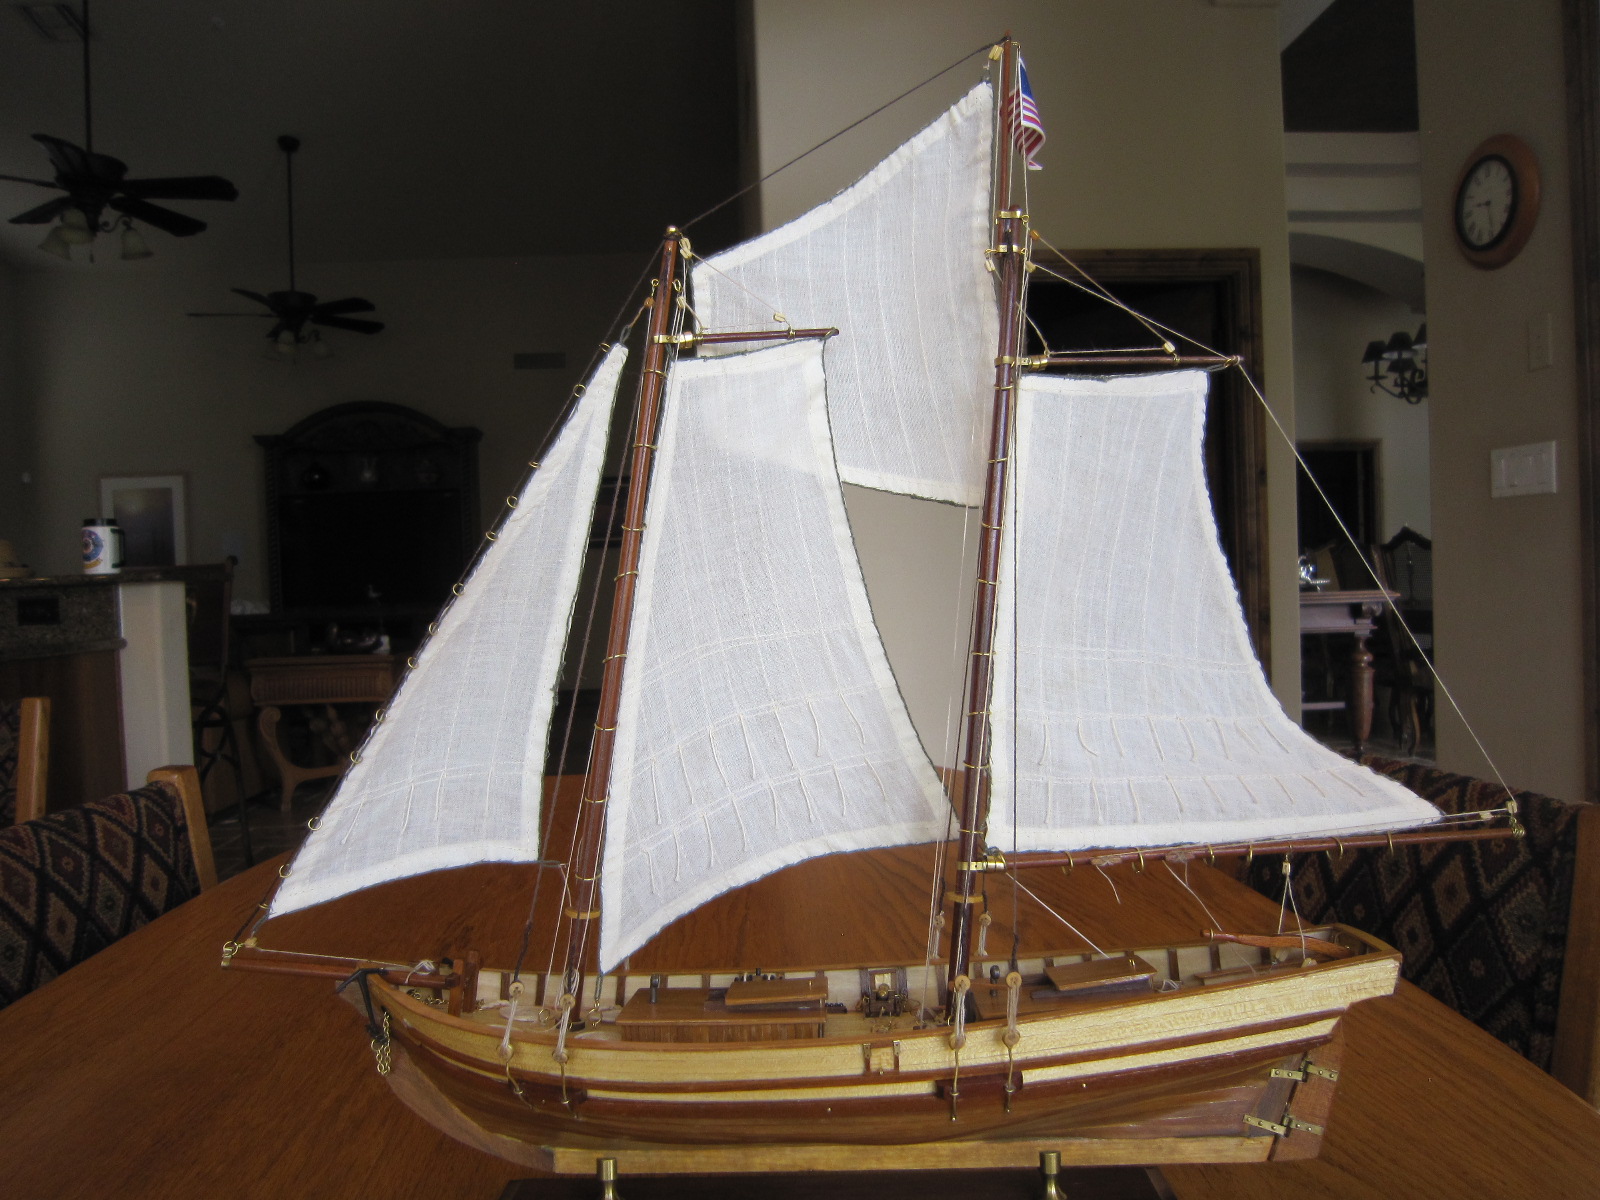
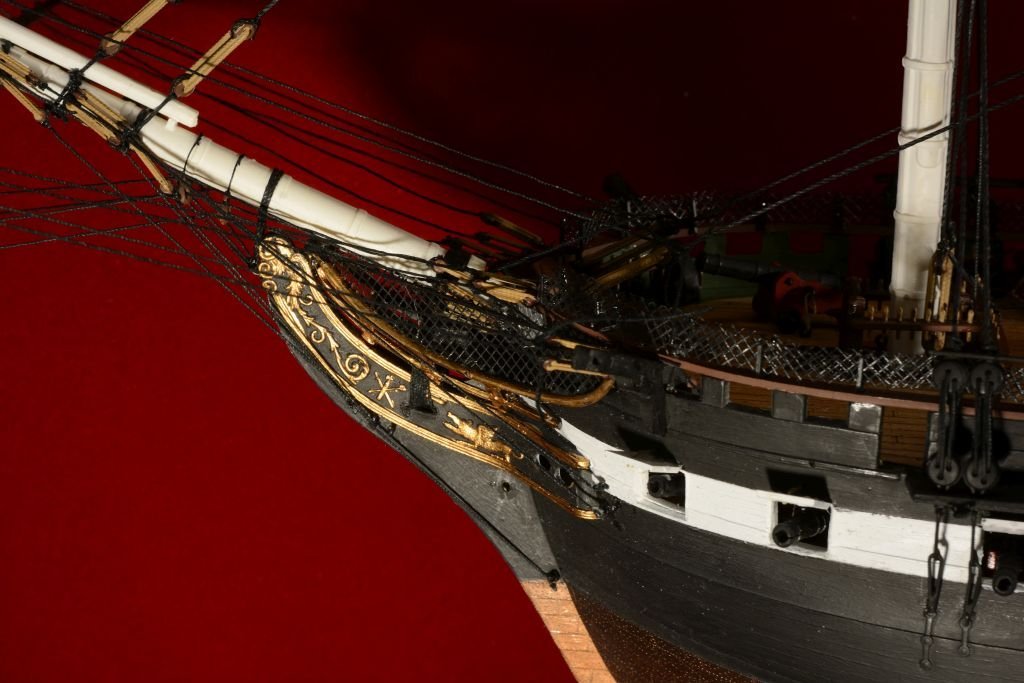
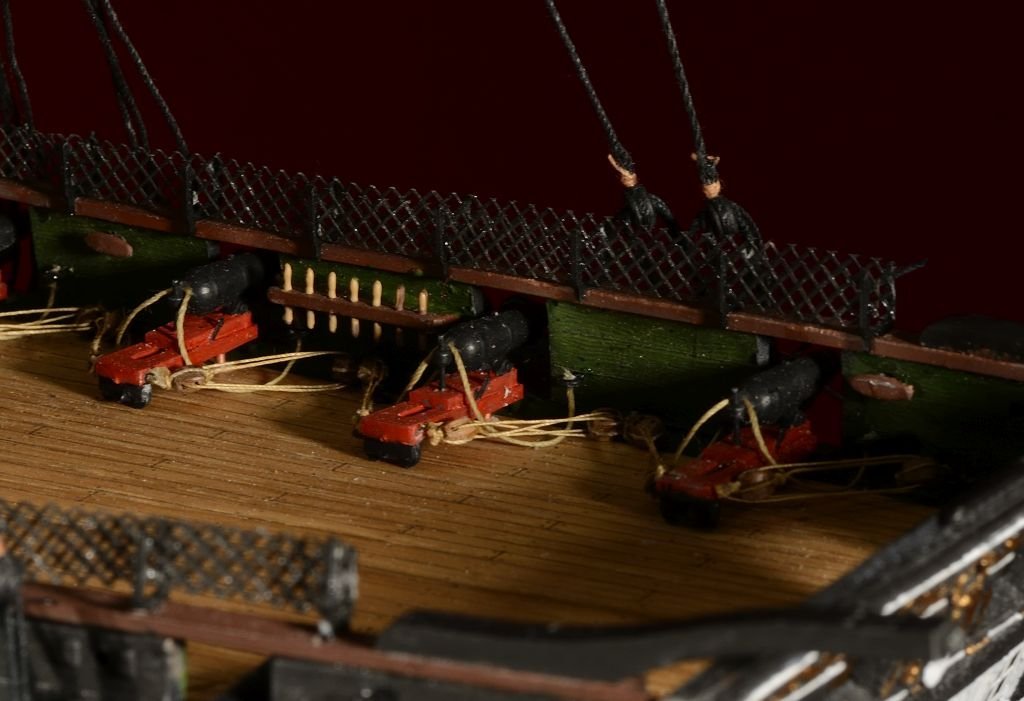
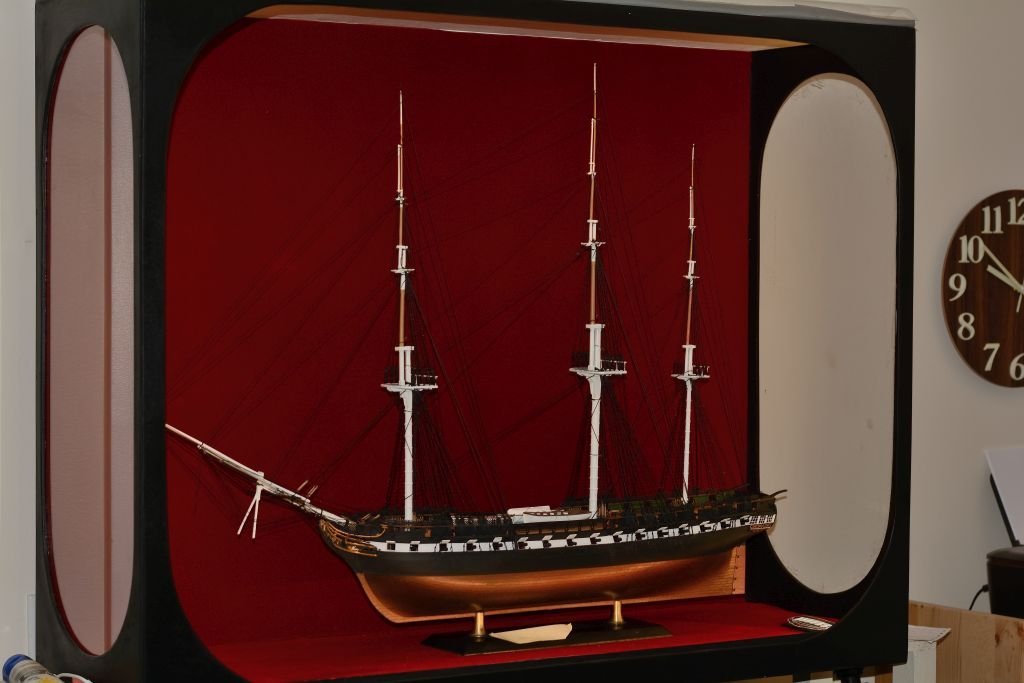
 it's just a keep in touch log.... am doing the constitution at the moment...thought you'd get a kick out of the fact that i can clip on the two different sterns with magnets....my first effort in trying to paint plastic...hopefully i can do better on the sr....you won't believe, this thing has cost me $2000 cdn. so far, with all the sails and addons from the czech rep.....plus building the case.... just building what i like, not what's politically correct 🙂...use netting at the bow and changed the windows on the side stern galleries....a bit messy but will clean up and touch up later...wish i had learned about scoring the window frames on acrylic, instead of building them out of wire........so difficult to solder...... i couldn't tolerate tying all those ratlines, my neck and shoulders couldn't handle it at my age, so i made a jig....placed it over the shrouds, and tacked the contacts with gorilla ca.....still trimming to do... ha...i made the case too narrow...forgot about the stud sail boom, especially on the main mast....will have to shorten it, even thought the yards are on an angle....par for the course for me....the front glass will slide off to the left to easily change the stern gallery....covering with acrylic plastic for now...easy access..... now for the sails and running rigging....huff an puff

-
 Captain's log: First model ship build, not going to end up a historical representation but my own dream boat. Upon opening the box, I knew it was the right first build for me, I love a challenge and an easy build would have bored me to the art. Upon starting the build I was confirmed (I chose to ignore the 3 booklets dedicated to rigging). Upon getting to the rigging, I second-guessed my initial appraisal. Upon attempting the rigging I was confirmed yet again, and Understood how I scored such an awesome deal at the local goodwill, and this poor vessel then sat in my closet for over a year. I have now committed to finishing this beast of a project.
- 35 replies
-
- 3
-
-
- Constitution
- Revell
- (and 1 more)
-
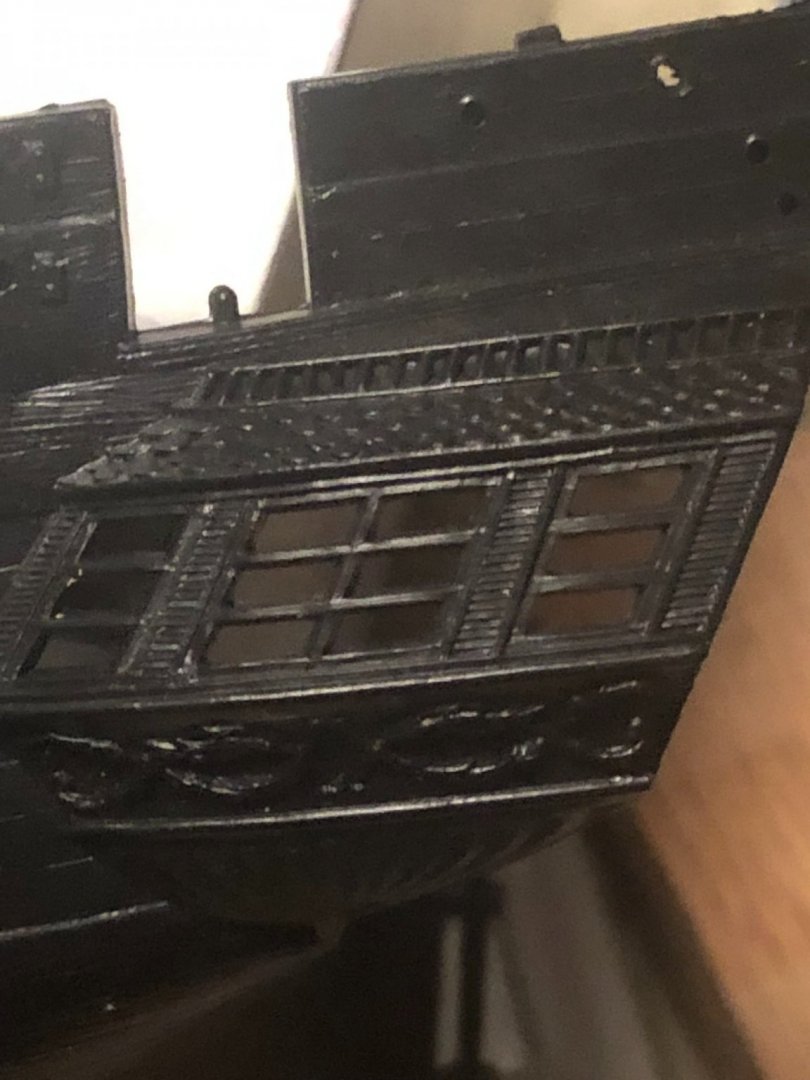
 This is my first time logging a build. I bought an model of the Constitution on-line at an auction for $60.00 minus shipping. My whole thought was to build the Constitution at a point of one of her famous battles during the war of 1812. When I got the box and opened it much to my horror that once more Revell took some liberties' with it mold process. There is some major differences of their idea of what the Constitution looked like during the war and what the Anatomy of the ship USS Constitution puts out. I will not give up the ship to a few errors but will push through them and show you what I have done to correct them as well as from time to time ask for advice.
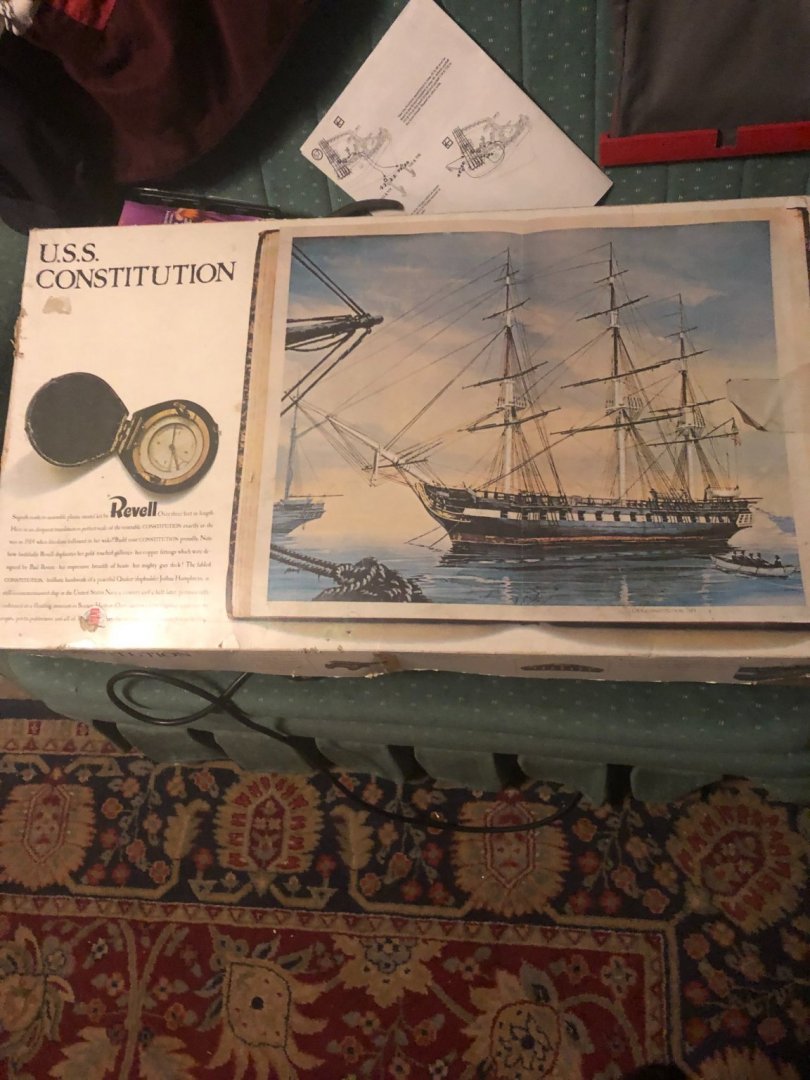


- 8 replies
-
- 3
-
-
- Plastic
- Constitution
- (and 2 more)
-
 This, being the first day of progress in my effort to scratch build one of the truly great war ships in naval history, I am hopeful that I will be able to do reasonable justice to "Old Iron Sides". I should begin with thanks to Tom ("usedtosail") and John ("mundie") for their valuable assistance in helping me get up and running on this project. Folks like these guys are a perfect example of what makes MSW such a great community. One quick note about scale.... A new experience for me has been the task of changing the scale of plan sheets - in this case, from 1:76.8 to 1:60. Many of my friends being aware of my initial thoughts of building the Connie at a scale of 1:50th. Then after receiving the plan sheets I discovered that the size of the model, as designed by Model Shipways, is already very large....and that converting the scale to 1:50th was pretty much unreasonable. Playing around with scale for a couple of days led to a conclusion that 1:60th is about the maximum size I can reasonably do. Why not just build her at the plan scale? For a scratch builder, "bigger is better" in terms of creating detail.... So, for what it's worth, here we go "splishing and asplashing"!
- 742 replies
-
- 16
-
-
- constitution
- frigate
- (and 1 more)
-
 I will pick up where my previous build log left off here. Unfortunately, I won't have time to reconstruct my previous posts.
 -
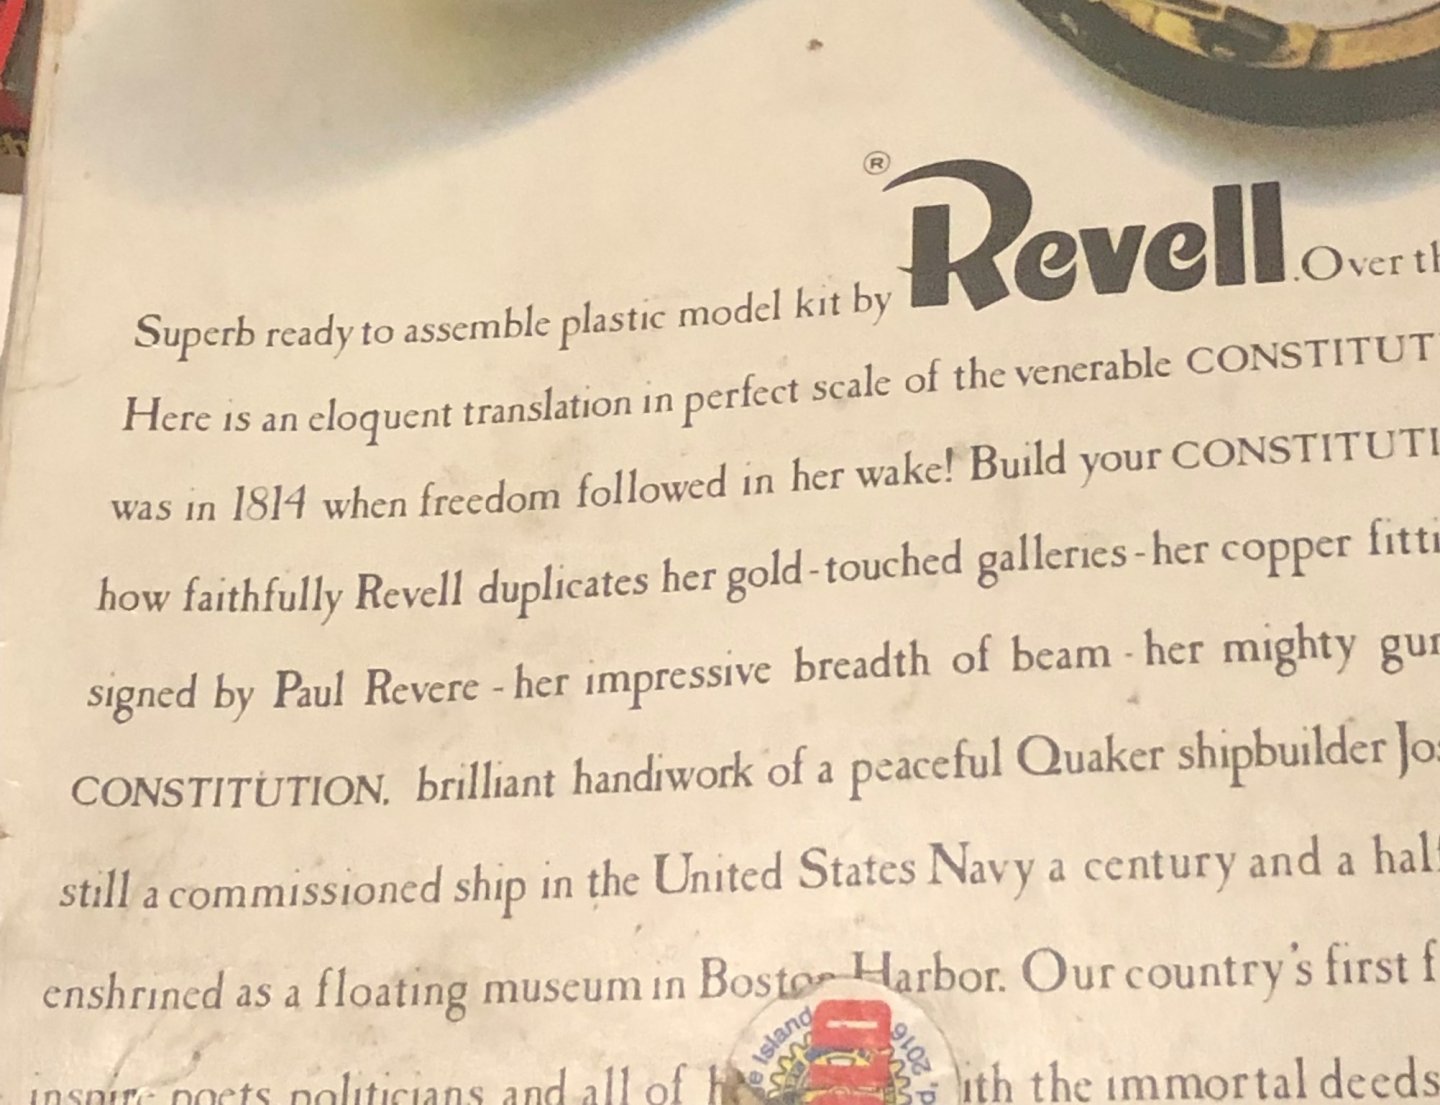
 “Huzza! Her sides are made of iron!” (Unknown sailor, USS Constitution, 19 August 1812, battle with HMS Guerriere) "Building a new Navy for the 'new' United States" The American Revolution ended in 1783, and the new United States sent its merchant fleet afar to trade in spices, fish, leather, etc. to rebuild its economy. However. The last Continental Navy warship was effectively sold in 1785, and US merchant vessels thereafter sailed unprotected. This lack of protection soon became a problem, especially when sailing off of North Africa in the 1790's, and finally Congress authorized a new navy, in 1794, to protect the fleet. Between 1797 and 1800, 6 frigates were launched: United States, Constellation, Constitution, Chesapeake, Congress, and President. USS Constitution, launched 21 October 1797, is the sole survivor (USS Constellation, in Baltimore Harbor, is the 1854 warship of the same name). Joshua Humphreys designed theses frigates to be the strongest, fastest, and most heavily armed warships of the era. Constitution’s hull is 3-layers of wood: exterior & interior oak planking and dense live oak framing (ribs) spaced 'close together' as the middle layer. At the waterline, the ship is over 22” thick... and this thick, strong and dense hull makes up her “iron” sides. When hit with enemy fire, Constitution’s hull either repelled the cannon shot's, and/or effectively absorbed them, due to her massive hull, thus helping to prevent serious damage to the ship while also minimizing casualties to her crew. Between 1798 and 1854, Constitution was victorious in 33 engagements and a great deal of her fame rests in her 3 stunning victories over Royal Navy vessels in the War of 1812. The USS Constitution is the oldest commissioned ship on the U.S. Navy roster. Still seaworthy and served by Navel officers and crew to this very day! _______________________________________________________ ... and so the build begins! I've acquired a copy of Joshua Humphreys original hull design from 1794, courtesy of the 'Naval History & Heritage Command Detachment, Boston'. This will make for a proper start to this historic project. My goal is to reconstruct an accurate depiction, in scale, of the USS Constitution as she was originally designed, by Joshua Humphreys in 1794. This build will begin with my restoration and clarification of the original hull drawing, via Autocad, as there are portions of this original drawing that have obviously lost a bit of needful detail via the ages. Mid-ship frame details, via the body plan, will likely be difficult to accurately recreate, therefore, I'll likely make those frames a bit proud both internally 'and' externally, for safety... and simply fair them down to their proper forms once it's time to fair the hull's frames to shape. I've not yet decided as to the true scale that I'll actually be building her to, however. I'm currently 'thinking' somewhere around 1/75'ish. Larger, maybe, but definitely no smaller than 1/75. I'll also likely build a rather lengthy mid-section 'prototype' prior to going for the full length build. I can see a lot of potential 'difficulties' to be encountered in such a complex build. A prototype, whether I finish it, or not, should prove to be a good 'test-bed' from which I can figure out just how in the h*ll I'm going to pull this off to personally 'acceptable' standards. It's going to be very interesting and time consuming, for sure! This is what I'm starting with. It's Humphreys original draft of the constitution's original hull as designed in 1794. Sorry for all of the edits to this post. I was trying to post the hull drawing that I received, in .pdf format, from the Naval History & Heritage Command, but no joy. You'll have to settle for this much smaller 'jpeg', instead of the actual 5' foot long drawing...
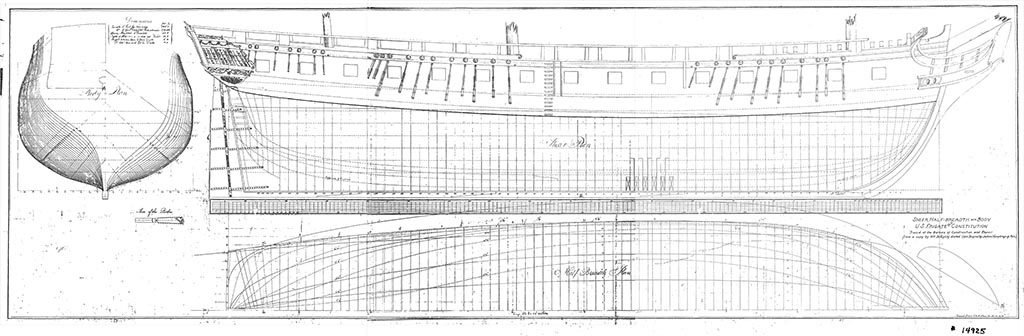
-
 With some trepidation, I've started the build on this kit. I was going to wait until this winter (when I do most if not all my modeling) to begin but decided to get an early start. This is a bucket list endeavor. I built two of the Revell plastic kits back in the 60's and out of that experience dreamed of building a proper wooden model. I'm just a beginner modeler so I'll be stretching my skills to do a good job. I've completed three models : U.S.S. constitution and H.M.S. Victory cross-sections and the H.M.S. Victory bow section. I consider these to be practice in preparation for this model. To assist me, I purchased Robert Hunt's practicum which really fills in the gaps left open by the MS instructions. Also, I'm following about five build logs in this site. So with them and all the other useful information on the forum, I just make a good go of it. So far, I'm assembling the center keel, keel, stern and stem. Pictures to following once I finished the clean-up. Thanks, Tidbinbilla
- 55 replies
-
- 8
-
-
- constitution
- model shipways
- (and 1 more)
-
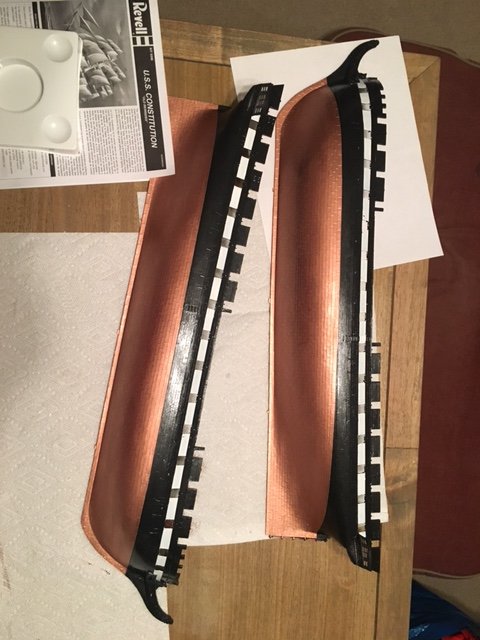
 Many years ago (25-30?), before the advent of the internet, I bought and started construction of this cross section of the USS Constitution. It may have been following a visit to that venerable ship in Boston that I felt so inspired. I got the frame built,deck beams formed and installed, and the planking done outside and in. At that time I started to feel overwhelmed,with many questions that needed answering before I went any further. With no help readily available I packed the unfinished kit away. Someday. I never lost my love of wooden ships and had the opportunity to visit several including the CW Morgan of Mystic, Cutty Sark in Greenwich, and the Draken Harfarge Viking ship. I still felt the tug of building a ship and when we moved to Maryland 3 years ago I started reading about The Pride of Baltimore II which I decided I'd really like to build. I figured that my long neglected Constitution would be a great practice project since I already had most of the hull built, and it only has one mast and spars, and associated rigging. I took her out of her cardboard box dry dock and started work. I made a crude working cradle to hold the hull, and gave the ship a quick coat of polyurethane as a sealer. The The mast dowel is just inserted to check it's fit and rake. The mast step is imperfectly fitted to the hold, but I figure that it will be covered with ballast and barrels so I didn't worry about it. I've read through the other build logs for this kit and if I was to do it over, I would not have installed the deck beams other than the ones over the hold to make it easier to install decking and deck fittings. You live and learn. Installing all the below deck items should be "fun". In my zeal, I mistakenly added un necessary hatch cross pieces between the lower deck's beams. Oh well, it was good practice. I'm planning on using copper foil rather than the cheesy looking green wood chips supplied with the kit. Anyone here tried simply scribing the lines in the copper tape to simulate individual copper plates? It would sure be easier, but might not look convincing. I might try to give the copper an aged patina which could enhance the illusion I can always try a strip or two on a piece of scrap wood to see. One thing that deterred me from working on this kit when I first got it was a dread of figuring out how to thread deadeyes and form ratlines. Now that there's a resource like Model Ship World, I'll have some guidance which is a great relief. I need to figure out a better way to mount the hull. The kit just includes a cheap looking piece of pine and I gather you're supposed to run a couple of screws up through it into the keel,which does not sound very secure. I might build a nicer version of my crude work cradle in better wood, like cherry, for final displaying. I thought it might be fun to have some crew members on deck and aloft, but I can't find any in 1:93 scale. Do you think figures in 1:87,HO railroad scale, would look 'way too off scale? I could probably modify some of those. What's with the natural colored standing rigging cordage supplied with the kit? Can I somehow dye it black or would it be better to replace it? I know I'll have tons of other questions as time goes on, and I welcome any and all criticism and suggestions.

- 48 replies
-
- 7
-
-
- mamoli
- constitution
- (and 2 more)
-
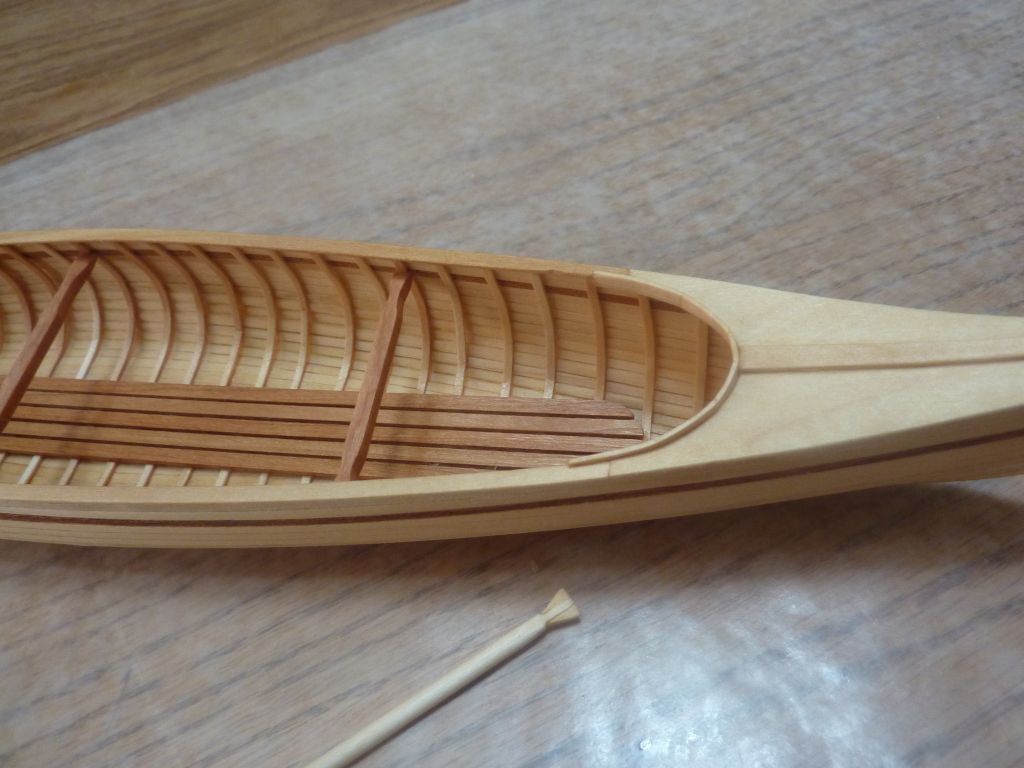
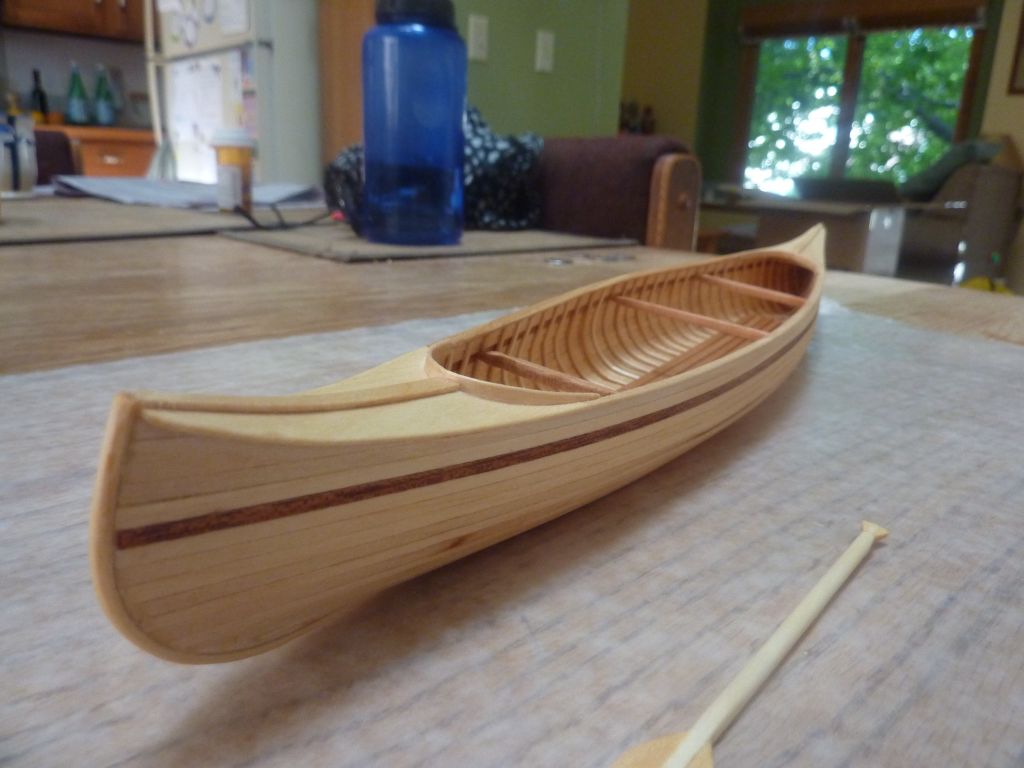
 Hey anyone, Since I finished my Revell 1:96 Plastic Constitution in the spring, I've been wanting to get into wood modeling. As I've only been a plastic modeler to date, I was a bit apprehensive as it feels like a whole new skill set (which I don't have). I've done nothing with wood, other than trim a few tree branches along the way. So, with that in mind, my first wood ship was the Midwest Peterboro canoe (at 1:12). It took maybe 6 weeks to do (I never seem to do any of this fast), and here's the result: Next up, I needed more experience. I have a Syren kit "on deck", but don't feel ready to tackle that yet. I felt a cross section would be a good next step up in complexity, as it involves some planking, some deck furniture, some masting, etc. A little bit of everything and with a ship I know pretty well from the Revell model. So, taking advantage of a nice sale by ModelExpo, I purchased the Mamoli USS Constitution Cross Section at 1:93, so very close in scale to my full ship plastic build. I'll detail the build step by step and stick to the instructions as best I can. I'll also be using some fine builds here on MSW to guide my progress. Suggestions and criticism welcome - I'm a wood novice so I'm especially interested in tips, tricks, best practices, painting suggestions, etc. Thanks for looking. Andy.

- 188 replies
-
- 7
-
-
- constitution
- mamoli
- (and 2 more)