
Search the Community
Showing results for tags 'Syren Ship Model'.
-
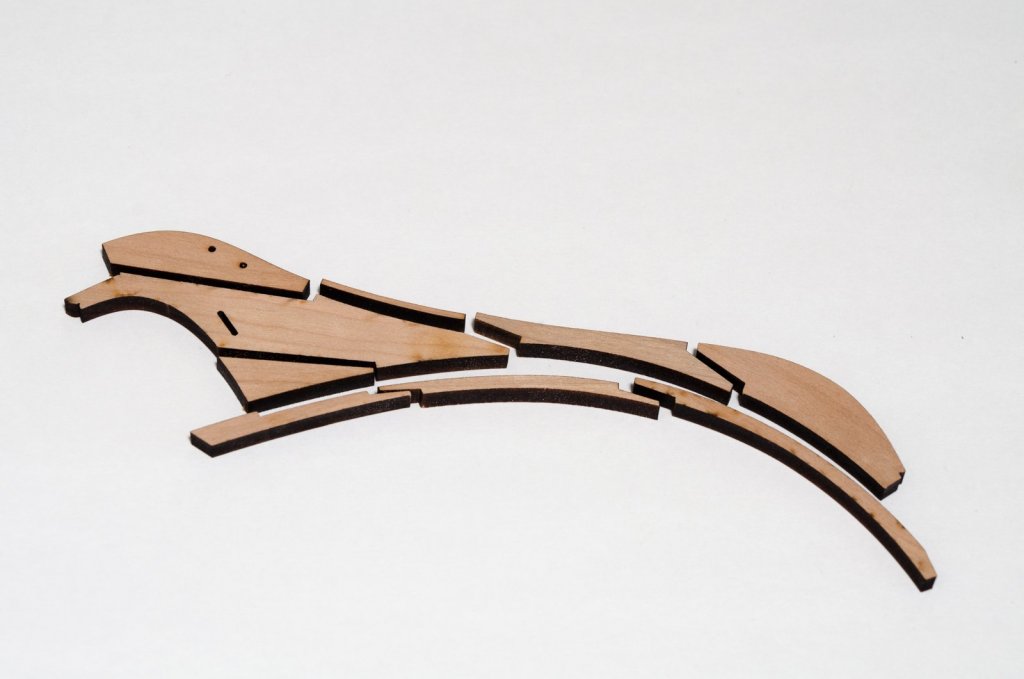
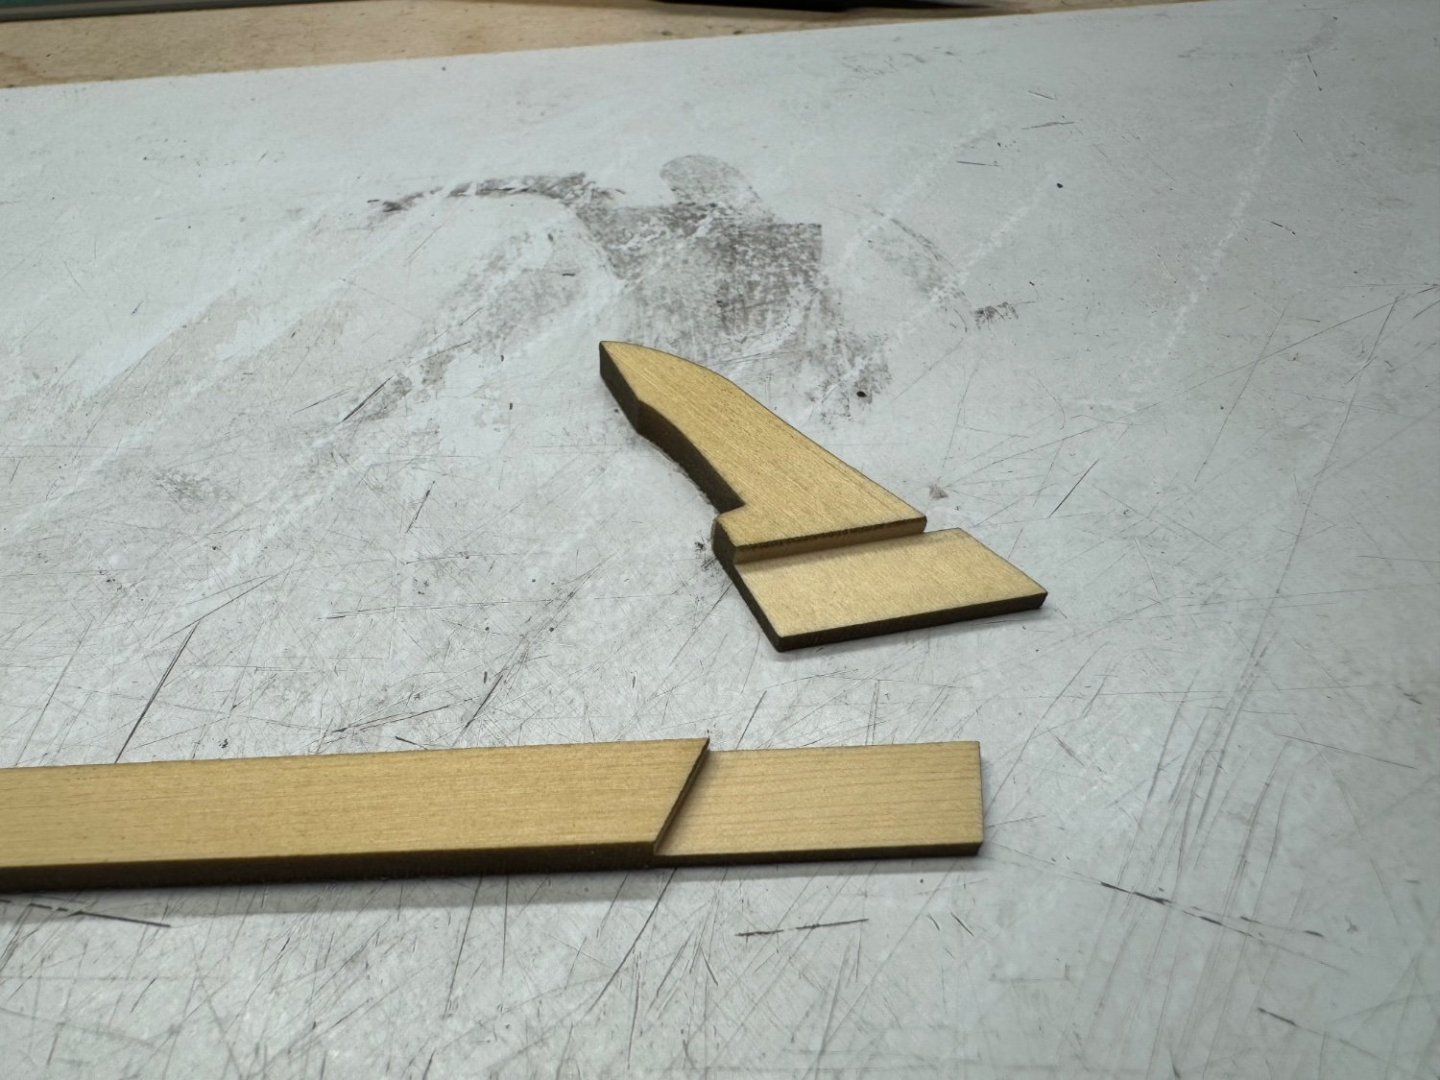
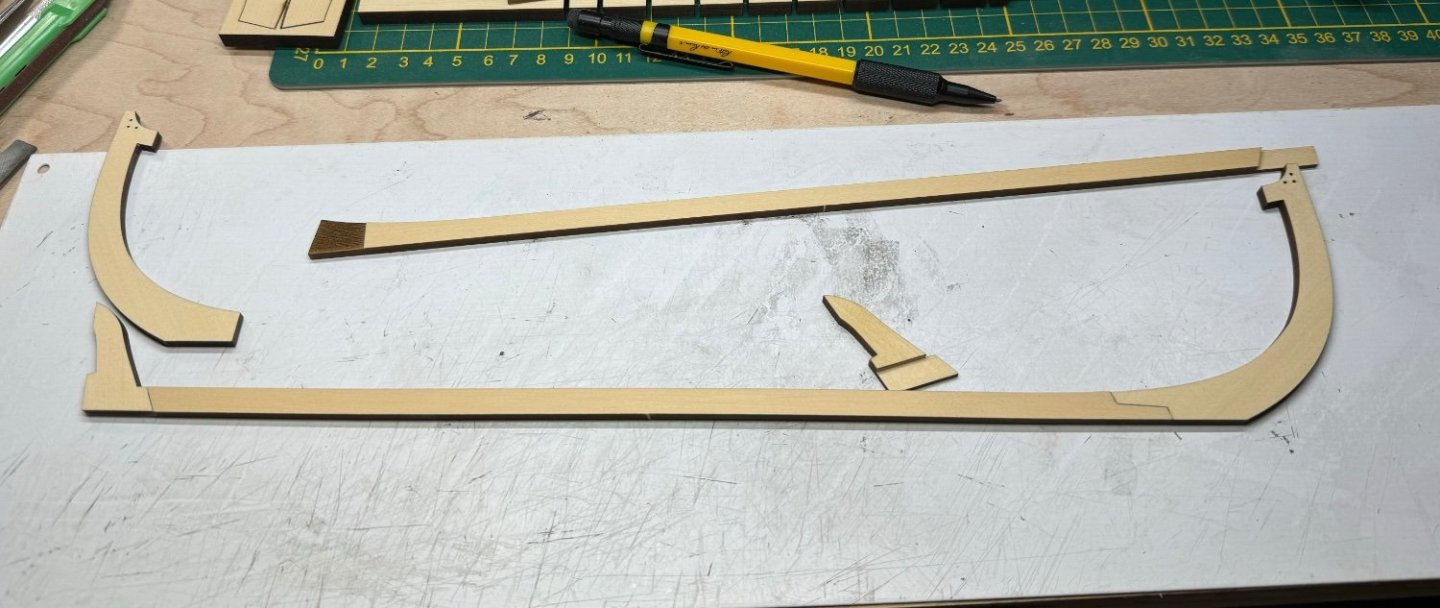
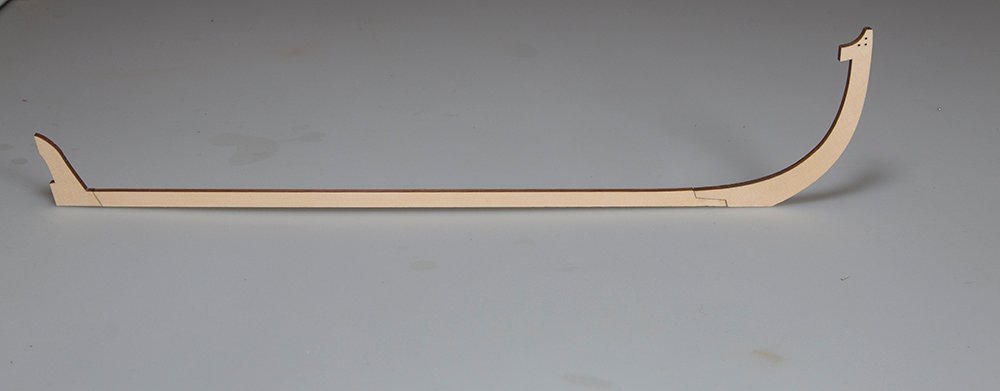
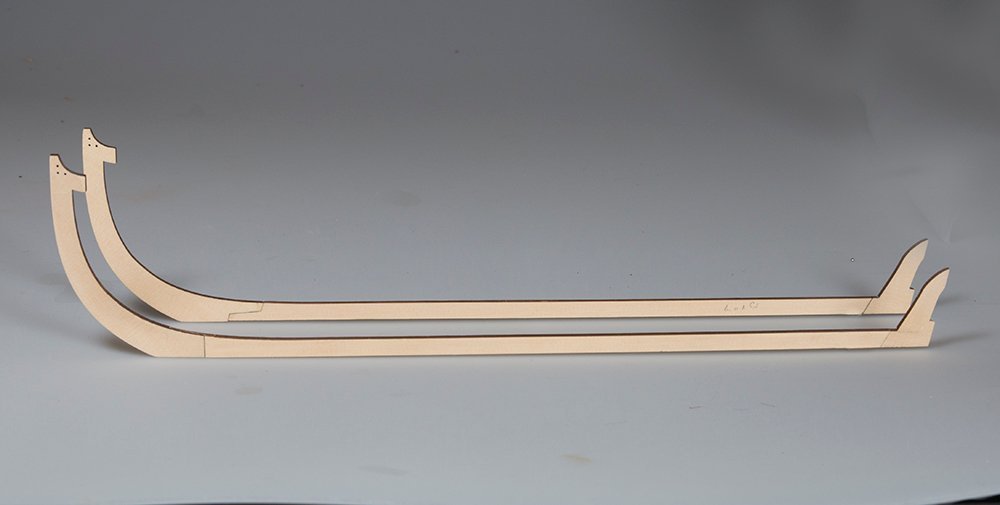
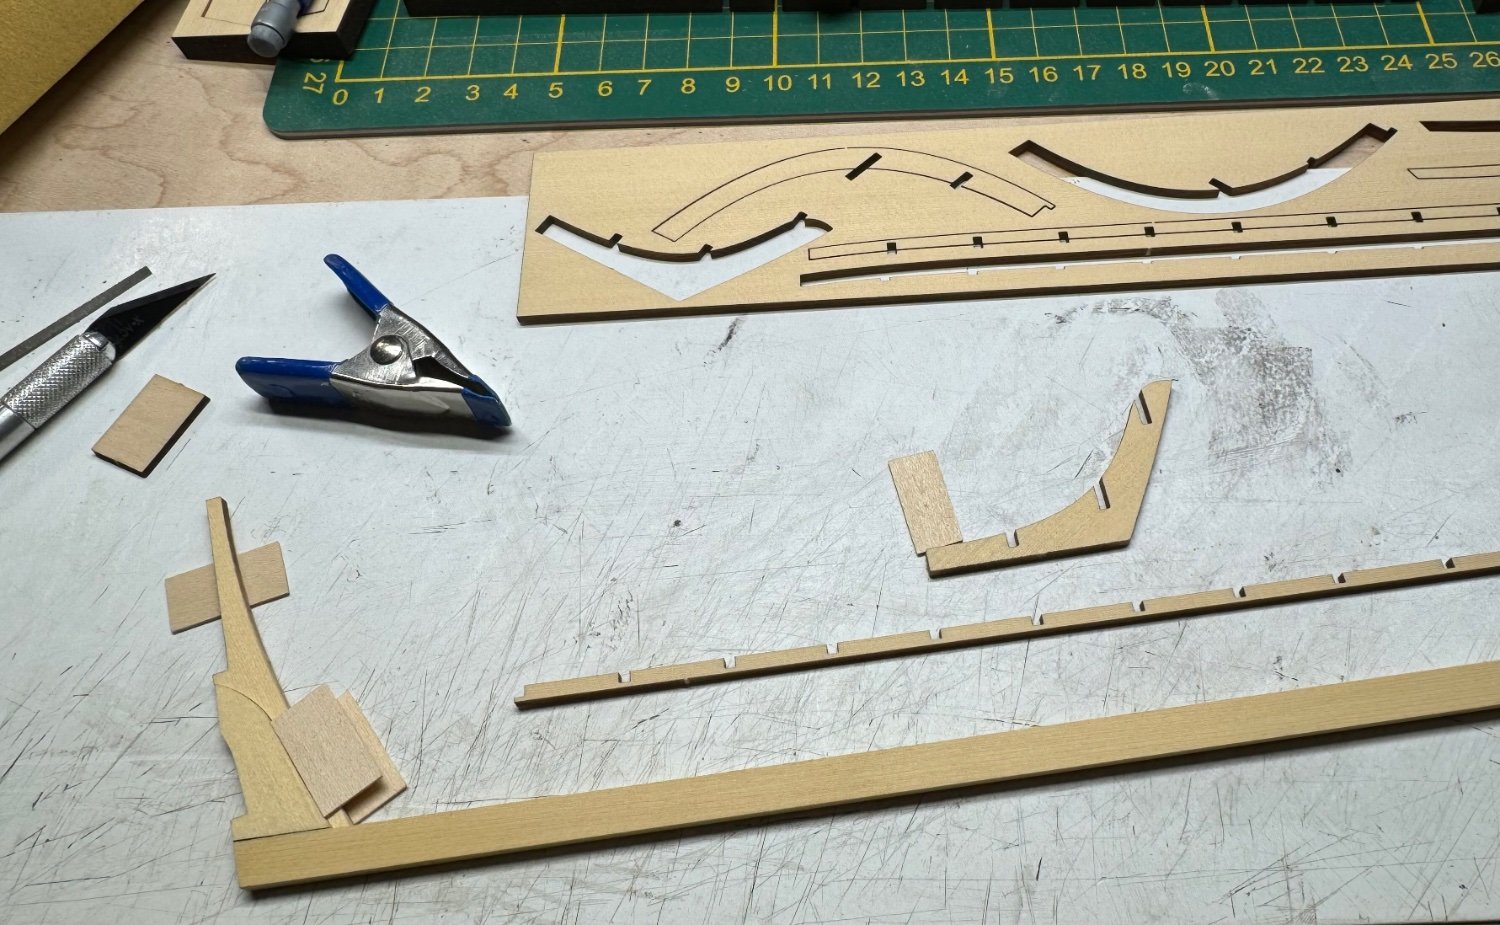
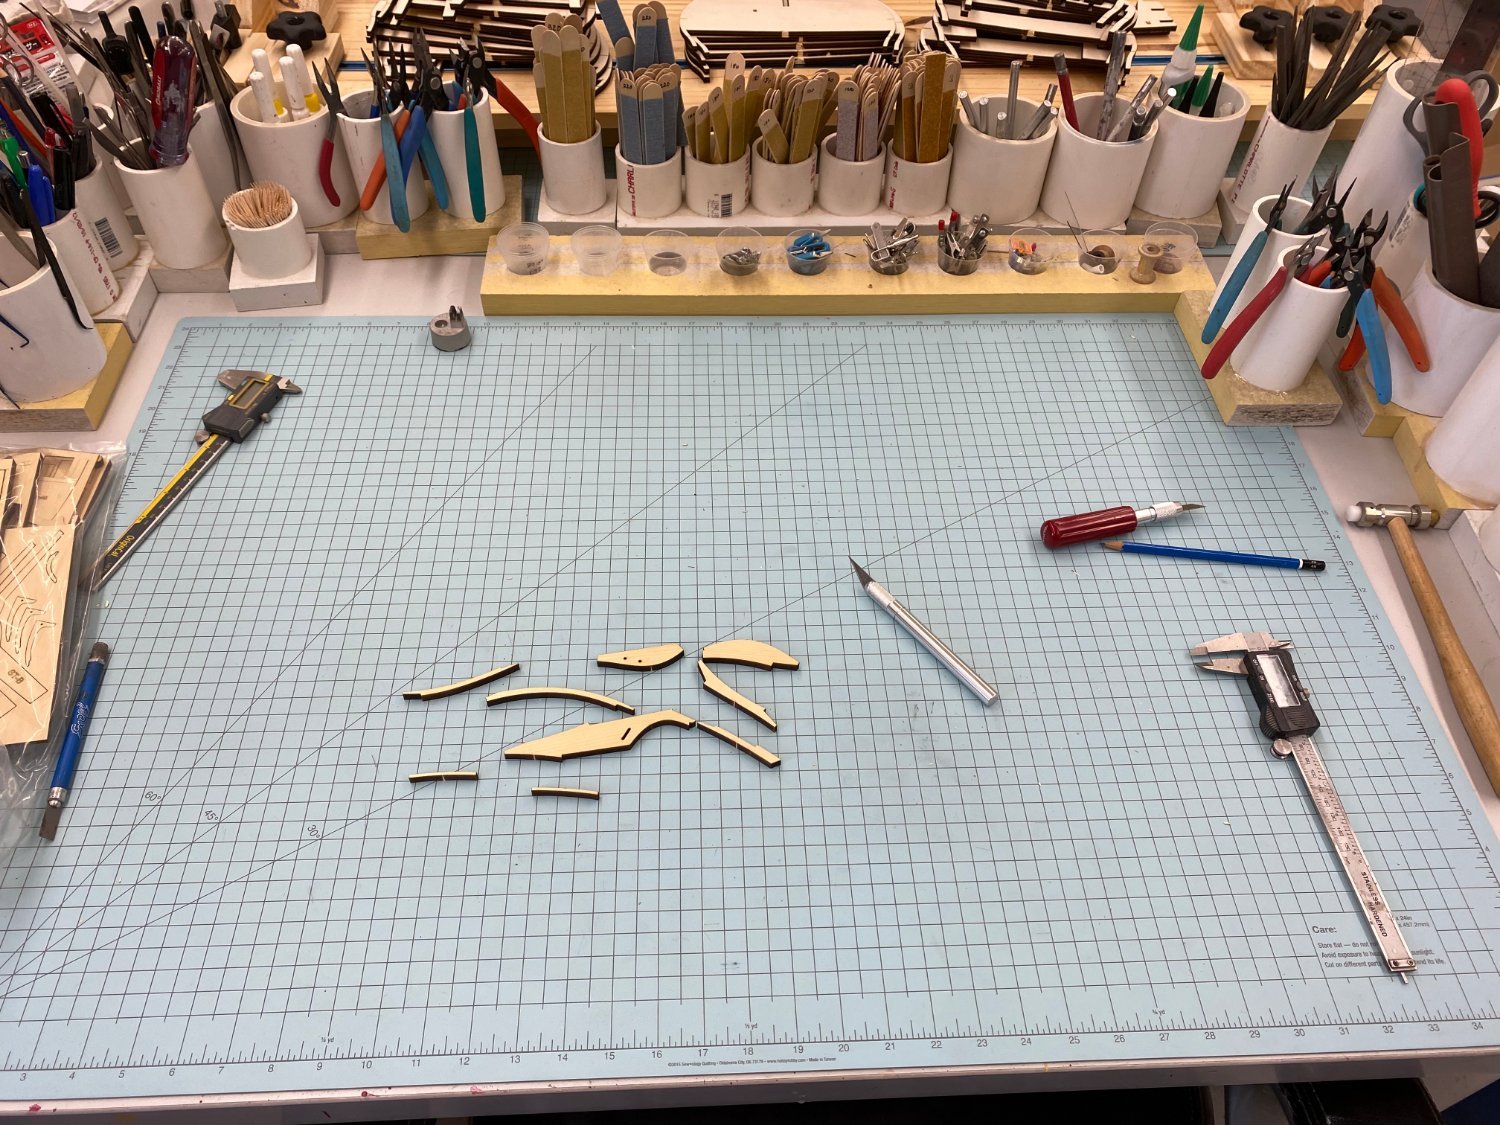
 Hello everyone: This seems to be the day to start Speedwell logs. I received my first 2 chapters about a week ago. I don't think I will be buildings as fast as some others but I have started and we are off & running. My only thought so far is when attaching the two curved pieces together make sure they are as exact as possible. Mine were off a little, and then you have to sand them to get a good fit with the stem assembly. And trust me - you don't want to sand any mating surfaces you don't have to... I think I finally got a decent fit. It took a lot of extra time but worth it. Now a little extra sanding for the figurehead and the fancy piece on the top. Then it will be time to get the plans out and lay the keel. I also hope we can start a group build. It might encourage a few others to join us. All for now Steve
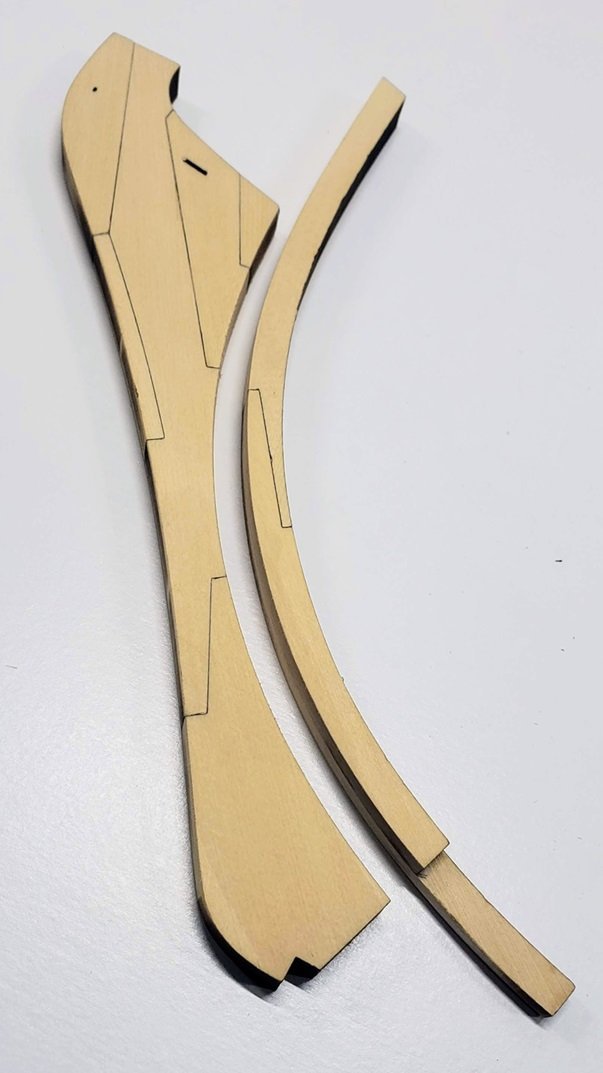
-
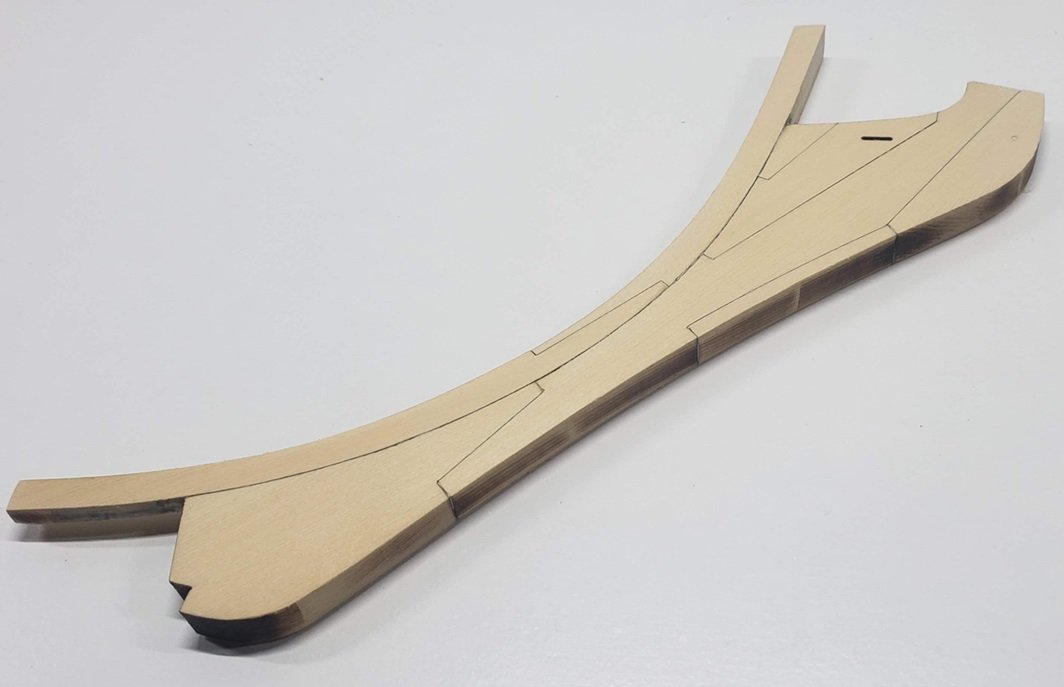
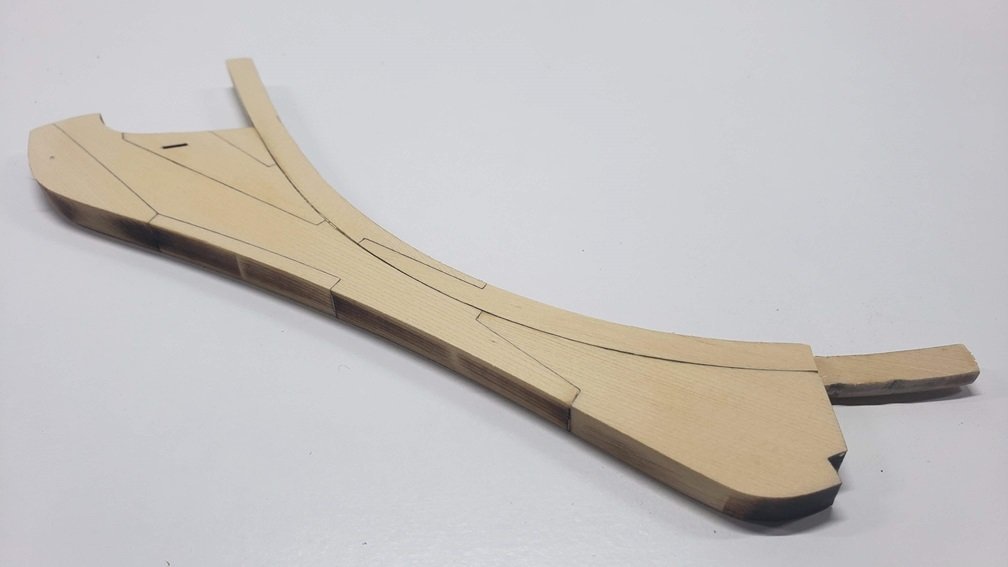
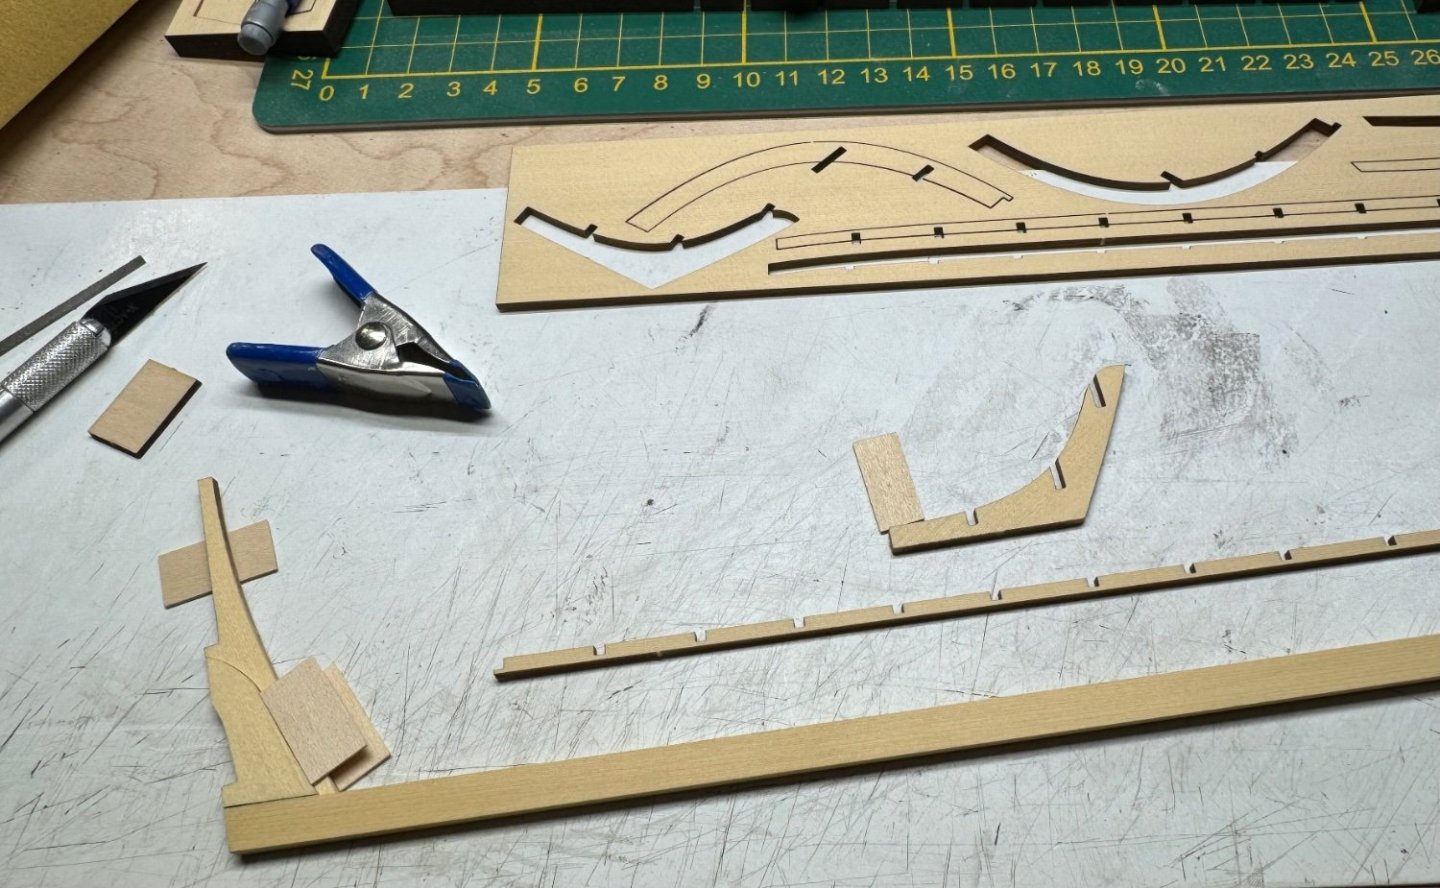
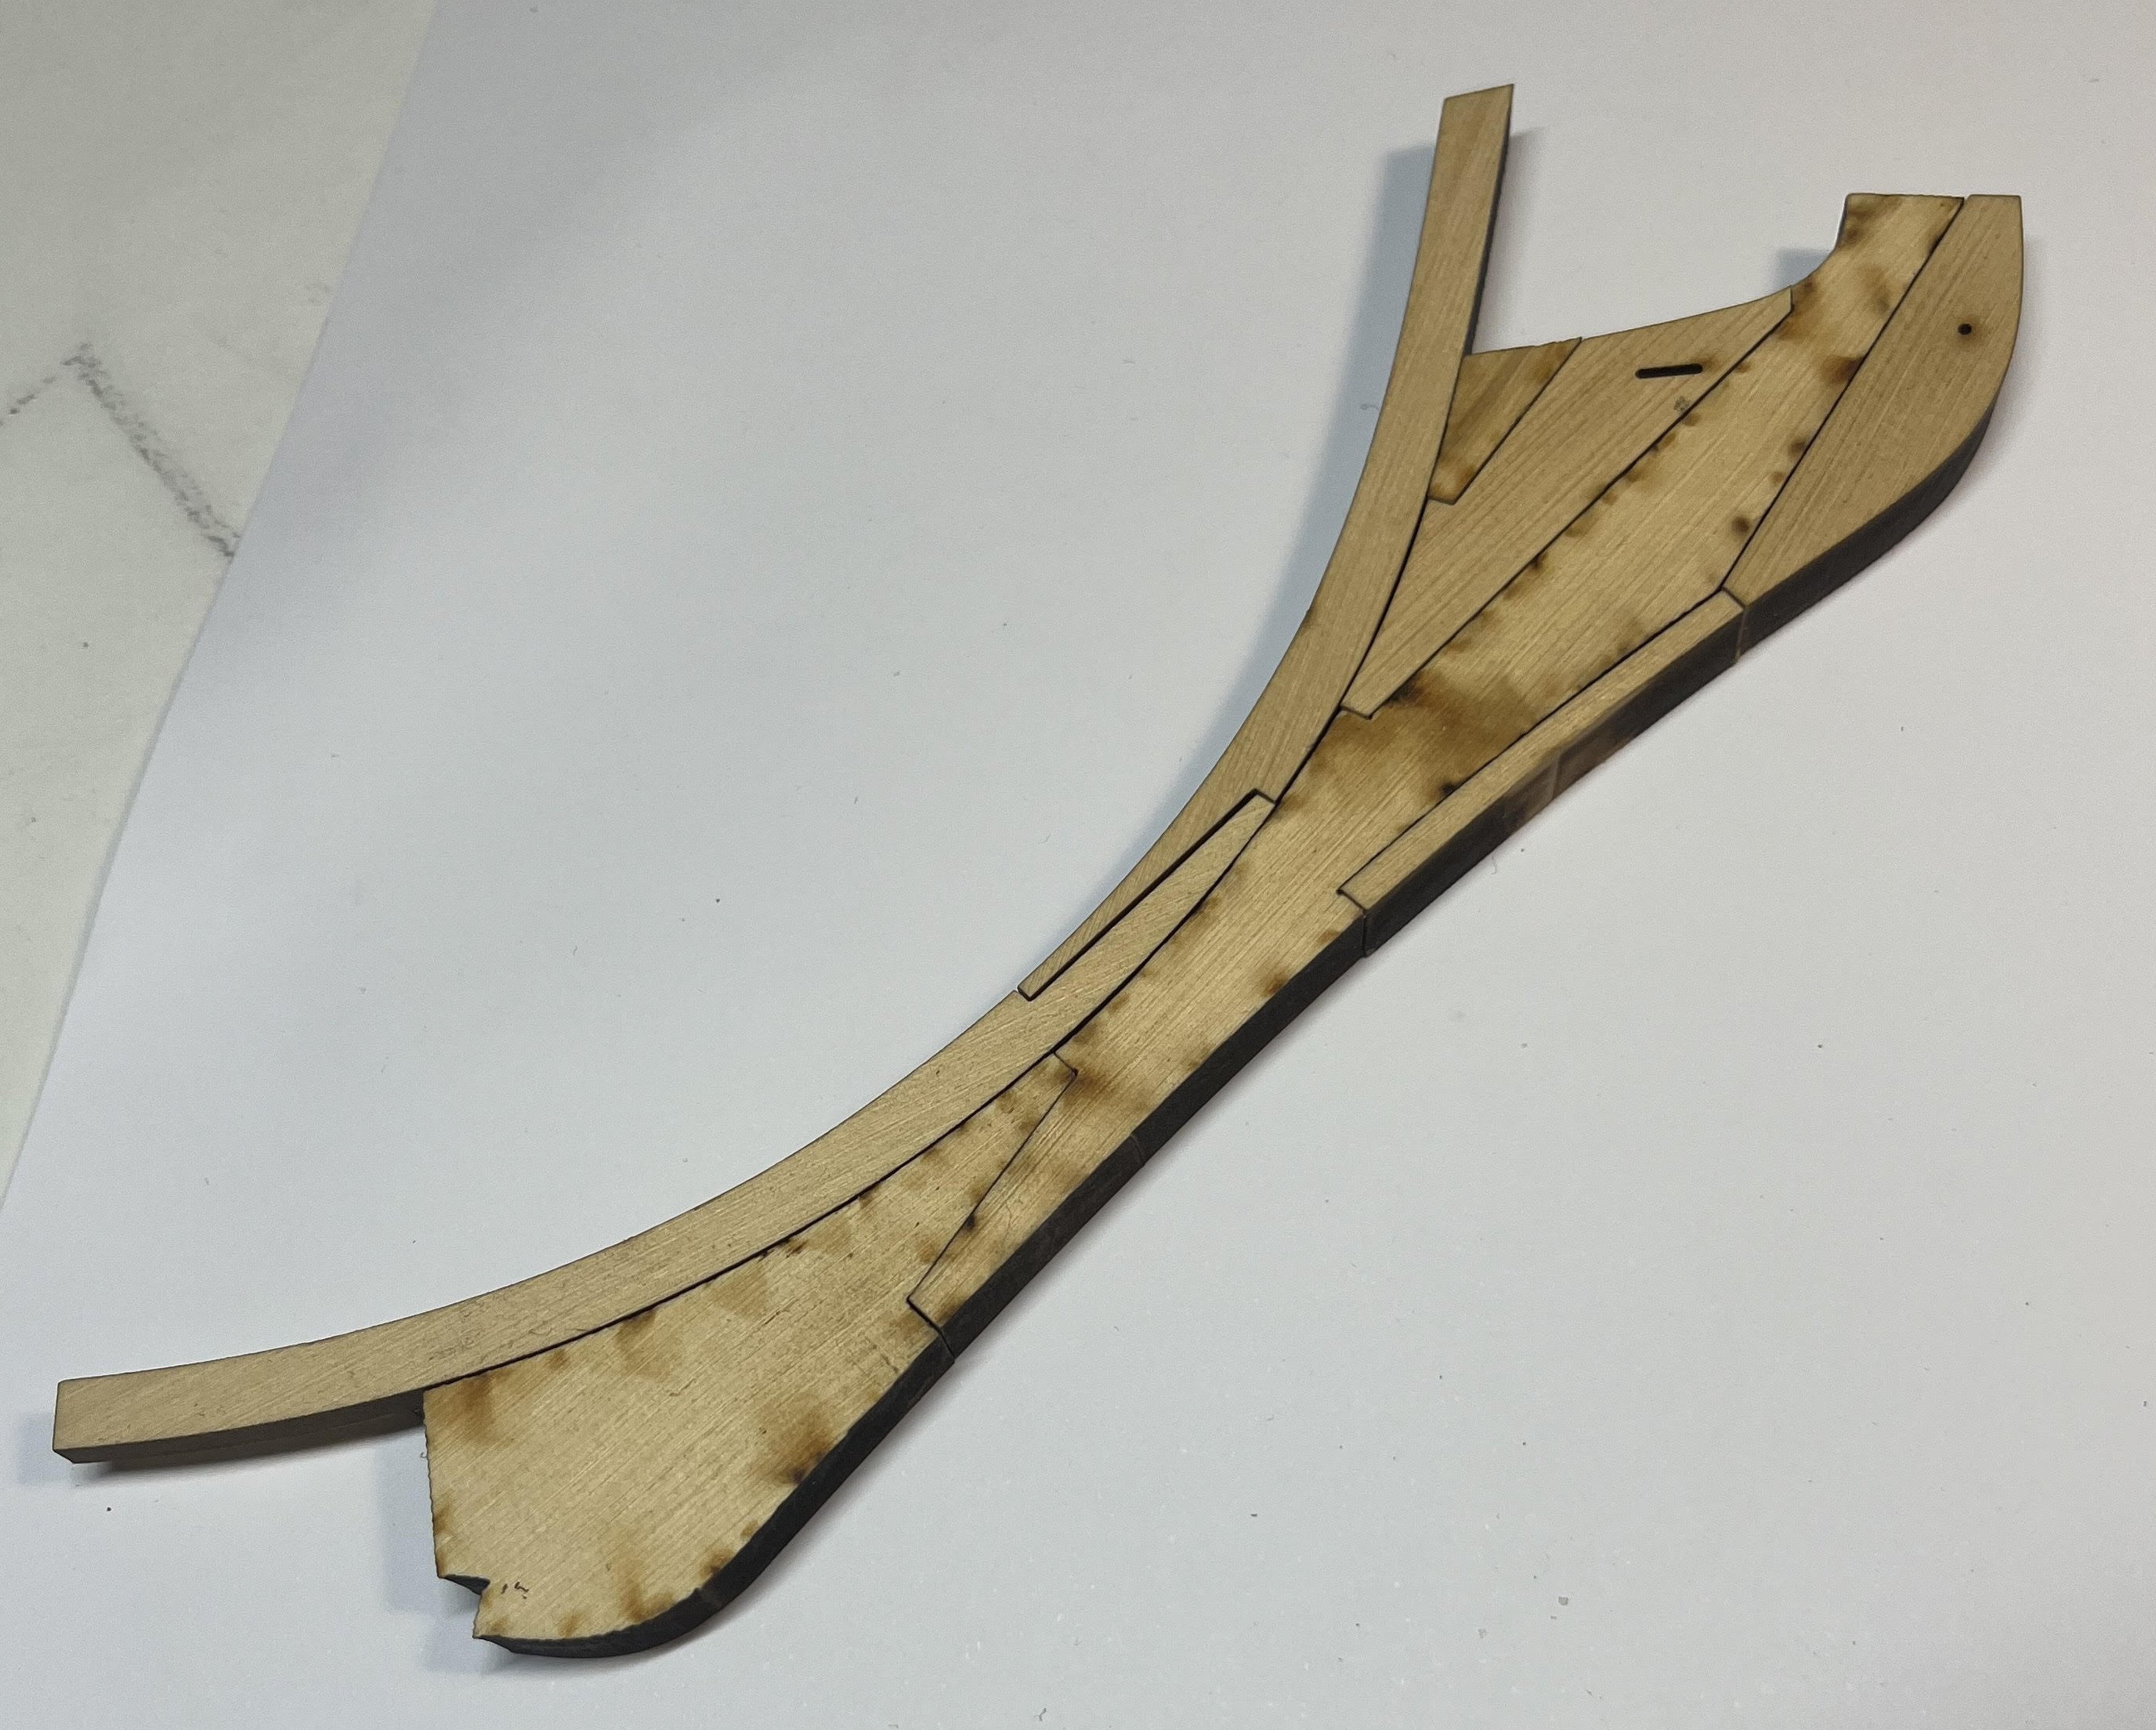
 Welcome to my Winchelsea build which will be done alongside Hayling. It will be based on Chuck's version II design. I have chosen to build the ship mainly from Cherry. It will be a P.O.B. model, using the laser cut parts and mini-kits that Chuck will offer. This will be a fun build for me and I'm looking forward to the many challenges that are ahead. The build starts with making the Knee of the Head from Chuck's laser cut kit. Cherry, being a softer wood than Boxwood, cuts somewhat cleaner and the pieces fit together quite nicely. Only a gentle scraping with a #11 blade was needed to remove the loose char. I used a #2b pencil to darken all the joints (optional) which were then joined with Elmer's Carpenter's Wood Glue. No clamping was necessary. The upper area from the stem down to the forward edge of the bobstay piece was gradually tapered from 3/16" to 3/32". The bobstay holes and gammon slot edges were softened as well. Mike

- 608 replies
-
- 27
-

-
- winchelsea
- syren ship model
- (and 1 more)
-
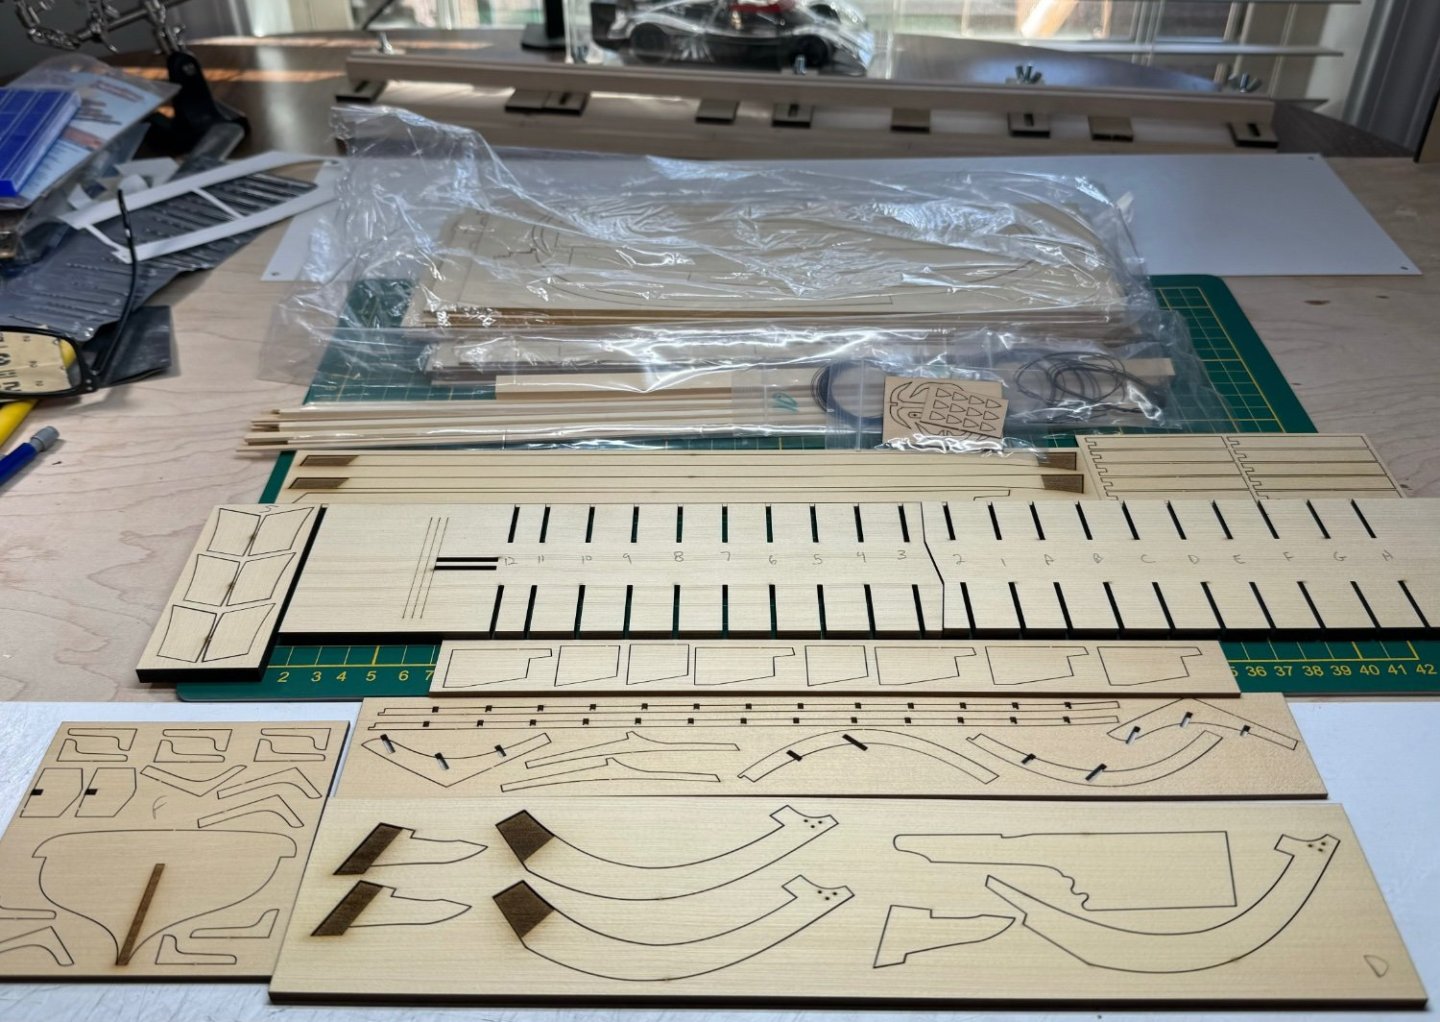
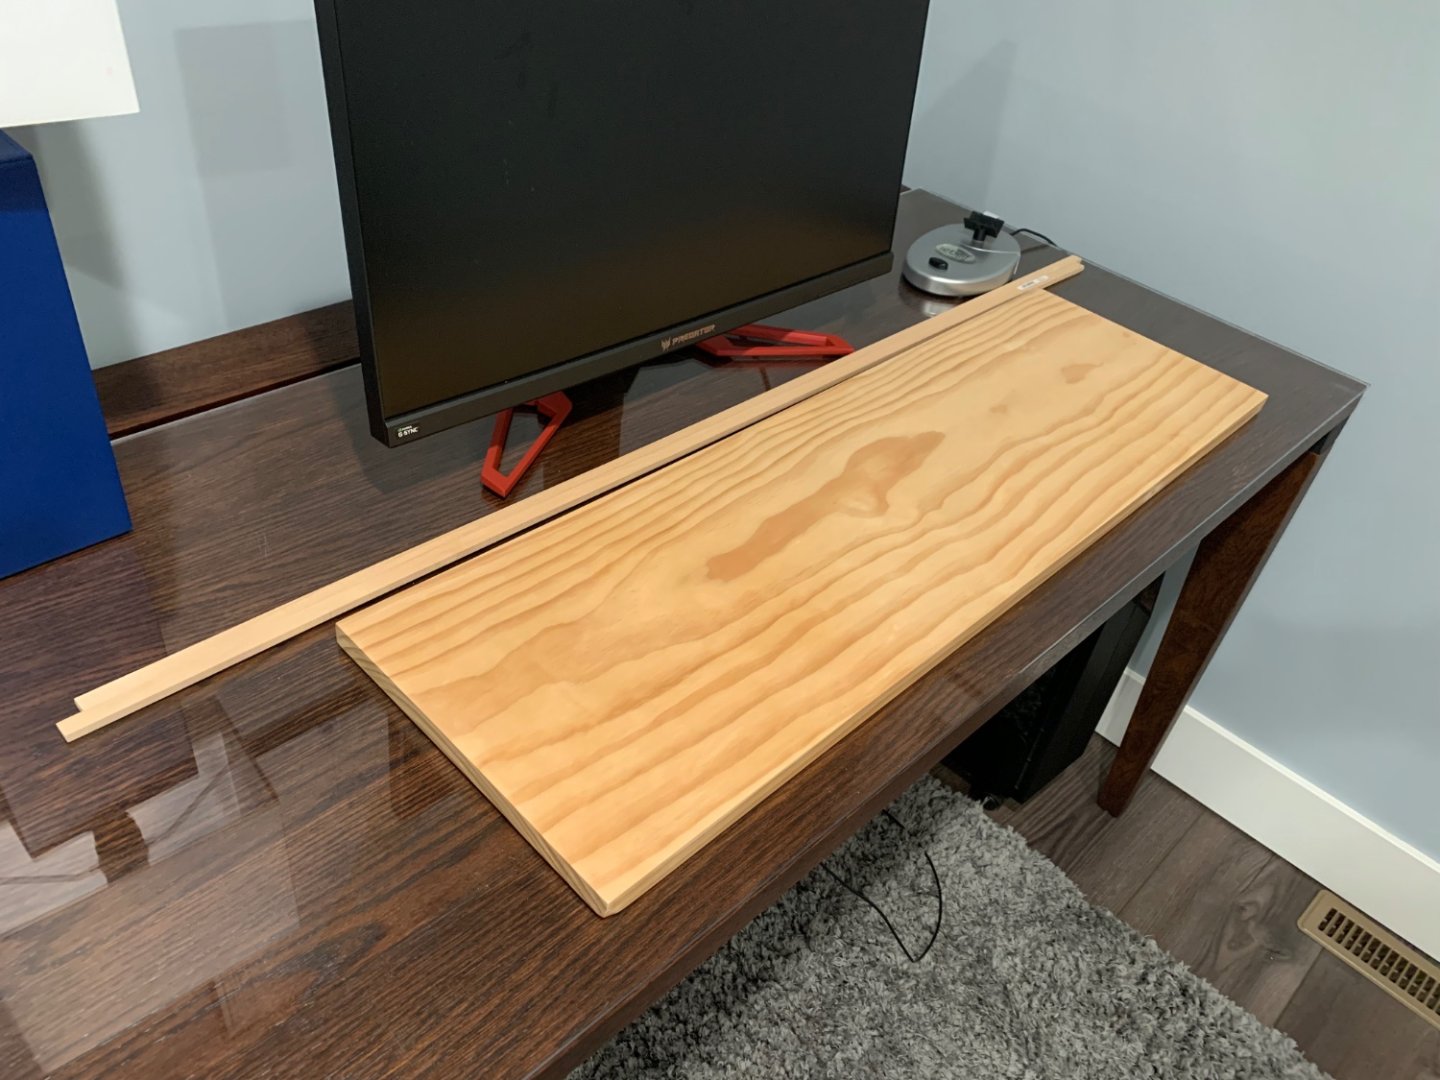
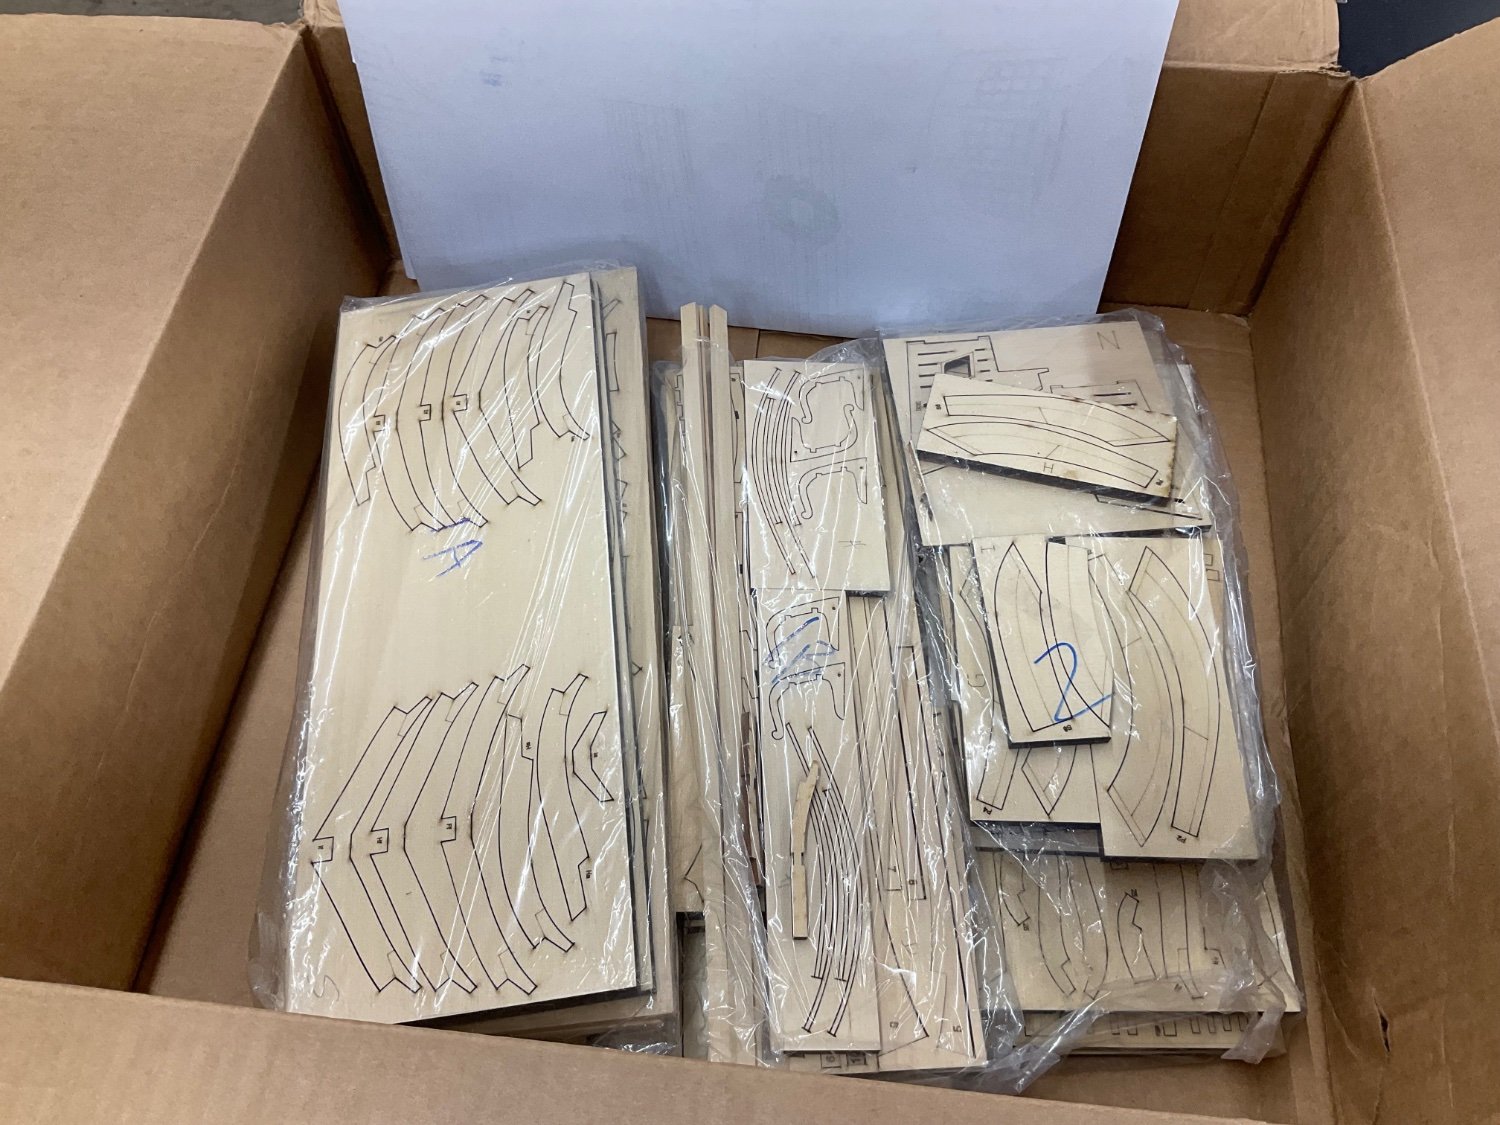
 This will be my build log for the Speedwell. I just received the box yesterday so not much to talk about yet. I need to go through the parts and make sure all is organized. I am planning on having a copy made of the plans in Tyvek and a second paper set. I don't plan to cut them up. I can just print the areas of the plan at scale that I need using the pdf's provided by Chuck. I haven't set up a build board yet but I will probably build the keel and all the frames first anyway. More to come.
 -
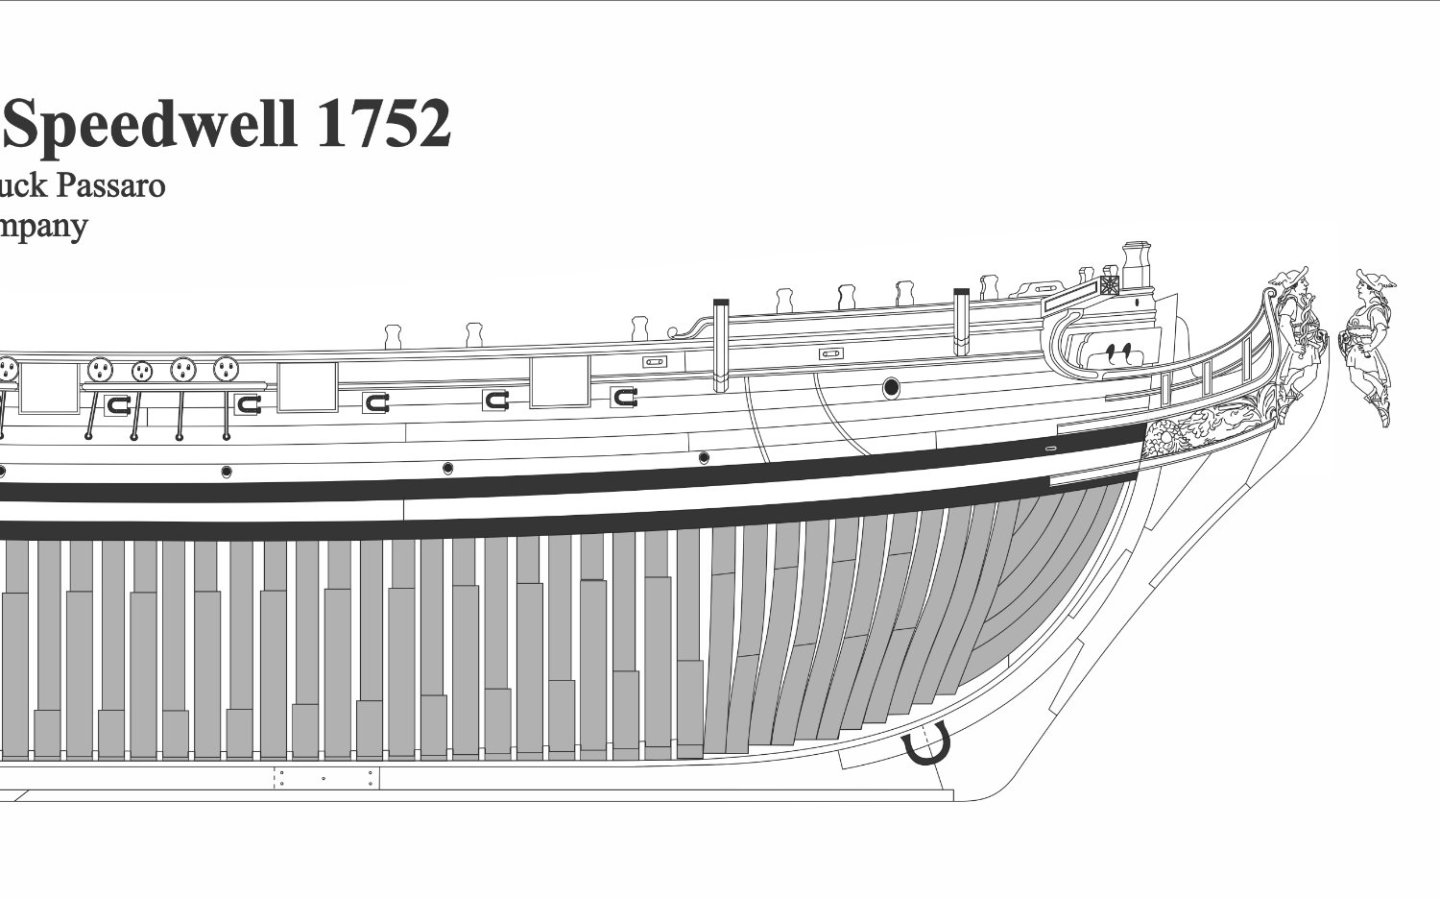
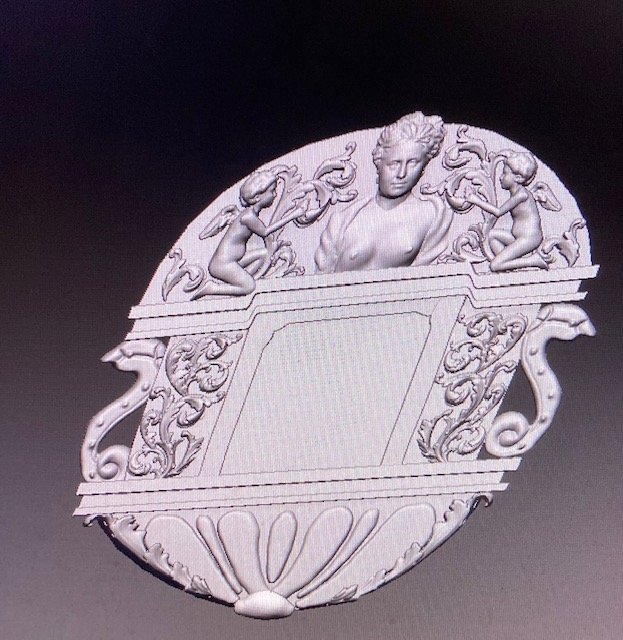
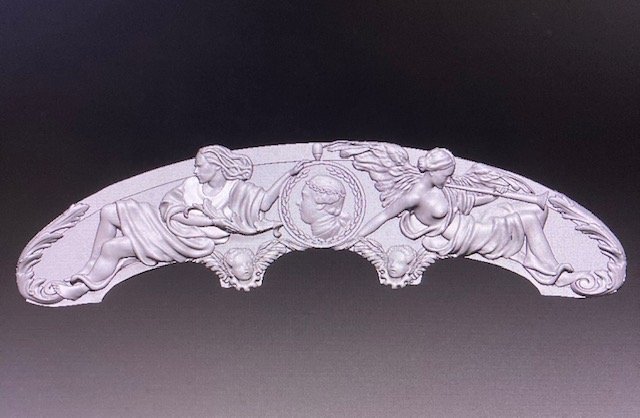
 The start of my build log...always a very exciting moment for a model builder!! I am assuming most of you are somewhat familiar with the Ketch Rigged English Sloop Speedwell - 1752. David Antscherl and Greg Herbert have produced a wonderful series of books for model builders on how to build a great model of her. Not only can you build one as a POF model, but as a POB and lift model as well. Why would I choose this as my subject. Those of you that know me, I have always selected a subject that was unique at the time. Never been done!!! The Syren, The Winnie, The Cheerful etc. I chose this subject for several reasons actually, knowing full well that this would become a commercial laser cut kit like my other Syren projects. First- I never really wanted to build a POF model. I prefer the look of a fully planked hull myself. But the craftsman side of me won out as I was looking for a challenge beyond just another POB project. I can build those and sometimes it feels like I am just going through the formulaic motions with each of them. This would certainly be a design and engineering challenge as much as a builder challenge. Second- I am always increasingly frustrated and disappointed to regularly see pirated kits come out almost monthly as of late. Mostly all the rage are those POF kits from China. A coincidence?? That almost all of them released are also subjects of Ancre, Seawatch, or Anatomy of the Ship Books. I think not. You may have noticed the latest pirated kit produced from one of David Antscherl's designs, the Hayling Hoy is now making its rounds. None of the parts fit as is typical and the instructions render this kit almost unbuildable....again very typical. Just check out the build logs of pirated Hayling kit from China on other forums. Its a complete disaster and a waste of money. Literally unbuildable but they are still selling them to unsuspecting builders. So I reached out to David and Greg and asked them if I could develop the Speedwell before a really bad pirated version is released (and one is actually on the way-surprised?) They agreed and are as excited as I am about it. I just dont want to see a crappy unbuildable version of Speedwell being sold to builders. Hopefully they will wait until this one is released. Maybe I should do one of Hayling as well. LOL. My goal...to design a kit based on the books where the parts actually do fit. One that would encourage POF building for folks who want to give it a try. To also write a set of English instructions that are in depth and easy to understand. In short, to make a legitimate kit of from a Seawatch book under license and permission from the author with the authors help and guidance. Will this stop folks from building the knock-off version when it comes out.....probably not. But at least you will now have a choice. The pirated version of Speedwell is currently almost ready and being done by the same company who pirated Hayling. Coincidence again?? I think not. Also and I dont mean to digress....but a pirated version of yet another Seawatch book....Ed Tosti's Naiad Frigate is also set for release very soon as well. Again a coincidence...I think Not. Why dont you ever see a subject from these guys that wasnt first a Seawatch Book or Ancre book? Honest inquiring minds want to know. Anyway There will be differences between my Speedwell of course. I will be modifying it for simplicity so you dont have to be a master builder with every expensive tool in shop. The design concept for this POF model will be unique and allow a novice and intermediate builder to tackle it. It will also be at 3/8" scale which should also make it much easier to build. BUT I will also make my Carvings available in 1/4" scale so folks building directly from the books will be able to buy them. Some preliminary views of the unfinished CAD work on the carvings. There is much work left t do on these but I hope you agree that they look pretty amazing so far. Here is the preliminary framing plan which will show just how different it will be. It will be planked from the wales upward so there is no reason to over complicate the project with bent frames....If you compared this to David's plan it is completely different. BUT make no mistake. Yes the folks who pirate these POF projects will claim its different and therefore original. BUT make no mistake. This is a 100% copy of Davids work. All of this is directly lifted from his plans and only modified to make production and building a bit easier. But it is a copy...literally traced. But the difference here is I give full credit to David and will be paying for the privilege to use his knowledge and expertise and hard work and years of research on this subject. I do hope you will swing over a chair and watch this new Speedwell project come to life. A huge thank you to David and to Greg who will no doubt think I am pain in biscuit by the time this is completed.
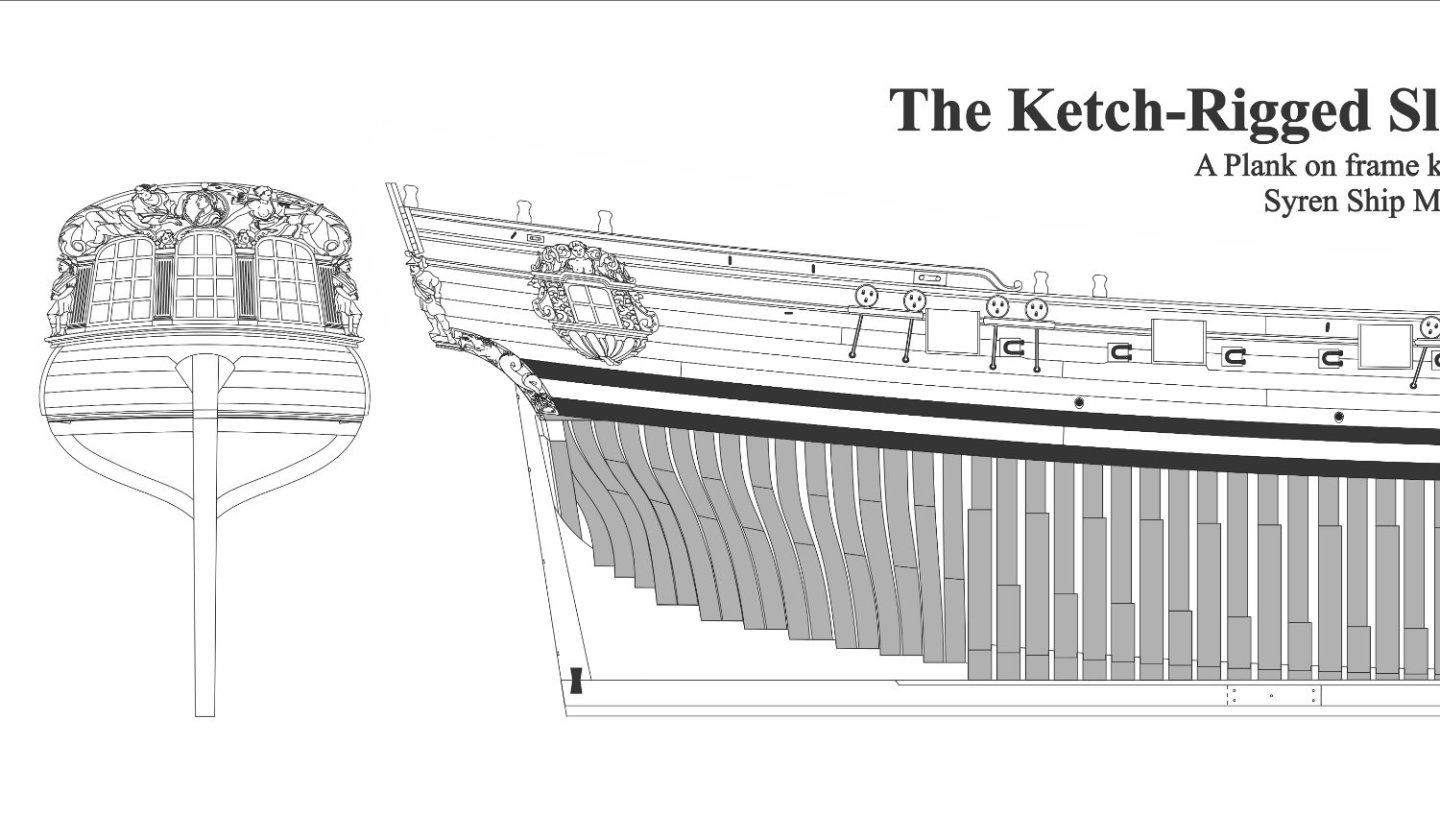


- 796 replies
-
- 67
-
-

-
- speedwell
- syren speedwell
- (and 1 more)
-
 Hi all. Another Syren Speedwell starting here. I received mine a couple of days ago. I haven't done more than look the wood over, print chapter one of the monograph and order copies of the first three sheets of the plans. The first two sets of parts look fantastic. As you would expect the cutting is first rate and the AYC is so nice. My first steps will be to read the monograph a couple of time plus review Chuck's and Mike's build's. Also, I'll get the wood for the build board and glue the plans to it. Once I've completed that I'll start in on the stem. Let the adventure begin!
 -
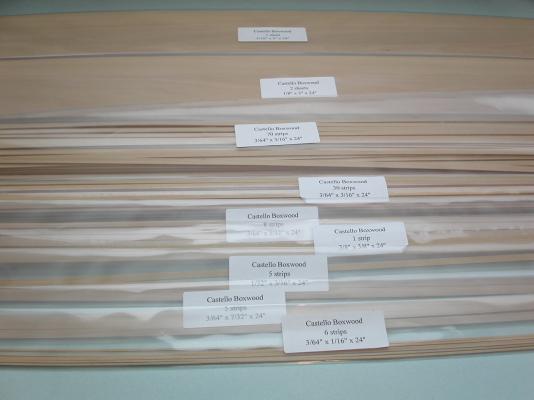
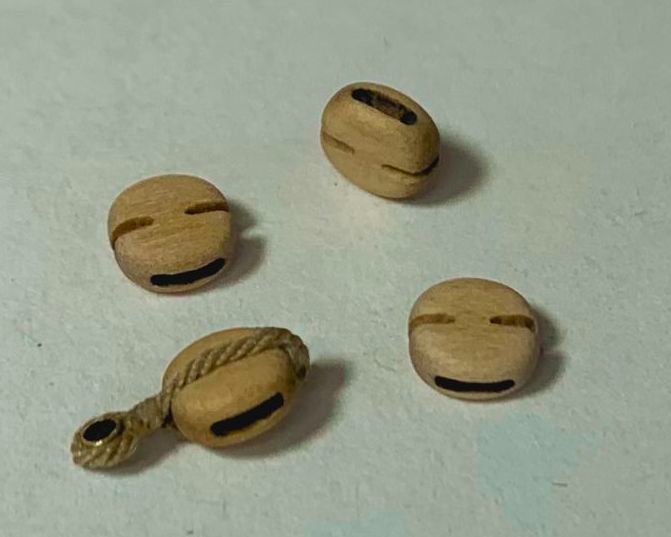
 Welcome to my Cheerful build! Little did I know when I bought a Model Shipways longboat kit last summer that I’d get bitten by the ship building bug so seriously. I finished my longboat a couple of weeks ago (see here http://modelshipworld.com/index.php/topic/10743-18th-century-longboat-by-erik-w-–-model-shipways-–-scale-148-first-wooden-ship-build-finished/?p=374717). I quickly realized that I missed putting time in daily working with my hands and building something. Aside from a Dremel, I currently don’t own any power tools suitable for modeling. So, with what Chuck offers for the Cheerful, and with the availability of a new Cheerful timbering package, with milled strip wood, from Jason at Crown Timberyard, I can build a POB ship with accurate plans, castello boxwood, and high quality rigging materials and fittings. I hope I’m able to hone the skills I developed on my longboat build, and do the Cheerful justice. Chuck, Mike (Stuntflyer), and Bob (rafine) have set the bar pretty high! Feel free to comment and offer constructive criticism. I realize how much better my longboat turned out with the input and advice from others. O.K. Time to stop typing and start building. I received my order from Chuck at Syren Ship Model Company last week, and my wood order from Jason at Crown Timberyard arrived yesterday. Here are a few photos of the raw materials . . . which will be slowly transformed into the HM Cheerful! Erik
-
 Hi All, About to start the Syren Speedwell build. I have received the chapter 1 and 2 parts and have gone through them all - the quality is great. As this is my very first ship build I will be taking it fairly slowly and will be learning from the other excellent builds on this forum. Any tips and suggestions would be greatly appreciated ! I have already assembled the build board from 25mm thick MDF and have glued x2 50x25mm strips to the underside of the board lengthways, along with a series of smaller strips across the width between the 2 long pieces. Hopefully this ensures the board does not warp. The plan I have had printed and have secured to the board using 3M mount spray aligning using a centre line on the board as reference.
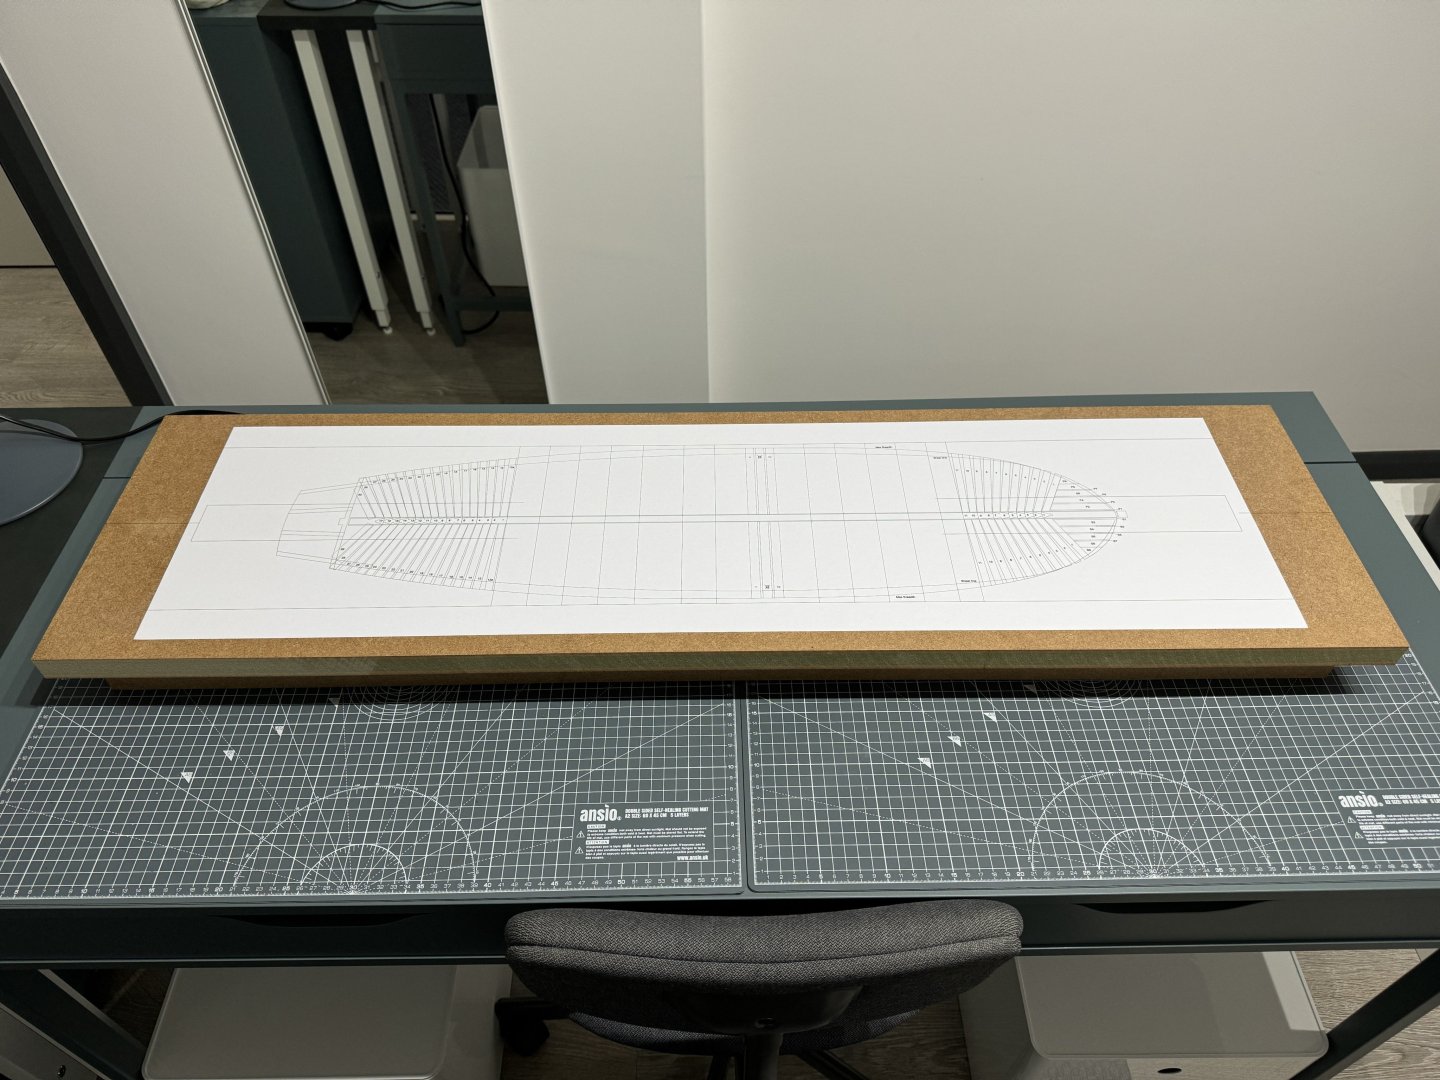
-
I am starting a new topic as the last one just got huge....over 2000 replies. Its fitting that I would do so today actually. Today marks ten years since I have started Syren. Its been a long and interesting journey. Ten years and miles and miles of rope made and thousands and thousands of blocks sold. Here's to the next ten years. Maybe not that long, LOL. For a bit of news....I have finally received the parts to maintain my CNC Mill. So blocks are on tap over the next few weeks. In fact I have already started. 3/32" singles and doubles are now in stock. More will follow. Although half of the 3/32" singles already sold out. UGH! Onward and upward as they say. Chuck
-
 After spending months looking at Chuck Passaro's website and reading through logs of finished and in process Cheerfuls' I ordered the kit. This being a scratch built POB I ordered the starter kit from Syren Model Company. I've been following the Winchelsea group build using Alaskan Yellow Cedar as the building material. Reading comments and looking at photos of the wood with WOP helped me buy some AYC to try on other builds. I must say "I like the way it looks, cuts and finishes" so I bought the wood along with the starter kit. When the Cheerful arrived in a large envelope and a small box upon opening the packages I immediately spread out the contents and started studying my loot. Let the journey begin. Now its back to reading the monograph and logs of how and what to start first Stay Well and Stay Safe Will
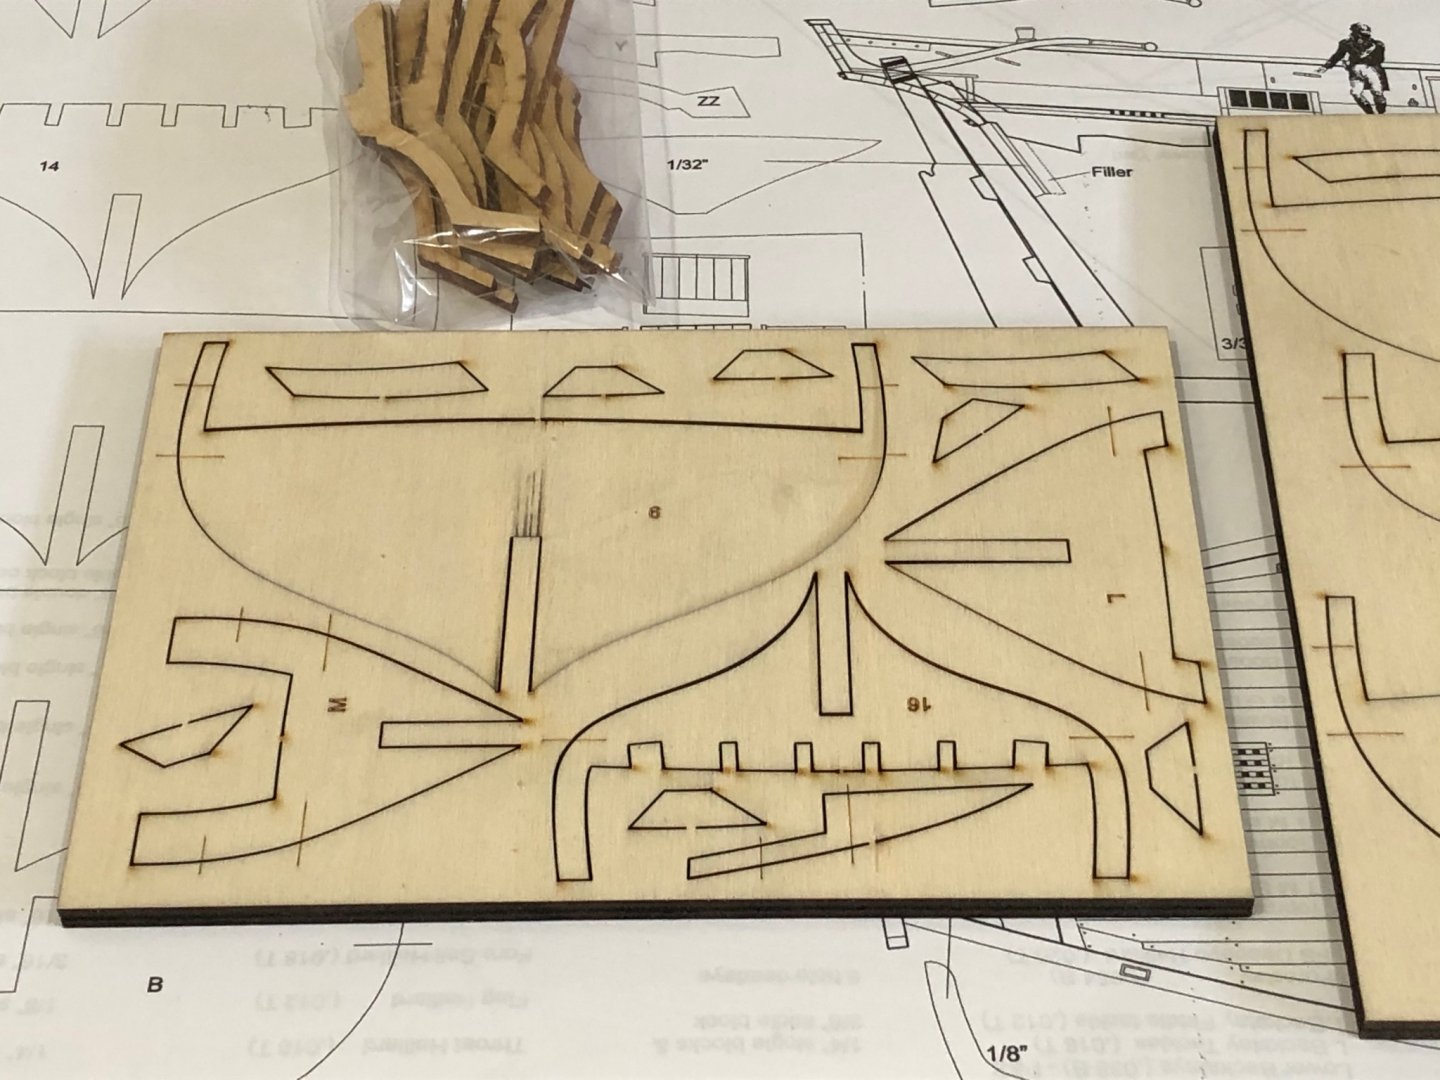


-
 I'm joining the family, soon I'll start my own Winchelsea. This first post is a place holder, I'm compelled to finish the Vanguard Models HM Flirt I'm already working on before embarking on this great project. So it will be a while before I actually start work. I also have the NMM draft for Cheerful and Pegasus framed hanging on my workshop walls, Winchelsea (or actually the type ship she was) will soon join them. I love these wonderful drawings, realizing I'm building a ship based on actual plans. All these years later they still exist for us to follow, with a whole lot of help from Chuck. I've printed the plans (40x30, no scale), the first chapters of monograph are printed and spiral bound, I have Yellow Cedar lumber and chapter parts from Chuck already on hand. I keep looking at the bin where I've stored them, smelling all that wonderful Yellow Cedar, I can't wait to start. Having recently finished Syren's HM Cheerful I have an idea just how fun its going to be. So for now I'll continue to check out other build logs and look forward to making my first actual build post here. See you soon.
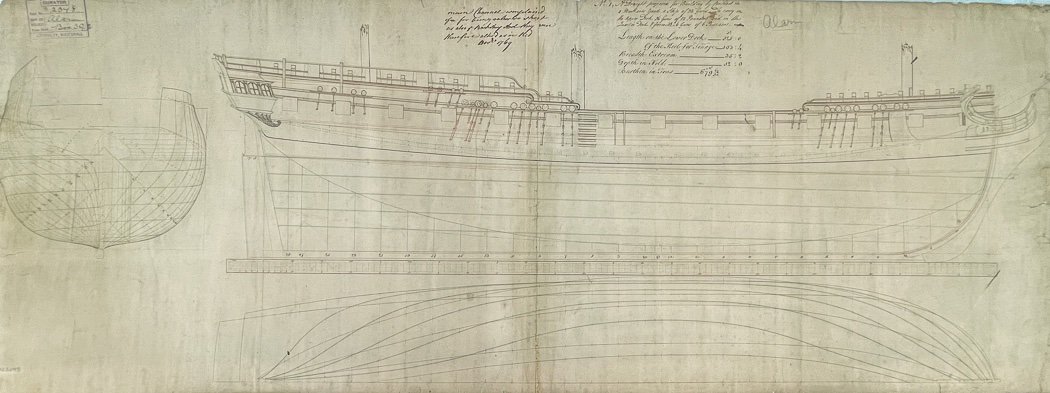
-
 I had been eyeing this boat for some time. I finally bought a kit a few weeks ago. There are many great build logs, I don’t plan to bring anything new to the project, I’ve seen many outstanding examples of fantastic craftsmanship. It’s an honor to build such a wonderful kit. I hope I can build it in a way it deserves, I will certainly try. I’ve had it all out of the box 4 or 5 times, it smells so good. This time when I got it out I kept going. Thank you in advance to anyone following, liking, or commenting. I tend to not be chatty in my responses, but I’m grateful for comments, tips, and encouragement. I printed out the sections a while back and have been reading them and marking notes to remember to do certain things. In an effort to not muck it up. So far, so good. Pictures I take and post are milestones for me and the build. I try to show the progression of the work, so someday I can look back and see how bad I was at this lol. I have my moments of a perfect fit, then I have to paint, paint is not a strong suit, yet. Wake up, let’s get started….
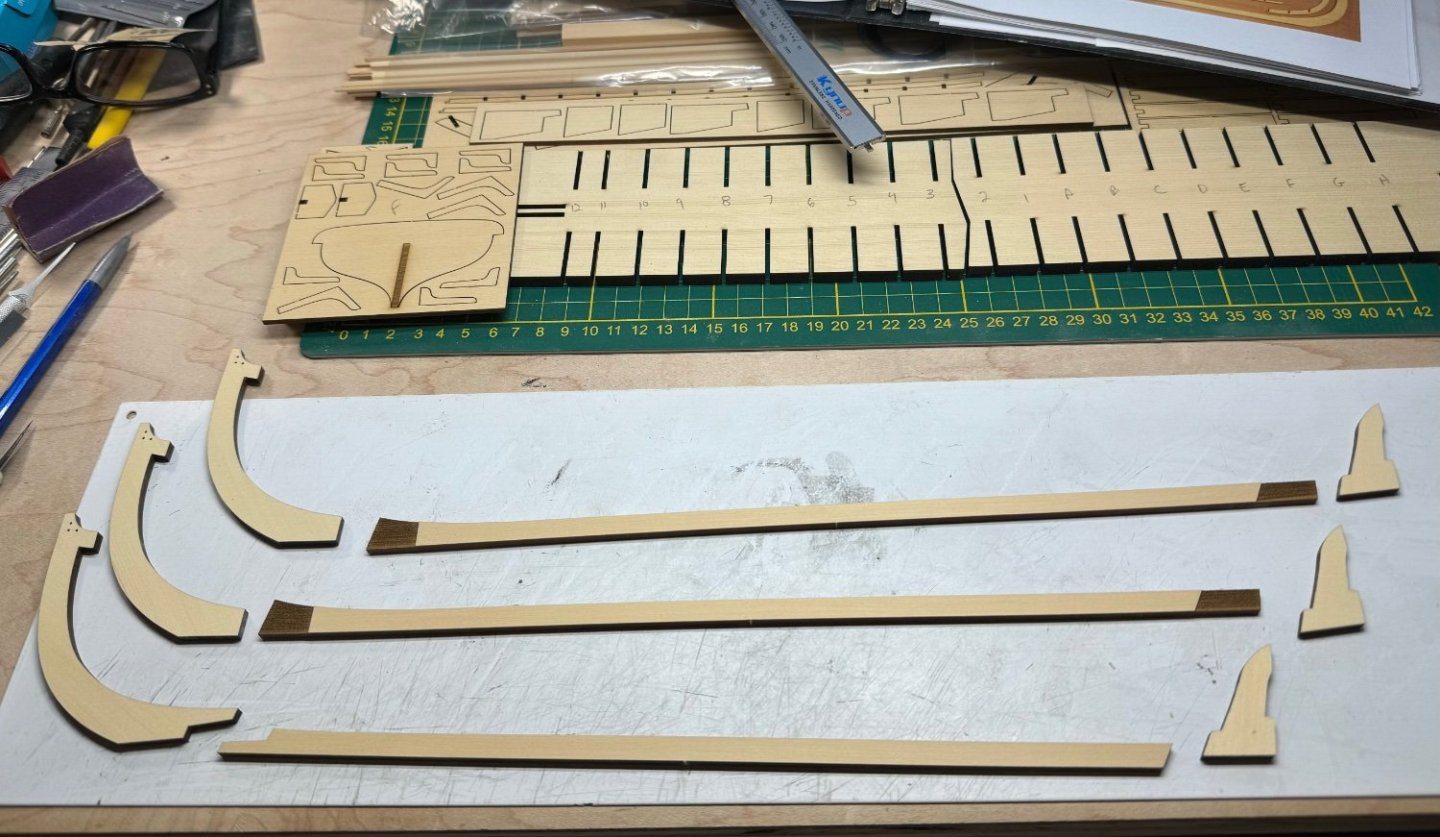
-
 Welcome... I was very excited when i was able to get chapters 1 & 2 for this new project. I already have my first question. When test fitting parts of the stem assembly the instructions suggest only sanding slightly on certain edges of each piece. However when I removed the pieces with no sanding, there is a slight gap. Is it appropriate to correct the other end?
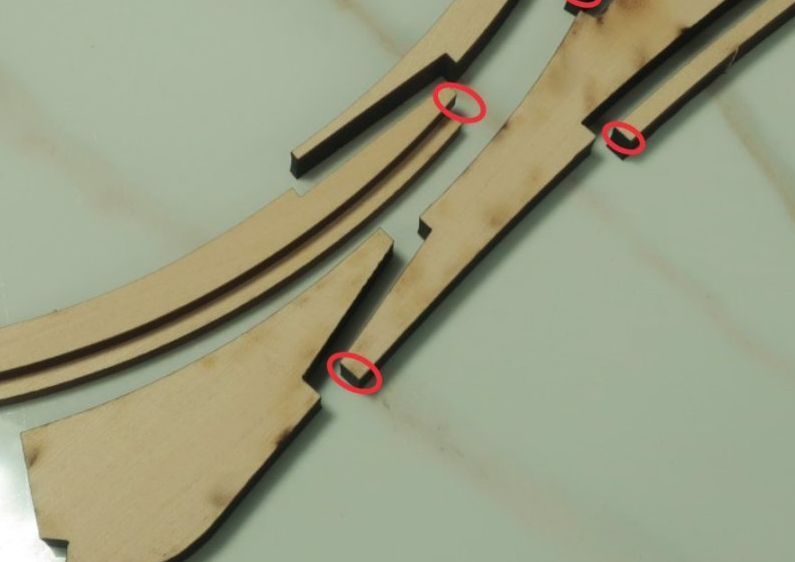


-
 Hi, I'm Dutch, live in the south of Holland, in Breda with my wife and three daughters (yes poor me, that's four woman under our roof 🙂). I am new here and hoping being able to start to build HMS Winchelsea 1764 in 1/48 as well. Inspired by all the other beautiful builds here, I'm now in the pre project phase and making my list of materials (writing a PID and making a product break down list in project terms). And then off to the (online) shops to order my wood and others. Oh, and ofcourse wait for the PM from Chuck with access to the download link of the plans. Thanks, Frank.
 -
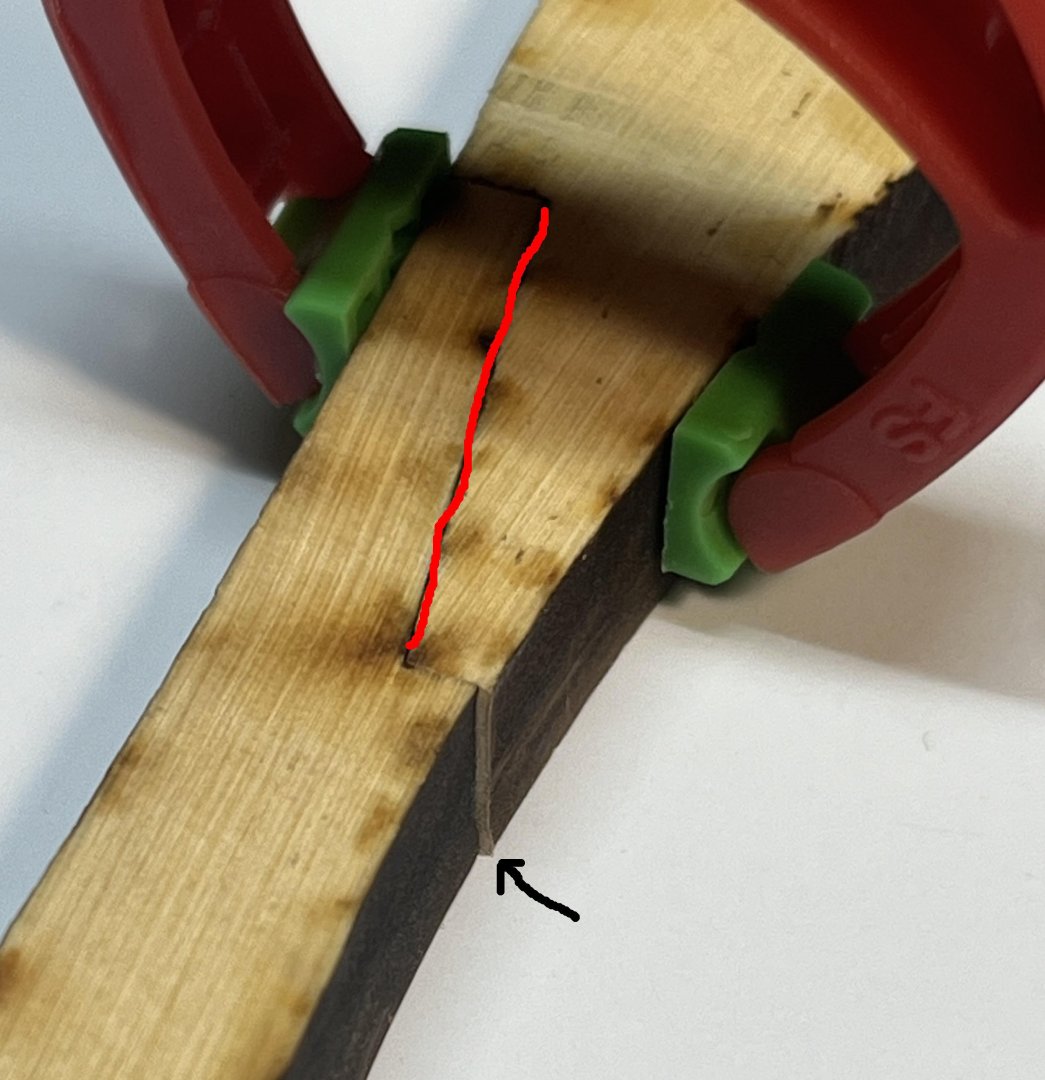
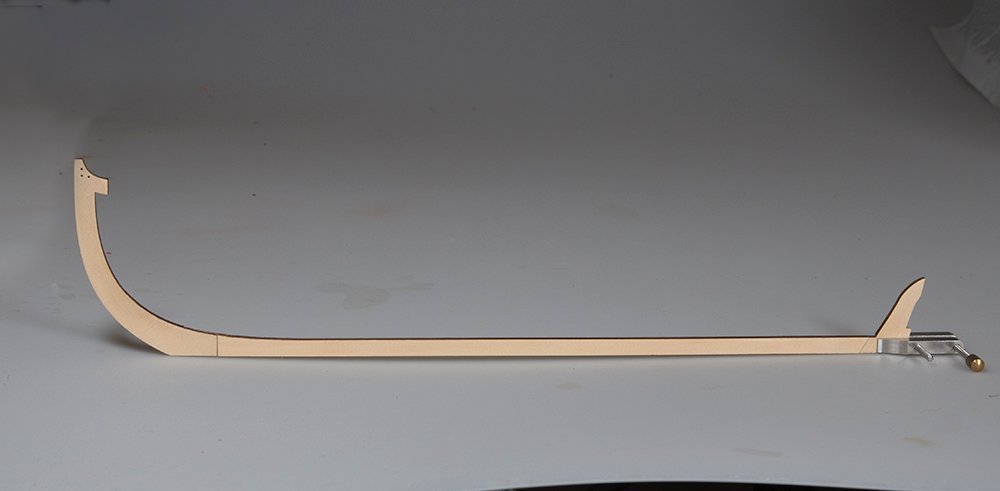
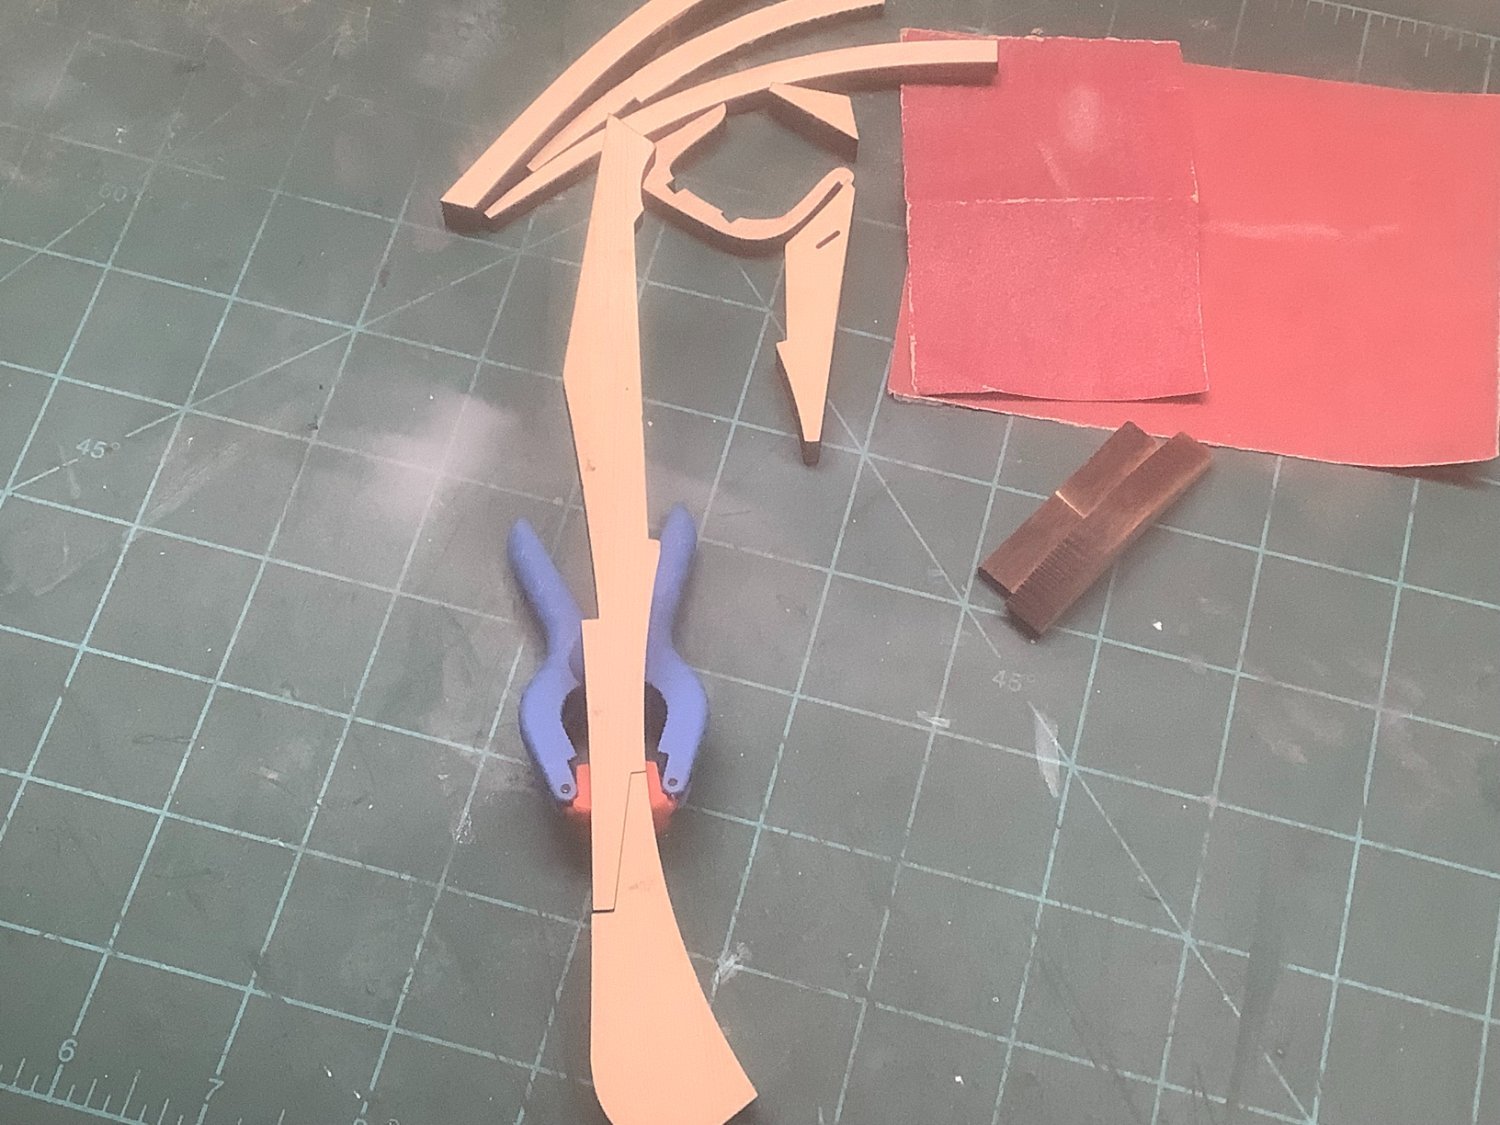
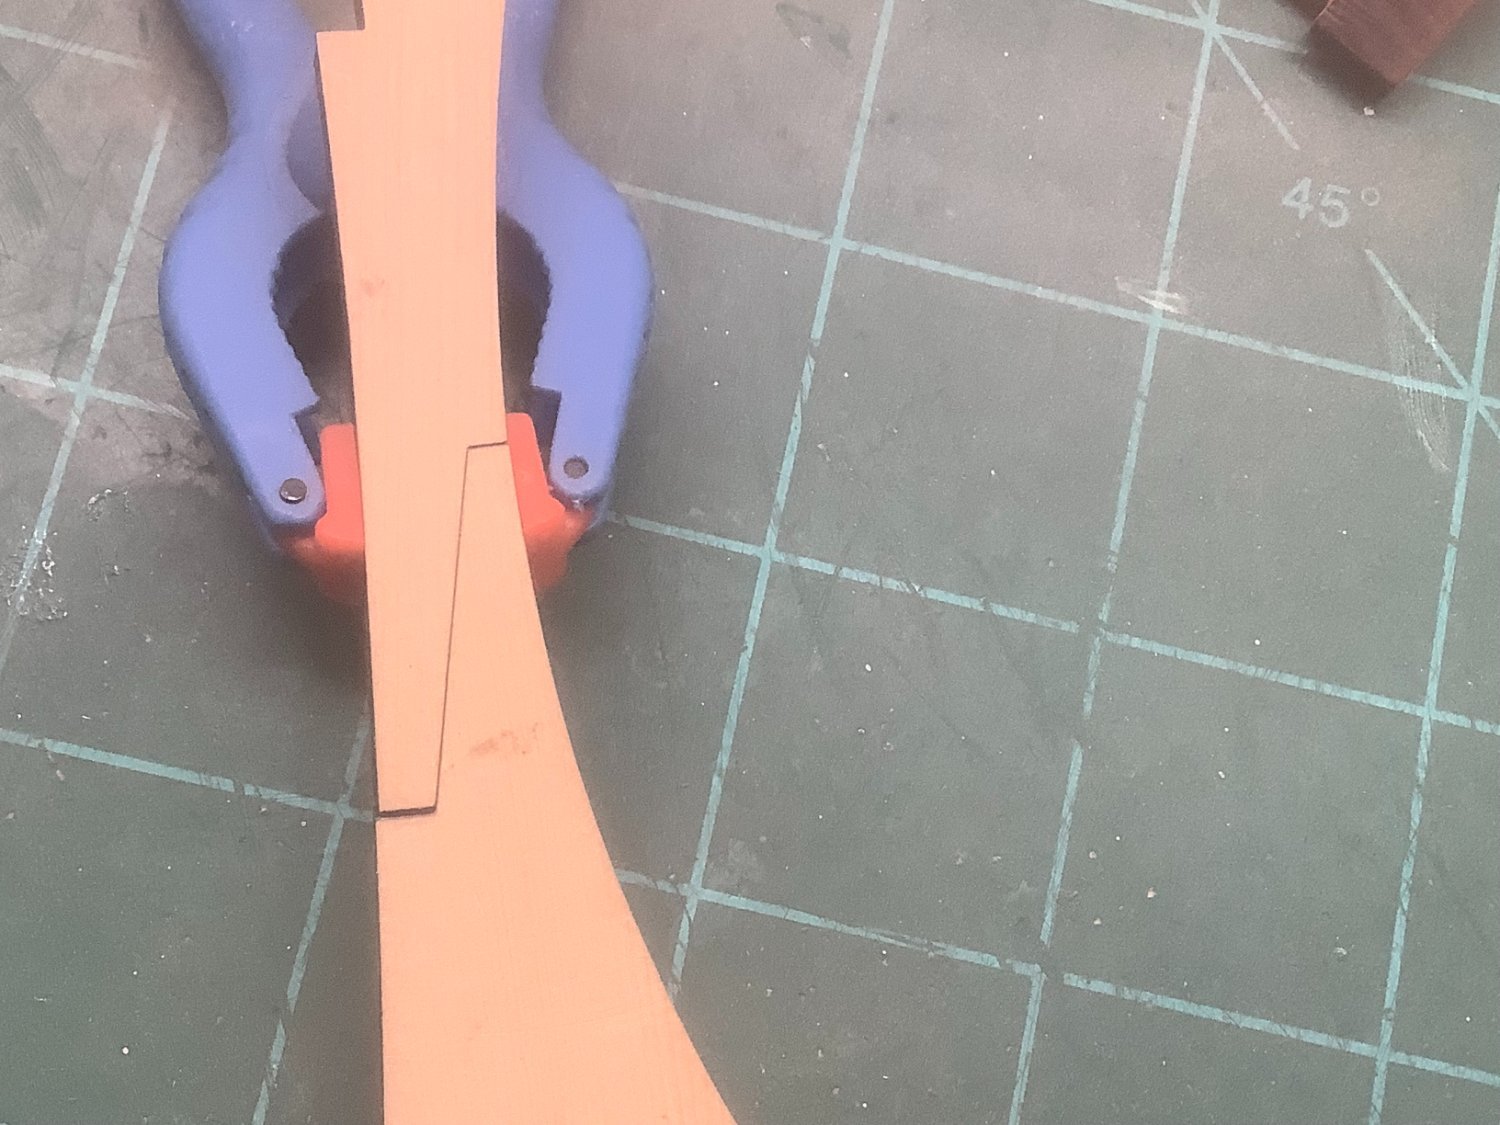
 After some delays due to Easter I collected my Speedwell kit yesterday and was able to get started today. New to the forum, I noted that Chuck would like to see buildlogs and figured why not, I can use all the help I can get. This is definitely a deep end type project for me and I expect that I will be building quite slowly. Happily I seem to have gotten a generous amount of spare parts. Started with the stem, not sure if I did something wrong but I ended up with a bit of a ledge along the curved inboard surface. Attempted to remove the ledge by sanding along the joint marked in red, which seems to have worked out ok. This is where I'm at with a loose dry-fit, will sleep on it and try to refine the joint a bit more before glueing.
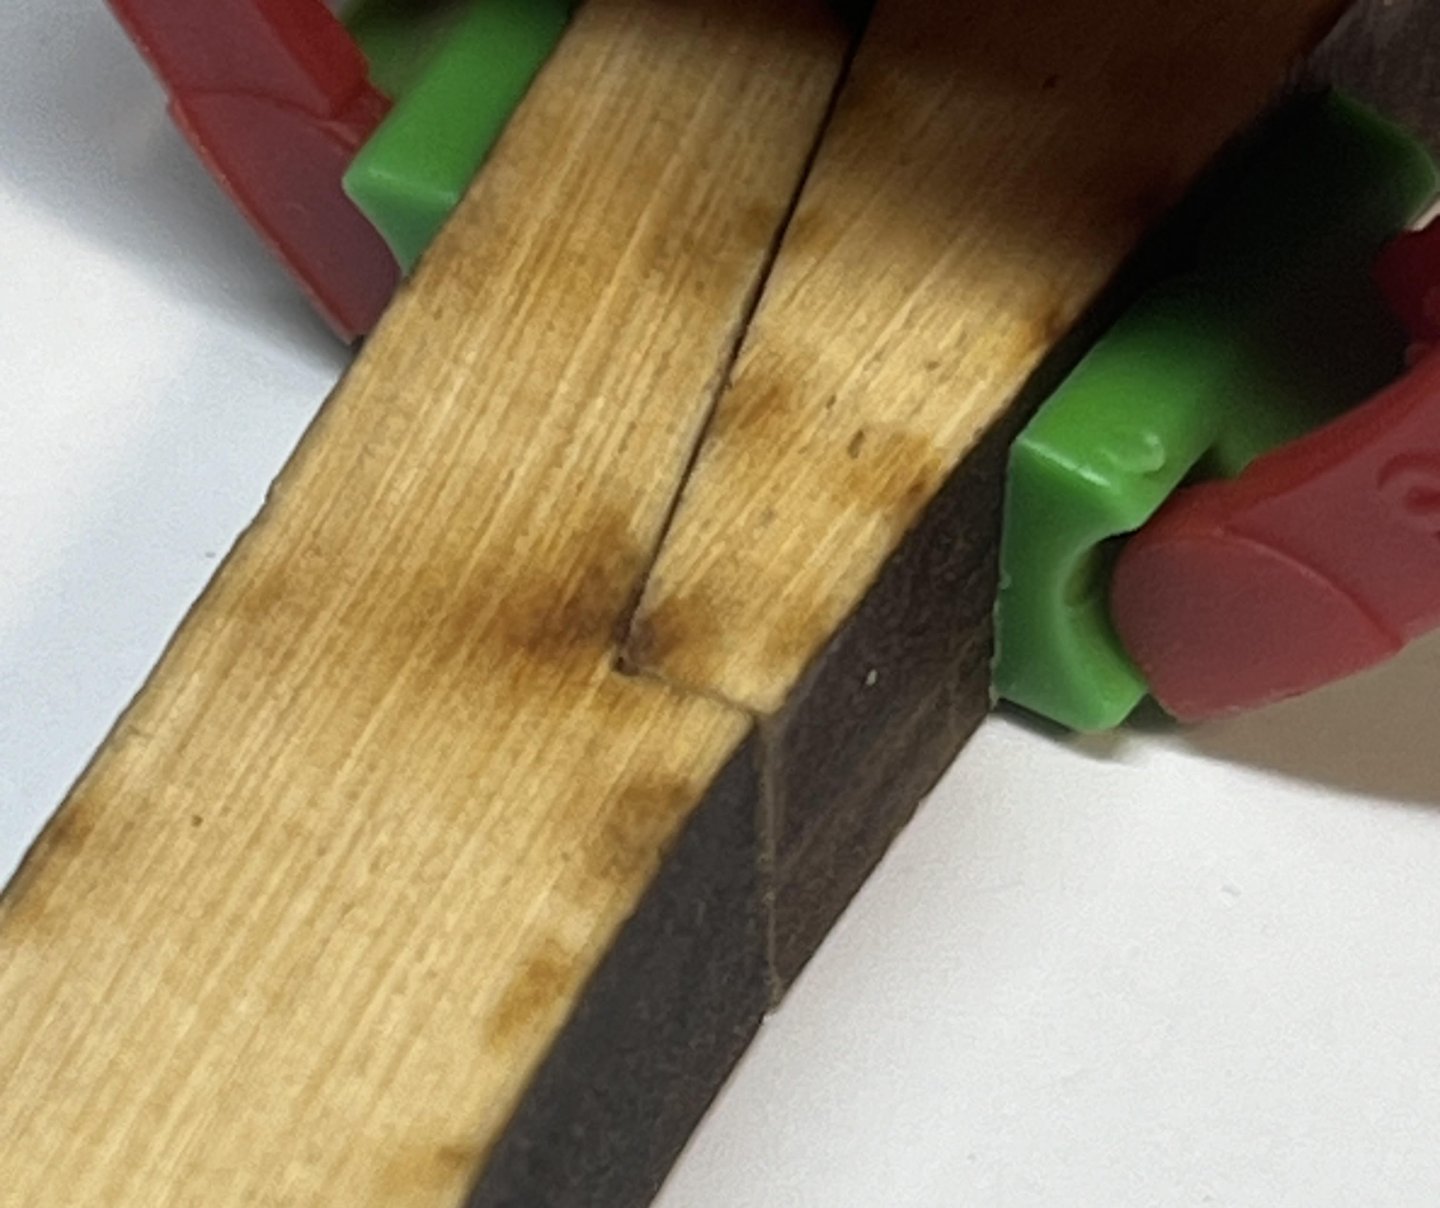

-
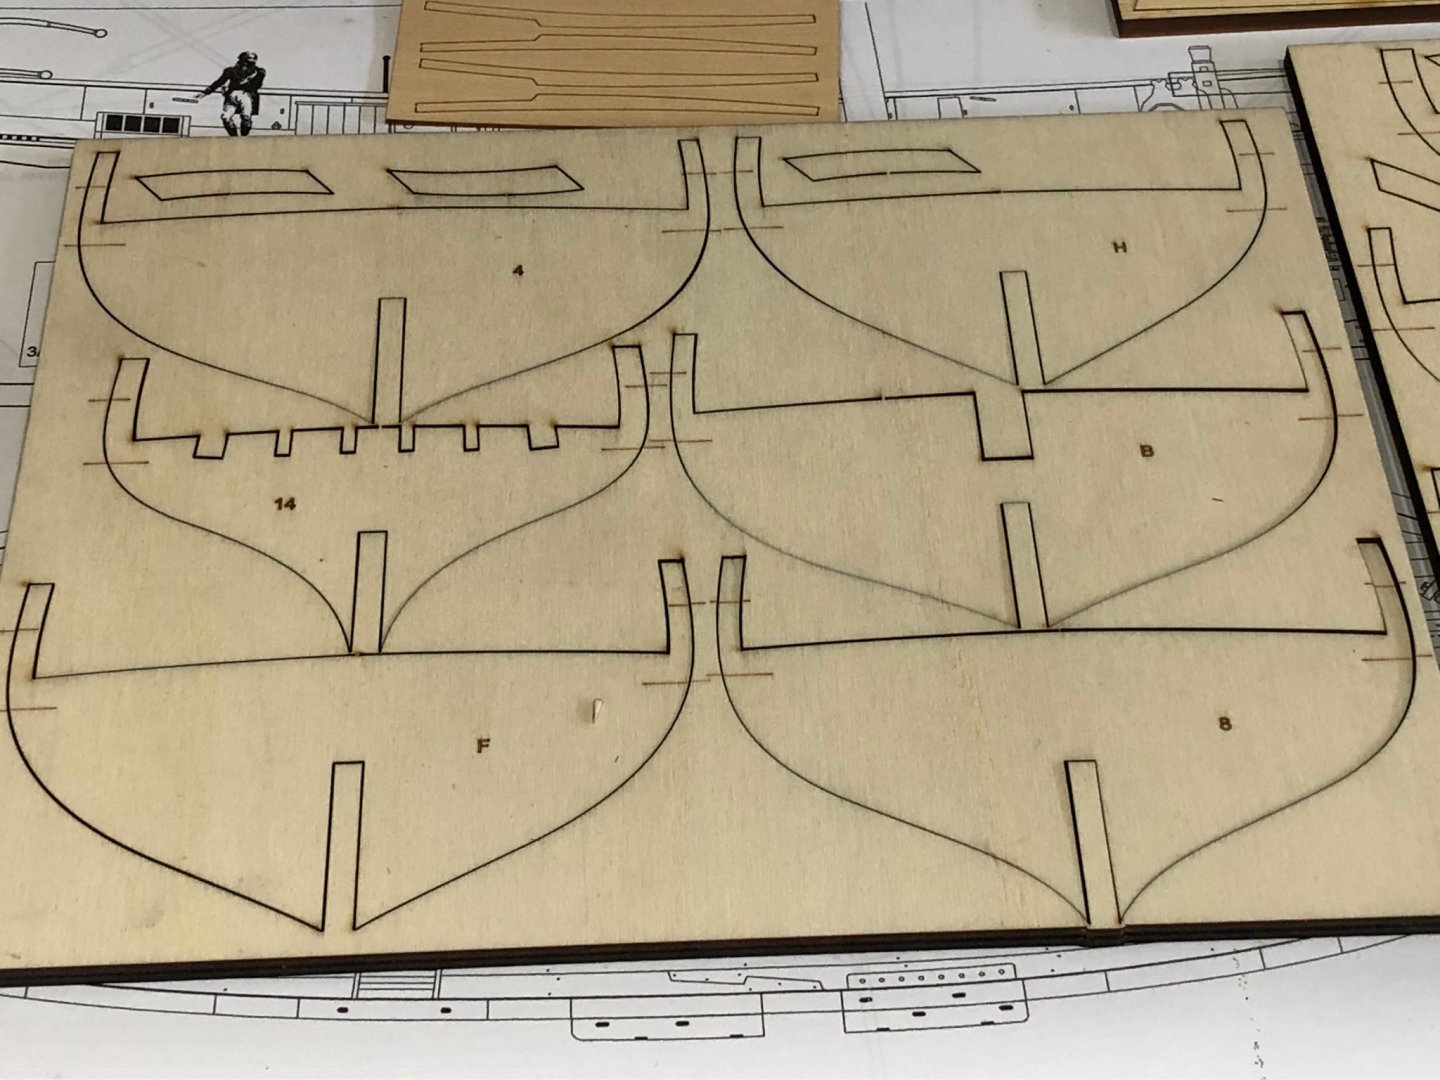
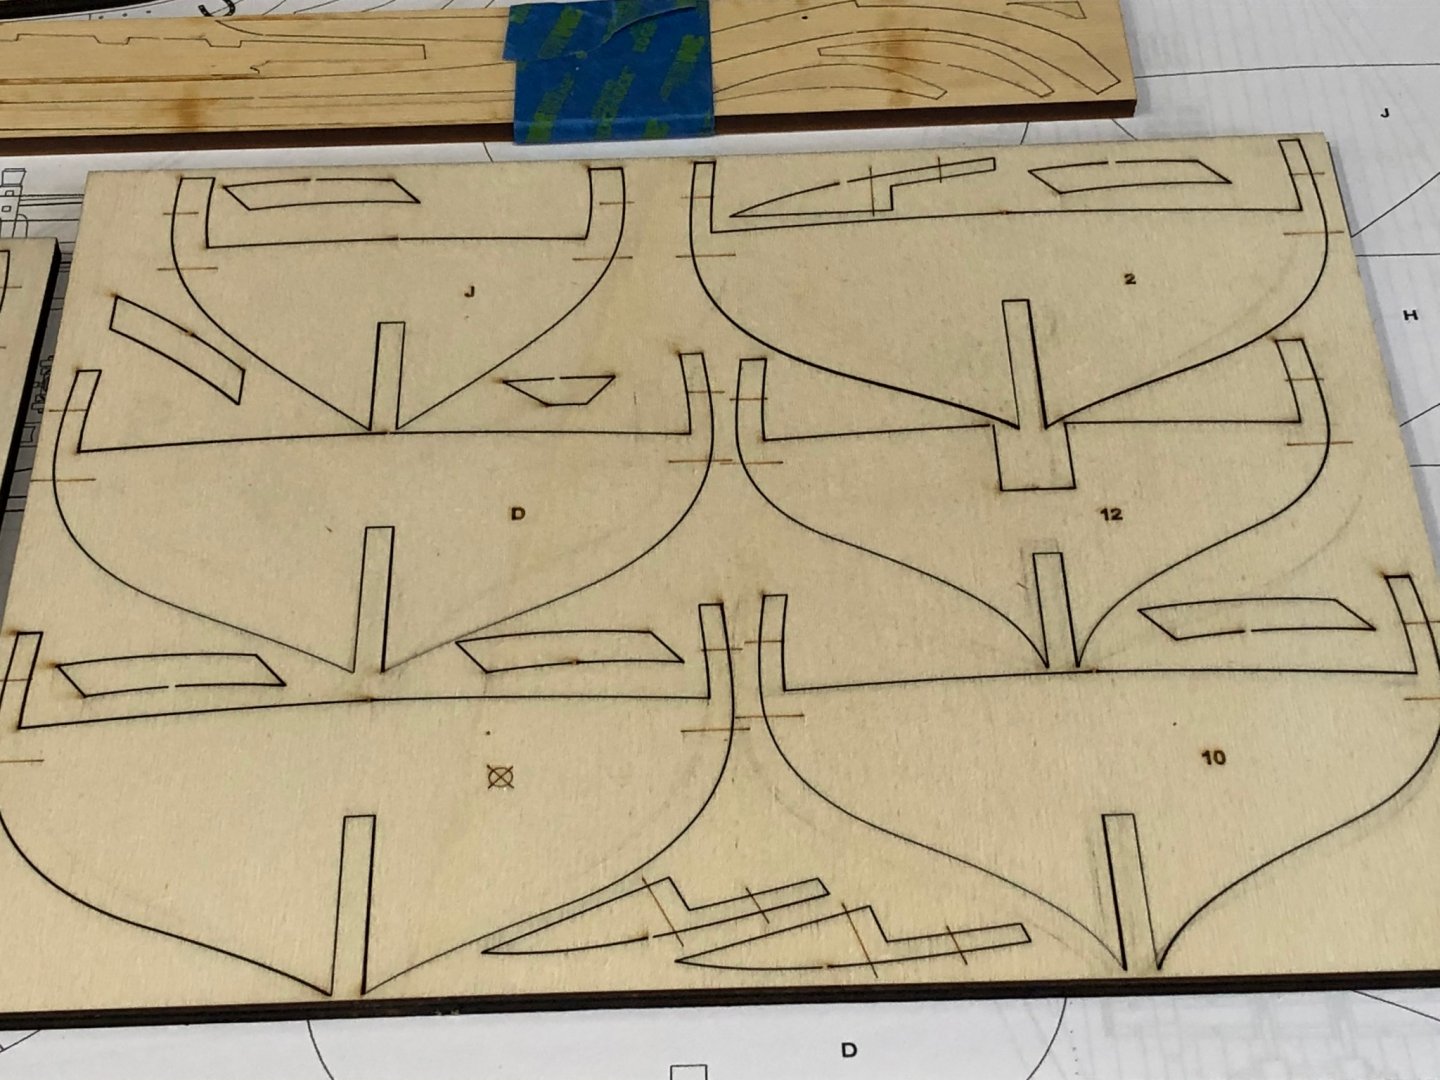
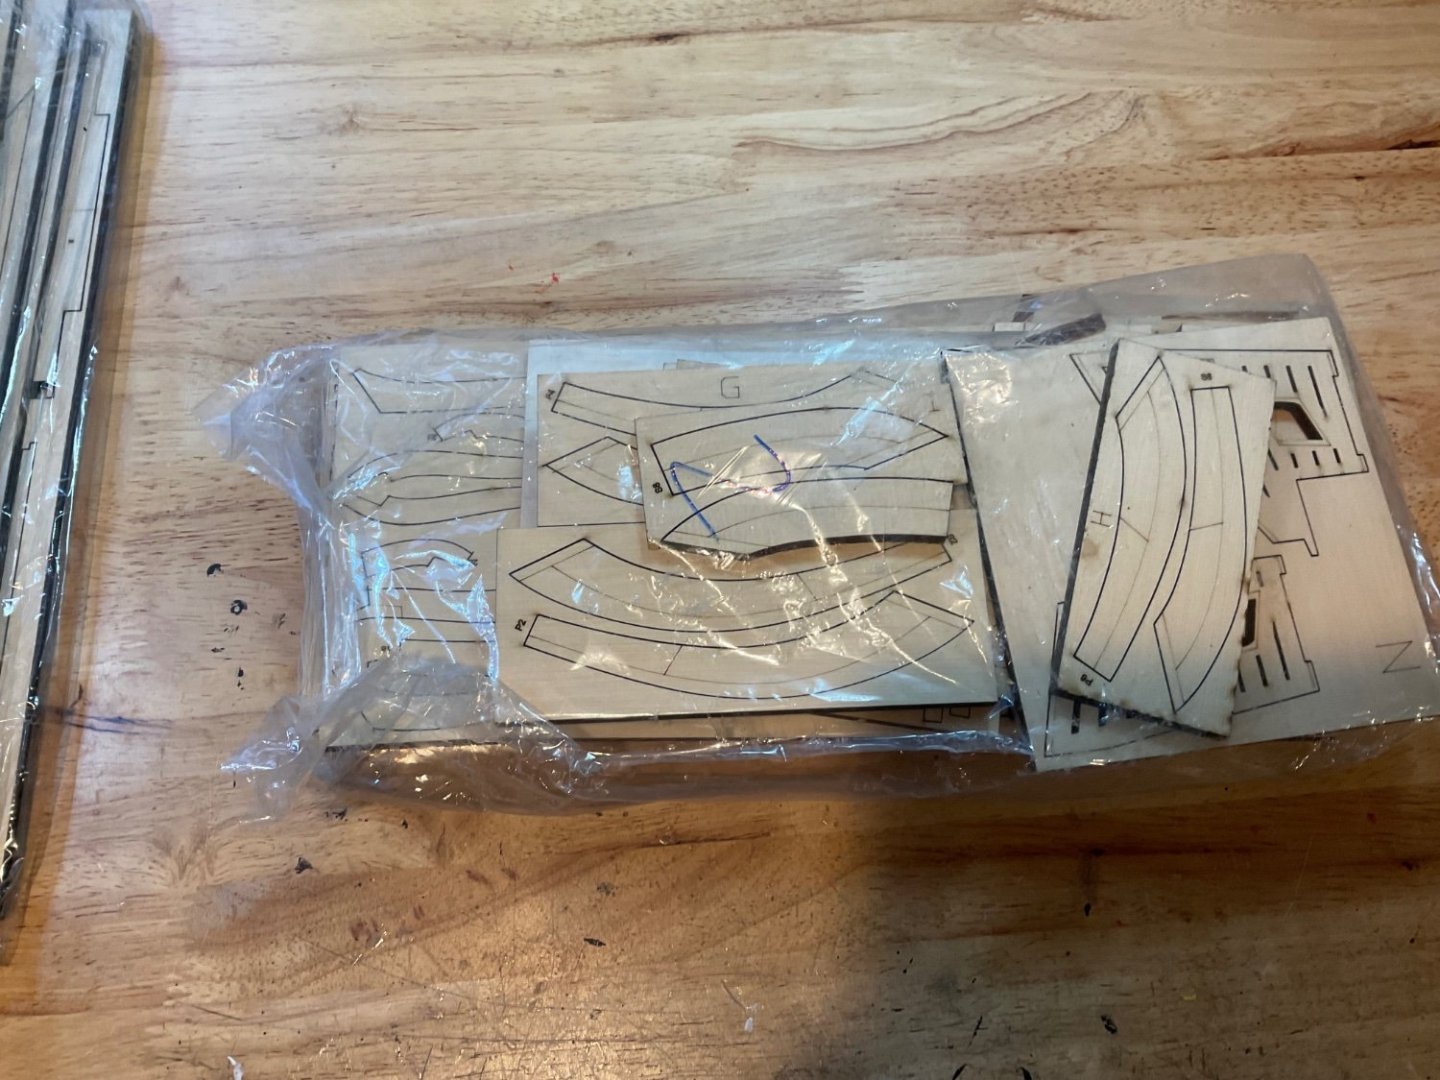
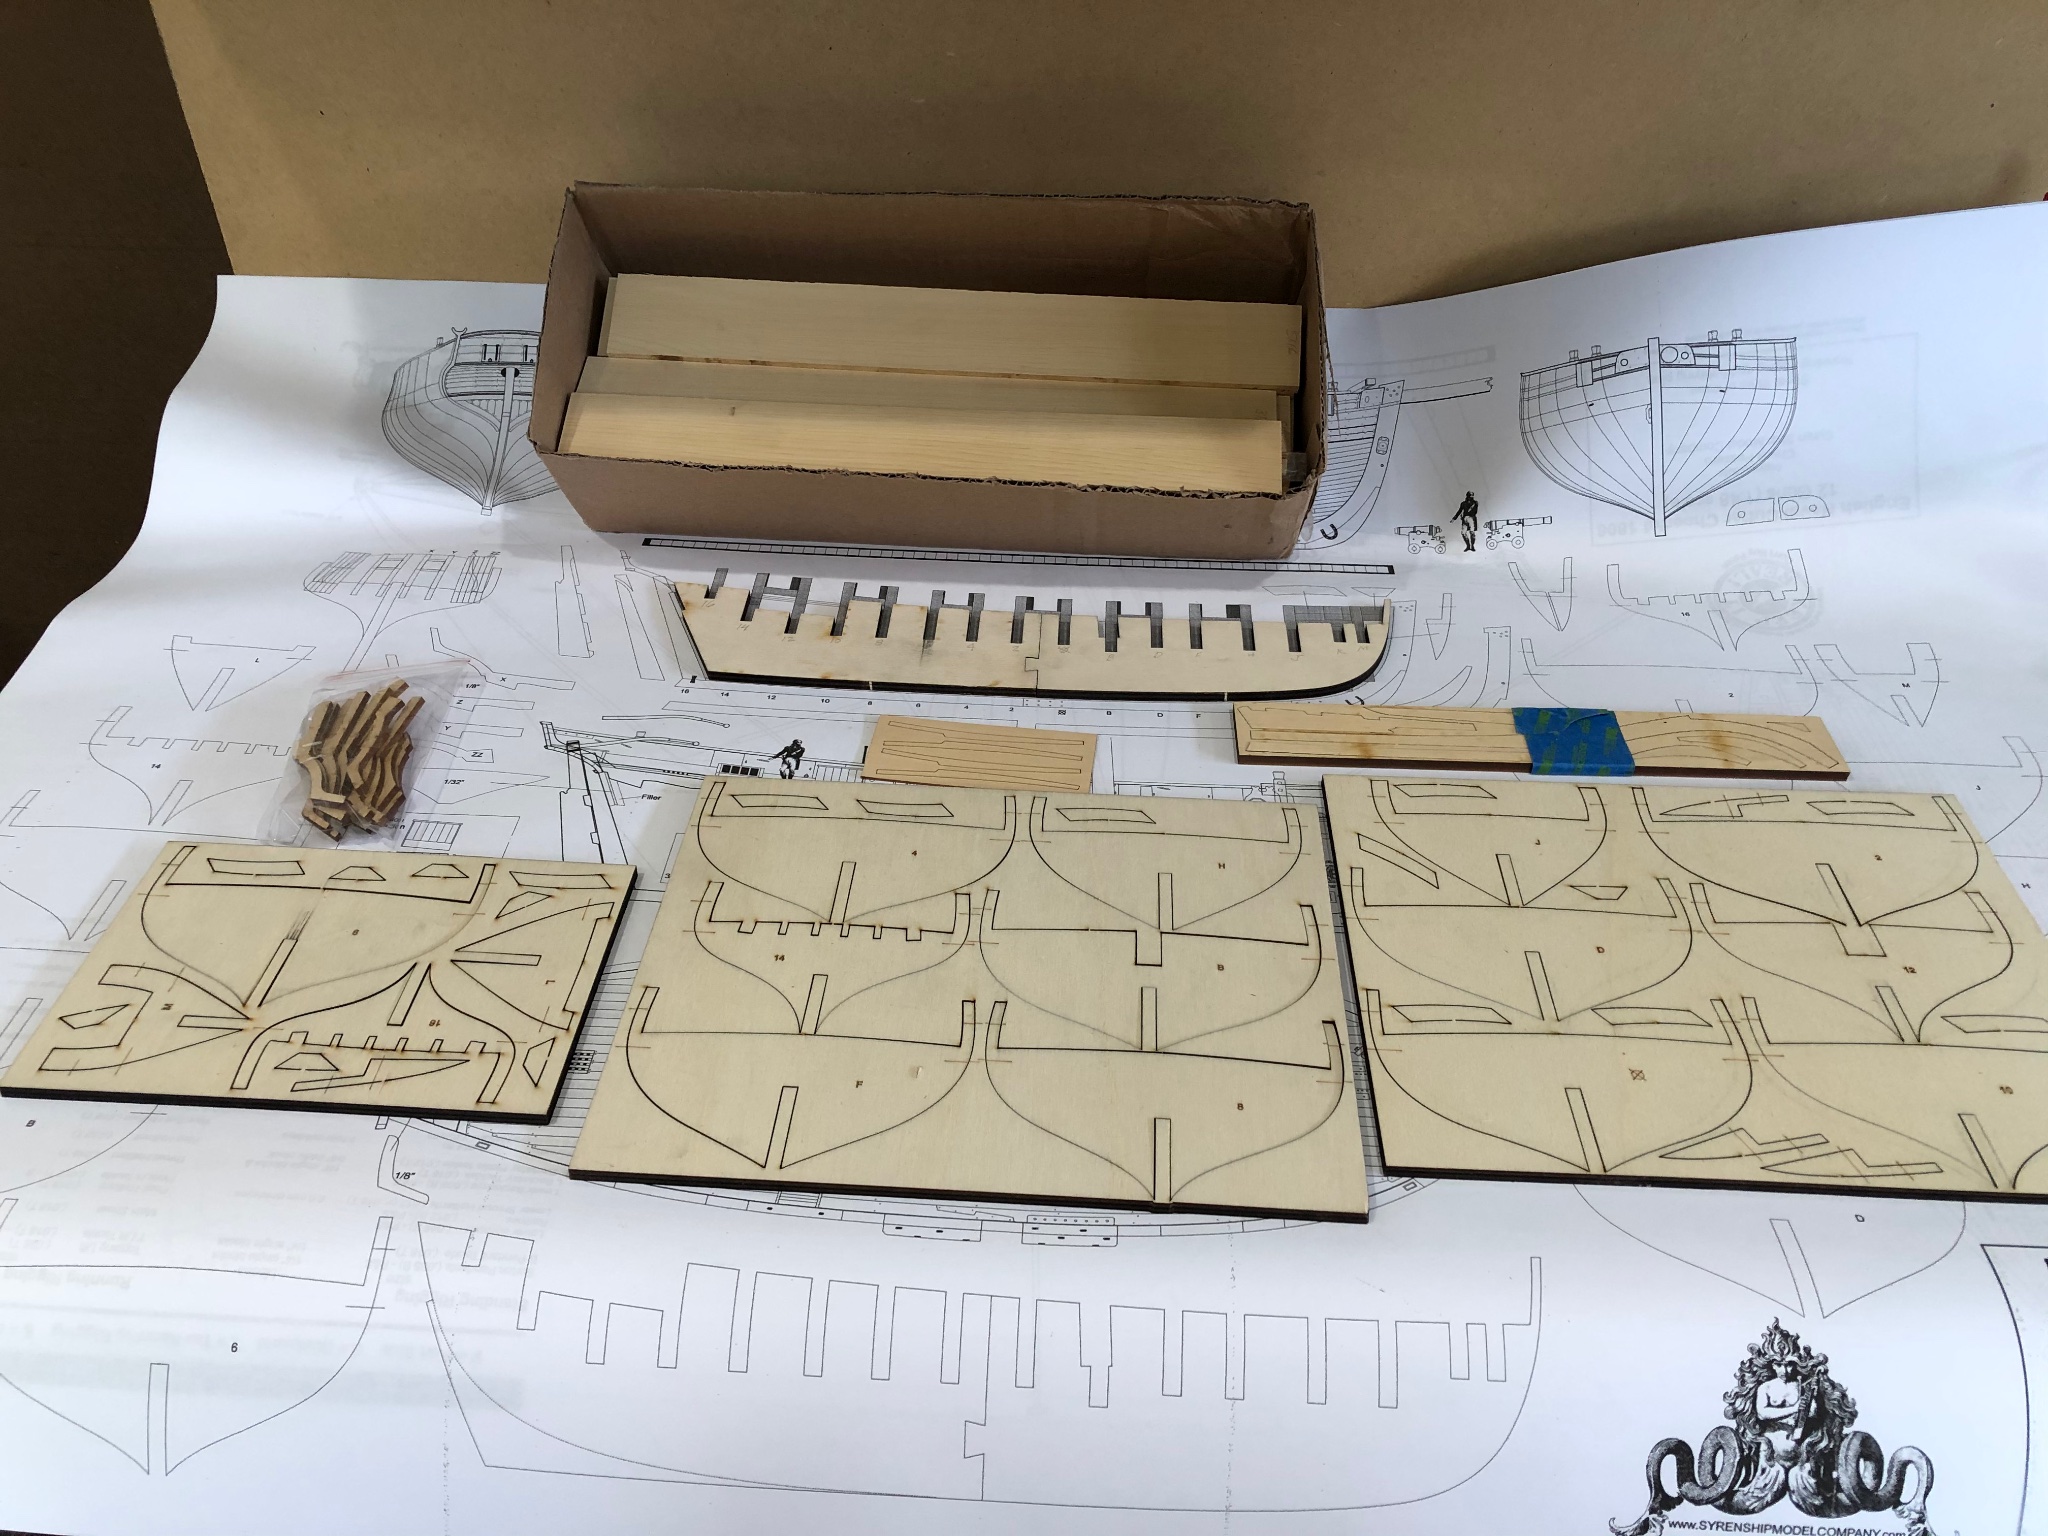
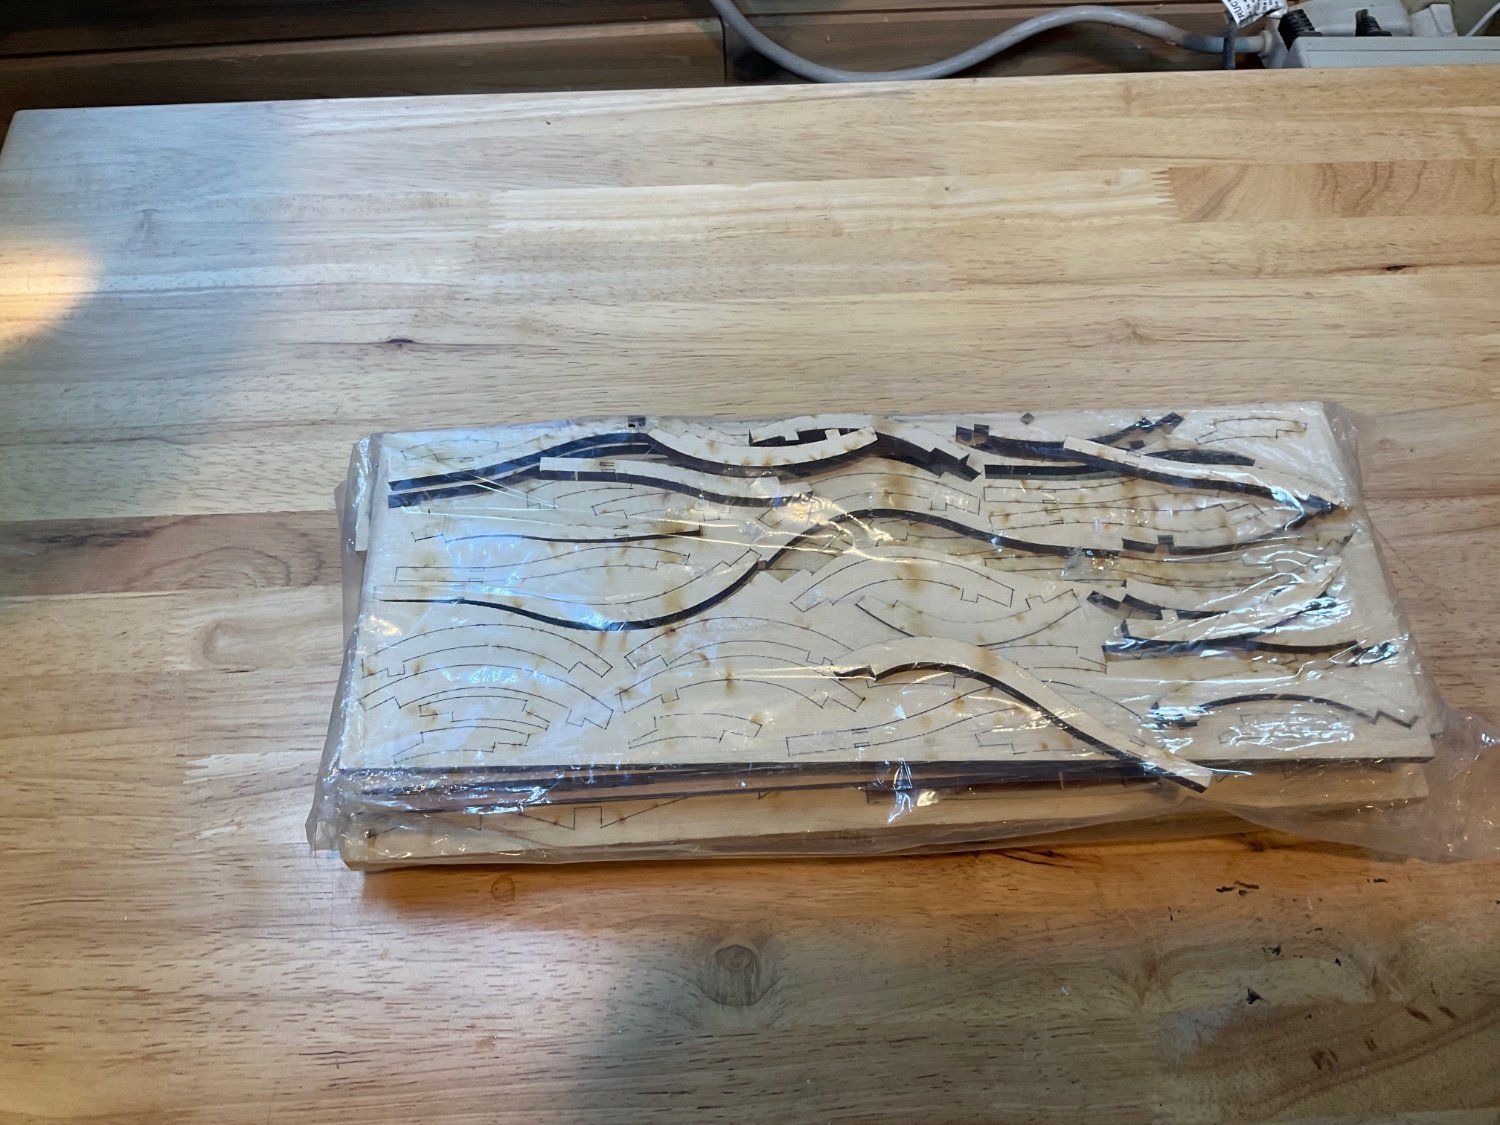
 Received a large box containing Speedy about 5 days after placing order. The first thing I always do is inspect parts. Many parts where loose in the box so spent a couple of hours figuring out whence they went and taping them in place.
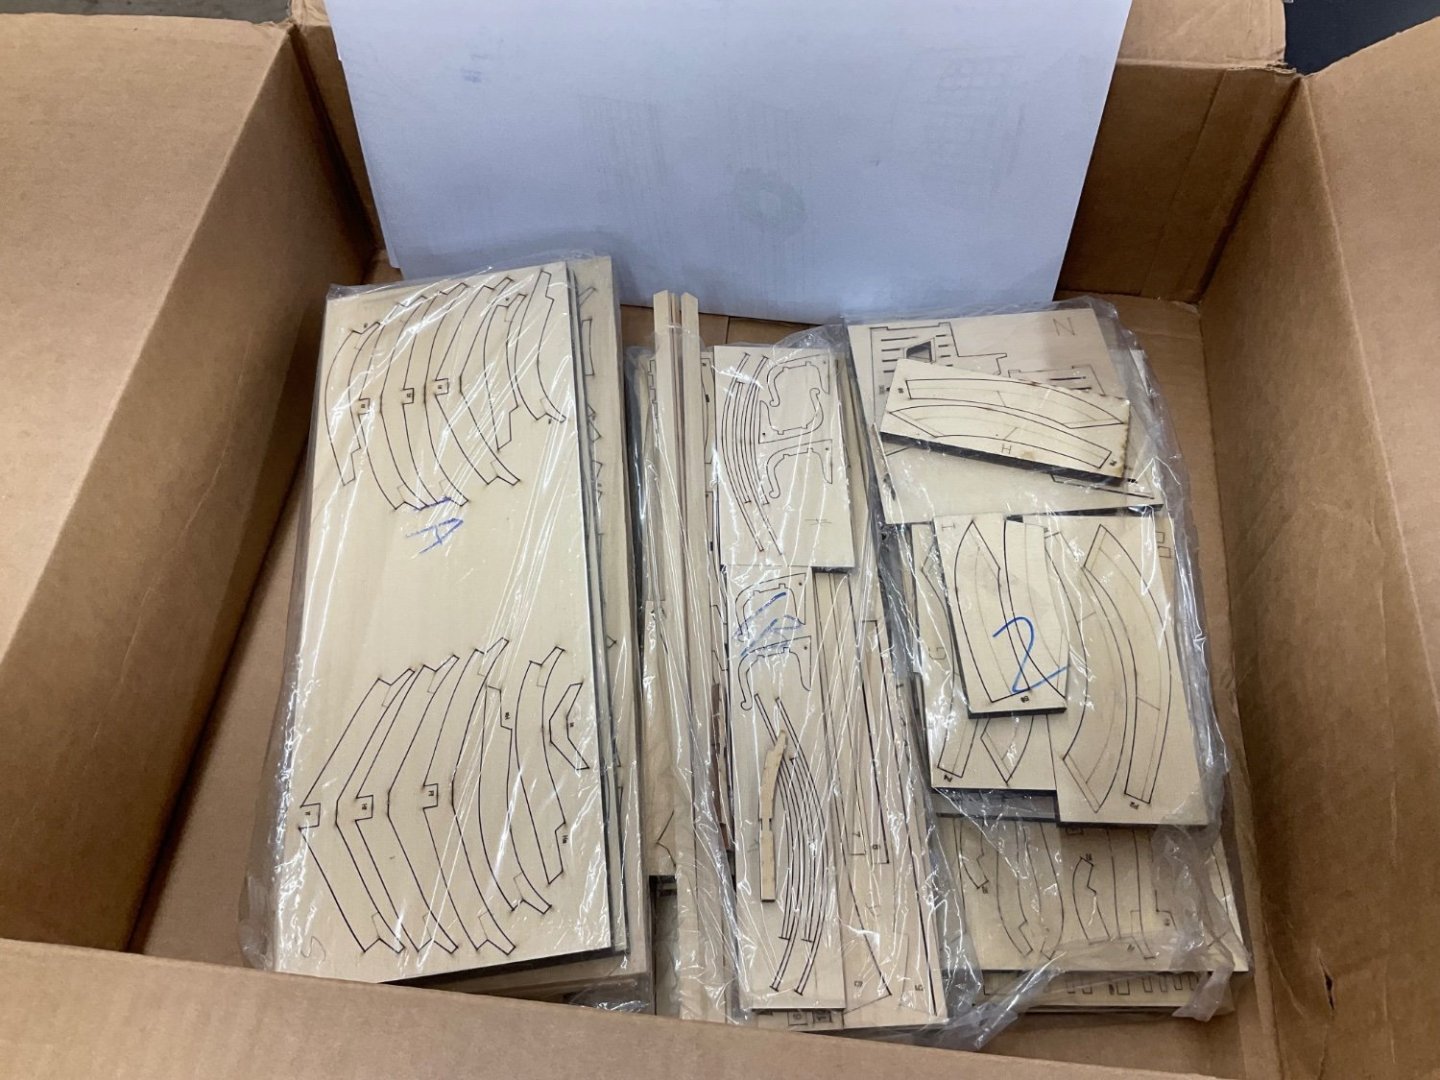

-
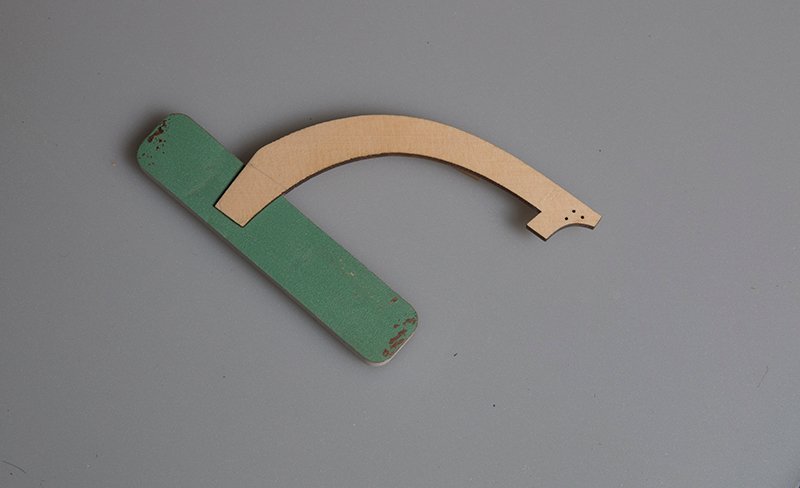
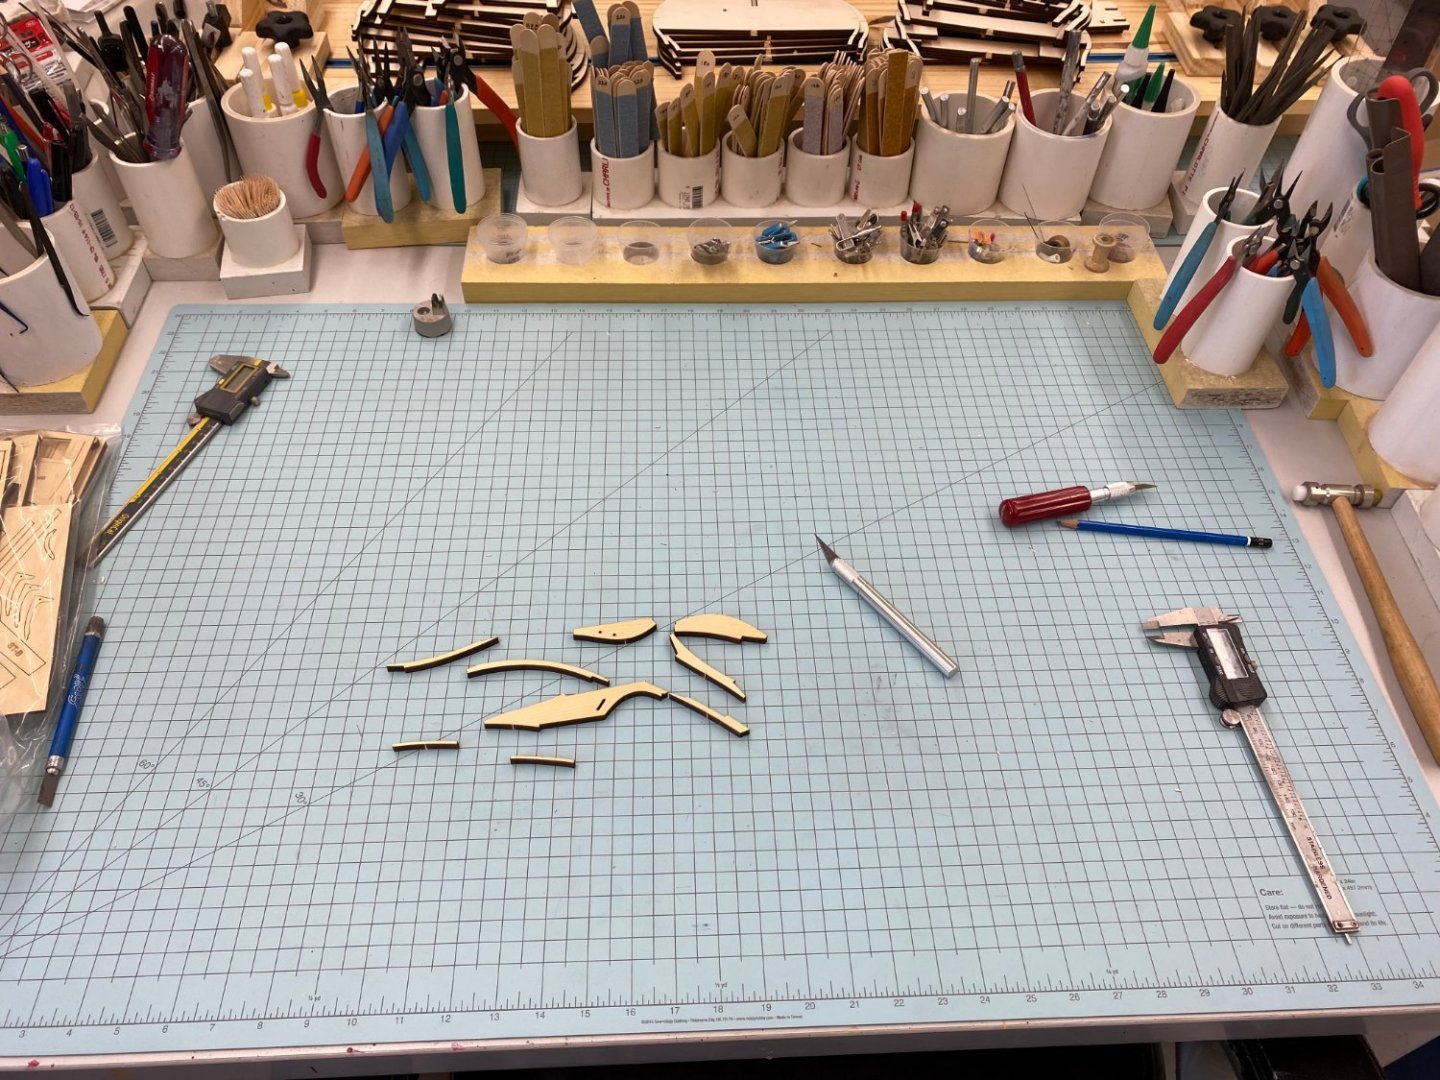
 I am starting another of Chuck's builds today and am excited as I have never used this method of construction before. The first task is to construct the keel. There are two versions - one with scarf joints and the other with lap joints I am going to build both but hope to use the one with the lap joints. Here are the laser cut sheets involved: The Scarph version is quite simple: The lap joint version is more challenging. I started by paring away the joint with a sharp blade and then once close the required depth I finished it off with one of these sanding blocks which have sandpaper on the top only and not on the sides and the two joints assembled: The two versions are shown here: The lengths were identical so I concluded that the lap joints were OK. The parts for the notched keel pieces are nicely etched on the following sheet Bolts for the lap joints are simulated with black monofilament: These are then trimmed flush with the surface. After a coat of poly the completed keel looks like this: John
-
 Hi Guys, excited to start this awesome project! Chuck, I plan to utilize as much laser cut products as designed by you as I can. I will probably be building in Alaskan cedar or what ever other wood may be recommended at whatever point. My shop space and resources are extremely limited and always on the move so I will be treating this like a kit as much a possible. Thanks for following, looking forward to this! JJ
-
 As we spoke at the NE Conference, this may be my last model build. It is difficult to say that but I have to be realistic about where I am in life. I can't imagine a more elegant subject to tackle. As you requested Chuck, I enter the "waters" and make a commitment to build a Winchelsea of cedar and will want to build it from your modular or mini kit offerings starting with the "starter" installment. Given the human factors a scratch version is not practical for me. Joe
 -
 Hi boys, Let me you join your group and introduce myself. I am Slovak, I live near Trenčín. I have a manual job so I spend my free time mainly on biking. I am a forum member for many years but I came back to modelling after about twenty years. Two years ago I started with Revenge kit which is rather a scratch build. But I like Chuck's project very much and indeed all your builds guys have inspired me a lot to return to this beautiful hobby. So I couldn't wait any longer and started building Winnie as well. I'm currently finishing the first chapter. I'll gradually upload photos of the build. Now I wish everyone happy, healthy and prosperous new year. Dusan
-
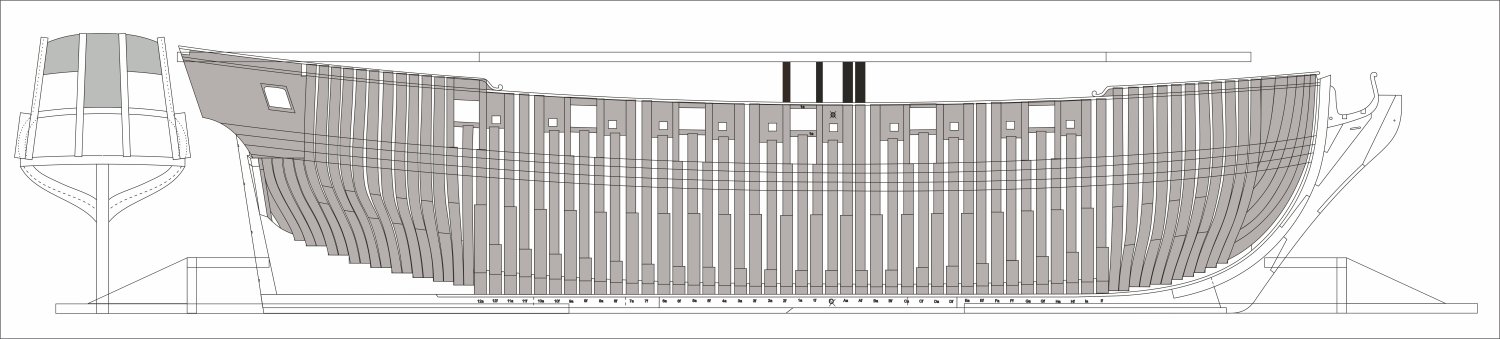
Welcome to the Winnie project. Yes I am starting over again. Many of you might wonder why I would do such a thing. There are several good reasons actually. Let me explain. - About 3 years ago during a flood in my workshop, the 1st Winnie was severely damaged. Although not submerged the humidty and moisture cause the planking at the bow to open up like a banana being peeled back. I did fix it as best I could but I will never be as happy with it now. - It has been a long time since I first designed the project and I have learned a great deal since then. In fact, I have already made numerous adjustments to the design which will make this model easier to build this time around. After watching so many folks build the Confederacy kit, the Syren and yes even watching Rusty build the Winnie alongside me....I was able to identify several key areas as trouble spots. I have since developed new design concepts to make constructing these areas less troublesome and easier all around. - Over the past several years...5 or 6 actually, I have discovered more info and facts about the Winnies appearance appearance. This includes finding the original draft of the Winnie herself. I originally used the drafts of her sisters to make the design. Although very very close, there are differences and I have made all of the required updates. I found this plan in Sweden of all places. I probably could have just continued and nobody would have noticed....but I would have known what the differences were. Better to do it right!!! - Lastly, as all of you know, this will be a commercial project of some sort. Probably like Cheerful with a starter package and many mini-kits. This project is so much larger than Cheerful and a frigate of this size would be very expensive to model. I wanted to ensure that as many folks who want to build her can give it a try. To use Boxwood or Pear for a project of this size would run into the thousands possibly and be very costly to manufacture as laser cut parts. I still do really want to. But some close friends talked me out of it for good reason. Anyway....the new version will NOT be made of Boxwood or Swiss pear. Instead it will be made out of less expensive materials where I could write about the techniques to finish the wood etc. I think it would benefit others to see a scratch model built from something other than costly boxwood and with some care it can look wonderful.

- 1,784 replies
-
- 44
-
-
- syren ship model
- winchelsea
- (and 1 more)
-
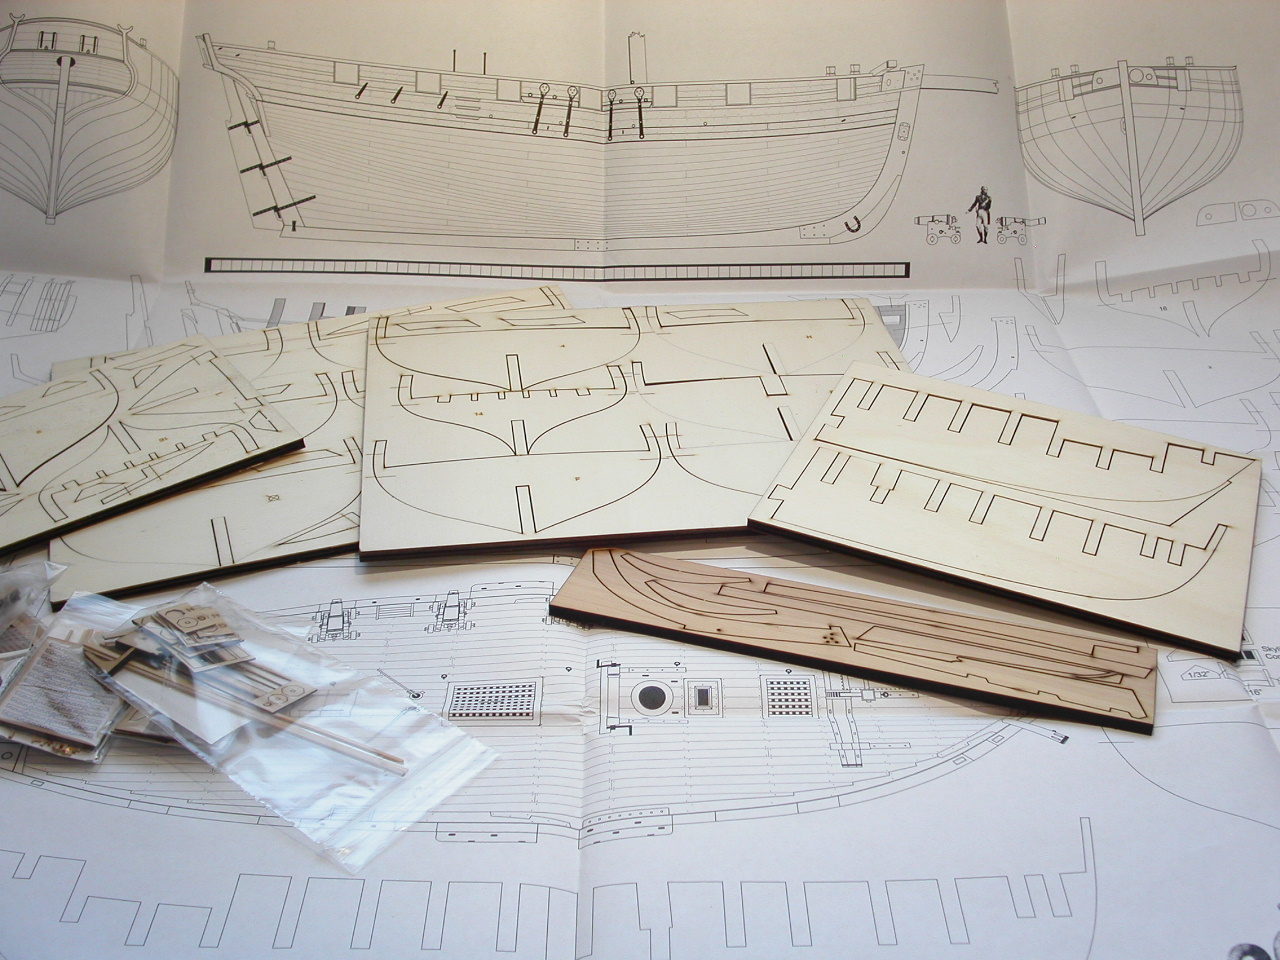
 So I got some happy mail today from Chuck! The laser cut pieces for Chapter 1 minus the bulkheads and bulkhead former. I elected to go with cherry wood. My plan for the bulkheads and former is to cut them out on my X-Carve CNC. My first step is to take the pdf files and get them loaded up in the program; hopefully at the right scale.
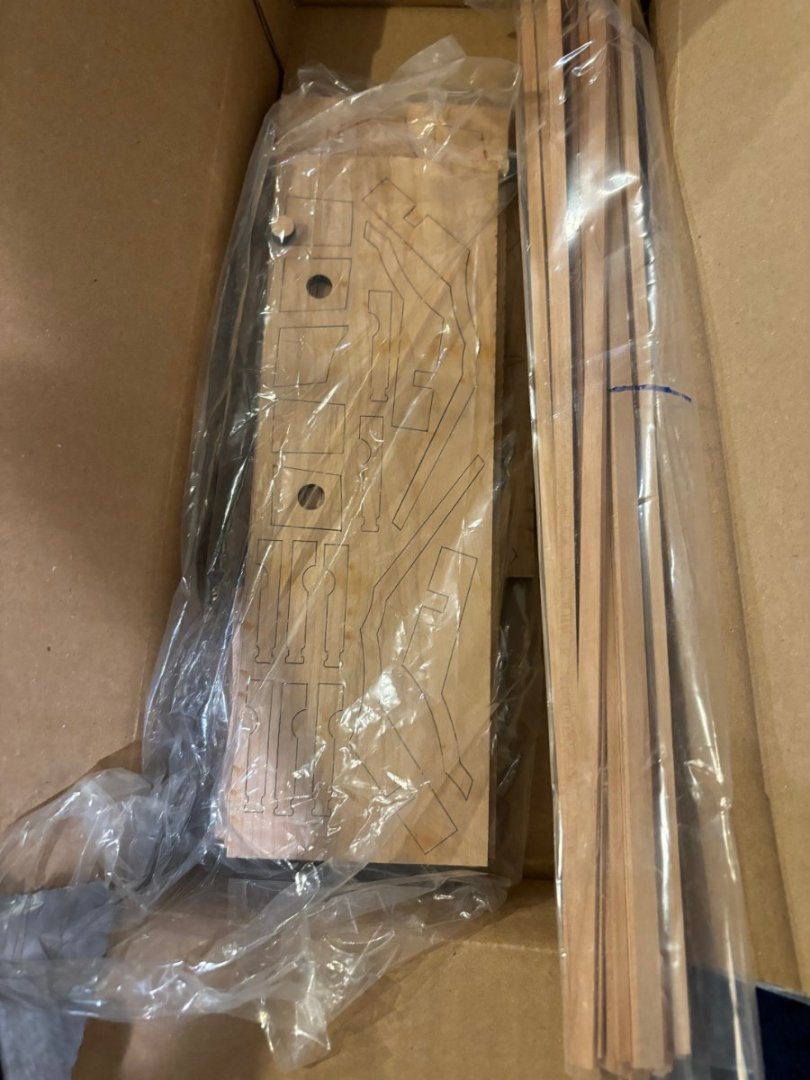
-
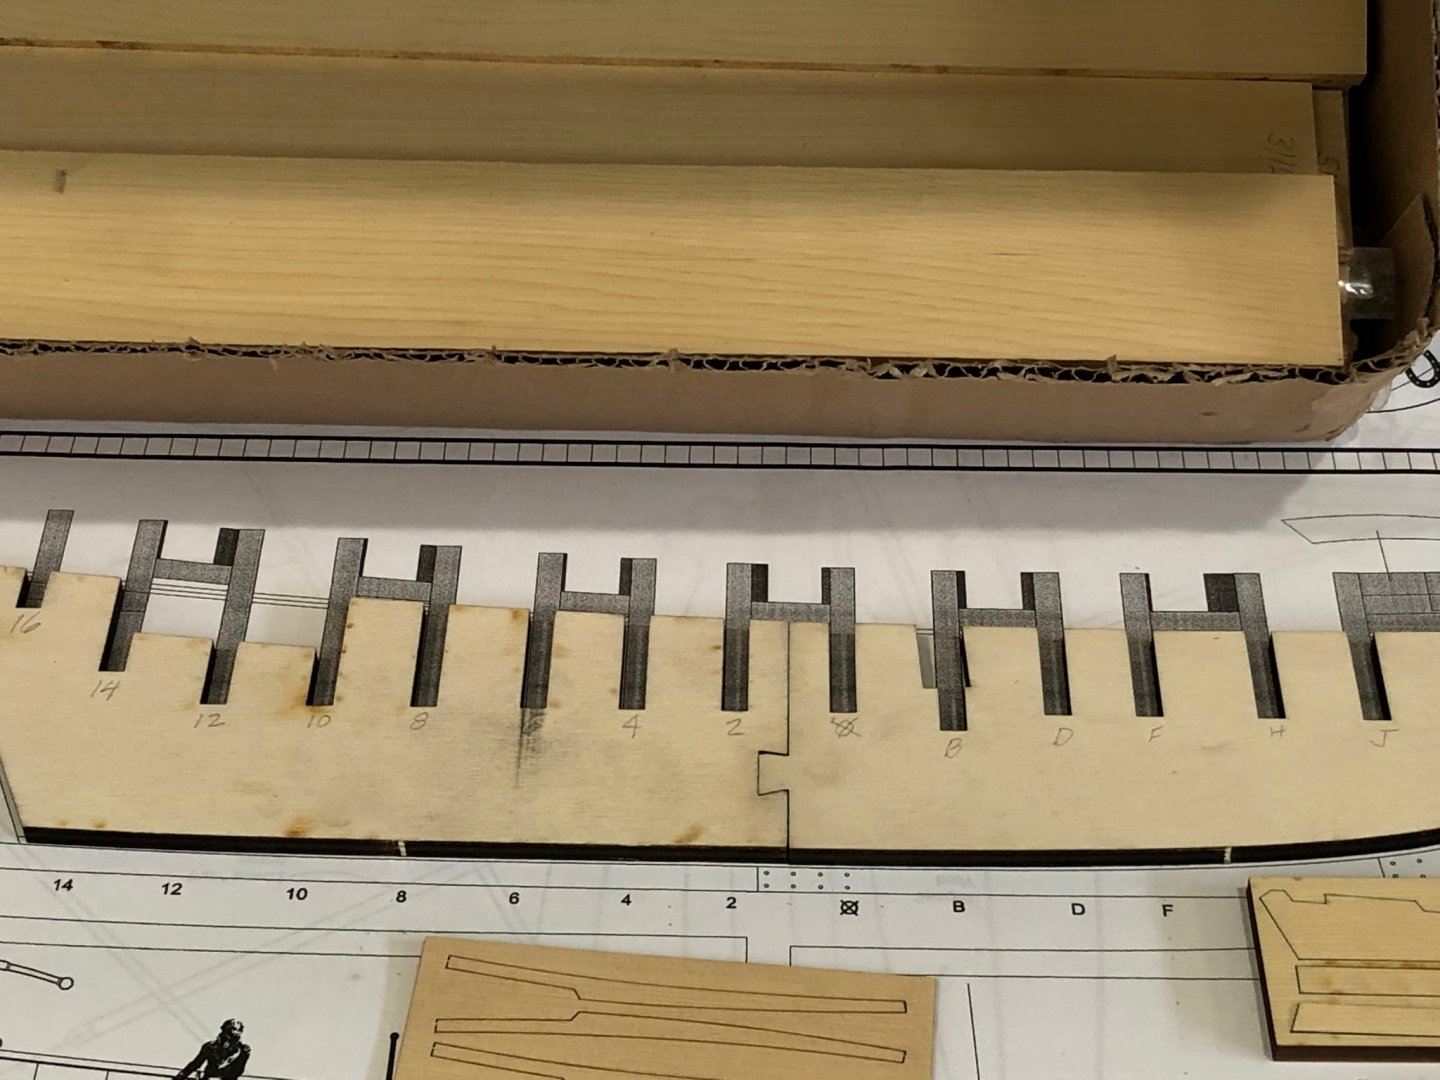
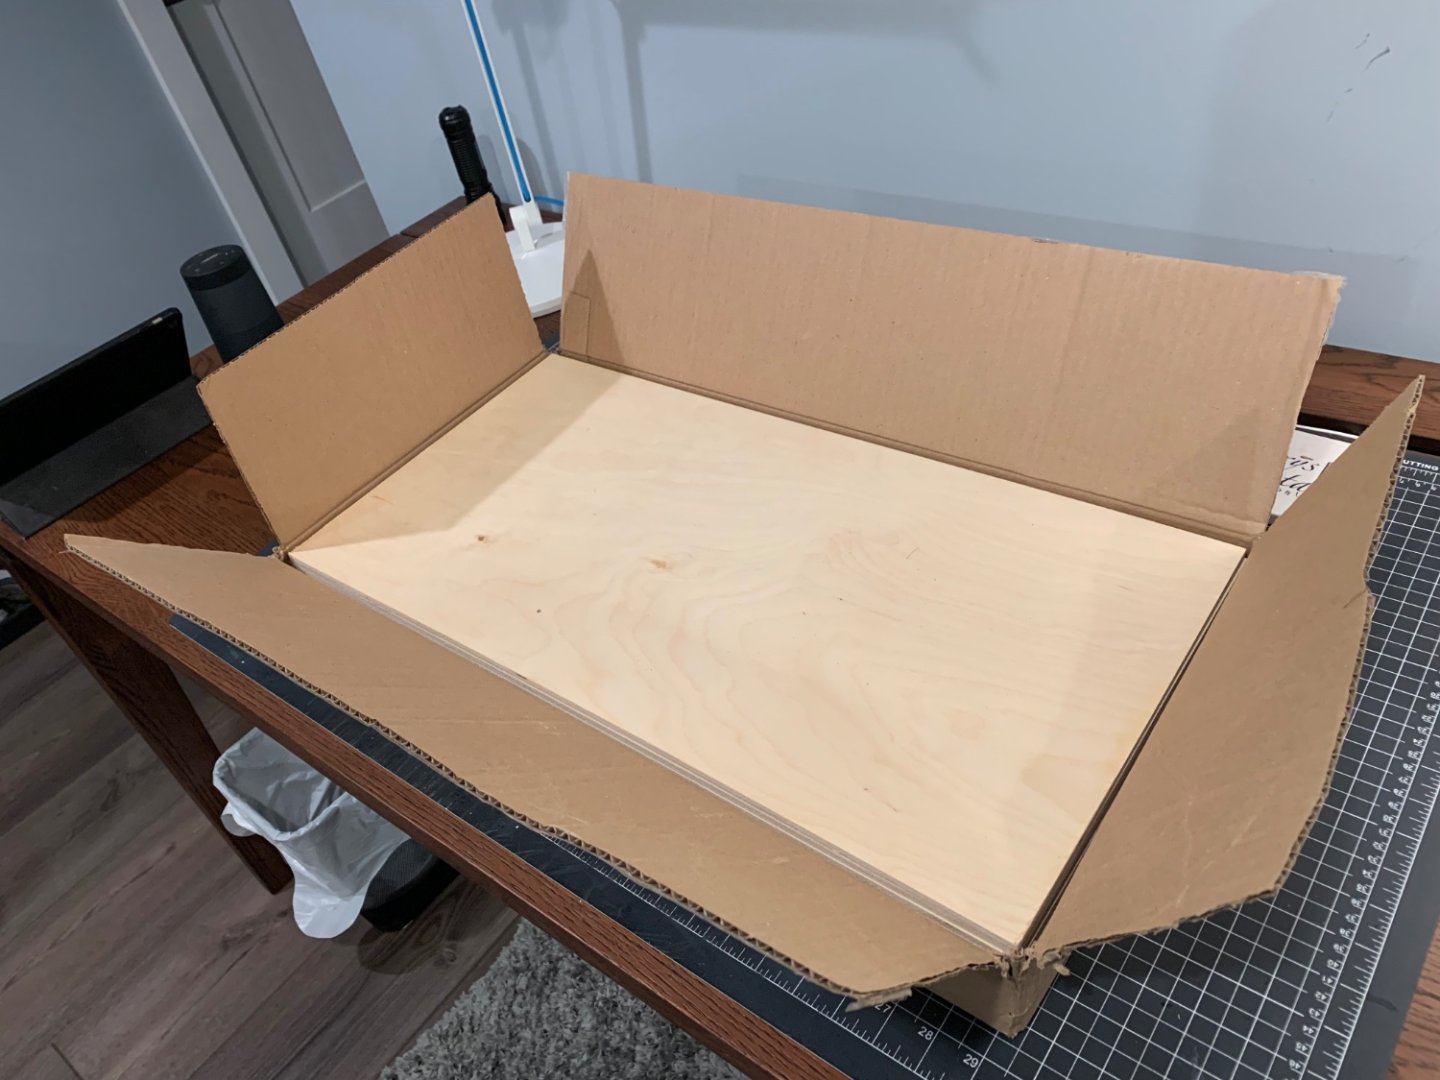
 So I finished the USF Confederacy from Model Shipways and have room in my ship model cabinet for one more model but it has to be "Admiralty" size (i.e. less than 14" high). So not wanting to pay for all the masts and rigging I decided to try my hand at Winchelsea. I spent the last few days cleaning up the workshop and getting ready to start although I will not get too far as we leave for three weeks the end of the month. So here we go. I spent a good deal of time on the build board as suggested in Chuck's monograph. I used this same build board for the initial stages of Confederacy construction so I thought it would work here as well. As it turned out all (or almost all) of the "fittings" that I made to hold the center keel are too wide to fit between the bulkheads here since there are markedly more than is usual in a POB model. So I made ten new, 3/4" wide ones. Hopefully they will work out but "no plan survives first contact with the enemy". Here is the build board with the center keel and bulkheads. I would point out that there where several instances where the laser cutter did not go all the way through the plywood and I had to cut through the last layer by hand (besides removing the usual "tabs"). I lost a layer of plywood on the bulkhead extensions on three of the bulkheads but do not think that will present a problem. I noticed that the center keel fits together with the center section upside down relative to the front and back - you can see the laser marks on the center section but not on the front and back. I assume this is to take advantage of the slightly offset angle that the laser cuts at (rather than completely perpendicular to the wood surface). This way should produce a tighter fit than having them all with the same side up. Since the keel/bulkheads are not the first step I also laid out the pieces of the stem (I bought the Chapter 1 wood package in Yellow Cedar) on the workbench adjacent to the build board. And now let the fun begin!!
- 389 replies
-
- 16
-
-
- syren ship model
- winchelsea
- (and 1 more)
-
 Greetings! I’m showing up a bit late to the party but hope this build log will still be relevant. I’ve enviously watched everyone’s builds since the group project began and have been working to improve my own skills to the point where I’m ready to take the plunge. I think now the time is right. I’m not getting any younger and after 3 POB builds of various scales I’m thinking why not? I’m pretty new to model ship building as I’ve only been seriously doing projects since 2019. I have grown to love the hobby and the quality of the work members of this forum post daily never fails to awe and inspire me. Ok, a few basics on my build. I’ll be doing my version in Cherry and will mainly be purchasing Chuck’s laser-cut mini kits. In fact, I’ve already purchased the kits offered through Chapter 5 to keep me busy for a while. I’ll be using birch ply for the bulkheads. I’m dreading the faring but wanted the added strength. I’ve purchased a scroll saw and already have a Jim Byrnes Table Saw. I plan on cutting my own planks. My wife and I are visiting our daughter and grandkids in Cincinnati now. I’m wrapping up an electrical project I’ve been doing at my daughter’s house. We return to Michigan next week and I then plan on making some sawdust. Thank you for looking and more importantly for all the wonderful sharing so many of you have done over the last several years. Best, Jim
-
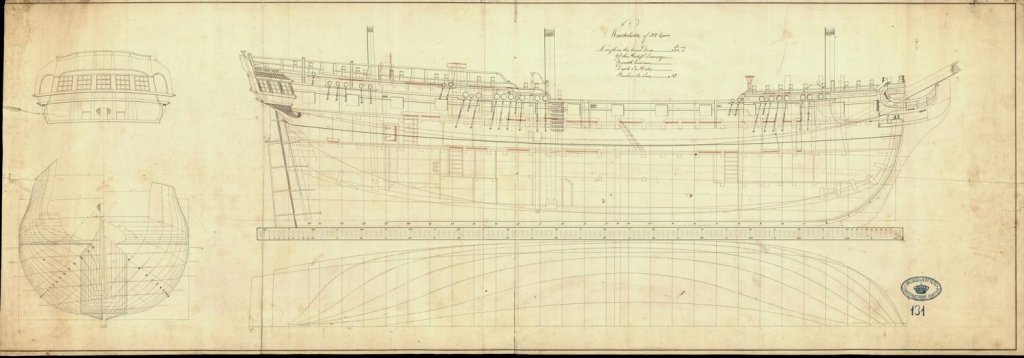
.thumb.jpg.6d6ee4bdbfaac2c58ecc77e7b80ae374.jpg) I am happy to announce that I have purchased the plans and am starting my build log for the HMS Winchelsea. I've been interested in this since the first time I saw the project on the Syren Ship Models website. I'm very excited to start a group project early on in its inception. It will be fun to work on this with so many other modelers. Thank you, Chuck, for putting this together and sharing your hard work and passion with us. I will download the plans and get started on cutting frames this week.
I am happy to announce that I have purchased the plans and am starting my build log for the HMS Winchelsea. I've been interested in this since the first time I saw the project on the Syren Ship Models website. I'm very excited to start a group project early on in its inception. It will be fun to work on this with so many other modelers. Thank you, Chuck, for putting this together and sharing your hard work and passion with us. I will download the plans and get started on cutting frames this week. -
 I'm taking a break from HMS Winchelsea. For those yet to start the Winnie it's a monster requiring real dedication and stamina. And, of course, for the relatively inexperienced model maker you look back at things you've done and think: "If I did that again I think it I'd do it so much better" ( do you, I wonder ever shake off that feeling?). Aan I so want to make the Winnie really well - so a break and a re-set are in order. I've decided to have a go at Chuck's ever so pretty little cutter Cheerful. I have the advantage coming late to the Cheerful of so many superb build logs to follow. This is where I am at the moment. All the best everyone Fred
.thumb.JPG.0b938845c46caa6ebcbe748475641b6e.JPG)
.thumb.JPG.595029c48b2697ec615fbf9f5e95c4a5.JPG)
.thumb.JPG.b3b79138be5a520fb691c9b3074fd028.JPG)
.thumb.JPG.07fbf744fd2d2522f5a8bdb027e4ab31.JPG)
.thumb.JPG.4812e99750d4be057ae7411694d991e7.JPG)
- 111 replies
-
- 17
-


.JPG.cb12e687d44929dcc66df88881c34833.JPG)
.JPG.4938e2a98a8c6d6388a1ac27368e215e.JPG)
.JPG.1dace2813d05f55a51f432fe31583906.JPG)
.JPG.a882ba682feb2b7df635f2ca5fdf4ab2.JPG)
.JPG.072ca9637ad4d6b2cd784f5f9cec5797.JPG)