Search the Community
Showing results for tags 'tamiya'.
-
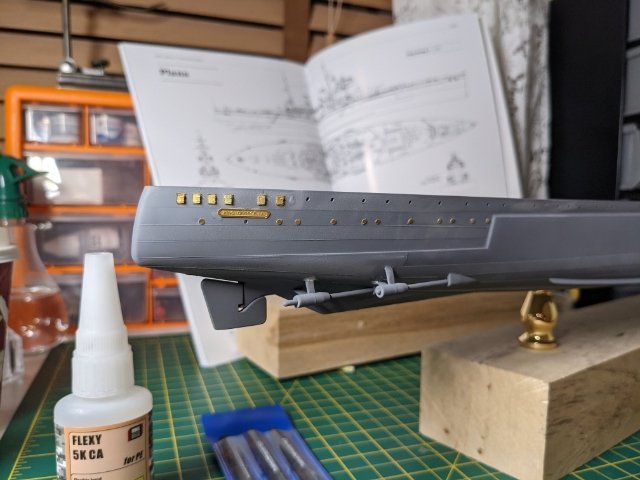
 OK, I'll make a start on my next build log. The 1/350 Tamiya (new tool) Yamato with Pontos upgrade set and numerous other bits and pieces. Those of you that have watched some of my other builds have obviously figured out I like the aftermarket stuff. That being said the kit is enormous, compared to my last build. I also got a cheap old took kit off ebay for painting practice when I get around to buying an airbrush.


- 743 replies
-
- 30
-

-
 Iam working the 1.350 tripitz so far I got some of the hull in paint. iam doing the paint job from 1940 to 1941here some pic .just getting ready to paint the bottom. Comments are always welcome
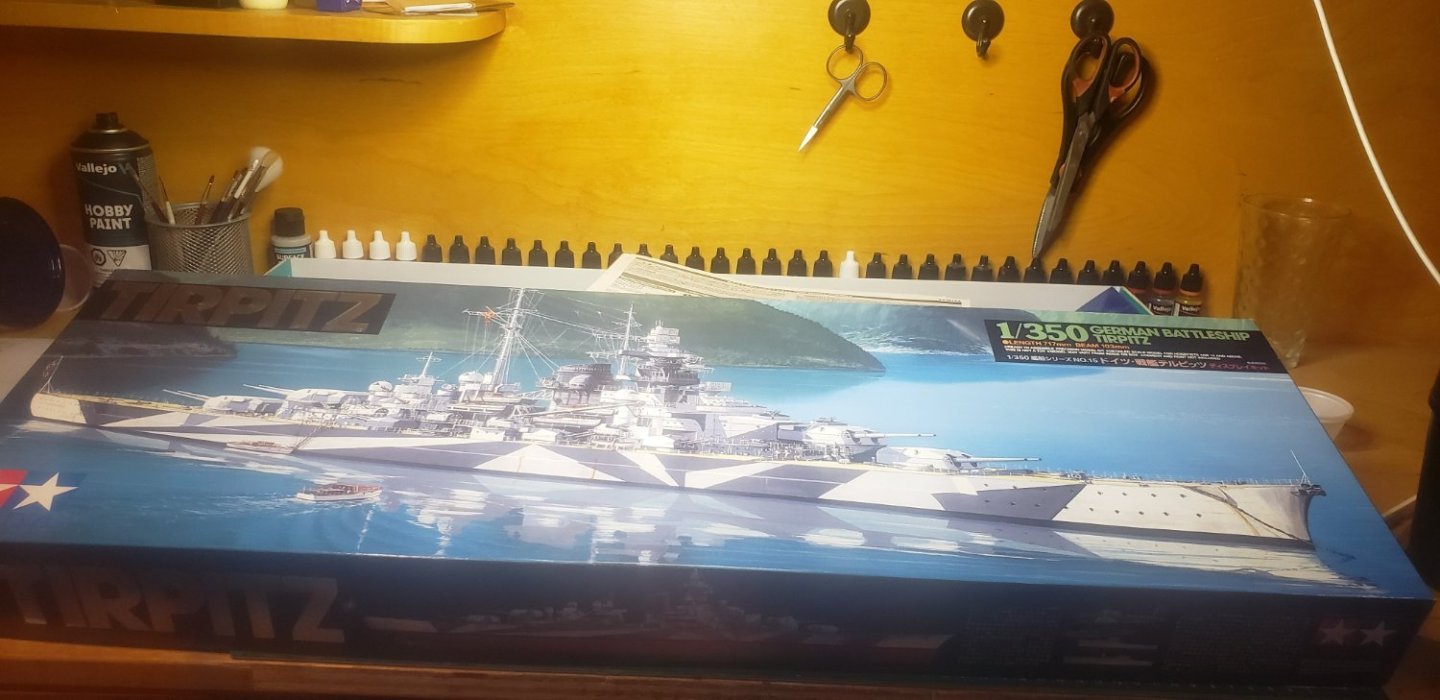


-
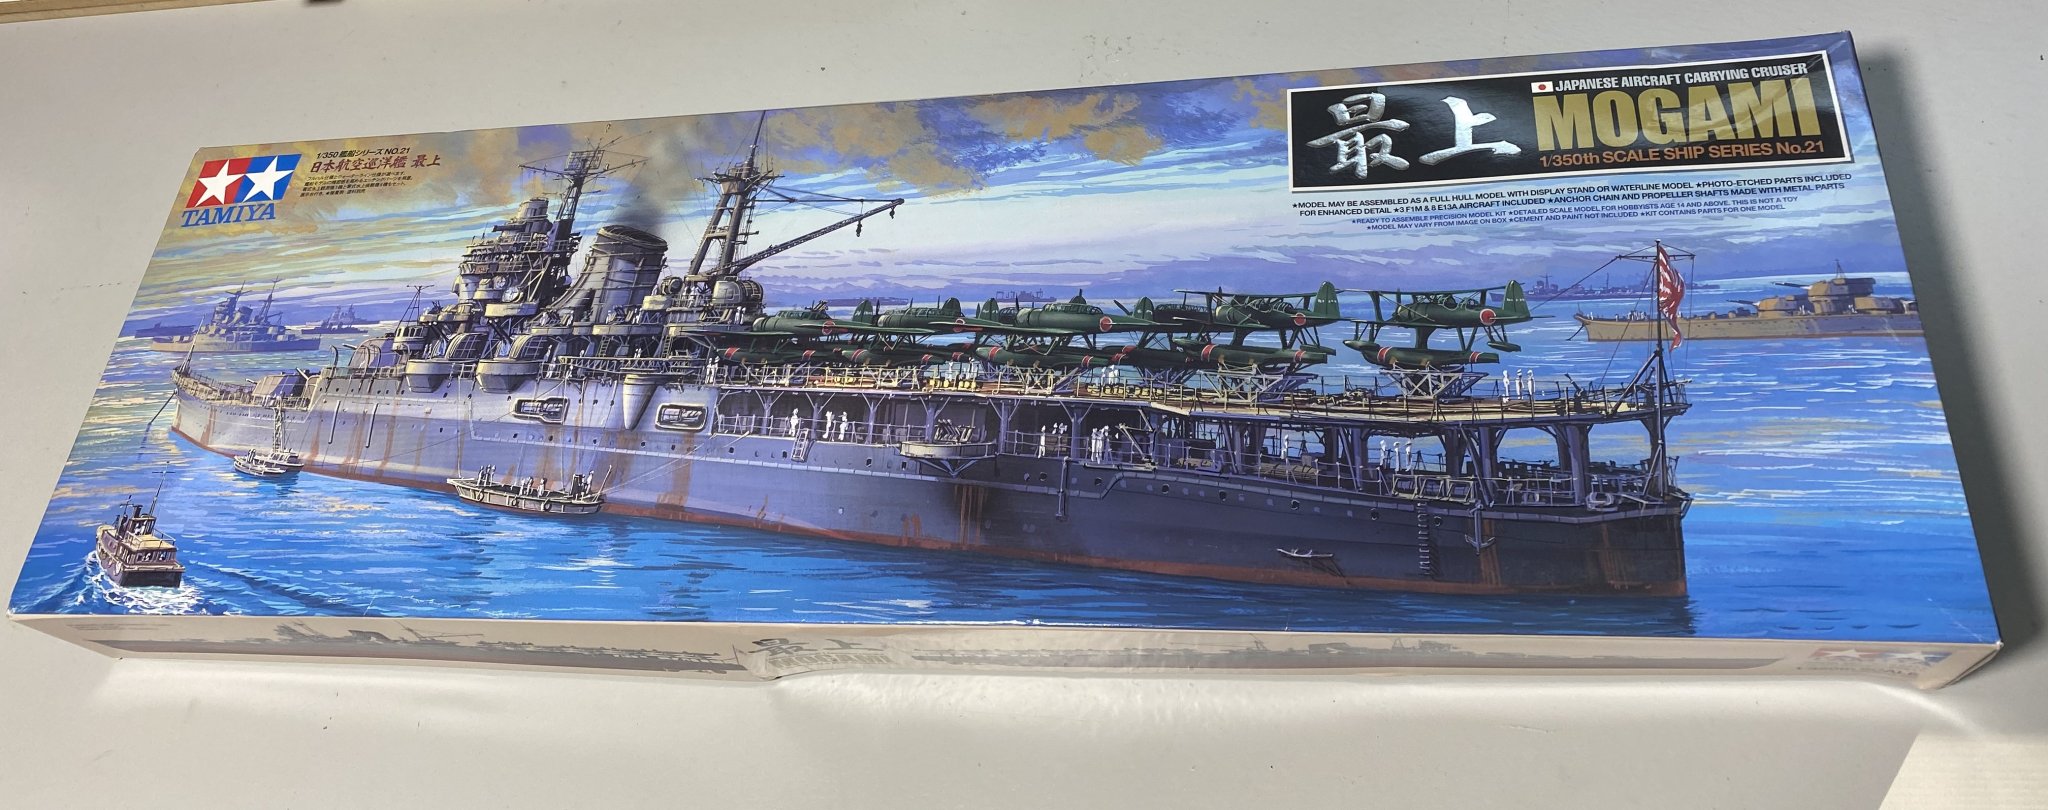
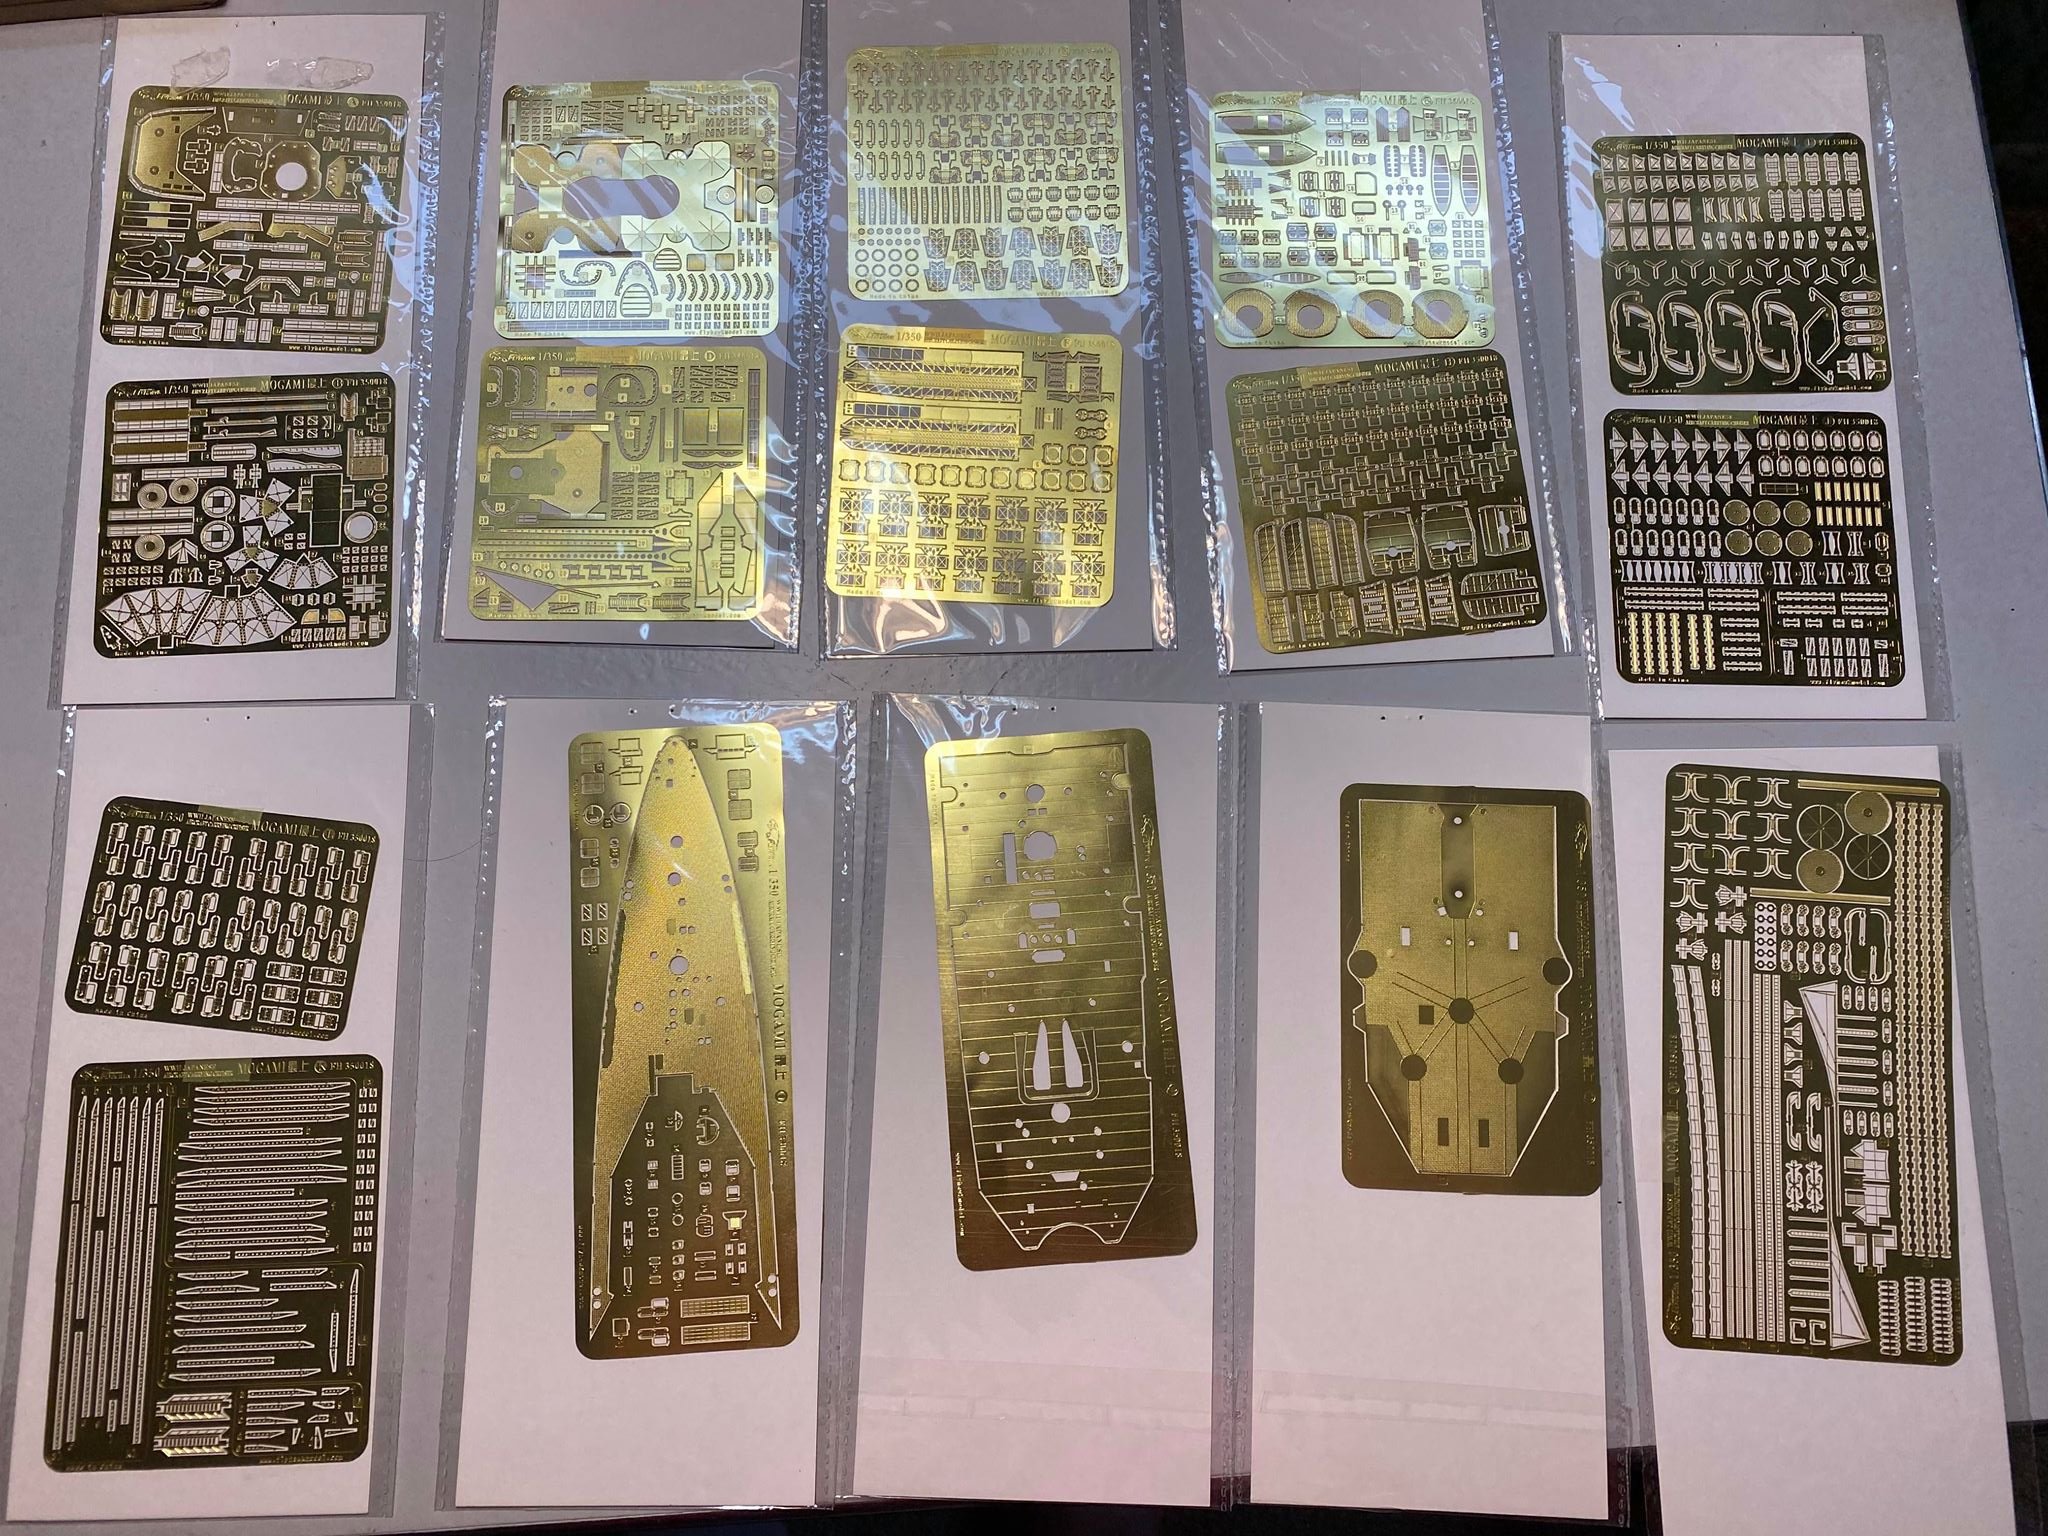
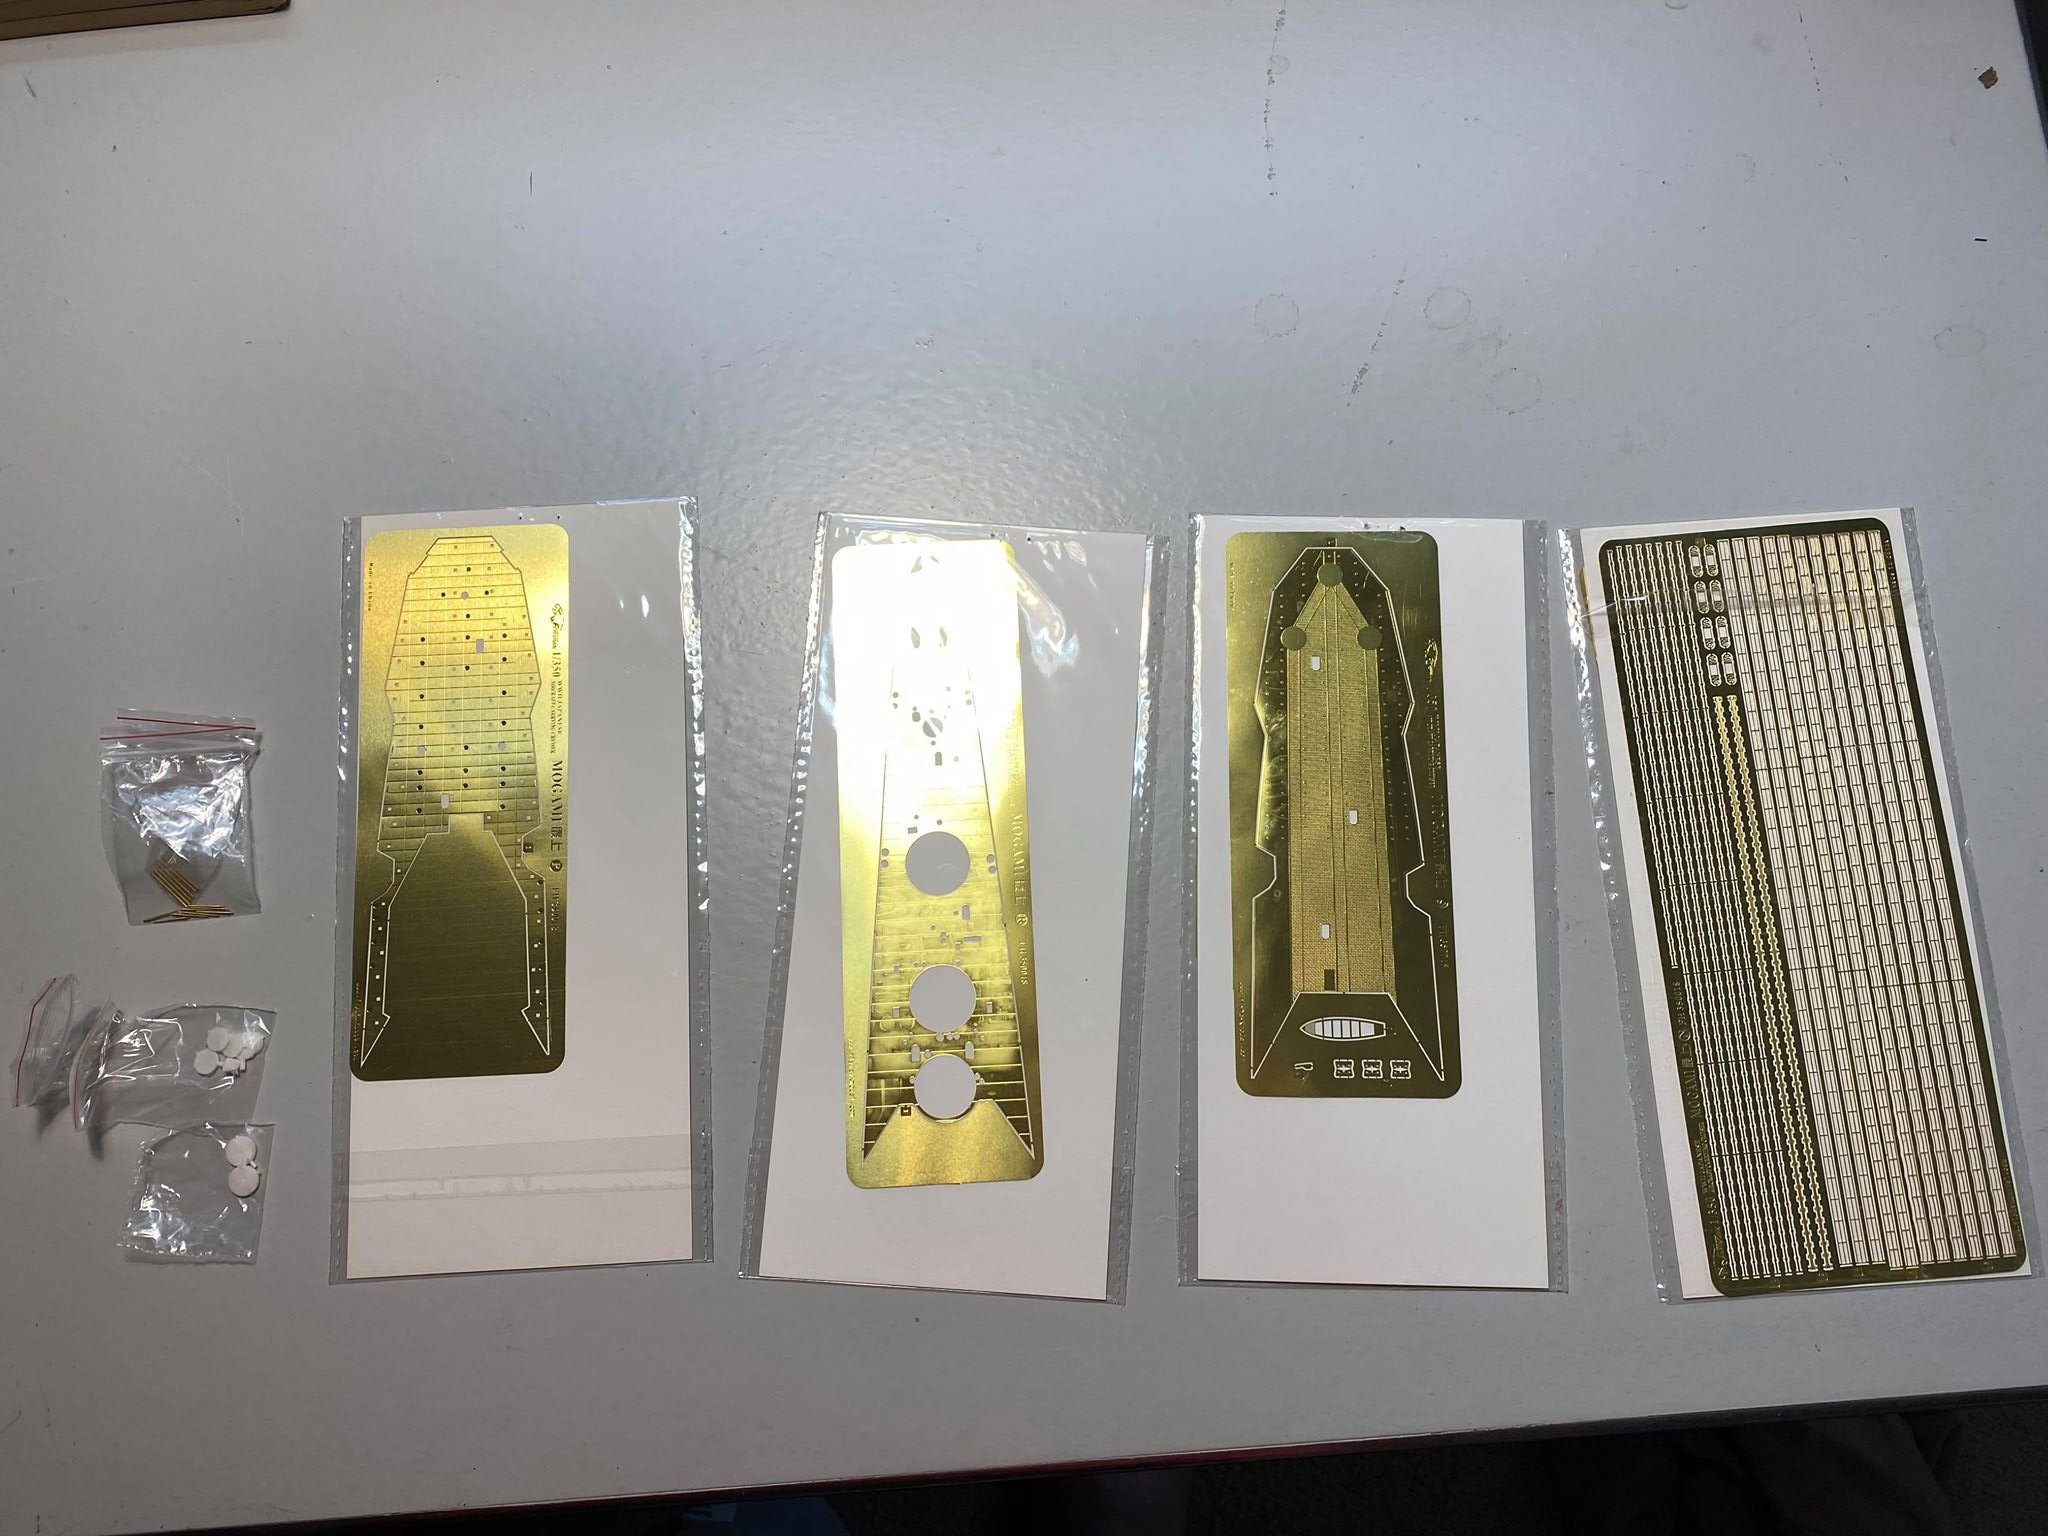
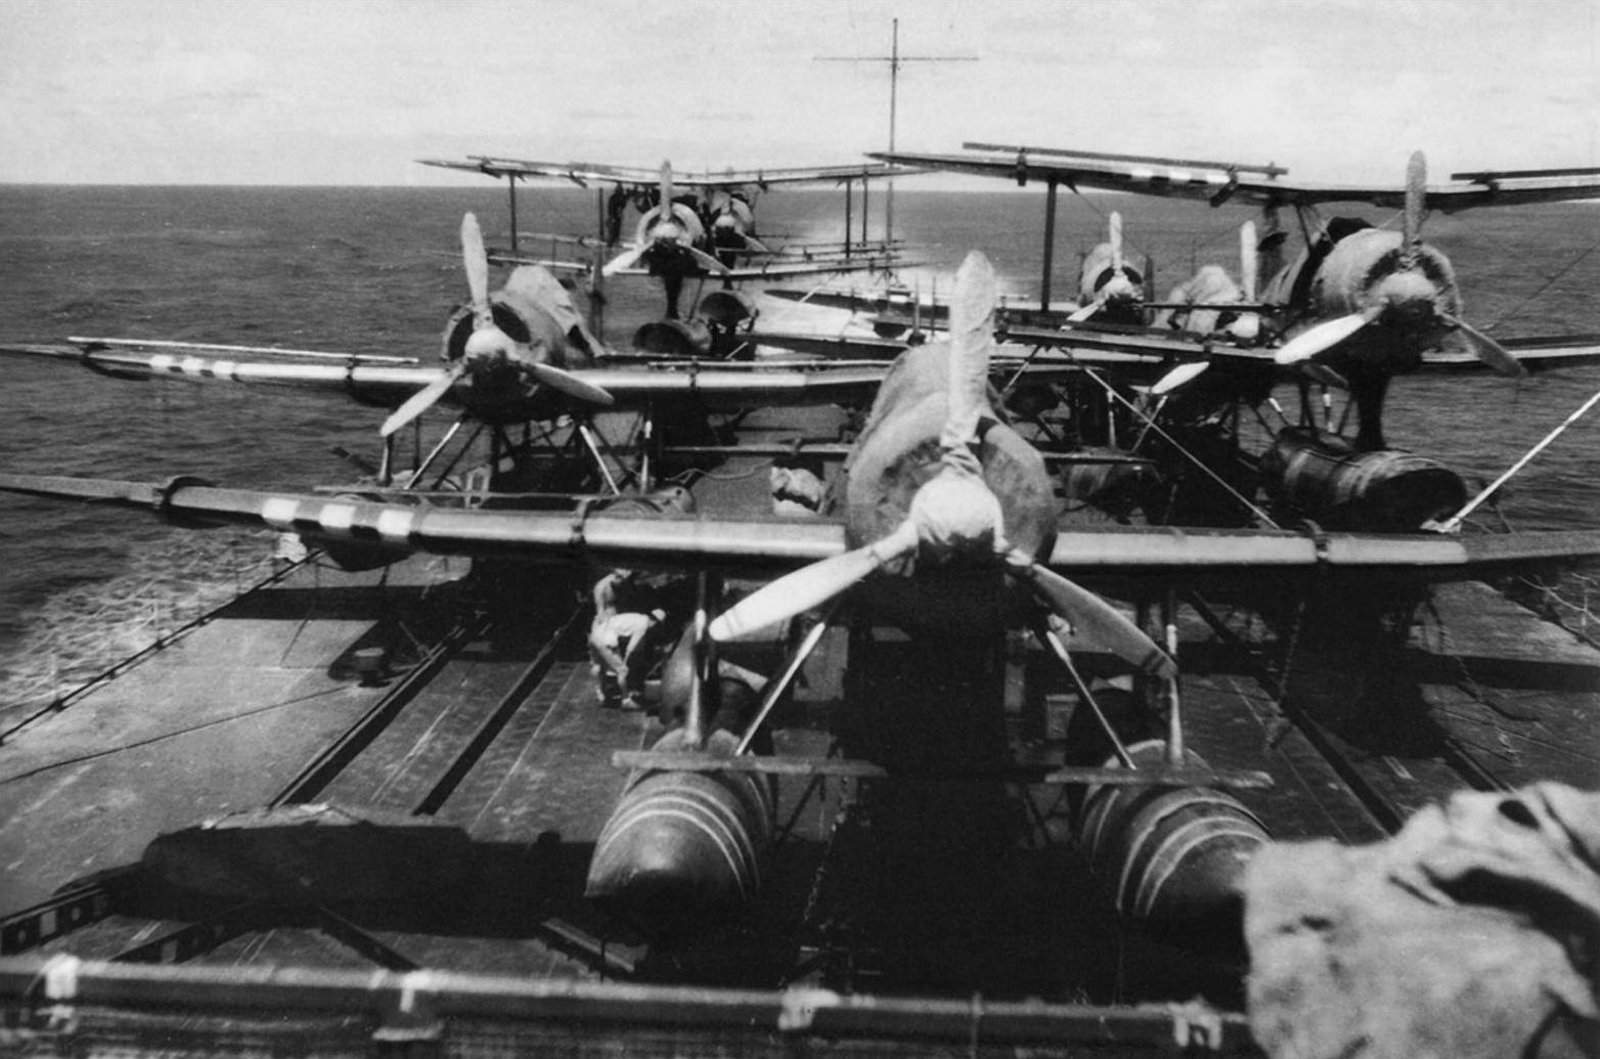
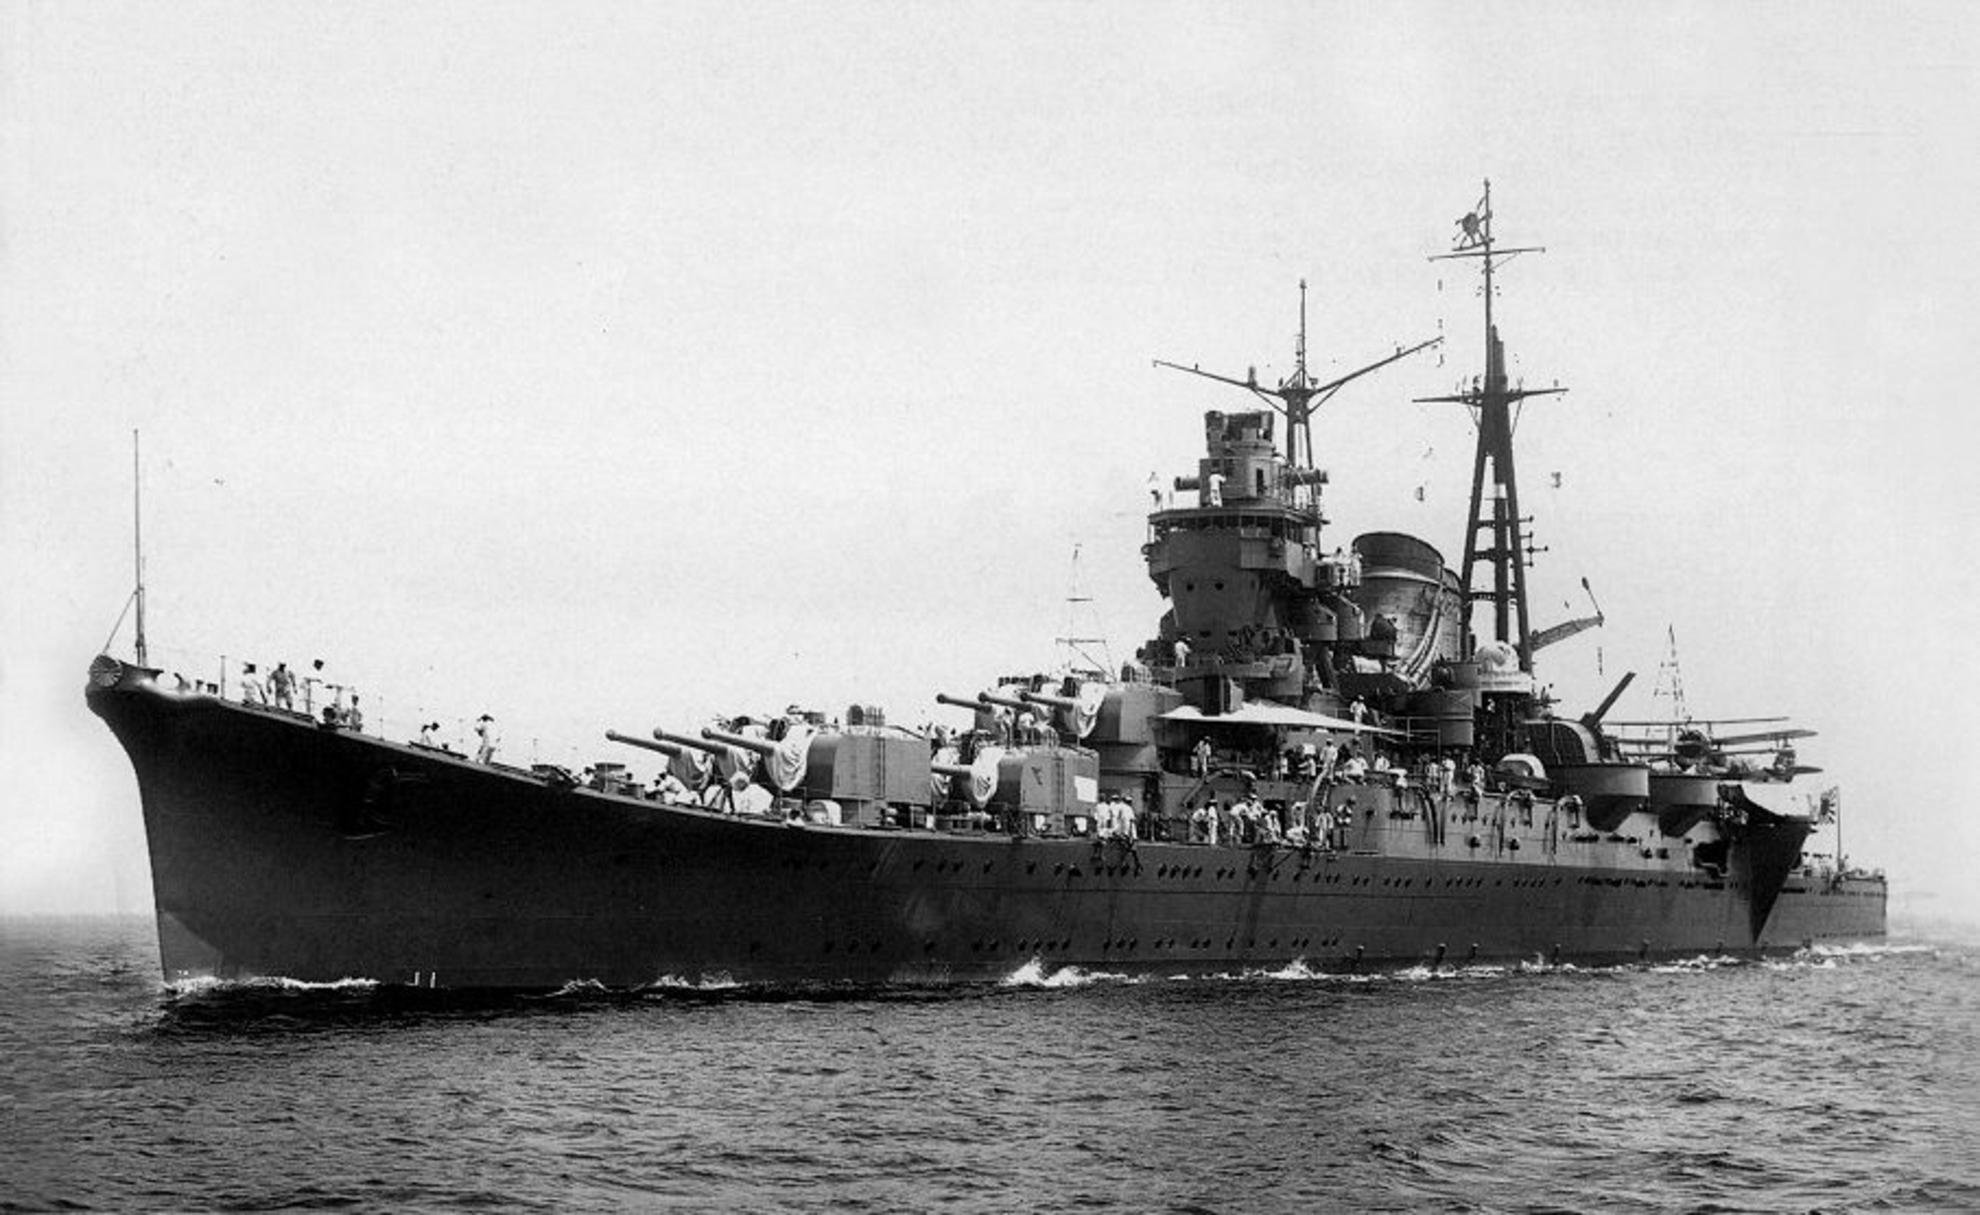
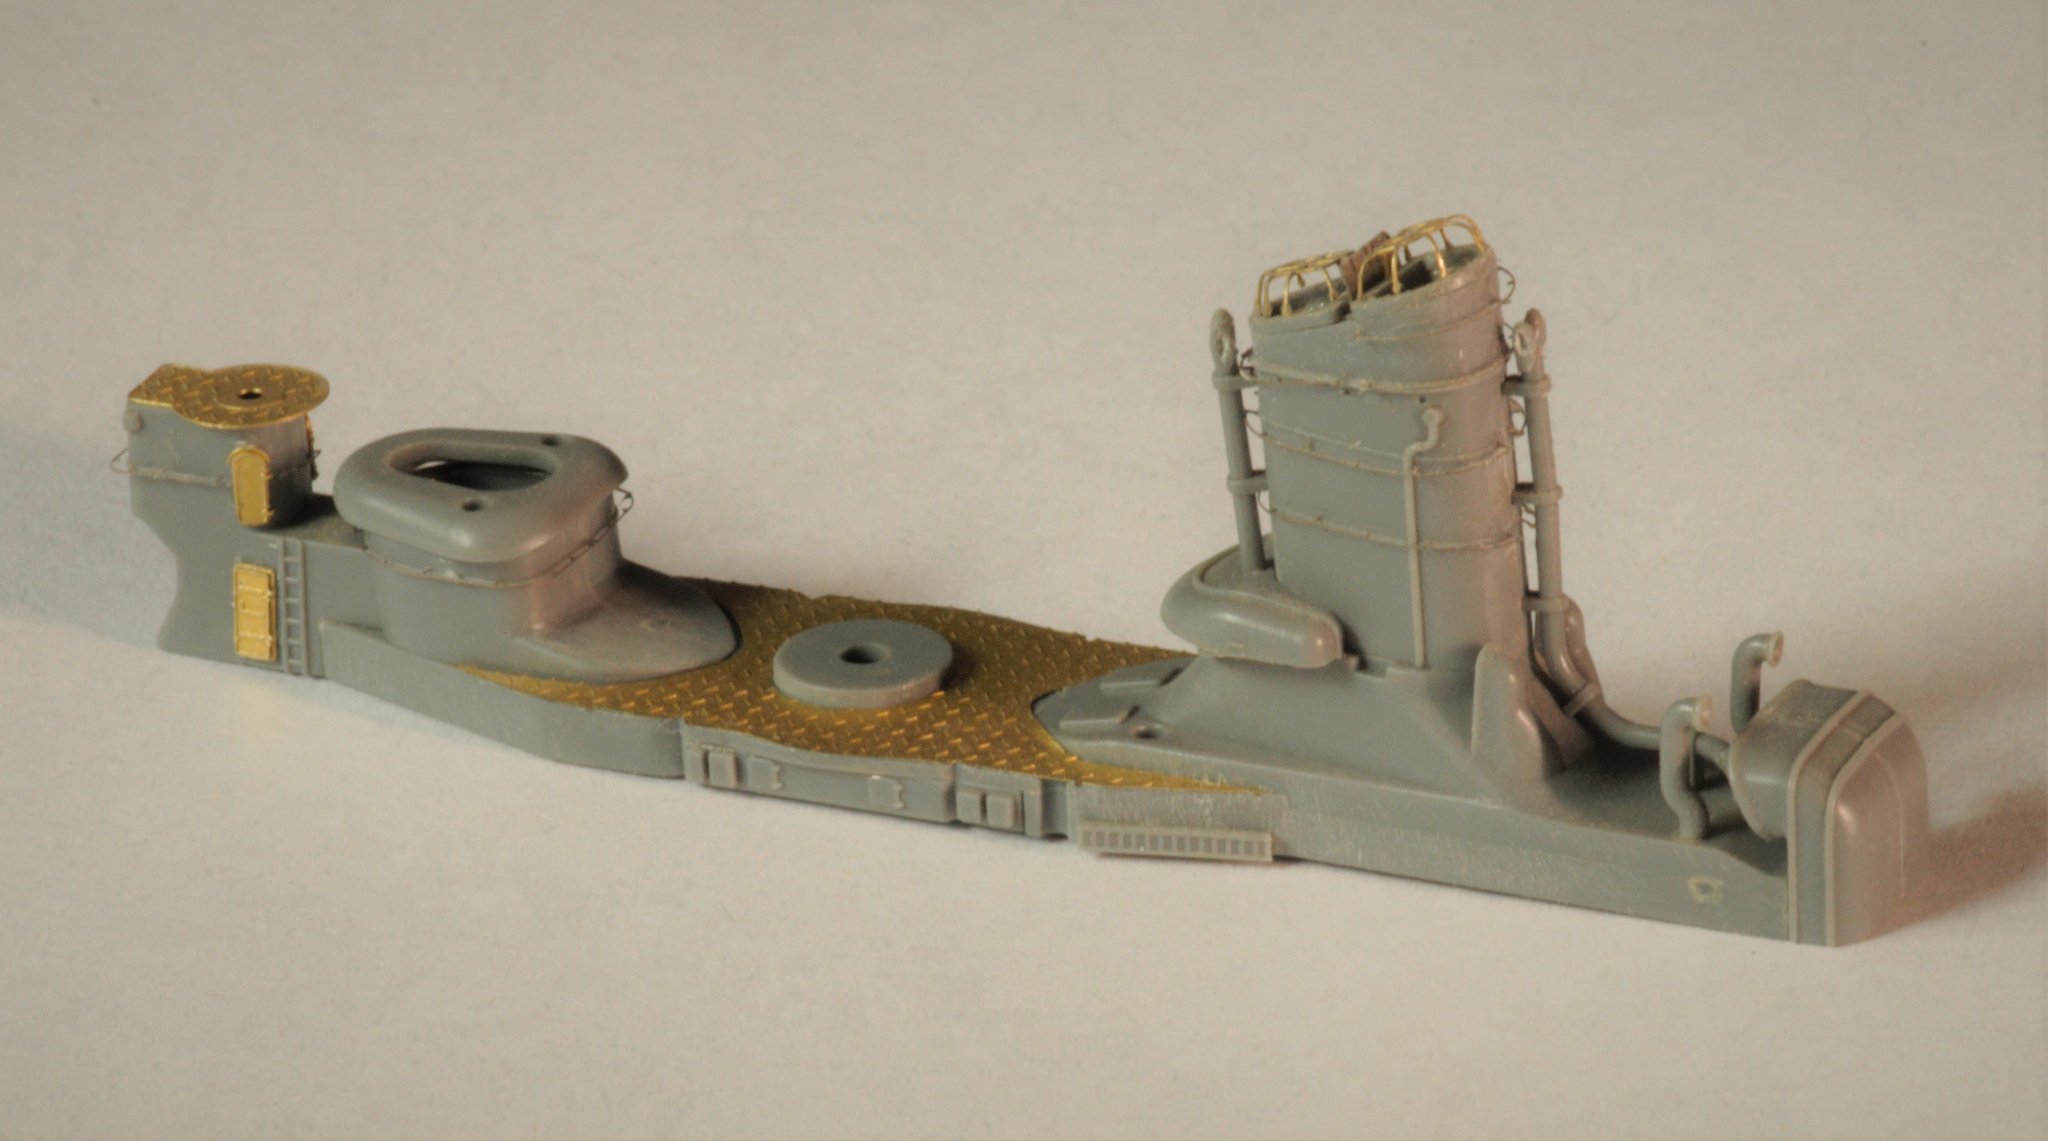
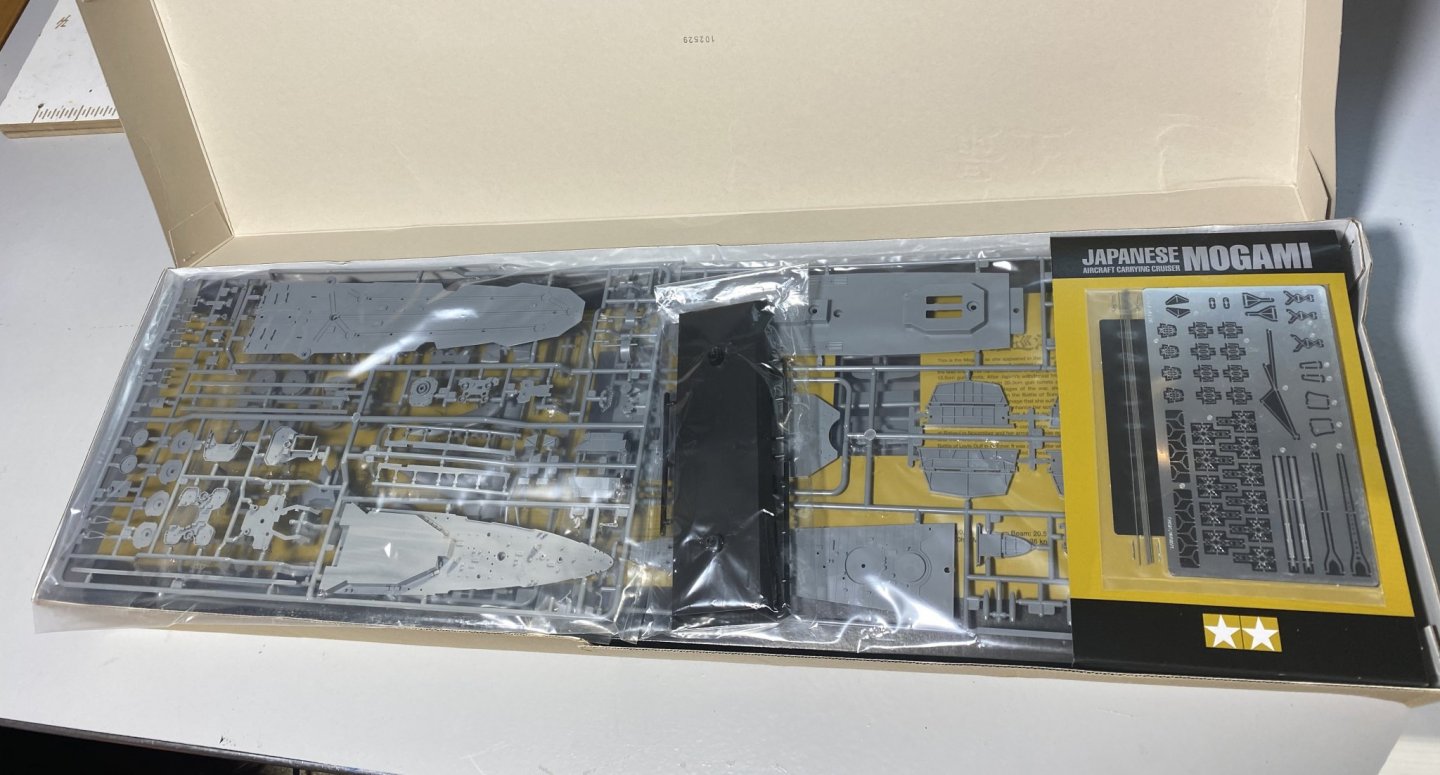
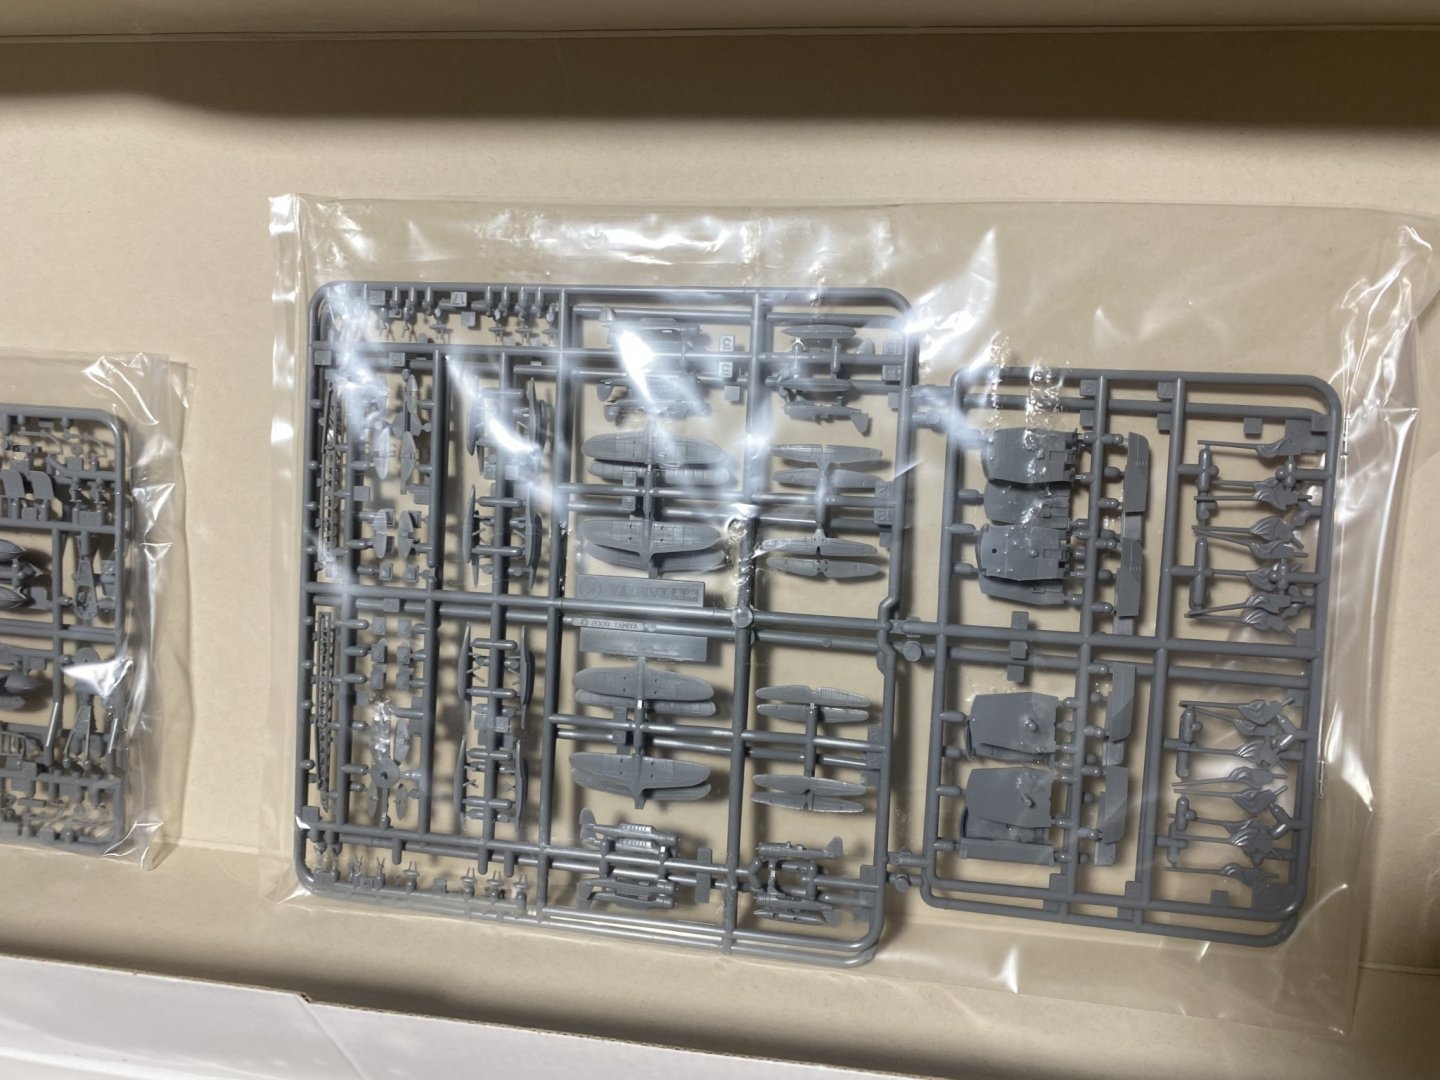
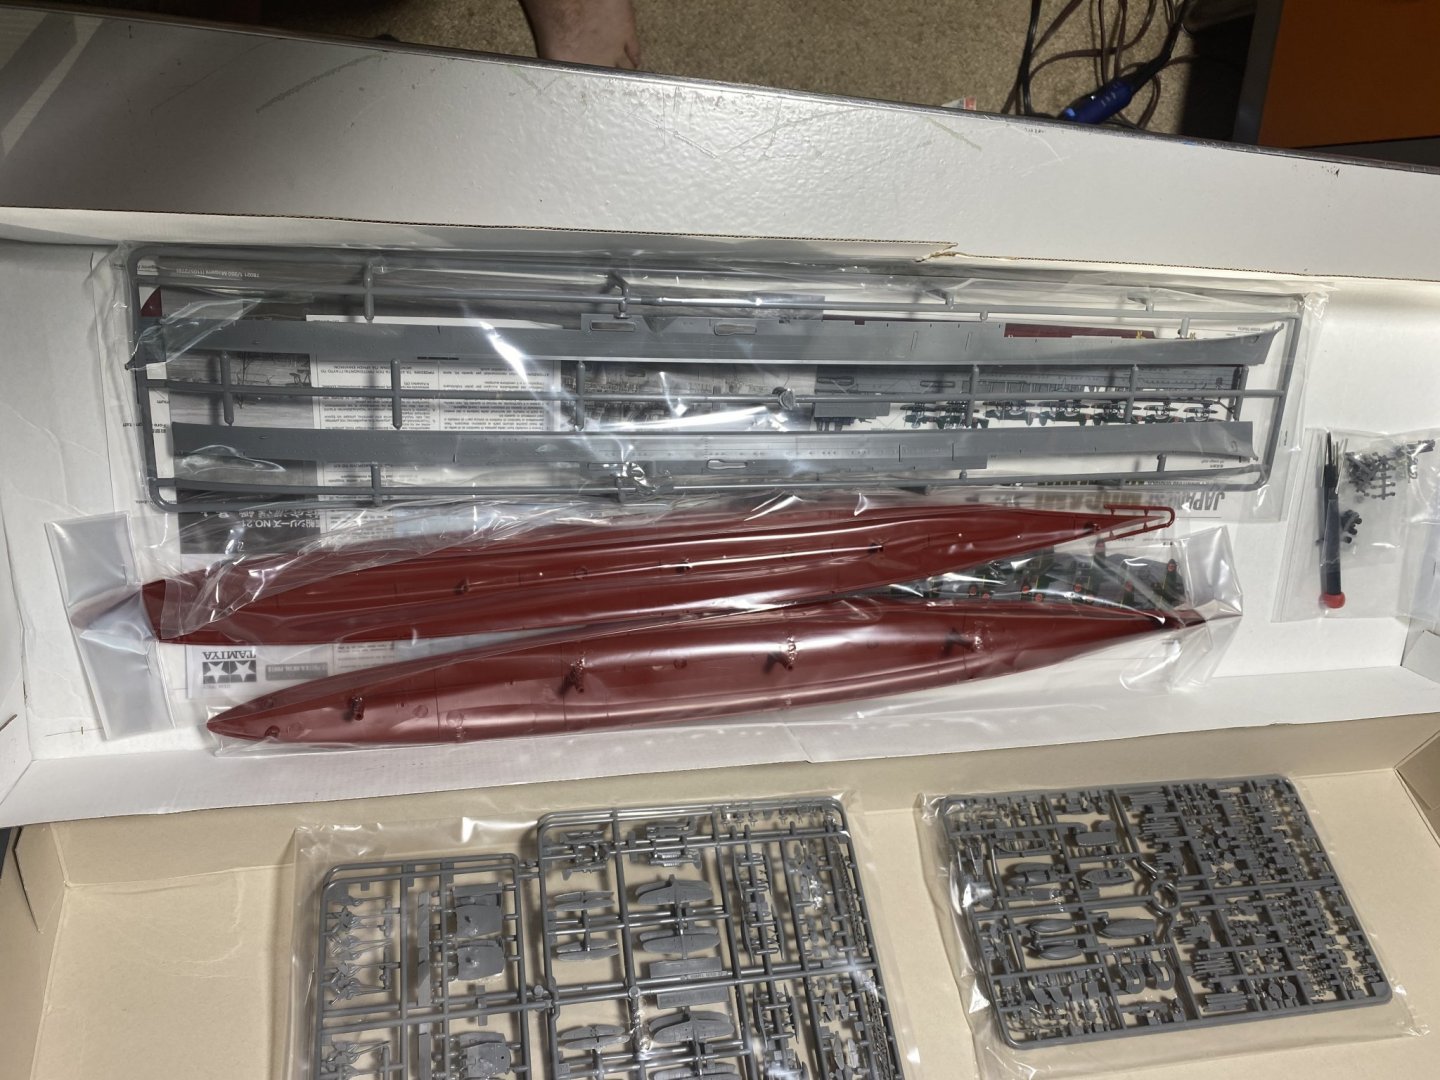
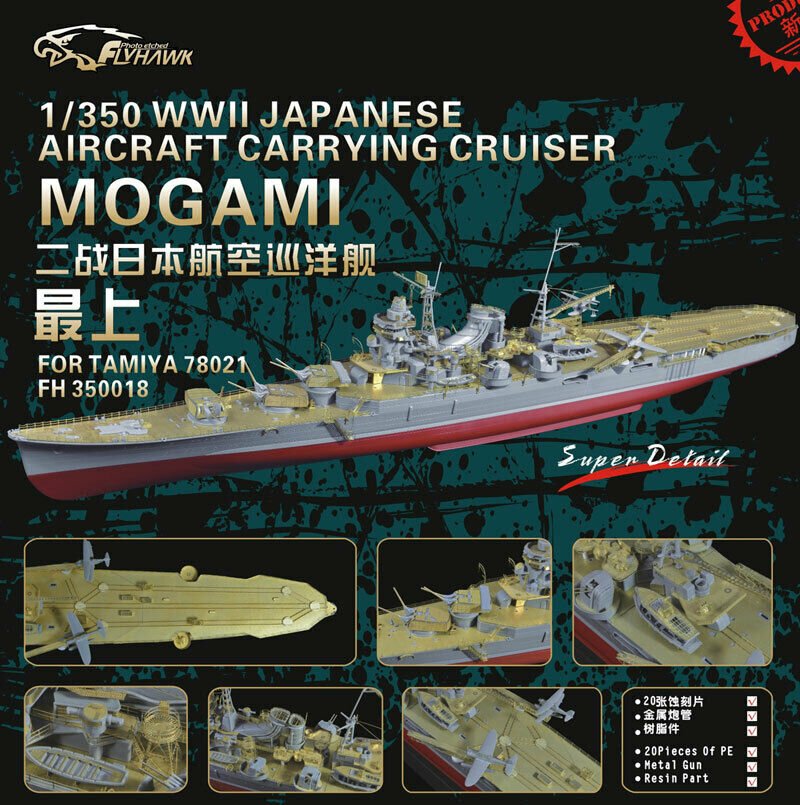
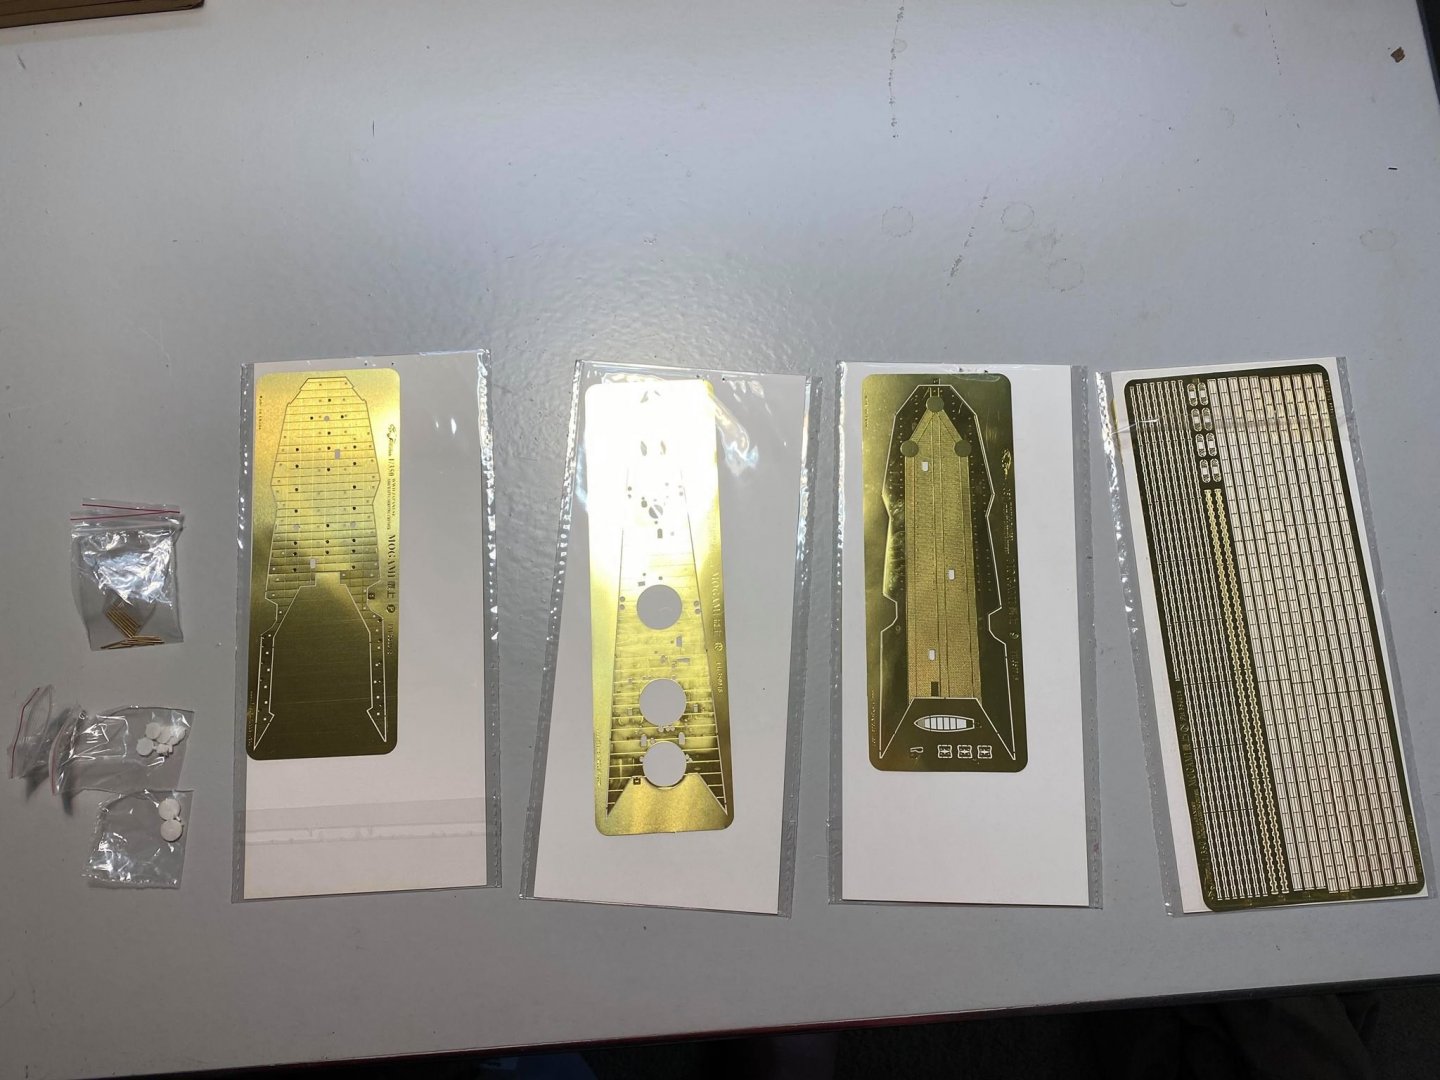
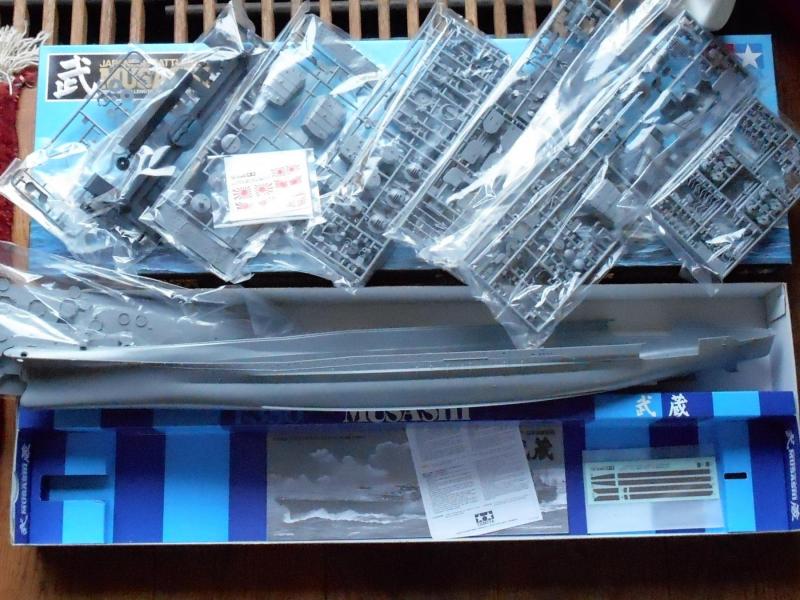
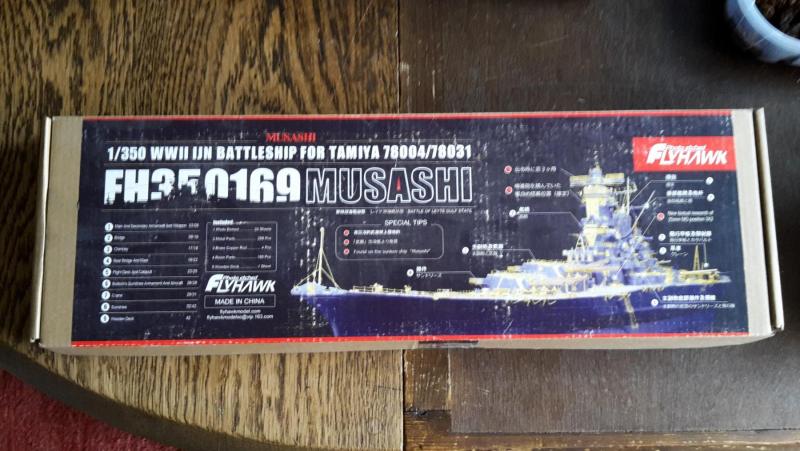
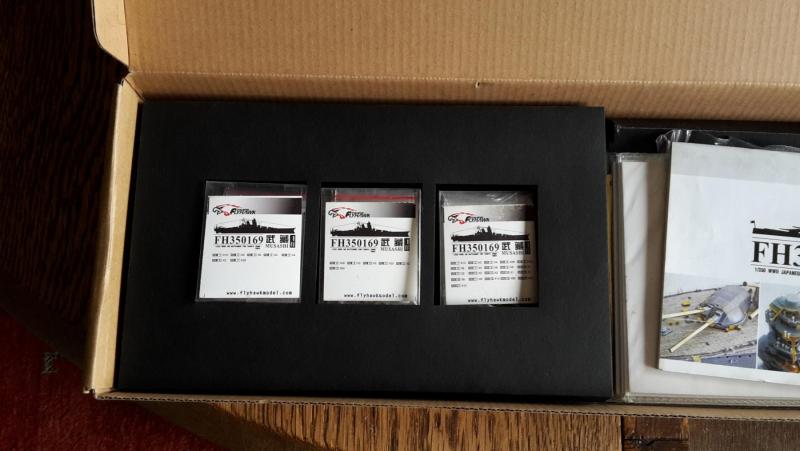
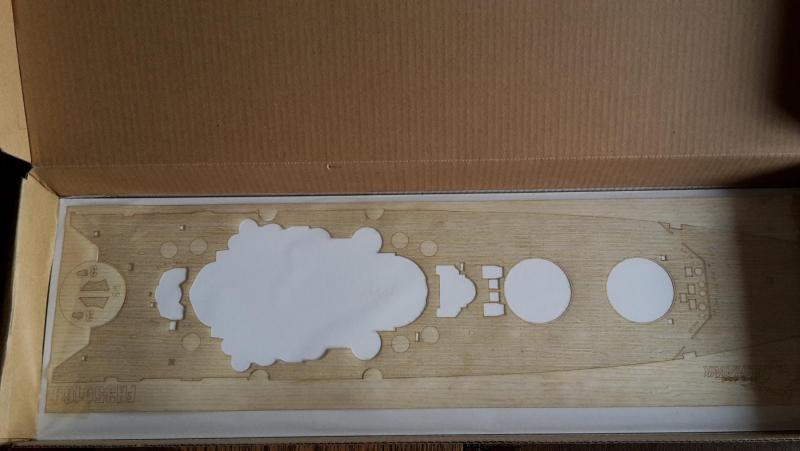
 Greetings, As far as I can tell, I’m the only IJN Mogami build log on here. I decided to take this project on as I wrap up other projects which is very different from the stick and string models I usually like to build. I found this subject interesting because of the hybrid characteristics as an aircraft cruiser which she was converted into in 1944. Commissioned in 1935 and named after a river in Japan and was the lead ship of four of her self-named class of heavy cruisers. Served in numerous battles in World War II until she was sunk at the Battle of the Surigao Straight in October 1944. This is a 1/350 Tamiya kit and I’ll be using the Flyhawk detail photo etch kit. Below are some photos I’ve found, mostly courtesy of Wikipedia and my unboxing of the kit and PE details. Should be an interesting challenge. All the best, Joshua
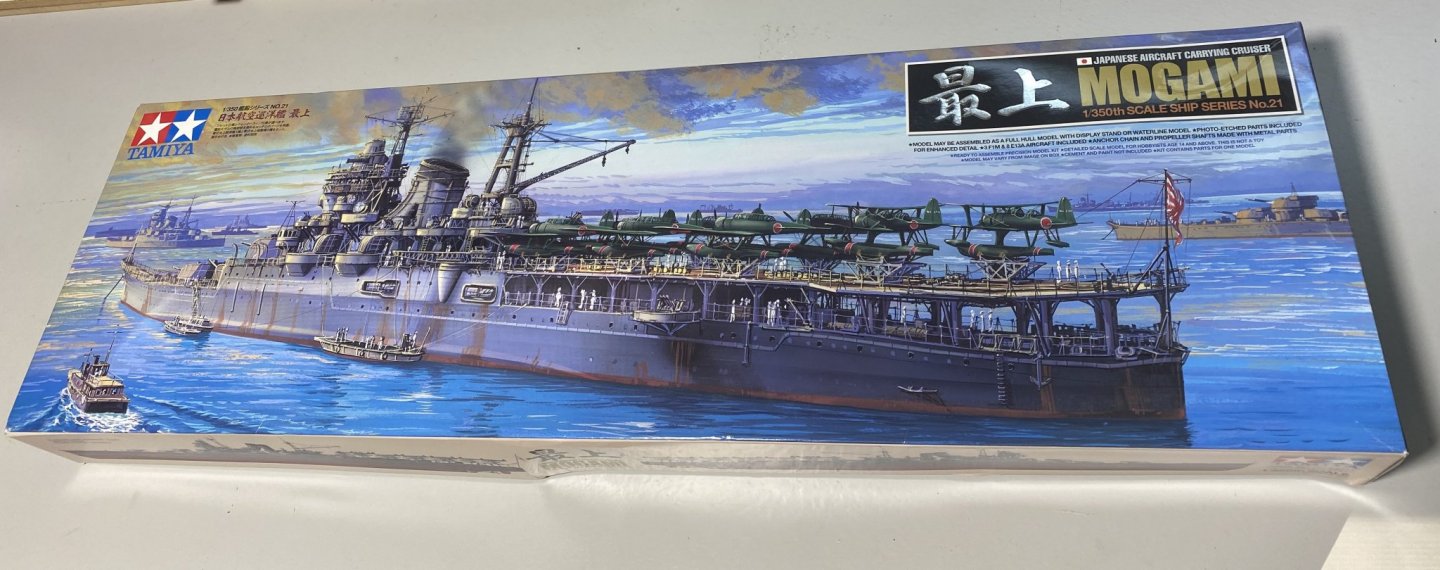


- 46 replies
-
- 15
-
-
 I finished the Yahagi and now have started the Chikuma moments later literally.Some history..... Chikuma Country Japan Ship Class Tone-class Heavy Cruiser Builder Name Mitsubishi Heavy Industries Laid Down 1 Oct 1935 Launched 19 Mar 1938 Commissioned 20 May 1939 Sunk 25 Oct 1944 Displacement 15,200 tons standard Length 649 feet Beam 60 feet Draft 21 feet Speed 35 knots Crew 850 Armament 8x200mm, 8x130mm, 75x25mm anti-aircraft, 12x610mm torpedo tubes Chikuma was a Tone-class heavy cruiser built at Nagasaki by Mitsubishi. With her large seaplane capacity, long-range scouting missions fitted her well. She was a member of Sentai 6 (Sixth Squadrion) until transferred to Sentai 8 in Nov 1939. She participated in exercises and patrolled off southern China until the outbreak of the Pacific War. She participated in the attack on Pearl Harbor, the event that sparked off the war, as an escort to the fleet carriers; one of her seaplanes flew pre-strike reconnaissance mission over Pearl Harbor before the attack. Immediately after Pearl Harbor, she sailed for Wake Island to assist in the conquest there. During Japan's conquest of the South Pacific in the opening six months of the war, Chikuma played a part in many of the key events aside aircraft carriers. She was also present beside the carriers when they met their end at Midway in Jun 1942. On 24 Aug 1942 she participated in the Battle of the Eastern Solomons, and then on 26 Oct Battle of the Santa Cruz Islands, both off the Solomon Islands. In the latter action, she was moderately damaged by American dive bombers and was placed out of commission in Japan until late Feb 1943. In early 1944, she was transferred to Sentai 7. She participated in a cruiser raid into the Indian Ocean in Mar, then fought off the Mariana Islands in Jun. Off Philippines, she was attacked by submarine and aircraft on 23 and 24 Oct as she headed toward the eastern shore of the island of Samar; at the battle bearing the island's name, she helped in the sinking of escort carrier Gambier Bay, but was later seriously damaged by torpedoes. Destroyer Nowaki took on Chikuma's crew as Chikuma was abandoned. When Nowaki was later sunk, all but one of Chikuma's crew survived. https://ww2db.com/ship_spec.php?ship_id=37 I give you Chikuma next to the IJN Light Cruiser Yahagi....
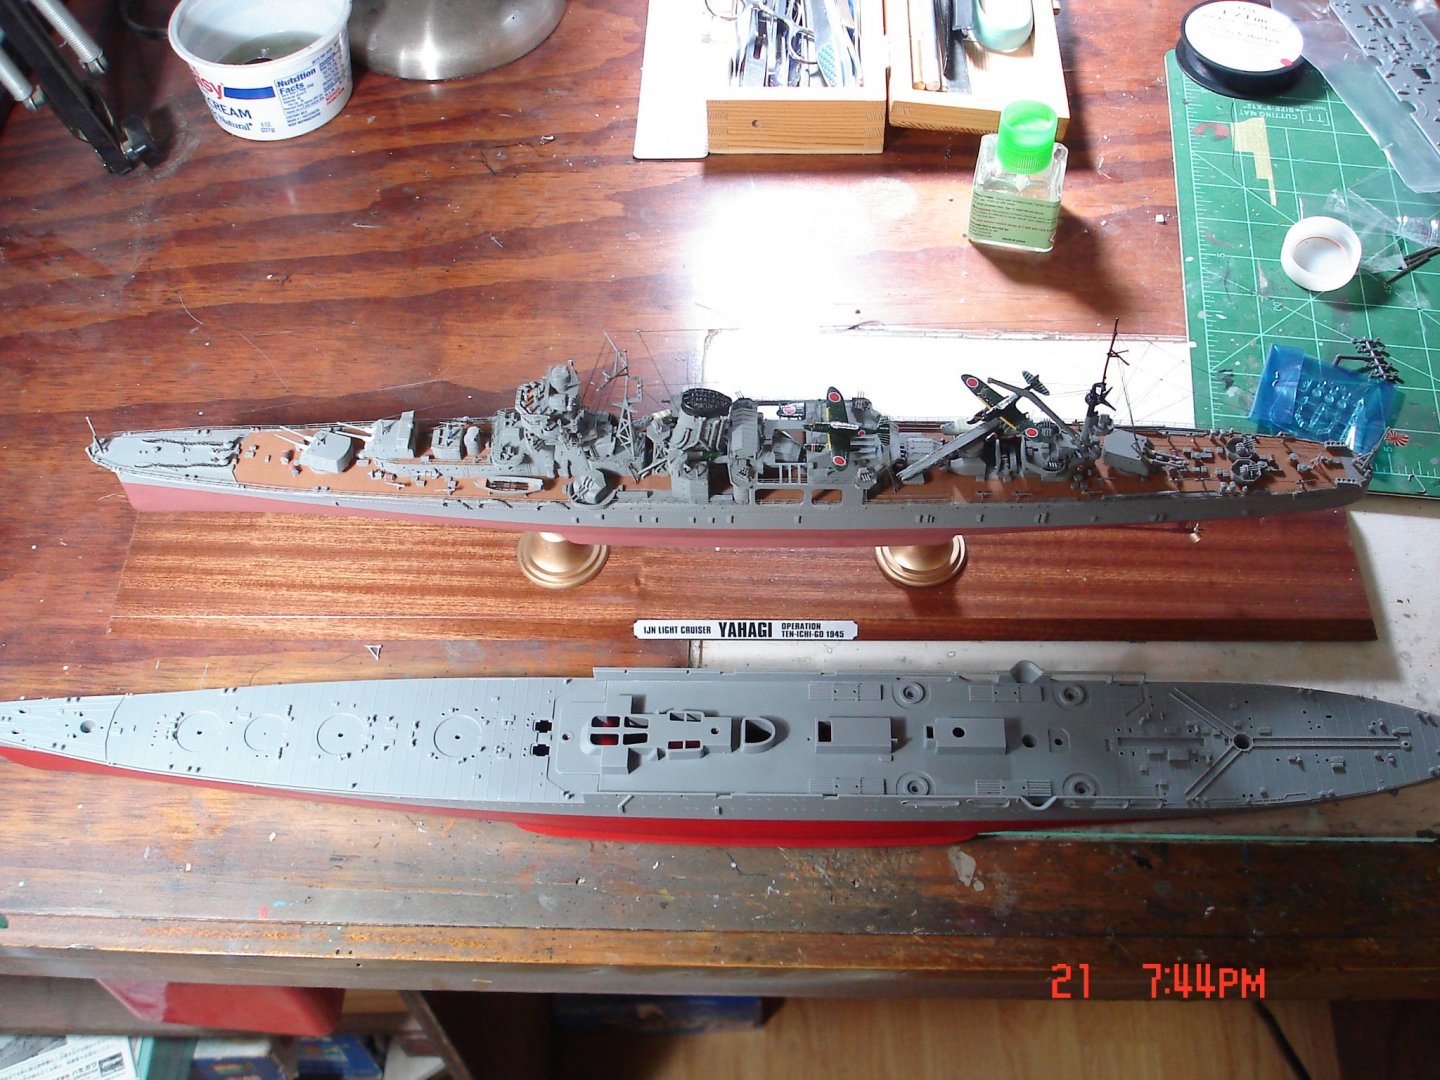
- 115 replies
-
- 10
-
-
 Hi! After a break I'm back to ship modeling, and this time I'll share the build here aswell! So my next project is the Uss Missouri as she appeared on her last tour in the Operation desert storm. My first form of business is with the hull! Firstly all the details were removed from the hull. After this thorough sanding to get rid of the all the parting lines and minor damages. Then the hull plates were masked and sprayed with Mr surfacer 500. This is by no means 100% correct so bare that in mind! Some other details were done with some masking tape on the top belts. After this Mr surfacer 1200 on top to check how it would look like. And closer look of the effect. Still waiting for the pontos set to arrive, then I'll continue to add the rest of the remaining drain pipes etc. details before continuing to the decks.
- 178 replies
-
- 14
-
-
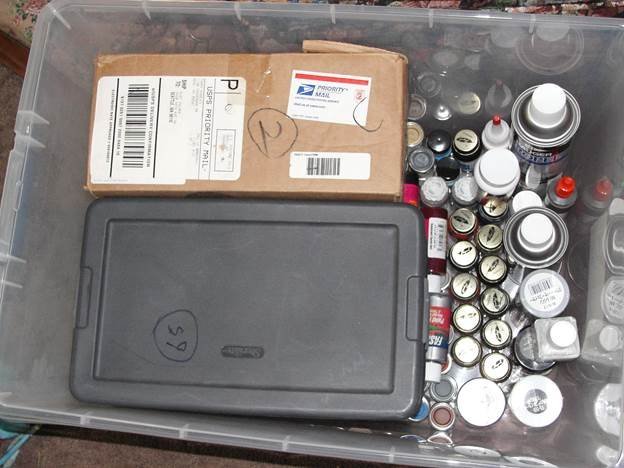
 this ought to bring a smile to your face Lou I was indecisive as to what to amuse myself with next.........could have been any one of the many active projects I have ongoing, but a recent exchange caused me to bring this out of the closet. I guess it's been over a year since Lou sent me this kit.........a kit that had been started by another gentleman, whose passing was how Lou came in possession of it. he also got/bought a rather vast array of different paints in many forms.......bottles, tins and sprays. it's been so long ago, that I can't recall what the deal was, but I got a good portion of these paints. Japanese, German, Royal Navy, French, UN....you name it.......I got a sampling of each nation. there were plenty of Testors paints too.......some quite old {I think he told me some were from his inventory}. I'm sure Lou can add to this. the fellow did a lot of prepainting and some assembly on the kit. I don't believe I got the fellow's name.......I don't recall it if Lou told me...I hope I'm not being rude after seeing what he painted, I did say that in light of how well he did, I wouldn't change any of it...>I didn't take into account that I would have to match up the paints before proceeding. I did do a light inventory to make sure all the parts were here..........and by my guess, it is complete. this will be the largest plastic ship I will have done to date. so now, the model is out of the box and I am evaluating where he left off, and what the best starting point is on it. since I received the paints, they are separated and I have been sourcing color charts for White Ensign and Humbrol........I already have one for Testors, and recently found a good one for Humbrol. White Ensign is a tough nut.......can't seem to find one........even if I did, it likely would be many charts to cover all the nations. so here we go.........down another rabbit hole

- 48 replies
-
- 14
-
-
- New Jersey
- Tamiya
- (and 1 more)
-
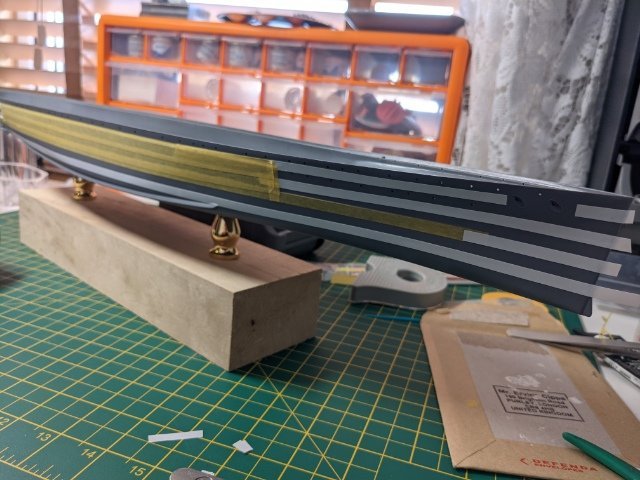
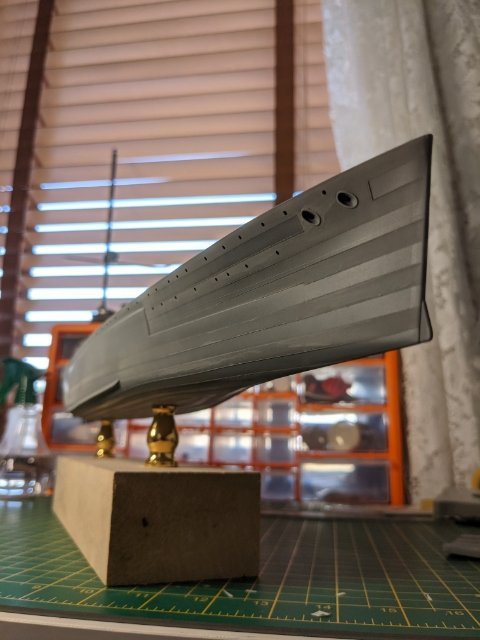
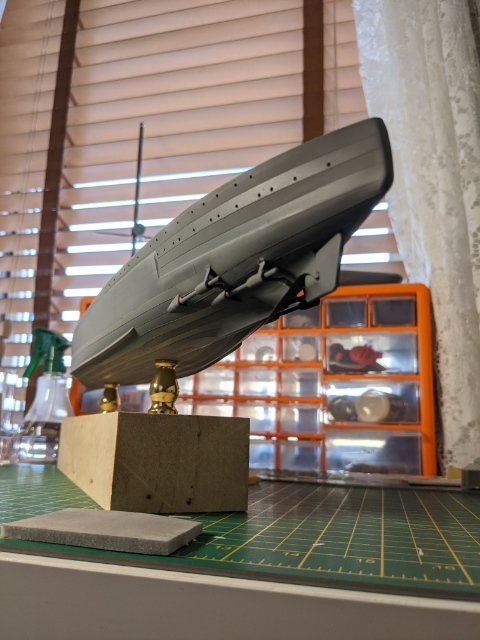
 This is my current build, Tamiya King George IV 1945 with White Ensign photo etch along with other extras, I'll show them off further along the build. First thing I done was mask off the panels/ armour plate on the hull, the Tamiya hull is pretty bare and I've seen 1/700 with better detail. But I've tried to get it semi accurate to the real thing. Then I used Halfords primer, it's for cars but read it has good reviews from other modelers, a solid primer. l've never attempted to model the panel detail but I was happy with the result. Sanded down to smooth the effect. Lastly some photo etch on the hull, to match the source material I'm using. I'll clean up the super glue residue once I've finished with the PE on the hull. This is what I done so far from a few months ago, in the meantime I've bought my first house and decorated it. Thought I'd restart with the house in a good state. Any ideas or helpful advice welcome.
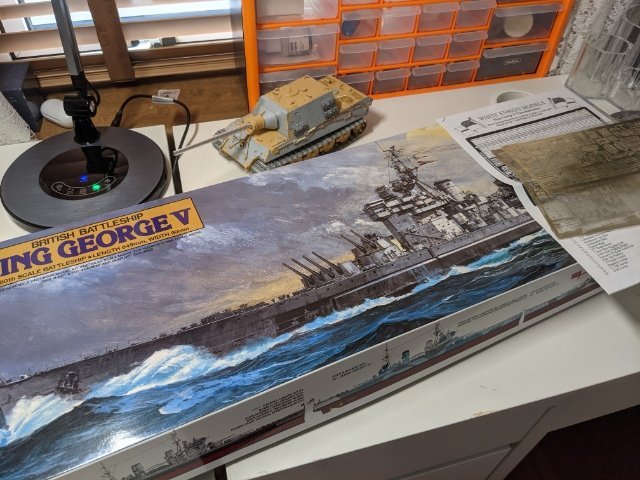

- 32 replies
-
- 10
-
-
- tamiya
- king george v
- (and 1 more)
-
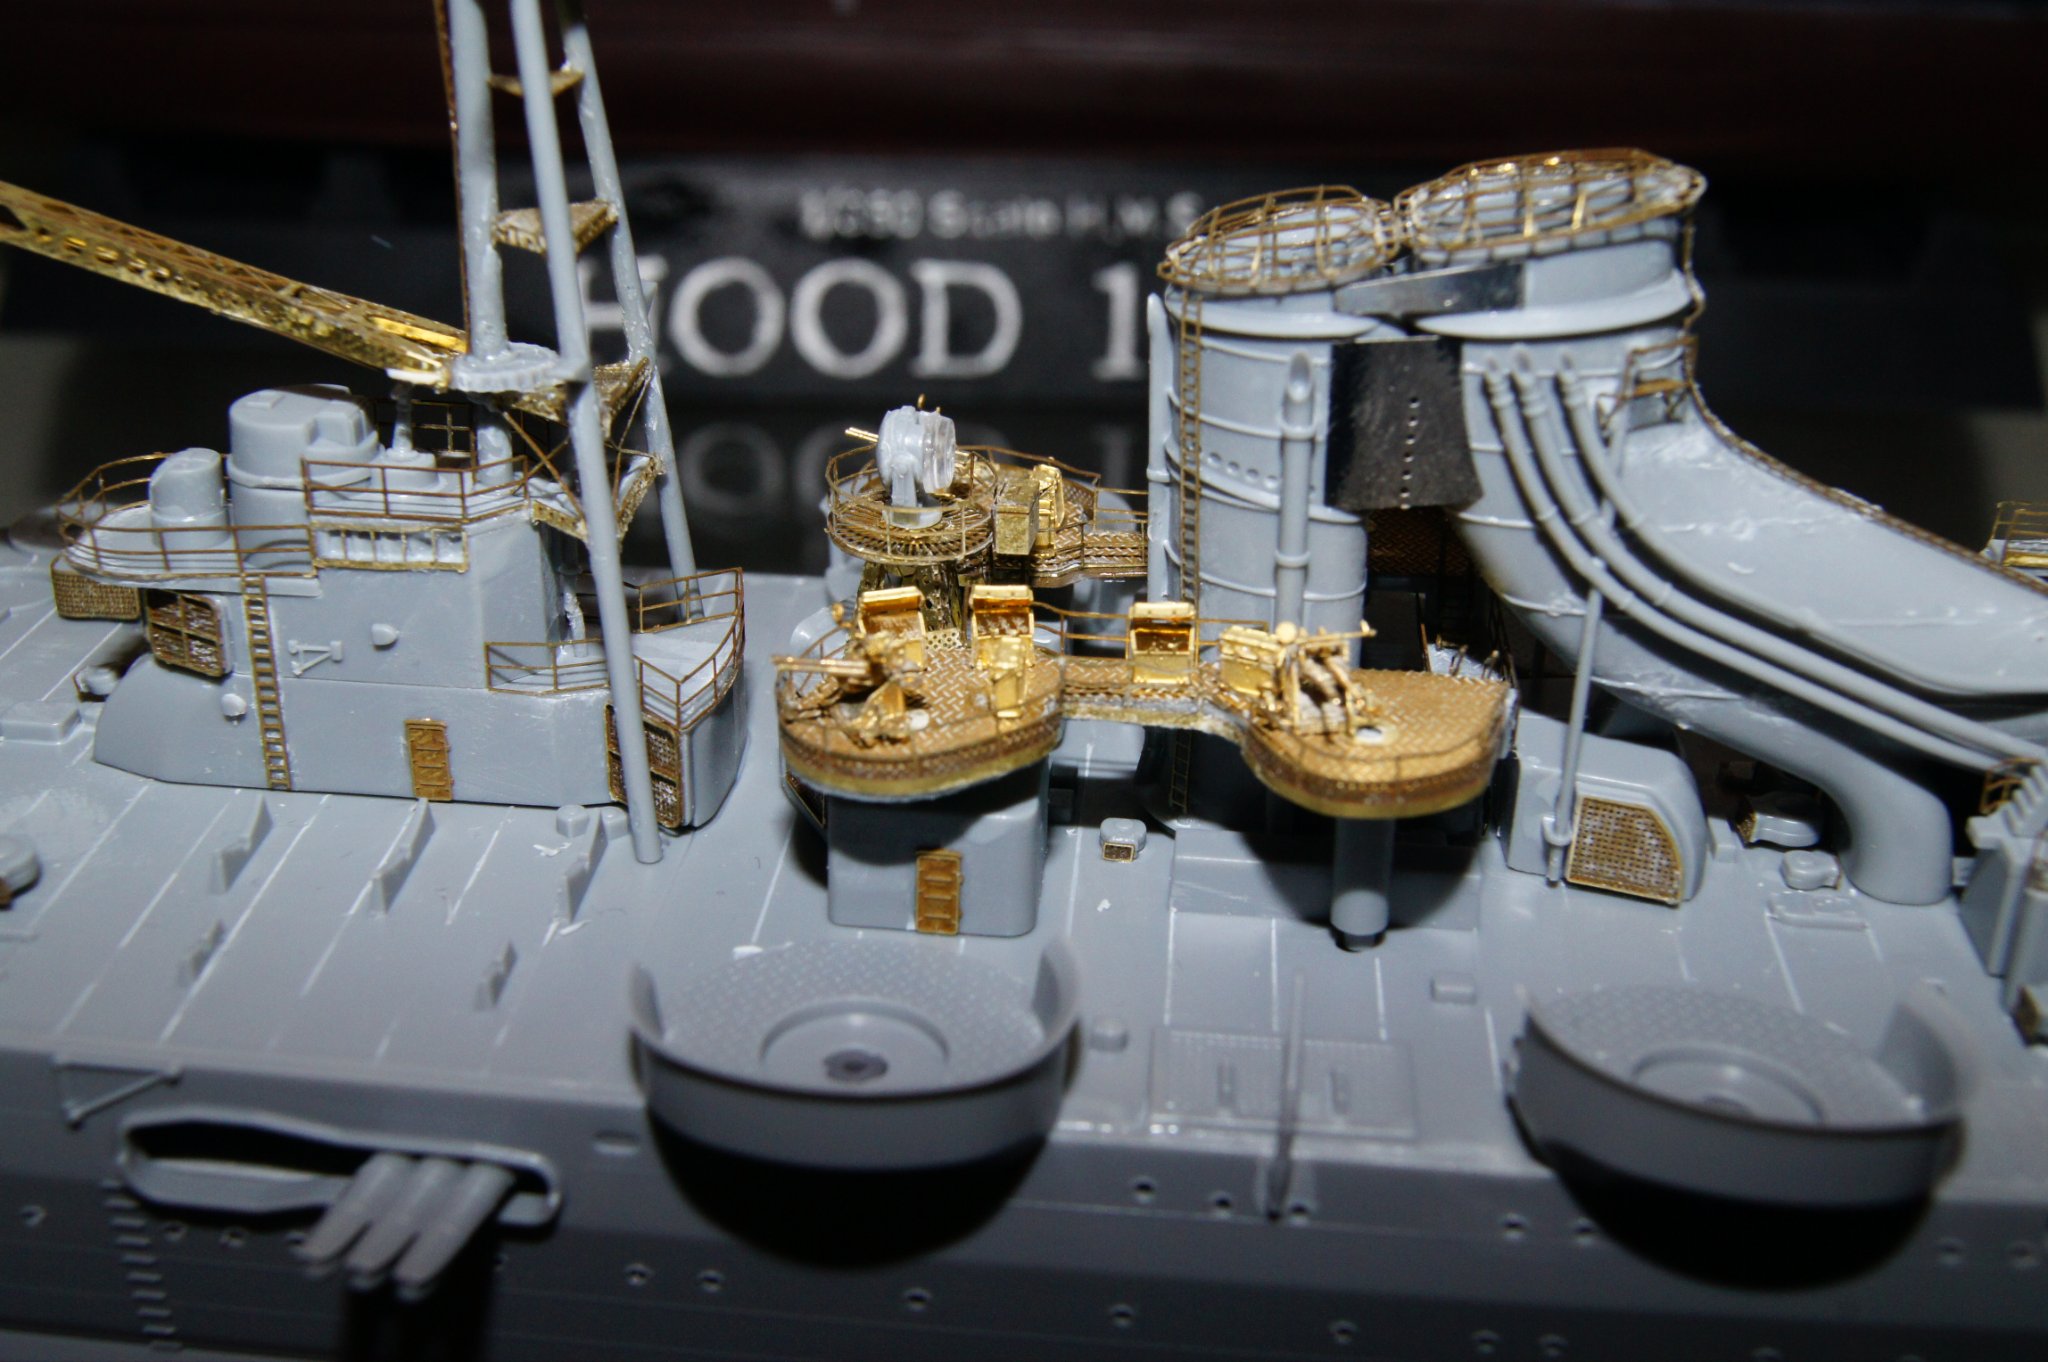
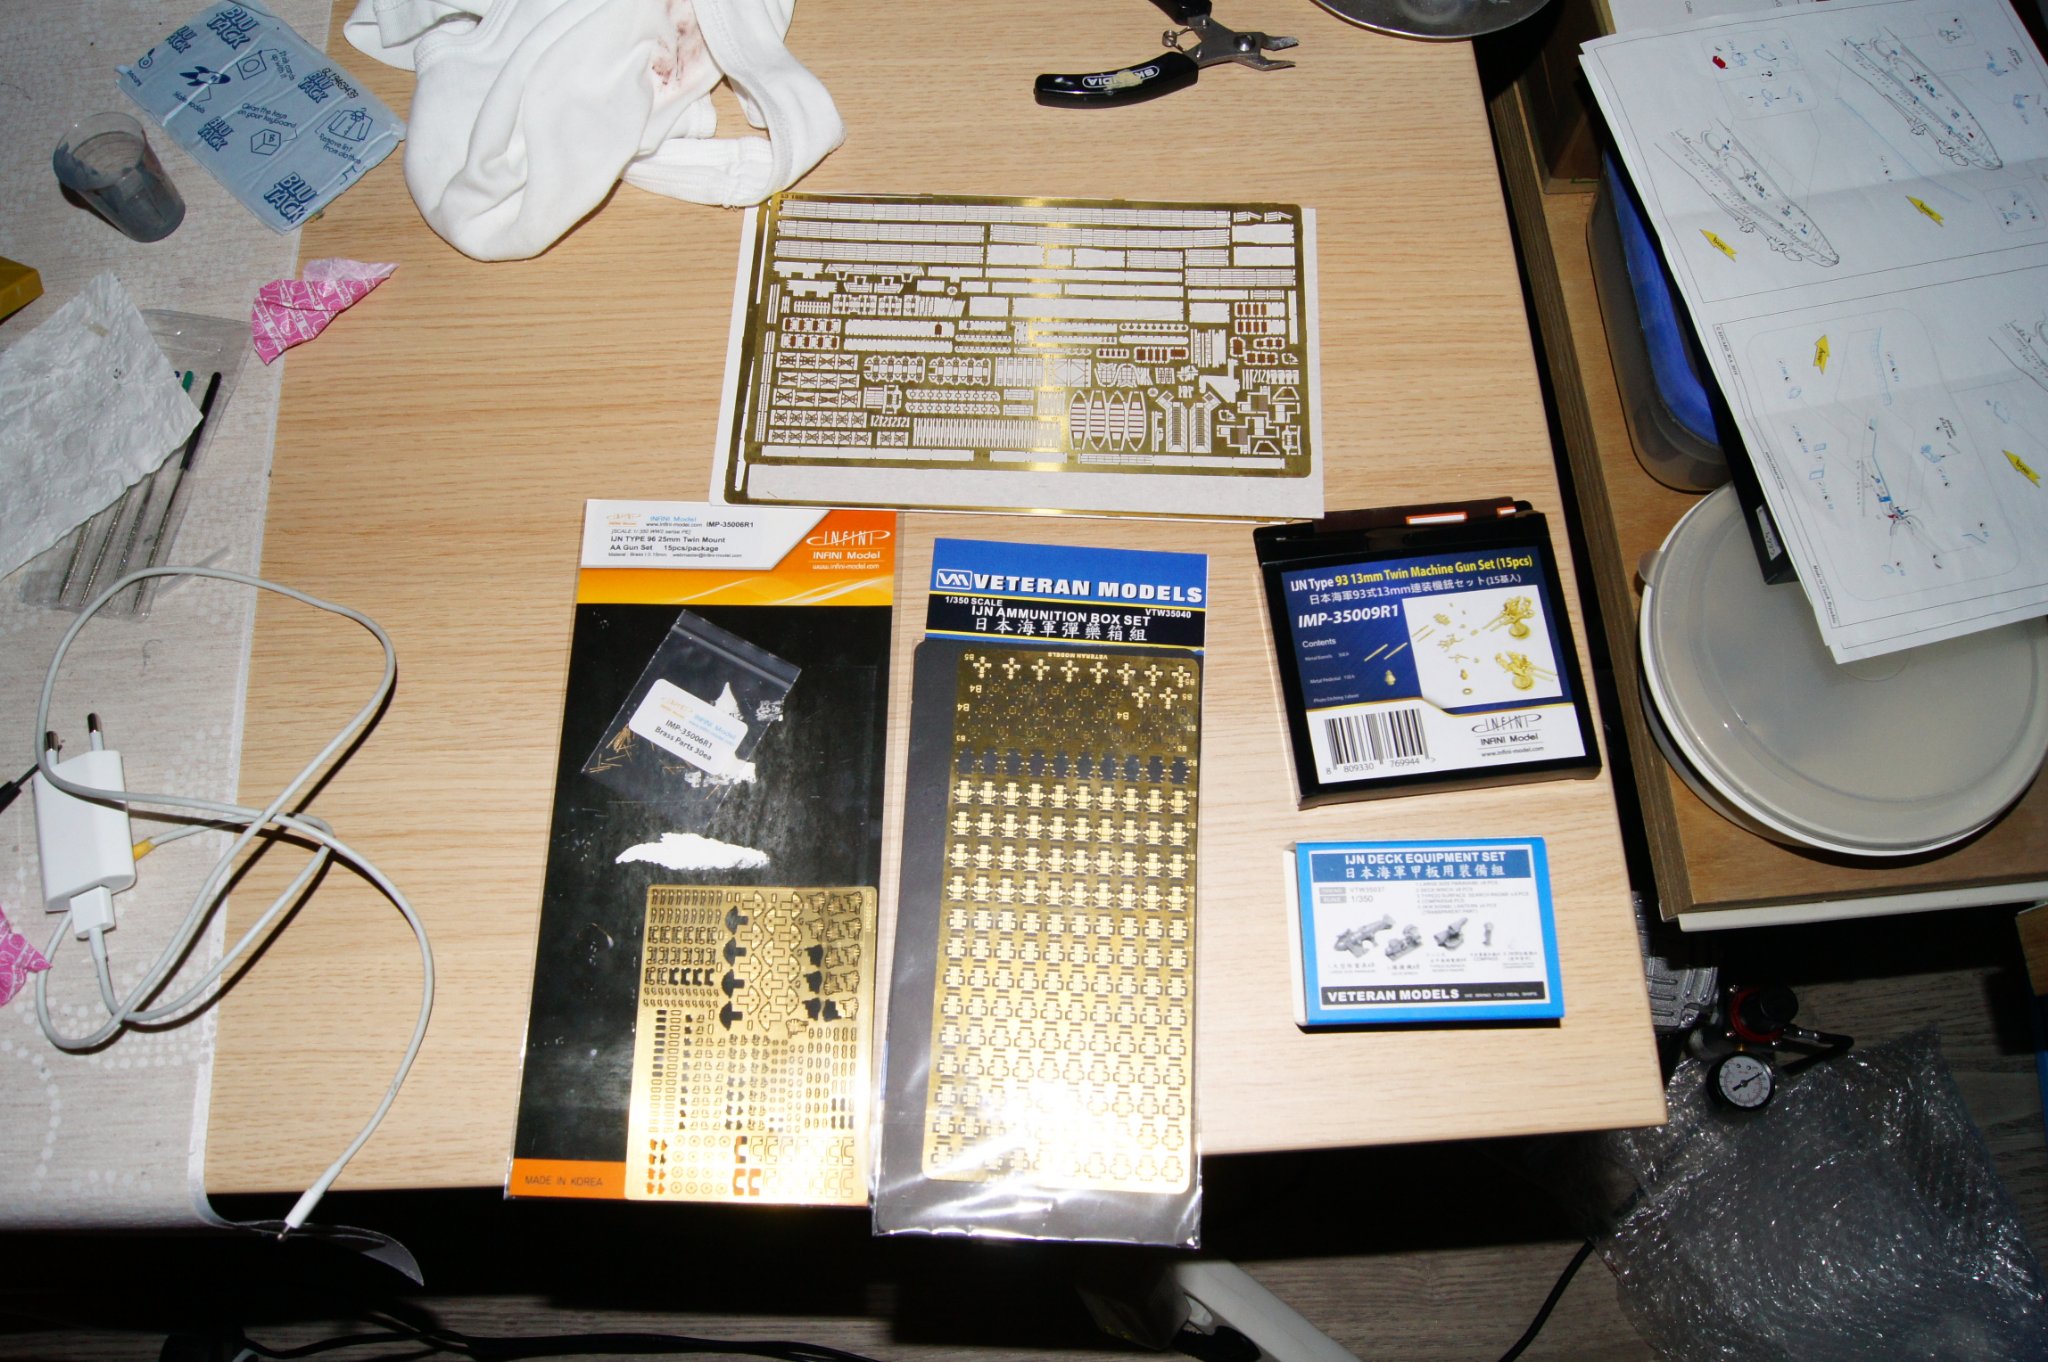
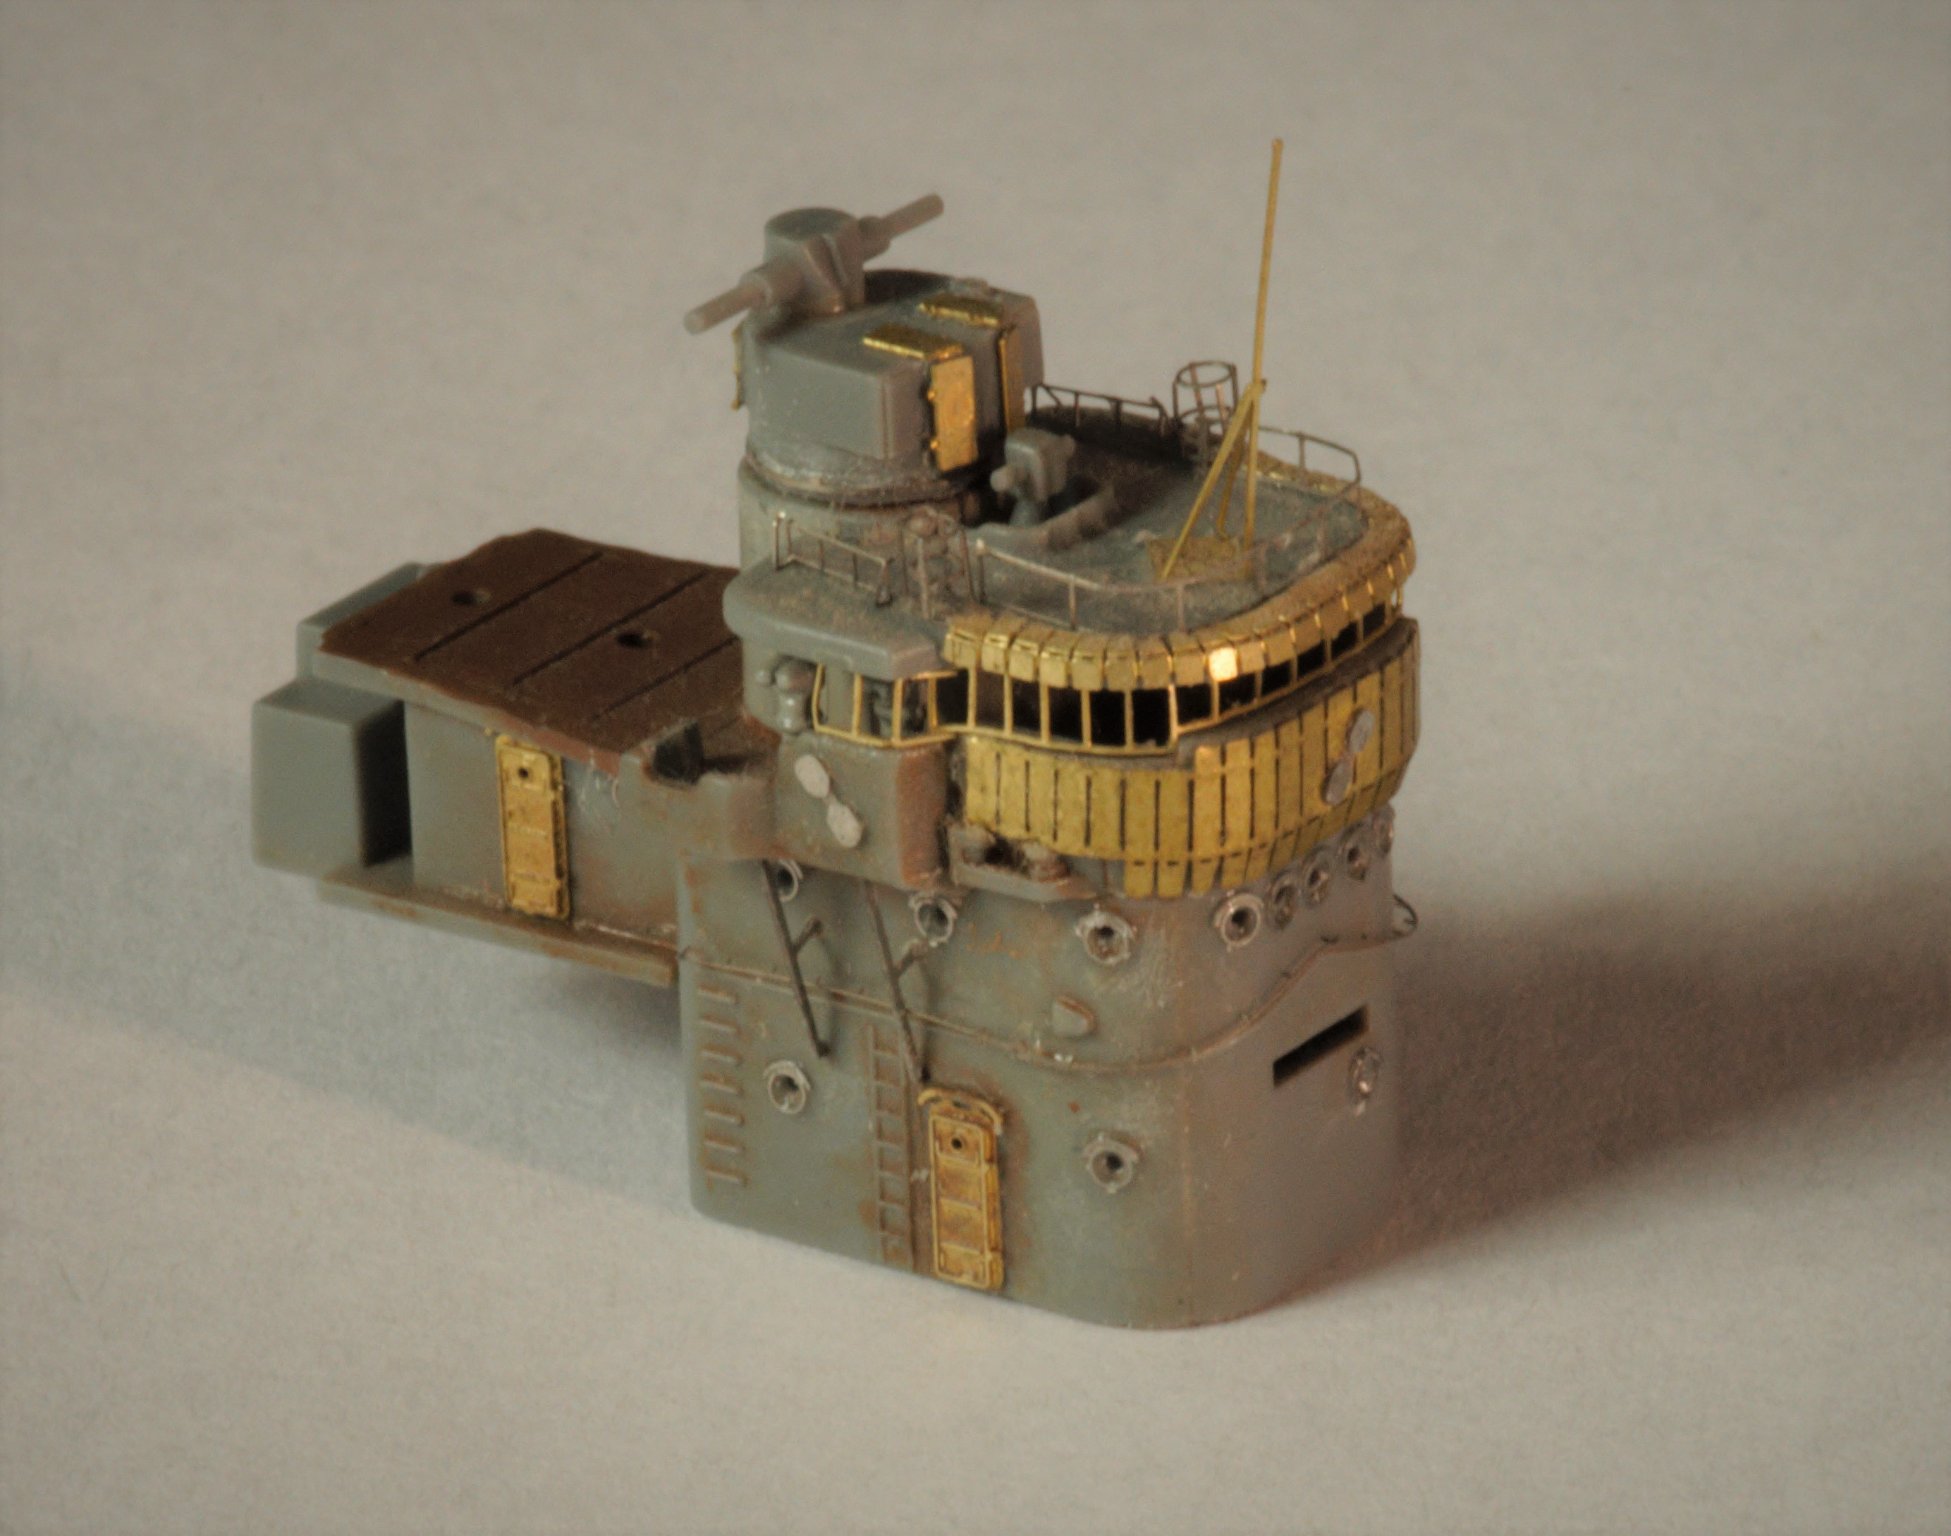
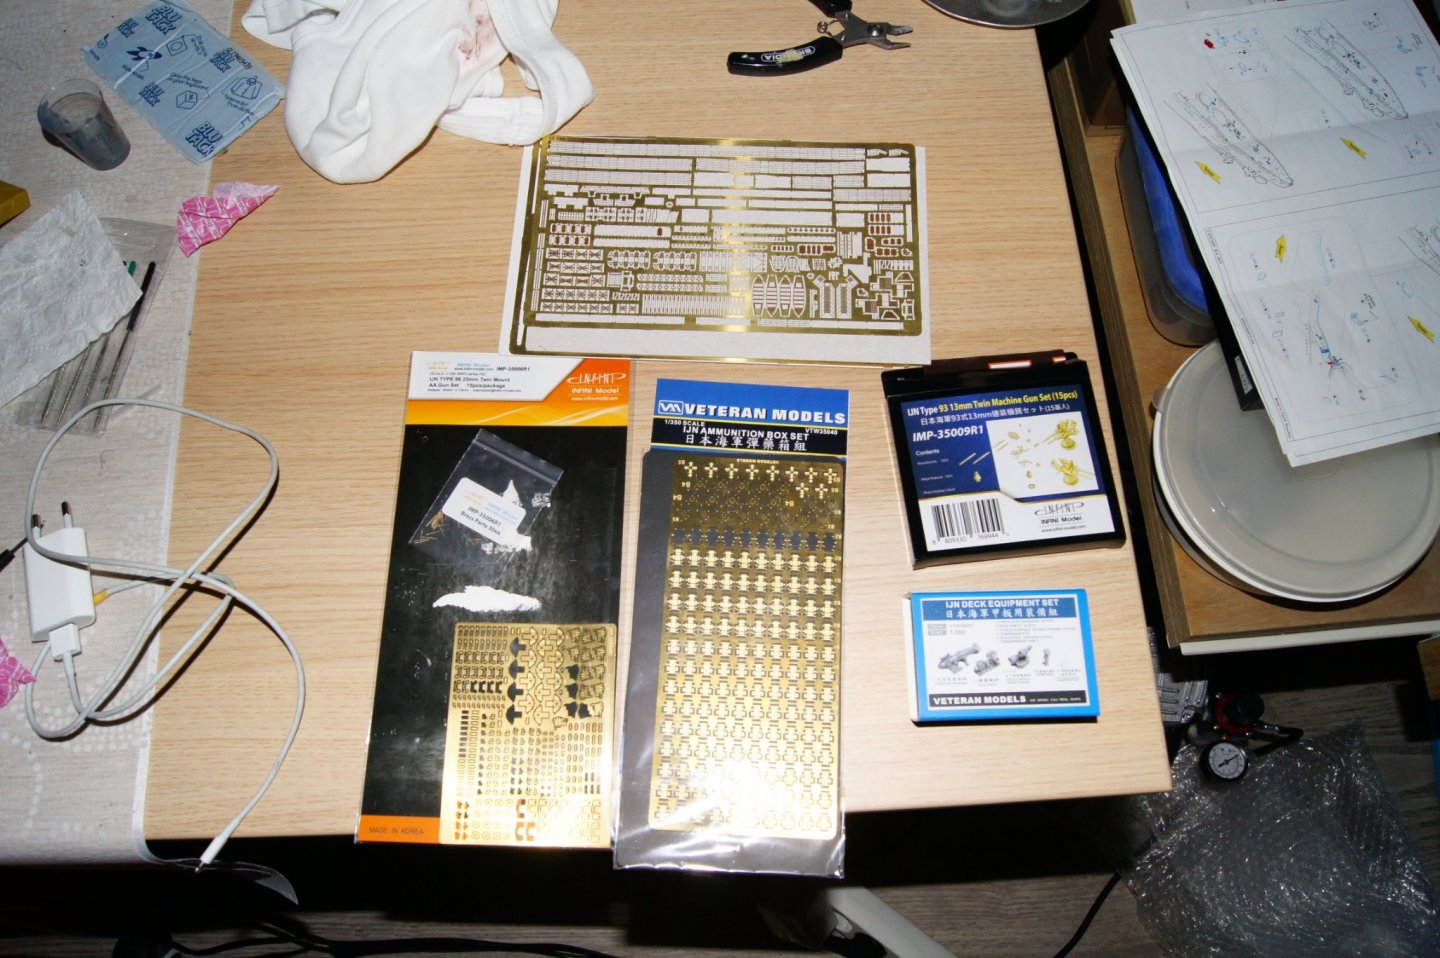
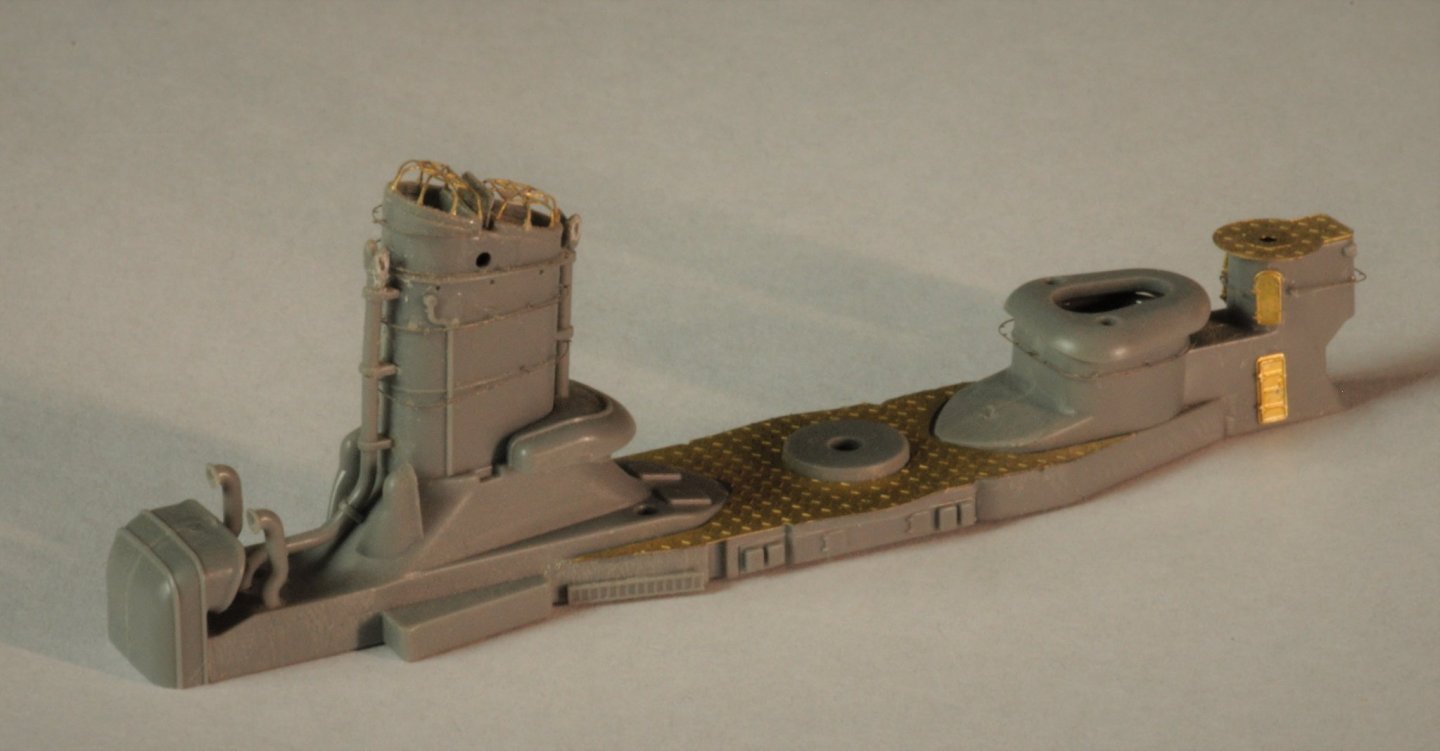
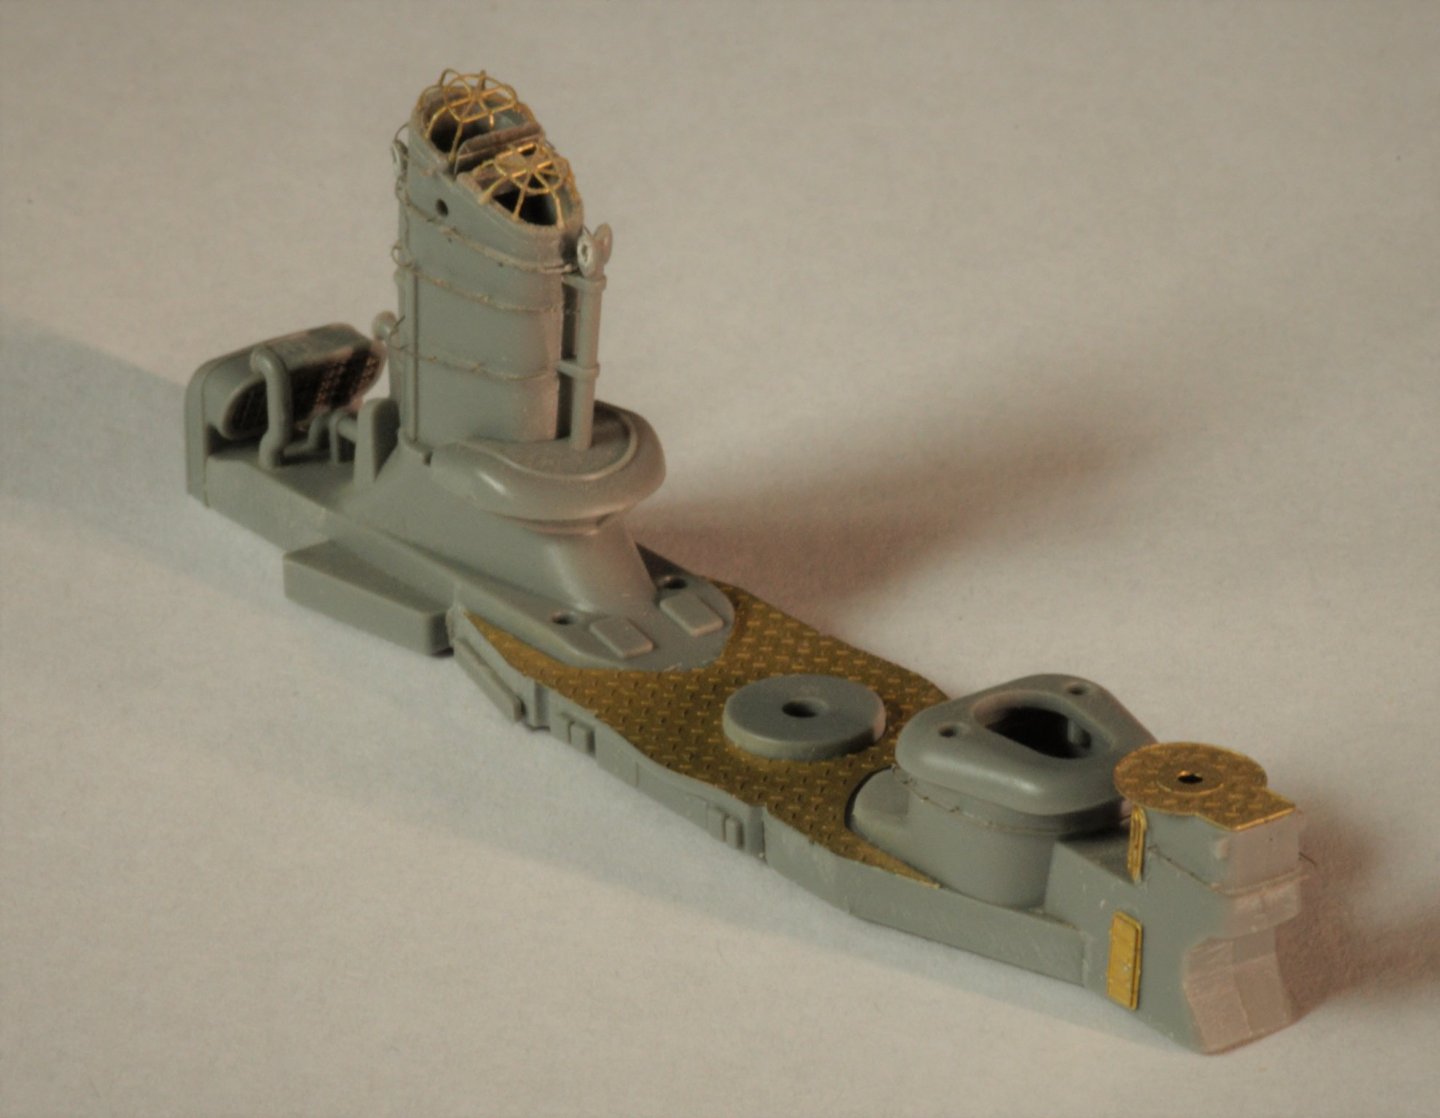
.thumb.jpg.9e71bc4d850b68141f833330cb5c0573.jpg) Hello everybody, It occured to me today that when I posted the Hiei there was a request for me to put my next build, then said to be IJN Mikuma, into a build log again. Honestly, I had forgotten about it and build logs take time and I was busy so I wasn't able to do it but since the build is going slow paced, I've looked into the topic and was reminded of the request so hereby I'll try and log the rest of my build. I have been building on the ship for a month or 2 - 3 now I think, and it is going rather well. A lot of the superstructure stands, together with some etchwork, railings, aa guns and masts. The pictures are shared below, what is to come is this - Repairs on one of the main masts where the support girders of the PE set got lost and denting out some railings that I saw on pictures were dented - finishing superstructures - making the gun turrets - putting small brass strips over the deck - paintjob - rigging got a few doubts too about the paintwork, whether I'll mount the superstructure on deck and then start the paintwork, or whether I'll paint the subassemblies first and then the deck/hull before mounting everything together. Maybe anyone got some tips on this. For the model I use the following - IJN Mikuma Light cruiser 1/350 Tamiya - Infini 13mm and 25mm twin aa guns - veteran IJN deck equipment - Eduard Mikuma PE sets - Uschi rigging - Tamiya XF paints and AK wheathering. - Aber main gun barrels (155mm triples) I'll include more pictures when I finish next steps to provide some extra detail. kind regards and stay safe
Hello everybody, It occured to me today that when I posted the Hiei there was a request for me to put my next build, then said to be IJN Mikuma, into a build log again. Honestly, I had forgotten about it and build logs take time and I was busy so I wasn't able to do it but since the build is going slow paced, I've looked into the topic and was reminded of the request so hereby I'll try and log the rest of my build. I have been building on the ship for a month or 2 - 3 now I think, and it is going rather well. A lot of the superstructure stands, together with some etchwork, railings, aa guns and masts. The pictures are shared below, what is to come is this - Repairs on one of the main masts where the support girders of the PE set got lost and denting out some railings that I saw on pictures were dented - finishing superstructures - making the gun turrets - putting small brass strips over the deck - paintjob - rigging got a few doubts too about the paintwork, whether I'll mount the superstructure on deck and then start the paintwork, or whether I'll paint the subassemblies first and then the deck/hull before mounting everything together. Maybe anyone got some tips on this. For the model I use the following - IJN Mikuma Light cruiser 1/350 Tamiya - Infini 13mm and 25mm twin aa guns - veteran IJN deck equipment - Eduard Mikuma PE sets - Uschi rigging - Tamiya XF paints and AK wheathering. - Aber main gun barrels (155mm triples) I'll include more pictures when I finish next steps to provide some extra detail. kind regards and stay safe


- 10 replies
-
- 13
-
-
 Hello everybody! I've got an IJN mood - so I want to share some "progress" on a Yukikaze kit I've started nearly a decade ago. Base of the build is a very well known kit by Tamiya - a very high quality product I dare say. Add-on is a Lion Roar photo etch kit which also includes turned gun barrels and depth charges. Also there are couple Veteran sets - single- and triple-25mm auto cannons. Most of sub-assemblies were built in 2011 🙂 Here we go:
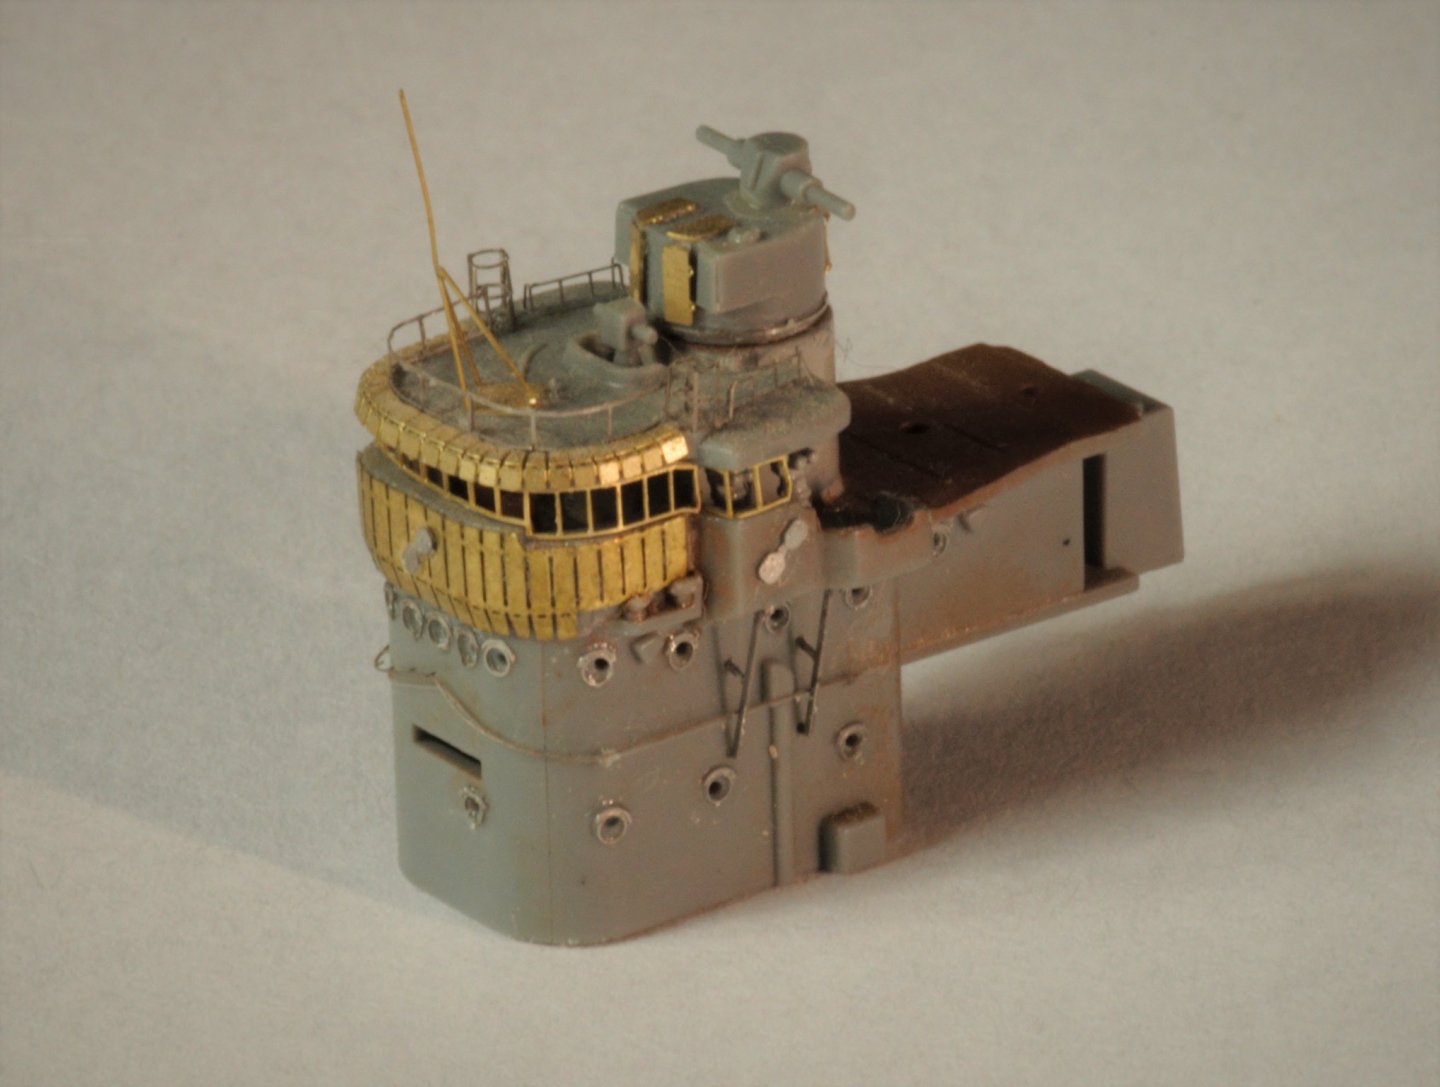


- 29 replies
-
- 15
-
-
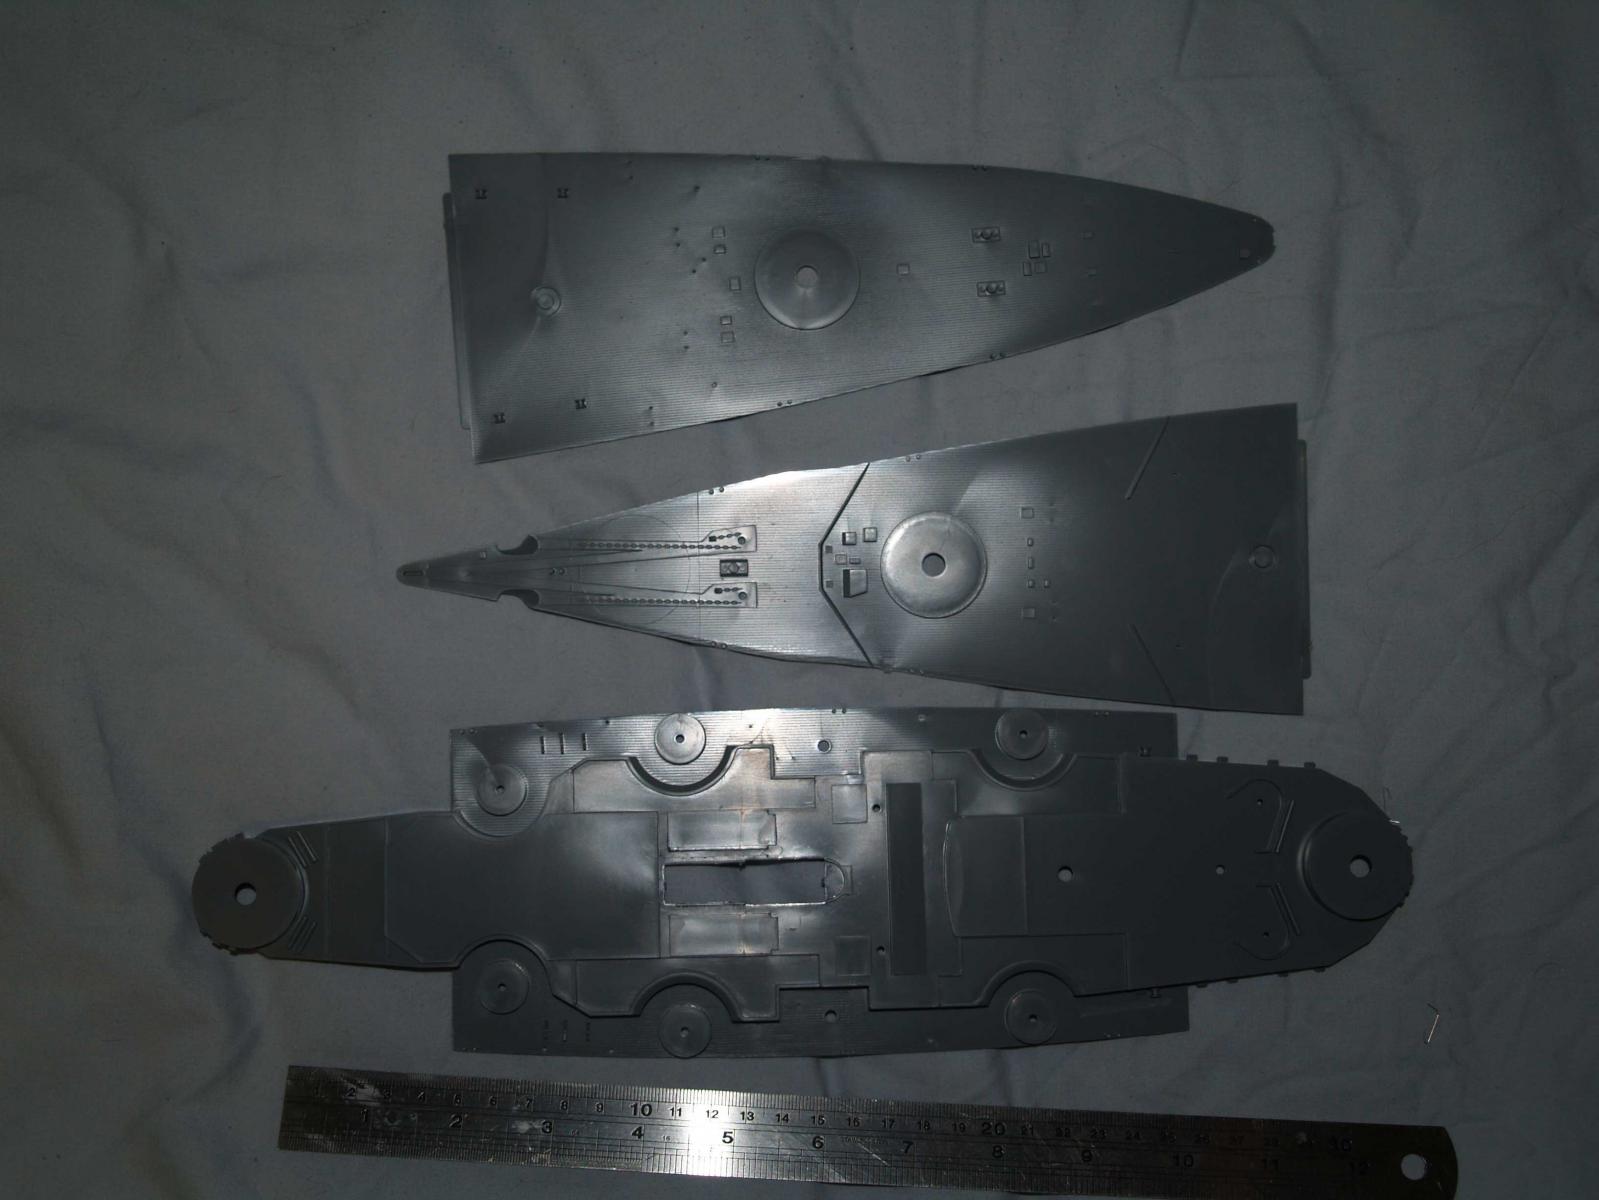
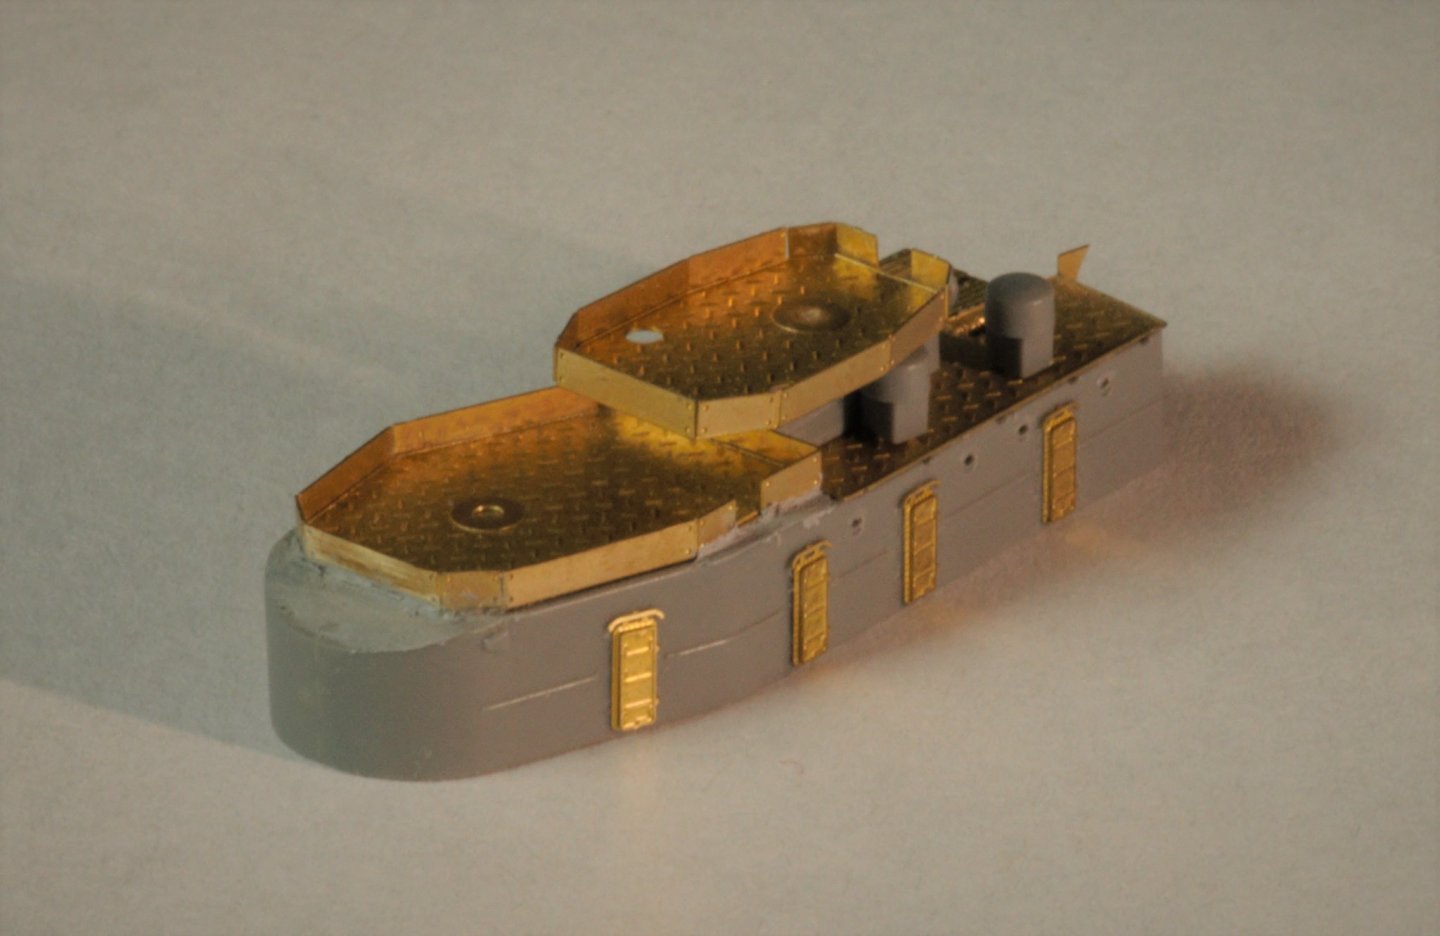
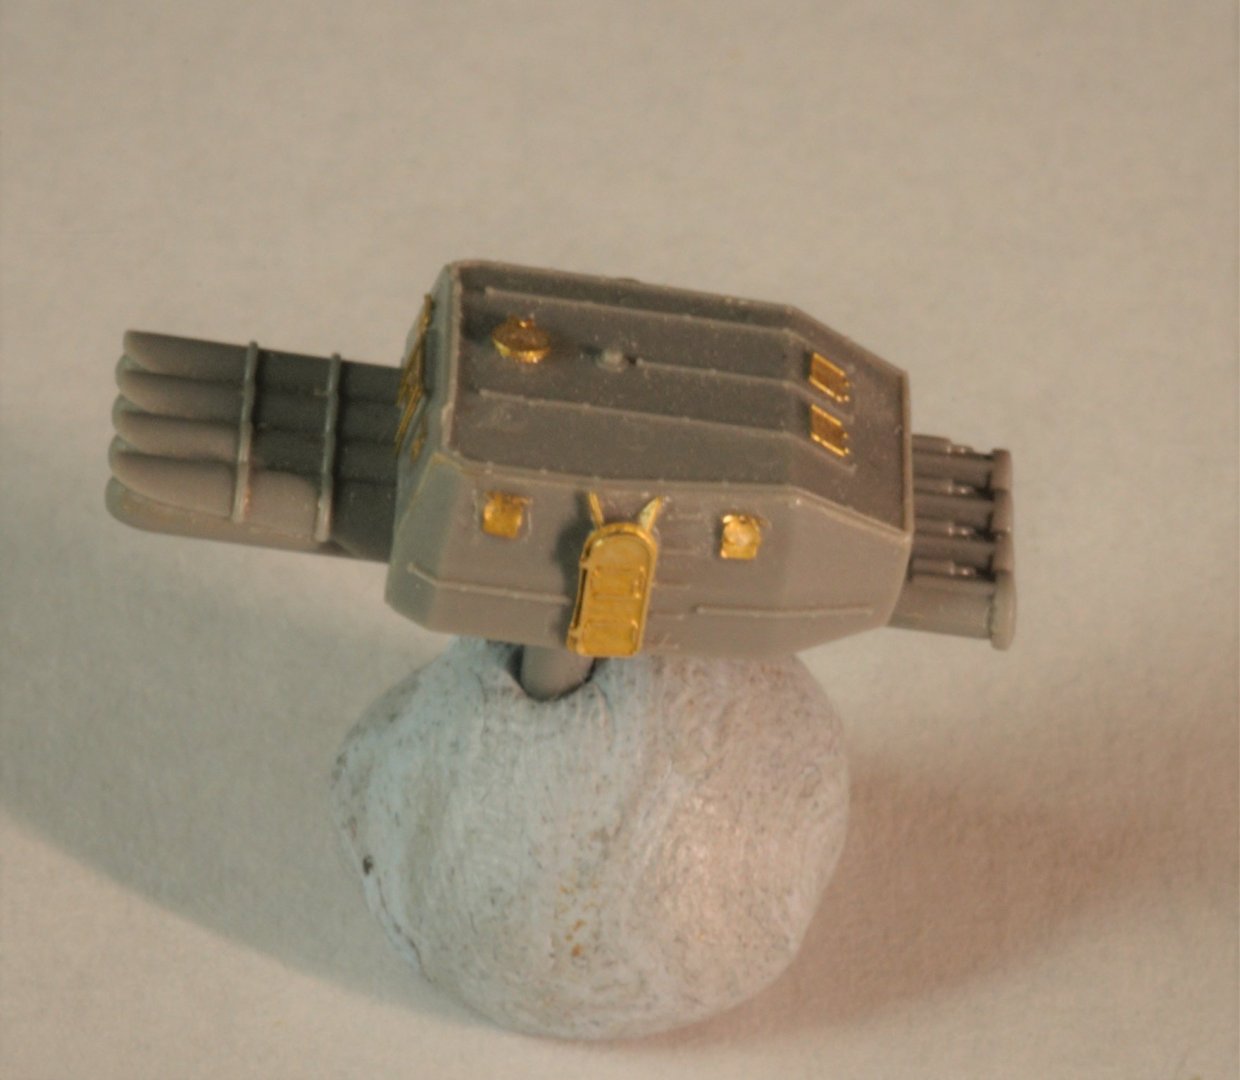
 Back to the small scale for a while. I bought this Tamiya kit for 9€. Like the German Z class kit of the same company it has two models. I'm going to built one including some PE from an ex eBay seller. Probably in light grey adding the seabed.
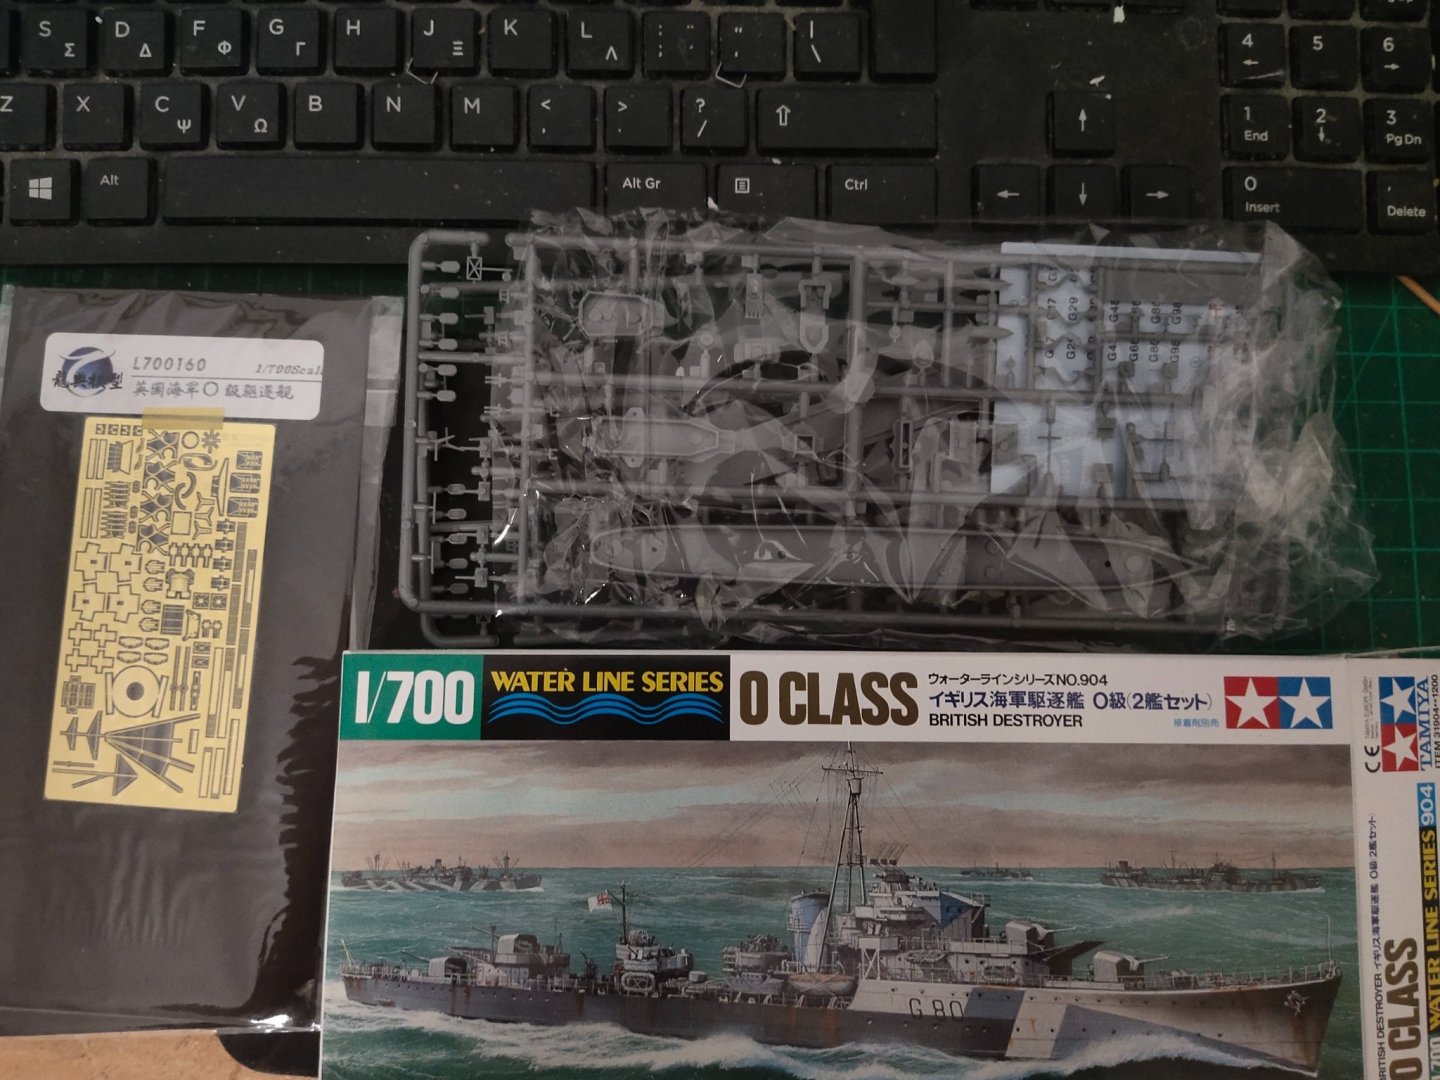
- 14 replies
-
- 5
-
-
- O-class destroyer
- Tamiya
- (and 2 more)
-
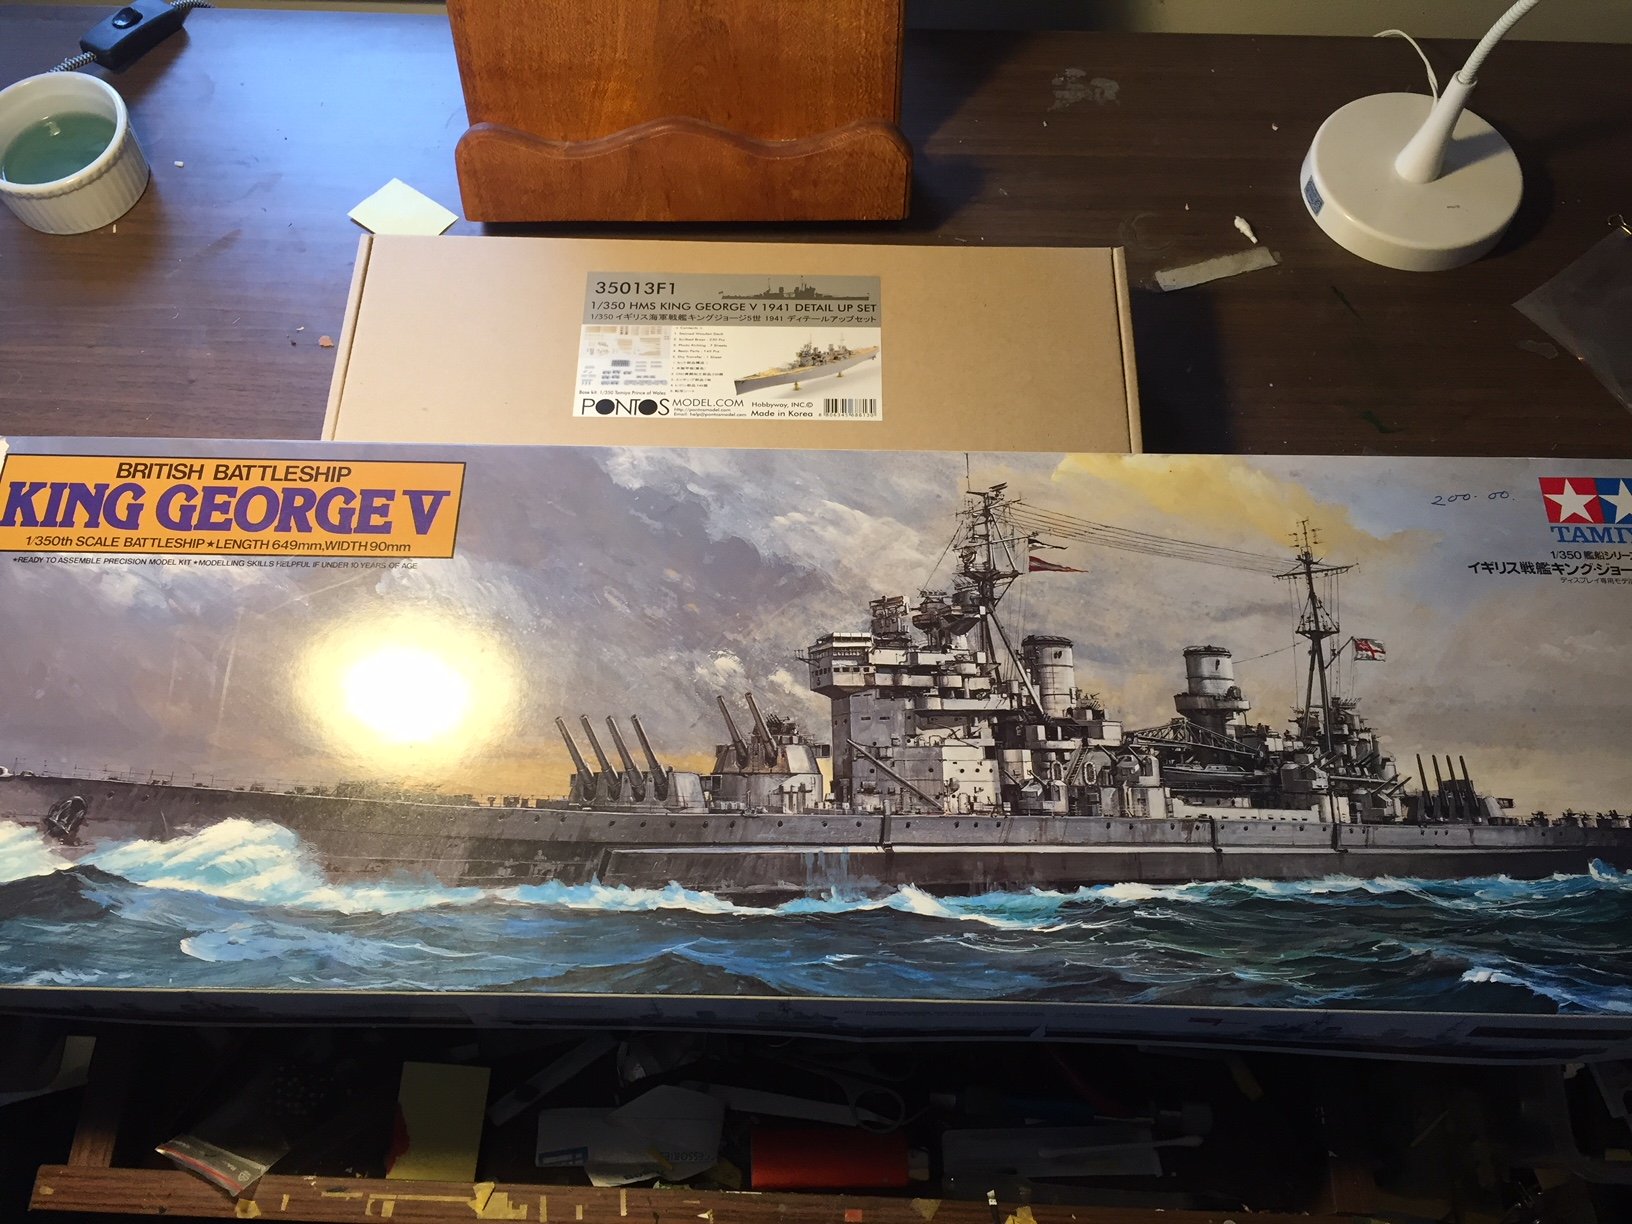
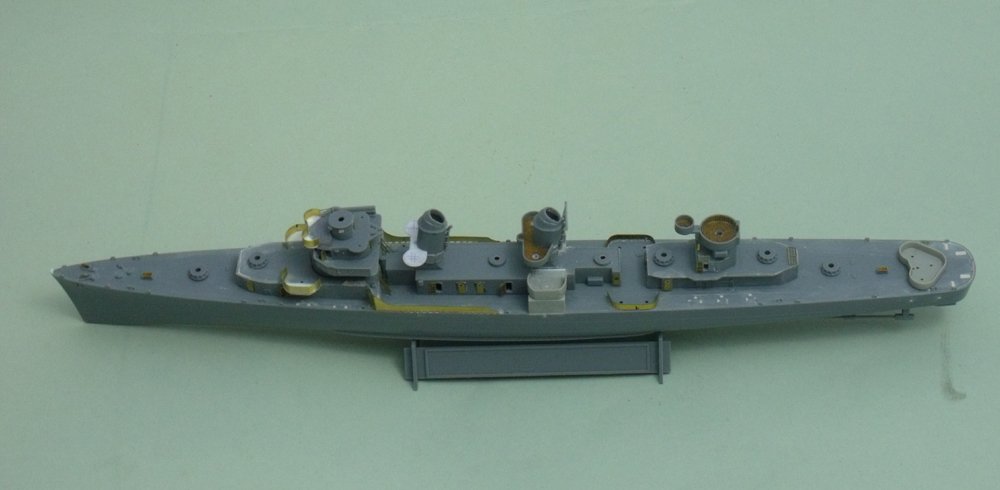
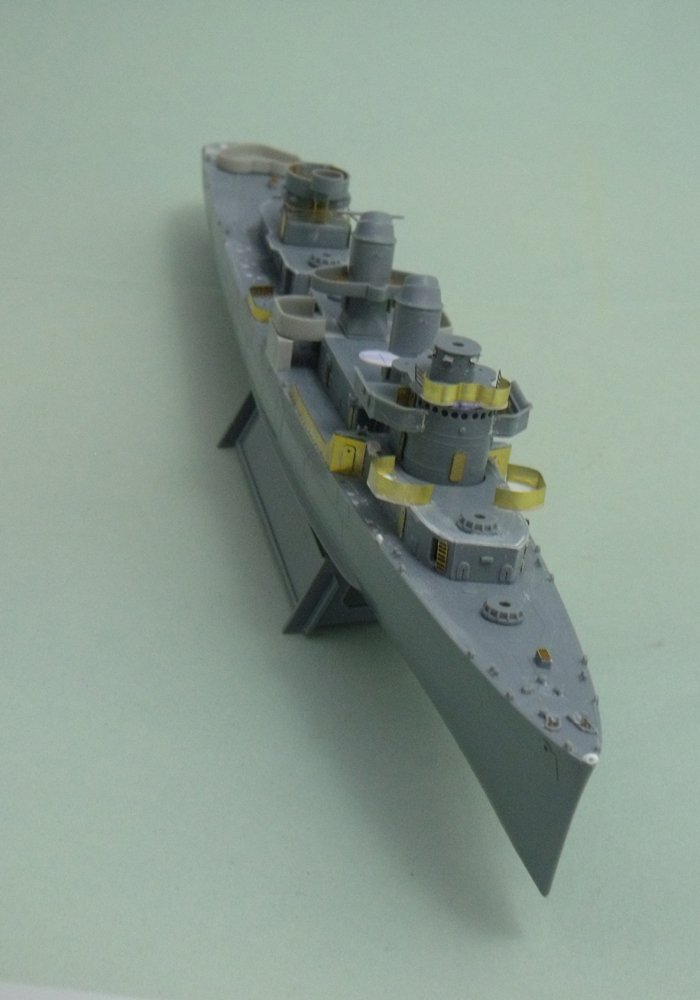
 This old 1:350 Tamiya 1:350 King George V kit has been in my possession a long time. Maybe 20 years or more, I forget. A short while back I took it out of storage from my attic and decided I would build it. Discovering that Pontos made a conversion set to build this model as the HMS Duke of York gained my interest because I had already finished the Scharnhorst and it's in my display cabinet. As you probably know, these two ships have significant combat history against each other. In December of 1943, the HMS Duke of York along with other British ships sank the Scharnhorst off the coast of Norway. In one salvo, the DoY destroyed the front main gun turrets of the Scharnhorst and everything went downhill from there for the ill-fated German Battleship. Here's my starting shot of what I'm working with. Even as old as this kit is, it's a testament to how well Tamiya kits are engineered for good fit. I am hoping it's going to turn out to be a nice model in the end. The Pontos set comes with five nice photo etch sheets, a heavy bag of turned brass gun barrels and ship's masts, and a large number of resin parts. In addition, it brings a wooden deck and a small sheet of dry transfers.
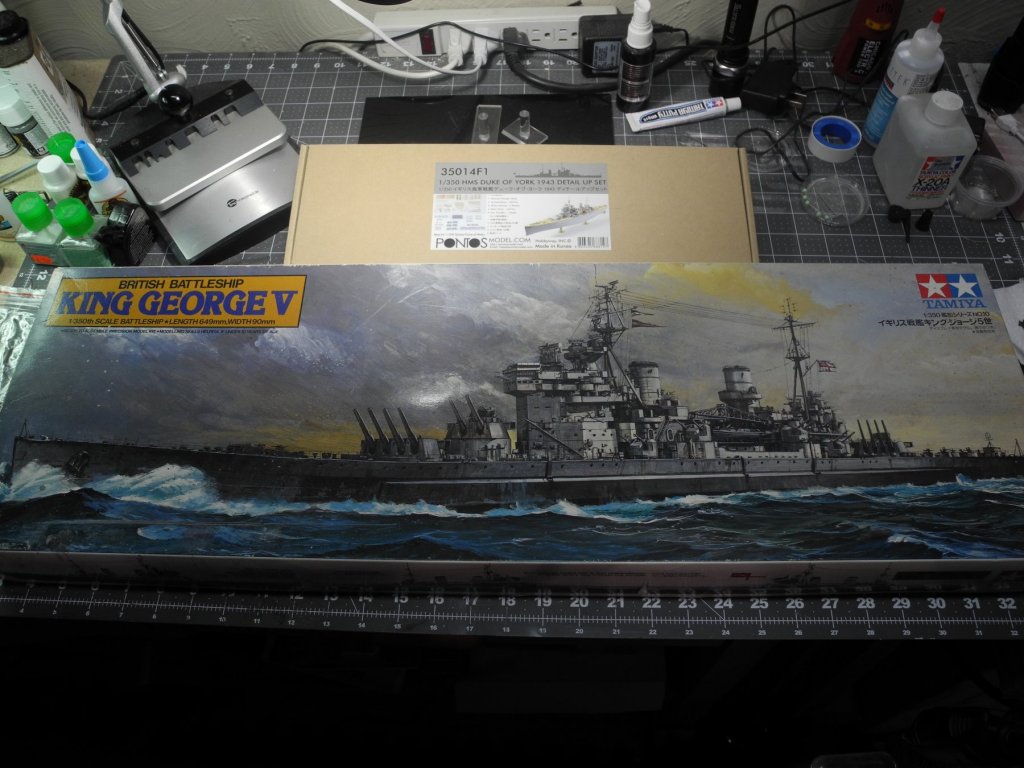

- 151 replies
-
- 17
-
-
- duke of york
- tamiya
- (and 2 more)
-
 Hello, This is my first ever build log and my first ‘proper’ ship build attempt. Ive followed a few builds on here as research and to see how things go together so thought I’d show my build too. It will be a slow one I think as I’ll try give it a good go and also tough to find much info on Her except low res pics from far awayso it won’t be a super accurate one as I’ll just have to wing bits I don’t know about. I got this kit for lockdown and from someone that had cut a few bits off but hadn’t really done any building.
- 211 replies
-
- 11
-
-
- prince of wales
- tamiya
- (and 2 more)
-
 Welp, My IJN Yukikaze arrived! So I'll start with the 'whole shebang' image of what I have to begin with! Keep in mind this is my first ship model, and the first time I've ever worked with PE parts! Wish me luck guys!
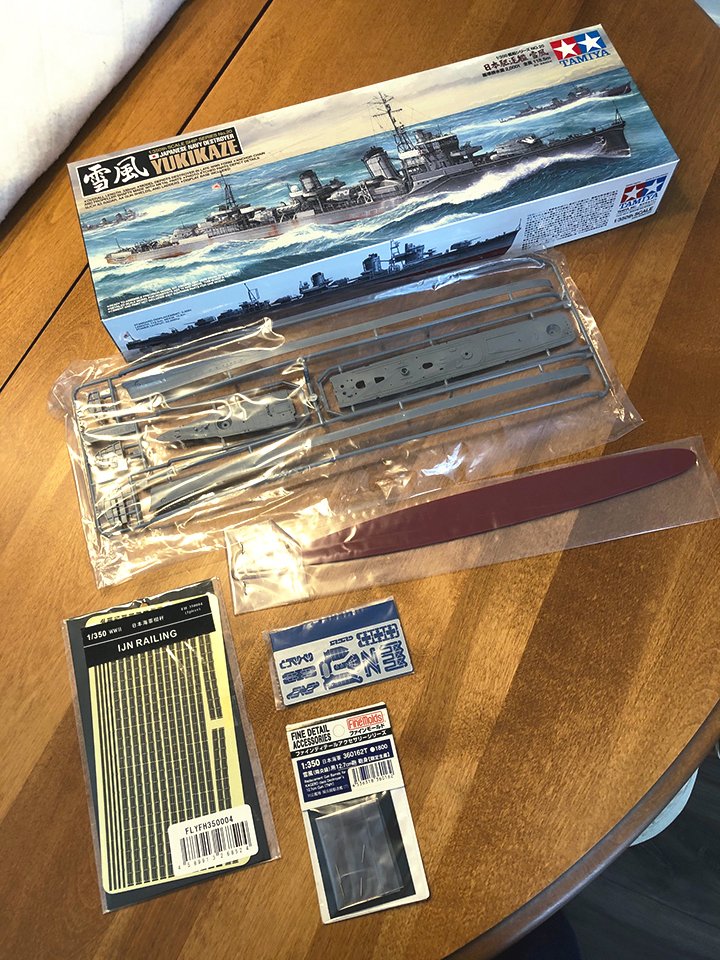
- 26 replies
-
- 12
-
-
- Yukikaze
- First Build
- (and 3 more)
-
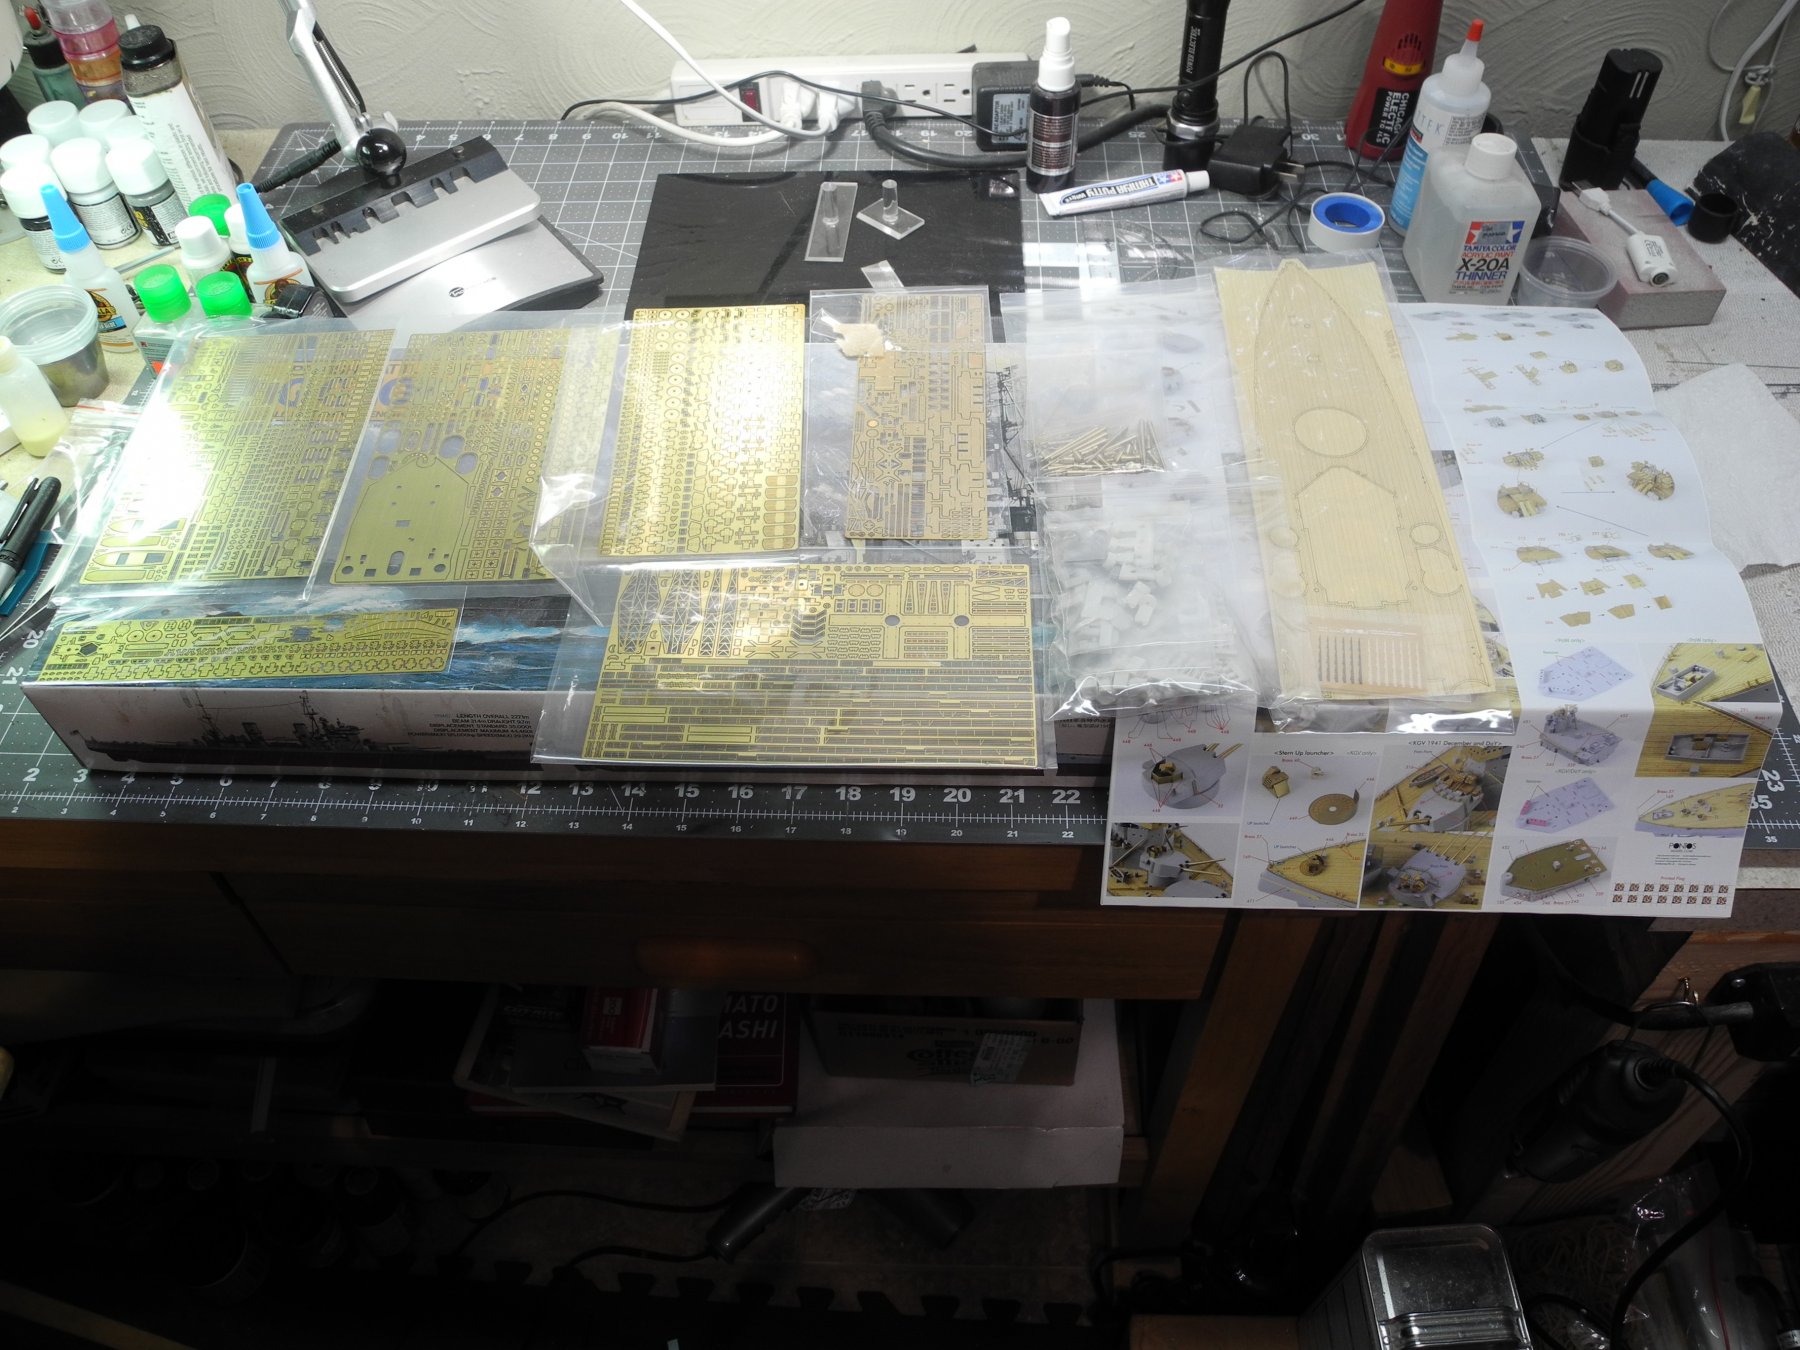
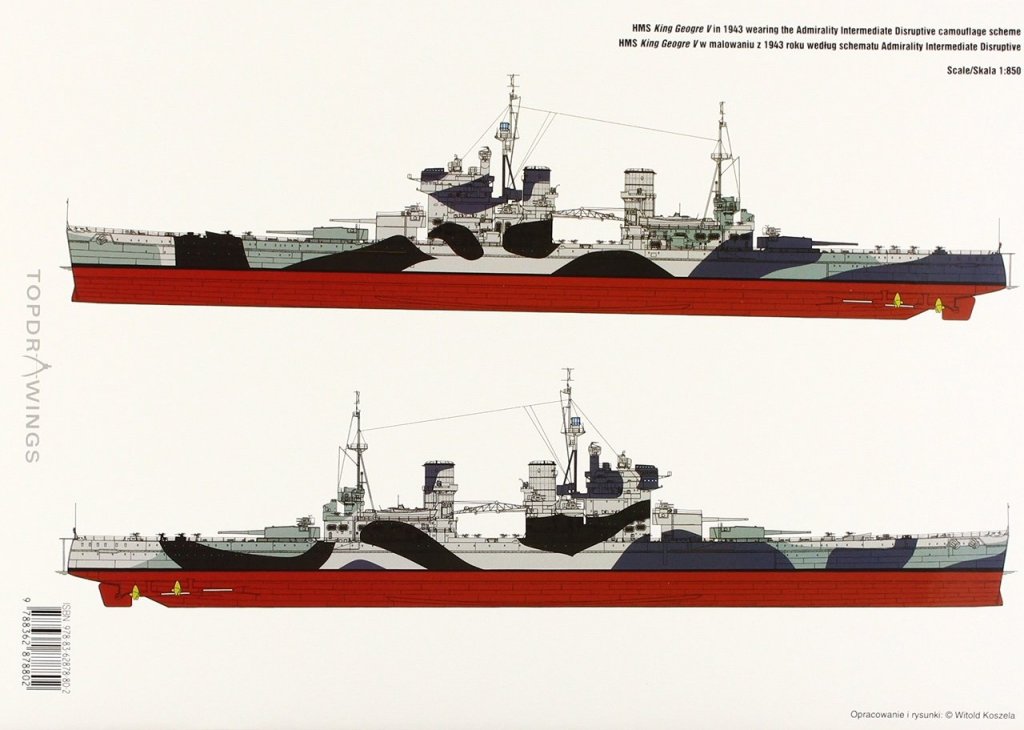
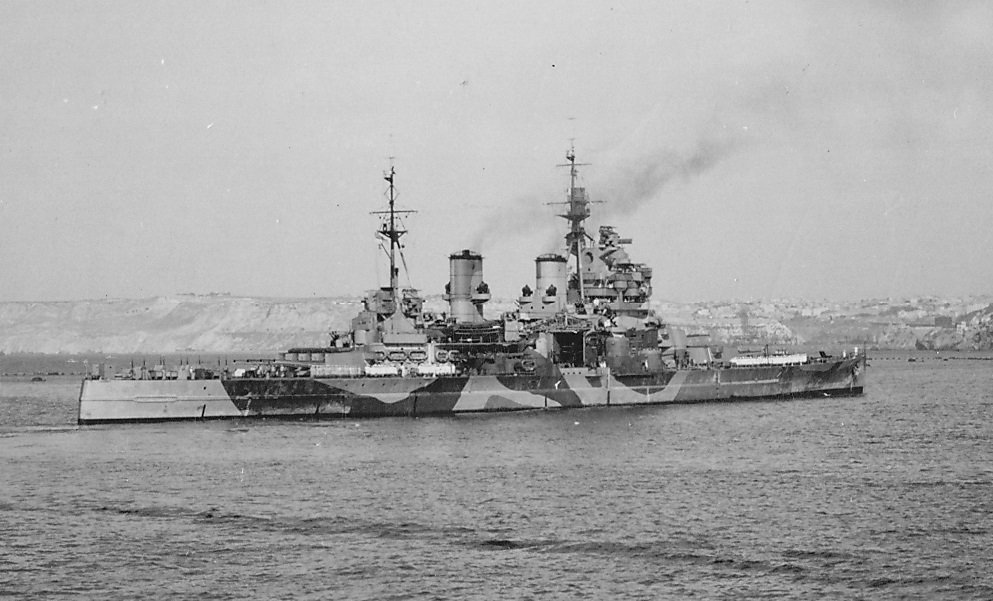
So I found a King George V on a local buy and sell site, came with a wooden deck and metal barrels at a good price. I know it's been done, Mr Rabbit and Kpnuts, and there are basically three iterations of HMS King George's Career, when she fought the Bismarck in '41, the '43 fit out then the '44 fit out. I want to do the '43 fit out as it hardly ever been done, the references are very obscure and I get to do camouflage and not strait grey. The Tamiya Kit is set for the 1945 fit out, having removed the aircraft and placed the ships boats amidships, but the Aftermarket Pontos is retrofitted for 1941. The thing is, the Pontos set gives you the ability to have an aircraft deck but the kit gives you no aircraft. Thus one has to buy a Walrus. The Tamiya kit has the stern square hatches omitted which need to be after - after market as Pontos ignored this gem. I got the new Infini Models RN Doors (he bloke who is Infini models designed this set when he worked for Pontos) as they are just magnificent. I also got some individual RN stanchions as I'm over one piece railings are I like to torture myself. I've ordered new Carley Floats (i'll have to scratch build the Flota nets) and an extra set of 20mm guns as there should be 38 of them all up. The Chap I bought the kit from had a Artwox deck which is suitable but the Pontos one is fairly clean which means I can add whatever configuration I want. I've spent a few weeks researching tis and the internet is just full of people who just do not check their references, as about 70% of the photos pro porting to be KGV are usually a sister ship. The Imperial War Museum has lovely photos which are correctly labeled and allow me to feel comfortable in my 1943 configuration. Welcome to build number 10 in 1/350.

- 405 replies
-
- 12
-
-
- tamiya
- king george v
- (and 2 more)
-
 As I mentioned in my introduction, I am currently working on Tamiya's 1/350 Fletcher. As I'm genetically unable to simply build a kit as provided, I'm trying to build her as USS Thatcher DD-514, as she appeared ca. February 1944 after she was rebuilt at Mare Island. That requires some extra work, as the kit covers only the earliest (6?) Fletchers, which differed a little in their AA arrangement Thankfully, I could borrow a couple of the required parts from Trumpeter's 'The Sullivans' kit. Furthermore, I'm throwing in some aftermarket for additional excitement. Enough of the words for the moment, here she as she currently appears: There's still quite some way to go, apparently...
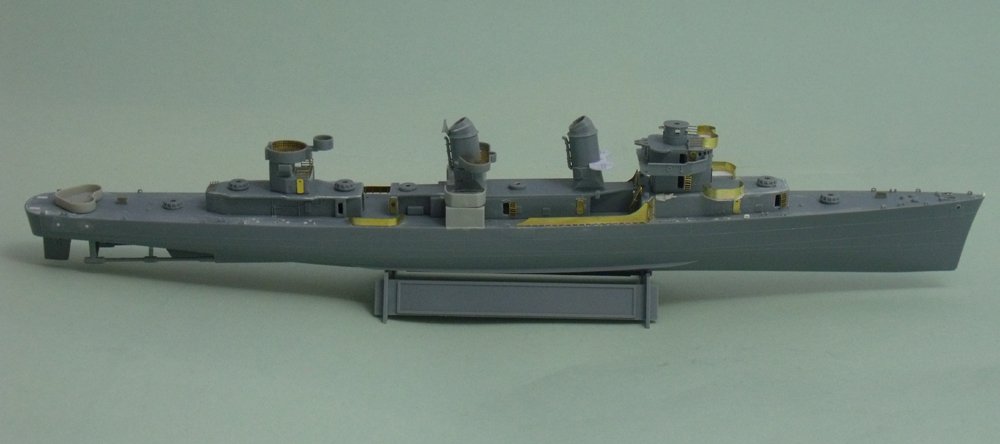
- 18 replies
-
- 12
-
-
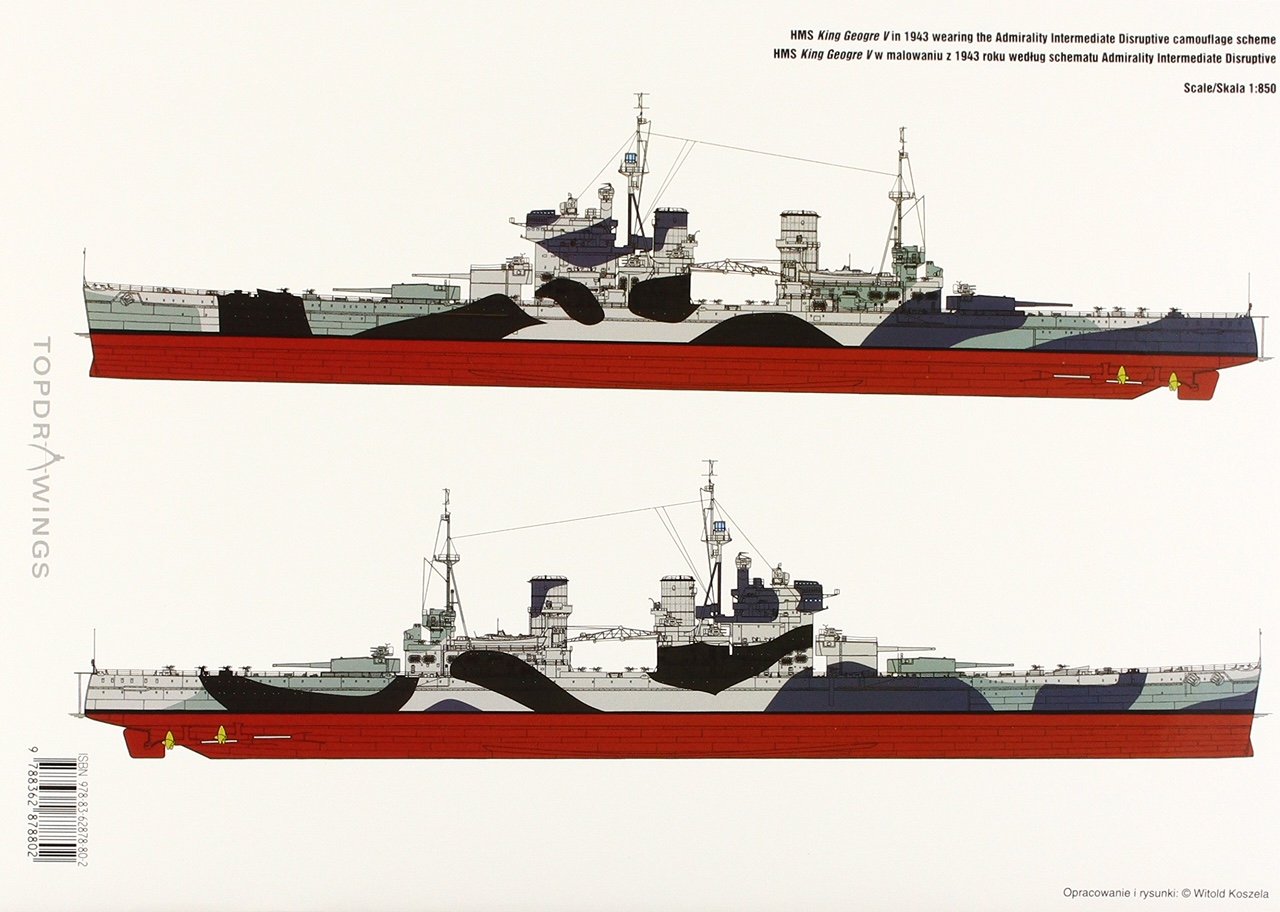
 Hello all. It's my first post here so a little about myself. Like many here, I suspect, I returned to the model hobby in my late twenties after a hiatus of 15 yrs or so. Since then I have made a number of wooden vessels, from kits, and I also very much enjoy bringing plastic kits mechanically to life - which is the main theme of my Youtube channel 'Gonzo mechanic'. This current project was spurred by reading about the naval campaigns of World War Two. I was fascinated to find out that the Duke of York (Capt. Guy Russell) took on and destroyed the Scharnhorst at night, in an Arctic storm, with gunnery controlled entirely by radar. Before reading about this, I had not realised that such a thing was possible in this period of the war. Indeed, it turns out Russell specially trained his gunnery teams to fight at night having discovered weaknesses in night-time drill during his time on the Nelson. Unluckily for the crew of the Scharnhorst, the Royal Navy presented the right man with right ship in the right place at the right time. I had planned to convert the Tamiya Prince of Wales to show the Duke of York in her post '44 re-fit form as the amount of anti-aircraft weaponry was truly awe inspiring: 12 pom-pom mounts (!) 2 quadruple bofors mounts and eight or so twin powered oerlikon turrets plus numerous single emplacements for the same weapon. It almost seems a pity this was never tested. However, over time, I decided to do the more familiar 1943 look as this is a rare example of a paint scheme mainly intended for fighting fight in the dark of the Arctic winter when the Russia convoys tended to run. Having bought an addtional KGV kit to borrow the waist boat platform I decided to build this later and she will form a later posting. Sources So what did she actualy look like? I bought the KGV series book by Witold Koszela and a book of drawings of the DoY by the same author. I also found this site https://www.naval-history.net/xGM-Chrono-01BB-Duke of York.htm which turned out to be vital. Finally, there are the pictures from the IWM website of which the series taken at Rosyth 'from the 100 ton crane' are easily the most important. However, beware pictures from the IWM site. Several turned out to be mirror images which resulted in quite a lot of wasted time. Some aspects of the ship are 'handed' - like the roof of the cabin abaft the main director and the mysterious little tub thing on the stbd. side of the forward superstructure and these need to be checked. Also the date appears to be wrong because on the 1 November 1943 the DoY was in Scapa not Rosyth. The pictures more likely date from around January to March that year. The Koszela material is helpful in many ways but many details are wrong or missing. We'll come to those later. Finally the Pontos set while also hugely helpful is also missing a number of items and is also wrong in detail in some places. In other words this project has required careful synthesis from disparate and sometimes conflicting sources. Some aspects remain unresolved and it will be most interesting to see if others here can shed light on them. It is, then, a source of some surprise that is can be so hard to piece together a reasonably faithful image of one of the largest warships the UK has ever put to sea - even within living memory. First up: the hull This, like all my plastic projects, is going to be rc so it can be filmed. There are various conversion kits for other vessels available but I decided to use my 3D printer to make a motor and servo mount. Anything to do with rc has to be maintainable because the first law of sod is that anything inaccessible will break first. In addition, and without disrespect to the many very fine modellers who use them this way, I could not face having the wooden deck show up with a 'real-world' 10" step - so joined the plastic deck together and cut a rebate around the edge so that it, with the wooden deck added, would fit flush with the hull sides. Here you can see the 3d printed motor mount and dog bones. I inserted small brass washers where the dog-bones met the mount. Stern glands Rudder pintle On the right you can see, just about the rebate cut into the under edge of the deck. This was a tiresome process involving a mini-router. N.B. the hull on the left is for the KGV hence stern windows but is otherwise identical to my DoY Next up: alterations to the forward superstructure.
- 23 replies
-
- 13
-
-
- pontos
- king george v class
- (and 5 more)
-
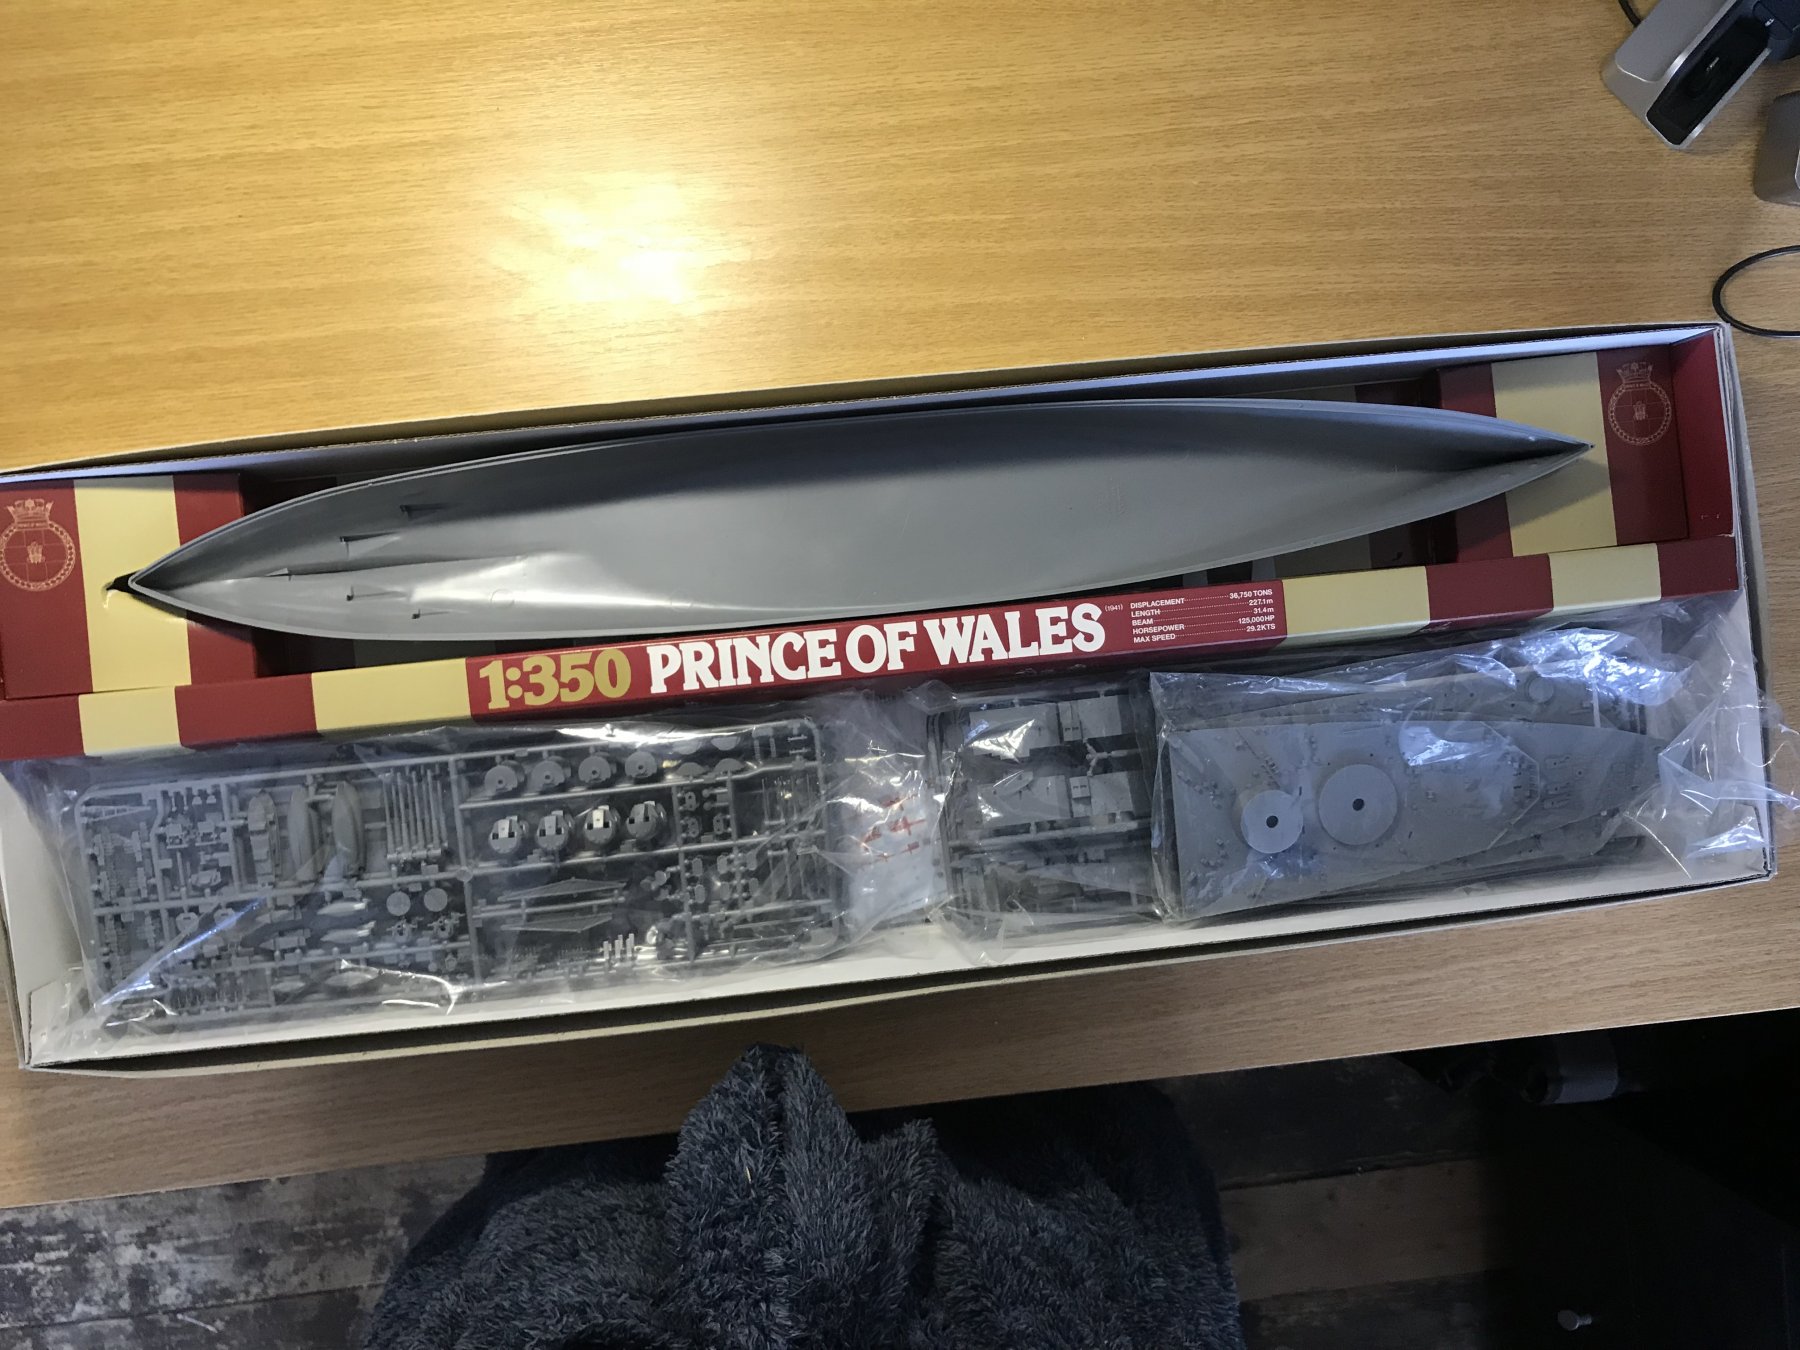
 This will be my first MSW build log “in plastic”. I first want to be clear that this build will be “out of the box”. There will be no aftermarket wood, PE, resin or brass. The purpose of this build is pure glue galore and using MSW to improve my weathering skills and try to do simple improvements on a cheap model. The Tamiya model is quite old and dates to 1980s, I think. I bought it cheaply a couple of years ago and have had in the stash ever since. The battleship HMS Prince of Wales had a short and dramatic active service period. HMS Prince of Wales took part in the battle of the Denmark Straits against Bismarck and Prinz Eugen, hosted the conference between Churchill and Roosevelt at Newfoundland and was tragically sunk by Japanese planes outside Malaysia, all this in period of less than seven months in 1941. Although I prefer wooden ship models, plastic has its charm. Building a ship in plastic brings me on a trip down the memory lane. My first model ship was a torpedo boat which had an electric motor driving the propeller. I played with it in the bathtub practicing torpedo attacks towards my younger brother. The second kit was a pirate’s ship in black plastic which I think I built in 1973 or 1974. I do not remember the manufacturer. I do not think it had an archetype from real life. It looked more like something from a Disney movie, but the model was very intriguing. One detail I remember was that it had shrouds with ratlines in injection moulded plastic. My third ship was Wasa by Airfix which I got for Christmas in 1975. Wasa was a lot more advanced than the previous pirate’s ship and had shrouds with ratlines in sheets of threaded material which you cut out with a pair of scissors. Wasa came with sails in creamy yellow thin and brittle plastic. At that time, I always followed the building instruction and meticulously used all the material included in the box although the model looked much better without the sails. All my friends at that time built Wasa and we compared our building results. Some of us did better than others. Next ship was HMS Victory which I got as a birthday present in 1976. I wanted the 1:180 Airfix version but was given a model in a slightly smaller scale from another manufacturer (Revell?) and thus probably cheaper than the big Airfix version. For some reason I seem to remember that Christmas presents used to be more lavish than the birthday presents. Another disappointment with my Victory was that many of the cannon ports of the hull were moulded closed. What is the point of building HMS Victory if you cannot see all the cannons? I remember my parents had a book about HMS Victory which I studied. It was in English, a language which I did not understand much of at that time, but in it was a picture indicating where Lord Nelson had stood when he was shot during the battle of Trafalgar. I painted a pool of blood on the deck of my model with Humbrol number 19 (bright red gloss) indicating the misfortune of Lord Nelson. My interest then turned towards ships from WW2. First, I built Admiral Graf Spee (Airfix), then HMS Nelson (Airfix) and finally Bismarck (Airfix). My first plastic modelling era ended with the build of Golden Hind (Airfix). This time I ignored using the creamy yellow sails. My fixation to the Airfix kits probably has to do with their fantastic box art of the 1970s. My inaccurate notion for Airfix kits from the 1970s being the pinnacle of plastic modelling was not changed until my wife gave me a modern Tamiya kit 25 years later. 1970s now turned into 1980s and my interests focussed on other things than plastic model kits. University studies, marriage and a beginning working career eventually brought me and my wife to northern England (Cumbria) for a couple of years in the early 2000s. Cumbria is known for its mountains, sheep, rainy weather and beautiful lakes where the rain eventually pools up. During the first rainy and dark winter there, I felt I needed a hobby and, in a town, called Kendal I found a model shop displaying a re-boxed Airfix version of Wasa. I was hooked. Gone where the creamy yellow plastic sails and shrouds and ratlines were made using gigs which were included in the kit. It turned into a decent model and for nostalgic reasons I painted the decorations according to the erroneous Airfix instructions from the 1970s. Ever since this second Wasa build I now and then dabble in plastics although I now prefer wood. HMS Prince of Wales is my first ship in plastics since my second Wasa almost 20 years ago. Off we go! Regards Henrik
- 20 replies
-
- 13
-
-
- prince of wales
- tamiya
- (and 2 more)
-
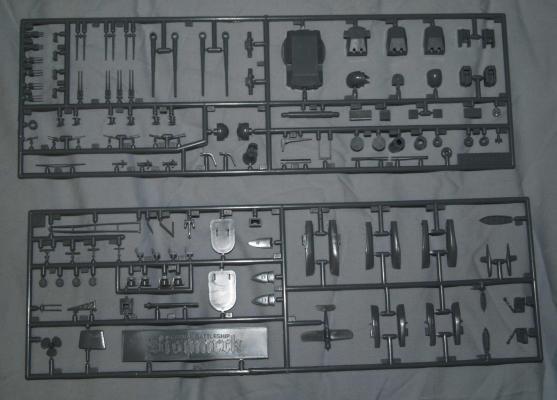
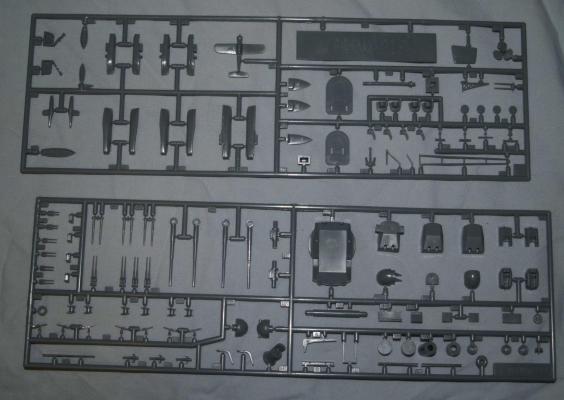
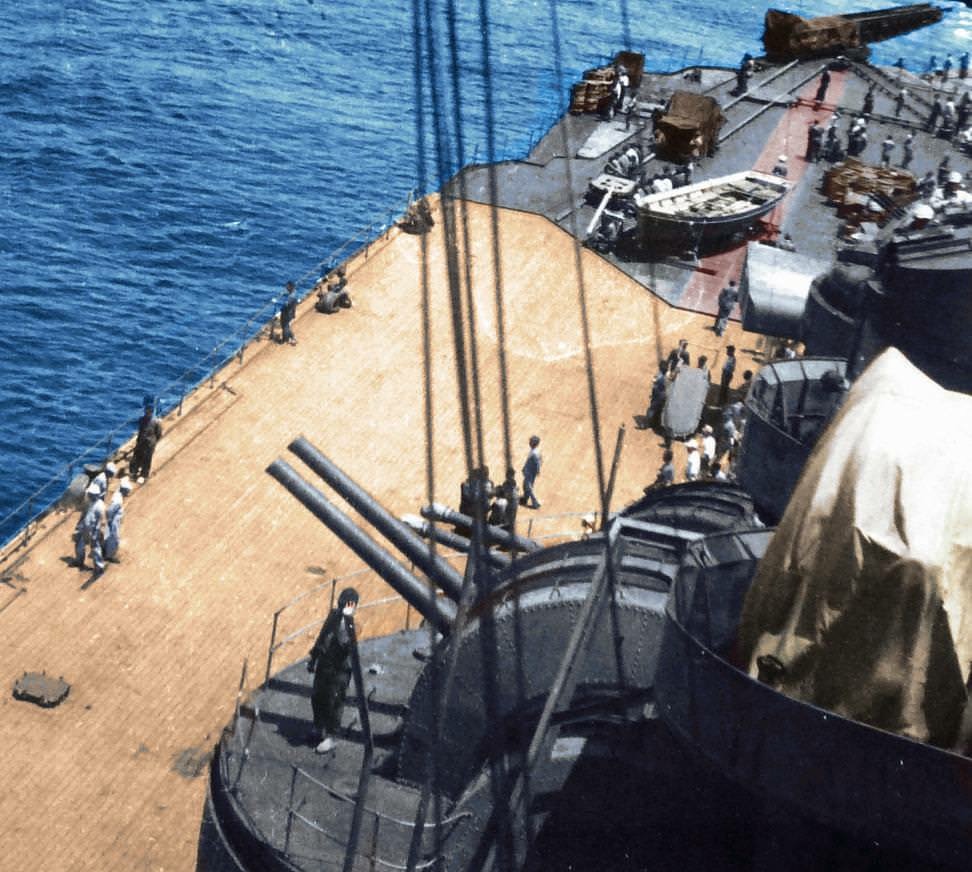
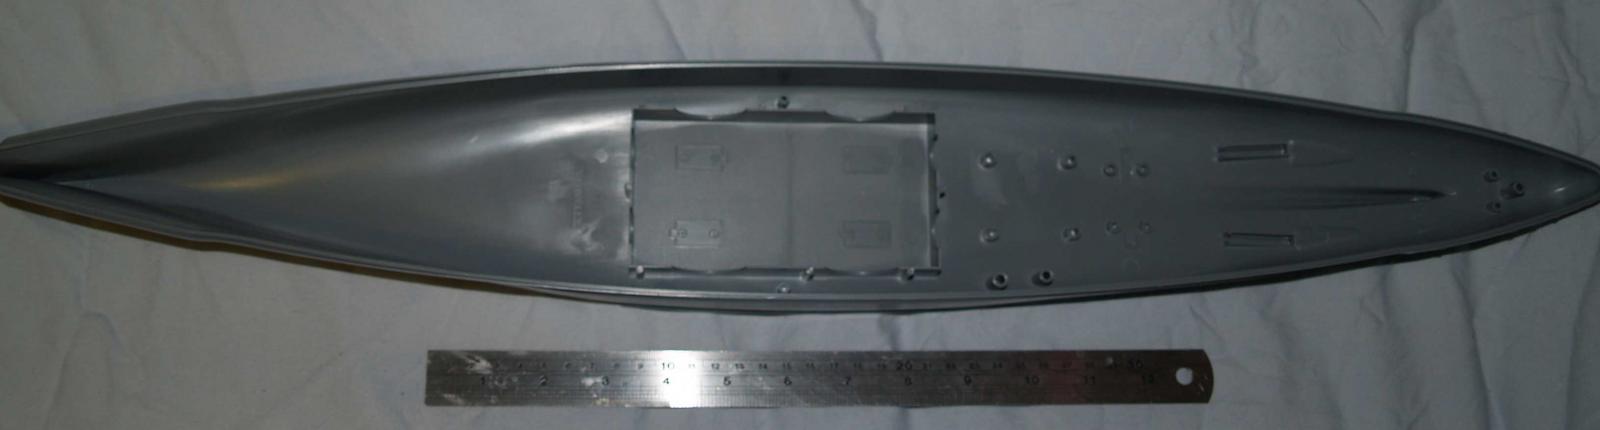
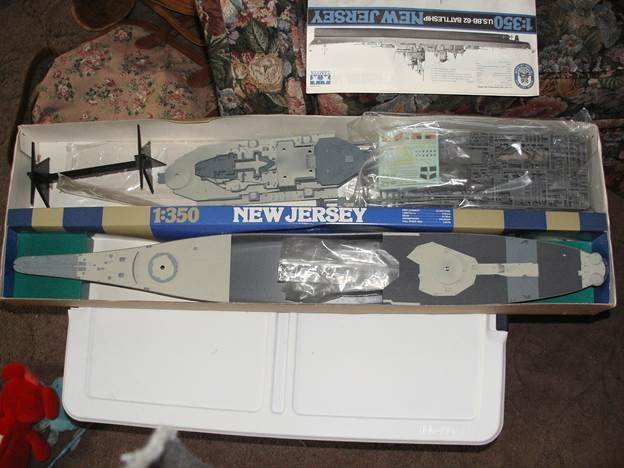
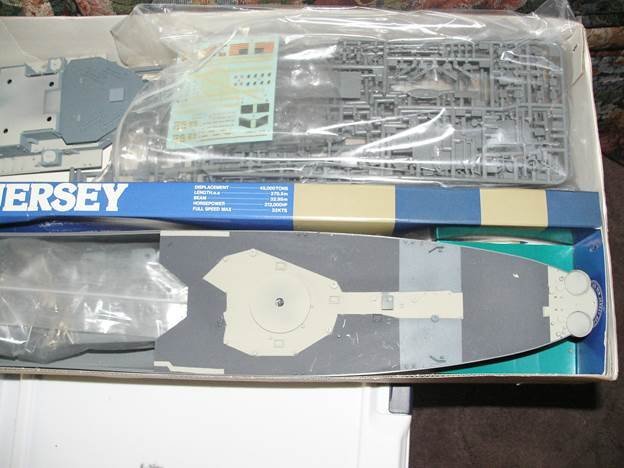
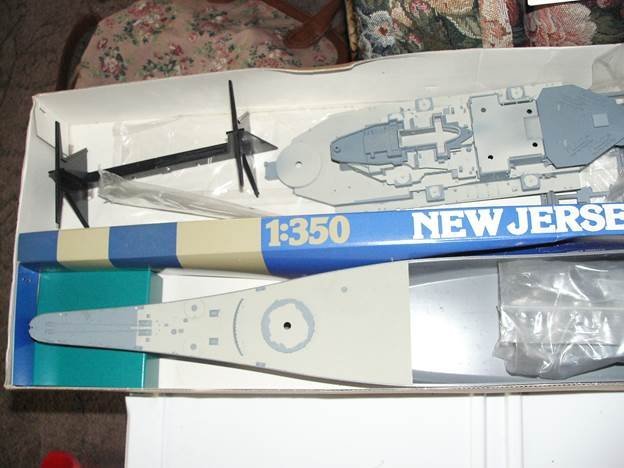
 I was able to pick up this Tamiya 1/350 scale German Battle ship Tirpitz, which is the sister ship to the infamous Bismarck kit for $48.00, which I though was a pretty good deal since it retails for about double that price. I intend on building it radio control, which shouldn't be too difficult since it as well as the Bismarck with both made for R/C use with diagraming of the R/C setup in the instructions. This model will be more of an inside build versus me having to work out in my shop like I usually do with my wooden models.
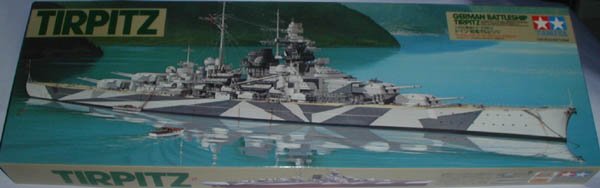
-
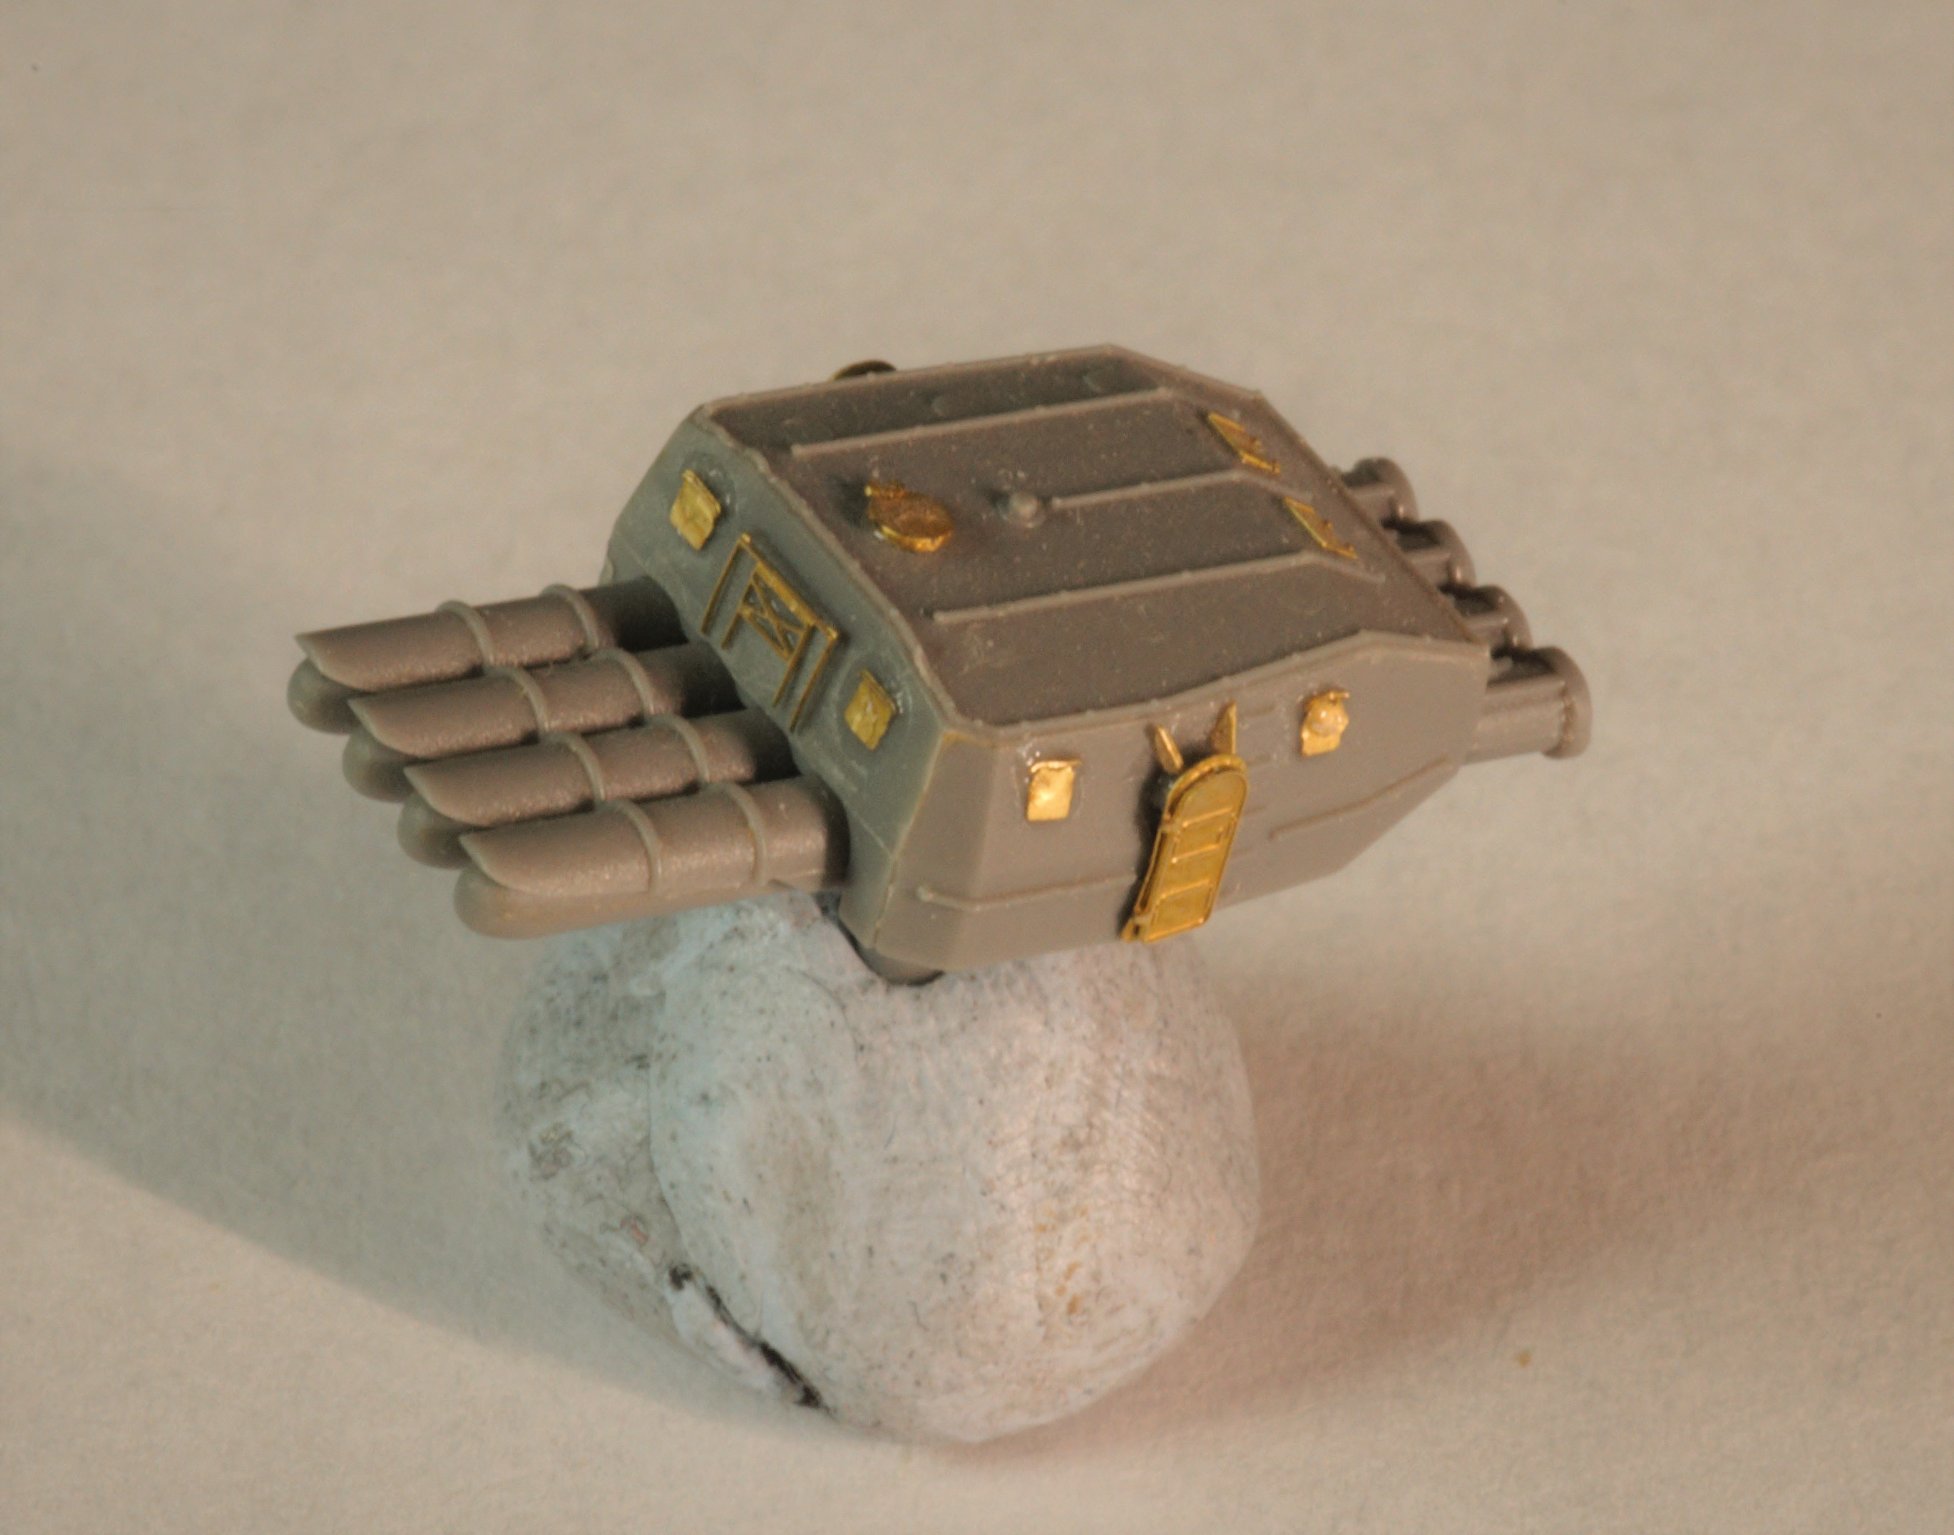
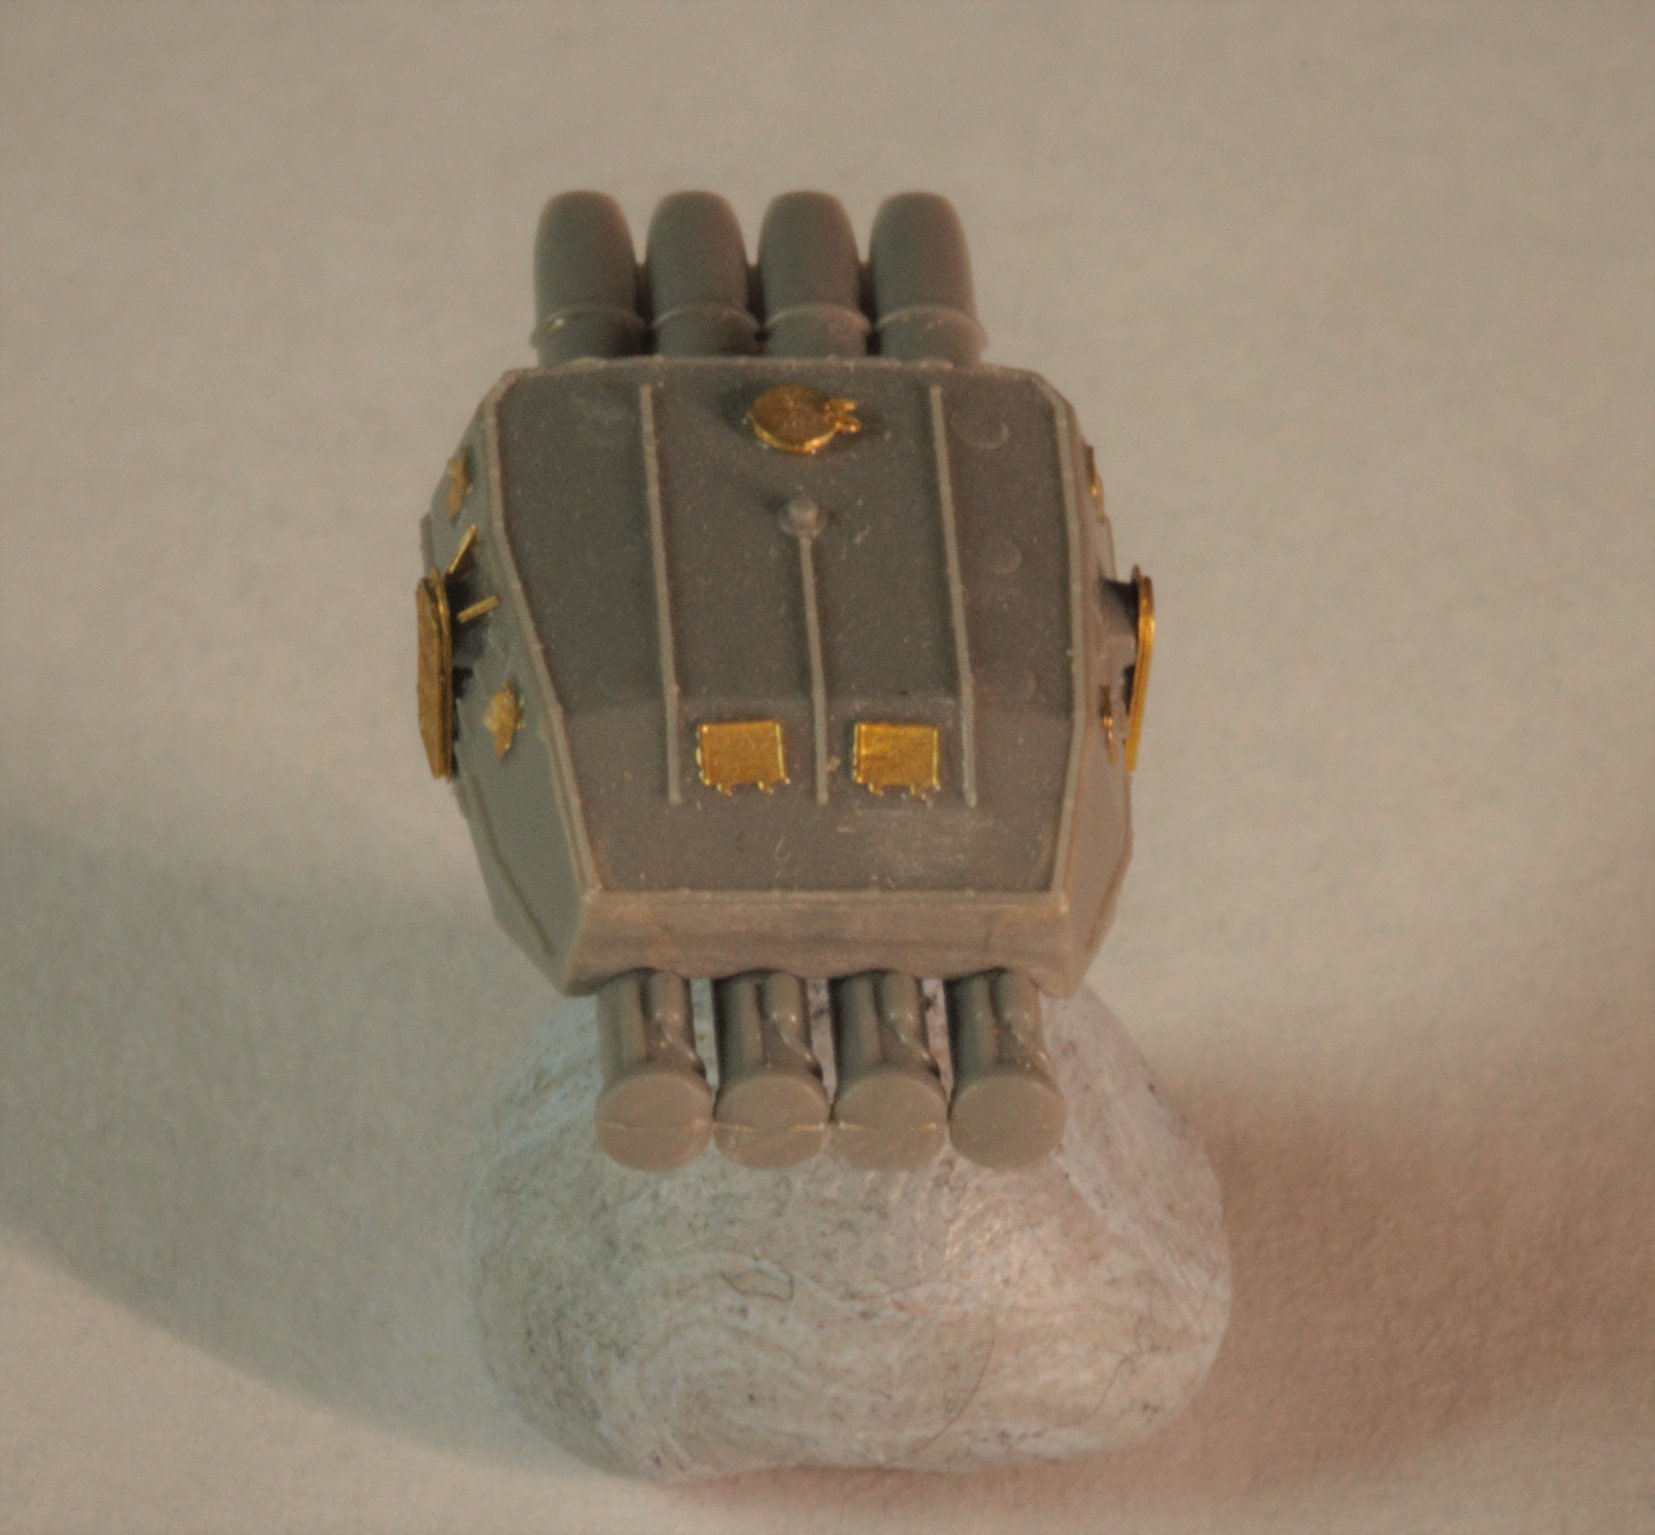
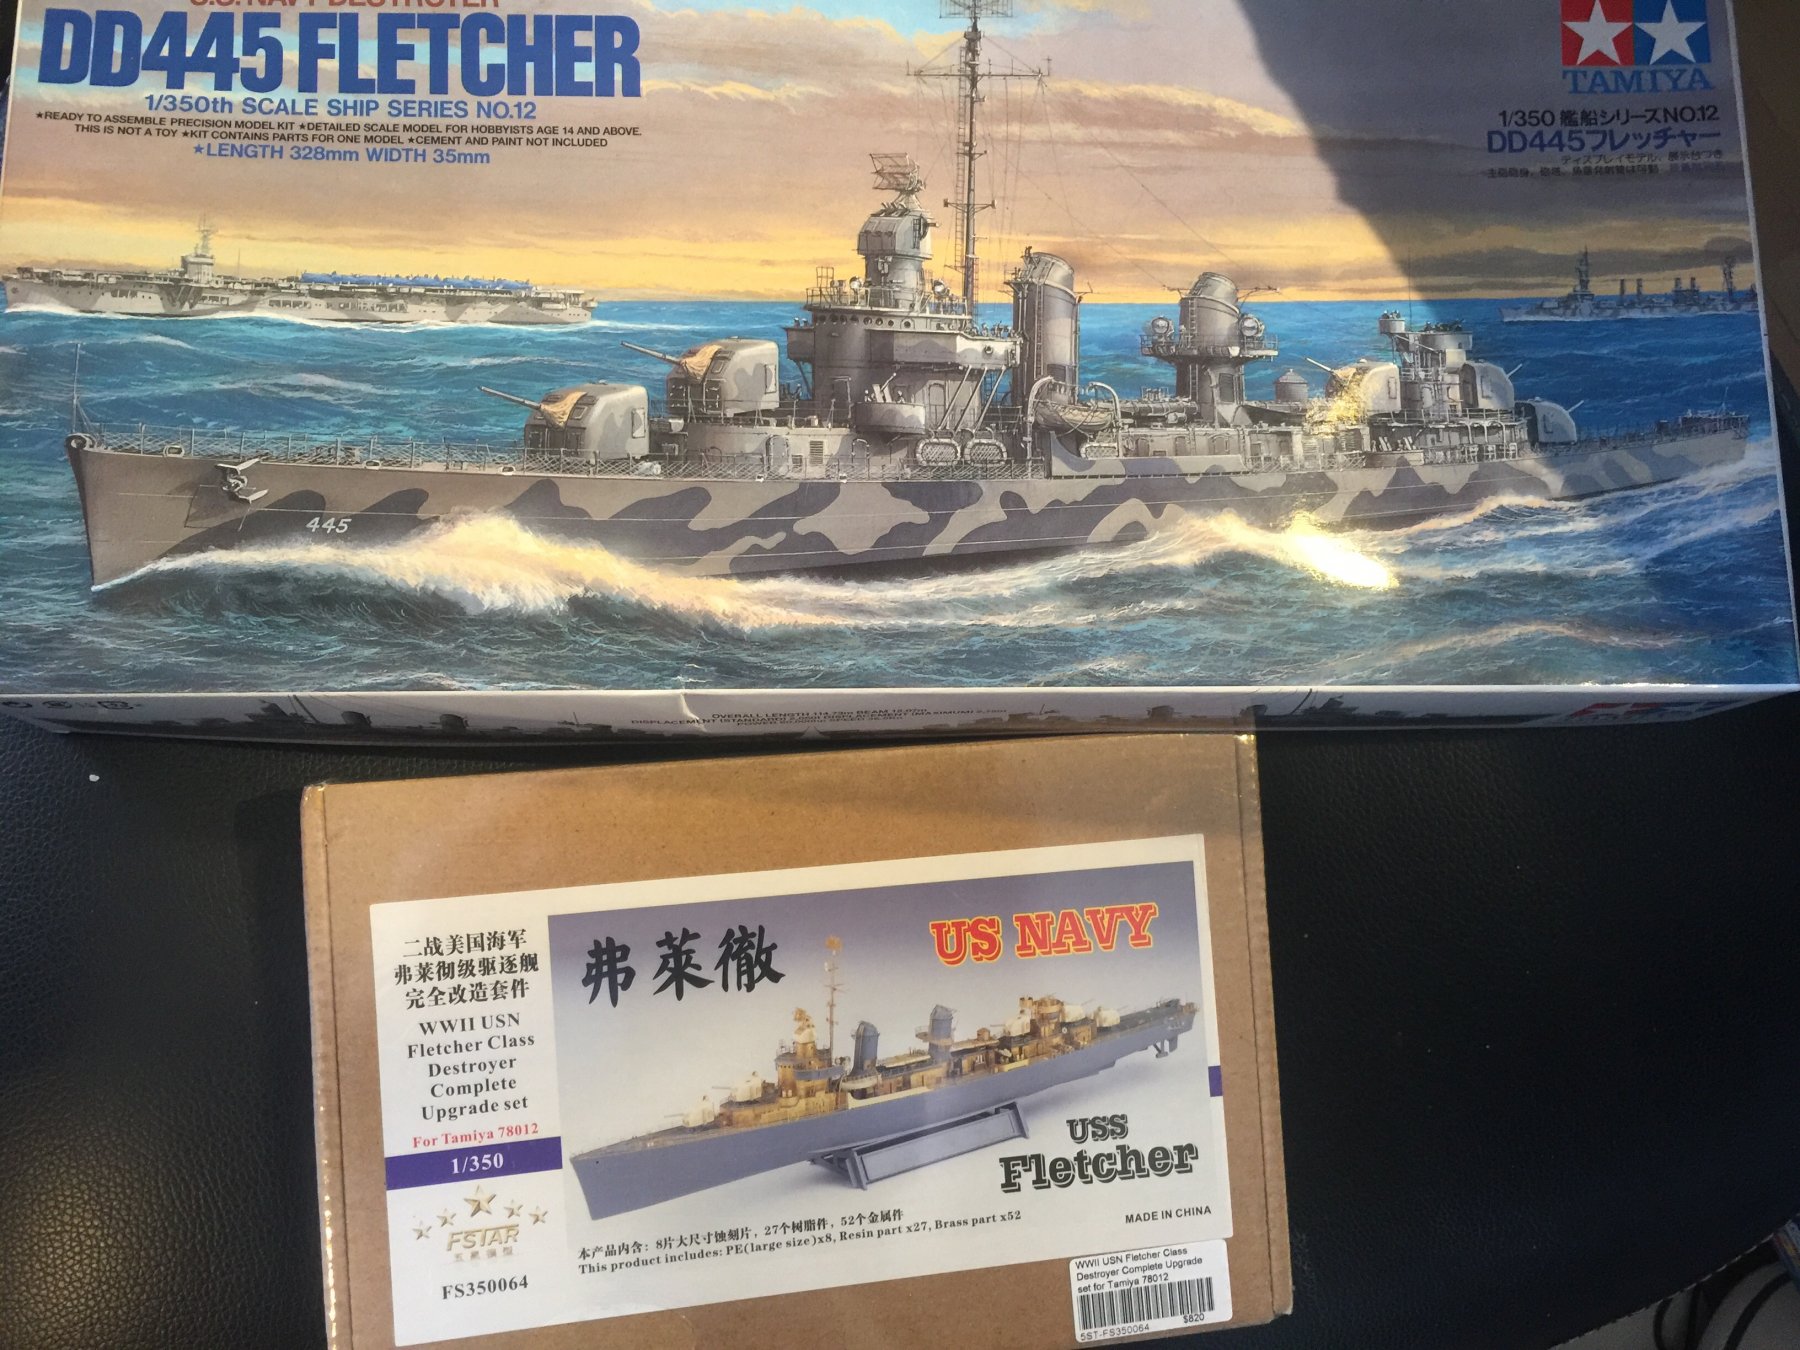
I saw this upgrade from 5 Star models when I was watching @Jack12477, 's build of a Fletcher. http://steelnavy.net/5StarFletcherUpgrade350FBustelo.html Then I saw a photo on the net of some oilcanning So I thought, challenging, detailed (seriously the hardest PE set I've seen to date), I can beat it up, and it's small so mistakes won't be so visible. As it's a US Ship there are a lot of photos but this one will be strait out of the boxes.

- 194 replies
-
- 10
-
-
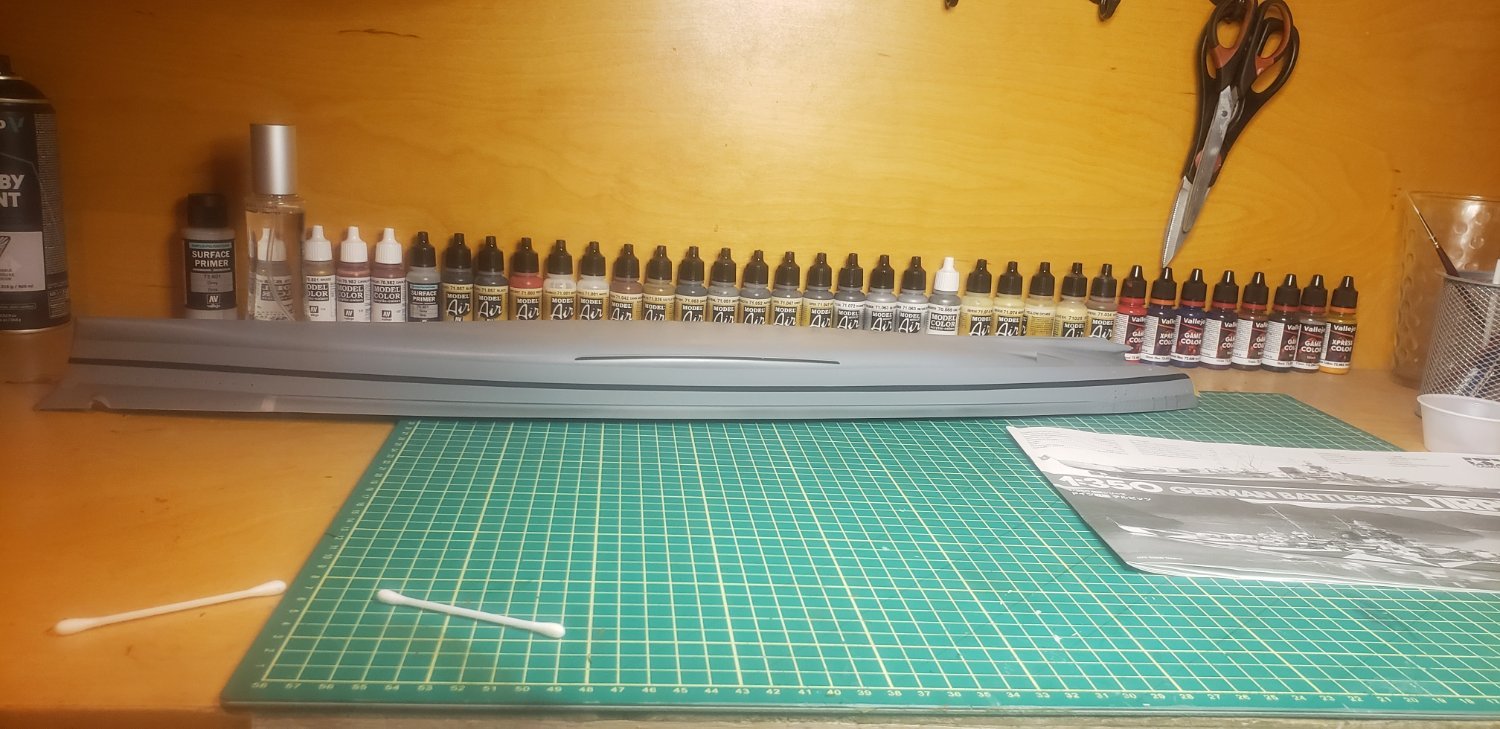
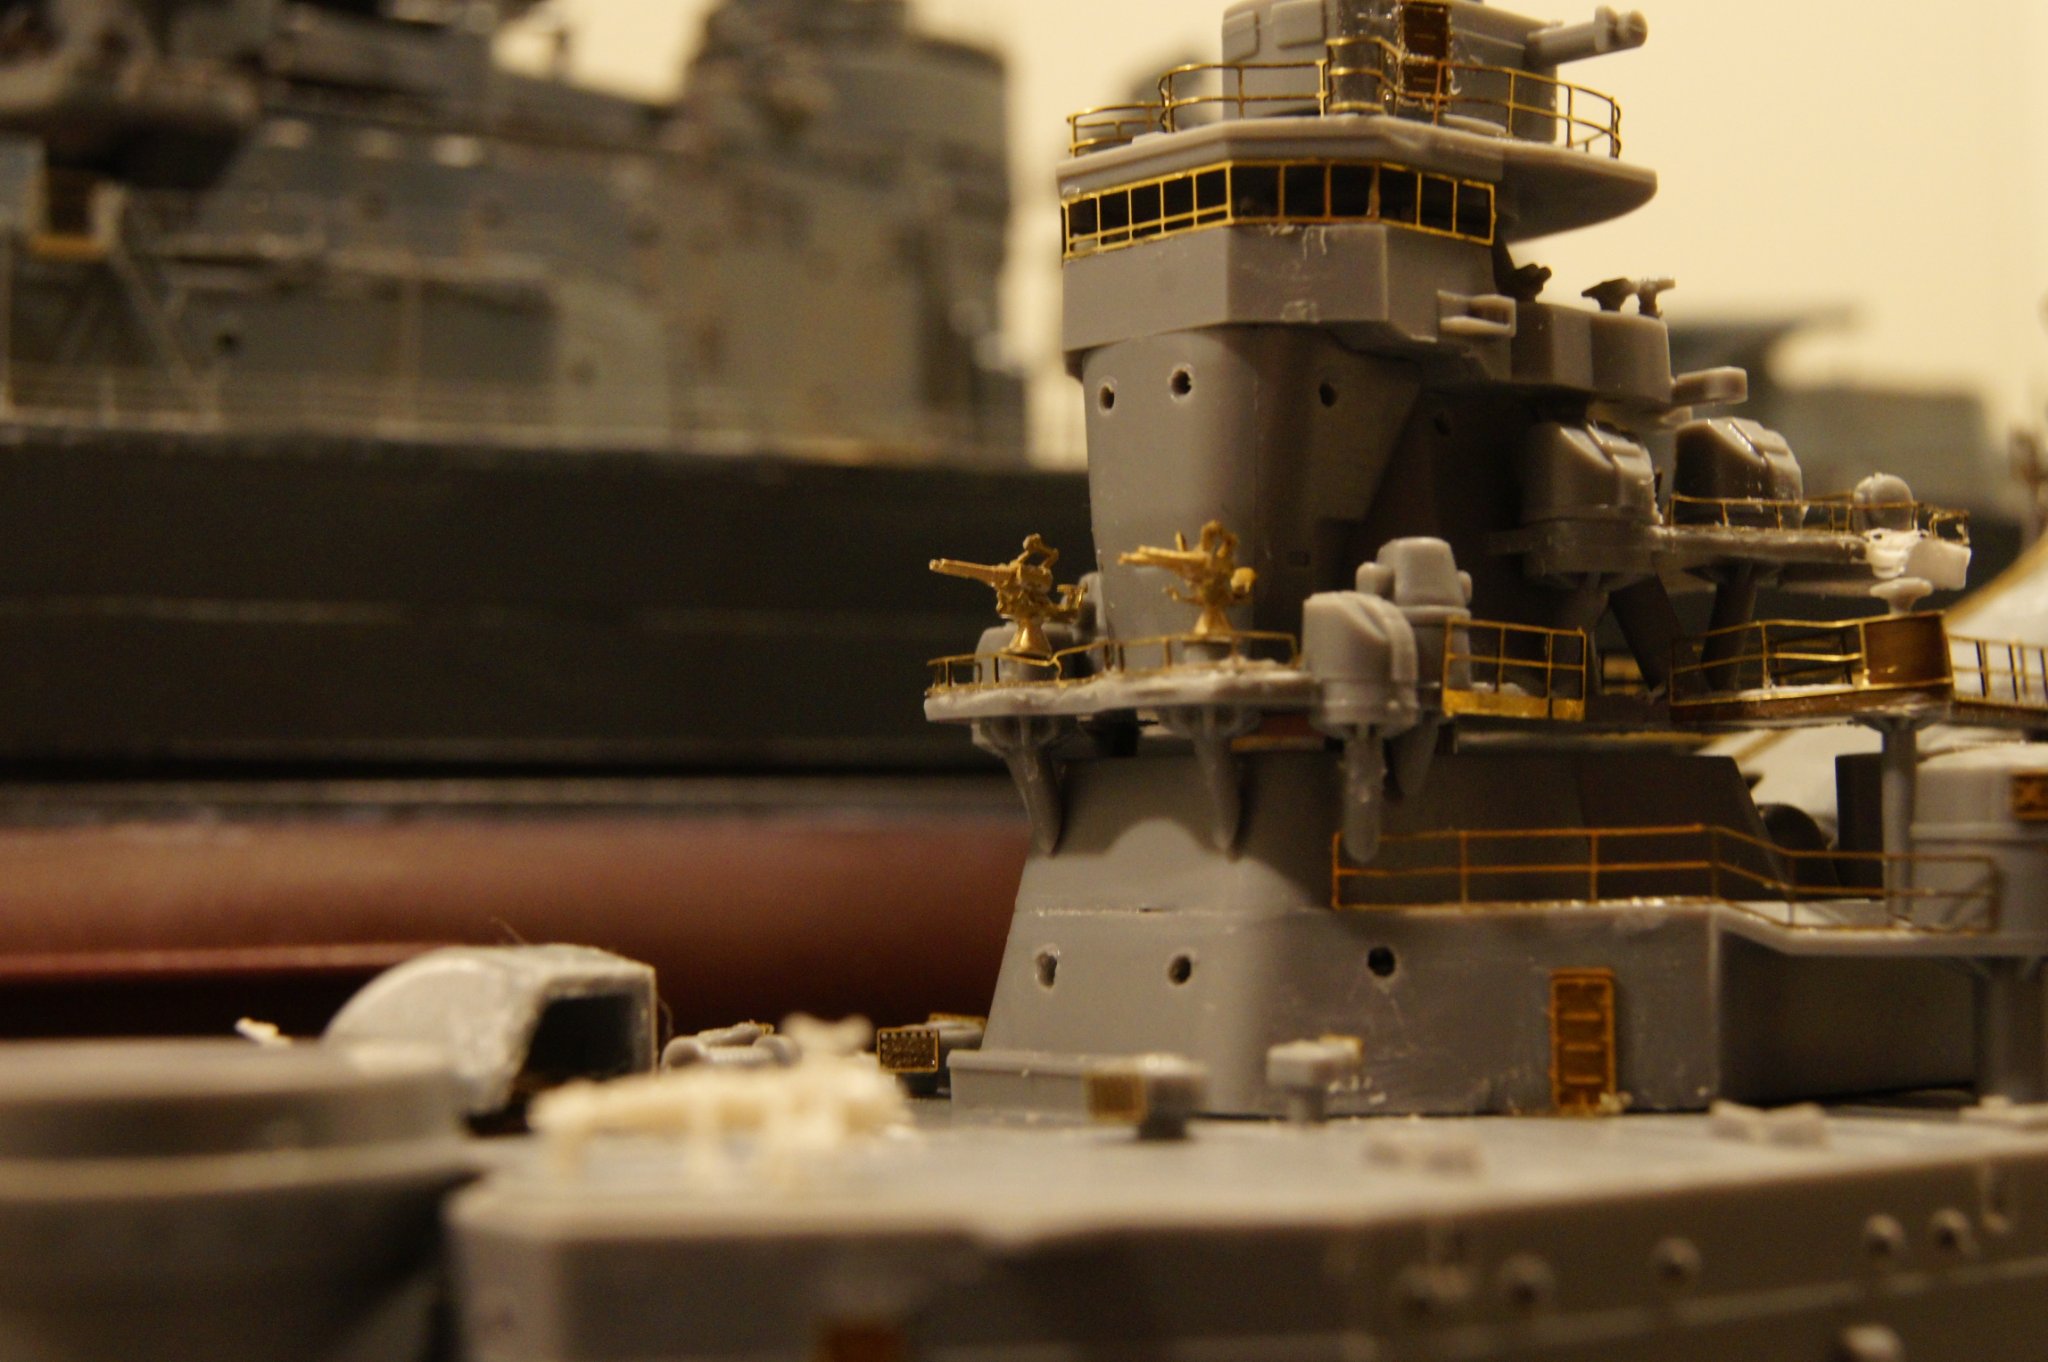
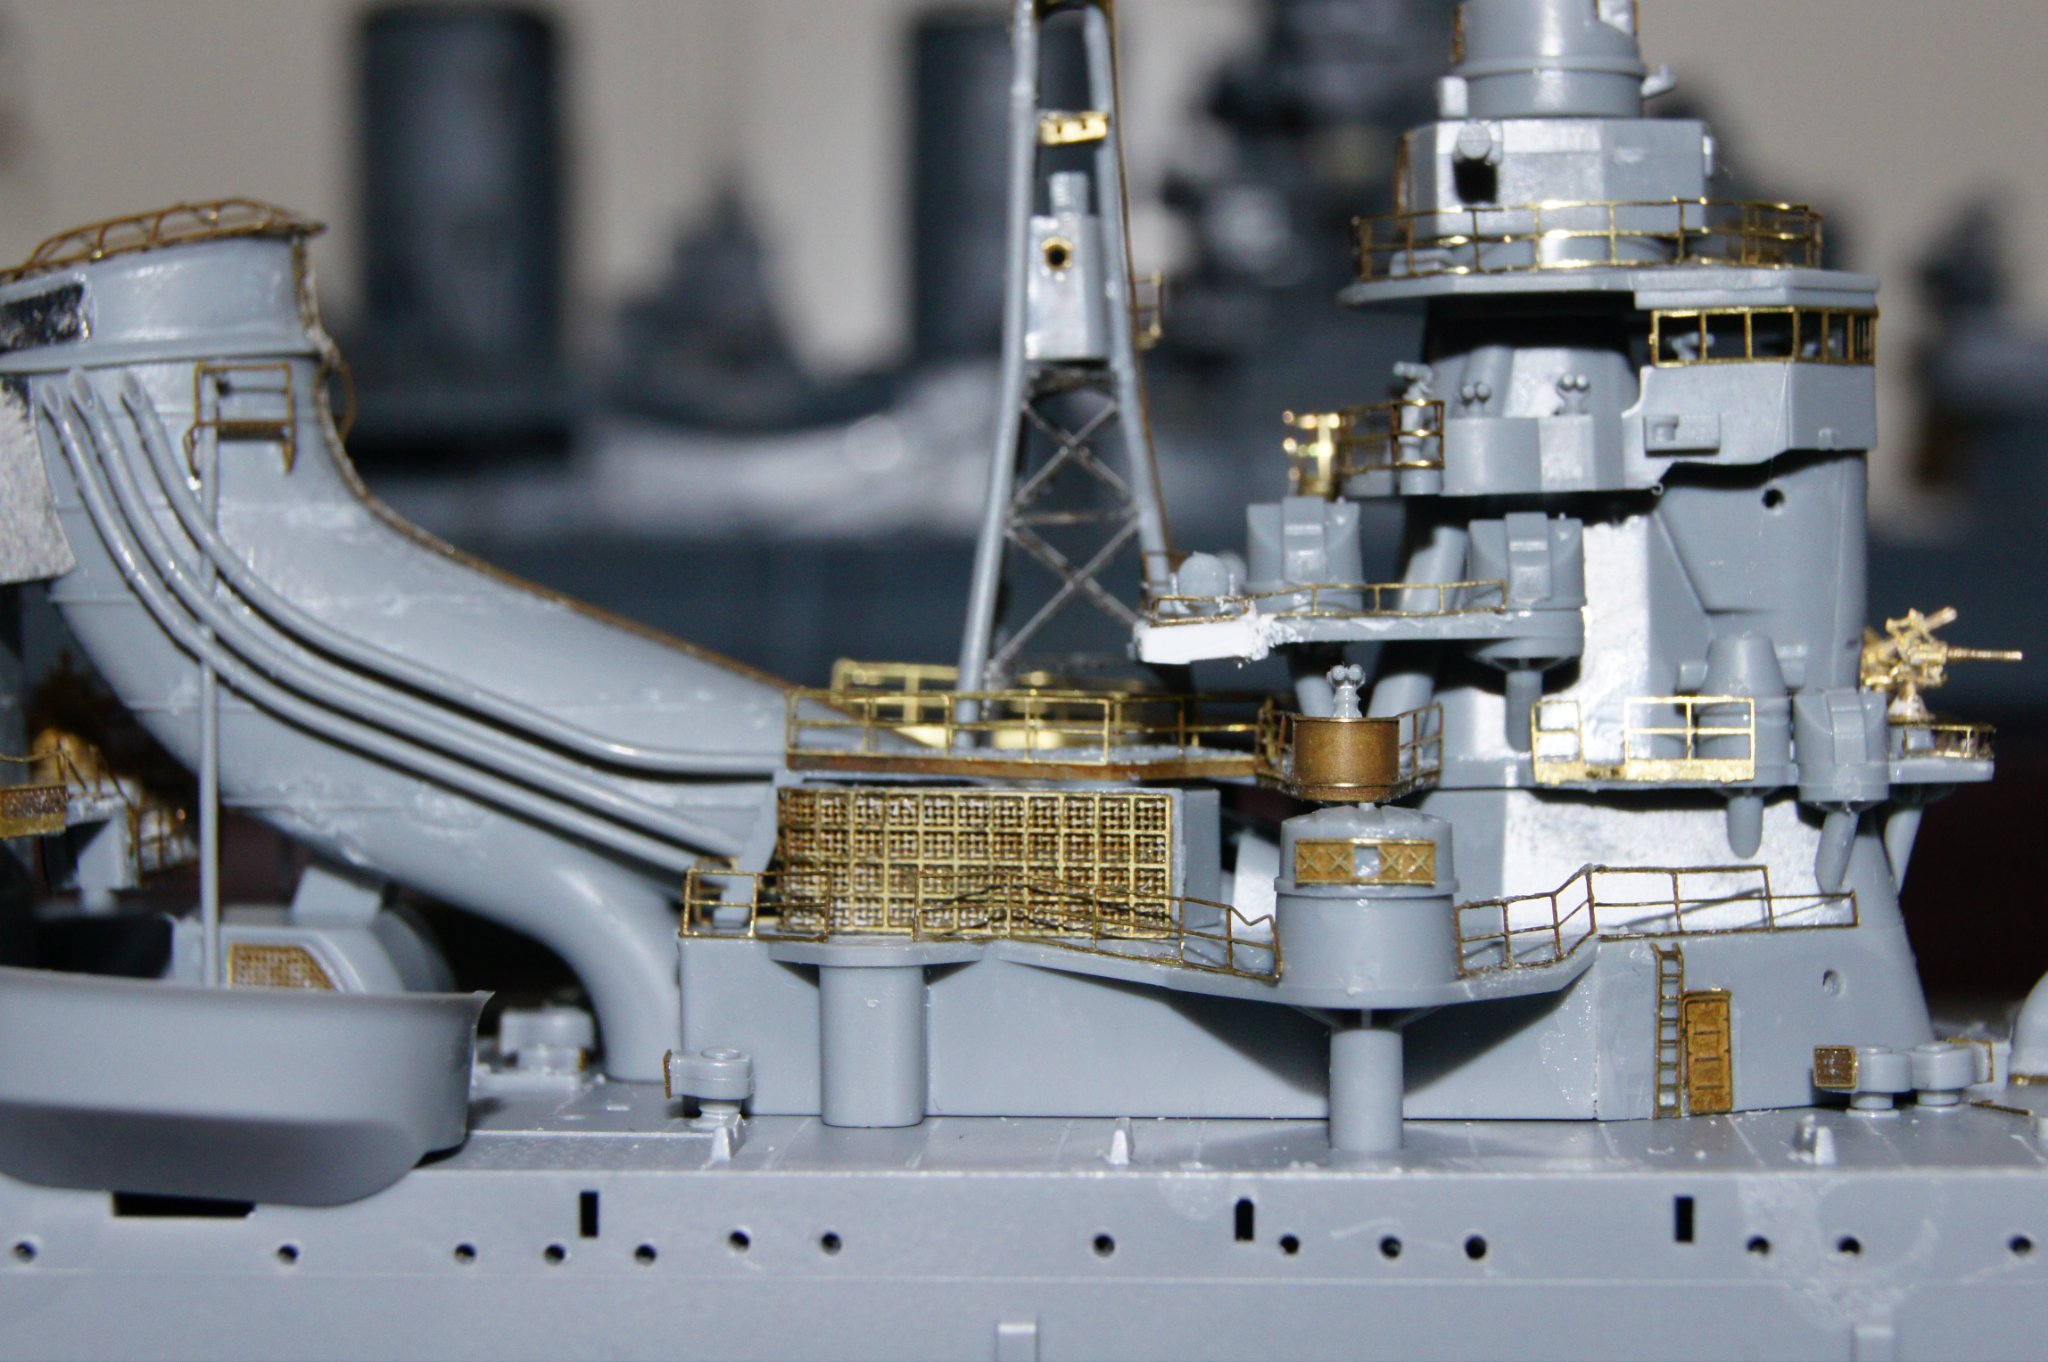
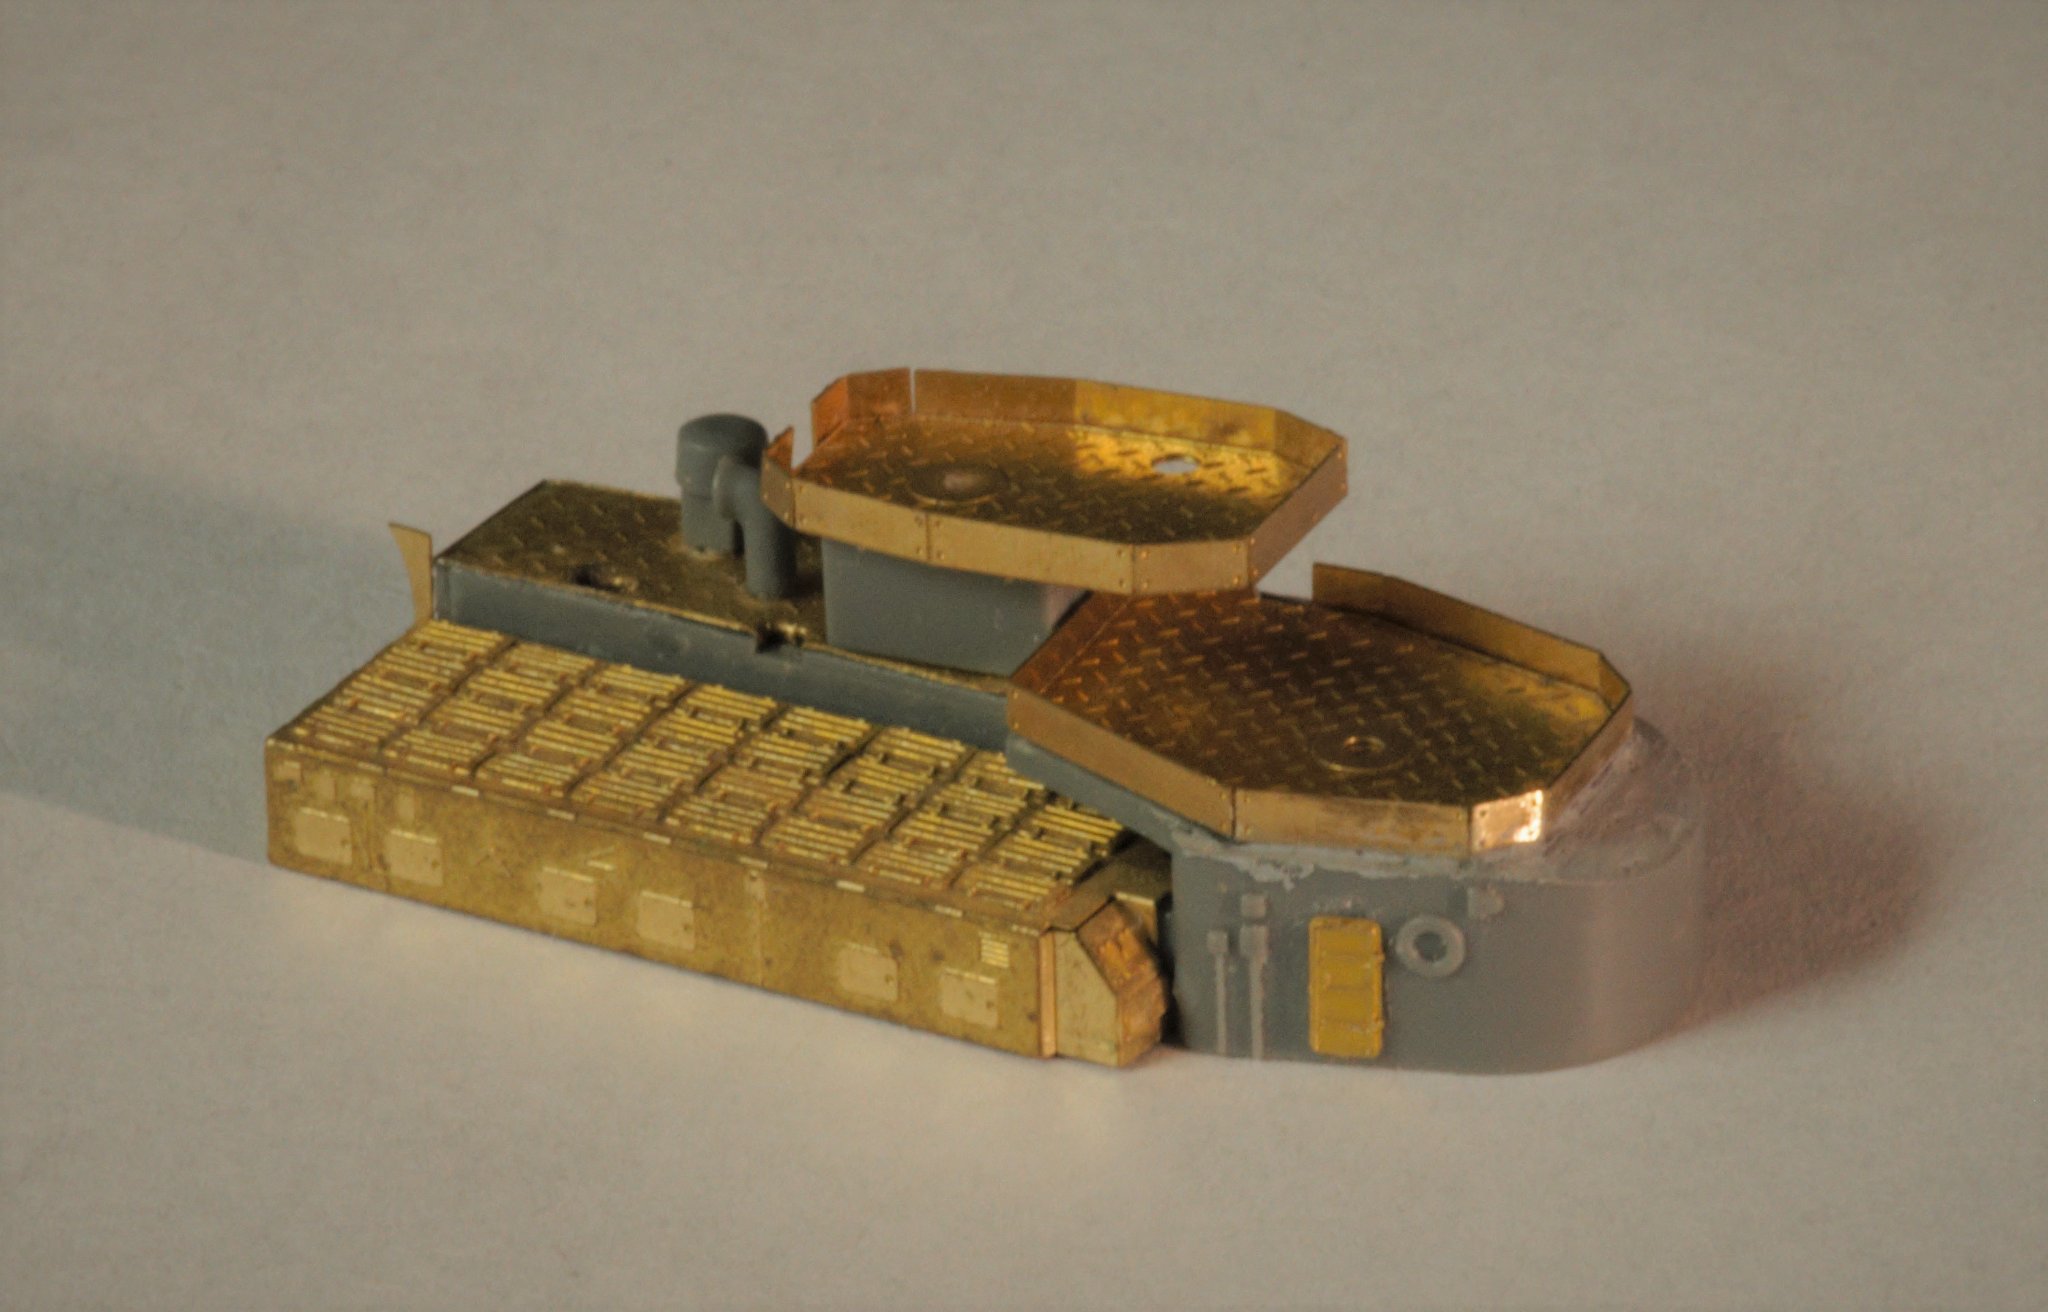
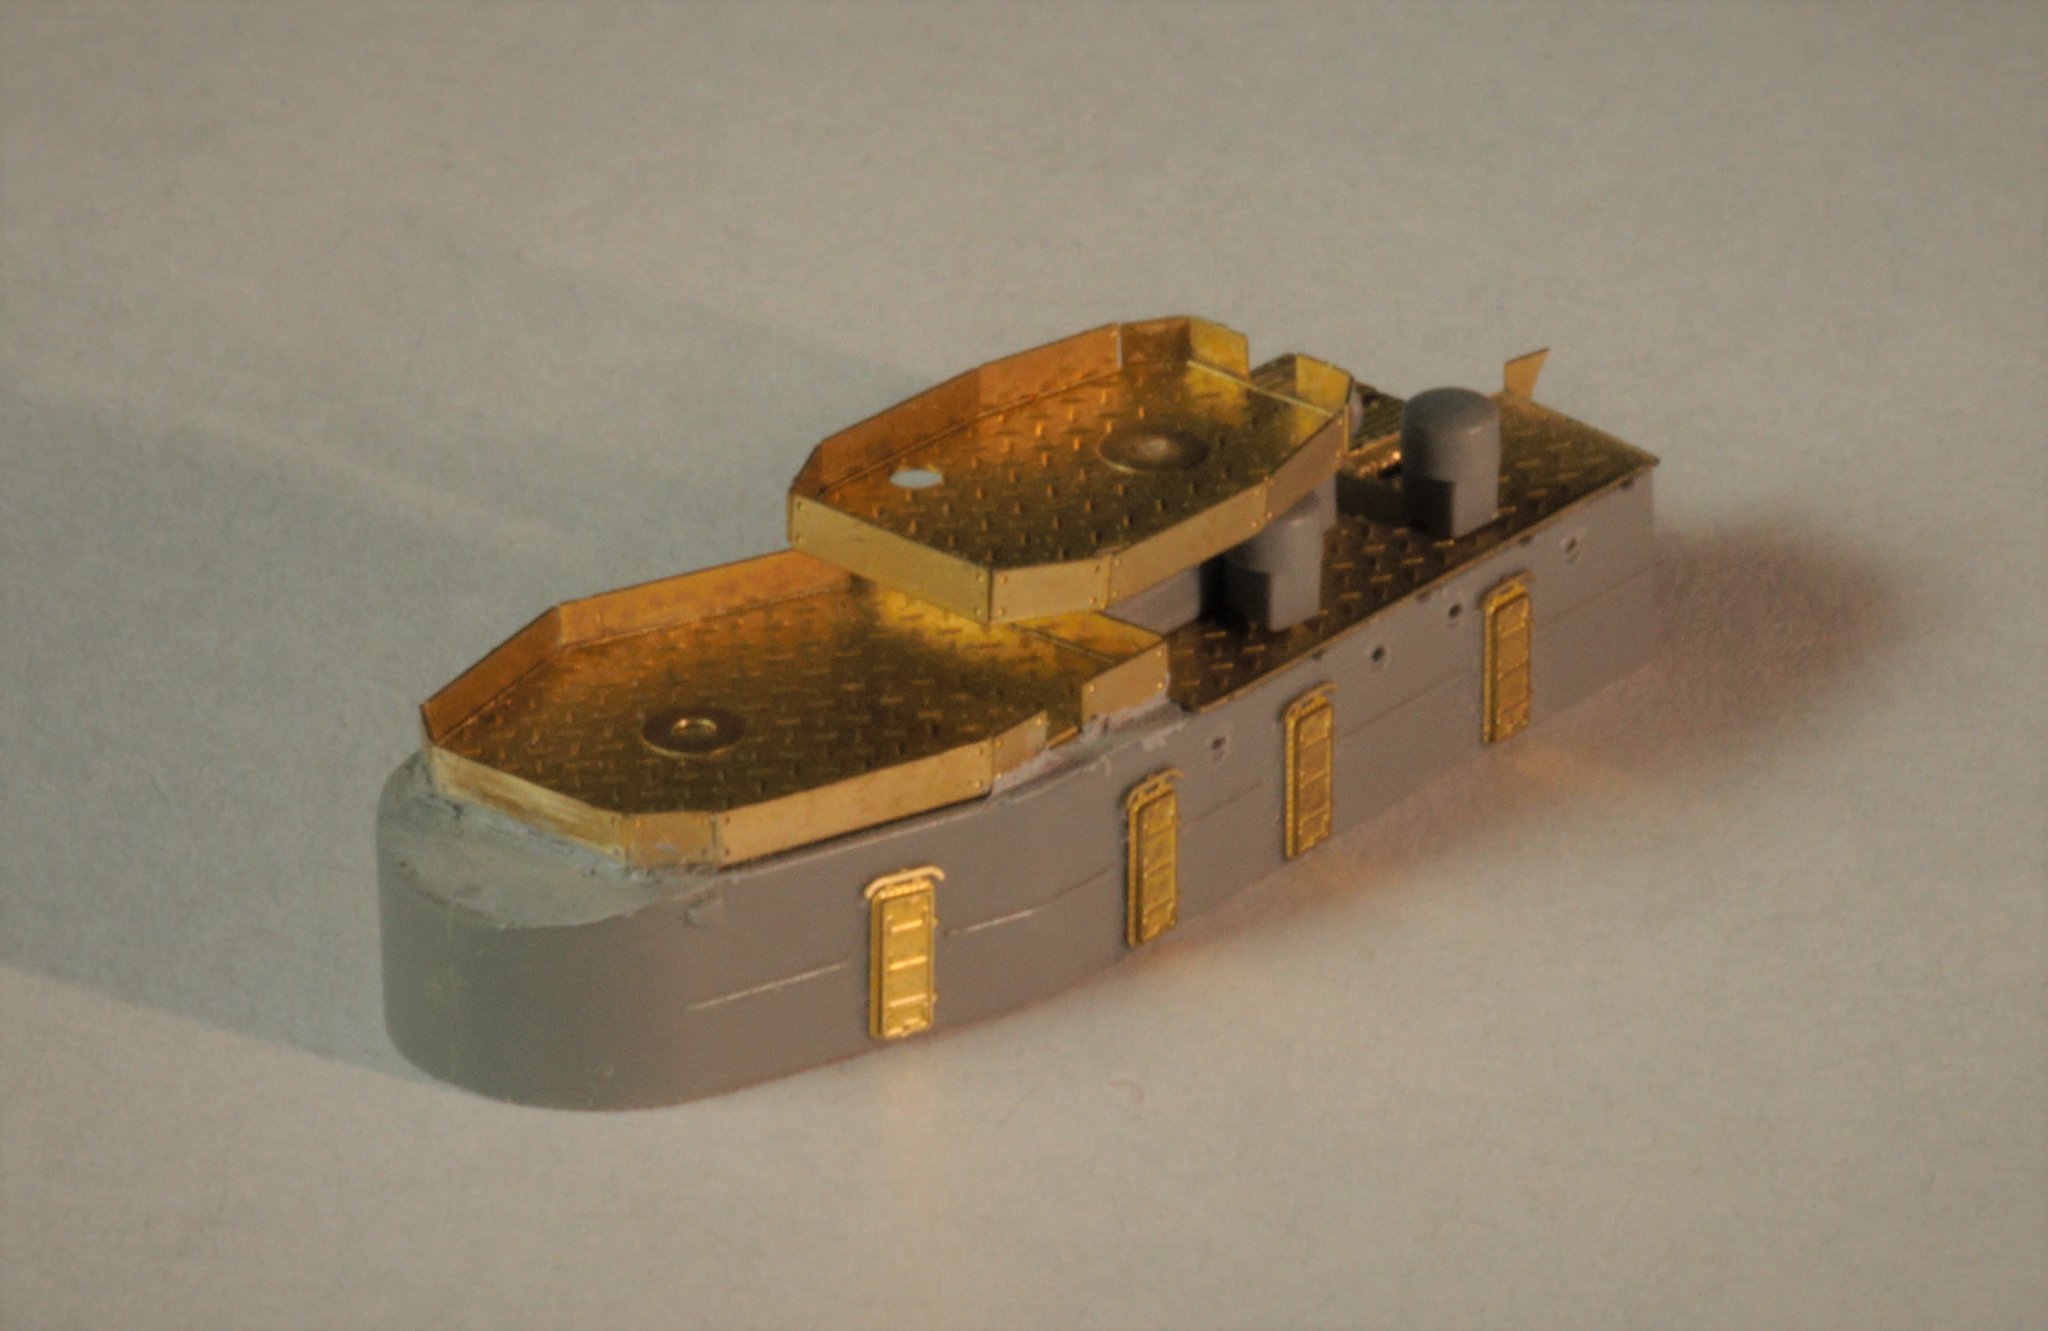
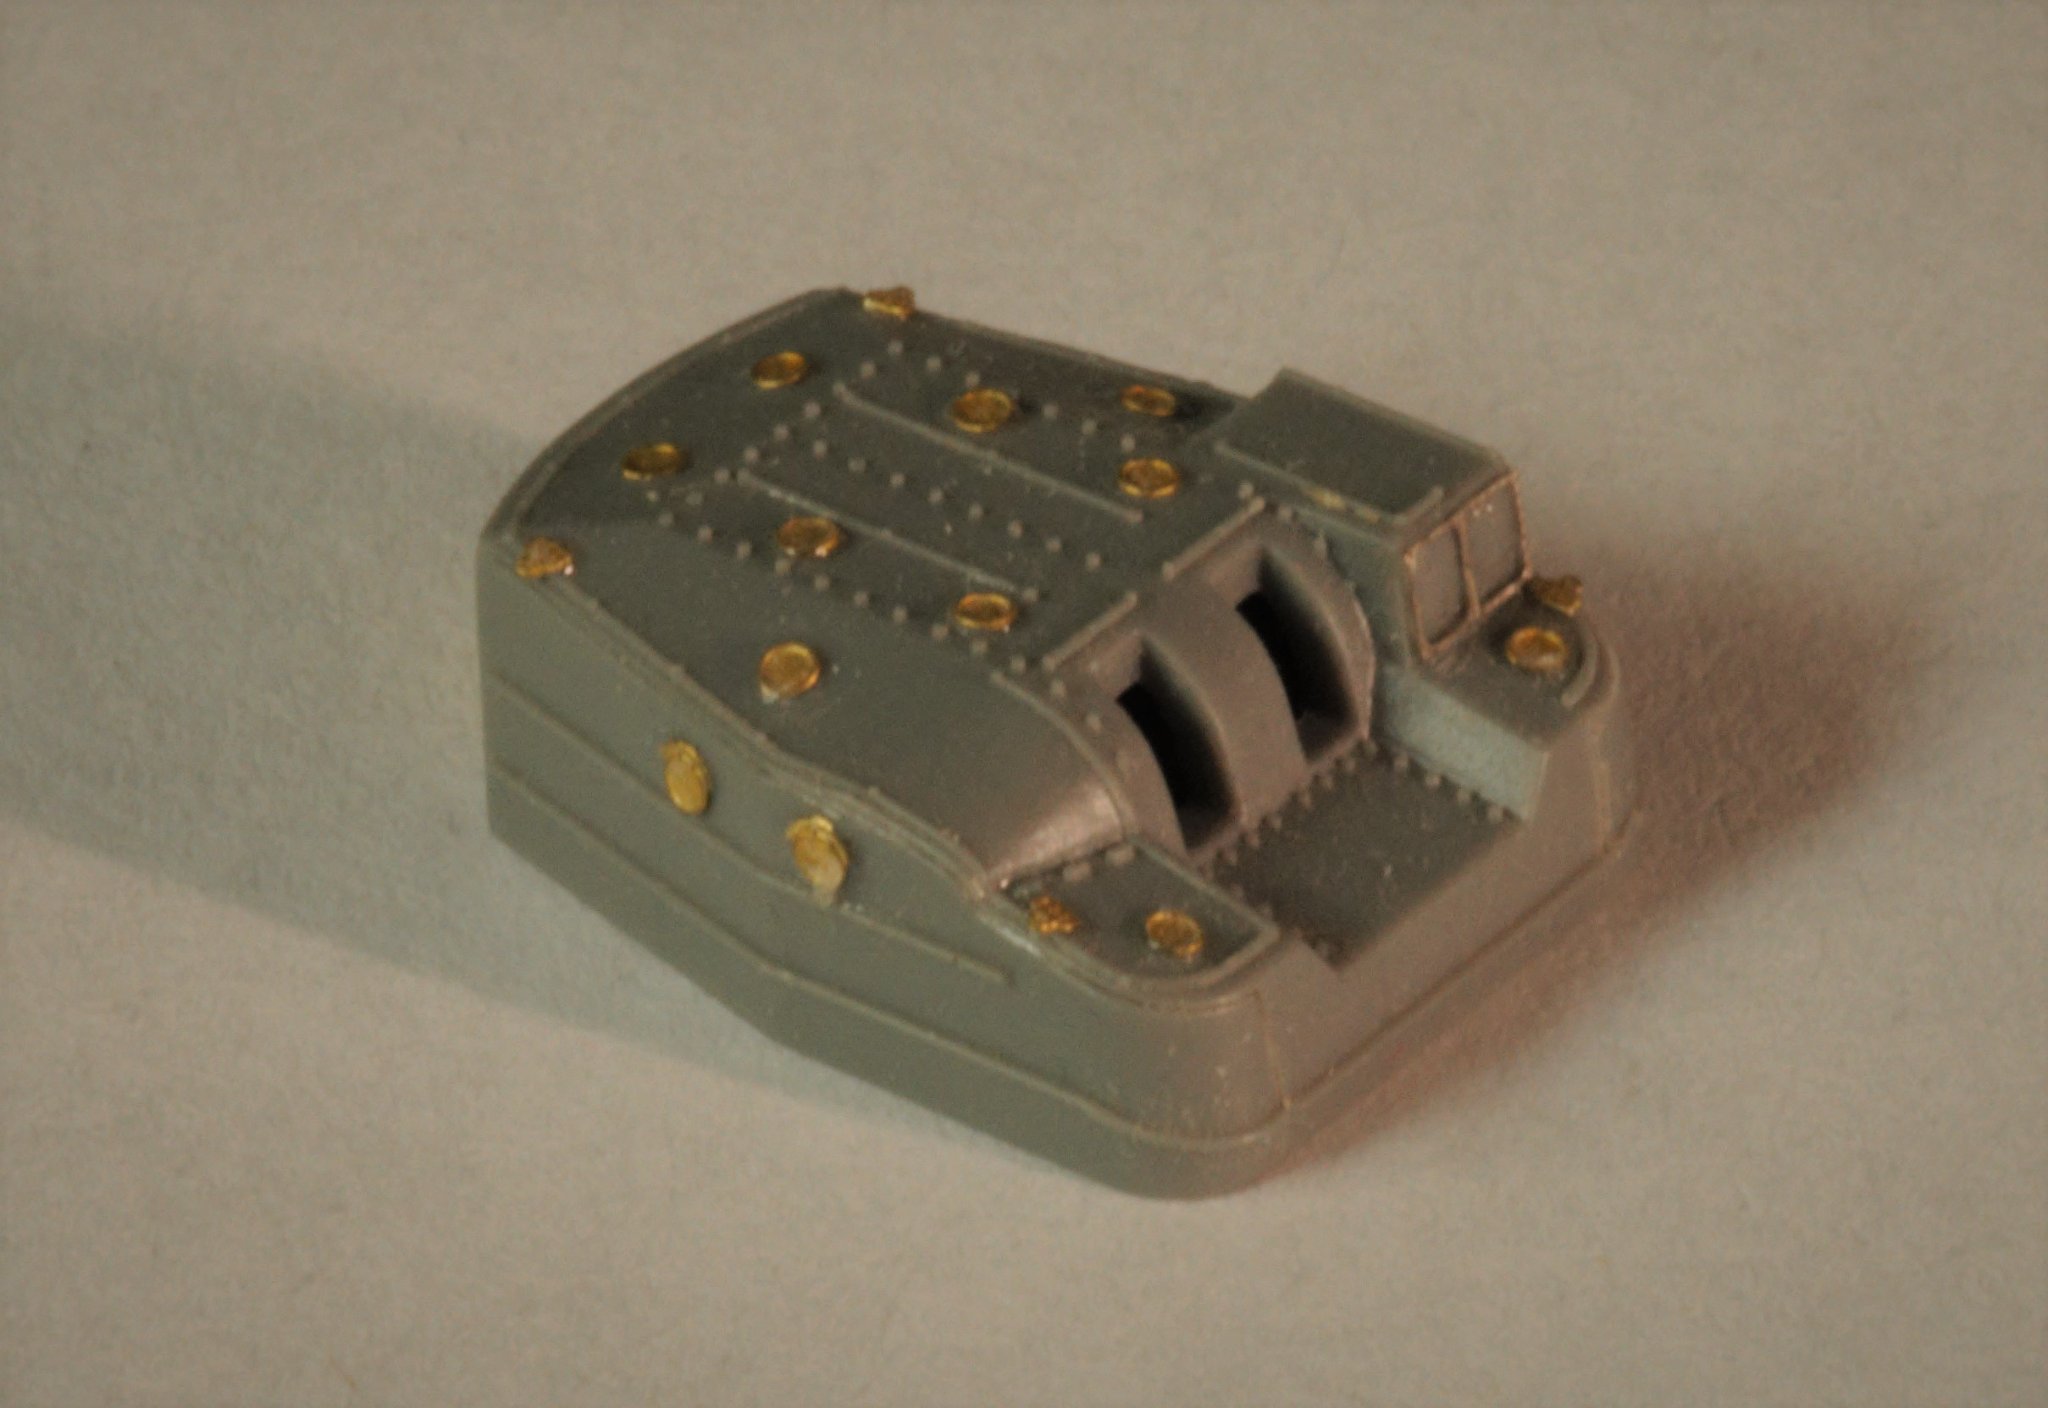
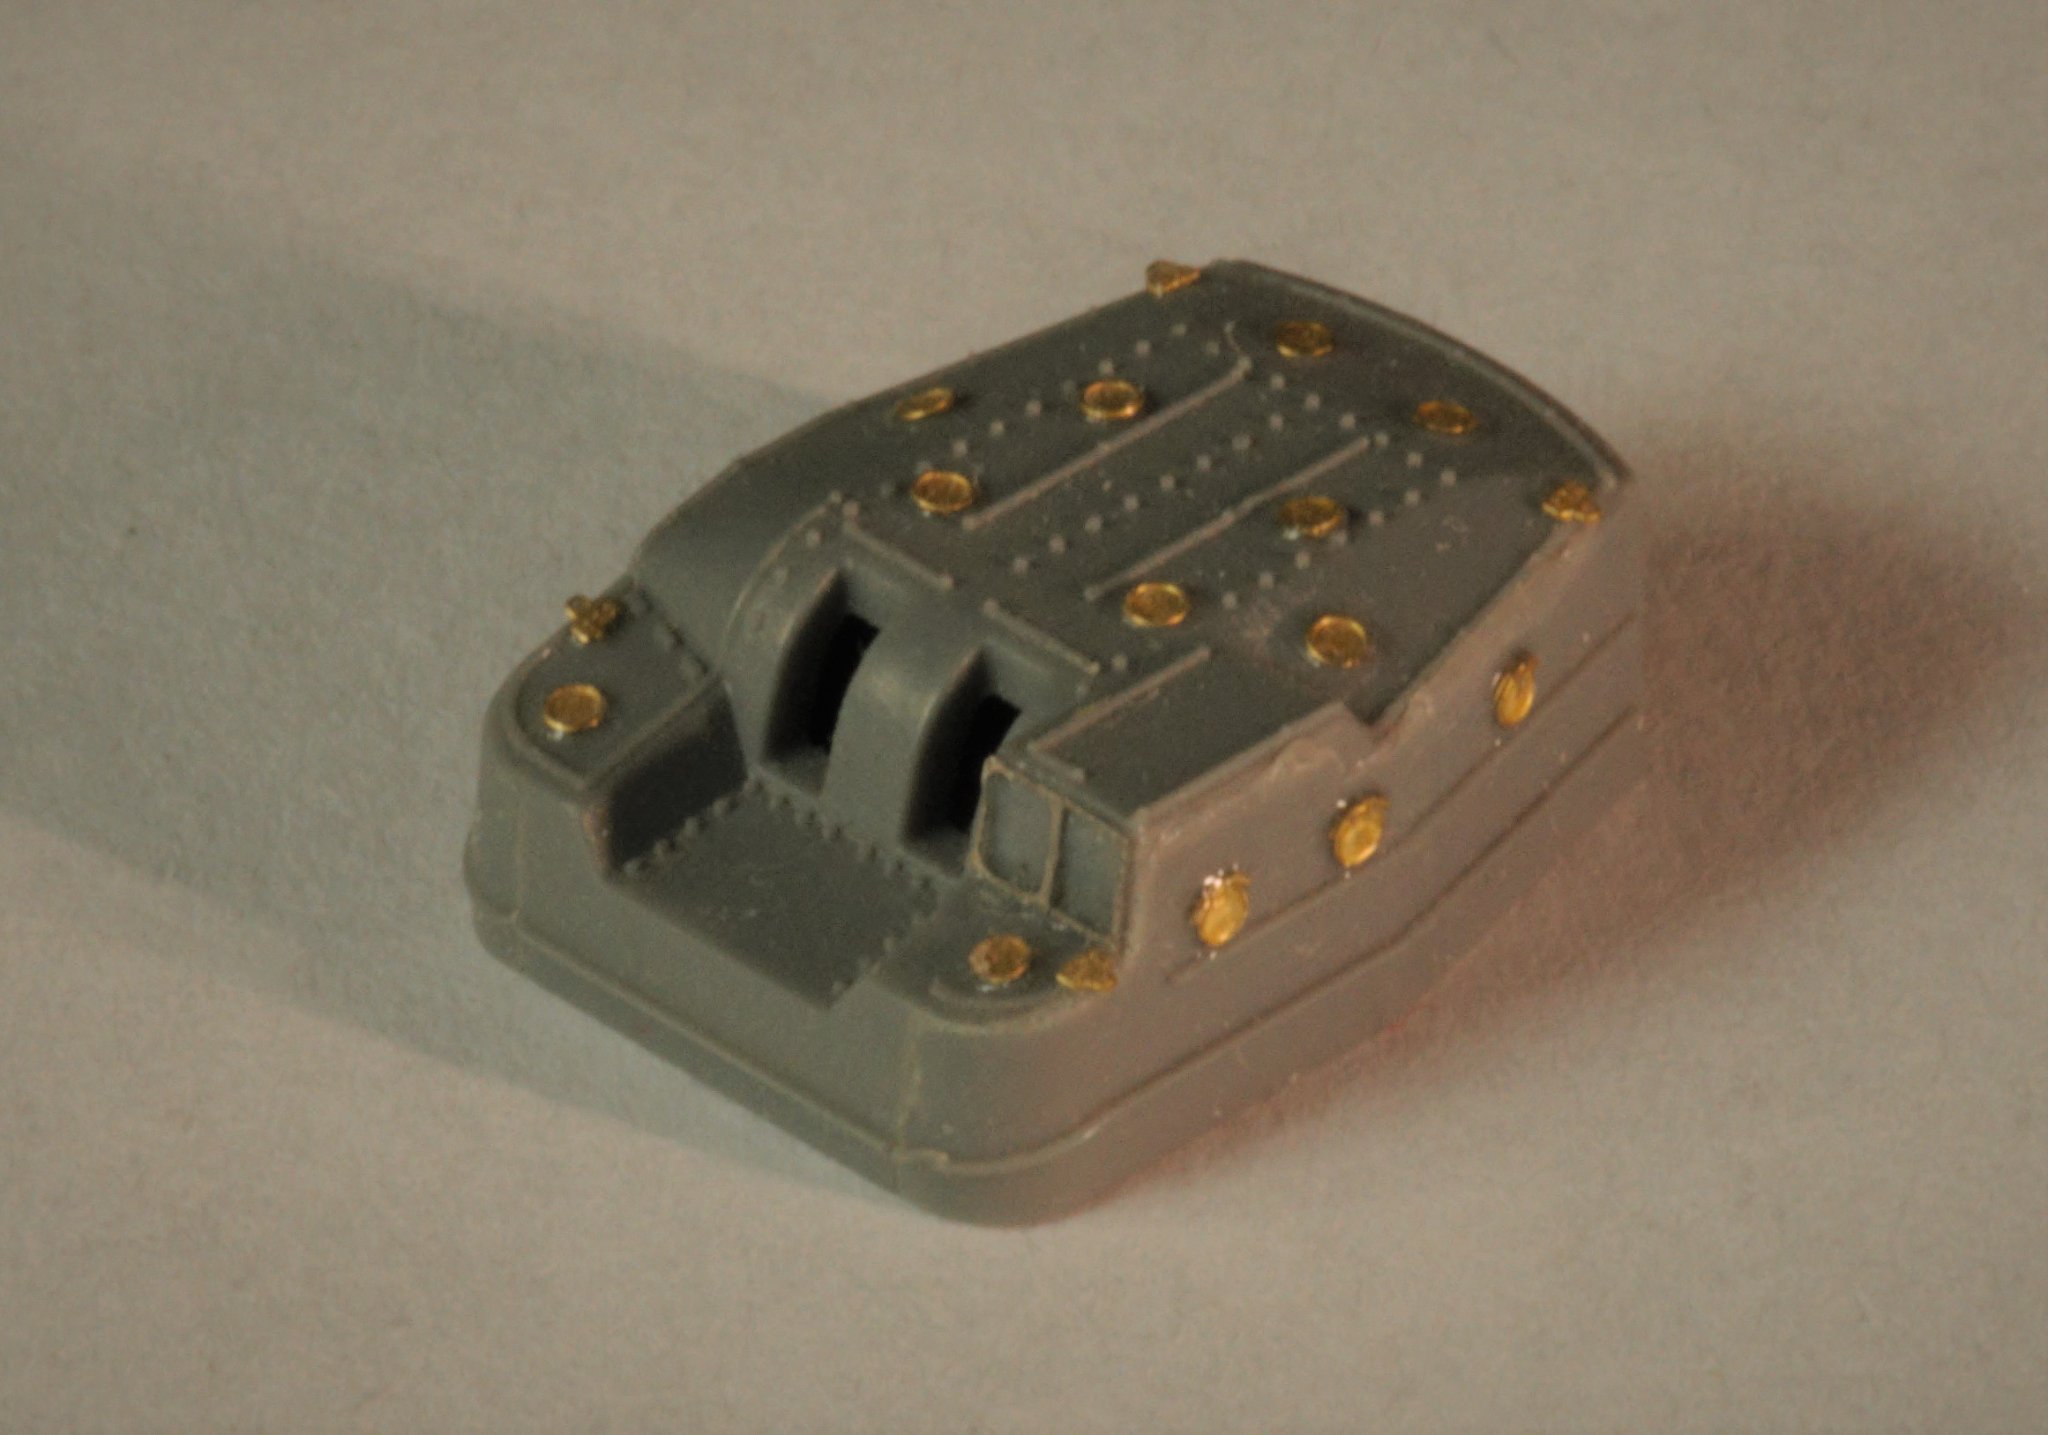
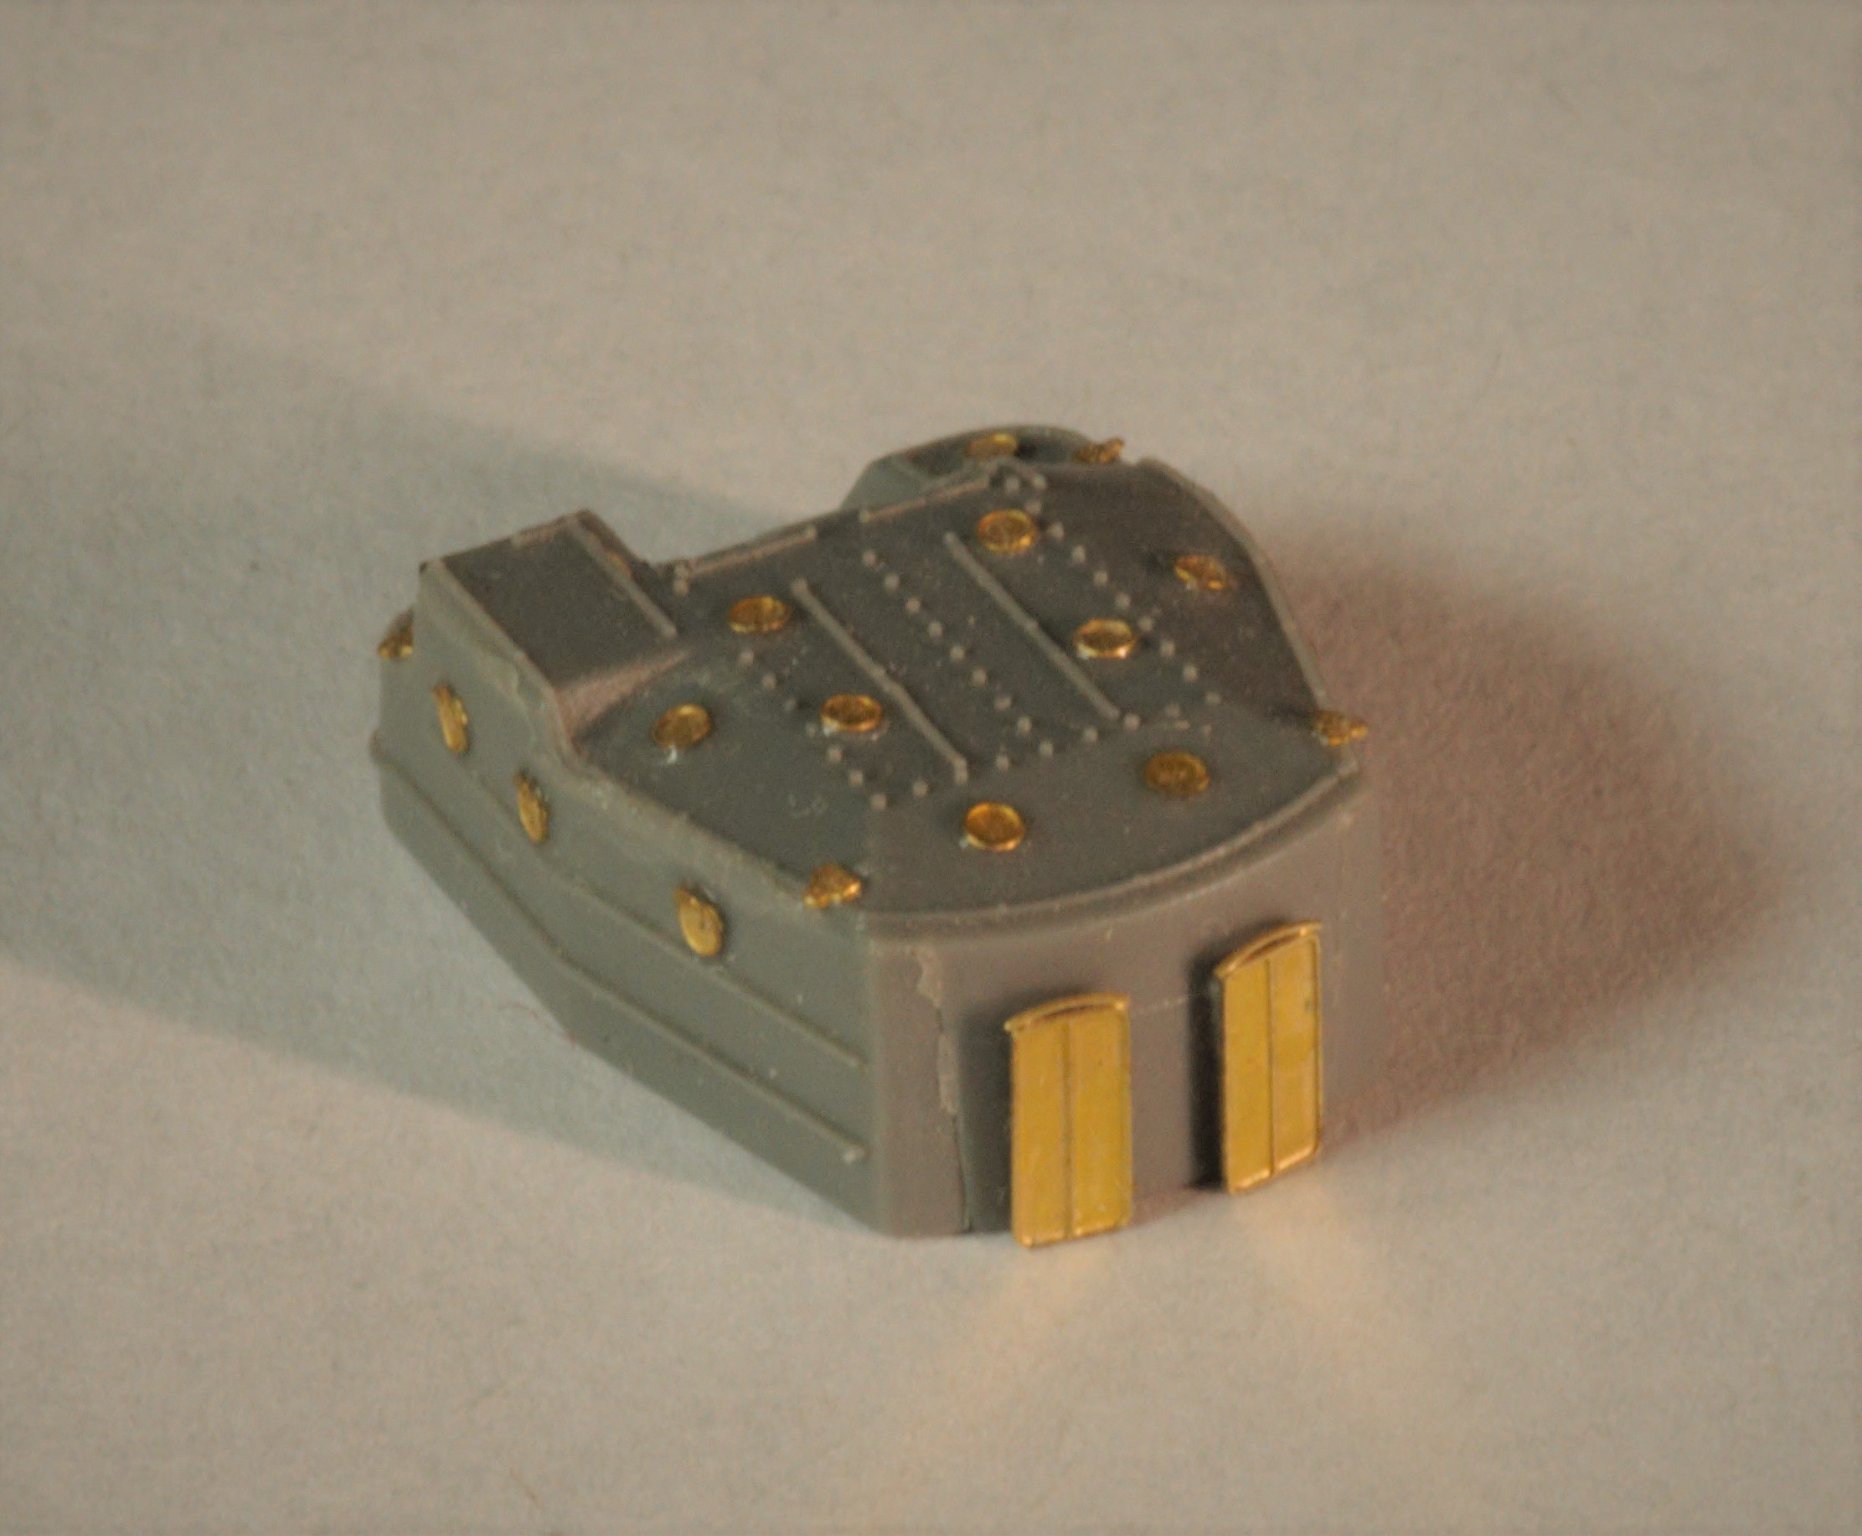
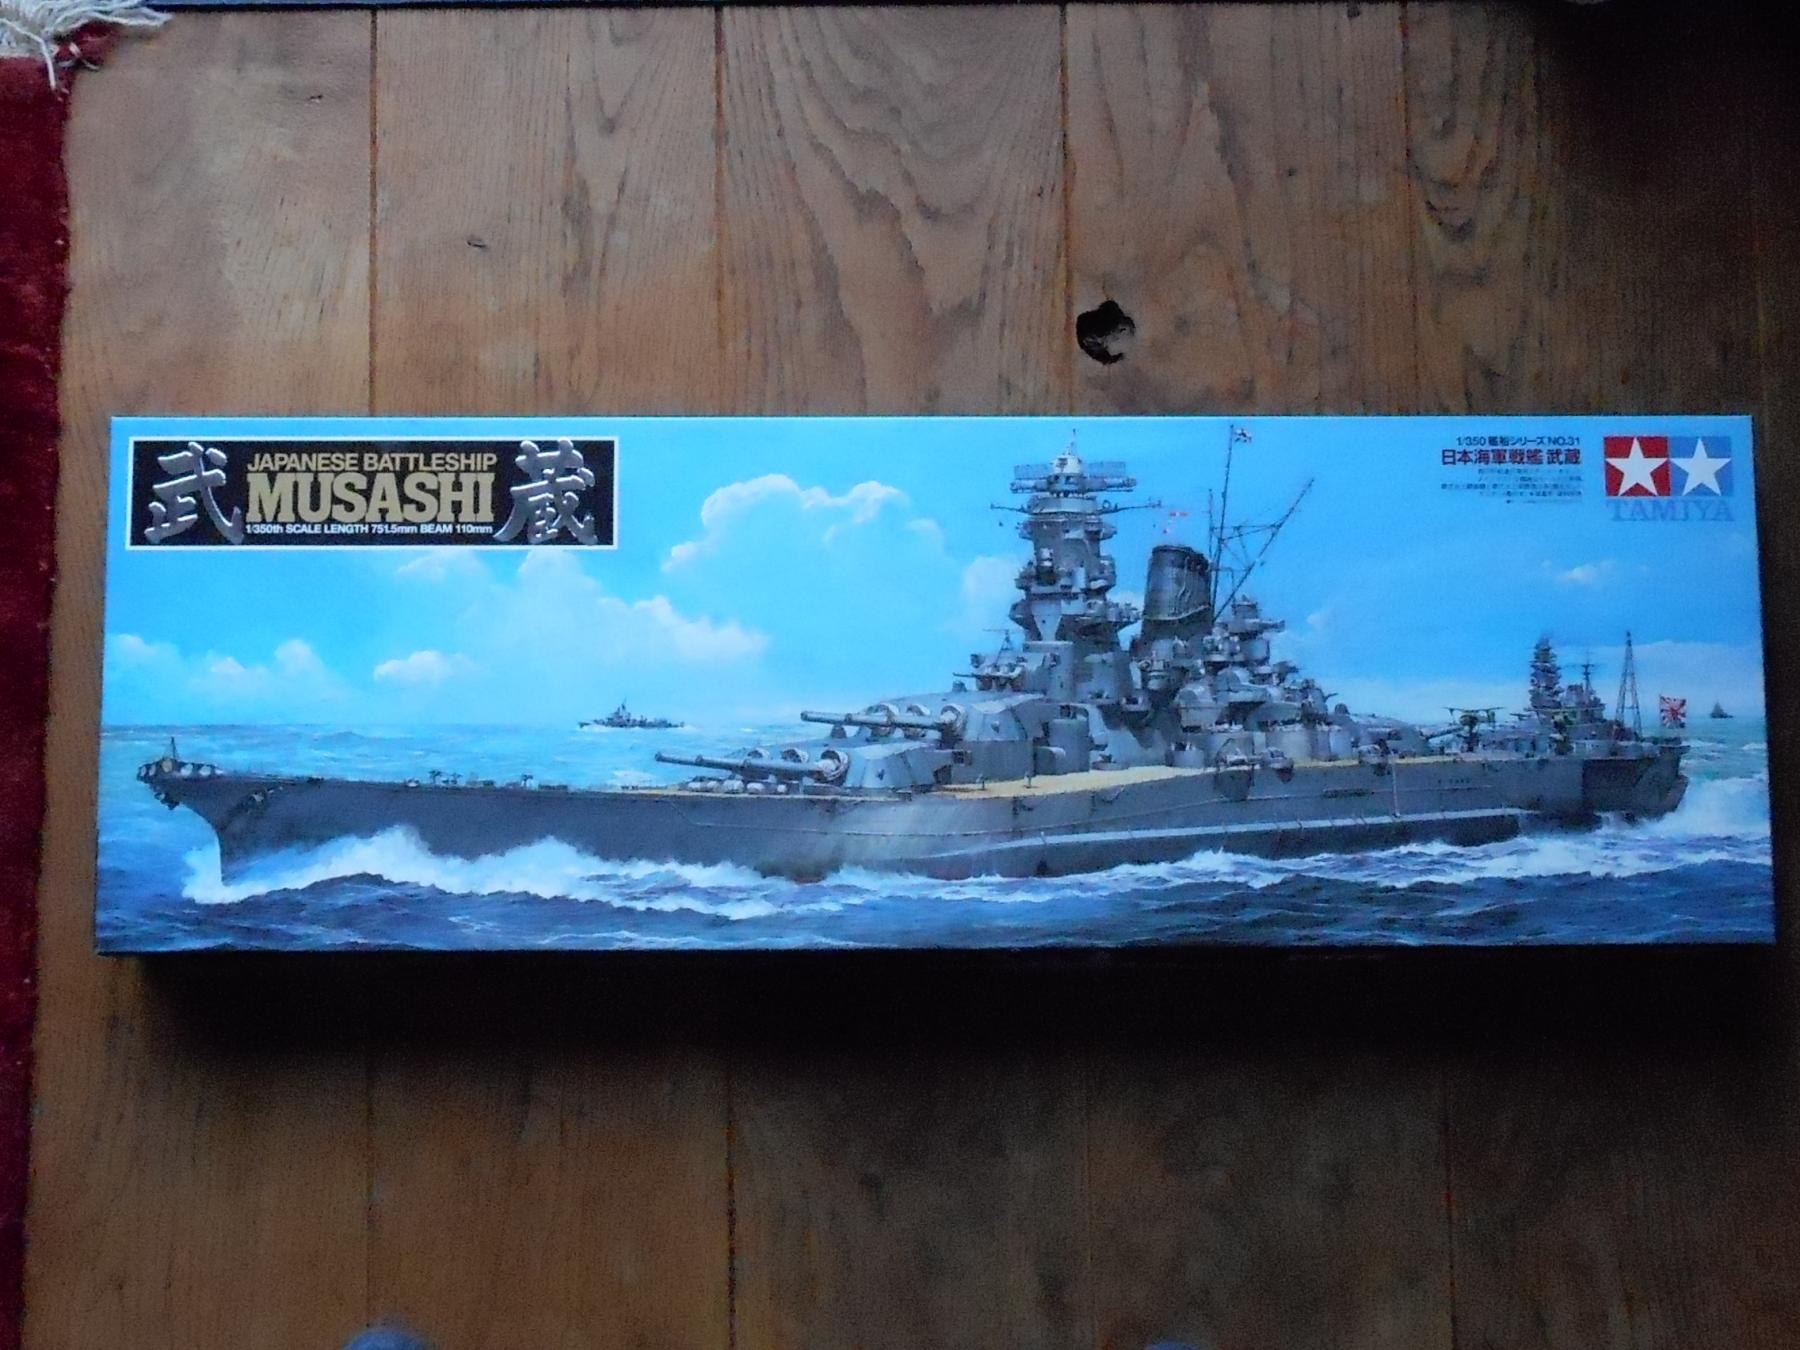
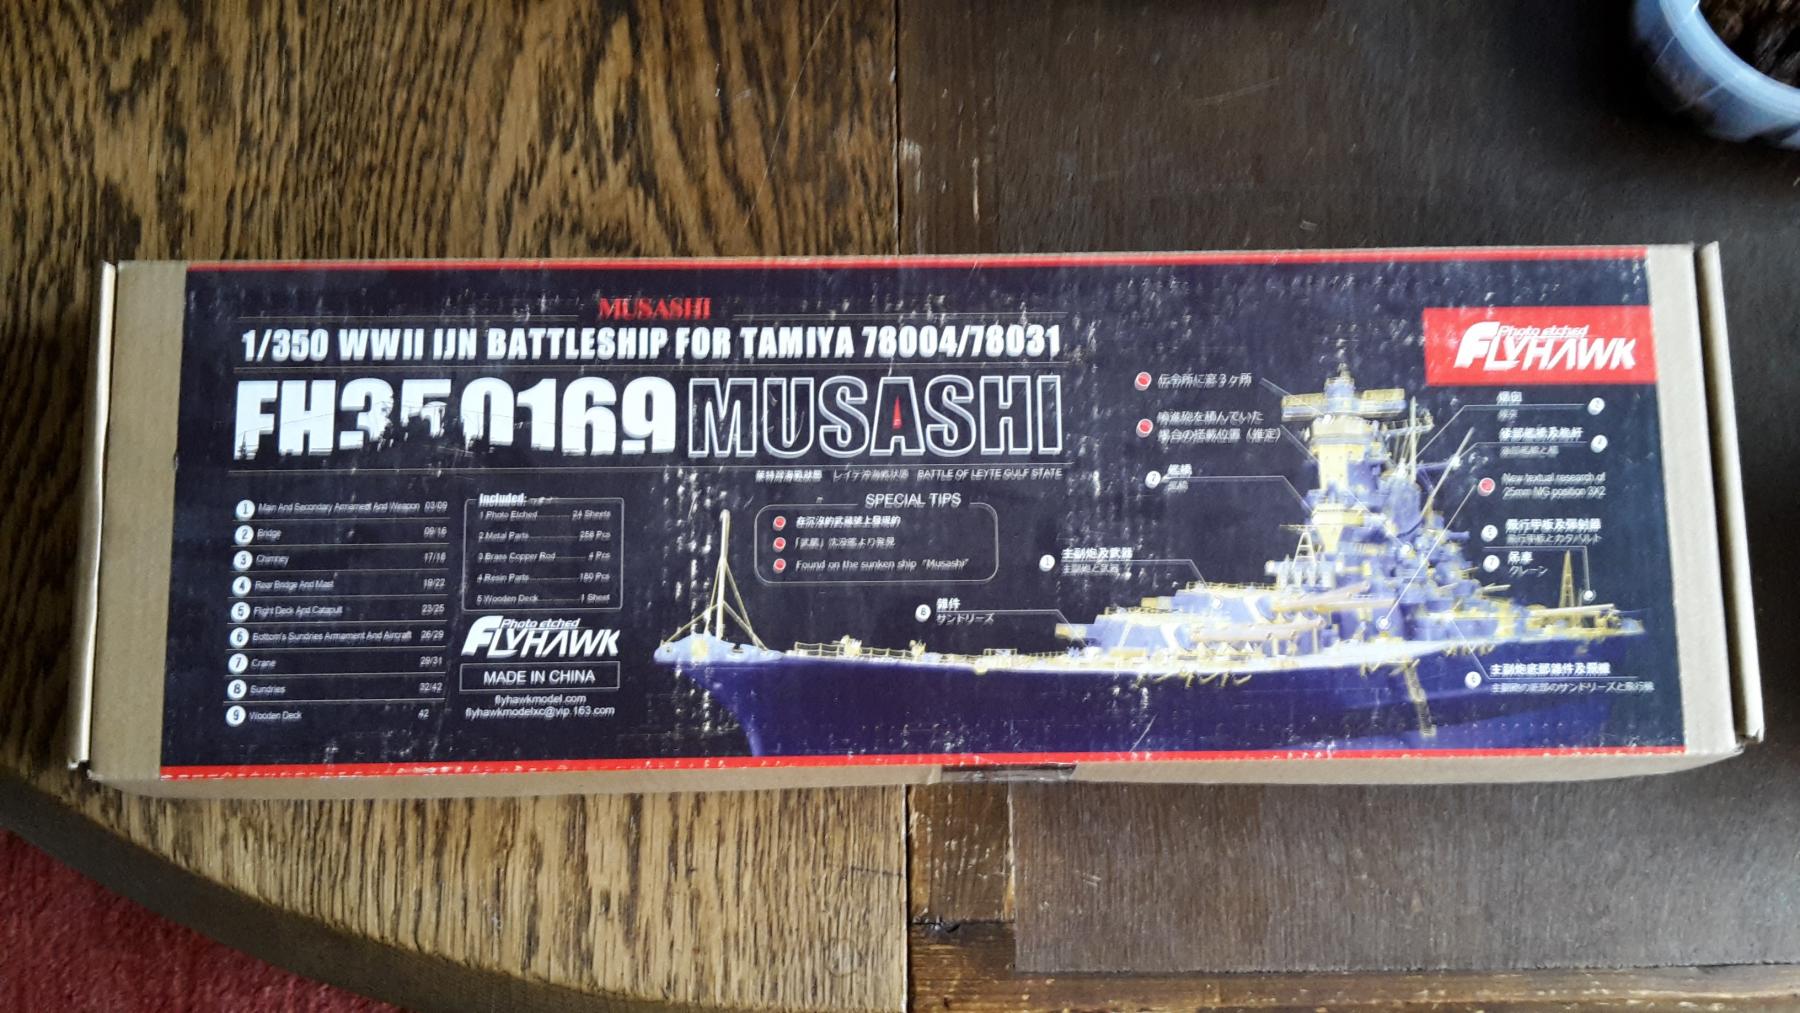
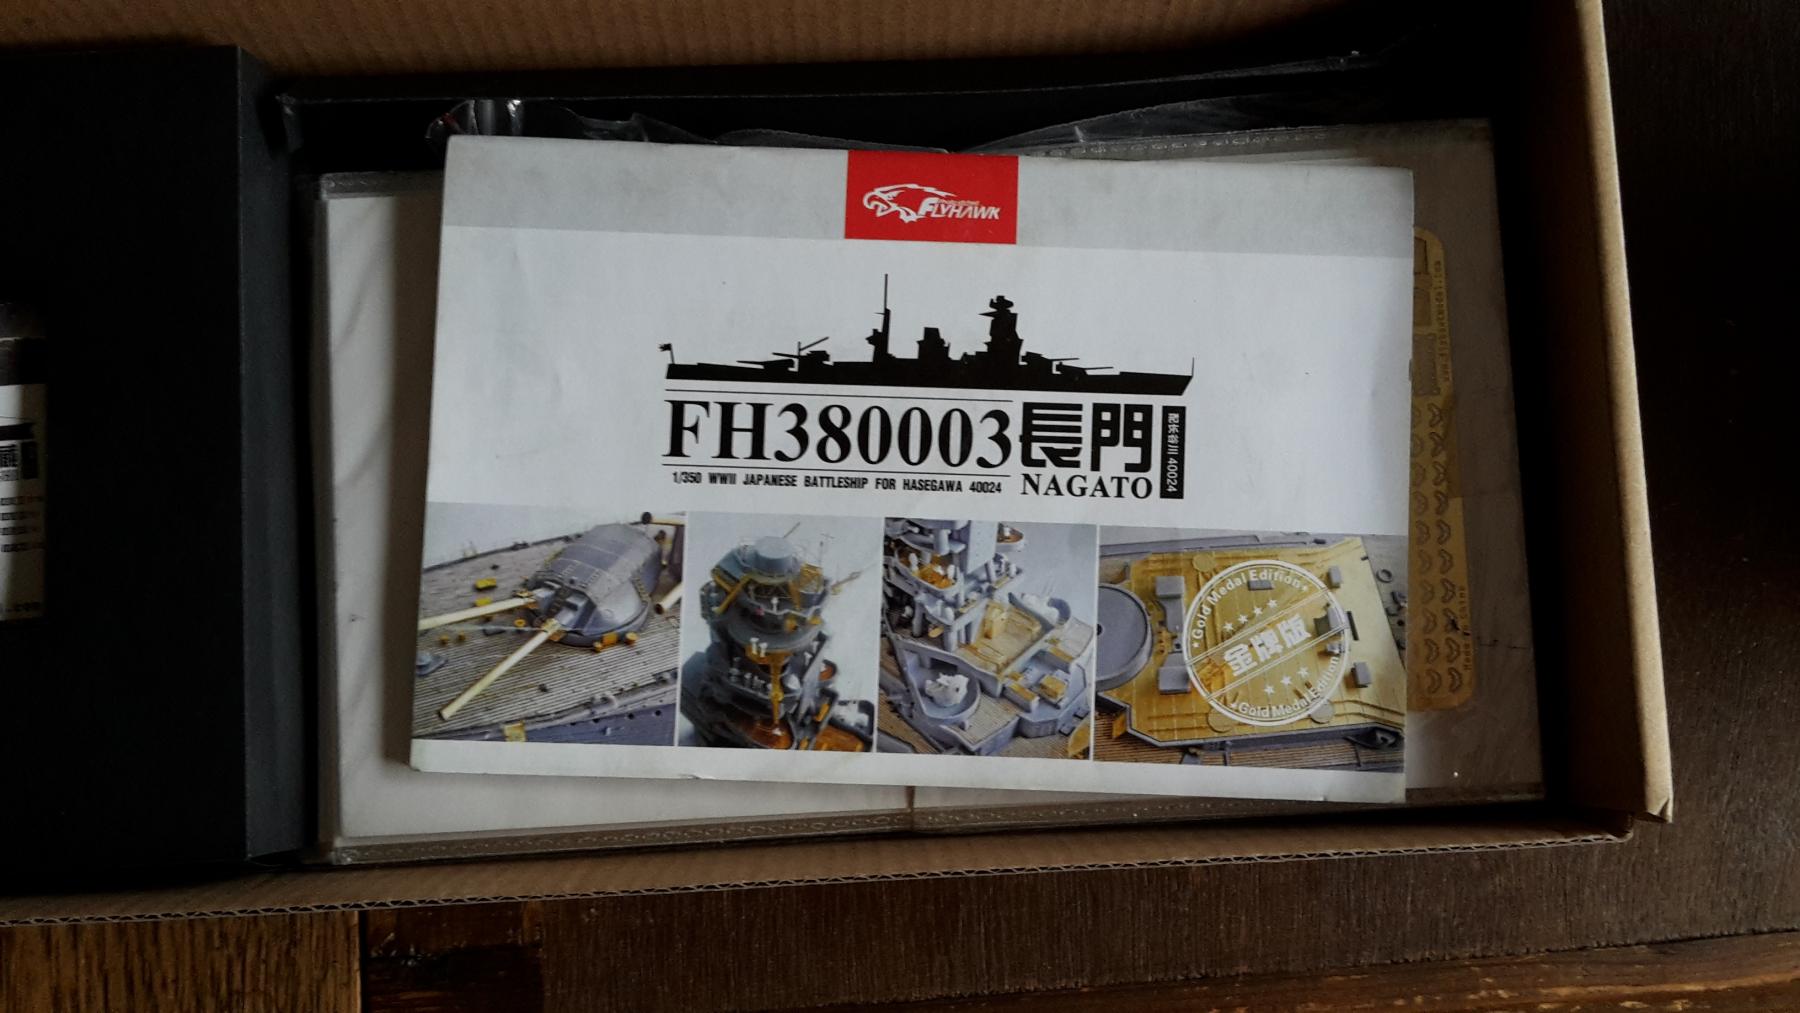
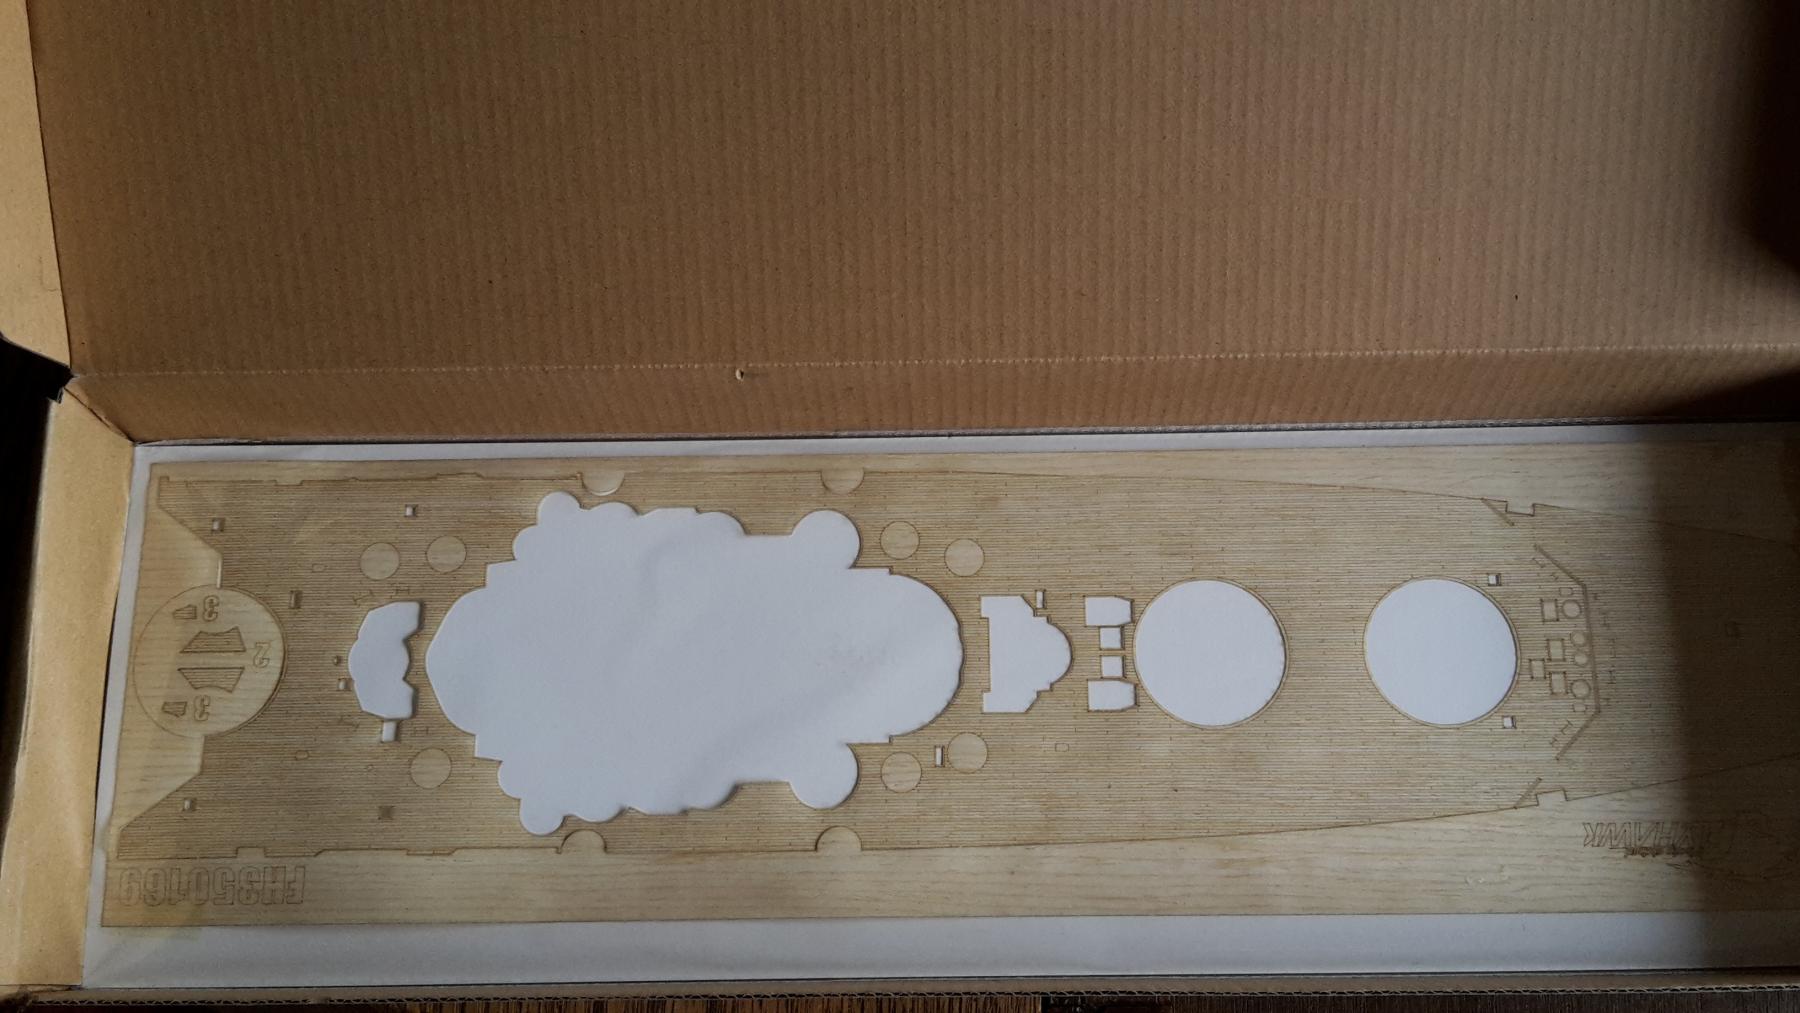
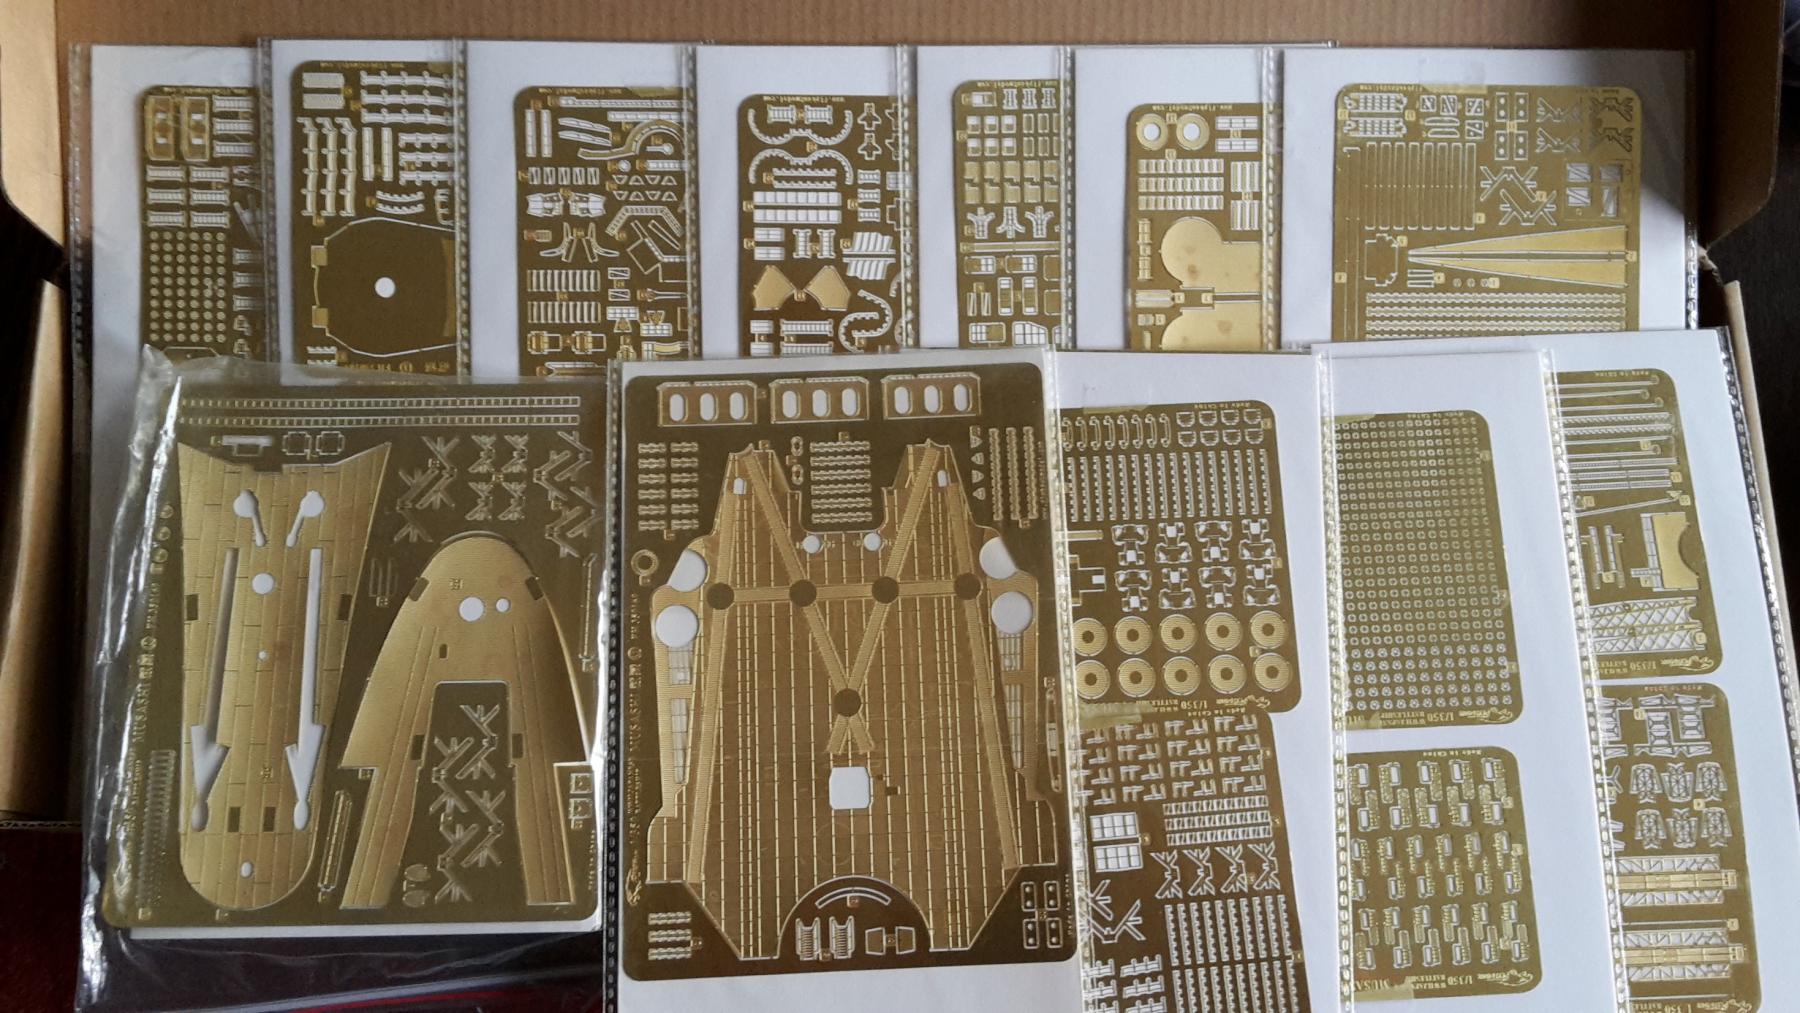
 Finally started on this big plastic tub. Besides the invisible PE from Tamiya - bring x-ray goggles - I've got both the Pontos detail up set advanced , and the FlyHawk. The latter is quite impressive. No pictures from the Pontos PE. I forgot to take pictures, and on top of that I just dropped my coolpix on the ground, lens first. It seems I might just as well buy a a new one, as repairs will cost me about the same The Flyhawk had the Nagato booklet, but they sent me a replacement. It seems it is easier to find what parts go where with the proper booklet Sister ship is built by Greg IJN Yamato 1:350 This will be a slow (agonising) build. I've decided to start with all the small parts like guns and turrets to get some dexterity with the PE. This is worse than the stripdown Fokker DR1 I build from Eduard


- 383 replies
-
- 27
-
-
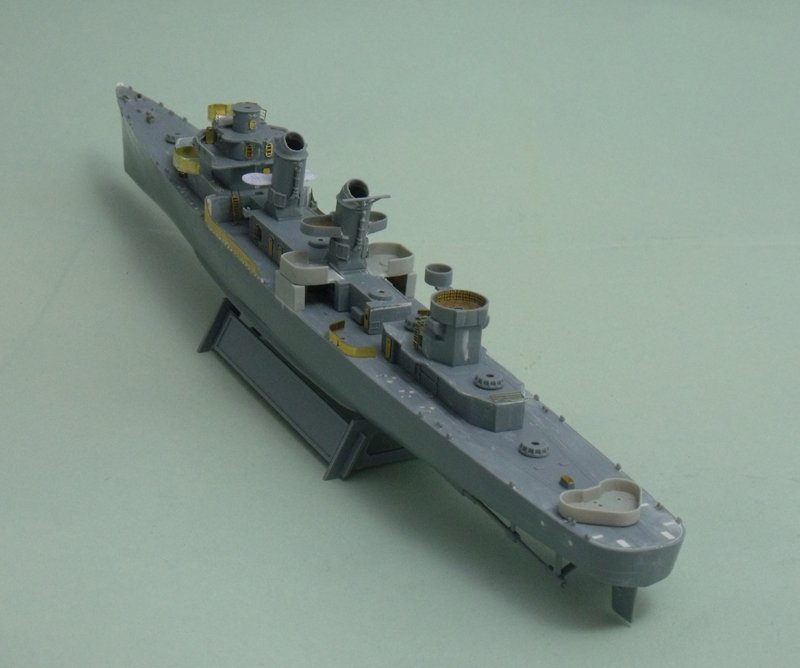
 Hi all I was given this and the Bismark for a Christmas pressie from my daughter and son I bought what i thought was the pe for this kit (which cost more than the kit and I now discover is still not the full pe for it, i will buy the rest but just have to wait a bit) so I was thinking I quite like the pics by Eduard and pontos (others are availiable) of the pe on the finished ship with no paint on it and was thinking maybe I would do that with just a slight difference being I would weather the pe but leave it unpainted. What do you all think, I quite like the pe showing I think it adds interest(i know it's not very accurate but let's face it I'm pretty rubbish with this modelling lark and I very seldom build as per the instructions anyway. So here is my start on this build Made a start on the decking (Will be using pastels for the decking this is just the base coat.
- 122 replies
-
- 11
-
-
- tamiya
- King George V
- (and 2 more)
-
Hi all I got this last Xmas and although I don't get much modelling time these days I wanted to start it but as always with a difference I want to depict her during the battle as she's sinking and at the bottom of the sea, all at the same time. I realise she didn't break up and apart from 35 meters of the stern is still in one piece on the bottom. She landed practically on top of an undersea volcano which erupted and she slid down the side as the volcano erupted leaving her laying level on the seabed with her stern mostly covered. My problem is do I play with the historical facts and cut her into 3 sections to depict what I want or is there a way of depicting the whole thing whist keeping her whole.
-
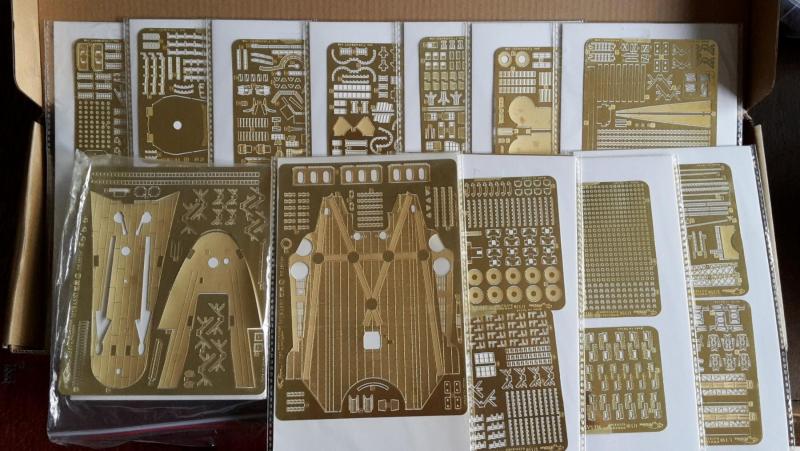
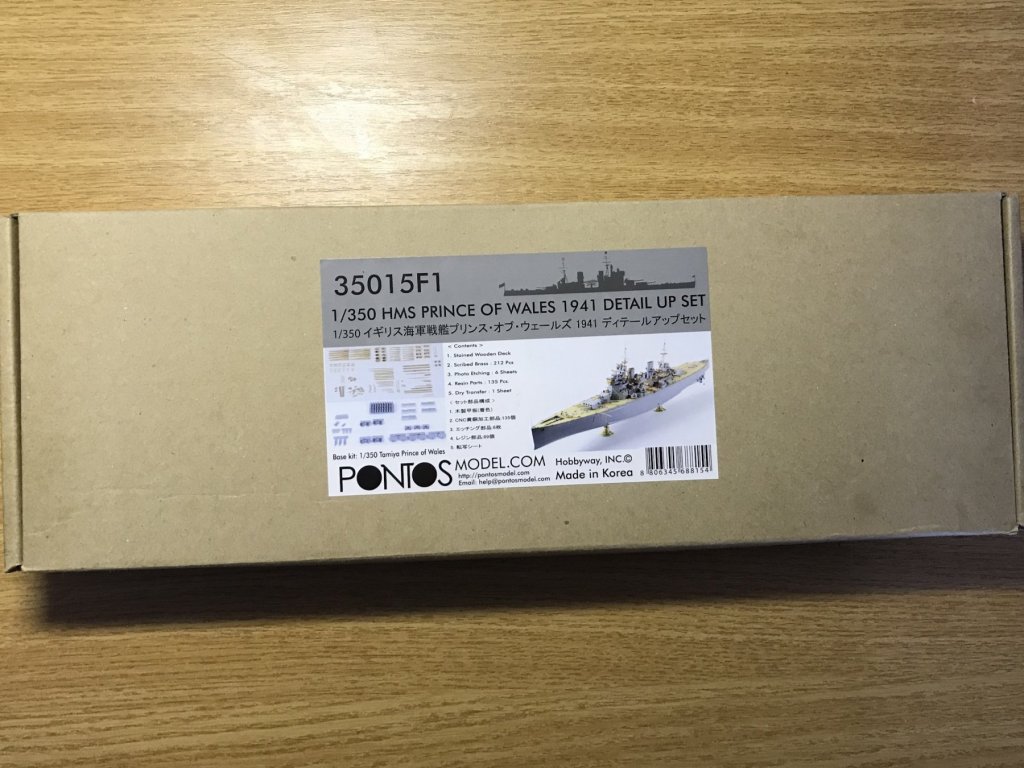
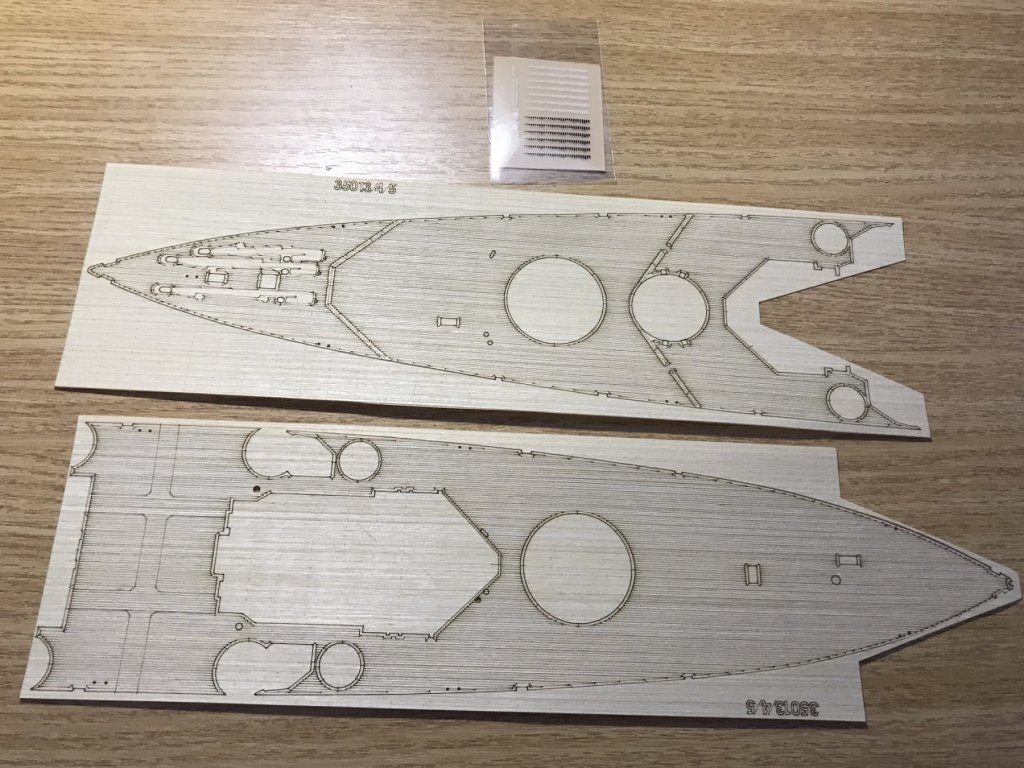
 I’ve been making models since the late sixties but stopped making them when I moved home back in 2008. Due to acute kidney failure back in March leaving me needing a hobby that wasn’t to physically demanding bought me back to scale model making. My first foray back led me to buying Tamiya’s - still rather good - 1:350 scale Prince Of Wales kit which had an all too brief but illustrious career in 1941. However Tamiya being a Japanese company depicted her at the time Singapore fell in December 1941. After some research I’d decided to depict her as she was in May 1941 as she was while berthed at Scapa Flow - a bit of local interest as I live within range of her main artillery. I also needed to backdate her Triple A and colour scheme to her pre June 1941 refit. Another search led me to Korean company Pontos models multimedia Bismarck action detail up set. First image is the Tamiya kit, most of it will be staying on the sprue as the original - although good for how the technology was in 1986 leaves us wanting in the second decade of the 21st century. Second image is the Pontos models 1941 detail up set. Inside are two large bags - one containing four smaller bags of resin parts and the other containing four bags of turned brass with everything from the ships bell up to main armament barrels. Underneath are six sheets of photo etch brass. There are a couple of omissions from the set - porthole covers and carley rafts. L’Arsnell solves the raft issue still looking for a solution to the porthole issue. First update 04/07/2018 I’ve been a little busy over the last week but Sunday and today I had free time, the deck has finally been cleared and the Pontos wooden deck finally attached - it’s a nice snug fit and really looks impressive. One word of caution though, don’t remove The rectangular bumps from the foredeck and the two just aft of “Y” turret - they form the bases of the PE hatches that Pontos provide also the two square “boxes” attached to either side of “B” turret as the wooden deck goes around them - I see some scratch building in my not to distant future. THE HULL Looking at the kits hull shows only one major(ish) clanger - the bilge keel is too long (it extends too far aft and too far forward - a little bit of surgery will put that right. For reference, I’m using Roger Chesneau’s book on building the KGV class battleships and the drawings there show the bilges start 21 cm from the bow and finish 21 cm from the stern (1:350 scale) One other issue is the lack of riveted panel joints on the hull - Tamiya have managed to put them on the turrets but not the hull. A search on the internet reveals an image of POW moored in Placentia Bay, Newfoundland - stern in but riveted panel joints clearly visible - a second image (this one of the Hood) shows the entire hull panel joints clearly visible, but only down to the boot topping - Royal Navy used the same pattern in all their capital ships.
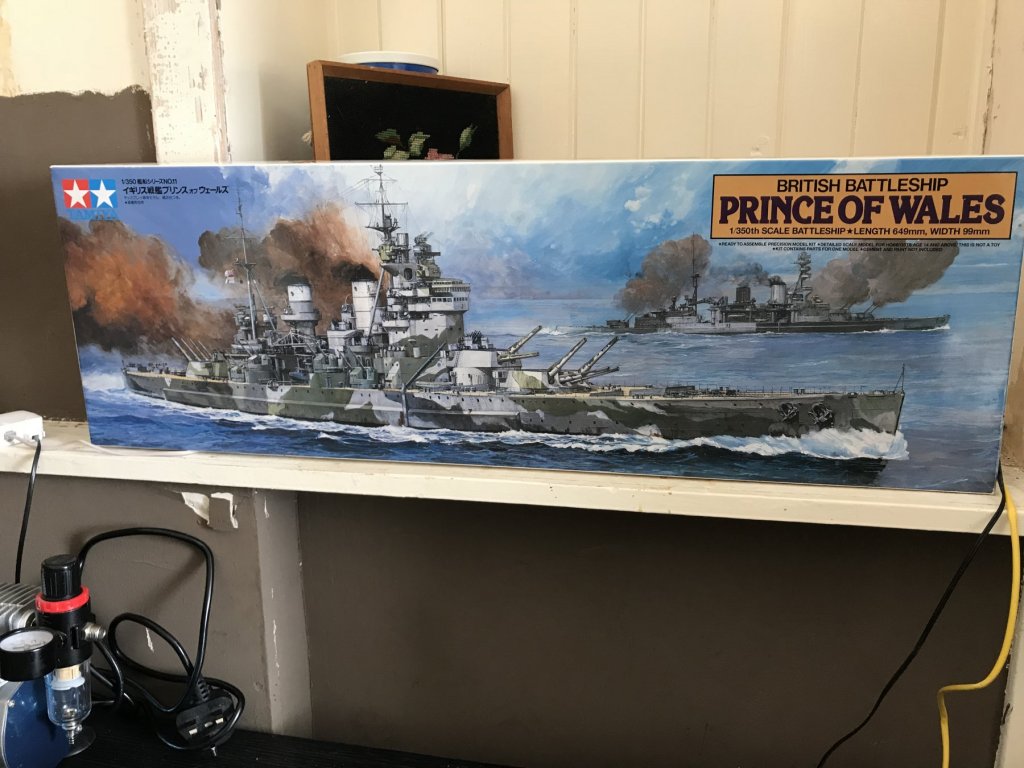


- 5 replies
-
- 4
-
-
- prince of wales
- tamiya
- (and 1 more)
-
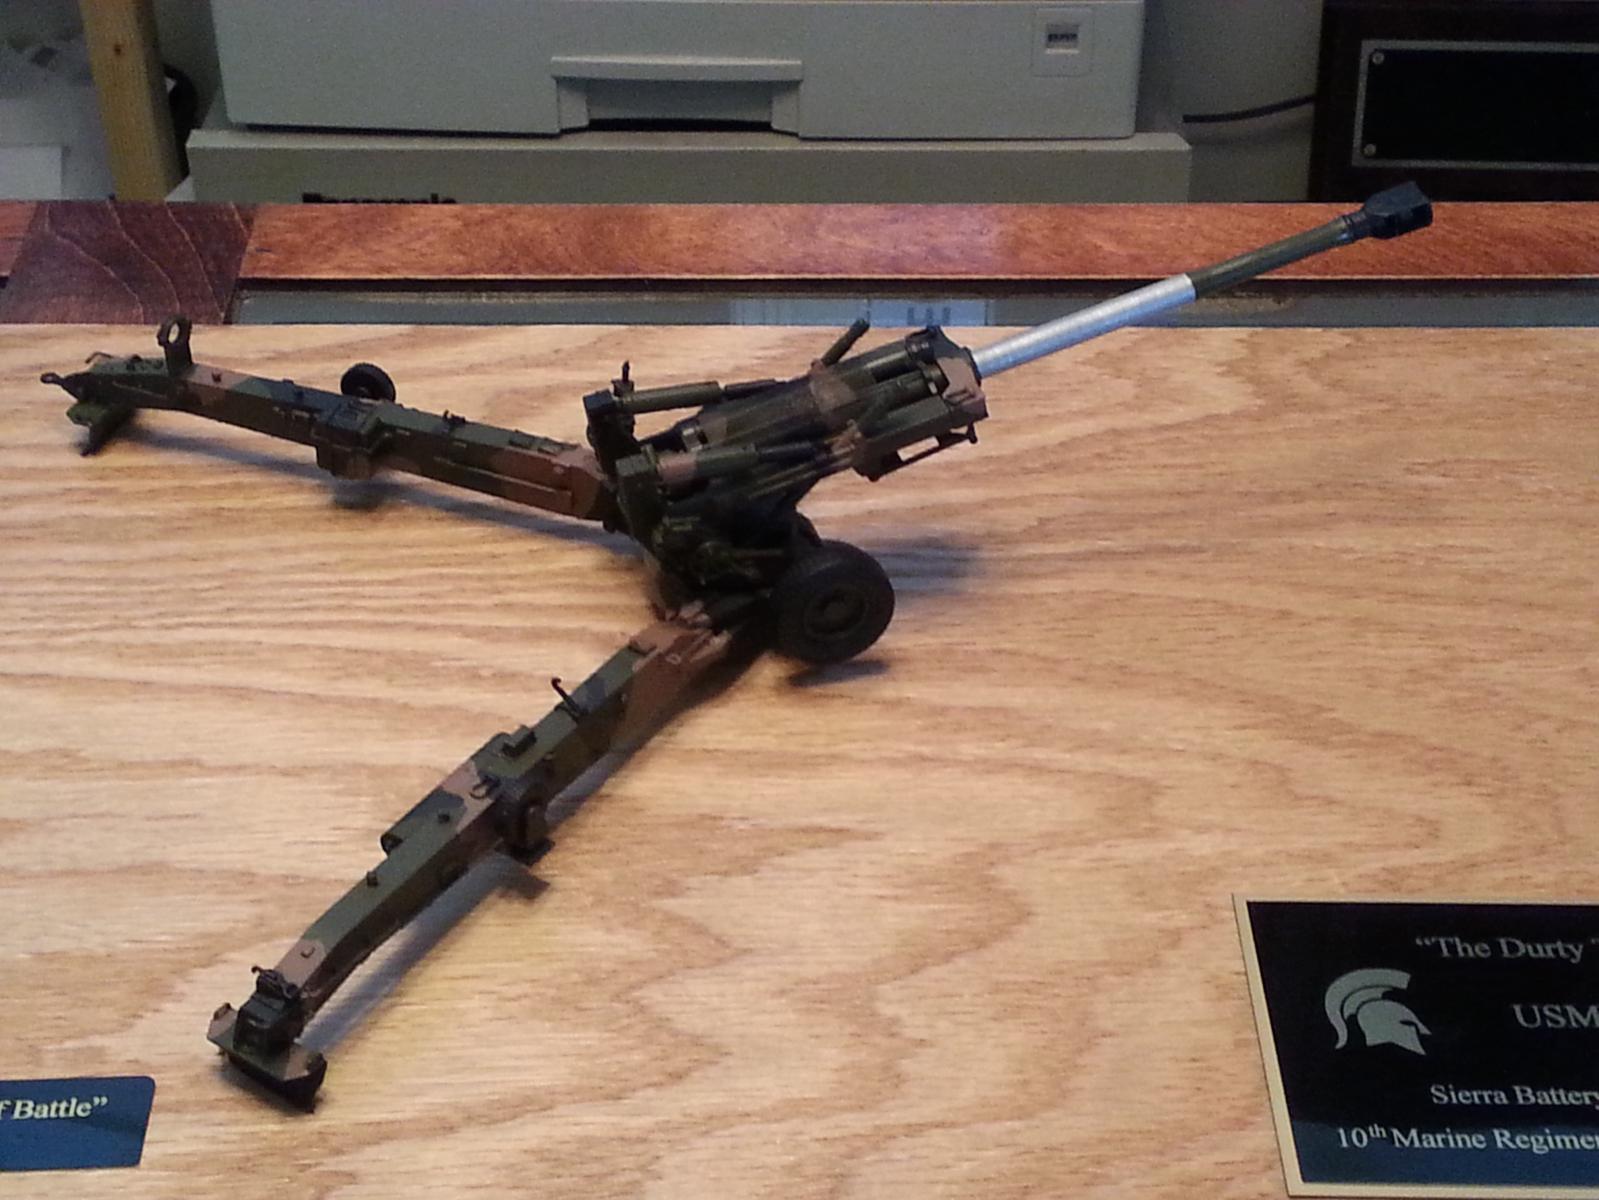
 Since my account got lost in the redesign of the site i am going to start this build log. I am building the Tamiya USS Missouri ( as can be guessed by the title). I started this a while back but took a short break to build my friend a 1/35th scale M198 Howitzer (pics below). He was an artilliery man in the Marine Corps. I am enlisting myself so i would like to see if I can finish the Mighty Mo before i ship out. (fingers crossed). I will add pictures soon of what i have completed but i have painted the hull and some of the super sturcture. I have also sanded down the modeled chain and bought a real chain to replace it. I have some PE kits that i hope to expand my skills with and replace some of the stock parts. I also have purchased a wooden deck to be placed over the plastic one. I stumbled upon this site http://www.worldaffairsboard.com/modelers-corner/60395-building-tamiya-missouri-super-detailing.html where someone has built the same model. He adds some REAL detail to it and i have been taking a lot of tips from this sight. Just hope it turns out half as good. I think that is it for now. More to come soon.
-
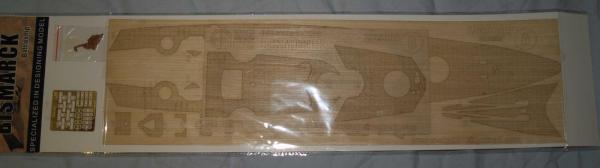
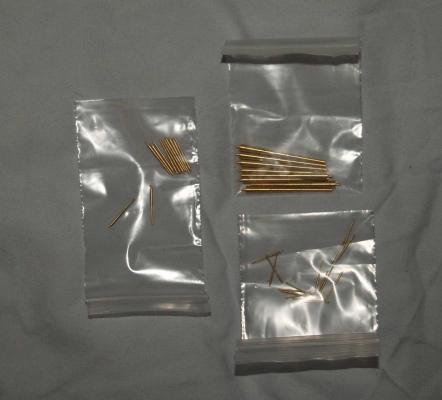
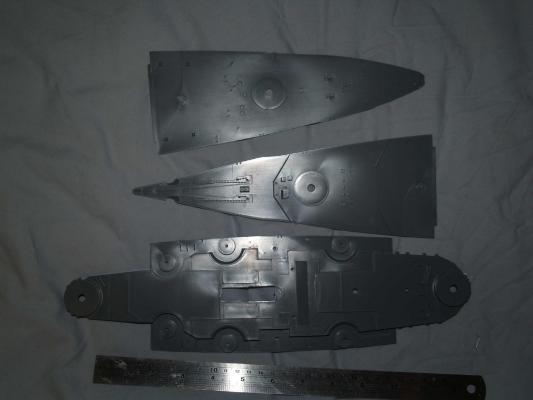
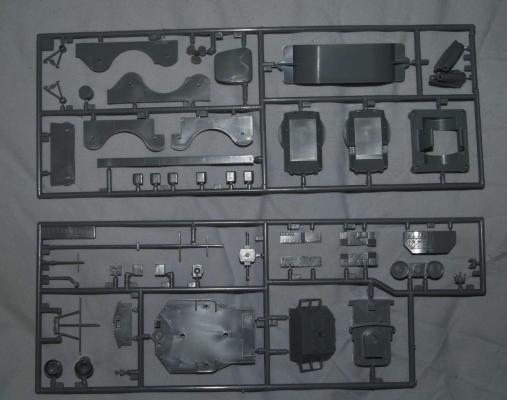
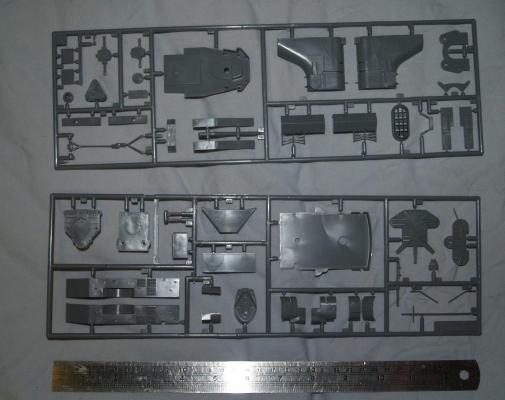
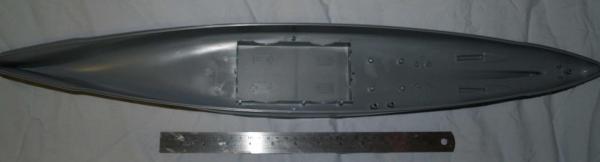
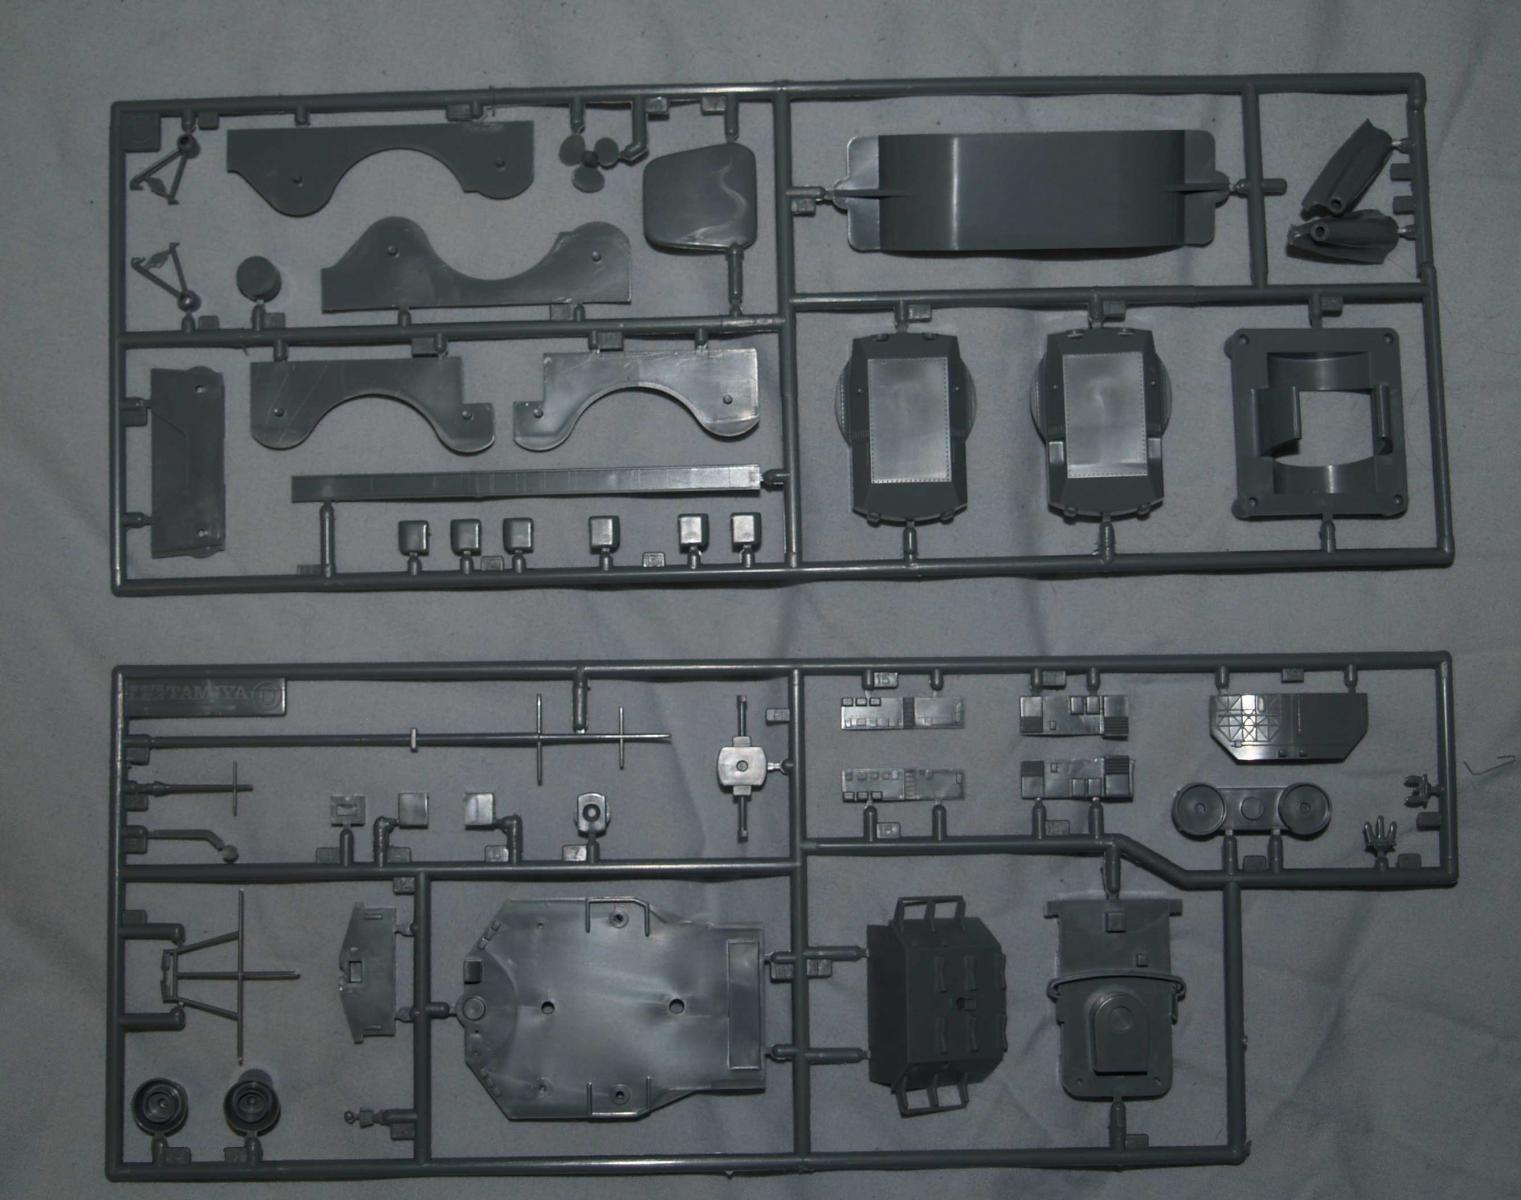
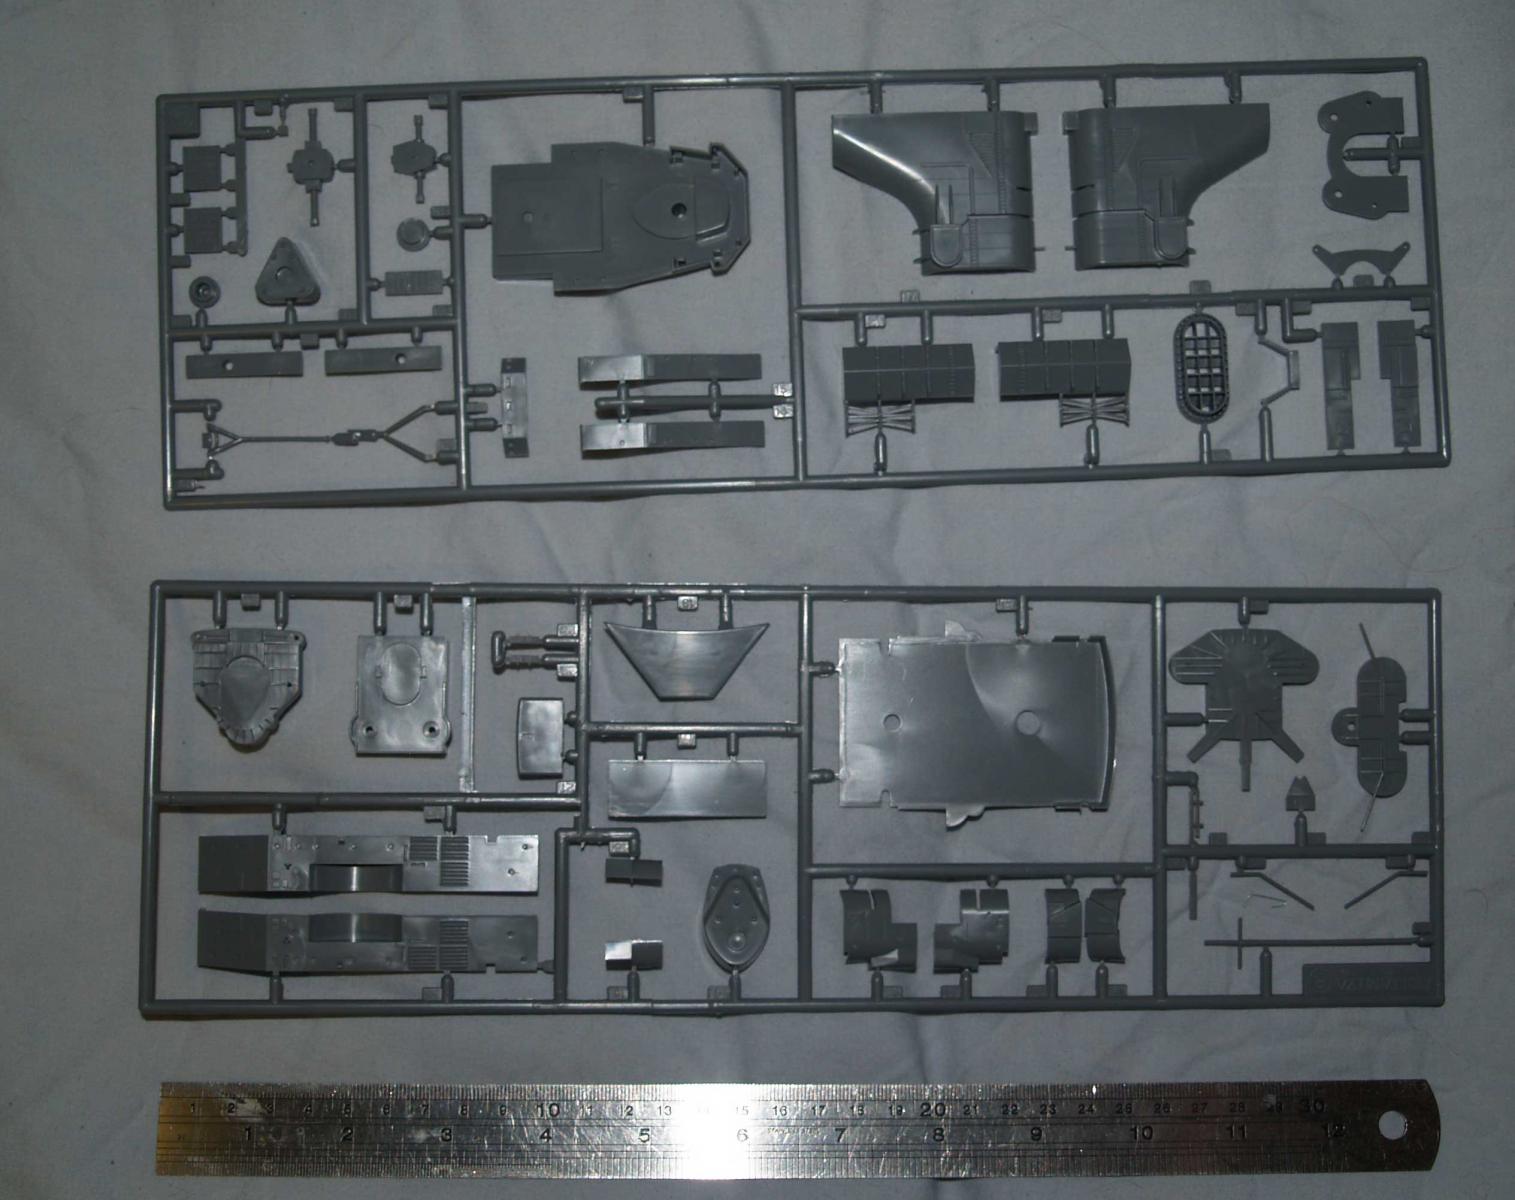
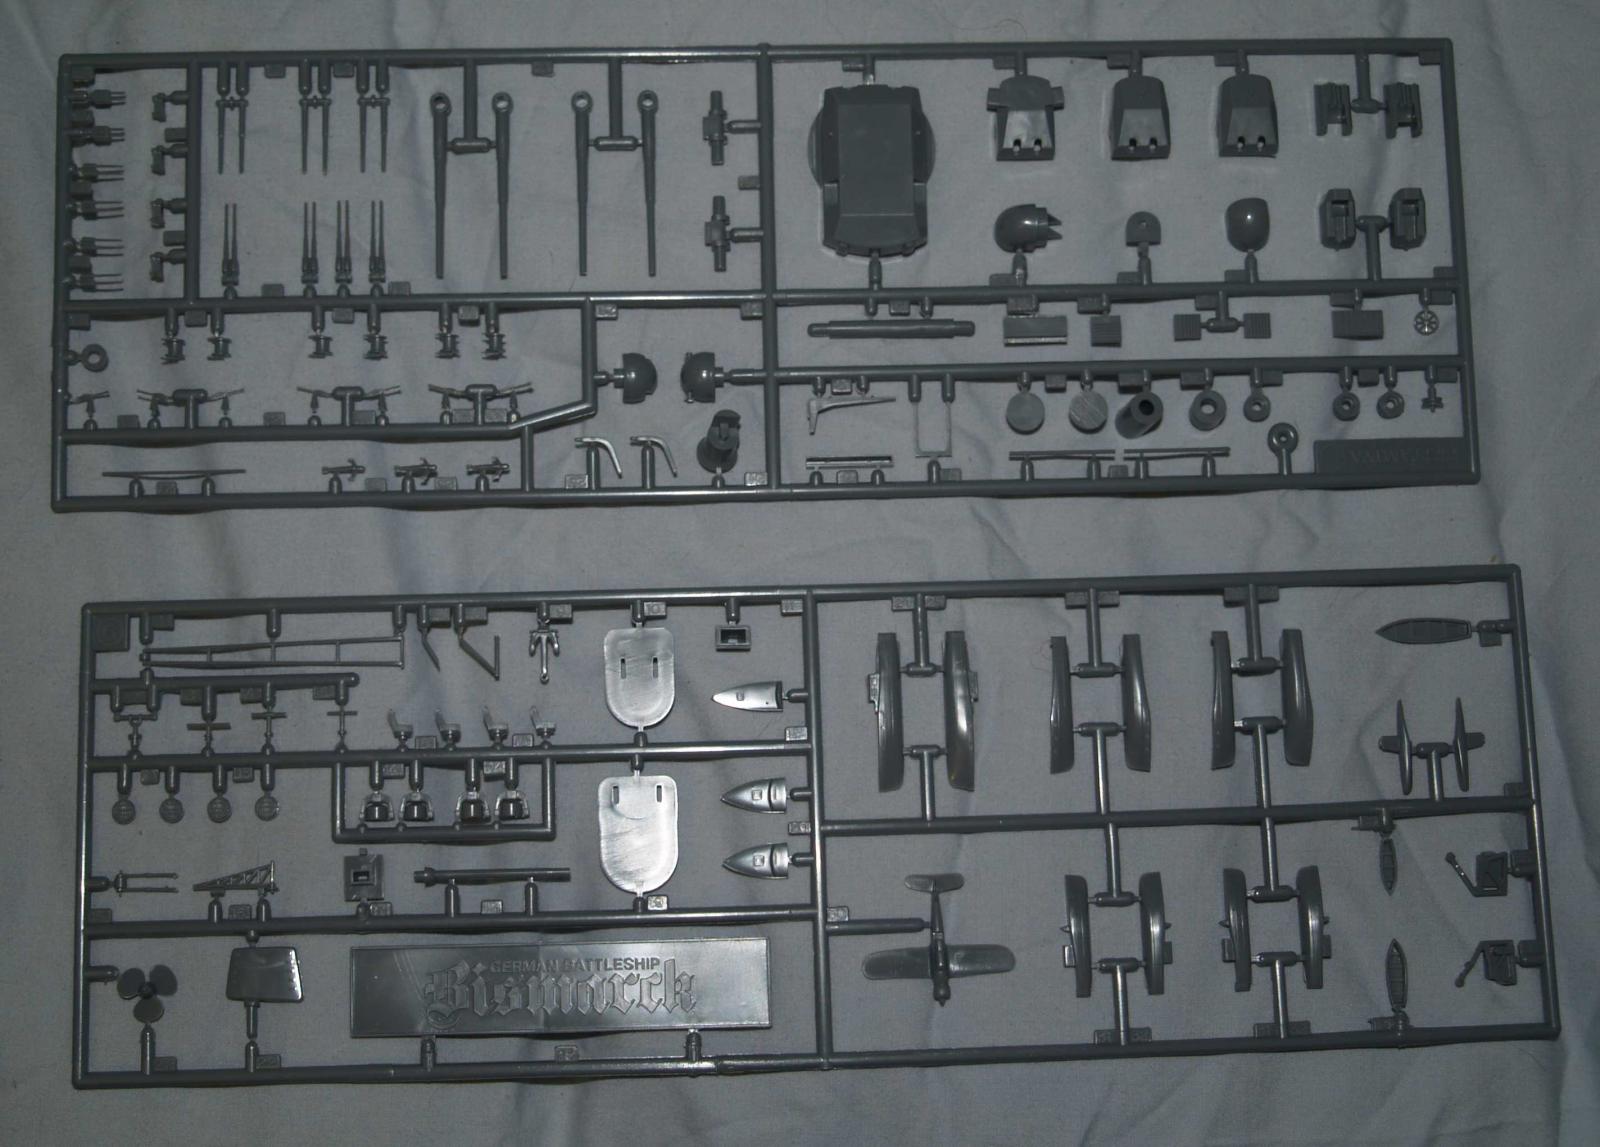
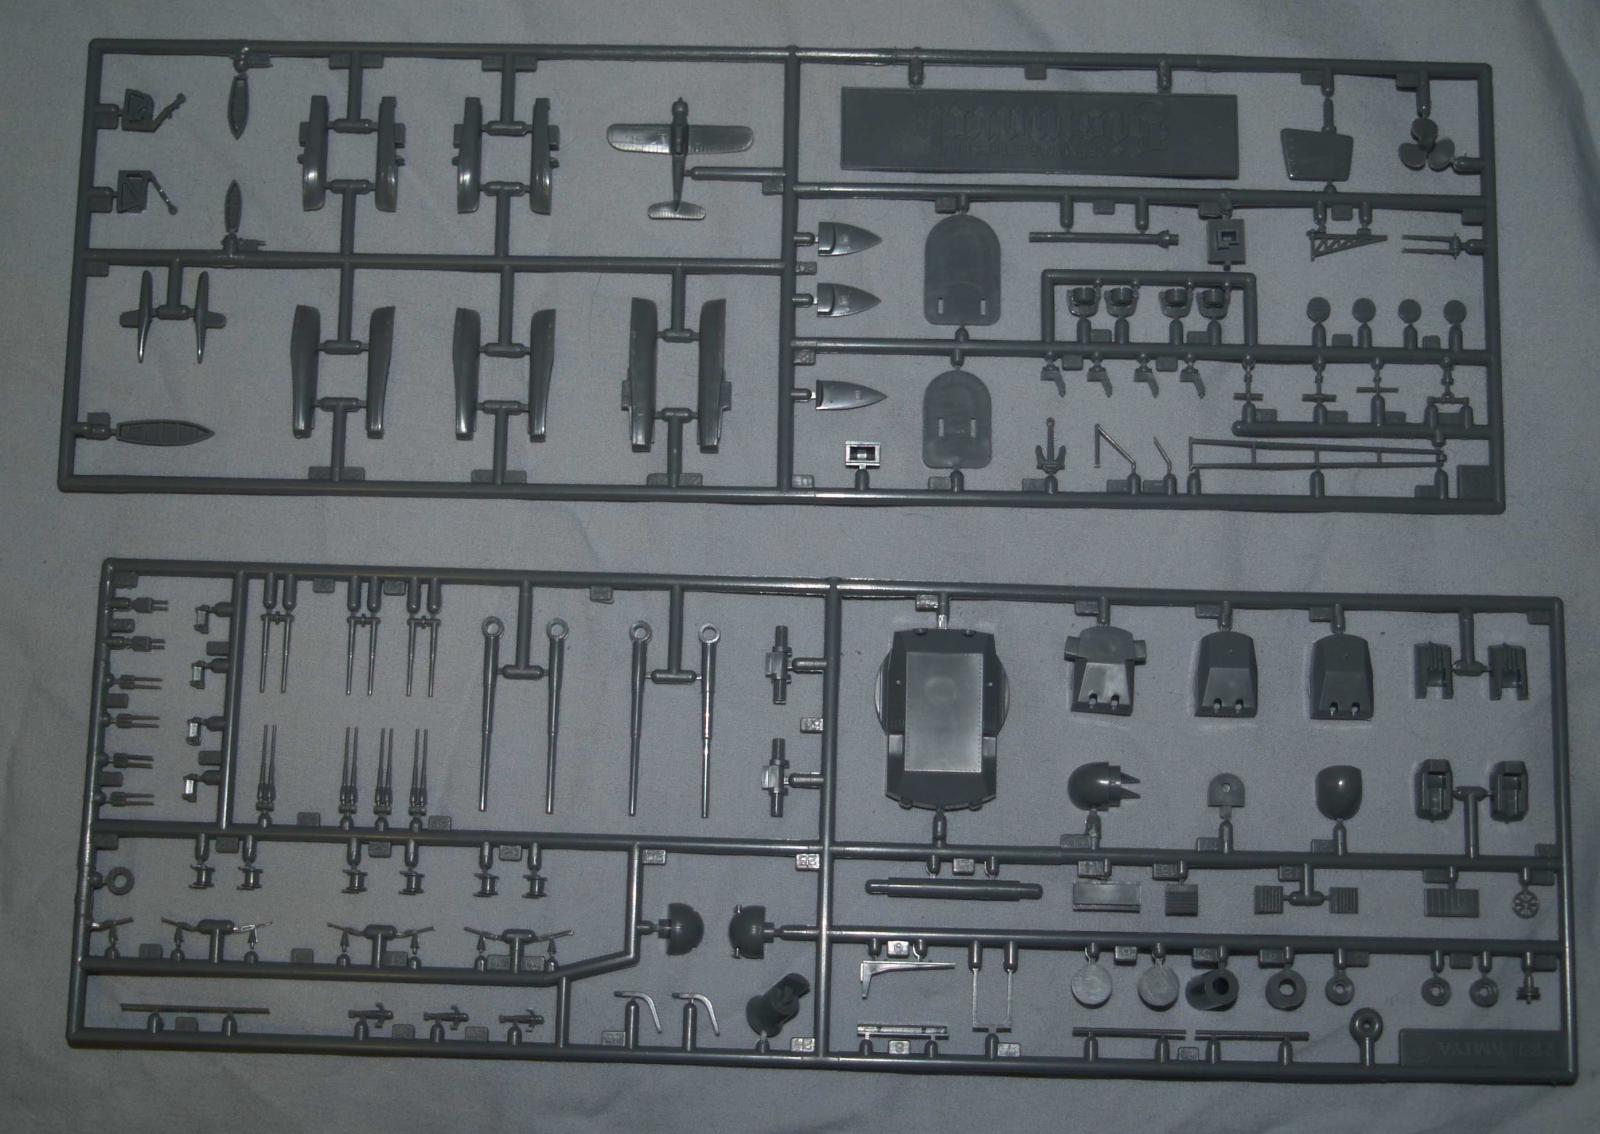
 Here is a new build, the Bismarck. All I can say is that this is one kit that needs photo etch as there is very little detail. I would expect more from Tamiya. Anyway here are shots of the sprues