James H
-
Posts
6,136 -
Joined
-
Last visited
Content Type
Profiles
Forums
Gallery
Events
Everything posted by James H
-
 That is gorgeous! Oh, try 2mm planks.
 -
It's a tough job, but someone has to do it 🤣
- 488 replies
-
- 13
-

-

-
- Indefatigable
- Vanguard Models
- (and 1 more)
-
I build my stuff in a tiny box room which can barely fit a single bed and a wardrobe. Unless you're working smaller than that, you'll probably be fine. Even a kitchen table would be easy enough.
- 488 replies
-
- 12
-
-
- Indefatigable
- Vanguard Models
- (and 1 more)
-
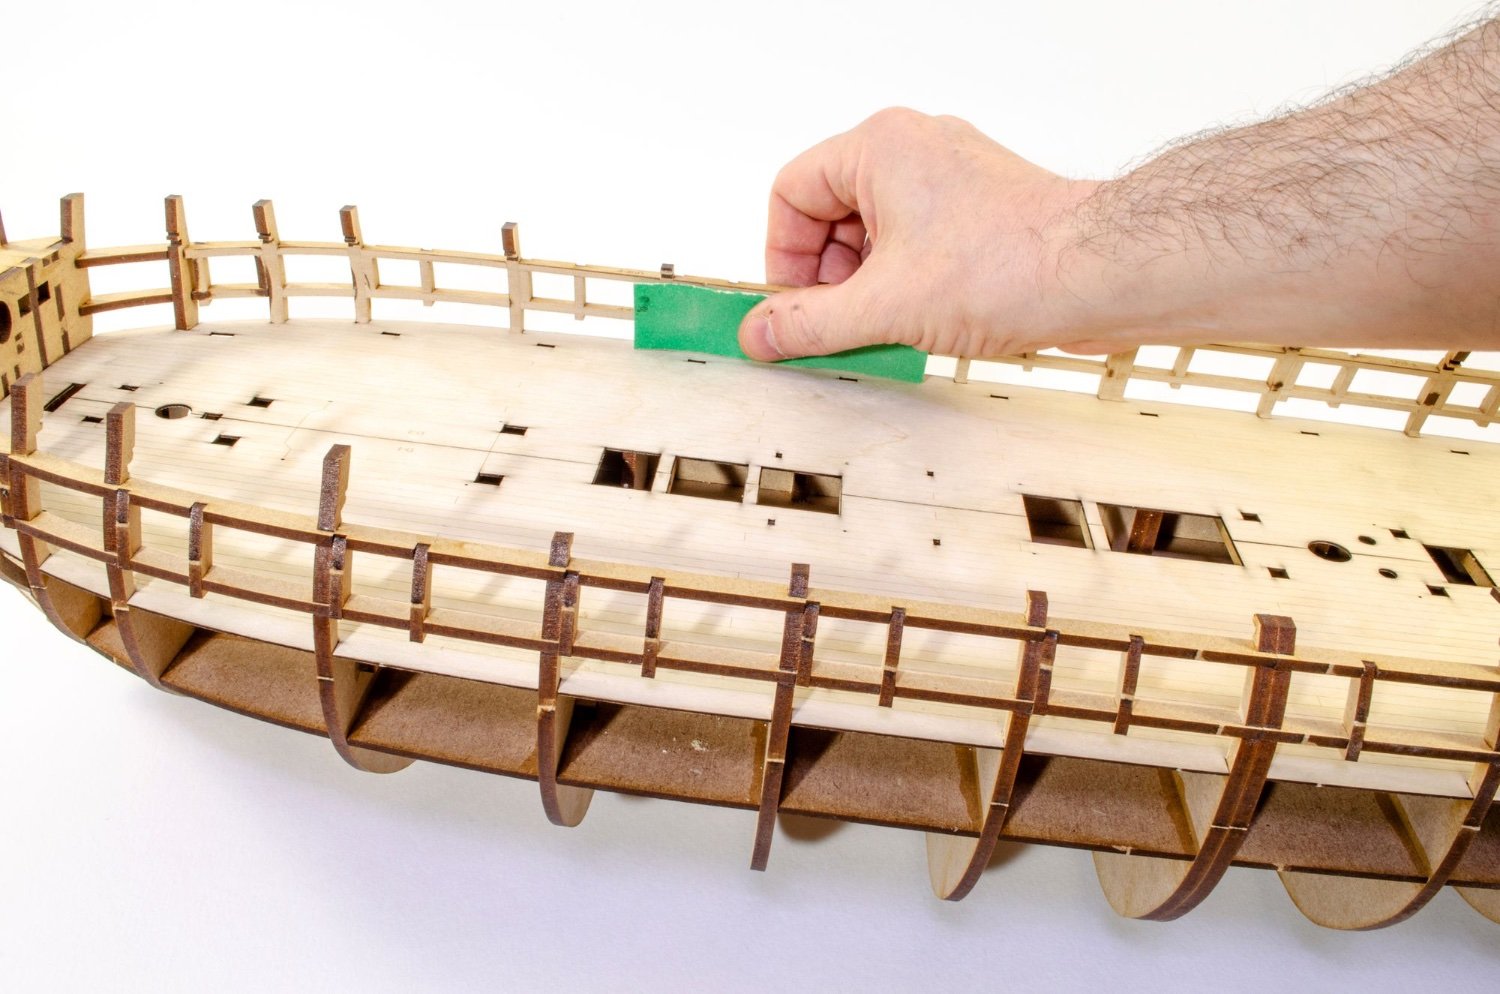
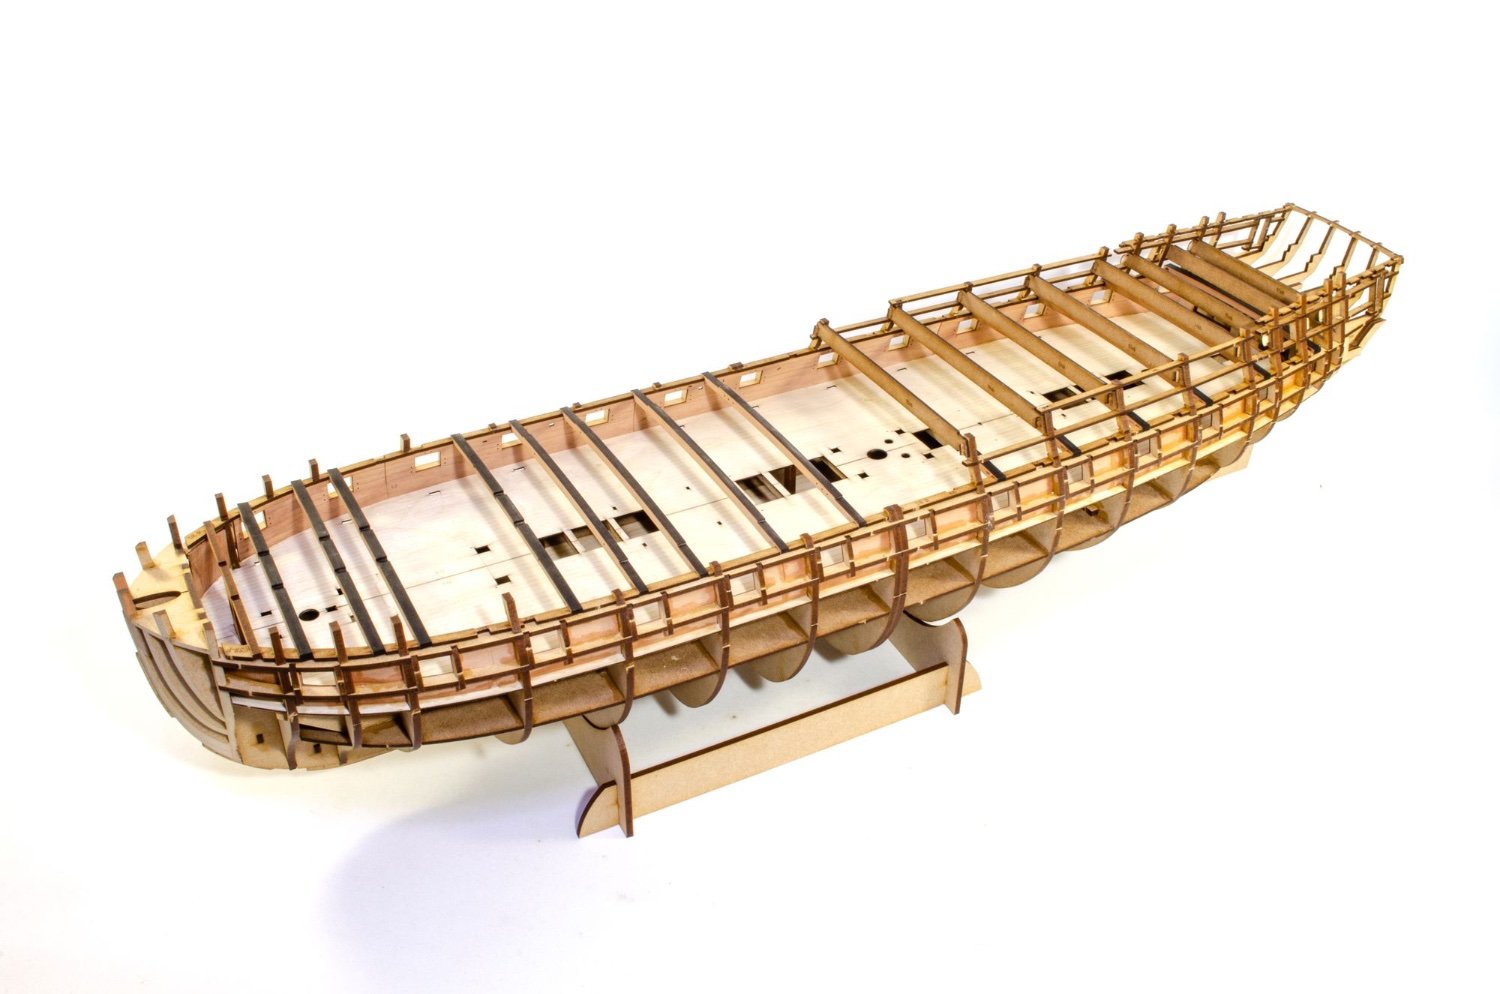
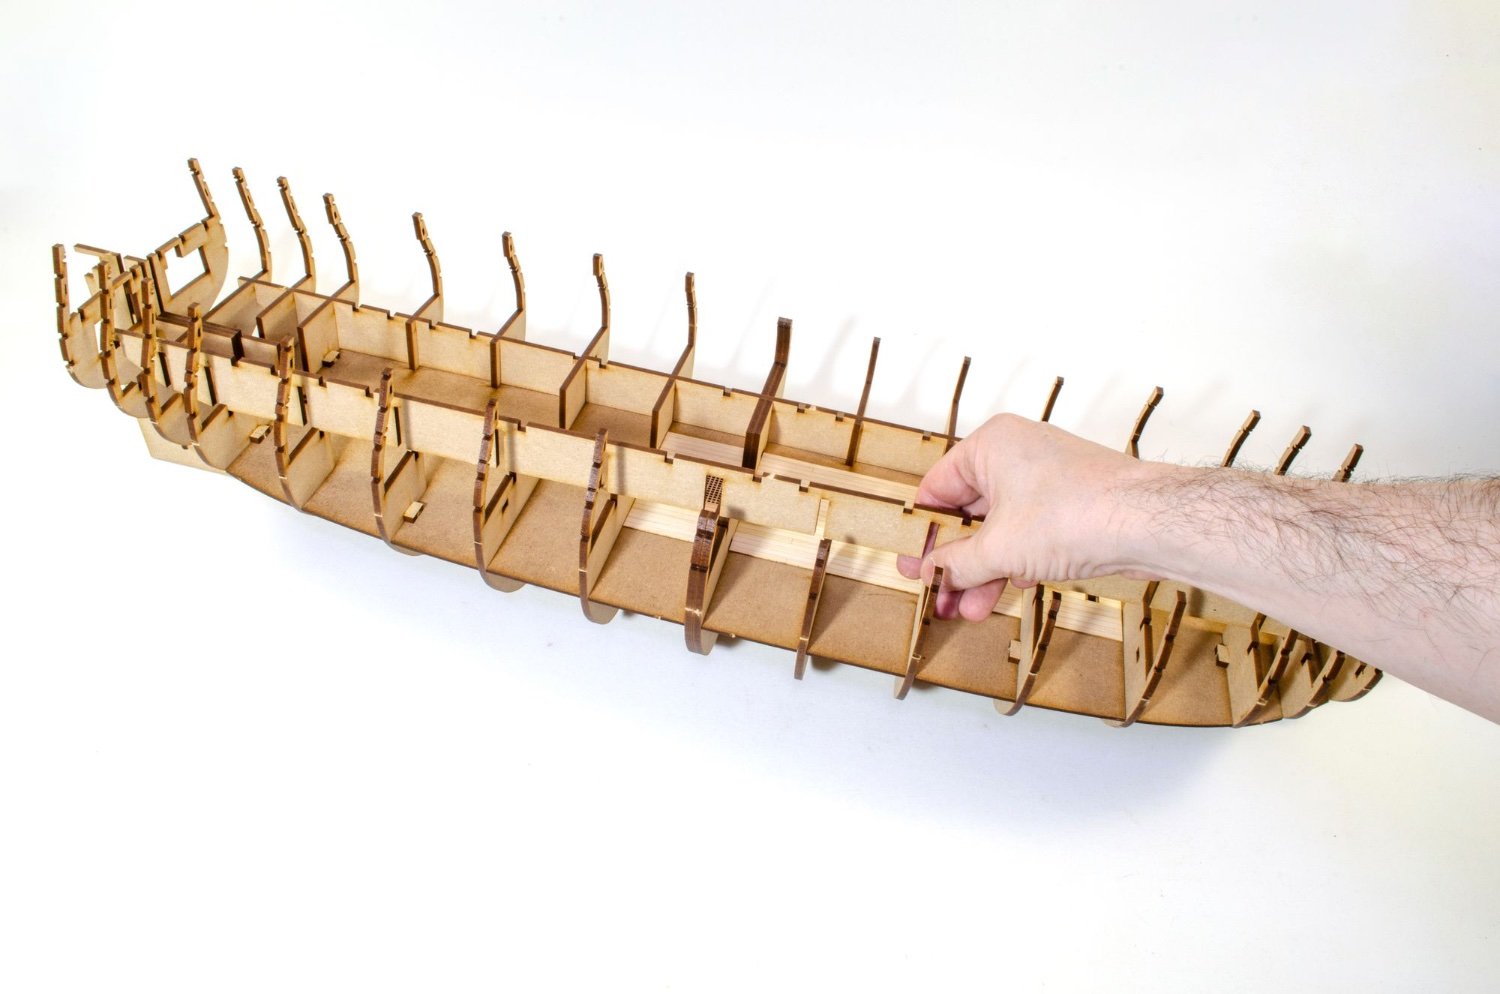
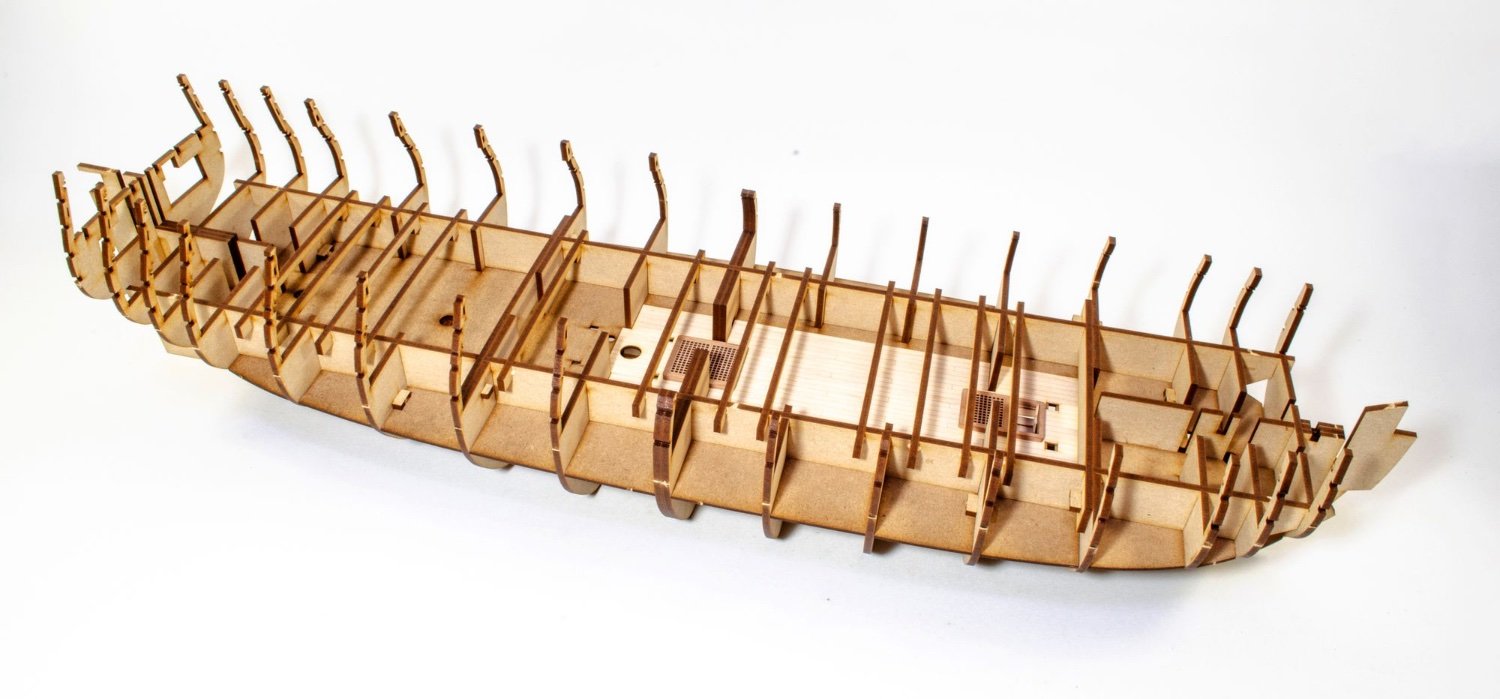
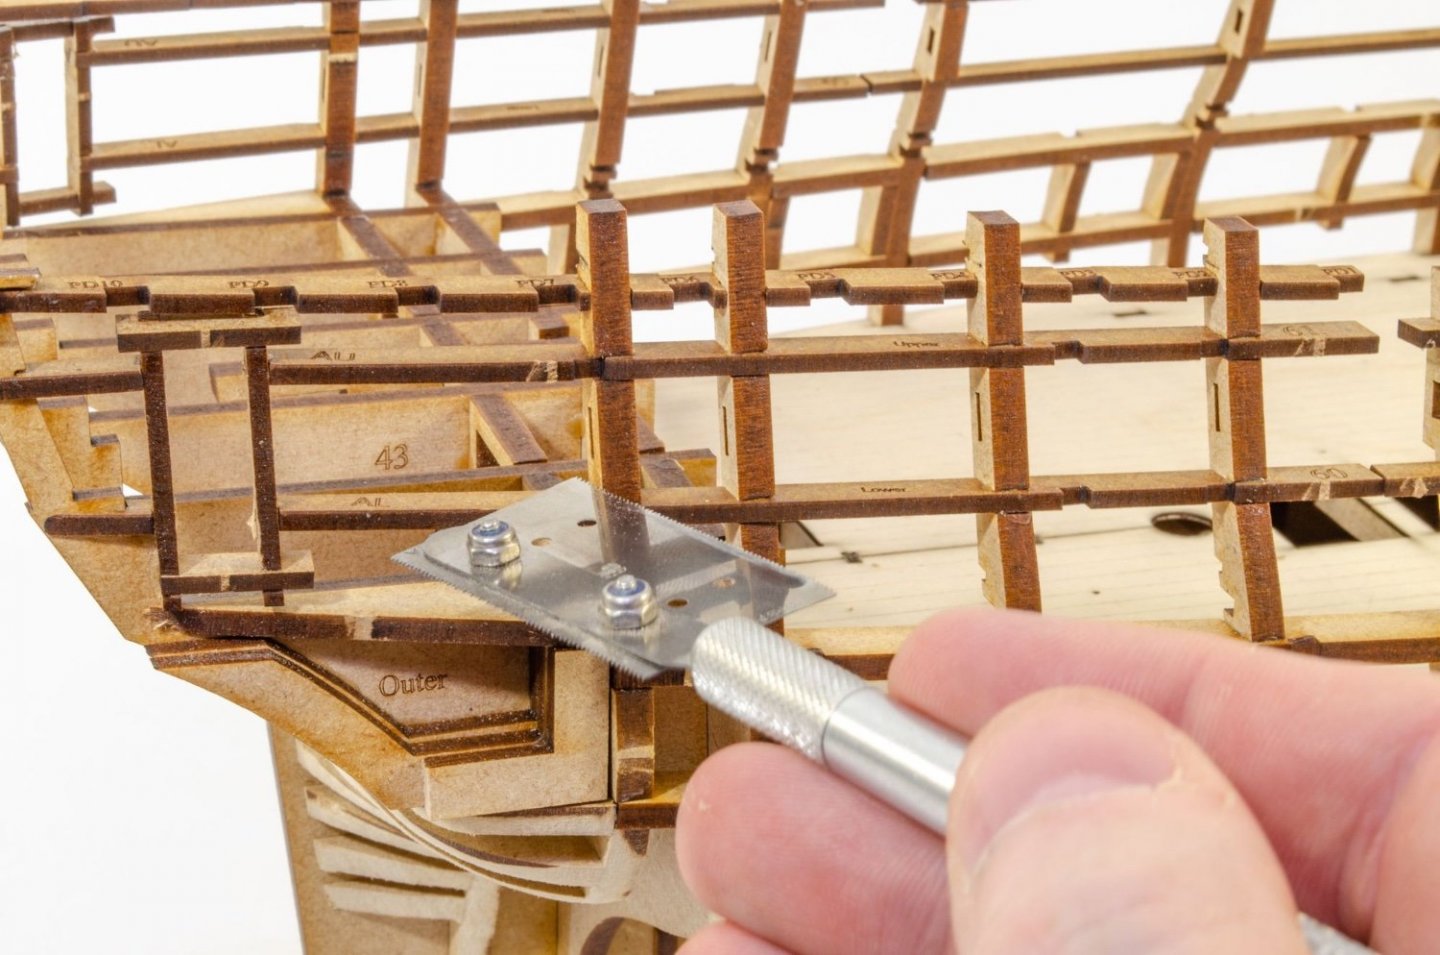
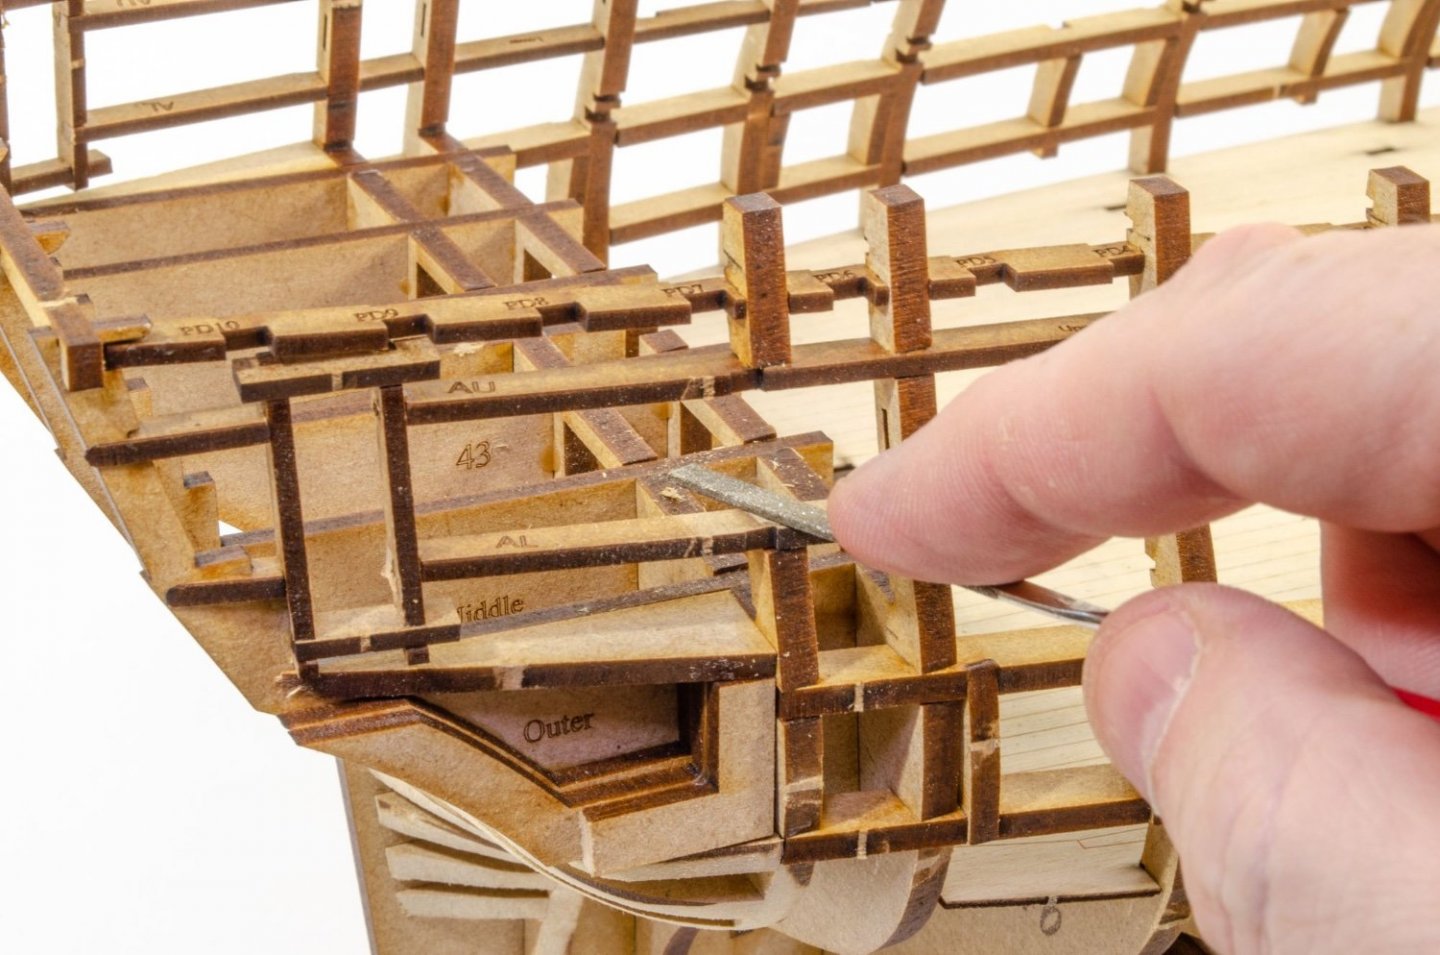
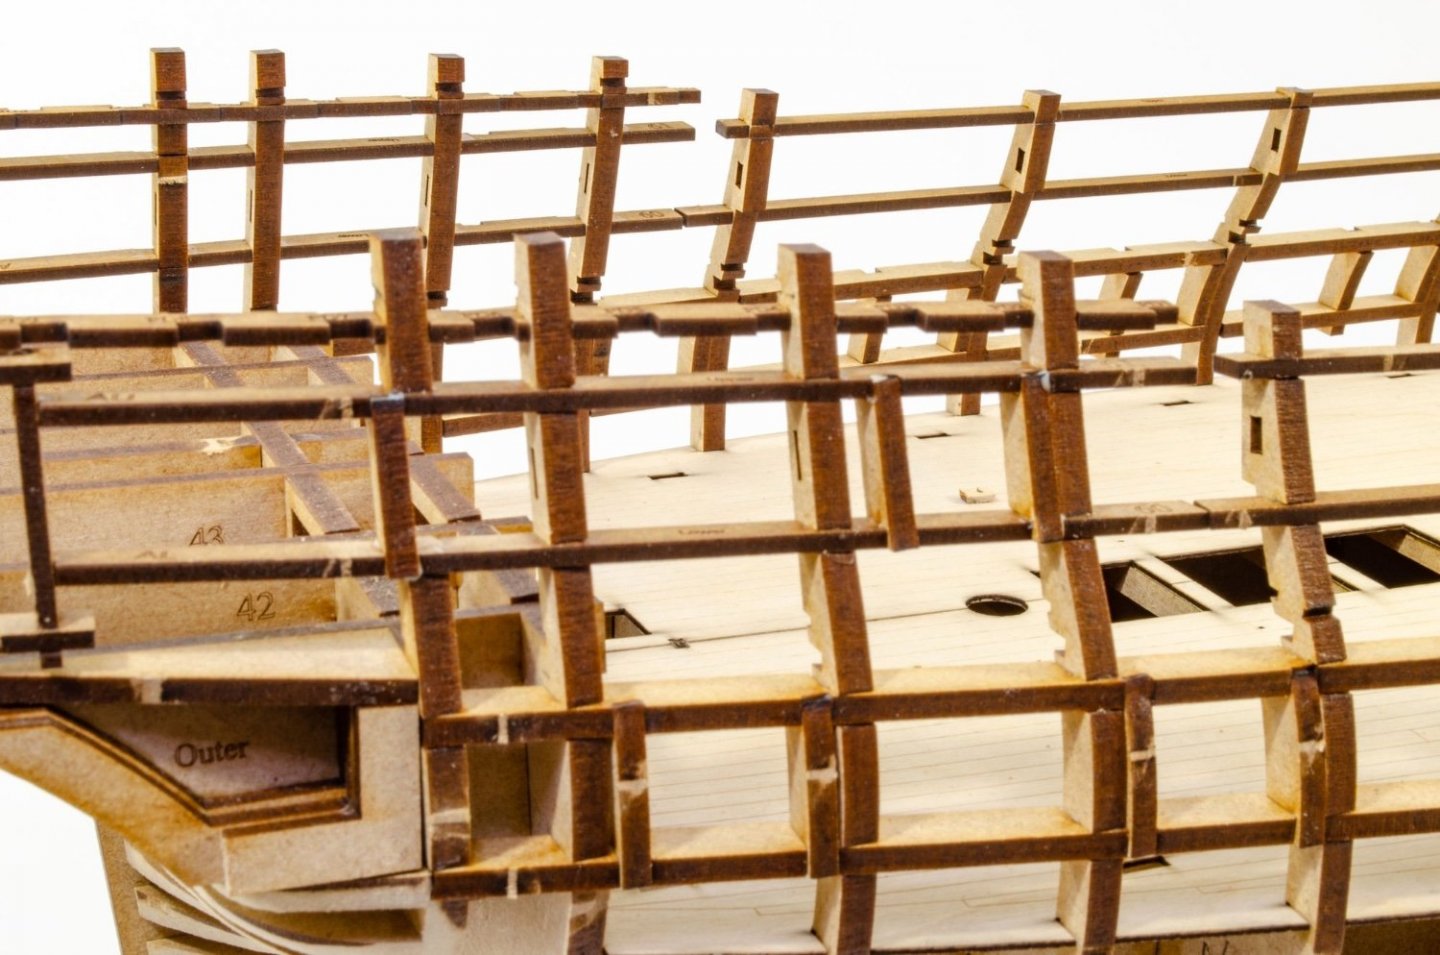
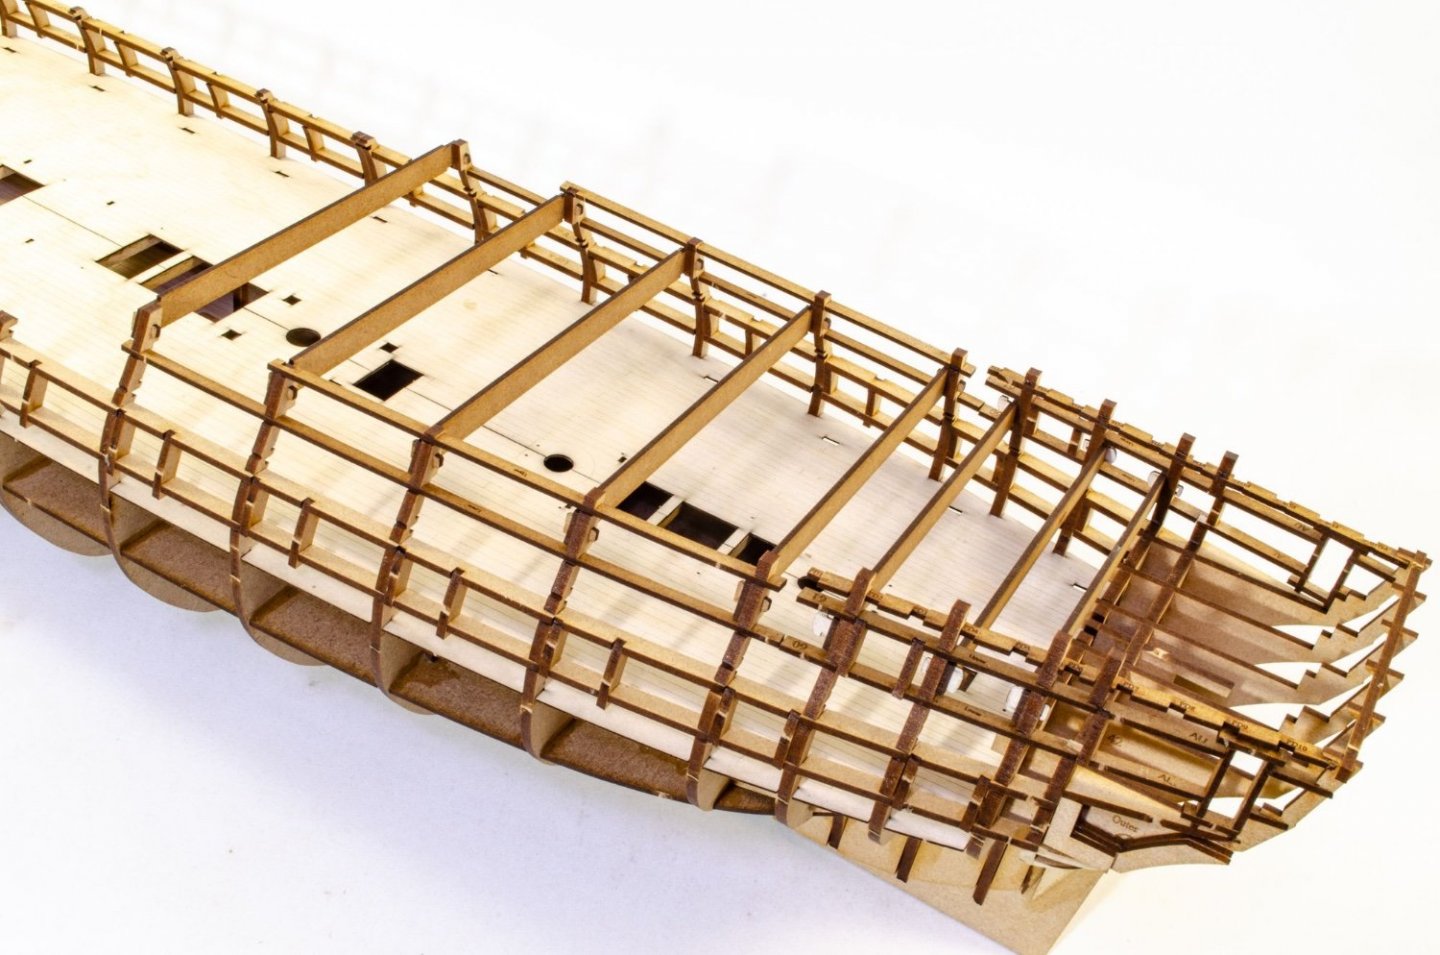
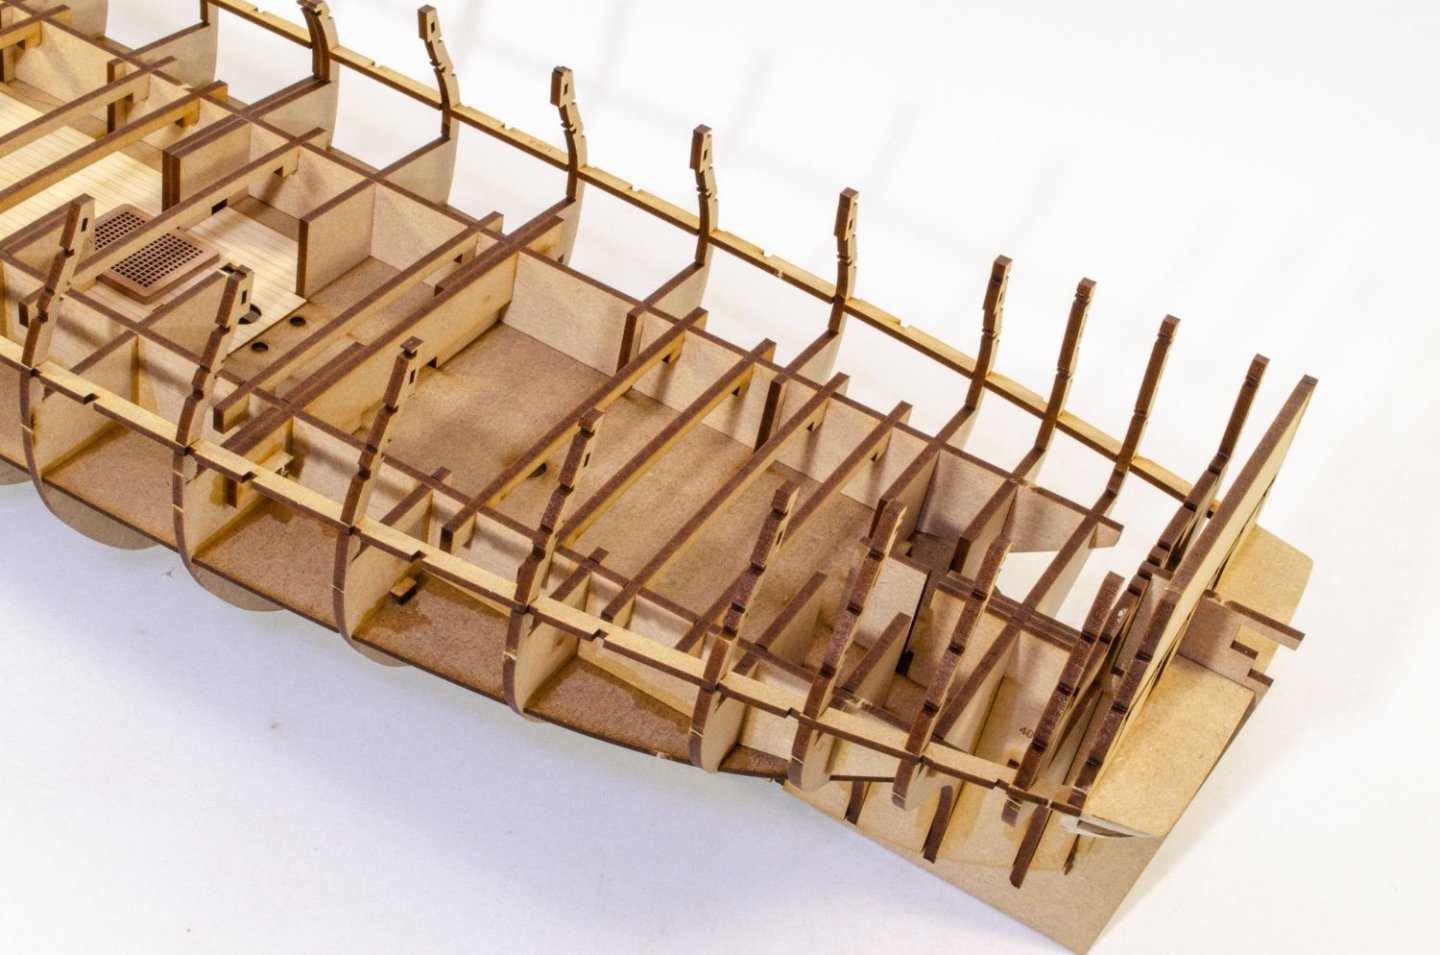
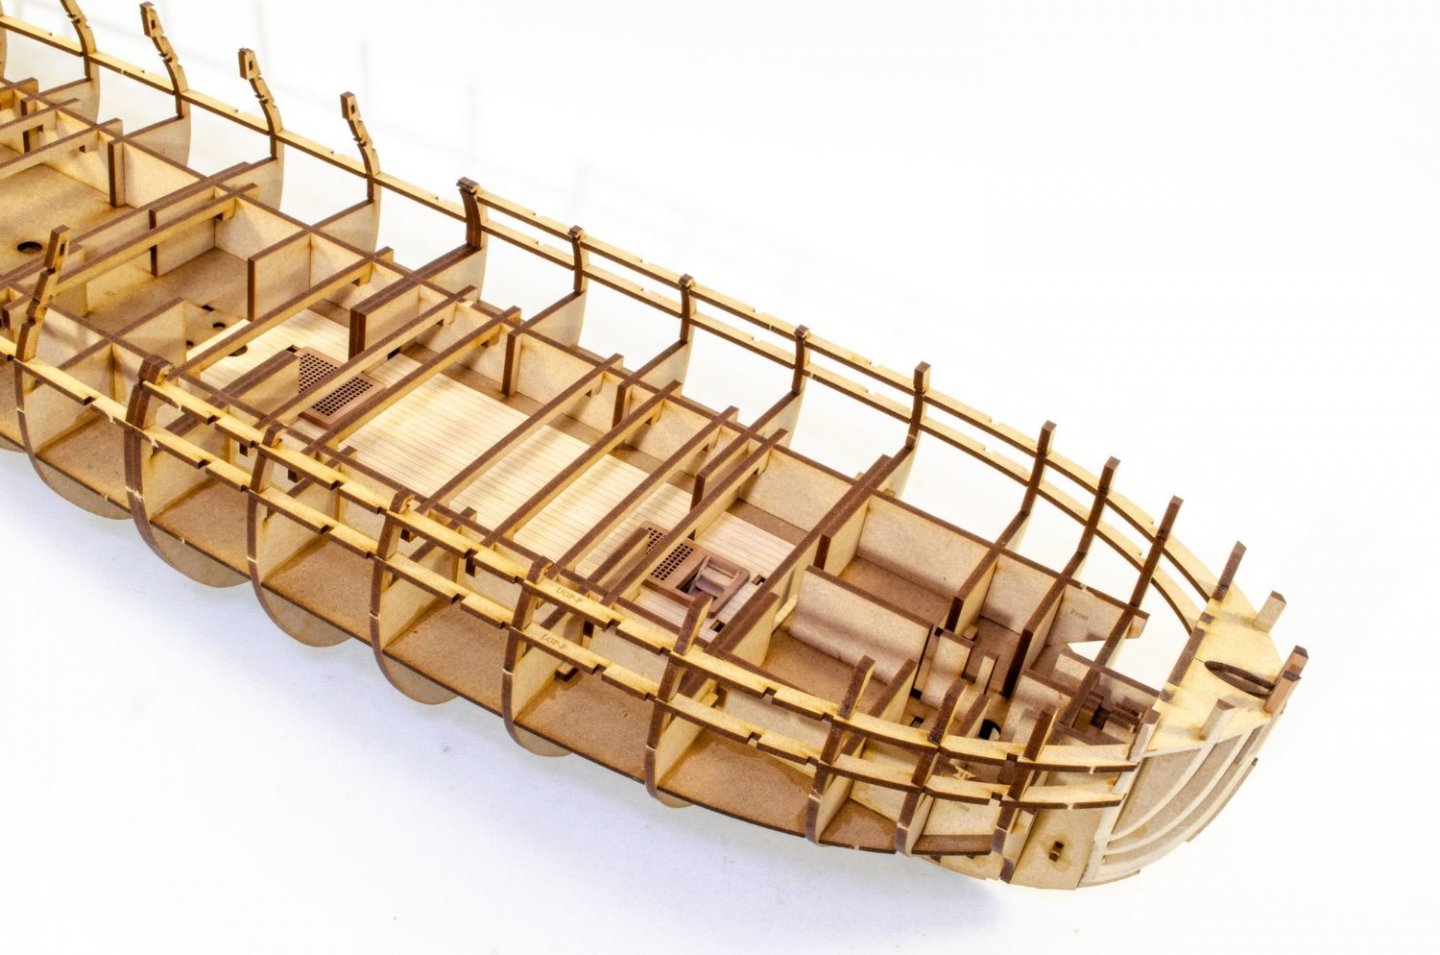
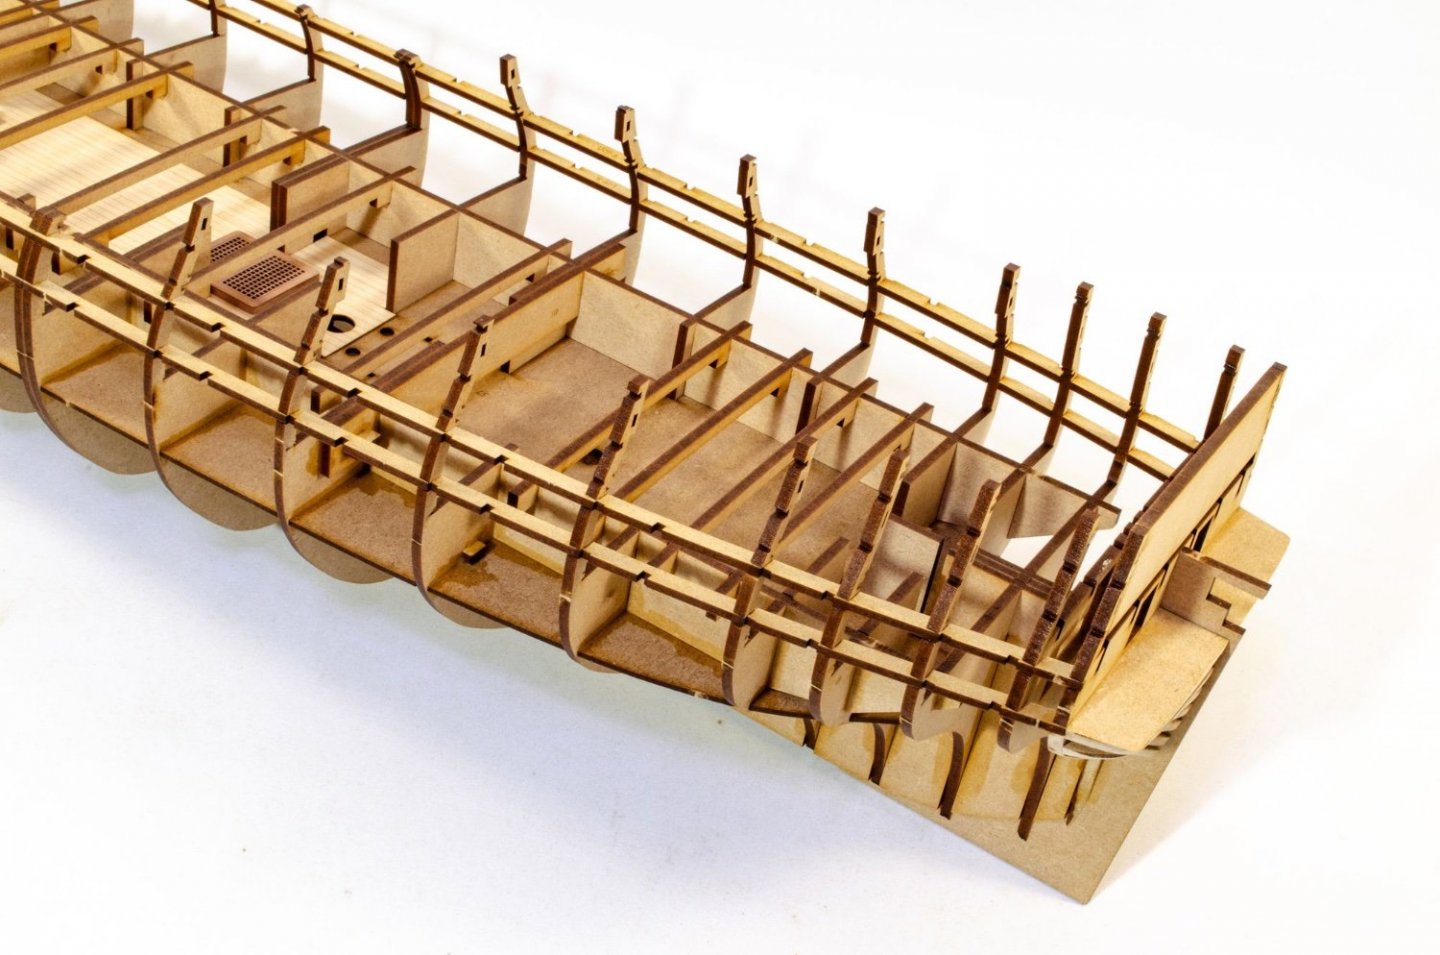
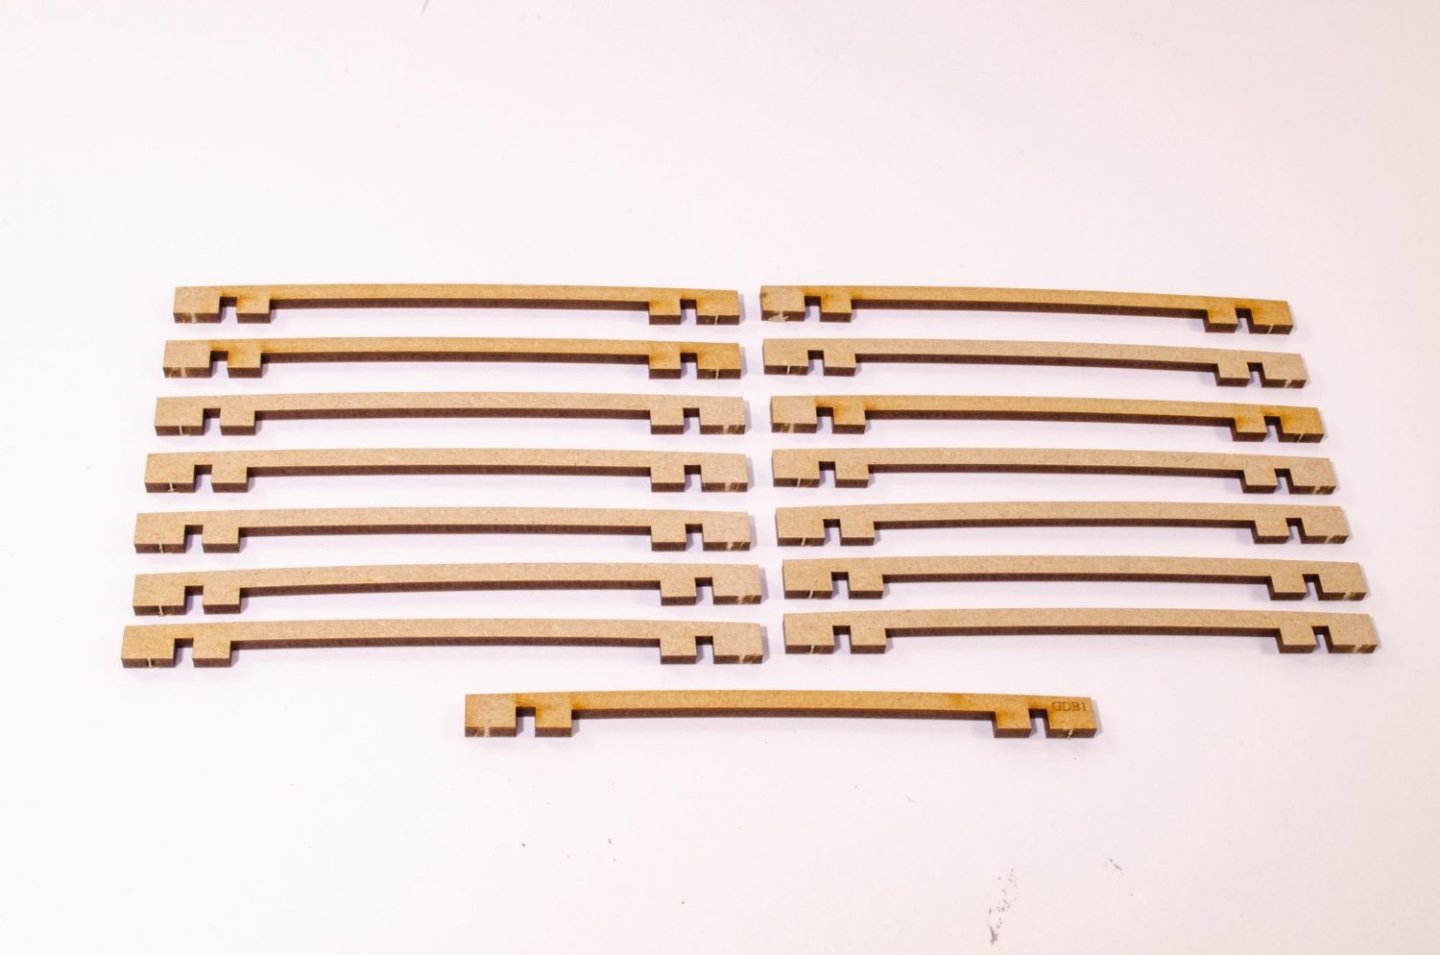
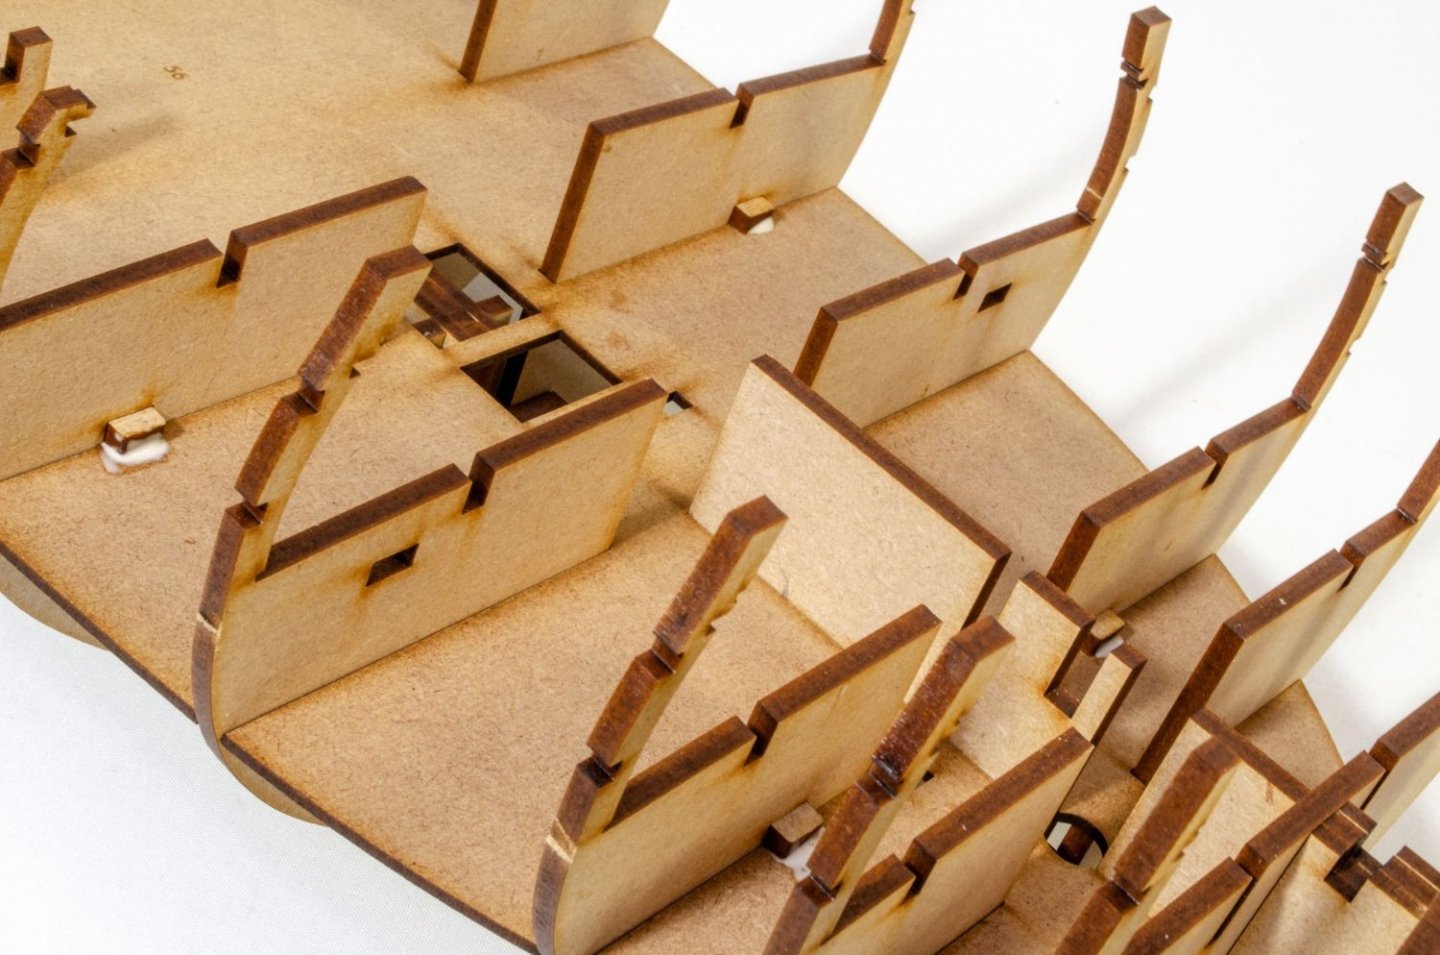
Another update. Not too much to show this time, but there was a lot of work in terms of sanding and waiting for soaked parts to dry before gluing etc. Before I could proceed, I needed to sand the inner bulwarks. This isn't too bad of a job...just time consuming. Despite my pic, you're best rolling the hull onto its side on a towel, and applying pressure downwards when sanding. This is done until everything is nice and even. Each 1mm interior bulwark is split into four easy to manage sections. To lessen any load on the frames, so as not to cause any spread in them, all inner bulwark parts were soaked for 30 mins before clamping into place until dry. These were left 24hrs so they were entirely back to their normal size. Pear swells a lot in water, so it's vital you know, beyond doubt, that there's no swelling left. Once dry, all parts were carefully aligned to the port frames, glued into place, and clamped until set. Provision now needs to be made for the eventual deck beam positioning. This is done using some 2mm MDF frames which slot into the bulkhead beams, above the inner bulwarks. There are two per side. These fit with a nice, reassuring push, but at this stage I don't glue them. A good number of the 6mm pear deck beams and 5mm boat beams are now sotted/hooked over the MDF parts I just installed. This is done to check that the position of those MDF parts are absolutely in the right place. These beams are NOT glued in yet, obviously. At this point I've also reinstated the MDF temporary beams across the quarterdeck bulkheads. Again that's just to make sure every dimension is exactly as designed. Once happy with everything, the MDF deck beam mounts are brush glued into place. Lastly, the pear beams are removed and carefully put away somewhere safe. The temporary MDF beams remain in place to help me with the hull fairing, and that's the next job. That's all for now.


- 488 replies
-
- 42
-
-

-
- Indefatigable
- Vanguard Models
- (and 1 more)
-
What does...
James H replied to Gregory's topic in Using the MSW forum - **NO MODELING CONTENT IN THIS SUB-FORUM**
That's because that's not new content. If there is any topic within those forum areas which is new, the main forum area will show the 'NEW' text. Not everything has to be new. -
What does...
James H replied to Gregory's topic in Using the MSW forum - **NO MODELING CONTENT IN THIS SUB-FORUM**
It means there's new content in those areas since your last visit. -
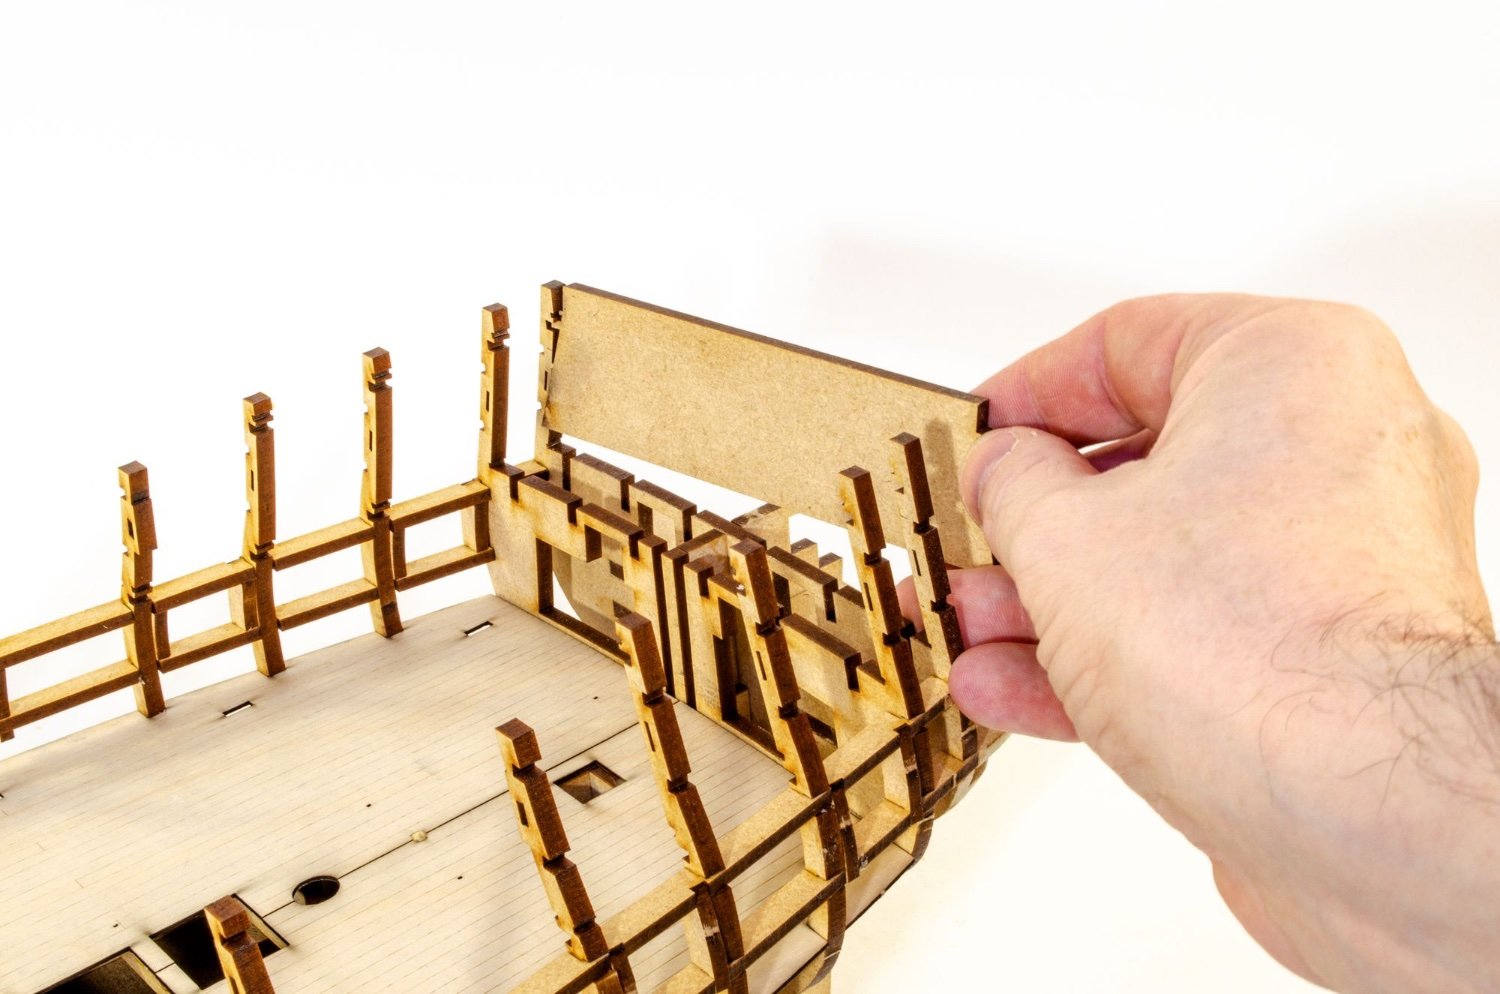
I'd fair those filler blocks in a little more between the bulkheads. They shouldn't be standing proud of the bulkheads as they do.
- 73 replies
-
- 5
-
-
- Sphinx
- Vanguard Models
- (and 1 more)
-
You're doing a great job of Sphinx. You'll notice some design similarities to Indefatigable.
- 73 replies
-
- 2
-
-
- Sphinx
- Vanguard Models
- (and 1 more)
-
Sort of. The bench pics Chris sends me are usually of 2 or 3 test fits, sometimes with different sequences. I spend a lot of time going through many hundreds of photos and working out what I think is the best order of doing things, especially as the parts I've been sent often differ to the ones in the photos. Those differences are little things like the inner bulwarks changing from 3 parts per side to 4 parts, and other more constructional changes. Sequence changes and suggested modifications to parts are then looked at, and you then see the results here.
- 488 replies
-
- 23
-
-
-
- Indefatigable
- Vanguard Models
- (and 1 more)
-
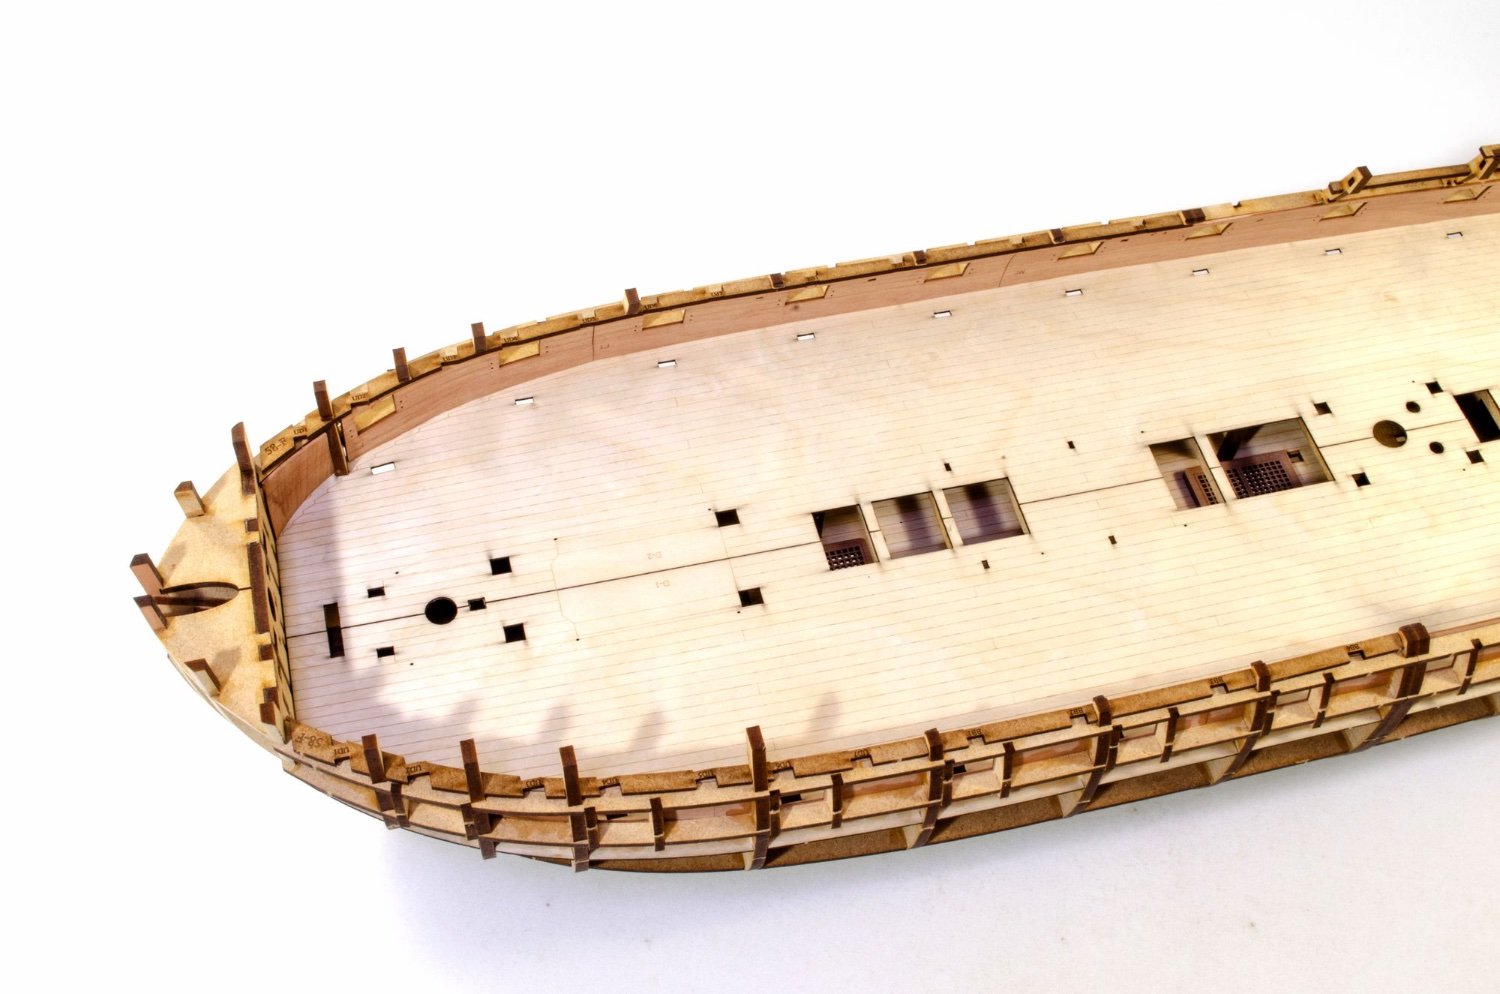
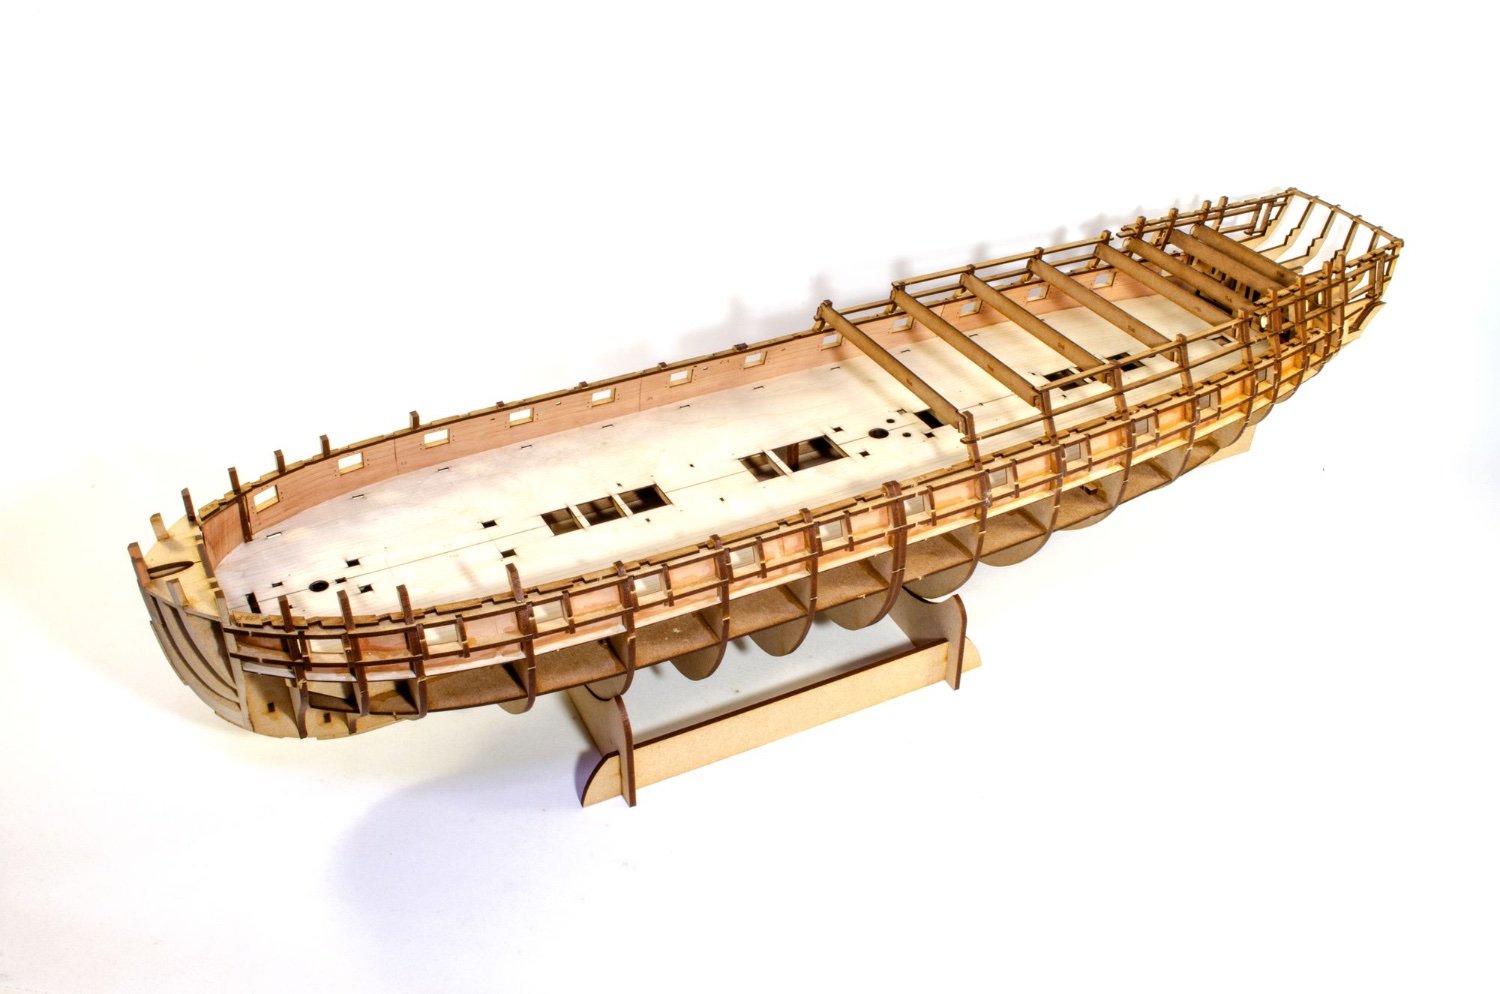
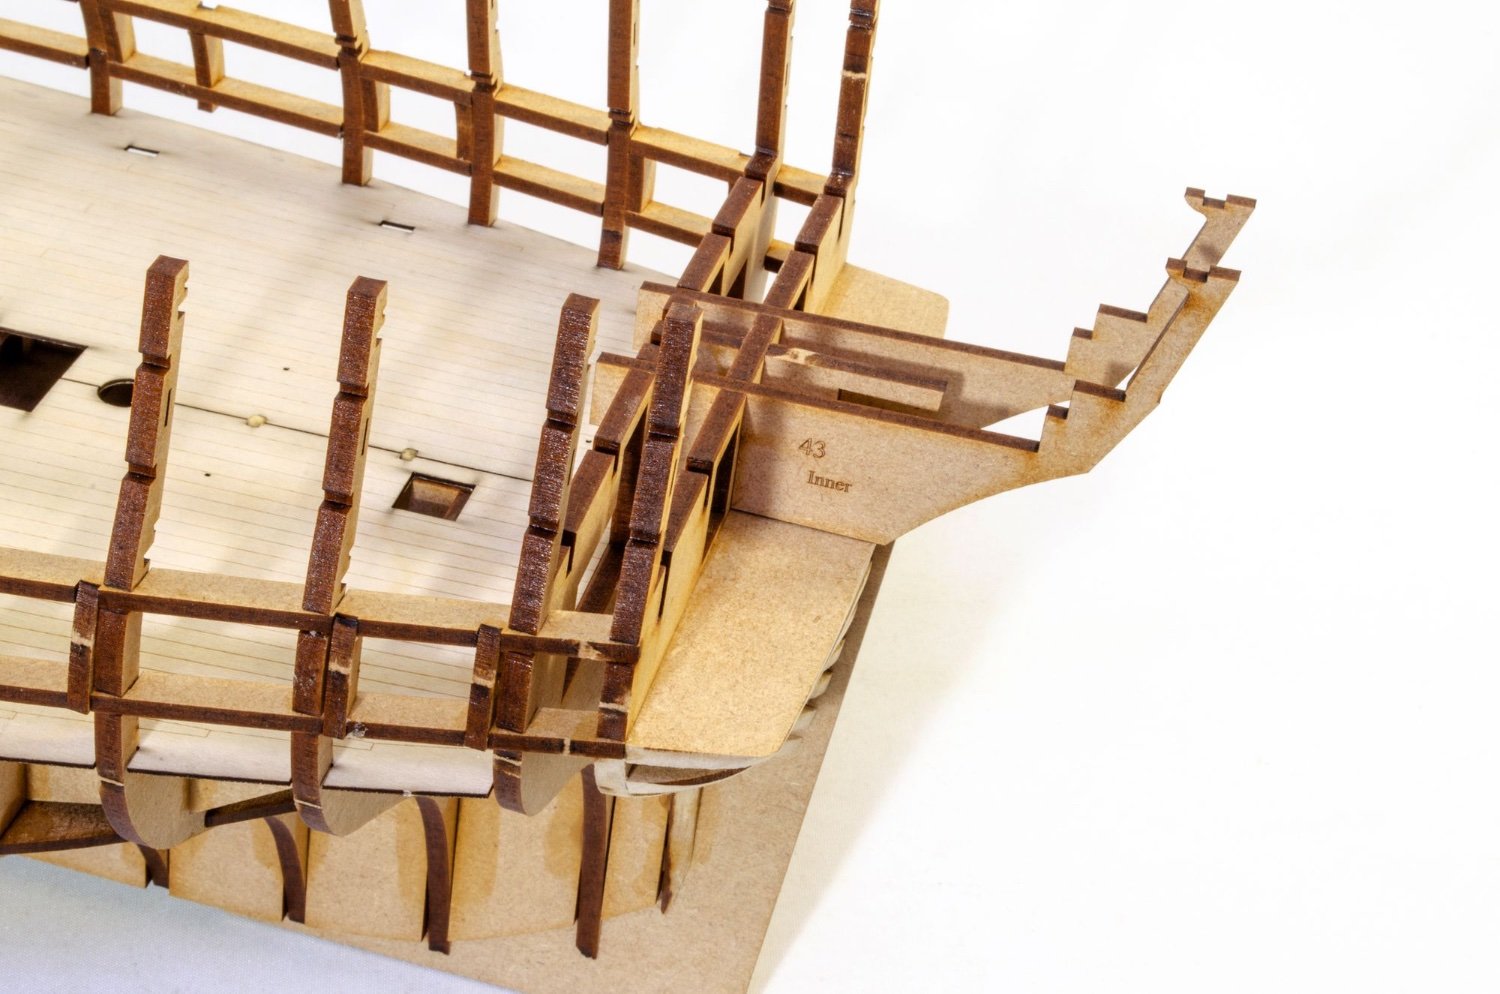
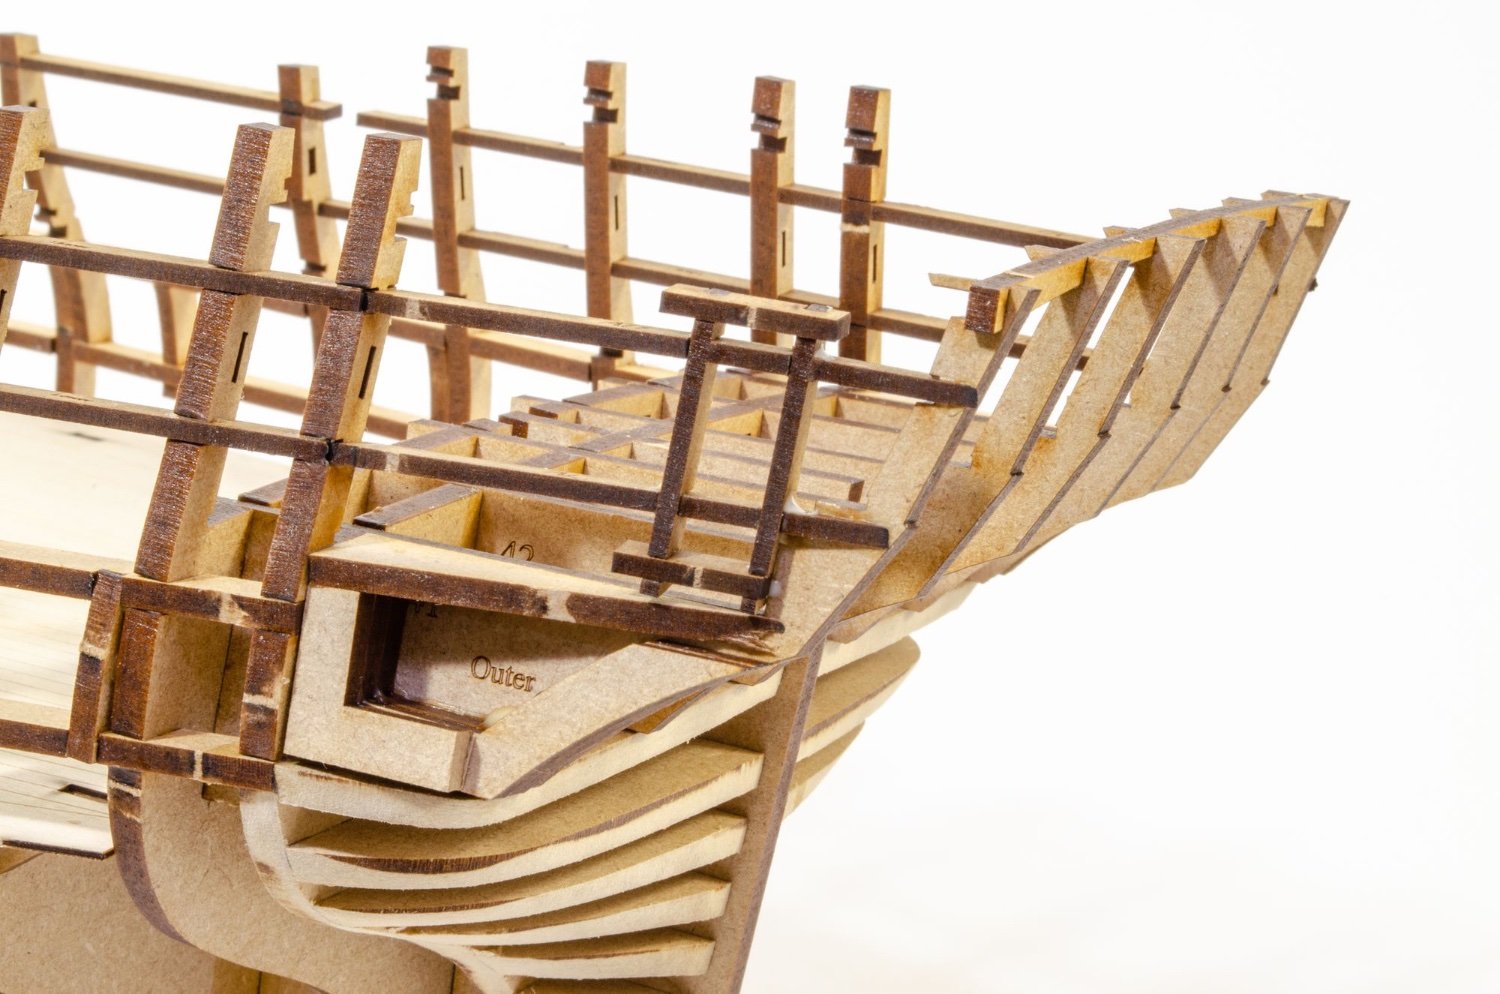
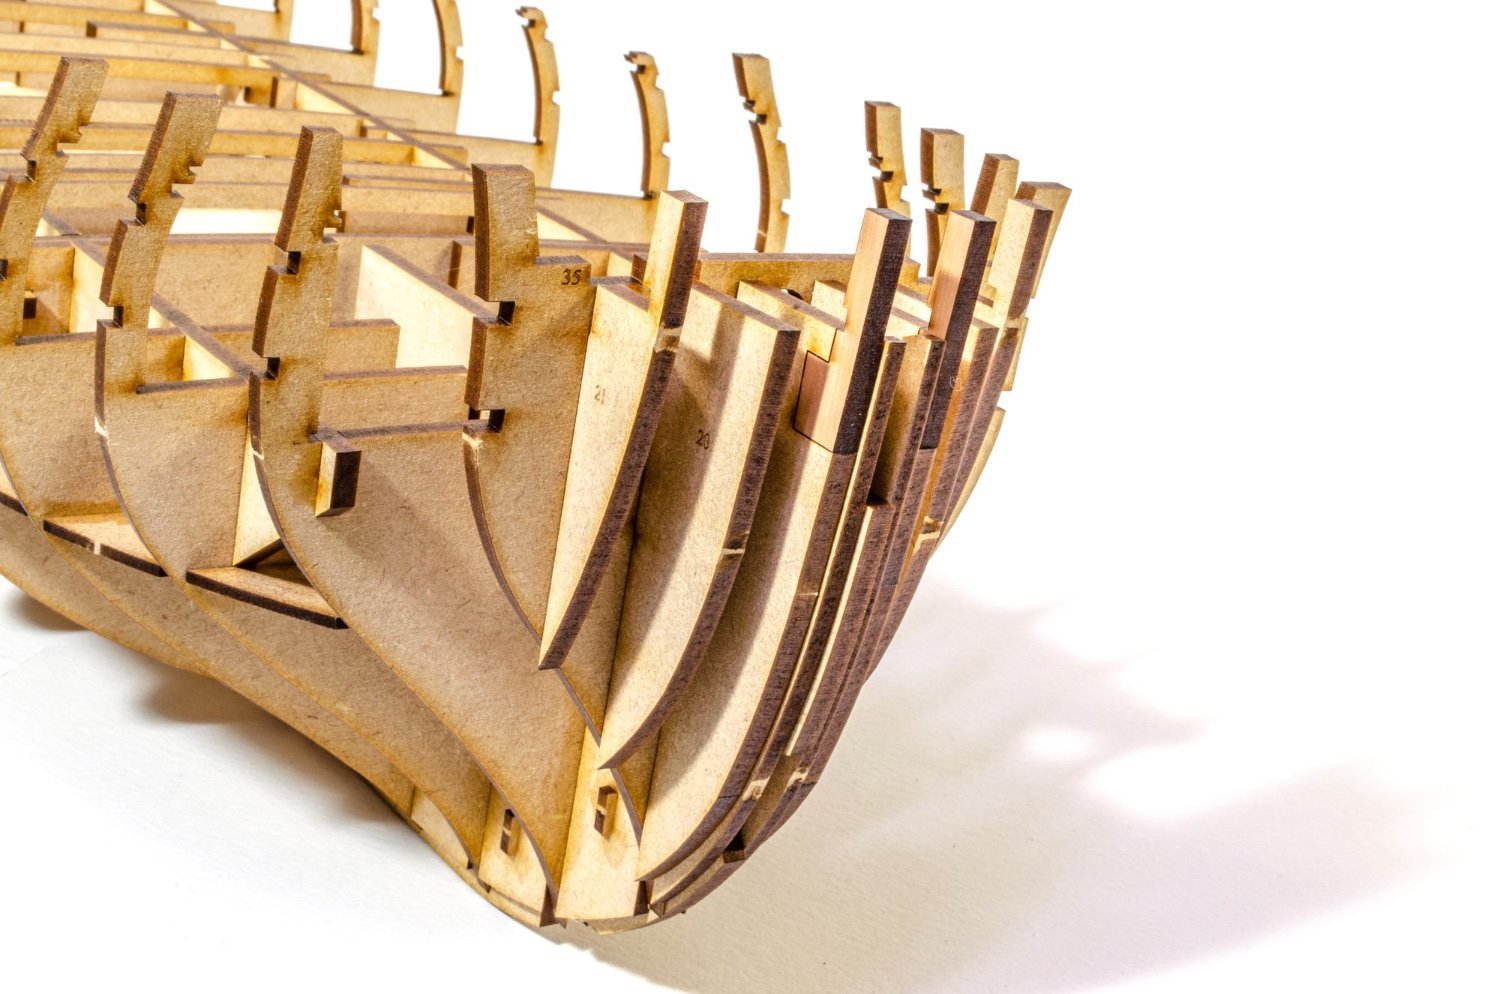
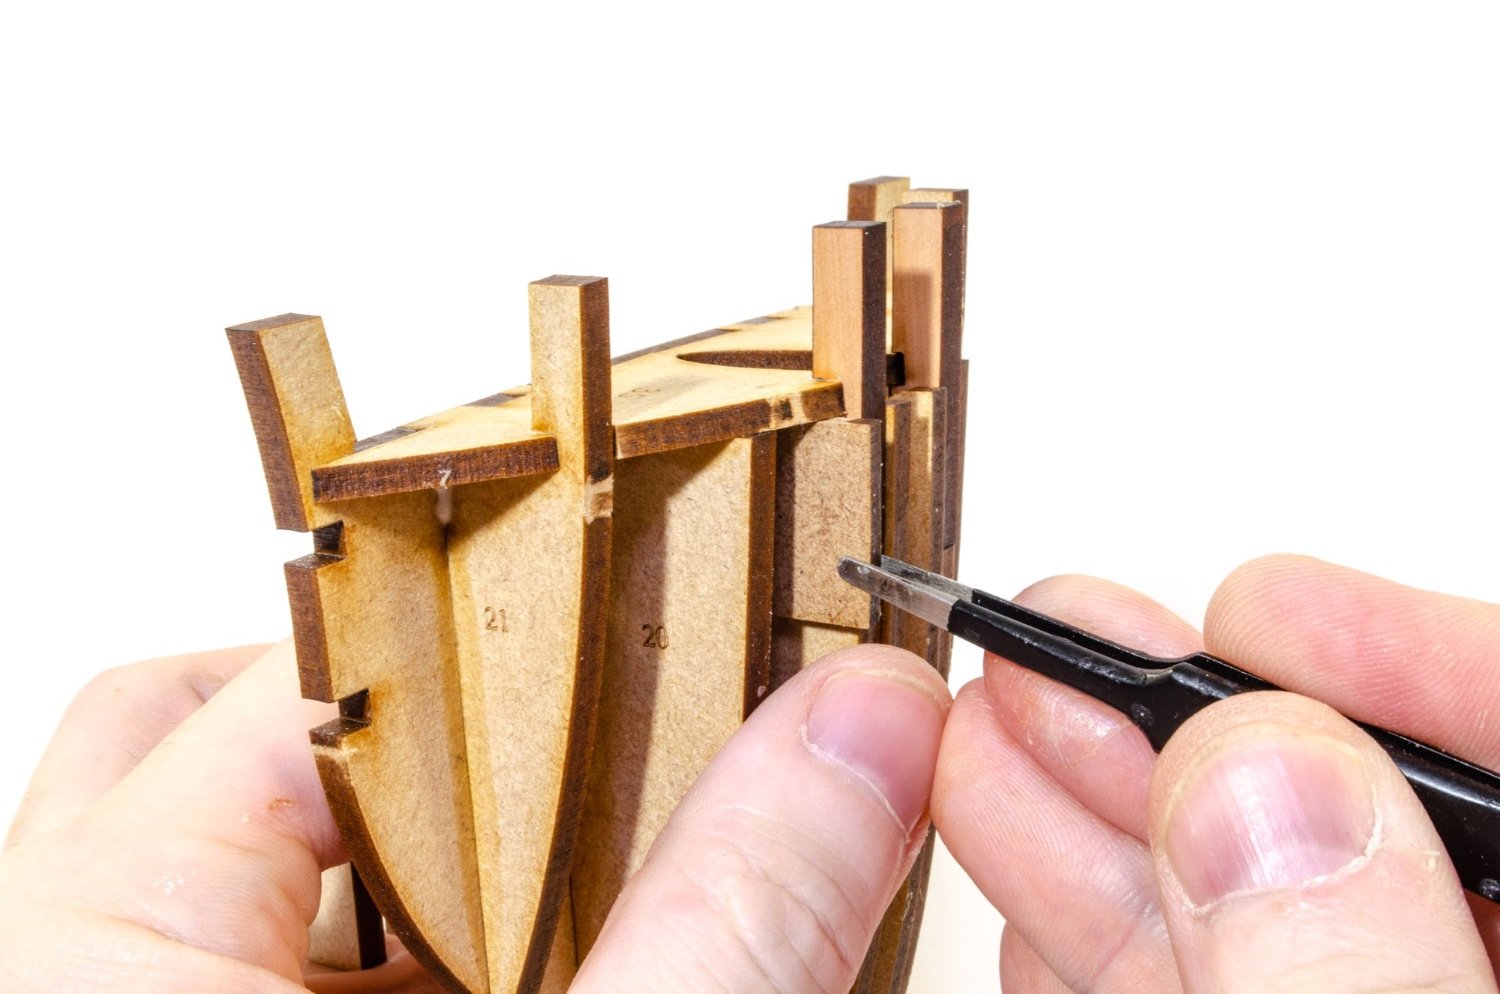
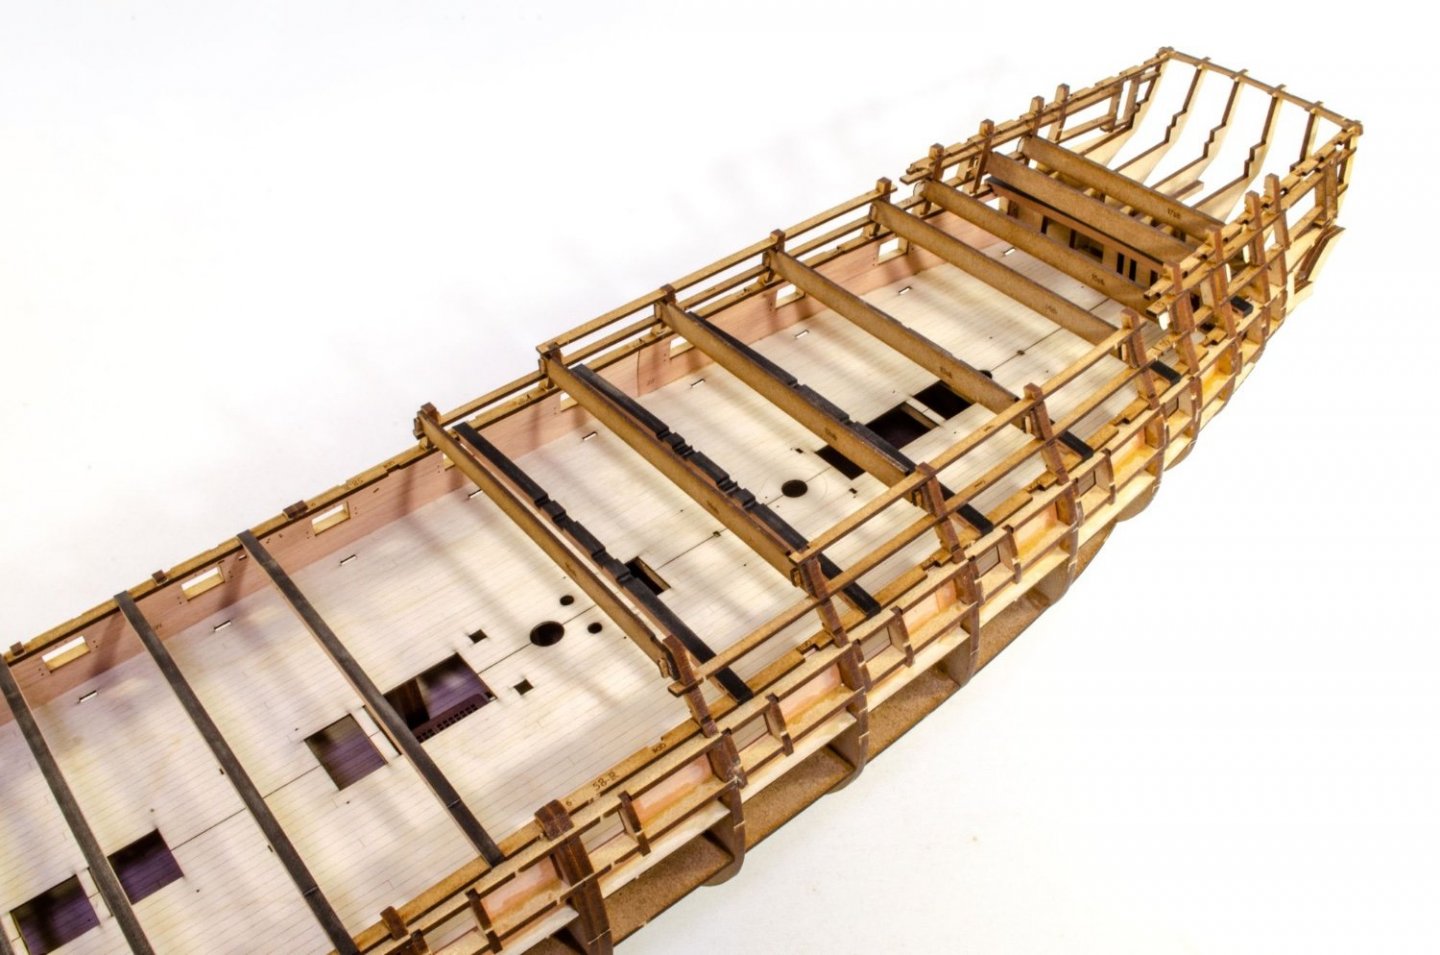
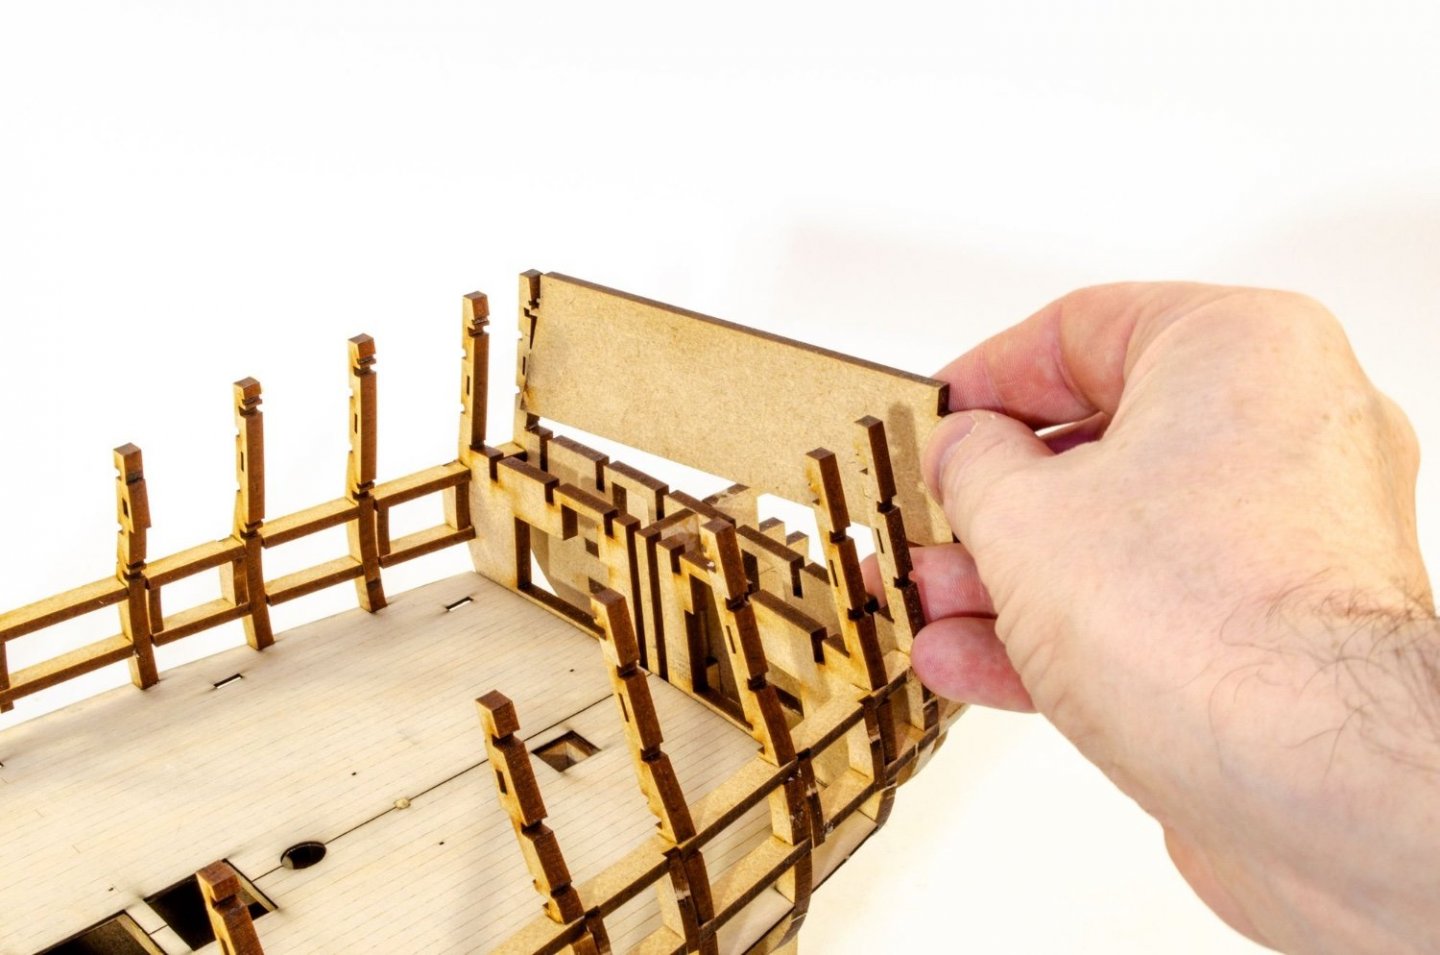
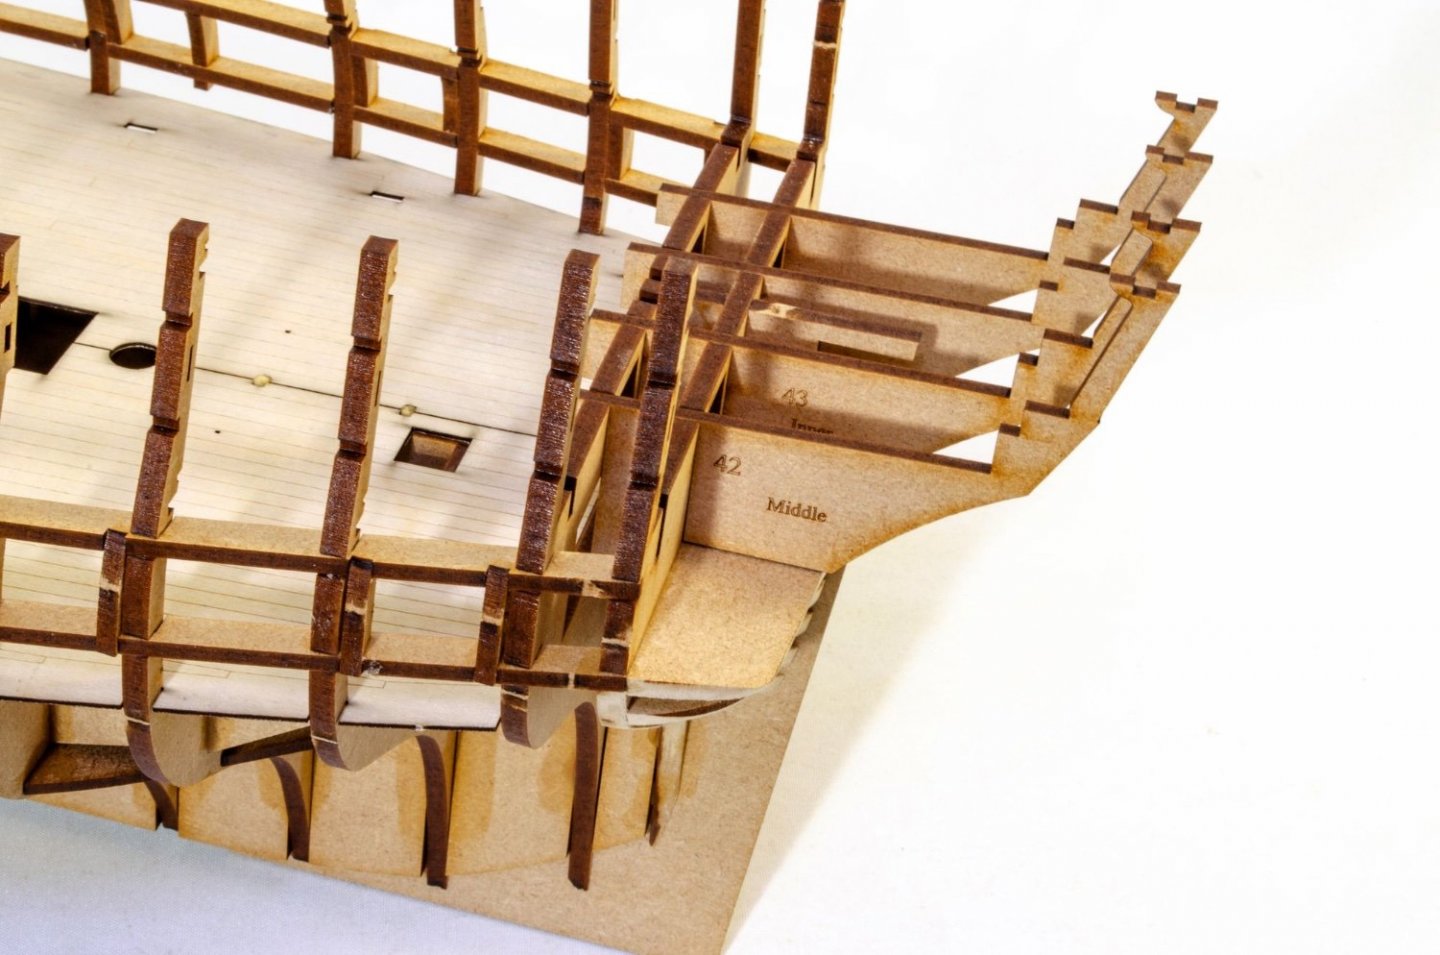
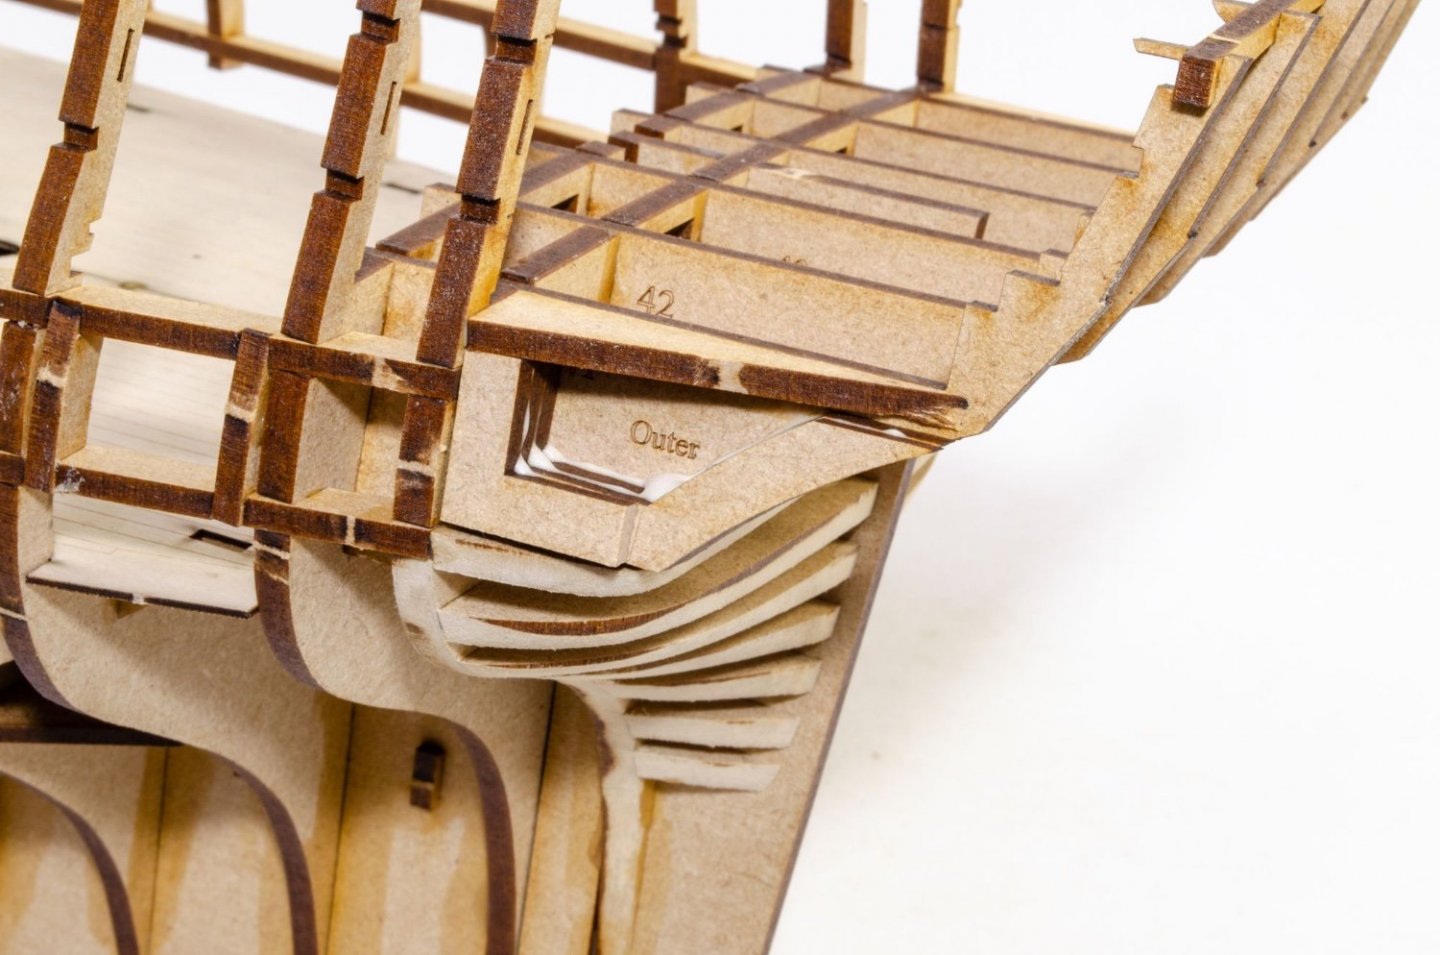
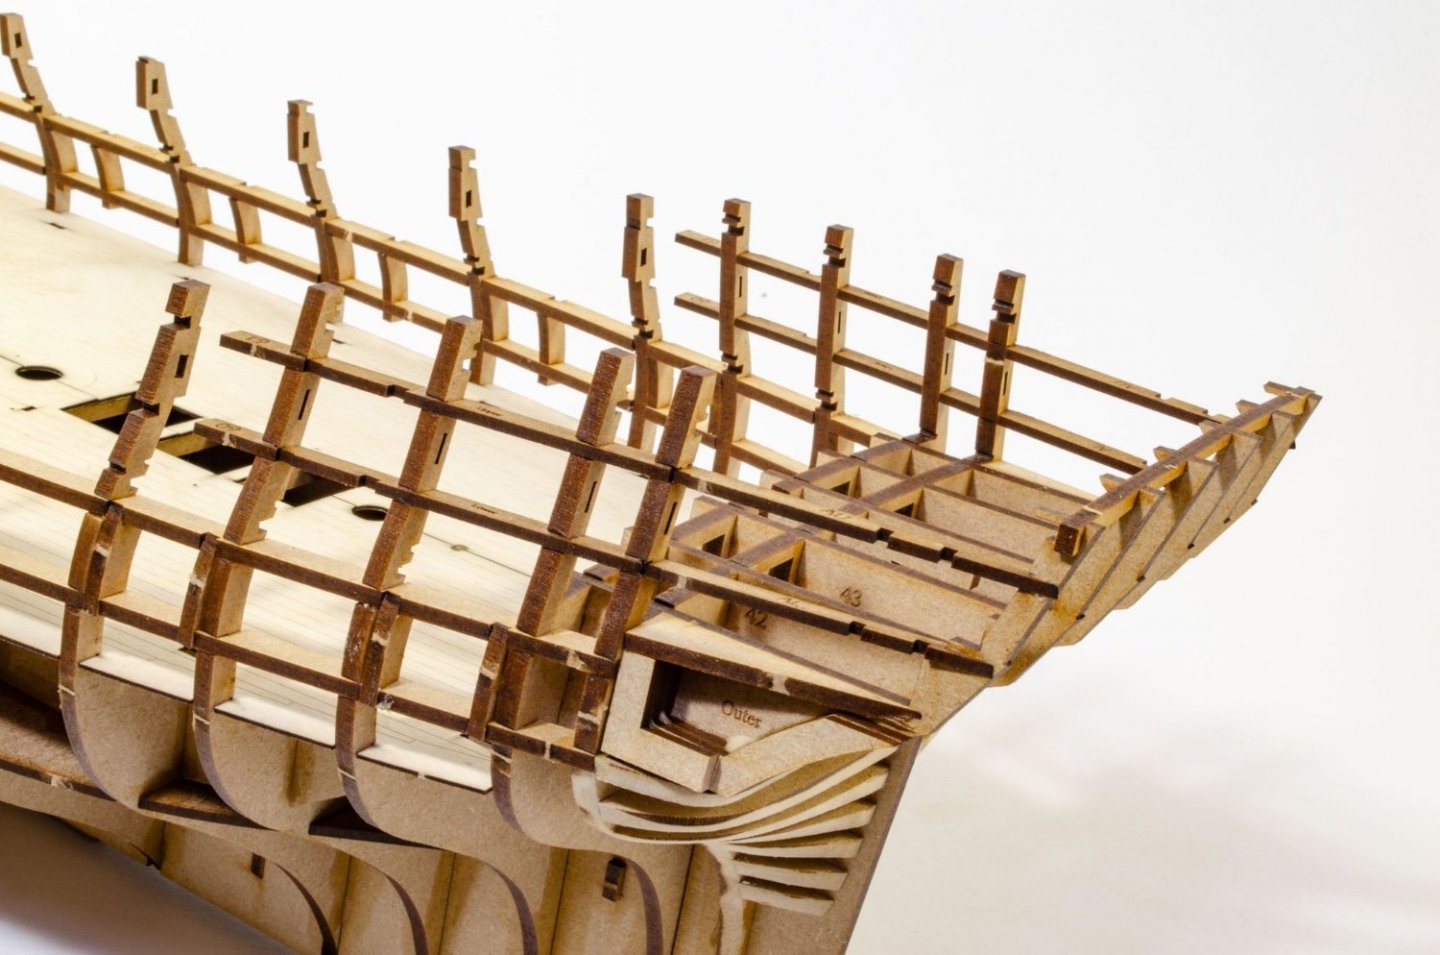
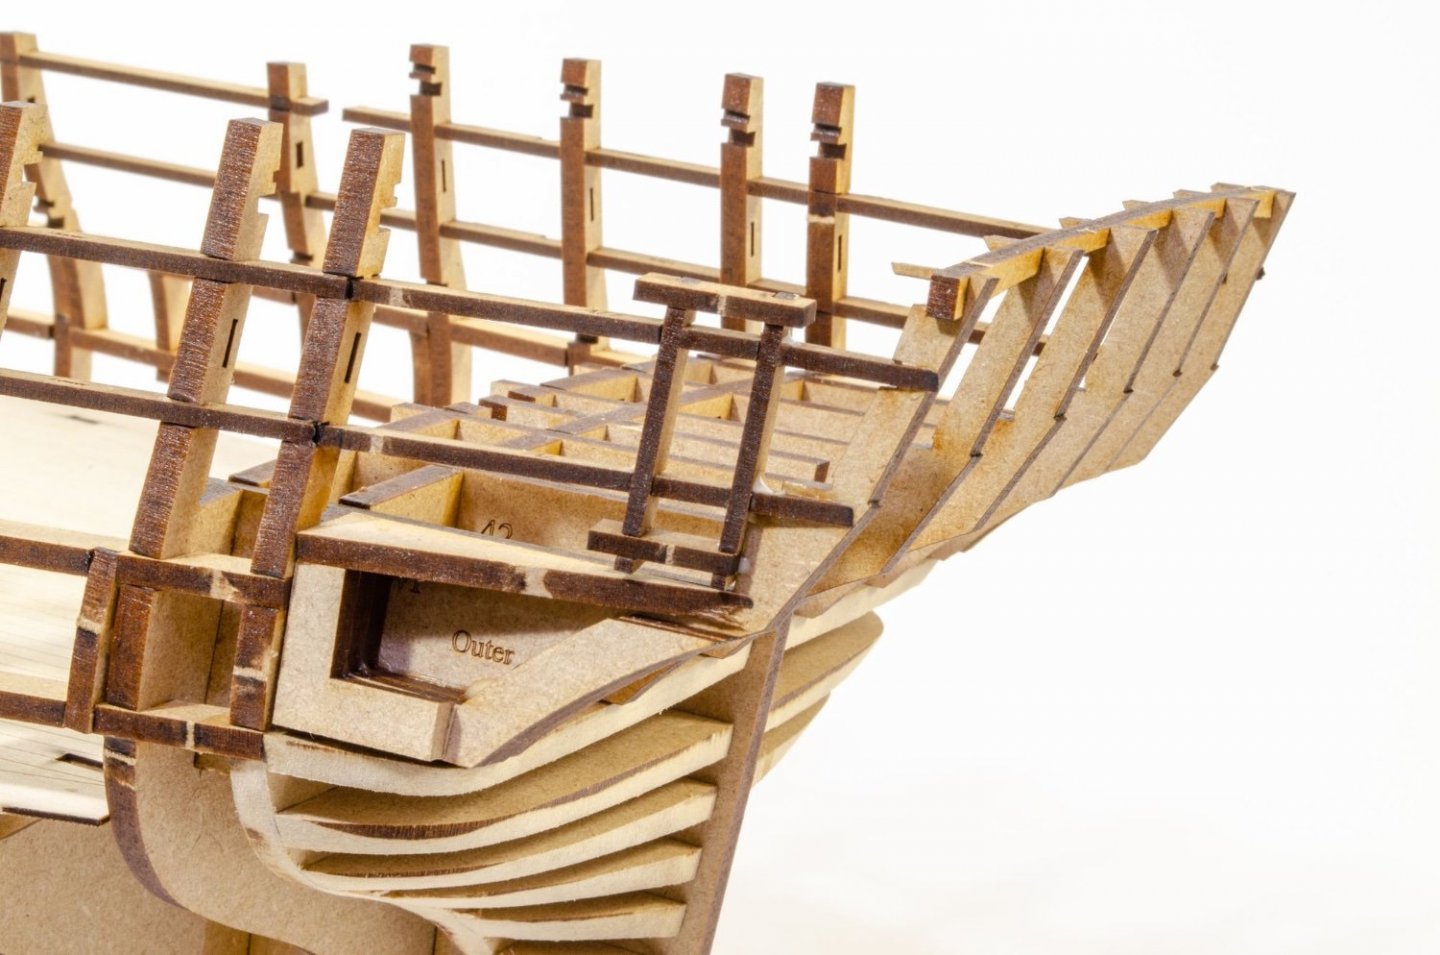
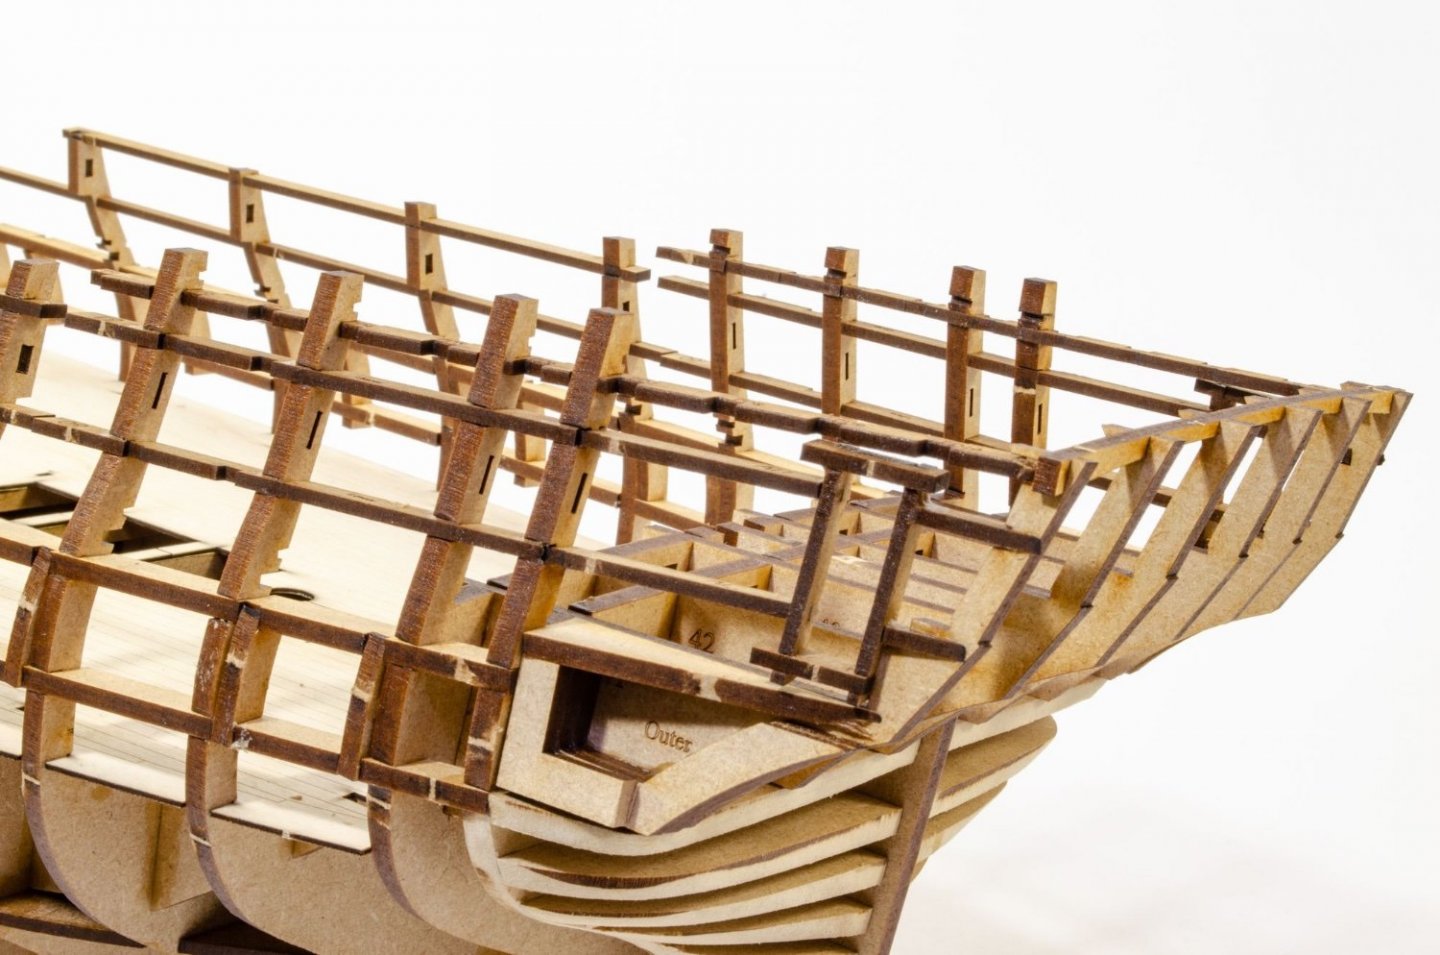
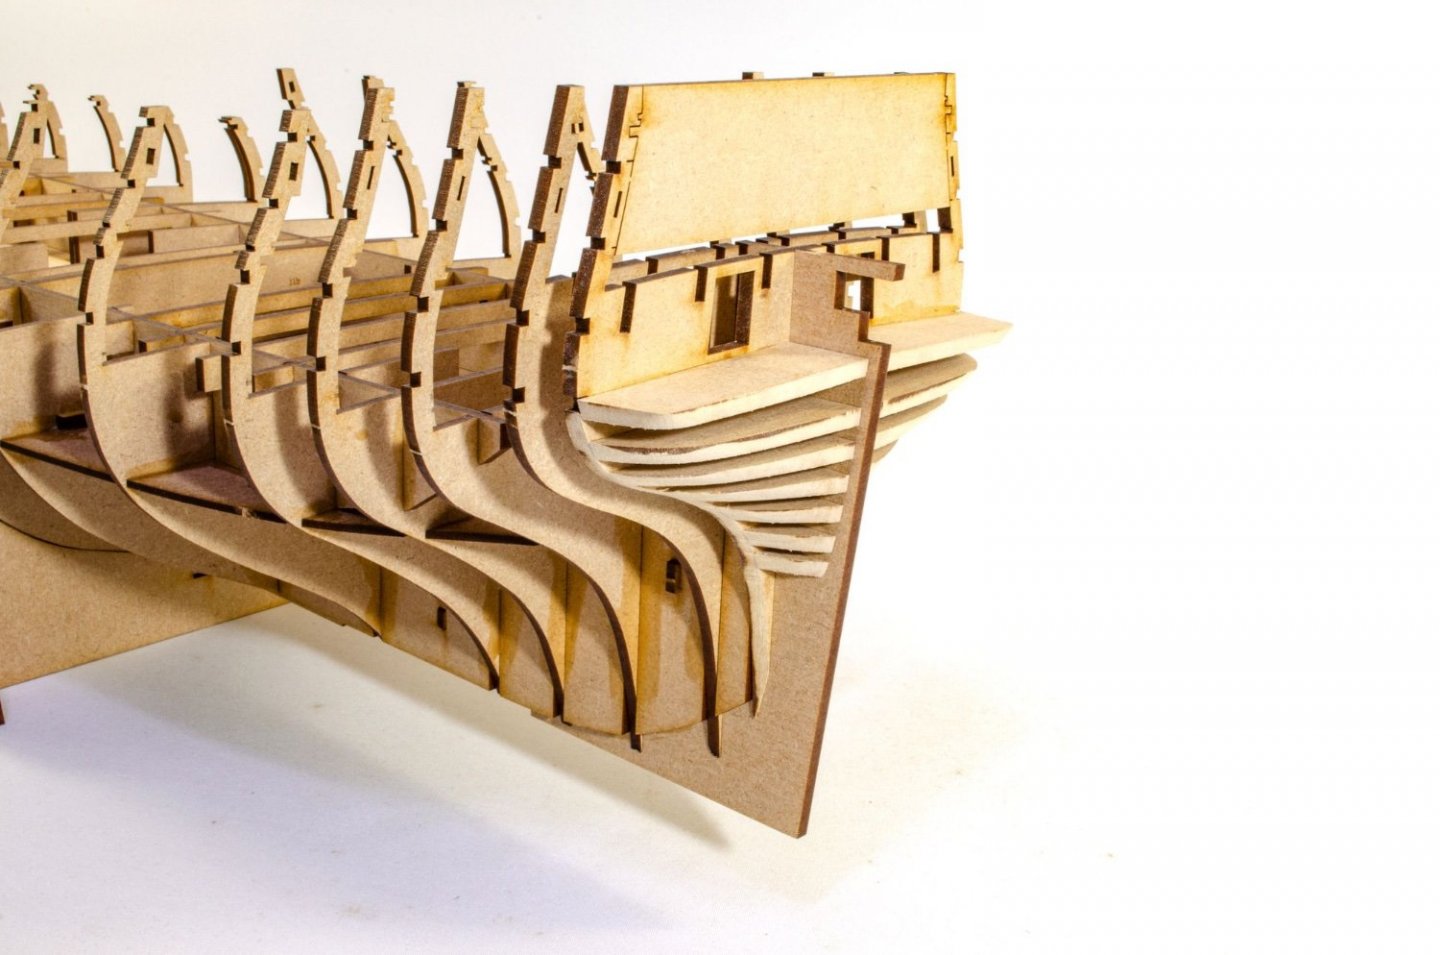
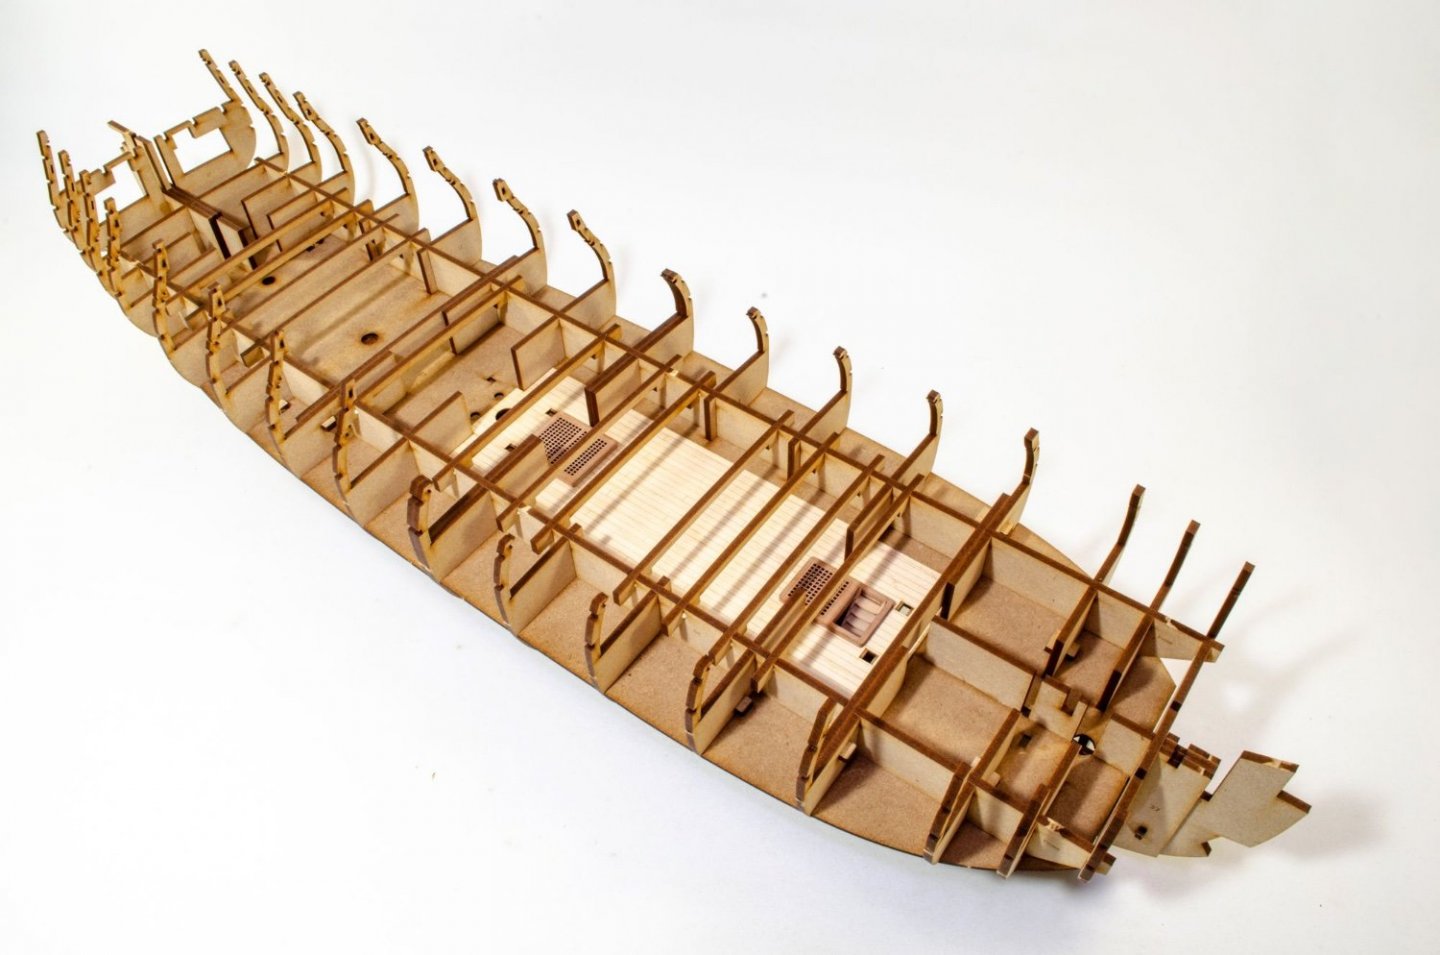
Continuing today's update: Time to get rid of that blank section in the last bulkhead. That was there to protect the bulkhead while work was being done on it with shaping the stern. A gentle twisting removes this from the hull. Time for the stern timbers to be fitted. These slot across the rear two bulkheads, creating the correct angles for the parts. They also sit on the shaped stern upper block. First the inners, then the middles, followed by the outers. Some filler blocks are now added to the outside of the outer timbers, creating the rest of the platform and something to plank to also. Those fragile rear bulkhead ears are now bolstered with the addition of more longitudinal strips, all slotted to fit. The gap you see between some of them is to house the fore bulkhead screen. That's designed so you get zero gaps. You'll see that later in the build. Door frames are added from the captain's cabin to where the quarter galleries will eventually fit. Once dry, the inner horizontal parts of the frames are cut out. Part of bulkhead 18's ear is now cut out as this is the only one that would obstruct the gun port. That is sawn out and filed flush before the last gun port frames are glued in. To create a rigid structure for fairing, the rear of the hull has some temporary MDF sections that are held in place with pegs. These are totally solid and shouldn't come loose. And that is it for today. I'm whacked!


- 488 replies
-
- 50
-
-
-
- Indefatigable
- Vanguard Models
- (and 1 more)
-
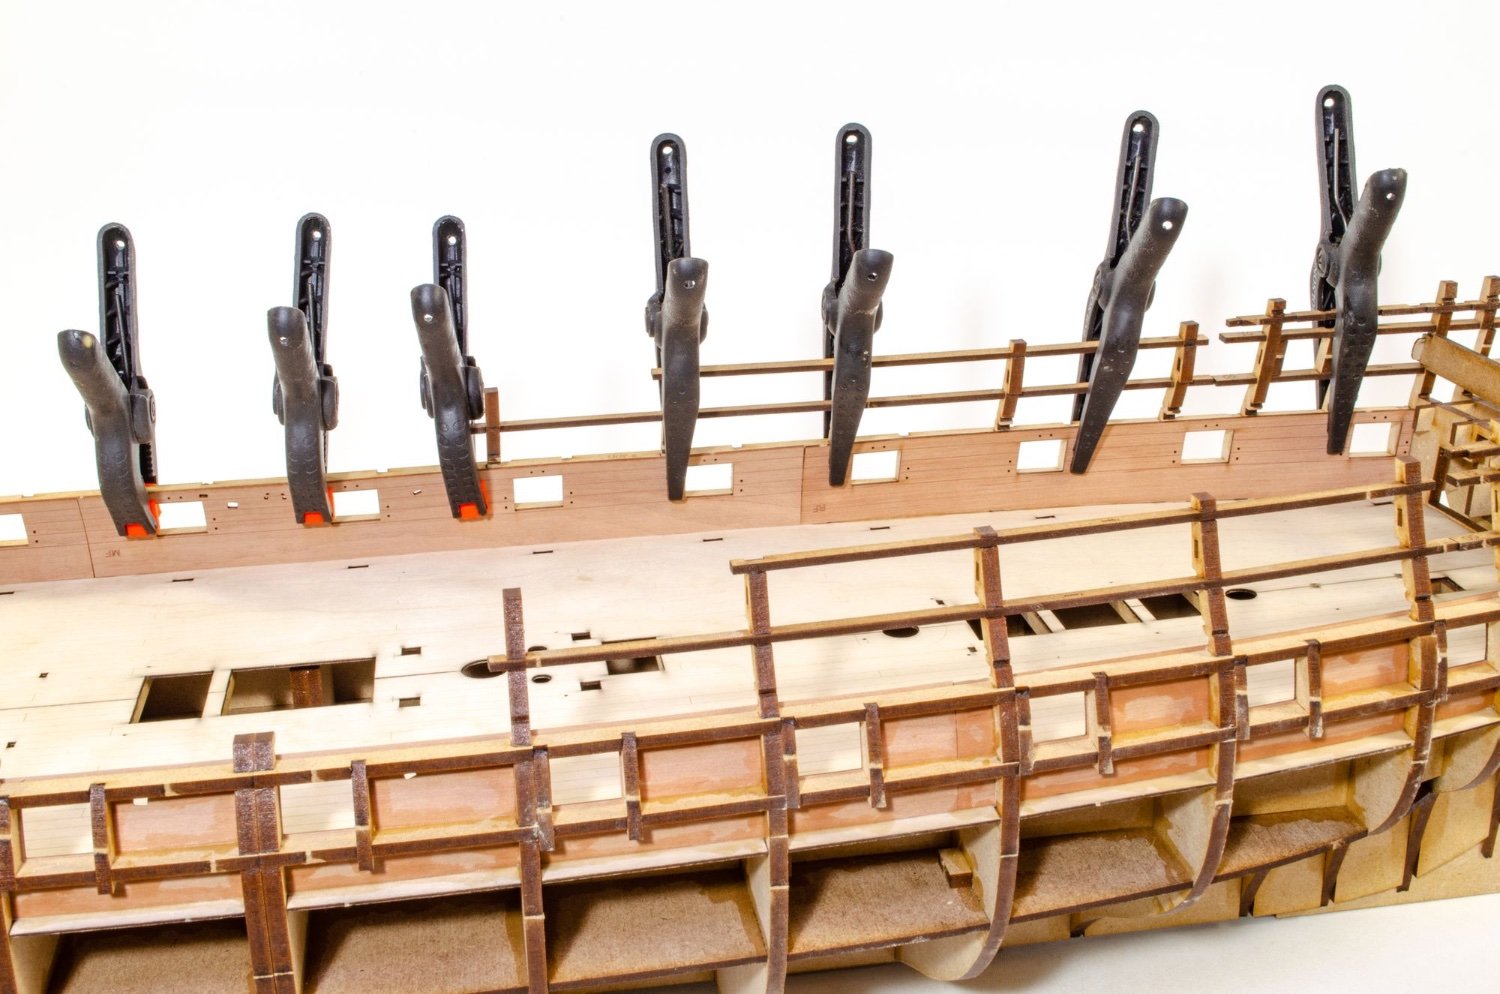
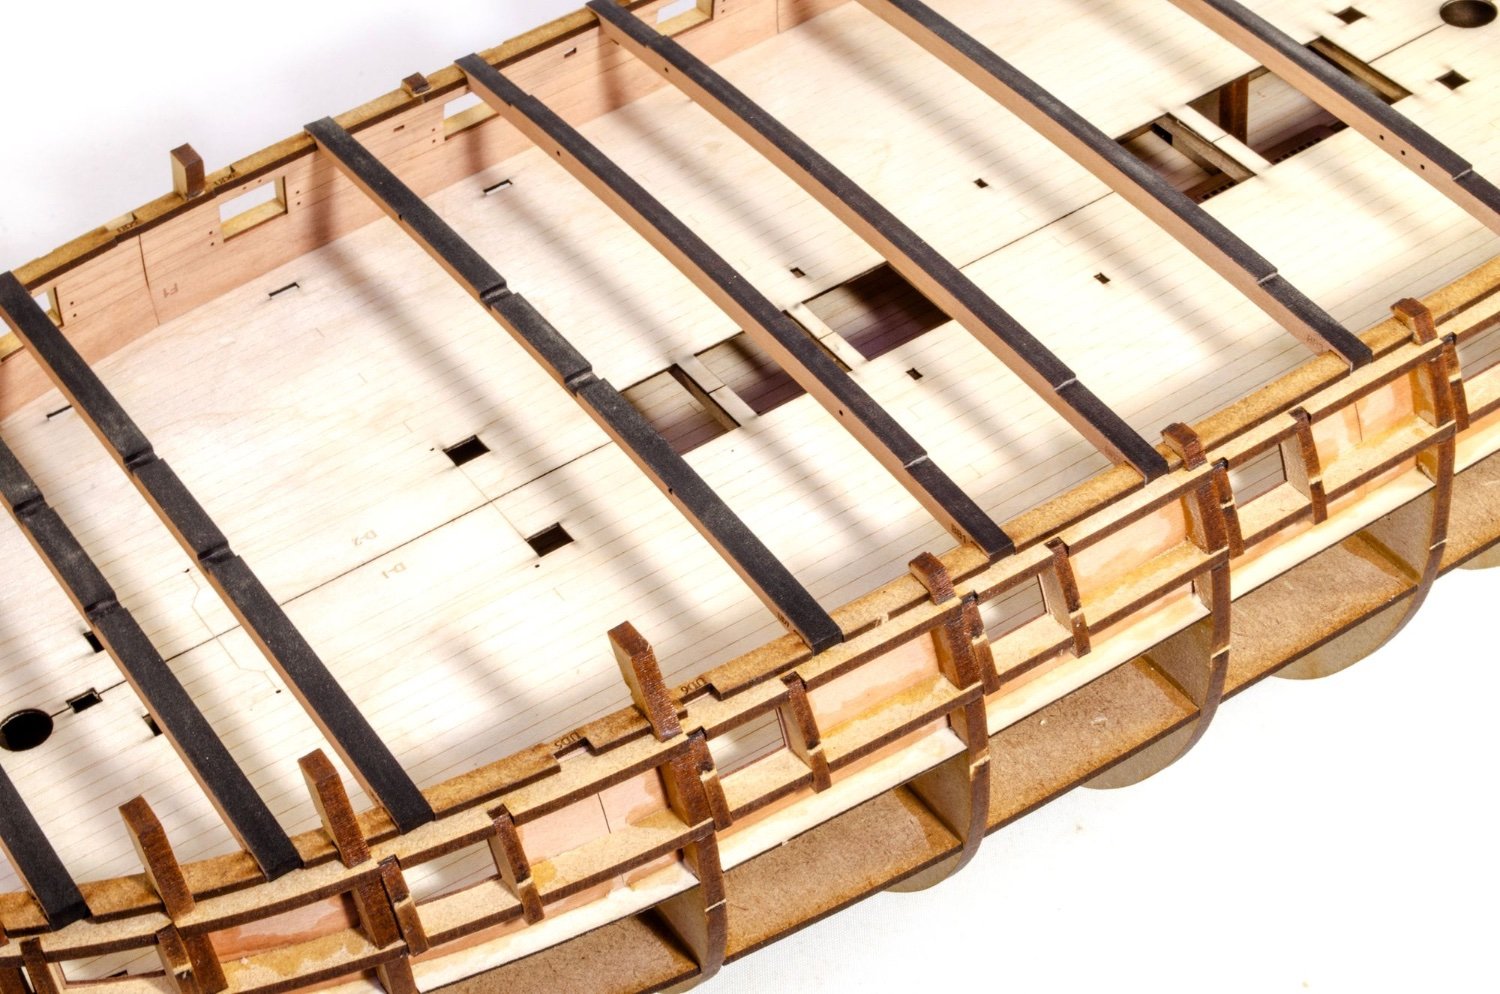
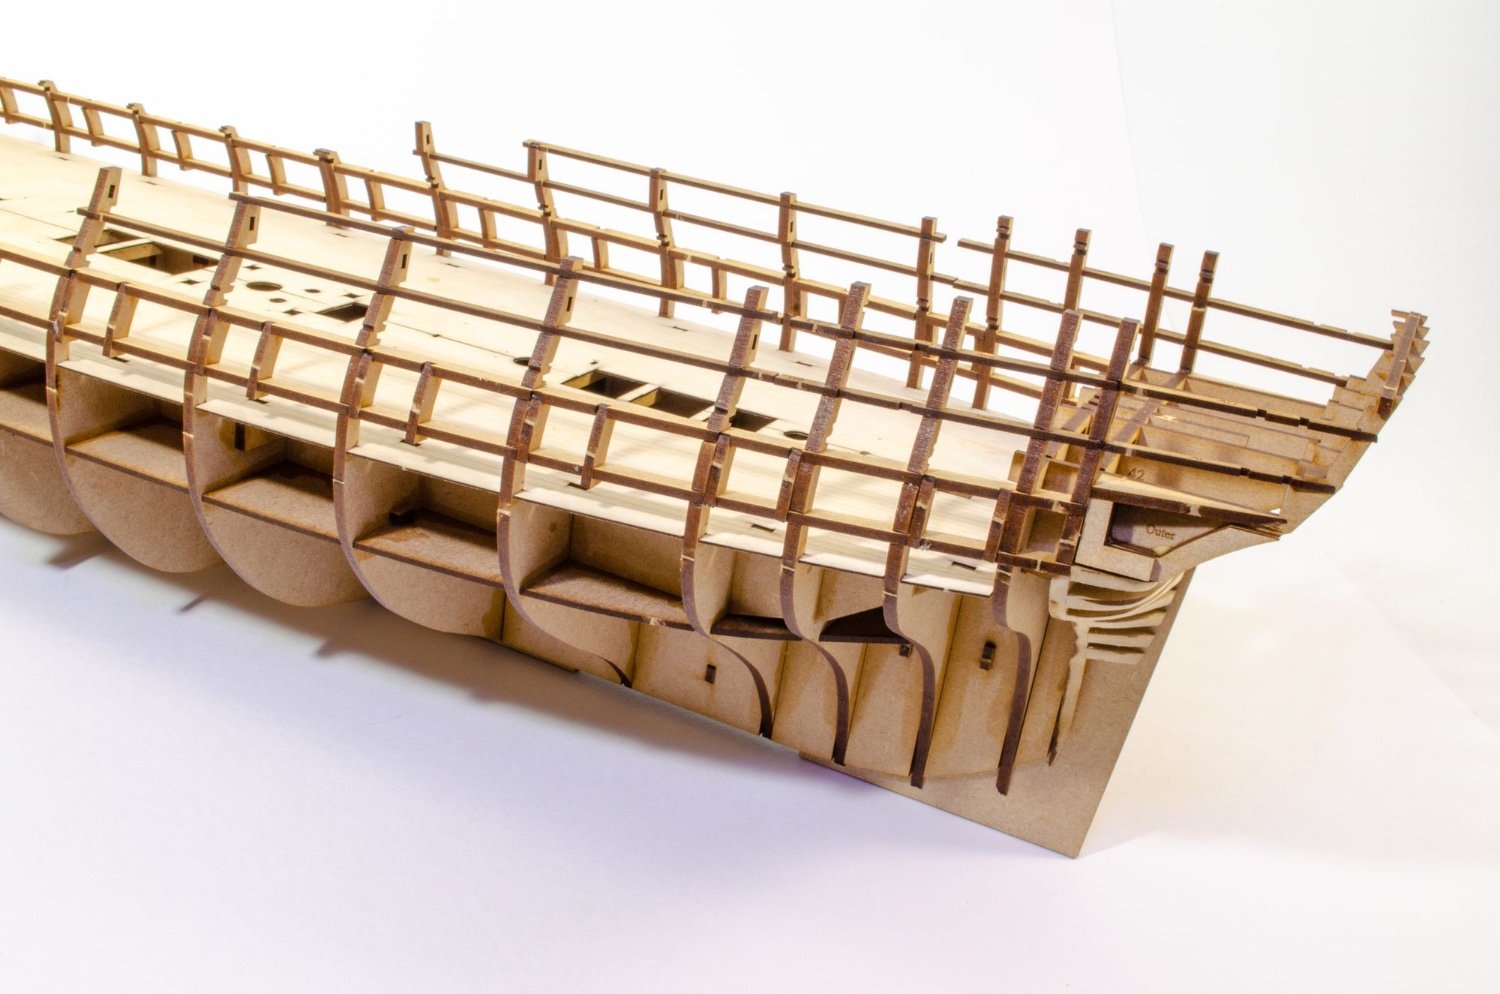
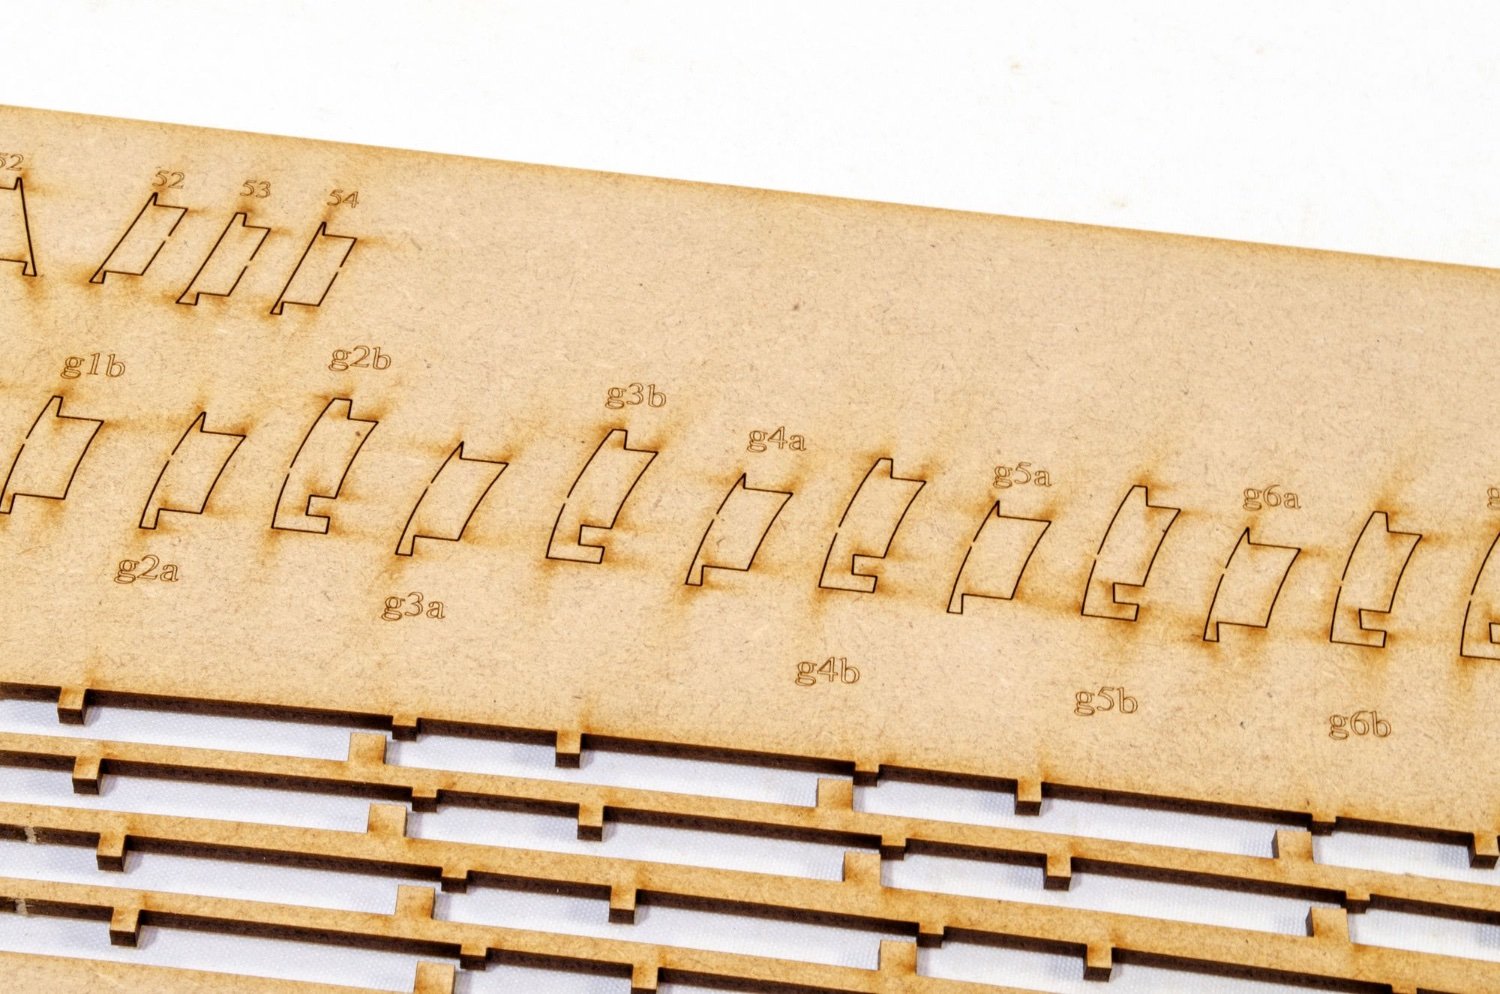
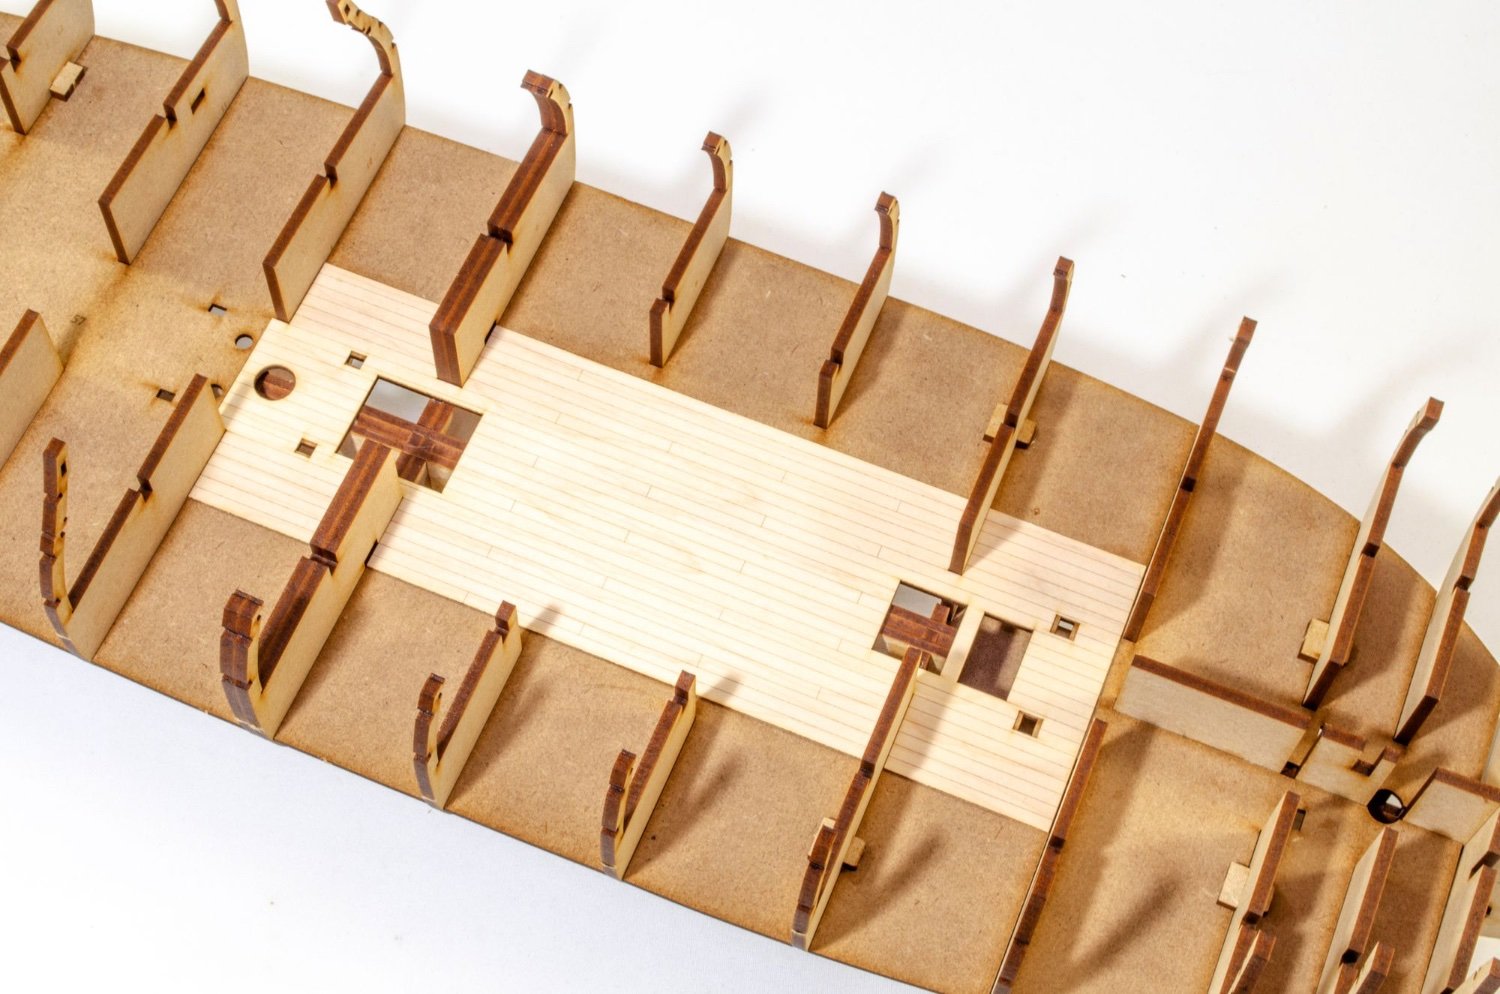
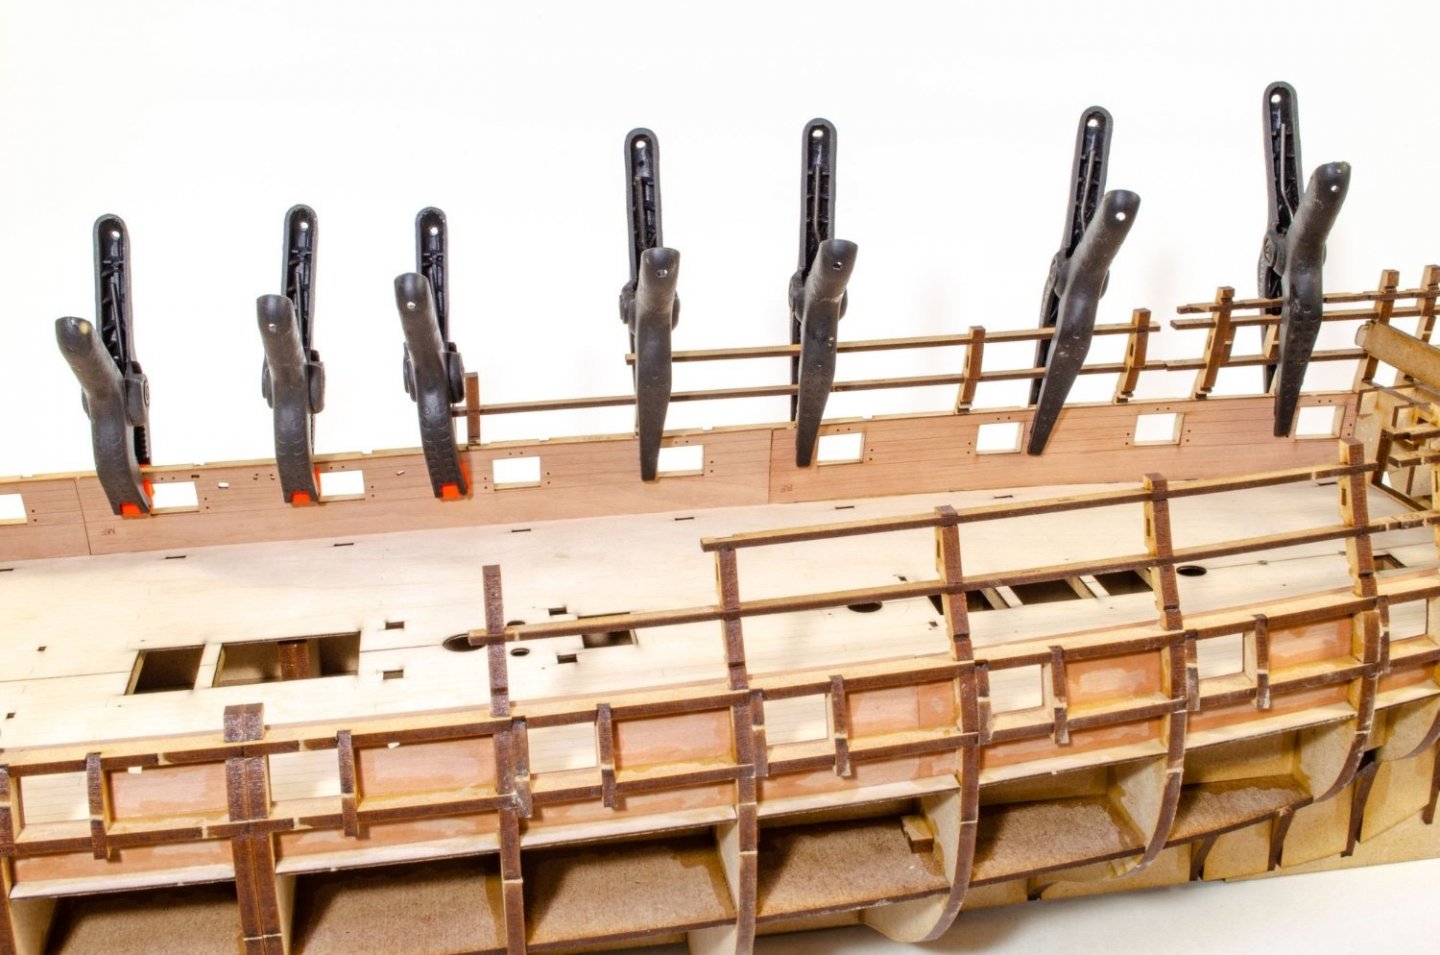
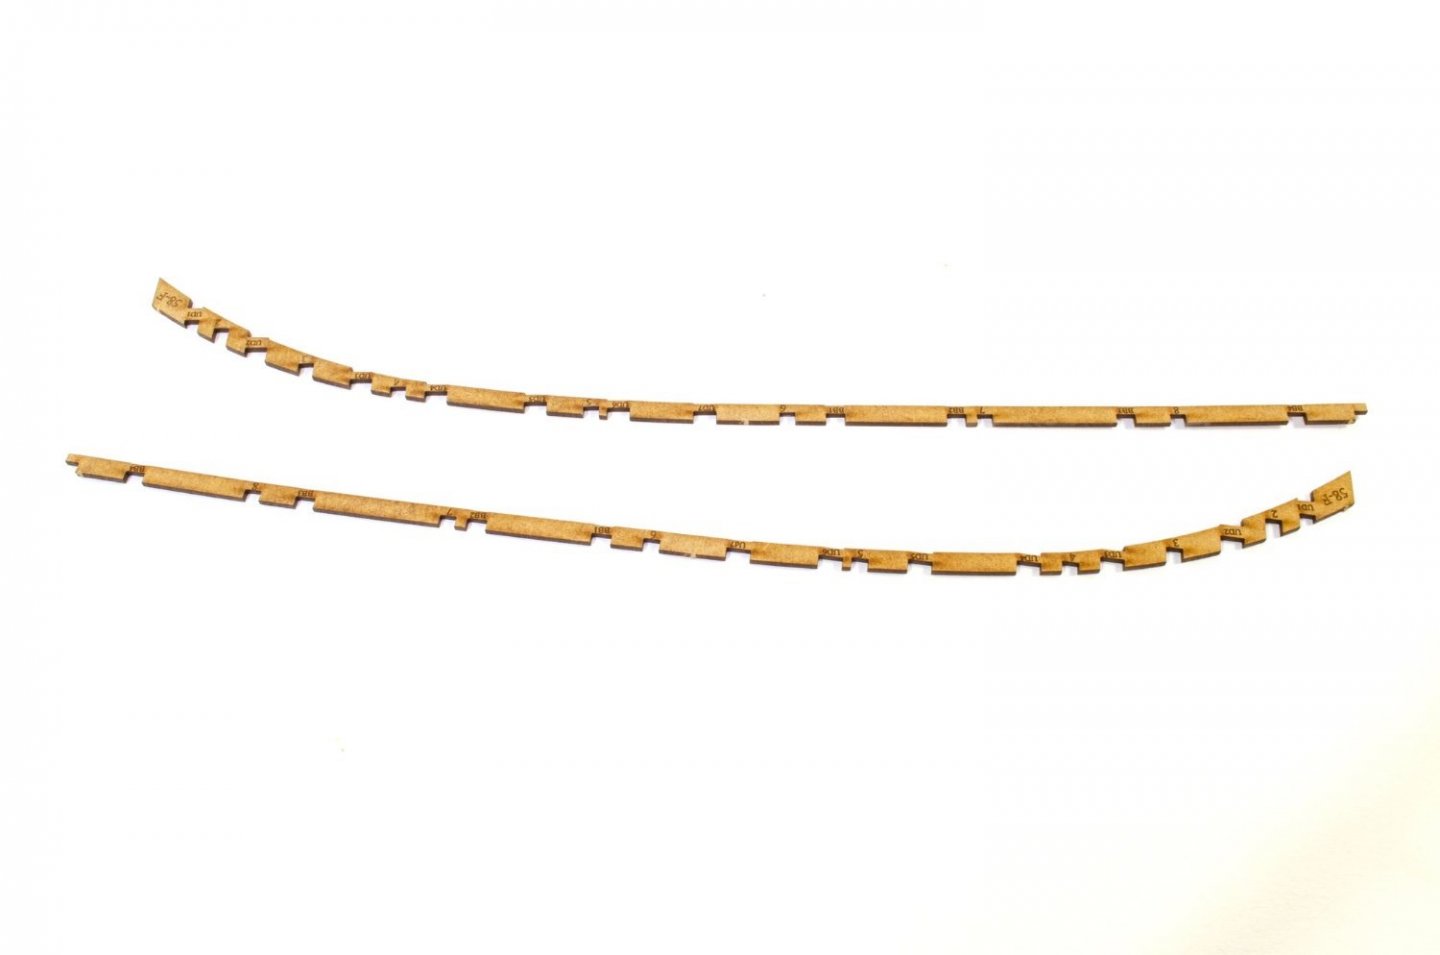
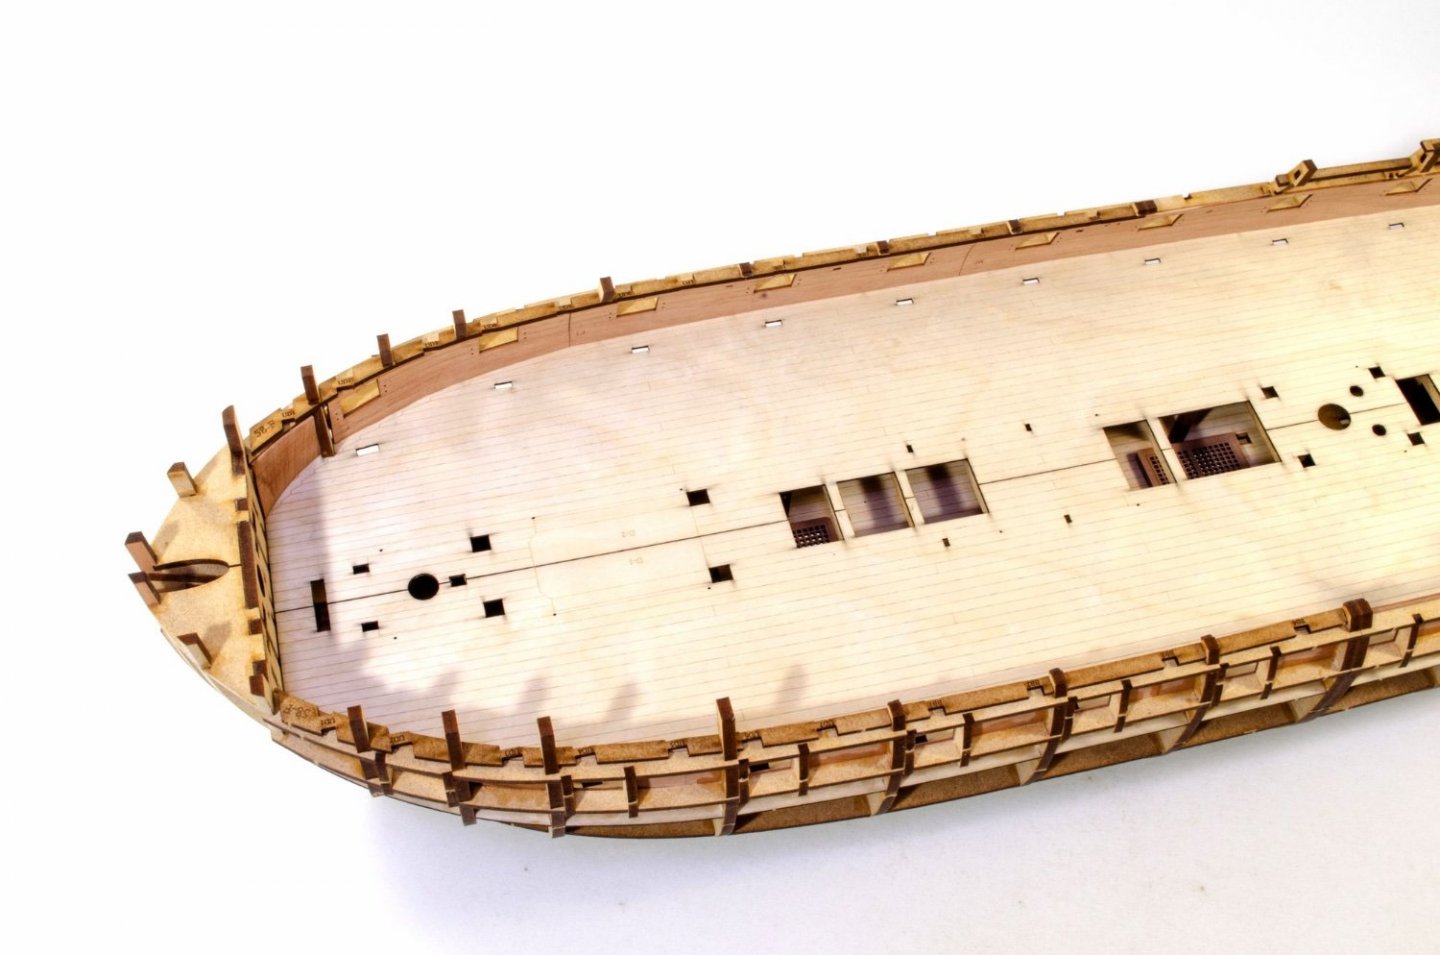
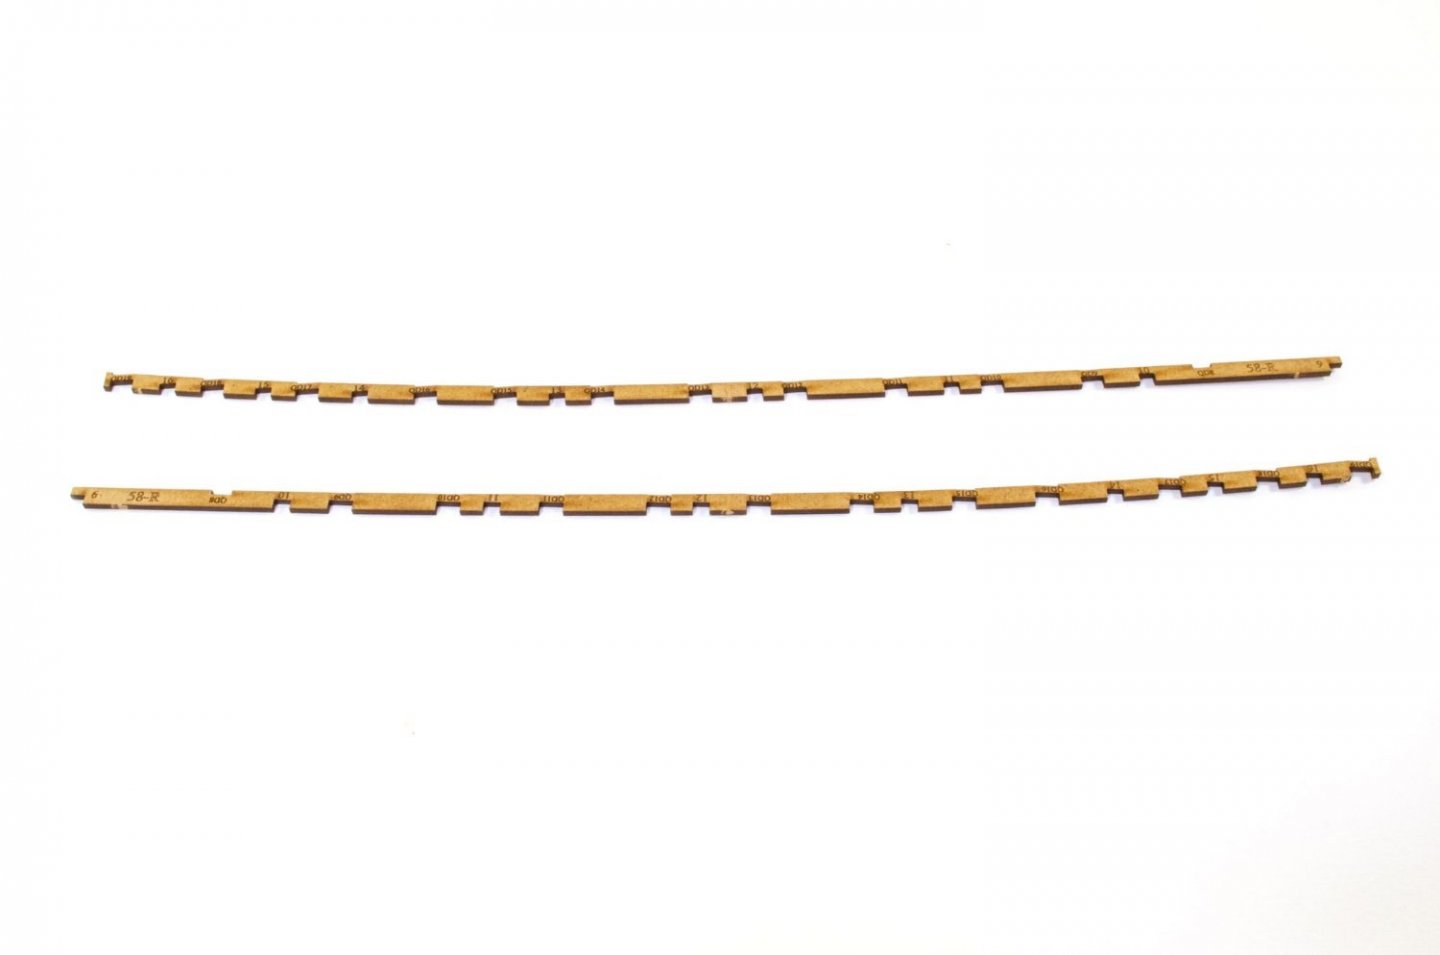
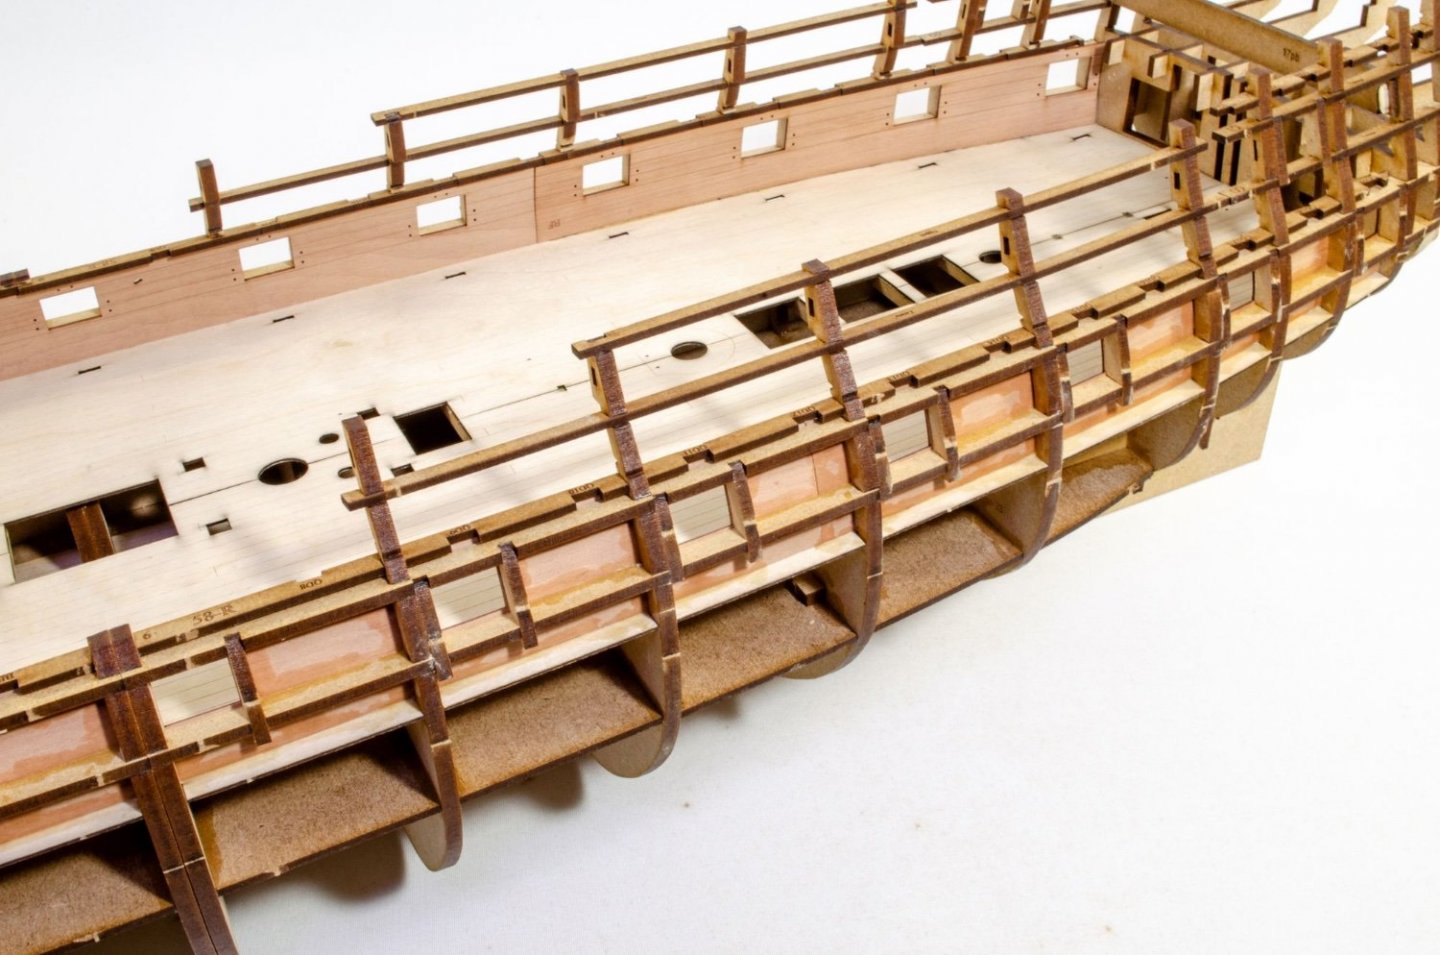
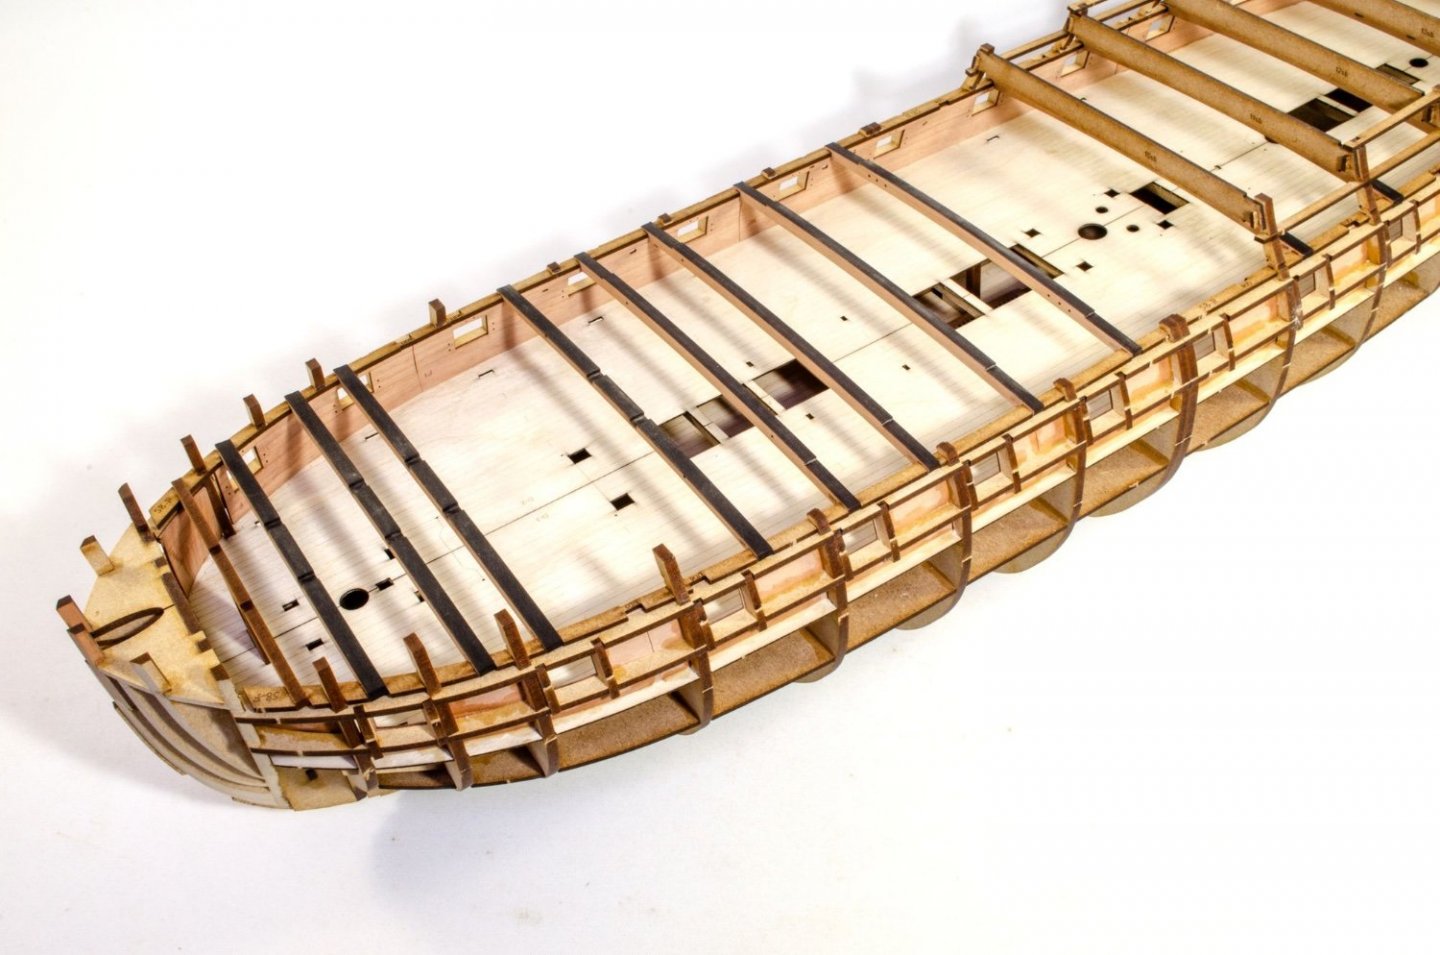
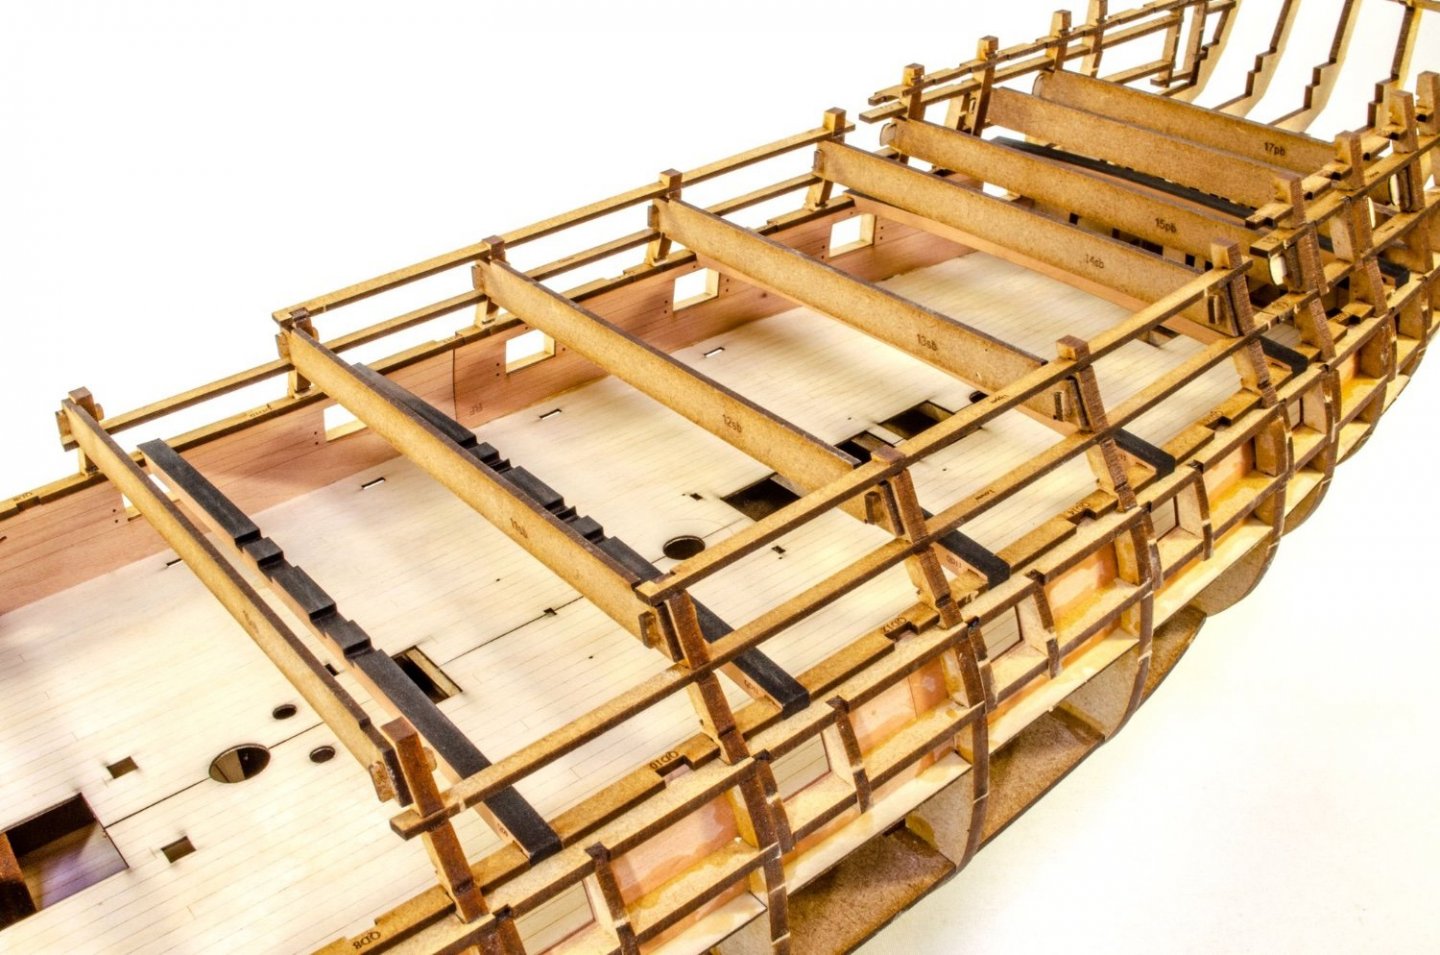
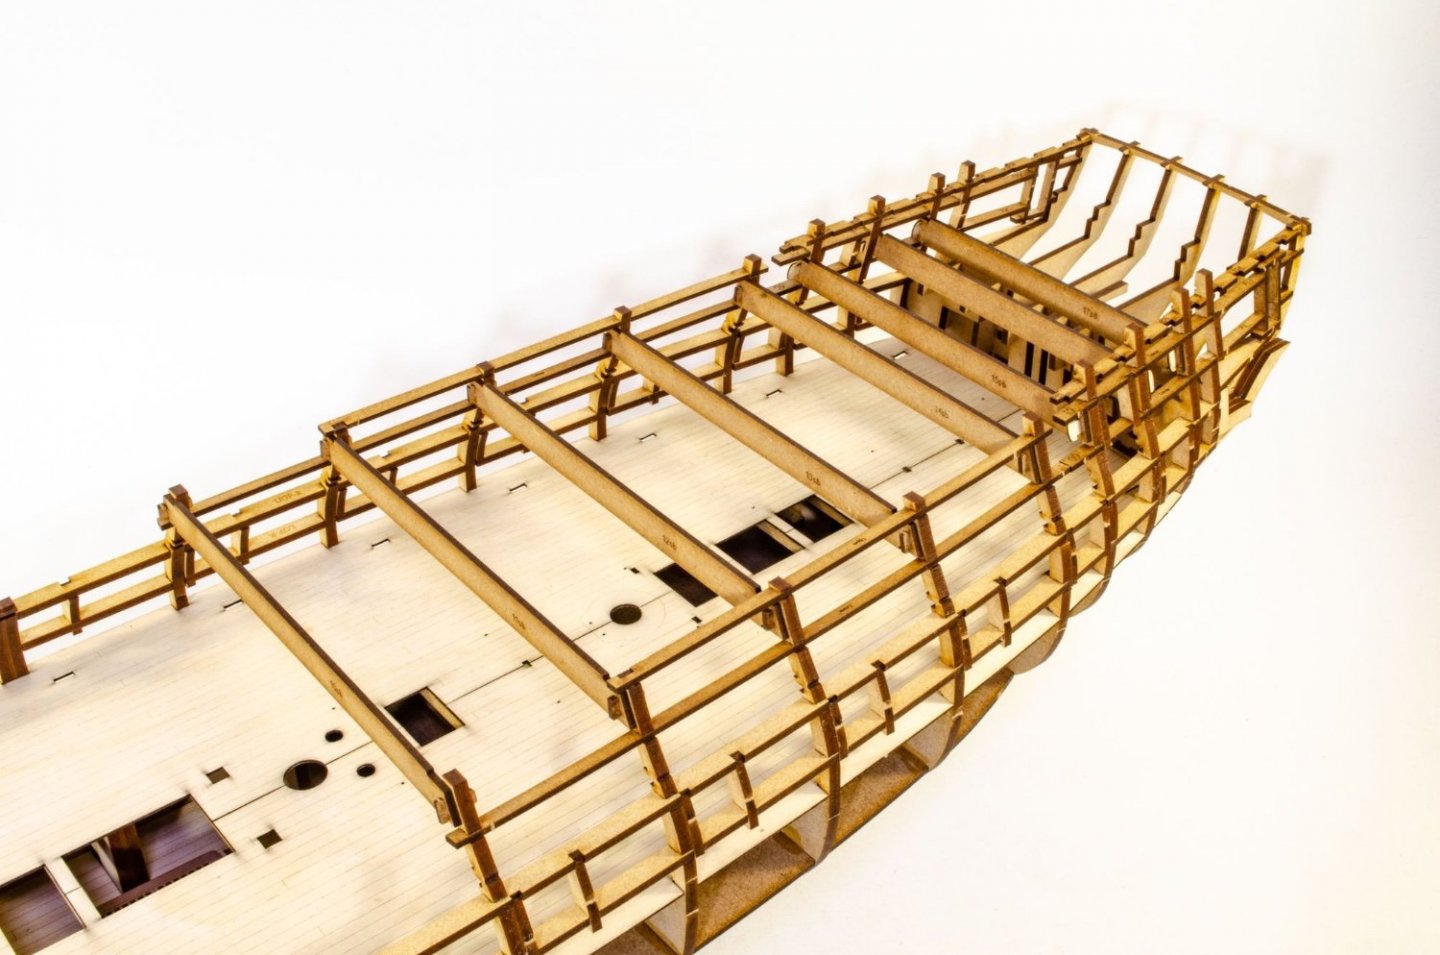
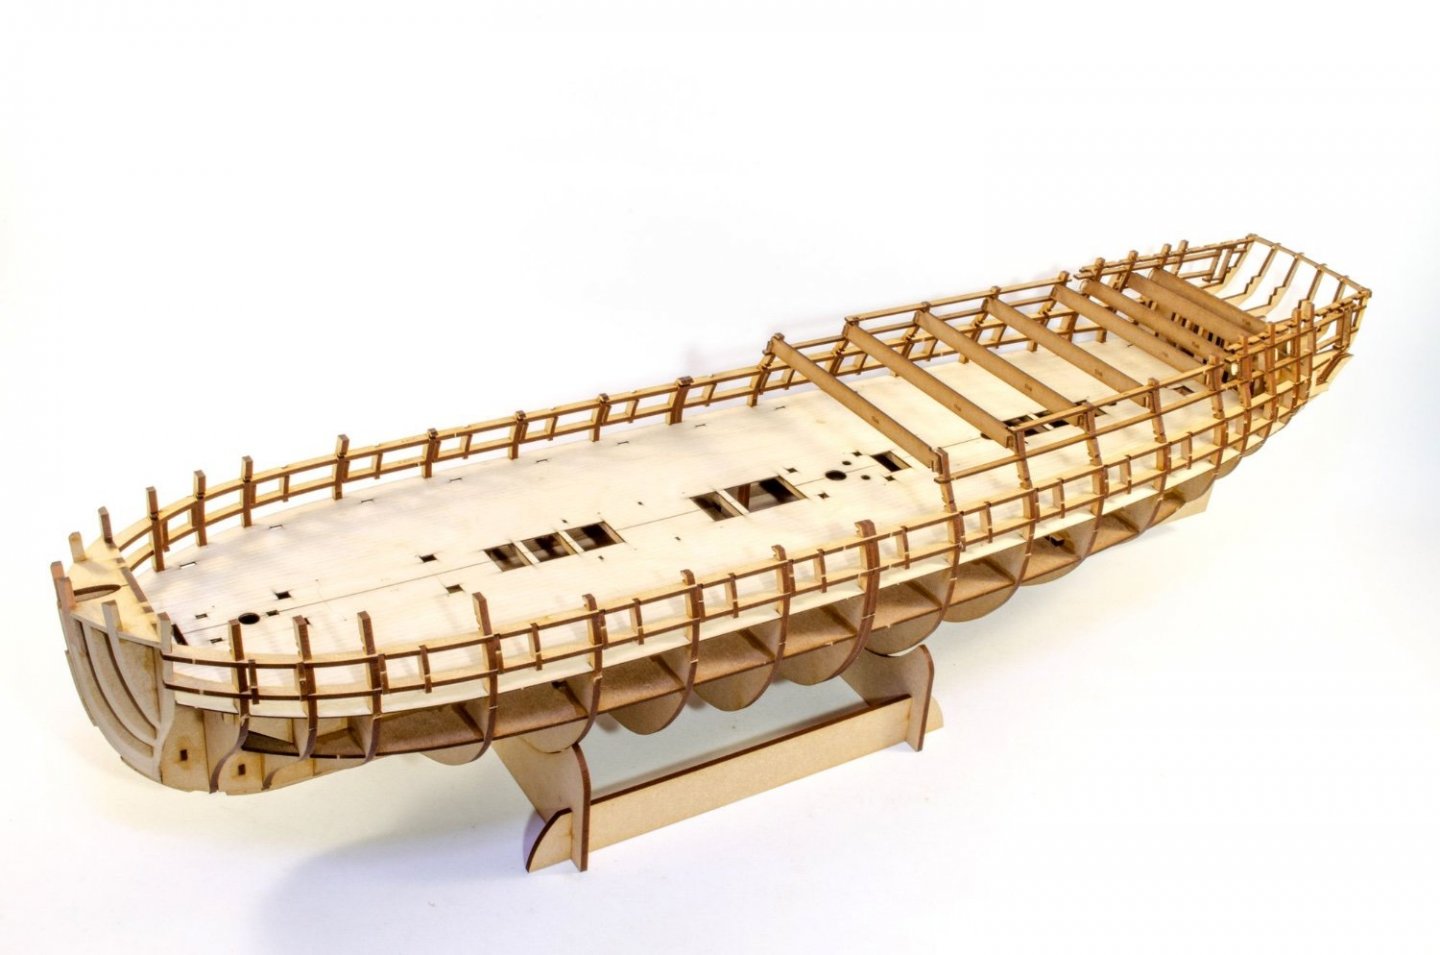
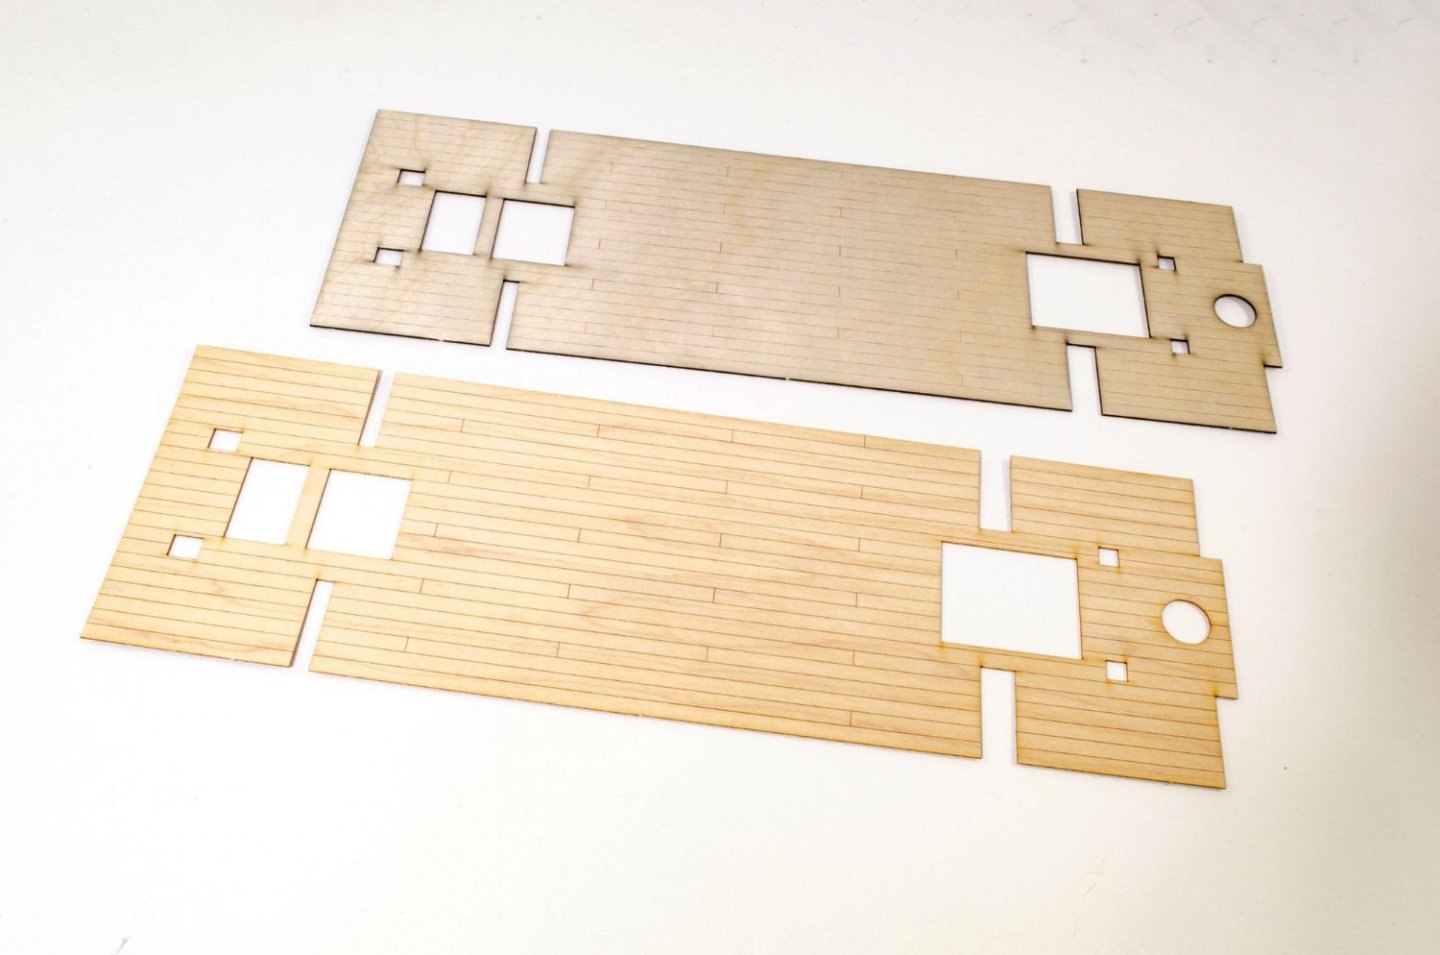
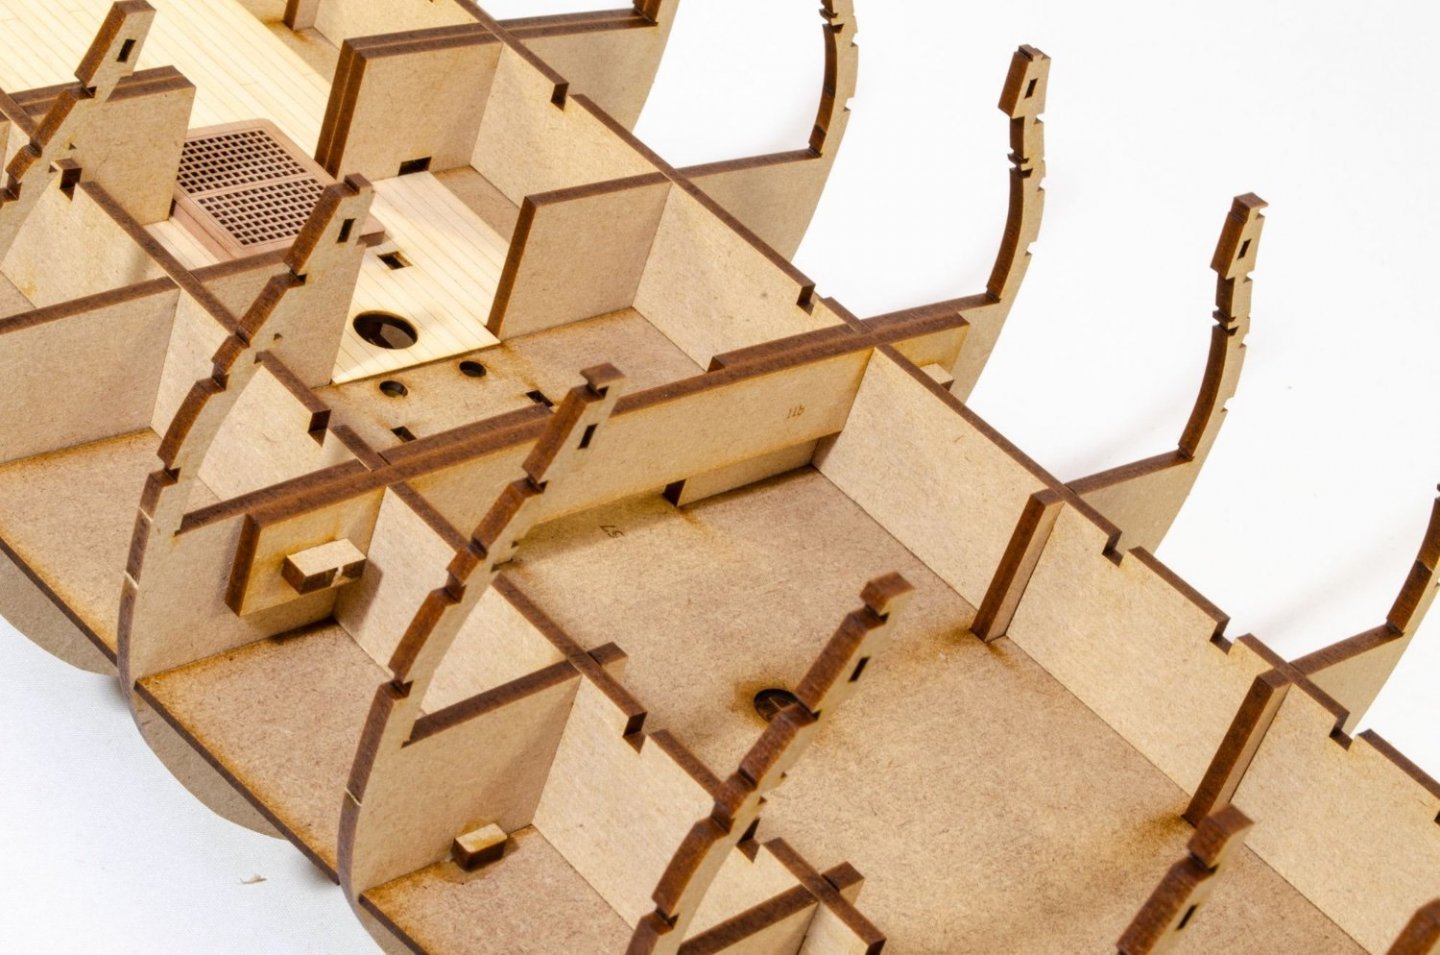
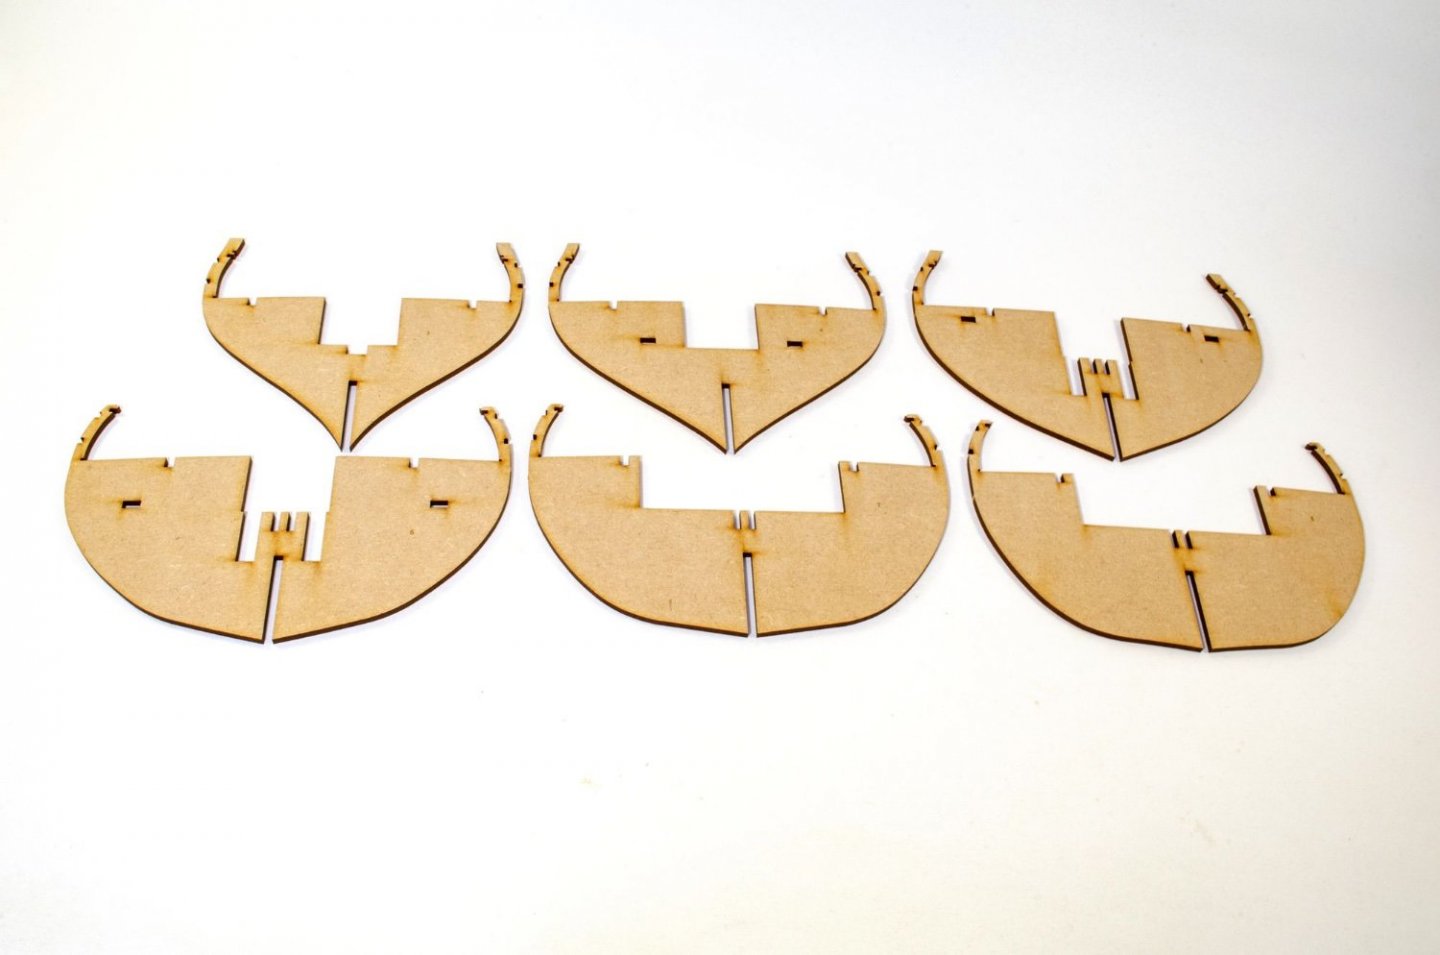
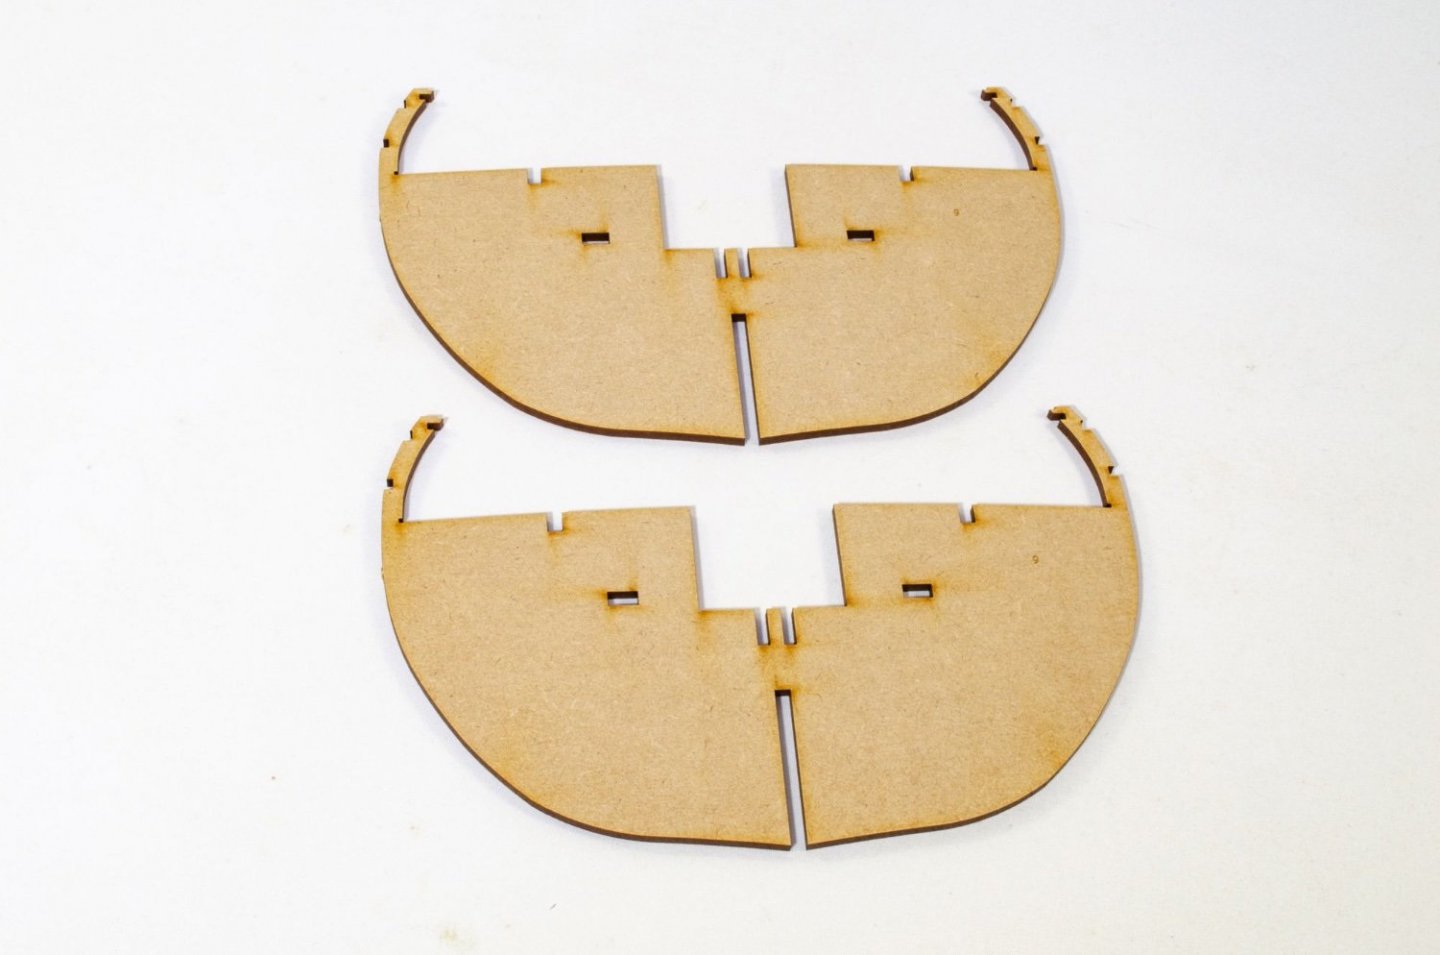
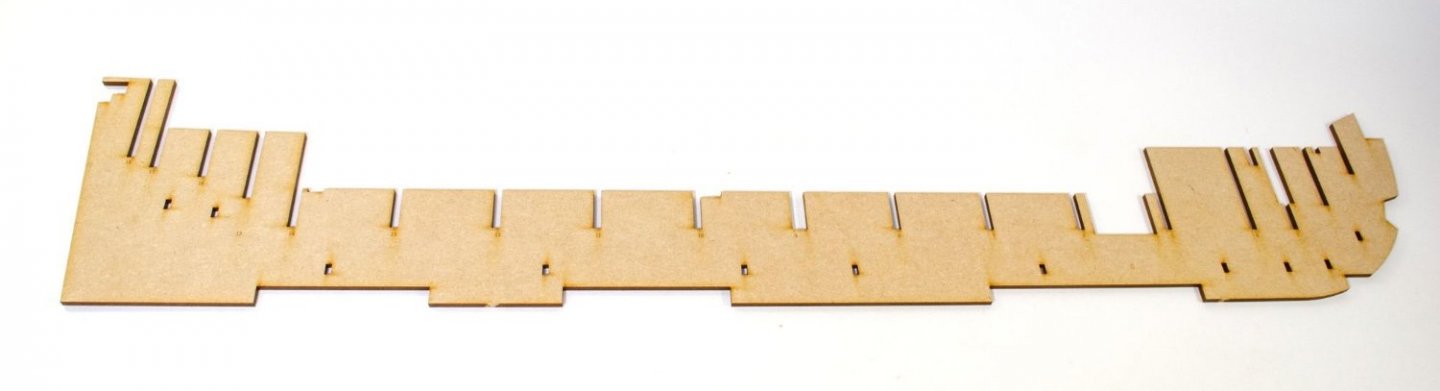
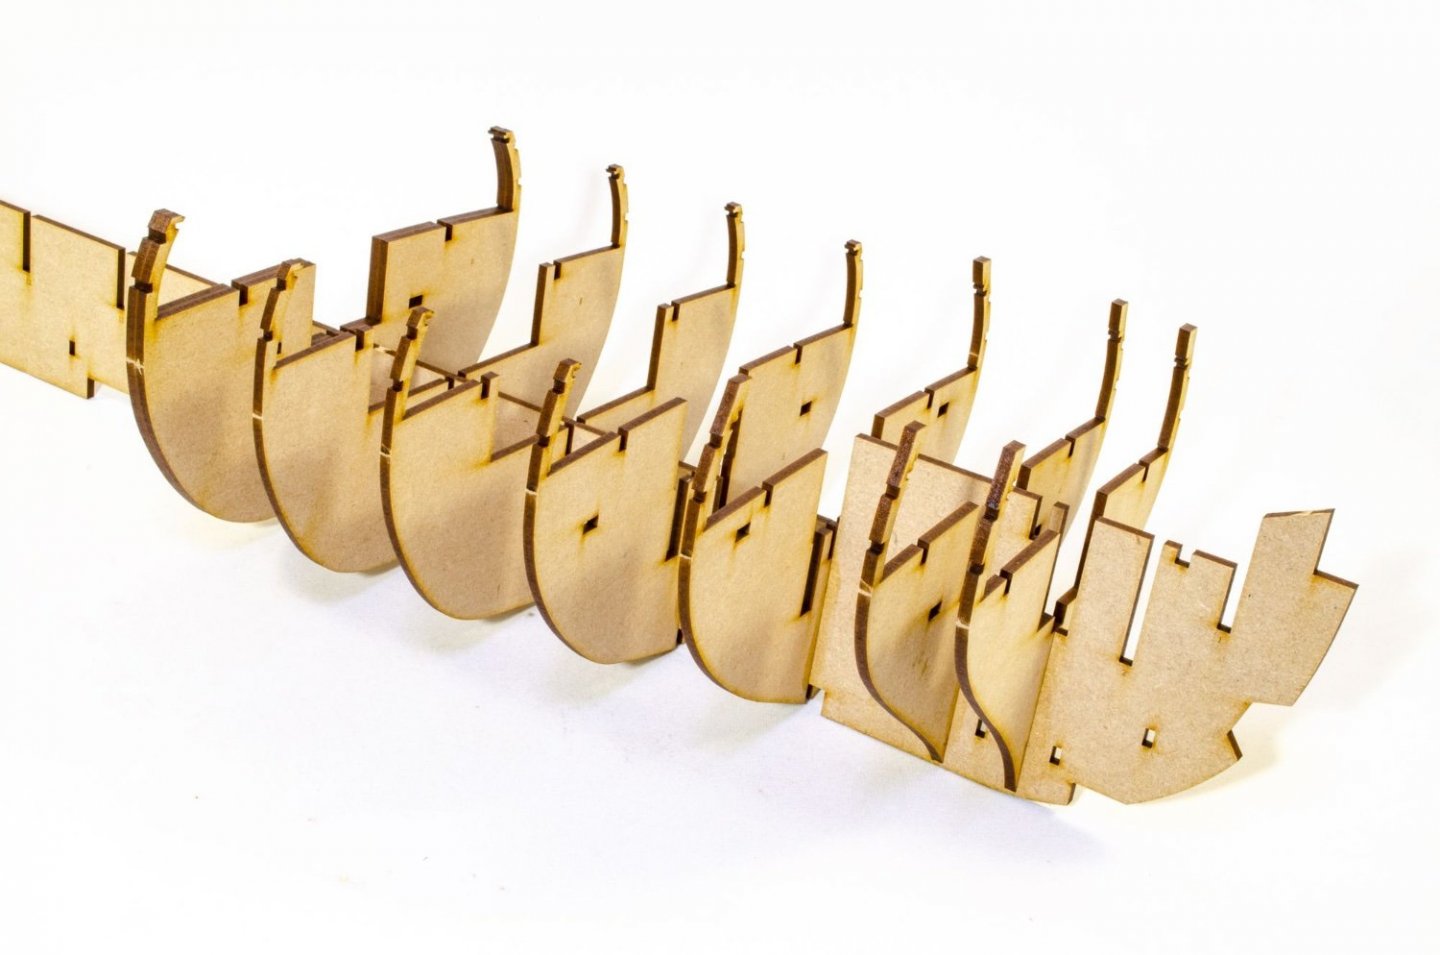
Time for another Lego update. Next job was to bolster those bulkhead ears by adding the gun ports. As with Sphinx, these are built into the frame. The main gun deck longitudinal frames lock into the bulkheads and comprise two parts upper per side, and two parts lower. Lower in first of course. The vertical gun port frames now need to fit in. These are all specific, to suit the curve of hull. Each port has two verticals apart from #7, as that one uses the side of a bulkhead for the other vertical. The main gun deck ply layer is pre-engraved to help you with laying the planks. It's also supplied in halves, to make it easier to fit. Both deck halves are turned upside down and a strip of narrow tape is applied full length, and then the various openings cut out. The deck is then turned over and bent down the tape hinge before being glued into place. Deck edges lock into slots in the base of the bulkhead ears, so there's no problem with it popping up. It's just a case of making sure it's glued down across the deck beams and then weighted down while it dries. No need to pin anything here.

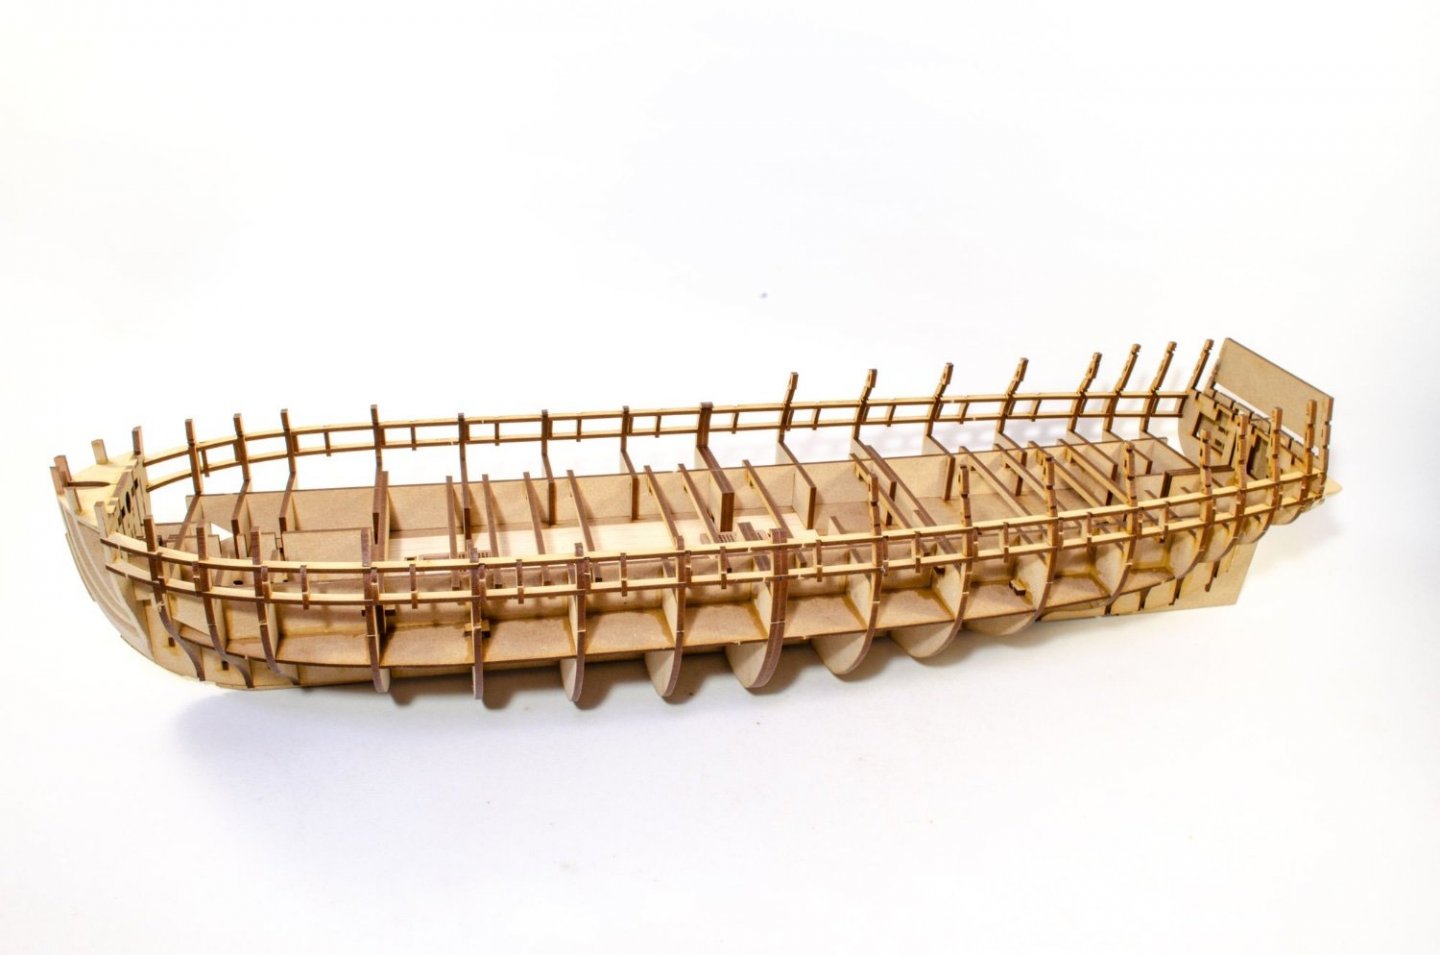
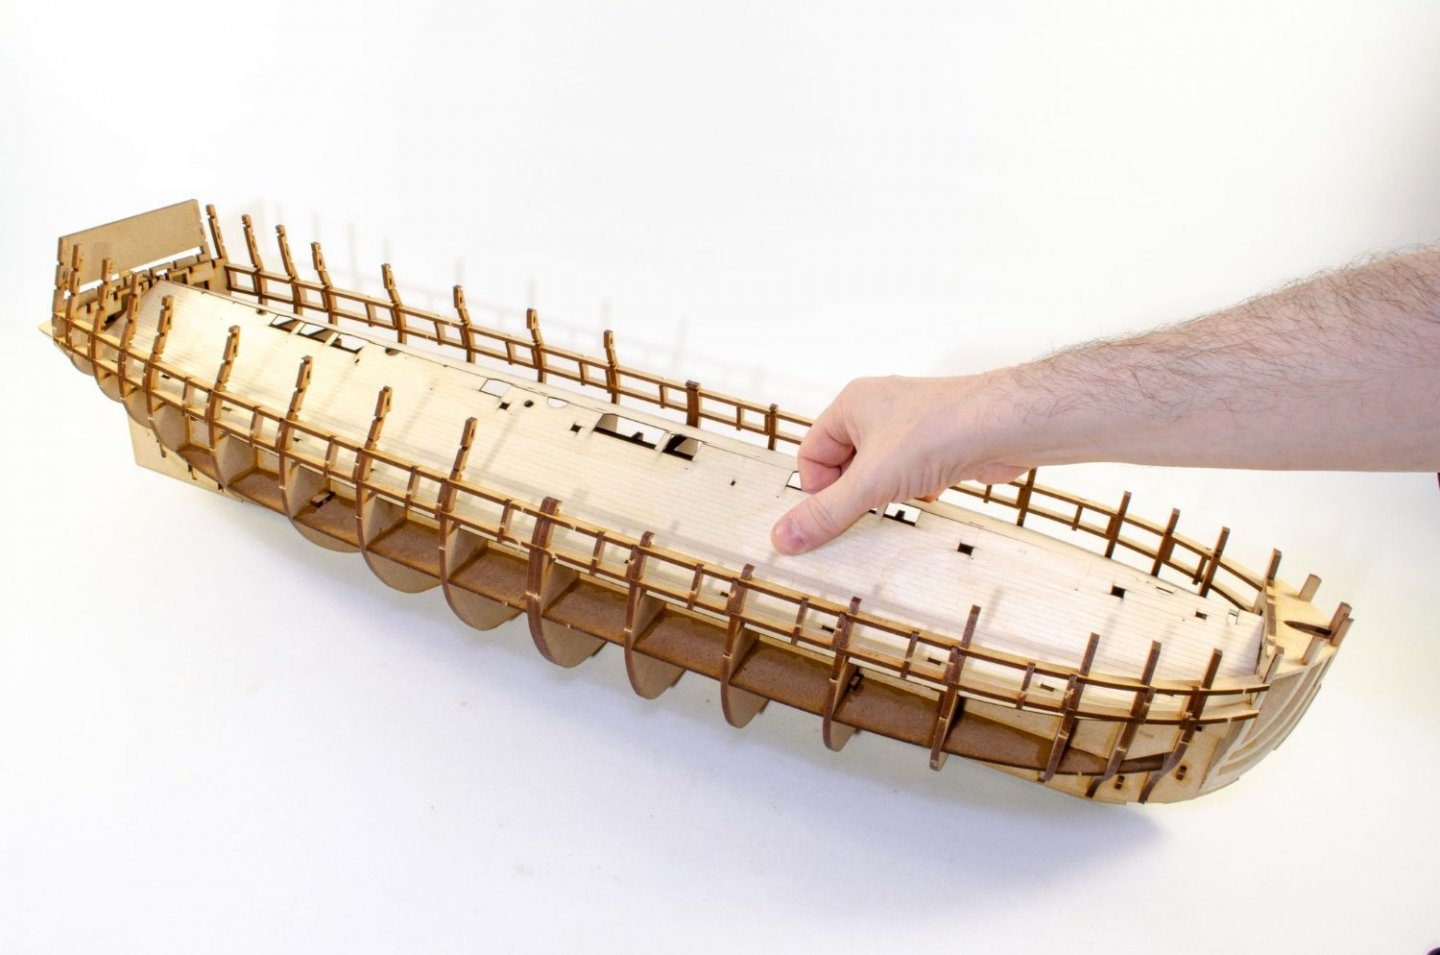
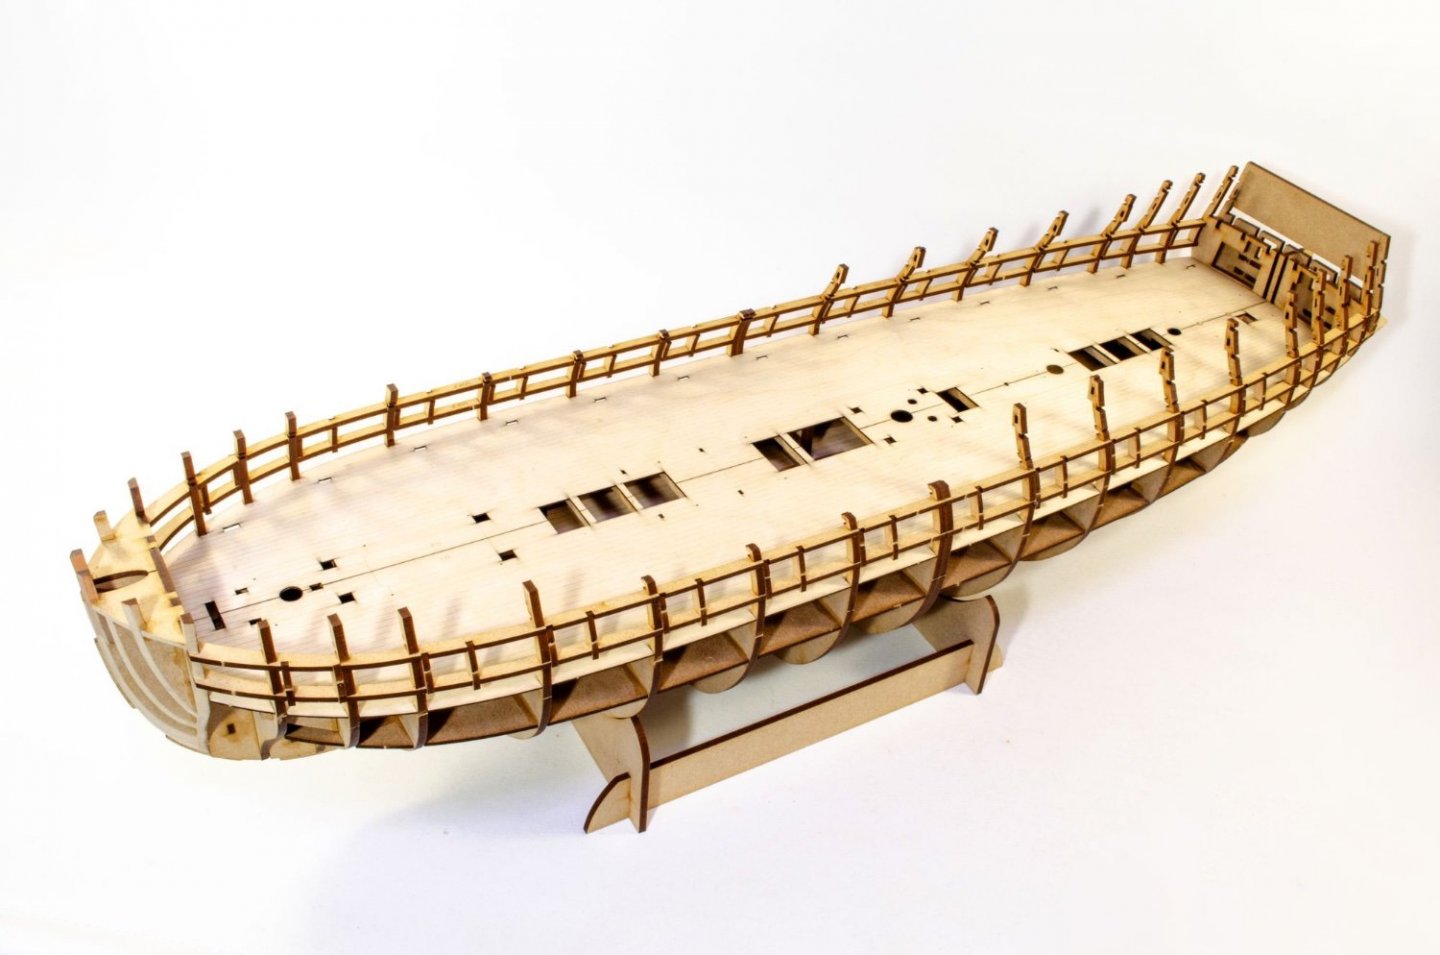
- 488 replies
-
- 31
-
-
-
-
- Indefatigable
- Vanguard Models
- (and 1 more)
-
That is just gorgeous! Thanks for sharing that 🤩
-
It's a no-brainer! Ply wouldn't really work on this as the tolerances needed for so many Lego slots would throw the construction out, especially the framed gun ports. MDF tolerances are much tighter.
- 488 replies
-
- 16
-
-
- Indefatigable
- Vanguard Models
- (and 1 more)
-
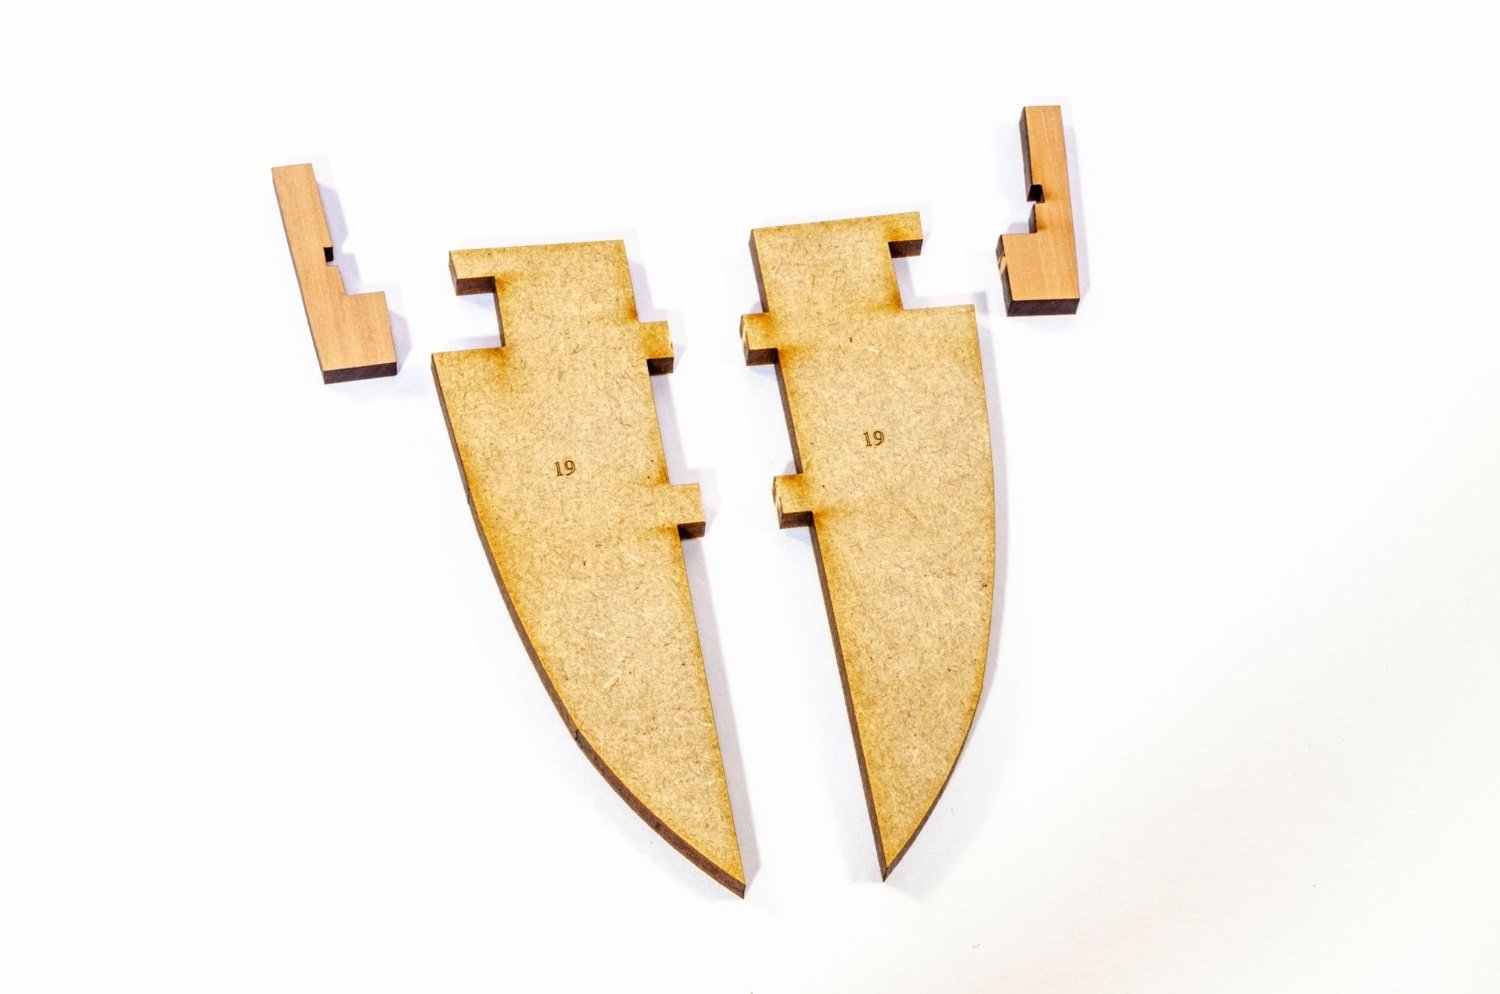
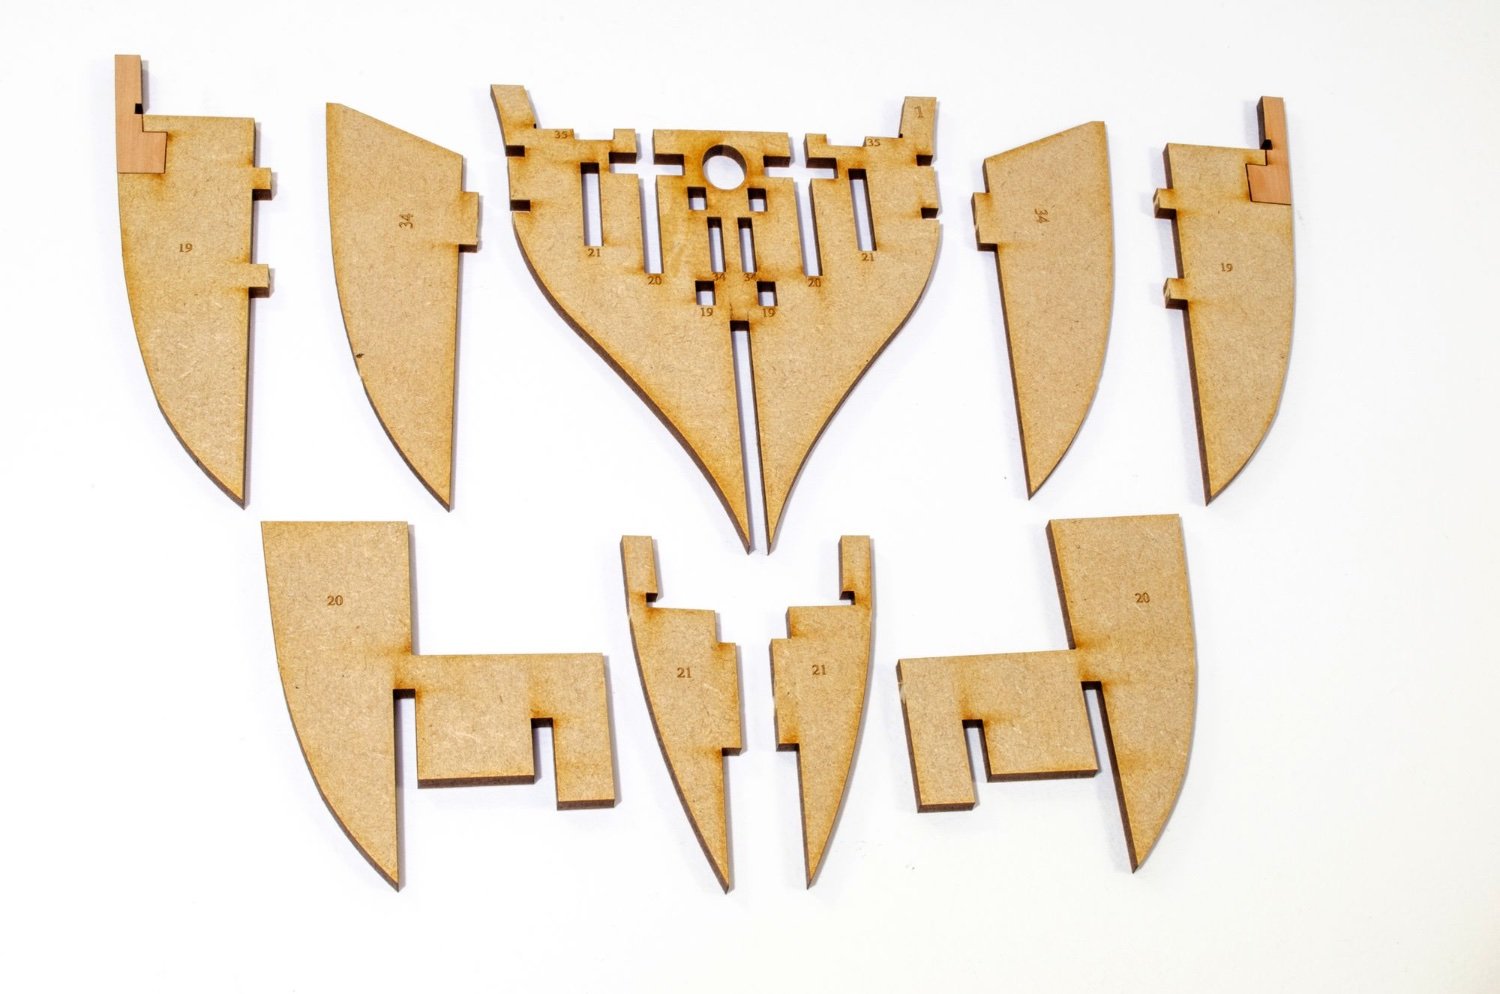
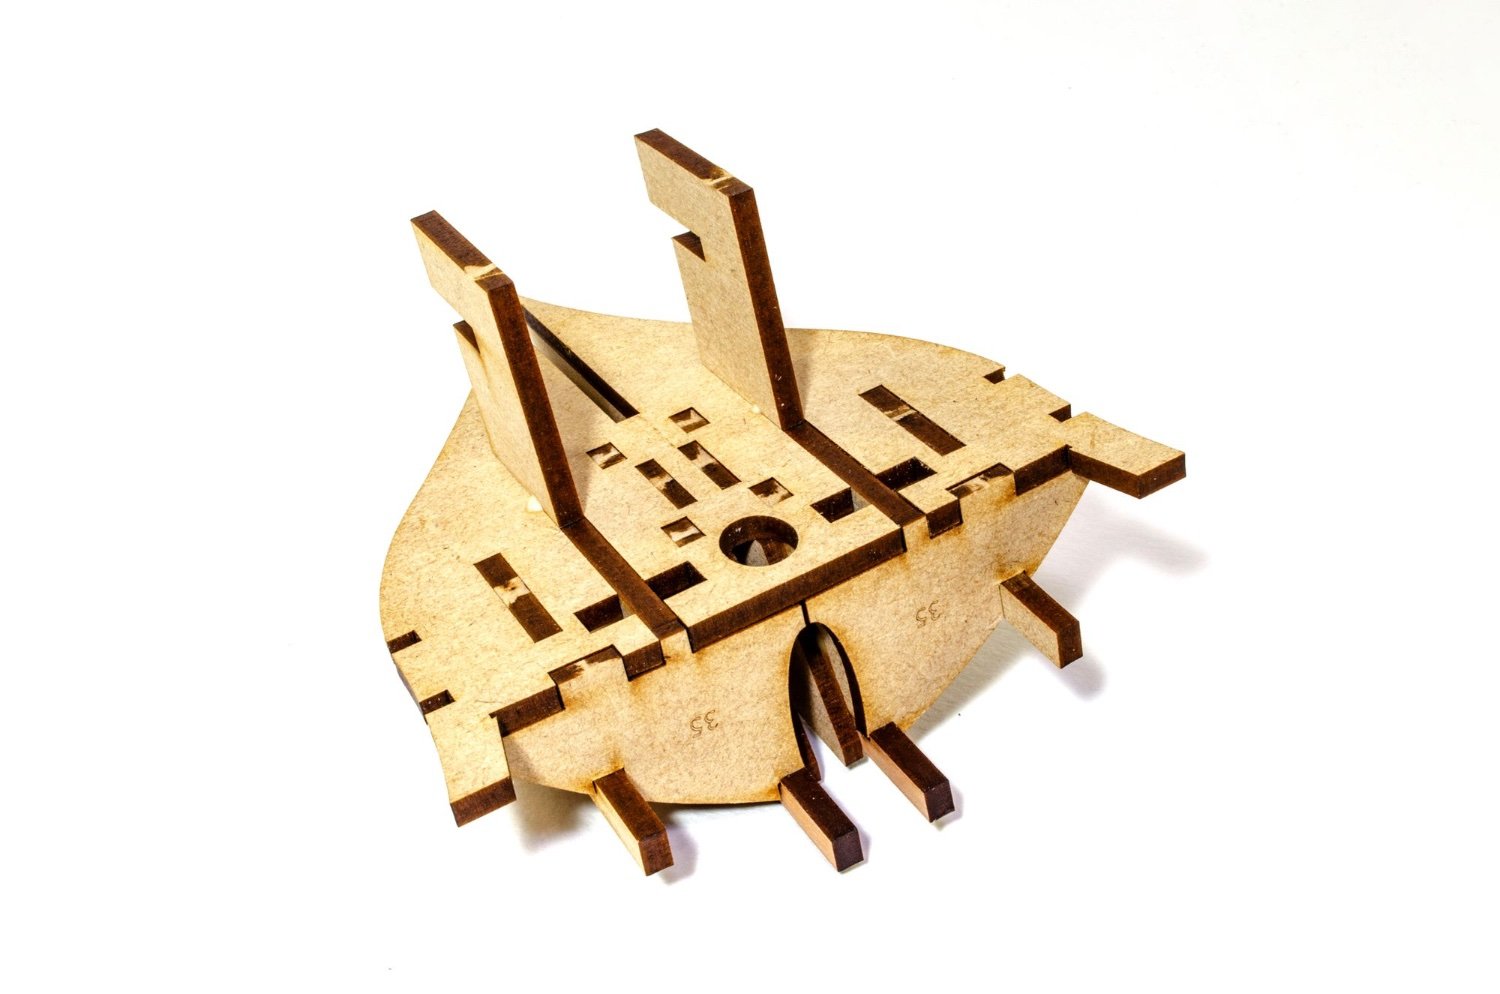
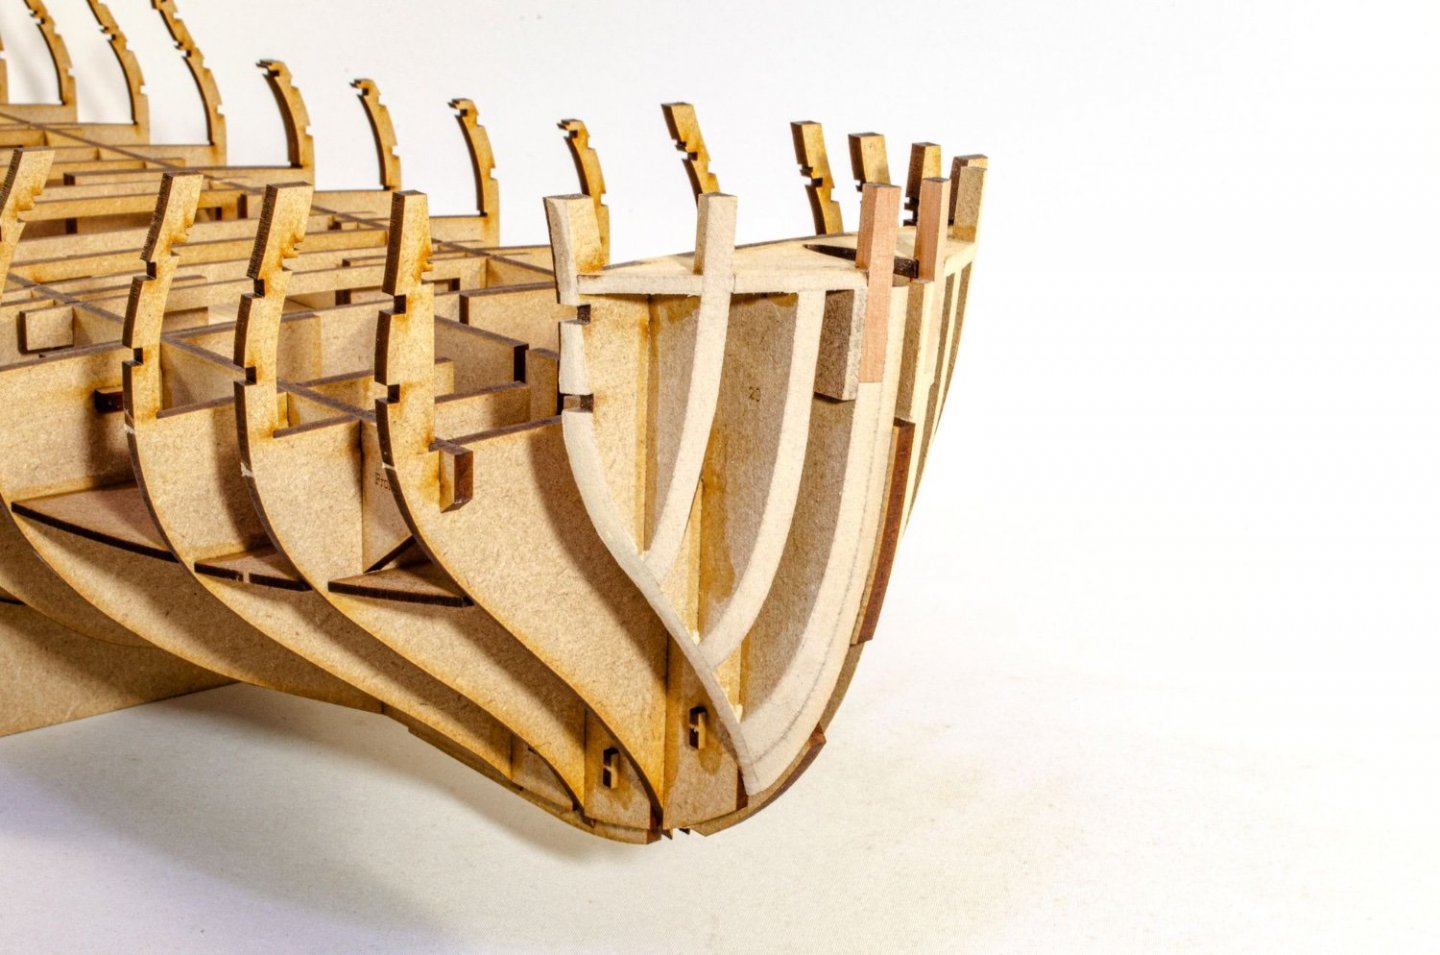
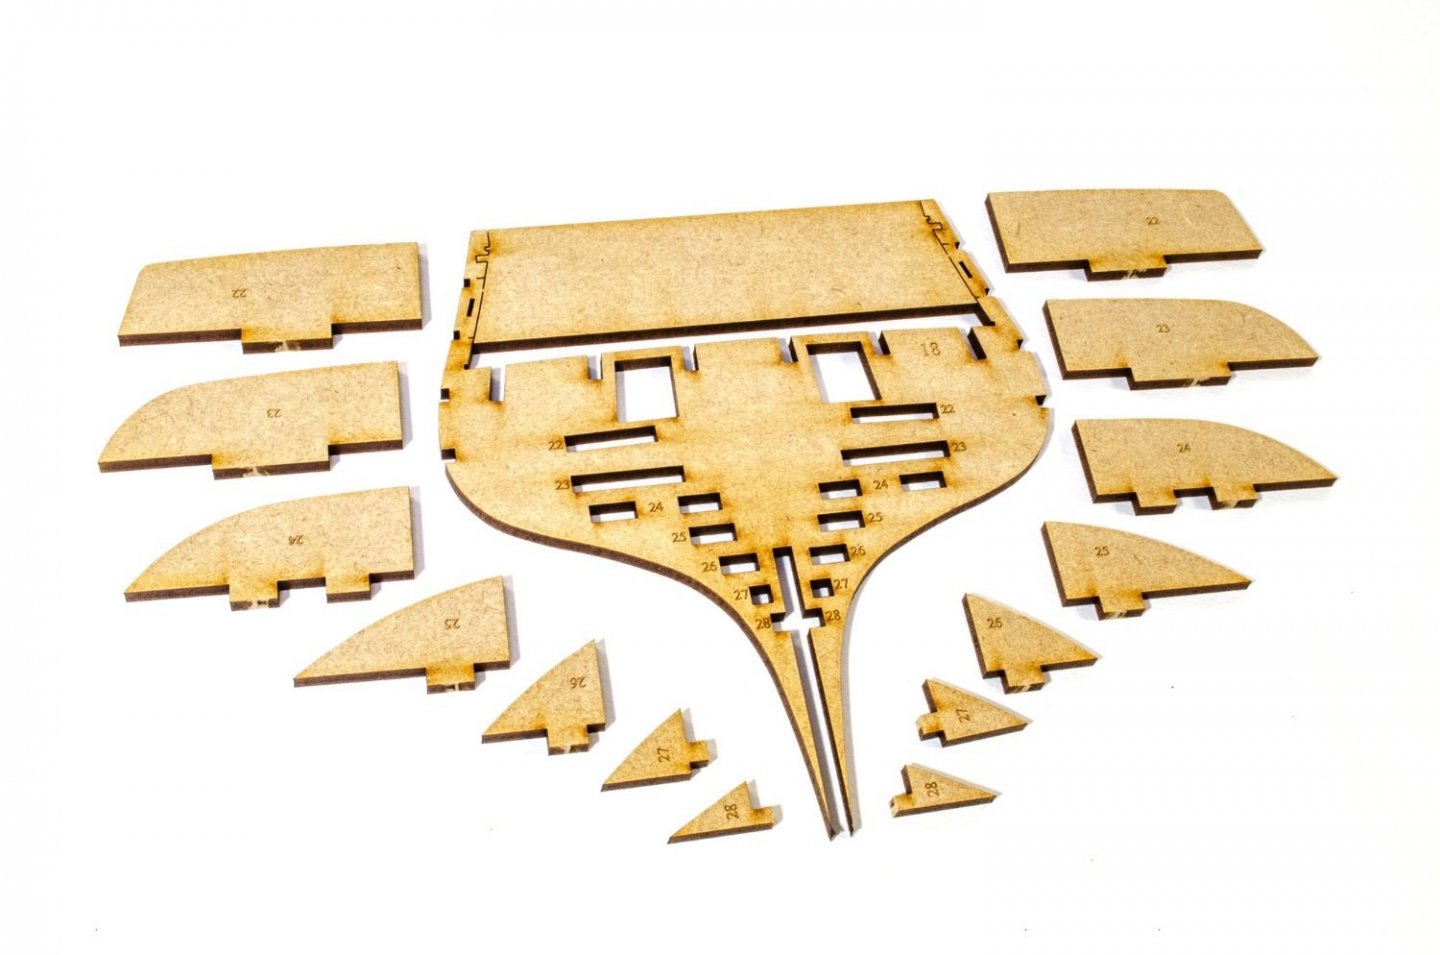
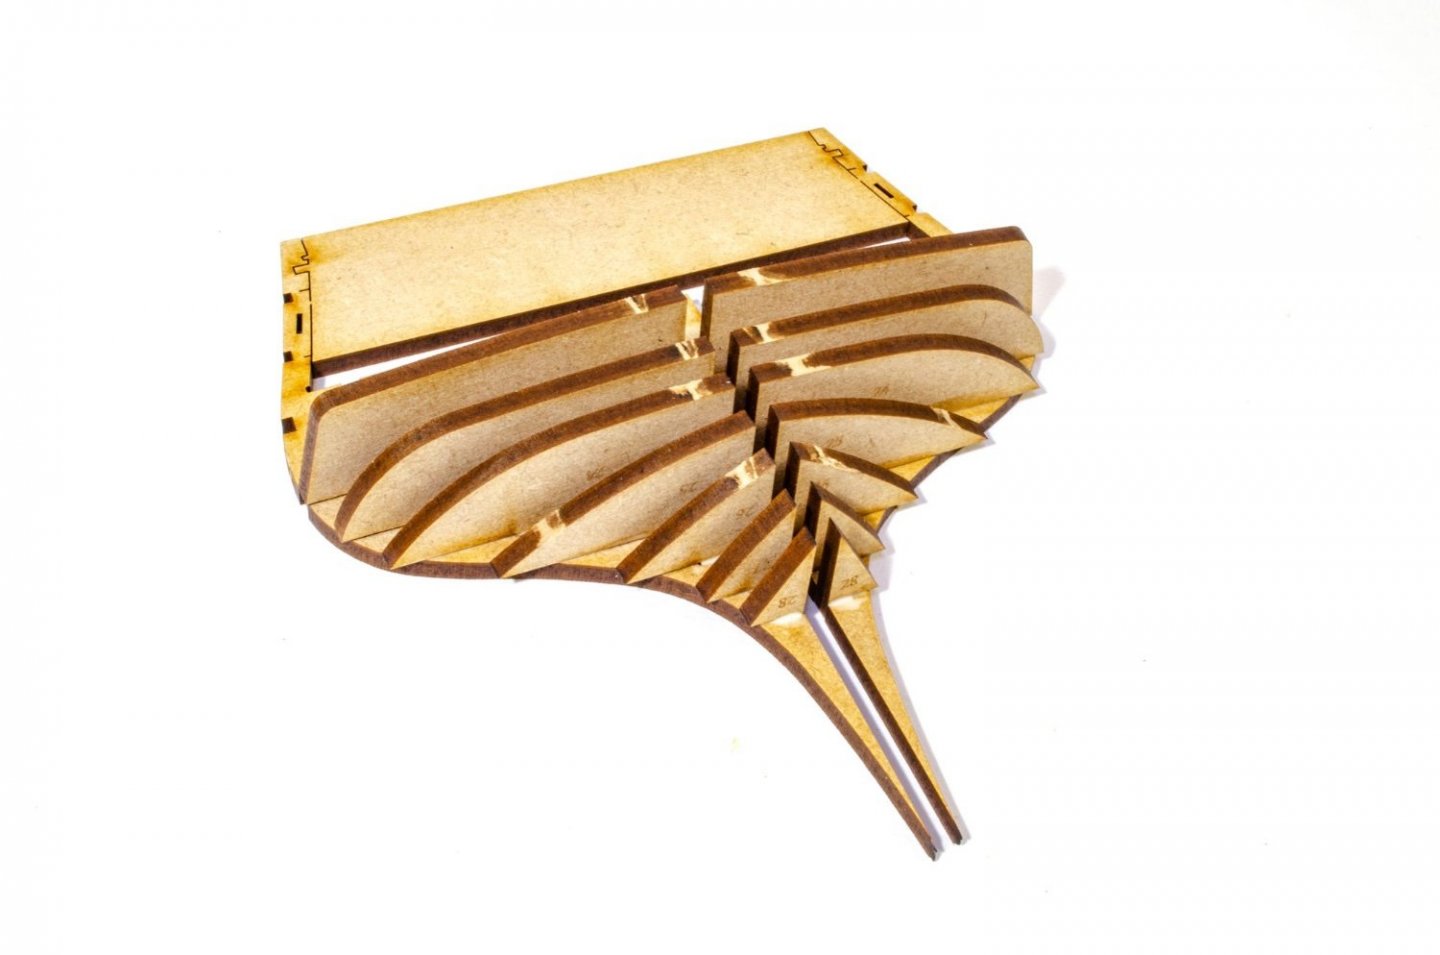
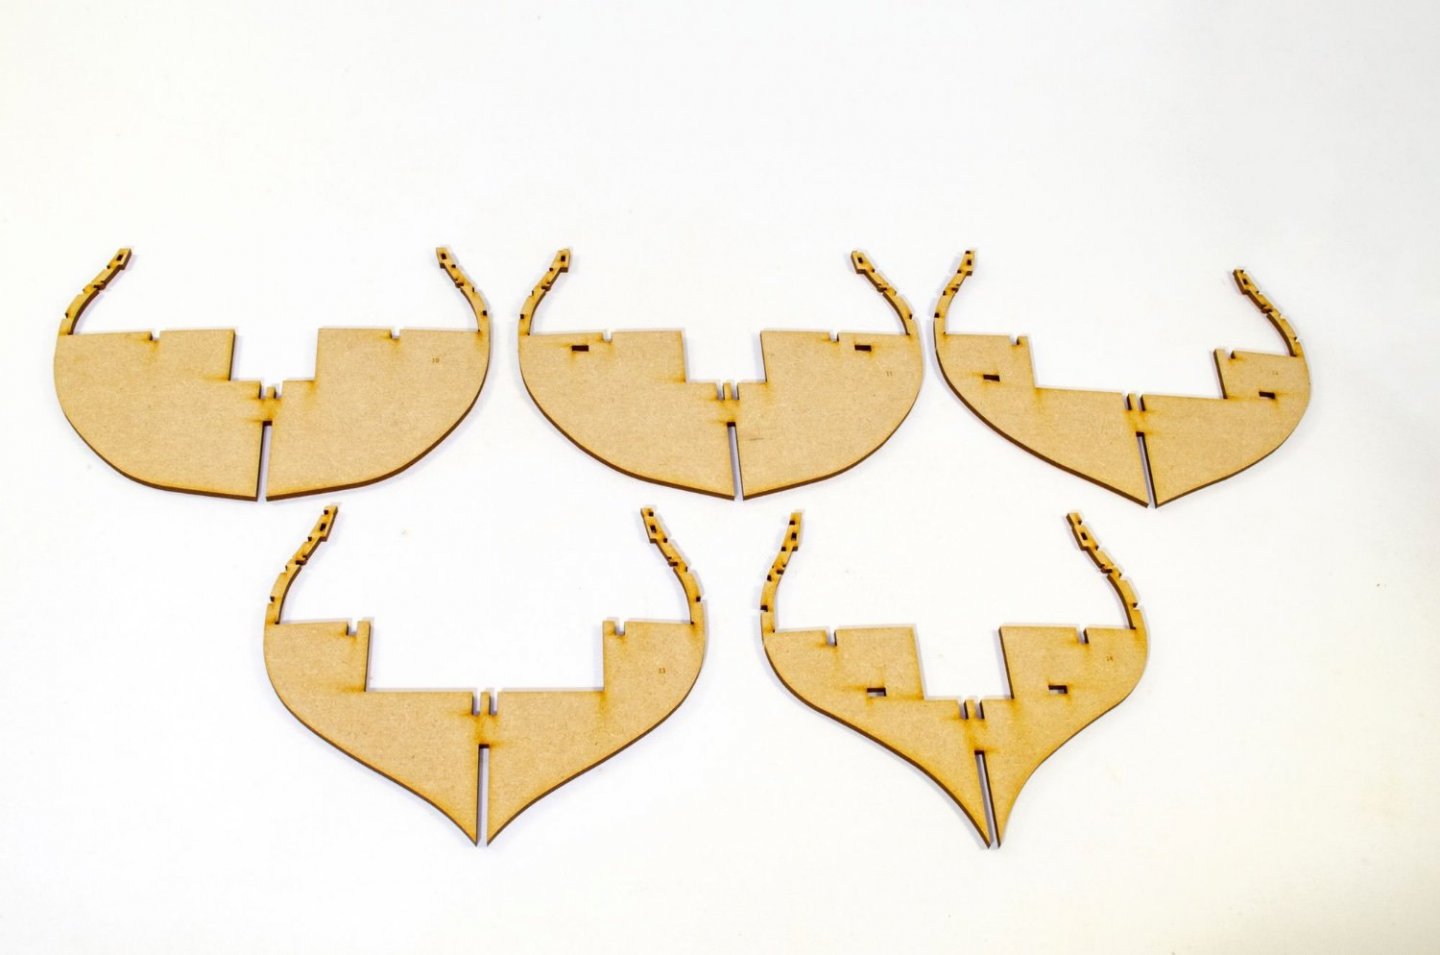
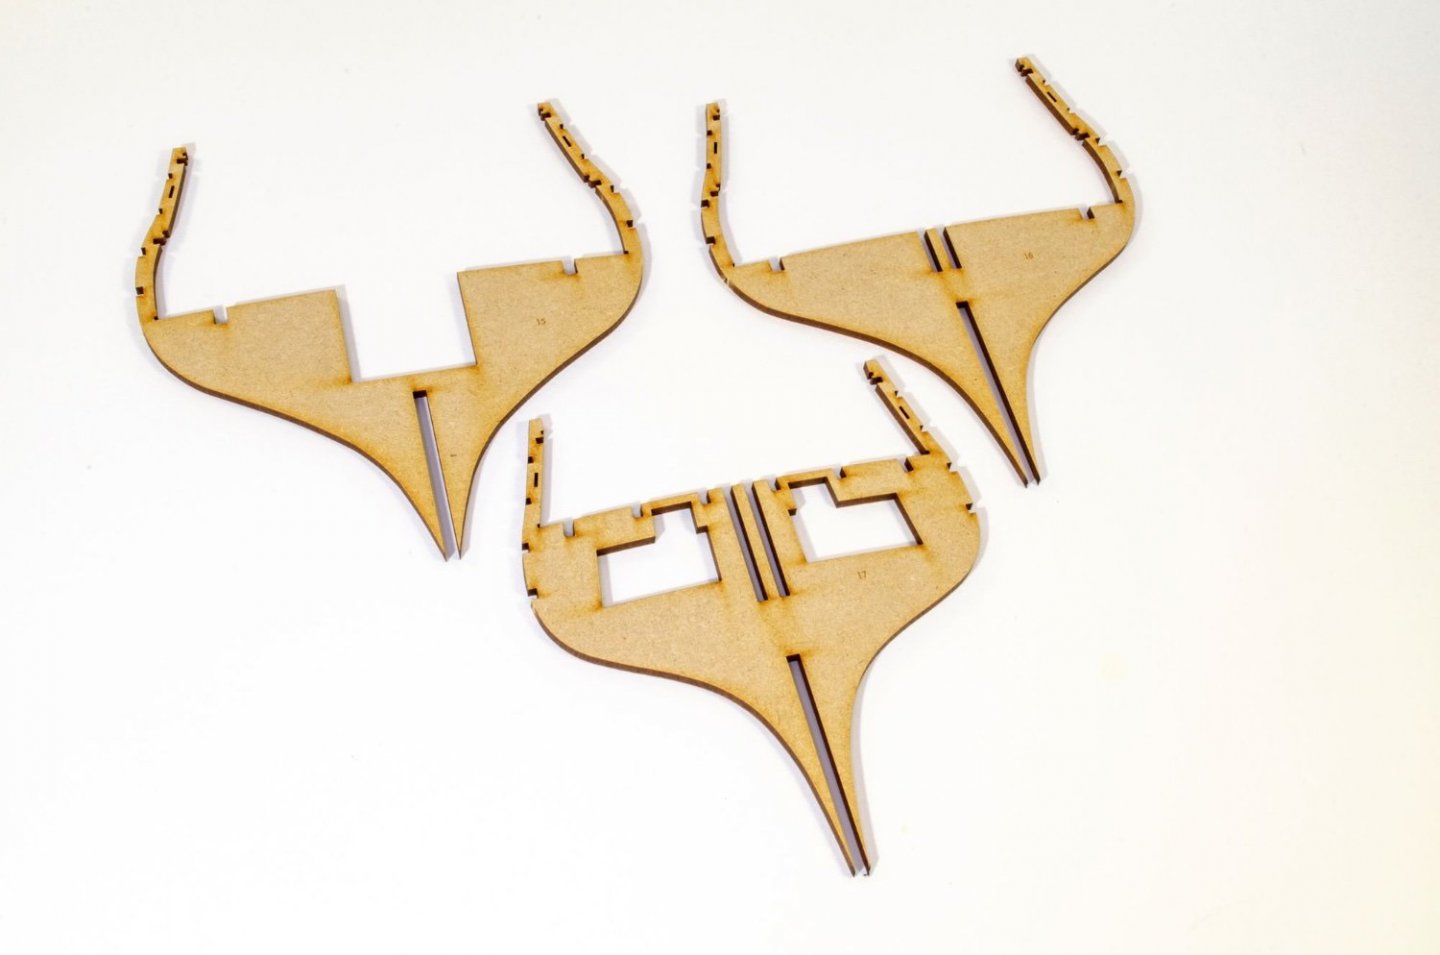
Small update as I hated leaving it without a bow and stern from the last update 😁 First, the bow. The foremost 'timberheads' near the prow are pear inserts to the MDF former so there's lots of strength up front when later work is carried out. Bulkhead #1 is temporarily fitted to the hull and then the formers are fitted in. The reason for doing this on model is so I can get the innermost formers snug against the keel. All these parts are numbered and the relative slots on the bulkhead are numbered too. The assembly is now removed from the hull before the outer formers are set and the upper parts (35) are glued into place as seen here. Too stiffener pieces are also glued to the exposed side of the pear inserts. The assembly is now left to properly dry. A sanding block is now taken to the bow and the whole lot is sanded and shaped in readiness to fit to the hull. The back side of this also hooks onto bulkhead #2. When I was happy with this, it was glued to the hull. It's now the turn of the stern and fitting out the final bulkhead. As with the bow, this is fitted with a series of formers that are numbered in relation to the bulkhead slots. It's a no-brainer! This is now carefully sanded to shape. It will doubtless be refined later when it comes to fairing the hull. Once happy with it, it's glued onto the hull. Until later!


- 488 replies
-
- 49
-
-
-
- Indefatigable
- Vanguard Models
- (and 1 more)
-
I'm not missing the chat here, but I'm also working as flat out as I can with some respiratory problem I have. No update yet, but proof I'm not idle.
- 488 replies
-
- 15
-
-

-
- Indefatigable
- Vanguard Models
- (and 1 more)
-
I'm just the monkey. Chris is the organ grinder. 😄
- 488 replies
-
- 10
-
-
- Indefatigable
- Vanguard Models
- (and 1 more)
-
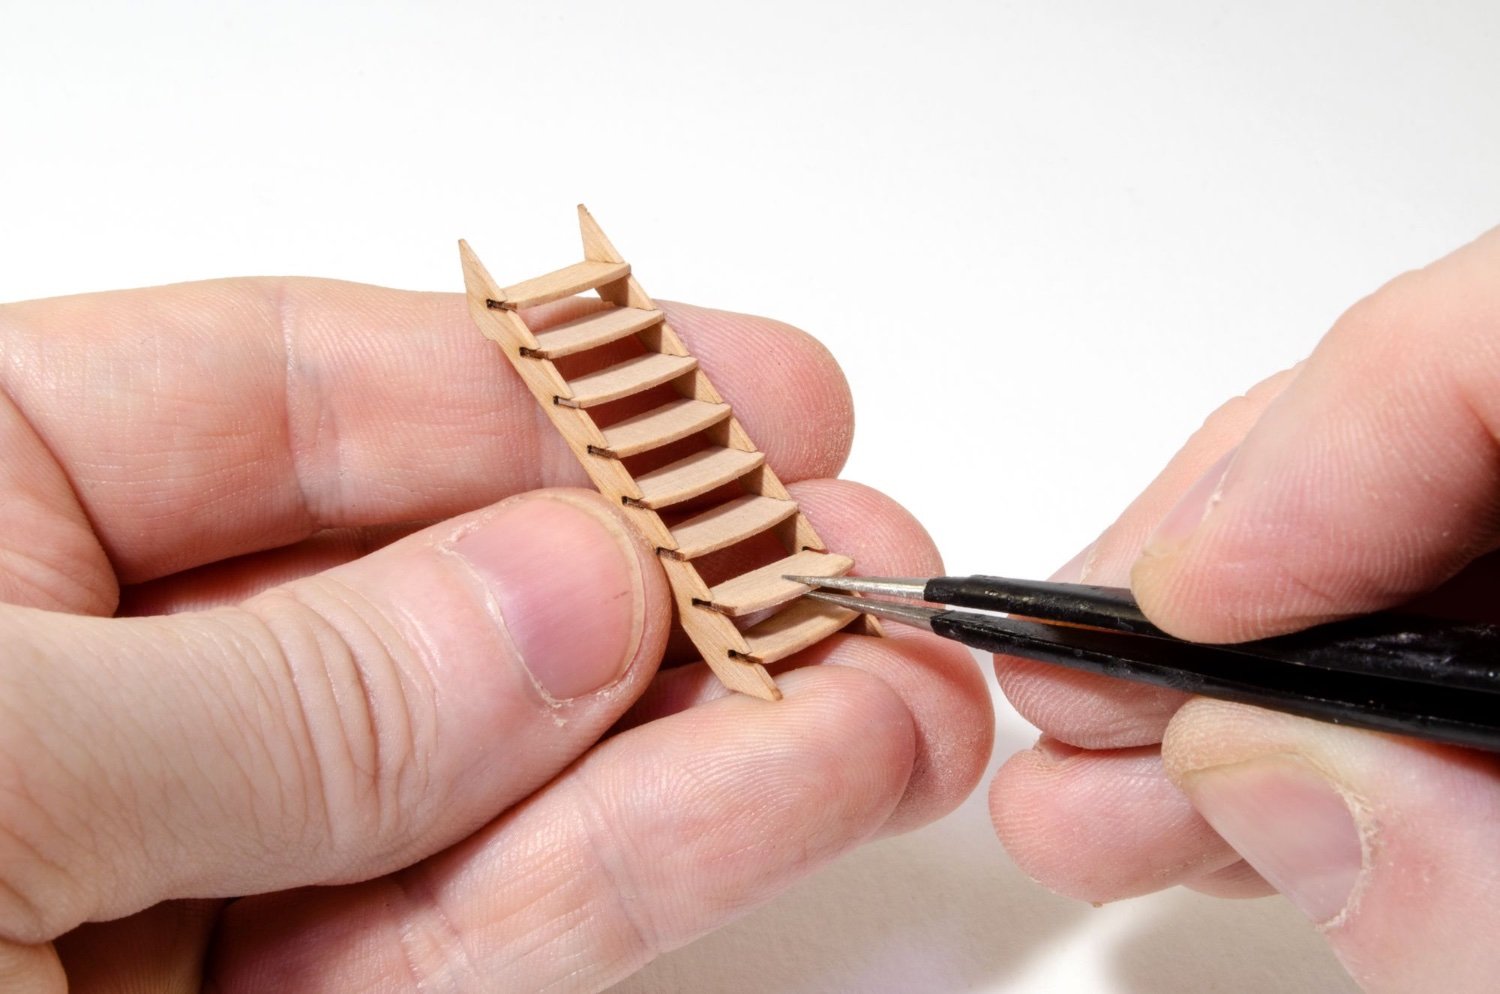
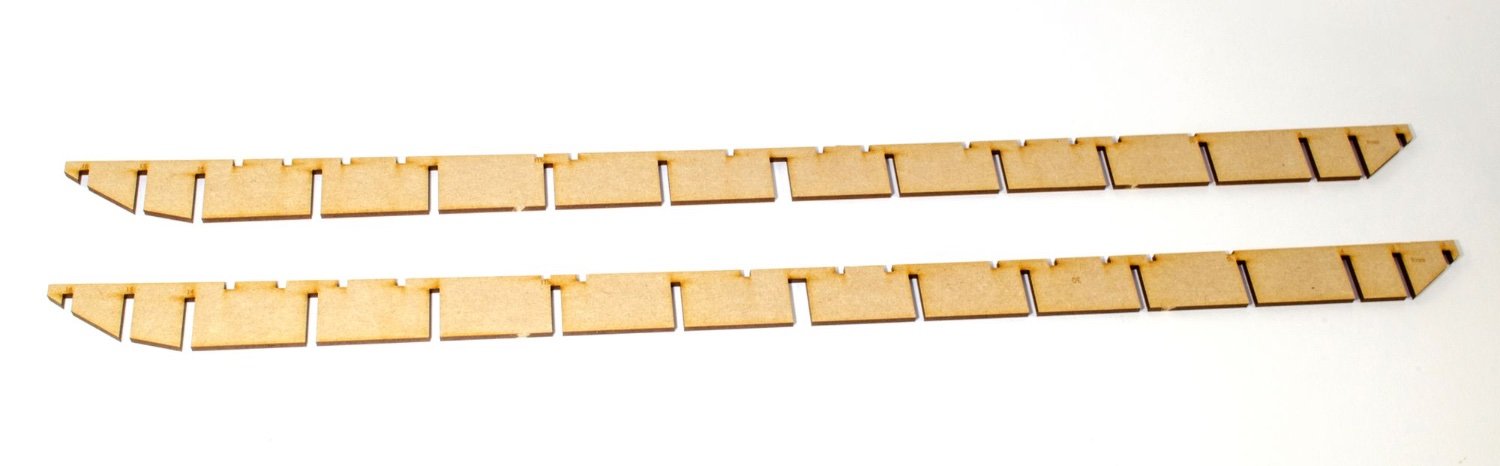
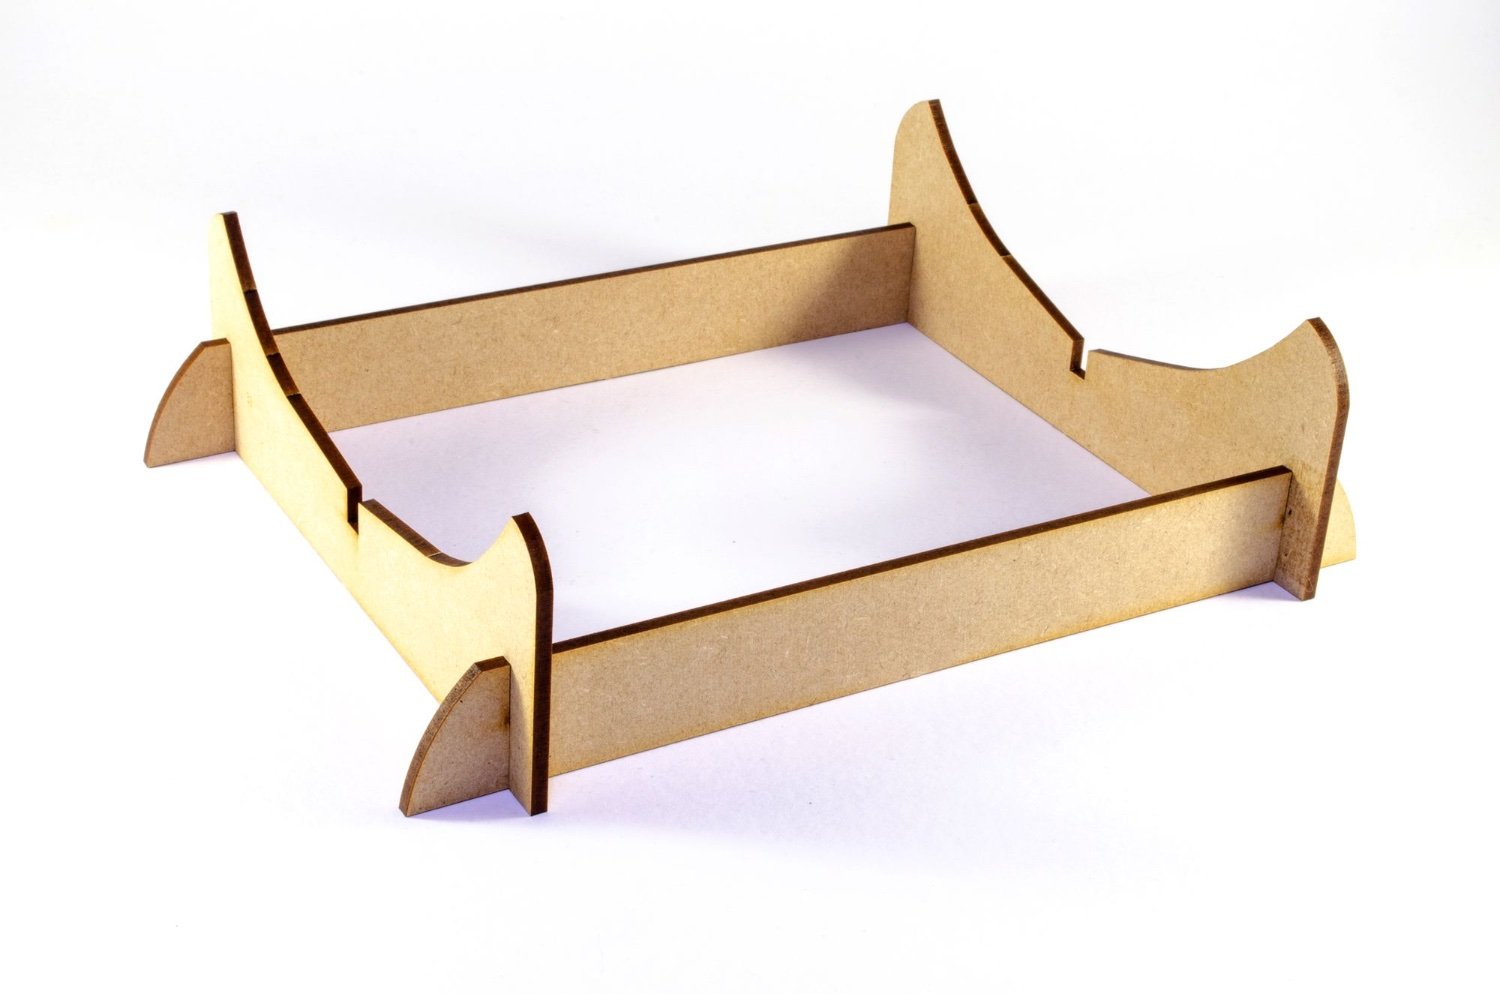
I was going to do these with just my hand at the end of the hull, but thought these gave a better sense of proportion!
- 488 replies
-
- 11
-
-
- Indefatigable
- Vanguard Models
- (and 1 more)
-
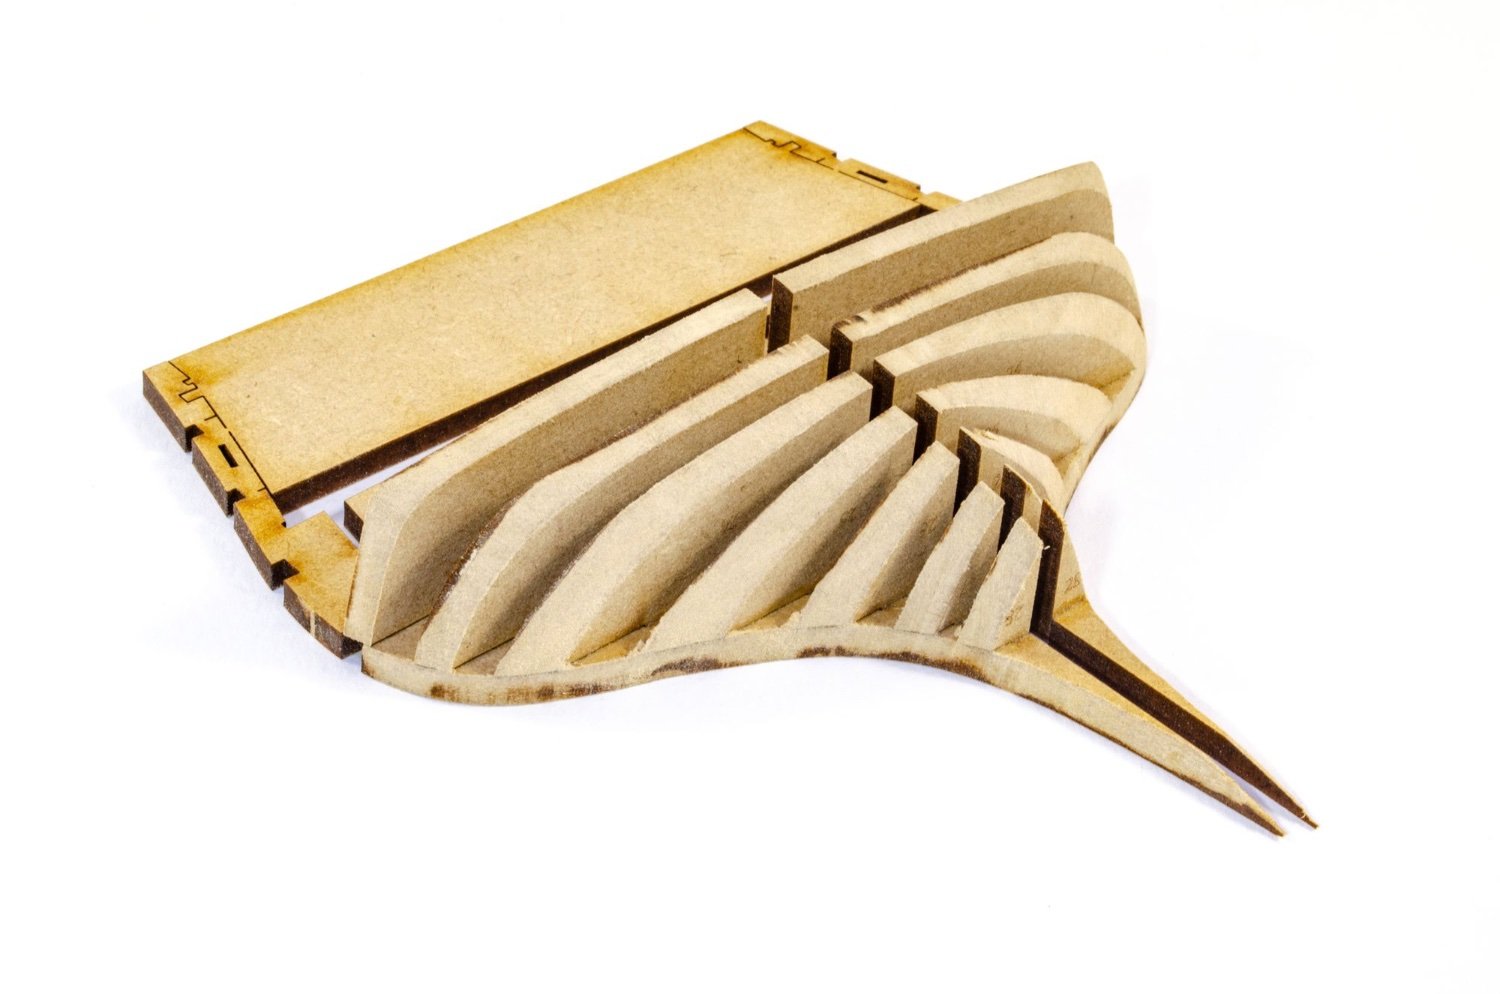
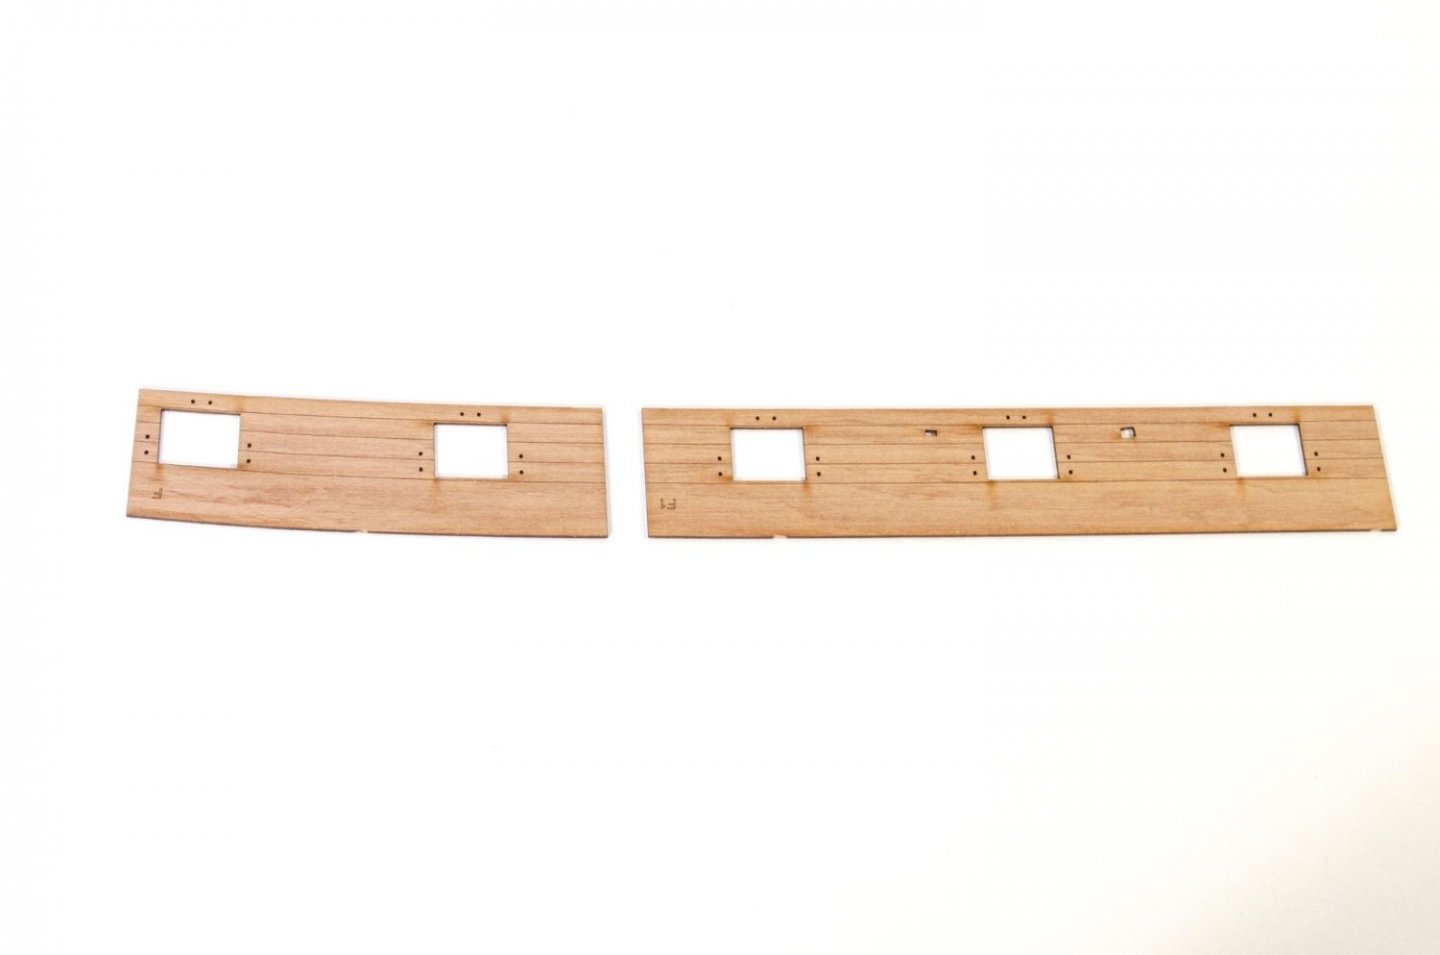
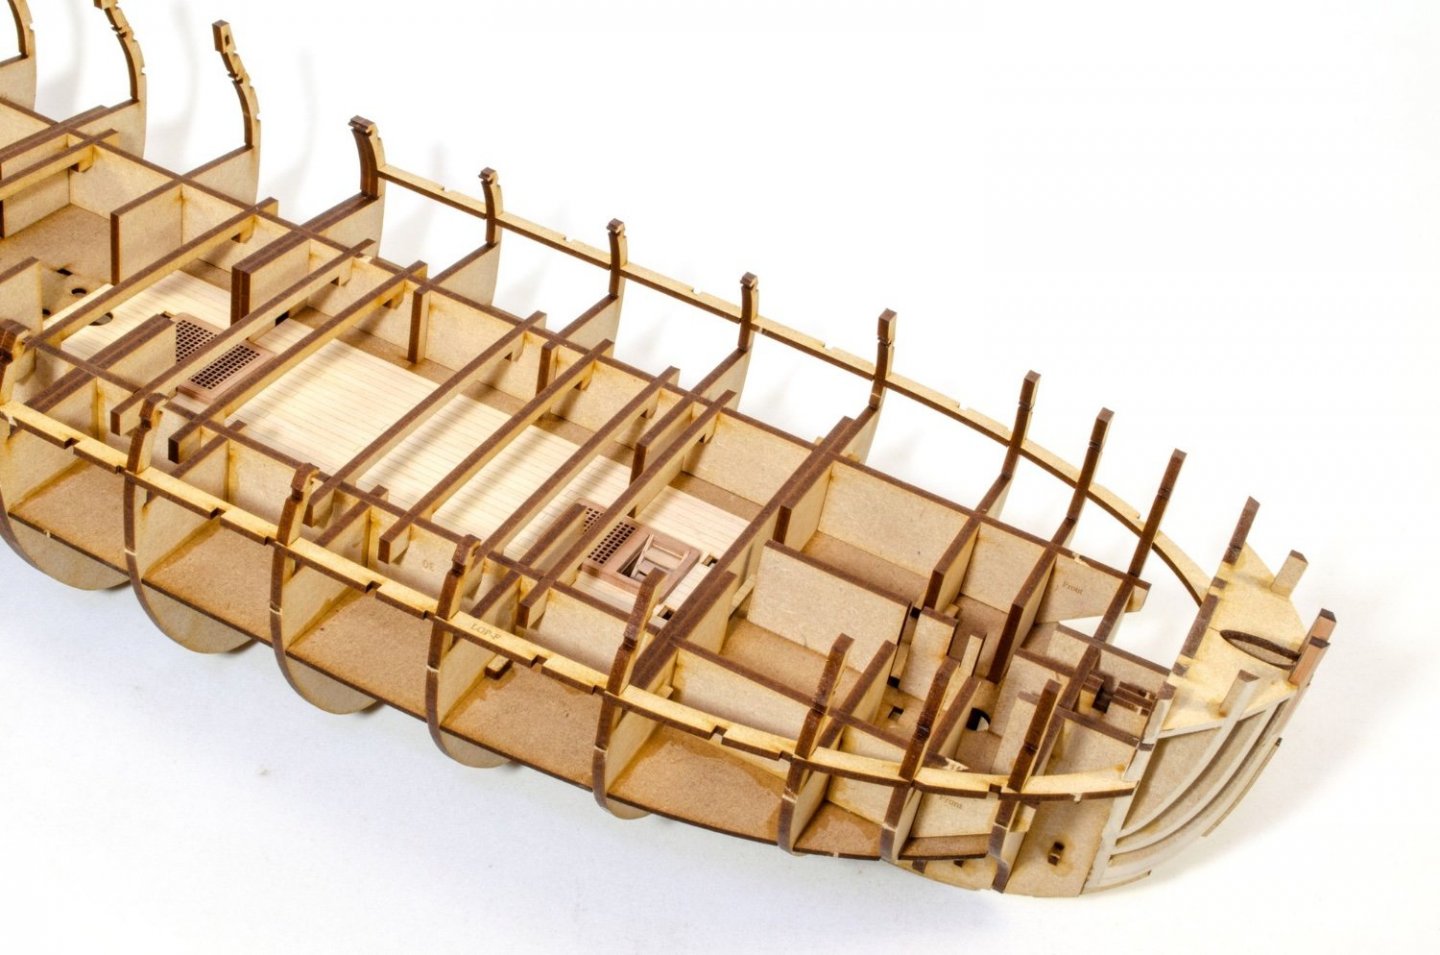
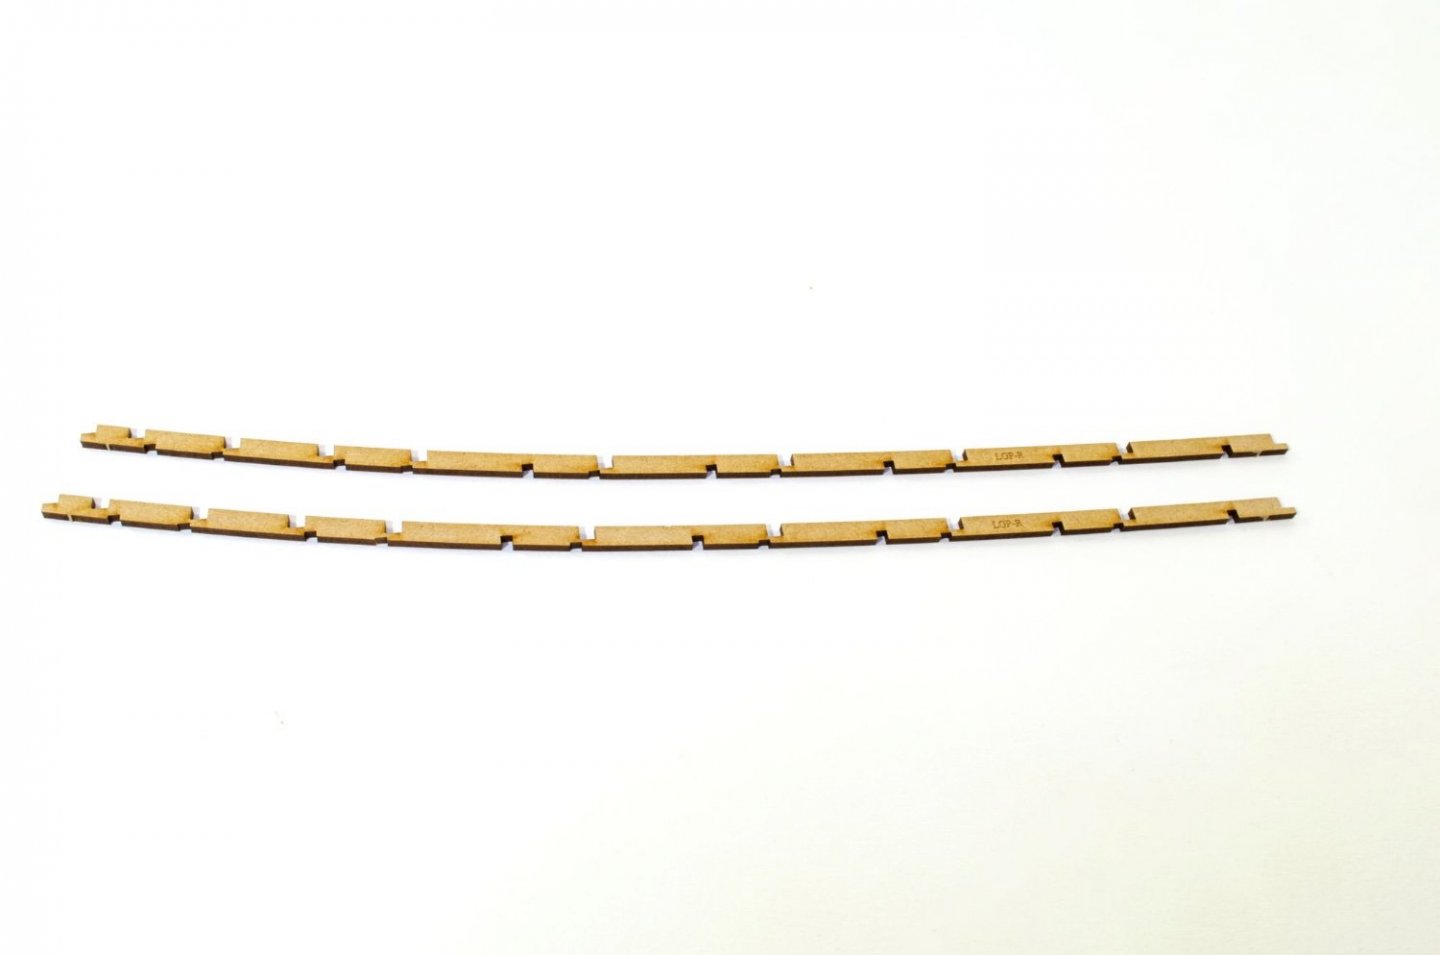
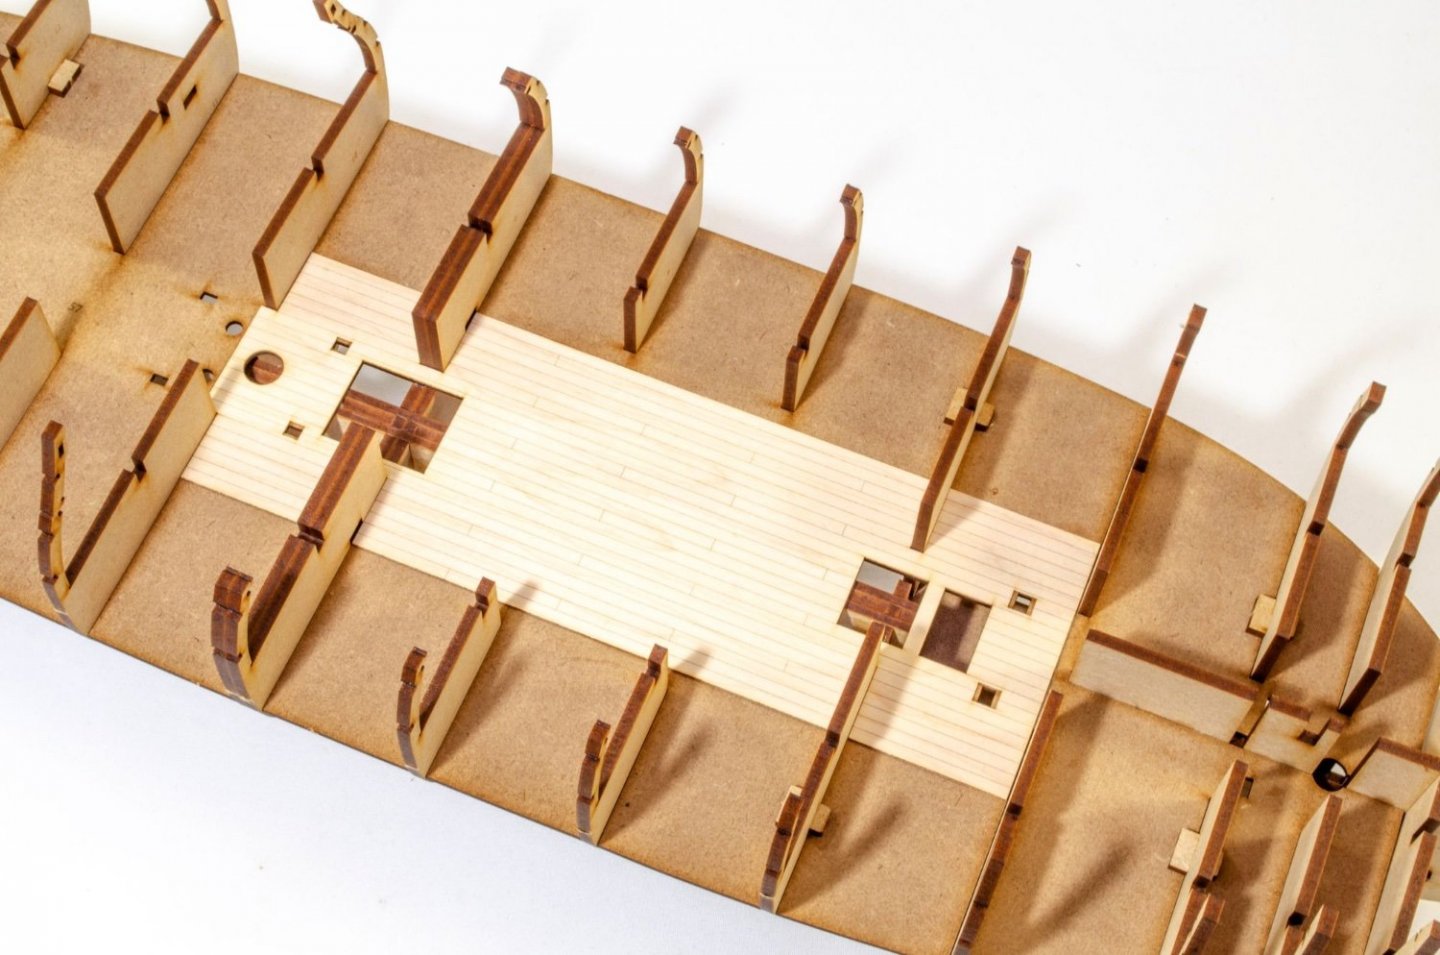
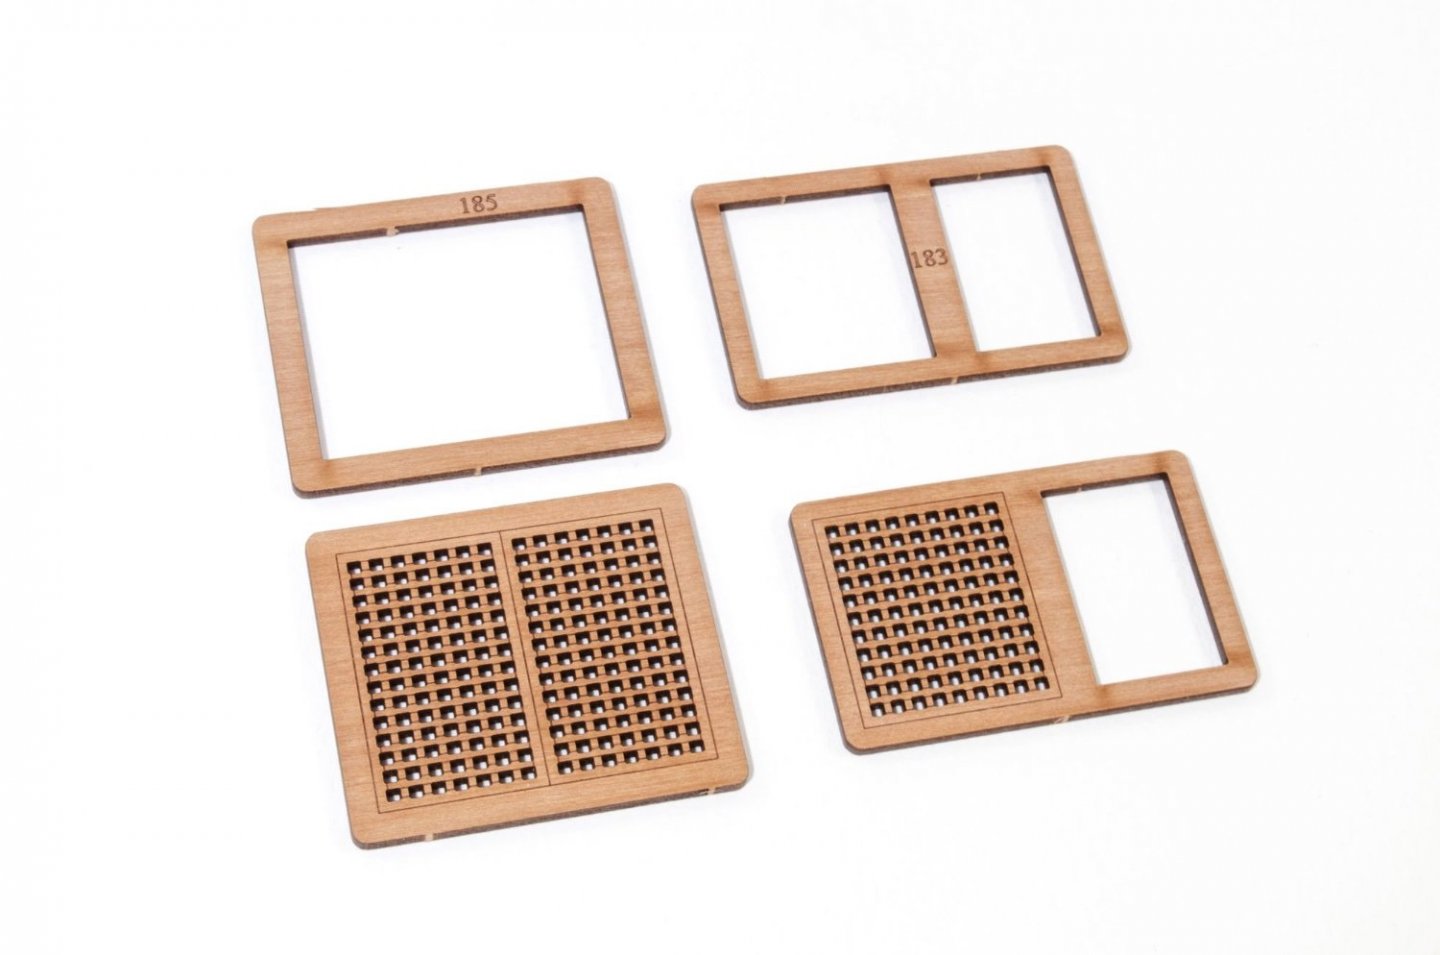
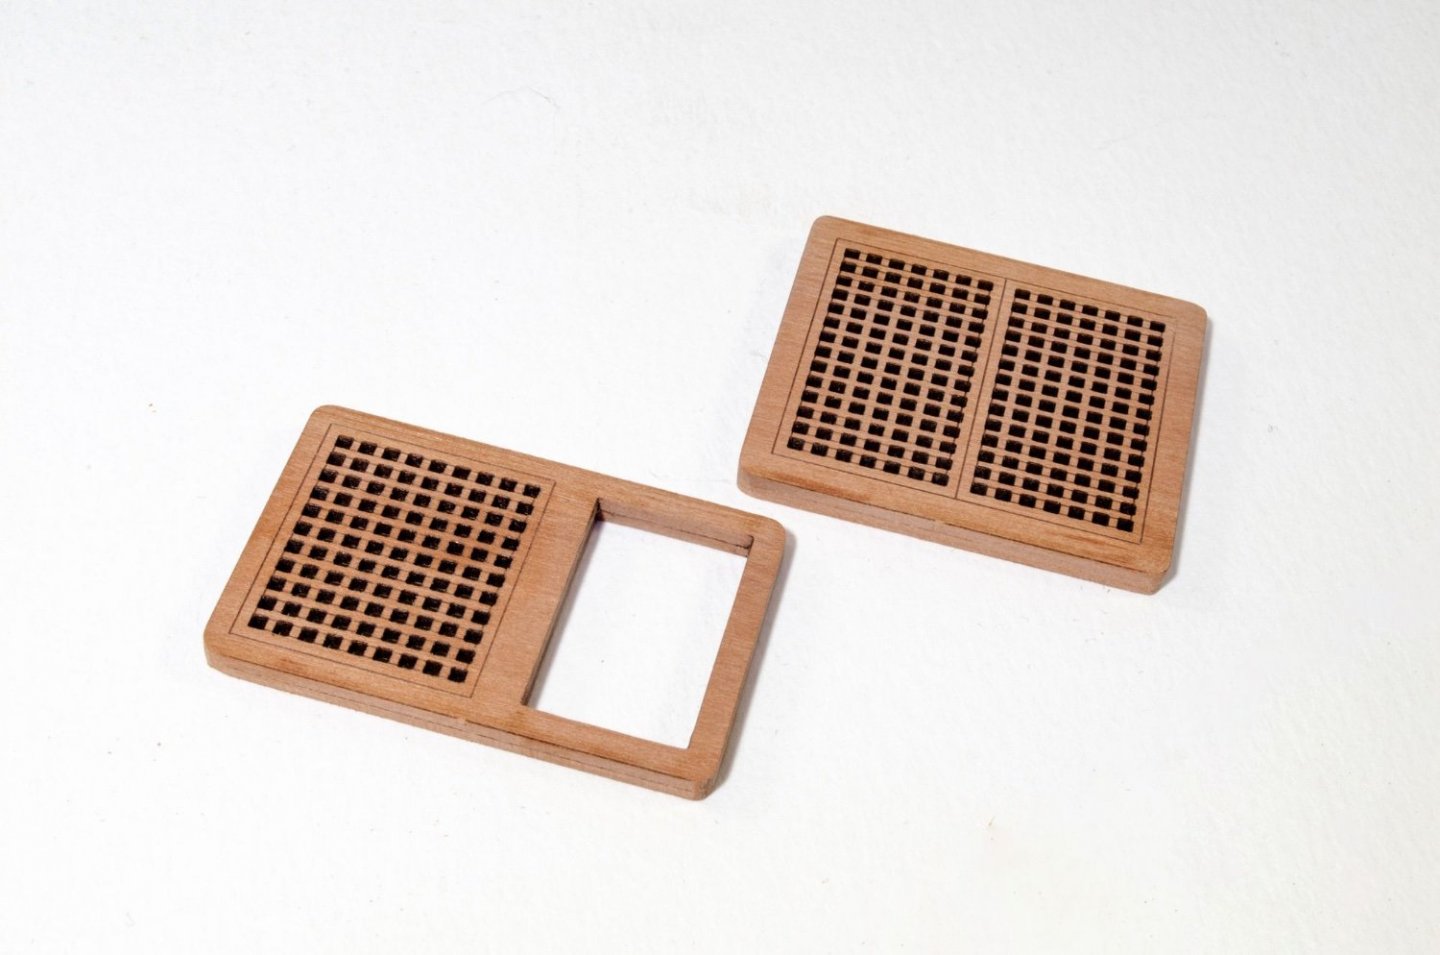
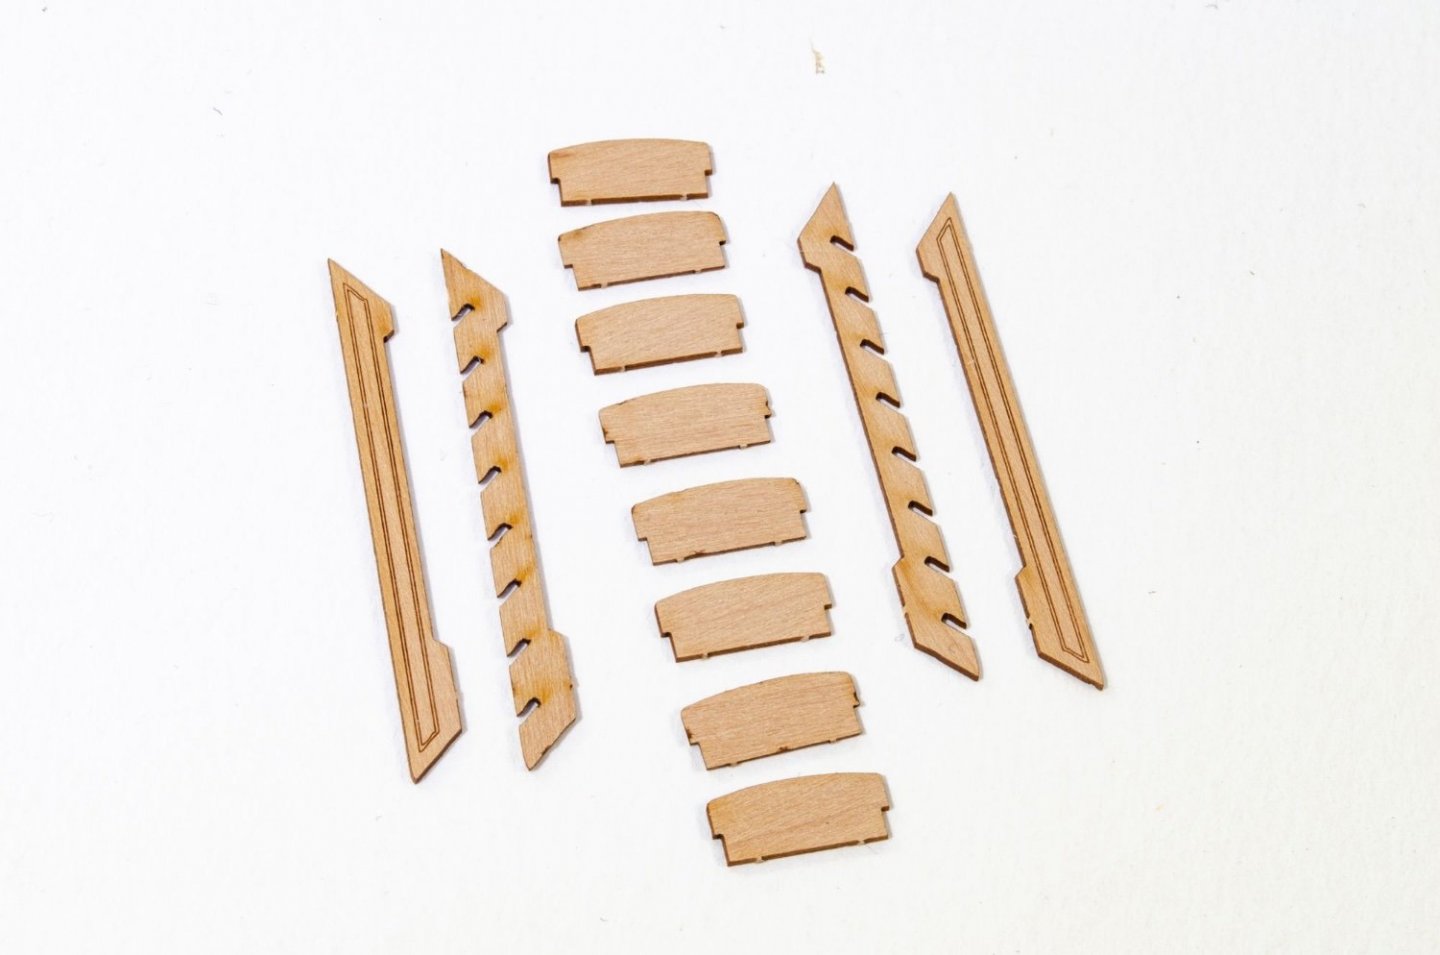
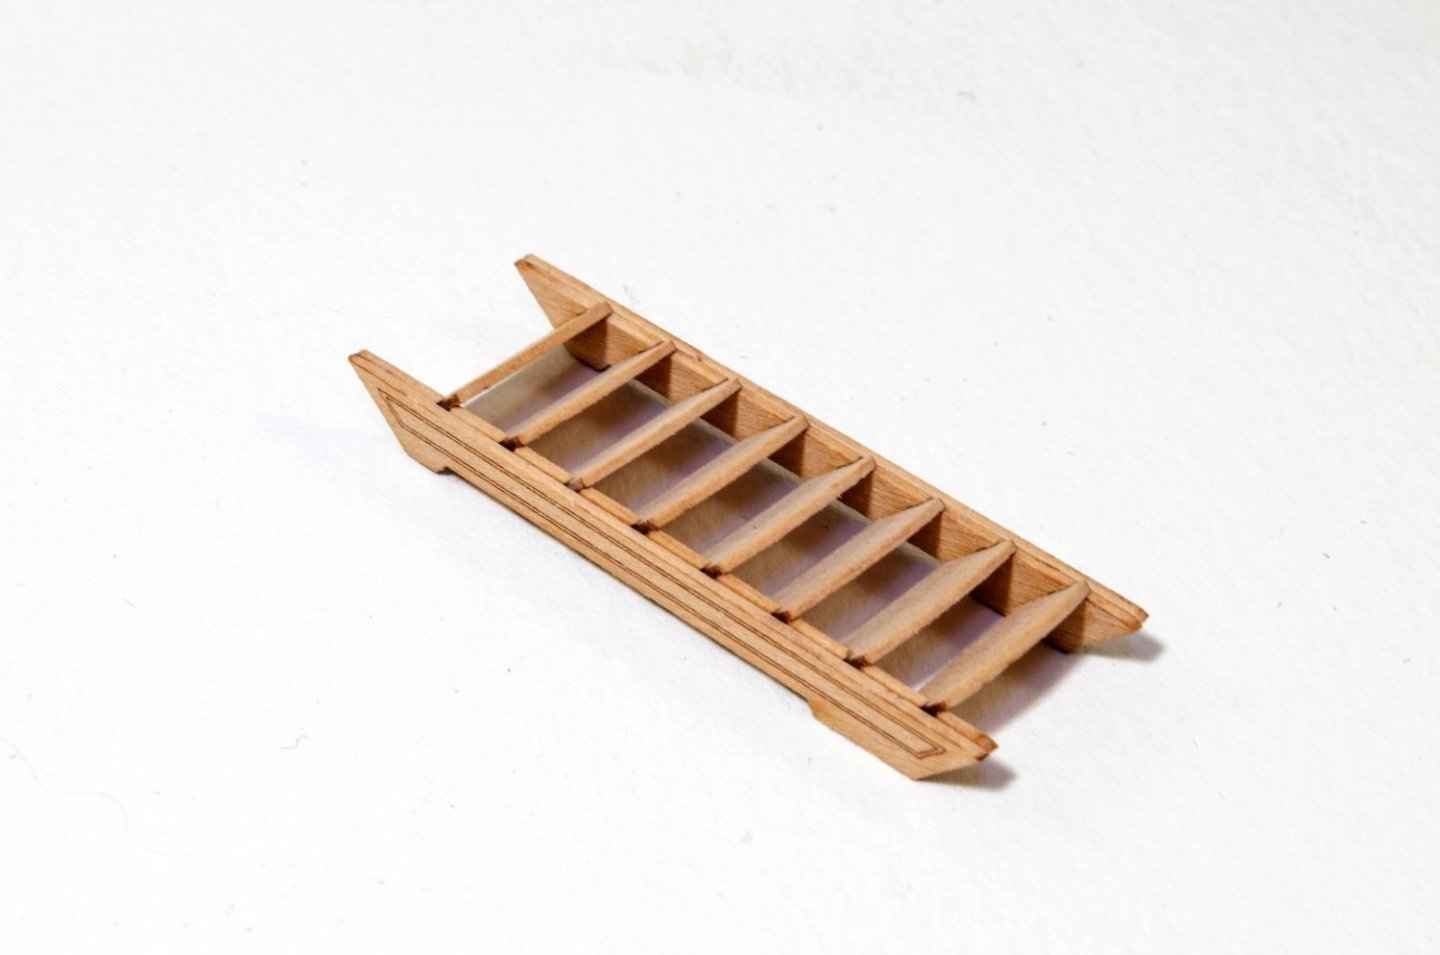
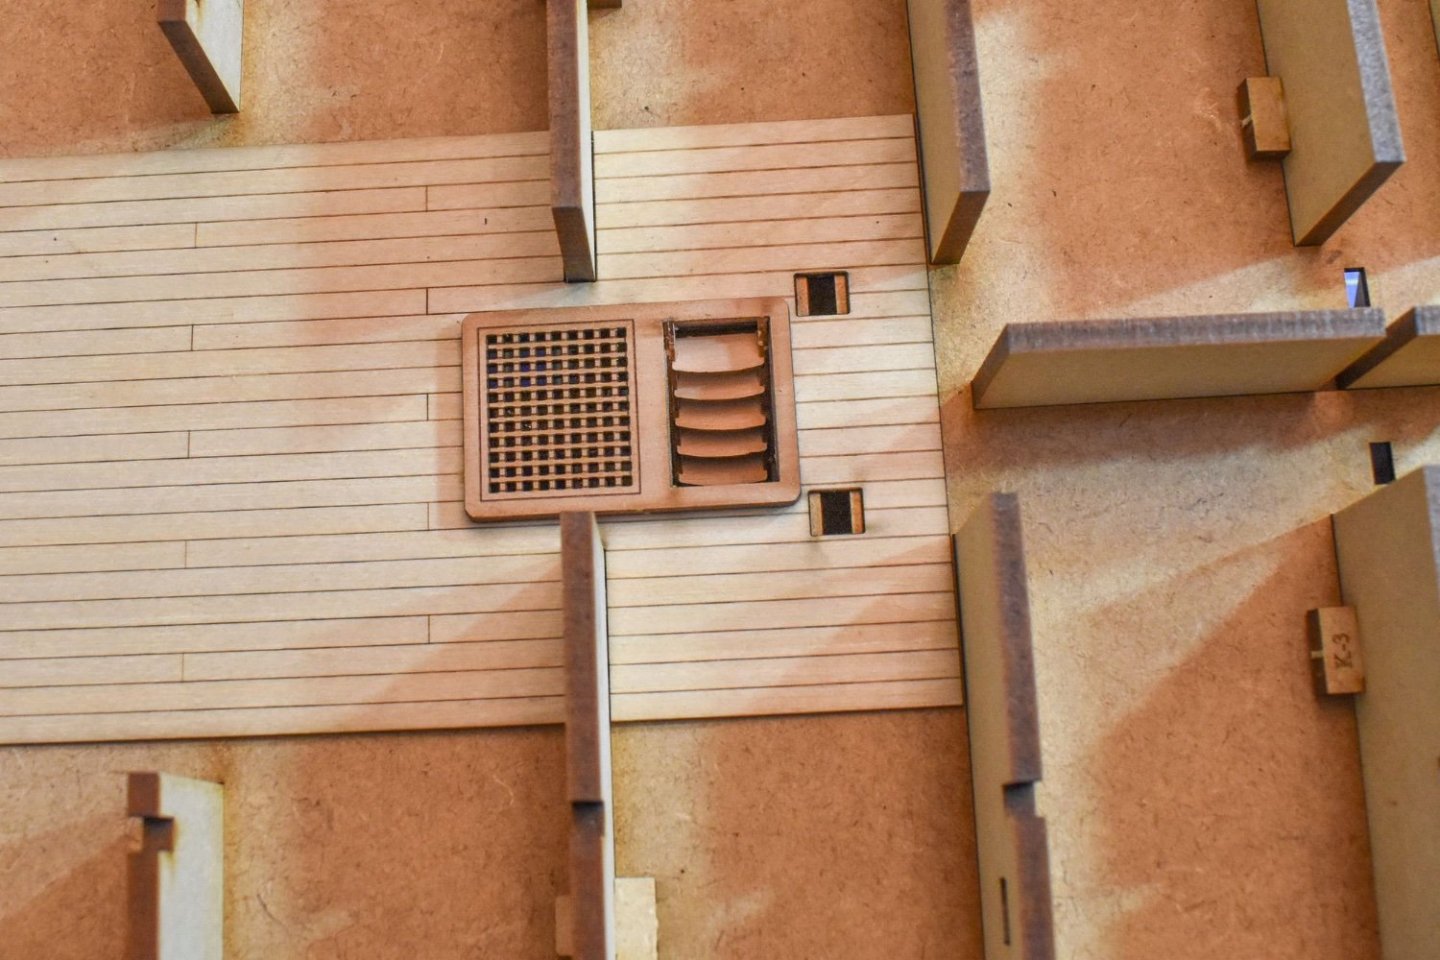
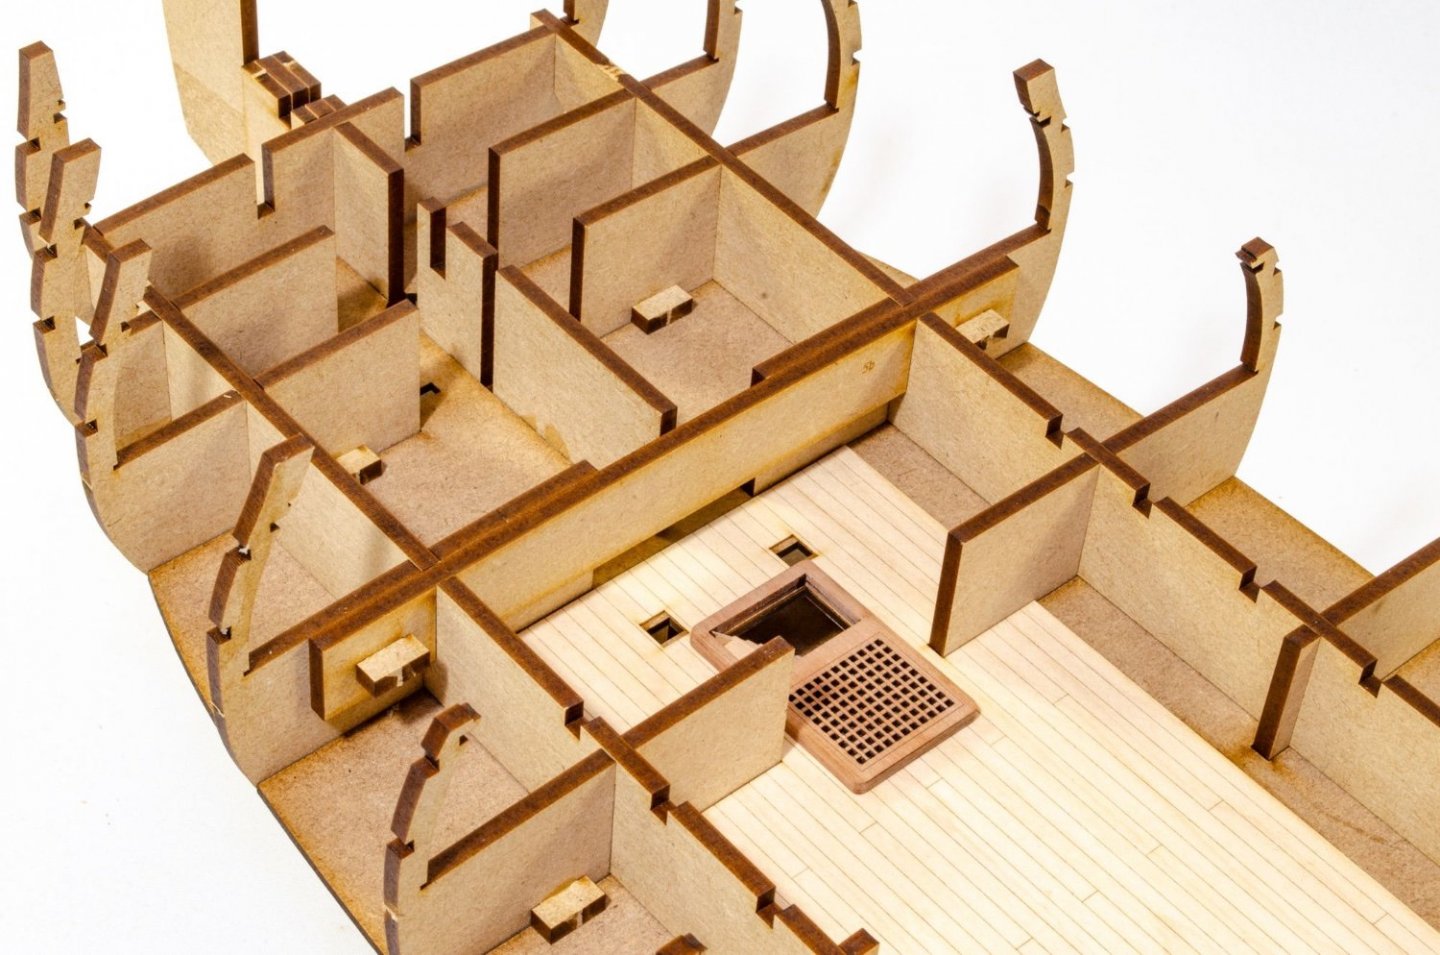
This photo shows the standard ply engraved section for the lower deck. As I've said, you'll be hard pressed to see this stuff, unless you're an ant that's crawled in. But in case you are, or have that endoscope I mentioned, the detail is there in part. Here you see the ply engraved part along with the optional maple deck section which I have opted to use for this build. The deck section is now glued into place. Two, 2-part grates are now built and added. And of course, you'll need some steps down to the dinky orlop deck. These two beams are now added, again without glue. These two beams hole them firmly in place and are located with two pegs each, glued into the slots. And lastly for this update, a whole raft of deck beams are fitted between those two longitudinal parts. Until next time!


- 488 replies
-
- 46
-
-
-
- Indefatigable
- Vanguard Models
- (and 1 more)
-
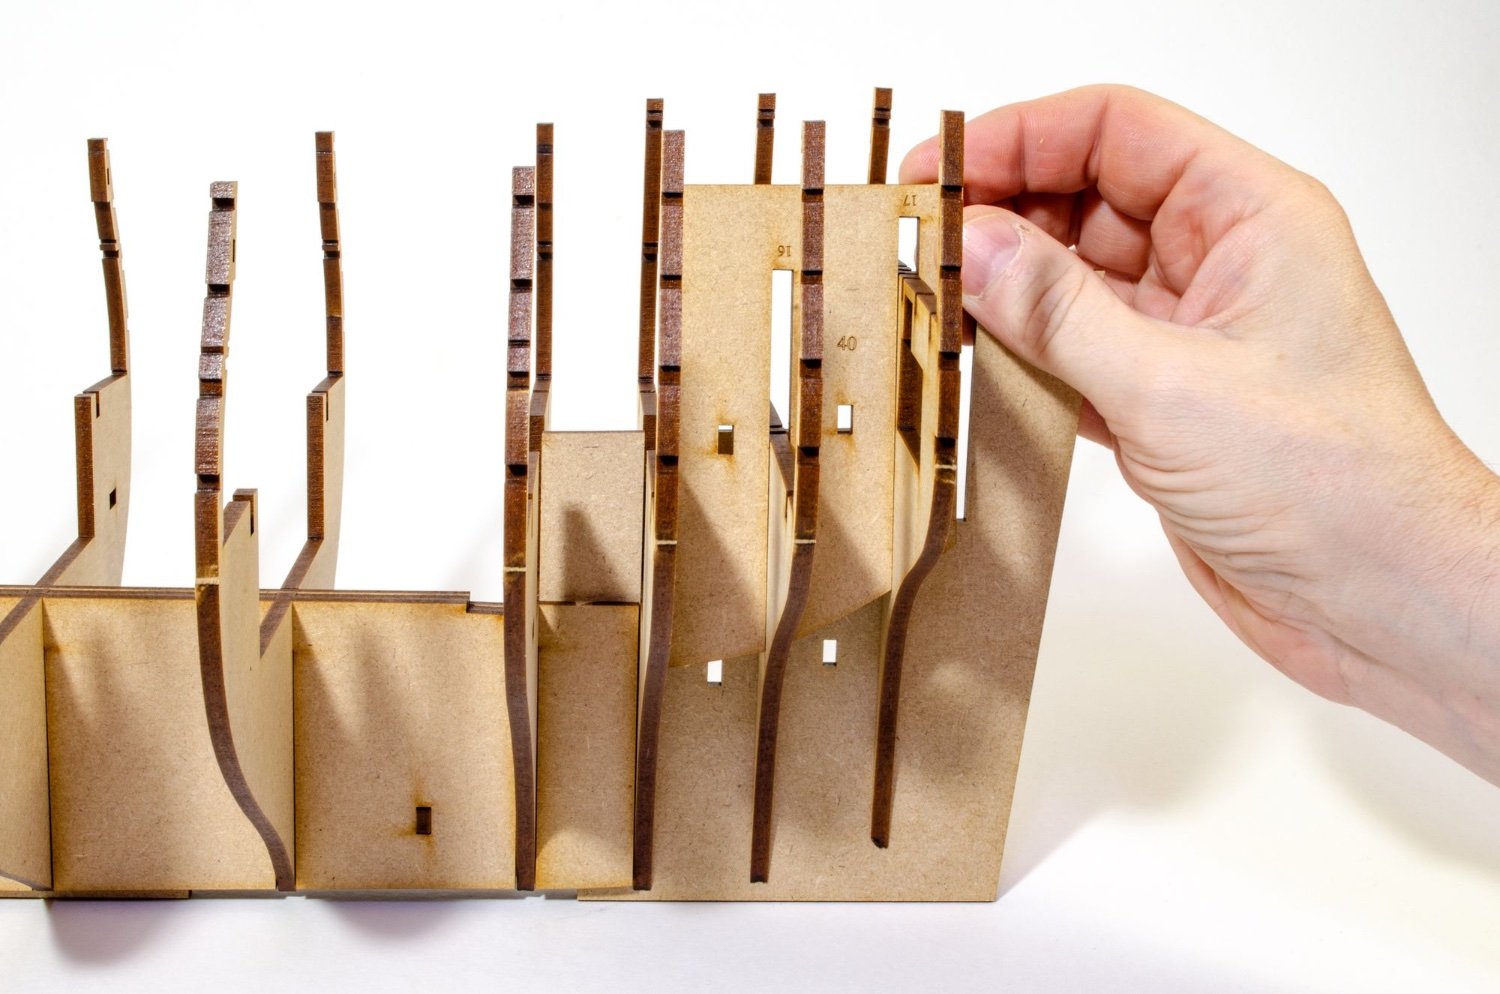
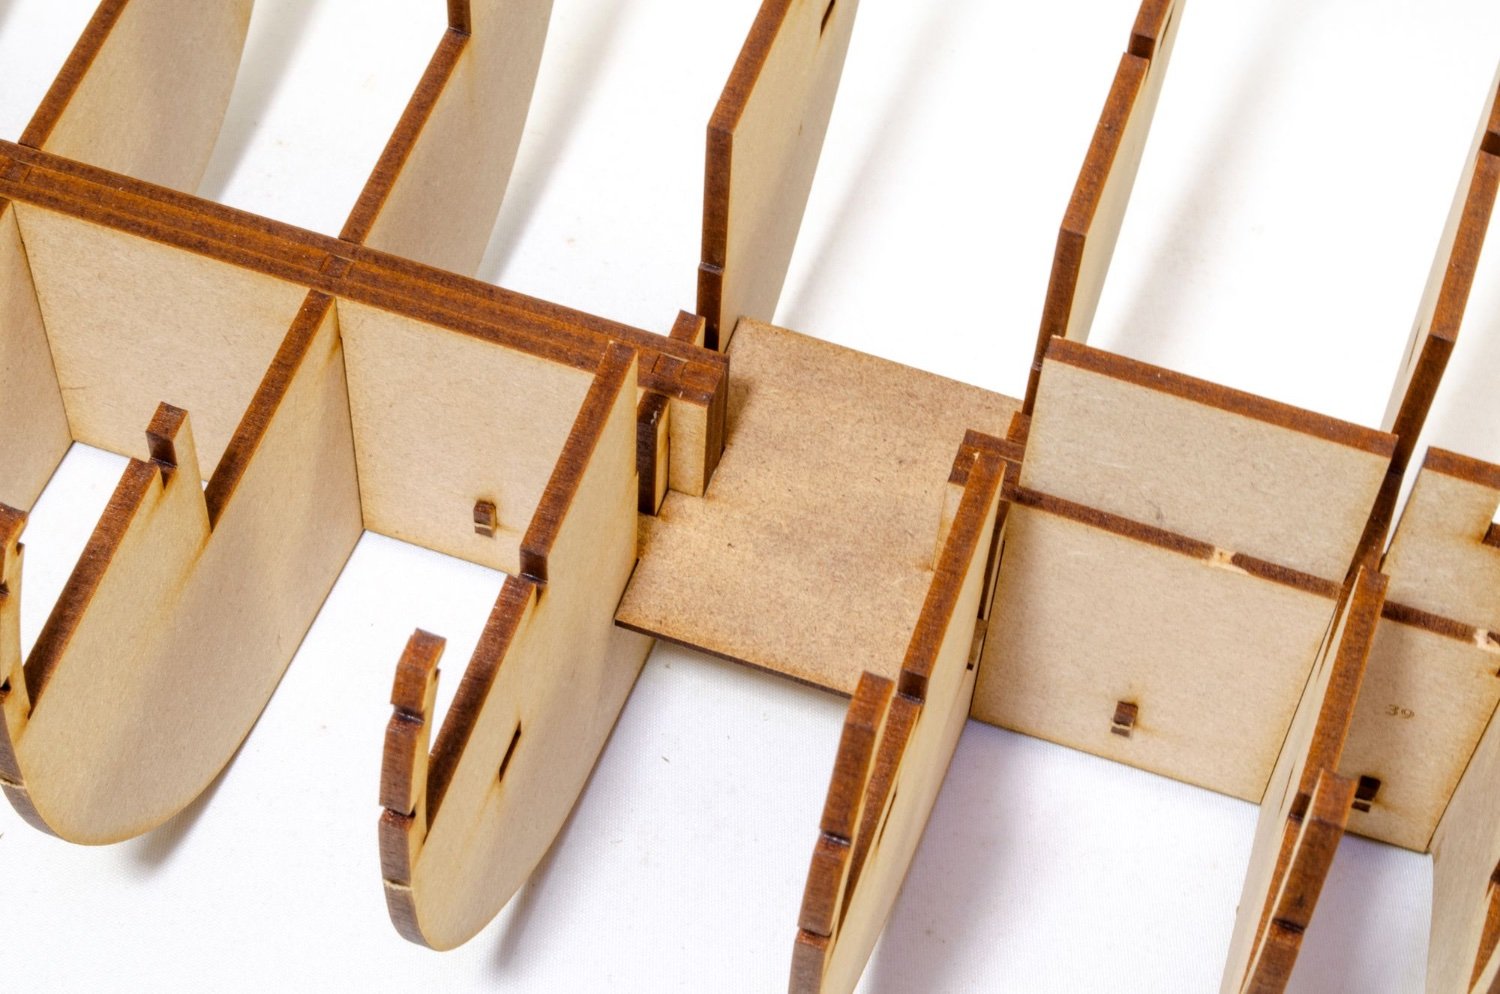
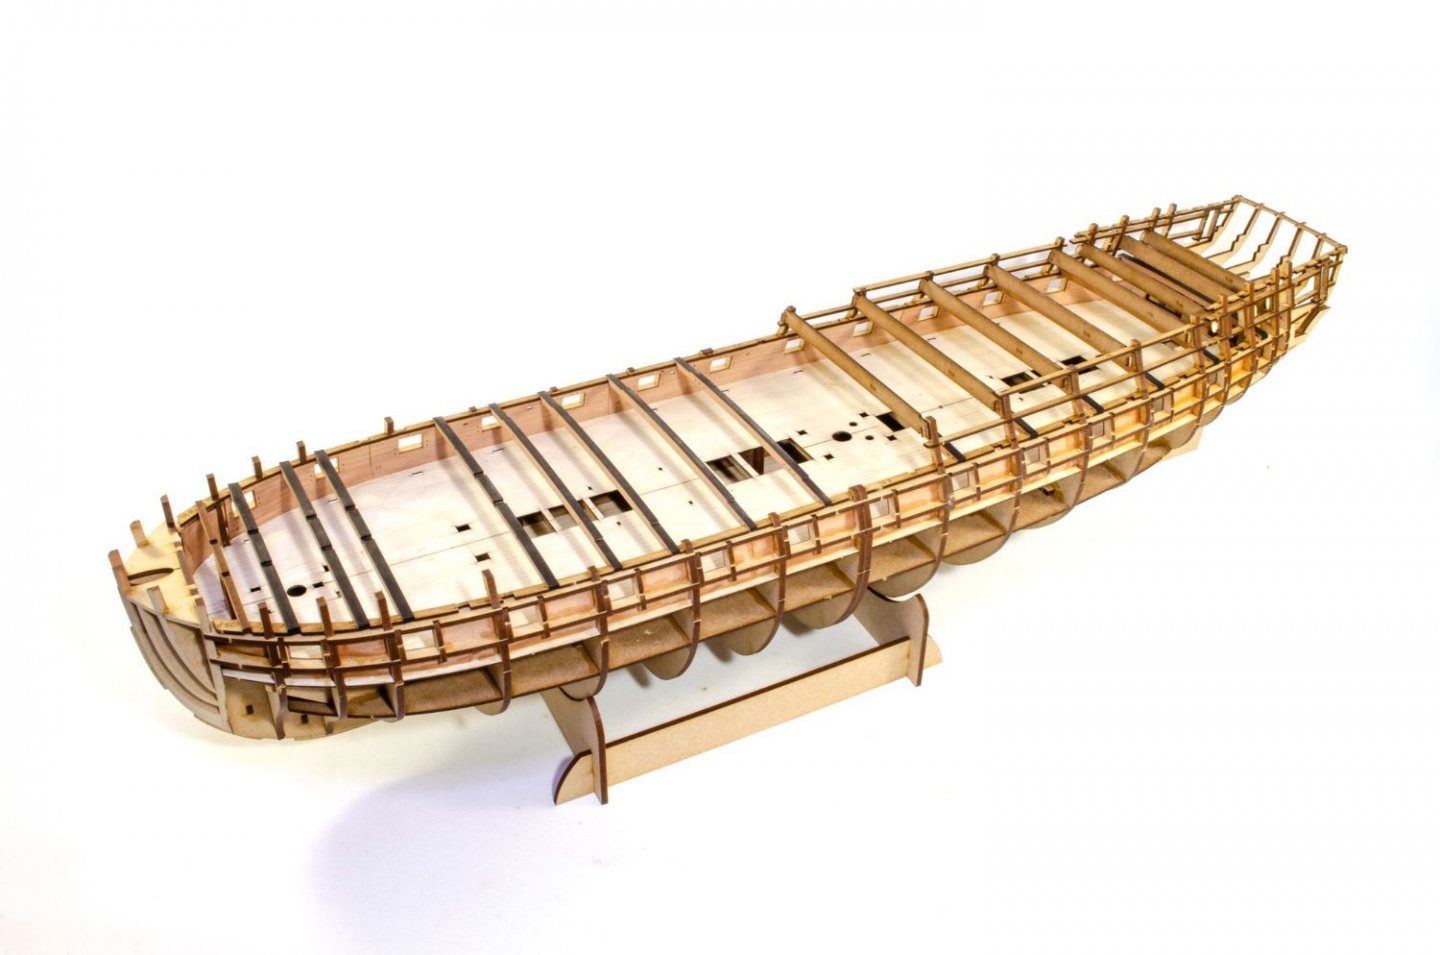
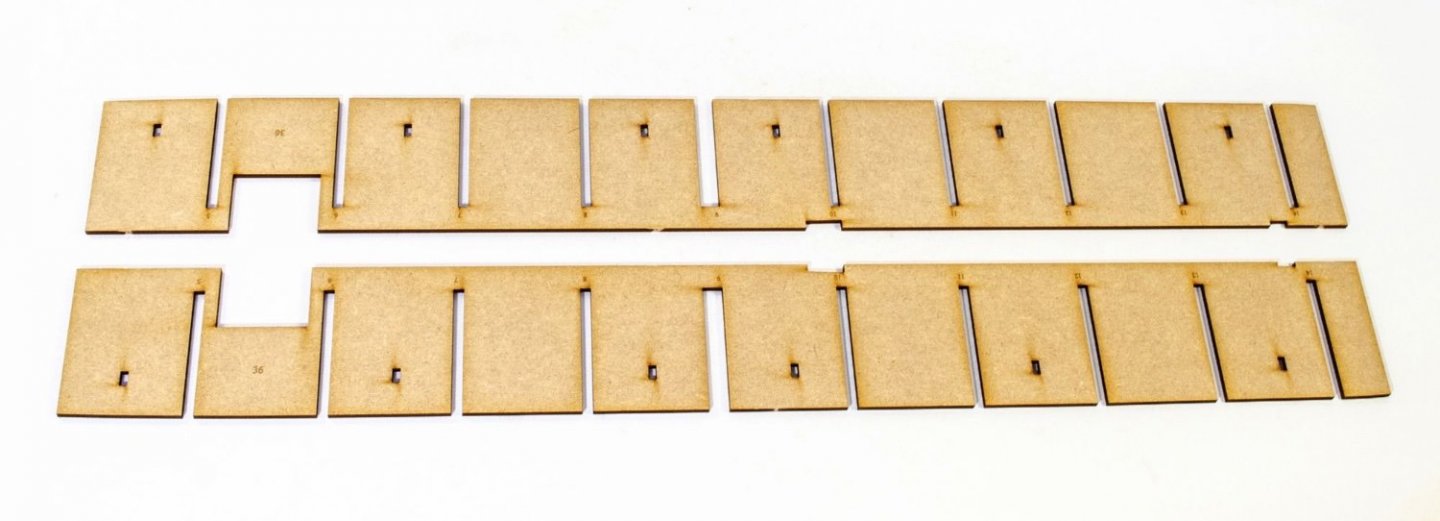
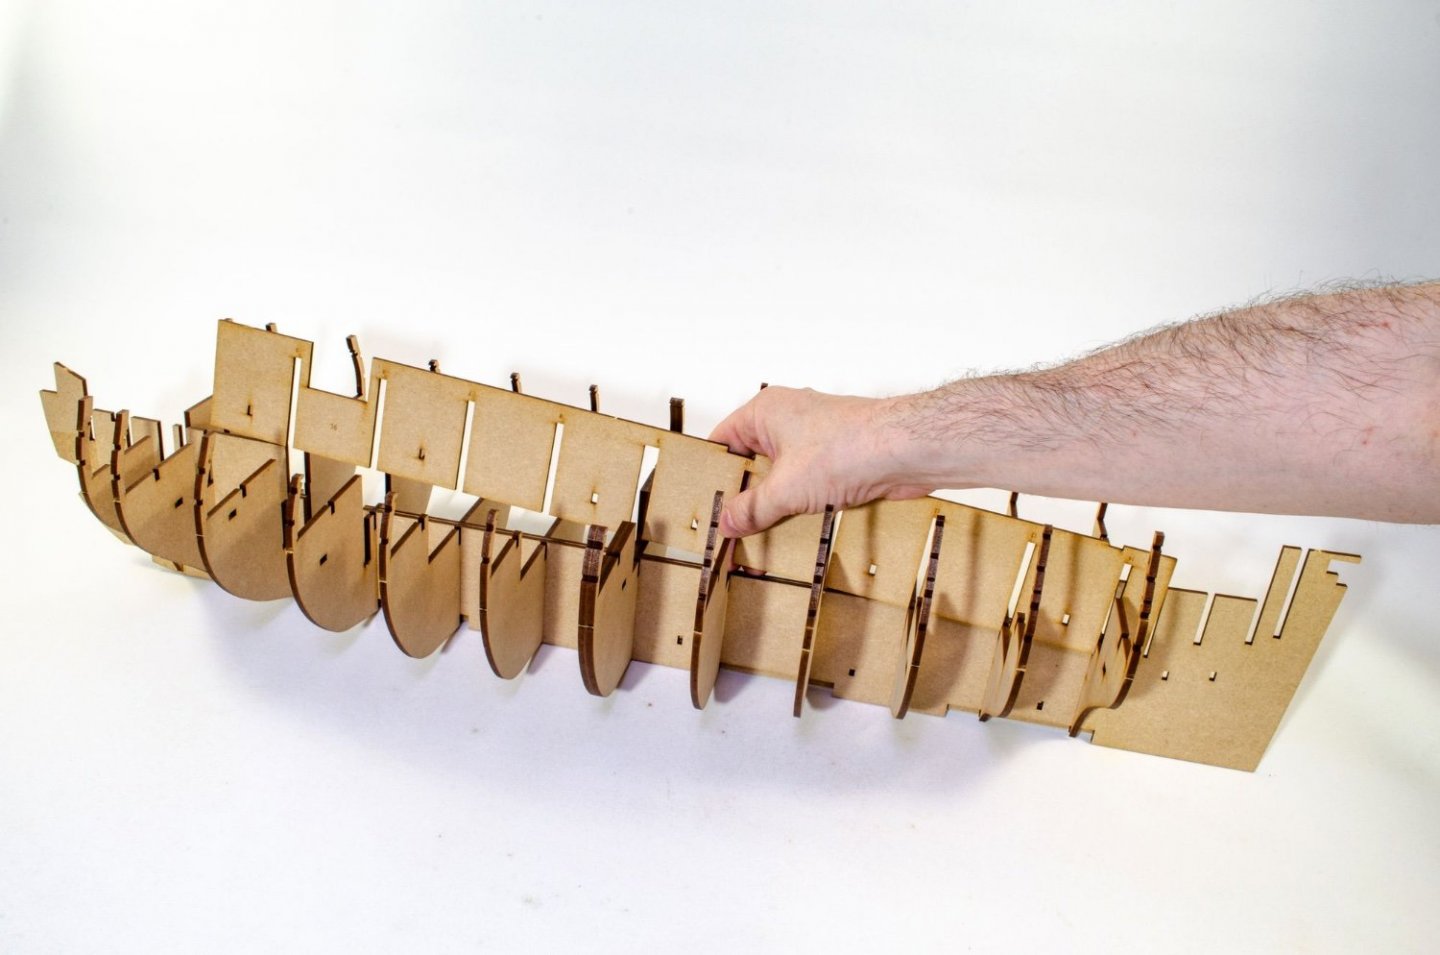
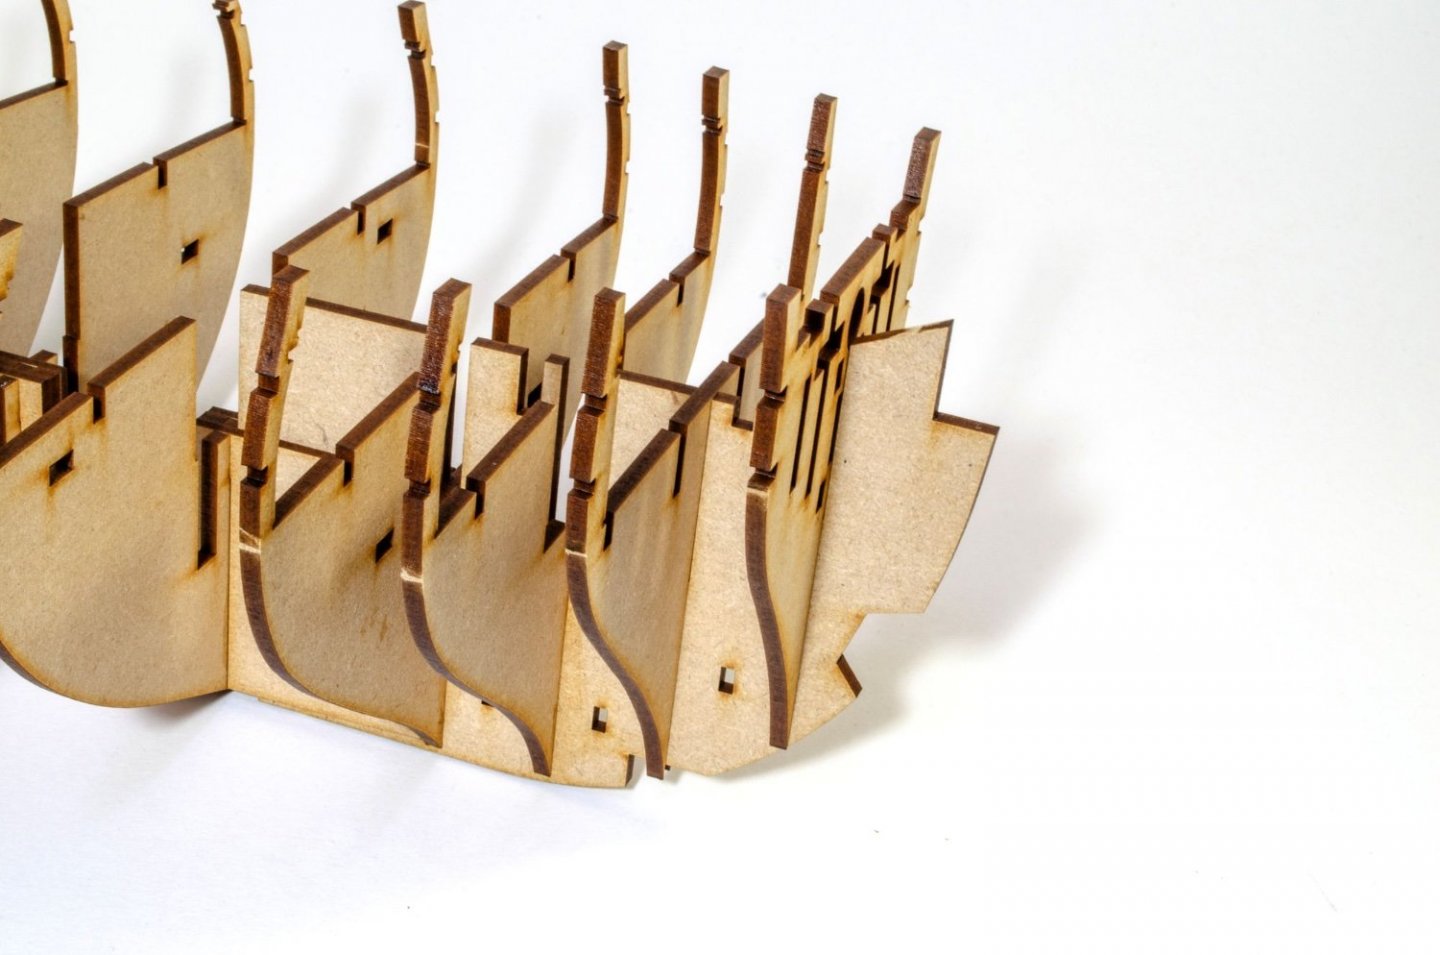
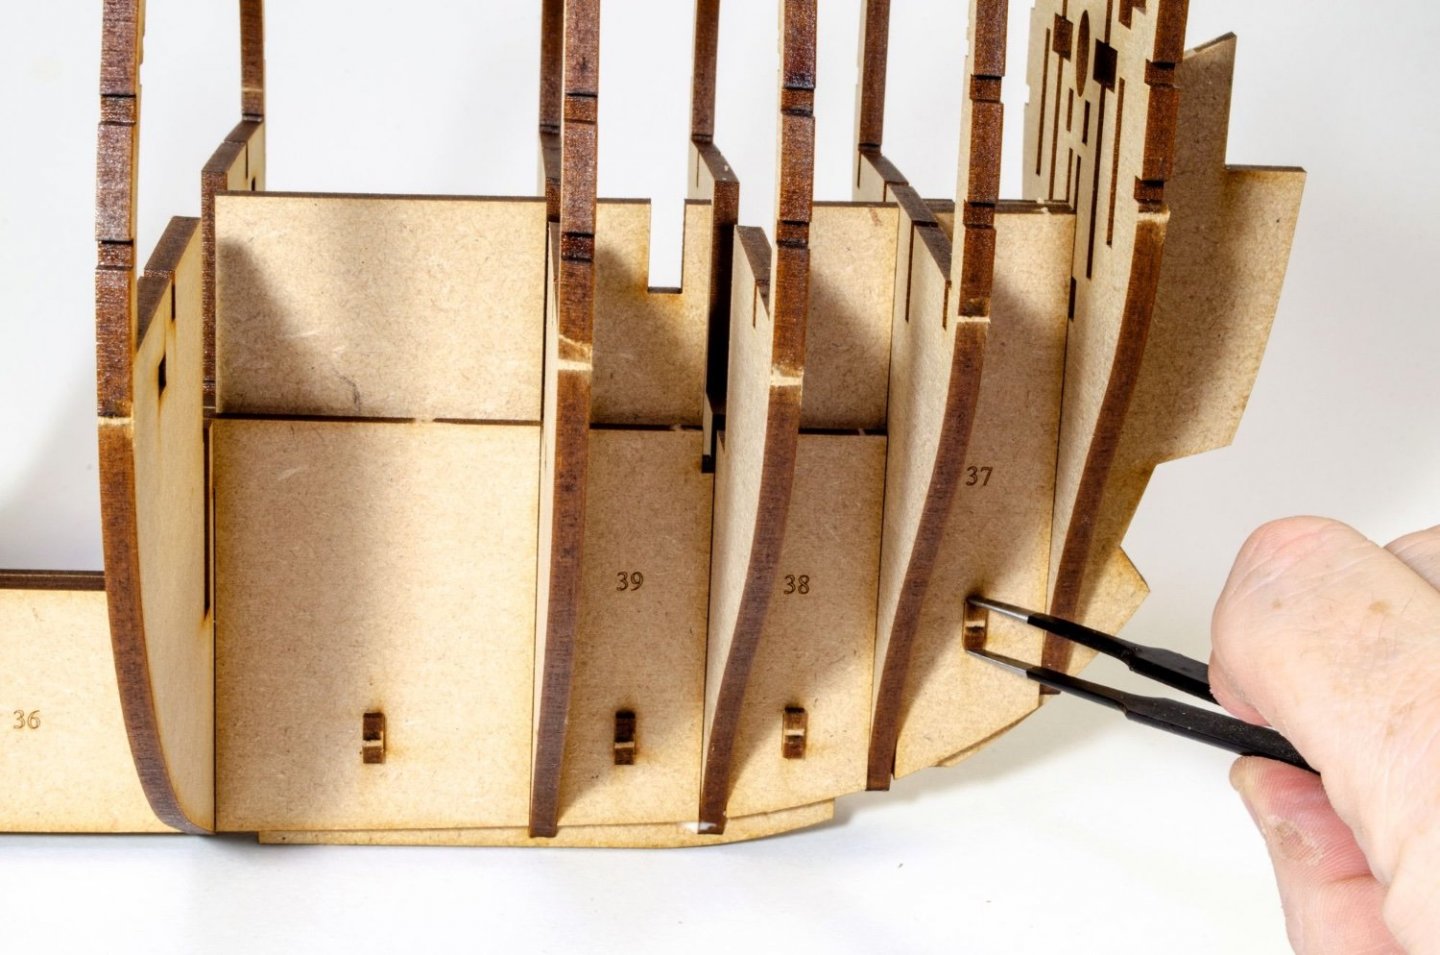
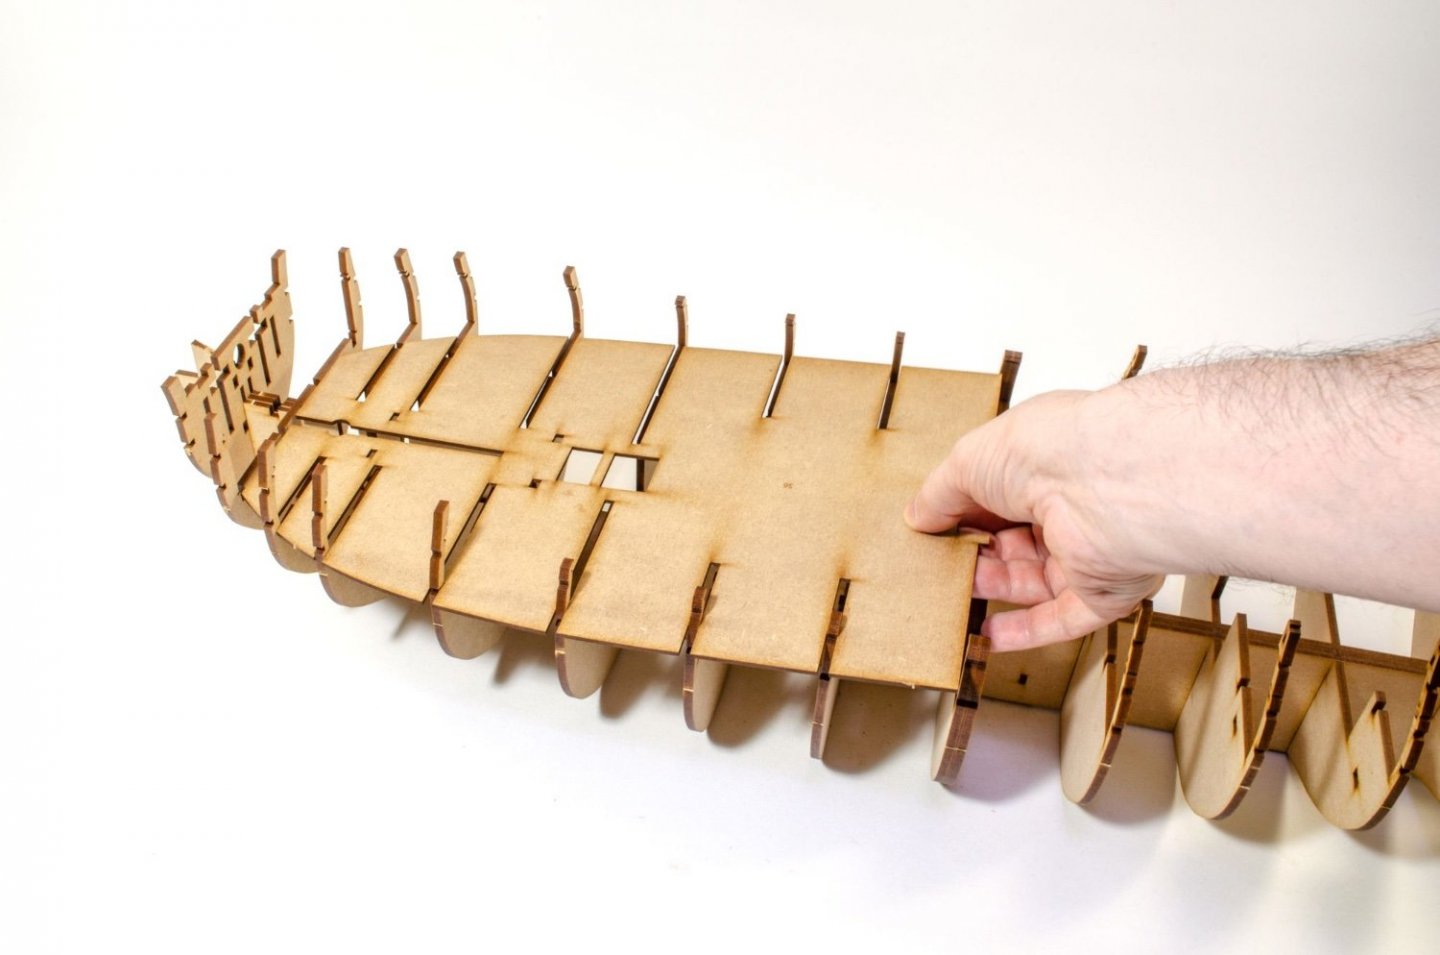
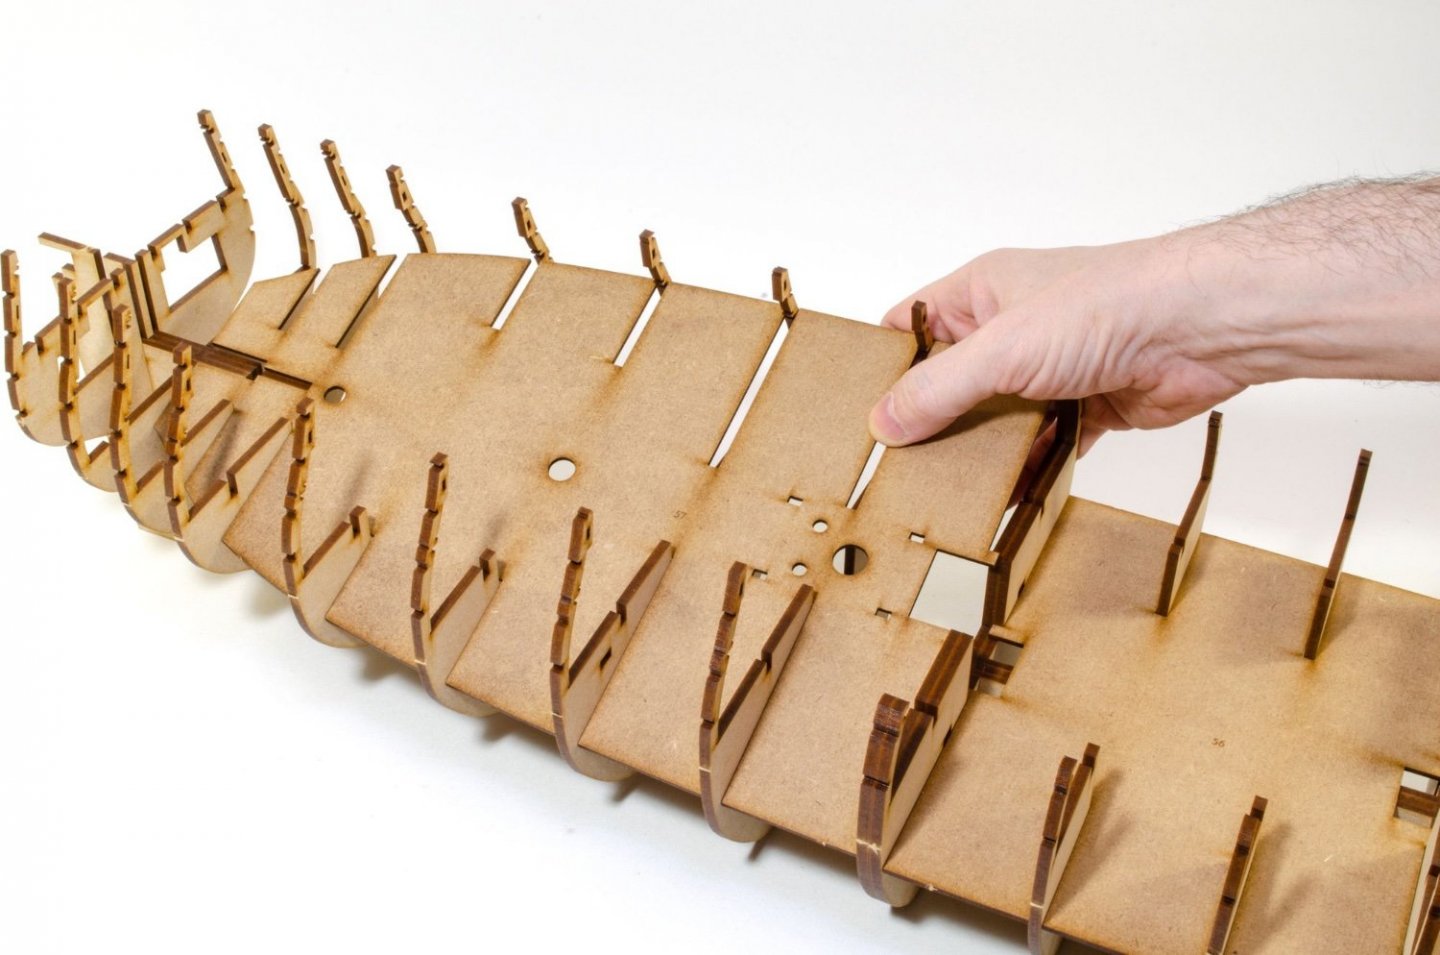
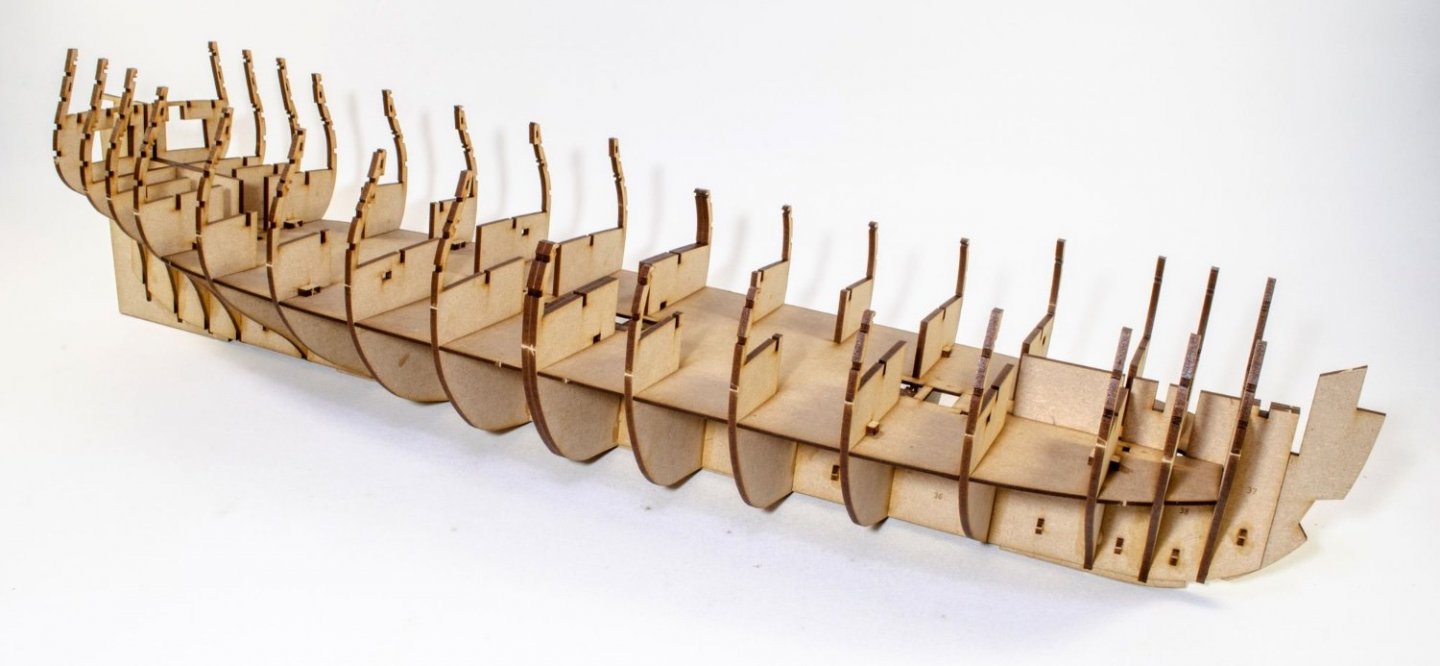
Work has now begun. First, the obligatory disposable cradle shot 😃 Indy certainly isn't short of bulkheads. There are 18 in total, with #9 midships being a double layer bulkhead. There are no bevel marks on Indy. They simply aren't needed for a kit of this level. Fairing will be an easy task. All bulkheads are 4mm MDF, as is the keel. The keel slots are numbered too so you get things in the right place. Indy is a strange build in that practically all you see in this update, with the exception of lower deck/orlop detail, can be assembled initially with no glue. All bulkheads you see being added here are put into position as such. Now this is where the magic happens. Once all bulkheads (apart from #1, #2, #15, #16, #17 and #18 because they aren't needed yet) are slotted into their position, these keel doublers are added, bulking out the keel to 12mm! What these do is to hold the bulkheads in their exact position. while pegs slot through the holes to lock everything into position. Zero glue apart from the pegs themselves. Bulkheads #15, #16 and #17 are now added because the fairing parts will now lock them into position as with the other bulkheads. Bulkheads #1 and #2 are now fitted, but NO GLUE at this time. The fairing patterns are now added. You will see these as No.s 37, 38 and 39. Like the others, these are pegged into place. Is there an orlop deck? There certainly is. This is it 😆 Nothing more is needed. In fact, you'll probably not even see this without an endoscope. This part is glued into place. The 3mm MDF sub deck is now fitted. Care needs to be taken around the bulkhead ears. You should have no problem....just don't go charging in. To fit this, I ran some Titebond down the 12mm wide keel centreline. Nothing here needed to be weighted down or pinned. It fit perfectly with a reassuring push. Pegs are now pushed into position which give a further aid to making sure everything is level. At this stage, things look like this:


- 488 replies
-
- 39
-
-
-
- Indefatigable
- Vanguard Models
- (and 1 more)
-
You should only need to search for data pertaining to this site, as I can on my Mac:

-
I will do some day, but they are all in attic storage at moment and its more effort than I have strength for at moment.
- 16 replies
-
- 2
-
-
- Ranger
- Vanguard Models
- (and 2 more)
-
Ok. We've had no system software changes at all for a while now, and as this seems to be very unusual, I can only surmise that the problem lies at your side. Please try to clear your browser cache and cookies, then restart your browser. This will force MSW to reload for you and not from a copy stored on your computer. Give that a try and see if it works.