James H
-
Posts
6,139 -
Joined
-
Last visited
Content Type
Profiles
Forums
Gallery
Events
Everything posted by James H
-
 Yes, give or take a couple of millimetres, by Sphinx is around the stated size.
- 355 replies
-
- 1
-

-
- vanguard models
- Sphinx
- (and 1 more)
-
She's looking real nice!
-
They sure do. The main wale is quite proud, and there is a thinner section that runs above this.
- 355 replies
-
- 1
-
-
- vanguard models
- Sphinx
- (and 1 more)
-
That just looks really nice. 😁
-
I use spots of Gorilla CA gel on all my second planking 😉
-
You got it. All char removal is a good indicator that all is faired to the same level for inner bulwarks. I just used a piece of 110 grit paper, doubled over for stiffness but allowing to form into bulwark side shape.
- 857 replies
-
- 3
-
-
- Sphinx
- Vanguard Models
- (and 1 more)
-
So pleased to see this take shape like it is. 👍
-
Make sure that stern counter upper edge is roughly along the bottom edge of the stern timber slots. You can see the amendment in the manual. If you set it too low, the rails around the stern won't match those on the galleries and the stern fascia will be too low with the top of the bulwarks towards the top of the fascia.
-
Just sit tight and follow this topic. When there's any movement, this is where it will be posted.
-
I think with Sphinx taking a full day to produce, adding more to it wouldn't be beneficial (especially in cost to the customer), plus it's sort of reckoned that if you are building at Sphinx level, that you can work out any rough bevelling quite easily. The manual does show that bevelling, so the builder isn't really in the dark, so to speak. Ok, dimensions: Erycina, with masts and bowsprit is 525mm long x 379mm high Nisha, with masts etc. is 387mm long x 311mm high
- 36 replies
-
- 8
-
-

-
- vanguard models
- Erycina
- (and 2 more)
-
Work on this so far had been about 3hrs, and that includes my photos (not editing though). I think the build will be quicker than the others, but there is a little more rig, including those minimal shrouds and rats.
- 28 replies
-
- 5
-
-
- vanguard models
- Brixham trawler
- (and 2 more)
-
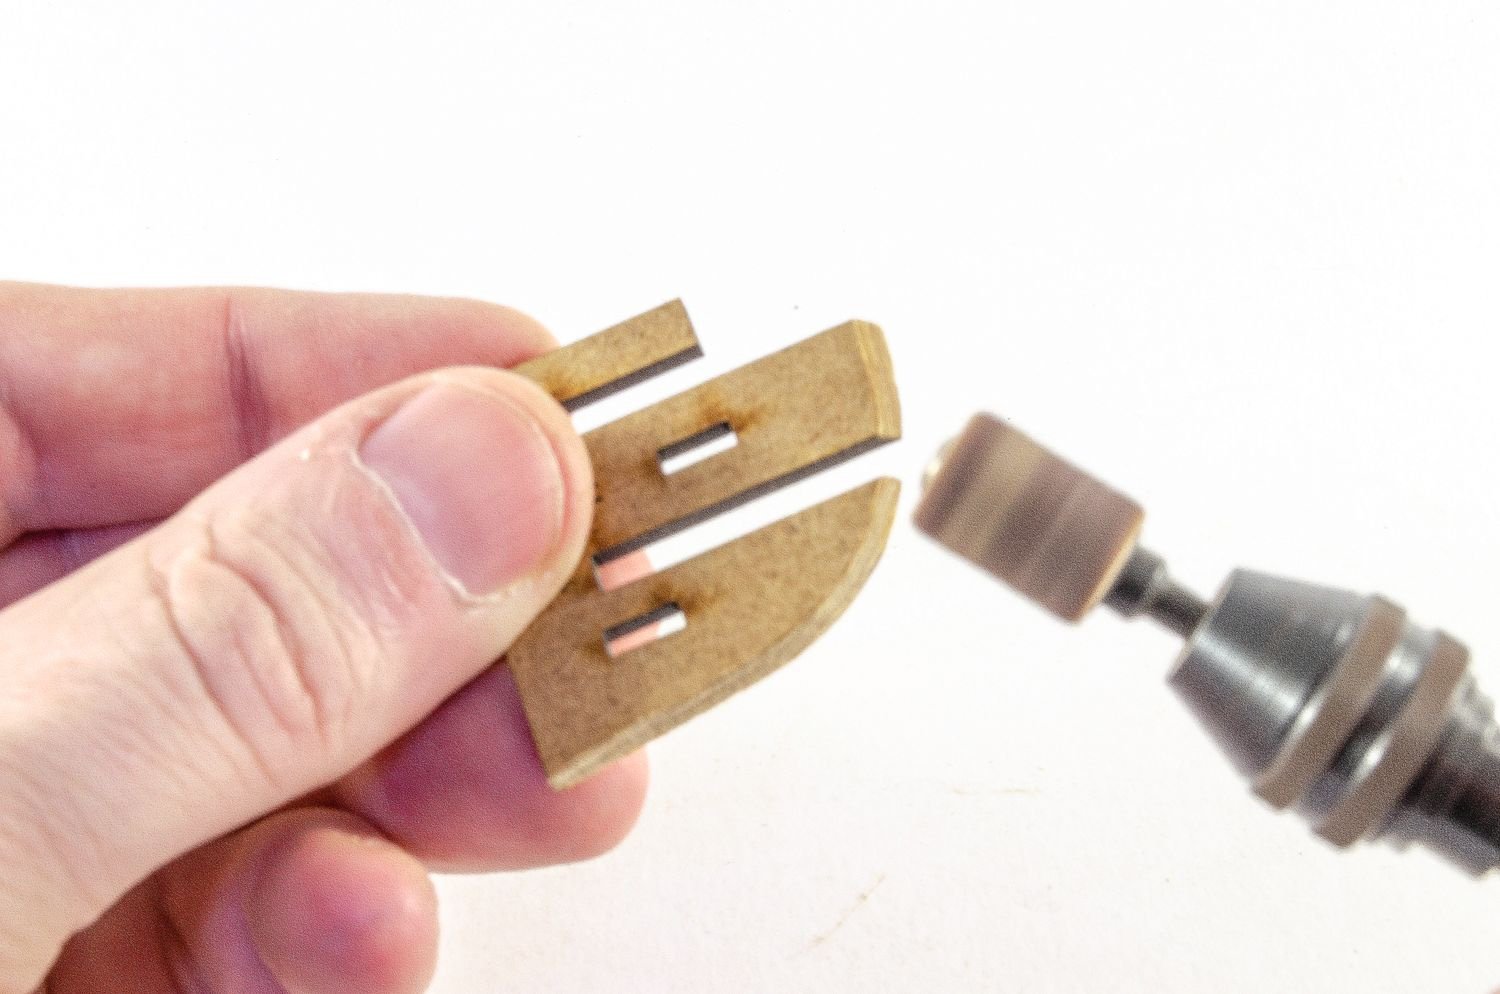
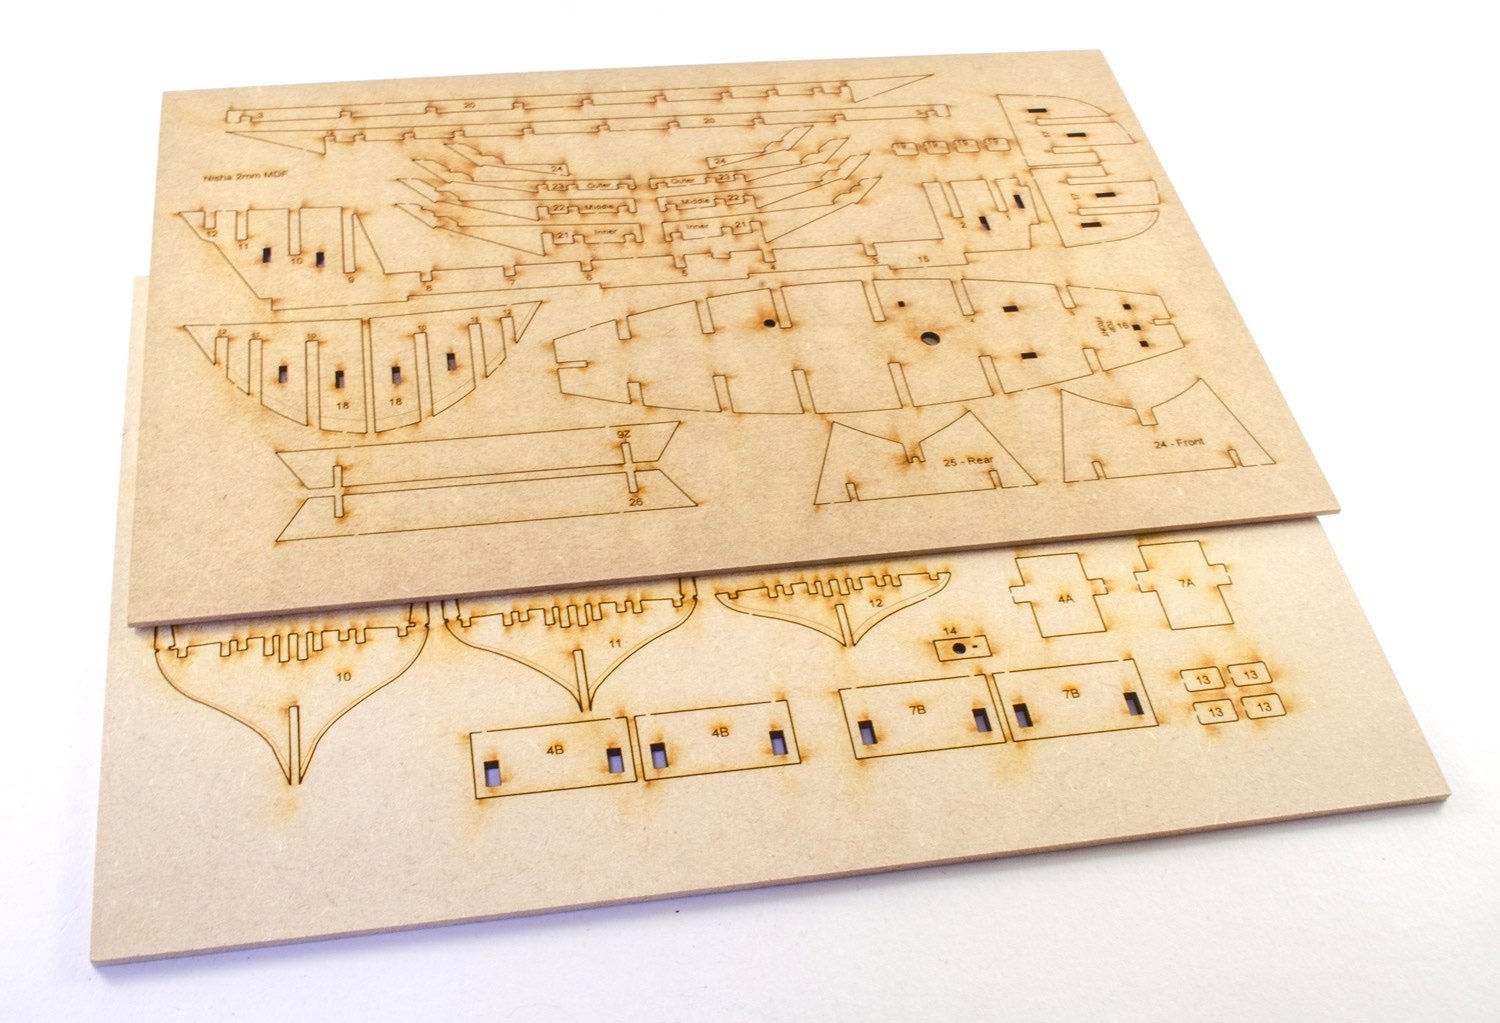
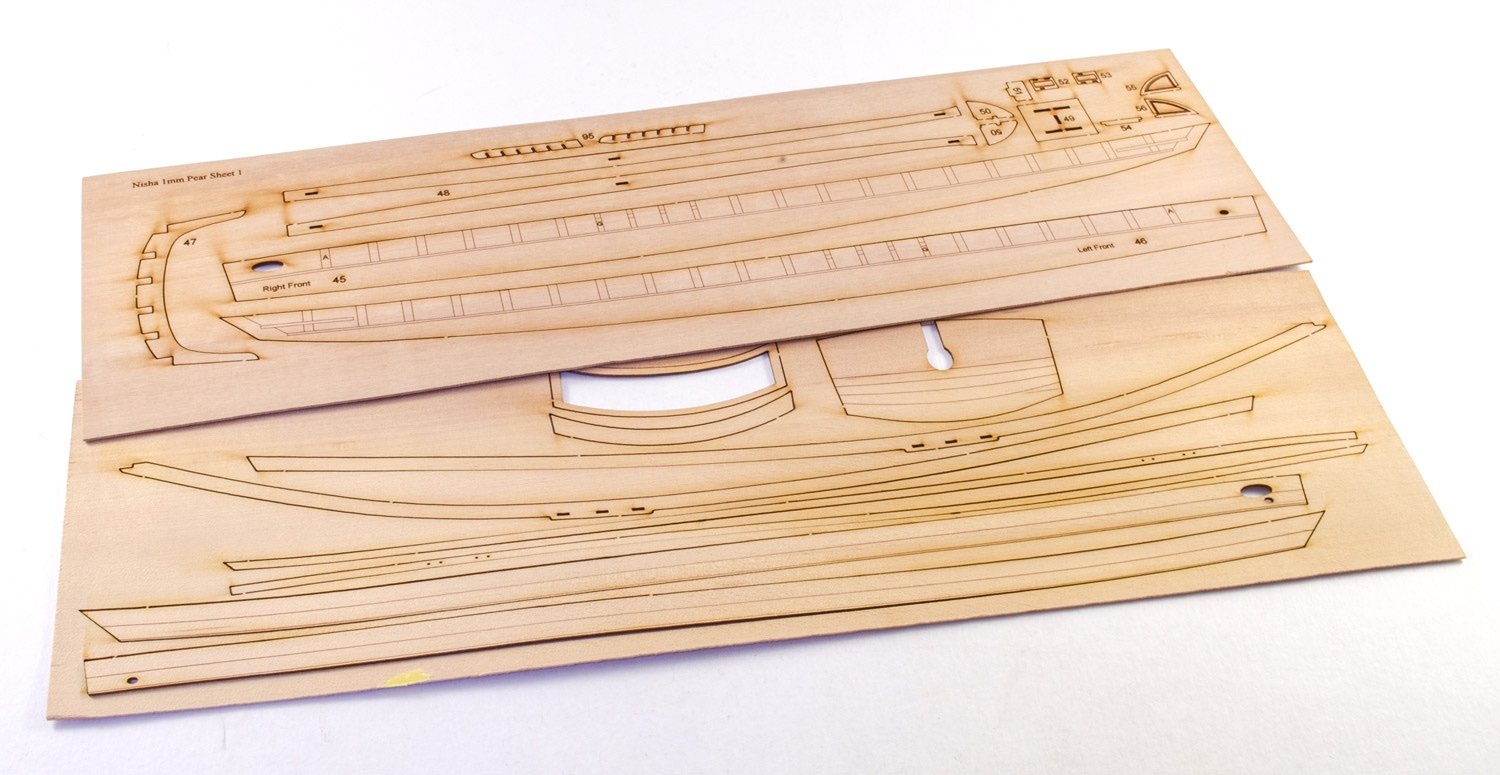
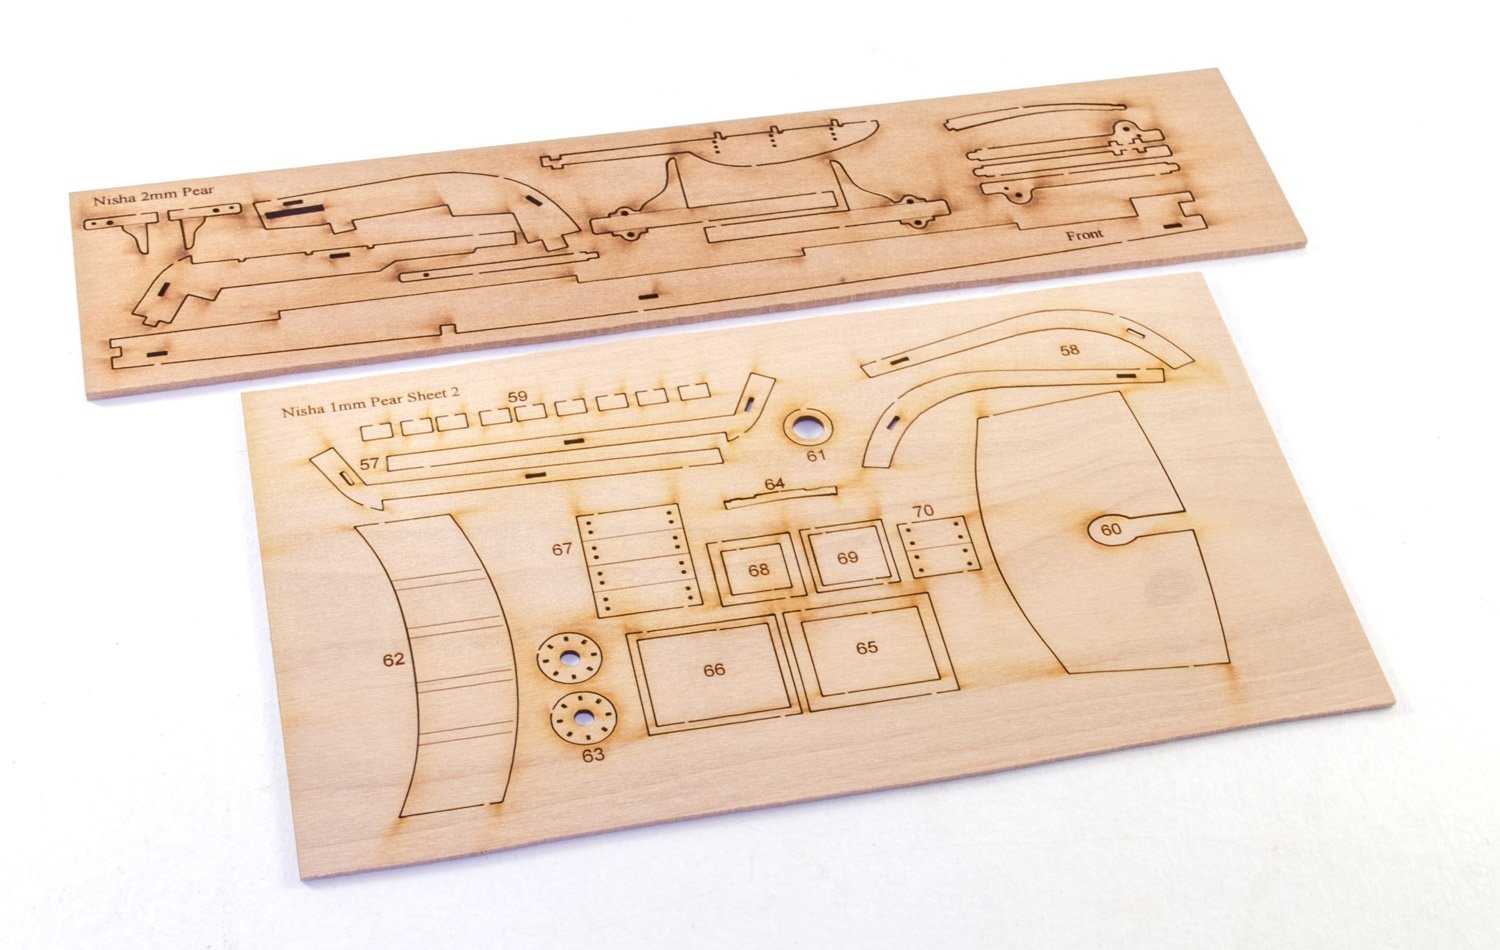
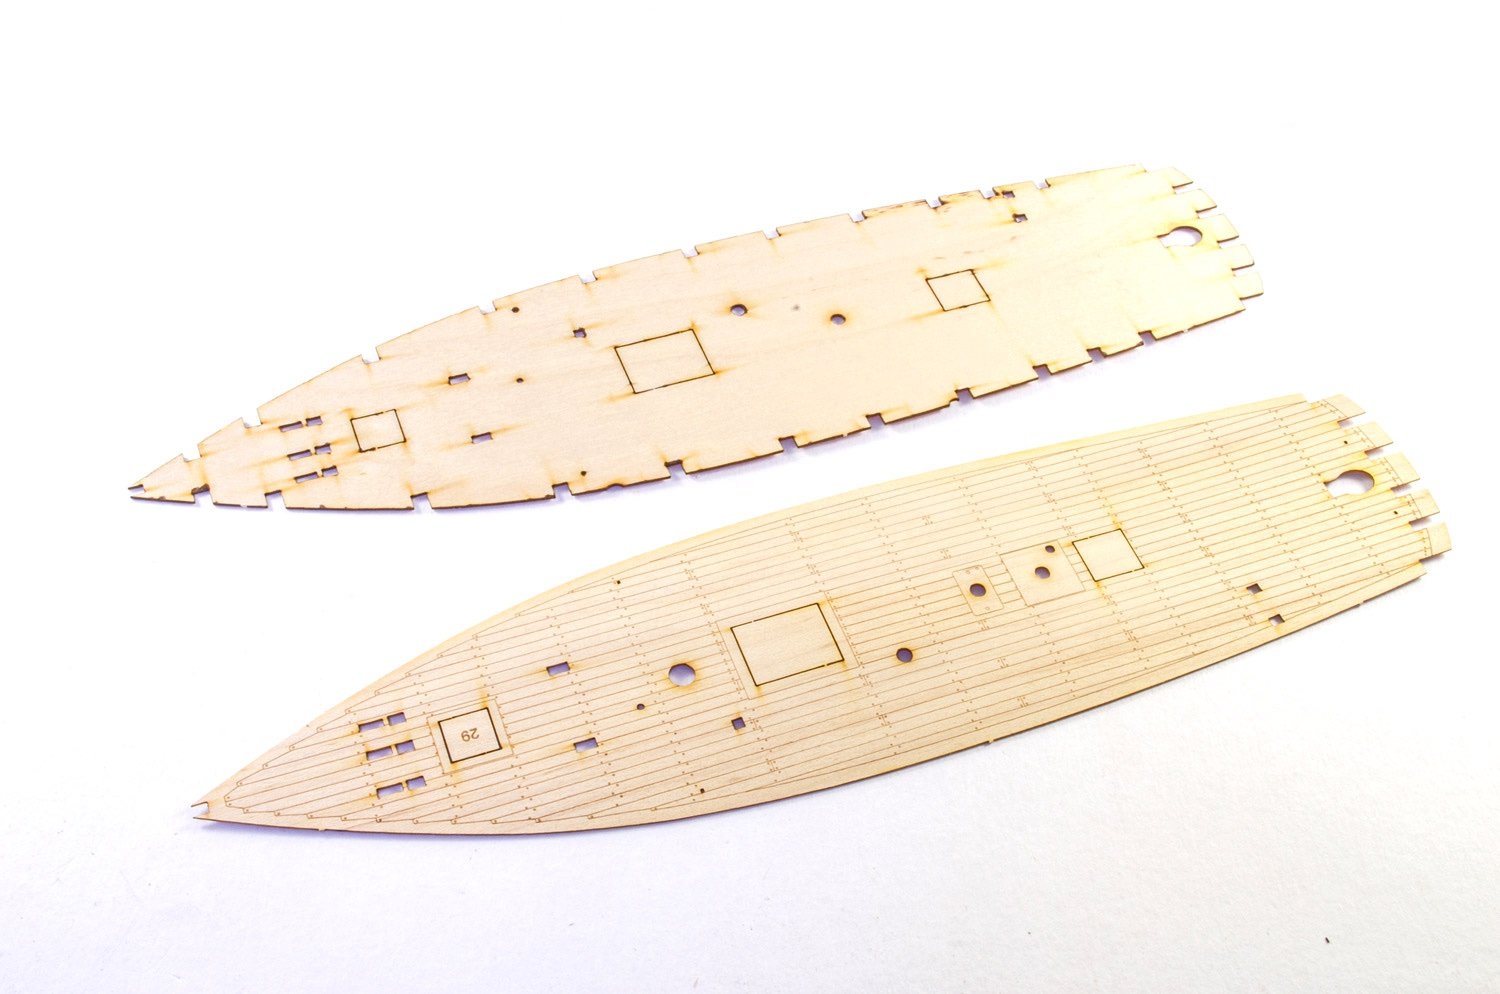
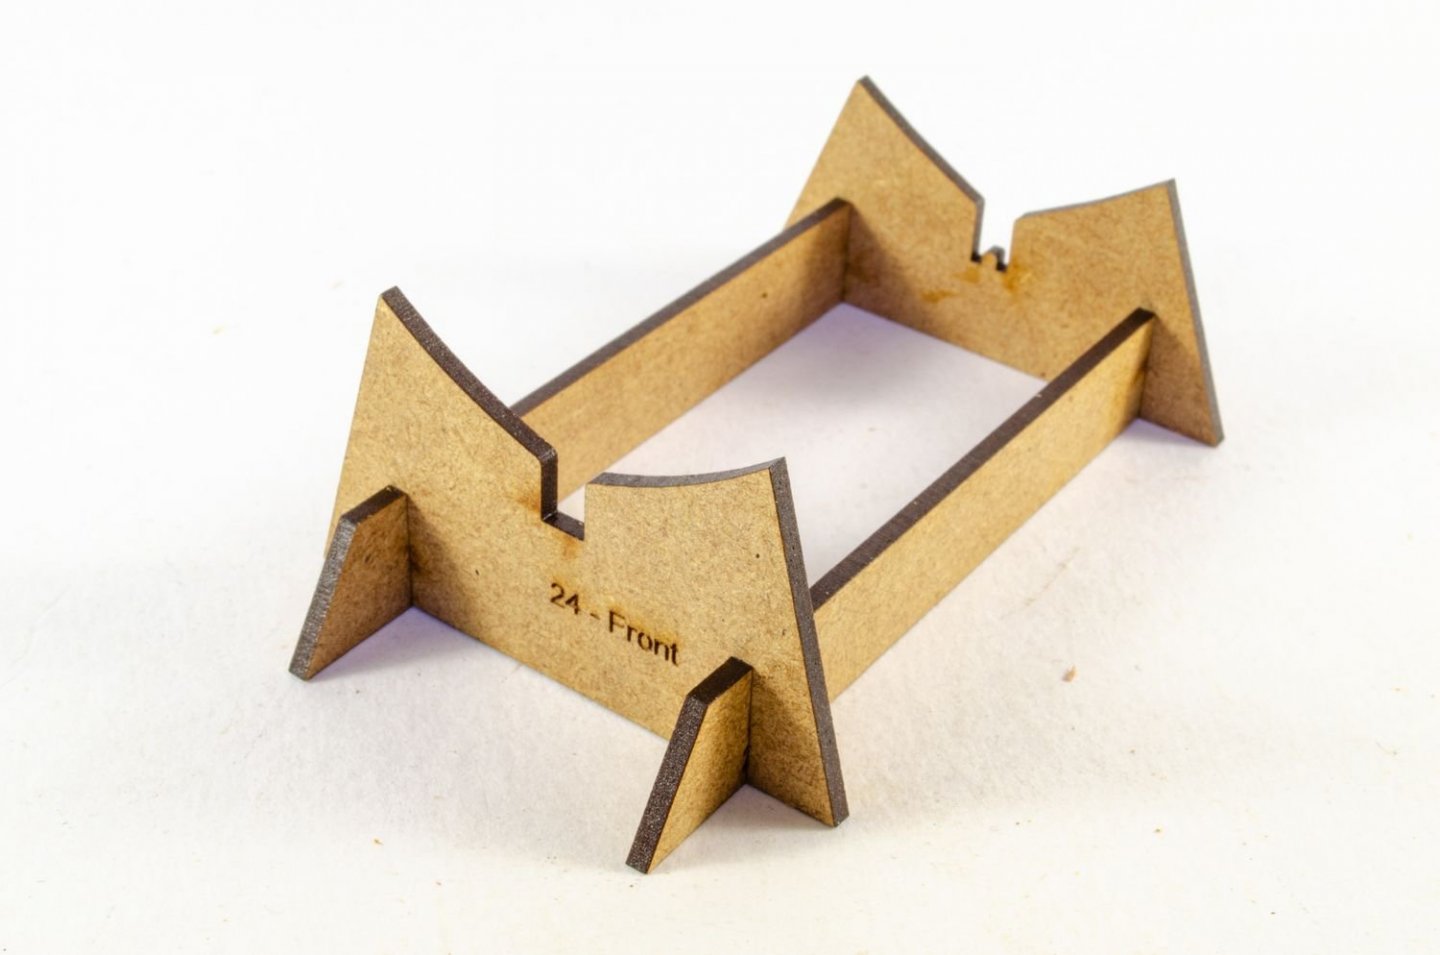
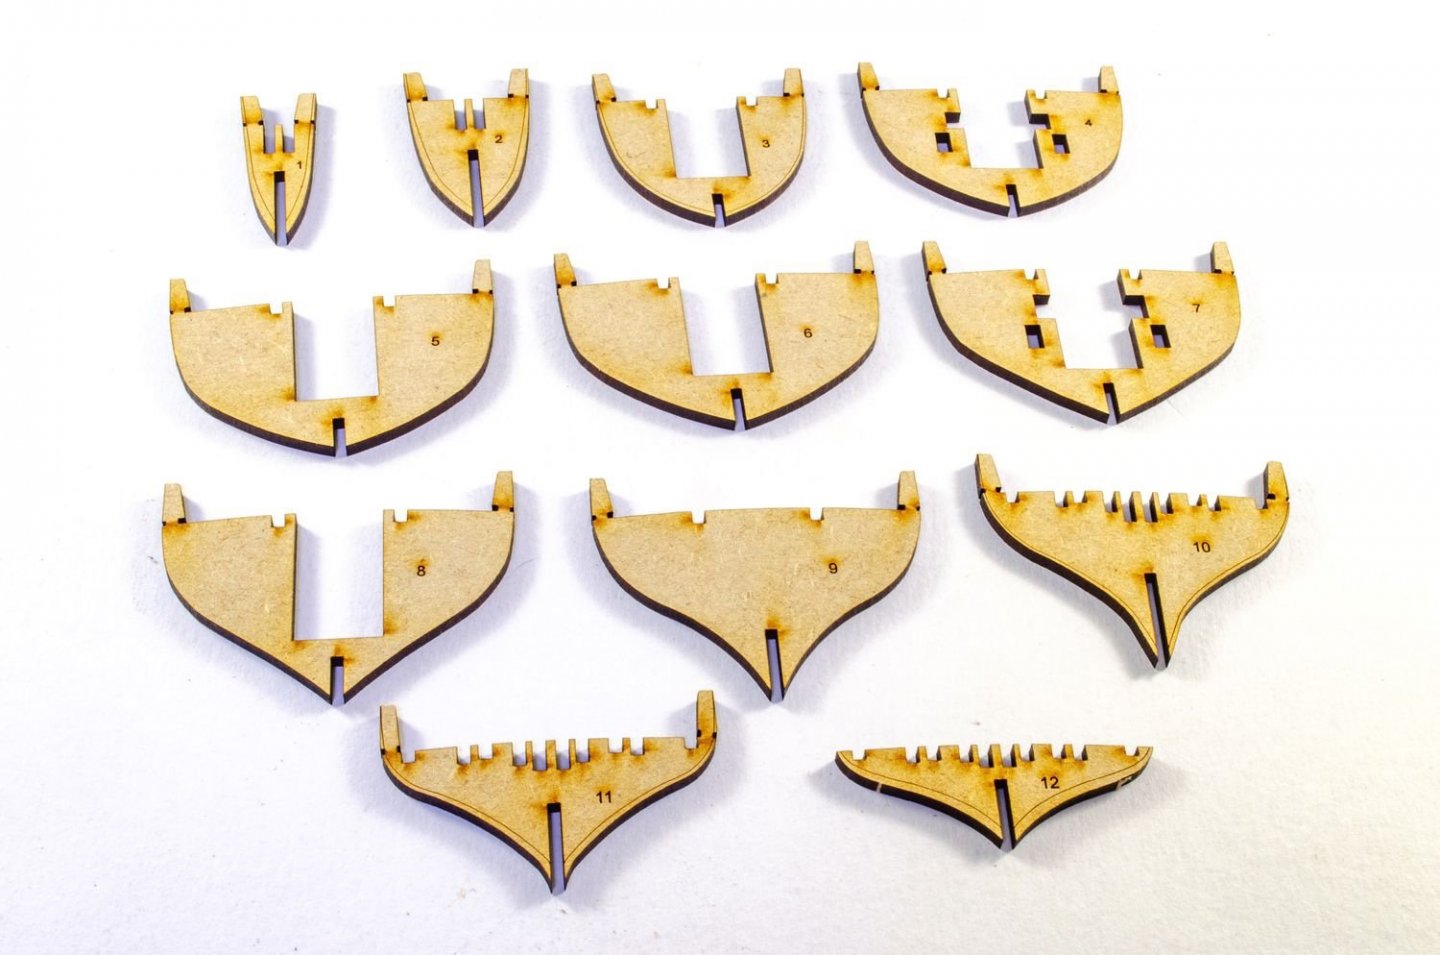
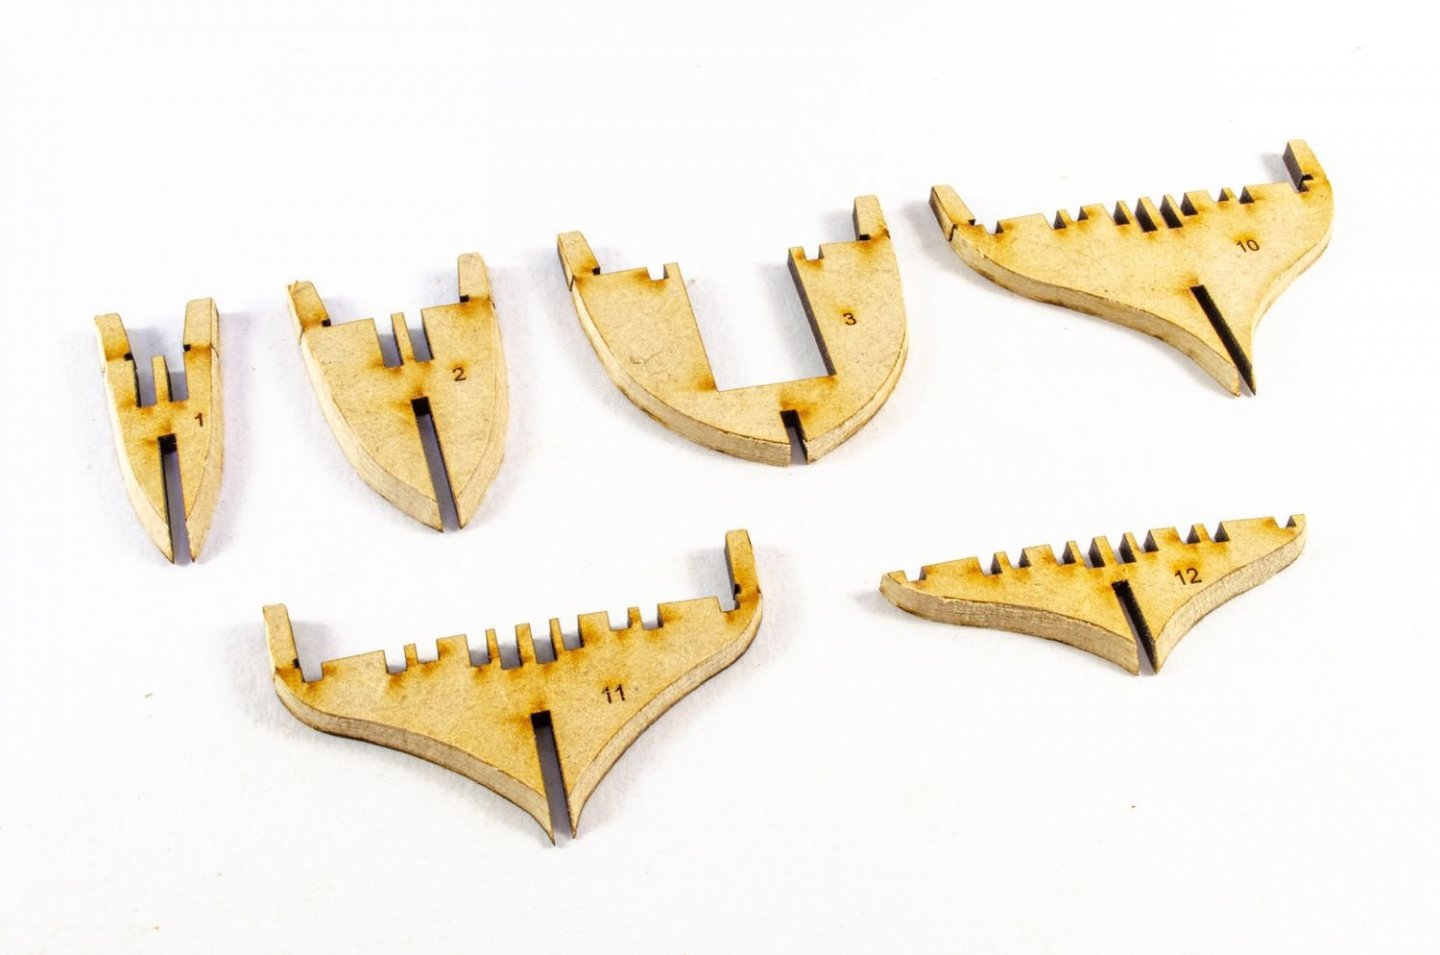
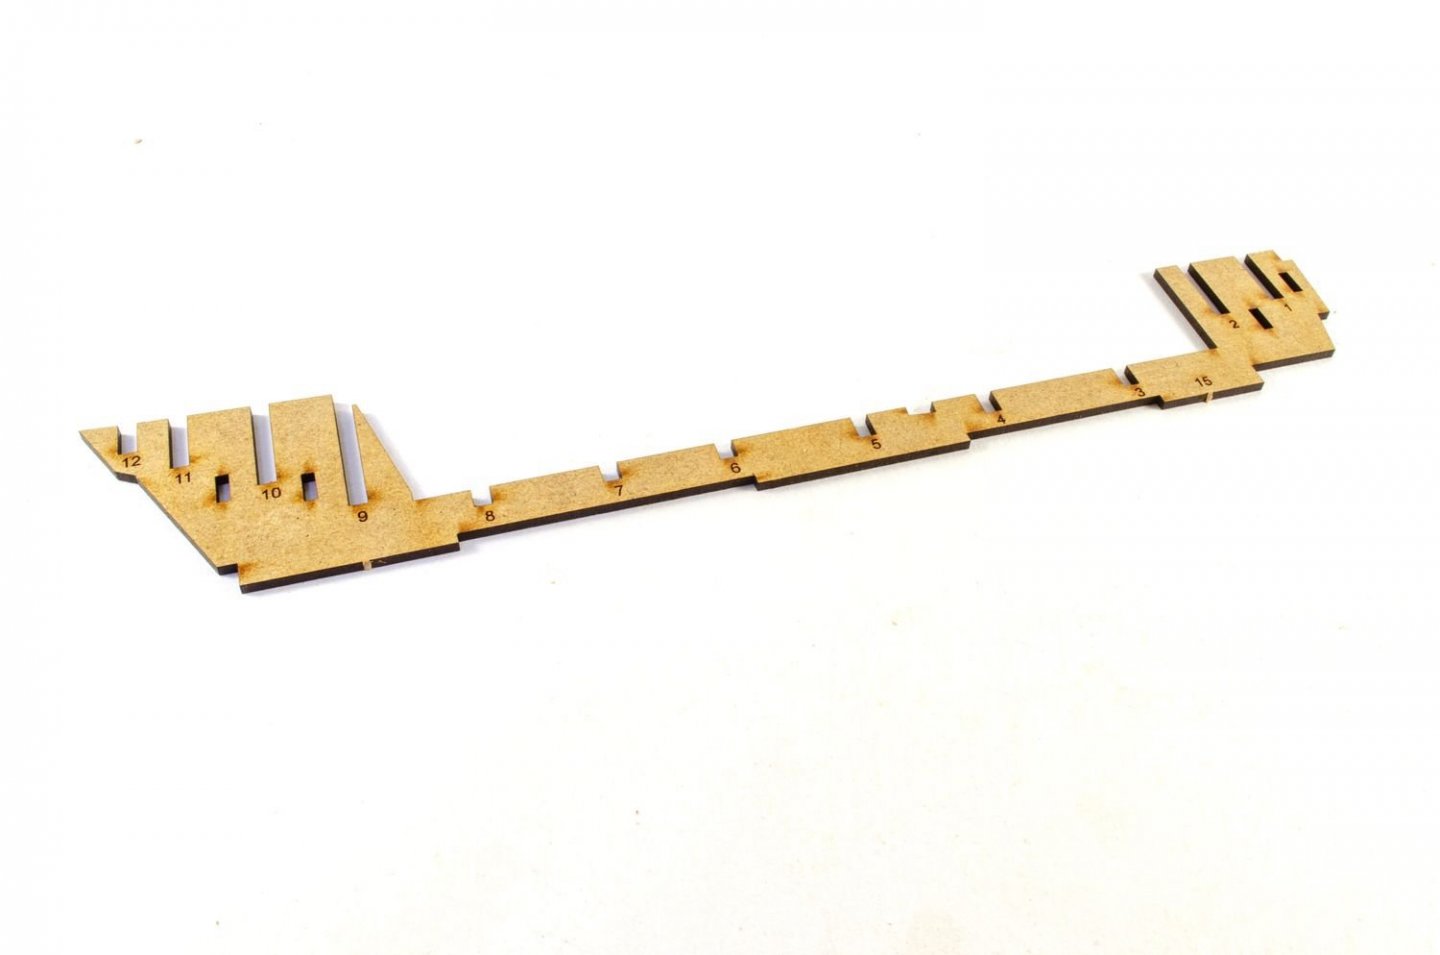
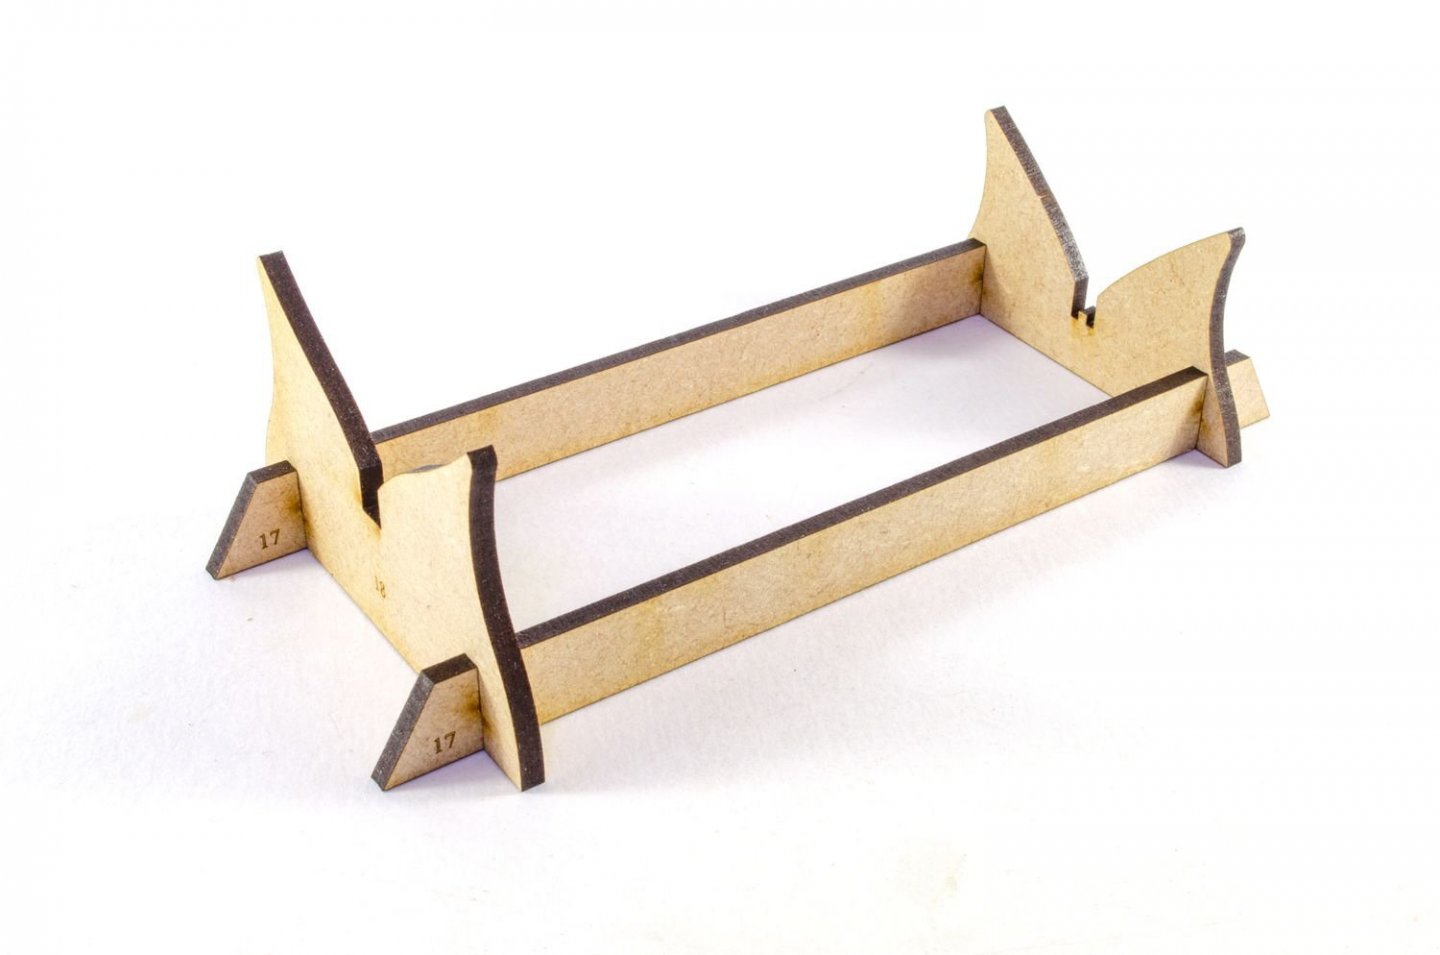
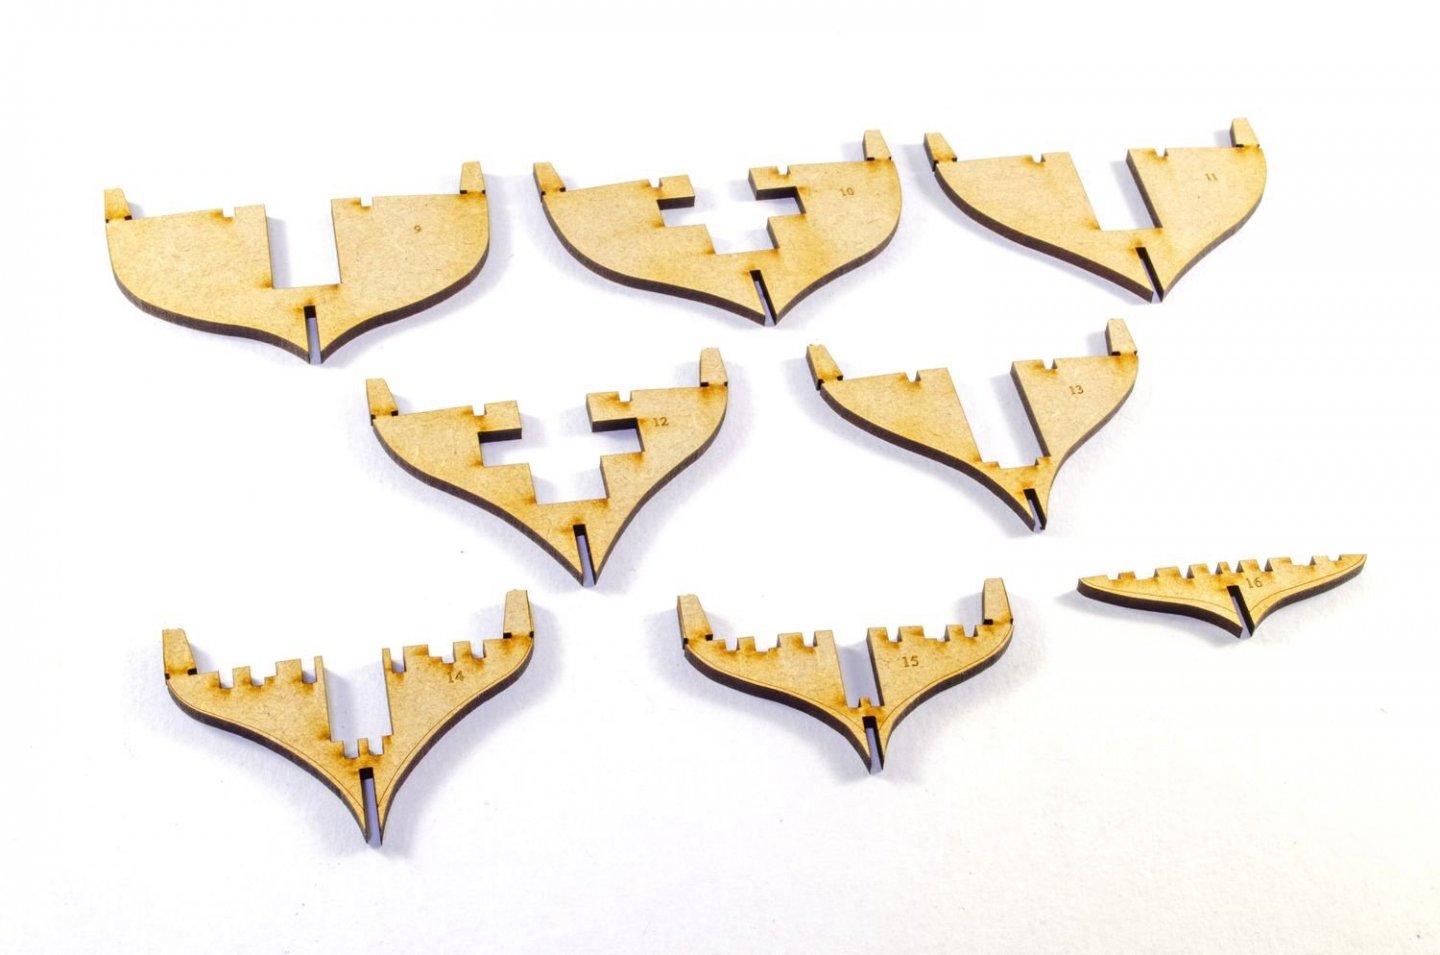
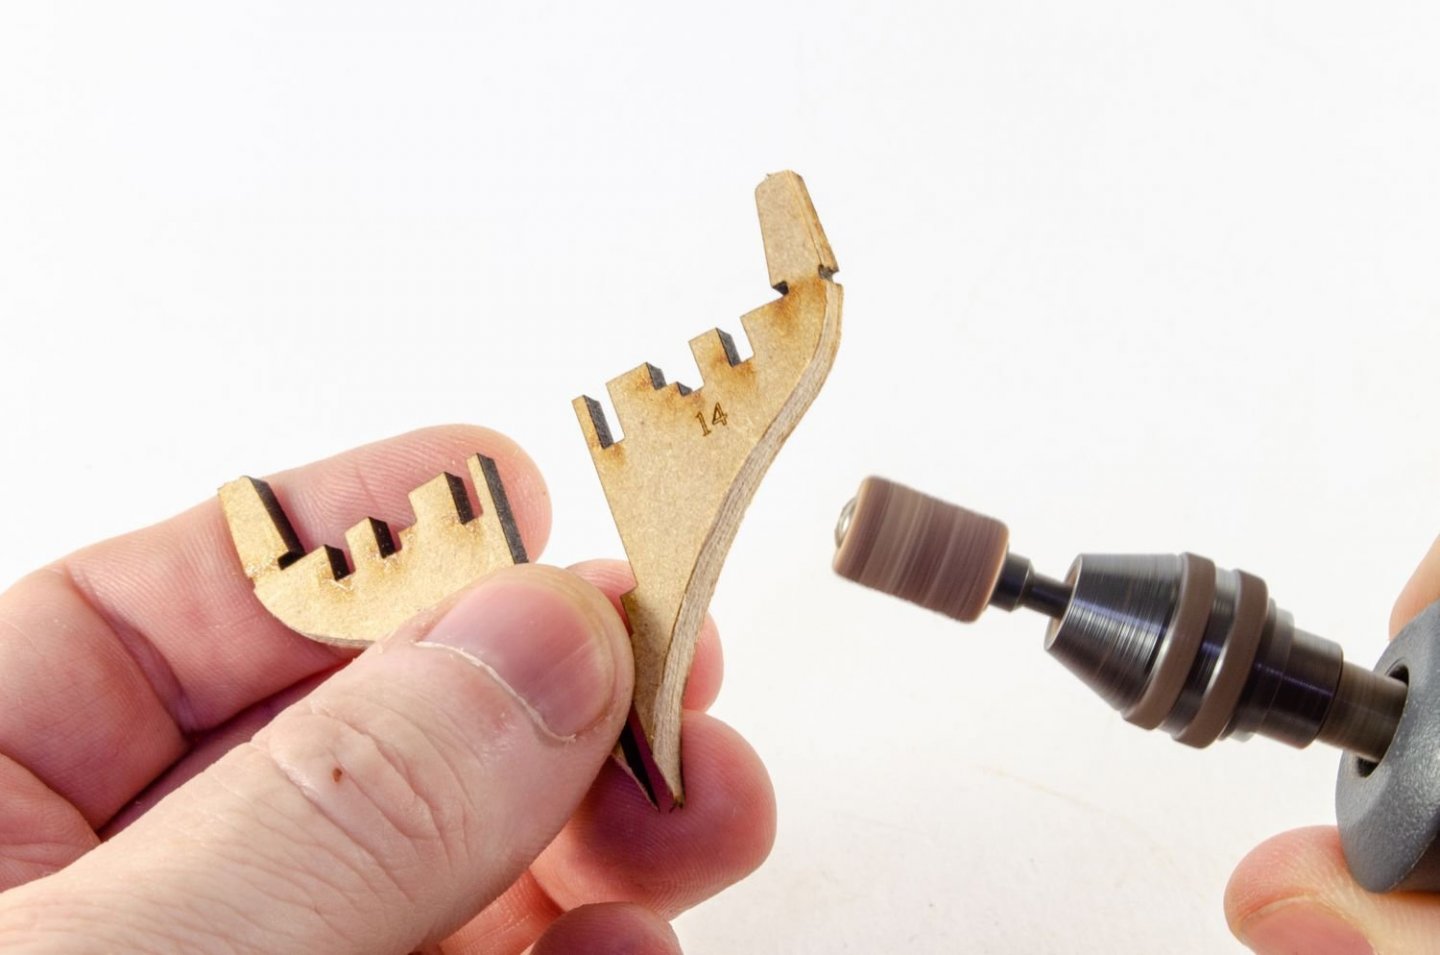
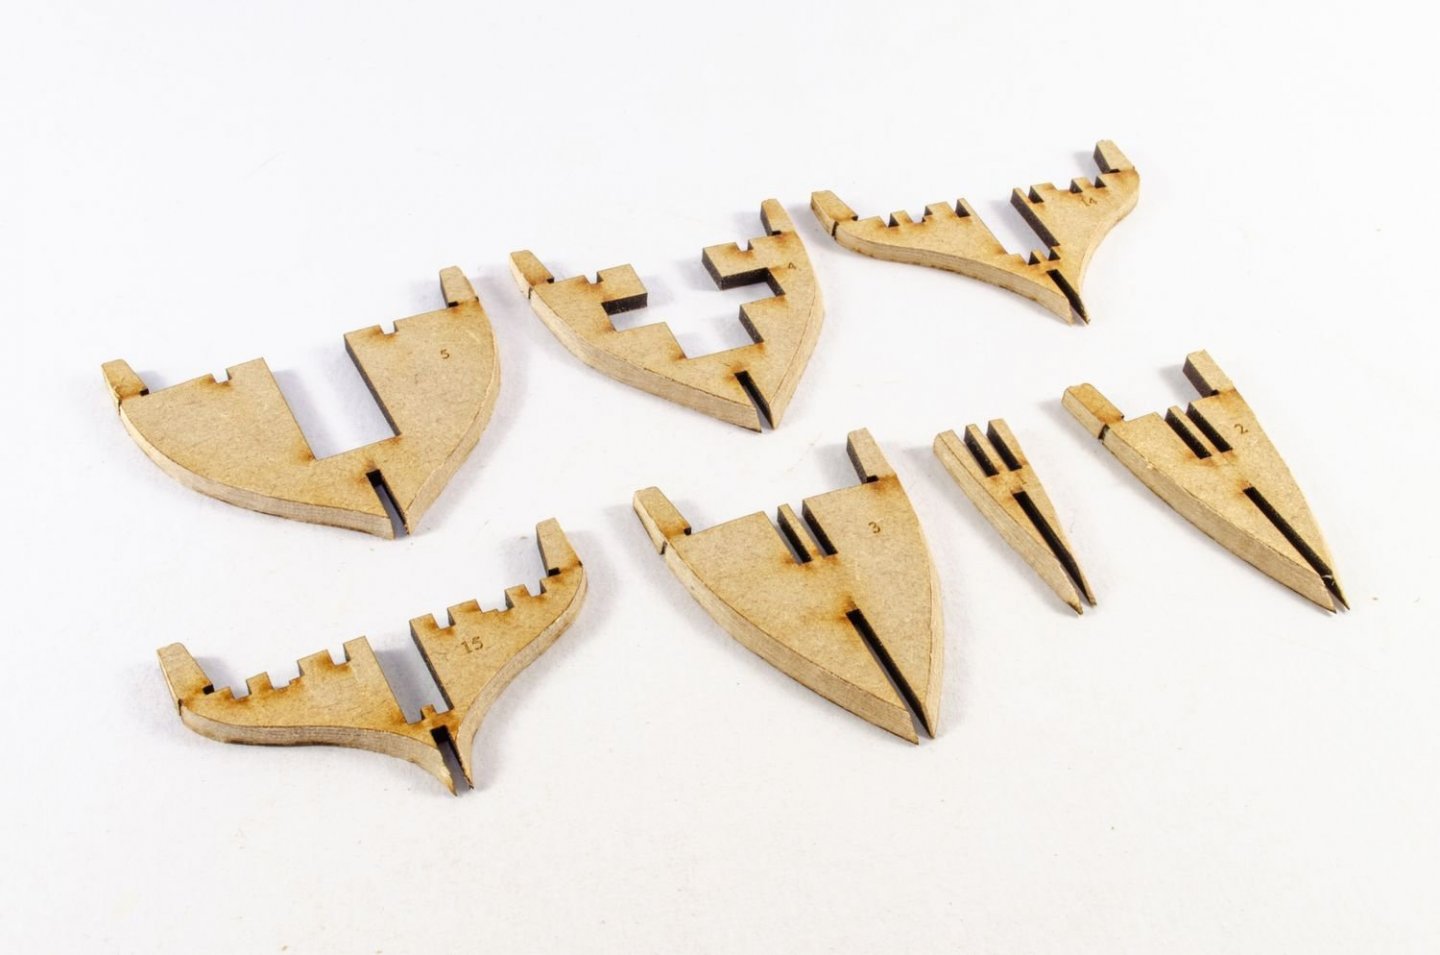
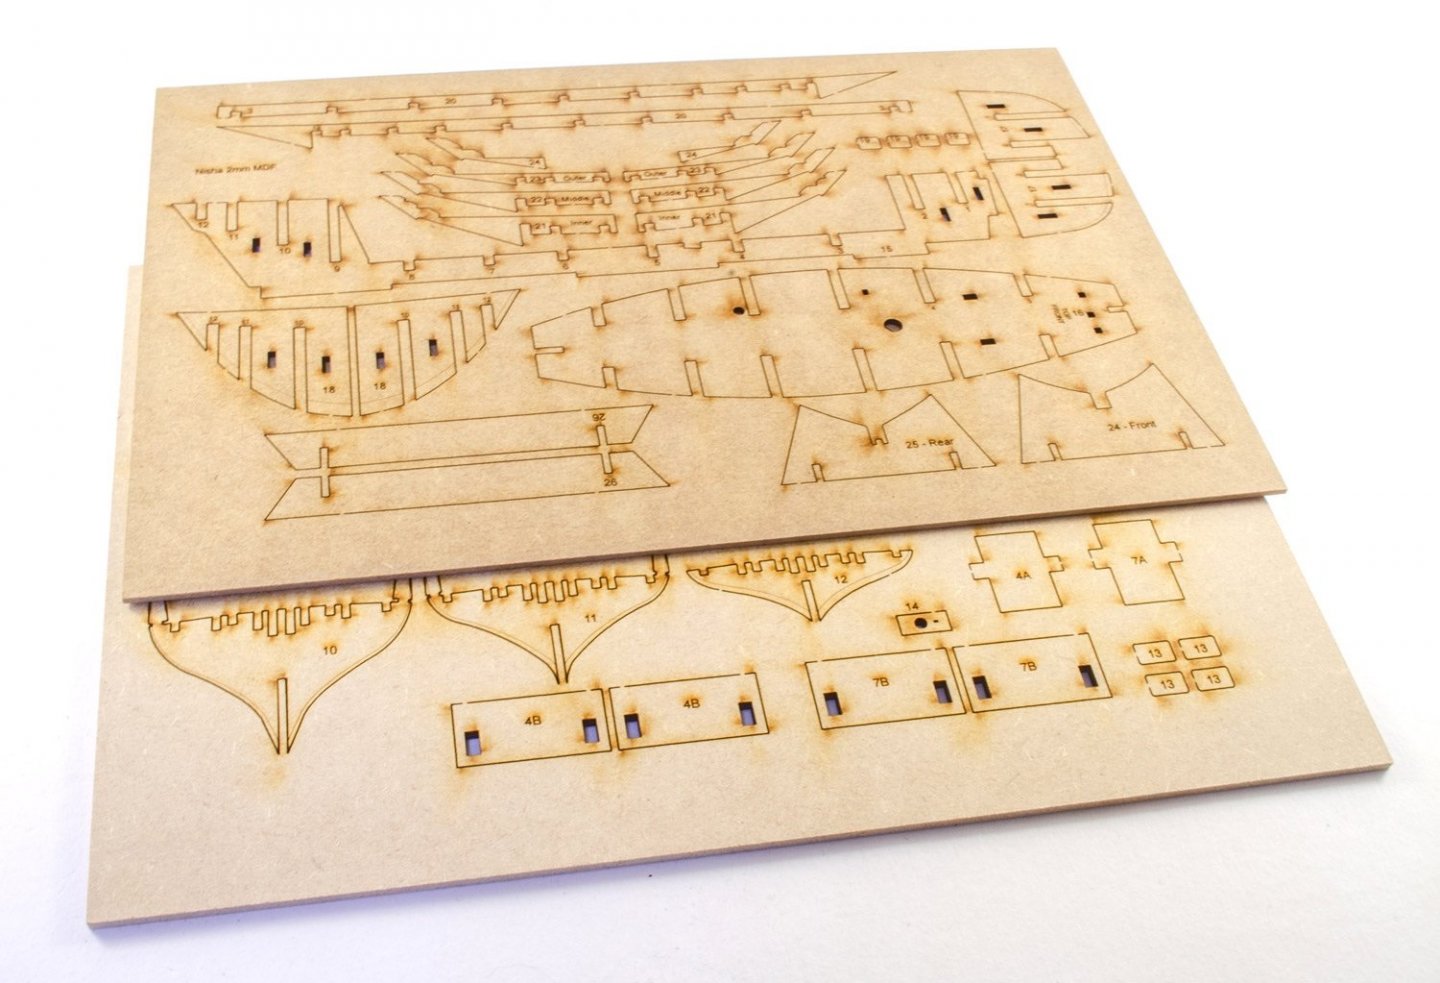
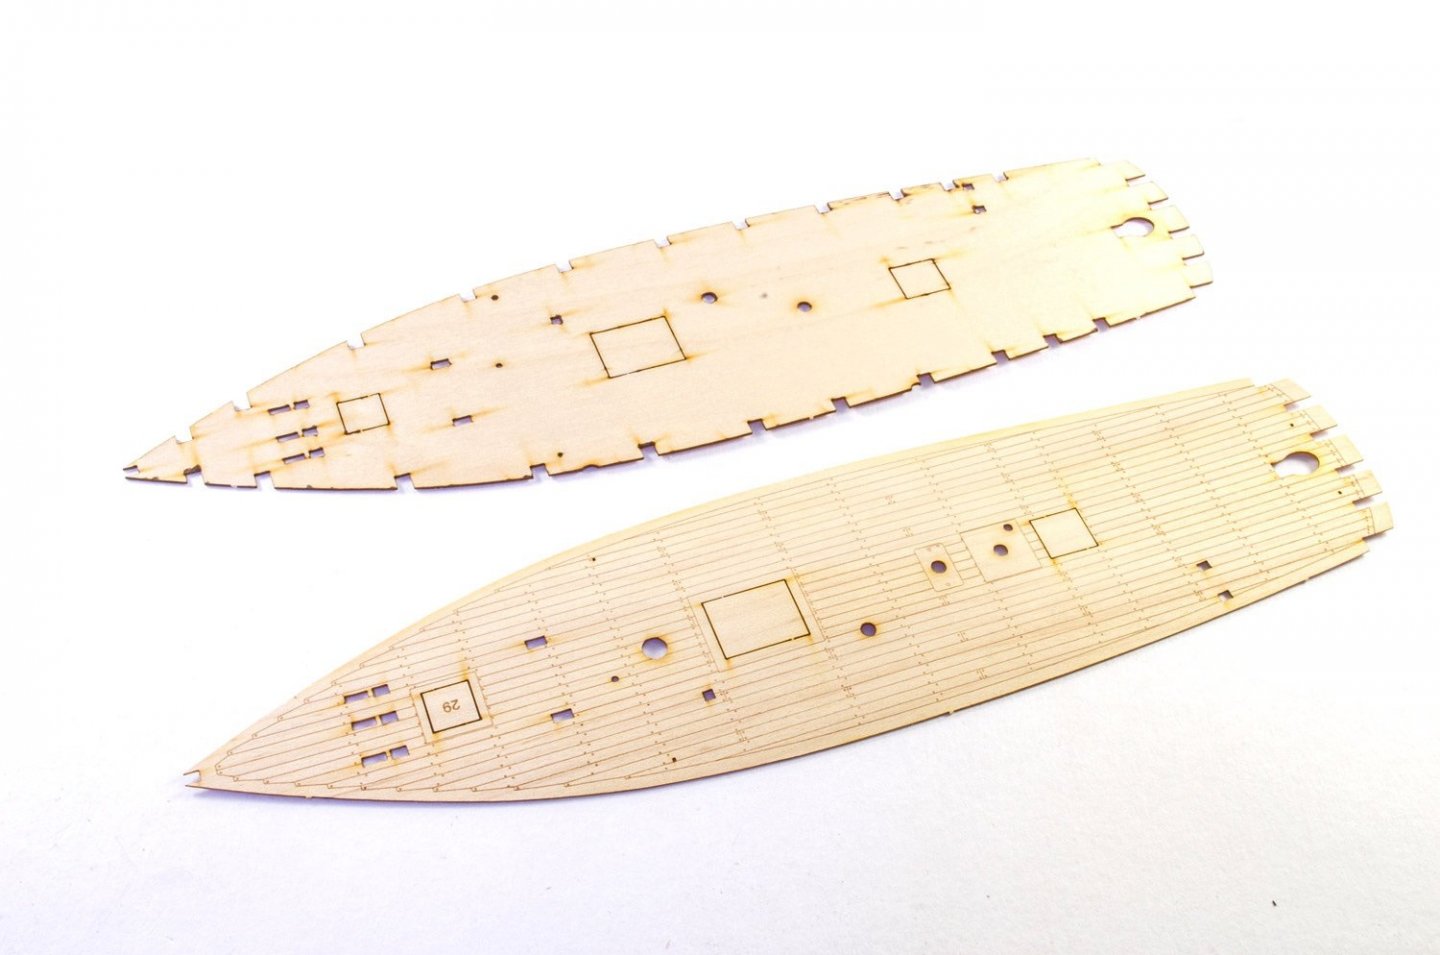
Straight after Erycina, I made a start on Nisha. Both models are being built in tandem for a release at the same time. Both kits come with an MDF build cradle and an acrylic display stand that has an engraved plate. Fewer bulkheads in Nisha than Erycina. Again, engraved bevel lines are supplied on those that need them. These are now bevelled with a Dremel at 10,000RPM The dainty little keel has bulkhead numbers engraved adjacent to each slot, making it a little harder to get these wrong. At this stage, everything is fitted dry, with no glue. The lower deck is now slotted into position. Engravings help show you the orientation of this. Bearding fillers are also included which can be pre-bevelled and then pinned into place with MDF tabs. This is a little different to Erycina in that the two bulkhead infill pieces are bolstered on both sides with an MDF plate that is pinned into position either side of those bulkheads. This creates a nice, solid construction. Both longitudinal deck beams are now slotted into position, followed by the stern timbers that are marked to show their relative positions. Diluted Titebond is now brushed into all the joints and the frame set aside to dry for a couple of hours. Lastly (for this update), the ply deck is fitted and glued. This fits into the slots in each bulkhead ear, and lies perfectly flat with no other fettling required. More next time


- 28 replies
-
- 20
-
-
- vanguard models
- Brixham trawler
- (and 2 more)
-
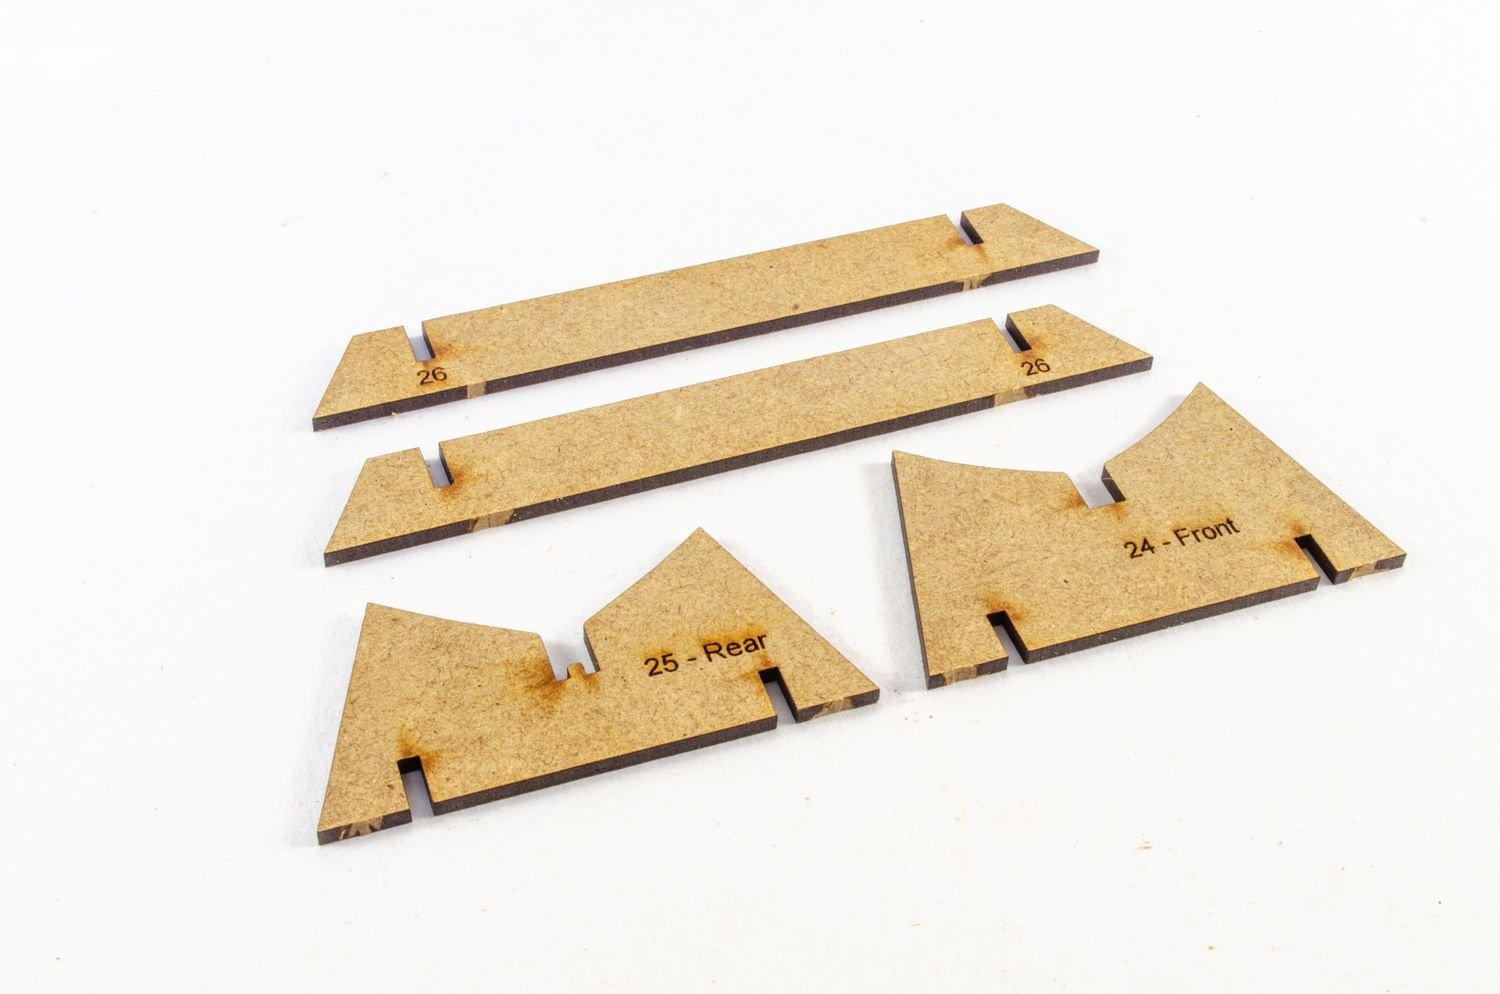
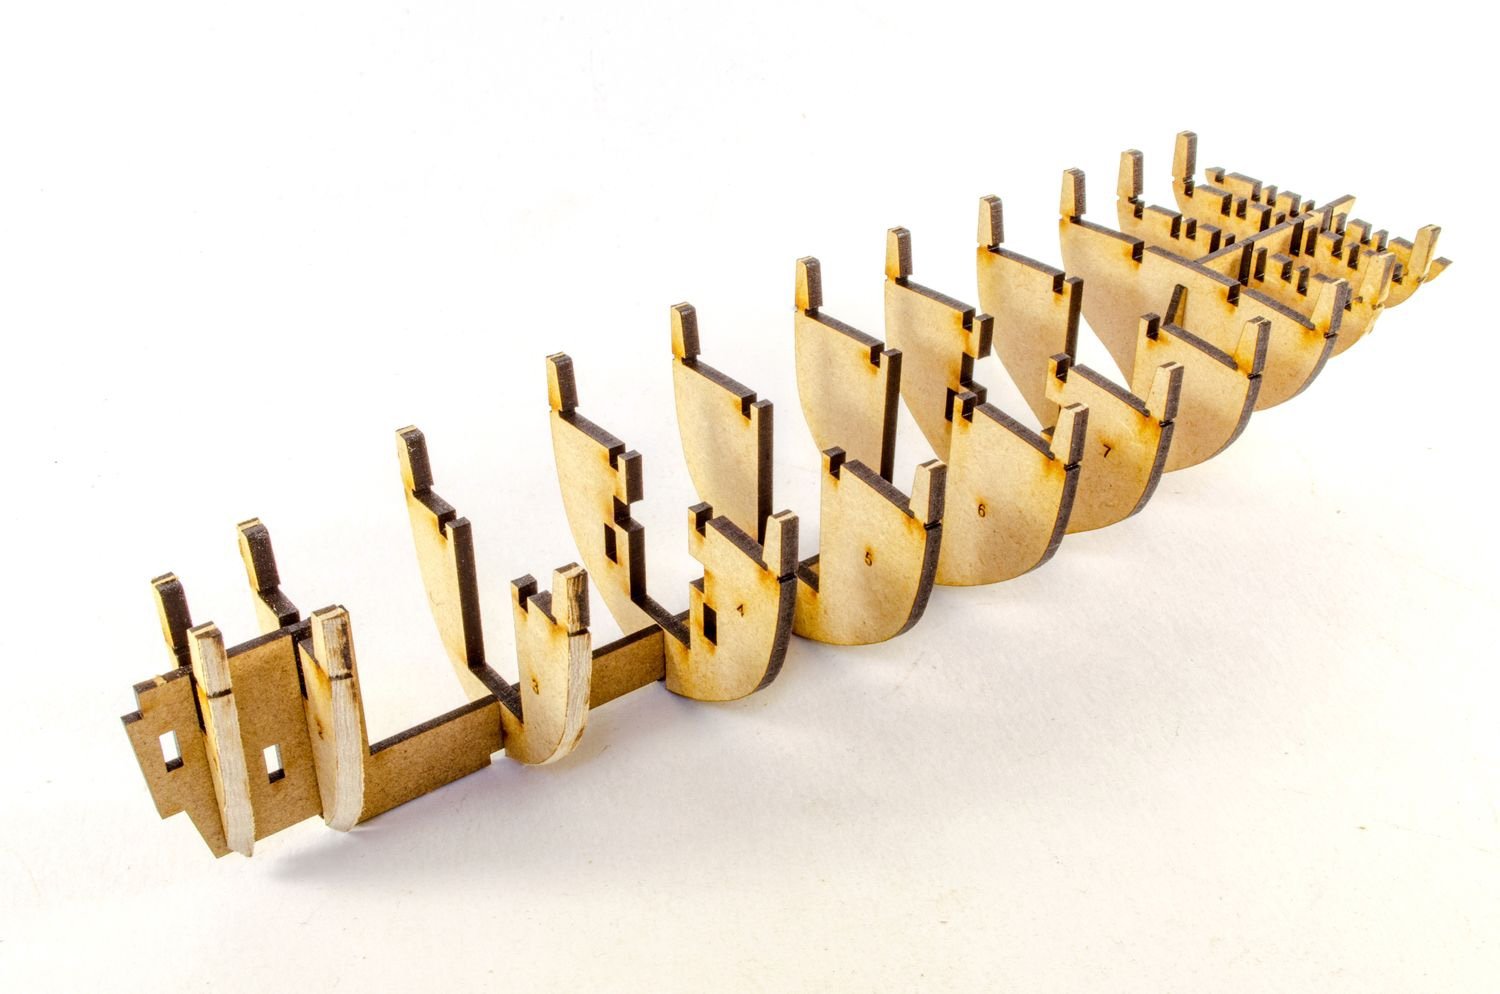
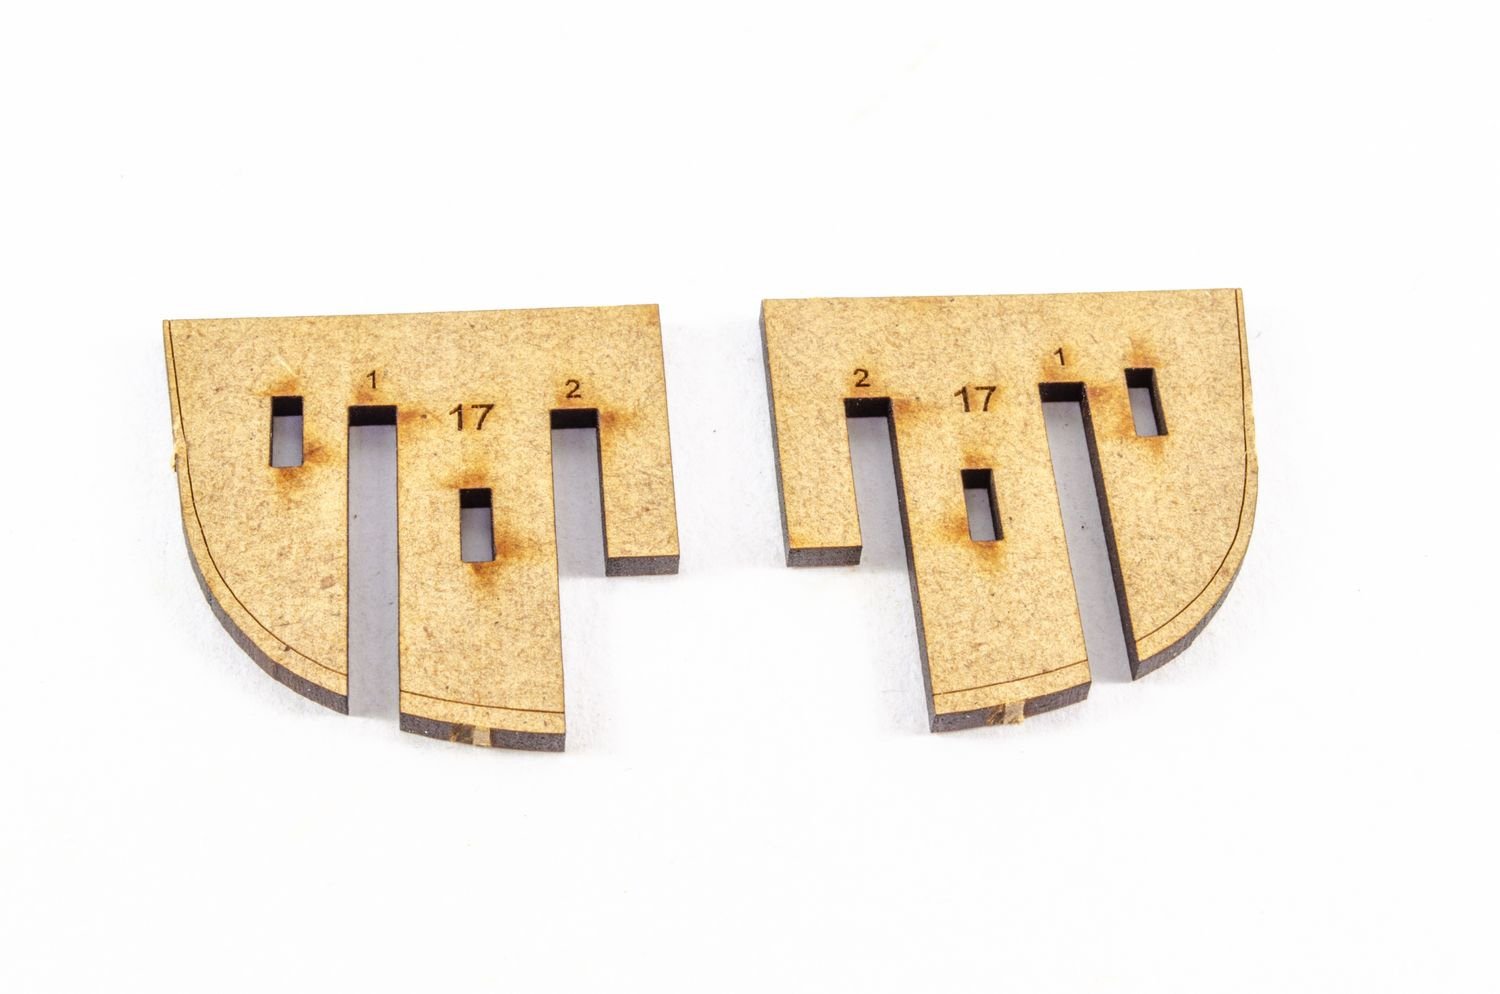
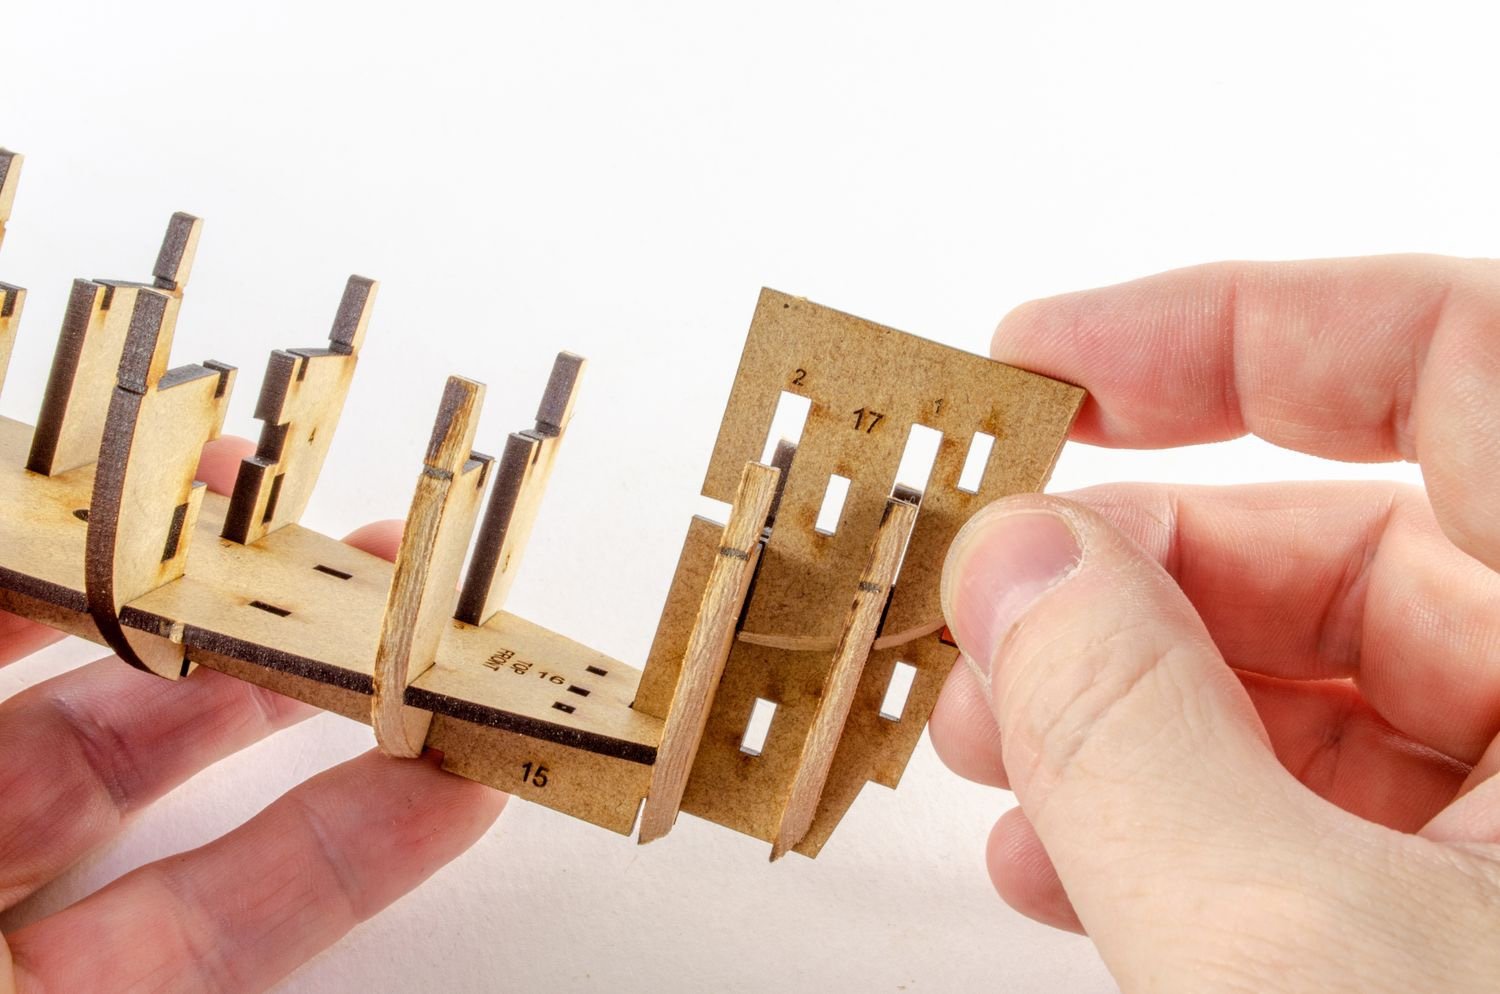
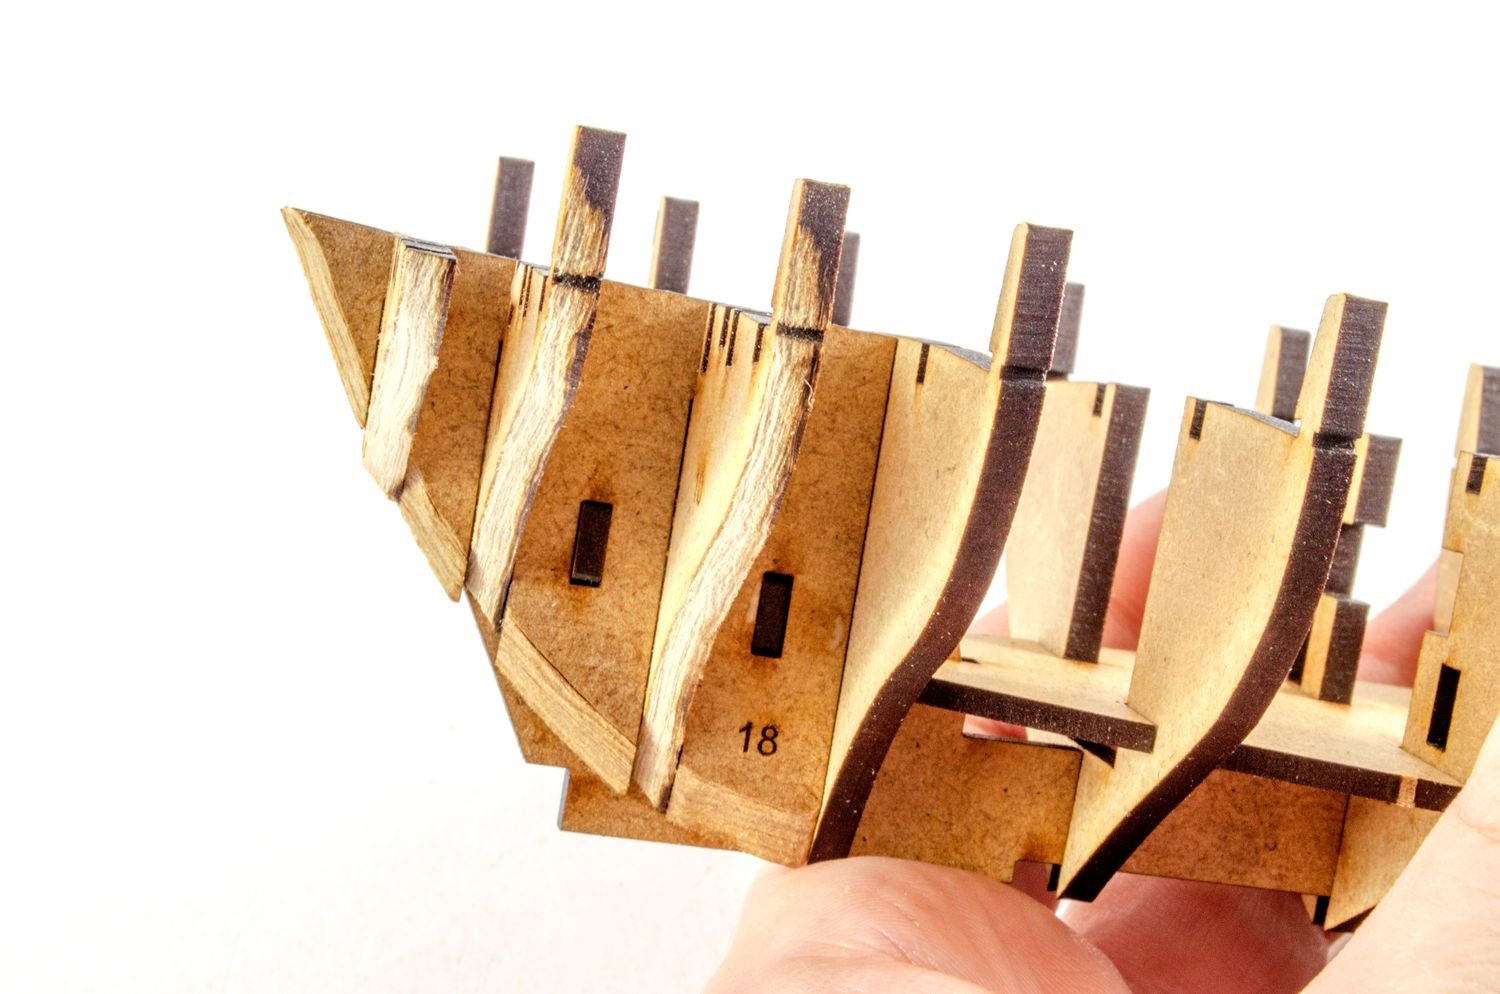
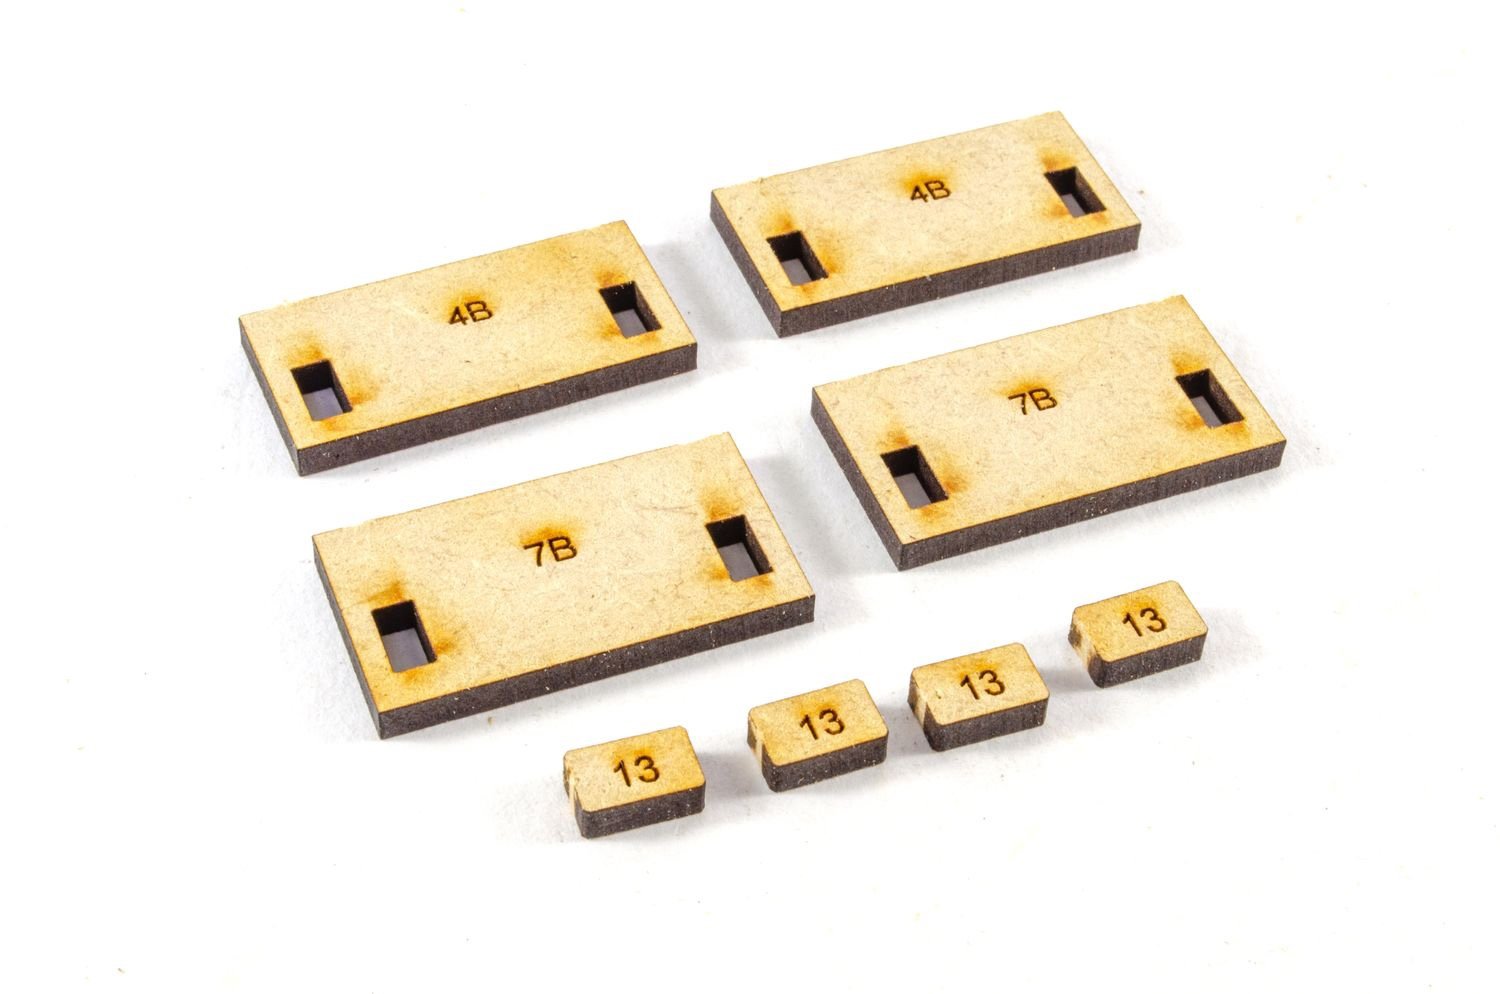
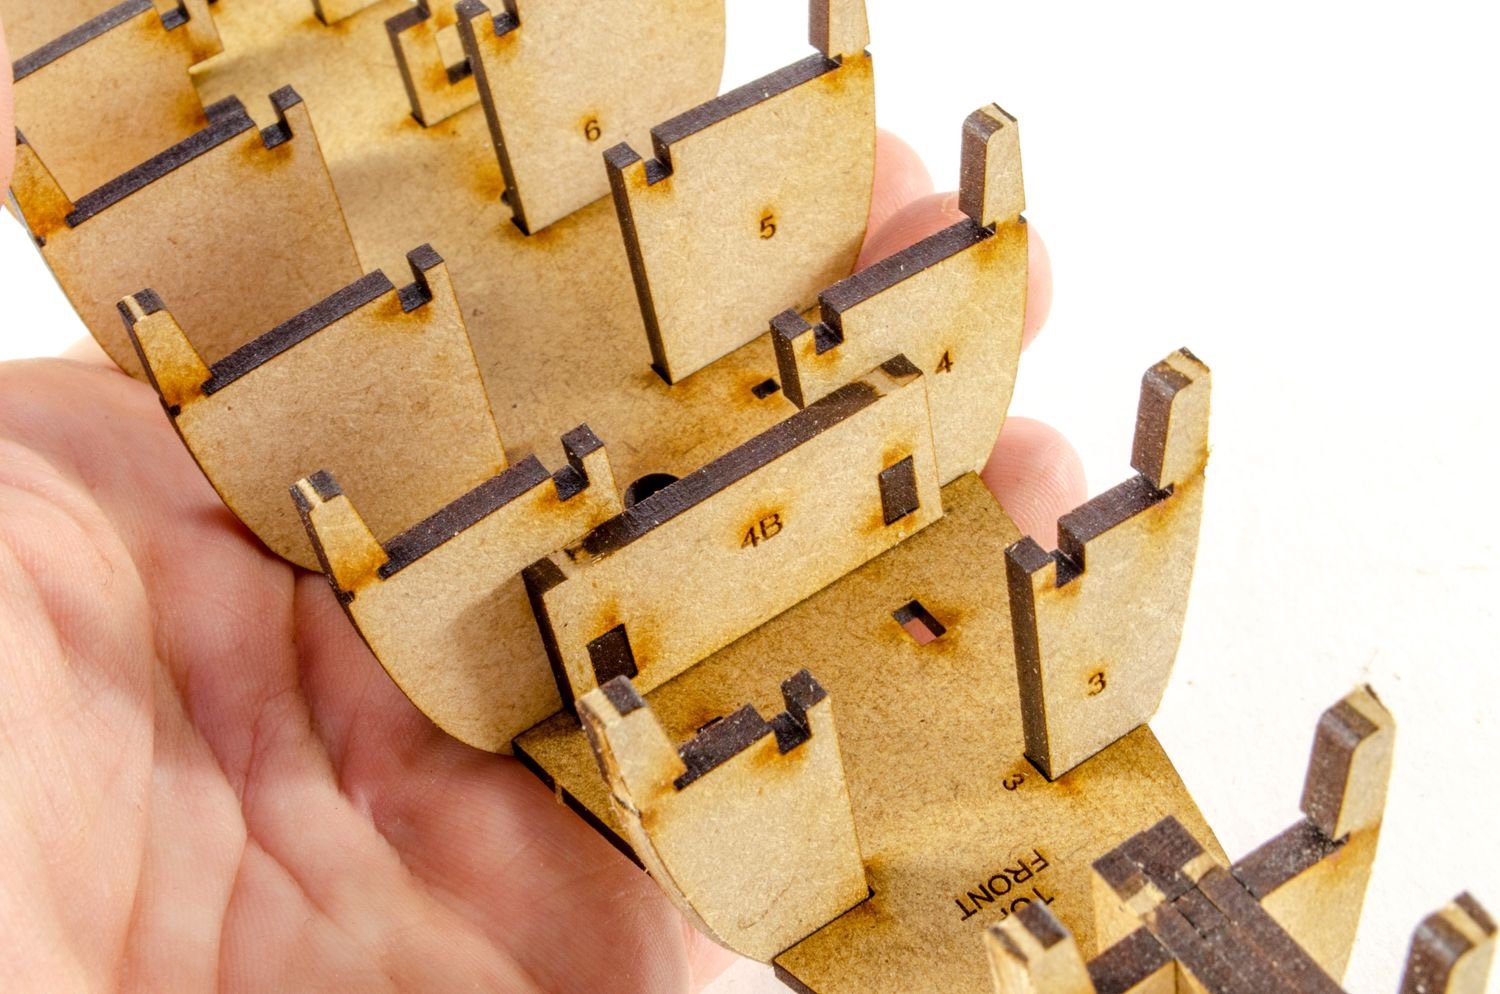
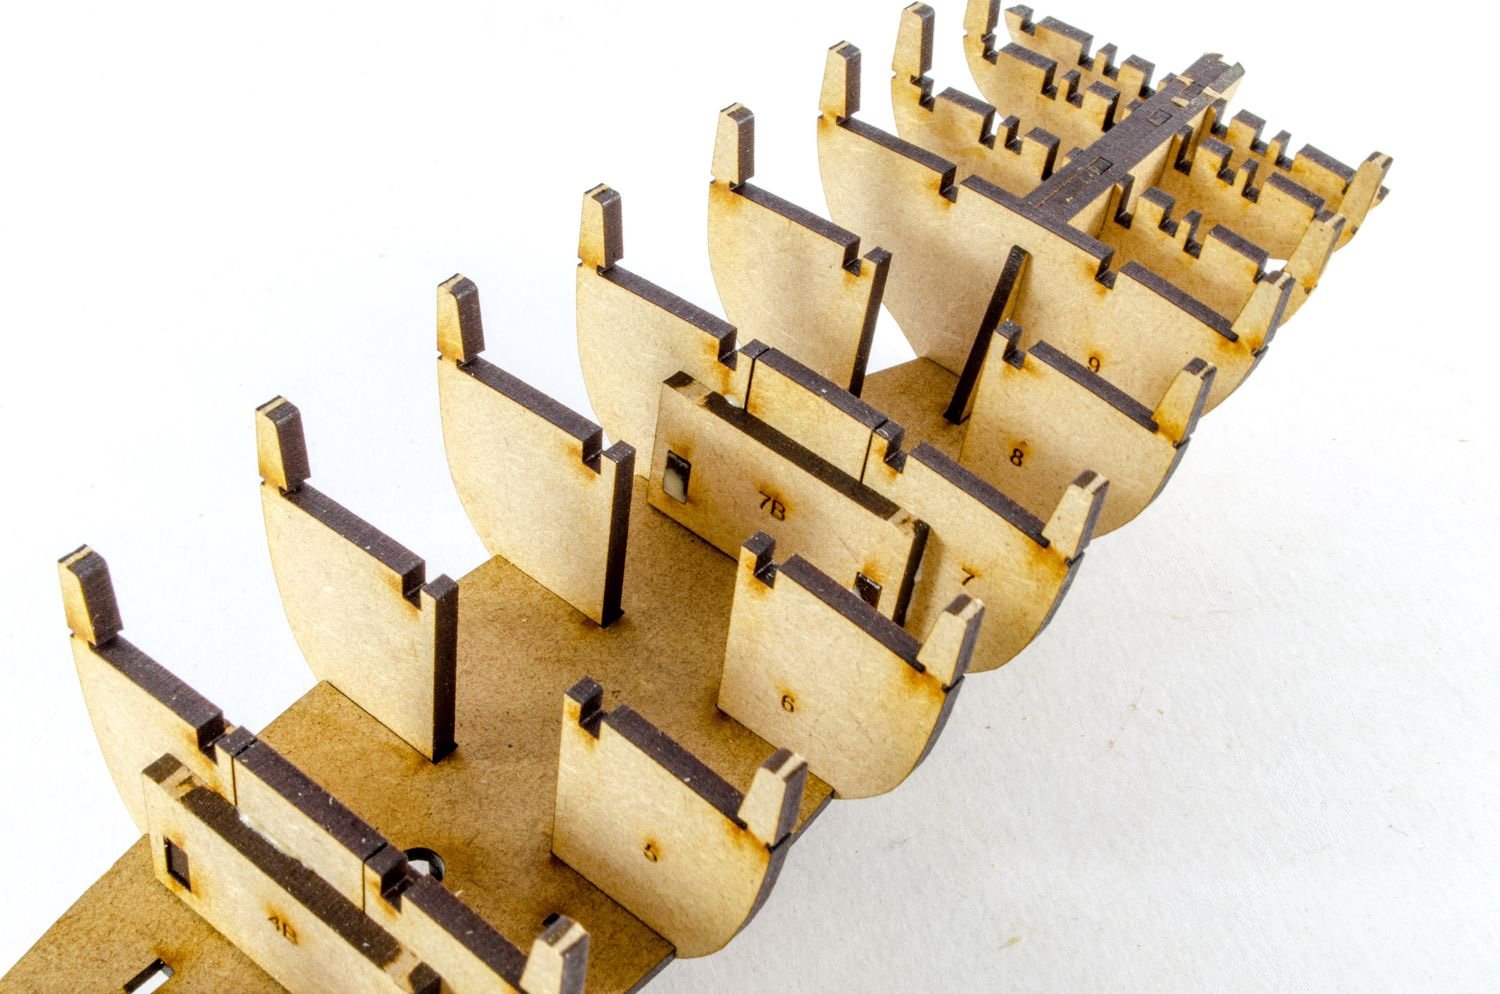
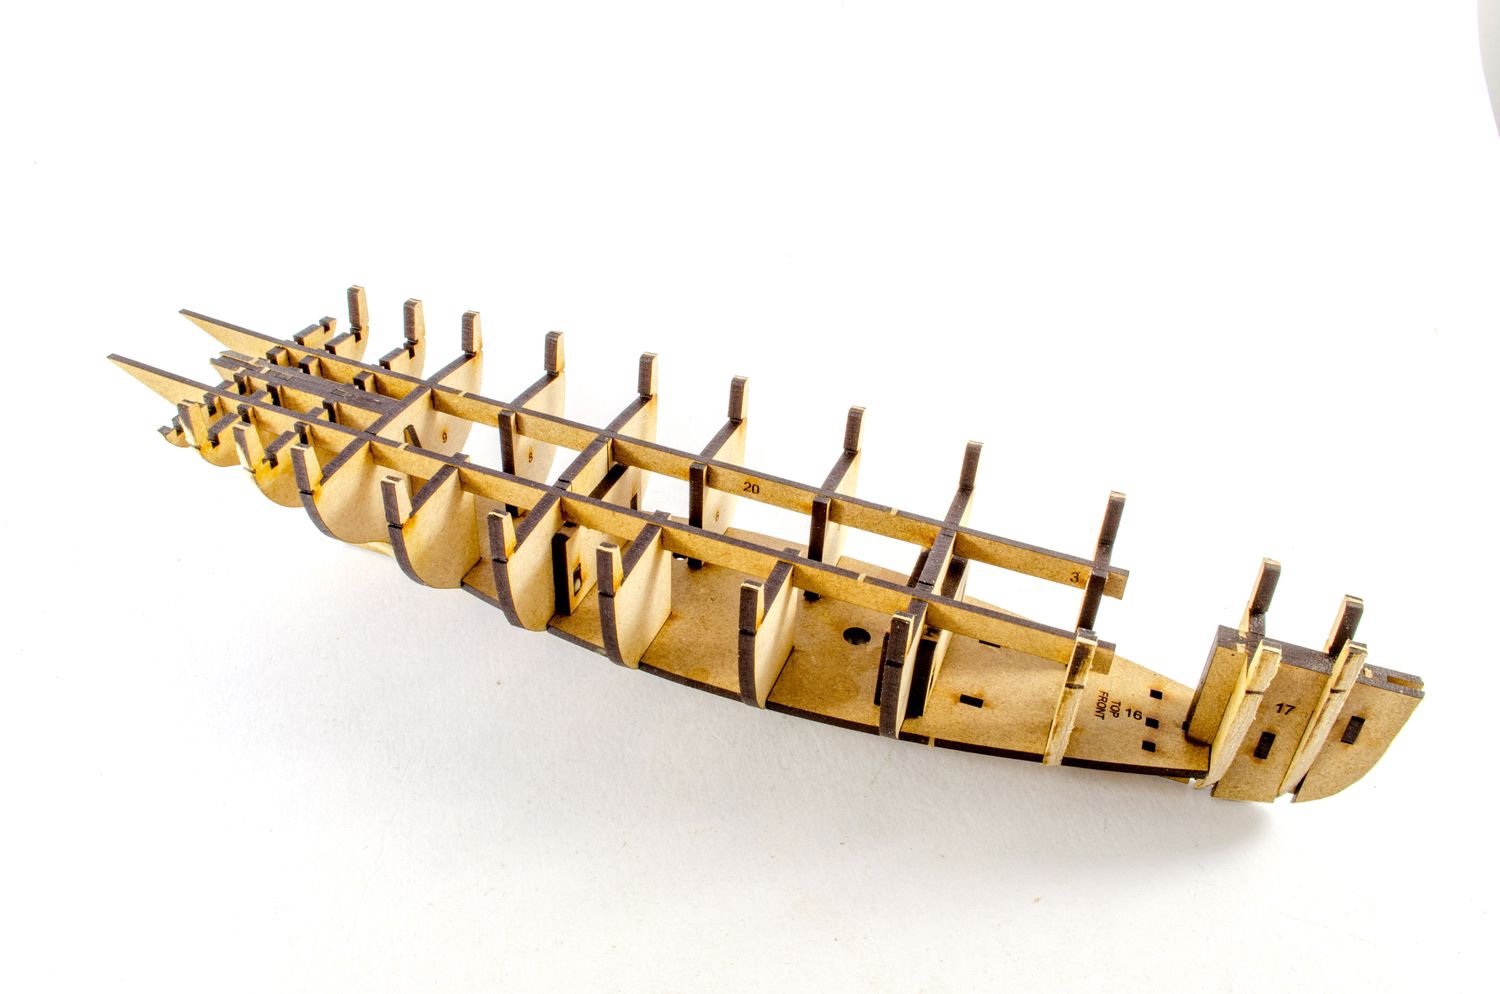
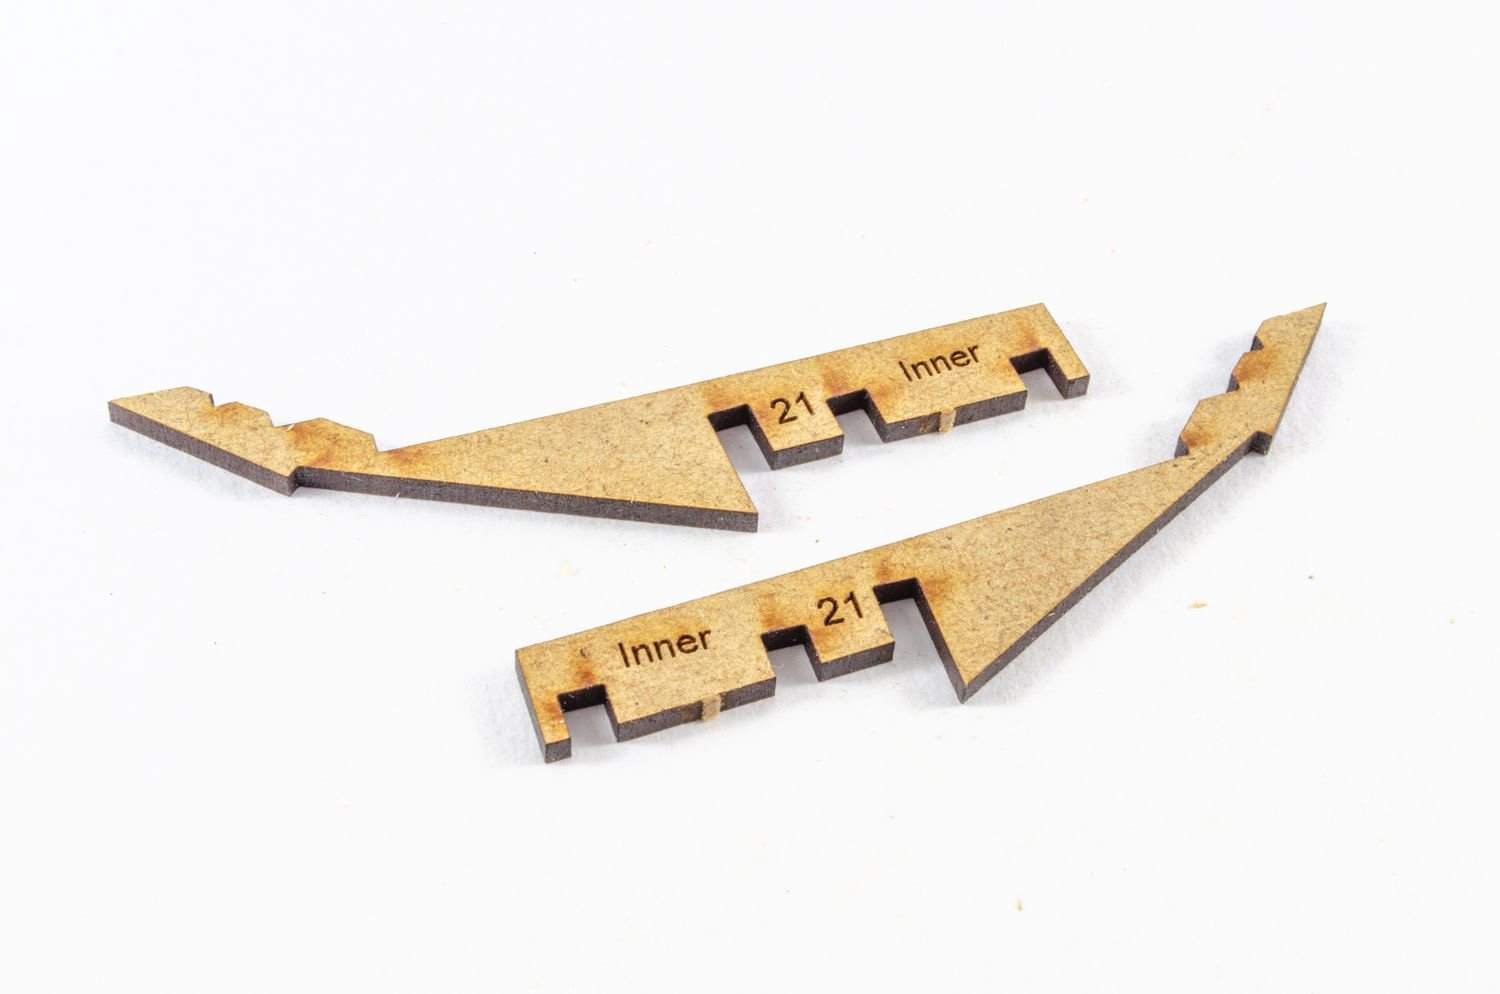
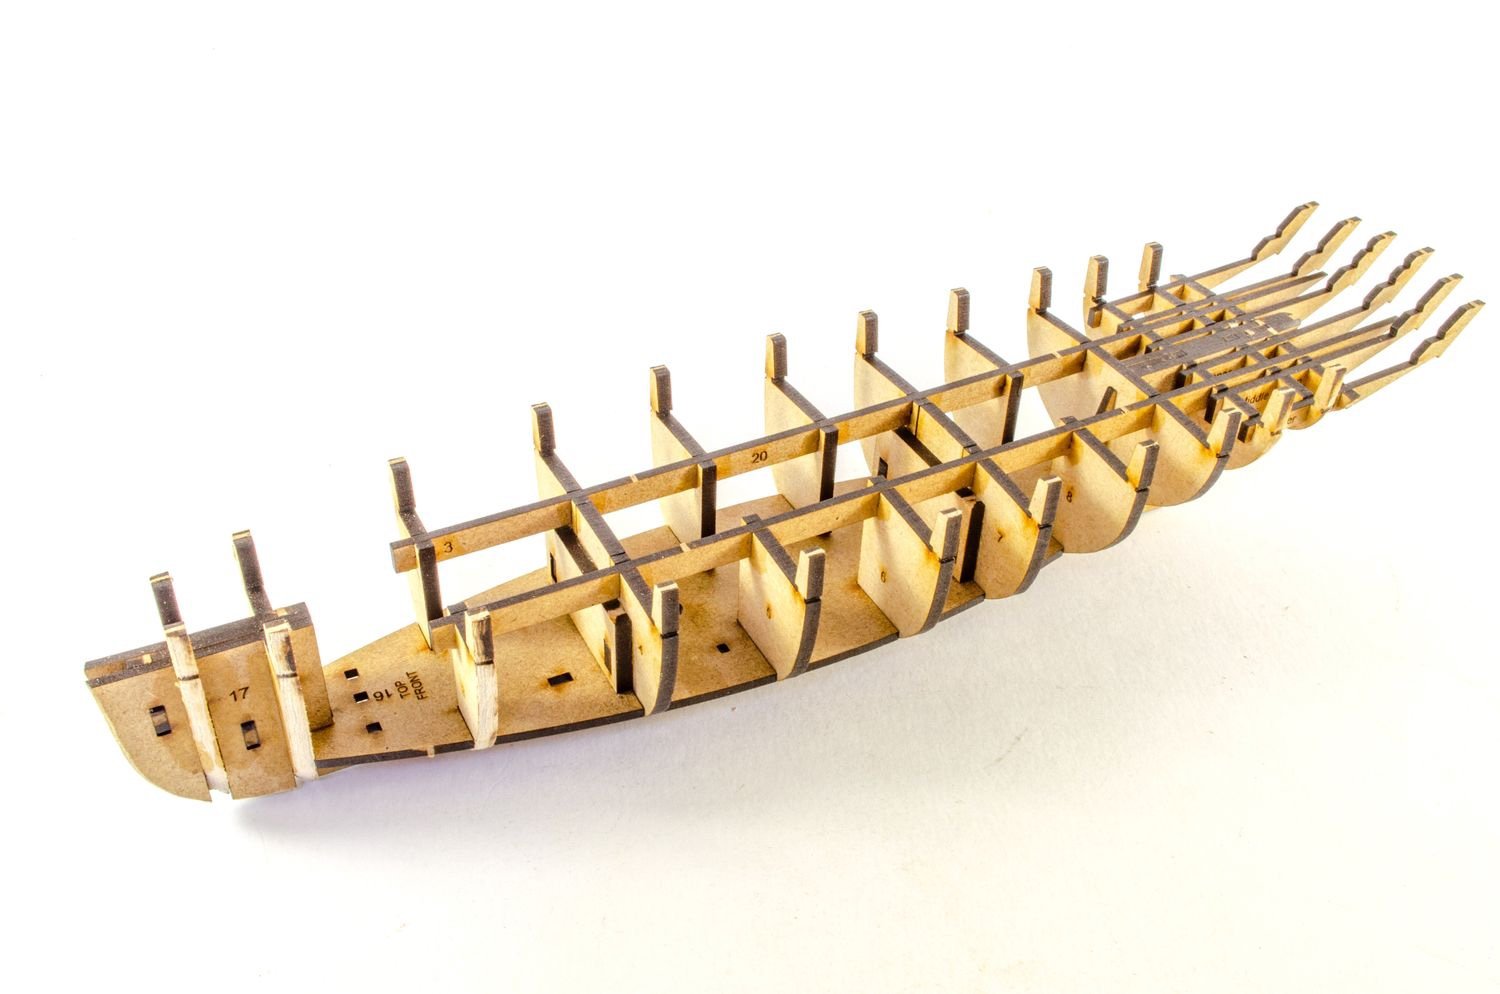
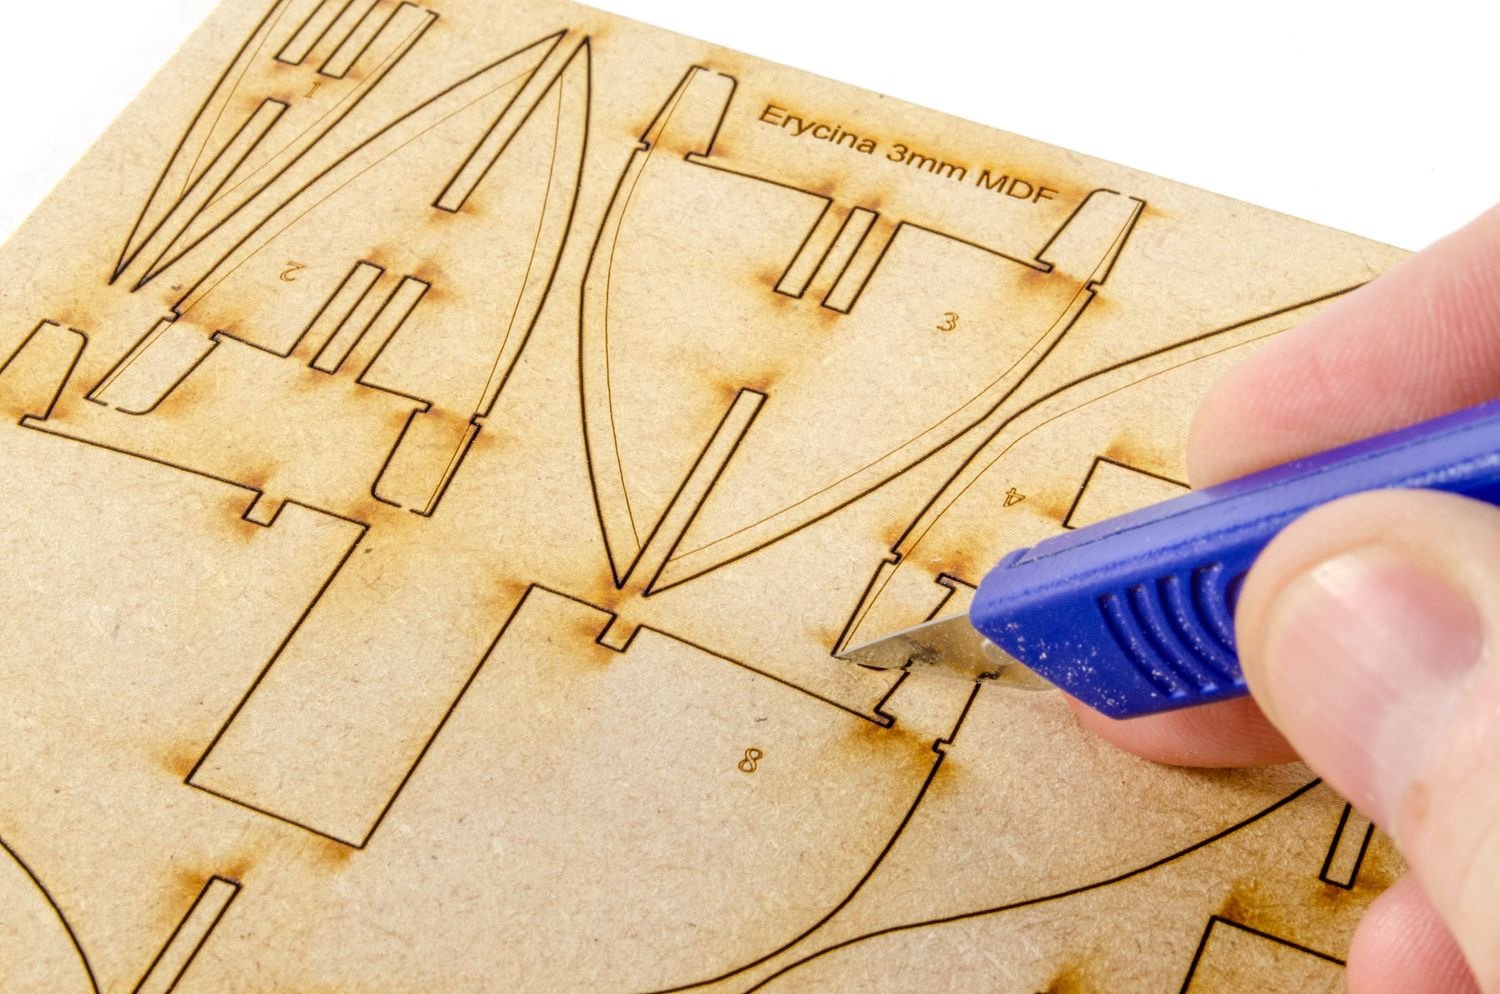
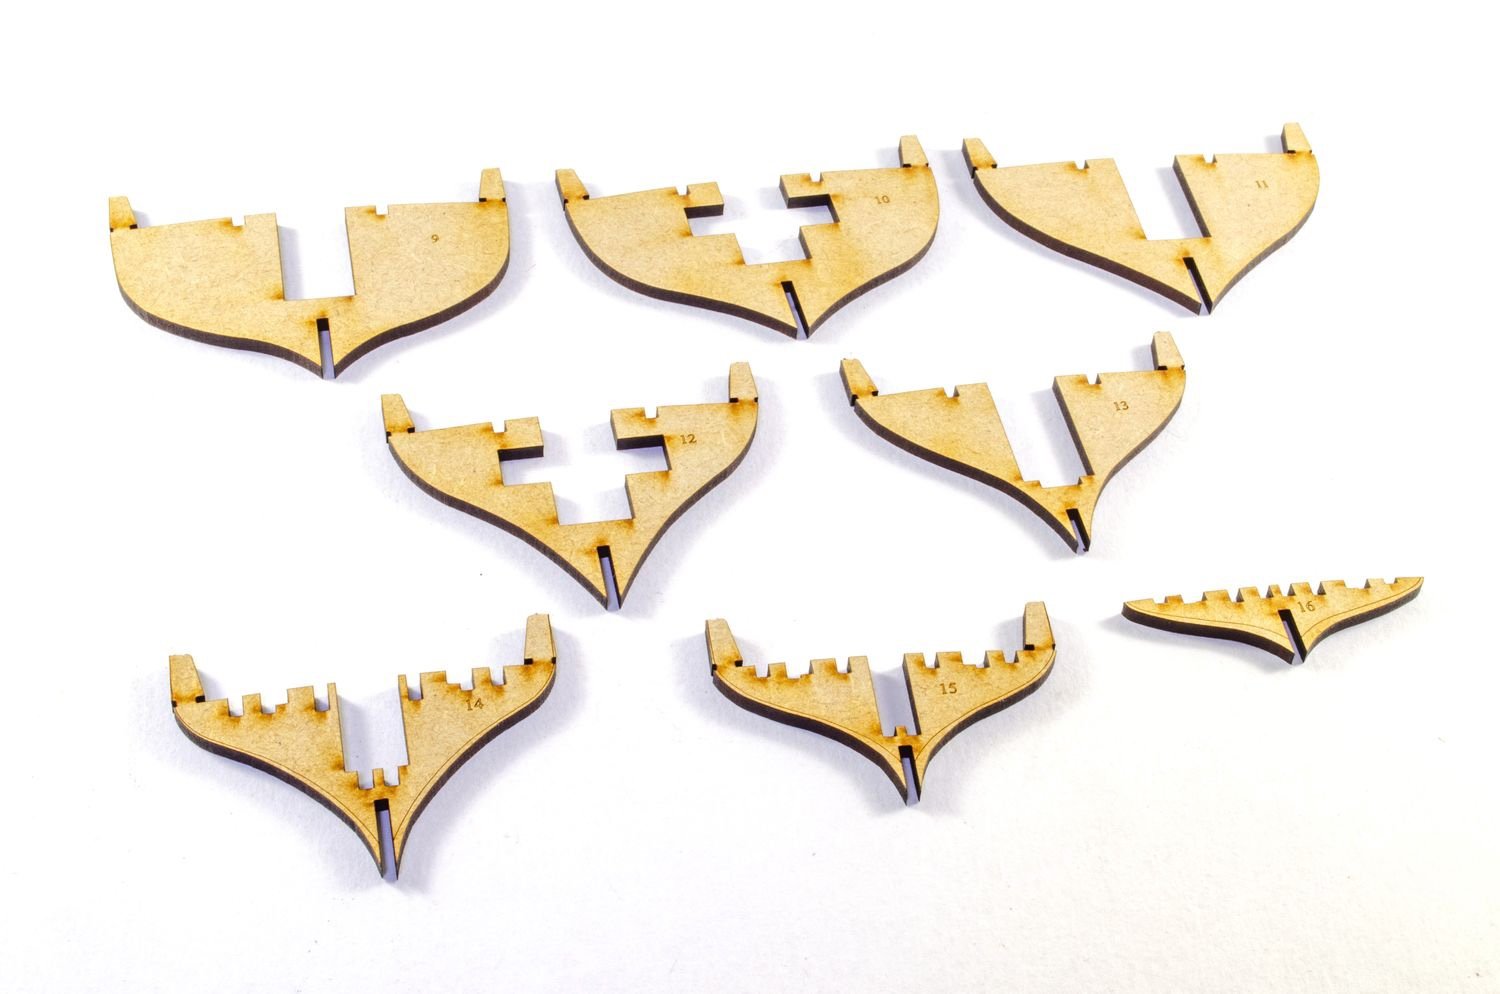
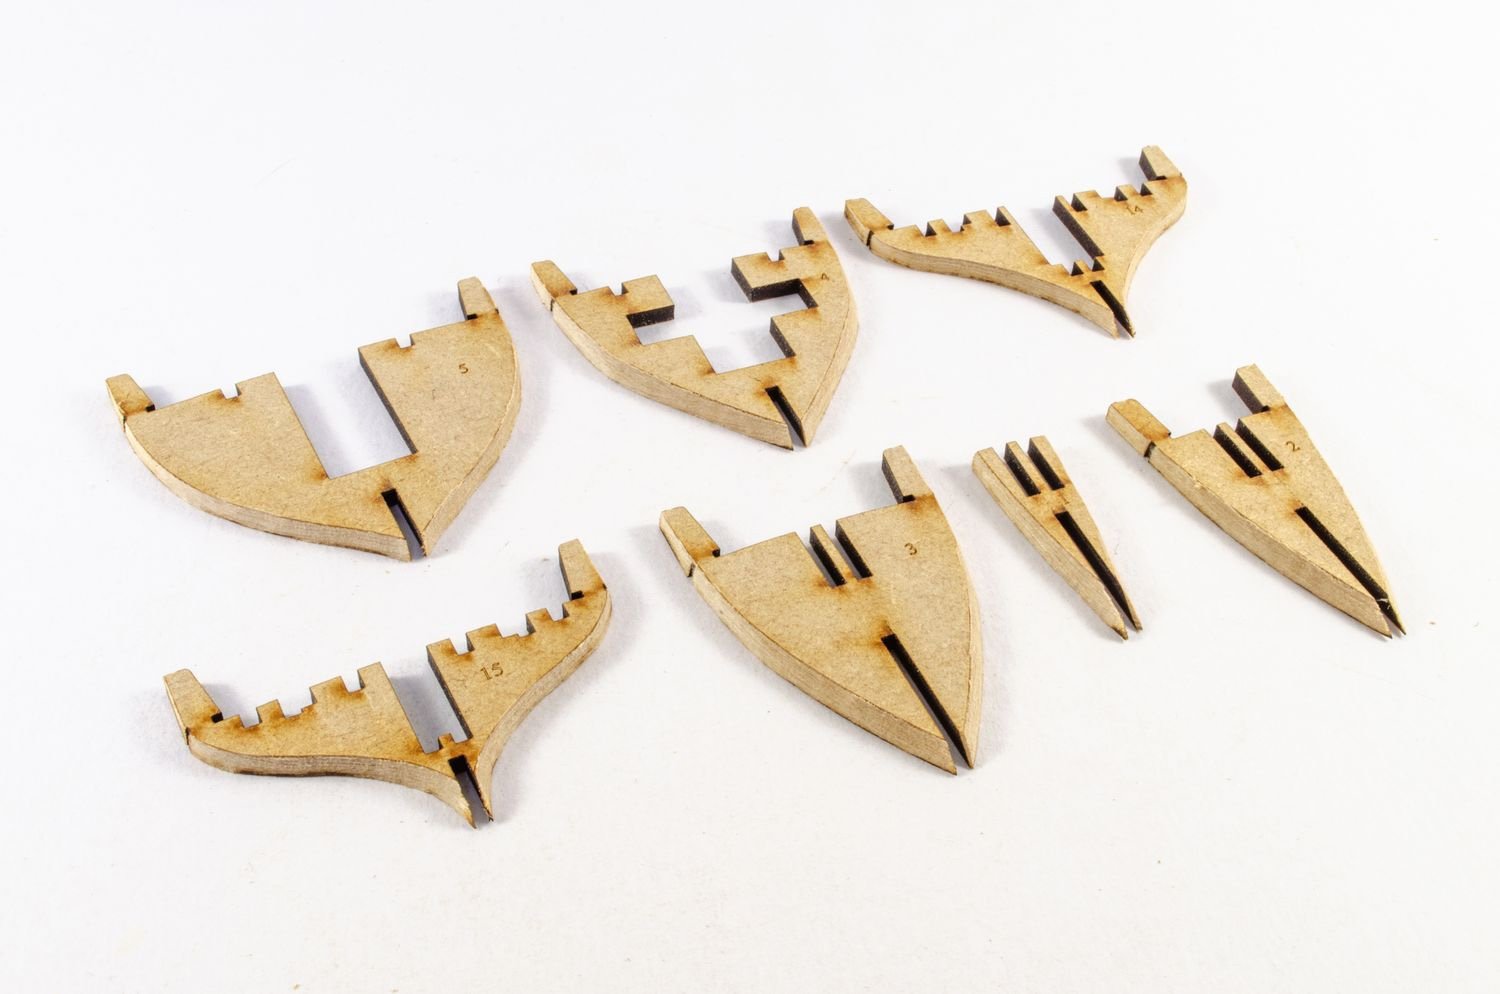
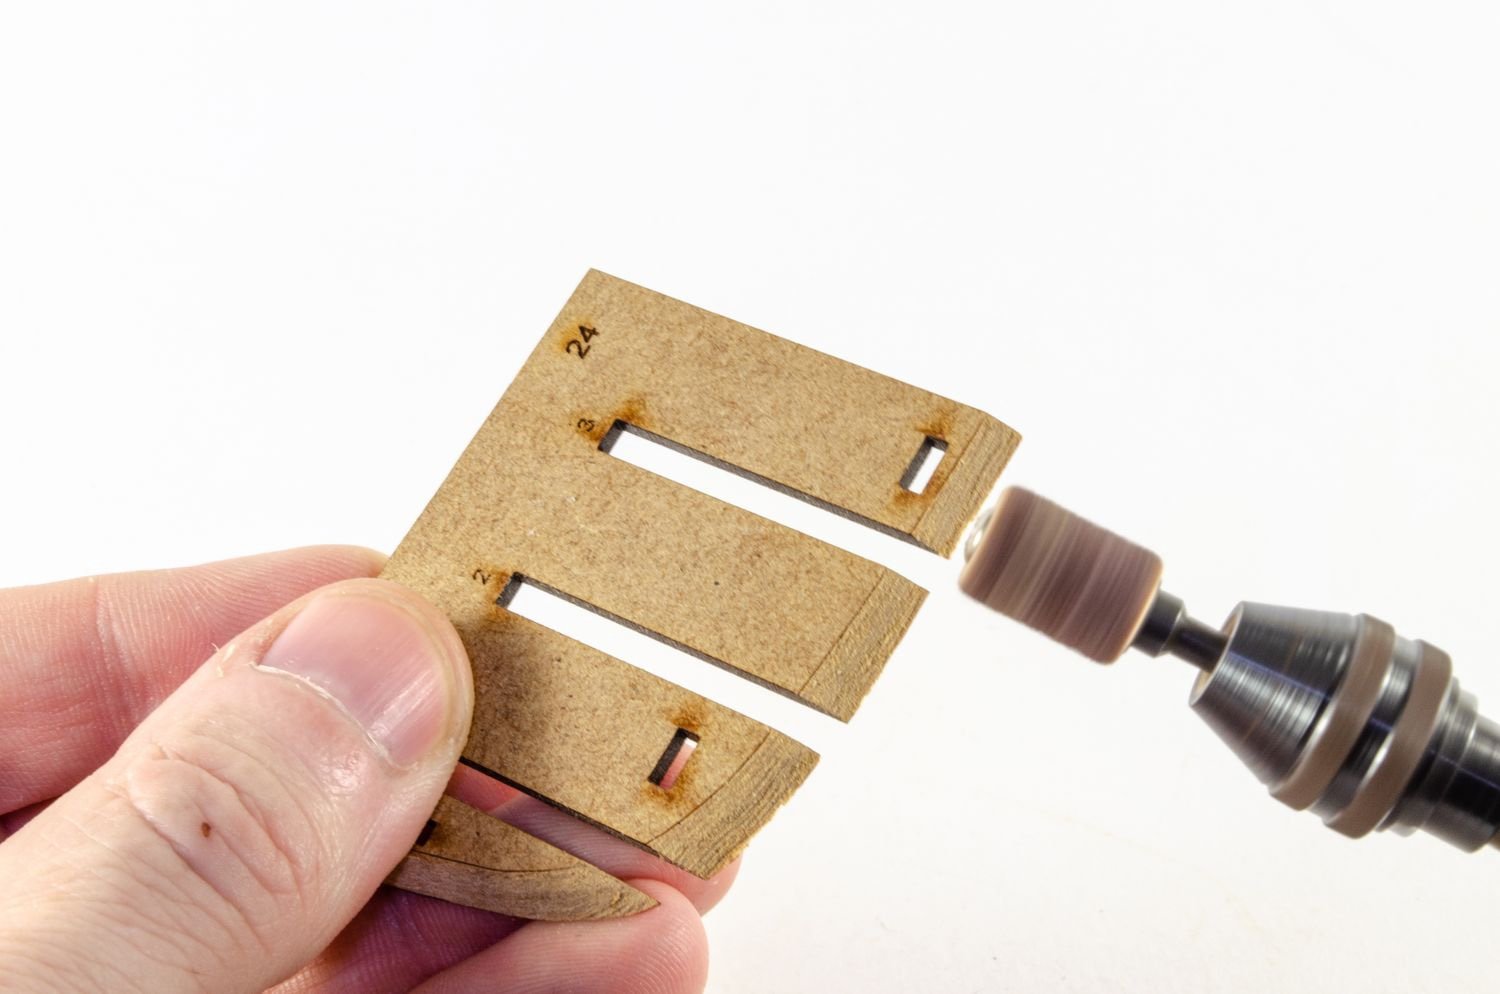
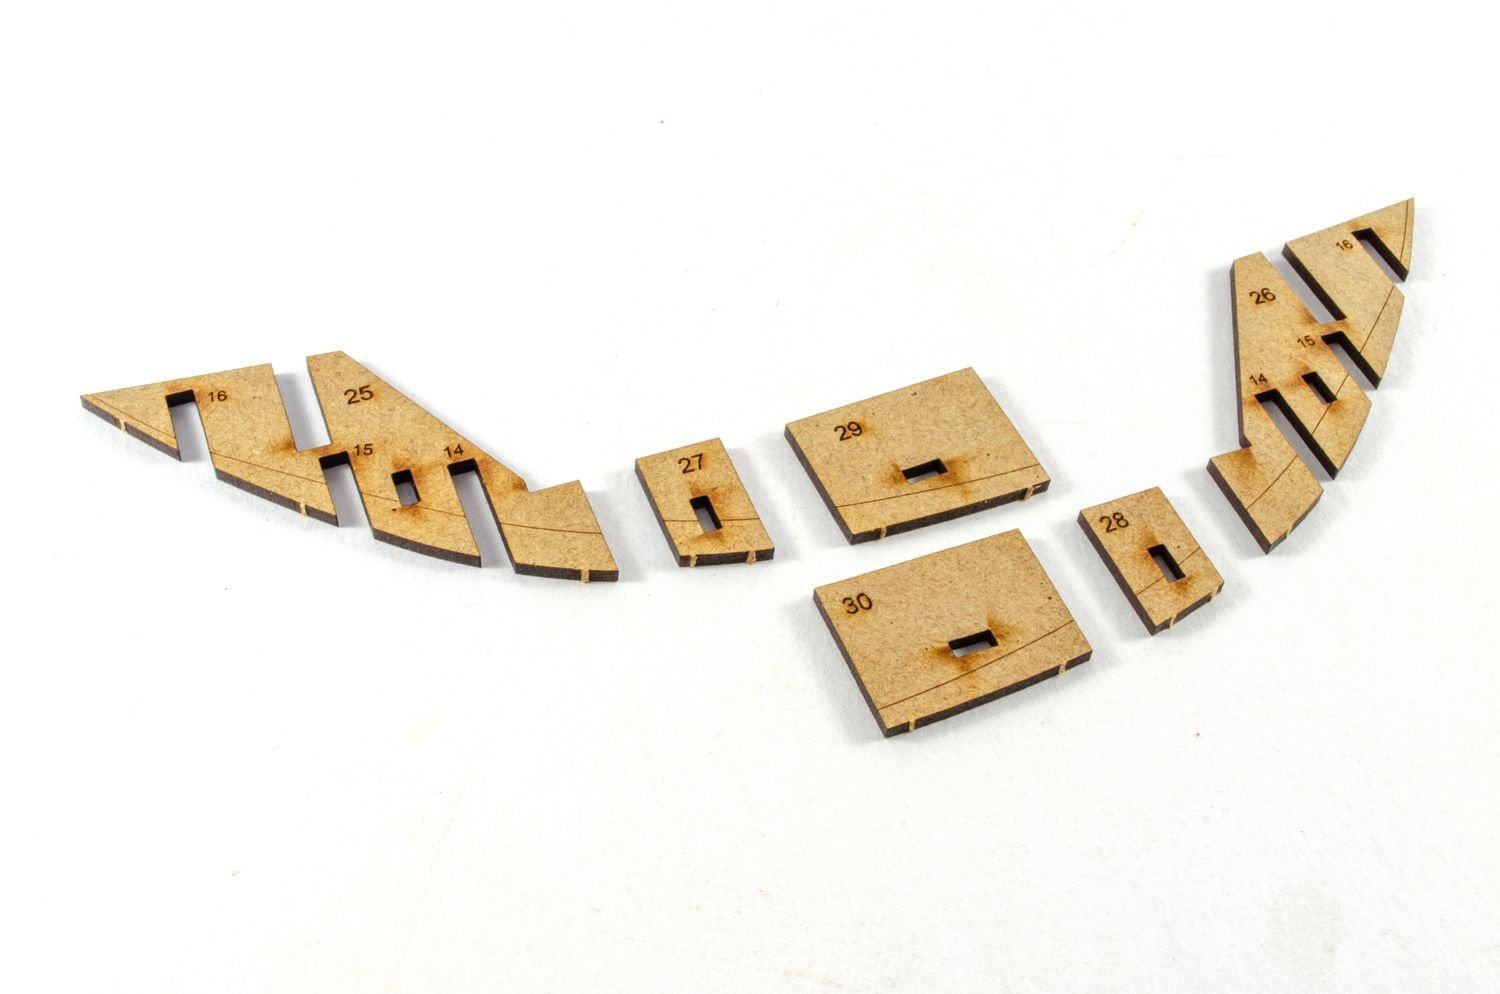
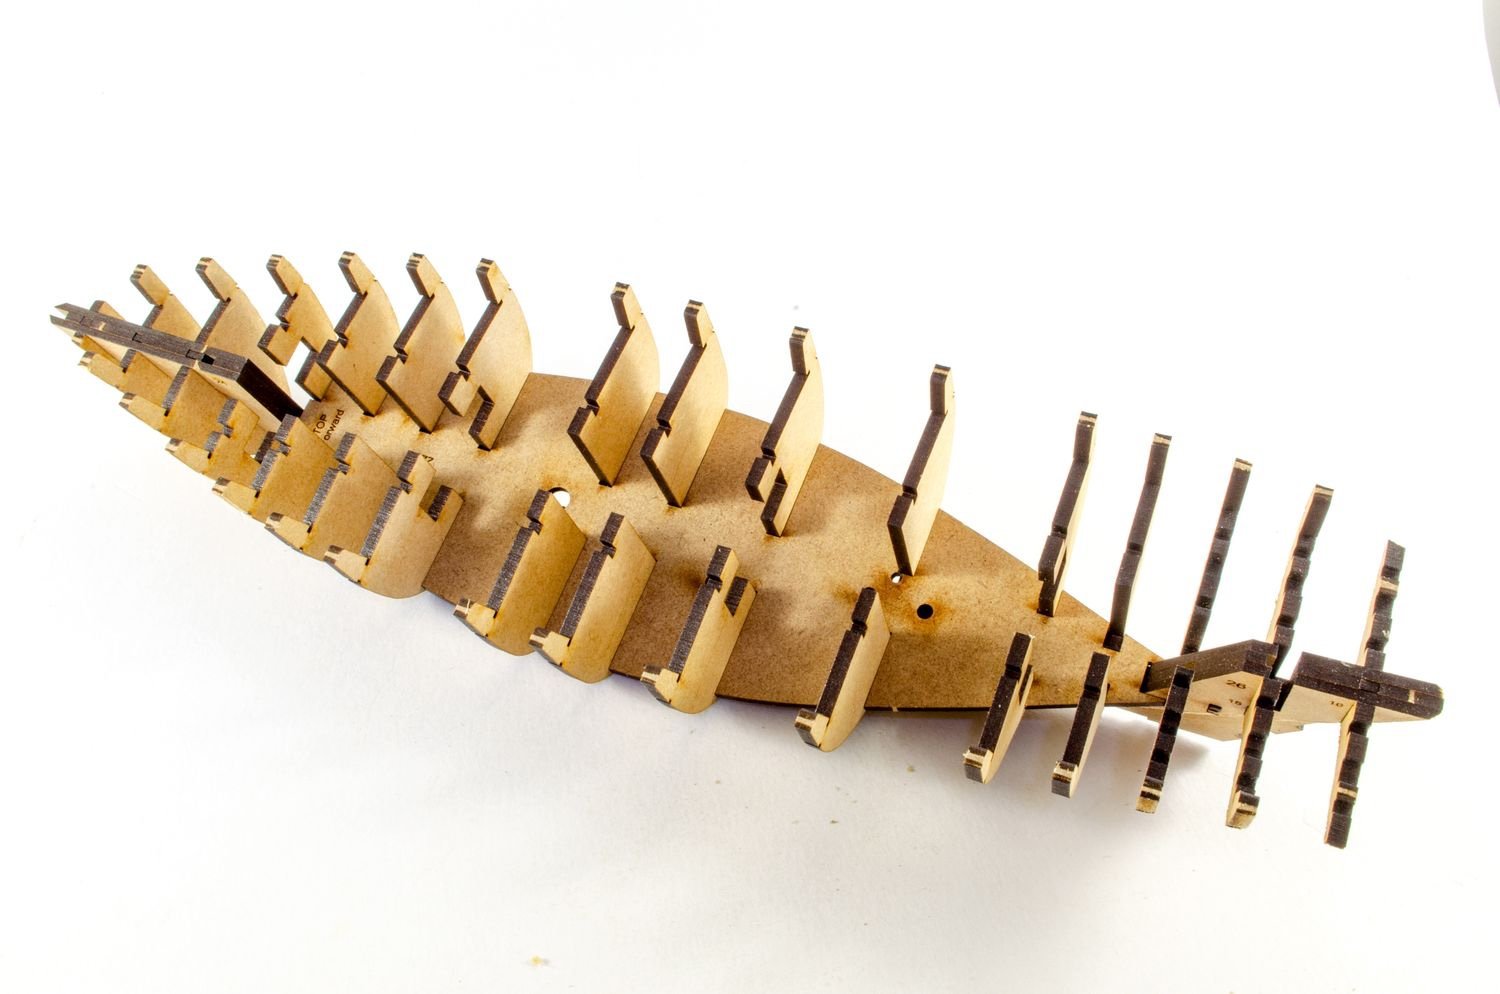
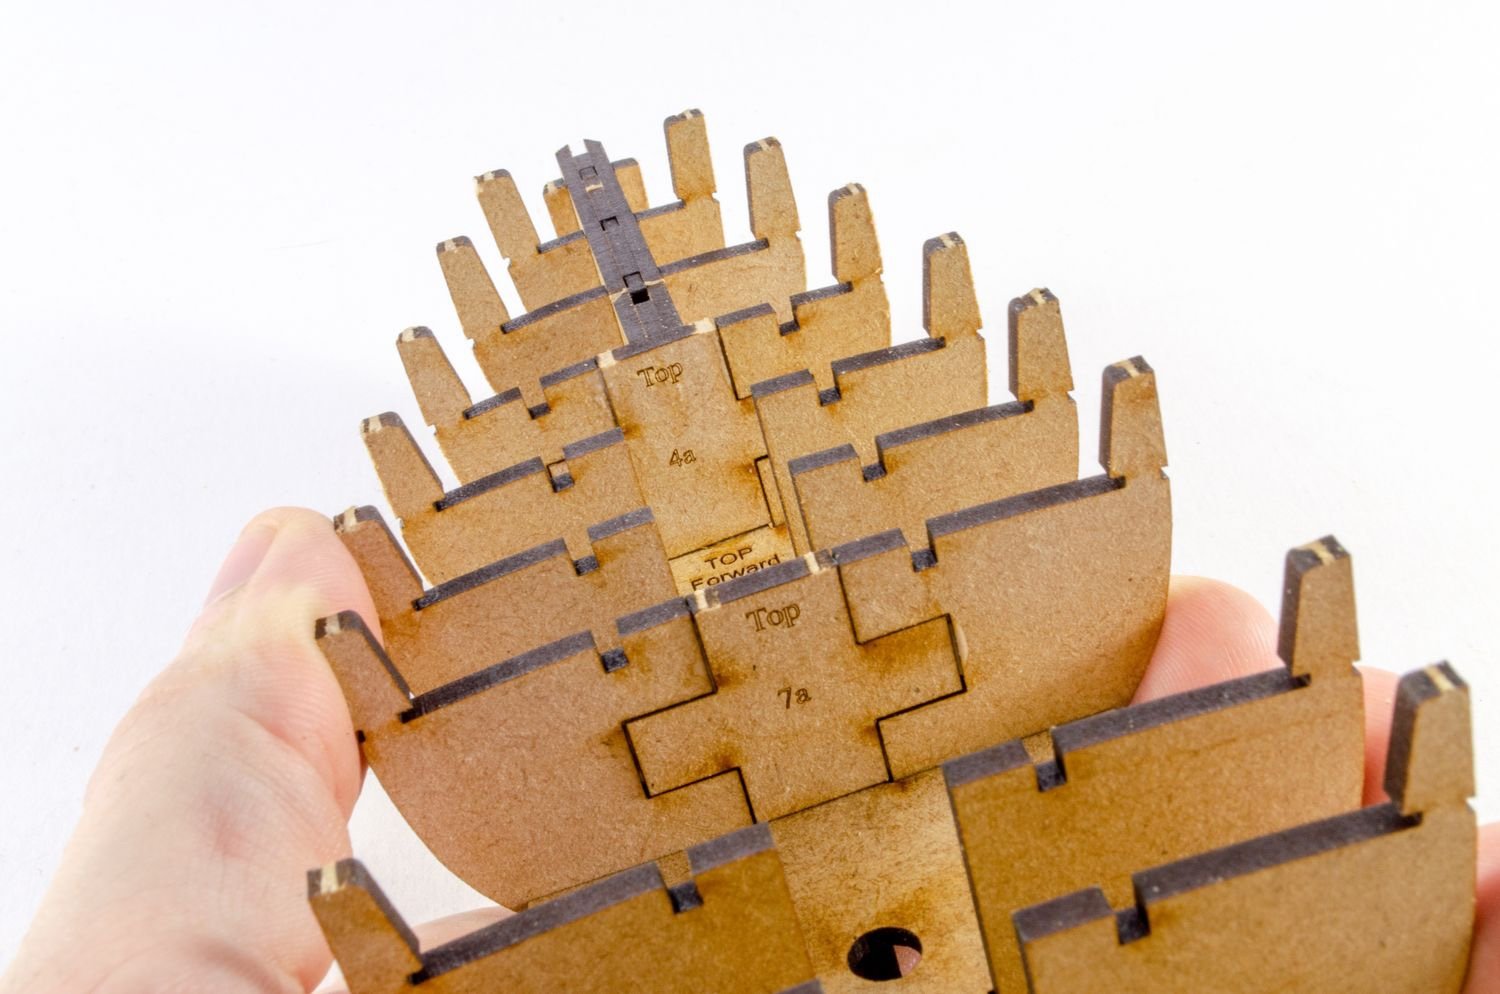
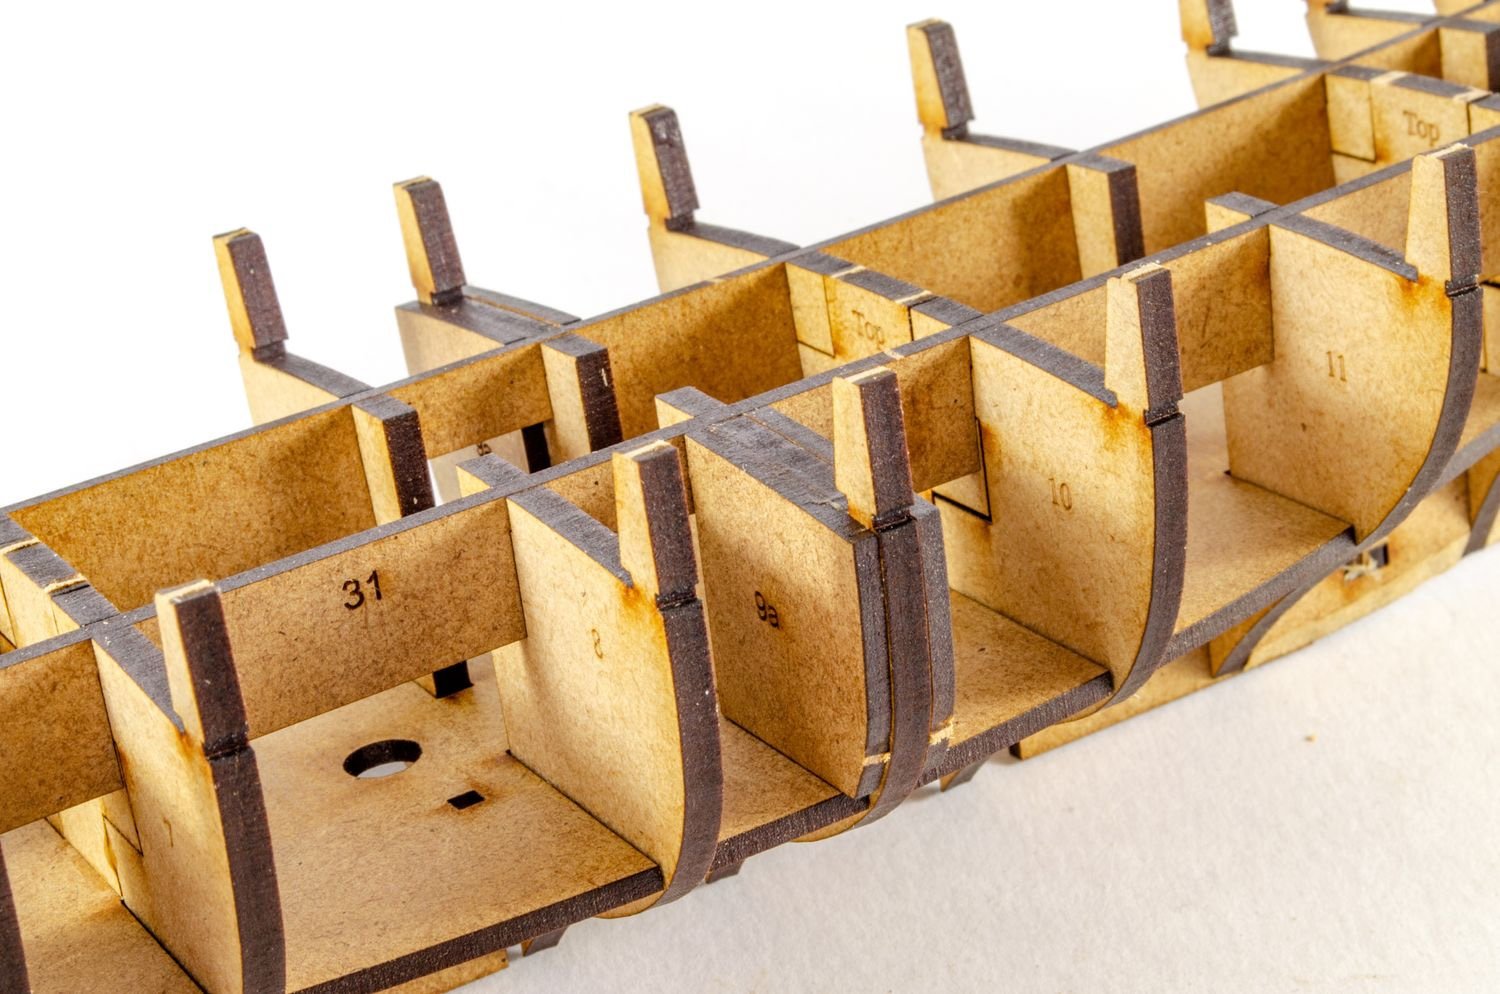
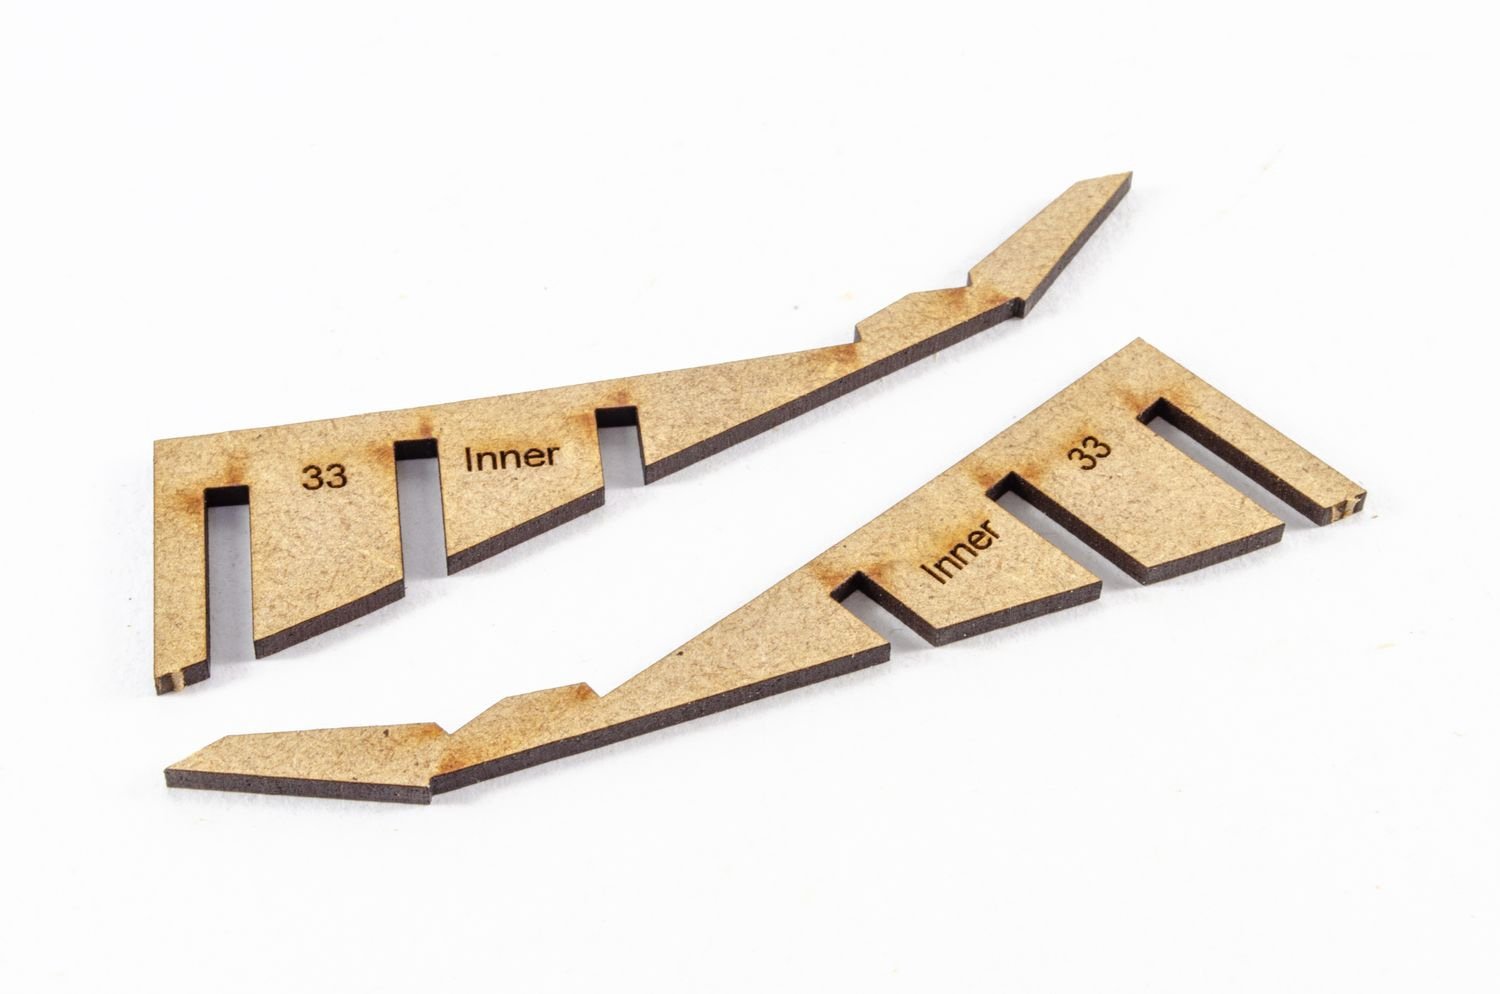
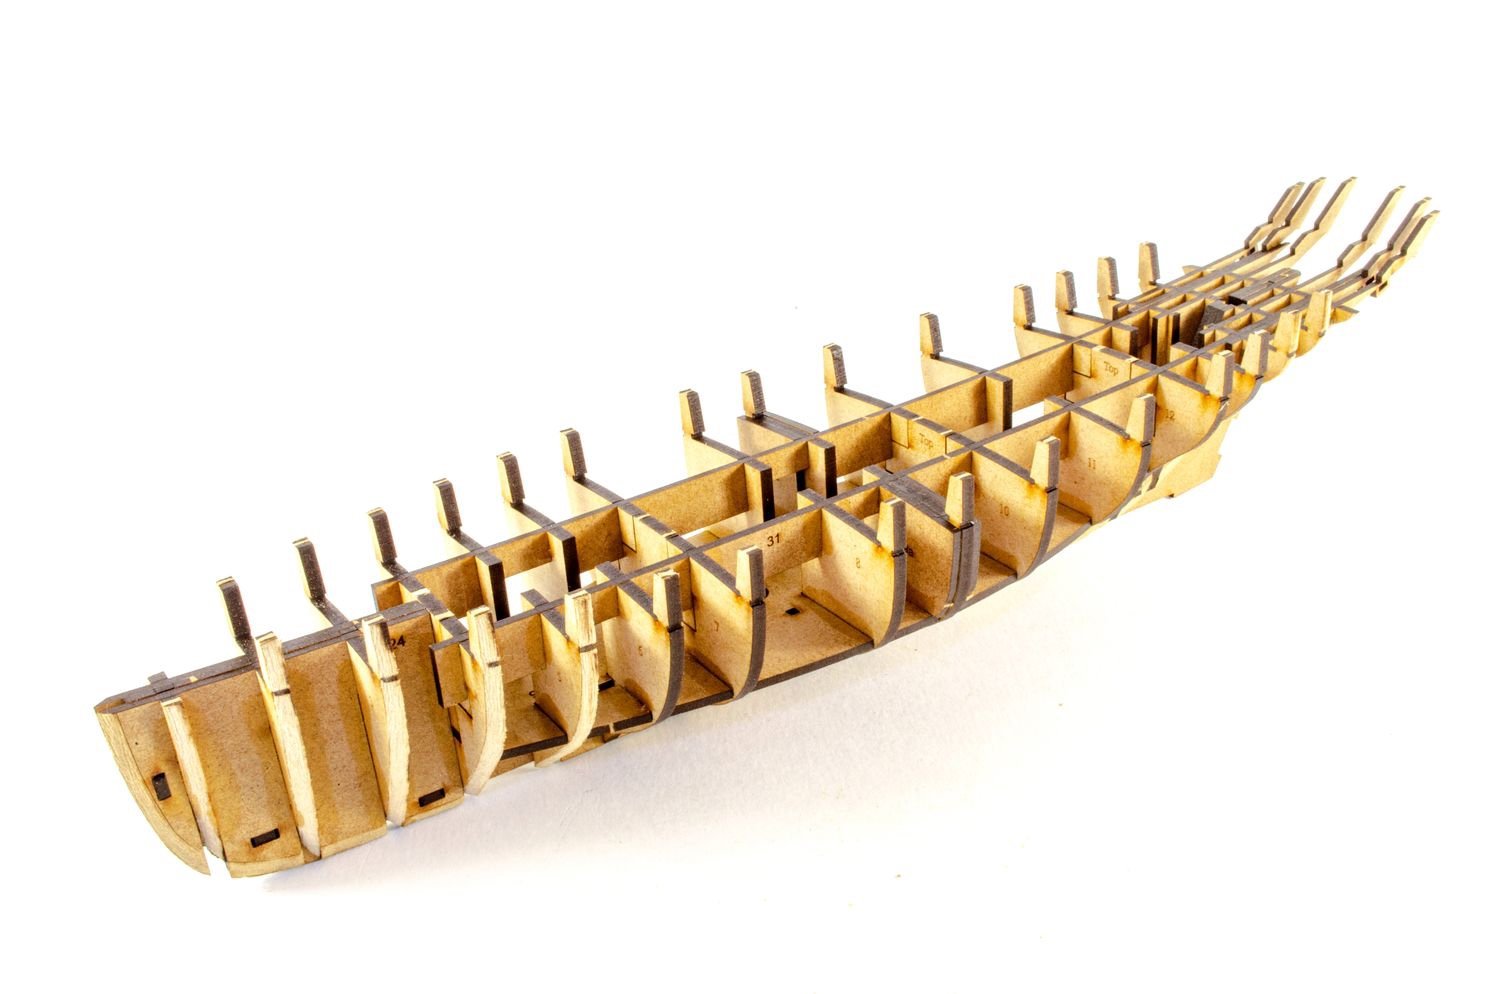
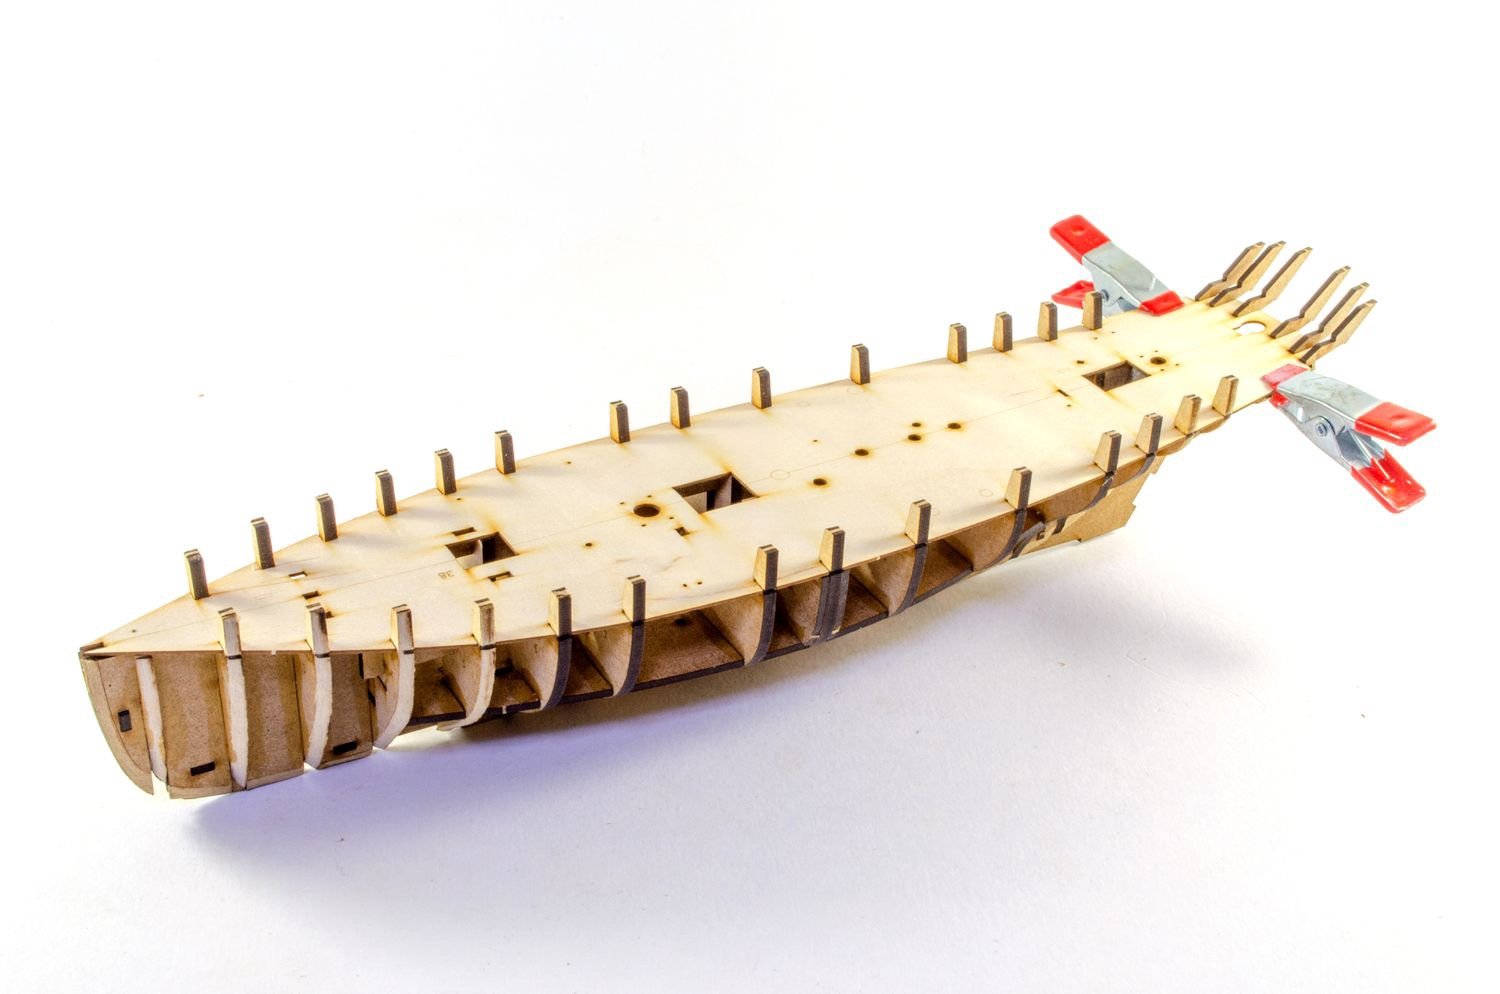
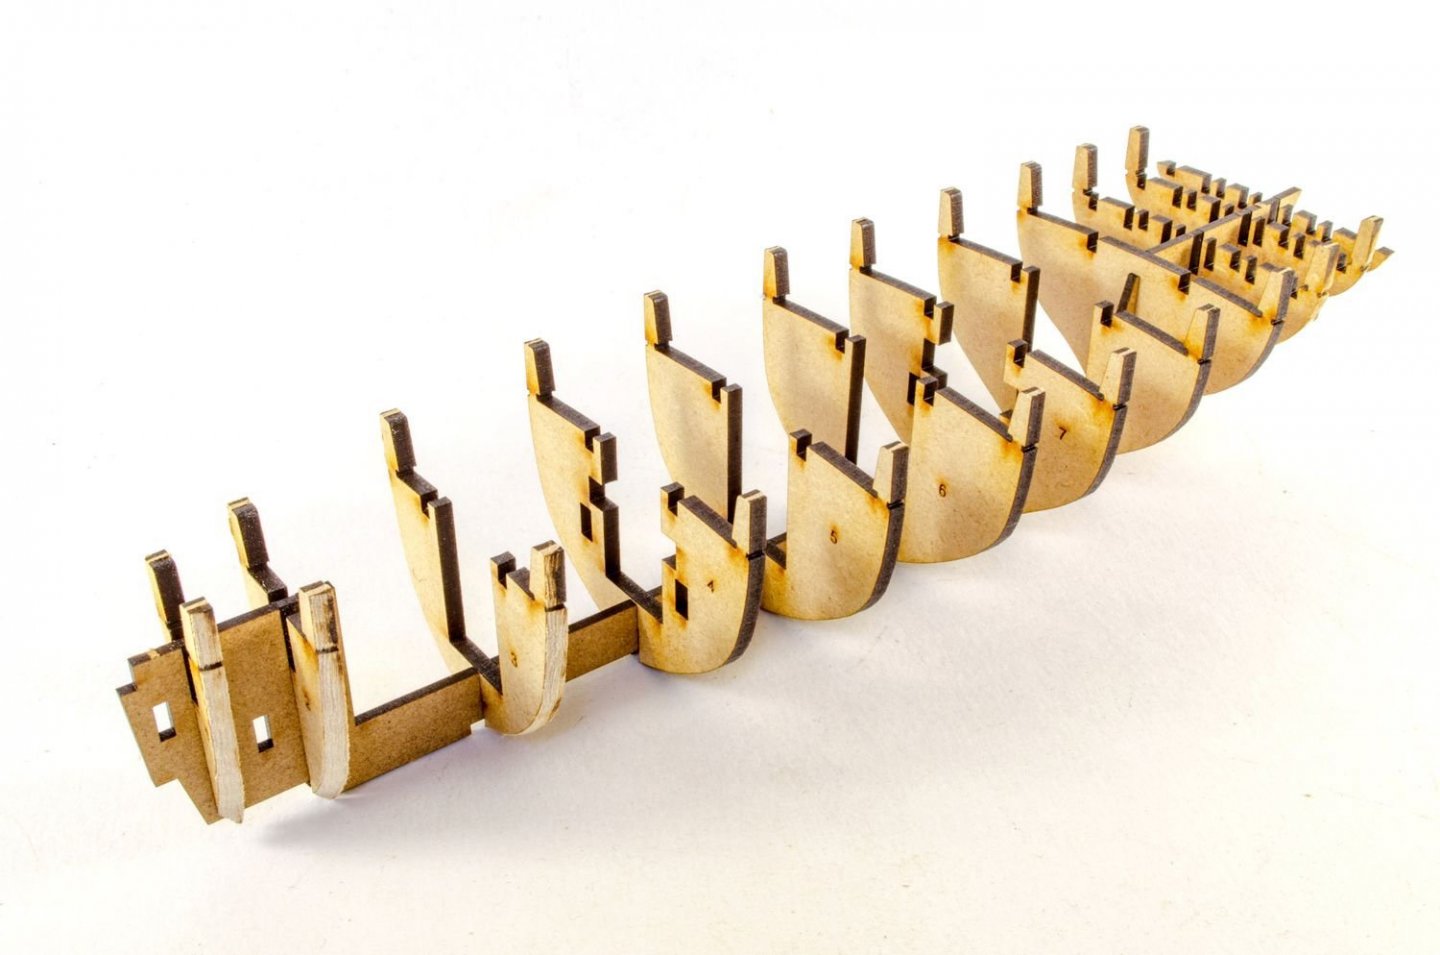
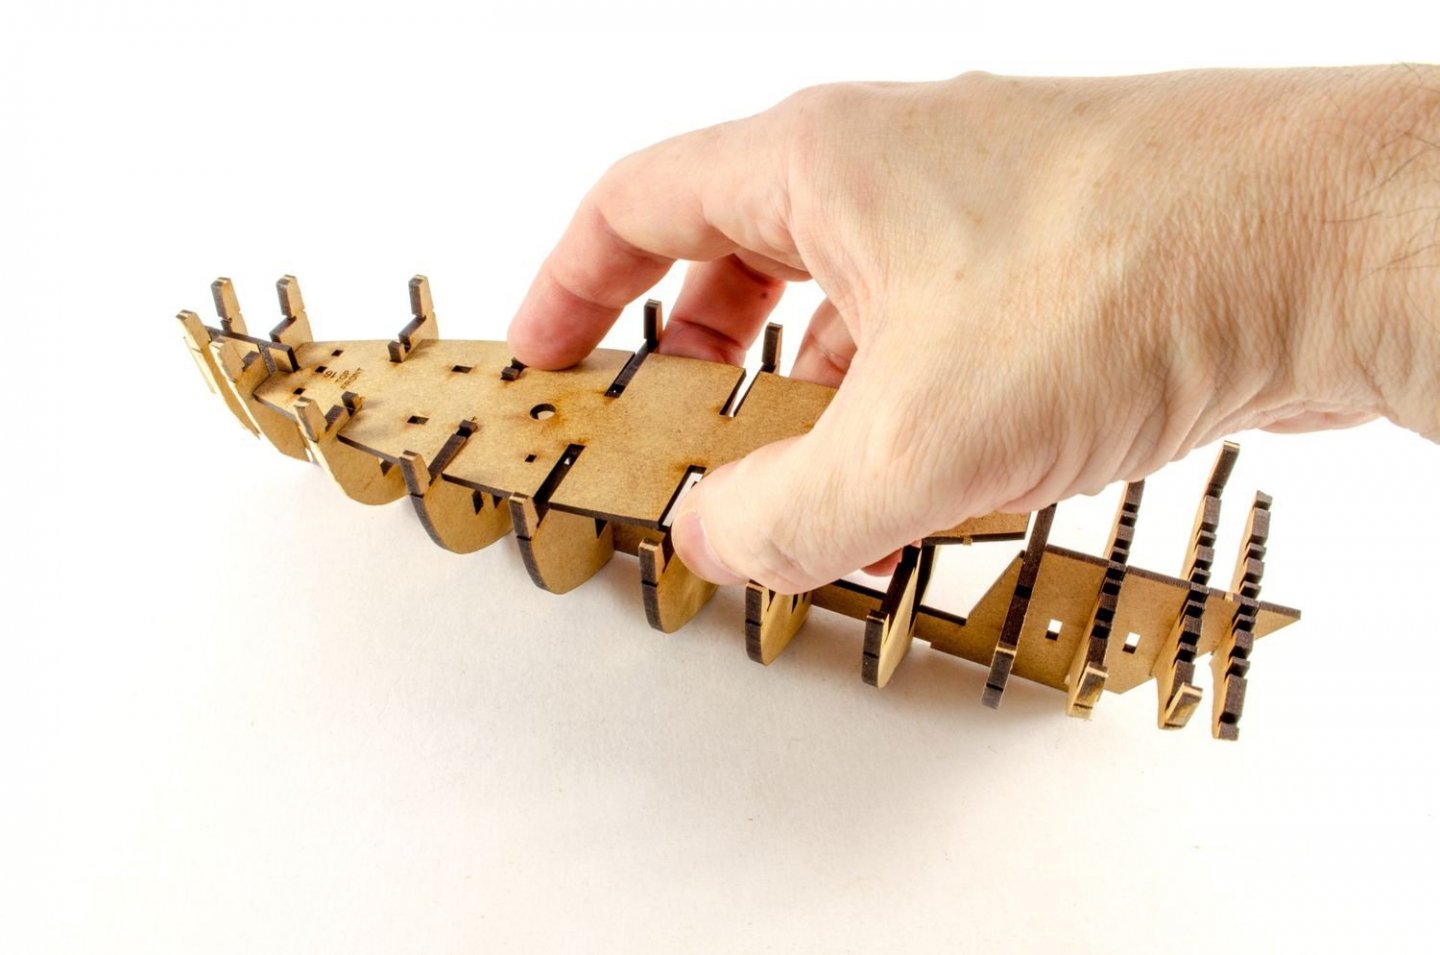
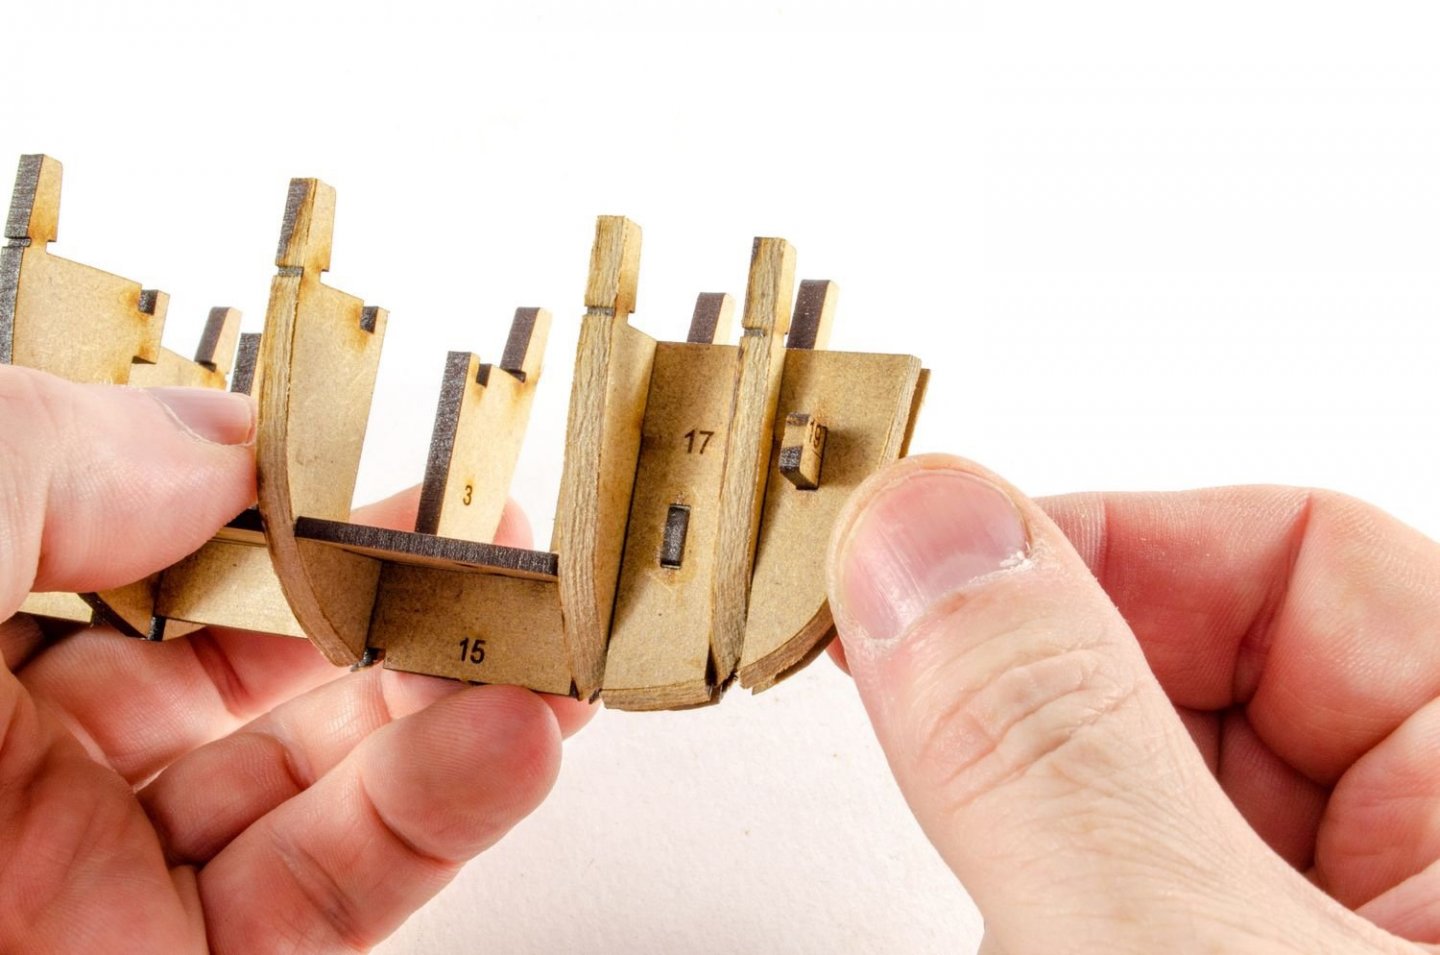
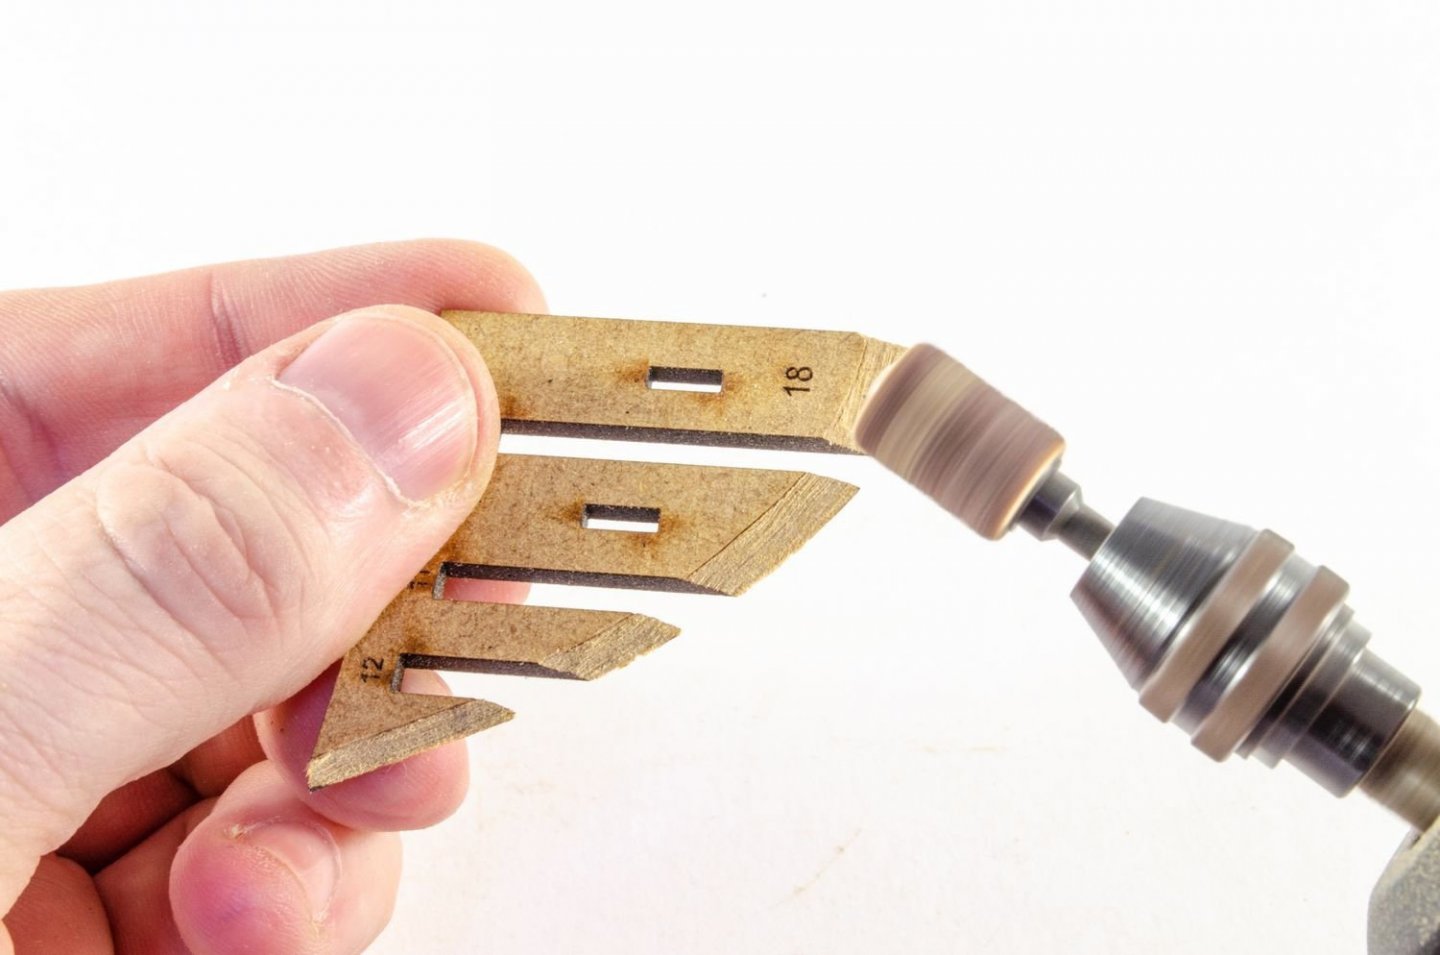
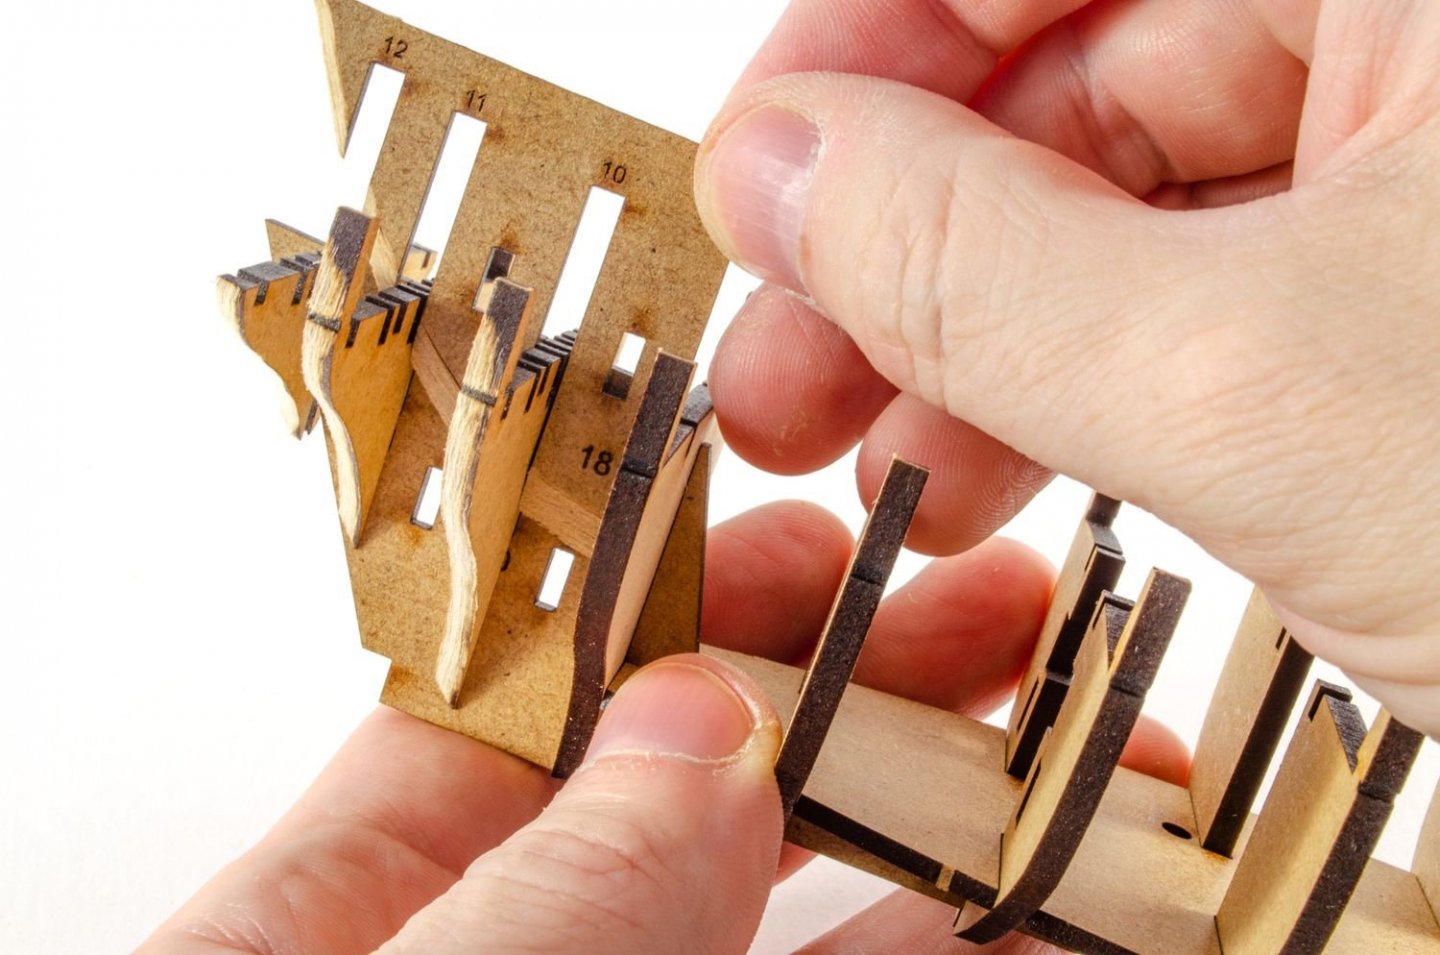
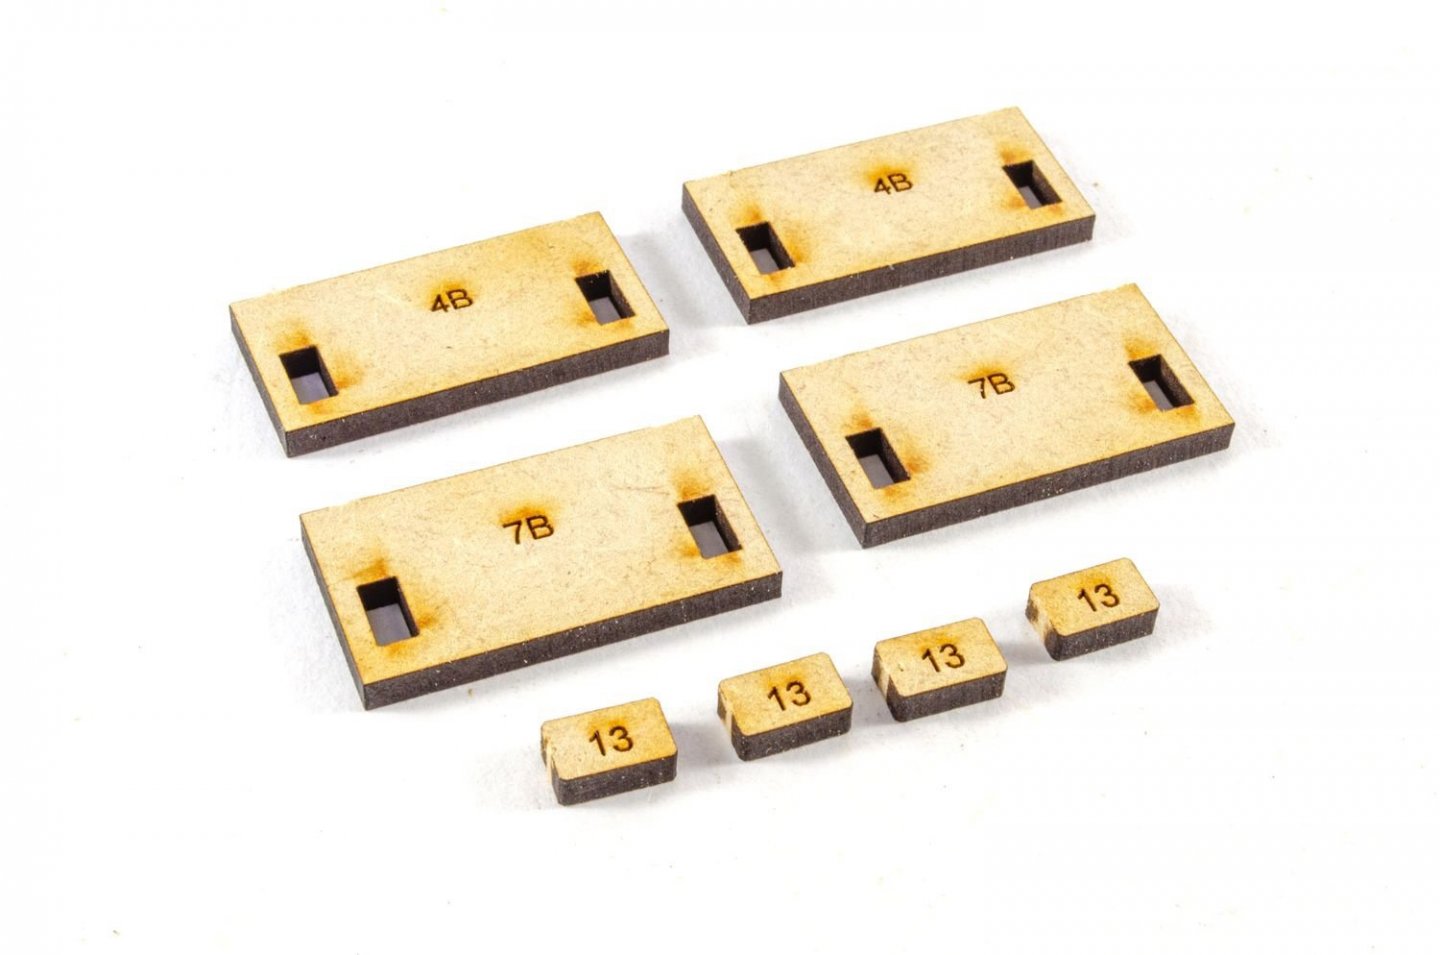
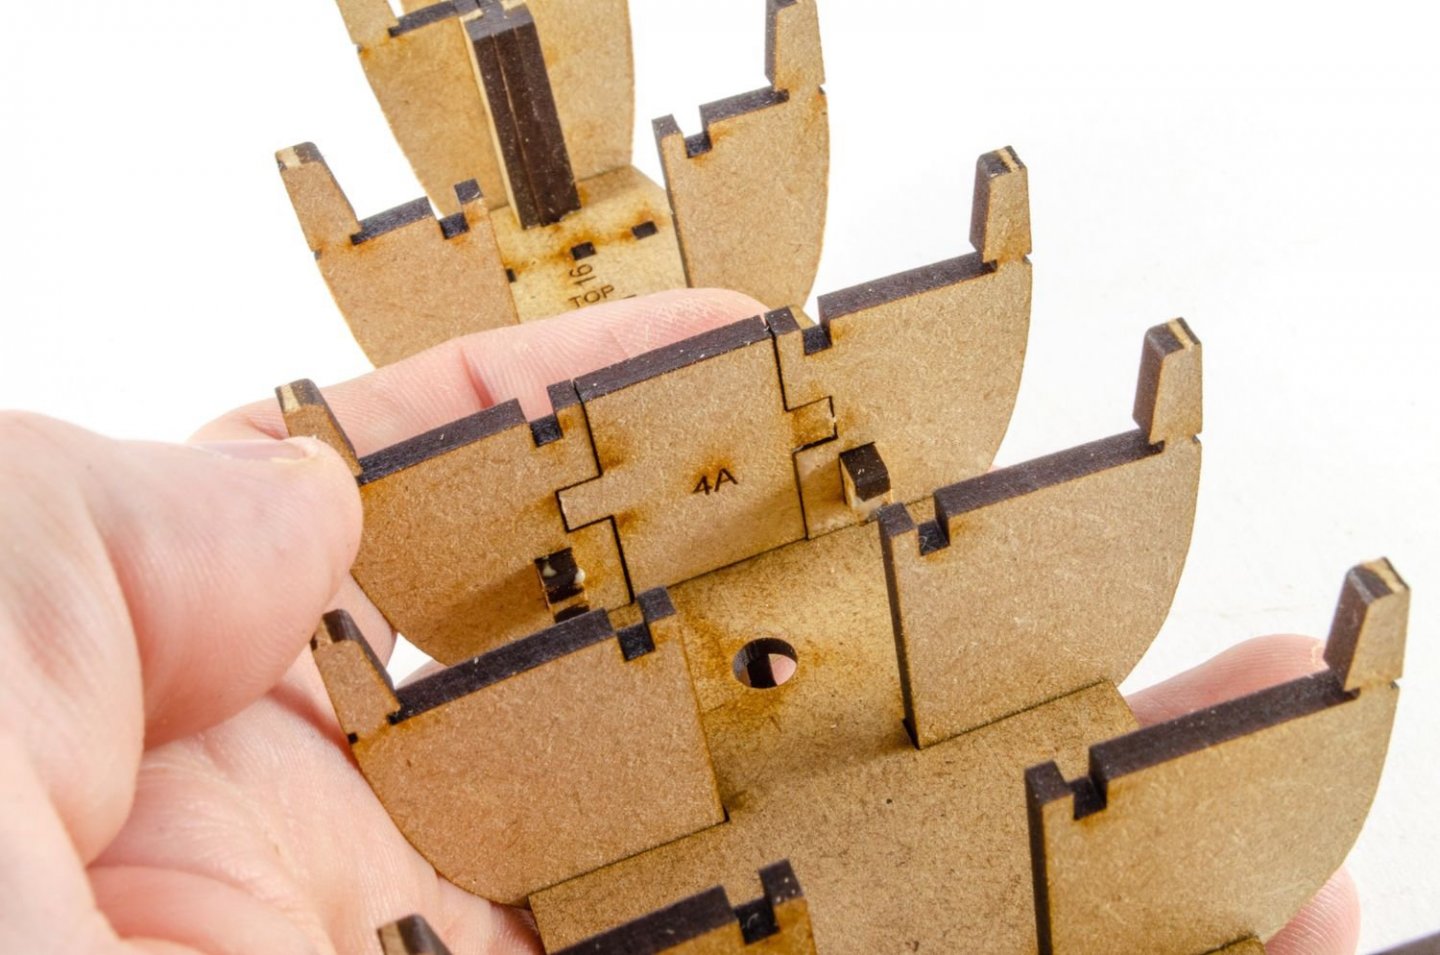
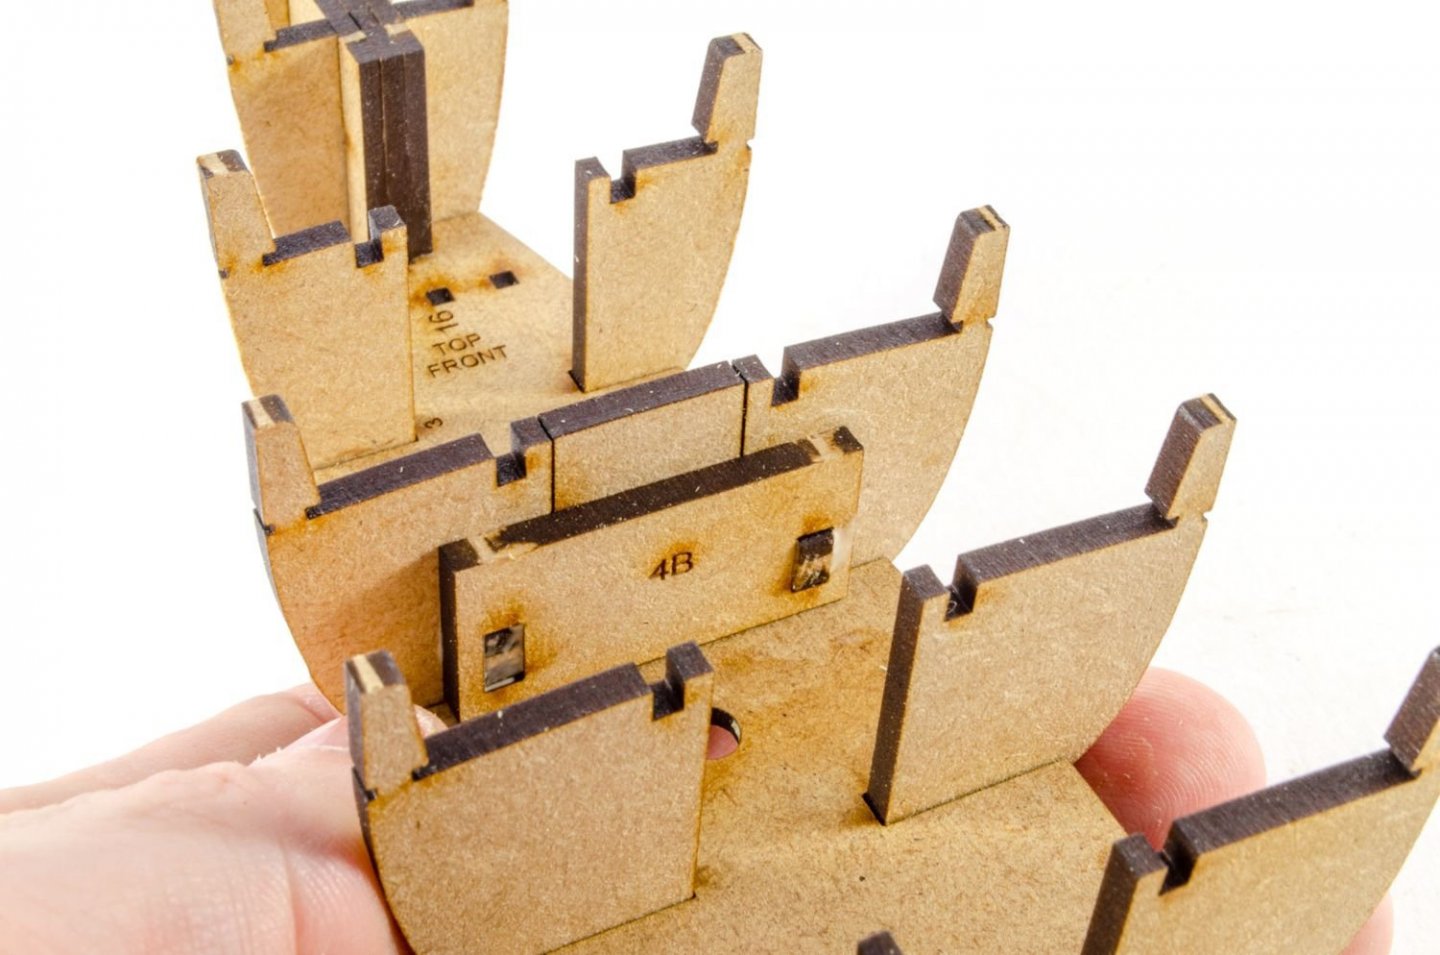
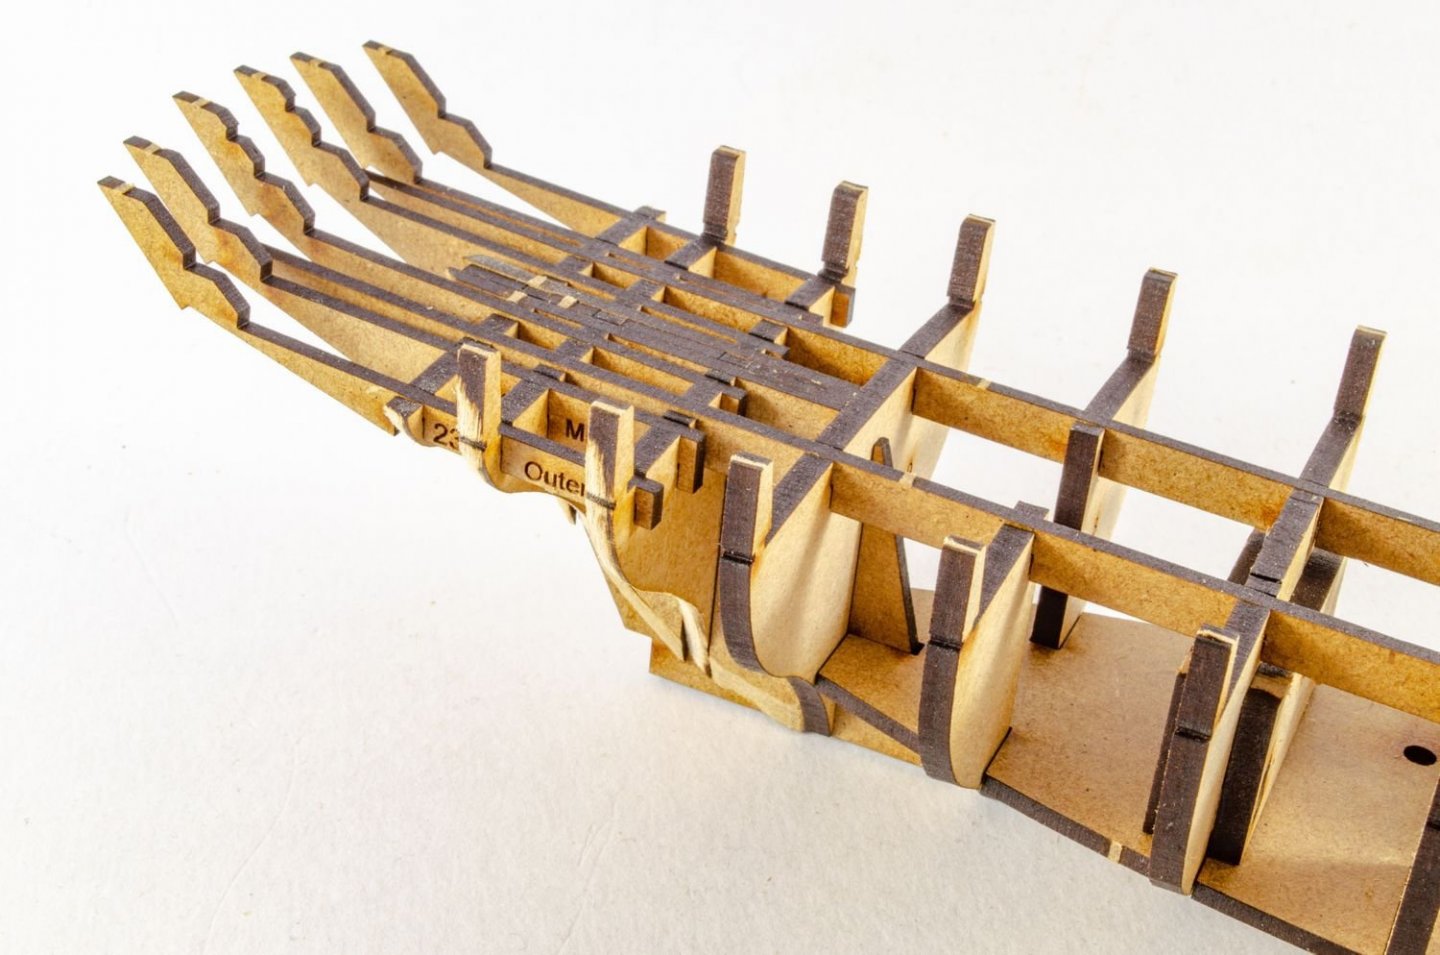
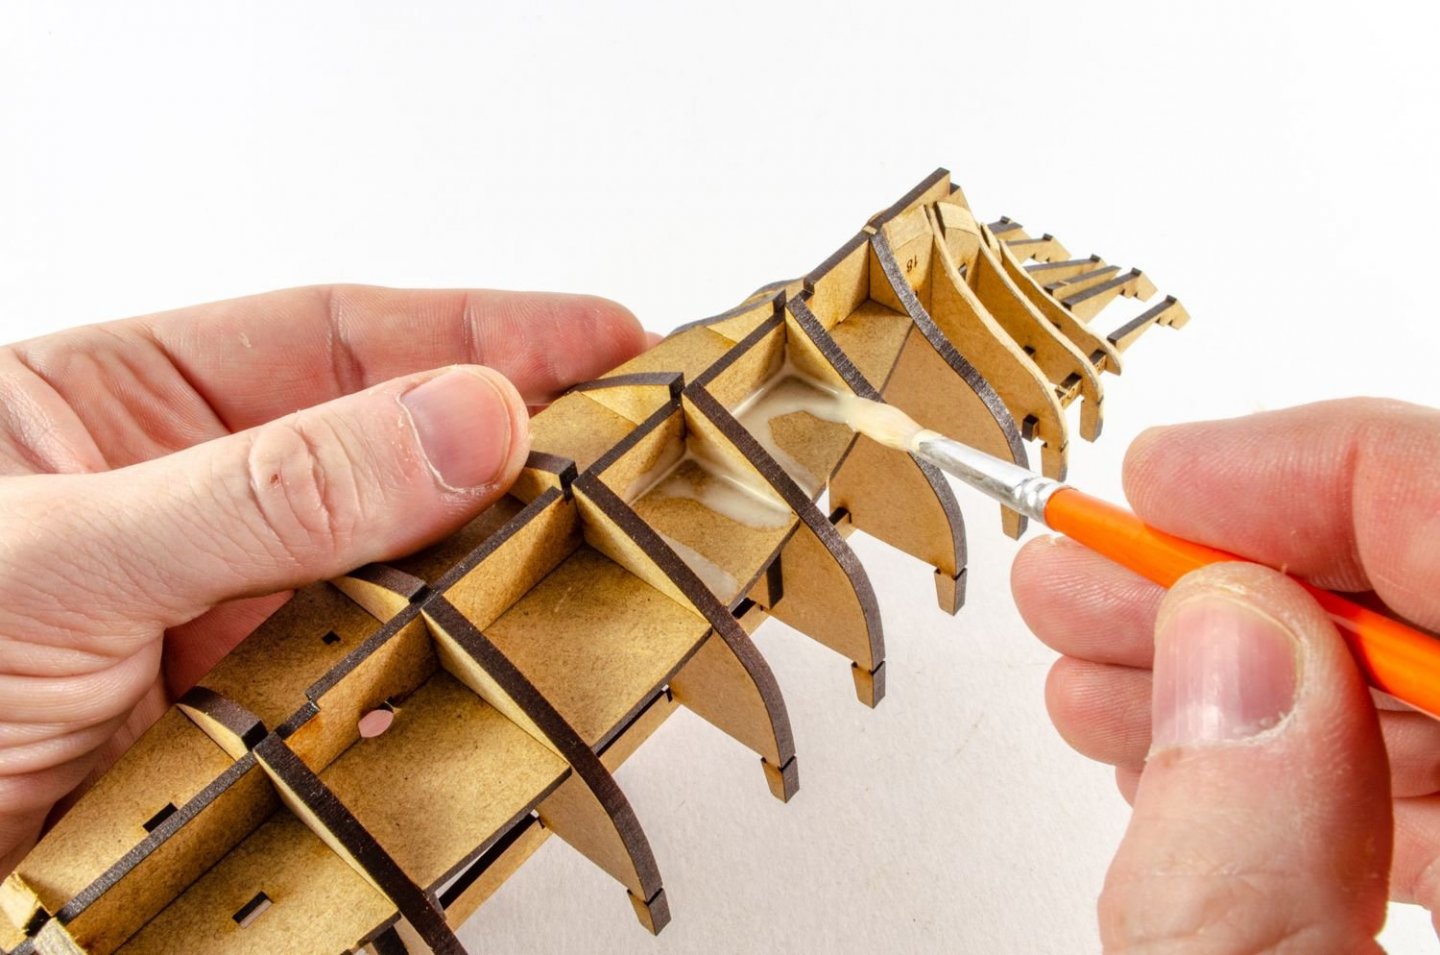
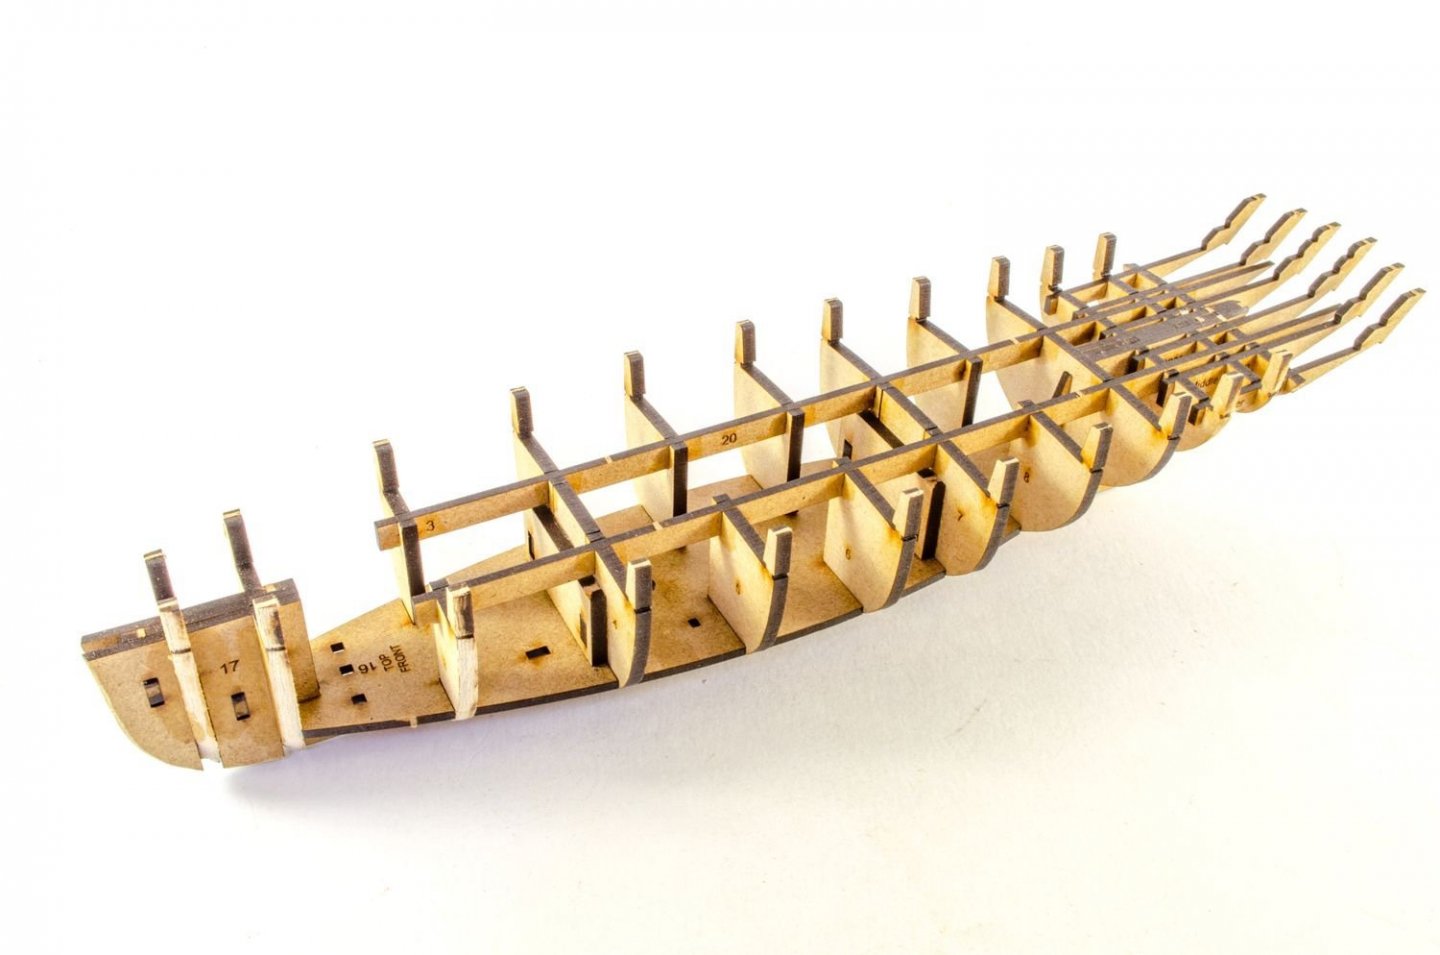
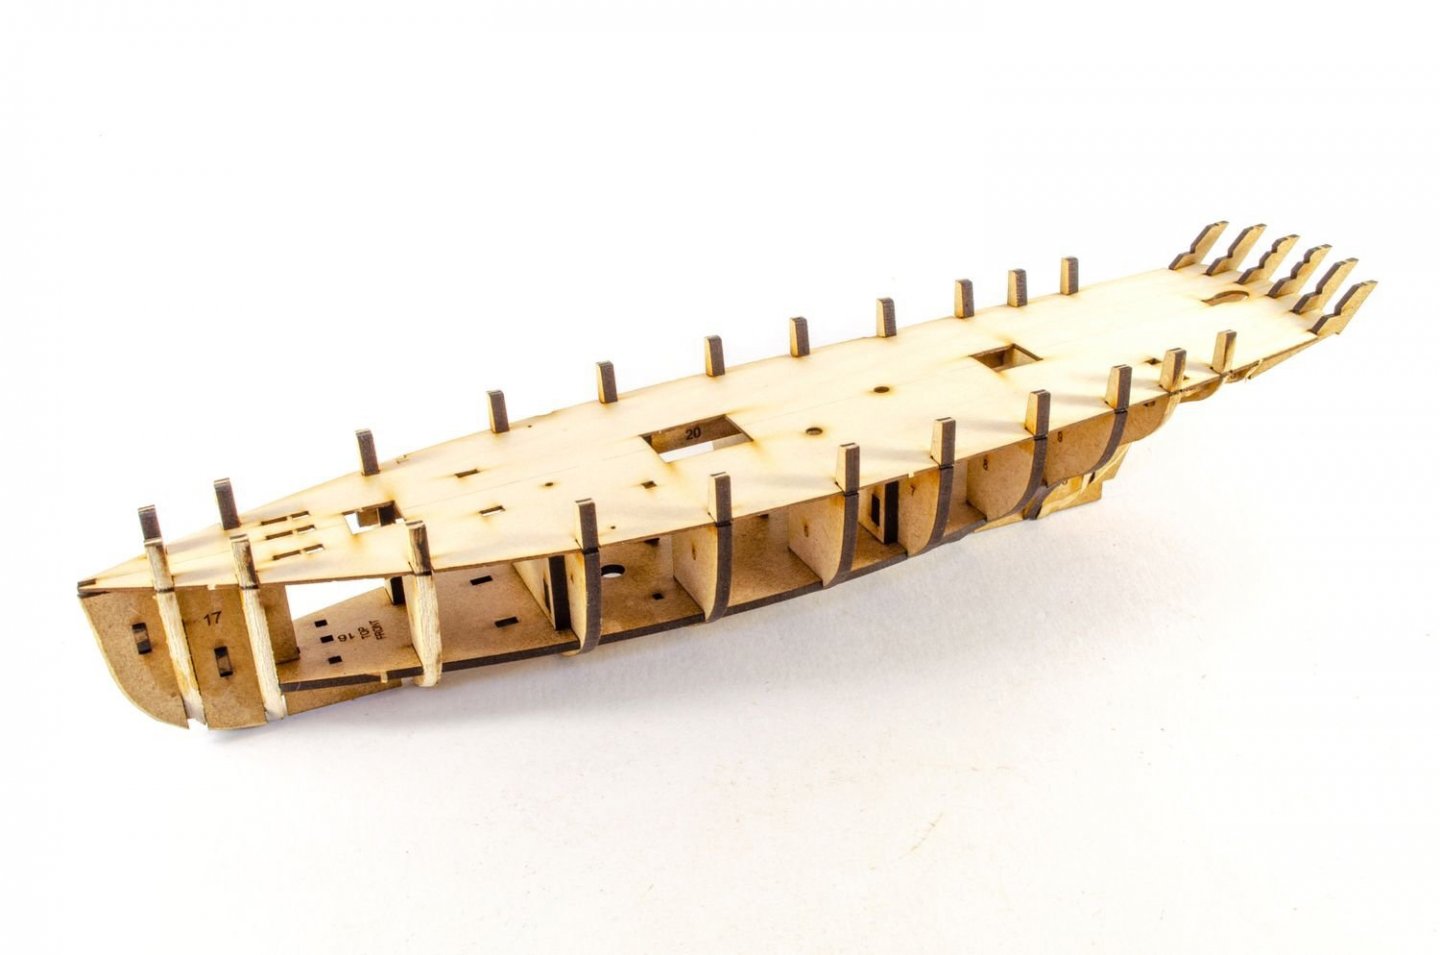
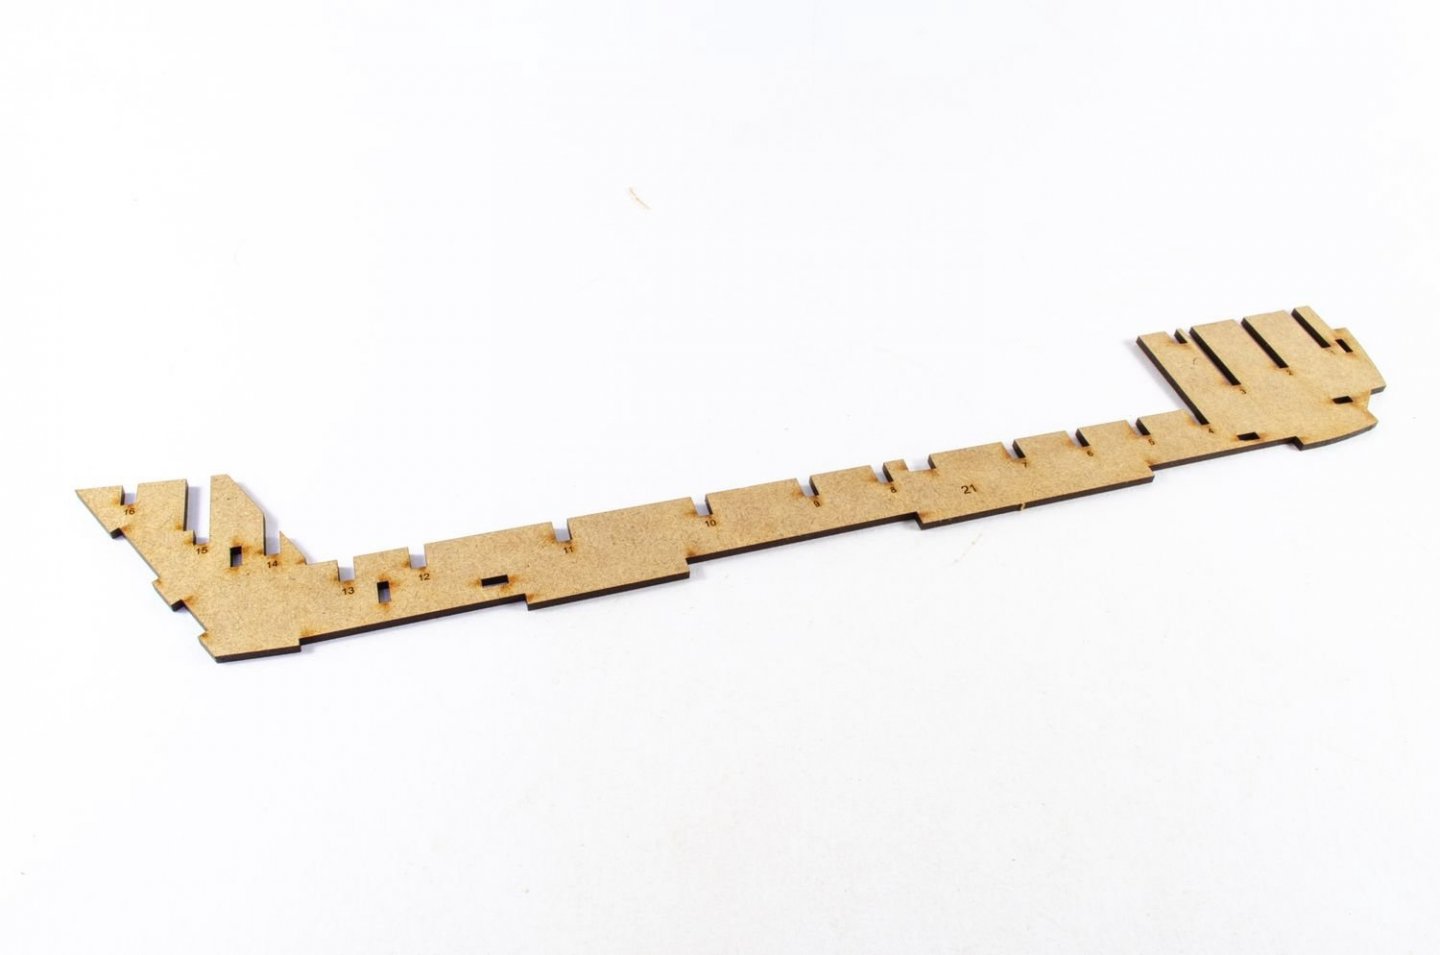
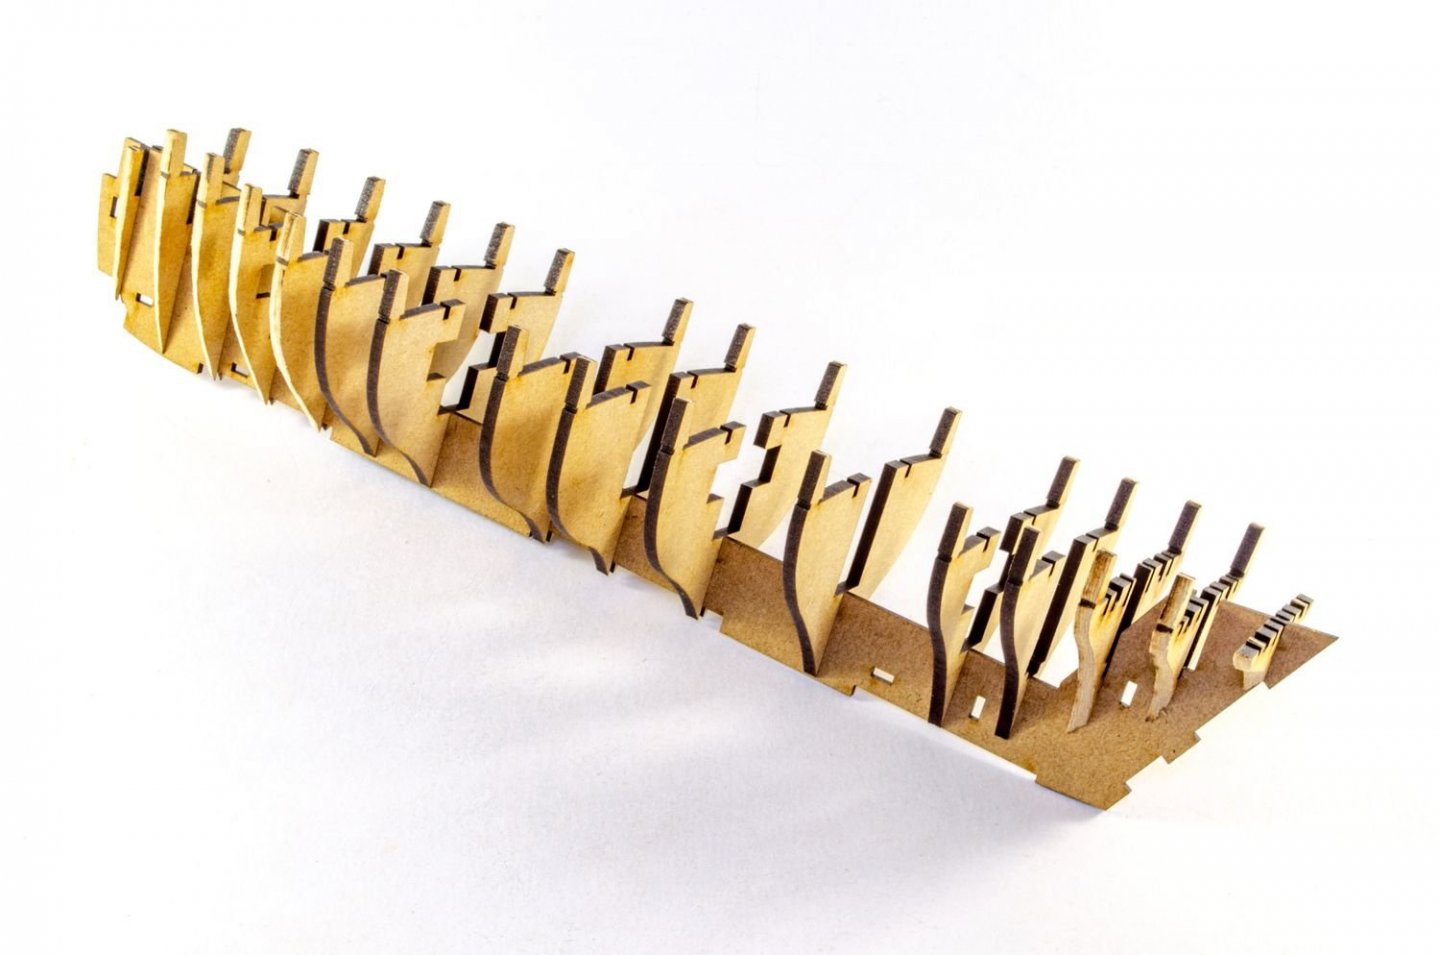
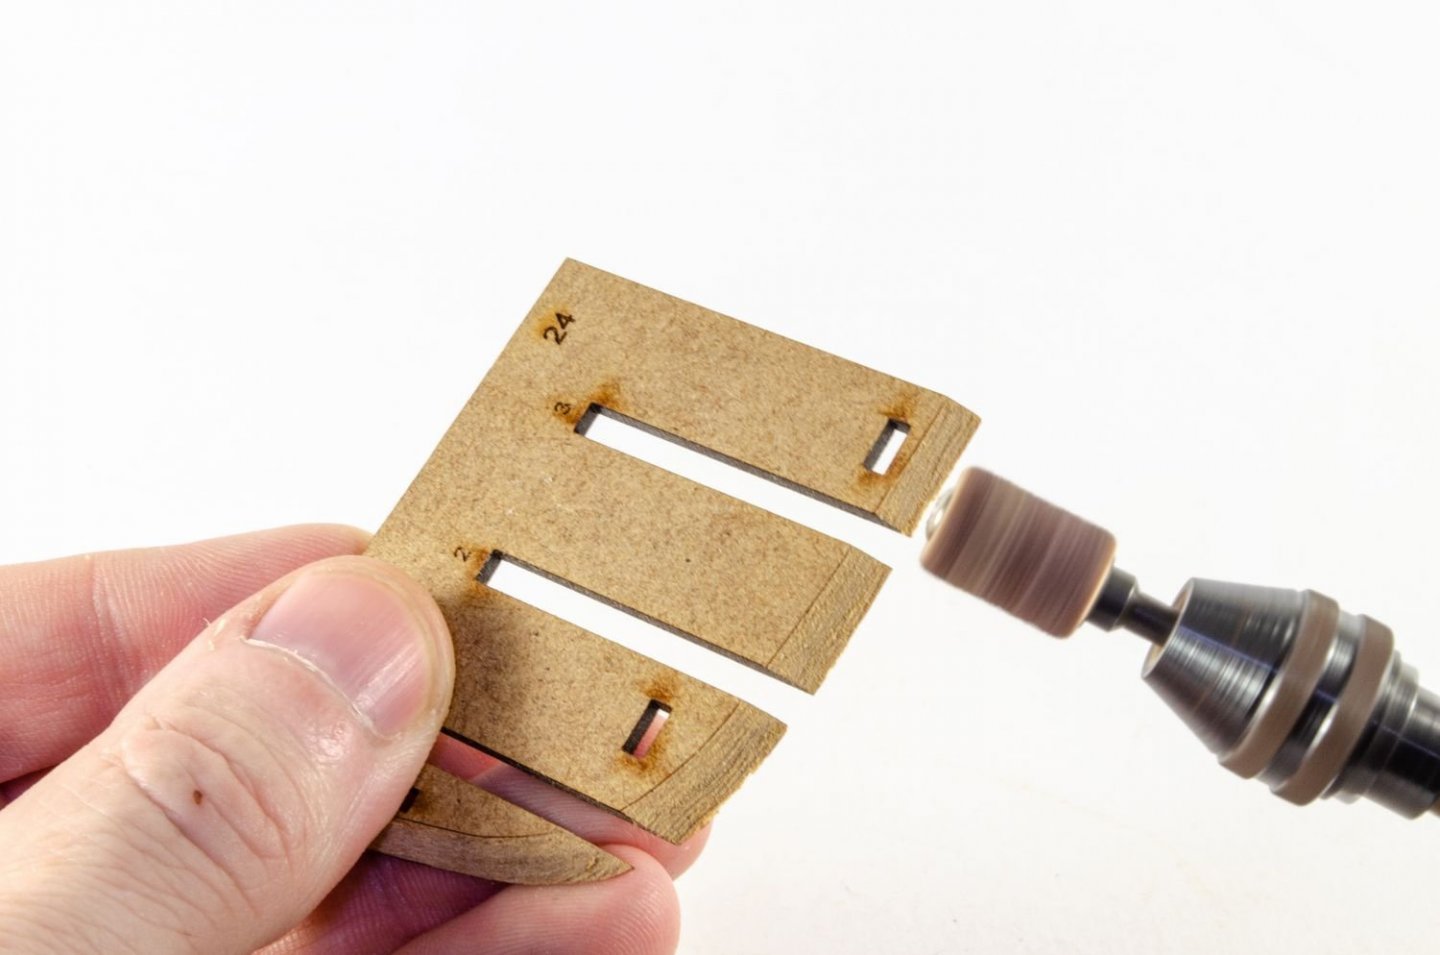
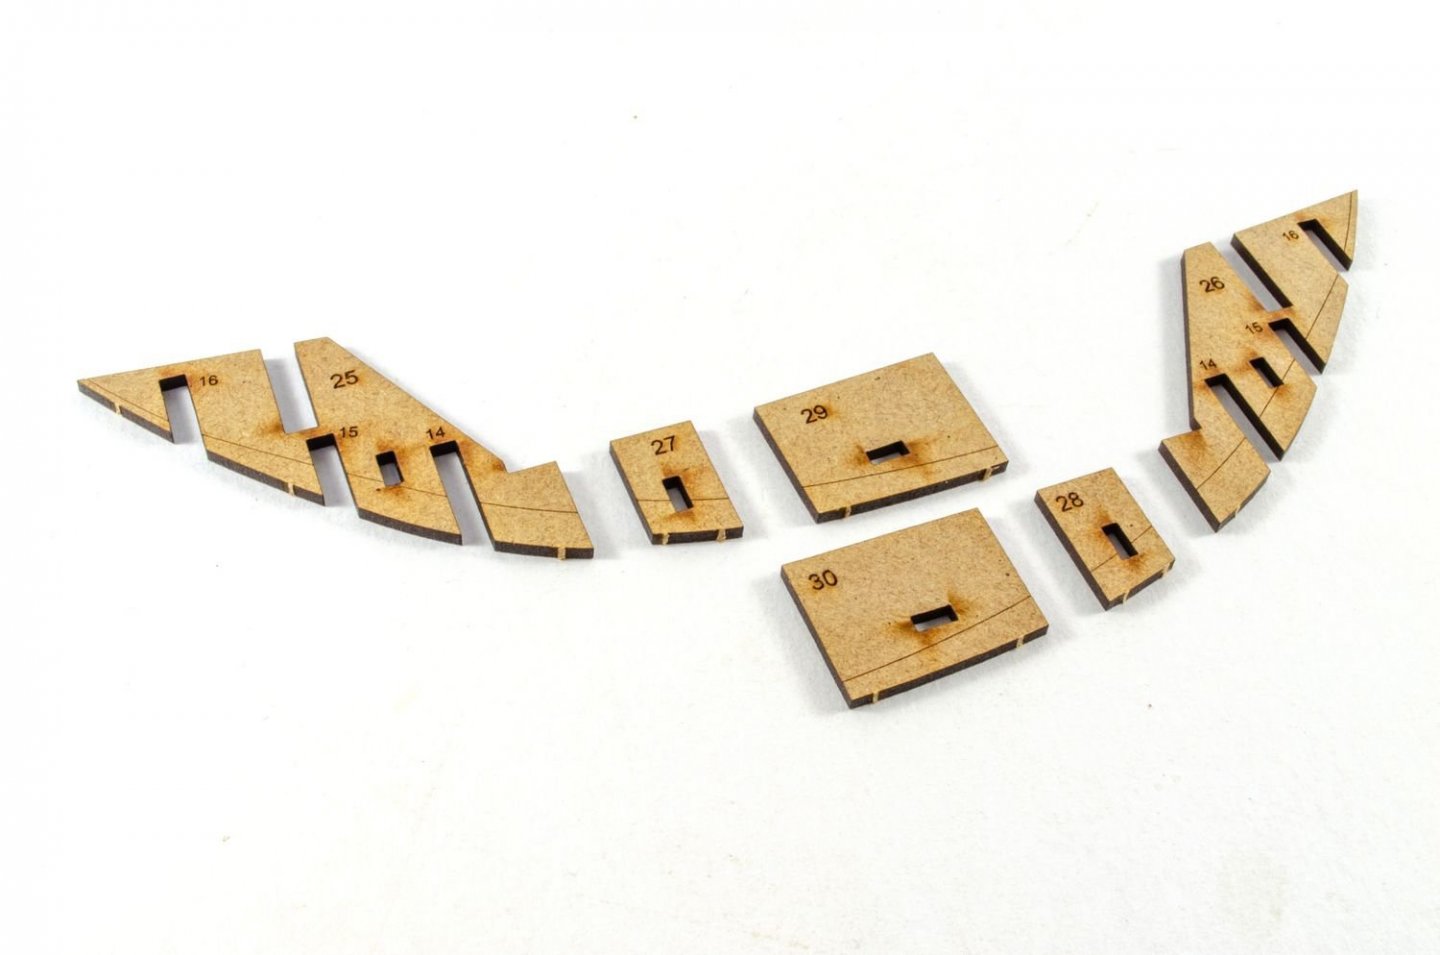
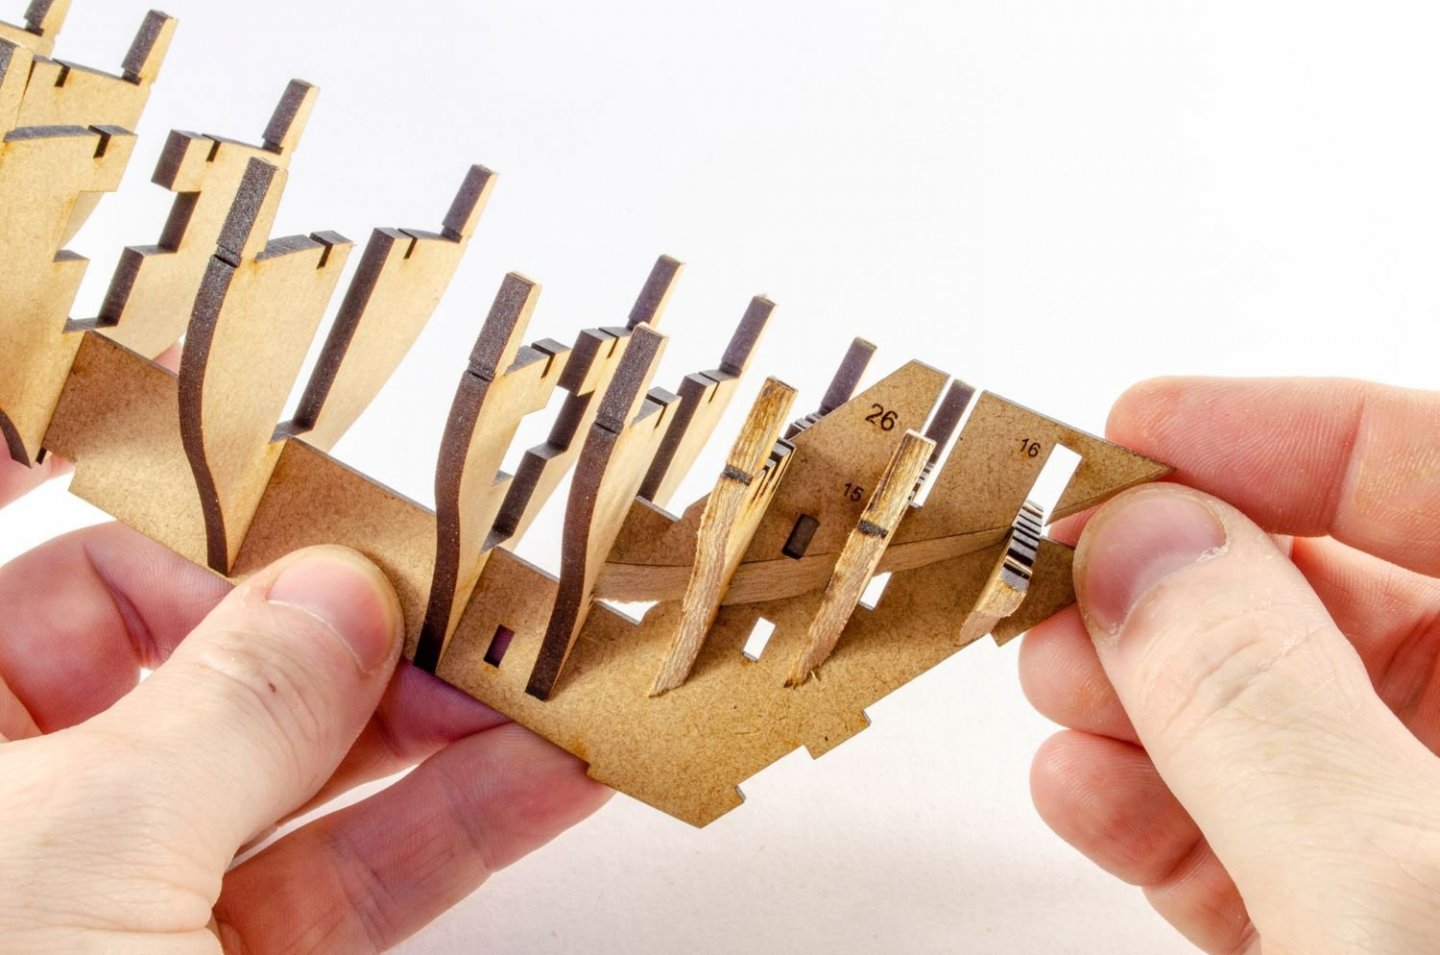
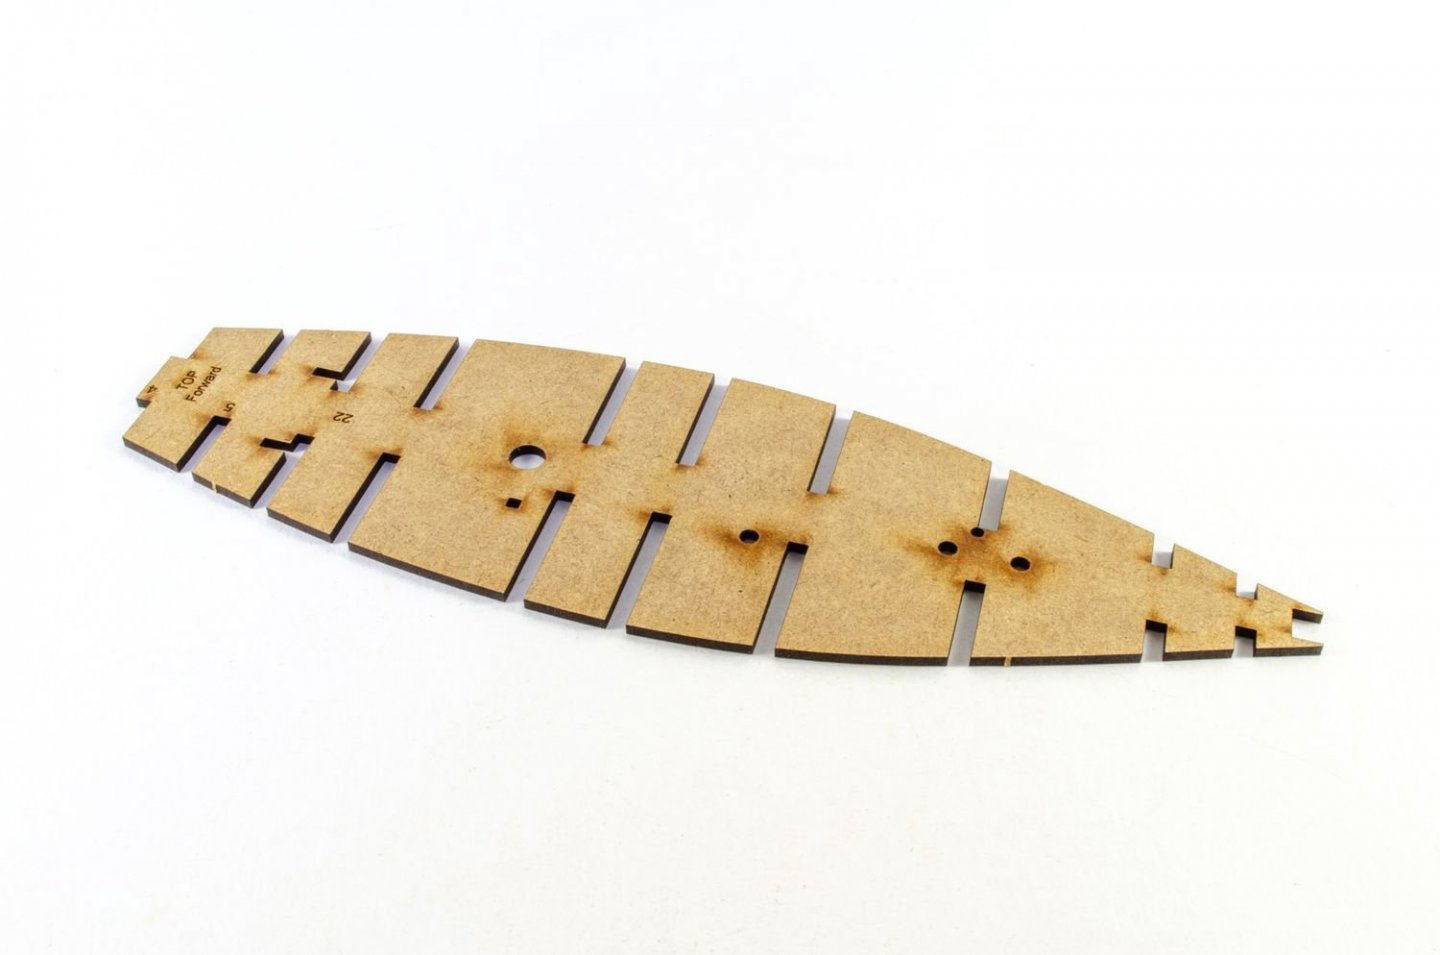
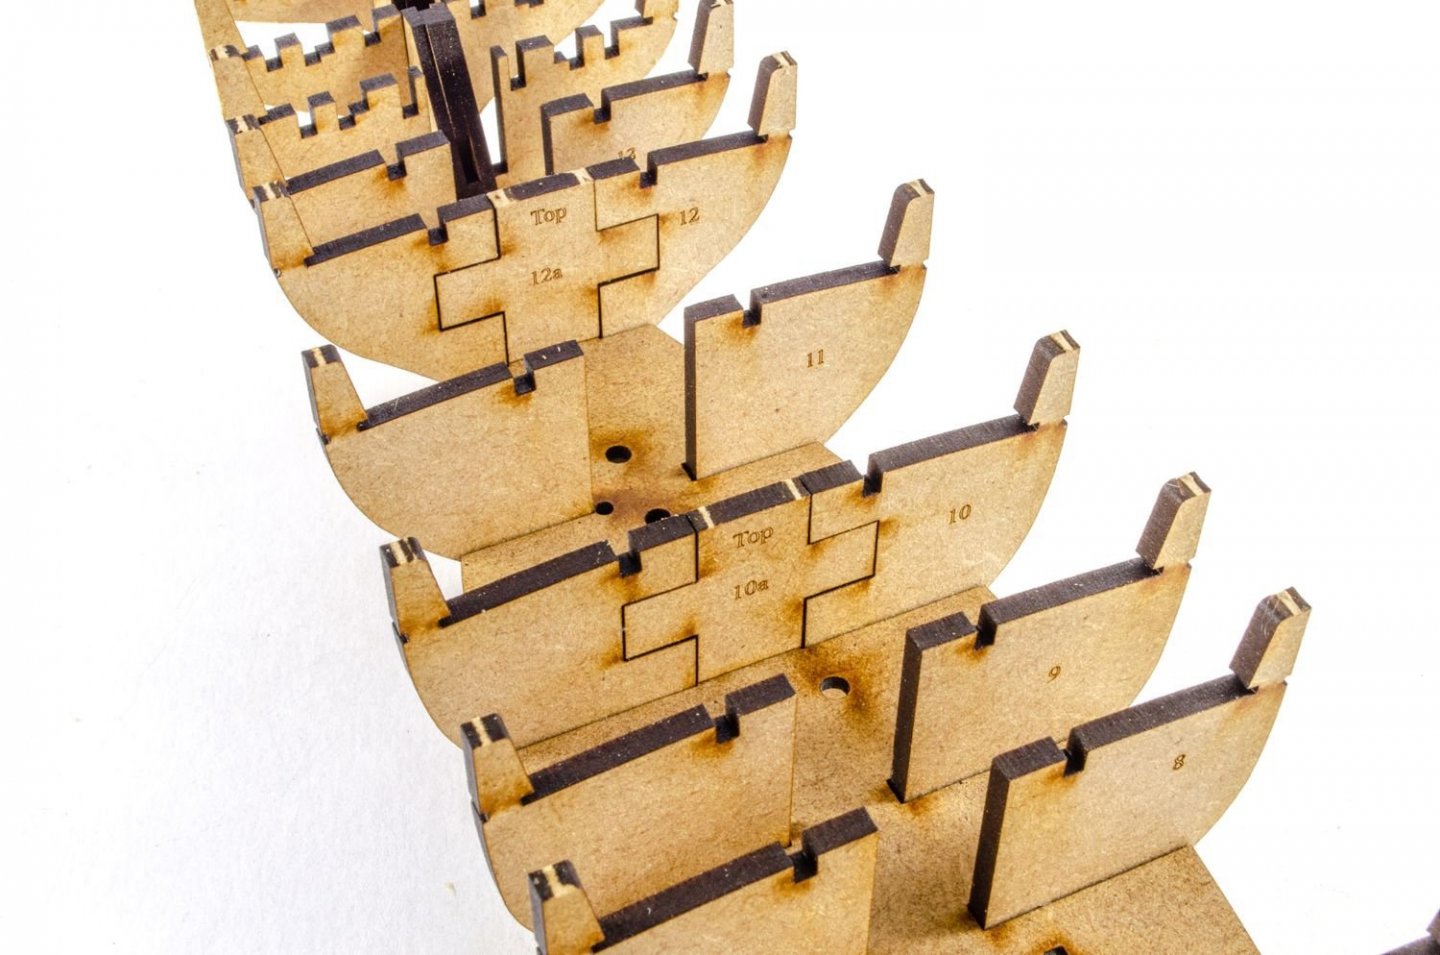
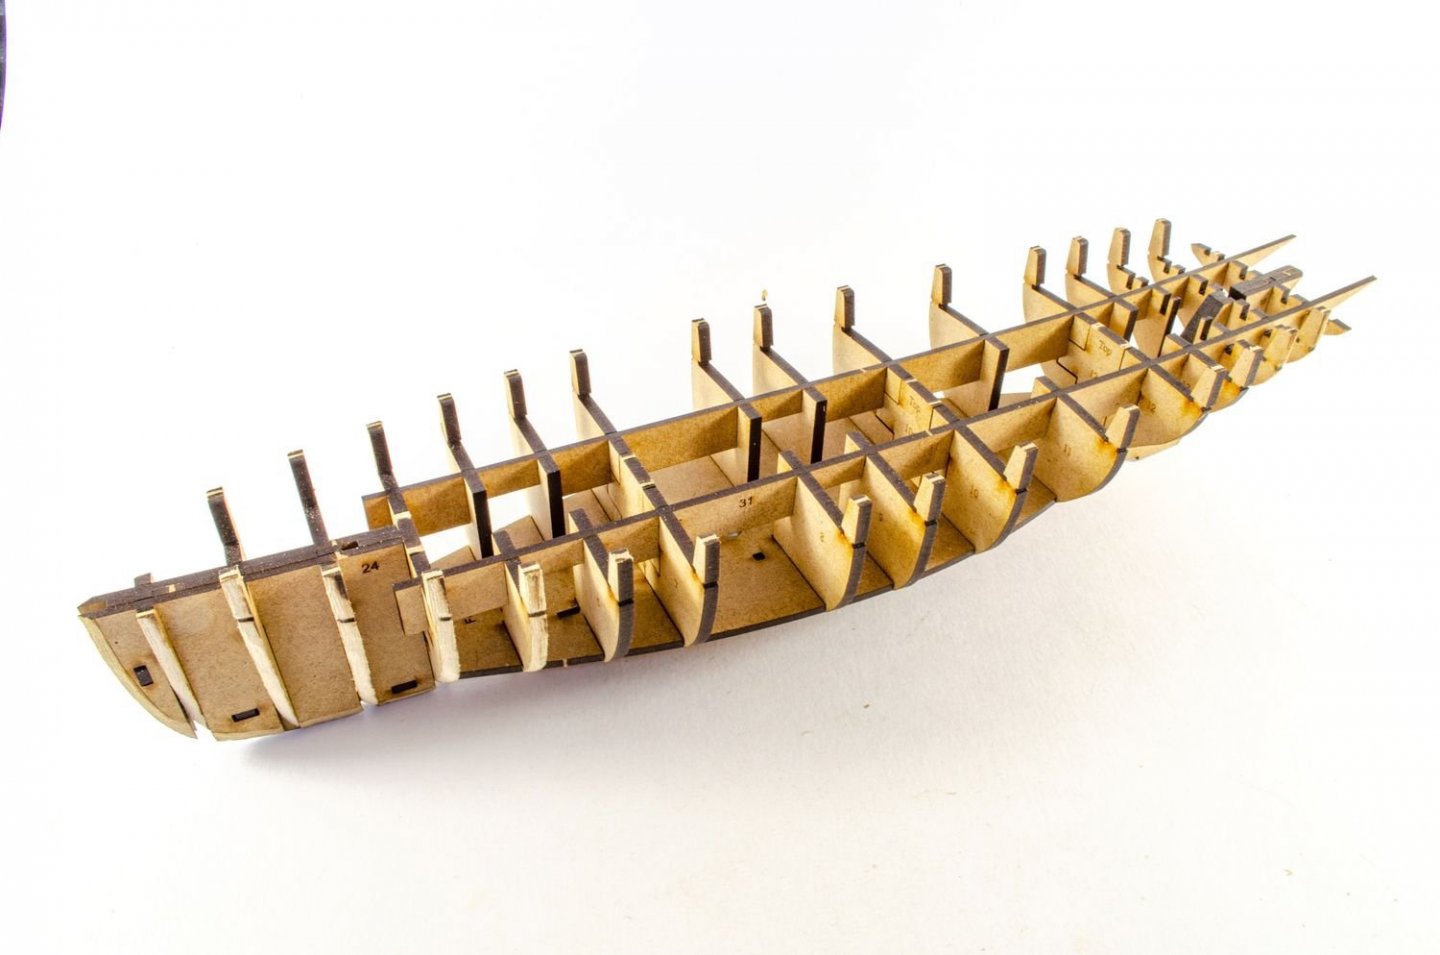
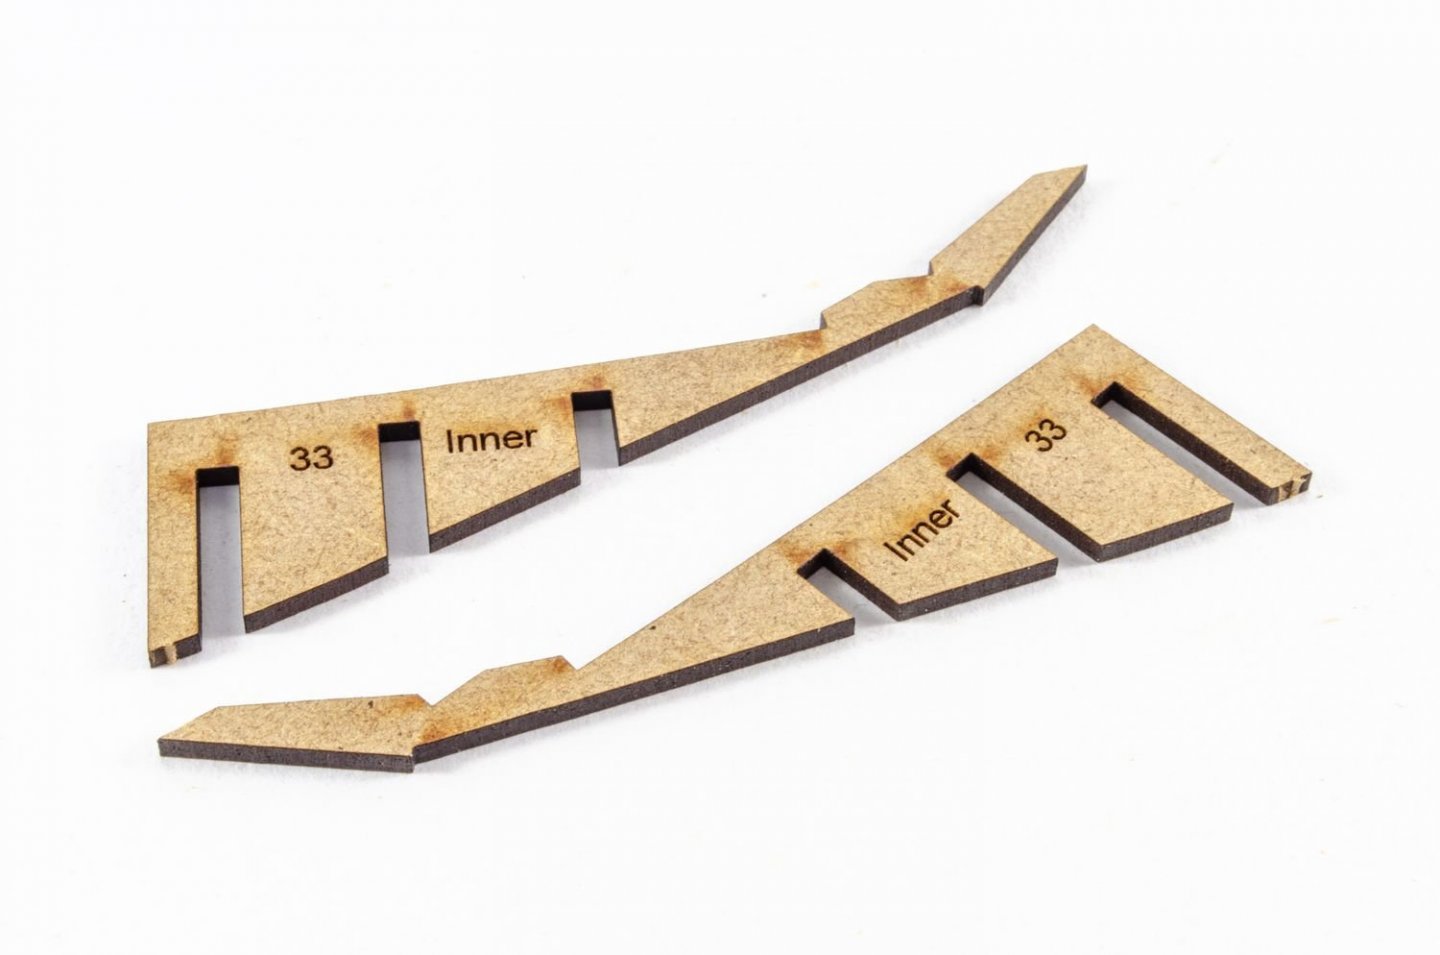
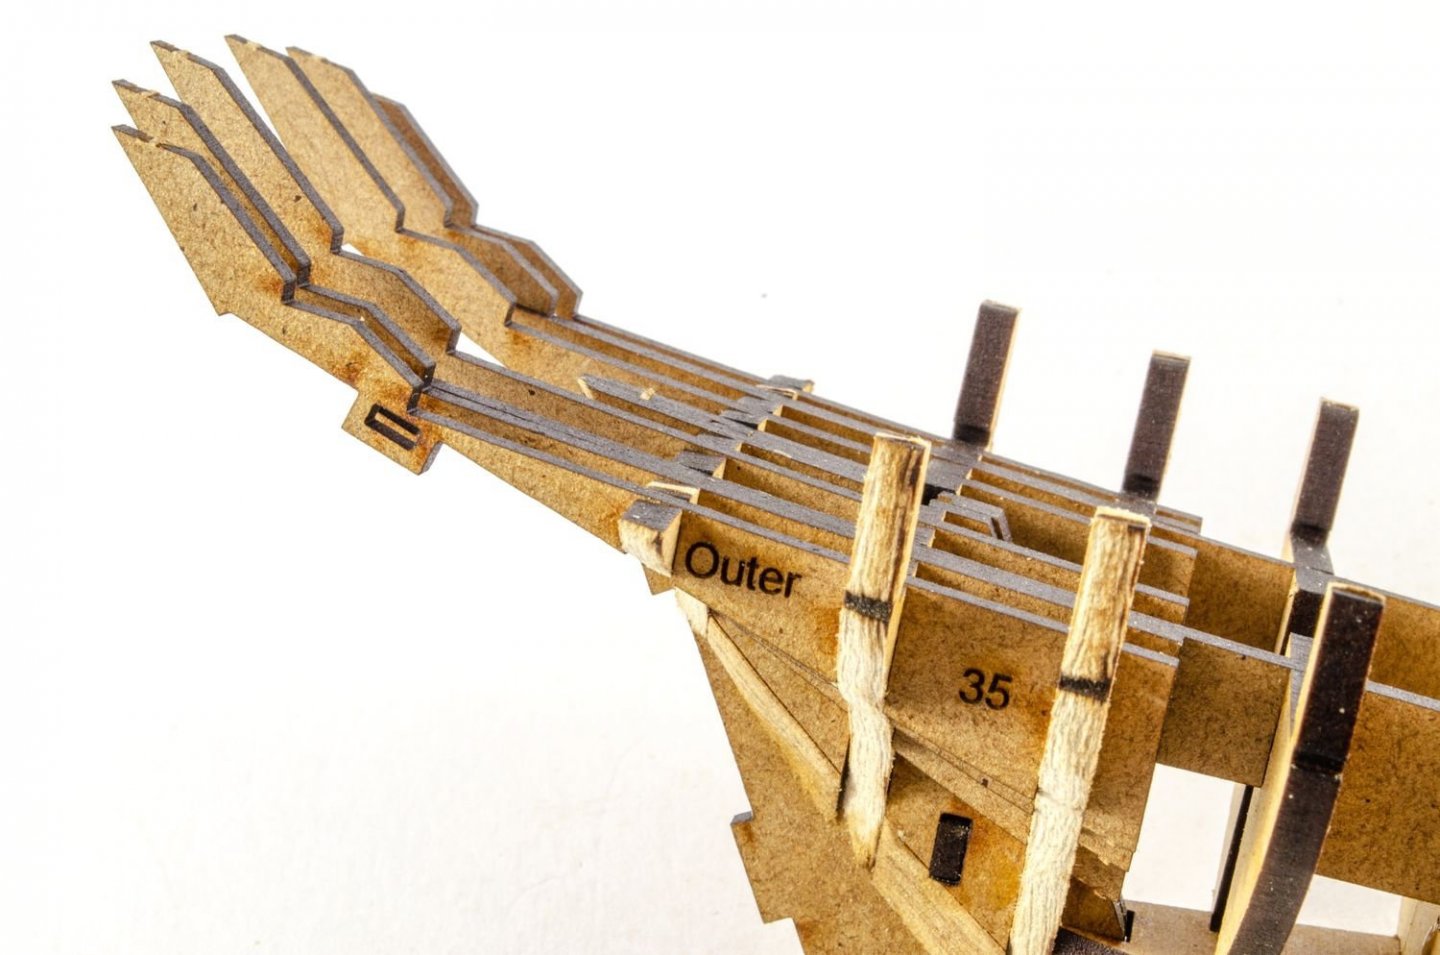
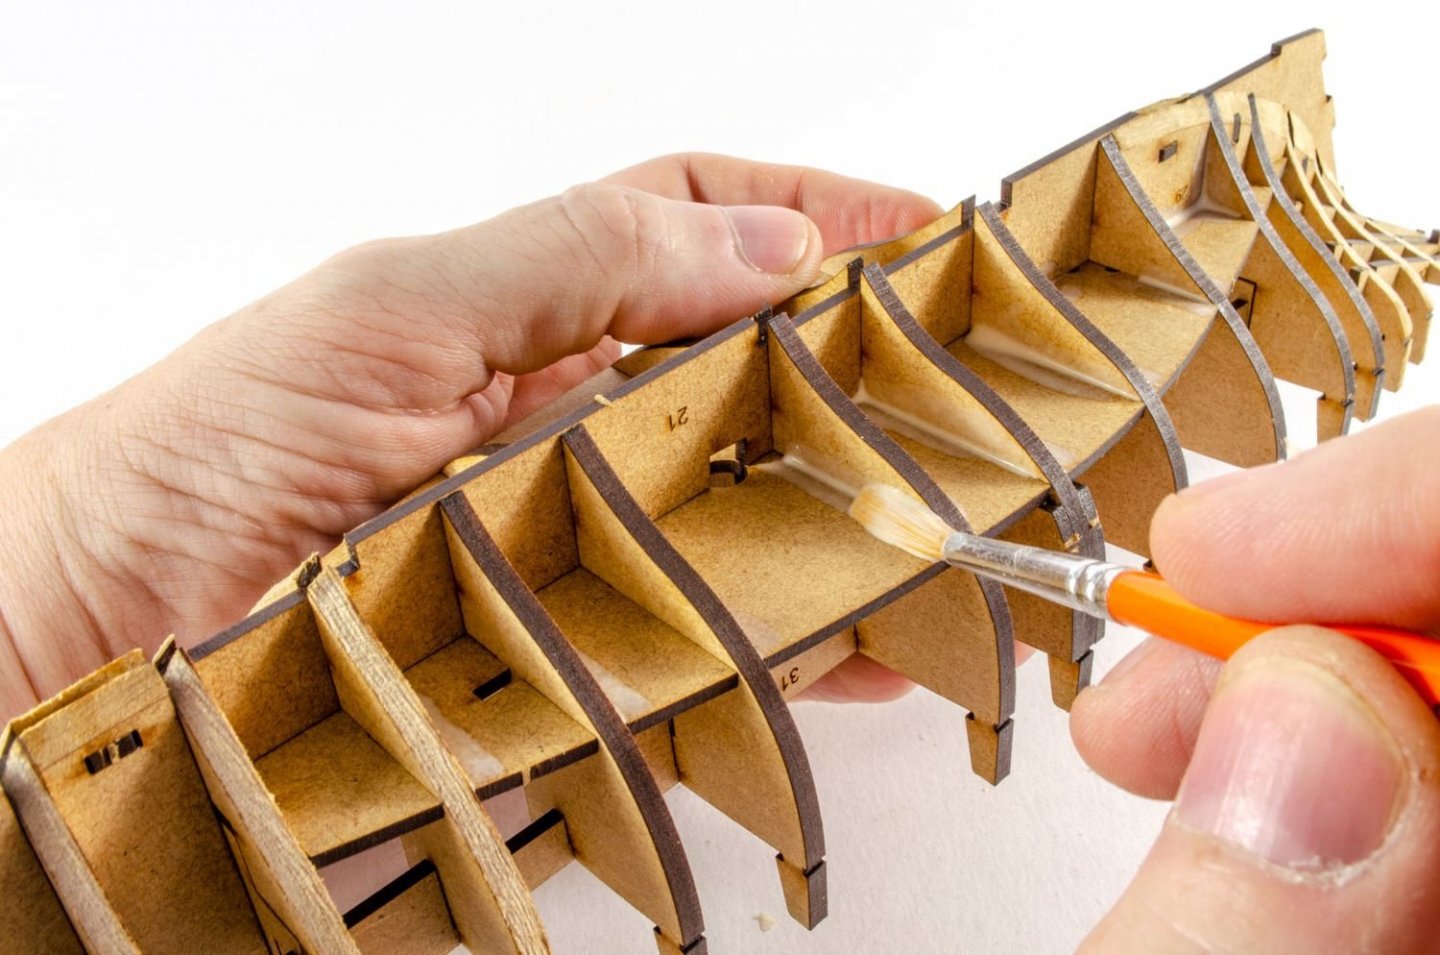
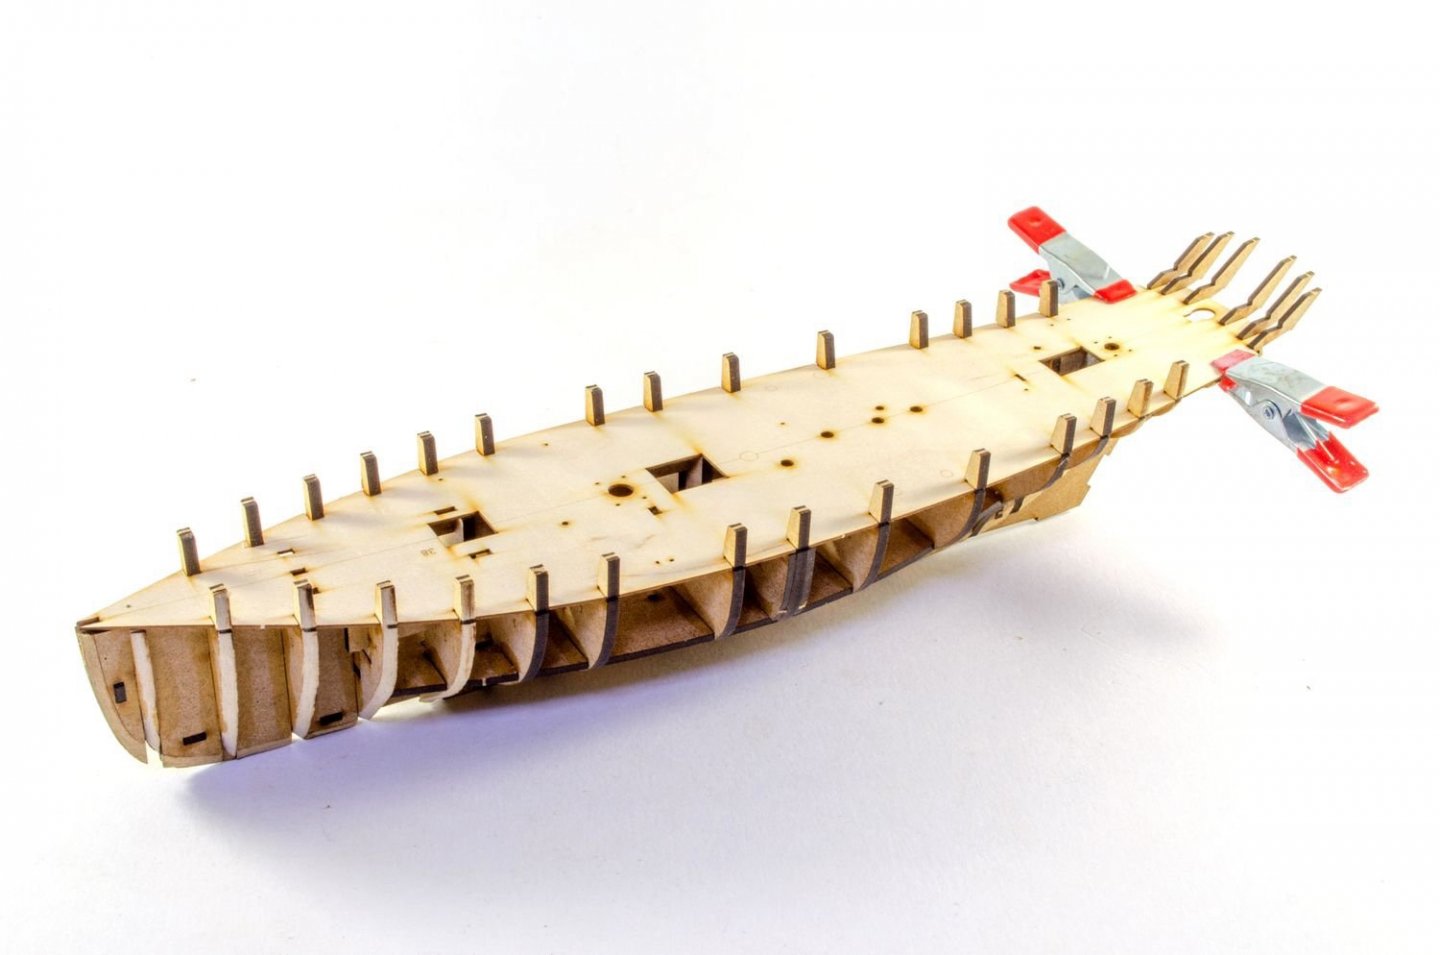
Work on this is progressing swiftly, especially when you consider that I've not got to the same stage with Nisha over the last couple of days. All photos are from the manual, but here I've done no re-cropping, but simply resized the originals for MSW. Both of these new fishers are designed to be very simple to build and there's actually less planking involved than the Zulu and Fifie. Construction is very much the same, with similar stern timbers as seen on Sphinx. In fact, these also have the little safety gates that strengthen the parts until you can safely remove them. Just a small selection of the SIXTEEN bulkheads on this little model. You can see that bevelling lines are also included. A Dremel is used to make short work of these. In fact, it took only 30 mins to bevel all parts on this model. The keel. Note that all slots are numbered too, so you really shouldn't get the positions of individual bulkheads wrong! All bulkheads are dry-slotted into the keel. The bearding parts are now bevelled and fitted into position. These are also pinned into the keel to ensure the correct positions. The lower deck serves the purpose of simply holding the bulkheads in position and also for masts etc. that will plug down into it. This is now slotted into position, again without glue. Note that engravings show which is the front and TOP. Four bulkheads into which the lower deck were slotted, are now filled in with these pieces that strengthen the overall skeleton. These are glued into place. The longitudinal deck beams are now dry-slotted into place. Builders of the other VM kits will be familiar with this approach. Midship bulkhead doublers are now glued to either side of bulkhead #9. The stern timbers are now slotted into position, 3 on either side of keel, and these are identified with INNER, MIDDLE and OUTER engravings. The hull is now turned over and a slightly diluted Titebond is brushed into the joints. As this model has so many interlocking joints, this is a good approach to take so you know glue won't be setting are you're working through the hull. It also gives you some time to make sure everything is to your liking before committing to glue. The hull is now left a couple of hours for the glue to penetrate and set. The ply deck is now fitted, engraved face upwards. This just needs to bend slightly to lock into the bulkhead ears at one side before snapping down into the other side. No amendment is needed at all here and the deck lies perfectly flat over all bulkheads. Not even any sanding of the sheer is needed before fitting! Small clamps are used to hold the rear deck down onto the stern timbers. Next up is fairing and planking. More soon....


- 36 replies
-
- 21
-
-
- vanguard models
- Erycina
- (and 2 more)
-
I'll try to explain this one again 🥸 In 2013, we were paying our host to backup for us, but they didn't even have the secondary drive fitted, let alone back things up. Our current system does have a drive fitted and I have personally scheduled all backups. These are created every other day so the most we will ever lose is a day or so. No more need to back up this log than any other on MSW 😉 Ok....back to the log.
- 857 replies
-
- 7
-
-
-
- Sphinx
- Vanguard Models
- (and 1 more)
-
Despite having the HZ ones here, I simply never use fancy tools for holding hulls etc. Never found the need, ultimately.
- 505 replies
-
- 5
-
-
- vanguard models
- Sphinx
- (and 1 more)
-
Remember, you can never have enough clamps. 😄
-
That's about the amount of time it takes me to sand using my sanding blocks. Looking really nice indeed.
-
Remember folks, I have to build these quickly so you can buy them and take your time. 'Taint a hobby if you hurry.
-
Fixing that bow should be pretty easy. Super nice work so far, and I did think that stage was important to stand back and admire 😝
-
That would be entirely your choice, but I must prefer to make sure all my mast alignment is done 'off model' instead of fitting sections at a time during rigging.
- 355 replies
-
- 4
-
-
- vanguard models
- Sphinx
- (and 1 more)
-
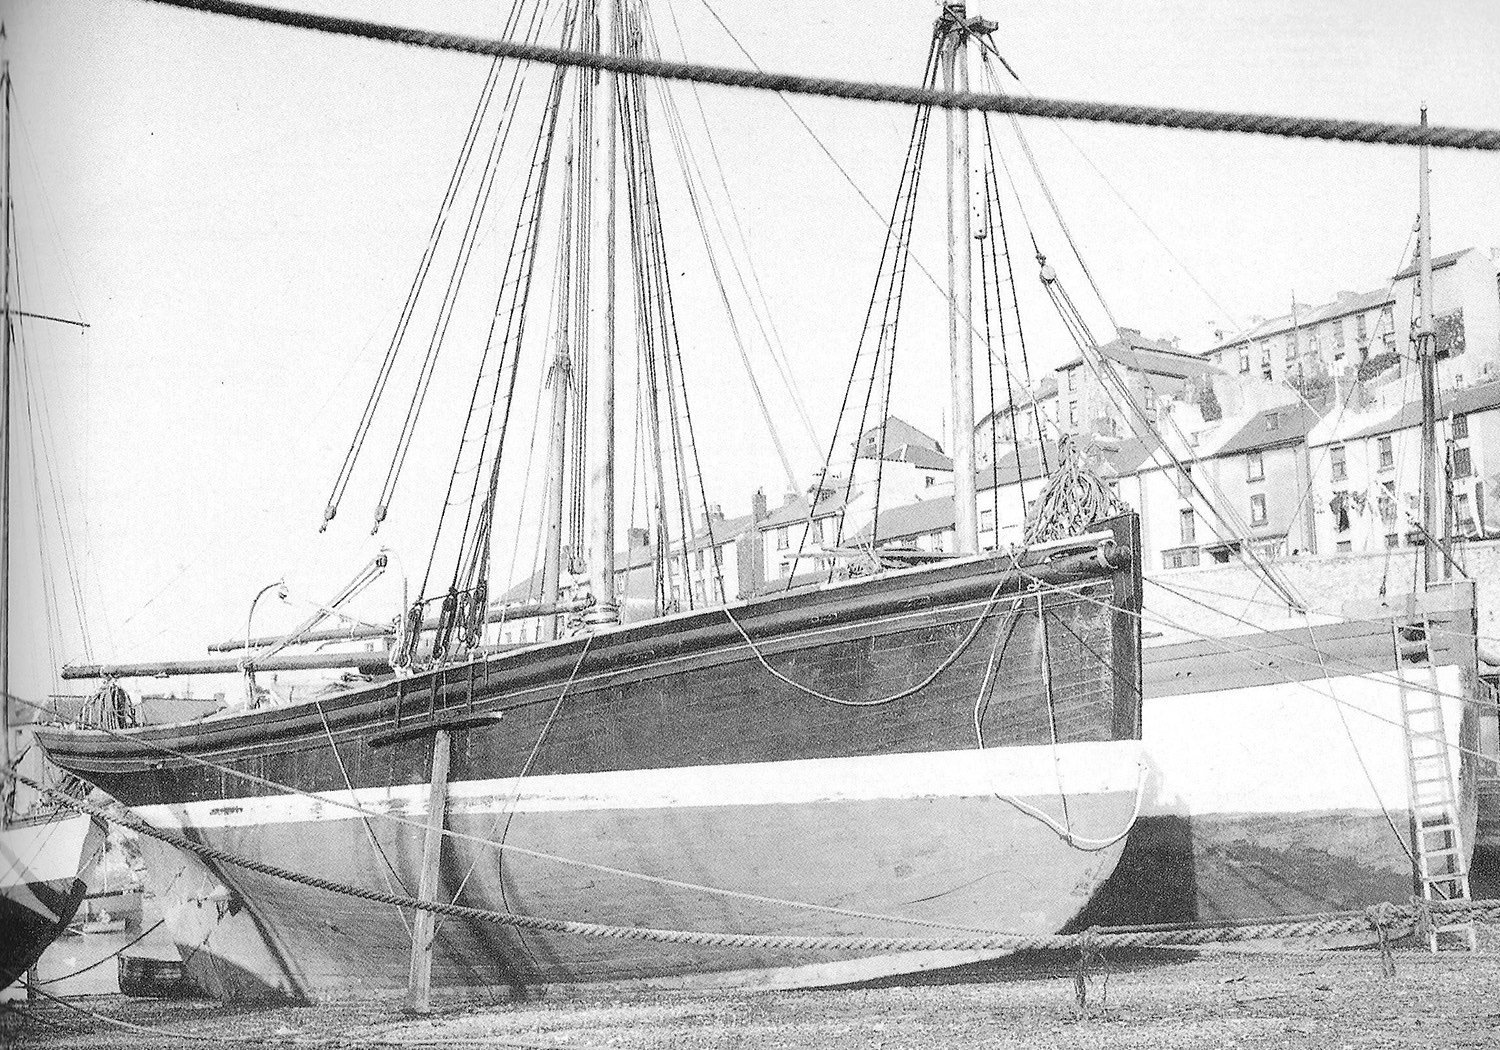
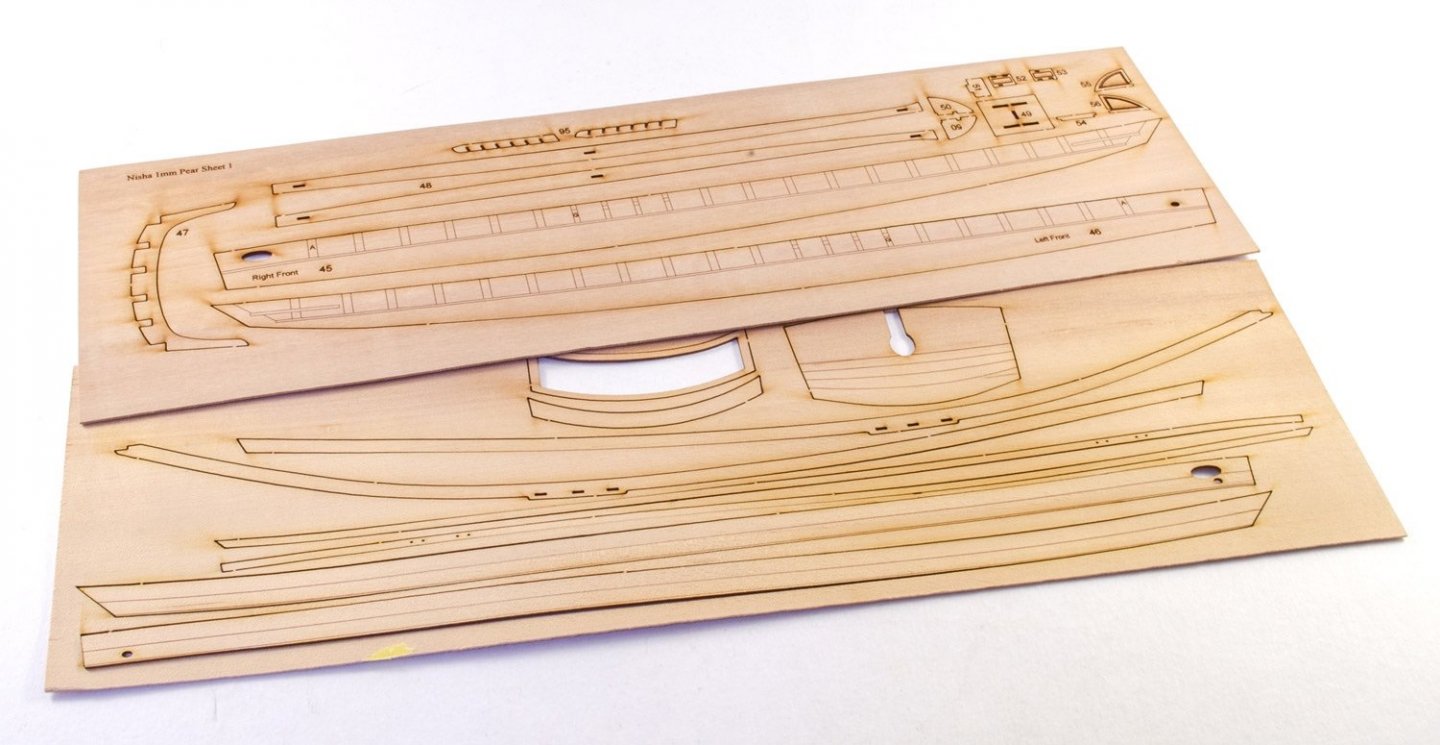
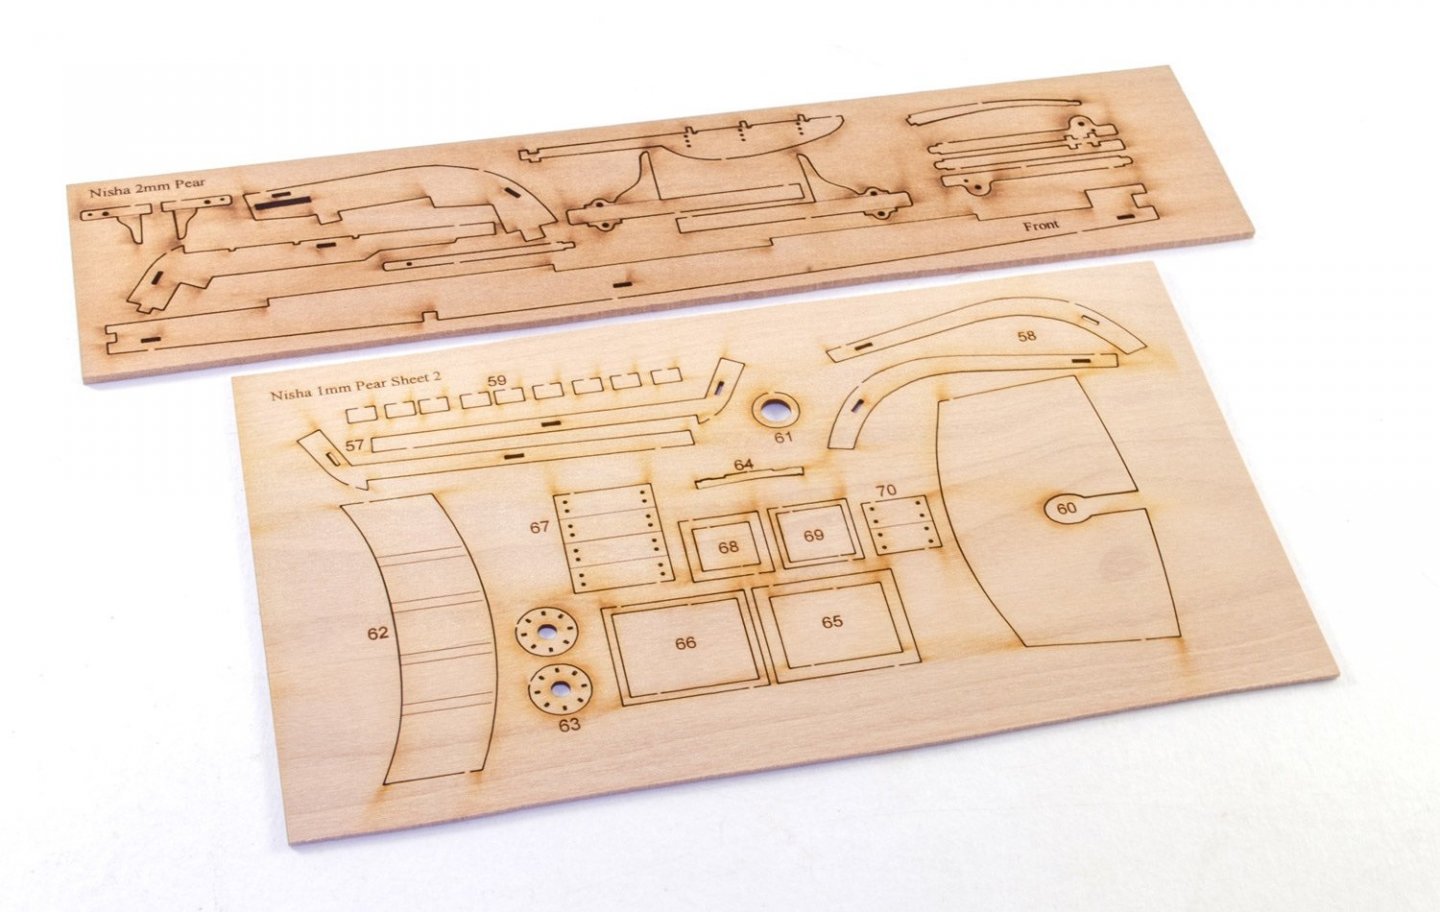
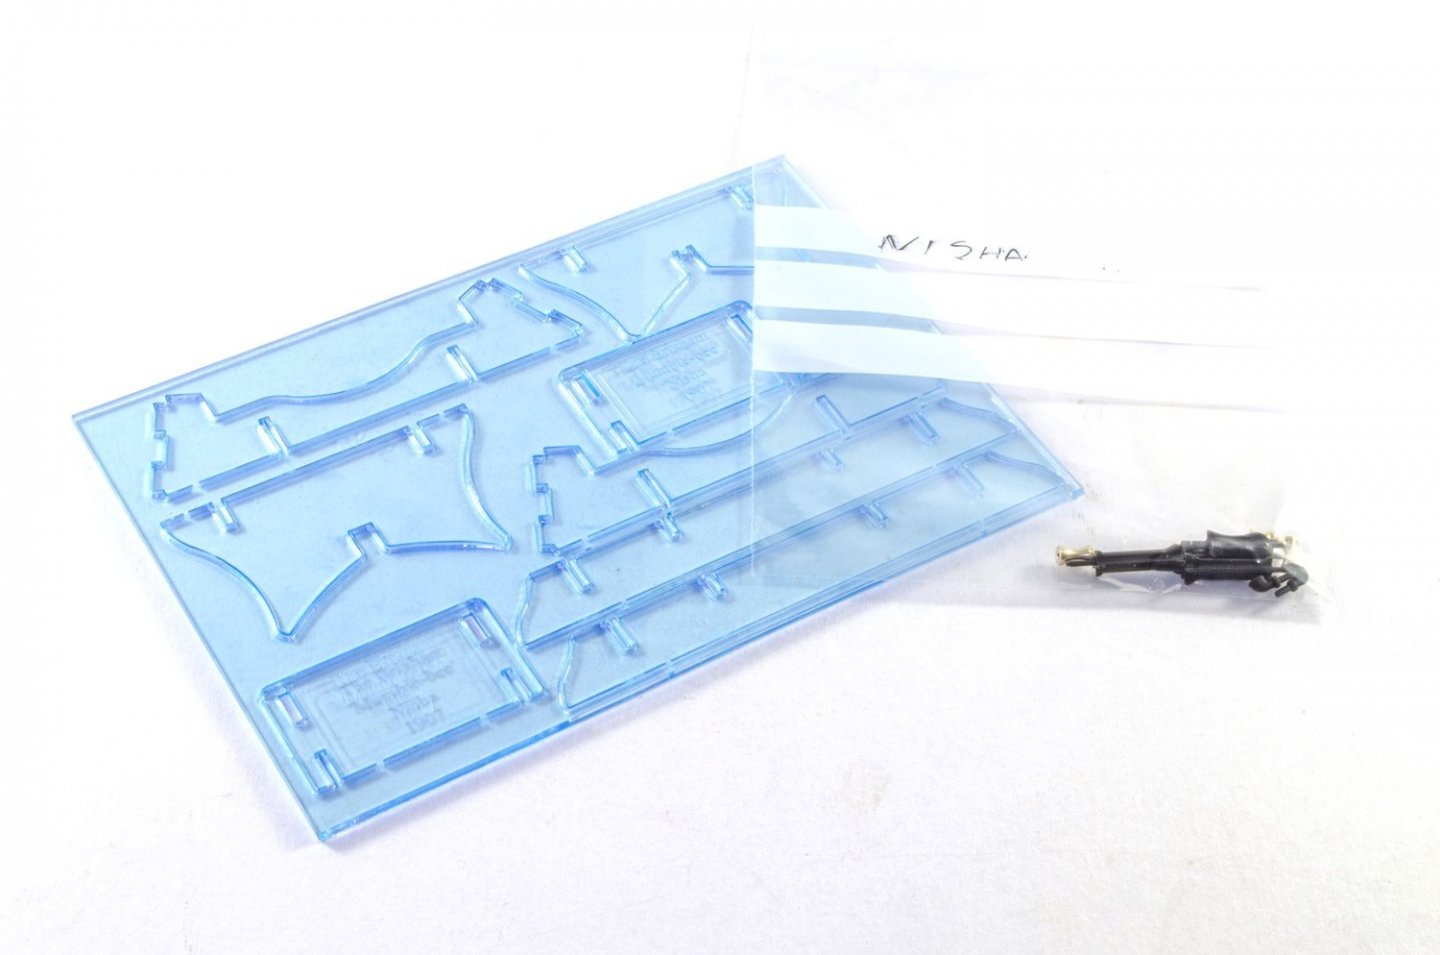
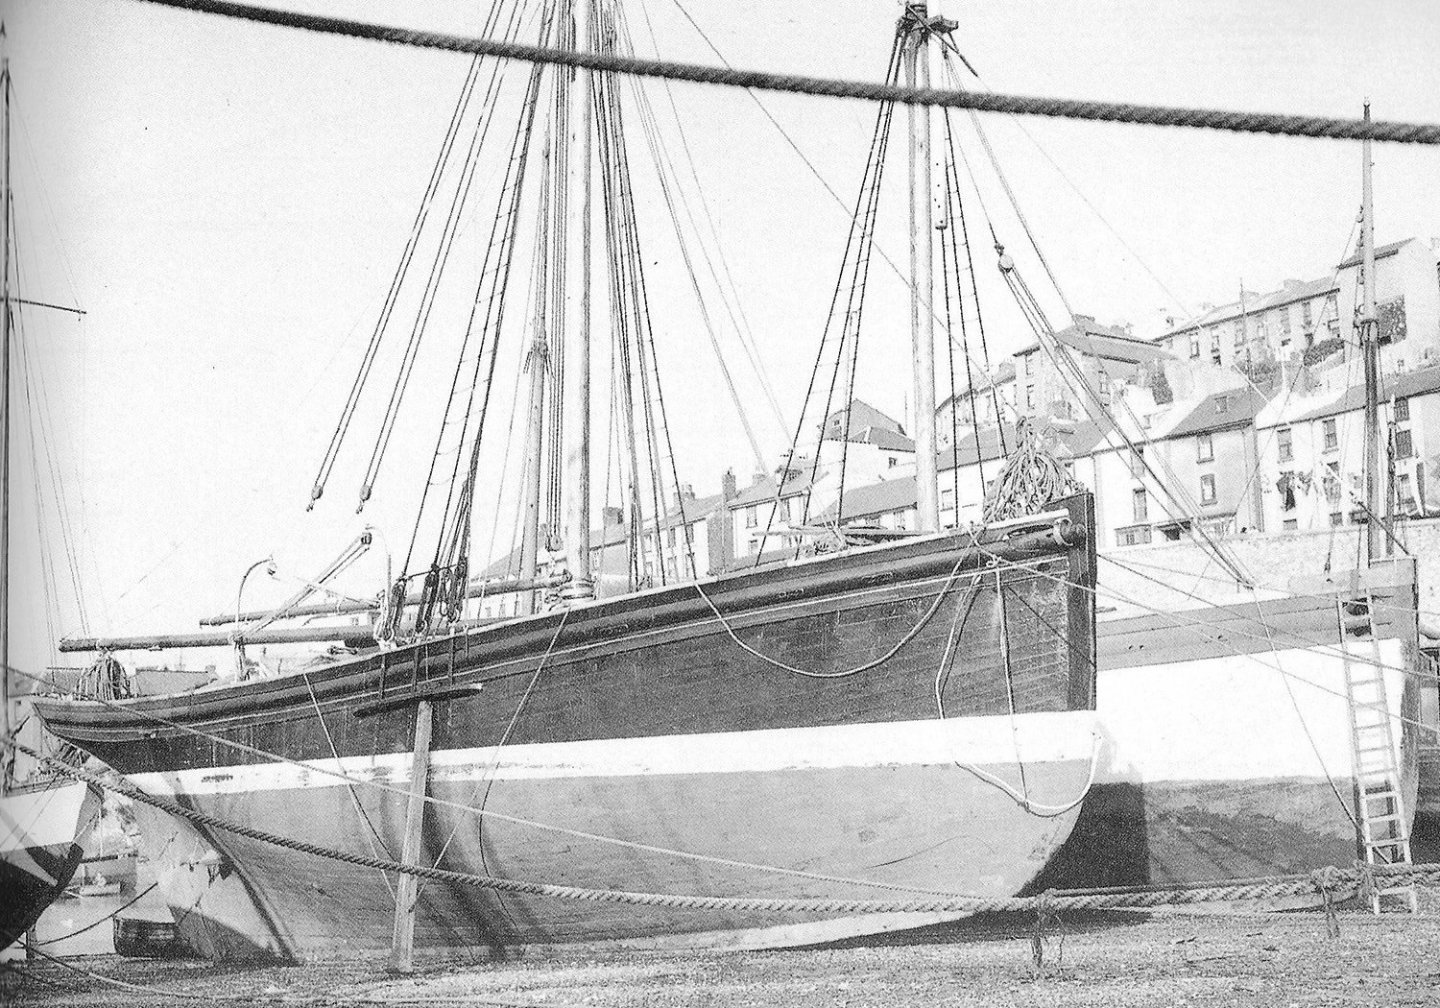
'Nisha' was a Brixham 'Mumble-bee' from 1907. I will be building this one concurrently with 'Erycina' for release around the same time. All I currently require for this one is the photo-etch and sails, which should be with me quite shortly. While there is no picture of Nisha, here's a photo of another 'Mumble Bee' class fisher. This one is smaller than Erycina and very petite. Like that one and other kits in VM's range, this starts with an MDF core, plenty of bulkheads with bevel lines on them, and a nice selection of pear in numerous thicknesses. An MDF construction cradle is supplied as well as an acrylic stand for display. Also some nice 3D printed and brass parts too. Again, I've not shown the plank strips here or the dowel for the masts. Note the shrouds and rats in the above pic. Ok, I'm still on my personally enforced 7-day workshop hiatus, so I can spend my spare time on my new PlayStation, but I do have the original prototype photos to study too, so both models will be started next Monday. Until then...
- 28 replies
-
- 21
-
-
- vanguard models
- Brixham trawler
- (and 2 more)
-
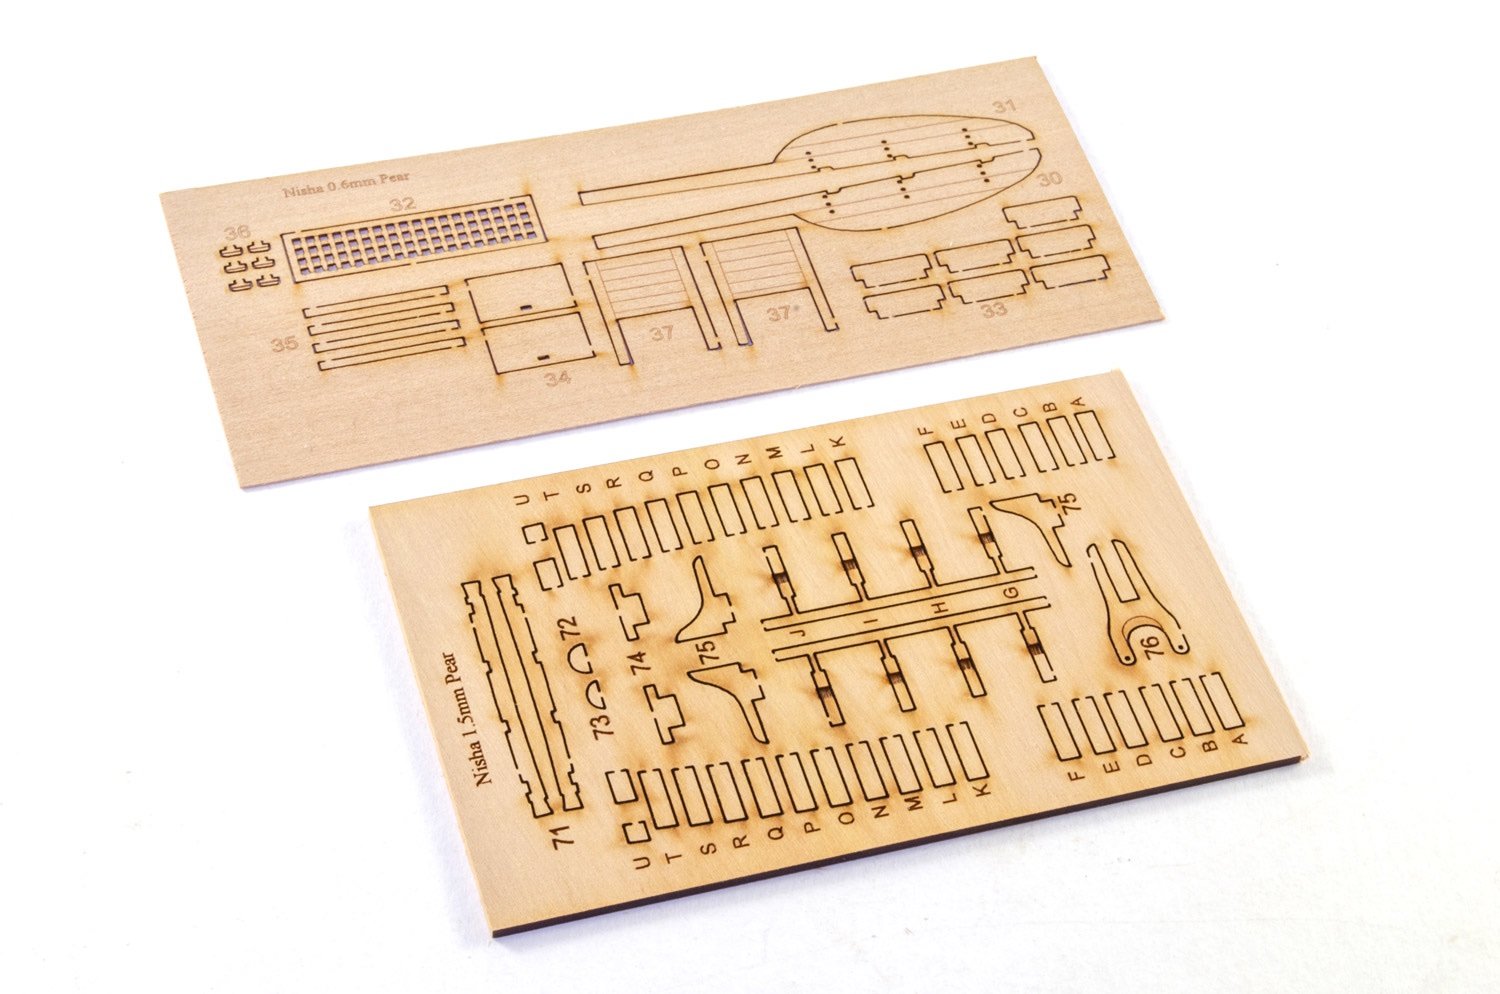
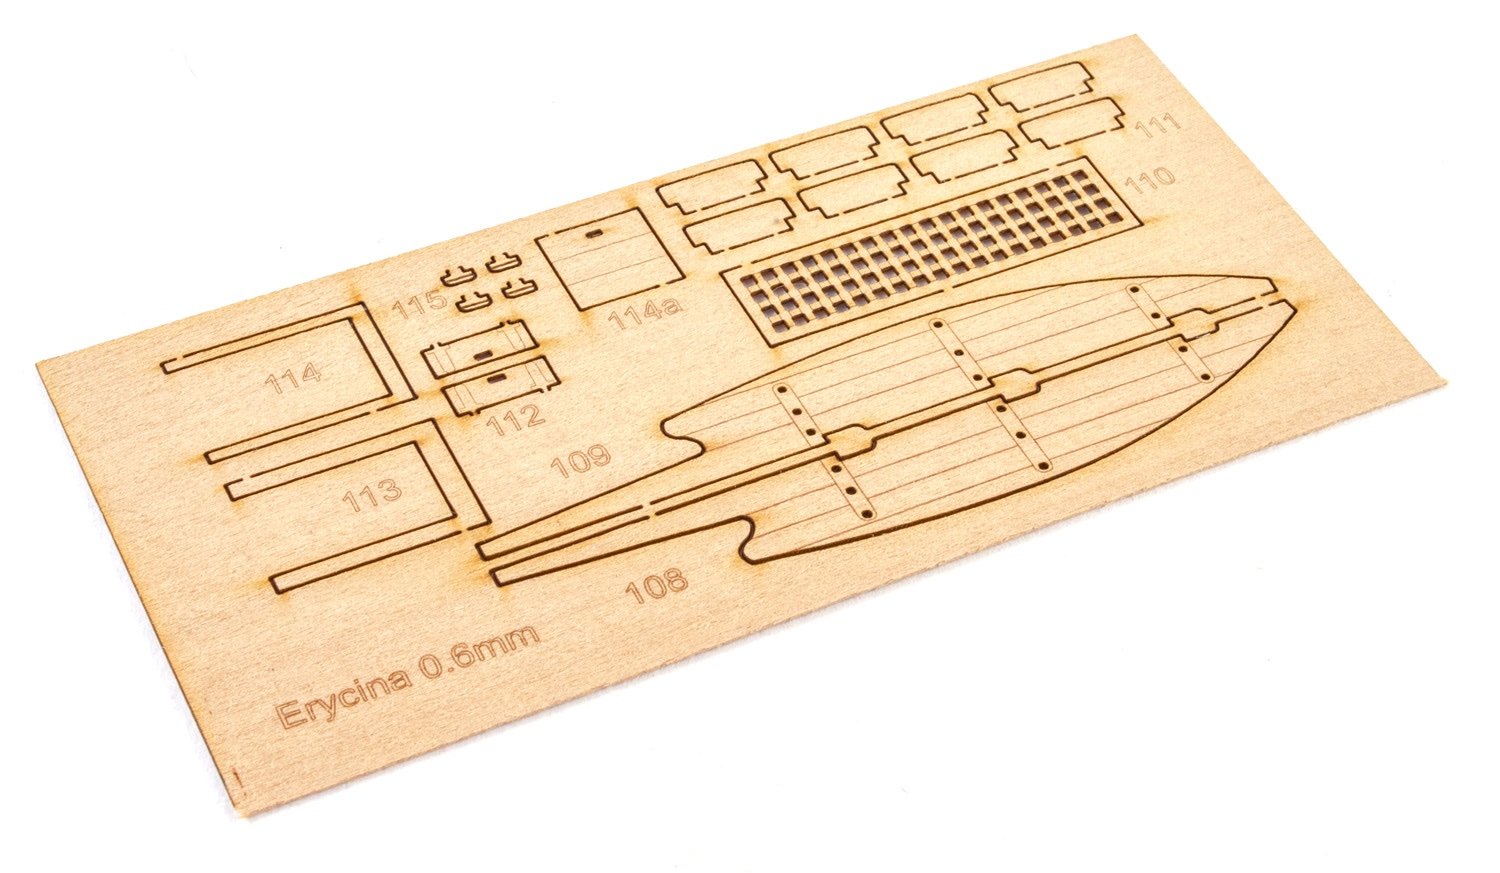
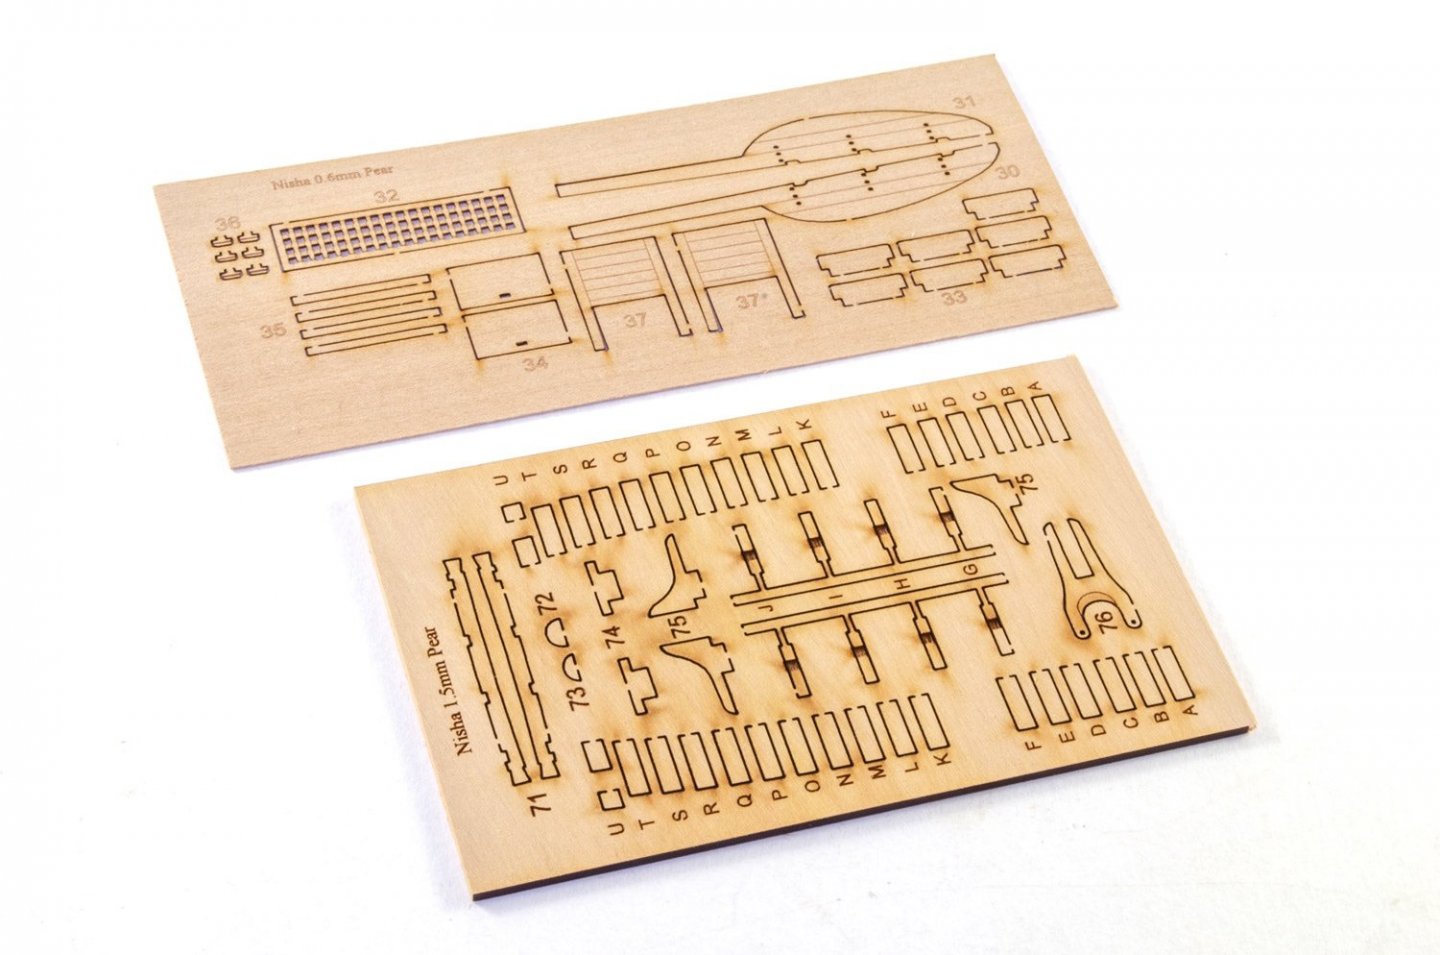
Oh, this little sheet of 0.6mm pear was missing from my original parts pictures.

- 36 replies
-
- 11
-
-
- vanguard models
- Erycina
- (and 2 more)
-
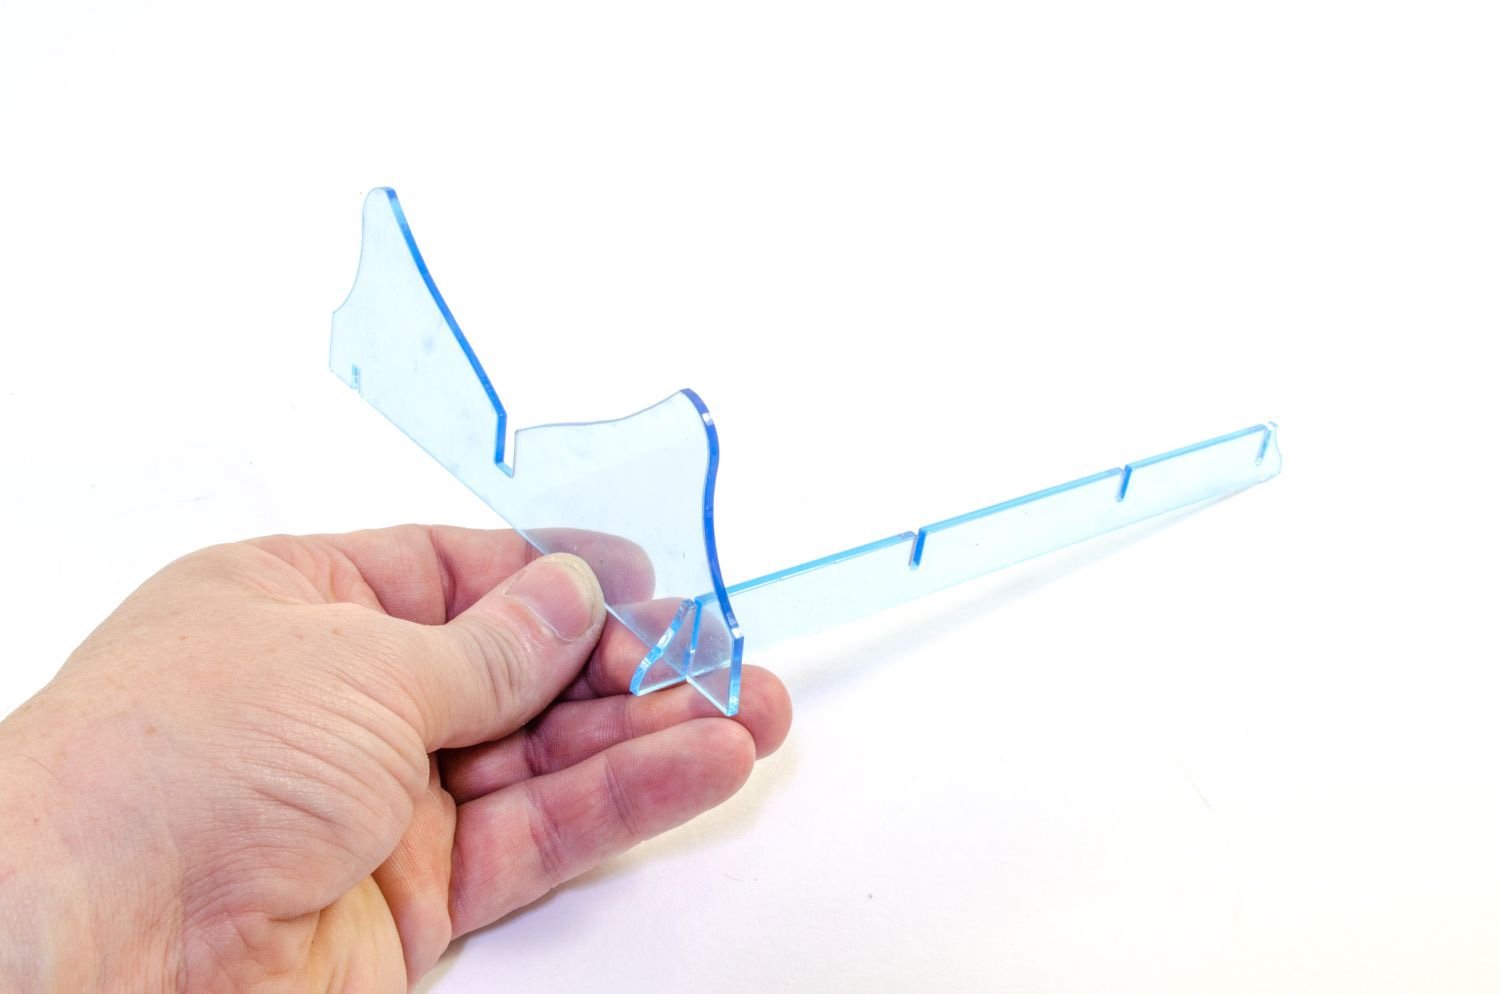
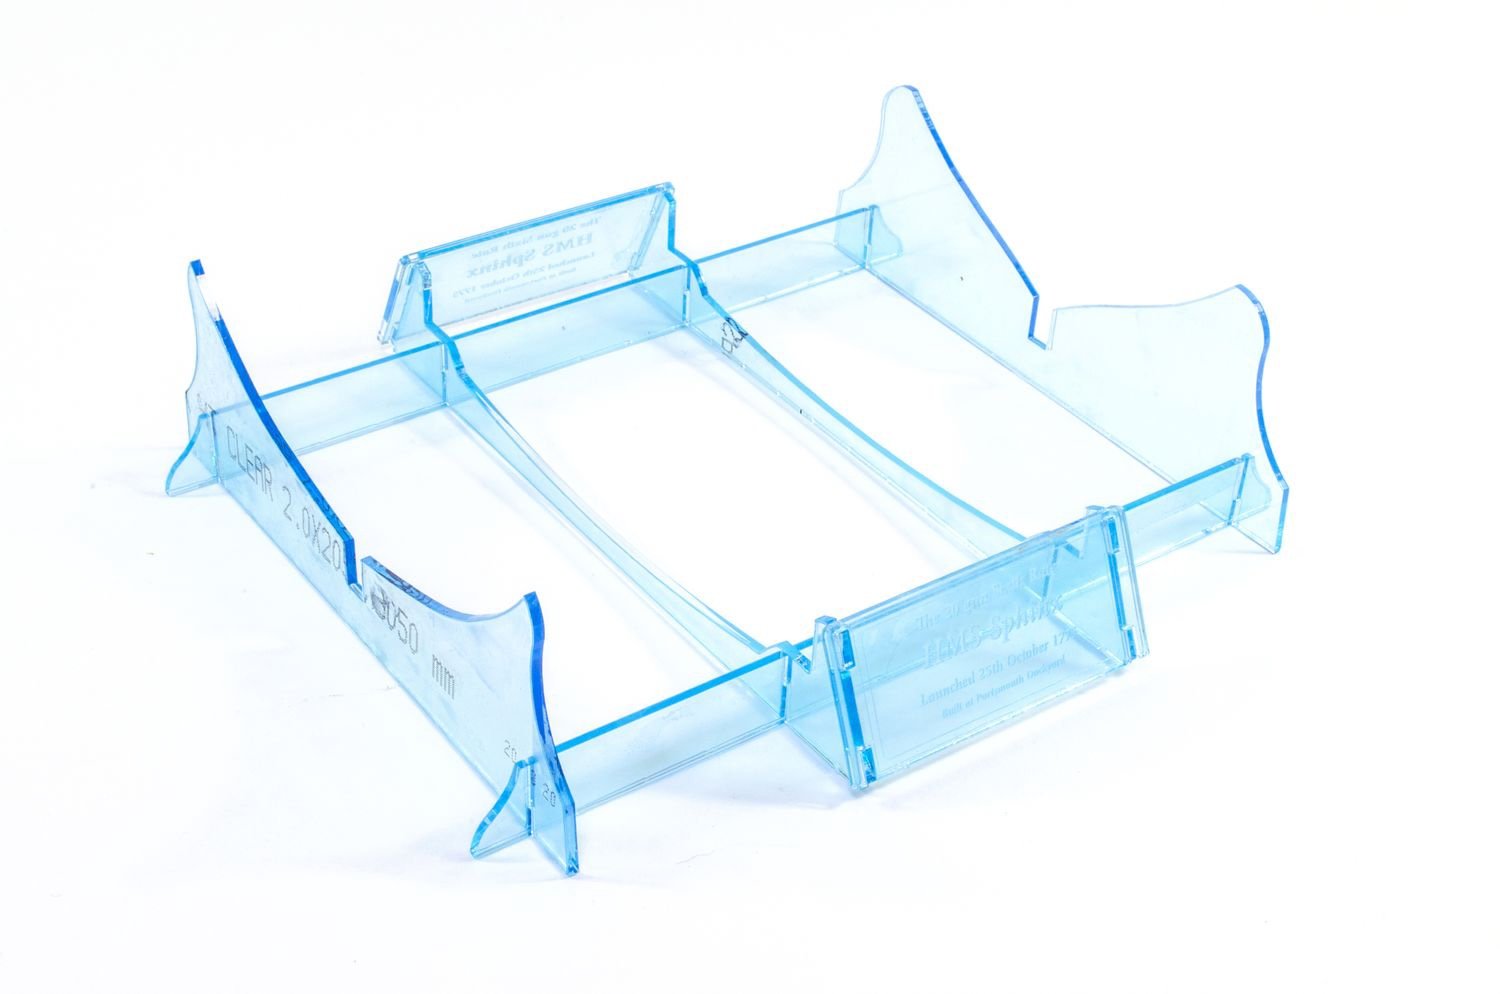
The stand is actually quite nice but it's difficult to capture with it being clear. I do think it's far nicer than general fare you get in kits these days....if indeed you get anything.
- 355 replies
-
- 10
-
-
- vanguard models
- Sphinx
- (and 1 more)
-
Consider those as being 'Limited Edition'
-
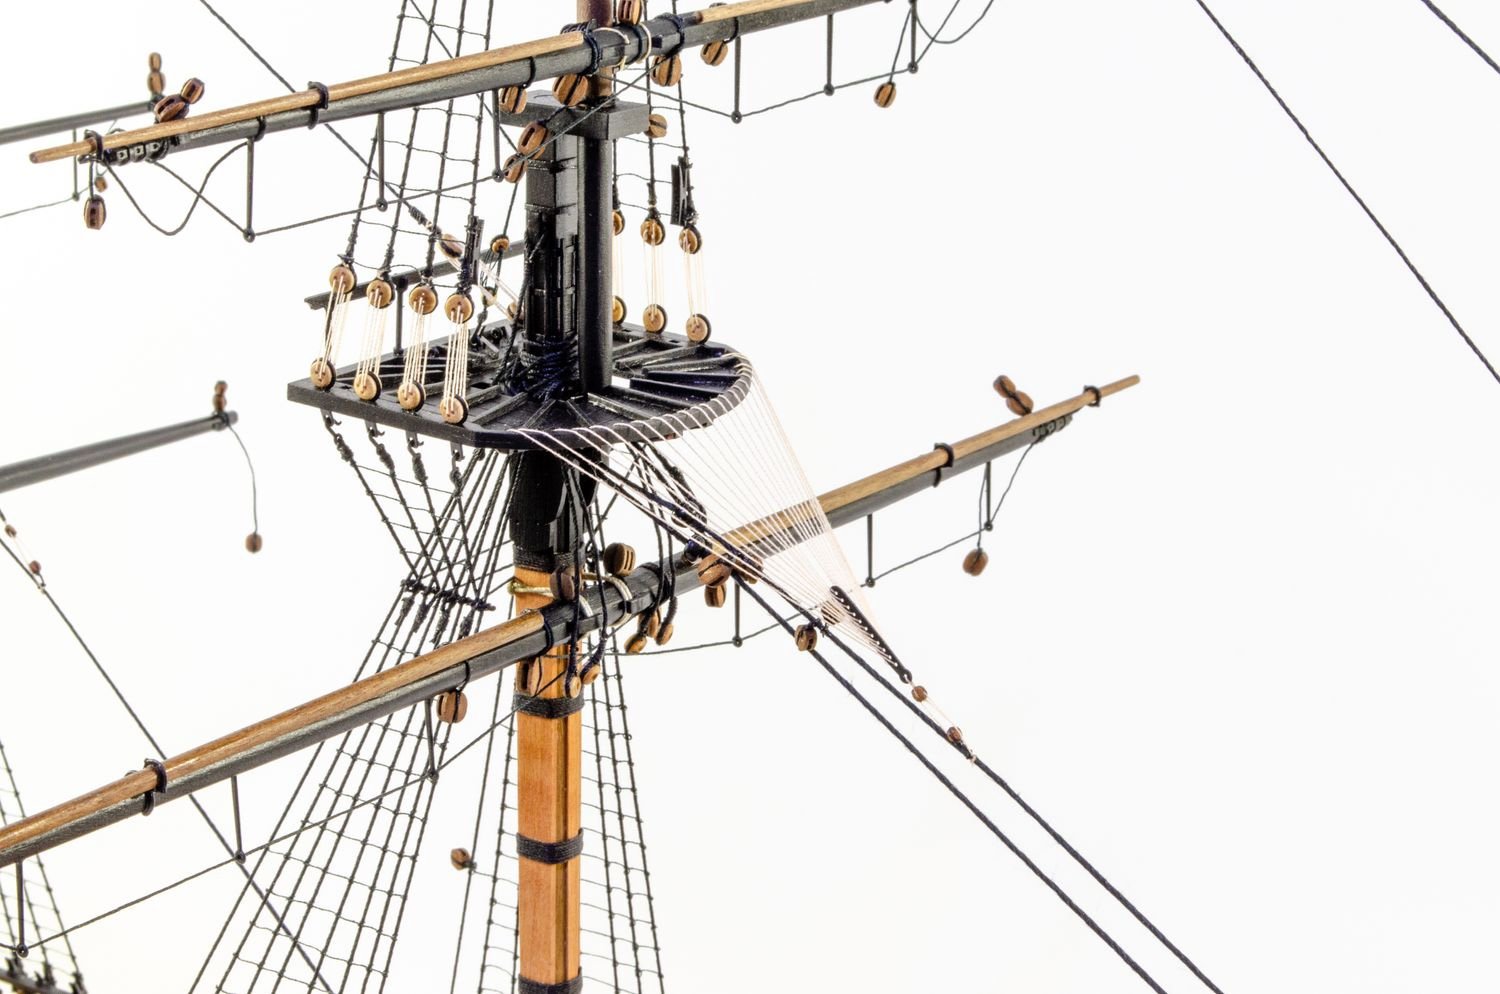
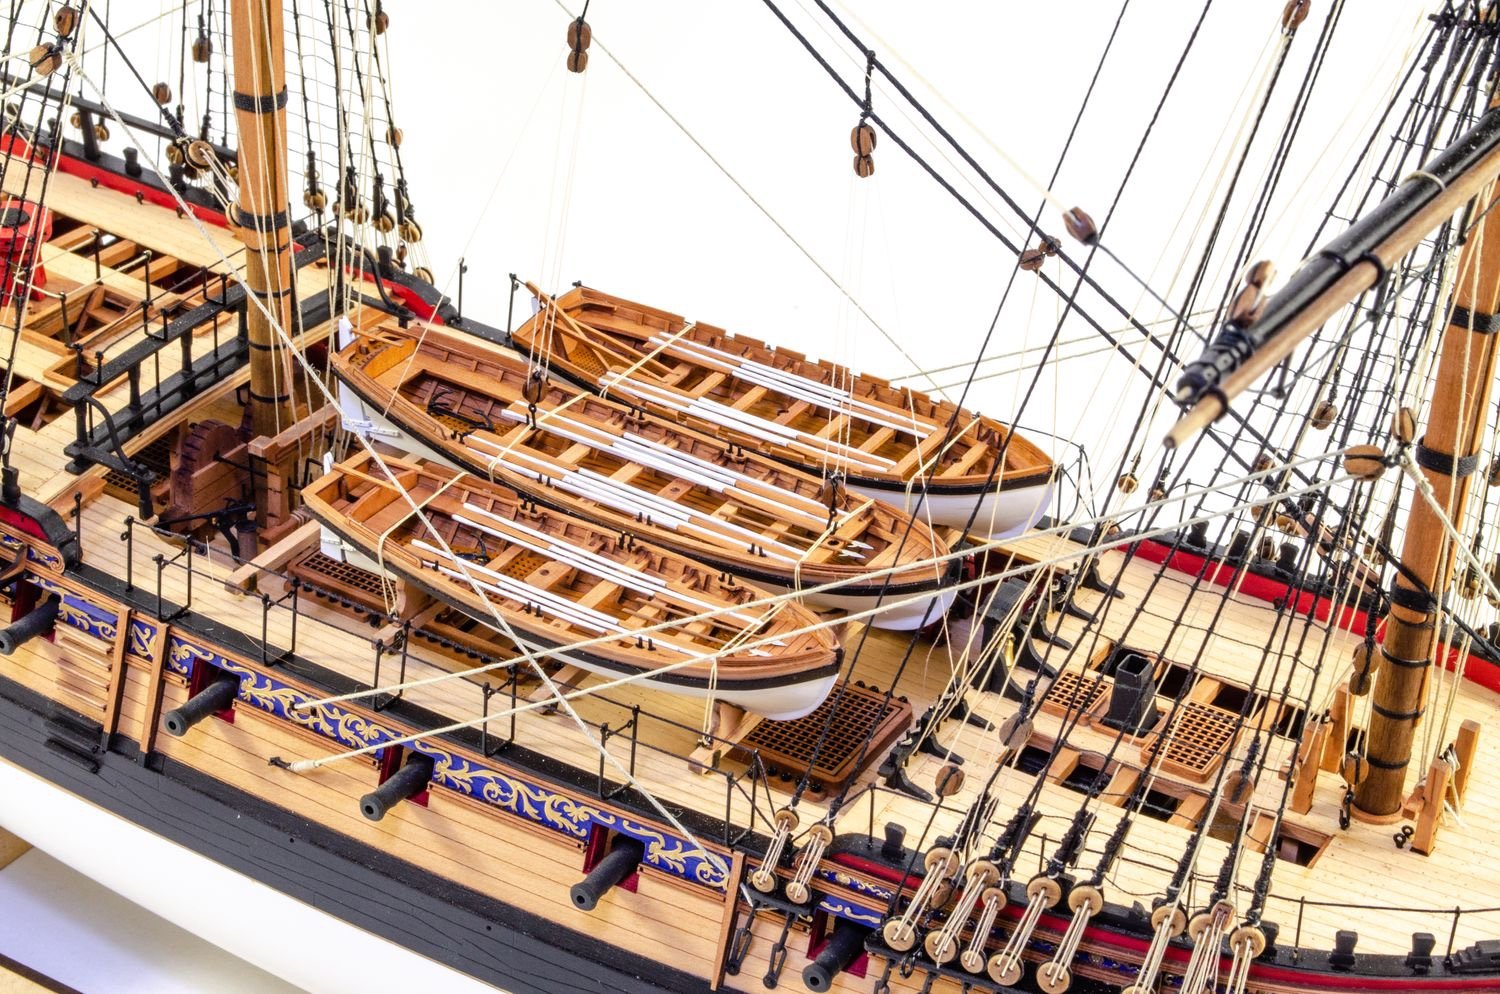
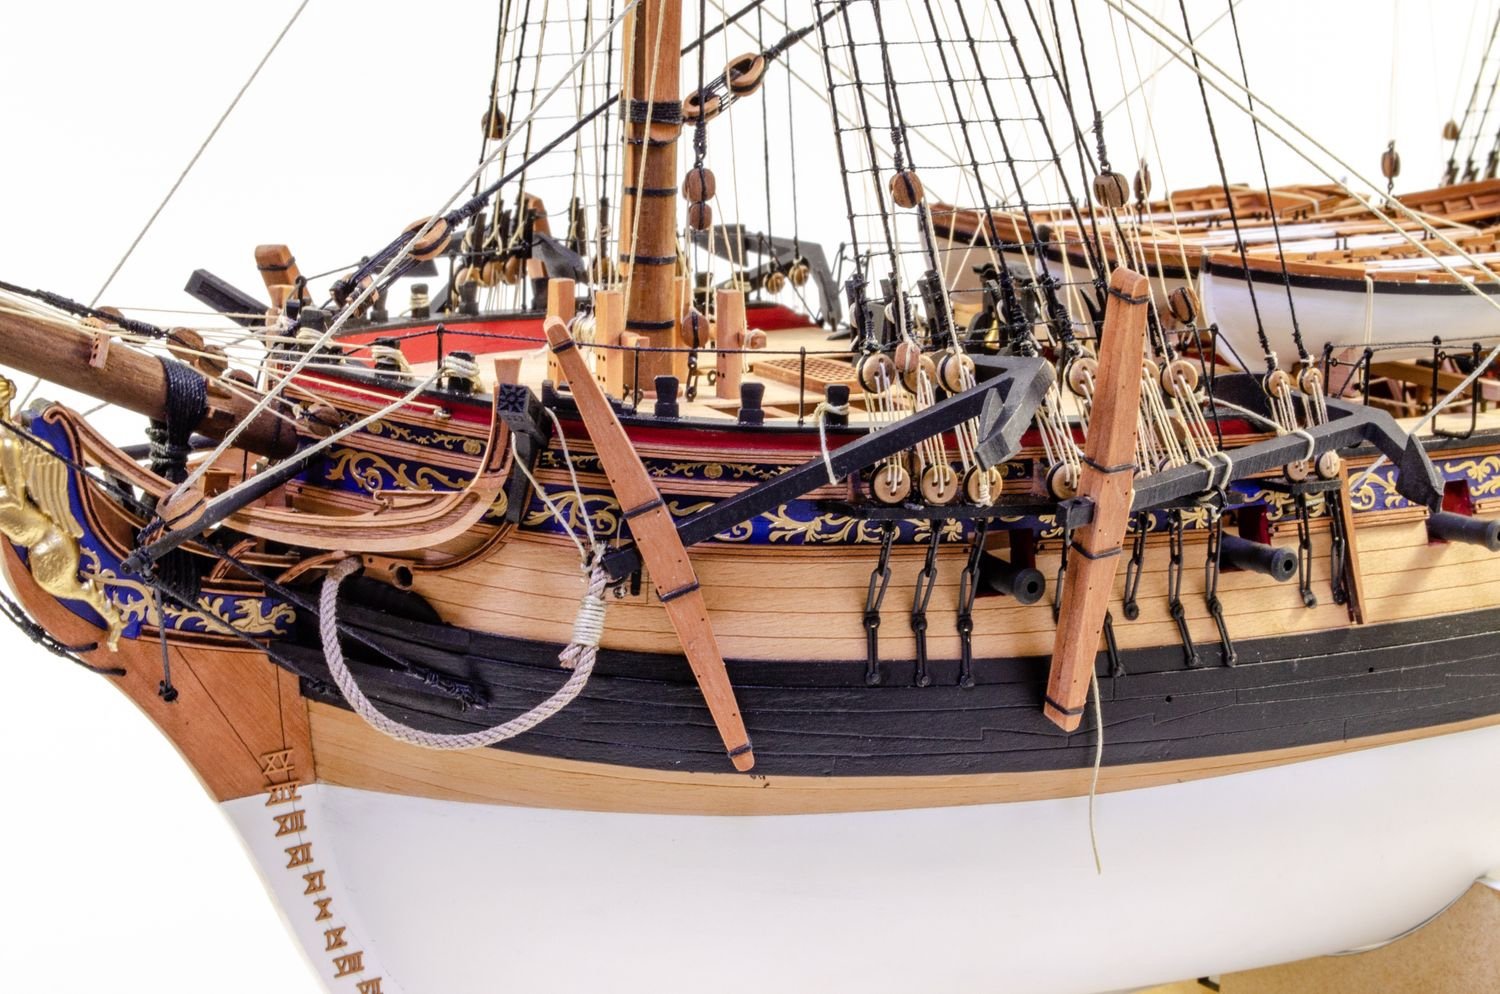
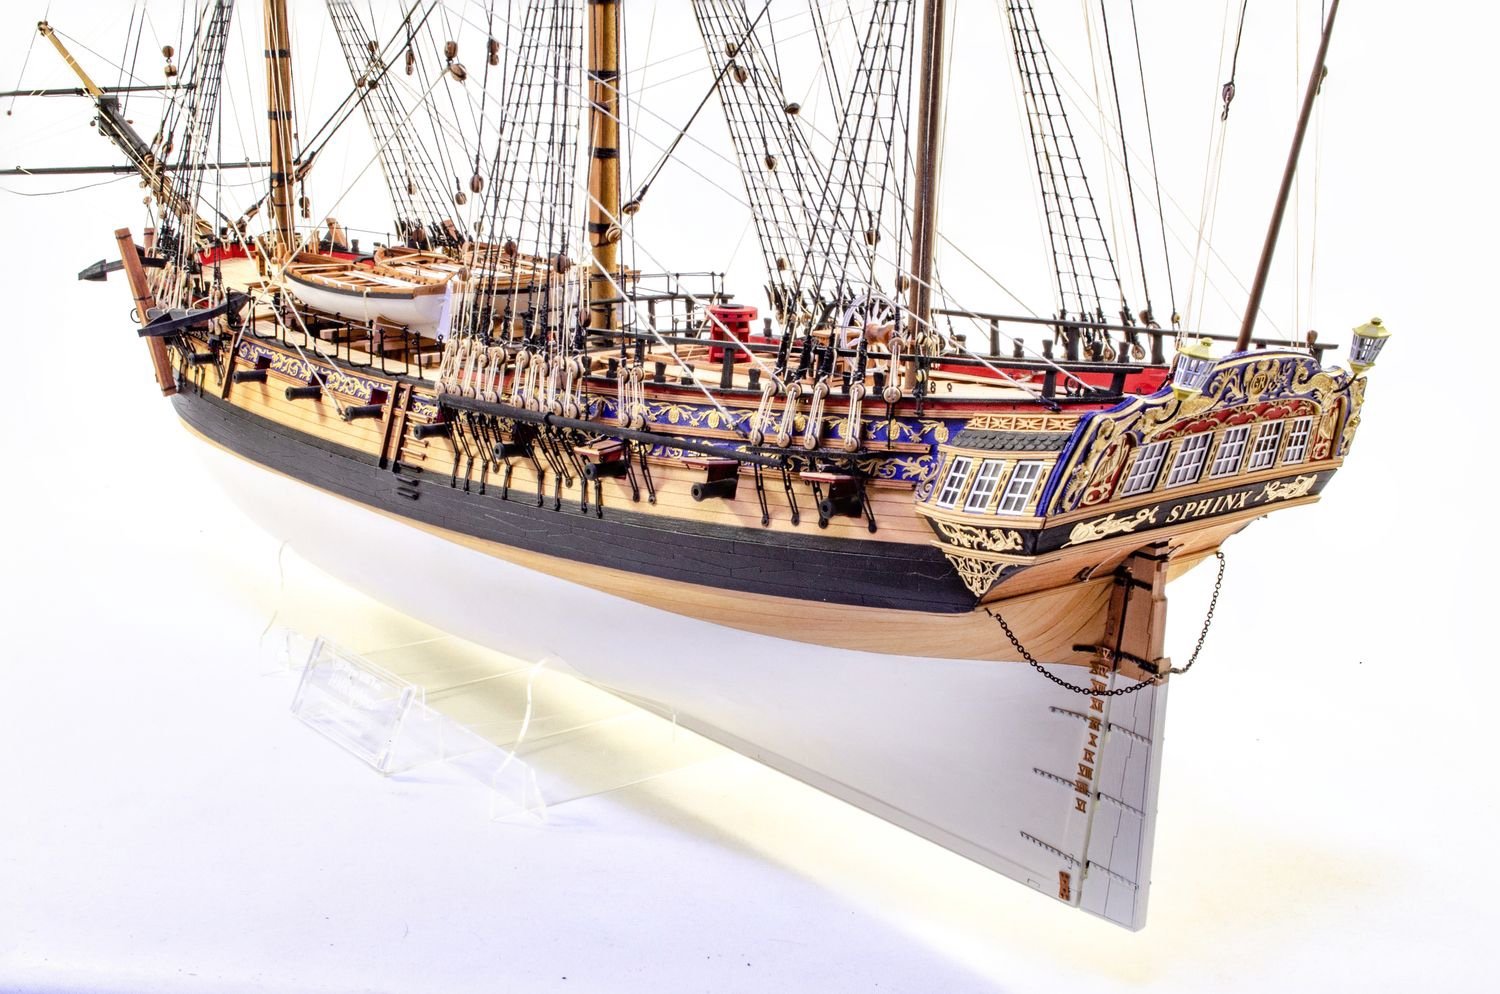
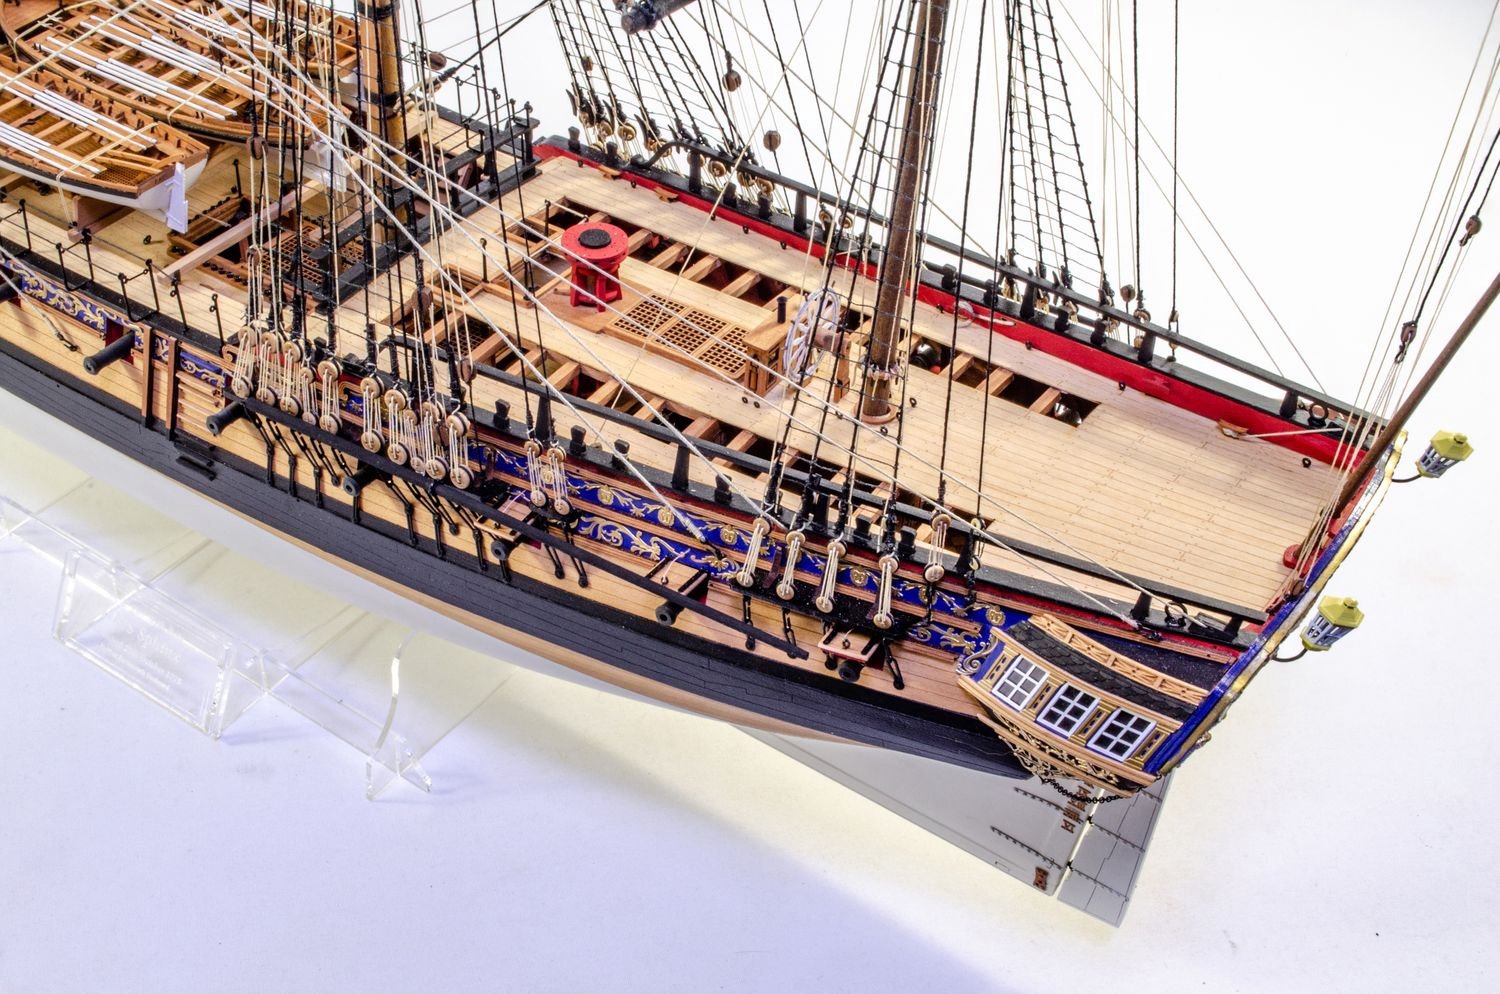
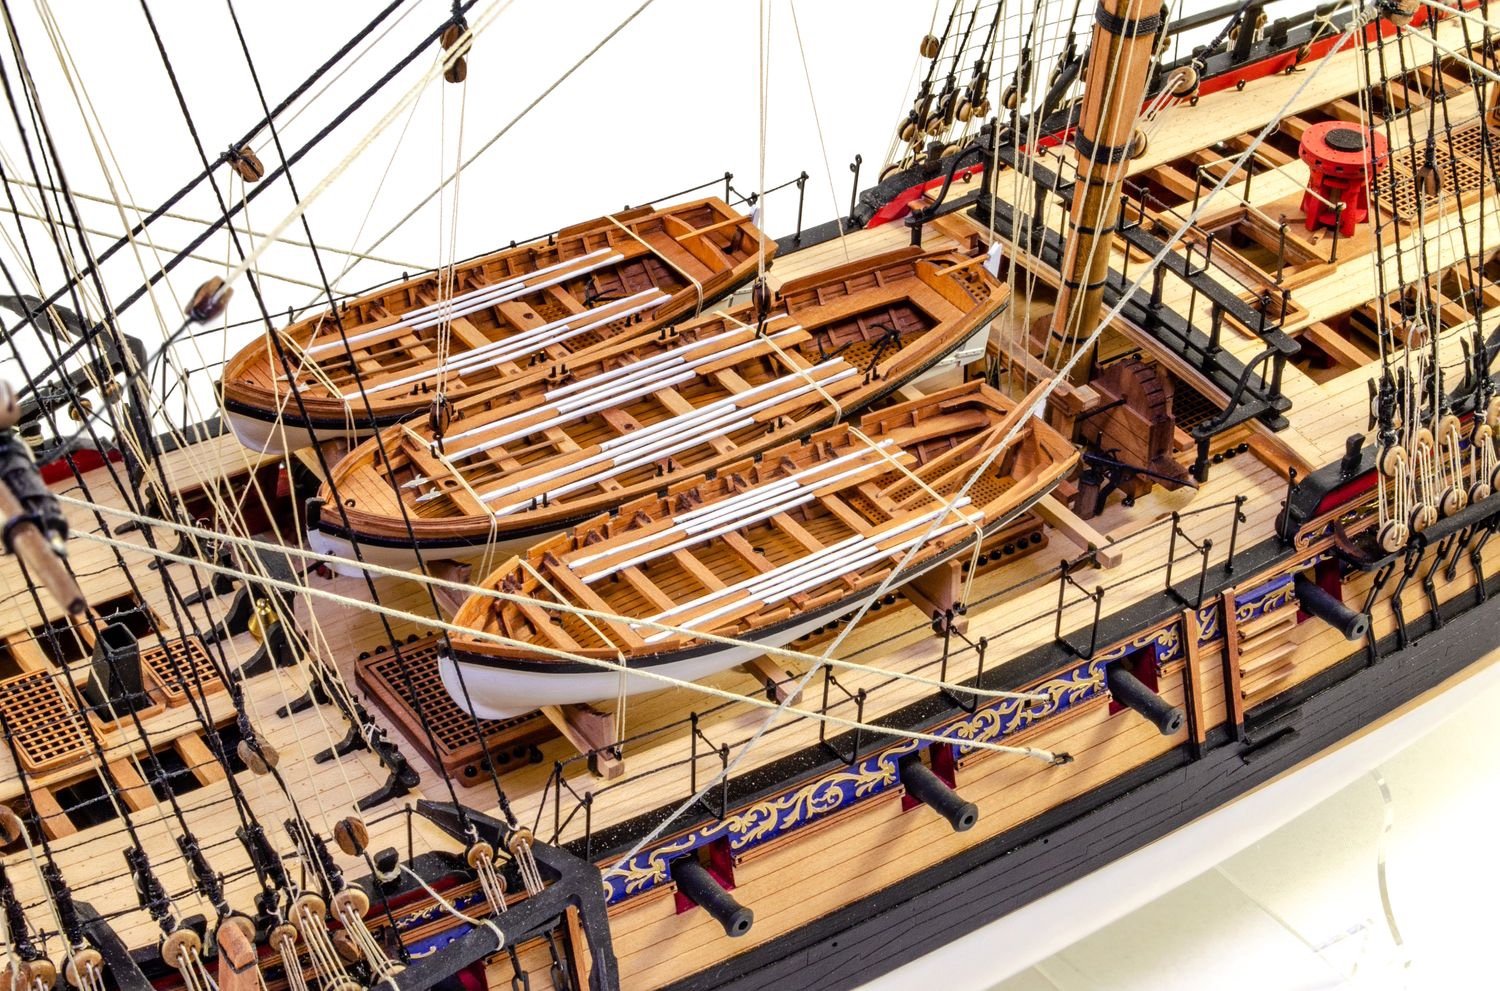
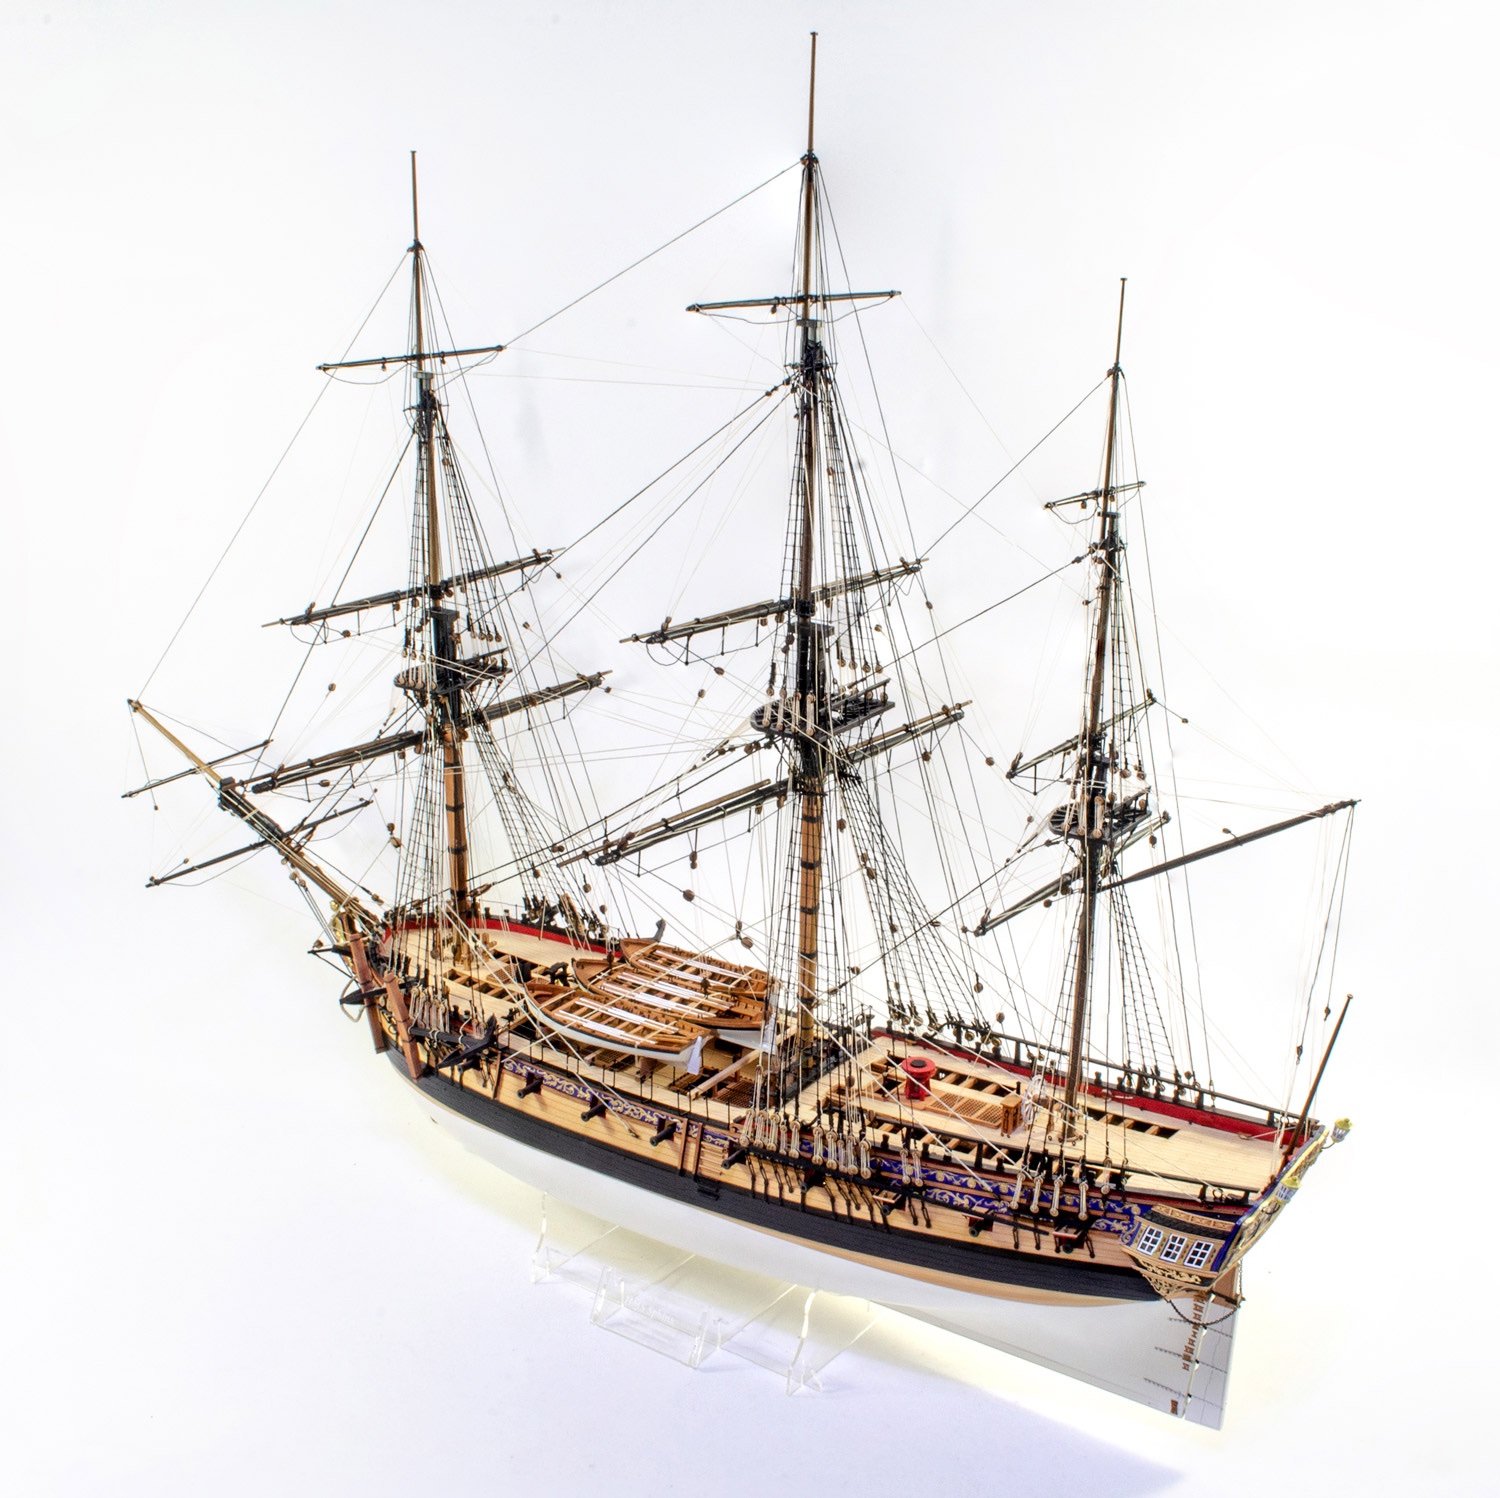
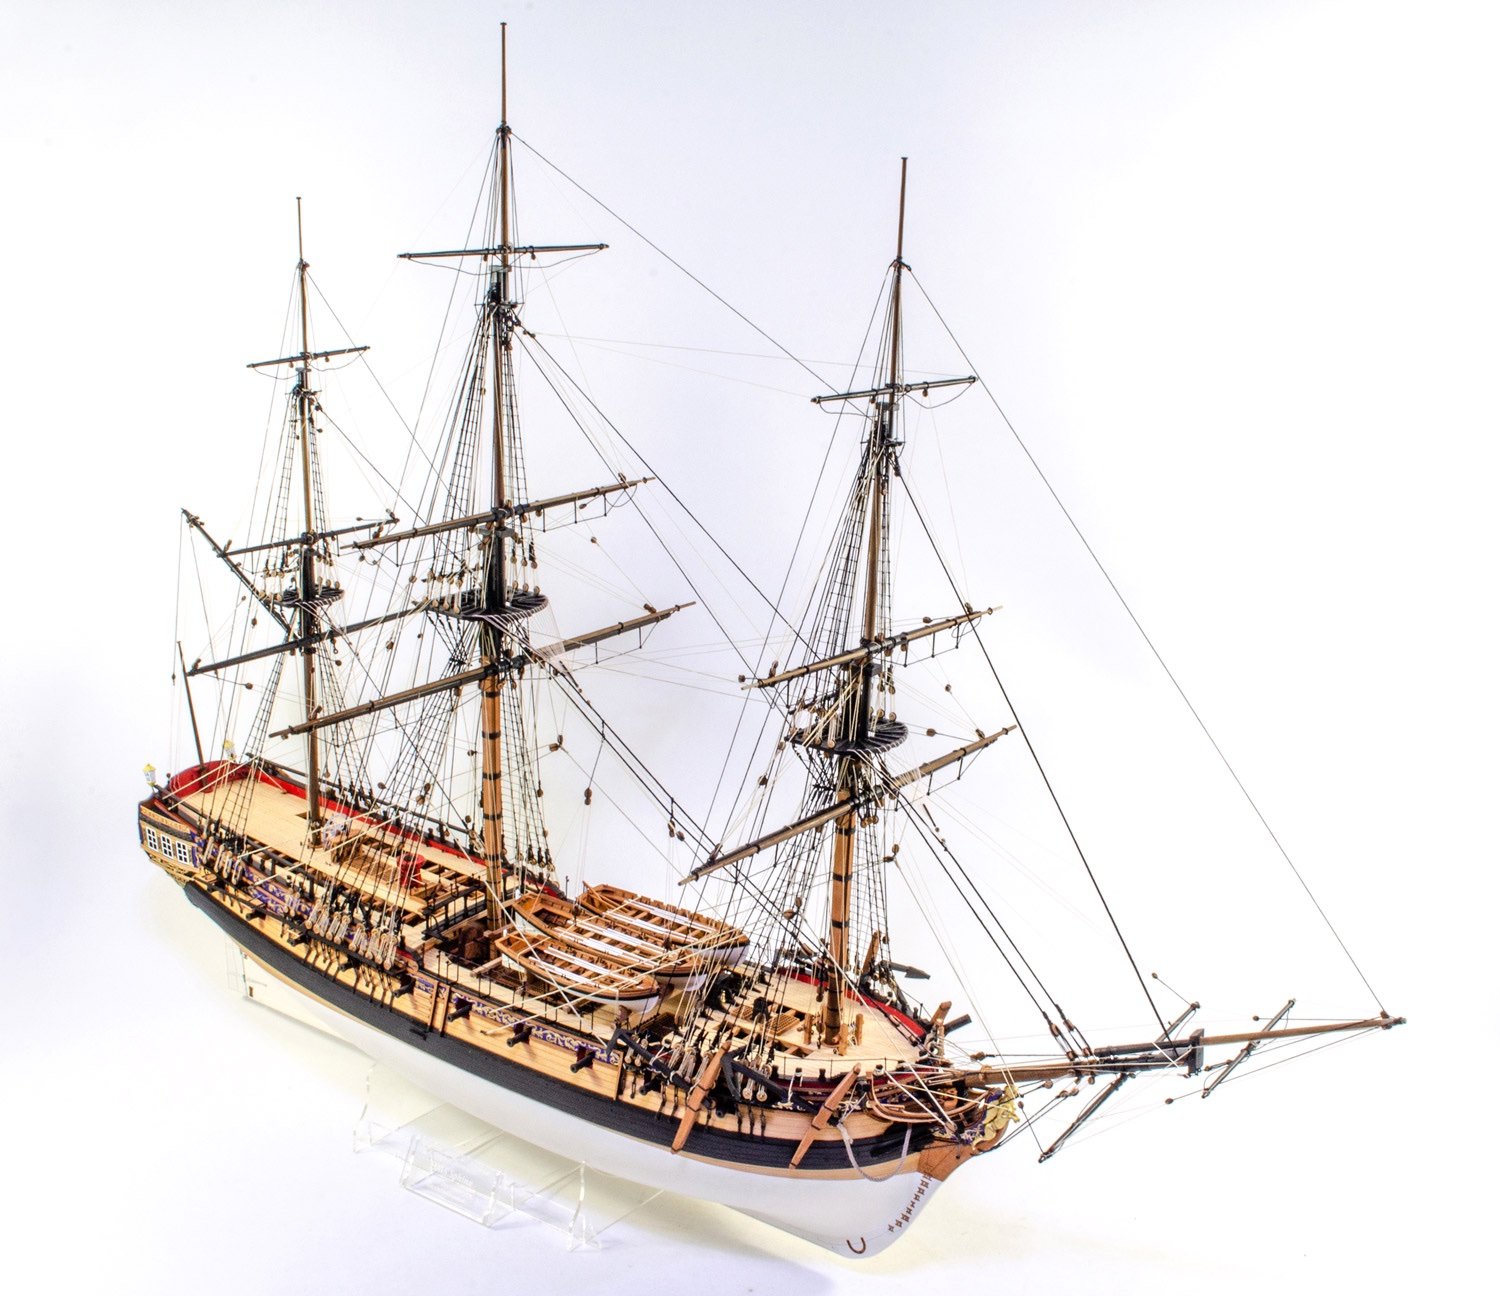
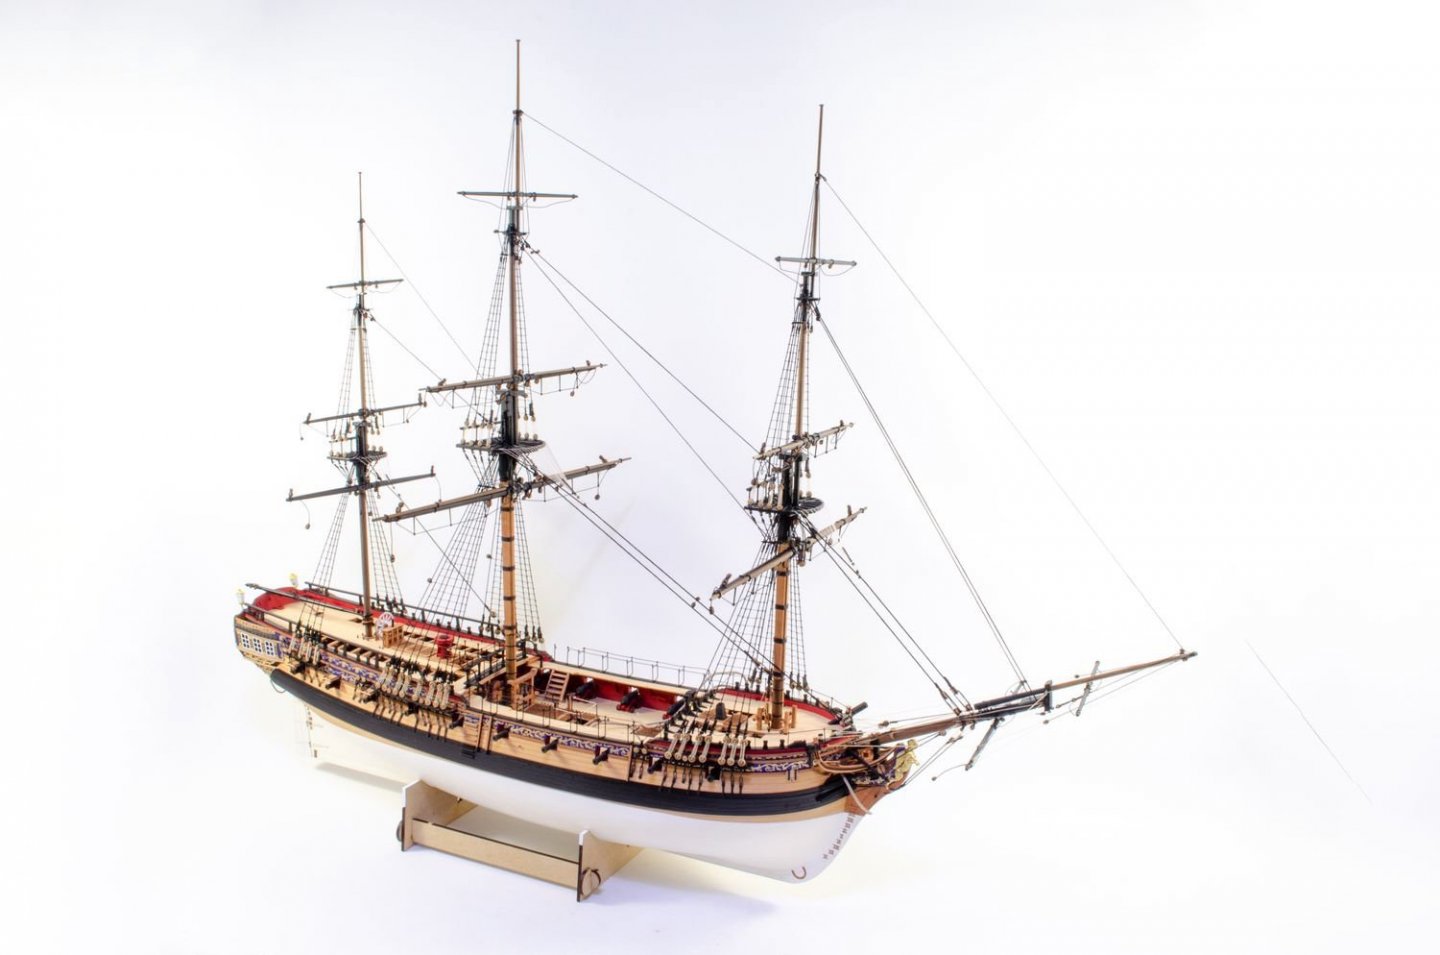
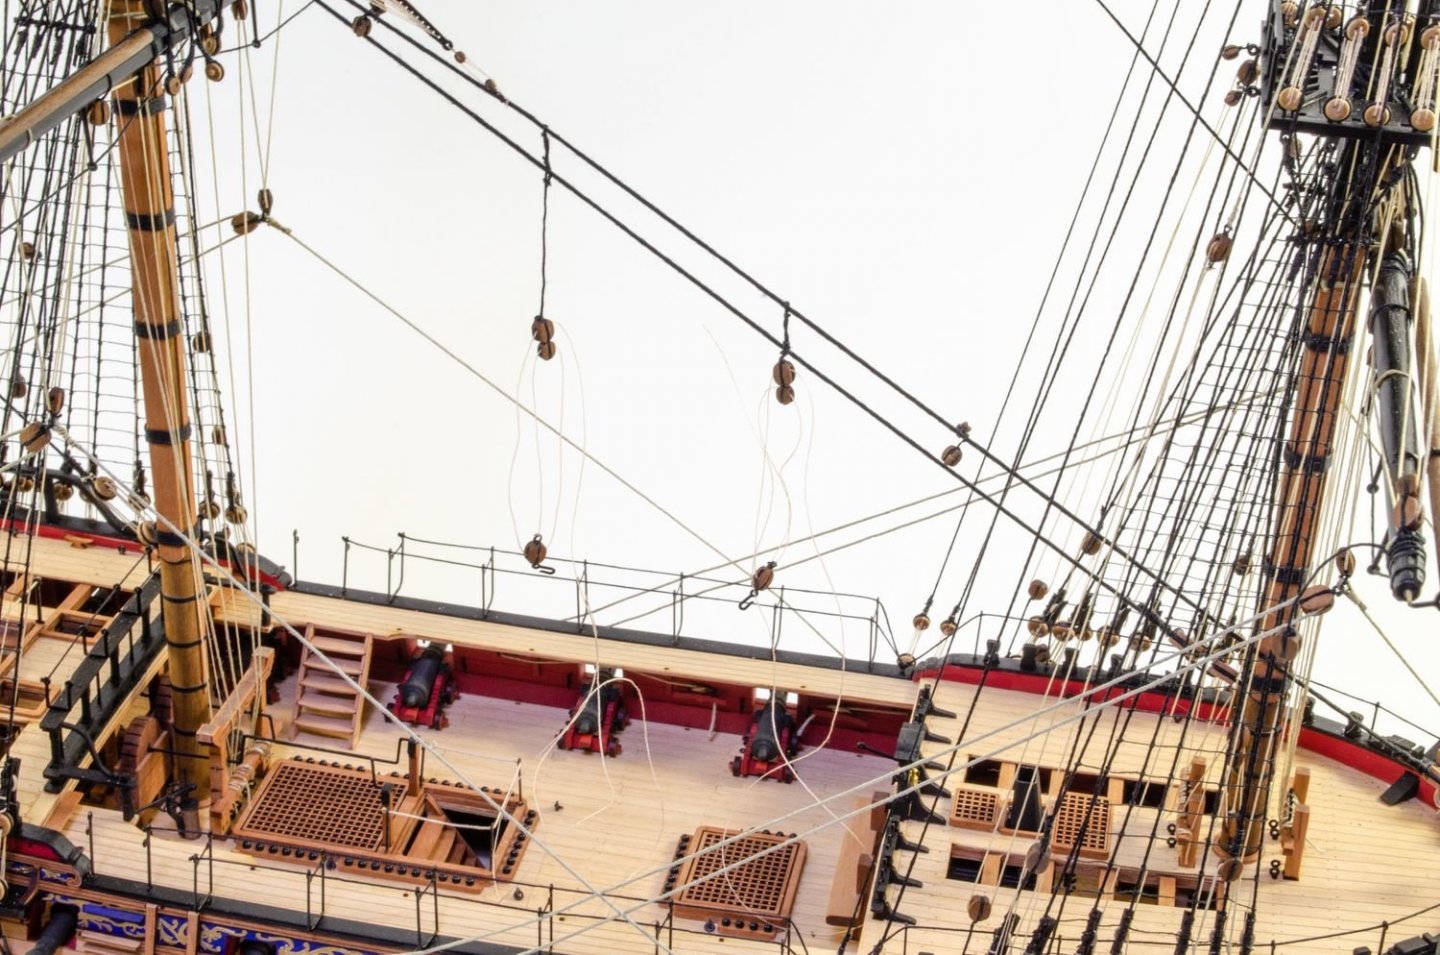
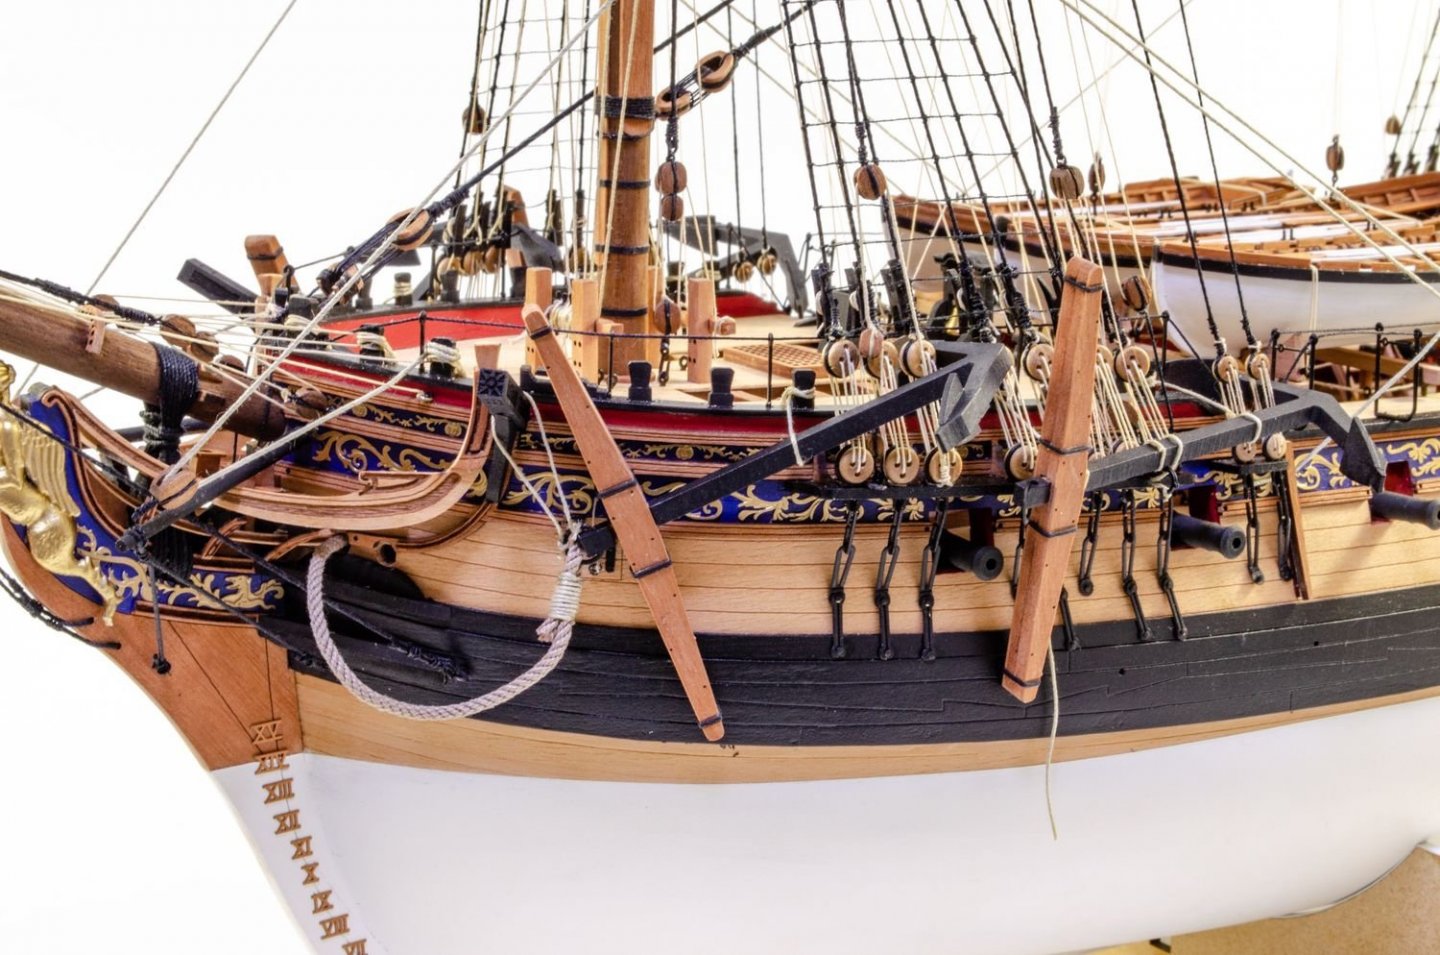
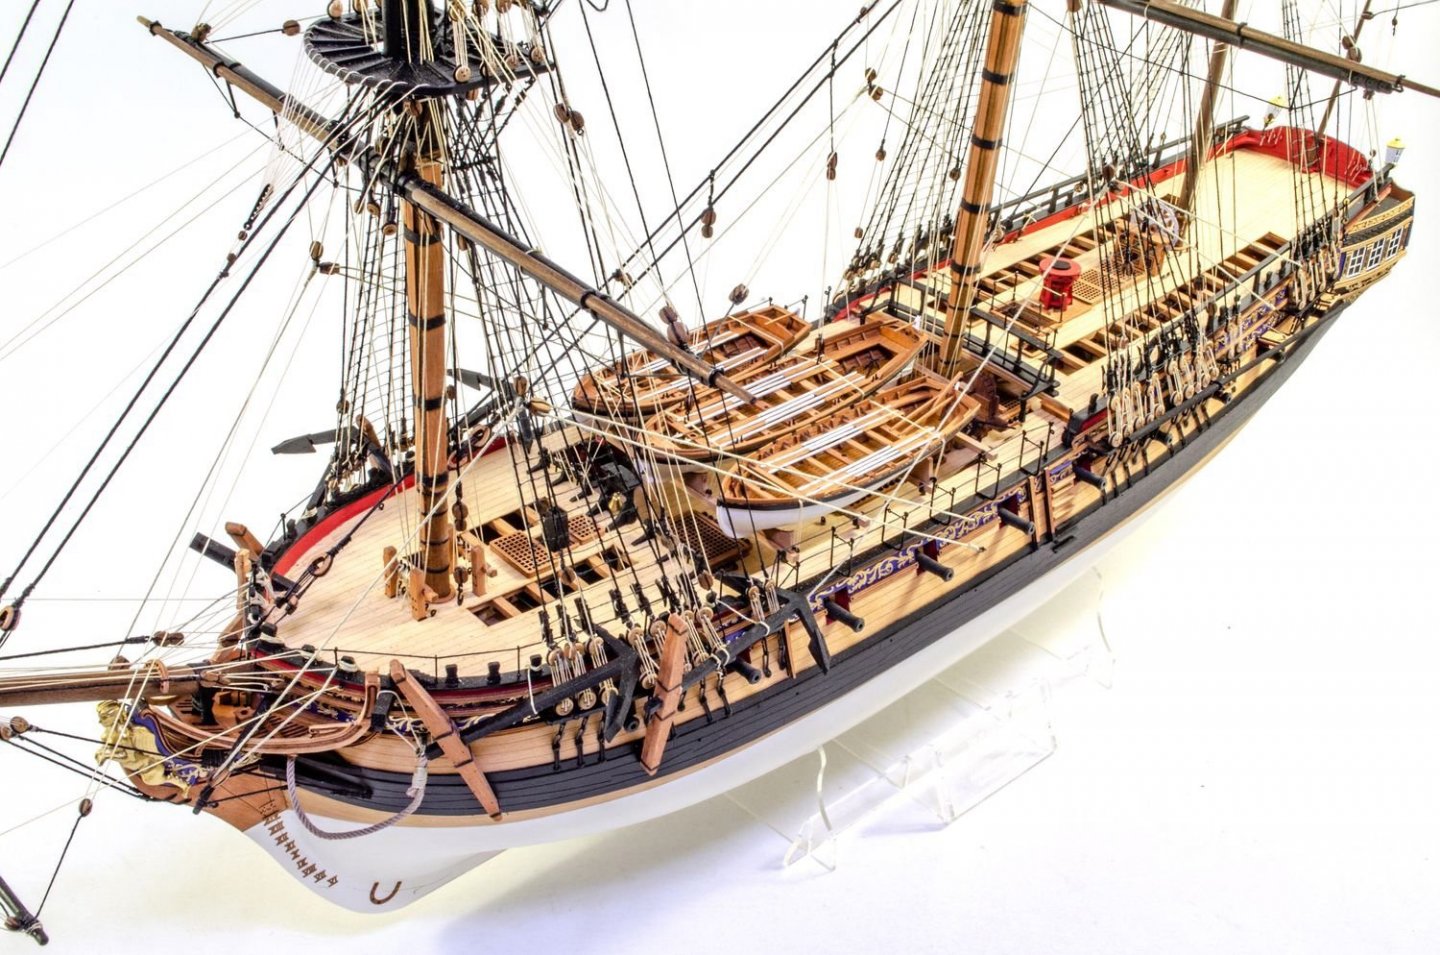
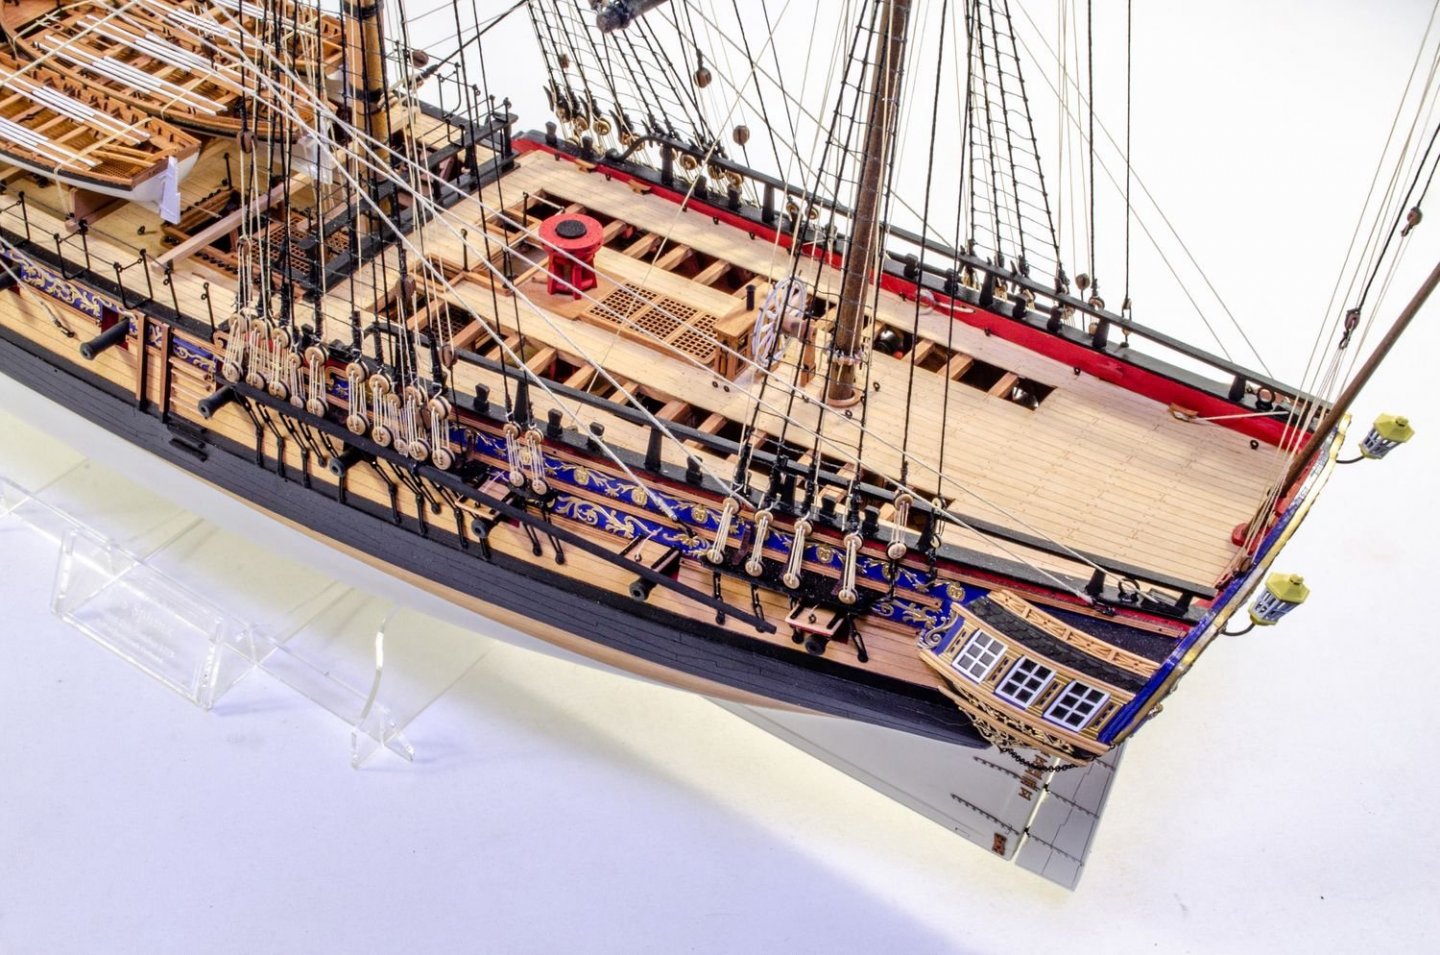
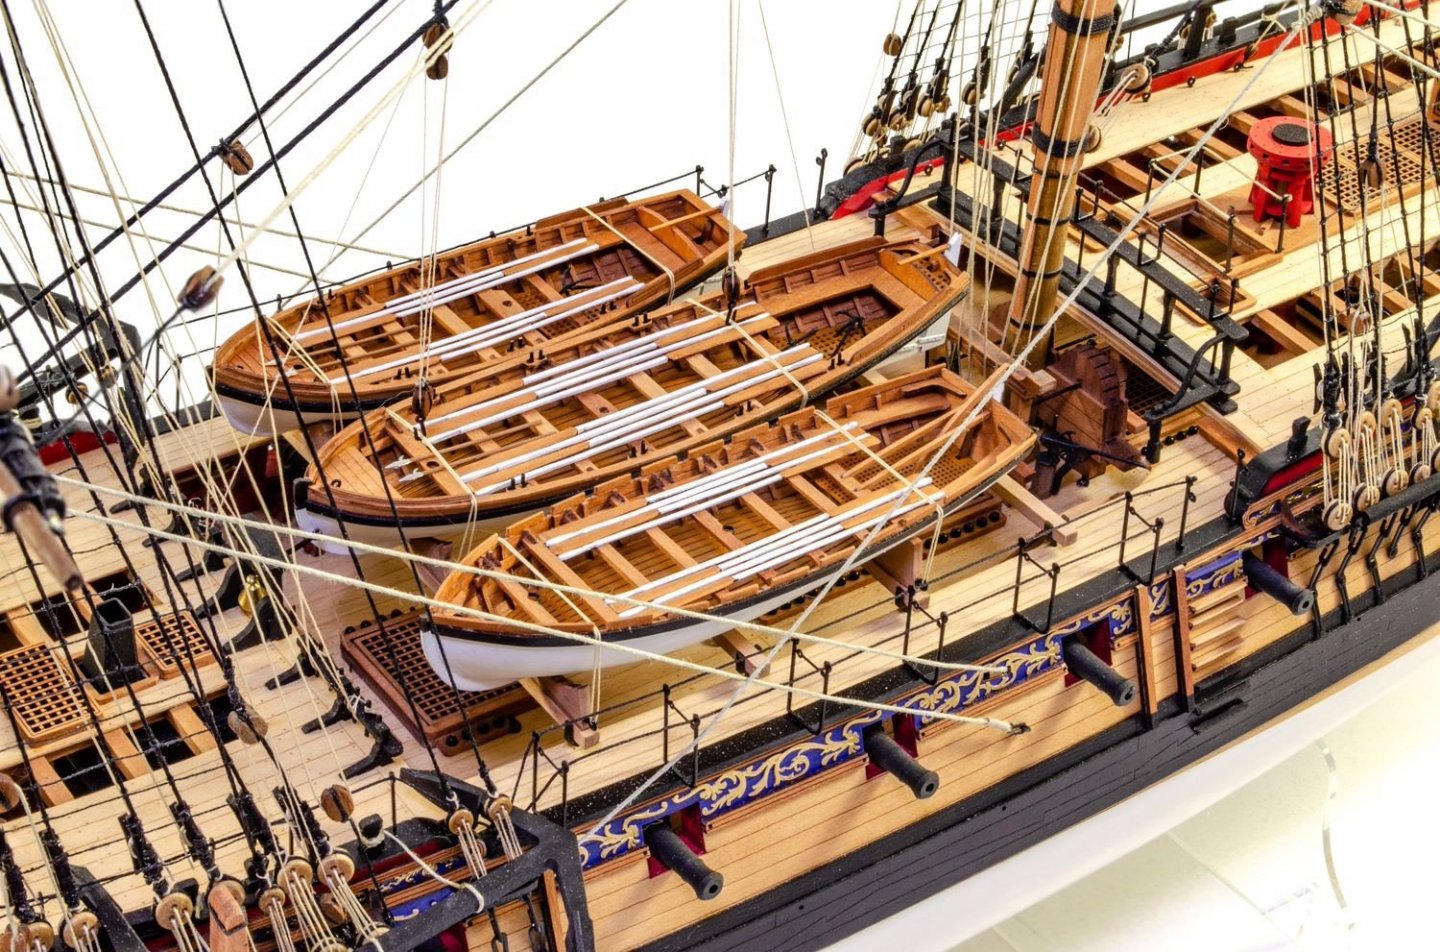
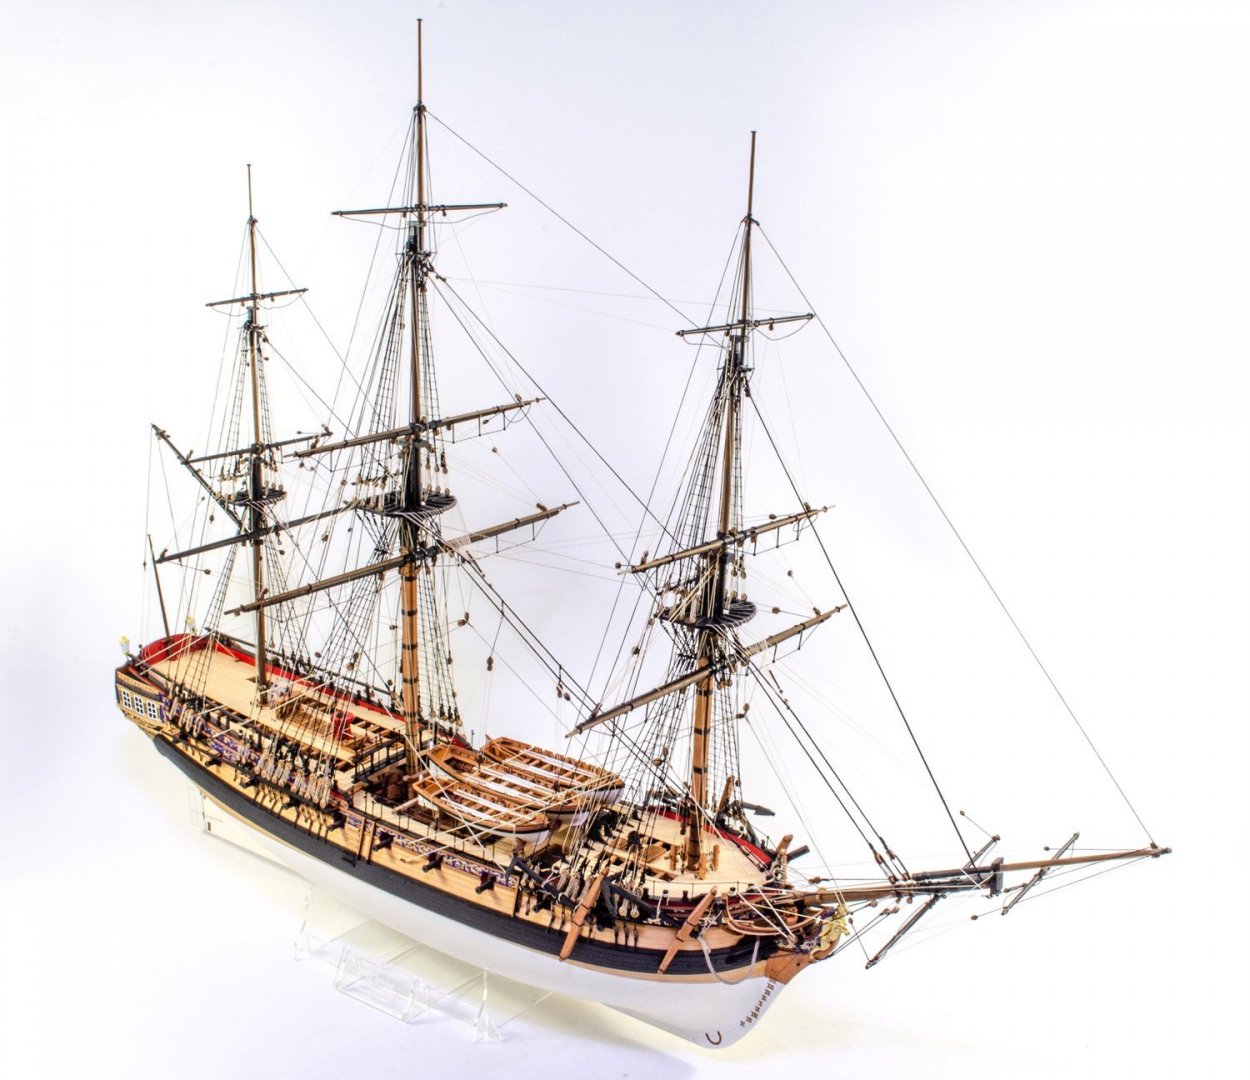
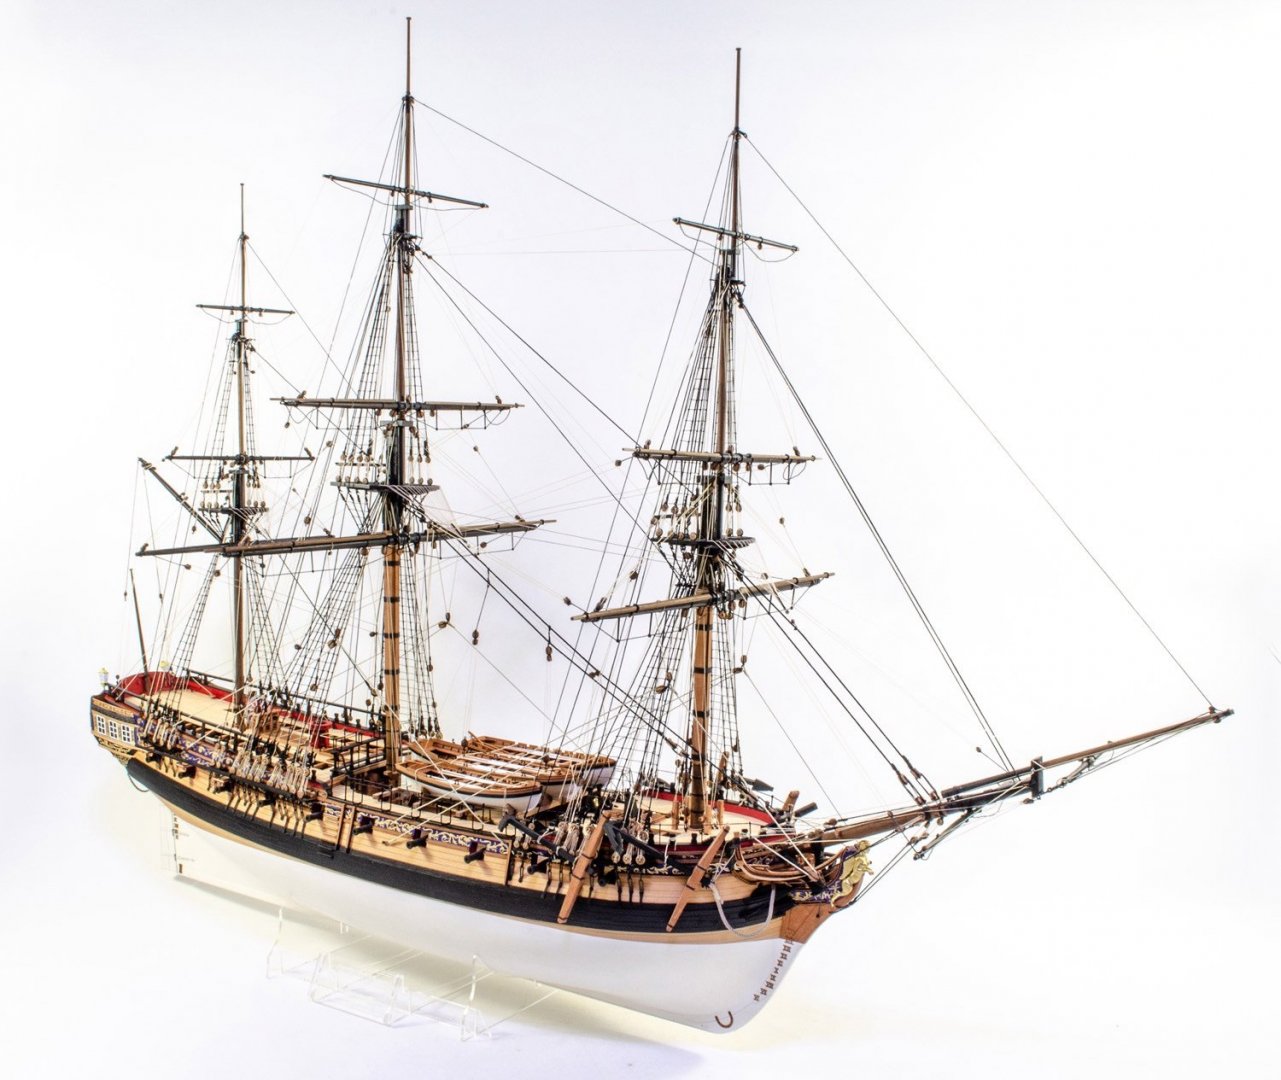
After around 5 1/2 months, HMS Sphinx is now finally complete and the updated box label and manual are with the printers for the next production run. This last stage has of course been the rig, but I've added a few photos too which show the stand etc. There's not too much to say at this point. You will notice that all the blocks are the optional pear set and not the standard kit parts. Here's a fe sequence shots showing yards fitted, and stays etc. And finally, here are the completed images. Hope you like her!


- 355 replies
-
- 64
-
-

-
-
- vanguard models
- Sphinx
- (and 1 more)