
HOLIDAY DONATION DRIVE - SUPPORT MSW - DO YOUR PART TO KEEP THIS GREAT FORUM GOING! (Only 68 donations so far out of 49,000 members - Can we at least get 100? C'mon guys!)
×


TBlack
-
Posts
1,308 -
Joined
-
Last visited
Content Type
Profiles
Forums
Gallery
Events
Everything posted by TBlack
-
 You know Tom I find that I drop Candles all the time! Perhaps Michael, but thanks for electric lights, we don't need many candles. Thanks, all, for the likes. Let's see if I can finish the cockpit with any elegance.
 -
CA residue problem
TBlack replied to Doc James's topic in Painting, finishing and weathering products and techniques
I find that the white streaks will disappear with varnish or dull coat. Tom -
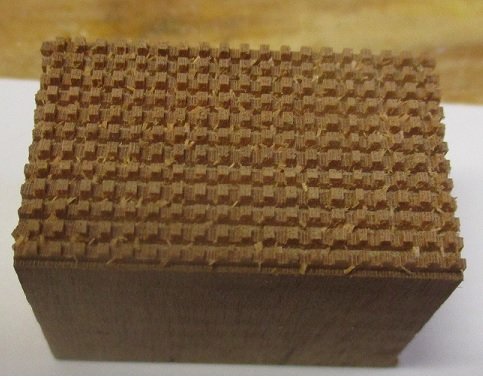
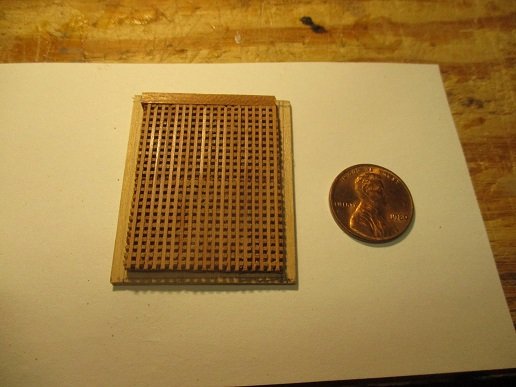
I've been working on the cockpit. And BTW, you'll notice that Michael Mott is building a Bristol Pilot Cutter. If you think mine is going to look like his, sorry to disappoint but I can't hold a candle to his ability. Anyway, my cockpit has a grating for a floor. Here's the first cut: I use the end grain which eliminates broken teeth. I also use a 1/32" end mill and a DRO that give me precise cuts. I needed to butt 2 of those to make the final product:
-
Michael, I don't think I've seen a picture of your new shop. I like the windows (I'm in the basement). I know we're supposed to write about the boat, but I'm intrigued with what looks like windows over the bench where the plaid box is located and the wye for a railroad? Tom
-
I'm following with interest. A number of years ago (23) I built a 1939 triple cockpit Chris Craft. No access to CAD and 3D printing back then. I will be interested to see how these parts turn out. Tom
-
I, too, am most impressed. Not only with the operation, but also your drawing of the davit is quite a work of art. The drill is hand operated, right? Tom
-
Thanks, dear bro!
-
Roger, I also struggled with how to do a model of an ore boat in 1:96. Here is my solution:

-
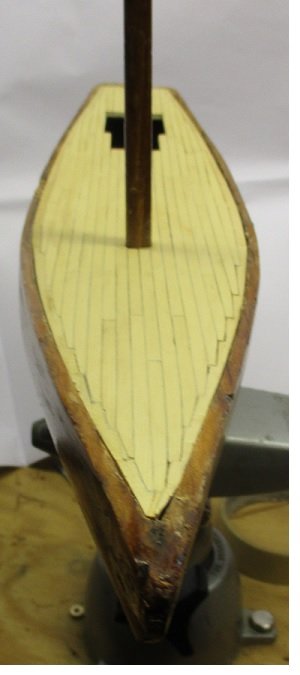
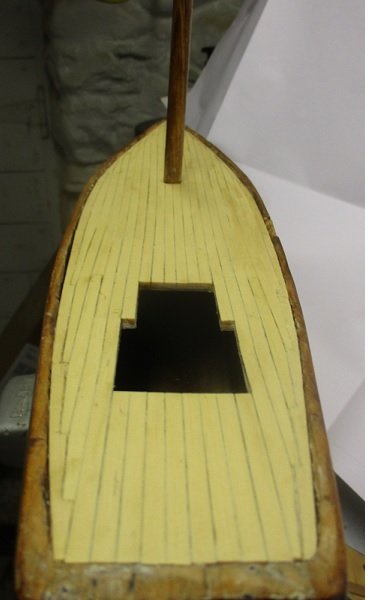
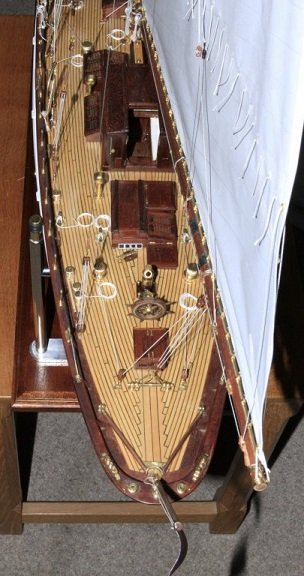
The plans arrived from England. They are of the Hilda and Marguerite. They have enabled me to lay out the cockpit and main hatch which then allows me to see where the deck planks don't go. Consequently, I've been able to lay the deck. The hull isn't quite symmetrical, but I've managed a passable presentation:
-
Your method is much better than mine, but I don't have a full sized lathe. I use a Unimat SL1000.
-
Don, I get it. Thanks. I use a drill press. Same idea just 90 degrees different. Tom
-
Ron, Hard to tell from the photo, but are the top and bottom sides parallel? If not then you've got to square the whole piece up, and then is there enough lumber to do what you want to do? The bigger question in my mind is: why do you want to use it in the first place? Won't the wale be painted black? I may be ignorant. Tom
-
Hello Don, Trying to make connections. Do you remember the Salmon Kings hockey team? My son-in-law used to play for them. Also, I'd love to know how you turn a lathe into a thickness sander; I'm having a hard time picturing the set-up. Tom
-
Druxey, You're saying that the timberhead tops need to be parallel to the waterline? Tom
-
Me too, if I do it right! I'm awaiting a deck plan from England before I tackle the planking. I need to know where the hatches and cockpit go. In the meantime I've been setting up to construct a dinghy to sit on the deck.
-
Then I think your hand/eye coordination is outstanding! Tom
-
Alex, Boy, have I got questions! 1. How do you get the lower jaw of those clothes pins to hold? 2. How do you get such uniformity of the timberheads? 3. How do you do that little curl at the end of the planksheer? Help us poor buggers do better. Tom
-
Hey John! I still use bees wax. Not only does it get rid of the fuzz, but also gives the line a little body which helps thread it through the block. Tom BTW, I think my wax dates back to 1975. A great bargain!
-
Peter, Thanks for the prompt reply. Picture not necessary. I get it. Last time around I tried super glue which didn't work so well. Tom
- 366 replies
-
- 1
-

-
- bellerophon
- victory models
- (and 2 more)
-
I know it's a bit of a back track, but how do you get the footropes to hang so nicely? Tom
- 366 replies
-
- 1
-
-
- bellerophon
- victory models
- (and 2 more)
-
Dave, If you tell us which model you are working on, there will be someone here who has built the same model and can give you specific advice. Tom
-
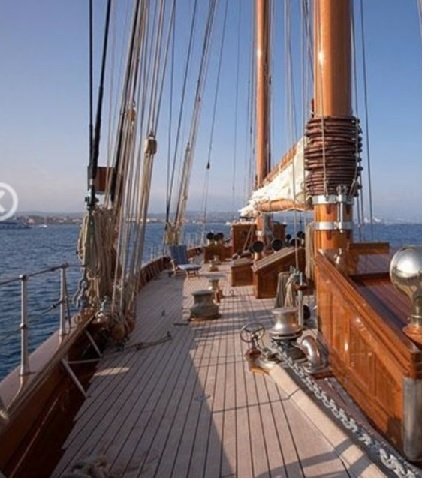
Having decided on the scale (1:32), and the type of boat (pilot cutter), I then discovered that the African Boxwood is brittle. On ripping the wood to make deck planks I found that small pieces would break off, making it impossible to get a straight edge. Putting the boxwood aside, I ordered up some yellow cedar from Chuck that has arrived. I found a couple of pilot cutter plans from Starik Hobbies in England, so I have a small hiatus while awaiting delivery. I can do some of the deck planking in the meantime. I have option: planks that follow the line of the hull, or straight planks. I prefer the curved option, I think it looks more elegant, but all the pilot cutter I have researched have straight planks So that's settled. Oh, and thanks Keith for the photos! Tom
-
Thanks, Kurt, and Mary, got it! Visual inspiration for the shop! Tom
-
Hi Kurt, Where do you buy it? I didn't see it in the store. Tom
-
HMS Sphynx by TBlack - 1:64
TBlack replied to TBlack's topic in - Build logs for subjects built 1751 - 1800
Druxey, I understand your concern. The final resting place for the model is presently occupied by a forest of nutcrackers. Post Christmas season, the model gets moved inboard. Thanks to all of you for the likes. It's always rewarding to see one's efforts inspected so closely. However, there are 3 tests for any model: the 10 foot test, the 3 foot test, and the 6 inch test. I hope I pass! Tom
