


TBlack
-
Posts
1,315 -
Joined
-
Last visited
Content Type
Profiles
Forums
Gallery
Events
Everything posted by TBlack
-

SS Mariefred by captainbob - 1:96
TBlack replied to captainbob's topic in - Build logs for subjects built 1901 - Present Day
I am not proud of my hulls and it is definitely not the way I see everyone else doing it. So I paint my hulls to cover up the mess. Now did you really want to see all that? Actually, I do the same thing, so I don't need to see it; I know how to do that already. Press on... Tom -
Sjors, Nice job! I make the start date as Jan 1, 2014. Given the size of this project, mighty fast work, I'm thinking. Incidentally, where do you display this art work? Not exactly coffee table sized! Tom
- 1,616 replies
-
- 5
-

-
- caldercraft
- agamemnon
- (and 1 more)
-
John, I love to see someone else work in 1:96 scale also...gives me comfort. Also, I see some differences in rigging and deck furniture from one painting to the next. Go with the latter? Tom
-
SS Mariefred by captainbob - 1:96
TBlack replied to captainbob's topic in - Build logs for subjects built 1901 - Present Day
Hi Bob That was fast work! Is the horizontal line the waterline? And the shoulder on the bulkhead is where the main deck lies? TB -
SS Mariefred by captainbob - 1:96
TBlack replied to captainbob's topic in - Build logs for subjects built 1901 - Present Day
Bob Glad to see you tackle this project. Looks a little like the one I did a couple of years ago: Tom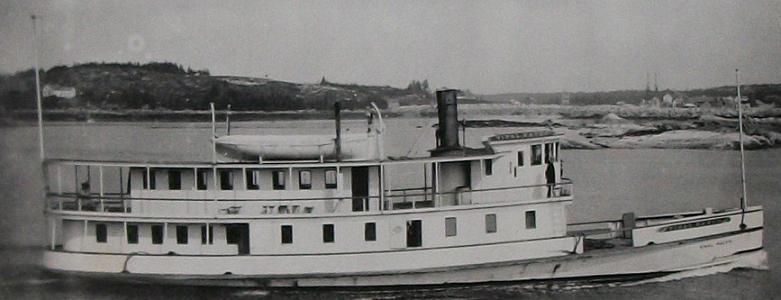
-
Bob, I don't know how you could be more careful. Don't think about it too much. We love your work and your careful explanations. For me, I like the fact that you are also adept with the software. You're an inspiration! TB
-
Bob, Not only good work, but fast work besides. I'm thinking from the end of Oct. to now is about 3.5 months for 2 crafts? Mighty productive! TB
-
The result has not been entirely satisfactory, but seems to be the best that I'm likely to achieve. You can judge for yourself from the photos. Bob, I don't see any flaws. Looks good to me, and the camera can be a harsh critic. Tom
-
Eric, Whatever your misgivings about tackling this project, it all looks crisp and well done so far. I'm doing a model in 1:96 as well, so I'm interested in your ability to deal with small dimensions. I'll check in from time to time. BTW, forgive my ignorance, but what is GRP? Tom
-
Denis, I've been following your progress and artwork for some time without comment. Now, I feel compelled to comment. This trawler is much more sophisticated than your previous builds. You've been hiding your talent! Well done; a crisp beauty she is. BTW, what kind of soldering iron do you use for that intricate work? I mostly use a torch; not always appropriate for delicate work. Tom
-
Another thing you can do is buy your dowels from a woodworking store that caters to furniture makers (in the USA I'm thinking of Woodcrafters or Rockler). Furniture makers typically make plugs from dowels to cover screw heads. Consequently, cherry, mahogany, etc dowels are readily available in these stores. Tom
-
Well there you are! You understand about the left brain and the right brain? One side is artistic and verbal; the other side is math and science. According to your wife, you've got an abundance of one side and according to your accomplishments, you've got an abundance of the other side as well. Yah, I'm corny, but I love to look at talent! Tom
- 348 replies
-
- 7
-
-
- pequot
- cable ship
- (and 1 more)
-
Bob, Damn, you're either smart or very experienced, and you explain it well. Thanks for the tips. Tom
- 348 replies
-
- 6
-
-
- pequot
- cable ship
- (and 1 more)
-
Bob, Beautiful ladder! And interesting technique to get it all uniform. But I've got a couple of questions: I understand that the treads are slipped into the slots of the fixture, but how do you put the angled side pieces on where you can do the soldering? Also, is that a picture of your soldering gun, or is it a pen? Finally, the clean-up of excess solder in the angle of the side pieces must have taken some time? Tom
- 348 replies
-
- 4
-
-
- pequot
- cable ship
- (and 1 more)
-
Frank, Not only is your workmanship superb, as our colleagues have attested, but also your step-by-step explanation and photography are so easy to follow. I ALMOST think I could do it myself! Tom
- 649 replies
-
- 8
-
-
- dunbrody
- famine ship
- (and 2 more)
-
Grant, I just finished my first fiber glassing on a model, and the advice I got from the "pros" was to use thin glass and keep the epoxy really thin. I'm wondering if that magnificent planking job will show up through the glass? You might seek out some advice about using just the epoxy over the mahogany after you've varnished. I've got to admit I'm a little at sea on this; I've only done it once and I had a painted hull. Tom
- 339 replies
-
- 2
-
-
- dumas
- Chris-Craft
- (and 3 more)
-
Grant, Nice work on the deck planking and the hull. If you're going to put the boat in the water, do you have to fiberglass the hull? Tom
- 339 replies
-
- 2
-
-
- dumas
- Chris-Craft
- (and 3 more)
-
Grant, I was thinking about Mobbsie's comment on the exposed prop. Can the rudder post be made longer so that the rudder hangs down below the prop?
- 339 replies
-
- 4
-
-
- dumas
- Chris-Craft
- (and 3 more)
-
Tom, You and I have previously communicated at my log entitled "Sphynx". It seems like we've both had to start over, albeit, in my case, not due from an accident. Rather than my recounting the story in your log; I'll reactivate my log and post an explanation shortly. BTW, that's a fabulous looking shop you've created. Tom
-
I was just over at the Lowe's store, and they sell it, dimensioned as 0.19 inches. I assume Home Depot would have the same thing, but dimensioned as 3/16". You have to pick through the pile to find the straight piece, but it's doable. Tom
-
Garth, I'm finishing up a kit of the Midwest bass boat (kit not made anymore) for a friend. I also chucked the balsa in favor of bass wood. I'll be interested to see how your plans match up with the model. I found several glaring errors in dimensions between the plans and the supplied cut pieces. Tom
-
Bob, Wonderful subject to model. I'm with everyone else; 1:96 is a good choice, and 20" isn't terribly long. I'm gathering that you're pretty good with the computer. Not only in finding your source site, but also in maneuvering autocad. I love it when us older guys can manipulate the new technology! Tom
- 348 replies
-
- 4
-
-
- pequot
- cable ship
- (and 1 more)
-
Why not secure the lower deadeye so that it doesn't swivel?
-
Actually, Frankie, I think it's a ketch. A yawl has the mizzen aft of the rudder post and a ketch steps the mizzen forward of the post. Looks like fun. Enjoy. Tom