HOLIDAY DONATION DRIVE - SUPPORT MSW - DO YOUR PART TO KEEP THIS GREAT FORUM GOING! (Only 68 donations so far out of 49,000 members - Can we at least get 100? C'mon guys!)
×


TBlack
-
Posts
1,308 -
Joined
-
Last visited
Content Type
Profiles
Forums
Gallery
Events
Everything posted by TBlack
-
 Immaculate! Up to your usual high standards. And the log is entertaining.
 -
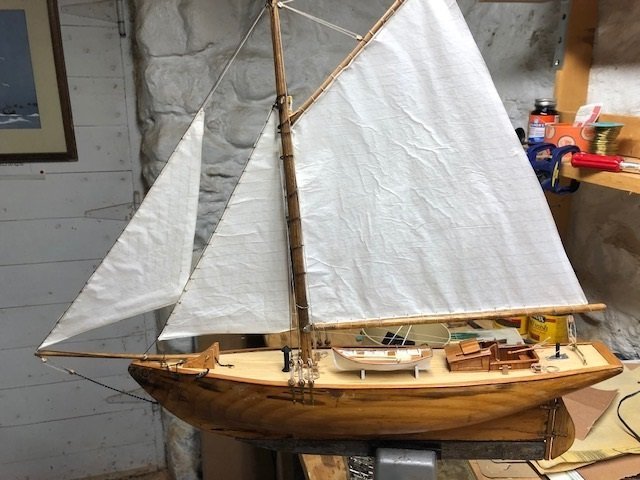
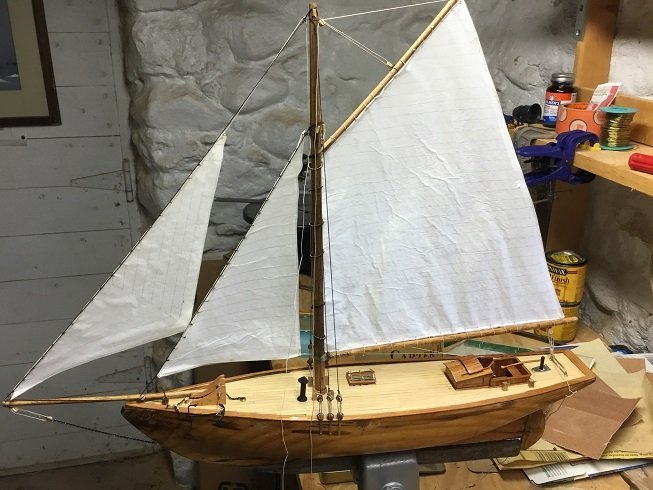
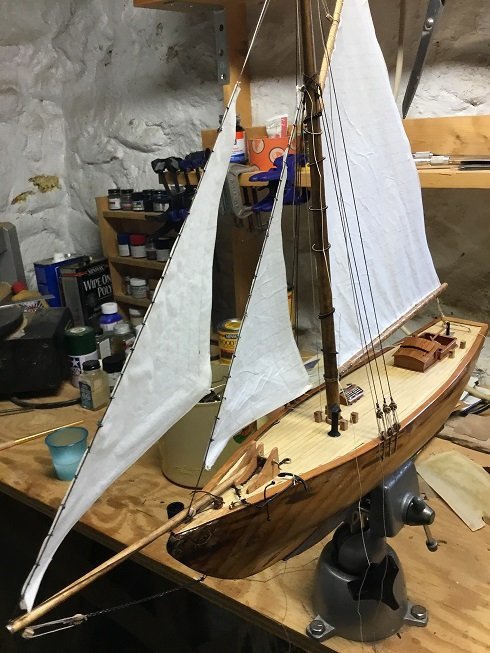
Finished! One more notch in the belt! I hope Jon's widow appreciates the final product. Just to remind me, here's what I started with: And here's what I've produced: With thanks to Druxey, Tomshipmodel, Keith Aug, and especially my new brother, Keith Black for advice and following along. After this I have one more restoration/completion for yet another friend (you never know how many friends you have until you tell them you build ship models!).
-
Jim, can you buy them individually, or do you buy the set? Tom
-
Macro photos with an iPhone
TBlack replied to Tomculb's topic in Photographing your work. How to do this.
No, Tom, you’re not the last guy, but I might be. Thanks for the info. Tom -
I can’t add any accolades that haven’t already been mentioned. Truly, a fabulous work of art! Also, I have mentioned before that there are logs that show us what the modeler has done, and there are logs that show us how the modeler did it. You are gracious enough to share your technique with us. I have taken many notes. Finally, you needn’t be modest about your photography; you’re doing just fine! Tom
- 725 replies
-
- 3
-

-

-
- vanguard models
- speedy
- (and 1 more)
-
I think Jan is on to something. The Hanna layout is quite similar. I was thinking that forward hatch was going to have a grating over it, and that cargo is loaded through the two larger openings aft. Tom
-
Wefalck, Totally agree. Unfortunately, there are no plans for referral. We are left to guessing. Tom
-
Thanks to all of you for your thoughts. It seems the committee has reached a consensus. Now to figure out how the rest of it looks. Tom
-
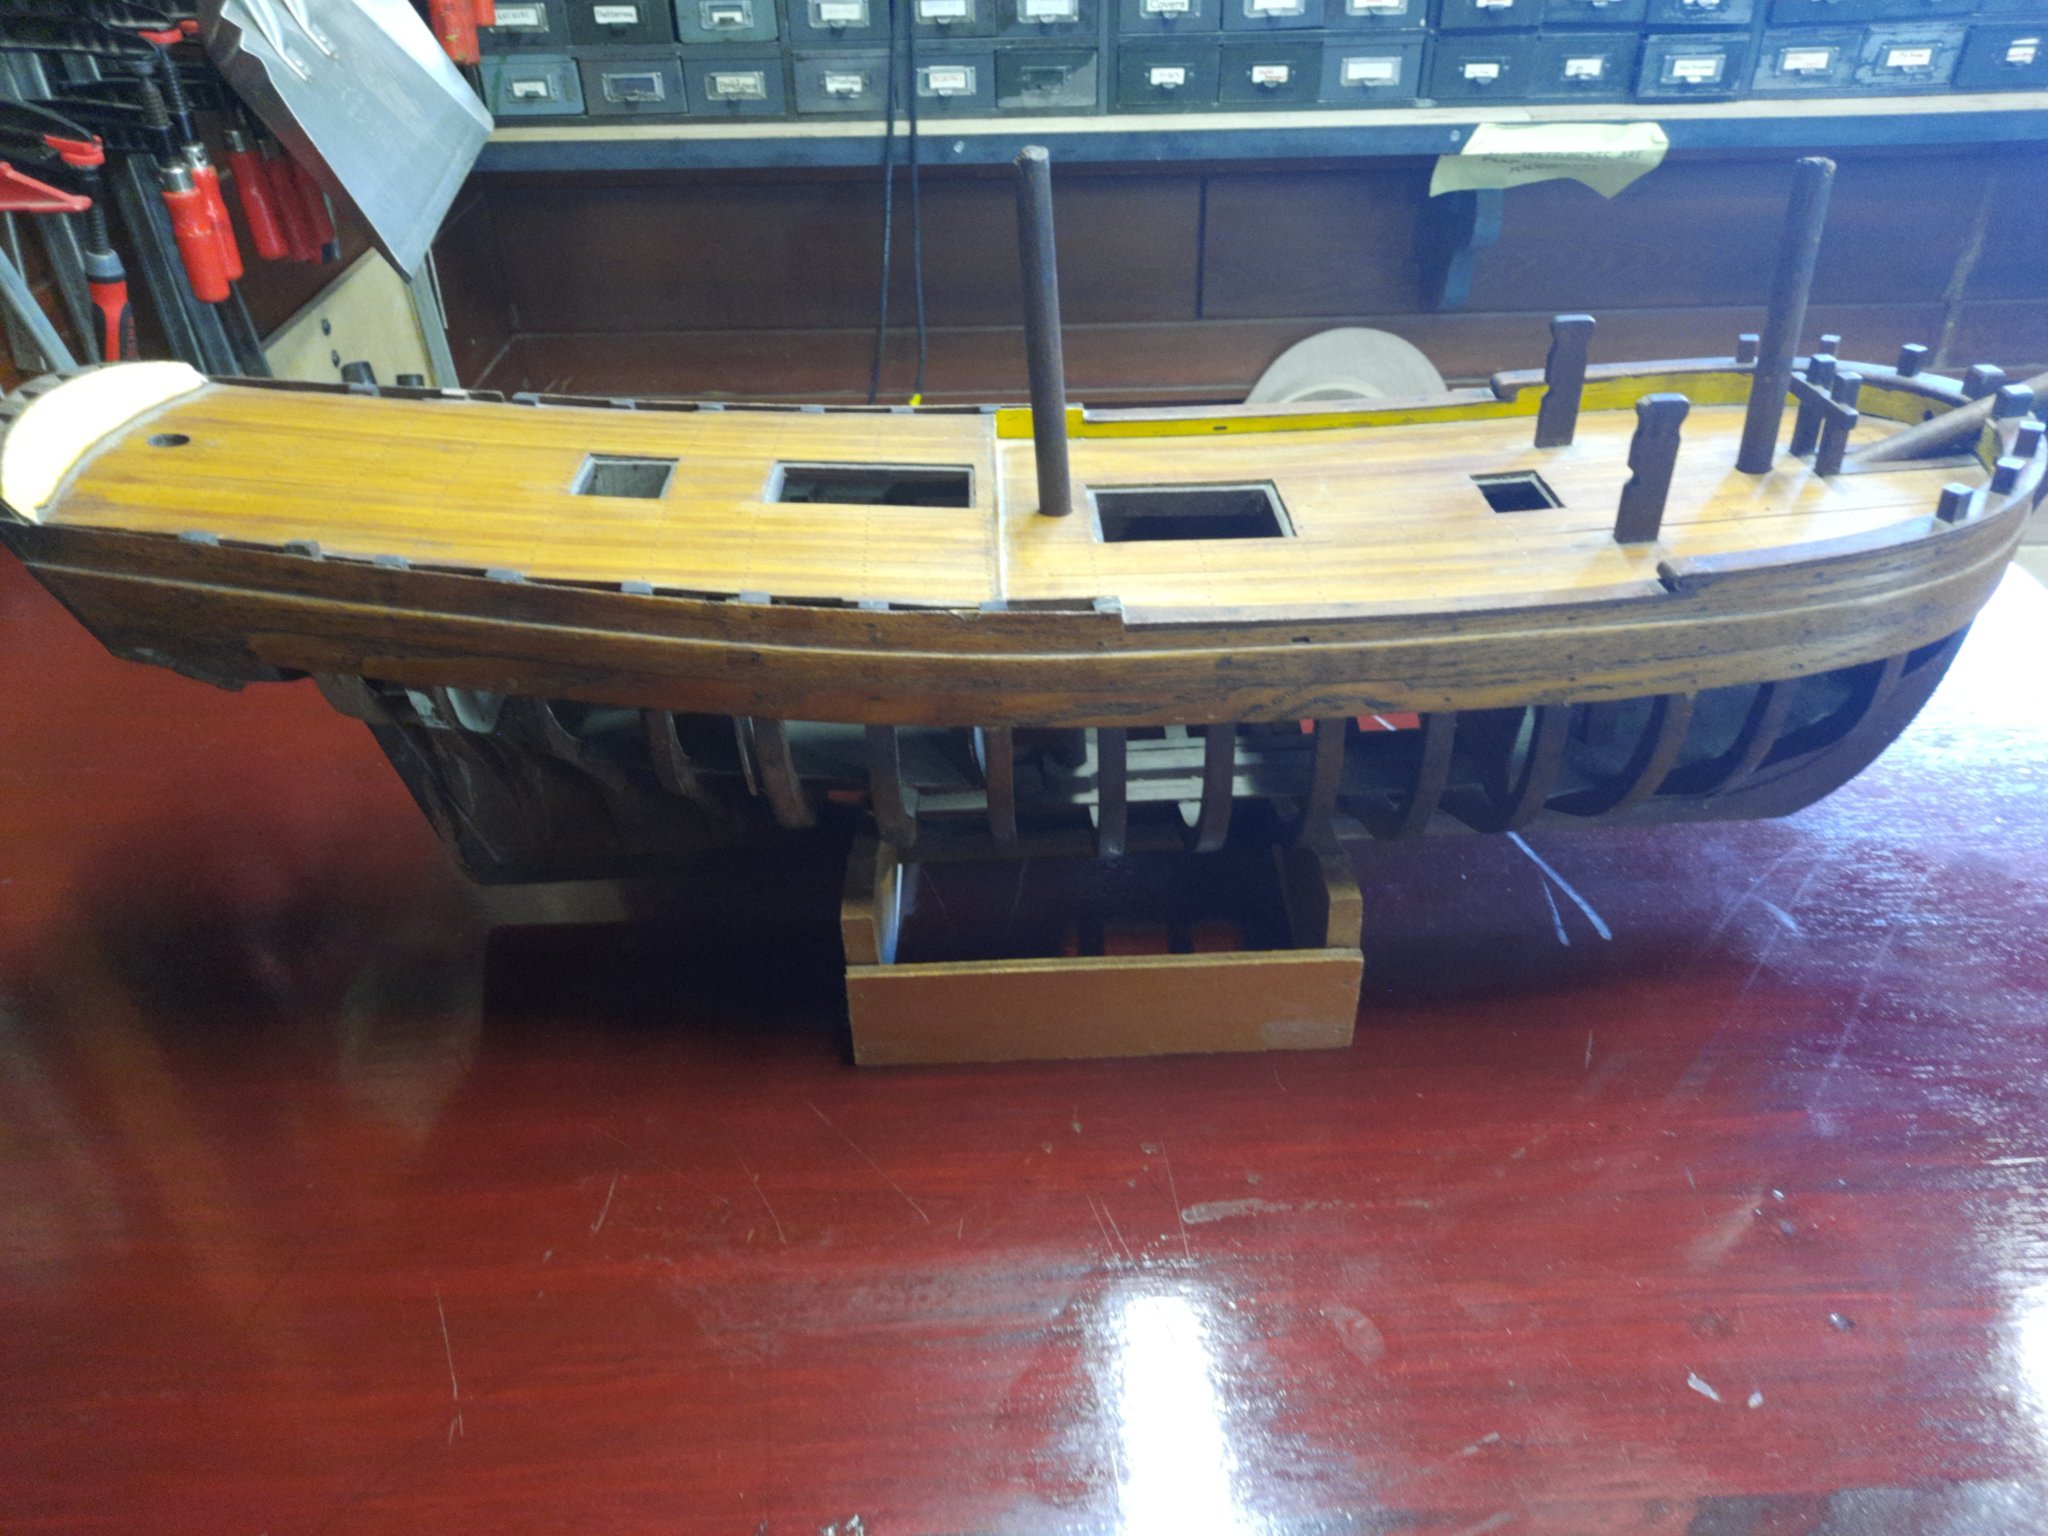
John, I guess I wasn’t very clear about the history. The current owner of the model is the grandson of the modeler. The owner of the boat is the great grandfather of the modeler. Indeed, the ship is from the late 18th century and involved in the Connecticut coastal trade.
-
Pat, That was my initial thought also. But then why extend the supports up so high? Tom
-
This is an almost finished model of a coastal freighter from the 1900. She sailed out of both Stonington, CT and Mystic, CT. I know little more about her than that. My question is, what is the function of those two uprights aft of the foremast? Any ideas? Tom

-
I read the first entry of your log; the trepidation comes through pretty clearly. You did it! And she looks beautiful! Stick your chest out, big guy! Tom
-
Derek, Ever read Nevil Shute's "The Trustee From The Toolroom"? It's about an ordinary guy asked to do some extraordinary tasks. I don't know whether you're an ordinary guy, but I know you are doing an extraordinary task! Tom
- 725 replies
-
- 1
-
-
- vanguard models
- speedy
- (and 1 more)
-
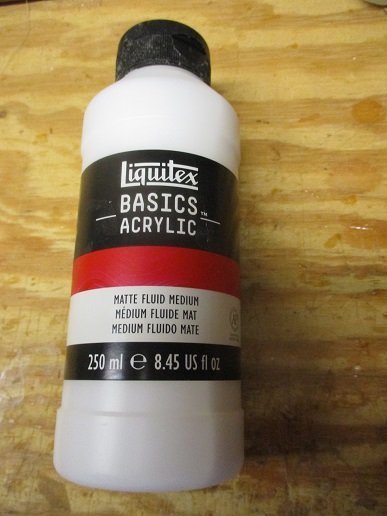
Derek, Instead of diluting PVA, have you seen this? It works the same way and dries transparent. No mixing required! Tom
- 725 replies
-
- 1
-
-
- vanguard models
- speedy
- (and 1 more)
-
There are a lot of planks on that craft! Nicely done. An aside, I use wooden wedges to get those last planks in place. Tom
-
Actually, Druxey, when we look at photos of your work we also ask, “How on earth did he manage to do that!?” And, BTW, do you suppose the size of your hands is a factor? Tom
-
Allen, try now. They seem to be working Tom
-
I'm coming late to this party, but I get my silkspan from: www.bluejacketinc.com. Before I got a set of sails for Scud that I was happy with, I went through 5 sheets of the stuff (each sail is 3 ply). Also, Tom Ruggiero (tomshipmodel) has a tutorial on sail making. Otherwise, a nice looking craft! Tom
-
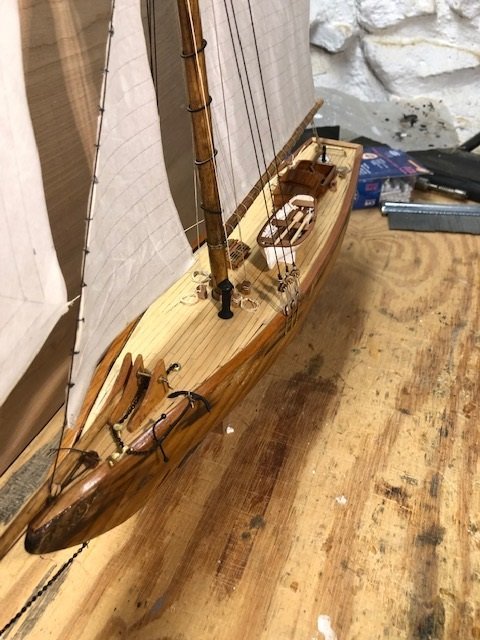
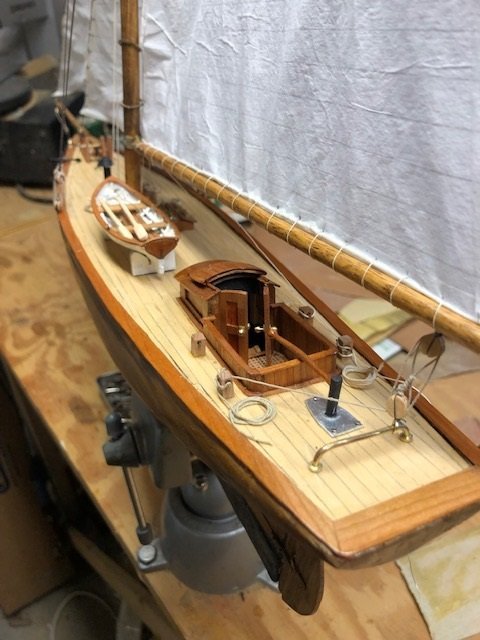
As an update, almost finished. I got an enormous amount of help in fabricating and rigging the sails from Tomshipmodel (yet another star from that NJ club, and a director of the NRG). I have yet to put the reefing points in, and a dinghy goes on the portside amidships.
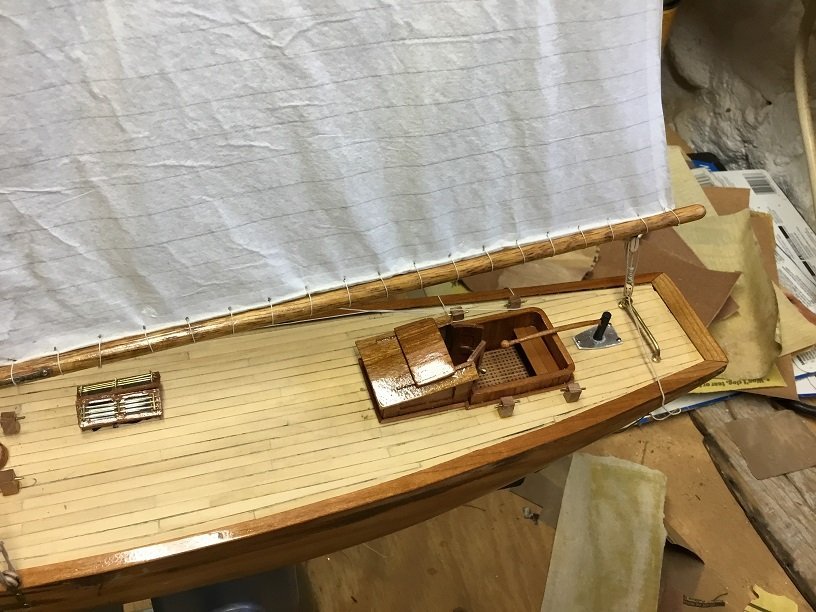
-
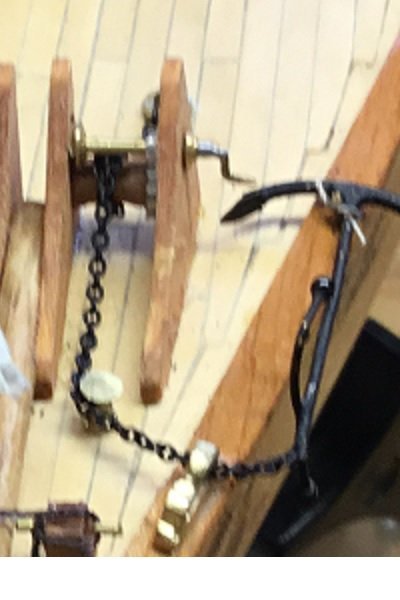
Here's how I solved the feeding of the anchor chain. Wasn't on the plans, but it seems logical.
-
Check out Tomshipmodel's tutorial. in the search box type: sails for a cutter rigged long boat. Tom
-
Steve, Great question' I hope Druxey has a chance to answer. In the meantime, check out plexiboxes4u.com Tom
- 433 replies
-
- 2
-
-
- open boat
- small boat
- (and 1 more)
-
Magnificent! I hope you signed this original artwork somewhere. Tom
- 433 replies
-
- 3
-
-
- open boat
- small boat
- (and 1 more)
-
It’s like the end of a great movie. A wonderful journey, and a shame it’s all over.
- 433 replies
-
- 5
-
-
- open boat
- small boat
- (and 1 more)
-
A bit of a setback, but, at least, the Drs. think they can do something about it. TB