ChrisLBren
-
Posts
790 -
Joined
-
Last visited
Content Type
Profiles
Forums
Gallery
Events
Everything posted by ChrisLBren
-
 Nice work Gaetan !!!
 -
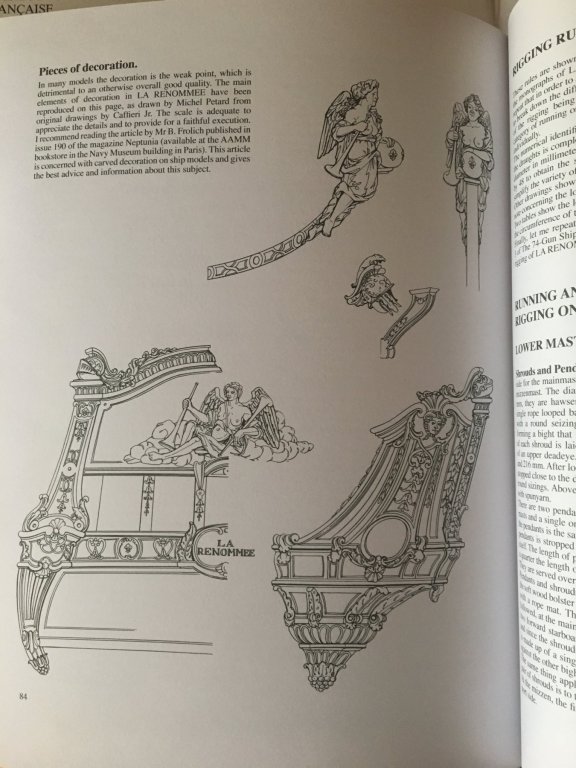
Hey Group, I am excited to announce my next project - a fully framed build of the French Frigate La Renommee in classic 1/48 scale. After a couple of false starts (Le Gros Ventre in 1/36th and a 74 in 1/48 - I have deleted those logs) I have fallen in love with this ship. This will be a 6500 hour plus build as I intend to mast and fully rig her. I have spent several years amassing the amount of tools necessary not to mention building out a workshop to handle a project of this degree. The reason I chose her over Le Gros Ventre and the 74 (I love both of these ships) is she embodies the best elements of French Naval architecture (extreme tumblehome, elegant sculptures, inner oblique planking and racy lines) and is scalable for a first fully framed build. Boudriot's Monograph of La Renommee landed last week (it took less than a week from when I placed the order from France to arrive at my door) and its spectacular. The figurehead and stern is intimidating and right now I am by no means a "carver". But this is a skill I want to master - and done right, in my opinion La Renommee's sculptures are some of the most beautiful in all of naval architecture. For reference I have volumes 1-3 of Boudriots 74 Gun Ship Series and David A's The Fully Framed Ship Series for "how to" techniques. My goal is to build the construction board/site and begin work on the keel by year end. Stay tuned....

-
I'll send you a PM
-
Hey Group, If anyone is looking to upgrade and or wants to sell their current mf70 in good condition with any accessories - send me a PM. US only. Thanks !
-
Thanks for the kind words Kurt and Adam - really appreciate it. It was a really fun build. Chris
- 290 replies
-
- 1
-

-
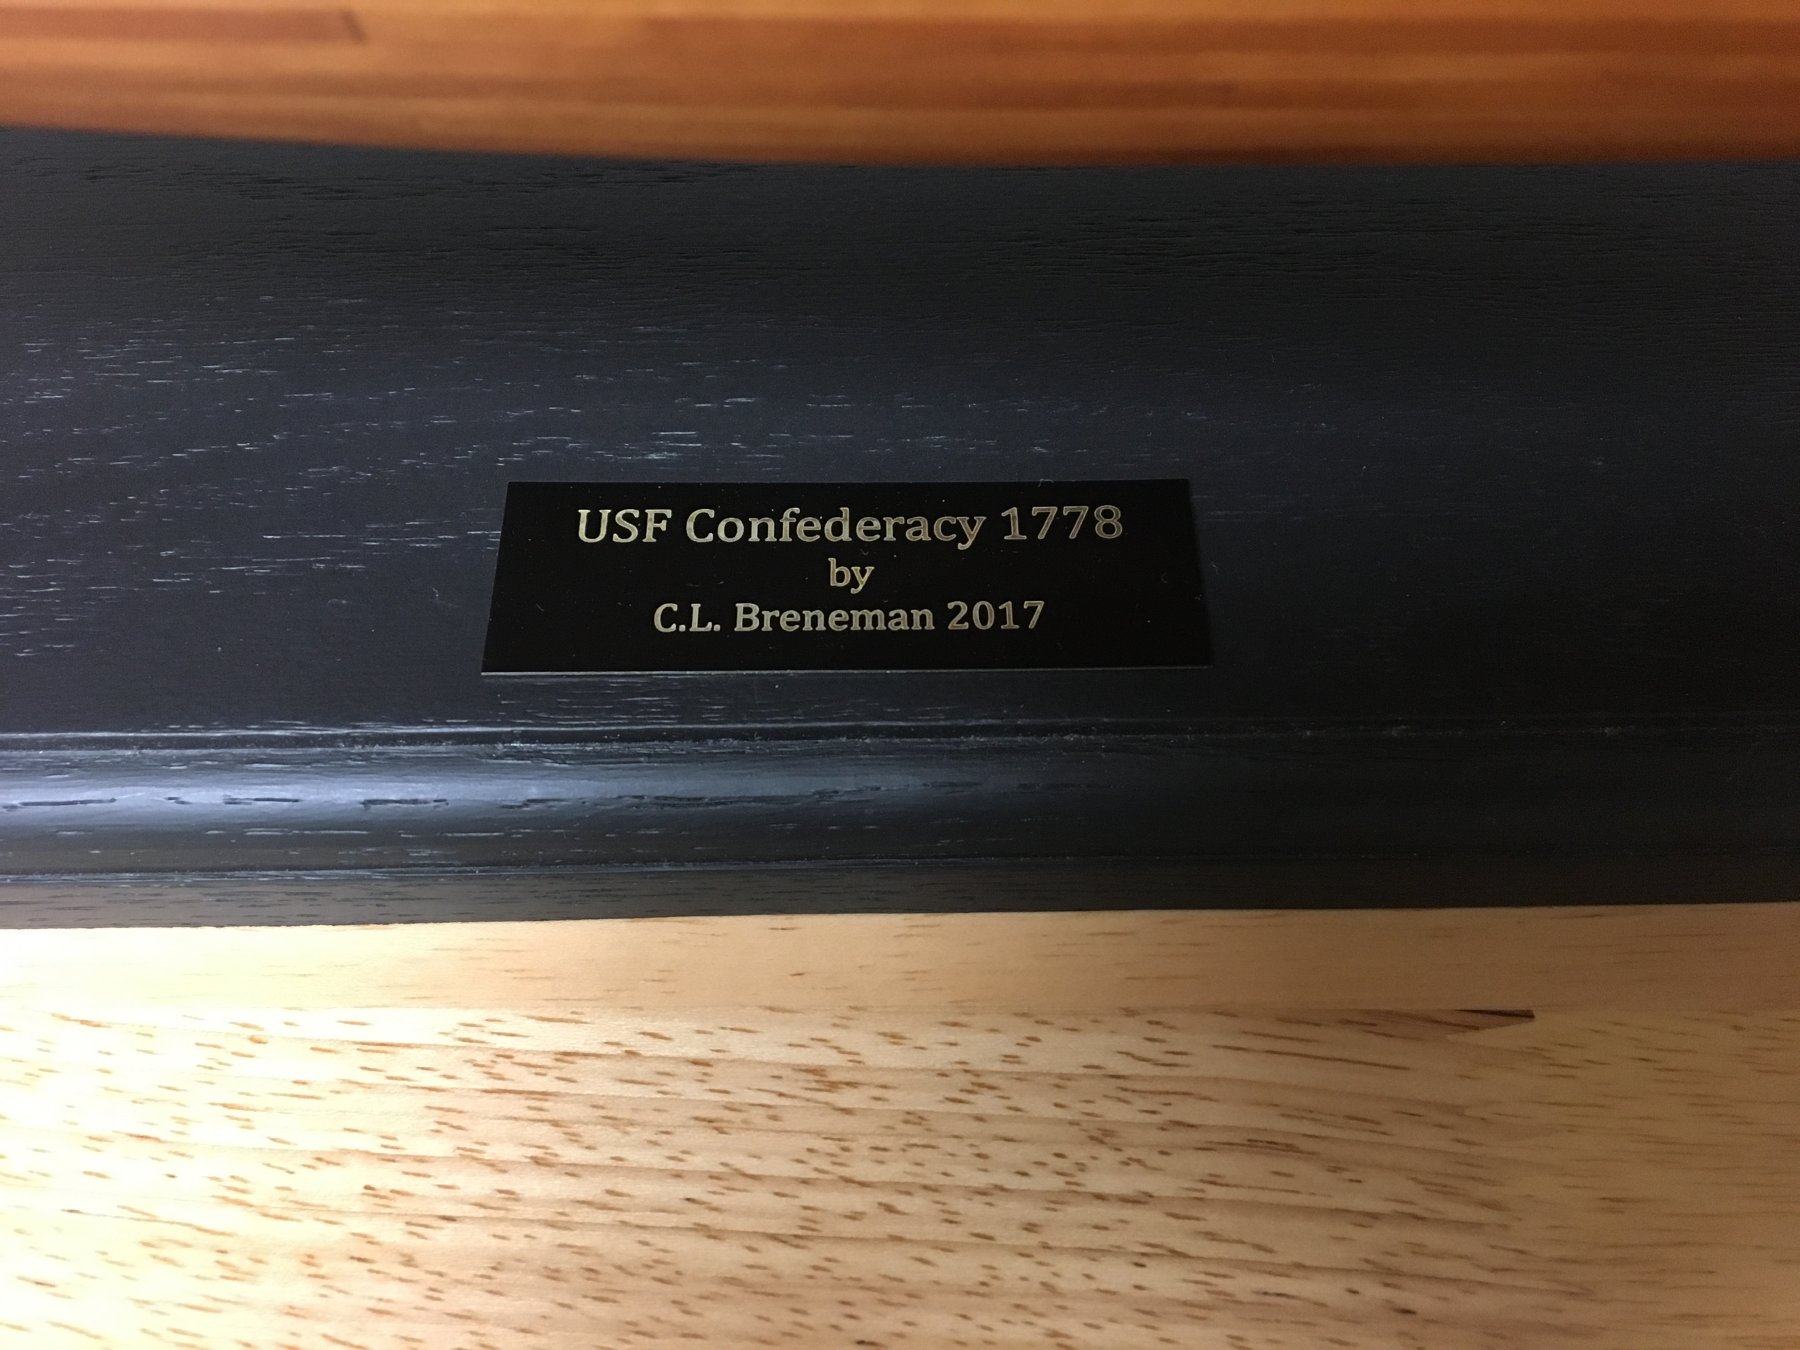
- confederacy
- frigate
- (and 1 more)
-
Yes thats the French ship with the curves. Have a look at Patricks log here on MSW to see how beautiful this hull is - he's done an amazing job. I can't wait to see how he handles the sculptures. As far as the twins - yes it may be time to update their photos - they will be 5 in January !
- 290 replies
-
- 1
-
-
- confederacy
- frigate
- (and 1 more)
-
Thanks Mark - I will have to up my game with carving - but that's a skill I'm interested in mastering. To me - sculptures are the very thing that transforms a ship model into art. I can't wait for the Monograph to arrive !
- 290 replies
-
- 2
-
-
- confederacy
- frigate
- (and 1 more)
-
Hey Group, I just ordered the La Renommee Monograph from Ancre. I have fallen in love with this French ship. The extreme tumblehome, oblique inner planking, and sculptures seduced me. I will be figuring out the case situation for Confederacy while I wait for the Monograph to arrive. Thanks again for your likes and compliments regarding Confederacy. Chris
- 290 replies
-
- 7
-
-
- confederacy
- frigate
- (and 1 more)
-
Thanks guys - just like anything with this hobby - you fixate on certain "elements" during construction - always the most recents ones. With a little perspective/time away - those "elements" tend to blend into the background. The bands stay as is. This one is FINISHED. Per Gaetan's advice I will shoot some photos on a black background for the finished model section. I have two more pressing decisions - a display case and the next build....
- 290 replies
-
- 5
-
-
- confederacy
- frigate
- (and 1 more)
-
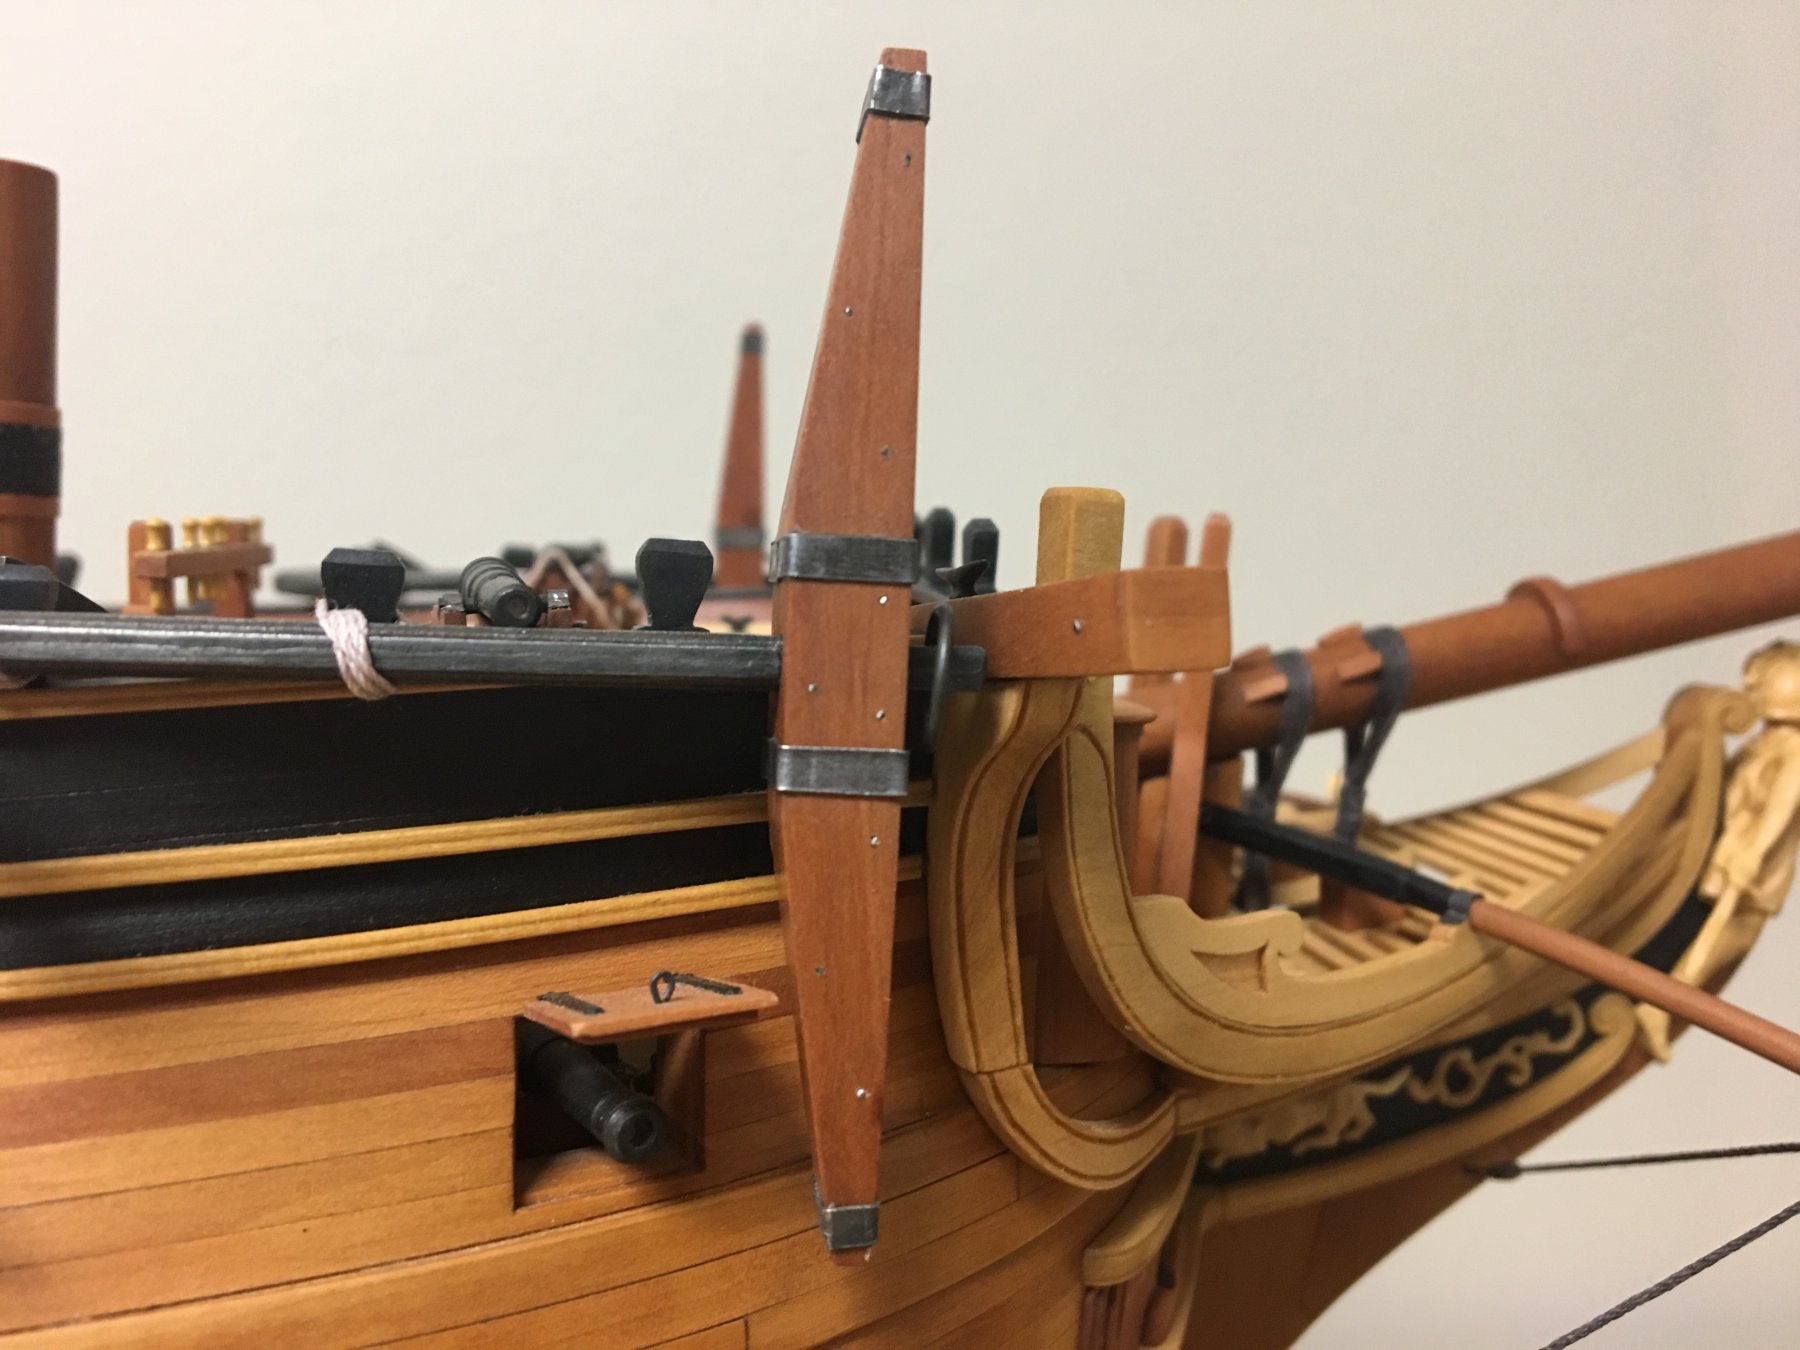
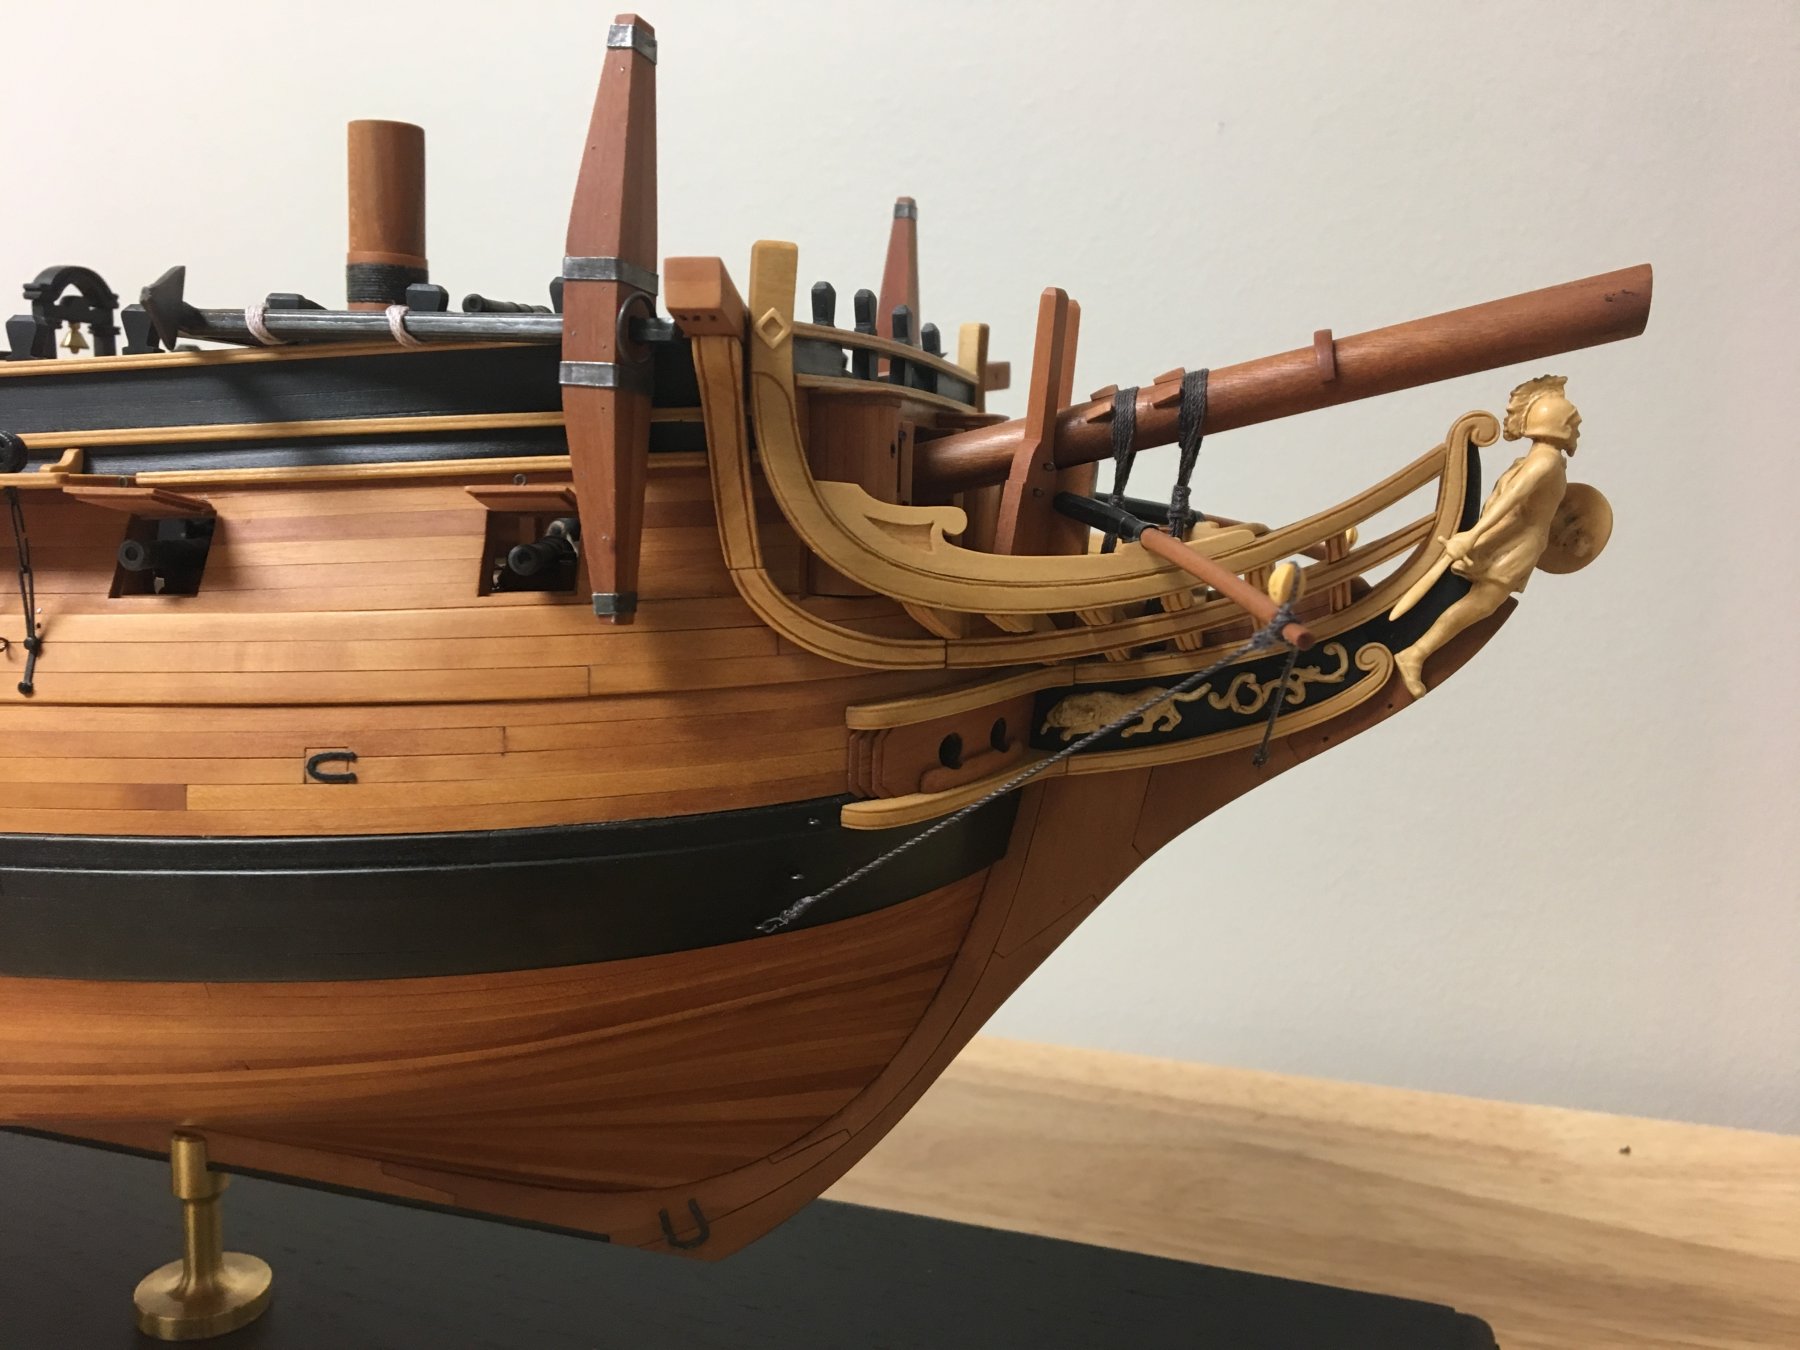
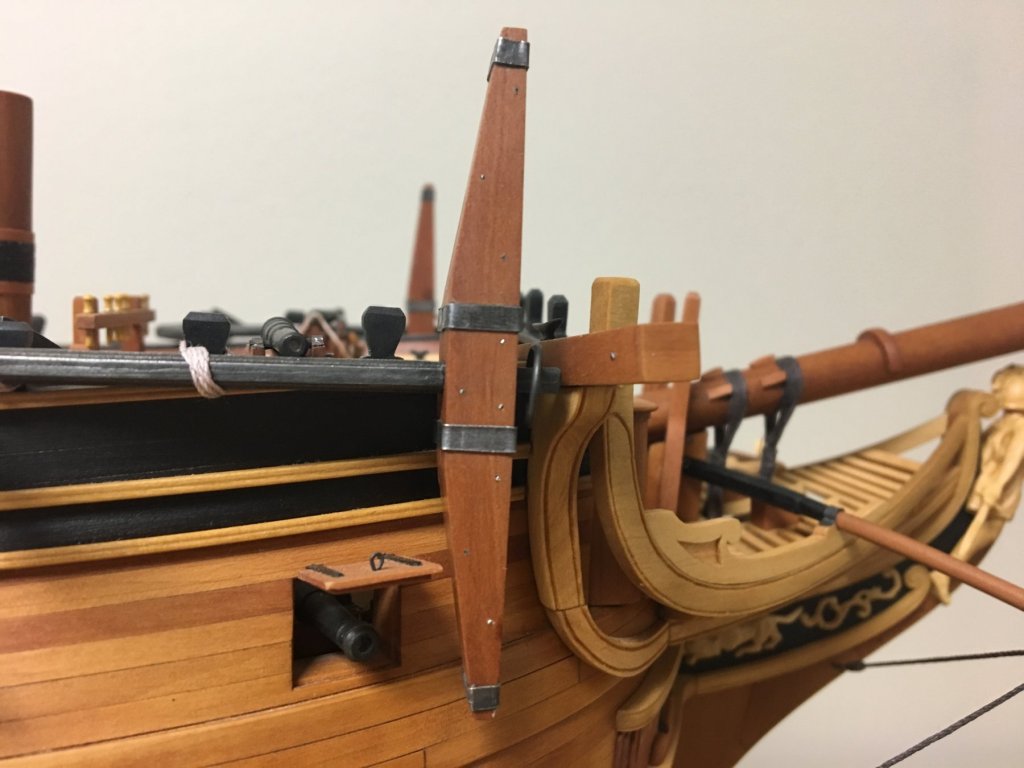
Thanks so much for the flattering comments gents. Here's a close up of the anchor and its bands - should this be re worked with thinner/narrower metal or even artist tape painted ? I feel like they look clunky - but then again maybe Ive been staring at them too long. Any tips feedback is appreciated.
- 290 replies
-
- 11
-
-
- confederacy
- frigate
- (and 1 more)
-
Thanks Michael and Mark - both of those questions will be answered soon. Im a big fan of photographing your model - thats how I noticed a molding off the quarter gallery in the second shot crooked - its fixed. I really have issues with CA and won't use it on future builds unless absolutely necessary. I may have a second go at those anchor bands this weekend - they are an eyesore to me - cutting them thinner would make a big difference and not an issue to re rig them to the knightsheads.

- 290 replies
-
- 17
-
-
- confederacy
- frigate
- (and 1 more)
-
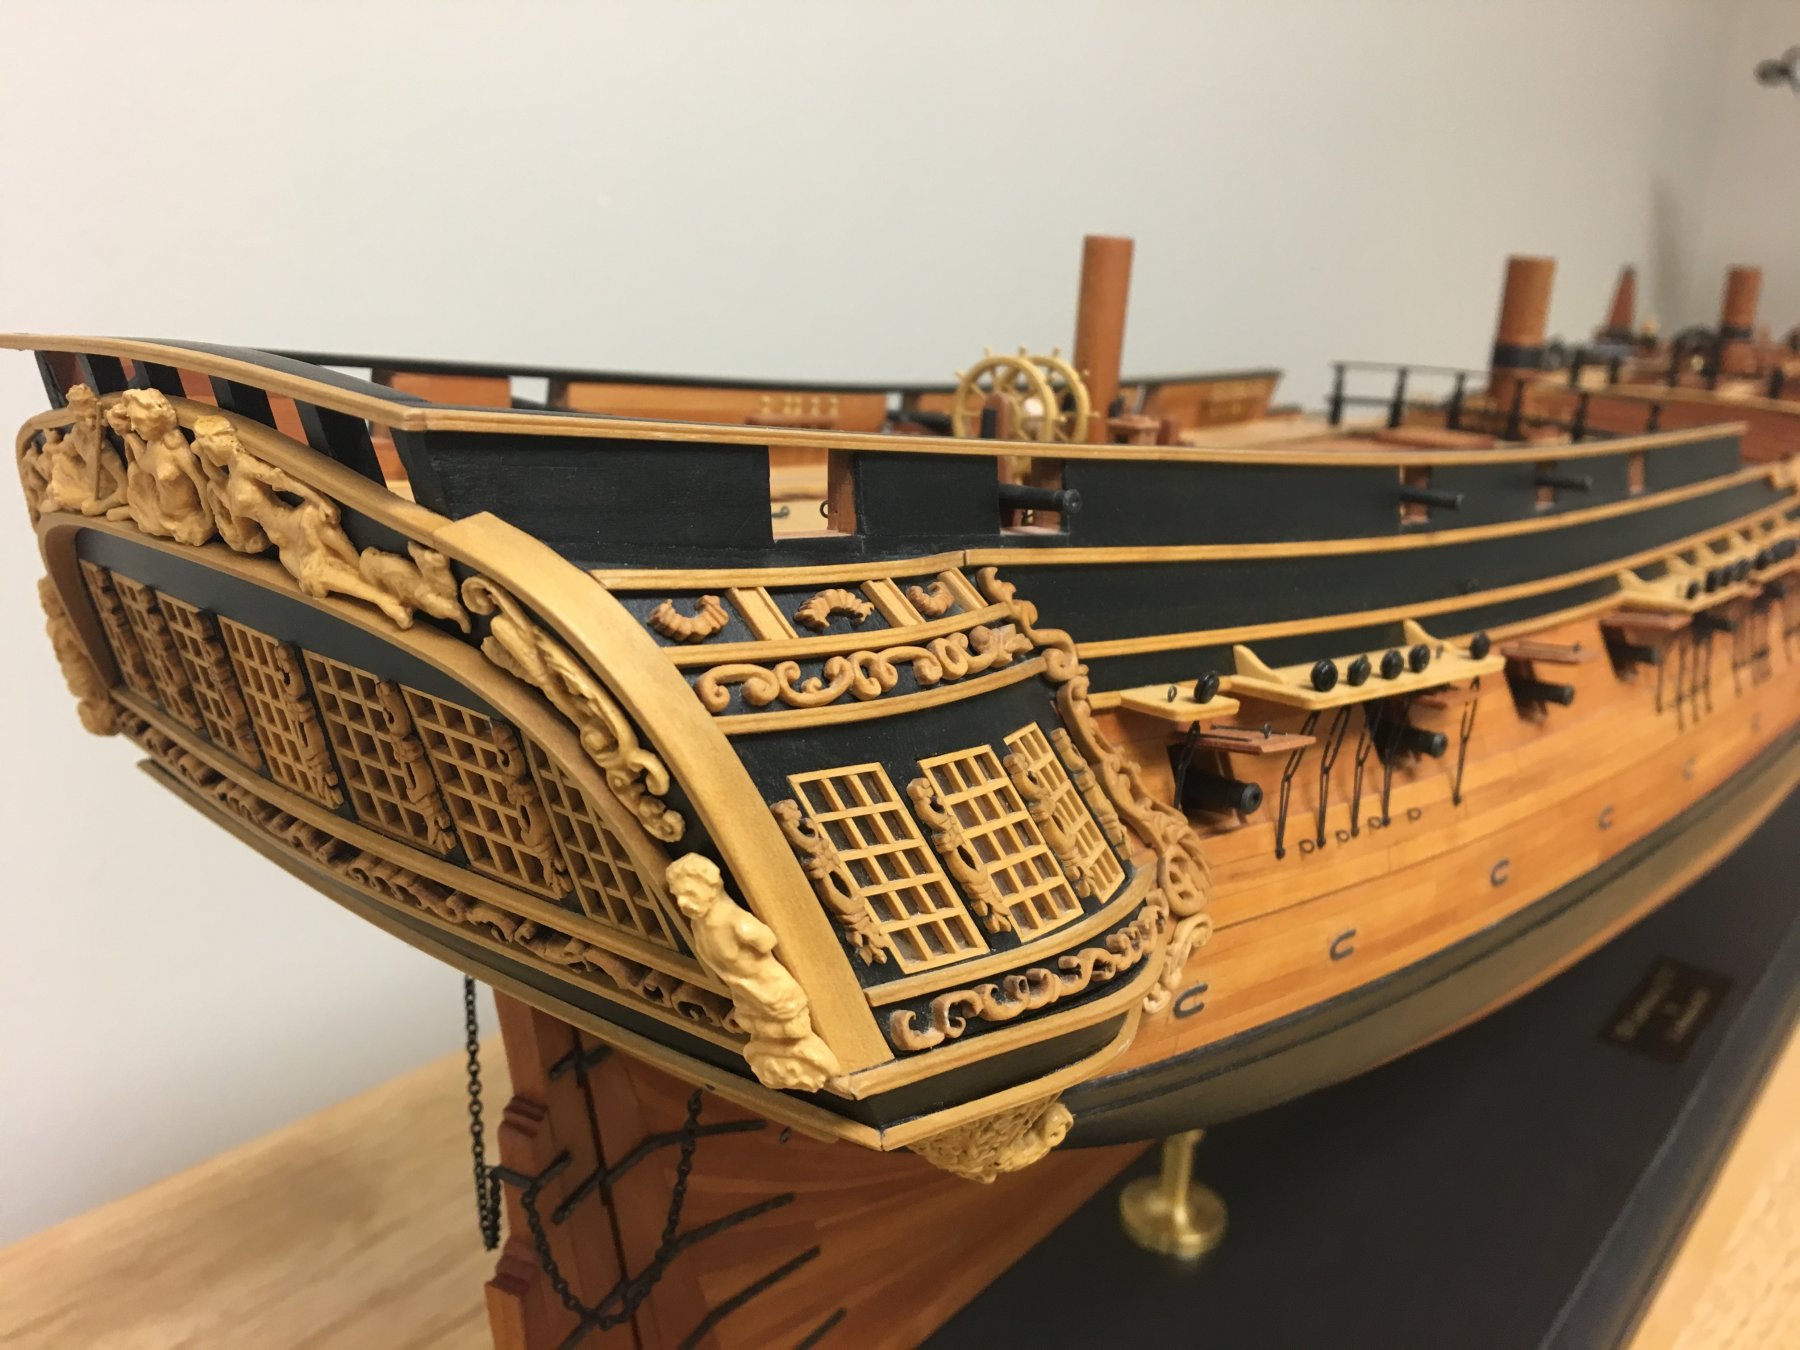
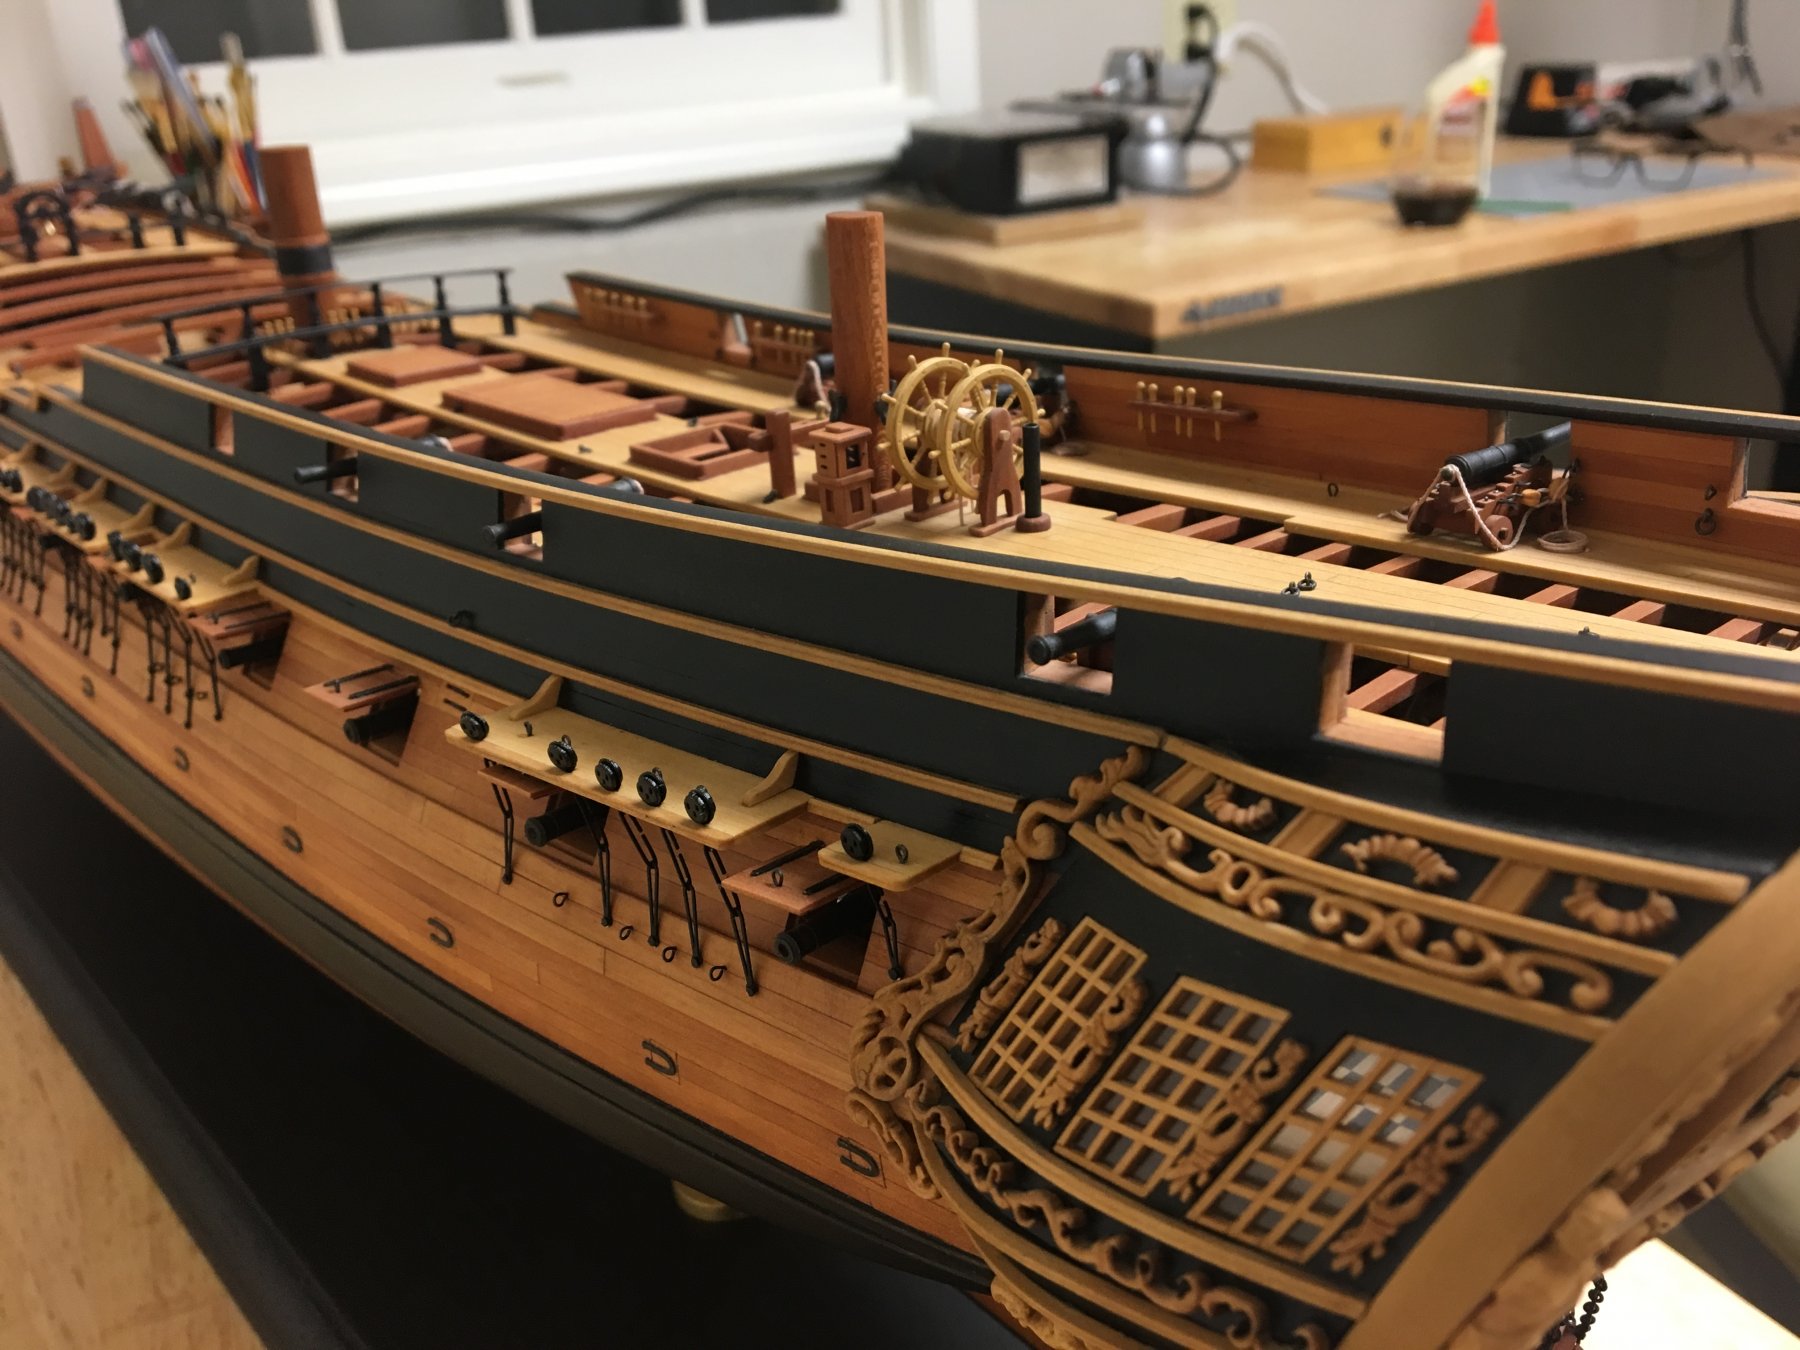
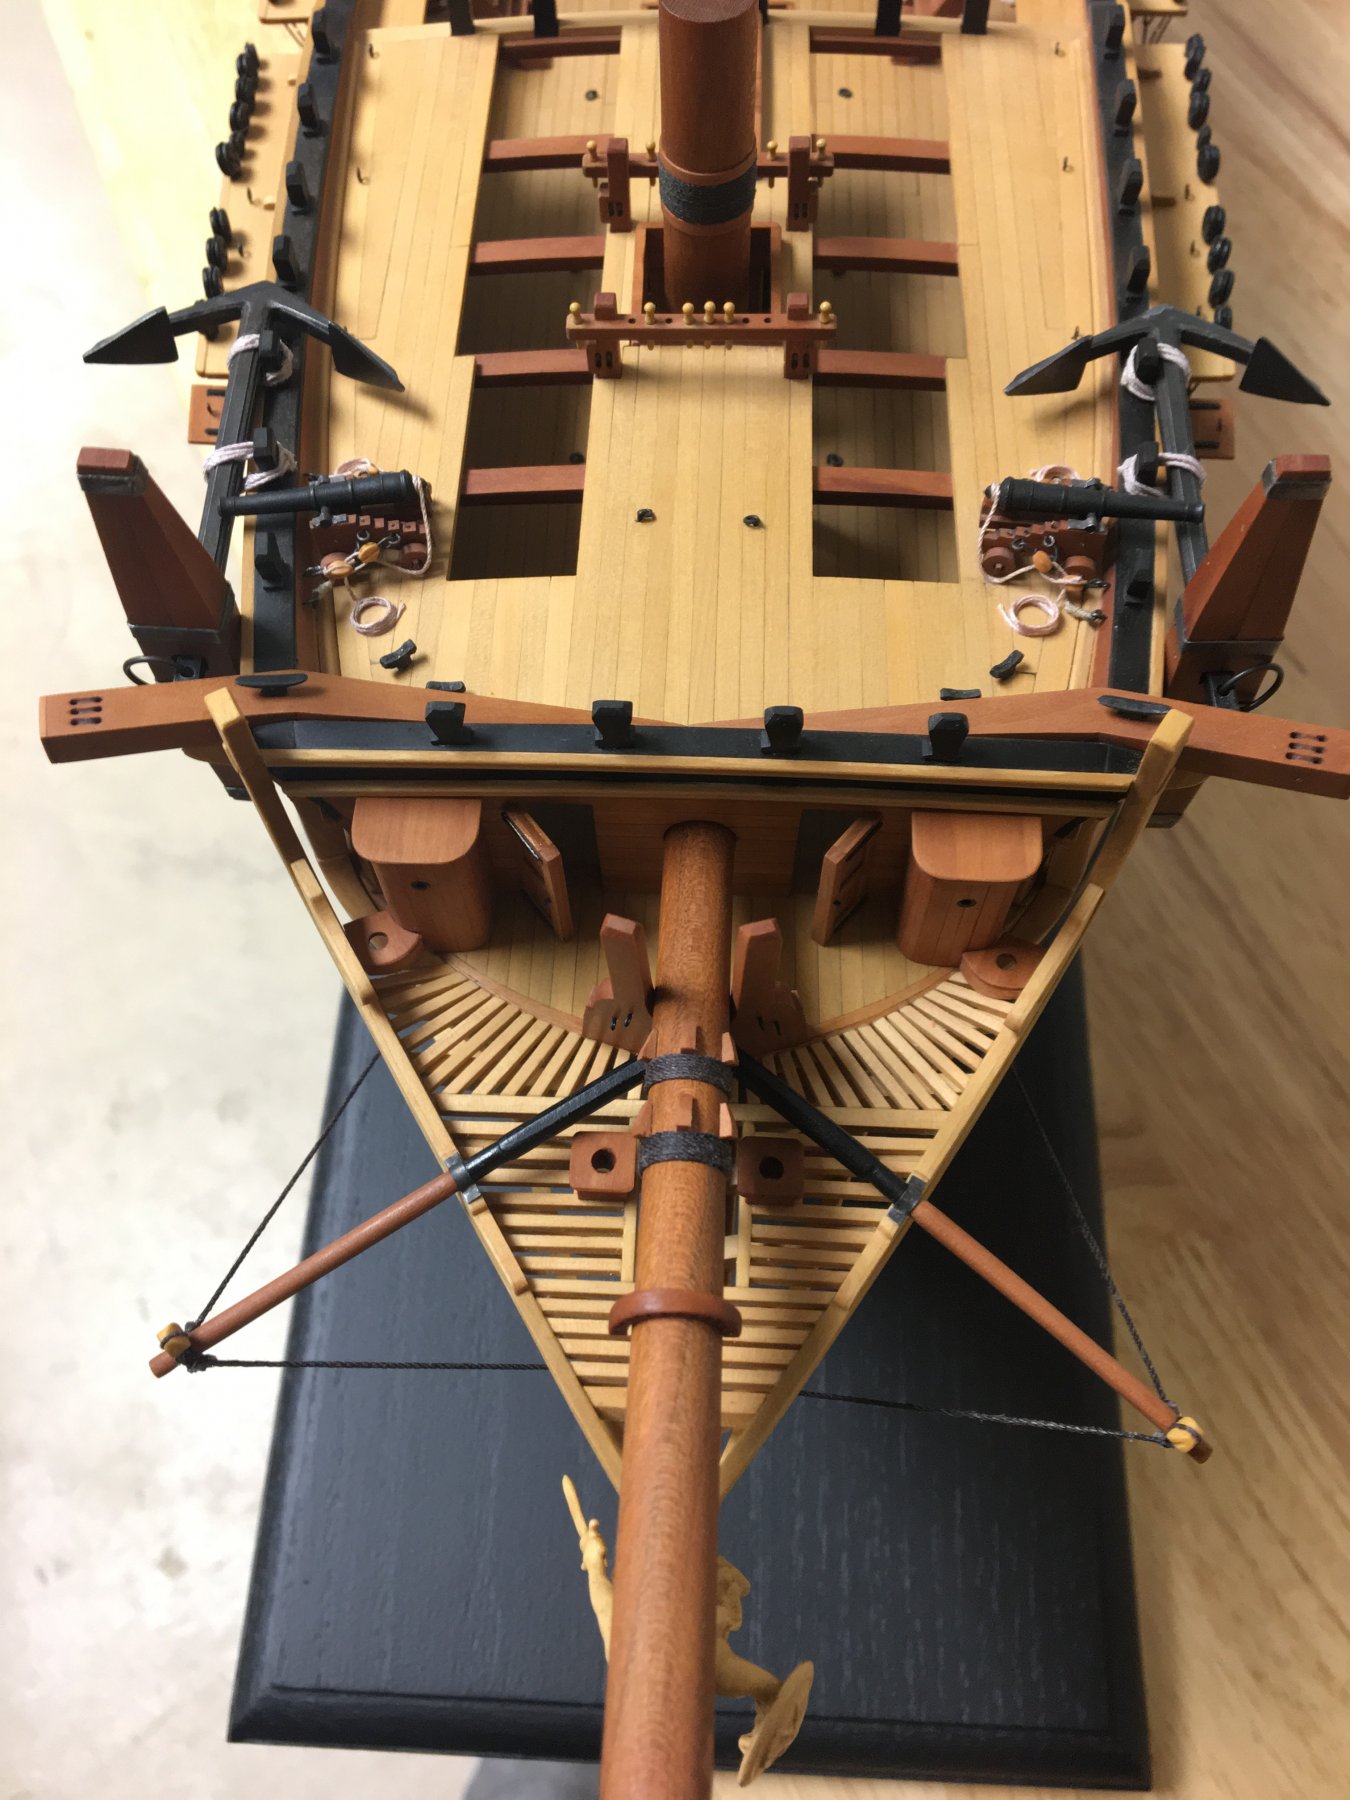
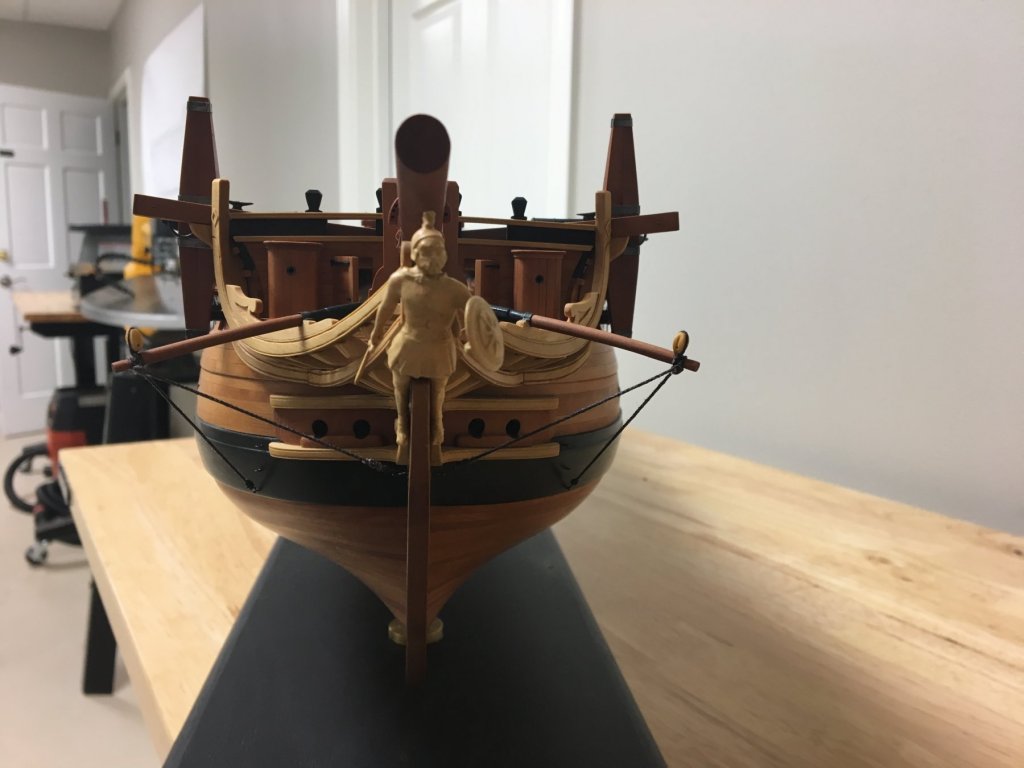
Put a pin in this one - Confederacy is completed ! I wrapped it up earlier this week than I thought this evening - here are the latest photos. I think the area I want to improve the most with the next build is metal work - my anchor bands look a bit chunky. Johann is an inspiration in that area. But overall very satisfied with the build and the enjoyment it gave me over the last 8 years. Thanks again for all of the support/encouragement and comments. And thank you Chuck for second to none plans and guidance with this build.


- 290 replies
-
- 23
-
-
- confederacy
- frigate
- (and 1 more)
-
Appreciate the comments gang ! I promise I'm not trying to tease about the photos.... I am toying with the idea of simply placing the anchors on the display base near the bow. With them lashed to the hull it sort of breaks up the beautiful lines of the vessel (the same reason I decided against building ships boats for this one - I think if she was masted would probably be a different story). Ill take photos both ways and get some feedback from you guys.
- 290 replies
-
- 4
-
-
- confederacy
- frigate
- (and 1 more)
-
After almost 8 years of construction, a marriage and birth of twins - she is mounted on pedestals and awaits the anchors. It was kind of a surreal moment this AM - by far the longest/most satisfying build I've ever completed. I should have the finished photos posted by next weekend. Chris
- 290 replies
-
- 6
-
-
- confederacy
- frigate
- (and 1 more)
-
Beautiful work Jason - also nice beer in the background shot !
-
This is a spectacular build - I've been watching your progress on the Ancre site - such a gorgeous model - congrats !
-
I bought this product off Ebay and have a couple of jars of it - to me it works very similar to a sepia oil paint thinned wash. Some of the Russians mix it with Tung Oil as a finish. http://www.ebay.com/itm/Pentart-Liquid-Patina-30ml-Bitumen-for-Antiquing-Decoupage-/202061449669?epid=1565589069&hash=item2f0bcd09c5:g:xf0AAOSw7NpZw7GT
-
My vote is for a scroll saw as well - but dont skimp on the cost. I owned a table top Delta unit I paid 100 USD on ebay - the vibration was so terrible it was almost impossible to use and broke many blades. My new DeWalt mounted on a stand made a world of difference - it cost me close to 500 USD but is a dream to use - its extremely accurate and i can cut curves closely to plan lines easily. I will be using this saw quite a bit cutting out frame pieces for my next fully framed build.
-
Wow - nice work !!!!
-
Thickness sander
ChrisLBren replied to Kurt Johnson's topic in Modeling tools and Workshop Equipment
Hi Michael, This is very helpful - I too have wondered about Thickness Sanders vs a Planer. I have an operation near where I live that mills my flitch of Pear to billets of standard dimensions - 1/4 or 3/8 thick by 2 inches wide by 24 inches long - I have no desire to do the heavy lifting here. I do want the best tool for precision work for final dimensions. It sounds like if I can get a hang of it - the Byrnes tool is the right one for my purposes. Best, Chris -
Thickness sander
ChrisLBren replied to Kurt Johnson's topic in Modeling tools and Workshop Equipment
Hey Group, I too am wondering how to use this tool - I've only used it a few times - but soon I will need to reduce some 1/4 inch thick blanks to 7/32nds thick and I want consistent results. I hope Kurt doesn't mind me jumping on this thread - but I think his question is similar to mine. What is the step by step way to carry out this operation ? A tutorial for using this sander if you will - that will address amongst other things - how much do you take off per pass to get to close to final dimension before using the finishing side of the drum. Also I read somewhere on this site the sander feeds better if you rest the front of the machine on a 2x4 so the table is more horizontal. Thanks Chris -
Thanks Dave - Ill probably just end up mounting it 2/3rd's up the stem unless any other concrete info comes to light. Chris
-
Hey Group, I am about to mount the boomkins to the stem of my Confederacy and have been trying to find some information as to how high on the stem they would have been mounted. I have seen photos showing them mounted anywhere from resting on the beakhead deck to almost the top of the stem itself. These are spars curve downward so changing the height they at which they are mounted on the stem changes their appearance. I don't own Lees Masting and Rigging - maybe there is some info there ? Any info is appreciated. Chris
-
These guys are the best - I bought a flitch of Pearwood from them this past spring - I had it milled here in Chicago into 70 planks 24 x 2 x 1/4 and 6 planks 24 x 2 x 3/8. And thats only half of my supply - the rest is on pallets. All in for wood/shipping and milling it cost me 700 dollars. http://www.rarewoodsusa.com/