ChrisLBren
-
Posts
784 -
Joined
-
Last visited
Content Type
Profiles
Forums
Gallery
Events
Everything posted by ChrisLBren
-

workshop floor material
ChrisLBren replied to davec's topic in Modeling tools and Workshop Equipment
Hey Dave, I think thats what I have in my workshop - it was already here when we bought the house - its gray concrete slab with an epoxy coating on the floor - its semi gloss and moving my tools are easy (most tools have stands or are on tables with rollers). So far its been easy to clean and parts show up easily. -
Thanks for the feedback and compliments everyone. I have to say the luxury of a workshop makes all the difference - needless to say I'm really enjoying it - and look forward to the numerous additions I will be making in the future. As far as a build log - I'm working on finishing the Confederacy - hoping to have some updated pics in the next couple weeks when I finish the headrails.
-
Hey Bruce, Pick up this book - I purchased it back in 1994 when I was getting into the hobby - and successfully built an AL Harvey, POB as my first ship model. You can find a Harvey on Ebay - very simple hull lines and rig. While not entirely accurate - its an easy fun build to get your feet wet. Mastini references this build along with the Blue Nose in the text of his book. https://www.amazon.com/Ship-Modeling-Simplified-Techniques-Construction/dp/0071558675
-
Thanks for the replies ! As far as my power tool setup on the bench - these tools are simply stored this way - when in operation they will get reconfigured - again they are on a table with coasters - so I will push the bench away from the wall when in use (thickness sander, Byrnes table saw etc). As far as the table saw - just buying a 745 portable Dewalt which will enable me to rip down a board to usuable stock for the Byrnes tools. The planer also will make life much easier than relying on the Byrnes Thickness sander - which is a precision tool. For now - finishing the Confederacy - almost there ! Chris
-
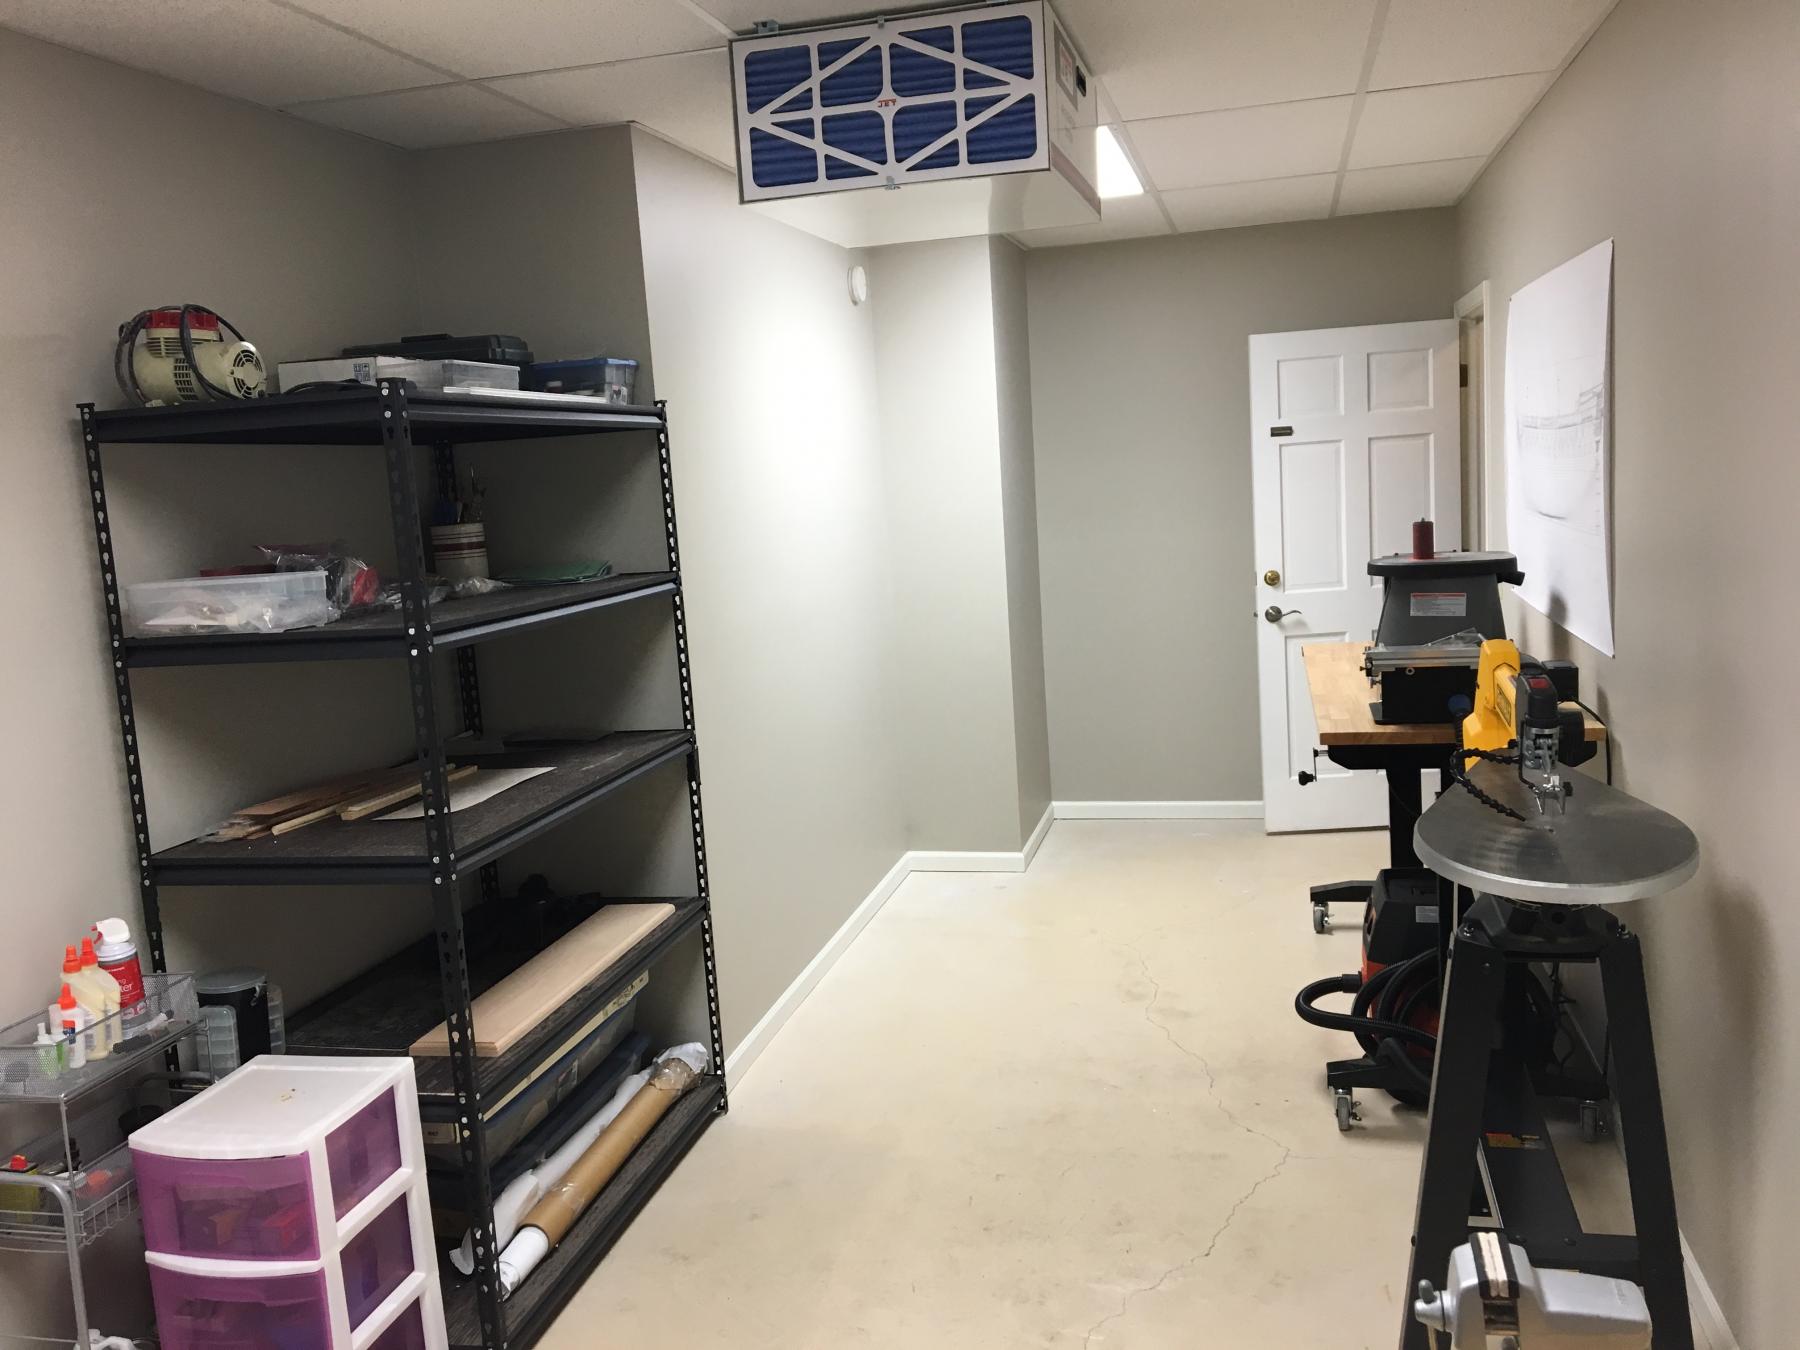
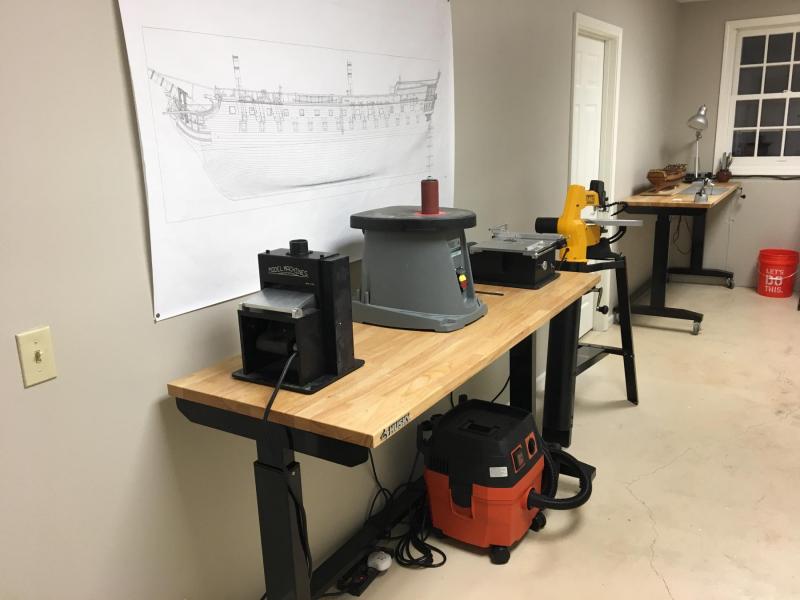
Gents - here are some progress shots of my workshop - notice 2 out of 3 tables are on rollers for maximum efficiency. Also they are height adjustable. I installed the JET Air Filtration system as well. Next up - on order - 10 inch table saw and 13 inch planer to break down a swiss pear board for my next build.

- 72 replies
-
- 20
-

-
Thanks for the lively discussion here - a bit of an update - I bought 2 tables from Home Depot for 200 a piece - I like them because they are on wheels/mobile and are height adjustable - perfect for my Jim Brynes tools - since I typically stand while using them. http://www.homedepot.com/p/Husky-62-in-x-24-in-D-Work-Table-Black-HOLT62XDB11/206698778 Im buying this desk as my main workstation https://www.uline.com/Product/Detail/H-1222-SMAP/Packing-Tables/Packing-Table-96-x-36-Maple-Top-with-Square-Edge My dust collection system - again thinking mobile is best - waiting for the holiday sales to purchase these https://www.amazon.com/Fein-9-20-28-TURBO-II-Turbo/dp/B00K74N8A8 And hung from the ceiling http://www.rockler.com/jet-1000cfm-air-filtration-system
-
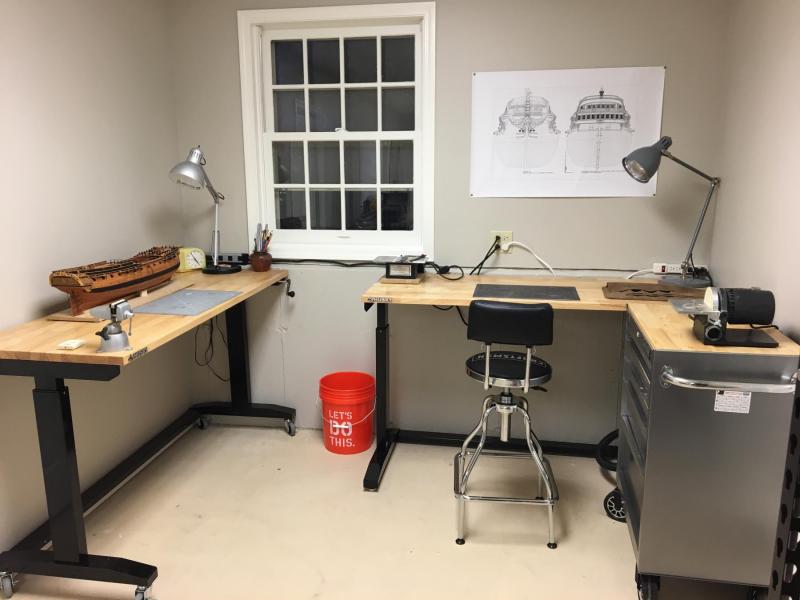
Thanks for all of the suggestions everyone - here are pics of the shop finished. They installed 4 bars of lights on two panels - the lightening is terrific. Again - Im trashing that desk, and will be bringing one that is height adjustable. Im running another work bench with all of the major dust makers and still deciding on dust retrieval - you given me some great ideas. Rockler sales will be good for equipment thru the end of the year.
- 72 replies
-
- 16
-
-
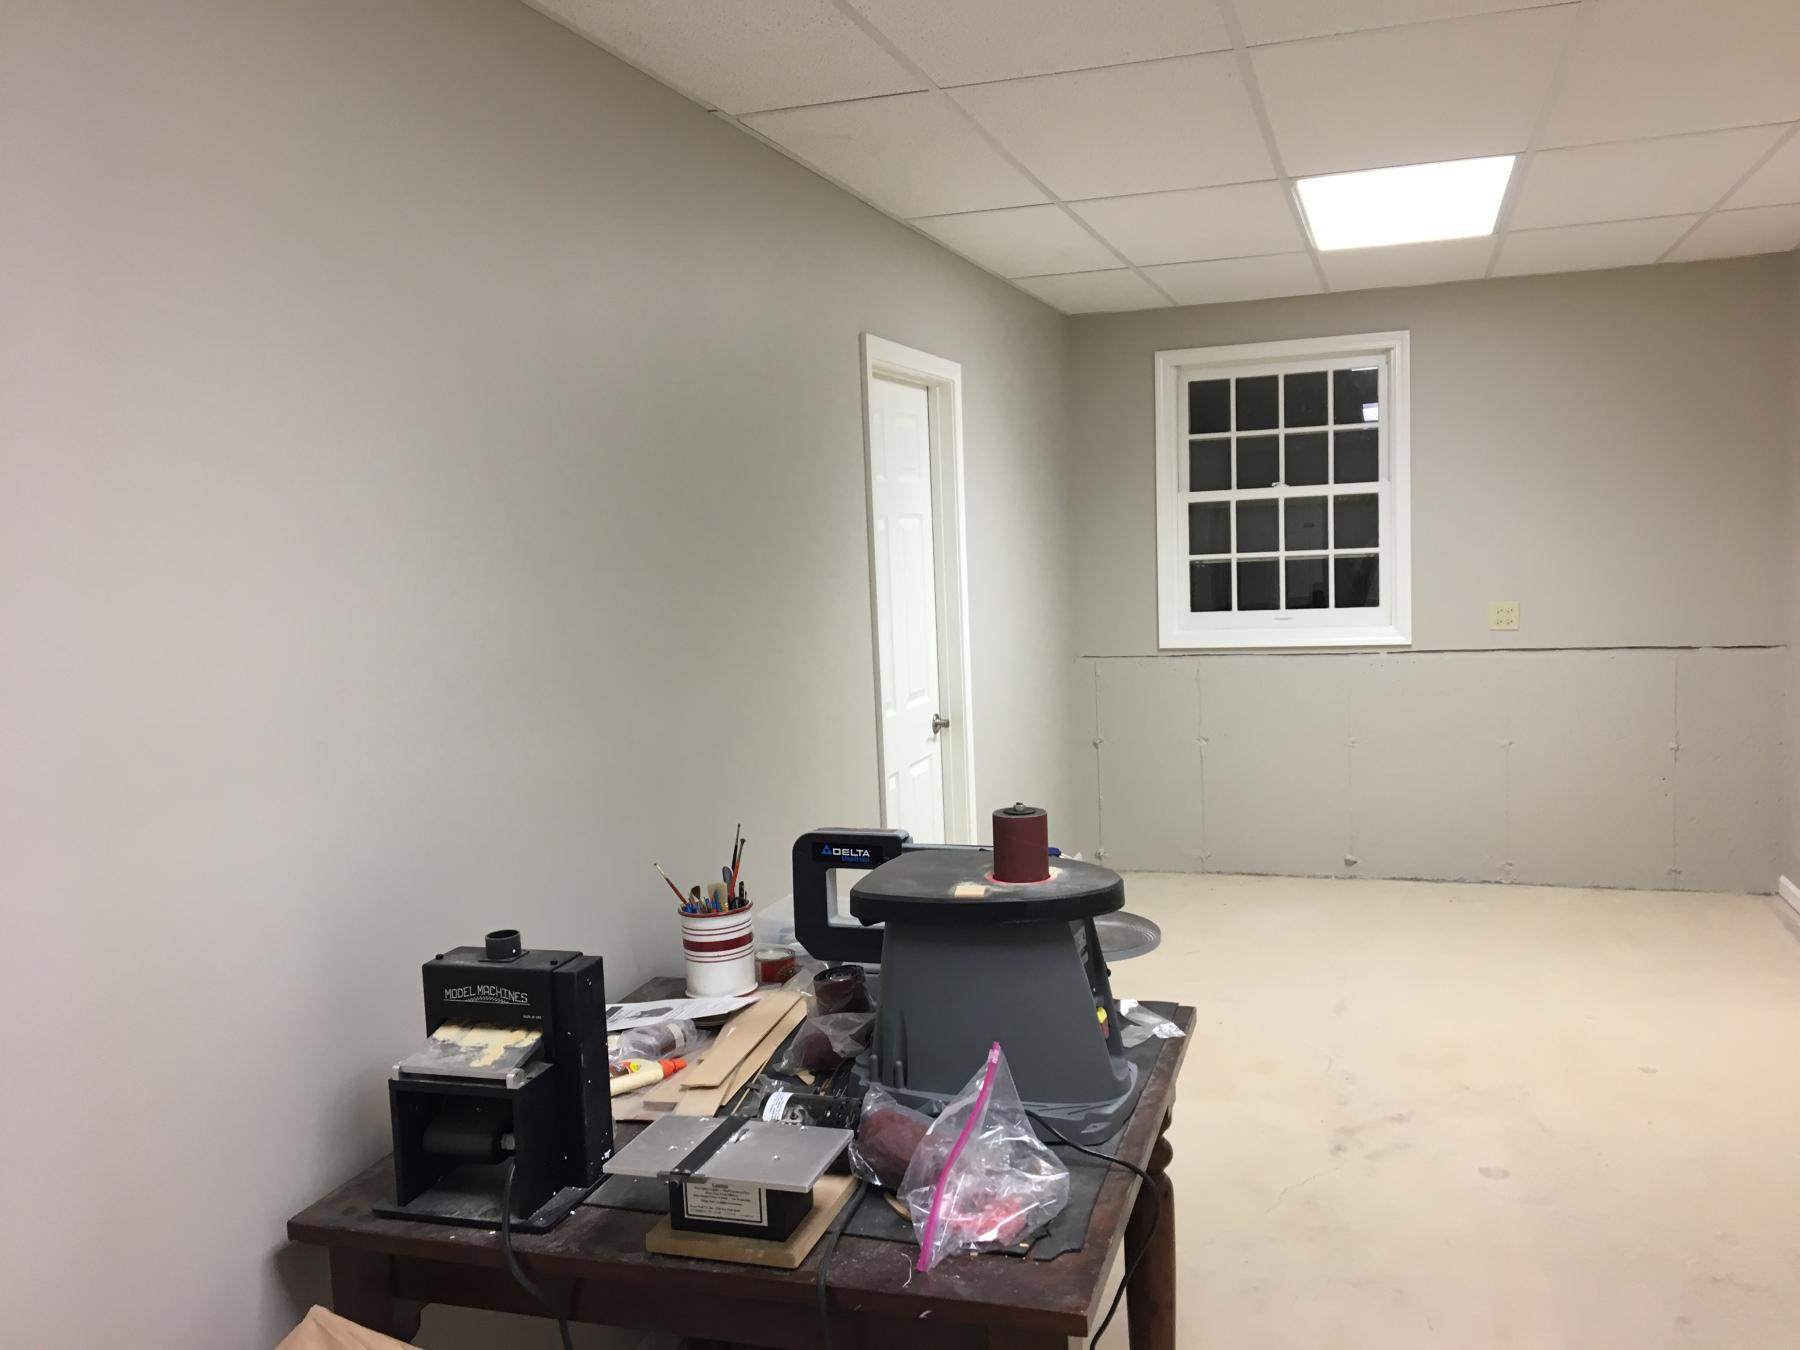
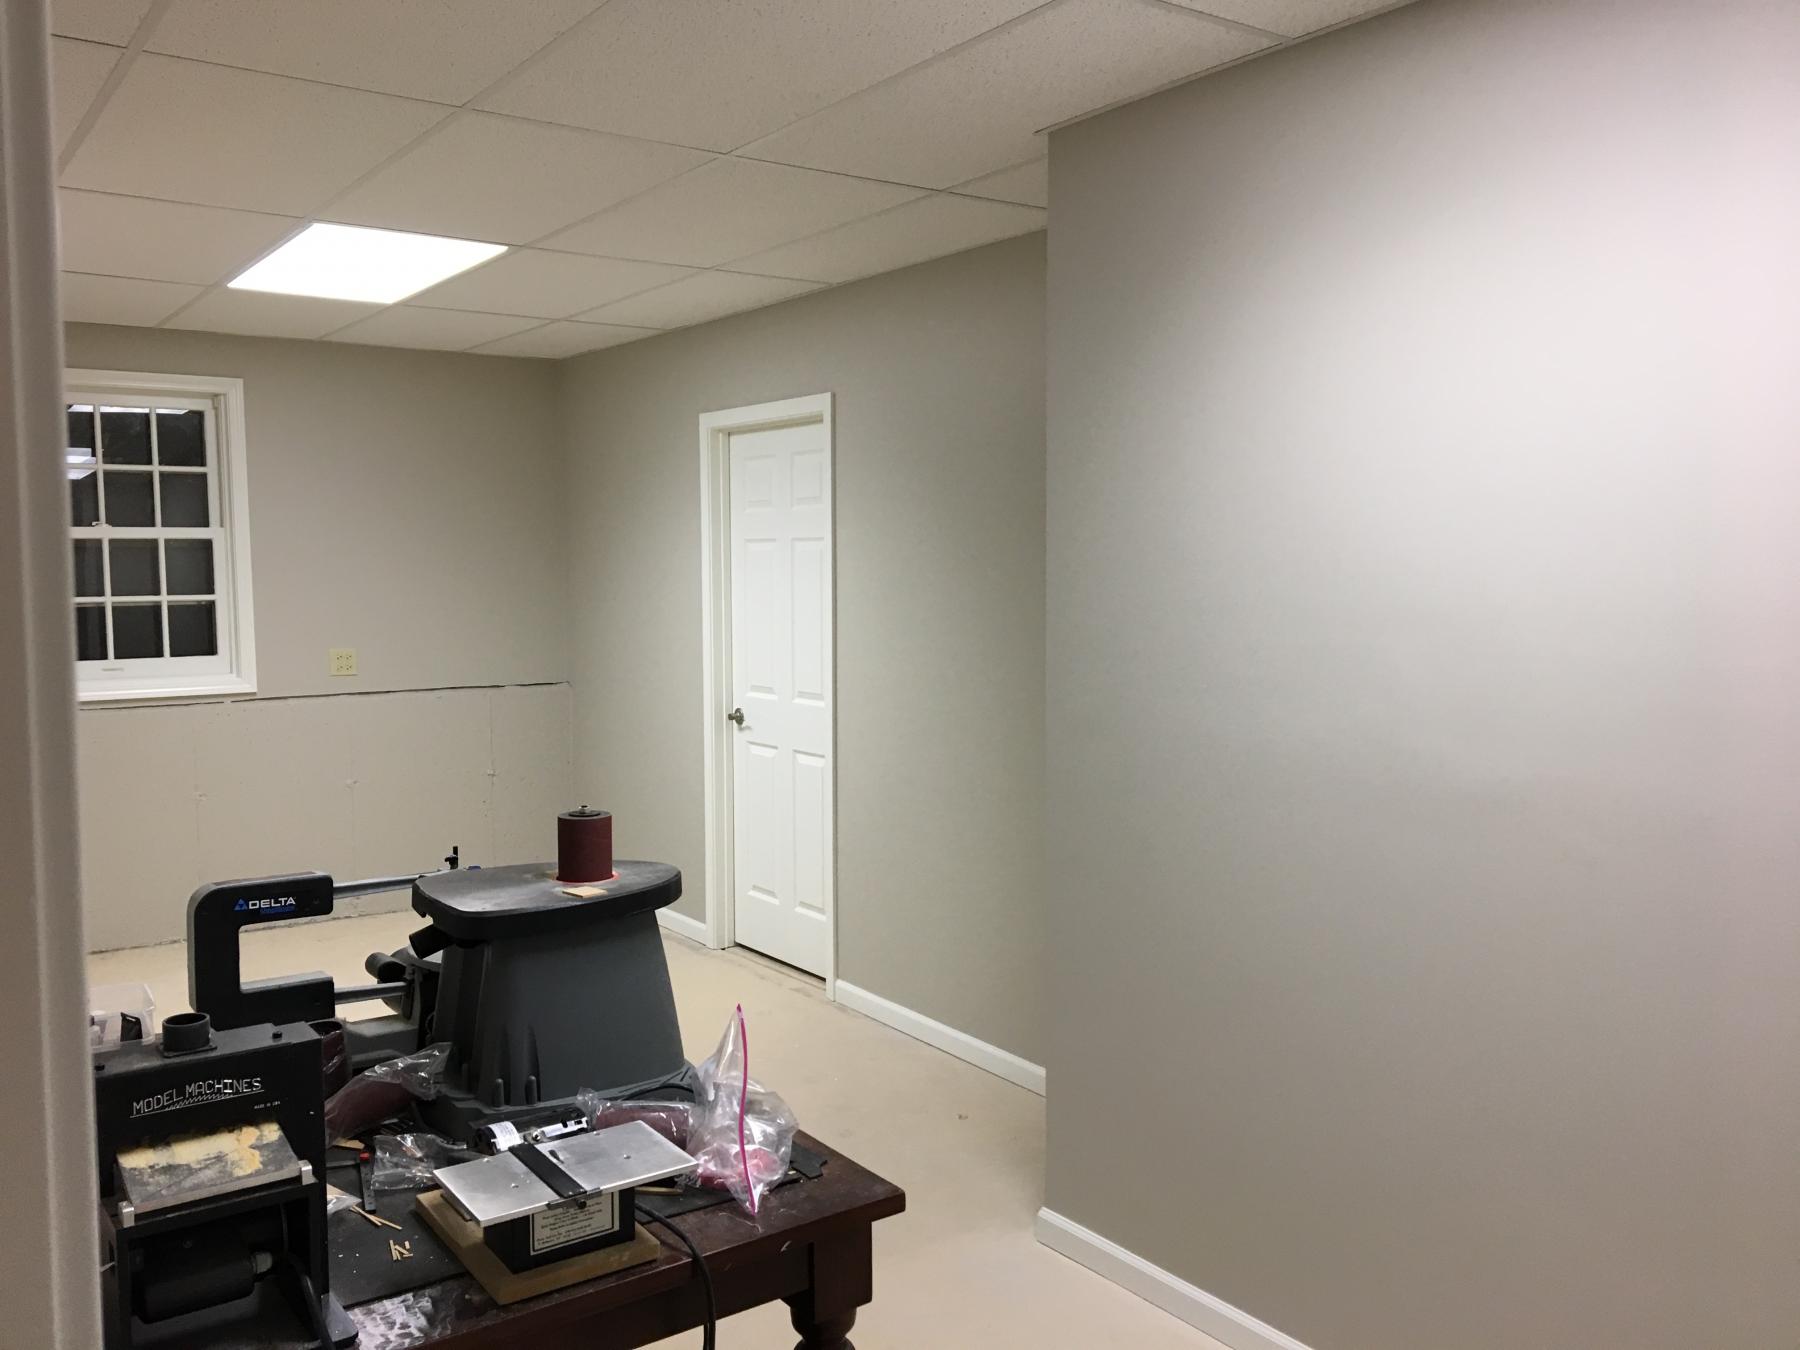
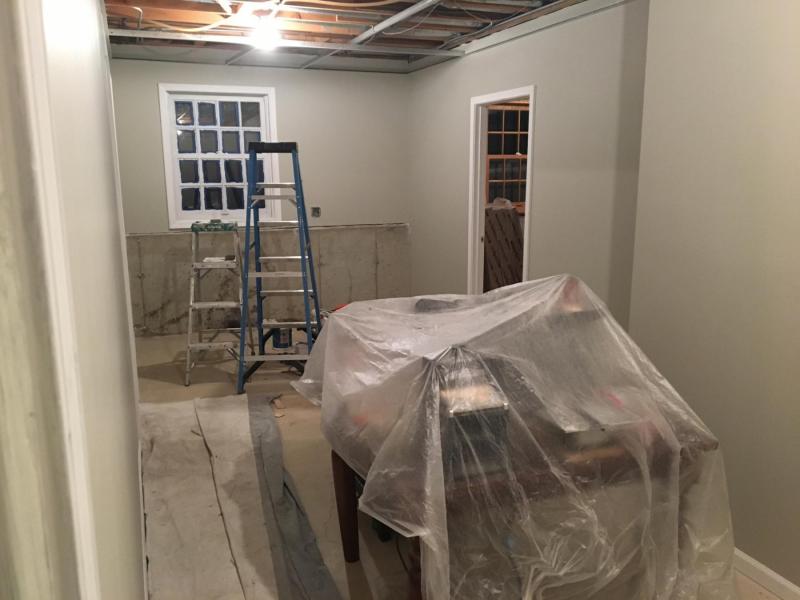
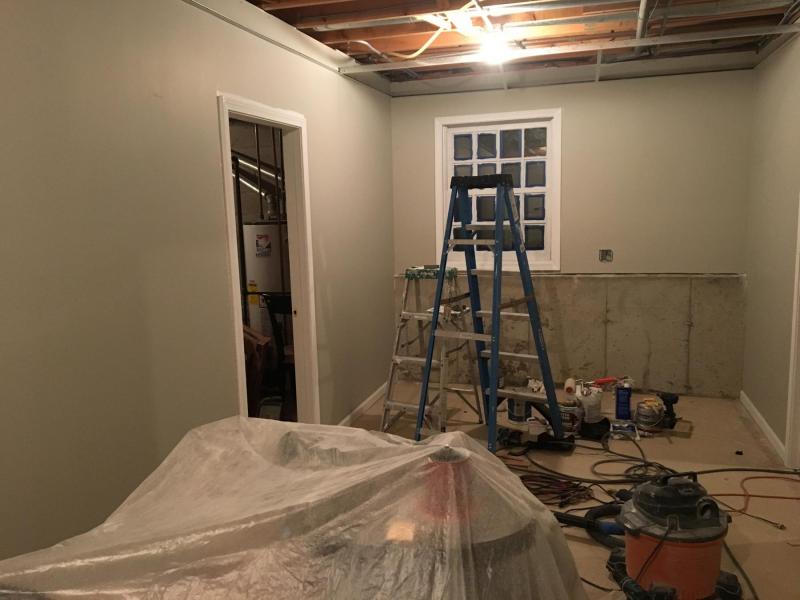
Thanks for the feedback everyone - here are some progress photos - should be done by Wednesday (I used left over Benjamin Moore Paint Revere Pewter Paint from our living room rehab). The drop ceiling and lighting will be installed tomorrow. I could have the contractors drill a hole in either wall on the HVAC side or the Water Heater side for hoses to install the dust collection/shop vac system away from the shop behind the doors. Would that make sense ? Also do I need a ceiling mounted unit to clean the air as well ?
- 72 replies
-
- 10
-
-
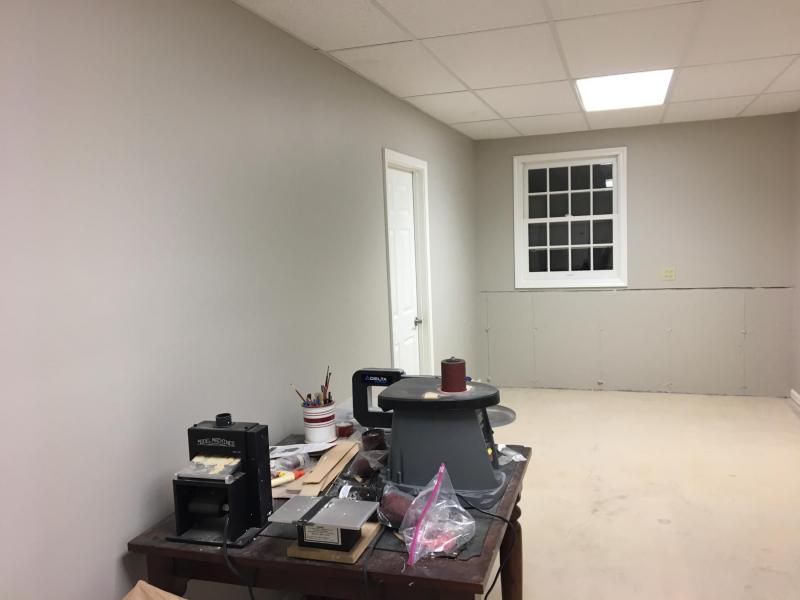
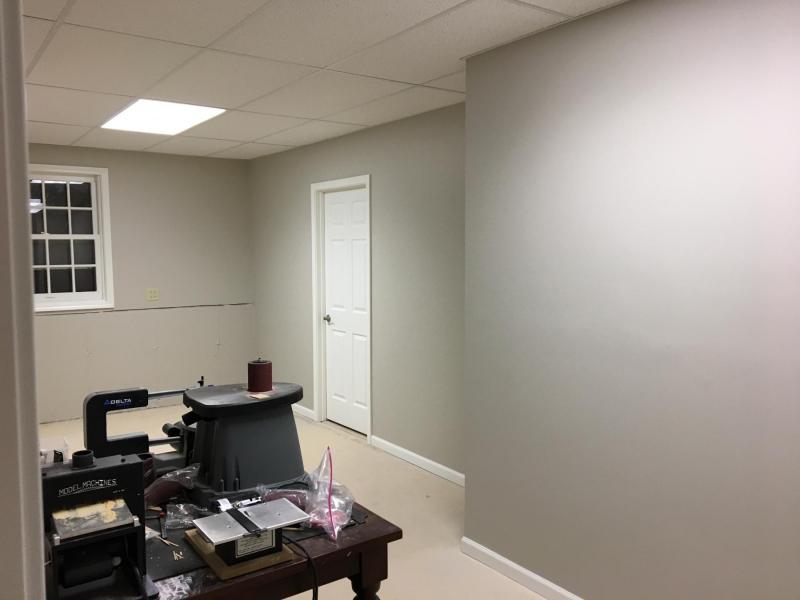
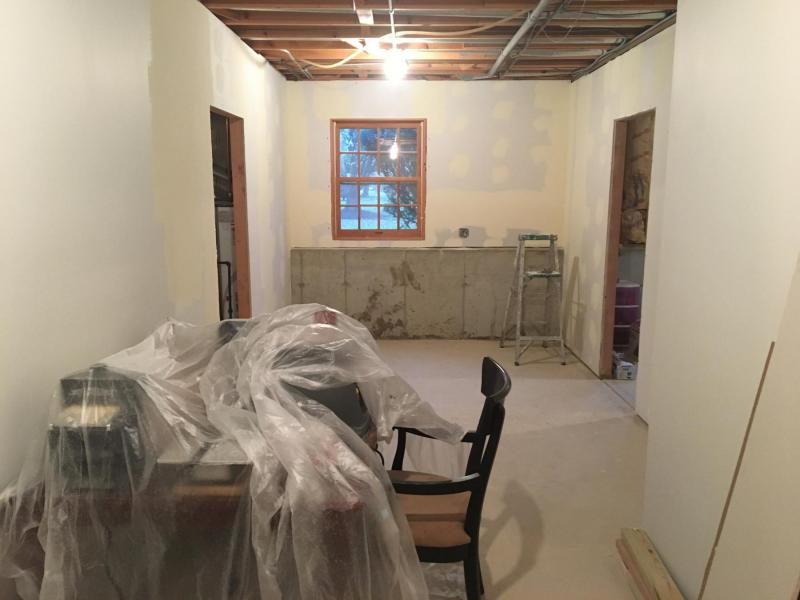
Hey Group, I have contractors finishing my shop next week - its approximately 24 feet long by 9 feet wide. I've attached a pic - they will be installing a drop ceiling as well as lighting. I intend on installing a work bench on the wall below the window - and thats where I will place my Jim Saw, Jim Thickness Sander, Scroll Saw and Spindle Sander. What sort of dust collection system will I need ? Rusty has given me some ideas. Any recos on workbenches for this space as well are appreciated. My next project will be a fully framed build - and I do intend on buying dimensioned timber from Jason at Crown. Im still going to need to thickness sand. I talked to a sales person at Rockler today and he was selling me on a freestanding JET 1 Horsepower system - it seems like overkill. I do need to install some sort of system to hook to my tools for dust extraction - just not sure which one. I was also considering the JET Air Filtration system hung from the ceiling. Any ideas ? I've never set up a proper shop until now. On the left hand side of the space will be my main workstation (new table will be moved down from my office and the one in the pic is getting trashed) and Ill place my Jim Sander and Preac there that don't throw out as much dust that get heavy use. I can just use my shop vac there to clean up. Thanks for any input, Chris
-
Power Tools for a Fully Framed Build
ChrisLBren replied to ChrisLBren's topic in Modeling tools and Workshop Equipment
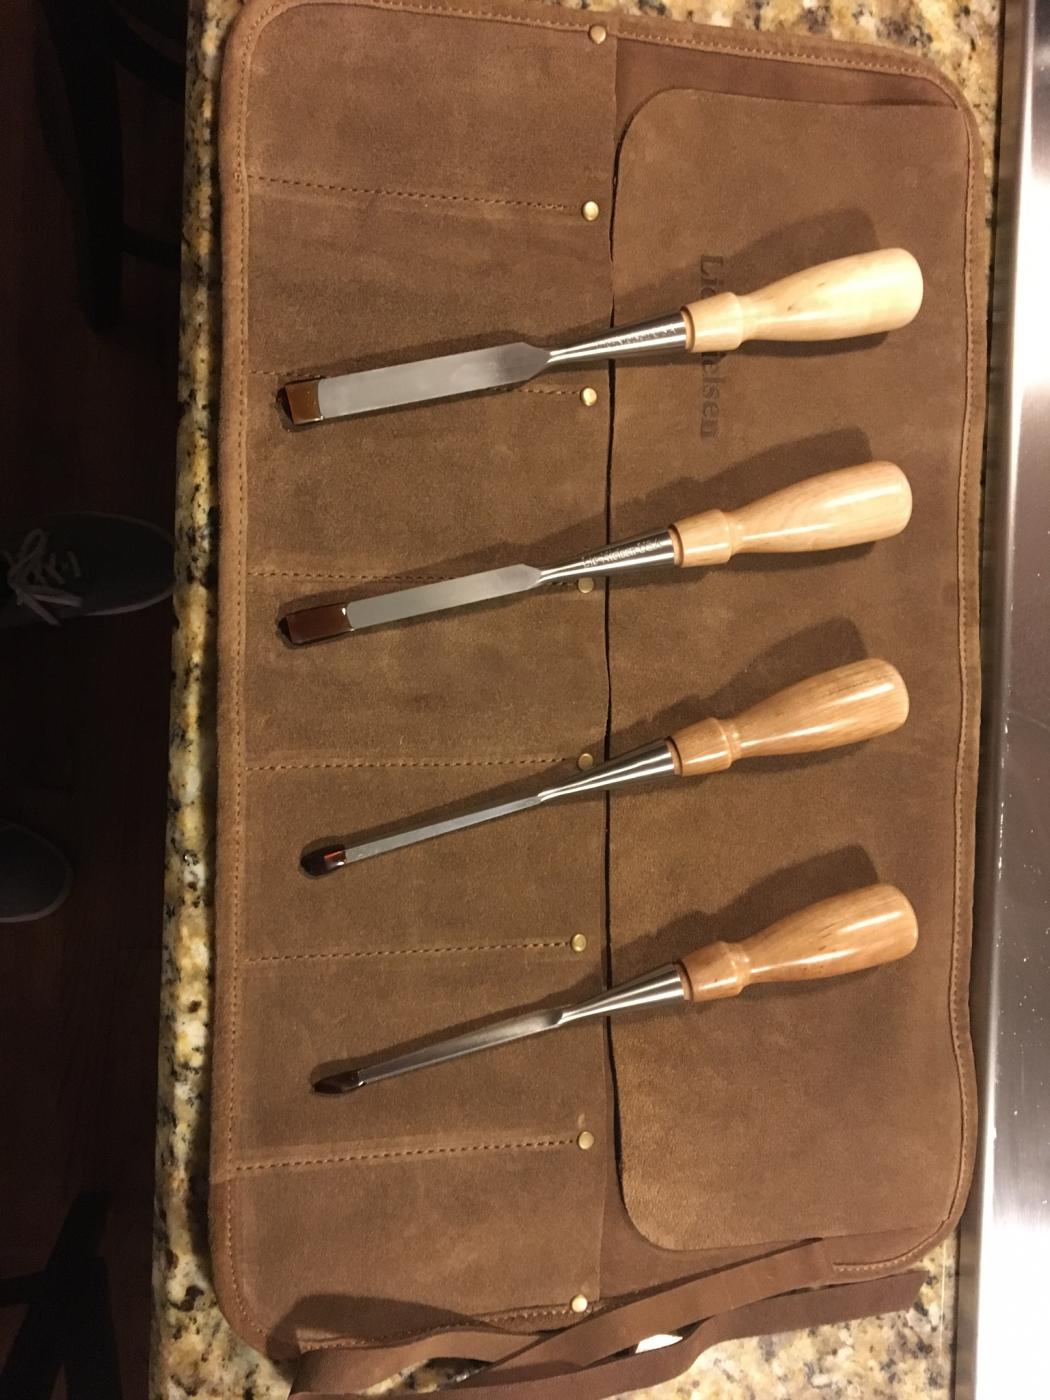
Look what showed up last night - these tools are so well crafted and balanced - can't wait to get them sharpened/honed
- 54 replies
-
- 10
-
-
Power Tools for a Fully Framed Build
ChrisLBren replied to ChrisLBren's topic in Modeling tools and Workshop Equipment
My wife bought me the Lie Nielsen chisels at 1/8, 1/4, 3/8 and 1/2 for my birthday along with a leather roll to store them ! I'll purchase the Veritas Sharpening System myself - maybe I won't need a mill for a while.... -
Looks awesome Rusty - Im about to build out a workshop as well - you've given me some ideas...
- 310 replies
-
- 2
-
-
- cheerful
- Syren Ship Model Company
- (and 1 more)
-
Agree with Doc Blake here - my dyed Pear with Fiebings on Confederacy has looked great for its 7 years - its all top coated with Danish Oil. I cant even comprehend the thought of trying to plank a bluff bowed ship like the Morgan with Ebony....
-
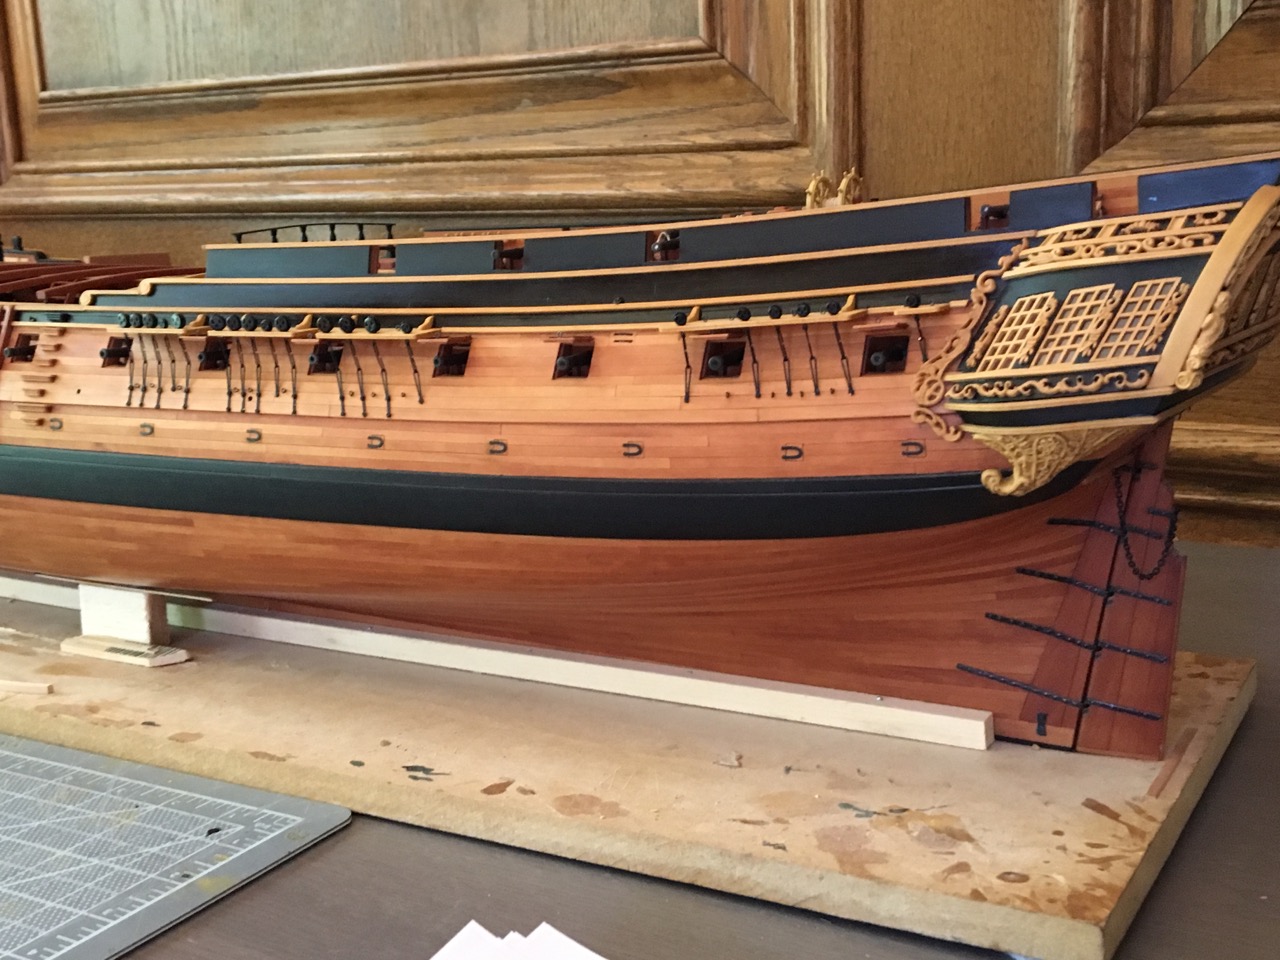
Hey Jason I scratched my lights on my Confederacy at the same scale without a problem using a miniature table saw - similar approach to making gratings - it can be done and your lights have fewer panes Best Chris
-
Power Tools for a Fully Framed Build
ChrisLBren replied to ChrisLBren's topic in Modeling tools and Workshop Equipment
Those are the brands I'm looking at Toni - I like Lie Nielsen and Stanleys as the cheaper option since they're both in Imperial - the Two Cherries are nice too -
Power Tools for a Fully Framed Build
ChrisLBren replied to ChrisLBren's topic in Modeling tools and Workshop Equipment
Hey Greg, My Delta does have a tilting table - so one less tool to buy... -
Power Tools for a Fully Framed Build
ChrisLBren replied to ChrisLBren's topic in Modeling tools and Workshop Equipment
Thanks for the advice everyone - after sleeping on it - I may hold off on the mill for now. I think a smarter investment is a high end set of chisels and a sharpening system. I've got my Byrnes Sanders/Table saw, a Preac Saw, a Wood River Spindle Sander and a Delta Scroll Saw. Eventually I will need to buy a lathe -
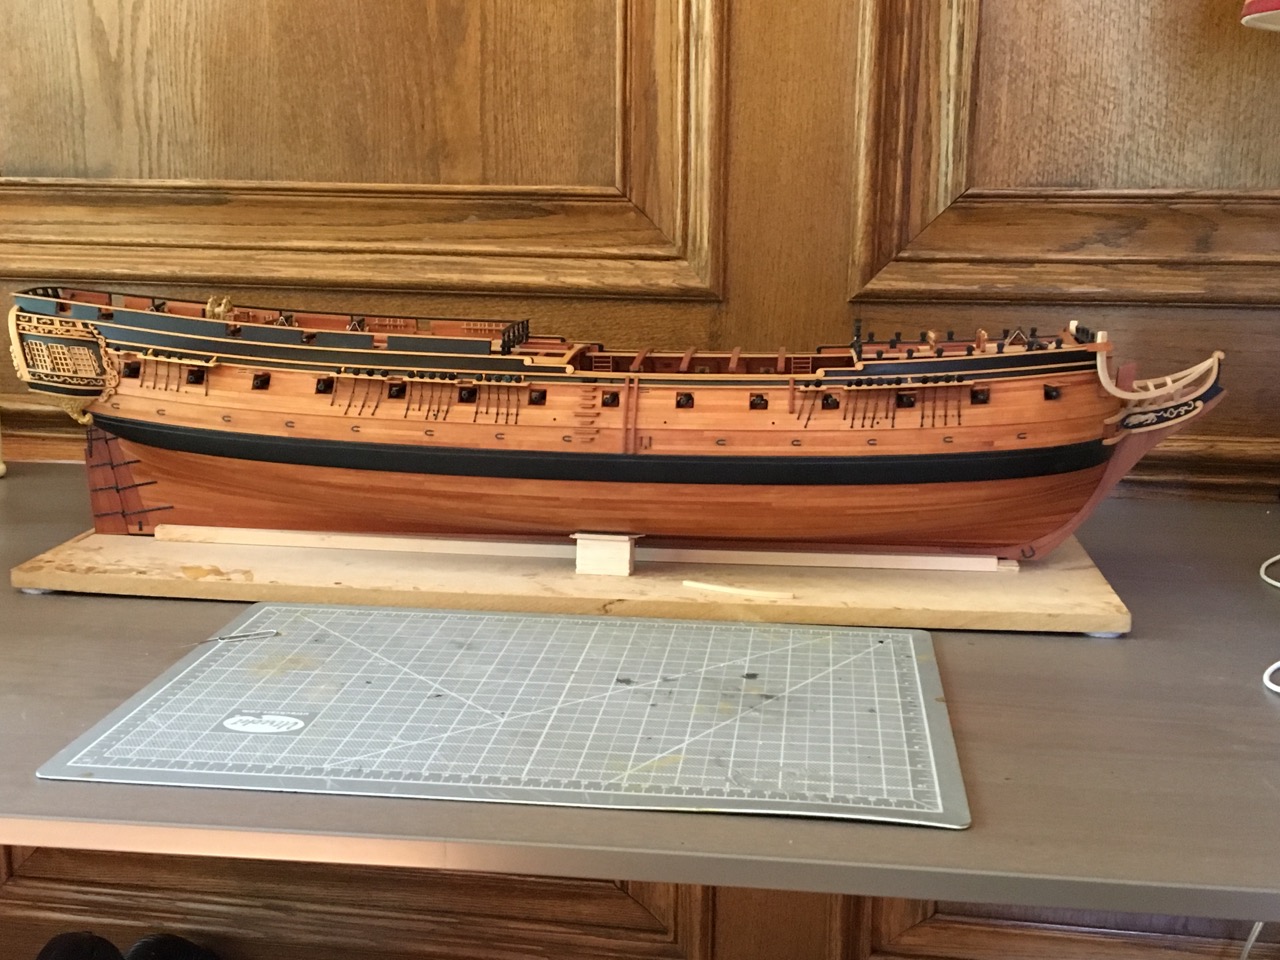
Thanks guys - appreciate the kind words. Mike, i top coated three coats of Fiebings (buffed with a tshirt after ever coat) with Danish Oil - which gives it a slight luster that mimics ebony. Hope this helps, Chris
- 290 replies
-
- 6
-
-
- confederacy
- frigate
- (and 1 more)
-
Power Tools for a Fully Framed Build
ChrisLBren replied to ChrisLBren's topic in Modeling tools and Workshop Equipment
Thanks for the input - actually the difference in price between the Microlux and Sherline is not that significant for me. I'm new to Mills and have never used one. I do notice that many people use them on fully framed builds - and I plan on being active in this hobby for awhile (Im 46). What would really be helpful is to understand which accessories I will need to get started. The first parts I will be building will be the keel and the frames. I will also buy some high quality chisels and a sharpening system which can do the work of a mill by hand. It does seem to me that a mill will offer me more precision. Thanks Chris -
Power Tools for a Fully Framed Build
ChrisLBren replied to ChrisLBren's topic in Modeling tools and Workshop Equipment
Yikes - Ill clean it out - thanks for letting me know -
Power Tools for a Fully Framed Build
ChrisLBren replied to ChrisLBren's topic in Modeling tools and Workshop Equipment
Thanks for the feedback guys - does any one have an opinion on this mill ? Its 20 percent off at Micromark right now for approx 660.00 http://www.micromark.com/microlux-high-precision-heavy-duty-r8-miniature-milling-machine,9616.html -
Thanks everyone - ASAT - this approach is not mine - I imitated many French Builder's use of color/wood tones - if you have Frolichs book, "The Art of Shipmodeling" you'll see my reference. 7 years as of Thanksgiving this year on this build - lately I've been up in the shop at 5am and working till 7am until the kids get up - seems to be working...
- 290 replies
-
- 3
-
-
- confederacy
- frigate
- (and 1 more)
-
Hey Group As I'm winding down Confederacy I'm gearing up for my next build. I already own all of Jim Byrnes tools and a spindle sander. On the list is a mill - would love suggestions as to accessories (I understand Sherline may be the way to go), a lathe, and possibly a drill press (but won't mills have that capability?). I'm building in 1/48 or 1/36 scale - thanks !
-
Hey Group, Back at it with Confederacy - all of the channels and chainplates are installed - now its back to the head timbers and finishing up the bow

- 290 replies
-
- 27
-
-
- confederacy
- frigate
- (and 1 more)
-
Yikes sorry to hear Ben - hopefully you can salvage and rebuild the elements that are warped.