


ChrisLBren
-
Posts
789 -
Joined
-
Last visited
Content Type
Profiles
Forums
Gallery
Events
Everything posted by ChrisLBren
-
 Looks great ! I have this Monograph with plans both in 1/36 and 1/48. I will follow your progress !
- 589 replies
-
- 1
-

-
- le gros ventre
- cargo
- (and 1 more)
-
Thanks for the likes - so now that I have assembled bulkhead 10 - I used Gorilla Spray Adhesive for the lamination - this is great stuff - I can see why this method makes so much sense. As you can see everything lines up on the build board. I have highlighted the bevel and left some extra meat on the bulkhead for proper fairing. Every bulkhead - regardless of deck sheer will be 4 and 3/4 high - so the keel remains exactly parallel to the build board. When all of the bulkheads are built and their slots created for the false keel they will be drilled into the the wooden slats and then into the build board.


-
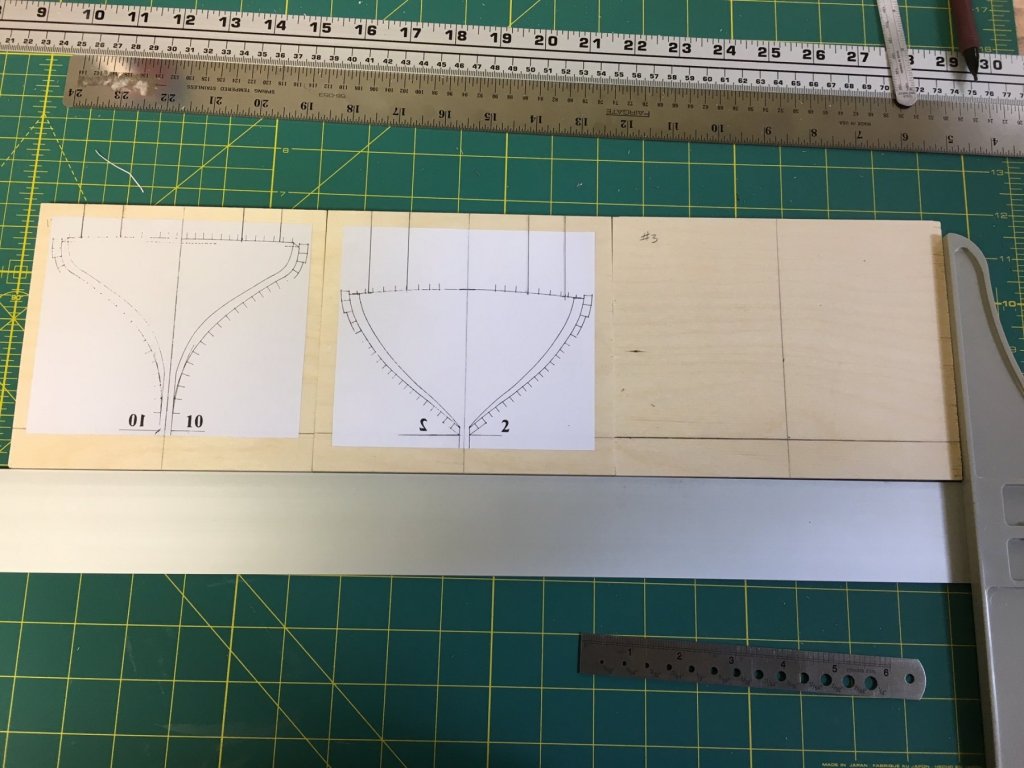
Hey Group, Bit of an update - I decided to proceed with the "upside down" method for Topaze. I wanted to give this a try to make the planking process easier as an inverted hull secured to a build board vs planking in my lap. First step - I cut out all of the plywood blanks from a 5 and 1/2 inch wide board for the bulkheads with my new 10 inch Dewalt Saw (great buy for 380.00) and marked both centerlines and as a vertical reference point the rabbet line. This way I will insure the keel will be level for all of the bulkheads. I then adhered the plans to the boards using repositionable spray mount. Lastly I drew the lines for the lugs on the blanks that will be used to mount the bullkheads to the build board. Every bulkhead will be laminated with another 6mm inch thick plywood bulkhead (without lugs) which should give me more surface to plank later. Im hoping to cut out all of the bulkheads with the Dewalt scroll saw (no product placement - just a big fan of these tools ) this weekend.

-
Congrats on a job well done. Beautiful Confederacy my friend !!!!
-
This Mono is designed for beginners and outlines a proposed building method - so I thought I would give it a go. It seems much more complicated than building right side up that most are familiar with.
-
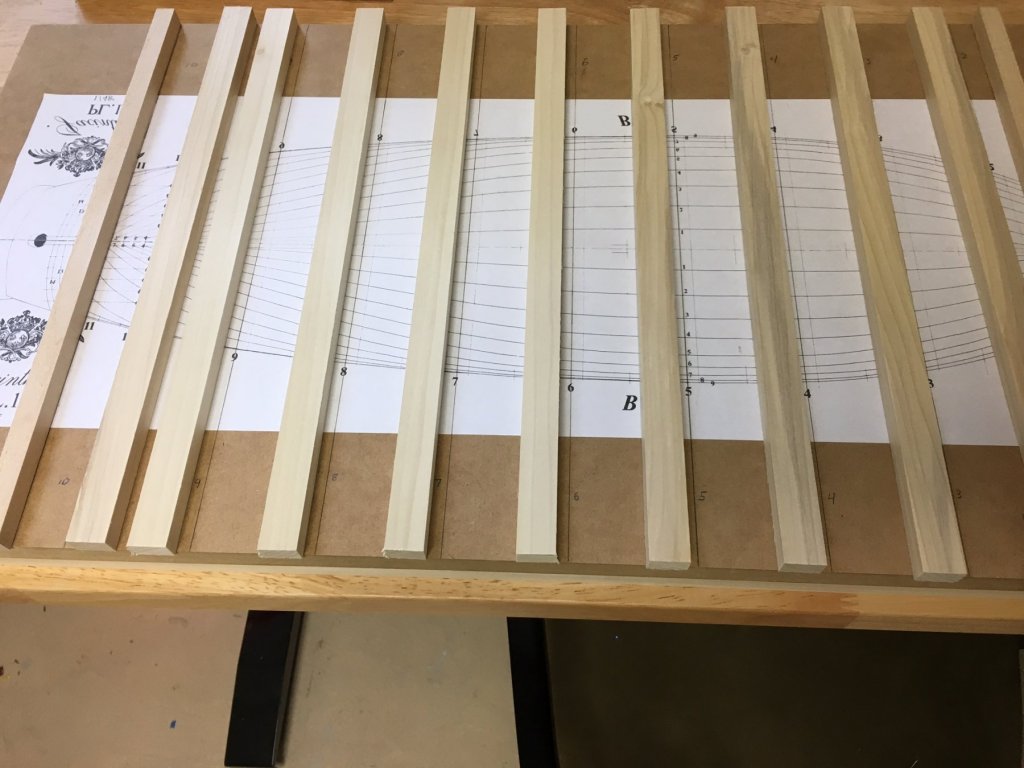
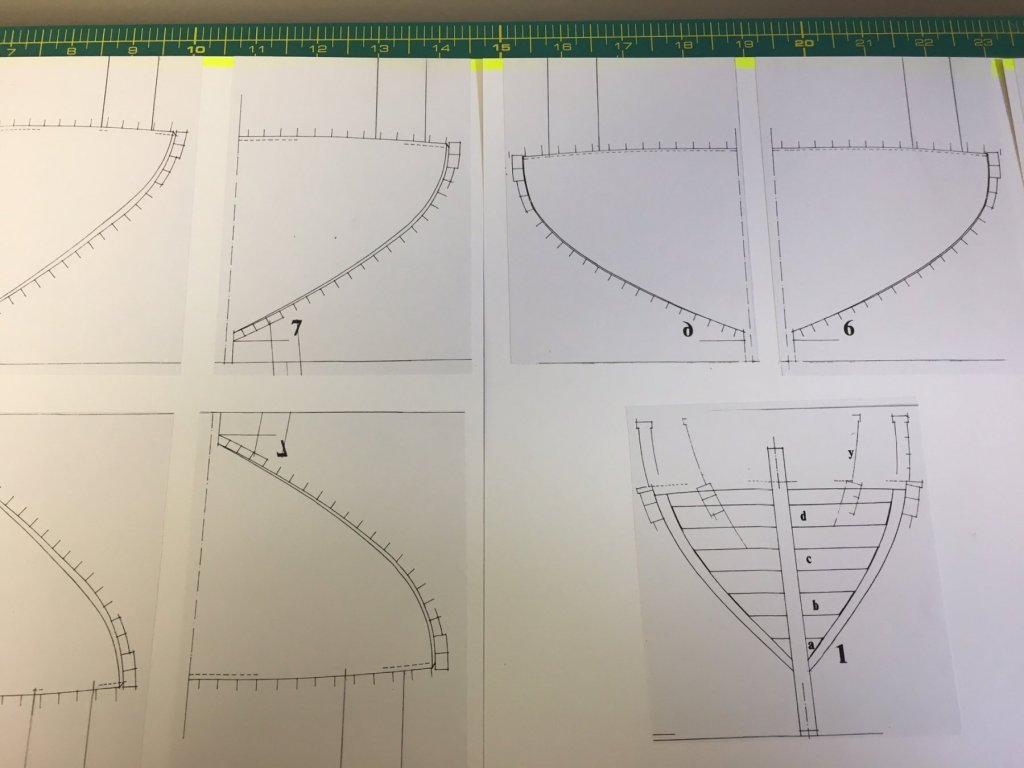
Hey Group, So I would love some feedback. I fully intended to build this ship with the suggested method in the Monograph - which is unlike any method I have ever used in past builds. Im really starting to scratch my head. Let me explain. So as you can see in the first photo the build board has been constructed and the wooden slats you see correspond with the various bulkheads. These are to be screwed to the bulkheads and then to the build board. The ship is build upside down - once the bulkheads are installed you insert the former. Here's where it gets tricky - you can see I have copied mirror images of the enlarged bulkheads from the plans. These will be copied and glued with spray mount to a vertical line drawn on the square of 1/4 inch plywood and the bulkheads can be cut out with my scroll saw. Later the notches will be added for the former. As you can see from the plans - I drew on "lugs" on the bulkheads - these will be screwed into the slats on the build board. The only issue here is you need to create a reference since the heights are all different on the various bulkheads to account the deck line - which is not horizontal to the keel. I used the edge of the plans to create the reference line. After carefully measuring and comparing the enlarged plans to the originals - Im seeing a variance between .25mm - 1mm. Im not sure if this is due to the fact these plans were originally hand drawn by Boudriot, if its my error measuring or an error in the copying process. This whole approach seems very odd. Not only are these bulkheads laminated - resulting in 1/2 inch thick bulkheads - the recommended method in the monograph recommended a bulkhead former or 1/8 inch - which was clearly an error - it should be 1/4 inch according to the plans. I am seriously tempted to just build up right - create bulkheads that run from deck line the the rabbit line - use a 1/8 inch wood to line the bottom of the former (to create a rabbet - like on my Confederacy build) and then add the keel and stem parts. Also I dont really see the need to have 1/2 inch thick laminate bulkheads. The spacing seems fine to me especially if I choose to fill in the spaces between the bulkheads with basswood. Does any of this make sense ?

-
Hello Group, I want to introduce you to my good friend Bob Putnam of Rare Woods. He just sent me an email regarding a nice supply of Boxwood. This guy is first class - I have purchased a flitch of Swiss Pear from him along with some Ebony. This wood is in larger dimensions than most of us need - but I have locally sourced milling operations to reduce my stock to our requirements for ship modeling. Its a very cost effective way to have a good supply of quality wood. Boxwood reply info sheet.pdf
-
Pandora by marsalv - FINISHED - 1:52
ChrisLBren replied to marsalv's topic in - Build logs for subjects built 1751 - 1800
Well done - gorgeous model - Ive enjoyed following your progress ! Best of luck with Le Gros Ventre. -
Congrats Toni - beautiful ship/build !!!! And if you want you can build a simple schooner along side me.... Just a thought (smile)
-
Thanks Chuck, I saw your technique of using fishing line for treenails. It looks really interesting. I was going to use wire but might want to consider this. I wonder what size you would use for this scale ? I am anxious to see how this method of construction works. As many of you who followed my Confederacy build with its long hull - I had a warp to the hull due to the plywood of about 1/16. Topaze as this scale is also a long hull so I wanted to give this one a chance to be as perfect as possible.
-
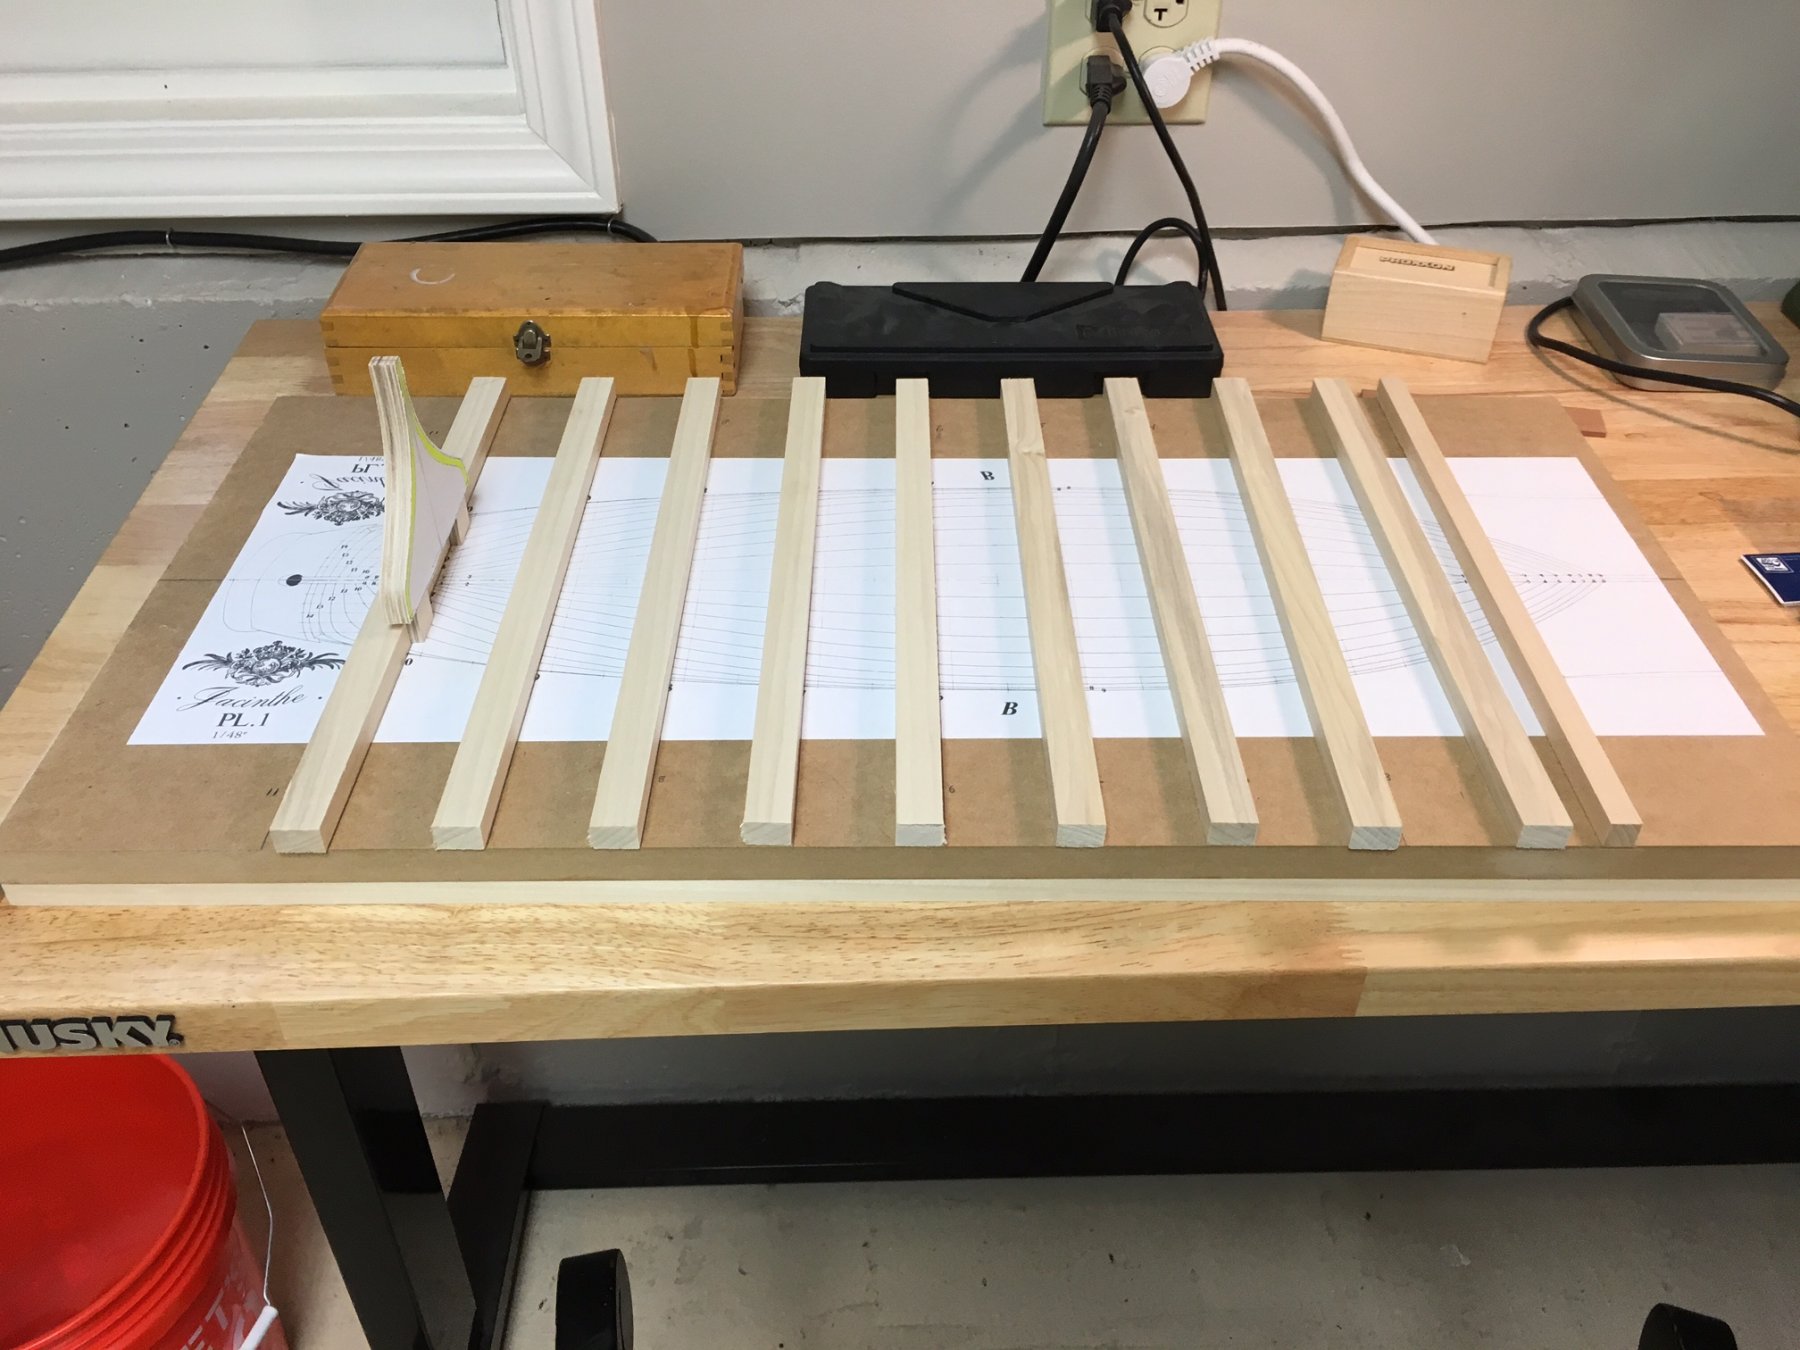
Hey Group, I have decided to restart this build log now that I have enlarged the plans to 1/32 and have decided to build La Jacinthe's sister ship, La Topaze. There hulls are identical but where they begin to differ are the deck fittings, closed bulwarks and rig. I am following the recommended construction process in the monograph which is a bit different than previous Plank on Bulkheads builds. As you can see here I began with a 3/4 inch thick piece of MDF reinforced by 1/2 by 3/4 poplar strips to ensure a flat surface. Many of the Ancre Monographs only depict one side of an image - so I mirror copied the plans and adhered them to the build board using 3M Artist Spray Mount. I highly recommend this product for frame patterns etc because you can re position them easily if need be before they dry. This hull will be built upside down with the keel parallel to the build board and the bulkheads will be screwed into lugs and into the build board to ensure they are perfectly 90 degrees. The bulkhead former will be added last - if all goes well it should slide in perfectly to the slots in the bulkheads. I am hoping to have some updated pictures after the long weekend, Chris
-
ancre Chebece 1750 by Jeronimo - FINISHED
ChrisLBren replied to Jeronimo's topic in - Build logs for subjects built 1501 - 1750
Terrific work Karl !!! -
Love it !!!!!
-
Looks really good Toni - you have my admiration in completing such a challenging project.
-
I recommend the AL Harvey along with Frank Mastinis Book Ship Modeling Simplified which references this kit. You can pick it up for under 100 dollars on EBay. While not historically accurate - it's an easy build and makes into an attractive first time model. https://m.ebay.com/itm/ARTESANIA-LATINA-1-50-Scale-Baltimore-Clipper-HARVEY-Kit-MINT-Cond-Nice/132653398889?epid=1320503011&hash=item1ee2c23b69:g:dSQAAOSw8FBbGJJV
-
Looks gorgeous - congrats on a well built Confederacy !!!!
-
ancre Chebece 1750 by Jeronimo - FINISHED
ChrisLBren replied to Jeronimo's topic in - Build logs for subjects built 1501 - 1750
Beautiful work Karl !!! -
Thanks for the clarification Mike. If you can build a display case as perfect as yours - applying a French Polish finish would not be above your talent ! Well done - the Danish Oil looks great.
- 969 replies
-
- 4
-
-
- hahn
- oliver cromwell
- (and 1 more)
-
Damn Chuck - that looks amazing !!!!
- 1,784 replies
-
- 3
-
-
- winchelsea
- Syren Ship Model Company
- (and 1 more)
-
Hey Mike, On a piece of furniture that gorgeous you may want to consider this finish - classic French Polish using thin coats of shellac. https://en.wikipedia.org/wiki/French_polish Or even a simple wax finish would work well. http://www.thefurnitureconnoisseur.com/c/furniture-wax/ I know many use sanding sealers on their models - but on furniture its not really considered a final finish its more of a sealer before applying a finish from my research.
- 969 replies
-
- 2
-
-
- hahn
- oliver cromwell
- (and 1 more)
-
Looking good !!!


.JPG.fe89a571c7fbb23f21a9577e905e03f9.JPG)