HOLIDAY DONATION DRIVE - SUPPORT MSW - DO YOUR PART TO KEEP THIS GREAT FORUM GOING! (89 donations so far out of 49,000 members - C'mon guys!)
×


ChrisLBren
-
Posts
784 -
Joined
-
Last visited
Content Type
Profiles
Forums
Gallery
Events
Everything posted by ChrisLBren
-
 Looking good Toni ! I just got thru this on Confederacy and was dreading it - after completion I have to say - most satisfying part of my build. Im sure your headrails will be as beautiful as the rest of your ship in the end.
 -
Welcome Tiz ! Ive been admiring your model on the Ancre site for years - great to have you onboard here. Along with Gaetan's build - yours is also an inspiration. My wood has been milled and sits in wait to start this build in 1/48 after completing Confederacy. Best, Chris
-
Oscillating Spindle Sander to get one or not.
ChrisLBren replied to Eddie's topic in Modeling tools and Workshop Equipment
I bought mine - WoodRiver - for 169.00 from Woodcraft - I use it all of the time. Just make sure to get the finest sleeves available - most of them will fit any of the machines mentioned in this thread. -
My workshop is just barely big enough Ben ! LOL. Again terrific save - most might have trashed the entire build after your setback. Look forward to your progress in the Fall....
-
Hey G Ive seen some build fully framed this way - just curious as to your thoughts as to its advantages vs mounting fully assembled frames. Does large scale have something to do with it ?
-
Thanks everyone - I just took the pics with my iphone - hoping to get back in the shop this week for some more progress - literally I am probably 30 hours or less to the finish line - kids and "honey dos" get in the way of my ship time !
- 290 replies
-
- 4
-

-
- confederacy
- frigate
- (and 1 more)
-
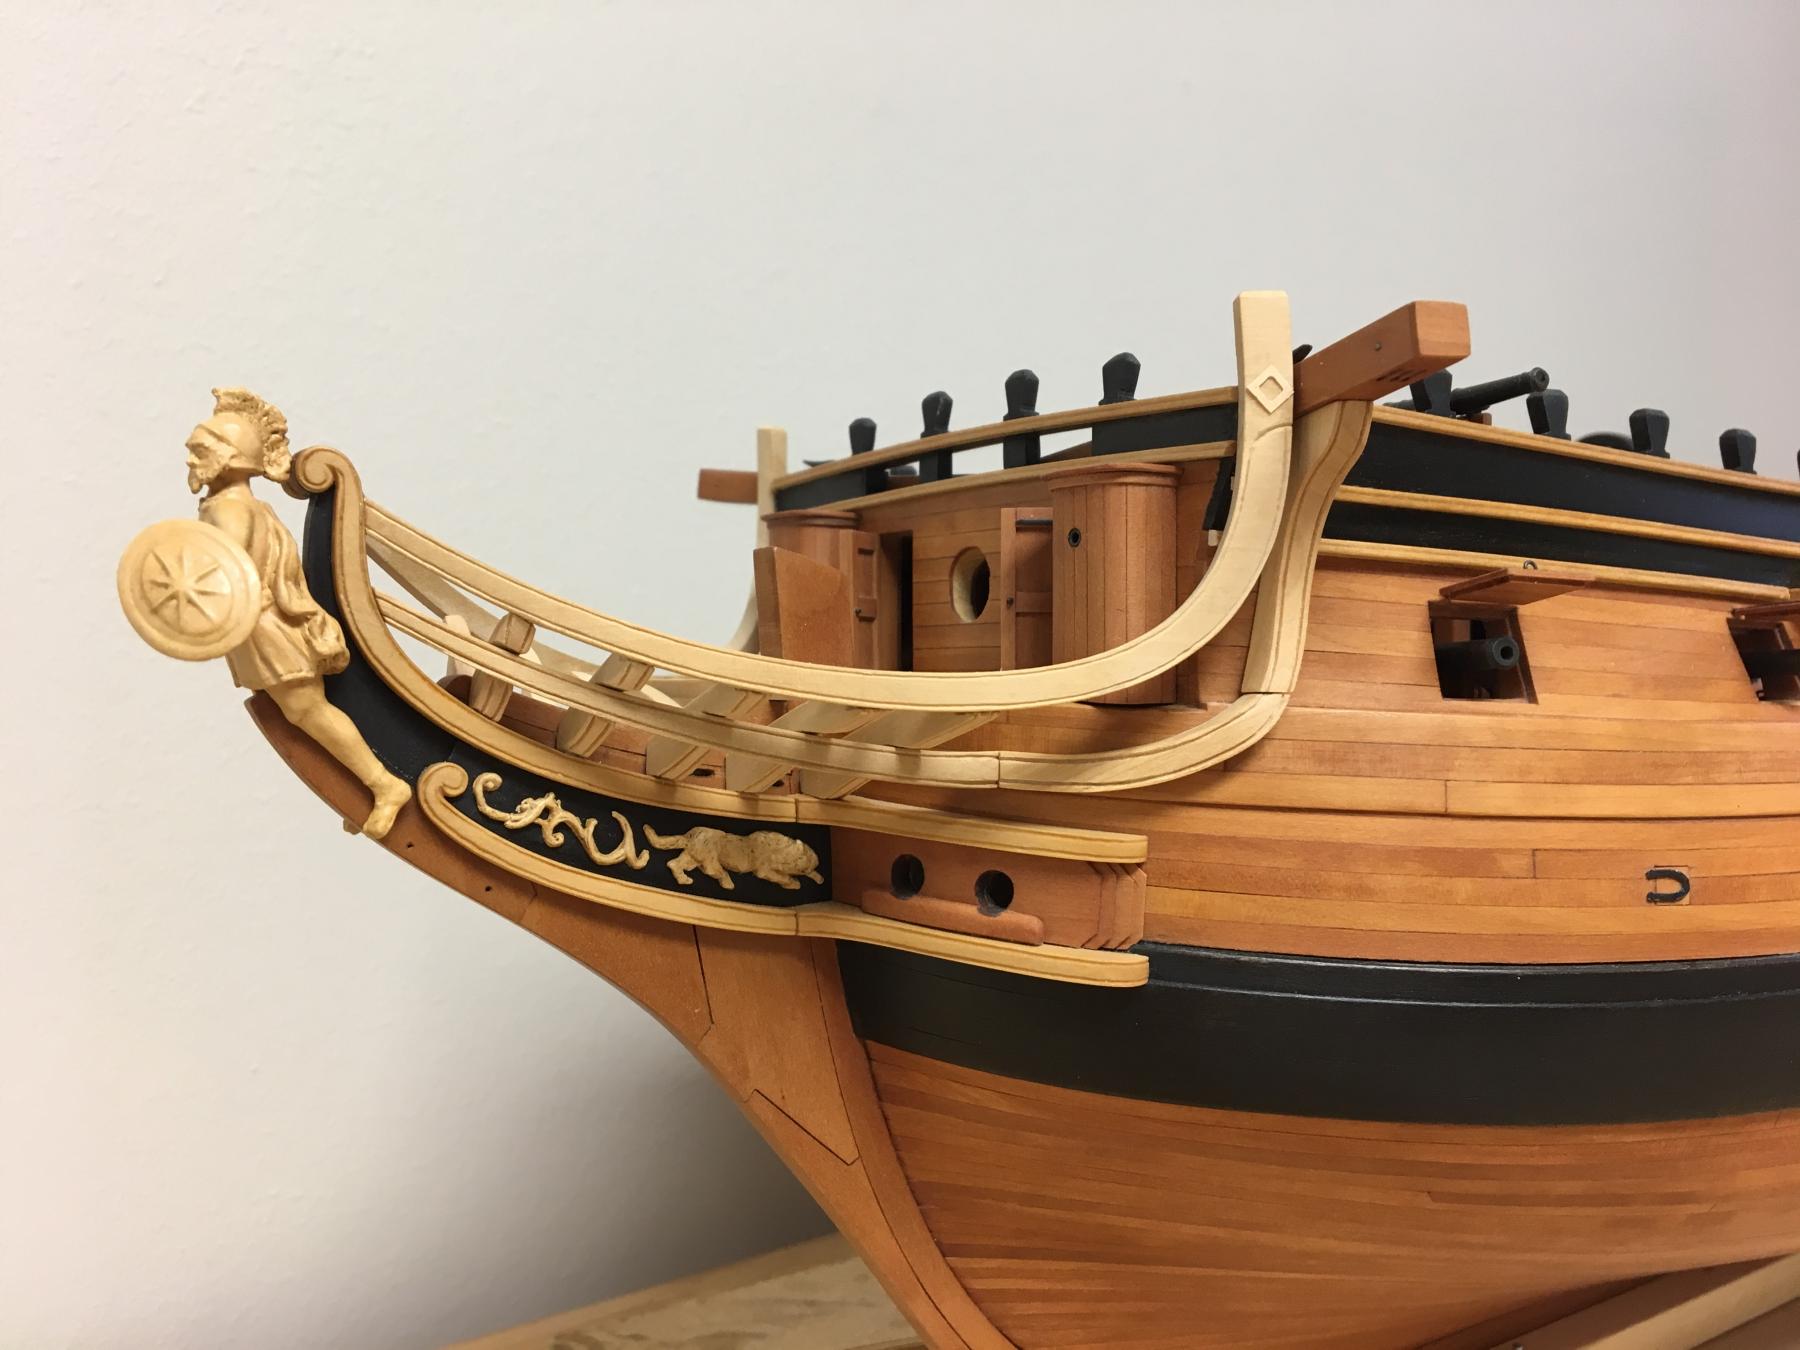
Thanks for the compliments and likes everyone. Update - the head gratings are completed - they took me longer than I expected to get all of the spacing accurate. I should have the seats of ease and the false rails mounted soon.


- 290 replies
-
- 19
-
-
- confederacy
- frigate
- (and 1 more)
-
Hey Ken Your first planking looks great - question are you painting the hull white below the waterline or leaving it natural ? Reason I ask - your method of first planking is fine for the structure but not historically accurate. If you paint no issues - but if you want second planking natural finish you may want the consult some of the planking guides here on MSW. I love the Royal William - look forward to your progress Chris
-
I recently purchased my Swiss Pear from Bob Putnam at this website - I am very happy with his service, pricing and the product ! http://www.rarewoodsusa.com/
-
You are right ! I do have the carbide blade that came with the Jim Saw and it cuts 3/4 like butter! For my 74 build - the largest dimension in the plans is 3/8 thick @ 1/48 scale - which is what I was referring to not the saws capabilities. Thanks for the heads up on Thurston - talk about quick turn around - I ordered the blades Tues and they arrived Friday
-
Yup - you're right Greg. New blades from Thurston arrived - adjusted the fence - the Preac cuts like a champ again. I am glad I'm keeping it. Now just need to plan for my next purchases - a Lathe and possibly a Mill (I want to see if I can get by as long as possible without that one....)
-
Thanks for the feedback everyone - I went ahead and ordered a couple of blades from Thurston for the Preac along with some for my Jim Saw. With some new blades and a fence adjustment - Im sure it may come in handy. I've owned it since 2003 and it has served me well.
-
Hey Group, Ive got my Jim Saw up and running as I wind down my Confederacy and gear up for my next up build. What an incredible piece of hardware - more than capable of ripping boards up to 3/8 thick which should be the limit I will need for the 74 in 1/48th scale after I get the material milled down professionally. For my Confederacy build I used a Preac exclusively and milled strips/sheets from Hobby Mill which were at most 3/16th thick. I need to order new blades for both saws and am wondering if I should order any new ones for the Preac ? The Jim Saw with fine cutting blades seems to be able to handle most of the uses of the Preac. Just wondering if anyone out there uses both machines and what might be specific uses for Preac at this larger scale - maybe for very fine cuts using thin kerf blades for thin stock ? Or making gratings ? Any ideas here are appreciated. Chris
-
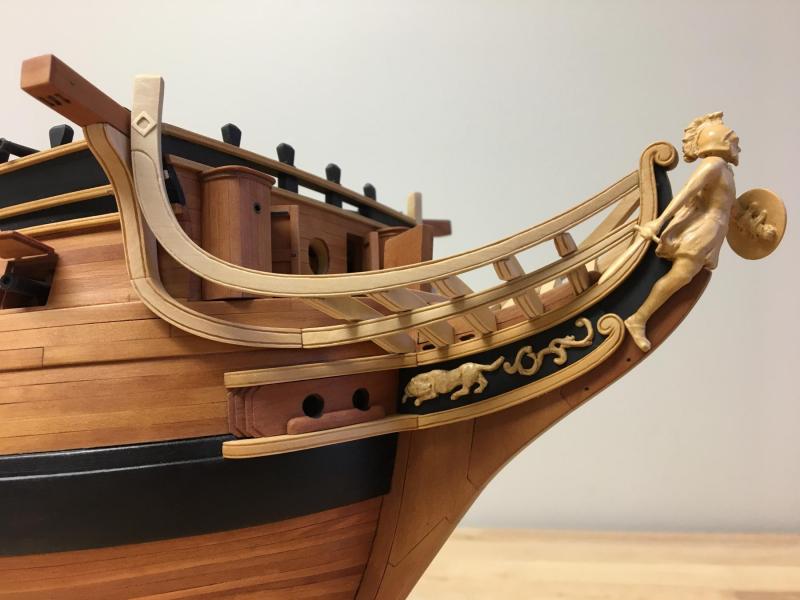
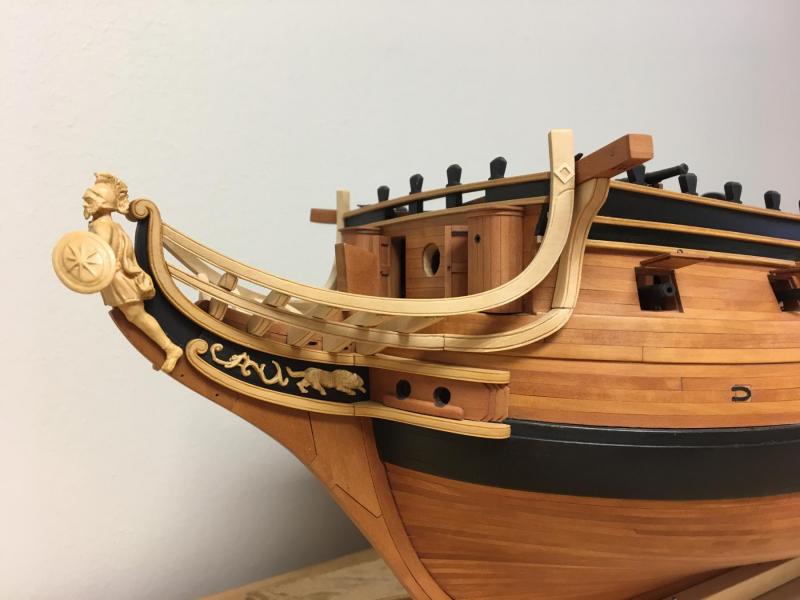
Thanks guys - here's the other side - adding the last aft timber on each side tomorrow
- 290 replies
-
- 23
-
-
- confederacy
- frigate
- (and 1 more)
-
Hey Gataen, I own the timbering plans (in 1/72 - I scaled them up to 1/48 in pdf) - I checked in with a builder on the Ancre Site who's building the 74. The booklet in the plan set shows some pictures of his build. He tells me that the plans are very sound - I'm sure you can offer us some feedback once you have received them. I am also curious which 74 you choose to build. Le Centaure resembles Boudriot's 74 in his 74 Gun Ship Treatise but with a Lion Figurehead vs a Greek Warrior. Le Superbe has a figurehead of a shield with the Fleurs de Lys topped wth a Crown. It looks very close to the figurehead of Le Commerce De Marseille - which according to the booklet standardization was taking place in response to a ministerial decree in 1786. The stern is less ornate than Le Centaure. Both are beautiful in my opinion. Chris
-
Excellent Gaetan - she's sure to be a masterpiece !
-
Thanks guys - both of your Confederacys look amazing. I've learned a ton during this build and it's given me much pleasure over the past 7 years. I'm just eager to see her mounted on brass pedestals on an ebony stained base.
- 290 replies
-
- 2
-
-
- confederacy
- frigate
- (and 1 more)
-
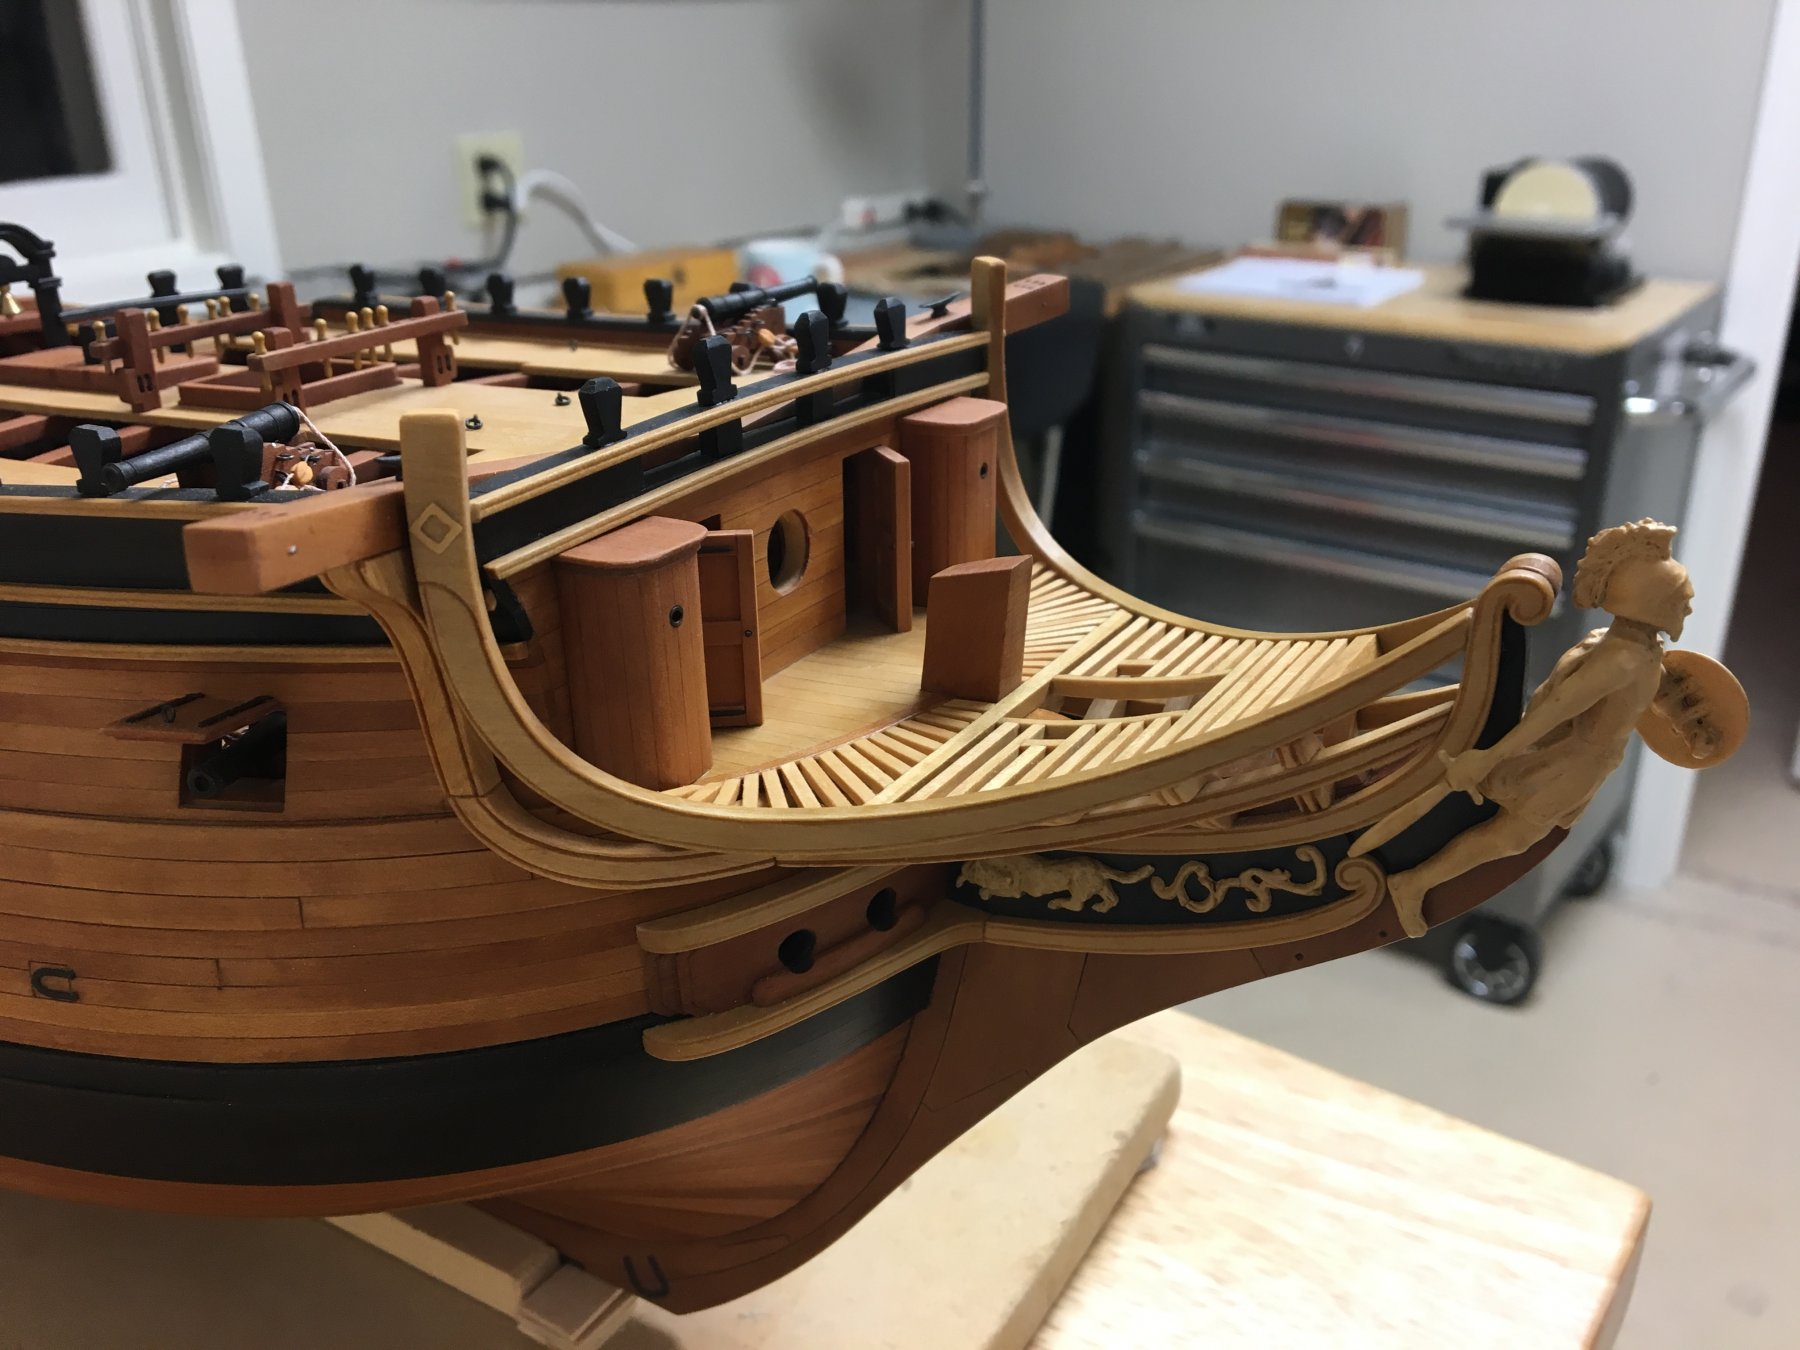
Hey Group, Bit of an update - Ive been plugging away on the head for the past month - this by far is the most challenging part of this build. Im very happy with my new Dewalt Scroll Saw, Spindle Sander and Byrnes Sander - it made reproducing these parts a snap and believe me I went thru a lot of scraps to get here. I could tinker with this area forever - but I really want to finish up the other side (the head timbers are installed and notched for the middle rail) and proceed with wrapping up this build. Chris
- 290 replies
-
- 17
-
-
- confederacy
- frigate
- (and 1 more)
-
Hey Gaetan, How about a large scale (1/24 or 1/36th) fully rigged version of Boudriot's Renommee ? Chris
- 728 replies
-
- 3
-
-
- le fleuron
- 64 gun
- (and 1 more)
-
What a gorgeous model/work of art - congrats Gaetan !!!
- 728 replies
-
- 3
-
-
- le fleuron
- 64 gun
- (and 1 more)
-
This seriously sucks Chuck - sorry to hear the one of the "good guys" advancing the craft is getting ripped off.