-
Posts
2,421 -
Joined
-
Last visited
Content Type
Profiles
Forums
Gallery
Events
Everything posted by usedtosail
-
I totally understand. For instance, I keep looking at the Sherline lathes and mills, but that would be a huge investment and I do not have the knowledge to use them very well. None of these tools are necessary but can help make things easier. Its when the tools overwhelm and makes things harder that is the bigger problem, I think.
- 1,354 replies
-
- constitution
- model shipways
-
(and 1 more)
Tagged with:
-
Hi Jon. I have one of the Dremel drill stands too and gave up on it long ago as just not accurate enough. I also have a small drill press, which is good for drilling holes and I used to use it for milling. I found the problem to be the Z axis, not so much the XY axis. Every time I had to adjust the height of the drill head it would throw off the XY because the head could rotate. I think you have the same problem in the Dremel stand. That said, those mill bits should work fine in the Dremel tool. You can see two of the bits in the upper right of the last picture above. They would fit into a Dremel just fine. The shafts are about 3mm diameter. They are end mill bits that I got here: http://www.amazon.com/Proxxon-27116-32-Inch-64-Inch-Milling/dp/B0017NQG1Q?ie=UTF8&psc=1&redirect=true&ref_=oh_aui_detailpage_o02_s02
- 1,354 replies
-
- constitution
- model shipways
-
(and 1 more)
Tagged with:
-
I find the cow hitch for the outside knots works really well. Any slight ends that are not cut off flush are pointing back into the shrouds instead of pointing out of them, which I think makes them less noticeable. You do have to be a little more careful trimming them so you don't accidentally cut the ratline or worse, the shroud.
-
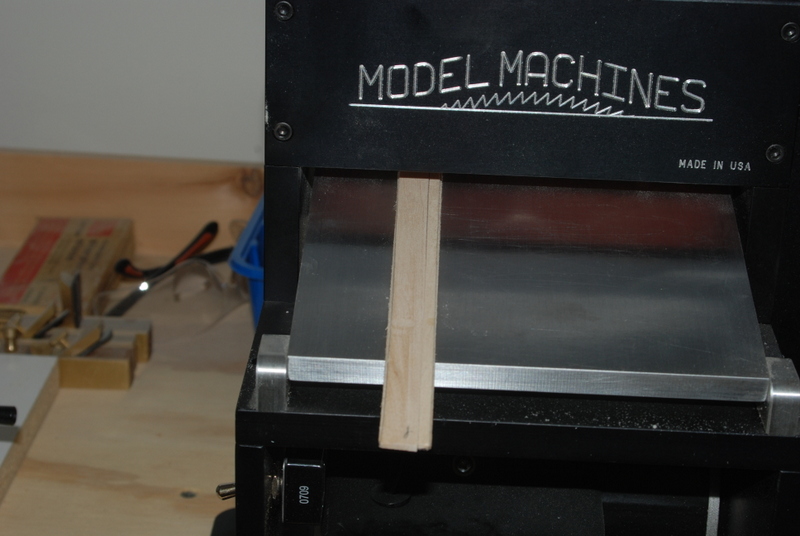
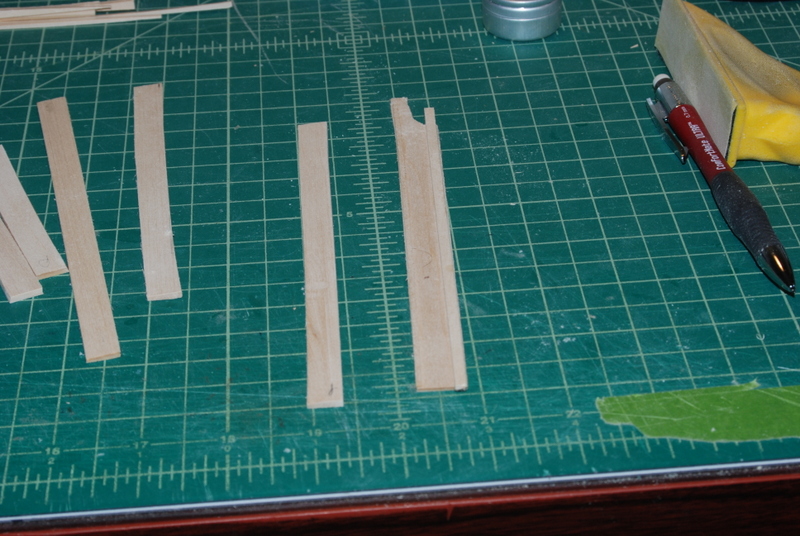
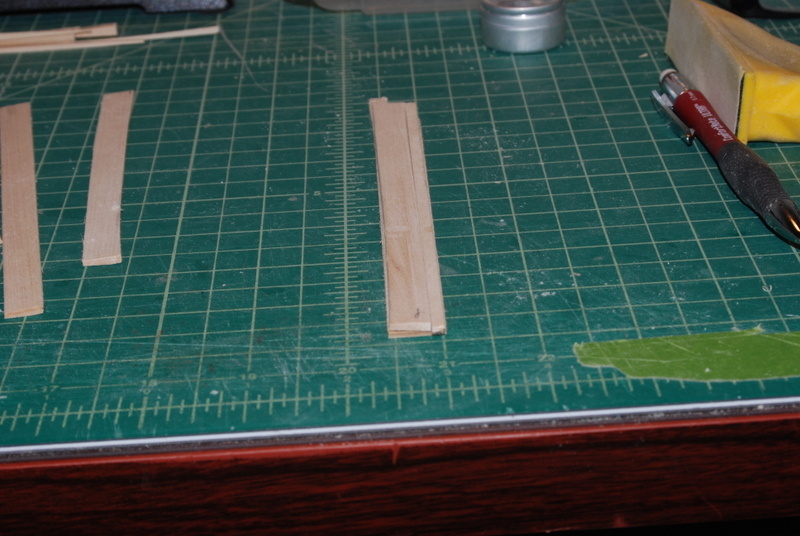
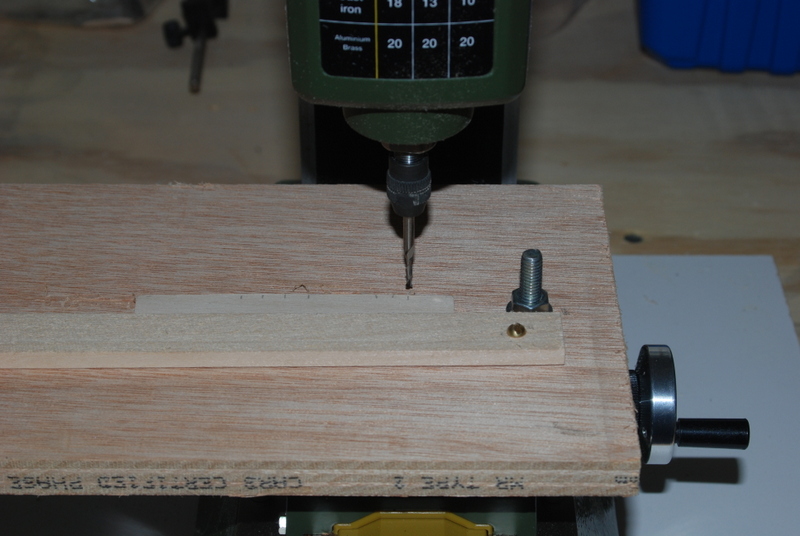
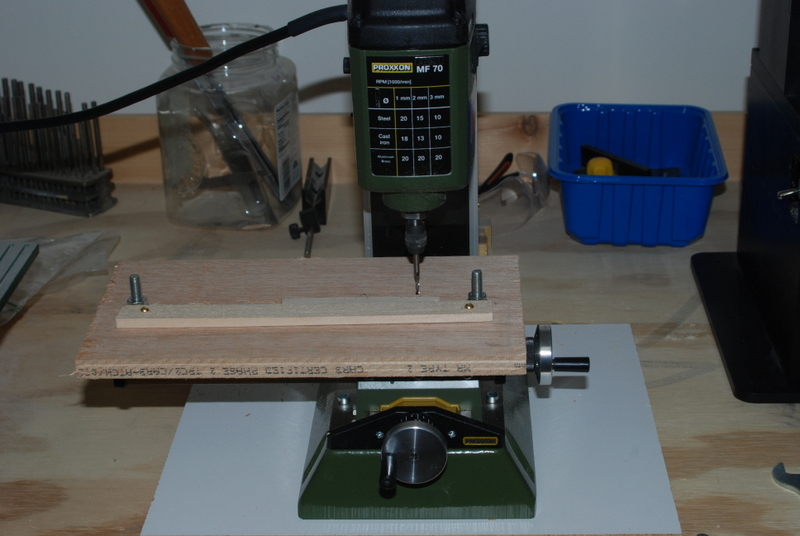
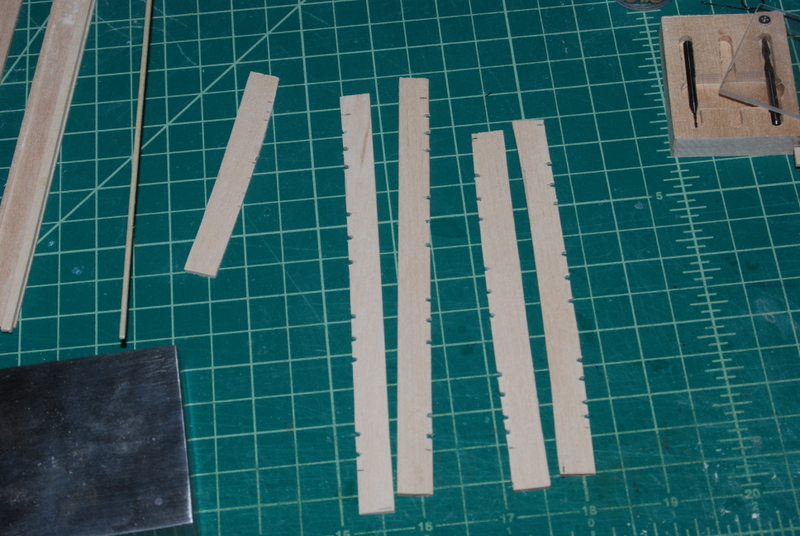
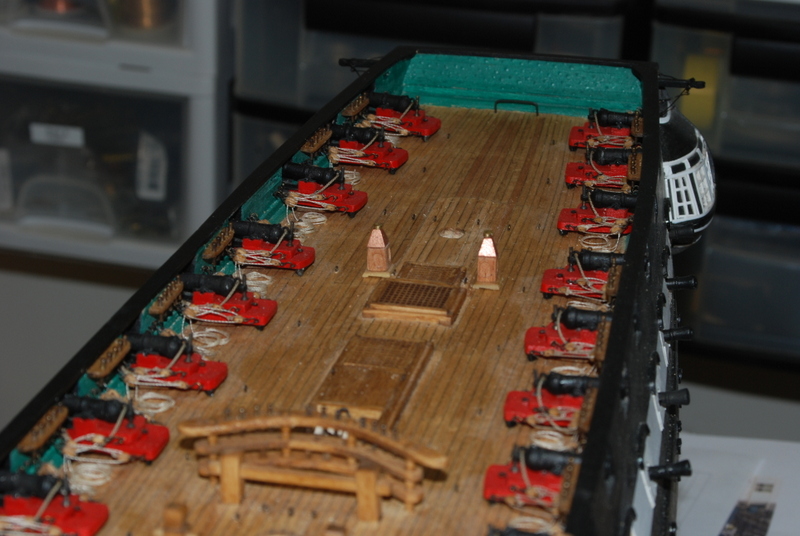
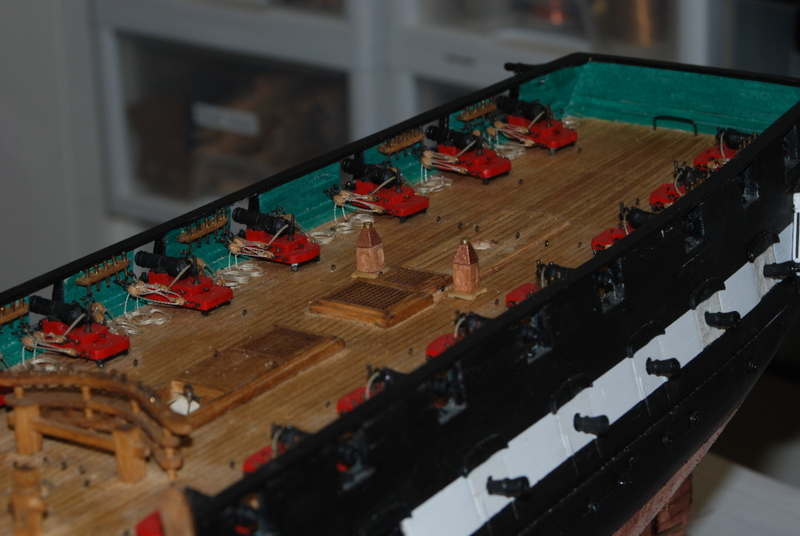
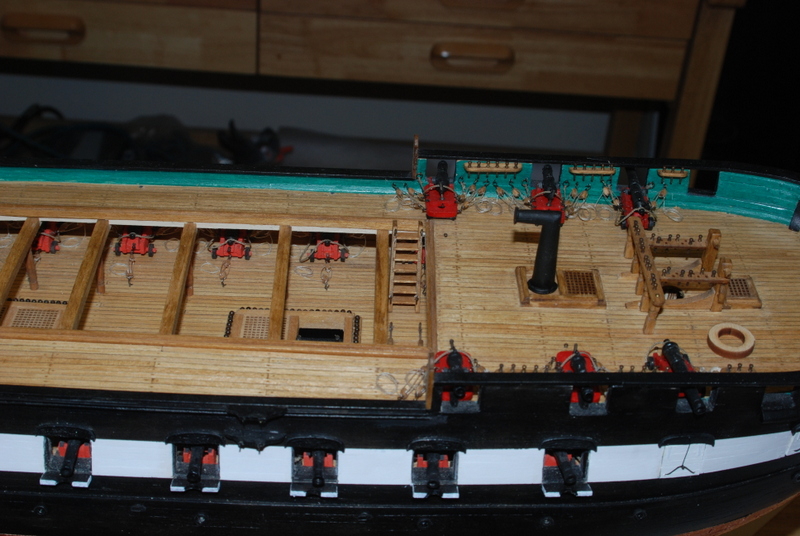
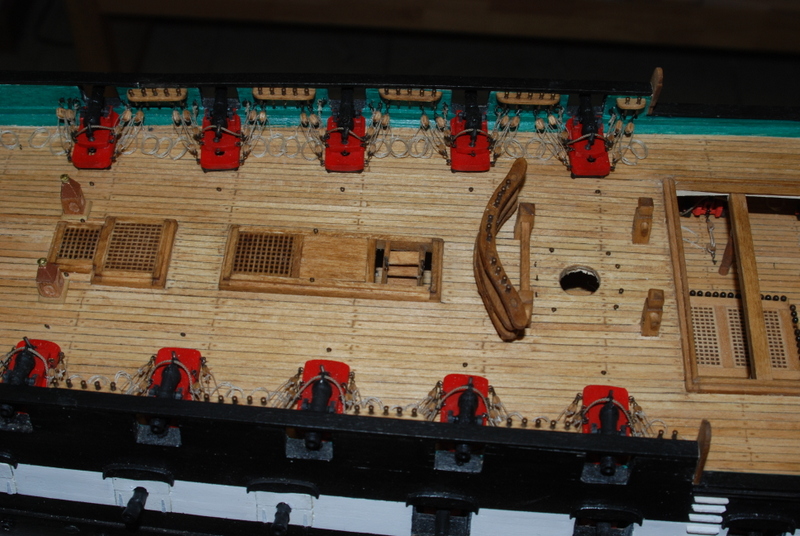
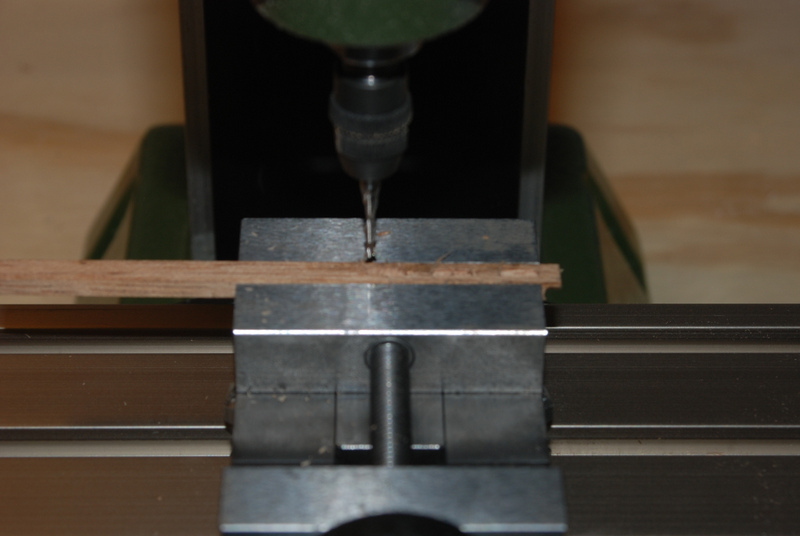
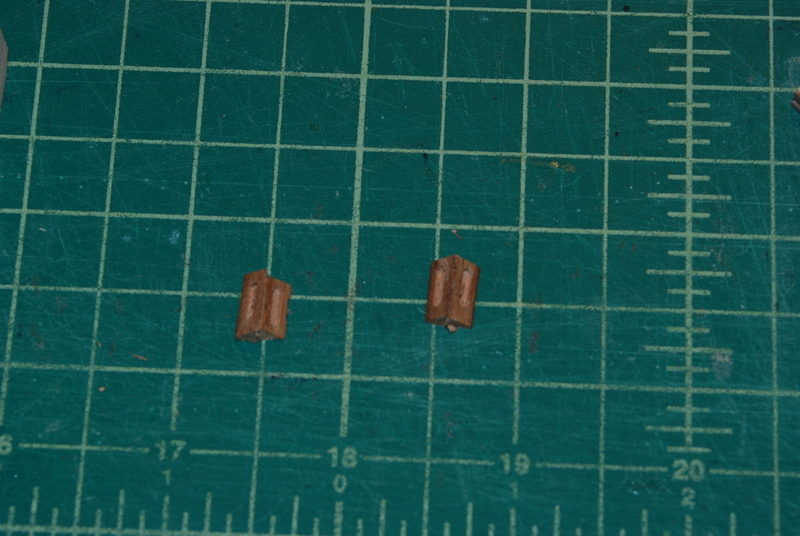
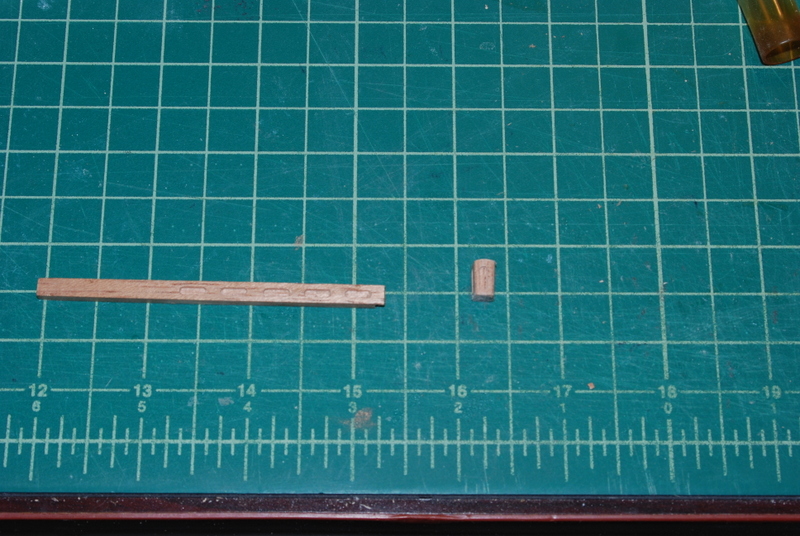
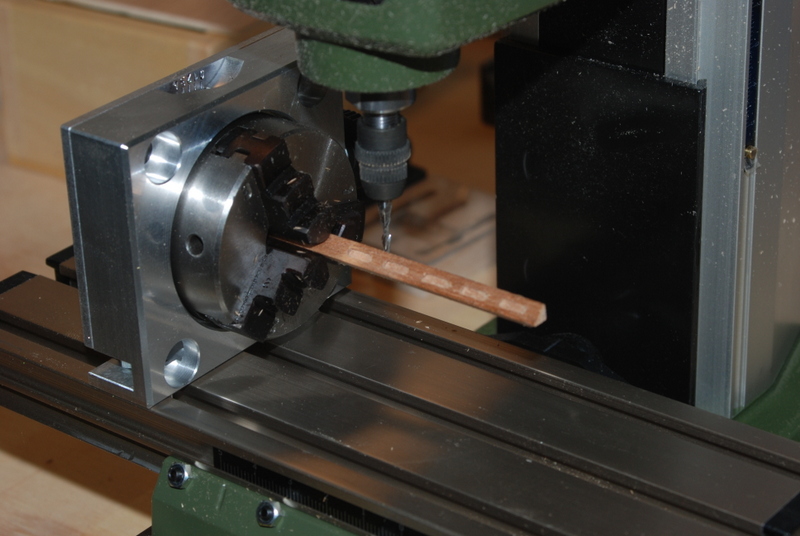
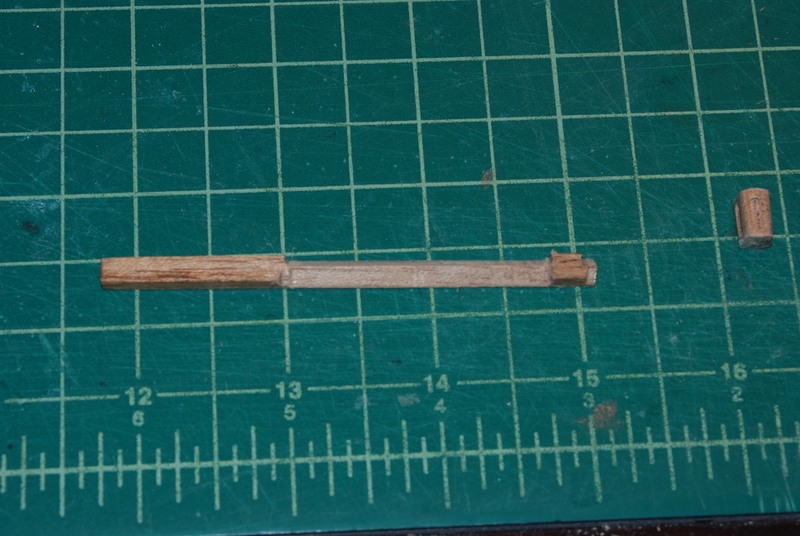
Thanks Popeye. I do like making those small parts and am finding that scratch building them can be very rewarding. I have finished up the spar deck, except for the adding the ships wheels which I will wait a little longer to do. I added shot holders around some of the gratings and added shot, but for this deck I spaced them out more in the rack. I happen to be reading TFFM Vol2 and saw that the English Swan class had a fixed block on the planksheer in the open waist for the fore sheet. This got me thinking that the Constitution plans show a fixed block in the bulwarks for the fore sheet, but I don't have bulwarks there because of the open waist. So, I am going to add a fixed block on the planksheer so that the fore sheet will look right coming back to the large cleat I put on the planksheer for it. Now I just have to figure out what it should look like. In the mean time I have started making the channels, now that I know their sizes. I started by cutting the rough rectangles out of 3/32" basswood sheet, leaving enough on them to cut in any curves needed to get them to fit to the hull. I then fit each one to the hull, using manila folder material as a template for the fore channels, since they curve more than the others. The main channels didn't need much curving and the mizzen channels I just sanded until they fit. I then cut each one to width duplicating the outside edge to the same curve as the inside curve. I then had to taper the undersides so that they came to 1/16" at the outside edge. I could have done this by hand and it probably would have been OK, but I have this new thickness sander just waiting to be used. So, I first had to make a jig to hold the channels at an angle so I could run them through the sander. I came up with this simple arrangement, which is just a 1/32" strip along one edge and a higher fence on the other side. The channels ride against the fence and sit on top of the 1/32" strip. I ran them through the sander using the jig after iterating on the first one until I had the 1/16" edge. Here is a completed one in the jig OK, now that they were tapered I needed to cut the notches into the outside edges for the deadeye strops. After some experimentation on how I was going to strop the deadeyes (more on that in a future post) I came up with the size of the slots. Now, how was I going to hold the channels while milling. I didn't want to lay them flat on the XY table because I didn't want the mill bit contacting the metal table. I thought to hold them upright in a vice and use the mill bit to cut the slot that way, but then I just happened to see this recent post from Frank. http://modelshipworld.com/index.php/topic/13125-dunbrody-irish-famine-ship-by-mahuna-148-sectional-model/page-13#entry418554 Now I knew how to do this right. I took a piece of plywood and bolted it to the XY table, then screwed a fence to the table that was parallel to the X axis. I held the channel against the fence and cut each slot with the bit down into the plywood slightly. I then cleaned up the slots with a small square file. I have the fore and main channels milled and will do the mizzen channels tonight. Then I will use a smaller bit to mill the slots for the eyebolts on the channels that have chains attached to them. More on these later too.
- 1,354 replies
-
- constitution
- model shipways
-
(and 1 more)
Tagged with:
-
Those planks and treenails look great, Frank. I have to really thank you for the photos because I have been thinking how best to mill the slots in the channels for my Connie and your setup will work great for that. I had not thought to use a plywood backing board on the XY table with a wooden fence. I love those sensitive drilling attachments, but I have yet to find one that will fit either my drill press or mill. They seem to all be made for full size milling machines. Oh well, they are pretty expensive anyway. Keep up the great work.
- 649 replies
-
- dunbrody
- famine ship
-
(and 2 more)
Tagged with:
-

Question on MS Constitution kit - Channels
usedtosail replied to usedtosail's topic in Wood ship model kits
Yes, I was thinking that the width shown on the plans (thanks to David for showing me where) would not be wide enough for an engine too, unless maybe they were longer and narrower than what Joel showed above. But then again the plans are for the ship as she is today so perhaps the channels were wider in the past to account for them. -

Question on MS Constitution kit - Channels
usedtosail replied to usedtosail's topic in Wood ship model kits
Thanks Joel and Henry. I was getting scared that I was going to have to make two of those engines. It would be a conversation starter though. That is really fascinating information (at least to me). -

Question on MS Constitution kit - Channels
usedtosail replied to usedtosail's topic in Wood ship model kits
Thank you all for the answers. This is exactly what I needed. David - I should have just looked at your log. I forgot that you have added the channels already. -
I have a question for all you builders of the MS Constitution kit. I am making the channels but I looked through all the plans last night and none of them show what the width of the channels should be - ie the distance from the hull to the outside edge of the channel. There is a side view that shows the length and what looks like a taper from about 1/8" at the hull to 1/16" at the outer edge for the thickness, but I could not find any view that shows the channels from above. The AOS book does show them from above, so I may just take the width off of those plans, but I was wondering if this is something that the MS kit lacks, and what other builders of the kit have done. While I am asking, does anyone know if there should be supports or knees either above or below the channels? If i go with the width in the AOS book, there are very wide and seem very flimsy without any supports. I imagine the taper helps some with more contact area at the hull, and I will certainly use pins between the channels and the hull. Again the plans don't show any supports that I could see. Thanks in advance for the help.
-
Thanks everyone. Matt - that's OK because its suggestions like that that got me to try the tape in the first place. The drilling error was probably mostly me. I do have some center bits my brother gave me a few years ago but I forgot I had them. Next time I will use them for sure. David - I know what you mean about these family events. We are have been having a great time all weekend. Geoff - I saw that you recently received many of these same Proxxon tools and more. They are a blast to play with.
- 1,354 replies
-
- constitution
- model shipways
-
(and 1 more)
Tagged with:
-
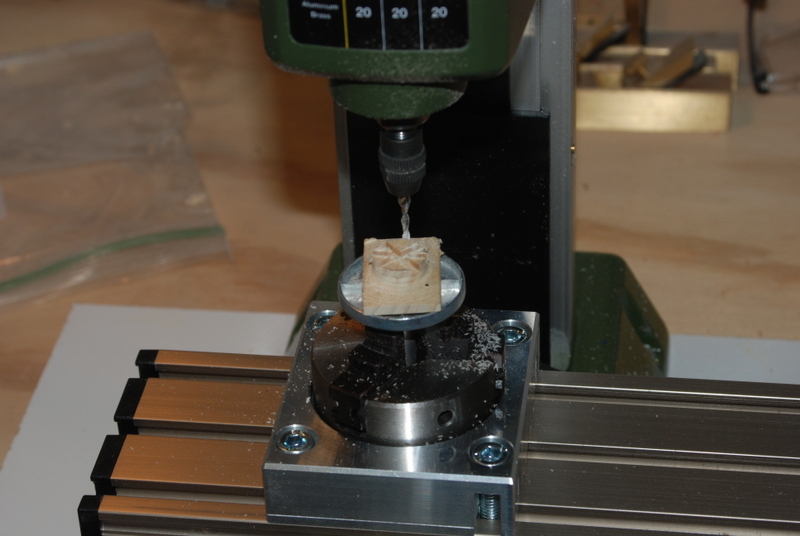
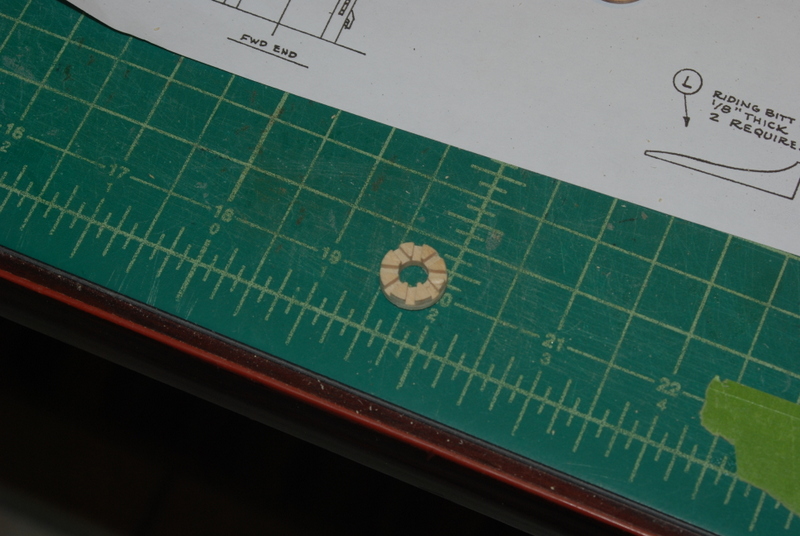
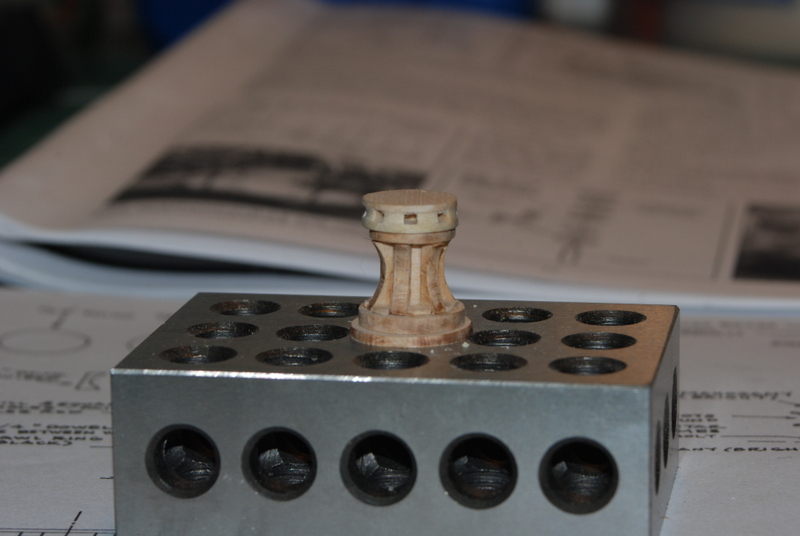
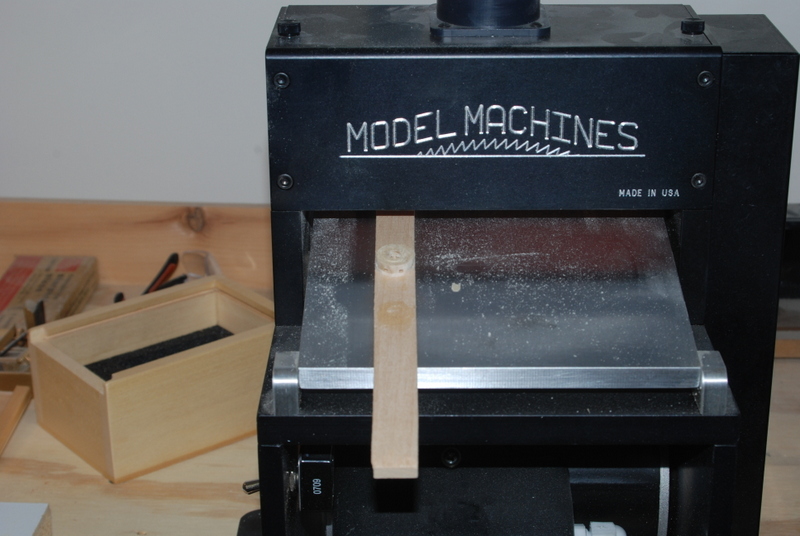
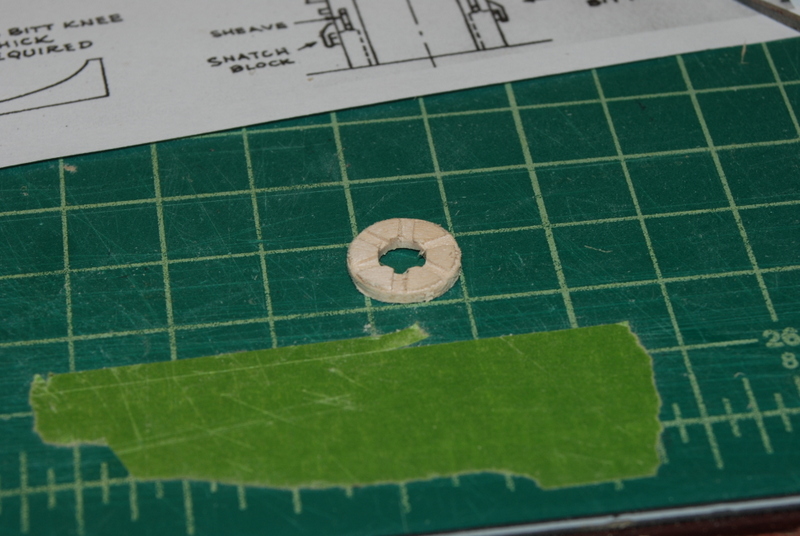
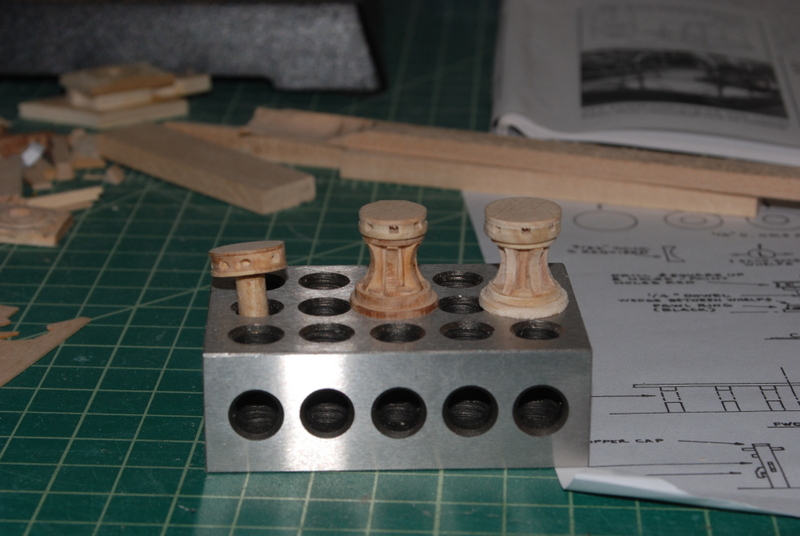
Hi Matt. I tried putting tape on the hemostats but the cleats are so small they weren't gripping them well and they kept flying out. I received two smooth jaw hemostats that cost me a whopping $12 on Amazon and they work great. Thanks for the advice, though. I have been building the capstan and after three attempts I finally have one I like. Here is the tale. I started by using the kit supplied laser cut pieces, particularly the thick round piece for the head. You are supposed to drill 8 holes around the edge then square them up with a file. Sounds easy, right? I do now have a mini mill with a dividing head, so that should make this a cake walk. I glued the top to a piece of dowel and put it in the dividing head so that I could drill each hole by rotating it 45 degrees. This part went OK, but the spacing between the holes was slightly off, as well as the horizontal spacing to the head, I think from deflection of the drill bit. And trying to square these off just made them look out of round. So I stopped there with this attempt. For the second try, I turned a piece of thick sheet wood to make a new head, then put this in the mill horizontally and used an end bit to mill four slots through the head at 45 degree angles to each other. The depth of the slot was the size of the hole and the bit was the same size. For the center hole, I used the same mill bit while it was on the mill and routed progressively larger holes by moving the X axis of the XY table slightly and rotating the dividing head a full turn. The nice part was that this ensured a perfectly centered hole, which I have trouble with on the lathe. After that I just glued a piece of sheet to the top to cover the holes. I used the thickness sander on both sides of the top to get it to the right thickness. I temporarily glued the part to a strip of wood to feed it into the sander, which worked great. I then used the rest of the supplied parts to complete the second capstan attempt. The head looked a little small when I was done, but I was going to live with it, but then I tried adding the little wedges between the whelps. It was really hard to get these to look right and in the end they never really did. It also showed me how much the spacing between the whelps was off, even though I marked the bottom part for where each one should go. Now I could either live with this capstan or make one totally from scratch. I got to thinking that with the mill I should be able to mill in slots for the whelps to fit in on the bottom piece, which would look like wedges when the whole thing was assembled, and help space them more consistently. This got me pumped for another try. So, I made the head the same way, but made sure I didn't turn it too small from the start. It looked much better than either of the first two attempts. I also turned the other pieces from sheet stock and used the thickness sander to get them to the right thickness and a consistent thickness. For the bottom piece, I was able to mill in the slots using the exact same process as the head but with a smaller depth of cut. For the new whelps, I took a piece of strip wood that was roughly the size of the whelp in profile and used the Dremel with a sanding disk to get the shape of the whelp, then cut off slices in the table saw. I sanded these a bit thinner until they fit in the slots and glued two on opposite sides of the center dowel, fitting the bottom piece while the glue was still wet. I then fit in the other four whelps. These came out so much better than trying to fit individual pieces between the whelps. I added the final bottom piece and put the whole capstan back into the lathe for a final shaping and sanding. Here are the three attempts. The good one is on the right (but that should be obvious). I will give this two coats of oak stain and add it to the platform between the hatches, after I drill a hole for it. The best part of this project is that I got to use almost all of the power tools i have acquired over the last couple of years, which was a blast. I should have taken a pic of the workshop at one point. There were tools and stuff everywhere, although I did try to keep up with the sawdust as I went along. There was a lot of sawdust generated for such small parts. We are having my son's graduation party this Sunday (he just received his masters degree in computer science), but Mrs. UsedTo broke two toes at work yesterday, being run over by a wheel chair with a large middle schooler in it. I think I am going to be very busy this weekend but not in the shop. More next week.
- 1,354 replies
-
- constitution
- model shipways
-
(and 1 more)
Tagged with:
-
Nice setup and jig you have there Matt. The results really do look very realistic. This is one of those details that is worth taking the time to do because you just don't see it on other models. Is that the Dremel drills stand you are using? And is that a precision drilling chuck like you would see on a mill? Thanks.
- 117 replies
-
- constitution
- model shipways
-
(and 1 more)
Tagged with:
-
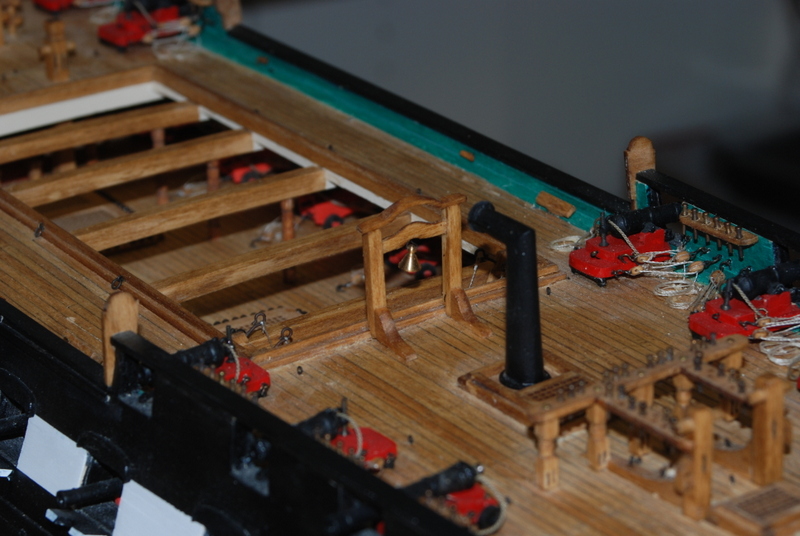
Al - you are doing a great job on your Glad Tidings. The Constitution build is a lot of the same processes, just more and bigger. If you are comfortable planking, for instance, it is just more planks to do. The instructions are probably very familiar to you as Model Expo seems to reuse a lot of the same information. For this detailed a ship, however, I think they are minimal. Another option is to purchase the Launk Street shipyard tutorial for the Constitution, which uses this model. The first chapter is available for free, so you can take a look and see what you think. I used the first chapter but did not use the rest. I think you could do a decent model of this ship if you take your time. It all depends on what you want in the end. In my case, I know I will be pleased with the outcome even with the many flaws because 1. I am learning a lot and have attempted things I would never have tried before, and 2. It is taking me a long time, which to me is a good return on investment. Oh, and it is a big sucker so think about where you will put it when finished. Geoff - I was going to grind the grooves off one of the hemostats I have, but they seem really hard, so I went for the easier solution. Here are some pictures of the small wooden cleats from Syren in place. I am very happy with the result. And here is what I was referring to in an earlier post. While looking for information on the binnacles, I re-found Force9's build log (on another site) and there was this great looking belfry that he added to his Constitution. His research found that she may have had a belfry in the 1812 era, so he put one in. I liked it so much I had to try making one. The curved piece at the top was the challenge to me, so I first tried making a form from some plywood and bending a piece of basswood strip in it. This came out OK, but the strip thickness was not consistent across the whole curve. My second try used a piece of basswood sheet. I cut the upper profile in the scroll saw, then made a cut straight across at the thickness of the ends. It was then just a matter for filing out the underside of the curve until it was the same thickness all the way along its length. I was quite afraid that the piece would split somewhere near the end of that process, but luckily for me it did not. The brass bell I had left over from a previous build and I just added a large eyebolt that I opened up to hold the bell, then glued it to the underside of the cross piece. I have been going through the two rigging plan sheets to start figuring out the sizes of line I need to make. In the process, I saw that the main stay and preventer stay connect to bullseyes that are attached to the bulwarks under the bow pin rail. I think it will be a good idea to add these bullseyes now while I still have good access to this area.
- 1,354 replies
-
- constitution
- model shipways
-
(and 1 more)
Tagged with:
-

Brig Eagle by robnbill - 1:48
usedtosail replied to robnbill's topic in - Build logs for subjects built 1801 - 1850
I like that look of the rope coils. I tried for something similar. You have got to show the horizontal milling set up for the masts when you have it figured out. Thanks. -
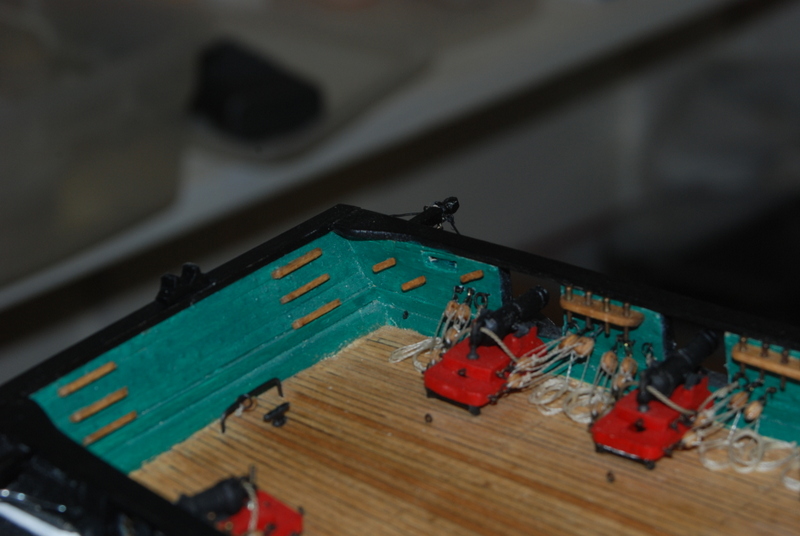
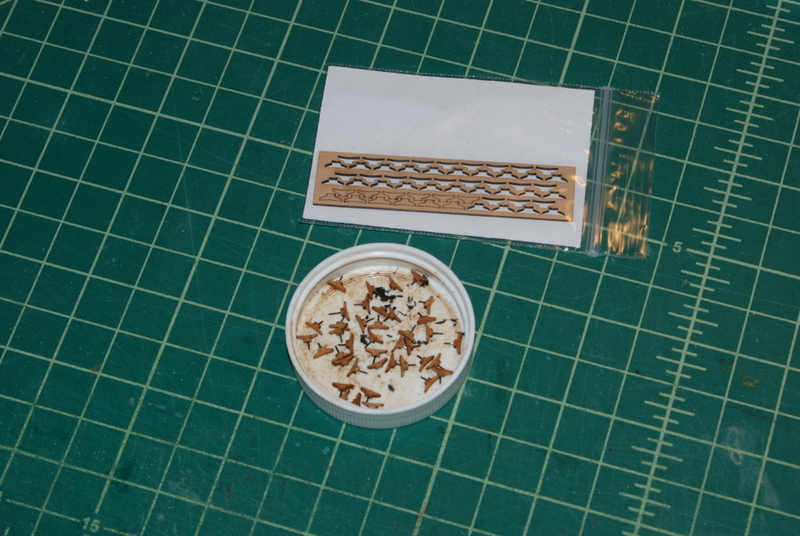
I have been working with the wooden cleats from Syren to get them ready to install. I cleaned about 40 of them using a small file. This took a while but they look great to me. They are so small (I am using the 5mm versions) that the only way I can hold them while working on them is with a hemostat. Unfortunately, all of the hemostats i have have grooved jaws, so they left some slight indents on the sides of the cleats. I was afraid these would be really noticeable after staining, but they look OK. I have since ordered some hemostats that have smooth jaws for future work like this. After staining, I drilled a tiny hole into the base of each one and glued in a small piece of wire. Since most of these will have lines attached, I wanted a more secure connection than just gluing that bases to the bulwarks. Some of these will be used on other parts, like the spanker boom. I have started adding these to the bulwarks. The size is perfect and they fit in all the places they should. I was going to include my attempt at a cleat to compare, but it was too pathetic. I have also been getting the pieces of the Syren serving machine ready for assembly. This involved removing the char from 1/4" pieces of cherry. I recently received a Dremel routing table attachment which I used with a sanding drum on these pieces. It worked great. I finished the clean up with sanding blocks. The wood is absolutely beautiful when sanded. I gave all the pieces a coat of Wipe on Poly last night and will start assembly soon.
- 1,354 replies
-
- constitution
- model shipways
-
(and 1 more)
Tagged with:
-
Wow, thanks so much guys. Tim - thanks for the advise on assembling the serving machine. That was the problem with the one I made - everything was too tight. The wax in the bearing surfaces will help too. Starboard - I am so glad I could help. I would love to see some pictures of your ship.
- 1,354 replies
-
- constitution
- model shipways
-
(and 1 more)
Tagged with:
-
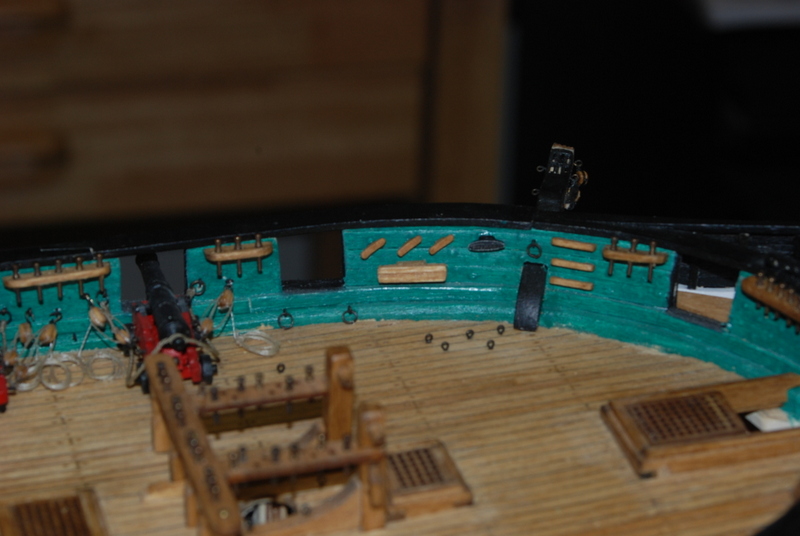
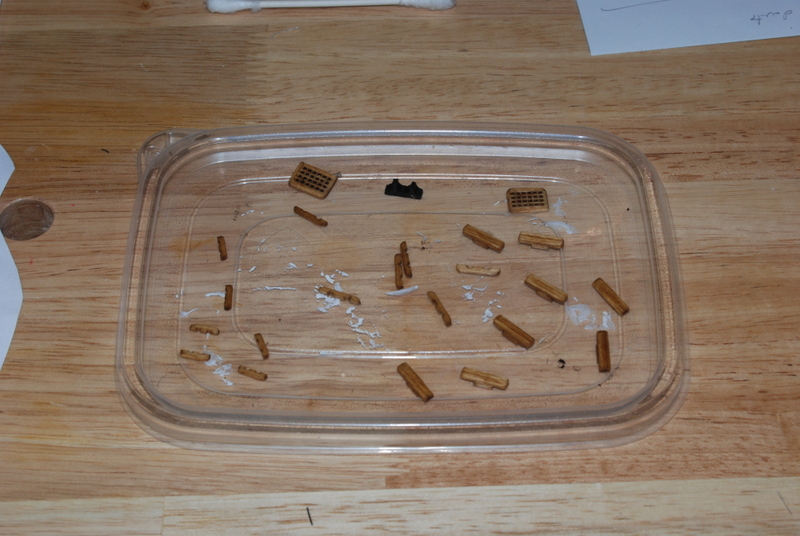
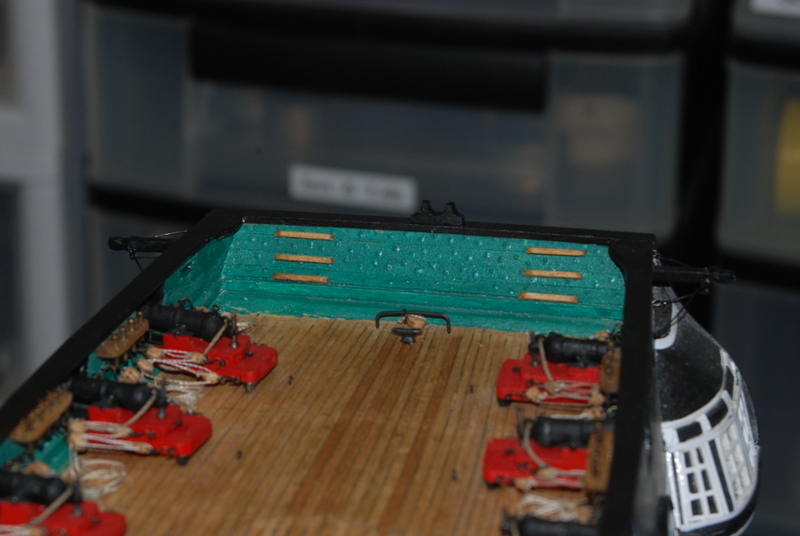
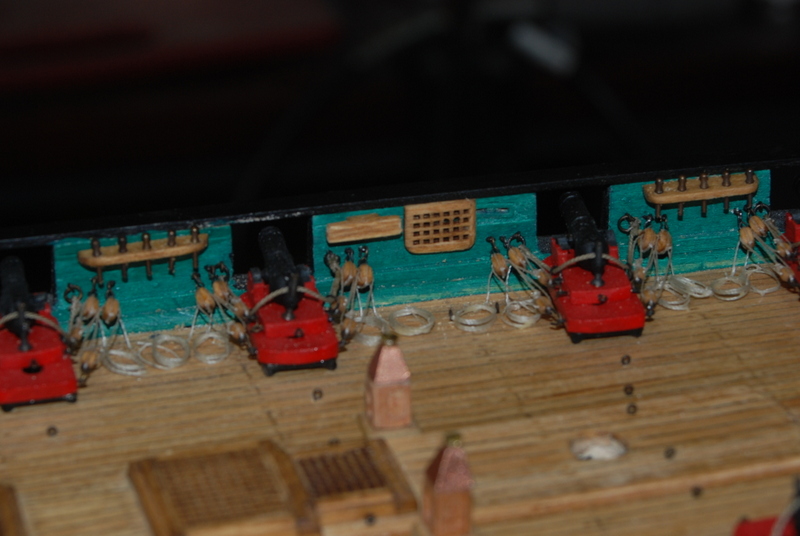
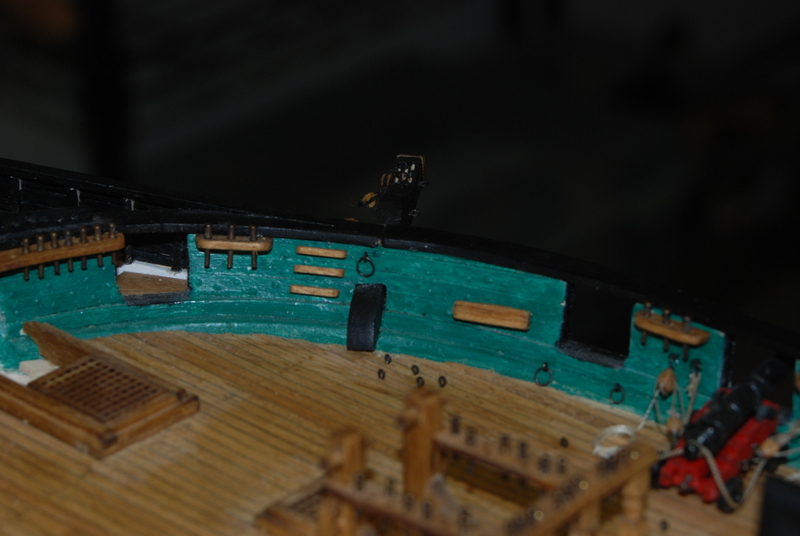
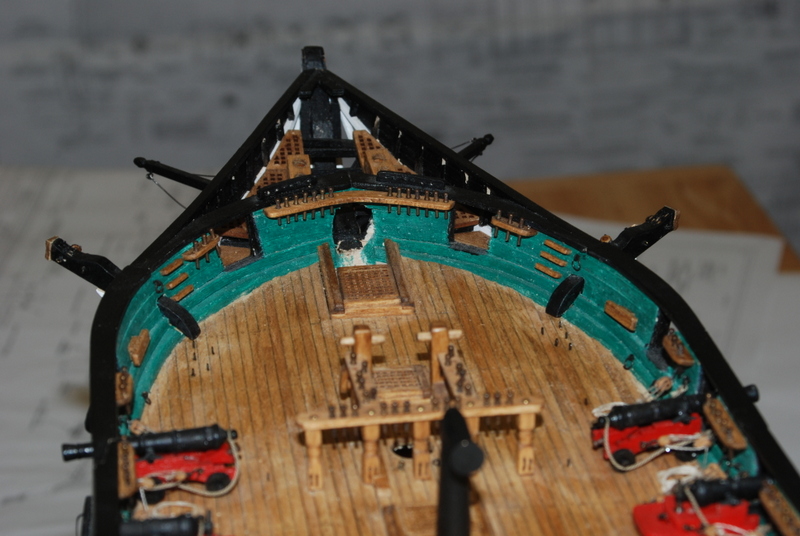
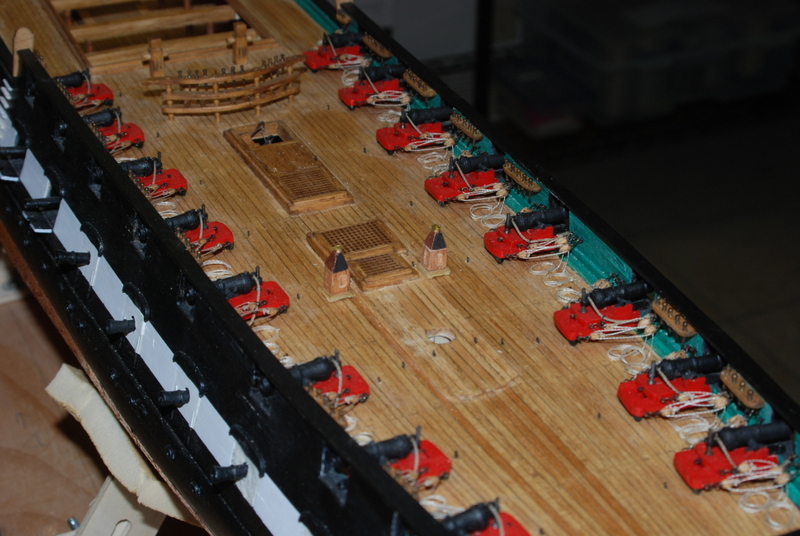
Thank you Nenad, Popeye, and Geoff, and for the likes. Geoff, good luck with your new ladders. I am sure you will do a great job on them. I have been working on more spar deck and inside bulwark details. I made steps for the transom and bow areas, and the few large cleats that are needed. I also made two horse blocks (those grating pieces) that were used as platforms to stand on. I attempted to make the small wooden cleats, but I was not happy with them so I have an order into Syren for some cleats of the appropriate size. While I was on the web site I also ordered a serving machine to replace my homemade one, since I have a lot of serving coming up. It looks so much better and I know it will work better too. Here are the pieces installed, except for the small cleats and the two iron cleats in the bow. I have metal cleats from a previous model I am using for them, but they are still being painted. I installed the horse blocks in the folded down position, since without the higher bulwarks of the current ship configuration, I could not use the current mechanism of rope to hold them up. I am not sure how they were held up on the original ship. And here is the bow details. I am working on something that I may or may not include, depending on how it turns out. Then it is off to fabricate the capstan.
- 1,354 replies
-
- constitution
- model shipways
-
(and 1 more)
Tagged with:
-
Looking really good, Matt. For metal castings, I use Bin Primer after cleaning the parts in white vinegar. This has worked very well for me. I'll have to give gesso a try at some point though.
- 117 replies
-
- constitution
- model shipways
-
(and 1 more)
Tagged with:
-
Very nice work Ken on the boomkins. Those rods look excellent, much better then my attempt at using wire. I thought the eye bolts at the ends were for the rods to hook onto the boomkins, though. Also, I thought there were two rods on each of the fore boomkins. At least that is how I interpreted the plans. I am hoping you will pass me soon so I can start getting ideas from you.
-
Nice job, Matt. Your attention to detail now will really pay off as you progress.
- 117 replies
-
- constitution
- model shipways
-
(and 1 more)
Tagged with:
-
Nice job on the replacement. I could have sent you one of mine that I didn't use, too. That is still an option if you like.
- 117 replies
-
- constitution
- model shipways
-
(and 1 more)
Tagged with:
-
And here are the finished binnacles placed in position but not glued down yet. I forgot to mention that for the base I glued a square piece of mahogany sheet to the bottom that I sanded at an angle. I also filed the underside to simulate the four feet at the corners. Overall I was very happy with the mill and how these turned out. You can also see in those pictures that I have started adding all of the eyebolts to the deck that will be needed for the rigging.
- 1,354 replies
-
- constitution
- model shipways
-
(and 1 more)
Tagged with:
-
Thanks Frank and popeye, and for all the likes. I am a bit hesitant to keep showing my pedestrian work after seeing the other Constitution build logs in progress now, especially Ken and David's, but they are all looking really good. I wish I had started this one after them, but over 2 years into this I am not stopping now. I finished up the ladders by adding some rope hand rails, using some large eye bolts I had for the stanchions. I also made the binnacles which house the compasses. I made the bases from some mahogany strips that I had left over from a previous build. These were not thick enough to make a square base big enough for the binnacles so I made them in four pieces, using my new tool/toy that I bought for myself as kind of a birthday present. This is the Proxxon hobby mill, and this seemed the perfect little mini project to try it out on. I first milled the recesses for each of the eight faces of the two binnacles, using an end mill bit that was just wide enough. After the faces were milled I attempted to square off the corners of the recesses with limited success. The bases were made with four pieces that each had a 45 degree angle milled into the back of them. To mill that angle, I used the dividing head I also bought with the mill, squaring up the strip then tilting the strip 45 degrees in each direction and milling off the material in the back, again with the end mill bit, but using the side of the bit. I then glued four pieces together for each base, and sanded them to final shape after the glue dried. They are no where near perfect but they do look so much better than my first attempt, which was to cut thin strips of mahogany and glue them to the sides of a square basswood plug. For the tops I did use square basswood that fit the bases. I put some tape on the table of my disk sander at 75 degrees, and used it as a guide to sand in the four faces of the simulated brass top. I then sliced these off the strip and fit them to the bases. I glued in a piece of wire as a holder and painted three of the faces with copper metallic paint (I didn't have brass paint or I would have used it), and painted the window face black. I thought about putting plastic over this face but it didn't look good so I left it off. I had also tried wrapping the whole top in thin brass sheet, but the edges just made it look bad, so I went with paint. I made two vents by making thin slices of some brass tubing that I topped with some thin brass sheet. Pictures of the finished binnacles are in the next post.
- 1,354 replies
-
- constitution
- model shipways
-
(and 1 more)
Tagged with:
About us
Modelshipworld - Advancing Ship Modeling through Research
SSL Secured
Your security is important for us so this Website is SSL-Secured
NRG Mailing Address
Nautical Research Guild
237 South Lincoln Street
Westmont IL, 60559-1917
Model Ship World ® and the MSW logo are Registered Trademarks, and belong to the Nautical Research Guild (United States Patent and Trademark Office: No. 6,929,264 & No. 6,929,274, registered Dec. 20, 2022)
Helpful Links
About the NRG
If you enjoy building ship models that are historically accurate as well as beautiful, then The Nautical Research Guild (NRG) is just right for you.
The Guild is a non-profit educational organization whose mission is to “Advance Ship Modeling Through Research”. We provide support to our members in their efforts to raise the quality of their model ships.
The Nautical Research Guild has published our world-renowned quarterly magazine, The Nautical Research Journal, since 1955. The pages of the Journal are full of articles by accomplished ship modelers who show you how they create those exquisite details on their models, and by maritime historians who show you the correct details to build. The Journal is available in both print and digital editions. Go to the NRG web site (www.thenrg.org) to download a complimentary digital copy of the Journal. The NRG also publishes plan sets, books and compilations of back issues of the Journal and the former Ships in Scale and Model Ship Builder magazines.


