usedtosail
-
Posts
2,421 -
Joined
-
Last visited
Content Type
Profiles
Forums
Gallery
Events
Everything posted by usedtosail
-
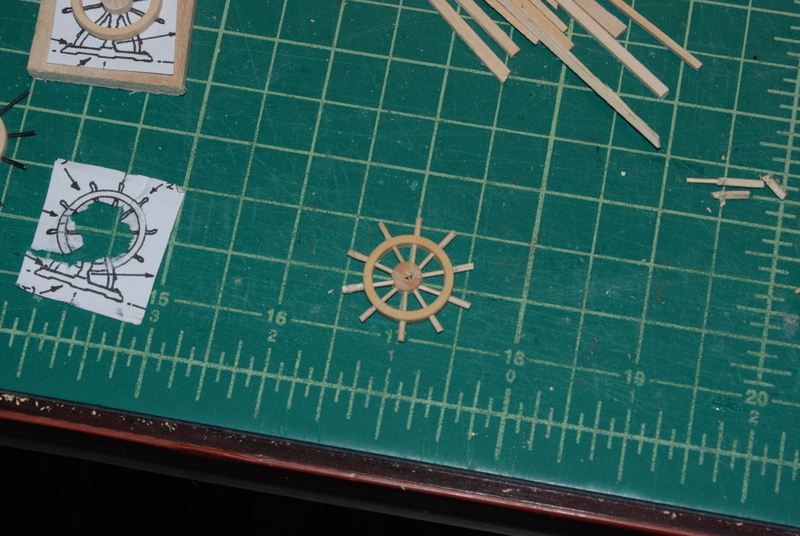
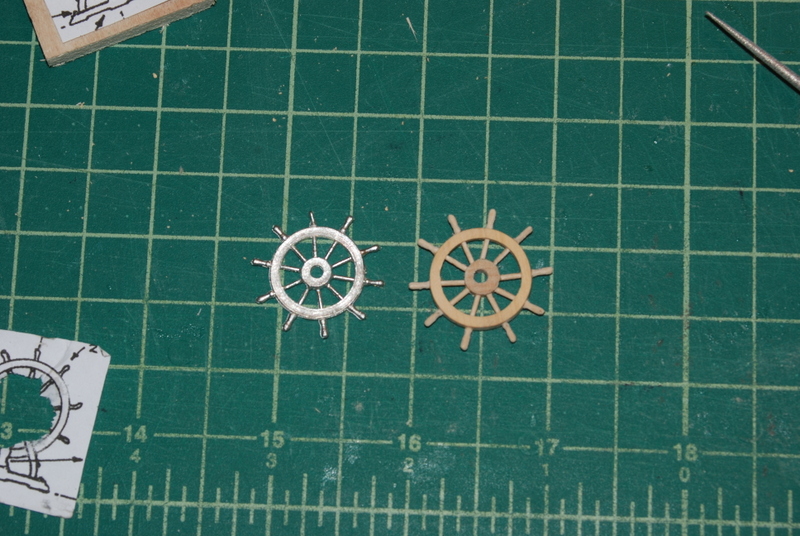
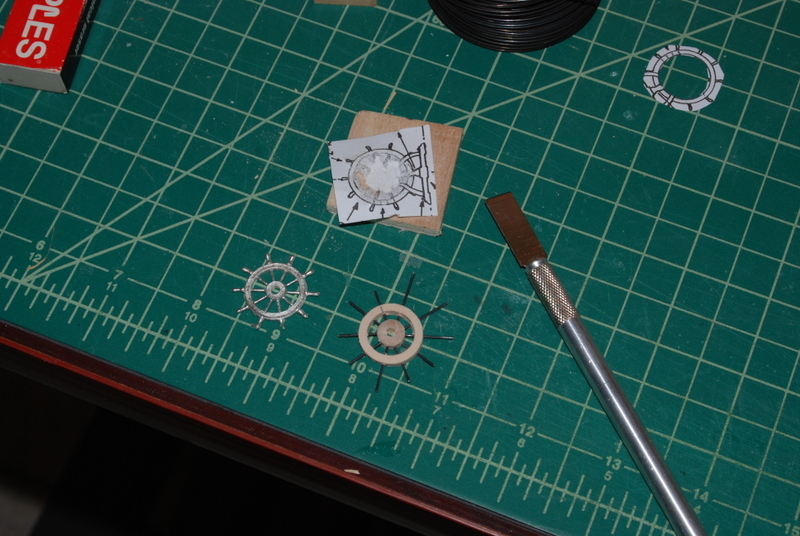
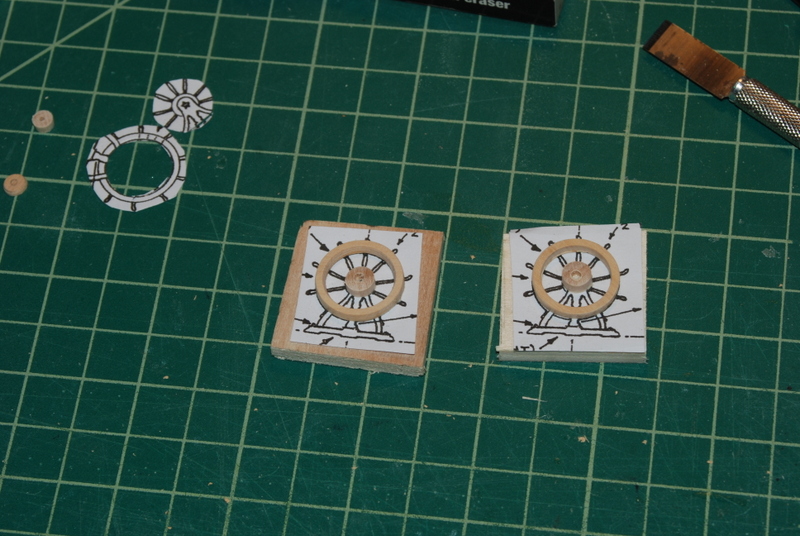
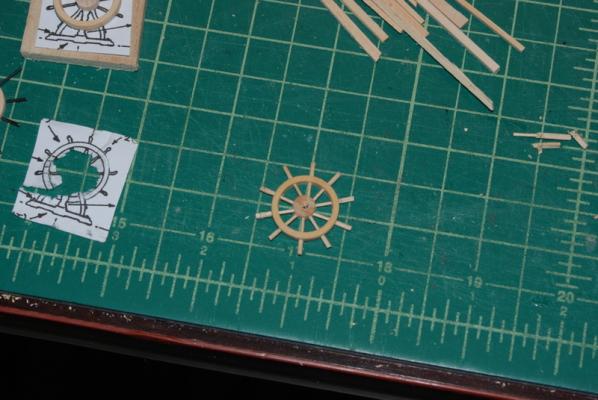
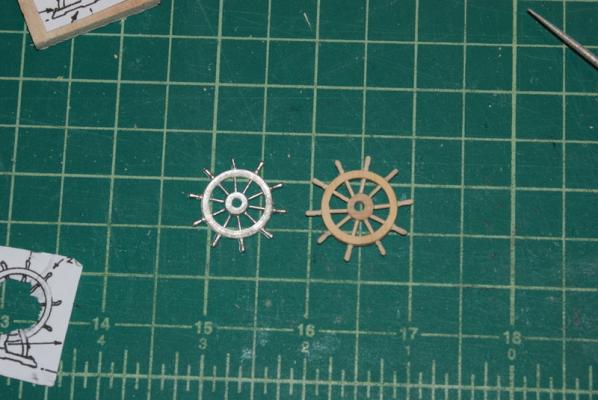
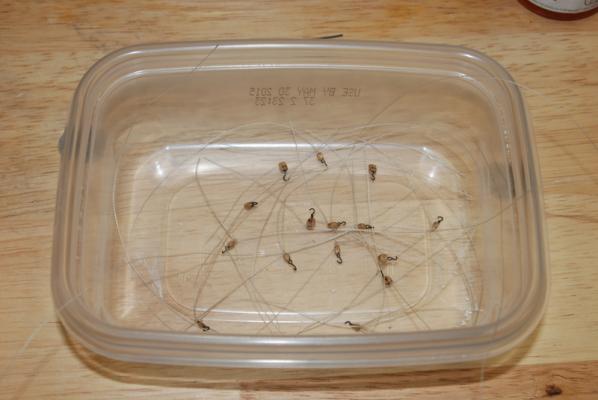
 JS - I can't access that web site - I get a Sucuri warning. Pressing on, I drilled holes in one of the rims for the spokes, then placed wire into the holes like I did for the first attempt. Here you can see the first one on the left and the new one on the right. It is much thinner and looks much better to me, so I am happy so far. I then turned the spokes using the Dremel and a draw plate. I made the thinner part of the spokes first to fit in the holes in the rims. I then turned the part sticking out for the handle in the draw plate and cut them to length. Here is how it looked at that point. The spokes were glued into the rim by sliding them out slightly then placing a tiny bit of glue on the end and just under the handle, then pushing them CAREFULLY back into the rims before the glue set, which happened pretty quickly. I broke a few in the process but they were easy to remake. The next day I used a small round file and a small flat file to shape the ends into the handles and here is how it came out. A few of the spokes don't line up across the inner hub, but other than that I am pretty happy with the look, compared to the metal supplied wheels. I then used the same process on the second wheel, but this time I was more careful drilling the holes at the inner hub. I started making the spokes last night and they are just set in place for now. Rounding and trimming the ends for the handles is next to do. I may redo the inner hub on the first one and make new spokes or I may remake a whole new wheel, but first I will see how the second one turns out.
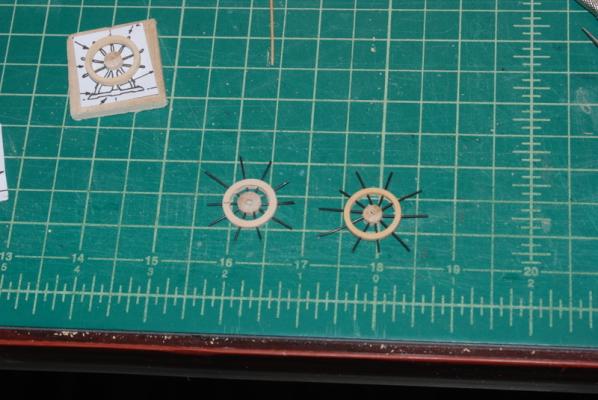

- 1,354 replies
-
- 8
-

-
- constitution
- model shipways
- (and 1 more)
-
Cutty Sark by NenadM
usedtosail replied to NenadM's topic in - Build logs for subjects built 1851 - 1900
Superb!- 4,152 replies
-
- 7
-
-
- cutty sark
- tehnodidakta
- (and 1 more)
-
Thanks Al and JS, I think I remember seeing that build log a while ago but I will go back and take a look.
- 1,354 replies
-
- 1
-
-
- constitution
- model shipways
- (and 1 more)
-
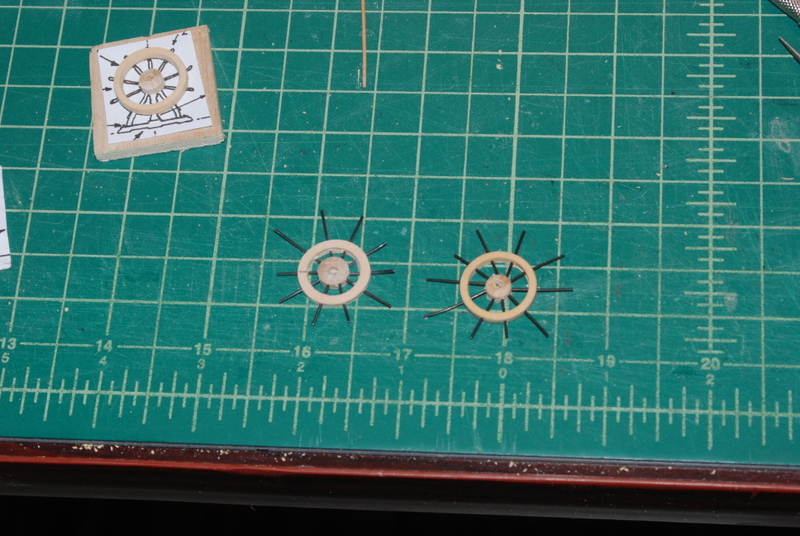
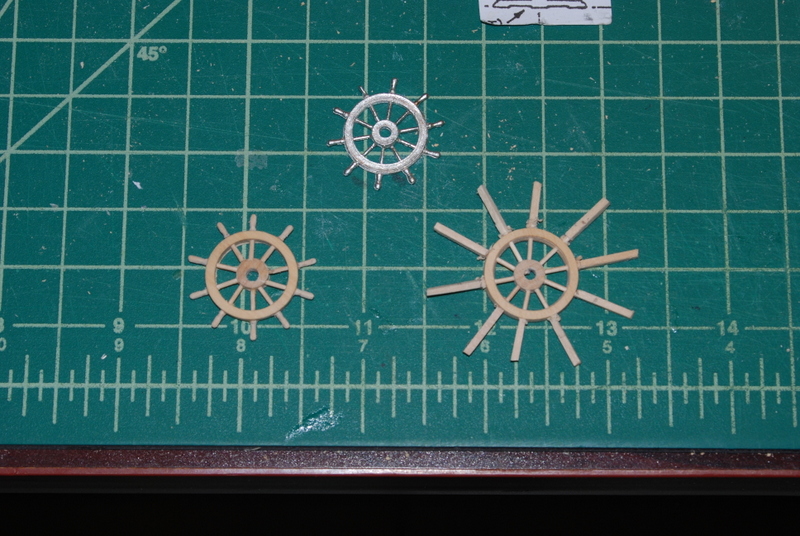
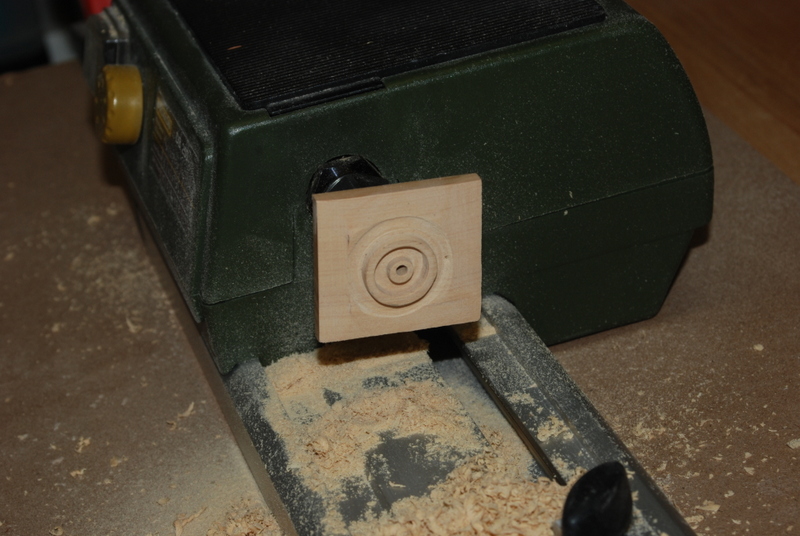
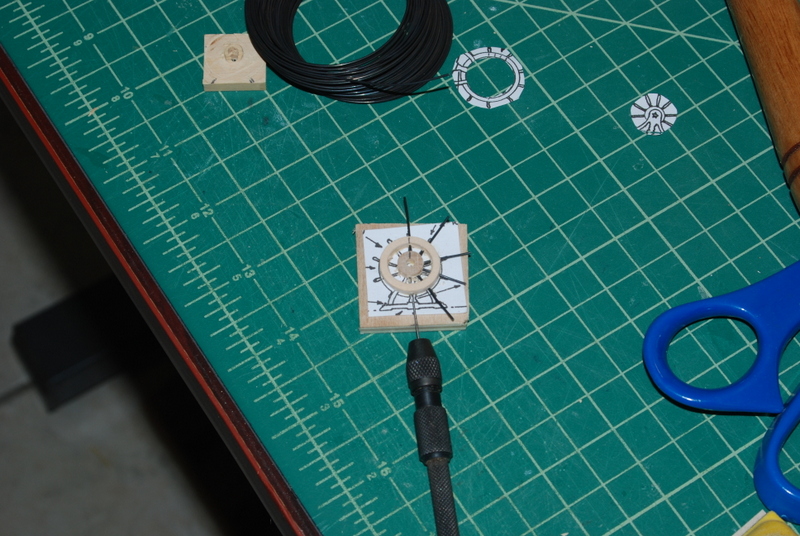
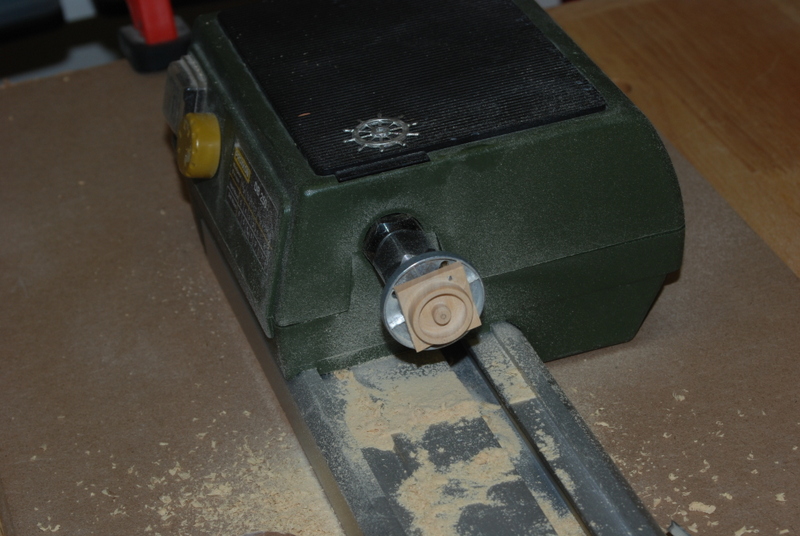
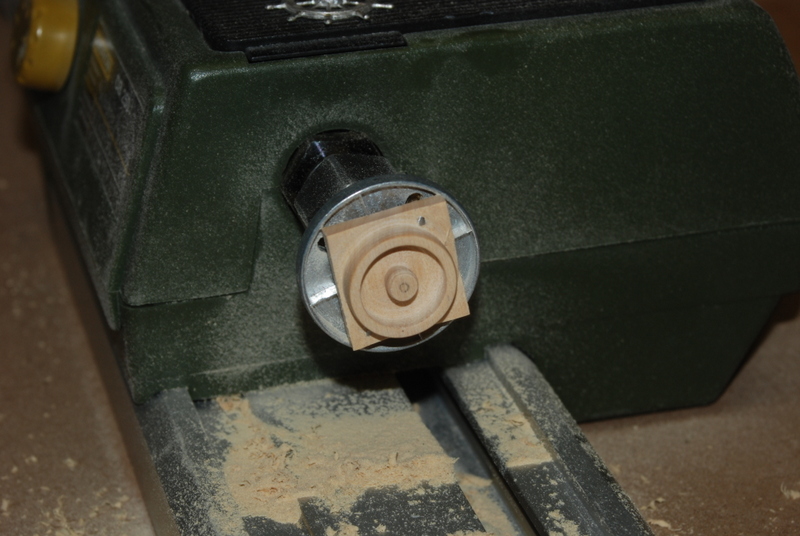
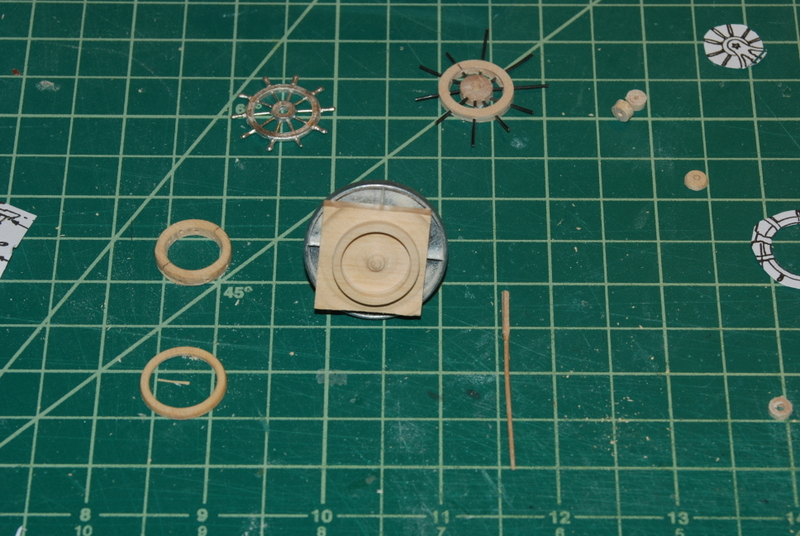
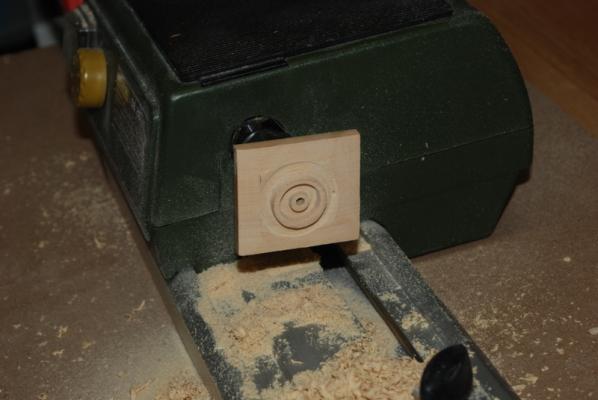
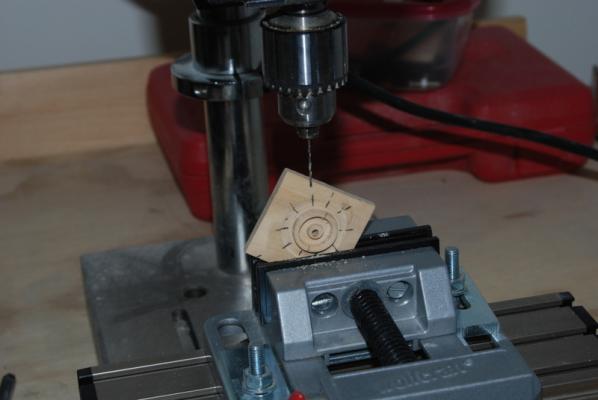
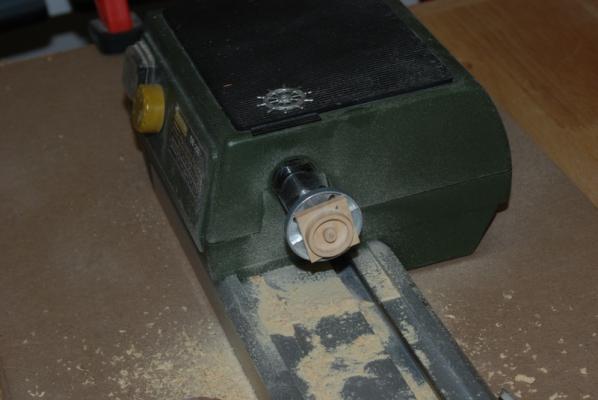
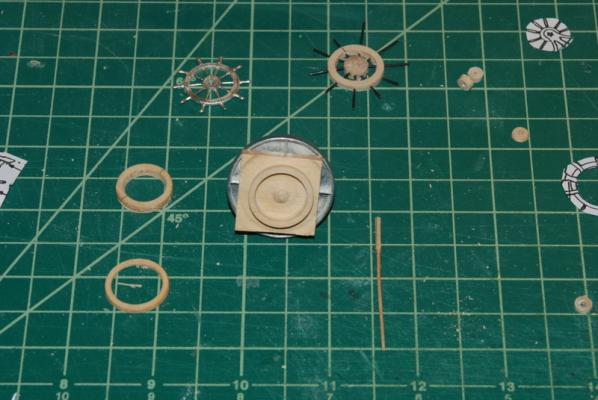
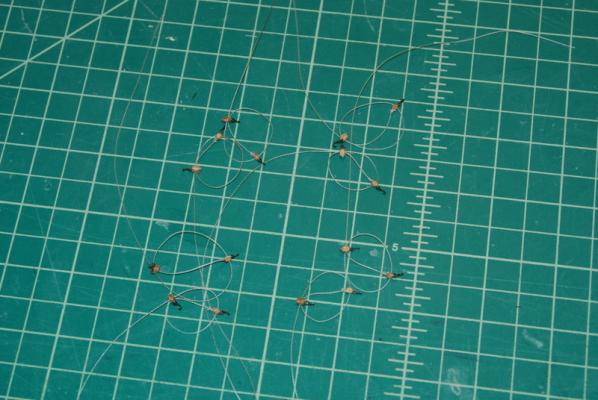
Thanks Al and Nenad. Nenad - you were the one that inspired me to try make new wheels. Yours came out great. Well, here is my weekly update for the build log. I figure I should at least let you know where I am. I have been doing a lot of work but nothing real to show for it yet. First of all I have made all of the flat rope coils I need to finish the spar deck guns, but haven't installed them yet. I have the Conny set aside under an old T-Shirt to keep the dust from making the wheels out of it for now. For the wheels, I read up on ways others have made these , including Nenad, EdT, David A., and others. I have come up with (I think) a process that works for me given my limited abilities and lack of precise machine tools. I started out with some basswood sheet, mostly to practice on. As I expected, the basswood doesn't work real well for this application. I glued up some square pieces of 1/16" basswood to make a 1/4" thick piece, with each layer turned 90 degrees to alternate the grain. I then glued this stack to the end of a longer piece of basswood and put it in the 4 jaw chuck i have on the Proxxon lathe. I was able to turn a rim of sorts with this set up, but the 4 jaw chuck is not very good at holding this kind of item very securely, so I was getting some wobble in the turning. I also tried to turn the inner hub at the same time with bad results. For one, I tried to drill the center hole using the drill chuck in the tail stock, but this holds the drill near the end and it was sticking out very far, so I was getting deflection which caused the center hole to be off. That would have been bad except that while turning it I managed to break it off because the basswood is so soft and my skills with a chisel are pretty bad. No pictures of these failures but I will leave it up to your imagination. I was tempted to give up at that point but I had to tell myself that was just practice. I had bought a piece of 1/4" boxwood a few years ago and I thought to give it a try. I was not going to use the 4 jaw chuck again so I had to come up with another way to hold the wood. In my box of lathe stuff I found a spindle with a small plate and some holes. I think it came with the lathe. I was able to hold the wood on this spindle with a couple of brass screws and it seemed very secure. I used brass screws because they were the only screws small enough that I had and I knew they would be very close to the tools so if I hit one it wouldn't do too much damage. So here is the set up in the lathe after I turned the two rims: I again tried to use the drill chuck on the tailstock, but I still had the same result, as you can see. I also had to remove a lot of material around the outside of the outer rim so that I could drill the holes for the spokes before removing the rims from the rest of the board. I first marked the spoke locations as best I could by copying the plans and cutting out the outer rim with the locations of the spokes. I copied those locations to the area surrounding the outer rim. This was not as precise as I would like it to be. I then put the whole thing into the vise on the drill press and lined up the drill bit as best I could with the center of the hub and drilled the holes: This also was not as precise as I wanted it to be as some of the holes were not centered on the rim and I was still having problems with drill bit deflection. But, I was able to cut the rim off the backing without any problems, so I was happy about that. So at this point I was confident I could do the cutting but needed a better method for drilling the holes for the spokes. I took one of the basswood rims I had made earlier and glued it to a piece of plywood. On the plywood I had glued the plans for the wheel, but only from the rim into the center, so the edges were loose. I took a piece of dowel for the center hub and carefully found the center and drilled the center hold by hand. I glued this piece to the plans too. The next day I used a pin vise and drilled the holes for the spokes by hand. I was able to line the drill bit up to the whole spoke image on the plans so I was able to drill these all nice and straight into the hub. As I drilled each hole I put a piece of wire in to substitute for a spoke: When all the holes were drill, I gently pried the rim and hub away from the plywood using a flat X-Acto chisel under the paper. I couldn't soak it in alcohol first because the rim was a sandwich of thin layers and might have come apart. With the solid boxwood rims, I will be able to soak them first. In any case, the rim and hub came away clean, and I just had to sand the paper off the back: So then the question was what to use for spokes. I didn't like the wire because I would have to make separate handles anyway and I want the wheels to be all wood, which I way I am not using the supplied metal wheels if I can help it. I tried something that I have seen on this site before for making treenails, which was to take a piece of 1/32" square stock and chuck it in a Dremel tool, then with the Dremel running, push the wood through smaller and smaller holes in a draw plate. This turned nice round tiny dowels and the ends that were in the Dremel chuck can be shaped into the spoke handles. At this point I have made exactly one of these, which you can see in a picture further down, but I am pretty confident this will work for the spokes. I will still use the wire as I drill the holes, but then I will replace each wire with a spoke one at a time after I spearate it from the backing so the whole thing will stay together. OK, so now I have the process somewhat down, so it is time to execute it. I turned a new outer rim and this time I tried to go deep enough to get both rims off the same turning. Let's just say that didn't work. I did get two rims but I by the time I sanded off the saw marks they were too thin in spots to drill the spoke holes. So, I turned two new rims, this time not bothering to make the center hub at the same time. Since I was going to be cutting these off the backing right away, using dowels for the center hub was a better option. I managed to get two nice rims, thinner than the basswood rims but not as thin as the last two, so I have enough meat left to clean these up before drilling the holes. I also cut these off using the lathe by just lightly holding a razor saw to the pieces as they turned until I cut through them. The widths are much more consistent this way and less sanding to remove saw marks was needed. In this picture you can see one of these still on the spindle and compare it to the basswood rims (with the spokes and directly to the left) and the too thin boxwood rim to the bottom left. You can also see the spoke prototype to the bottom right. Here are the two set ups glued up ready for drilling the spoke holes. Well if you have read all this expecting to see finished wheels, I apologize. I was pretty long winded. I am hoping to have finished wheels by the end of next week, probably without the stand yet. I may have another problem though in that the space for these to fit between the mizzen mast coat and the hatch coaming is pretty tight, so I can't let these wheels get too thick if I want room for the drum between them. If I end up getting nice wheel but they are too thick, I may end up using them as decorations on the ends of the cradle. At least I will know how to make these for future builds.


- 1,354 replies
-
- 10
-
-
- constitution
- model shipways
- (and 1 more)
-
Nice looking cannon, Ken. I really like your trunnion straps.
-
Thanks Ken I had the same problem with the carriage wheels (trucks). I am going to try to build two new steering/ship wheels.
- 1,354 replies
-
- 2
-
-
- constitution
- model shipways
- (and 1 more)
-
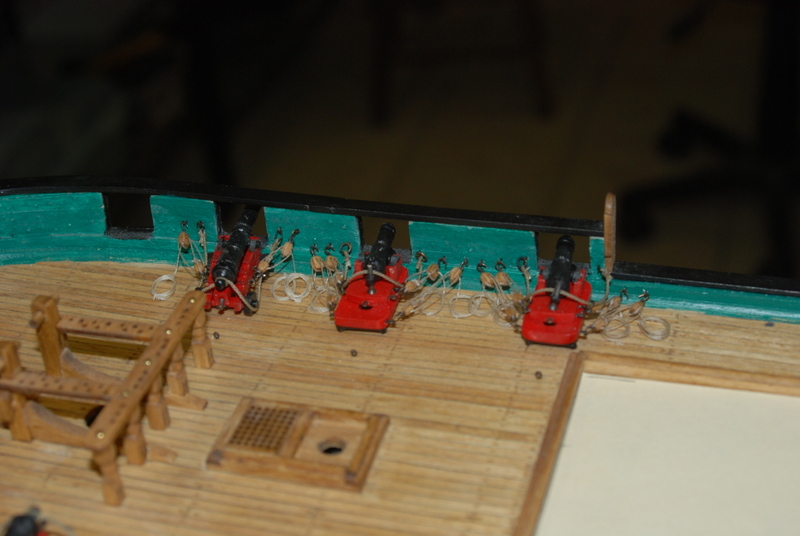
Al - I used some tack cloth on the deck and it got a lot of the dust off. I then used a Q-Tip with some paint thinner which got a little more. Popeye - Furniture polish and a stiff brush sound like a good solution too. I don't think we have any in the house anymore but I will pick some up next time I am out. I have also placed an old T-shirt that I opened up over the model now to try to keep more dust out. Thanks for that suggestion. Greg - I think another coat of Wipe On Poly would do the deck some good as it seems to be drying out a bit. Thanks for that suggestion. Here are some final shots of the cannonades. All side tackles are installed and all of the rope coils on the port side. I have about 20 more to add to the starboard side. I am going to attempt to make new wheels, but still reserve the option to fall back on using the supplied metal wheels. They are not too bad but I want to try making my own.


- 1,354 replies
-
- 8
-
-
- constitution
- model shipways
- (and 1 more)
-
Thanks Al. I like your suggestion of the tack cloth. I do have them and use them before finishing but had not thought of them for cleaning up. I'll let you all know how it worked.
- 1,354 replies
-
- 2
-
-
- constitution
- model shipways
- (and 1 more)
-
Thanks David. I have the same problem being photographed. Thanks too George. My initial attempt was a damp Q-Tip, but I think that just moved the dust around. I may try some type of solvent, but I don't do want to loosen any glue.
- 1,354 replies
-
- 1
-
-
- constitution
- model shipways
- (and 1 more)
-
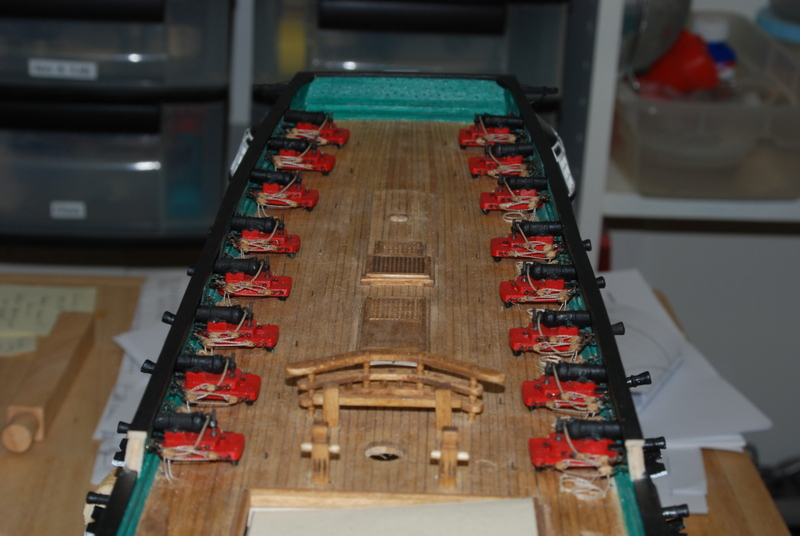
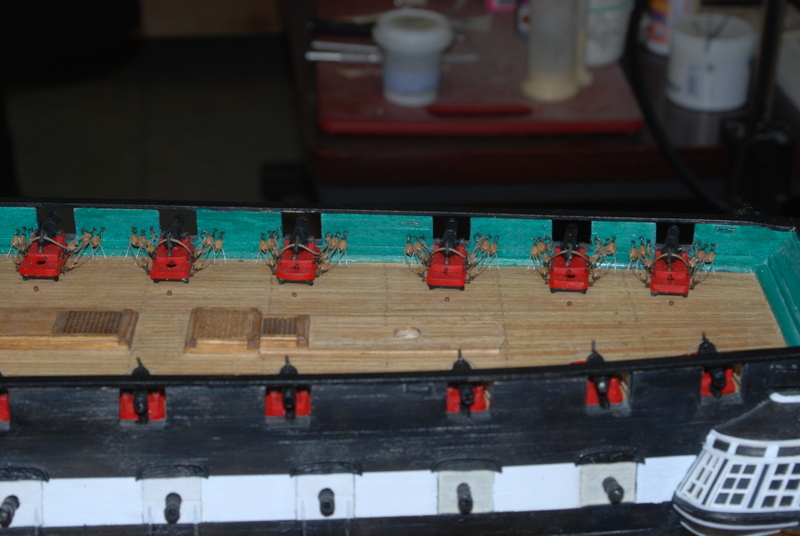
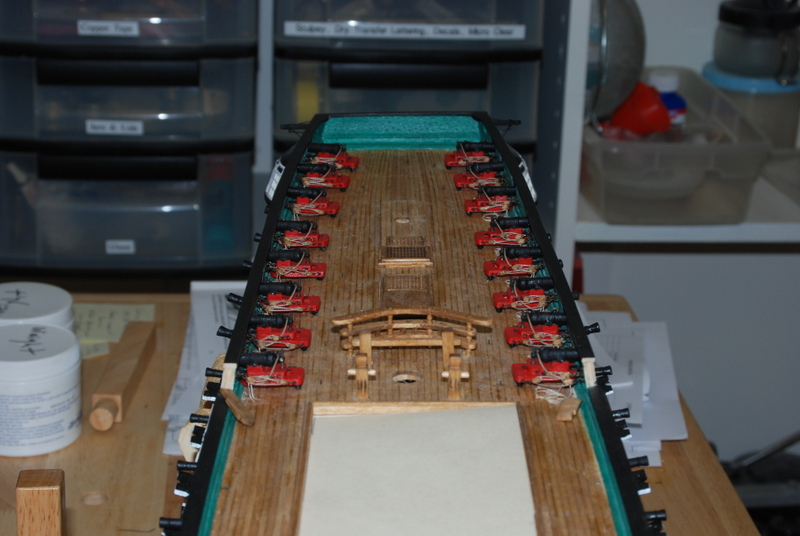
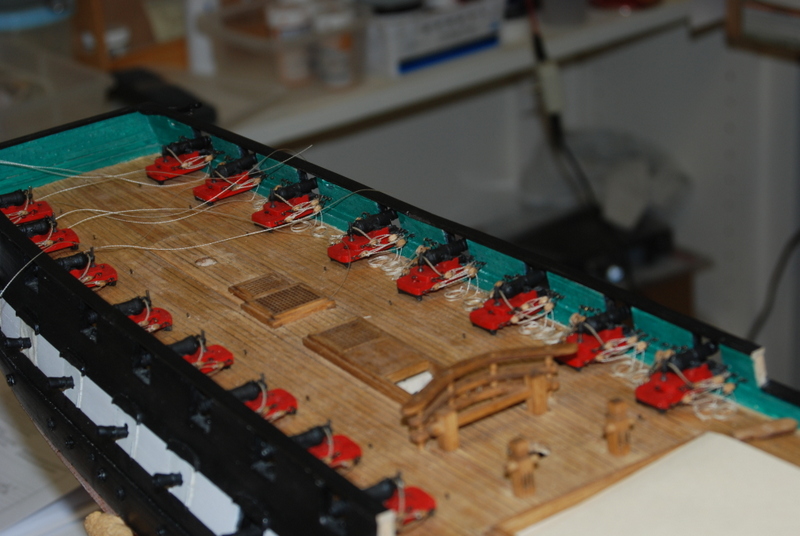
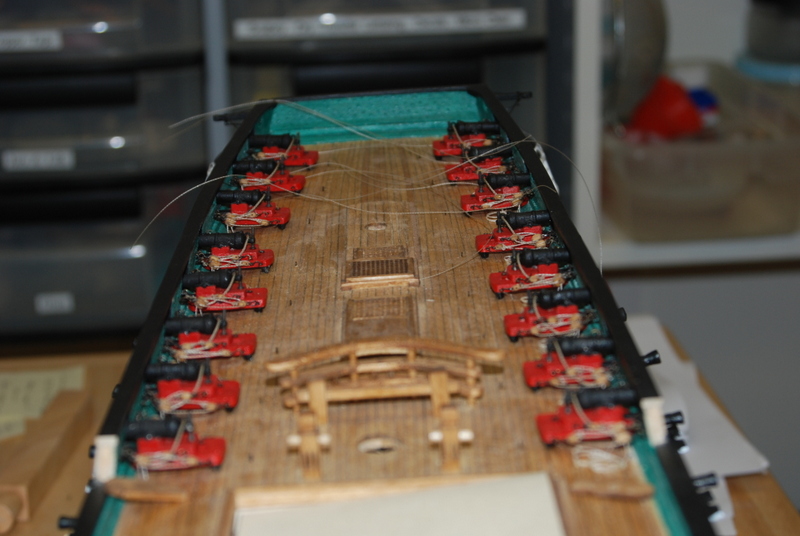
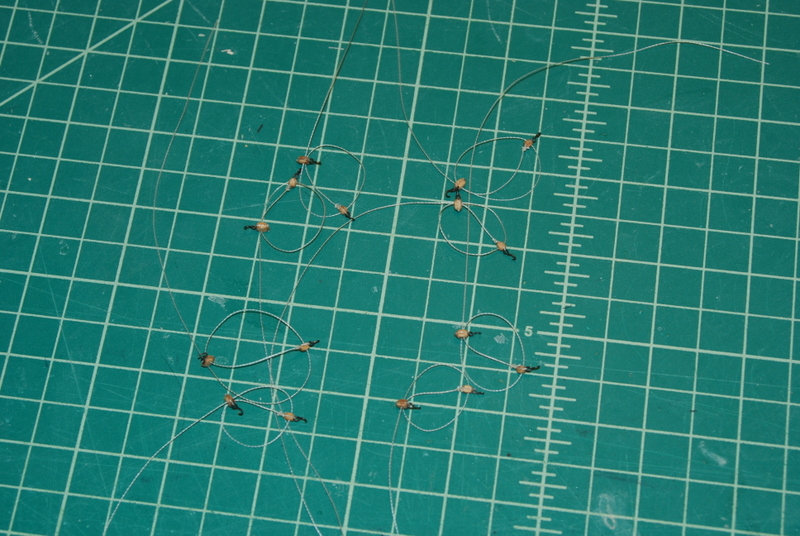
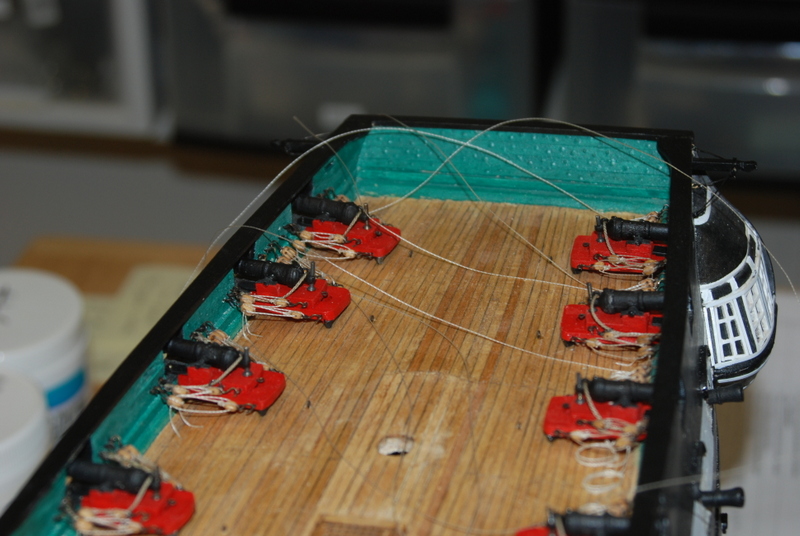
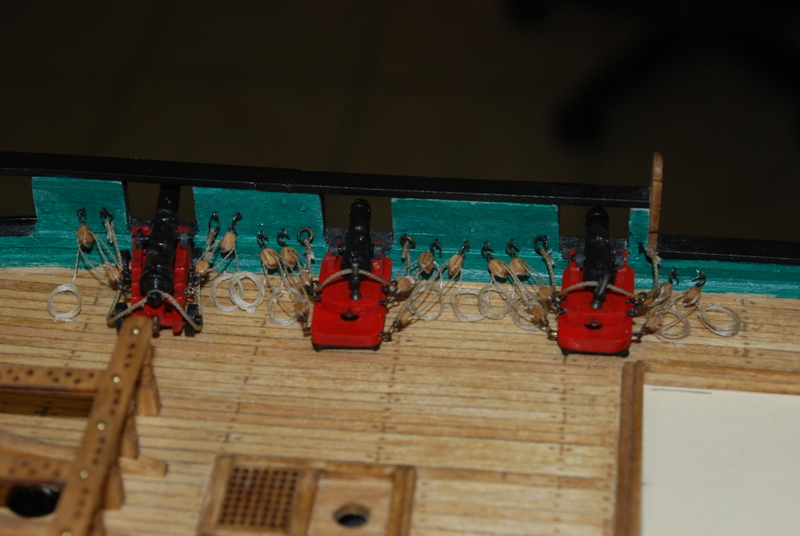
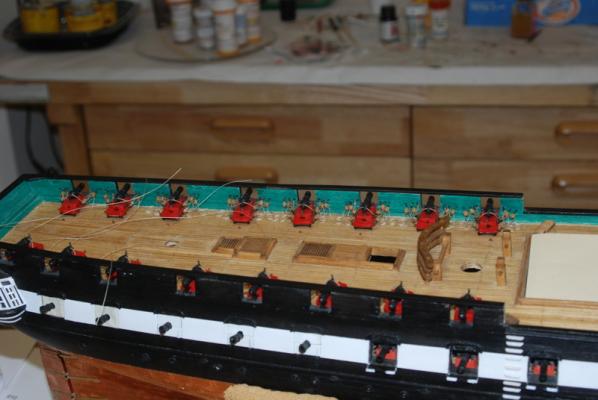
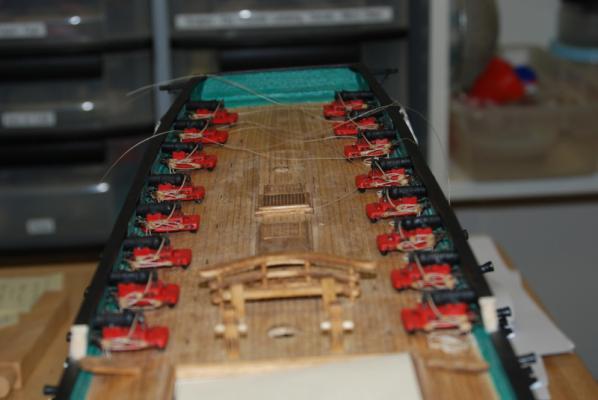
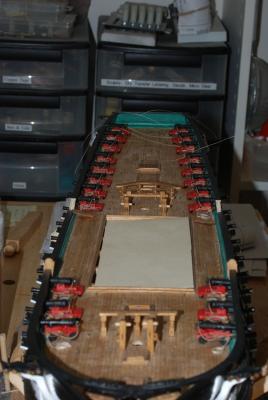
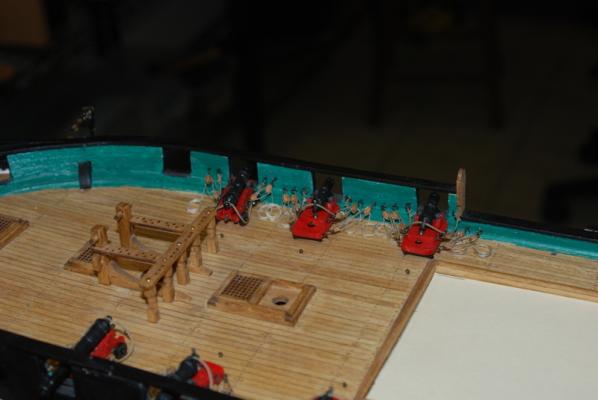
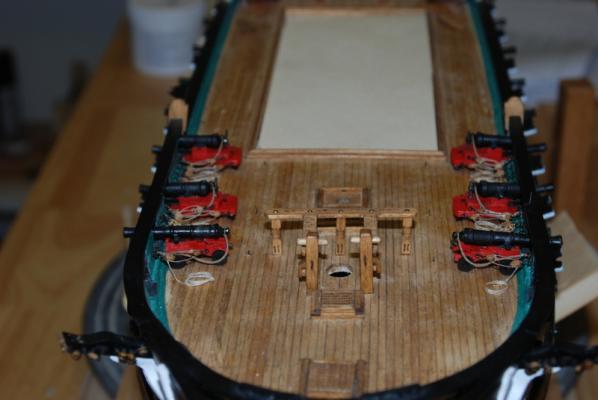
Thanks John and David, and the likes. The carronade assembly and rigging are completed. Here are the last four with the first set of side tackles installed. And here are the last eight sets of side tackle blocks and the assembled side tackles. I am glad to be done with these for now. I did change the way I make these about half way through the carronade rigging. When I seize the single blocks, I first tie a simple overhand knot around the block. This is set with a tiny bit of CA, since I do not want this to come undone when pressure is applied. I then use the excess to tie a longer piece of line to the block to use as the tackle line. I was also using CA to hold this knot, but this is a real knot and not a half knot, so to speak, so I switched to using the Dullcote Lacquer to hold these instead of CA. This eliminated making the end of the tackle line stiff at the block, so the resulting tackle lines on the model look better. So, my rule going forward for the rest of the ship rigging is to use lacquer on real knots and only use CA on half knots, if there are any left of those. And here the outer side tackles are installed on the last carronades. I still need to trim the ends off the deck and add rope coils. I have rope coils on almost all of the port side guns, but still need a lot on the starboard side. I still need to make a lot of these, so I will be adding them in batches as I move on to other deck furniture on the spar deck, like the wheels and capstan. BTW - I tried cleaning the deck to get the dust off, but it looks like it didn't do much based on these pictures. You don't see this dust in real life, but I bet with the right light I would. Any suggestions on how to get rid of it?


- 1,354 replies
-
- 8
-
-
- constitution
- model shipways
- (and 1 more)
-
You copper plating looks really great David. I got over the masking problem by not adding the red stripe.
- 117 replies
-
- 3
-
-
- constitution
- model shipways
- (and 1 more)
-
I agree - those hanging rope coils look very realistic. The carronade rigging looks great too. I am at the same stage on the Conyy - i wish I only had 5 more to do - wait I only have 4 more to do. I will be glad to get past it.
- 1,051 replies
-
- 4
-
-
- cheerful
- Syren Ship Model Company
- (and 1 more)
-
Your transom looks great Ken
-
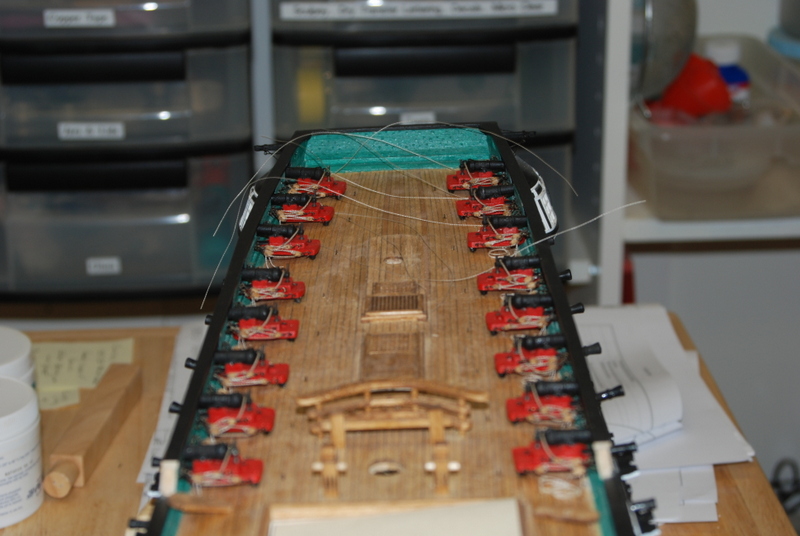
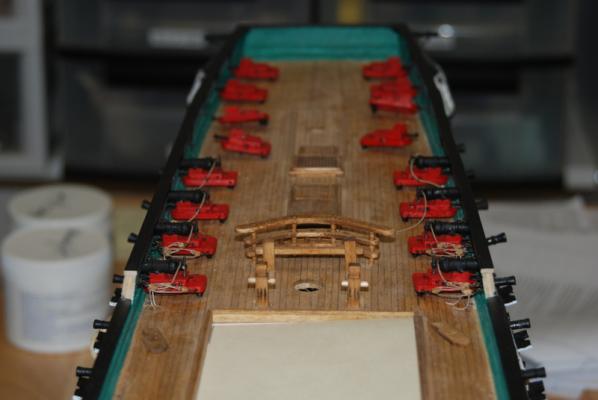
We stayed home this weekend so I had a lot of time to spend working on the carronade rigging. I have been making rope coils for the deck three at a time in the little jig I built when I was rigging the gun deck guns. I had enough to add them to the starboard side guns that are before the waist and a few on the port side. I have to make these very flat to fit under the side tackles on the carronades. I have also assembled more carronades on the deck behind the waist and some of them are in various stages of rigging. Doing these four at a time has been helpful to relieve the monotony factor, but there is still a lot of seizing of blocks that needs to be down for the side tackles. [Edit] - Boy there is a lot of dust on that deck. I am going to have to do something about that.


- 1,354 replies
-
- 9
-
-
- constitution
- model shipways
- (and 1 more)
-
I just made an edit on post 792 - it turns out the boarding steps are at the aft end of the waist not the fore end, so my carronade tackles would not be in the way of the boarding steps. There is enough bulwarks at the aft end of the waist for those tackle lines to be attached so I don't need to put those into the plank sheer.
- 1,354 replies
-
- 4
-
-
- constitution
- model shipways
- (and 1 more)
-
Don't despair David, I have the same problems. Just last night I managed to pop off both trail boards at the boarding steps while rigging the carronades. Luckily for me it was a clean break. I also have been touching up the paint along the sides as I go along. I managed to drill one hole for an eye bolt clear through the bulwarks in a moment of not paying attention. But with the black paint it cleaned up nicely. I have also always had trouble drilling through planks as they want to splinter. I haven't decided if a slow drill by hand or a fast drill using the Dremel is the better method - I seem to have trouble with both. Keep up the great work you are doing.
- 117 replies
-
- 3
-
-
- constitution
- model shipways
- (and 1 more)
-
Nice job on the rails David, That is one of the hardest areas I have had to deal with so far, and you pulled it off nicely.
- 117 replies
-
- 4
-
-
- constitution
- model shipways
- (and 1 more)
-
Ah yes, where to put this beast. Luckily both my kids have moved out so I have access to more room in the house, but that is only temporary until we retire and sell the house. I'll ether find a place in the new house or give it away. Maybe my son will have a house of his own by then.
- 1,354 replies
-
- 1
-
-
- constitution
- model shipways
- (and 1 more)
-
Thanks John. Welcome to the build. Sorry if you had other plans for the day. I hope you do decide to build this model someday as it will keep you busy and is very satisfying. The Niagara looks like a nice model too.
- 1,354 replies
-
- 2
-
-
- constitution
- model shipways
- (and 1 more)
-
David, I just had a chance to look at your log, and you are doing a fantastic job. I started with the first chapter of the Hunt practicum which did help me out to get started. Keep up the good work, but as JS says use it with a grain of salt.
-
David, you are doing a fantastic job. I will enjoying following along.
- 117 replies
-
- 3
-
-
- constitution
- model shipways
- (and 1 more)
-
Thanks Greg. Thanks George. I am trying to break up the repetition by assembling and rigging 4 carronades at a time. That way I have a variety of tasks for each one before repeating on the next group. Sal, your Syren is looking great. Ratlines are another of those repetitive tasks that you can't wait to be finished with. Yours are looking great. Welcome David. Thanks for the compliment. Do you have any pictures of your build? I would love to see them. Are you following the kit or making changes/additions as you go?
- 1,354 replies
-
- 1
-
-
- constitution
- model shipways
- (and 1 more)
-
I have used thin CA to fix a few spots on mine. I have not had widespread problems with tiles not sticking, though, usually they stick very well. I do prime the wood under the tiles and I don't cut off individual tiles, which are hard to remove from the backing. On a strip of copper tape, I cut through the copper for each tile but not through the backing, then I can remove just the copper pieces from the strip of backing more easily, leaving the copper tiles nice and flat.