
.JPG.ca33079f5815b861e67b9c2cccd37982.JPG)

Blue Ensign
-
Posts
4,564 -
Joined
-
Last visited
Content Type
Profiles
Forums
Gallery
Events
Everything posted by Blue Ensign
-
 An interesting project. Danish sterns had a very different look to those of British ships which should clearly mask the Sphinx origin. Replacement of the Sphinx figure, not the prettiest of features, is a bonus. A bit of kit bashing is right up my Strasse, and I wish you well with your endeavours.👍 B.E.
- 111 replies
-
- 5
-

-
- Christiania
- Vanguard Models
- (and 1 more)
-
I'm in, thank you for pressing on with this project.👍 B.E.
-
Love the look of her David, very nicely done. 👏 B.E.
-
I think your biggest achievement is your obvious enjoyment of a first build, recognition of areas that you hope to improve, and an appetite gained to build another. Well done.👍 B. E.
- 152 replies
-
- 3
-
-

-
- Flirt
- Vanguard Models
- (and 1 more)
-
Old news Glenn, the project is back on for one last throw of the dice. 👍 I rather think your description of the figure set as small plastic toy a little unkind and dismissive of the hard work that no doubt goes into creating such items. B.E.
-
I would urge Chris to reconsider his decision and proceed with this project, it has the makings of being a unique and interesting addition to his range. I was looking forward to making a dio around the figures as I did with the cook figure at 1:48 scale, in addition to having a sitting figure to have in the Great cabin of my 1:64 scale build. There are going to be a lot of disappointed people, and I'm one of them.😞 B.E.
- 991 replies
-
- 10
-
-
The reason I asked is because I was thinking about retro fitting to my existing 'Indy' model. B.E.
-
A big improvement Chris, the standing figure looks just like Rupert Penry-Jones. Is the sitting figure separate to the table/chair, and scaled to fit your existing furniture designs? B.E.
-
An excellent rendition of an oob build, very well done James. She surely looks impressive as a fully rigged model. B.E.
- 488 replies
-
- 7
-
-
- Indefatigable
- Vanguard Models
- (and 1 more)
-
I'm not too sure about the rear view of the standing figure, there seems to be an unnatural look to the upper body, and the coat looks odd without tail vents, as per the sitting figure. B.E.
-
What I've been waiting for, thank you Chris. Presumably there is more work to do on the figures before they go into production? B.E.
-
You've been spoiled by Vanguard kits, but at least there are plenty of bulkheads in that bow section. B.E.
- 62 replies
-
- 2
-
-
- belle poule
- OcCre
- (and 1 more)
-
It will be interesting to see if the separate bow sections allow for easier fairing given that you have the run from the already planked hull.🤔 B.E.
- 62 replies
-
- 3
-
-
- belle poule
- OcCre
- (and 1 more)
-
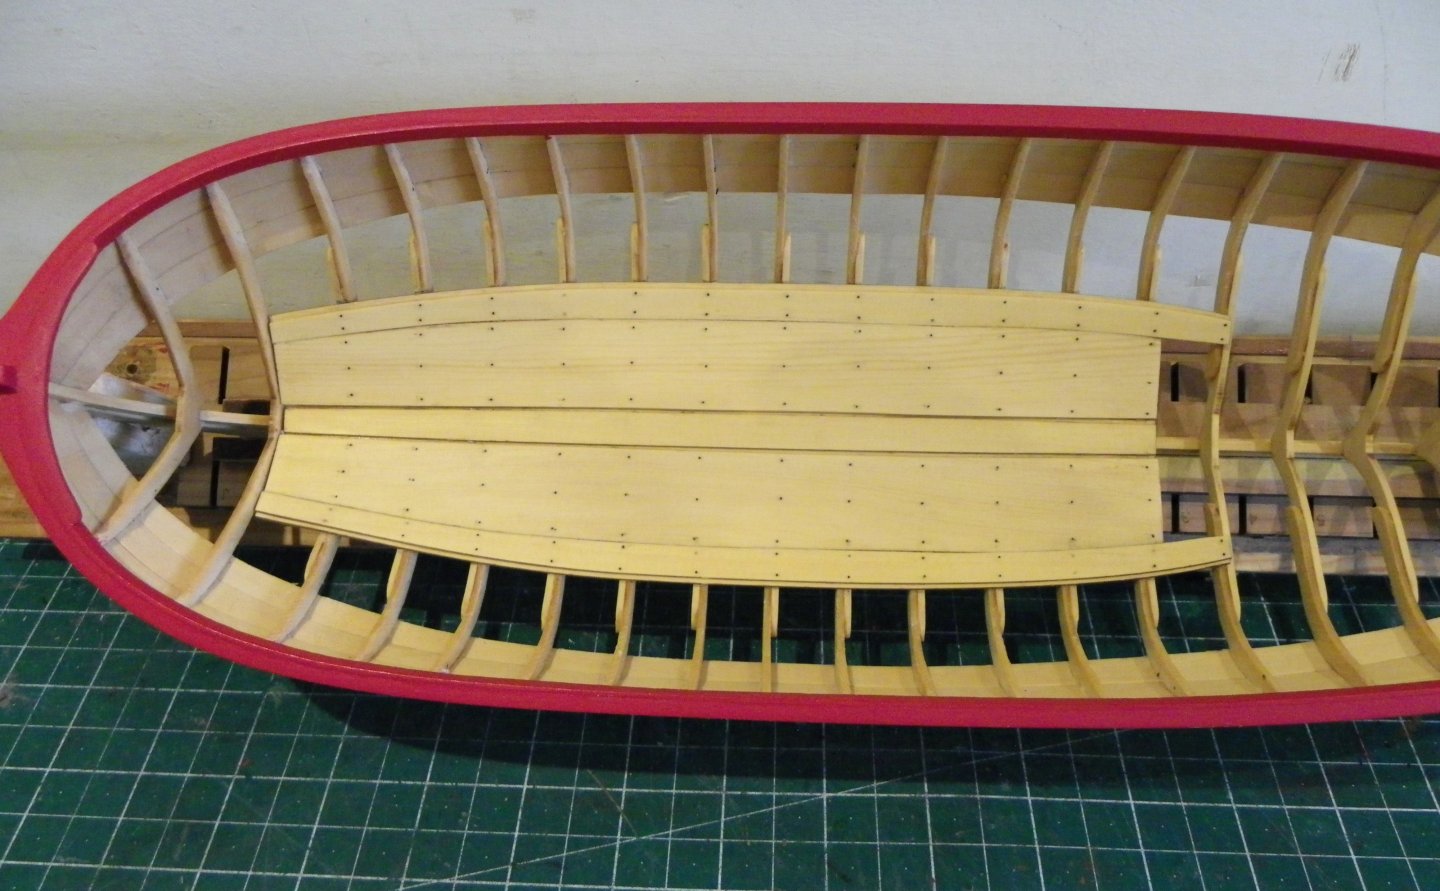
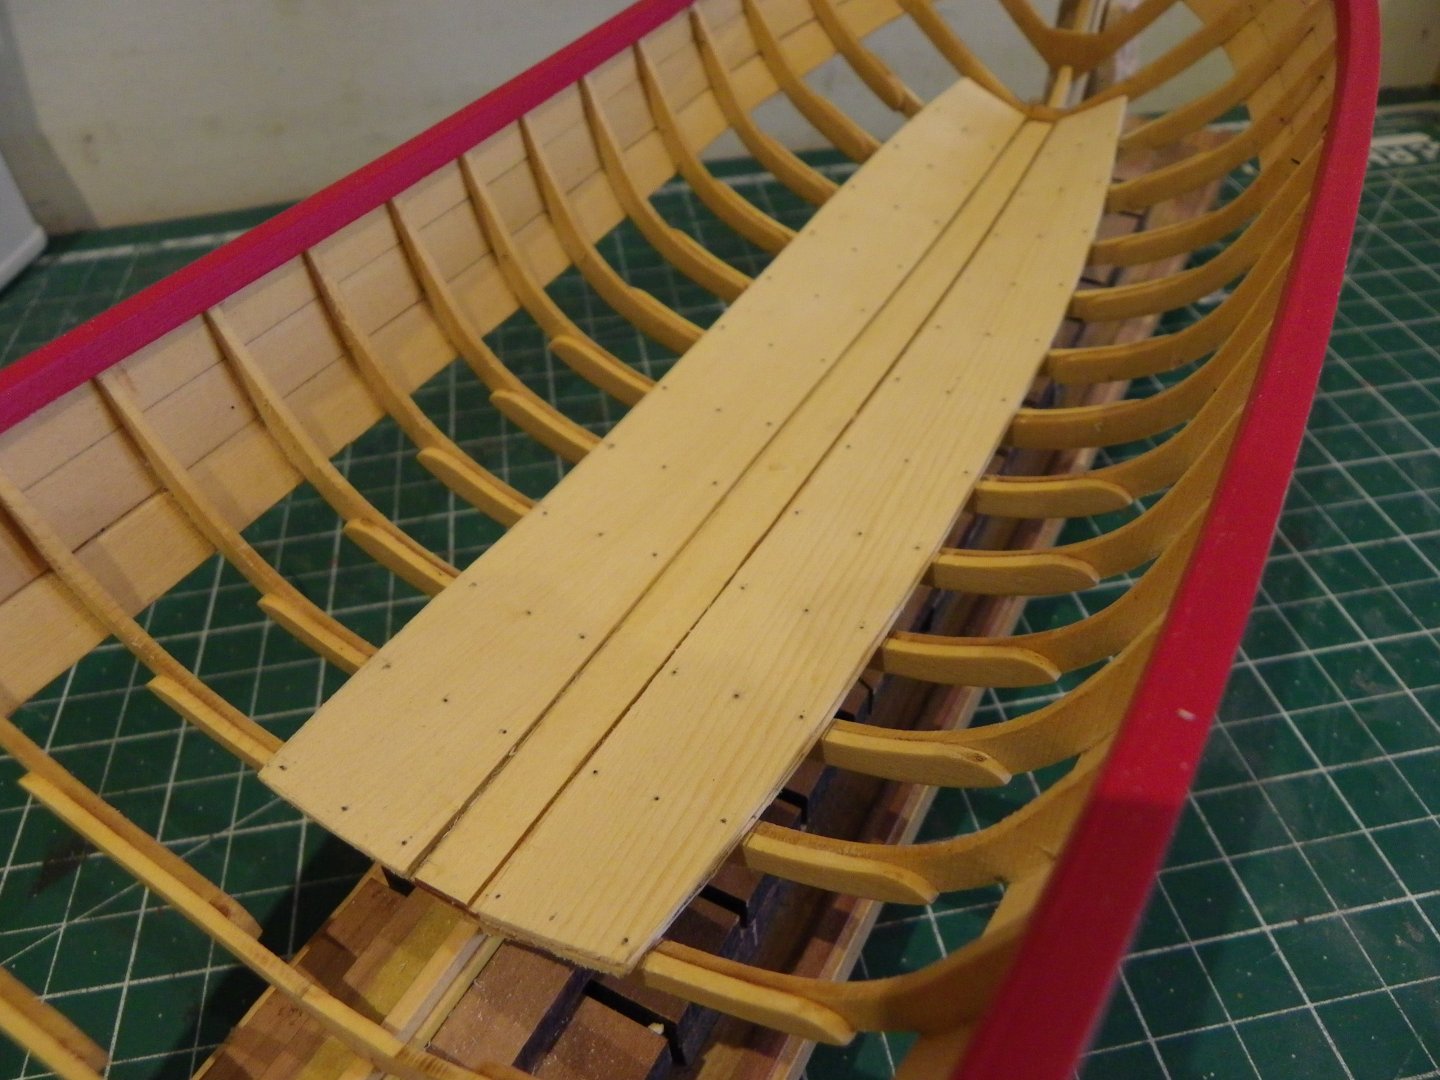
Post 23 Completing the boarding. The outer boards, one each side are a construction of two 1/32nd strips, one atop the other leaving a rabbet on the outer side. As with the wide boards I opted to glue the base layer first followed by the top layer. 0071 There was a degree of fettlin’ to get the planks tight against the broad planks, and an even rabbet along the outer side. The nail positions were marked with the top planks in situ and removed for the drilling and ‘nail’ insertion. 0076 0075 On completion a coat of w-o-p was applied. Moving onto the platforms. B.E. 05/06/2024

- 131 replies
-
- 7
-
-
- Medway Longboat
- Syren Ship Model Company
- (and 1 more)
-
Kit review Belle Poule - Occre - 1/90 - review by kevin
Blue Ensign replied to Kevin's topic in REVIEWS: Model kits
All those metal fittings look so ‘last century’ to my eye, and stub guns, takes me back to Norske Love of the 1980’s. Times have moved on…….. B.E. -
When I came back to the build I re-read Chuck's log and many others, to refresh my memory. I consider myself lucky that I have all these excellent builds, including yours Bob, to refer to. I picked up the tip of using the thinner stuff from Chuck's log, but it's not mentioned in the download instructions. I was concerned about using too much pressure on those open frames. B.E.
- 131 replies
-
- 3
-
-
- Medway Longboat
- Syren Ship Model Company
- (and 1 more)
-
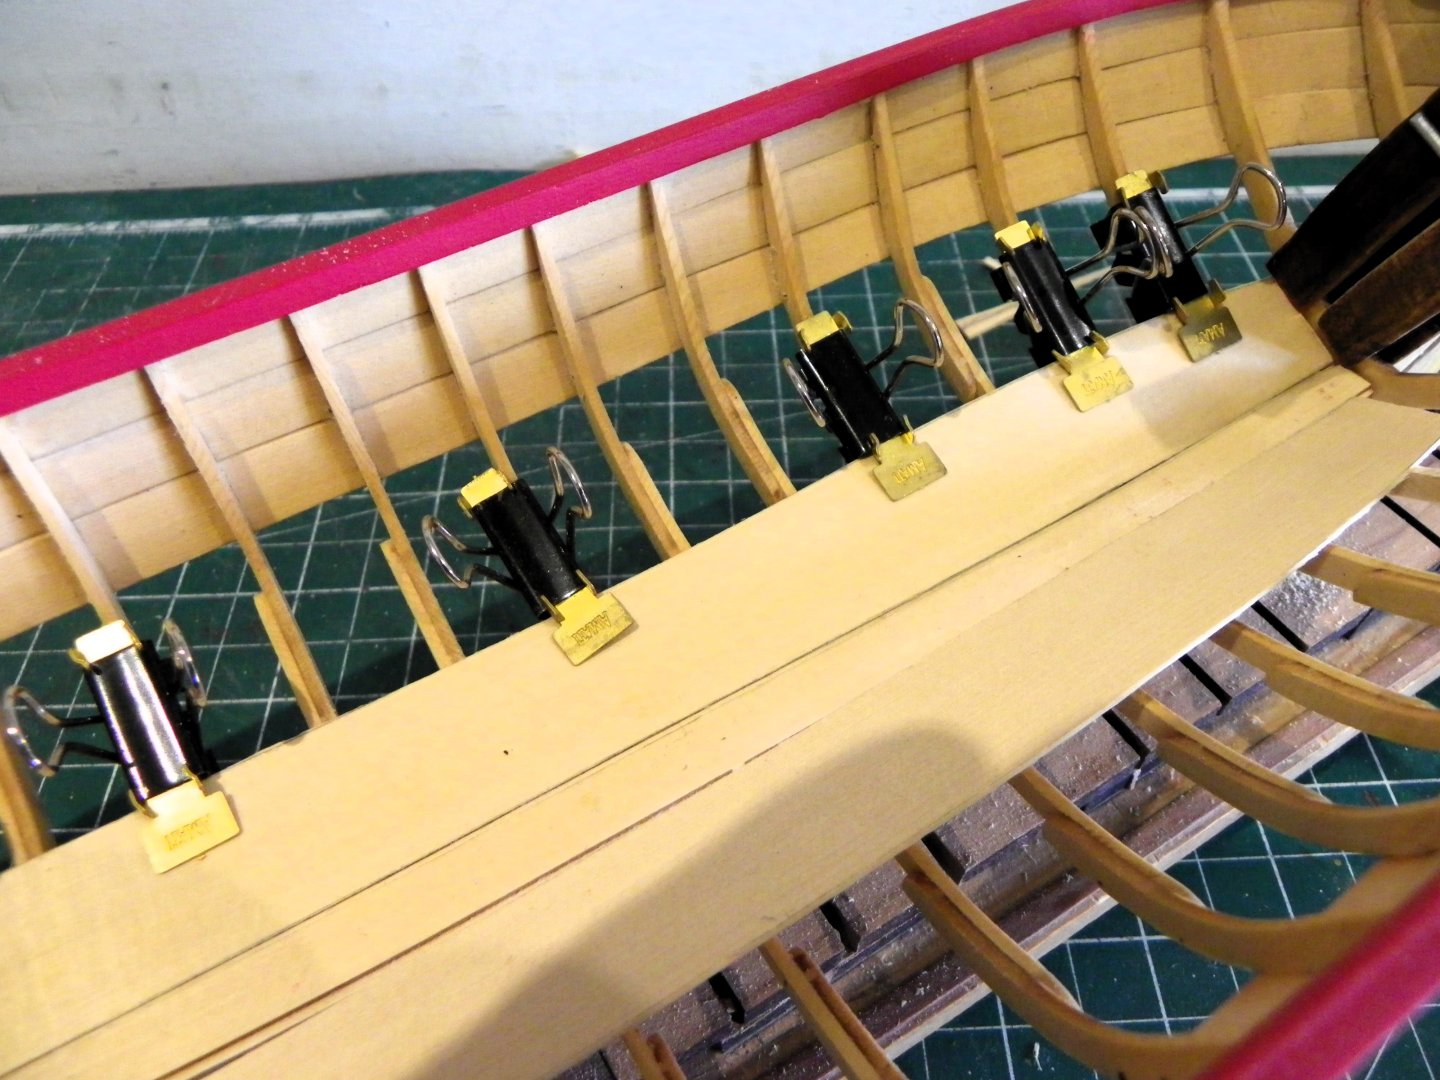
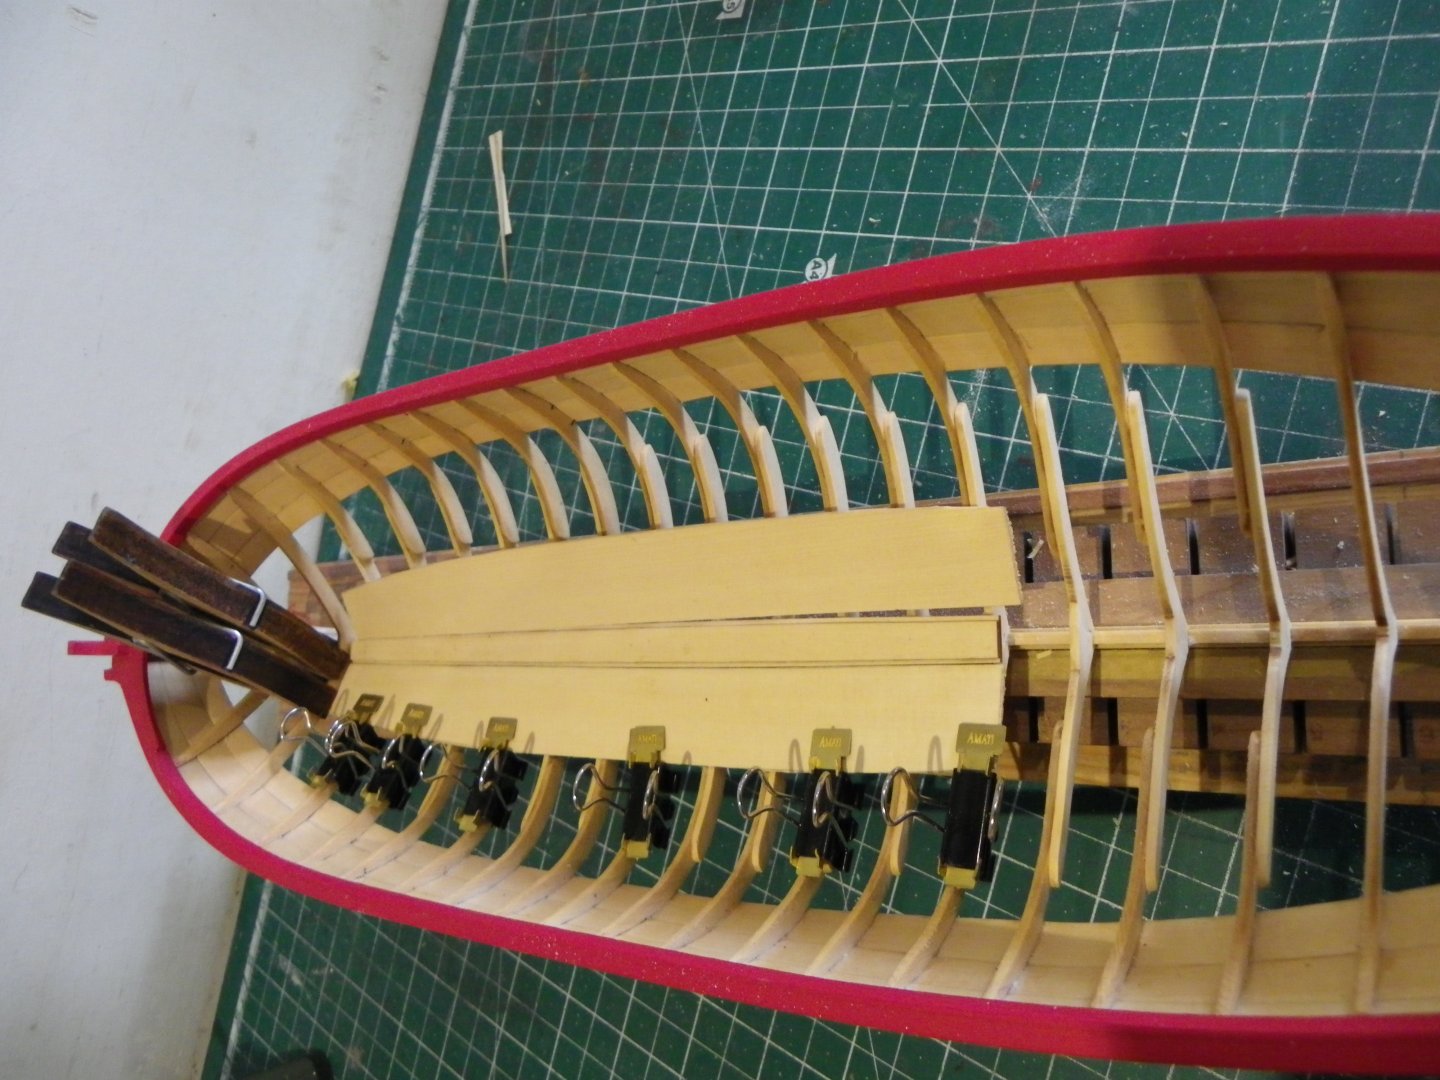
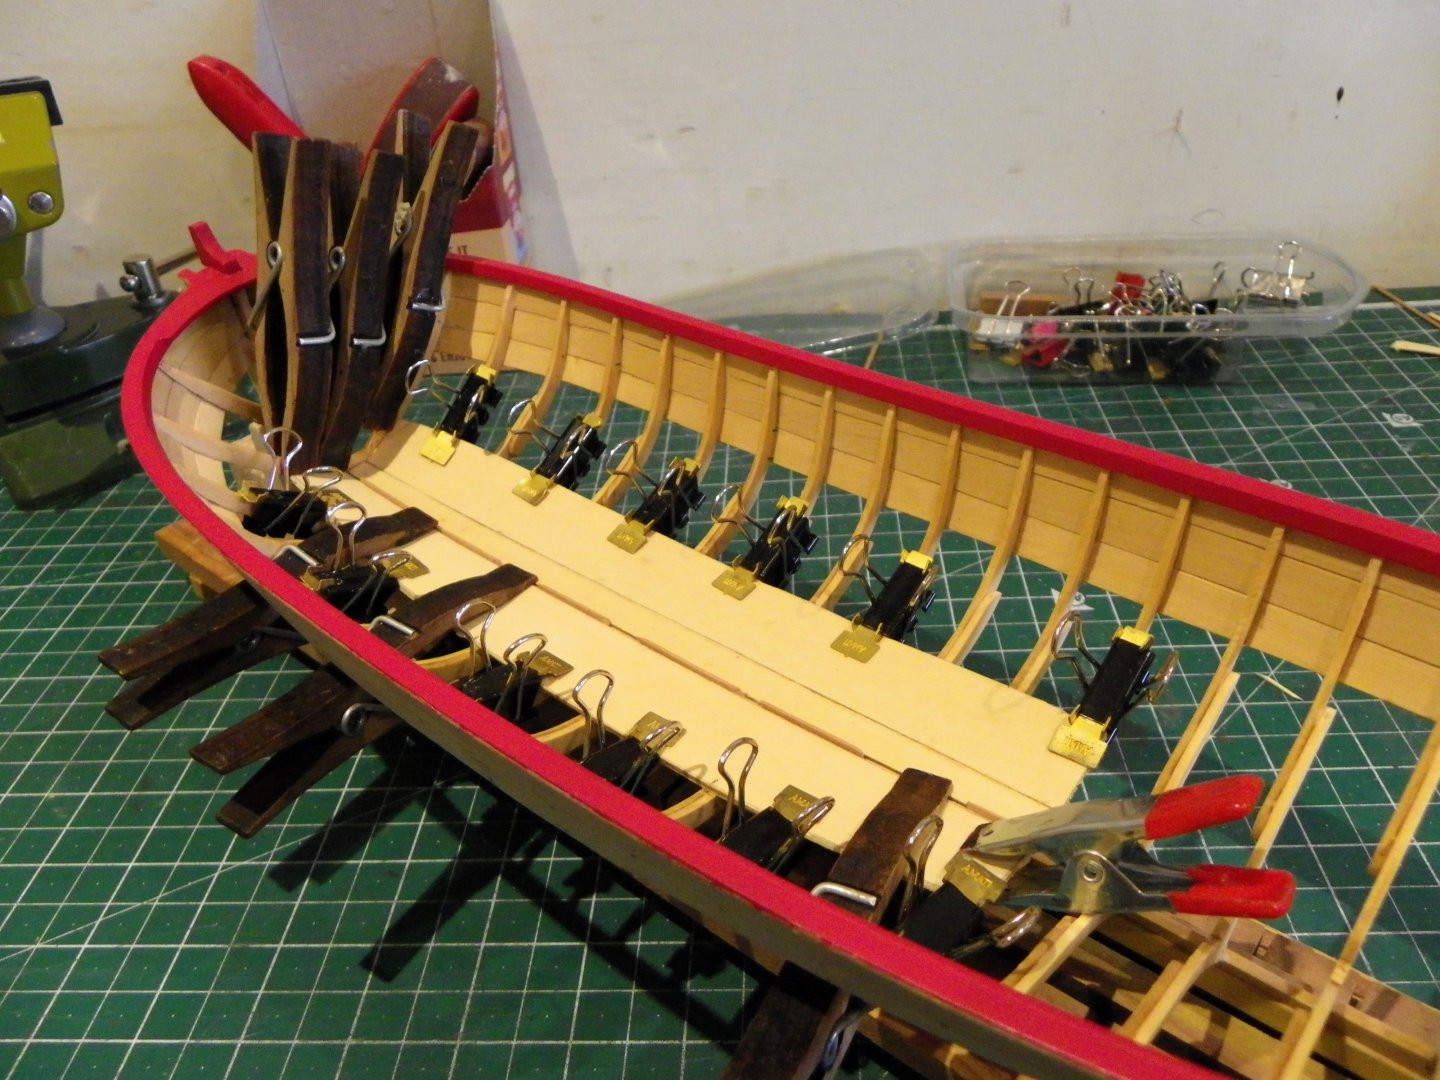
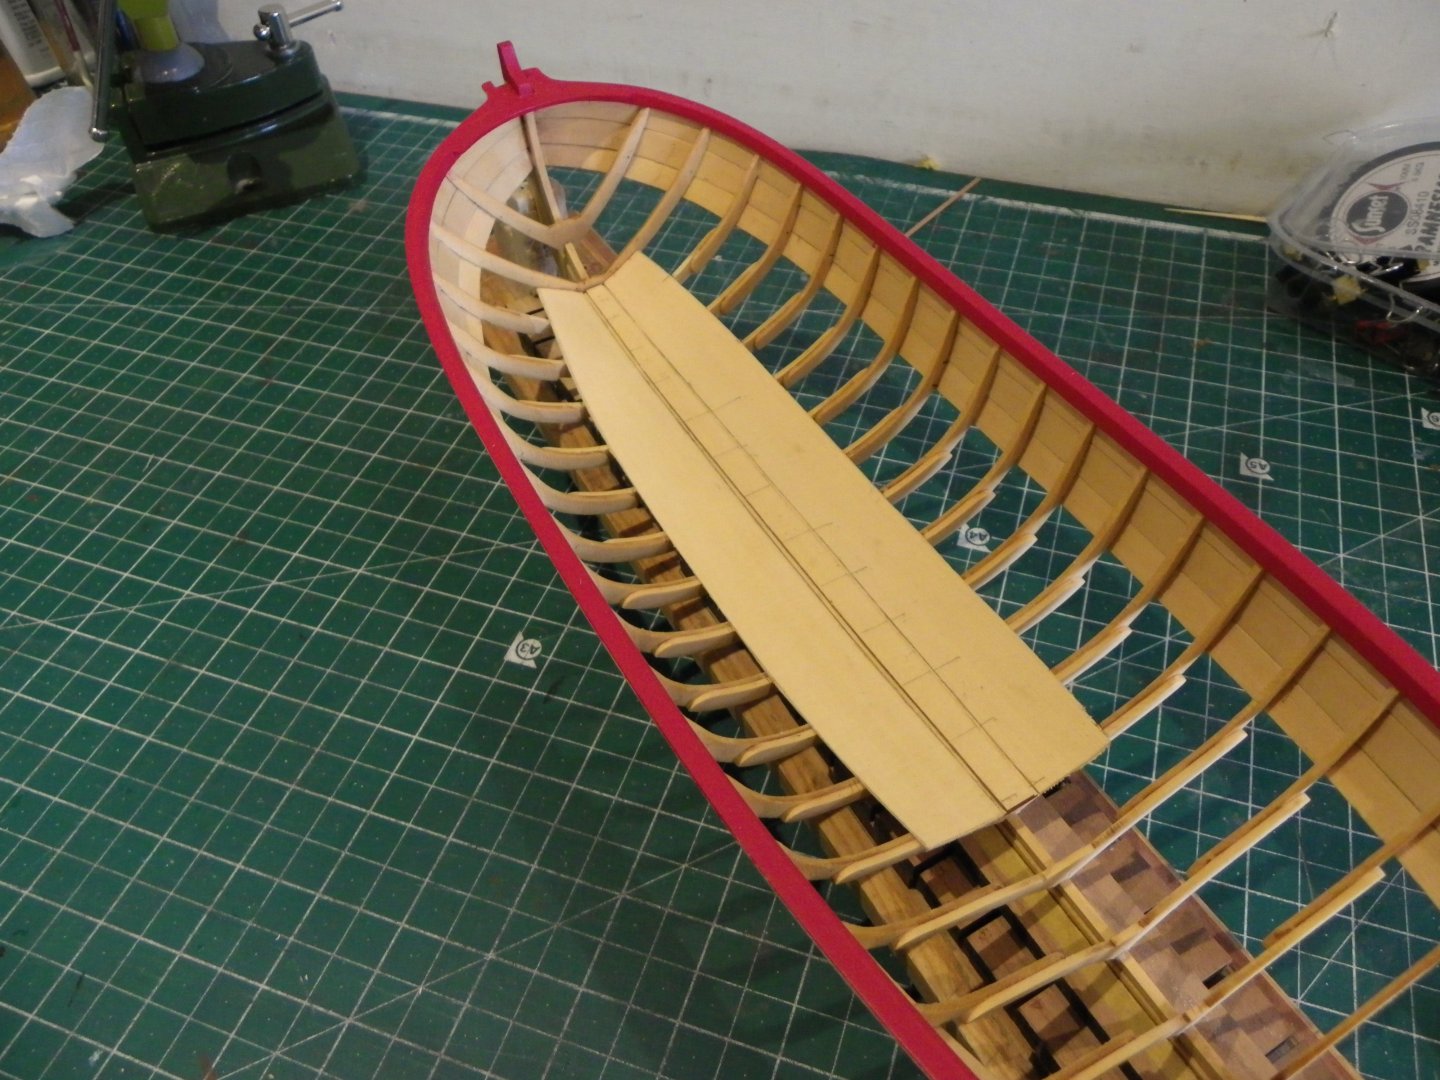
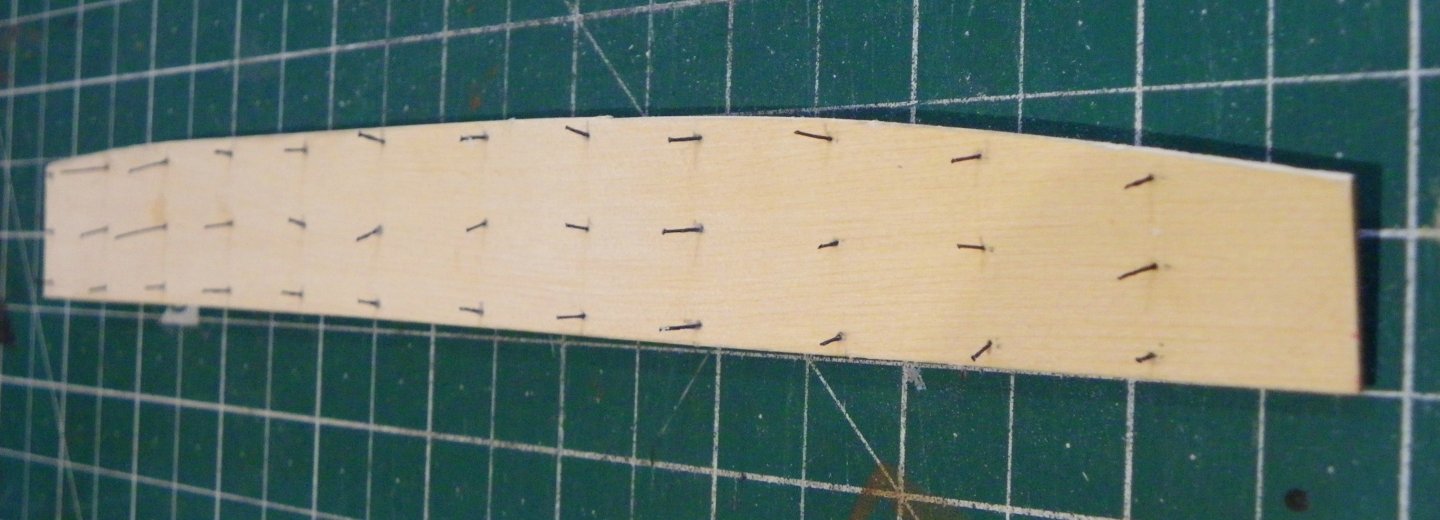
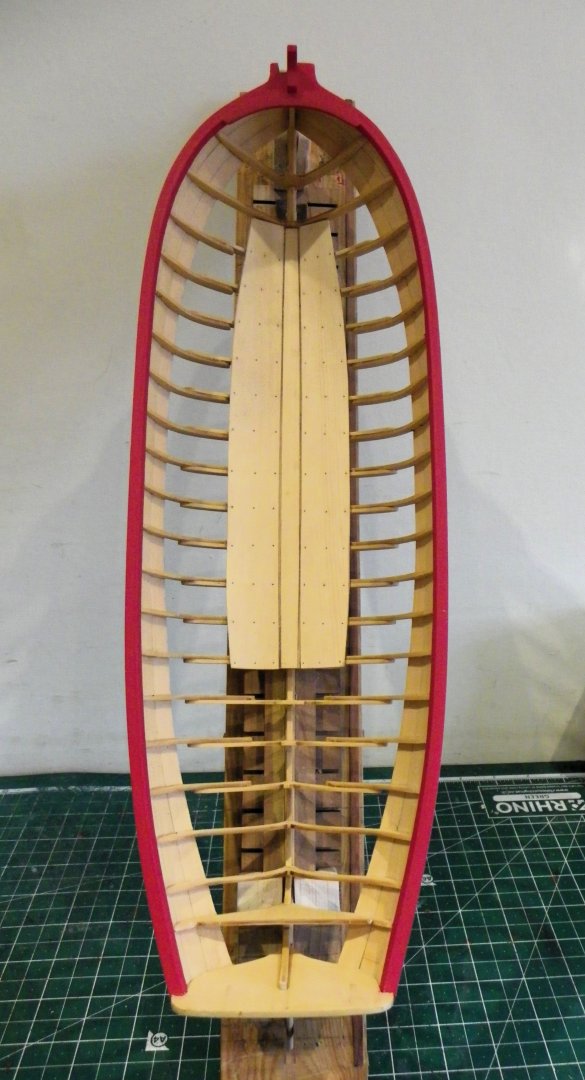
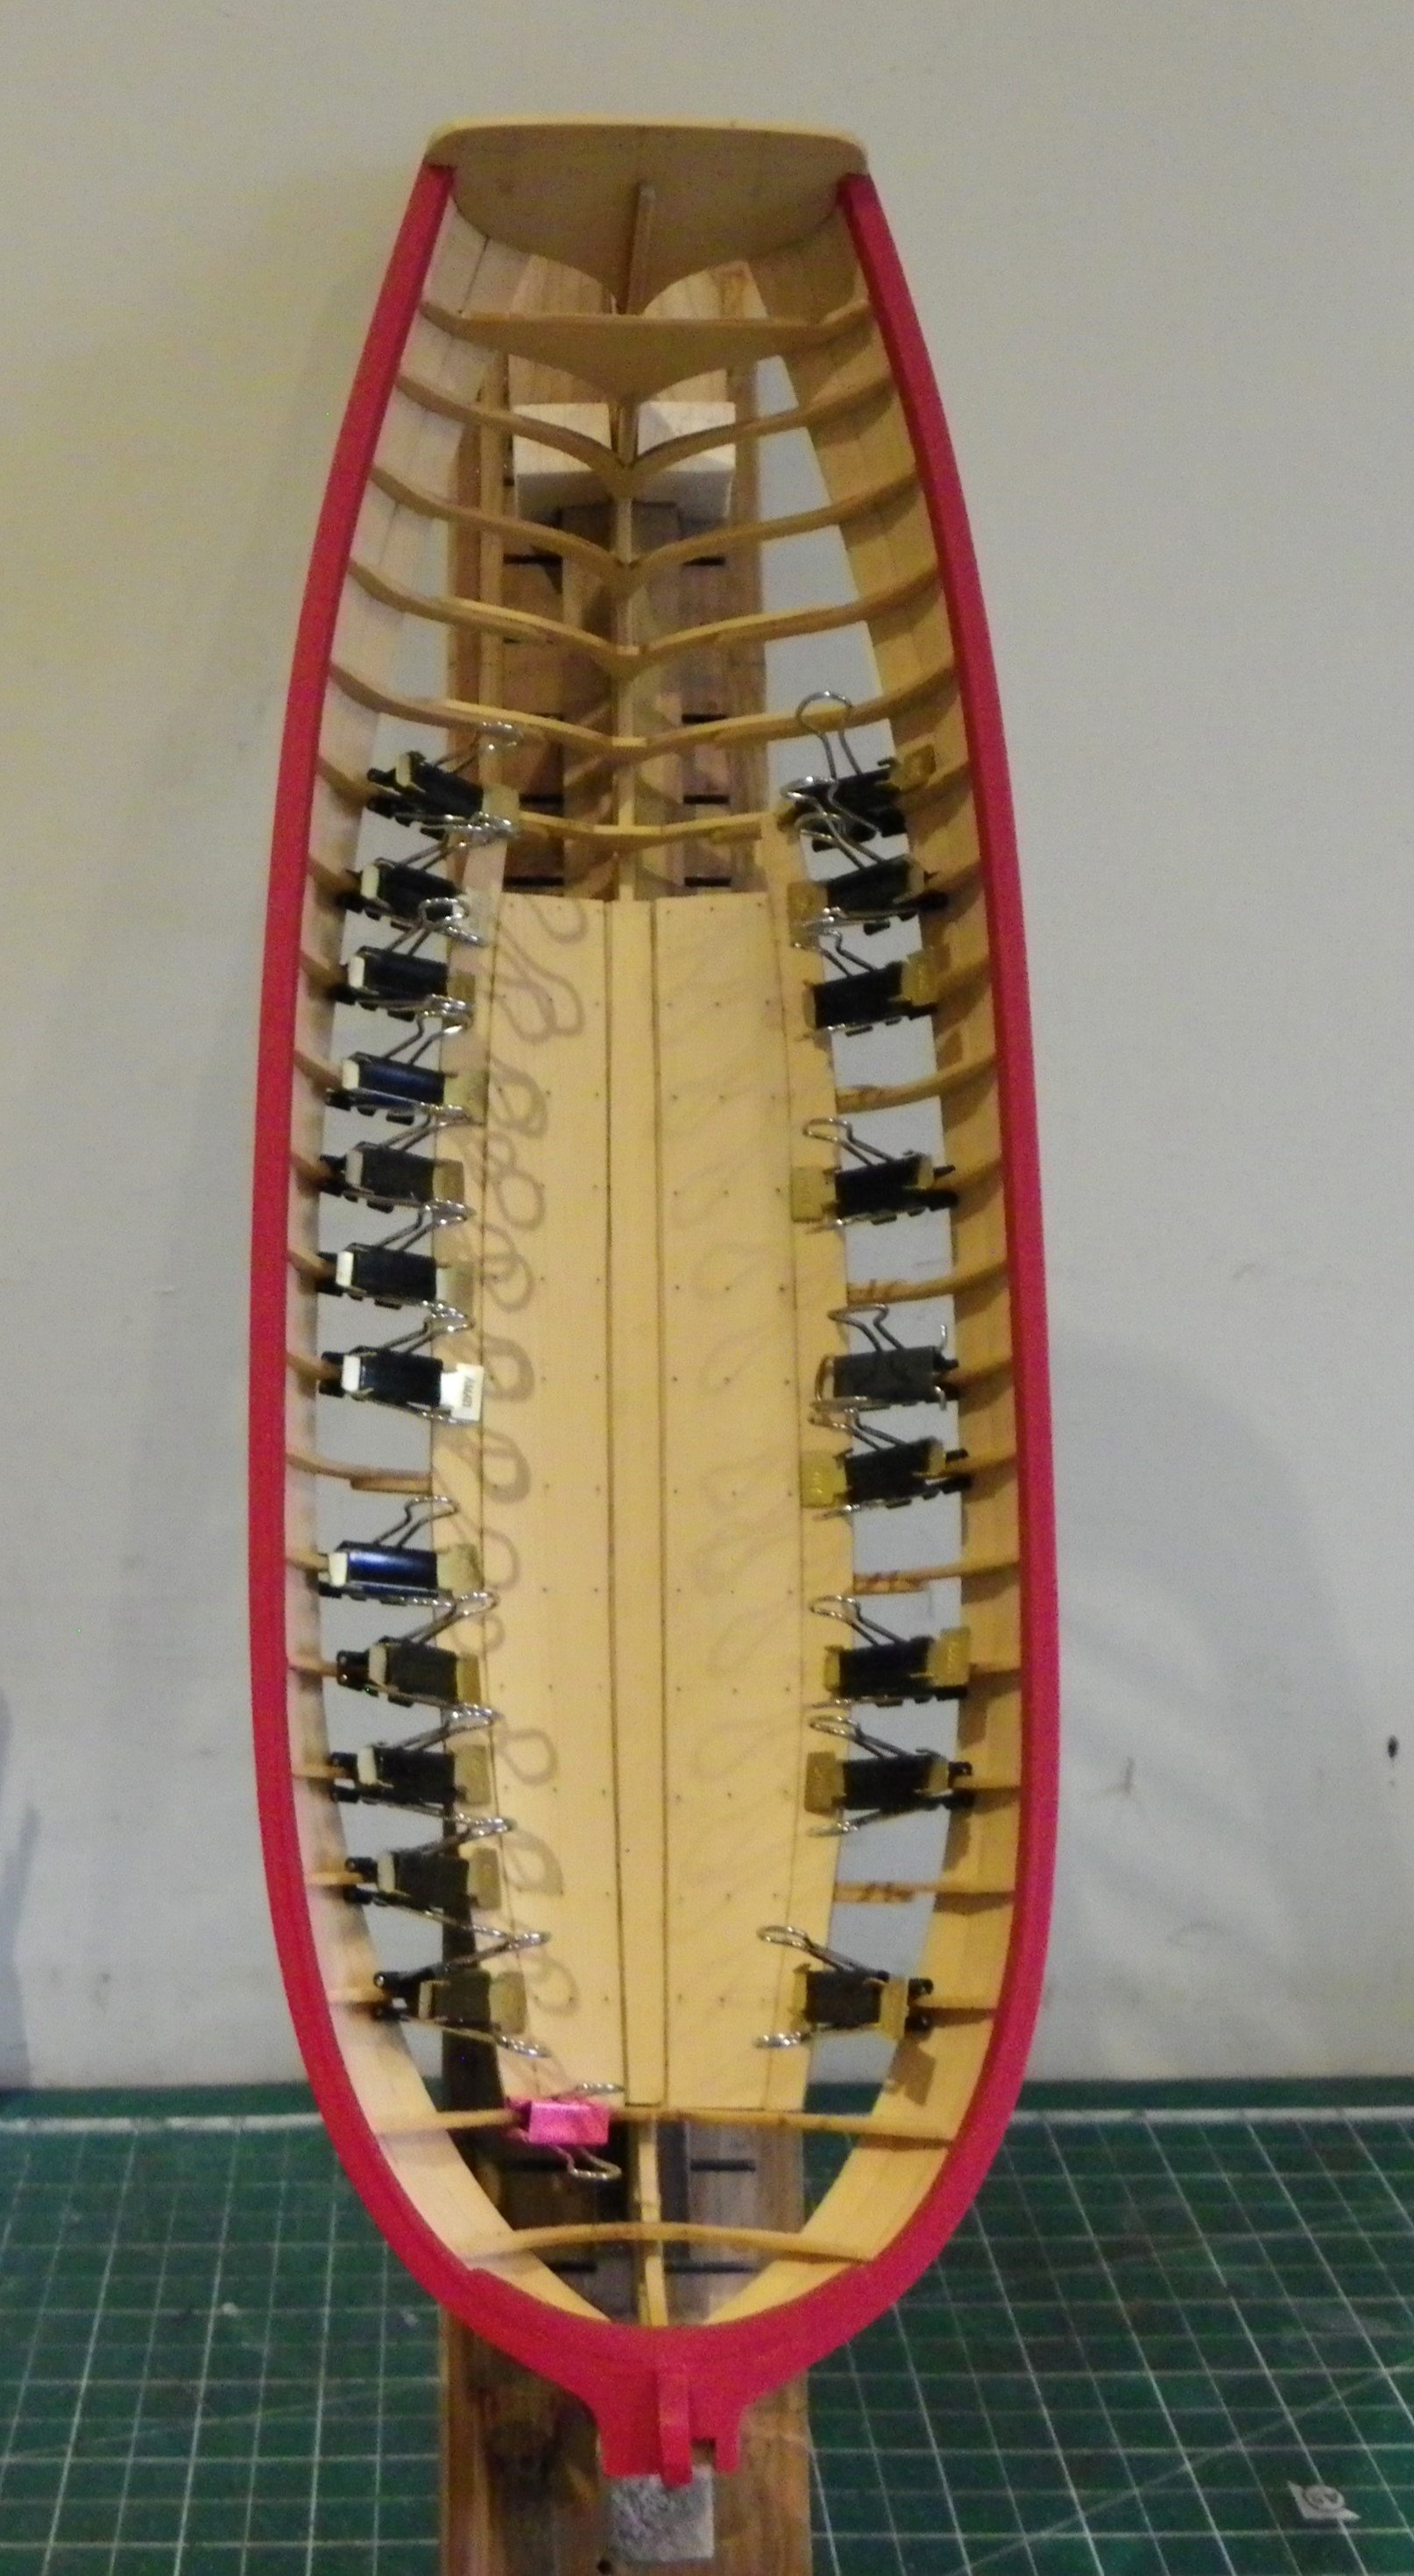
Post 22 Fitting the boards Initial fitting of the 1/16th broad plank reveals it will be a tricky part to fit. It is clear that a gentle approach will be required in getting the boards to conform to the frames as they are far more vulnerable without the support of outer planking. Chuck had suggested that the broad planks could be cut from 1/32nd sheet and glued one on top of the other in the same manner as the outer planks. These would better conform around the inner framework, and having played around with the 1/16th board I decided that the 1/32nd option was both easier and safer. Not out of the woods yet; Shaping by degrees was needed on the inner side of the broad planks to cleanly meet the central one. Additionally, I had problems with Frame ‘F’ - third from the bow, which needed additional fairing to allow the board to sit down properly. This frame was also troublesome with the central plank. 0040 0042 These Amati planking clamps are ideal for securing the boarding both for heat treatment to conform the board, and for eventually gluing. This would not be an option with a fully planked hull. It is the forward section of the boards that require some twist to conform to the forward bow frames but using 1/32nd board there is no problem. 0049 The base layers in place. 0045 Here the port side second layer strip in position for the application of the heat treatment. Spacers are used to maintain the rabbet line on the central plank. Before finally gluing into place the nail points were marked on the planking and pre drilled. I used a 0.4mm drill. Care is required to ensure that the nail lines across the board are even and square to the frames. With the board in place I drew fine pencil marks in line with the frames, and off the model I marked the nail positions and drilled. The board then needed cleaning with isopropanol to remove the traces of the pencil marks. 0054 Using 10lb fishing line the ‘nails’ are inserted, secured with pva. Dull work, but I can’t complain given that I have been spared the bulk of this task. 0055 0059 0057 0056 Onto the outer boards. B.E. 03/06/2024
- 131 replies
-
- 11
-
-
- Medway Longboat
- Syren Ship Model Company
- (and 1 more)
-
Nice progress Christian. On the subject of the Qtr deck Capstan, it actually sat on a platform called the step. This rose around 1.5mm (at scale) above the Qtr deck. The step was angled slightly to bring the capstan vertical to the spindle running between the two capstans. The expediency of bevelling the base of the capstan achieves the same effect, but does it look ok from a side on view? Regards, B.E.
-
Round-up to the head ledges and gratings👍 B.E.
-
As Alan has said above there is a design on the plans. Using a good quality paper, take a few photo copies in case you mess one up, trim to fit, spray with Artist fixative, job done. B.E.
-
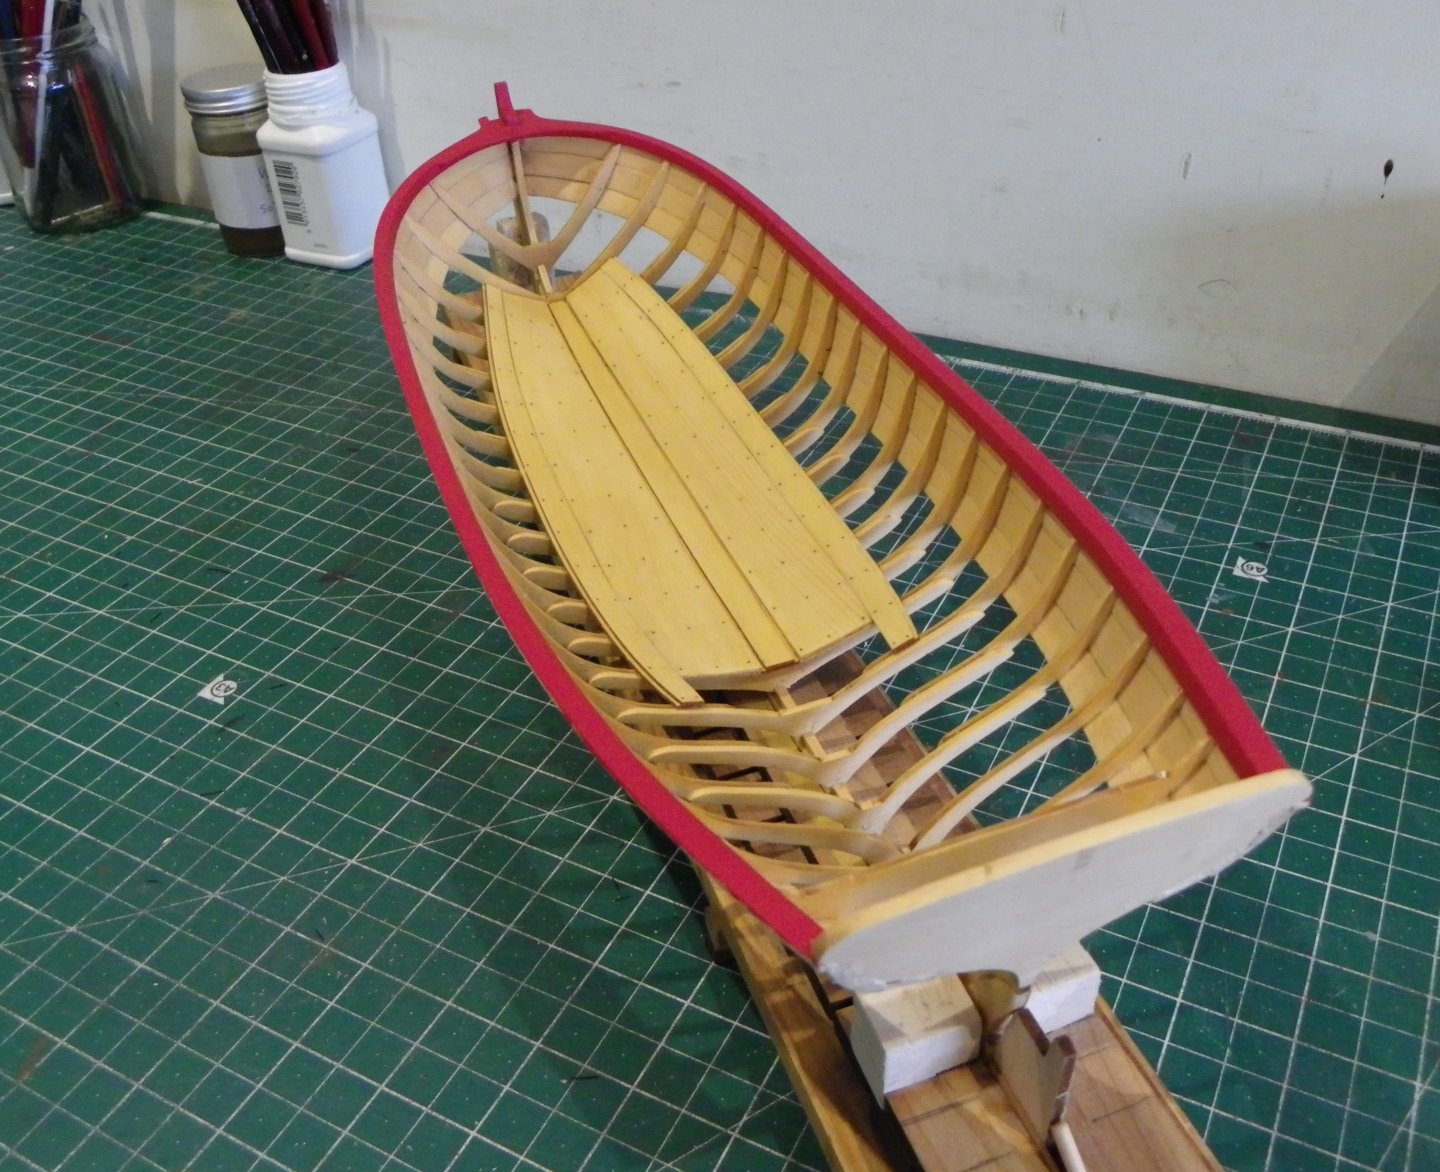
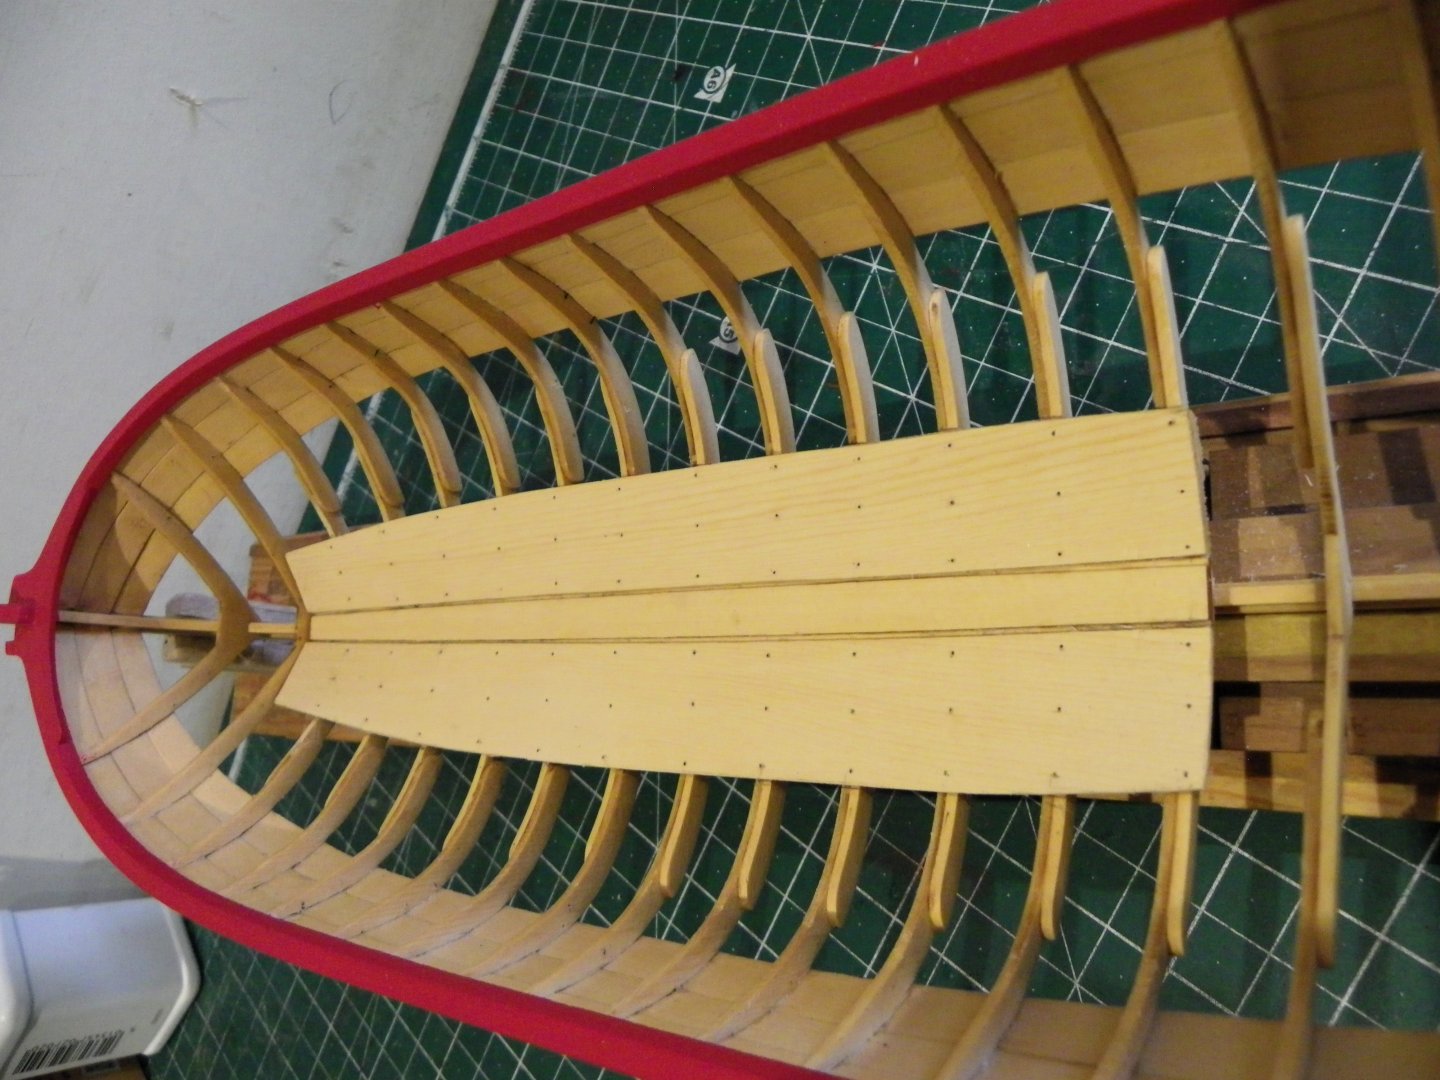
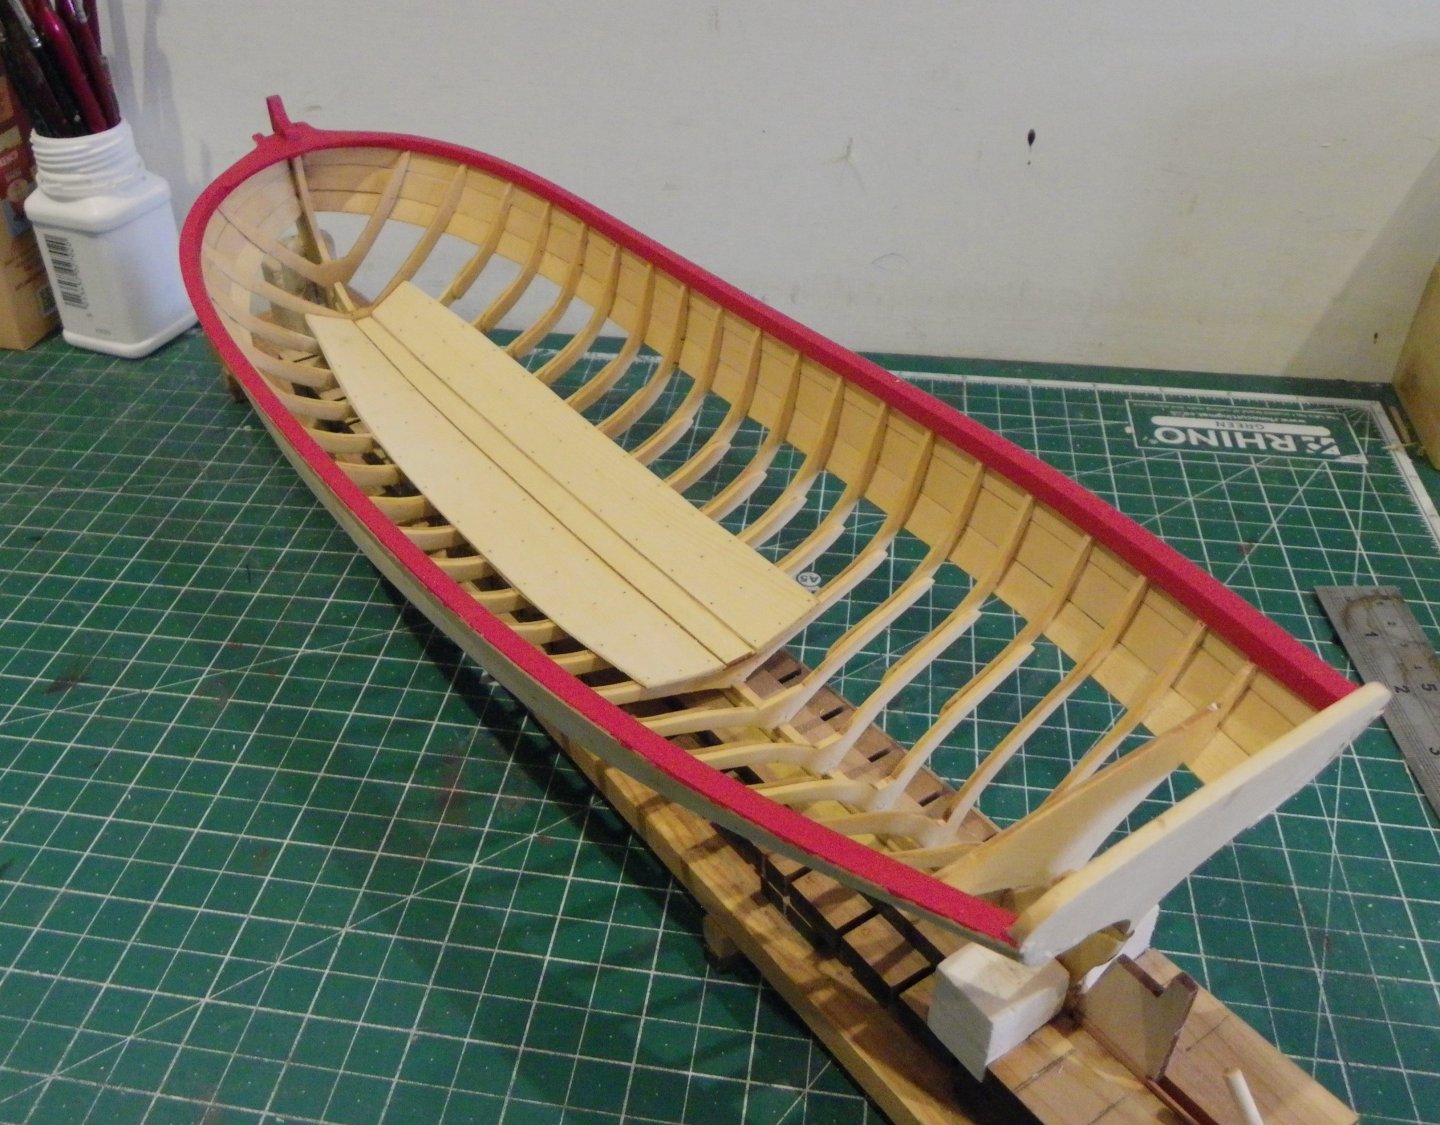
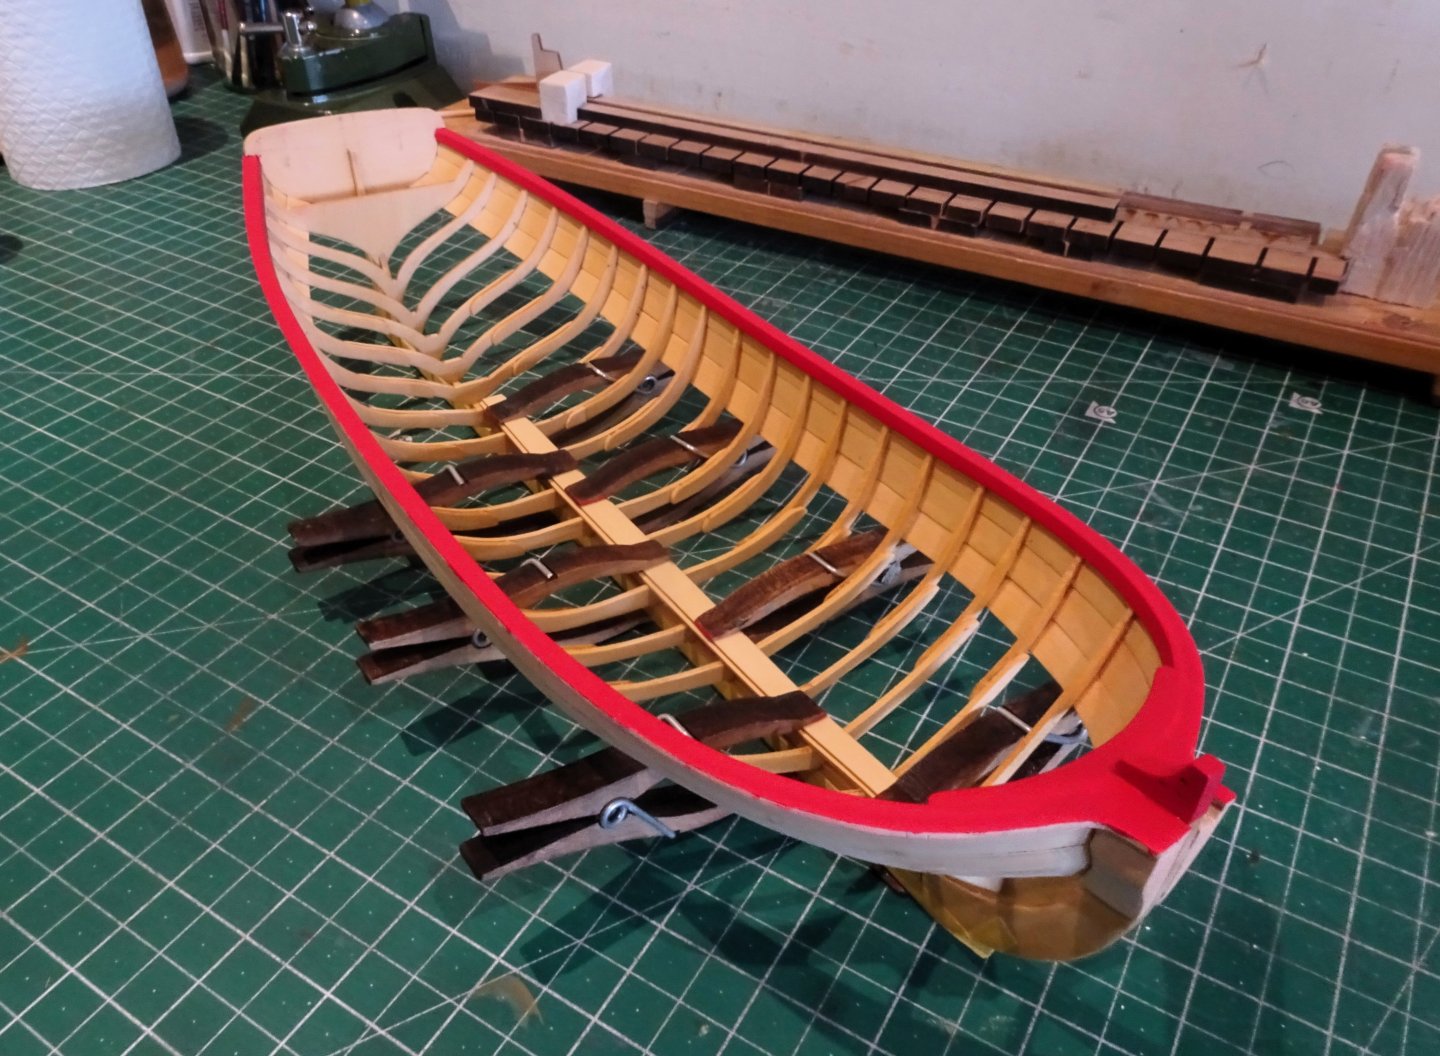
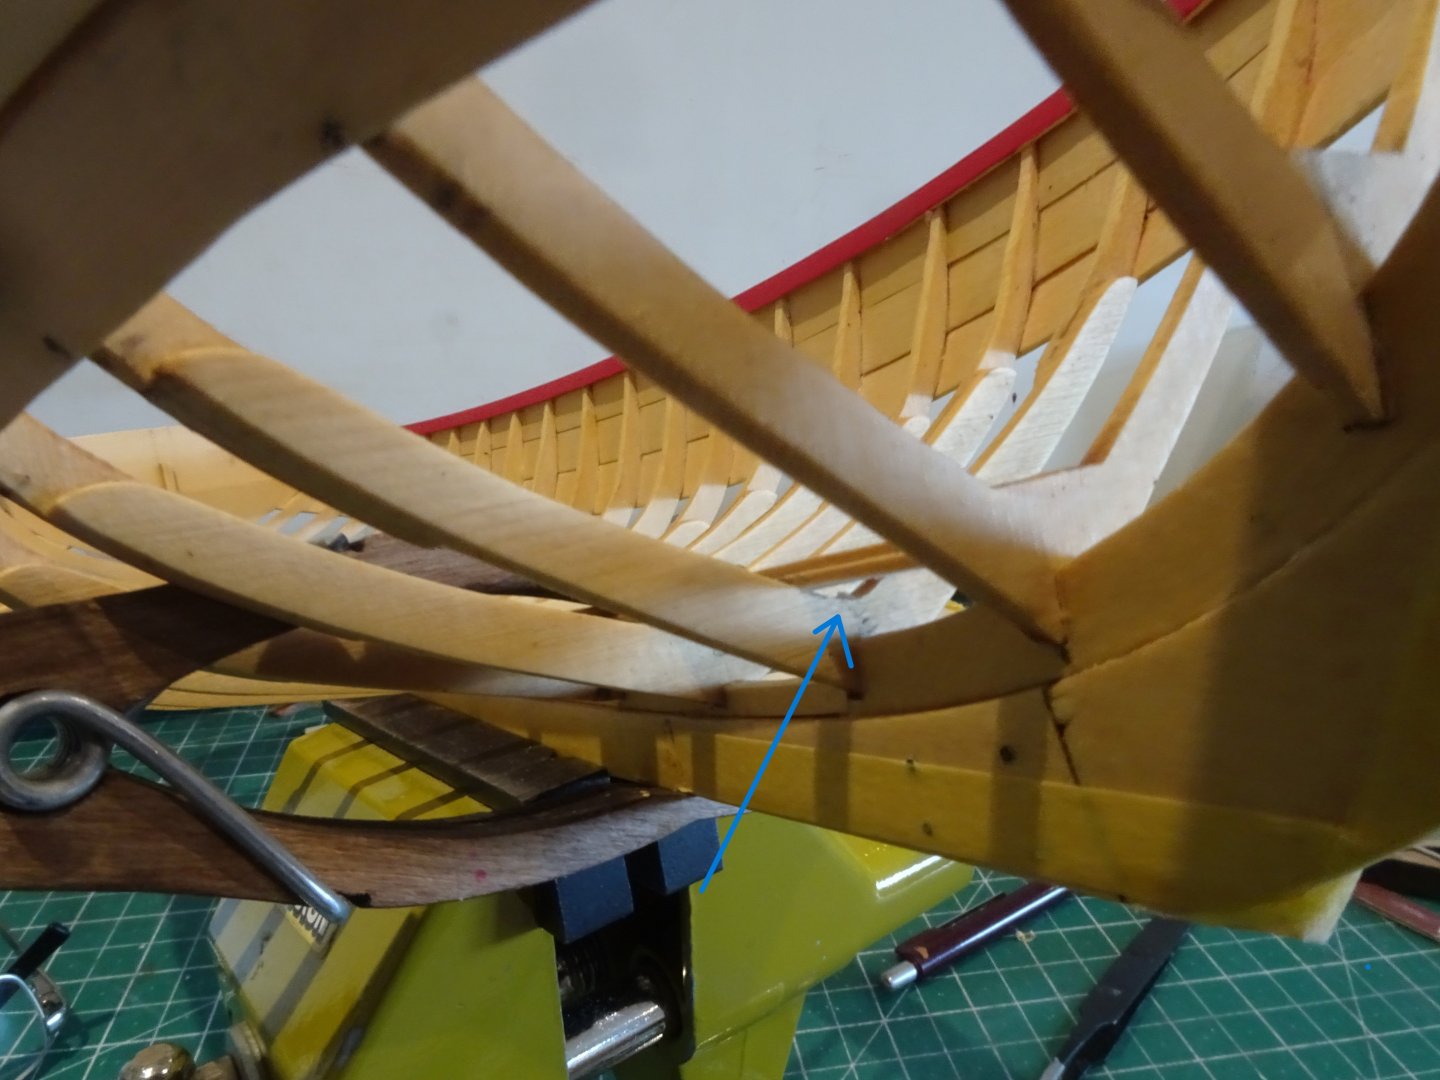
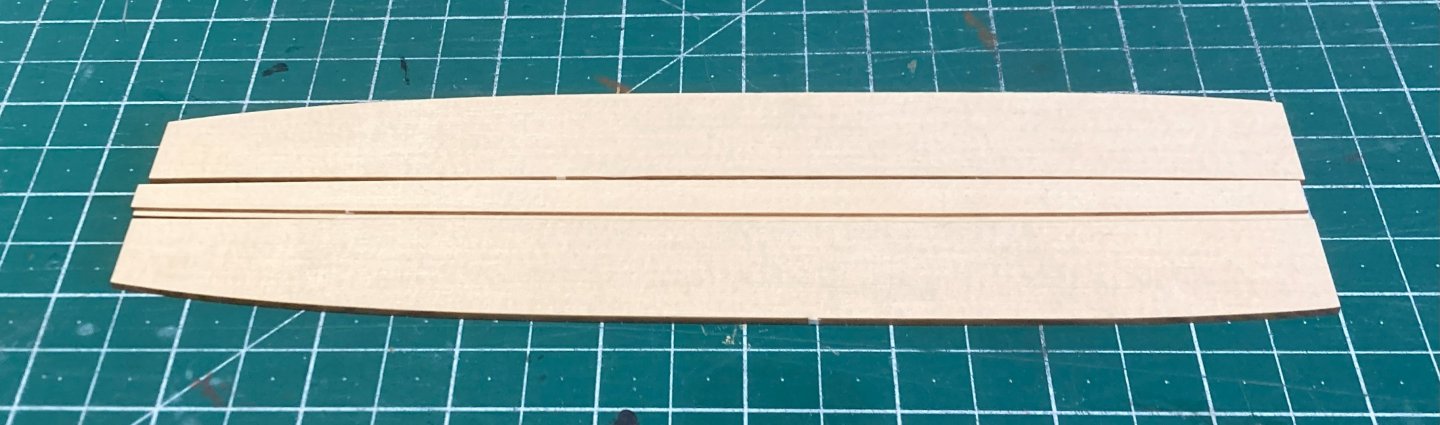
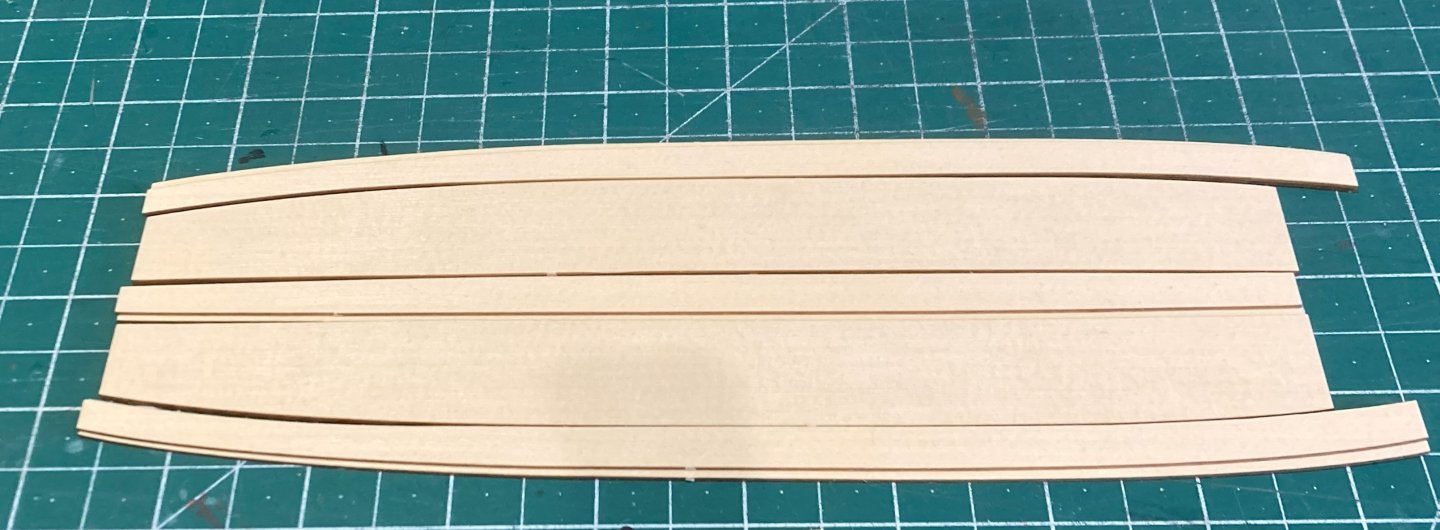
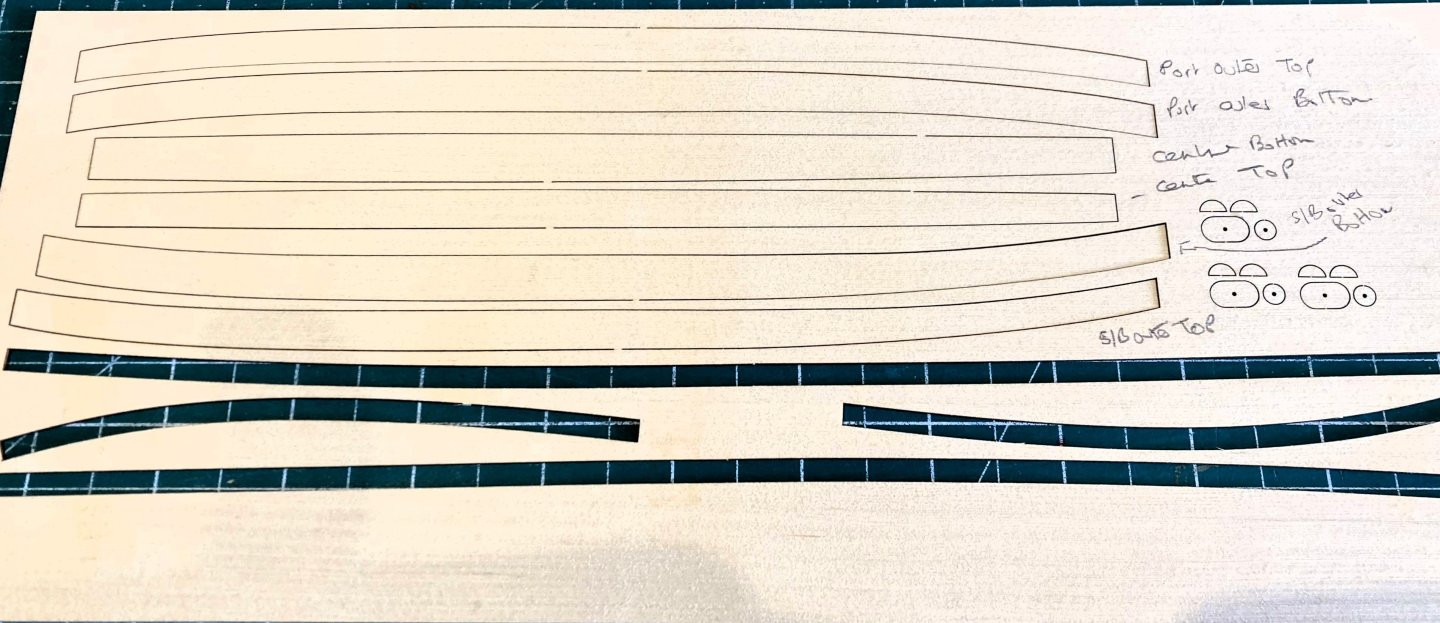
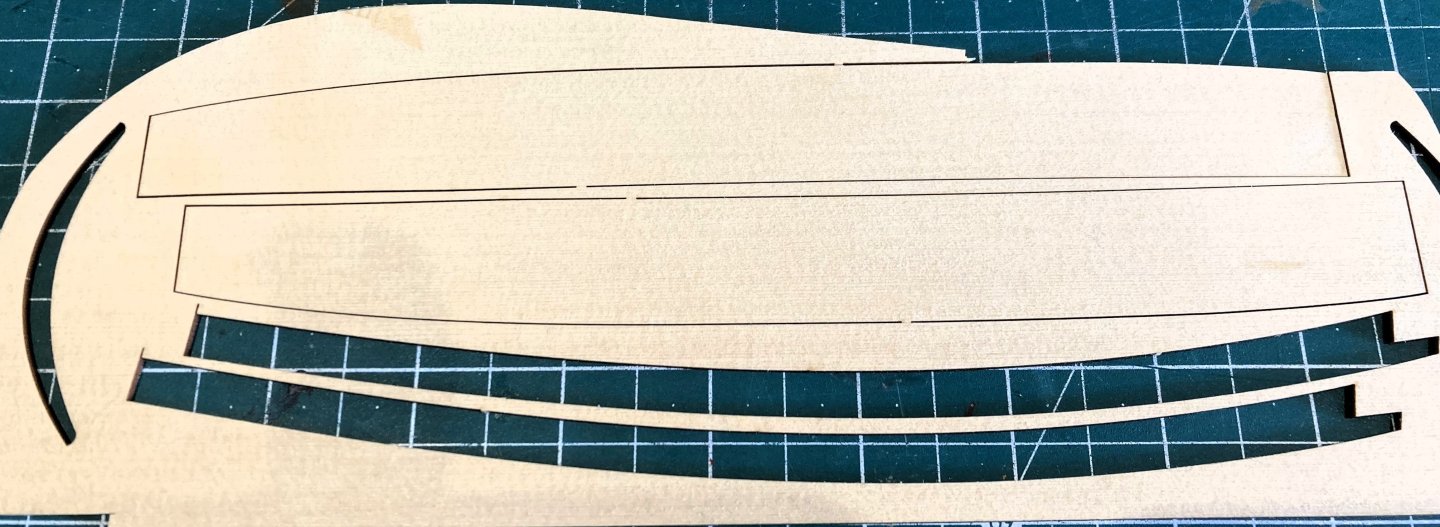
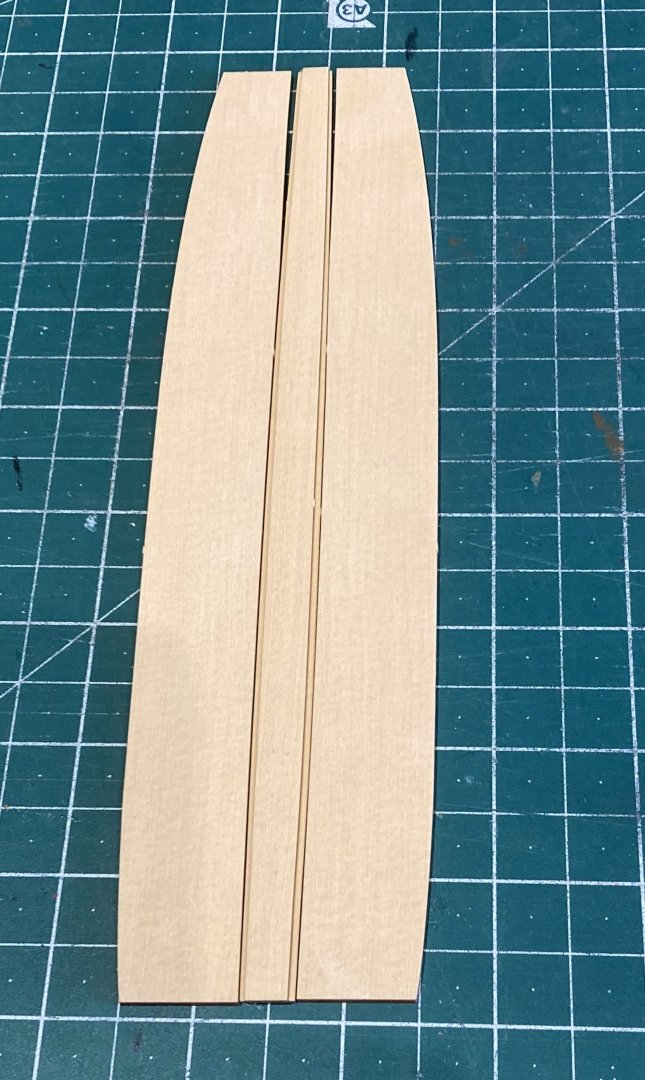
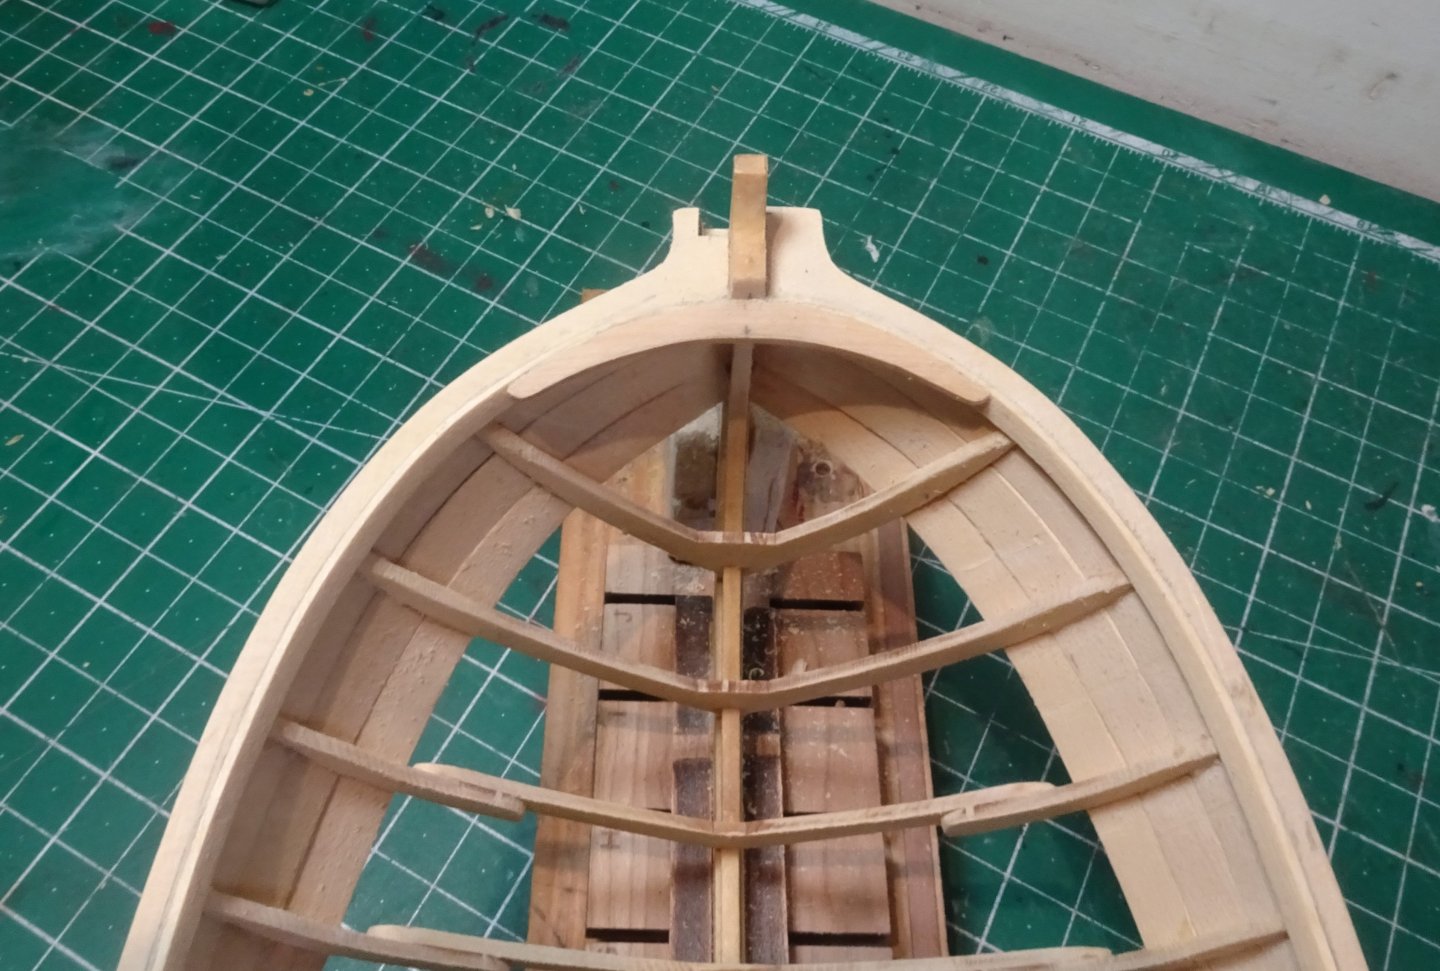
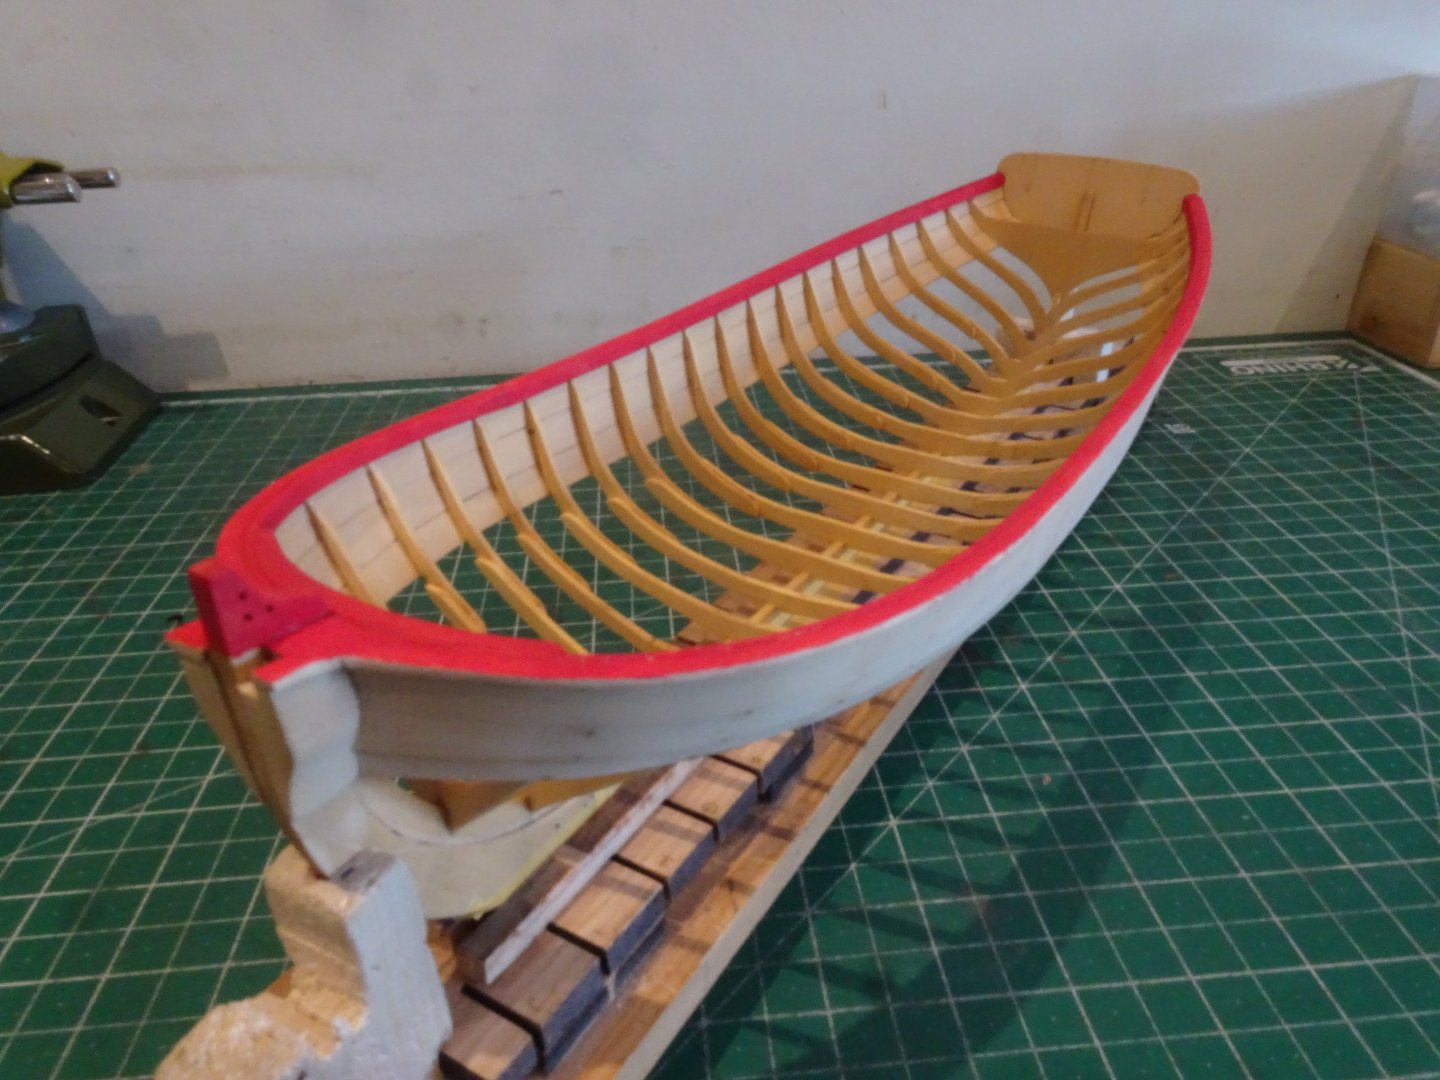
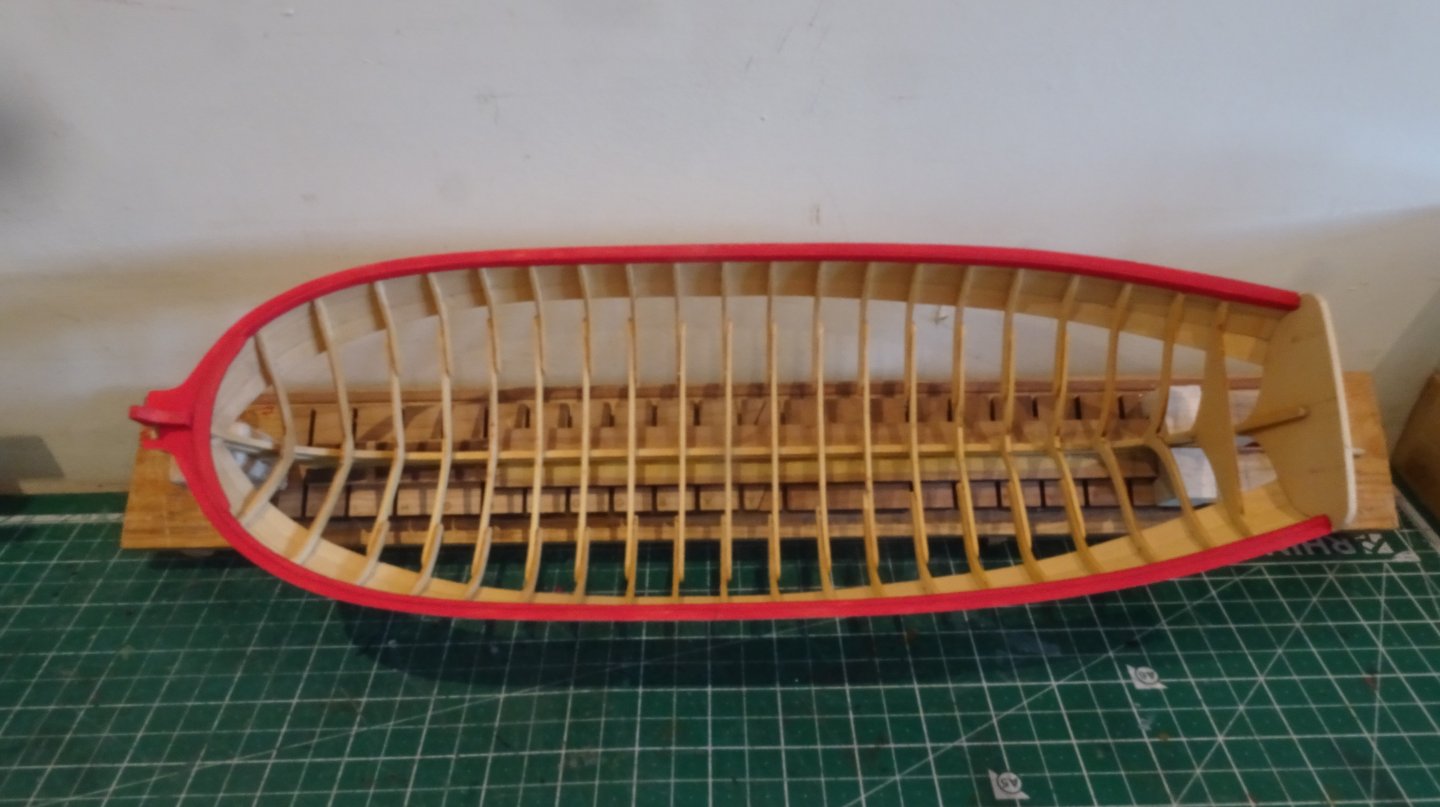
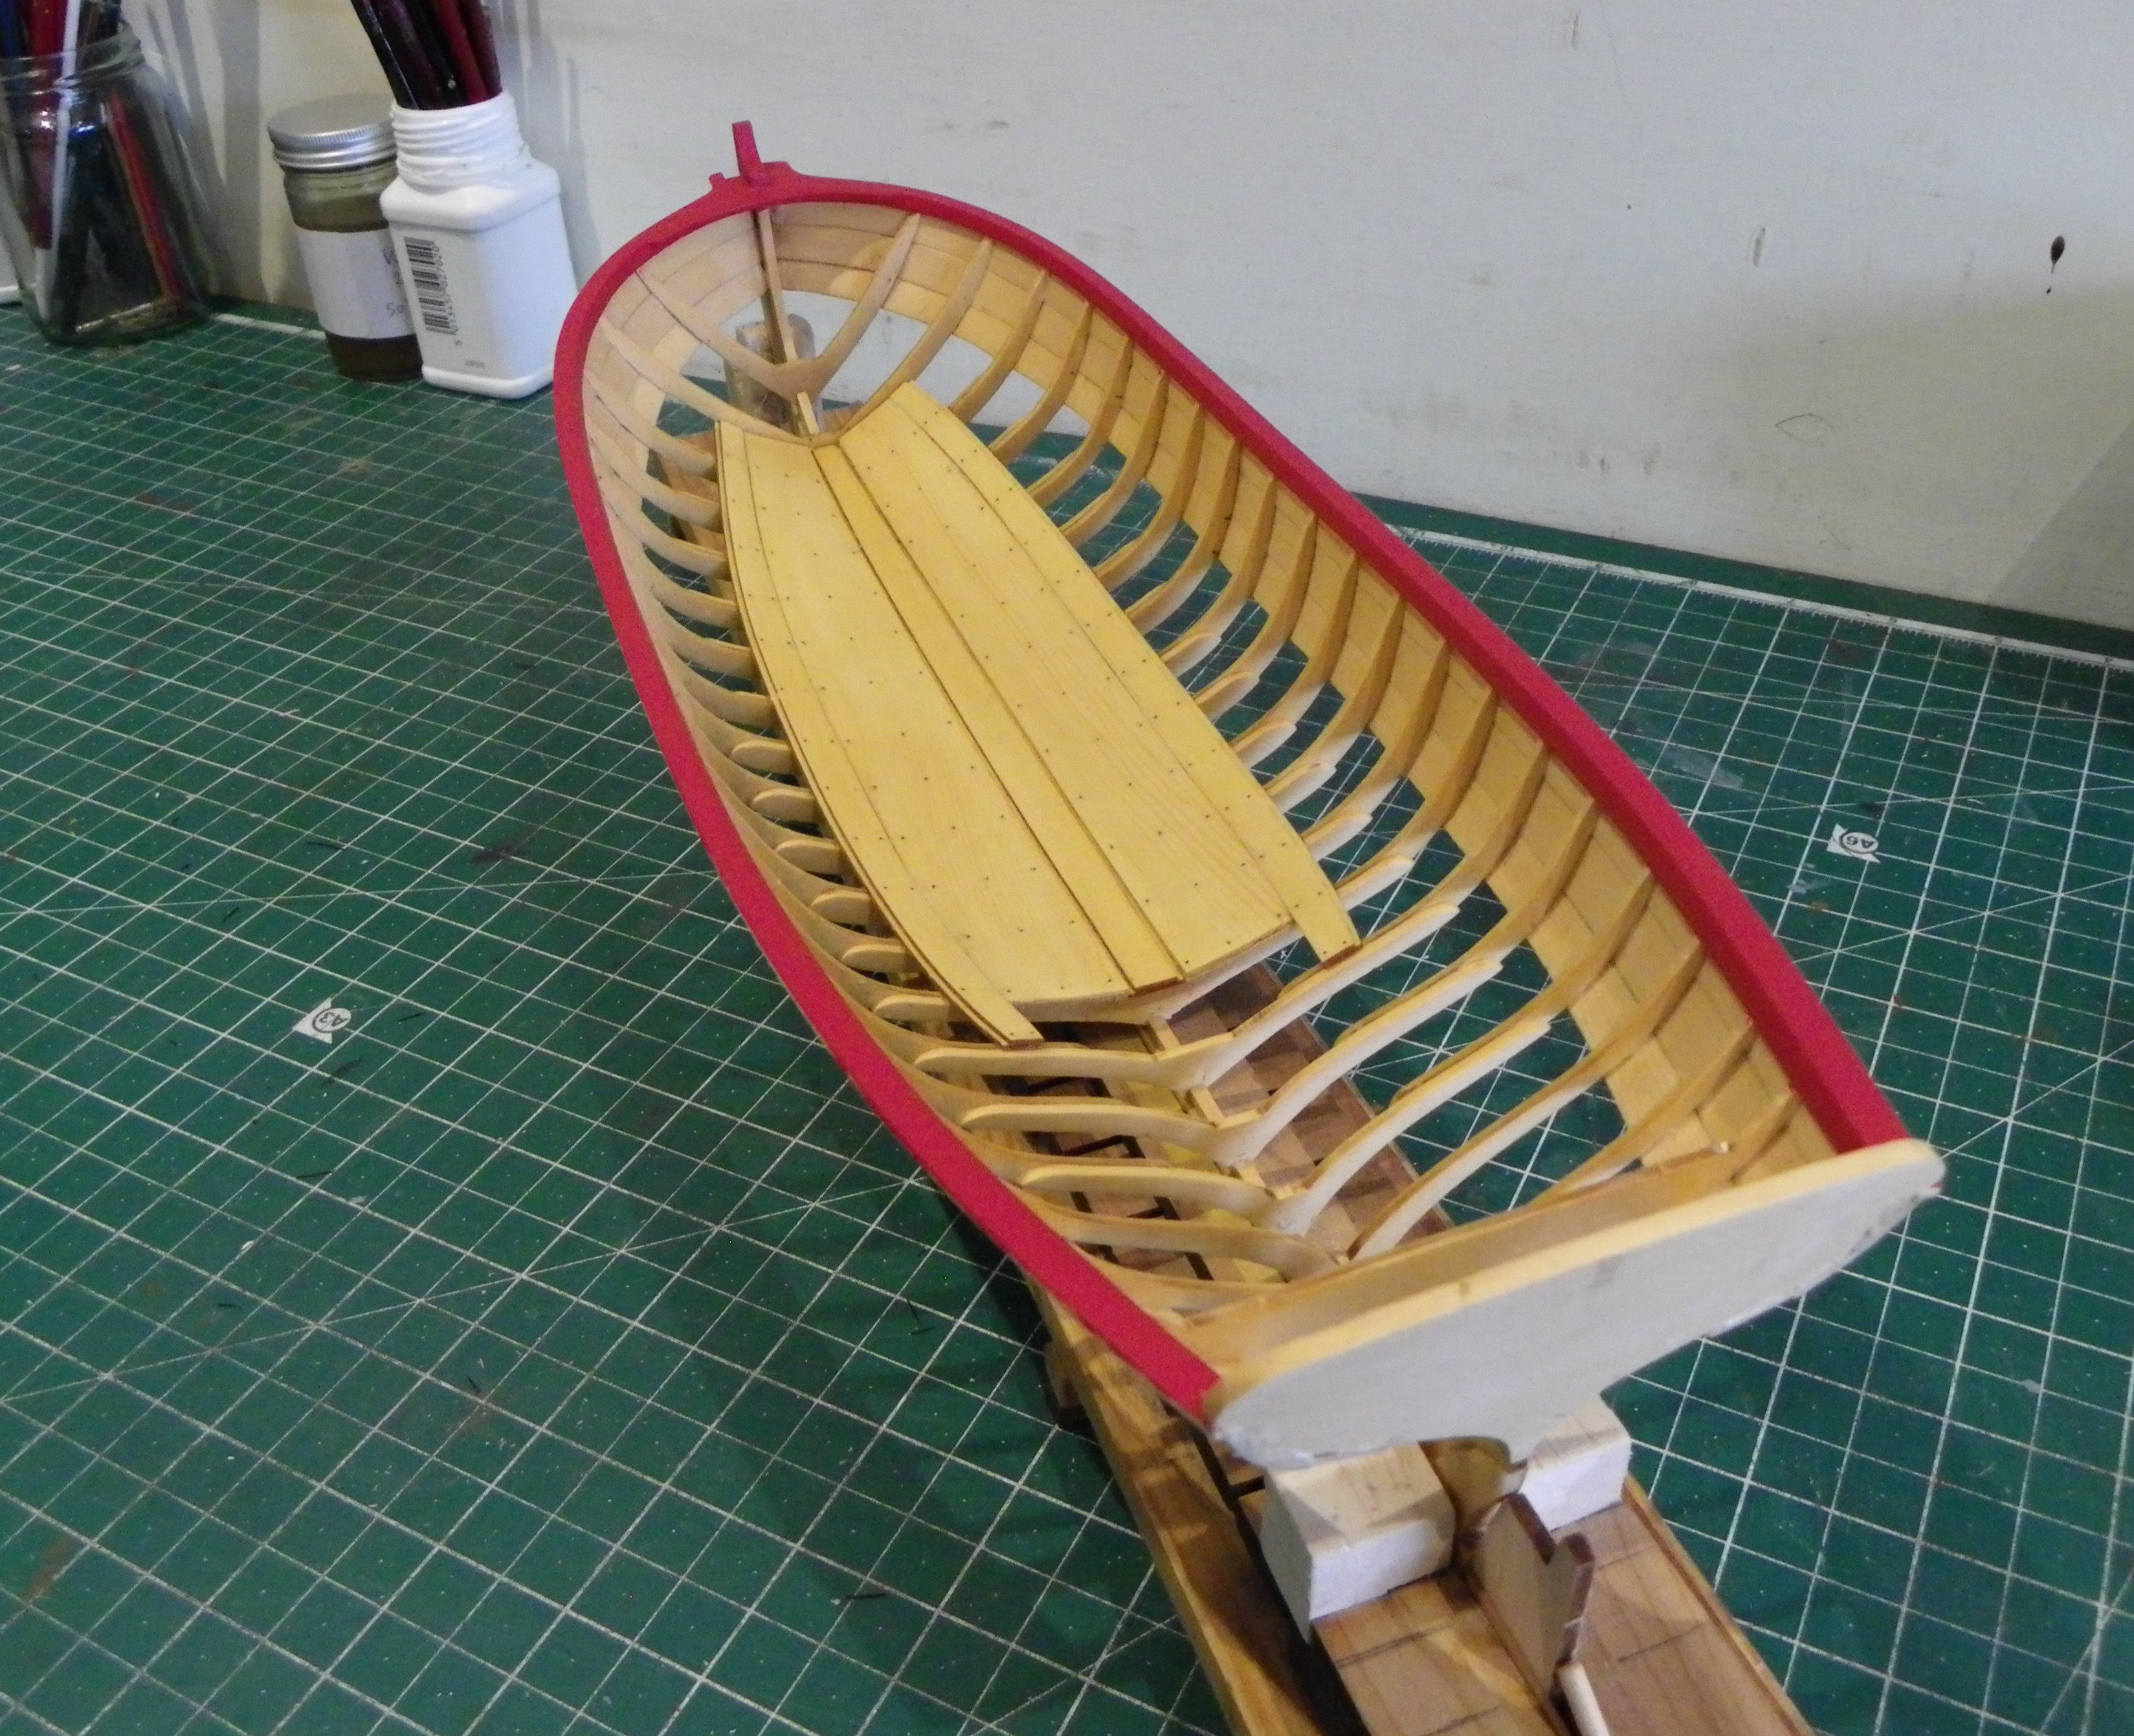
Post 21 Painting the rails There were some very fine imperfections between the capping rail and inboard sheer planking still apparent after two coats of thinned paint. 4849 I applied some fine surface filler atop the rails. Several more thinned paint coats were applied with sanding in-between initially using 400, then 1000 grit. At this point in Part three of the guide it is suggested that the decorative frieze and rail are fitted but I thought I would attend to the floorboards and platforms first. I will return to add final paint coats once the boarding is installed. Floorboarding The floorboards comprise the central board with a broad plank adjacent and a narrower plank outside. 2304a The two broad planks either side of the central plank are easy to identify on 1/16th cedar sheet. 2303a The centre plank along with the two narrower outer planks are found on sheet R. These are made up from two 1/32nd strips glued together. The top layers are slightly narrower to form a rabbet, one each side on the central plank, and one on the outer edges of the outer planks. 2307 The central plank with the two broad planks. 2305a These should meet the centre plank at all points. There is a gap at the fore end which I don’t think will accept edge bending, so the inner edges look to need shaping to allow the fore end to meet the central plank. The broad planks will also require some lateral bending to sit down on the frames. 2308a The two outer planks abut the broad planks with the rabbet on the outer edge. The central plank is fitted first which is necessary to provide a solid edge to work the broad plank fit. Trial fitting revealed a potential problem. With an open framed version the fit of the central board is perhaps slightly more critical than the fully planked version. 4855a The fit of the boards on the frames will be seen from below and as can be seen the central plank does not sit fully down on the third from bow frame due to the more acute angle of the frame. Having discussed with Chuck a small wedge was added to fill the gap. 4853 One of the advantages of open frames is that there is convenient access to clamp this part in place. B.E 29/05/2024
- 131 replies
-
- 11
-
-
- Medway Longboat
- Syren Ship Model Company
- (and 1 more)
-
There was a French 1st rate Le Fulminant built at Rochefort Dockyard 1691. B.E.
-
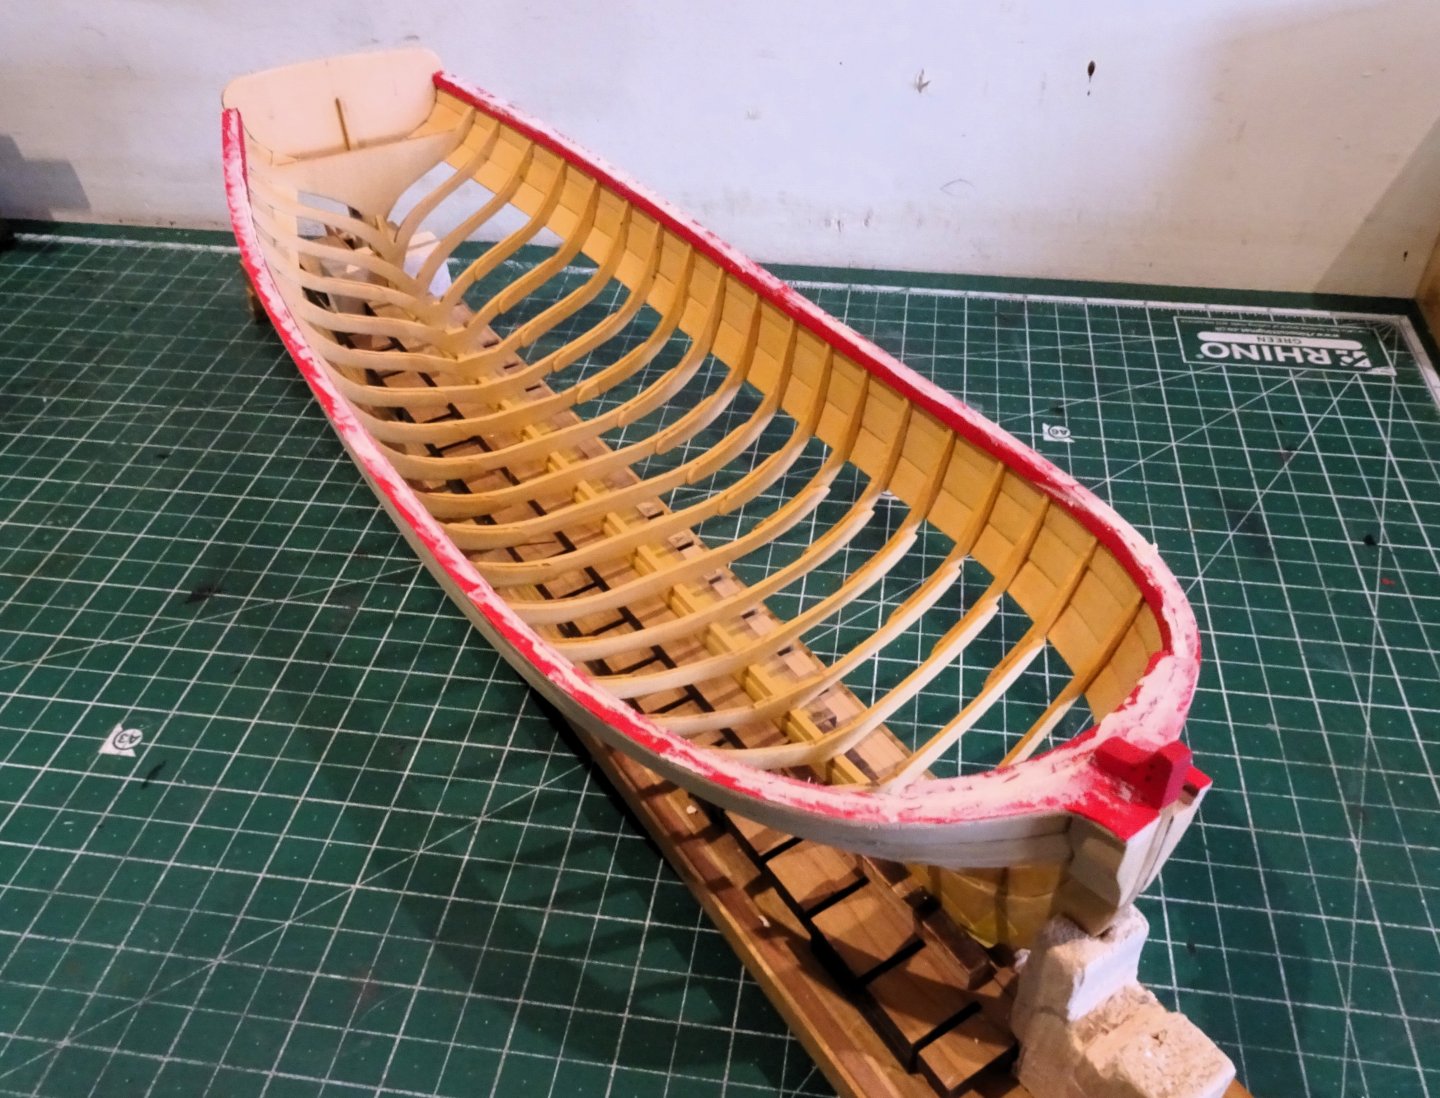
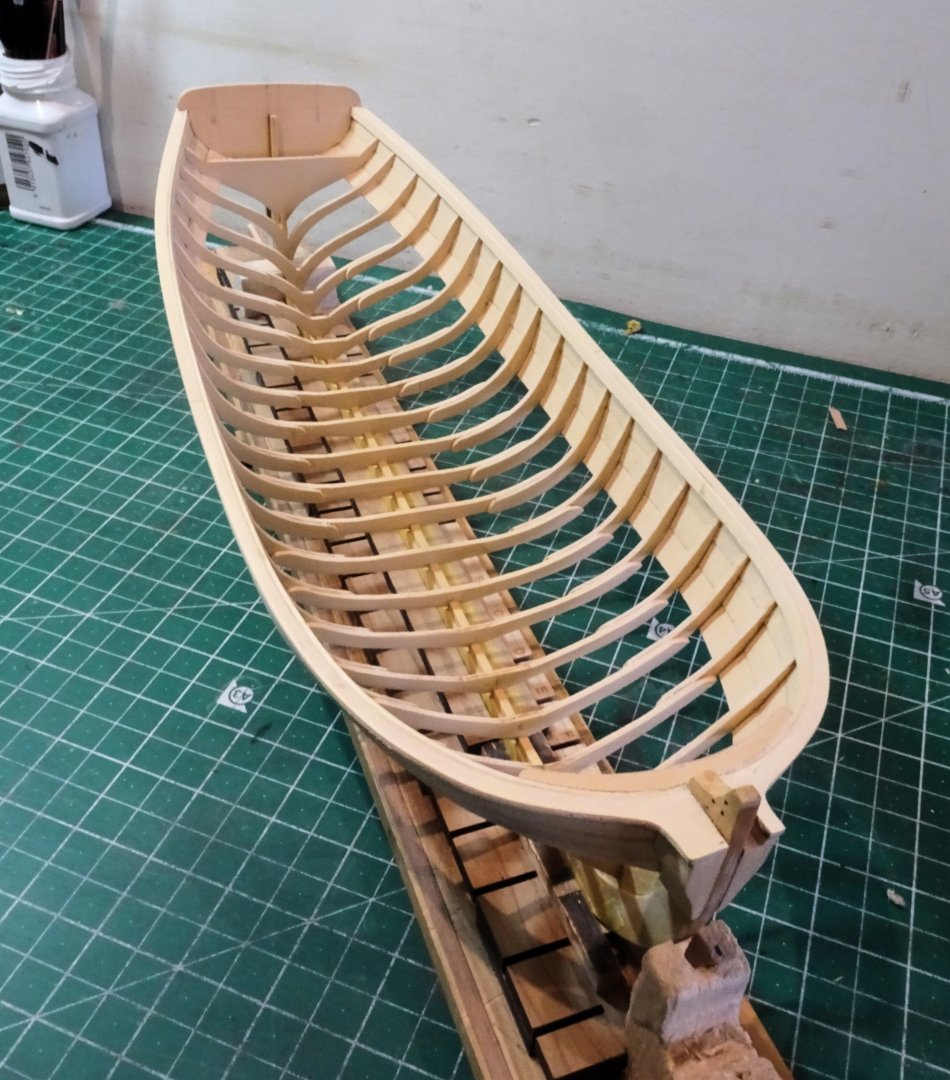
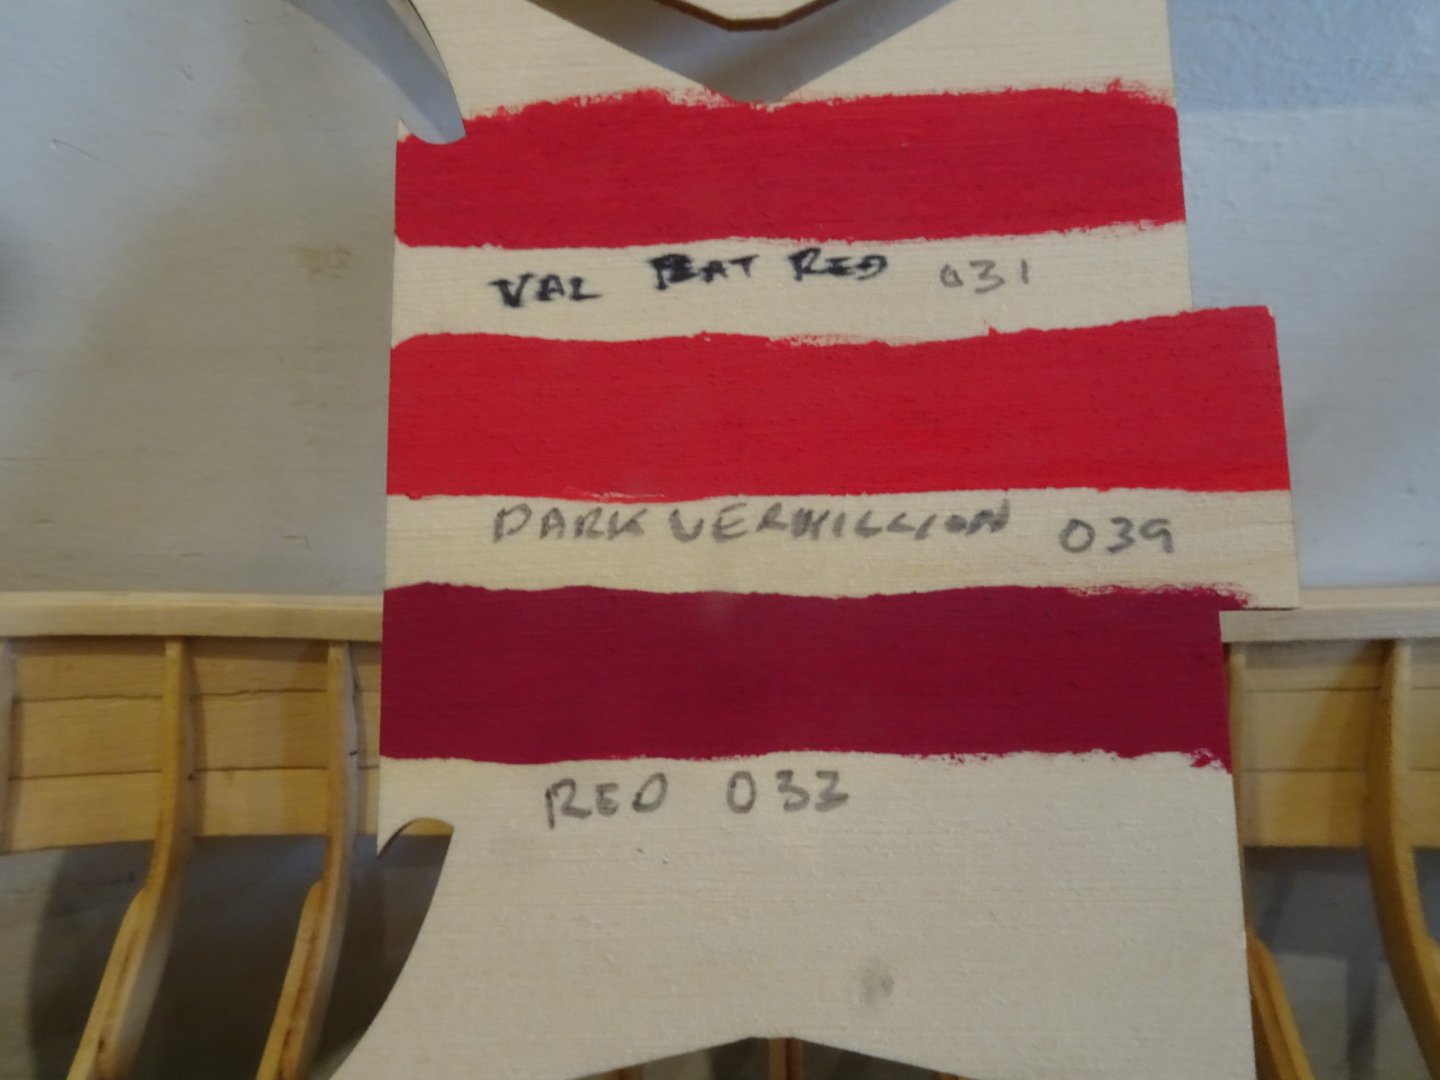
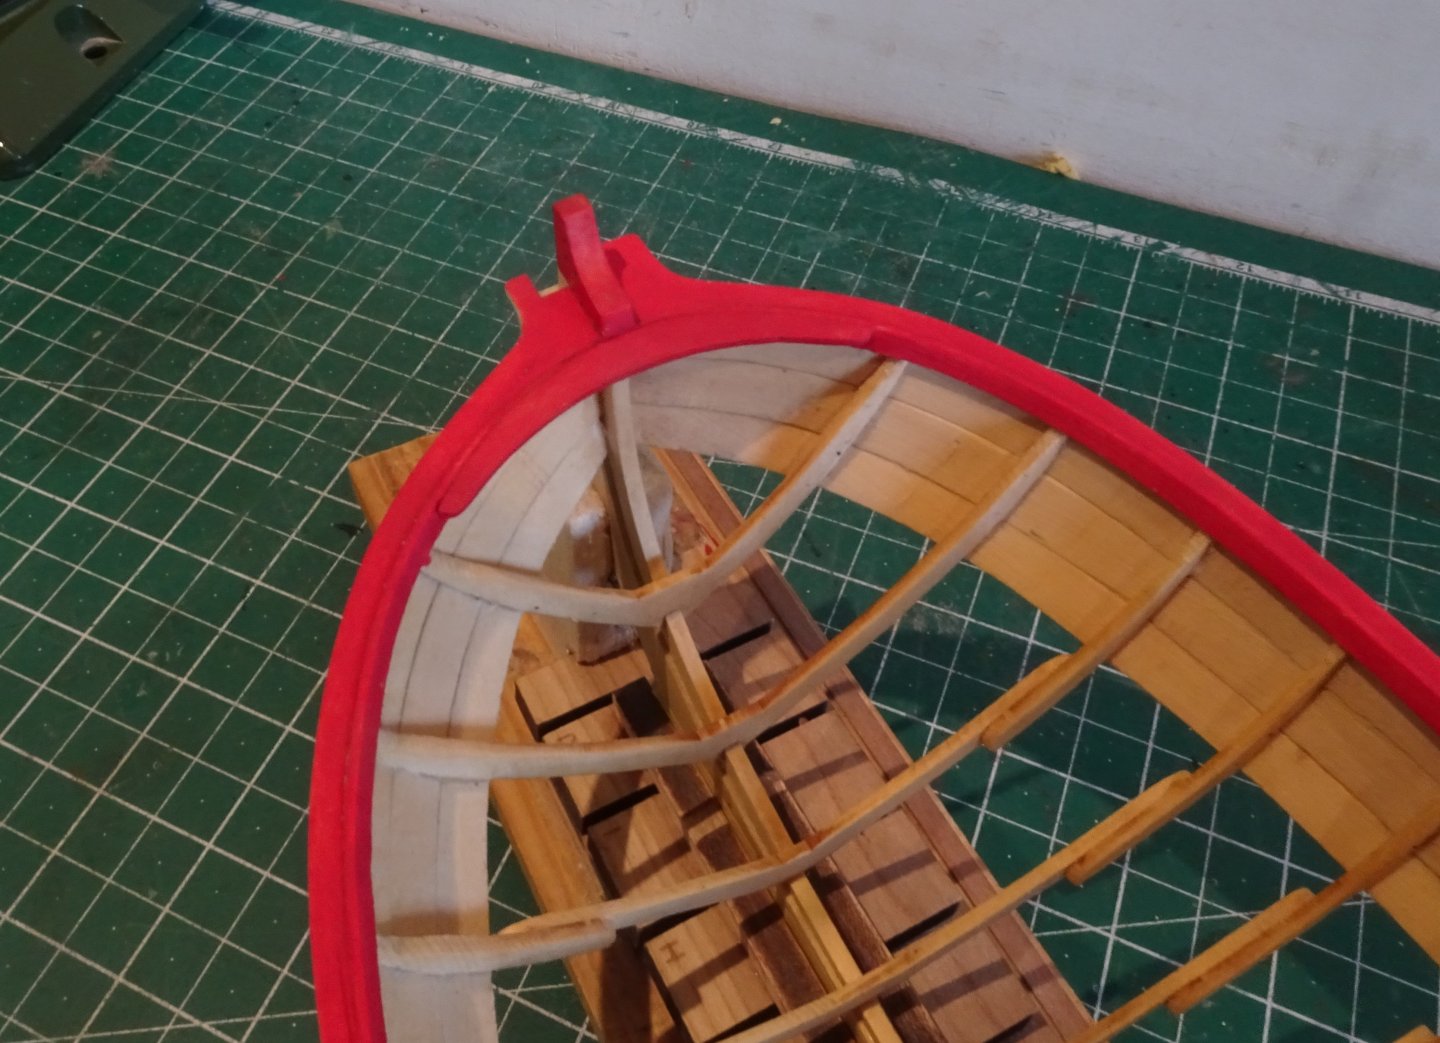
Thank you Chuck, it was the elegant sheer that attracted me to the model. Overall it is a thing of beauty. Post 20 In continuation. 4753 The re-made bow Breasthook/knee has been glued into place, I think I’ve got a close fit. 4754 I have continued to clean up the woodwork prior to applying a coat of w-o-p. With w-o-p applied to the frames and inner boarding it is time to consider paint. As with the Queen Anne Barge I will be using Vallejo acrylics. 3434(1) For that build I used Flat Red for the Barge paintwork. The uniforms for the Royal Company of Watermen were of a brighter hue. 4837 Before I committed to the paint shade I compared the likely Vallejo options. I think Flat Red (top option) still has the edge so I’ll stick with that. 4848 A first coat of thinned paint is applied, the first of several, and a first opportunity for the paint to reveal where areas need attention. 4842 4846 On with the show. B.E. 27/05/2024
.thumb.JPG.e754fc597c6215db1cd75e6681a81dcd.JPG)
- 131 replies
-
- 10
-
-
- Medway Longboat
- Syren Ship Model Company
- (and 1 more)


.JPG.63cadde8125687f101d6bc1075b0bd78.JPG)


