Supplies of the Ship Modeler's Handbook are running out. Get your copy NOW before they are gone! Click on photo to order.
×
.JPG.ca33079f5815b861e67b9c2cccd37982.JPG)

Blue Ensign
-
Posts
4,550 -
Joined
-
Last visited
Content Type
Profiles
Forums
Gallery
Events
Everything posted by Blue Ensign
-
 Thank you, Allan and Nils, @Allan – there is a lot to praise about Vanguard kits but I also comment where I think things could be modified or improved. All kits have limitations, but Chris has certainly raised the bar of kit quality and there is a decreasing need for bashing to enhance simplifications. (not to say that I don't enjoy a spot of 'modification'. @Nils - I have already started to add the tiller lines, there will not be any visible blocks, but the sliding feet will be included. Regards, B.E.
- 648 replies
-
- 3
-

-
- Indefatigable
- Vanguard Models
- (and 1 more)
-
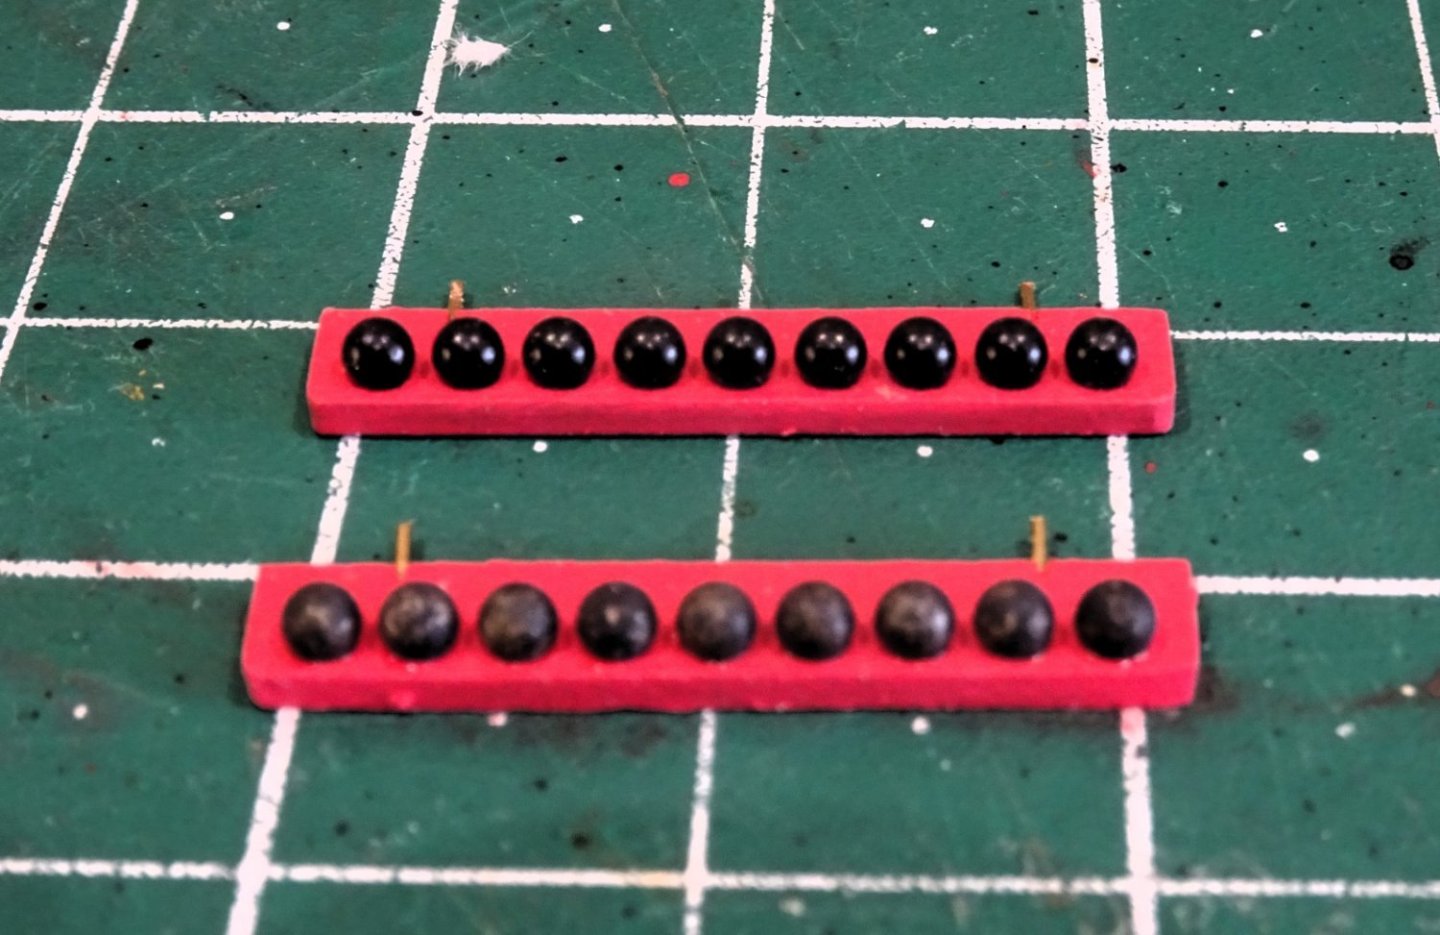
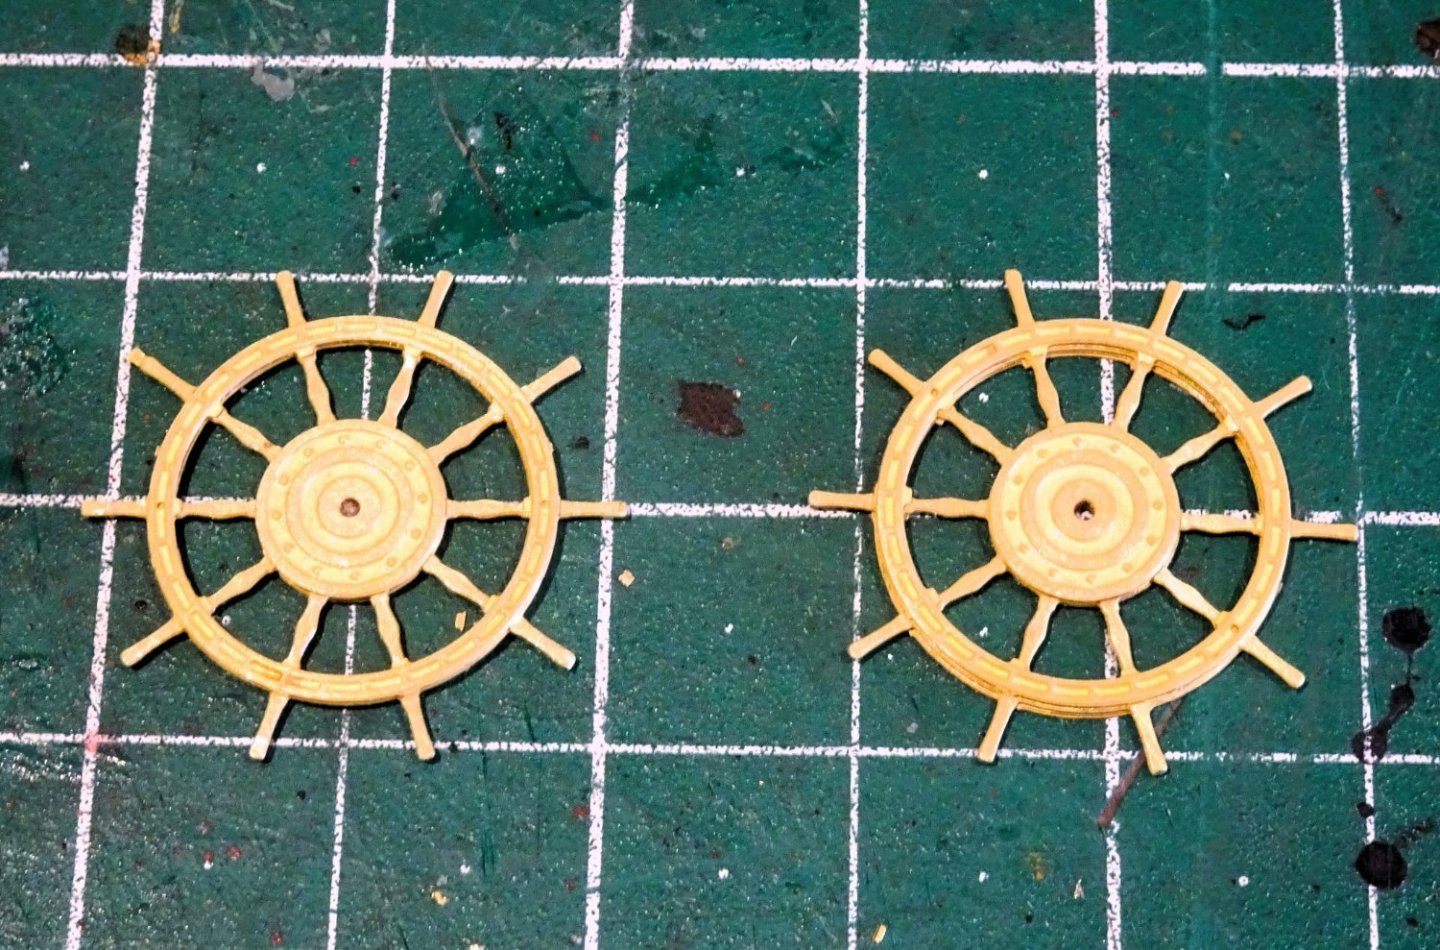
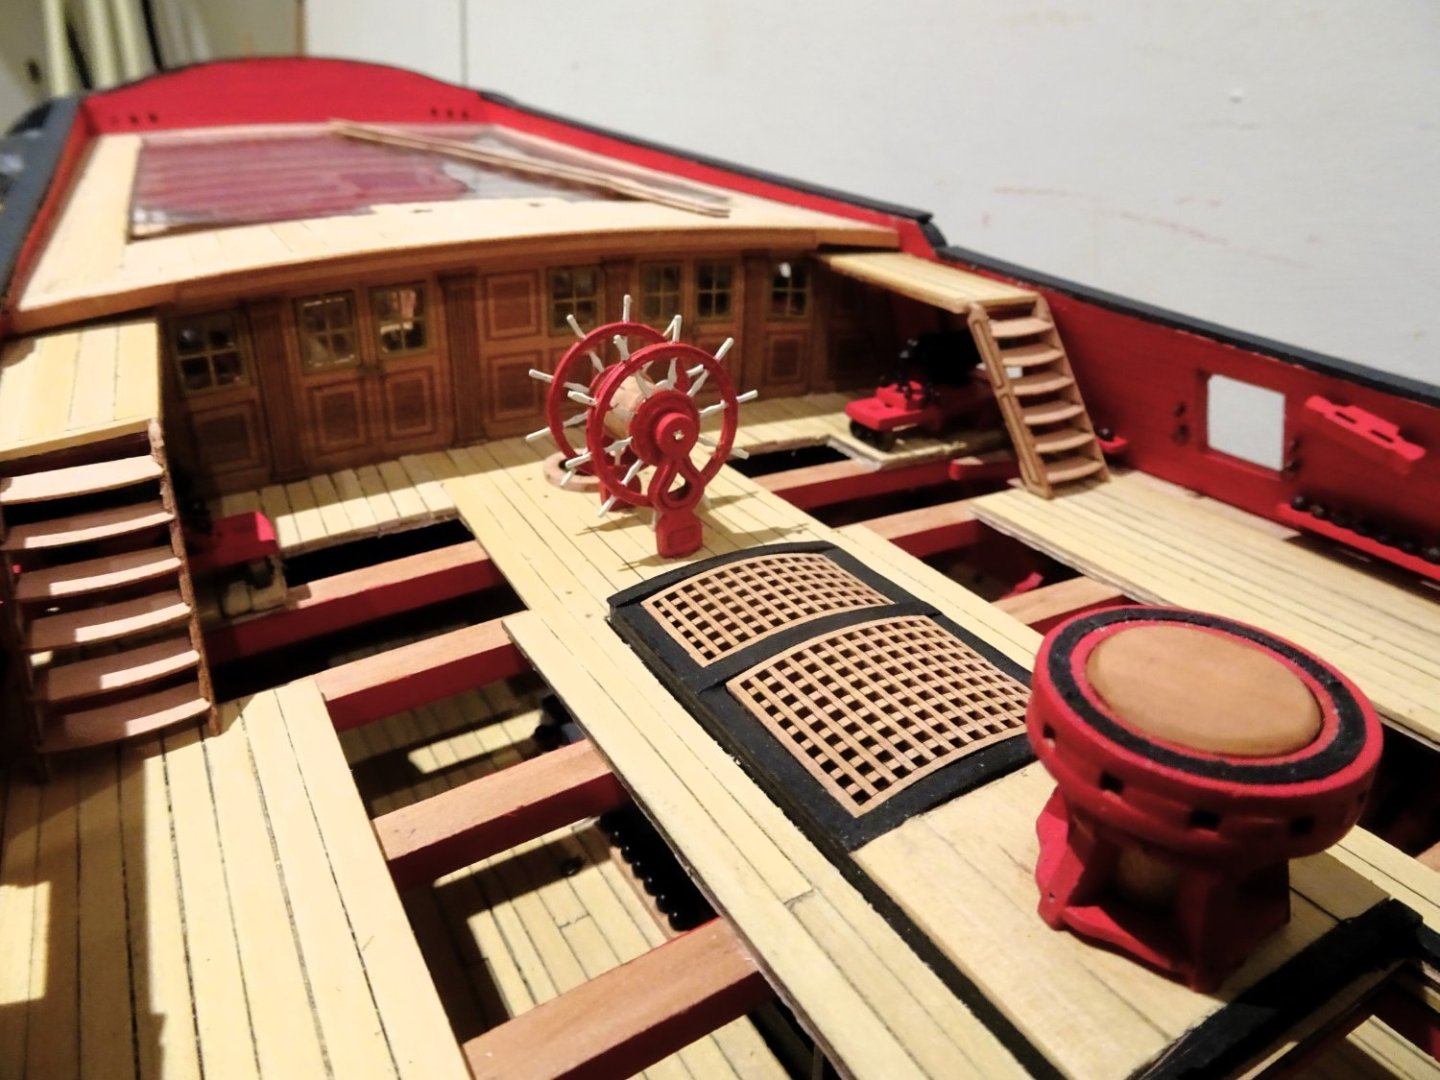
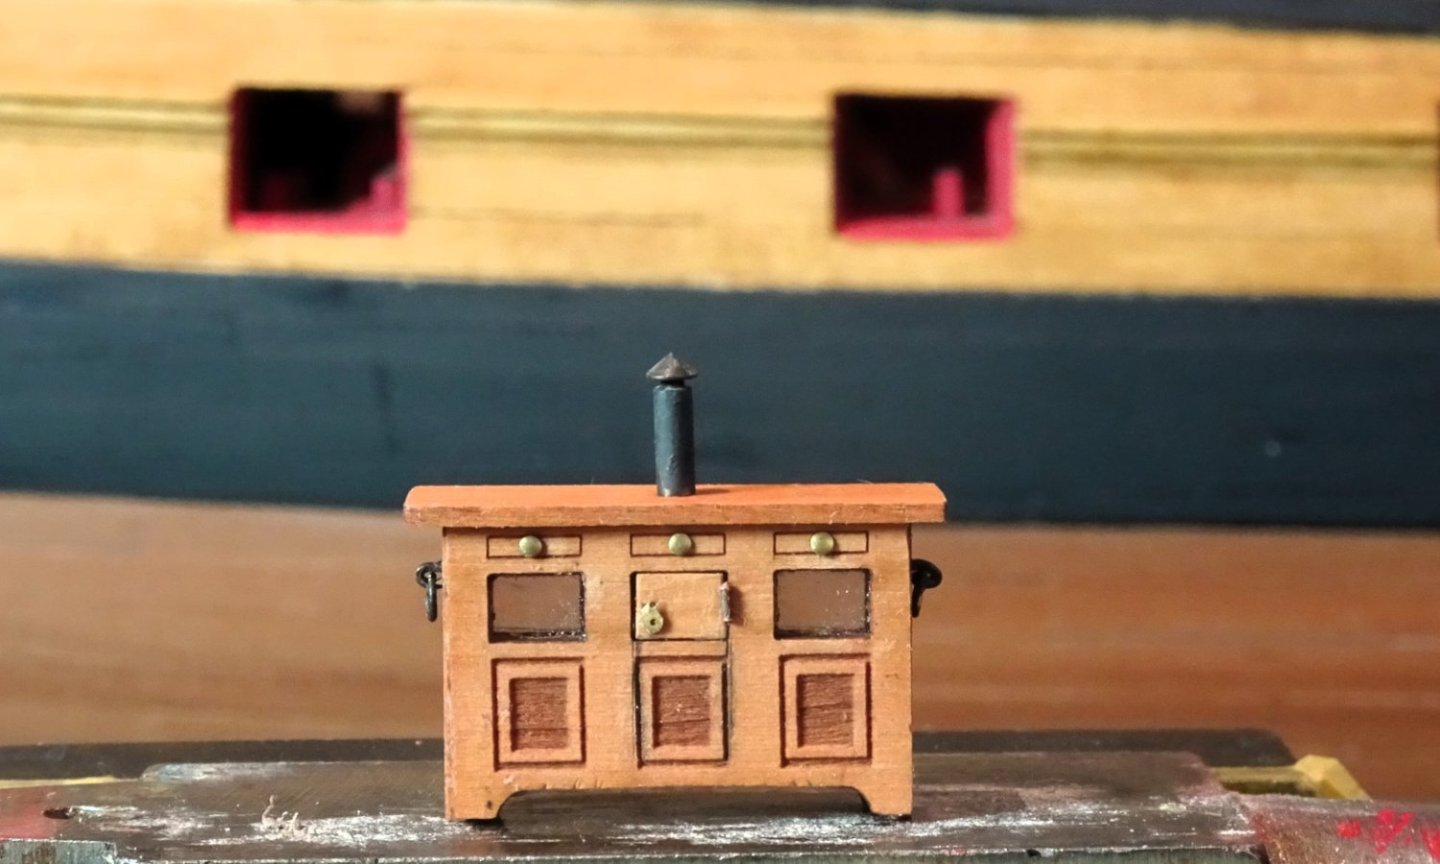
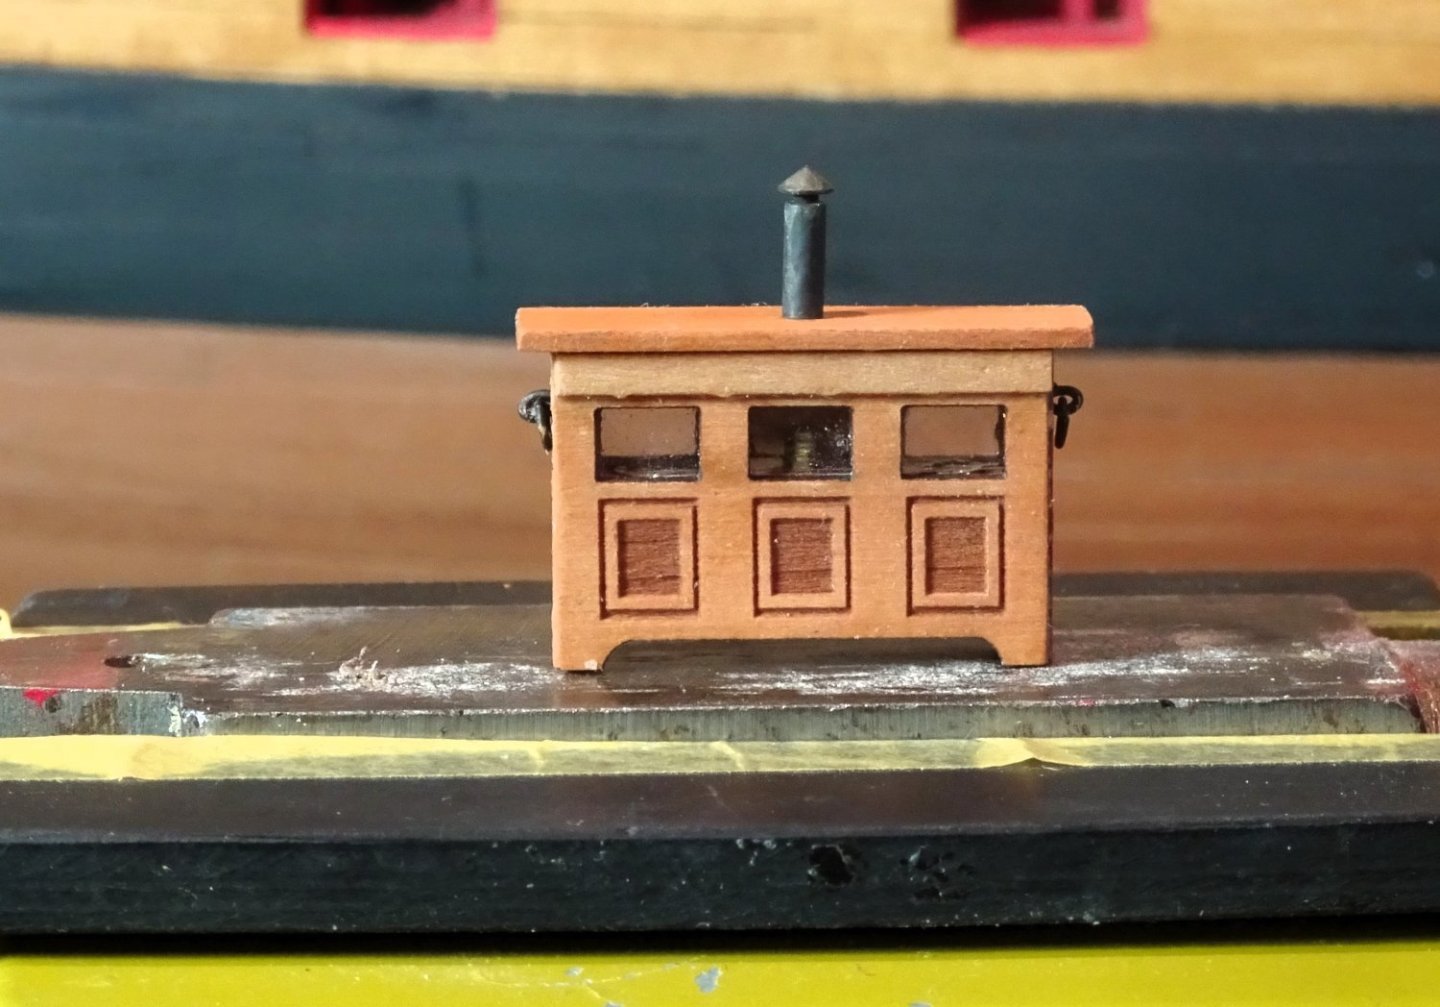
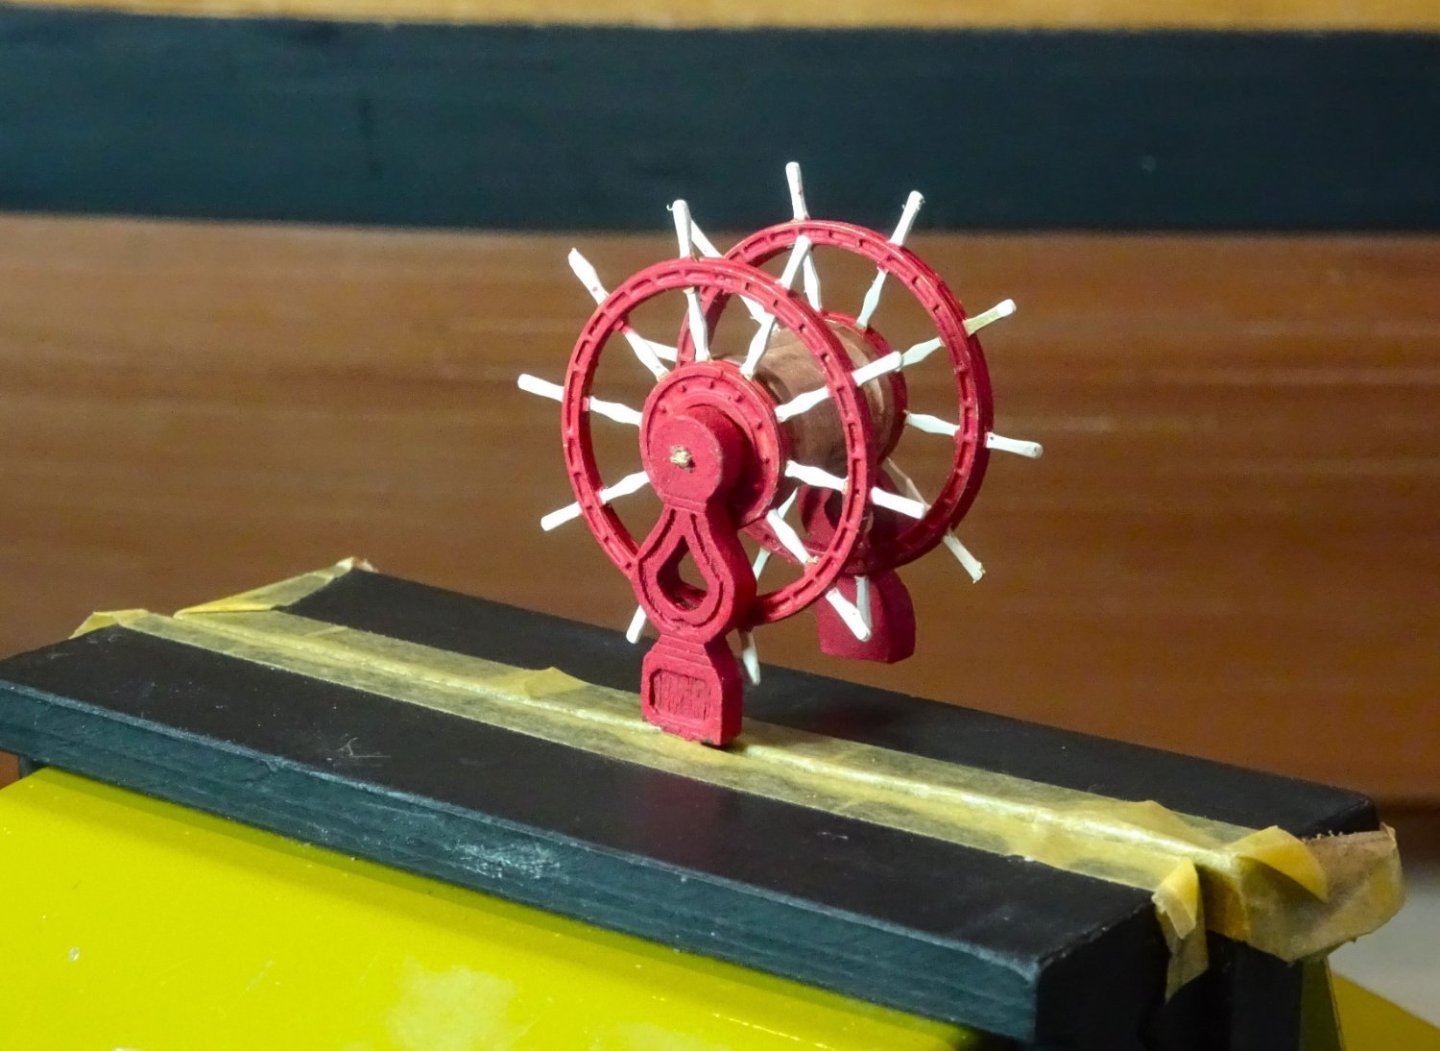
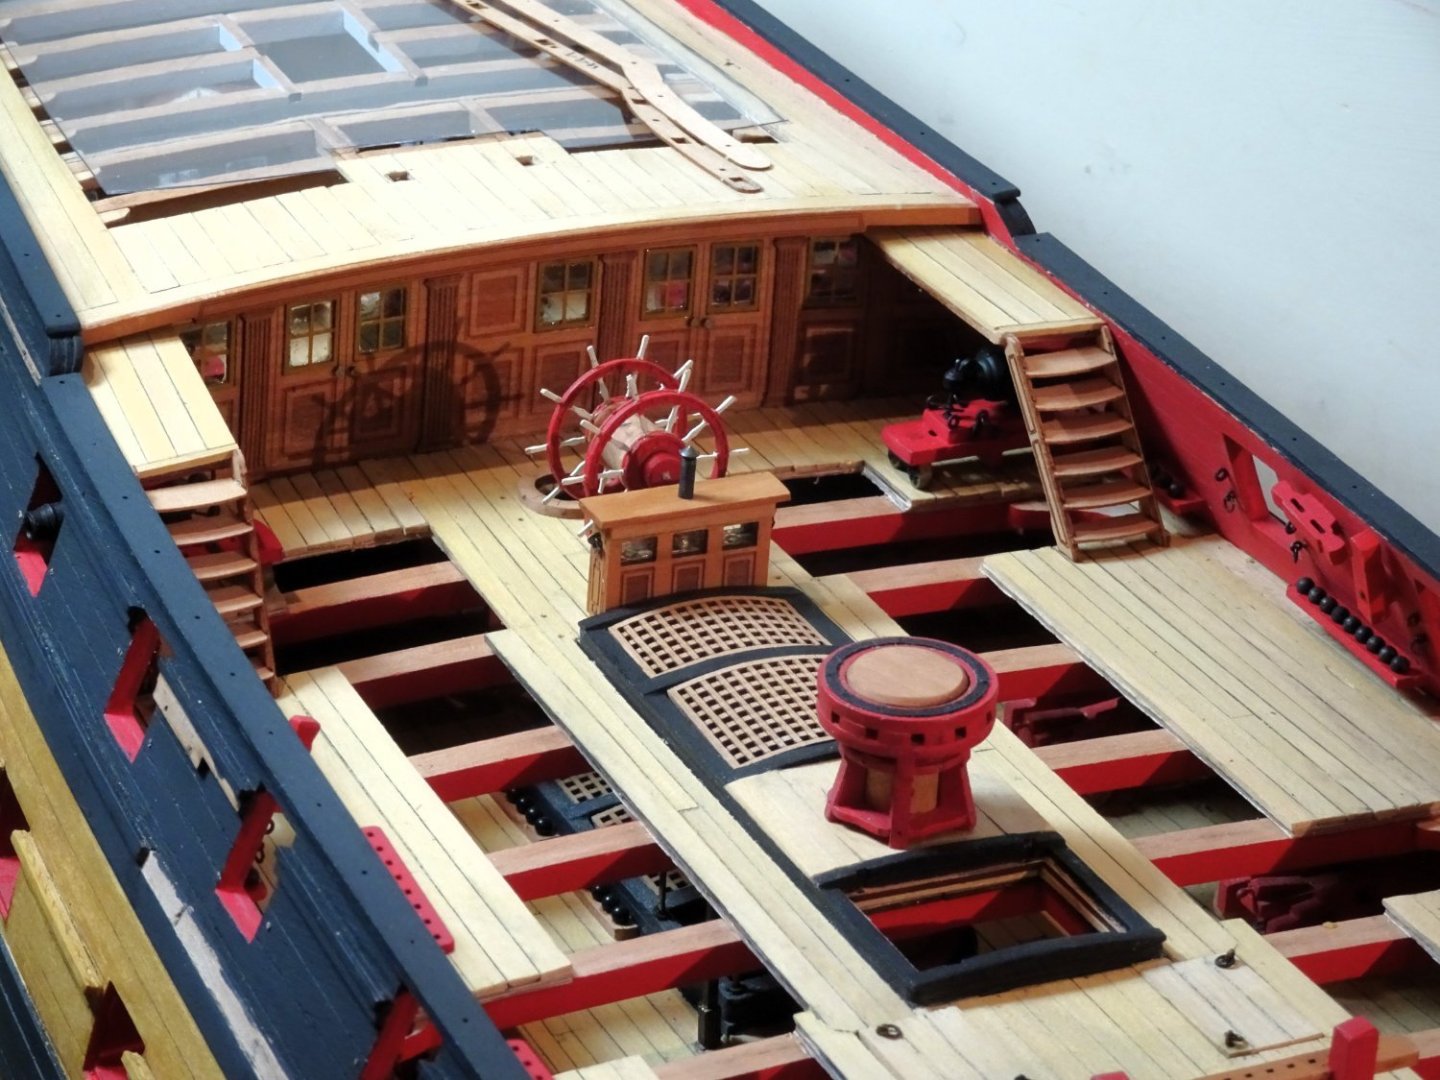
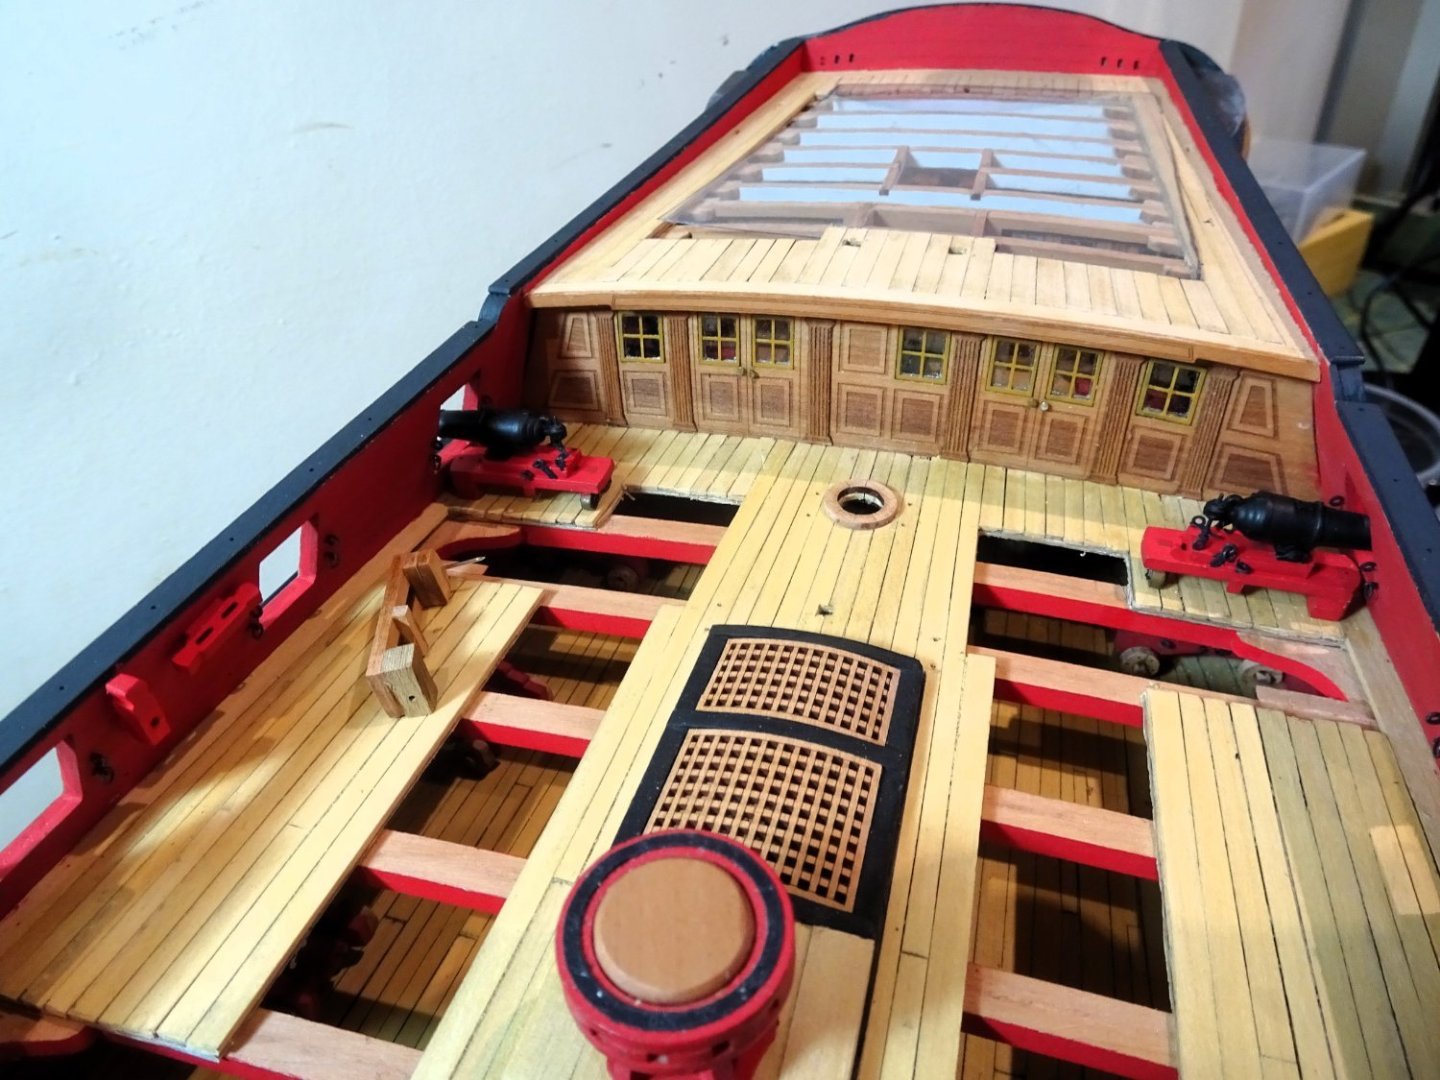
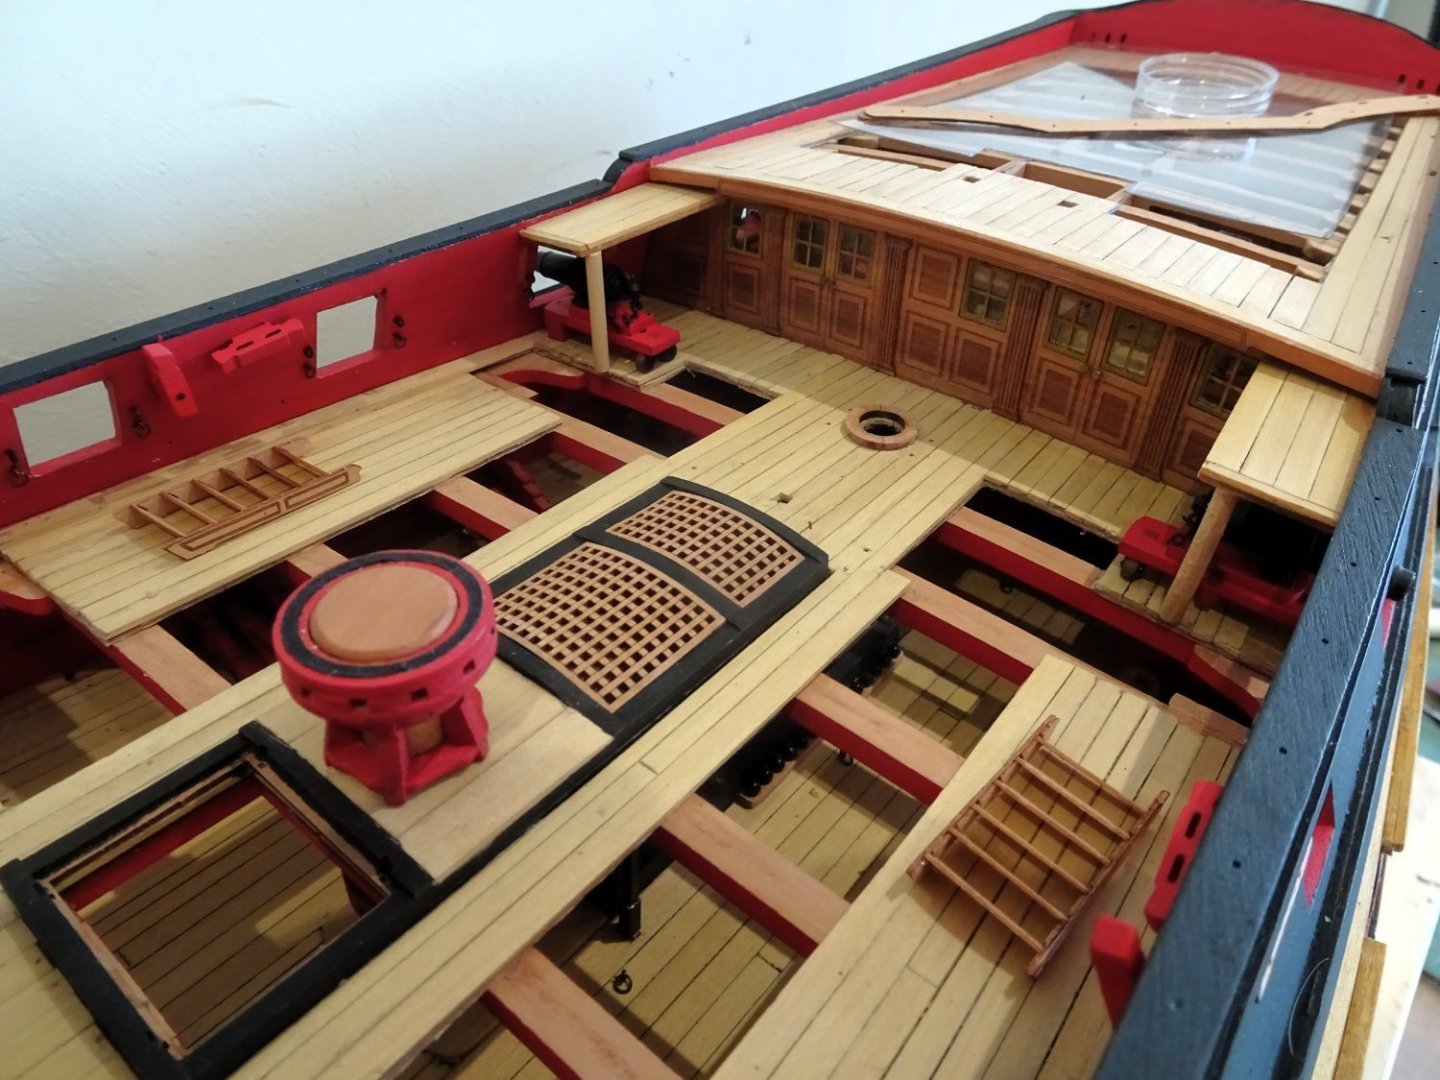
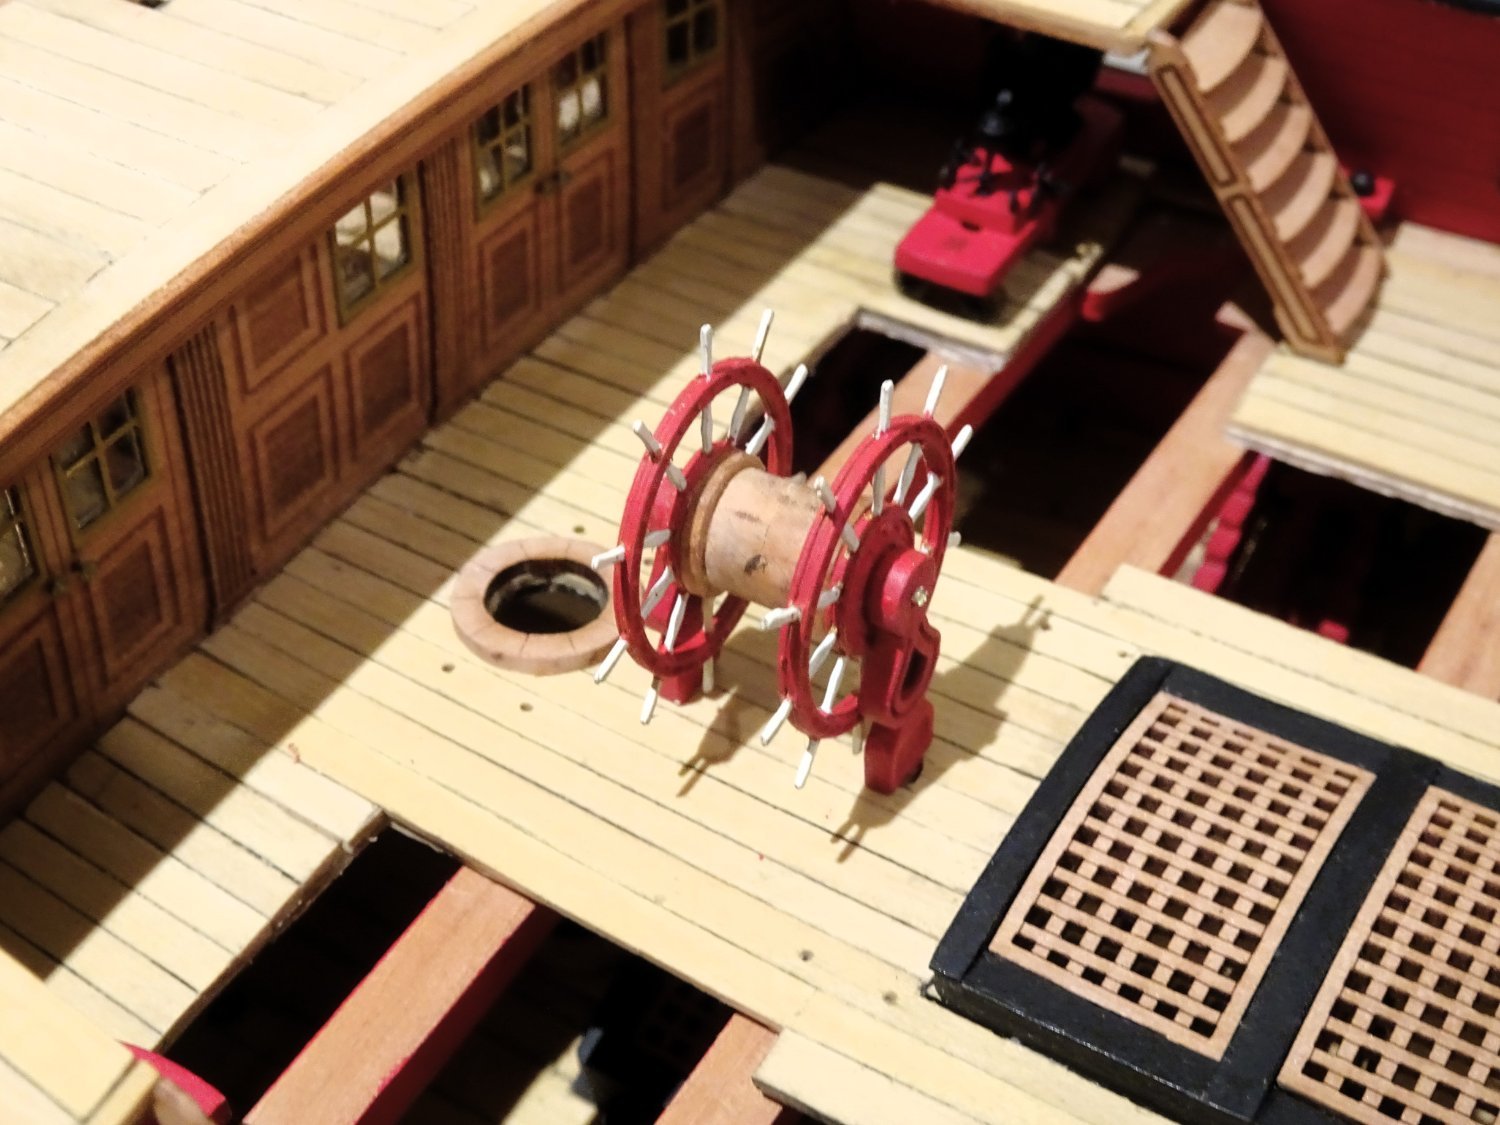
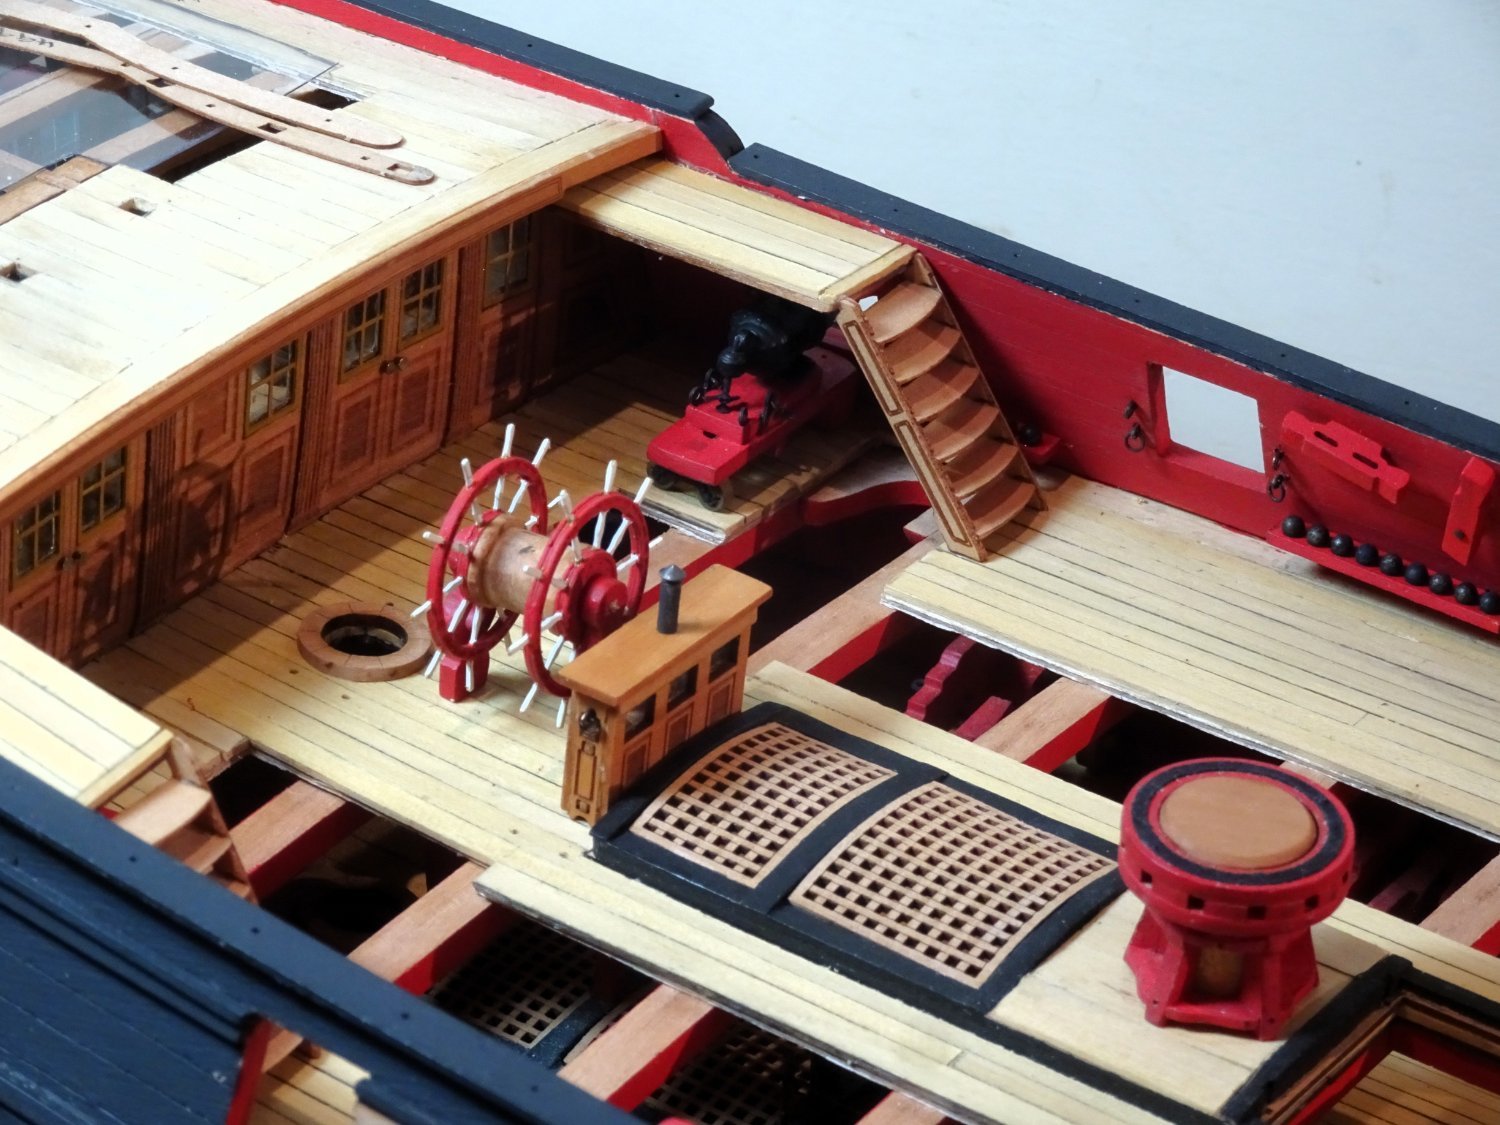
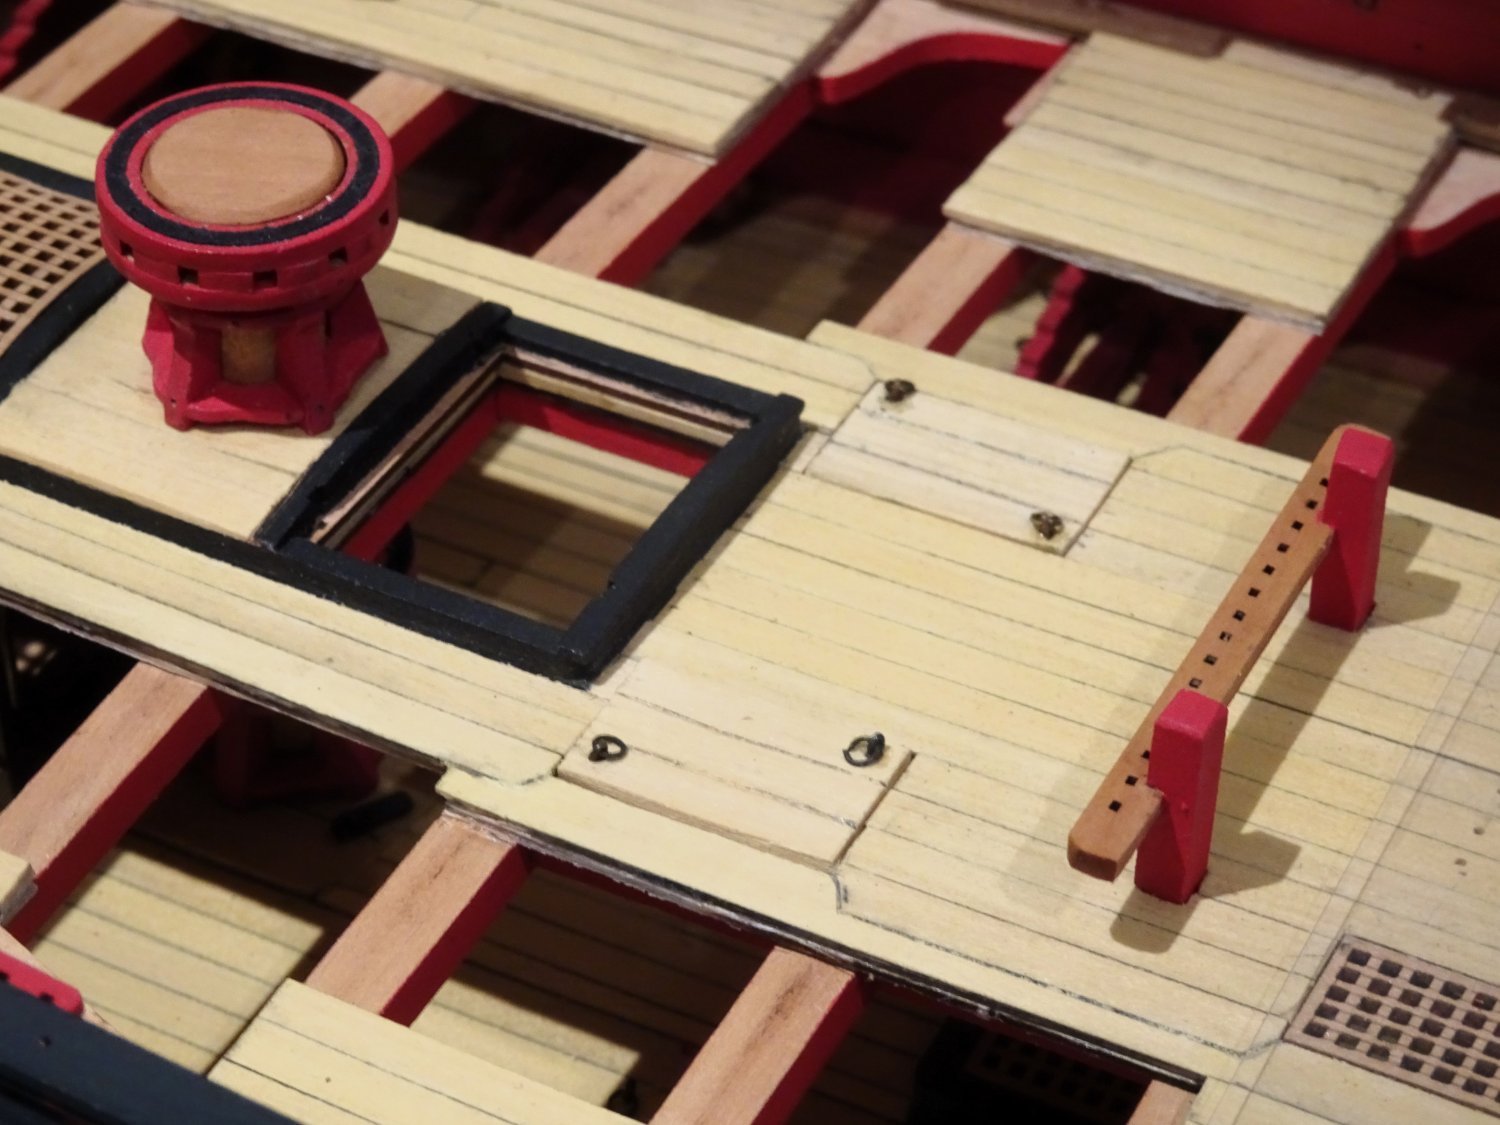
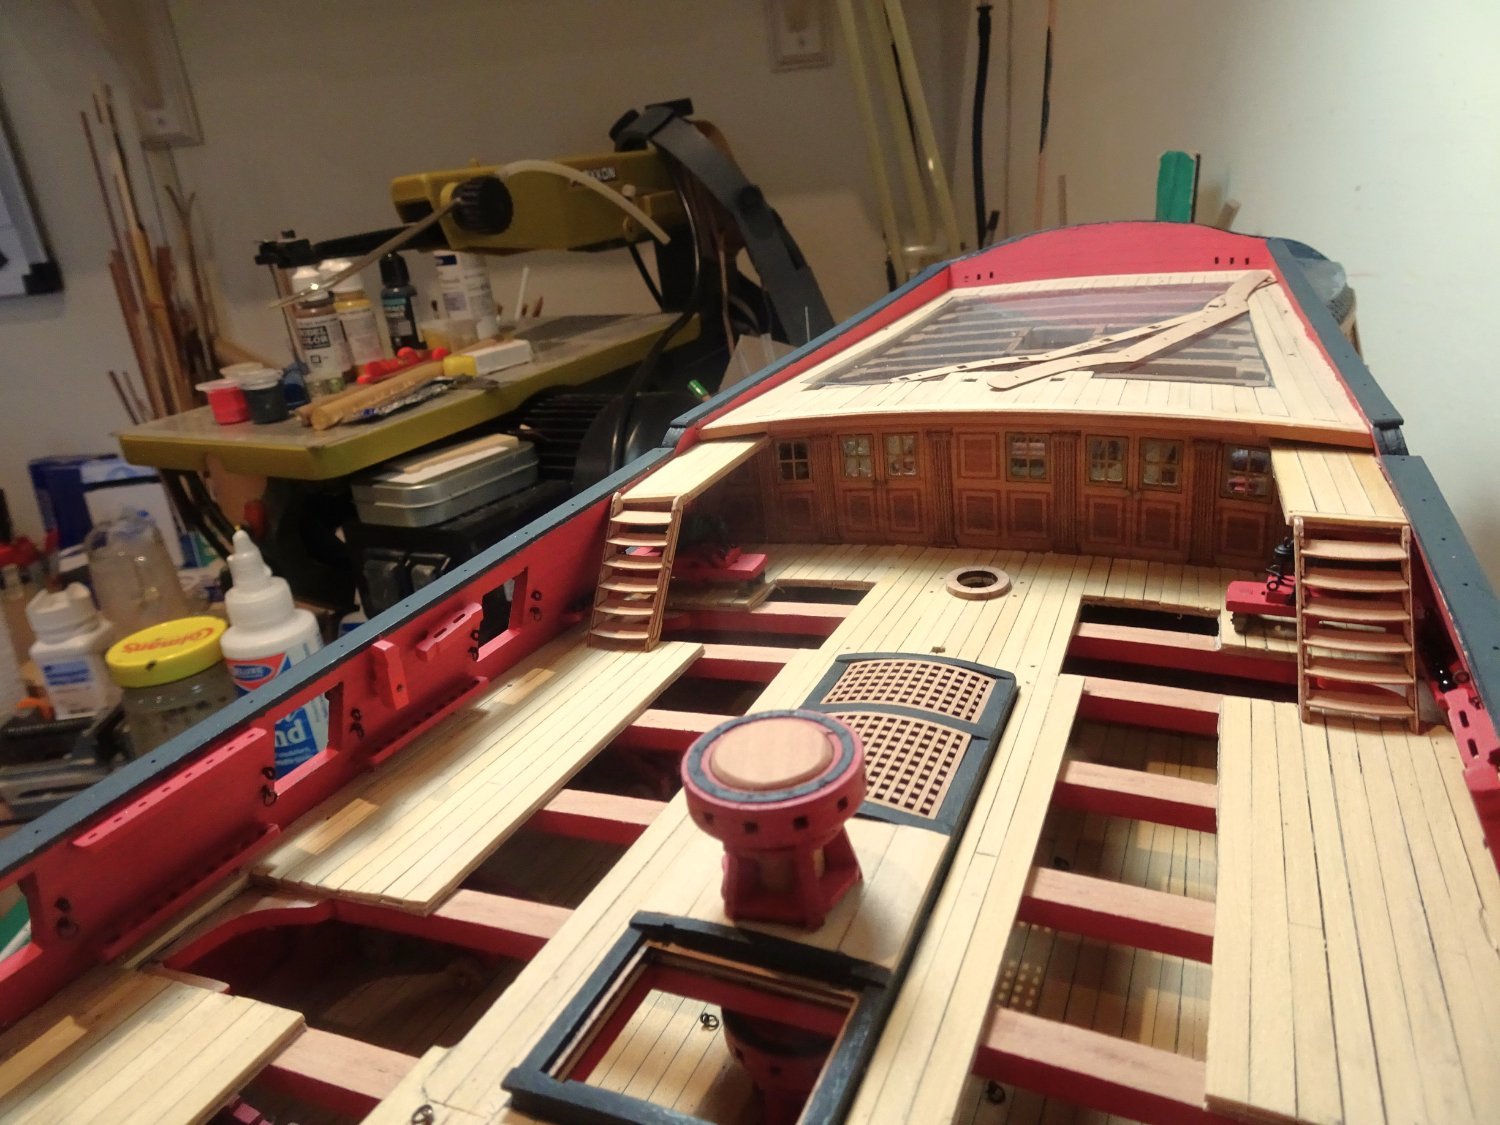
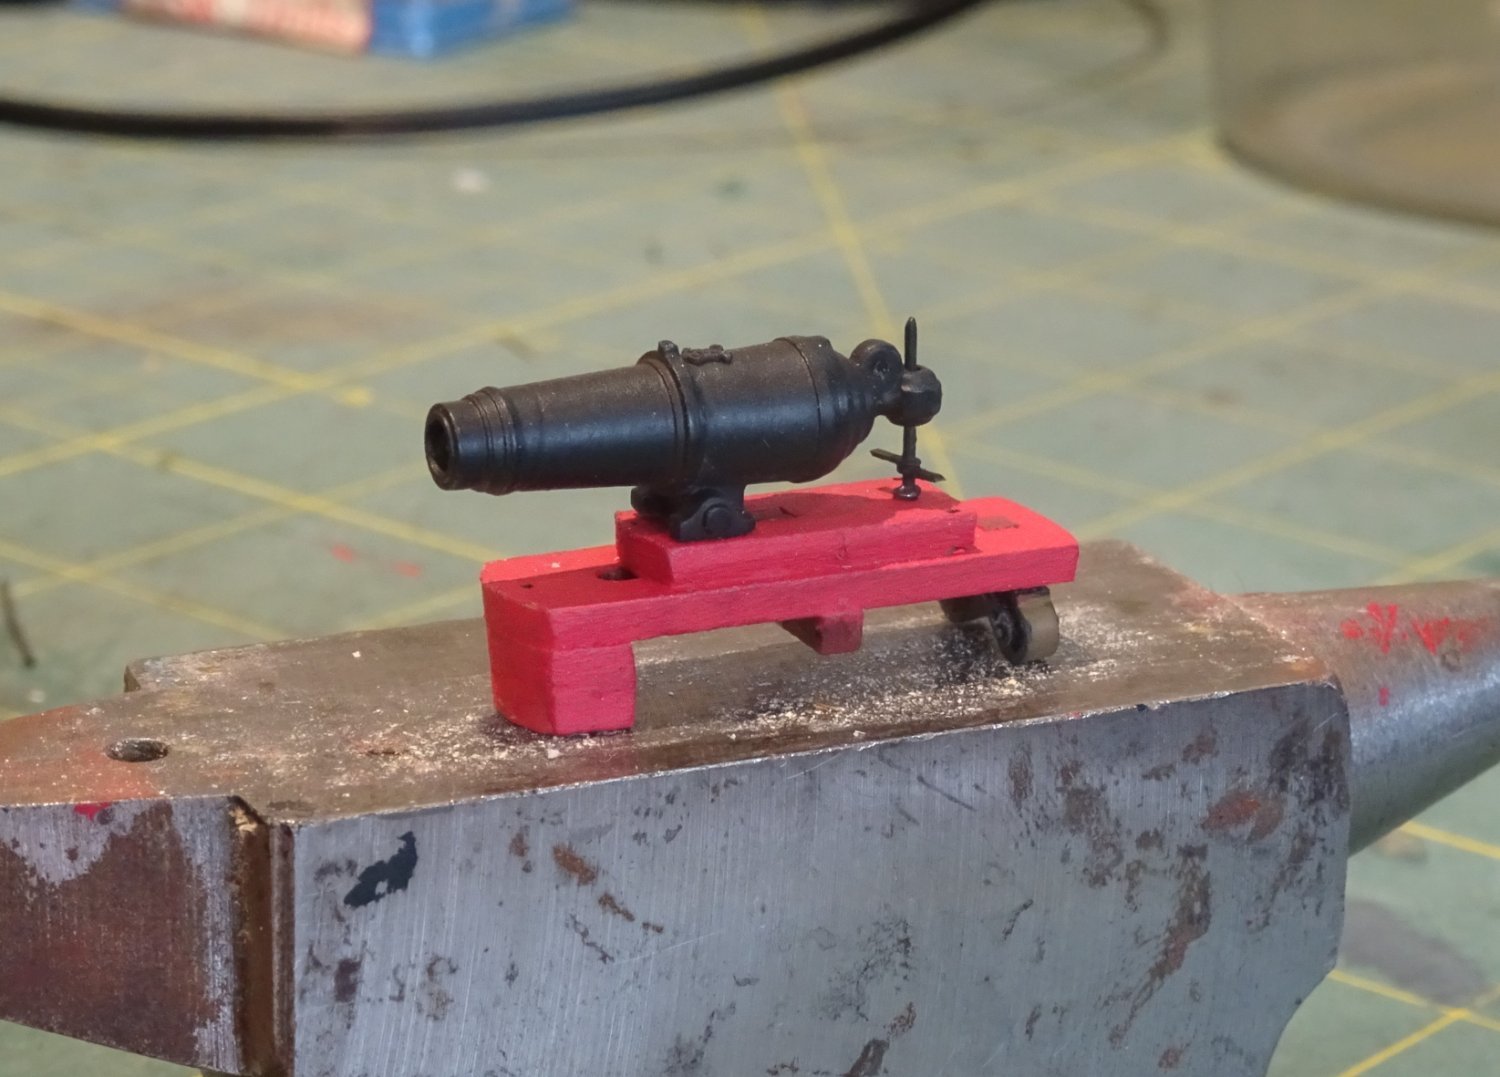
Post One Hundred and Thirty-five Inboard fittings (Part four) The kit provides two sizes of shot 2mm and 2.5mm ø in shiny black acrylic. The 2.5mm relates to the 24pounder longs and 42pounder carronades. The 2mm relates to the 12pounder longs. I didn’t really like the look of the acrylic balls, too black and shiny for my taste. I replaced them with blackened carbon steel balls of the same diameter. These were given an acid bath, followed by immersion in Aluminium blackening fluid (I didn’t have any for steel) but it seemed to work. 3400 The more muted colour of the blackened balls tones better with my build. 3415 The simplicity of these assemblies belies the time taken to complete and fit them. The Binnacle The design follows that as may be seen on Victory or Trincomalee. Laser cut from Pear; this little assembly is a delight. The mortises and tenons of the parts slot together beautifully. The unit is complete with brass compass rose and a brass chimney for the lamp or candle. Even so, I couldn’t resist making a couple of tweaks to the design. 3450 3451 3454 Glazing was added using a strip of thin acetate sheet, and the central section on the aft facing side was blanked out. Steering wheel. I liked the wheel provided on Sphinx and this one is of the same ilk only larger and double. 3429 A fully detailed brass etched wonder that gave me little incentive to consider a wooden replacement. The kit colour scheme of Red painted wheels with white spokes appears regularly on contemporary models. Deviations include All red, Black with white spokes, and all white schemes. The latter my be a reflection that Ivory was popular for the creation of ships wheels during the 18th century. I have decided to go with the ‘Red’ scheme with spokes ivory coloured. 3457 The brass etched wheels were assembled and primed with VMS Metal Prep 4K before painting. 3440 3441 Still pondering whether to add the tiller lines. In practice the centre of the tiller line was nailed to the centre of the barrel with 7 to 9 turns. Forward end to Starboard and aft end to Port. By reference to Steel the tiller line for a 64 is of 4” circ which scales close enough to 0.5mm ø line. 3442 3462 3461 Ladderways up next. B.E. 28/01/2024


- 648 replies
-
- 22
-
-
- Indefatigable
- Vanguard Models
- (and 1 more)
-
Hi Dave, Having washed the guns, I use Vallejo surface primer followed by Matt black. I then use a dark brown weathering powder and buff off. When I first worked with the 24 pounders on 'Indy' I found that without painting, striations could be seen along the barrels. B.E.
-
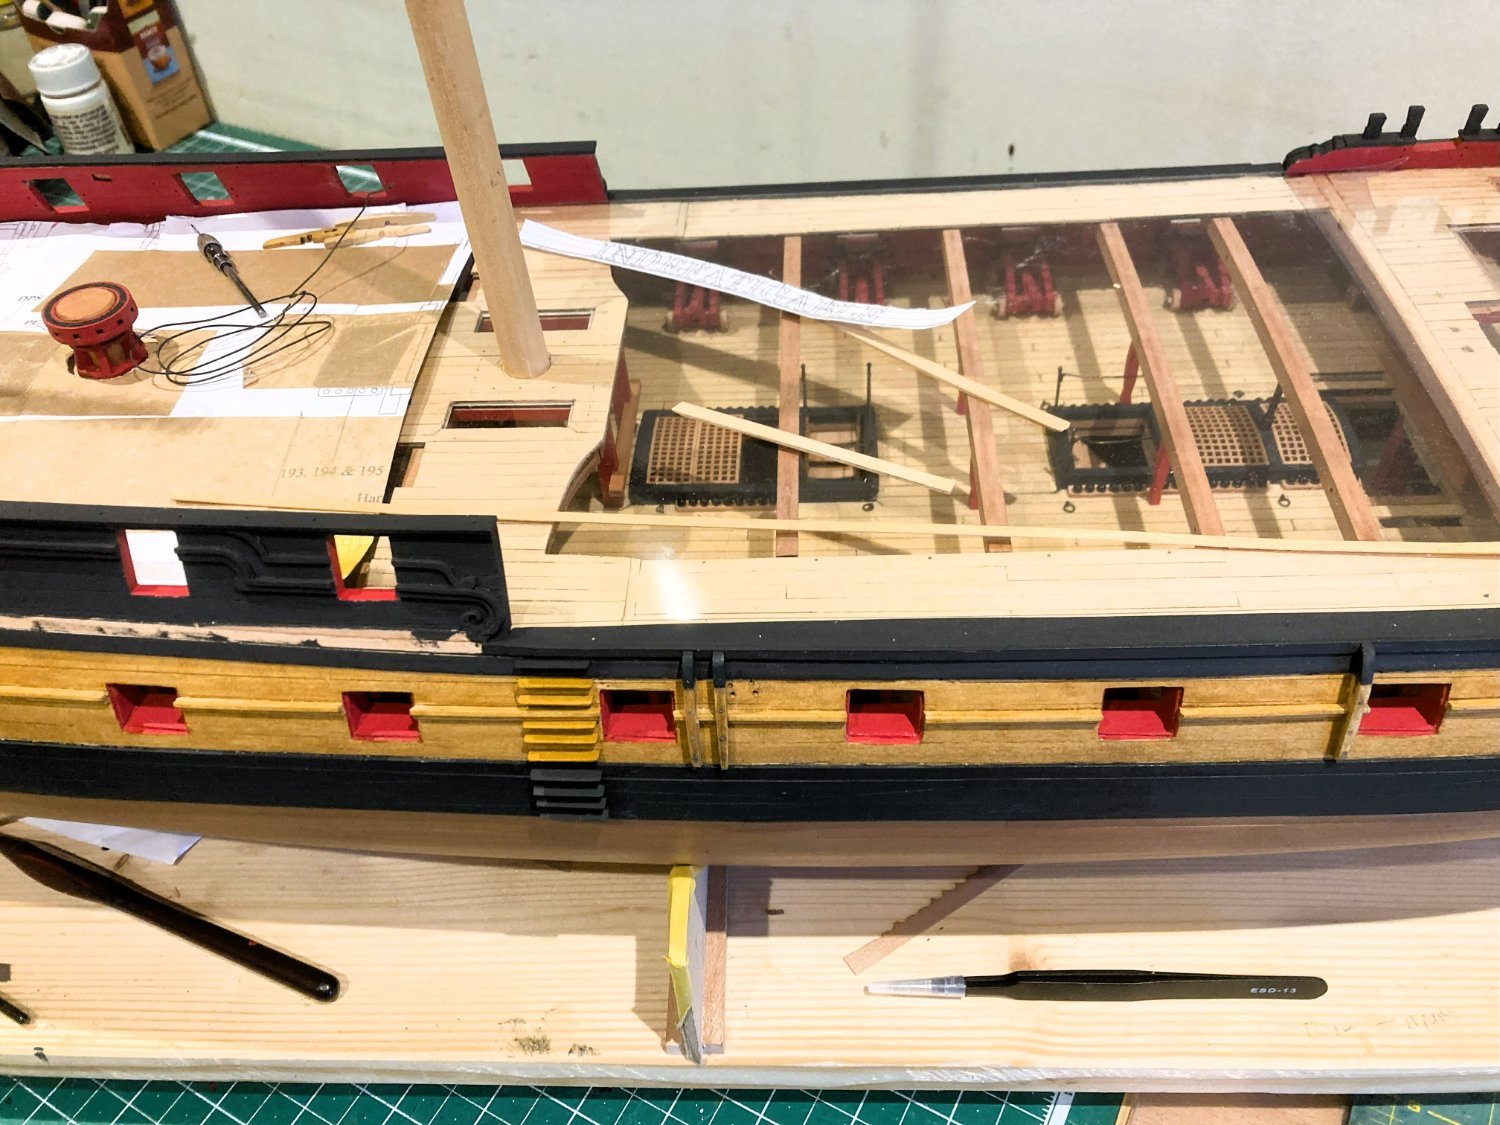
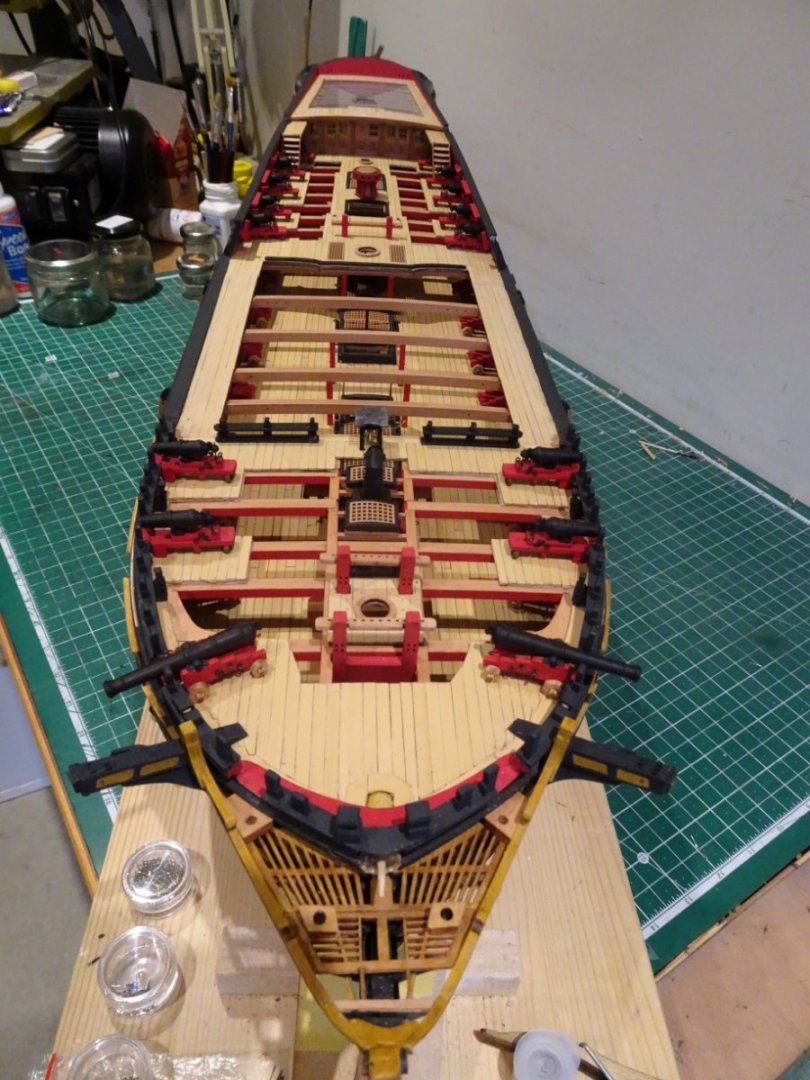
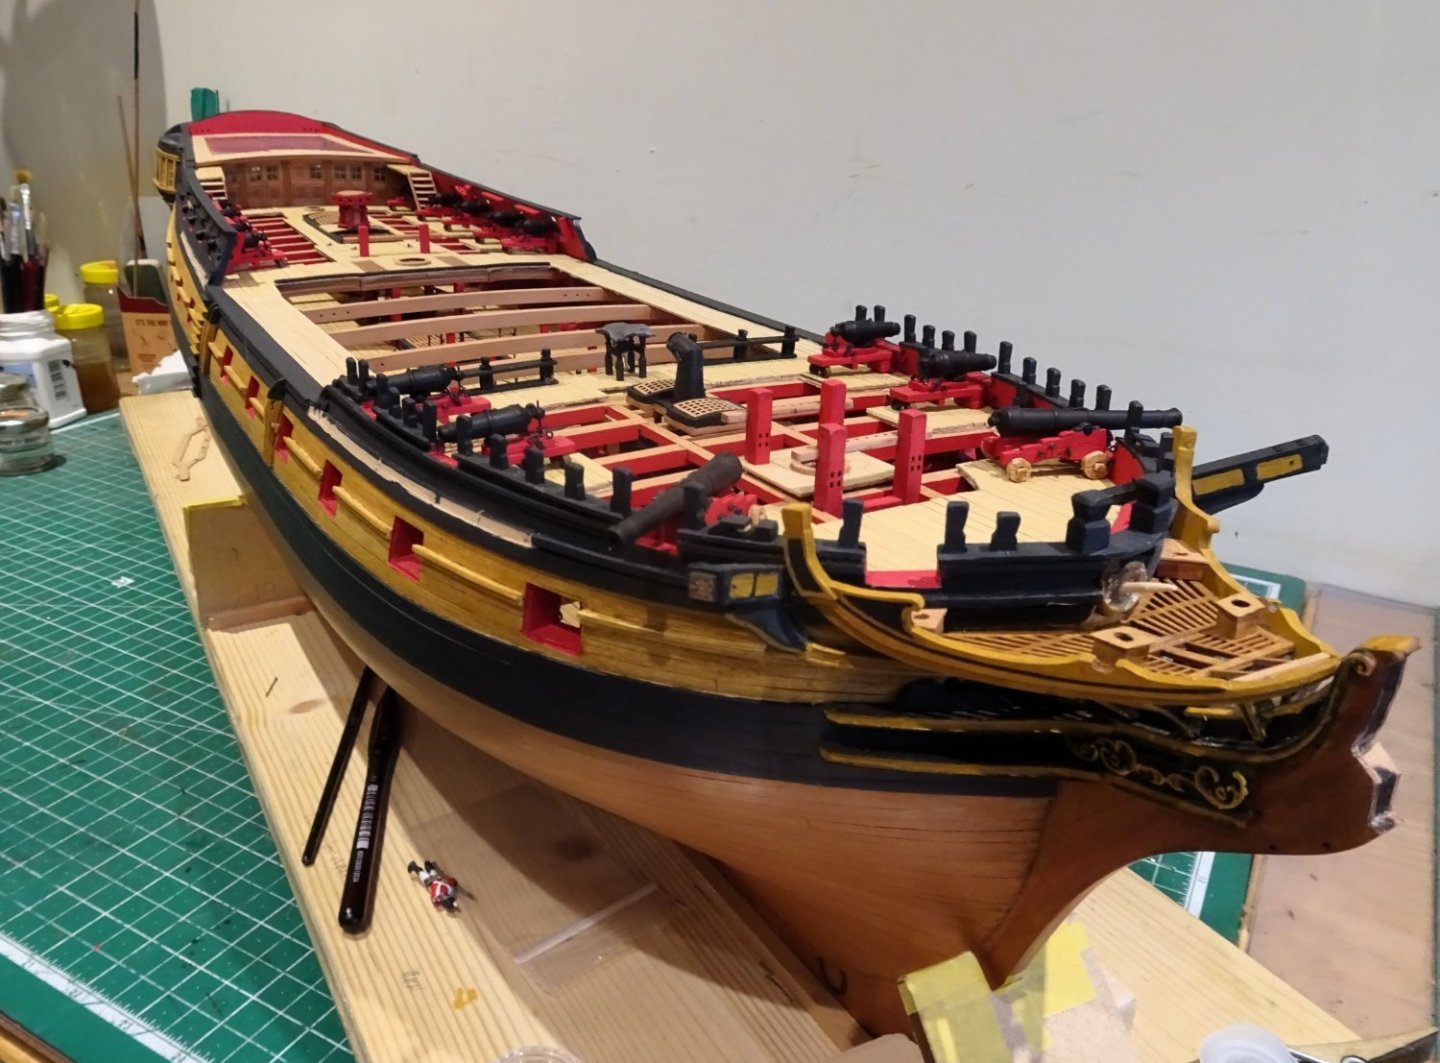
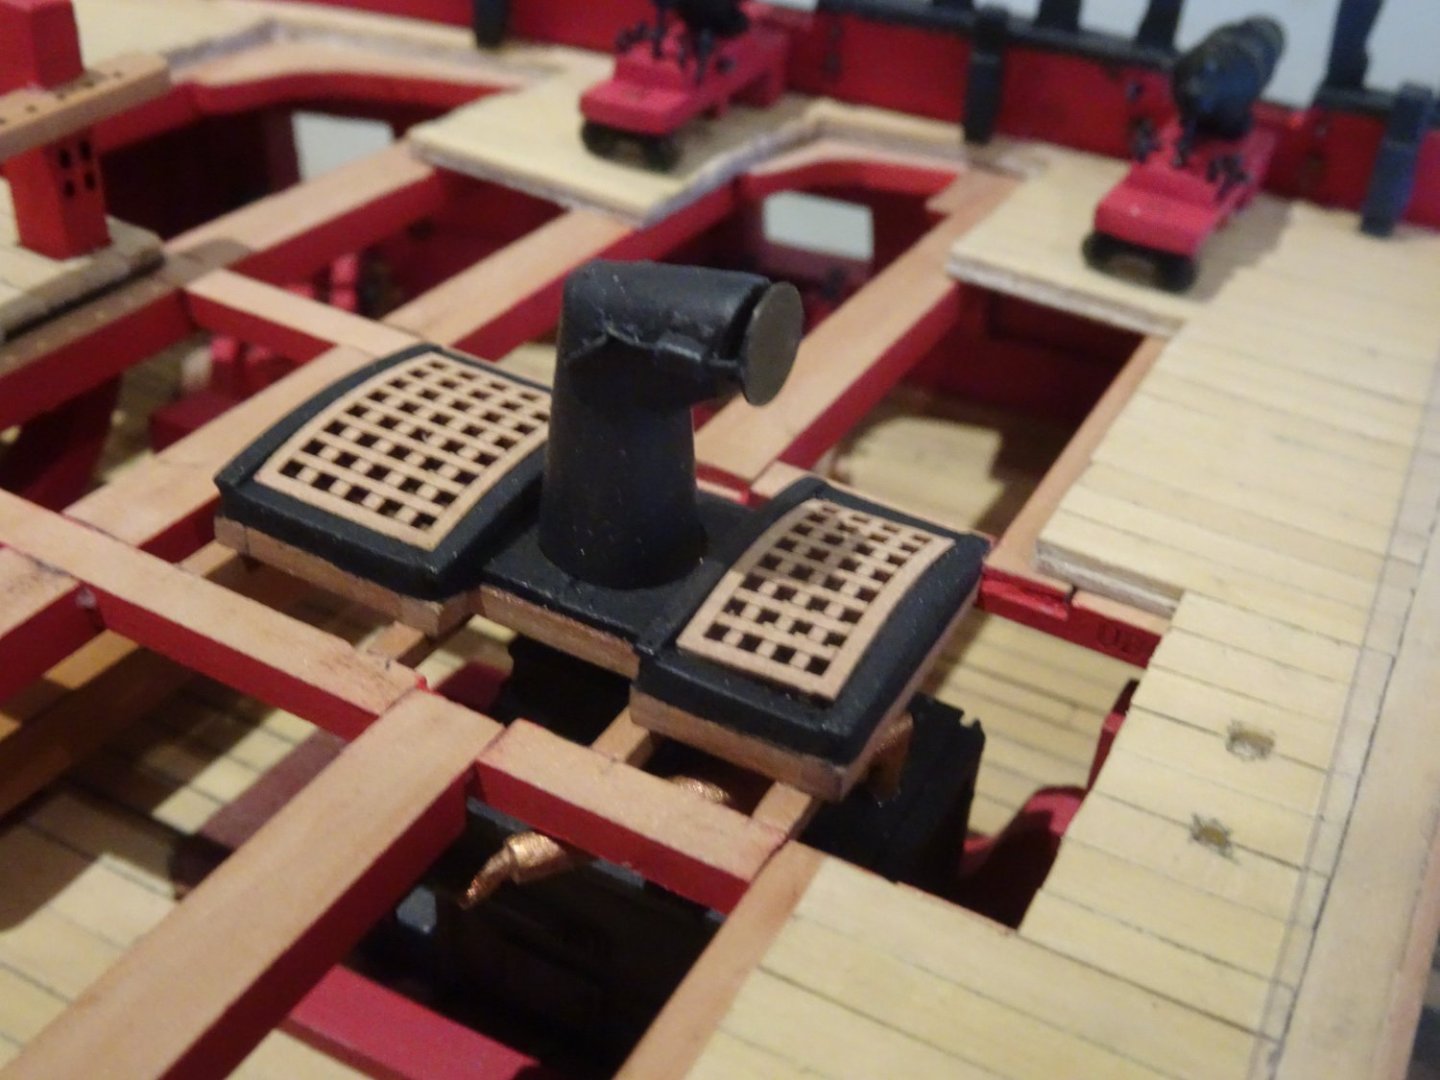
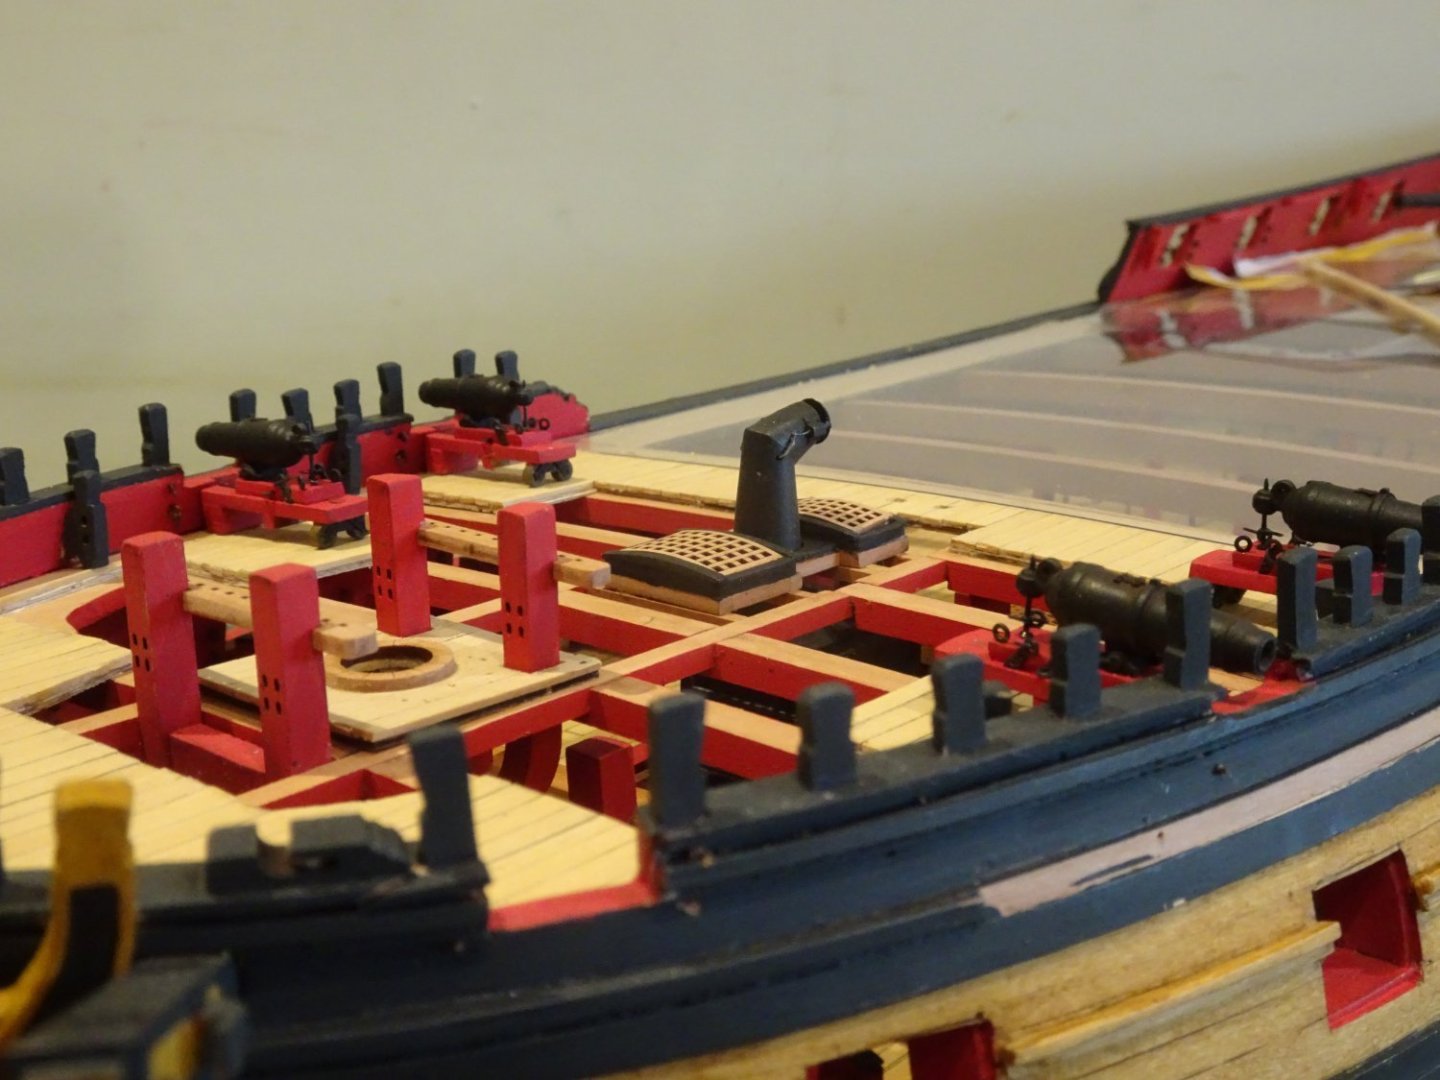
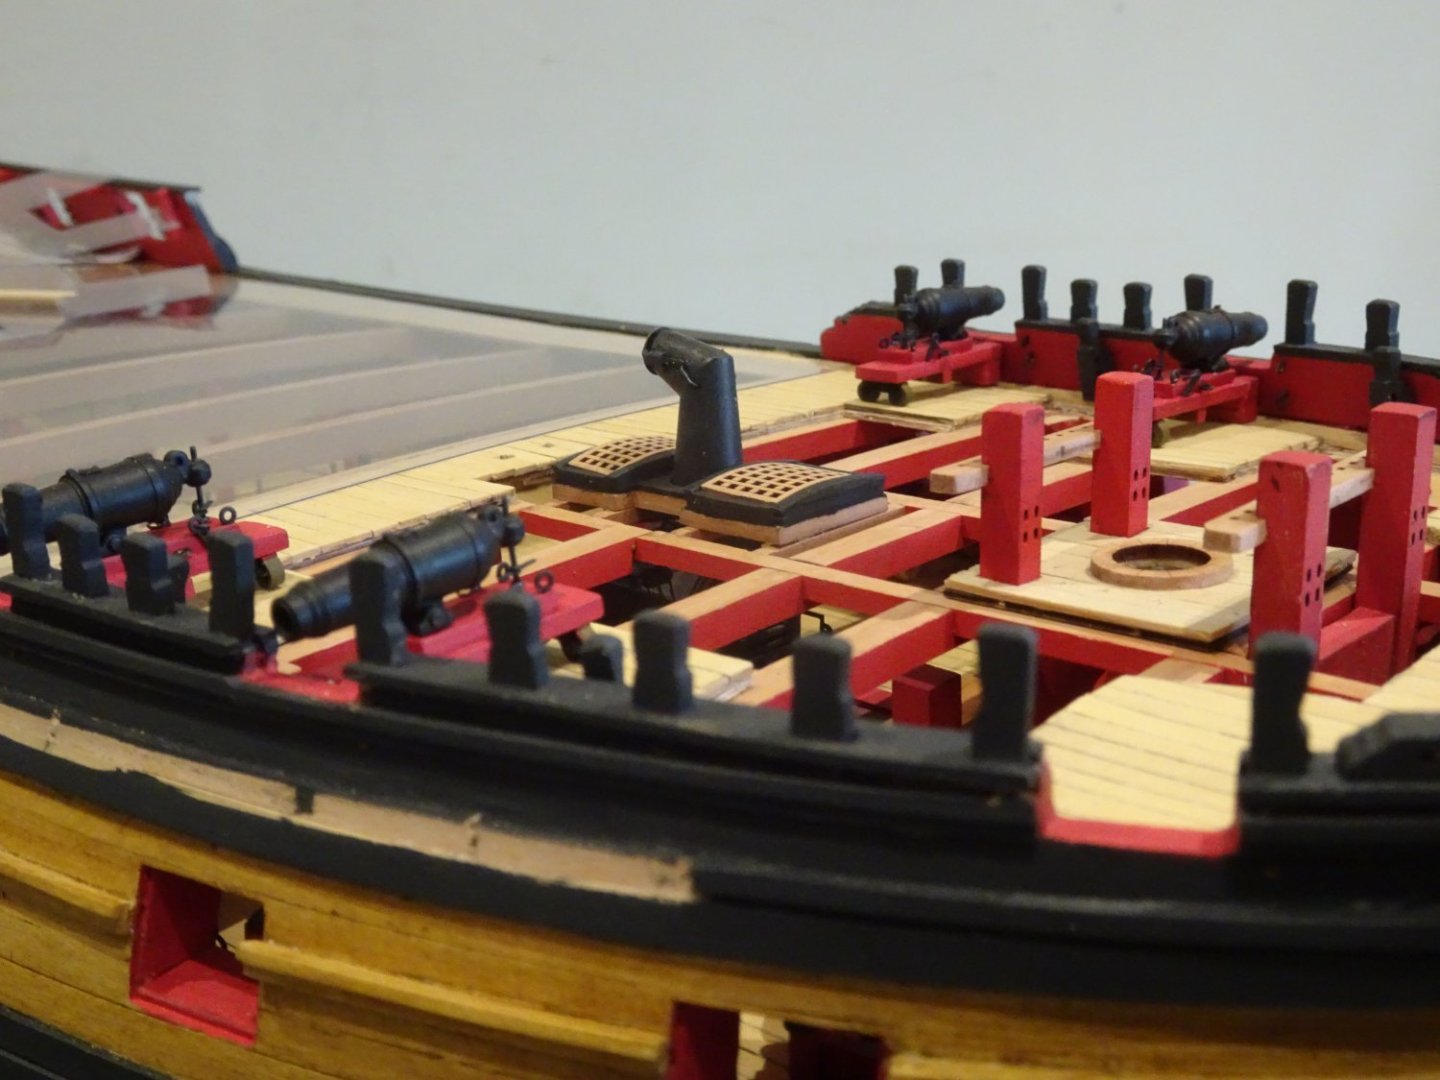
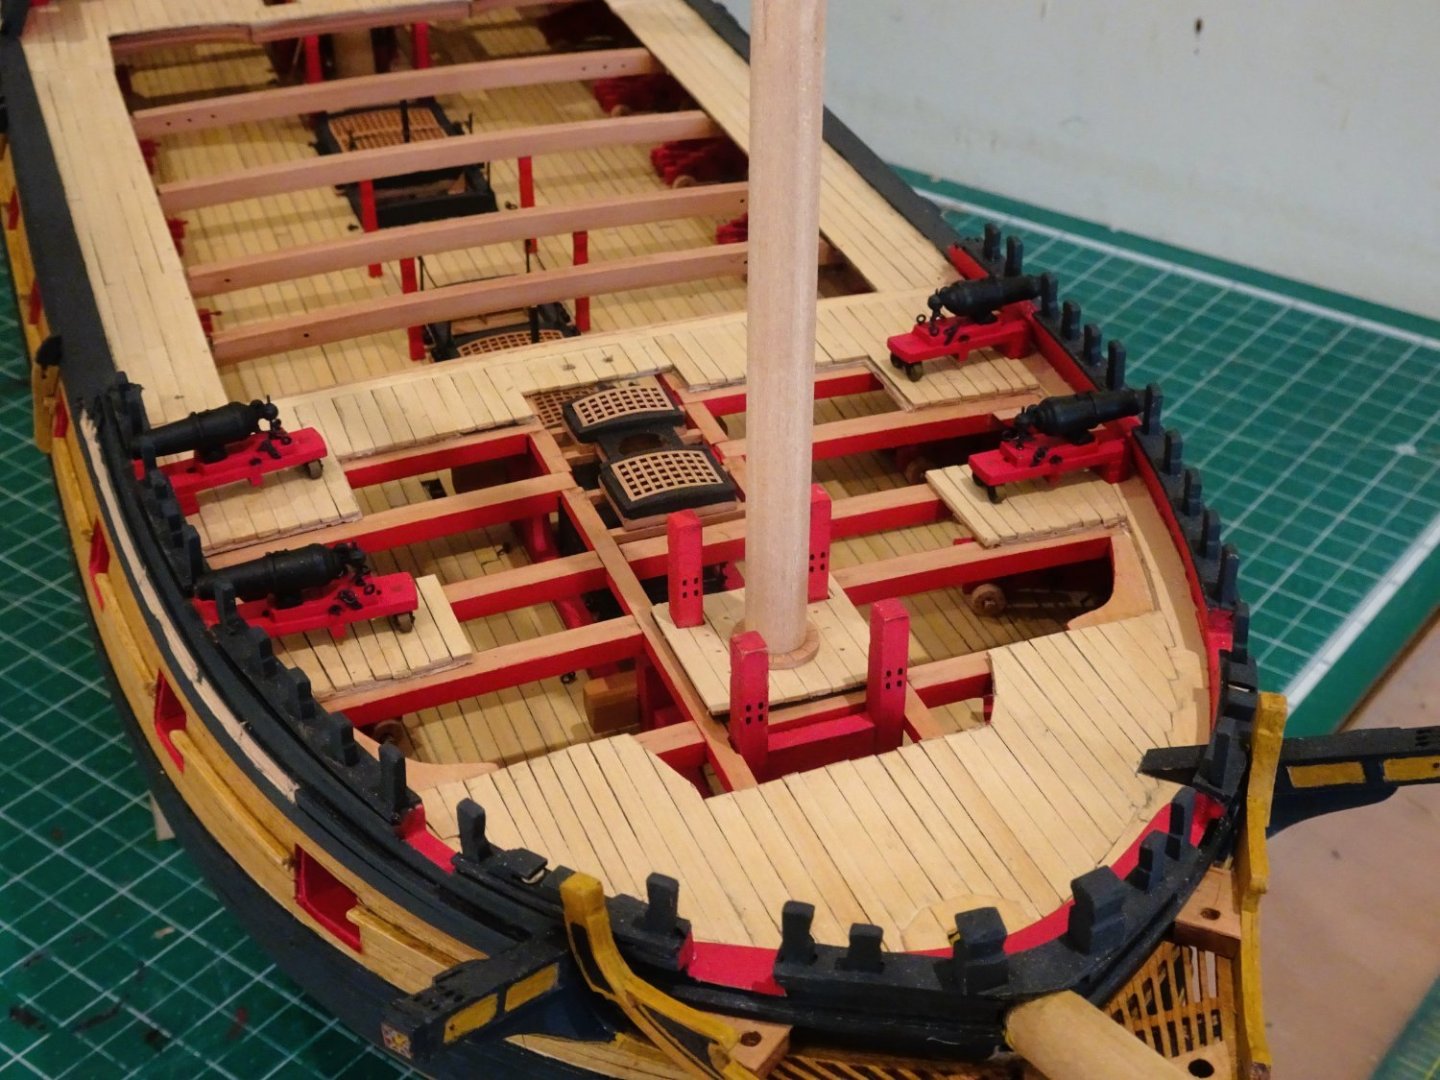
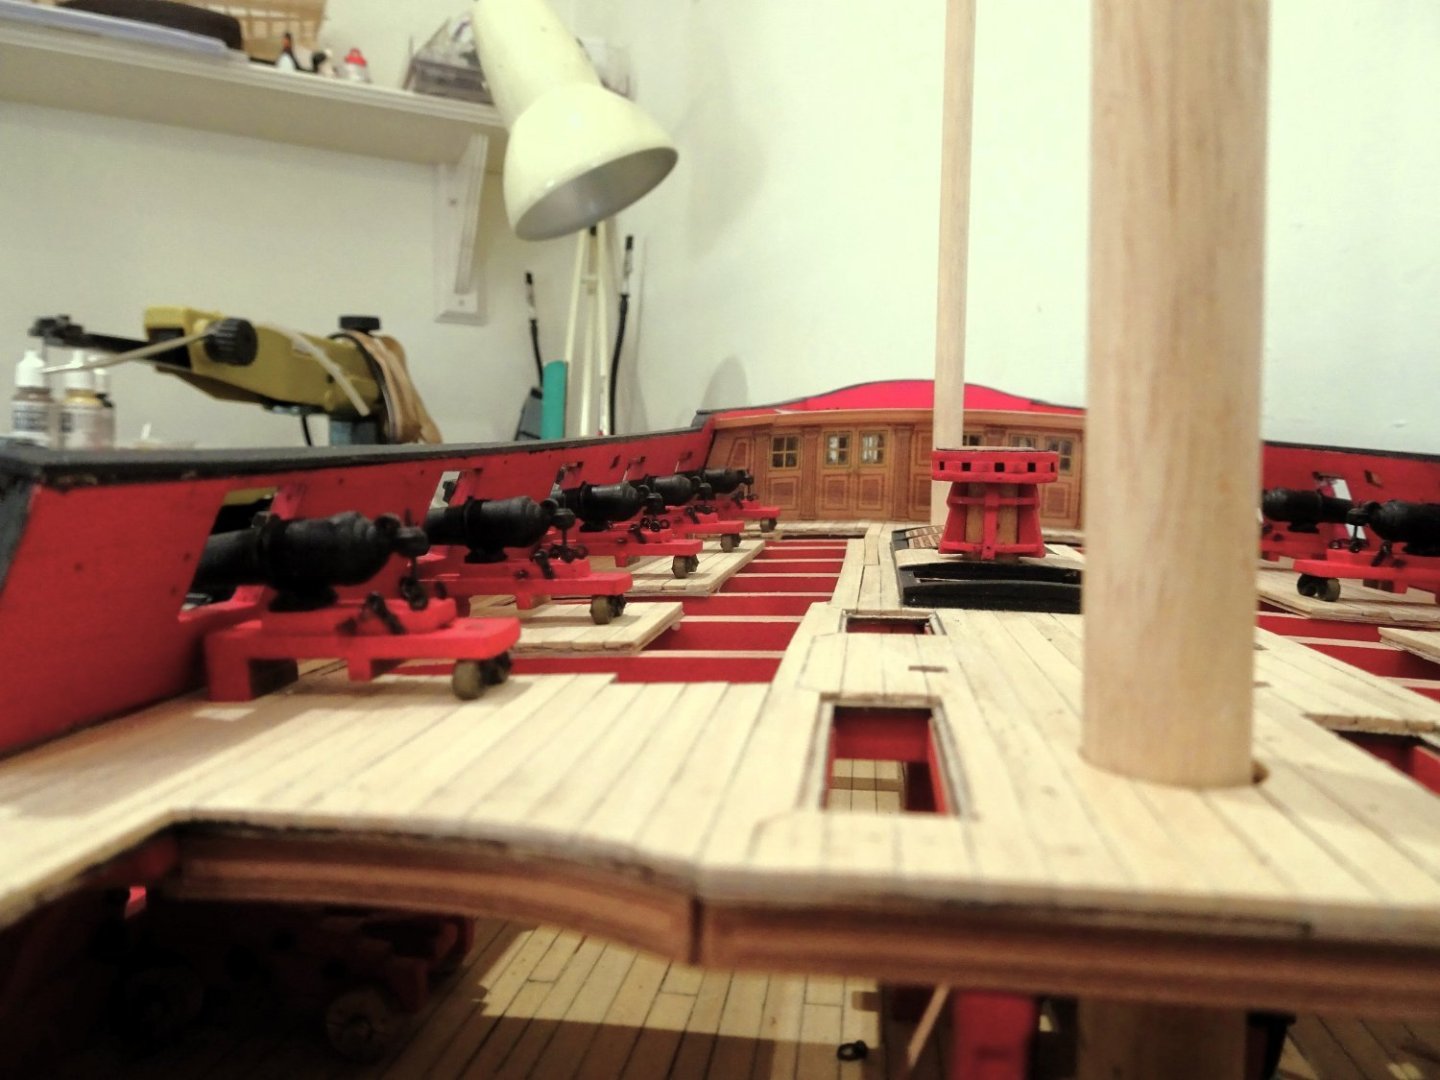
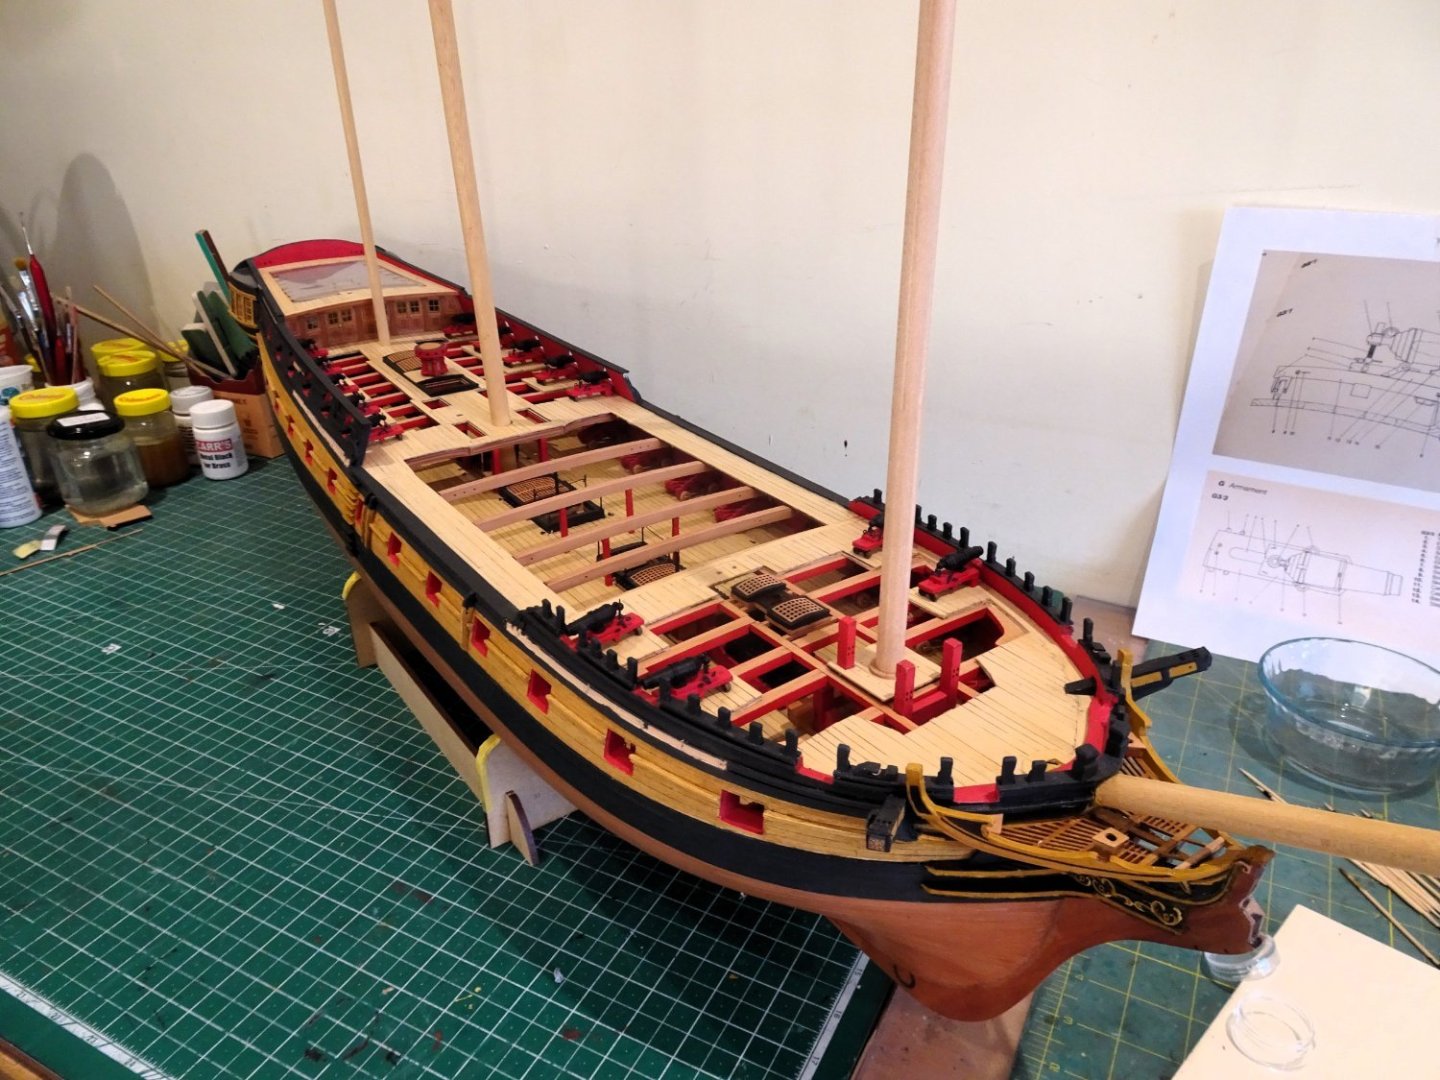
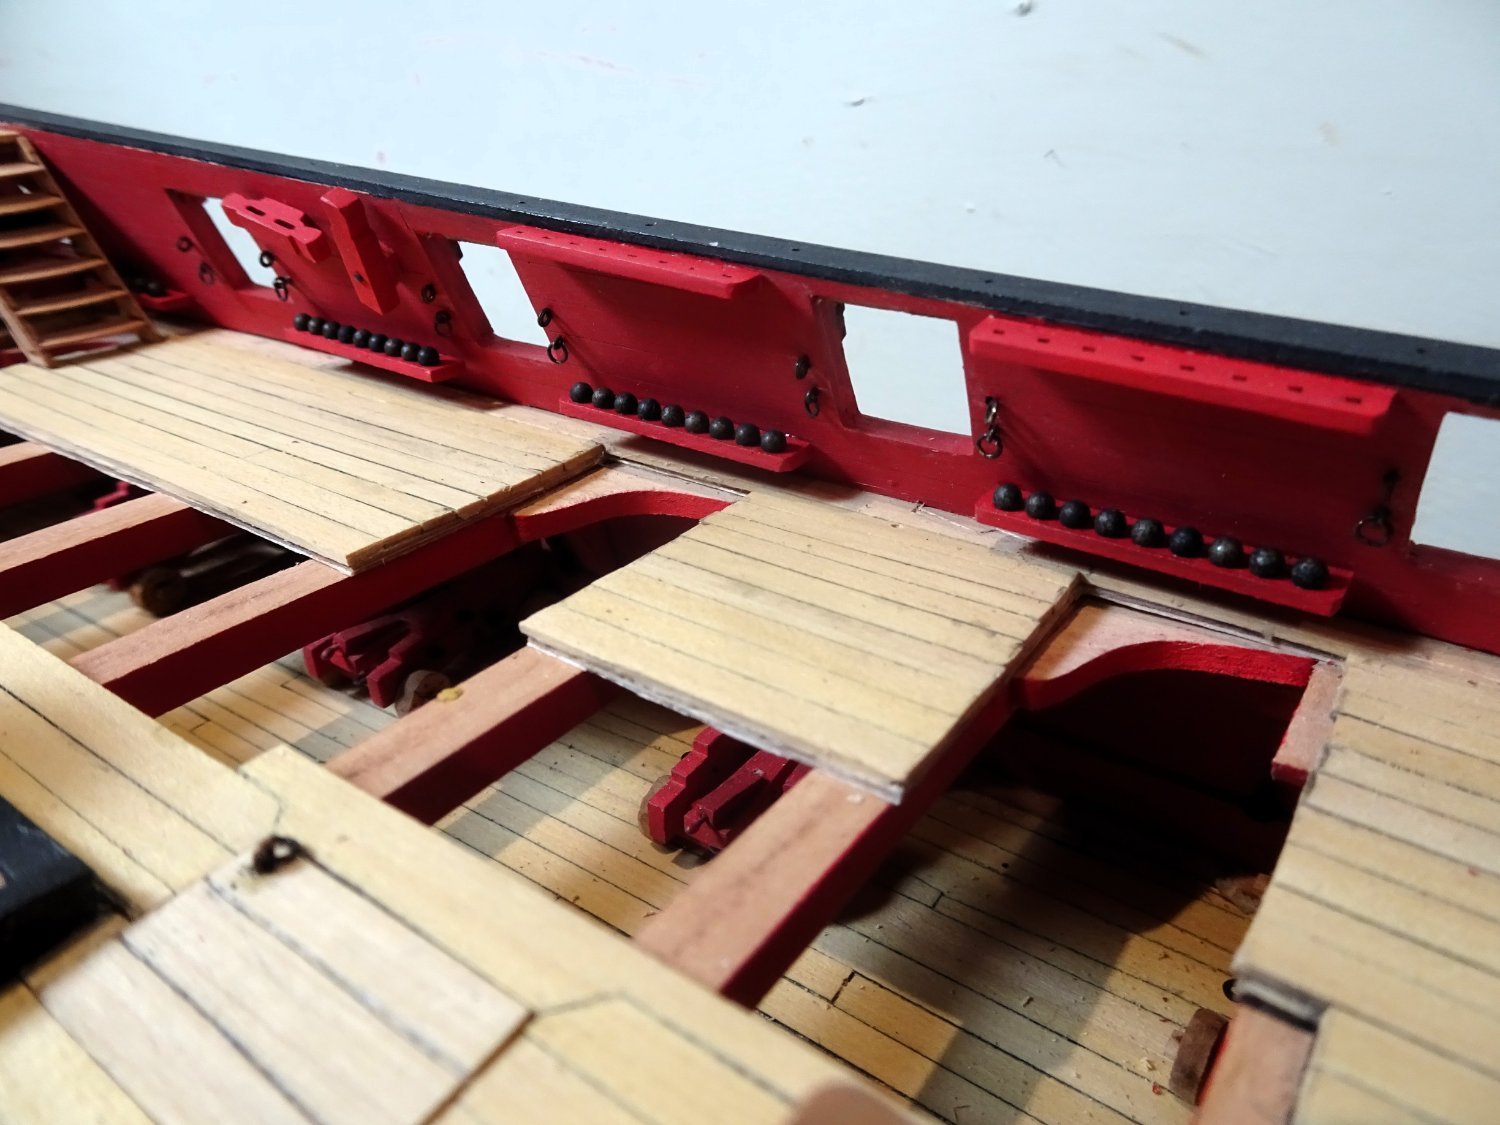
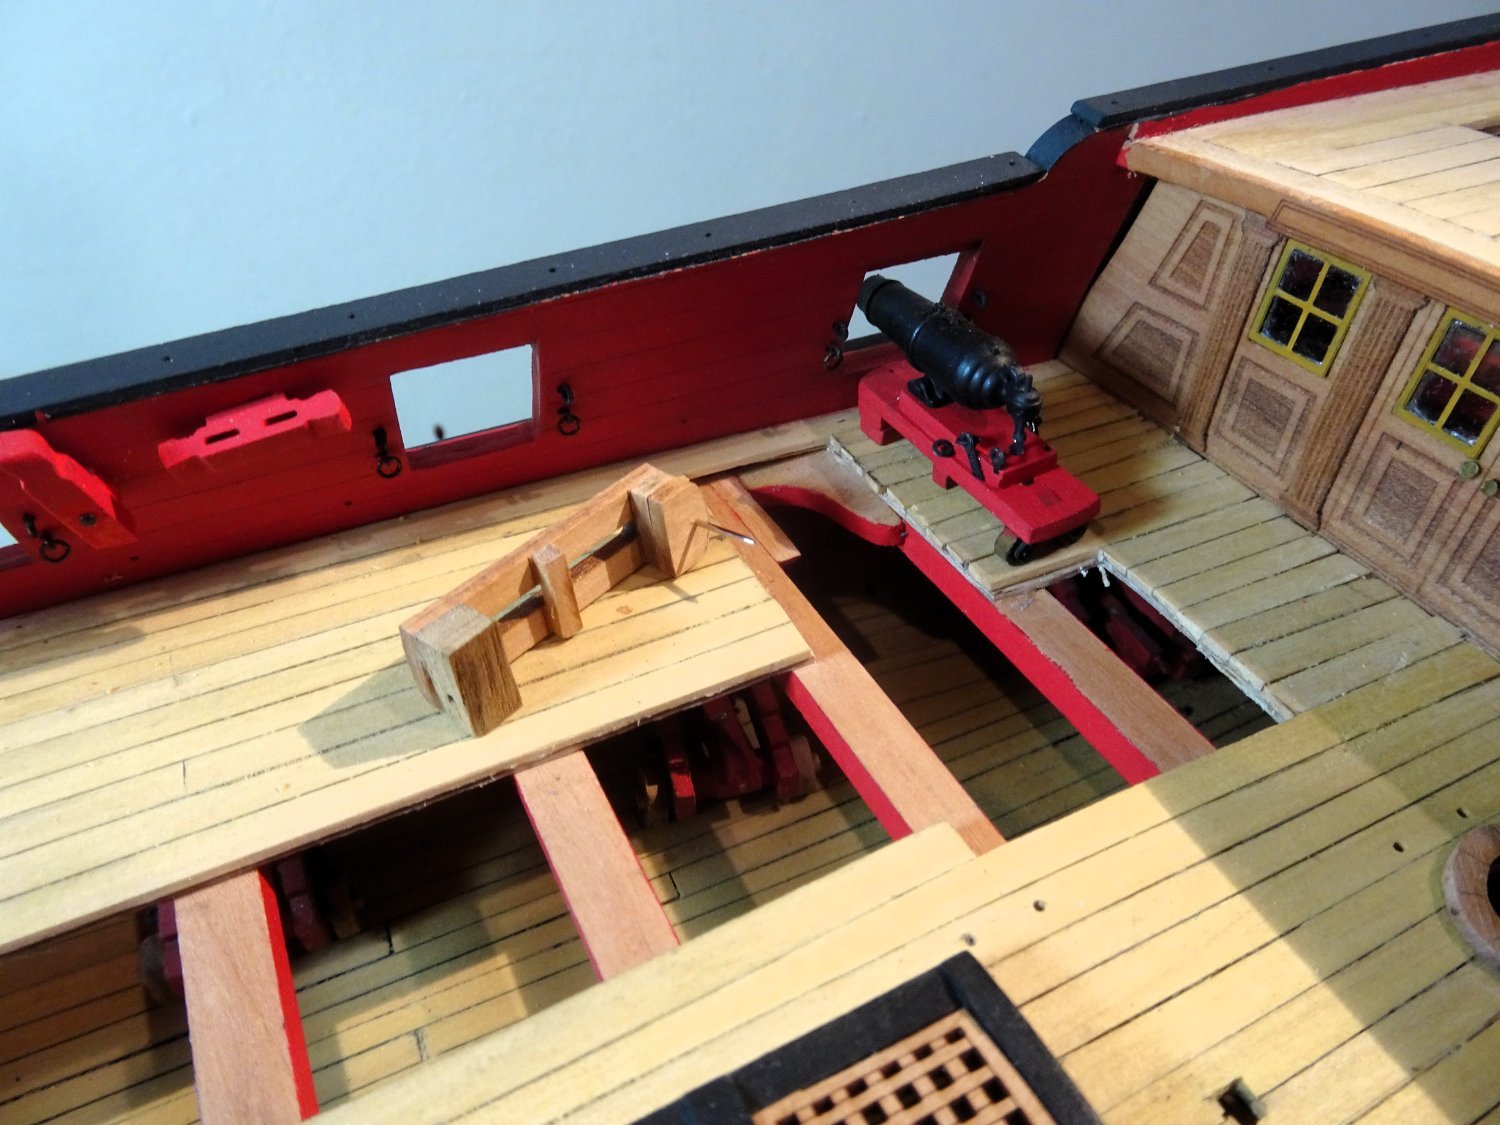
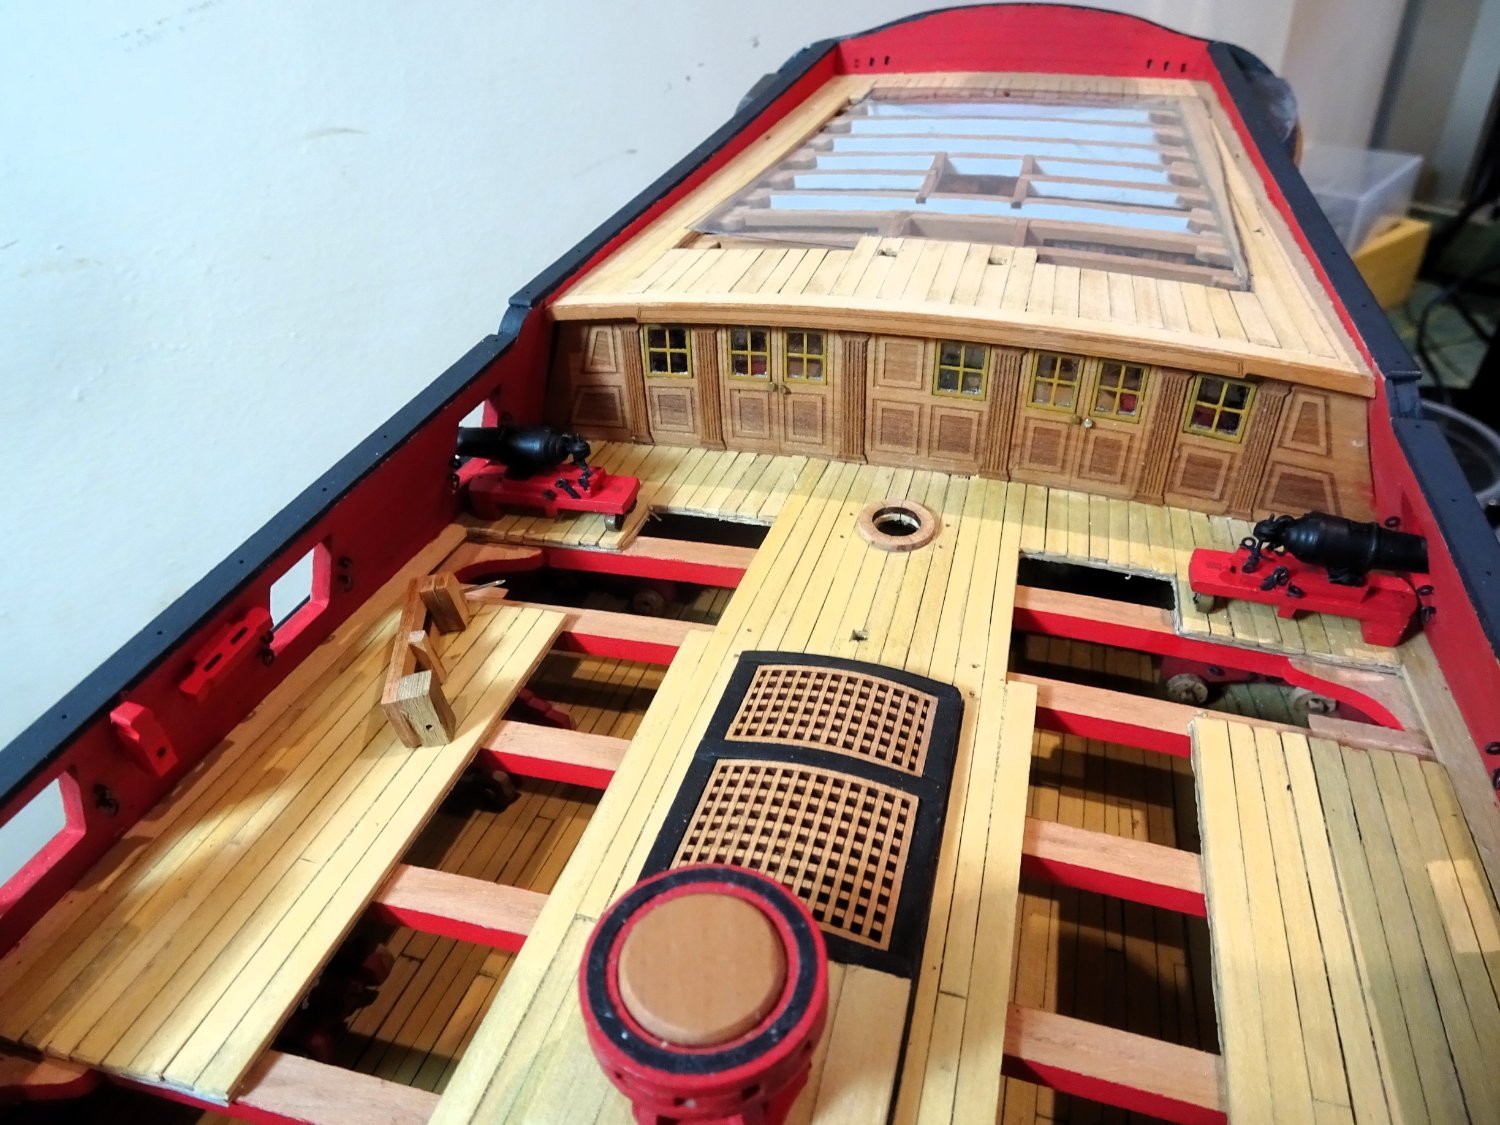
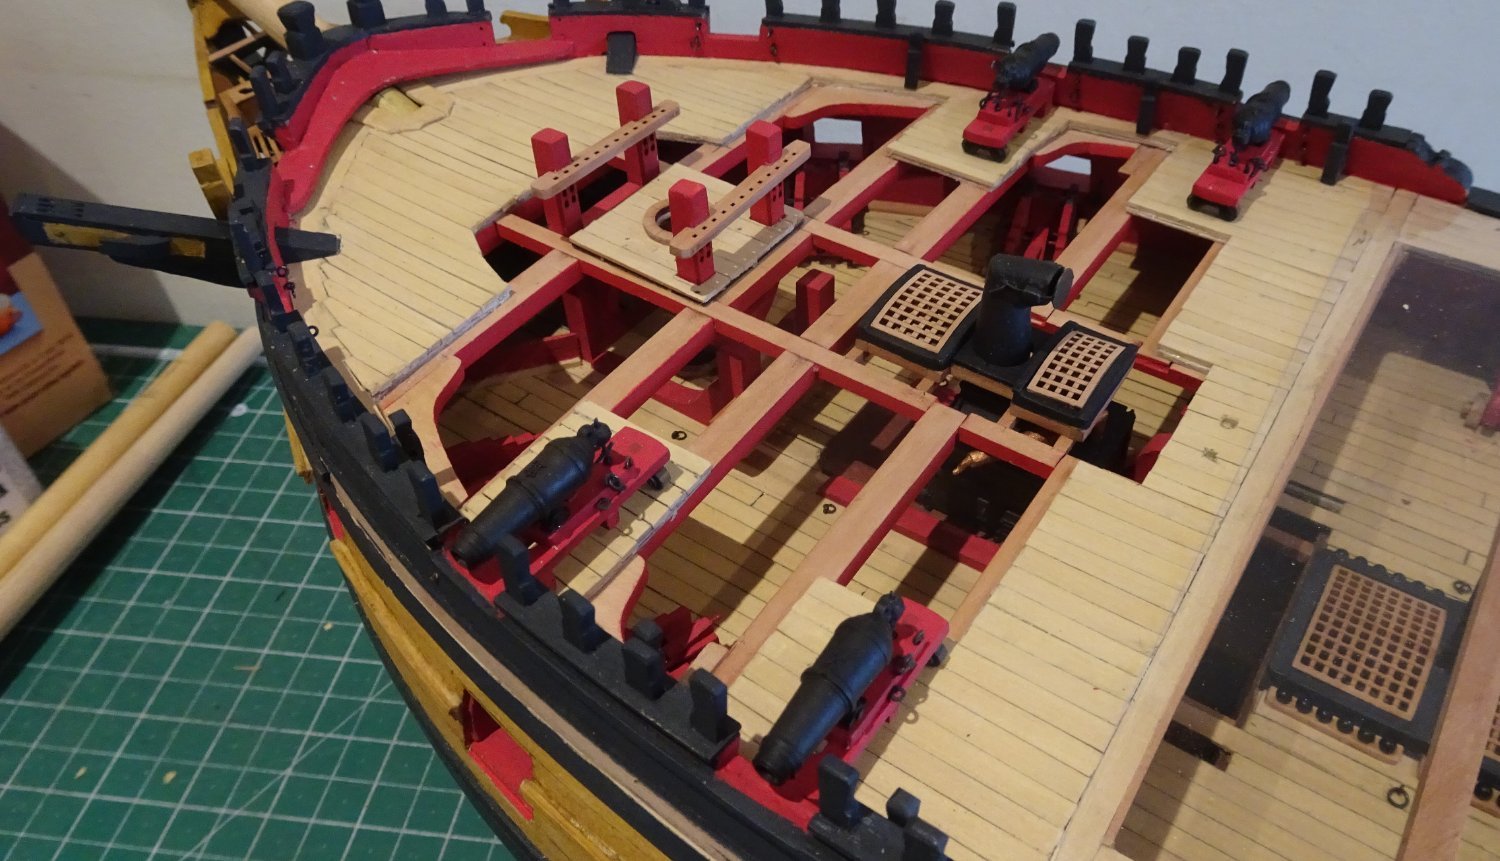
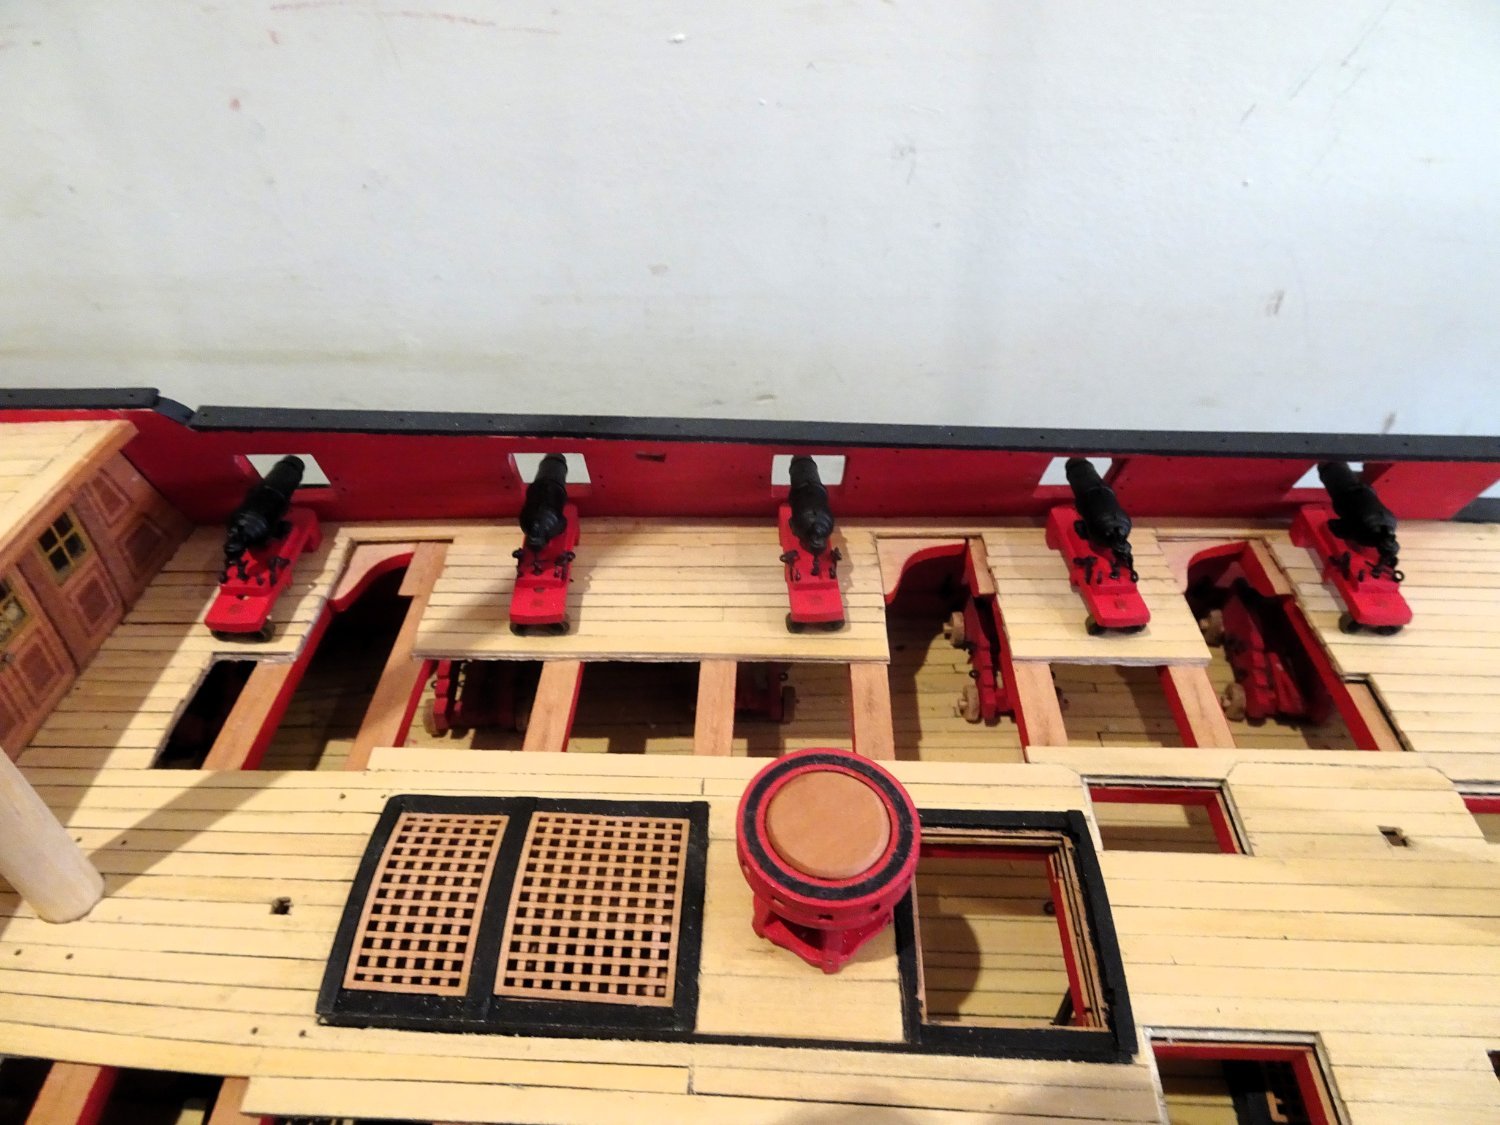
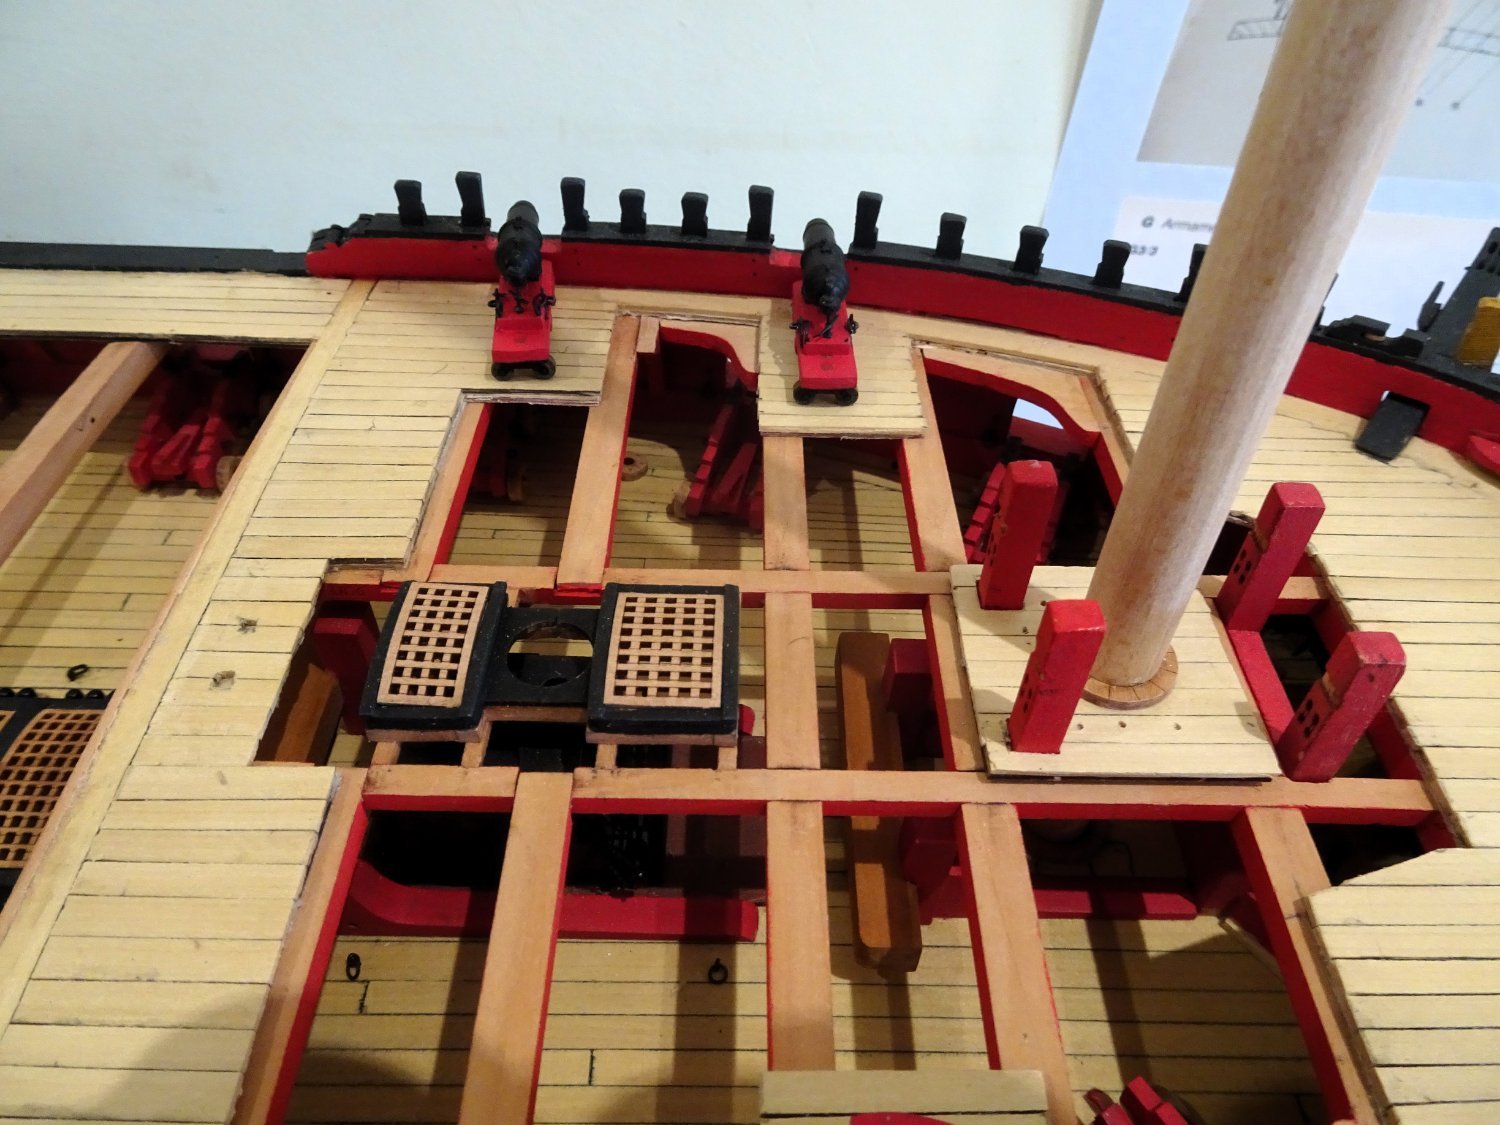
Post One Hundred and Thirty-four Inboard fittings (Part three) Moving back to the Qtr deck. I start the procedure by fitting the after-most carronades. 3376 3377 As with the Foc’sle they are pinned thro’ deck. Slightly more difficult to drill the location holes because of the bulwark tumblehome. I then moved onto the gangboards for the Poop deck access. These are completed parts, but I had to over-plank them to match the boxwood decking. Tricky little beggars to fit; the two supporting brackets must be positioned carefully to meet the bulwark whilst avoiding the iron work for the carronades. 3384 The Gangway camber is also critical, I had them on and off several times before I was happy. I opted to fit the support brackets with the Gangway in place. 3385 It dawned on me during fiddling with these that I had forgotten to consider the position of the Poop deck ladders when cutting away the Qtr deck earlier in the build.🙄 Fortunately for me my fear was short lived as can be seen in the photos. 3387 Shot garlands are not usually seen on Navy Board style models, but they are present on the contemporary Amazon model which has the guns in place. Incidentally Amazon was part of Pellew’s squadron for some notable engagements. 3379 The Qtr deck bitts are fitted along with the Top-rope scuttles. I have replaced the kit provided gratings with solid boards. 3396 3398 3394 3395 Moving onto the remaining fittings. B.E. 25/01/2024


- 648 replies
-
- 29
-
-
- Indefatigable
- Vanguard Models
- (and 1 more)
-
Cheers, Glenn and Andrew; @ Andrew - I used some stuff called Pewter patination fluid, I've had it a long time, but It is still available on the web. B.E.
- 648 replies
-
- 3
-

-
-
- Indefatigable
- Vanguard Models
- (and 1 more)
-
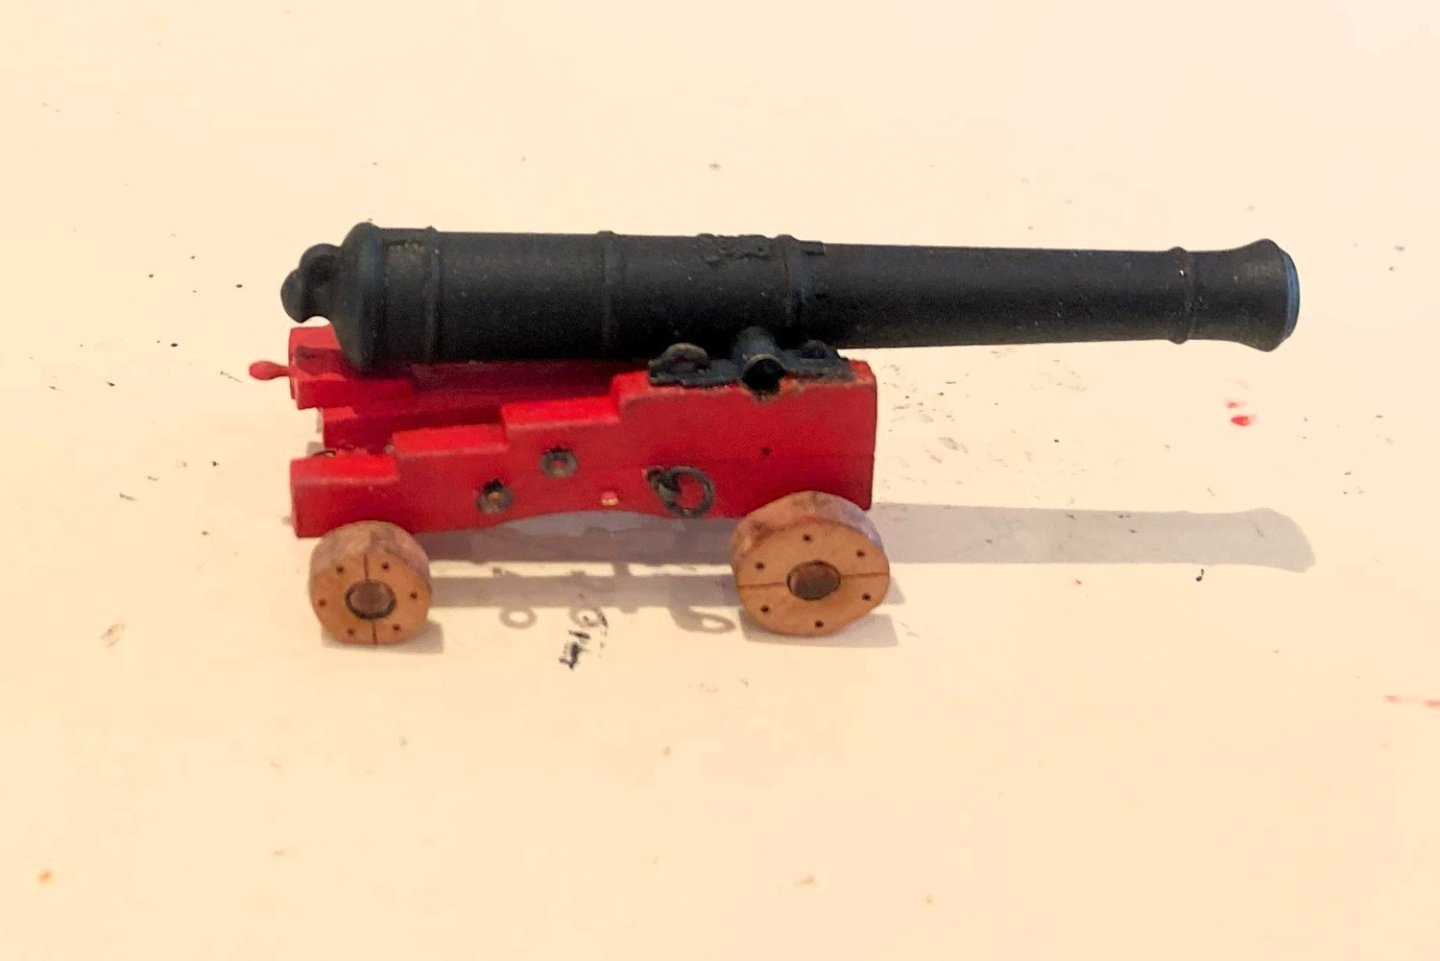
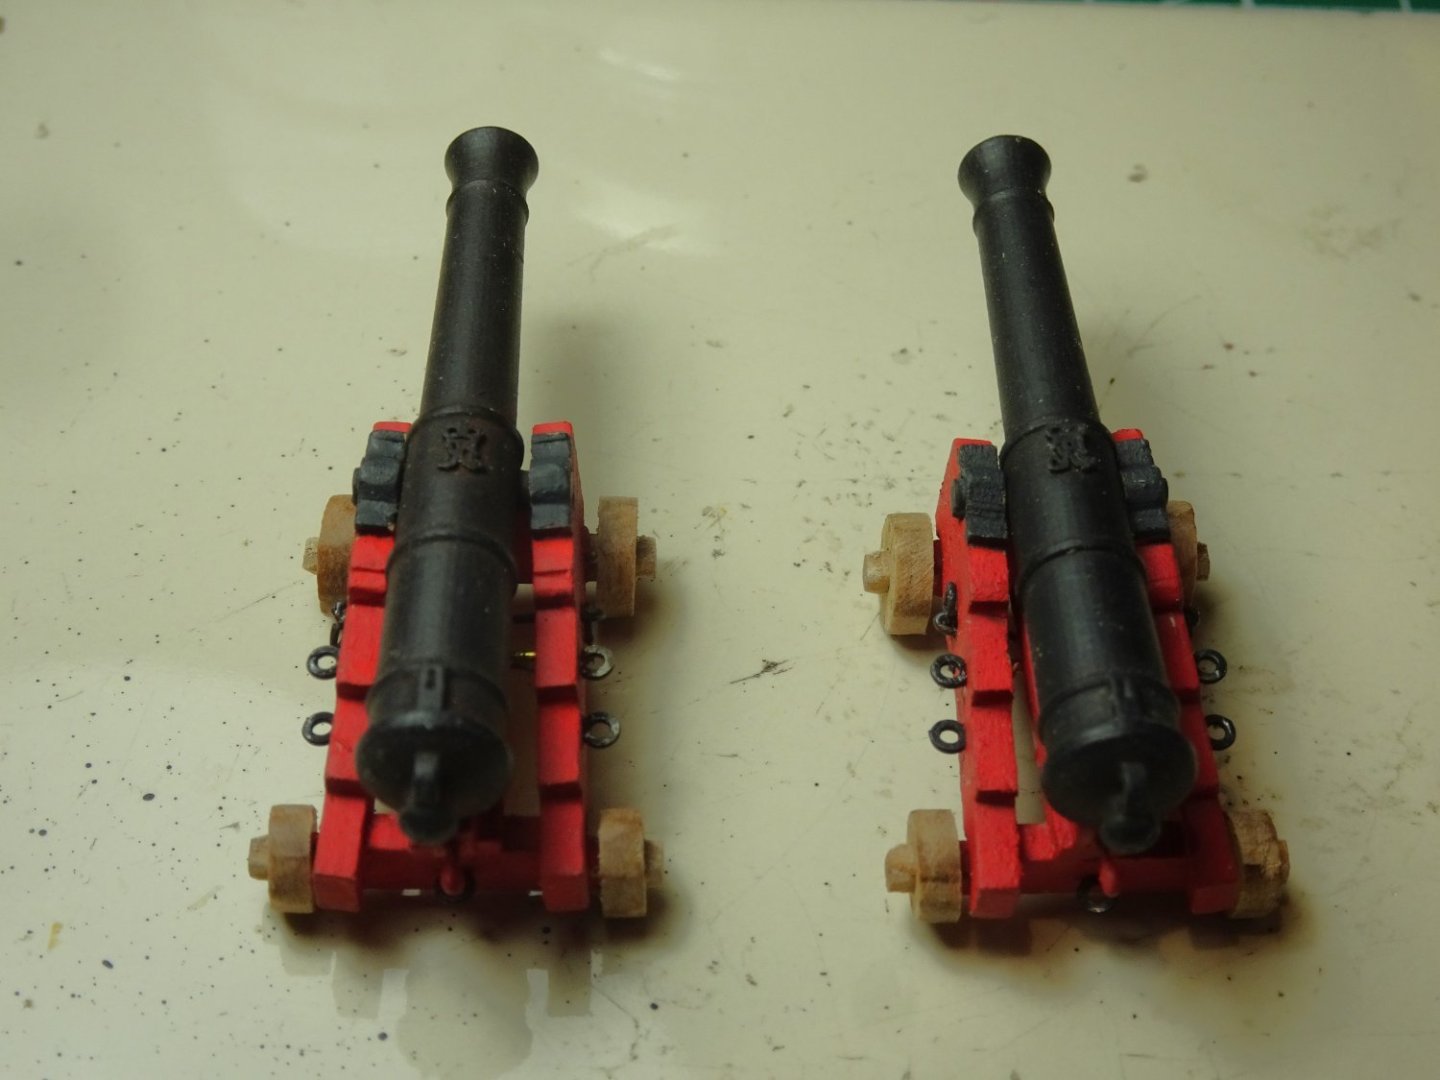
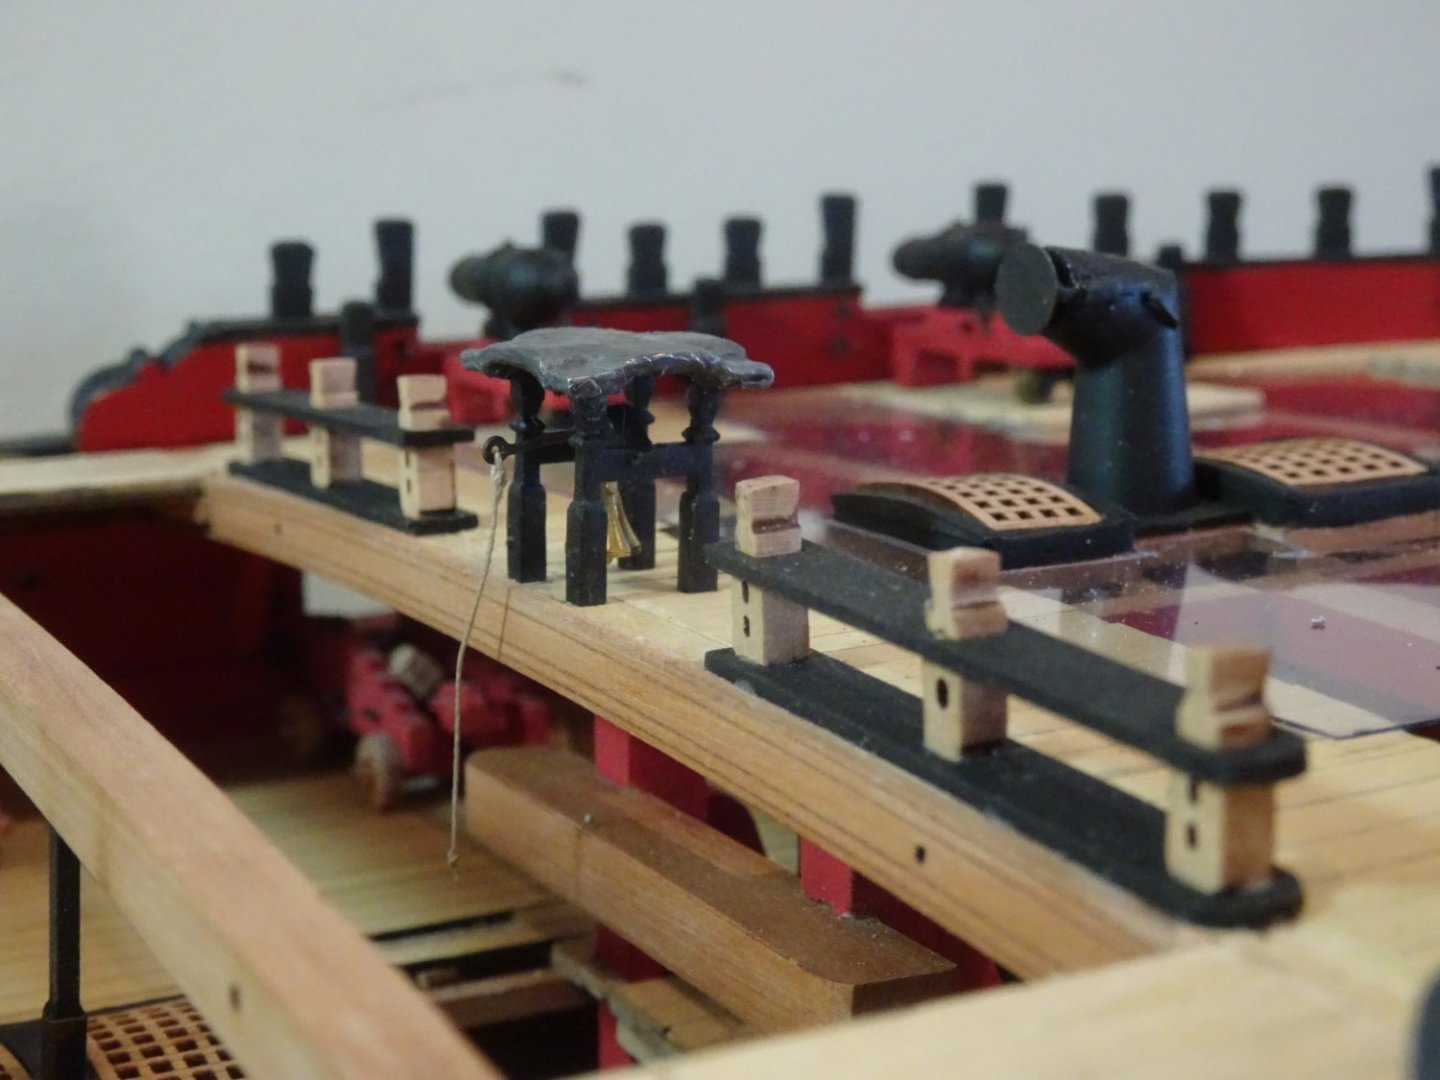
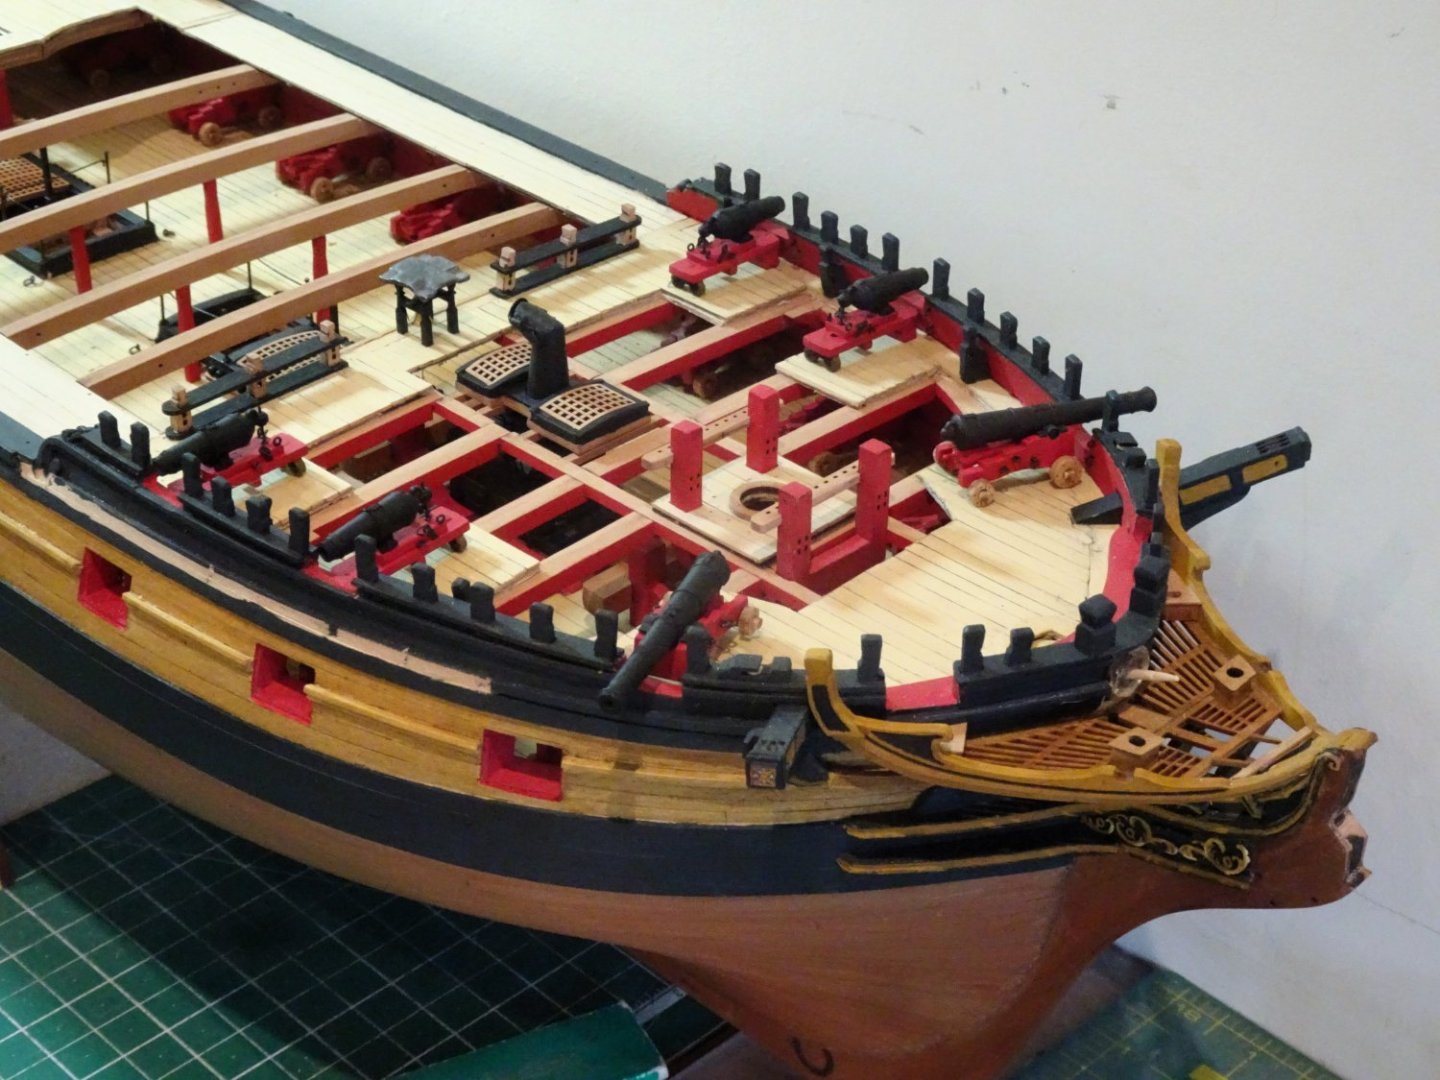
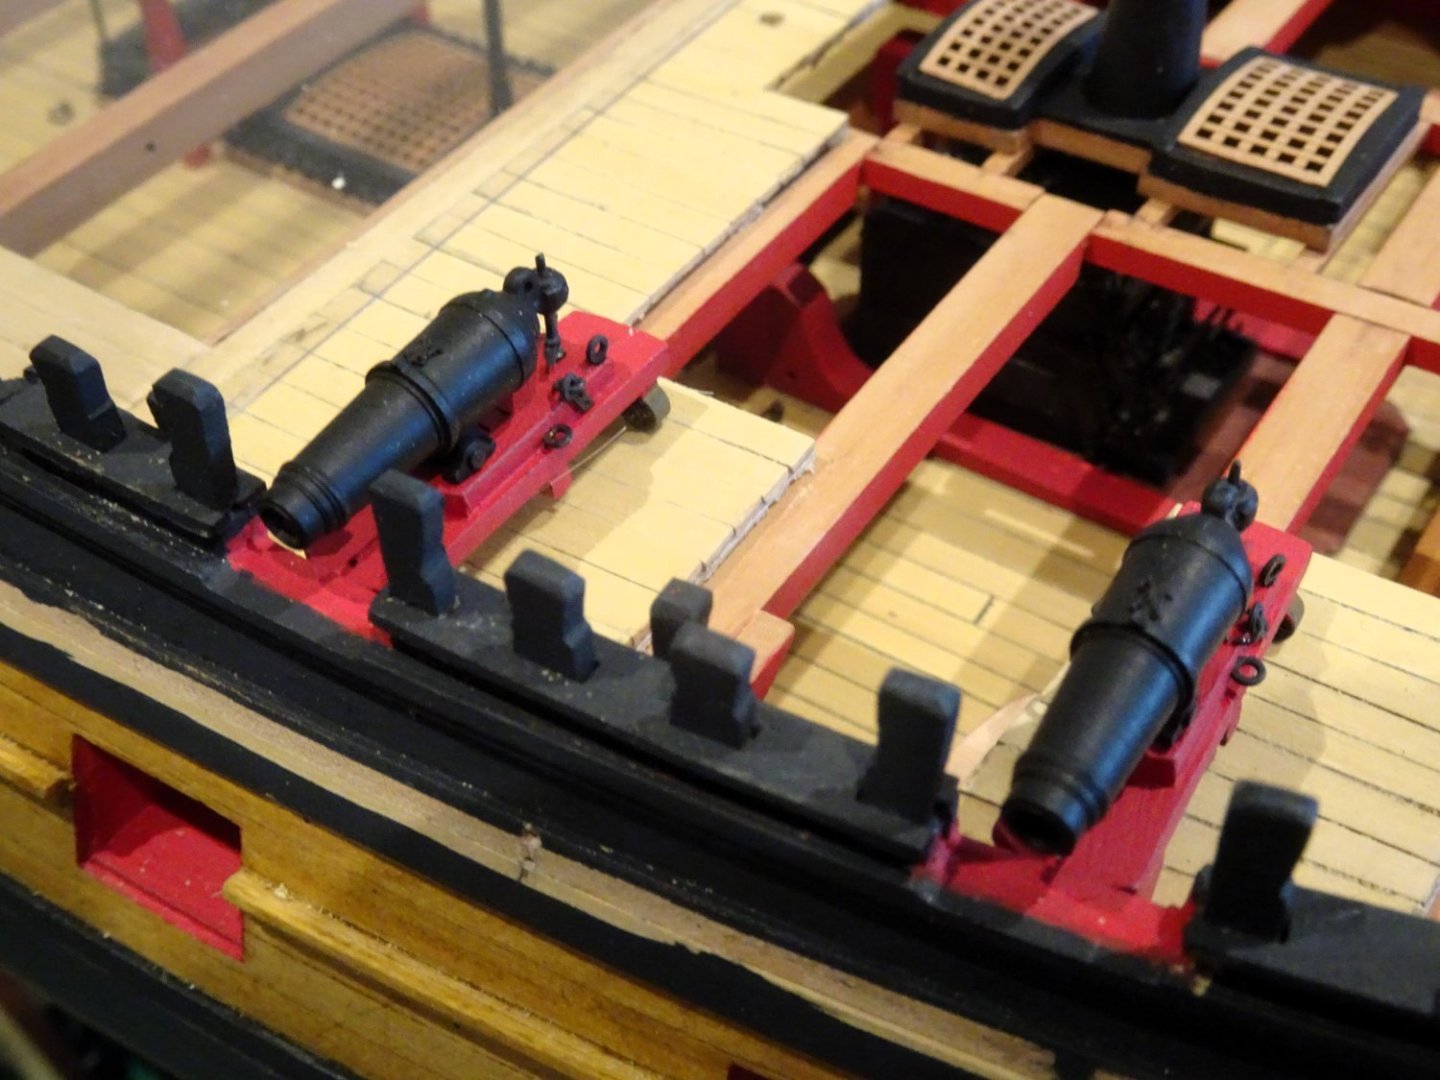
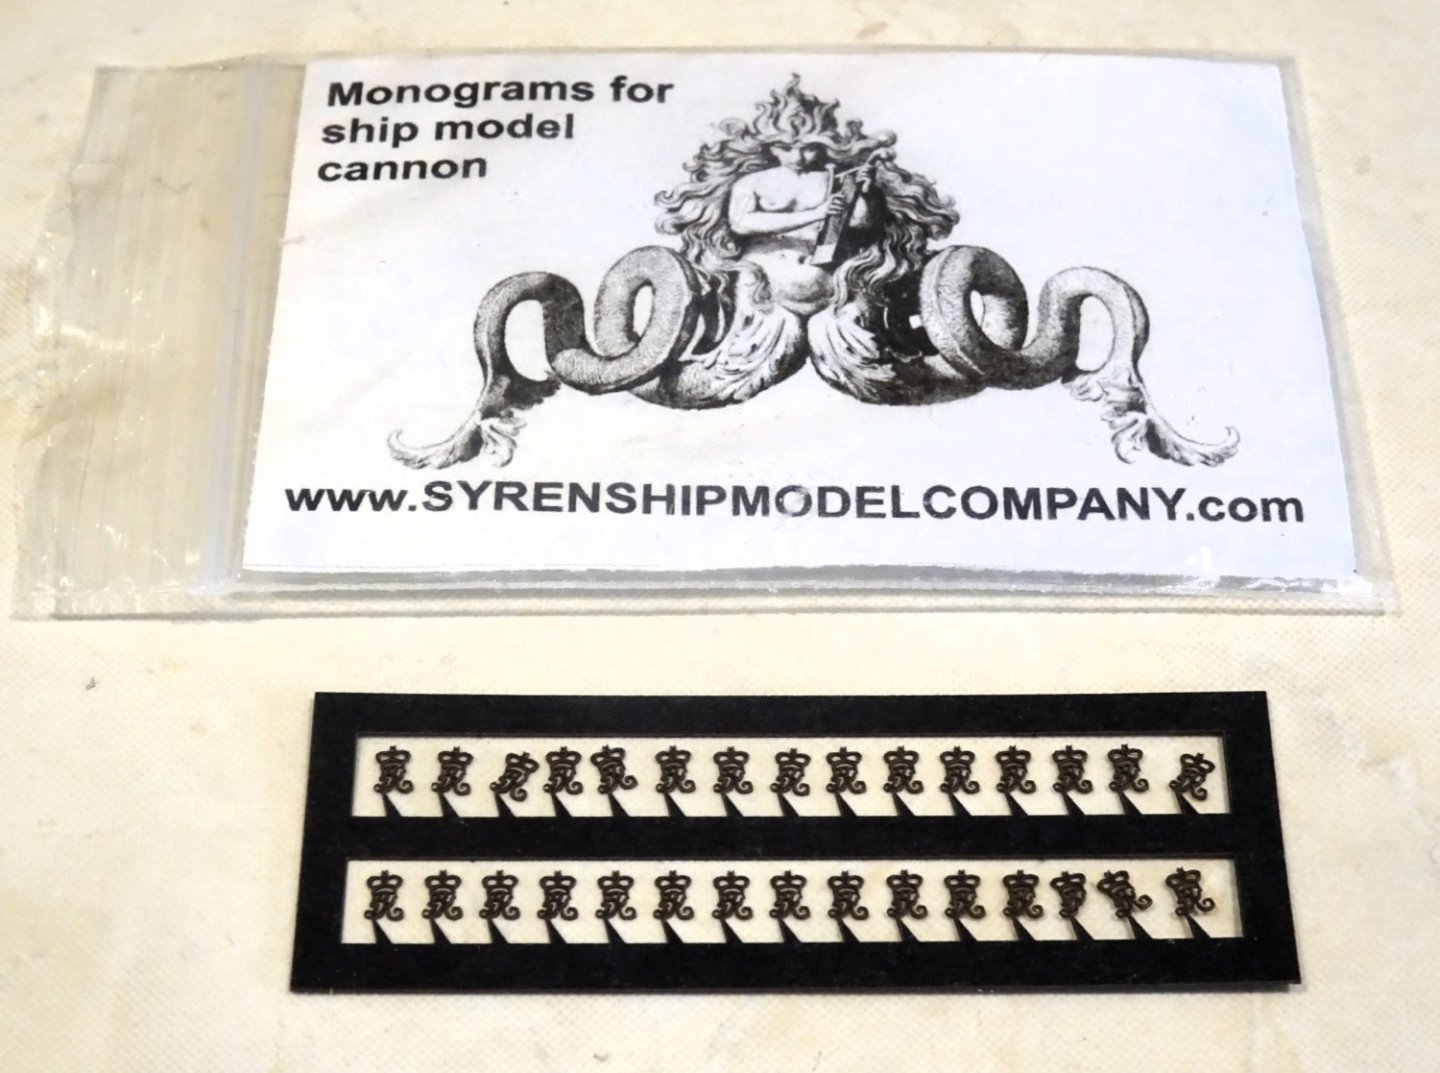
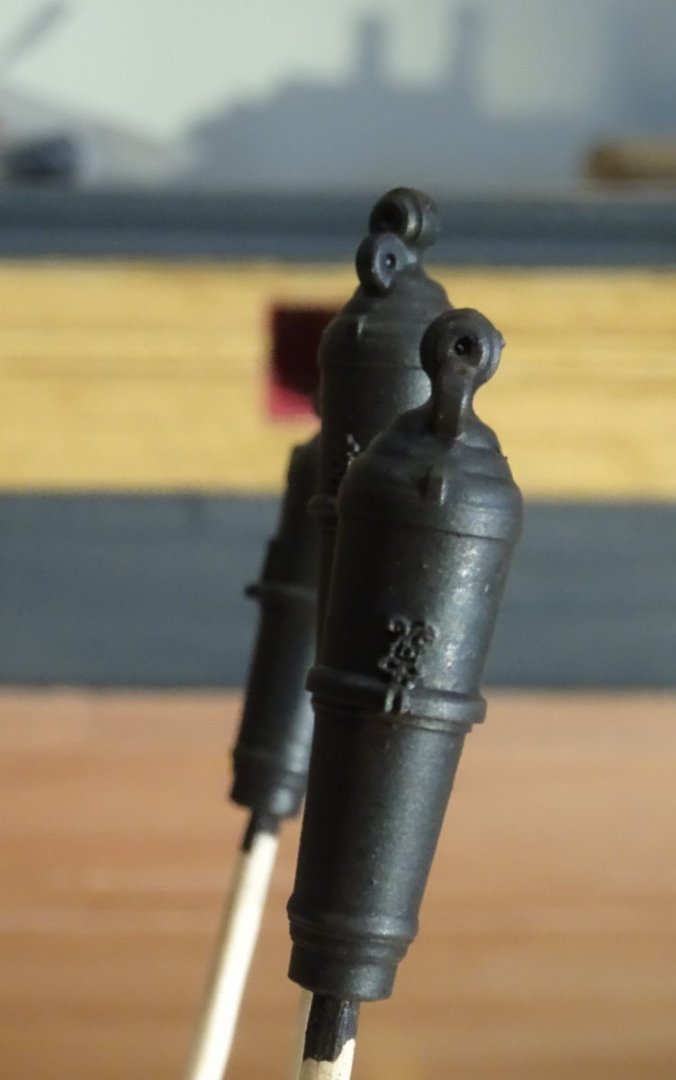
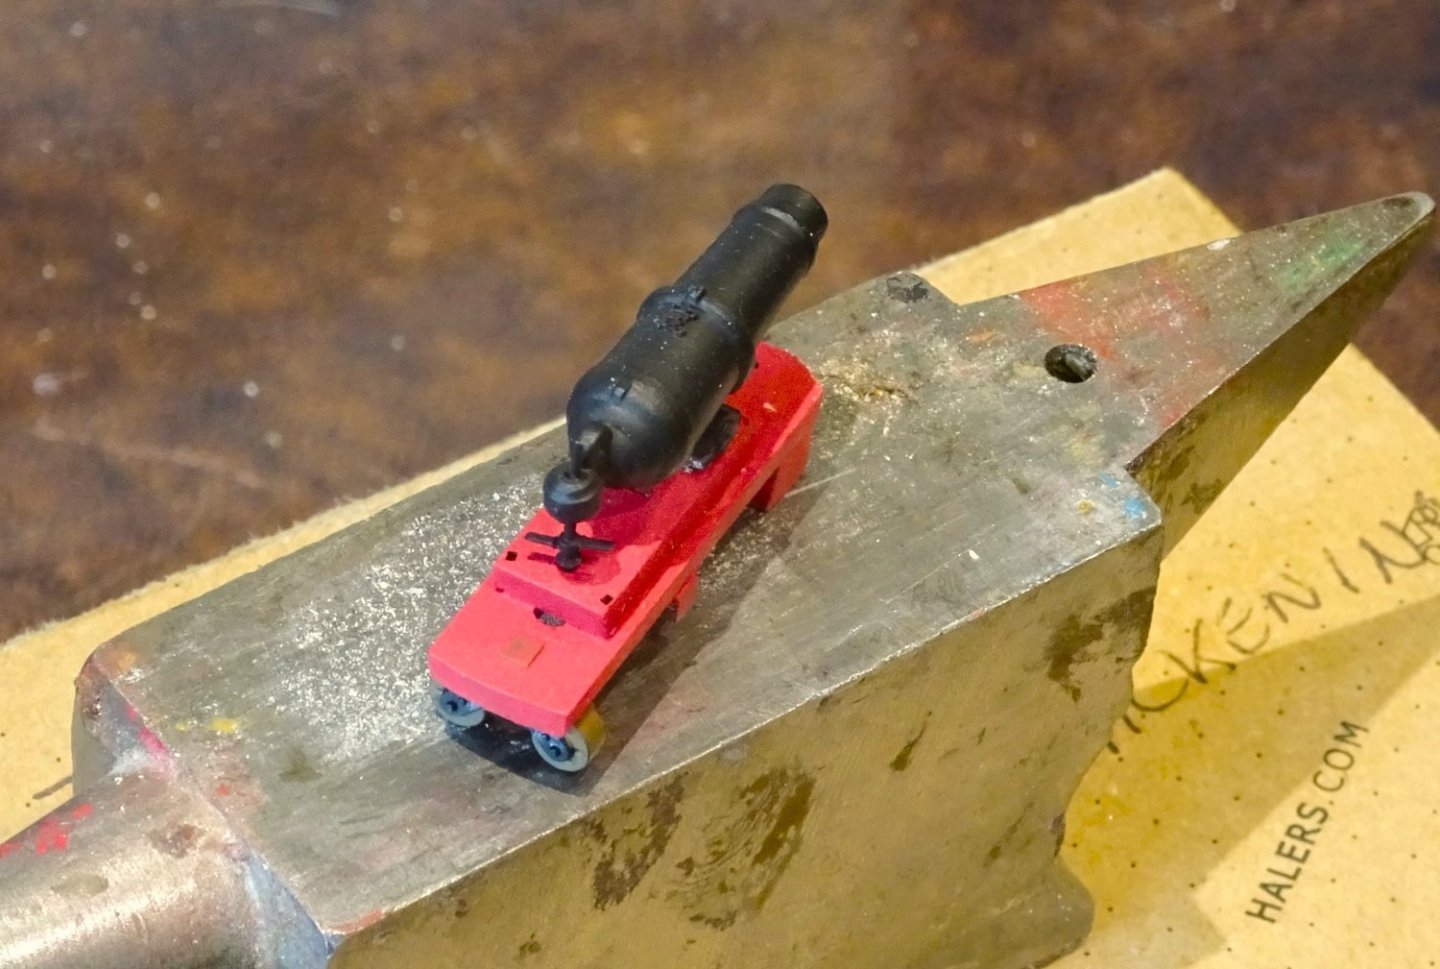
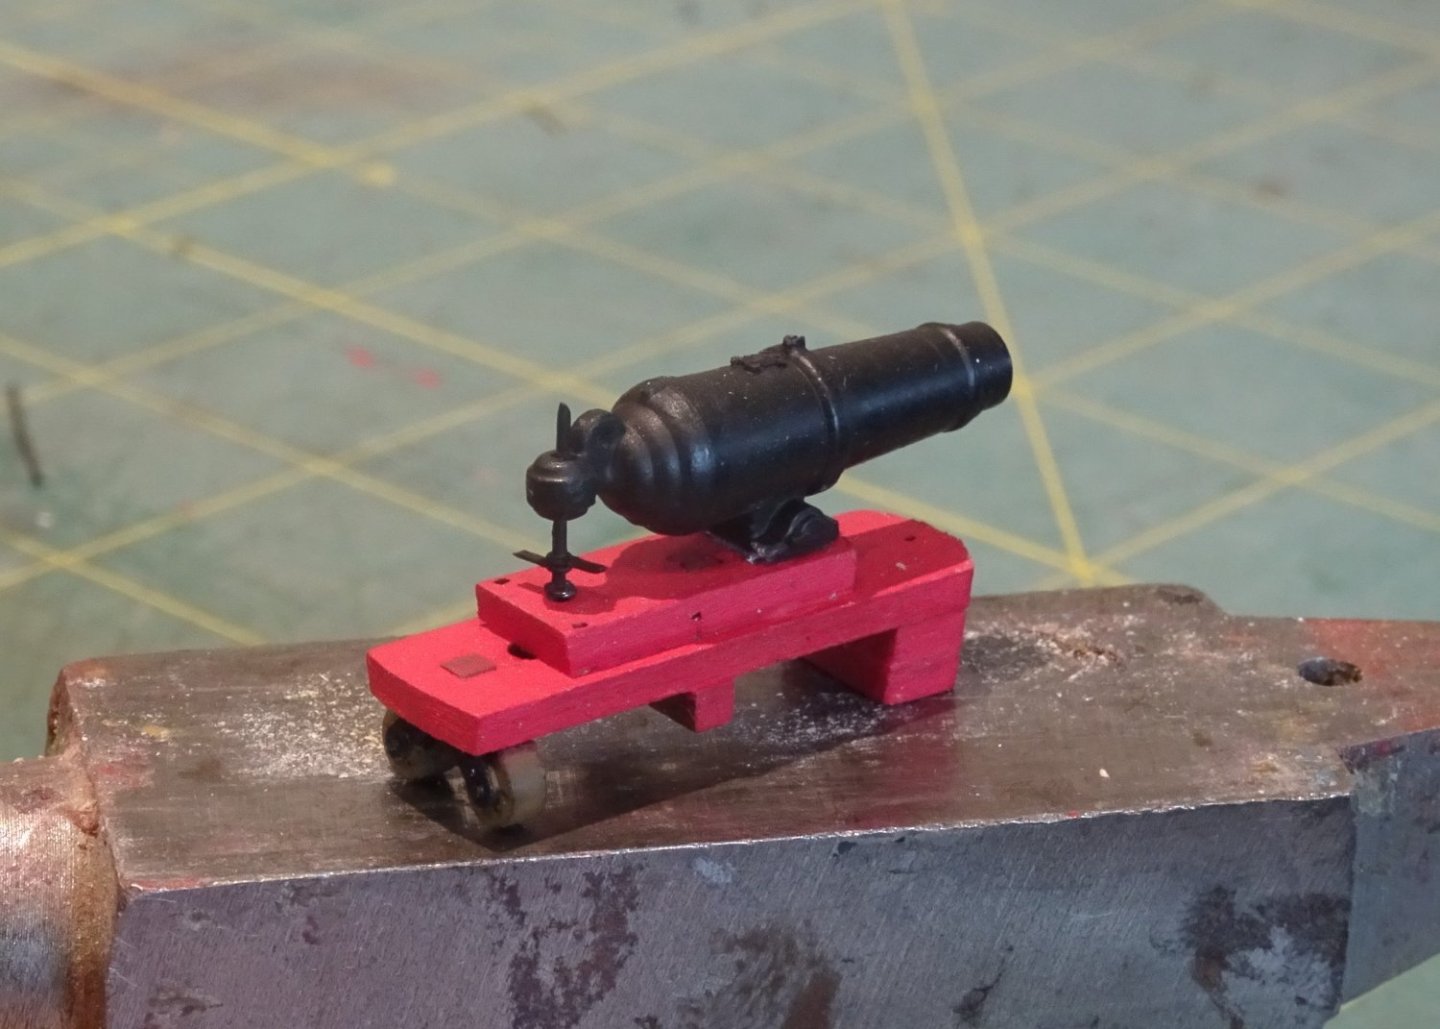
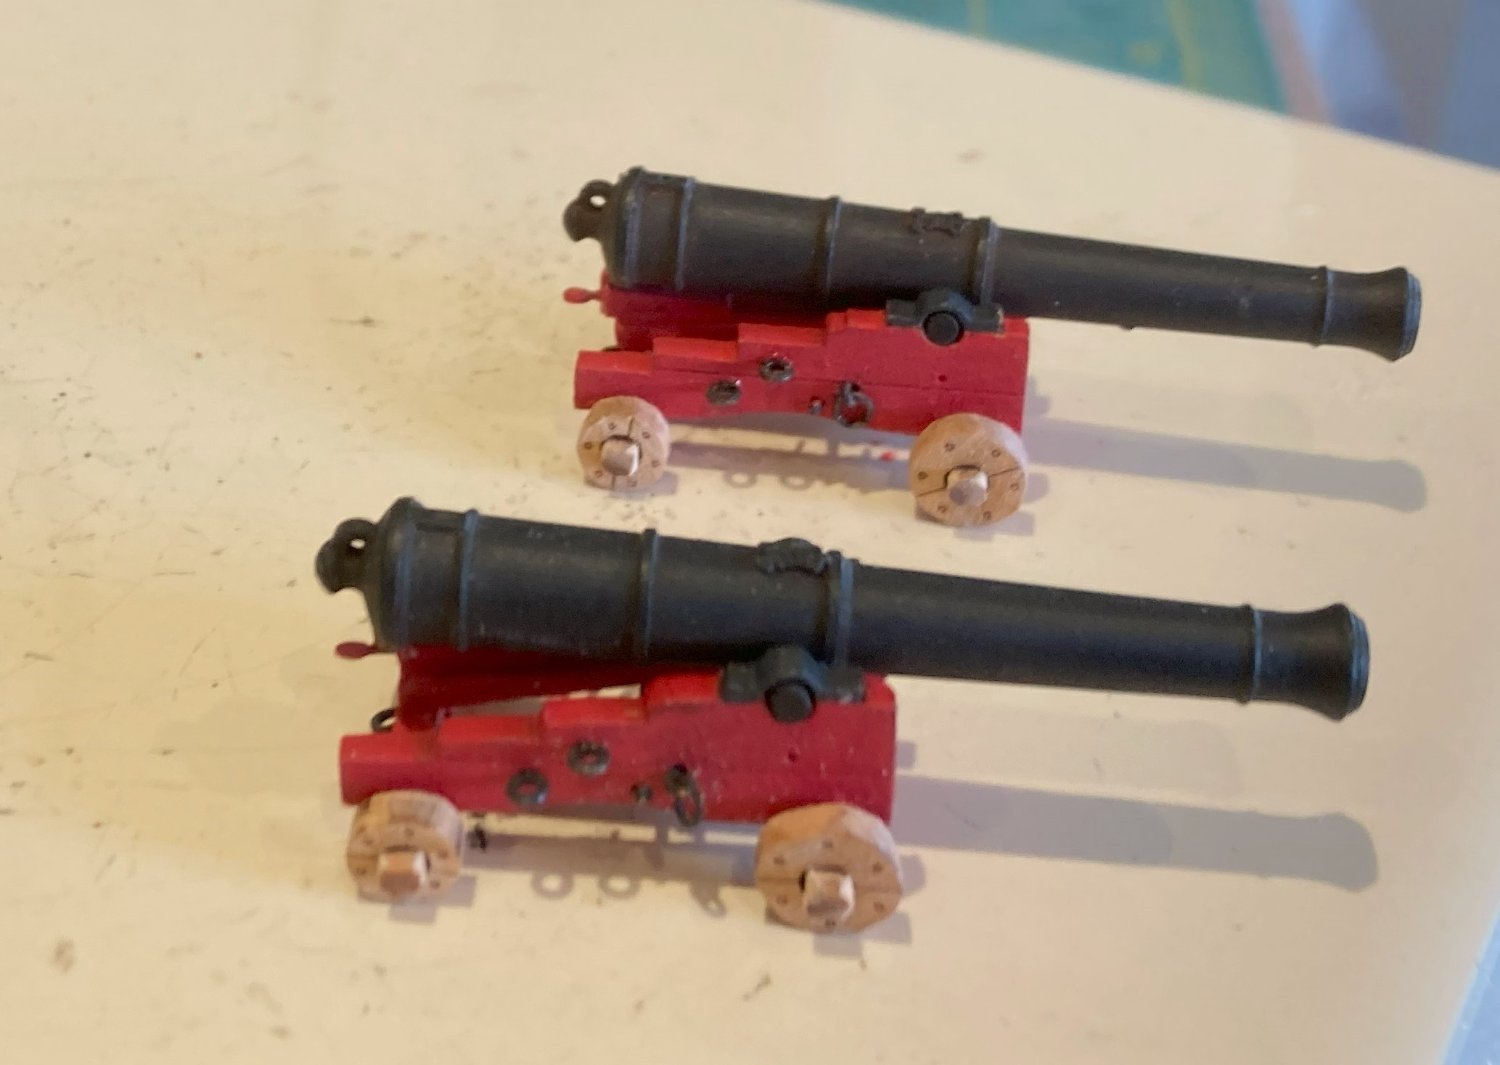
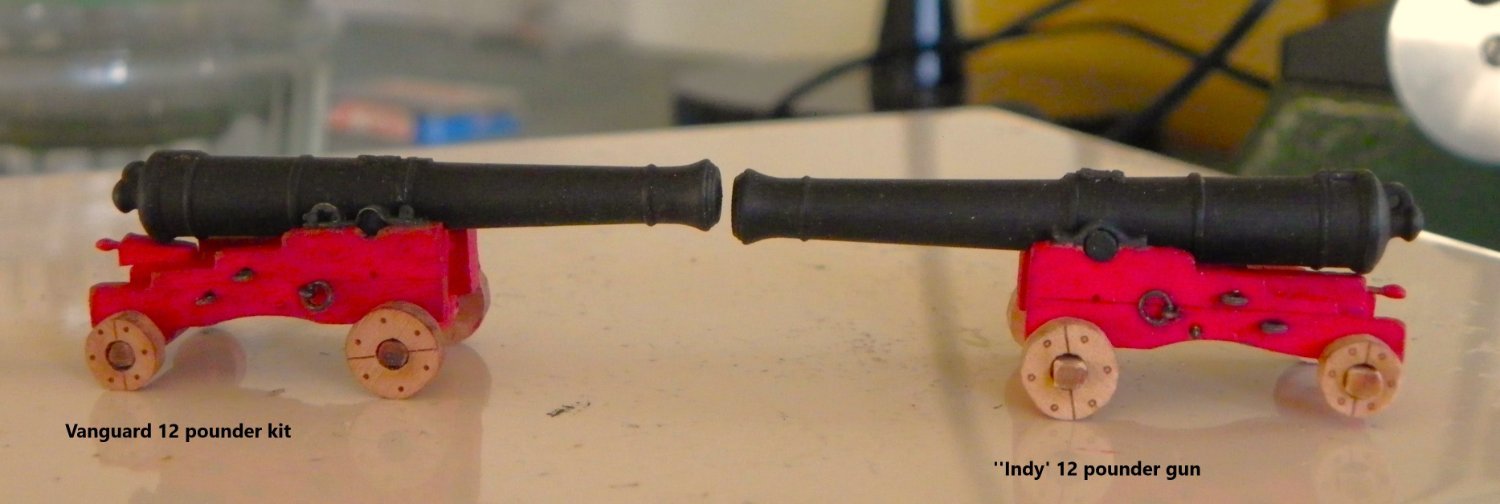
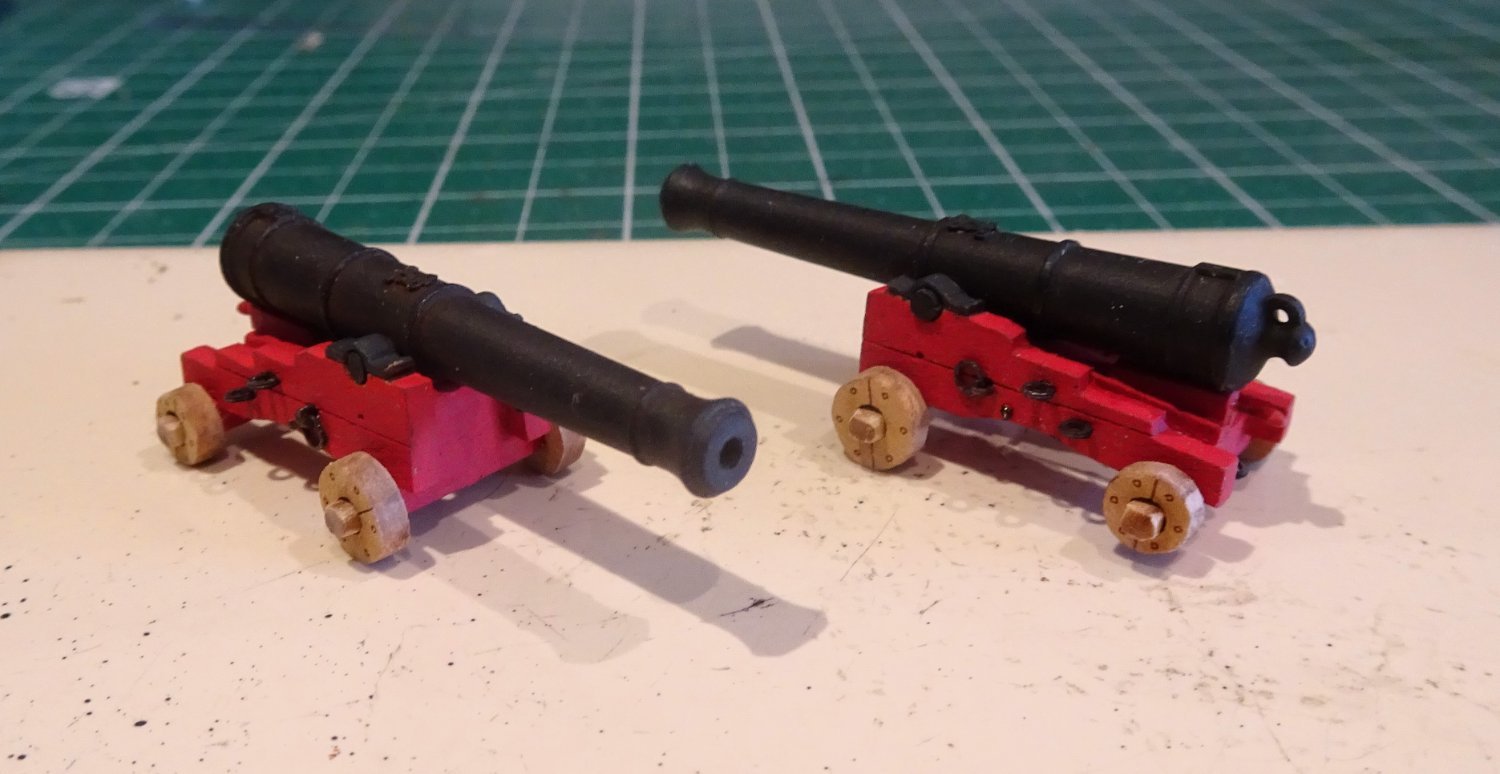
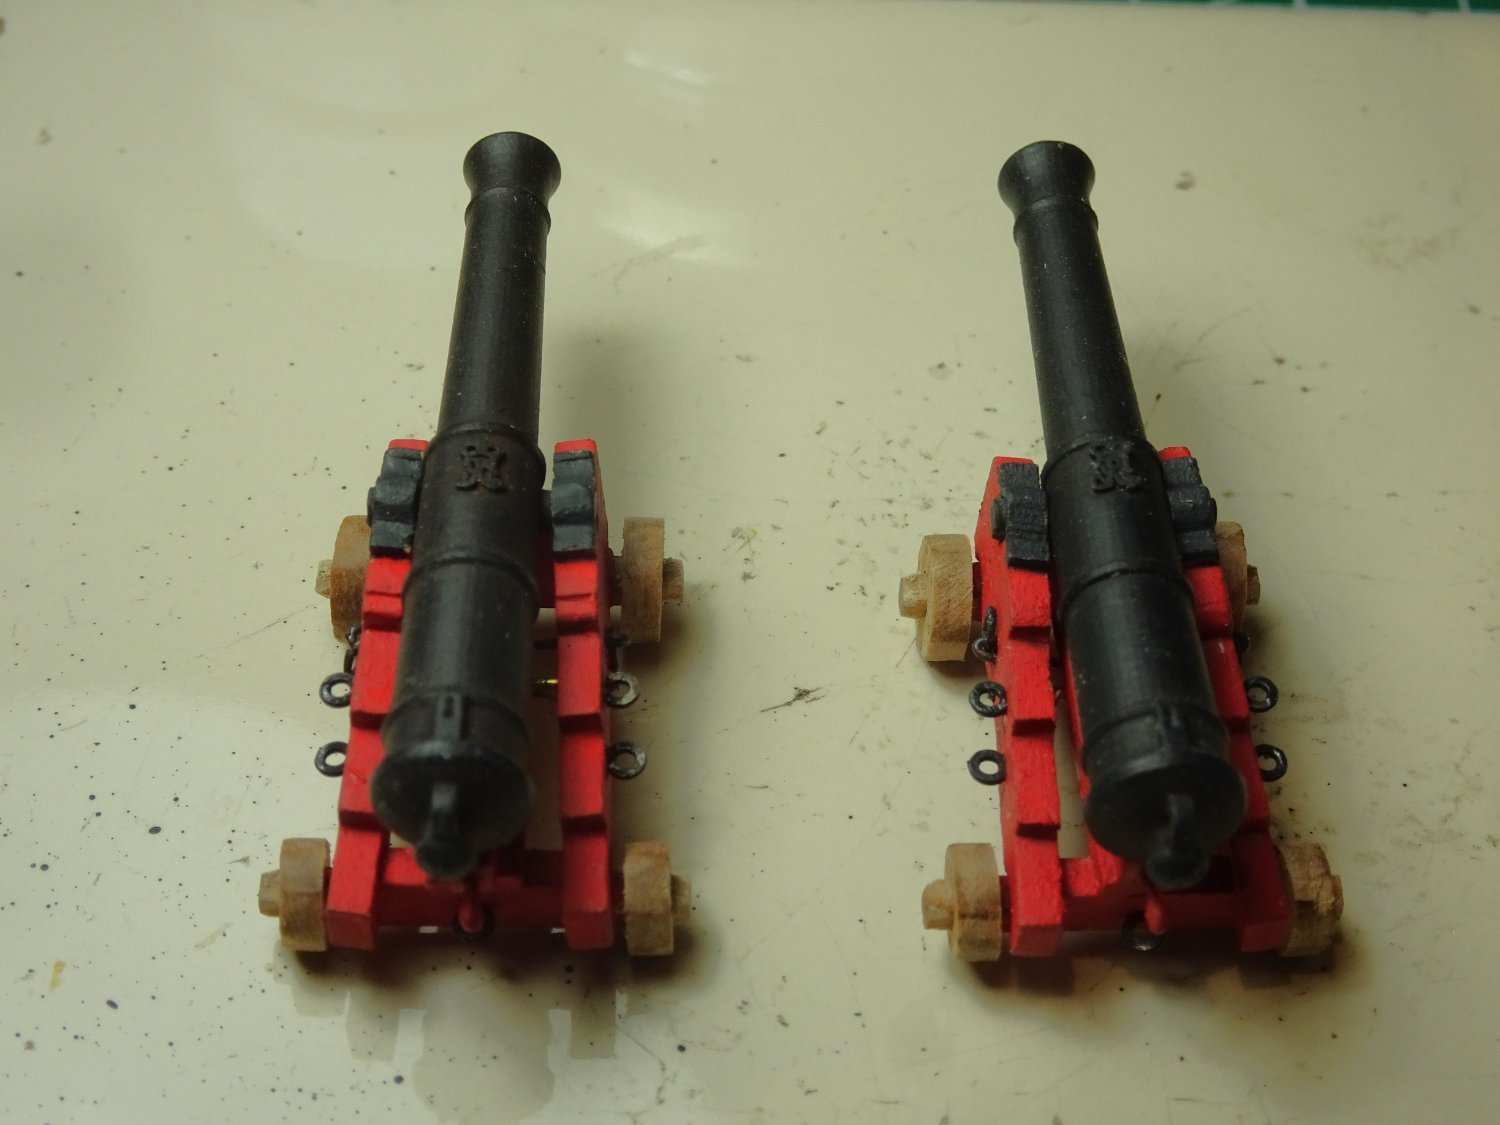
Post One Hundred and Thirty-three Inboard fittings (Part two) The Belfry. Another resin depiction in the style of that on Victory, nicely made and detailed. 3322 I decided to lead the roof, which was then patinated for effect. I applied the same principle to the lead sheathing on the Gallery roofs. The lead foil is only of 0.1mm thickness. 3334 This is a convenient point to fit the Foc’sle breast rails, a quick and easy operation. If you happen to lose one of the rail support pillars (106) a reasonable replacement can be made using a spare cavel block which requires only a little tweaking. Always the way, a part for which there is no spare, pings off into the ether, but you never lose bits that have spares. A pair of Twelve pounders are provided as bow chasers which complete the ordnance for the Fo’csle deck. 3331 These are of the style developed by Chris with integrated cap squares. They look the part when completed but do require the gun to be installed early in the assembly. 3333 I did remove the engraved monograms and replaced them with the Syren version. 1820a I’m still of two minds whether I prefer the new system to the separate assembly of carriages, where they can be detailed without the gun being in the way. I did purchase a couple of Blomefield 9’ long 12 pounders from Vanguard, which are old school and have detailed etched cap squares which involve more work. This kit does not include the Quoin as shown below but they are quite easy to make. 1817a Blackening and fitting the cap squares, particularly the tiny joint bolts and key bolts are testy, so both systems have their drawbacks. Both versions make up into nice guns, I am a confirmed fan of resin barrels now. 12 pounder guns The Vanguard after-market gun kit is slightly smaller than the ‘Indy’ kit gun in terms of barrel length and diameter. The trucks on the after- market gun are a better fit than those of the Indy kit, due to slightly oversize square axles which require rounding. The ‘Indy’ gun (on the right) has rectangular axles leaving an awkward gap that is difficult to avoid. I think the axle shape need tweaking to a slightly larger square profile which can be rounded for a better fit. 3338 3340 The Foc’sle is now looking quite furnished, and not far from completion. B.E. 23/01/2024


- 648 replies
-
- 23
-
-
- Indefatigable
- Vanguard Models
- (and 1 more)
-
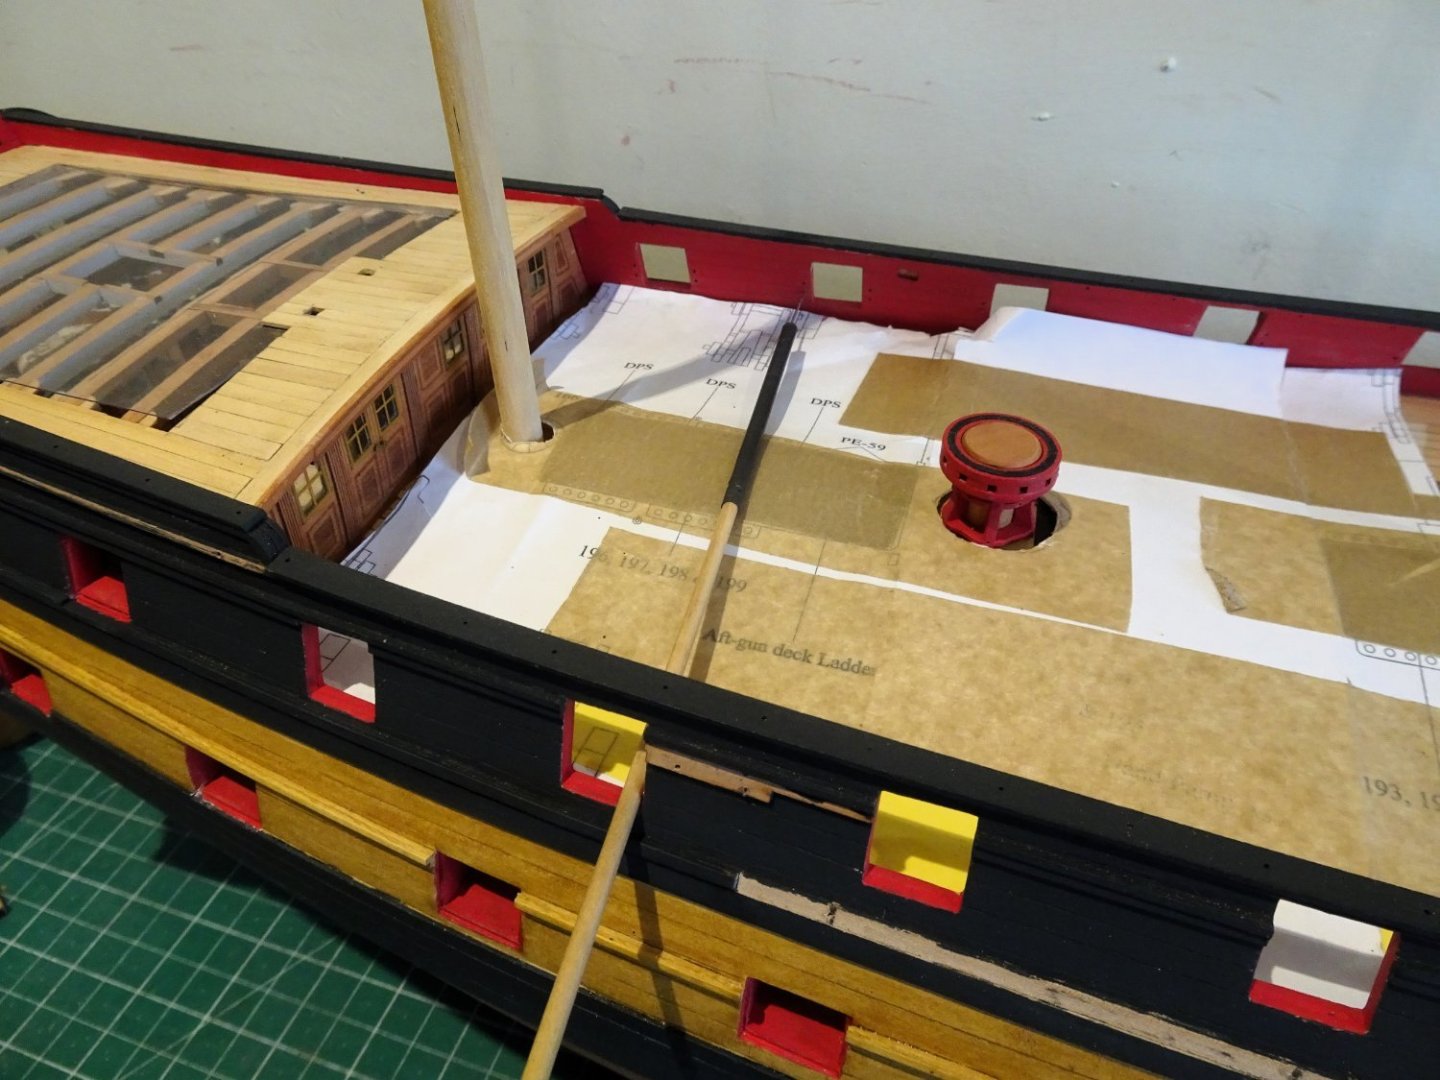
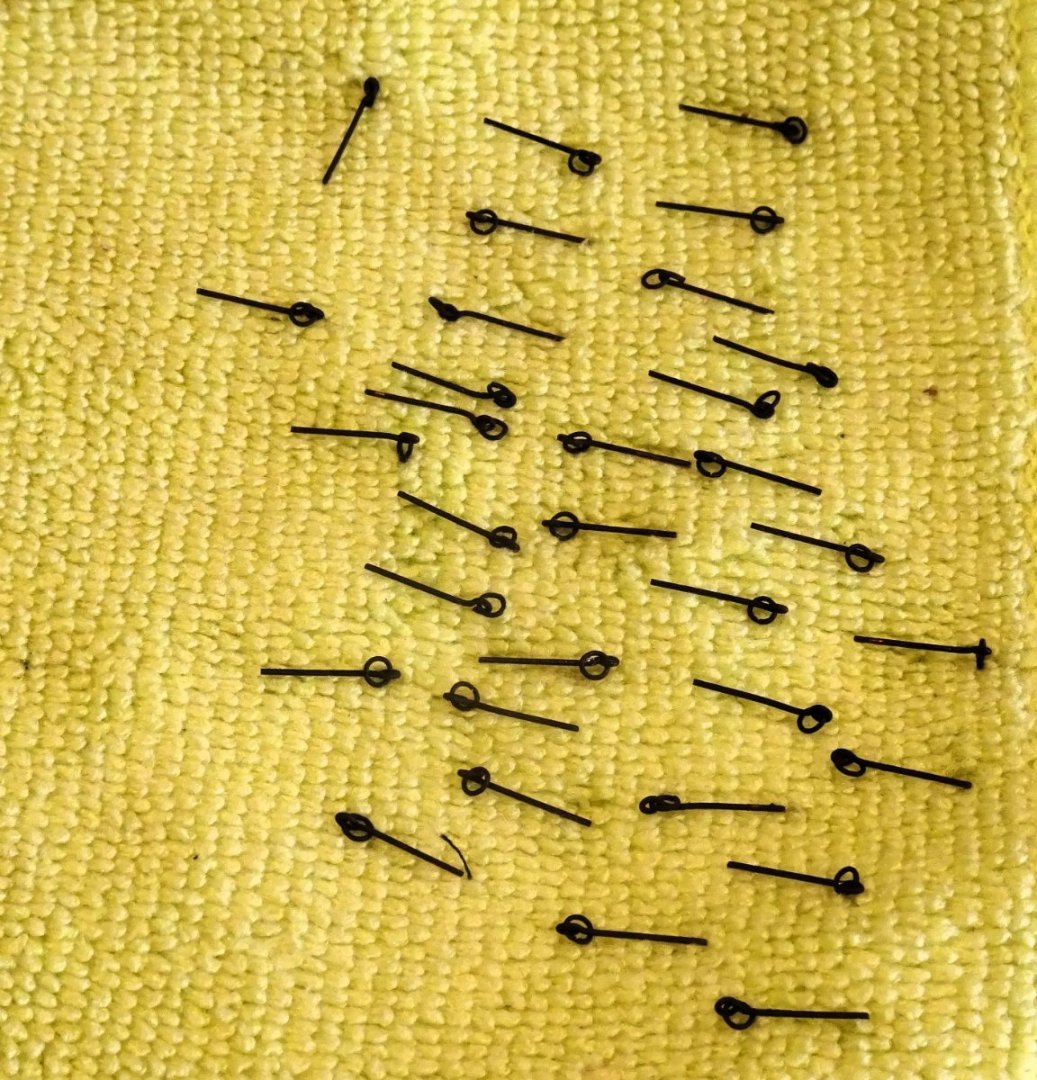
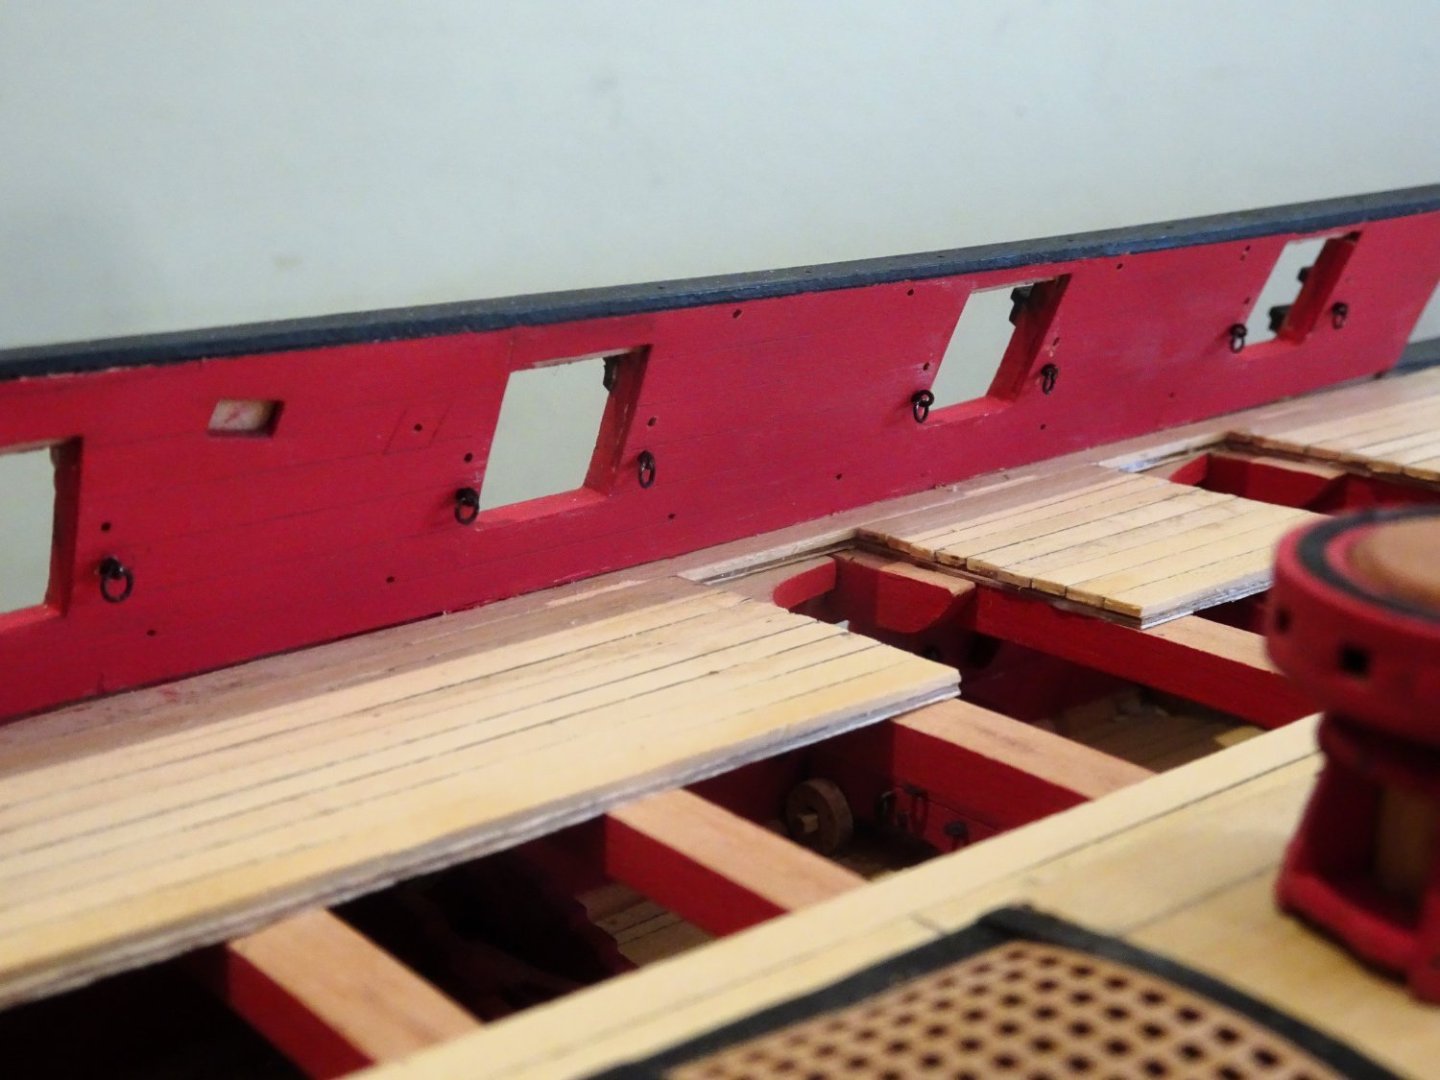
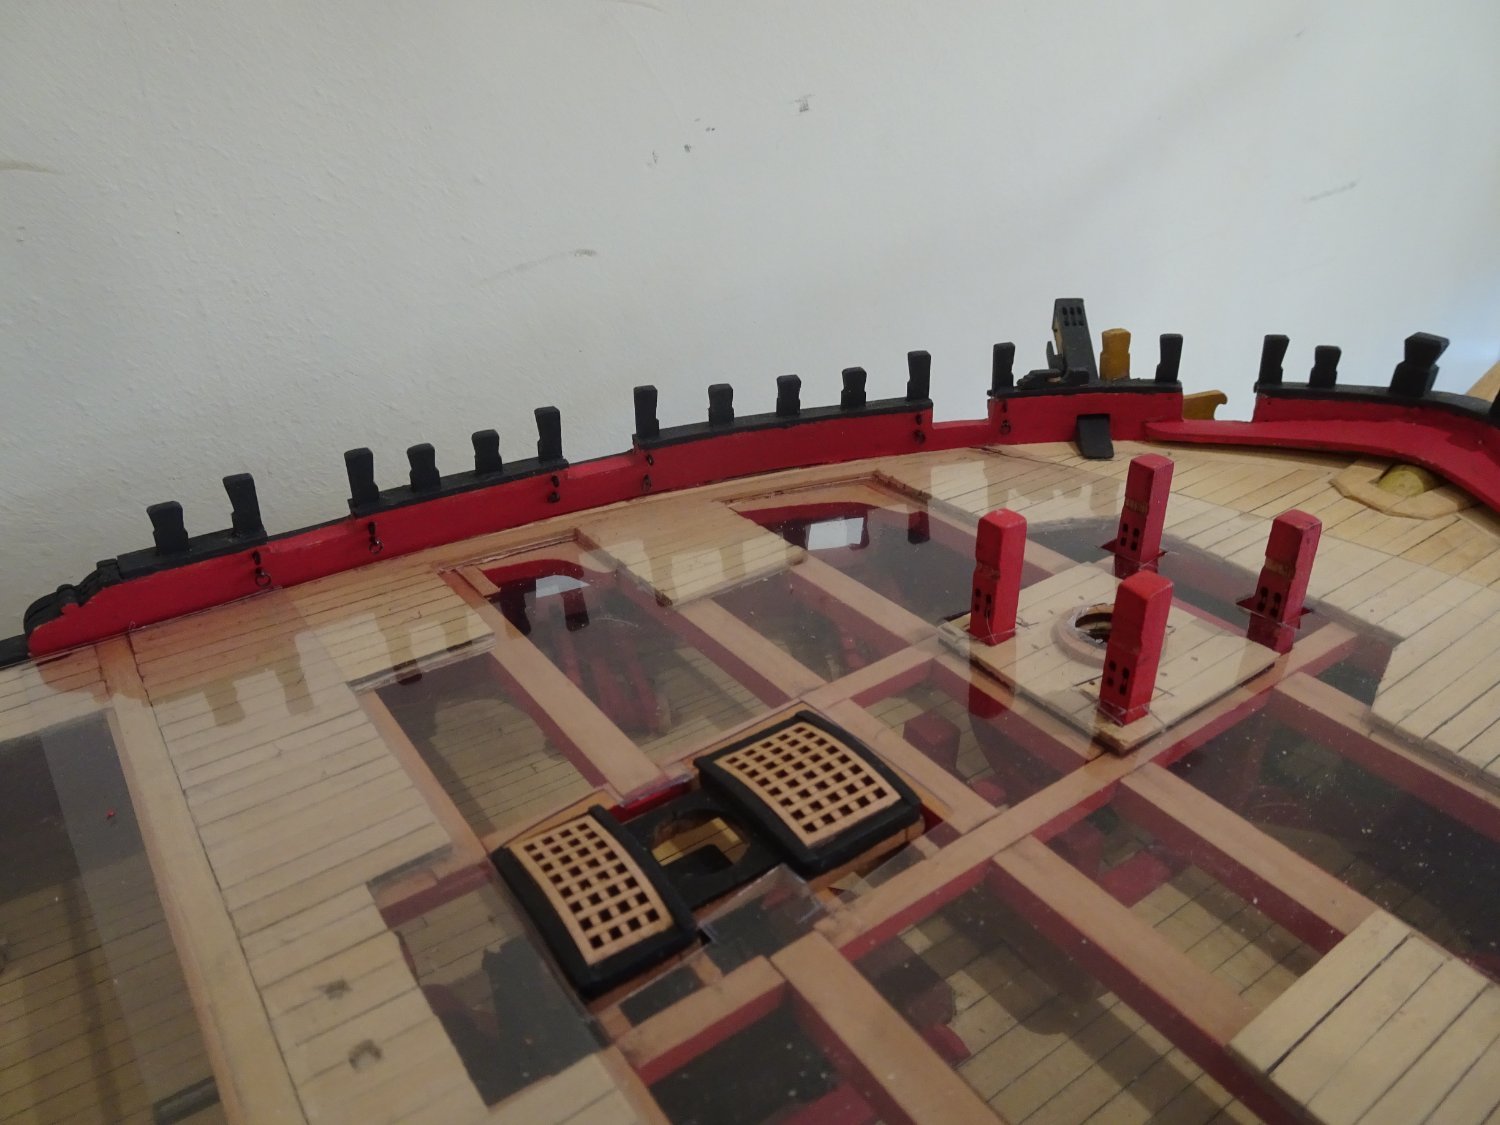
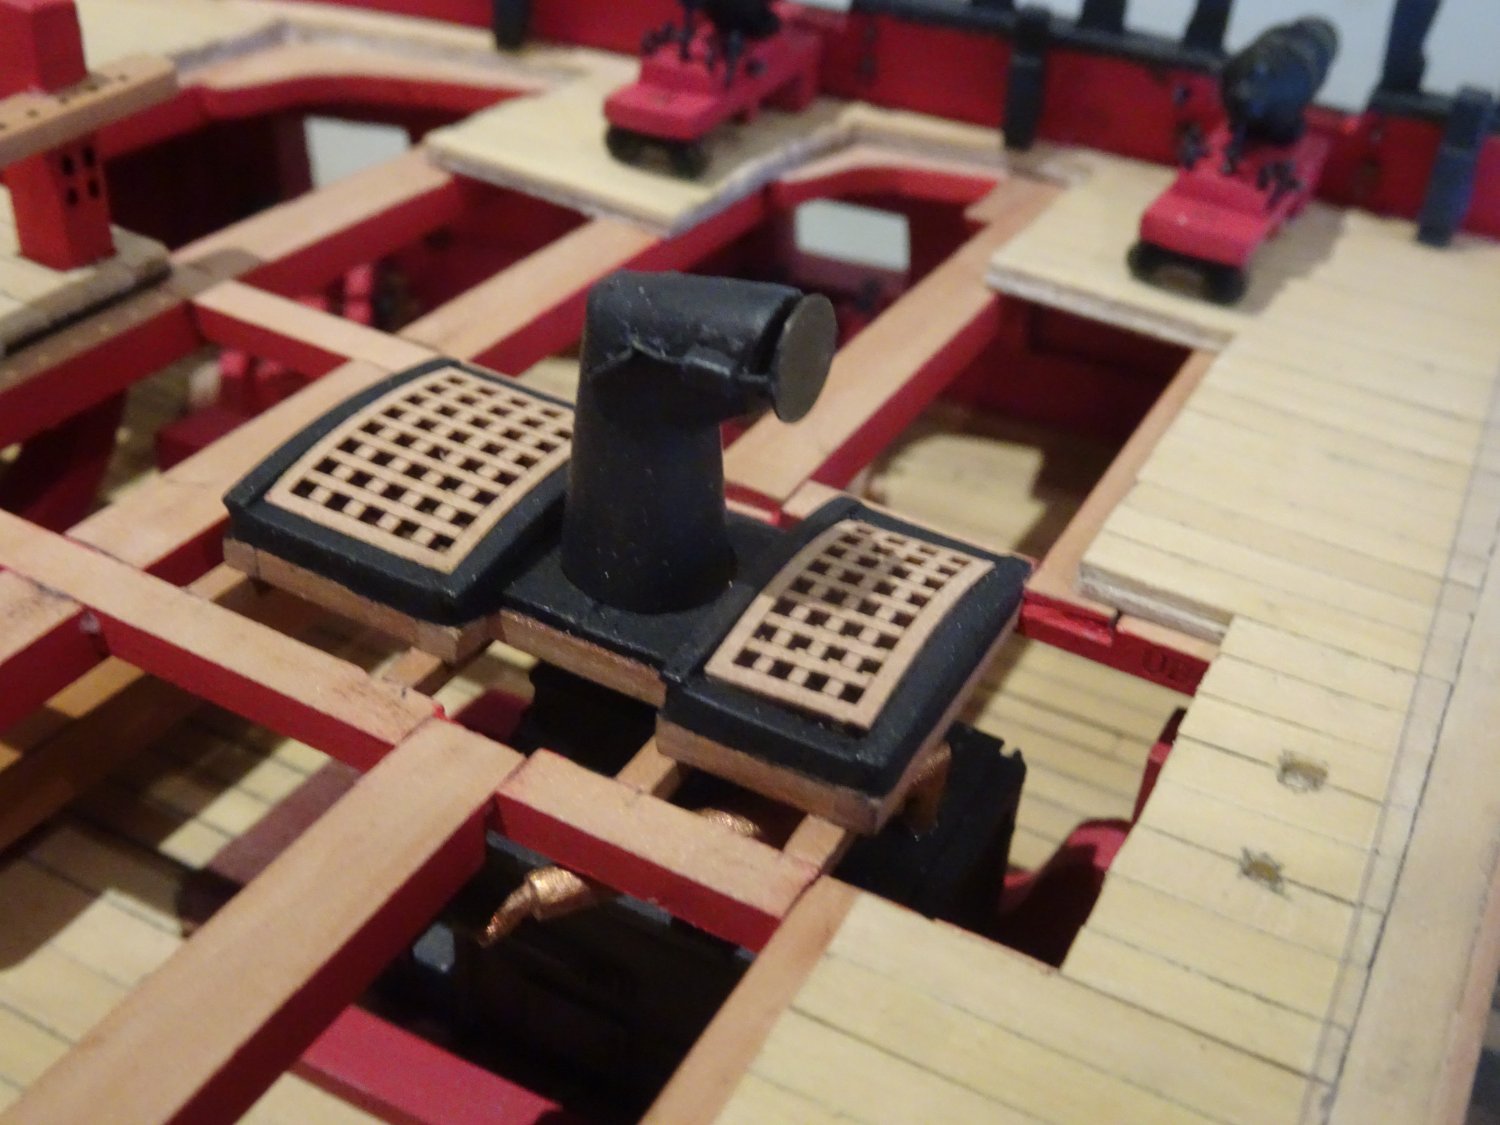
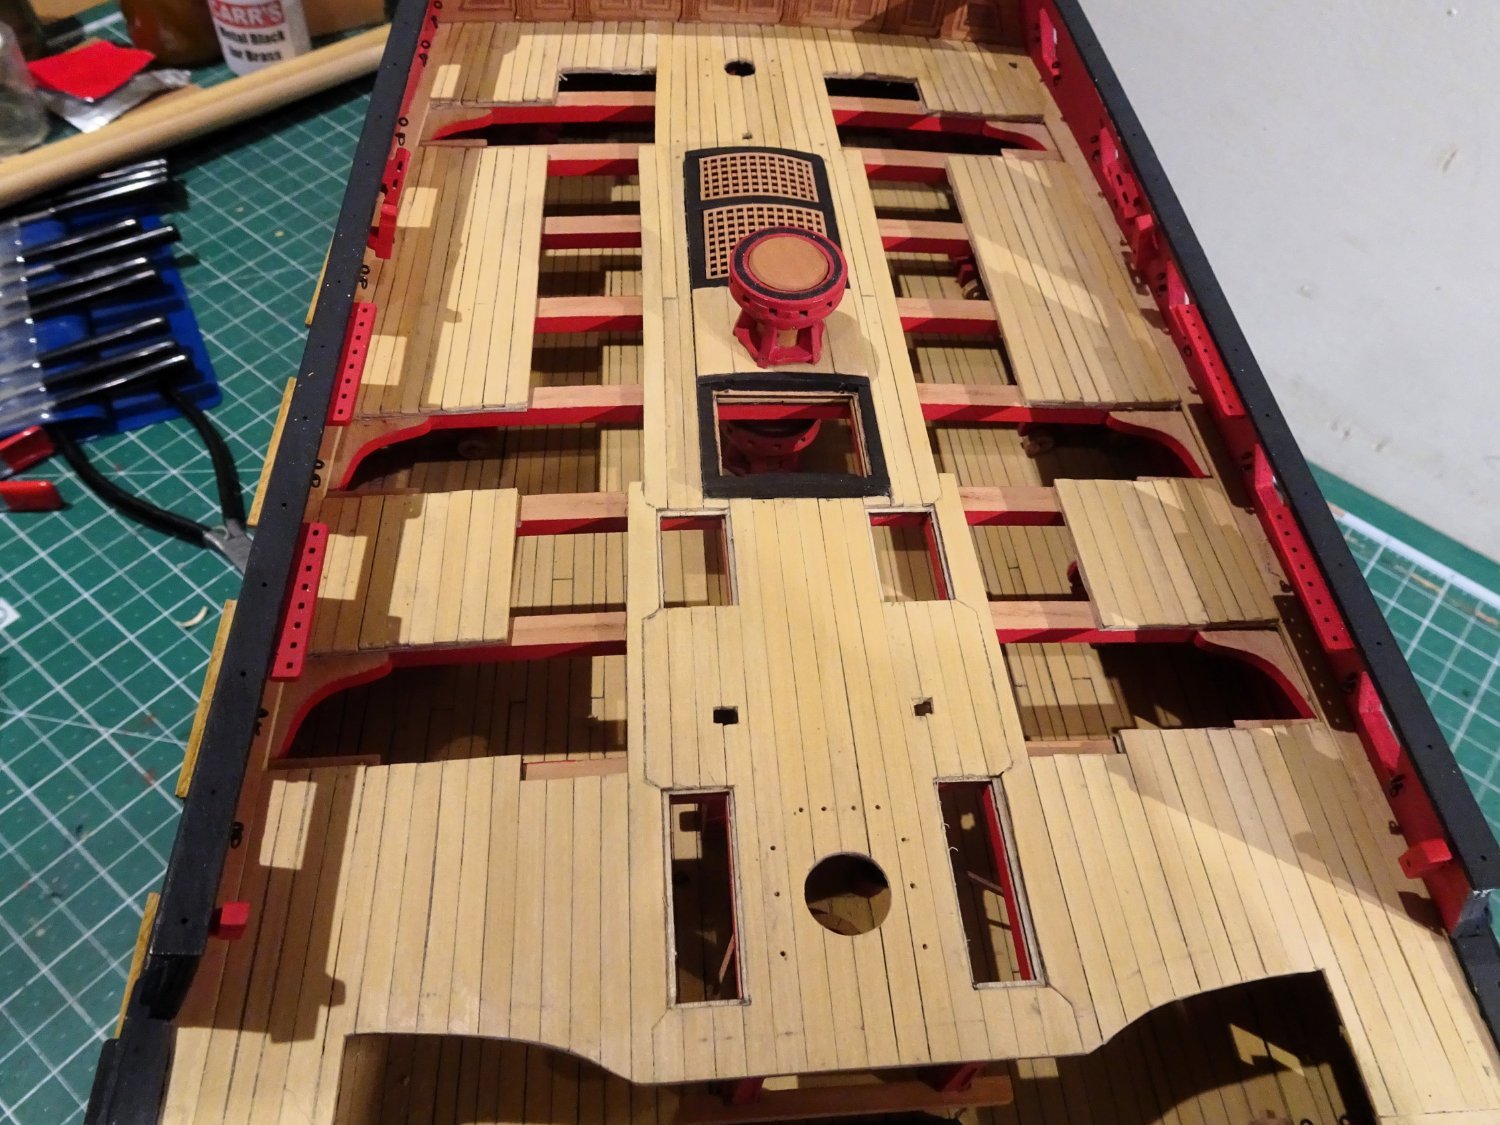
Post One Hundred and Thirty-two Inboard fittings A necessary job before I start is to add the bulwark tackle rings for the guns. 3294 A ‘long pole’ drill is useful for clearing the pin holes. 3296 As with the Main gun-deck I have replaced the kit items with Amati fine eyebolts and 2mm rings to make ringbolts for the breechings. 3297 3298 Look better to my eye than simple eyebolts. 3301 3321 To complete the bulwarks there are belay racks, cavel blocks and cavel cleats to add. 3302 I did wonder about the set of three cavels on the Fo’csle, they do appear on the restored Victory but I could not find examples on Navy Board models of Frigates and other larger ship types. Even so, they do make useful additions for rigging of the model. Chris has allocated the aftermost cavel (31) for the Fore Topsail tye, the centre (39) for the Fore-yard lift, and Fore-most (87)- Main course Bowline. 3311 The Foc’sle carronades are fitted with brass nails into the deck which holds them secure whilst allowing them to swivel. A spare carronade slide is used as a template to mark the nail holes on the deck. 3305 The cowl for the Brodie stove is fitted with a length of copper rod which secures it in place whilst also allowing rotation. My preference with fittings is to avoid glue where possible. 3304 3309 The Foc’sle Bitts are completed. 3310 Still a way to go, with lots of fittings left to make. Onwards. B.E. 20/01/2024


- 648 replies
-
- 24
-
-
- Indefatigable
- Vanguard Models
- (and 1 more)
-
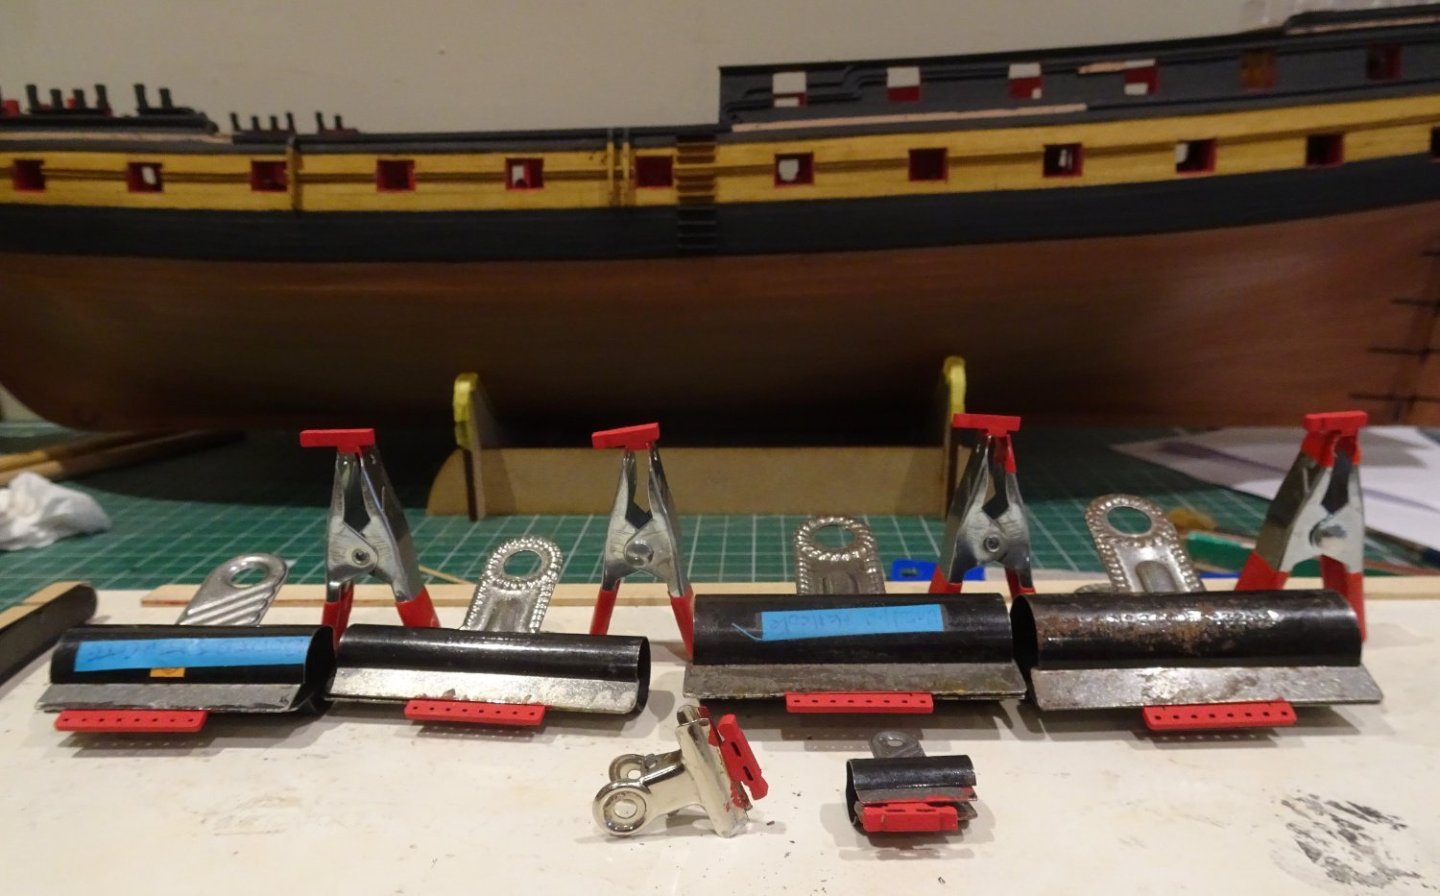
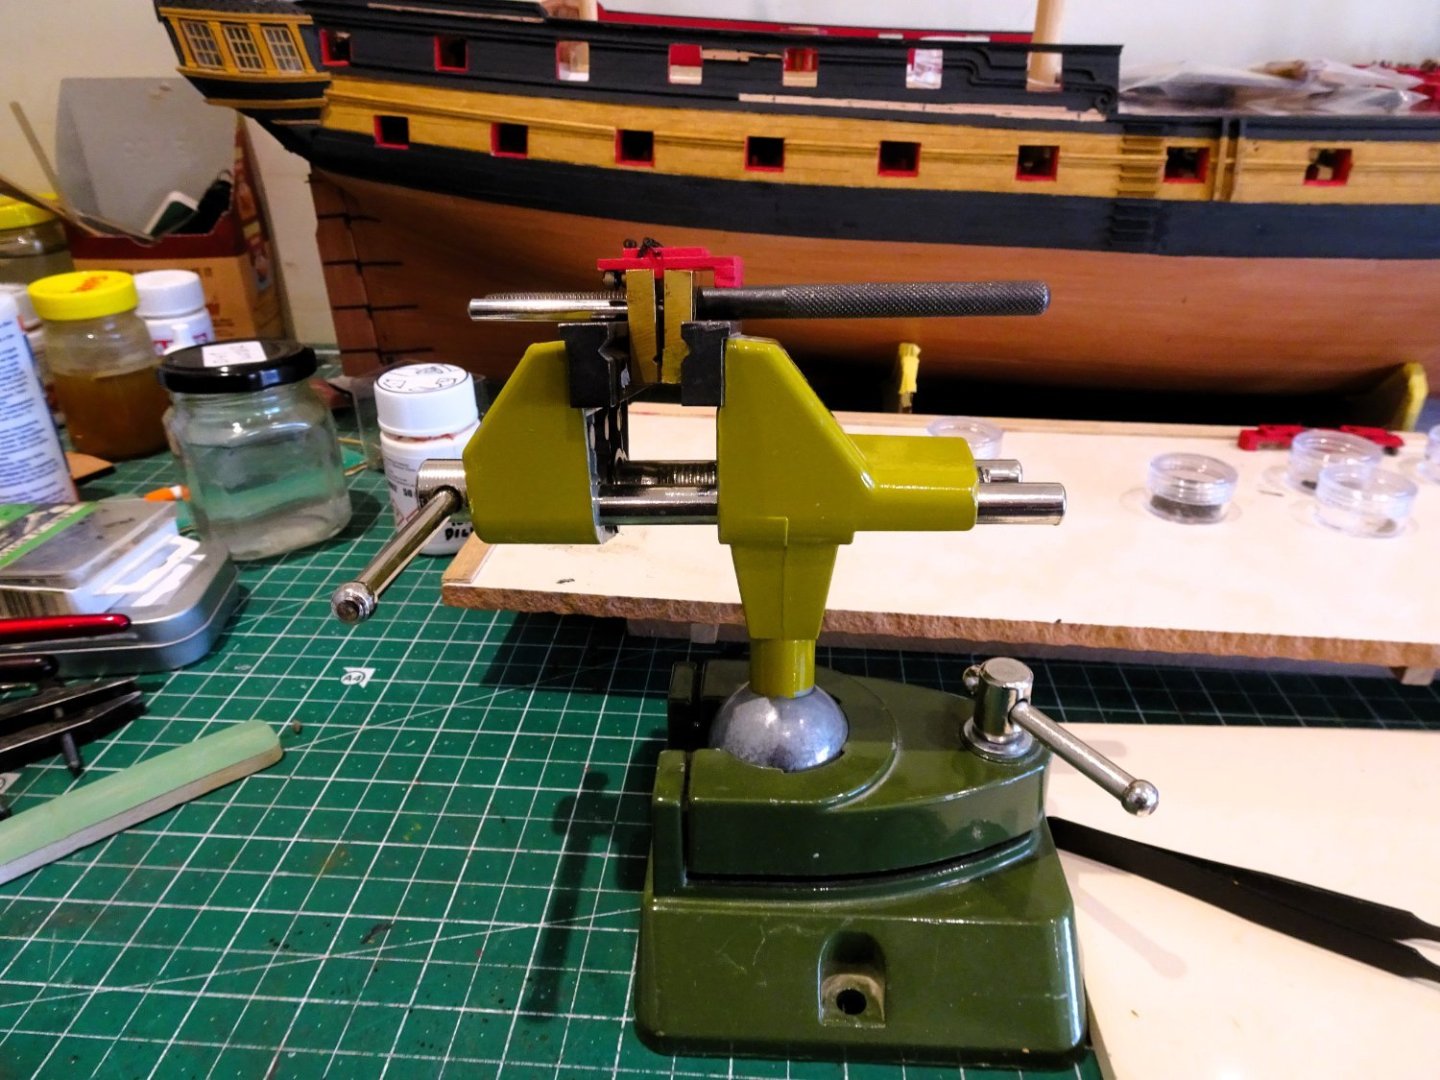
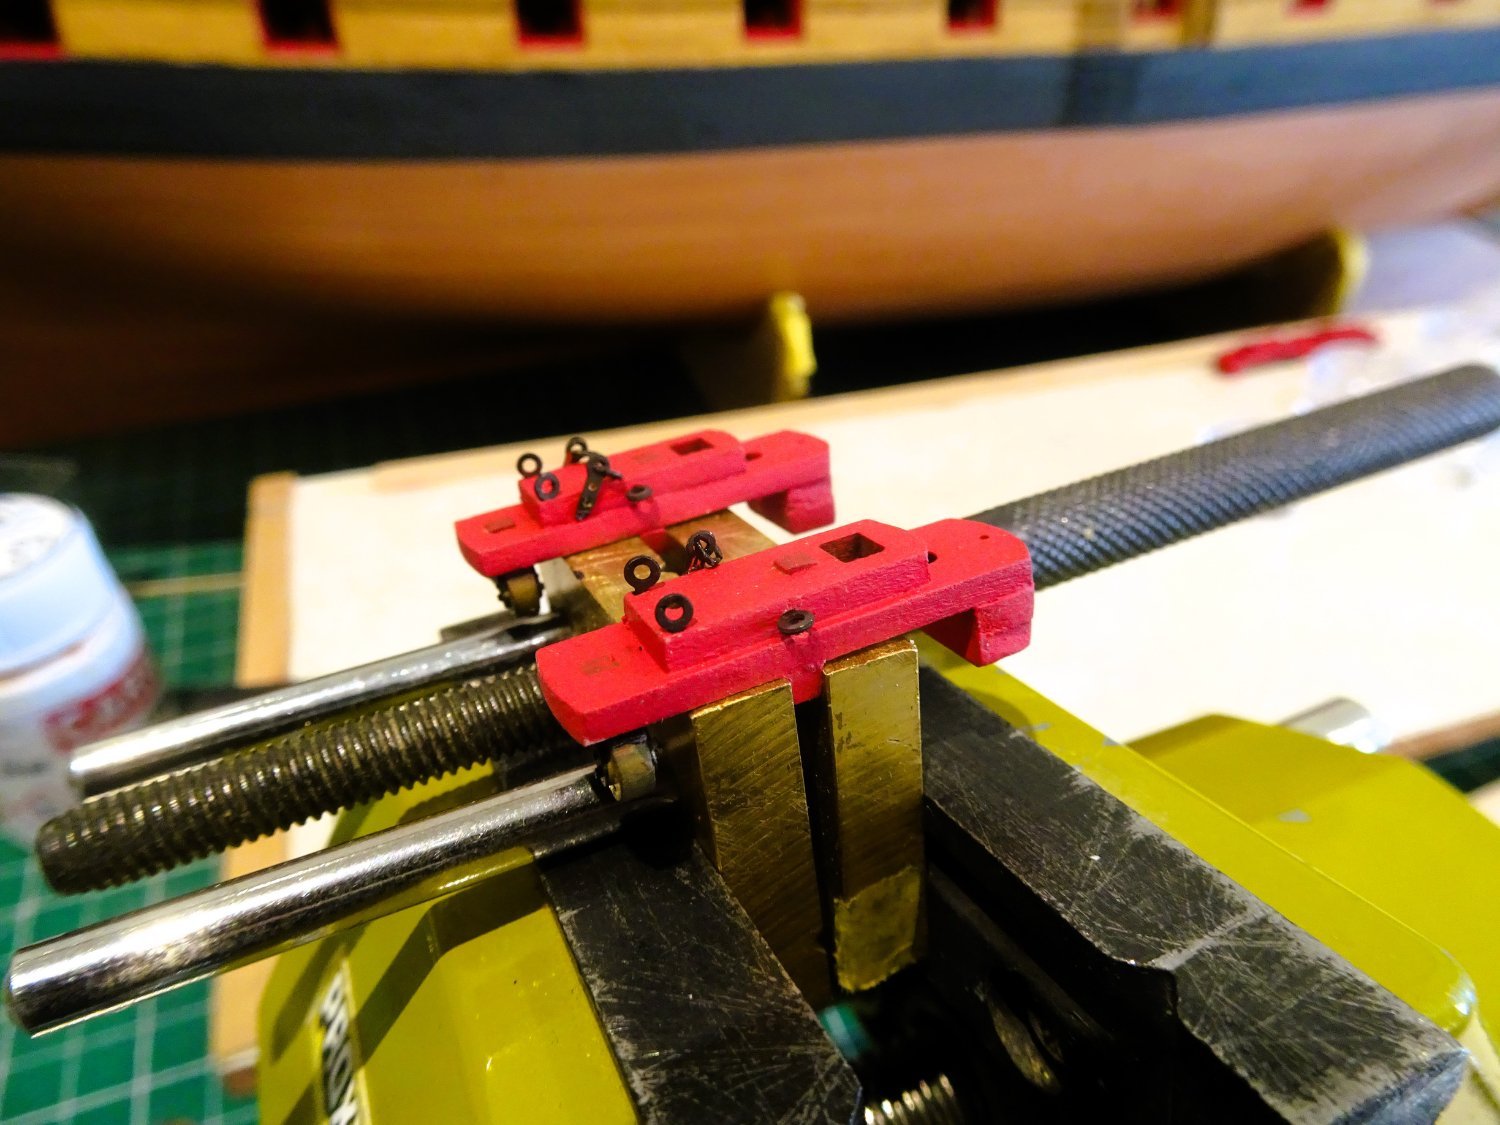
Post One Hundred and Thirty-one Completing the Carronades. One of the most tiresome aspects of completing the carronades is assembling the iron straps and breeching rings. 2mm ø Amati rings were used. 3268 3272 These are tiny things attached to the side of the bed and I found it useful to hold the beds in an angled vice to perform the attachment, using ca. 3273 With the Iron work completed, the barrels are glued into place. I have set the bed to the inboard position as I prefer it to the ‘outboard’ look. 3280 3290 3287 3291 Following a test fit on the deck, the carronades will be squirrelled away as work continues. 3293 Relieved this tiresome aspect is completed, but more tedium beckons with the ironwork for the inner bulwarks. B.E. 16/01/2024


- 648 replies
-
- 24
-
-

-
- Indefatigable
- Vanguard Models
- (and 1 more)
-
Just Beautiful Glenn, the harsh eye of the macro is testament to the quality of the your work. B.E.
- 840 replies
-
- 3
-
-
- winchelsea
- Syren Ship Model Company
- (and 1 more)
-
Wonderful build Nils, I love your choice of subjects and artistry in creating them. You have a most interesting collection of ship models worthy of a more public display. Regards, B.E.
-
I can imagine Chris, and not worth the expense given the scale. Macros don't reflect what the eye sees at normal viewing, and this is a very minor feature. The winding bars are feasible, but even these are very small, they have to fit between the eyebolts for the port tackle. B.E.
- 648 replies
-
- 3
-
-
- Indefatigable
- Vanguard Models
- (and 1 more)
-
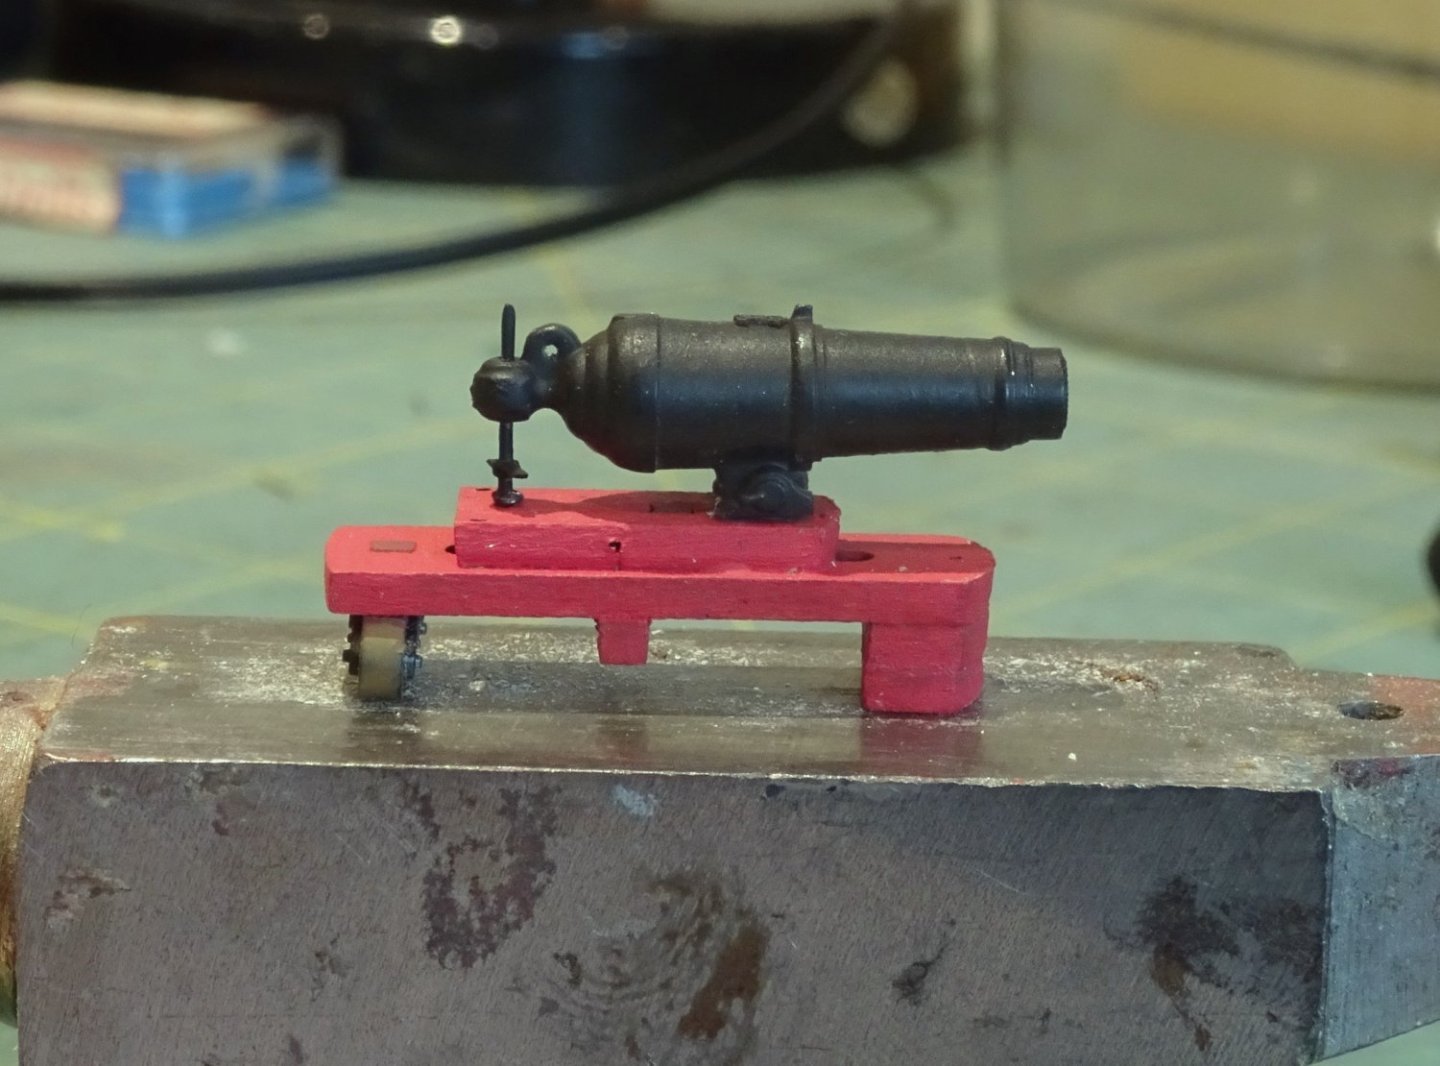
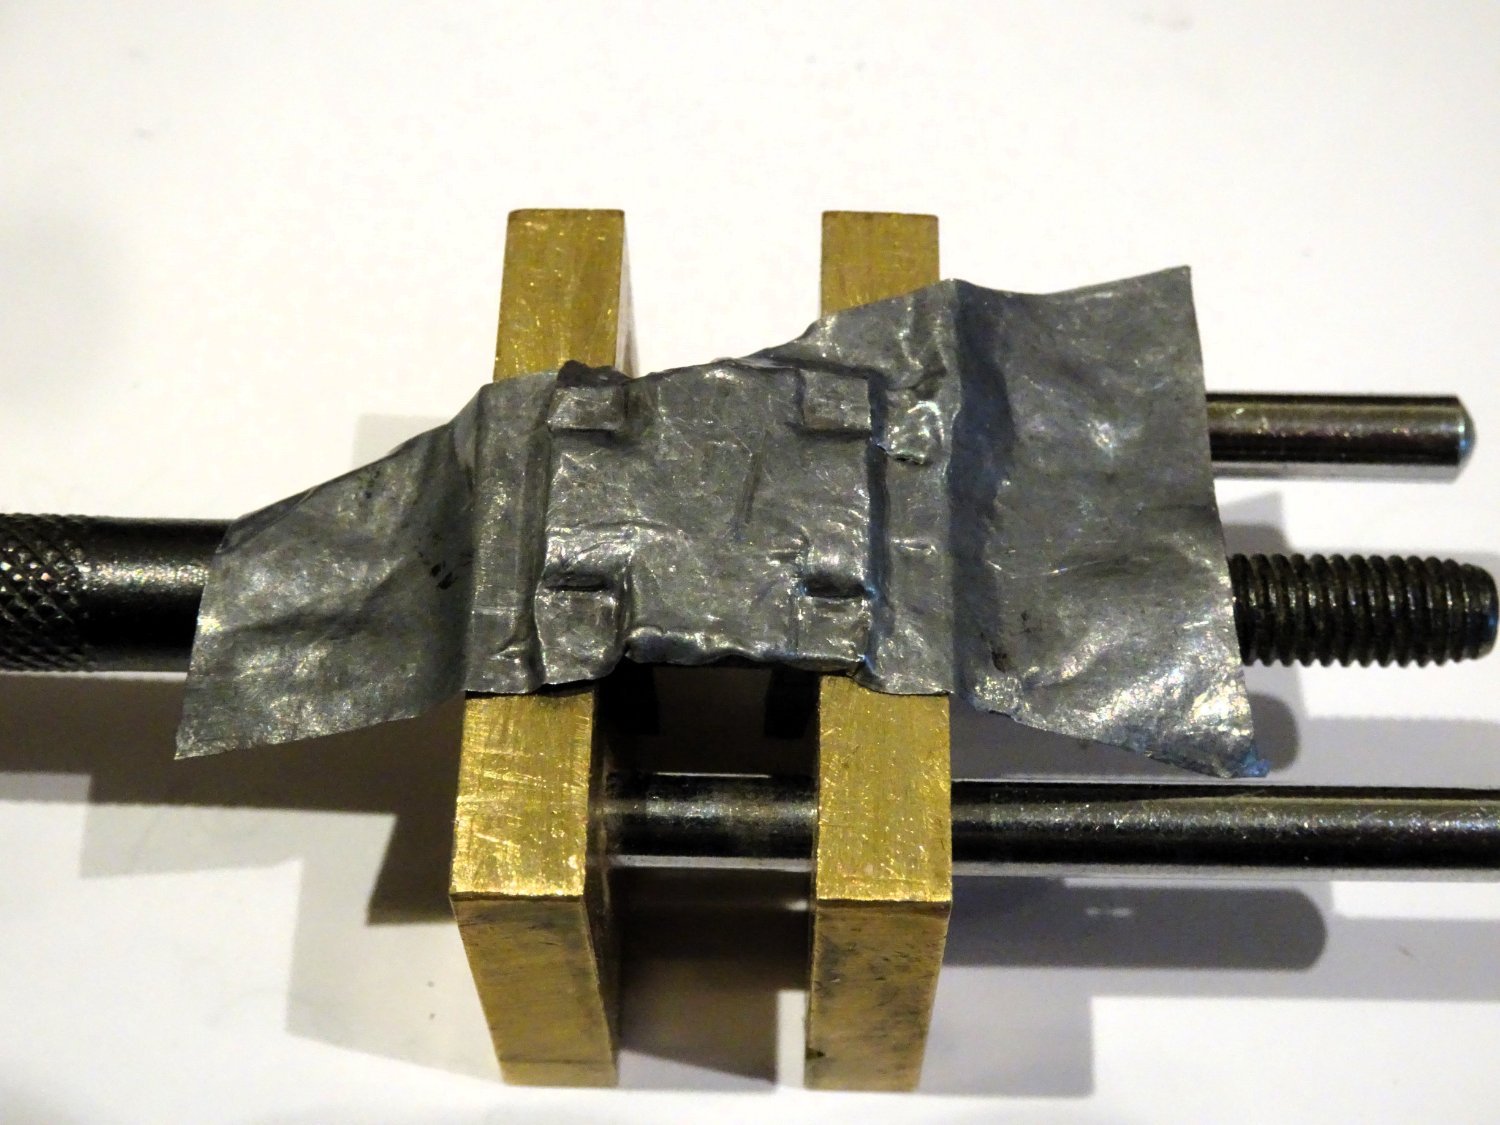
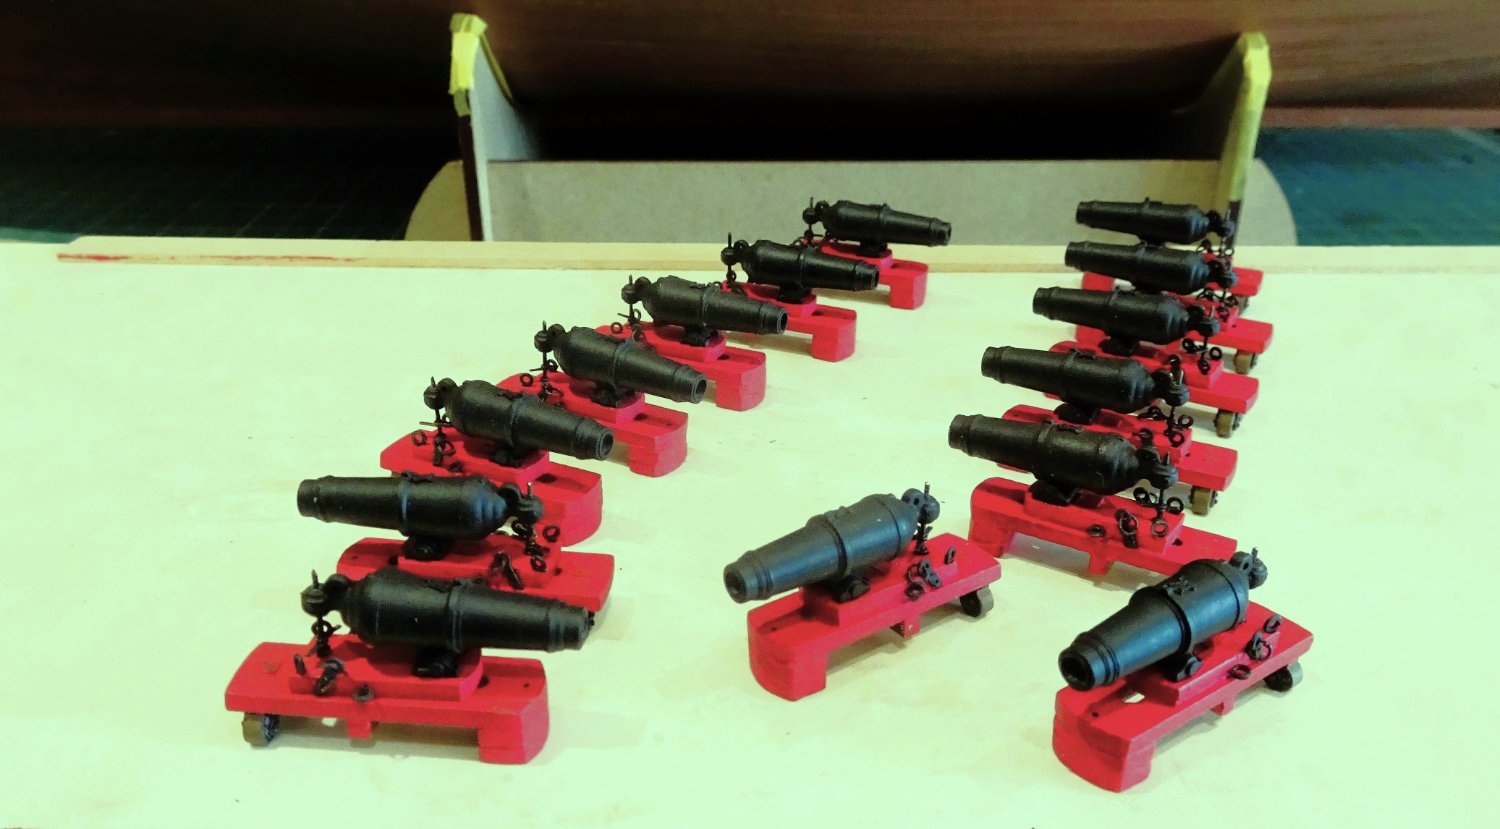
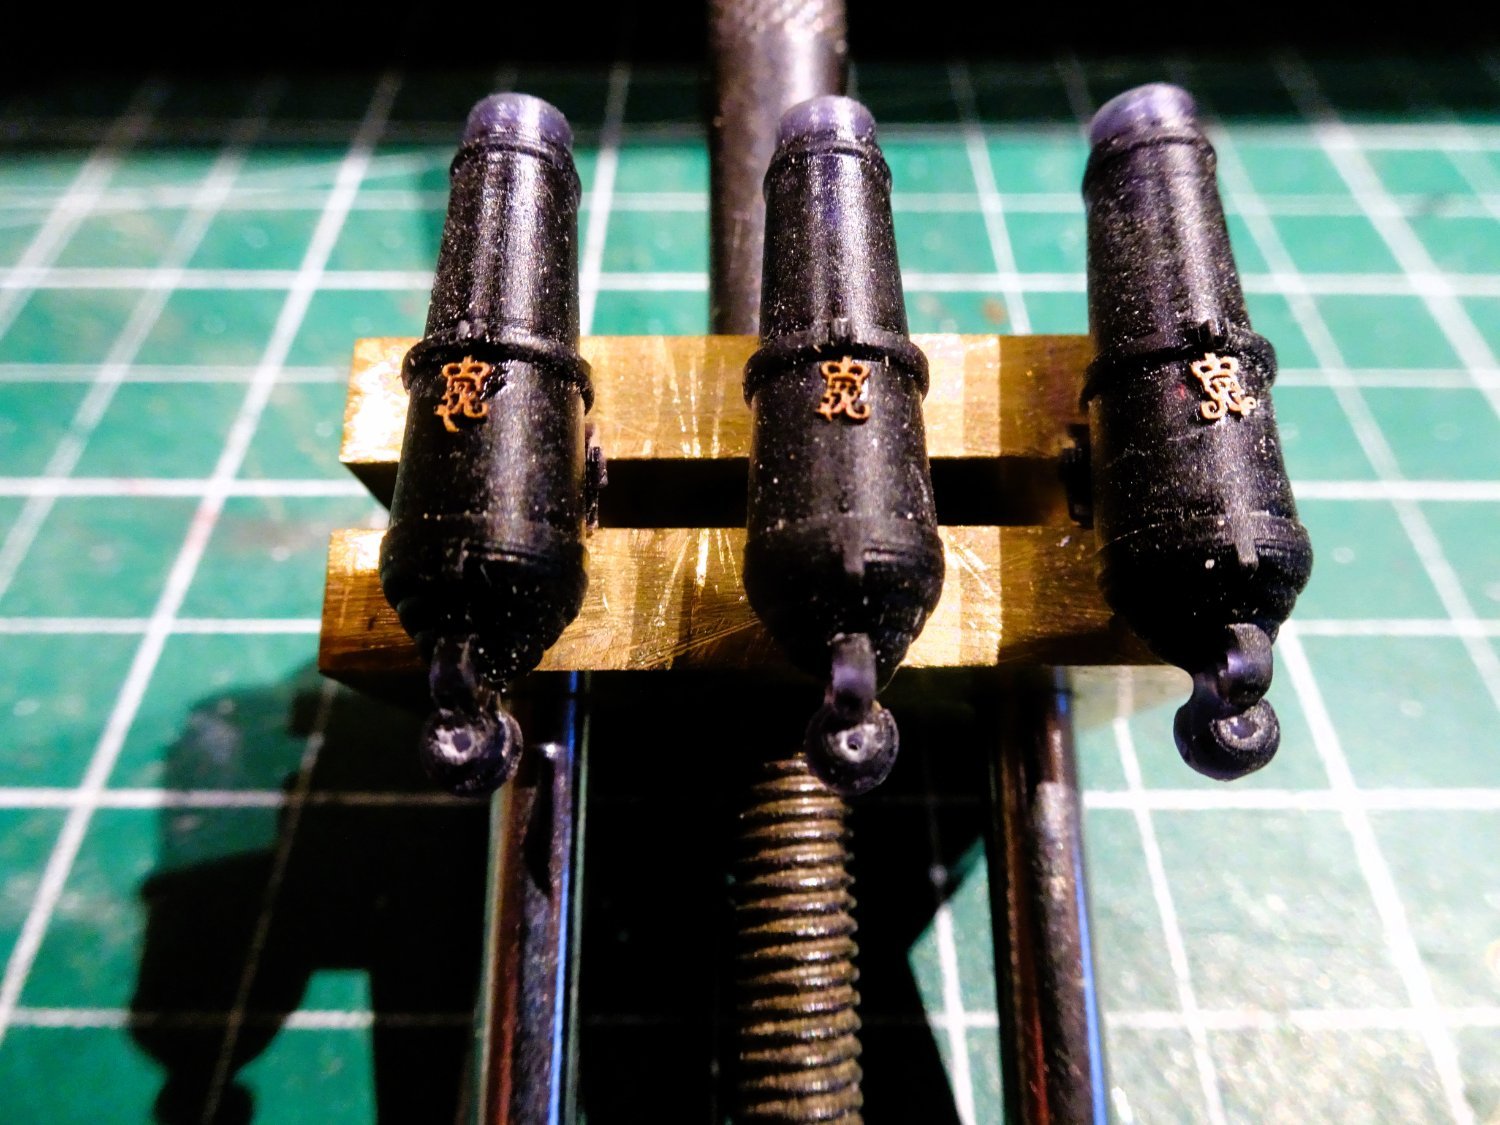
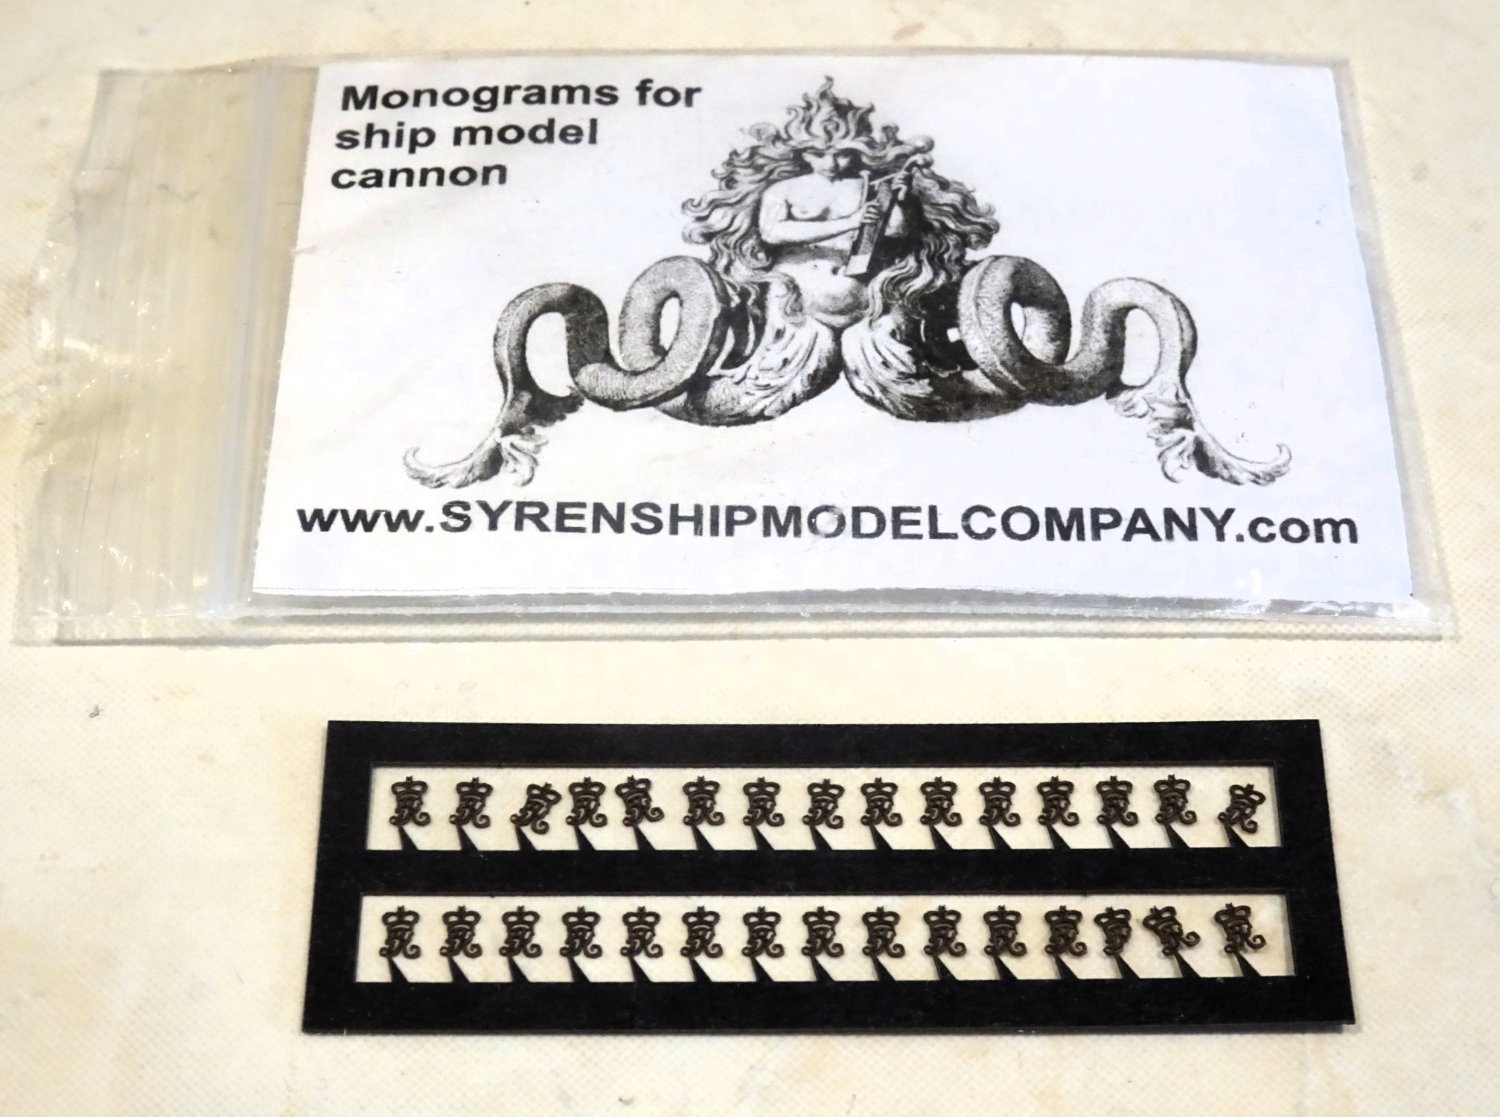
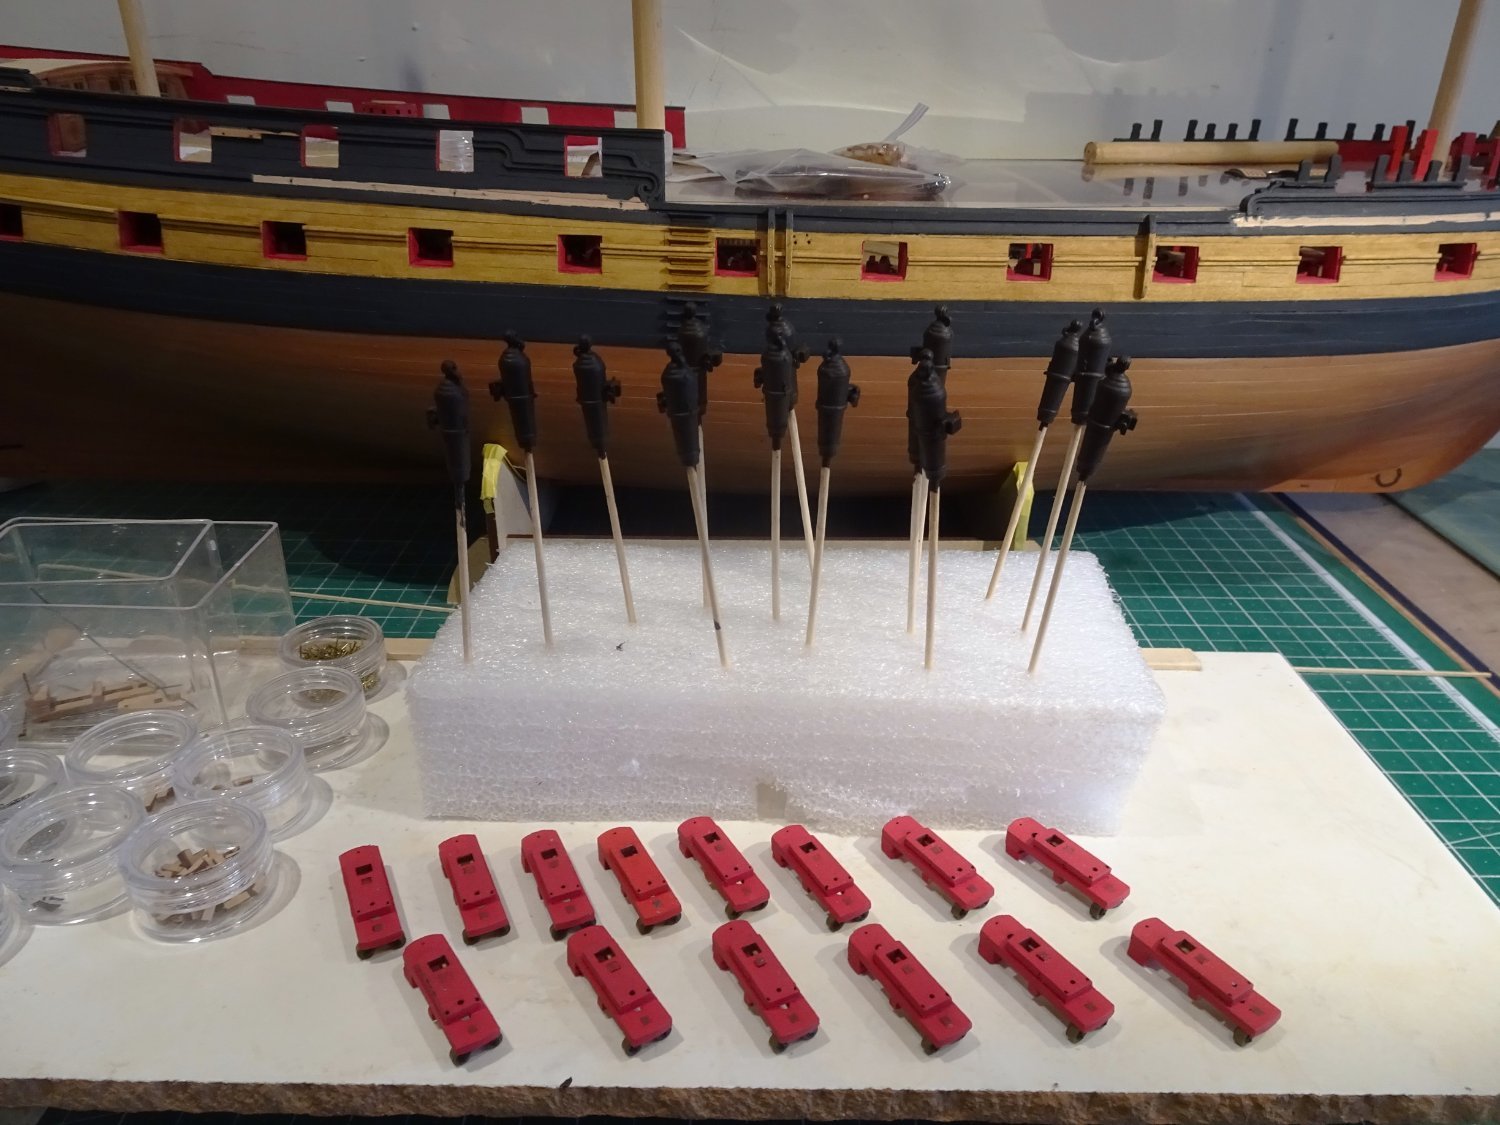
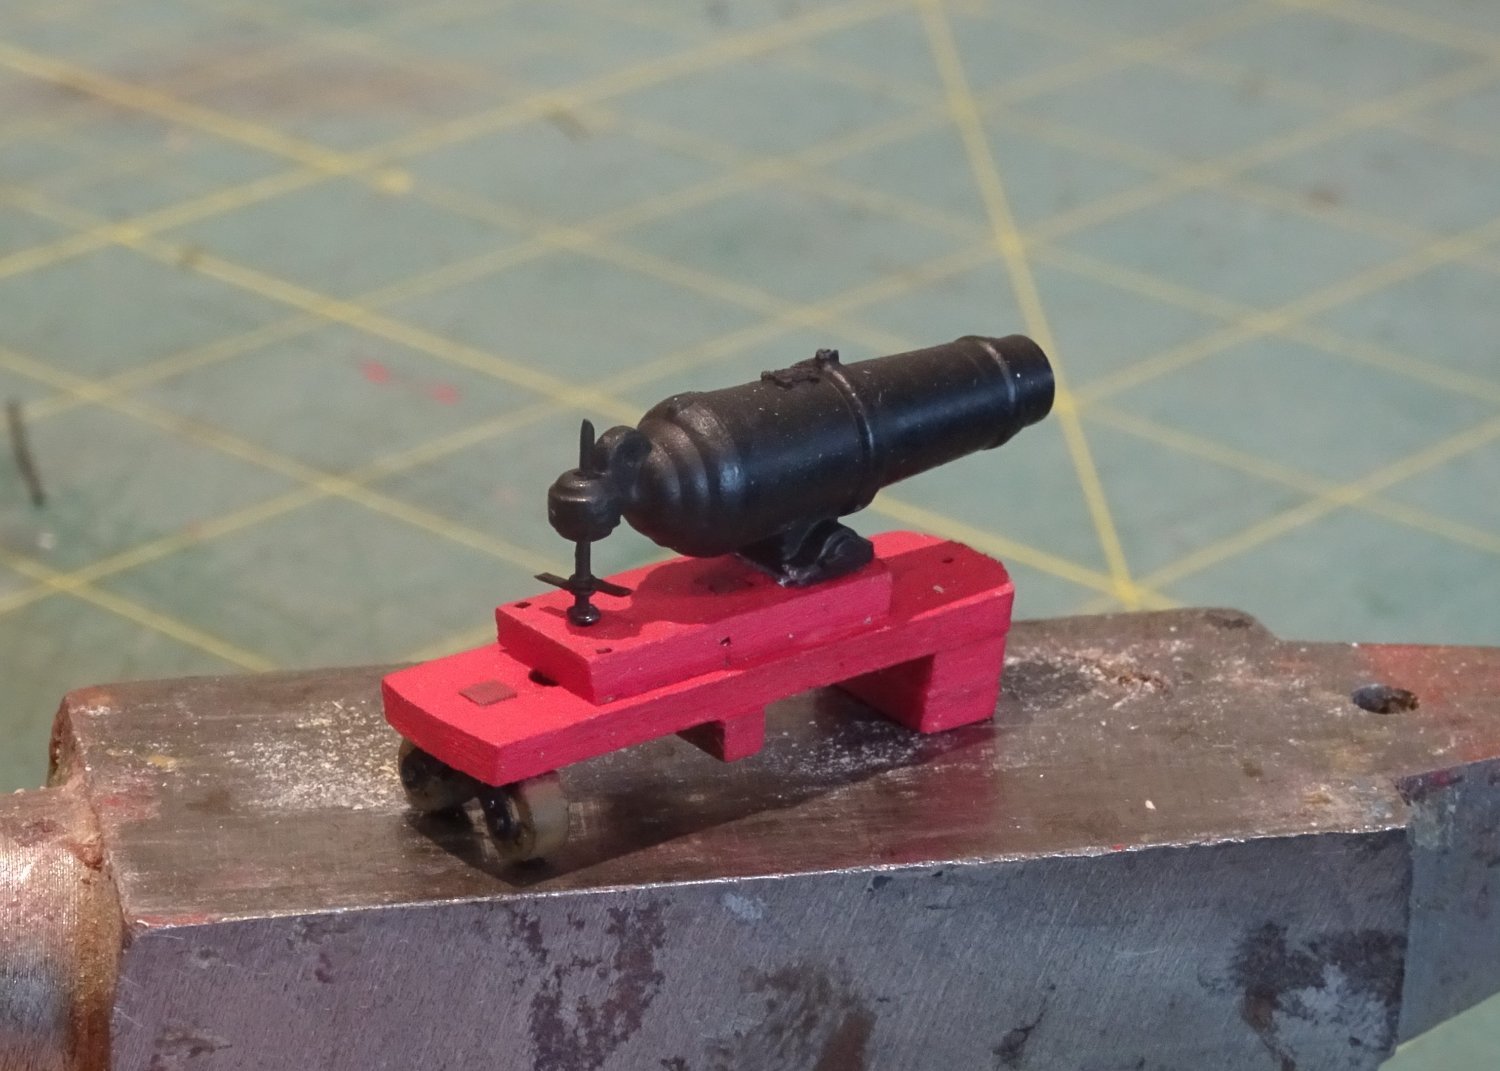
Post One Hundred and Thirty Carronades. The 42 pounders are nicely made with resin barrels, Pear beds, slides, and etch fittings. They will be highly visible items on my build, without the distraction of top hamper. I had already made up four carronades for the cabin area, and those seemed to take an age to assemble with the multiple stages. 3230 Assembling the remaining 14 is an endurance exercise but it helps to set up a production platform. The iron work was chemically blackened, and the barrels treated with dark brown weathering powder after painting. I replaced the kit breeching ring with Amati 2mm rings and added the Royal Monogram to the barrels. 3236 These are available as laser board items in different sizes from Syren. Always worth having a supply on hand. 3233 The Monograms were applied before priming and painting. 3238 3241 Three days’ work to complete the painting of guns, beds and slides. My mind returned to the possibility of adding winding bars to the elevation screw. 3253 I played around using cut-down 0.6mmø pins for the screw to which tiny eyebolts are added for the winding bars. 3255 3258 I thought about representation of the threads. The smallest threaded bar I can find is M1 which at 1mm ø is too large, but at 1:64 scale such detail would be very fine, and barely seen. 3251 On balance it looks better to my eye with them than without. There still remain the iron work to attach to the bed and slides before I can complete assembly. Onwards, B.E. 14/01/2024


- 648 replies
-
- 24
-
-
-
- Indefatigable
- Vanguard Models
- (and 1 more)
-
Very nicely done Daniel, it's always the eyes that give me the most trouble. B.E.
- 562 replies
-
- 3
-
-
- vanguard models
- alert
- (and 2 more)
-
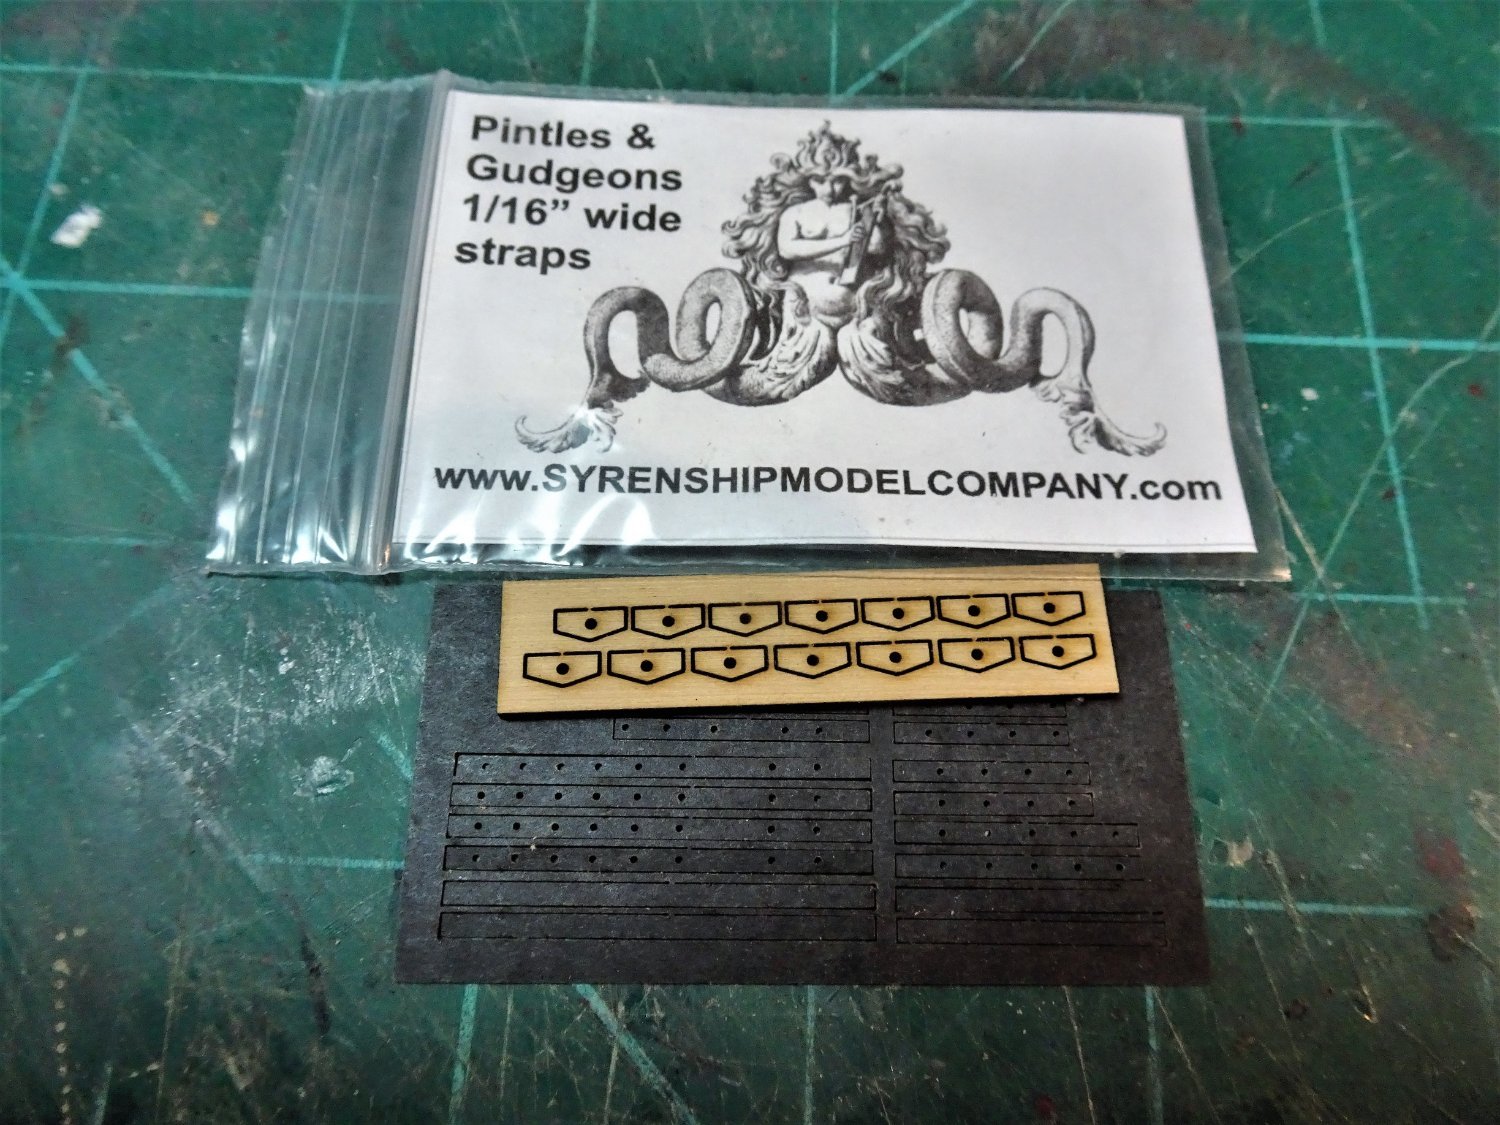
Thank you Daniel and Allan, I hope the resin gudgeon/pintle arrangement developed by Chris for 'Indy' is something he will adopt for his future kits, and even as a modification to the Sphinx set-up. Cheers, B.E.
- 648 replies
-
- 1
-
-
- Indefatigable
- Vanguard Models
- (and 1 more)
-
A fitting presentation, to complete a great build, well done David. B.E.
- 310 replies
-
- 2
-
-
- Diana
- Caldercraft
- (and 1 more)
-
Great looking build Rick, a very nice job, well done! 👍 B.E.
- 43 replies
-
- 2
-
-
- Essex
- Model Shipways
- (and 2 more)
-
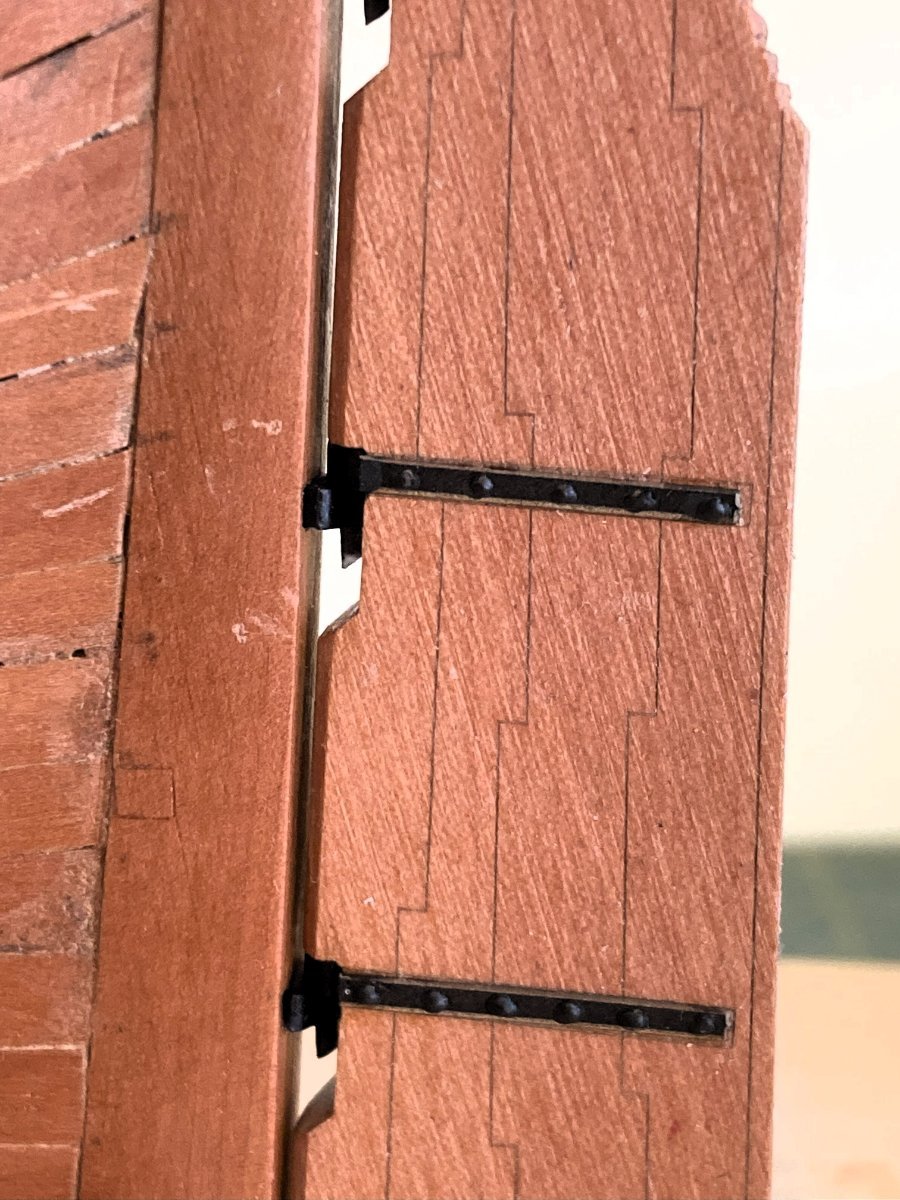
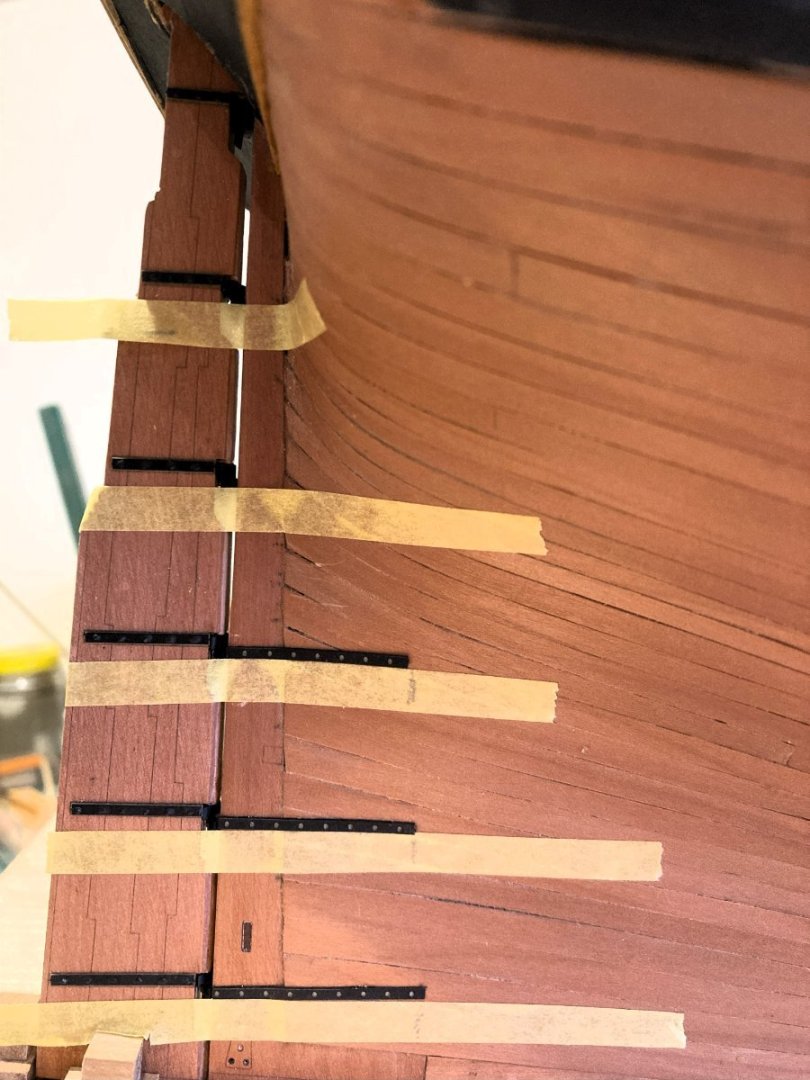
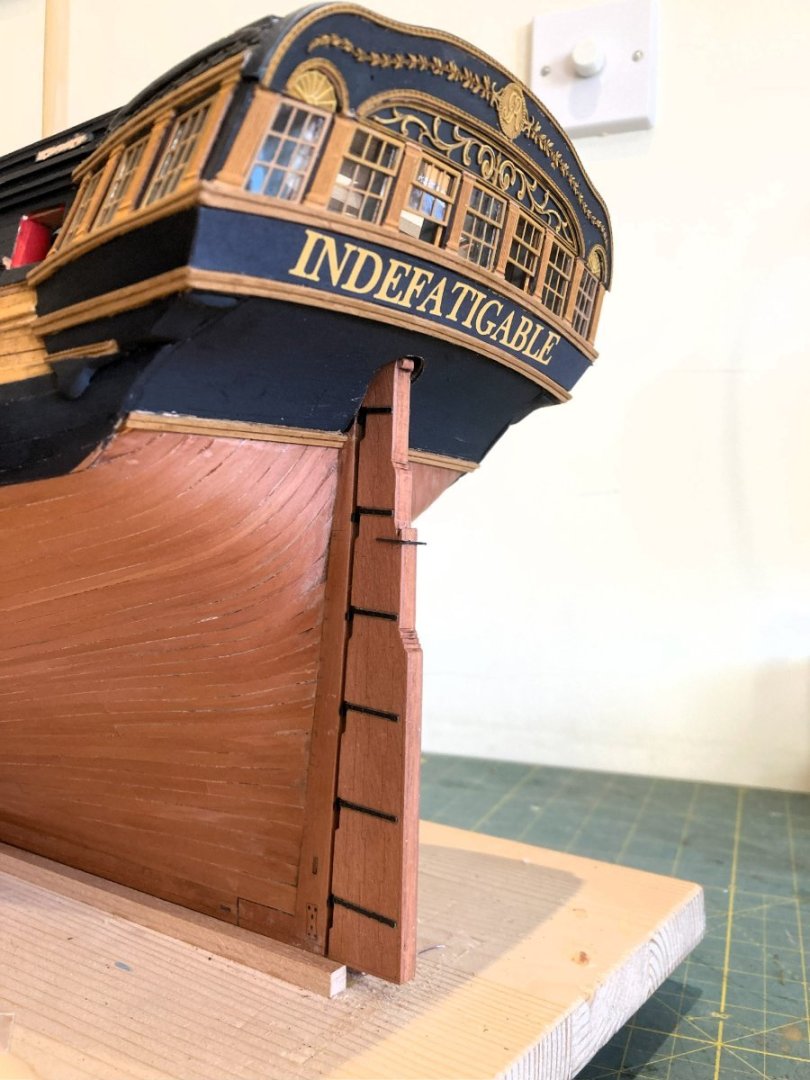
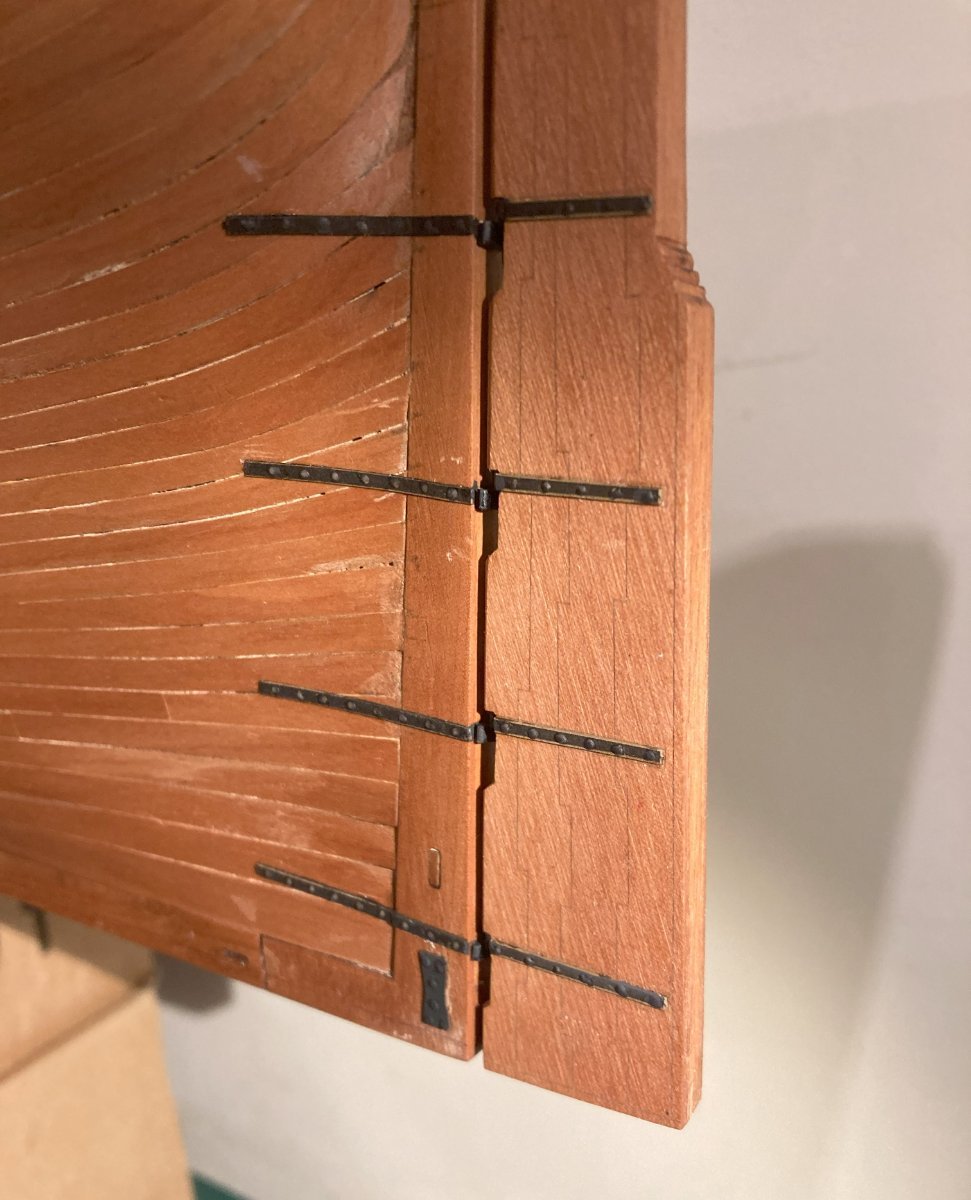
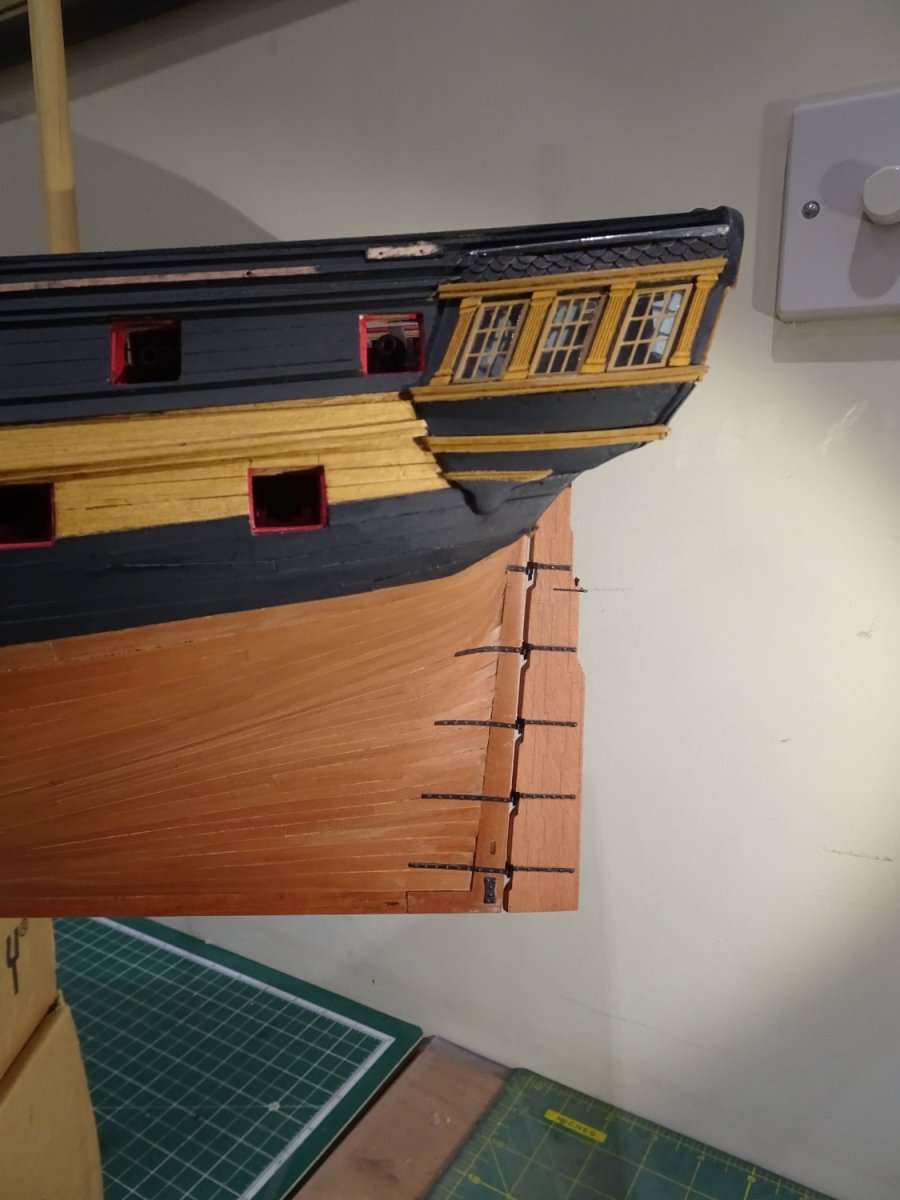
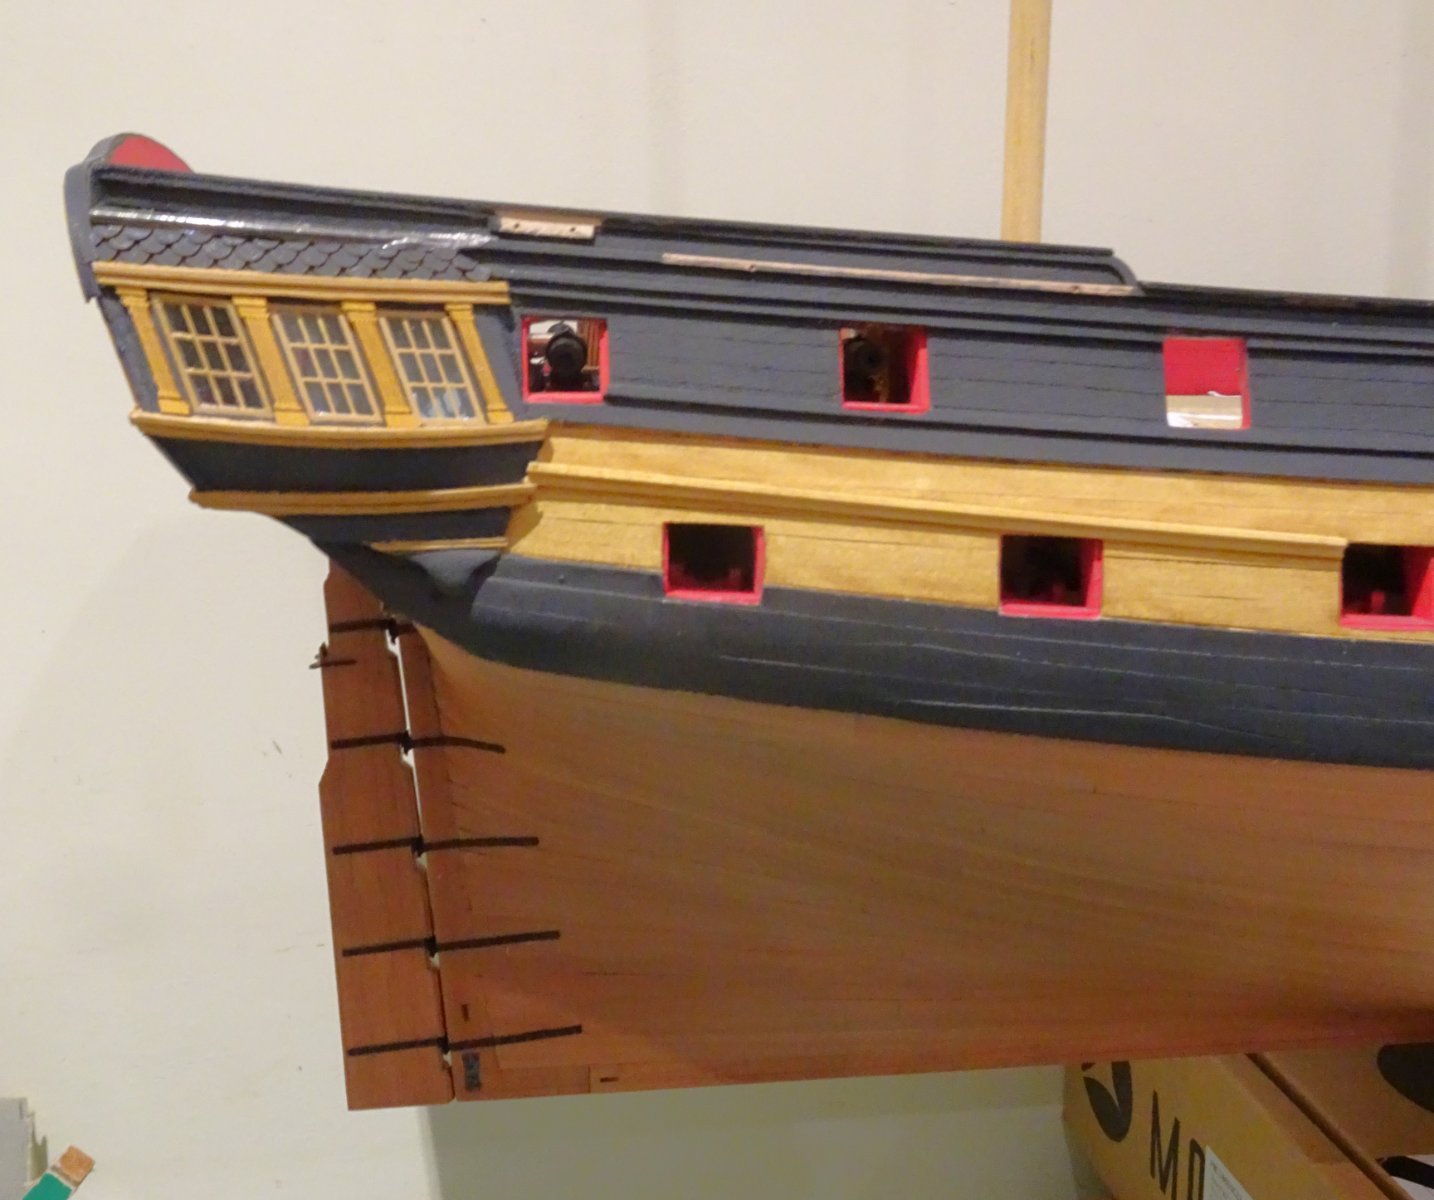
Post One Hundred and Twenty-nine Gudgeons With the rudder in place the line of the straps can be marked. 1782A The straps are easily lined up on the hull to butt against the Gudgeon centres. Trickier to fit than the rudder straps and care must be taken to avoid ca spread. The tape helps a little with this. 3216 3217 The Laser Board straps adhere well to the hull. 1787A A touch-in of black paint on the stern post edges finishes the effect which should be the look of complete iron brackets attached to the hull. Has the design achieved this; in my view it has. 3221 This is also a convenient time to apply the Horseshoe and Fish plates to the lower hull. 3227 These are brass etch versions, but they are another item suitable for Laser Board production. 3219 3222 A carronade assembly session looms, what joy.🙄 B.E. 10/01/2024


- 648 replies
-
- 31
-
-
- Indefatigable
- Vanguard Models
- (and 1 more)
-
Asking the same question over and over won't change the answer. You can pre -order now, but delivery is now expected from 21 January, but delivery has been put back several times since my pre-order in May 2023. There's no guarantee.
-
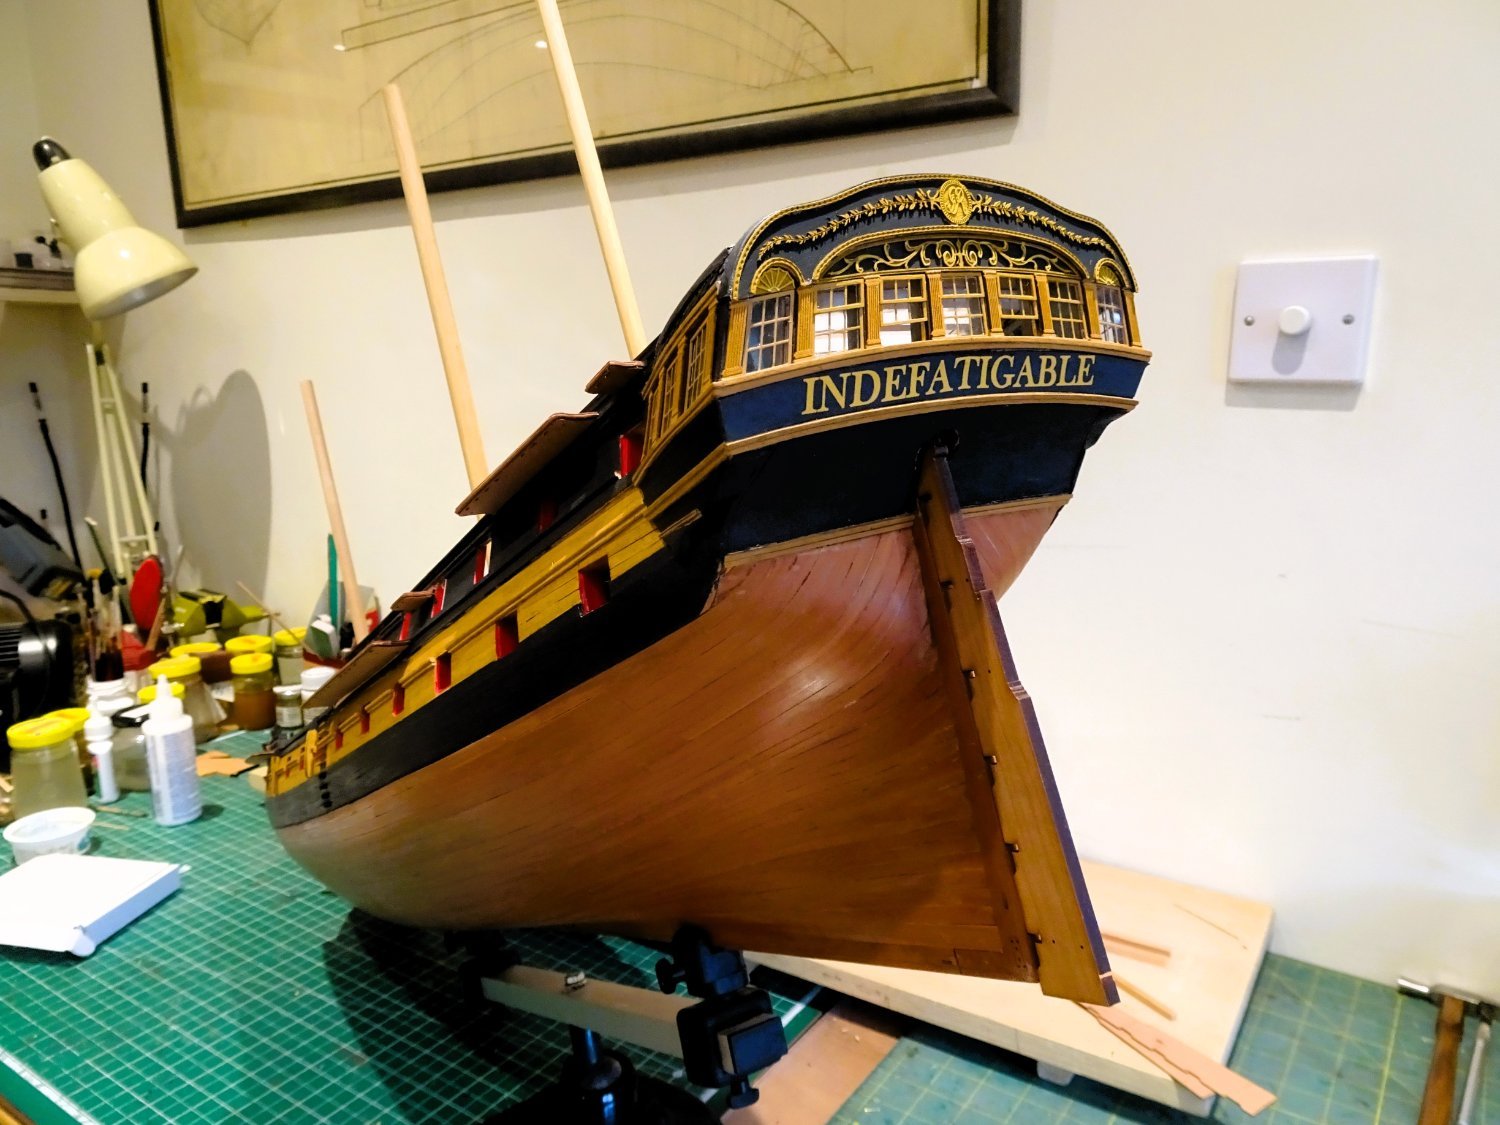
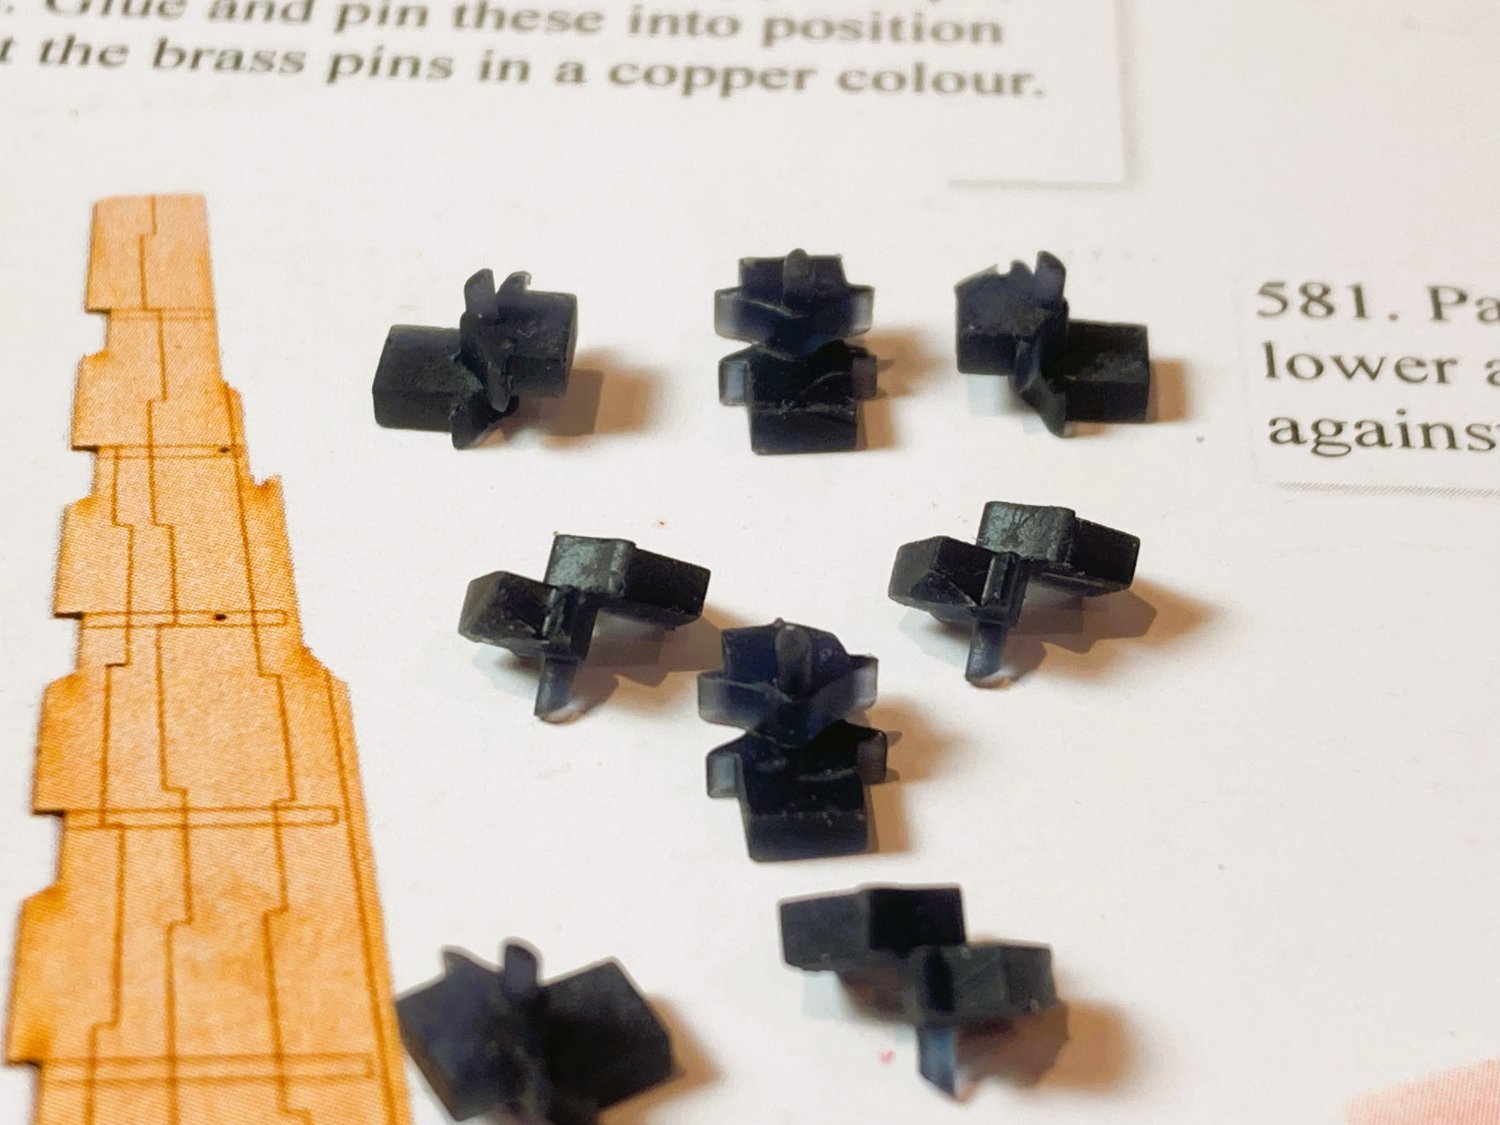
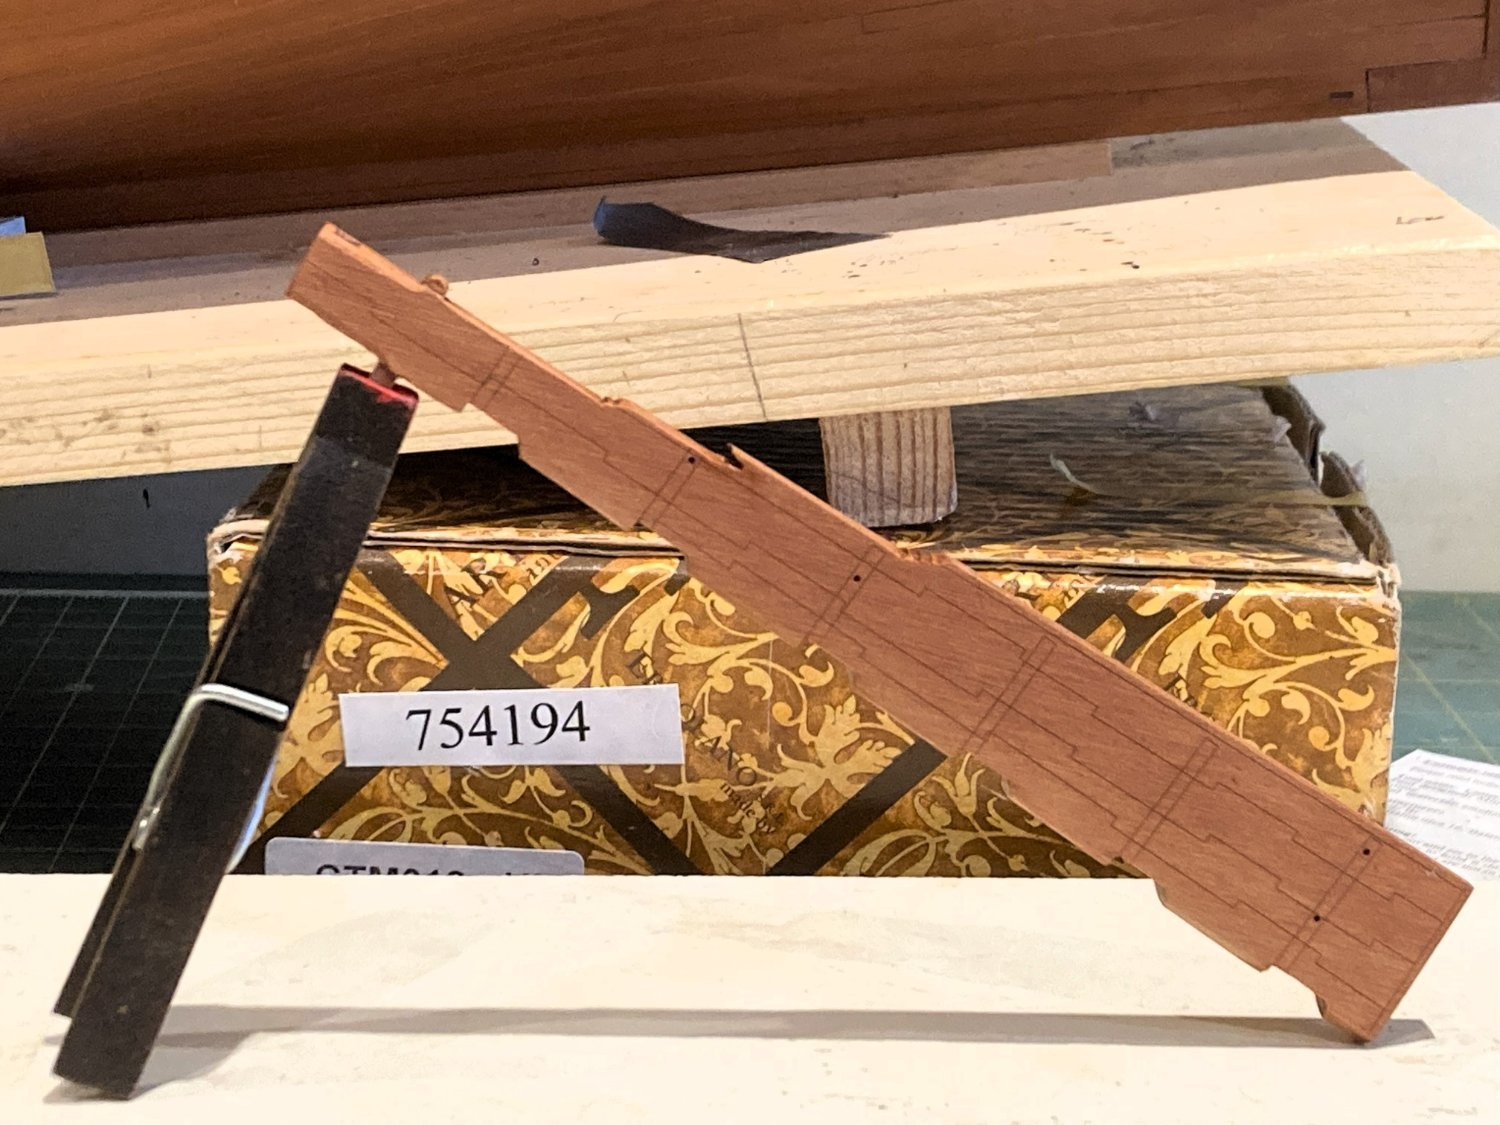
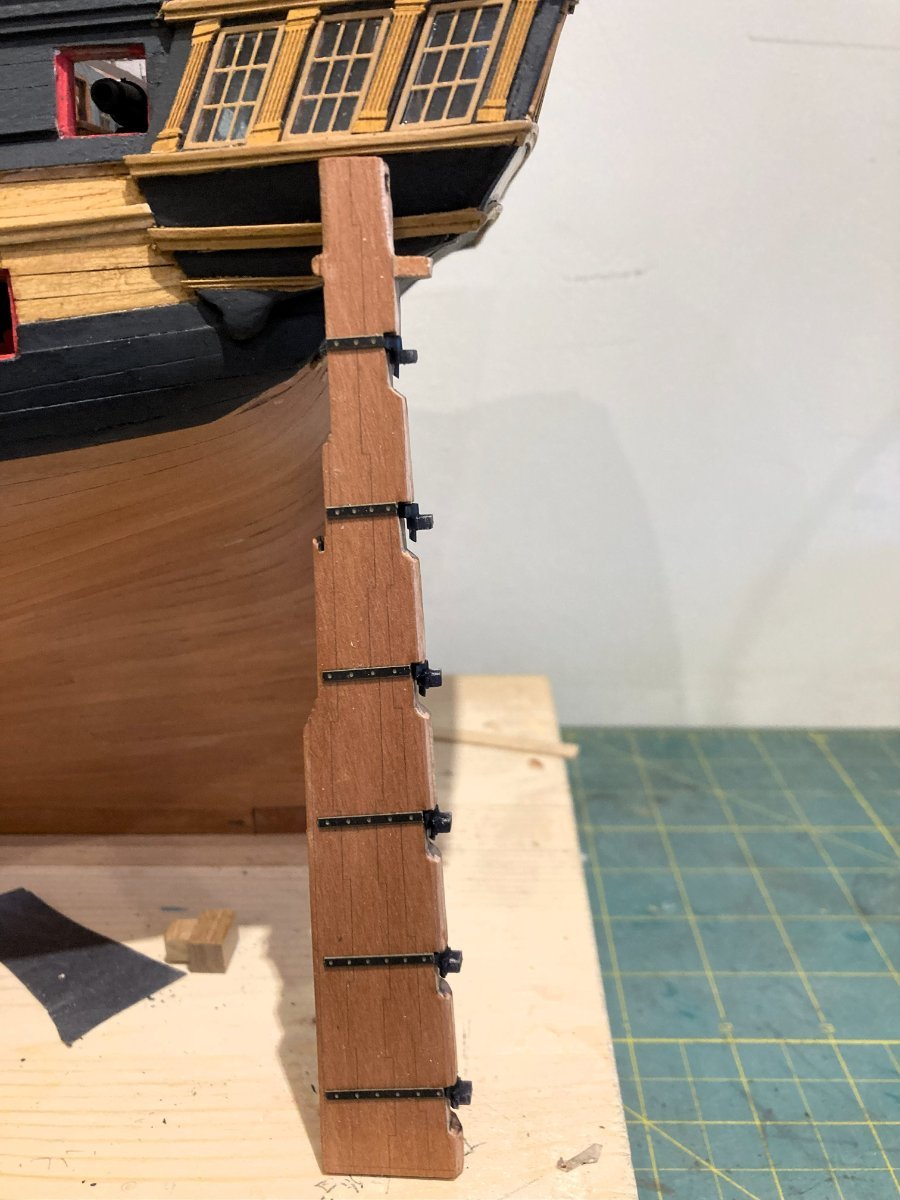
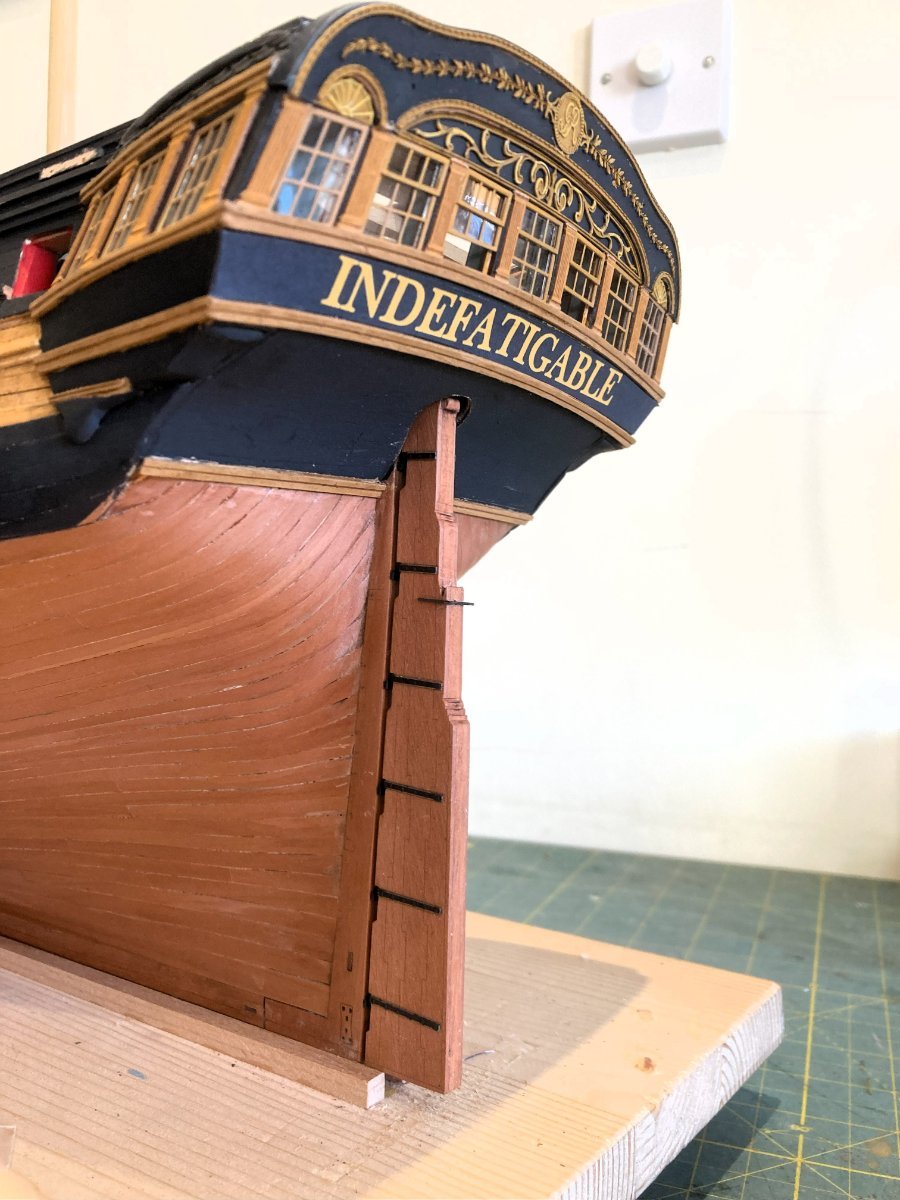
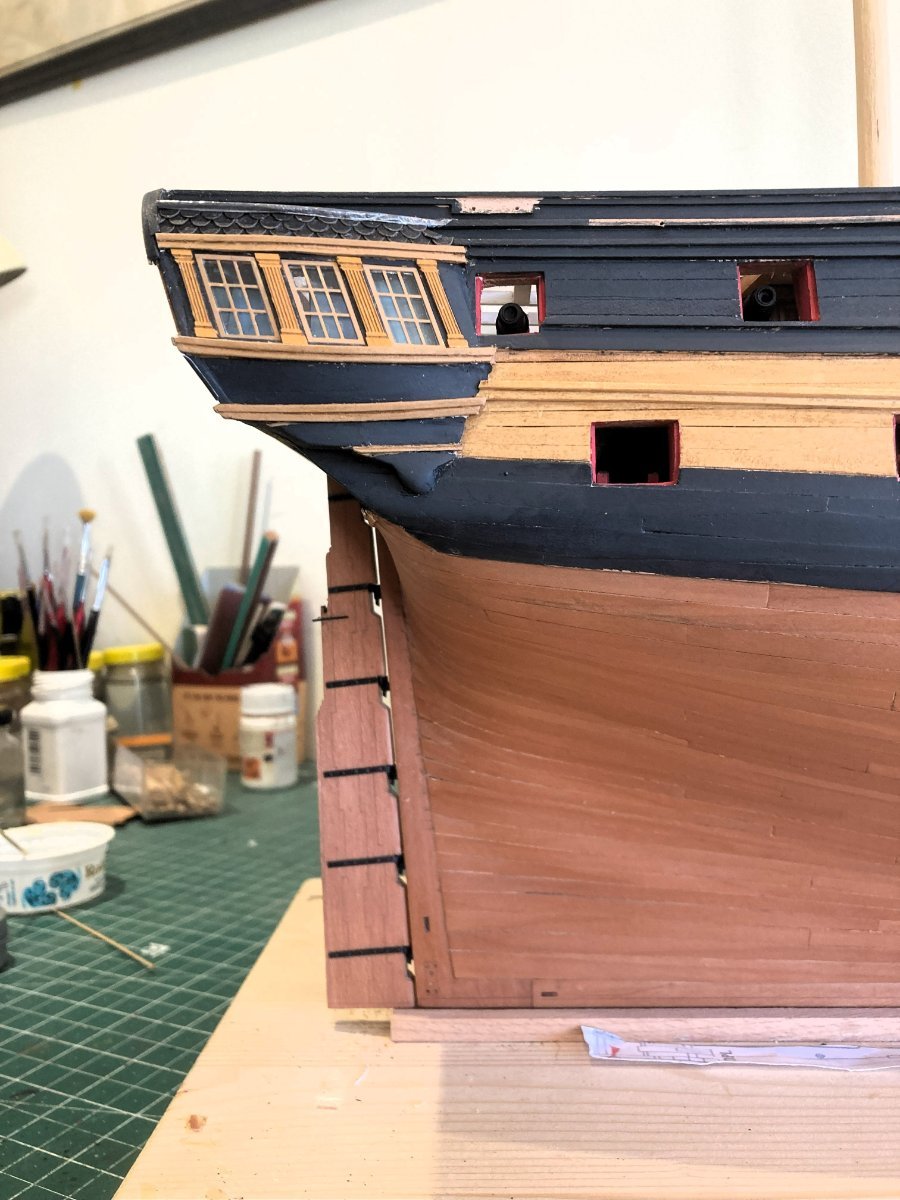
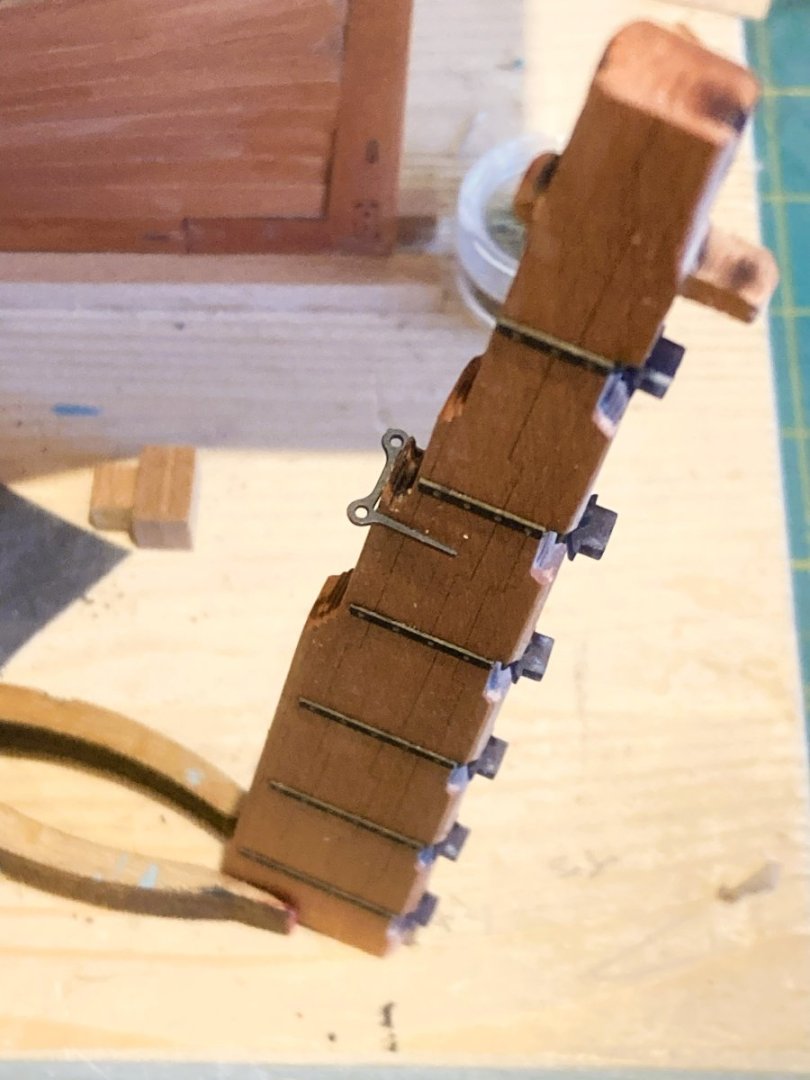
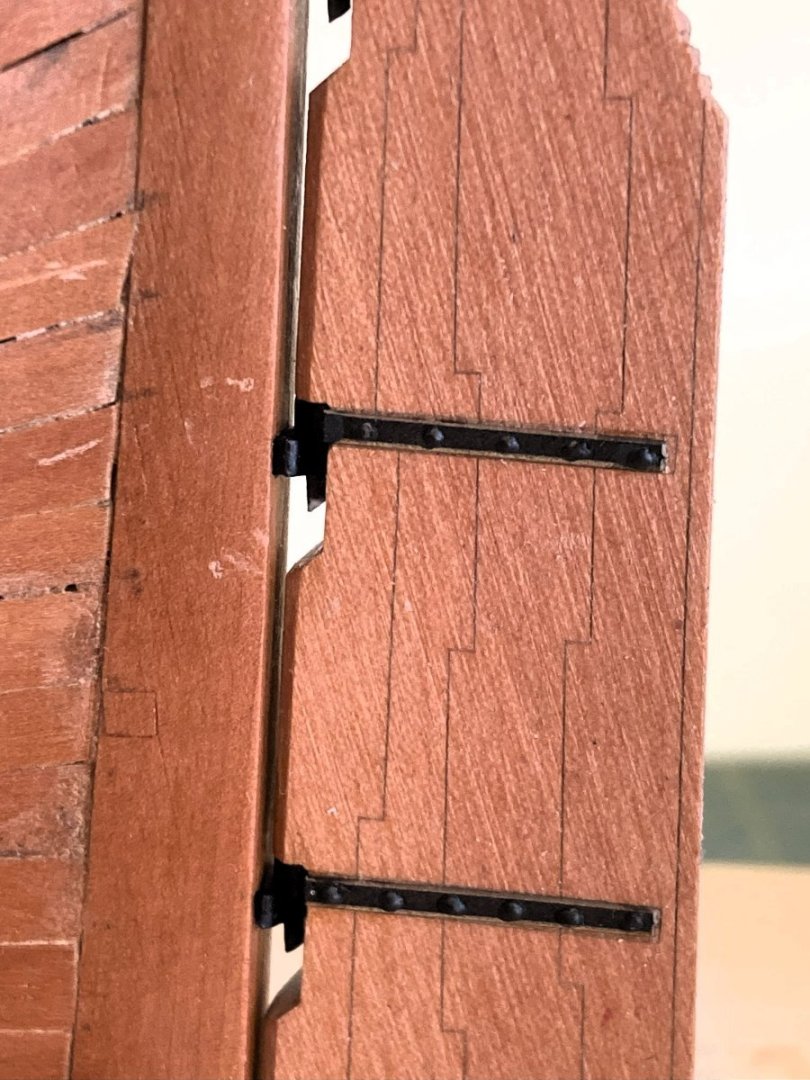
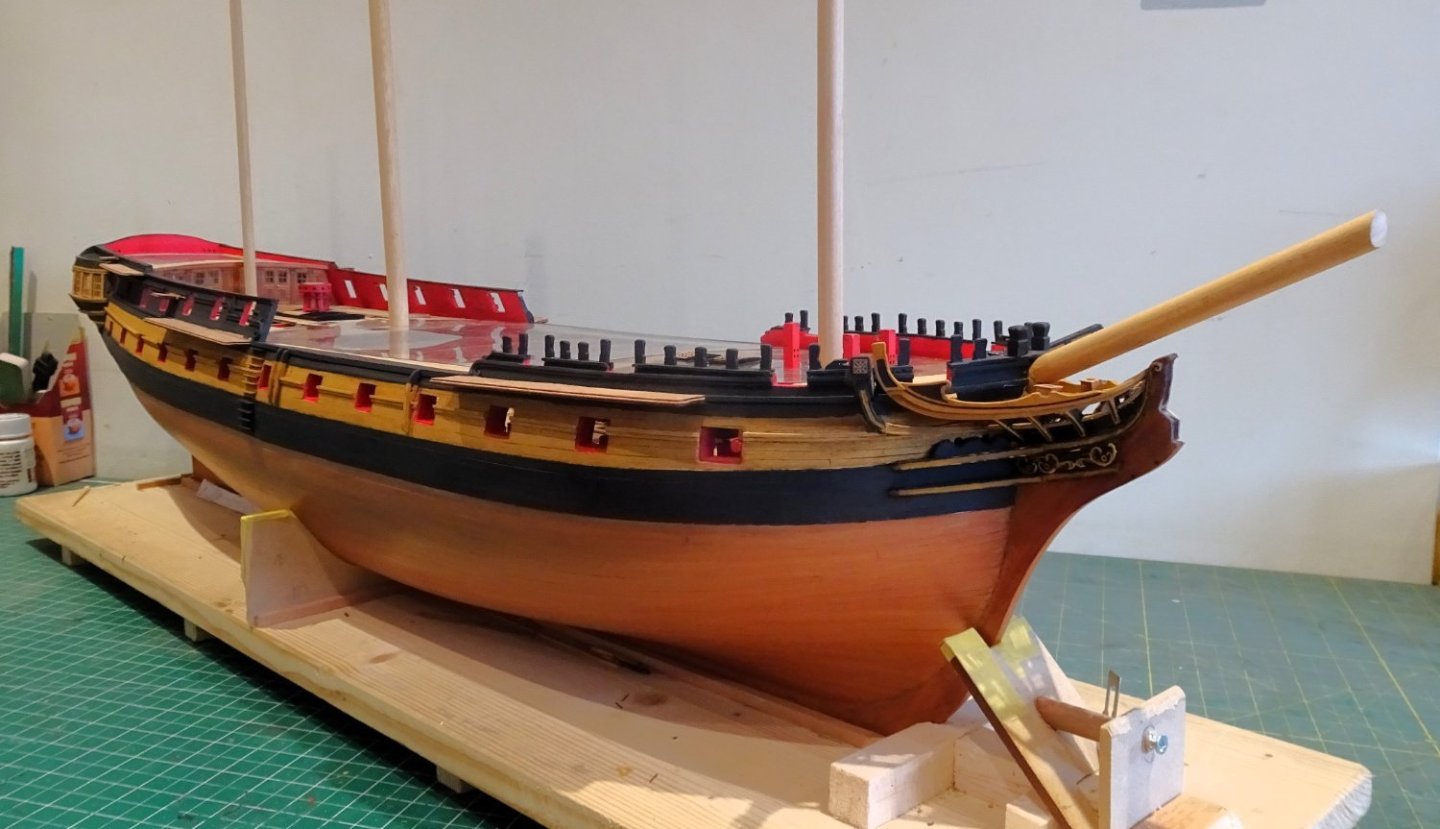
Post One Hundred and Twenty-eight Shipping the rudder I thought I would add the rudder now as fitting involves positioning the hull for access. The rudder has a central Pear core with facings engraved to represent the tablings and other sections that properly make up the rudder of a large ship. 1754a As I won’t be coppering, all this detail will remain visible. 3198 Before assembly of the rudder it is a good idea to check the fit thro’ the rudder port and against the stern post. I found I needed to fettle the port a little to get the head of the rudder into position. 5434 With regard to rudders I have mostly used the Syren system which produces a moving rudder on individual pintles and gudgeons. 2271(2) On Sphinx the kit provided ‘faux’ pintles/ gudgeons (above) were a thin brass etch affair which didn’t do it for me, and I used the Syren system. The arrangement on ‘Indy’ is a much-improved resin version of a pintle/gudgeon combo and with laser board straps replacing the brass etch. 1750a Chris has done a fine job in replicating these items and I am sufficiently impressed to use them on my build. These little widgets slot into the Rudder beautifully, and the corresponding gudgeons match to the slots in the stern post. 1759a The strap positions are marked on the rudder for the pintles, for accurate fitting. I think it is also a good move to make the straps out of laser board, saves all that brass blackening and then messing it up during fitting. 1778a The manual indicates use of brass pins inserted into drilled holes on the straps. I prefer to represent the bolts on the straps using blobs of pva applied with a toothpick. The final addition to the rudder is the Spectacle plate. 1763a This is chemically blackened brass etch. 1767b 1786a 1765a The fit of the rudder is excellent, with a good push fit. With this system there are no worries about getting a close fit to the stern post. Well done Chris.👍 B.E. 09/01/2024

.thumb.JPG.c32d6a34d26f3fcd9aa93b9408e7fe68.JPG)


- 648 replies
-
- 27
-
-
- Indefatigable
- Vanguard Models
- (and 1 more)
-
What do you do with your unusable rigging line?
Blue Ensign replied to capnharv2's topic in Masting, rigging and sails
Mine just builds up, I could open a shop selling Amati and other kit line. 3205 I never use black thread in my builds, and kit provided thread rarely if ever provides sufficient sizes for proper scale rigging. These days I only use Syren, and Morope for very fine lines, useful for seizings. B.E.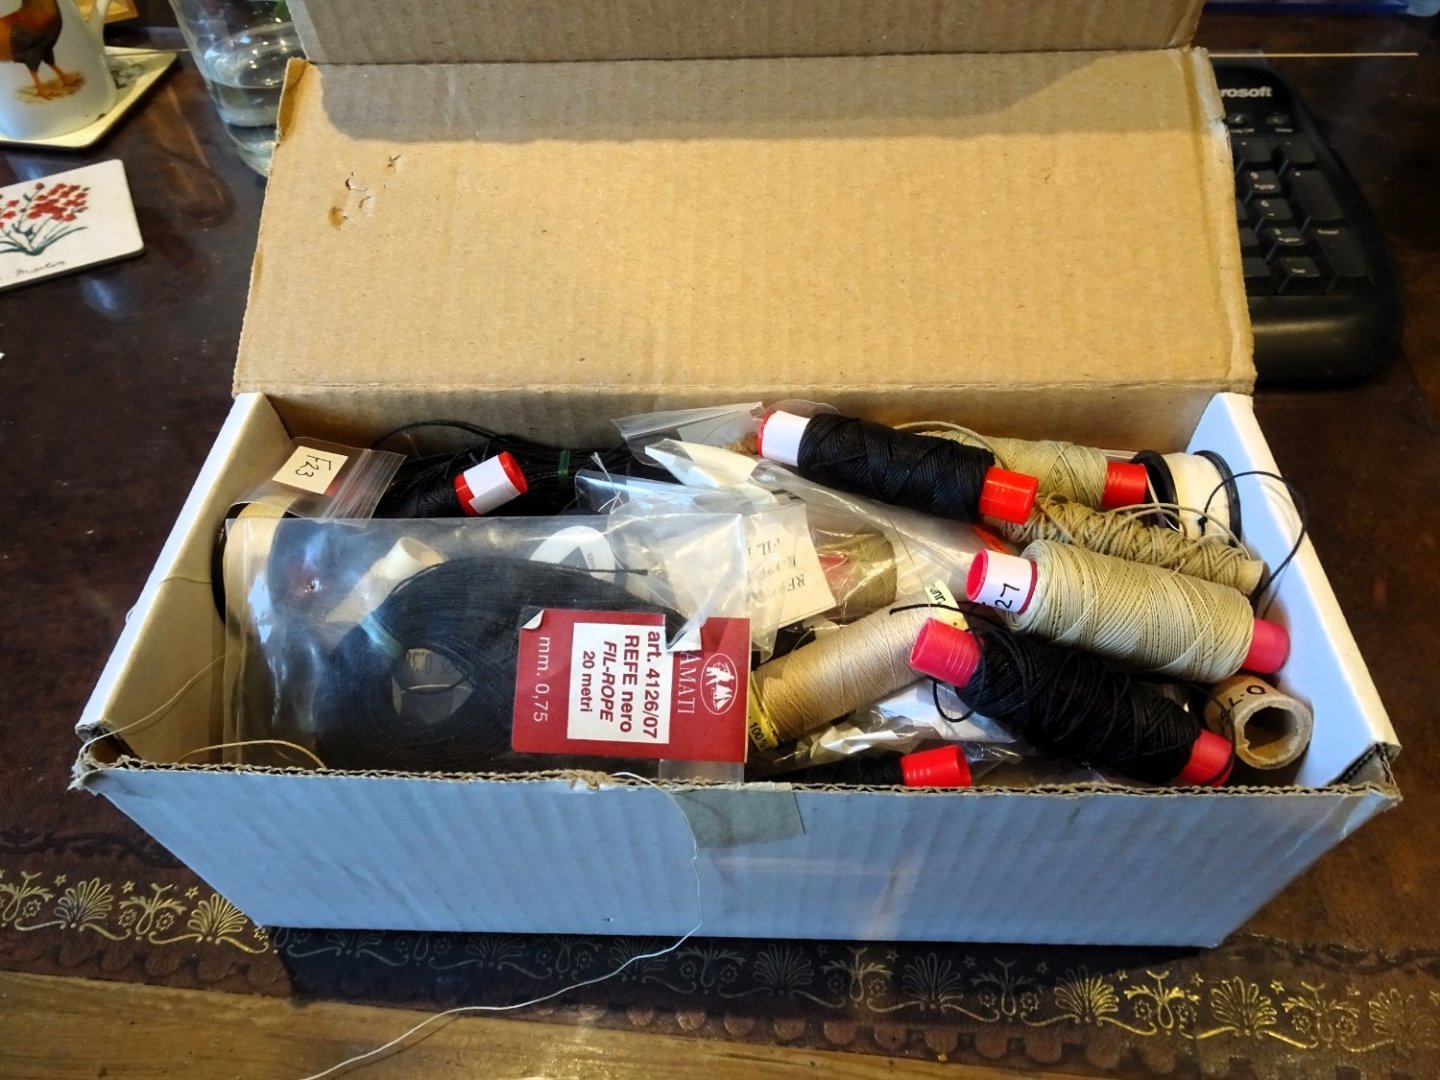
-
Completion in only seven months, that’s an impressive work rate ECK, and an impressive result, well done👍 B.E.
- 233 replies
-
- 4
-
-
-
- Indefatigable
- Vanguard Models
- (and 1 more)
-
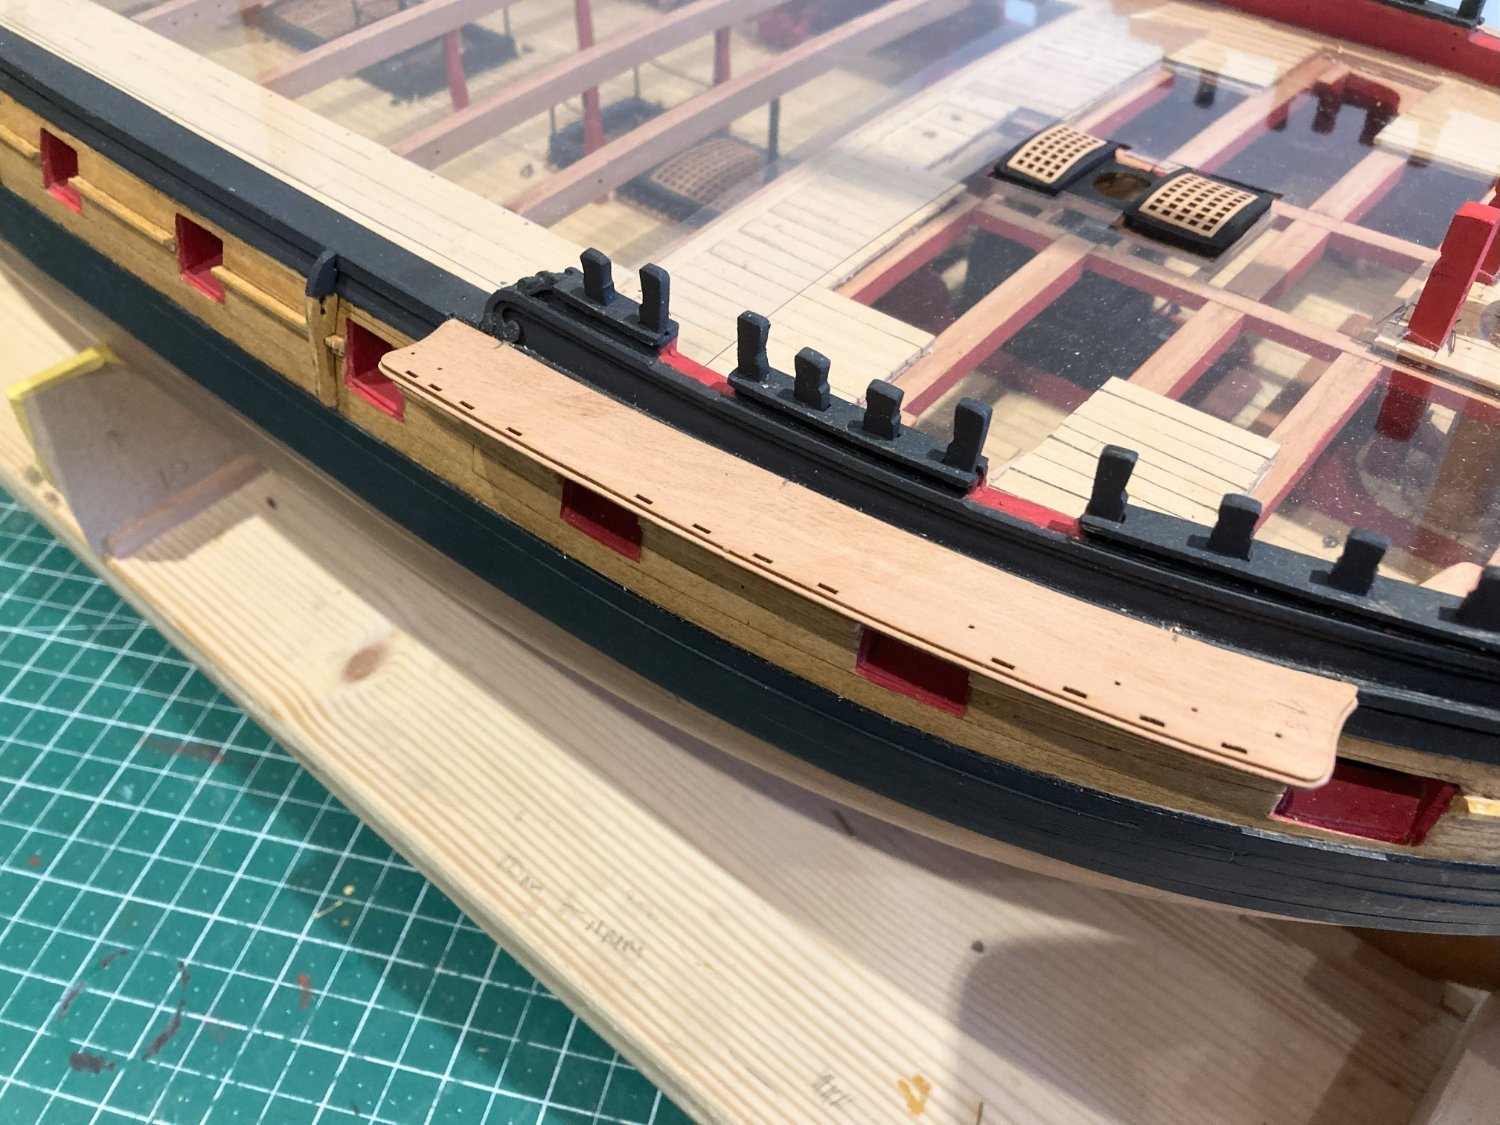
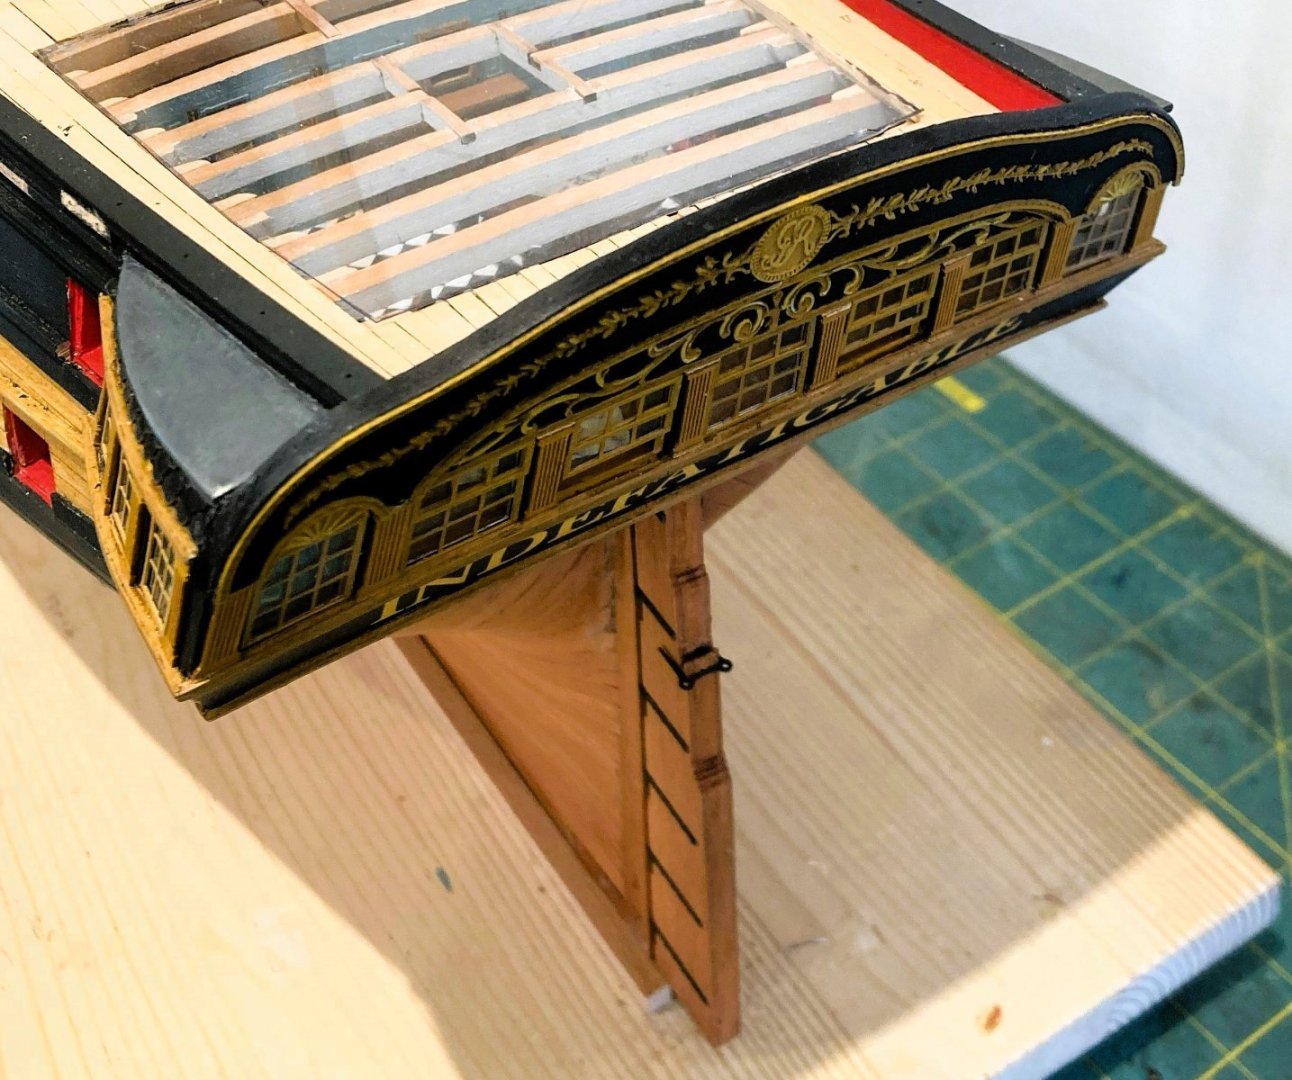
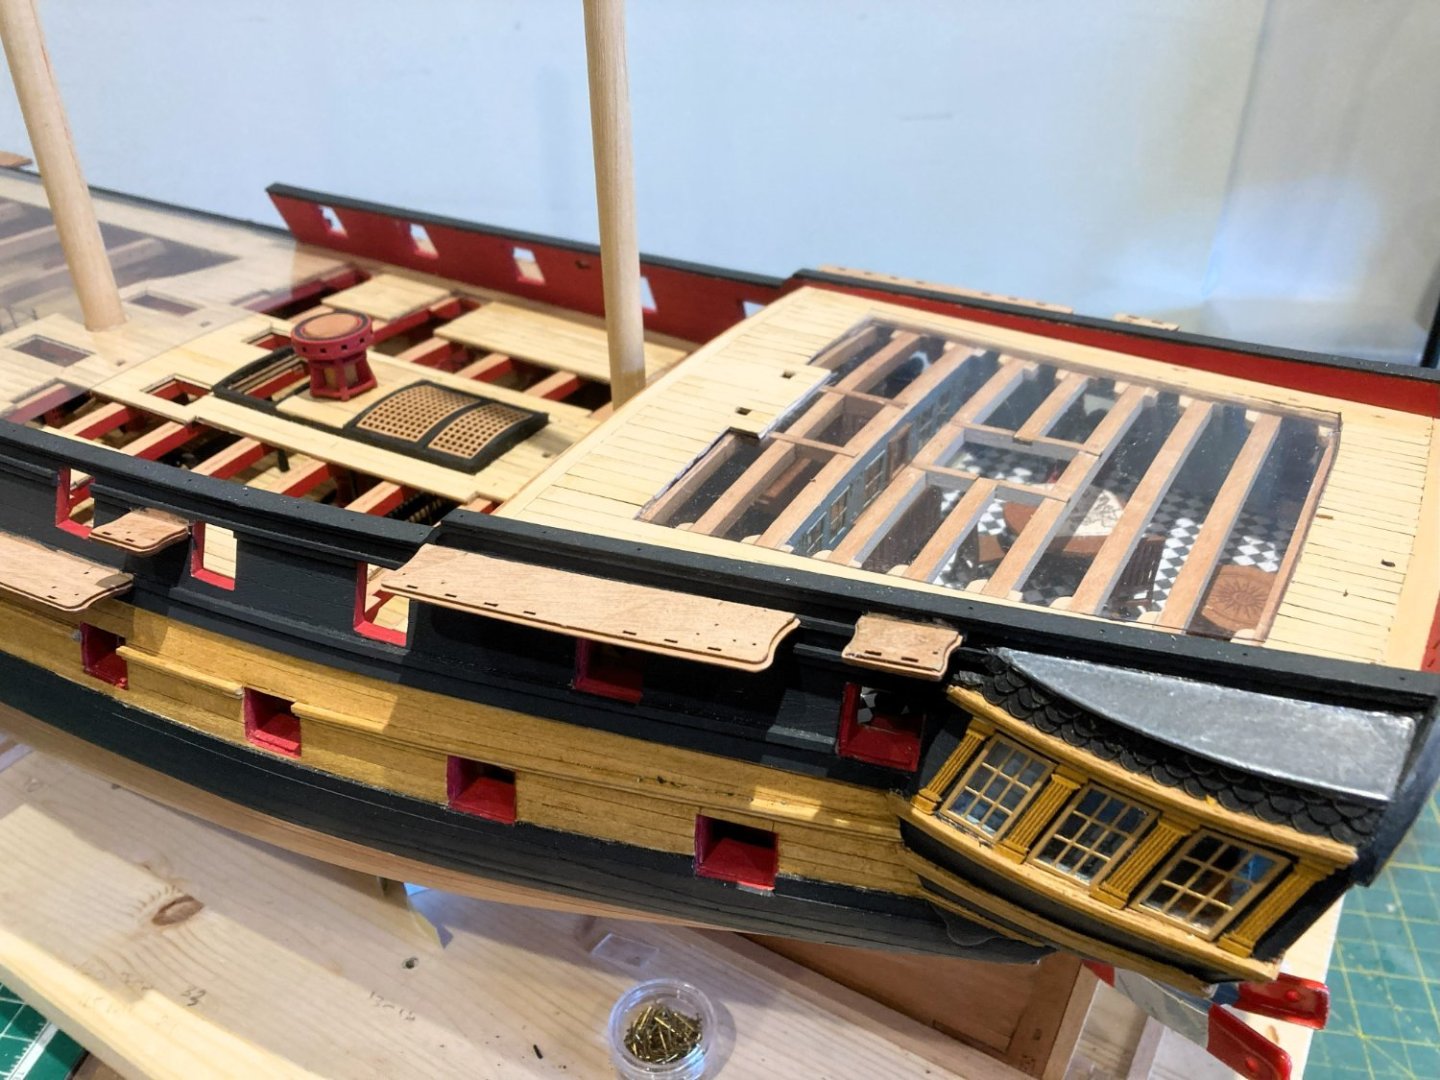
Post One Hundred and Twenty-seven Channels The channels each comprise laminations of three parts. The core centre part is rounded on the edges and extends slightly beyond the upper and lower pieces to create a decorative profile. 1748a In practice the edges of the channels were open to receive the deadeye strops, and a cover strip was nailed over the top, decorative or otherwise. Quite a straightforward business prepping the channels; largely making sure you have the correct cores and matching outer pieces, carefully applied to each side of the core, and aligned with the slots and holes. 1740a The Main channels require more bevelling on the aft side to account for the greater tumblehome. 1739a The Fore channels require bevelling and a little fettlin’ to match the round of the bow and take a little more time to fit. 3192 The Mizen and stools for the main and Mizen backstays require little attention and there are location holes in the hull for accurate fitting. 3194 3189 A well-designed set-up by Chris for what can otherwise be a tricky exercise. 1733a Whilst in the area of the Poop I added a lead sheathing to the Gallery roof, this will tone down to a dull grey over time. 1731a 1744a 1745a Before I permanently fix the channels I think I will return to the deck and inner bulwark fittings. At this point the channels will just present another incumbrance to be careful about when working inboard. B.E. 07/01/2024


- 648 replies
-
- 27
-
-
- Indefatigable
- Vanguard Models
- (and 1 more)
-
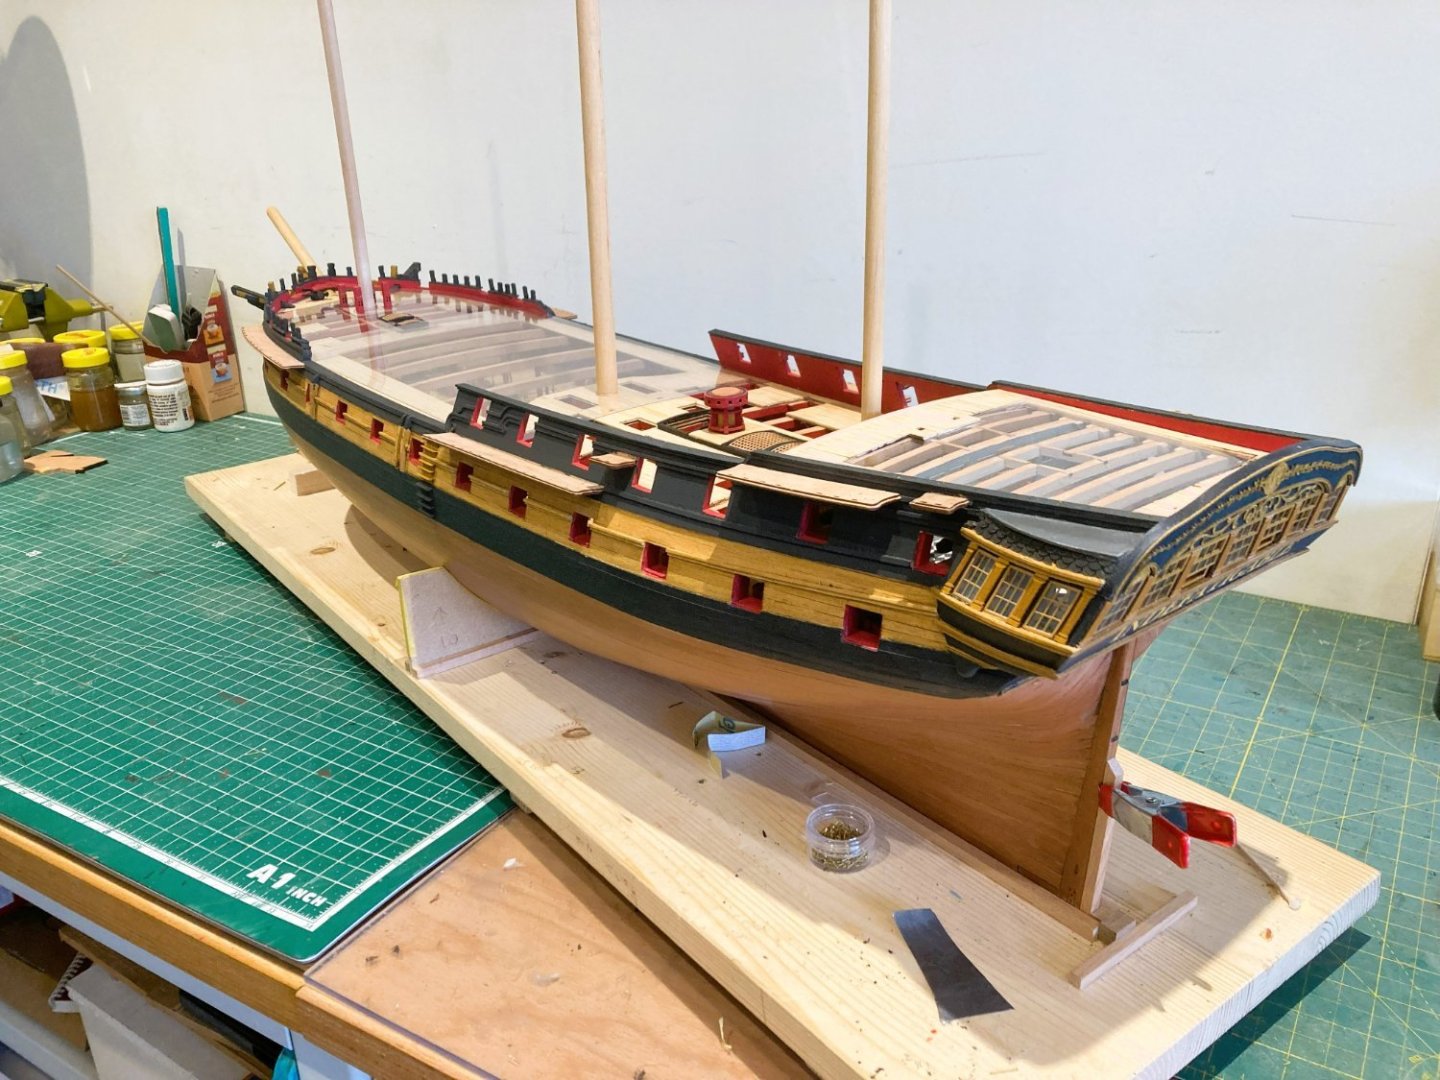
You are right Chris, As a builder of the 1/64 scale Vanguard' Indy' I can attest that it is a large and heavy model on its building board, and at times moving it around to work on can get quite wearing. Fully rigged, this model will require a significant display area, and I don't think I could accommodate a 1:48 scale version. The link on my original post to 'The art of age of sail' shows the scale as 1:64? B.E.
-
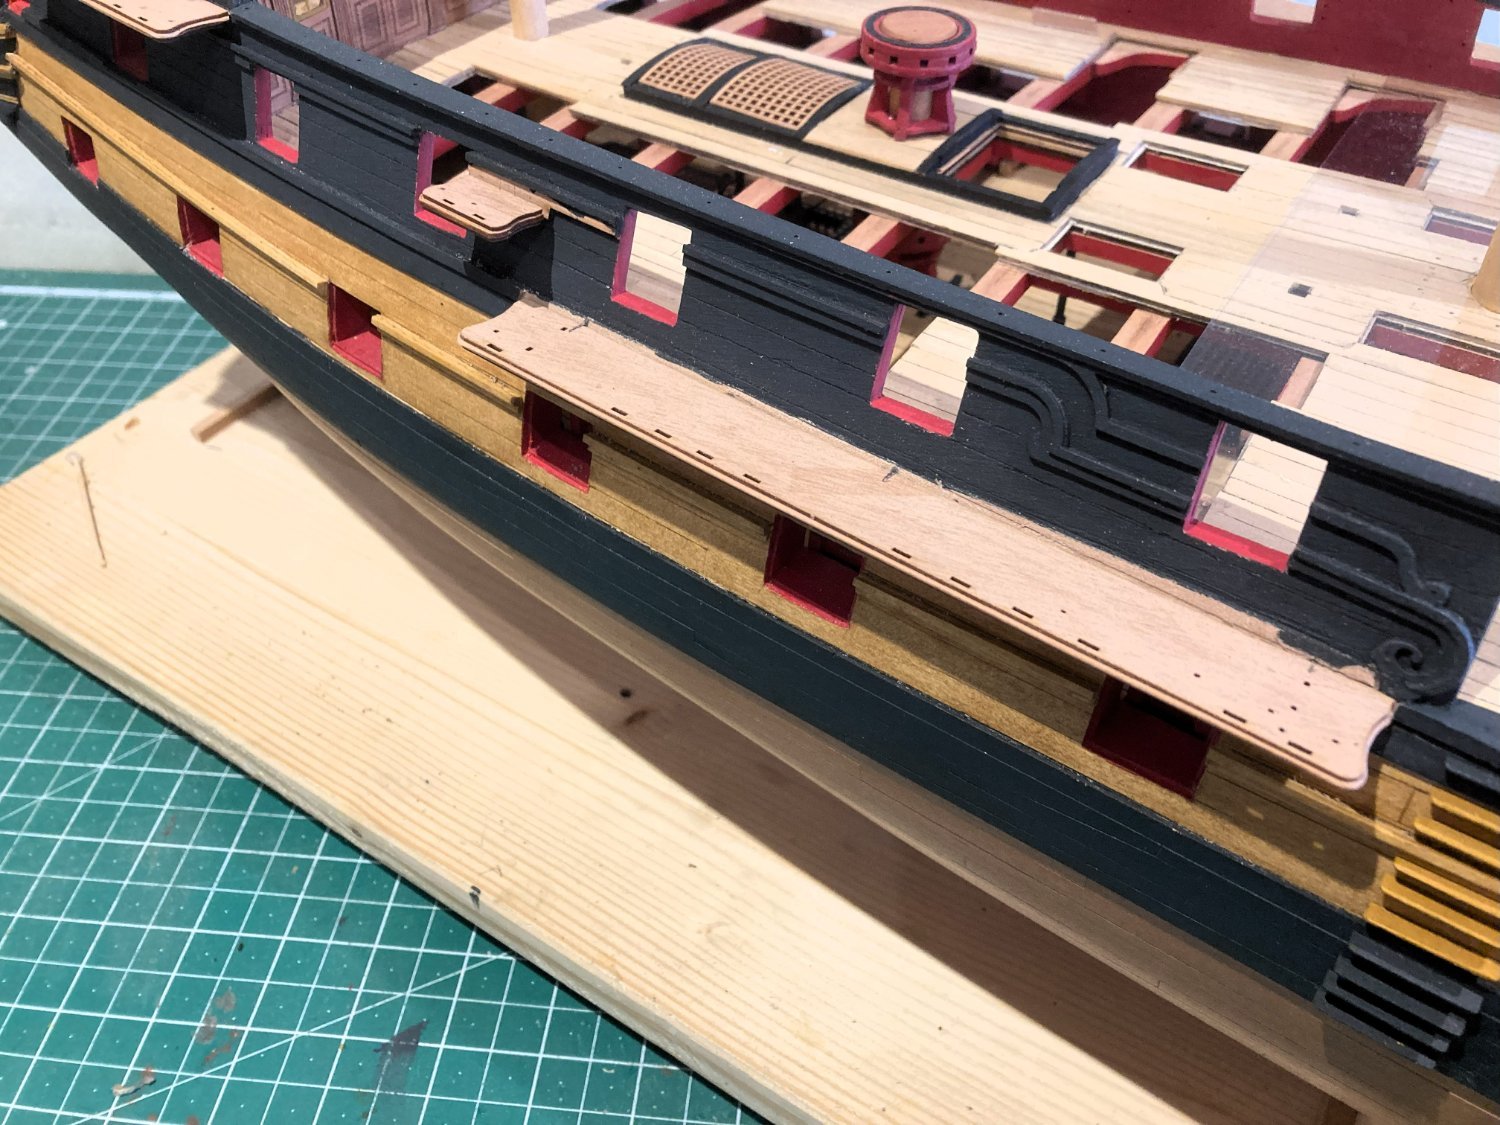
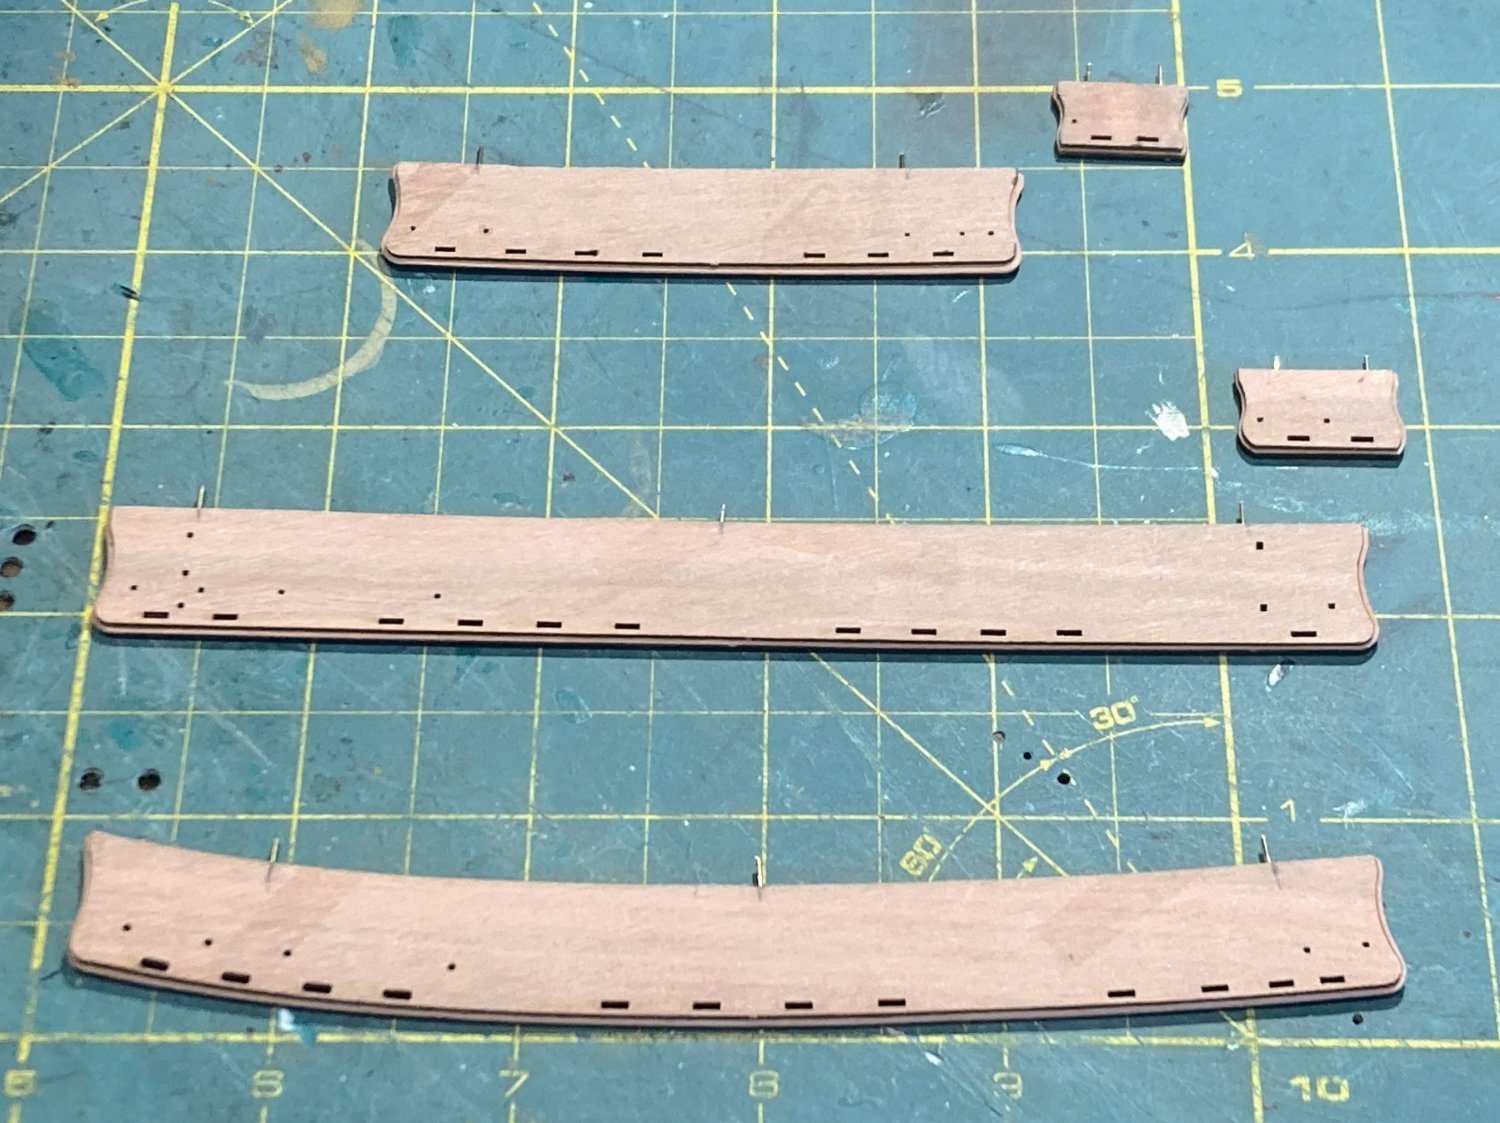
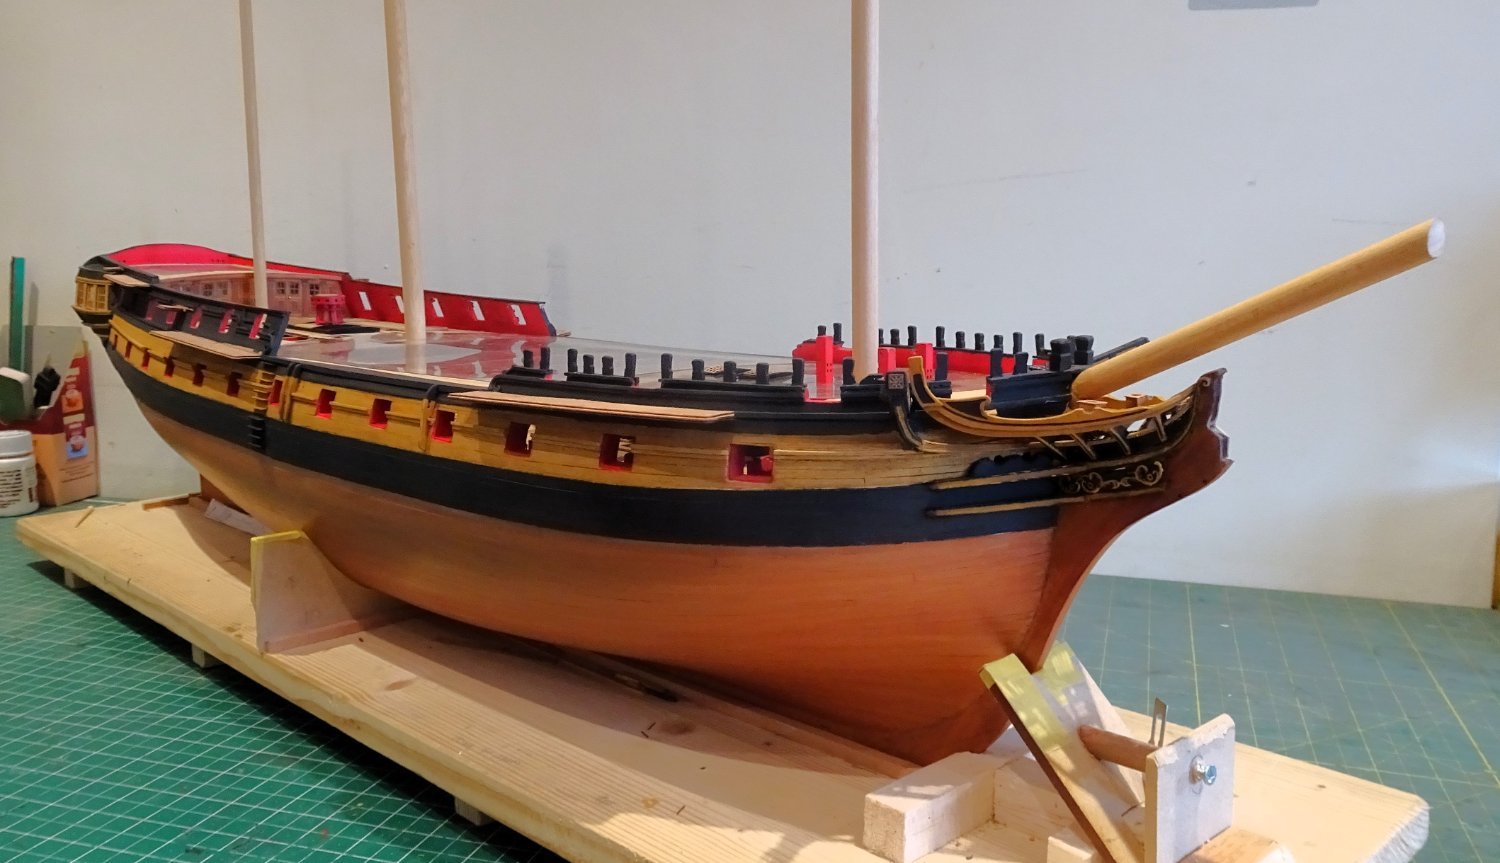
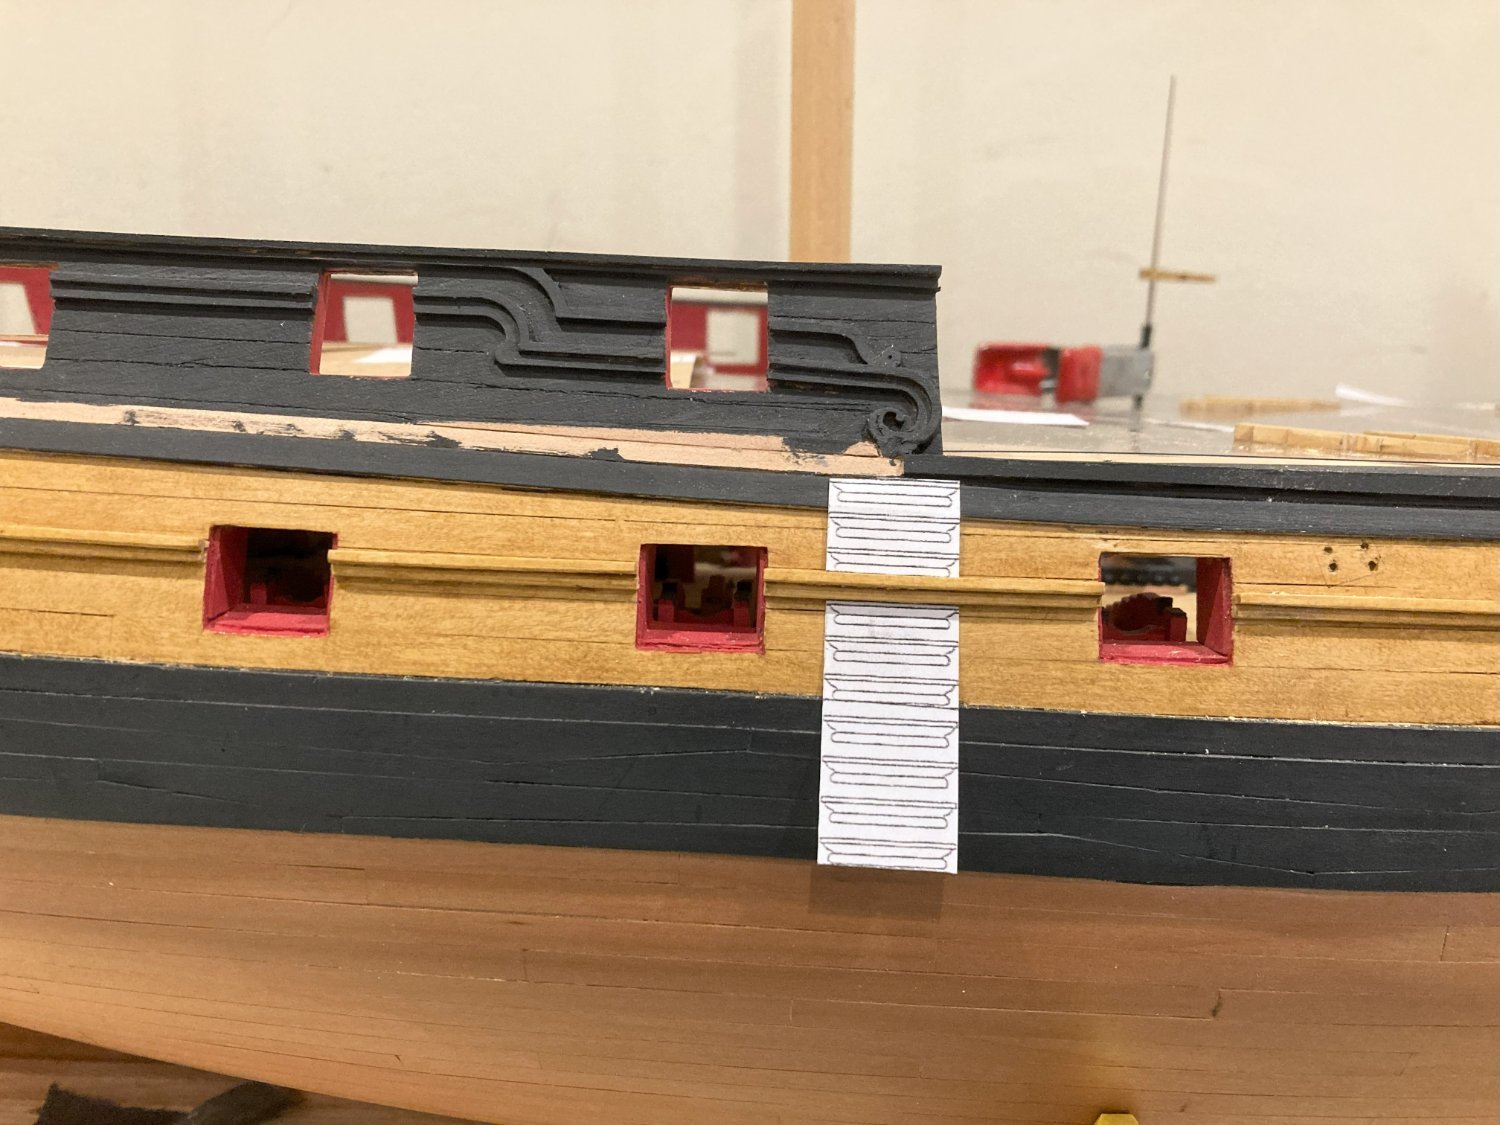
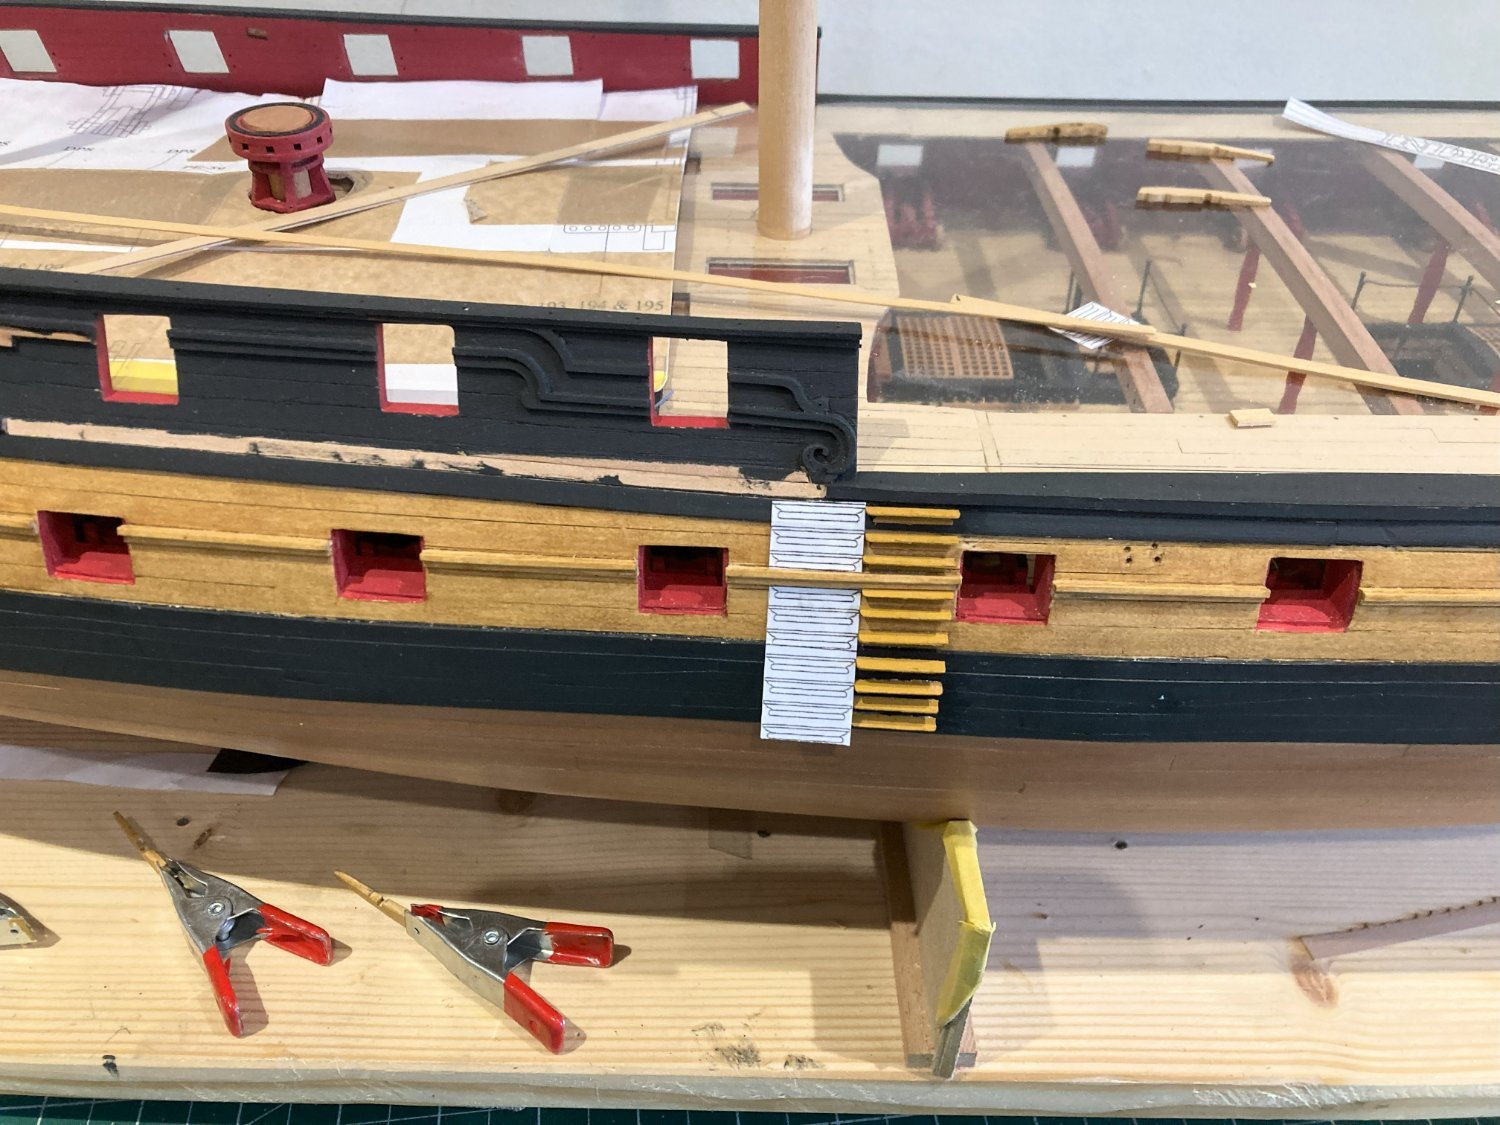
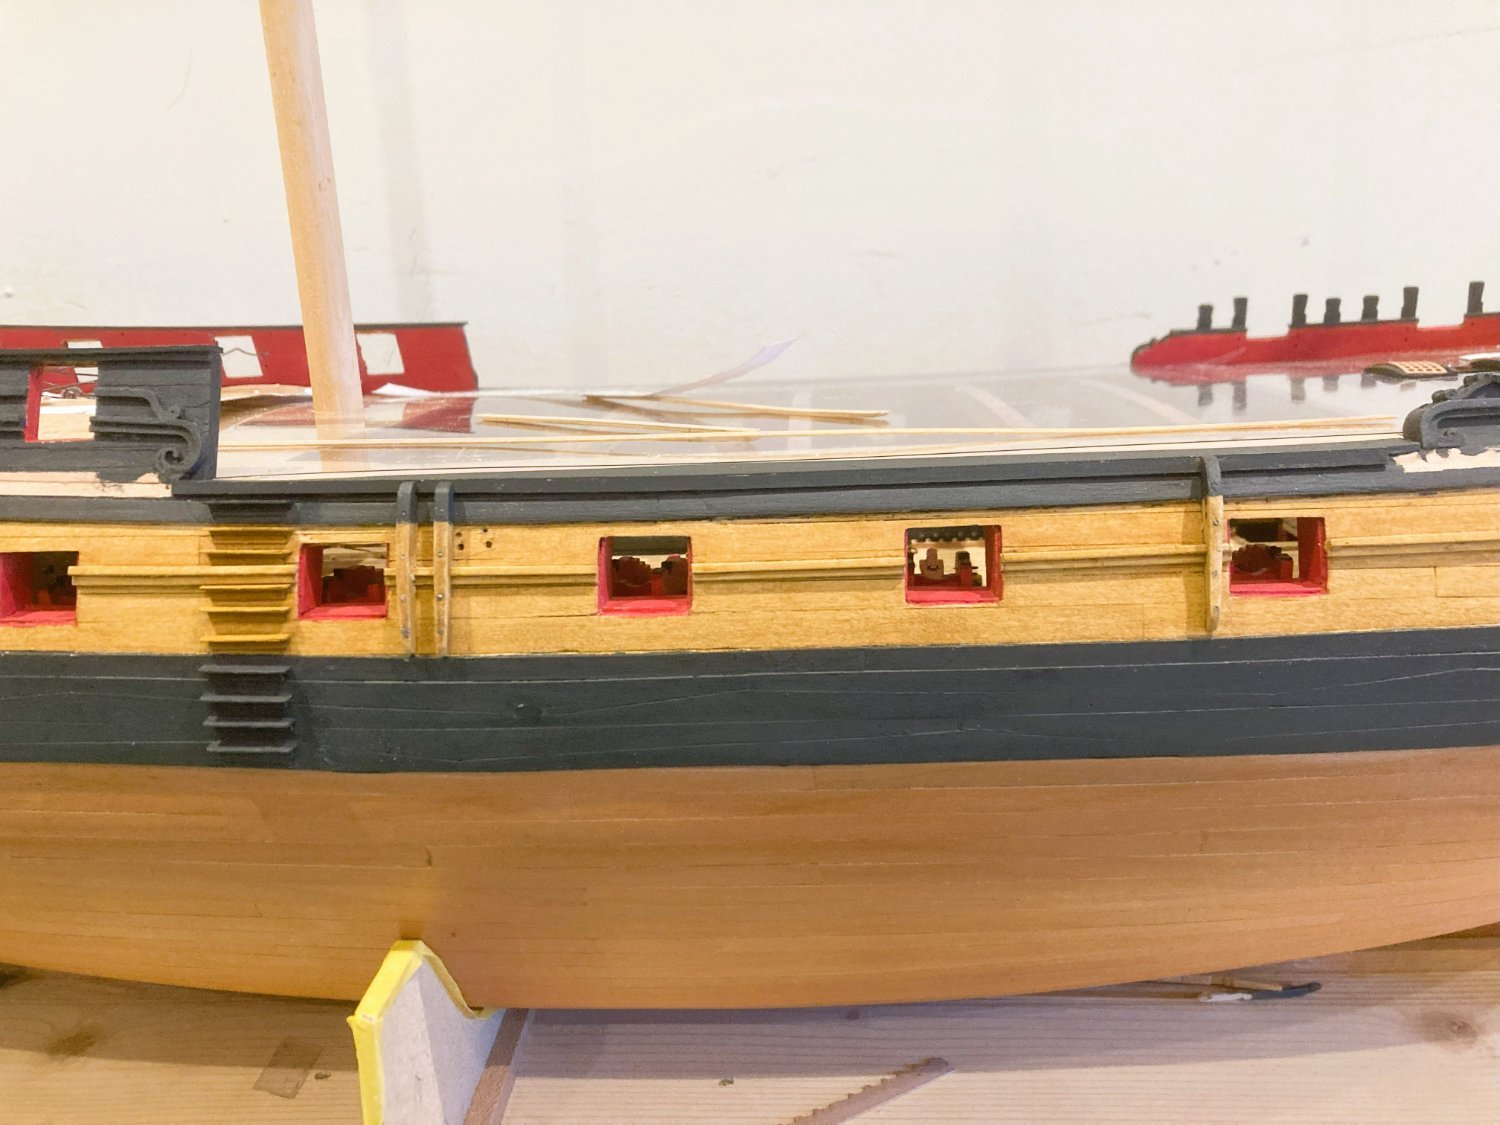
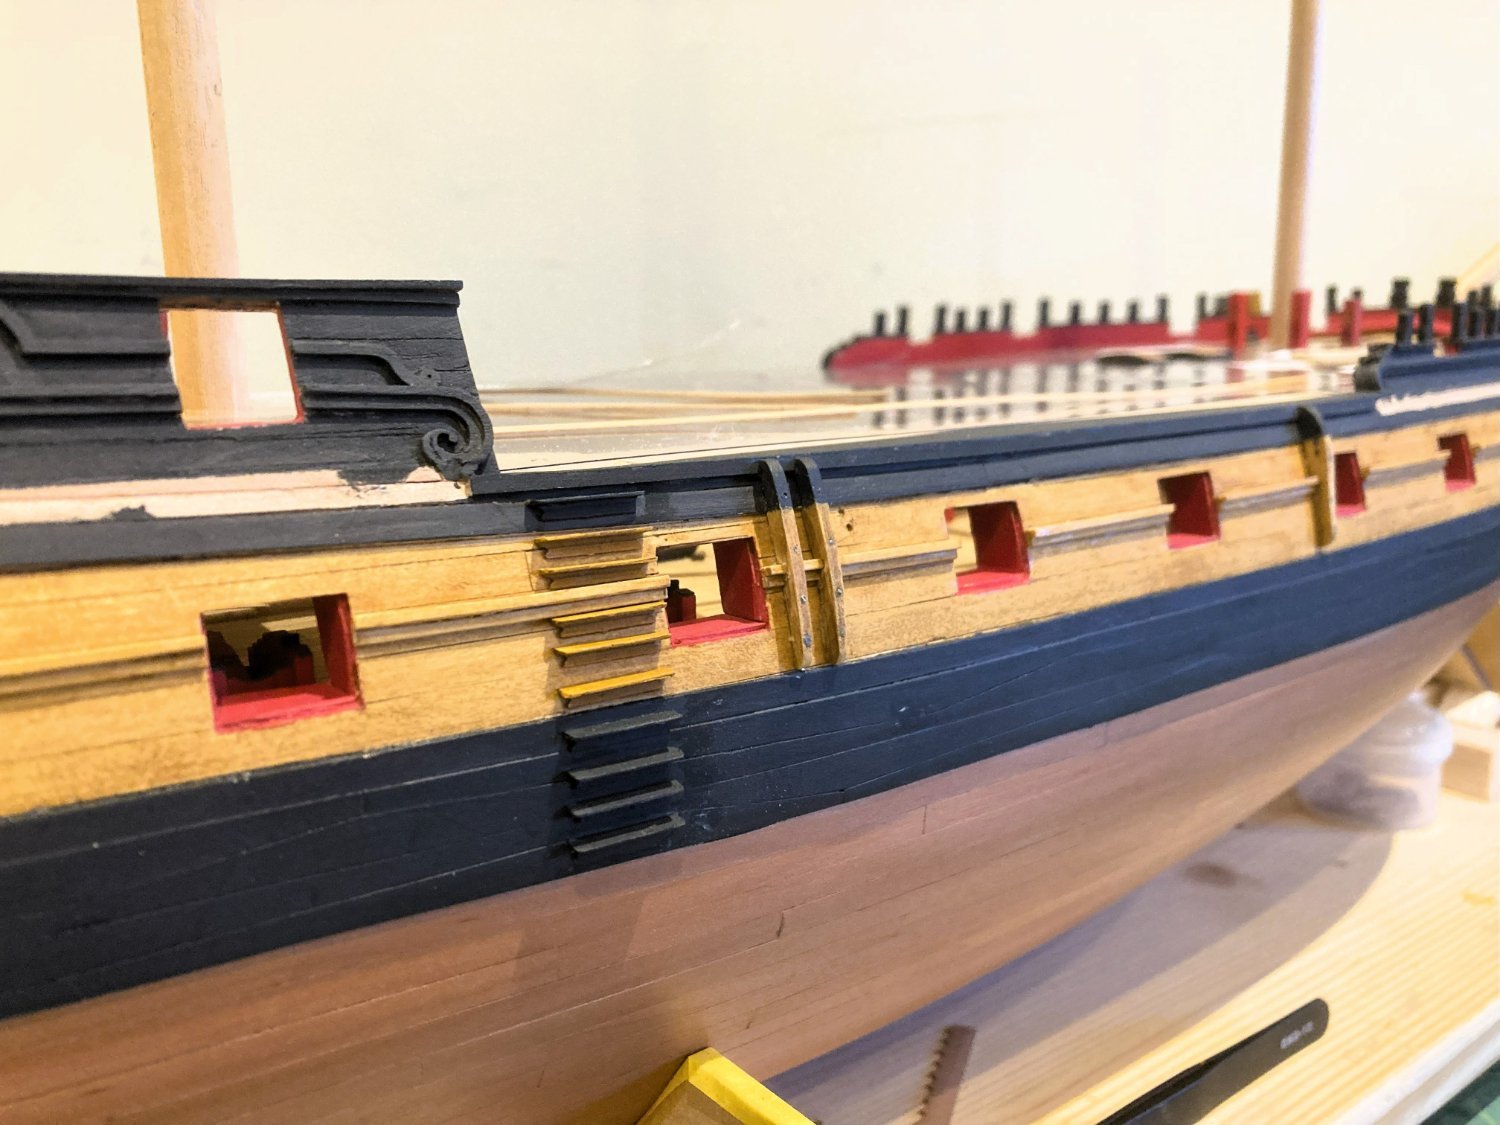
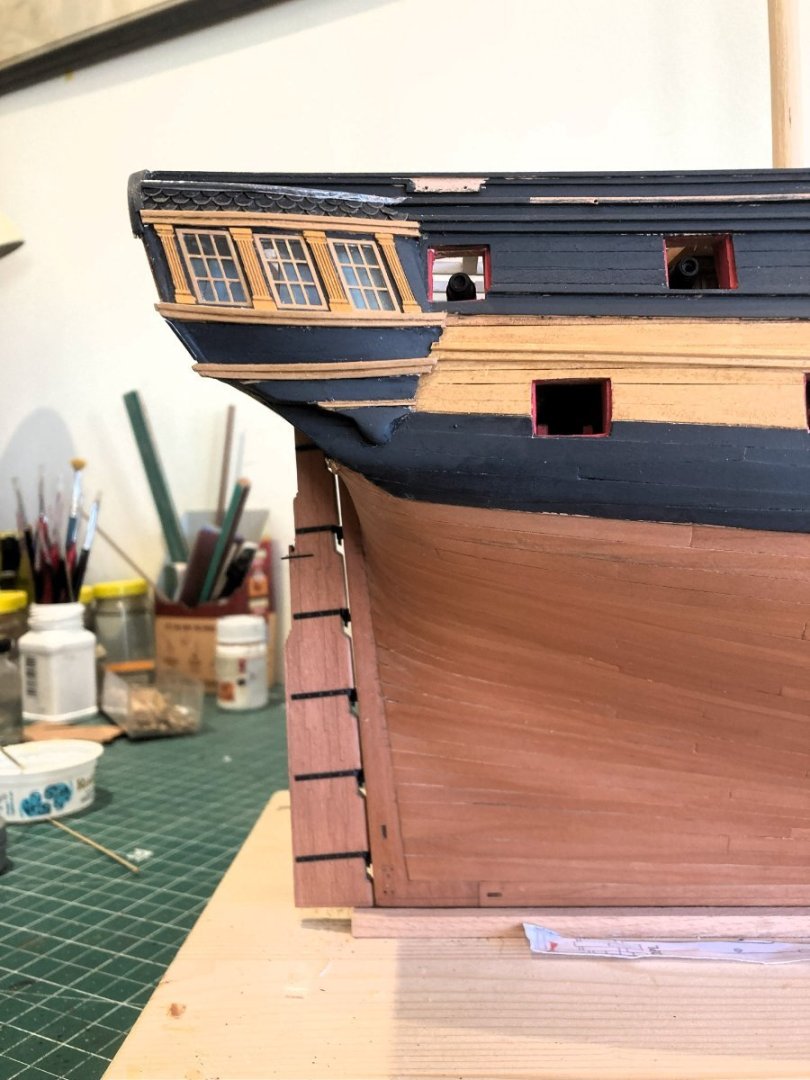
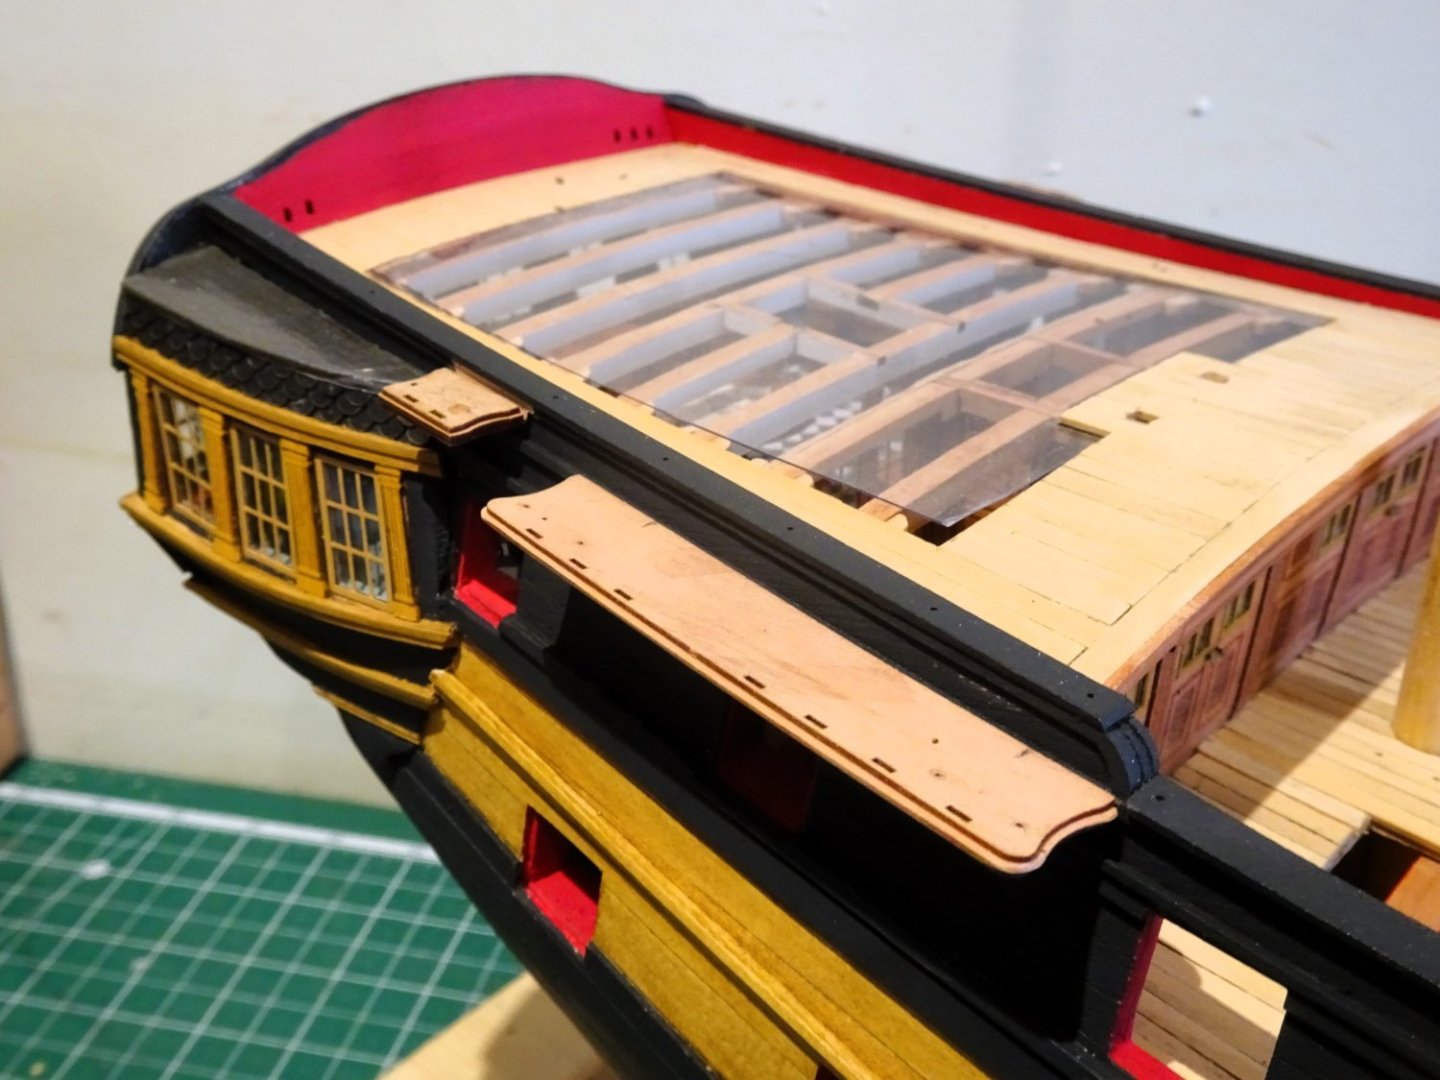
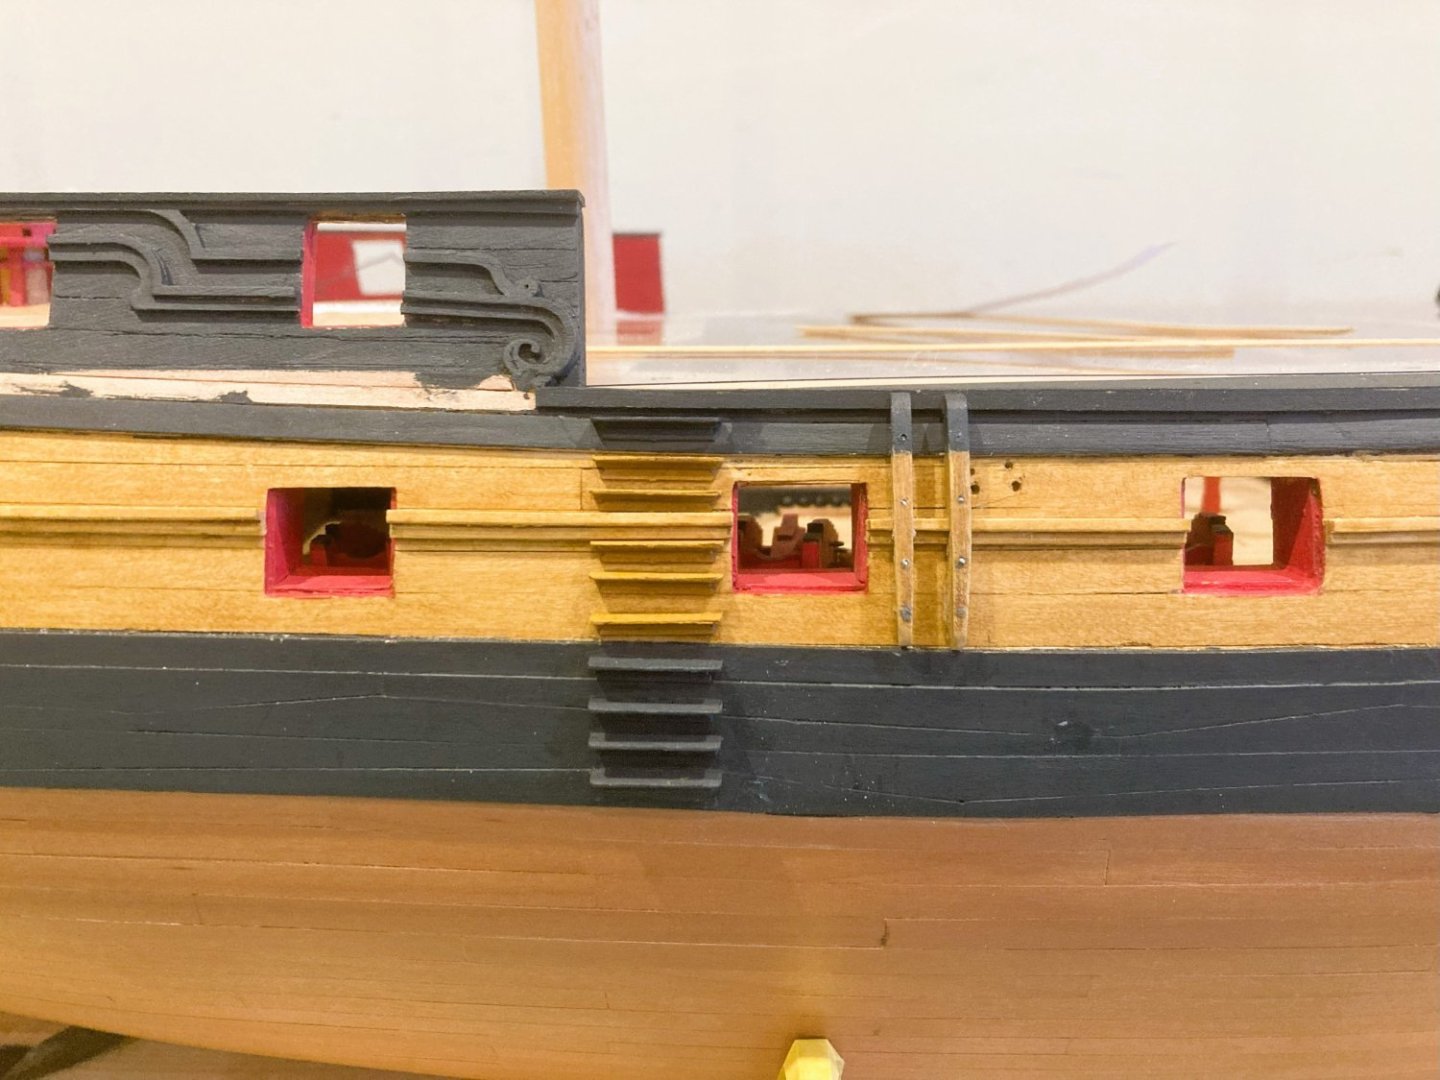
Post One Hundred and Twenty-six Side Steps There are ten of these fiddly little items to assemble for each side. The step equates to a depth of around 7” and length of 2’ 4” which seems about right. One of the trickiest things with steps is attaching them to the hull with correct spacing and alignment. 1711a To assist with this a copy is taken from the plan and attached to the hull adjacent to the actual line. This provides a guide for both position and level. 1712a Pva is used to attach the steps. 1723a 1725a The fenders and Chesstrees are fixed into position, they took me a fair amount of fettlin’ to get them to sit right against the hull. 1726a I wonder if it might have been a better option to cut the moulding rather than notch the fenders. 1722a Once fitted I drilled and ‘bolted’ the items to the hull. These were items subject to wear and tear and needed to be replaced fairly easily. B.E. 04/01/2024


- 648 replies
-
- 26
-
-
- Indefatigable
- Vanguard Models
- (and 1 more)


.JPG.d73b914b1b54e495e170910f79178867.JPG)