.JPG.ca33079f5815b861e67b9c2cccd37982.JPG)

Blue Ensign
-
Posts
4,564 -
Joined
-
Last visited
Content Type
Profiles
Forums
Gallery
Events
Everything posted by Blue Ensign
-
Well the contemporary NMM model of the cutter Hawke had it's name on the stern. I would be happy to put a name on the stern of Sherbourne, but not those supplied letters. They supplied the same with the Pickle kit which I didn't use. I prefer dry transfer lettering which looks far more authentic. B.E.
-
 Hi Nils, I’m curious about how I’ll master it too😀I note that on the NMM model of the Hawke 1777 flat nail heads are visible along the lap lines. @ Steve, the first strakes above the Garboard have to follow a tight curve around to the stem. Hopefully it will look better when a few more strakes are added, and I’ve smoothed out the clinker towards the bow. B.E.
- 335 replies
-
- 2
-

-
- alert
- vanguard models
- (and 1 more)
-
Thank you Nils, If you're referring to the copper fastenings, I'm not really sure at this stage. At 1:64 scale they will be pretty small, particularly to represent the roves. I was thinking that maybe fine copper wire with a flattened end may suffice. Watch this space! Regards, B.E.
- 335 replies
-
- 1
-
-
- alert
- vanguard models
- (and 1 more)
-
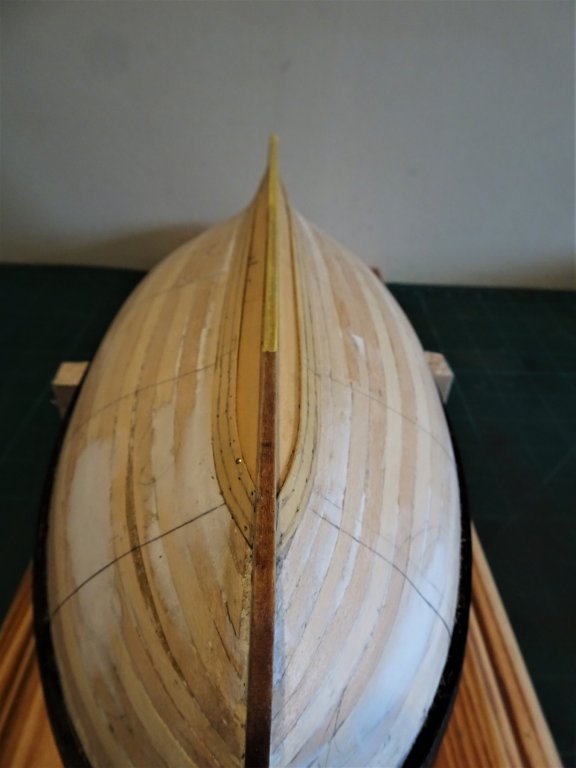
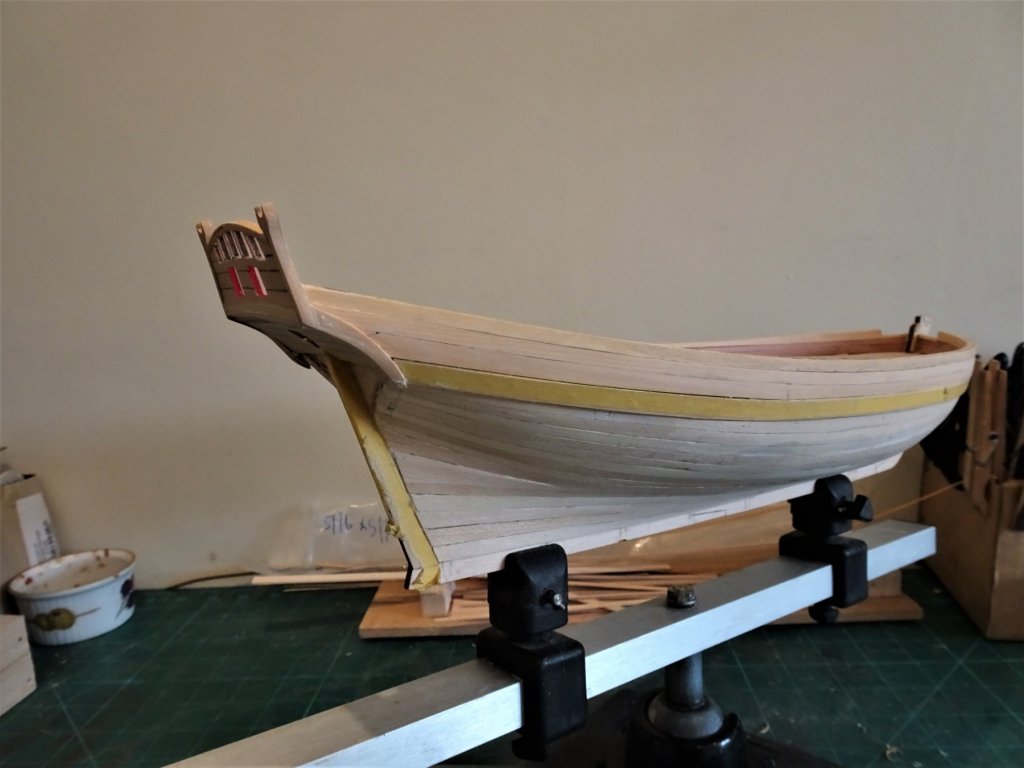
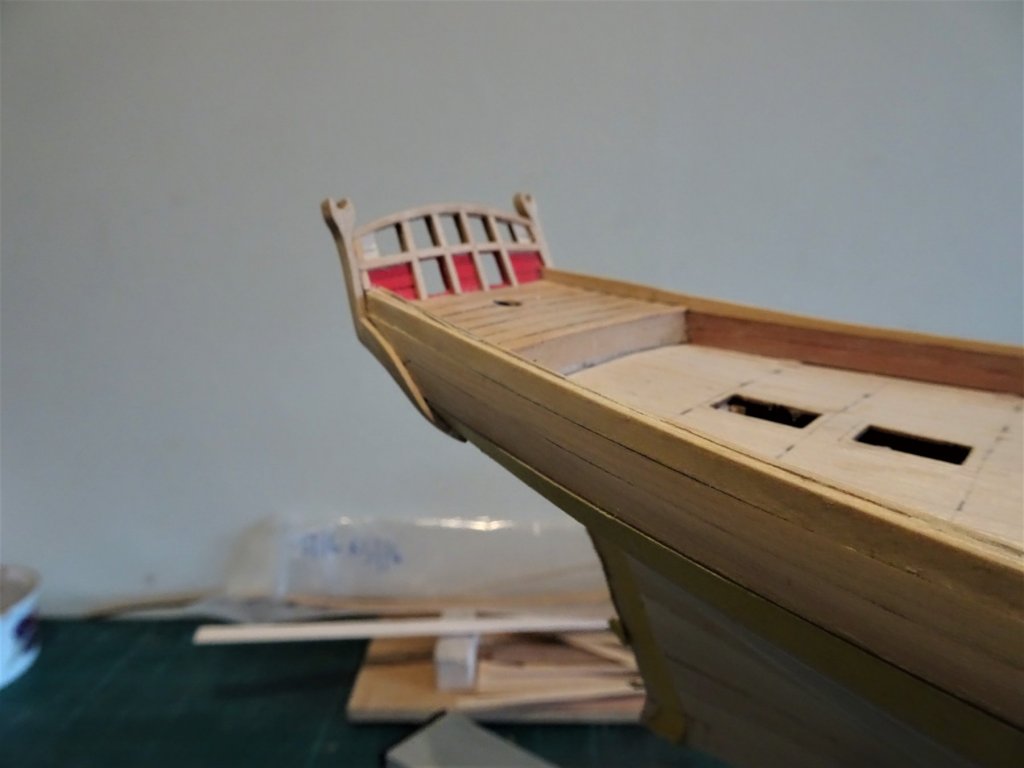
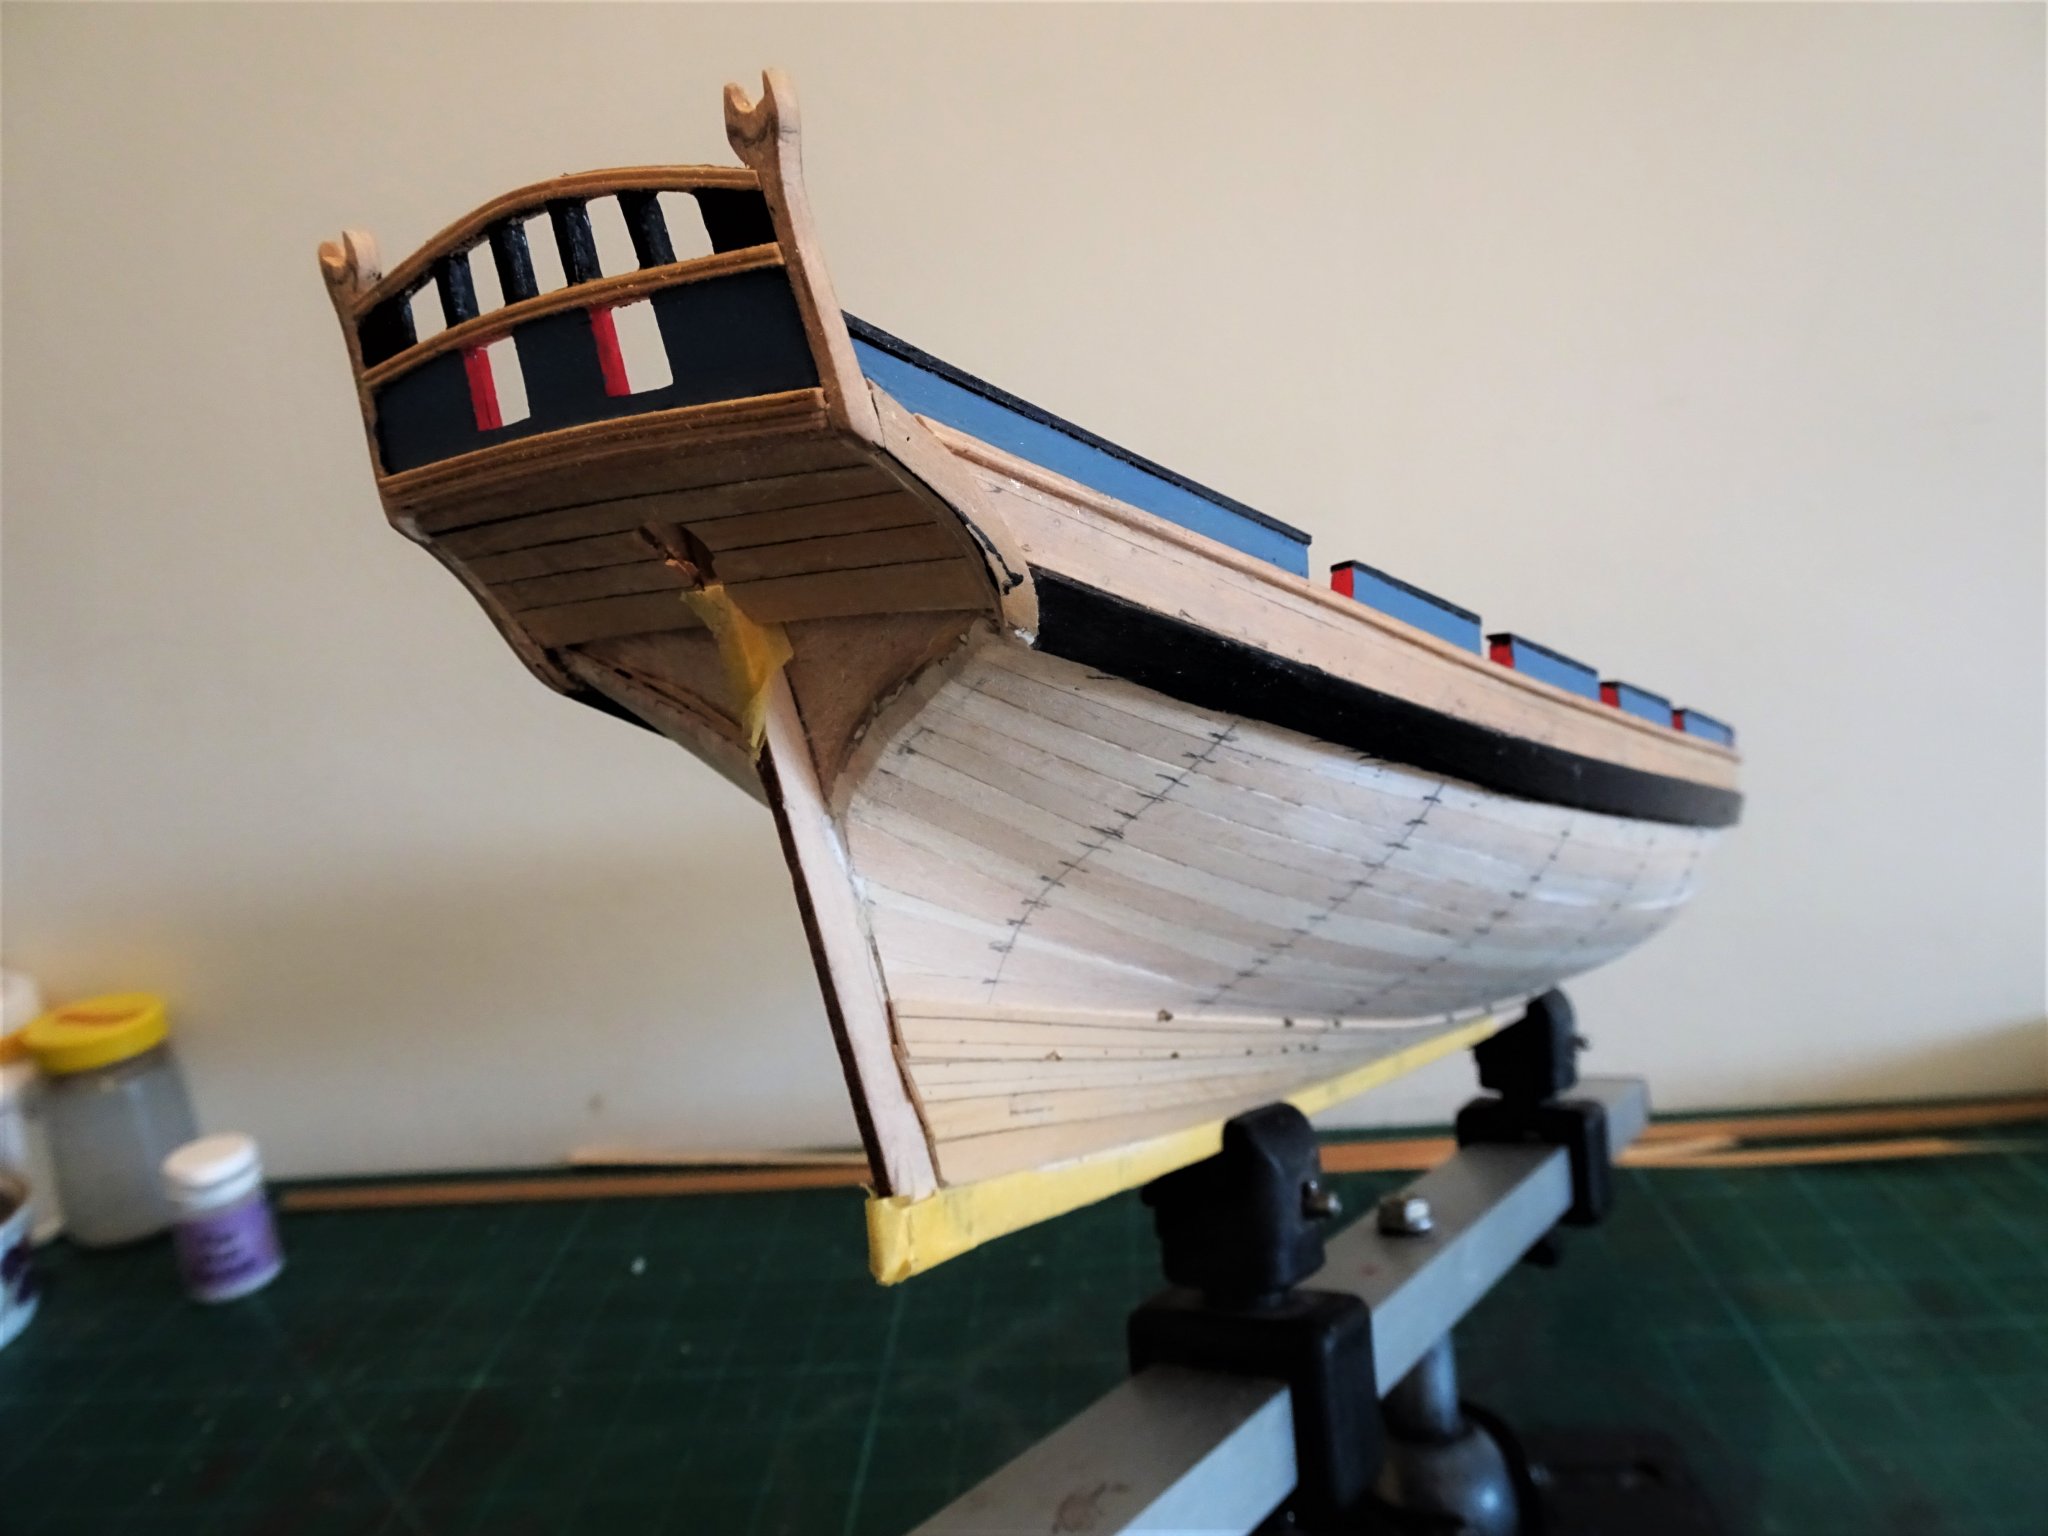
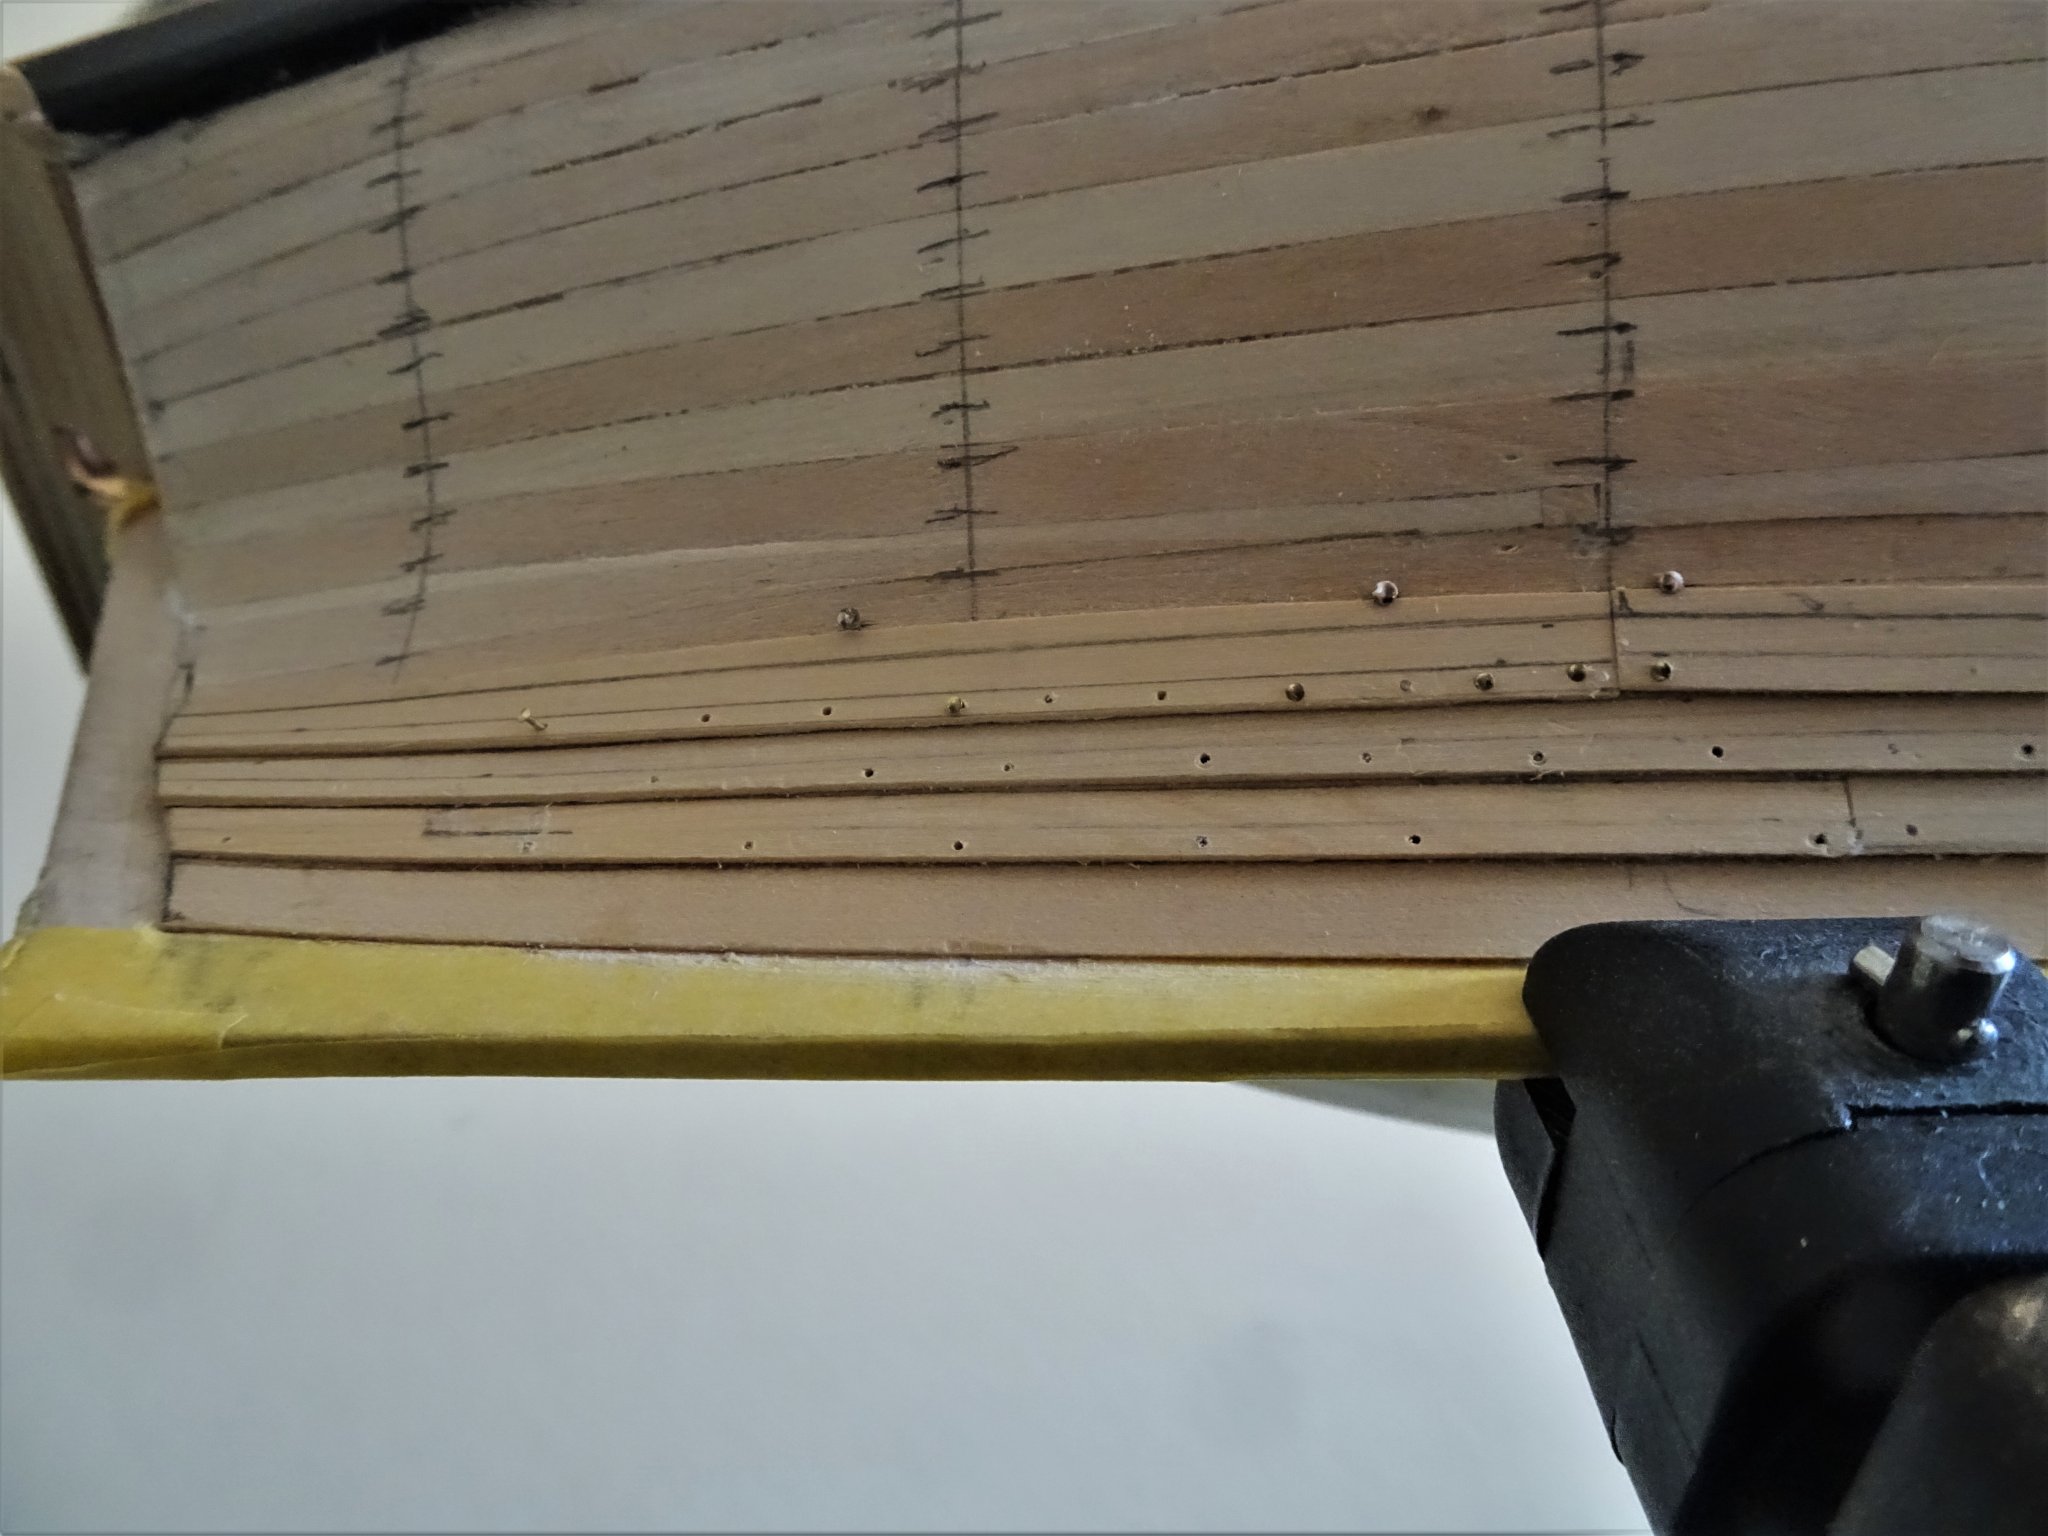
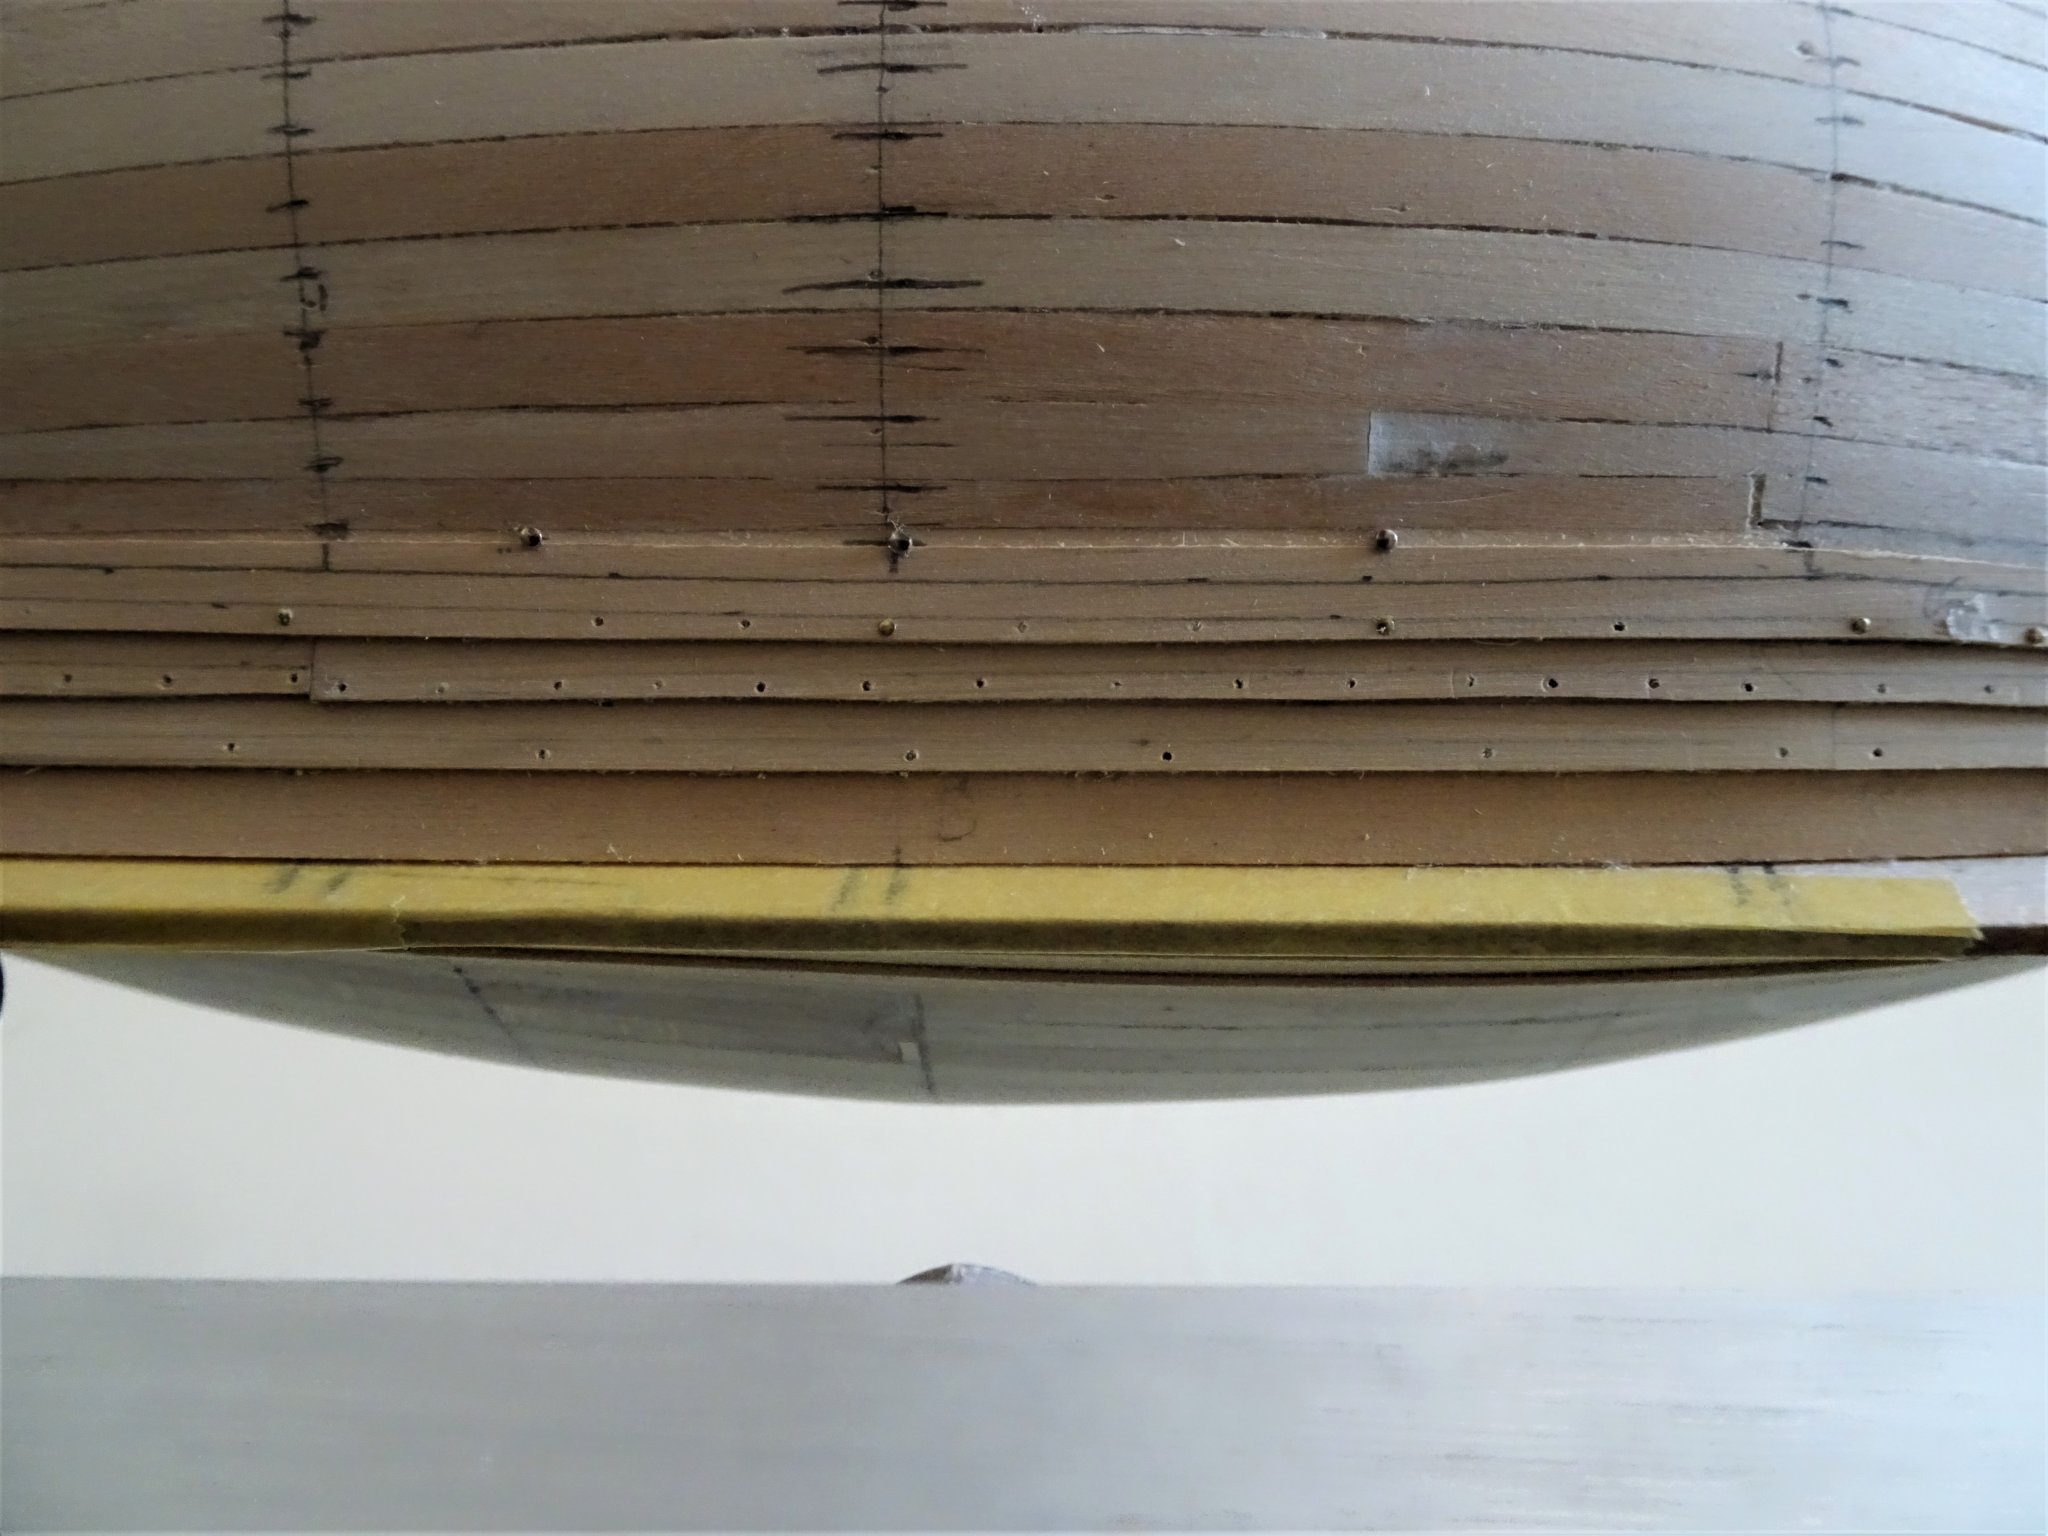
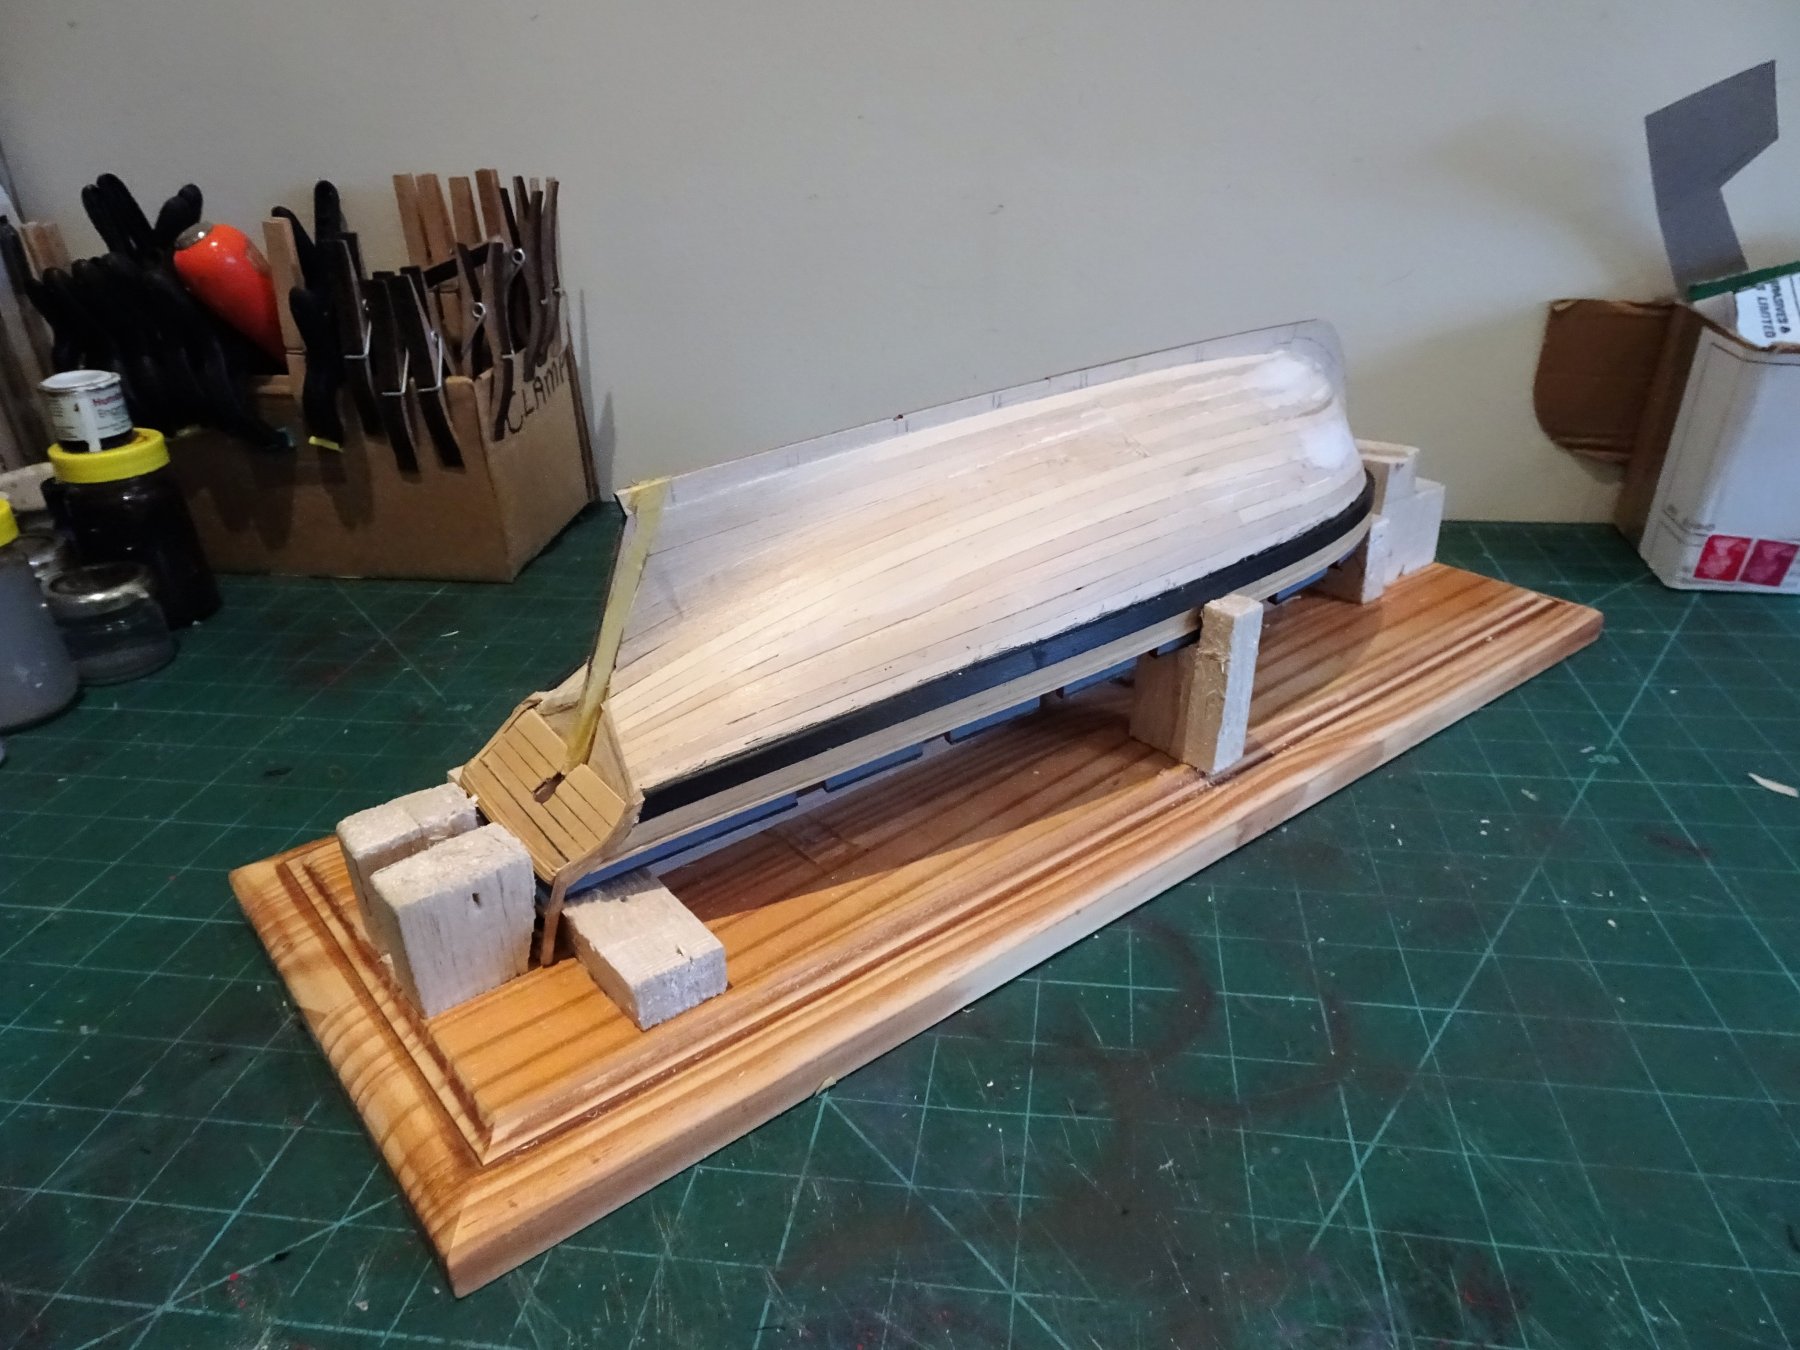
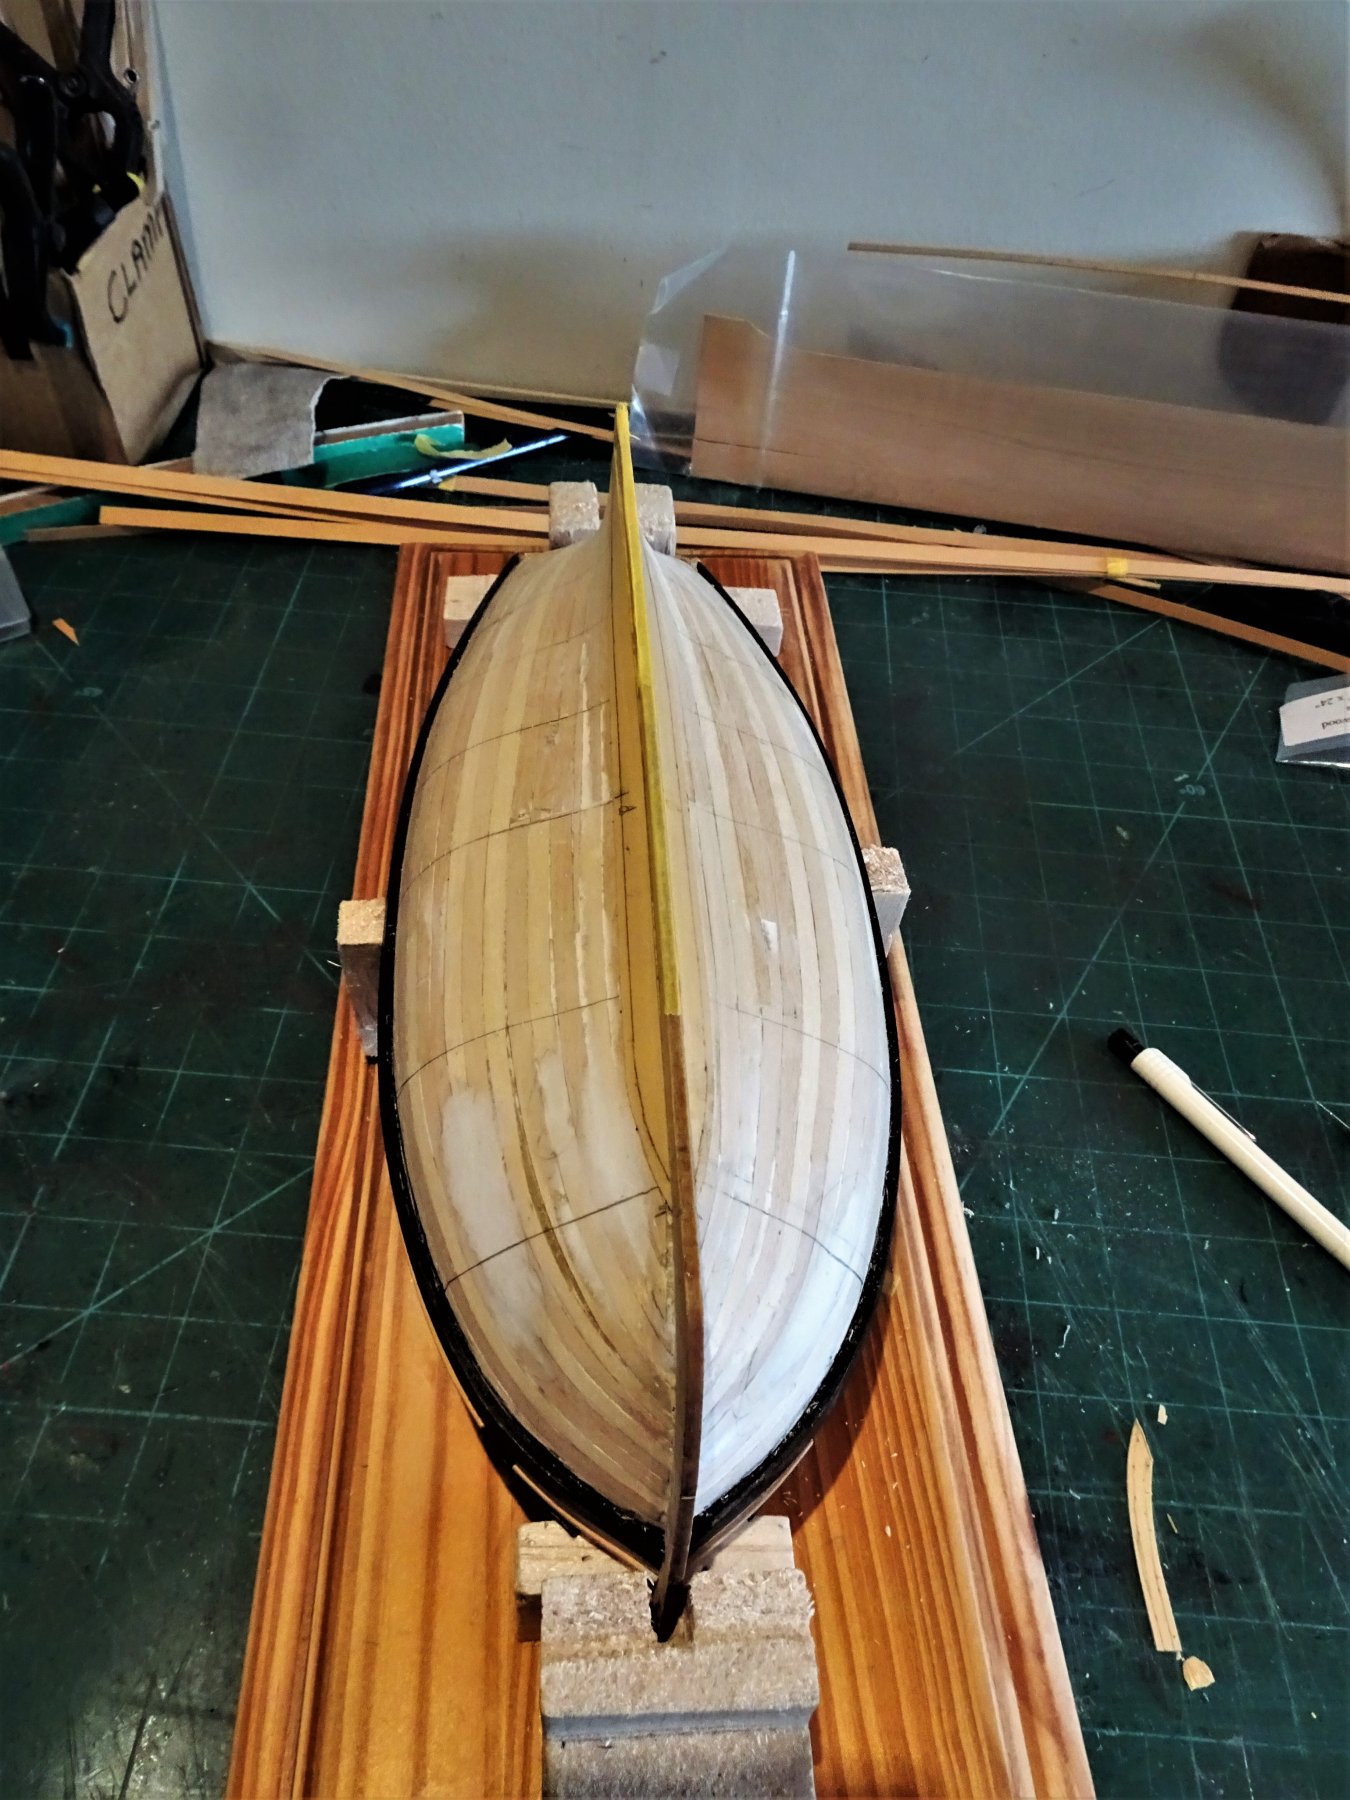
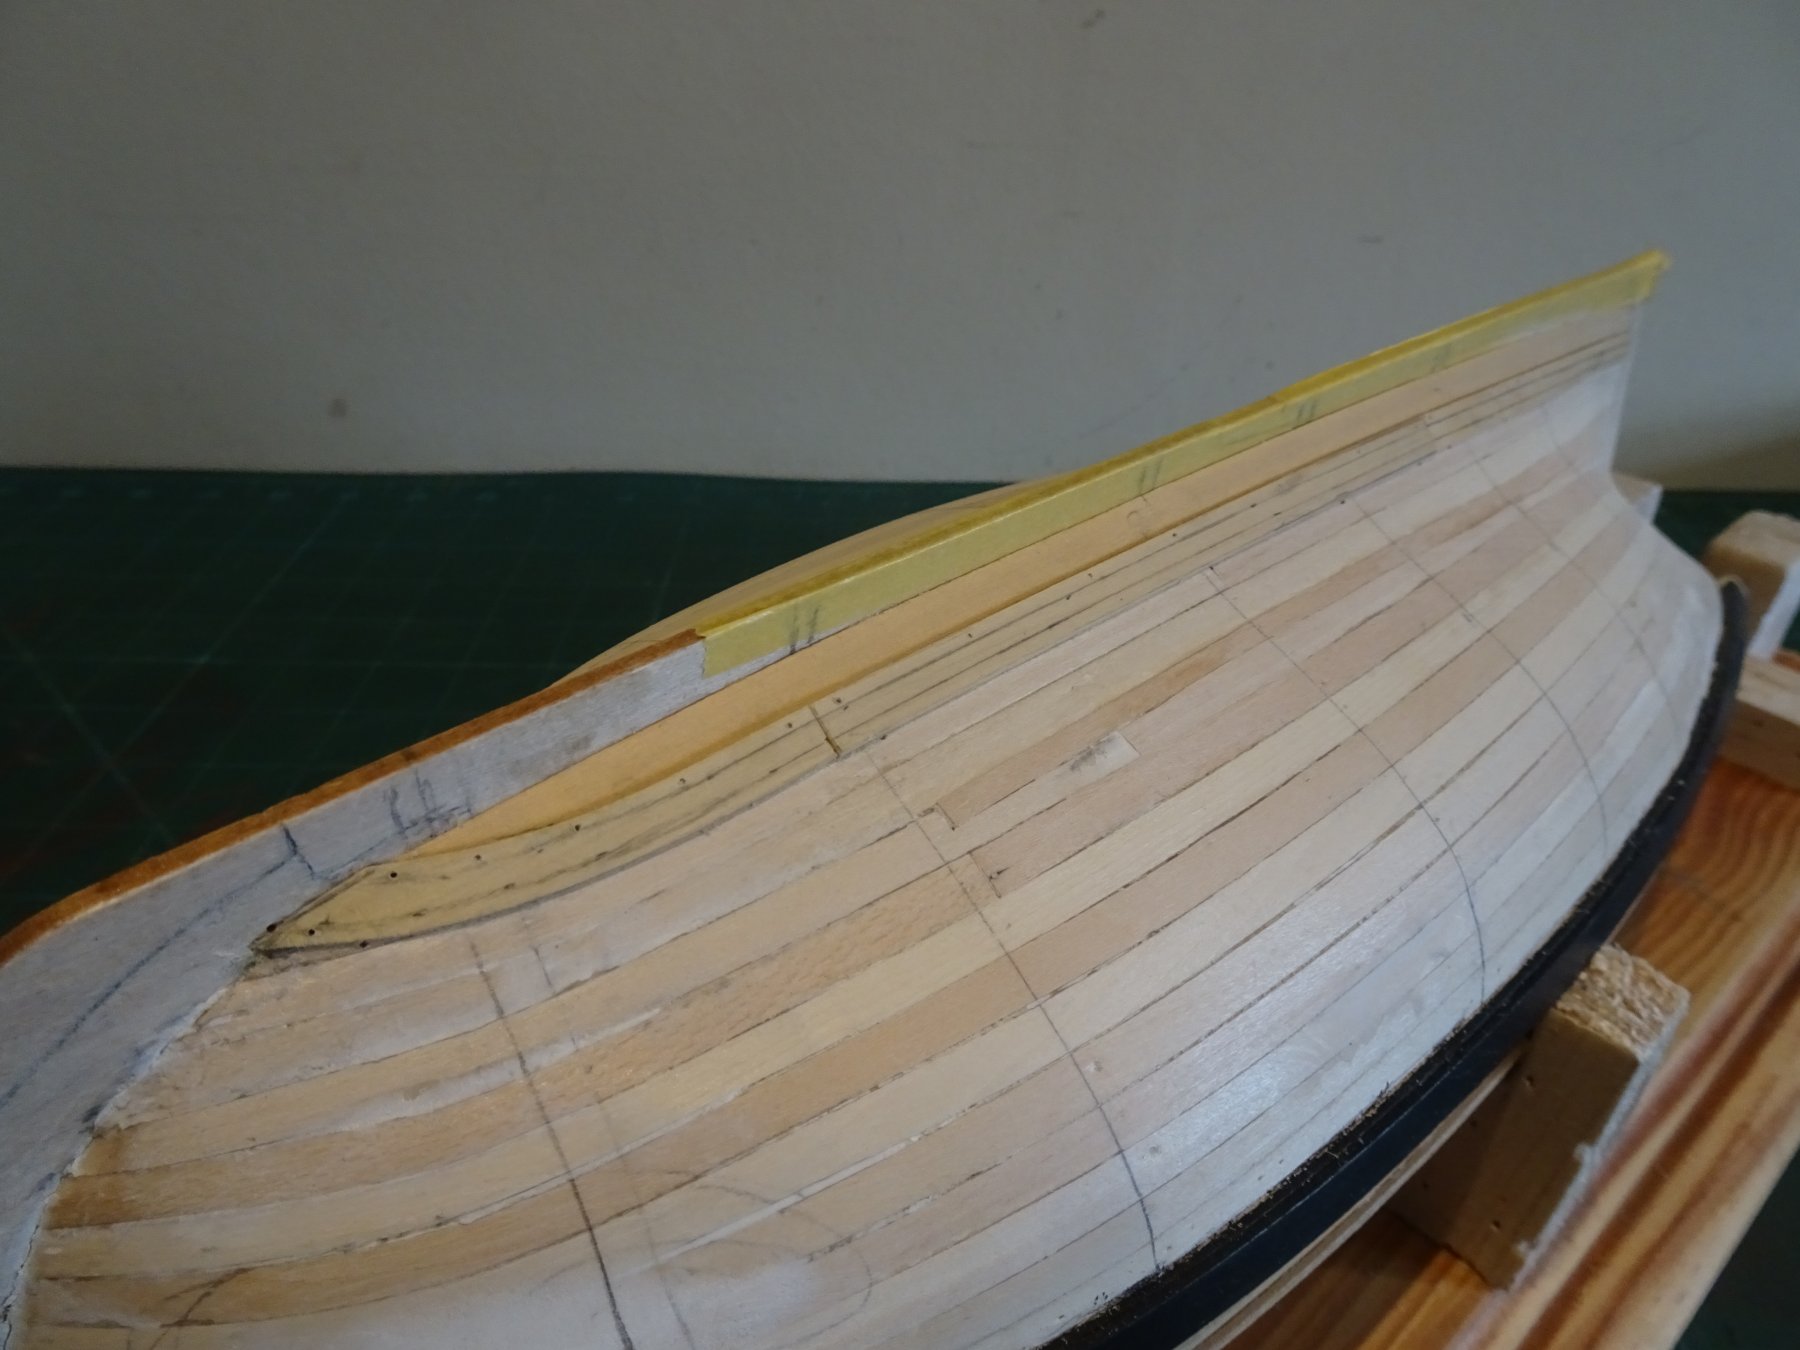
Post 17 More clinkering For the next few planks up from the Garboard it looks like I will need to spile each one individually. 1912 I have used tick strips to mark down the hull at the bulkheads and used those to gauge the taper required towards the bow. The tick strip spacing is of the net 4mm width of the lapped plank. 1910 I can then measure down from the lap edge to where the taper marks will come, and shape what is the upper edge of the plank. Once satisfied with the shape and fit the 2mm lap line can then be drawn in for the following plank. 1913 The tapering at the bow begins at the third plank from the Garboard, but before fitting it is used as a template for the corresponding plank on the opposite side. 1917 The clinker at the stern. Where the strakes approach the stern post the clinker will eventually be pared down. 1914 I will be adding a thin veneer Boxwood to the stern post which will act as a rabbet for the strake ends. 1918 In the midships area the clinker will remain more pronounced before being fayed down towards the bow. 1916(2) This is a much more involved business than straightforward carvel planking; four strakes fitted but I still don’t really know how it will turn out. Still it is an interesting exercise to have a go at. B.E. 24/08/2019


.thumb.JPG.6fa9f6f17706b4515d35bdc426036dfd.JPG)


- 335 replies
-
- 17
-
-
- alert
- vanguard models
- (and 1 more)
-
Thanks Dave, Glad you have had success with Speedwell’s fashion pieces, I modified those on Alert based on the Cheerful experience. Maurice
-
Thank you Nils, I wish I had your confidence, I'm very much a novice in the world of clinkering, but I hope visually at least it will look ok to the average eye once completed. 🙂 Regards, B.E.
- 335 replies
-
- 1
-
-
- alert
- vanguard models
- (and 1 more)
-
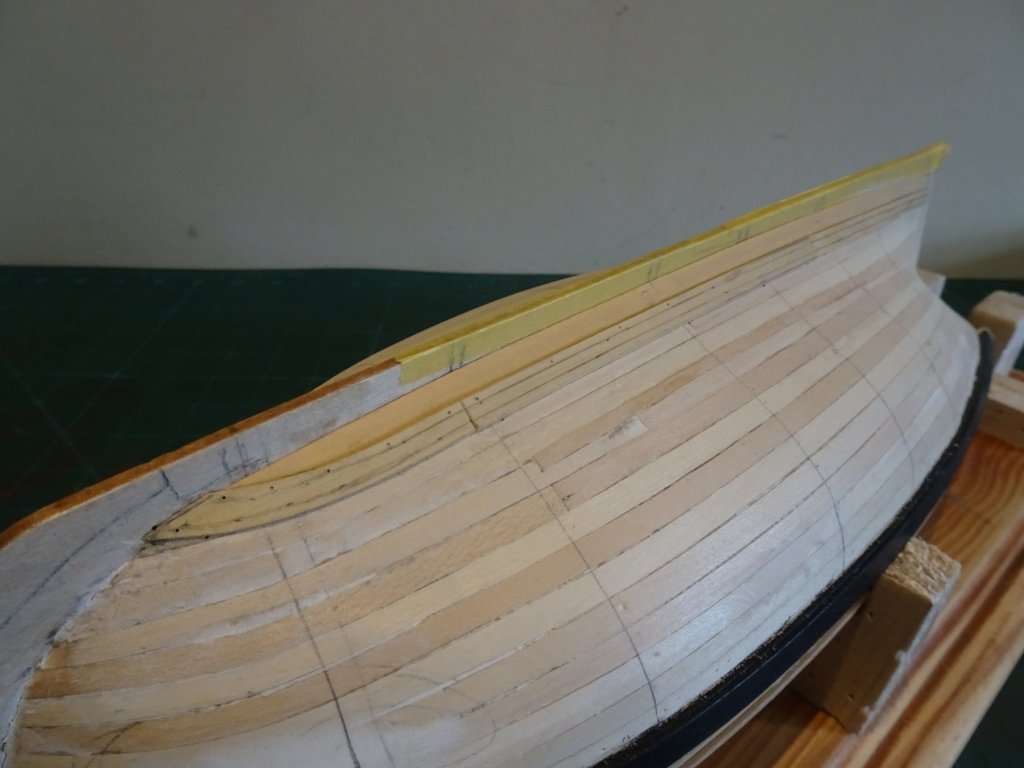
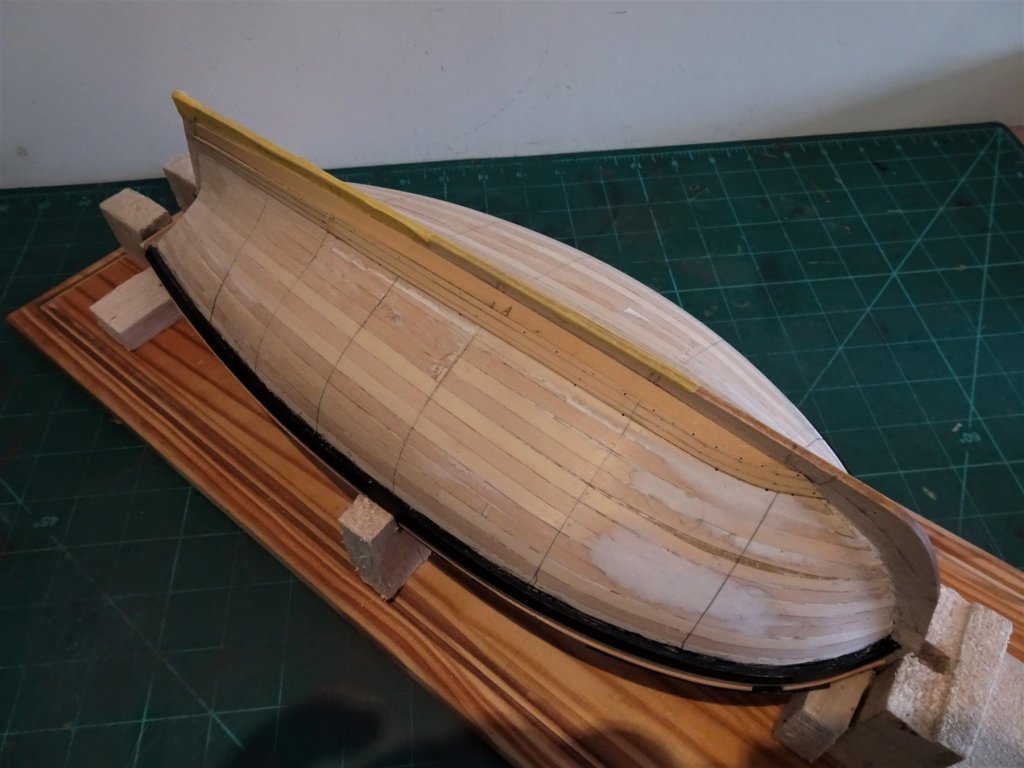
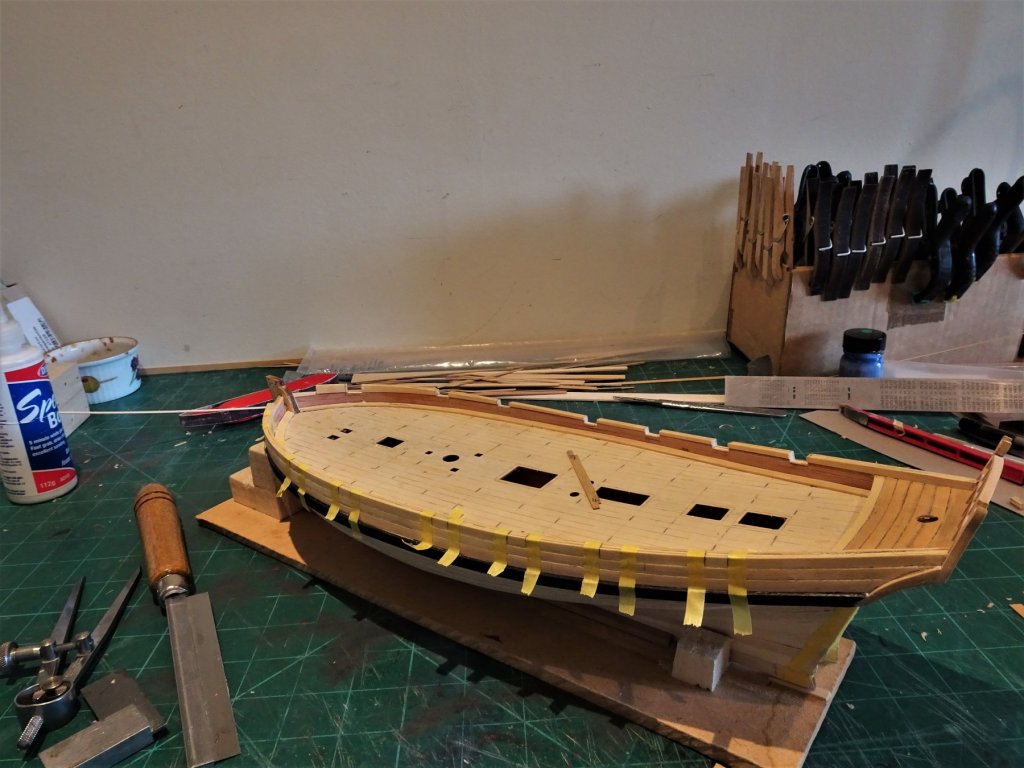
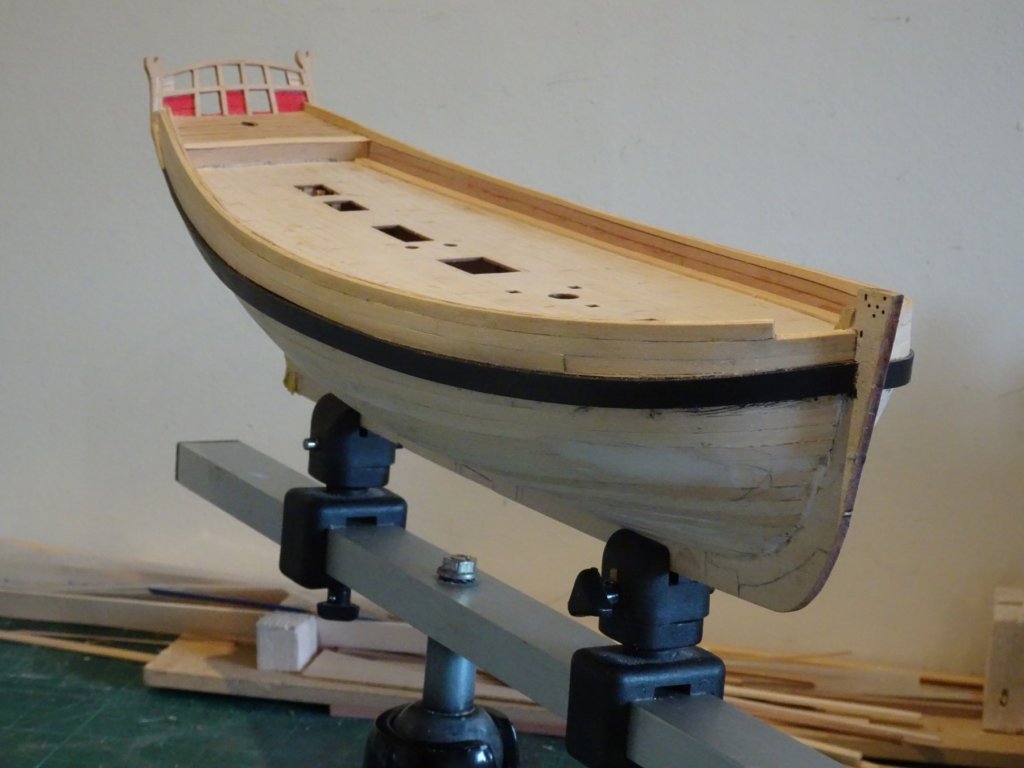
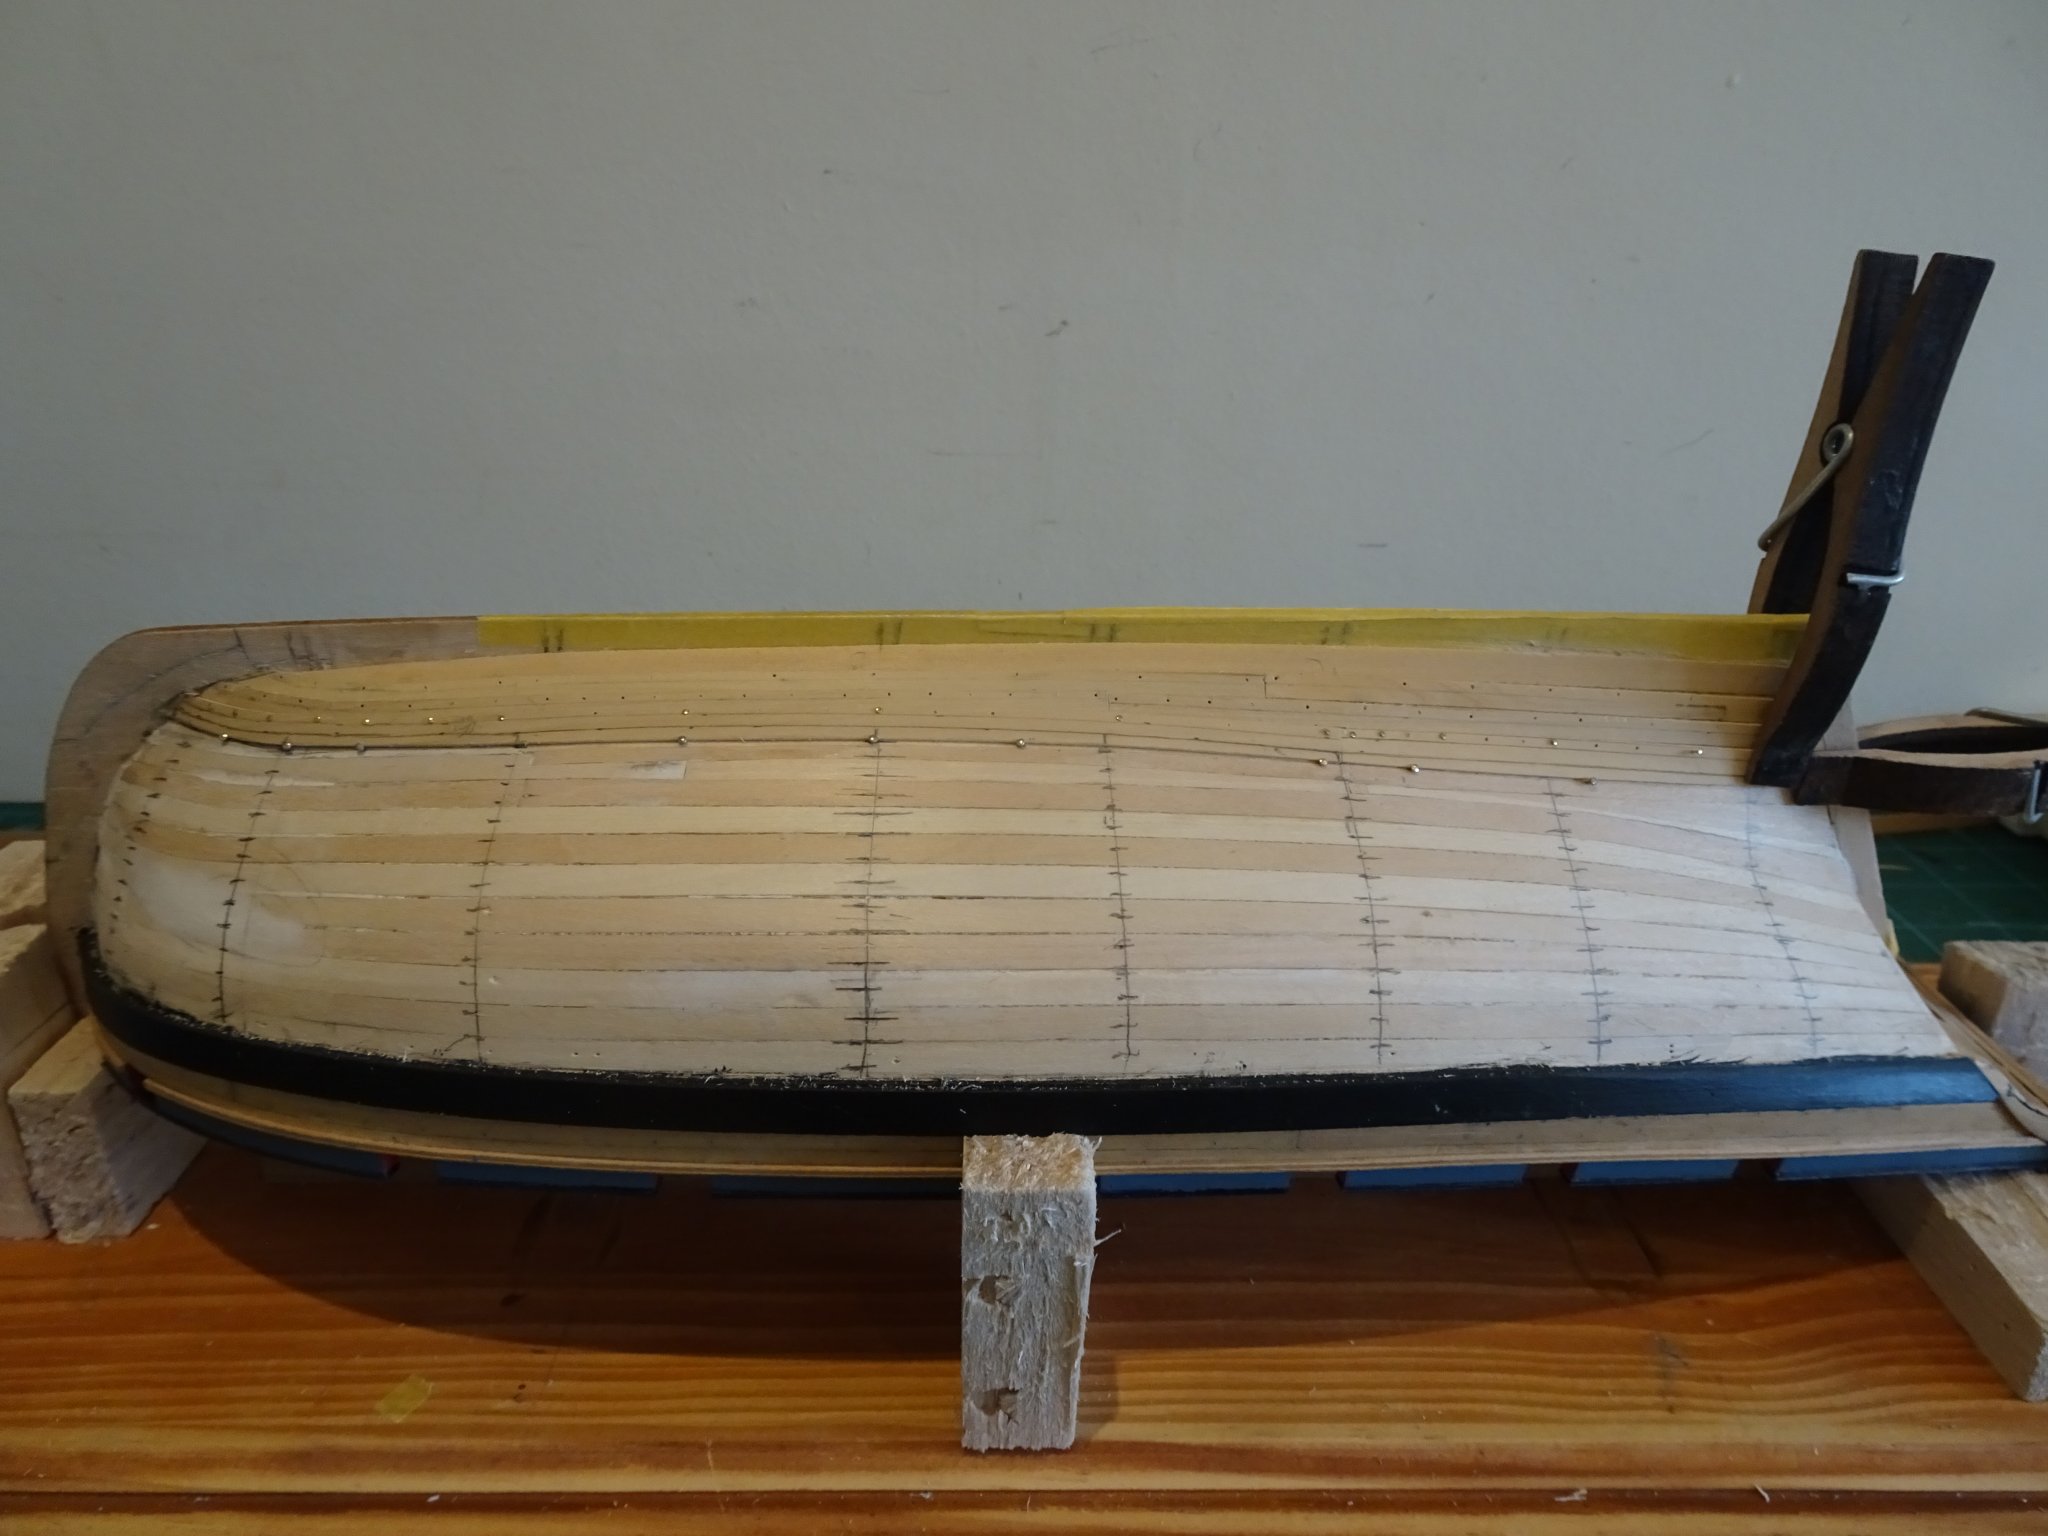
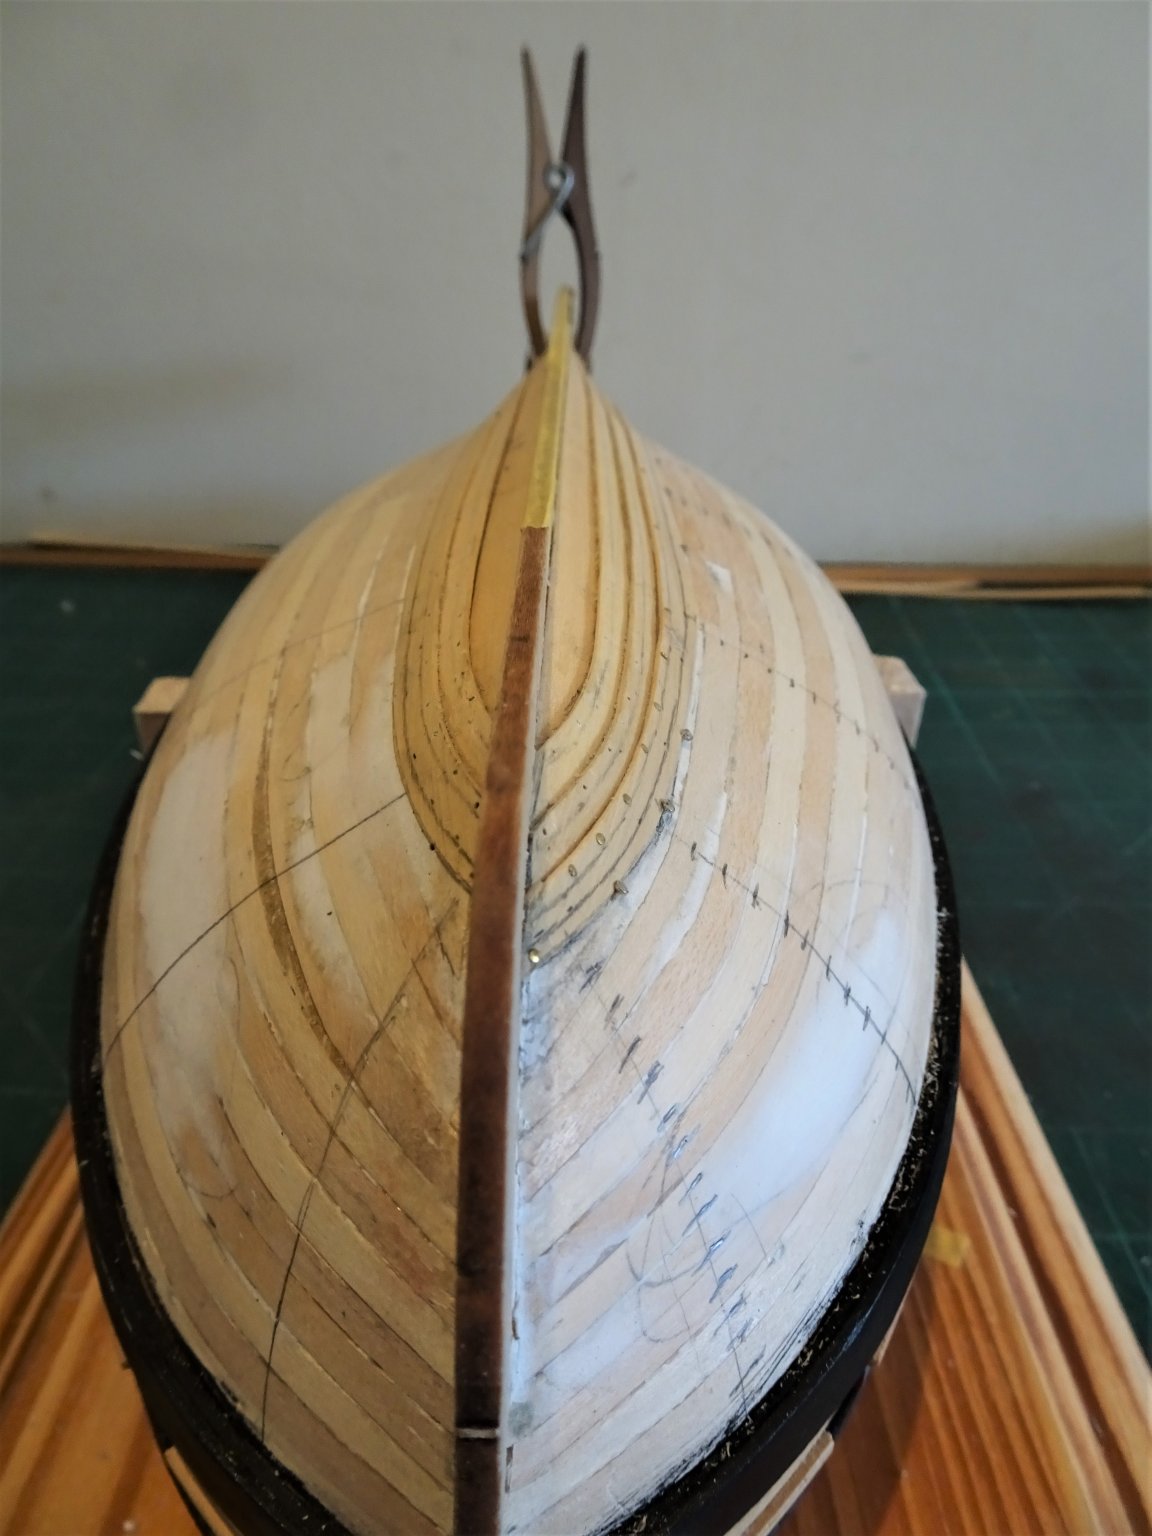
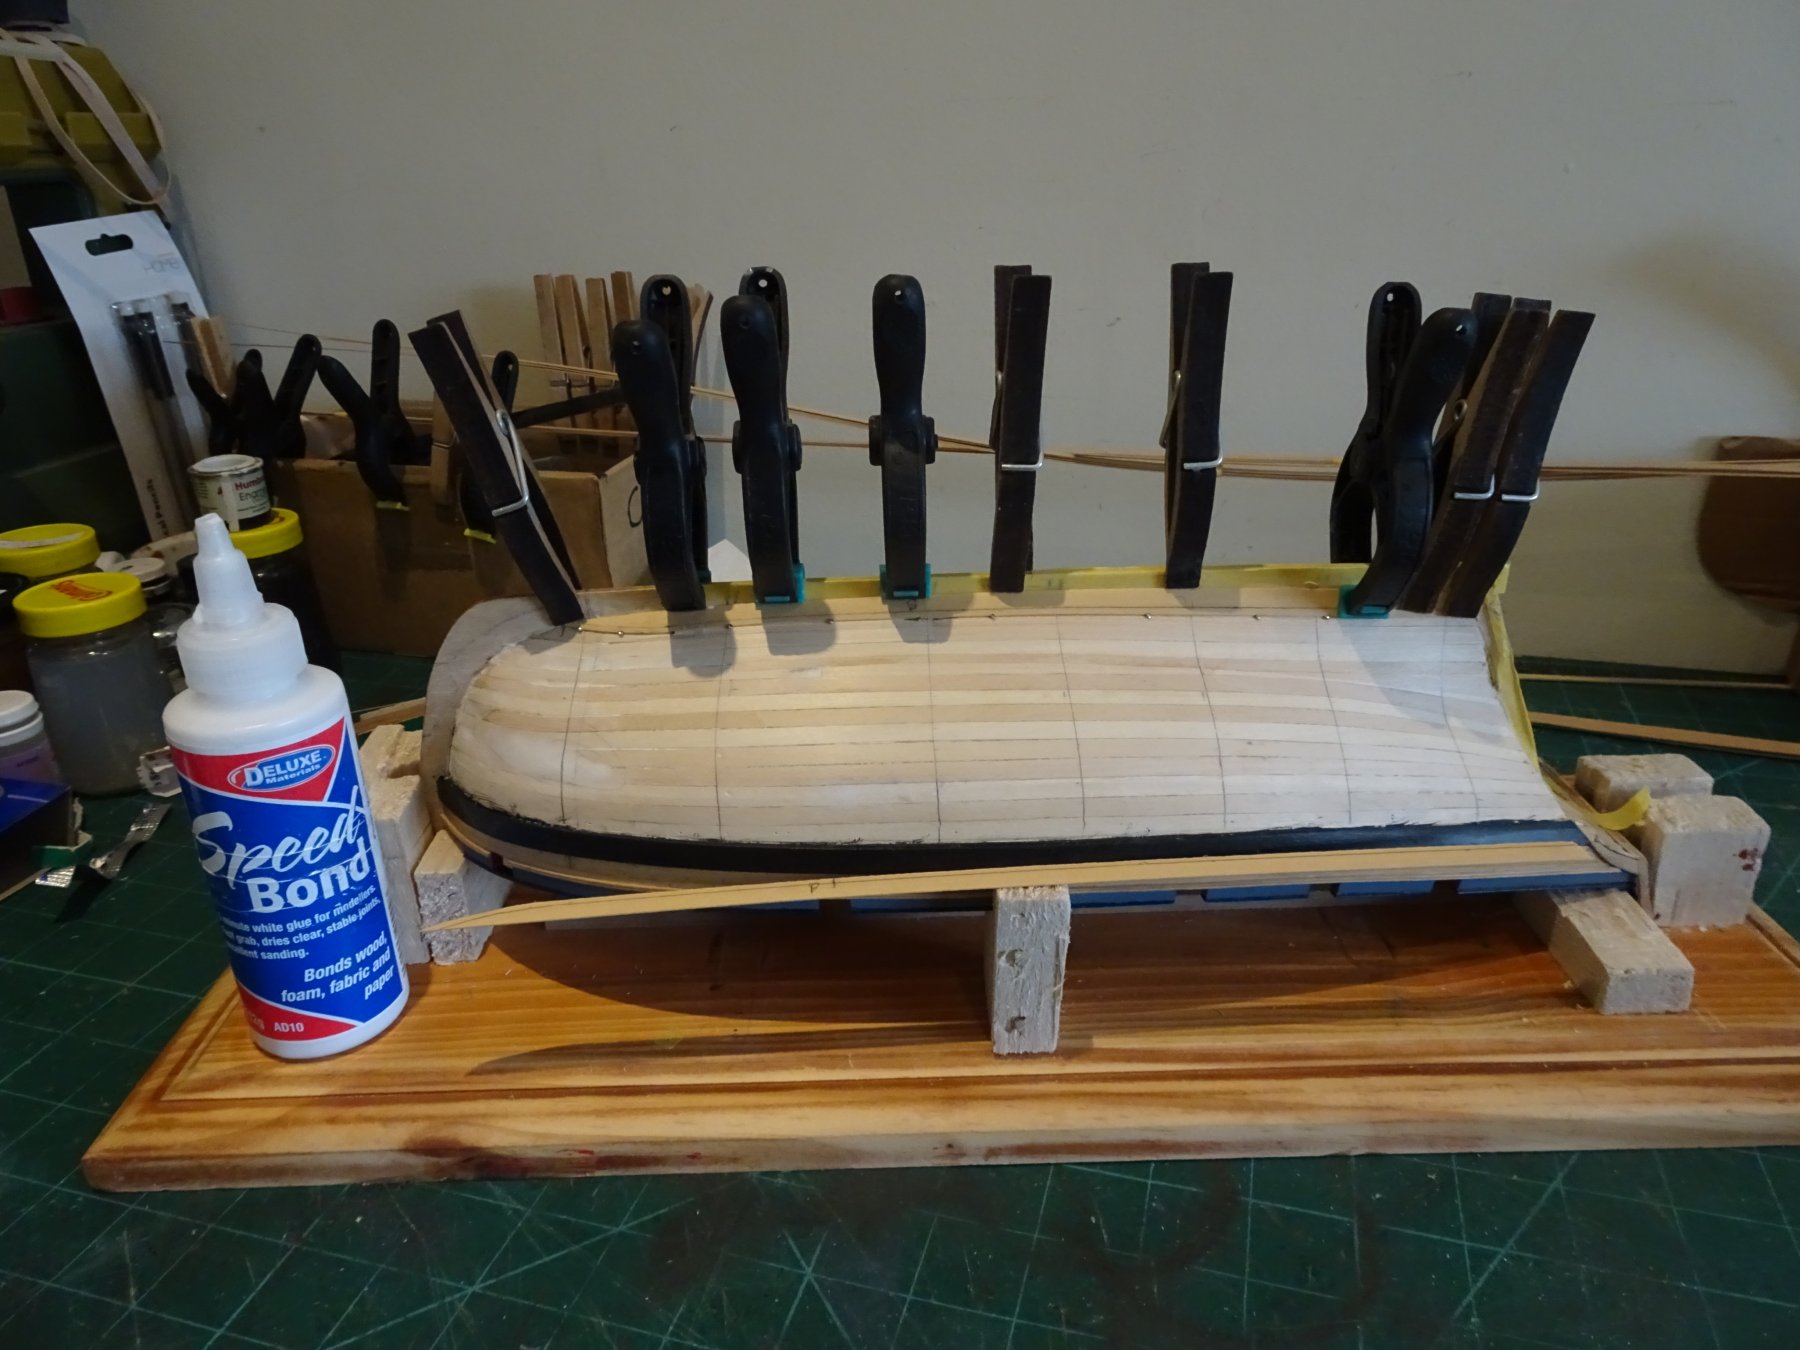
Post 16 Planking below the wale. So time to get to it. For the clinker planking the hull will need to be inverted during the whole process. 1860 First a new support base is cobbled together to hold the hull in position. Referring to the Alert book there is a mid ship section drawing showing the clinker boards, conveniently at 1:64 scale. 1886(2) I am using 0.7mm thick Boxwood strip and I start with an 8mm wide (midpoint) Garboard plank. Marked on this is a 2mm overlap for the next strake up. The first task is to re-mark the bulkhead positions on the hull and fix the Garboard plank. 1885 I don't use ca for second layer planking preferring to continue with a good quality pva. 1887(2) In the case of the Garboard plank the upper edge is held down using the heads of the provided steel pins. 1890 1888 Moving onto the adjacent plank to the Garboard the first thing I discover is that the 0.7mm strip at 6mm width is not conducive to an edge bend at the degree required at the bow. It is too thin and buckles rather than bends. 1892 The answer is to take a pattern and cut it out of some thin Boxwood sheet. Hopefully this is an issue where only severe bends are required. 1899 These second planks are attached using fine brass pins along the bottom edge, and the heads of the steel pins to secure the top edge. (The hull is inverted remember) 1905 1903 I have not cut a rebate or a chamfer on the plank edges to accommodate the lap, they are too thin for that. The laps will be fined down to suit later. So that's the start of the clinkering business. With the first two planks in place I can now try to work out the run of the following strakes. Between the wale and the overlap on the Garboard plank, there is 72mm at mid point. Using 6mm planking with a net 2mm overlap results in 18 strakes of net 4mm planks. B.E. 22/08/2019


.thumb.JPG.19154848c9624b19dec66977884f0c75.JPG)
.thumb.JPG.b4fb2534d96f5e24dda6048b6343af44.JPG)


.thumb.JPG.090891d578aeaf62d7ad26cf5f77c6e0.JPG)
- 335 replies
-
- 17
-
-
- alert
- vanguard models
- (and 1 more)
-
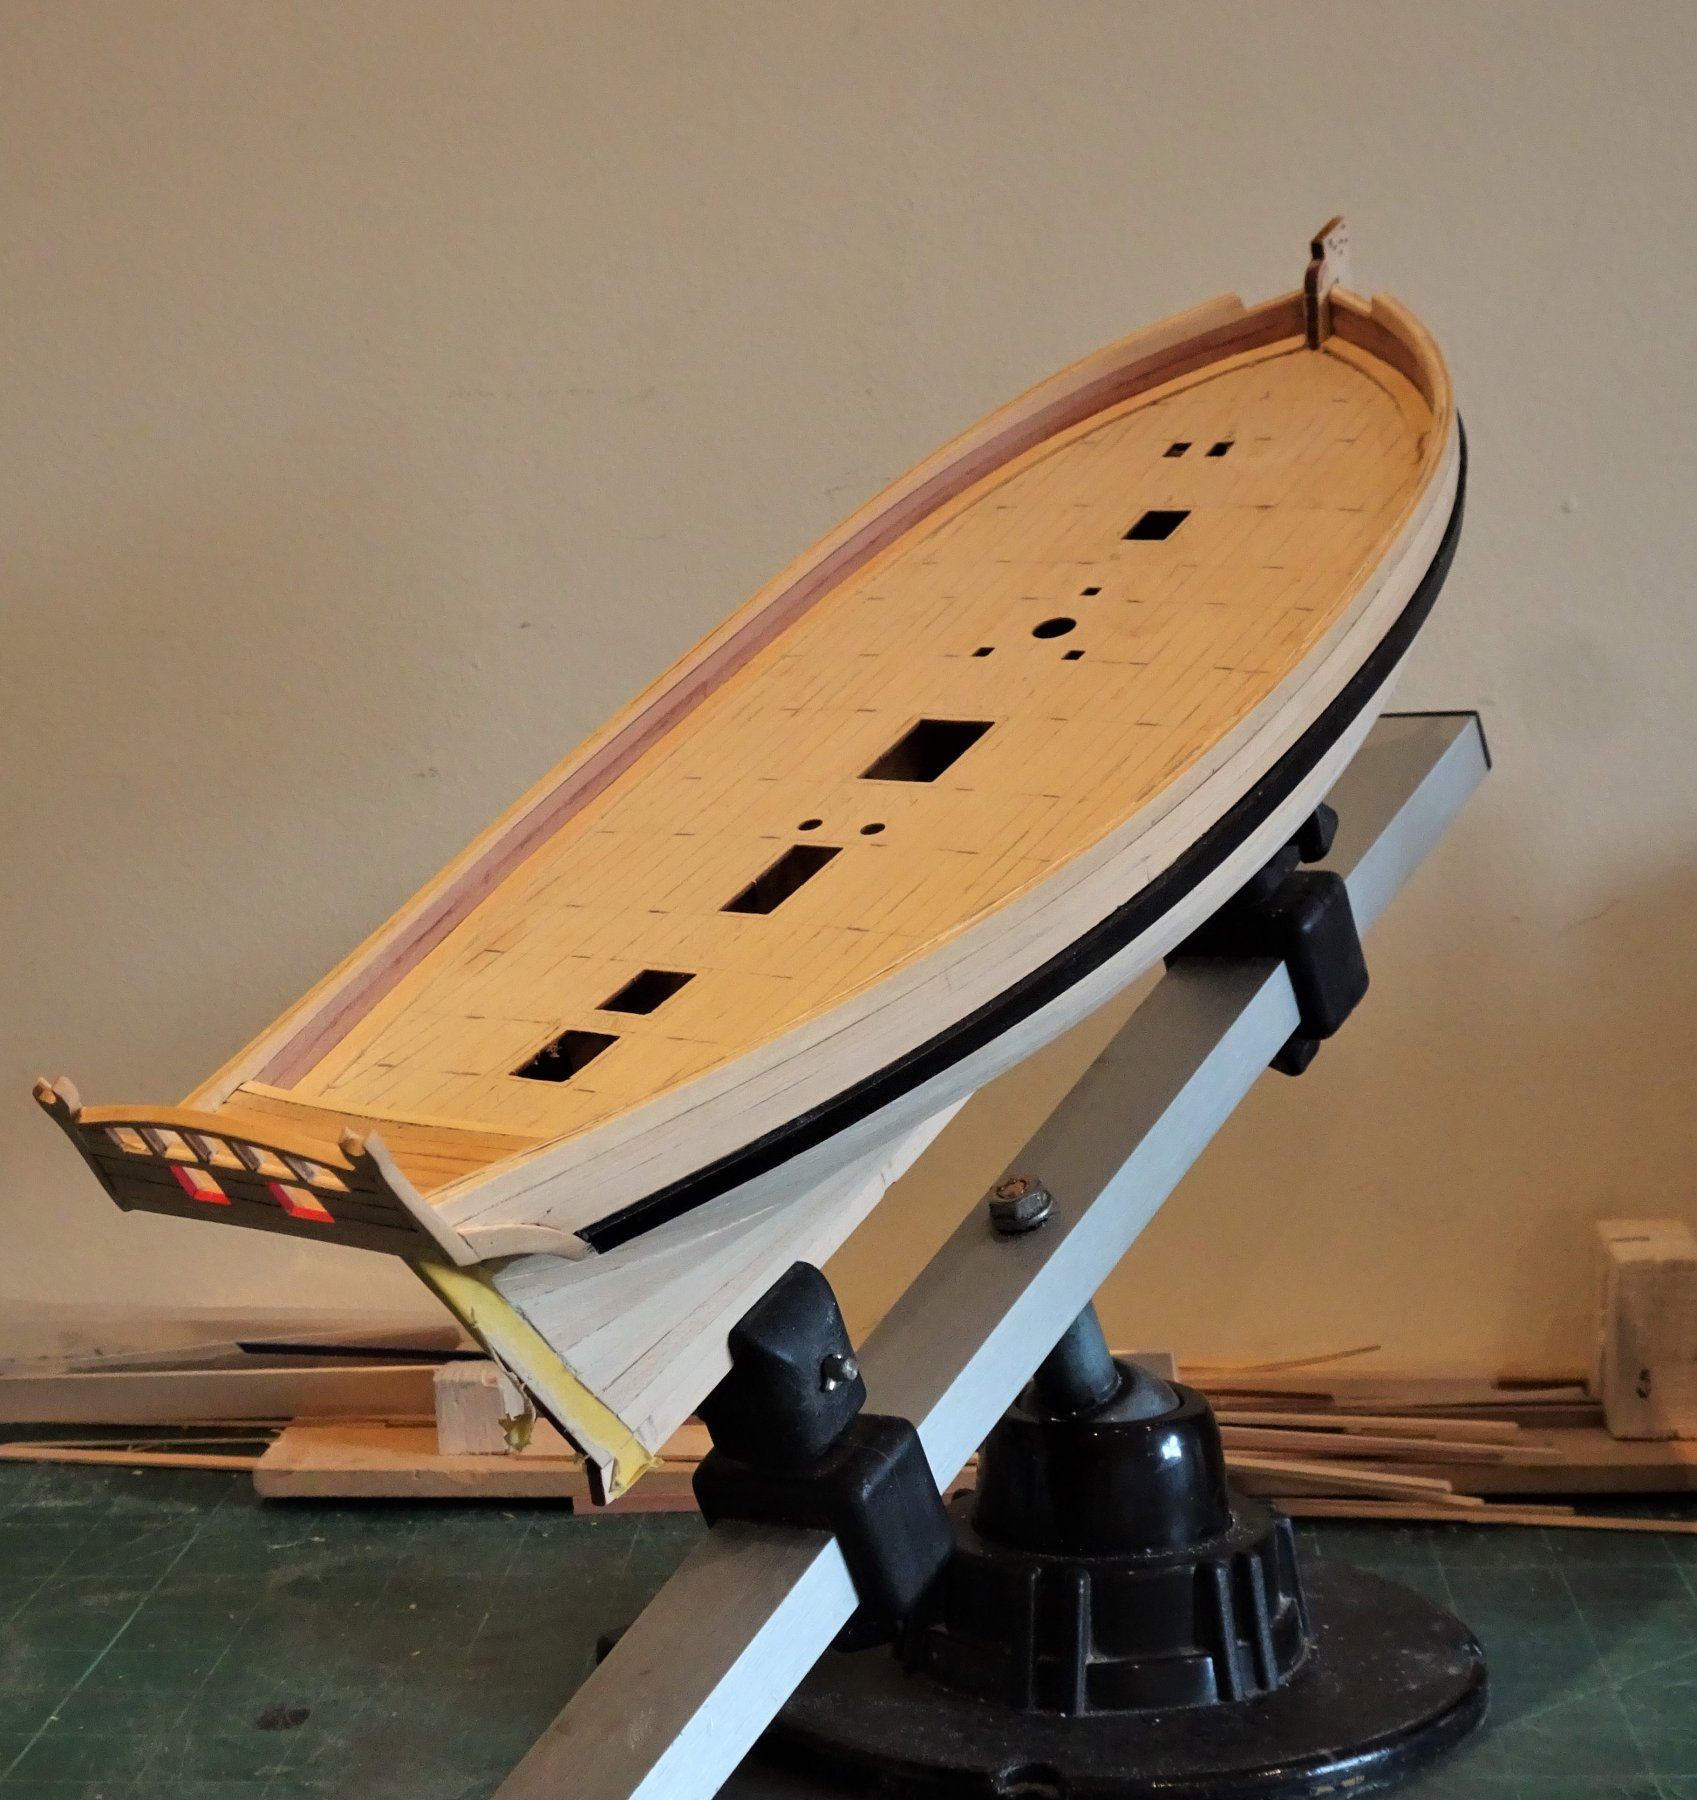
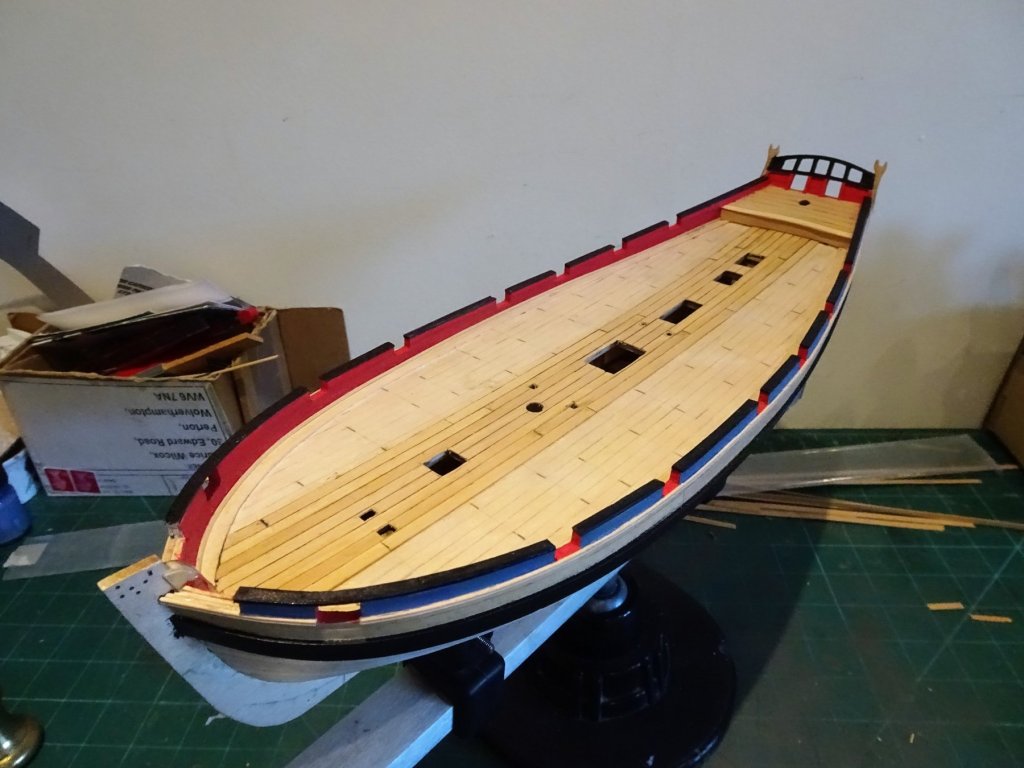
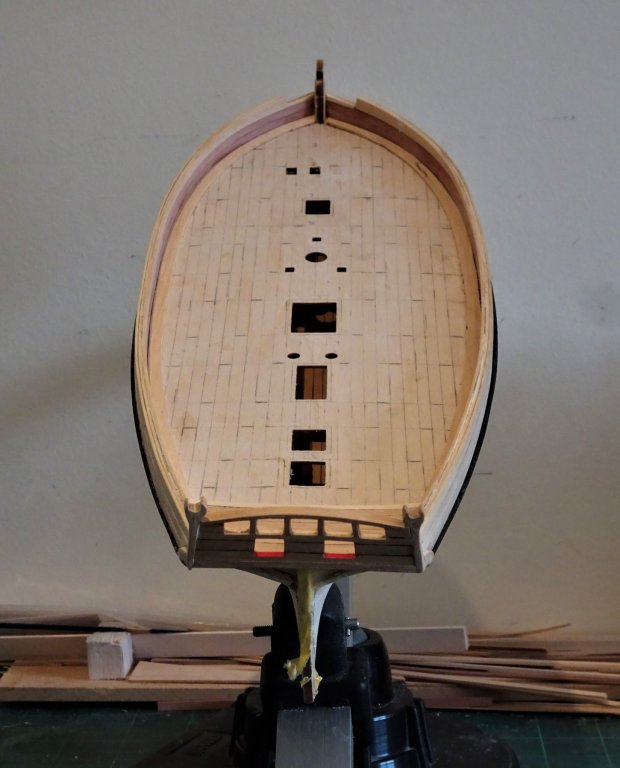
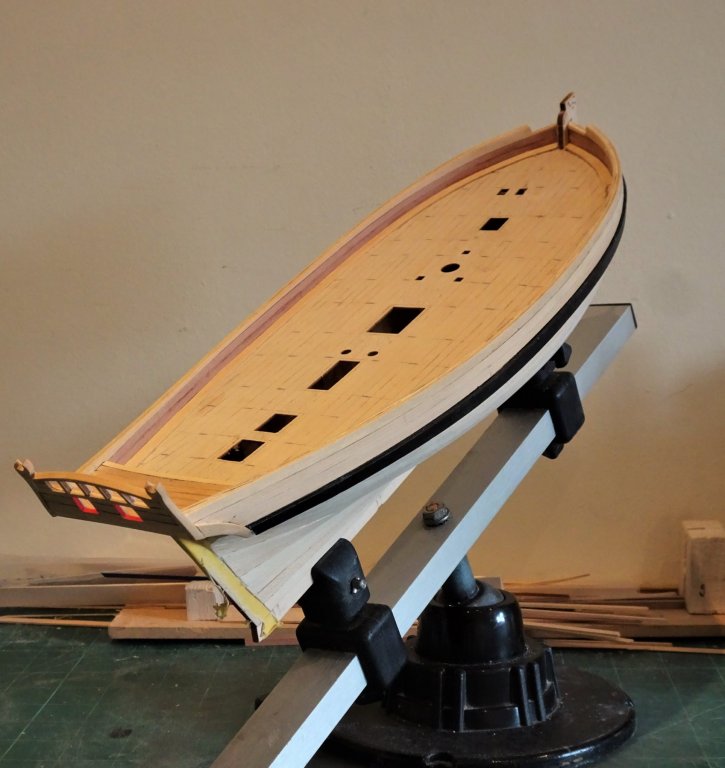
Post 15 Laying the deck. Before fitting the false deck I had marked the deck beams and planking layout in pencil. It is far easier to do this before the deck is glued into place. Because I like the option to leave covers off I install carlings below the deck to give the impression of depth if the gratings are left off. The waterway has already been installed so the decking can begin. I am using Boxwood, not the provided stuff, but 0.7mm thick strips which I can get in varying widths. I will be using nominally 4.5mm wide planks which equate to 11.3" 1821 The first two strips either side of the centre line are run full length down the deck, marking the cut out positions for the hatches etc; The planking then continues using the butt joint plan. 1856(2) I don't sand decks , I prefer to scrape them. For this I use an old plane blade. 1852(2) 1851(2) Once I am happy with the deck smoothness I will seal with a water based varnish, using Caldercraft Flat Matt Varnish. I now turn my attention to the lower hull planking. B.E. 20/08/2019
.thumb.JPG.2c244e4494880b3b2078e154deabf6a3.JPG)
.thumb.JPG.ea81c17cc52ea157598222317c788438.JPG)
.thumb.JPG.1bcc860ed776fb178aeb9bb84ed924bd.JPG)
- 335 replies
-
- 16
-
-
- alert
- vanguard models
- (and 1 more)
-
Thanks for looking in Alan, Chris's new crop of models do look really good, I loved his Pegasus designed kit marketed by Amati, one of my favourite models. I'm pleased if anyone takes an interest in my build Alan, and as Kurt also has this kit I guess he's interested in my approach. One of the great aspects of MSW is the sharing of information, and the way members give of their experience, I've learned such a lot from others on here, and I hope you find it as beneficial as I have. Cheers, B.E.
- 335 replies
-
- 7
-
-
- alert
- vanguard models
- (and 1 more)
-
I certainly will have to devise a jig of sorts to hold her during planking. The stern is always a worry, particularly those boom crutch extensions, which is why I have left them oversize for the present. I have started the deck planking so that should keep me busy for a while. Regards, B.E.
-
Have you thought of silver soldering Kevin. I haven't done much of it, but I have made attachments to fine brass work and I use Palmer Metals combined solder/flux in a syringe which is applied in a very neat bead and comes in different melt points for repeat additions to a unit piece. More expensive than the ordinary sort, but gives a satisfying result. B.E.
-
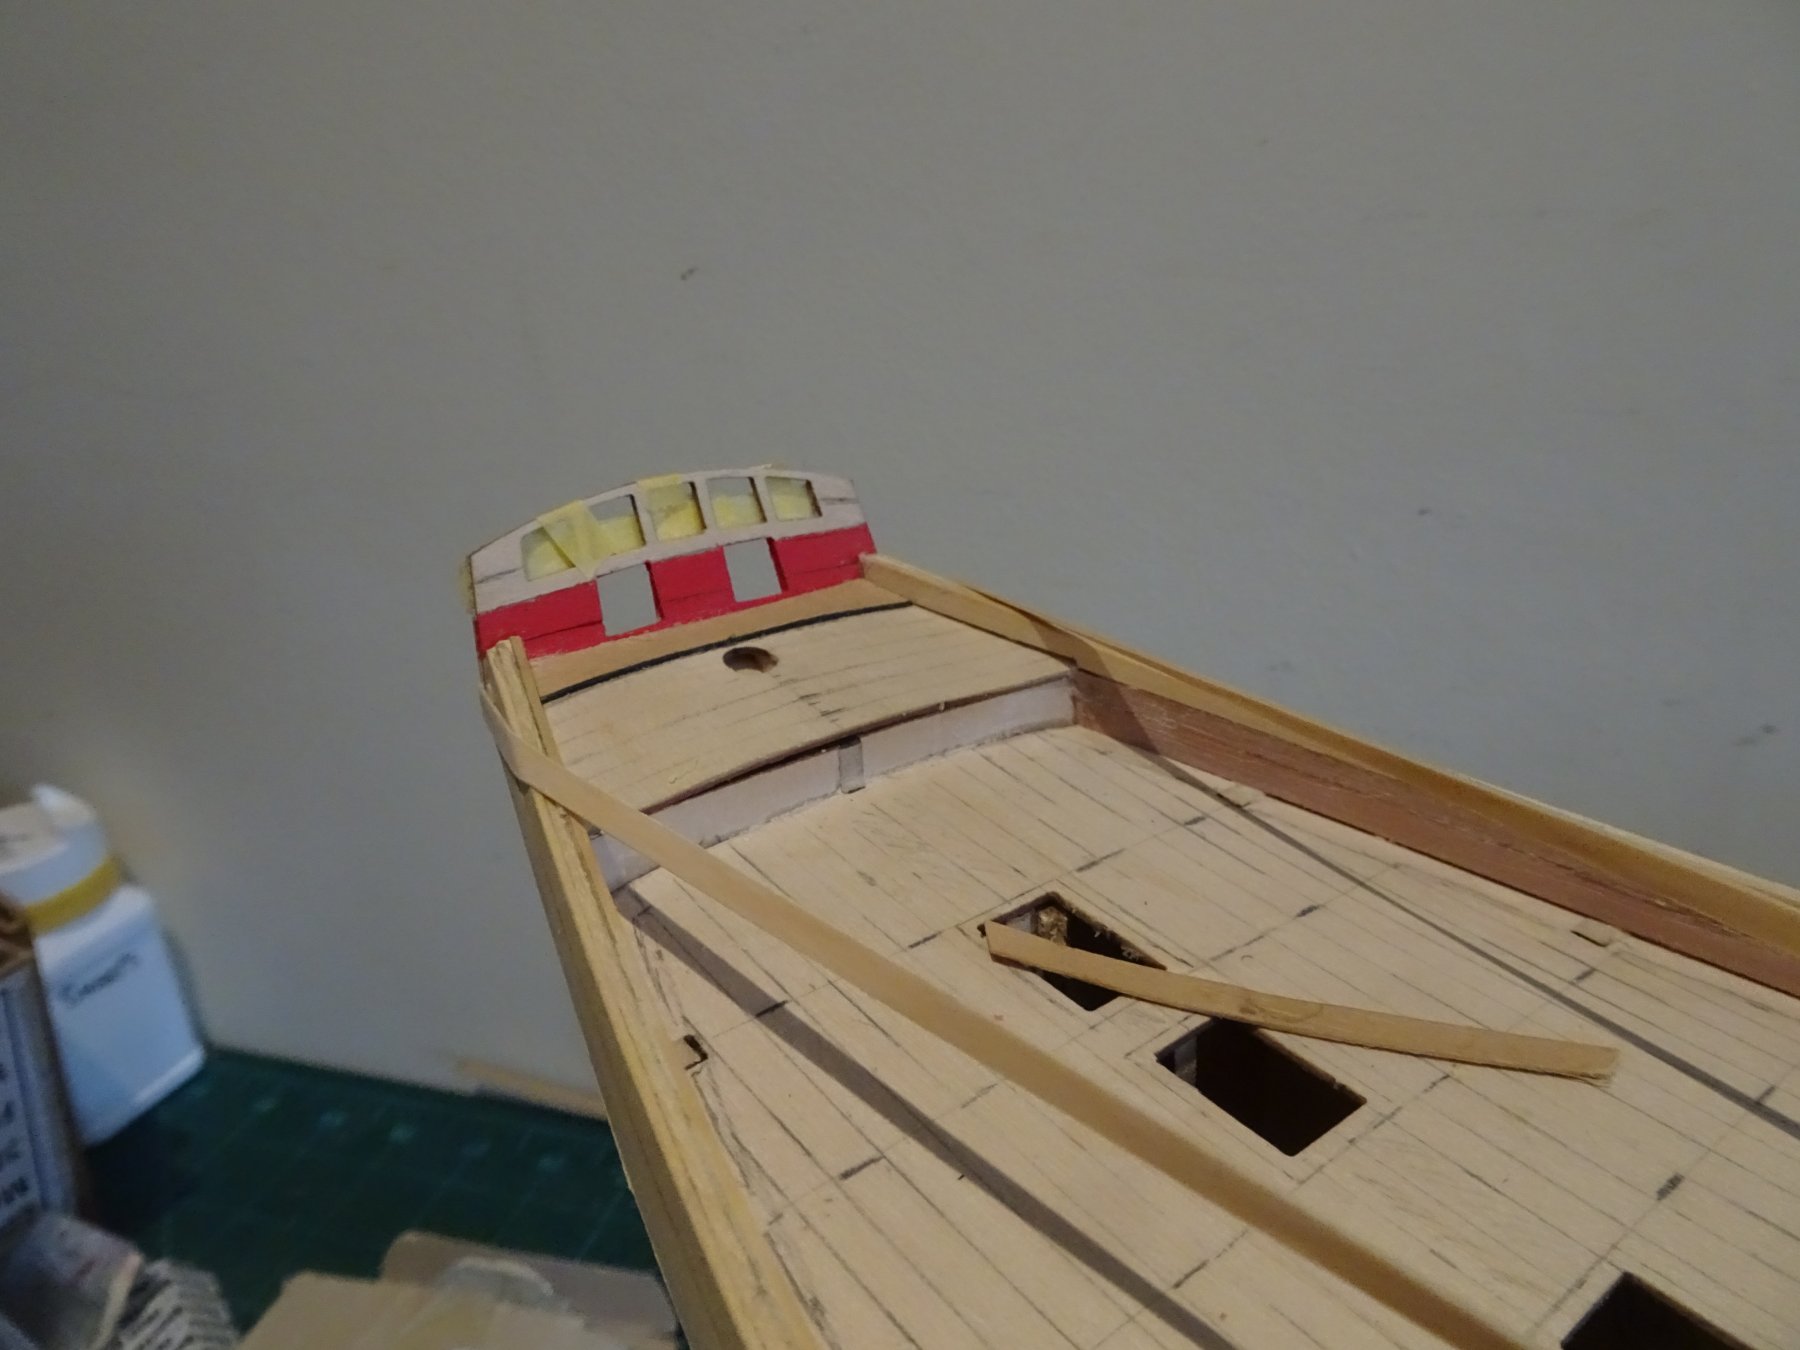
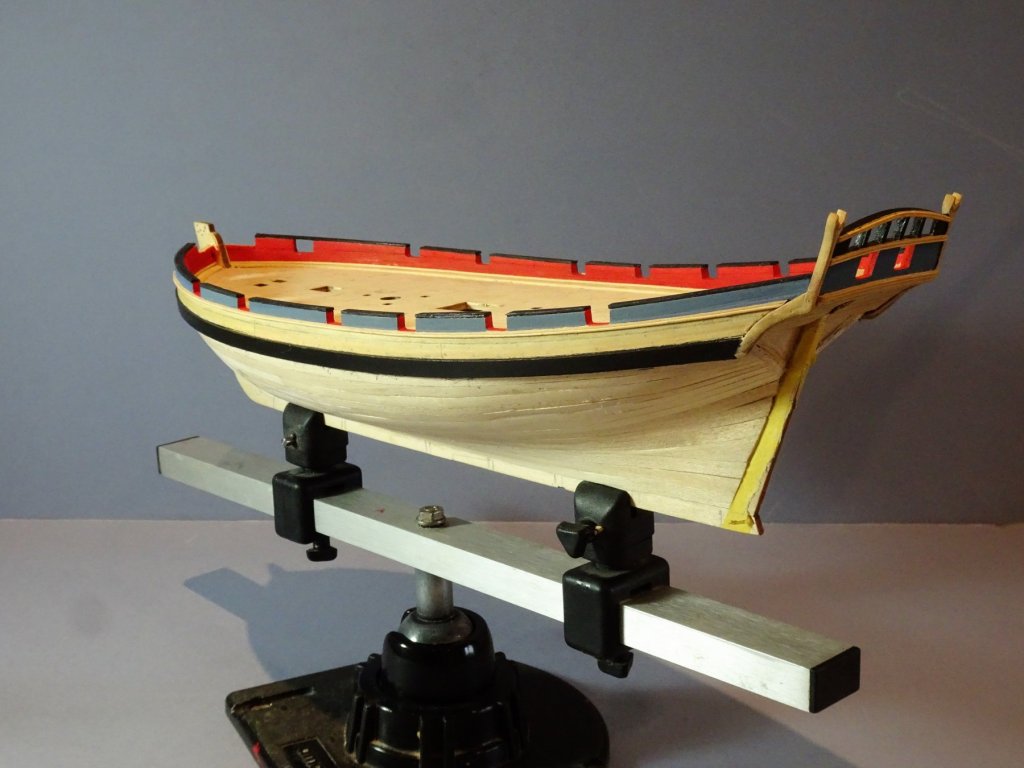
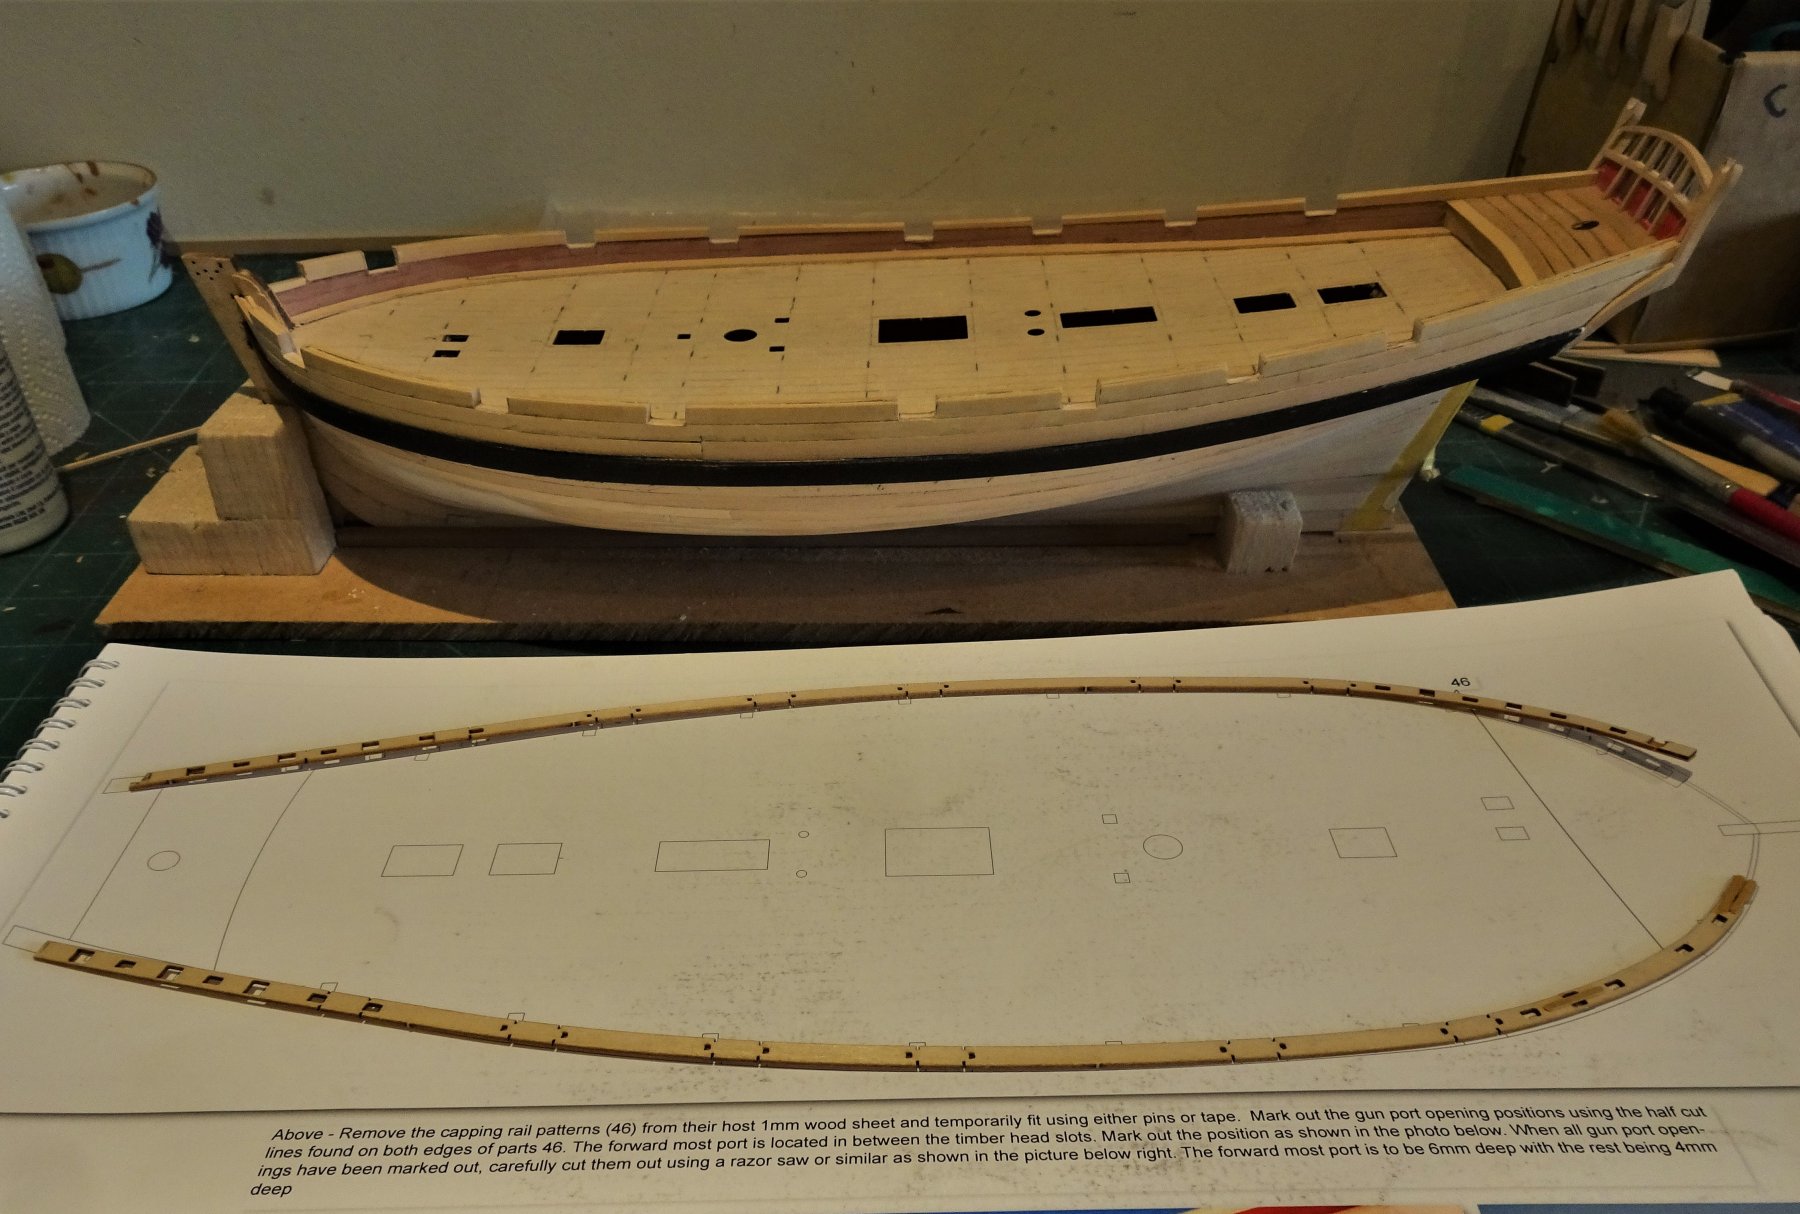
Post 14 Capping/Drift Rail (Part46) Much as I liked the idea of the pre marked capping rails, when I came to fit them they just looked too broad to my eye. This would have been exacerbated by my desire to add even a very thin edging strip with a profile moulding cut into it. 1820 The provided strip measures 4.5mm wide which equates to 11.3". The scantlings table in the Alert book gives the Drift rail width of 7½" which equates to 3mm at scale. I understand the over-scale width maybe a necessary simplification to incorporate the cut outs for the timberheads etc; and ease construction, but I have decided to go another route. I recall that I had the same issue with the Pegasus kit where the Drift rails also had to be reduced in width. 1806(2) For Alert I used Pear wood strip of 3x1mm which is a perfect fit for the drift rails, and add a moulding to the outside edge. 1812(2) The provided rails may come in to use as a template to mark the cut out positions but for the dedicated kit basher they aren't really necessary as the positions are clearly marked on the plans. New Paint job. I wasn't really happy with the shade of blue I first painted the topsides with. On reflection it looked too bright, somehow at odds with the red internal scheme, perhaps too modern looking. These things are hard to pin down. The revised scheme is based on Humbrol Matt 96 which is RAF Blue. At a pinch I think you could get away with this on its own, it has a muted dusky blue/grey tone. 1800(2) However, I thought it needed making slightly paler and a tad brighter. To achieve this I added white paint by degrees, testing each sample, until I arrived at the final shade I was happy with. 1811 1816 That's it for the outboard work for the present. To reach this point has taken some seven weeks of fairly regular work time. Amusing to think how many models Chris Watton has completed in this time, I think he must have an army of Elves down in the Forest of Dean working night shifts. I will now attend to planking the deck before I begin tinkering with the clinkering on the lower hull. B.E. 16/08/2019
.thumb.JPG.3789da8a632671e6b464bbd5a6743a5a.JPG)
.thumb.JPG.3ea8eb3020e065eb5587e4fcdaae996c.JPG)
.thumb.JPG.af6a8547b3eca2c4881e2a8c4d3ae281.JPG)


- 335 replies
-
- 19
-
-
- alert
- vanguard models
- (and 1 more)
-
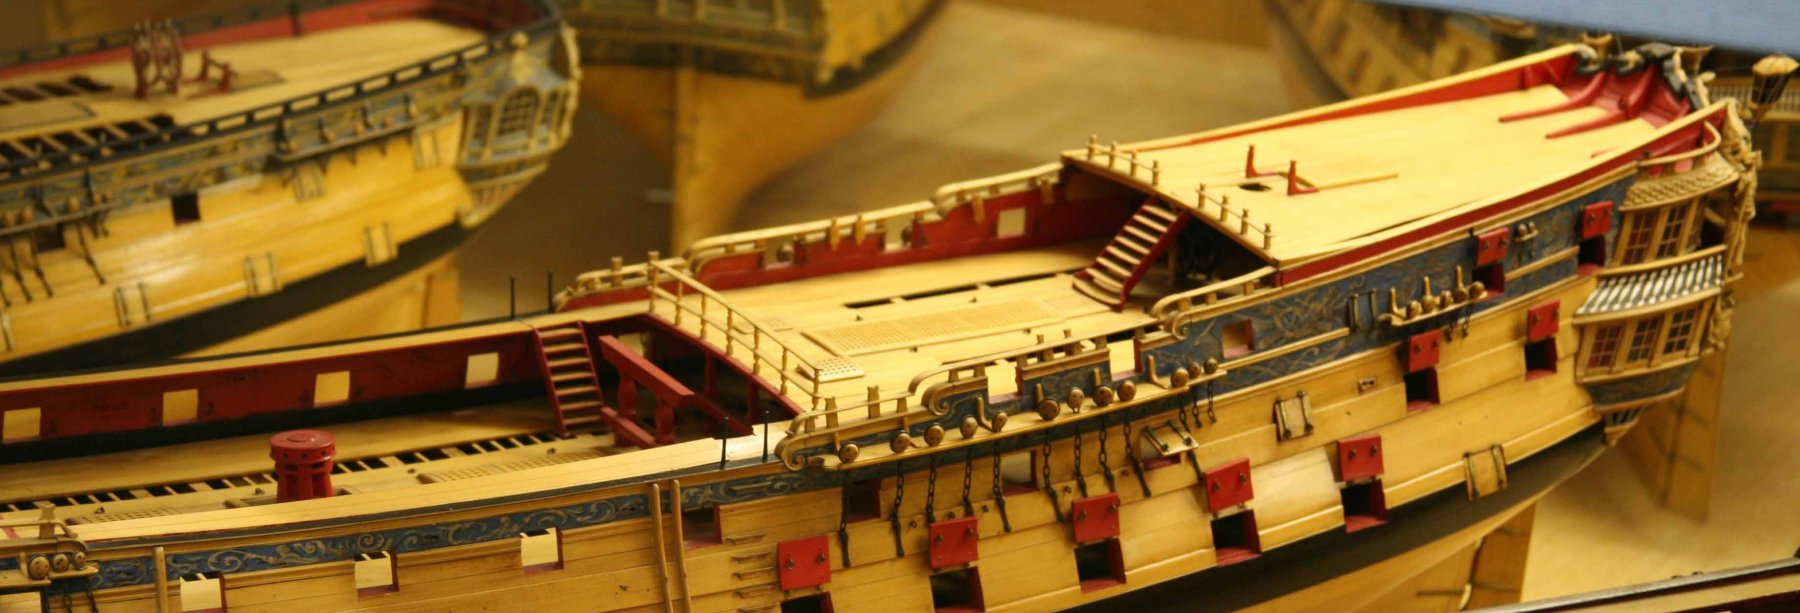
L.G. Carr Laughton in his book Old Ship Figureheads and sterns, covers this subject at some length. He specifically notes as a curiosity that in paintings and models the upper works of the period sometimes show the ground as blue or red, when "we know with some certainty that there was strict regulation that the colour should be black." This appeared to go back to the17th Century, and he cites an Admiralty order of 12 July 1715 that "the outsides of ships be painted of the usual yellow colour and the ground black". This doesn't mean that the rule was always adhered to, but in terms of fancy frieze works, it was usually restricted to ships of importance, and less so even on those, as the Napoleonic war ground on into the 19th c. With regard to cutters like Alert, they were utility vessels, commanded by low ranking officers, probably without the wherewithal, or authority, to pay for special paint jobs. If the topsides were painted at all I would guess it would be black. Even so I am happy to display my Alert with blue painted topsides, but I won't be adding the etch decoration. B.E.
- 335 replies
-
- 1
-
-
- alert
- vanguard models
- (and 1 more)
-
Thank you Kurt, she's still looking a bit rough at the moment, but I like to get some paint on her so I can judge the effect before I proceed too far. I think you're on the right track regarding the shade of blue for the topsides. This is the sort of tone I will ultimately aim to get. Of course using blue anyway is probably artistic licence as the official colour was black, but blue does make a nice contrast with the wood. Cheers, B.E.

- 335 replies
-
- 2
-
-
- alert
- vanguard models
- (and 1 more)
-
Post 13 Laying down some paint. Having taken a minimalistic approach to paint on my Cheerful build, with this model I am going to broadly follow the paint scheme as indicated in the Alert Book. I am using Vallejo Flat Red 031 for the internal paintwork, as I did with Cheerful. 1716(2) This is a good point to coat the internal bulwarks and internal faces of the ports. 1719 Once the spirketting had been painted I added the Waterway using 1/32" Boxwood square stock. For the stern and topsides the suggested Humbrol Matt Blue(25) is a tad too dark for my taste. 1770(2) I concocted my own mix based on the formula I used for Pegasus. The base paint is Humbrol Matt 89 (Middle Blue) to which Matt 25 (Matt Blue) and Matt 27 (sea Grey) and are added. The proportions are roughly 60% (89) 30% (25) 10% (27) 1769(2) Still not entirely convinced that I've got the shade right yet, but this is ok for a base coat. Mouldings and rails There are mouldings across the stern at Counter, Transom and Tafferal. 1721 I used 1/16th Boxwood strip for the purpose thinned down a little. These are much enhanced by scribing a simple relief using a razor blade cut pattern. 1718 For the Sheer rail which runs beneath the gun ports the kit indicates using plain 1mm x 1mm strip. I used a tad wider Boxwood stuff and as with the stern rails I scribed a profile on the face. The kit paint scheme indicates this be painted black, but I prefer to leave it bright. I rather liked the look of treenails on my Cheerful model. After some thought I decided to add the treenails along the broadside above the wale. 1759(4) Taking the arrangement from the Alert book drawings, I used a 0.6mm micro drill and filled the holes using a filler mix. Not very distinct but that's how they should be. A coat of wipe-on poly is applied to seal the surface. B.E. 14/08/2019
.thumb.JPG.f74d7f05789a00c7285a0a9f479bbc9c.JPG)

.thumb.JPG.d23fe67f2ceb5a577406929b6a789bfc.JPG)
.thumb.JPG.8606d6ca0a95c32a00b2aa70001bce7b.JPG)
.thumb.JPG.0fdf1cddb282a2762a2c96601ca03cec.JPG)
- 335 replies
-
- 18
-
-
- alert
- vanguard models
- (and 1 more)
-
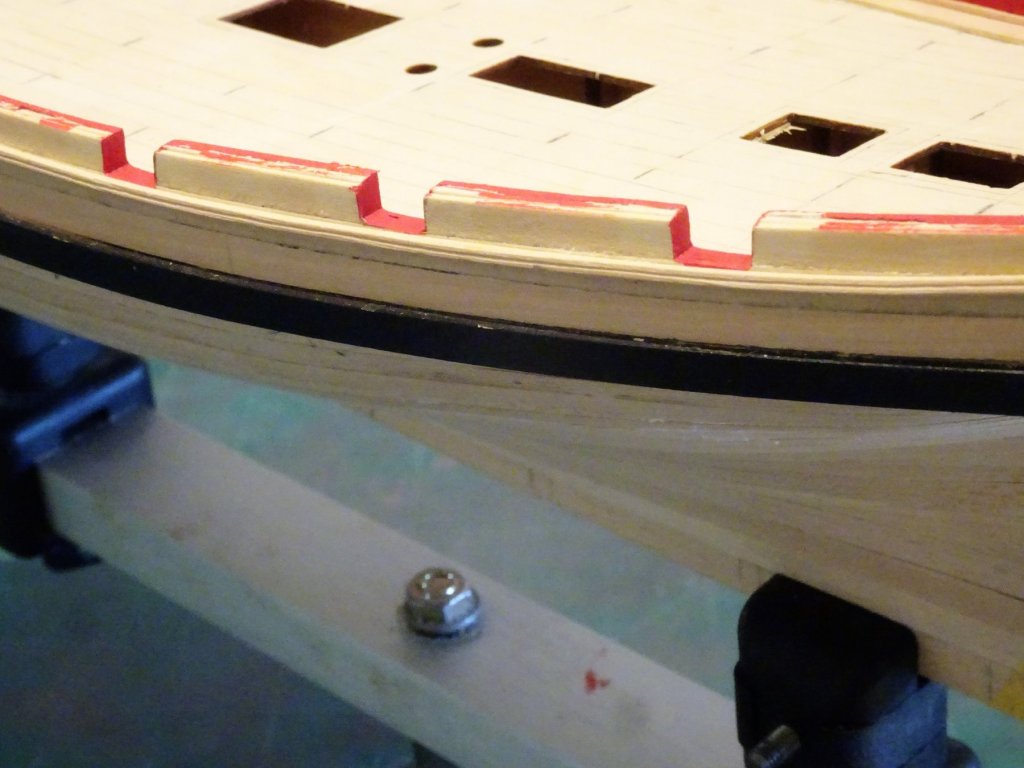
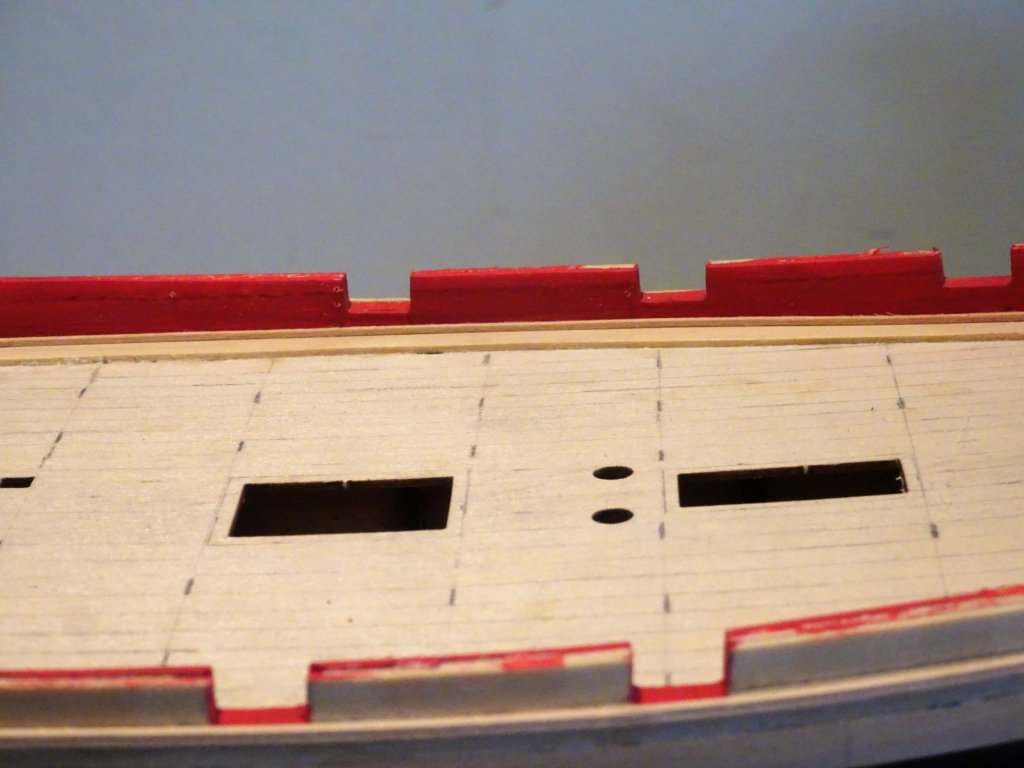
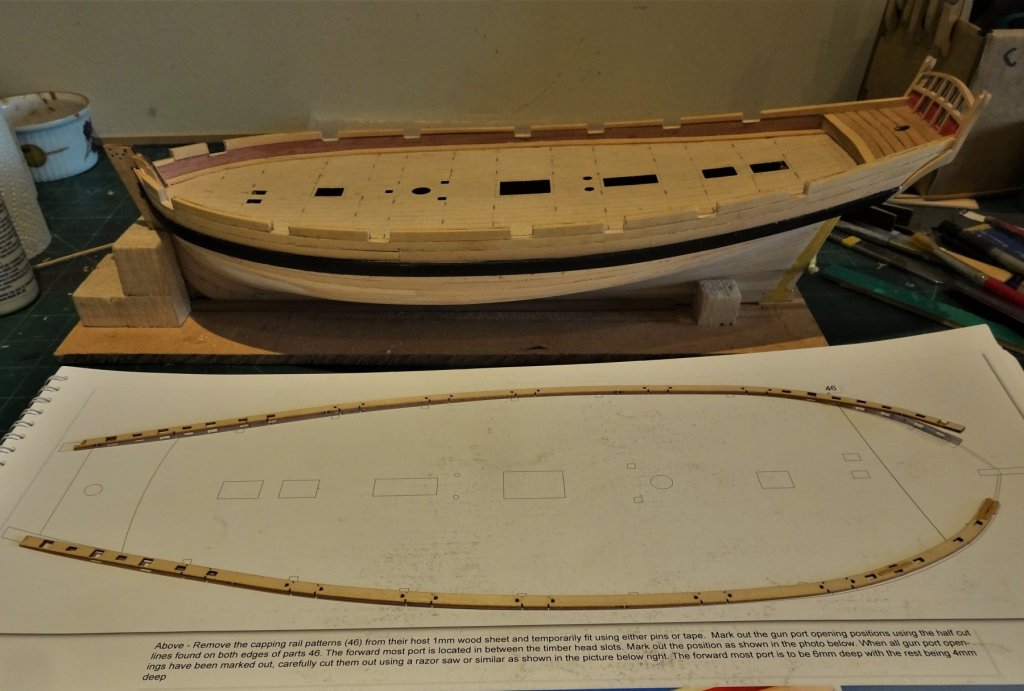
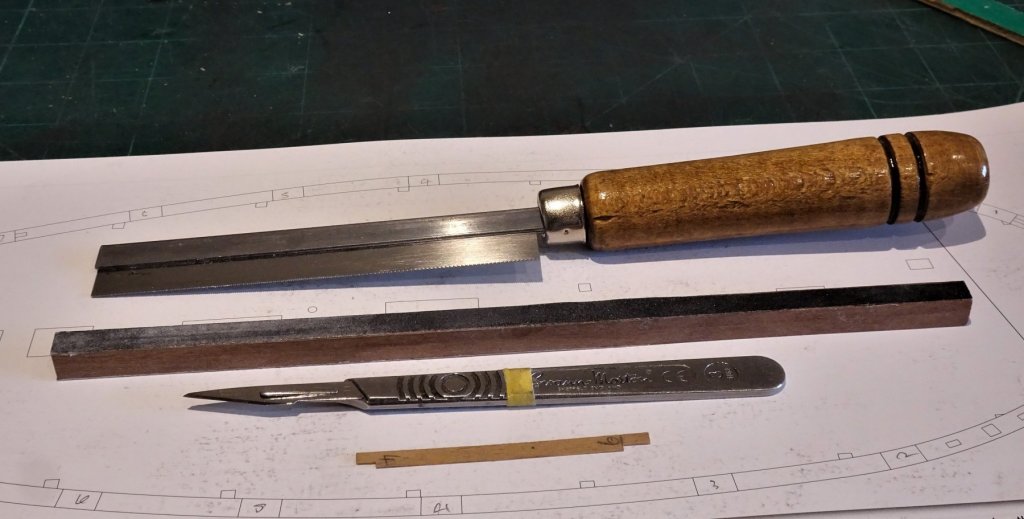
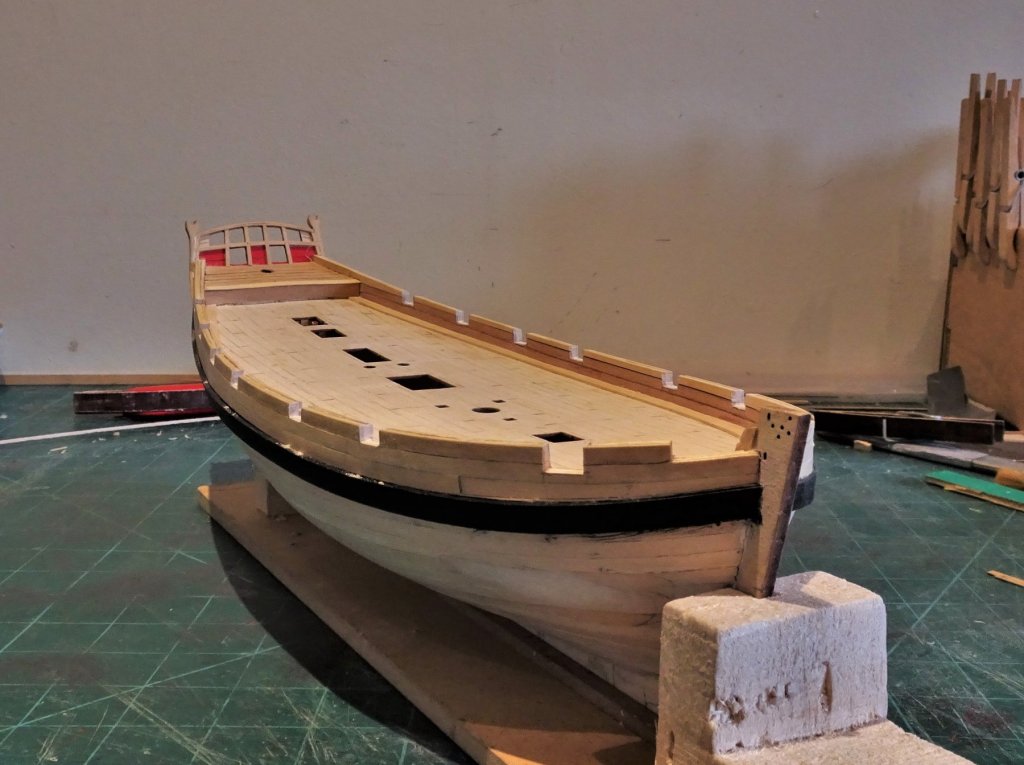
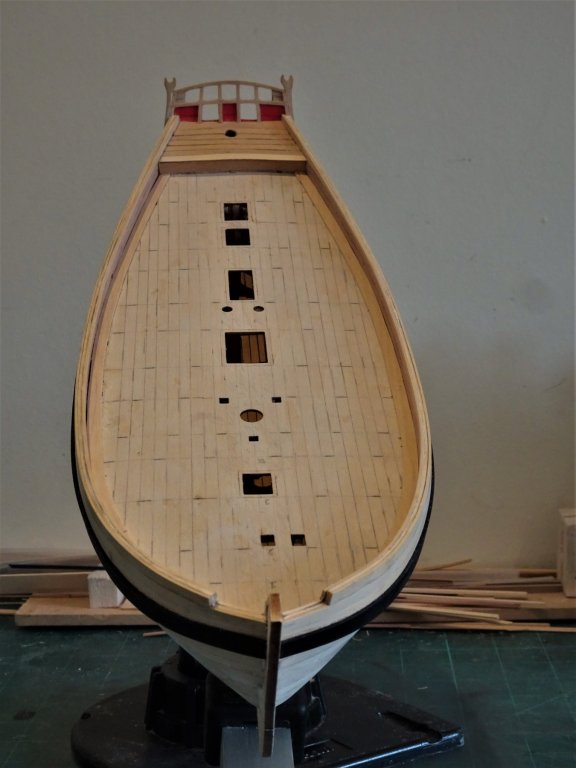
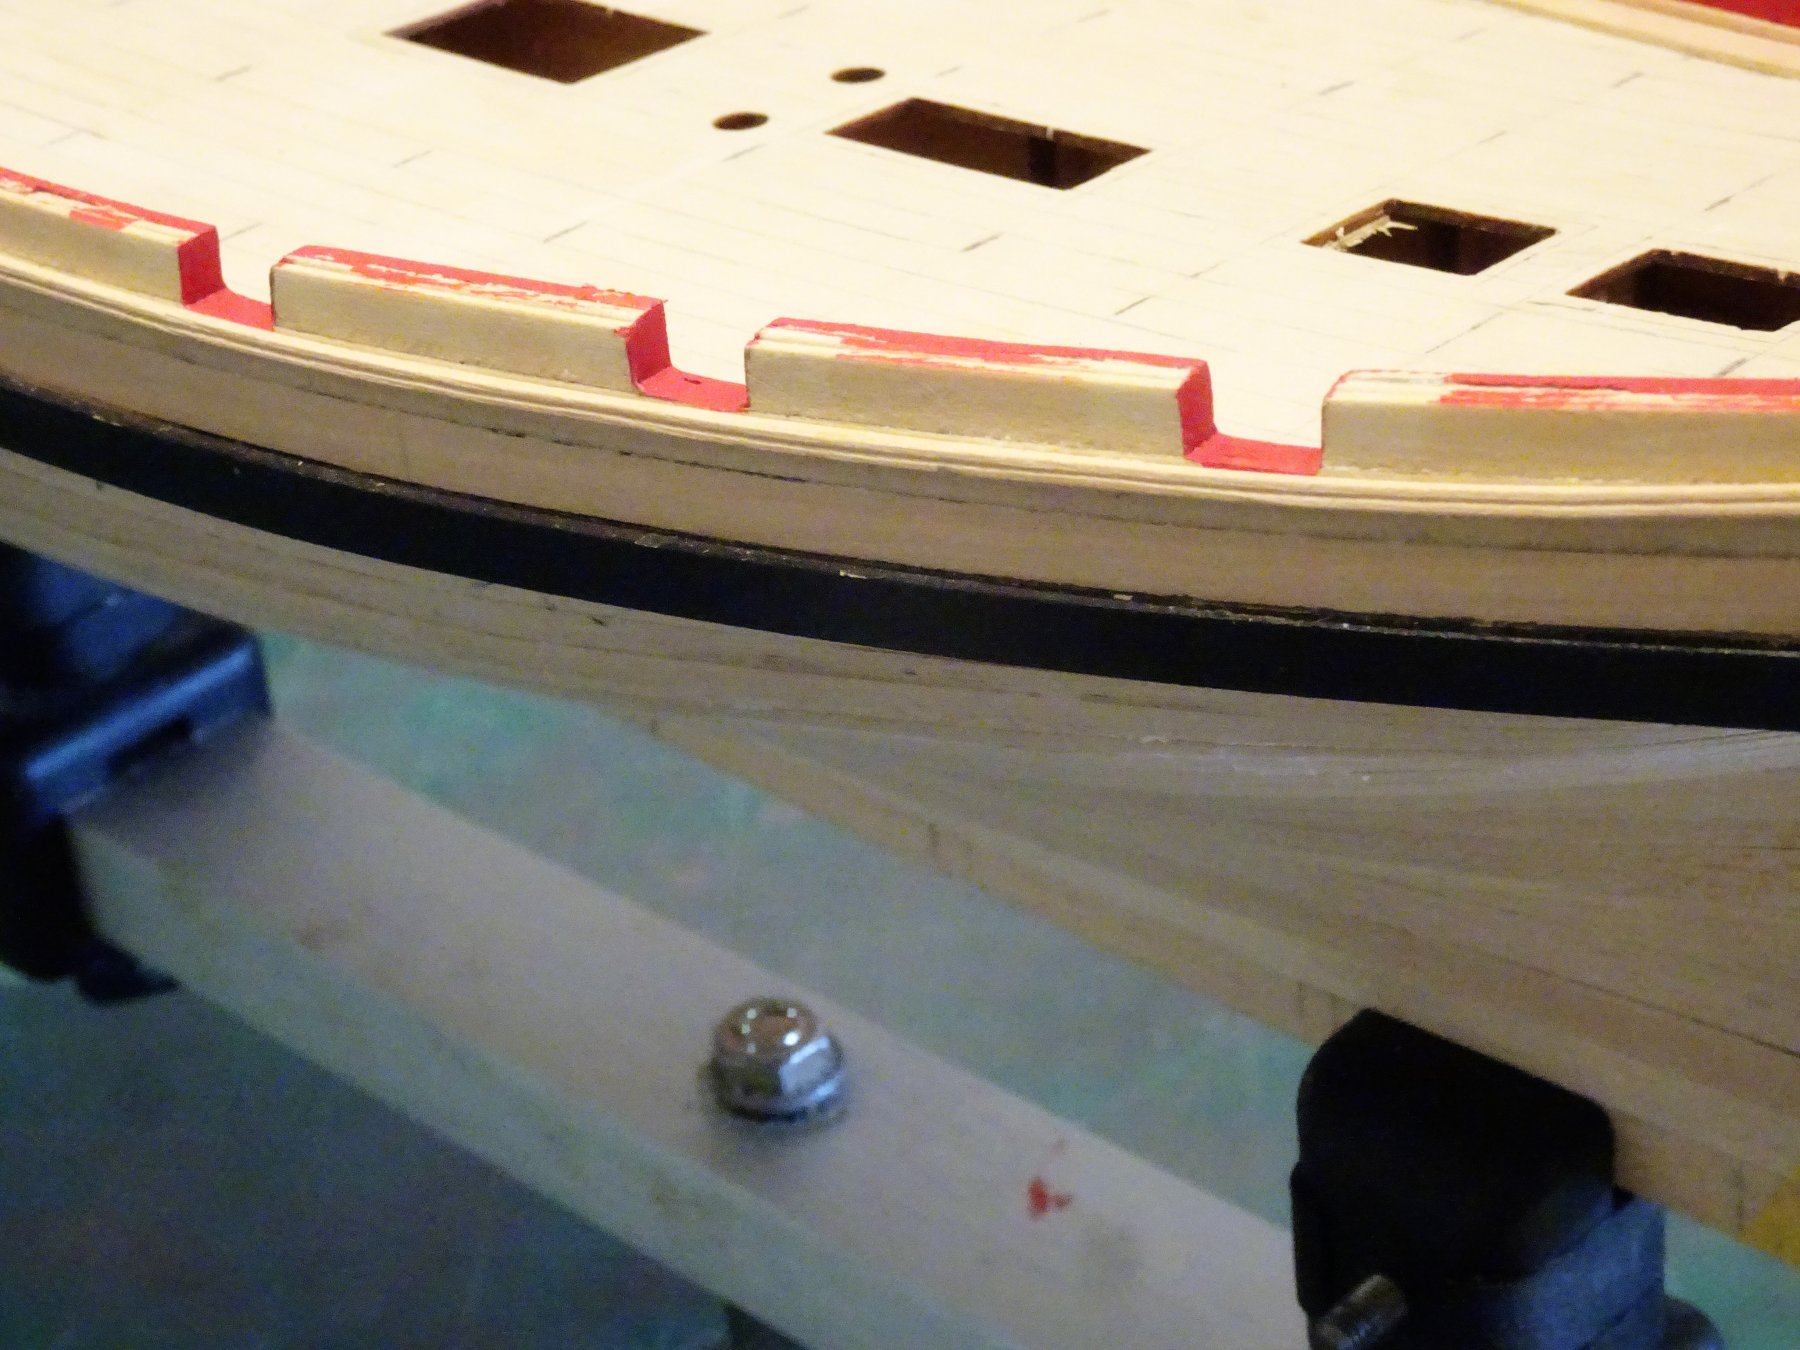
Post 12 Cutting the Ports The kit provides a combined capping strip/ gun port template (46) which has the port positions marked, along with the slots for the timber heads. 1640 These are very delicate strips and in my kit the front ends had broken away even before removal from the supporting fret. Even so they are a good idea, simplifies and takes all the hassle out of making a rail. I always find the cutting out of ports a tricky business, but at least these are only half ports. 1641 To assist the process it is useful to have:- A square section strip the size of the port, with two grades of sandpaper stuck to two of the sides. I'm using an 8mm square section of Walnut. A gauging strip with the 4mm and 6mm depths cut out to mark and check progress. A good quality narrow blade razor saw, and scalpel for cutting and paring. 1639 Once the ports have been marked, Tamiya tape is used as guides for the vertical cuts. 1636 Always a relief when this job has been done. 1643 With care things will go well, but watch the angles of the vertical cuts across the top, they are not all square to the keel, but follow the curve of the bulwark. B.E. 11/08/2019
- 335 replies
-
- 15
-
-
- alert
- vanguard models
- (and 1 more)
-
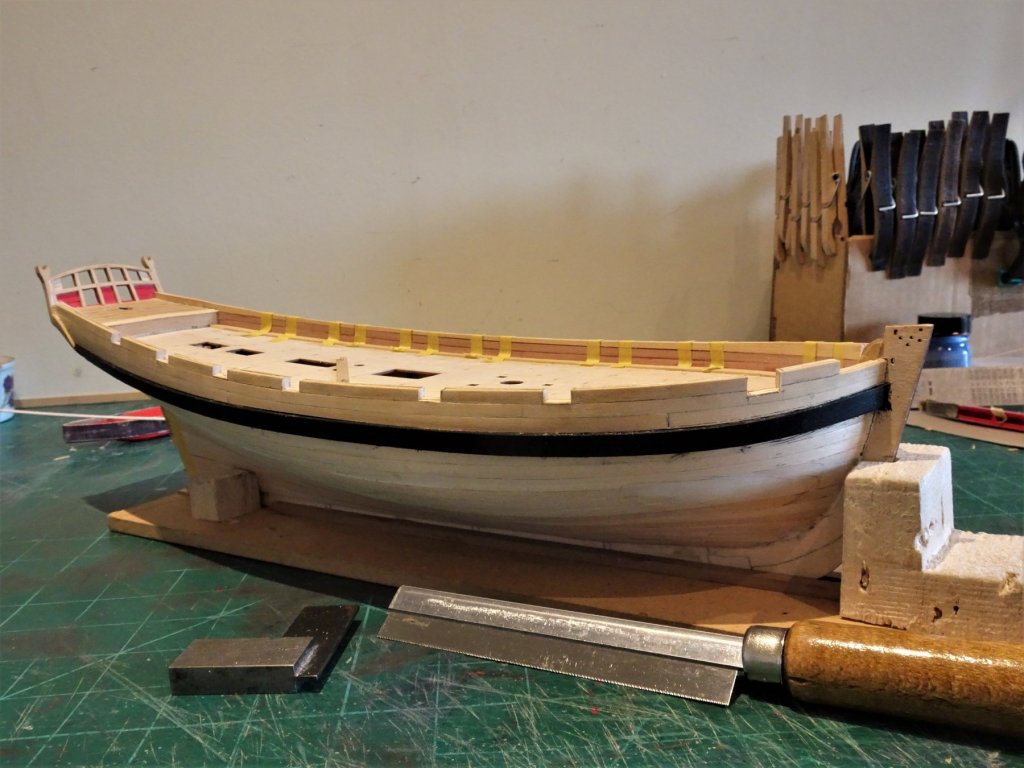
Post 11 Planking above the wale Above the wale I have used Boxwood strip forming three strakes down to the wale top. At the aft end the planks are shaped to meet the lower side counter pieces. 1598(2) I won't completely finish these Top sides off until I have cut the half ports along the bulwark. 1606 I then moved onto planking the internal bulwarks. For the Spirketing I used kit Pear wood strips,(1x3mm and 1x4mm) Above this I used a Boxwood strip sanded back to the top line. 1607 The second layer of the Wales were then attached using 6x1mm Boxwood strip. A rabbet is cut into the bow stem to take the forward end which is slightly reduced in thickness. The plank requires a little heat bending to take the stress out of it and before fitting the three Hook and and Butt scarph joints are represented by scribing into the surface. I have followed the arrangement from the Goodwin Alert book. Using Caldercraft metal black paint I applied a thinned coat to seal the wales, but these will need to be finished much further down the road. As suspected the scarf joints are barely visible, and probably not worth the effort. 1604 1605 I added the waterways along the deck, cut from some Boxwood sheet. 1609 Starting to look a little better now, my next job will be to cut the half ports along the bulwark, before planking the deck. B.E. 08/08/2019
.thumb.JPG.97757ea42bf84e60058d04965d6e6acc.JPG)

- 335 replies
-
- 18
-
-
- alert
- vanguard models
- (and 1 more)
-
Just beautiful, a worthy addition to the main build. B.E.
-
Thank you Dave and Kurt. @ Dave, - Bashing is part of the fun, I fully accept that most kits contain simplifications to appeal to a wider customer and skill base, and Alert is no exception. The single exception in my case is Cheerful, but that is on a completely different level. Good luck with the fairing, one of my least favourite jobs. @ Kurt - I will temporarily attach the wale with pins to mark the positions, and then scribe them off the model. When the wales are completed I doubt they will be very evident beneath the black paint. Regards, B.E.
- 335 replies
-
- 1
-
-
- alert
- vanguard models
- (and 1 more)
-
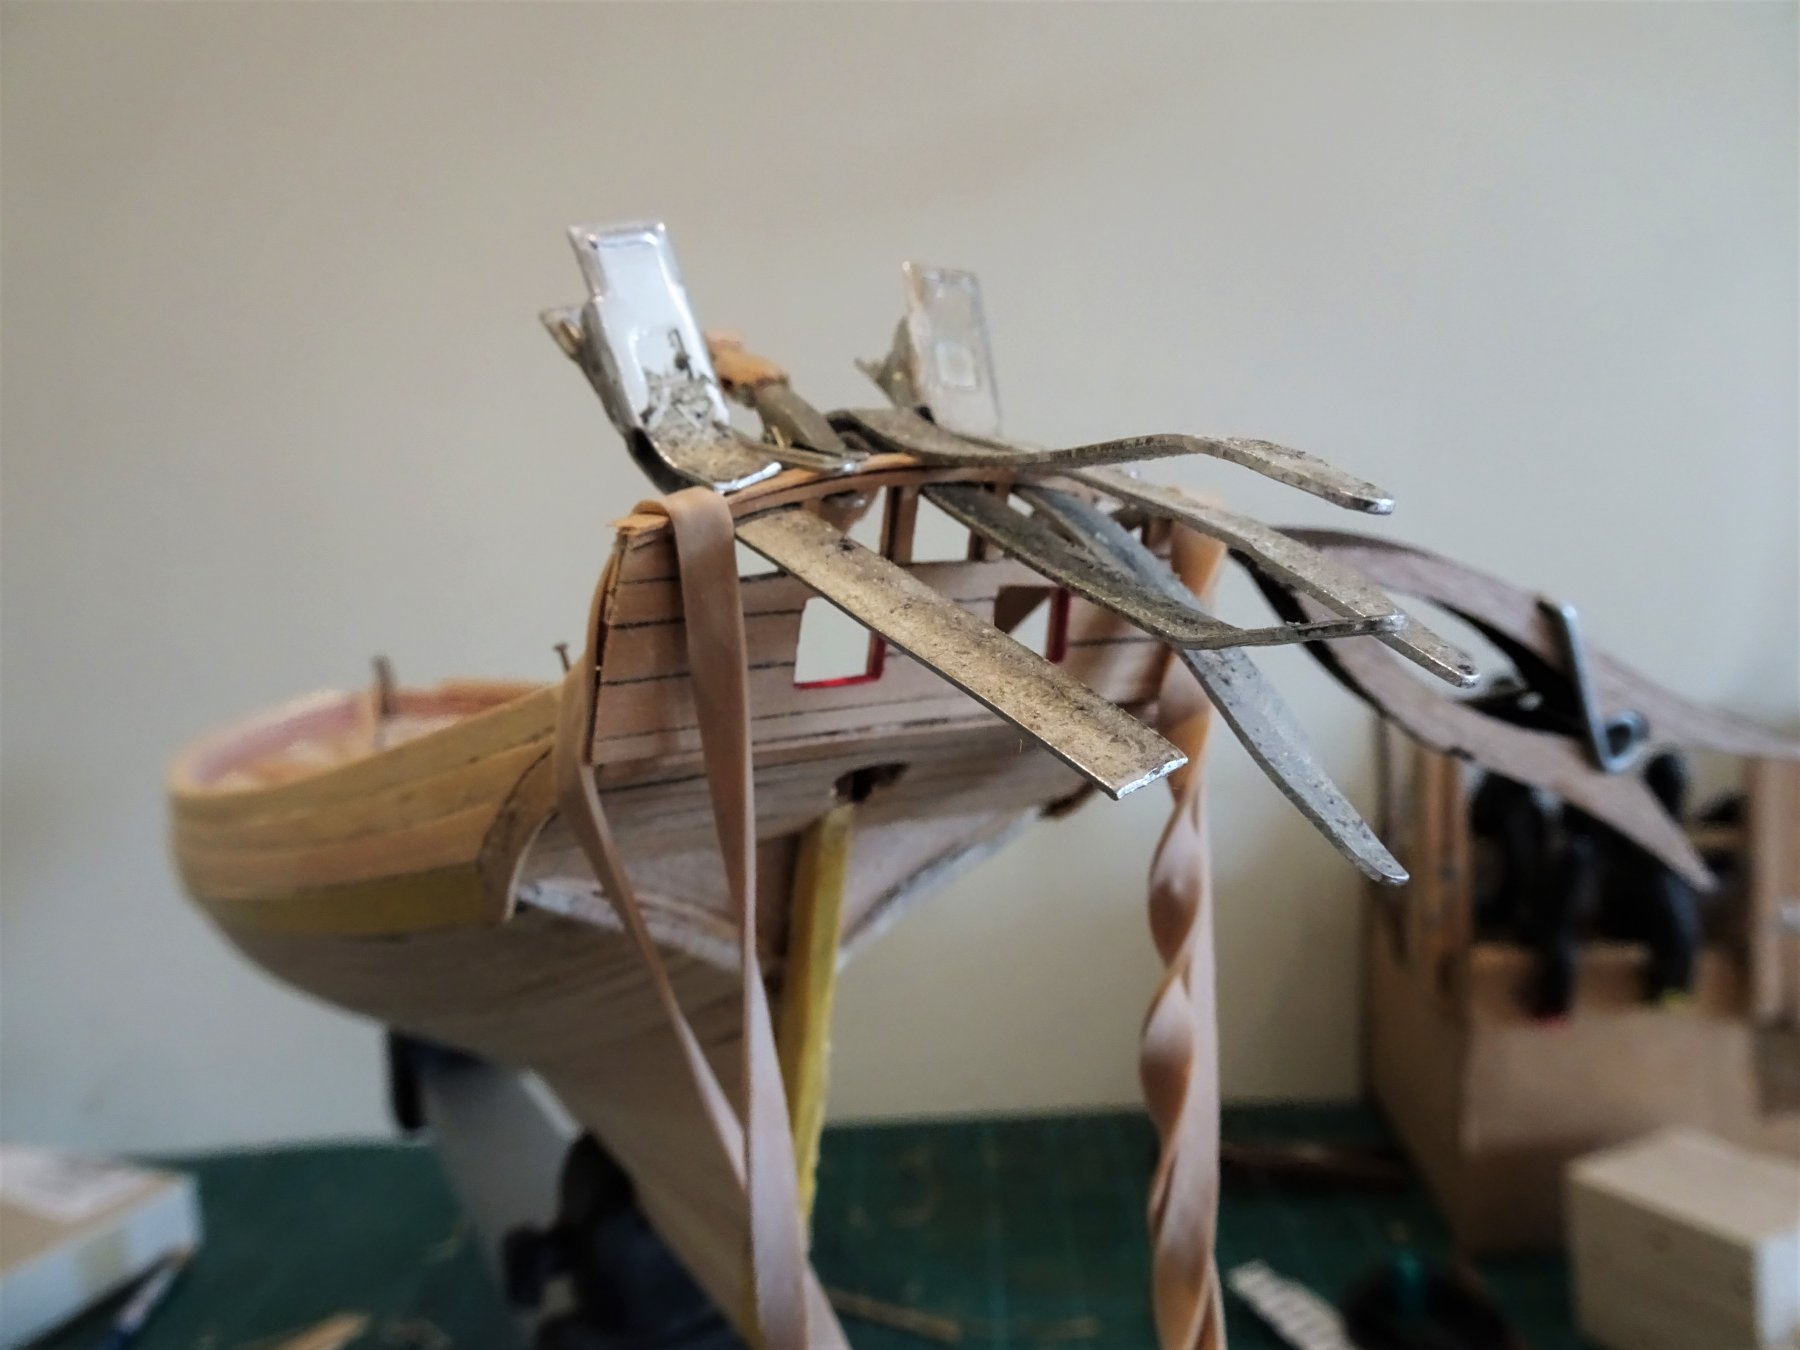
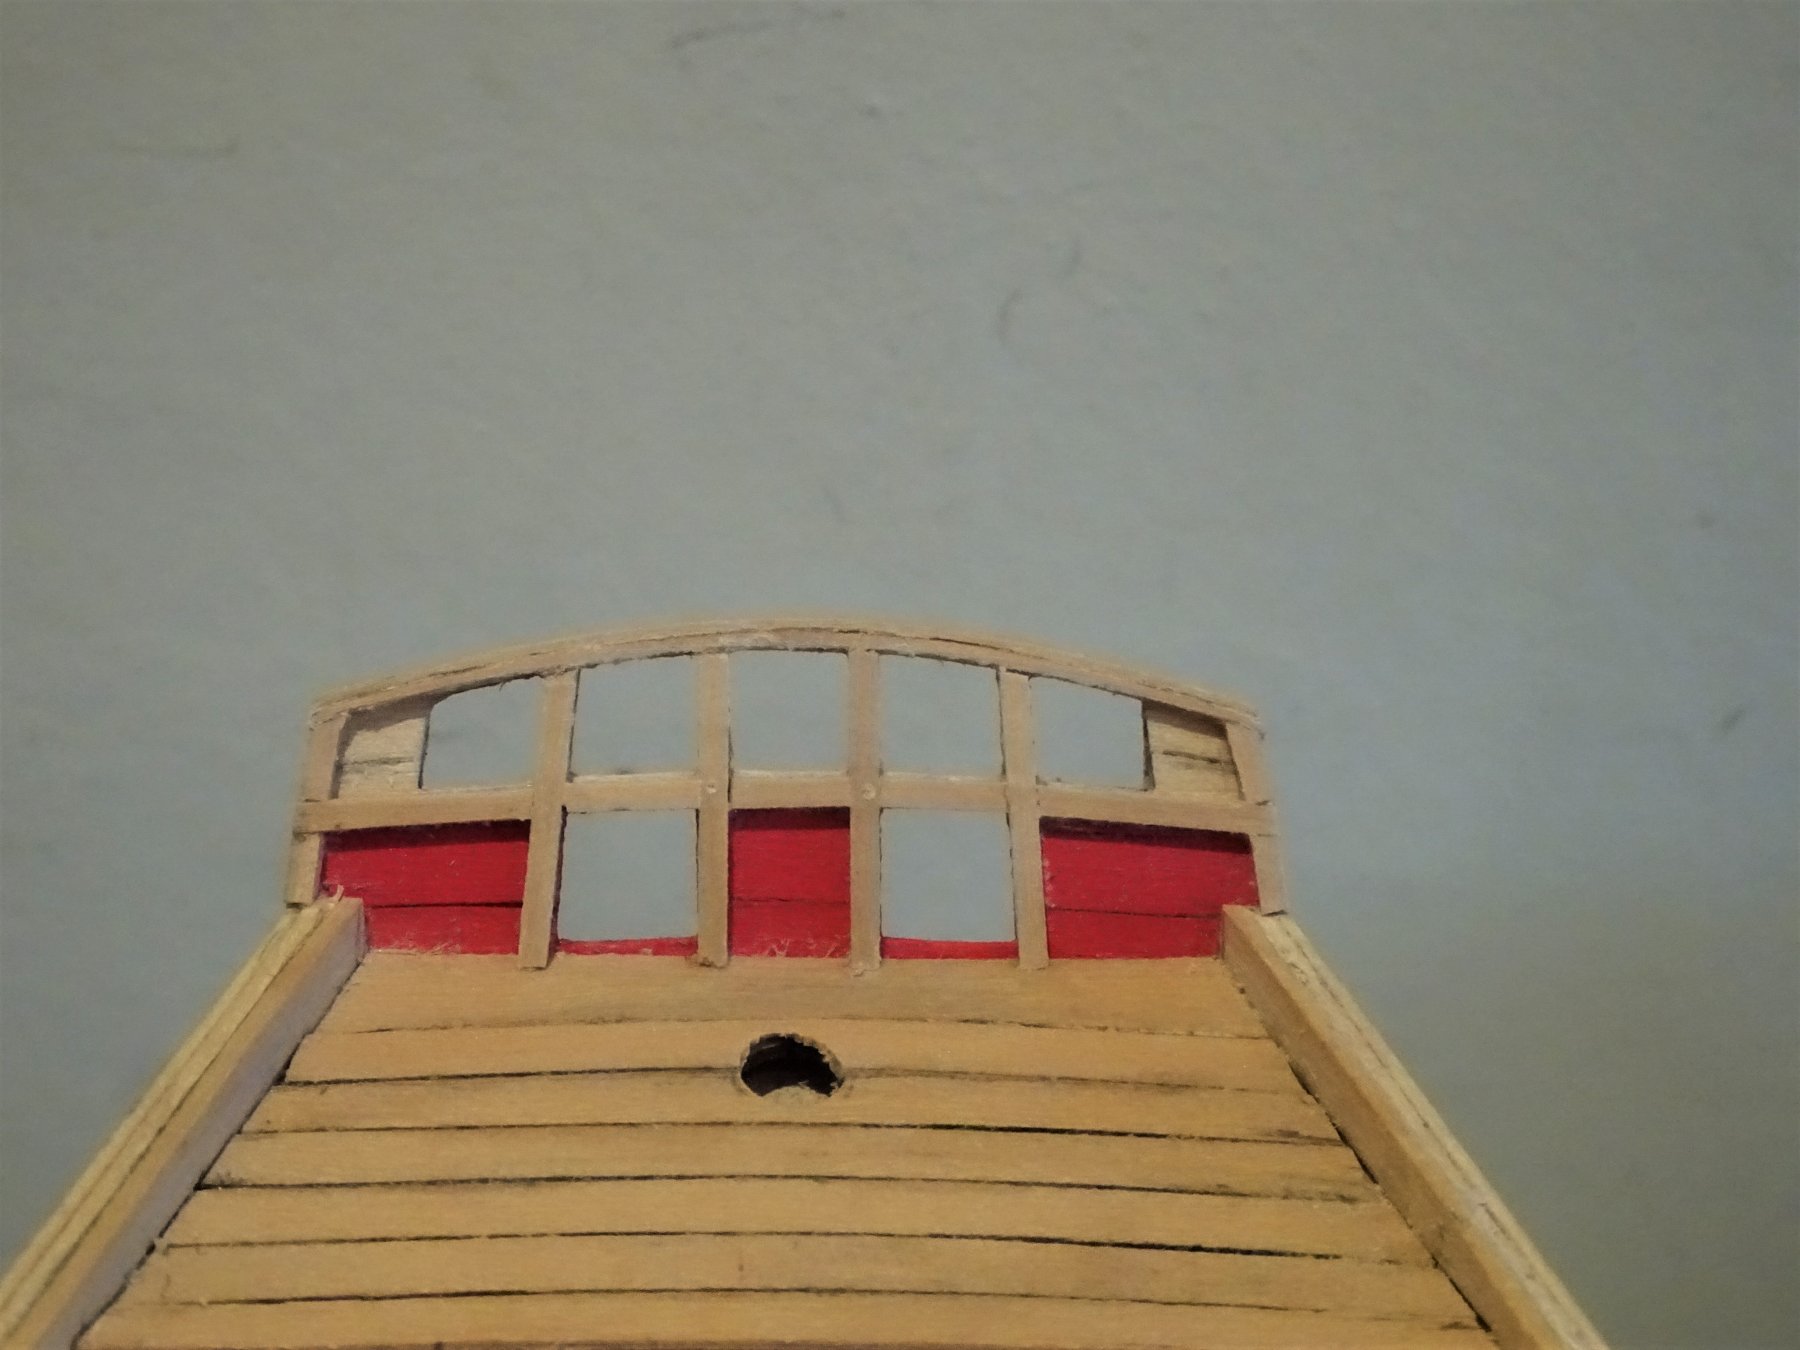
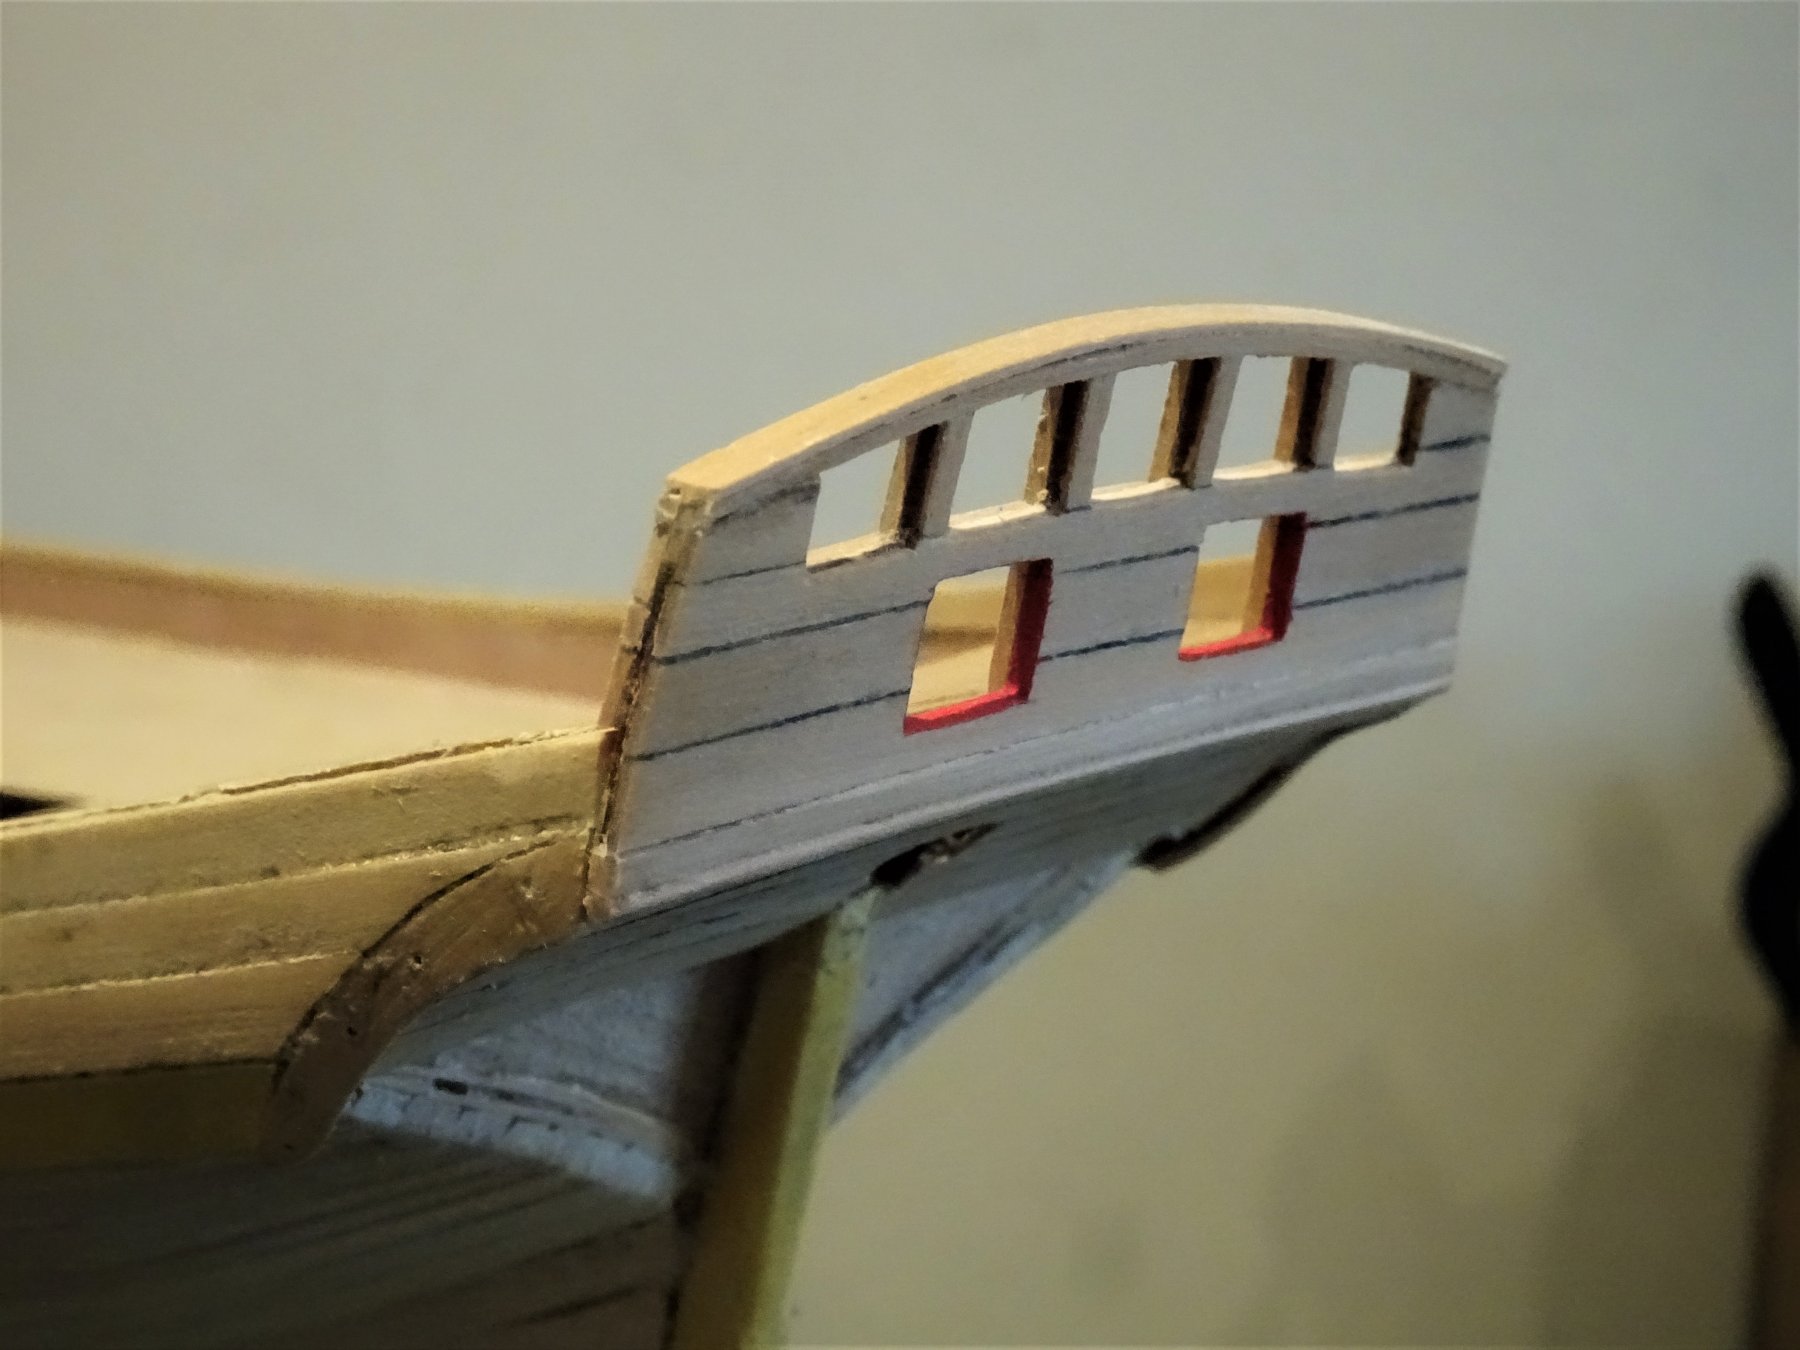
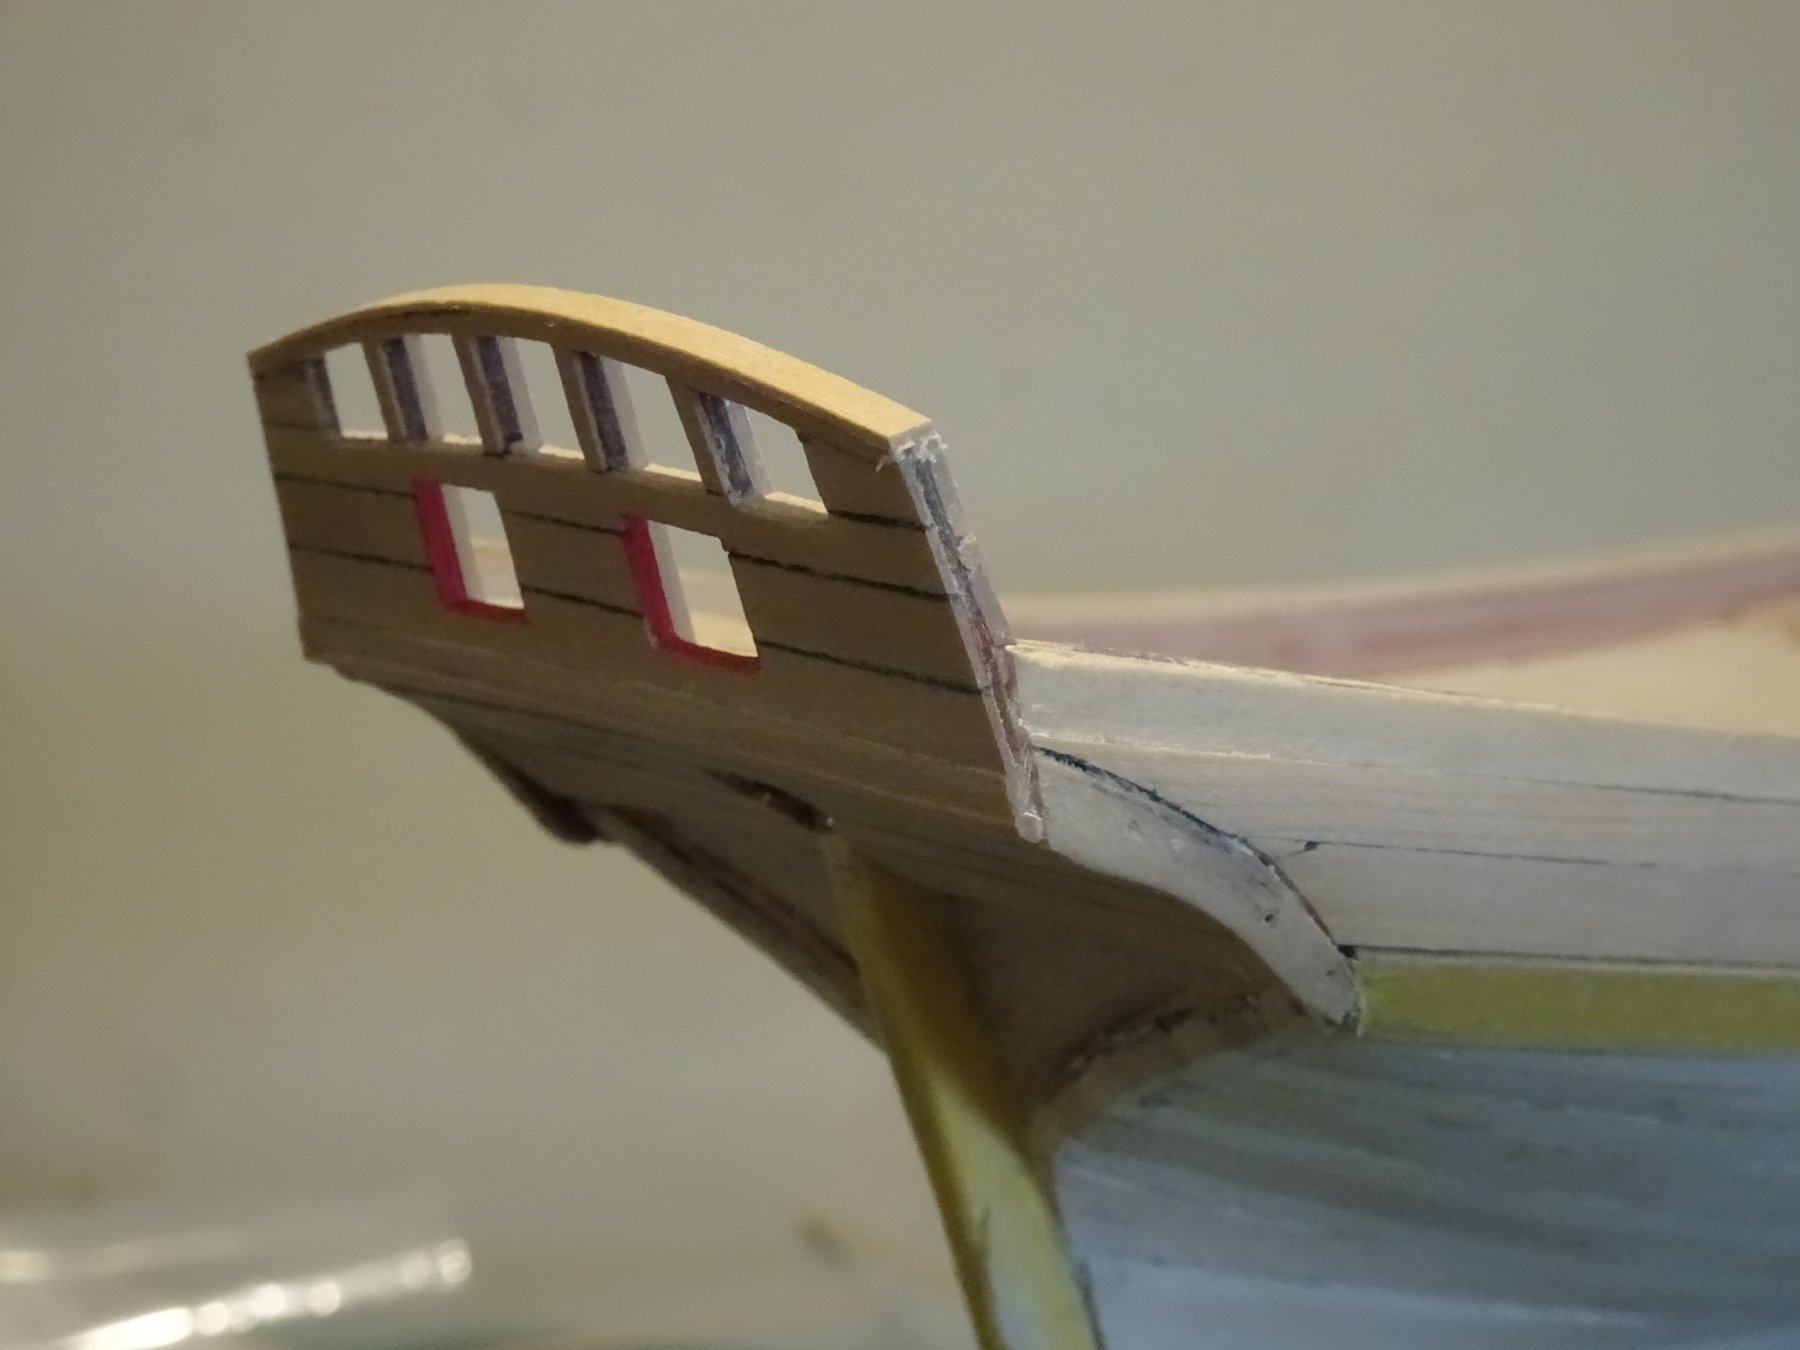
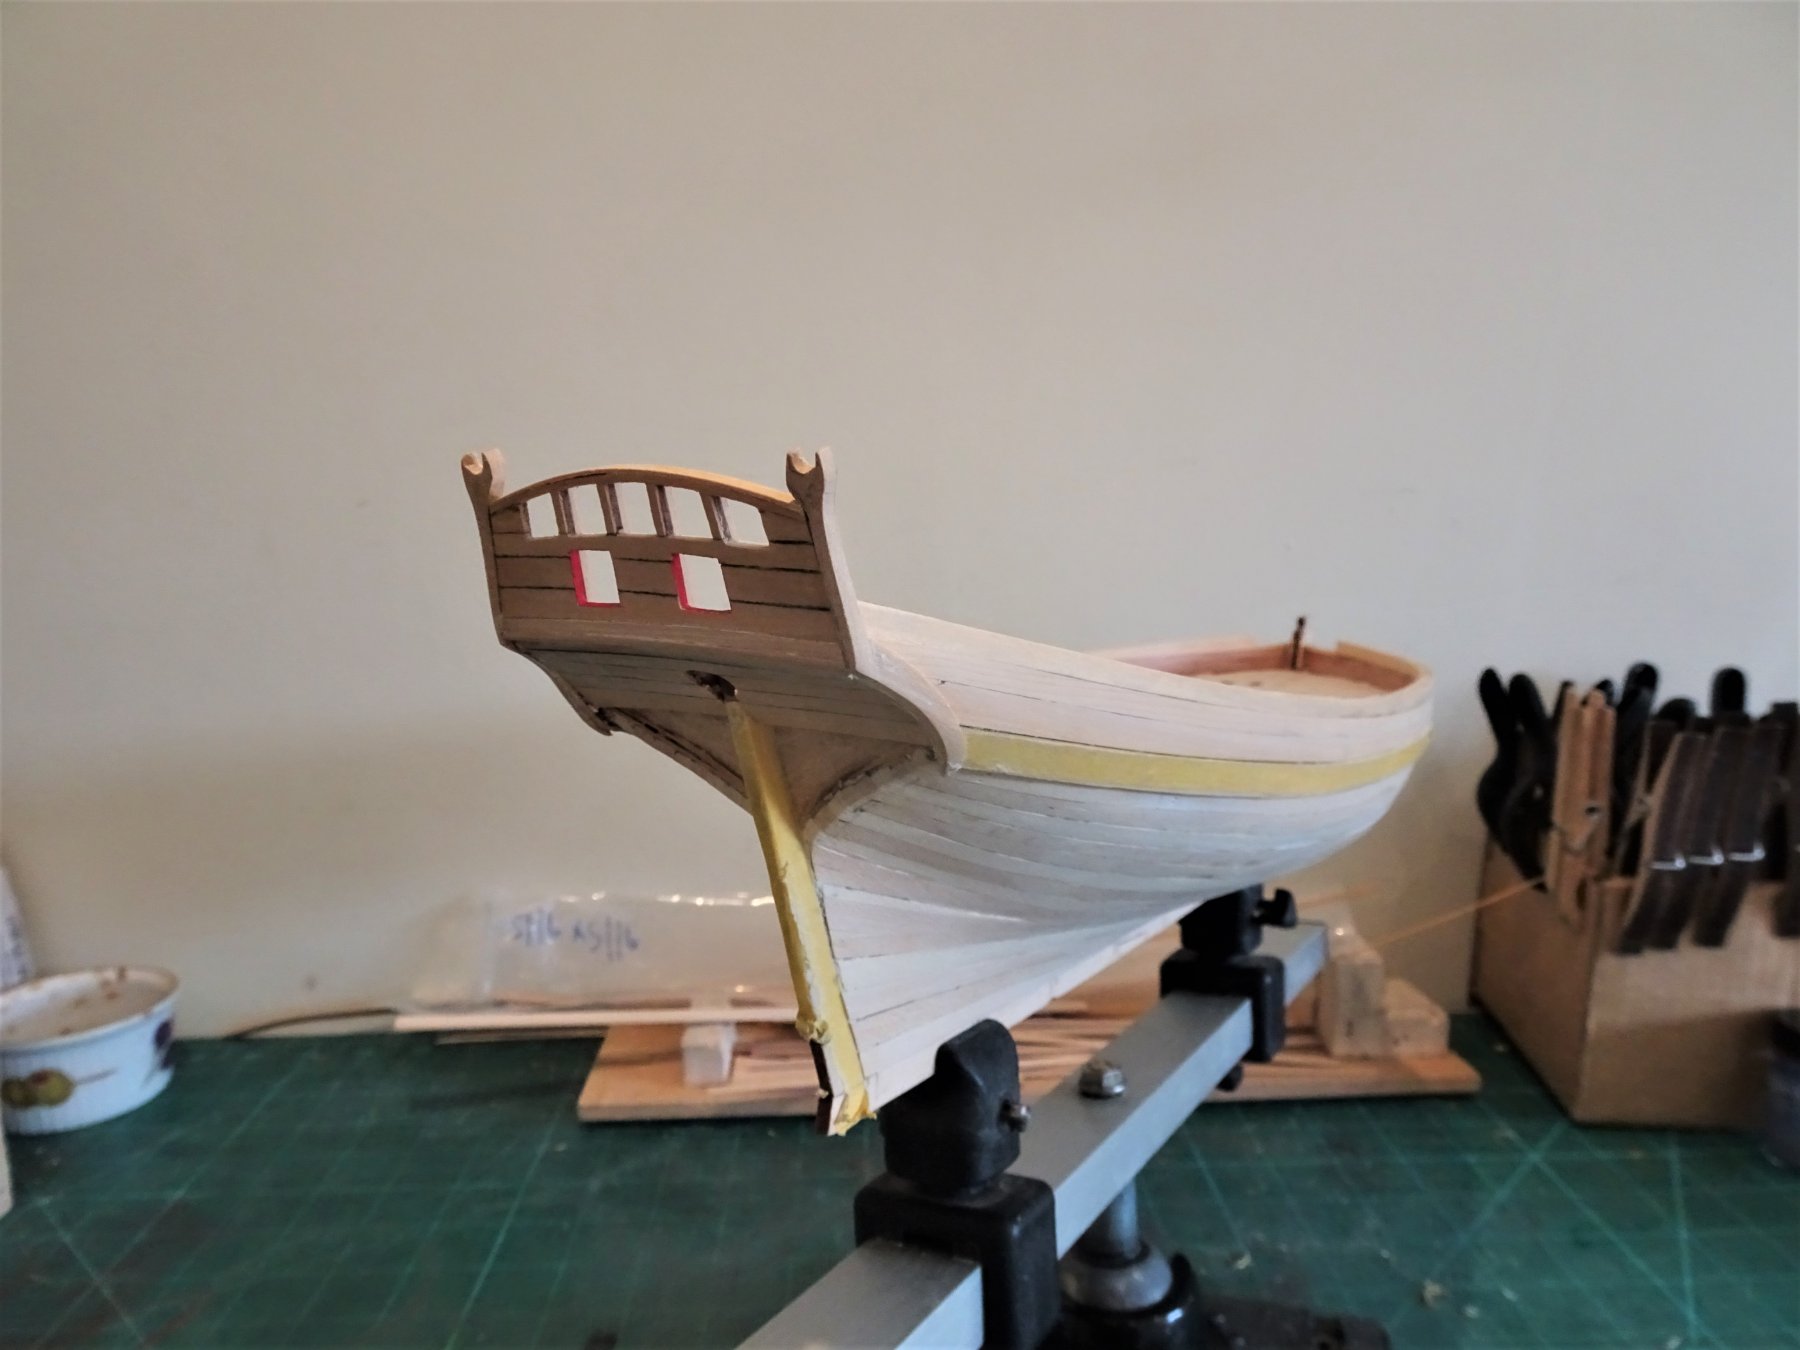
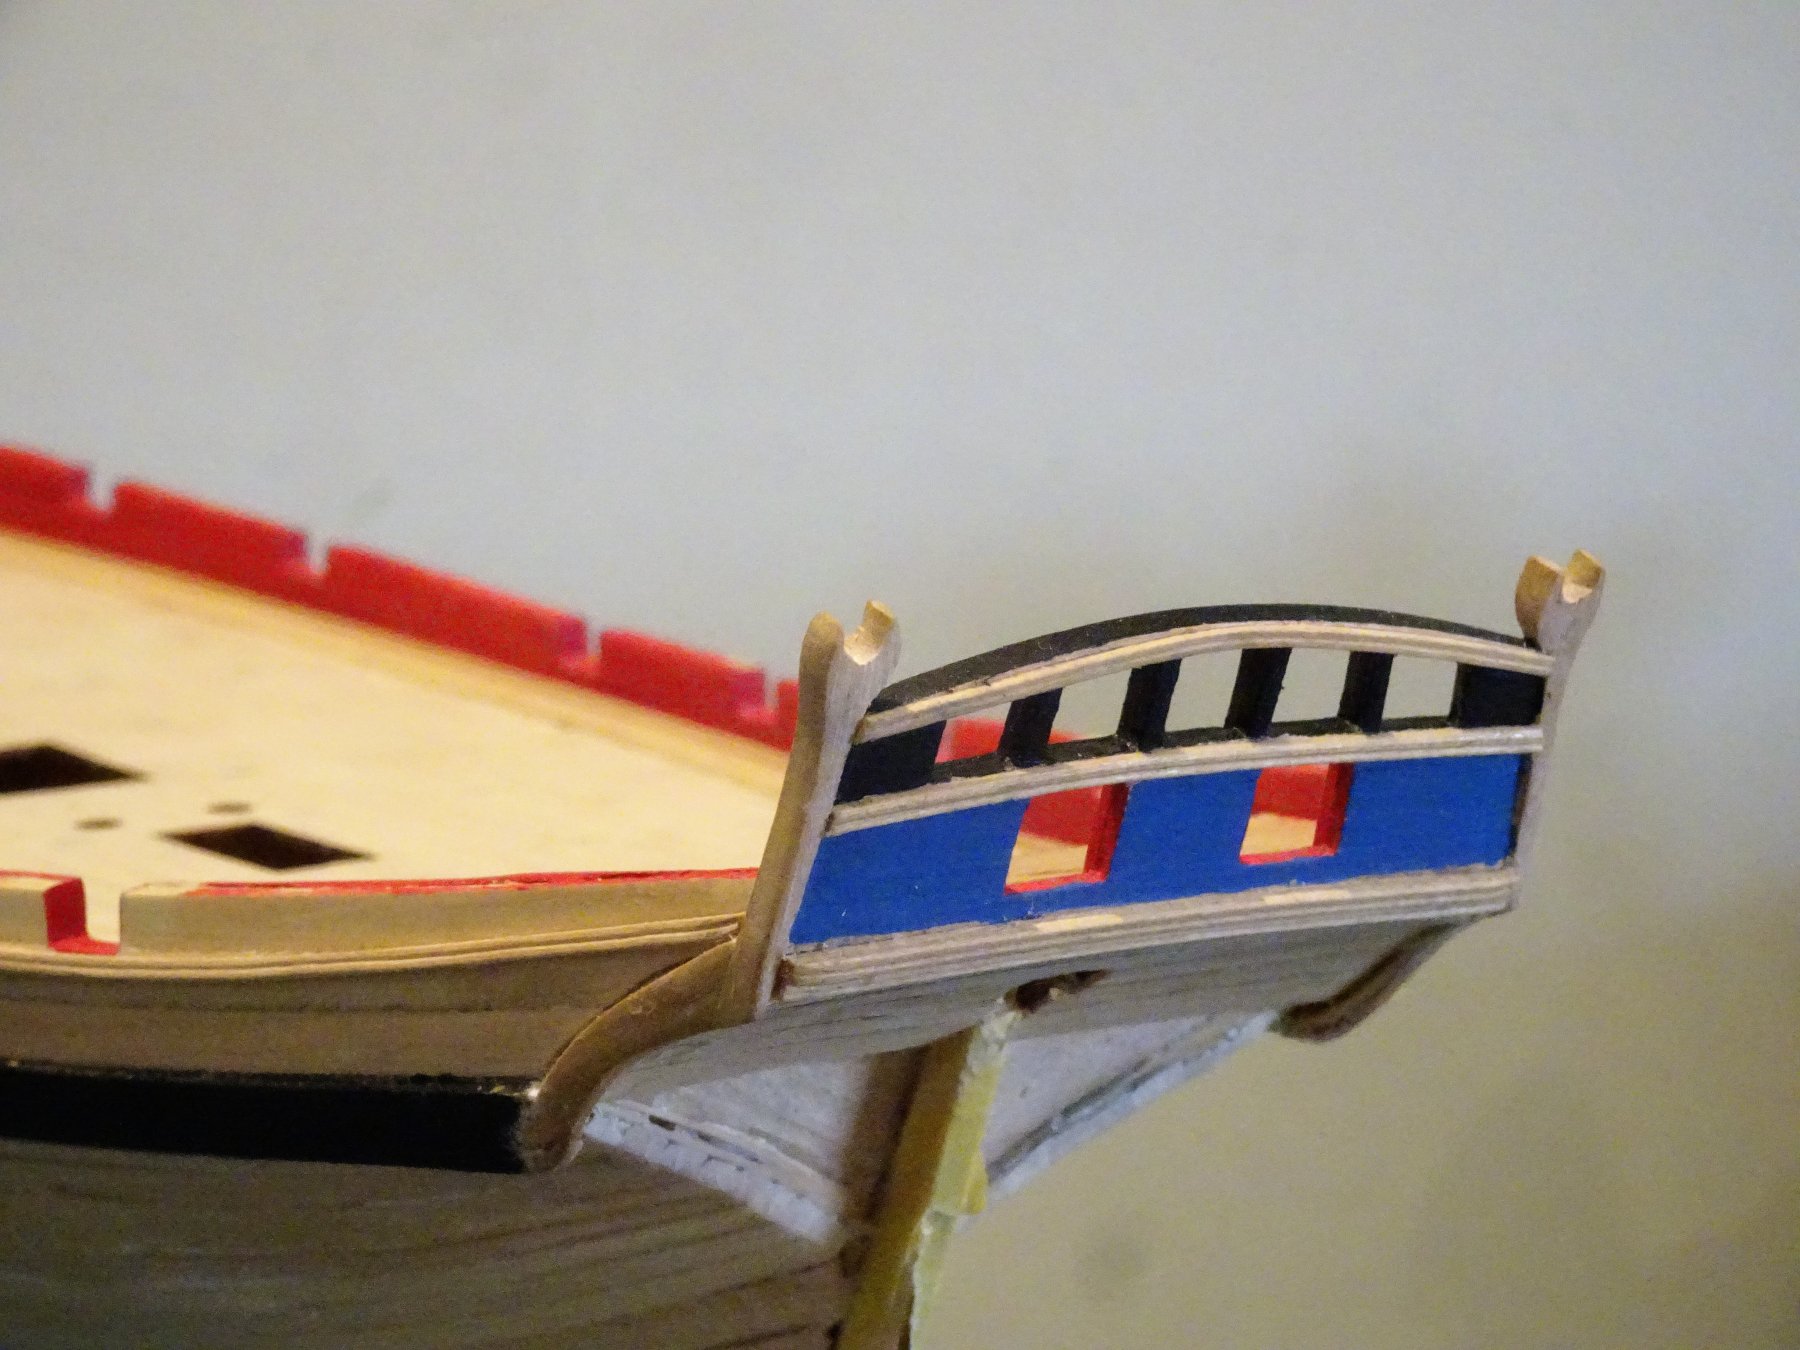
Post 10 Reworking the Transom:- I have already departed from the kit arrangement by incorporating lower side counter timbers. 1453 My next step is to glue the stern transom pattern (49) this also is planked with thin box strip. I think the stern pattern will stand a slight beefing up and the Box wood cladding will do the job. 1462 Initial trial fitting of the transom showed that there was no margin along the bottom of the gun ports inboard, to allow for the deck planking, which would otherwise rise above the framing. The one clear photo in the build guide shows such a margin, but that is without the 1mm planking applied to the platform deck above the counter. I had to tweak the transom piece by adding a strip along the bottom to raise it slightly above the deck level. Once this is done it is clearer to see how the upper side timber (75) which incorporates the boom crutch, can be accommodated. 1463 With the Transom piece fitted, I now have a solid edge to work the Upper side timbers. I think the inboard framing detail of the kit Transom configuration is a little sparse, having only the four vertical counter timbers, which are either side of the stern ports. 1460 Using Boxwood strip I added the transom beam which runs across the top of the gun ports, and a Tafferal capping strip. 1464 1459 Fixing Capping rails to the transom involves an eclectic mix of clamping items. These small additions, replicate more accurately the stern framing of the cutter, and imho greatly improve the look of the model, or will once I've fettled it. 1476 The modifications require making new side pieces including the crutch. The original piece is shown in the centre. 1481 These are attached to the transom and will be fine tuned on the model. 1482 A second layer lower Side piece is glued to the hull. These are quite intricate pieces that butt up to the upright and curve and twist down to meet the wale aft edge. 1486 Still very much wip but it is progressing as I hoped, and with the structure now there I can decide on the paint scheme and add the second layer wale timbers. B.E. 05/08/2019


- 335 replies
-
- 23
-
-
- alert
- vanguard models
- (and 1 more)
-
The boat looks good Chris, in scale terms what size is it? I like the inclusion of a deck boat on a model, and had to scratch them for my Pegasus build, so a 1:64 scale boat included with a kit would appeal to me. B.E.
-
Love this kit, especially when enhanced with etch and more true scale fittings. Major visual differences to the original Bluebell kit are the shape of the radar cover, some of the Carly floats, and Porthole layout. Some good reference photo's in Canada's Flowers by Thomas G Lynch, and Ensign 3 and man o' war 7' by Antony Preston and Alan Raven. Two other reference works I have are Flower Class Corvettes by John Lambert, and Corvettes of The Royal Canadian Navy by Ken Macpherson. Looking forward to see what you do with her Kevin. B.E.
-
I think I'll defer the paint versus varnish finish until I see how I do. Not even thought about treenailing at this scale.🤔 Regards, B.E.

.JPG.0dcd5064723245067da39af93175330d.JPG)
.JPG.c13bfcdbde226aac8eb69626d0a9d05e.JPG)
.JPG.0e746138ede966aeae698c434ddf0459.JPG)

.JPG.5696b0d4daf5136caf870ae6aa0bbd31.JPG)


.JPG.967c1dfdf987e2f628203c5d08314082.JPG)
.JPG.9ef91ce755aa6732eb66e63f6c3dd677.JPG)
.JPG.8af09872cb57c4e7e4060db127473a20.JPG)
.JPG.57b19afeb847ea19cf0e689c236caf66.JPG)
.JPG.2e4d8be2352069dd78d180eeb06de89e.JPG)

.JPG.e14dae05daac0dba034a9bf86f996cc2.JPG)

.JPG.967efea5e8473e325b128b4125395bce.JPG)

.JPG.5eb5d86fd775b12091d1fff1a206d72d.JPG)
.JPG.76b6266964eaacb19f128f97f0db0ac6.JPG)
.JPG.7ca29b330e52e212bb861ea0d0294ce5.JPG)


.JPG.24ee7d908d888bfb9be9e143f688e3e3.JPG)