HOLIDAY DONATION DRIVE - SUPPORT MSW - DO YOUR PART TO KEEP THIS GREAT FORUM GOING! (83 donations so far out of 49,000 members - C'mon guys!)
×
.JPG.ca33079f5815b861e67b9c2cccd37982.JPG)

Blue Ensign
-
Posts
4,565 -
Joined
-
Last visited
Content Type
Profiles
Forums
Gallery
Events
Everything posted by Blue Ensign
-
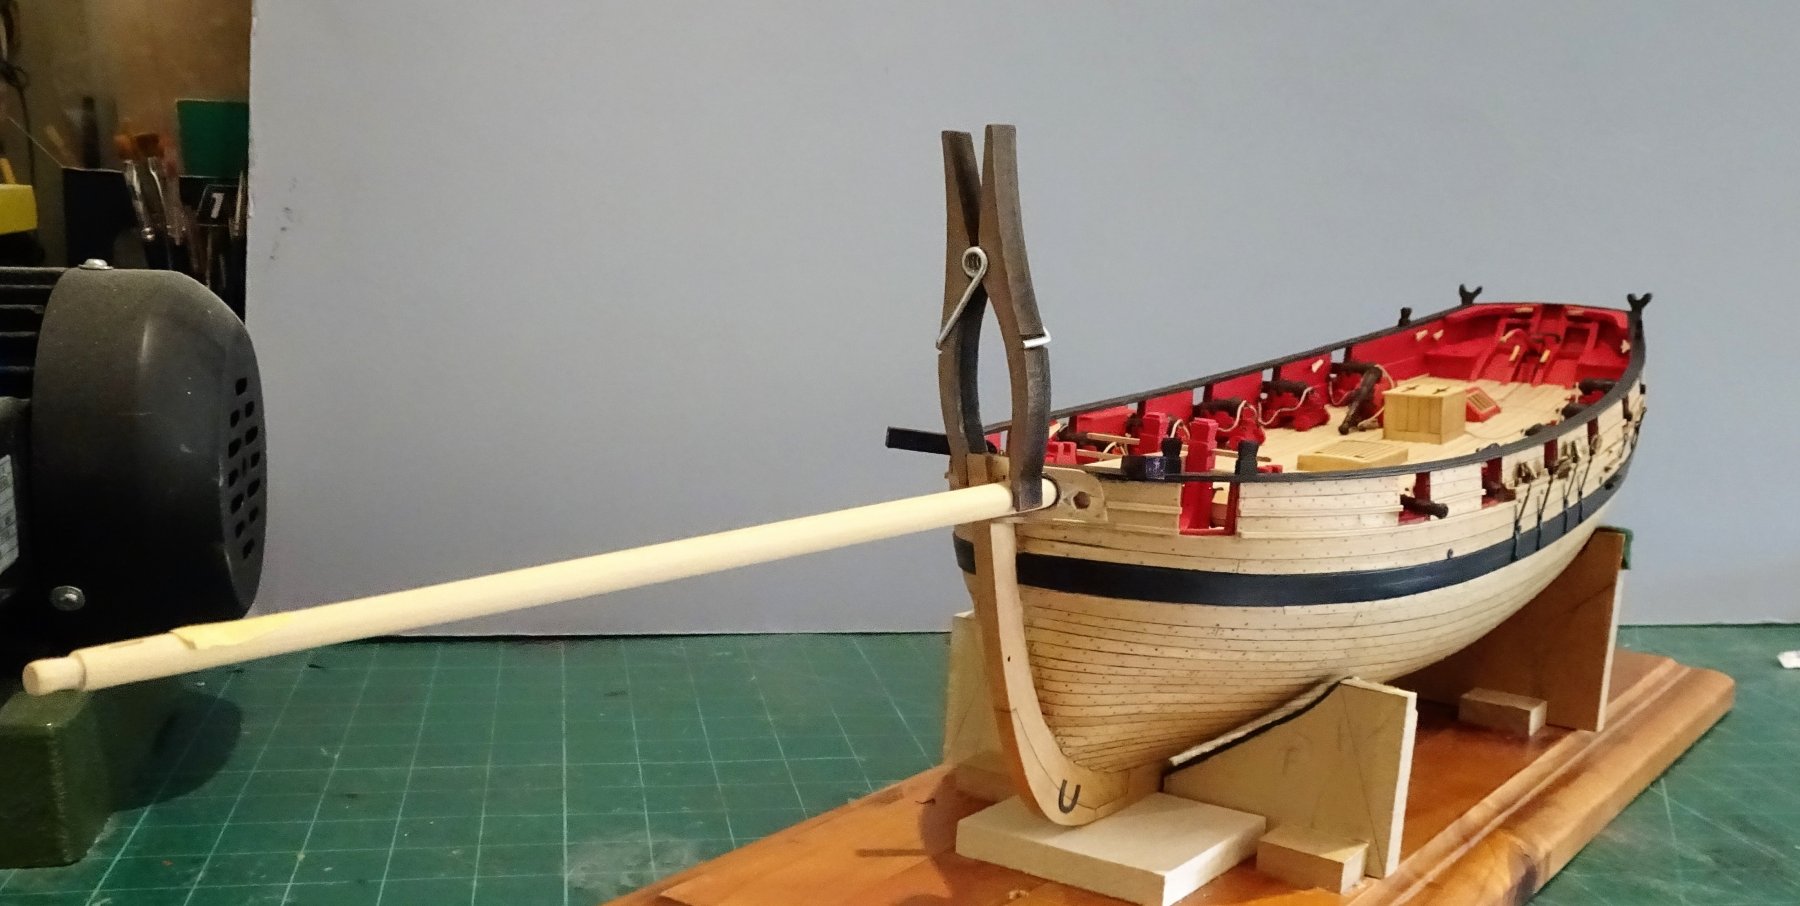
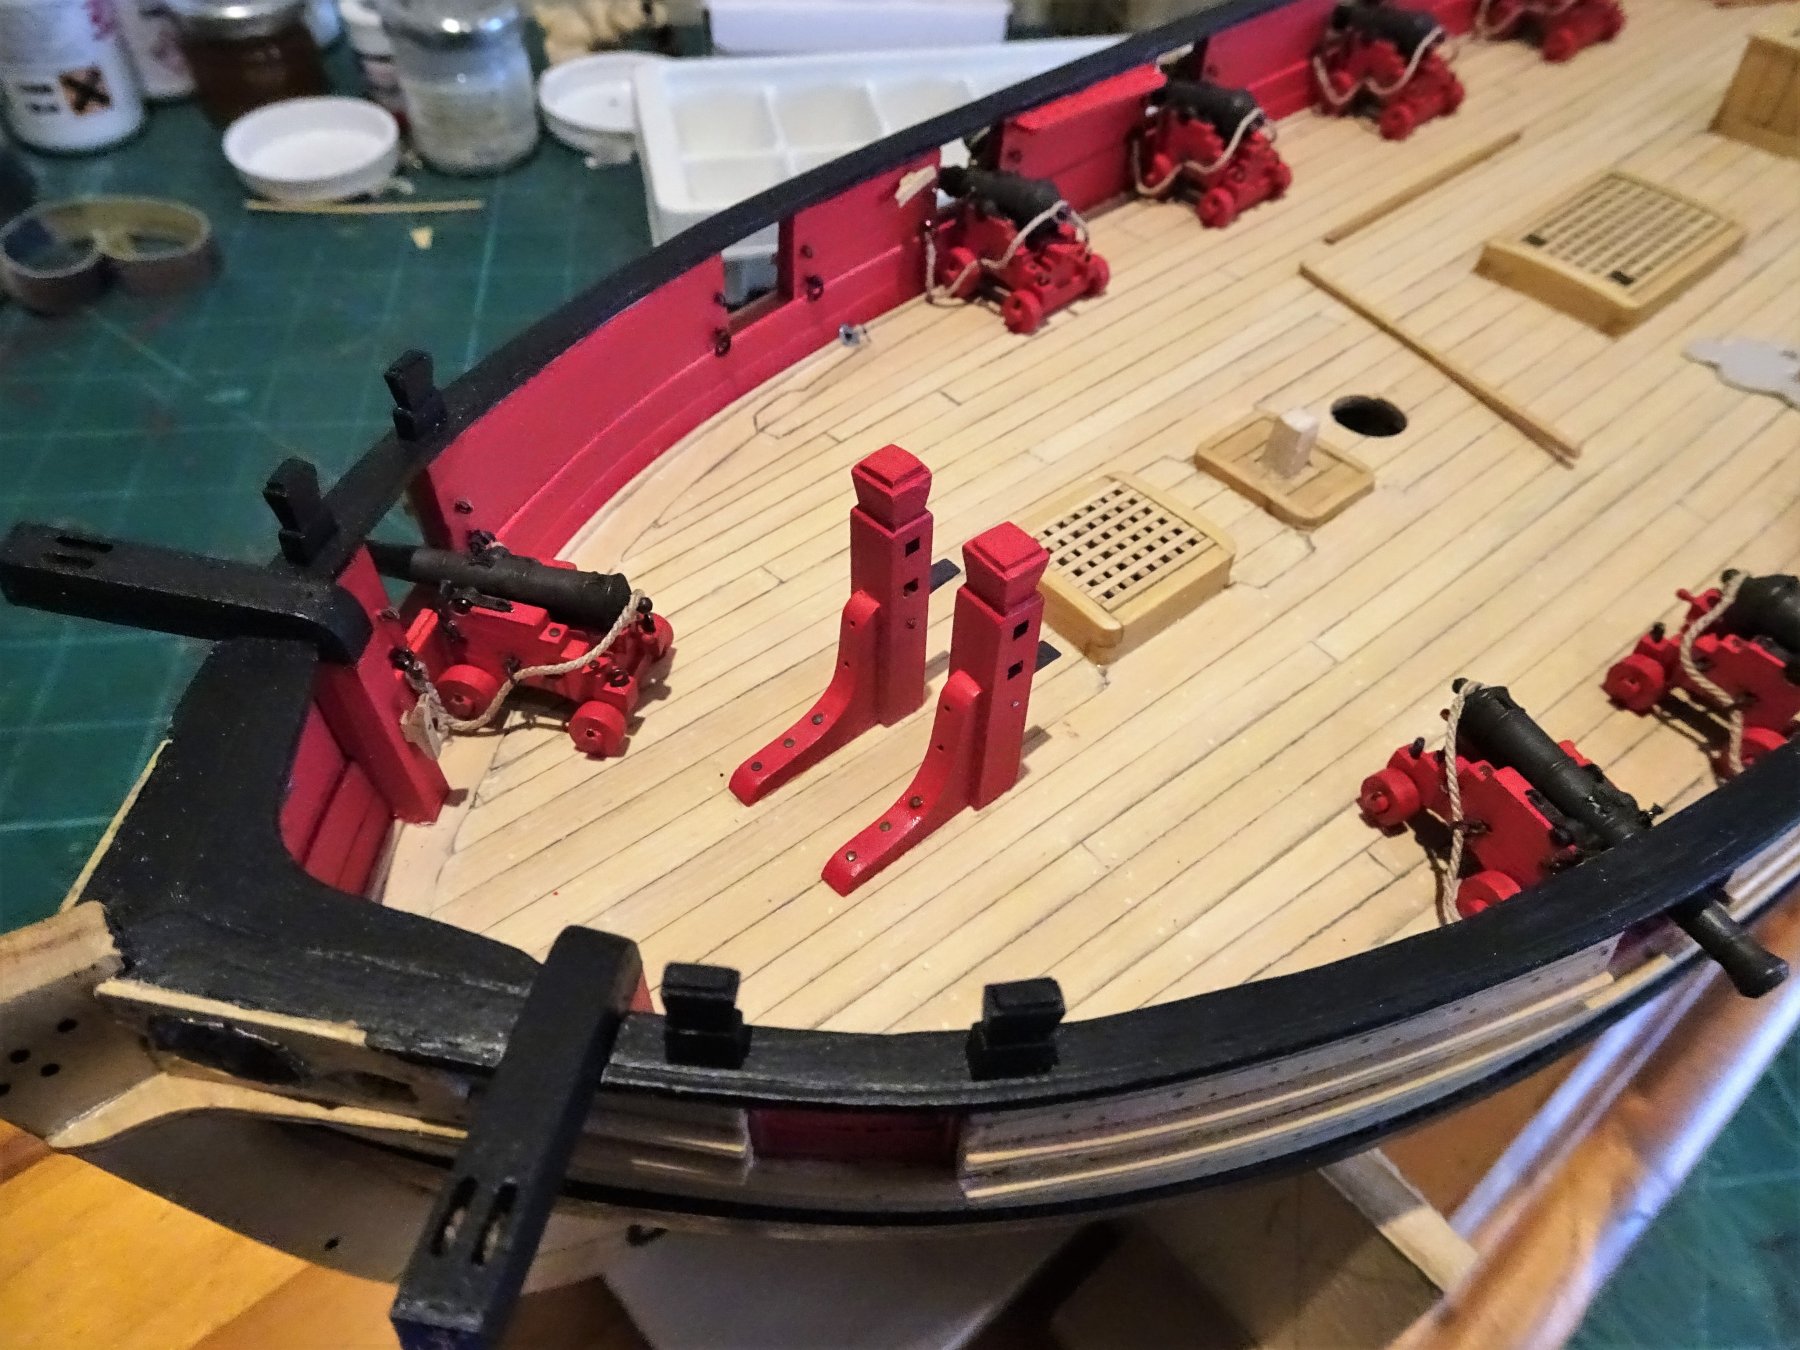
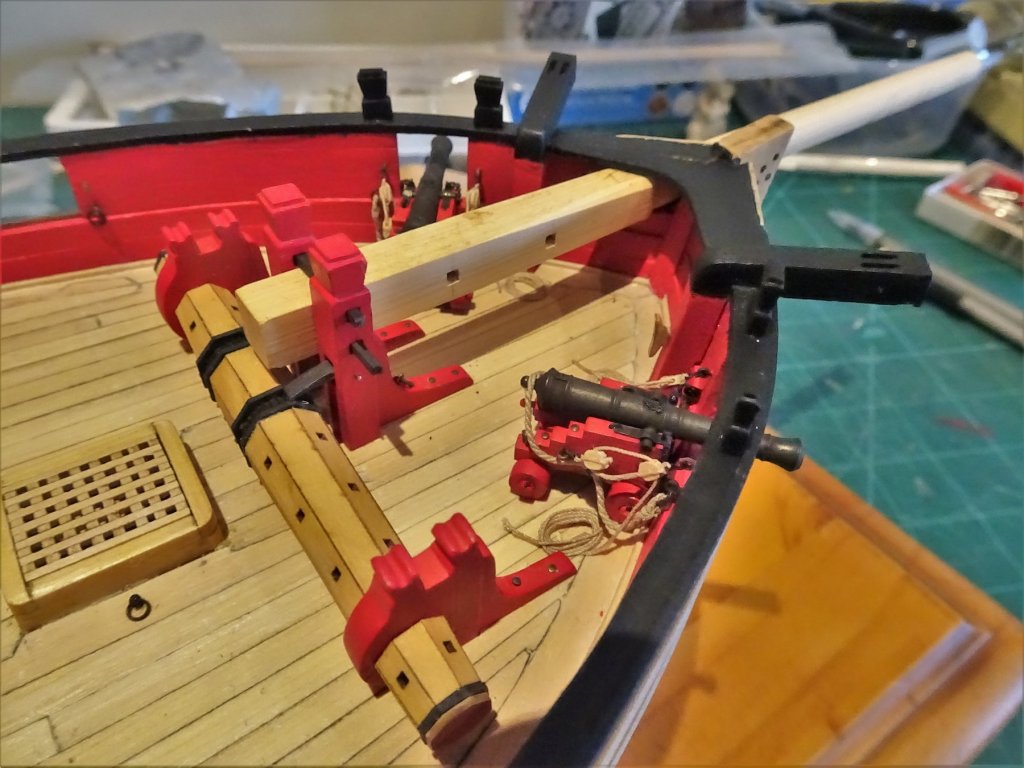
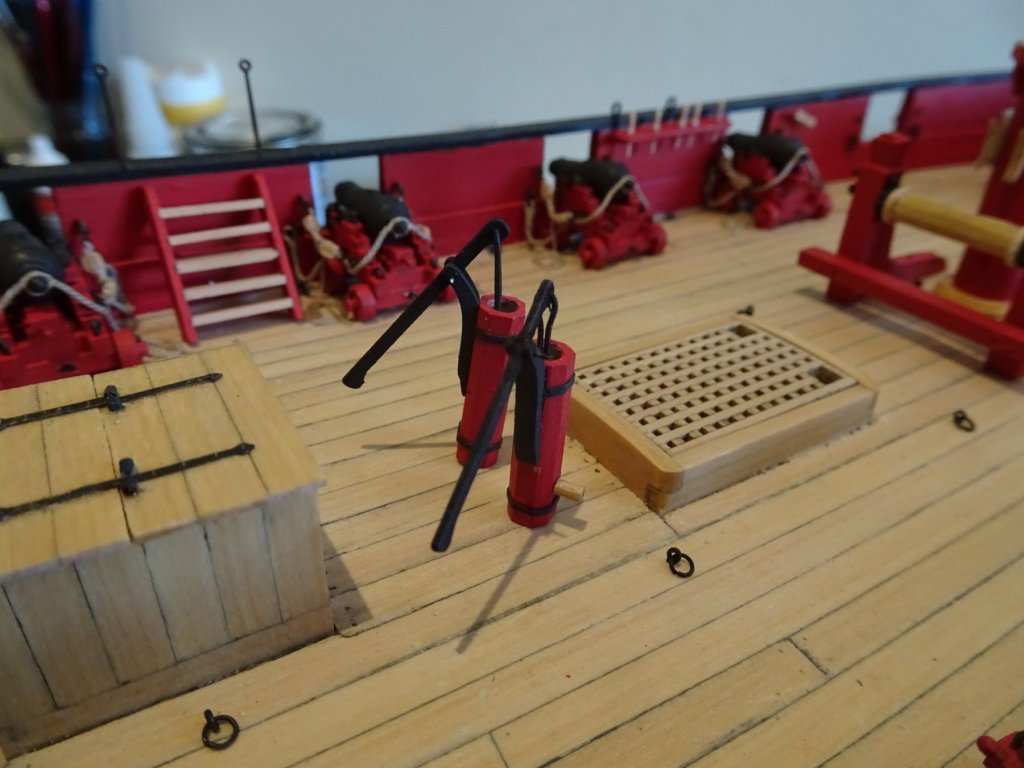
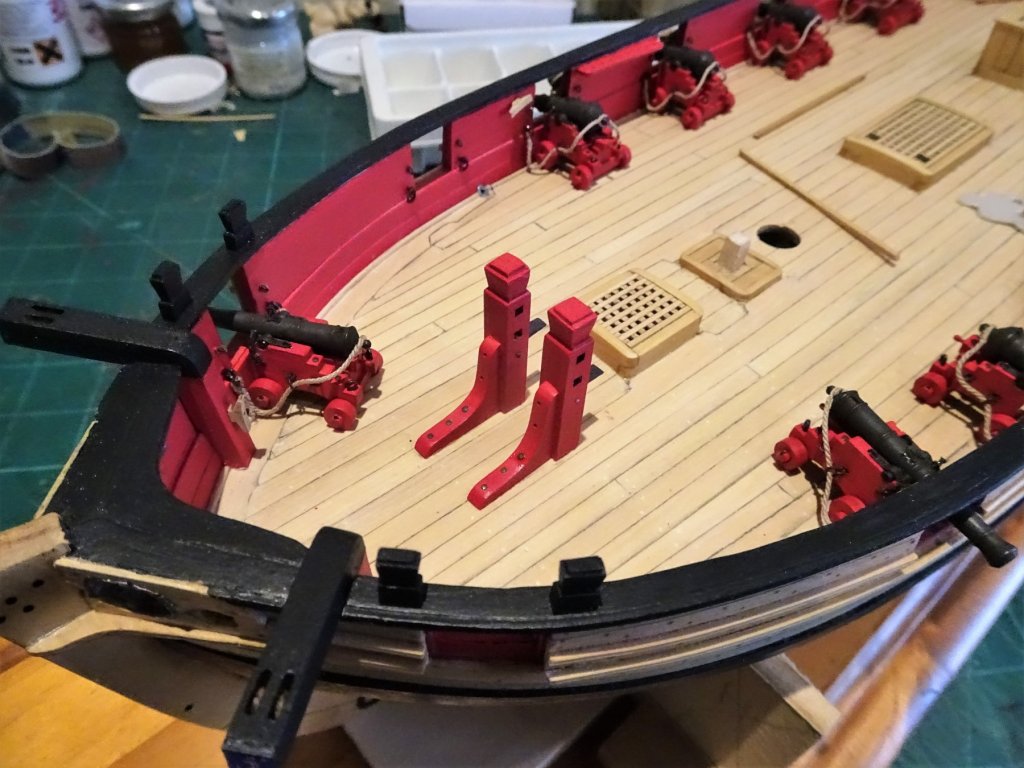
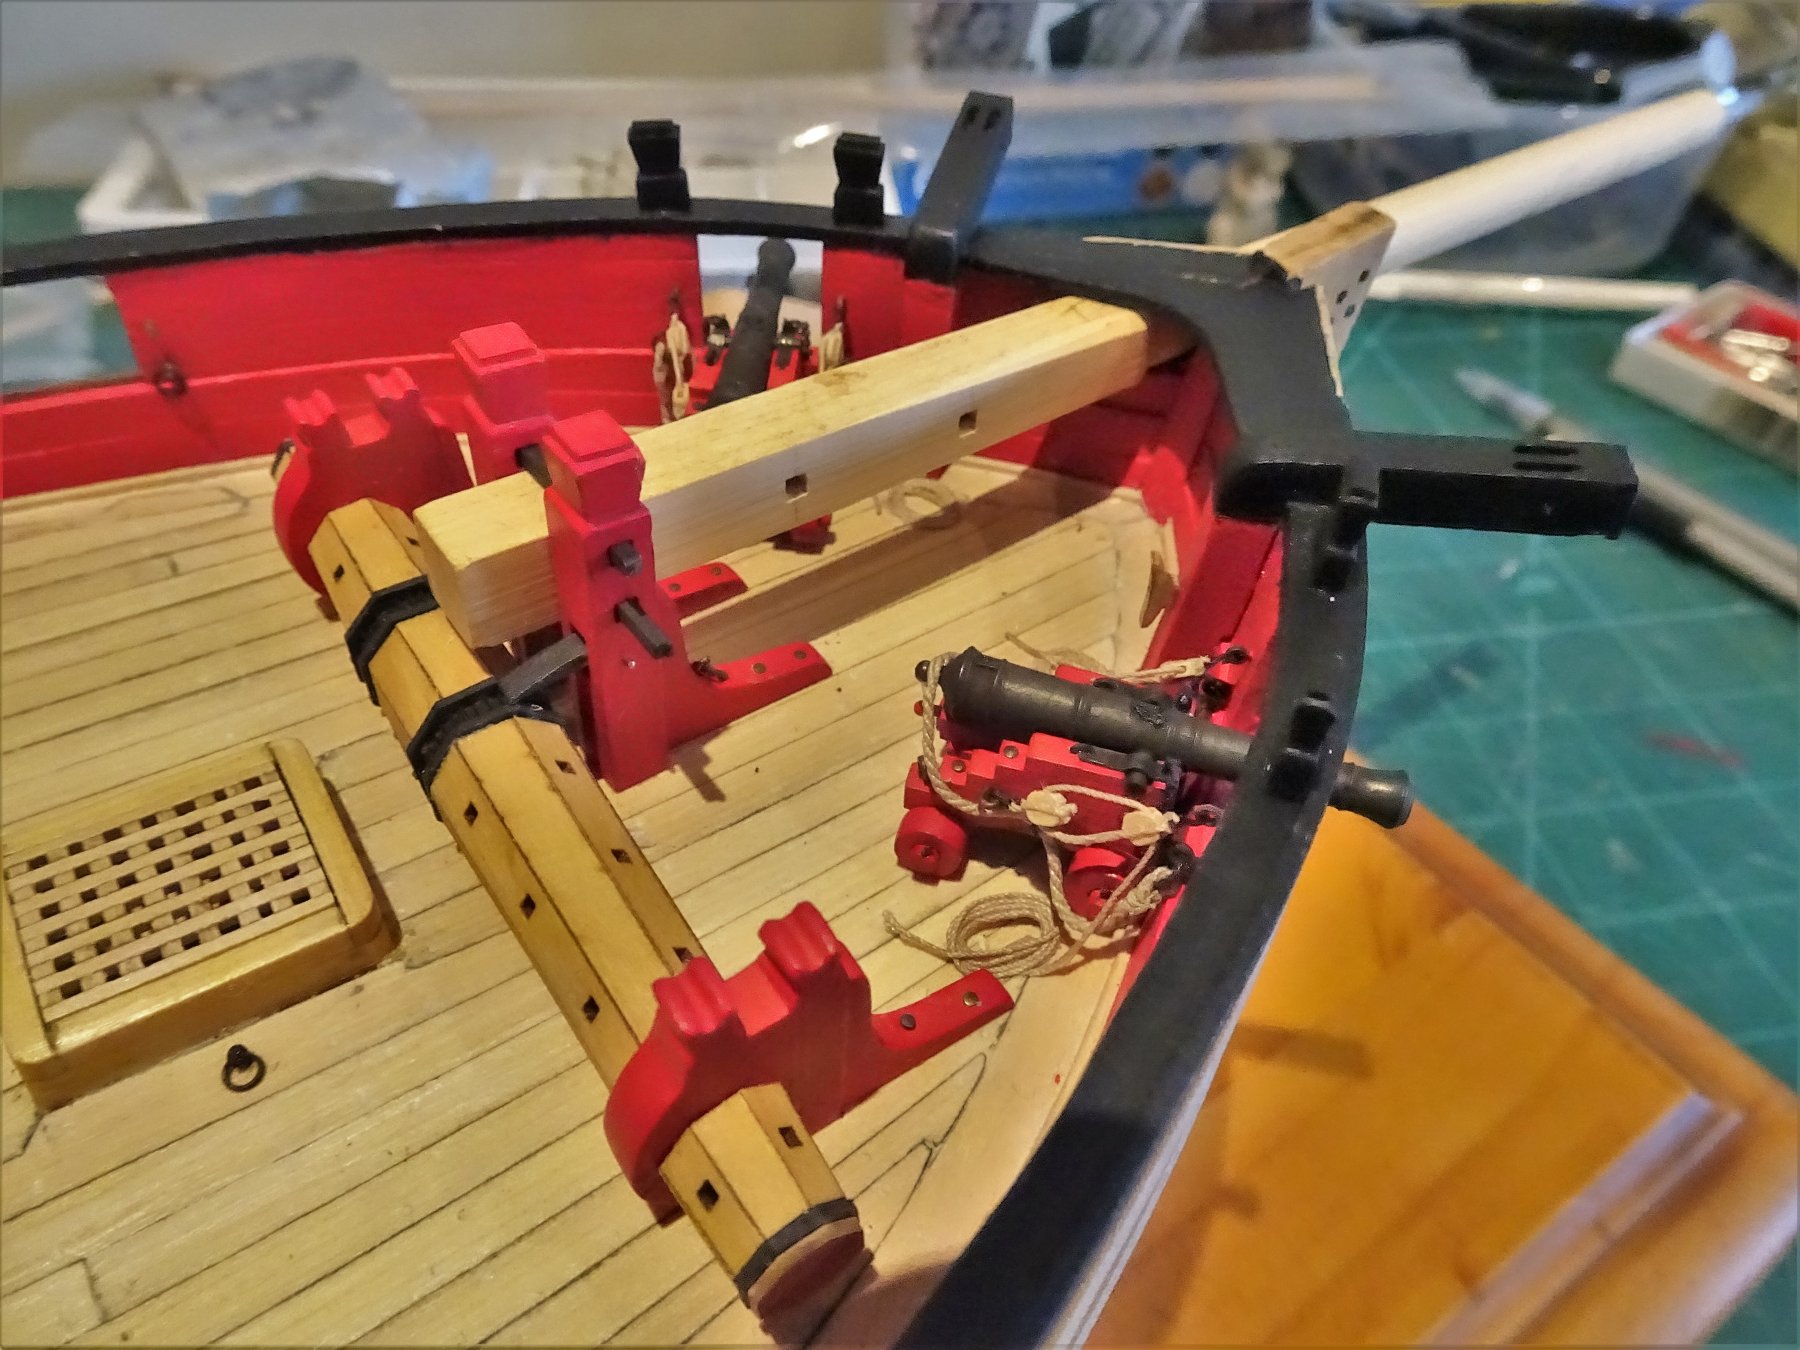
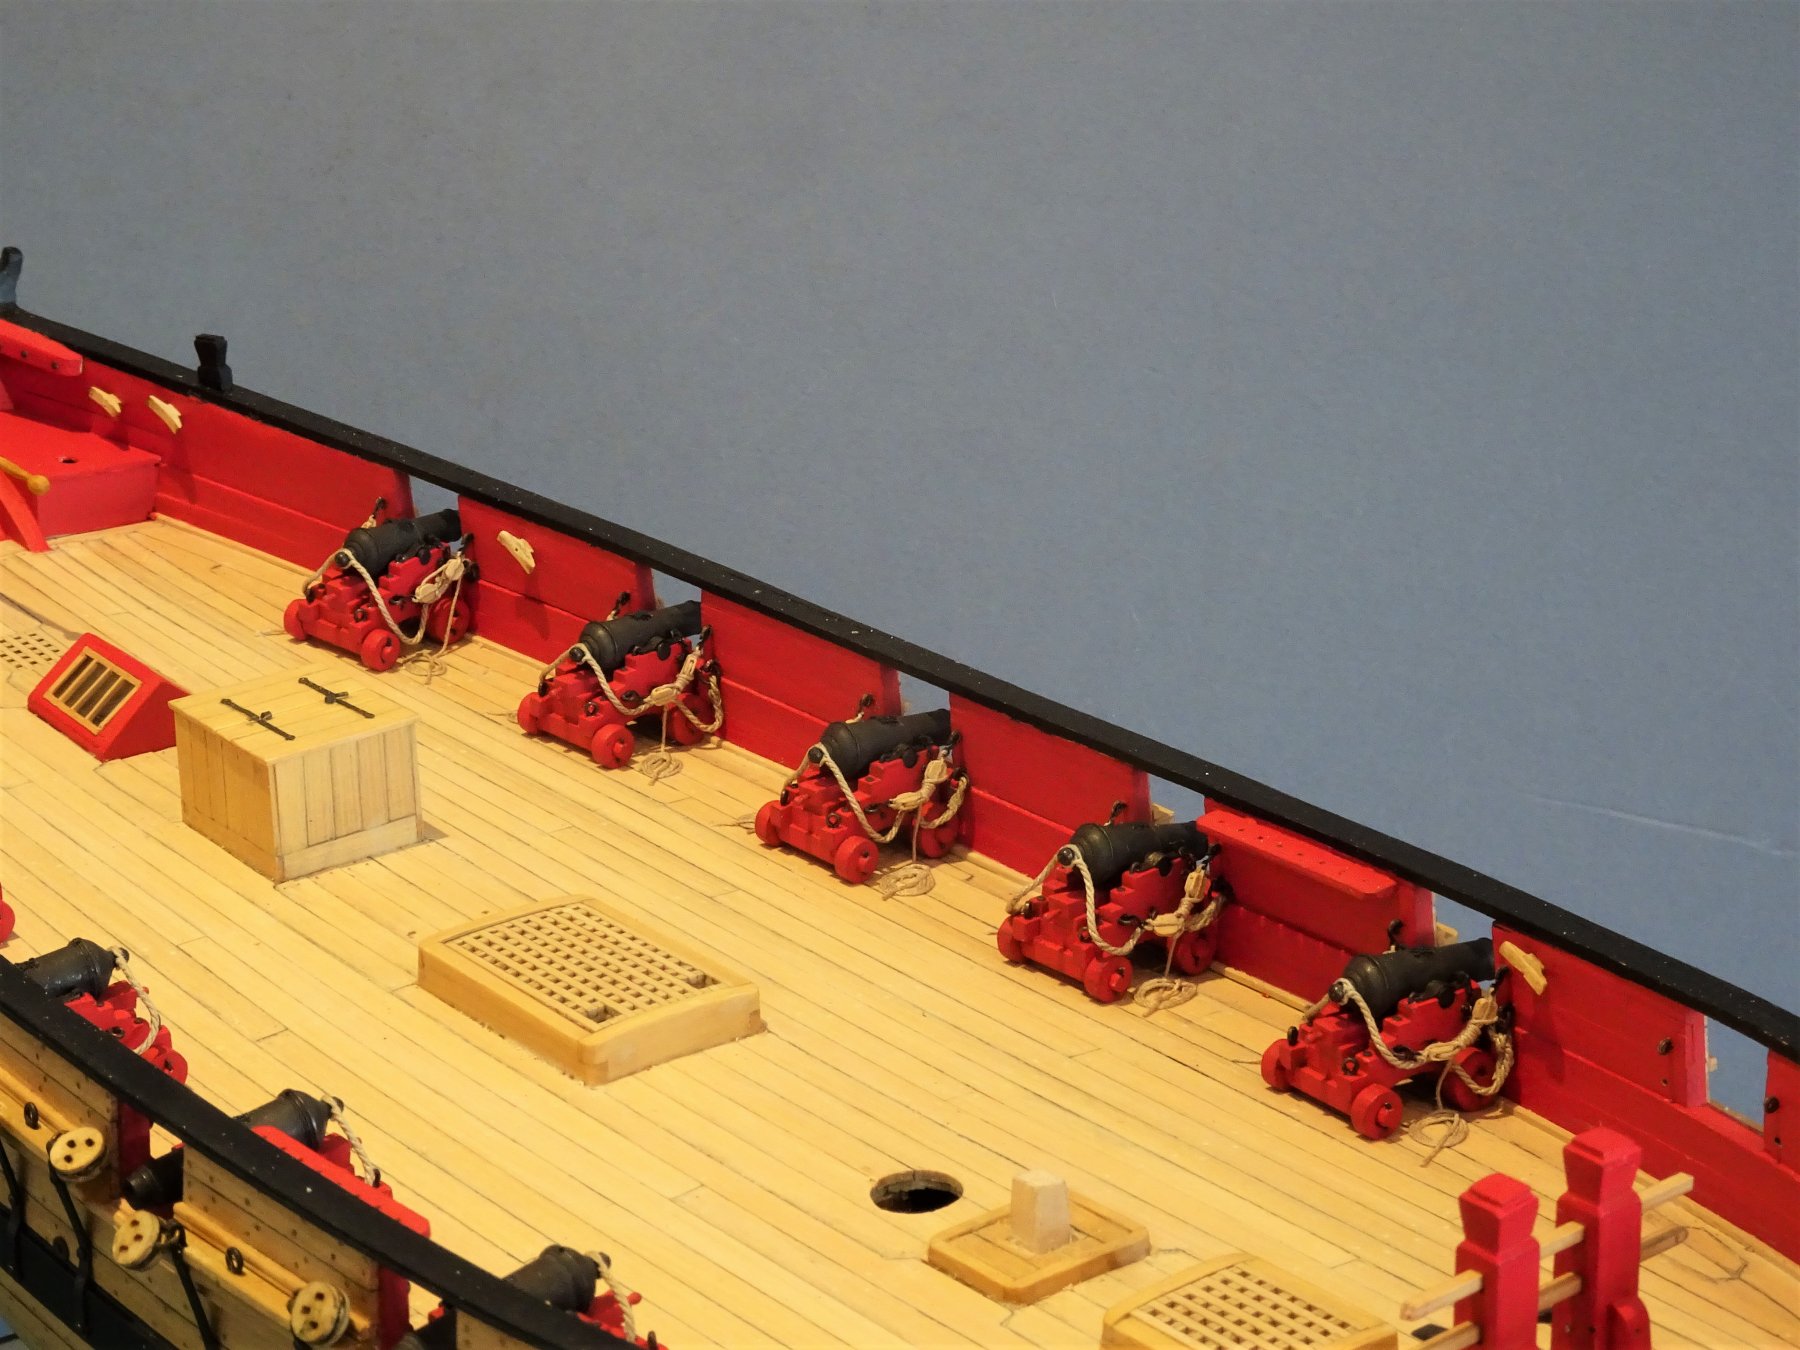
 Post 83 Completing the deck fittings With the guns completed the remaining deck fittings are added; I have also busied myself making a stub Bowsprit which will remain in place if I decide not to rig her. 8215 8214 8256(2) I painted and weathered the Bowsprit retaining fids to represent iron which I thought more apppropriate than wood. 8228 Pumps. The pump handles are now coloured to represent iron. I used toned down black paint and brown weathering powder to slightly change the look. Belaying pins. From the plans 9mm o/a length 3.5mm heads. As suggested by Chuck I used 3/64” x 3/64” Boxwood square stock. How do you make belay pins, the answer is very carefully. These are truly fine little items and I only have to give them a hard look for them to snap usually just when I reach the point of near completion. I am carving these by hand using a very sharp N0 11 scalpel blade, and my success rate is currently around 1 in 3. I have doubts that the stems will hold good under any sort of pressure so I may have to increase the diameter and enlarge the holes in the pin rack. 8231 I did retro add the hoops at the axletrees of the carronades which was a bit tricky but achieved insitu using micro drills and flexible awls. I thought in retrospect that as the deck rings were in place to take the training tackles they should be there. 8268(2) The Winch in place together with the stub mast. Not much to do with the mast, apart from adding the boom saddle and mast cleats. 8216 I fashioned the saddle on the mill and used Chuck's 7mm cleats to complete the job. 8256(3) The chimney is covered with micro lead foil to represent metal. Need to generally check her over now, and give her a dusting. B.E. 22/04/2019
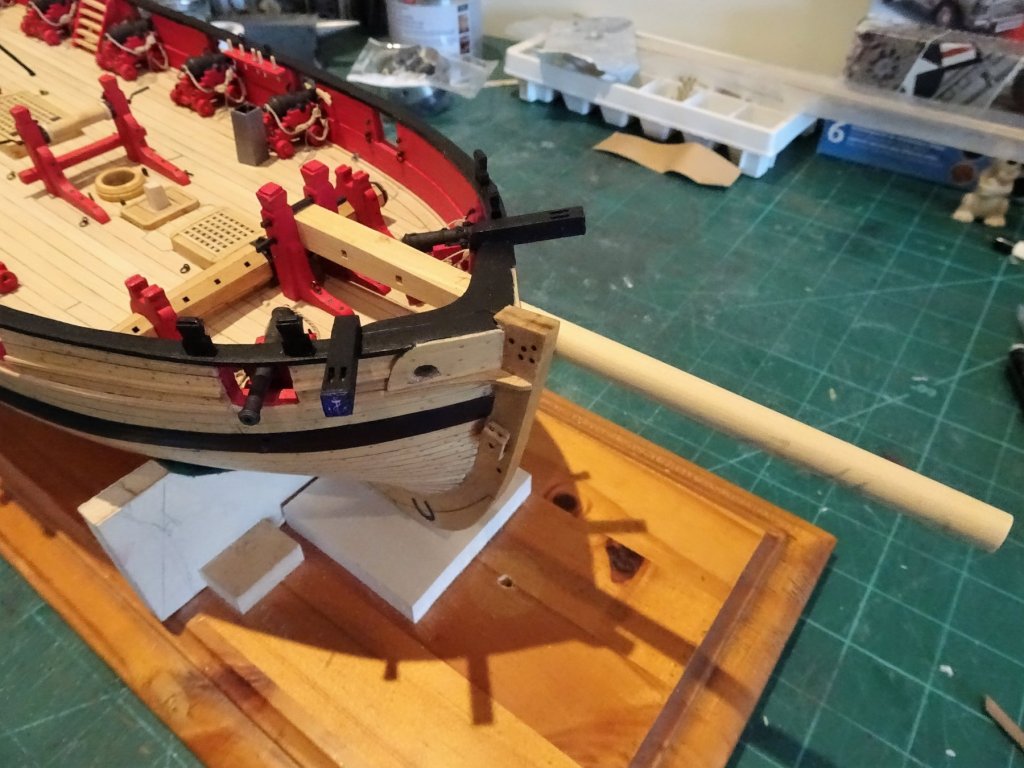

.thumb.JPG.8683f488bd4c80c81e38e938dec396d6.JPG)
.thumb.JPG.21c58aa9972bb30410d0ec5f62d6a37b.JPG)
.thumb.JPG.942da0b464044cfd78f17b0a3d41ea44.JPG)
- 574 replies
-
- 27
-

-
- cheerful
- Syren Ship Model Company
- (and 1 more)
-
Not one of my build photo’s posted by OC, Ferit, looks like Chuck’s super clean work to me. One of the risks of confusion when non related build photo’s are randomly put in a log. On the question of the Bowsprit position , nearly all British cutters of the period had the Bowsprit offset. Probably has something to do with the fact that the Bowsprit was moveable. Non naval or customs cutters were required to have a Bowsprit of restricted length and fixed, resulting in a speed disadvantage, or that was the theory. B. E.
-
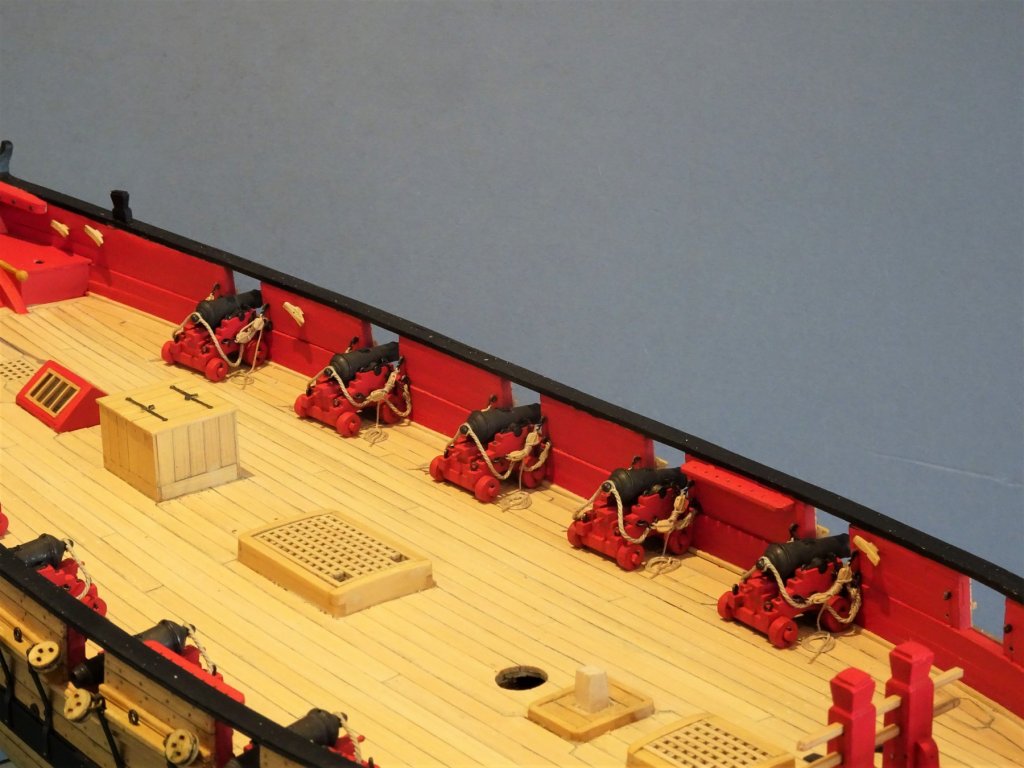
Gives a false impression that photo O.C. the port side position is very crowded once the gun is in place. Thank you Chris for looking in; in answer to your question, on Cheerful there are only the scuppers, four of which run along the waterway. I would imagine these would be very wet boats to operate. B.E.
- 574 replies
-
- 2
-
-
- cheerful
- Syren Ship Model Company
- (and 1 more)
-
Smart looking cutter Cabbie, nice work on the ports and bulwark planking. 👍 B.E.
-
Cheers guys for your input, nothing seems to work well in relation to that port side gun, whatever you do something gets in the way to impede operation. There barely seems room to move the bow guns past the windlass to change position. It would seem logical Peter to use temporary boards to close ports, but then our logic would say that the gun shouldn't be there, and it would be sensible to have lids on the bow ports. I think Chuck worked on the basis of available evidence in relation to Cheerful rather than indulge in assumptions, to produce a model based on the actual plans, and contemporary models. If nothing else it provides a talking point for we that are interested in the minutiae of such things.🙂 B.E.
- 574 replies
-
- 5
-
-
- cheerful
- Syren Ship Model Company
- (and 1 more)
-
Thank you Michael and Rusty @ Peter - It would, but the Bowsprit step standards are also a problem. @ Dave - grasping at straws but maybe recoil was very limited on these guns, and they wouldn't have to move far in order to load and swab. We know that run in guns weren't fully run in to the extent that you could stand in front of them and it was practice to lean out of ports to clean and load. What Ensign did you order? Chuck shows a Union Flag at the Gaff possibly influenced by the rigged model of the Hawke which has a small one at the Gaff peake, but I think this is unusual. I would love to see a photo of your model once it is completed. @ vossie - Agree with everything you say vossie but we're still stuck with the contemporary written evidence in relation to Cheerful. I have the same issue with the side steps, my inclination is to fit an additional step, and I even made them but the plan shows only three, so I am going to resist. Always more questions than answers in the world of period ship modelling. B.E. 18/04/19
- 574 replies
-
- 3
-
-
- cheerful
- Syren Ship Model Company
- (and 1 more)
-
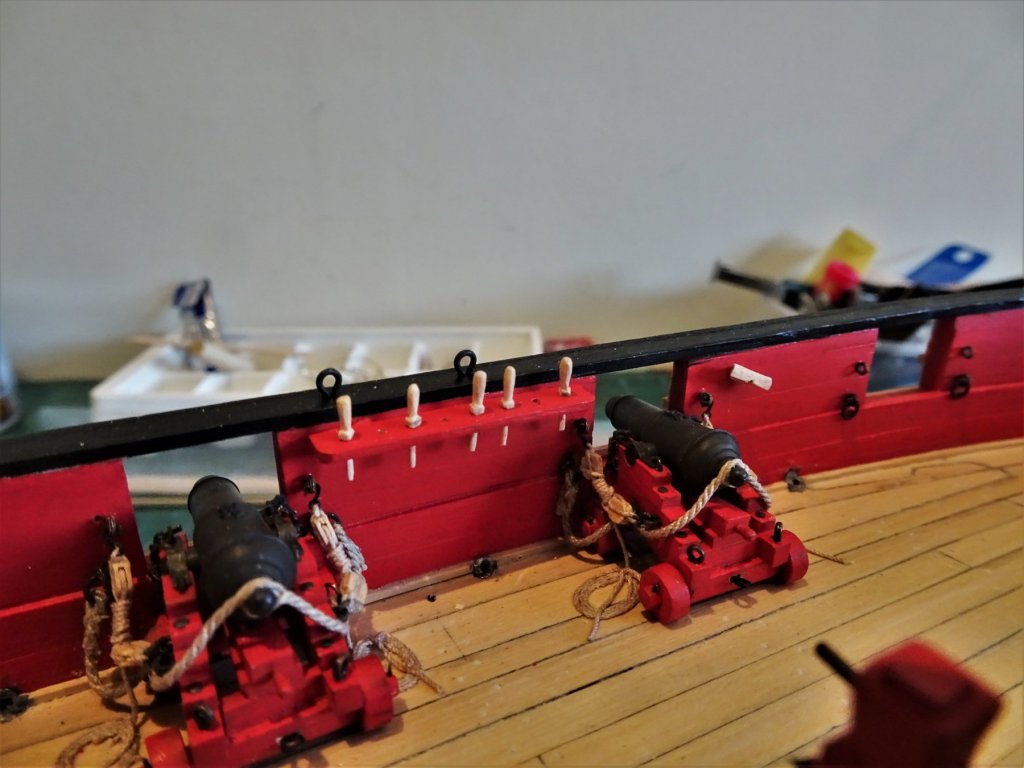
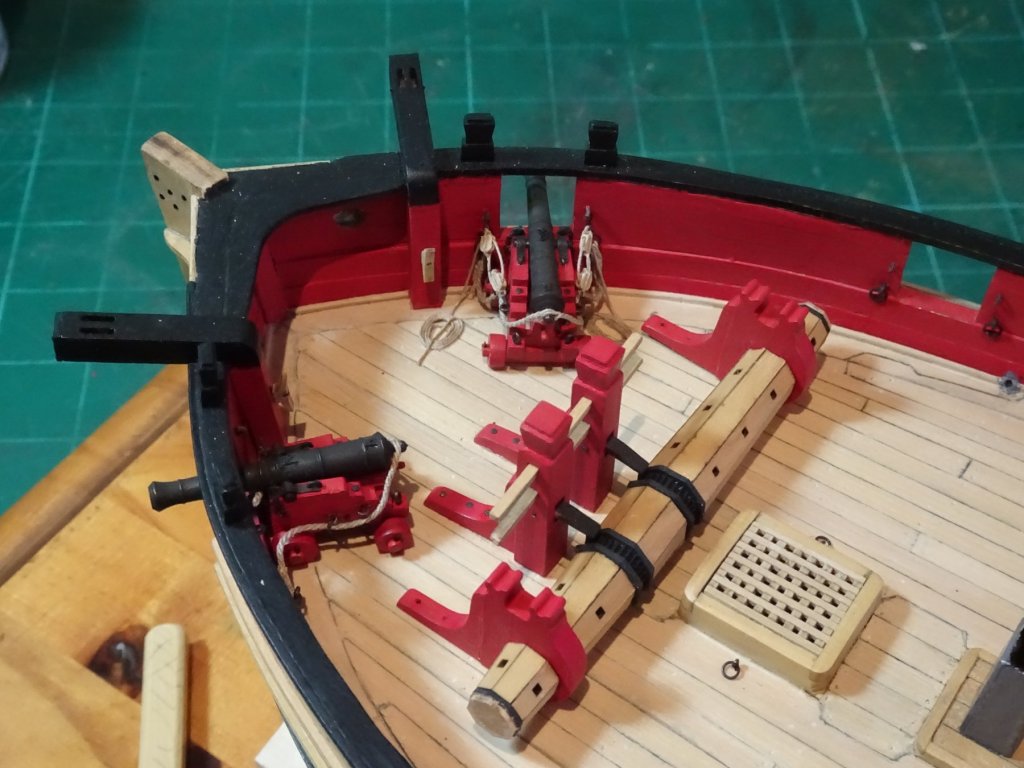
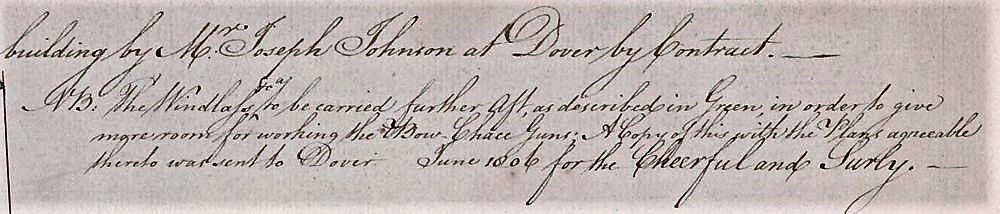
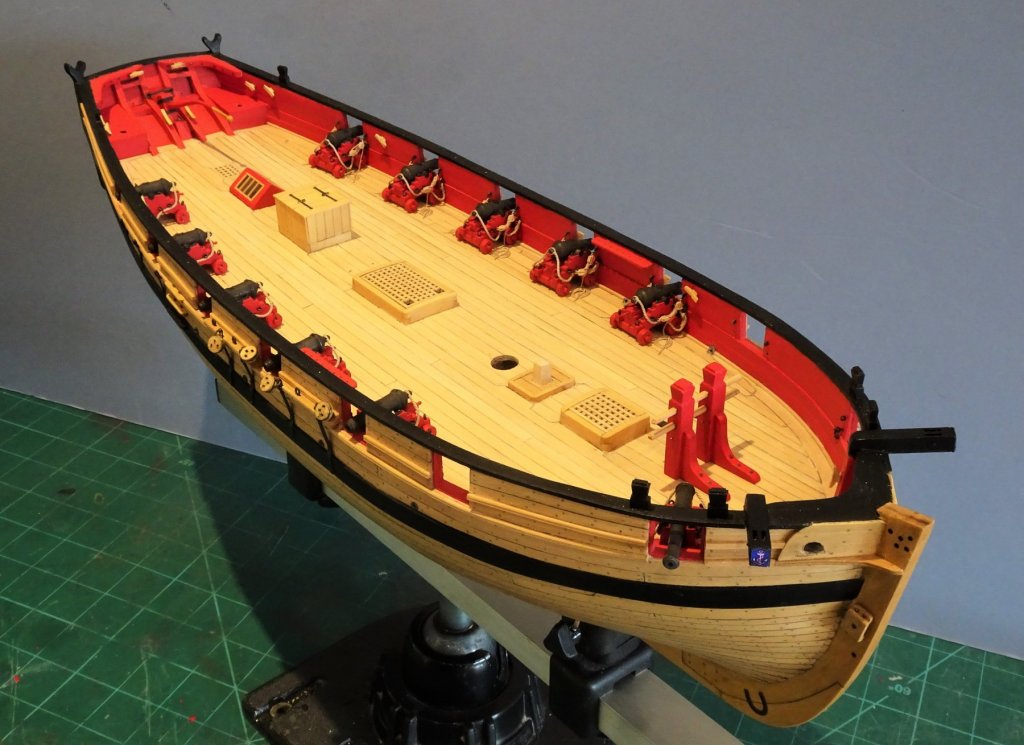
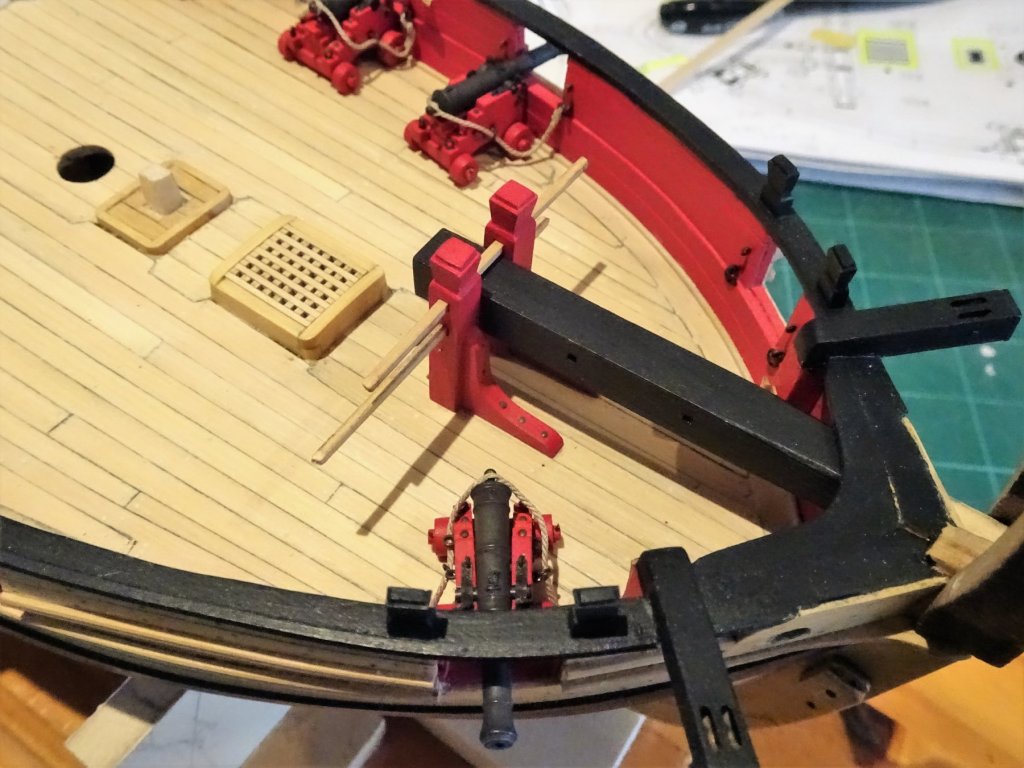
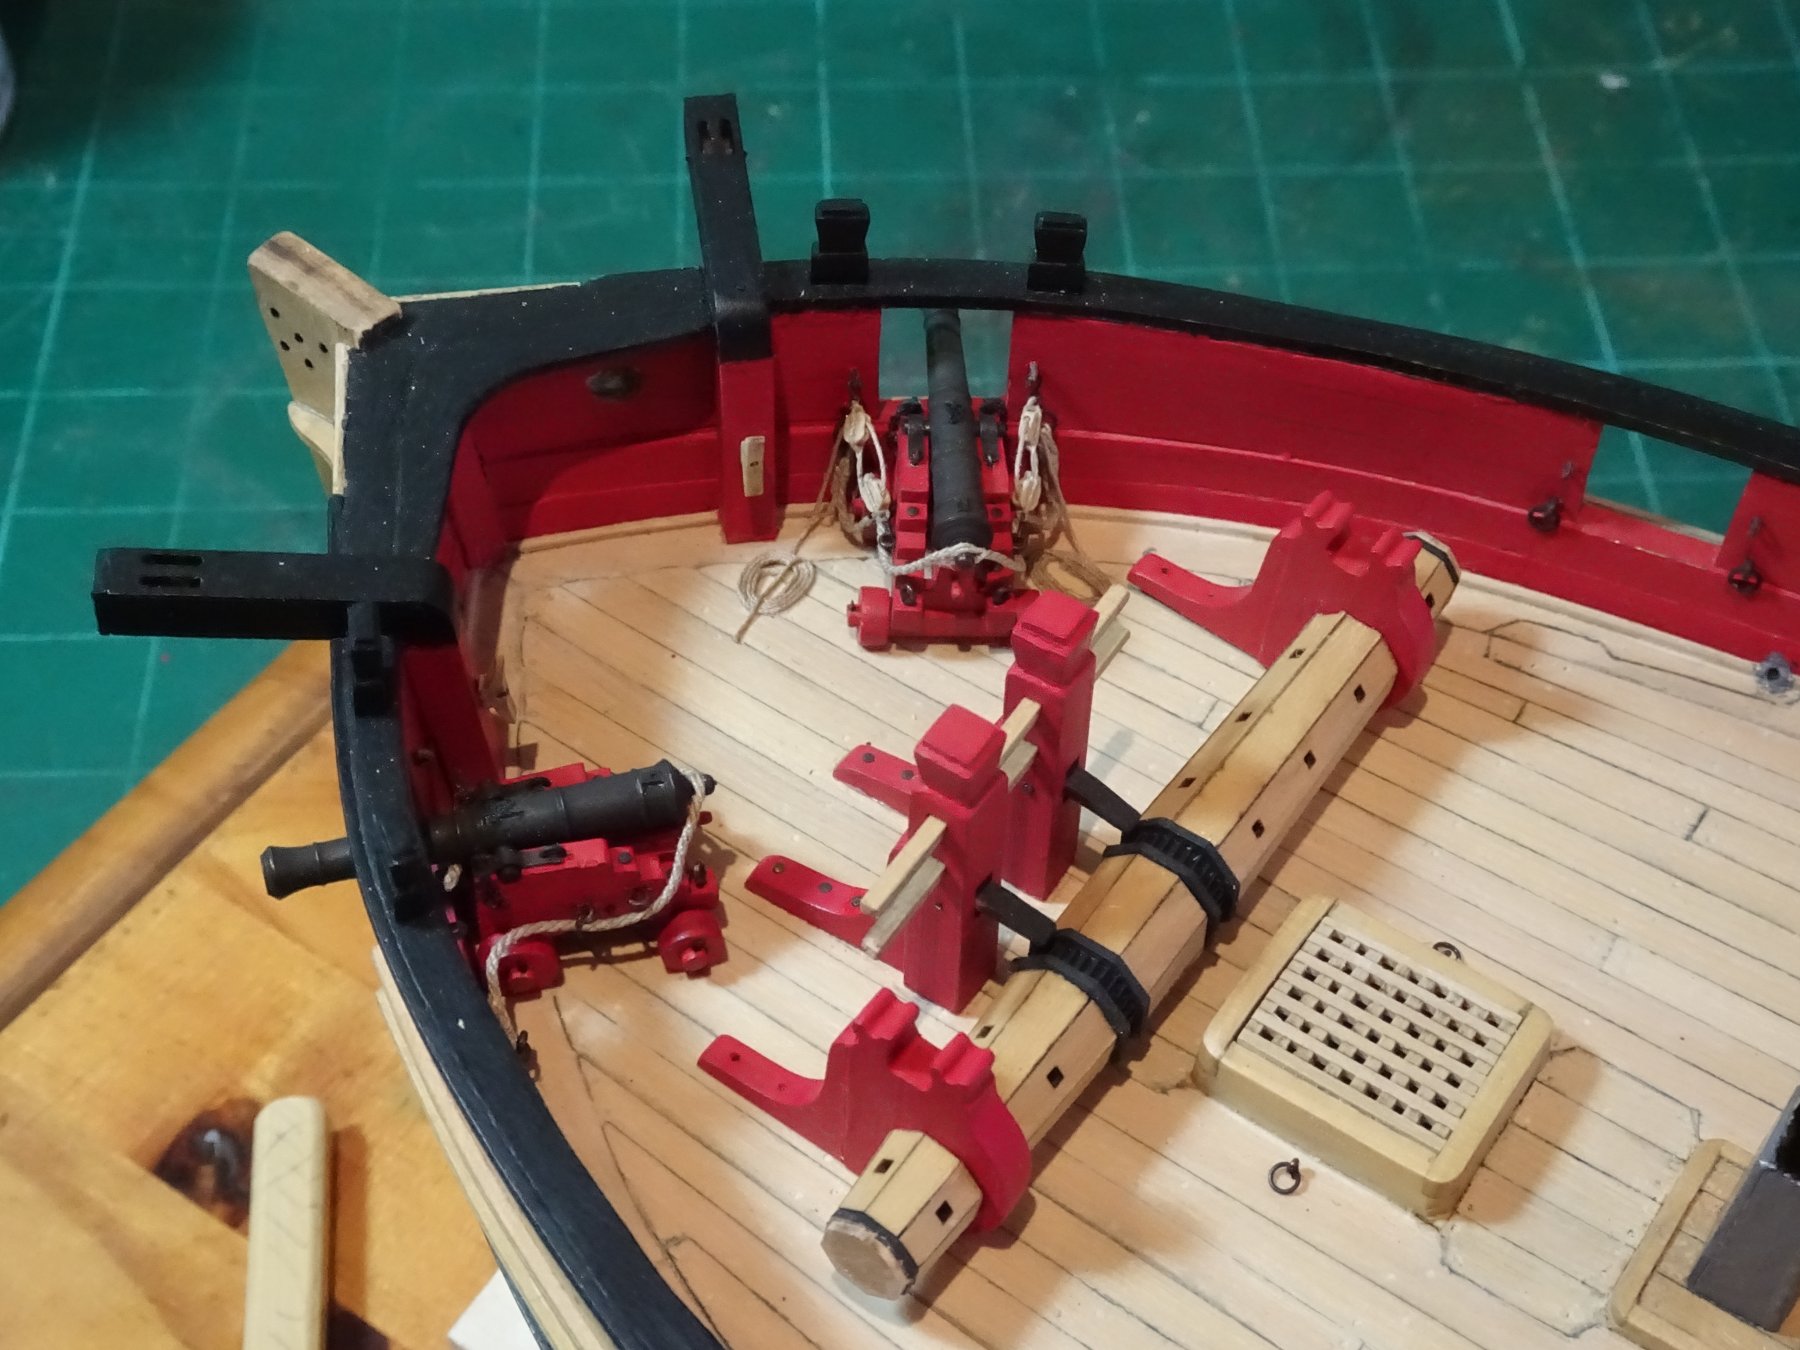
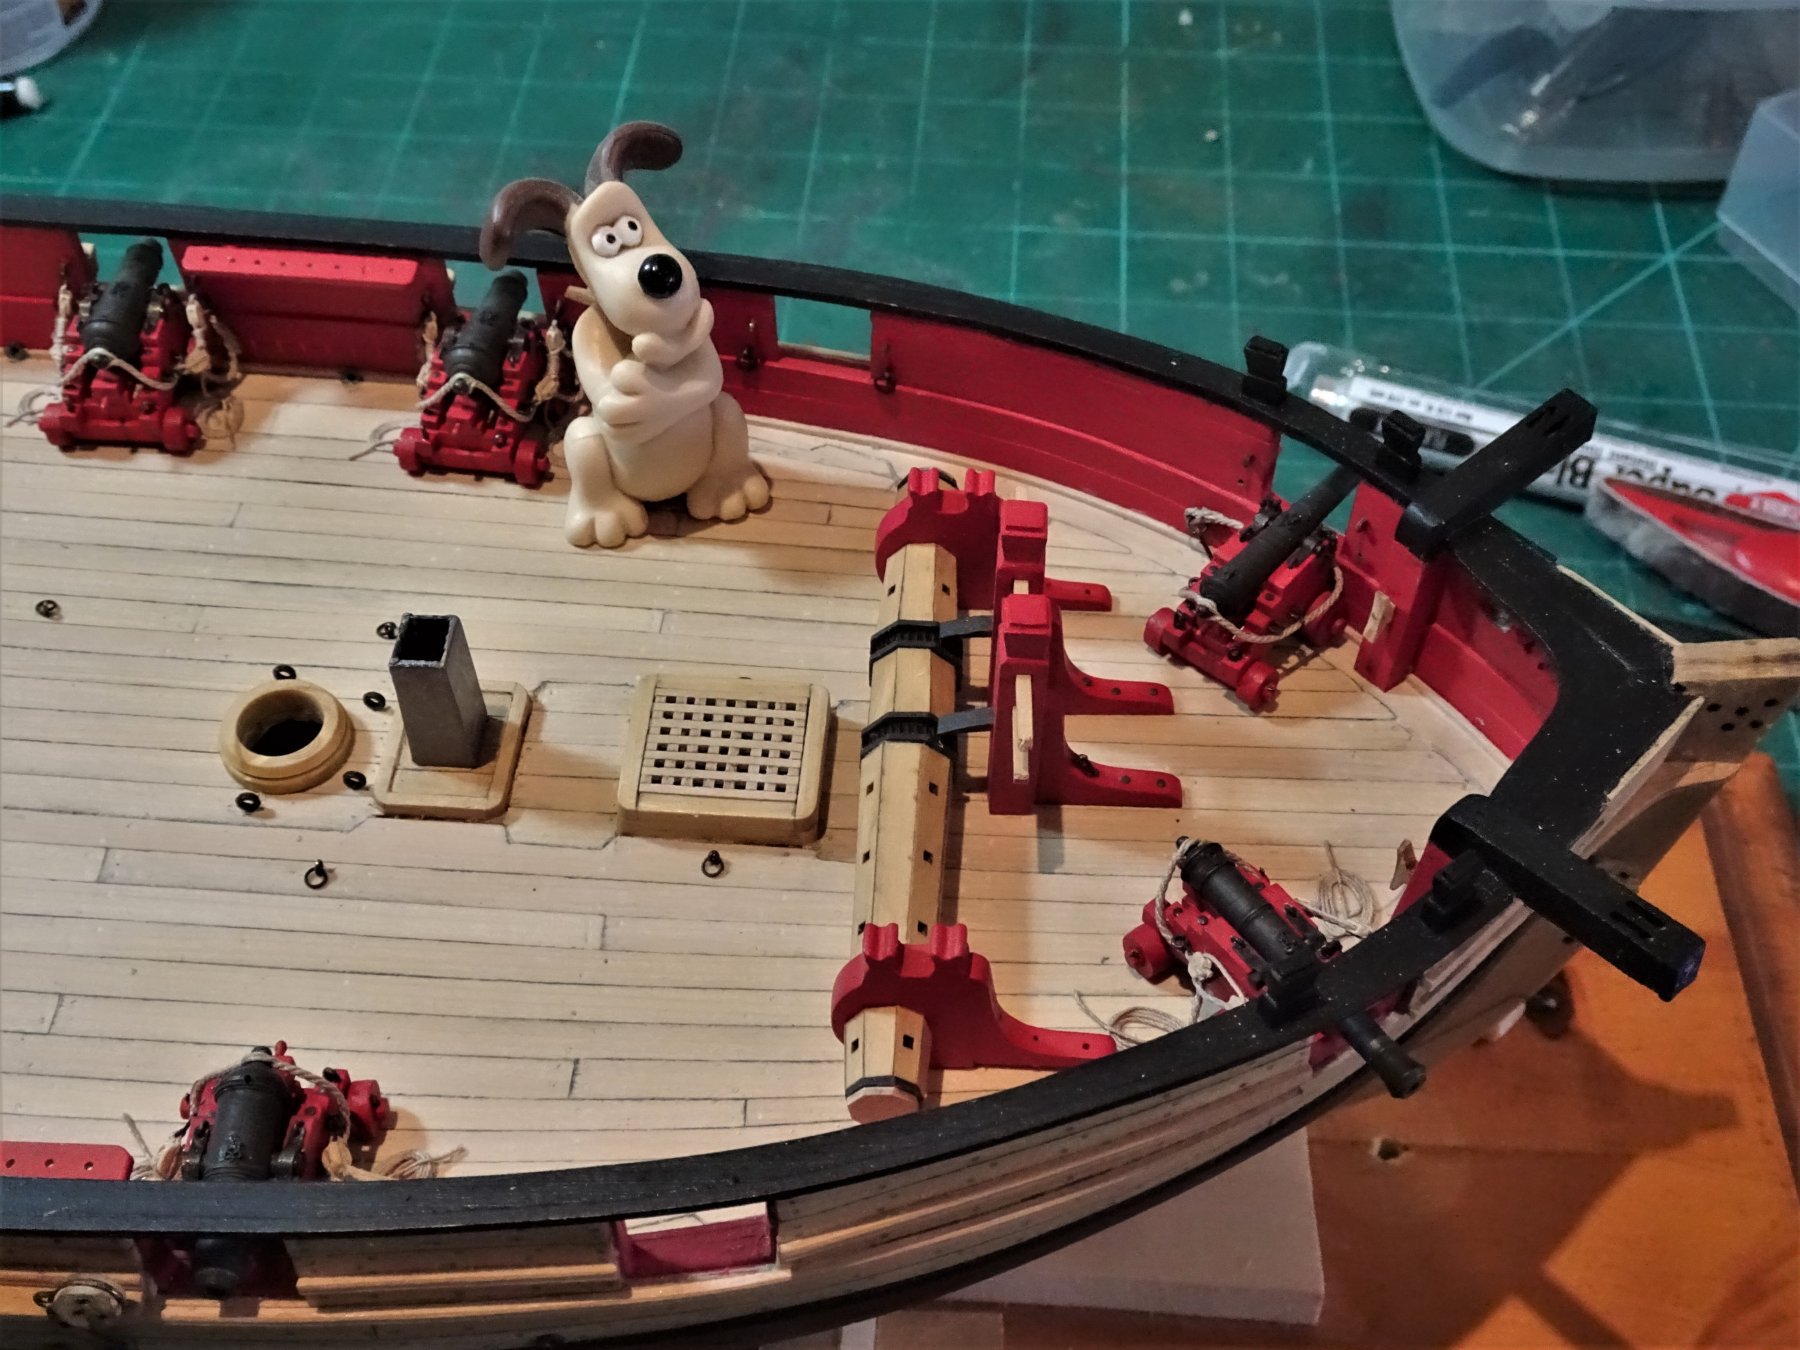
Post 82 The agony of indecision I have now rigged all the guns, bar the portside bow chaser. I have flipflopped between fitting it at the bow port or the second port, but the decision now has to be made. 8026 Having the port gun at the second port position but the starboard gun at the bow gives the model an unbalanced look, and having no guns at the bow with those large open ports empty doesn't look good aesthetically to my eye. I still think it's odd having those two large openings without any protection from an incoming sea. 8034 Gromit seems as confused as I am, but I can't deny the irrefutable evidence of the plans. The notation that the windlass be moved two feet back to give more room to work the portside chase gun. 1972 The plan appearing to show the revised position of the windlass. But the most important factor Mrs W agreed the bow position looked the best, even if it raises issues of practicality. 8027 So bow position it is with all its apparent difficulty of working the gun. I can now fix the gun and Windlass and complete the other deck fittings. B.E. 17/04/2019


.thumb.JPG.53ce5769cb1761eae1f2edb523108e85.JPG)
- 574 replies
-
- 24
-
-
- cheerful
- Syren Ship Model Company
- (and 1 more)
-
Good to have news from the prairies Martin and pleased to see that you are still chipping away. I couldn't come close to producing those figures within the size constraints you have to work. Keep at it. B.E.
- 467 replies
-
- 1
-
-
- fly
- victory models
- (and 1 more)
-
Nice job on scratching the Bowsprit cap Caroline, the kit provided item is worse than useless. B.E.
- 161 replies
-
- 3
-
-
- pegasus
- victory models
- (and 1 more)
-
Yawl looks excellent, I think it will have wide appeal at 1:48 scale, I would certainly buy one.👍 B.E.
- 216 replies
-
- 5
-
-
- masterkorabel
- ships
- (and 3 more)
-
Thank you Wallace, I always try to avoid making myself work if at all possible. 🙂 B.E.
- 574 replies
-
- 1
-
-
- cheerful
- Syren Ship Model Company
- (and 1 more)
-
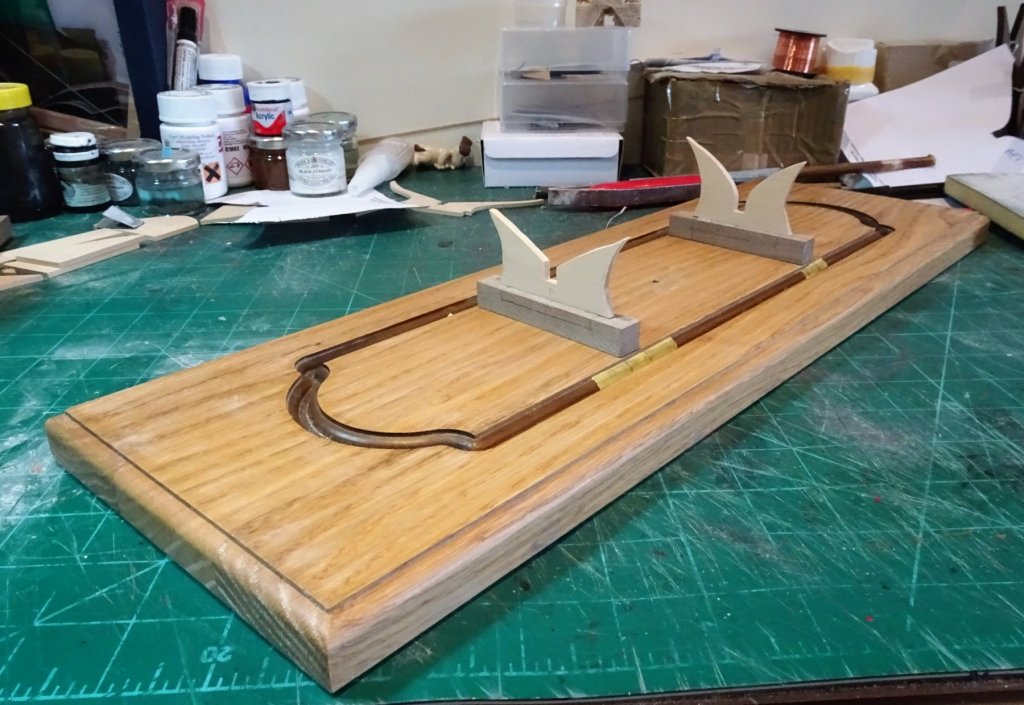
Post 81 A base for Cheerful Whilst I wait for more blocks to arrive I turn my attention to making a more stylish base for Cheerful. 7618 For the base I have an old drawer front made of American oak, already shaped and profiled. 7651(2) The hull supports are made from some 1/8" Boxwood sheet and slots are cut into some 7mm Walnut square stock to take the support tabs. 7654(2) 7657(2) 7658(2) This will suffice for now but I may add keel blocks along the hull as I did with Pegasus. Taking a break for a week now, and hopefully when I return my rigging blocks will have arrived.🙂 Cheers, B.E. 05/04/2019
.thumb.JPG.f15141743230105b8421373be646b684.JPG)
.thumb.JPG.110cd617f01a7405e13a25216f752601.JPG)
.thumb.JPG.71d0236d1271c43c93e84b8b07199a52.JPG)
.thumb.JPG.438e383016366eb9ac7042bfb5d87309.JPG)
- 574 replies
-
- 26
-
-
- cheerful
- Syren Ship Model Company
- (and 1 more)
-
Impressive Paul, I do like the look of her. B.E.
-
Hi Vossie, my own preference is for a clearer deck look, and I don't think training tackles would be in place unless action was imminent, but I can see why modellers fit them to show the working operation of the gun. ps. thanks for the link to your build, you're producing a fine cutter there.🙂 B.E.
- 574 replies
-
- 3
-
-
- cheerful
- Syren Ship Model Company
- (and 1 more)
-
You're doing a fine job on your Lady Nelson Vossie, and those training tackles are very well done particularly as you're working at 1:64 scale. 👍 B.E.
- 714 replies
-
- 3
-
-
- lady nelson
- victory models
- (and 1 more)
-
Thank you Ferit, Caroline, and Michael. @ Michael - the deck ring bolts are in place that would suggest use of training tackles, but there is no loop indicated in the rear axletree of the gun carriage that would usually be the attachment point for the tackle. I did wonder if this was an oversight. I don't usually fit training tackles so I haven't pressed the issue. B.E.
- 574 replies
-
- 1
-
-
- cheerful
- Syren Ship Model Company
- (and 1 more)
-
Sorry you've lost your shipyard companion, Rusty. As someone who also has such a companion I know how much you will miss Tallie, it is a hurt that those of us with canine family members feel far too soon. What we are left with is the knowledge that we gave them a good and happy life, and fond memories of our time together. B.E.
-
Cheers Guys for your responses. @ Wallace - I'm a big fan of jigs, they may be a bit rough and ready but they reduce frustration in working small parts and do improve the production process. 🙂 @ Martin - I suppose you may say that I have dabbled in gun rigging previously. 😉 @ Paul - Hadn't thought about that, could be a possibility but I've some time before the crunch decision has to be made.🤔 B.E.
- 574 replies
-
- 1
-
-
- cheerful
- Syren Ship Model Company
- (and 1 more)
-
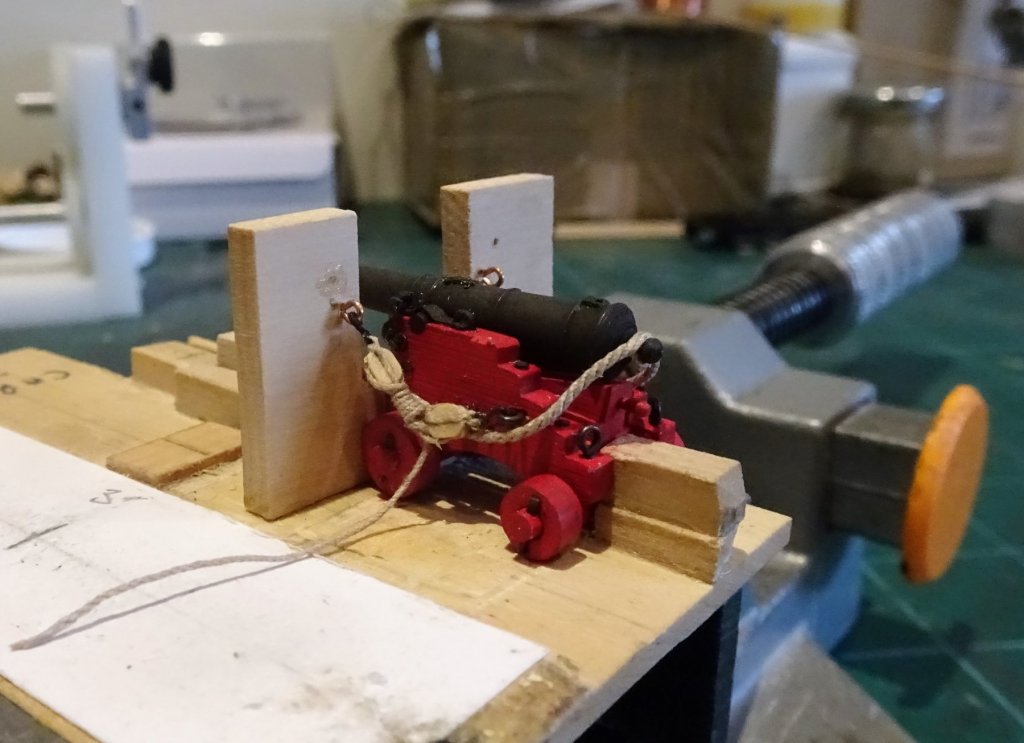
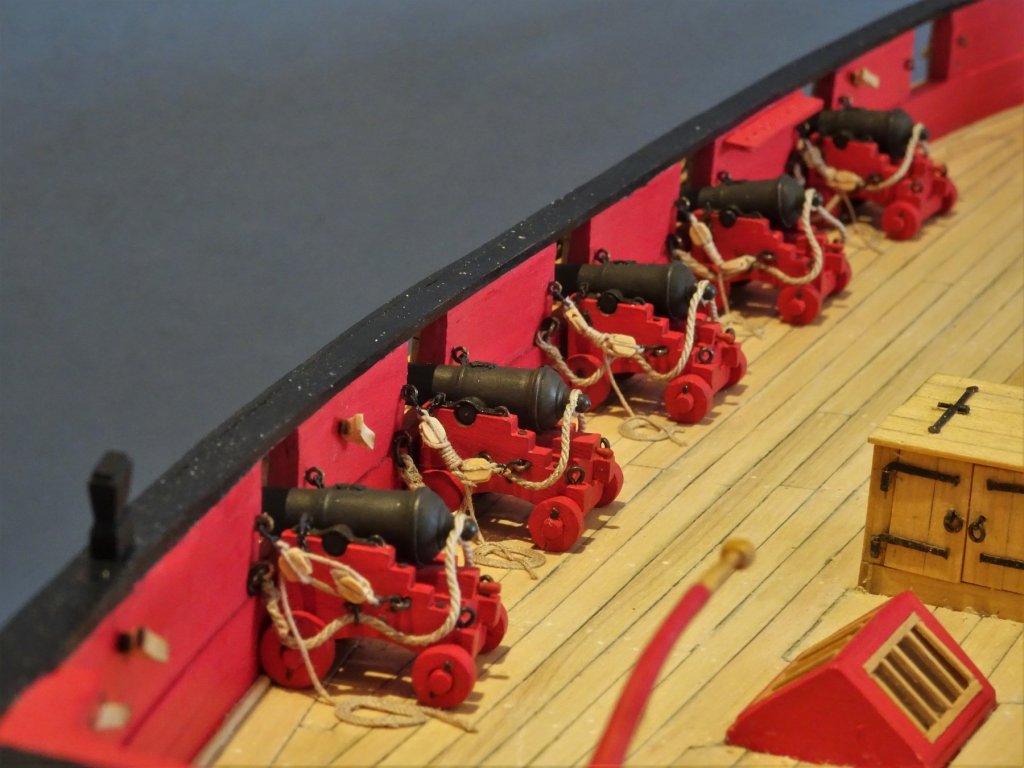
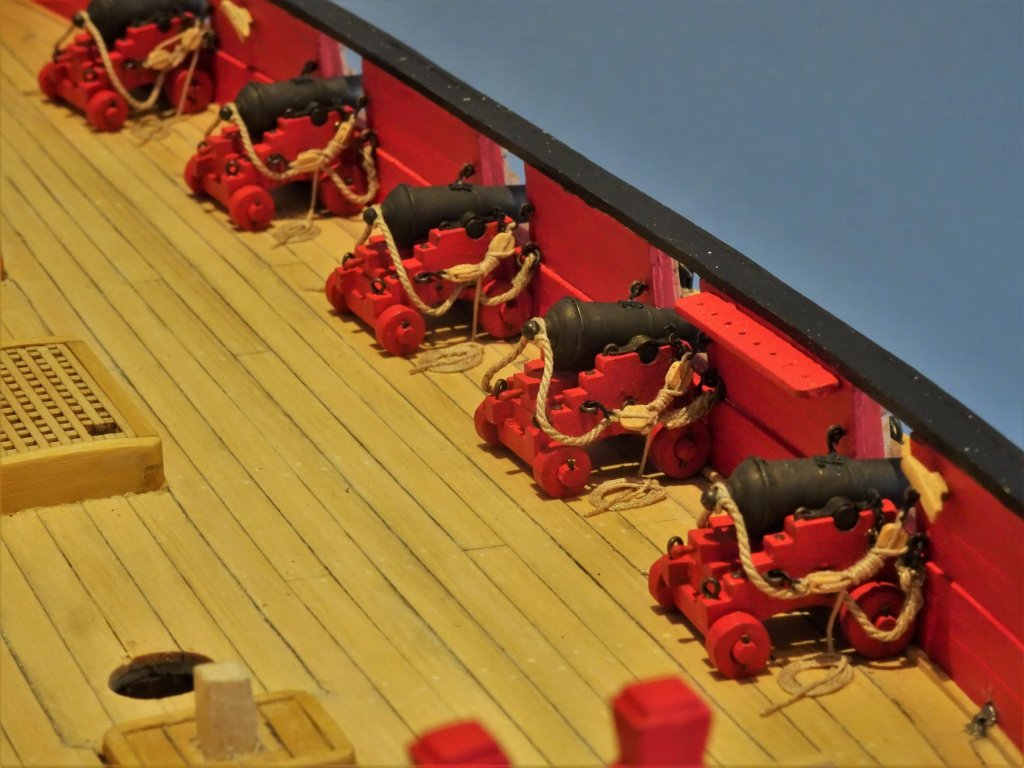
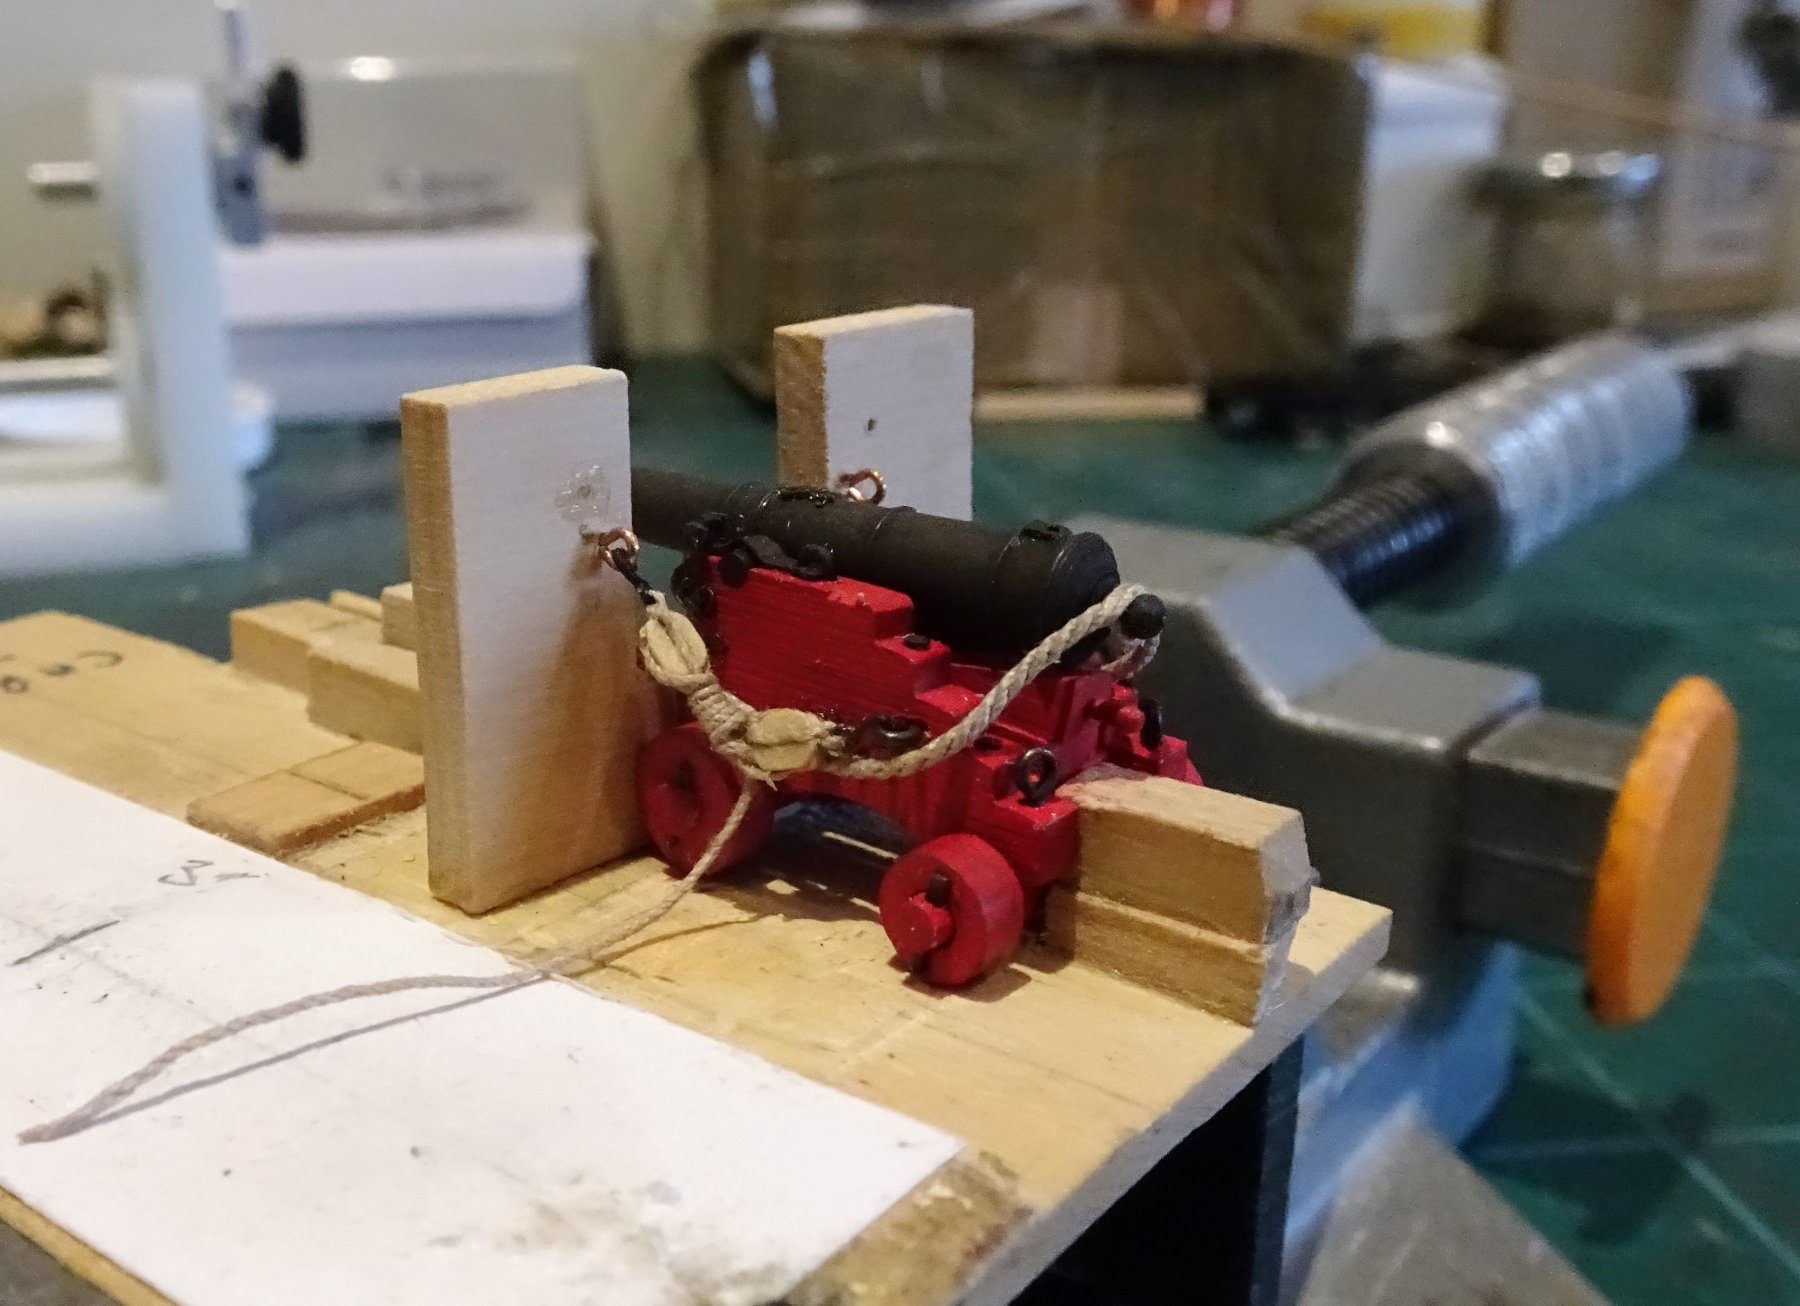
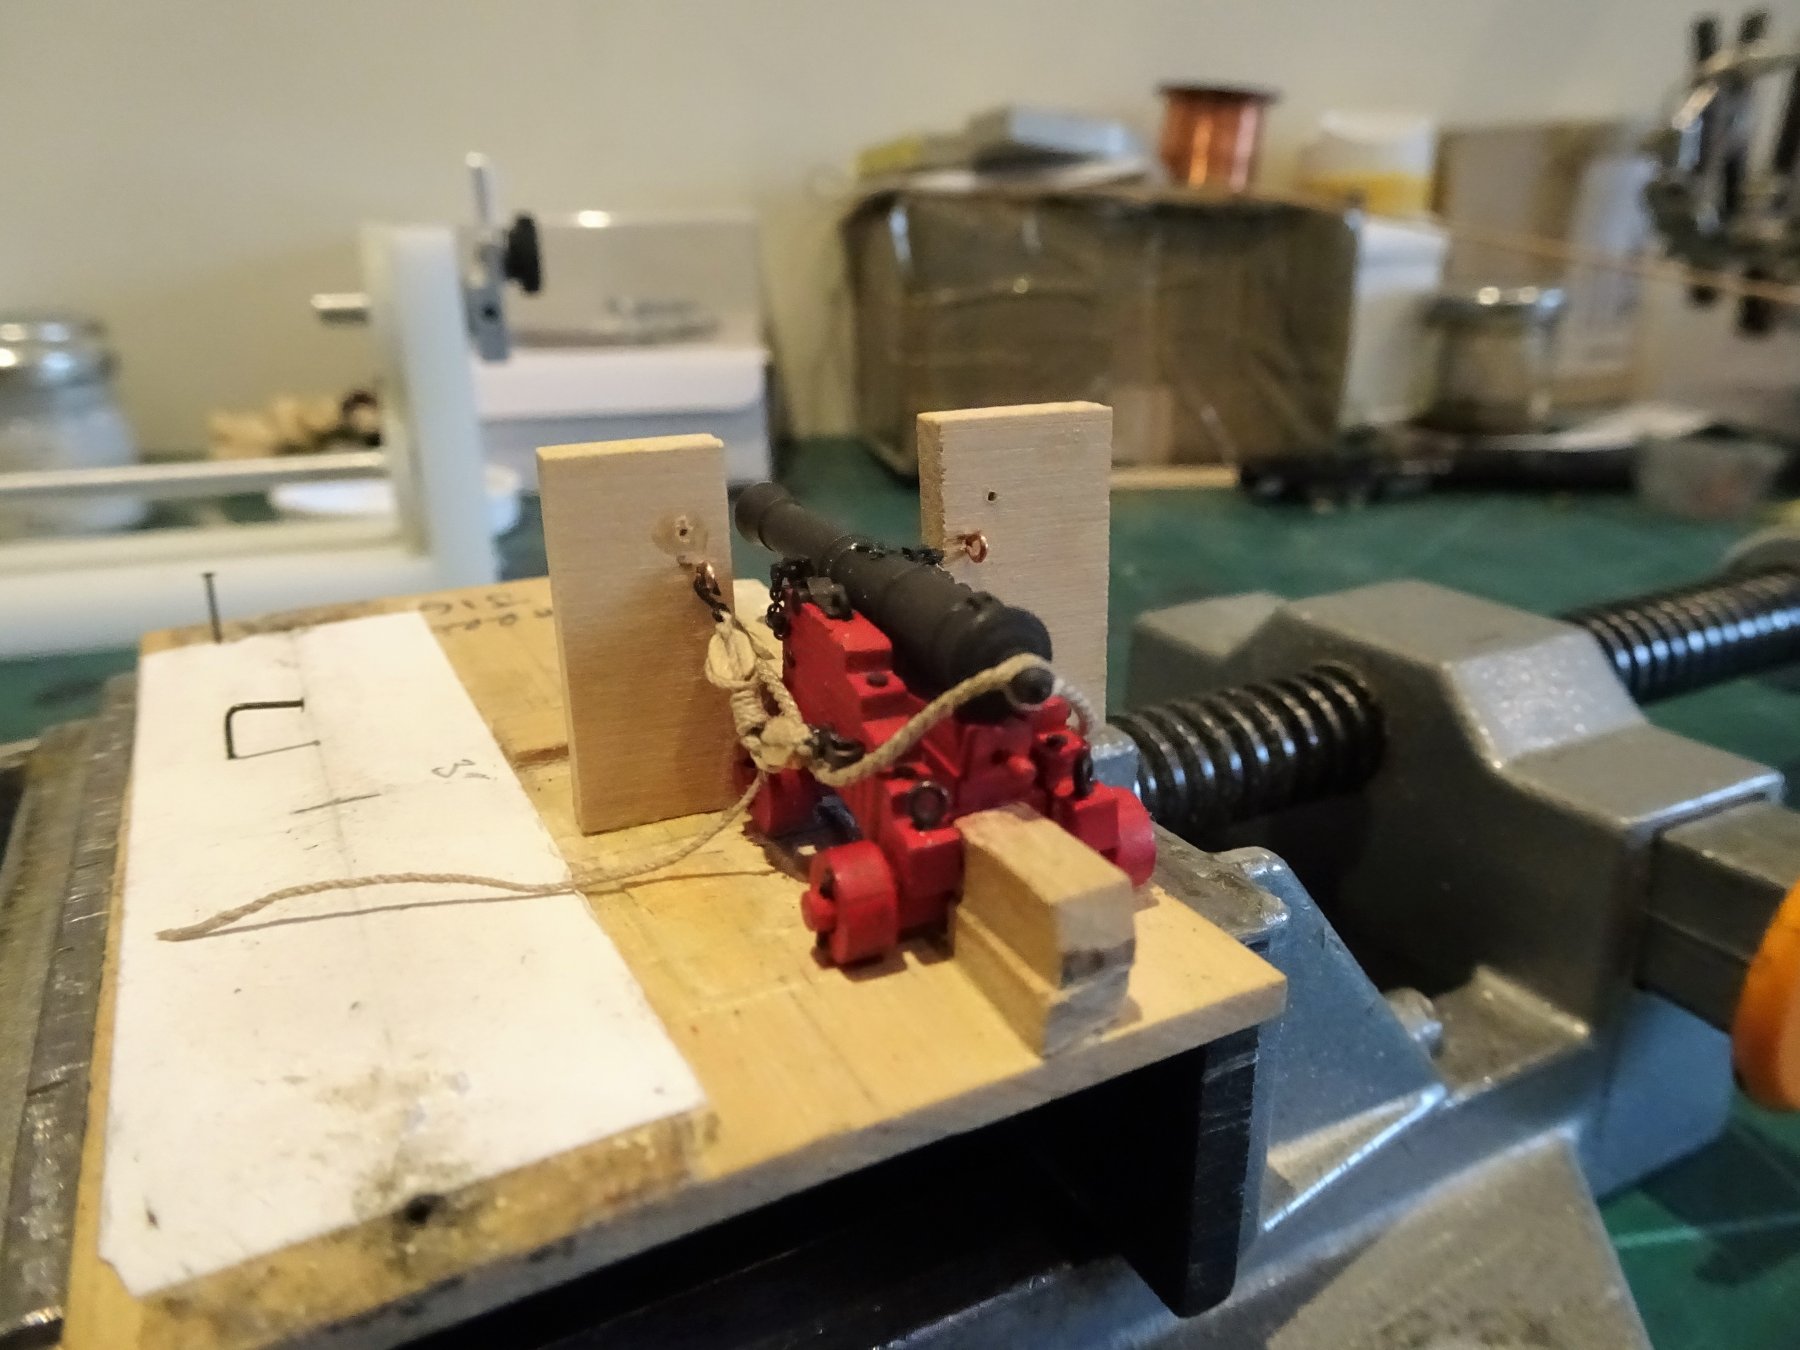
Post 80 Back to the gun tackles. Putting my mind to the side tackles a further modification to the gun jig is again required adding a mocked up gun port. 7530 The as yet unplaced Portside long gun was used as a test bed to rig tackles. 7533 My own preference eventually settled on using a slightly longer sagged tackle frapped with the excess loosely coiled alongside the gun. All the tackles were made on the test gun and then transferred. 7585 7584 I decided to leave for the present the aftermost carronade tackles unfrapped. 7579 The coils representing the excess line were made separately and pva'd to the deck. 7577 The Starboard side tackles will have to wait until block supplies arrive from over the pond. In the meantime I will have a think about the display base for Cheerful. B.E. 01/04/2019

- 574 replies
-
- 28
-
-
- cheerful
- Syren Ship Model Company
- (and 1 more)
-
Well done Peter, a very fine model. Regards, B.E.
- 236 replies
-
- 1
-
-
- artesania latina
- kitbashing
- (and 2 more)
-
Cheers Michael and Dave. It's not the rigging of her that's the problem Dave. Apart from Cheerful there are eleven other ship models displayed around the house, three of them large and fully rigged, it's really a question of space. Even if I don't mast and rig her I will make the masts and spars and display them in the case. Hope your rigging snags remain few and simple. 🤞 I can see that that a lot of care is required with that long Bowsprit on Cheerful when turning the model about, an island workbench would be ideal for the masting and rigging of models. B.E.
- 574 replies
-
- 4
-
-
- cheerful
- Syren Ship Model Company
- (and 1 more)
-
Thanks Chuck, for clearing that up. 🙂 B.E.
- 574 replies
-
- 1
-
-
- cheerful
- Syren Ship Model Company
- (and 1 more)
-
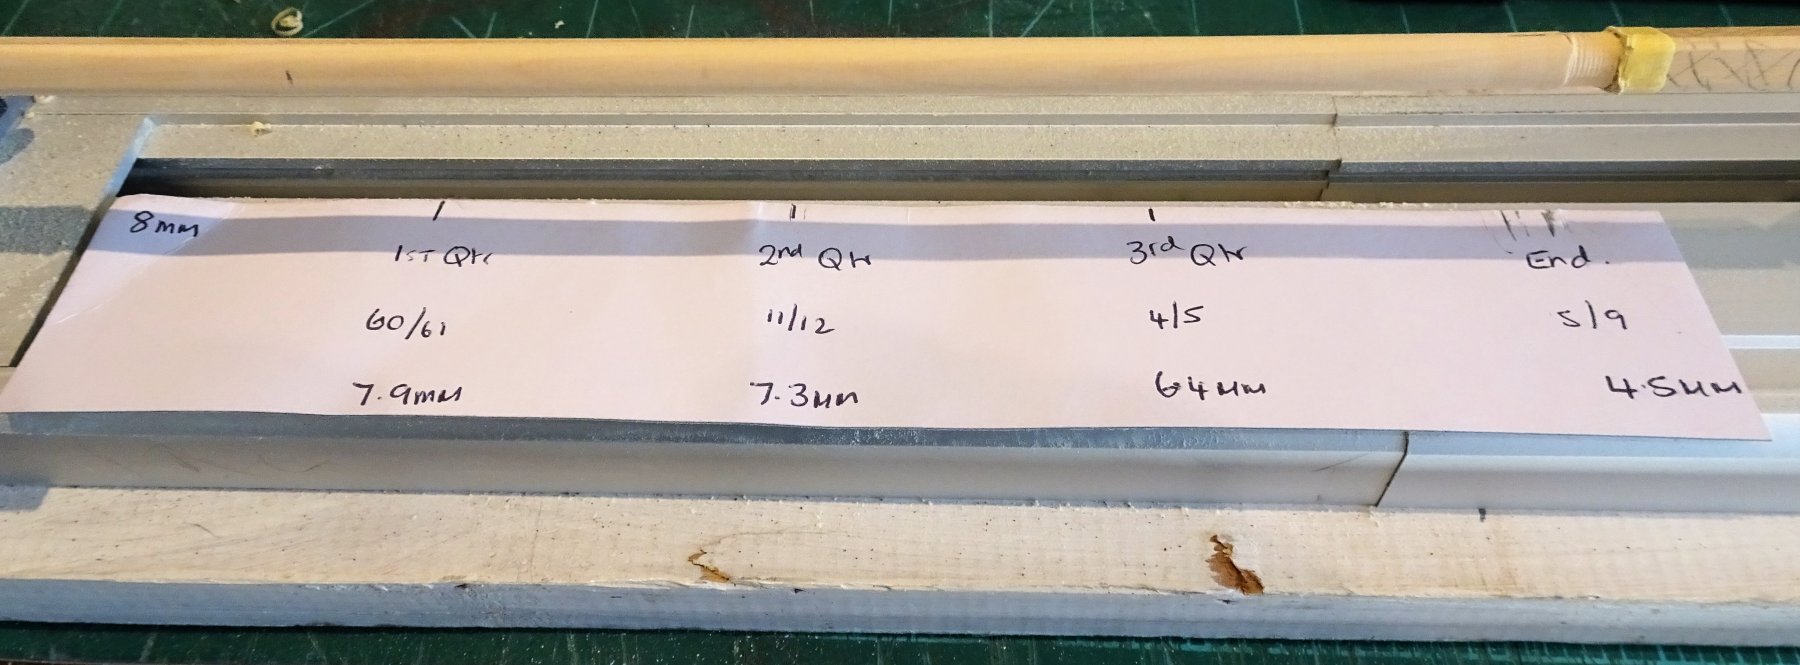
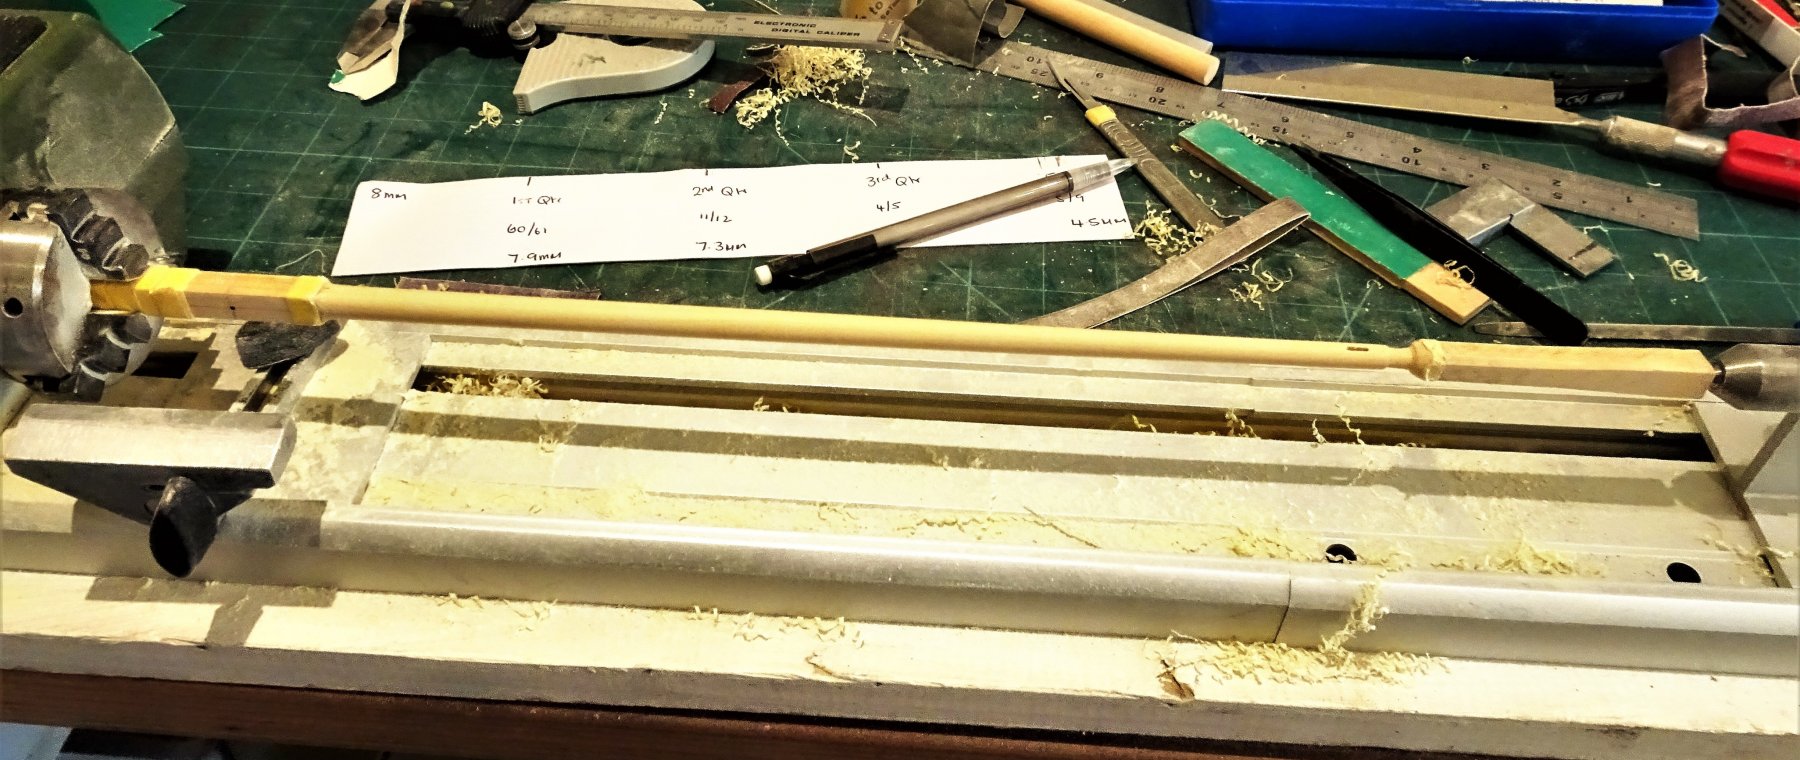
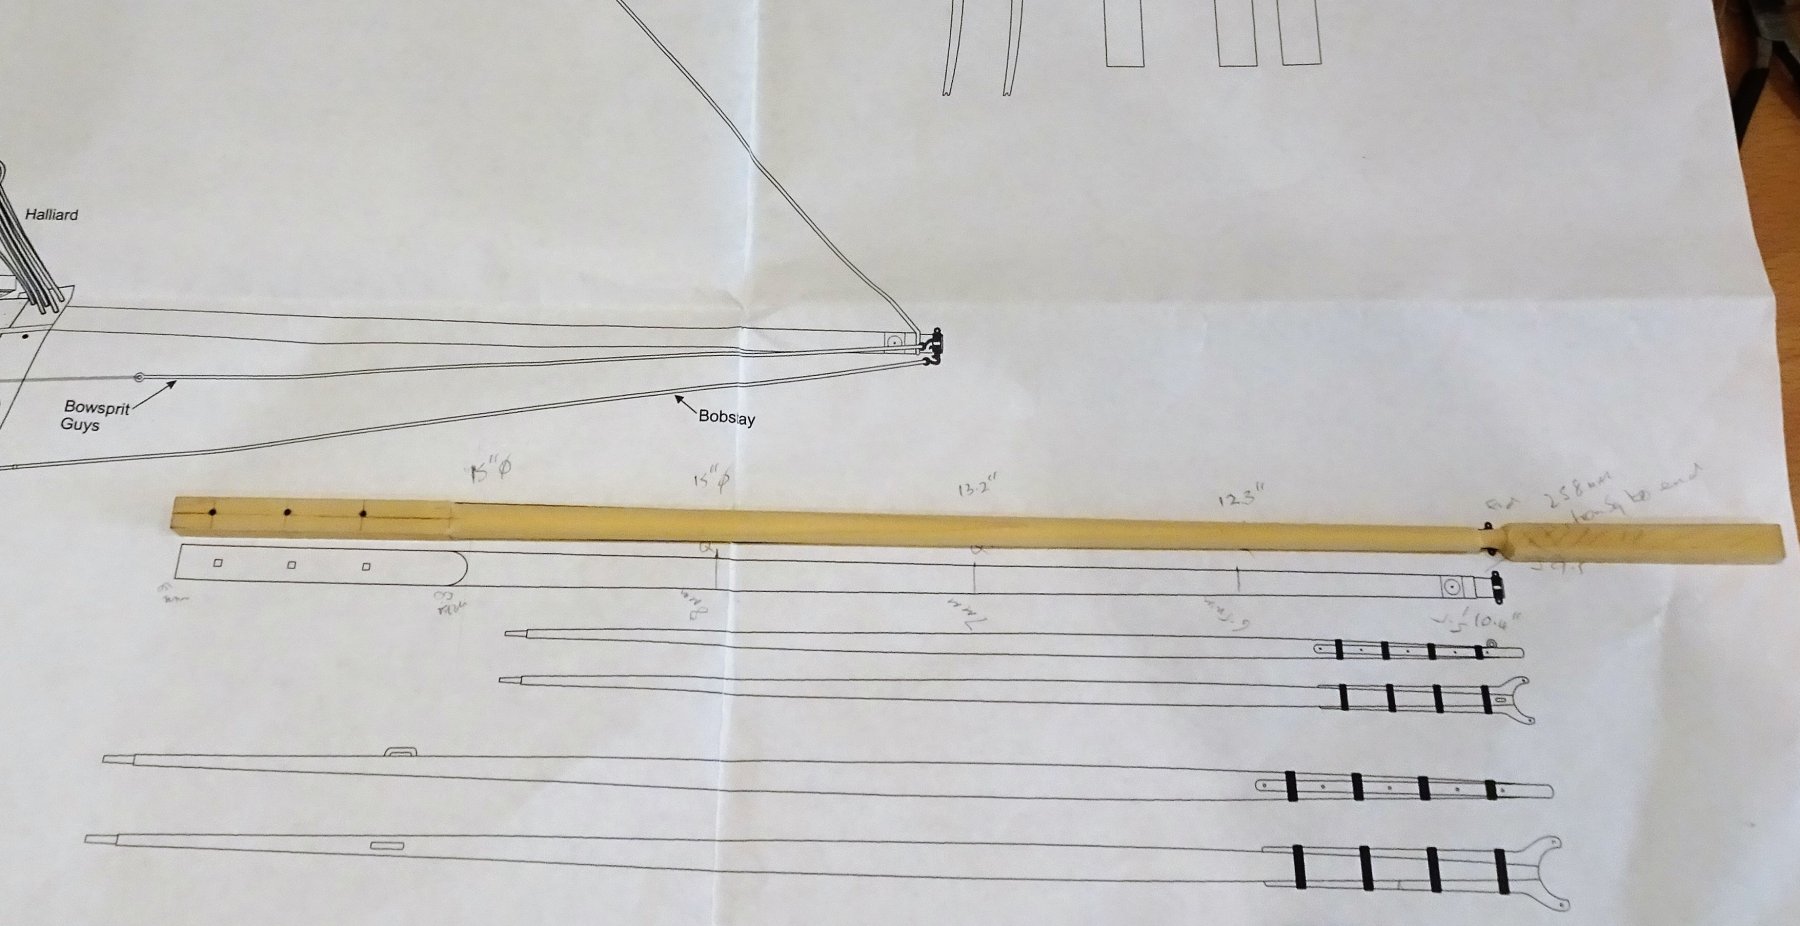
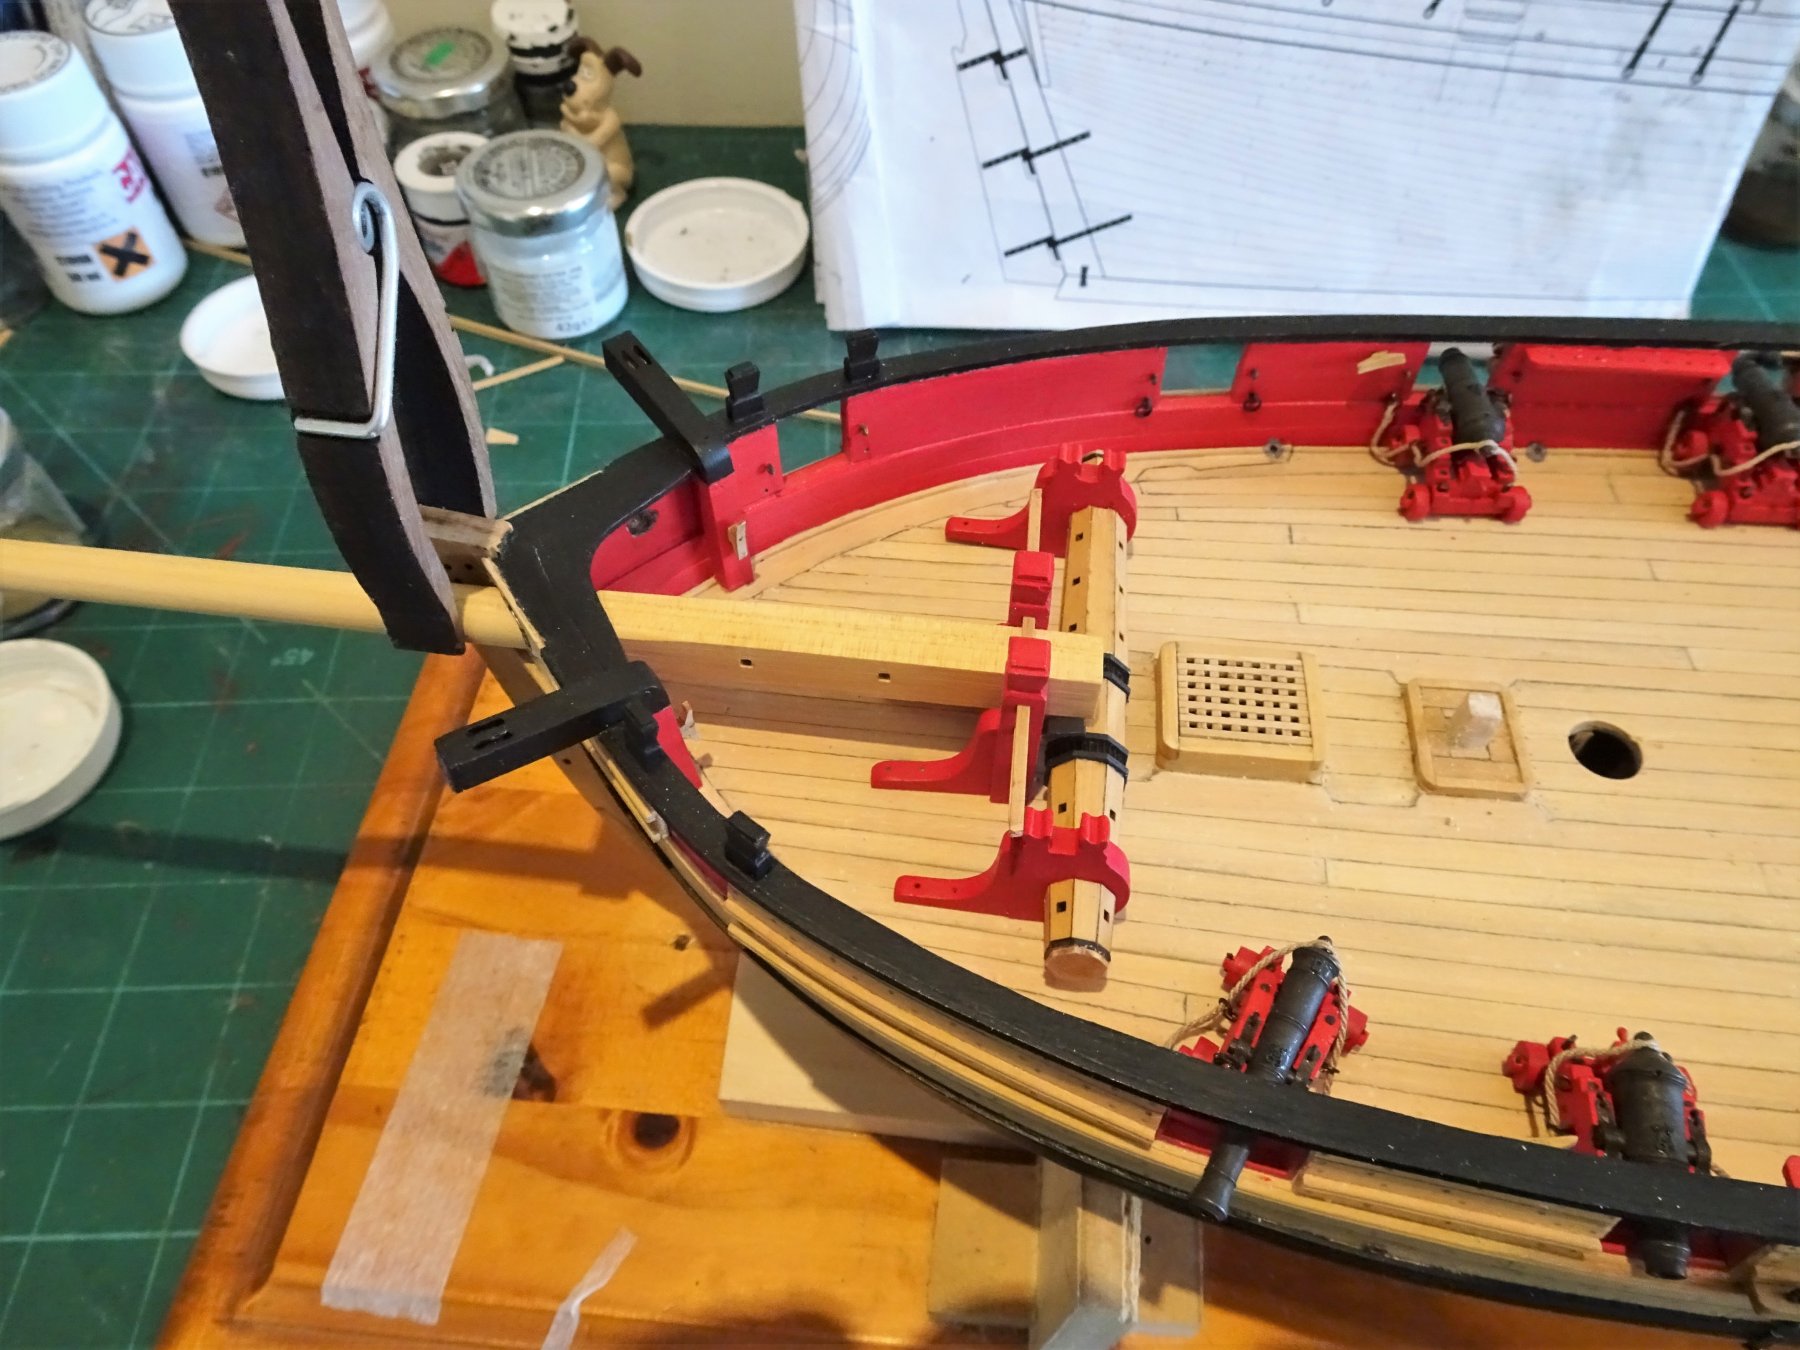
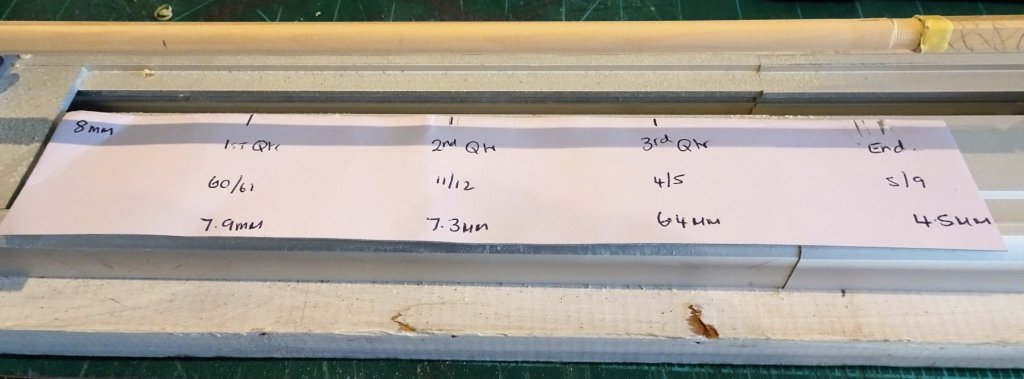
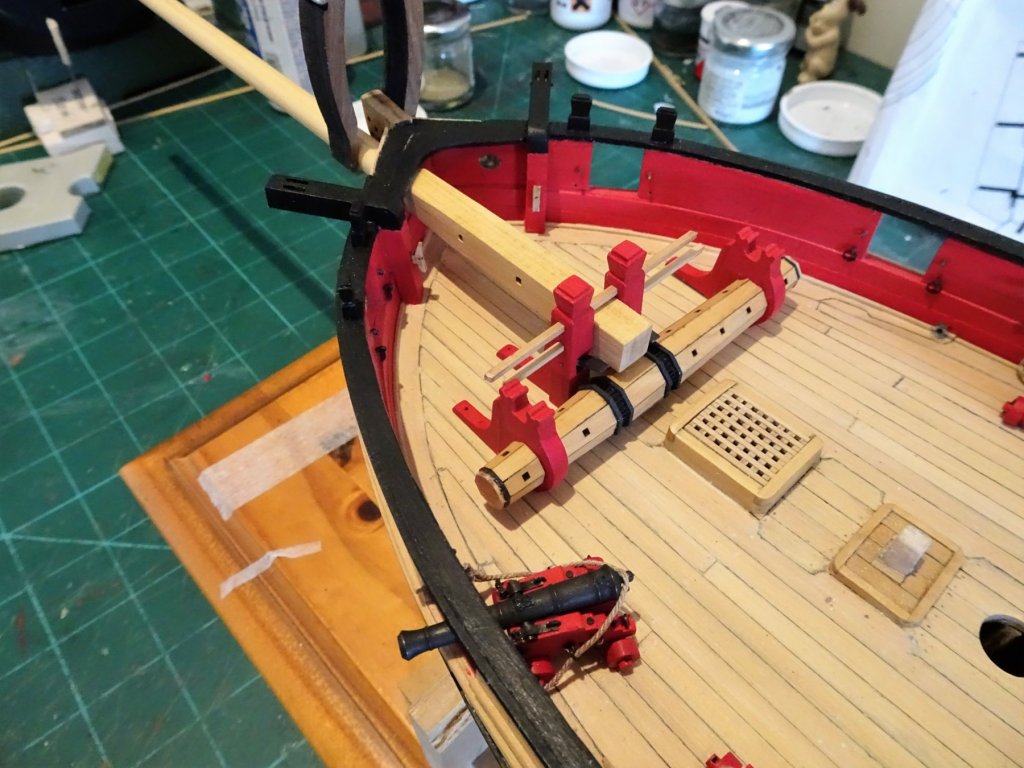
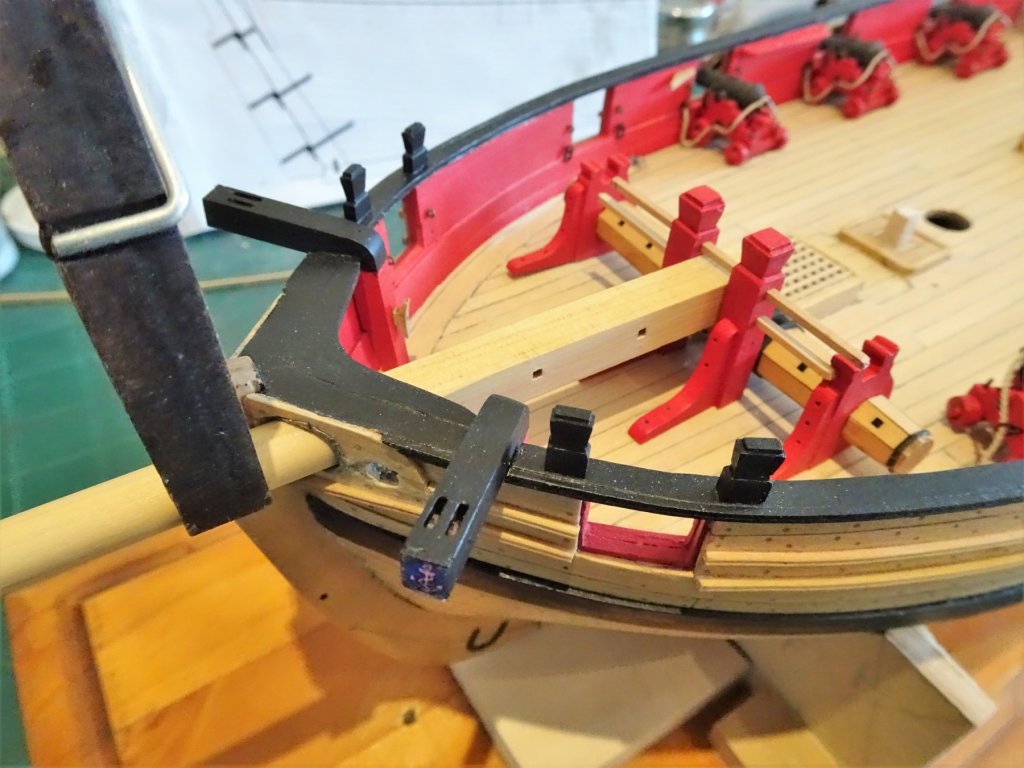
Thanks Dave, Caroline, and Martin, I will eventually get something that suits my eye, trouble is that what is fudgeable at 1:64 scale is not so easy at 1:48 scale on a fully open deck. Now a break from guns. Post 79 Thinking about the Bowsprit At this point I am looking at the Bowsprit because it ultimately determines the position of the Bowsprit step and the Windlass. I am using 5/16" Boxwood square stock and the process starts by drilling three mortices in the inboard end and the sheave hole at the Bowsprit outboard end. The stick will be put in the lathe for tapering and I have followed the proportions given in Steel. The length is quartered from the broadest point (8mm) and tapers in the proportions:' 1st Qtr 2nd Qtr 3rd Qtr End 60/61 11/12 4/5 5/9 The results are pretty close to the dimensions drawn in the Syren plans. 7434 To check progress during the tapering process the quarters and diameters are marked on a card. 7427(2) The lathe extension bed is required to take the length of the Bowsprit. 7441 The taper was produced using just sandpaper and constant checking of the quarter diameters. 7444 The next stage is getting the fit thro' the Bowsprit port and trialling the Bowsprit step set up. 7462 I have departed from the Syren instructions by having the retaining fid pass thro' the Bowsprit and standards. Came into my mind whether these were originally wood or iron. To my mind iron would make more sense for this important job of retaining the Bowsprit. 7463 By the same token it crossed my mind whether there would have been an iron Bowsprit retaining ring attached to the stem. 7466 The spare fid holes were punched with a square section needle file and finished off with a micro chisel. 7468 Seeing the Bowsprit in place indicates what the overall size of the model will be, representing a 51'6" length overall. I haven't decided yet whether I am going to rig Cheerful or have her as a hull model with stub mast and sprit, so it is important to me to have a removeable Bowsprit, hence not following Chuck's example for fitting between the Bowsprit Step standards. 7503 With the sprit in place the standards are glued and pinned to the deck. 7505 7505 Once dry the fids can be withdrawn and the sprit can be removed. The Starboard side long gun is secured in its port. I can now reurn to fiddling with the side tackles whilst Chuck makes a supply of 3mm blocks to complete the job. B.E. 30/03/2019
.thumb.JPG.206b51572f6ecb34baf8f710de19f805.JPG)


- 574 replies
-
- 21
-
-
- cheerful
- Syren Ship Model Company
- (and 1 more)
-
Caroline, in the end I didn't use the knights on my build, and removed them when I did my second stern modification. You are welcome to them, pm me your address and I will post them on. Regards, B.E.
- 161 replies
-
- 3
-
-
- pegasus
- victory models
- (and 1 more)


.JPG.f7bc98a83c2f9ad6b7c97d5094d02885.JPG)
.JPG.0fd25f963069b30102da4554e3f32883.JPG)
.JPG.83905ec89a3a7f3e2055b6ce9439c6ba.JPG)

.JPG.86b7902d6782cd1b6064483ea74ce786.JPG)

.JPG.8b546f5c99f3ad7303b7f6a3f7a60135.JPG)
.JPG.3701bae9cd23d66d43da27119b8f7472.JPG)
.JPG.b65e1c58995438d8e07af67b5454b22e.JPG)
.JPG.b39cbeb0cbef1dad390133e605e29ceb.JPG)


.JPG.e4a245efe3e5ad83b02fee7da0fbd693.JPG)