HOLIDAY DONATION DRIVE - SUPPORT MSW - DO YOUR PART TO KEEP THIS GREAT FORUM GOING! (89 donations so far out of 49,000 members - C'mon guys!)
×
.JPG.ca33079f5815b861e67b9c2cccd37982.JPG)

Blue Ensign
-
Posts
4,566 -
Joined
-
Last visited
Content Type
Profiles
Forums
Gallery
Events
Everything posted by Blue Ensign
-
 Well done Michael on completing this testy little model, I like the dark red paint colour, she looks very nice. I didn't make a full case for my Pinnace, just ordered a plain acrylic cover to sit over it. Regards, B.E.
- 90 replies
-
- 2
-

-
- english pinnace
- Finished
- (and 1 more)
-
Nicely done 👍 B.E.
-
Thank you Guys, for your appreciation @Dowmer - the figures are Amati 35mm code 8008. I just used metal blackener to colour them. @Ian - Not quite decided on my next project yet. I do have Chuck's Longboat and Barge kits under the bench, but my interest is also aroused by the upcoming Alert kit from Chris. @ Martin - Just for you, with his dockyard contract completed William has taken to the meadows for a summer of well deserved r&r 9224(2) We'll be back. 🙂 B.E.
.thumb.JPG.6d1c3947fe045a10eeb7579ec35ff930.JPG)
- 574 replies
-
- 9
-
-
- cheerful
- Syren Ship Model Company
- (and 1 more)
-
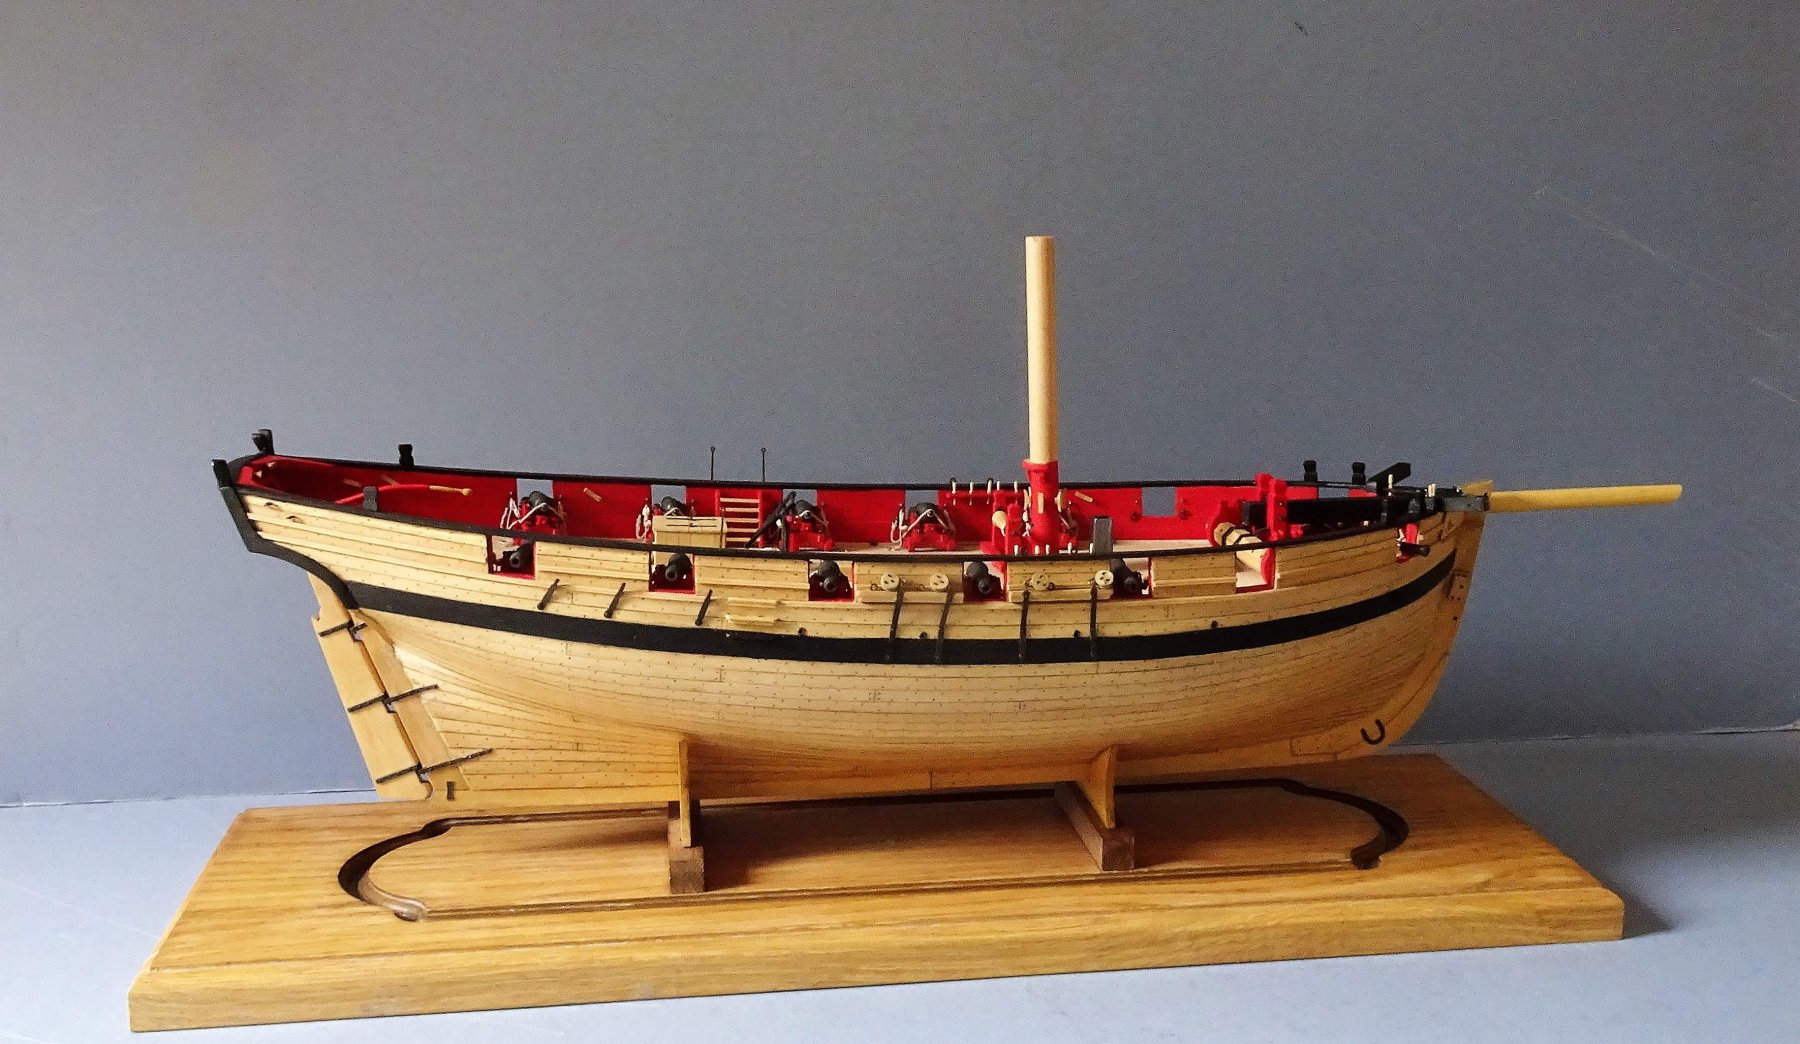
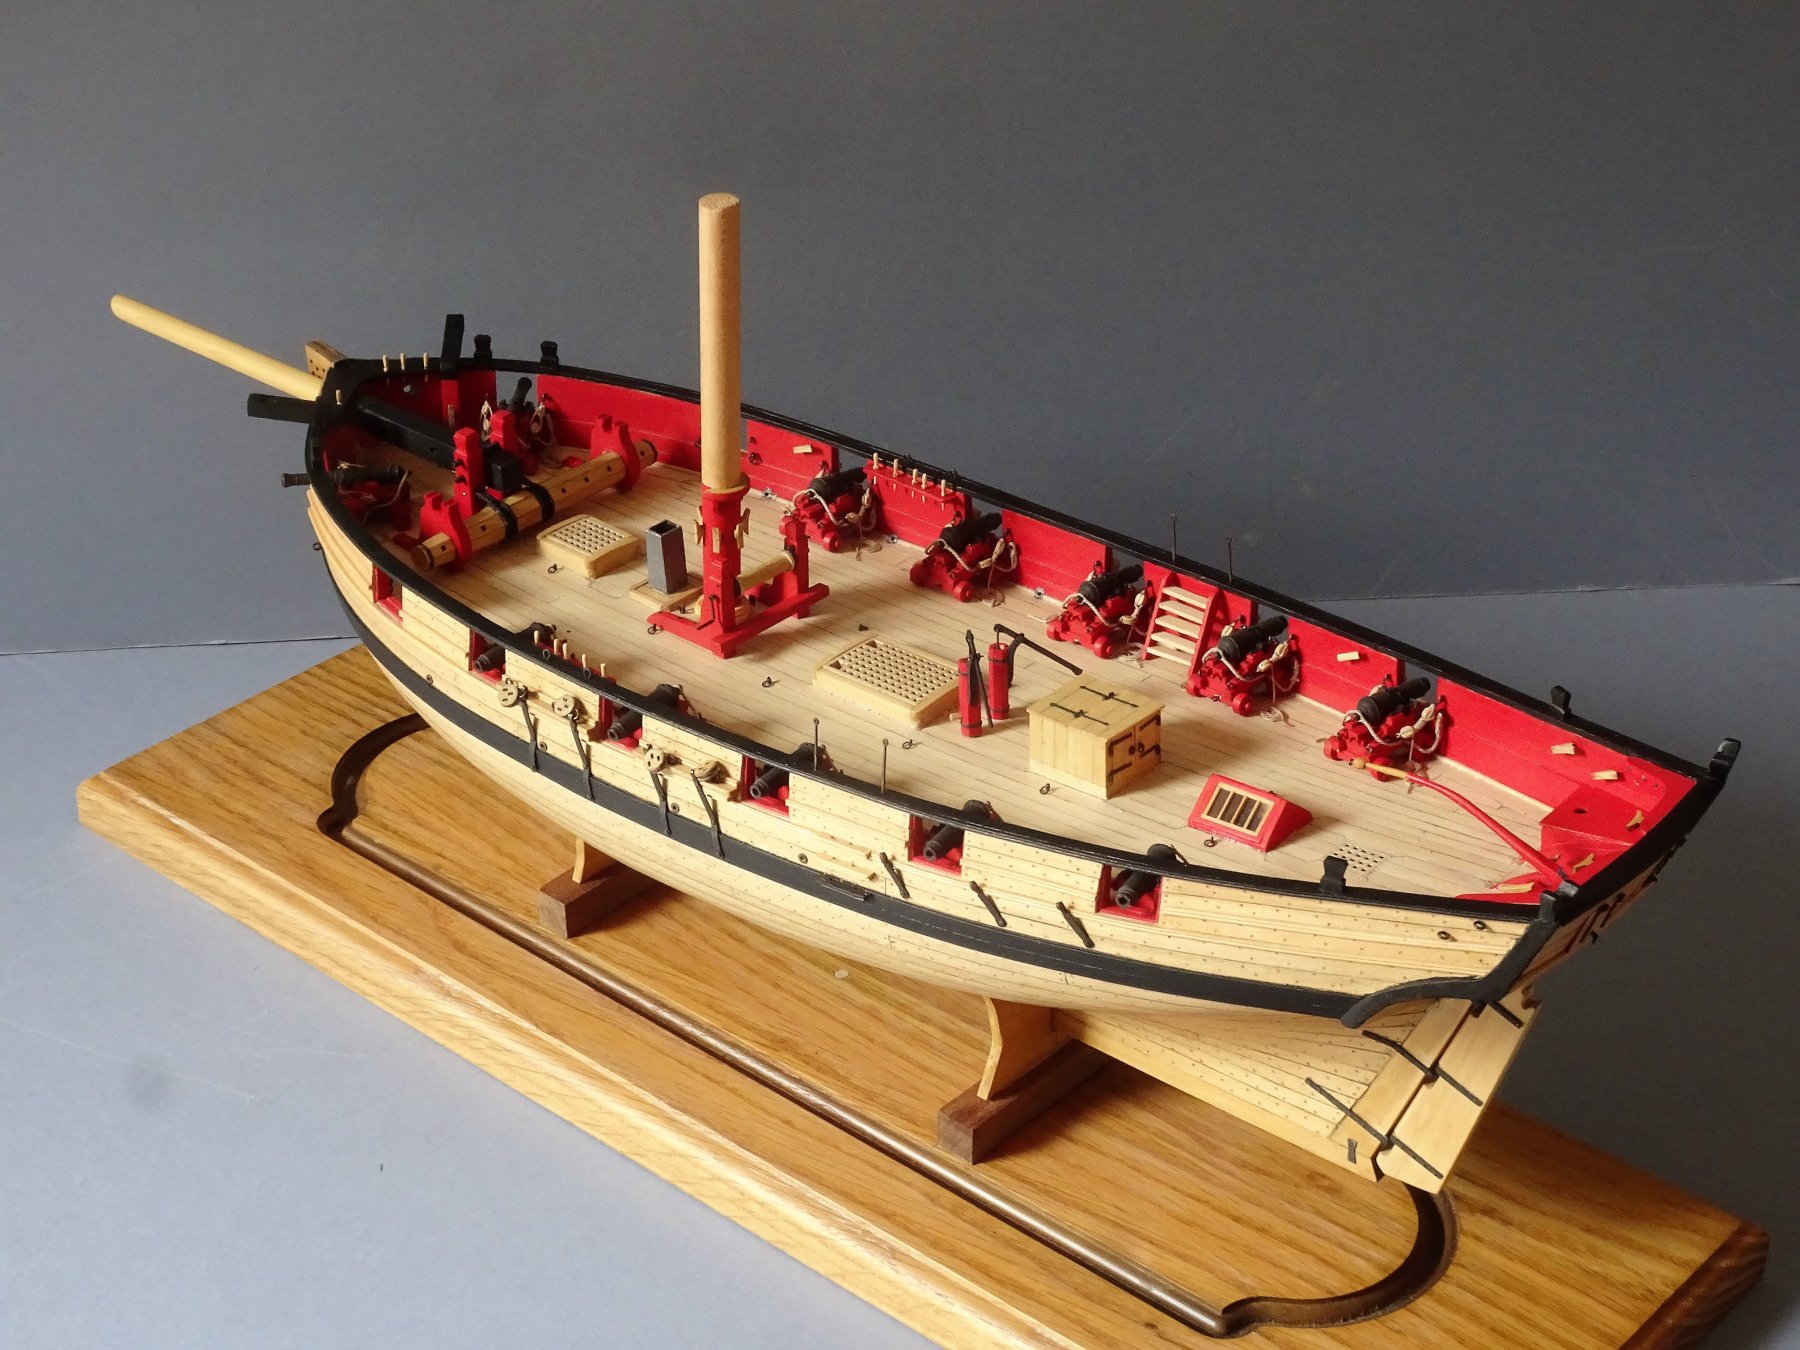
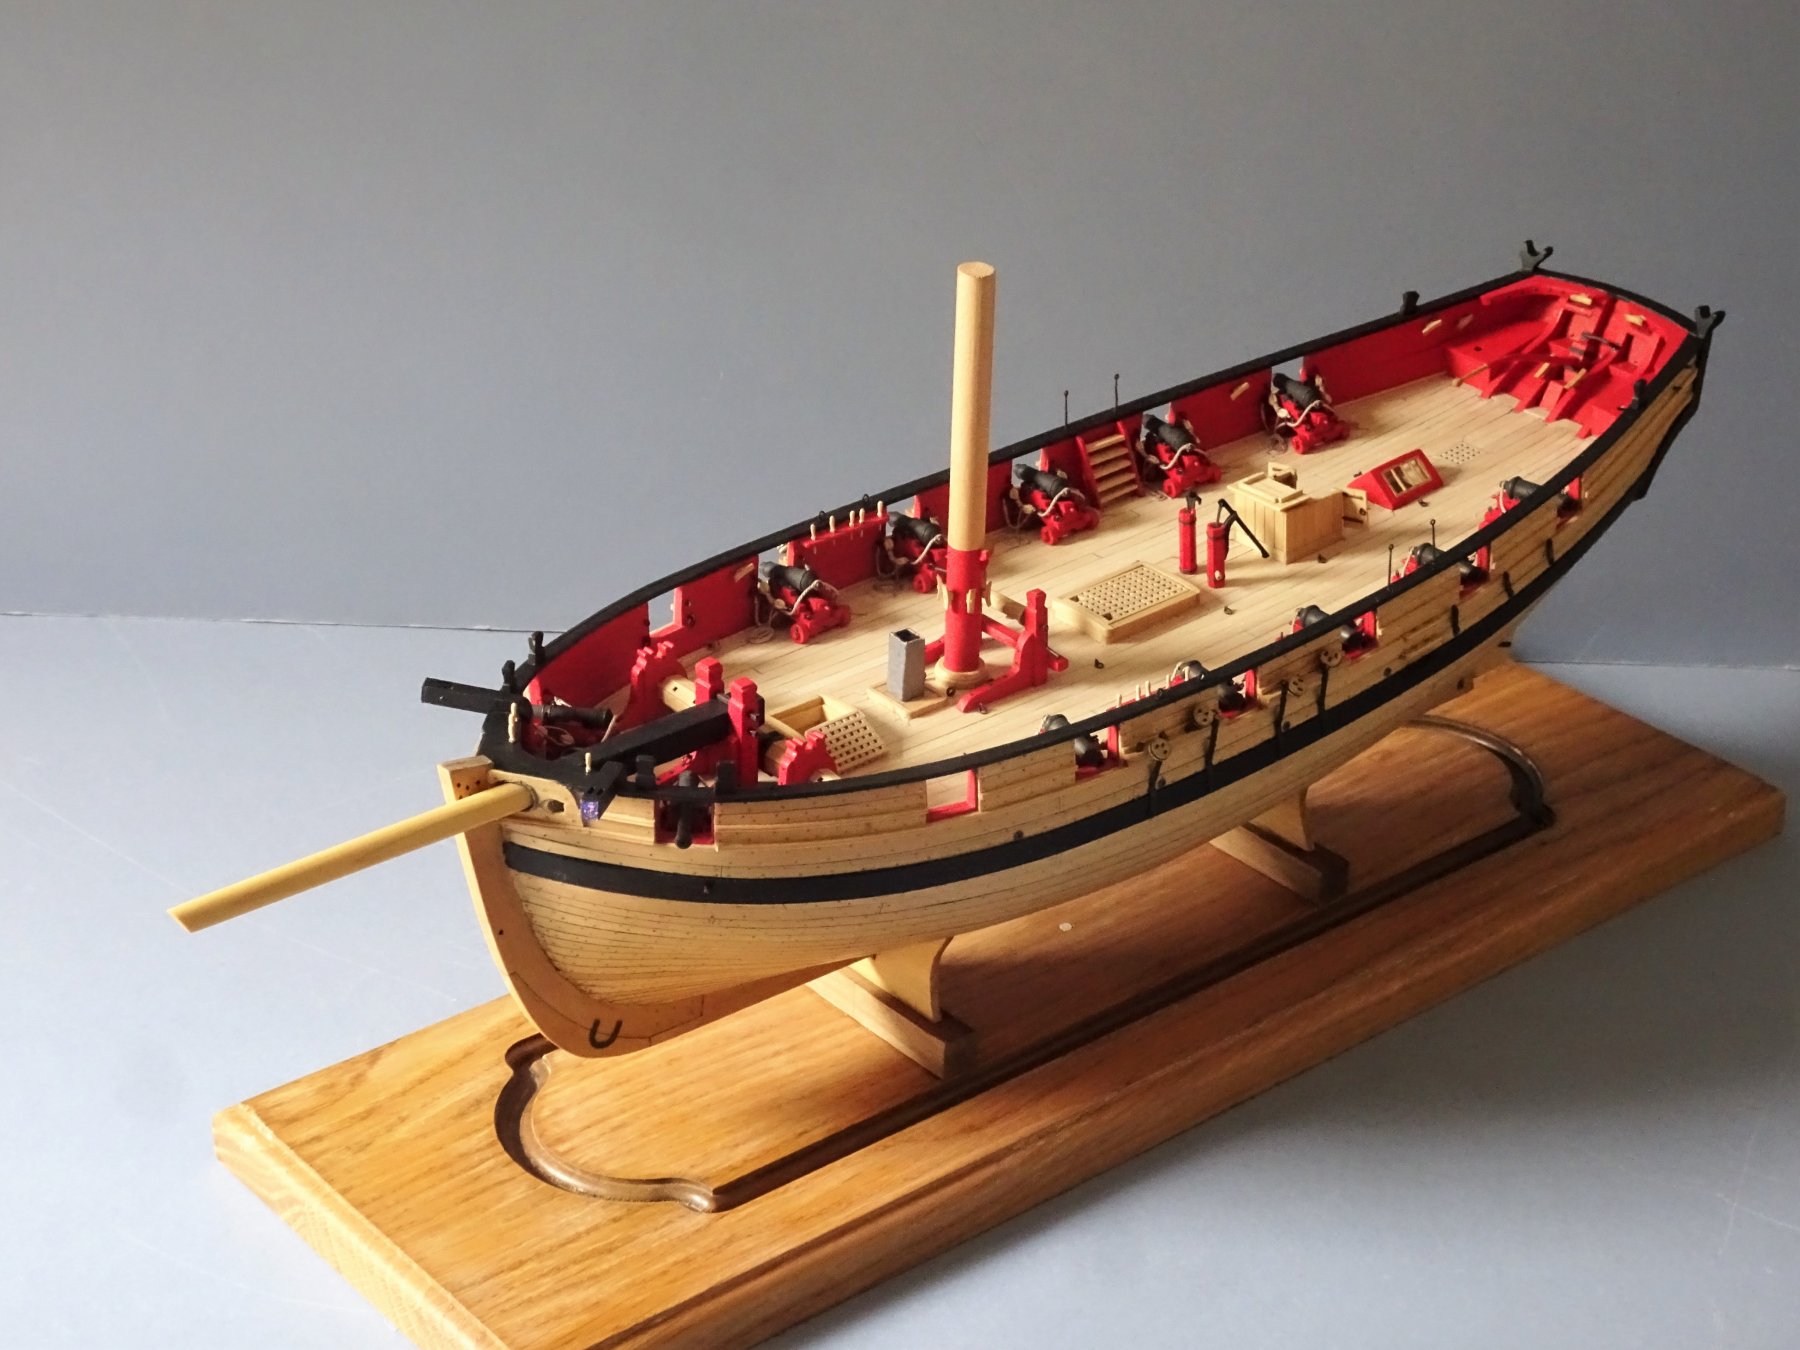
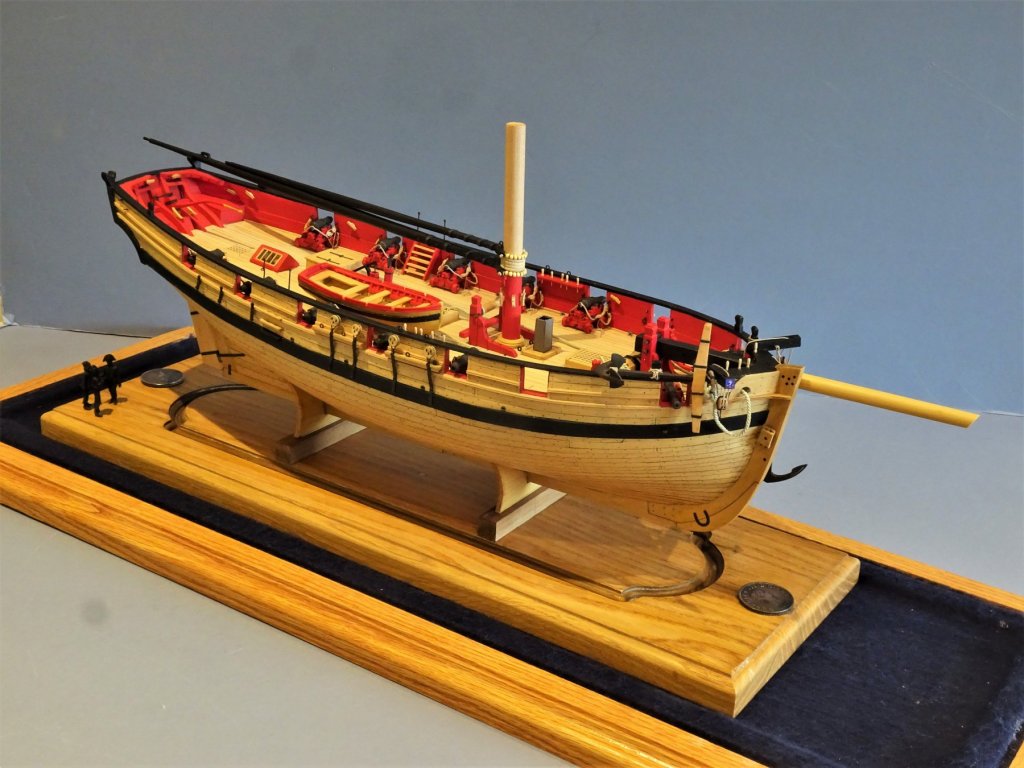
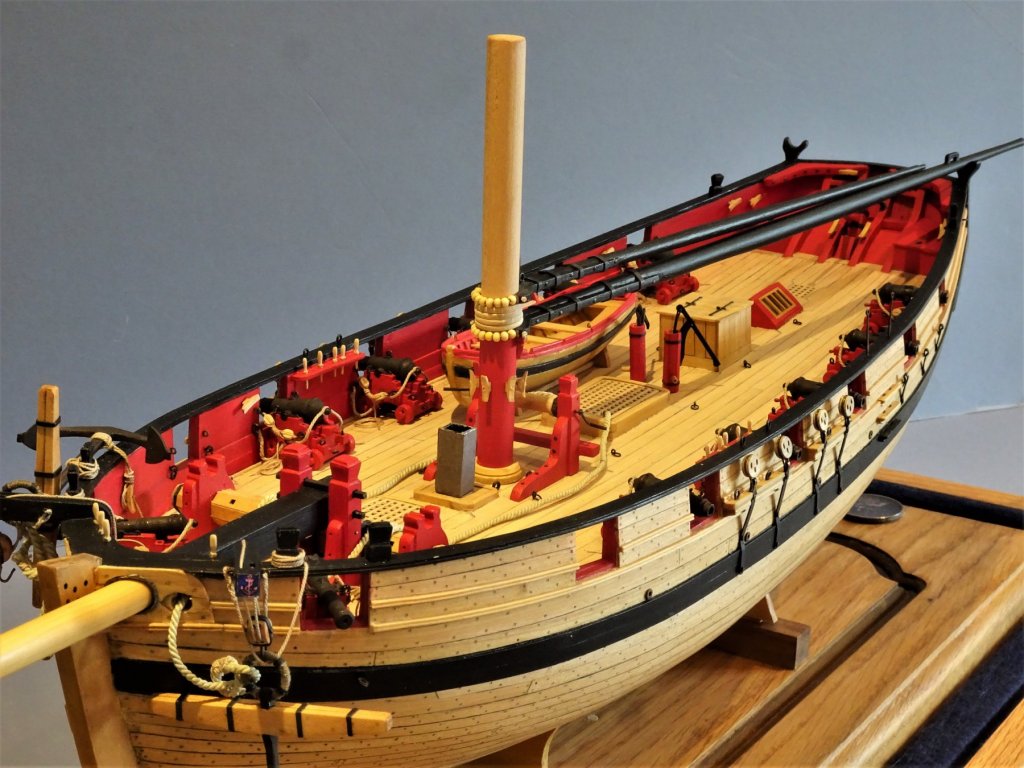
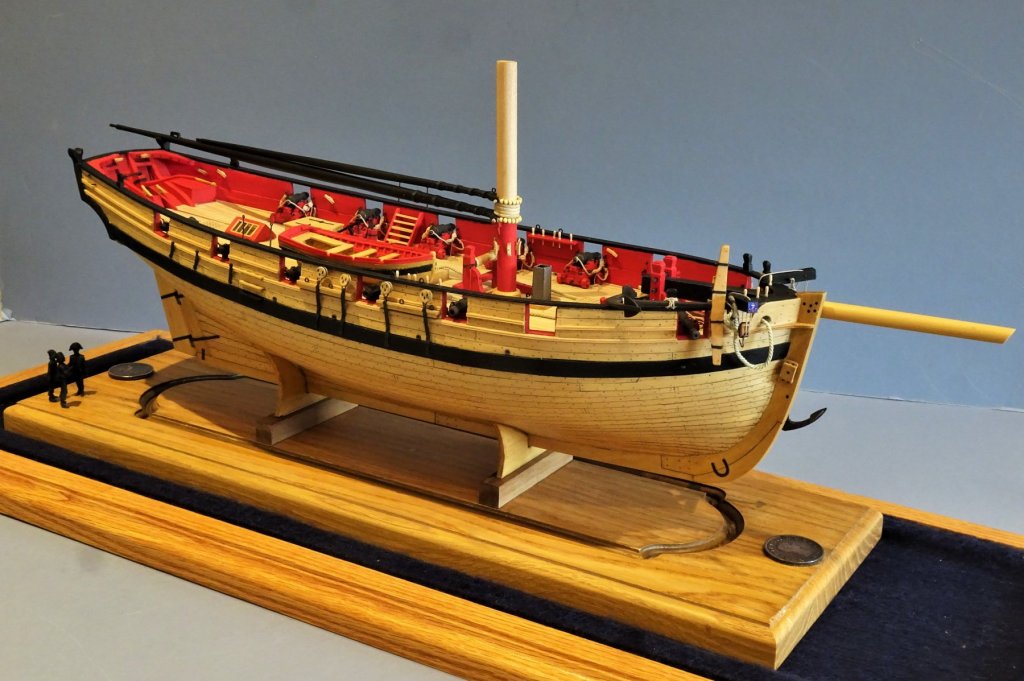
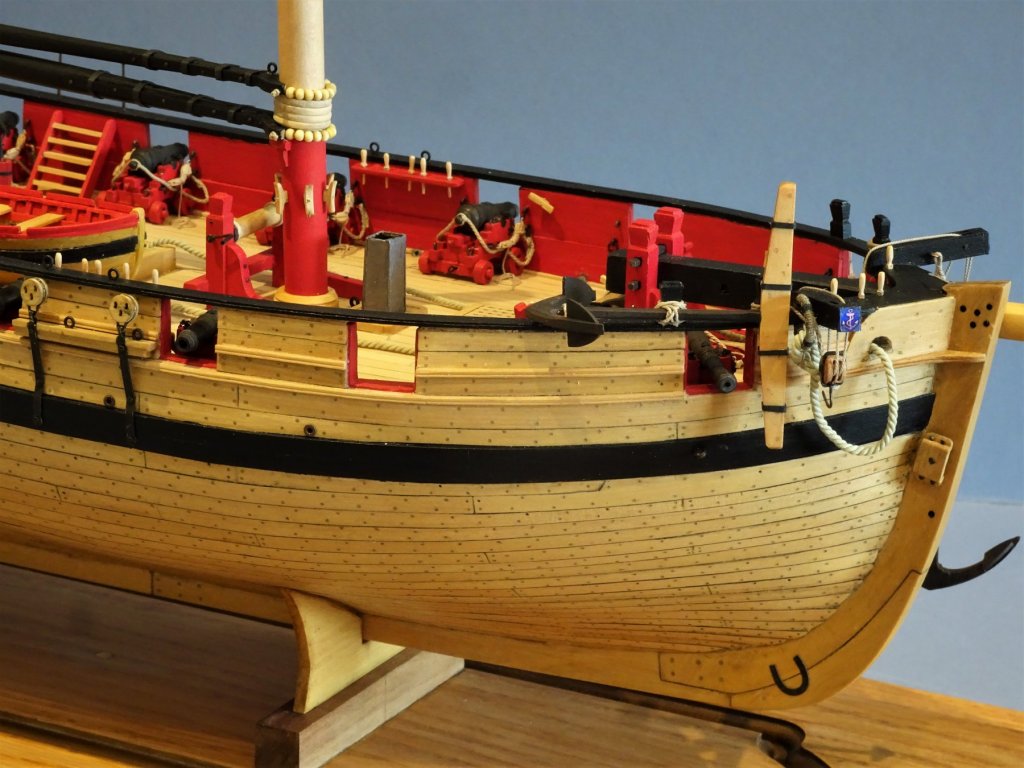
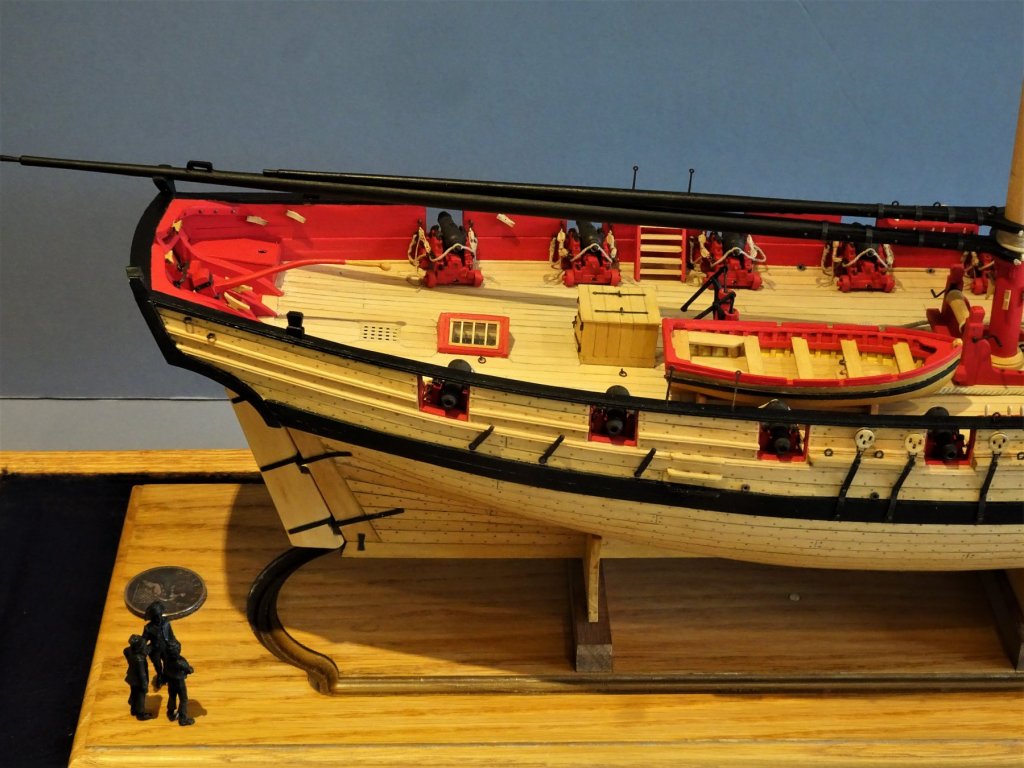
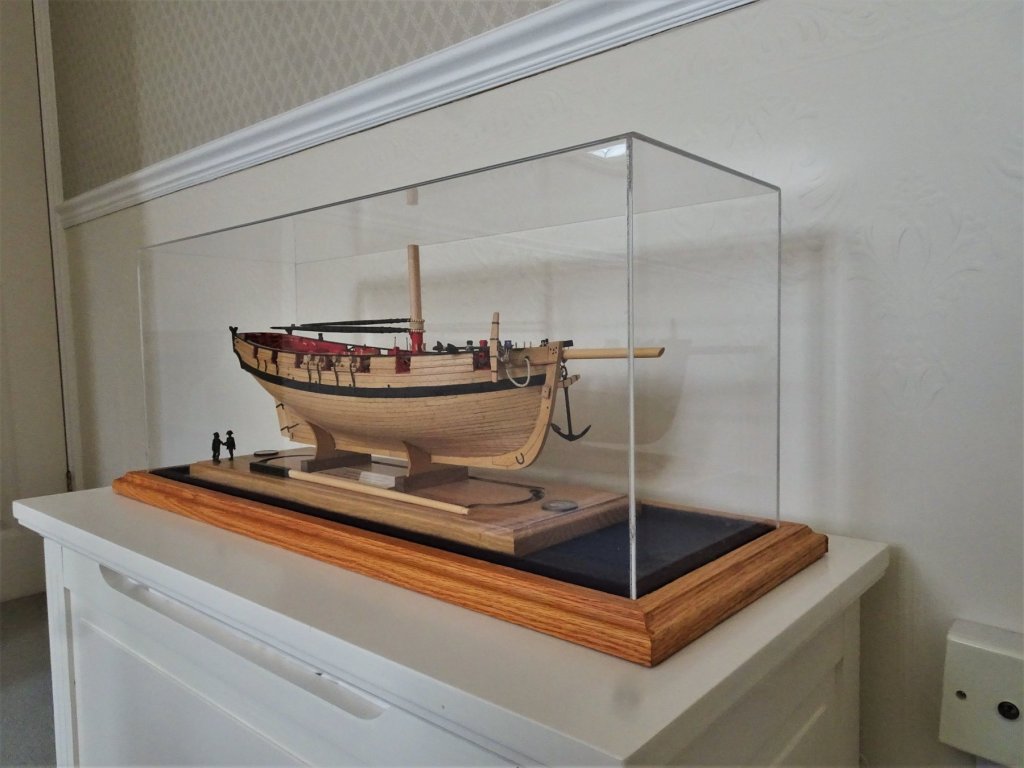
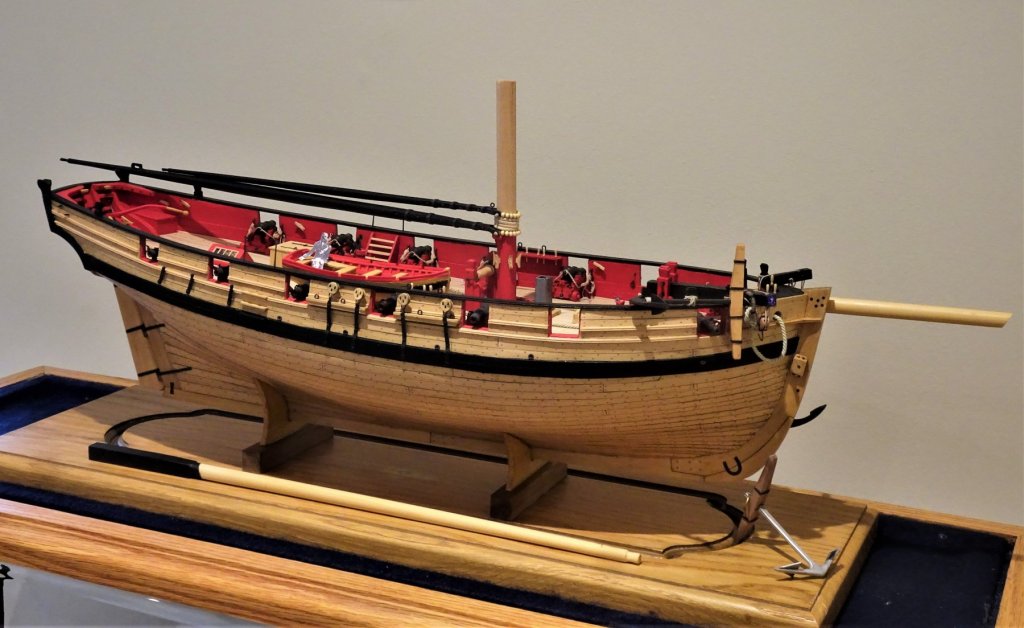
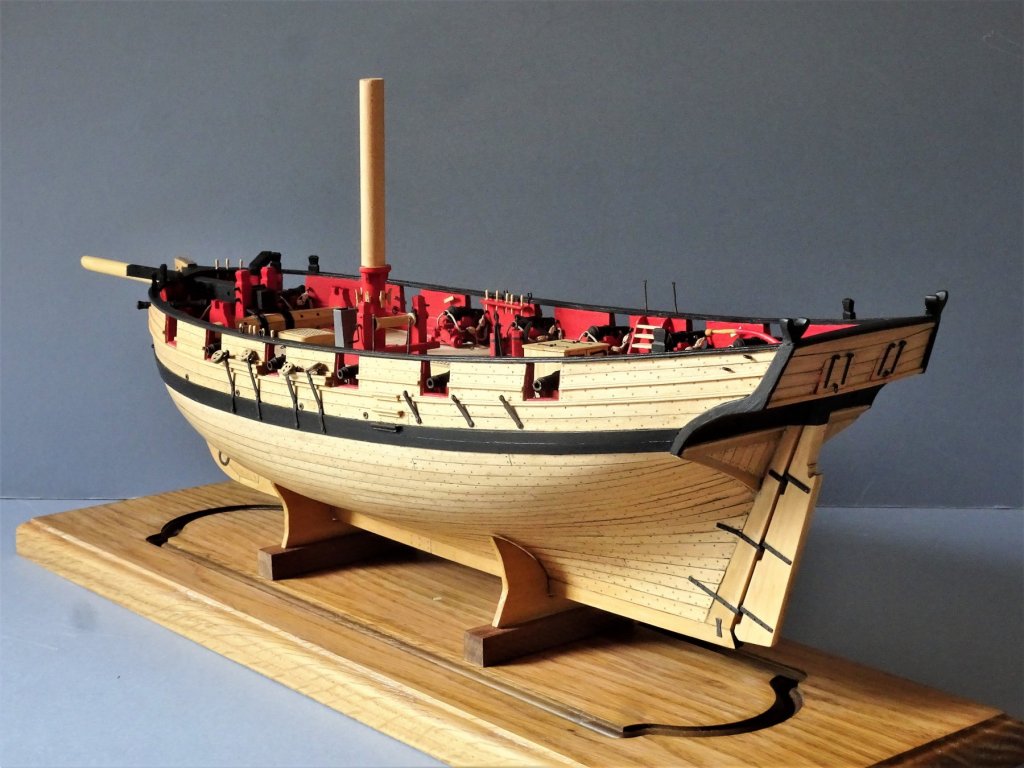
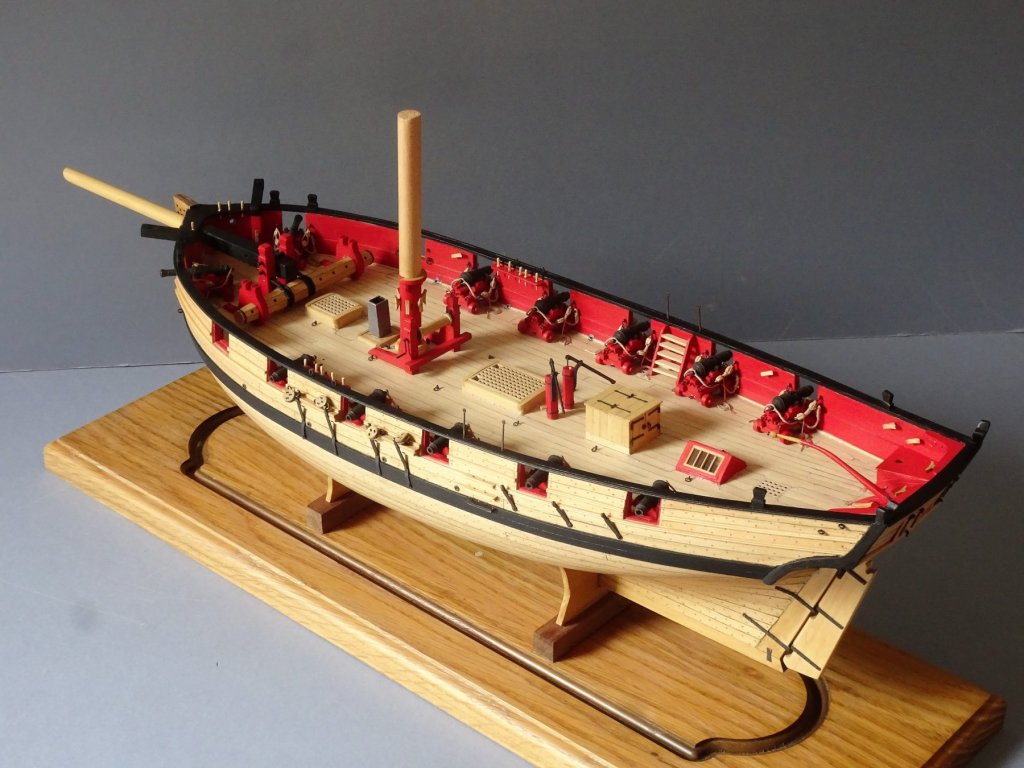
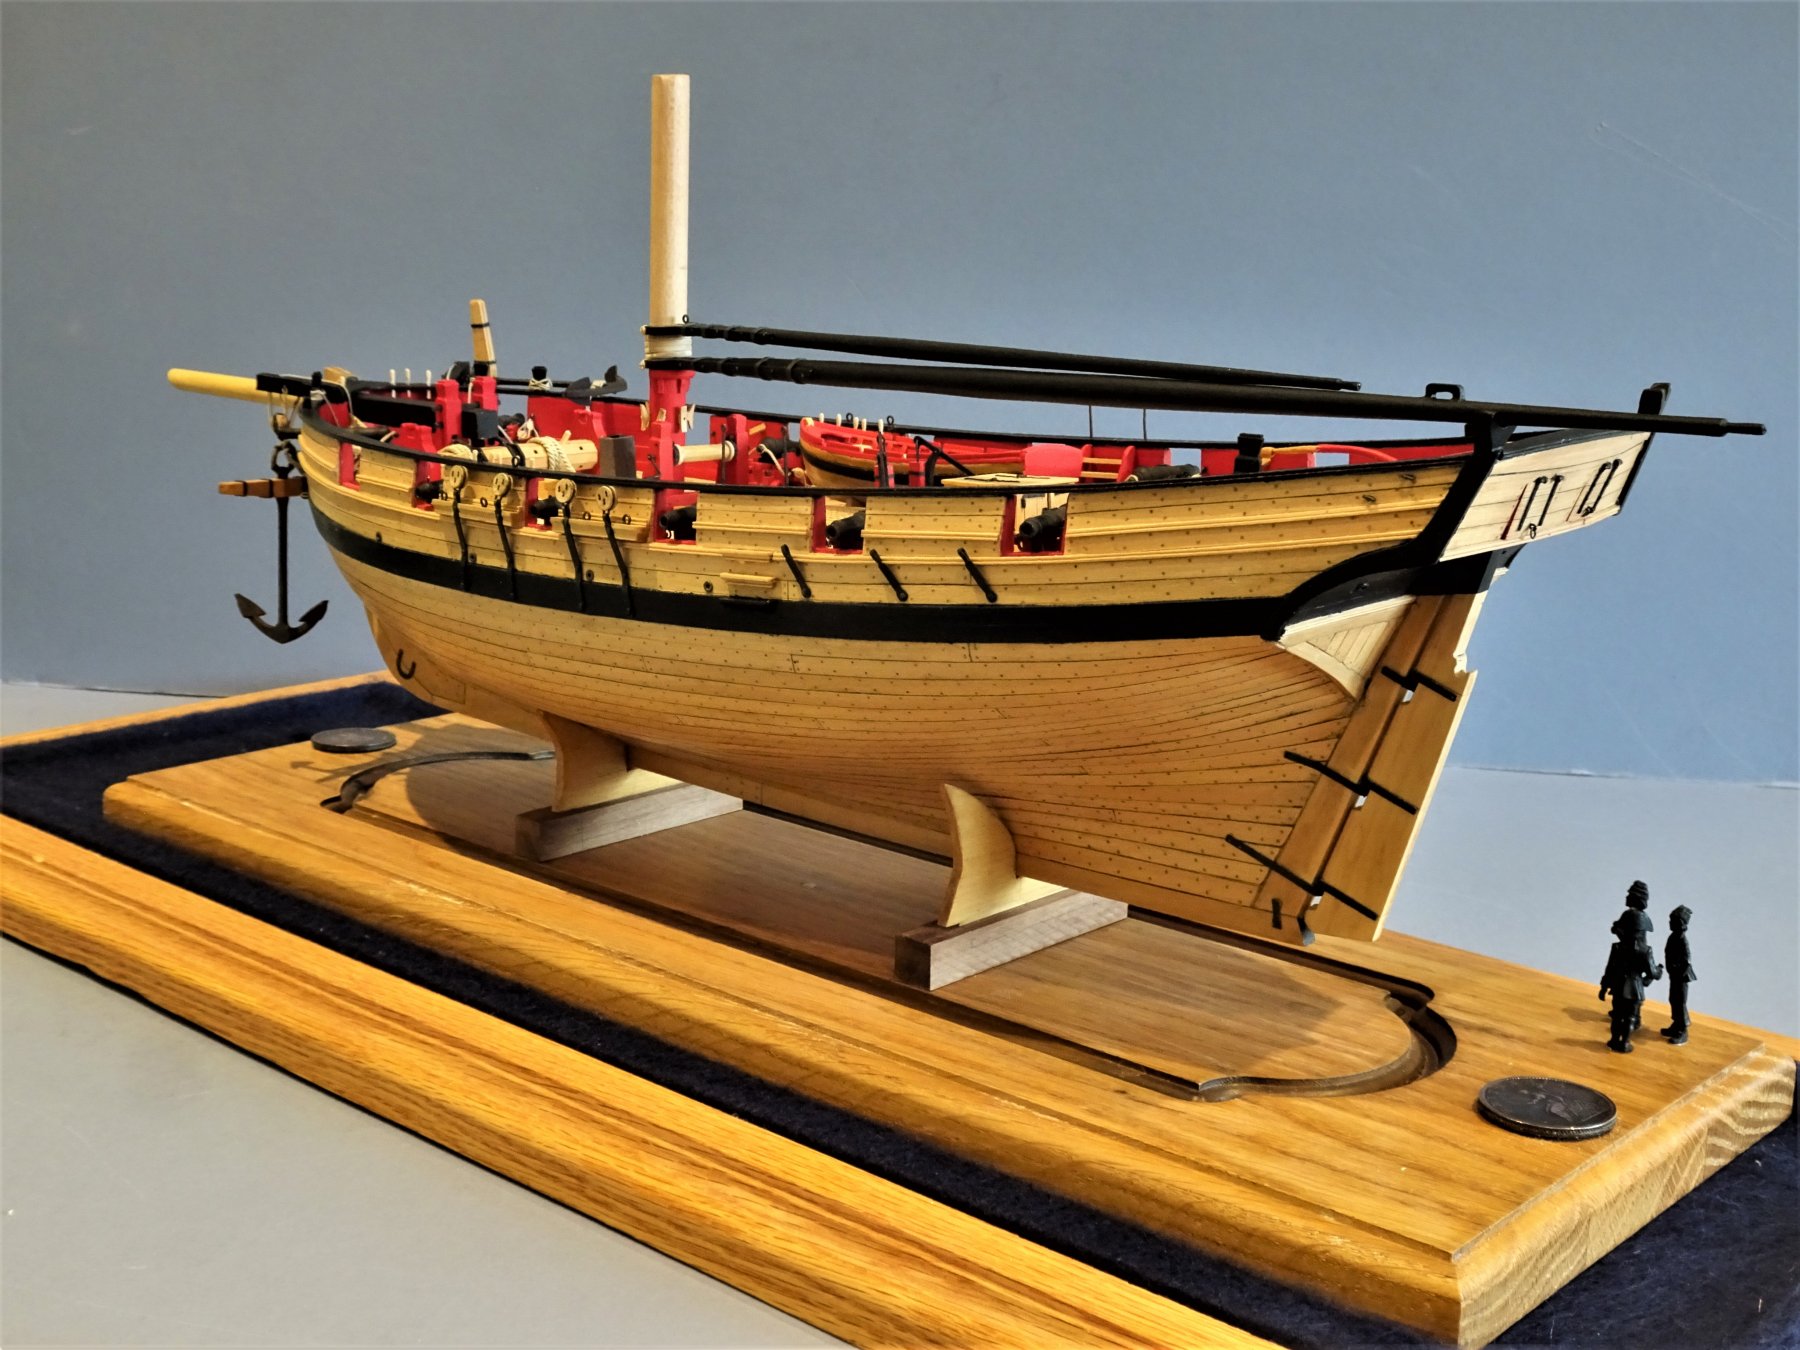
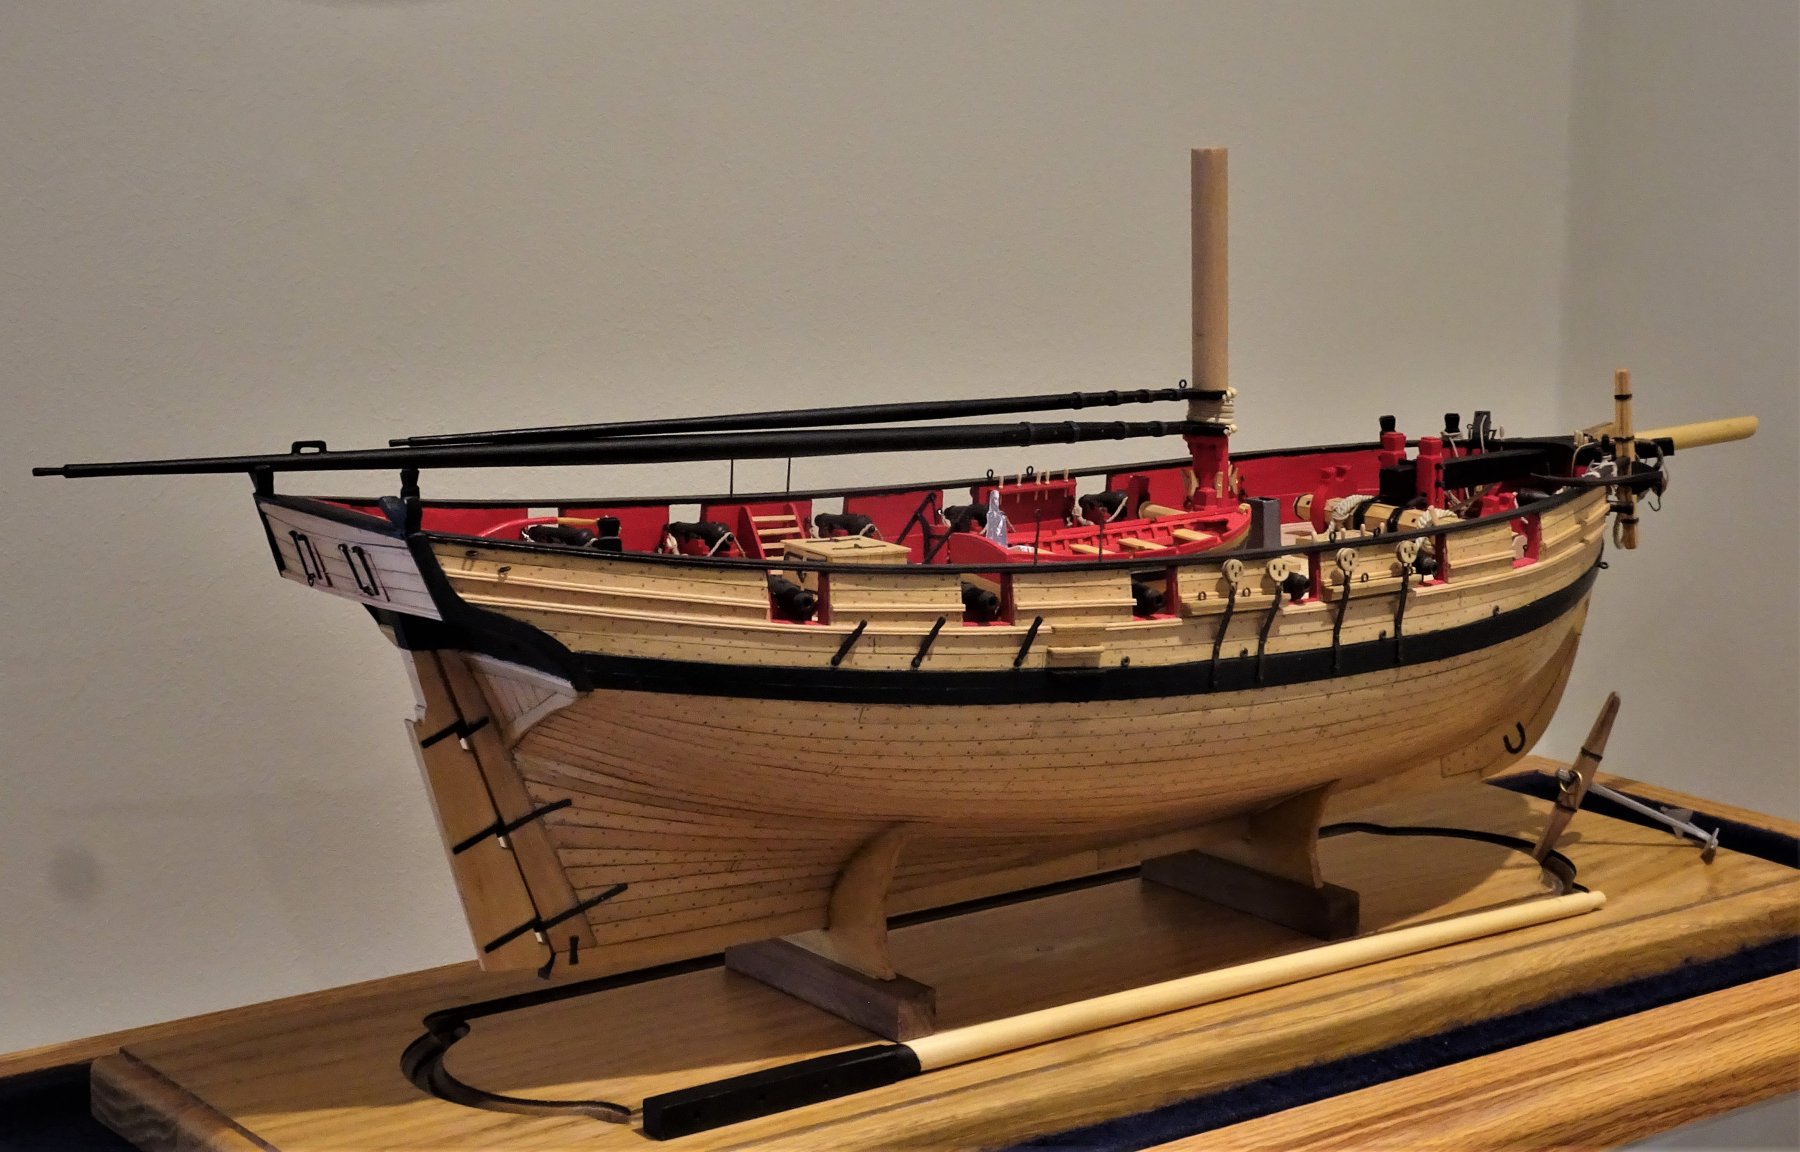
Post 90 Cheerful is completed. An eighteen month journey has drawn to a conclusion. It is interesting to note that the original was built and fitted out within a twelve month period. Tempted as I may be to mast and rig her, display constraints rule this out, but it's not like I don't have fully rigged models on display, Pegasus, and indeed a 1:72 scale cutter amongst others. I am happy to conclude the build with this configuration in the knowledge that there are many contemporary models displayed in this style. I really have to compliment Chuck for making this posssible with his wonderful plans, accurate pre-cut hull parts, mini kits, and excellent instructions. Cheerful as I bought it is an example of a high end PoB kit with beautiful kit specific fittings, a real pleasure to build. I must also compliment Jason at Crown Timberyard who supplied the bulk of the Boxwood strip and sheet, presented in a very clean and accurate condition. So here are the completion photo's before I slip the cover over the base. The case wasn't designed for Cheerful but for Pegasus to serve as protection during the long years before she was masted, but it does ideally fit the bill. 9361(2) 9371 9360(2) 9374(2) A set of 1:48 scale figures stand to provide a human scale to the model. 9376 9380(2) 9365(2) To provide an Historical link two copper coins of 1806 sit at the head and stern of Cheerful. 9382 9384 9387 9388 9392(2) 9383 9396 9403 Display position yet to be decided; Finally I must thank those members who have shown interest in this build and for their supportive comments and 'likes'. Regards, B.E.
.thumb.JPG.2dd4b3c0147ac3d1ad868d4894f90b96.JPG)
.thumb.JPG.e7408ff88ece4eb8304e48a52a4e51d1.JPG)
.thumb.JPG.b35f4a9d0e269853a4df18262a9cc162.JPG)
.thumb.JPG.0ecc18cf5eb51cea67adb7e84cf591ad.JPG)

.thumb.JPG.6c87f875b510b3d0dd19c6e3a5cf02f7.JPG)
.thumb.JPG.be09c707d39dad3fb71a6d9da0f8ca63.JPG)
.thumb.JPG.95e5f7f6271651744a1be5c9d8bde081.JPG)
- 574 replies
-
- 39
-
-
- cheerful
- Syren Ship Model Company
- (and 1 more)
-
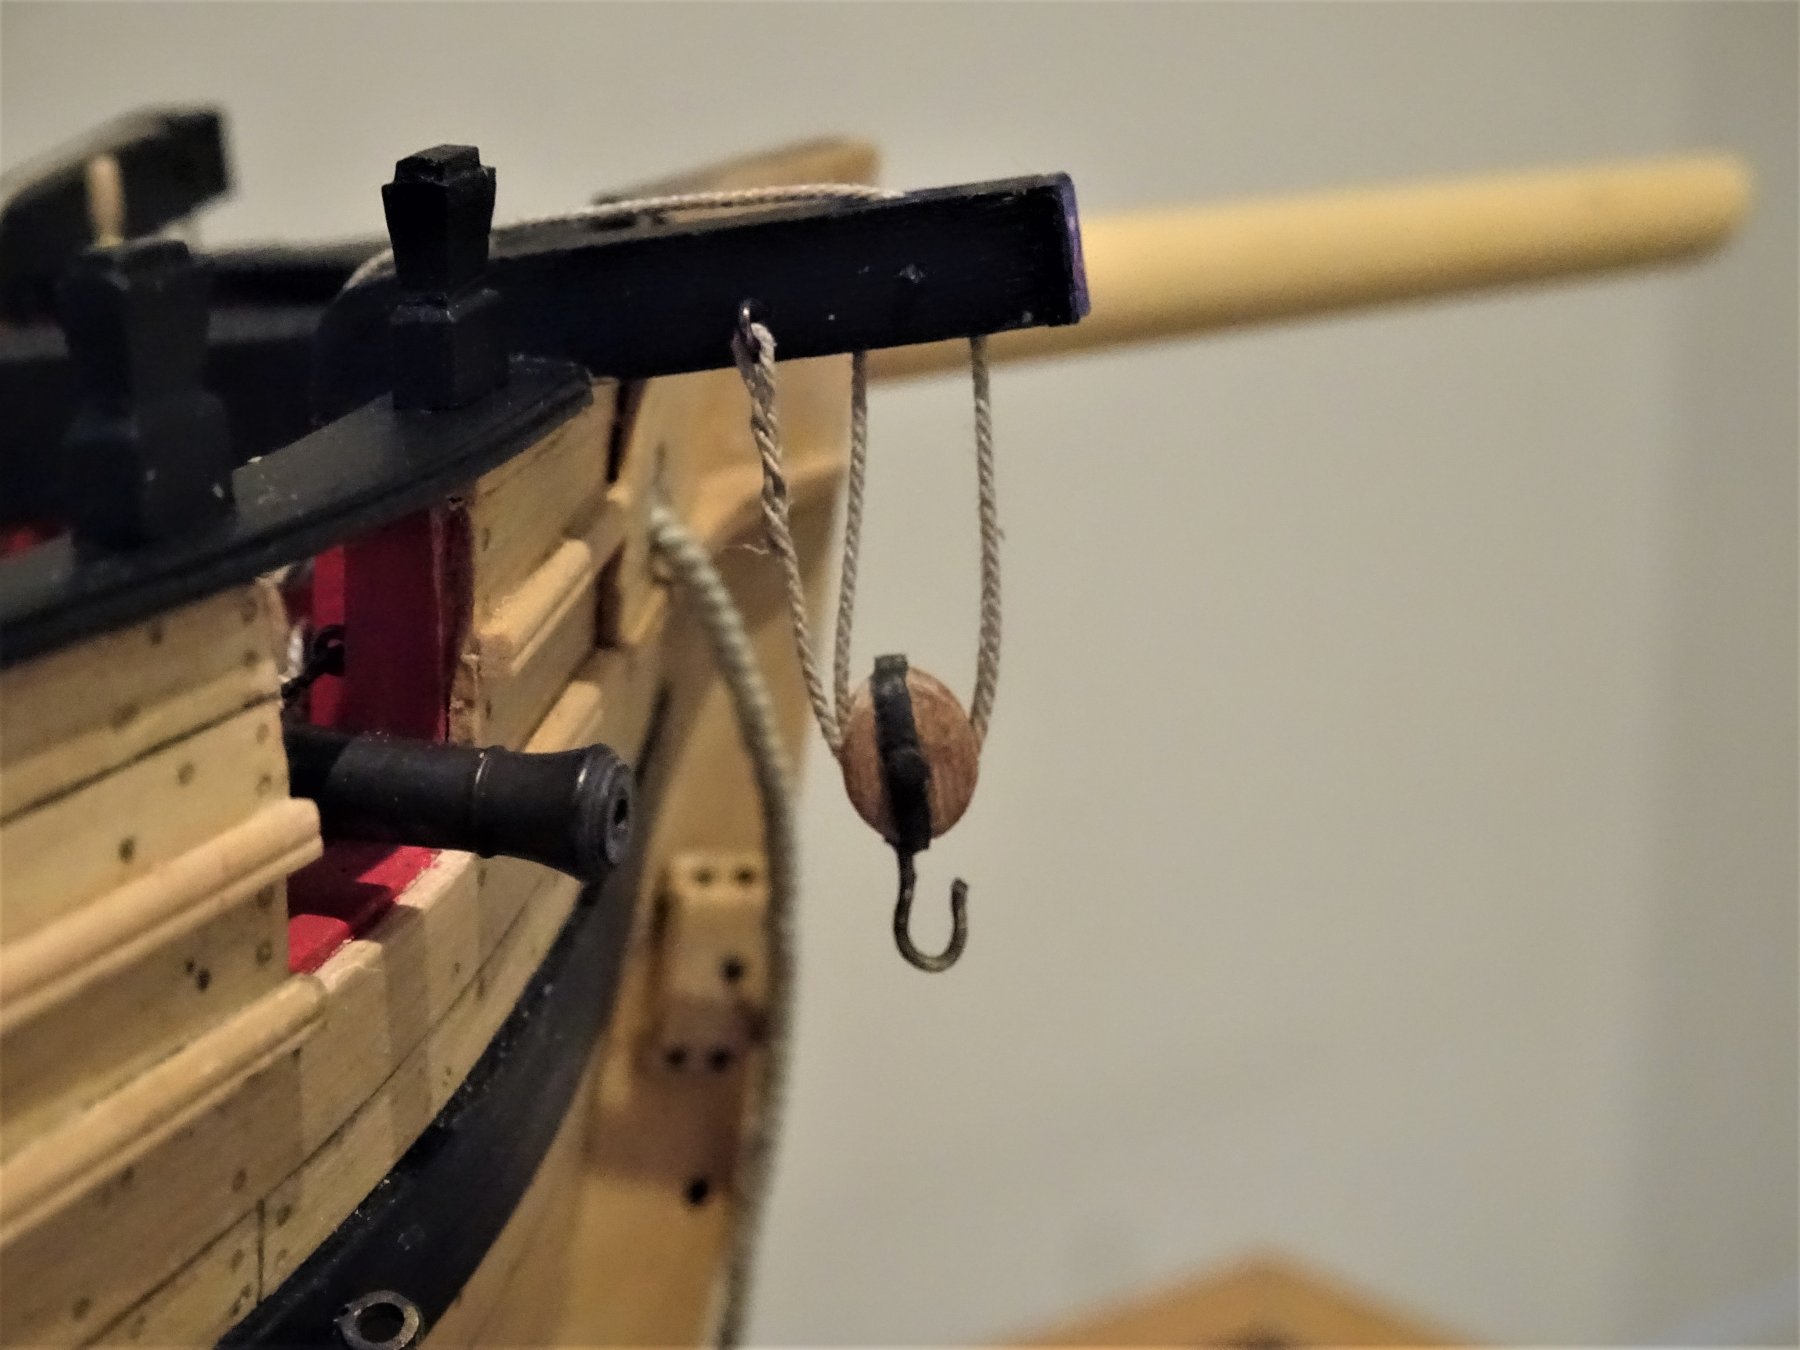
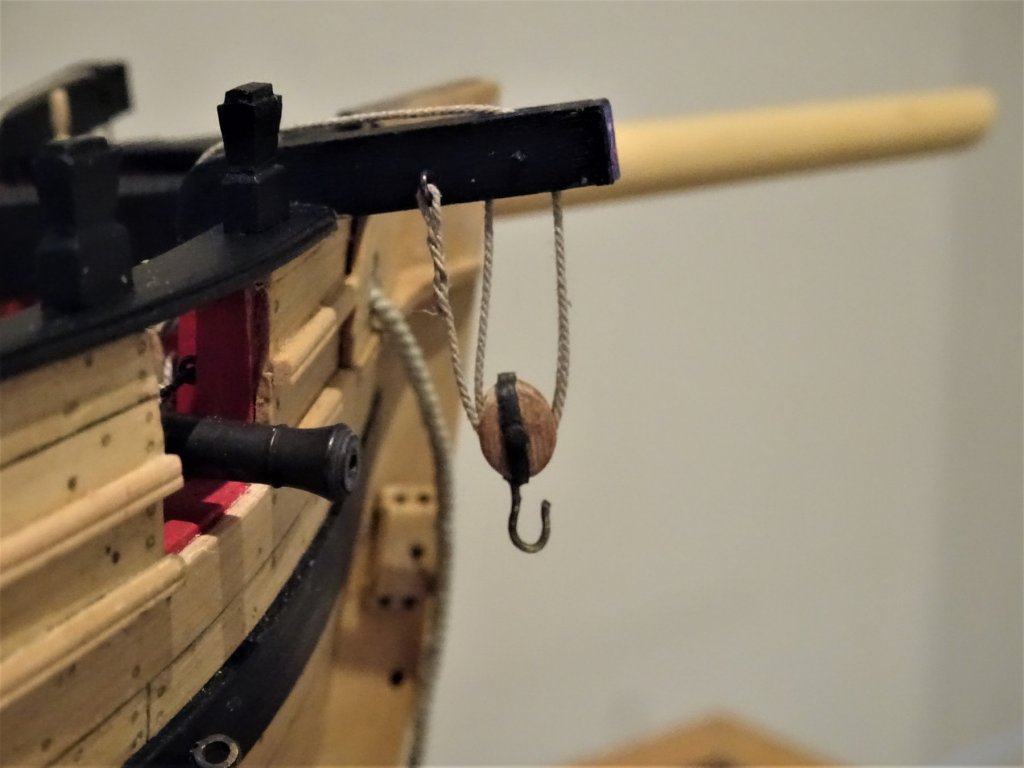
Thank you Michael, and Ferit. I'm impressed Ferit, I see you have been paying close attention.👍 I realised that I had rigged the cat blocks with the hook points outboard, when based on many contemporary models, the hook point faces inboard. I changed the arrangement to reflect this. Regards, B.E.
- 574 replies
-
- 1
-
-
- cheerful
- Syren Ship Model Company
- (and 1 more)
-
She looks impressive Doug, well done.👍 It is difficult to avoid the pull on the stays by the stay tackles which need to look taut. I seem to recall I spent ages stiffening the stay tackles so they effectively stood upright without tension, but it is a tricky thing to get right. Cheers, B.E.
-
Thank you Gregory, and I hope you enjoy your Cheerful as much as I have mine. B.E.
- 574 replies
-
- 3
-
-
- cheerful
- Syren Ship Model Company
- (and 1 more)
-
Thanks Dave, I think I’ll quit whilst I’m ahead, I have other little boxes of delight from Mr Passaro to entertain me 😀 We all have those moments, earlier today I photographed the boom in place except I had the mast hoops below the boom. Good job I spotted it before I posted. As for the rain, no different here. Cheers, B.E.
- 574 replies
-
- 3
-
-
- cheerful
- Syren Ship Model Company
- (and 1 more)
-
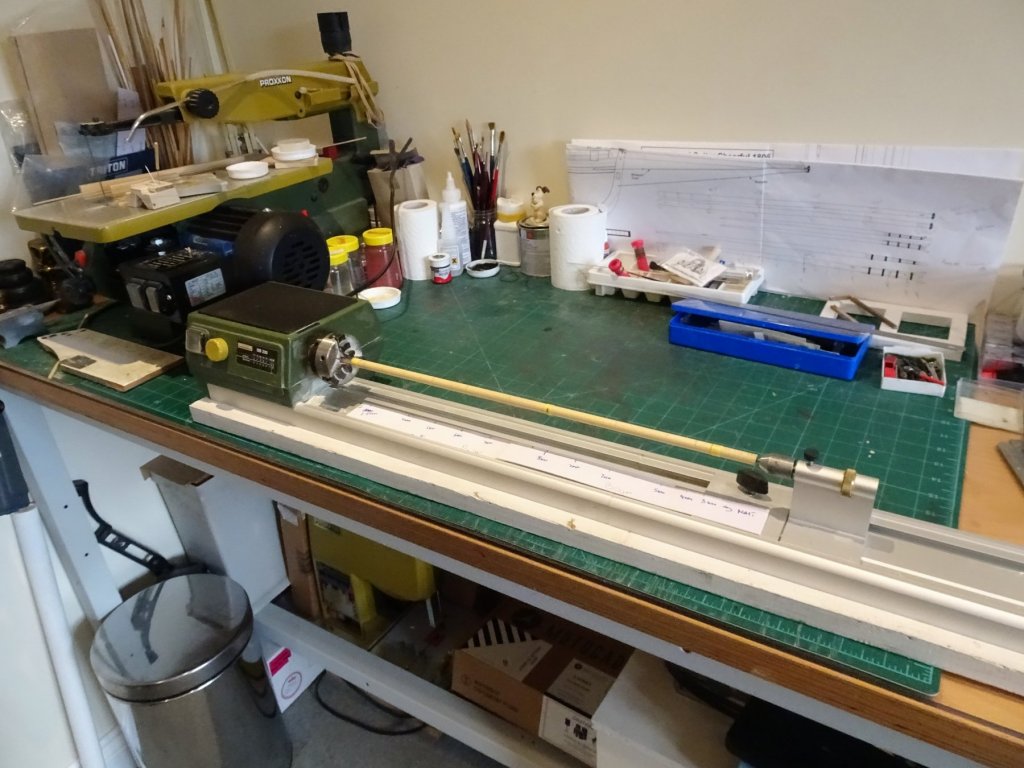
Not really Martin, I tend to have it turning at a low rev setting and on the odd occasion my hand has interfaced with the turning chuck no damage done.(well almost 😉) I've never got to grips with using wood turning tools on things such as masts and spars and I'm not really sure they're necessary. A good supply of sandpapers and a pair of electronic calipers seem to do the job. B.E.
- 574 replies
-
- 2
-
-
- cheerful
- Syren Ship Model Company
- (and 1 more)
-
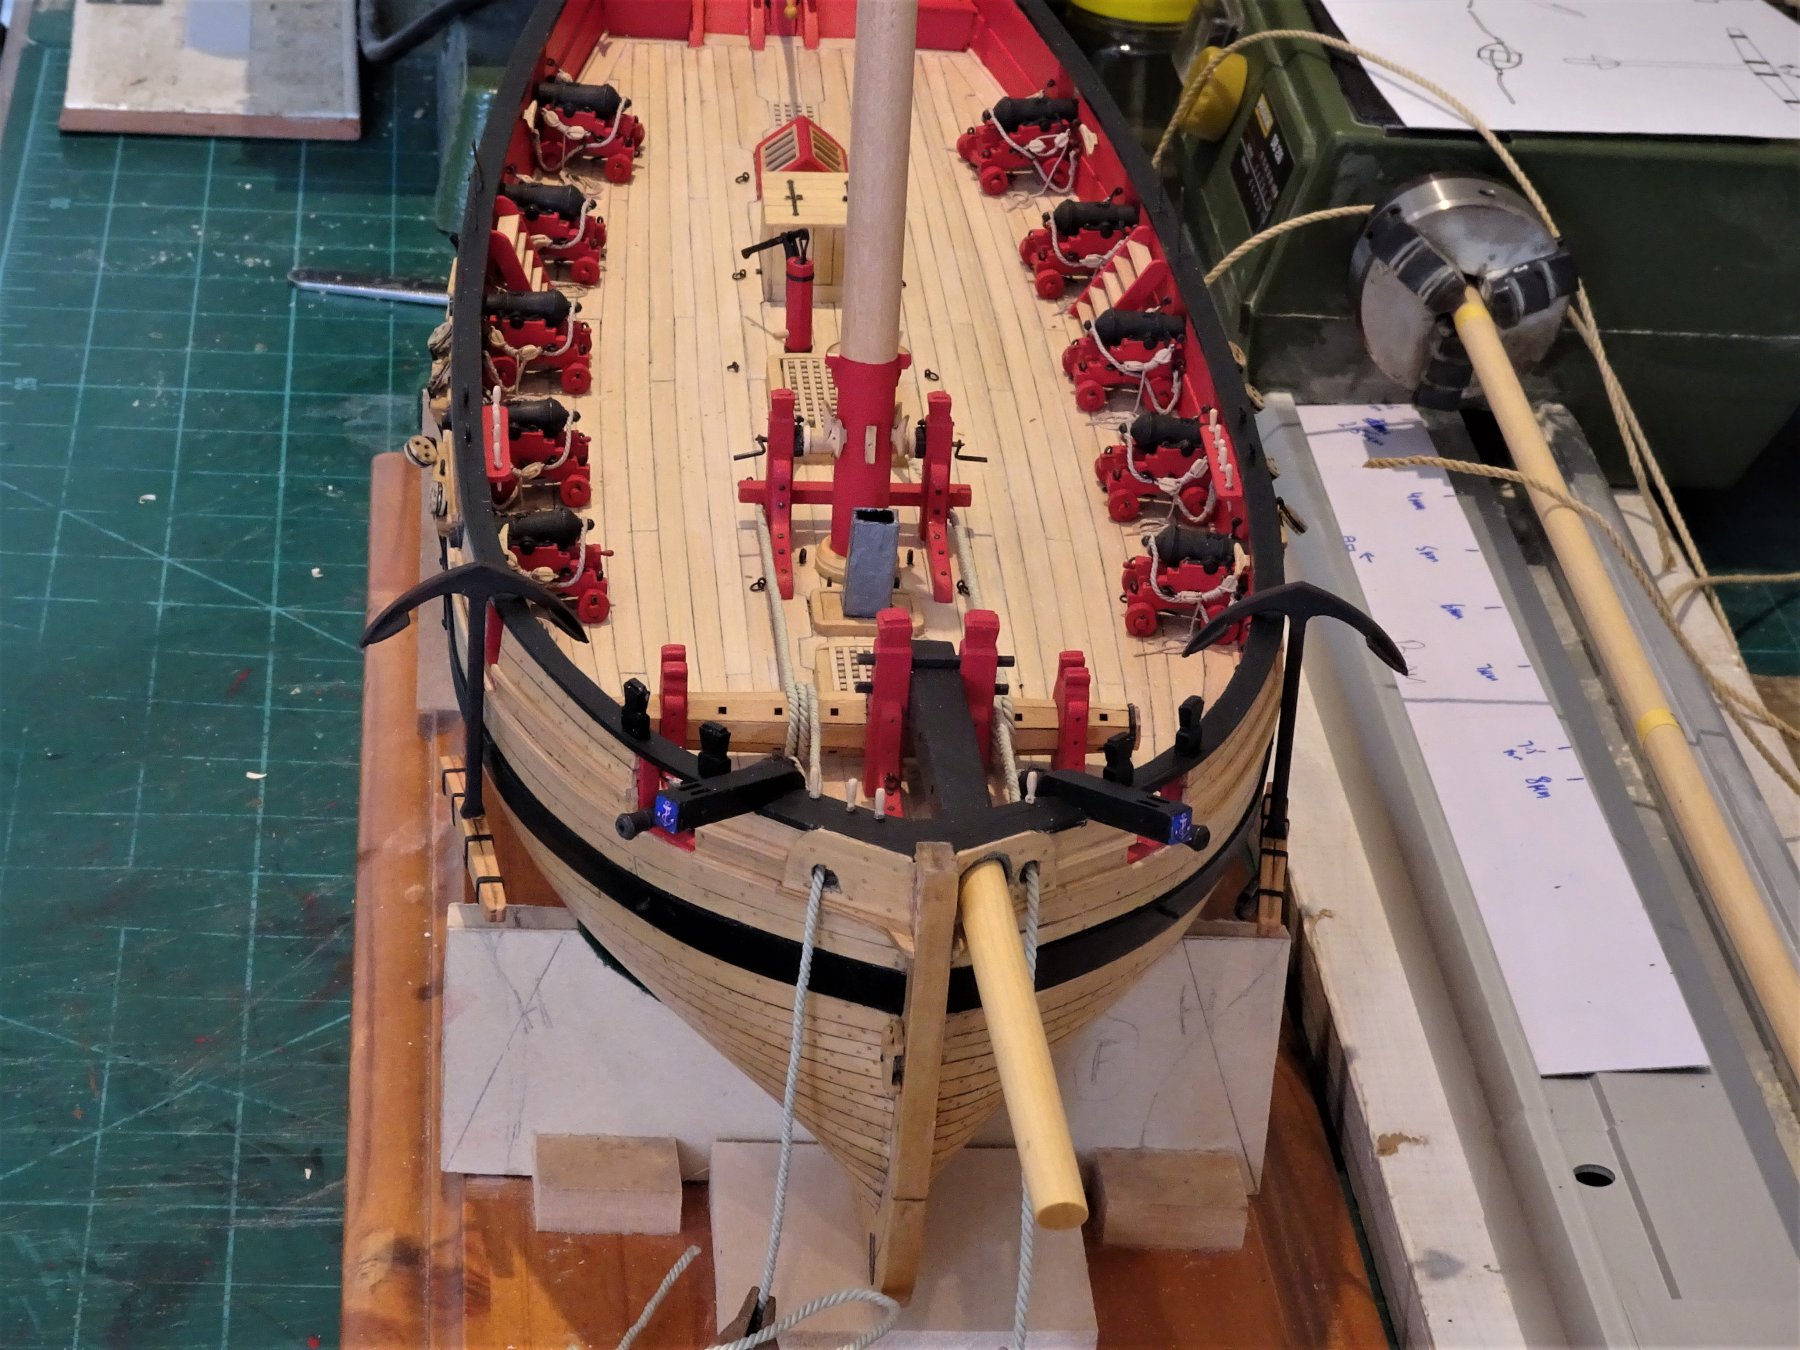
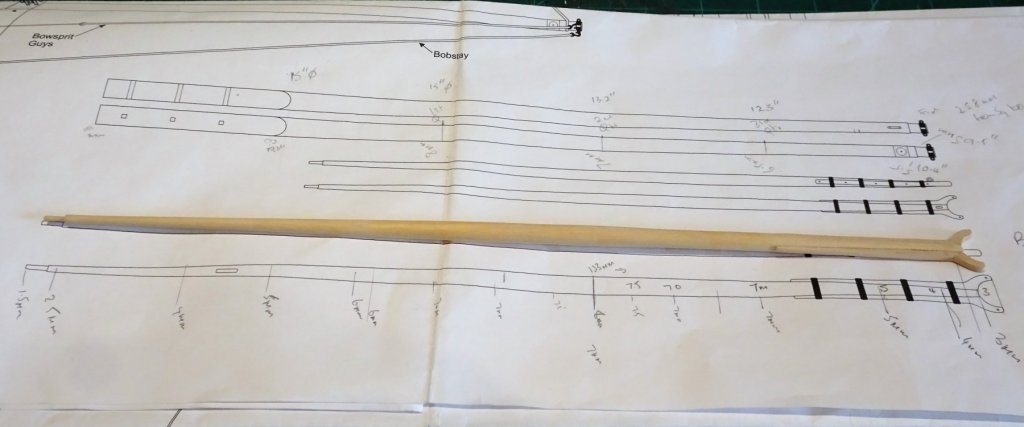
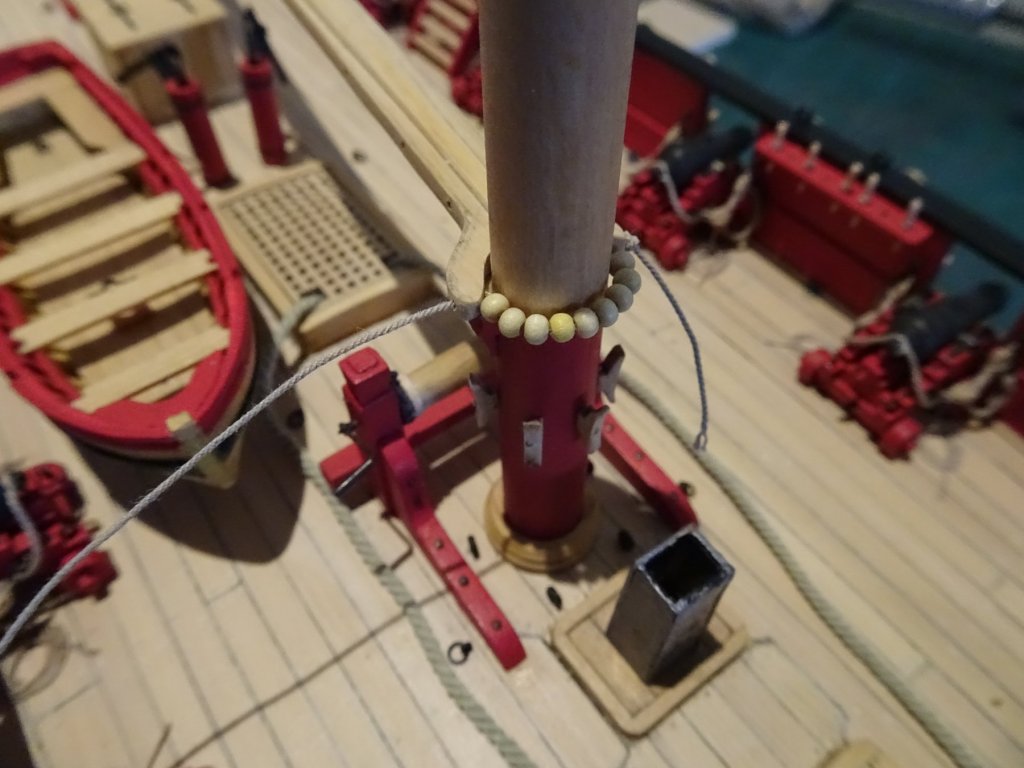
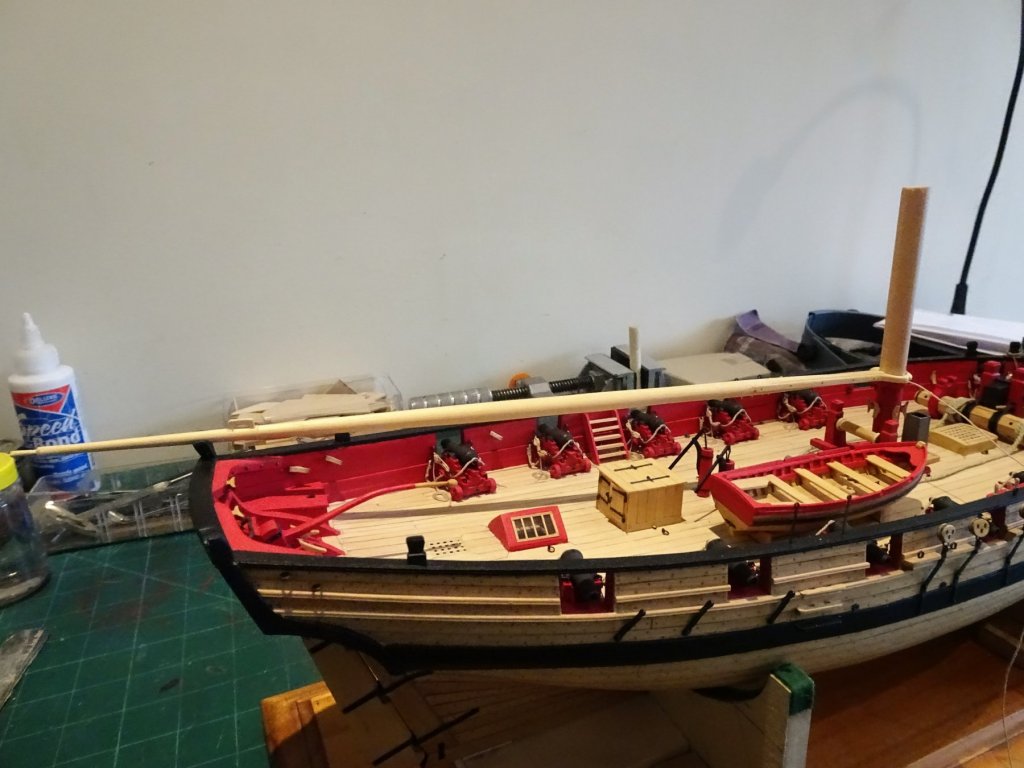
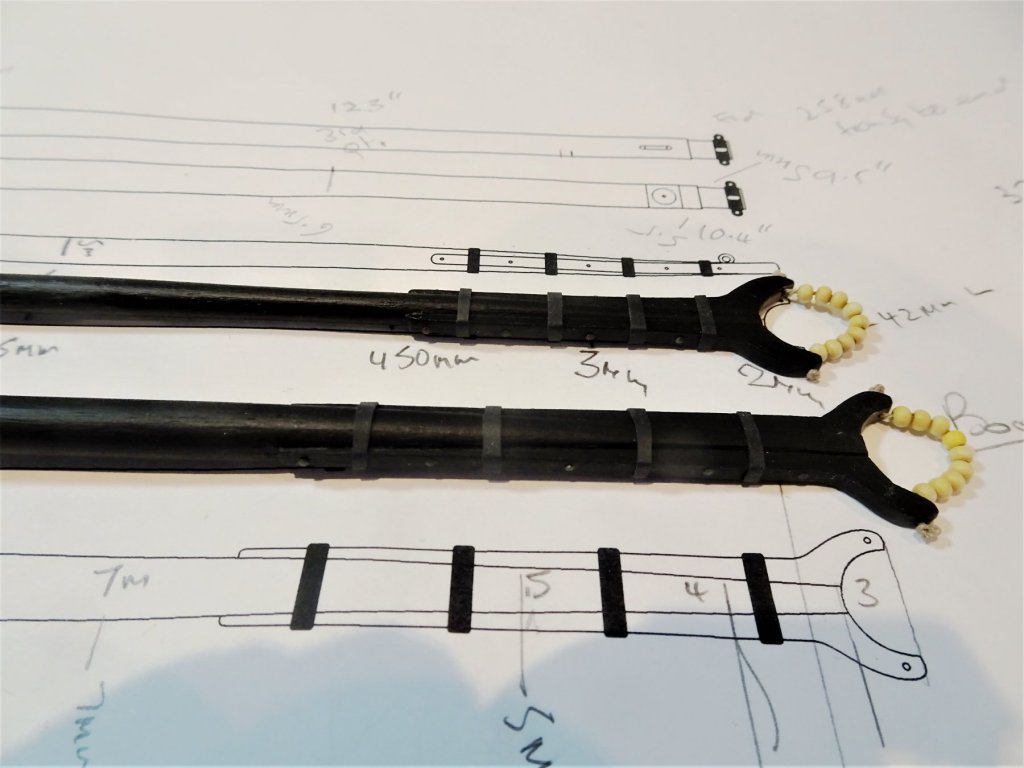
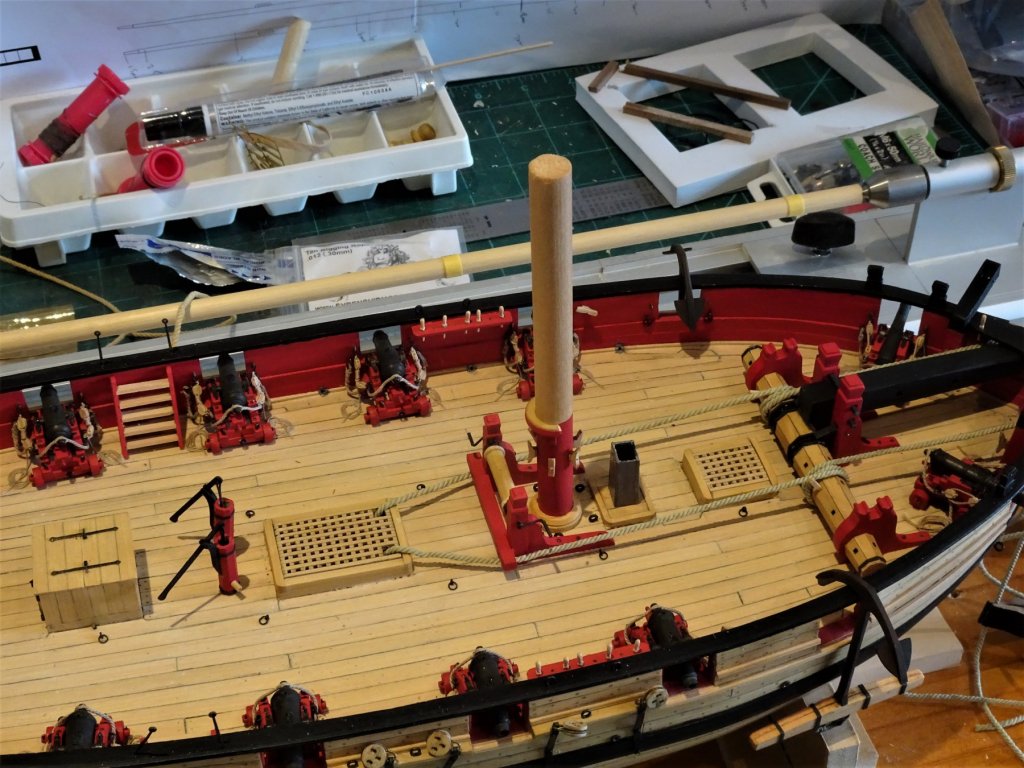
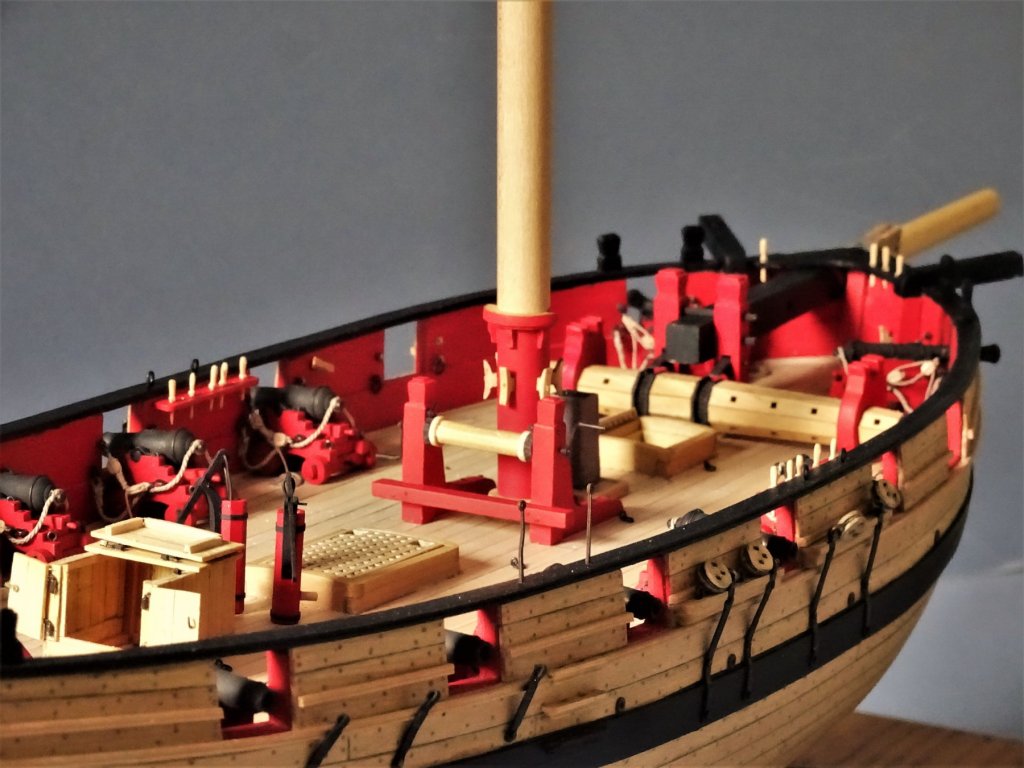
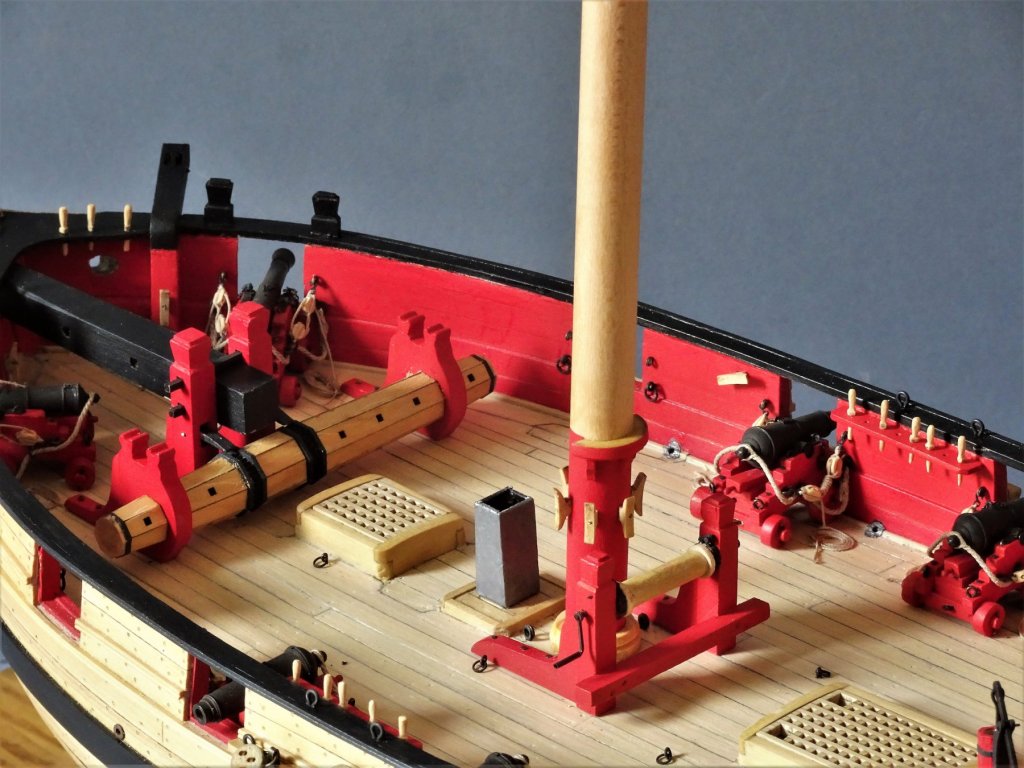
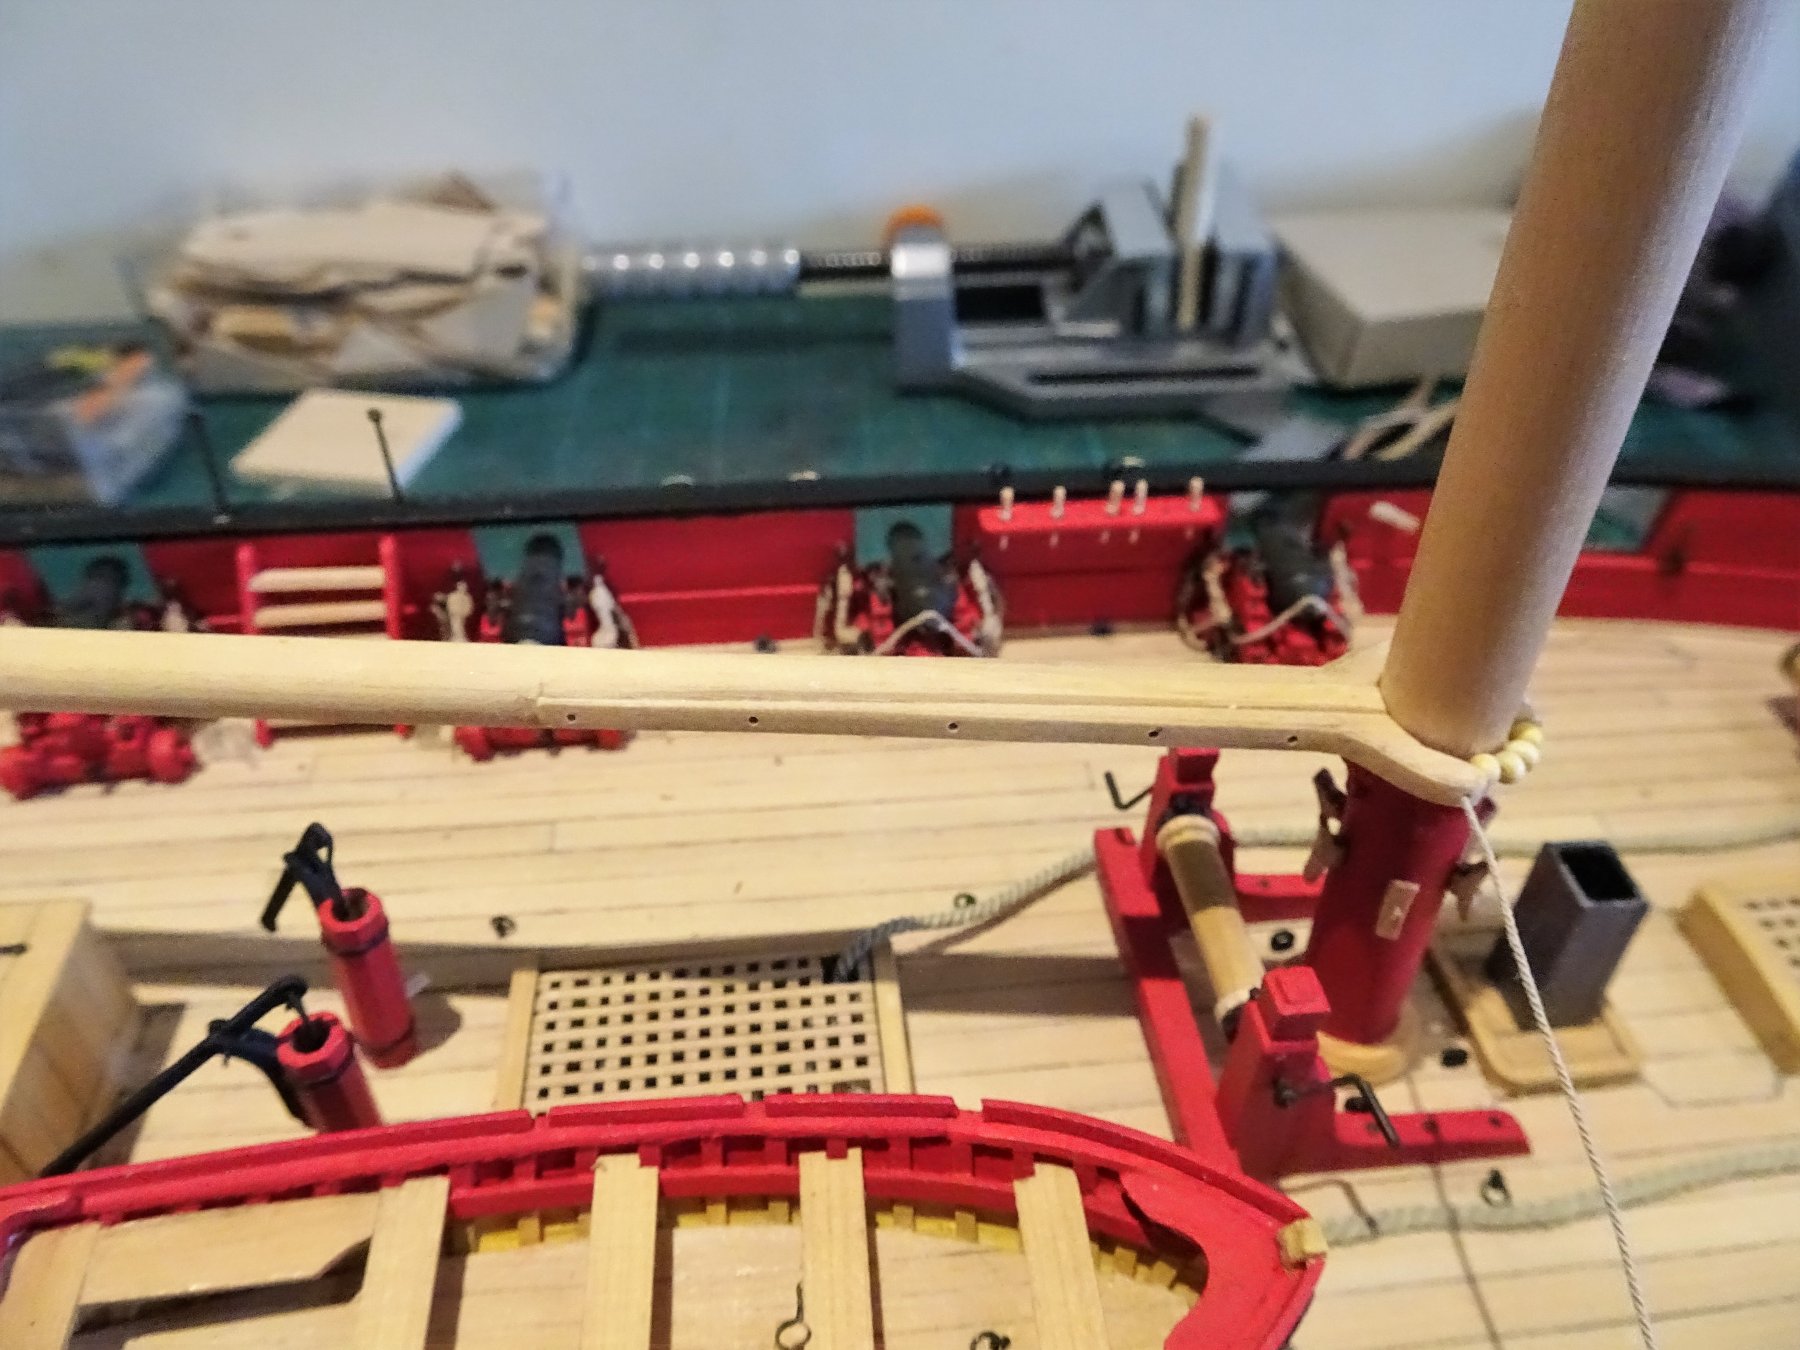
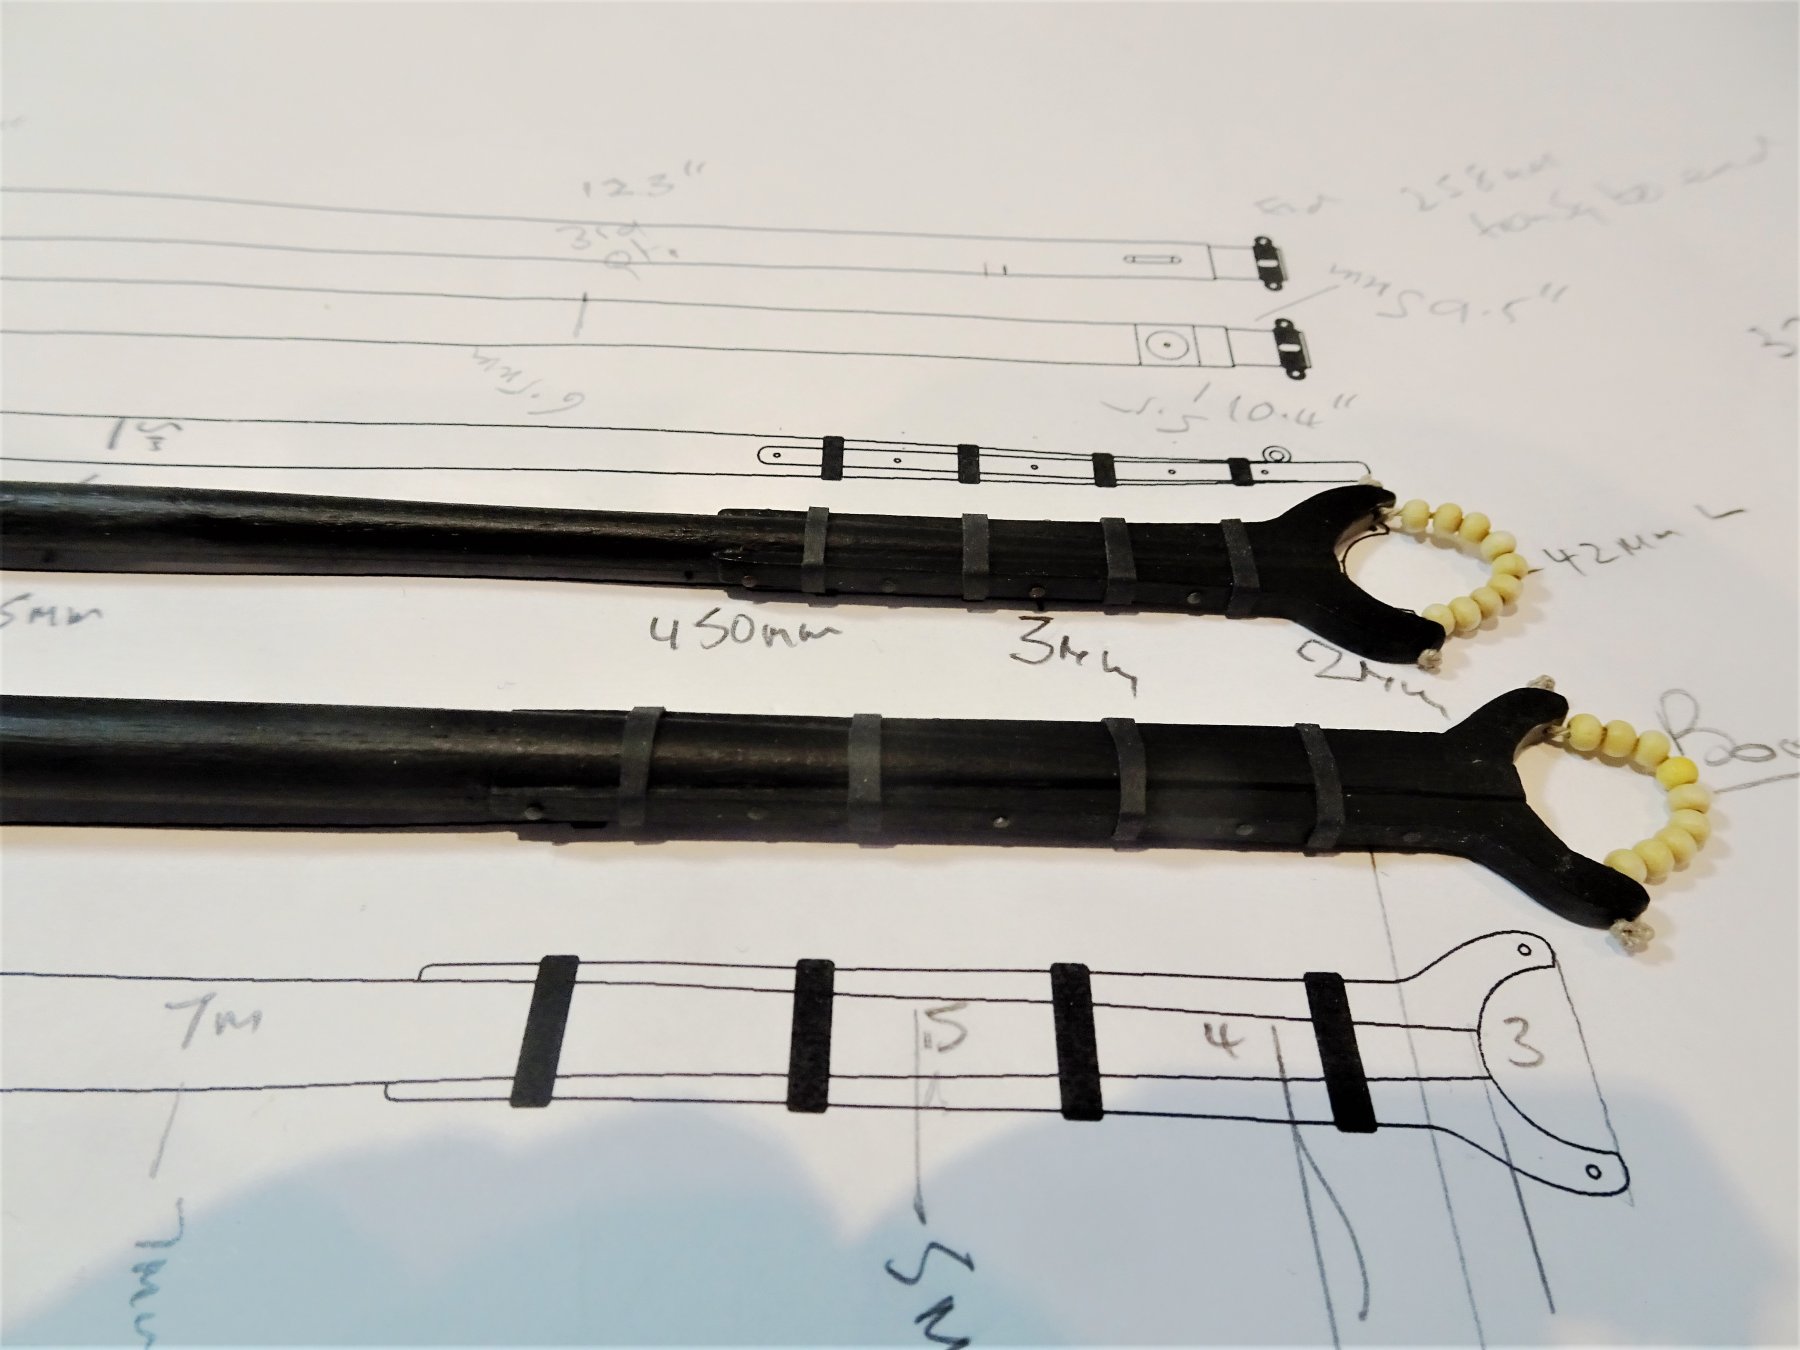
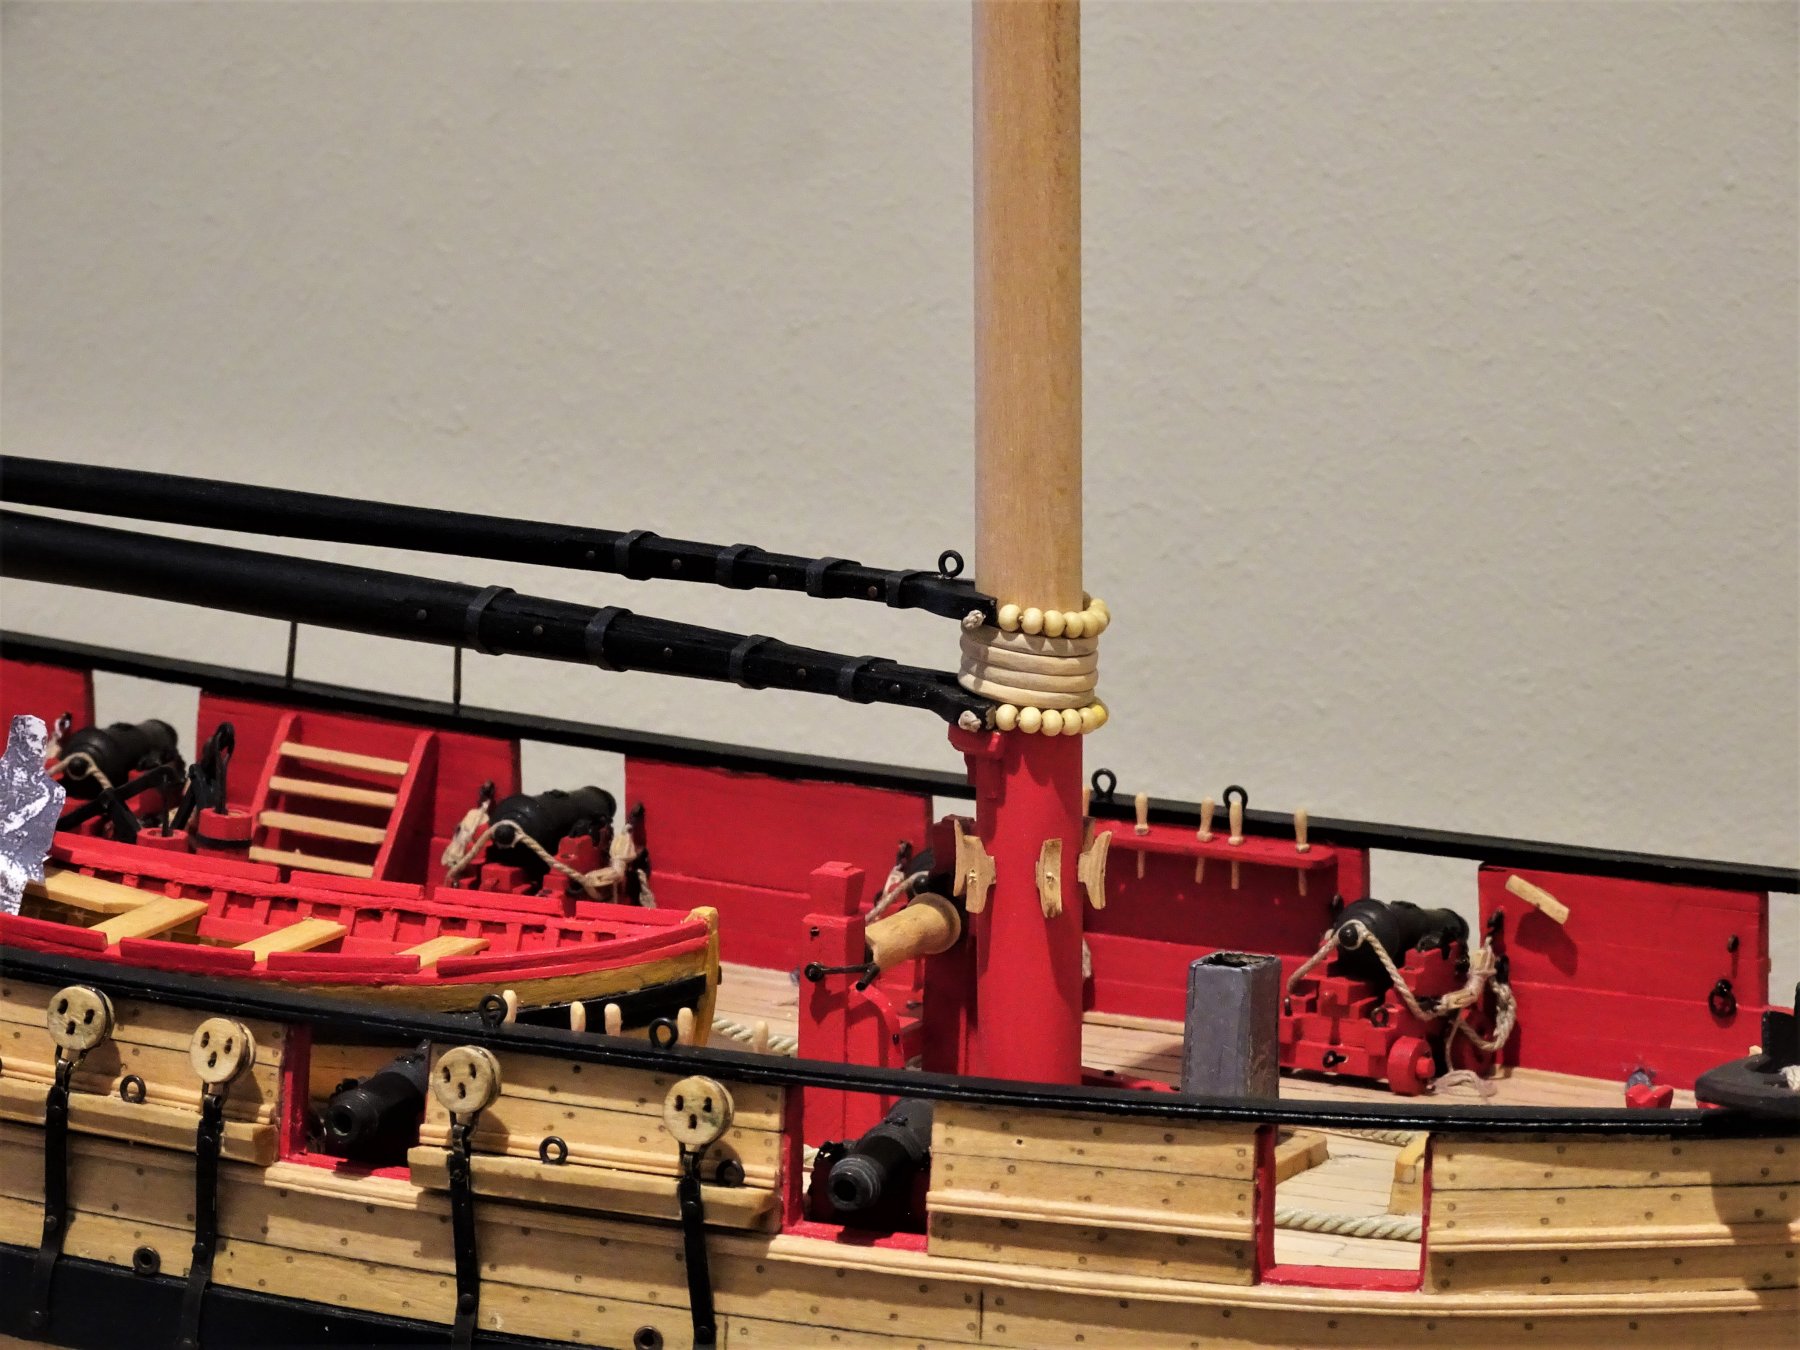
Post 89 Boom and Gaff As part of my reduced rig presentation of Cheerful I decided to add the Boom and gaff, or at least make them to see how they look. These are made from Ramin dowel a good straight fine grained timber which, as the spars are painted black, is a good substitute for the more expensive Boxwood. Boom 8mm ø dowel is used to make the boom which has an o/a length of 334 mm. The interesting thing about booms is that they taper both ends but not from the centre of the spar. The taper is produced on the lathe using a card template to check the diameters at various points. The taper is achieved using sandpaper only. 8313 It's when long spars are required to be worked that the bed extension to the Proxxon lathe comes into its own. A lot of taper is required on the boom reducing in the outboard end from 8mm to 1.5mm and the inboard end from 8mm to 3mm. 8546 The jaws proportions were transferred to 3/32" Boxwood sheet, and cut out on the scroll saw, finishing off by hand. 8550 Checking the fit of the jaws. 8548 ...and of the parral trucks. 8549 trial fit of the boom. Gaff I used 5mmø Ramin dowel, and the procedure is exactly the same as with the boom, but with considerably less sanding dust. 8870 The 'iron' bands are once again made from heat shrink tubing. Mast rings 8885 I had Chuck's mini kit for the rings I used a few to slip over the stump mast and provide a spacer between the boom and gaff. 8880 8884 8881 8883 Getting close to completion now B.E. 08/05/2019


- 574 replies
-
- 28
-
-
- cheerful
- Syren Ship Model Company
- (and 1 more)
-
Looks good to my eye James, and I do like that transom style. B.E.
- 241 replies
-
- 1
-
-
- mermaid
- modellers shipyard
- (and 1 more)
-
That's the conundrum Dowmer, proximity of the anchor to the Cathead, or greater field of fire, but with Cheerful there are other incumbrances to get in the way such as the standards for the Bowsprit step and windlass. The advantage of the bow chase gun is the range, as sailing ship don't sail in a straight line perhaps that didn't matter that much. I'll probably never get to the bottom of it, but at the end of the day it's a model and who's going to gainsay me, unless perhaps one of our members has the definitive answer in which case I'm all ears.😃 Cheers, B.E.
-
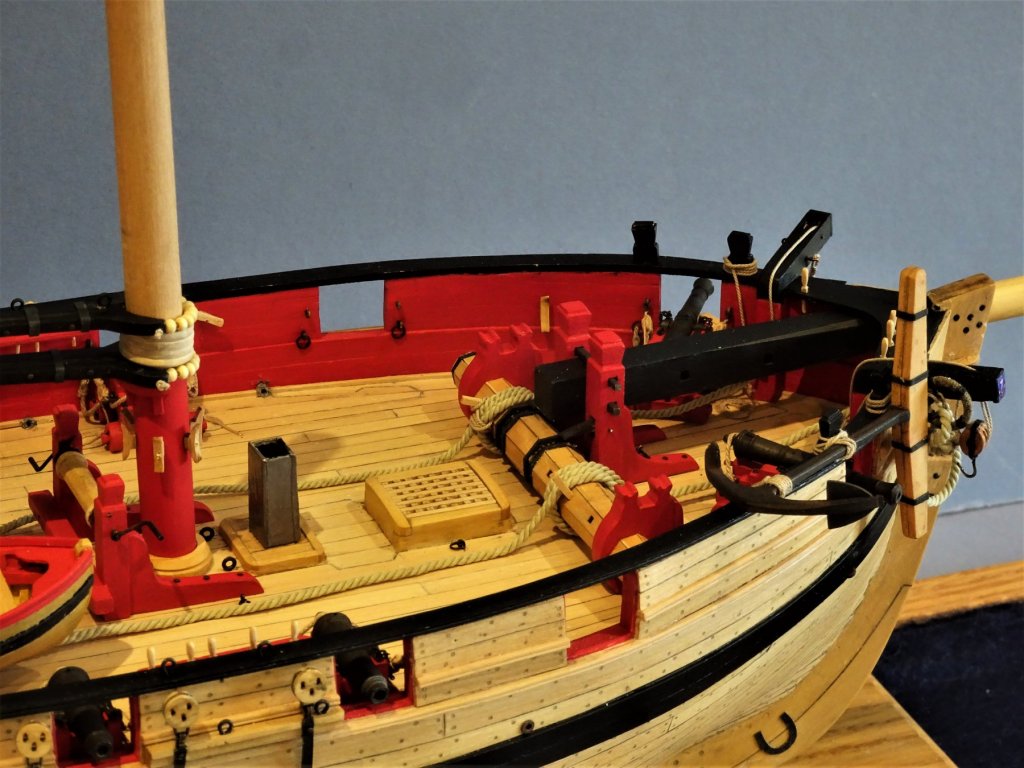
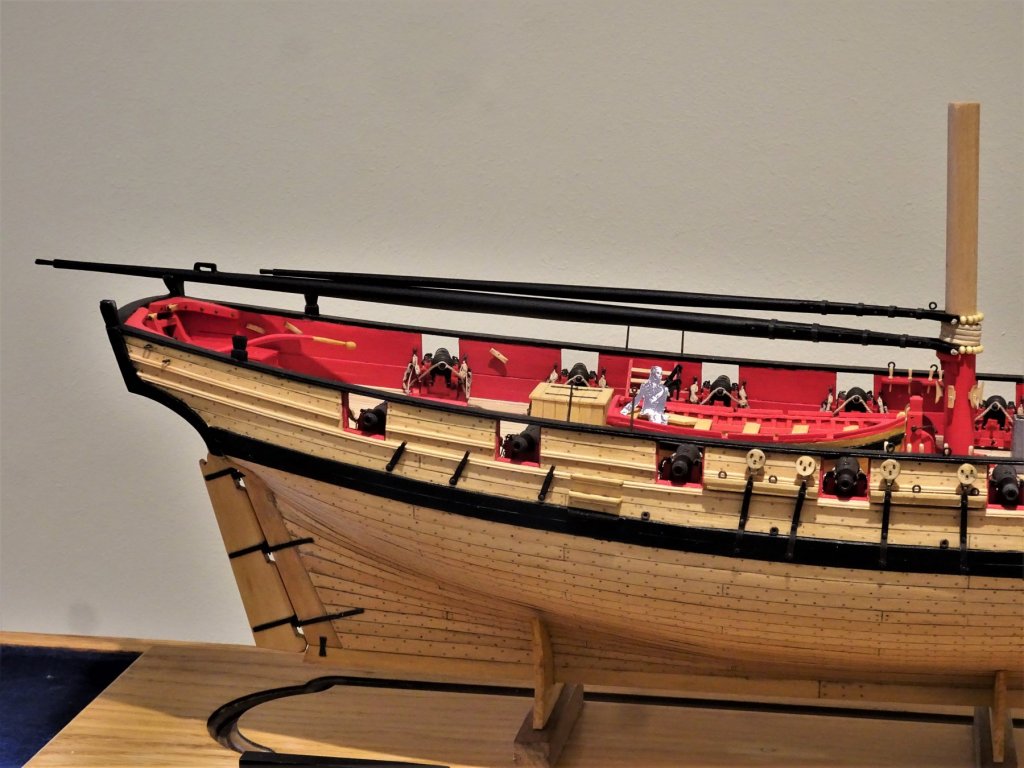
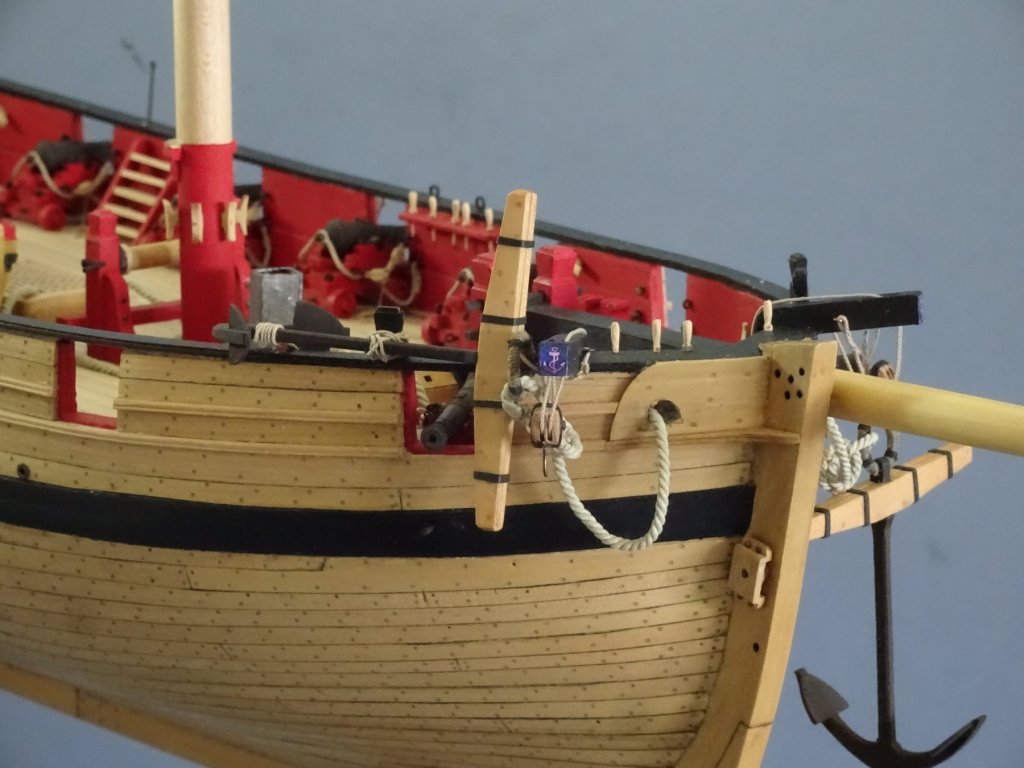
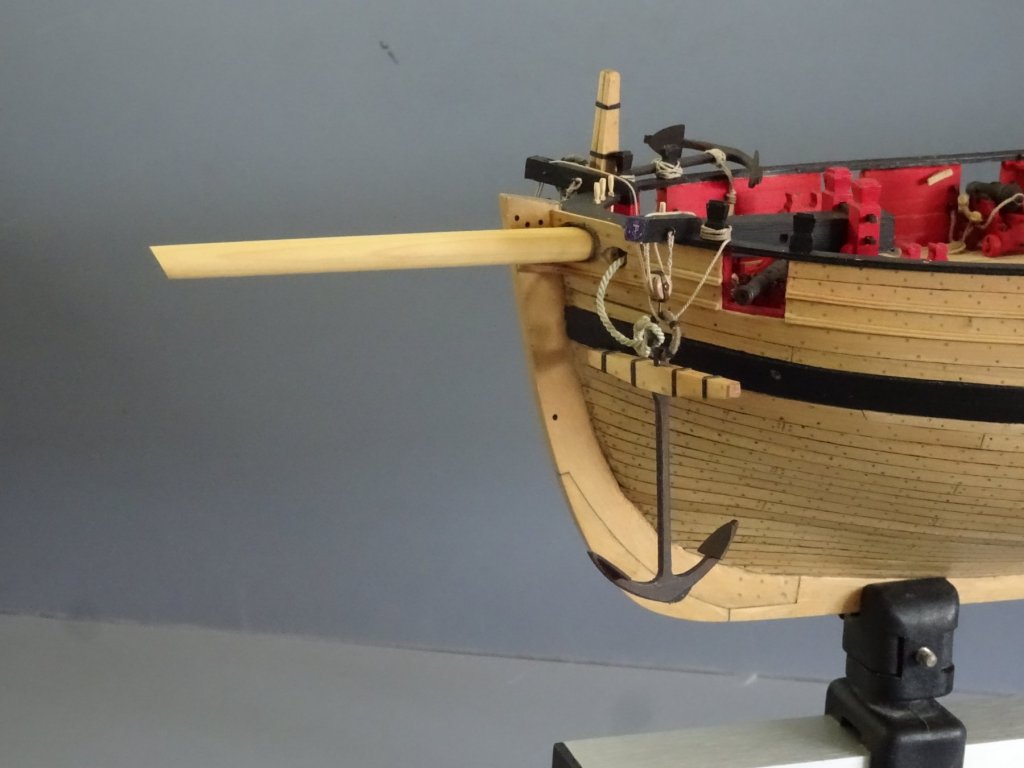
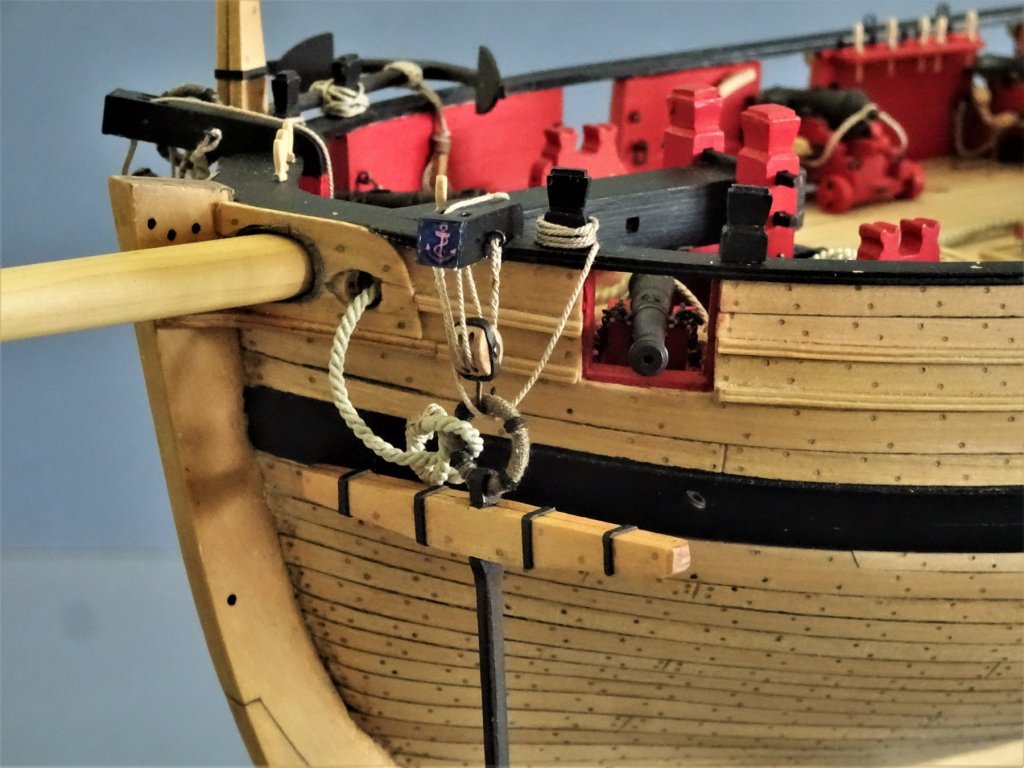
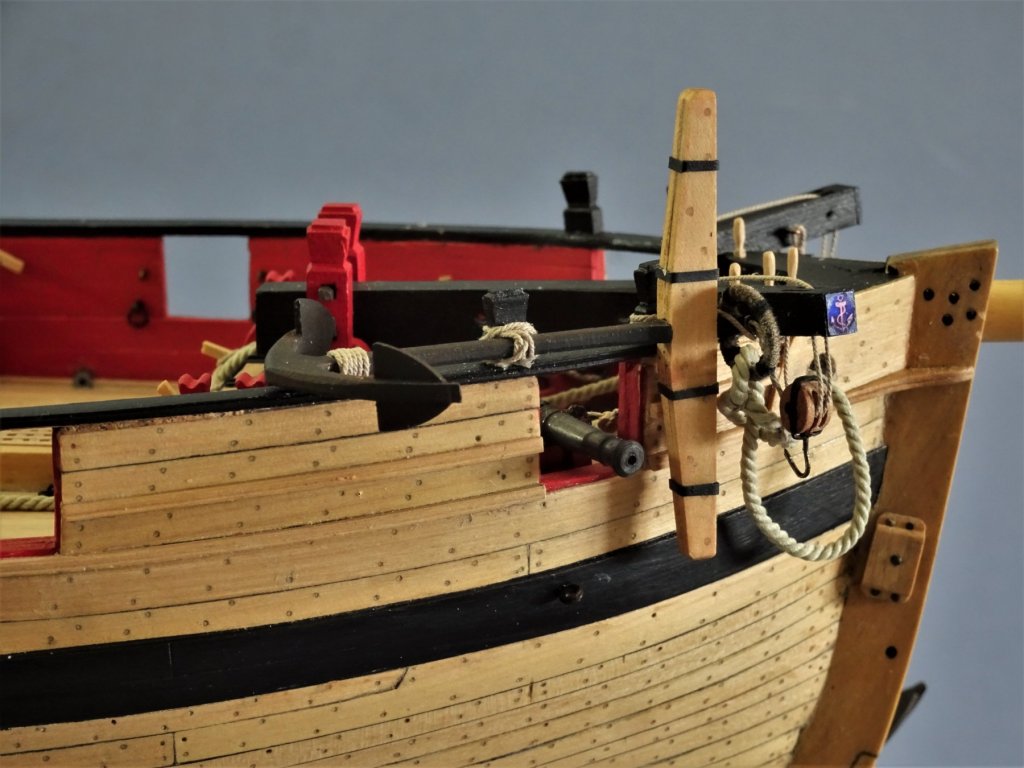
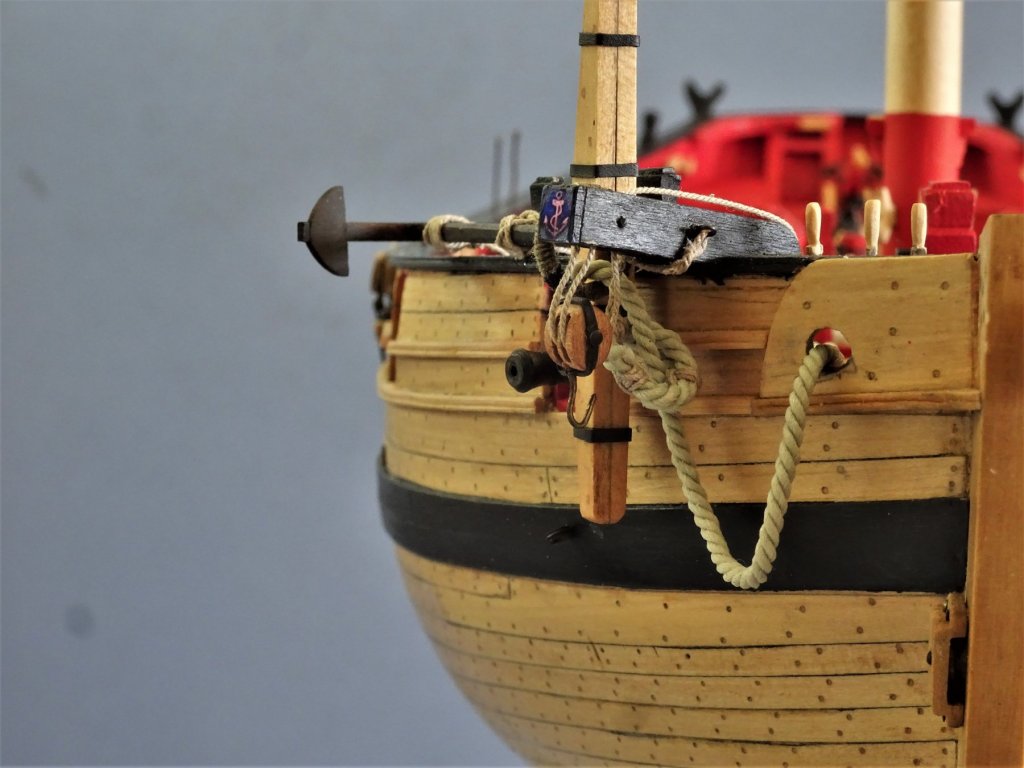
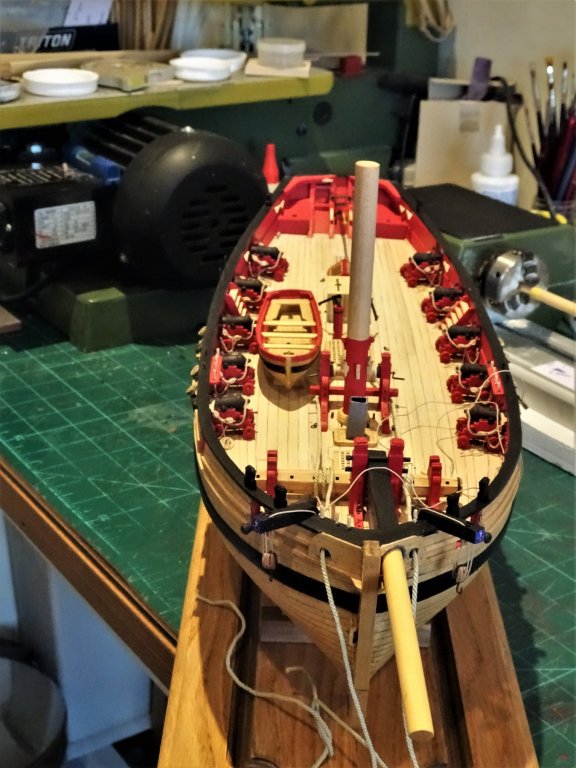
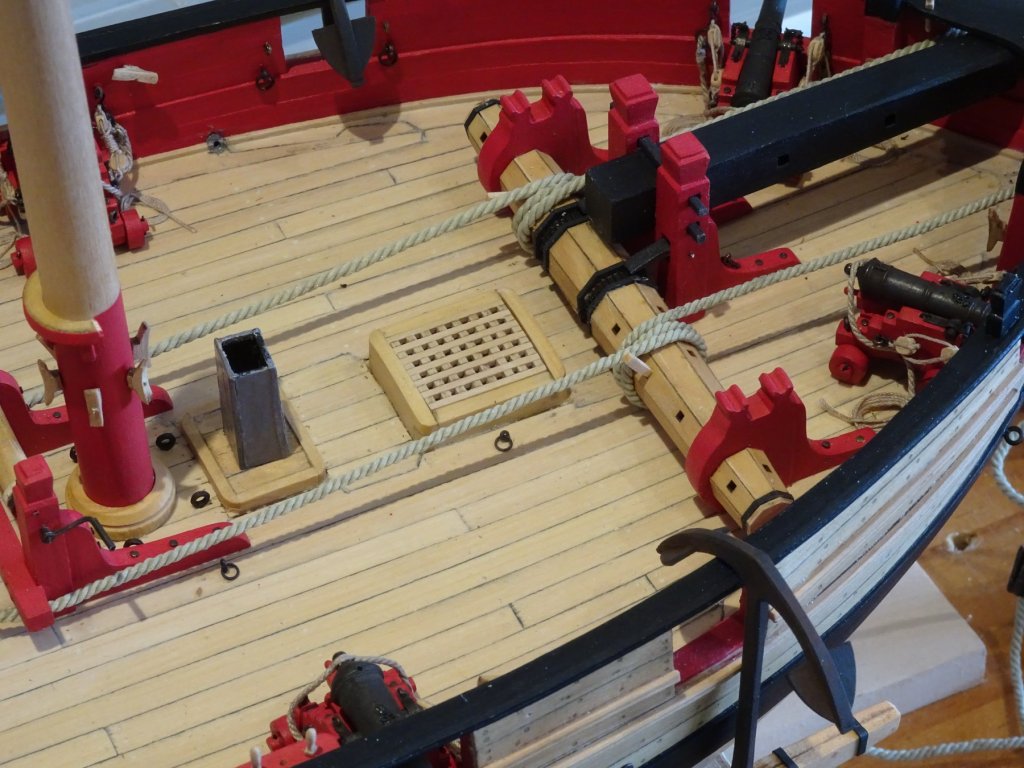
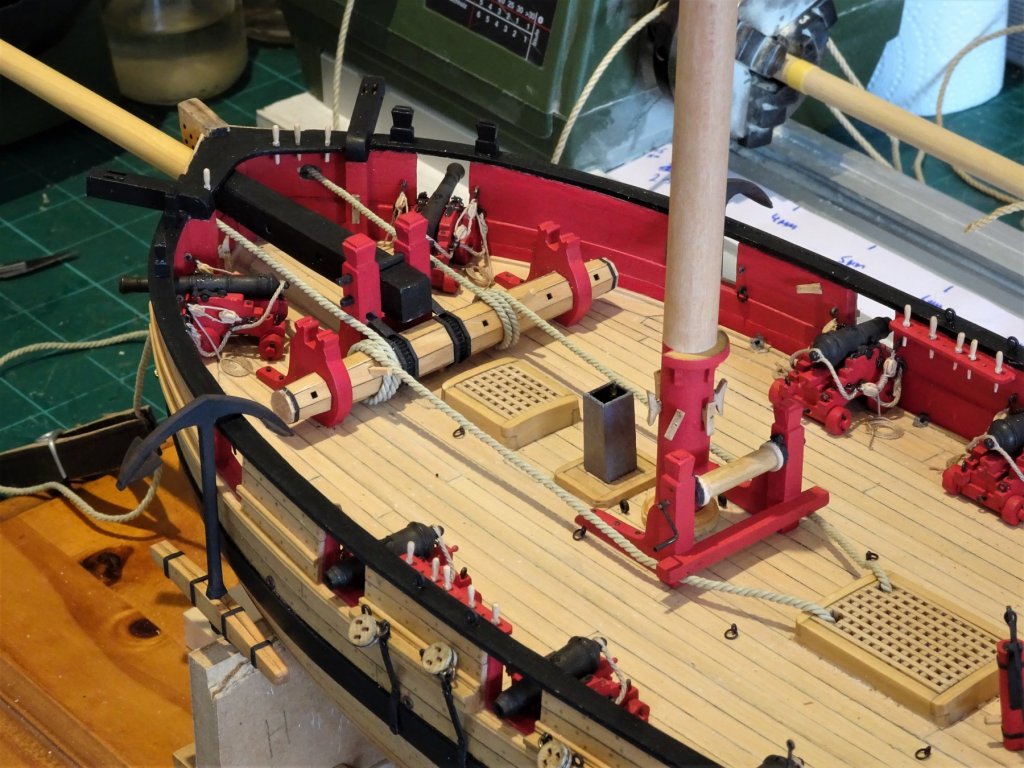
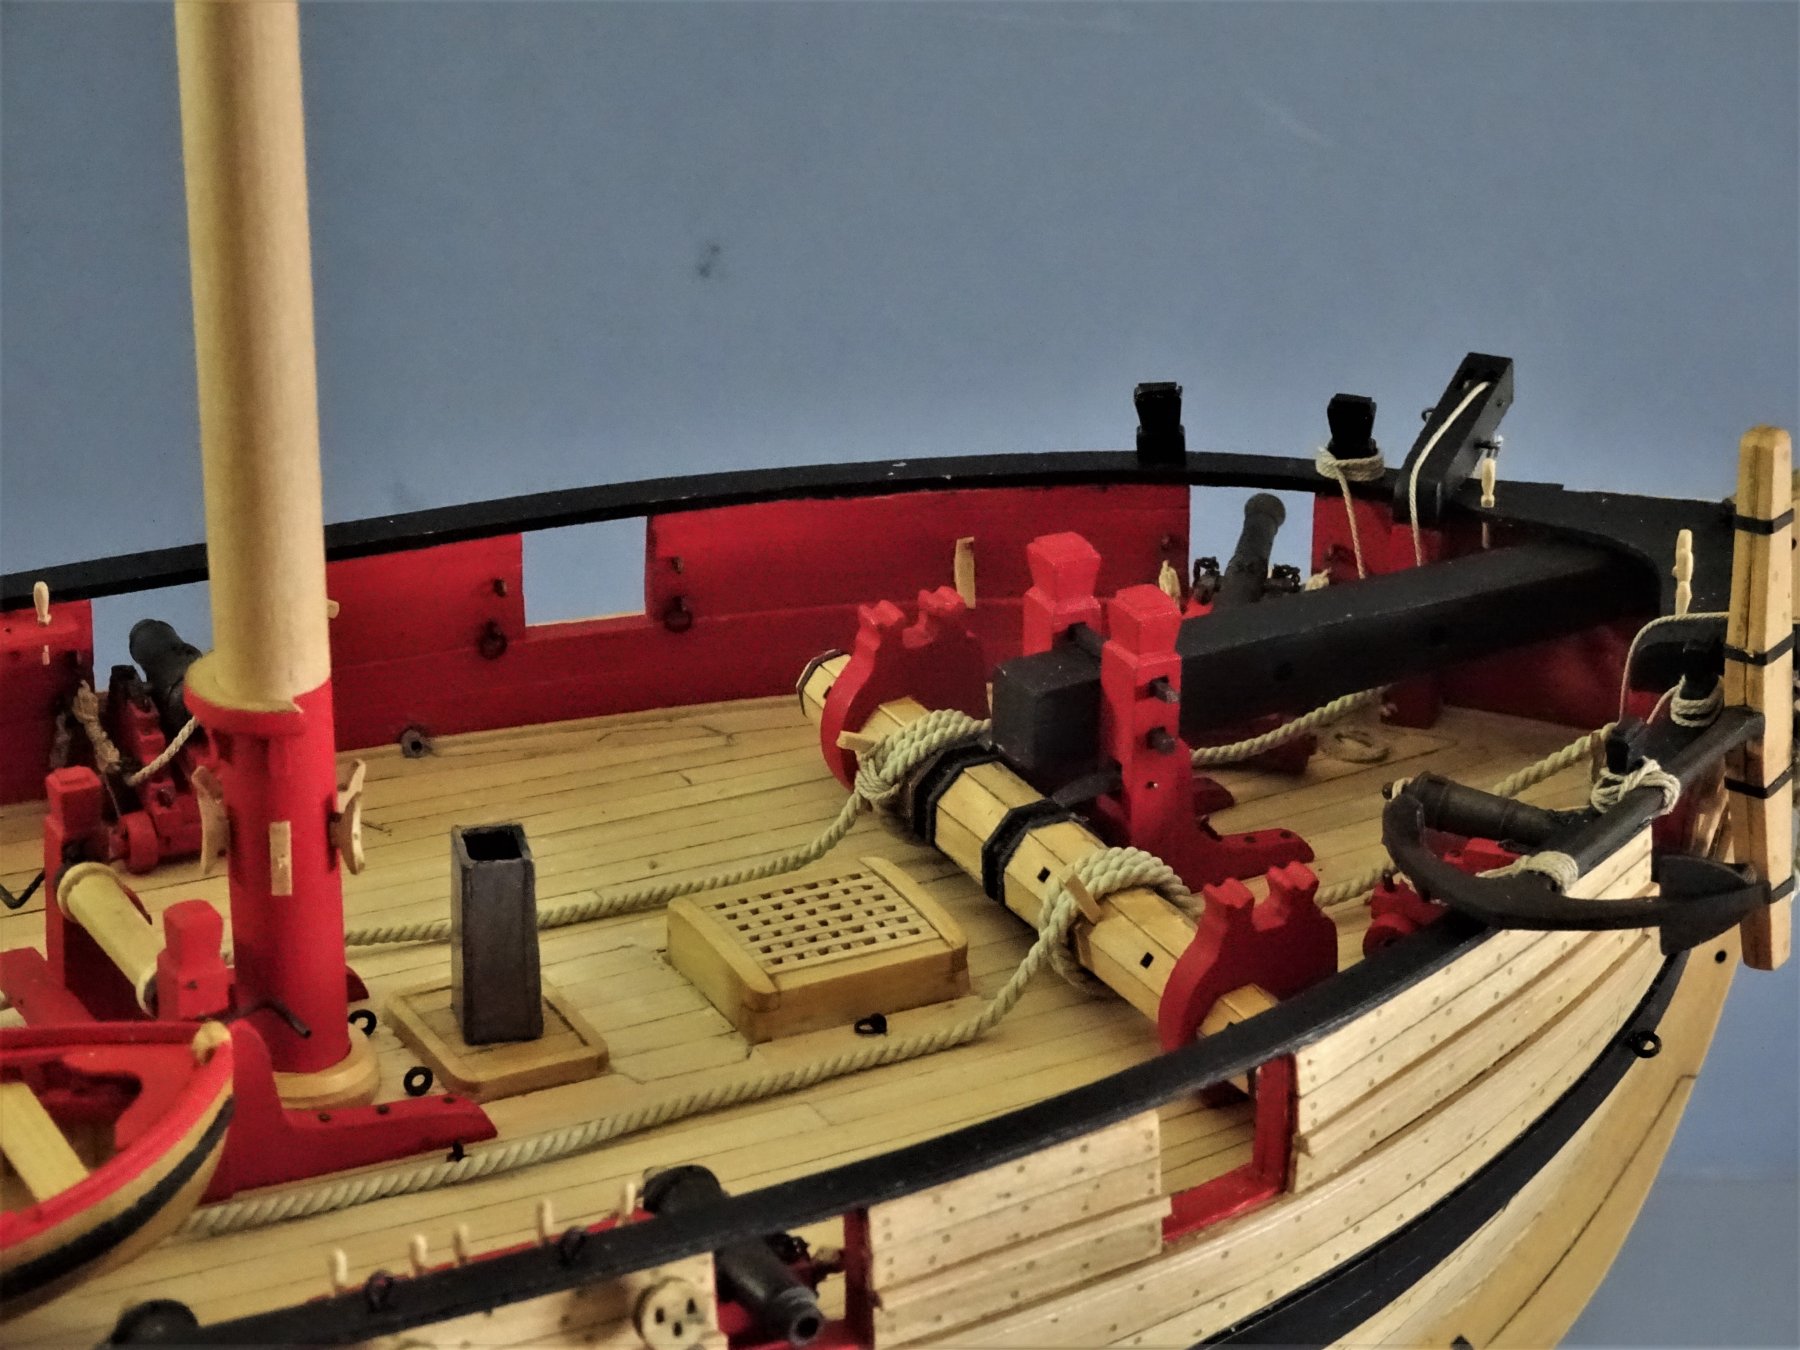
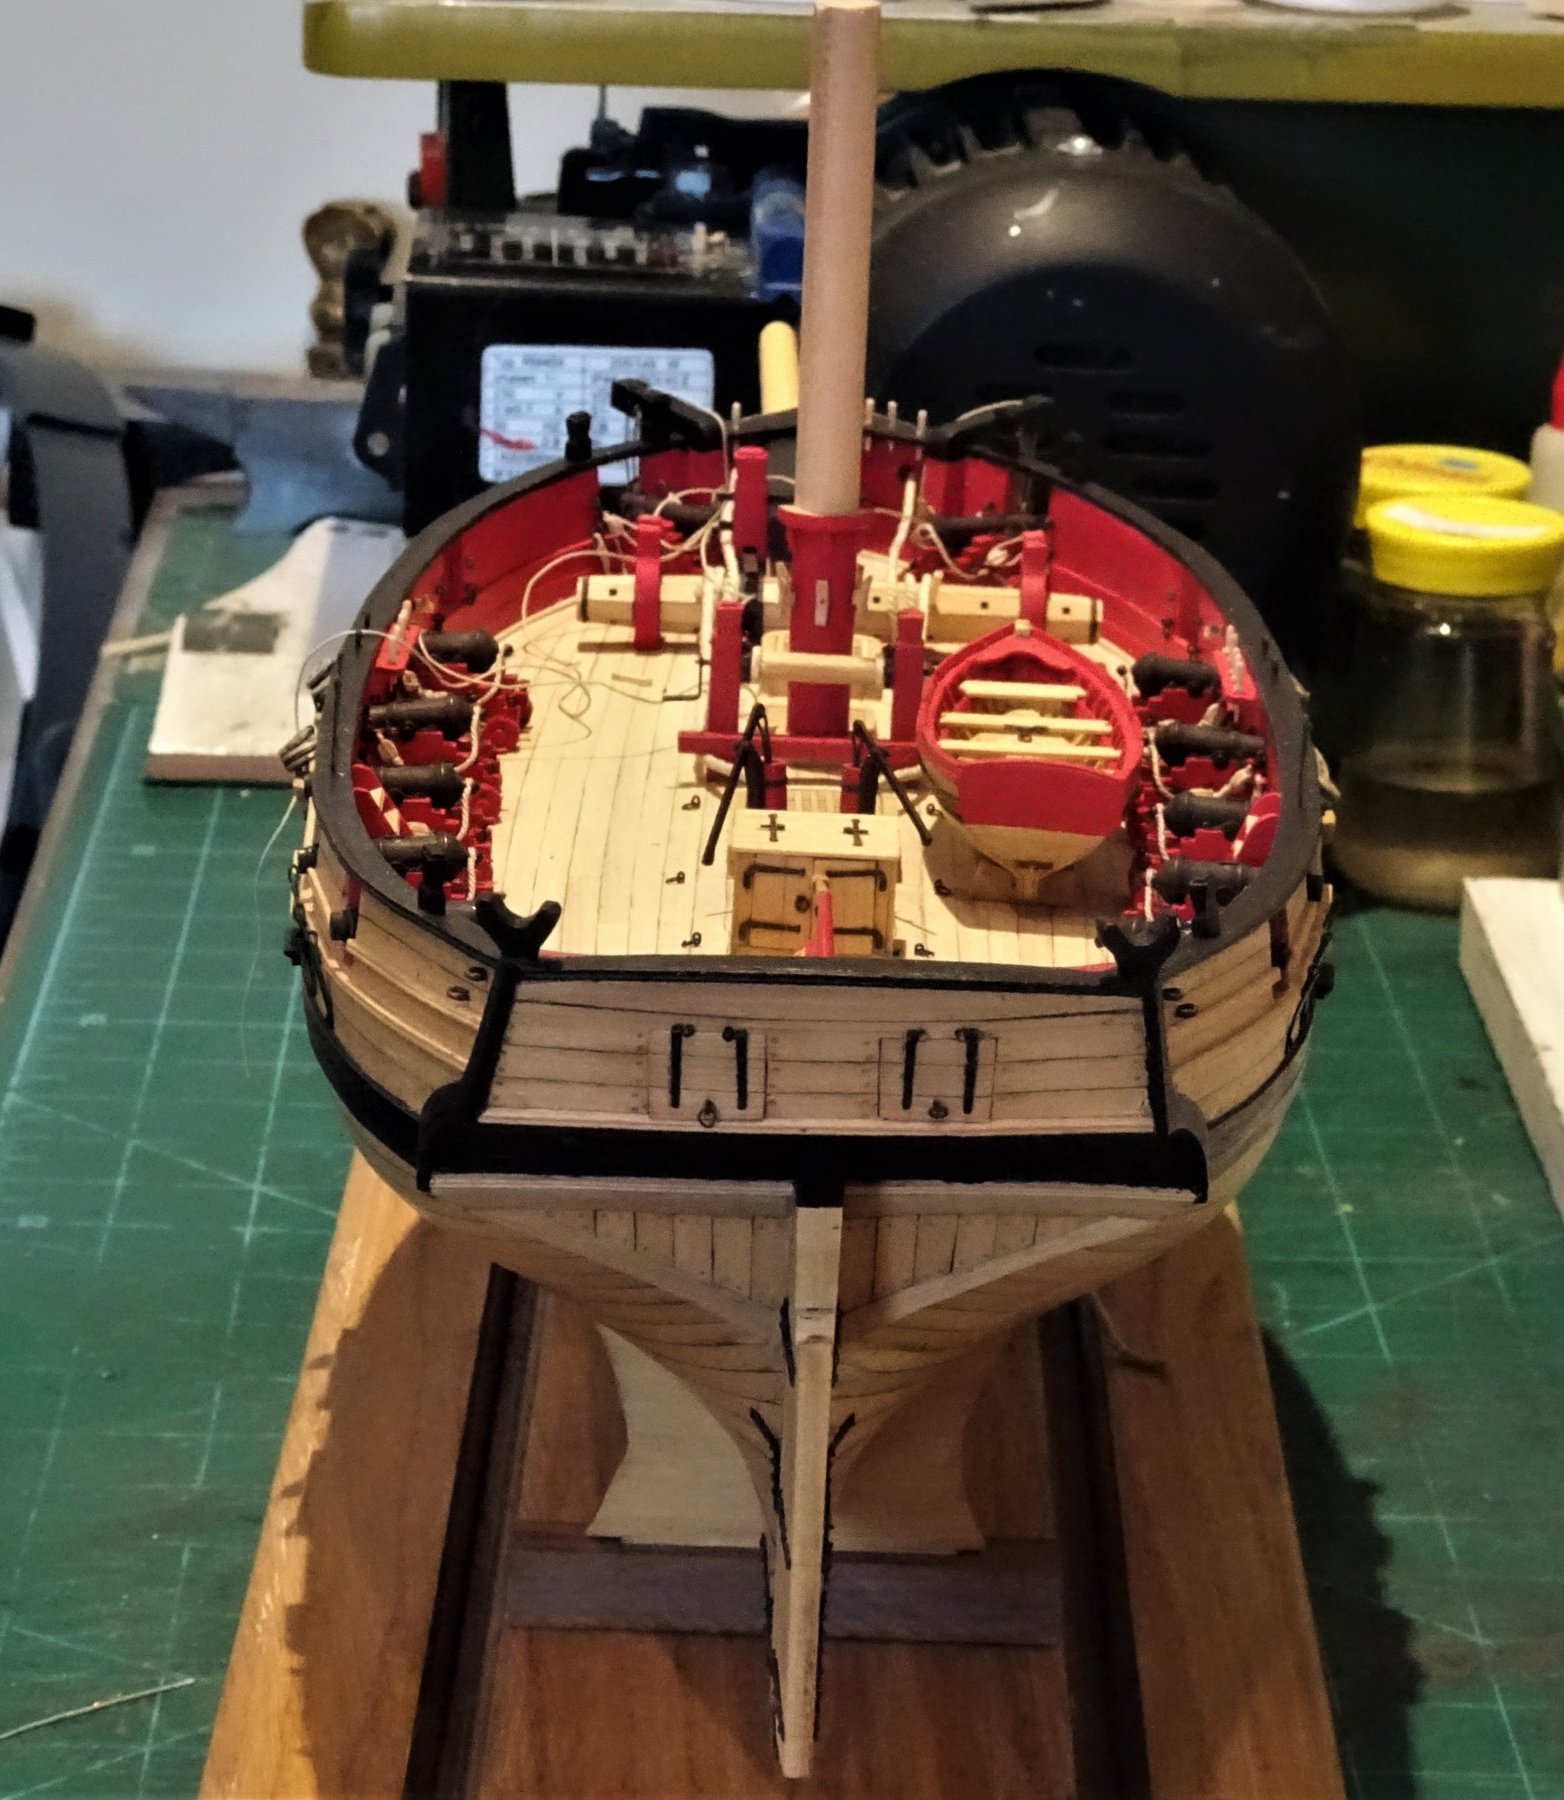
Cheers guys for your comments and likes 👍 Quickly moving on. Post 88 Positioning the anchors The position Chuck has placed the anchors on his model has a nice symmetry about it, looks aesthetically pleasing, and shows the anchors off to good effect. This placement however seems to put them a long way from the cathead which is unusual at least in respect of the Bower anchors, and this is the source of some puzzlement that has been engaging my mind. The two timberheads either side of the first port are there to do with anchor tackle, but it seems to me that there should be another one further back to to secure the shank rather than have that function achieved by seizing around the rail above the second port. ... but bringing the anchor ring closer to the Cathead and Cat block means the shank crosses the first port and the stock inhibits the line of fire available for the chase gun, The sole example we have of the Cheerful/Surly model shows the anchor ring close by the Cathead with the shank running across the first port. This is not unusual as demonstrated by many models of all ship types. I have scoured my books and endless photo's of cutters to try and establish anchor stowage arrangements. My solution to this particular problem is to add a bulwark cleat to secure the aft shank painter. 8523(2) The forward painter can then be secured around the second timberhead, and a stopper secured thro' the ring and over the first timberhead. 8518 8531 8534 This is the arrangement I have opted for on the starboard side, crowded as it around the cathead area. On the Port side I have the anchor hanging from the Cat block and secured by the stopper. 8529 8520 I like this position, it is aesthetically pleasing, indicates the use of the Cat block, and removes all of the issues around stowing the anchor. 8540 Getting some drape into the cables. 8527 I can see myself fiddling for some time adjusting the cables along the deck. In general I find securing the anchors to the boat a tricky business; they seem to have a life of their own, and temporary seizings are required whilst the first proper seizing is applied. Syren wooden anchors are far more delicate than their metal equivalents, and extra care has to be taken when attaching the puddening and cable to the anchor ring. Knock the shank and there is a risk of snapping it. 8539 Still have a nagging doubt, but for the present I will turn my attention to a bit of lathe work. B.E. 04/05/2019
.thumb.JPG.bca3f3f9f7b48312bc8e63cef033f363.JPG)


- 574 replies
-
- 28
-
-
- cheerful
- Syren Ship Model Company
- (and 1 more)
-
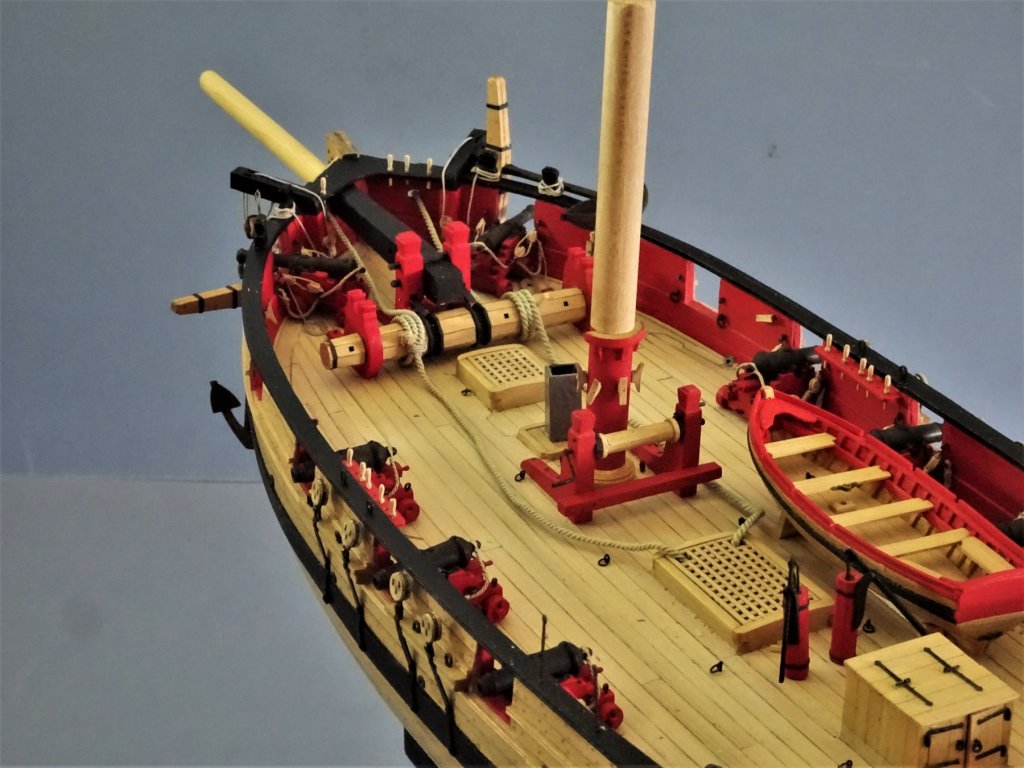
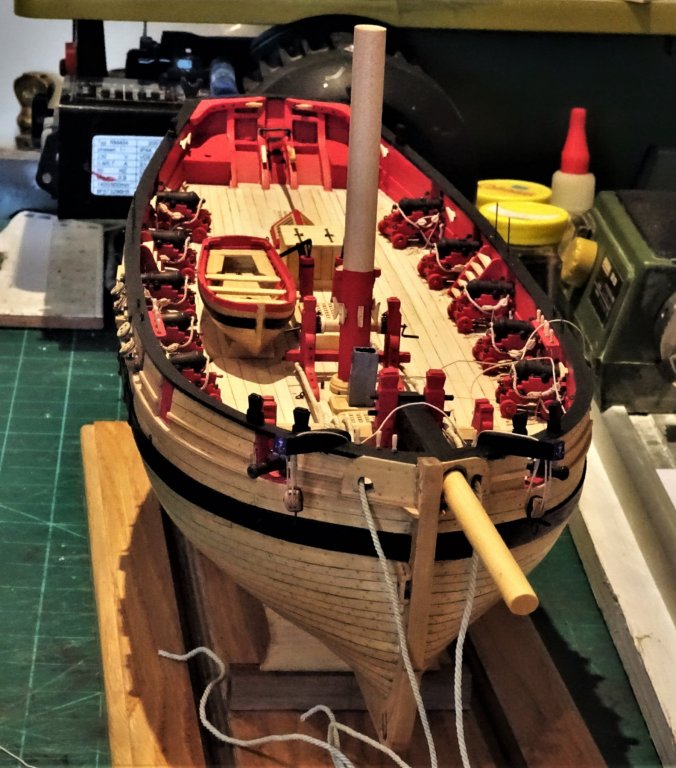
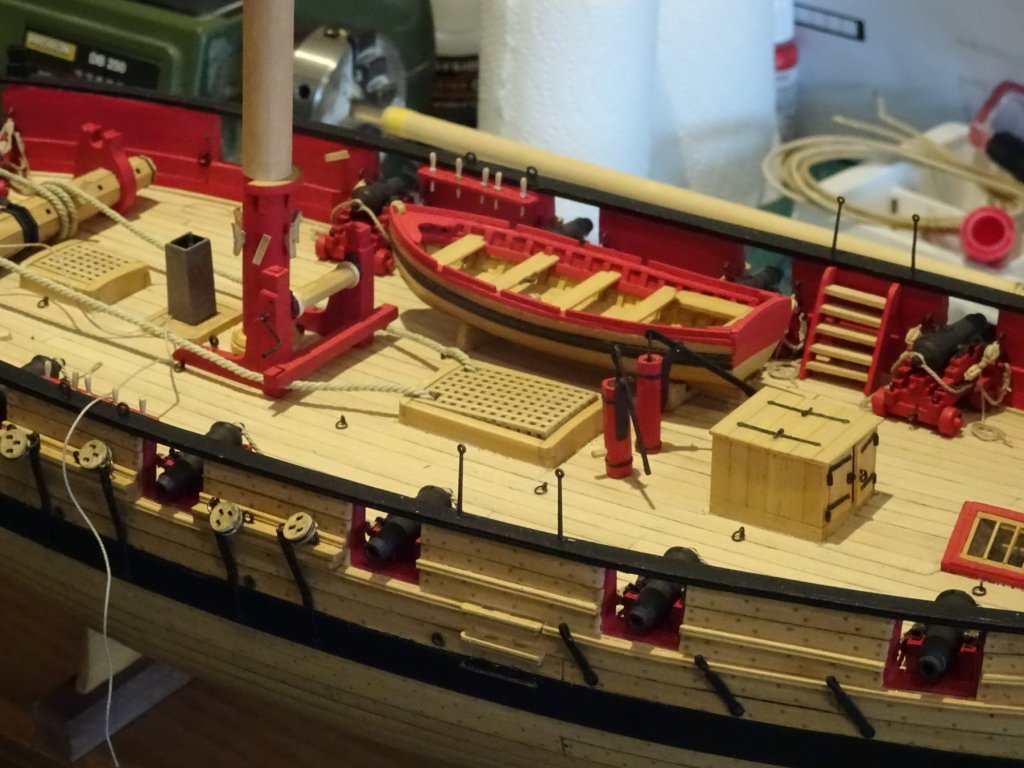
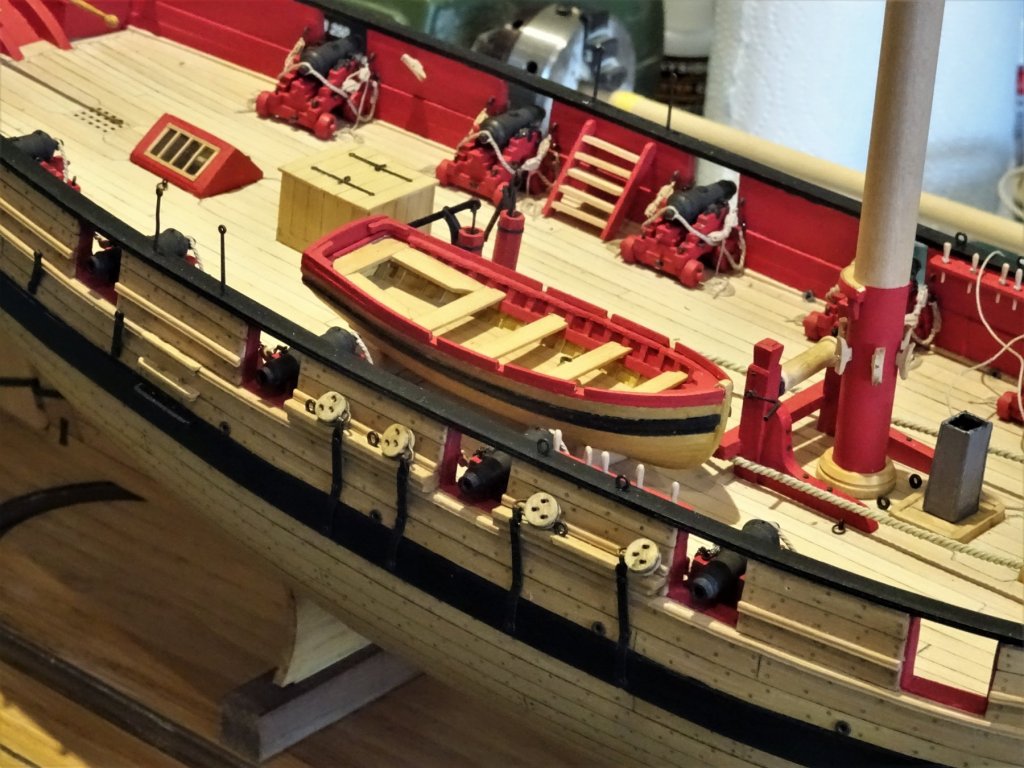
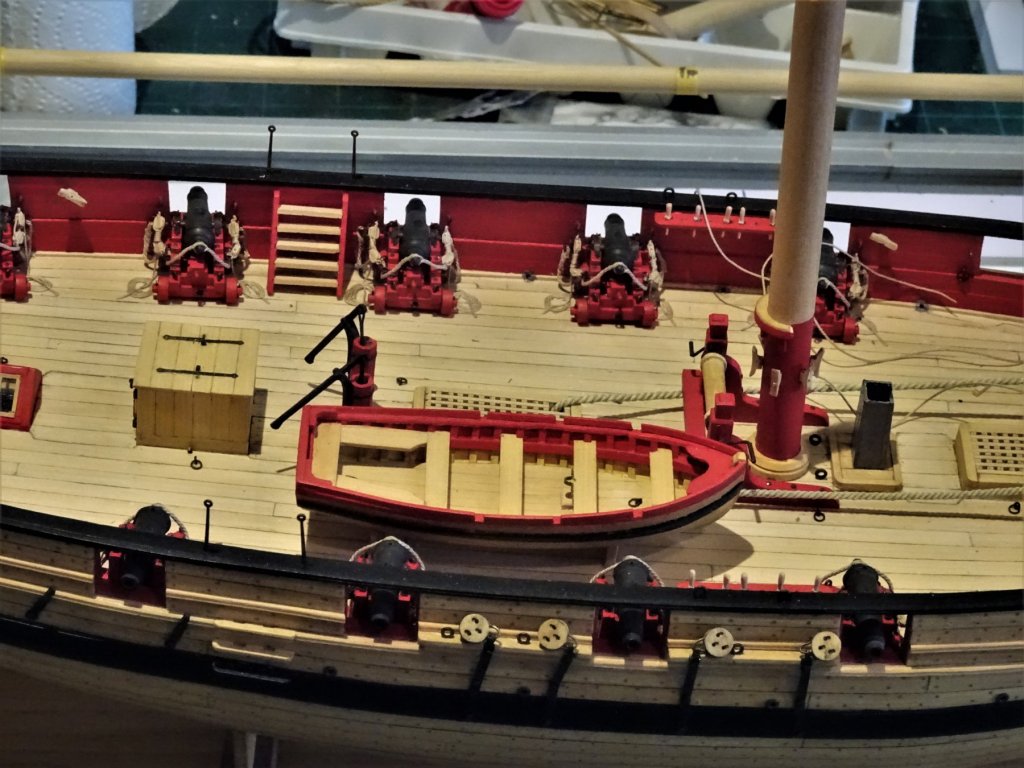
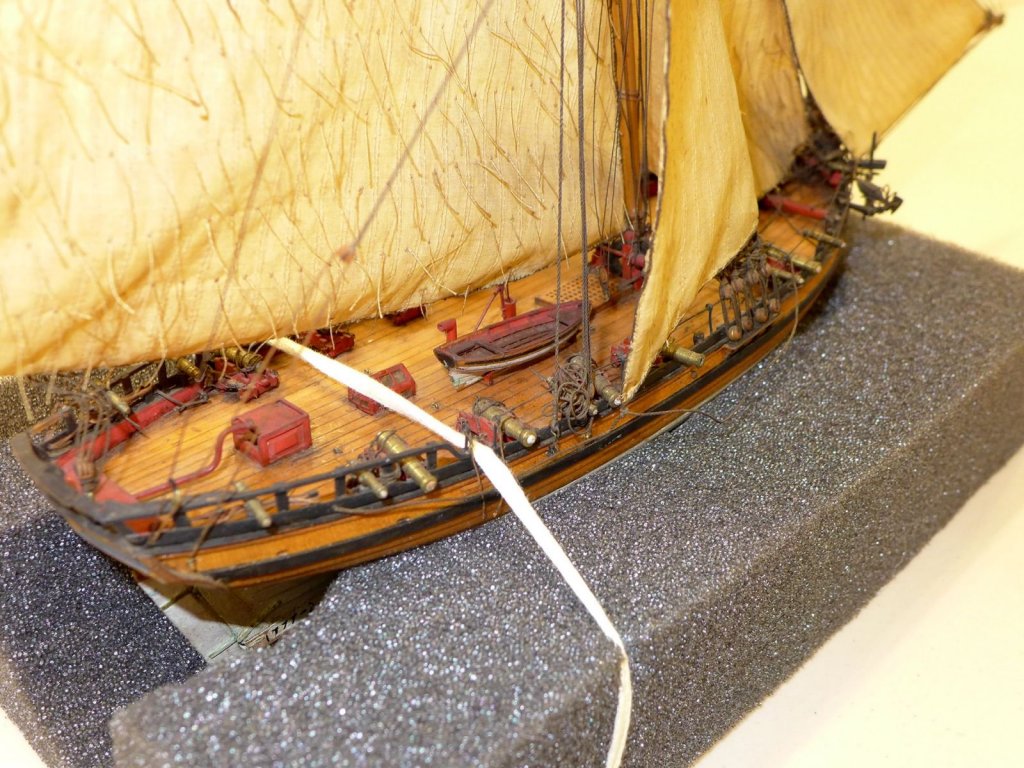
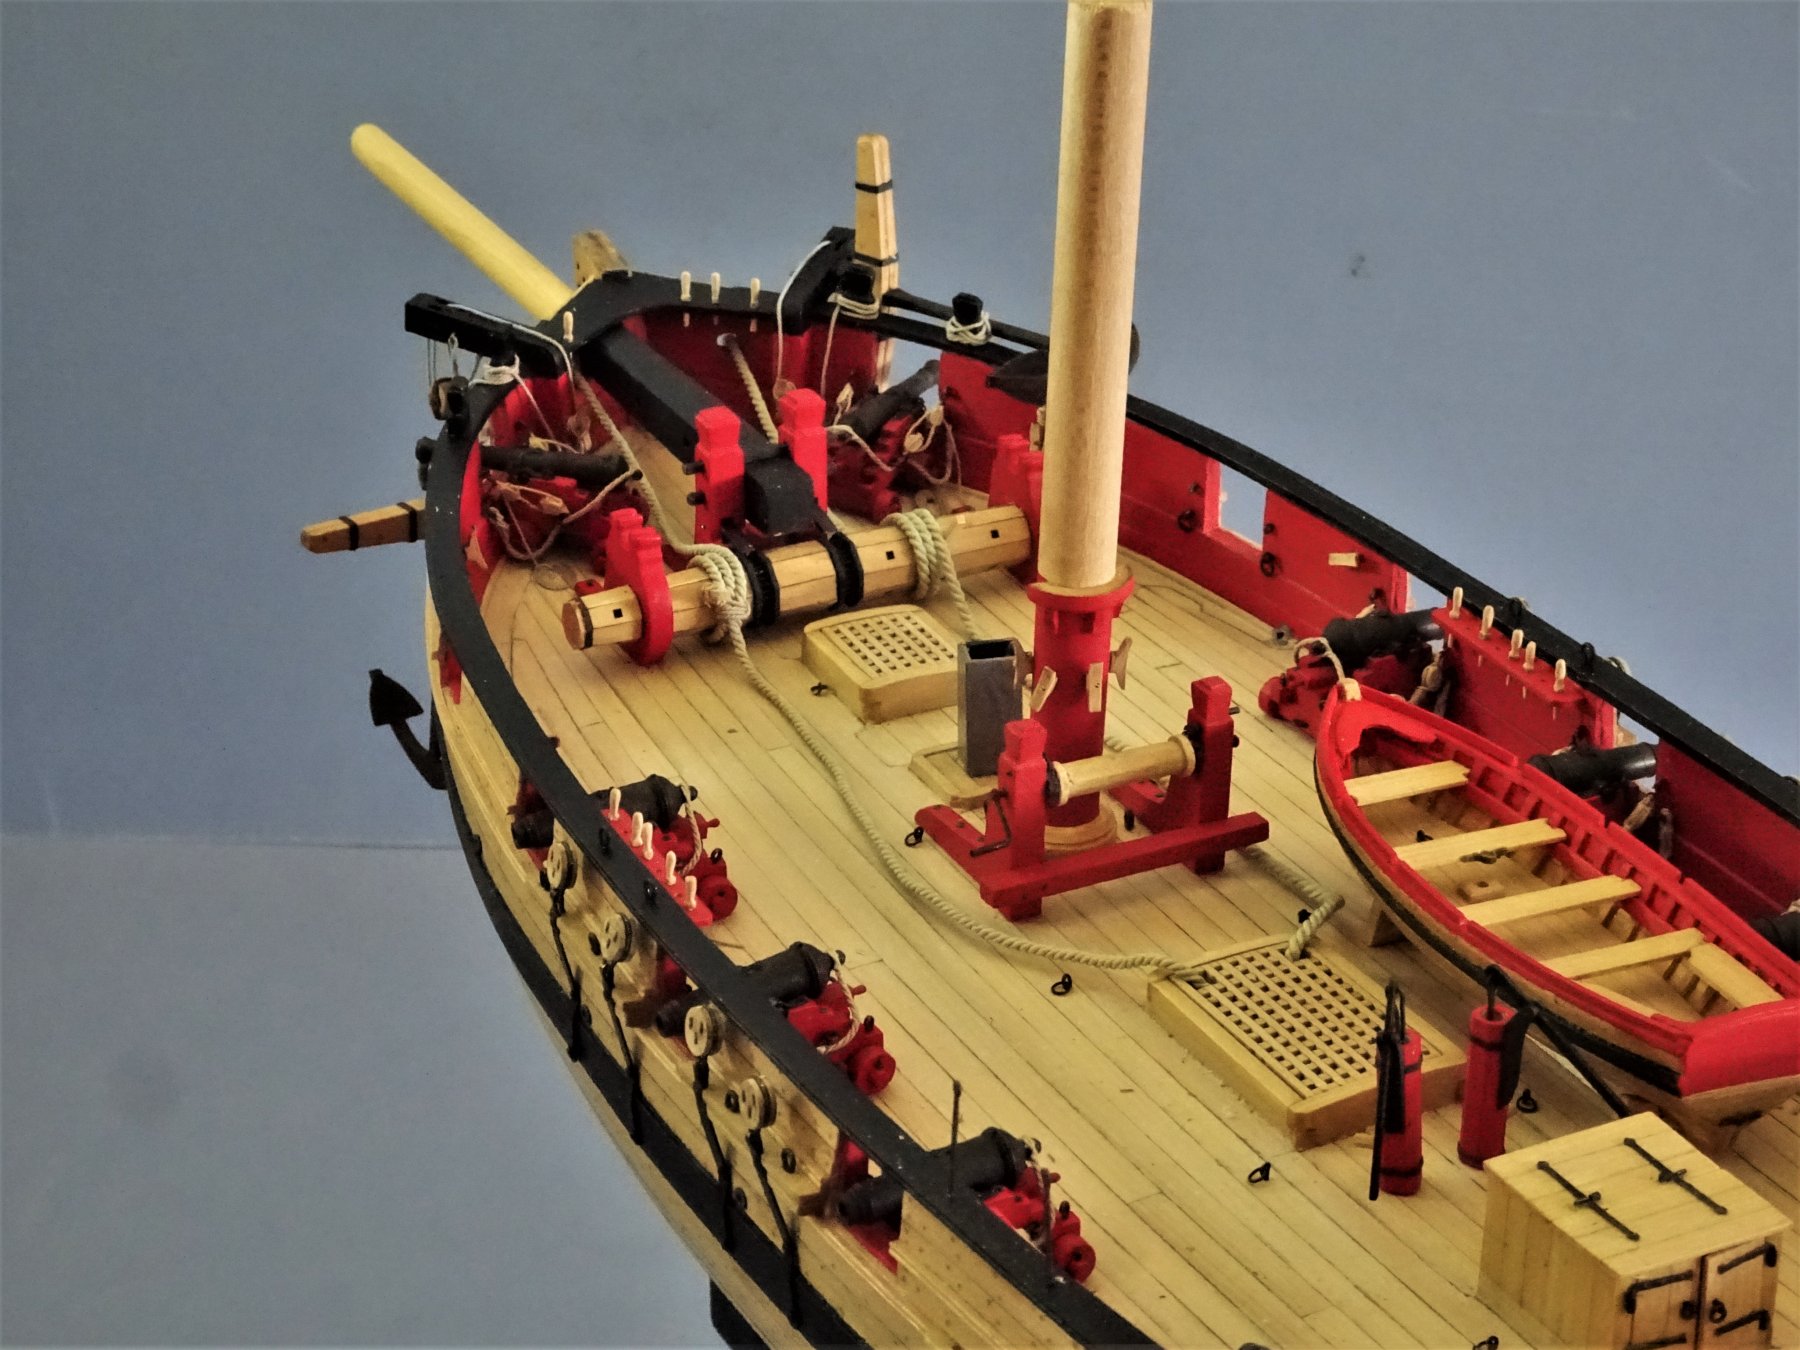
Suffering from modellers block in relation to the anchors, I turn my attention to another tricky subject. Post 87 A boat for Cheerful The only reference photo I could find of a boat onboard a cutter is this one of a model of the Hawke of 1777. Hawke The Cutter Alert book by Peter Goodwin indicates a boat stored on the centre line but from the plans there is room only for a 13' boat. On Cheerful in this position a boat of only 10.5' could be accommodated. The Model Shipways kit of a 1:48 scale Longboat would be in scale but is far too large for a deck stowed boat, and at 26' is on the large size for a towed boat. Before I consider scratching a boat as I did for Pegasus, I knocked up a version of a 14' cutter to assess whether I like the look of a boat on Cheerful's deck . 8424 The boat is based on a Caldercraft resin hull kitted out with thin boxwood planking and fittings. 8425 8426 8429 8431 8432(2) 8433(2) 8437 Not quite sure if it's what I'm looking for but I'll leave it in place to see if it grows on me whilst I return to the anchors, and making the boom. B.E. 03/05/2019

.thumb.JPG.d0c8442564e526dccf95e13c43cab408.JPG)
.thumb.JPG.2a0a16210bdaf756033852073ada5f7c.JPG)
- 574 replies
-
- 24
-
-
- cheerful
- Syren Ship Model Company
- (and 1 more)
-
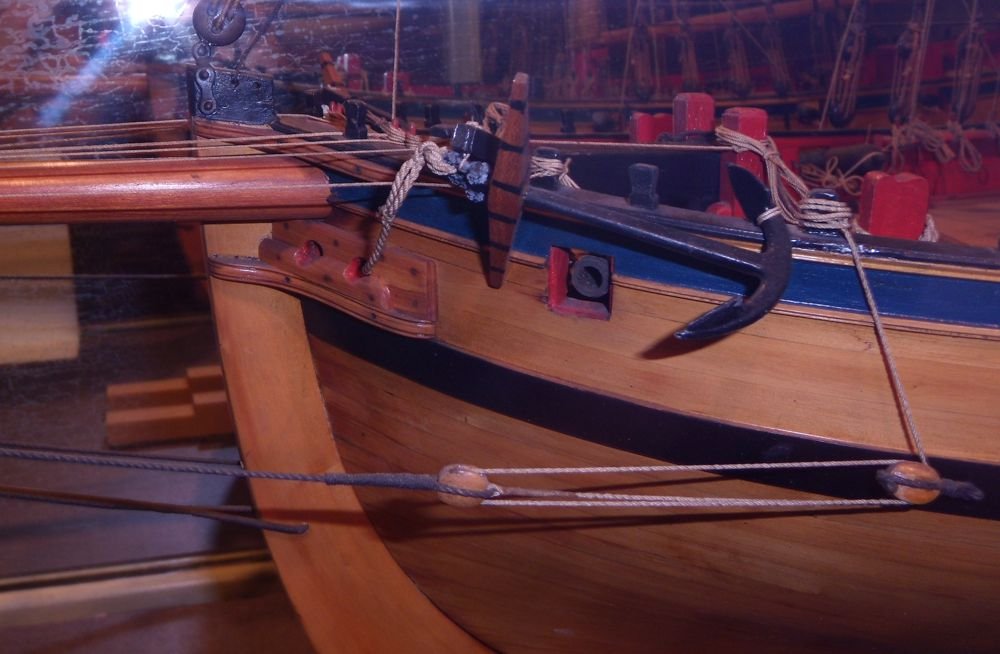
Thank you Dowmer, the anchor set up on vossie's Lady Nelson is exactly how I would expect the arrangement to be on a cutter. However, the relative positions of the timberheads on Cheerful and how the anchor would interfere with the the bow chase gun make this all look awkward. @ Dave - Hope your working hand recovers quickly and you're soon back to complete your Cheerful. Regarding the anchor cables just a wip at present I need to sort out the anchor positions before I fine tune the deck layout. @ Ferit - thank you for your kind words.🙂 Regards, B.E
- 574 replies
-
- 2
-
-
- cheerful
- Syren Ship Model Company
- (and 1 more)
-
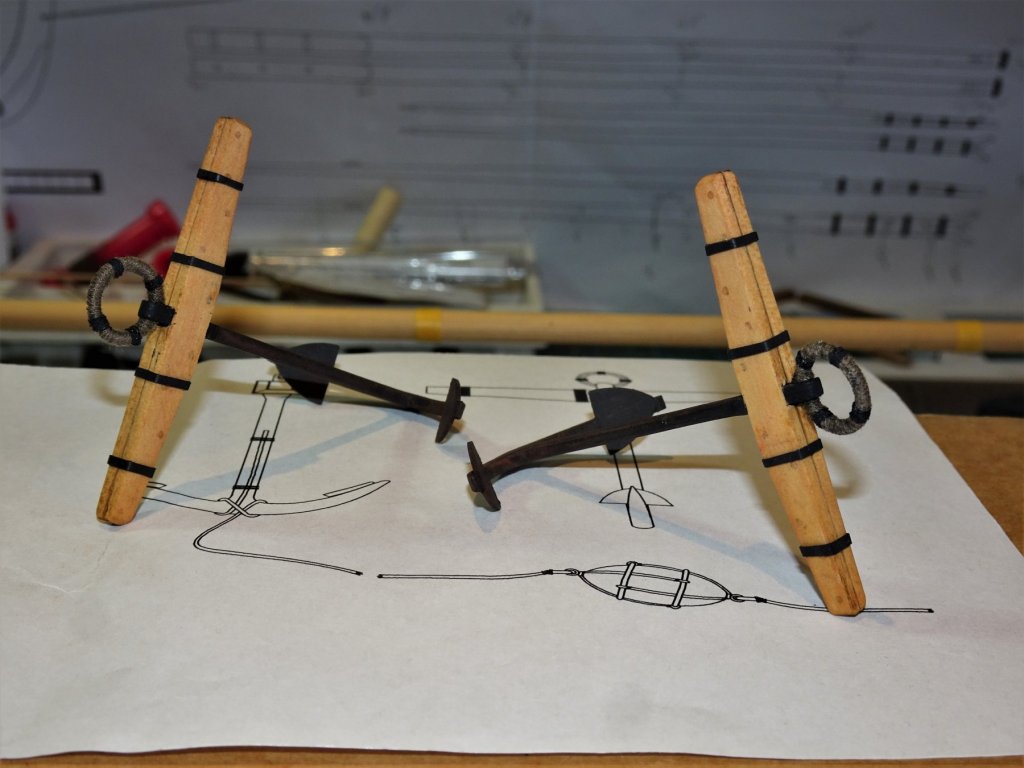
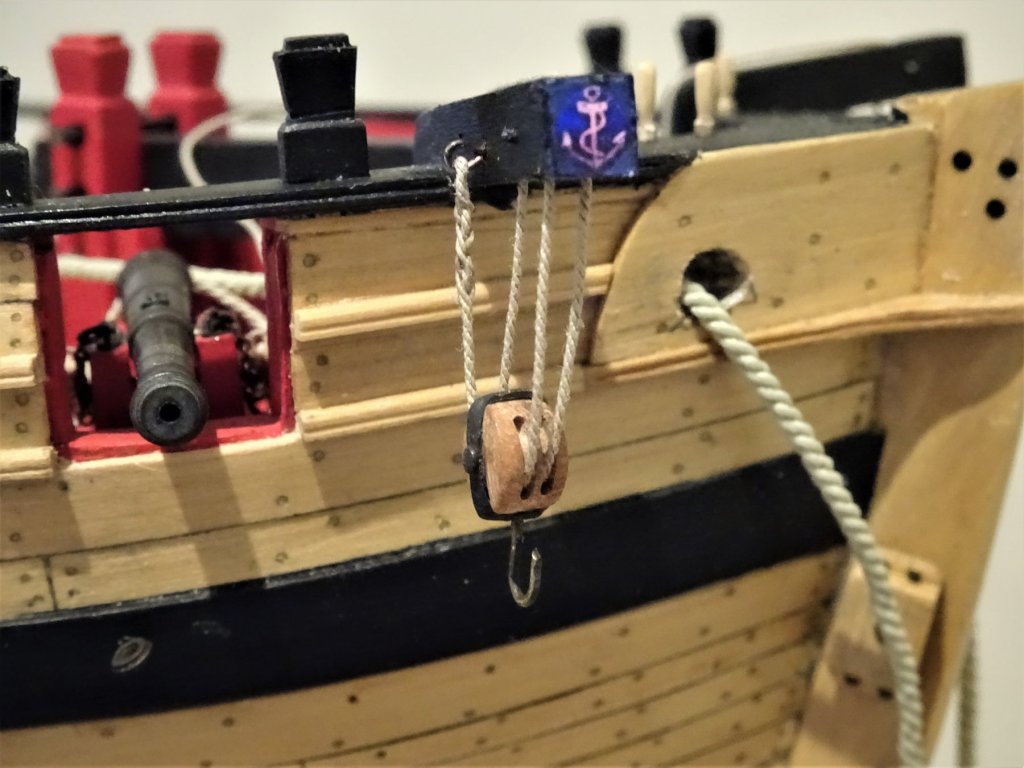
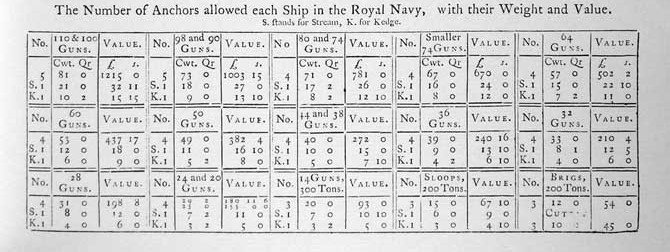
Post 86 Thinking about Anchors ... or ground tackle as we professionals call it. 😉 I have usually purchased metal anchors for my models, I check out the weight sizes according to Steel for the vessel concerned, work out the shank length at scale which gives me the size to buy. Anchors were allocated to ships by relative size and tonnage and Steel gives tables covering all rates. His reference to cutters appears to indicate (3) anchors of 10cwt + a figure for quarters which is not clear. This is at variance with Goodwin's figures in the Alert book which suggests anchors of 18cwt, 15cwt , plus a stream of 6cwt, and a kedge of 3cwt I don't know how Chuck arrived at the sizes for the anchors, they have a shank length of 55mm which scales up to a length of 8' 6" which according to Steel equates to an anchor of 6cwt but I made up the Syren wooden anchor kits, and in truth I do like the look of them. I used a toned down black paint for the anchors followed by weathering powder, dark brown and a smidge of rust. For the puddening of the anchor ring I used 0.30mm line (2" circ at scale) and 0.1mm line ¾" circ at scale) The stocks I drilled and pegged and coated with wipe-on poly. 8394 To represent the iron stock bands I used my favourite medium of slices of heat shrinkable rubber tubing. A short blast from the hairdryer on top heat and it moulds securely to the stock. Rigging the anchors I am trying out various arrangements, mainly using John Harland's reference work, Seamanship in the age of Sail. In relation to anchor cables and windlasses he describes thus: The cable is taken three times around the barrel, the turns coming off the top, the inboard end being kept to the outer end to facilitate the turns. 8402 8404 The cable is 1.5mm dia stuff equivalent to a 9" circ cable. The Alert cable is given as 11½" circ - 1.9mm ø at scale. I decided to stick with 1.5mm stuff. 8408 8409 Normans (wooden pegs) have been inserted into heaver holes to which the cables will be seized. This is a stylistic arrangement to display the run of the cables around the windlass and onto the anchor ring. I continued to rig the Cat blocks and falls using a 6mm double block with the ironwork represented once again by a slice of heat shrink tubing. 8418 8420 That is the easy bit, but as with other questions relating to Cheerful, positioning the anchors is a different story, and one that is giving me a headache, and brought me at least for the present, to a shuddering halt. 😖 B.E. 01/05/2019

- 574 replies
-
- 24
-
-
- cheerful
- Syren Ship Model Company
- (and 1 more)
-
Wales for Mermaid
Blue Ensign replied to Cabbie's topic in Building, Framing, Planking and plating a ships hull and deck
Hi Chris, By patterned planking I presume you mean Top and Butt or Anchor stock planking? I have not seen such an arrangement on cutters and did not use it on Cheerful, but wales were not one long strip and there were butt joints, as with other planks. For ease of fitting such joints can be scribed into the wales post fitting. If you feel adventurous you could add two or three scarf joints along the wale line, but in practice as the wales are usually painted black they are not very obvious. Cheers, B.E. -
Thank you Vossie and Ian. Peter Goodwin in his book The Cutter Alert makes reference to Admiralty orders specific to the provision of boats for cutters. He cites an order of December 1763 that during winter only one small 4 oared boat should be allocated and that it should be carried rather than towed to avoid being lost. An order of June 1779 mentions 16' boats for cutters, another in July 1783 recommends the addition of a second boat, and in September 1793 an order decreed that cutters employed against smuggling should replace their 18' boat with one of 20' On Cheerful only a small boat could be carried on deck so it is more than likely a larger one was towed. In the Alert book there is a photo of the model of the cutter Hawke carrying a small boat on the port side of the deck. I am playing around with what would be a 14' cutter or Jolly boat for deck storage. B.E.
- 574 replies
-
- 4
-
-
- cheerful
- Syren Ship Model Company
- (and 1 more)
-
Thank you Dave. A Red Ensign would be my flag of choice too. B.E.
- 574 replies
-
- 2
-
-
- cheerful
- Syren Ship Model Company
- (and 1 more)
-
Thank you Christian, and Peter much appreciated.🙂 @ Martin - Space is a real issue Martin, but unrigged I can display her to good effect. As far as my next project might be, I do have two of Chuck's other kits beneath the bench. I may return to the Belay pins, I was just too idle to get the lathe out. 🙄 @ Chuck - Thank you for your approval that means a lot to us students of your art. Even unrigged I think she presents a fine model, and I think a major credit should go to yourself whose design, plans, wonderful little mini kits, and fine example have indeed made this such a pleasure to build. I am thinking of adding the boom and of course the anchors. I am also thinking about a boat, Cheerful would certainly have carried at least one, probably two, but space onboard is severely restricted. There is not room between the winch and the pumps, and storage of even a modest 14' four oared boat stored on deck either port or starboard would effectively fill the deck space. I'm certainly going to look at it tho'. Regards, B.E.
- 574 replies
-
- 2
-
-
- cheerful
- Syren Ship Model Company
- (and 1 more)
-
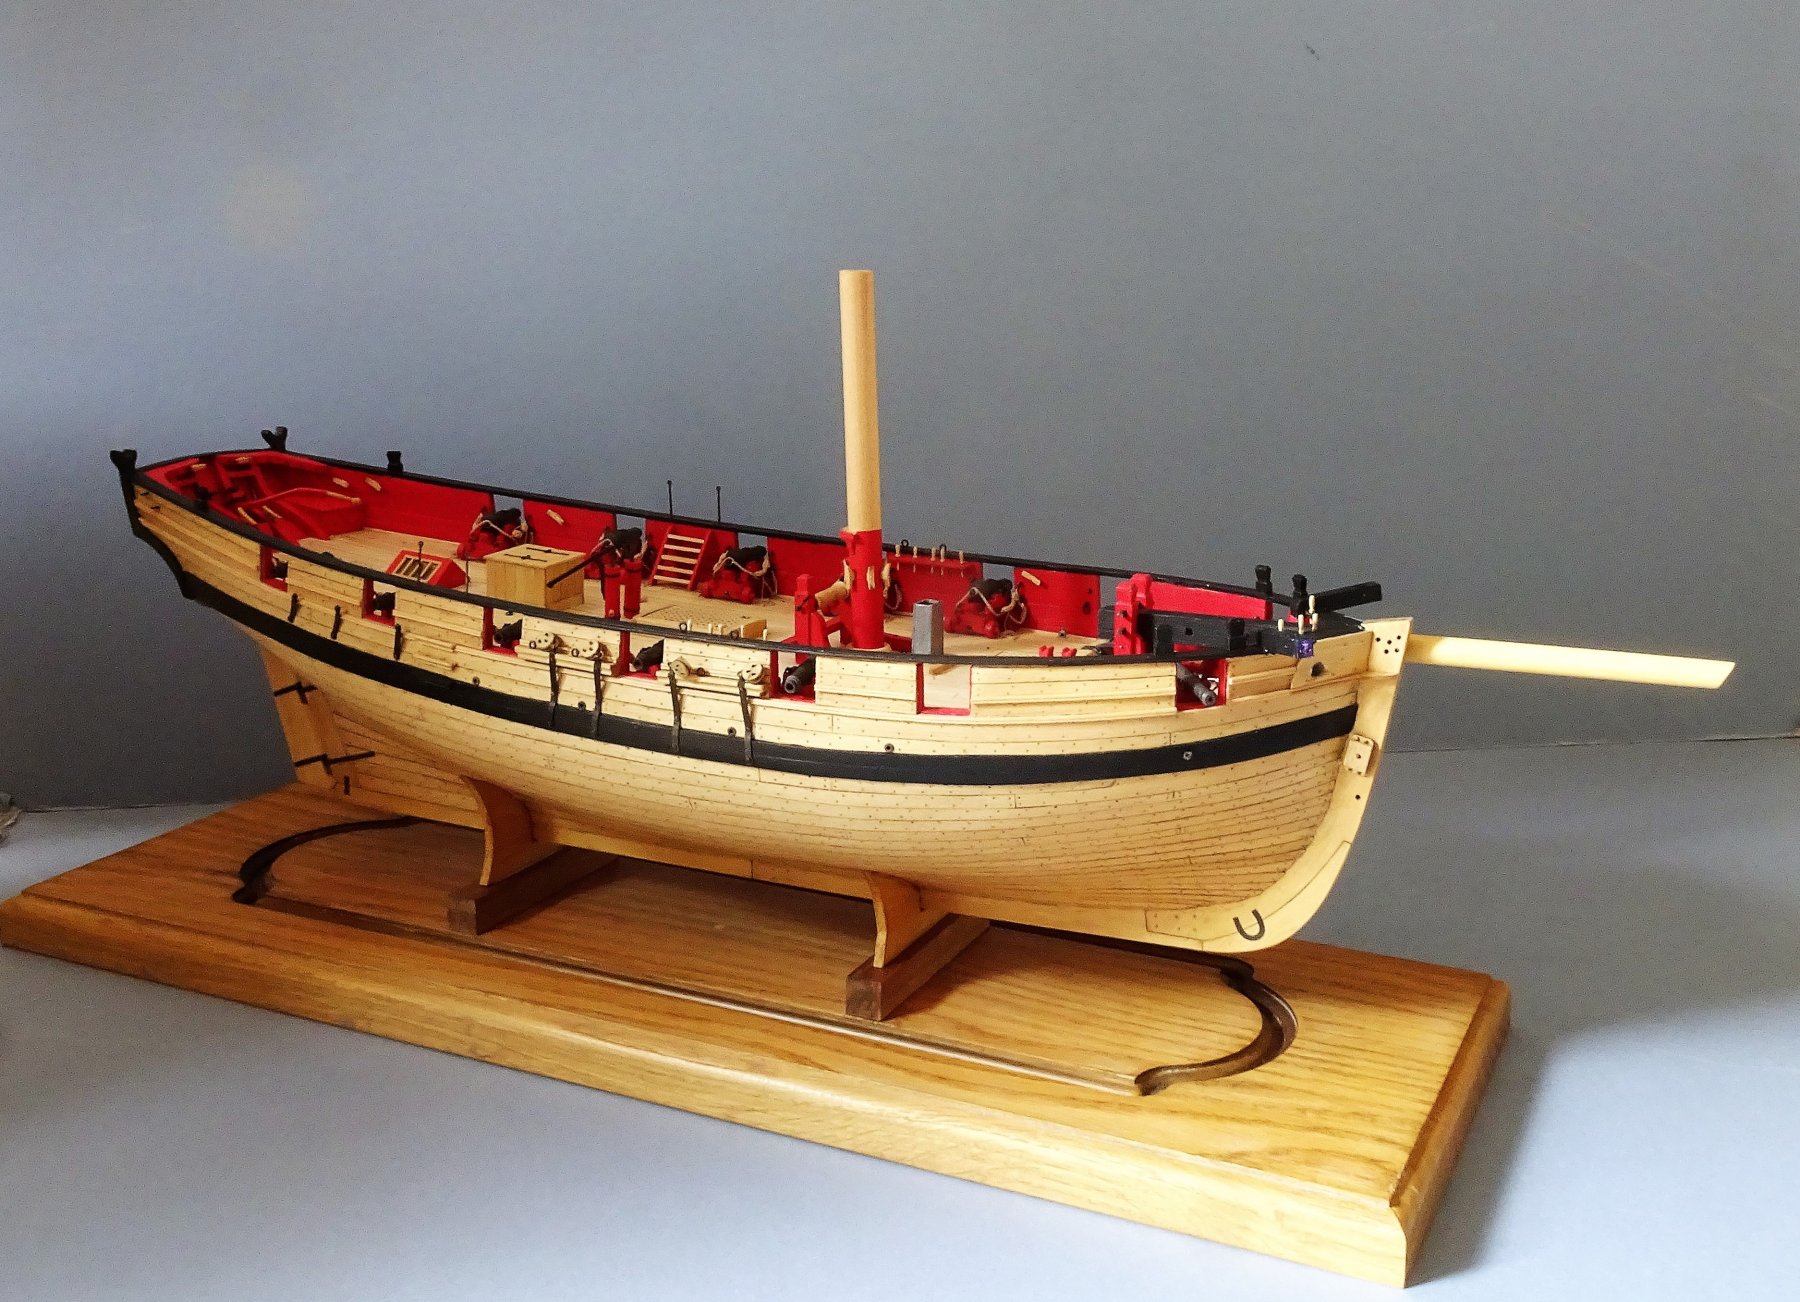
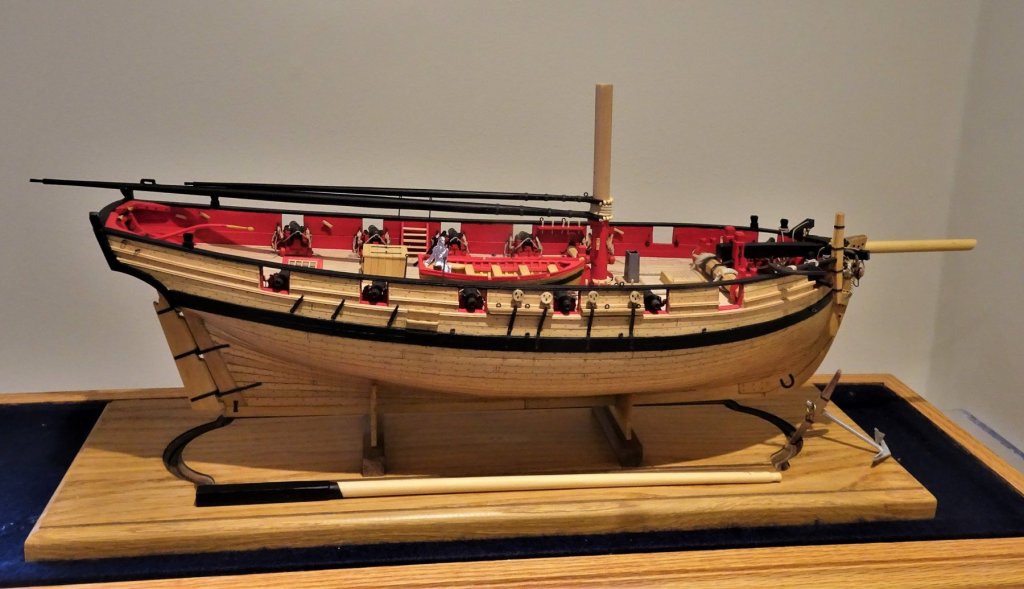
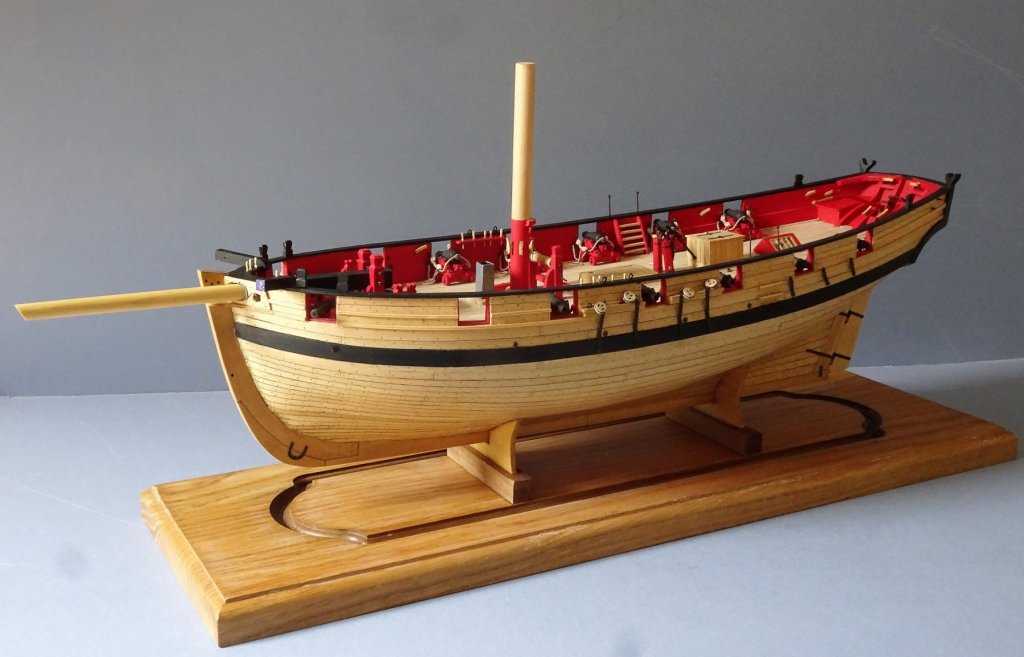
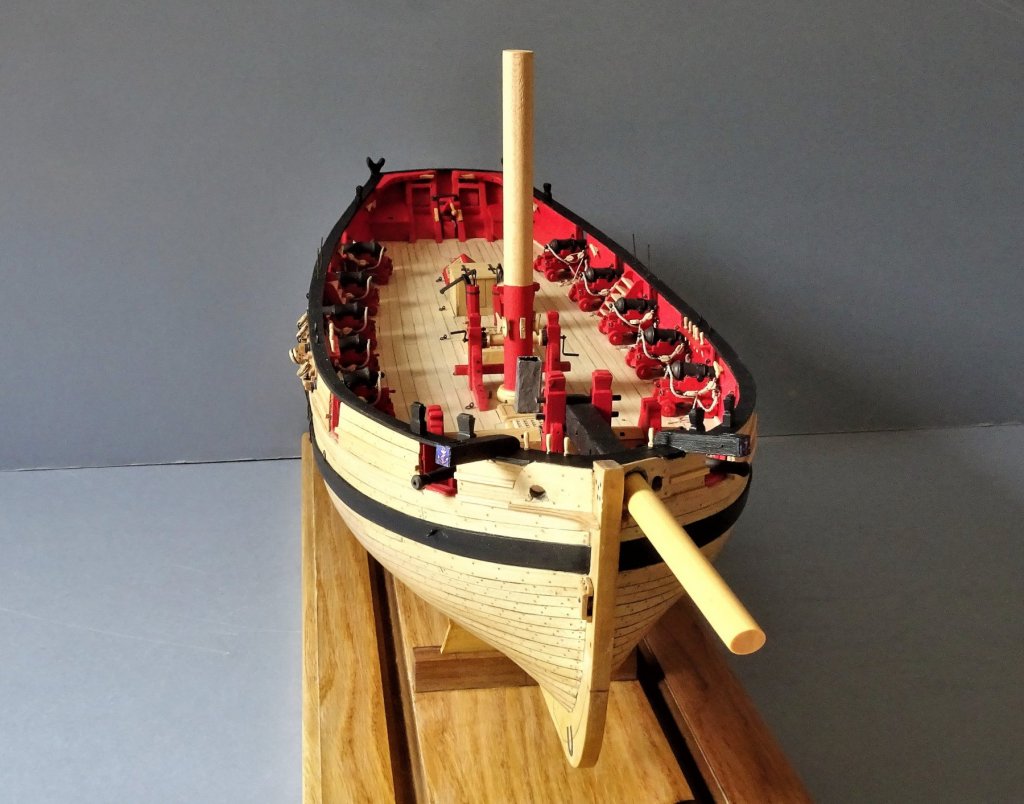
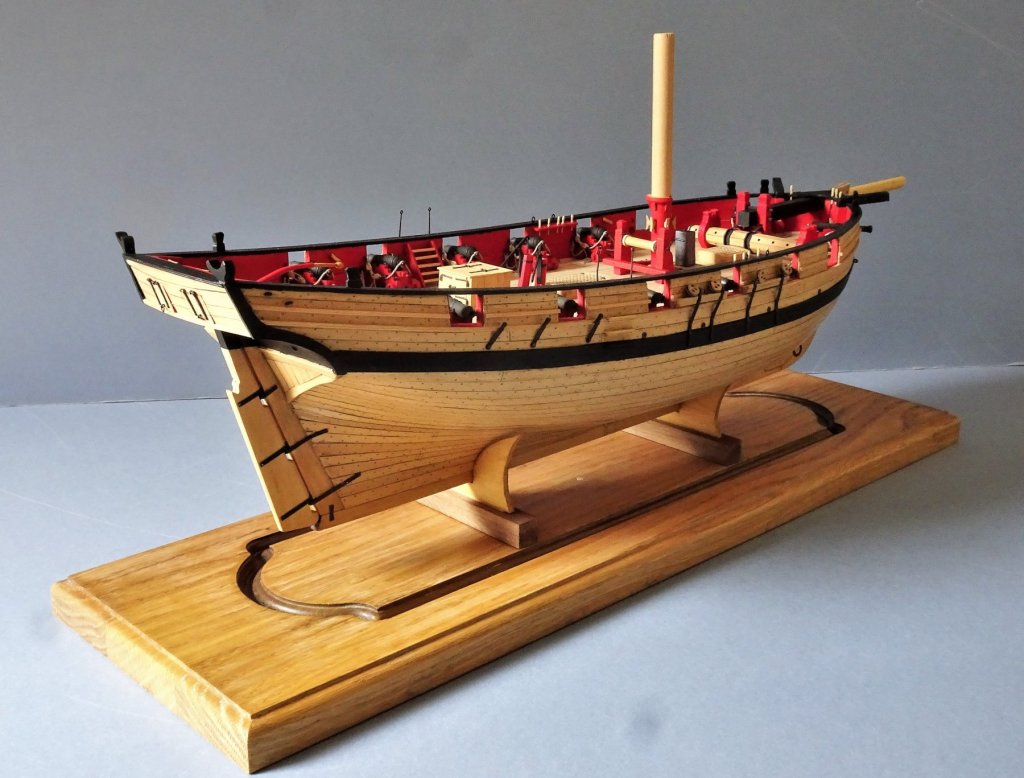
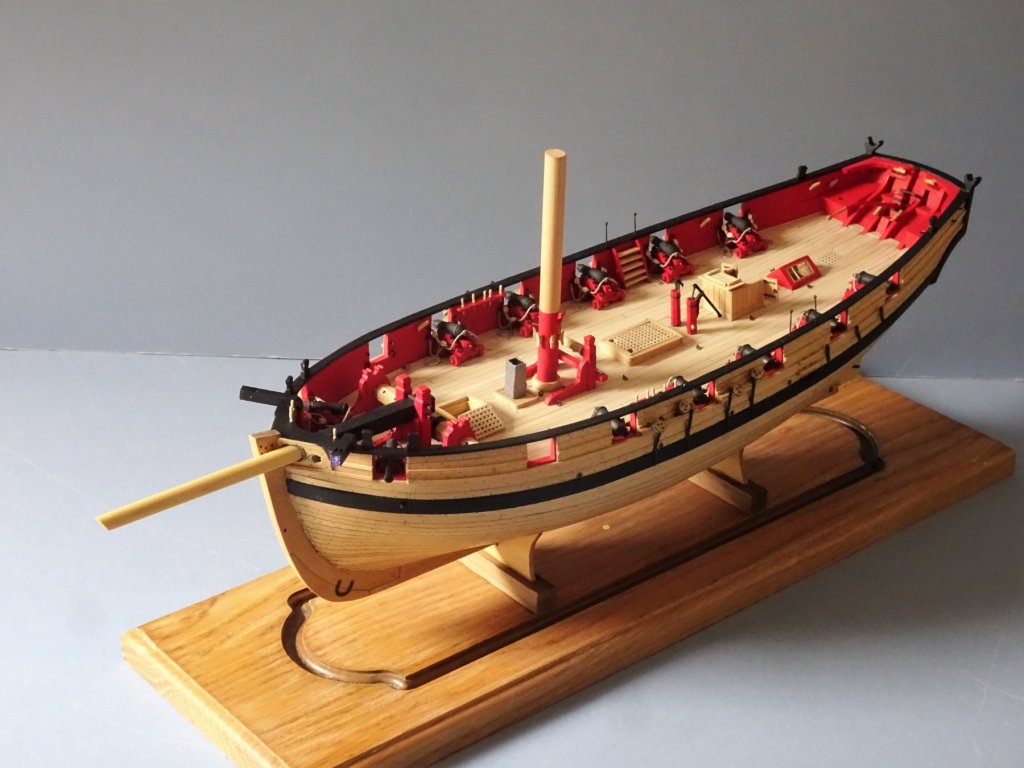
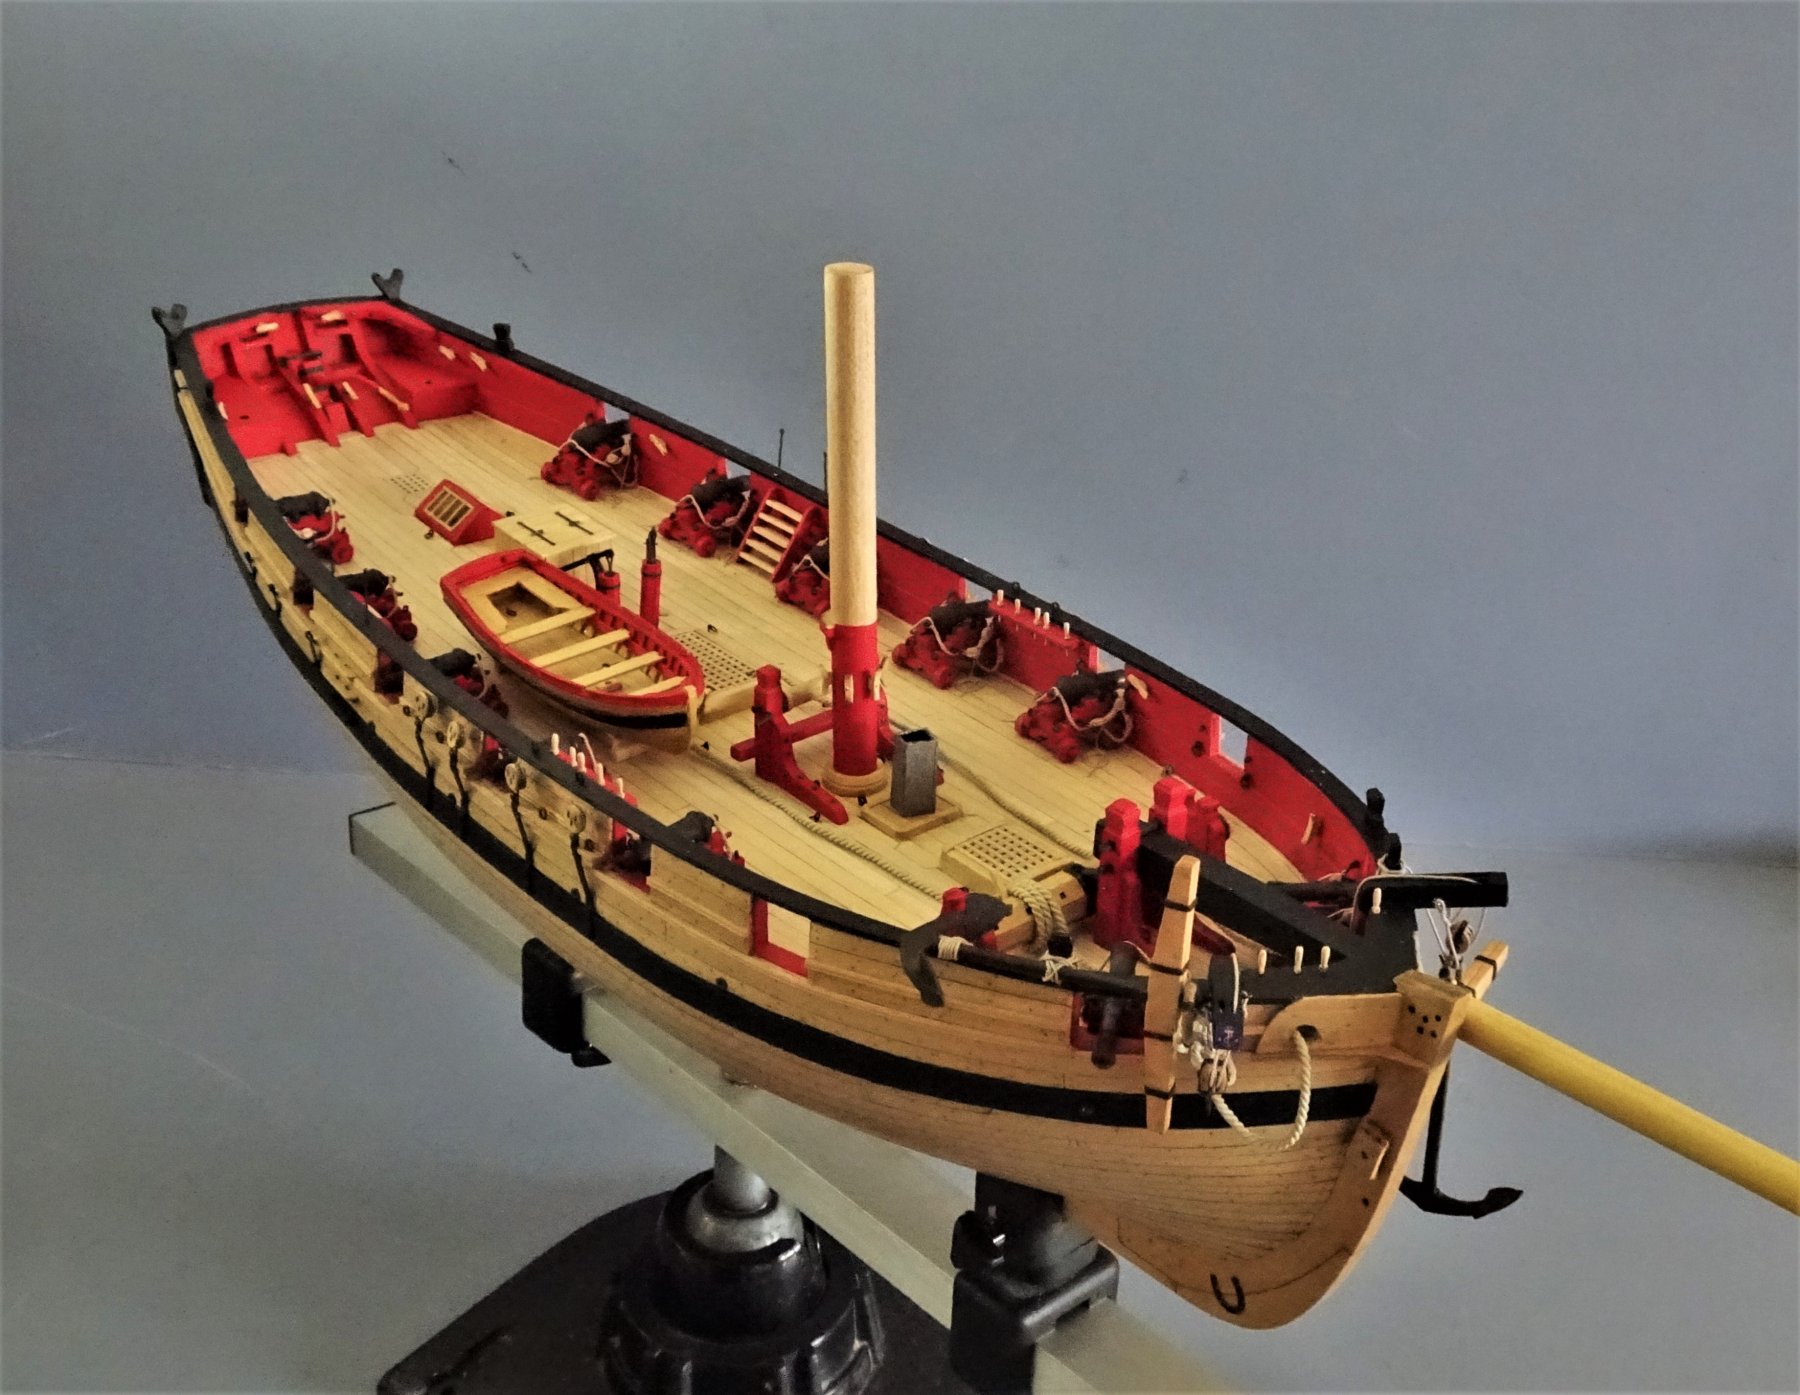
Post 84 A significant milestone is reached So here she is some seventeen months since the keel was laid. 8243 8245 8246 8248 8249 8252 8253 8268 8254 8264 Whether I proceed to mast and rig her is undecided but there is still a fair bit of fiddling to do before I consider her complete. B.E. 24/04/2019


- 574 replies
-
- 34
-
-
- cheerful
- Syren Ship Model Company
- (and 1 more)
-
Thank you Keith, glad you like it, and I hope it will be of some use to you. Regards, B,E,
- 366 replies
-
- 1
-
-
- pegasus
- victory models
- (and 2 more)
.JPG.a1cc45639c2f100489c7614a673b64f7.JPG)
.JPG.1028f1b0a78312301a2b51d411cdbf42.JPG)
.JPG.4fceef4688e5451047f2dd4a44b8036c.JPG)
.JPG.af4b49860b154969e121e7f9d72bea87.JPG)

.JPG.d220533095e7a0c0c72943e649205920.JPG)
.JPG.137781733a52c8fea2803b043adfbb40.JPG)


.JPG.dfbcab2e83aa362c55676bd8a6114549.JPG)
.JPG.68563e10394a681d690e6eeab1feedec.JPG)


.JPG.f3f6bd8c546b1427da962e74ca01ab26.JPG)


.JPG.7ffc80b60699be76708b095501b61e4b.JPG)
.JPG.4cf41b8213aa3a23f587141ee85926a0.JPG)