HOLIDAY DONATION DRIVE - SUPPORT MSW - DO YOUR PART TO KEEP THIS GREAT FORUM GOING!
×
.JPG.ca33079f5815b861e67b9c2cccd37982.JPG)

Blue Ensign
-
Posts
4,564 -
Joined
-
Last visited
Content Type
Profiles
Forums
Gallery
Events
Everything posted by Blue Ensign
-
 Much appreciated Rusty, your Cheerful log has been a constant reference source and inspiration during my build. I wish I had achieved the same cleanness of Hull planking so evident in your fine build. Regards, B.E.
- 574 replies
-
- 2
-

-
- cheerful
- Syren Ship Model Company
- (and 1 more)
-
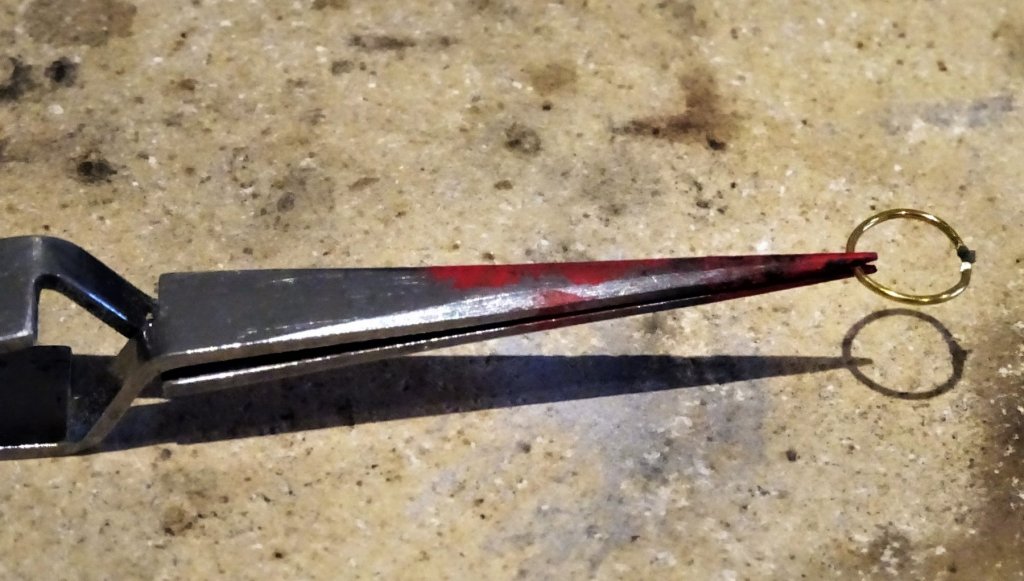
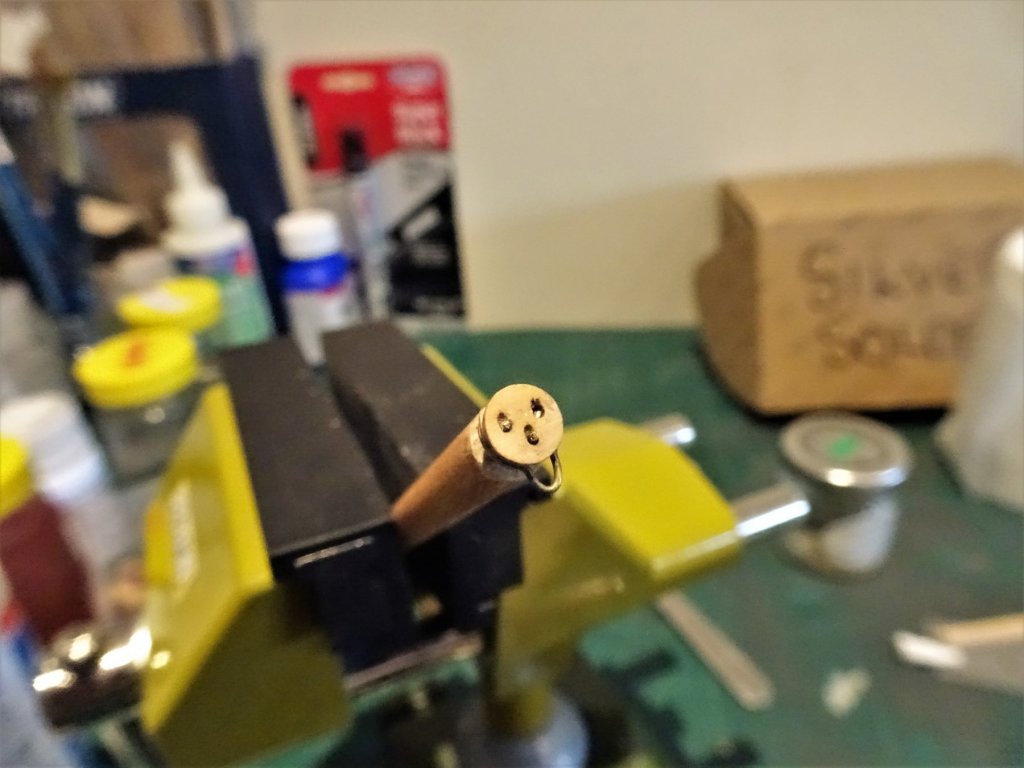
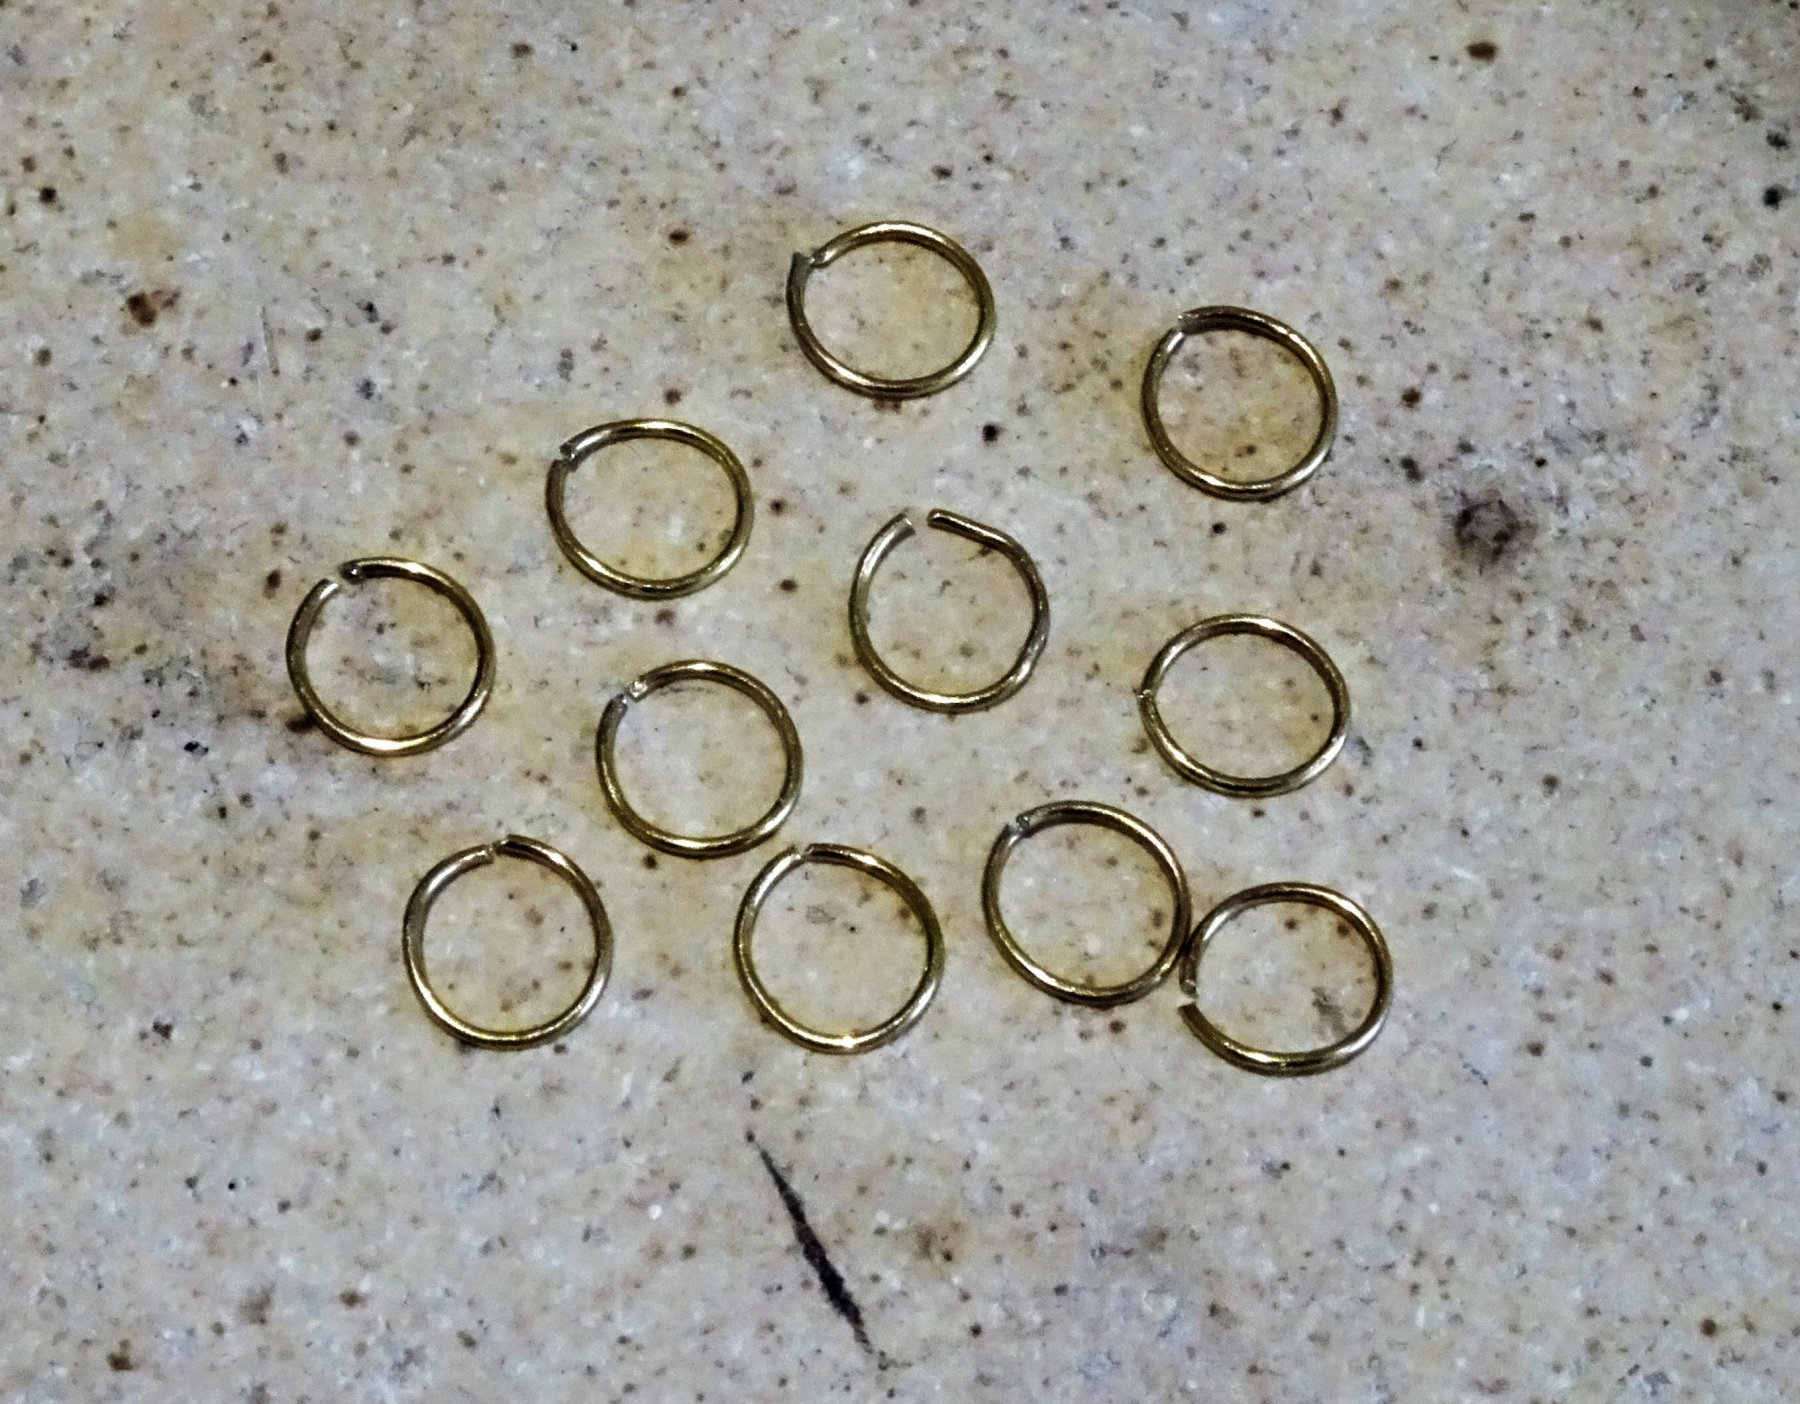
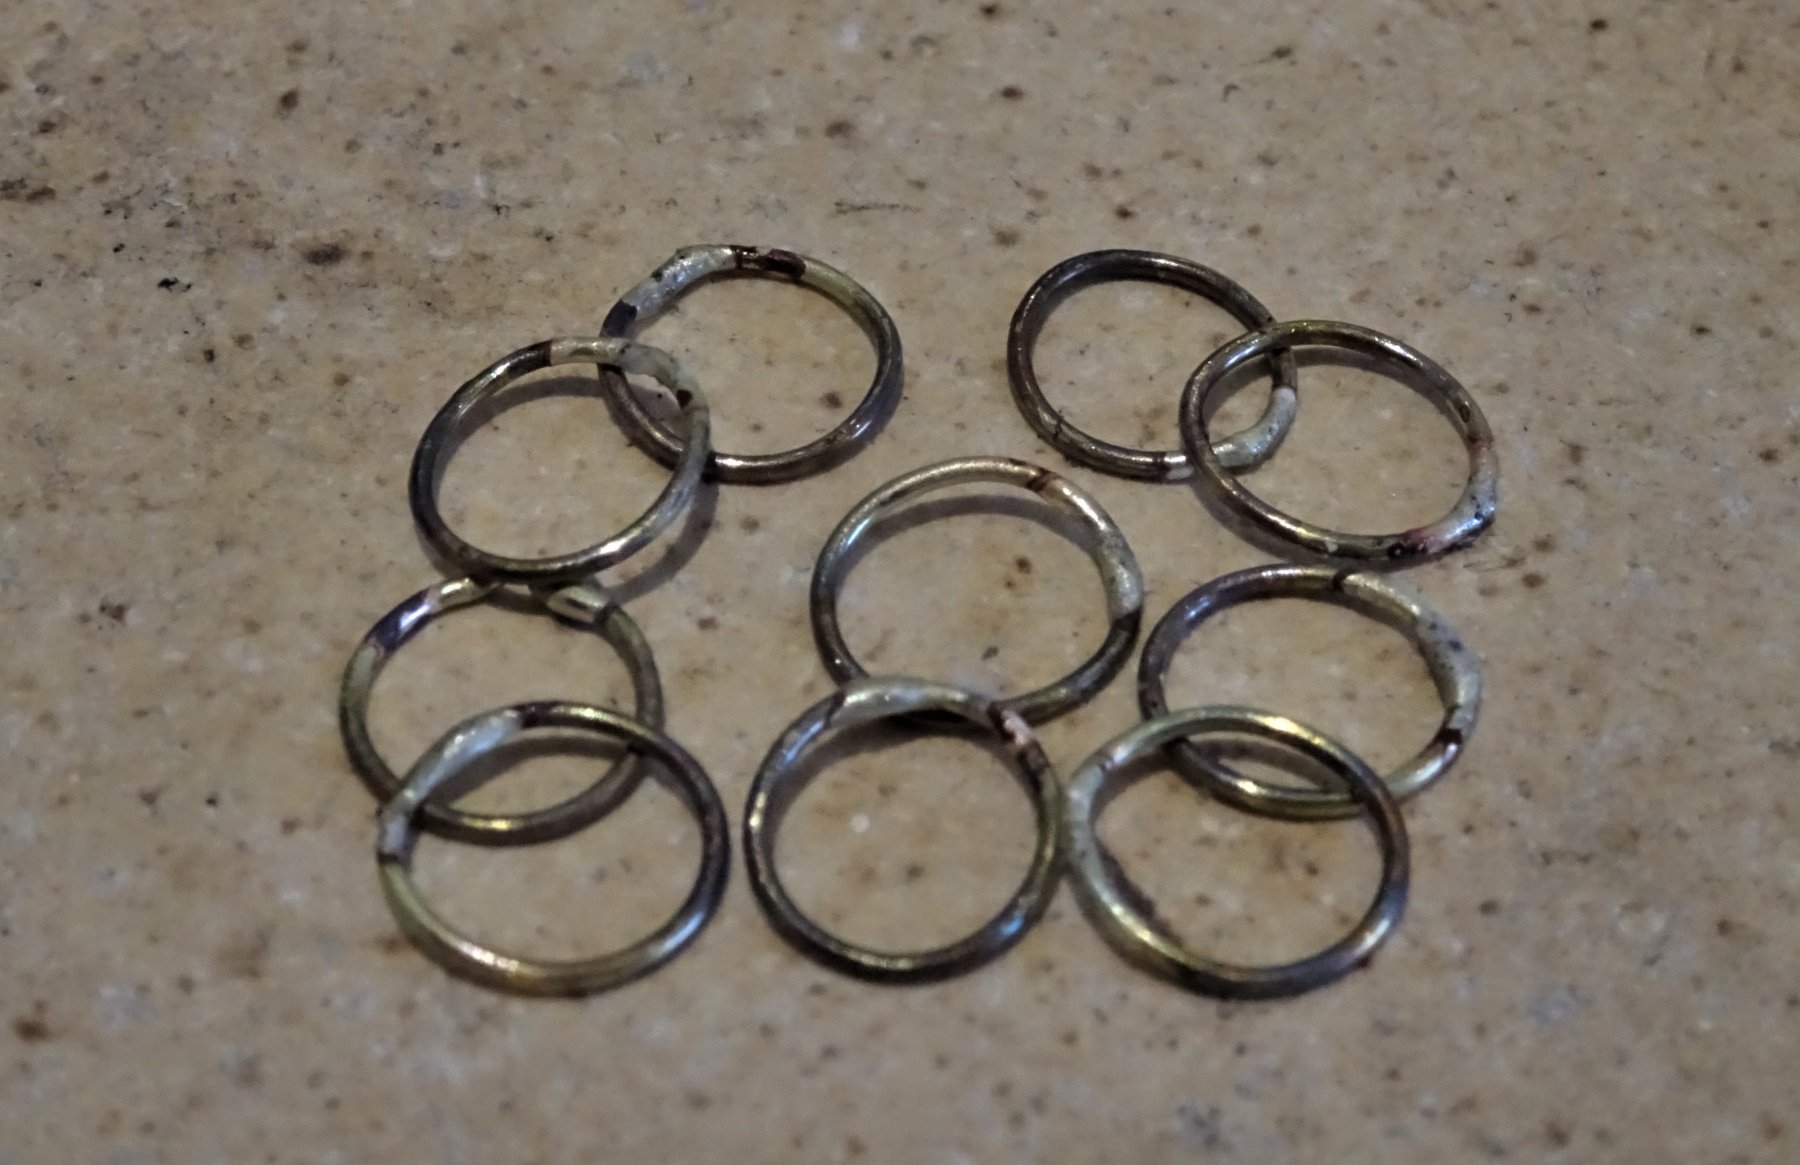
Post 68 Making up the Deadeyes Associated with the Chainplates are the deadeyes and strops. Chuck indicates 6mm deadeyes and 22 gauge wire for the strops. (this is 0.64mm ø (awg) or 0.71mm ø (swg) I used Chuck's self assembly Boxwood deadeye kit, and 0.6mm ø wire. 6051 I sacrificed one deadeye to form a jig to hold the others for char removal, stropping, and cleaning up. Deadeye strops Tricky little beggars these, a ring of wire needs to be formed sufficiently large to just fit over the deadeye, but small enough not to form too large a loop at the bottom to connect with the Chainplate. The process starts with a little bit of best guess to gauge the correct size. 6052 Once I've got the fit, I can proceed to make the number required, each one tested for size on the deadeye jig. 6050 Once formed the ring is cleaned in acid, dipped in de-ionised water before soldering, and quenching once again in the de-ionised water. A small amount of solder paste is applied to the join, a quick blast of the torch, a flash of silver and the jobs done. 6053 Hoping they don't break when the bottom is squeezed with long nose pliers to form the loop. In cleaning up two broke but the rest held good.They are then chemically blackened before fitting. 6055 The completed set with a couple of spares. For security silver soldering is the only way to go with this sort of thing. The whole process took around 4½ hours. I am conscious that the deadeyes need to be level with the underside of the Capping Rail when attached to the Chainplates so I considered it beneficial to complete them in advance. Back to the Chainplates. B.E. 11/02/2019


- 574 replies
-
- 17
-
-
- cheerful
- Syren Ship Model Company
- (and 1 more)
-
Looks wonderful Chris, I don't think I will be able to resist that one ☺️ B.E.
-
Just enjoyed reading thro’ your log Rob, love your approach to the build, and you’re doing a great job. Impressive stuff 👍 Cheers, B.E.
-
My eye is drawn to the 0.3mm line Jason, it looks to have nicer definition. I like the look of frapped side tackles, keeps everything neat and a nice sag is easily achieved. B.E.
-
Sorry for your feelings of dissatisfaction Bob, I guess we've all been there at some point with our modelling results, but nevertheless she looks a nice model to me. Wishing you better health in 2019 and a renewed enjoyment in your next project. Regards, B.E.
- 359 replies
-
- 5
-
-
- prince de neufchatel
- model shipways
- (and 1 more)
-
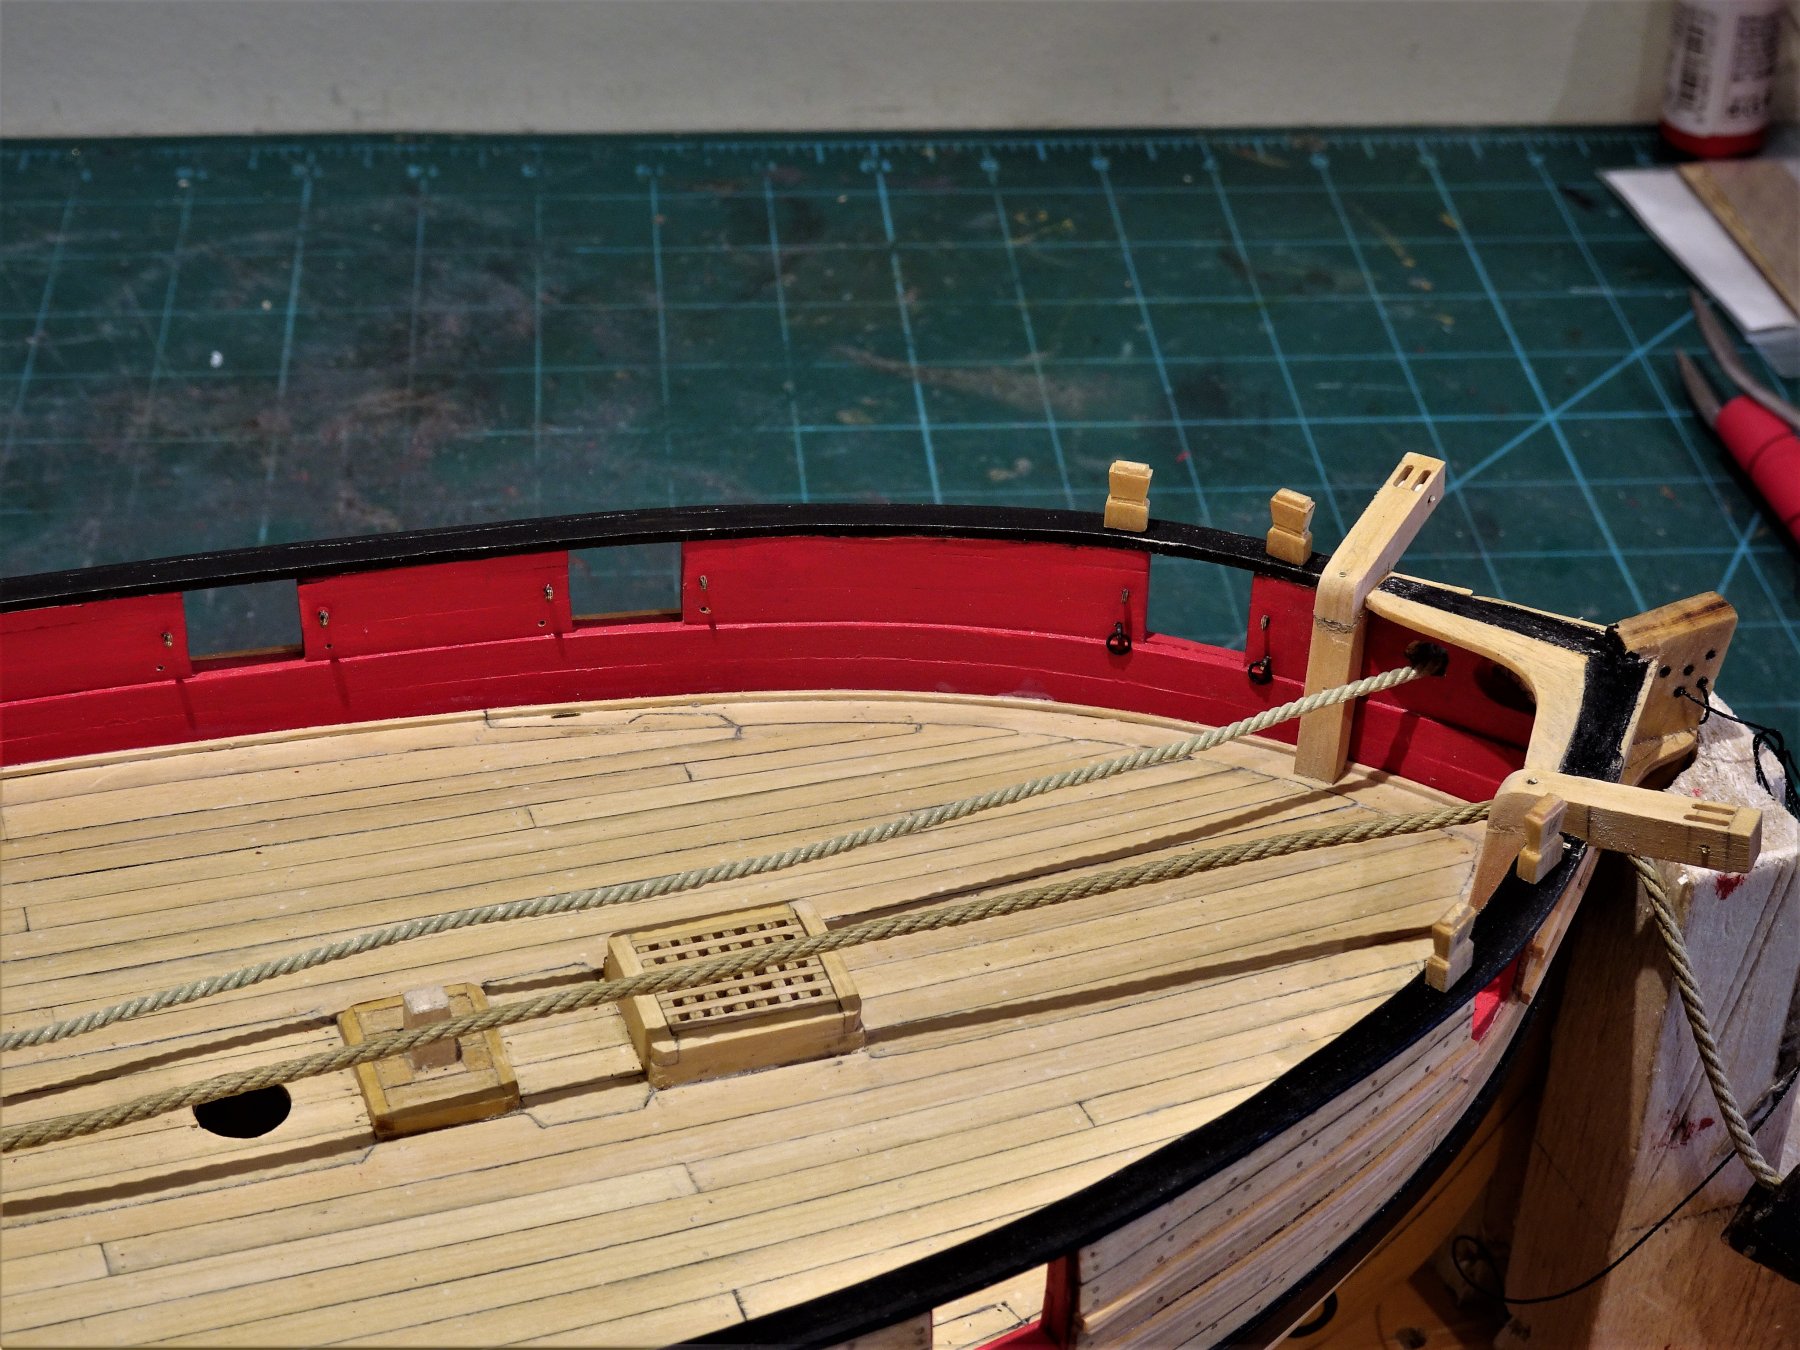
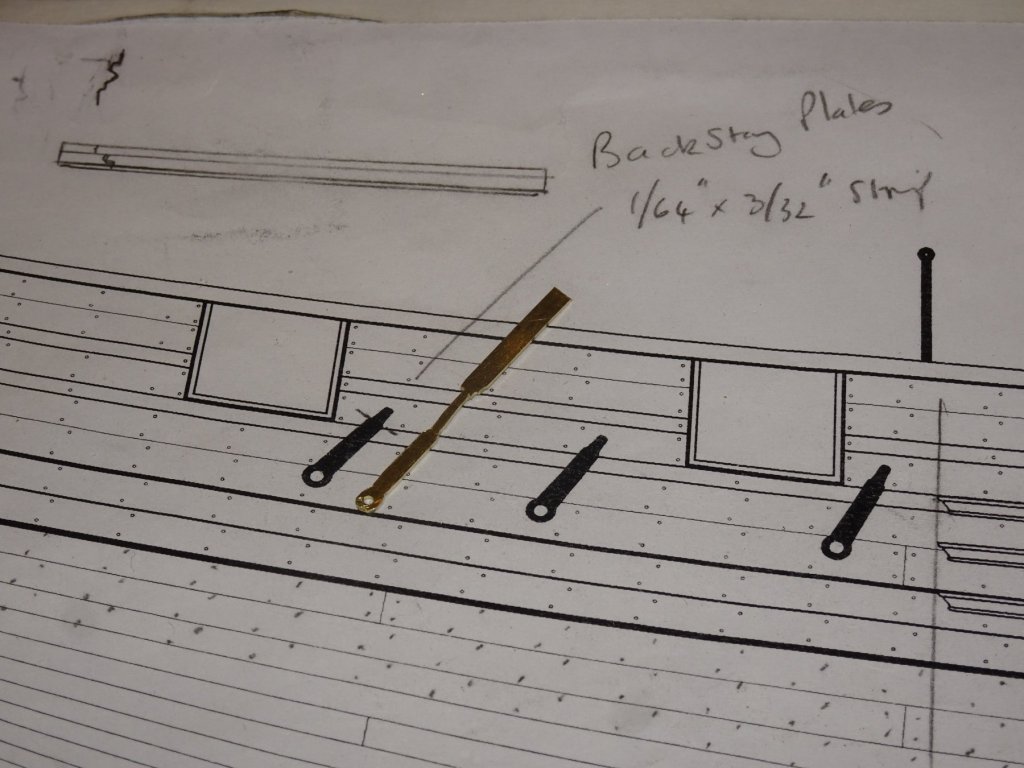
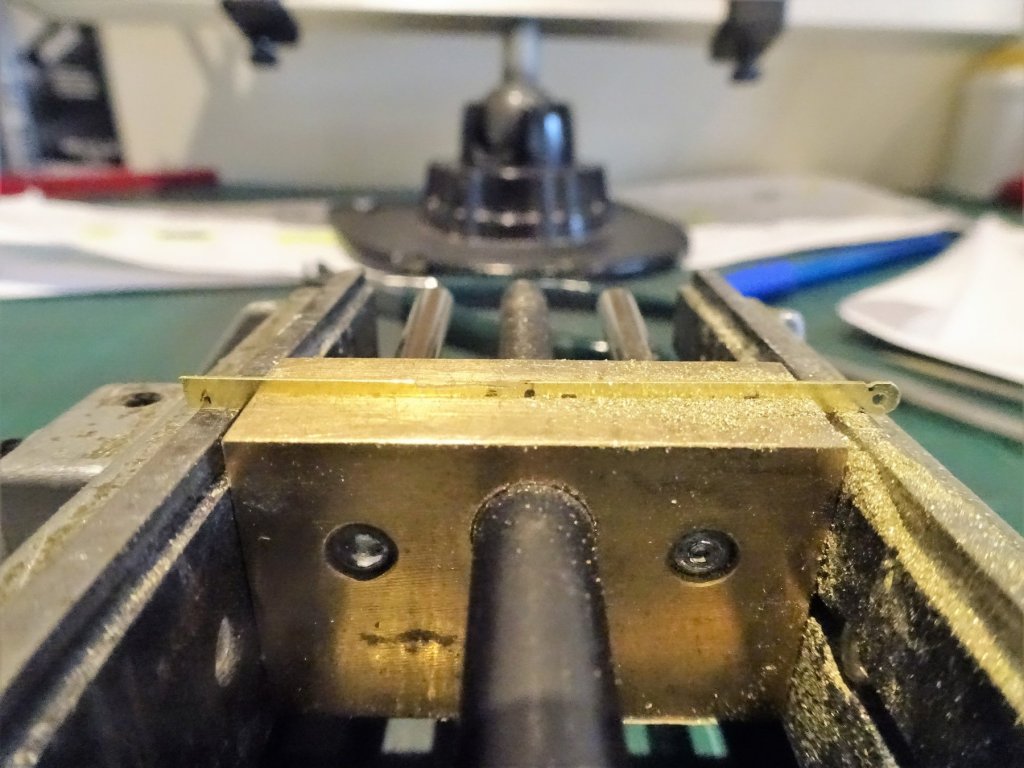
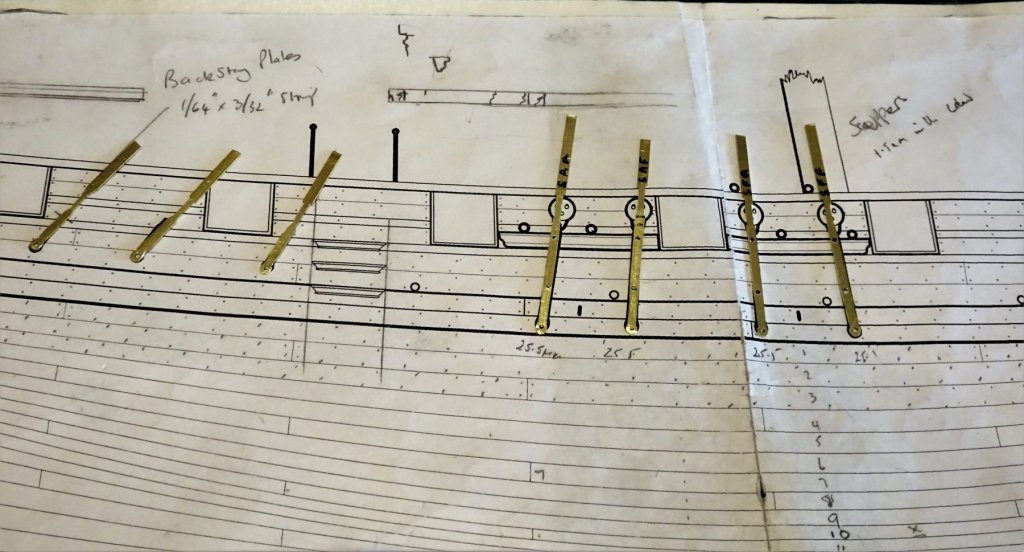
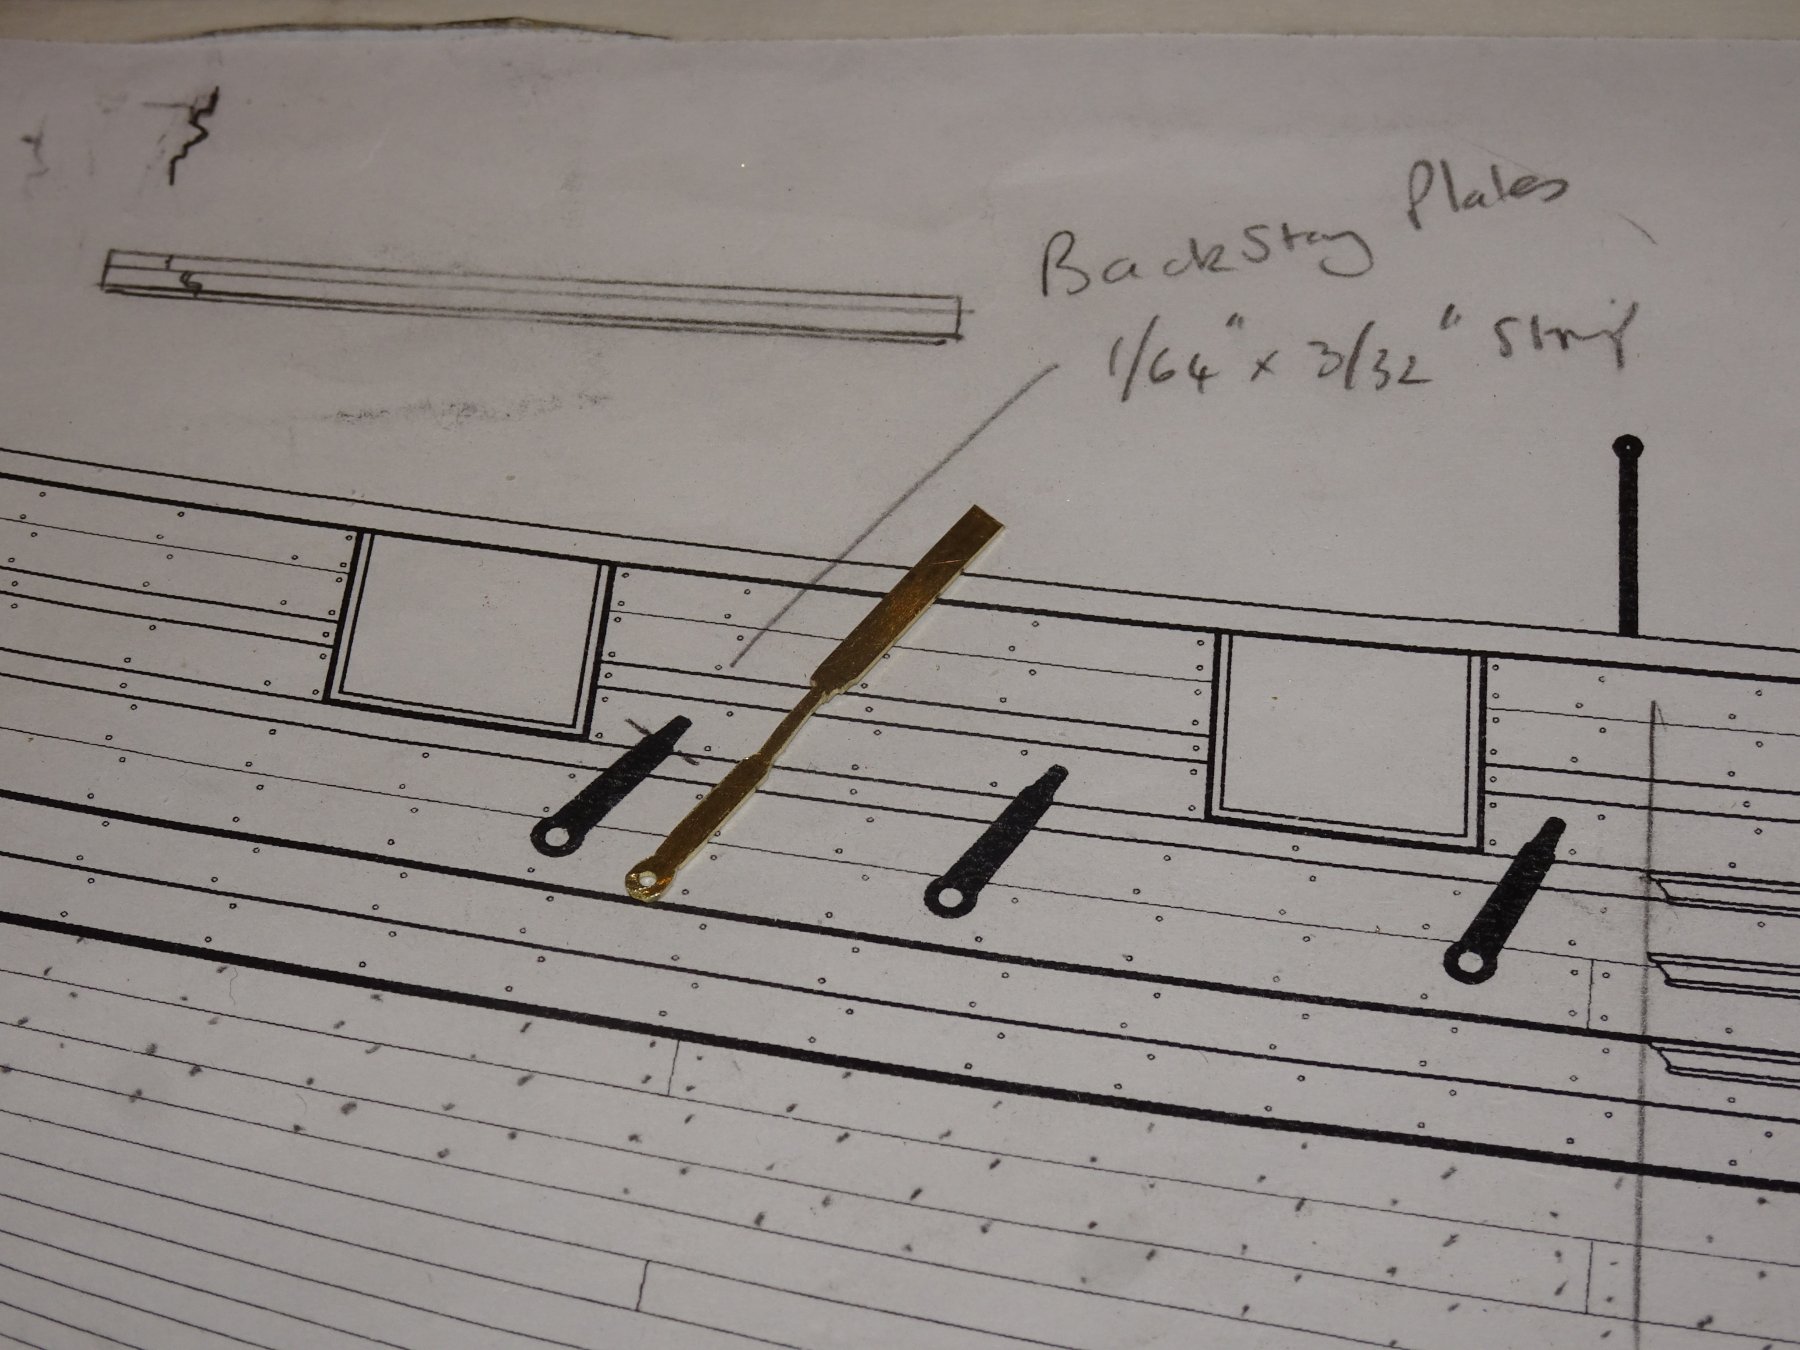
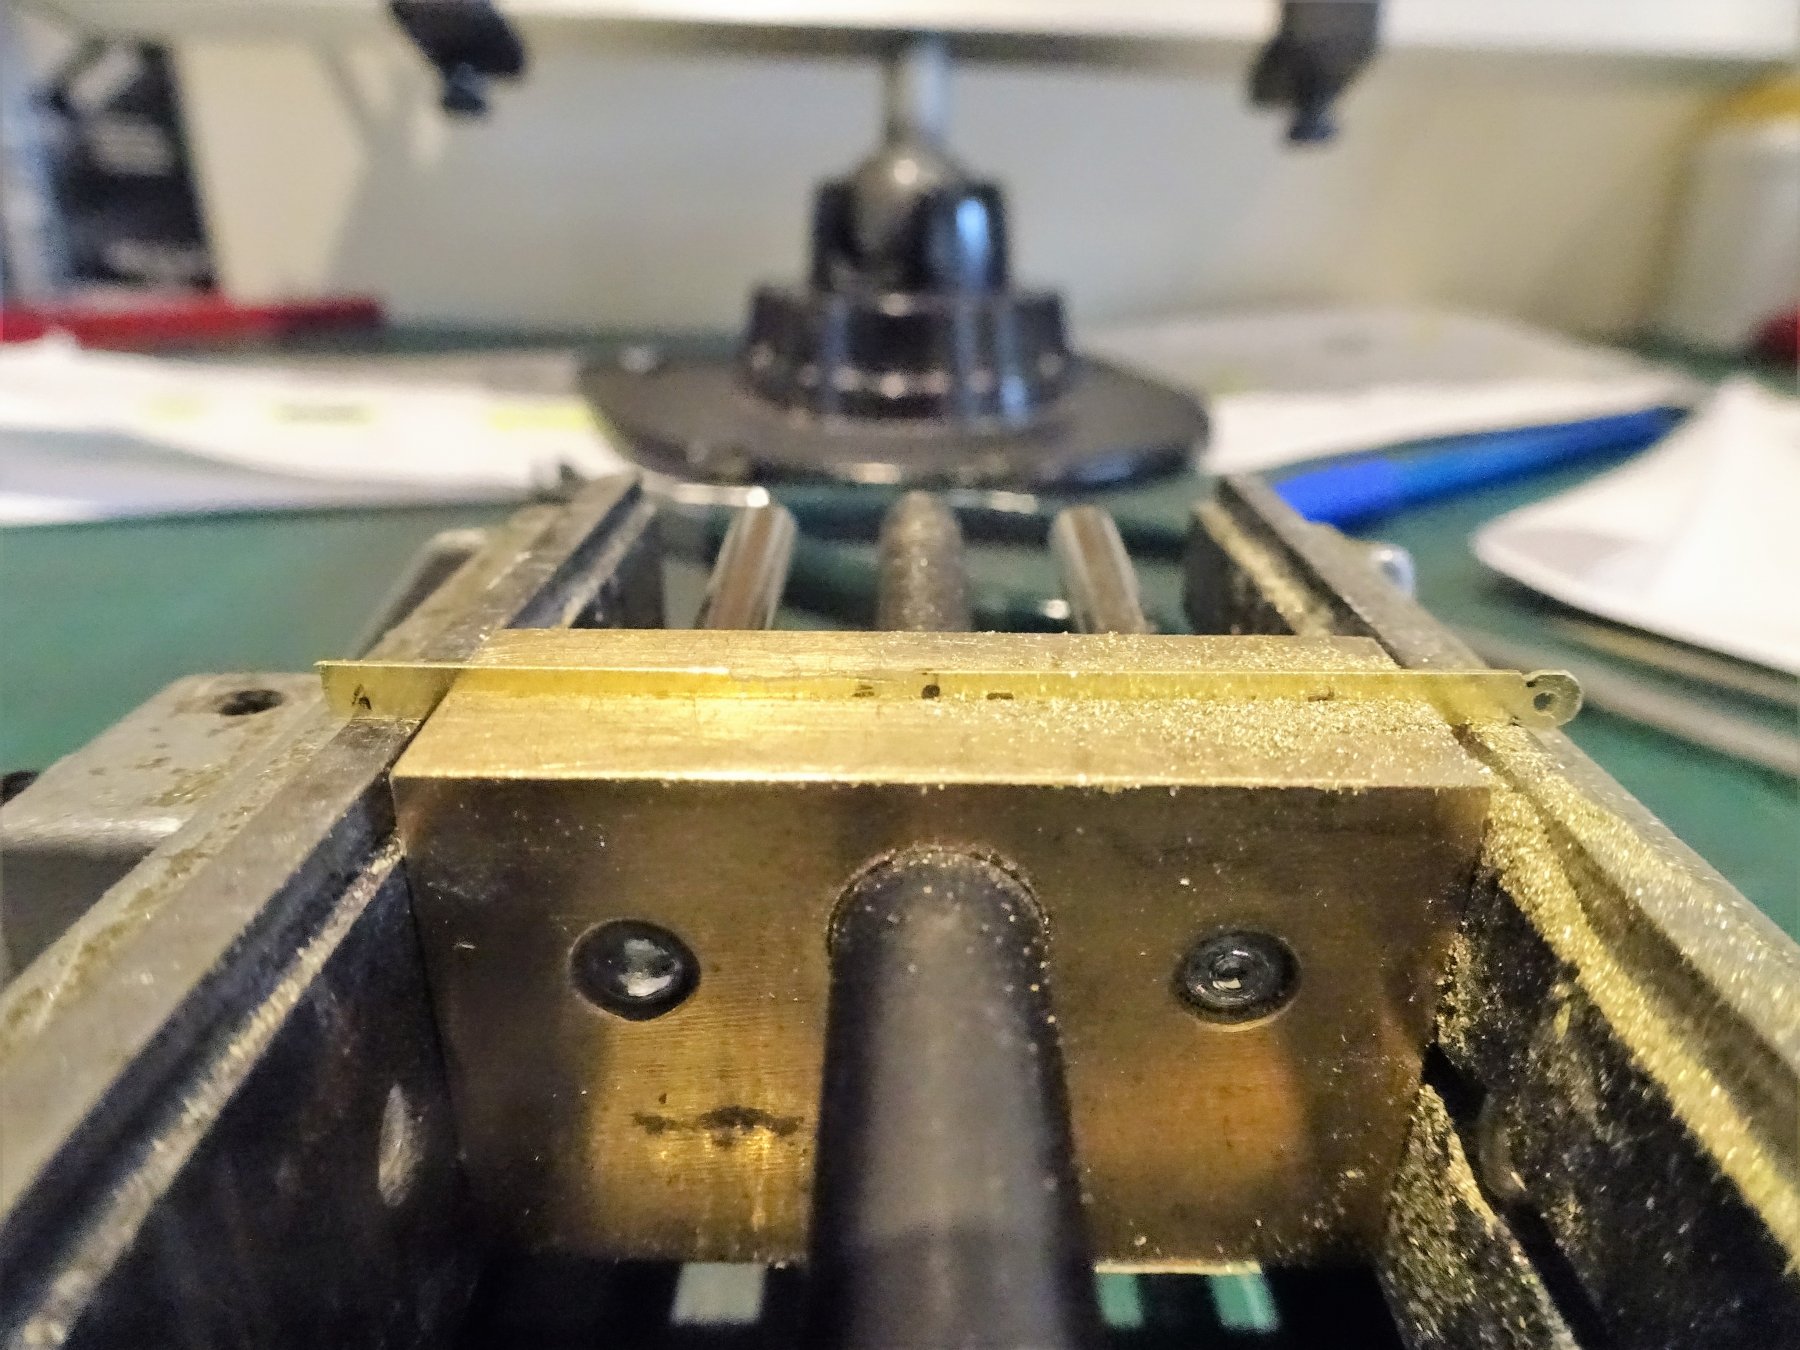
Post 67 Chain and Backstay plates. As indicated by Chuck I obtained some 1/64"x 3/32" brass strip to form the iron work. The K&S strip is quite easy to work, and I don't think I will need machinery to produce these fittings. 5891 I did need to work out a strategy to hold and work these quite small items. 5892 One of the things I wanted to replicate was the distinct round at the base of the plate where the bolt enters, rather than just a straight taper up to where the hook is formed. 5898 A prototype backstay plate. With the prospect of fourteen plates to make, my mind fondly drifts back to the brass etched versions provided with my Pegasus kit. However in practice the task proves less onerous than first may be thought. The Chain plates are measured against the model and cut to basic shape. Each strip is marked with its position on the channel. 5903 Having formed the plate the slight taper is filed in. 5907 I have left the chainplates overlong at this stage; before finishing I need to get the angles correct against the channels, and for this I need to rig a temporary mast and shrouds to be able to mark the channel slots. 5919 So the next stage is to set up a temporary shroud rig. 5914 5913 With the lines established I can now move ahead and mark the slots on the channels and fixing points for the Chainplates. 5970 With the slots cut and positions checked final finishing of the Chainplates can proceed. B.E. 10/02/2019


- 574 replies
-
- 21
-
-
- cheerful
- Syren Ship Model Company
- (and 1 more)
-
Good to hear Hartmut, yes Pete is still going strong, heavily involved with his wild life rescue interest, and caring for his orphan squirrels. Not so active on ship modelling at present, but the Victory forum is still alive altho' not as active as in previous years. Your fine Pegasus and Agamemnon builds are still there along with most of the other builds, recovered from a systems crash a while ago. Michael D is still progressing his wonderful 1756 Victory conversion, and the significant data on all things Victory is largely intact. I do go in and have a look from time to time, but I don't have any current builds posted on there. Regards, Maurice.
- 574 replies
-
- 2
-
-
- cheerful
- Syren Ship Model Company
- (and 1 more)
-
Thank you Thomas, Dowmer and Hartmut. 🙂 @ Dowmner - I believe the Channels were simply bolted to the side, thro' the planking into the frames. On larger vessels they usually had supporting brackets, but channels were fairly lightweight structures whose main purpose was to spread the shrouds, not as sometimes mistakenly thought to also bear the weight of the pull of the shrouds. That was the job of the chainplates. @ Hartmut - long time no hear Hartmut, but a nice surprise all the same. Hope you are well and still enjoying ship modelling. B.E.
- 574 replies
-
- 2
-
-
- cheerful
- Syren Ship Model Company
- (and 1 more)
-
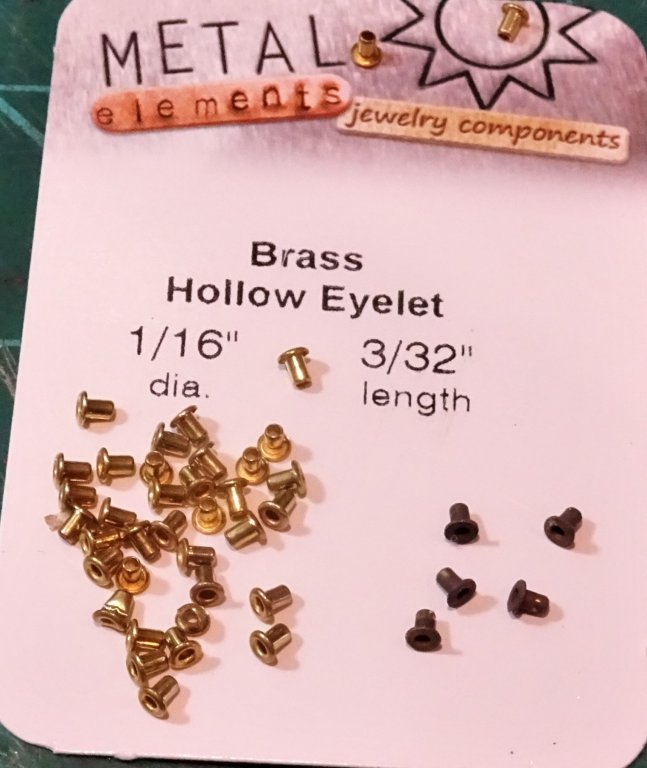
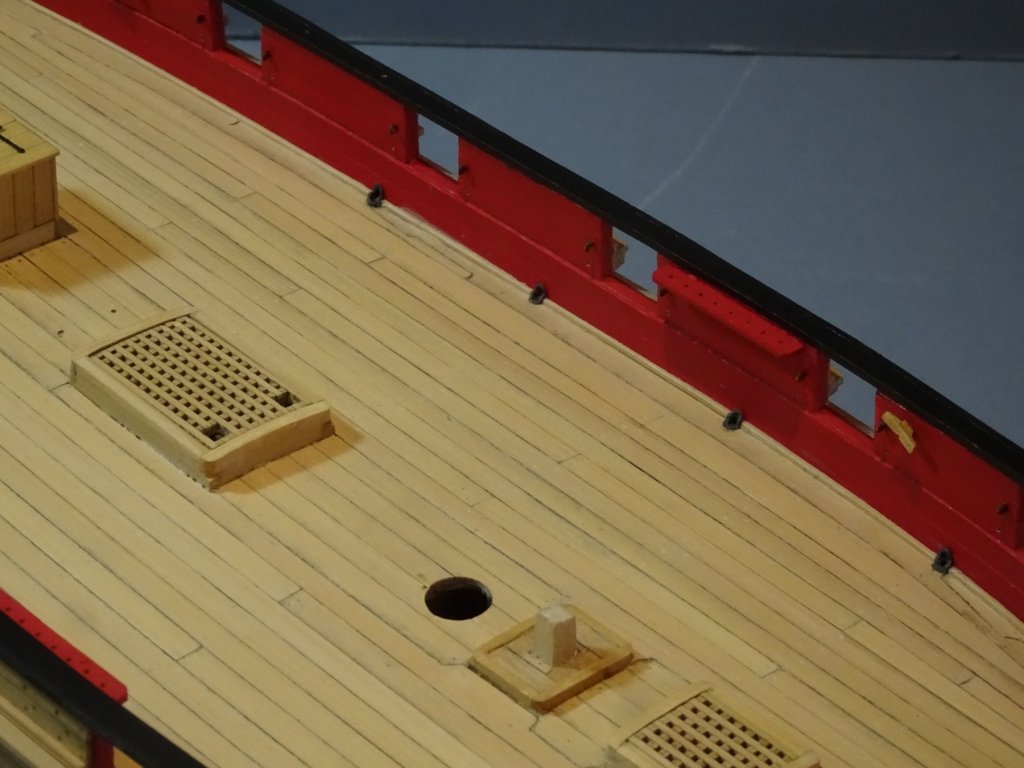
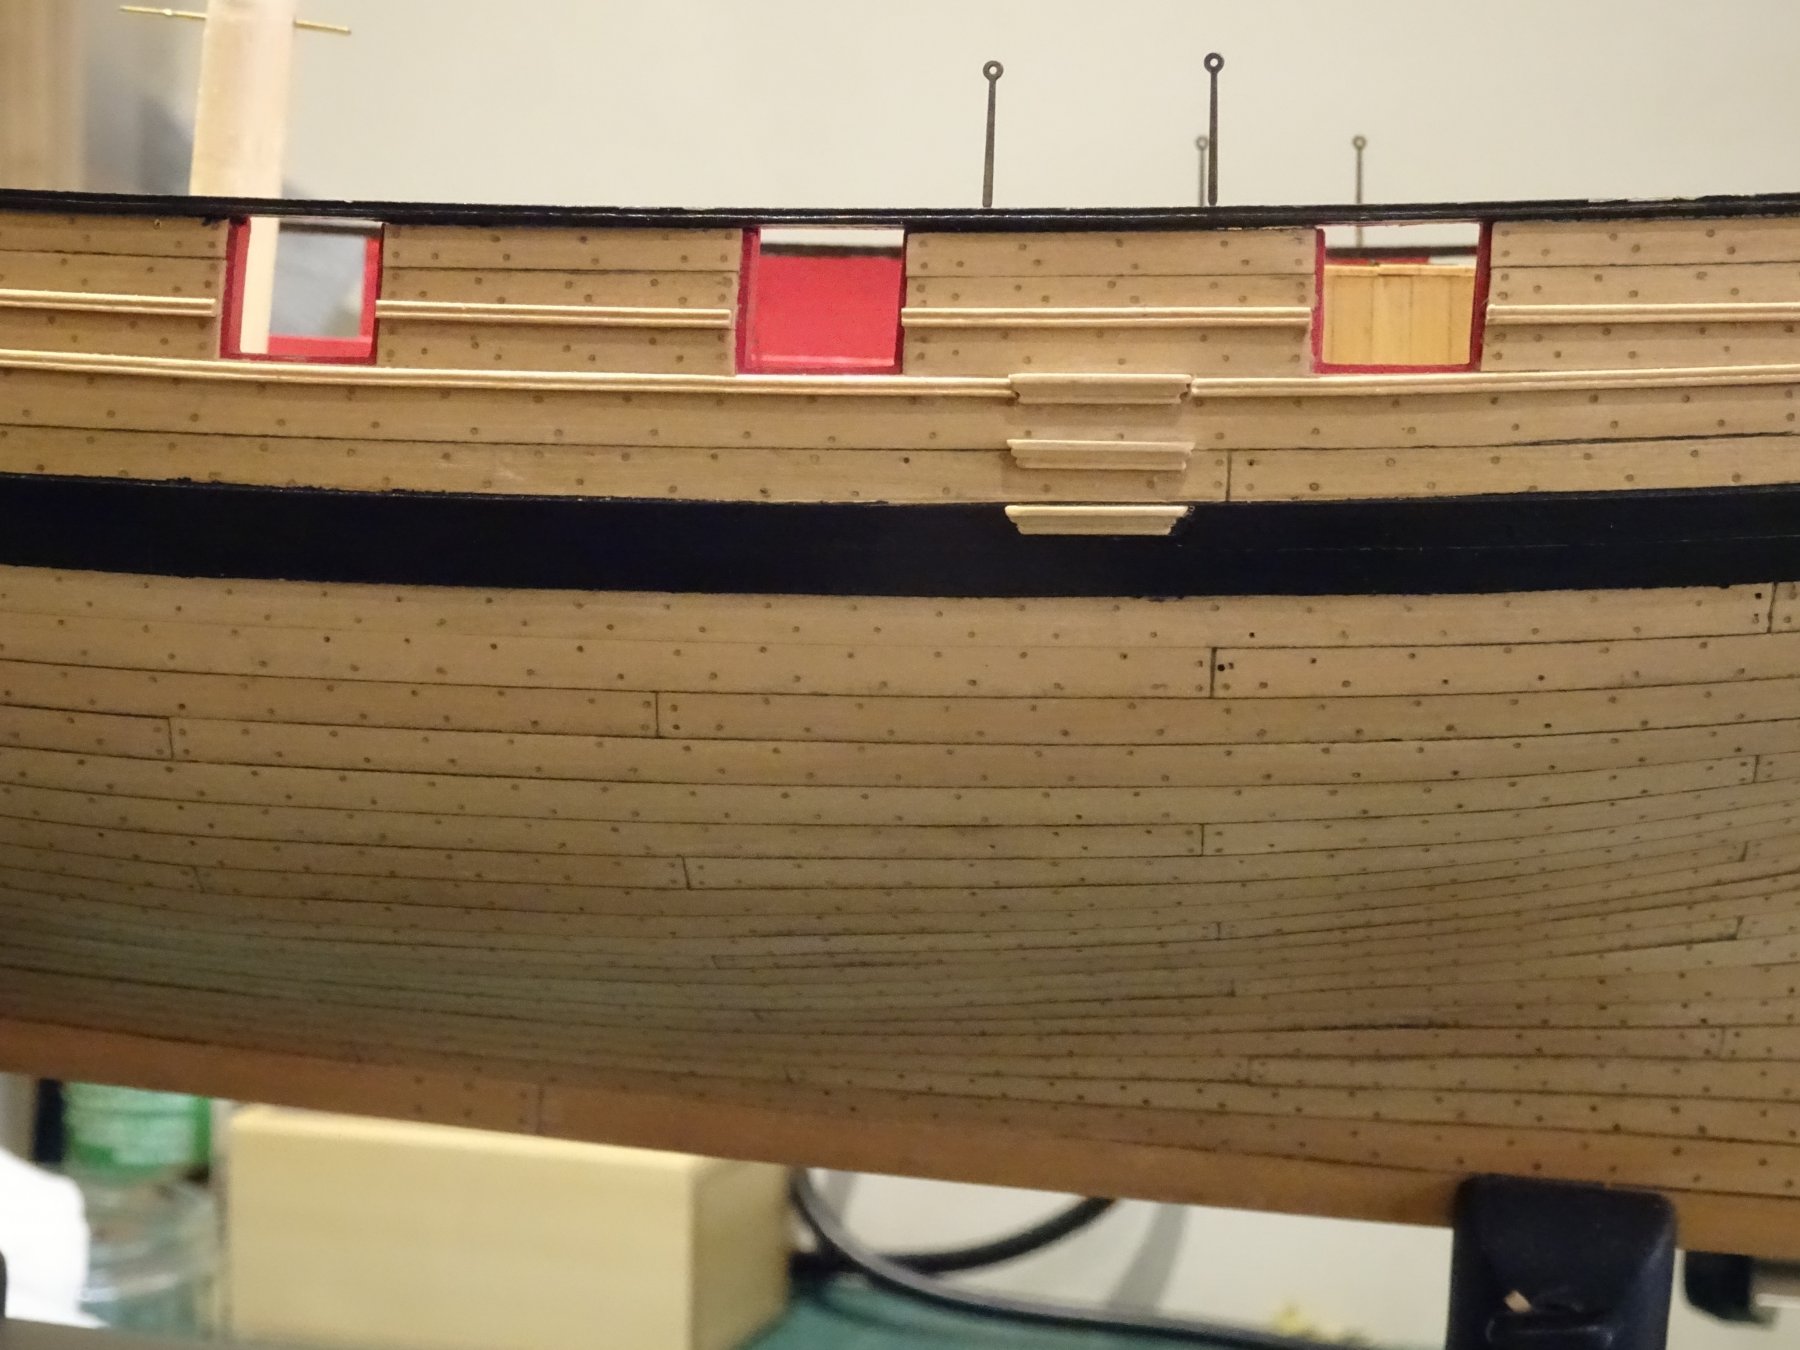
Thank you for your comments kirill4 and OC, much appreciated. Post 66 Continuing outboard Thinking about Scuppers On Cheerful there are four of them running along the hull with the outlets sited just above the wale. As far as I can see from the plans the scuppers are 1.5mm in the clear. I'm certainly not brave enough to drill the holes straight thro' the hull so mine will be false scuppers. Scuppers weren't just downward sloping holes drilled thro' the hull they were lead lined pipes exiting the hull thro' a specific block fixed between the frames, with flanges turned on either end. I wished in some way to at least replicate the flanges. 5818 The answer came in the form of brass hollow eyelets with a thickness of 0/1mm, 1/16th" dia and 3/32" length. I remembered that I had originally bought these for use on Pegasus but they proved a tad too large for 1:64 scale, but for Cheerful at 1:48 just about right. 5813(2) The scuppers were chemically blackened before a push fit into the hole. 5809 So far so good, I'm happy with the outlets. The internal scuppers are far more tricky with the flange fitting; part on the margin plank and part on the waterway, running to the spirketting. I take my lead for the internal scupper arrangements from David Antscherl's FMM book Vol 11. Drilling the internal scuppers needs care to avoid splitting the very fine waterway strip. I spent a day forming the flanges from slices of aluminium tubing, hammered a little, and squeezed to form an oval shape. 5852 As I thought fitting proved tricky, but in the end I didn't like the effect. I thought they looked too prominent, so off they all came. Approach 2 involved stamping flange shapes from a sheet of 0.1mm thick lead foil sheet. This was more promising as the process was quicker and the flanges moulded closer to the profile. 5879 5876 These are in a raw state but already they look more in scale and less prominent. 5888 5883 5875 I will leave these to allow for natural patination before I consider a coat of flat grey paint. Time to consider the Chain and Backstay plates. B.E 07/02/2019

.thumb.JPG.e30bee241327d98b82fa3ebb98d19cf6.JPG)


- 574 replies
-
- 28
-
-
- cheerful
- Syren Ship Model Company
- (and 1 more)
-
The breeching rope thro’ the gun carriage is correct for French ships, whereas on British ships it passed around the cascobal or thro’ the breeching ring on later pattern guns. B. E.
-
Thanks for looking in Jorgen, I'm quite impressed with the Vallejo paint, it has great consistency, thins beautifully, and very economical to use. I initially bought three bottles, unsure how much Cheerful would take, but I've still got plenty left from the first bottle. Regards, B.E.
- 574 replies
-
- 3
-
-
- cheerful
- Syren Ship Model Company
- (and 1 more)
-
My eye does keep getting drawn to that space above the third step, eventually I may succumb and add a fourth along the line of the top moulding. Only downside is that I would have to mill a complete new set to get the profiles the same. Not all sources agree Jason that there were hand holes cut into the entry steps but Peter Goodwin shows them in his Cutter Alert Book, and Victory had them, I thought them a nice detail, and besides getting aboard Cheerful seemed difficult enough😉 Cheers Dave, as soon as I received Chuck's mini anchor kit I thought 'too early for Round Crown' . I will be fitting an Admiralty pattern anchor; Caldercraft have a good range, one of which will suit, but that's some way off at present.🙂 Cheers, B.E.
- 574 replies
-
- 2
-
-
- cheerful
- Syren Ship Model Company
- (and 1 more)
-
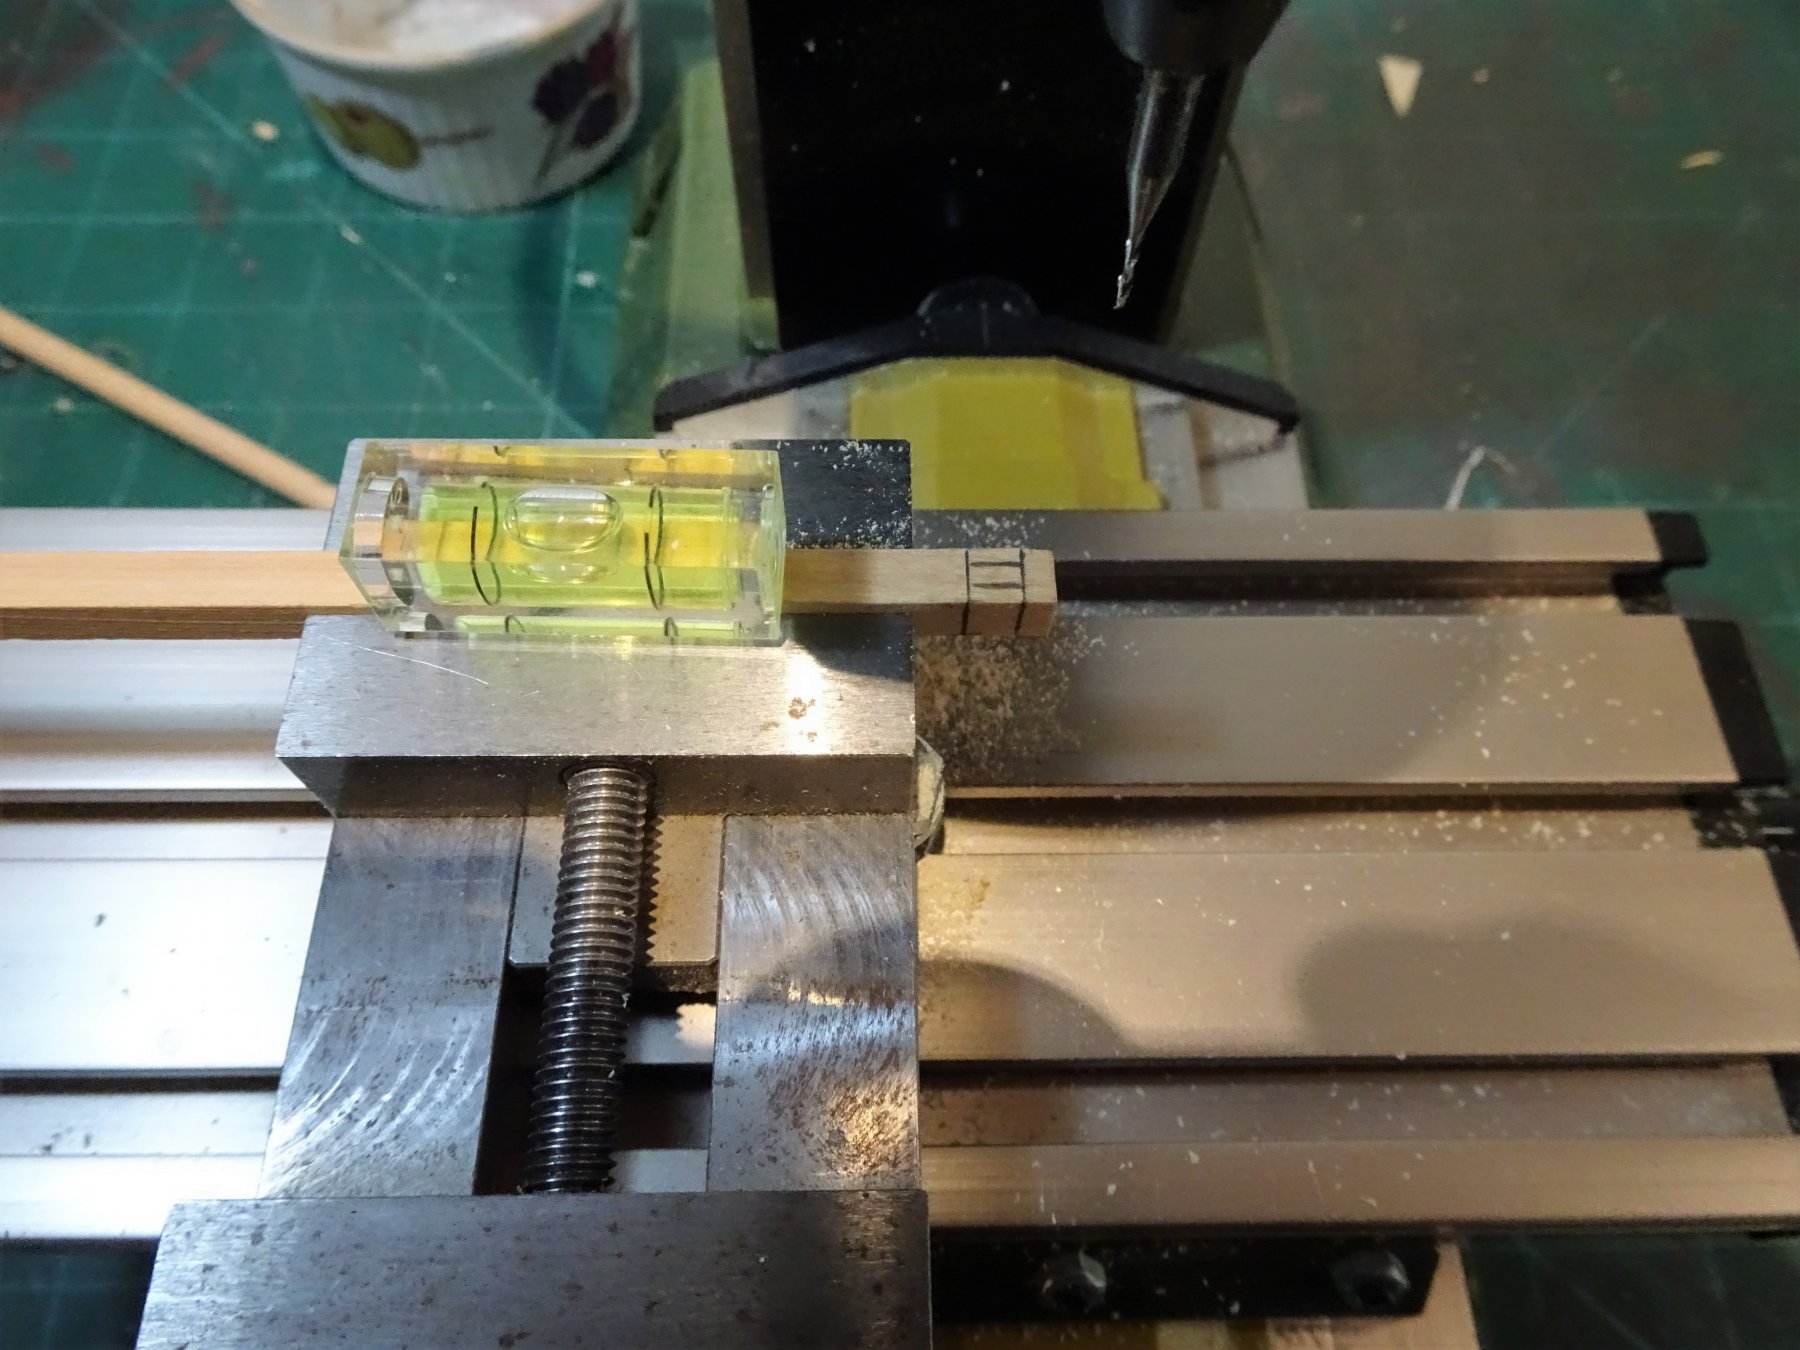
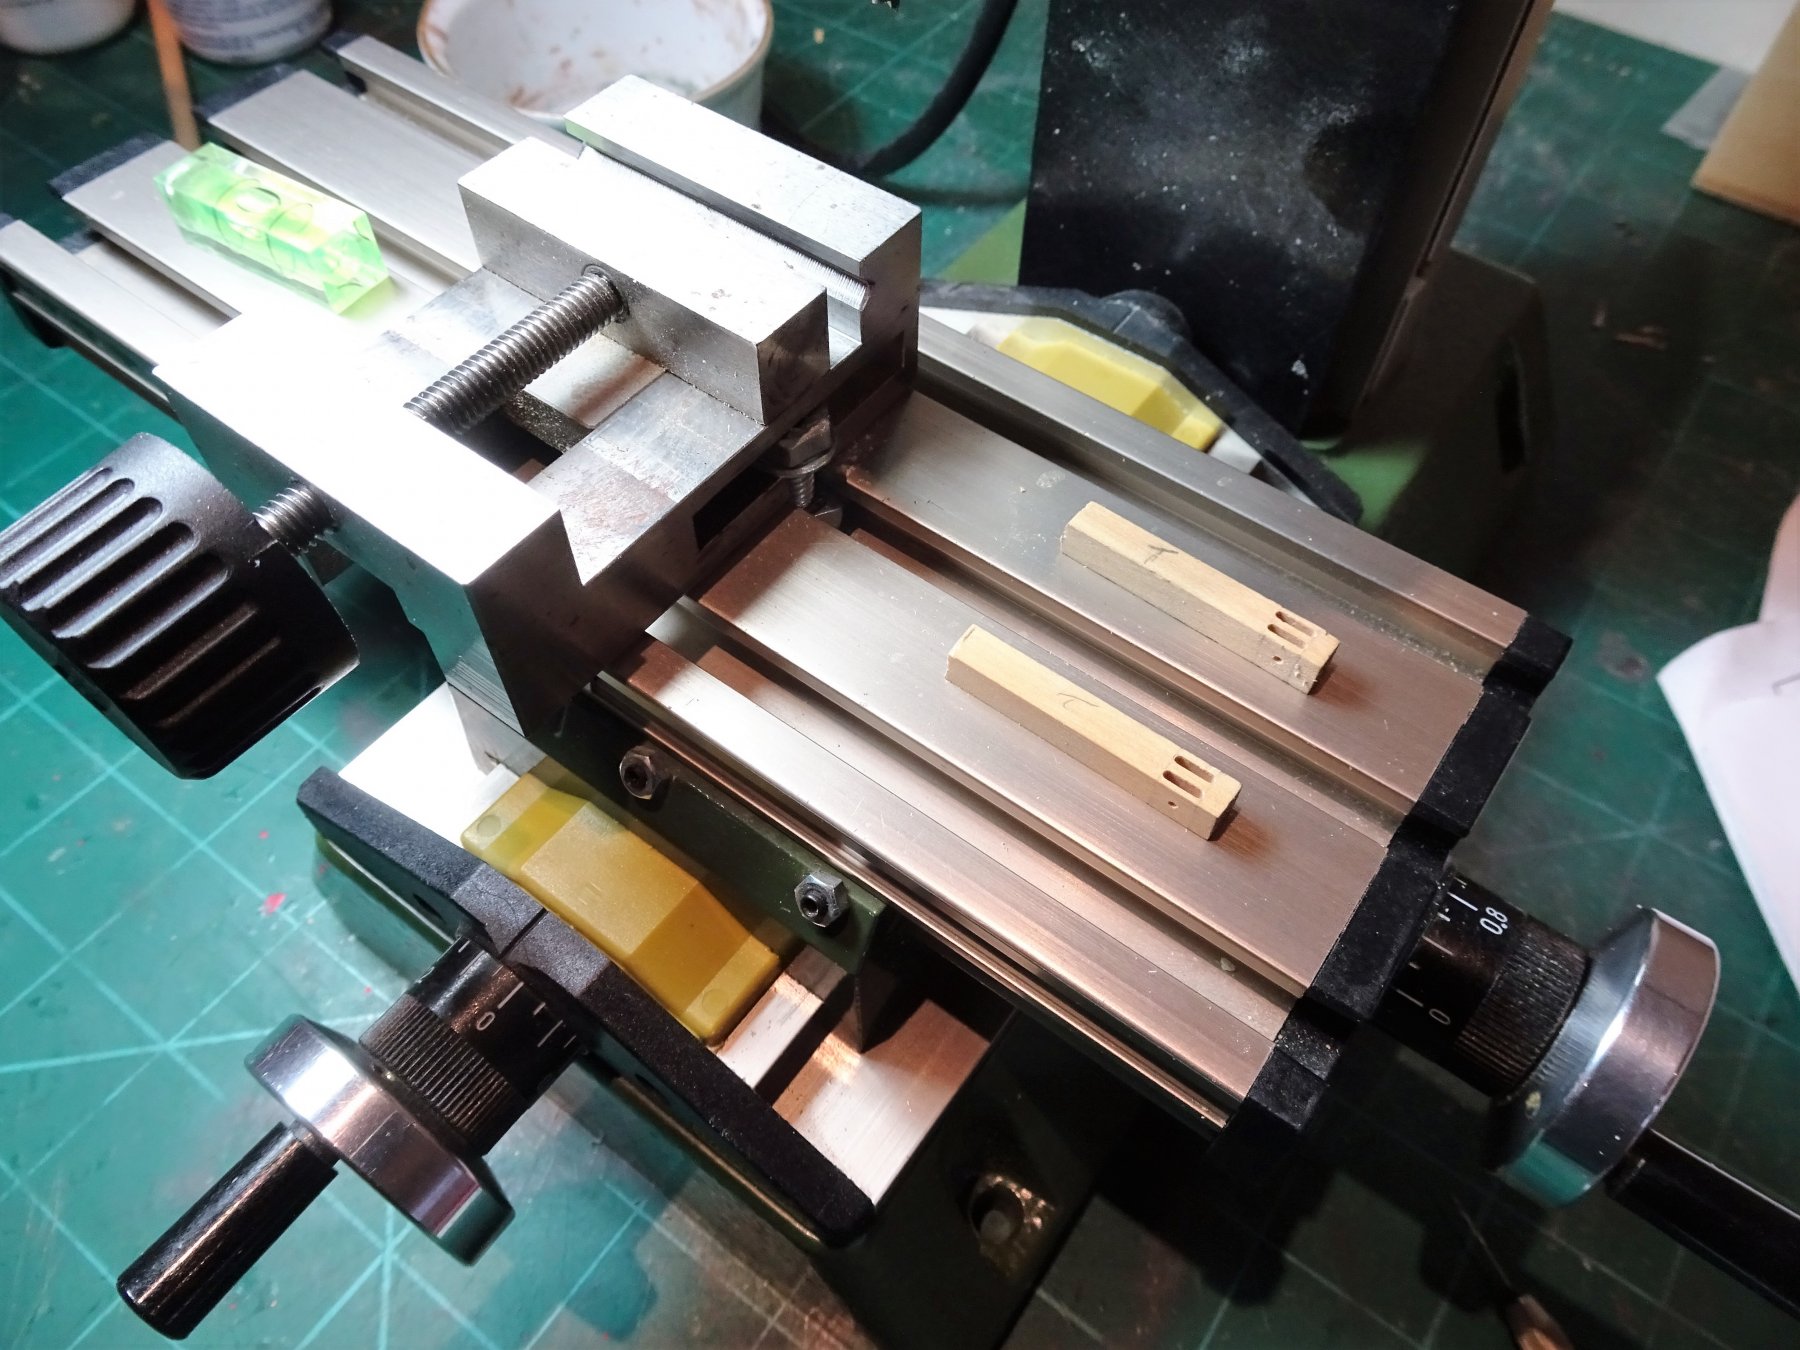
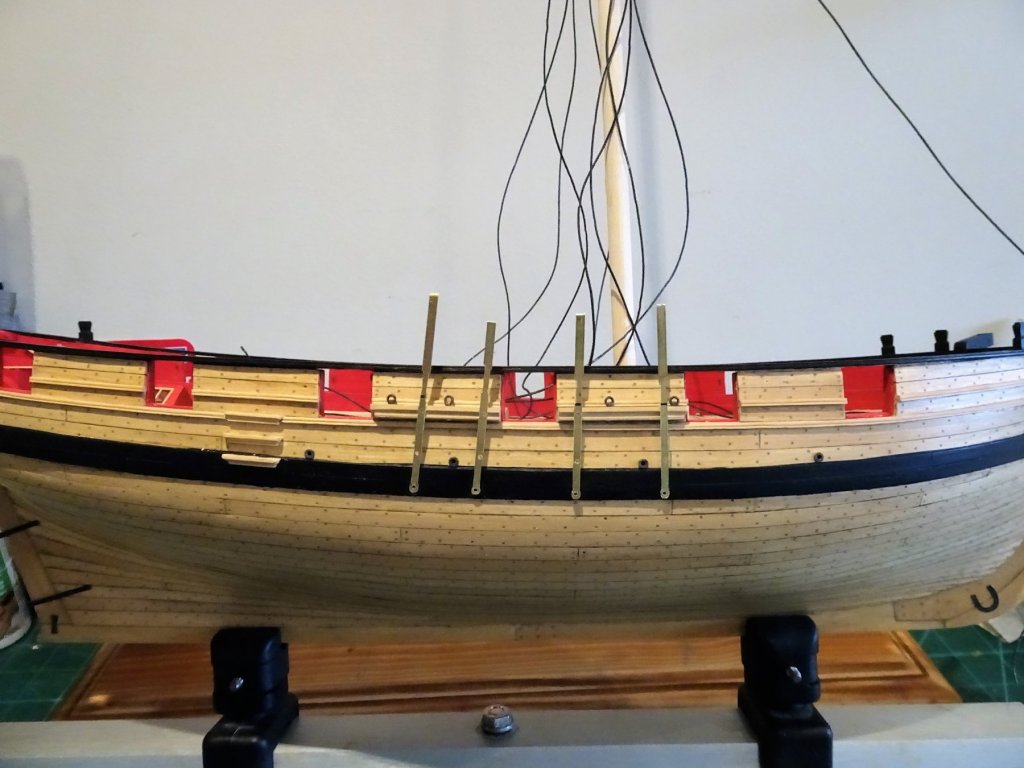
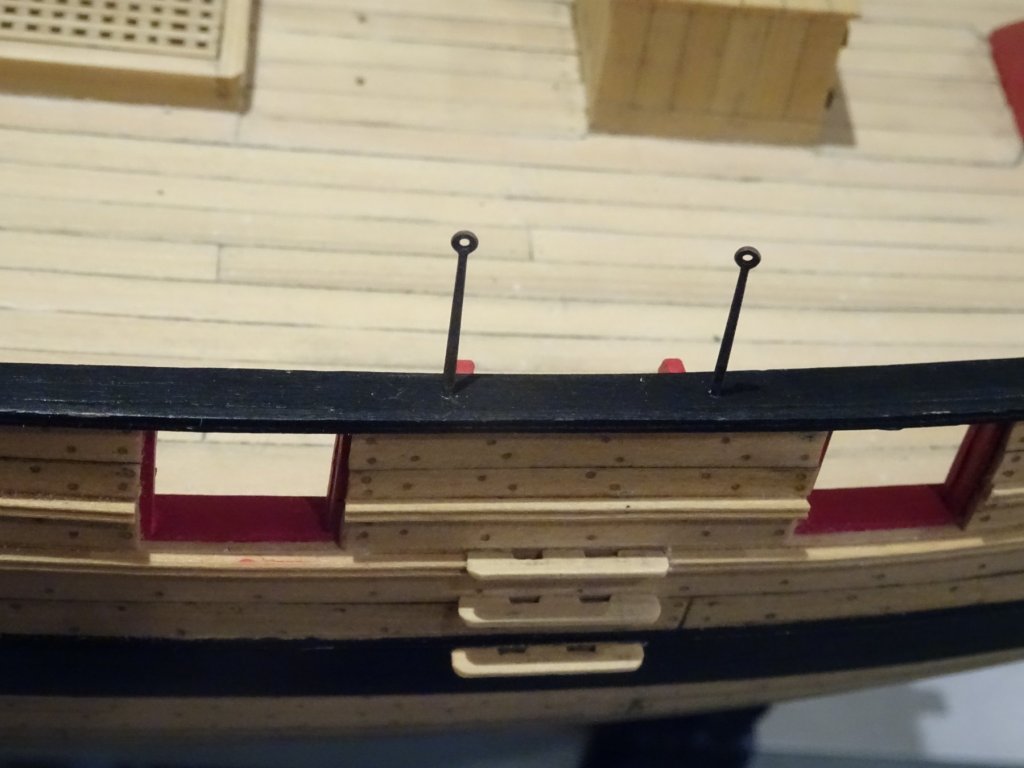
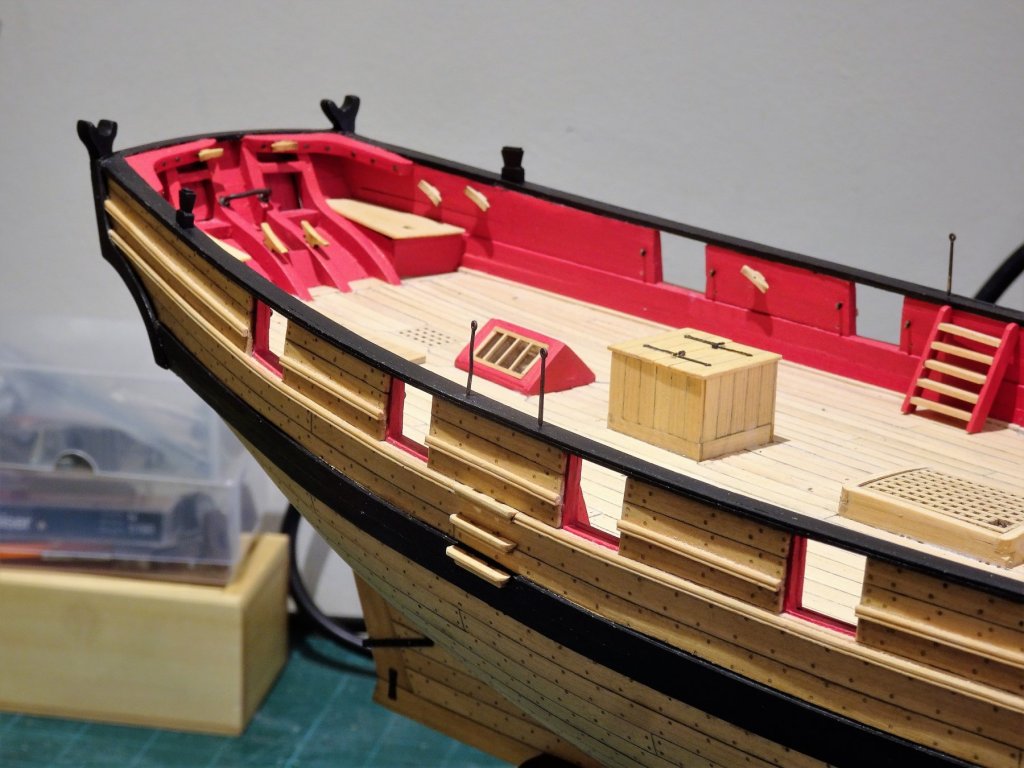
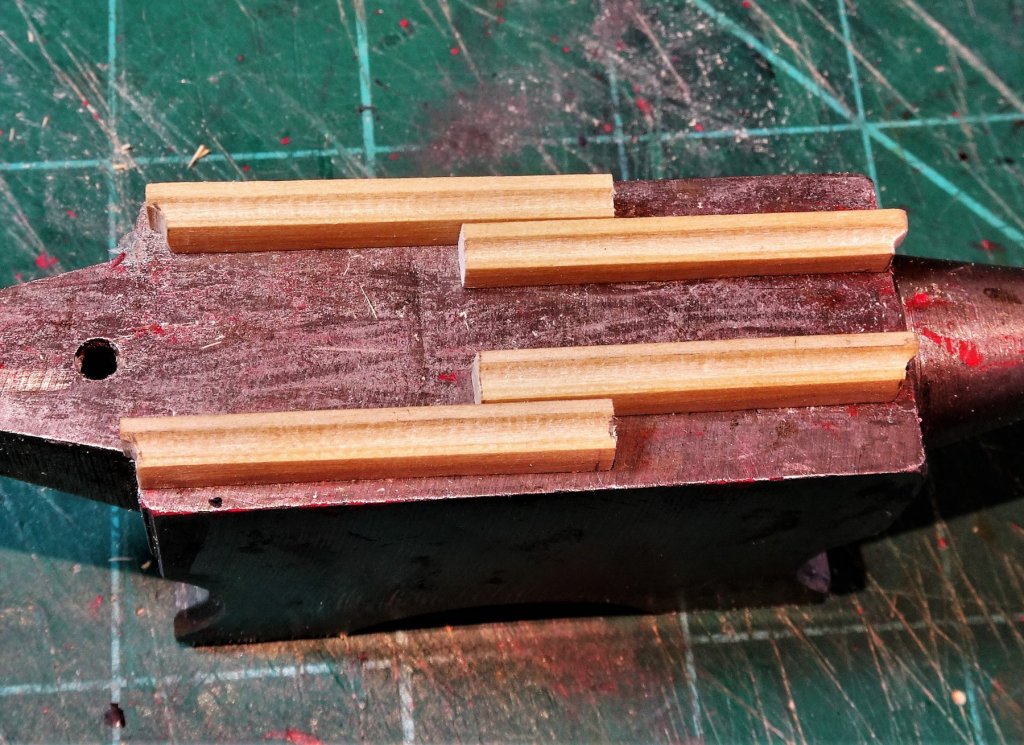
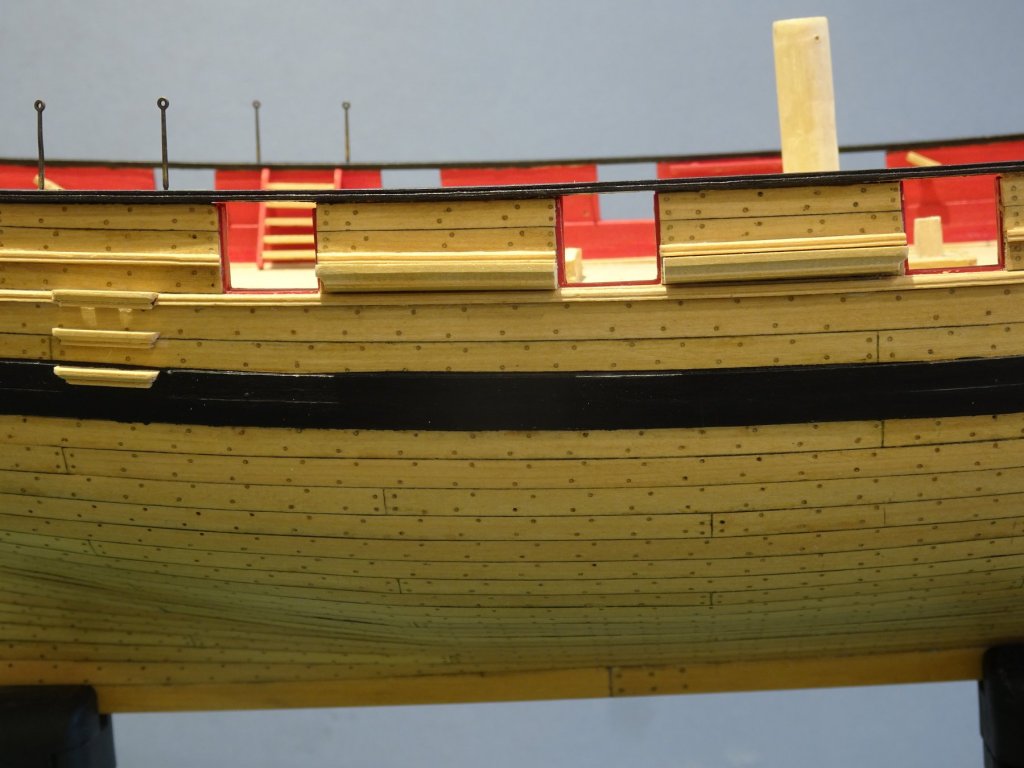
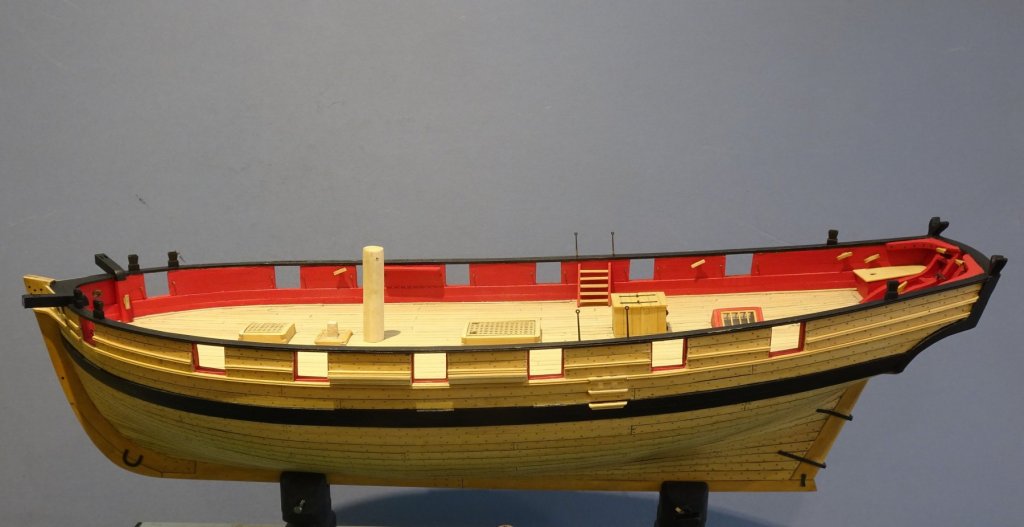
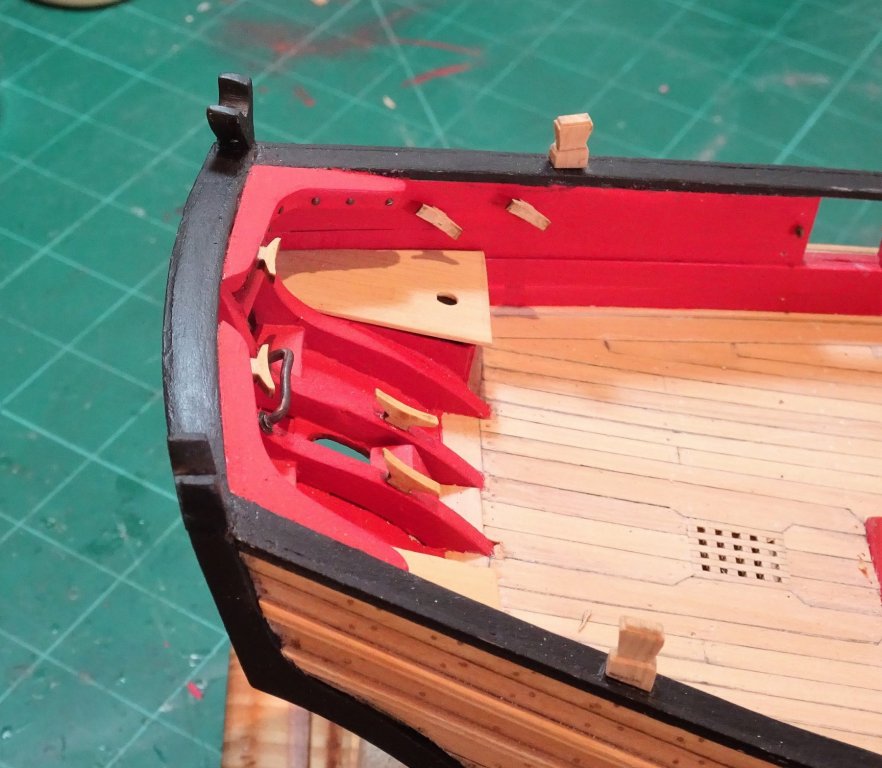
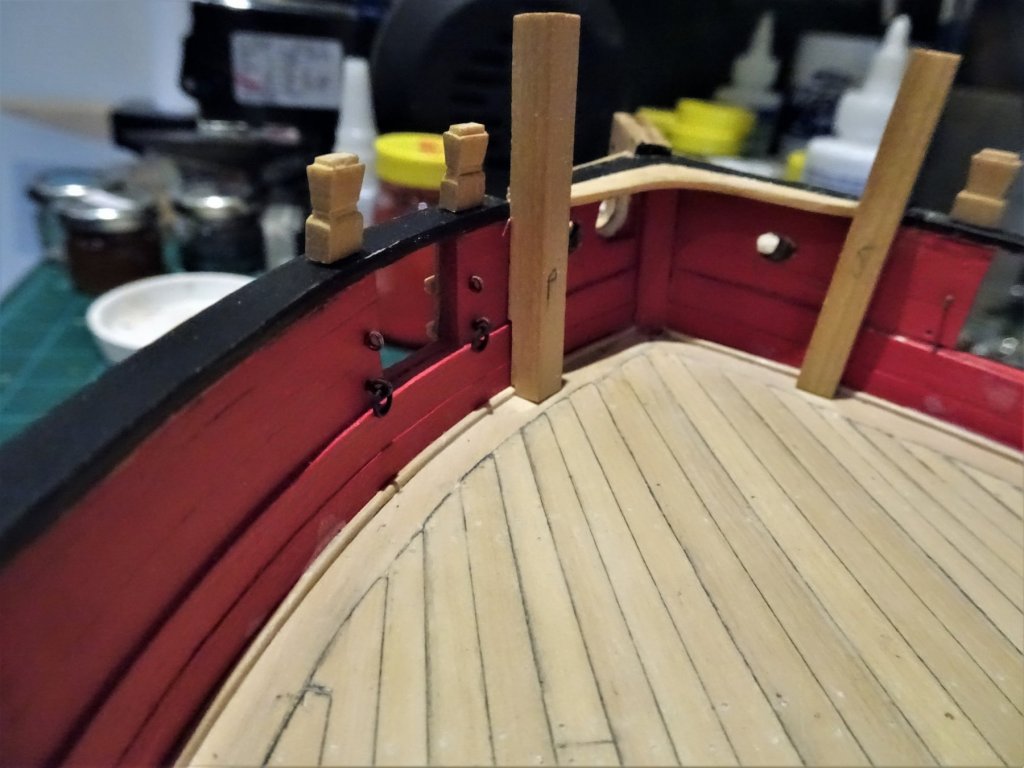
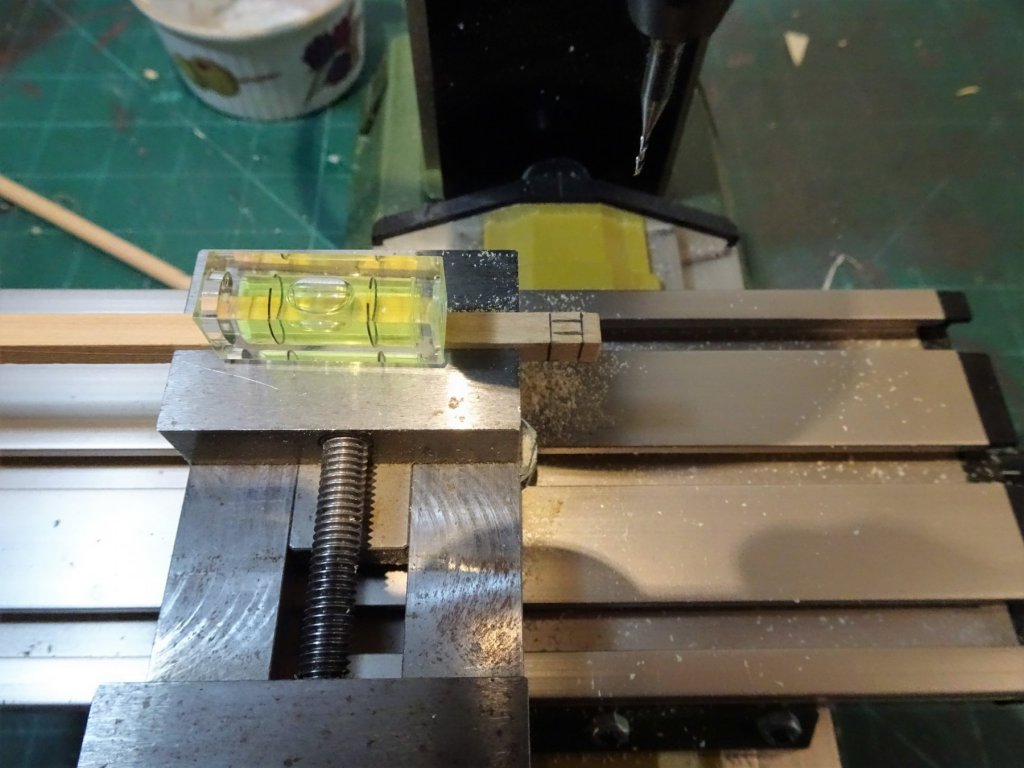
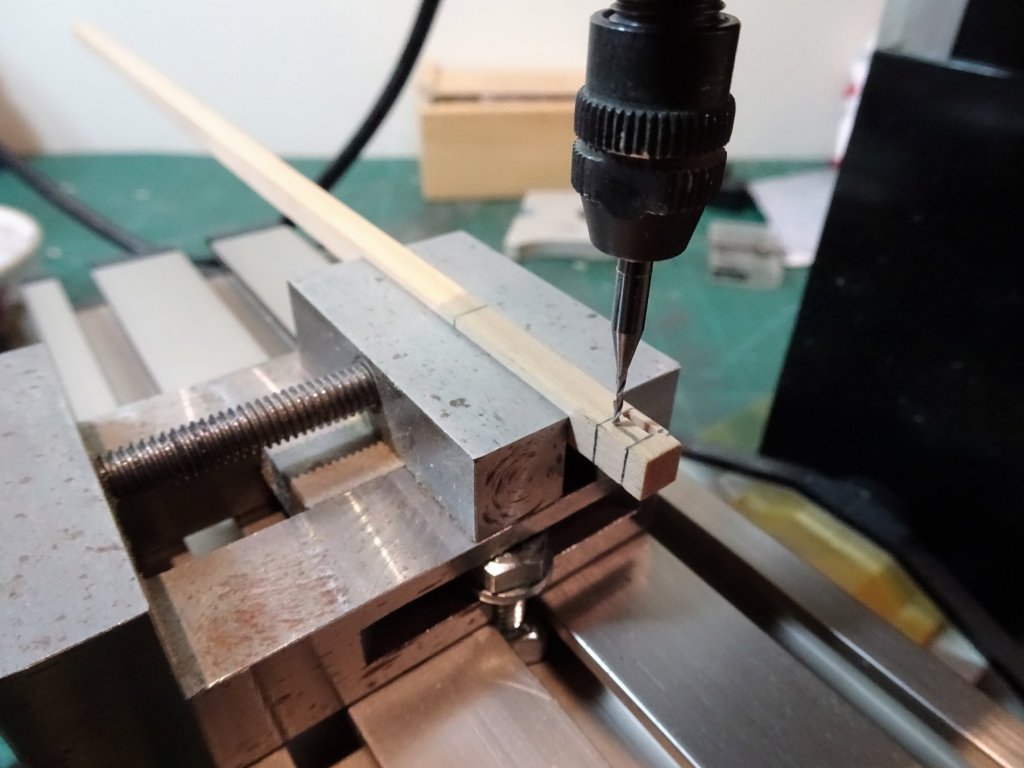
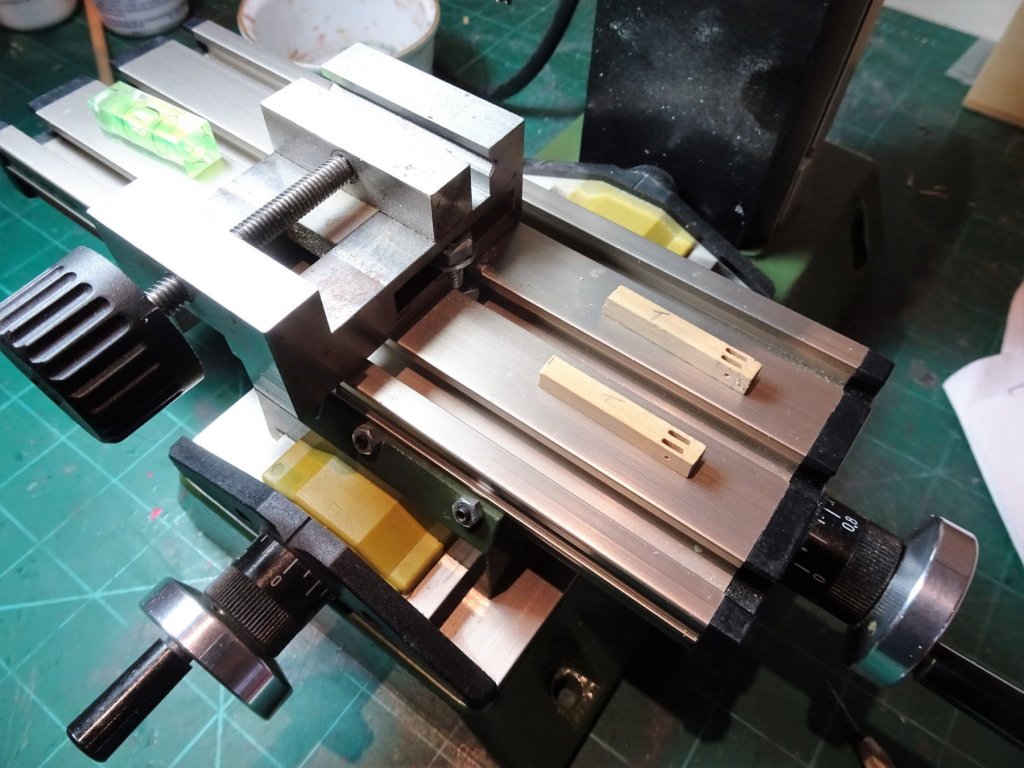
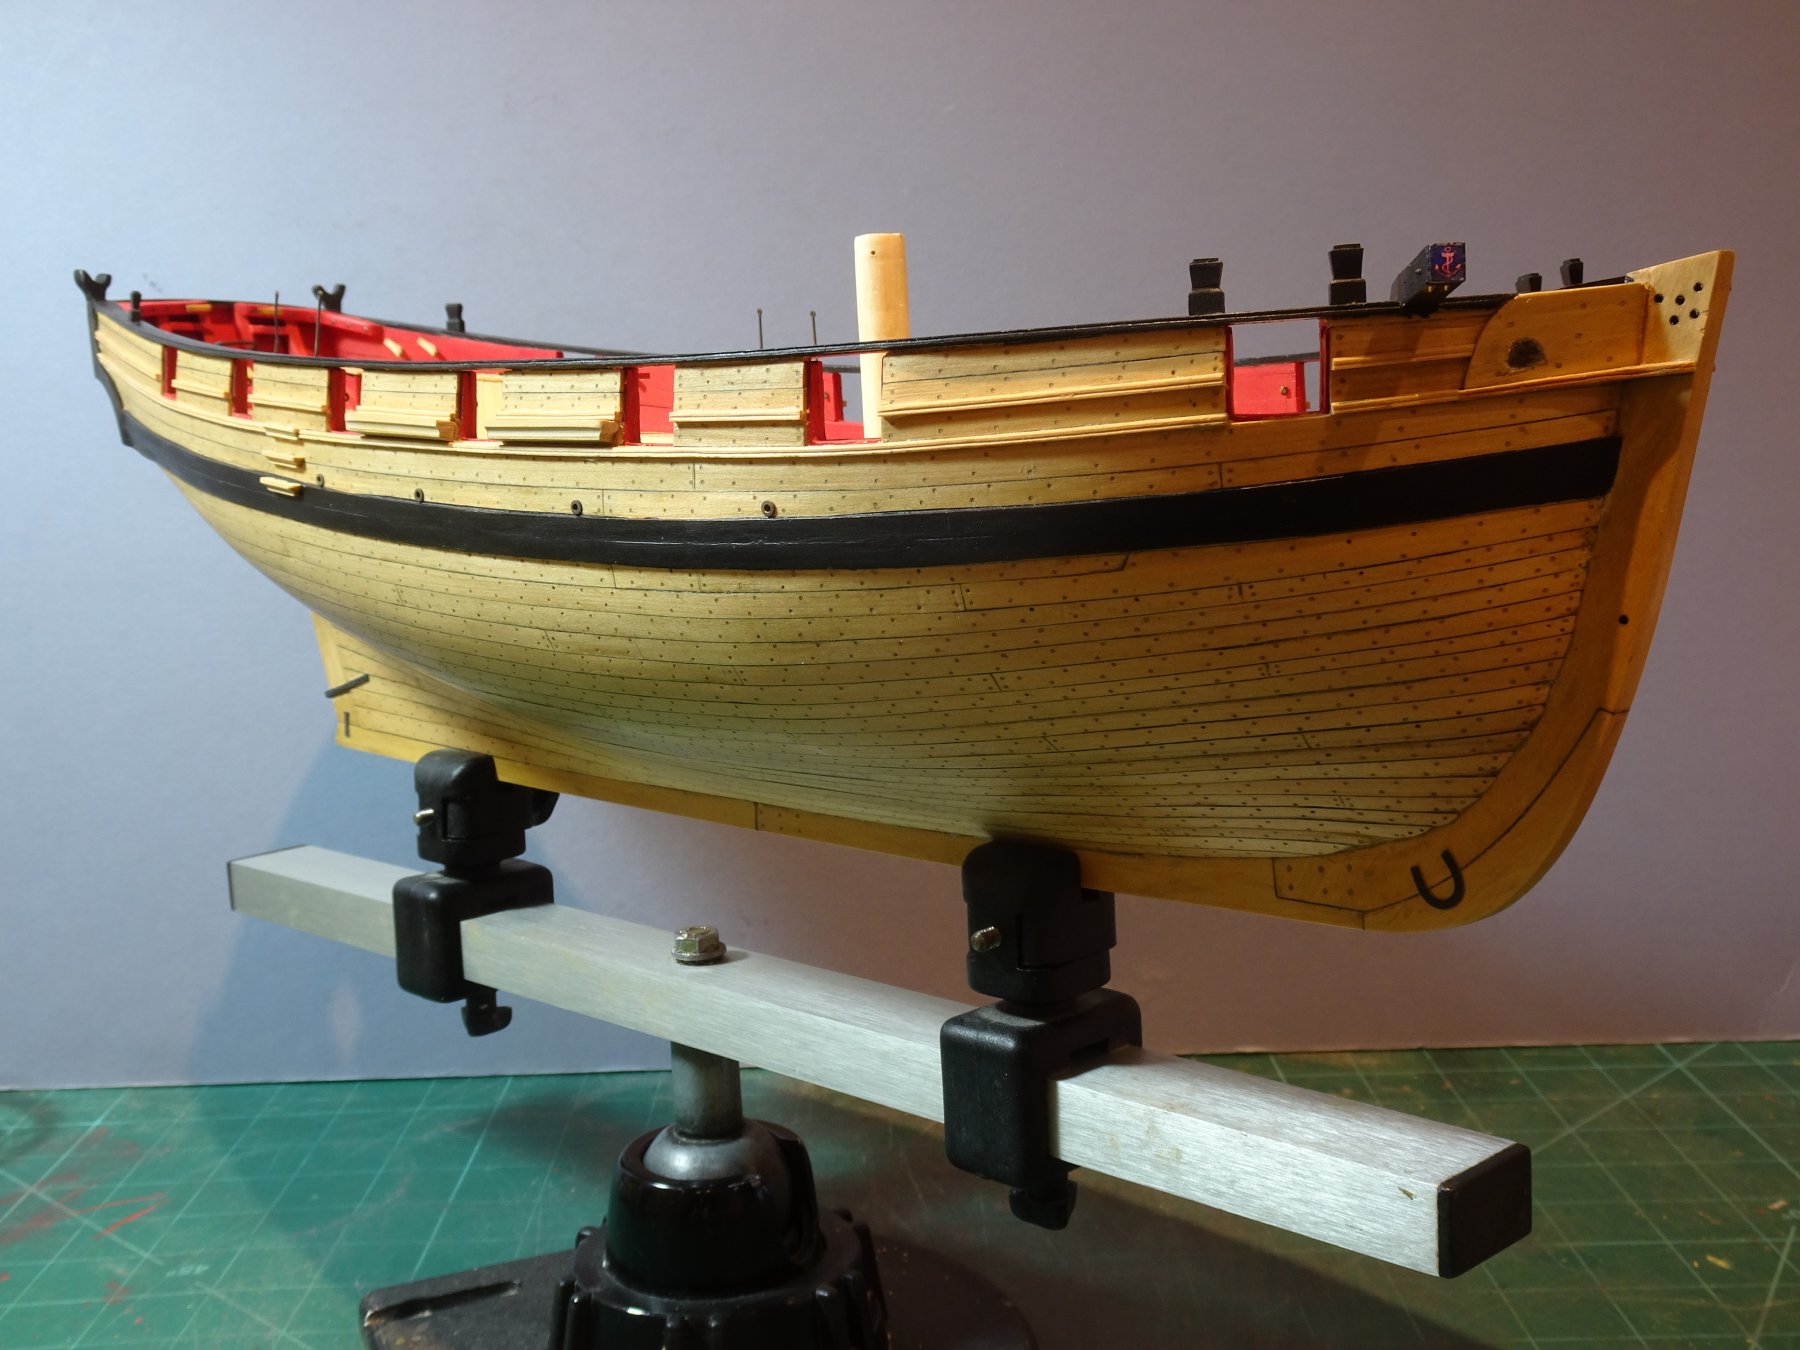
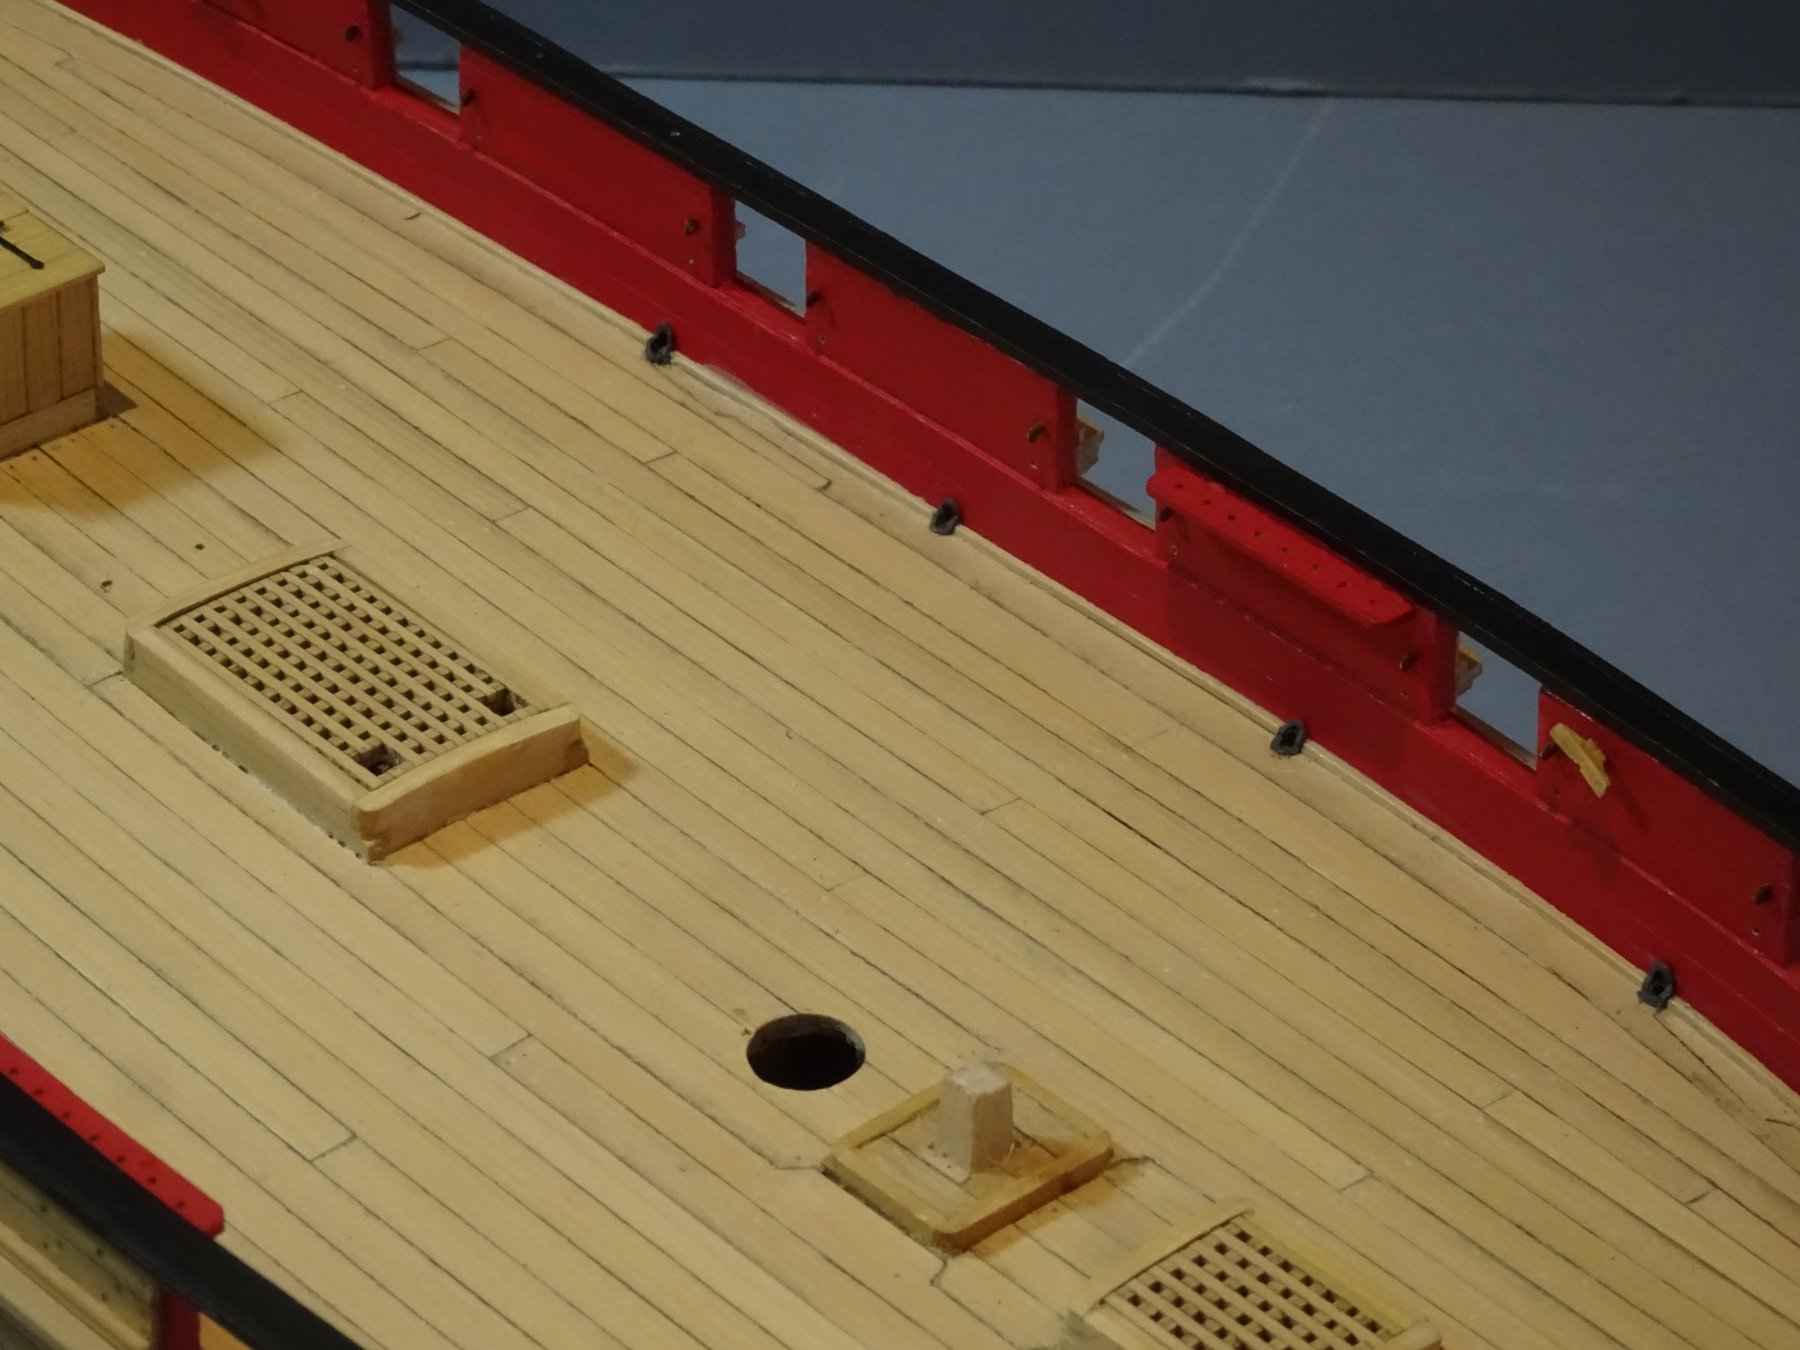
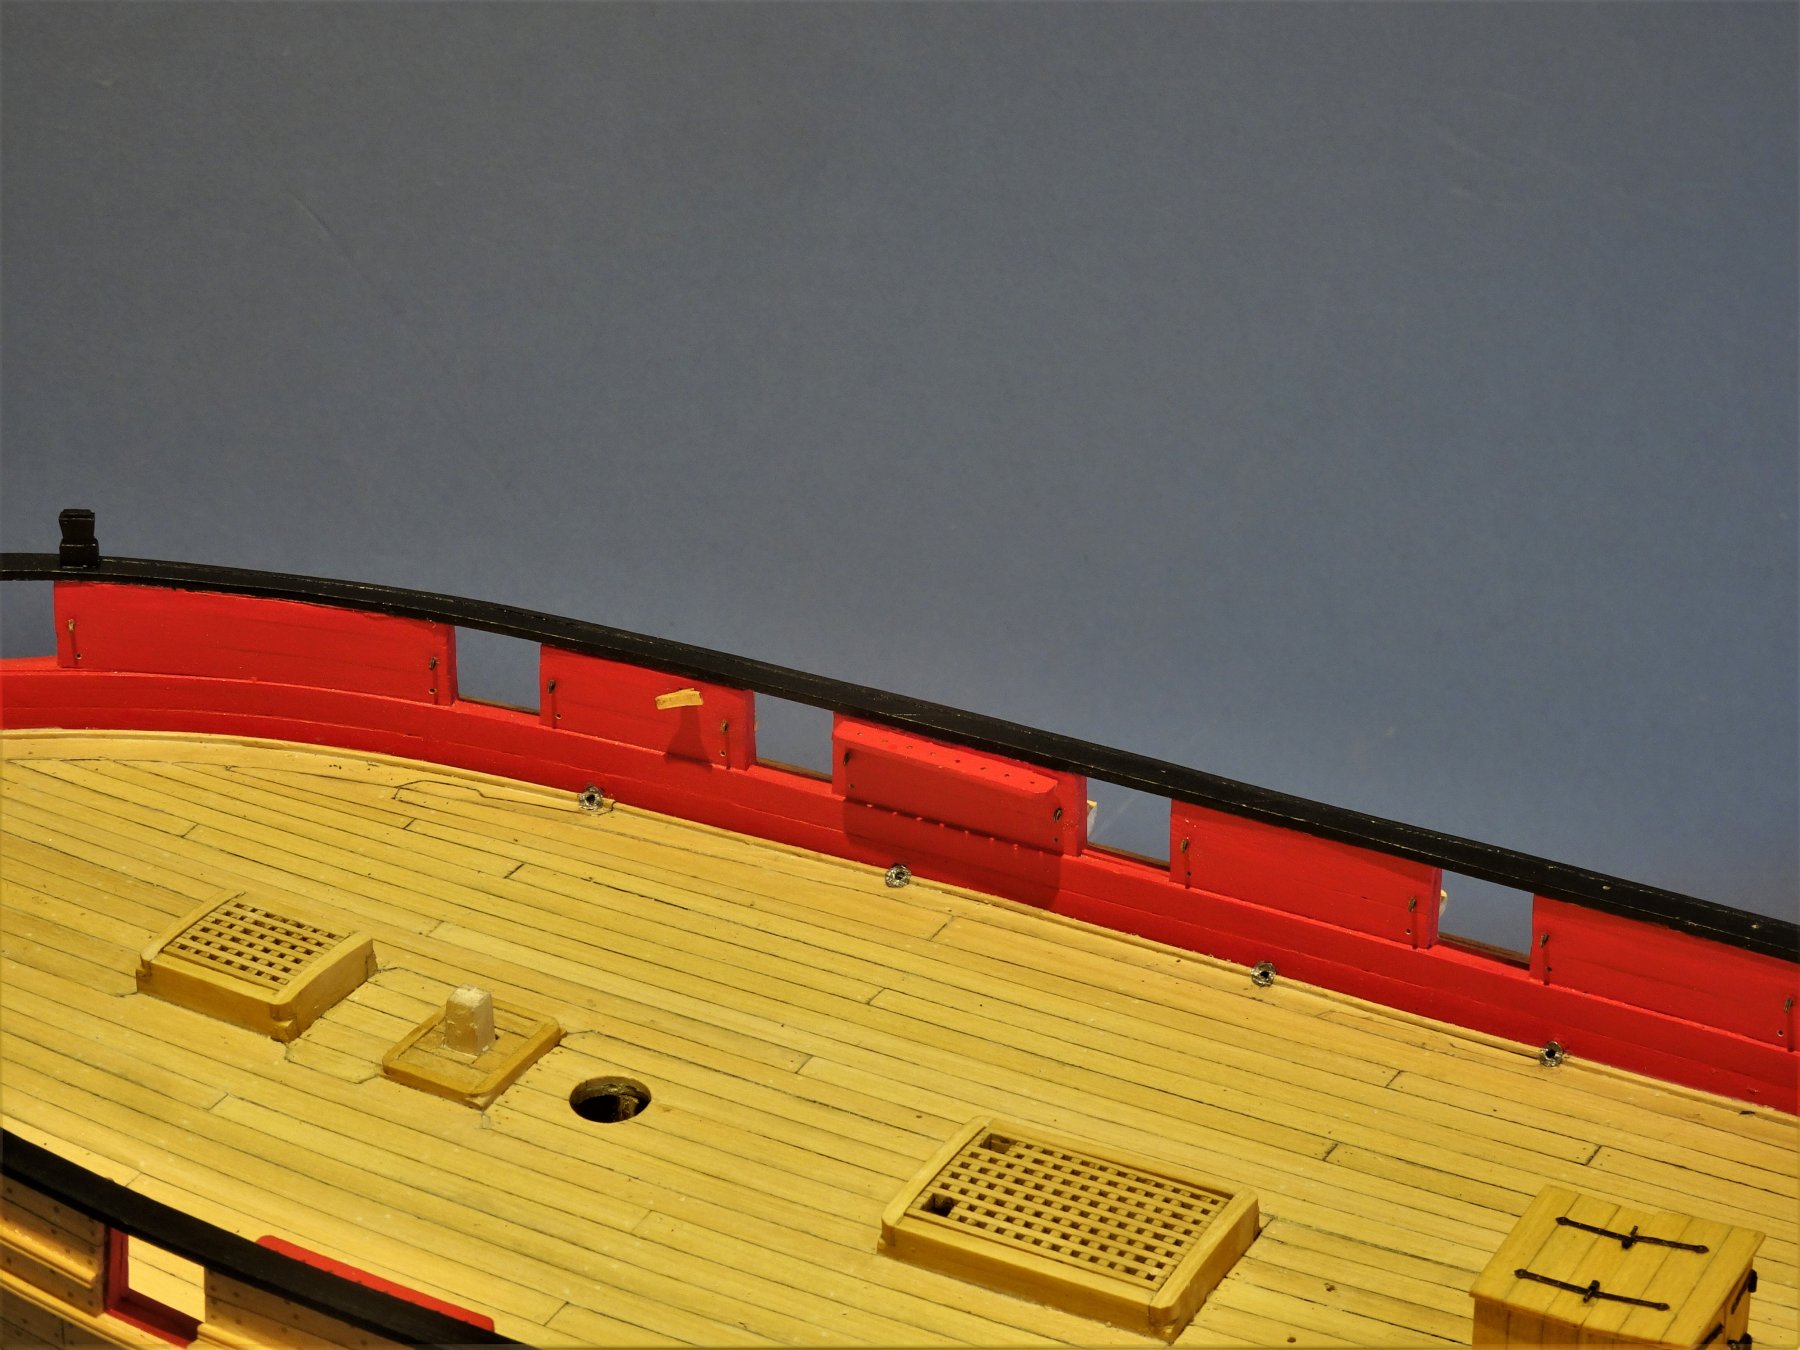
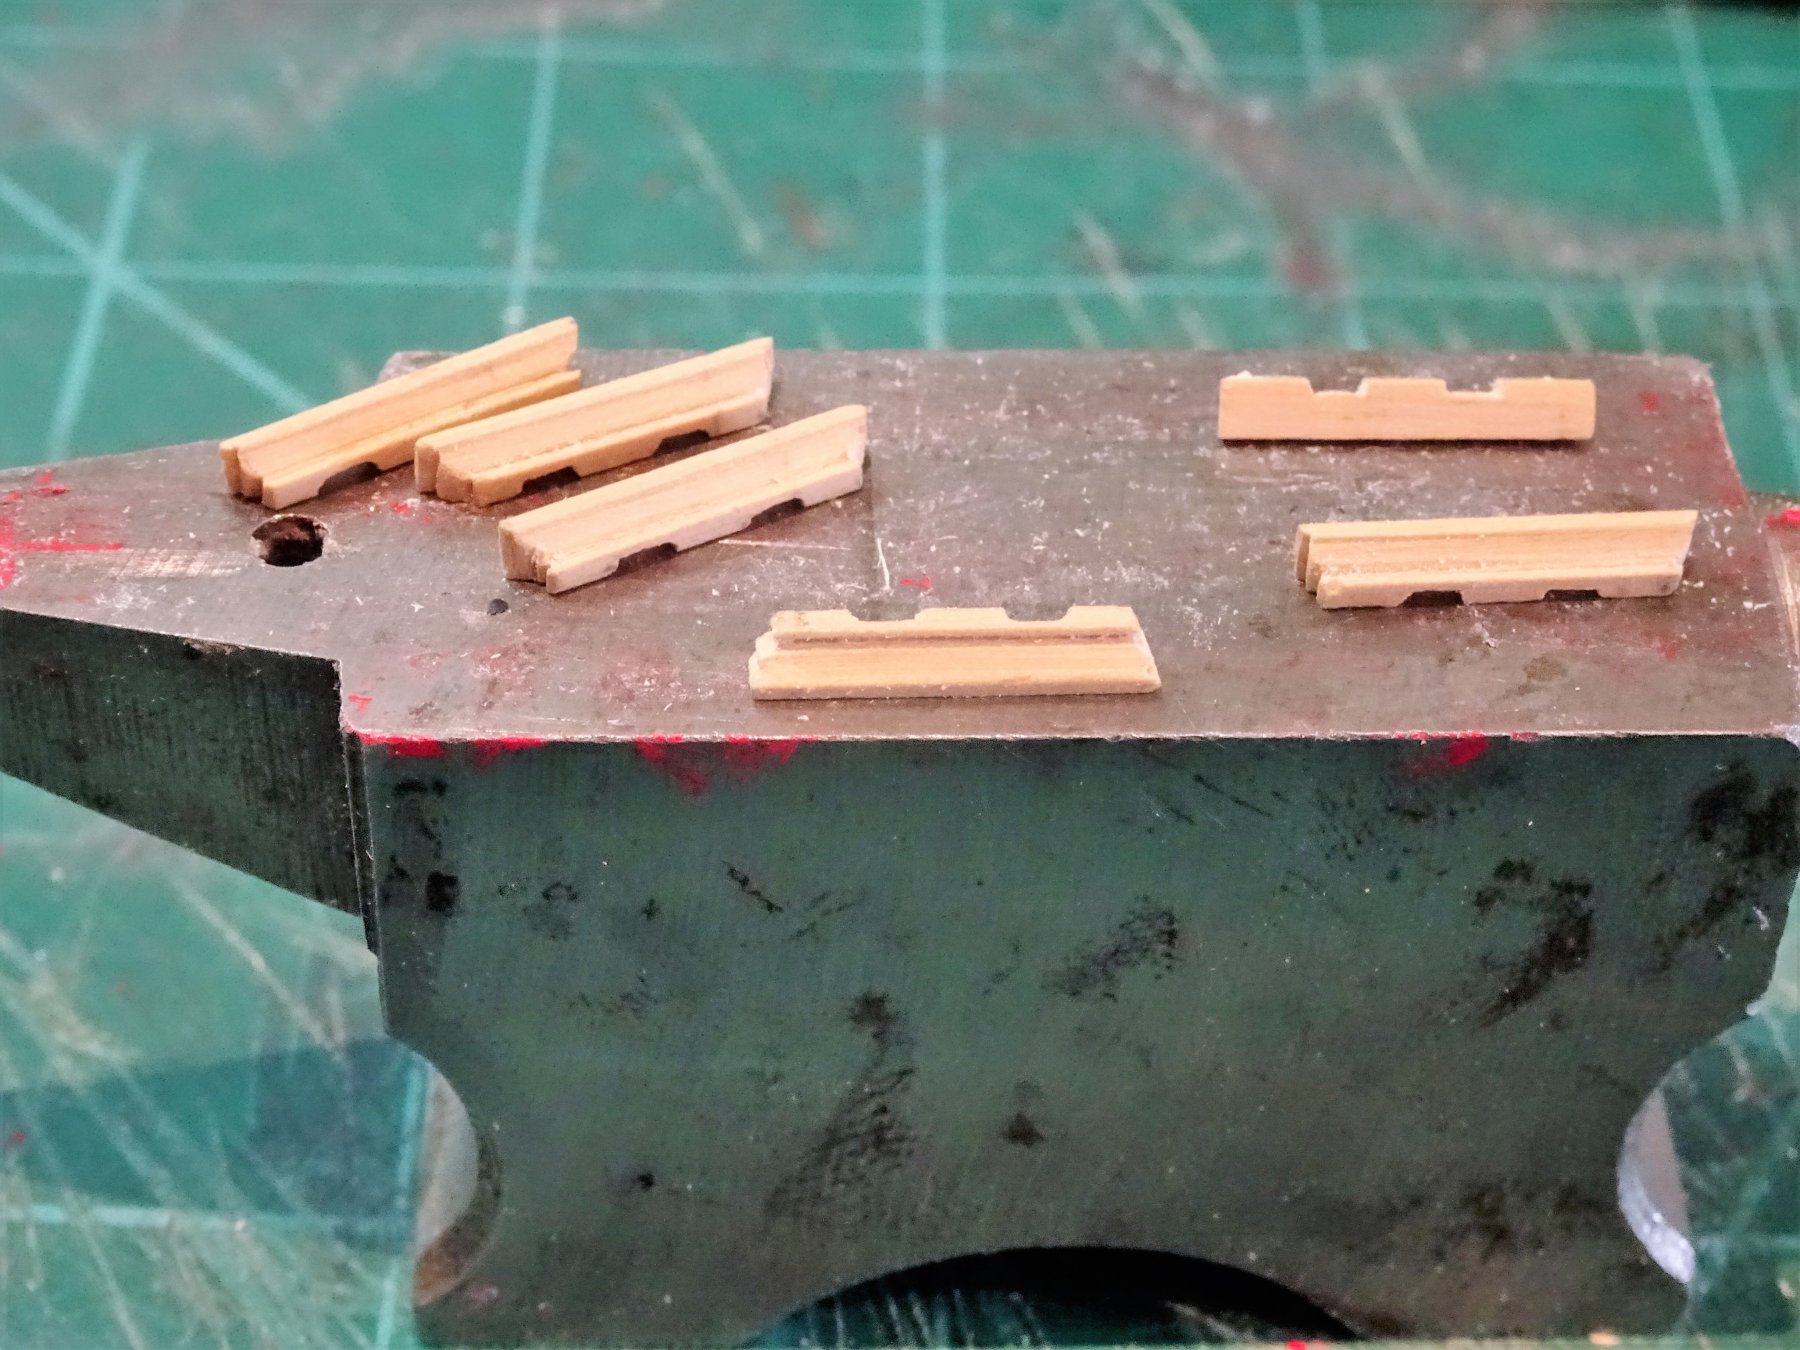
Post 65 Returning outboard Side steps and Channels Surprising how much time producing these seemingly innocuous little fittings take. There are three of these each side aligning with the inboard steps. They are formed from 3/32" x 3/32" Boxwood strip as indicated by Chuck. 5762 I decided to mill the profile rather than use the 'scrape' method but I first had a practice on slightly larger stuff. 5764 5770 Ready for fitting. I fit them in the order of top, bottom, and middle, taking care not to damage the moulding when removing a section to allow the top step to fit in. 5773 The 'iron' stanchions are only temporarily fitted at this point to help align the inboard and outboard steps. 5779 The question has already been discussed on Chuck's log as to why no fourth step. My eye screams at me that one should be there, along the line of the top moulding strip. Only three are shown on the NMM original plans, so three it is, but my eye still screams at me. 5787 Channels These are made from 5/32" x 5/32" strip as indicated by Chuck. Having marked the profile I used the little miller to produce the shape. 5790(2) 5797 The end profile was formed used a scalpel and mini round file. 5801 I decided to leave cutting the slots until later when I had a better idea of the Chainplate angles. 5804 Little by little getting there. B.E. 05/02/2019


.thumb.JPG.f3562c83b78e2e204e81ff93b88ae433.JPG)
- 574 replies
-
- 27
-
-
- cheerful
- Syren Ship Model Company
- (and 1 more)
-
A beautiful build Rusty, great stuff👍 B.E.
-
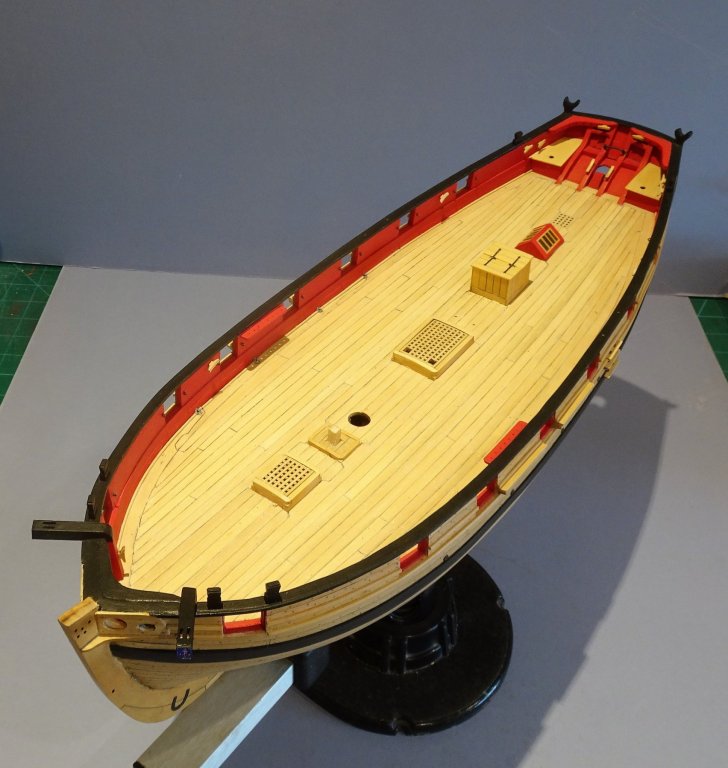
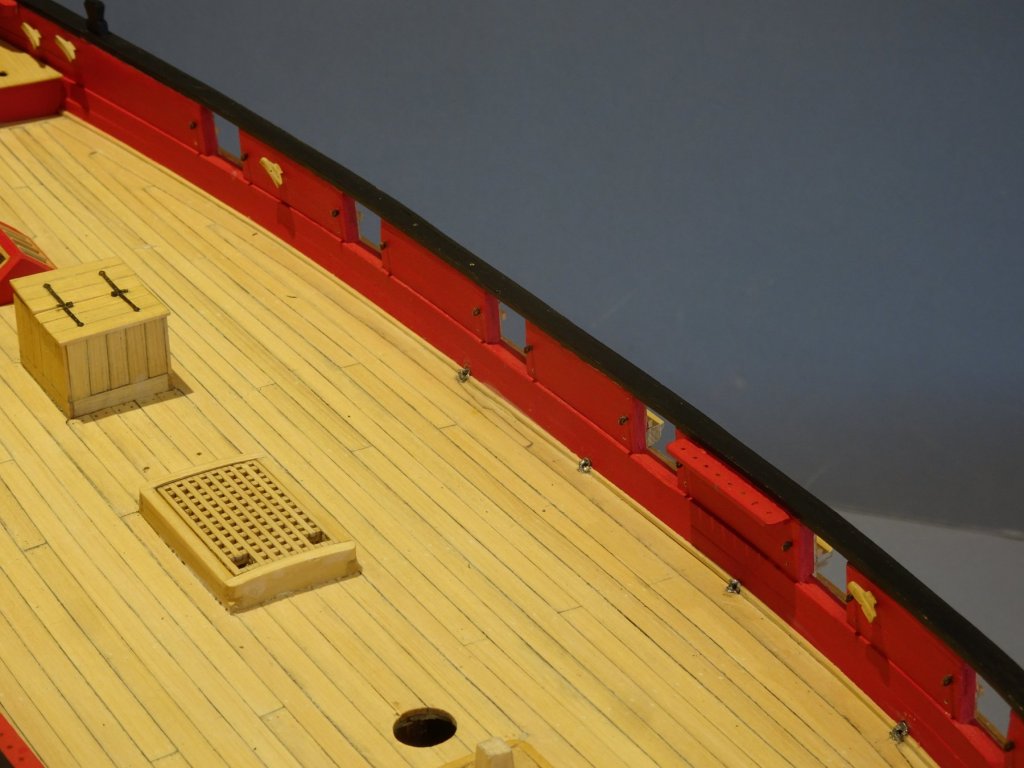
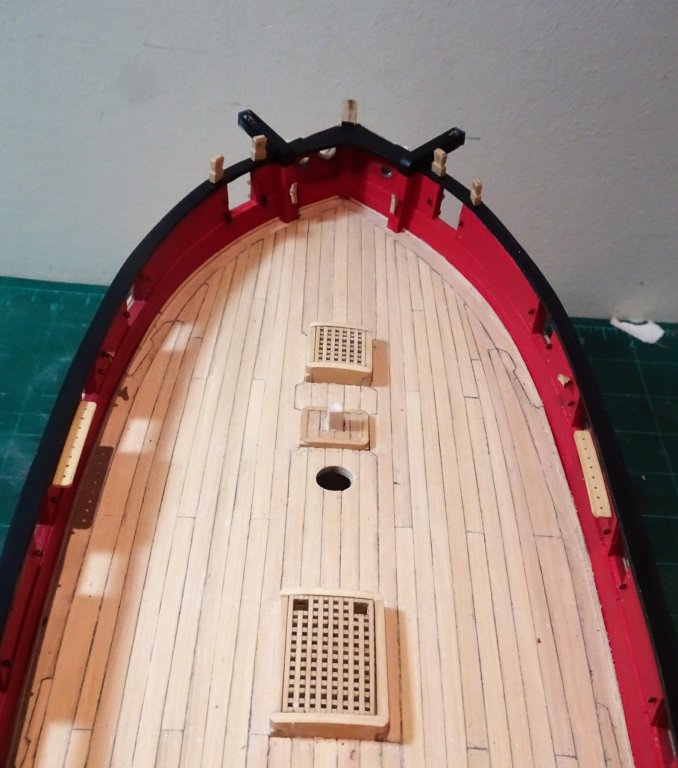
The coamings are glued to the ‘false deck’, the deck planking is then laid. B.E.
- 574 replies
-
- 1
-
-
- cheerful
- Syren Ship Model Company
- (and 1 more)
-
I think you're right Dowmer, having pre-made the hatch surrounds to the plans as I thought, I obviously didn't take the round down sufficiently to the deck level, and then forgot all about it as I moved onto other stuff. Thanks for the heads up, we need more members to point things out that puzzle them or don't seem right to help keep us on track. B.E.
- 574 replies
-
- 8
-
-
- cheerful
- Syren Ship Model Company
- (and 1 more)
-
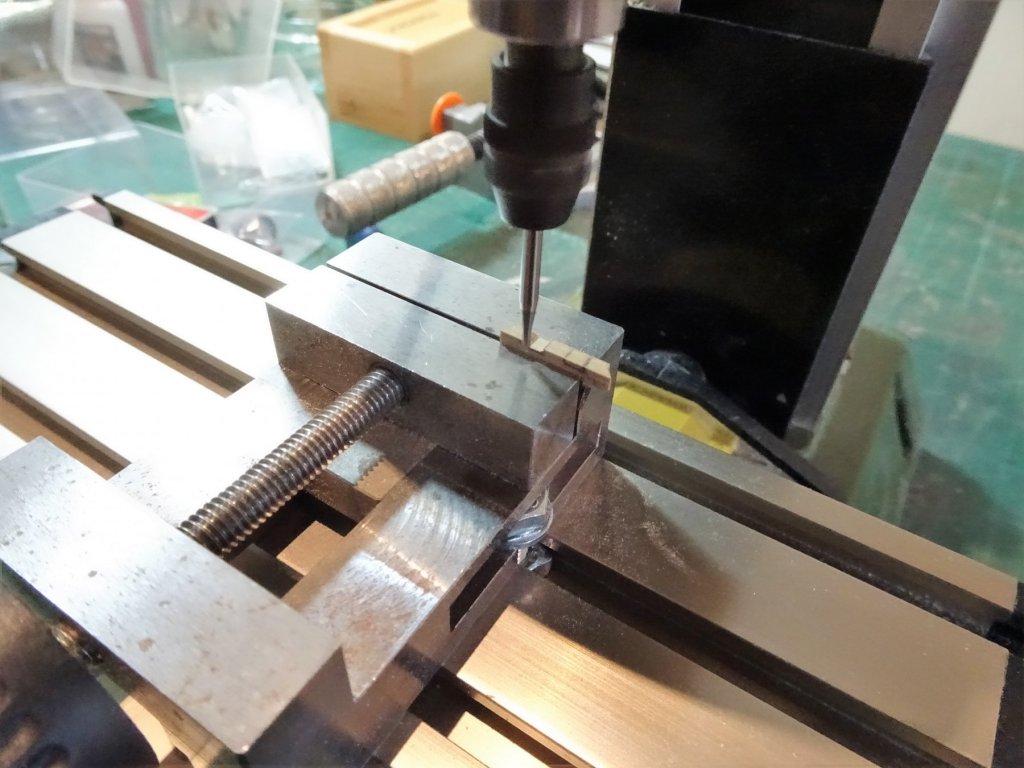
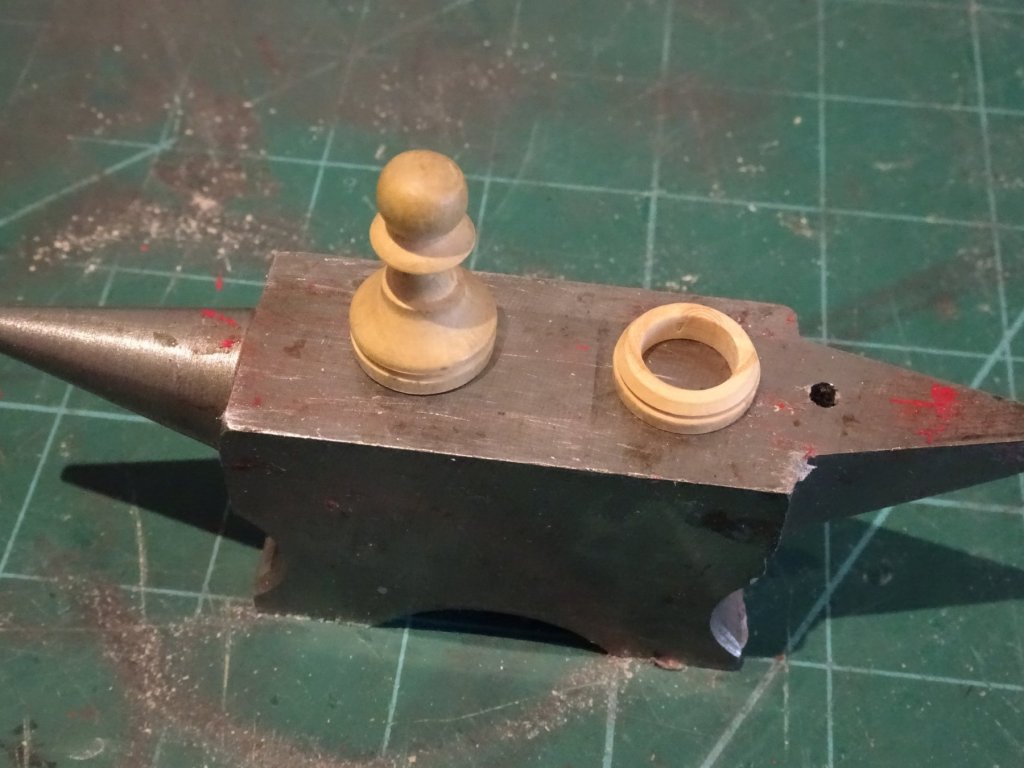
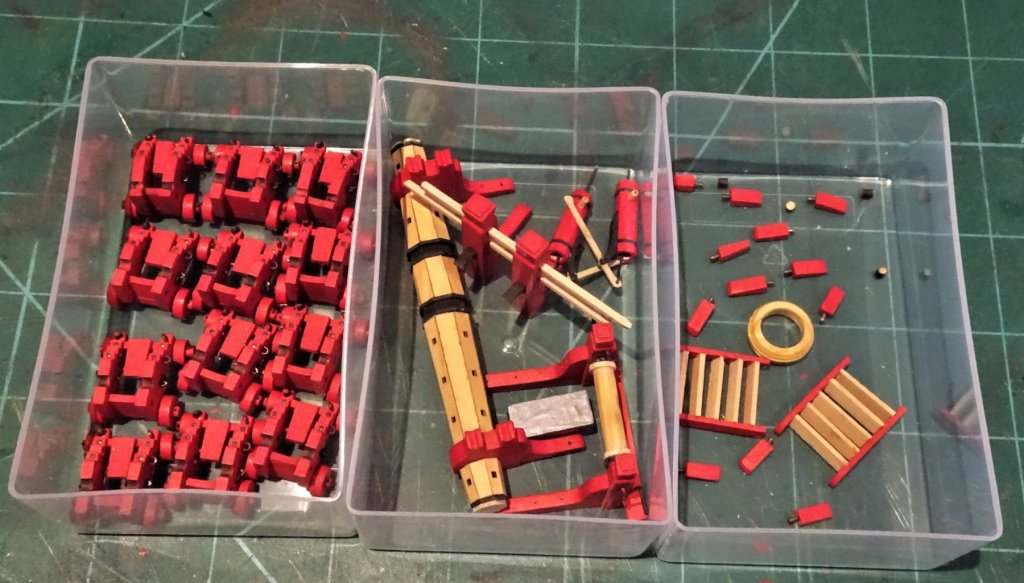
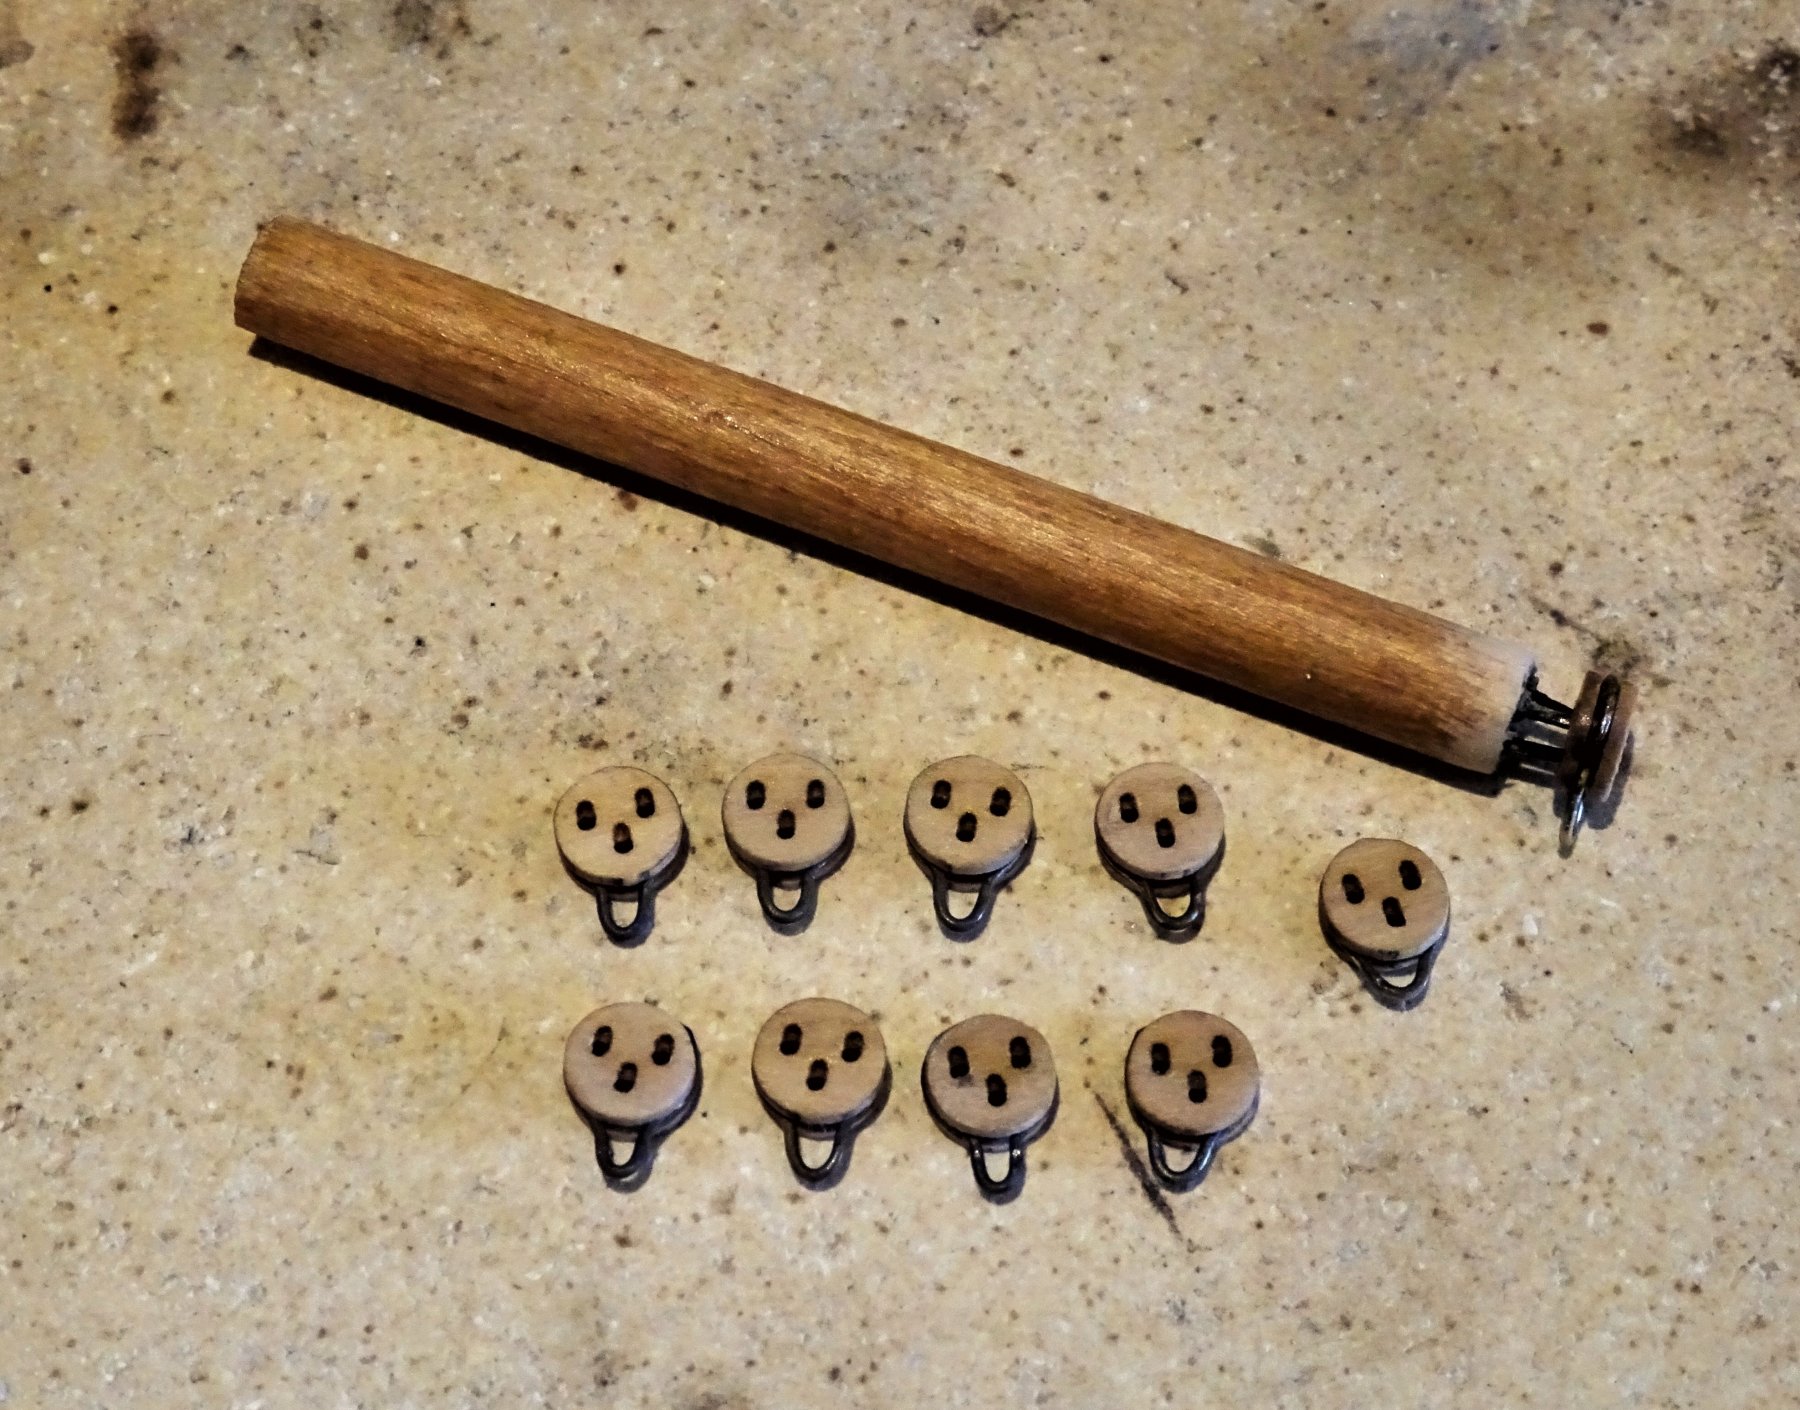
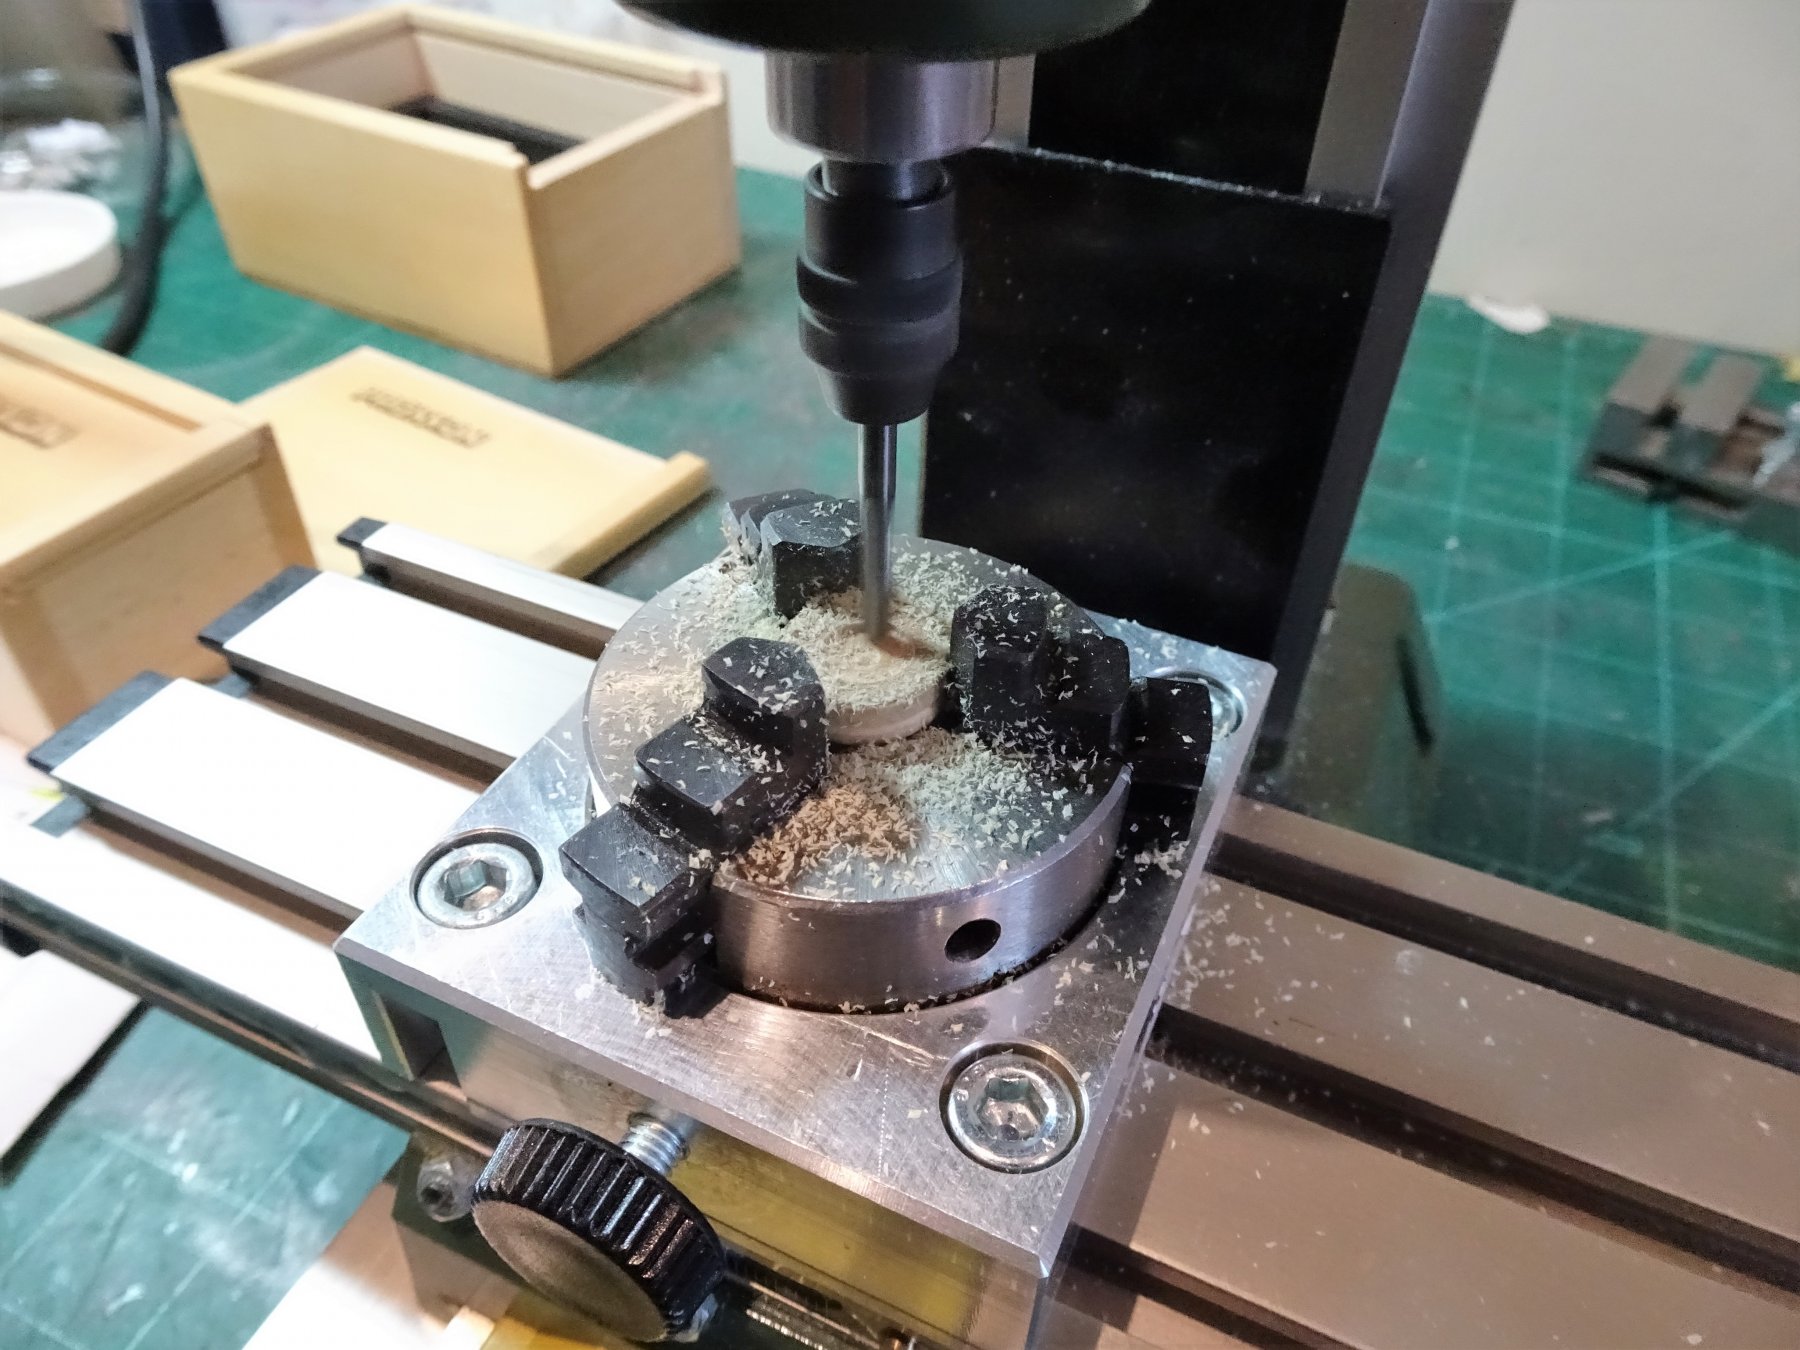
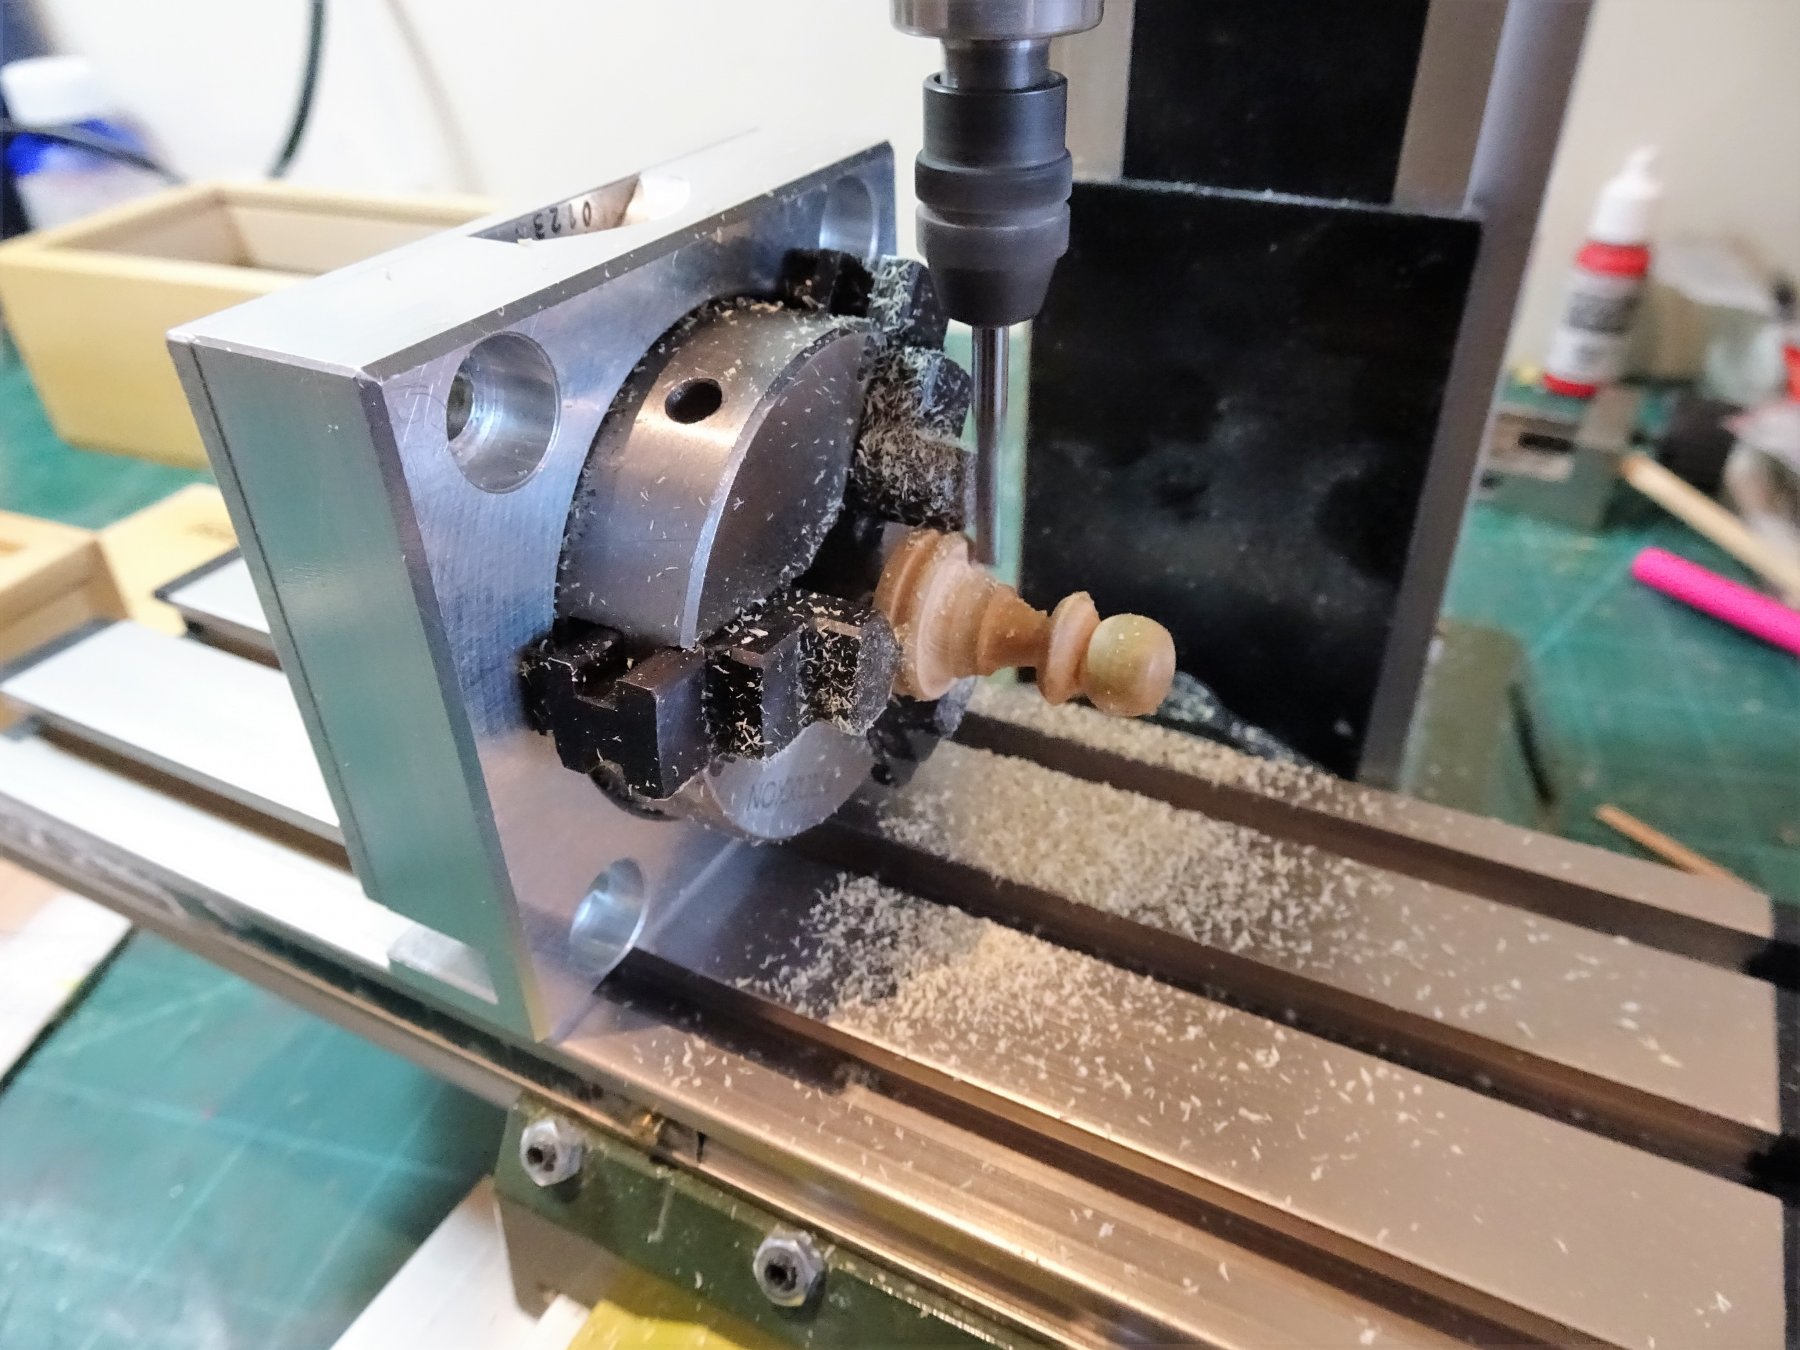
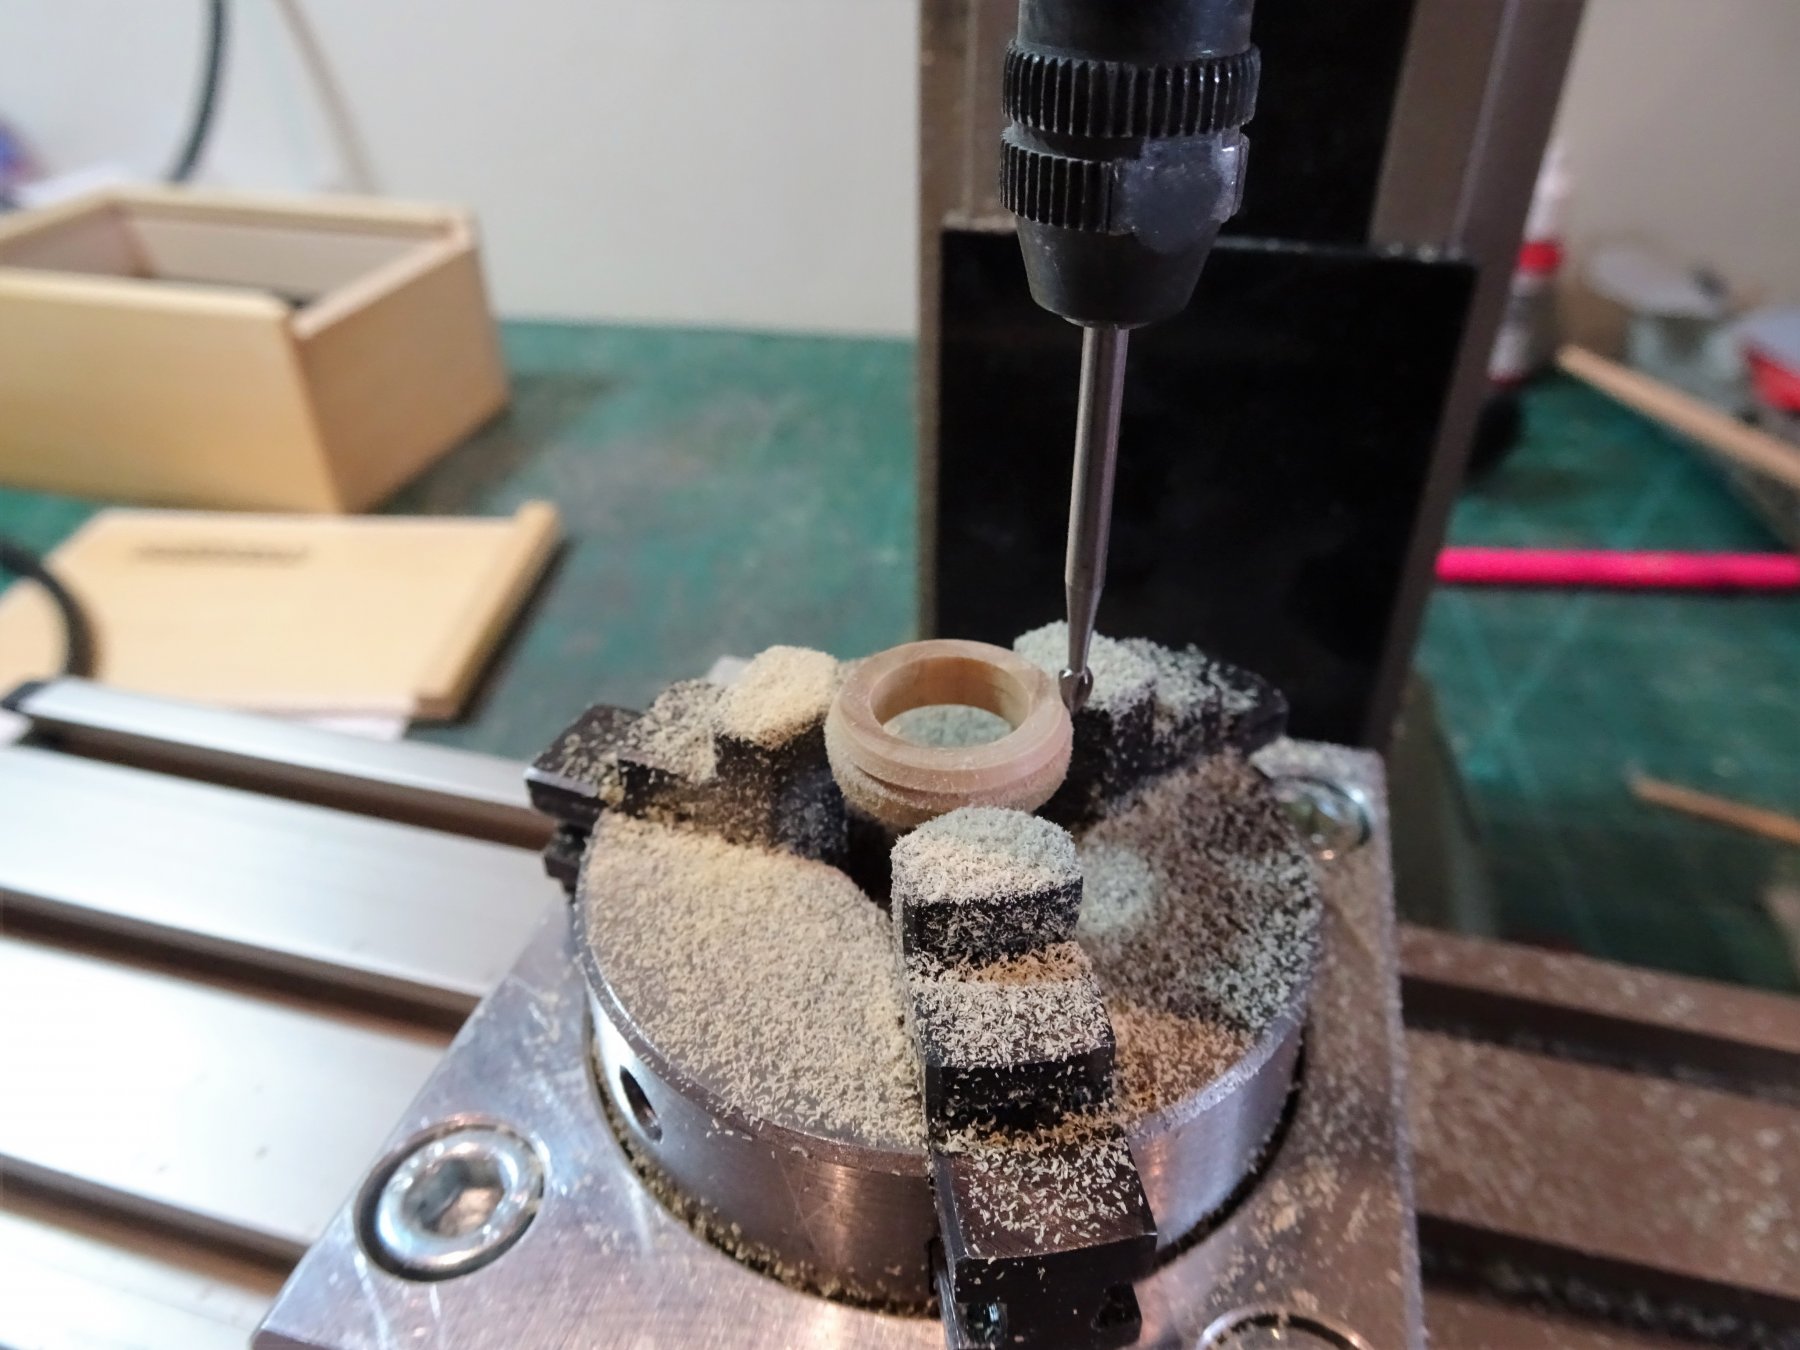
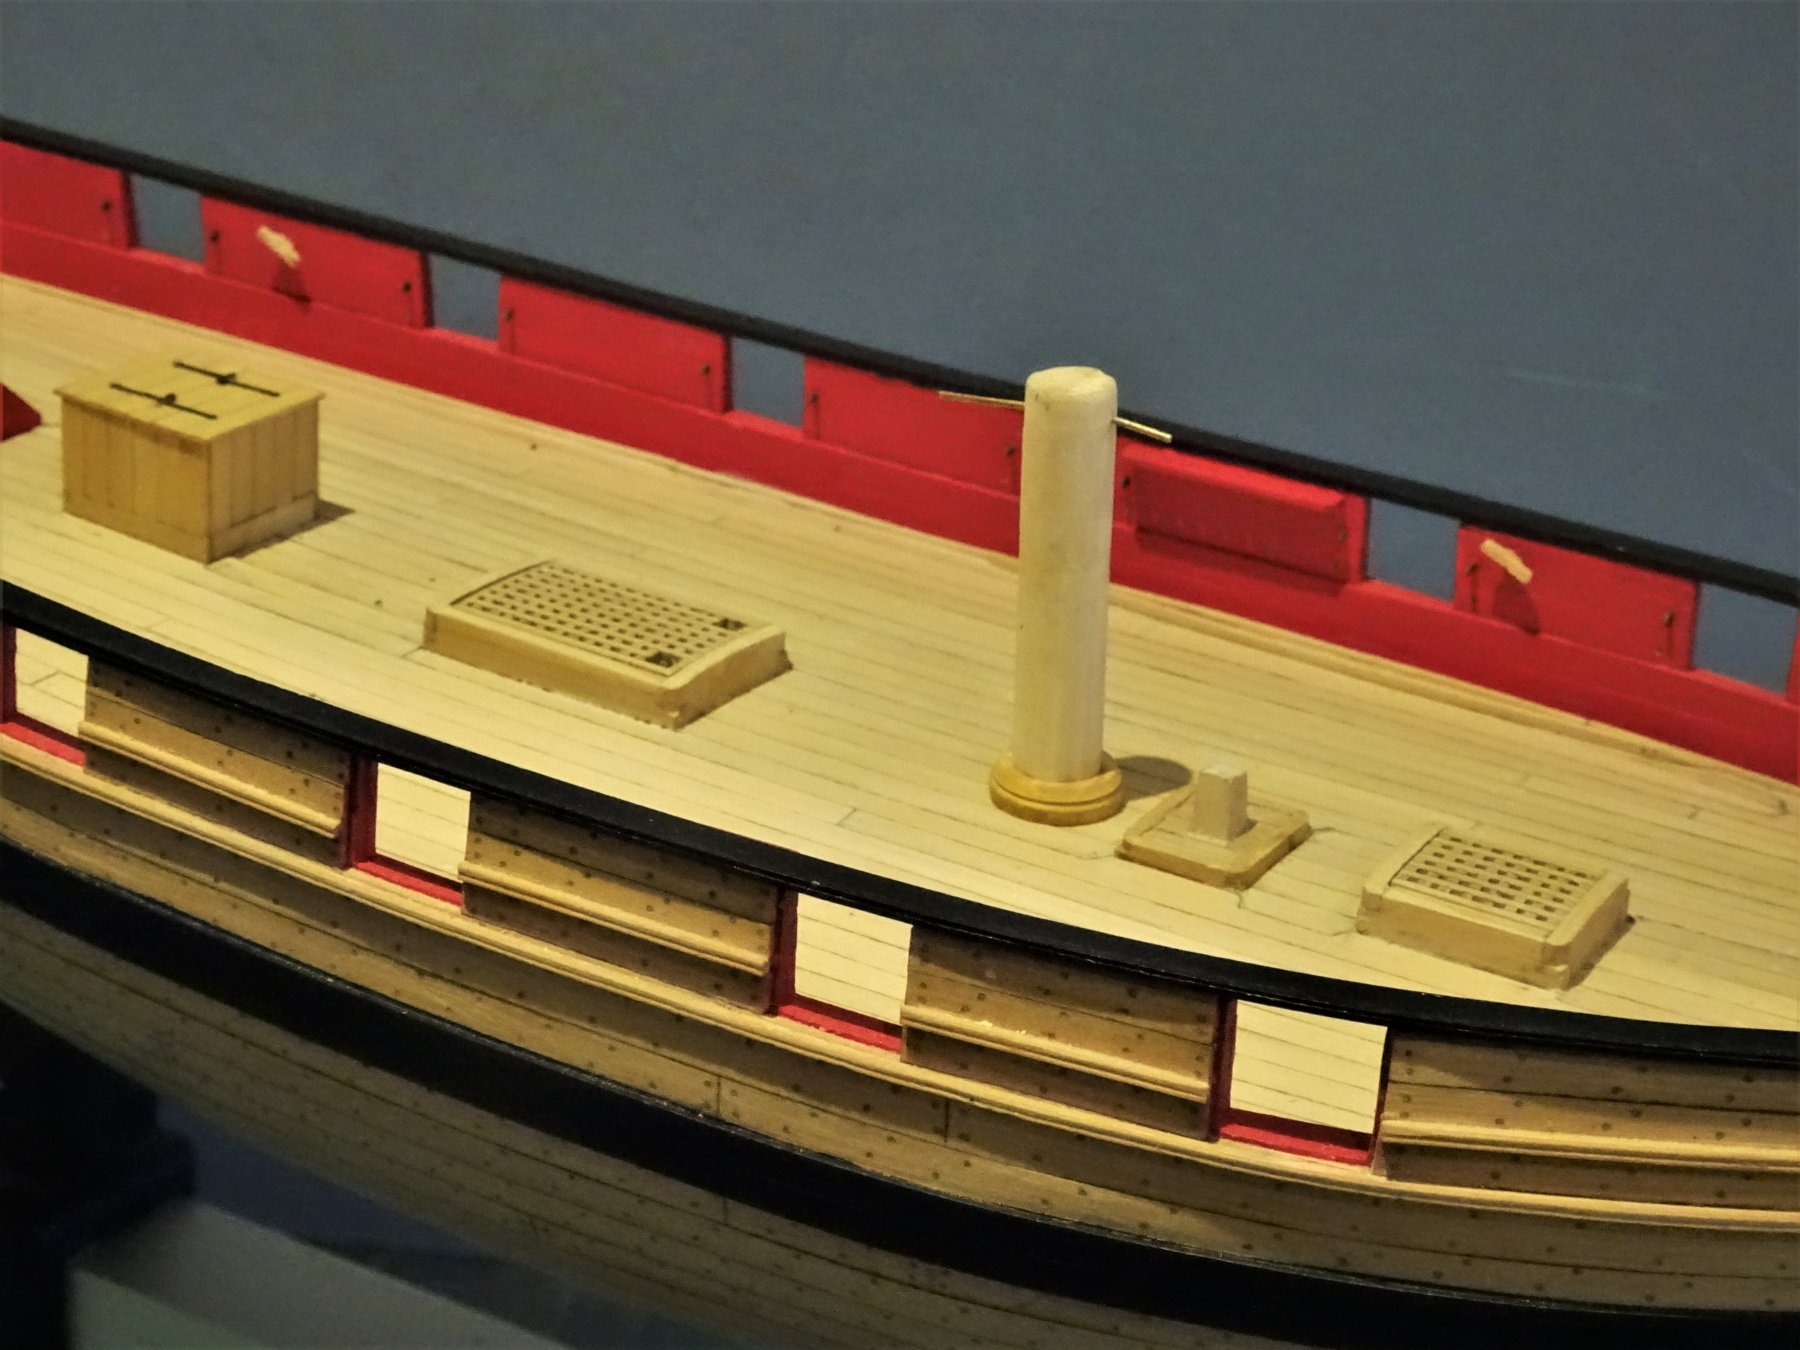
Post 64 Mast Coat This is the last deck fitting I need to make. Have been thinking about it for a while and I didn't fancy trying to drill and shape this boxwood ring by hand. So for this little exercise I got the mill out. 5735 I also brought into use the Dividing head to remove the centre. 5736 The beauty of this tool is that it can be used in either the horizontal or vertical plane. 5737 This gives a clue as to the donor for the mast coat. 5739 Shaping the rim is the final operation. 5741 Not for the first time an old Boxwood chess piece has provided the makings. 5746 5755 5754 A little more tidying up and another milestone sort of reached. 5760 Meanwhile the precious little boxes of fittings delight await their turn. That about does it for the present, now returning outboard. B.E. 01/02/2019


- 574 replies
-
- 22
-
-
- cheerful
- Syren Ship Model Company
- (and 1 more)
-
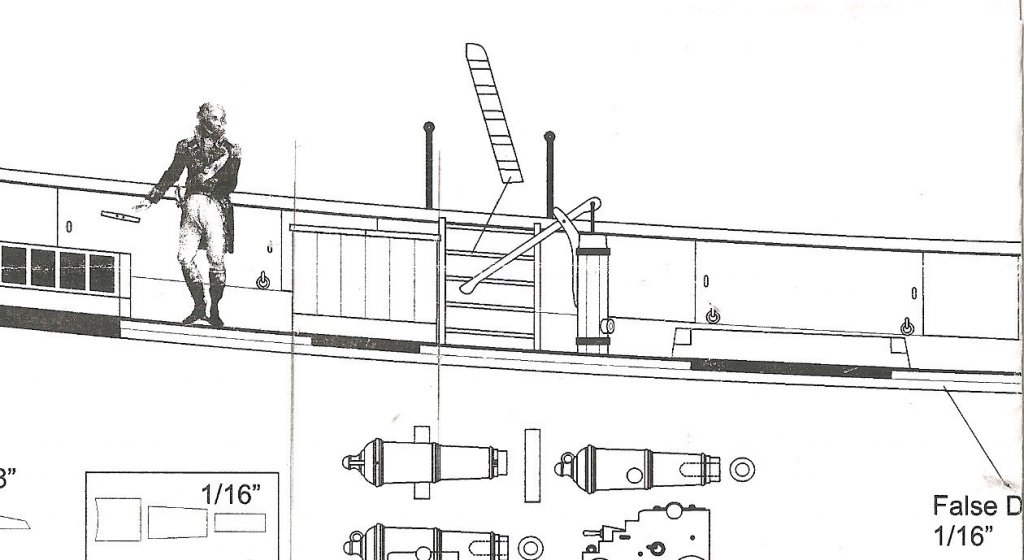
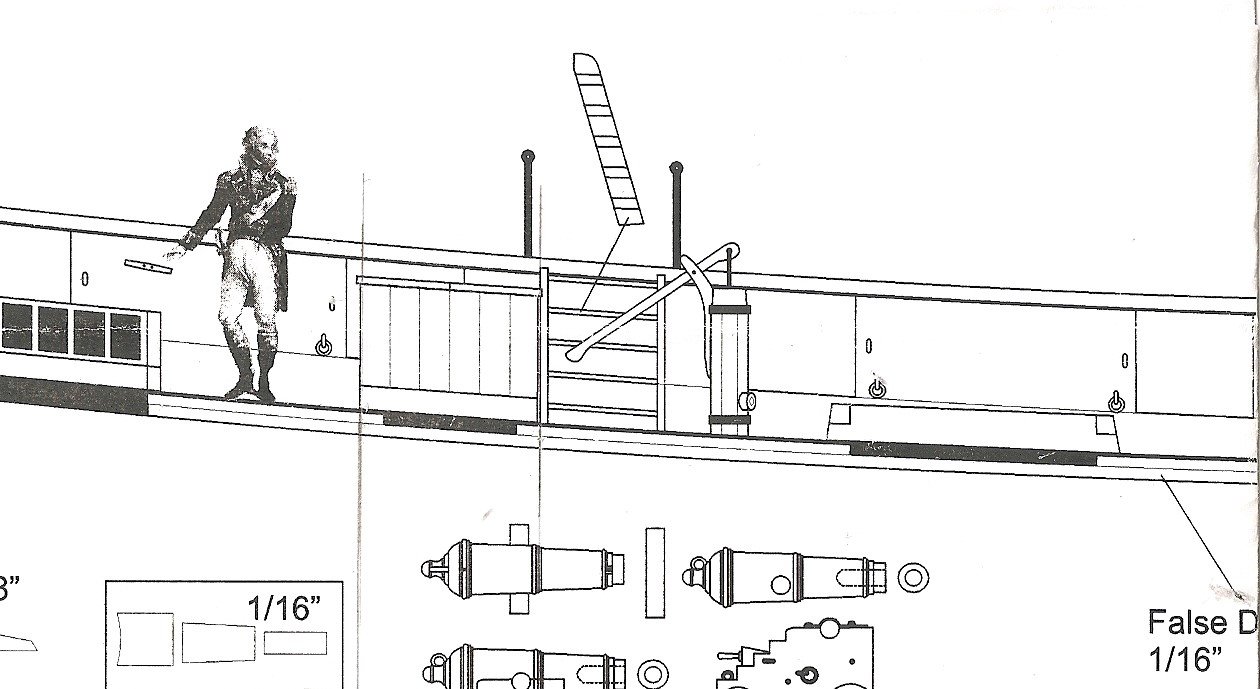
Hardly perfect Dave, I think you must be going blind 😃 I shudder sometimes at the macro shots, but from 12" it looks ok, at least to my eye. It is the plan with the inboard profile and deck plan on it. I chopped my plans up to make them more easy to use, but this section may help you locate the ladder profile. Hope your finger stiffness eases off soon. Regards, B.E.
- 574 replies
-
- 3
-
-
- cheerful
- Syren Ship Model Company
- (and 1 more)
-
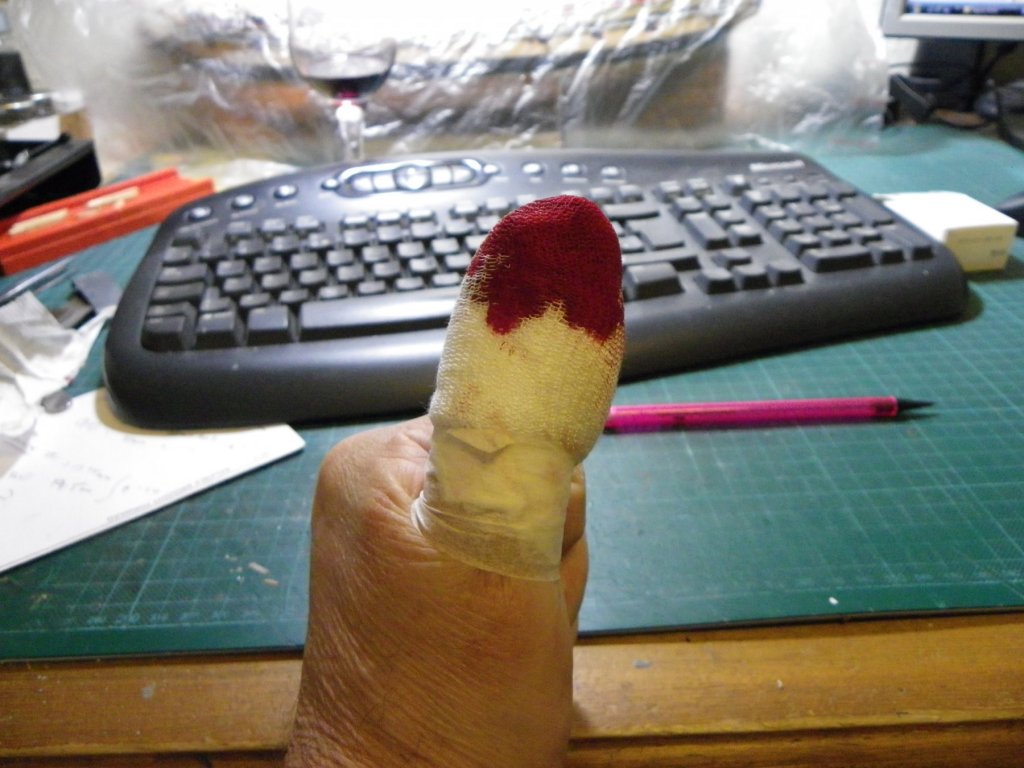
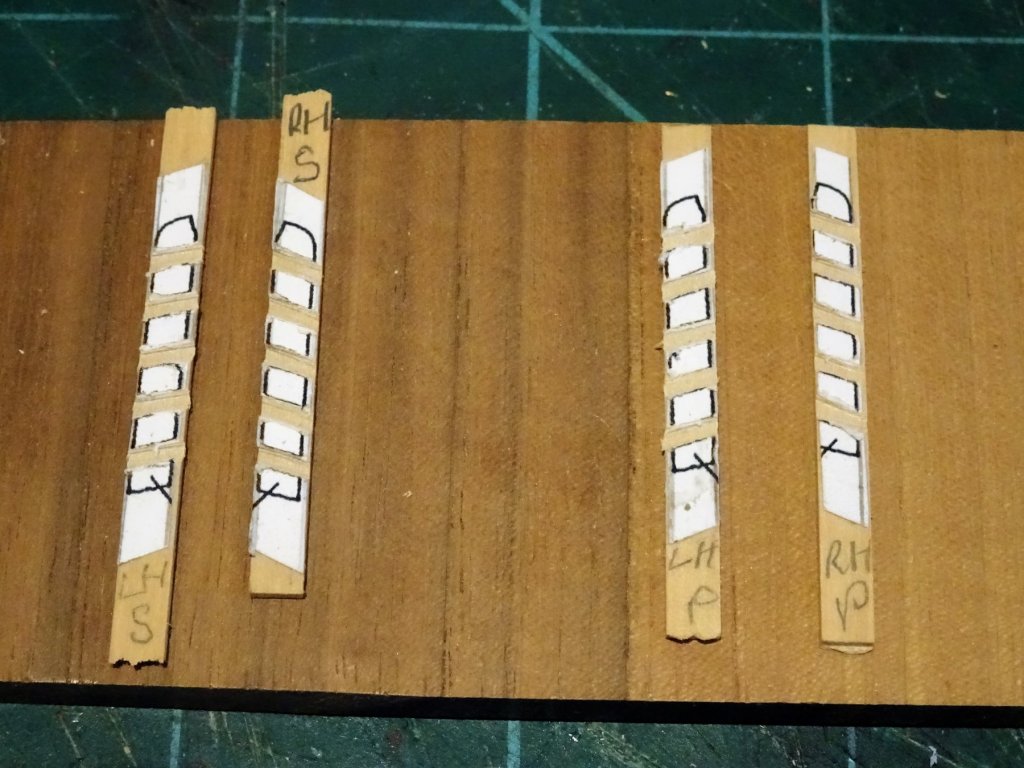
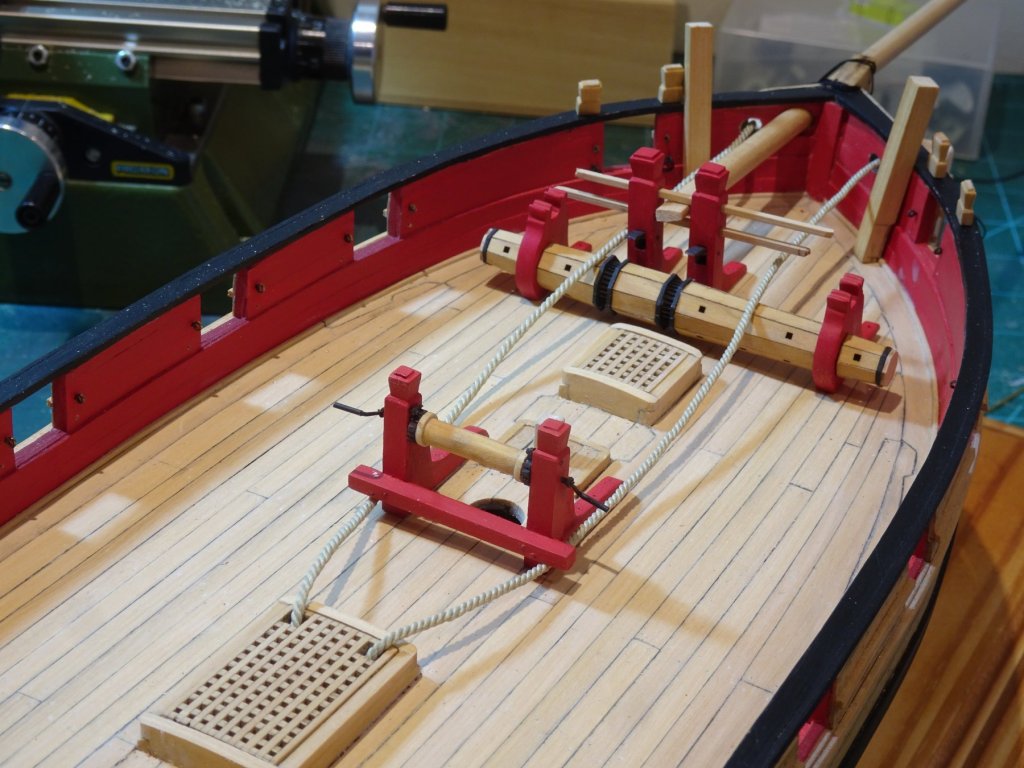
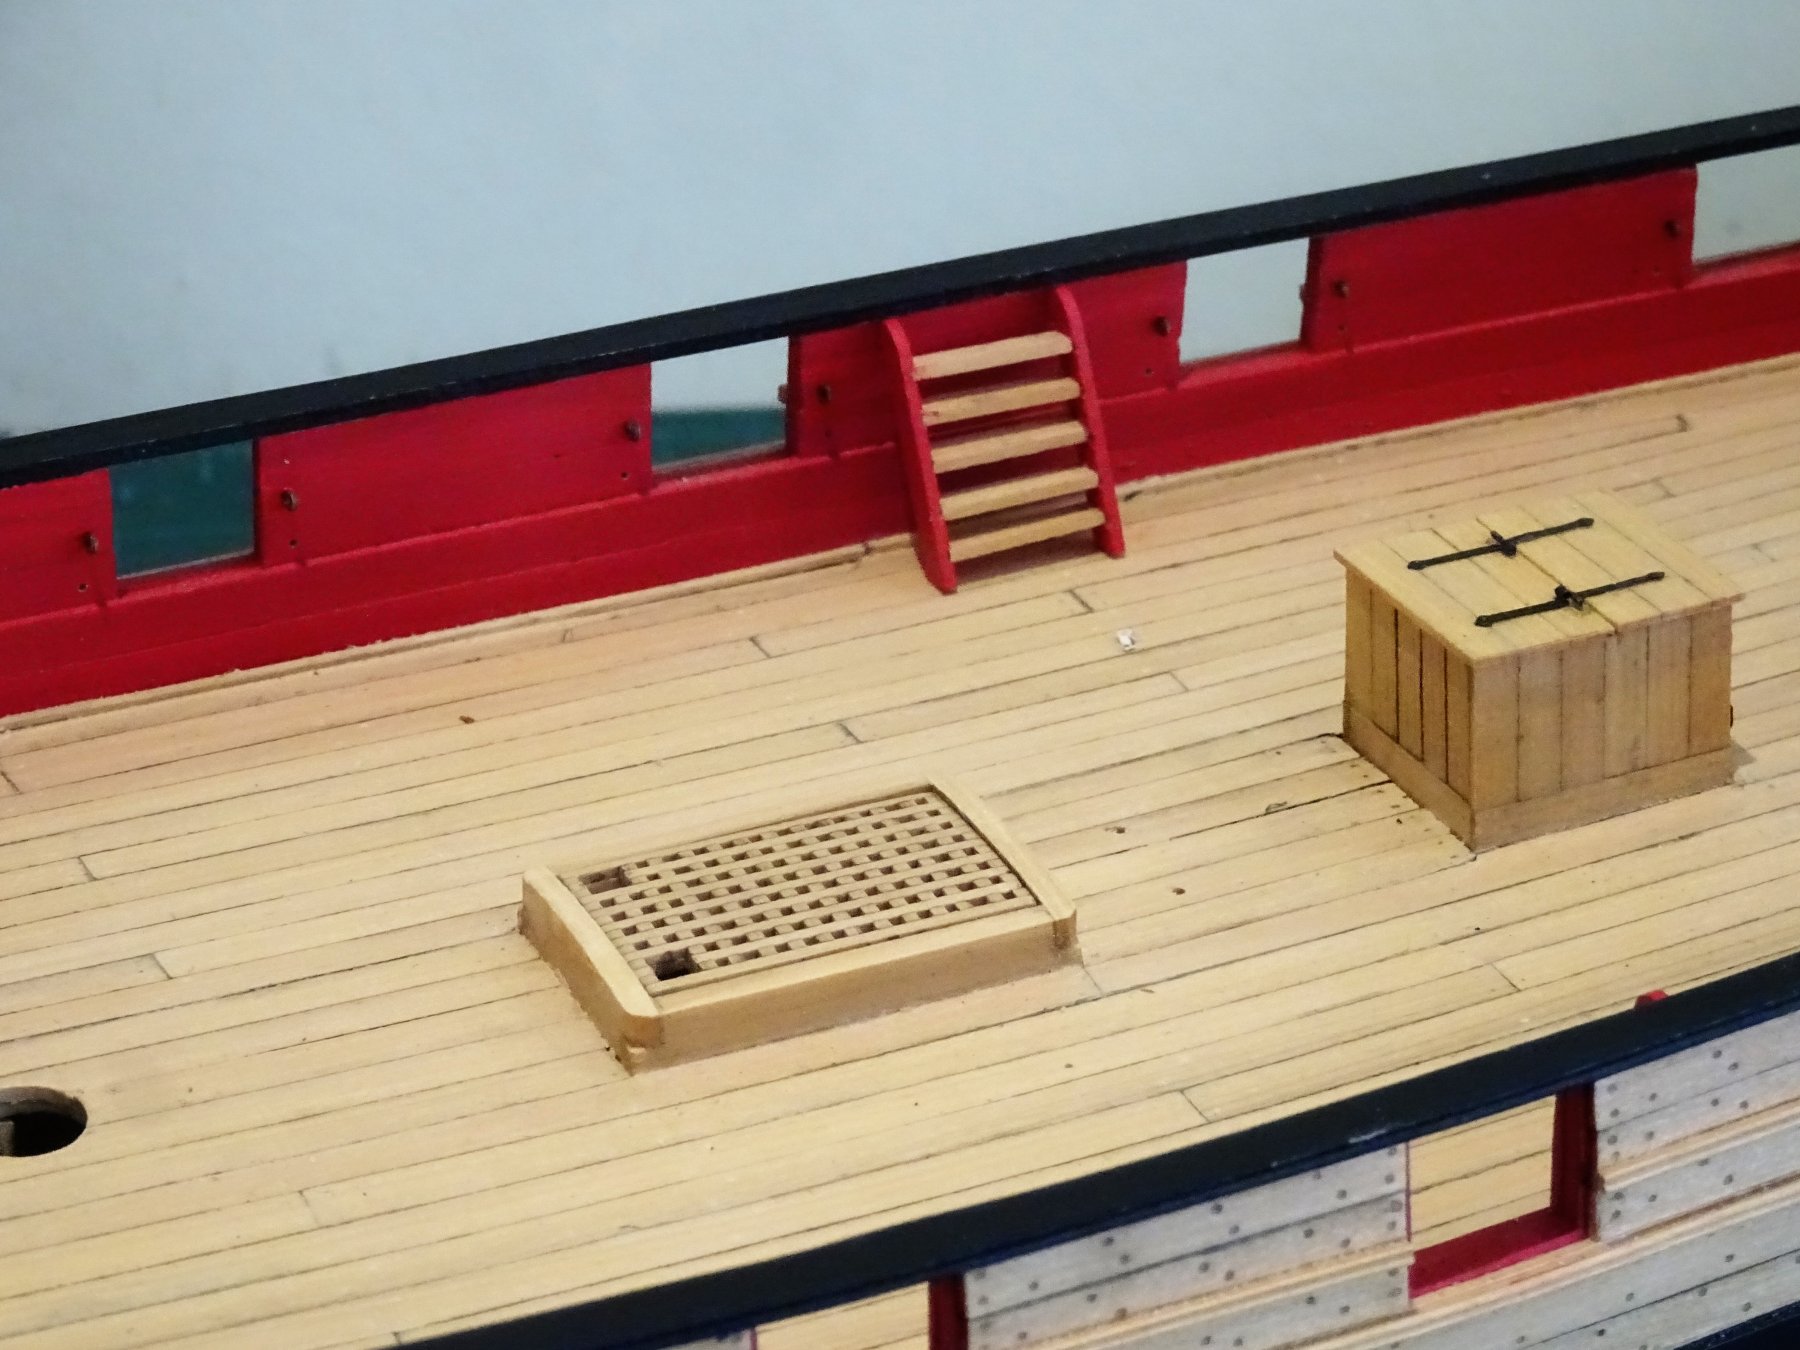
Post 63 Timberheads, cleats, and other sundry attachments Timberheads are fairly easy to carve, getting them all to look pretty much identical is the tricky part. 5693 It is a case of drawing the cut lines and shape on the strip and start carving. 5708 The aft timberheads are slightly more tricky as they have to be shaped at the base to counter the sheer of the rail. I like to use a No 11 scalpel blade fitted in a No3 Swann -Morton handle for this task. The boxwood pares away easily but care has to be taken to control the scalpel. I tend to hold the blade well down the handle, balanced across my forefinger and the scalpel handle end braced against my palm to limit movement. These things were designed to remove tissue and they do it very efficiently as I have in the past found to my cost. 001 Suffering for my art back in 2012 With the stems cut to size a short length of brass rod is inserted into the base to correspond with a matching hole in the cap rail. Cleats. Rather than struggle to make these tiny fittings I opted to use Chuck's pre -made items tweaked to suit. A mixture of 9mm and 7mm sizes. 5710 I also decided at present to leave them natural as a contrast to the inboard paintwork, but in view of my enduring indecision I may revisit this later. Boom Sheet Horse. A specific size for the horse is not given but a piece of copper wire of 1.3mm ø seemed to suit so I used that. The height of the horse is also not specified but the rigging plan shows it in profile and it looks to be around 3mm. 5703 I chemically blackened the horse before fitting. Mine seems to have developed a slight kink, I've previously warned the dockyard mateys about jumping up and down on it, it may have to be replaced. Inboard Ladders I would normally go thro' my parts stock and use pre cut ladder sets, but unfortunately I don't have any close enough to match the Plan requirement. For the ladders I used 3/64" x 5/32" strip. 5594 Copies of the plan ladder profile were glued to the strip and the tread slots marked with a scalpel, and cut using a mini file. It is necessary to take a reversed image of the plan to get the profile for the left hand stile slots. Always tricky little beggars to assemble, they seem to have a life of their own and the stiles do need simple jigs to hold them steady whilst the treads are inserted and the opposing stile is attached. 5684 I decided to leave the treads natural. 5707 5690 Pin Racks One each of these is positioned along the bulwark adjacent to the mast. Simple to make from 3/64" x 3/16" strip which allows for the slight curvature along the edges. 5733 Brass pins were inserted in the back edges to provide extra support when glued to the bulwark. B.E. 30/01/2019


.thumb.JPG.2406edc811025780ce462960e3524c79.JPG)

- 574 replies
-
- 22
-
-
- cheerful
- Syren Ship Model Company
- (and 1 more)
-
Very nice work on those guns Jason, I got off lightly having only a dozen on my little Cutter. Love the natural drape you’ve achieved on the breeching ropes , and impressed that you went with the proper hitch for the ring bolt seizing. Your little jig for rope length will prove useful for me in the very near future. B.E.
-
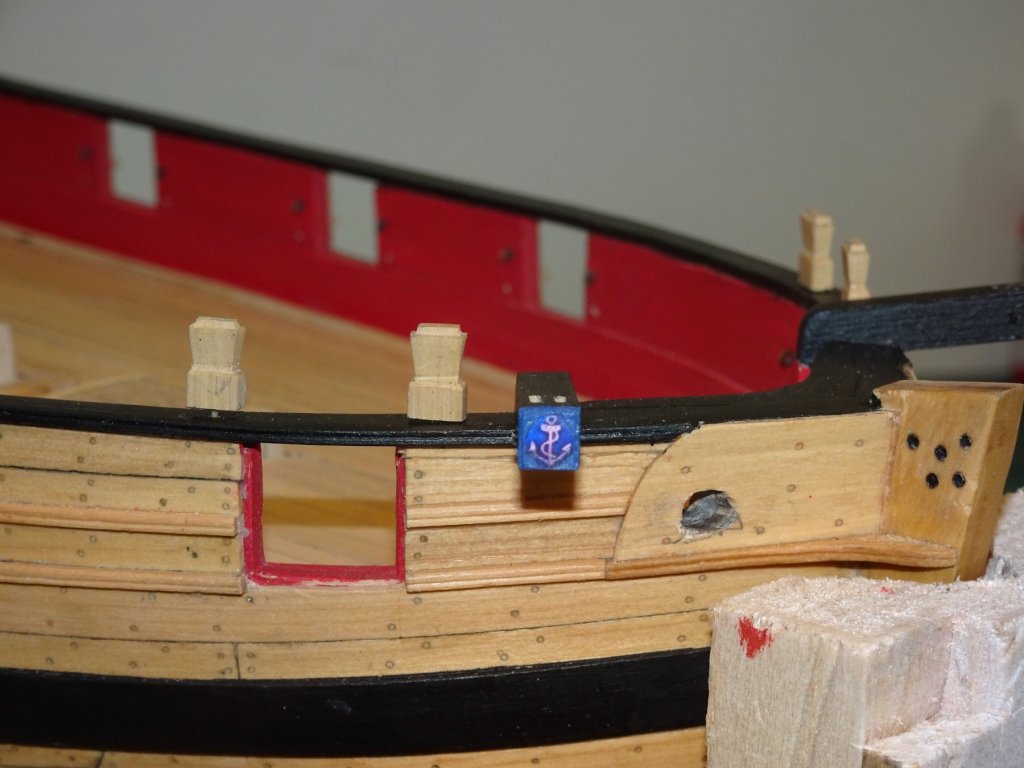
Post 62 Completing the Catheads These are now painted and the cleats attached. 5697 Working sheaves are in place, and I decided to add a decorative panel at the end which on the real thing also served the purpose of protecting the end grain of the Cathead. 5673 5691 Catheads were traditionally decorated and apparently around the beginning of the 19th c a *fouled anchor was in vogue. *The Construction and Fitting of the English Man of War 1650 - 1850 by Peter Goodwin. No evidence what decoration, if any, Cheerful had on her Cathead, but the idea of a fouled anchor appealed to my sense of irony, so a fouled anchor it is. 5700 Not a fancy carved version as might appear on a more important vessel, but a simple painted affair more appropriate to a humble cutter. Inboard works continue in my next post. B.E. 28/01/2019


- 574 replies
-
- 14
-
-
- cheerful
- Syren Ship Model Company
- (and 1 more)
-
Thank you Jnugid, much appreciated. 🙂 Hi Dave, I think 1.8mm ø line should be about right. I don't intend to fit a cathead bracket, but Peter Goodwin shows one on the Alert book plans and drawings. Hi Martin, The method of constructing the Cathead on the Cheerful is a modelmakers simplification as used by Chuck. I think the idea is you shouldn't see the join. Hopefully by the time I've completed the painting it won't be apparent on mine either. The alternative and more authentic method would be to cut the Cathead from a single piece of timber, but then it would be more tricky to cut the sheaves in the outboard end. In reality small vessels like Cheerful would have had what was described as a vertical Cathead, cut from a selected piece of compass timber shaped and bolted thro' the bulwark. Cutters carried fairly lightweight anchors of around 18cwt, so the method was considered adequate for the task. Thanks Jason, I didn't use a jig for the timberheads, these will be the subject of my next post. Cheers Guys. B.E.
- 574 replies
-
- 2
-
-
- cheerful
- Syren Ship Model Company
- (and 1 more)
-
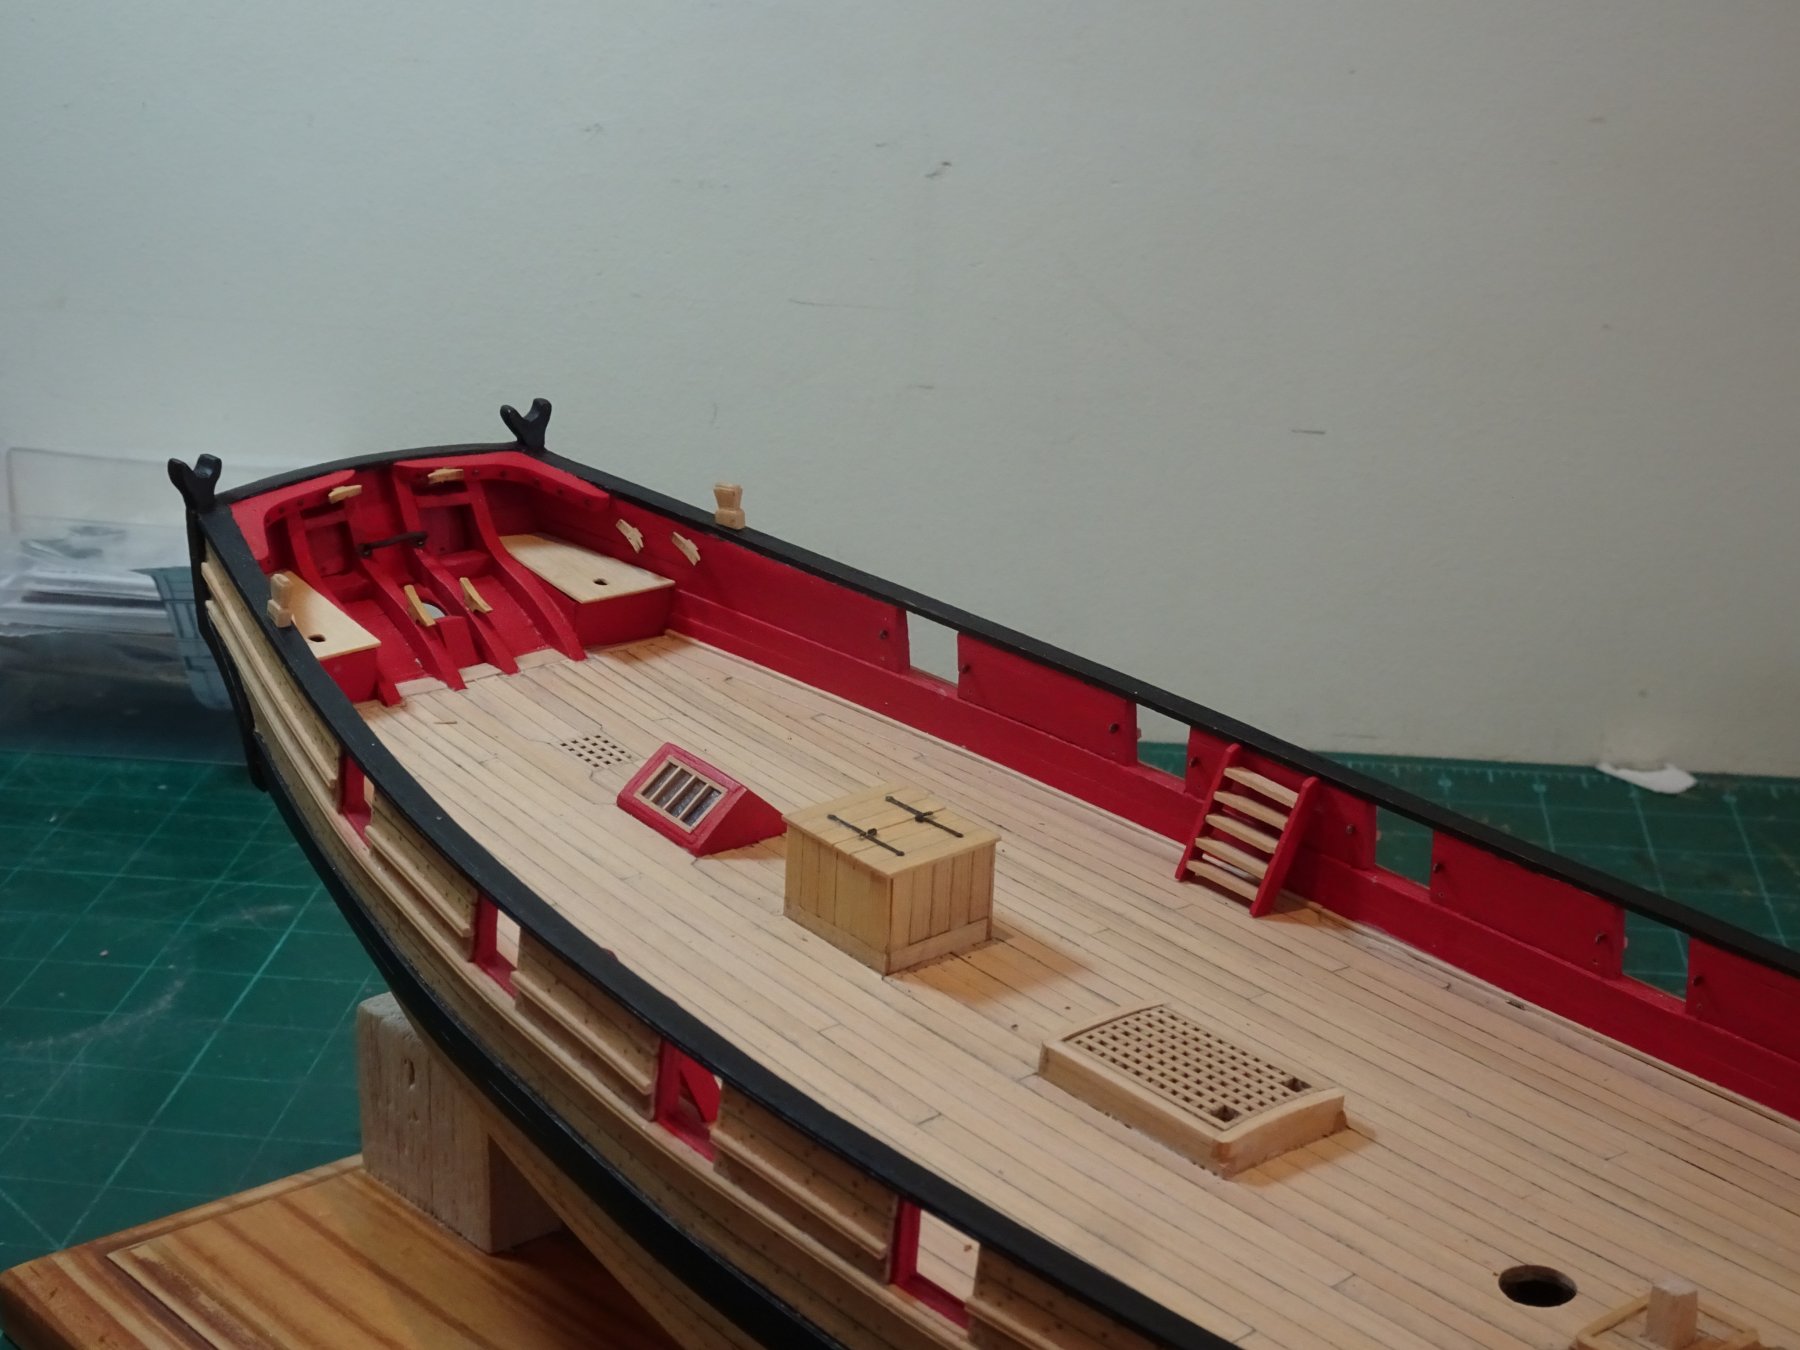
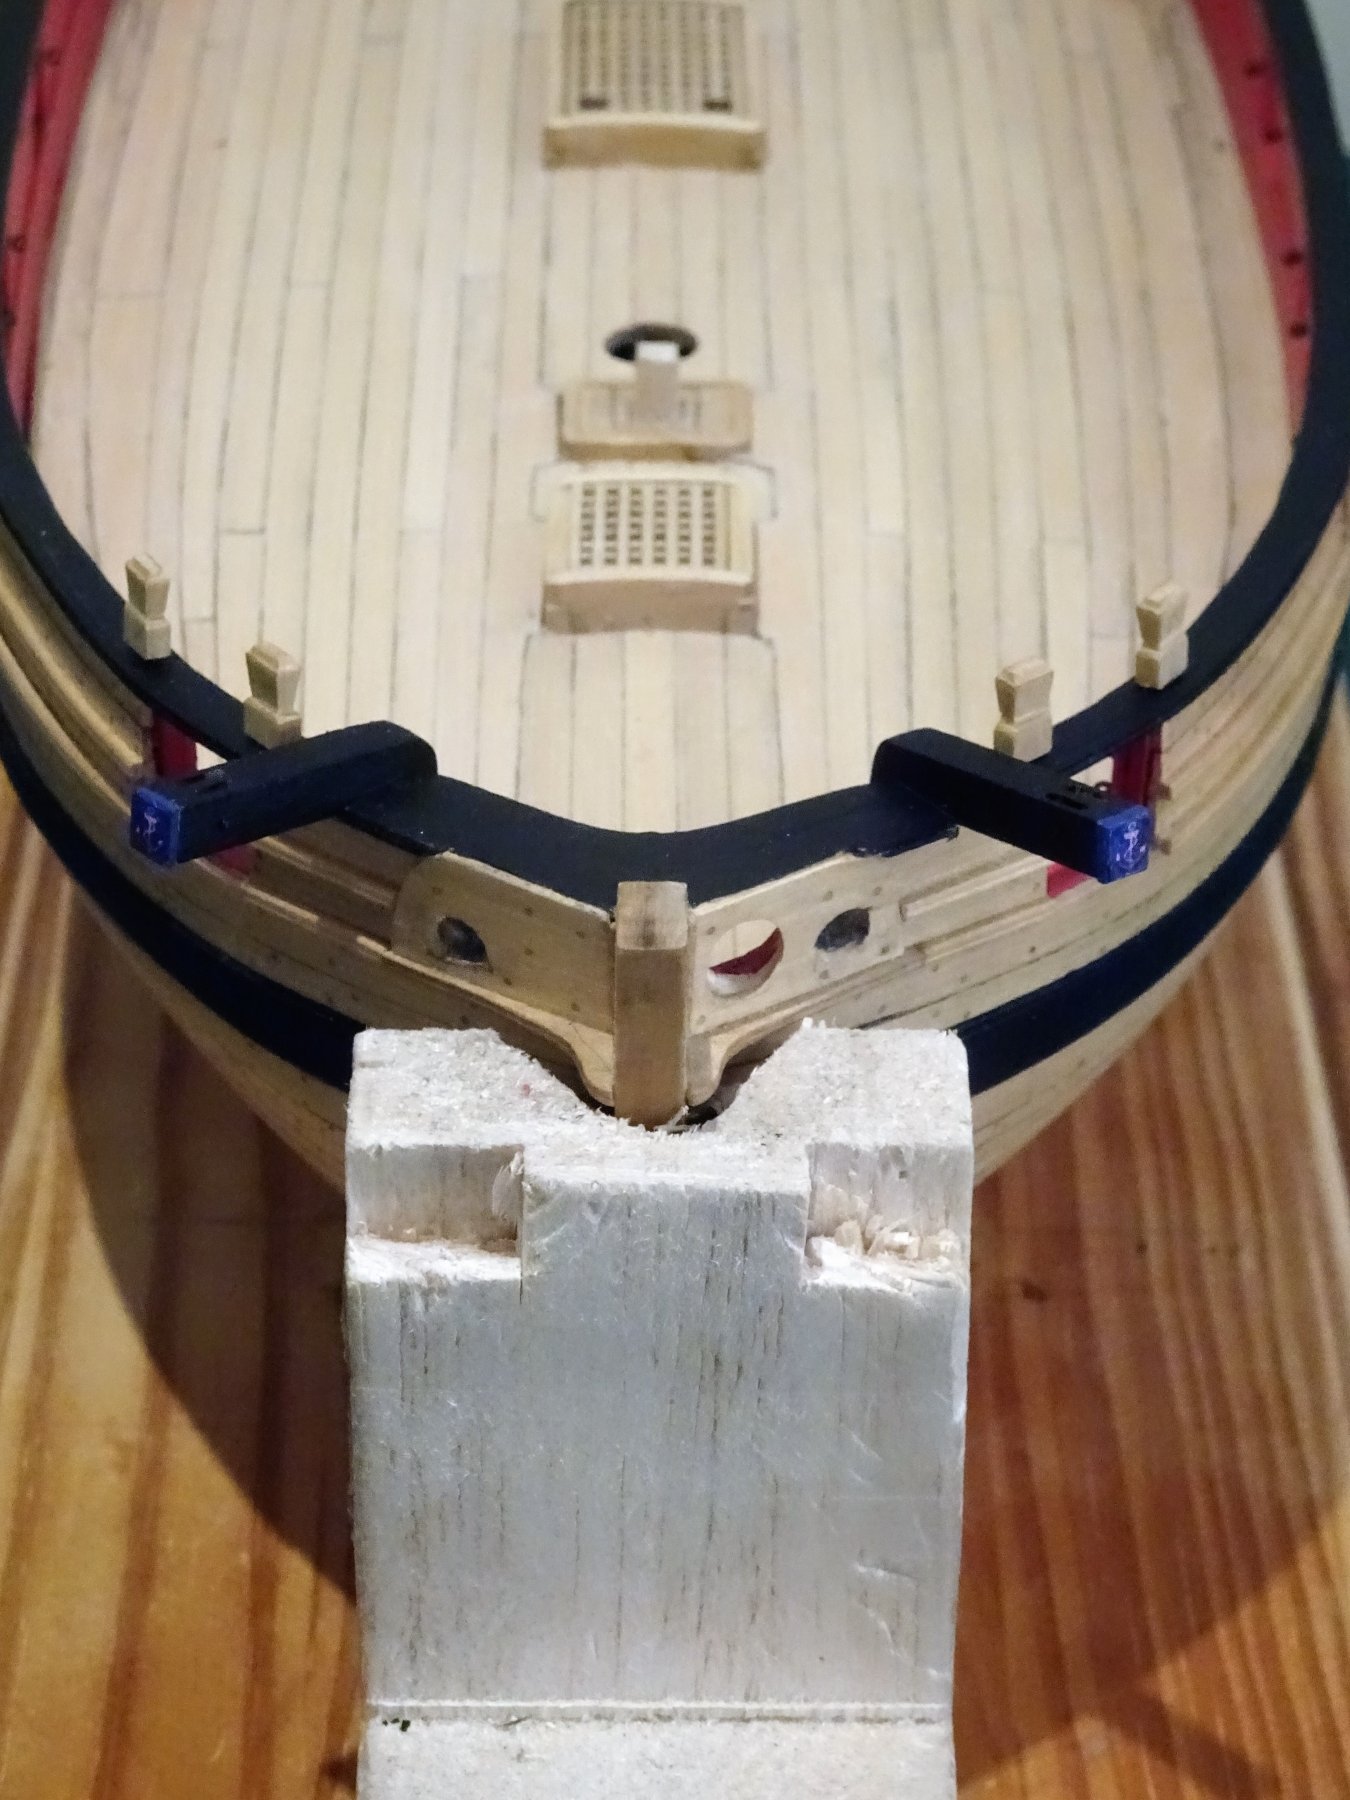
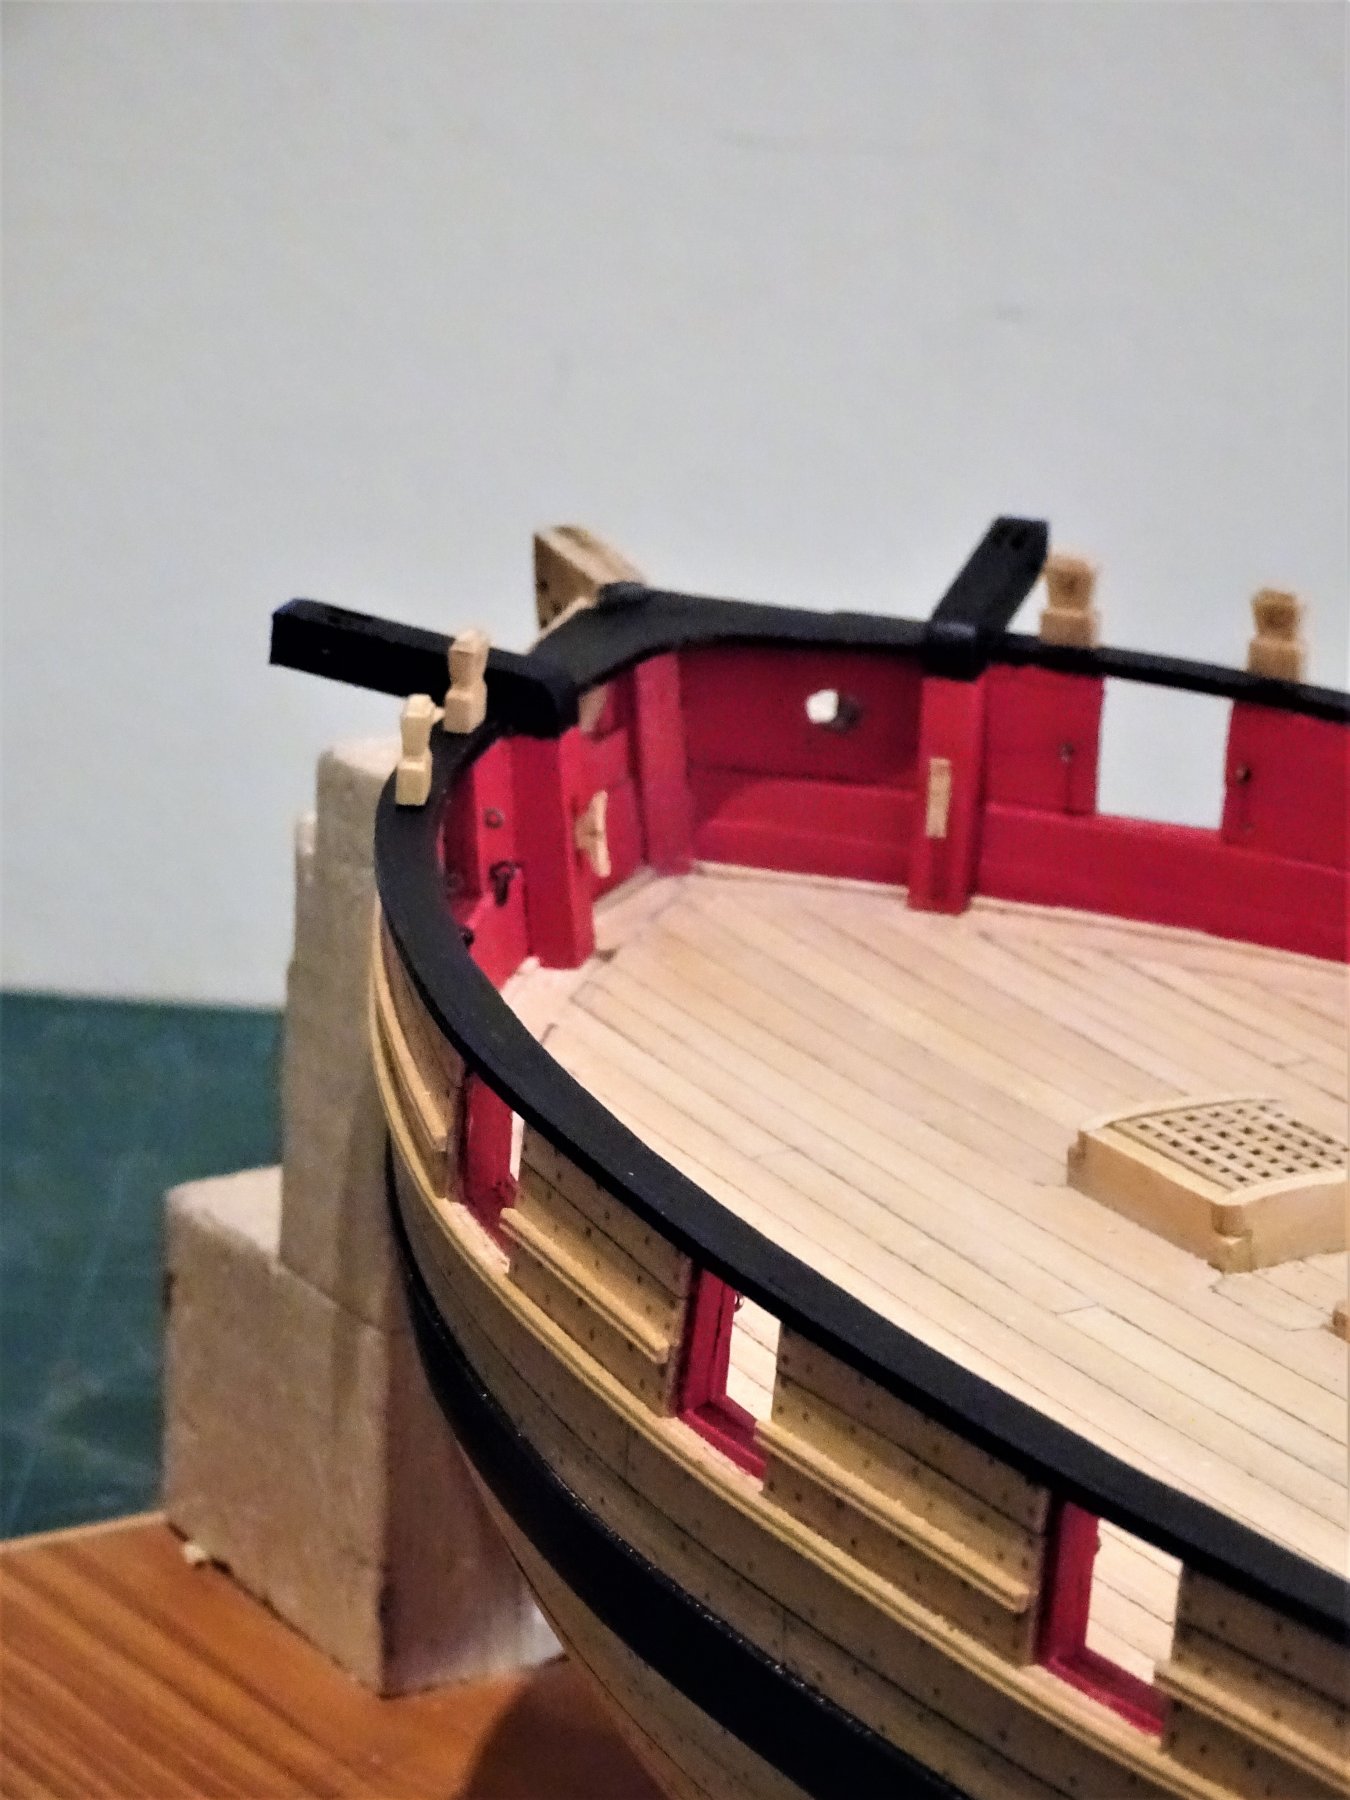
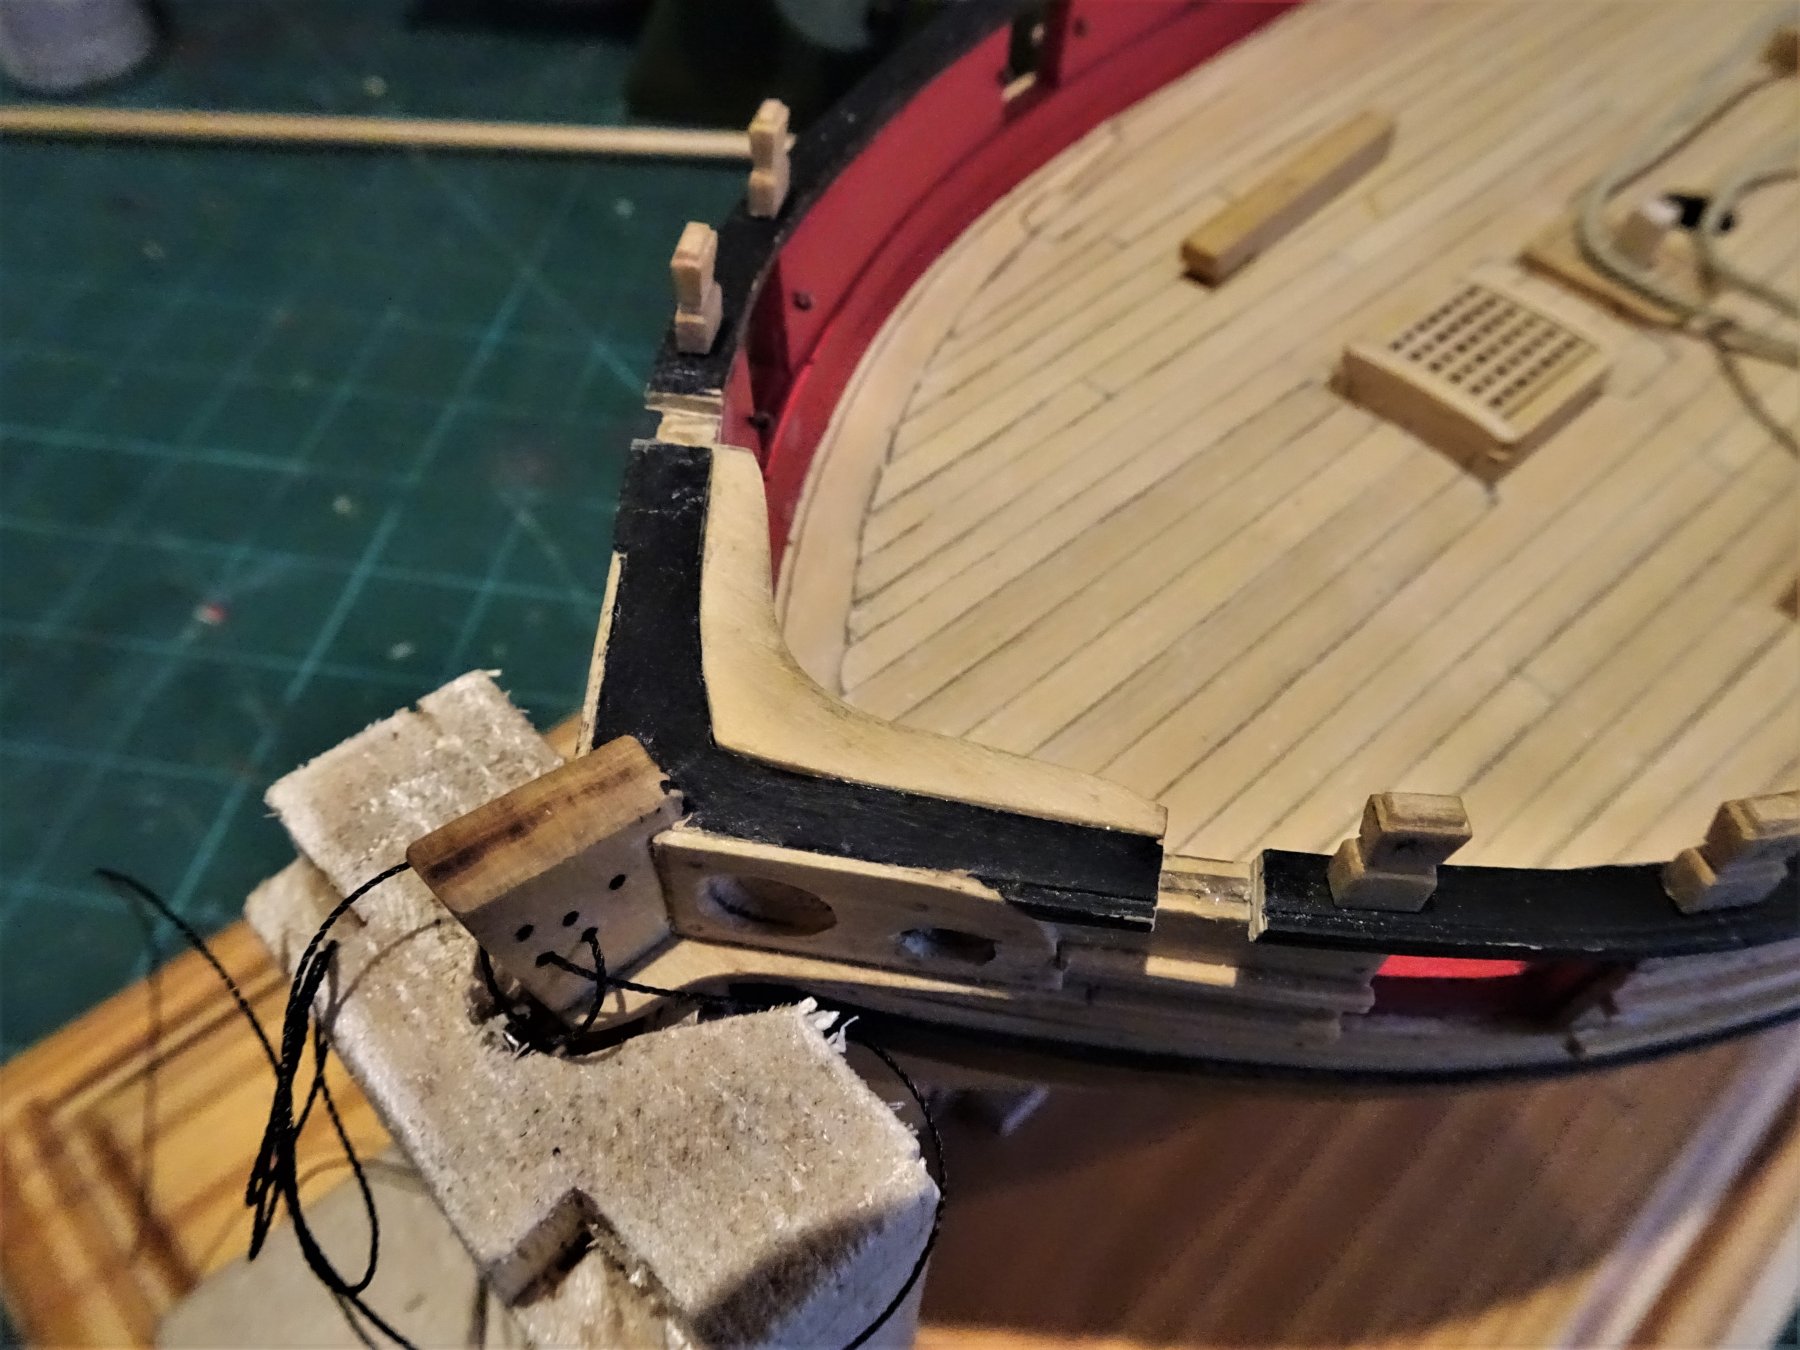
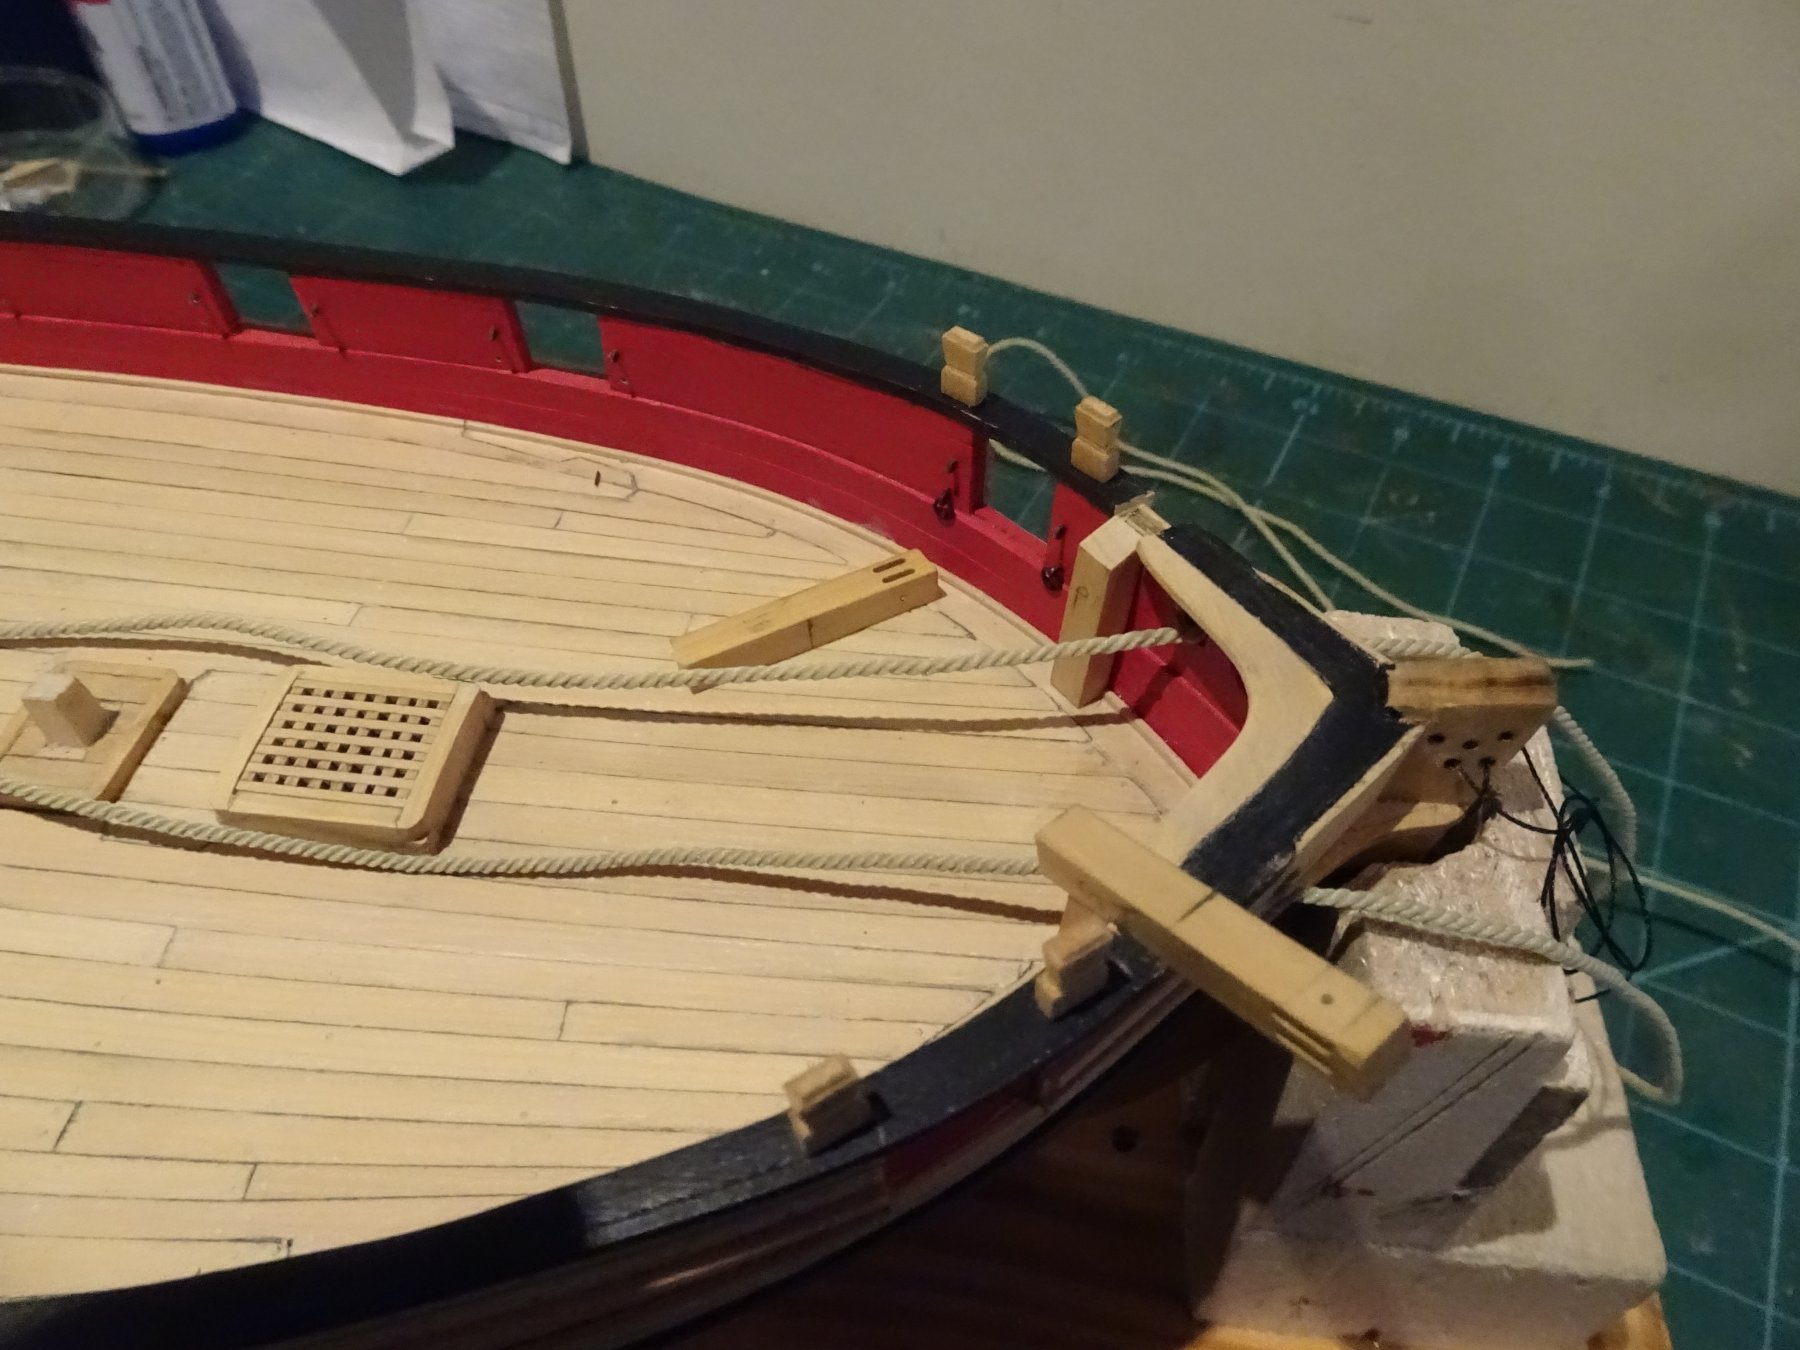
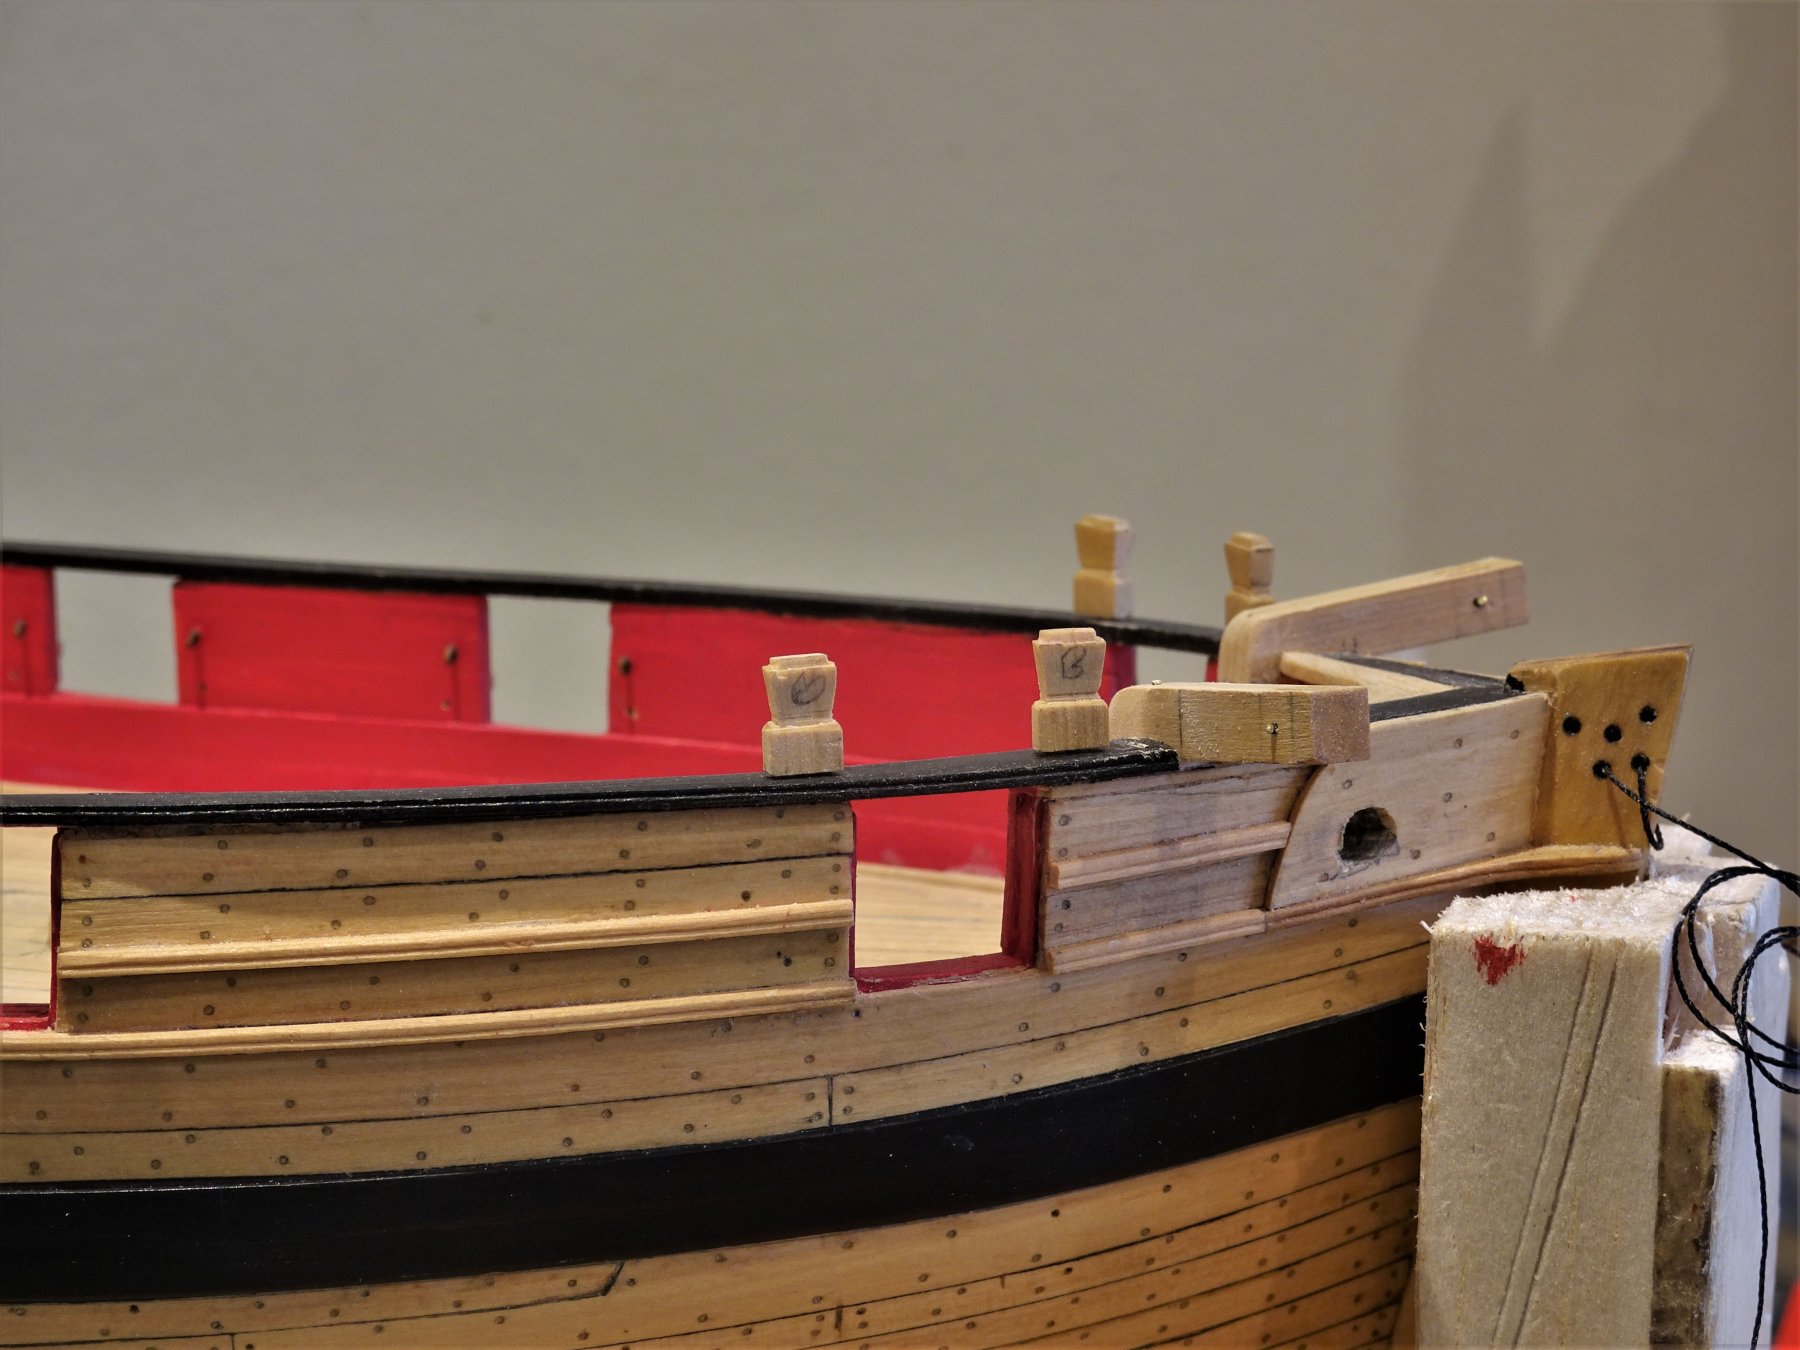
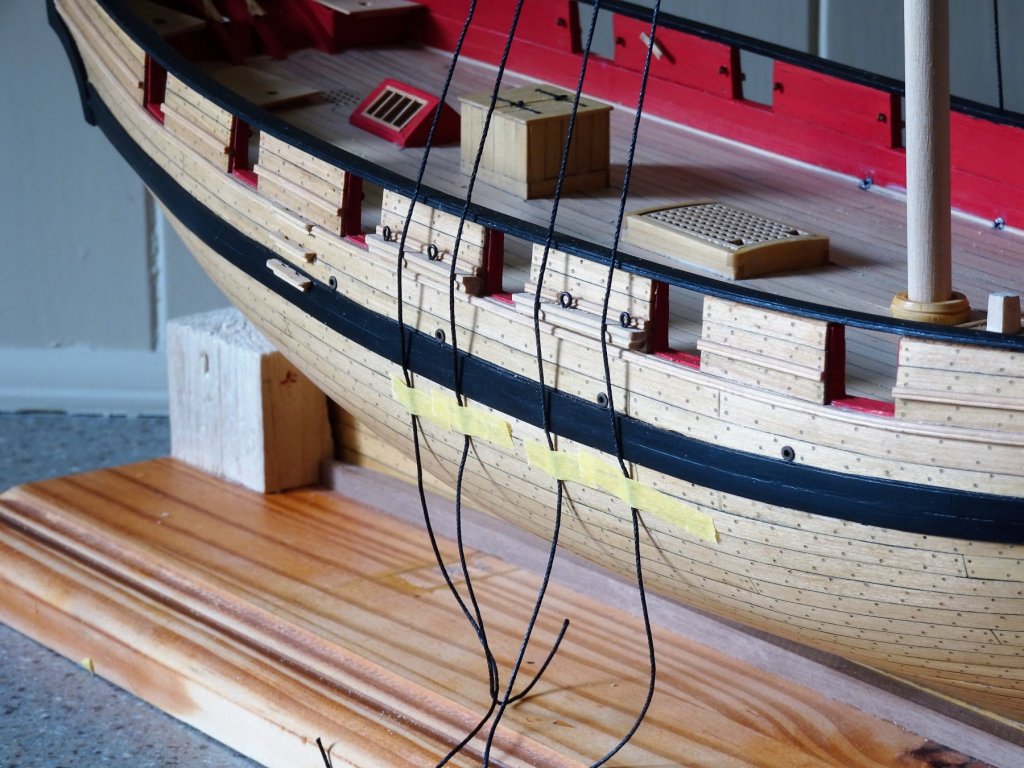
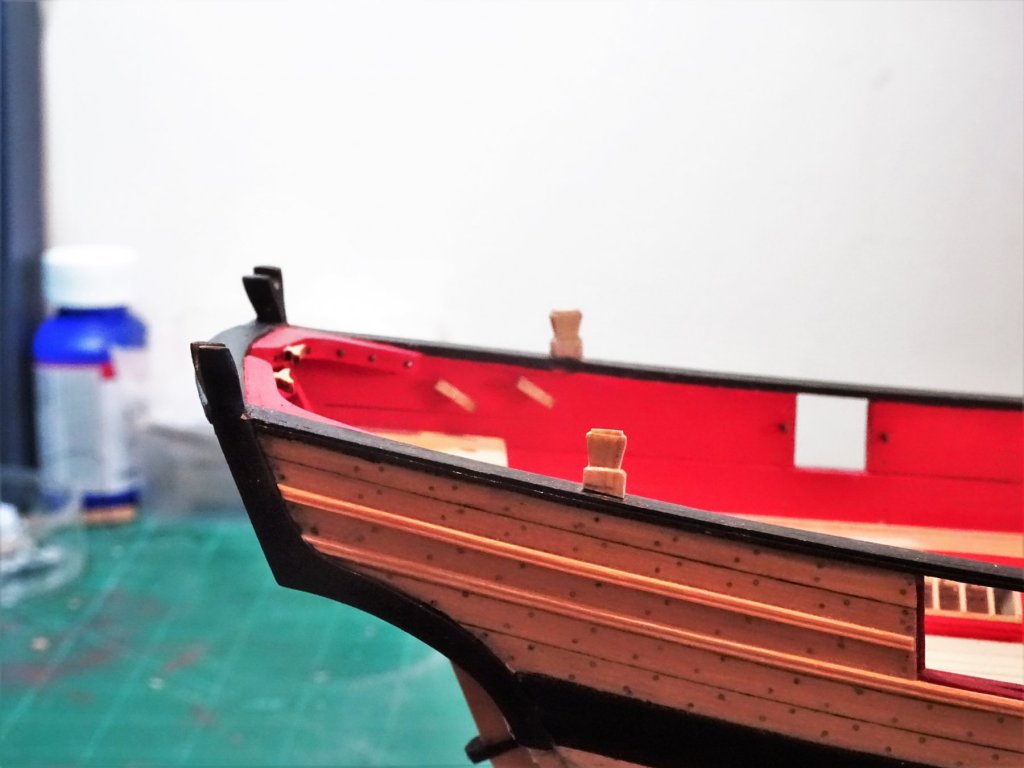
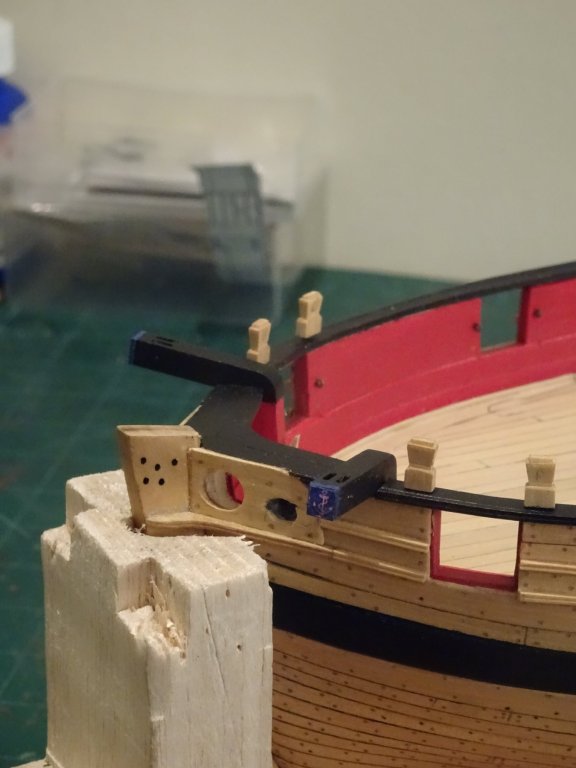
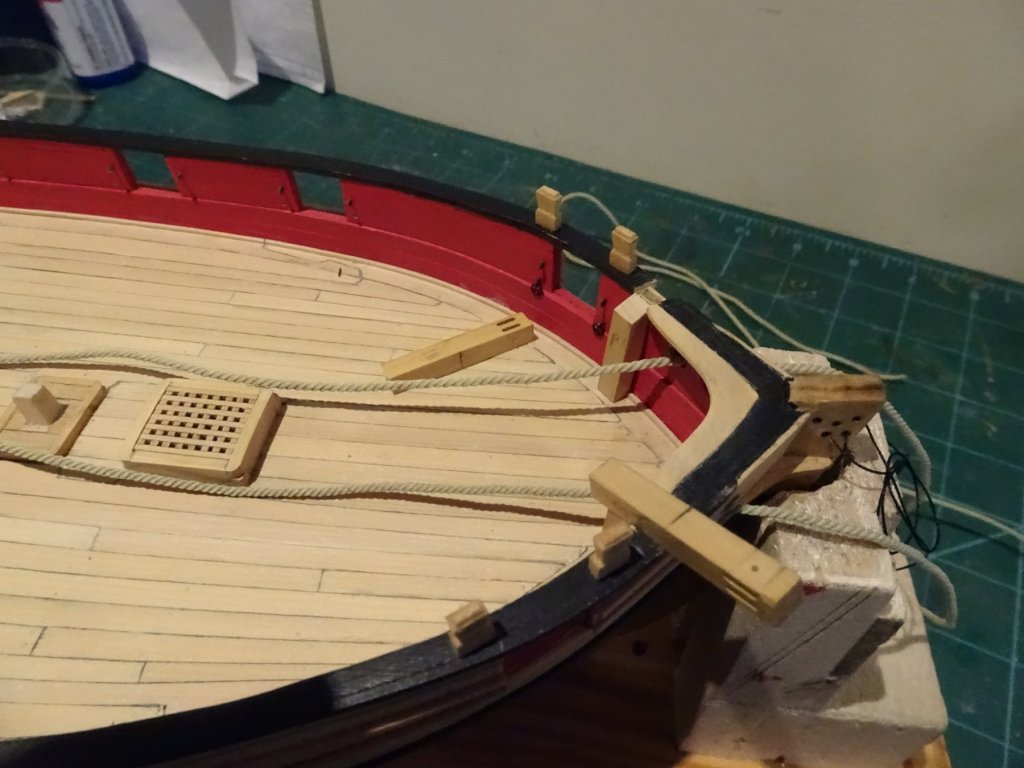
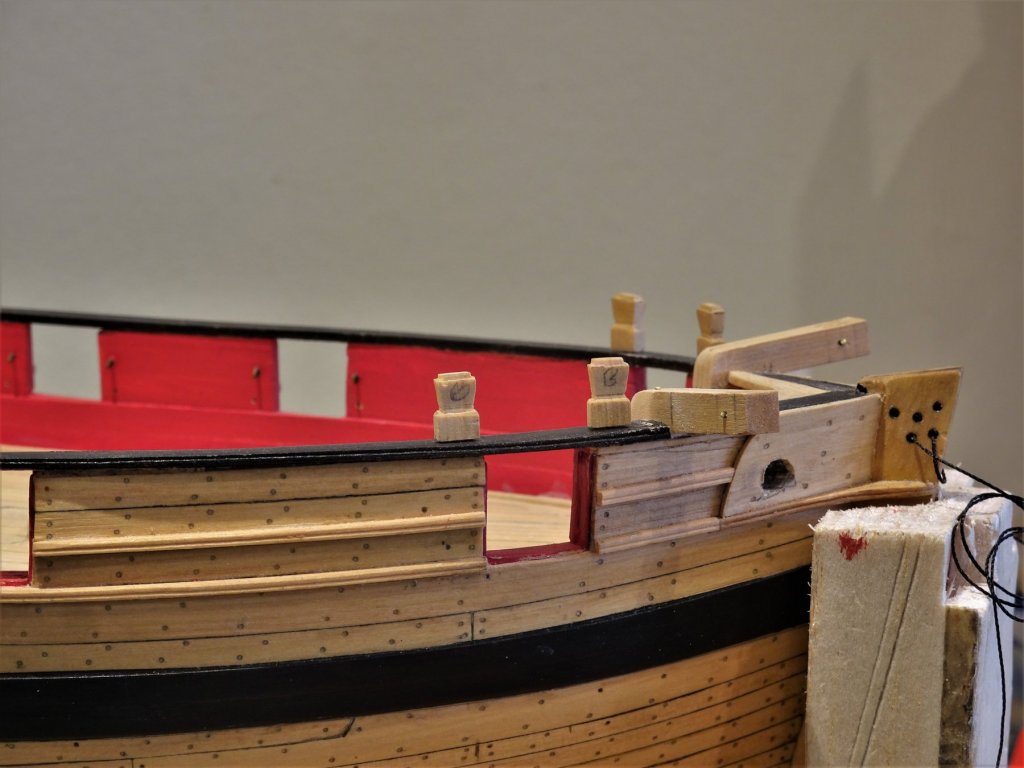
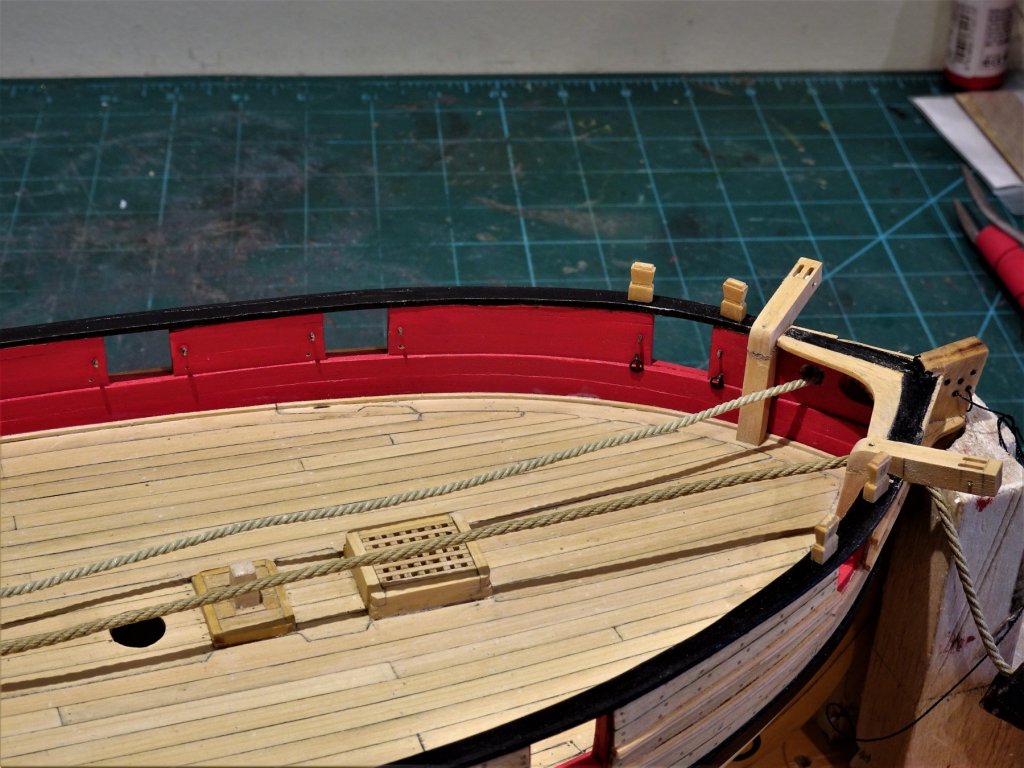
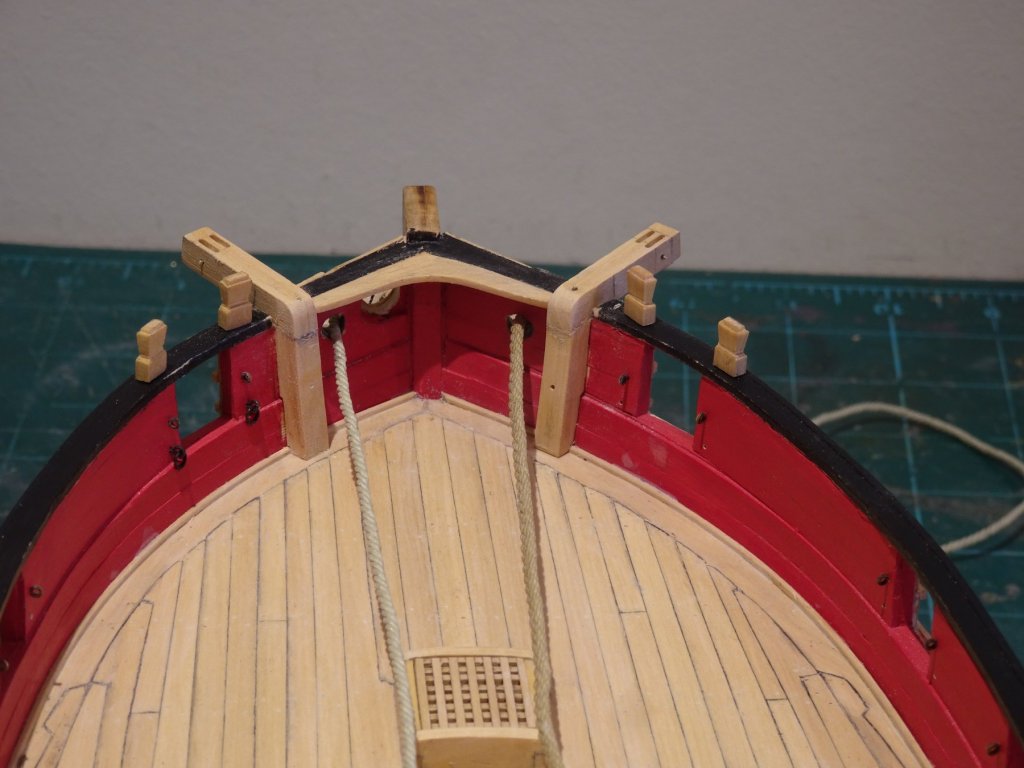
Post 61 Hawse Holes, cables, and Catheads. At this point there is a lot of inter-related stuff to consider. 1) I intend to rig anchor cables, so I need to establish the size. 2) I also need to enlarge previously drilled undersized hawse holes at the bow and the hawse holes sizes are relative to the circumference of the anchor cables. 3) A check needs to be made that the anchor cables will have a clear run from the hawse around the windlass, and back to the Main Hatch without fouling the Catheads yet to be fitted. Firstly Anchor cables Calculating anchor cable sizes can be a confusing subject. According to Lees the formula for anchor cable circumference calculation is 0.62 of Mainmast diameter. Peter Goodwin - The Naval Cutter Alert 1777 gives 11½" as the main cable circumference (1.93mm ø at 1:48 scale) He also gives the Mainmast ø as 22", which using the Lees formula would give a cable of 13.64" circ. (2.29mm at 1:48 scale) There is another formula based on the maximum beam of a vessel. - Cable Circumference being ½" for each foot of beam. Using the Alert figures we have a beam of 25'.11" which would give a cable circumference of 12.95" (2.18mm ø at 1:48 scale) So from a given set of reference figures you do get variances using the different formulas, but in modelling terms the differences are minor, and in practice the dockyards worked to range sizes, and the nearest fit was generally close enough. In relation to Cheerful the mast at the partners (model) is 10mm ø ( x 0.62 (Lees formula)) = 1.97mm ø line. Using the beam formula; Cheerful, with a beam of 23.5' would give 11.75"circ also = 1.97mm at 1:48 scale. Having eventually arrived at a scale anchor cable diameter, we can return to the Hawse hole. *To calculate the hawse hole size:- cable ø ÷9/4 = hawse ø *Construction and fitting of The English Man of War - Peter Goodwin I used incremental drill sizes to carefully enlarge the Hawse holes ensuring the drill was kept both horizontal and parallel to the keel. In considering cable sizes on models I don't think that arithmetically calculated scale line sizes are the whole story, Sometimes, 'true scale' doesn't suit the eye or model. 2mm ø line looked a little heavy, particularly bearing in mind that it will have to pass around the windlass three times. I am leaning towards 1.75mm ø line for the anchor cables which equates to a 10.3" circumference, and looks right to my eye. The calculated hawse ø scales to 3.93mm. This is pretty much the hawse ø given on the Cheerful plans. The related positions of the Windlass, Bowsprit, Bowsprit step, catheads, winch, and cables need to be assessed to avoid problems later. 5541 With the cables in place the Cathead positions can be tweaked to avoid any awkward abrasions. Before I do any further work I attended to the bow pin rack which butts against the Catheads each side. 5544 Bearing in mind that there may be an issue with belay pins where the Bowsprit passes beneath the rack I have held off drilling the holes until later. In making the Catheads I have followed Chuck's lead using 3/16th square boxwood section. 5548 The rebates to fit over the waterway and spirketing on the vertical sections of the Cathead were initially cut on the little mill, but to get the inboard shape to scribe closely to the bulwark took a fair bit of manual work with scalpel and sanding stick. The base needed sanding at an angle to sit flush on the margin plank. 5550 The sheaves for the outer end were cut on the little Proxxon mill using a 1mm bit, and holes were drilled to take the sheave pins. 5551 5552 Assembling and fitting the Catheads I found a little tricky. The Cathead should have something of a stive, angling slightly upwards outboard. 5569 This means that either the vertical section or the inboard tail of the outboard section needs to be angled. I decided to angle the uprights. Once I had got close to the angle required I glued the upright to the bulwark. 5590 The outboard section was then roughly shaped at the inboard end and glued and pinned, with final sanding done insitu. 5591 The Catheads in their raw state Here you can see a comparison of 2mm line (Starboard) and 1.75mm line (Port) 5587 I was a little surprised that a supporting bracket below the outboard cathead beam was not present on Cheerful. B.E. 25/01/2019

- 574 replies
-
- 22
-
-
- cheerful
- Syren Ship Model Company
- (and 1 more)
-
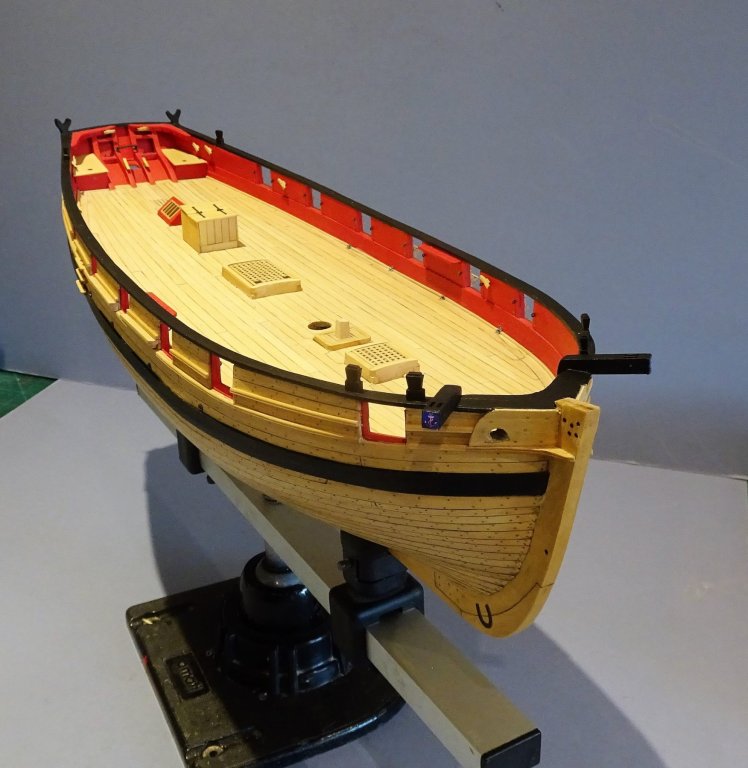
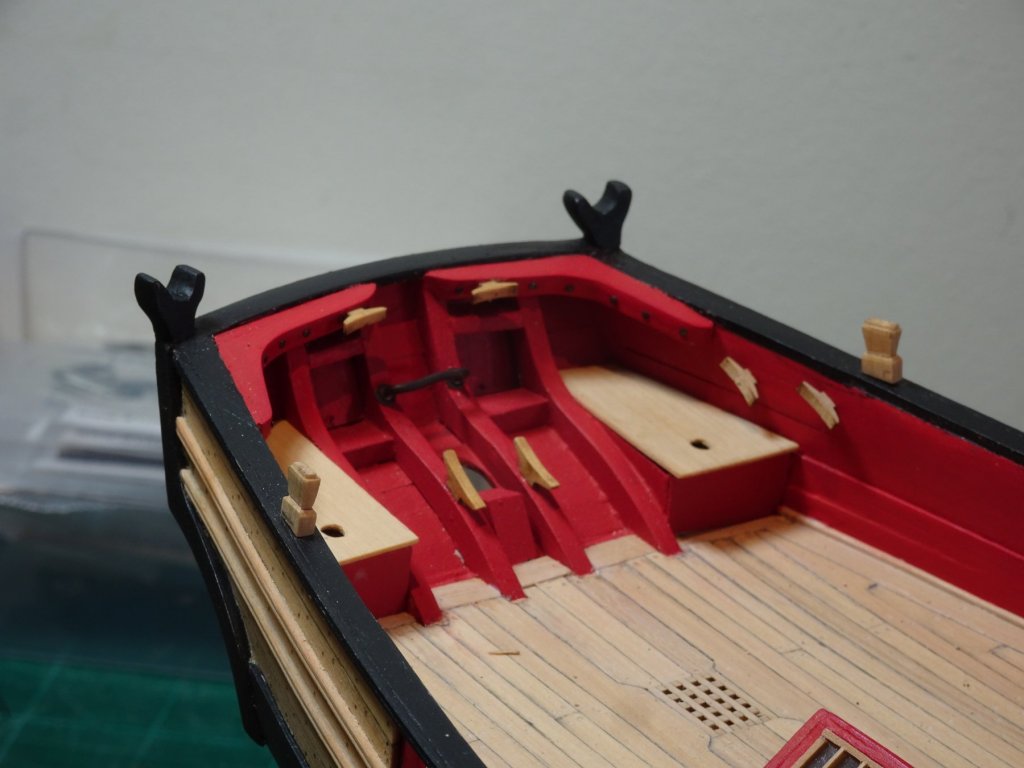
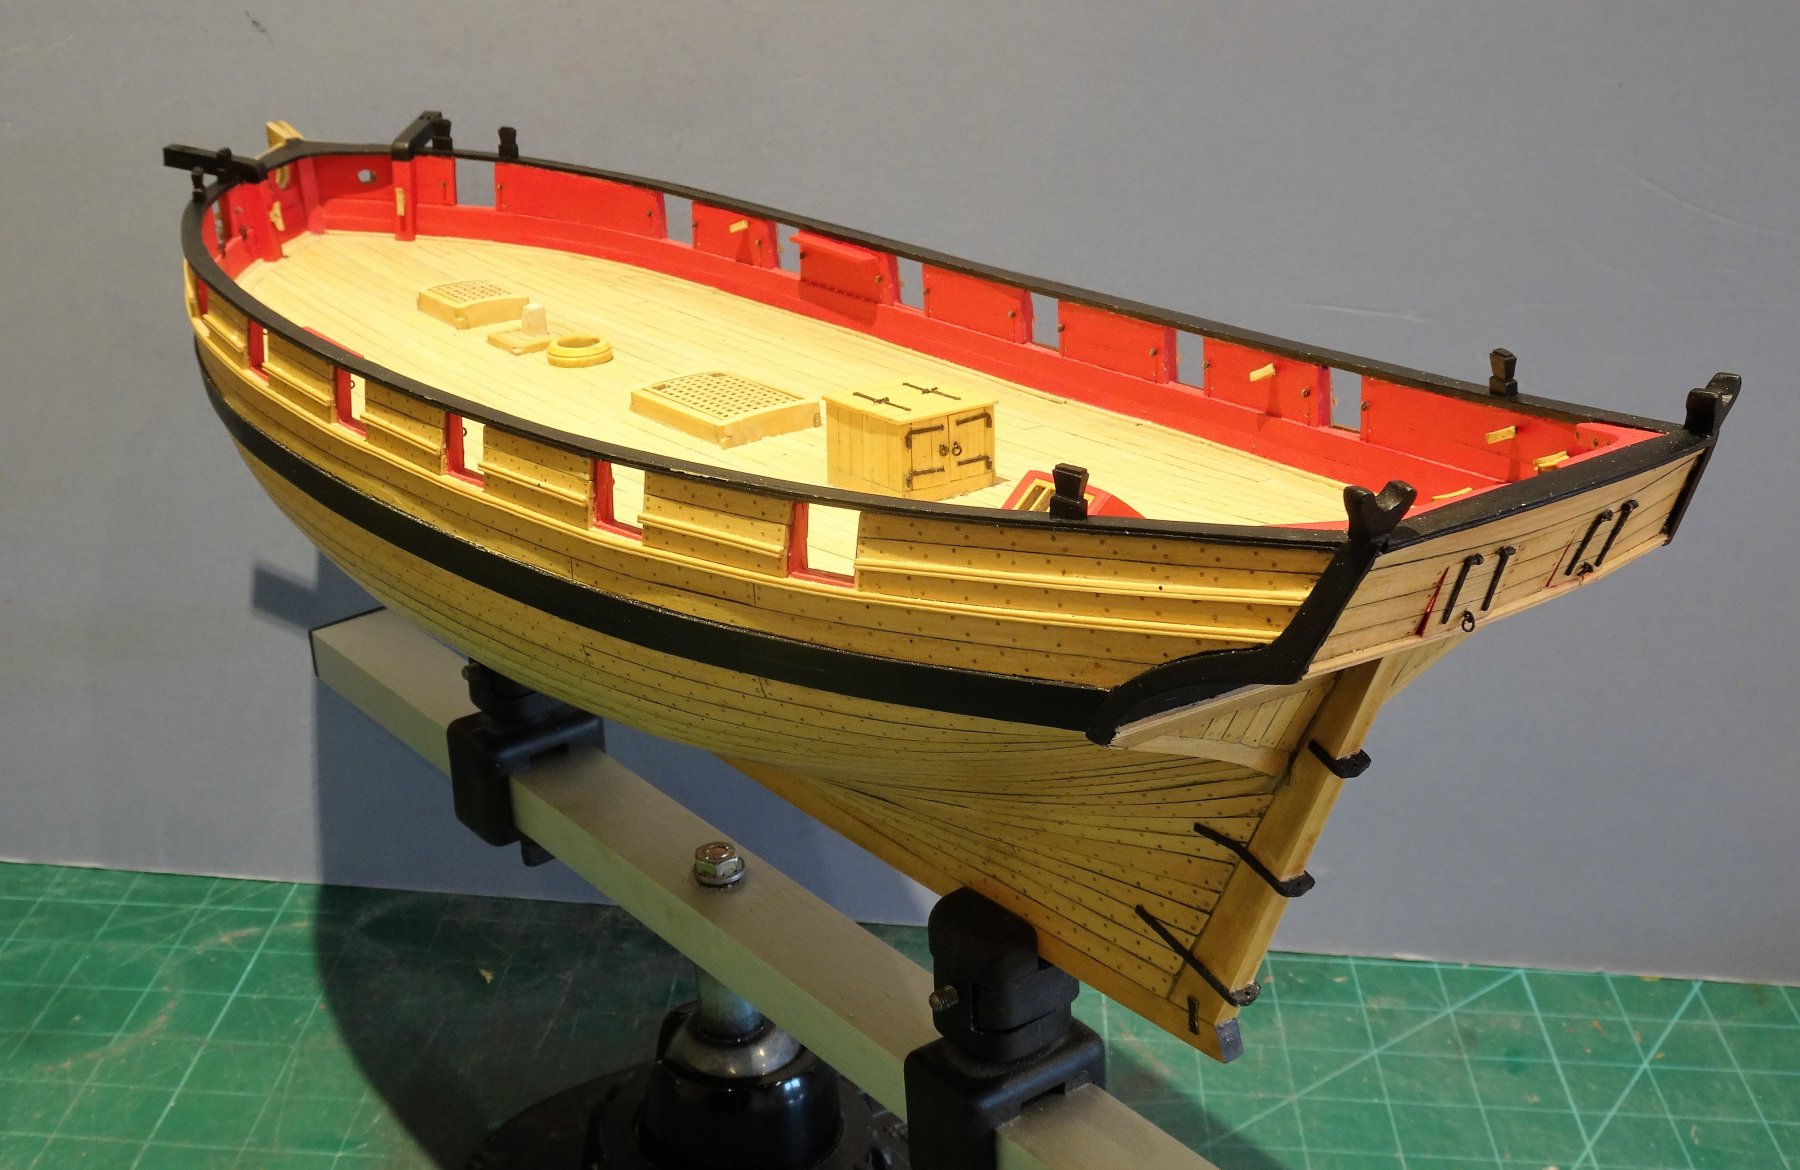
Hi bcd, yes the official colour for inboard works including the gun carriages was Red Ochre. This applied from the 17th century thro’ to the early 19th century. However, during the late 18th c Yellow Ochre became increasingly popular, initially unofficially, and some Captains authorised the repainting of the carriages which were the usual dockyard red. By 1806 I would have expected most inboard works to be Yellow Ochre, but for a small unrated vessel such as a cutter it would be the cheapest option, and still at that time the Official colour. This is the short simplified explanation. 😊 Cheers, B.E.
- 574 replies
-
- 4
-
-
- cheerful
- Syren Ship Model Company
- (and 1 more)


.JPG.7d96a822646c33578a19313e7c50239a.JPG)


.JPG.db33fe1d7c8aa6e80f2a91d43ee1e275.JPG)


.JPG.5a85d37e7e66c52c3ffb12b1ec2a1bc4.JPG)