HOLIDAY DONATION DRIVE - SUPPORT MSW - DO YOUR PART TO KEEP THIS GREAT FORUM GOING! (Only 72 donations so far out of 49,000 members - Can we at least get 100? C'mon guys!)
×
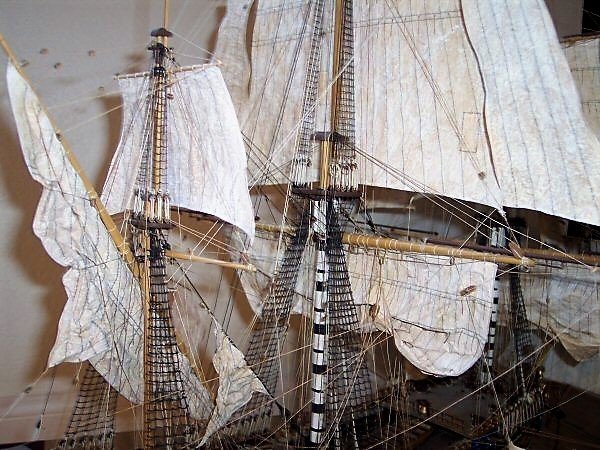
.JPG.ca33079f5815b861e67b9c2cccd37982.JPG)

Blue Ensign
-
Posts
4,564 -
Joined
-
Last visited
Content Type
Profiles
Forums
Gallery
Events
Everything posted by Blue Ensign
-
Hi Warren, it's a long time since I built Norske Love, but fortunately she is within 15' from where I am writing this reply.🙂 I followed the James Lees (Masting and Rigging) book for the Main Stay collar, arrangement after 1690. The collar was a long strop with a heart in its bight, the line leading thro' a hole in the beak below the Bowsprit. One end has an eye spliced into it and the other end rove thro' this eye and was seized to itself. The eye lies on the Port side of the Bowsprit and should be served all over. This was a fine detail I omitted back in the 1980's when I built my version. You can see the collar running down between the Knightheads before it rounds the Bowsprit and is seized thro' the eye. Regards, B.E.
-
 Sorry for the delay in responding to your post Peter, I have been away enjoying North Yorkshire, and our present run of hot weather has reduced my enthusiasm for return to the work bench. I know what you mean about the apparent distortions in the planking run. I have been aware of it, and I wasn't quite sure what caused it or indeed how to cure it, apart from stripping it all off, which I was disinclined to do. However, with the hull the correct way up that area falls below the curve of the hull and visually has little impact. Regarding the plank adjacent to the Garboard, I'm not unhappy about that one at the moment, the Garboard Plank looks as it should do, and in order for the next plank to meet the stem rabbet, that is the shape required. I'll see how I feel when the next one is added. B.E. 16/07/2018
- 574 replies
-
- 5
-

-
- cheerful
- Syren Ship Model Company
- (and 1 more)
-
Great result Steve, a fine looking model, a worthy companion to your Longboat. B.E.
- 190 replies
-
- 1
-
-
- pinnace
- model shipways
- (and 1 more)
-
Thank you Jason, fortunately the Garboard and its mate went on first attempt, on some builds it has taken me two or three goes, and we all hate wasting timber, especially expensive Boxwood. Hopefully there will be a much improved look once the hull has been sanded, and has been given a coat or two of varnish. Regards, B.E.
- 574 replies
-
- 3
-
-
- cheerful
- Syren Ship Model Company
- (and 1 more)
-
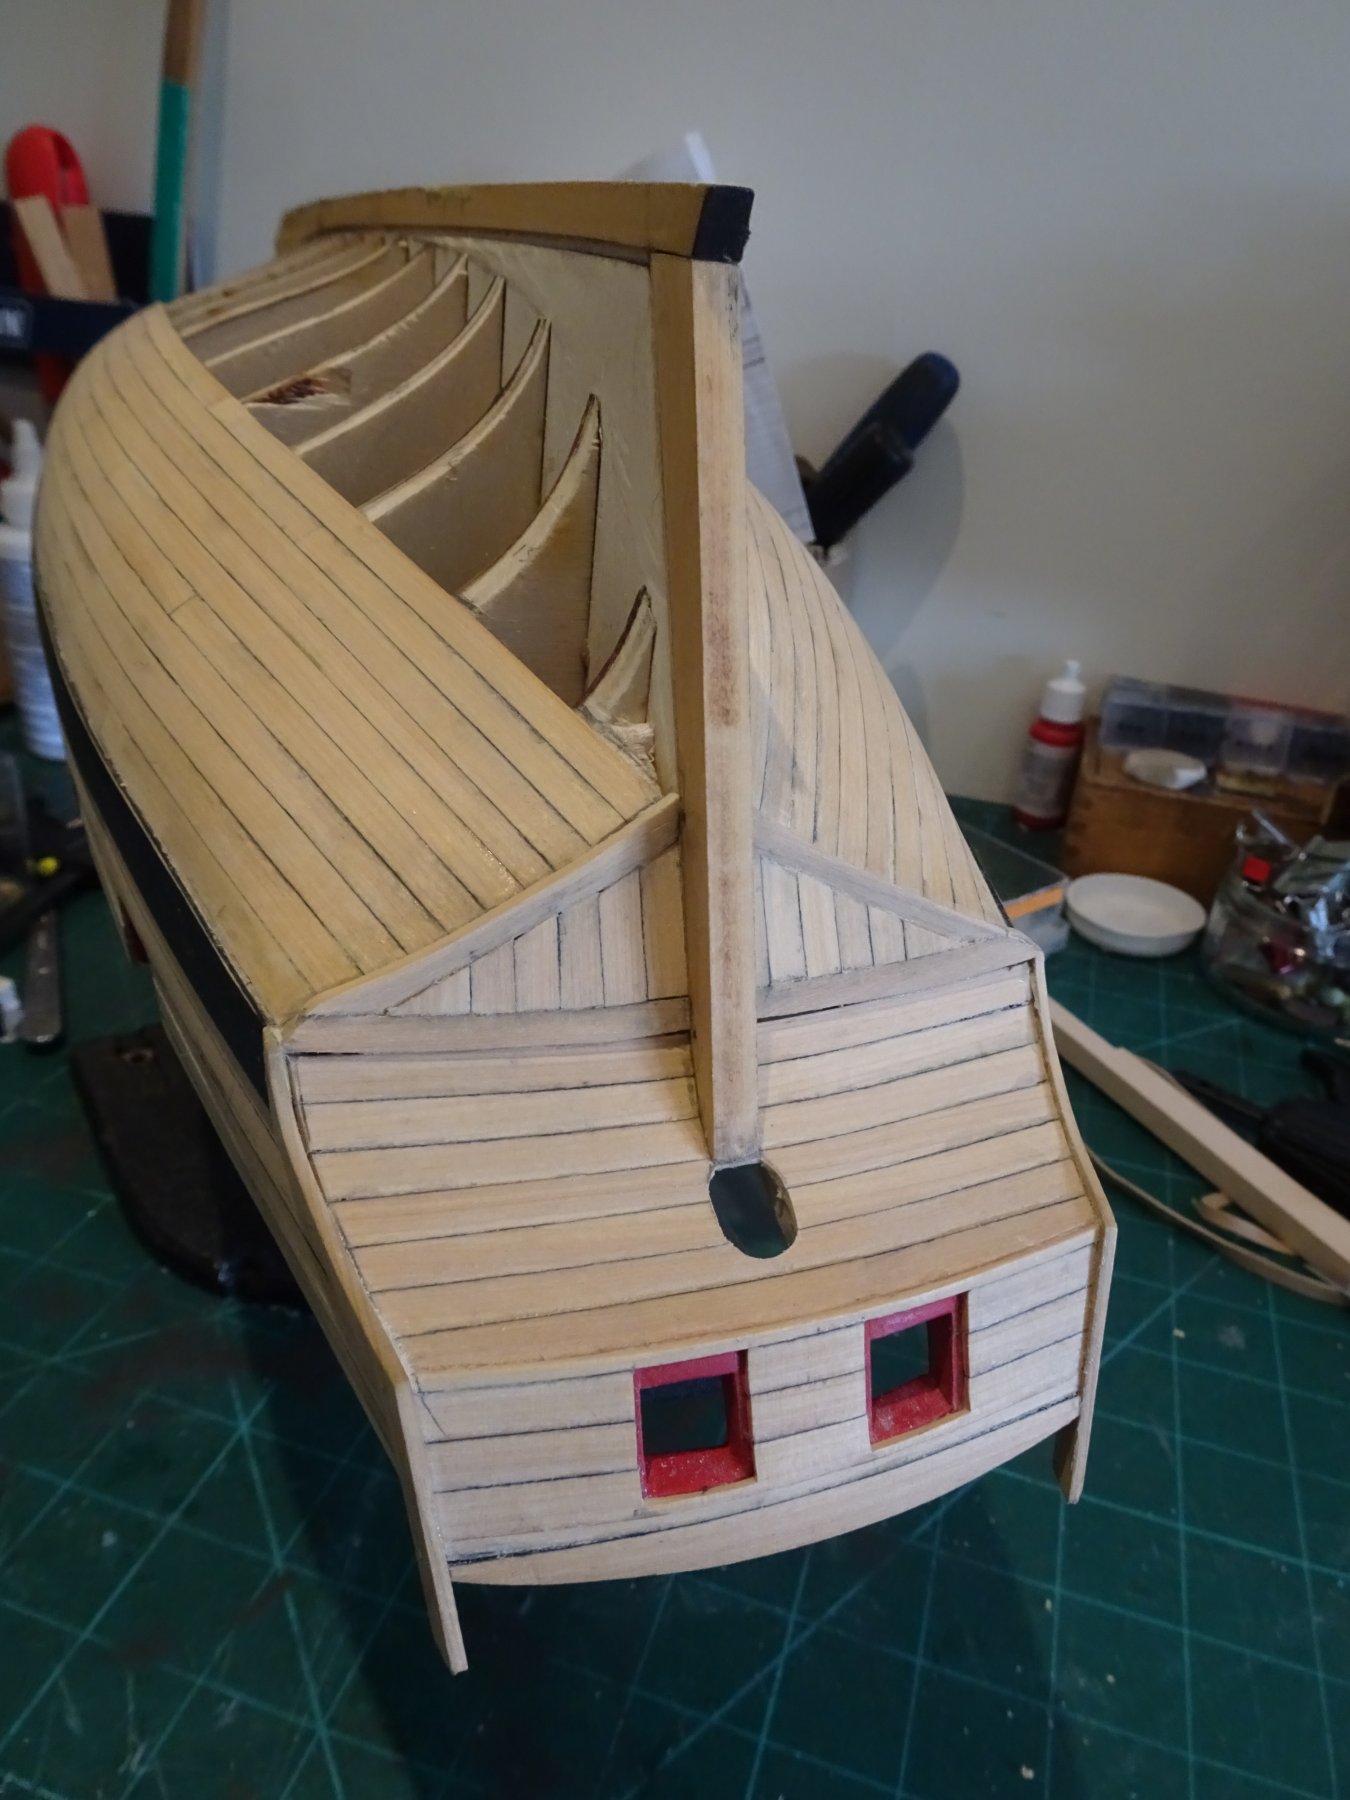
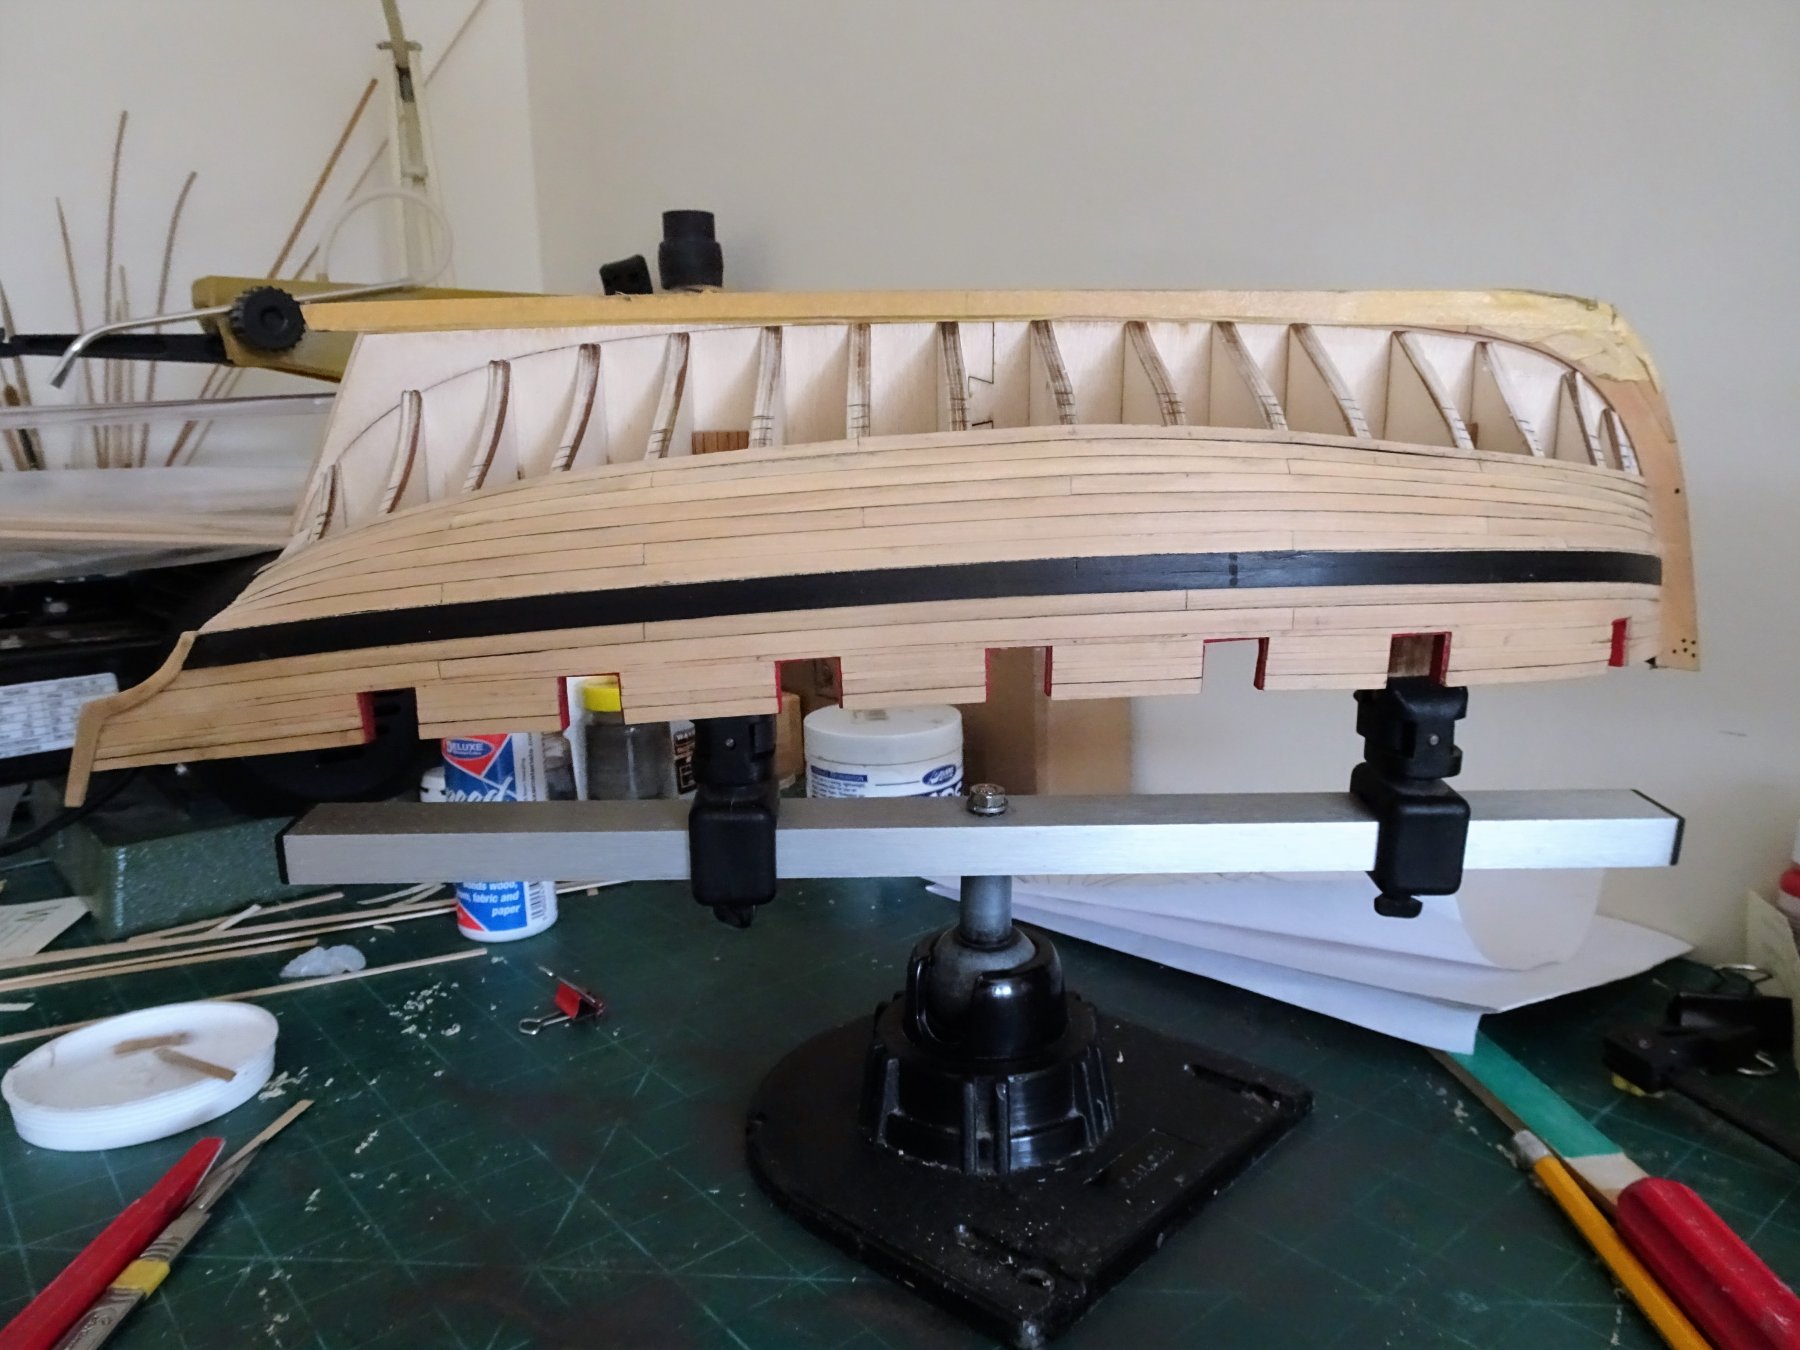
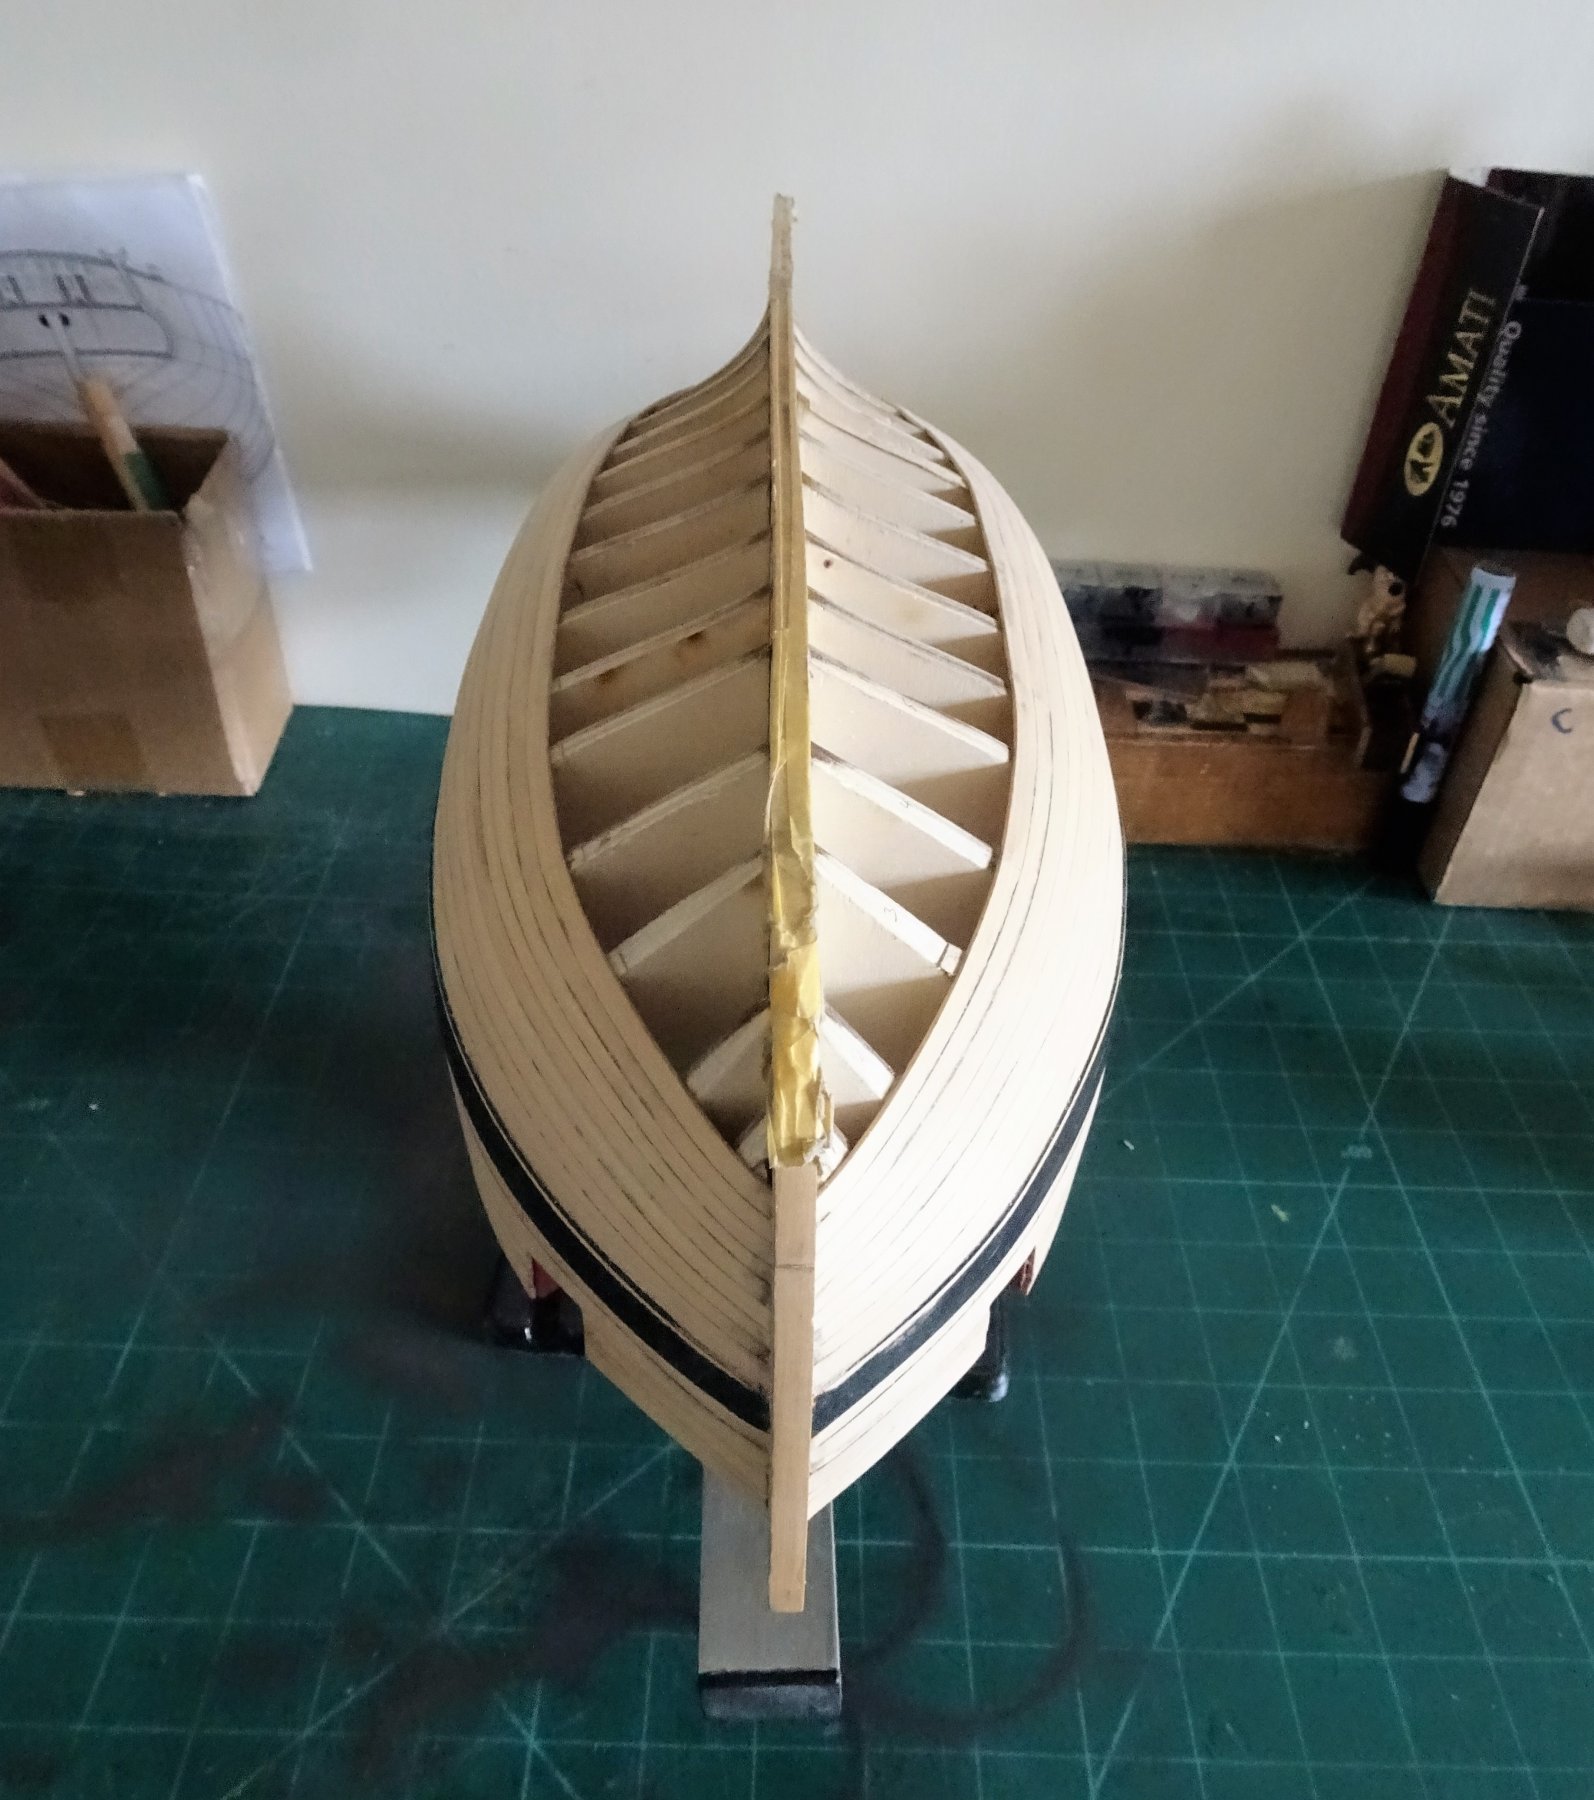
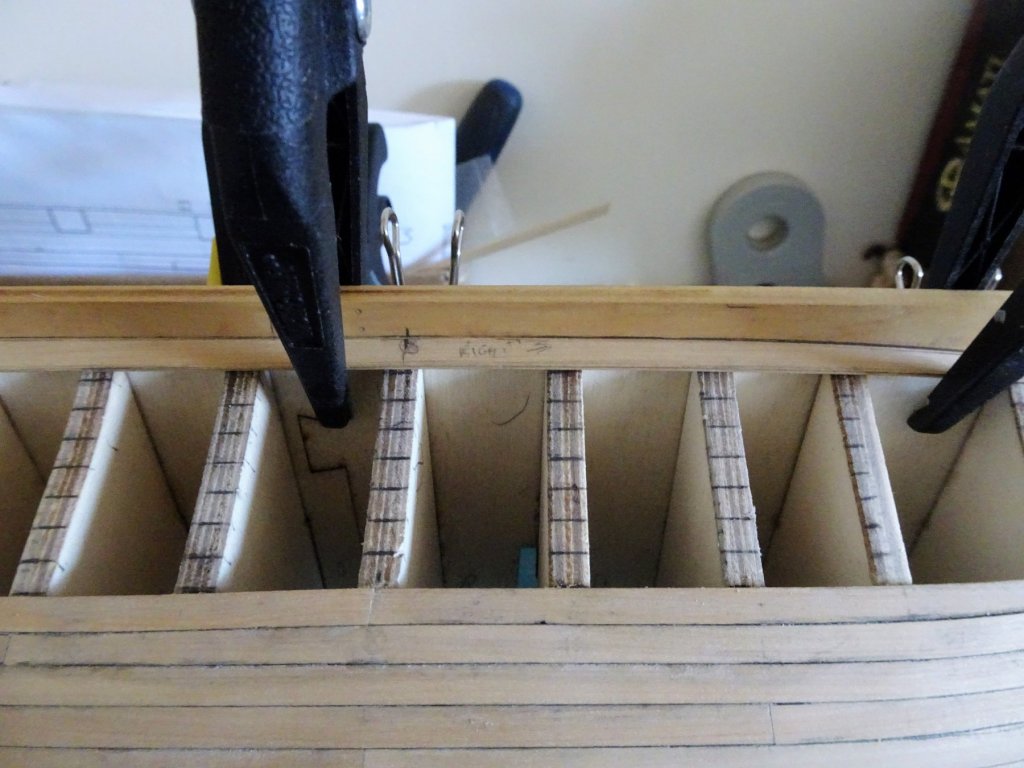
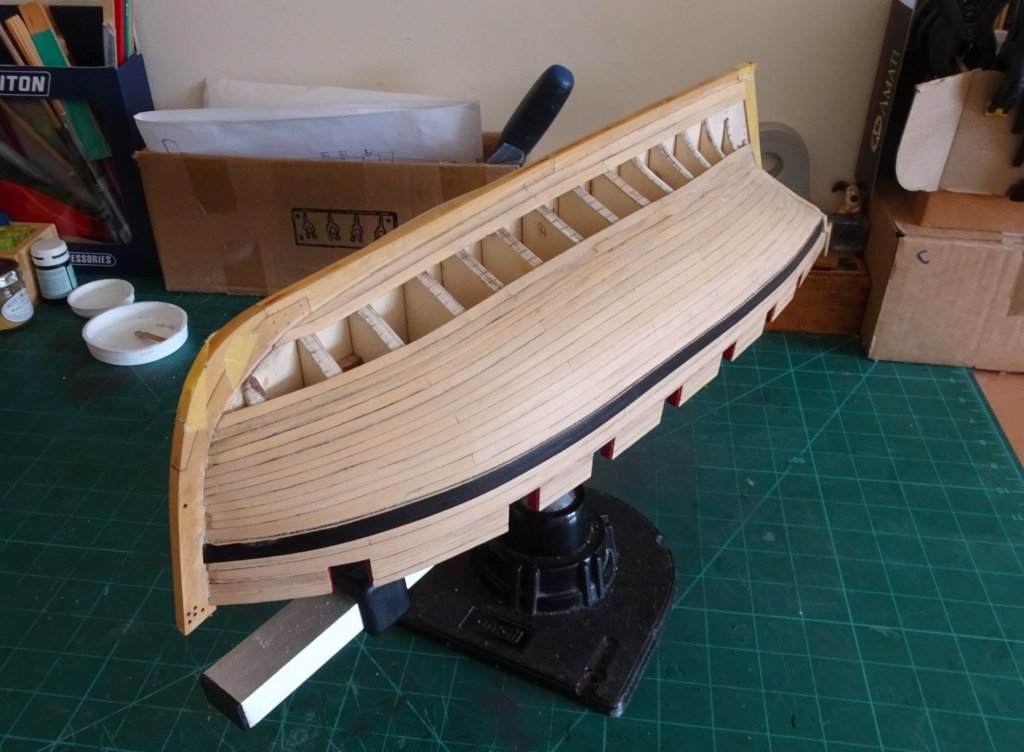
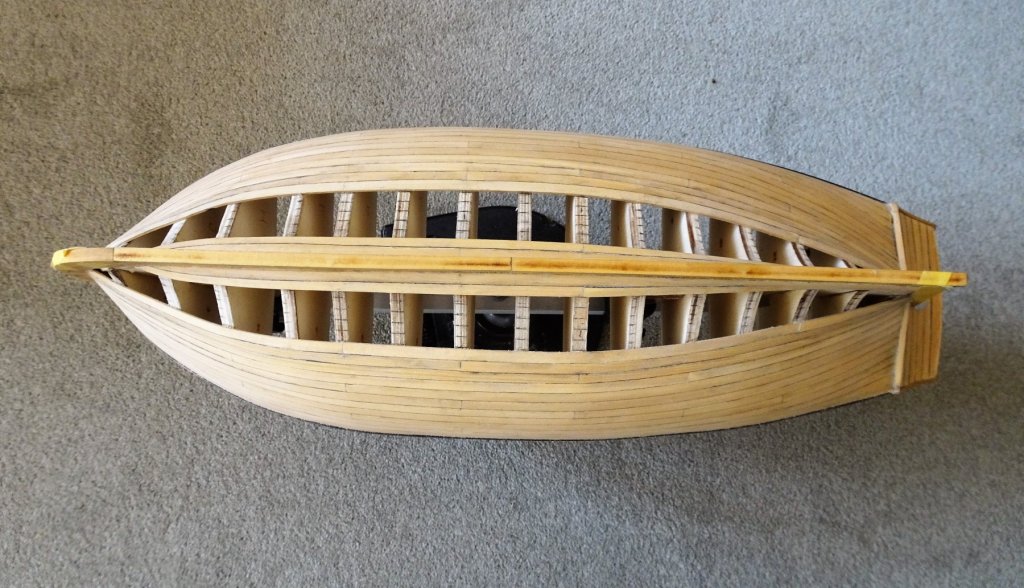
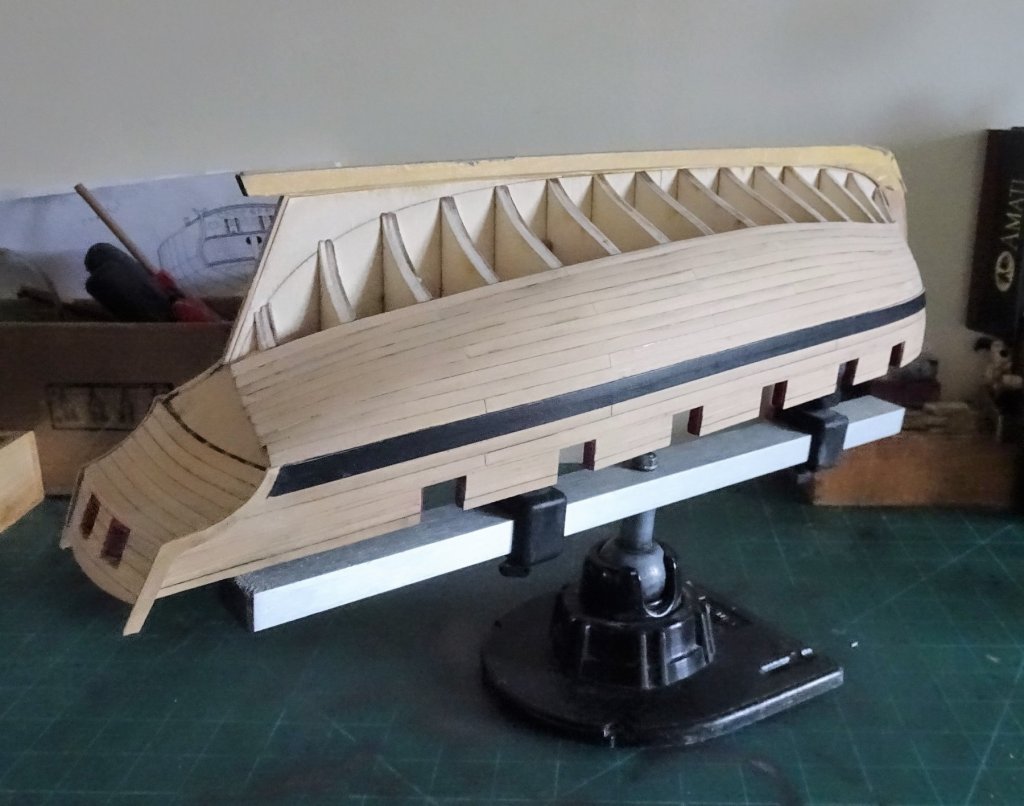
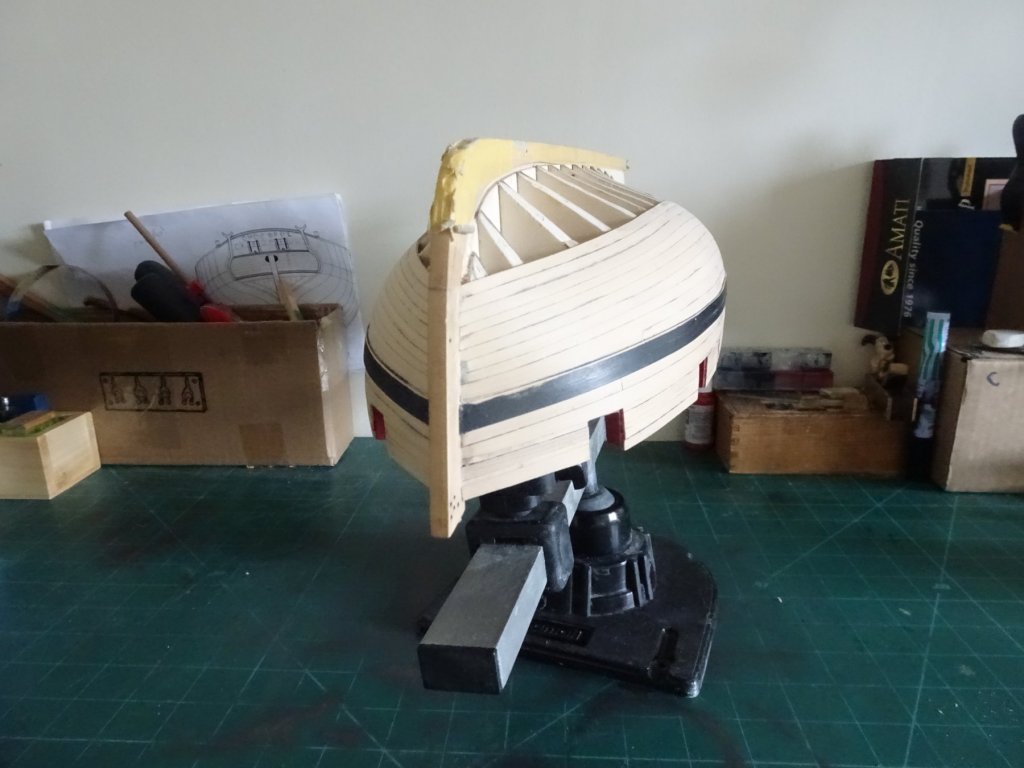
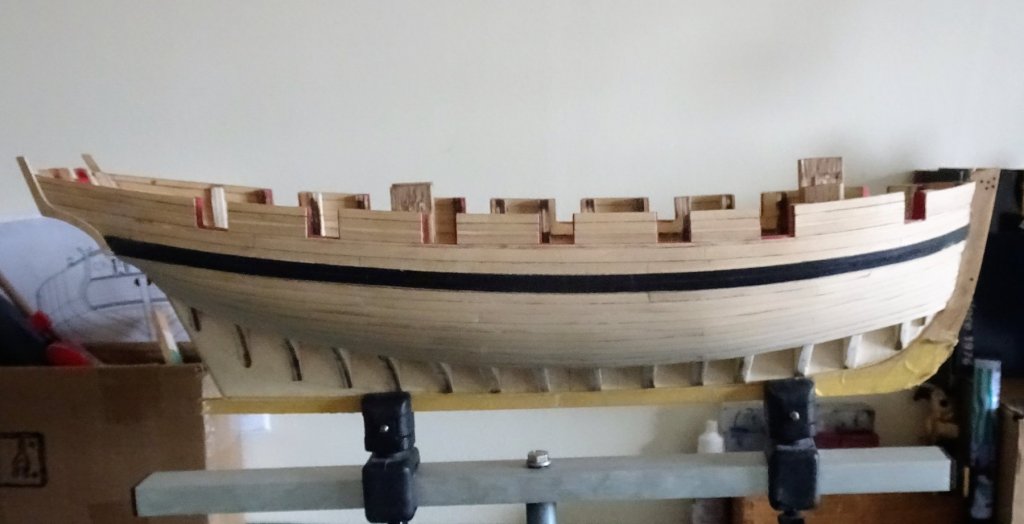
Post 29 Progressing the second band. My initial job was to add the first strake of the lower band meeting up with the Square Tuck. I then re-lined the hull using full 3/16" plank widths for the centre five bulkheads, and tick strips and the fan to mark the others. The lower band of planking is designed to take ten 3/16th strakes at mid-ships including the Garboard Strake. Allowing for the rabbet into which the Garboard strake fits, I calculated that a 9/32" strip would give me a little wriggle room to form the Garboard altho' at a push I think I could have got away with a 7/32" as used by Chuck. Suspecting that some wider stuff would be required over the kit package, I ordered additional width strips from Jason. These comprised 9/32" and 3/8" wide strips which should allow for the Garboard and any spiling requirements. 0305 To make the Garboard I cut the plank to length to butt against the Stern post and reach forward to the edge of Bulkhead J. 0310 I then ticked off forward to produce the taper which ends in a point at the forward end. 0306 Aft of the centre section the width was left at 7/32" I found it necessary to bevel the Garboard plank edge where it fits into the rabbet from the centre bulkhead ⊕ forward to allow for the plank to lie flat on the bulkhead. From the 5th bulkhead from the stern the plank lies flat against the false keel and butts up against the keel rabbet, and some heat applied twist is required for this section. For the adjoining plank I used 3/16" heat bent and shaped to fit. 0316 This is always a tricky plank to fit requiring quite a severe curve where it rounds the garboard plank to fit into the keel rabbet just before it curves up the stem. 0319 Achieving the curve required starting the process from a much longer strip than required. 0331 Having fitted the two lowest strakes I return to planking from the top. 0332 There is a reasonable match to the strakes each side of the stem. 0336 I finish this section with five strakes to go. I hope that four 3/16th planks plus a spiled strake made from a wider plank will complete the job. I'm now off to North Yorkshire for a week and will hopefully complete the hull planking on my return. B.E. 29/06/2018


- 574 replies
-
- 19
-
-
- cheerful
- Syren Ship Model Company
- (and 1 more)
-
She’s a fine looking model Doug, love the colour combination of the lower hull and top sides. Standing rigging looking all ship shape too 👍 B.E.
-
Nice work Ian , I will be very pleased if my effort gets close to what you have achieved. B.E.
- 51 replies
-
- 1
-
-
- cheerful
- Syren Ship Model Company
- (and 1 more)
-
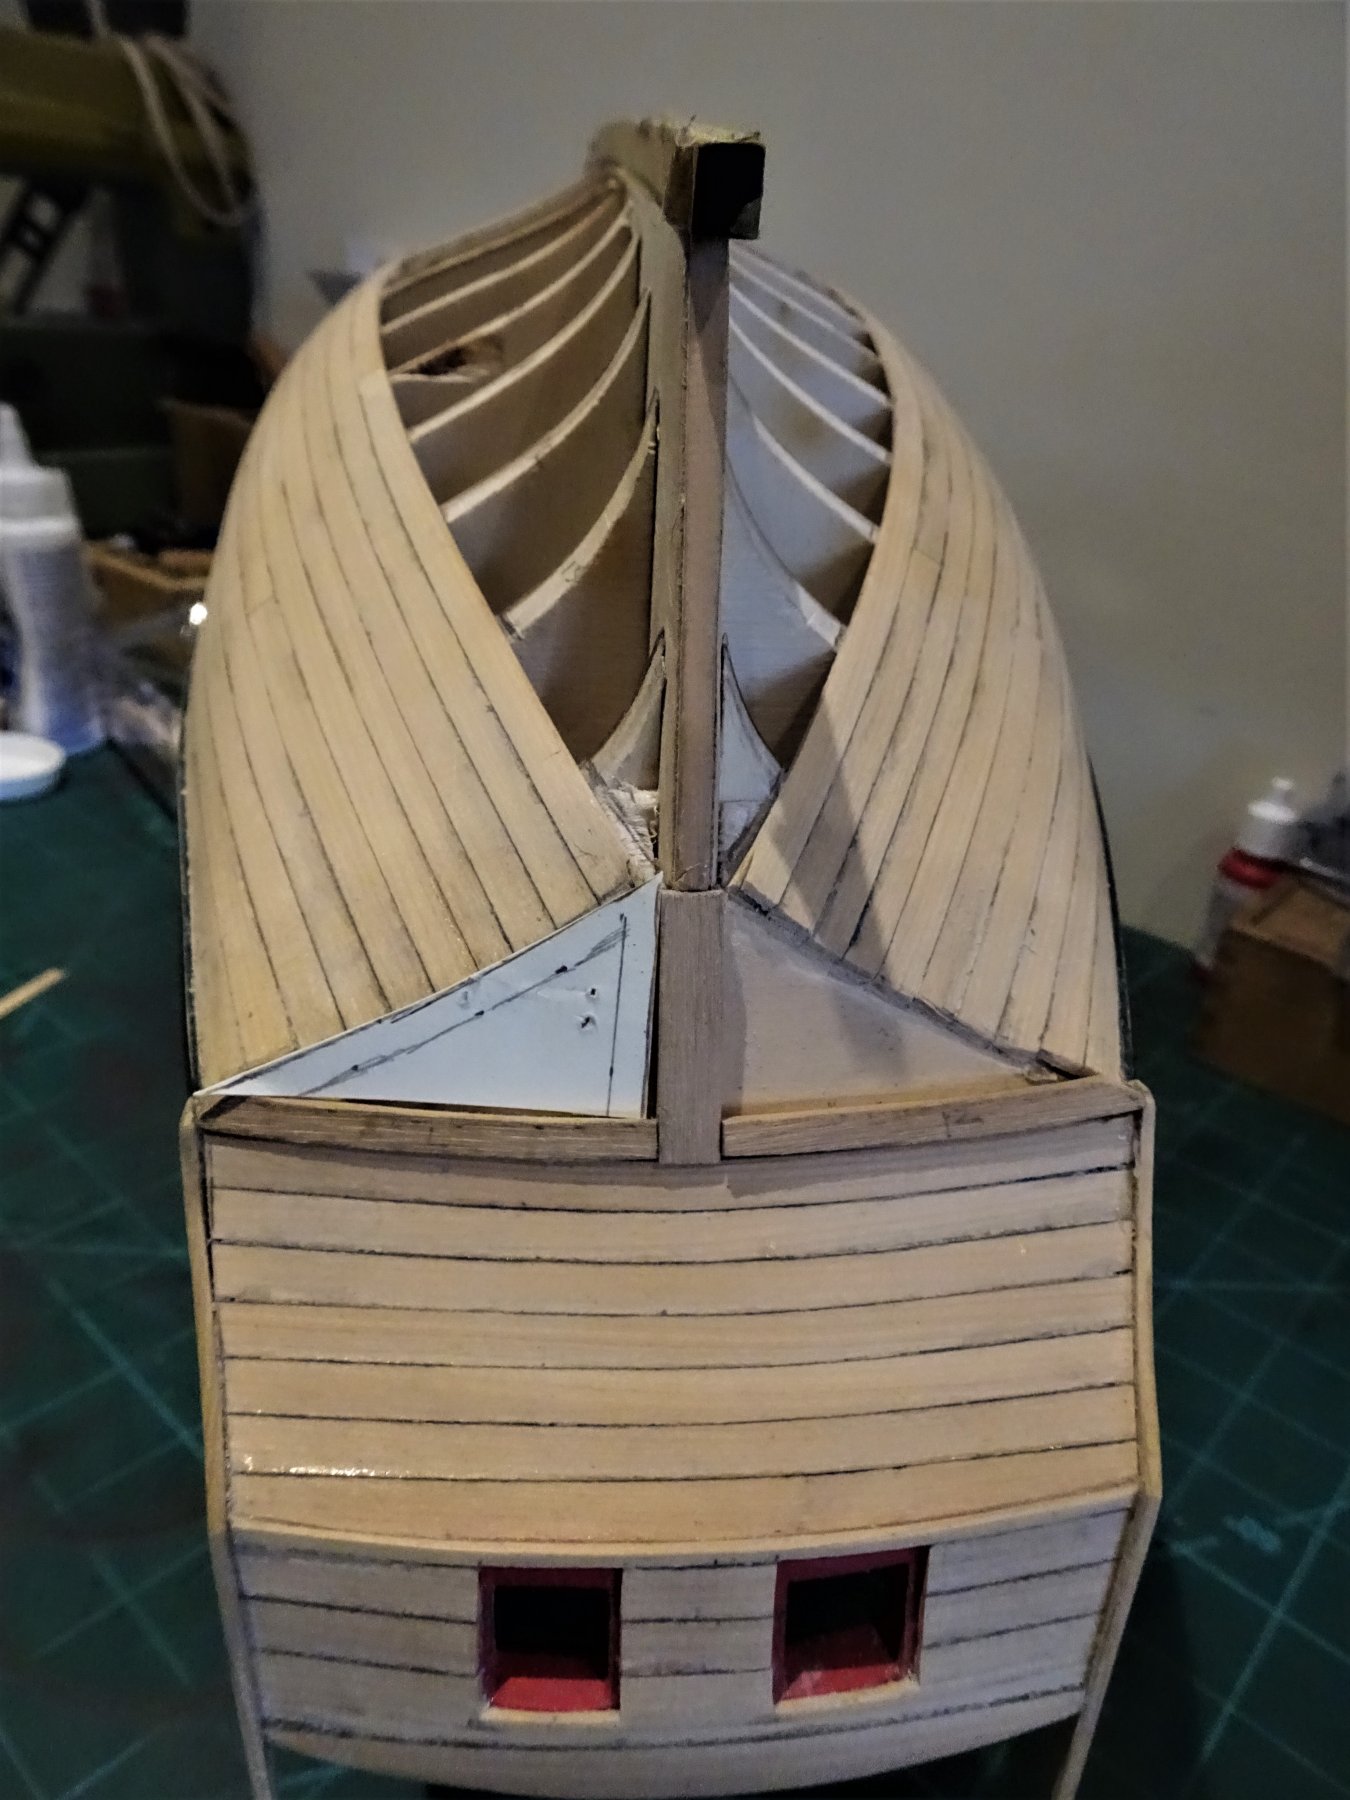
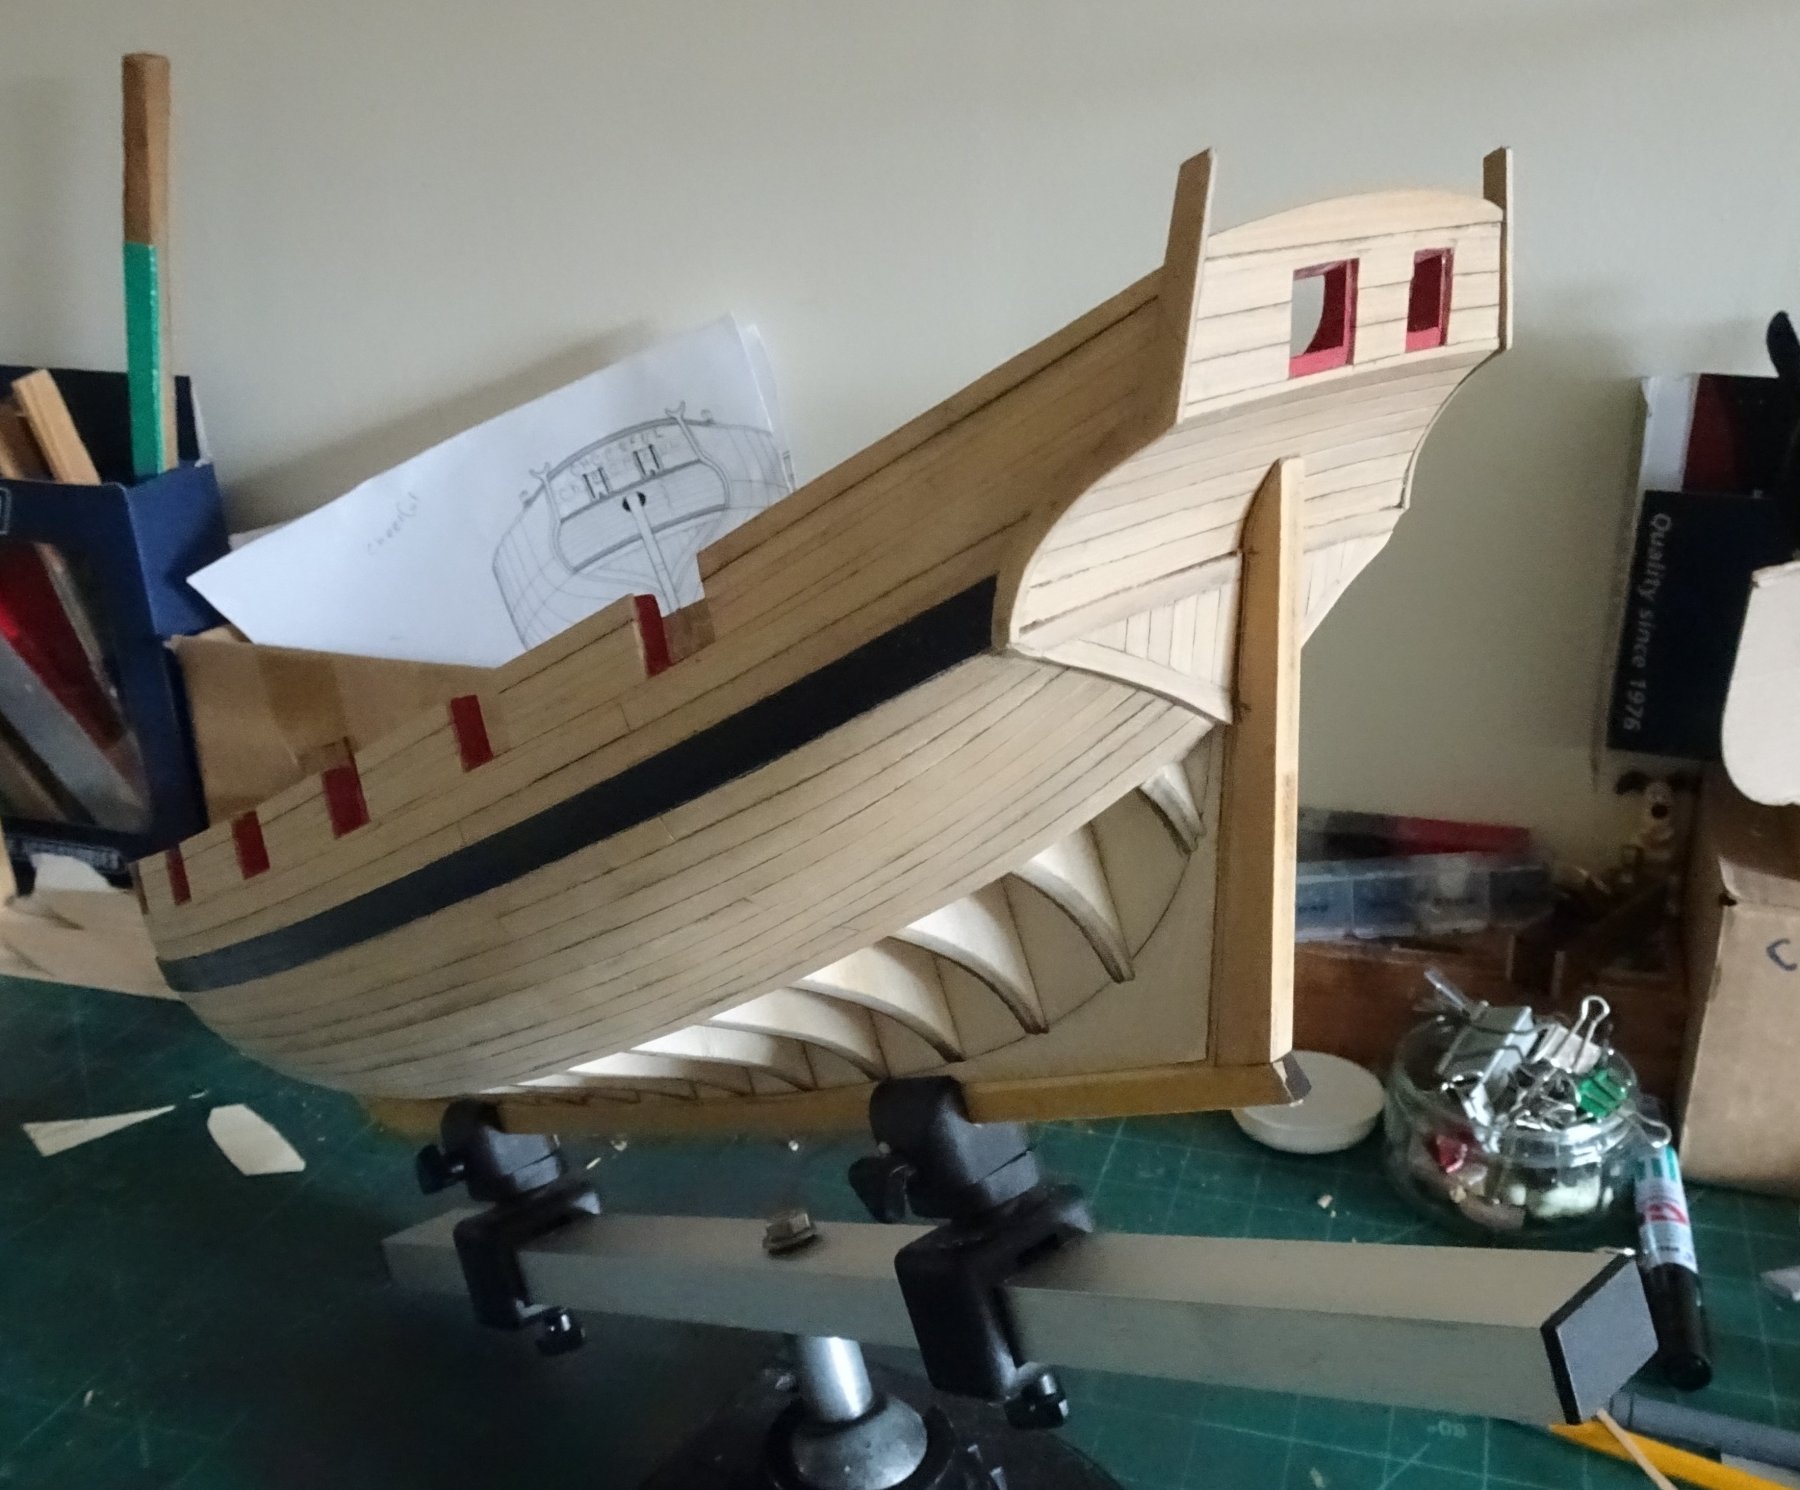
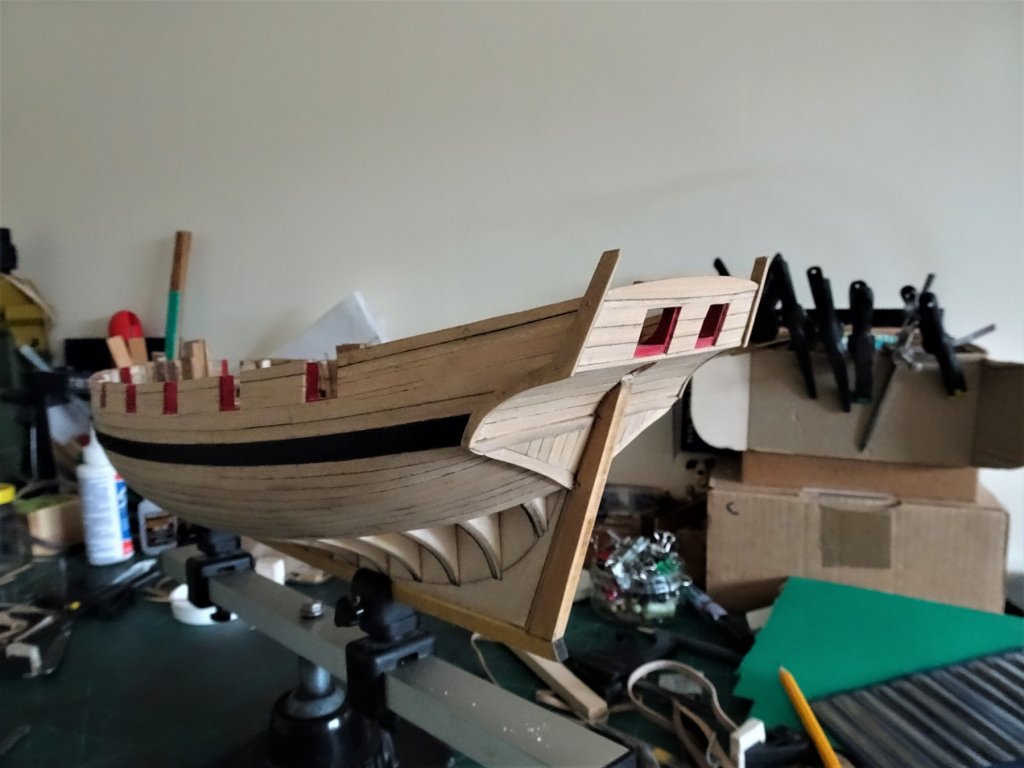
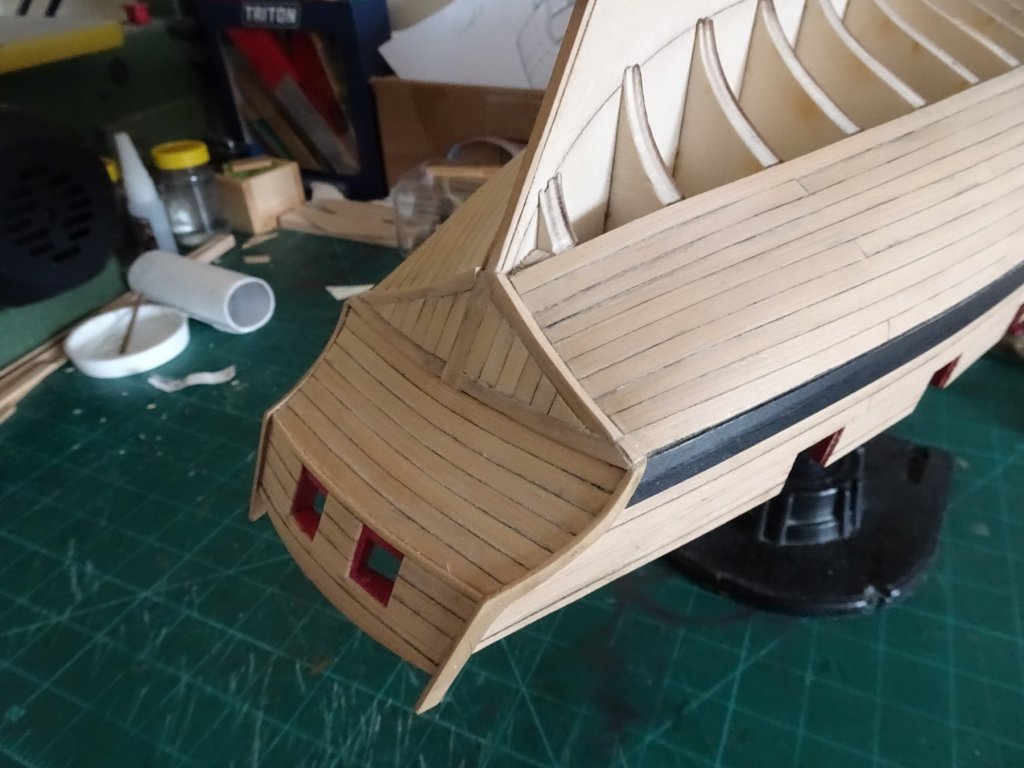
Cheers Dave, you know I hadn't picked up on the second smaller head piece for the stern post until you mentioned it above. I had managed to get a reasonable fit of the post to the counter so I opted to not hack into the counter planking more than I had to. Thank you Martin, I think it will look ok once fettled, but I still have a small sense of disappointment that I didn't get it closer to the plan. Post 28 Stern post 9767 Took a little modifying of clamps to hold the post close to the false keel and liberal use of elastic bands to hold in place until the pva set. 9772 With the Stern Post in place I carried on and cut out the Rudder port, I thought a convenient time whilst the build is still in a raw state. 9777 On with the lower planking band now. B.E. 06/06/2018

- 574 replies
-
- 21
-
-
- cheerful
- Syren Ship Model Company
- (and 1 more)
-
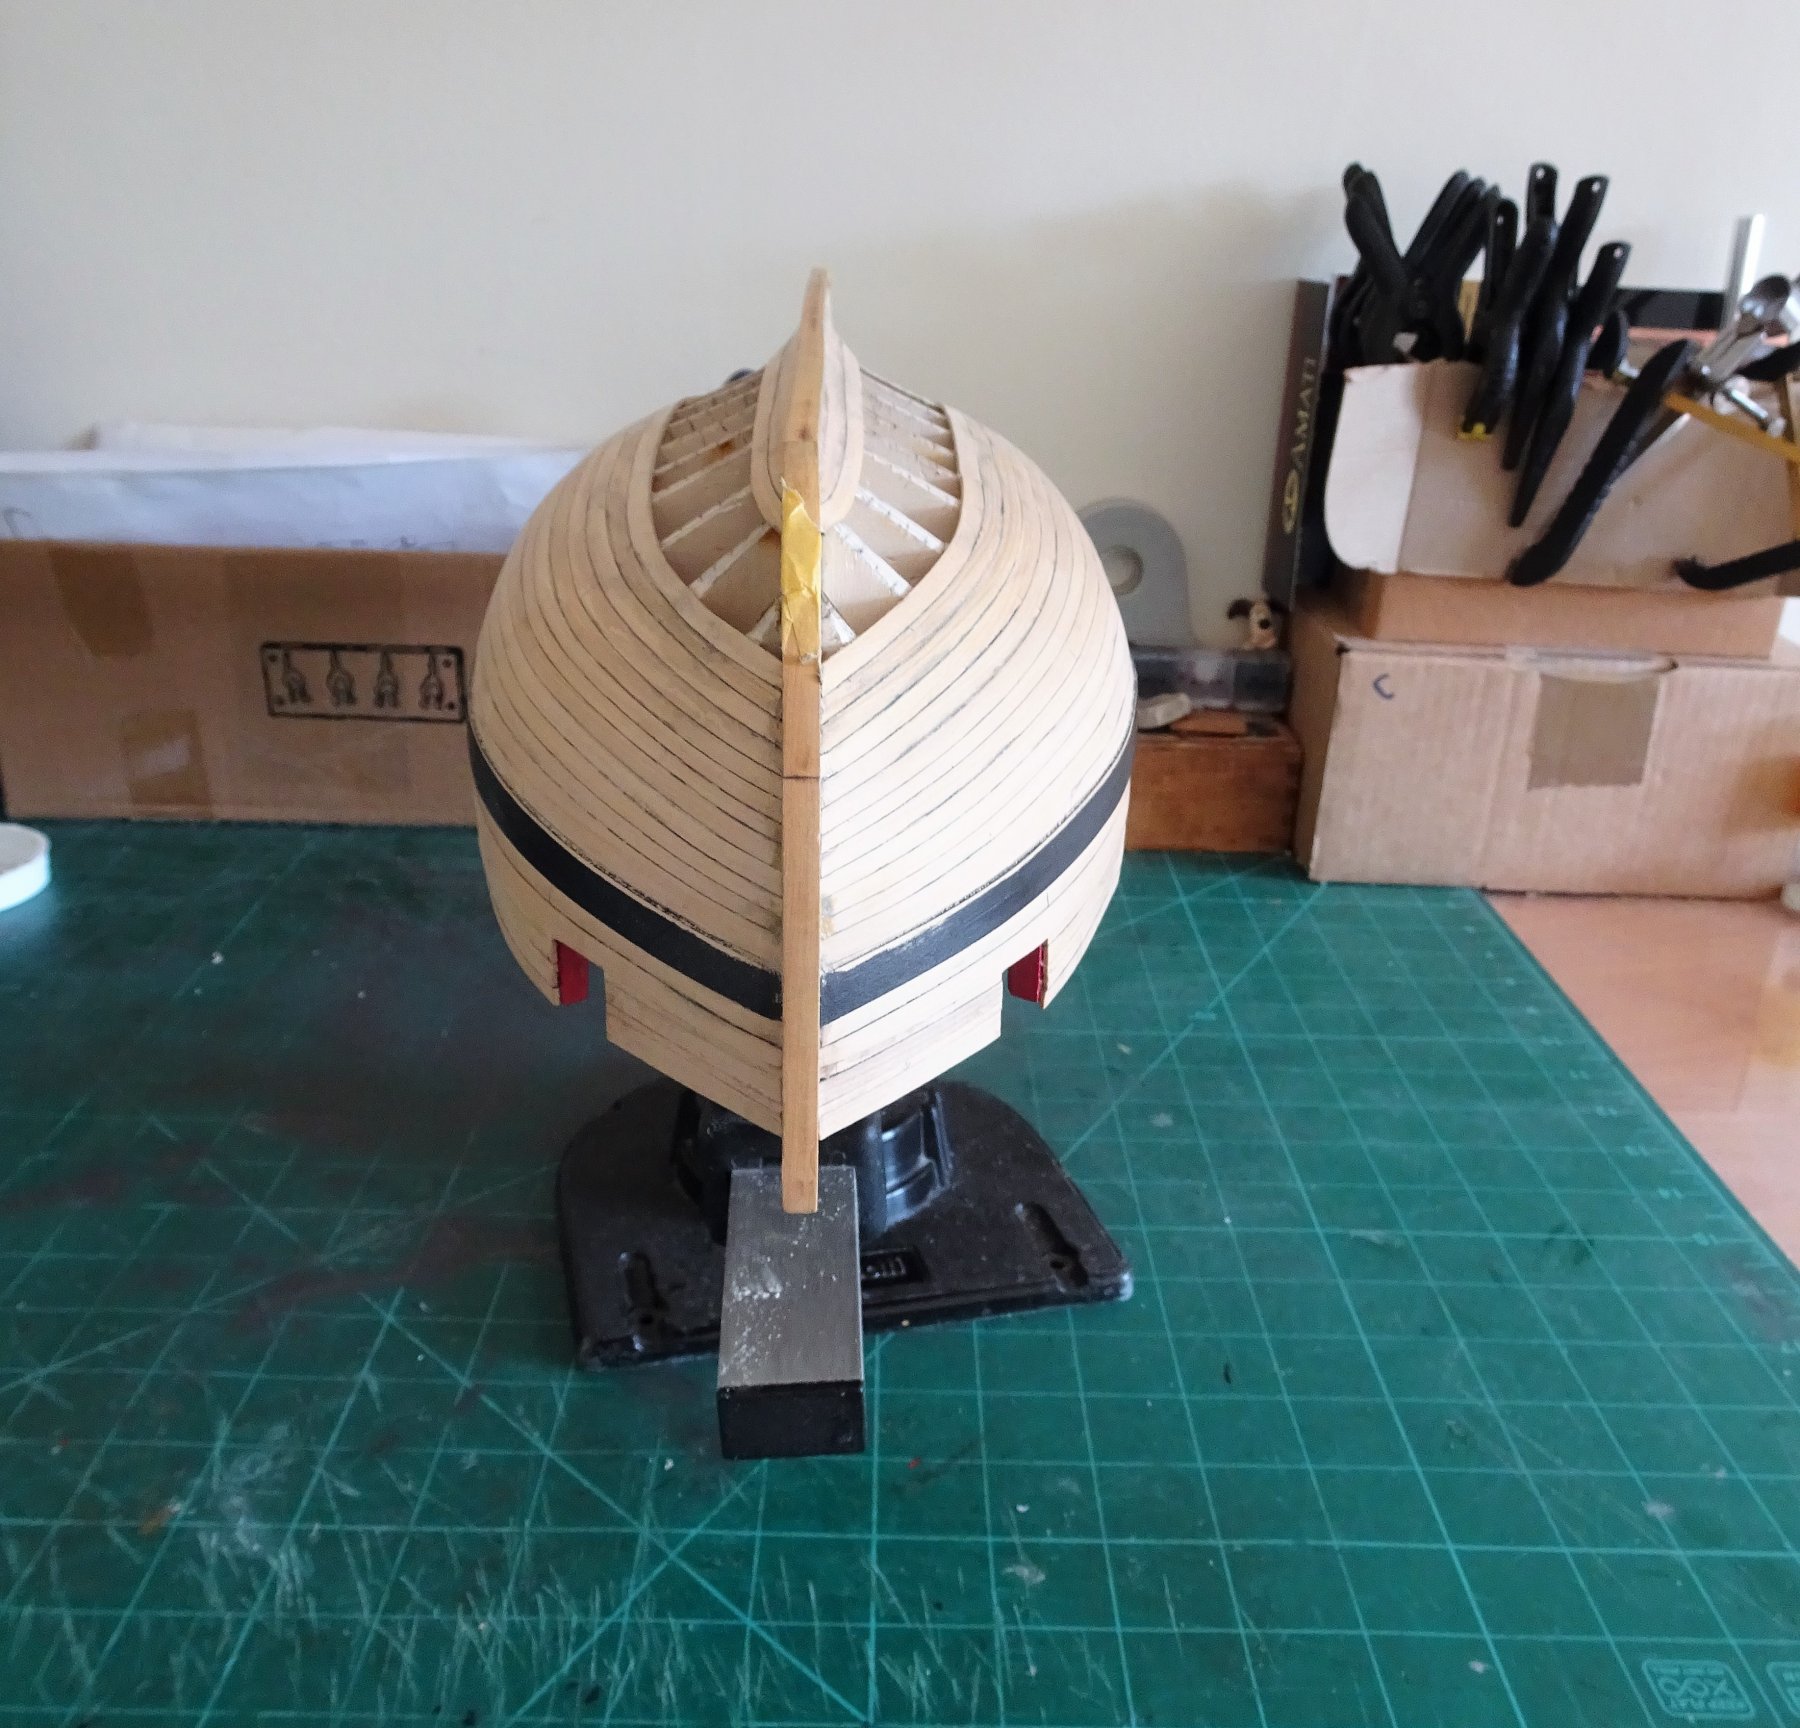
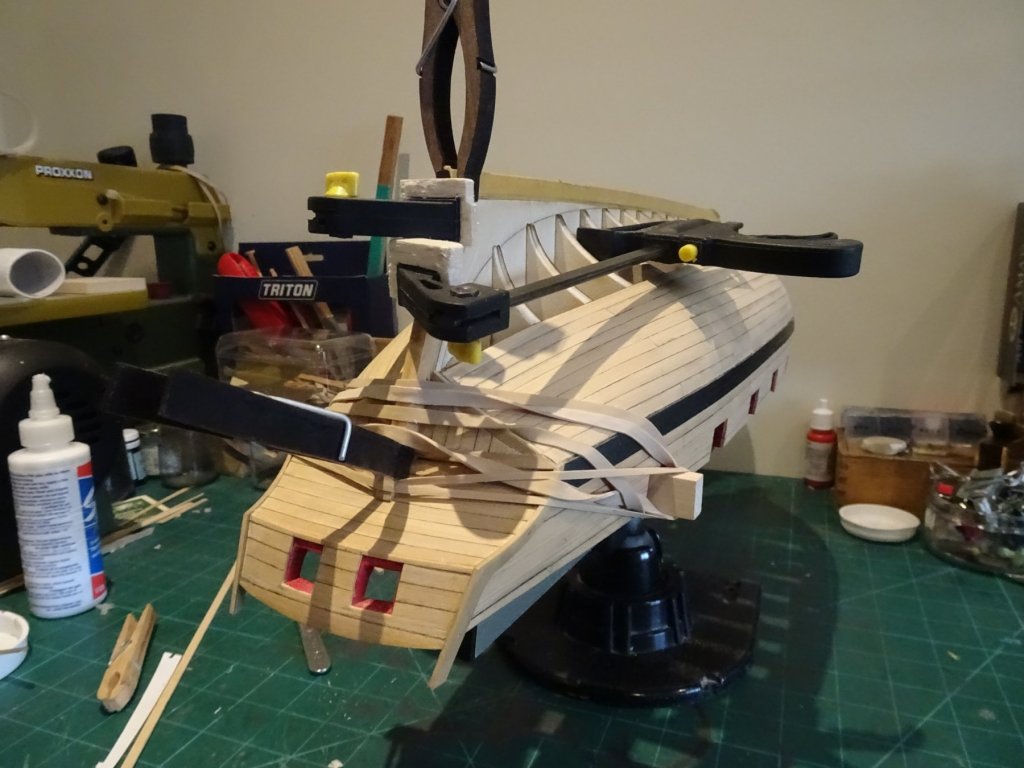
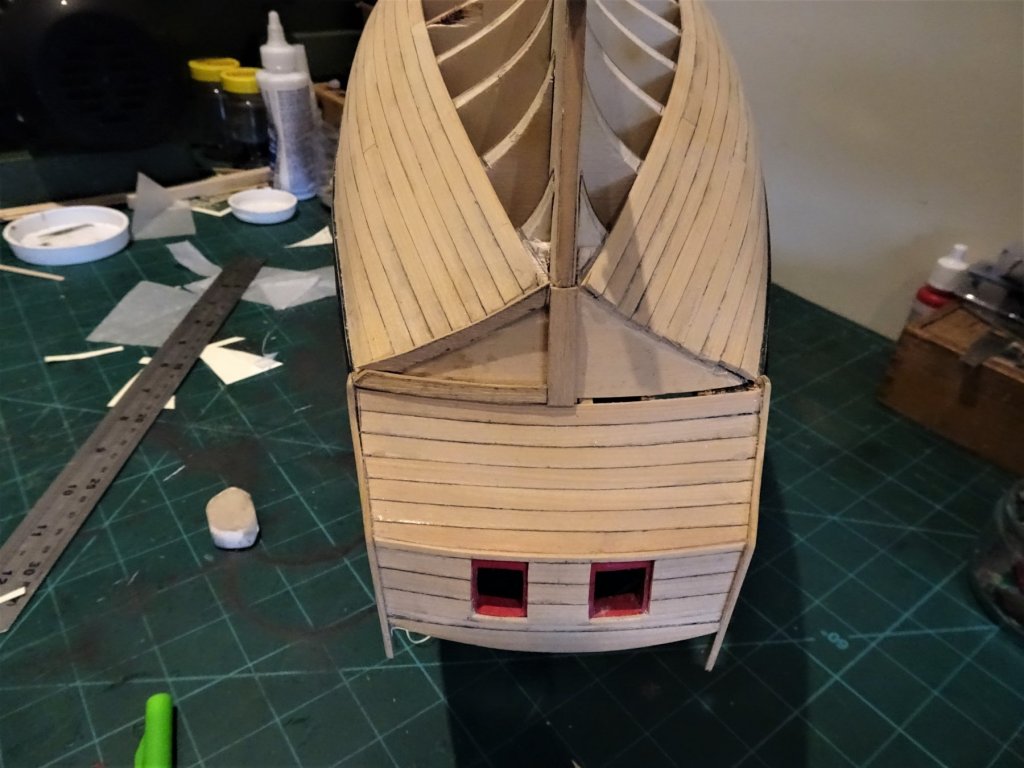
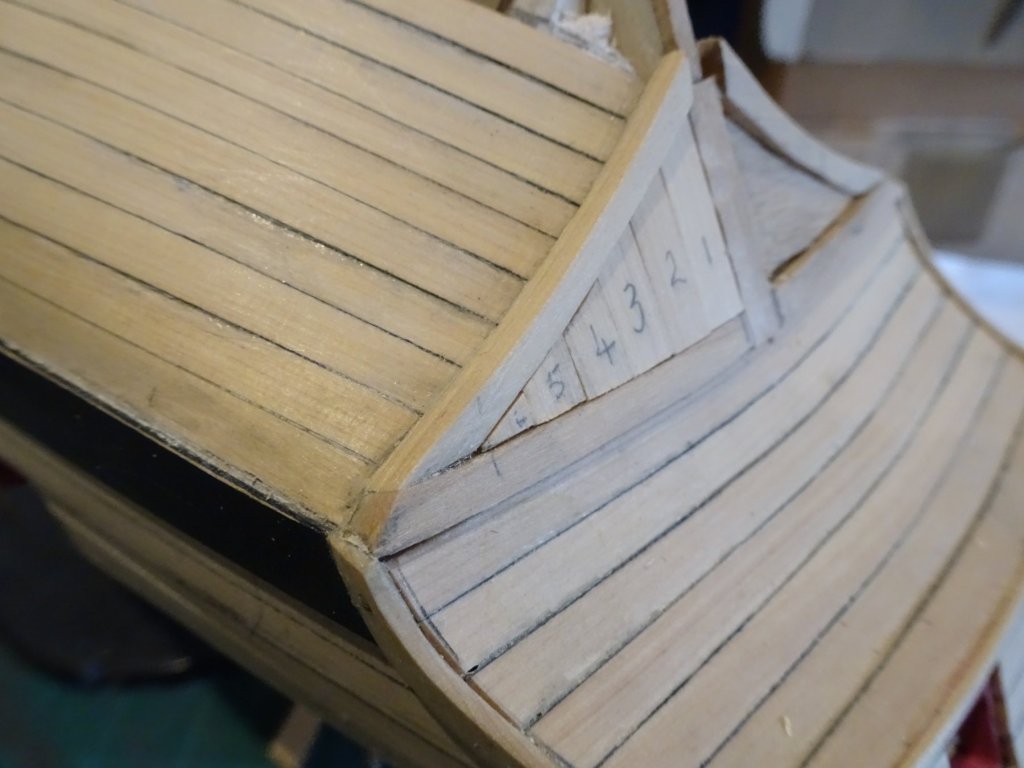
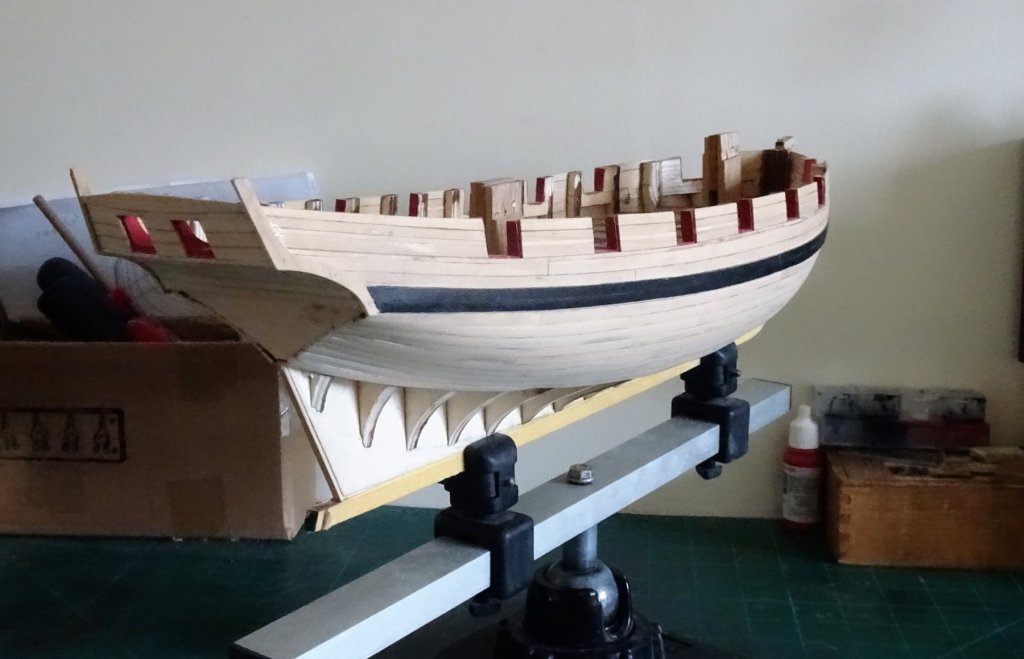
Cheers OC and Dave How time flies, I see it has been over a month since I last attended to Cheerful. Post 27 (27/05/2018) The mysteries of the Square Tuck This involves some intricate framing below the counter, and a job I approached with some apprehension. This may have contributed to my lack of eagerness to return to the workshop. I basically followed Chuck's instructions but I used some 3mm thick boxwood to form the frames. Fitting the centre strip and the upper sections along the counter edge is the easier bit; the testy part is the shaped frame that follows the line of the hull and butts against the other two strips. Having glued the first sections in place my approach was to form a template part out of card to form the basic shape before committing to the real stuff. 9548 Several tweaks of the card template were made before I committed the pattern to a 1.5mm thick piece of boxwood. The pattern was then transferred to the 3mm stuff. 9550 For the planking inside the frames I decided to infill with a piece of 1.5mm Boxwood sheet before planking so that I could use 3/64" thick strip rather than 1/8" stuff. As suggested by Chuck the pieces were temporarily glued to the hull for final shaping of the outer edges; the inner edges were then reduced to the 1/8th width before gluing finally to the hull. 9569 Not quite sure why but my version took six planks of 3/64" x 7/32" Boxwood strip. rather than 5 planks of 3/16" to fill the void. I suspect that the aftermost bulkheads were perhaps not faired down sufficiently to reduce the Square Tuck area. I decided to carry on to completion to see how the overall effect suited my eye. It didn't suit my eye so off came the lower frames and planking, but I baulked at removing the hull planking to re-visit the aftermost bulkhead. The revised arrangement still took six planks for the infill, the difference being the size of the outer segment between the 3/16th and 7/32" width planks. 9732 Having trialled both I opted for the (6) 3/16" planks with a slightly larger outer segment. 9733 This is in a fairly raw state prior to cleaning up. 9738 Not exactly matching Chuck's exemplary version and I cannot say I'm elated with my Square Tuck effort. As Mr Spock might say, It's a Square Tuck Jim, but not as we know it At this point I will also add the Stern Post as I prefer to work the lower planking to it rather than add it afterwards. That said the Stern Post will need some tweaking to get a tight fit from keel to counter. Still we press on. B.E. 04/06/2018


- 574 replies
-
- 20
-
-
- cheerful
- Syren Ship Model Company
- (and 1 more)
-
Looks beautiful Rusty, those friezes really pop out against the inboard colour. Incidentally my kit arrived today and altho’ I won’t start it until Cheerful is nearing completion, your log will provide me with a useful reference guide. B.E.
- 120 replies
-
- 2
-
-
- queen anne barge
- Syren Ship Model Company
- (and 1 more)
-
Fabulous photo's of some great progress Jason, and that 'iron' paint looks spot on. B.E.
-
I have to admit you've got a point Martin, Head-works and also Stern galleries are tricky little beasts; fortunately On Cheerful there is neither, but there is the mystery of the Square Tuck which may well involve a spot of tooth sucking and grinding, we'll see. B.E.
- 574 replies
-
- 4
-
-
- cheerful
- Syren Ship Model Company
- (and 1 more)
-
Thank you Chuck for your confirmation and support. Cheers Thomas, my planking is not as good as I would have wished, particularly when I look at Chuck's version as photo'd above. Planking is not my favourite part of a build and if it turns out as well as on your Syren I will be a happy man. I would happily swap you for a bit of later stage detailing work. B.E.
- 574 replies
-
- 5
-
-
- cheerful
- Syren Ship Model Company
- (and 1 more)
-
That's not how Cheerful, a cutter of 1806 was designed, so the arrangements you show above have no relevance to my build. B.E.
- 574 replies
-
- 4
-
-
- cheerful
- Syren Ship Model Company
- (and 1 more)
-
Don't know about that, I'm following Chuck's example and at this stage he suggests fitting the framing followed by the vertical planking. B.E.
- 574 replies
-
- 1
-
-
- cheerful
- Syren Ship Model Company
- (and 1 more)
-
Don't know what you're talking about, the Transom is planked, the counter is planked, framing the Square Tuck is up next. B.E.
- 574 replies
-
- 1
-
-
- cheerful
- Syren Ship Model Company
- (and 1 more)
-
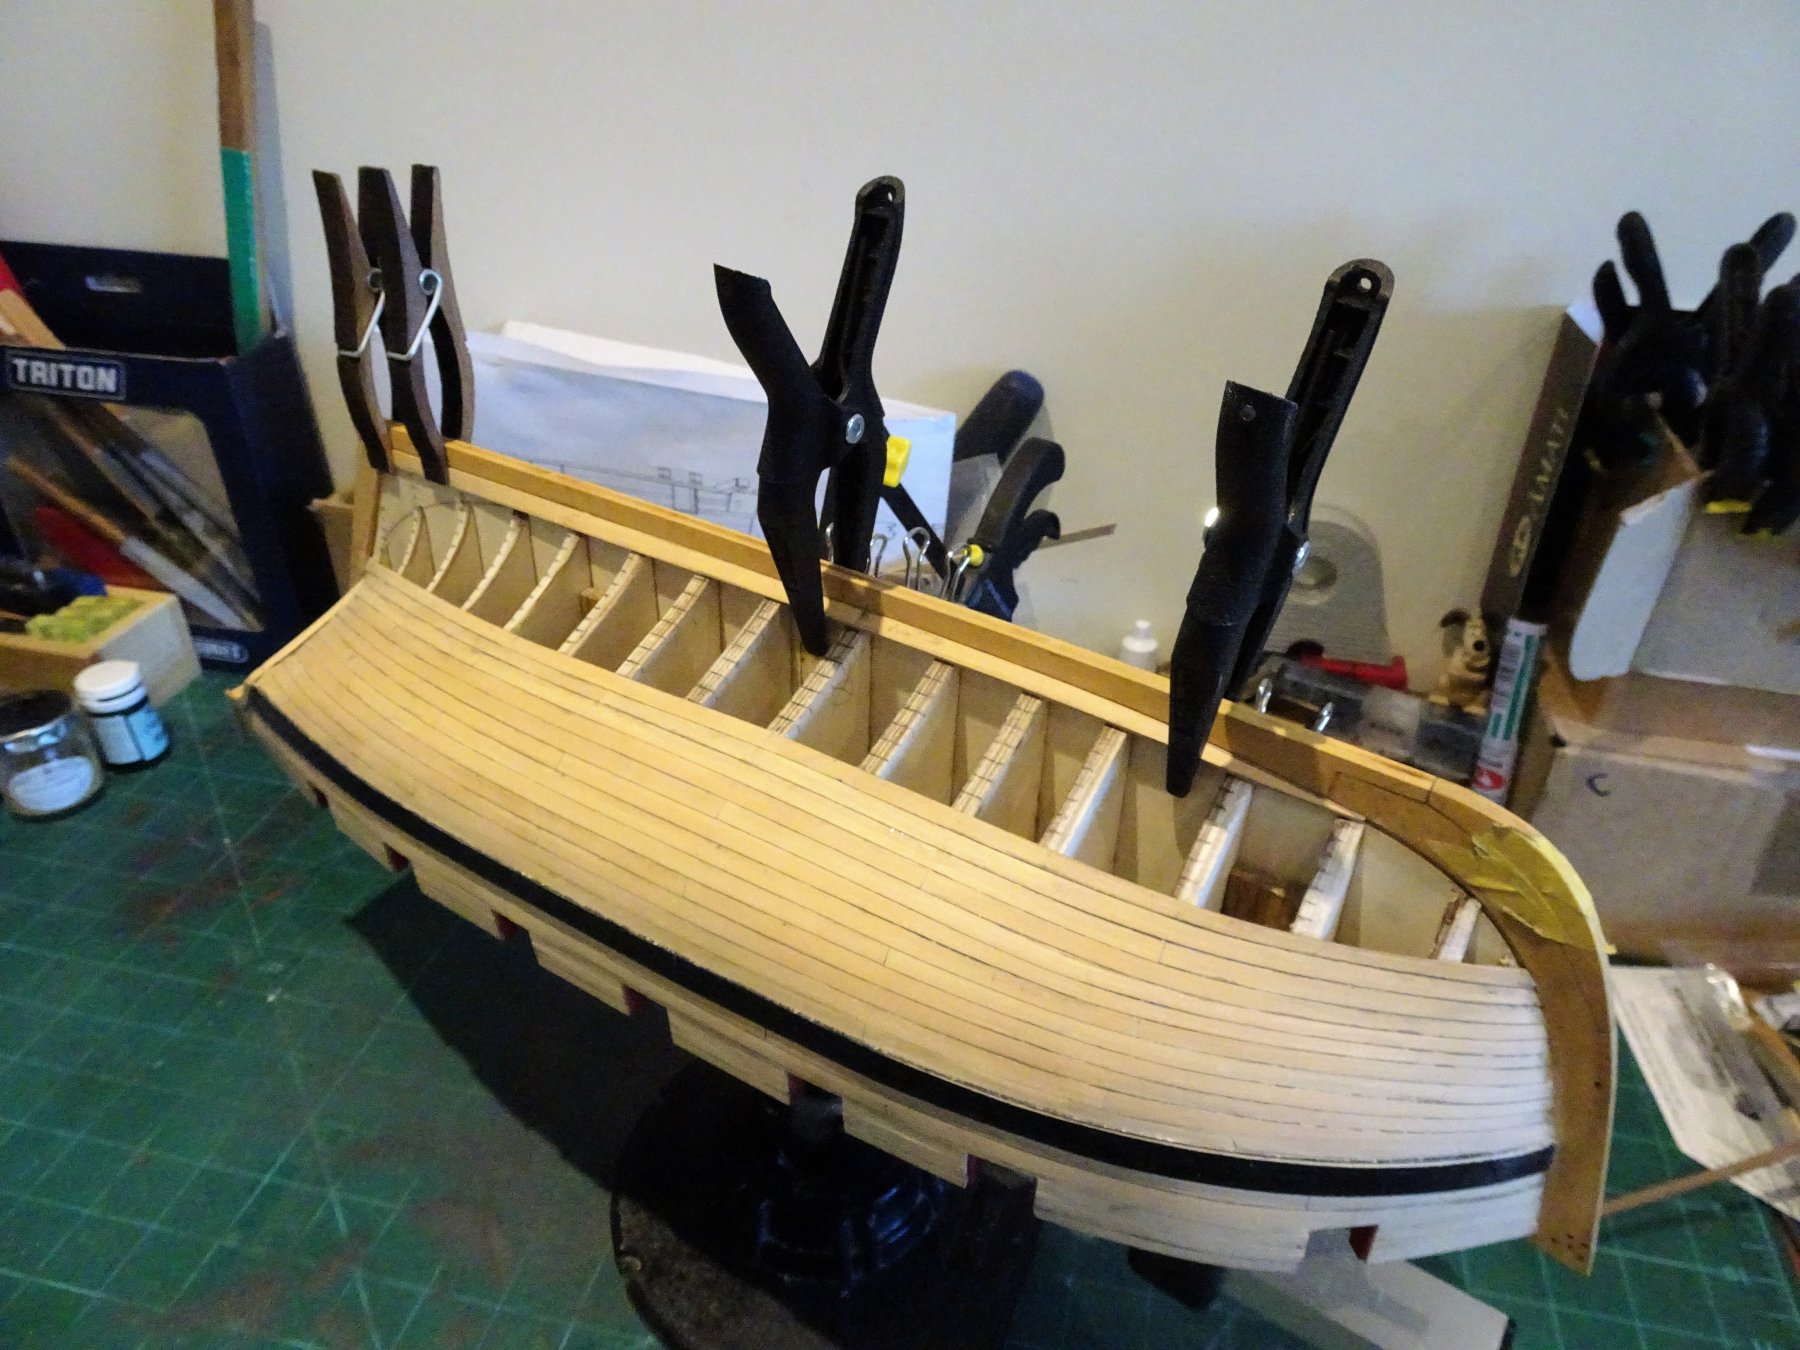
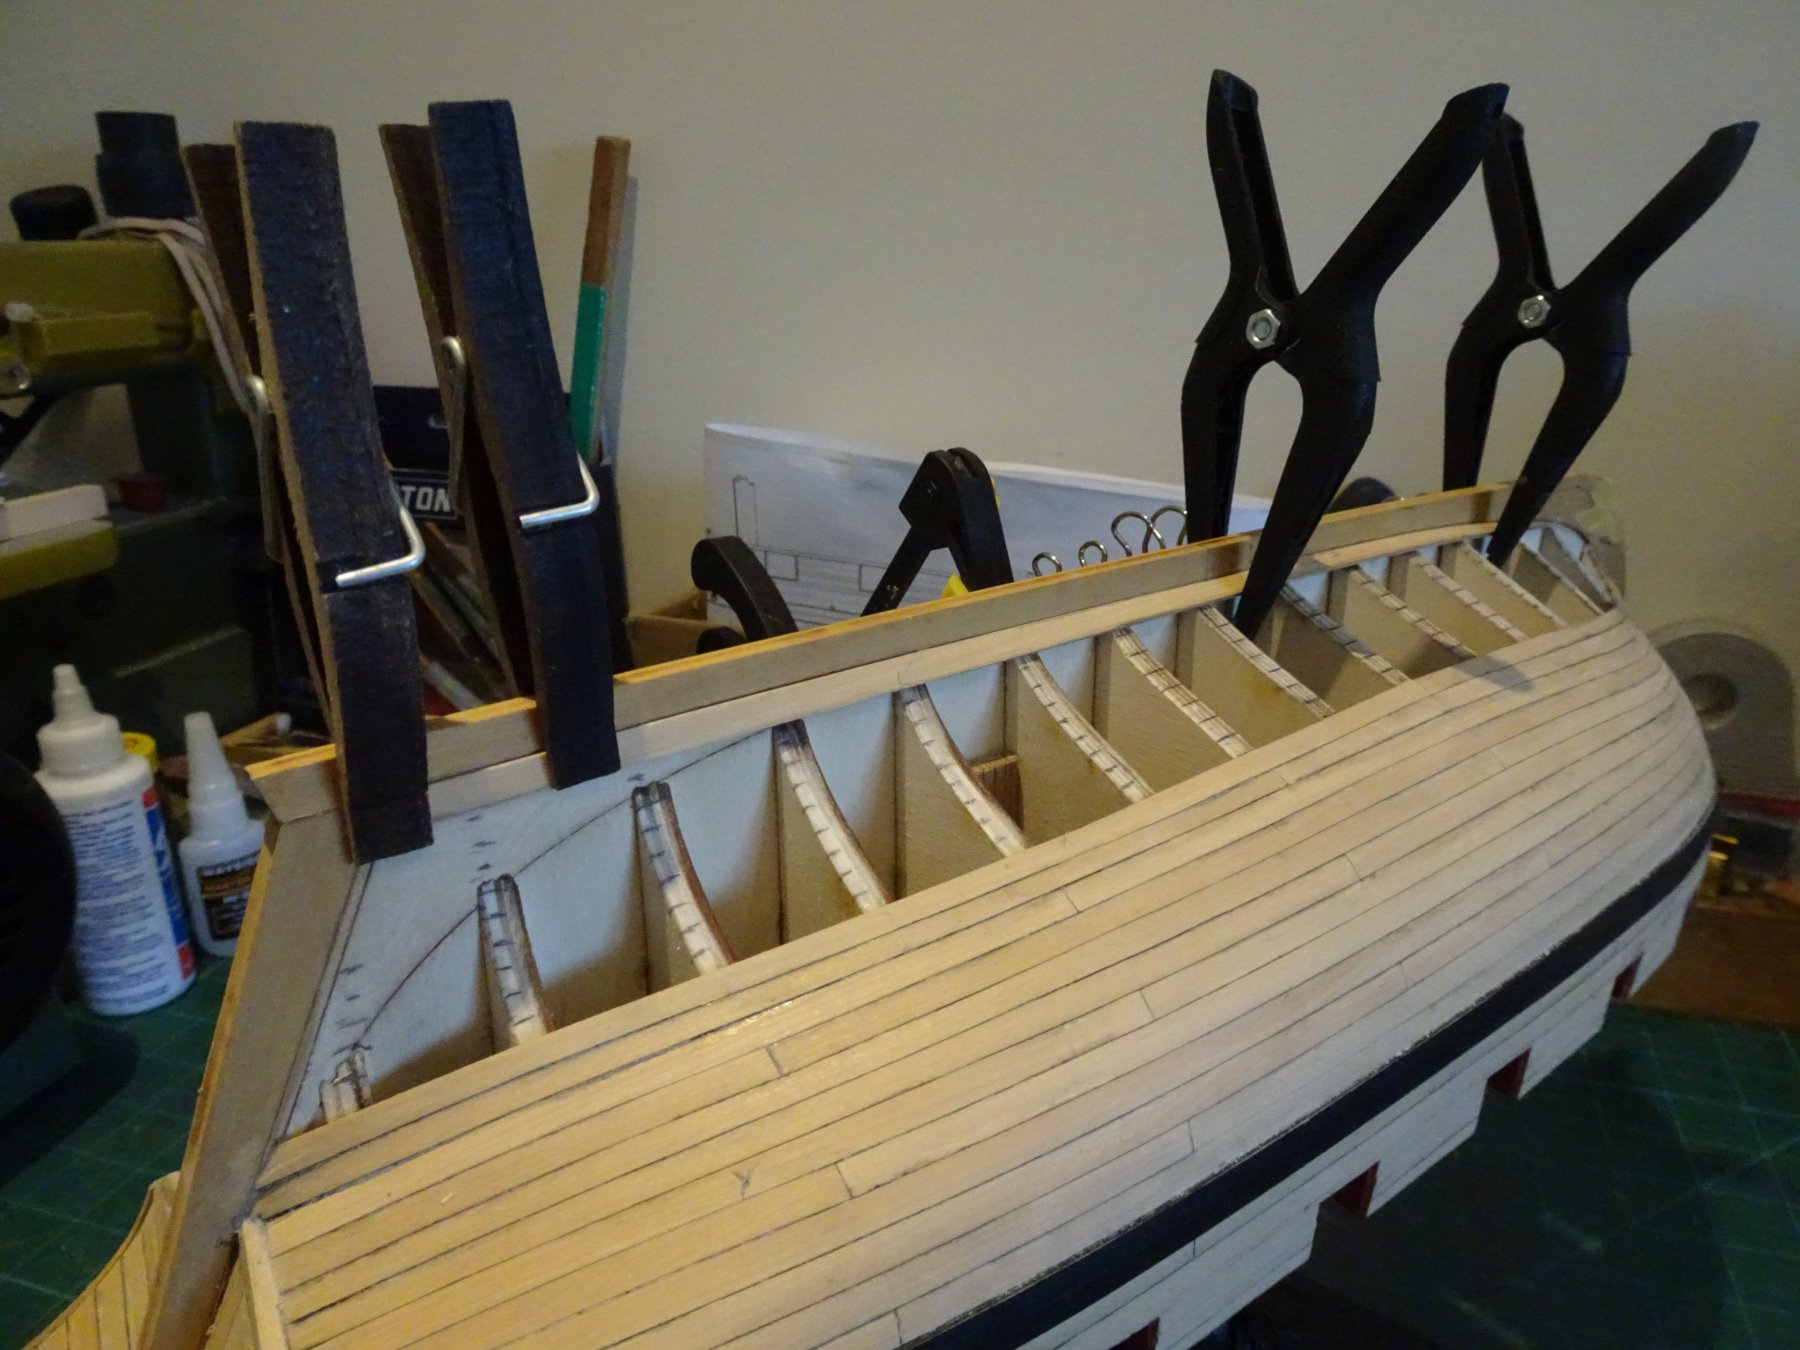
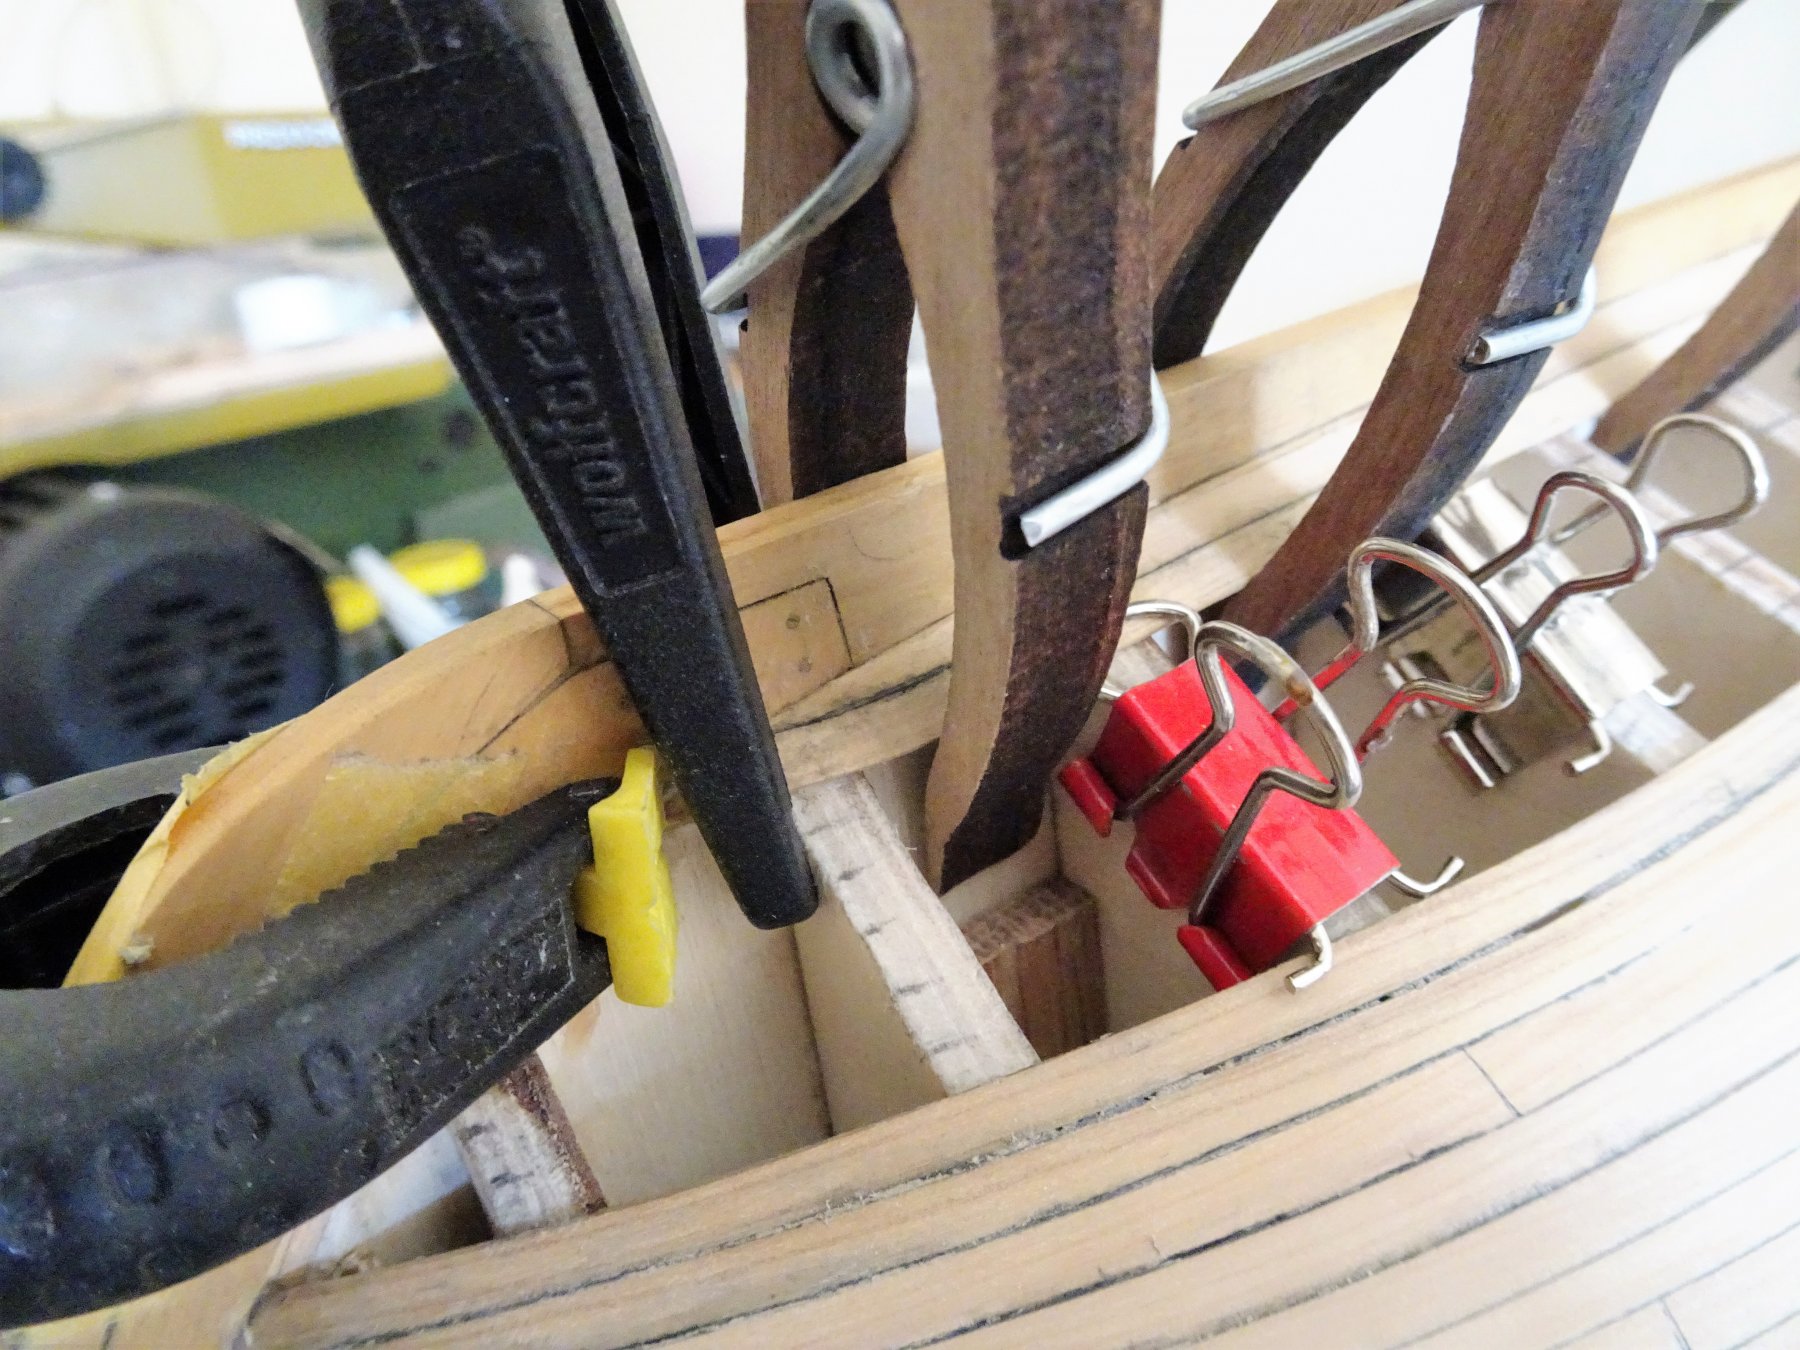
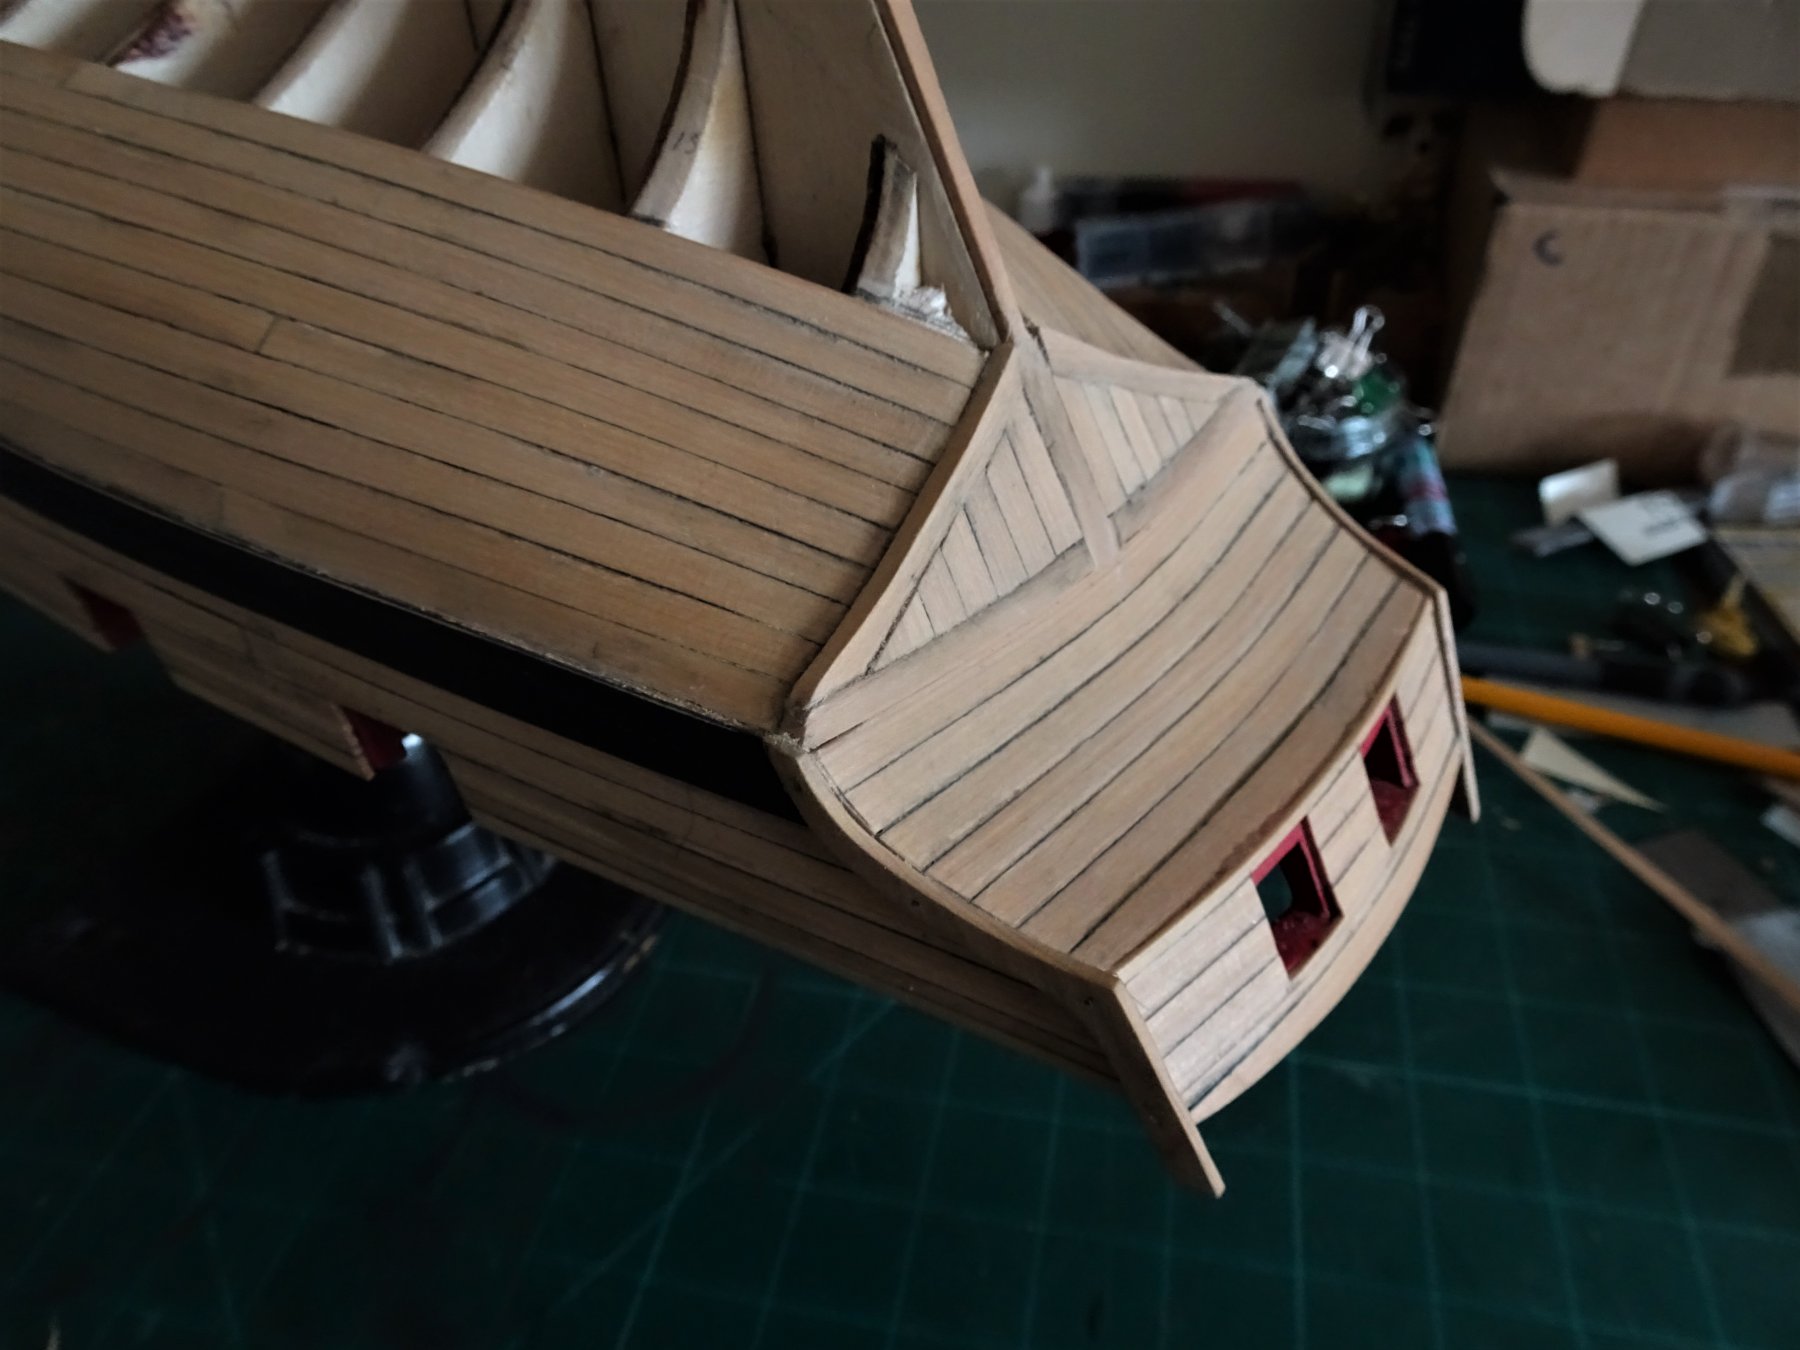
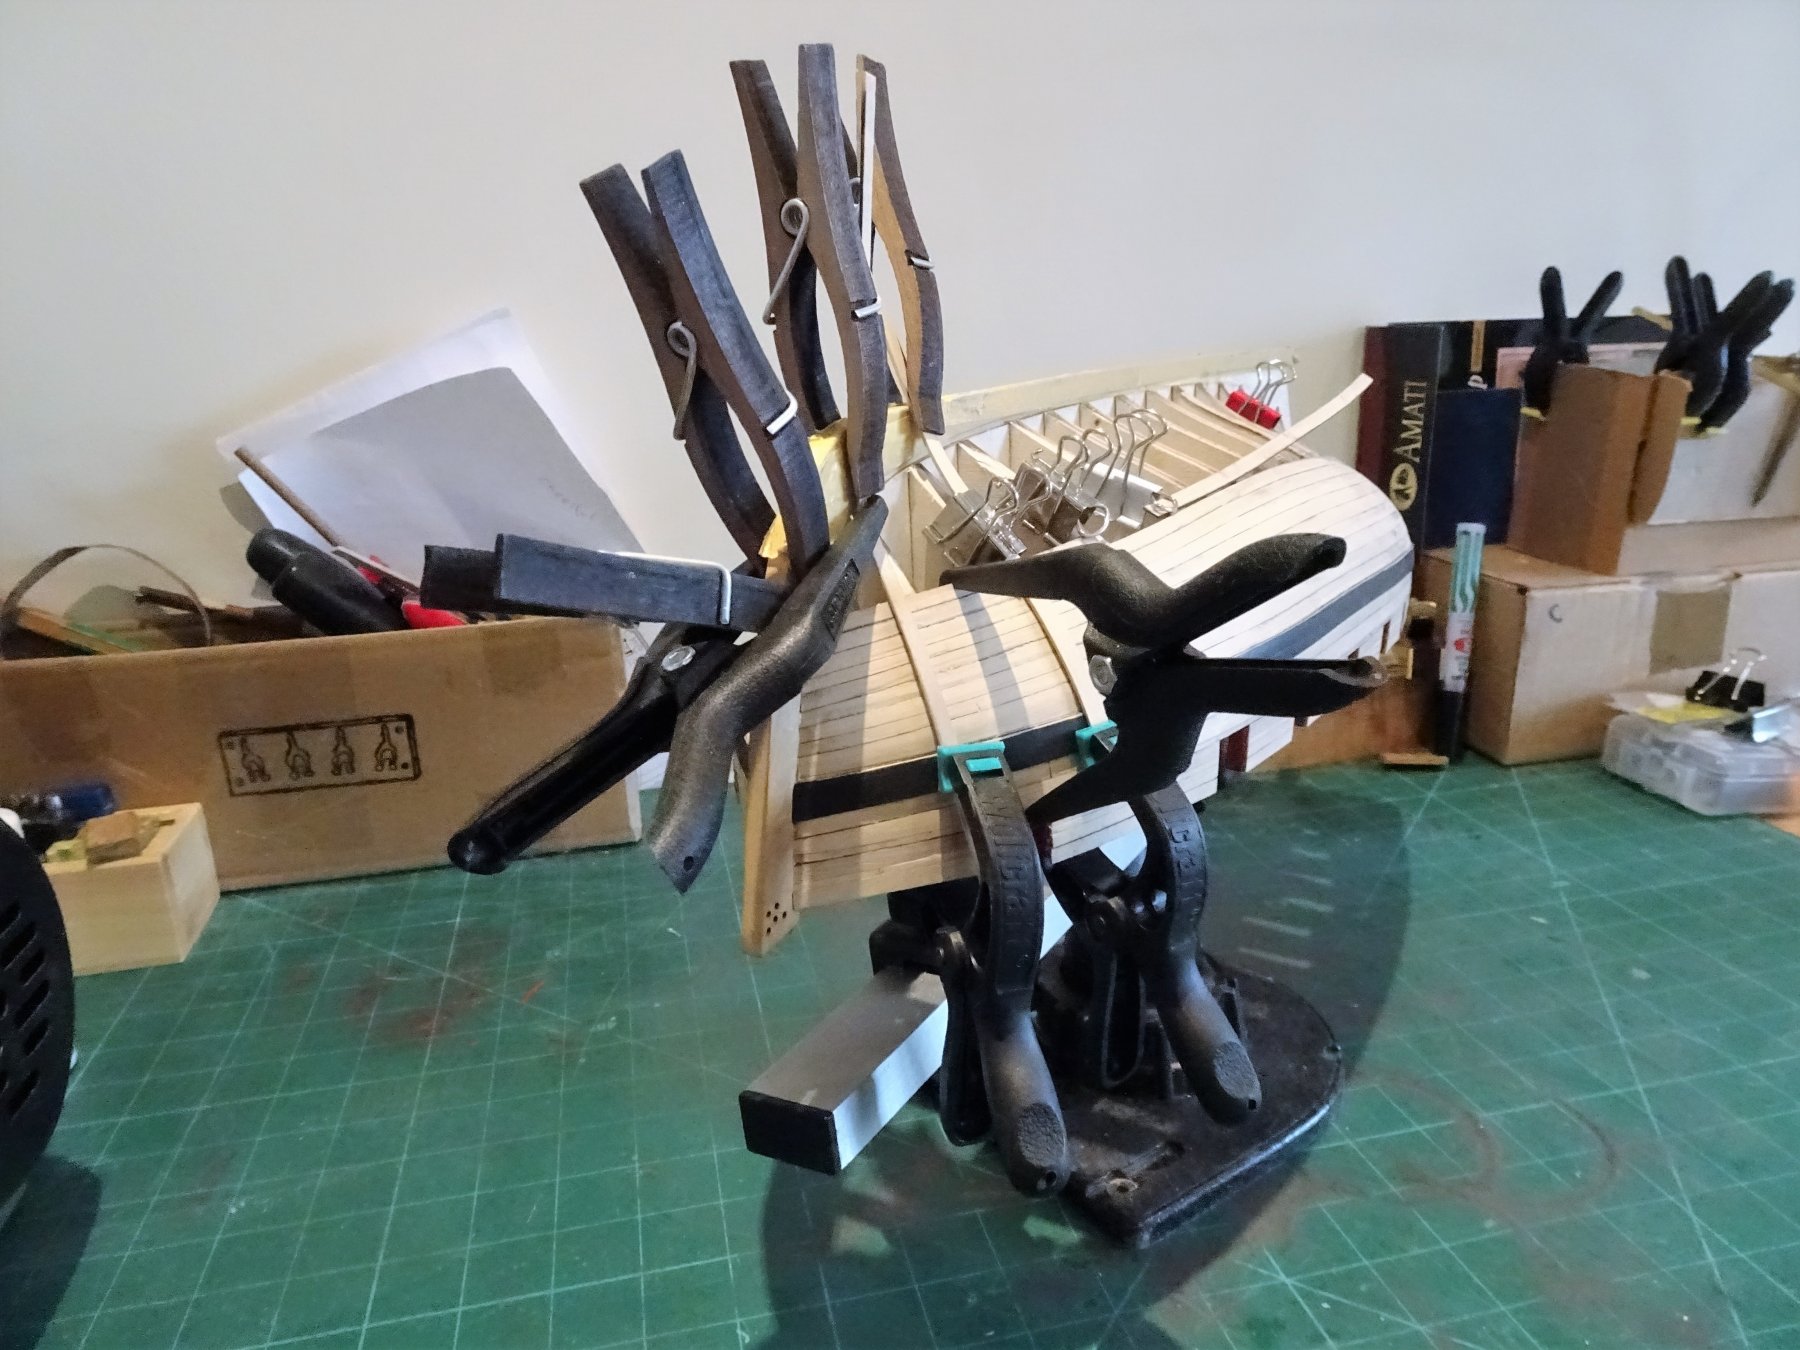
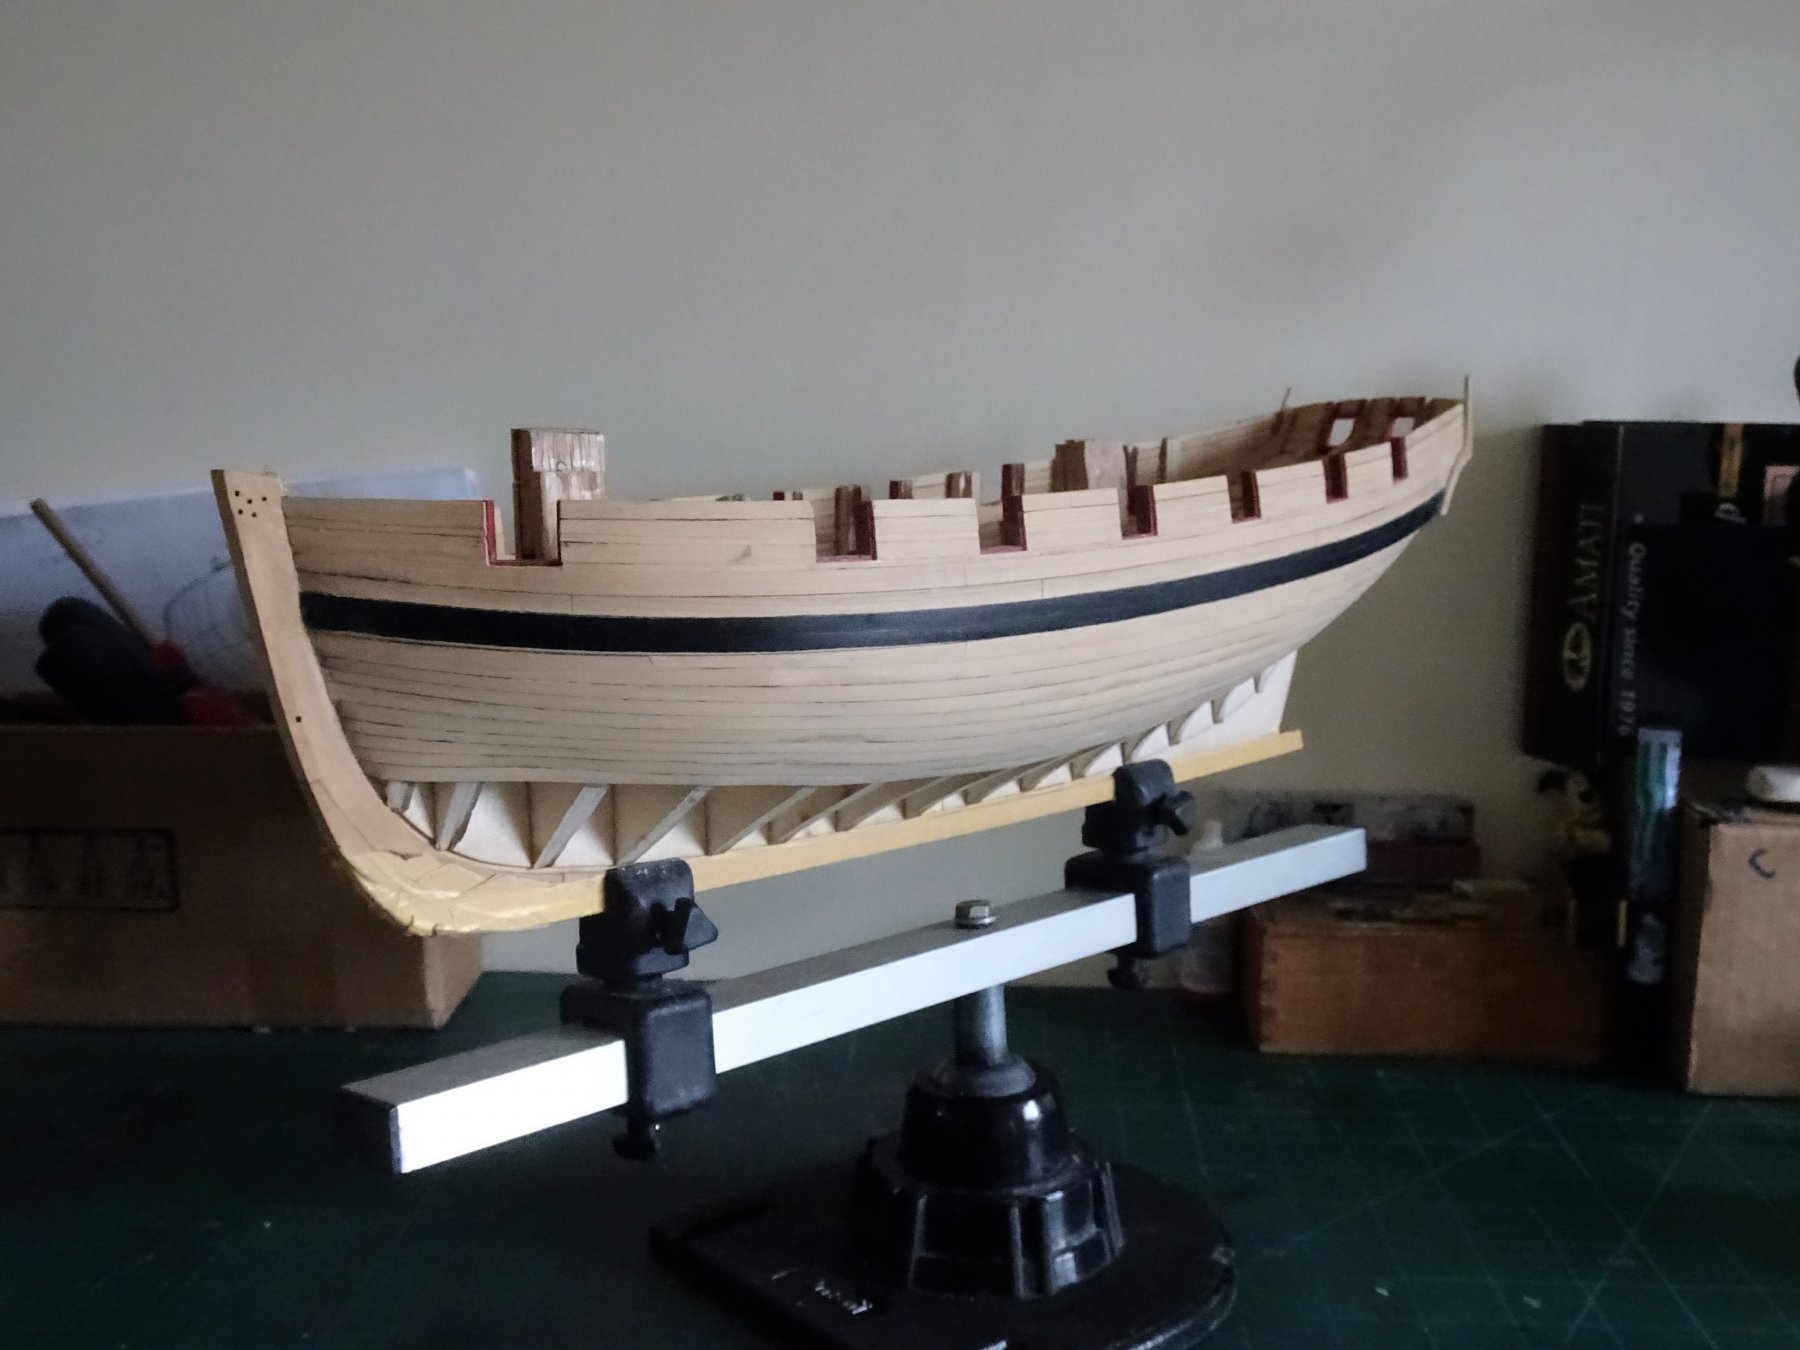
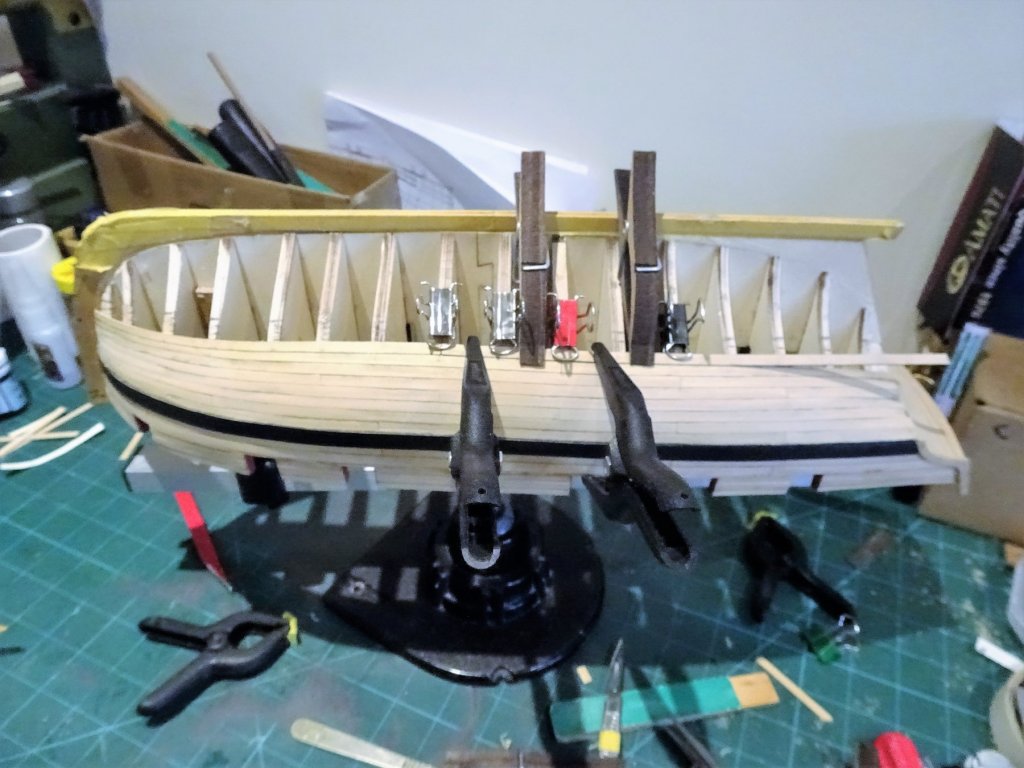
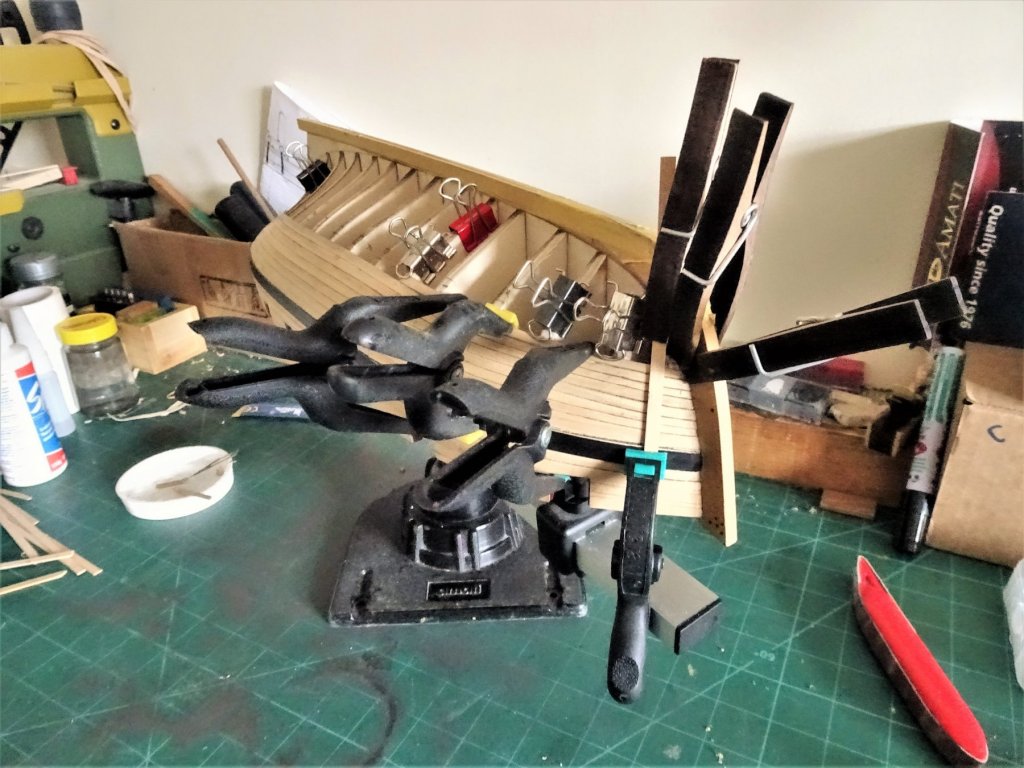
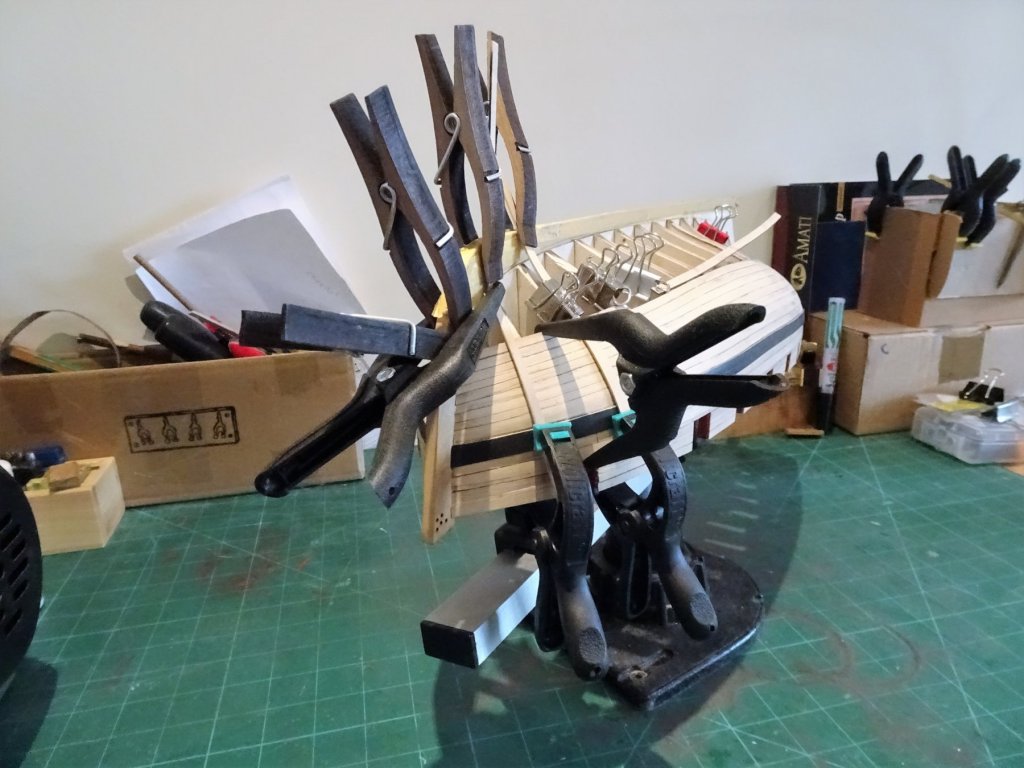
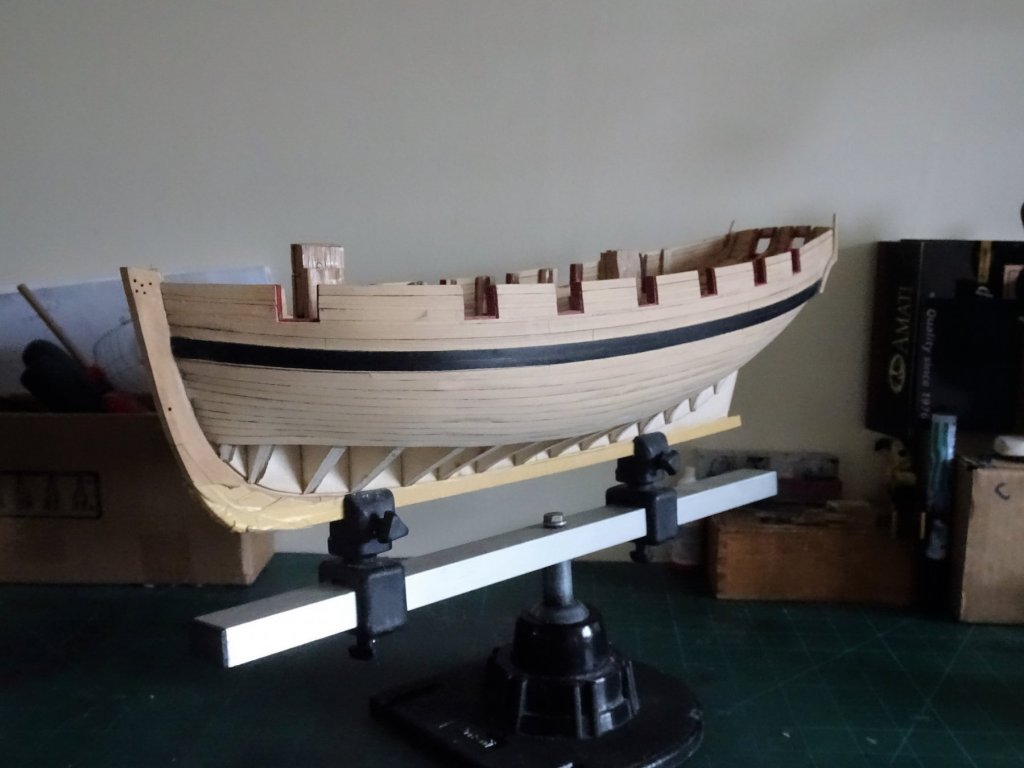
Thanks Dave and Ian, I'll check out those options. Post 26 Completing the first belt. As I progress with strakes seven and eight, there seems to be quite a sweep down in the tapering from B/h H to the stem, with more acute edge bending required. 8196 I also have to get more inventive with my clamping methods. 8271 It helps to have a range of clamping devices to hand. The planks are glued progressively along the hull starting at the bow ensuring the first three or four bulkhead points are well glued before moving on. Using a high quality pva glue there is sufficient 'grab' after around 20 minutes to move on. 8269 I use this period to start preparing the strakes for the other side. 8285 The last strake goes in. 8296 8309 8306 8304 8310 8314 8311 8315 So after eight days at the work bench the belt is completed. Needs a good sanding and scraping, but I'll leave that until the hull planking is fully completed. The Wales and the Port linings have also suffered during the process but that was to be expected. Taking a short break now before I return to tackle the Square Tuck - what joy. B.E 26/04 /2018


- 574 replies
-
- 21
-
-
- cheerful
- Syren Ship Model Company
- (and 1 more)
-
Big improvement on the carriages Peter, I don't know what period/origin Amati based their carriages on but they don't represent any style I've ever seen on British ships. The additions to the guns all help to add authenticity to the overall effect. B.E.
- 366 replies
-
- 6
-
-
- bellerophon
- victory models
- (and 2 more)
-
Hi HH, I think Modelspan would be just fine to kit the Soleil Royale out with sails. Here's an example of I think Tissue paper used on a Soleil Royale model completed some years ago by a fellow modeller (Michael D)on a different forum. Modelspan would be an even better option because of it's better surface finish and inherent greater strength. Cheers, B.E.
- 126 replies
-
- 1
-
-
- le superbe
- heller
- (and 2 more)
-
Swann Morton chisel blades.
Blue Ensign replied to harlequin's topic in Modeling tools and Workshop Equipment
Thanks for the heads up on this harlequin, I am very familiar with Swan Morton scalpel blades, order them in boxes of 100, but these little beauties escaped my attention. Ordered SM61 and 62 SB blades yesterday together with the SF2 handle, they arrived today. In use already, they are fine narrow chisels perfect for those awkward places. B.E. -
Thanks Al and Rusty, I'm some way off decking so exposing a Holly strip to the air with and without varnish is a good idea. ps. you make reference to Beech Al, which naturally has a more brownish tone and more pronounced grain pattern; it has its uses, it is quite flexible in strip form, but it is not a wood I would use for decking. B.E.
- 574 replies
-
- 2
-
-
- cheerful
- Syren Ship Model Company
- (and 1 more)
-
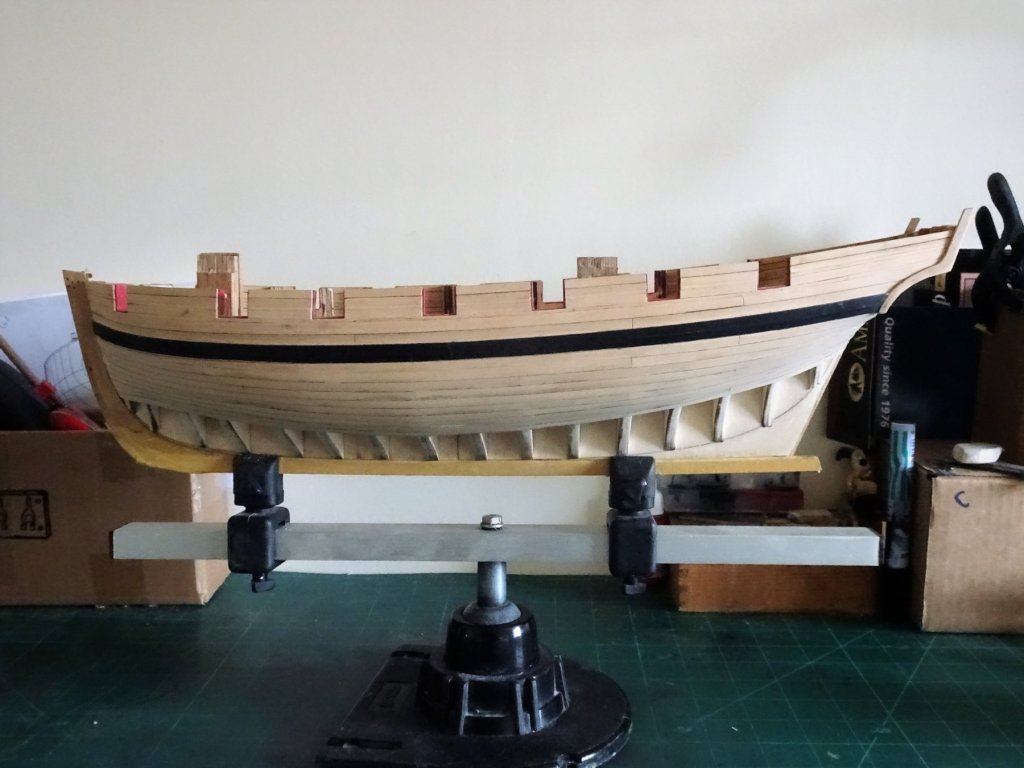
Thank you Dave, Personally I like the look of natural Boxwood, harkens back to those wonderful contemporary models of the 18th Century. I do intend to varnish it which tends to darken the wood a little but I do favour the look of the black wale against the pale hull. The only thing I'm not too sure about is the Holly I bought for the decking, I'm now thinking it may be too white for my taste, and may require a little tweaking, or even replacing with Boxwood. I'm some way off from that decision tho' B.E.
- 574 replies
-
- 5
-
-
- cheerful
- Syren Ship Model Company
- (and 1 more)
-
I have used Modelspan which is the same thing, excellent stuff particularly at smaller scales, also good for flags and ensigns. I used it on my 1:150 French Seventy-0four build. B.E.
-
Another beautiful build Rusty, and given that I have just ordered the kit from Chuck, one that I will follow with great interest. B.E.
- 120 replies
-
- 4
-
-
- queen anne barge
- Syren Ship Model Company
- (and 1 more)