


dcicero
-
Posts
259 -
Joined
-
Last visited
Content Type
Profiles
Forums
Gallery
Events
Posts posted by dcicero
-
-
Thank you so much for that reference from the University of Chicago!
The university is easy to get to from where I live. (It's near the Museum of Science and Industry too, where you can see the U-505. I never miss an opportunity to do that.) I'll see if I can get it through inter-library loan. My local library is great about getting books like that and, if there are plans for the boats, that might be all I need.
And getting the kit to use the parts are templates is also a good idea. The kit is at 1:20 scale, which makes a model about 30 inches long. That's a big model. I think I would prefer one at something like 1:48, so plans are the way to go and templates would be useful too because they could be scaled and reproduced.
Thanks to everyone for responding! I did a presentation at my local ship model club last week about these boats, their use and the Danubian Limes they protected. I've attached a copy for anyone interested.
Dan
-
Thanks!
I sent an email off to Herr Doktor Dreyer and he answered me. They only sell the kit, not the plans. He didn't give me any details. I suspect you're right and the kit is very basic. I might still order one to see what shows up. I'd really rather have a good set of plans because I would never build such a model from plywood.
Dan
-
This might be a long shot, but has anyone bought this model of the Fridericiana Alexandrina Navis, a reconstructed 1st century Roman boat used on the Danube River? The Friedrich-Alexander-Universität
Erlangen-Nürnberg built and sailed this boat in 2016 and they now sell a kit of it:Kit - Roman boat of the FAU Erlangen-Nürnberg (fau-shop.de)
I'd prefer to just get the plans and any other documentation that comes with the kit as the kit materials appear to be plywood and I wouldn't build a model from that.
Just thought I would check here to see if anyone's got any experience with this. The subject is very interesting!
Dan
-
On 2/11/2022 at 4:25 PM, Glen McGuire said:
Hey Grant - if you drink enough of that $8 brandy, you will see more penguins than you can count!
To quote Zulu...
Hook - "A spot of medicinal brandy would set me up, sir."
Reynolds - "Brandy! Brandy is for heroes, Mr. Hook!"
Dan
- Keith Black and Glen McGuire
-
 2
2
-
Interesting subject, I must say. I saw the James Caird in Sydney many years ago where it was on loan from England. It would make an interesting model. Too bad it's this company making the kit.
Dan
- thibaultron and Canute
-
 2
2
-
Re: " Anyone else have hairspray in their toolbox?"
I use hairspray on rope coils to make them lay like I want them and stay that way. Works great.
Could I ask what kind of putty you use for the sea? How do you keep it from off-gassing and fogging up the inside of the bottle?
Dan
- Keith Black and mtaylor
-
2
-
Wonderful work. What a great model!
Just a quick question. It doesn't seem like you did a lot of sanding on the inside of the canoe. Is that the case? It seems like it would be hard to sand with all those concave surfaces.
Dan
-
It would be hard to find another writer who contributed more to our understanding of naval architecture than Chappelle, particularly with regard to small, regional sailing craft, but I've read his books. "Dry" doesn't begin to describe them. I can't imagine reading them for pleasure. I've referenced them many, many times and used the drawings in them as references. There's a ton of information there, certainly, but I wouldn't even call his writing style academic. There are plenty of serious academics who write in an engaging style. Chappelle isn't one of them, even when compared to other writers of his time.
I don't think -- to get back on topic -- he's particularly controversial. I think his essay on "models that should not be built" just puts forth an argument, well supported. I don't necessarily agree with it -- if you want a model of USS Constitution, knock yourself out -- but he wrote it from a position of great knowledge, skill and experience. Got to admire that. He's worth reading.
- catopower, Justin P., SaltyNinja and 2 others
-
5
-
Re: "Two models for the price of one!"
And they only take up the space of one model!
Dan
- Ryland Craze, Reece and Keith Black
-
3
-
Just curious what kind of surface prep you did on the companionway before applying the tung oil. I've always liked the look of that finish and yours looks great!
Dan
-
Very nicely done model, Reece. And on that whole "build it, tear it apart, do it again" thing? I've just learned to accept that that's part of ship modeling. I look at it this way. I build every model twice ... at the same time!
Dan
- Ryland Craze and Keith Black
-
2
-
I’ve seen a lot of really fine masts on 1/700 steel navy warships, but I’ve not been able to find any guidance on how to actually make them
Anyone got a suggestion?
Dan
-
Thanks, Toni,
That explains a lot.
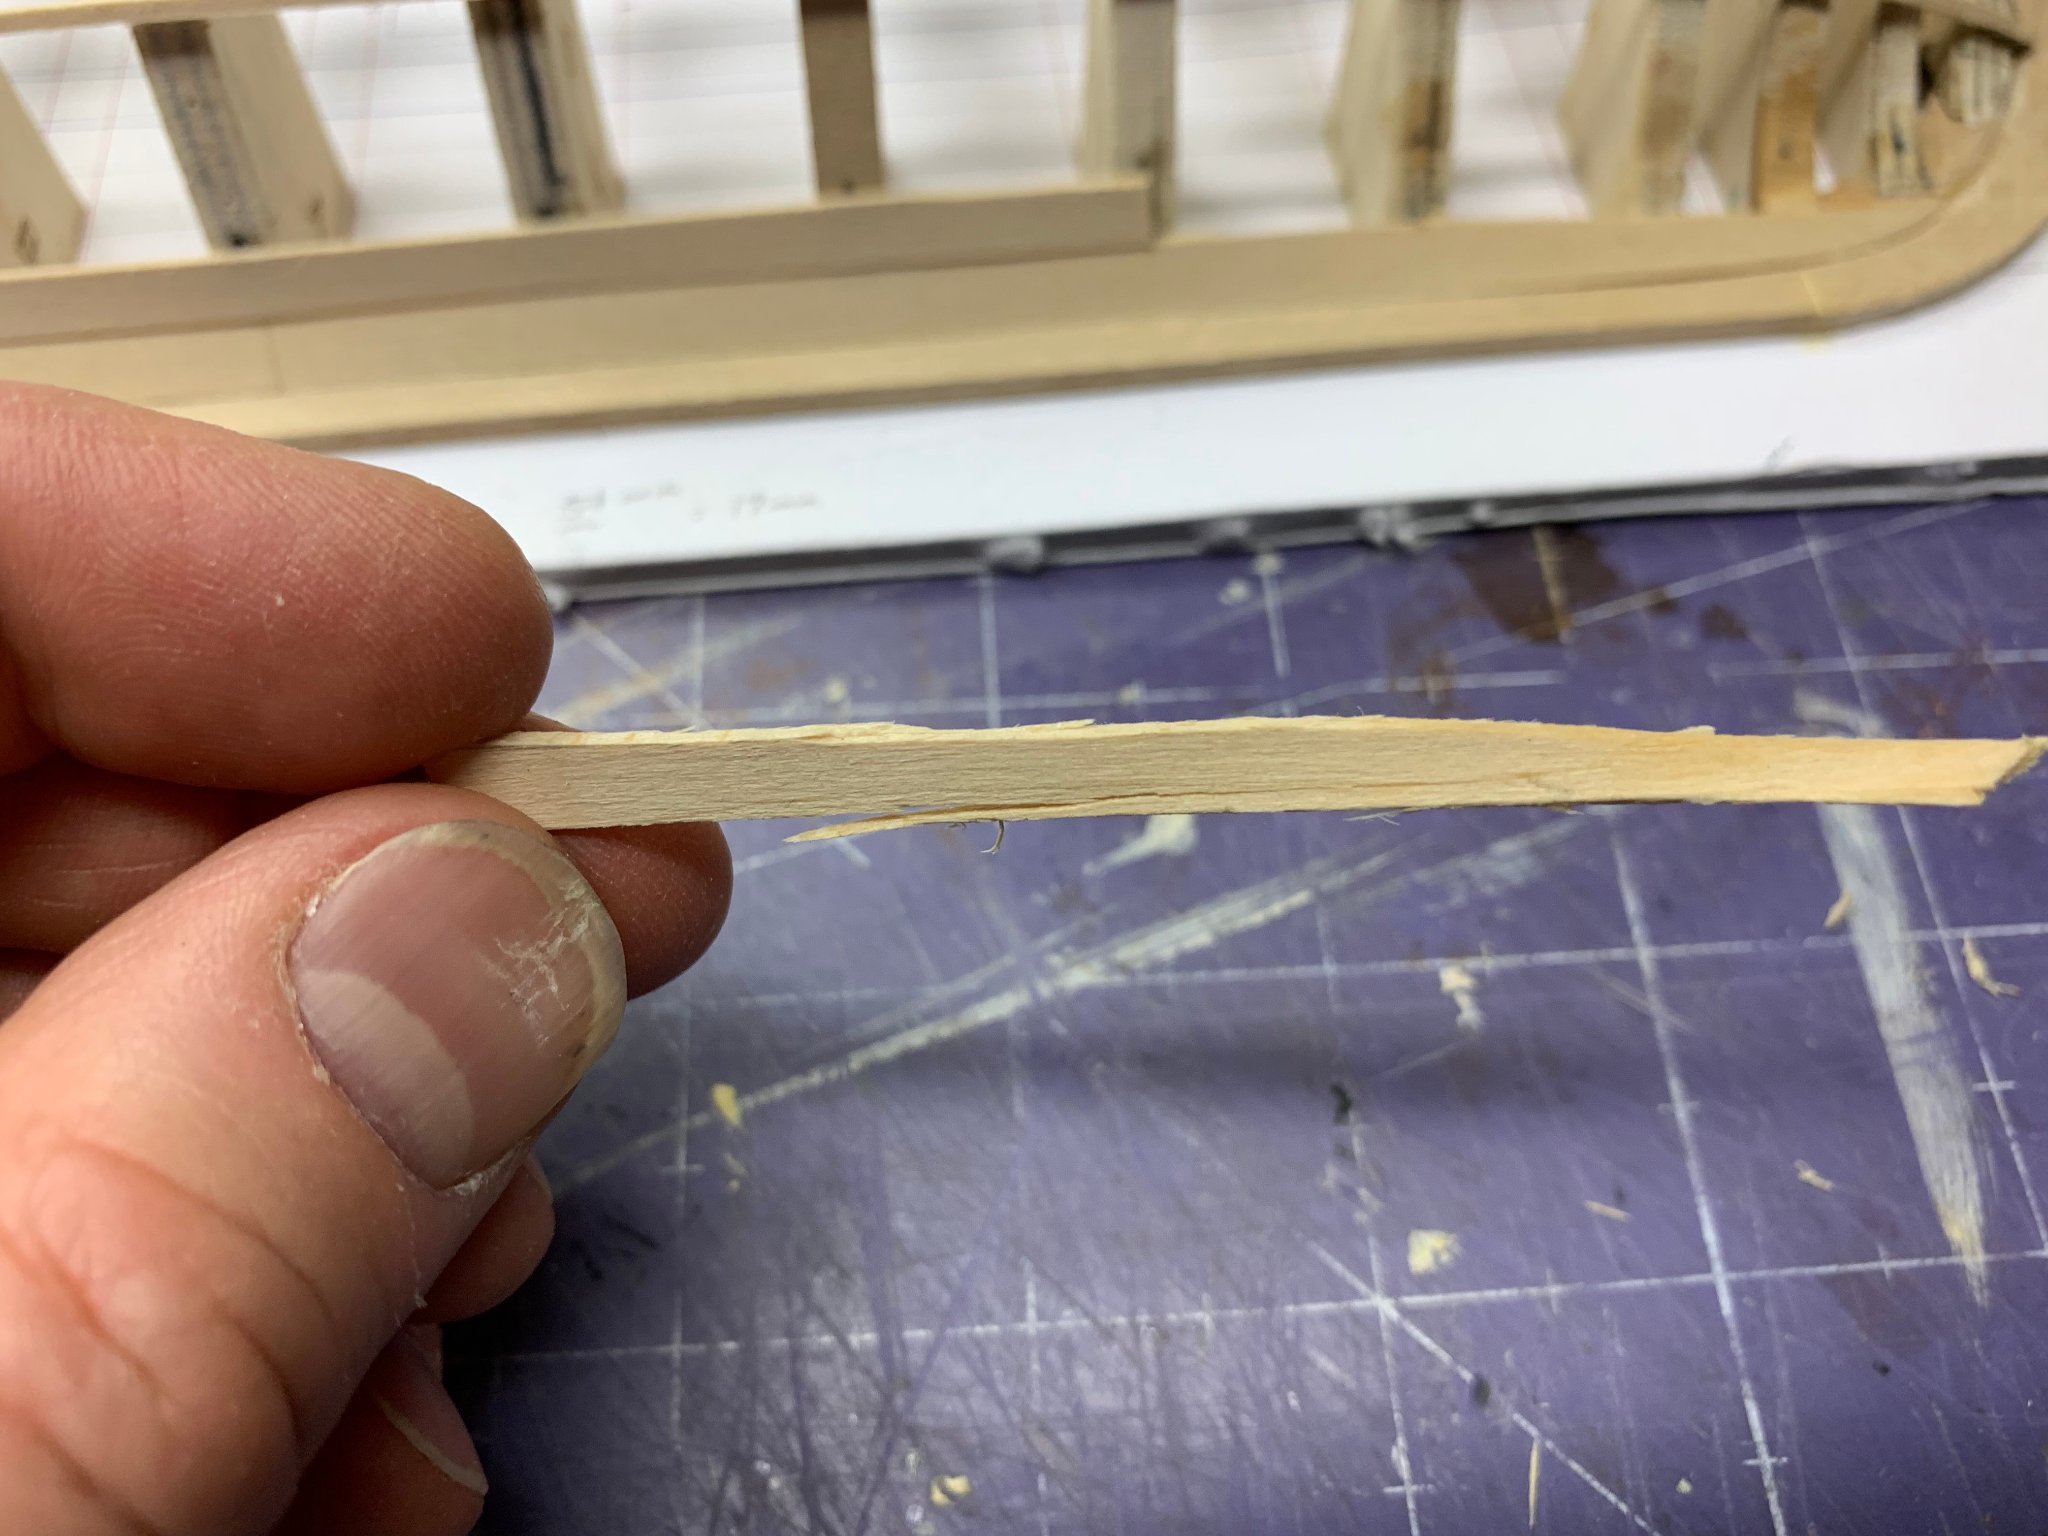
I installed another strake yesterday, but it was looking a little weird too. I suspect it has more to do with the shape of the strake below it than anything else, so I removed it, along with the plank just above the broad strake that you pointed out.

Only a little bit of splitting on those planks when I removed them, so I can probably use them for templates for new ones.
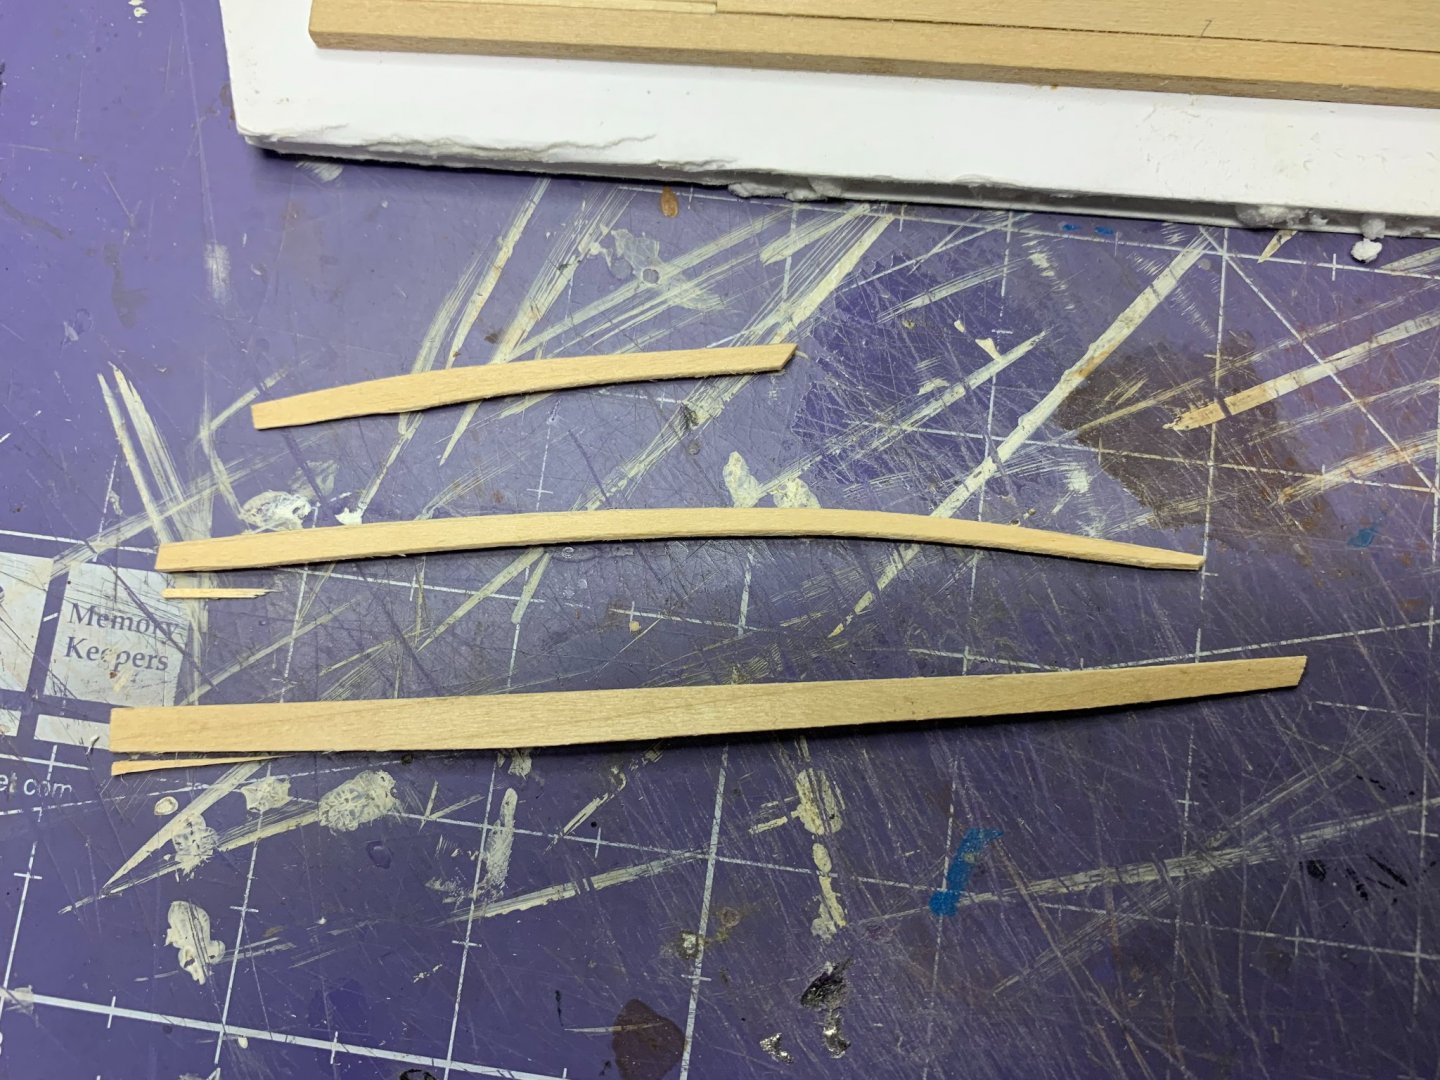
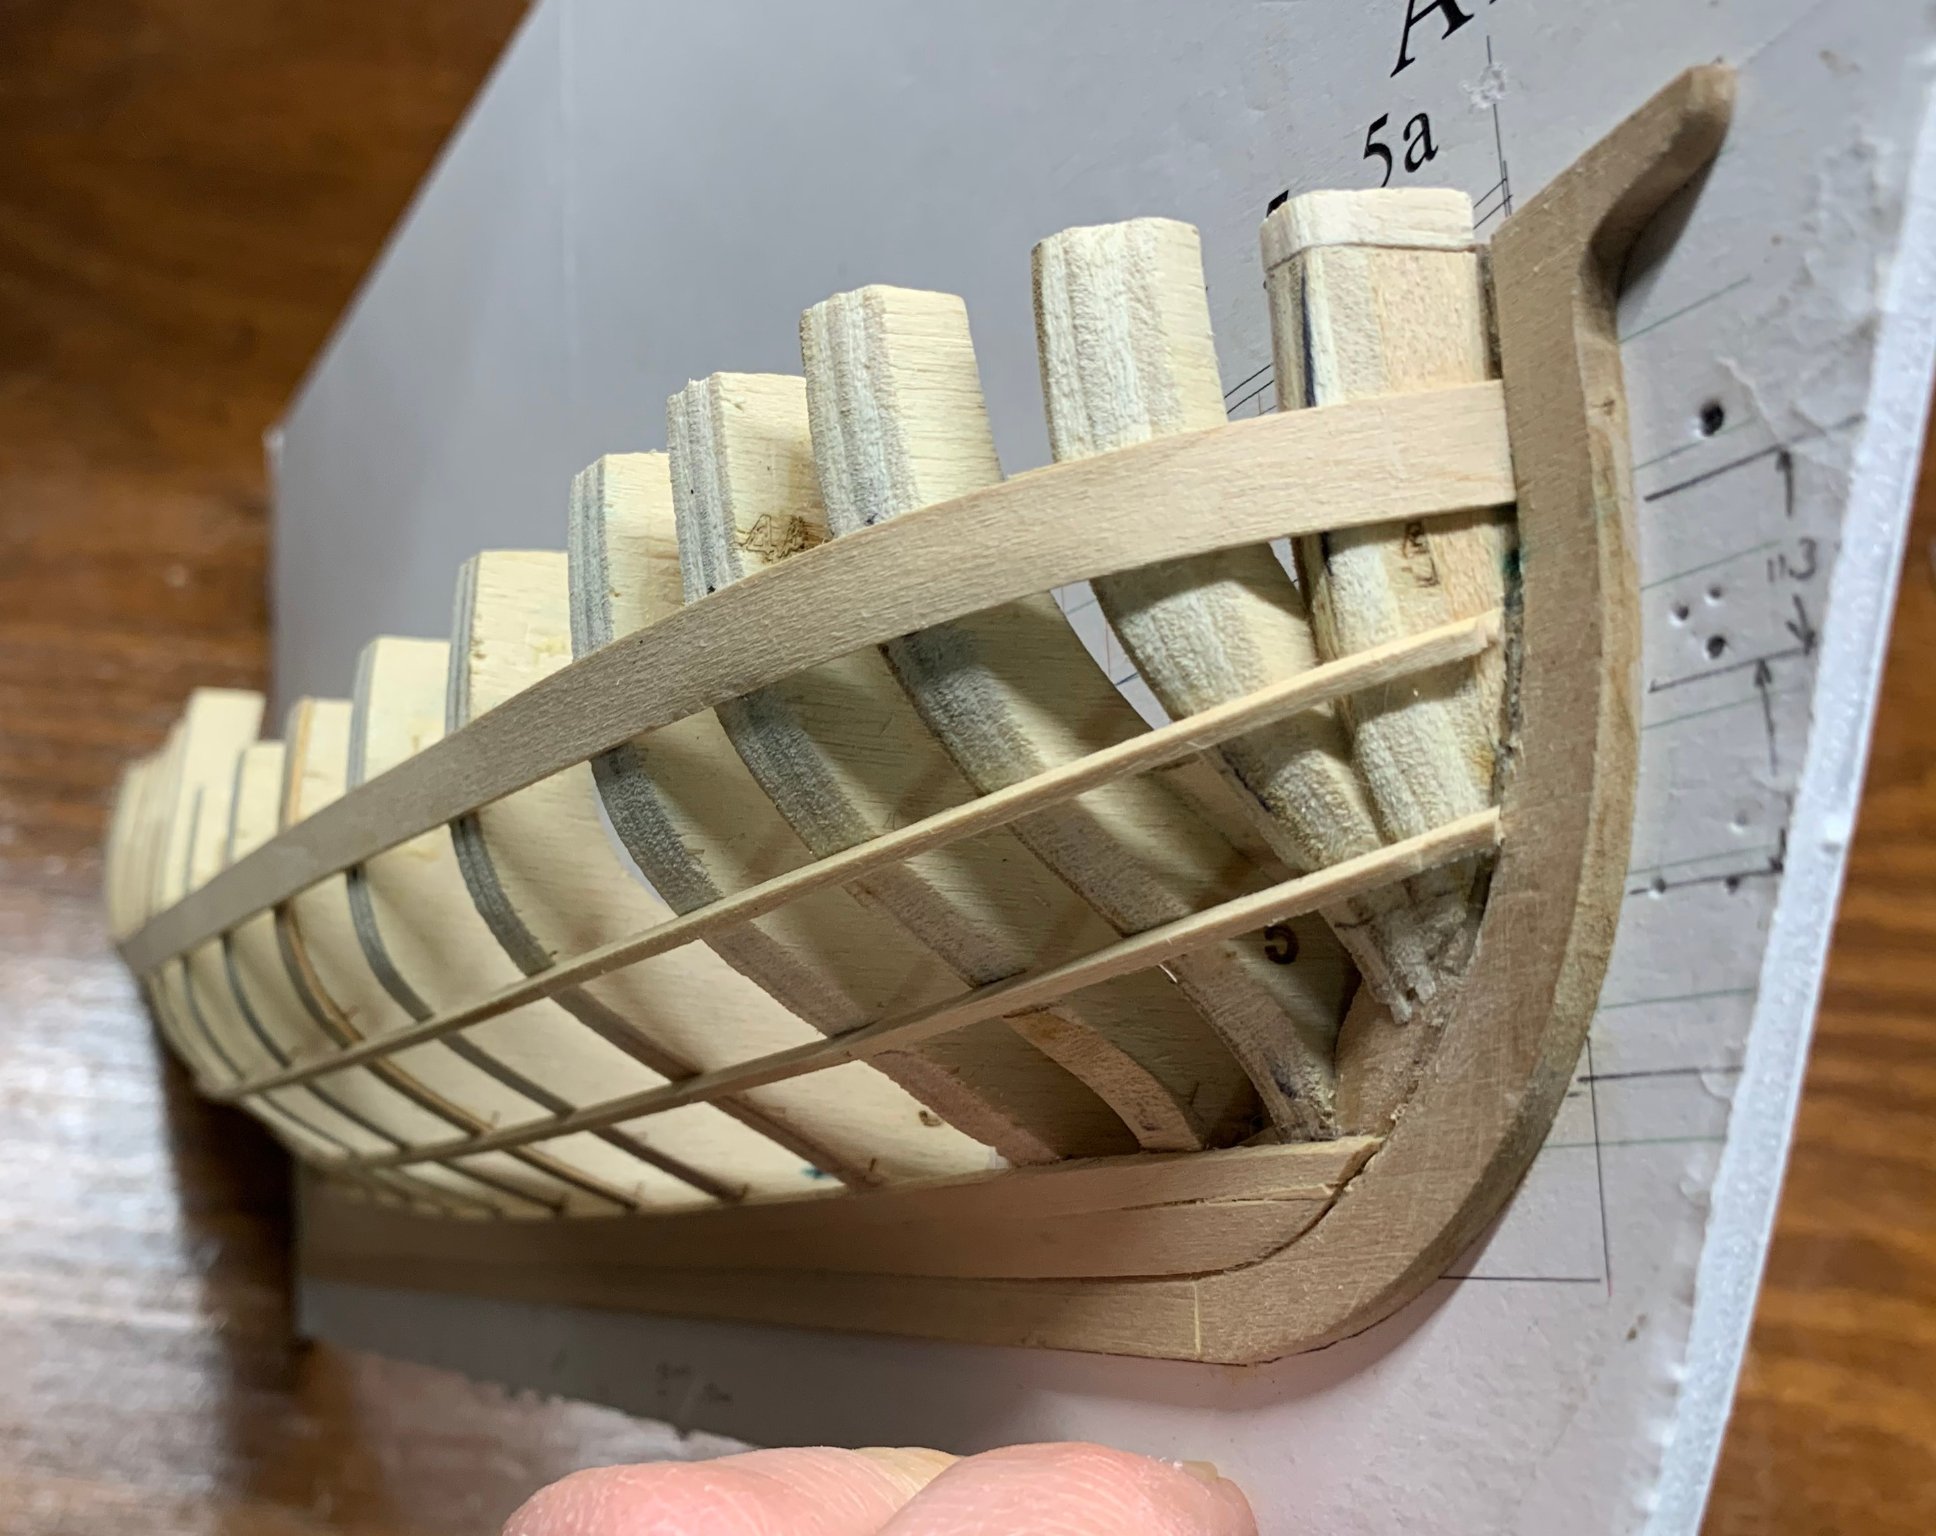
And here's what it looks like now.
How do you usually deal with the tops of the planks when you find a defect? Do you carve them in place? Or do you remove them and and just make another?
Making each of these planks is a time-consuming process (at least the way I'm doing it) and it seems that, no matter how carefully it's done, defects appear when the plank is actually glued in place. Is there any way to adjust them in place? I know I can't add any wood to a plank that's been carved too aggressively, but it seems like I can remove wood from one that needs trimming.
Dan
-
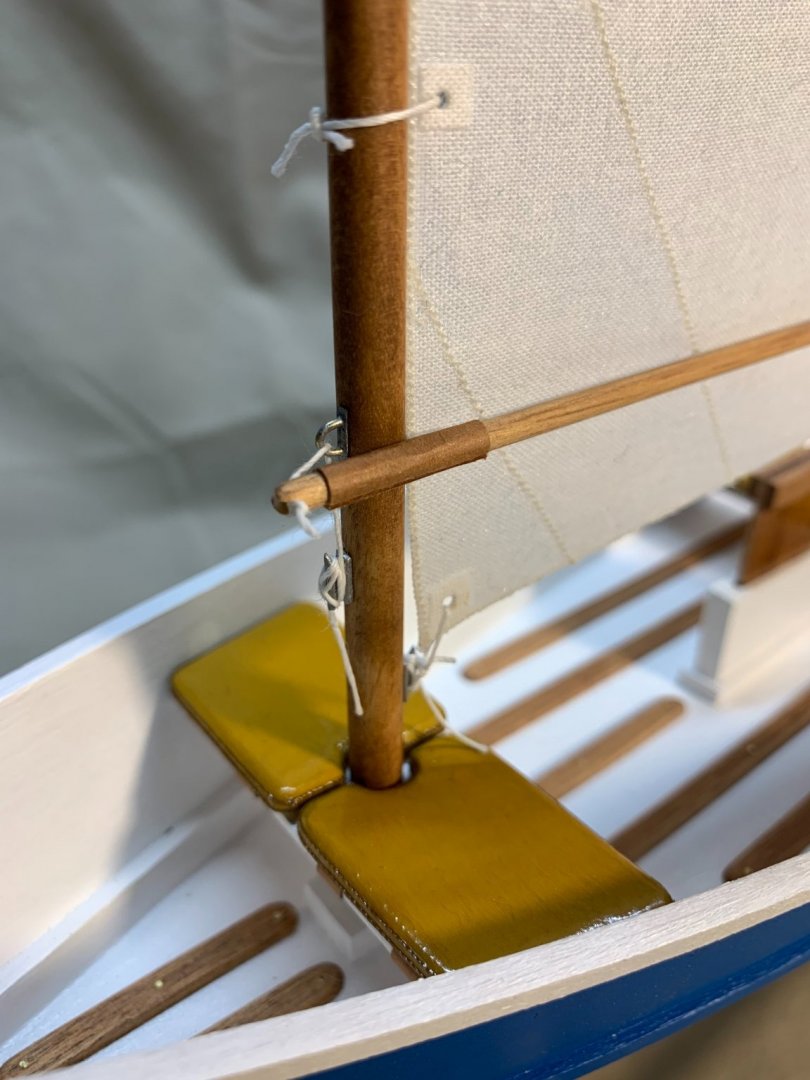
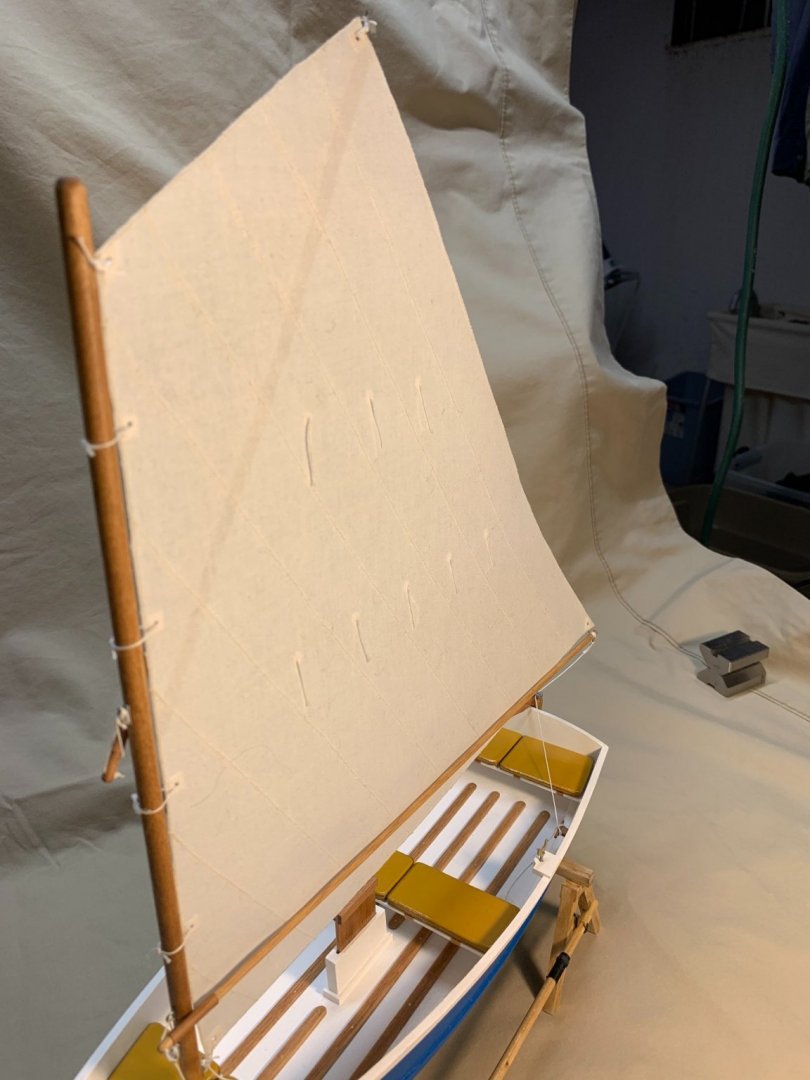
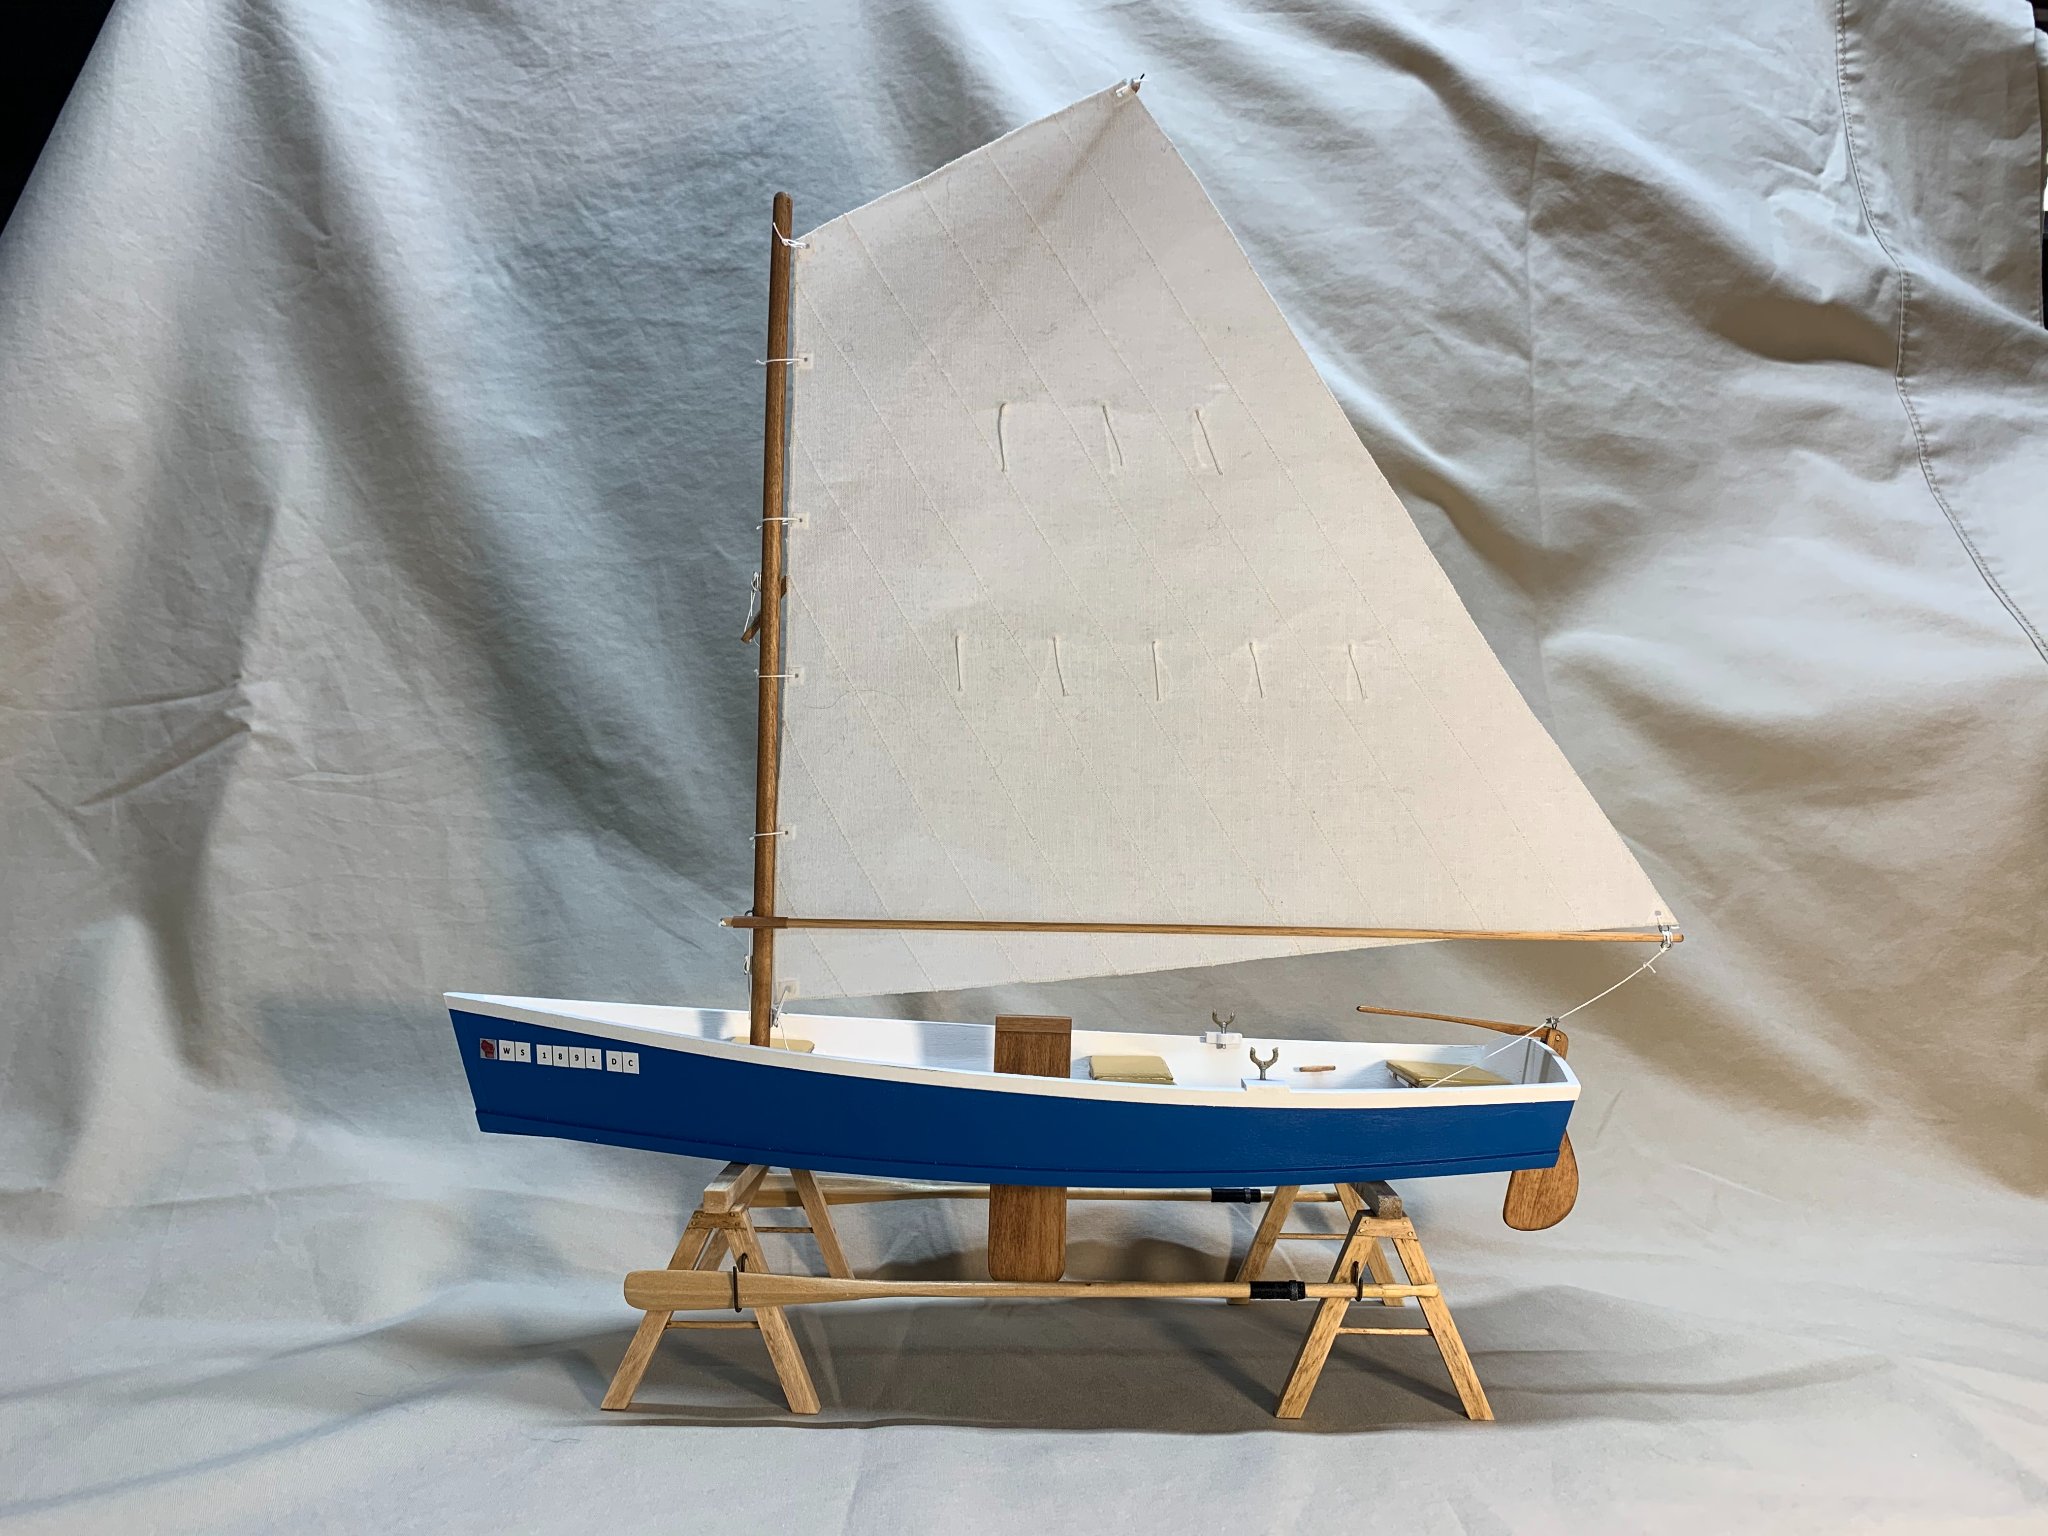
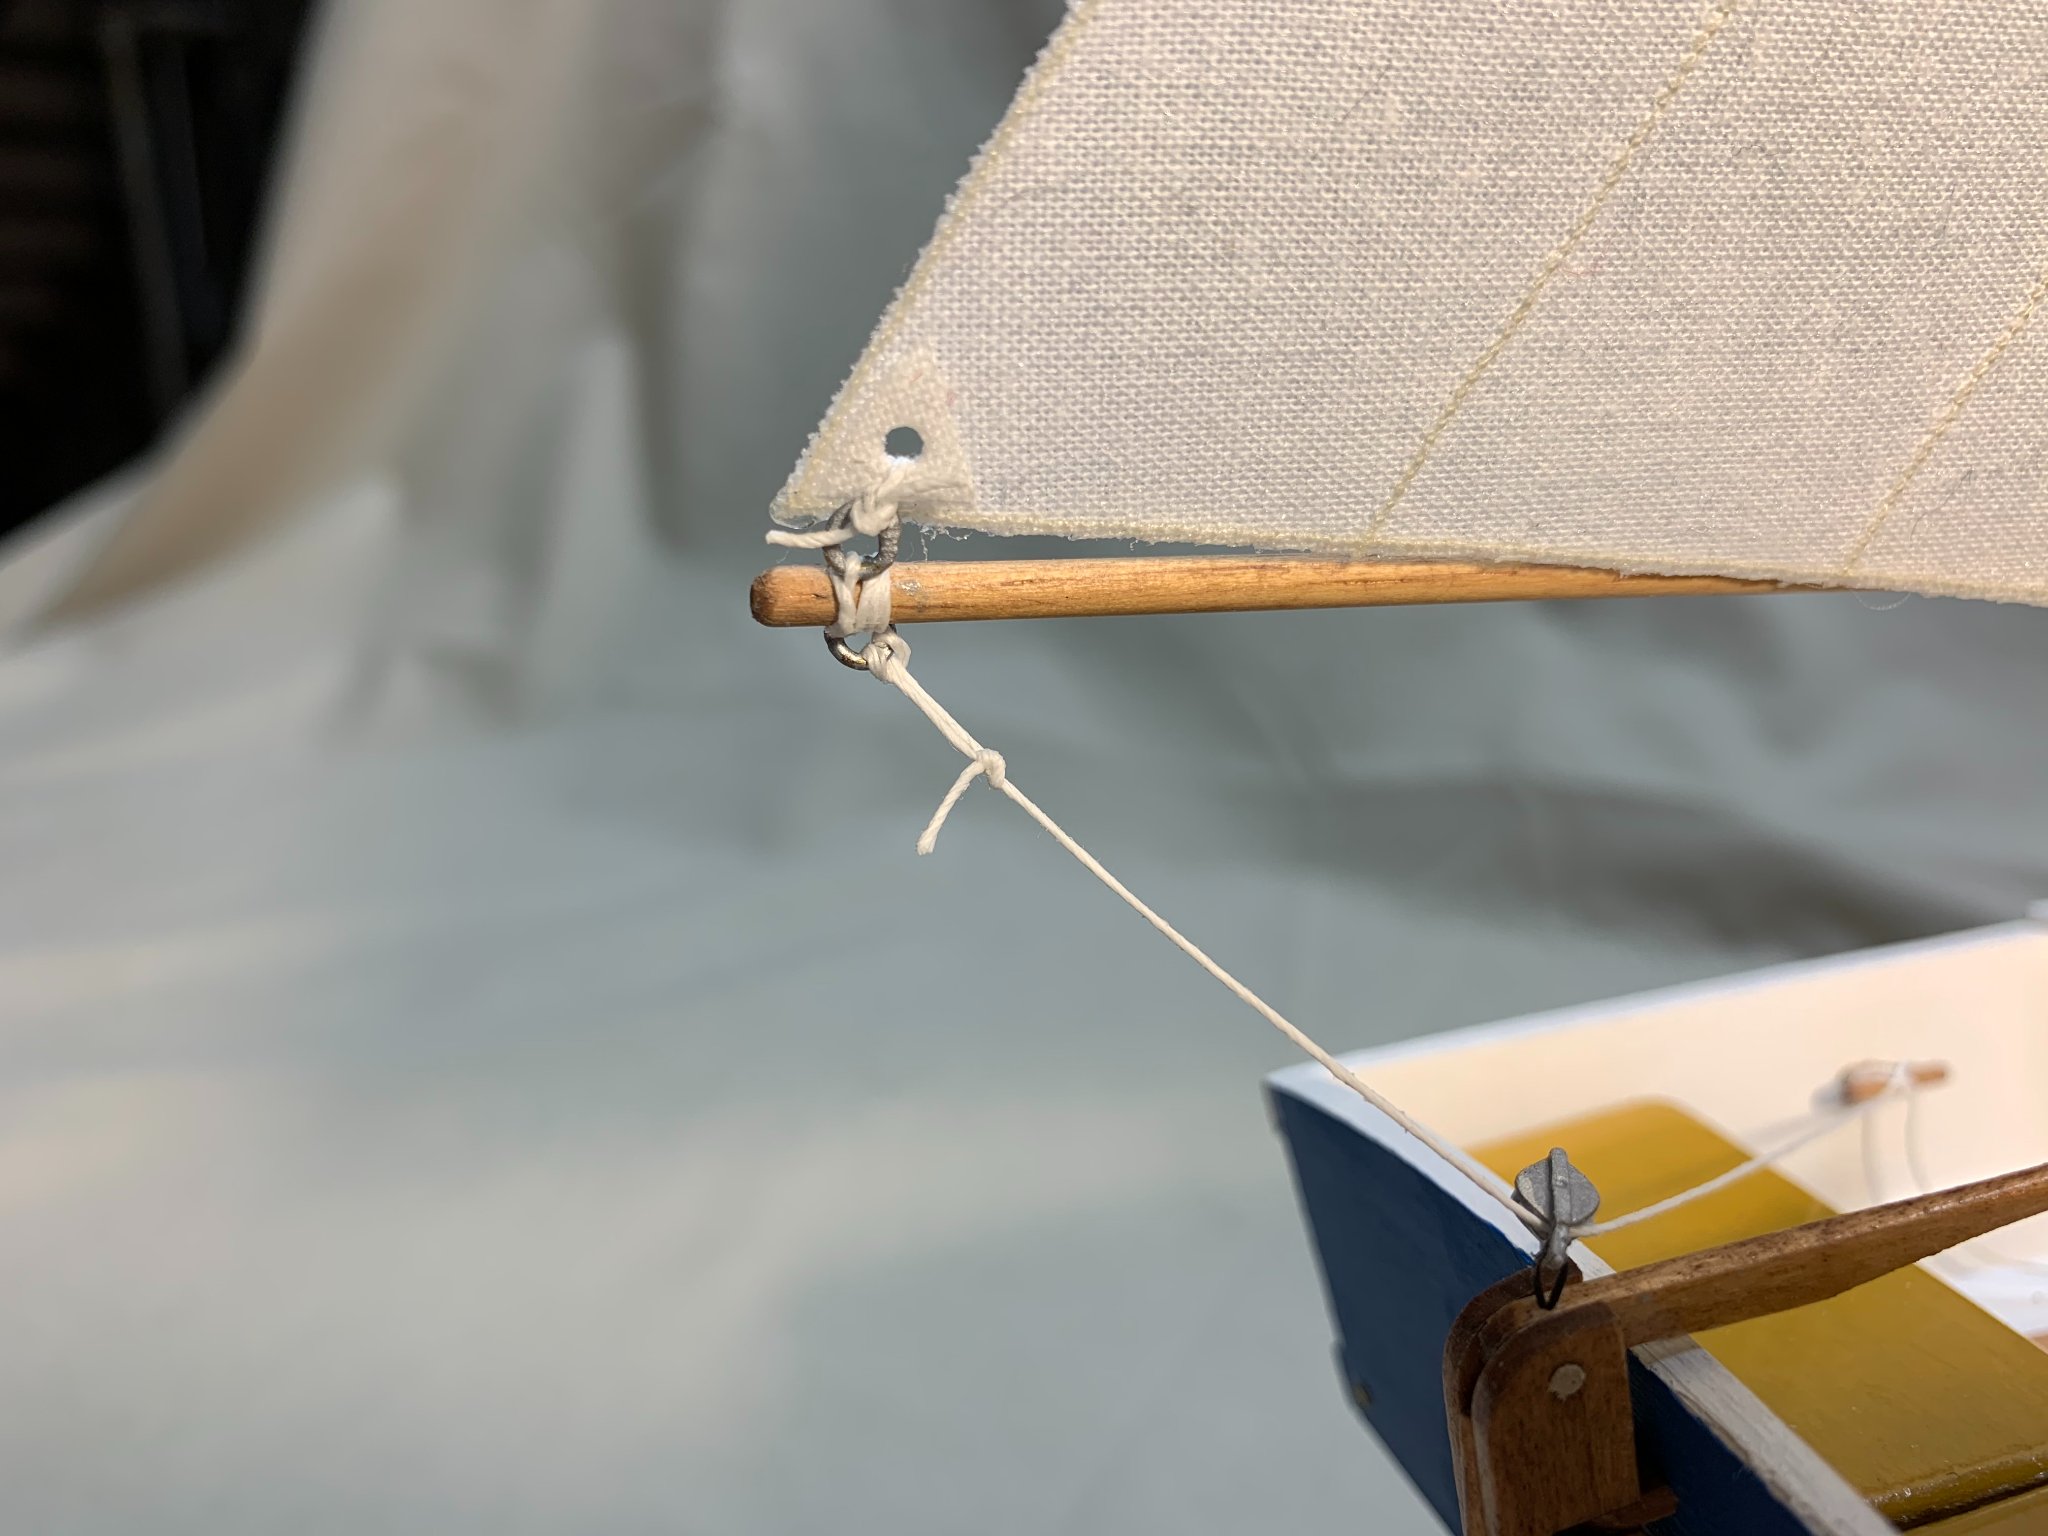
I just finished a model rigged with a sail. I used Steve Wheeler's technique from an article he published in Ships in Scale in 2004.
He built spectacular 1:12 boats and used 700 count cotton fabric to make the sails. There's plenty to learn in his article, but the biggest keys for me were 1) use an embroidery stabilizer to stiffen the cloth and prevent deformation and 2) use an automotive lacquer to further stiffen it after it's been sewn. I set my sewing machine for the finest stitch it could make, used a fine thread and the smallest needle I had. I'm happy with the results.
Dan


-
Progress...
I made a decision not to just re-do what I did before, but to try to understand what went wrong the last time and how to get it right this time. I re-read Toni's instructions. I re-read Planking the Built-Up Ship Model and David Antscherl's A Primer on Planking. I also read through a number of build logs here on MSW. I watched a few of Chuck Passaro's videos. And I incorporated some techniques I've learned through the Nautical Research and Model Ship Society of Chicago. Here's the step-by-step process I went through with the first plank above the broad strake using a mash-up of all those techniques (all of which produce perfect results, by the way).
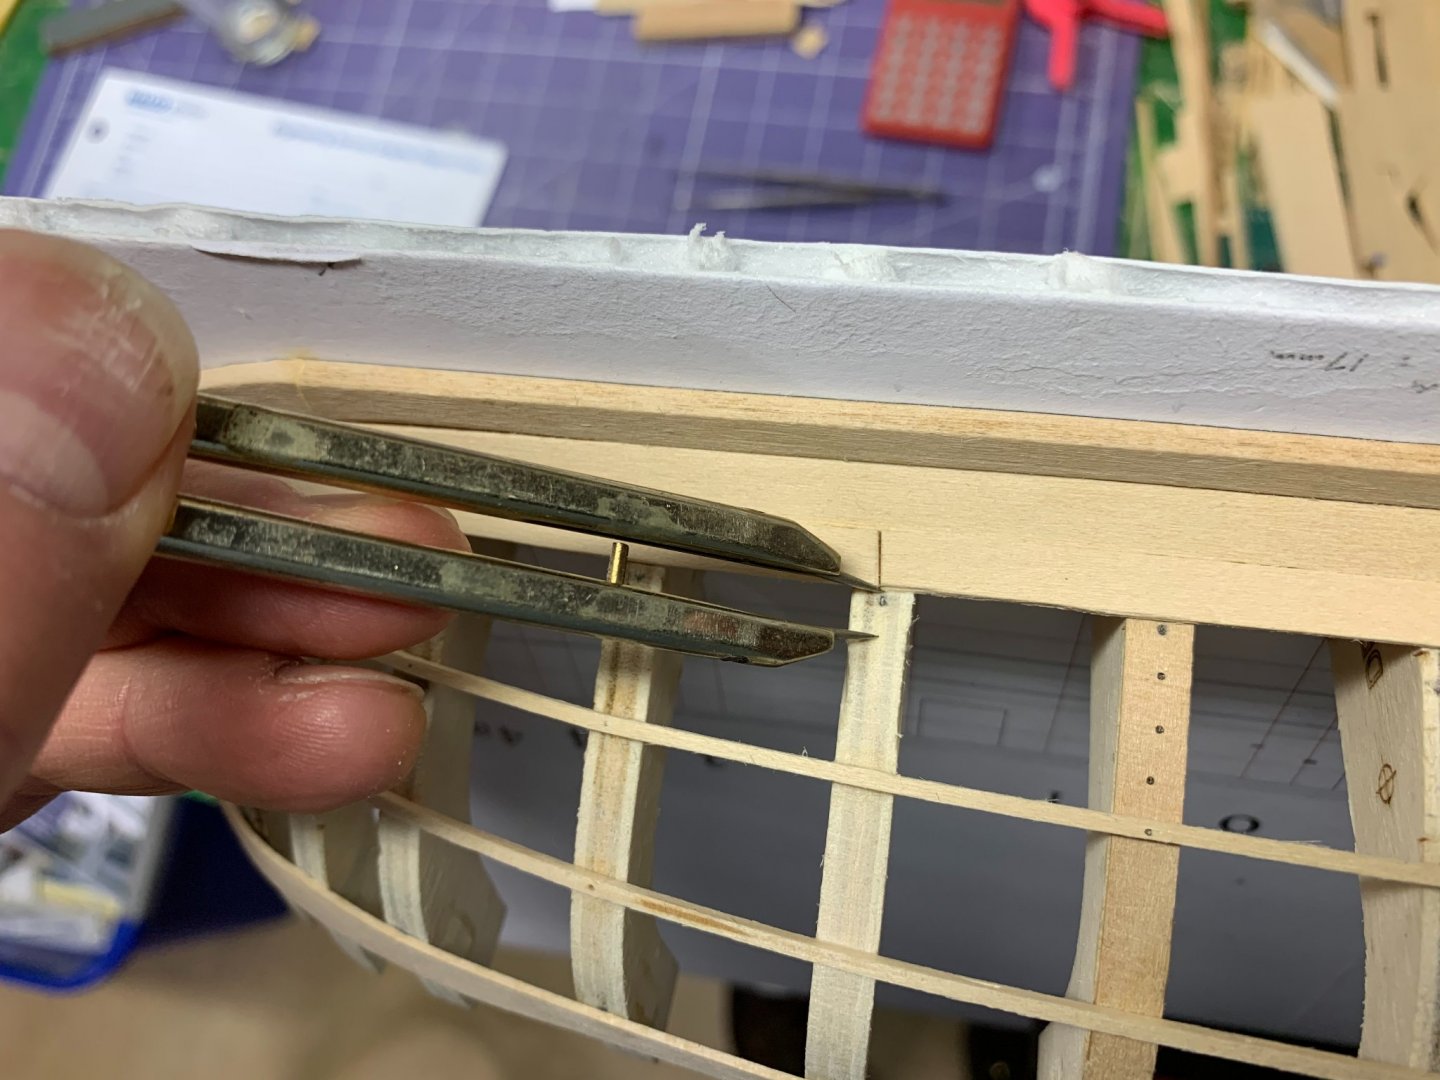
First, I measured with dividers the distance between the middle of the batten and the top of the prior plank. (That's from Planking the Built-Up Ship Model.)

Then I constructed a table of equal distances. (I learned this from Bob Filipowski from the NRMSS.) I have to fit four planks in the distance measured, so I just found the line at which the distance equals four spaces on the table.
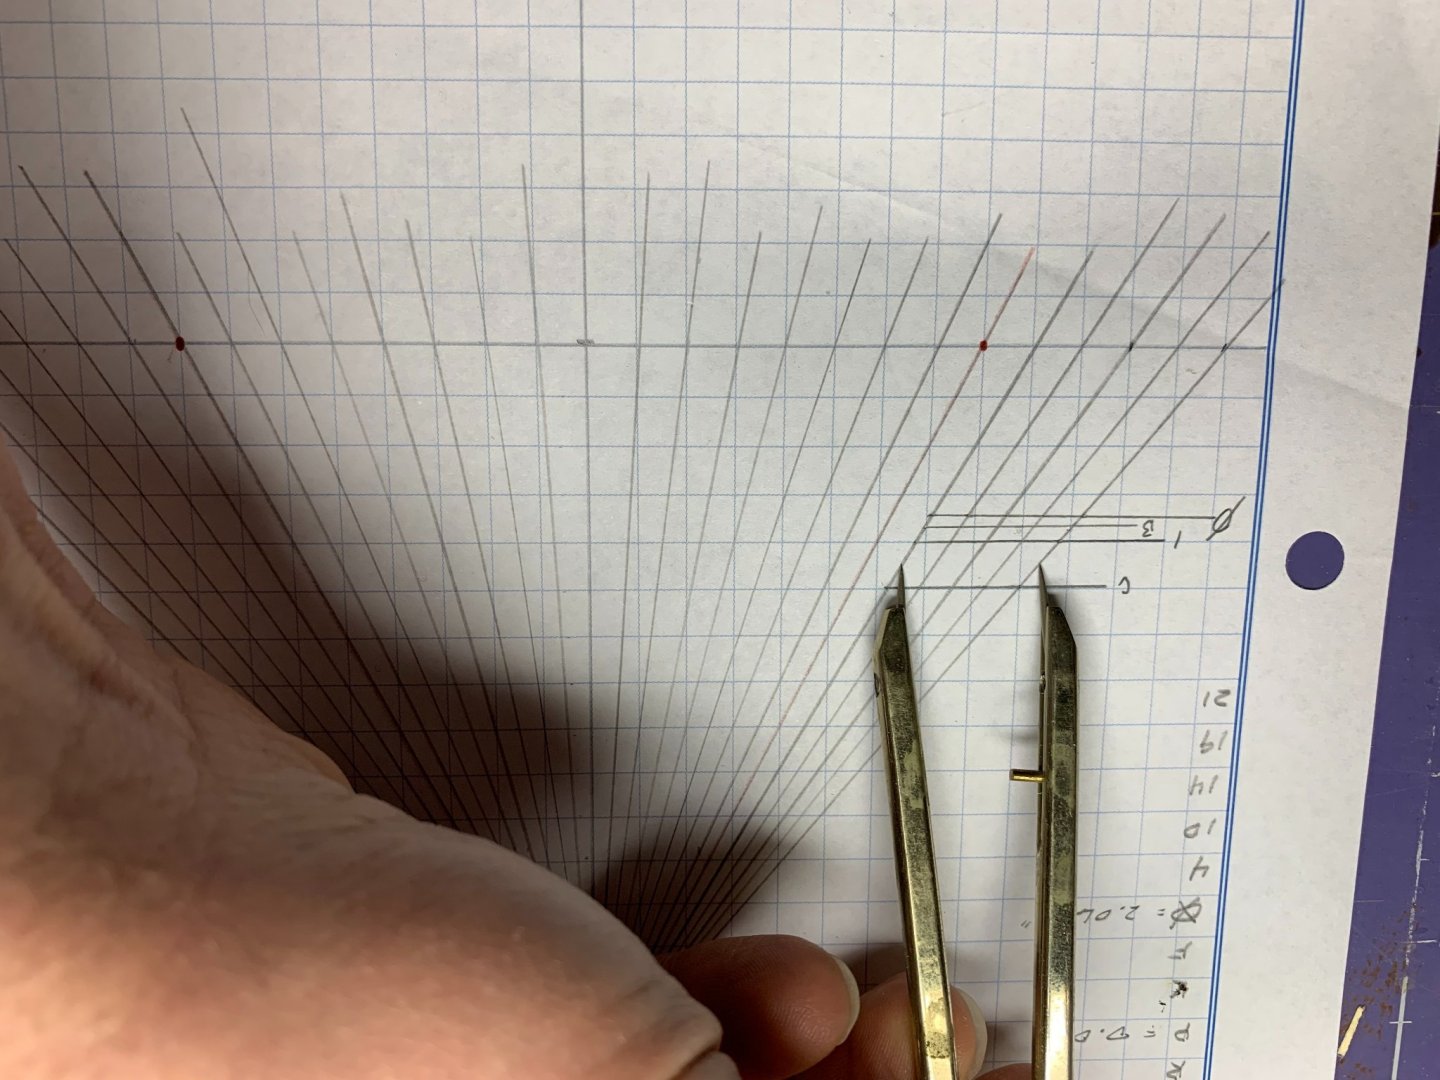
Then I drew a horizontal line for frame 2. (For some reason this photo and the next are upside down, even though I edited them before uploading them here.)
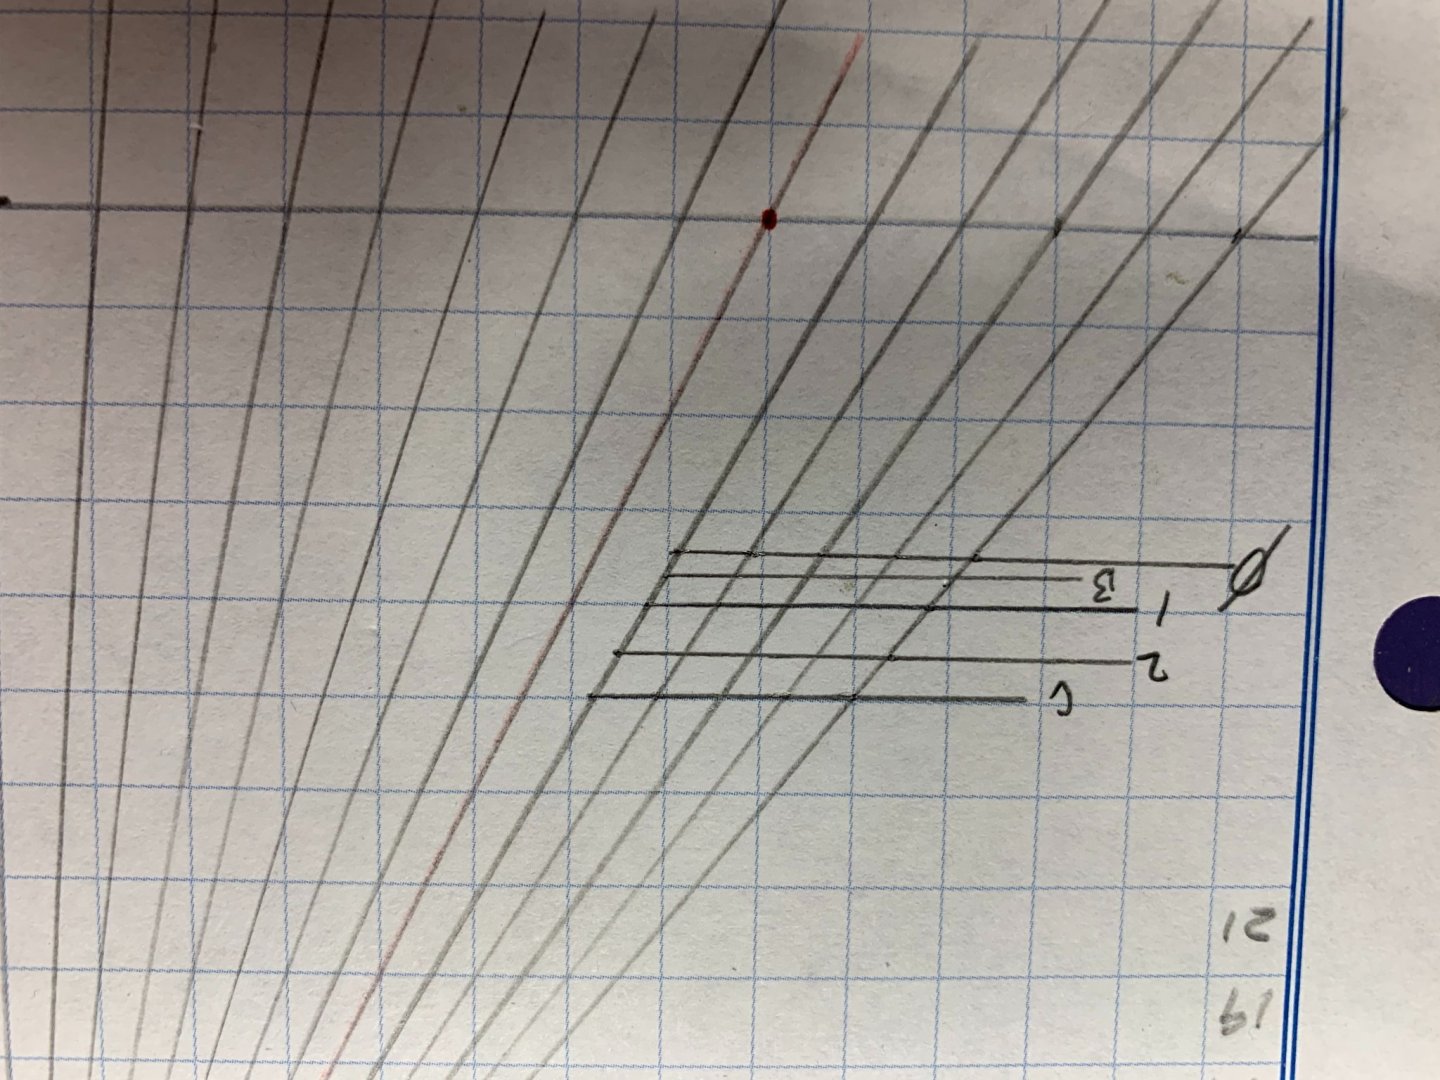
Each of those divisions equals the proper width of the plank at that frame. By labeling all those lines, I can go back to this table at any time and determine what the plank width ought to be.
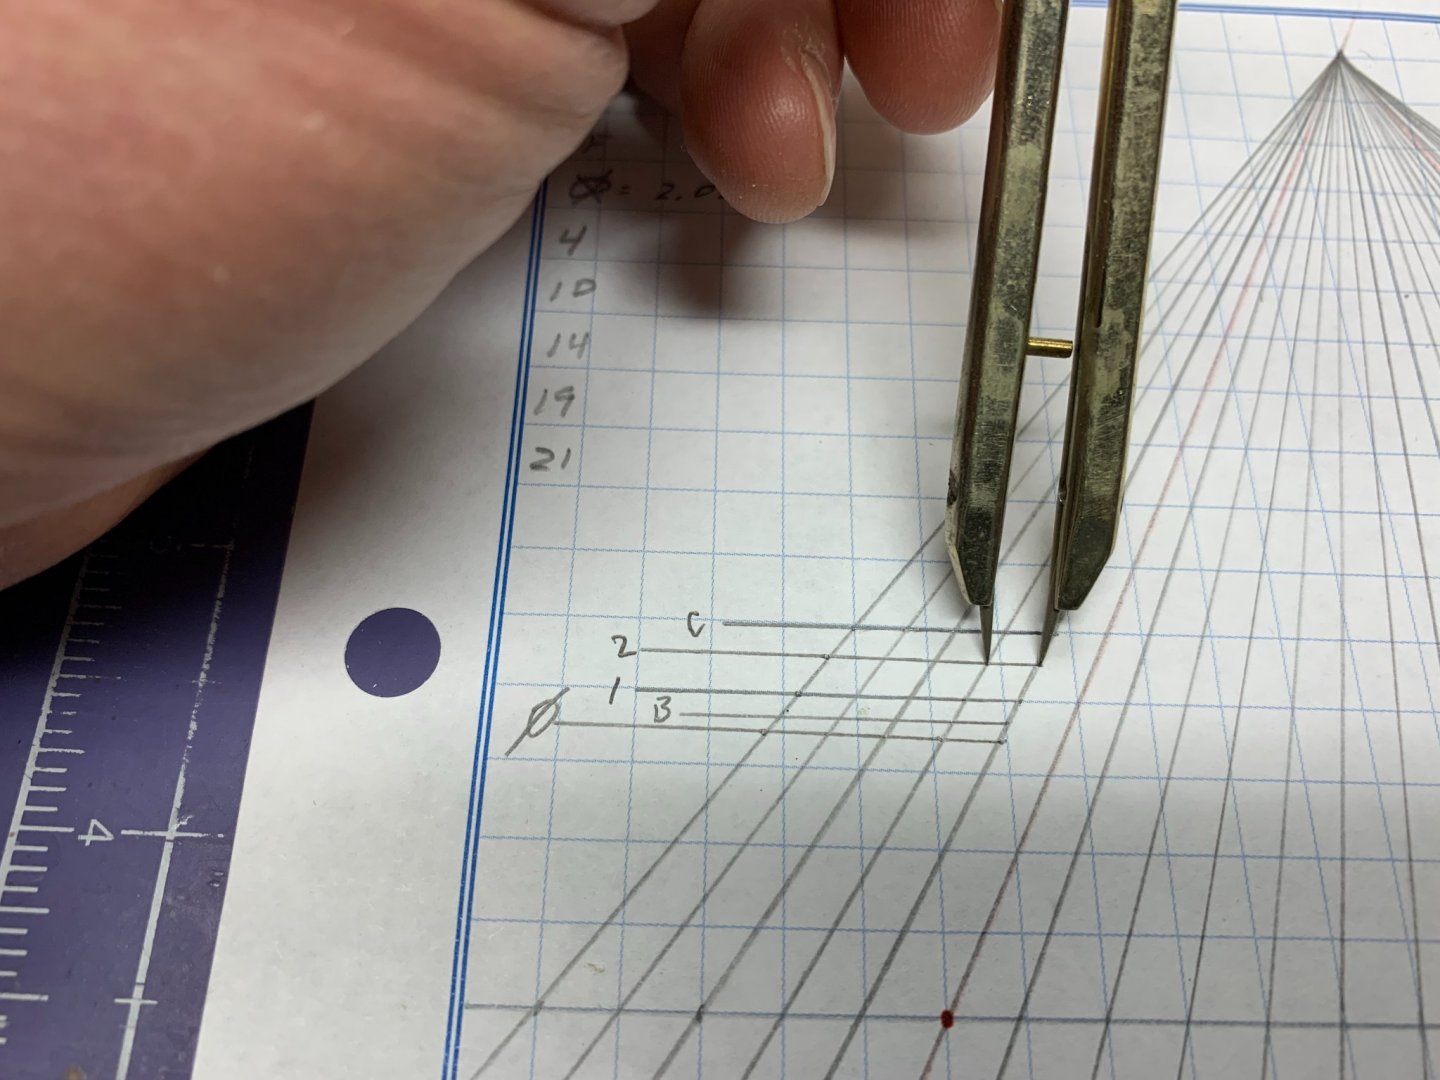
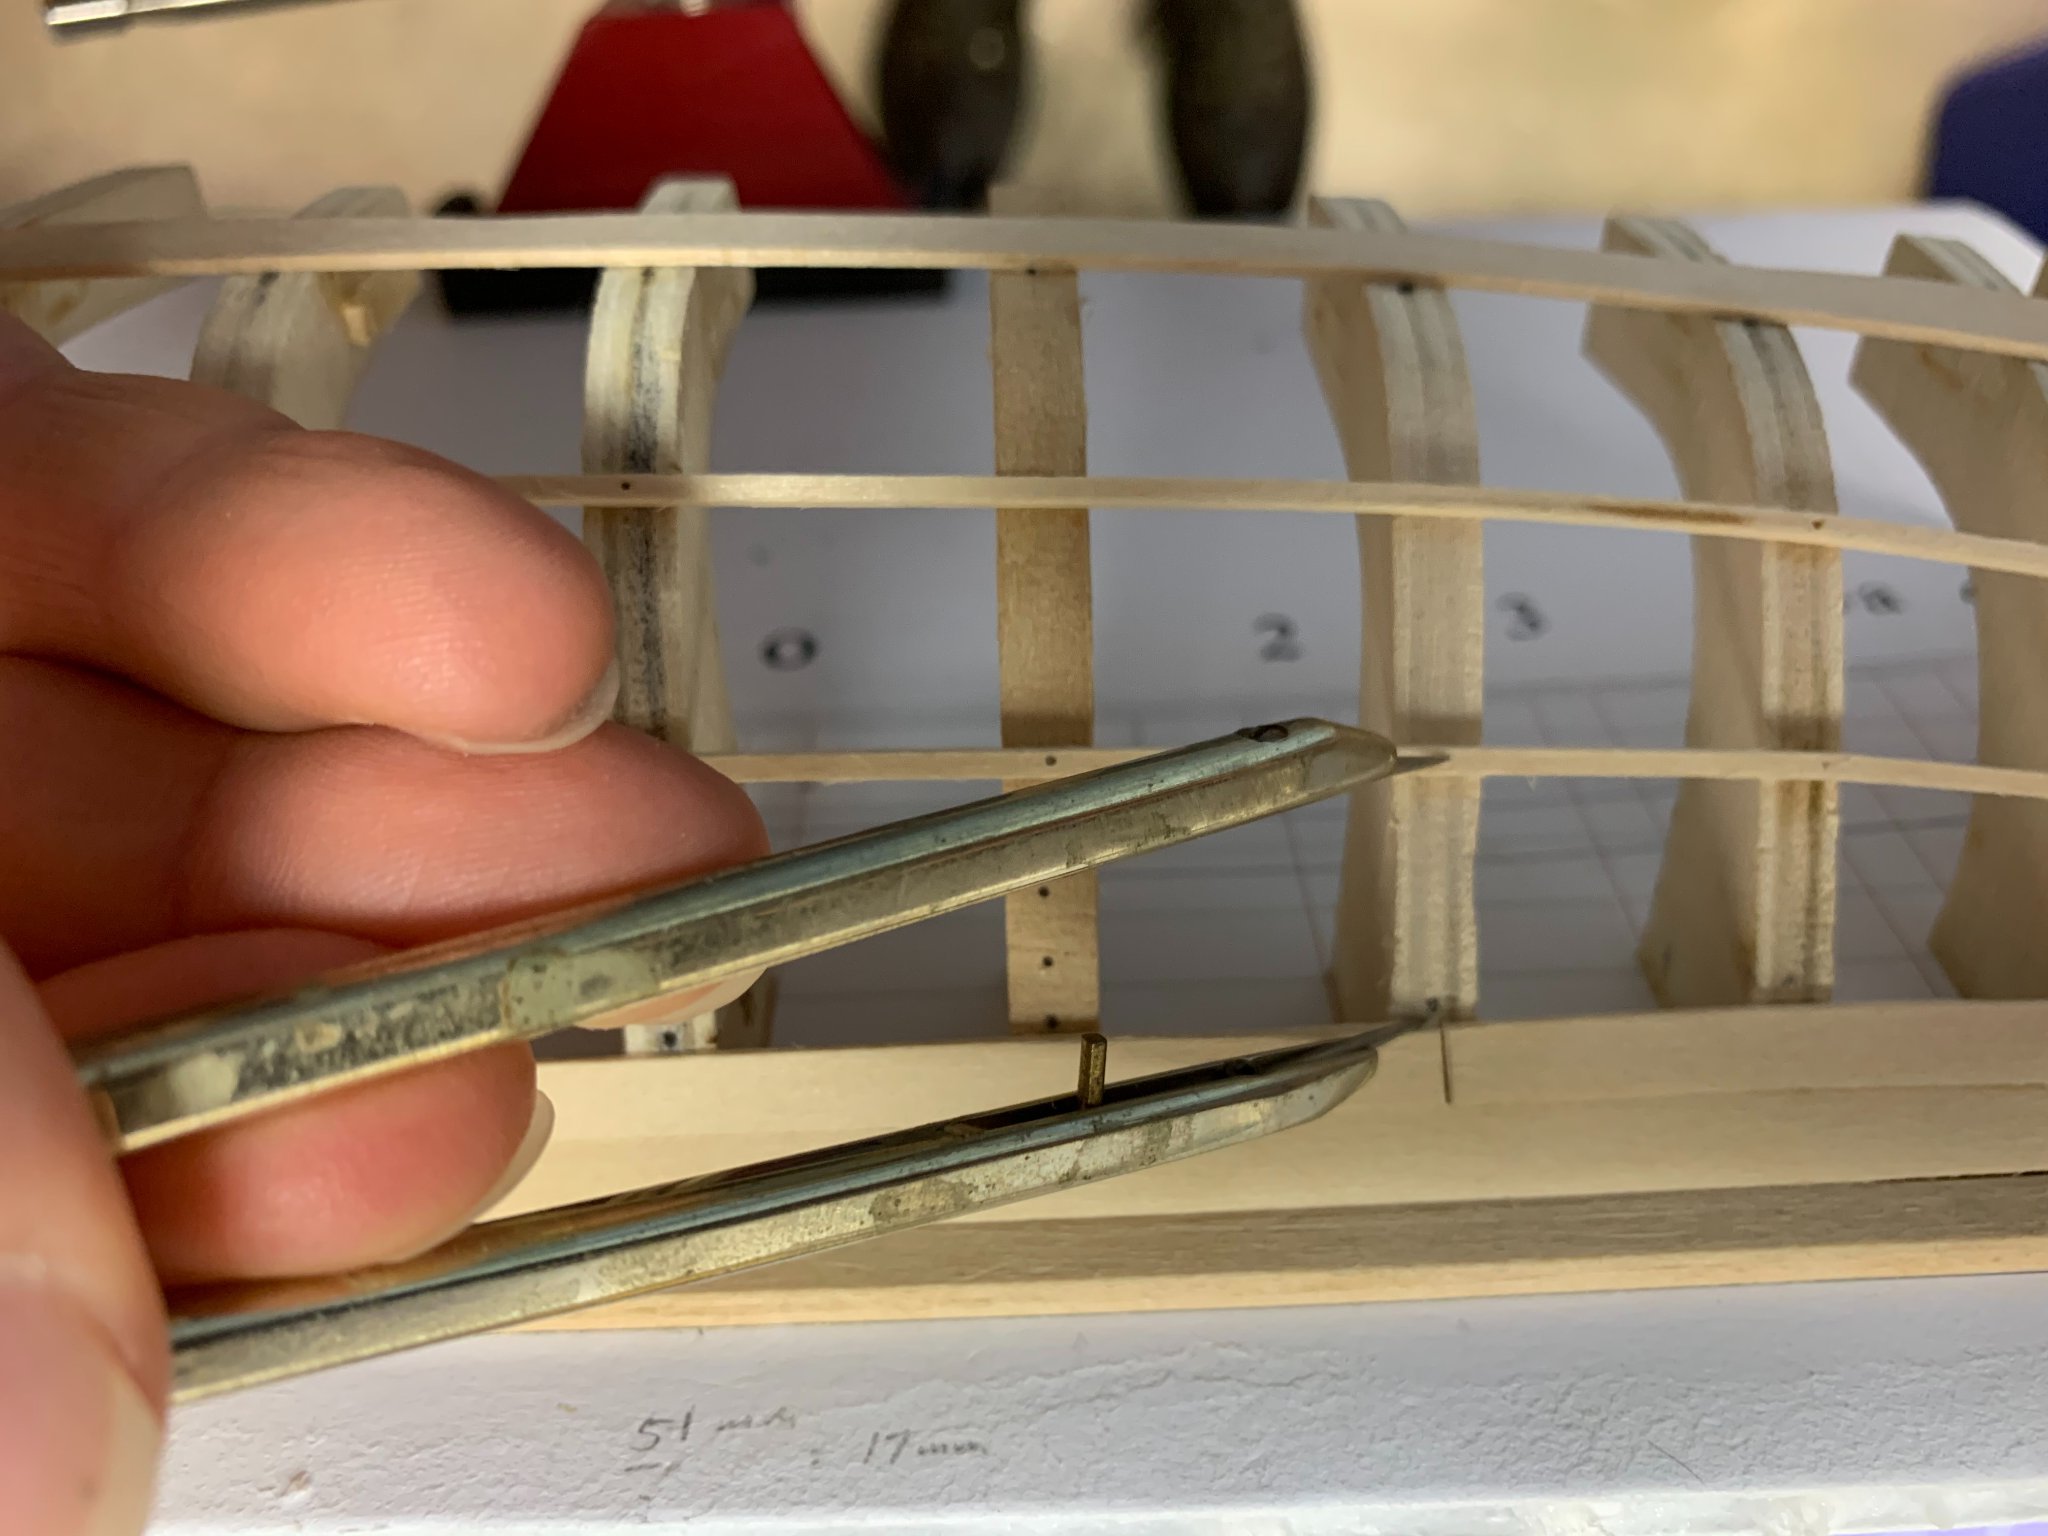
Then I used an awl to make a small mark on the frame showing where the plank edge should be. My goal is to have the top of the plank cut that tiny circle in half when it's in place. (That small mark at the top of the broad strake was misplaced. I needed to adjust the width of that plank when I installed it.)

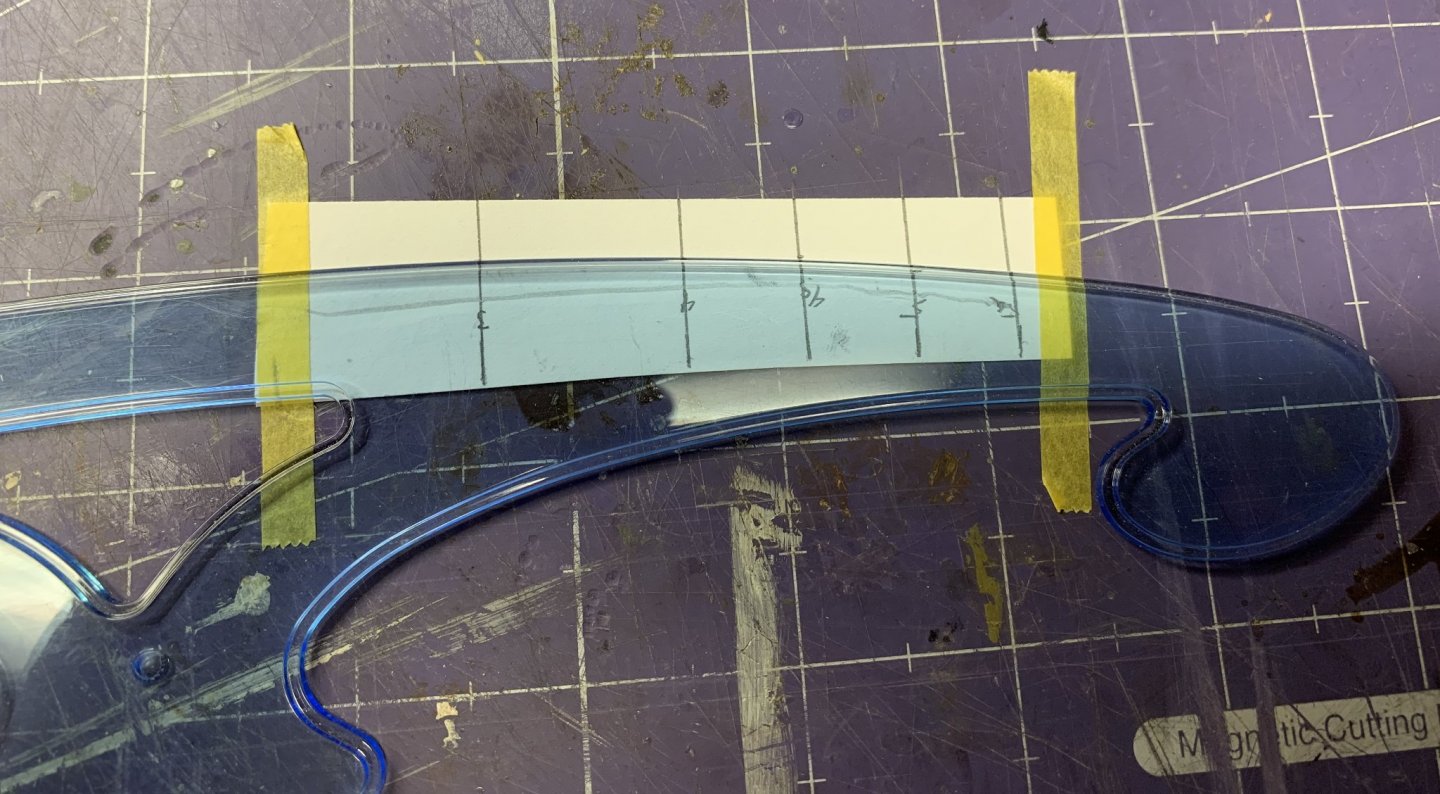
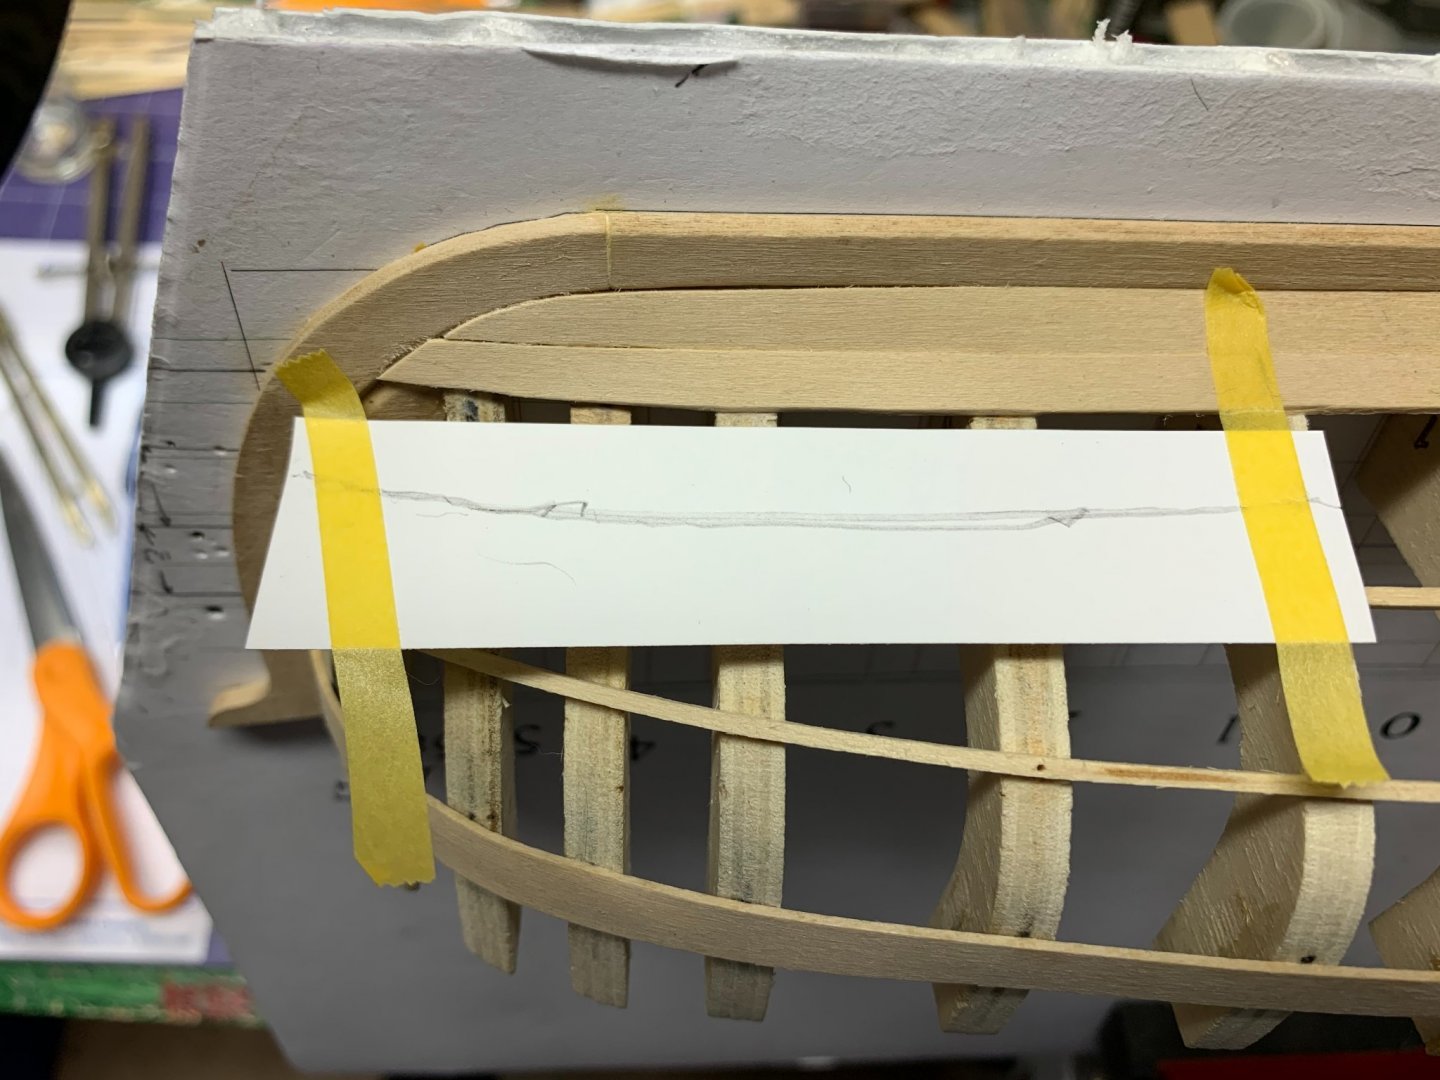
All ready to make the plank. I found the blue painter's tape Toni recommended to be difficult to use because it twisted a little every time I tried to use it. I used Antscherl's process, using a piece of cardstock. Just cut a piece slightly wider and longer than the plank you intend to make, position it close to the top of the lower plank with just enough gap to fit your compass point into.
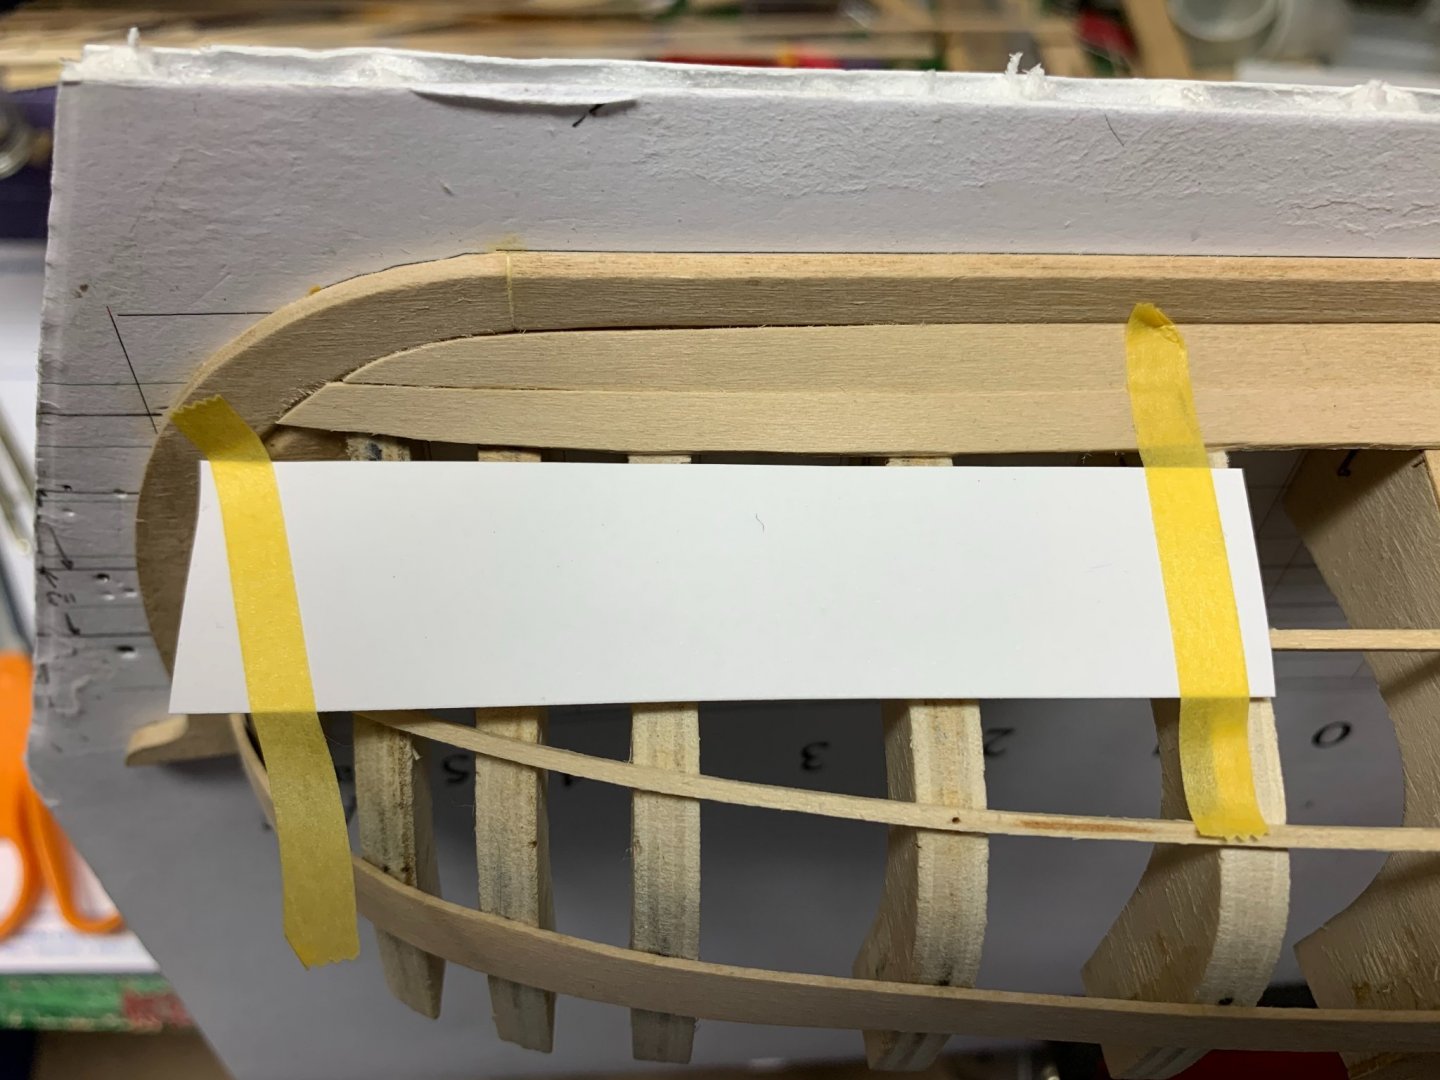
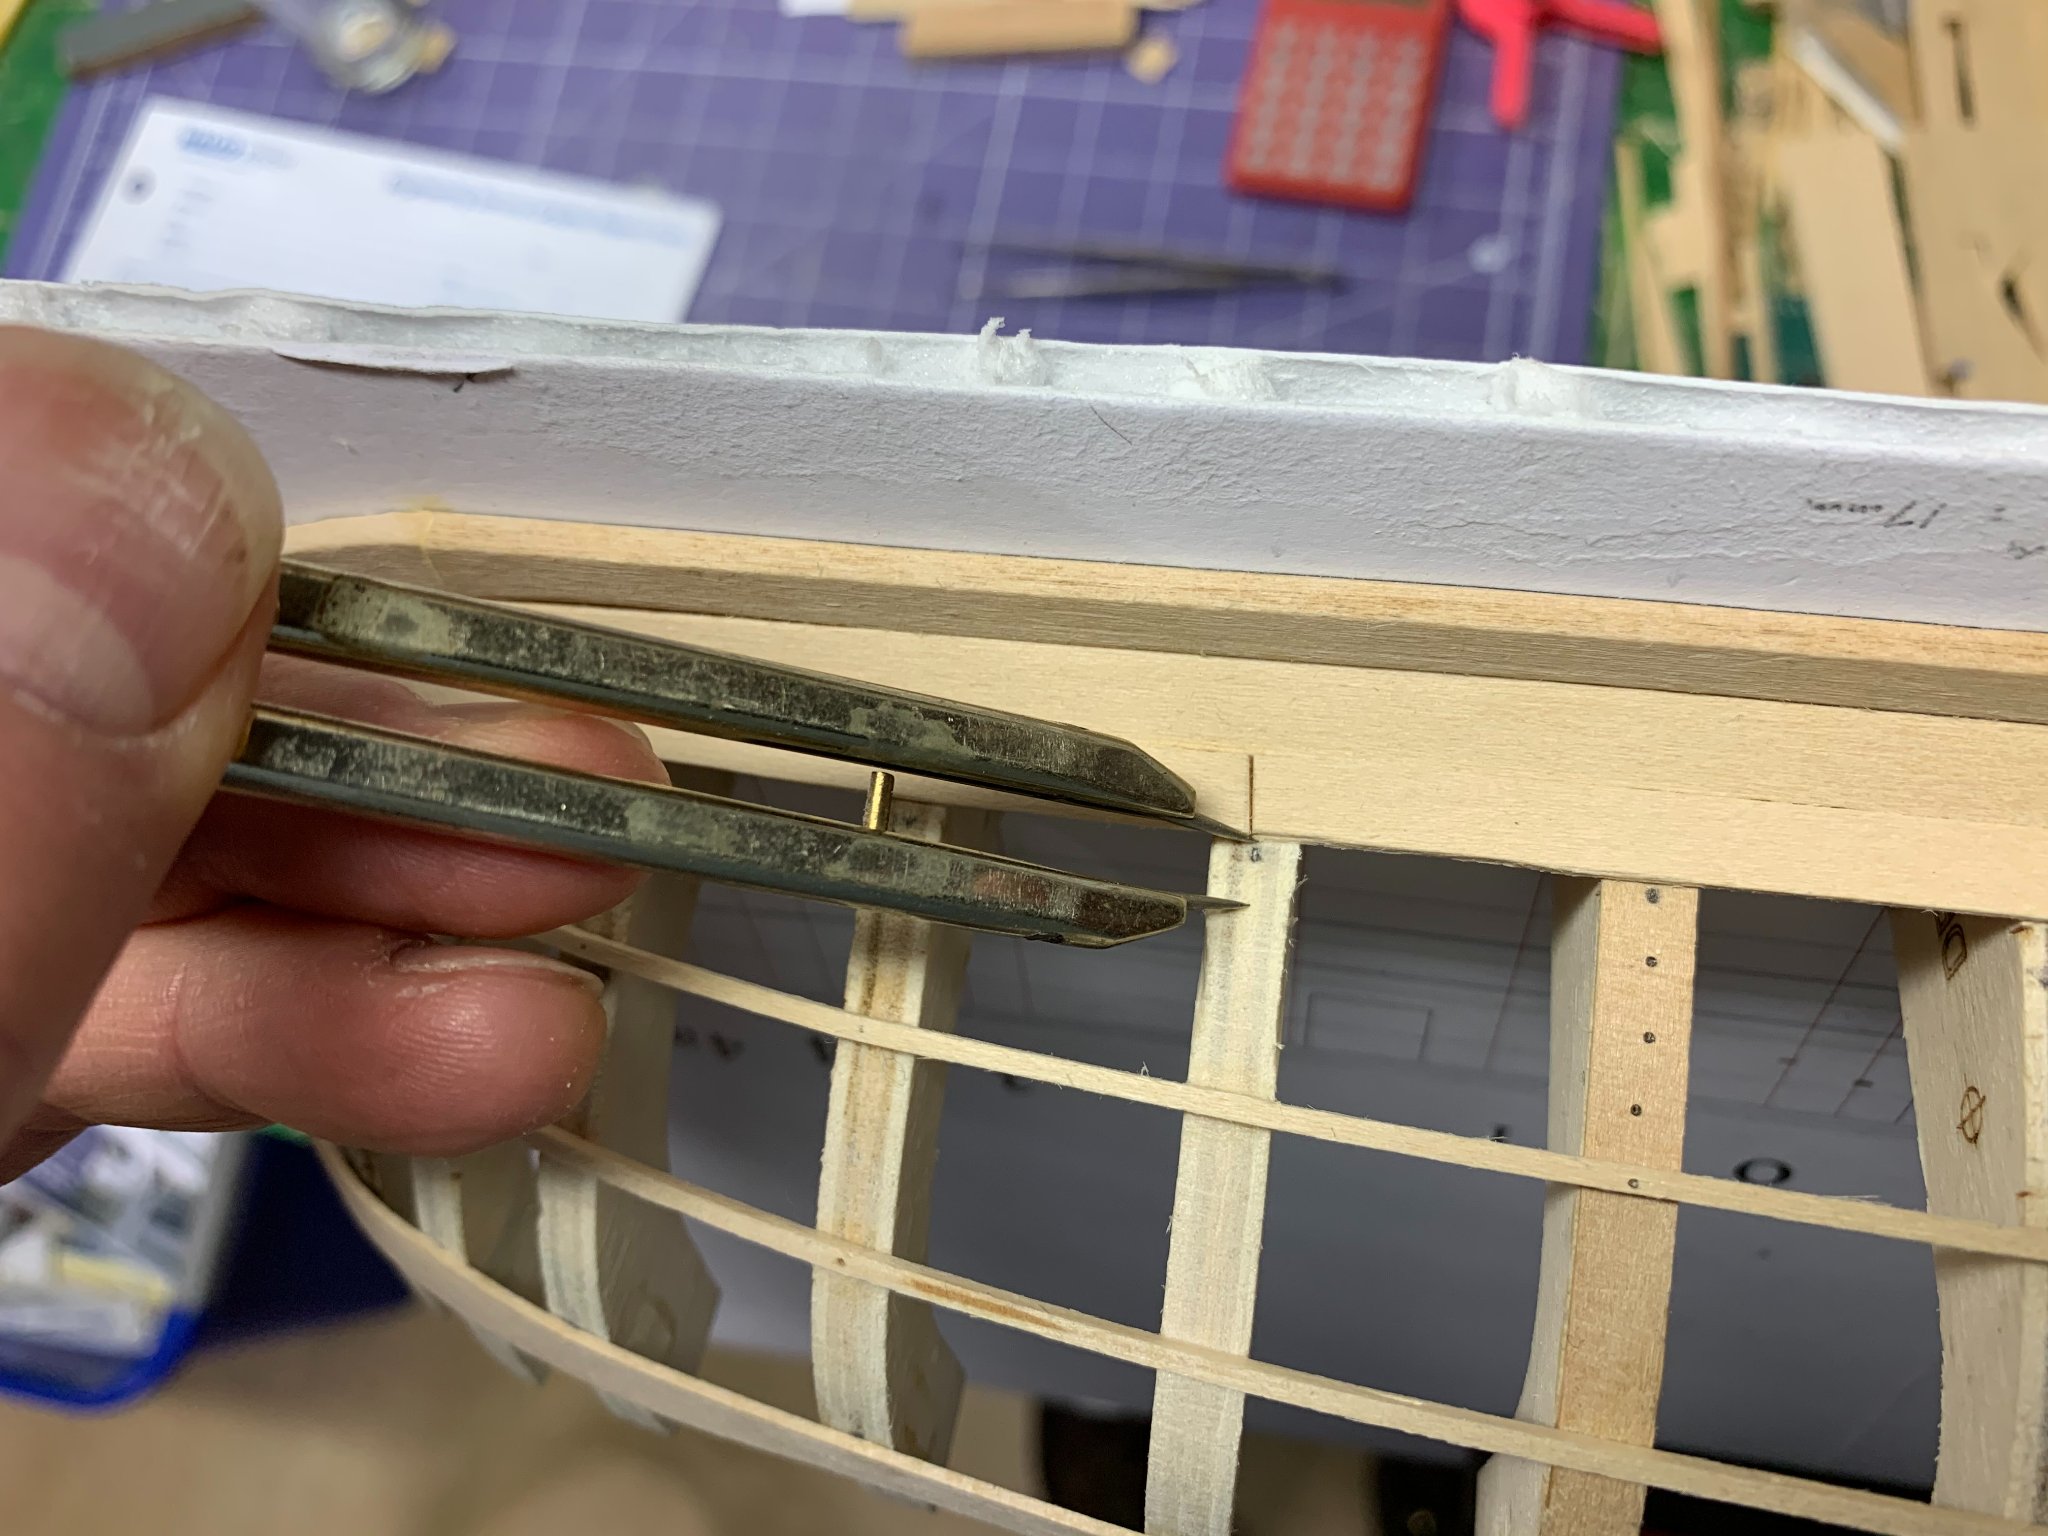
Mark each of the frames on the cardstock and run a compass point along the top of the lower plank, marking a parallel line.
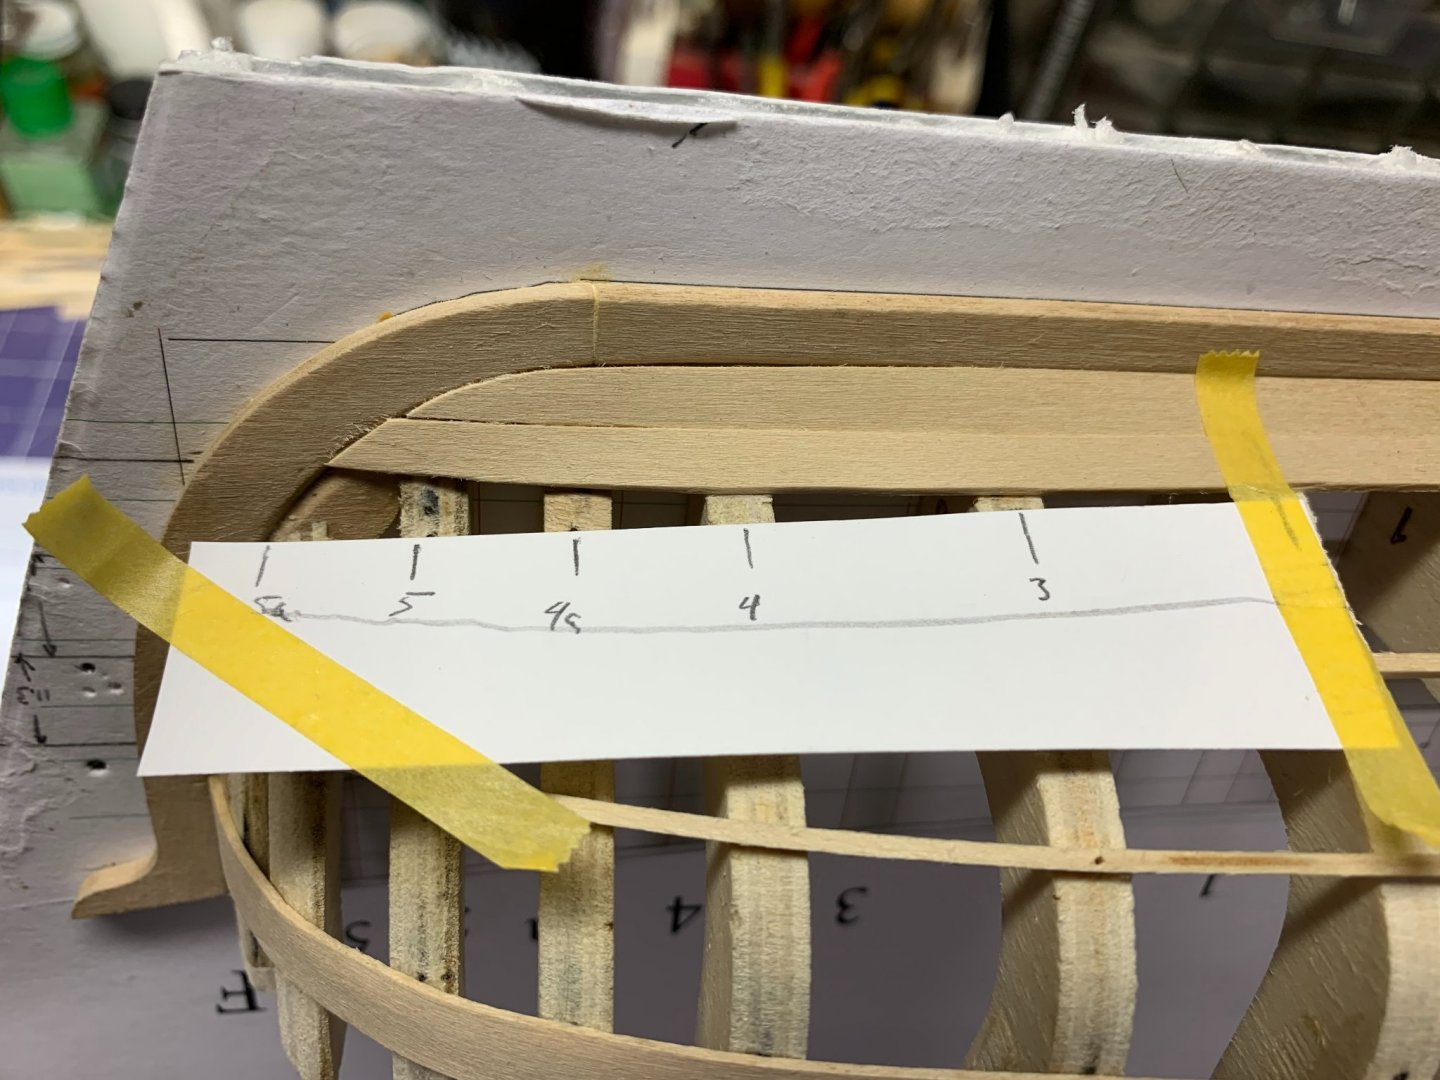
Now I have the bottom edge of the plank defined.
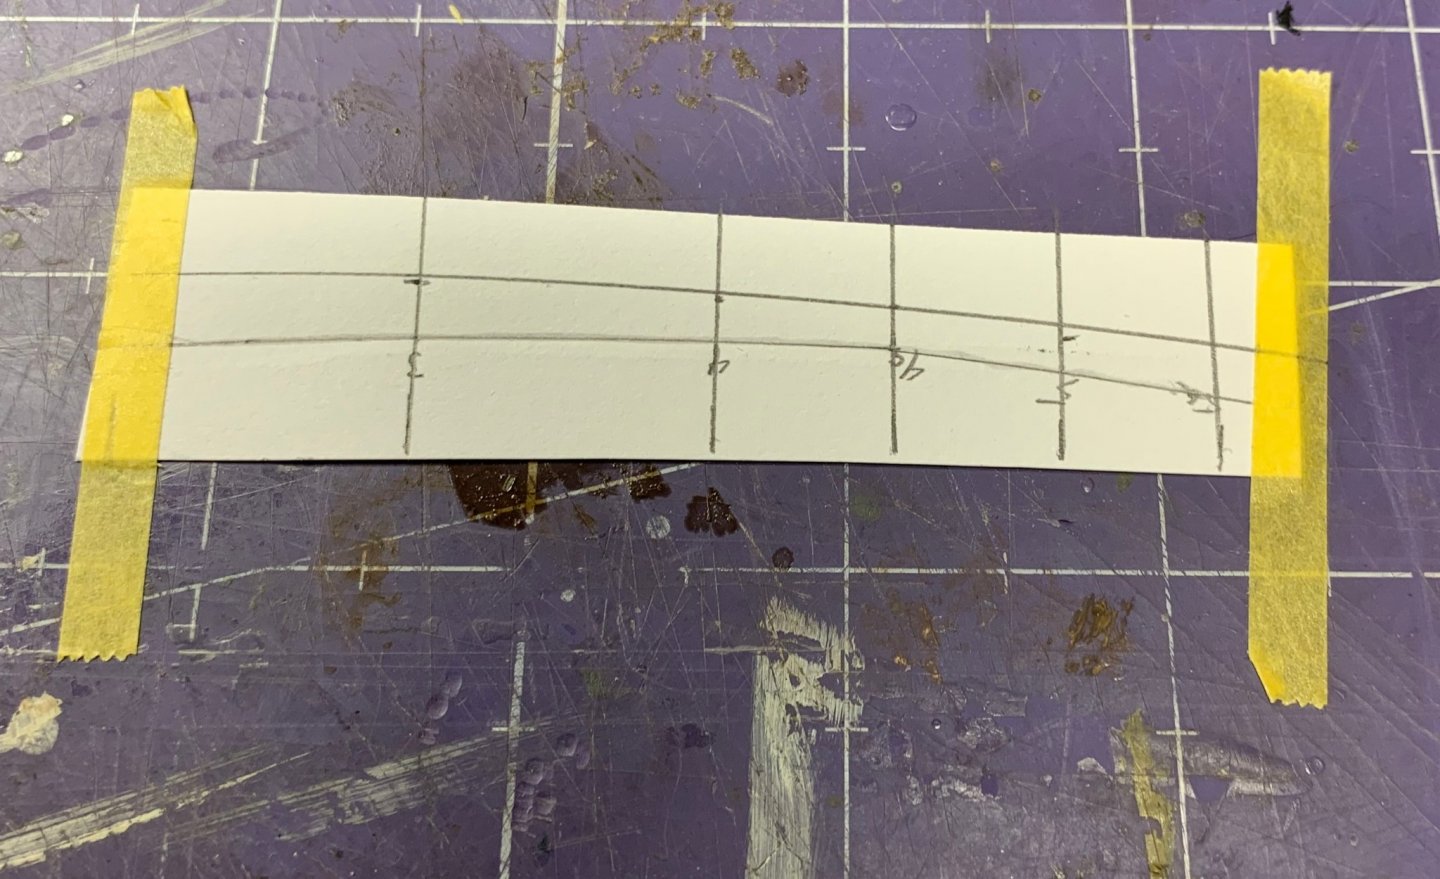
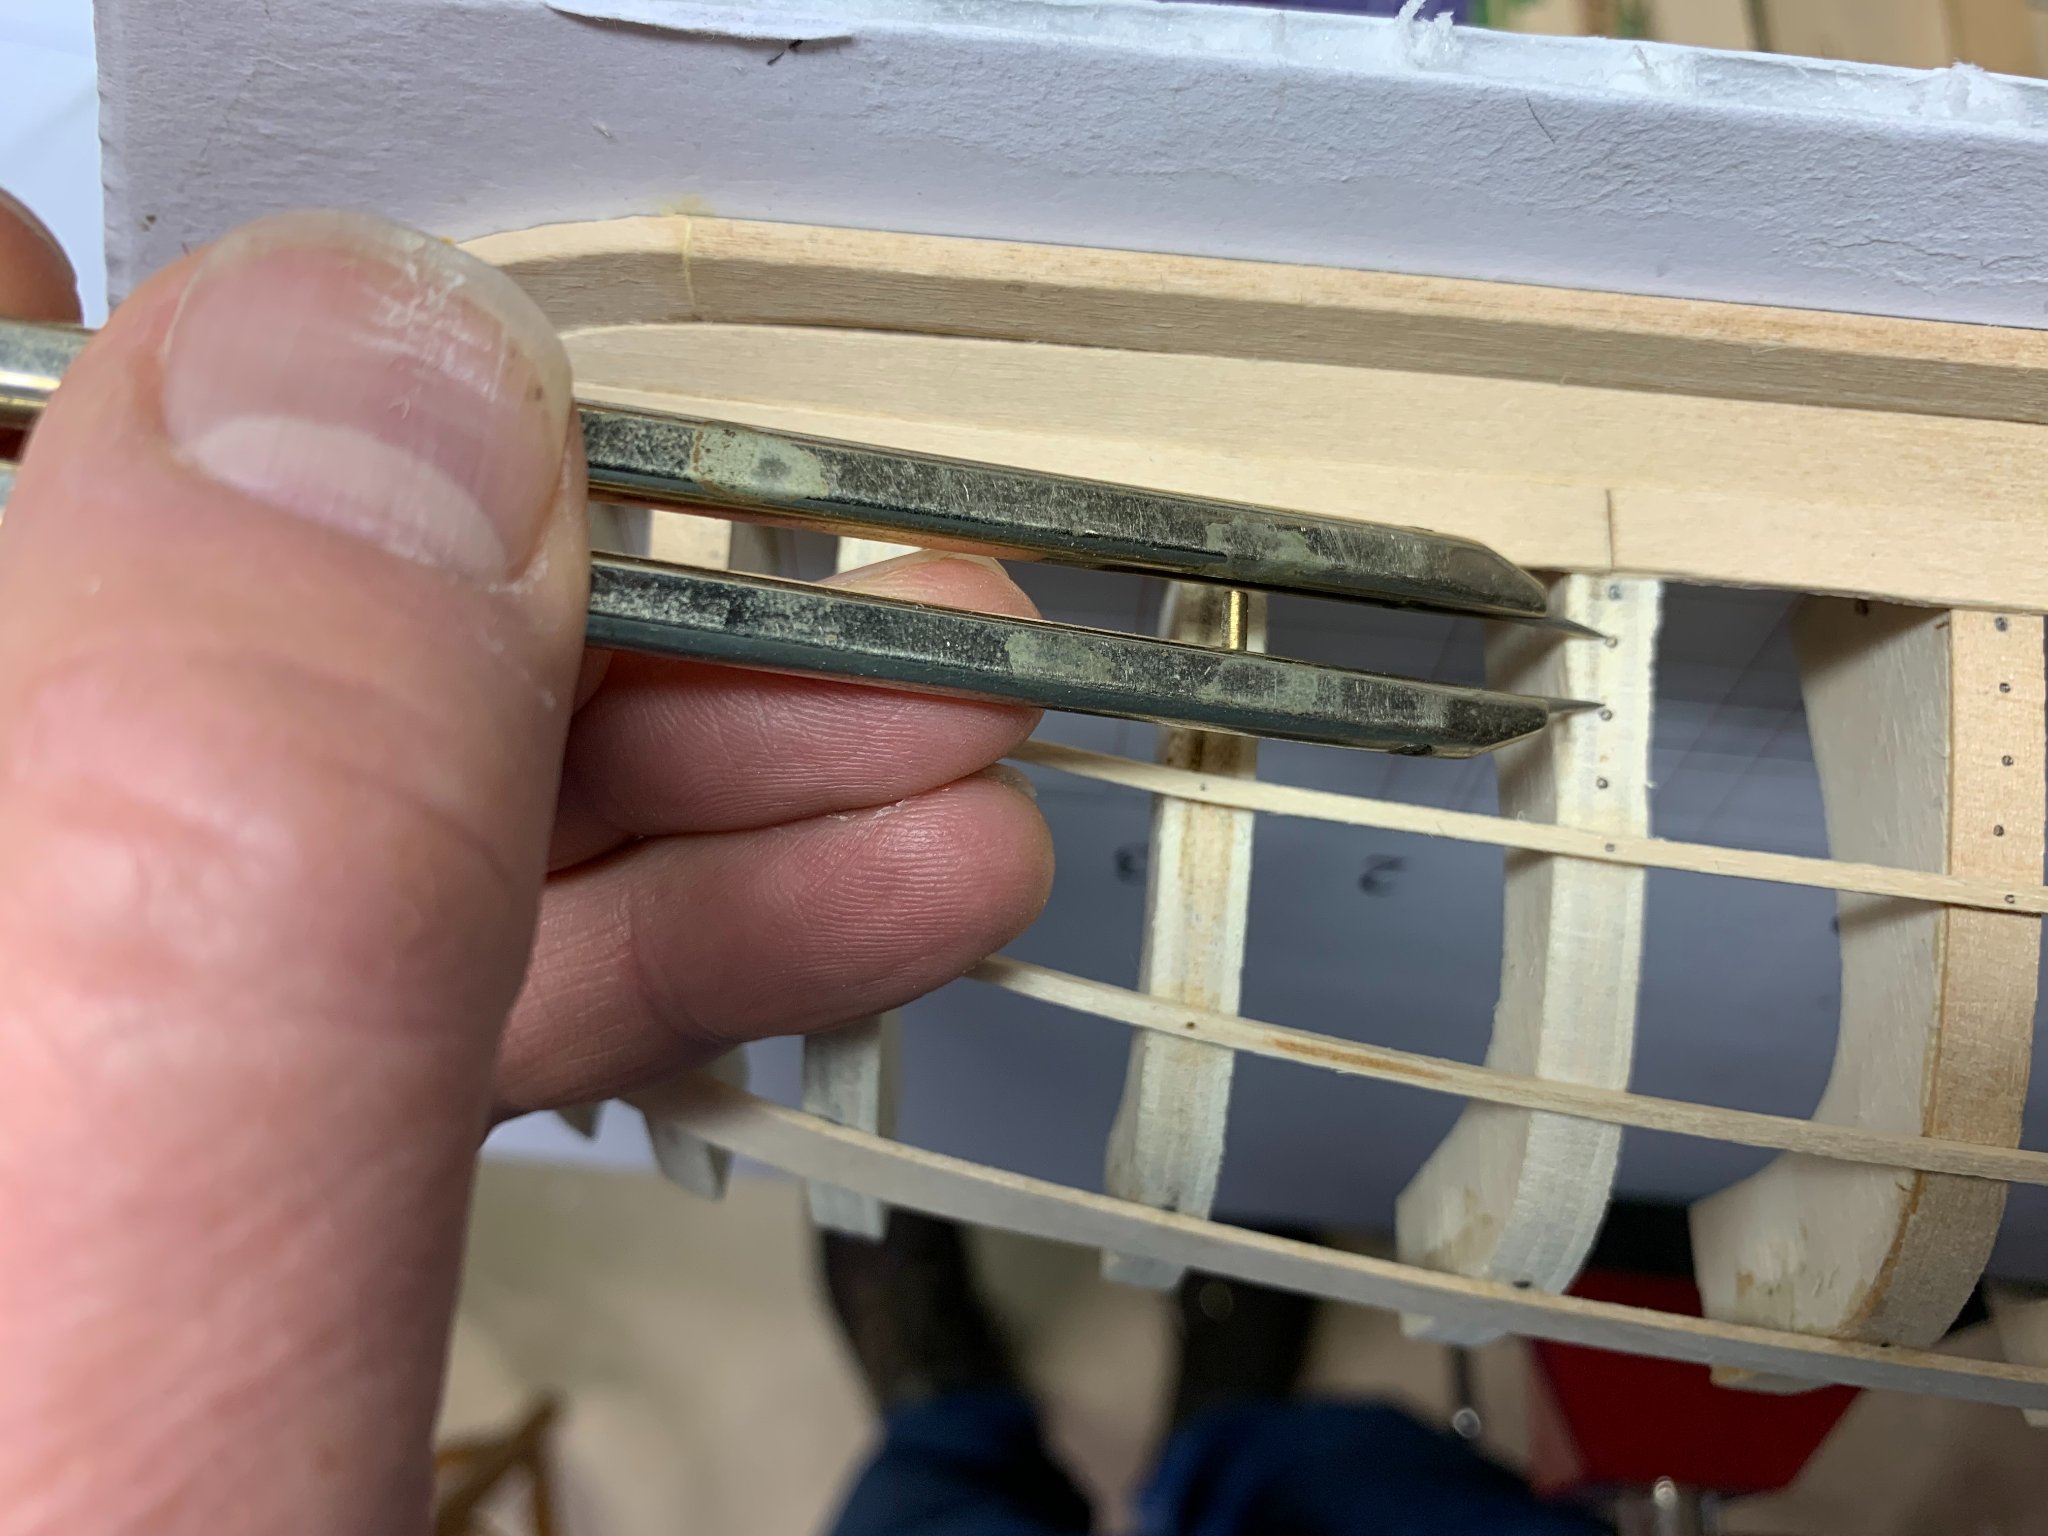
Remove the cardstock from the model and, at each frame, take the measurement from the table of equal distances for those frames and make a mark on the cardstock.
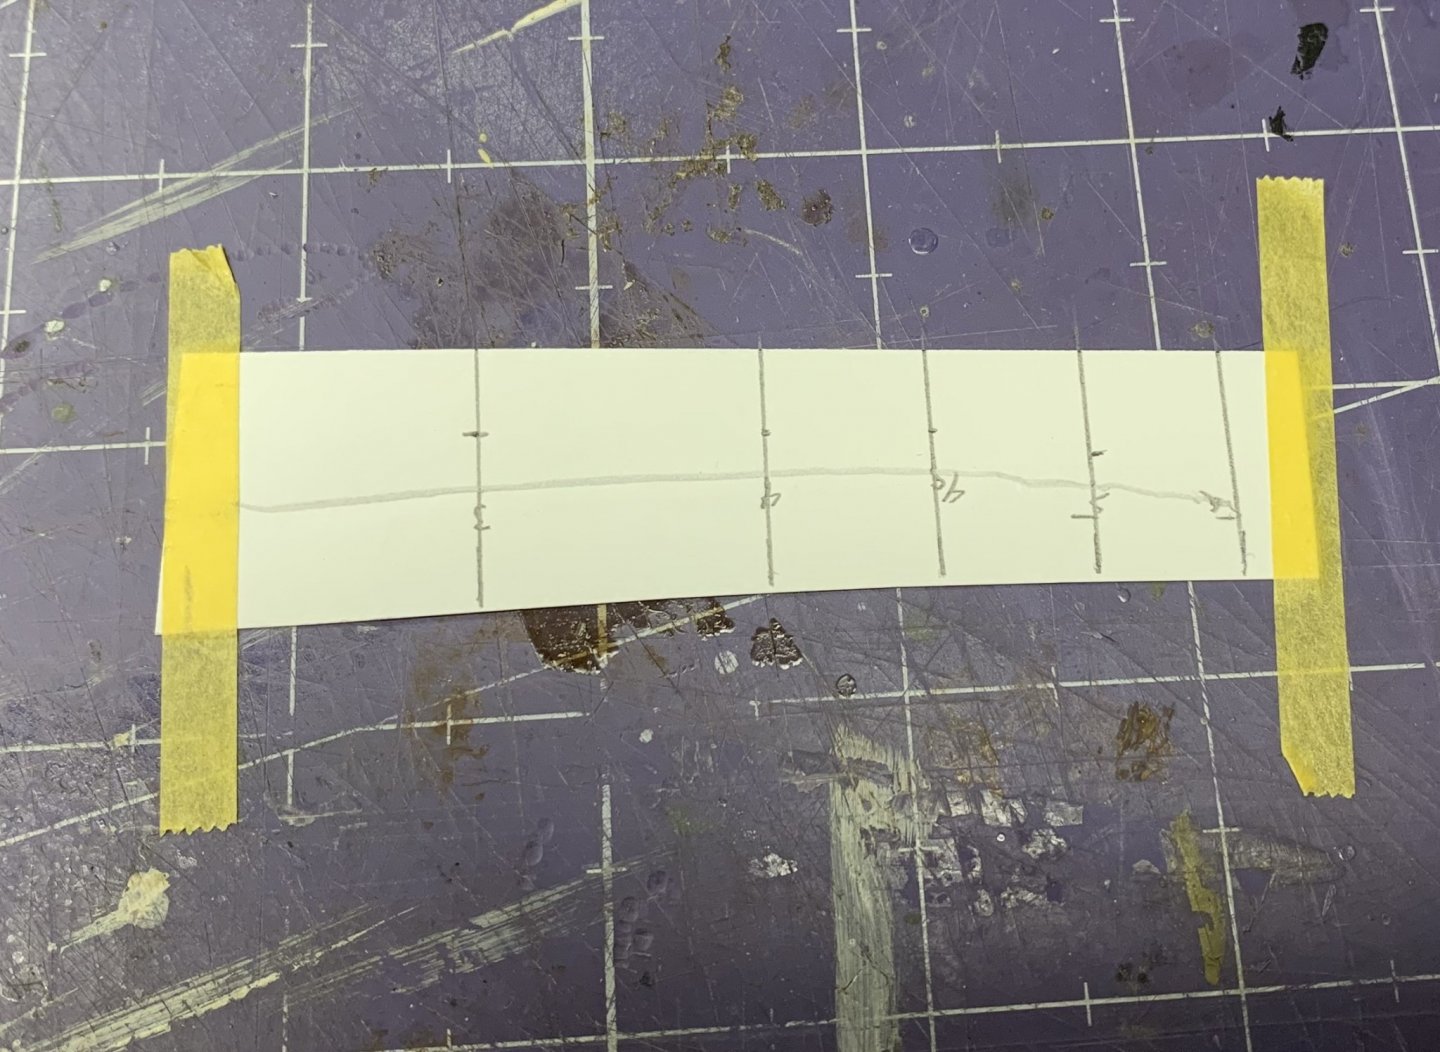
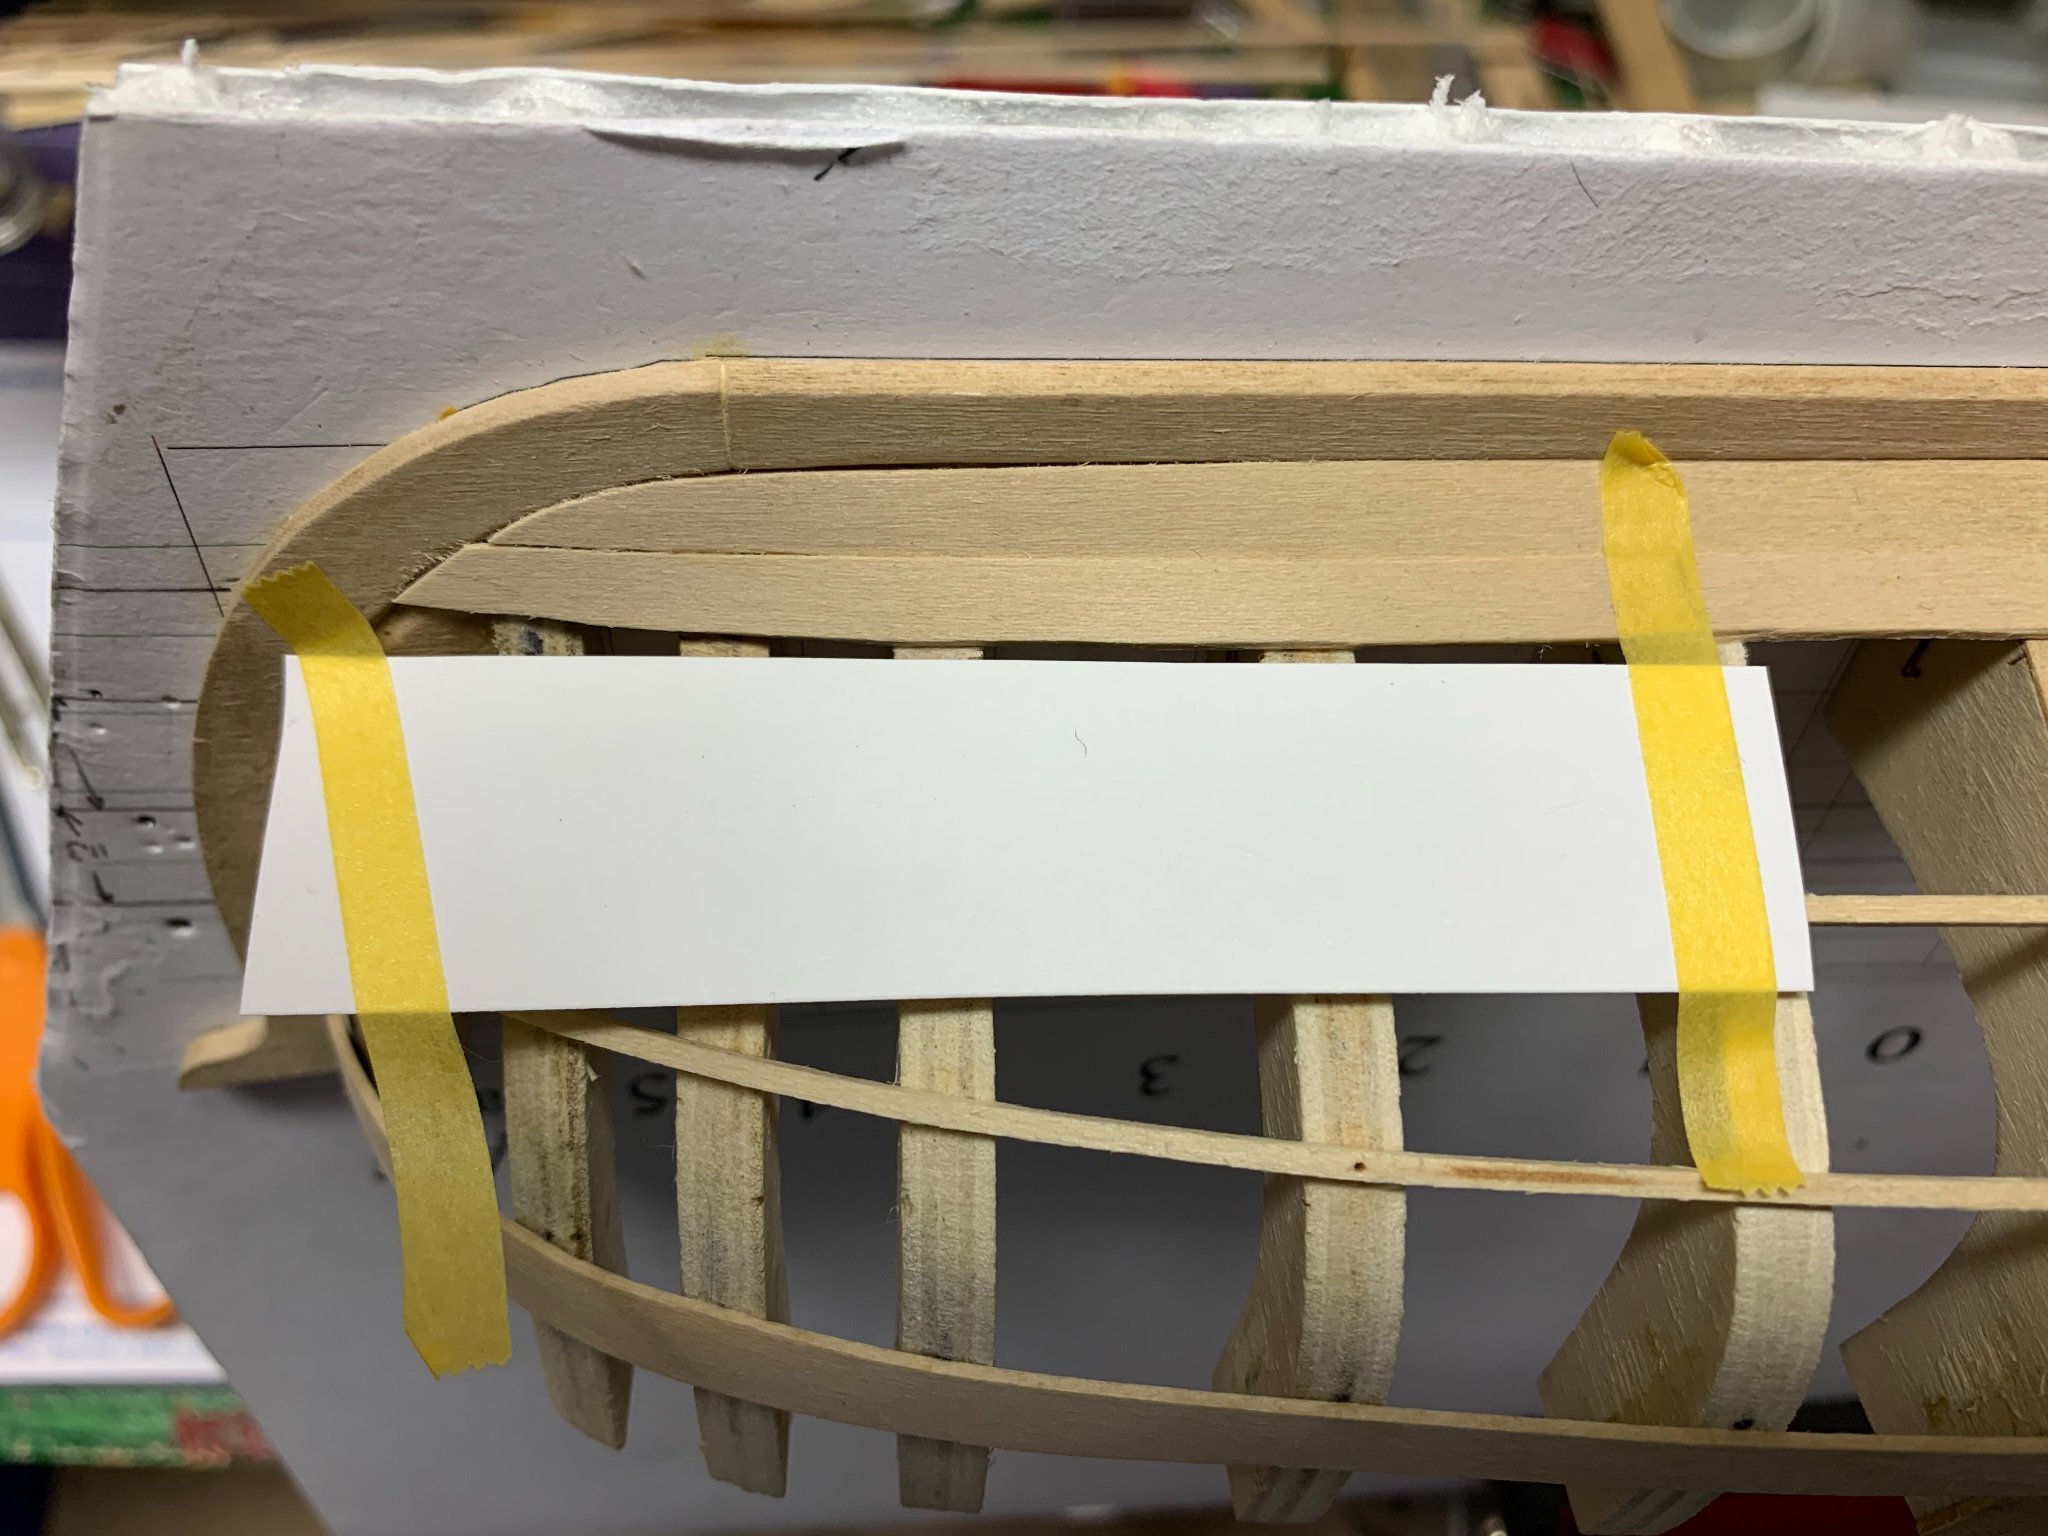
Using a French curve or ships curves, connect the dots. In Planking the Built-Up Ship Model, the point is made that you don't necessarily want to "connect the dots." Just describe a smooth curve. (There's a great diagram in that book showing what your plank should not looks like.) Use the French curve to clean up the line drawn by the compass too.
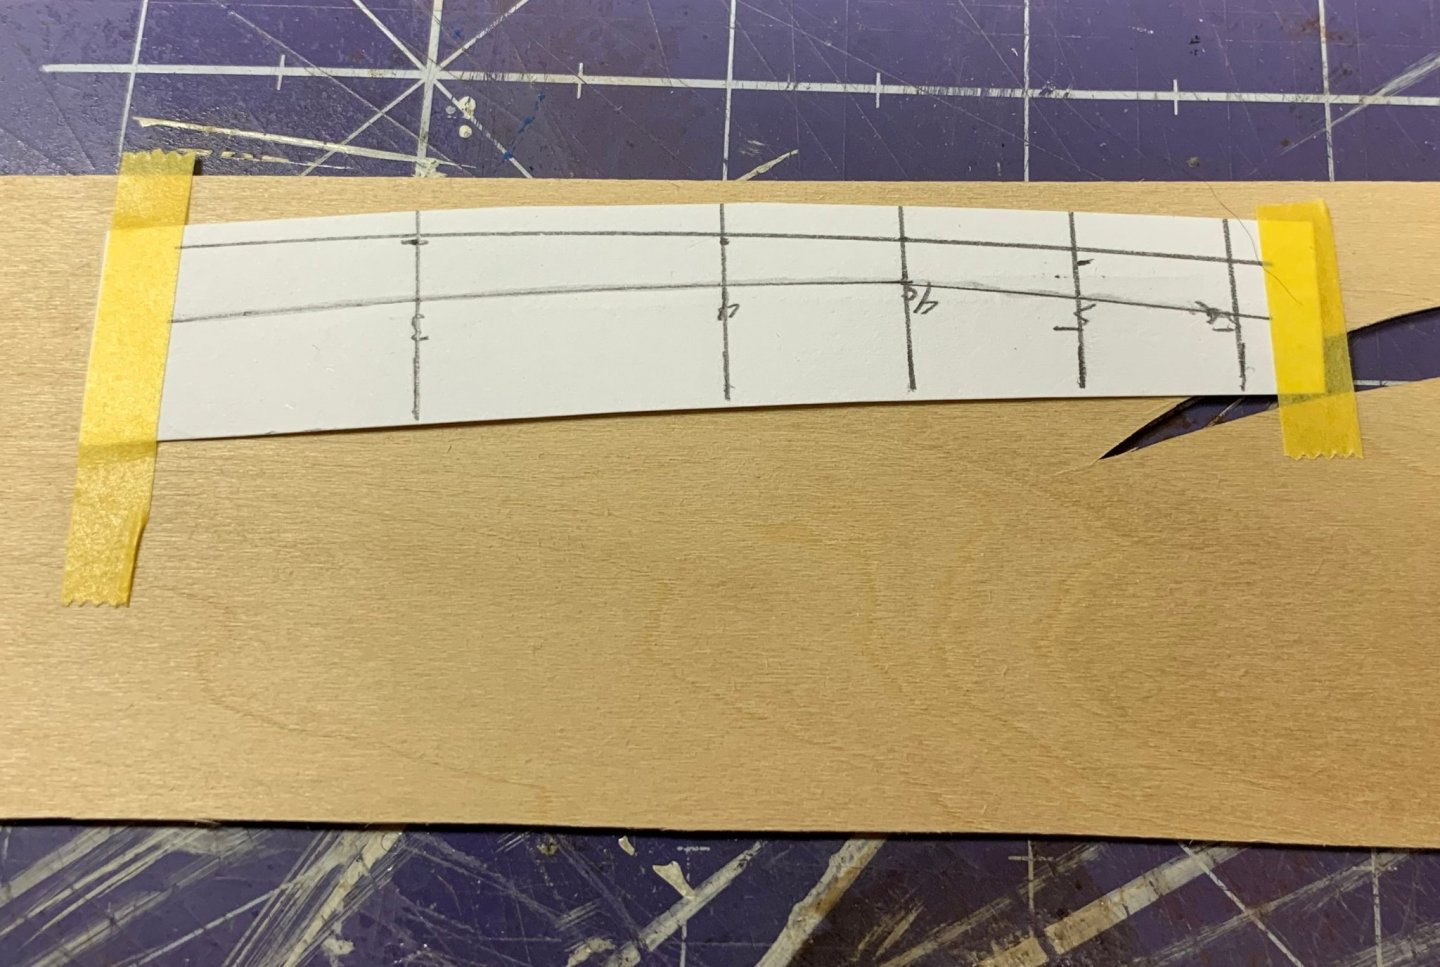
And now you have a template.
With which you can cut out the plank.
I did find it difficult, at times, to clamp the planks in place. And now, with the bigger battens in place, I've found it impossible to fit clamps in there. I watched a few of Chuck Passaro's videos about planking HMS Winchelsea. He uses heat to bend the planks. David Antscherl makes the point that wood can be bent in two planes, but not three. In my experience, it can be bent easily longitudinally (back an forth), easily torsionally (twisting) and with some difficulty laterally (side to side). That's not to say edge bending doesn't work. It does. I built my Longboat using nothing but edge bending and Chuck uses edge bending in his videos, but the fact that these planks have been spiled eliminates the need for edge bending. It doesn't eliminate the need for the plank to bend in the other two planes. The fact that clamping these planks is problematic -- for me, at least -- meant that I needed to bend the planks and get them to stay where I wanted them without pressure.
I heated up my plank bender ... which is nothing more than a soldering iron.
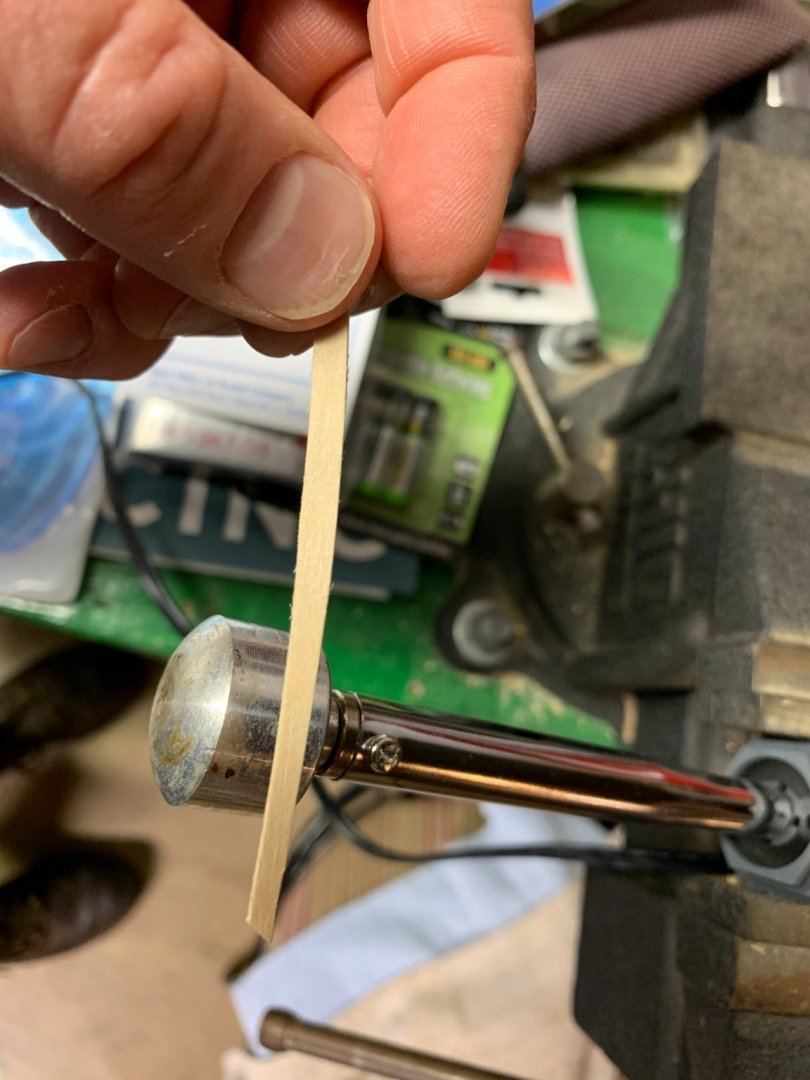
I wetted the plank before bending it. That's optional, but it made this process go quickly and smoothly.
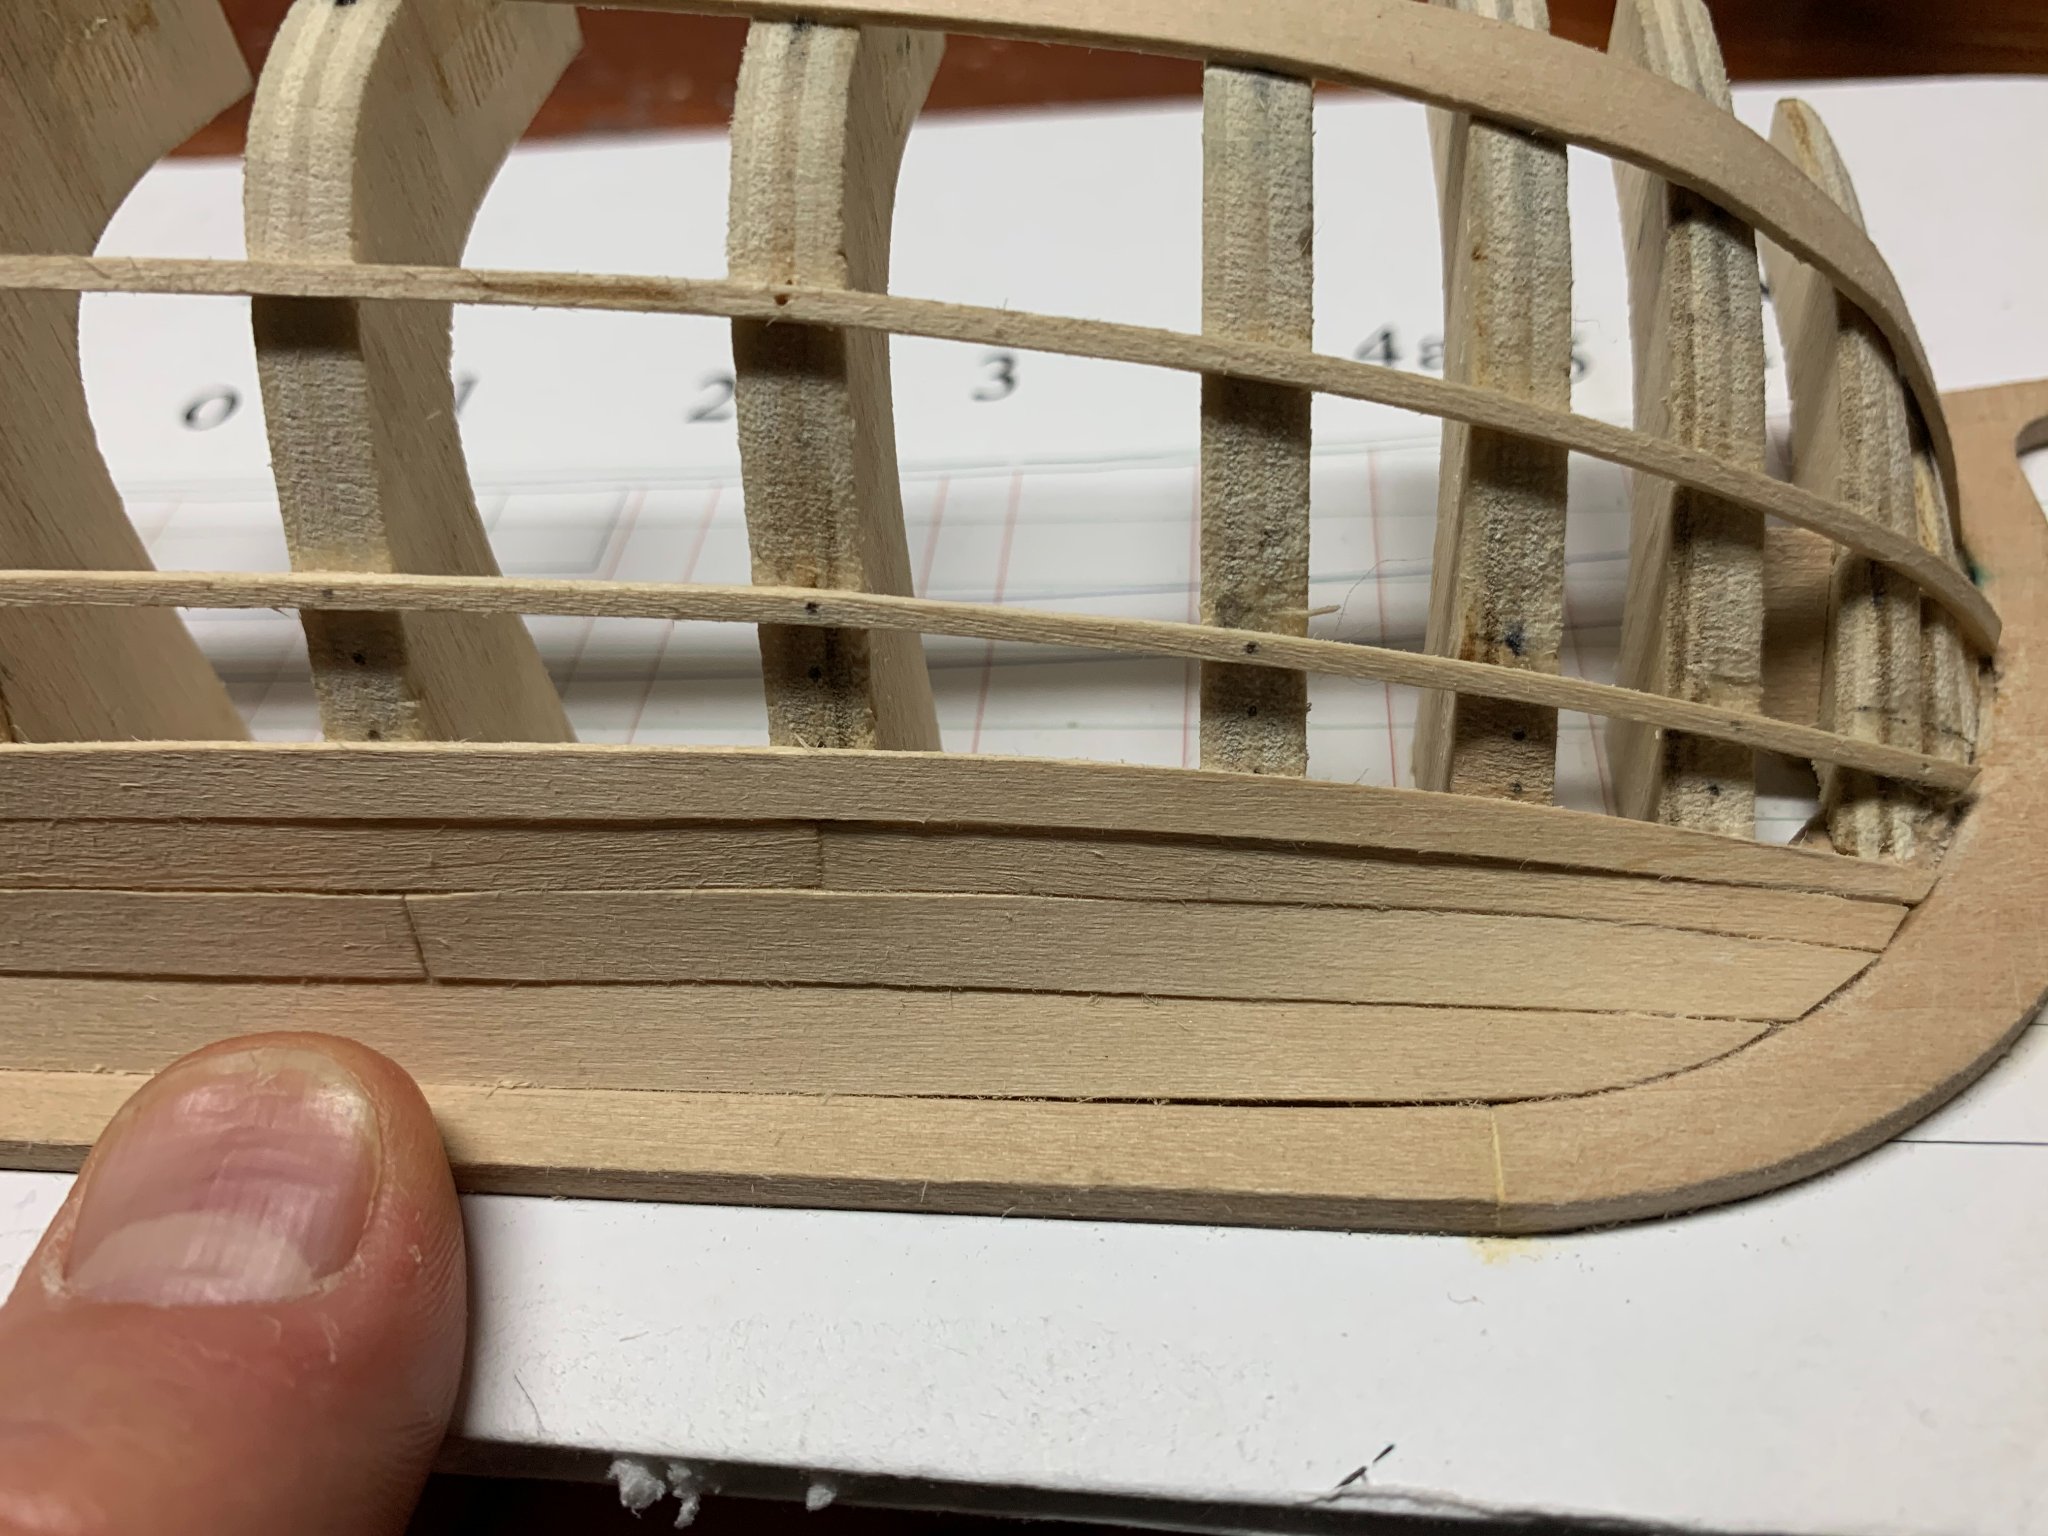
From there it was just a little sand-fit, sand-fit, sand-fit until the plank sat nicely where it belonged without the need to clamp it. Here's the result. No gaps, no bulges, no cracks, no deformation. With one exception, it cuts my little marks in twain. No connecting the dots, just a smooth curve.

So that's it. I only have to do that about another hundred times -- accounting for the ones I'll mess up -- and this thing will be done!
Dan
-
2 hours ago, brunelrussell said:
"...you have to list an institution in order to be allowed the privilege. What's wrong with being a private individual?"
I suspect institutions -- libraries, universities, etc. -- pay for access for their members, so if you can demonstrate that you're associated with one, you can get in. I suspect, if you contacted the publisher, they would either sell you the article you're interested in or direct you to an institution that would loan it to you.
Particularly on technical subjects, I expect to pay for good information. We subscribe to a data service at work that costs a fortune. Every year I have to answer questions about how much value we get from it and every year we renew that subscription. The people who run that service earn every penny of it.
Dan
- mtaylor, Keithbrad80, Rik Thistle and 5 others
-
8
-
-
-
-
-
For everyone in the US, Happy Memorial Day!
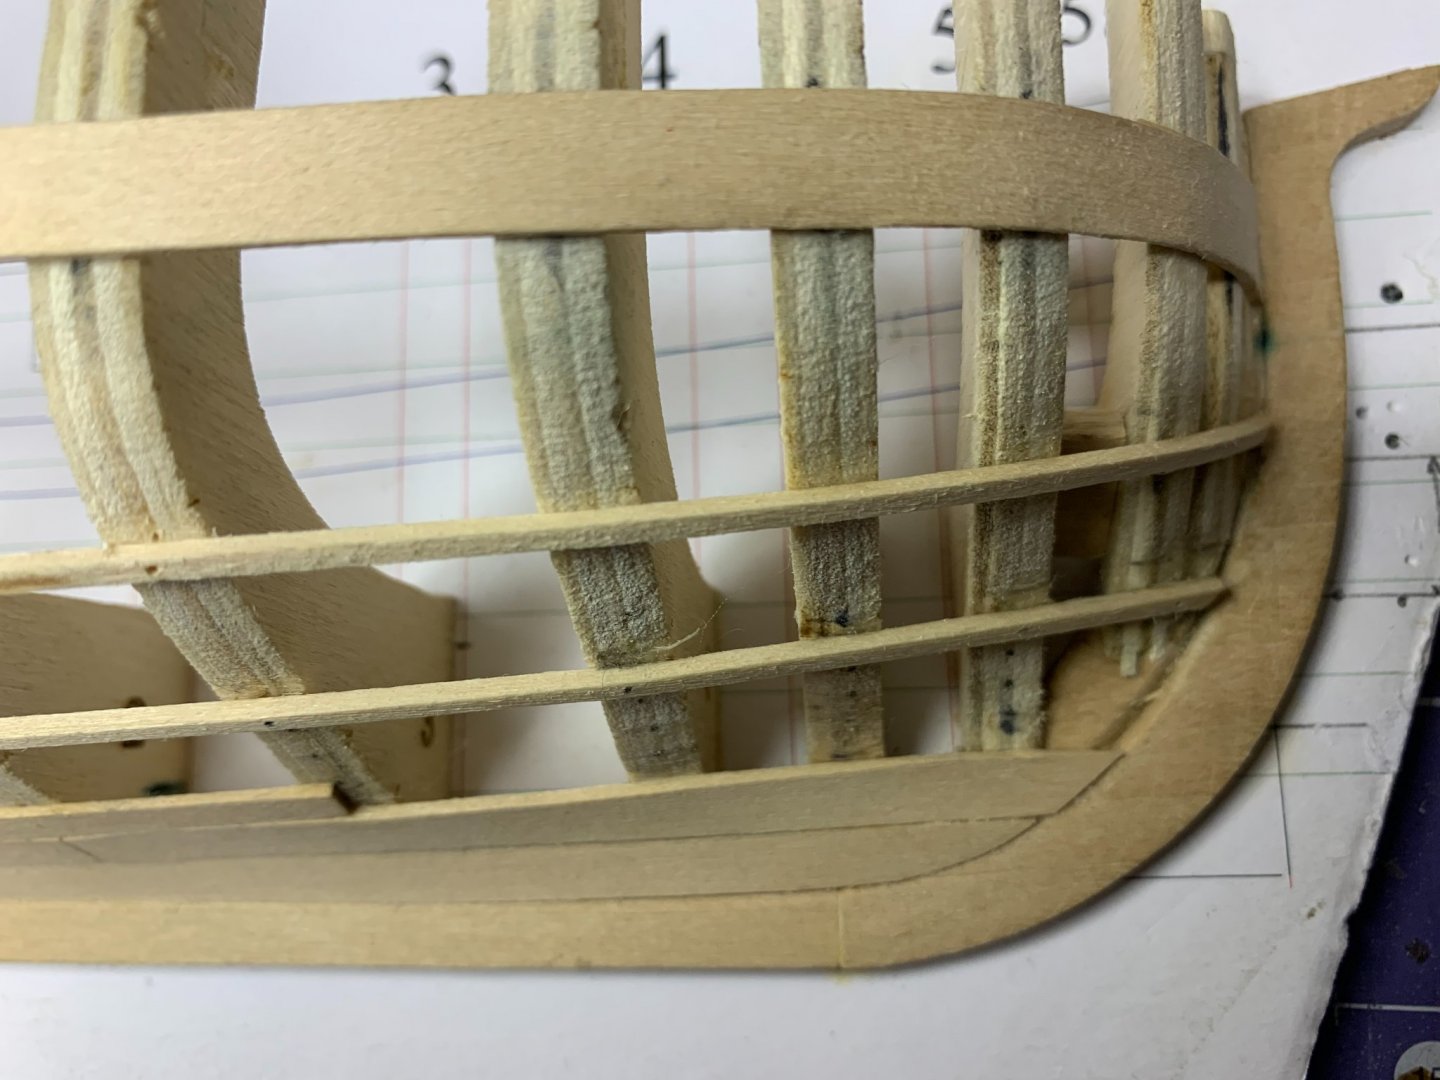
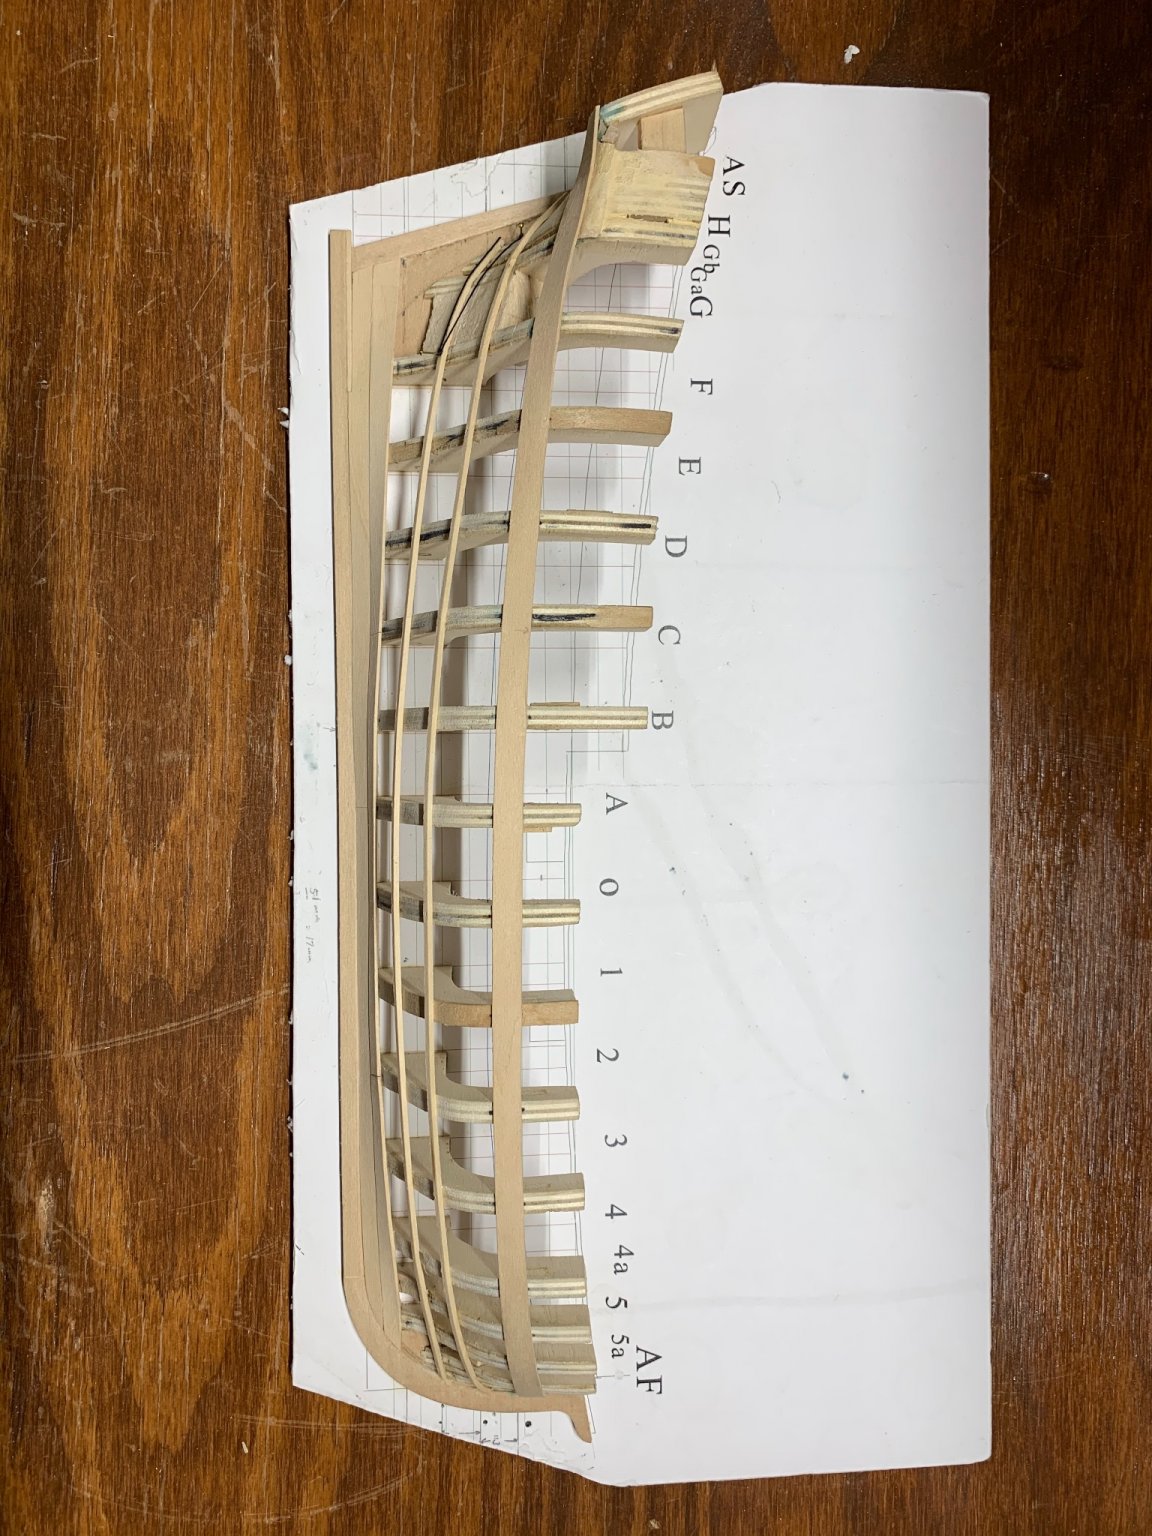
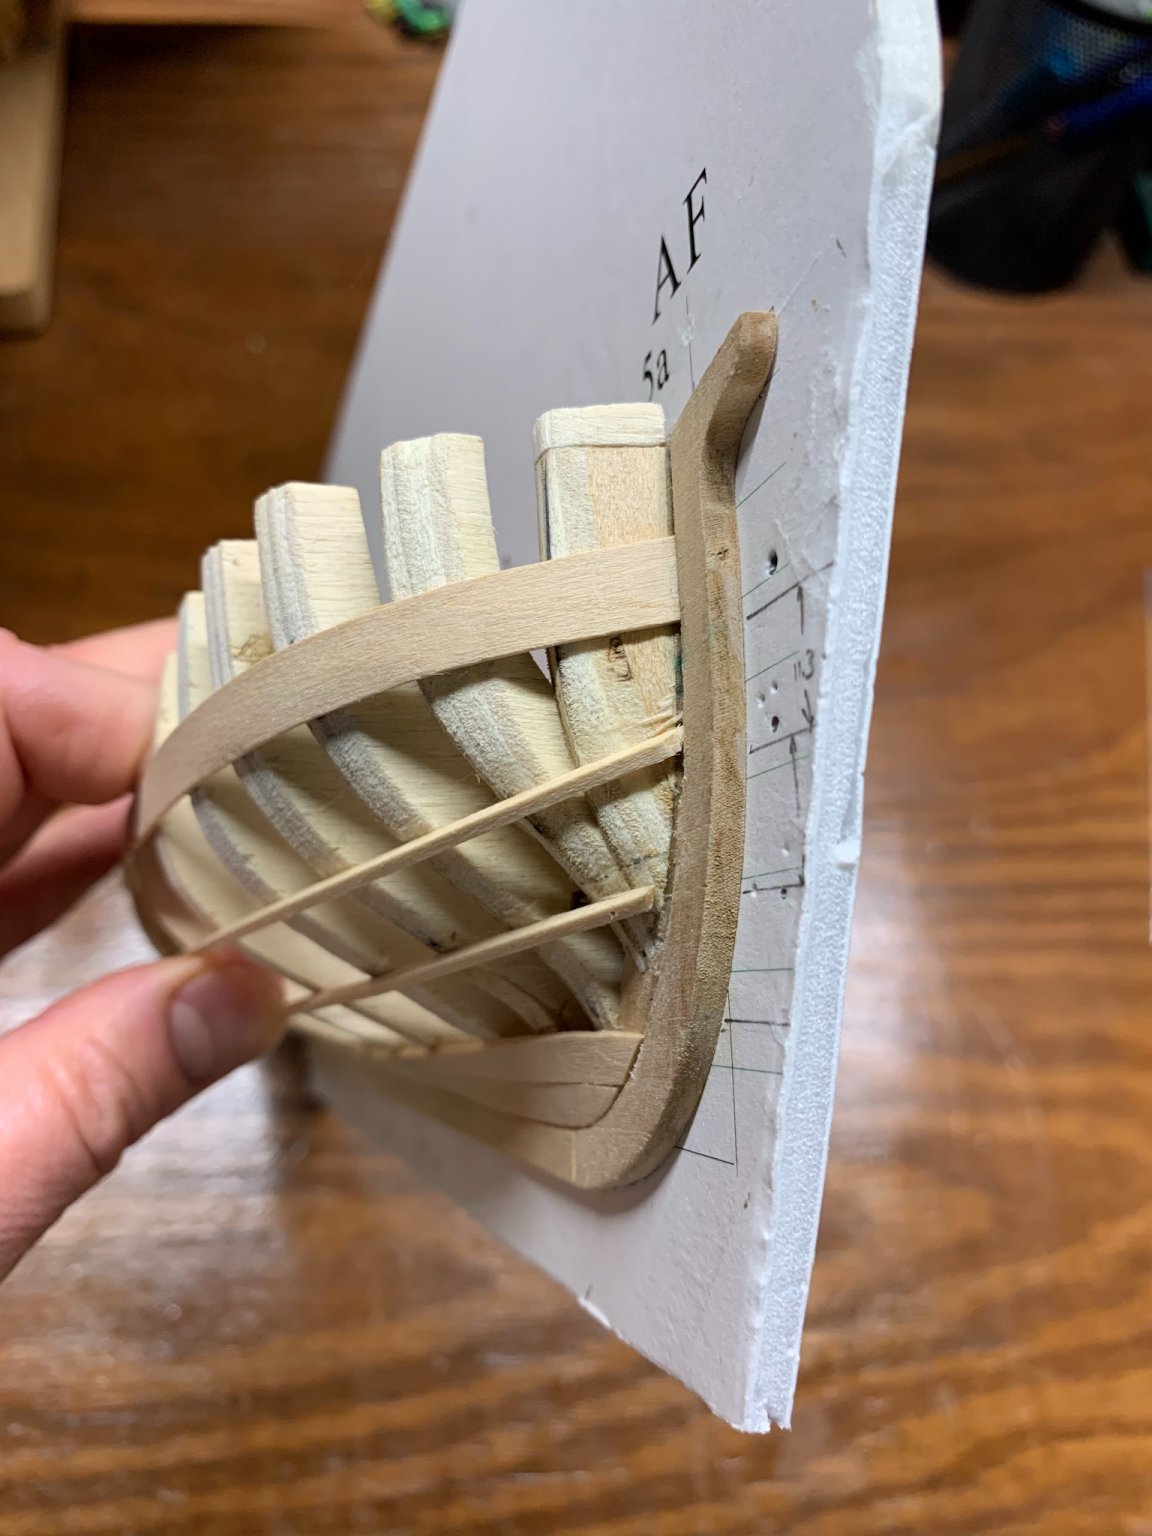
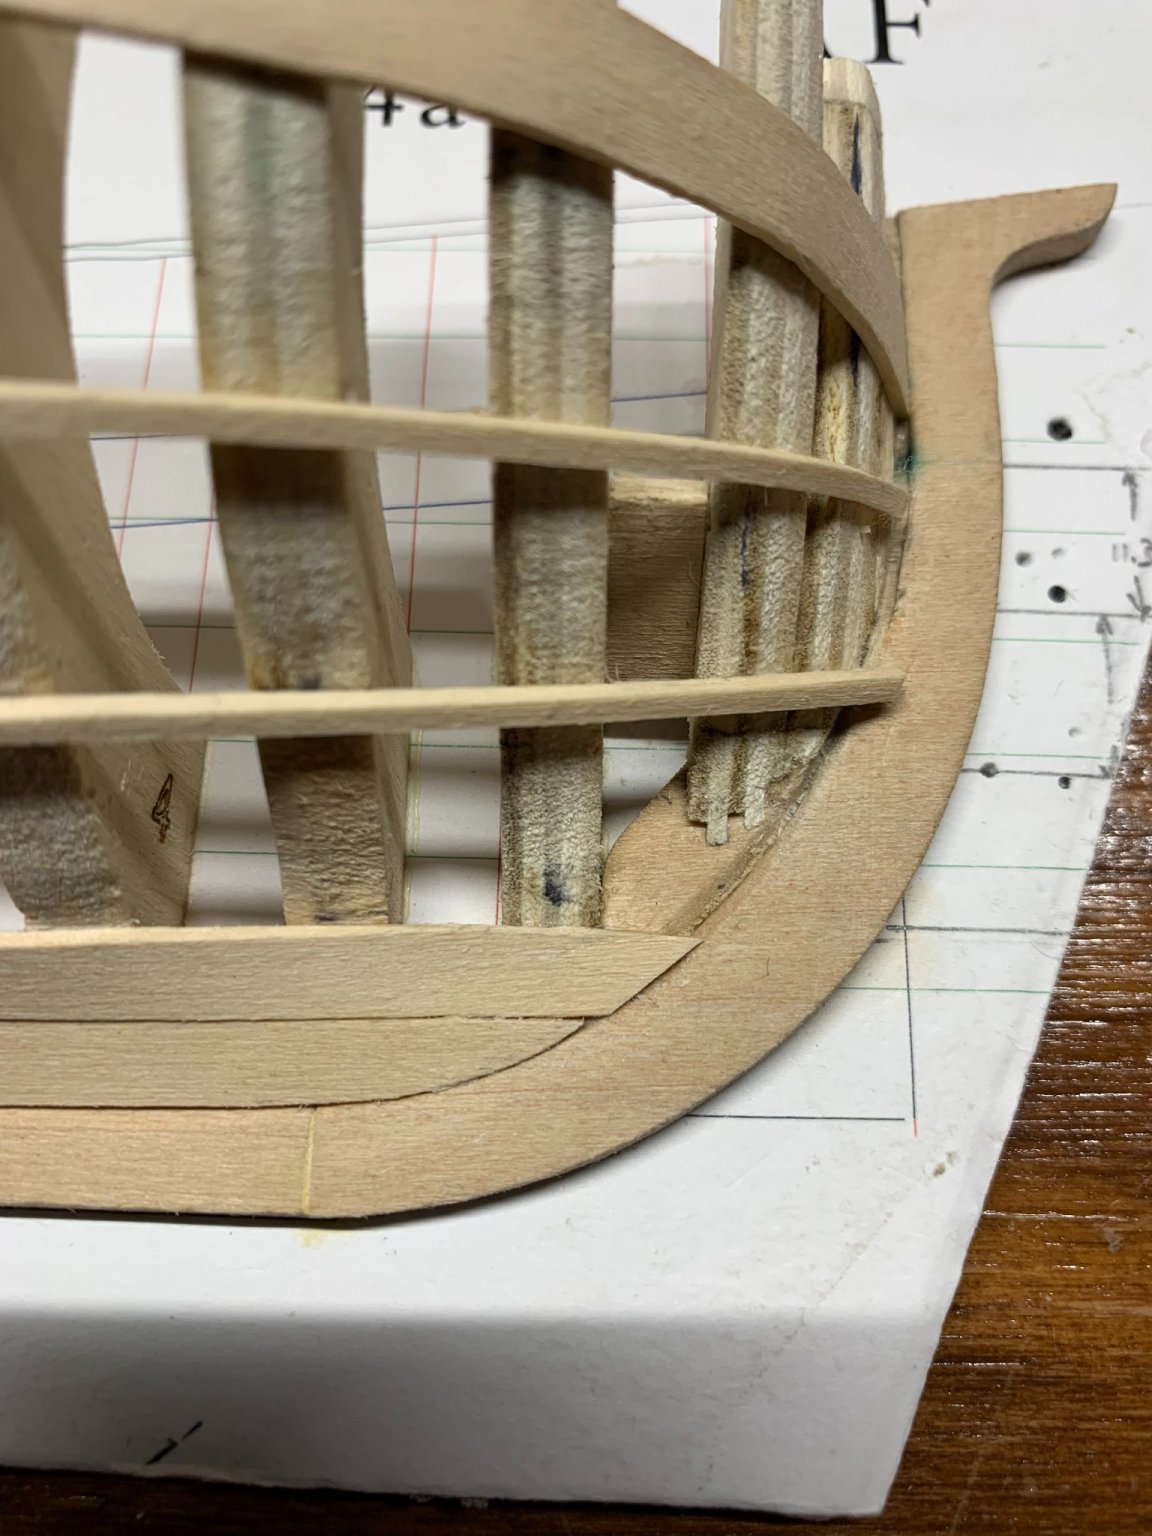
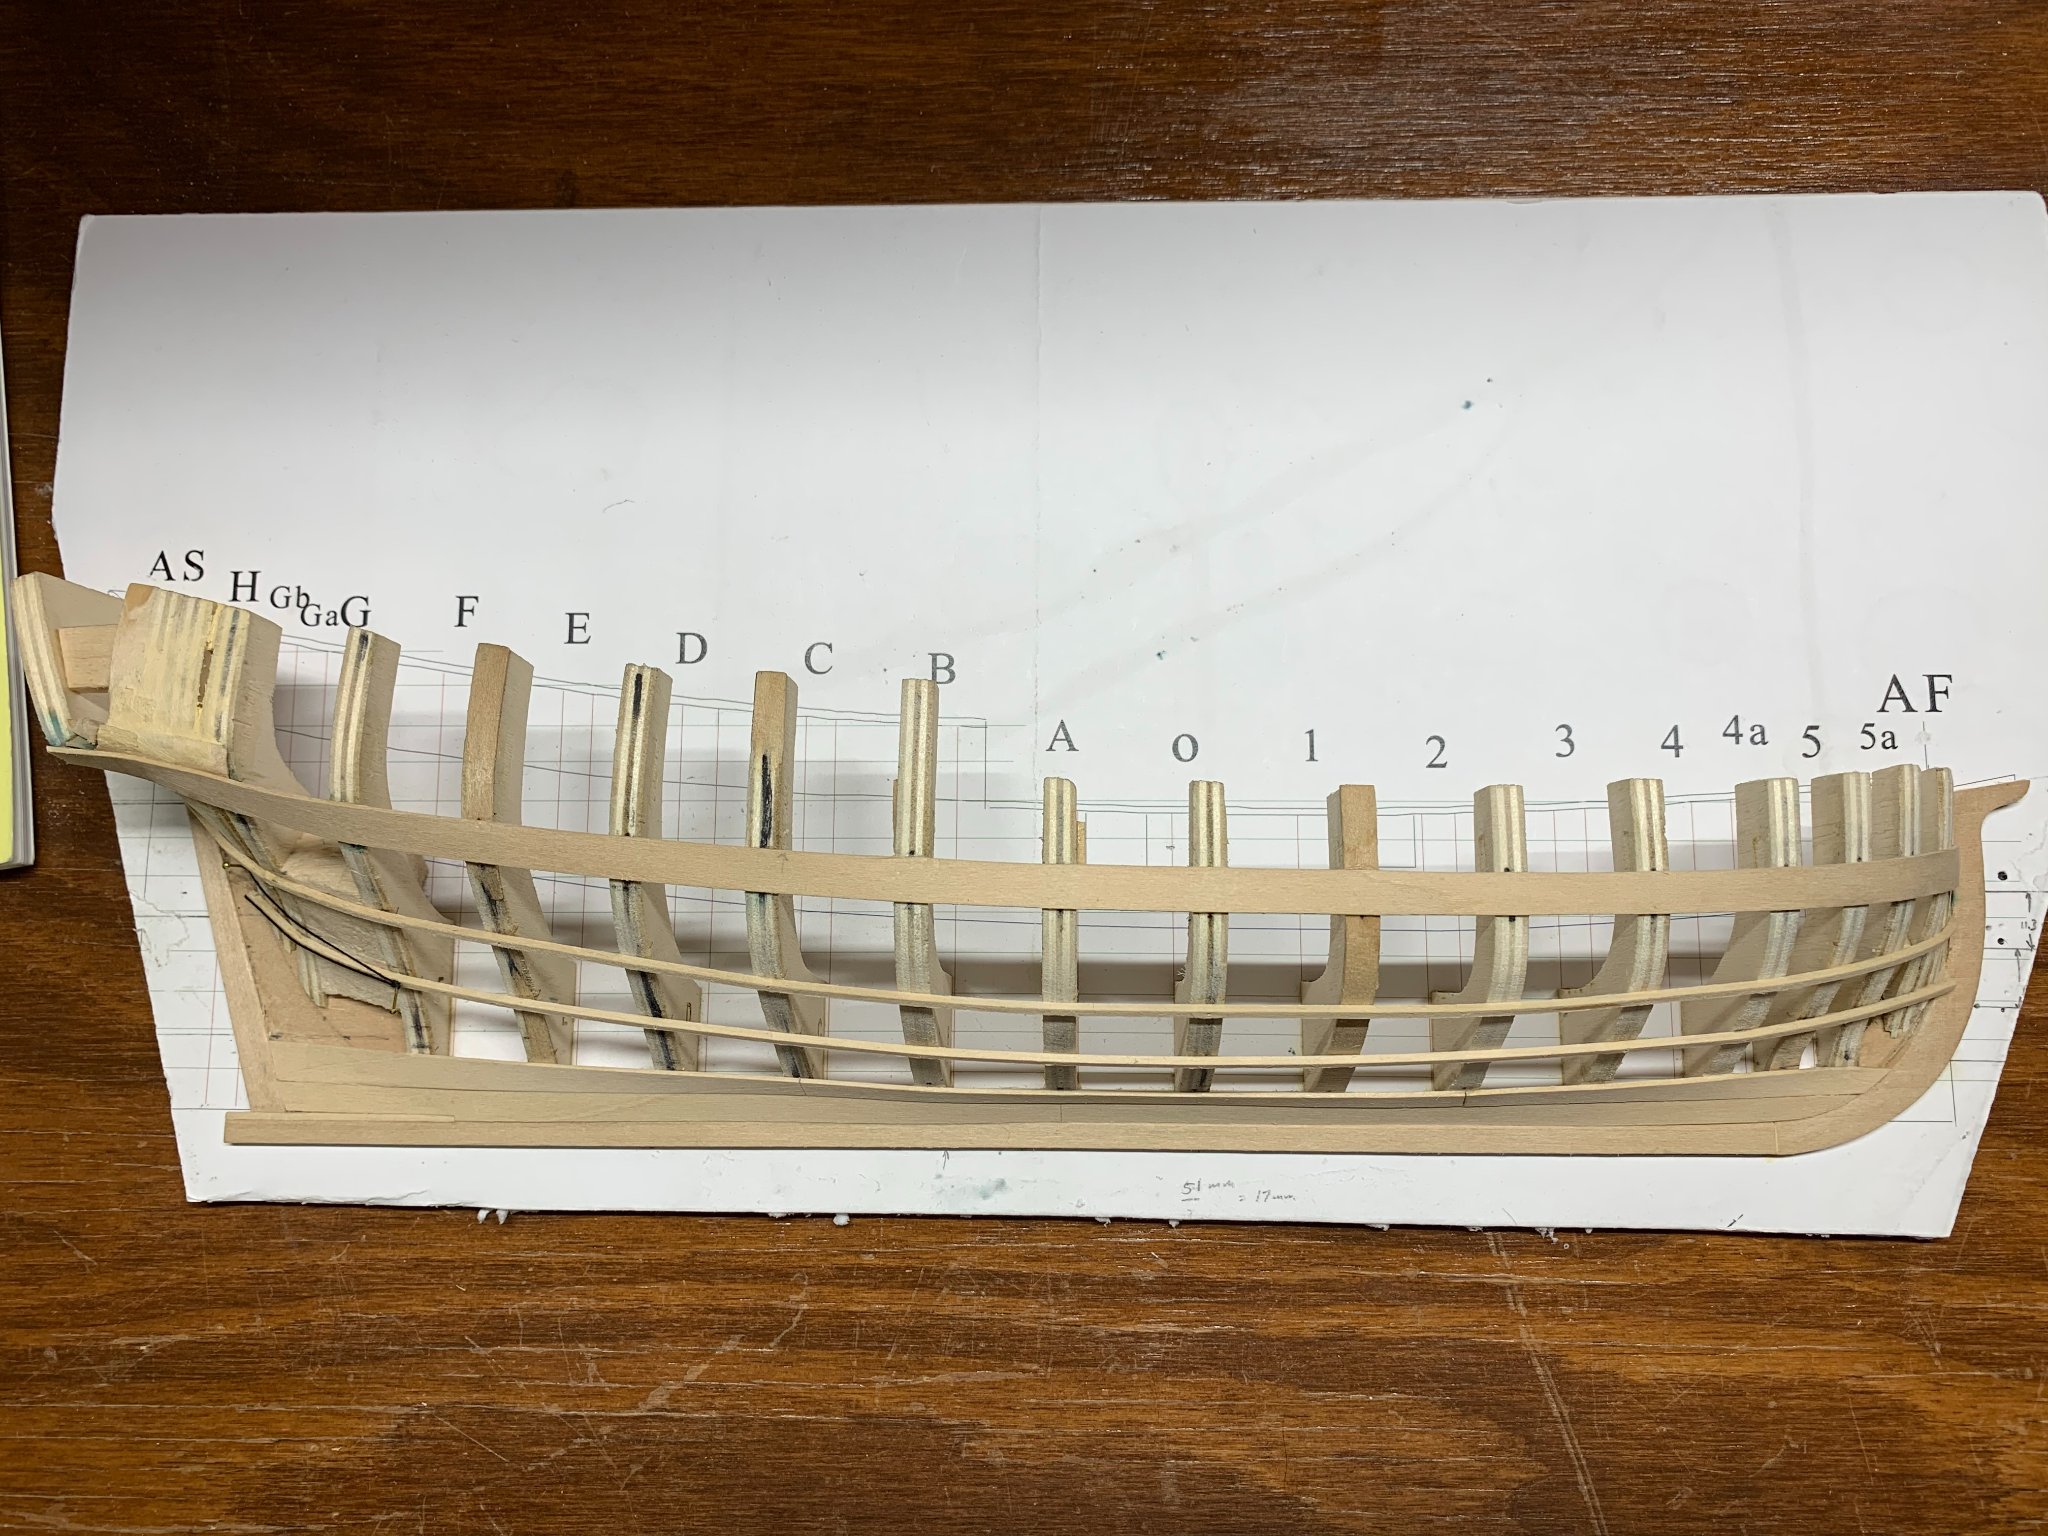
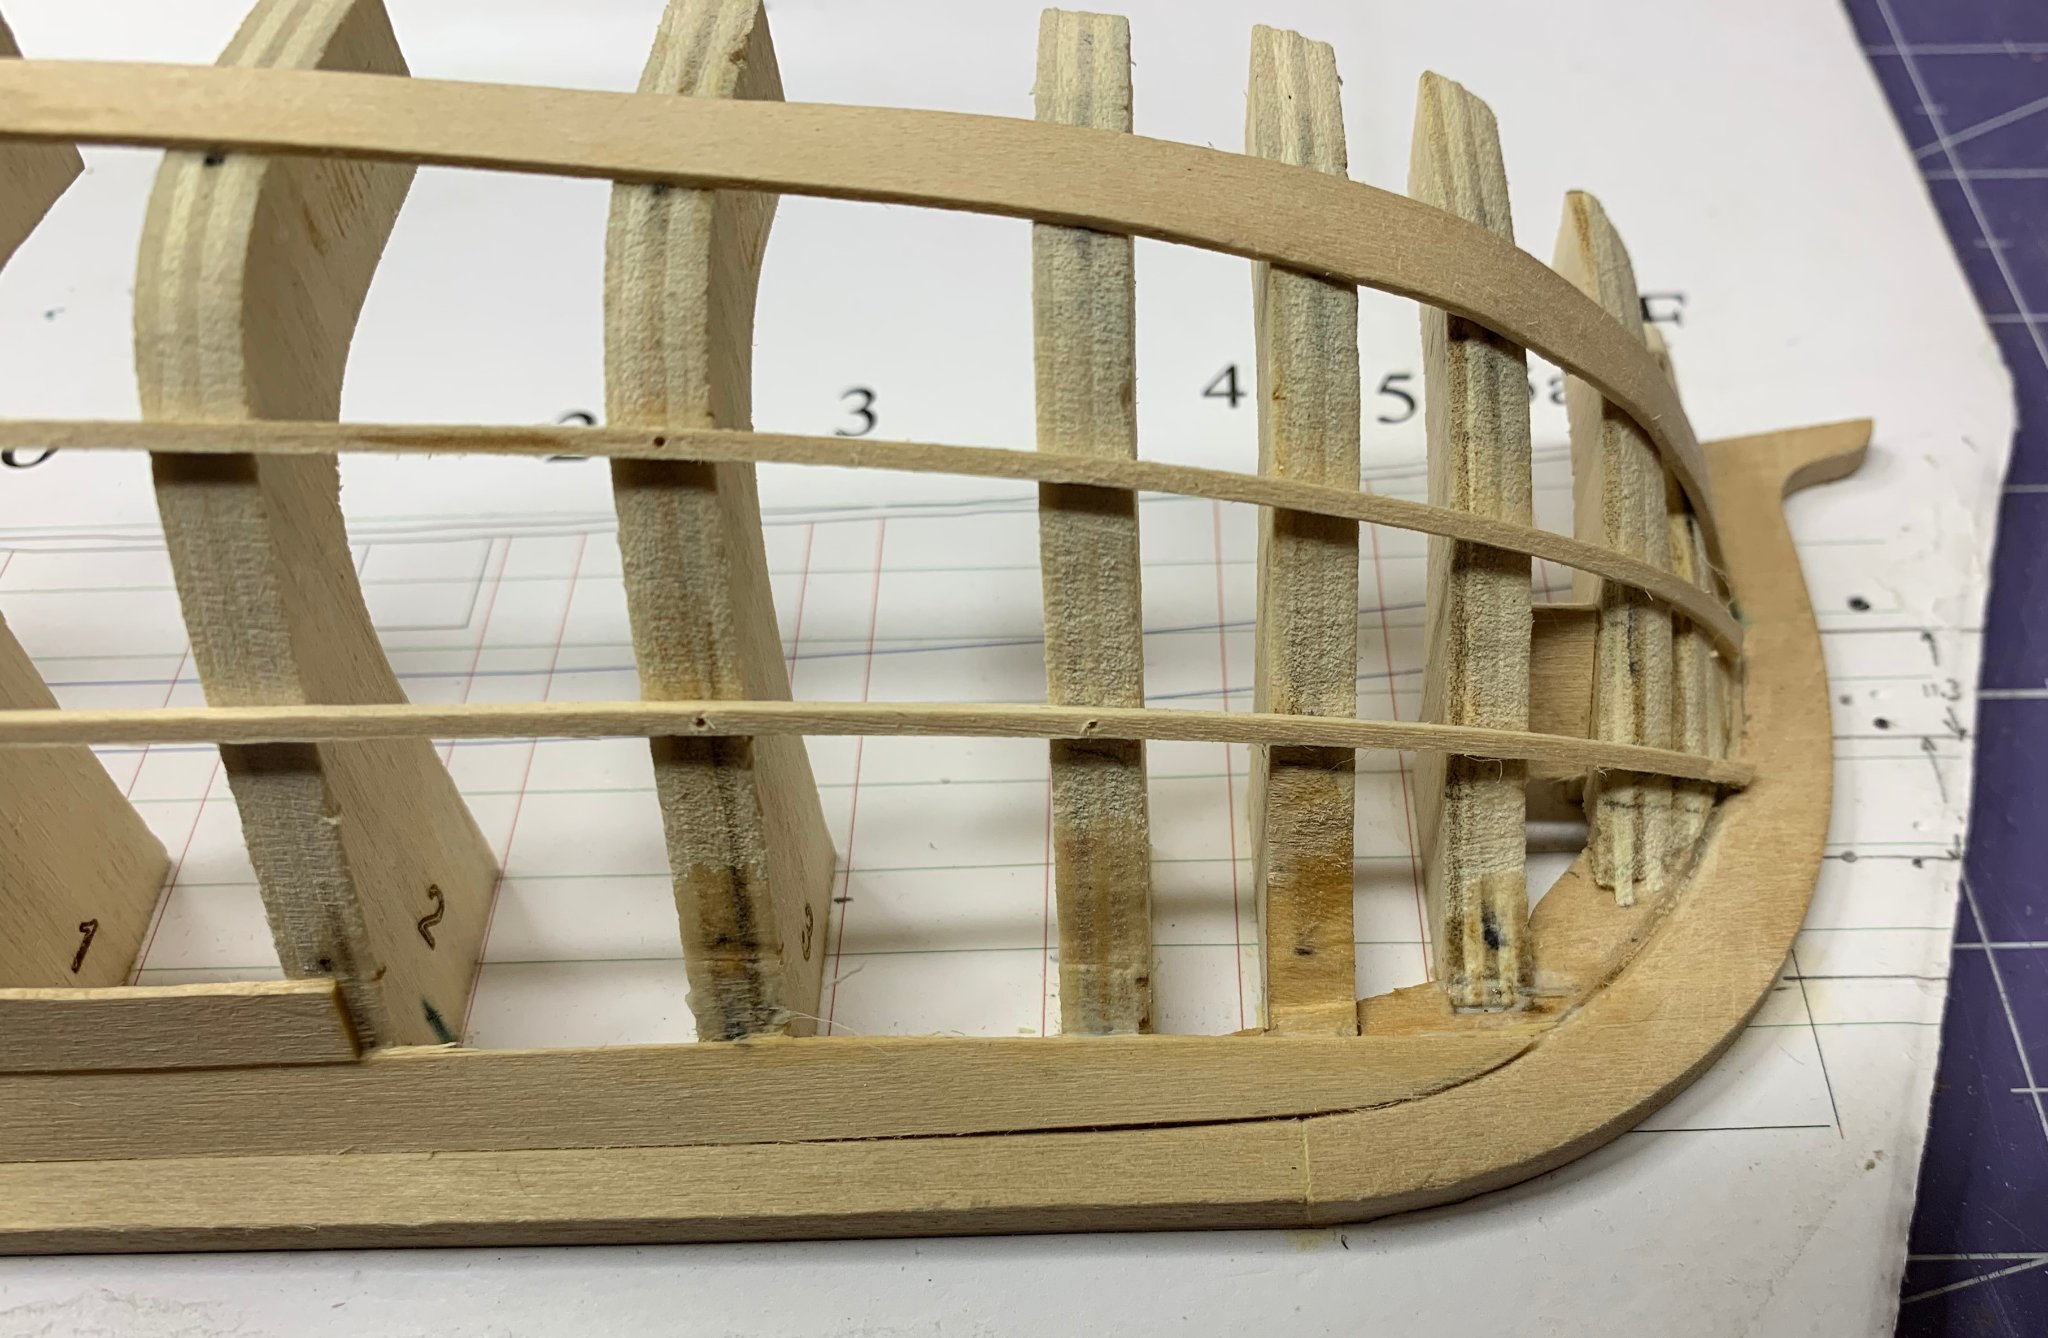
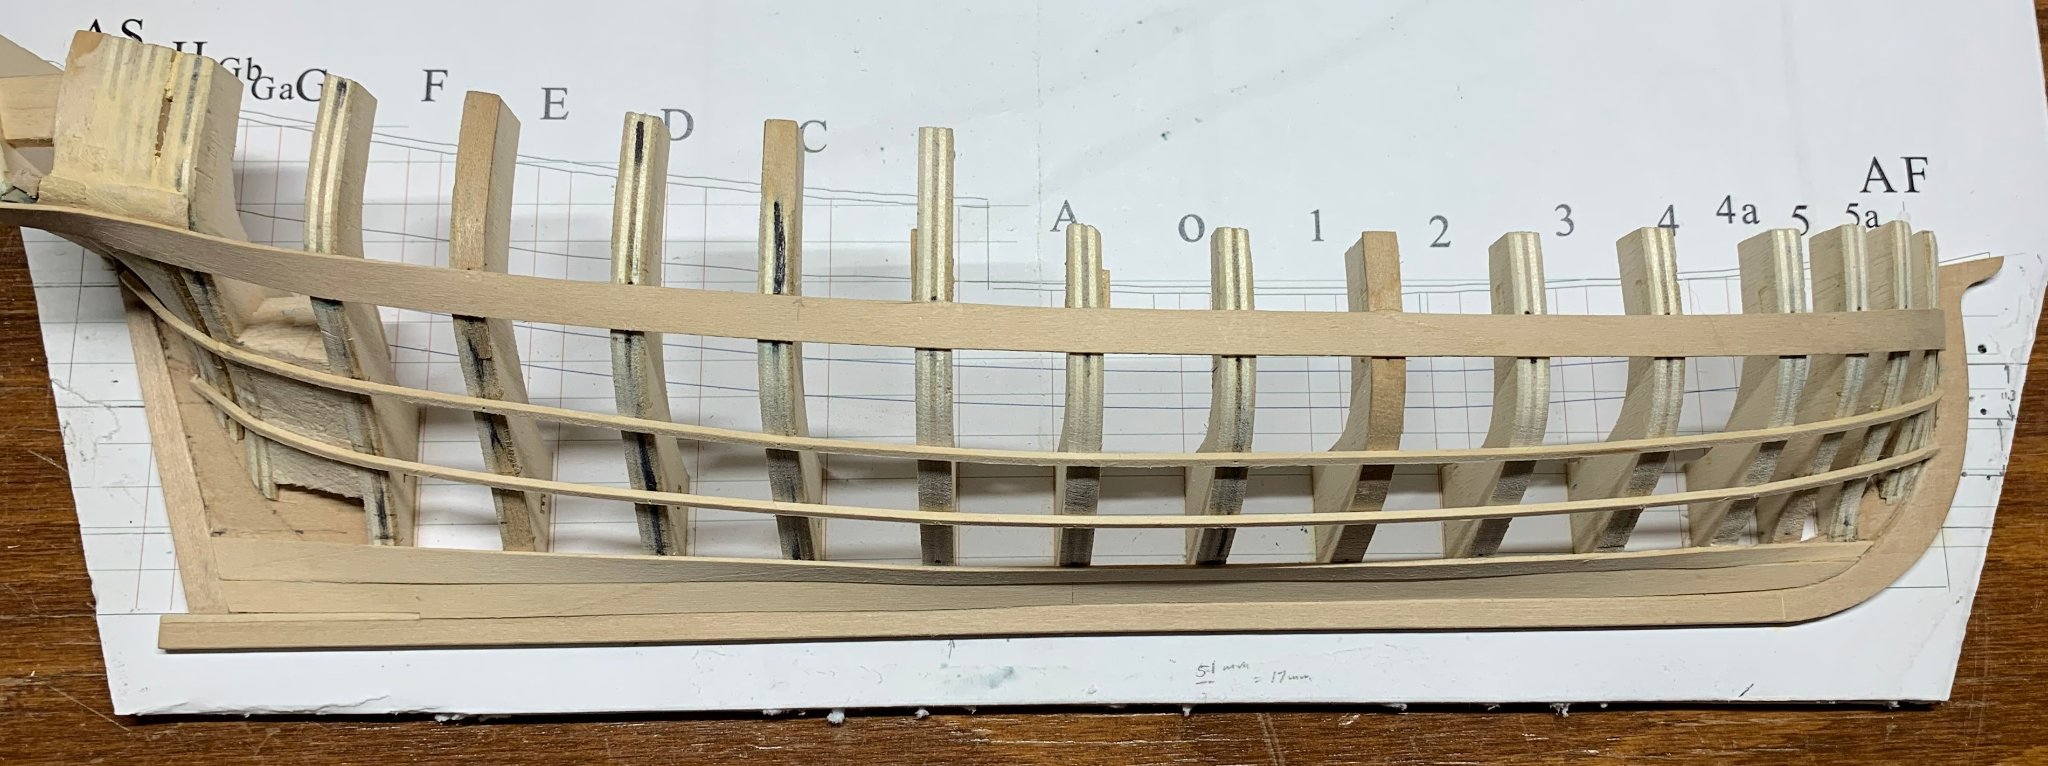
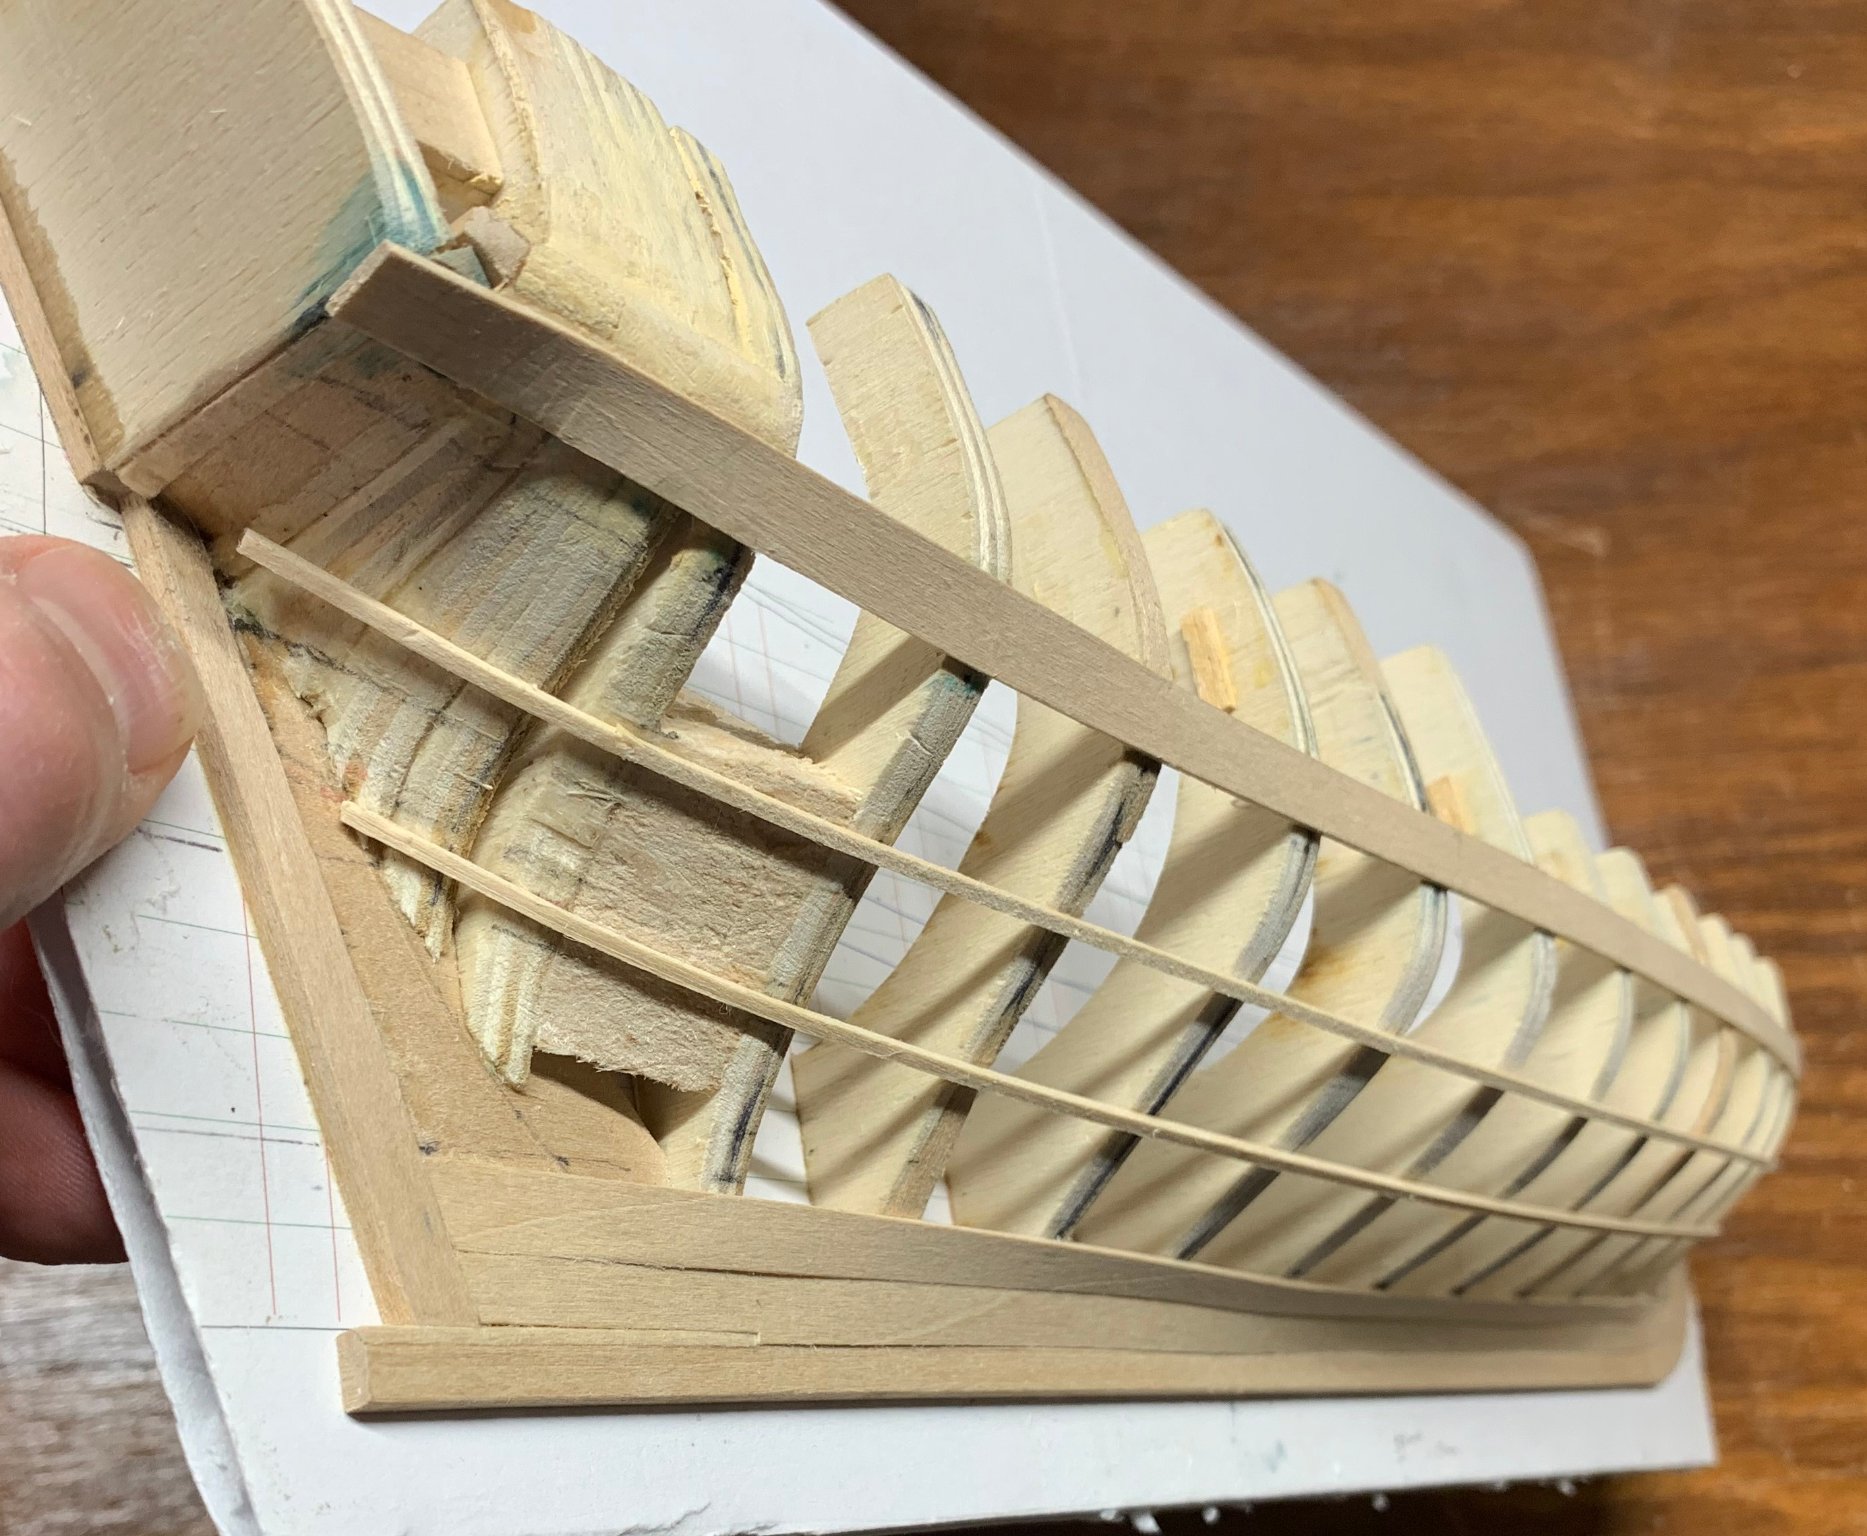
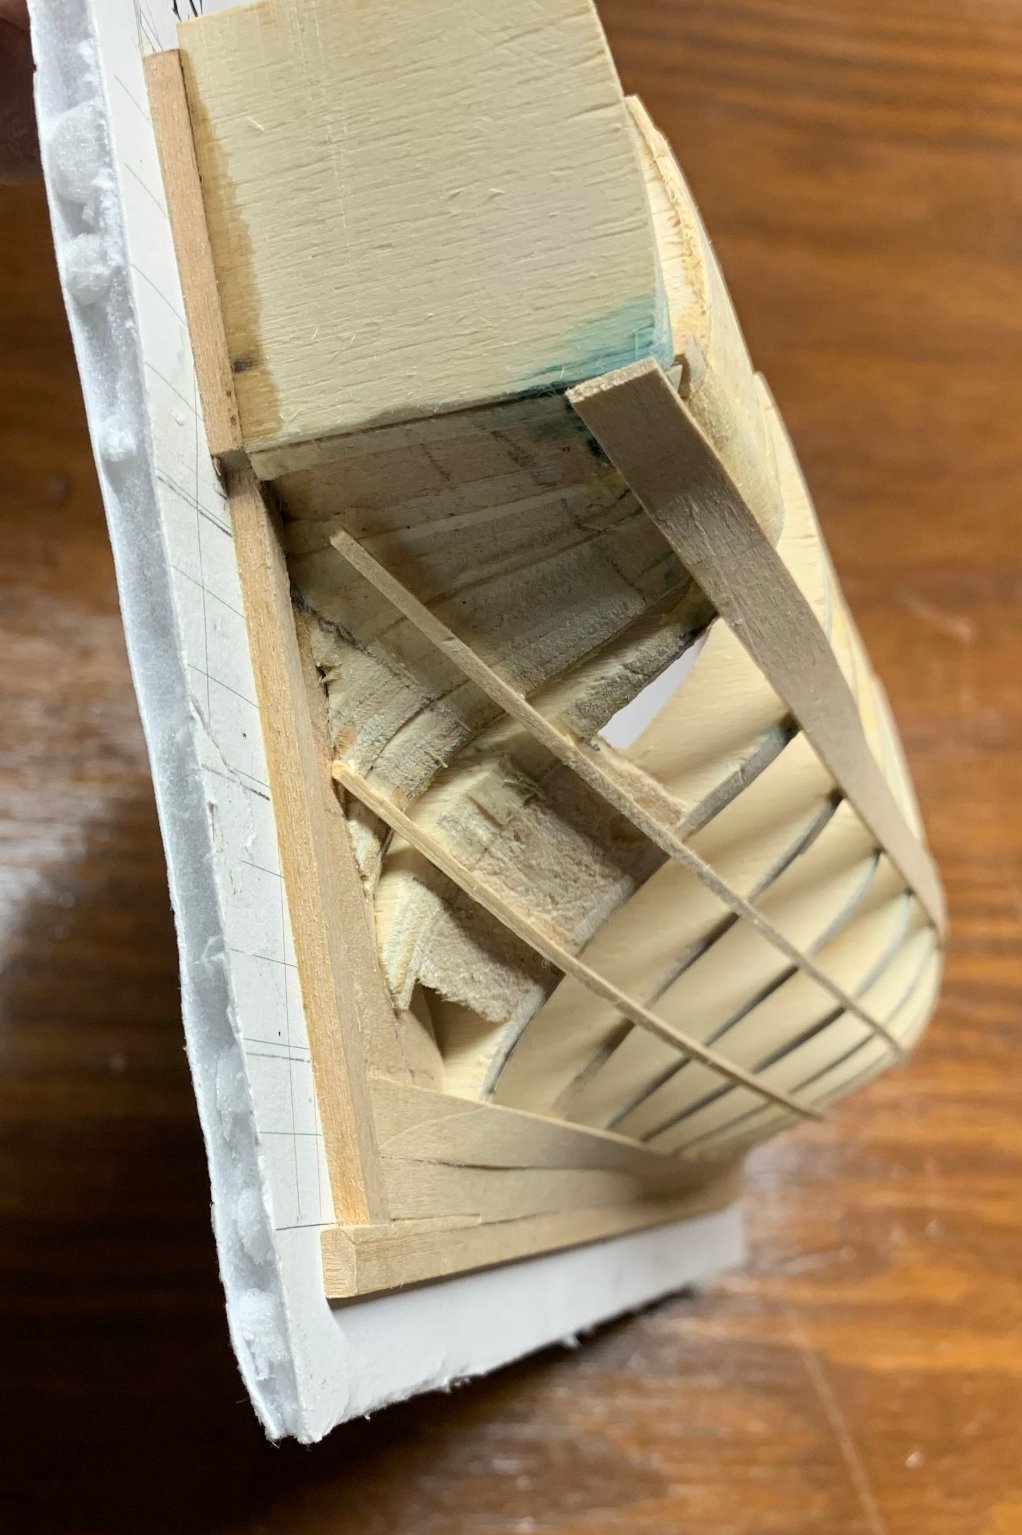
Just a quick progress update today. I've installed the planking battens. I used the technique explained in Planking the Built-Up Ship Model. That book recommends using 1/16" wooden battens rather than the string battens Toni recommended. Since I'd tried the strings before and had a tough time getting them to stay where I put them, I decided to pull some 1/16" strip wood out of my wood pile and see how they would work. I like the results. I tacked them to the frames with the smallest brads I had, which kept them in place. I wetted them slightly to get them to bend around the bow and just moved them around until I got a "pleasing run of planking." I'm happy with the results, but let me know if I shouldn't be!


I struggled with the broad strake. Once I had it installed, I had to do some trimming on the upper edge to get a clean line, fore and aft. And you can seem in the bow, that I had a little splitting happen. It's a lot more noticeable in this photo than it is on the model itself and will be easily fixed up. I'm working hard to minimize the amount of "fixing up" I have to do. I haven't done any sanding at all on what I have in place so far. That'll wait until everything's installed.
Dan
-
It's been almost nine months since I posted anything to this build log. Frankly, I was so frustrated with this project that I put it aside. I've since finished another model and decided to take another look at the half hull project.
It hasn't gotten better with age. Just look at this thing...
This was my second attempt!
And it wasn't like it was just the wale that needed work. The object here is to create a "pleasing run of planking." I hadn't created that. I'd created a chaotic mess.
Kinks that I doubted I could work out around the bow. Uneven plank widths in the stern. Wavy lines. I was really discouraged and just didn't want to put more work into something that was clearly not going turn into something of which I might be proud.
So I trashed it.
Well, not completely.
I just removed all the planking. I'd used white glue, so a little water softened up the joints. Then I removed any excess glue with a damp cloth. Then I started fairing the hull again, being even more meticulous about the bow and stern.
I found that I'd sanded a little too much off the aft frames. The instructions say not to do this and I tried to follow them, but I couldn't figure it out. Turns out, the stern is a lot more boxy than I thought it was. Coming to that conclusion showed me where my errors were and I corrected them. The forward-most frame was a little too short, so I extended it. I removed the spacers so I could properly mark the wales without going through all kinds of gyrations with my square. I copied a technique shown in one of the other build logs where the measurements are punched into the frames. One of the problems I had was with smudged pencil marks, particularly in the bow. This technique solves the problem.
I added a little more filler in the stern to give a better gluing surface for the stealer.
I'd run out of planking material building what I'd already built, so I went off to Hobby Lobby to get more 1/32" planking material.
I also re-read Planking the Built-Up Ship Model.
I think, for this re-build, I'm going to use some of the techniques described in that book, particularly with regard to laying out the planking. I have a pair of proportional dividers, not the expensive ones used by draftsmen of old, but inexpensive ones uses by artists, with set proportions. I think that's going to make laying out the runs of planks easier and more accurate.
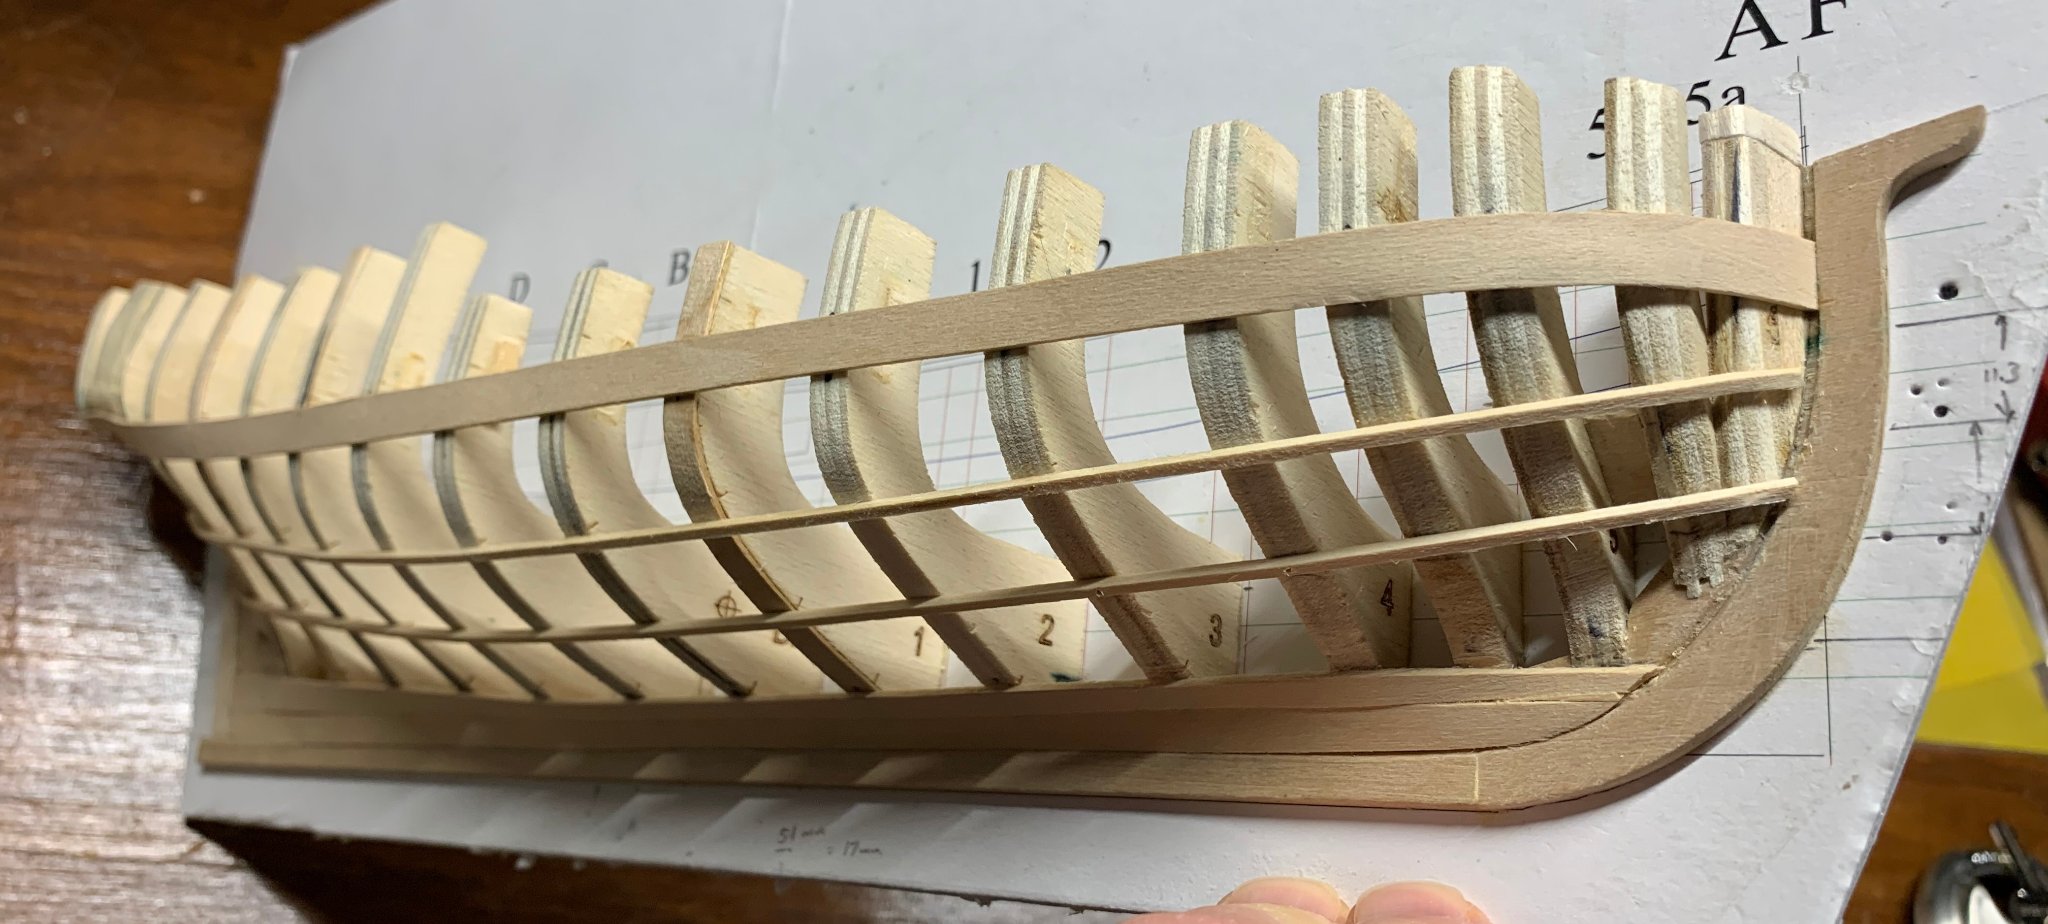
So I'm back in the saddle again, as the old cowboy song says. The frame is fair. The wale is installed. Off once again to the garboard strake.
Dan
- RGR III, VTHokiEE, Ryland Craze and 2 others
-
5
-
On 5/14/2021 at 9:56 AM, alross2 said:
OK, bottom color on this AM. After peeling away all of the masking tape, I found some underbleed on the deck, but that's easily removed.
How do you remove underbleed like that? I've messed this up so many times, I find ways to avoid situation where it might happen.
Dan
- Canute, mtaylor and thibaultron
-
3
-
Thanks, everyone!
Nic, I will definitely be taking you up on your offer. I just have to figure out what kit I want to build. That's a tough choice.
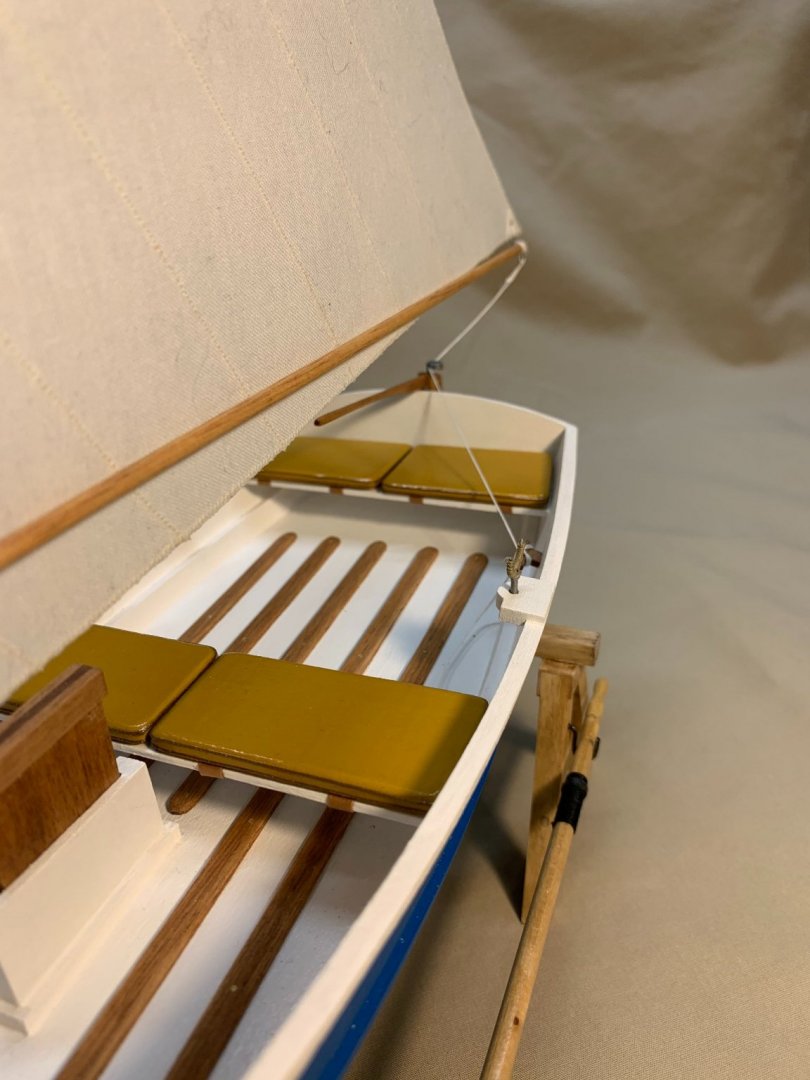
Like Kurt said, the model did win a Gold Award in the Wisconsin Maritime Museum Annual Model Ships and Boats Contest, which was really a thrill. I thoroughly enjoyed building this model and did it to 1) relieve my COVID fatigue and 2) learn how to make proper sails. Mission Accomplished, I think, on those two points.
I appreciate the comments about the sawhorses. Necessity is the mother of invention and I thought a good long time about how to best display the model. Glad you liked the result.
Dan
- Matt D, gsdpic and Ryland Craze
-
3


Fridericiana Alexandrina Navis, 1st century Roman Danube River boat
in Wood ship model kits
Posted
Quick update on what has kind of turned into a project. (I was just interested in this before, but now things are moving along.)
First, Interlibrary Loan was able to get me a copy of the Roland Bockius book. Wow. Just ... wow. Thanks for that recommendation! It is incredibly detailed (and in German, which means I can't read it) and it includes seven sheets of plans. I took those over to my local copy shop and made myself a set of plans. (By the way, I know the University of Chicago -- which is very close to me -- has a copy, but the copy I got was from Emory University, which is in Atlanta, GA, quite a long way from me. Hard to understand how these things work, but just glad it did.)
And, second, I heard back from EGEA about the model. The price is 96.99 Euros (the kit plus shipping from Germany to the US) which is $104 today, not unreasonable at all. Since they don't seem to take any kind of electronic transfer like Zelle or PayPal or Venmo, I'll have to find some other way to do it, but that shouldn't be too hard to do.