


dcicero
-
Posts
266 -
Joined
-
Last visited
Content Type
Profiles
Forums
Gallery
Events
Posts posted by dcicero
-
-
The blocks between the bulkheads are very tight and they're identical, port and starboard. I thought that was going to fix the warpage, but no luck. America's deadwood was pretty substantial. The after bulkheads end a long way from the keel. Most of the warpage is there. And it's not warpage in one direction, either. Port and starboard is easy to fix, at least amidships, but there's also warpage from keel to deck and there's no way to really get at that.
I considered cutting a new central former from new plywood and using the existing bulkheads, but, honestly, there isn't that much difference in terms of the amount of work involved, to use the Chappelle plans as the template for the new former. The kit former is pretty close, but it's not perfect, so why duplicate the "pretty close" and have to rework it? I also got the HAMMS plans, but there's no scale indicated on those, so I'd have to do a little math to get them to the same scale as Chappelle's work.
And there are a couple of other things I'm thinking about. I've been considering learning the CAD skills needed to create these model components. Might be time to take that on. And my local library has a "Maker's Space" that has a laser cutter. If I can provide them with the drawings, they might be able to cut the parts for me. I need to do a little research on that, but that, it seems to me, would be an idea solution.
Dan
-
Glad you asked, Dave. The warp in the central former has compelled me to take another approach to this model.
Bearding Line, Rabbet and Bulkheads
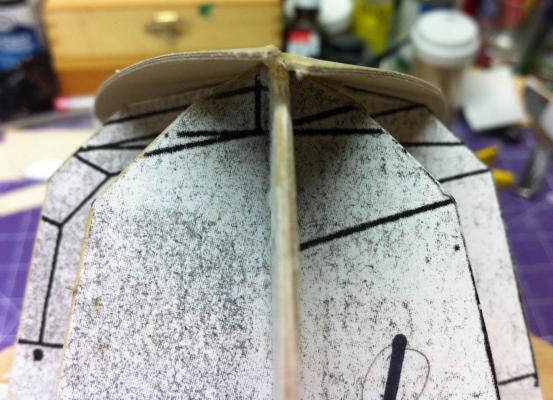
With my building board complete, it was time to start on the bulkheads and the inner structure of the model. I cut a bearding line and a rabbet to accept the garboard strake. On this model, the stern post, false keel and stem posts are all integral to the central former. They're not separate parts as on other models. This means getting the bearding line and rabbet cut has to be done carefully. The kit instructions say the second layer of planking is to be installed over these timbers -- which makes sense -- but if you don't locate them before the first planking goes on, that'd be difficult to do later.
Here's the bearding line laid out.
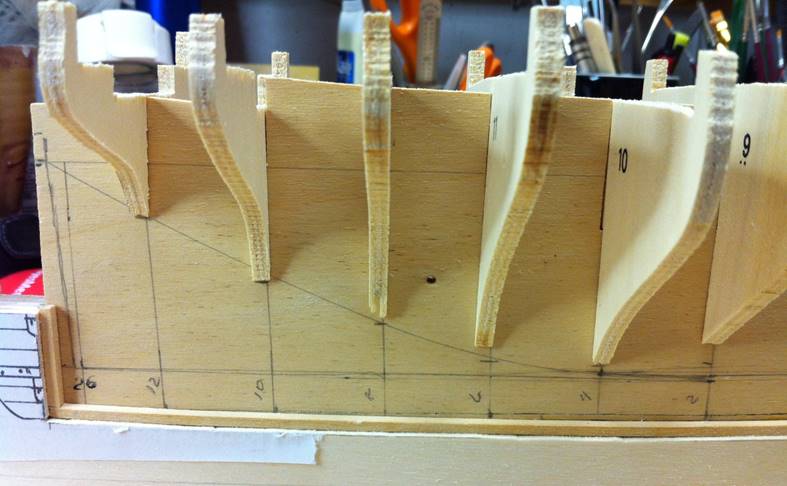
I used my Dremel to carve down to the stern post and keel. I neglected to take a picture of that, but the intent is to give a gentle taper into which the planking fits.
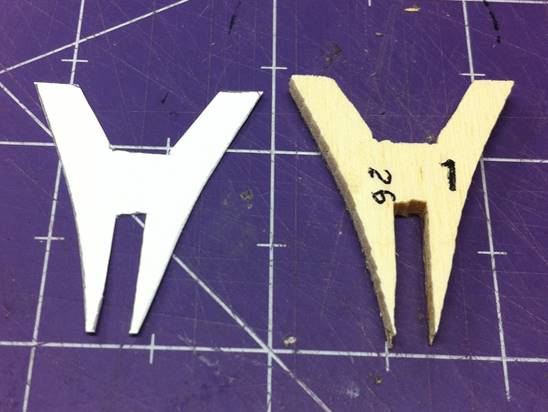
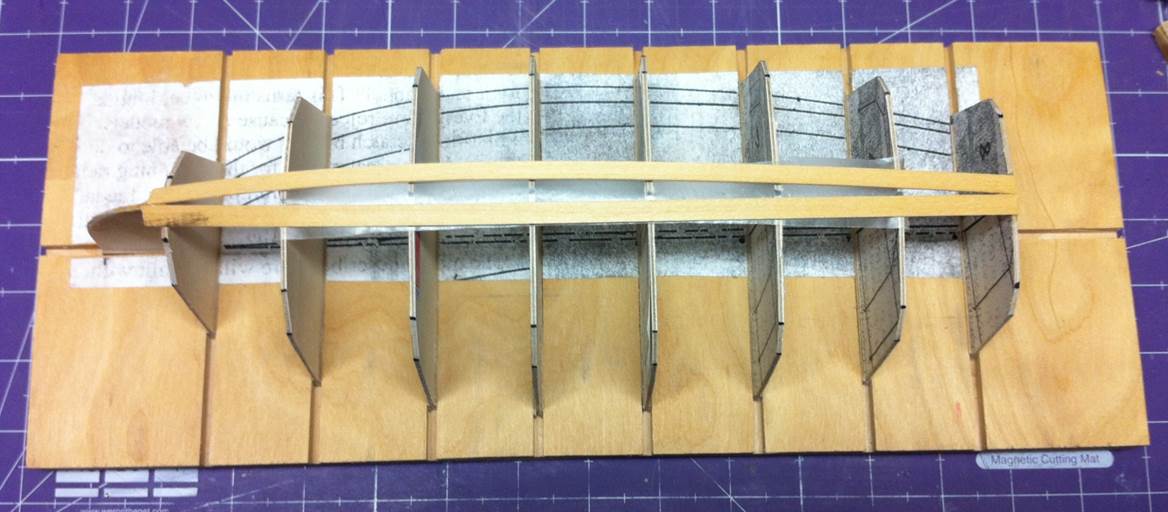
Then it was time to test all the bulkheads for trueness. Honestly, I hate this job. Boring. Time-consuming. Tedious. And most of the time, the frames are pretty close to alright. Frank Mastini's Ship Modeling Simplified -- which I recommend -- makes a big deal out of this. It's good advice and, although it wasn't much fun, I did it.
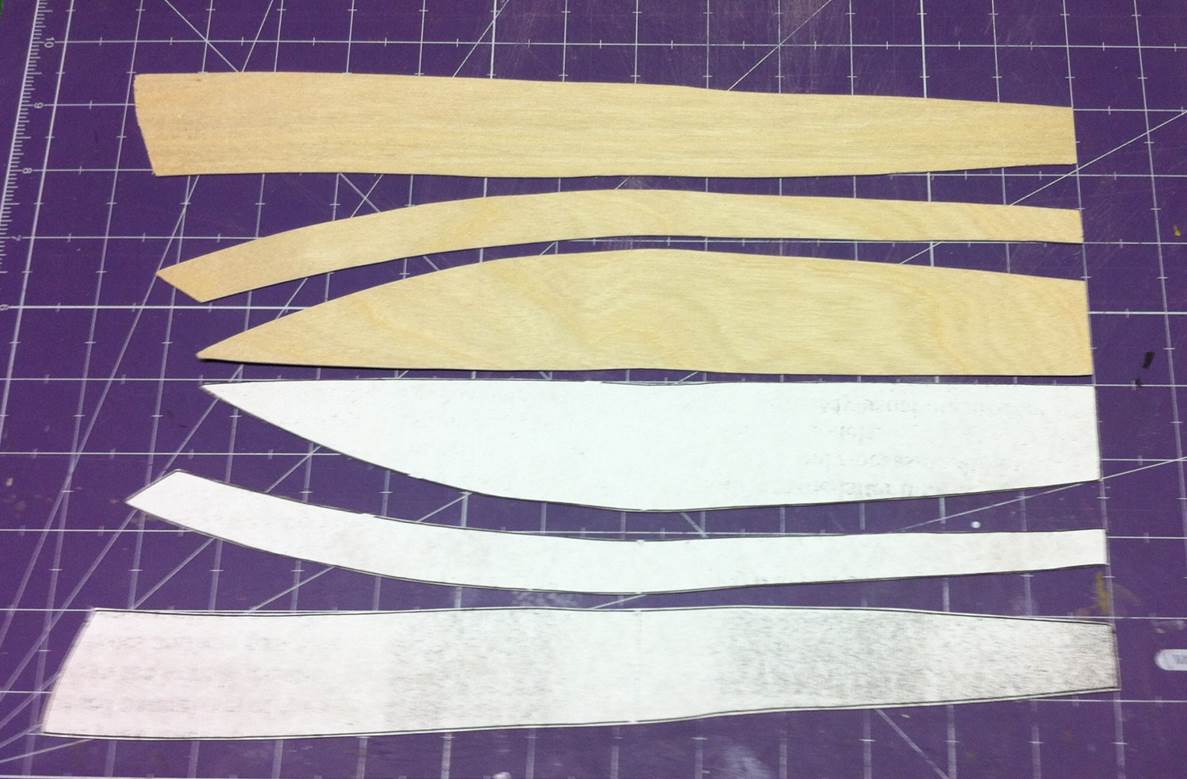
Mastini's procedure is to draw out an outline, cut it out, fold it in half and locate the centerline and then shim or cut away as needed to produce a true bulkhead.
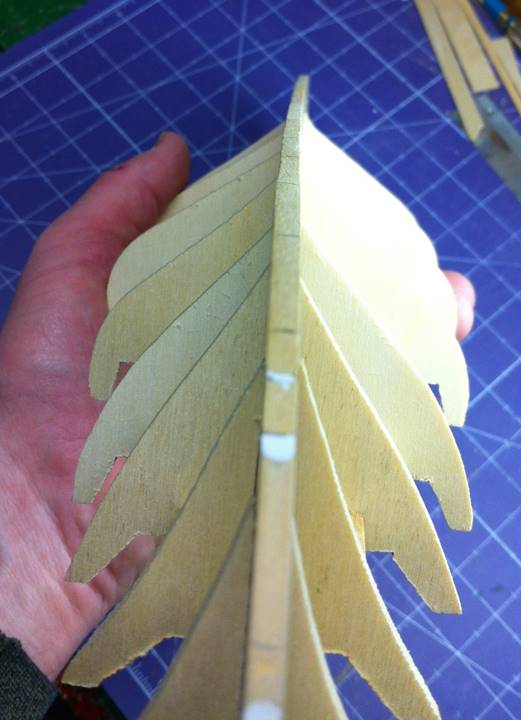
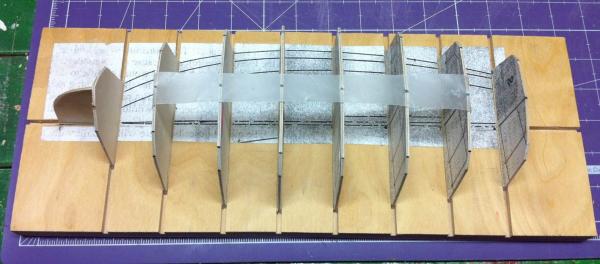
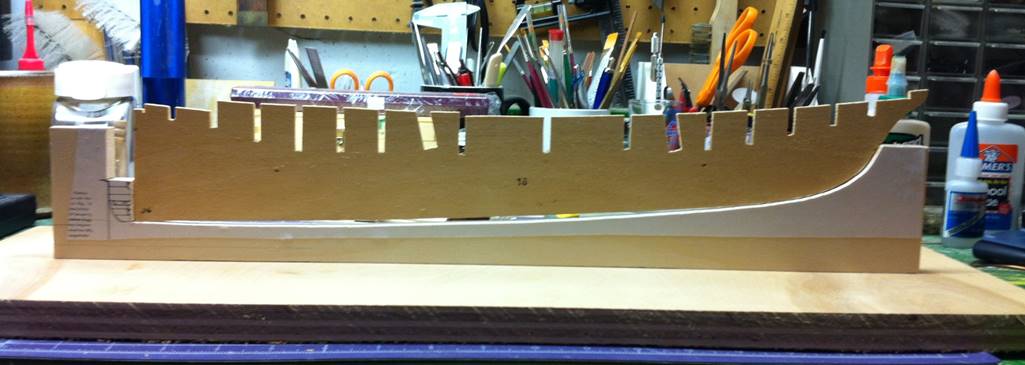
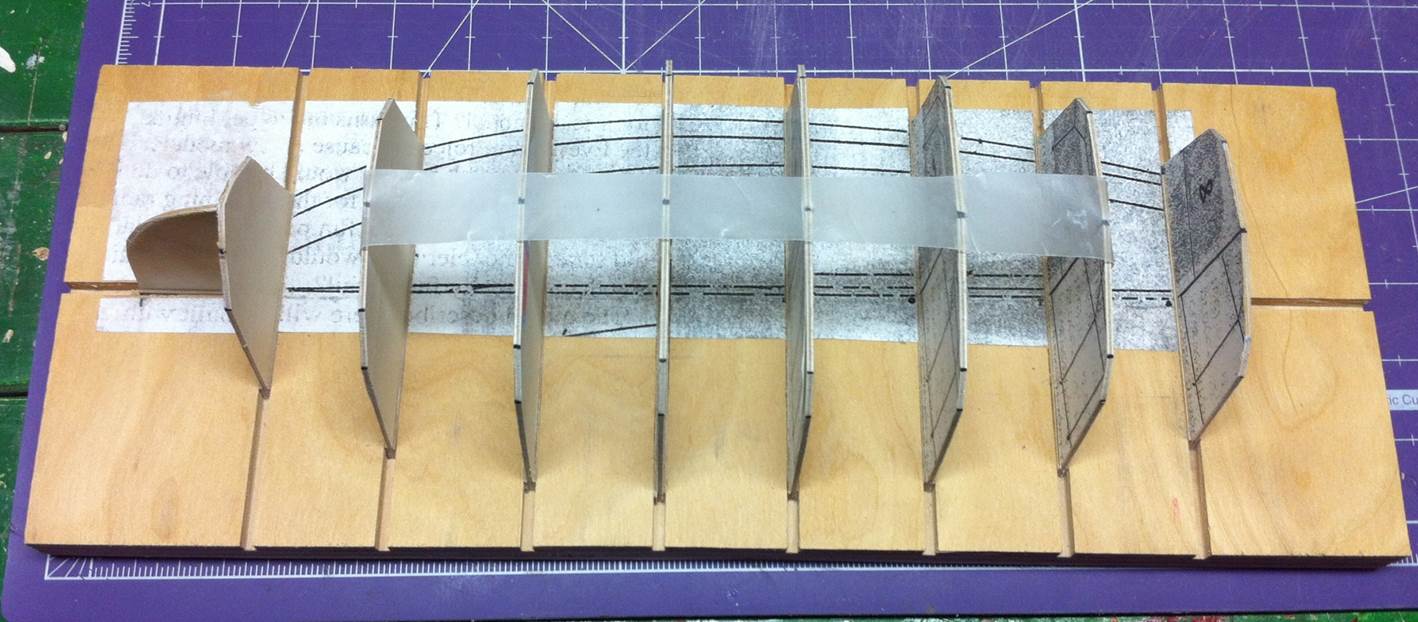
I installed them.
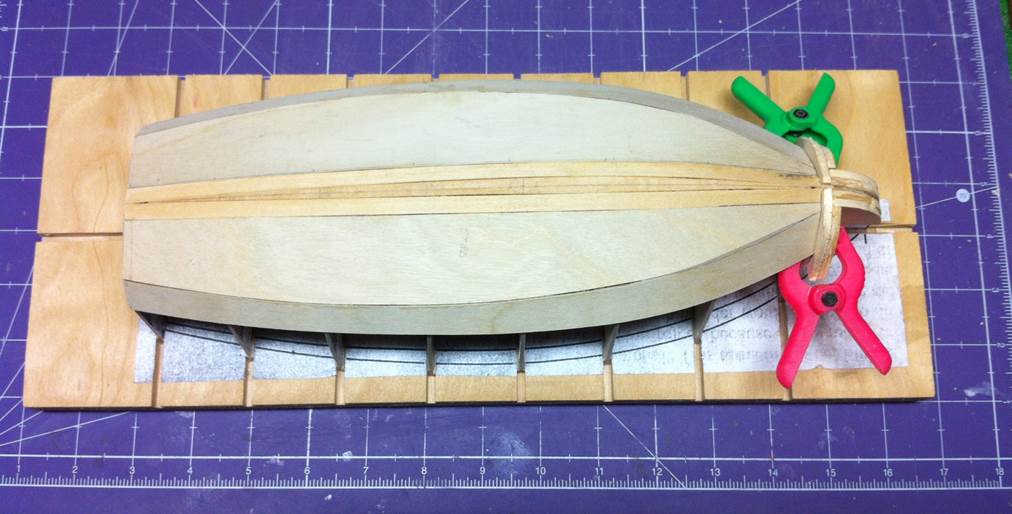
Warped Keel
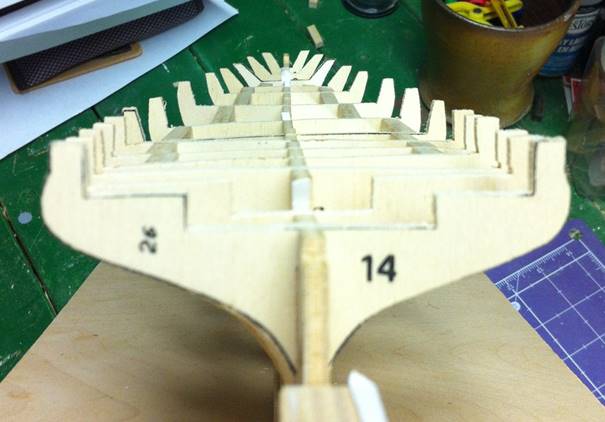
To get the warp out of the keel I installed some braces betwen the frames . The braces were equal in length and should have, I thought, brought the keel into true. (Here's a picture of some of the braces in place.)

But it didn't. Even with all that bracing, the keel was still warped.
At that point, I figured it was going to be more work to fix this than to simply make a new one and, as long as I was at it, I might as well make some new bulkheads too.
This has turned into a scratch building project now.
Dan
-
What kind of a vise is that, Patrick? I think I need one of those!
Dan
- thibaultron and Elijah
-
 2
2
-
Just wondering...
Is the Clay Feldman scratch building practicum on the brig Lexington advertised in Ships in Scale any different from the eight articles in the magazine published back in 2005?
I have those old magazines -- both the digital and hard copies -- and was wondering if there's any difference.
Dan
-
The Building Board
Making a proper building board was the first order of business. I had some 3/4" Baltic Birch plywood in the garage, which is really nice stuff. I cut a piece on my table saw and drew a centerline on it.
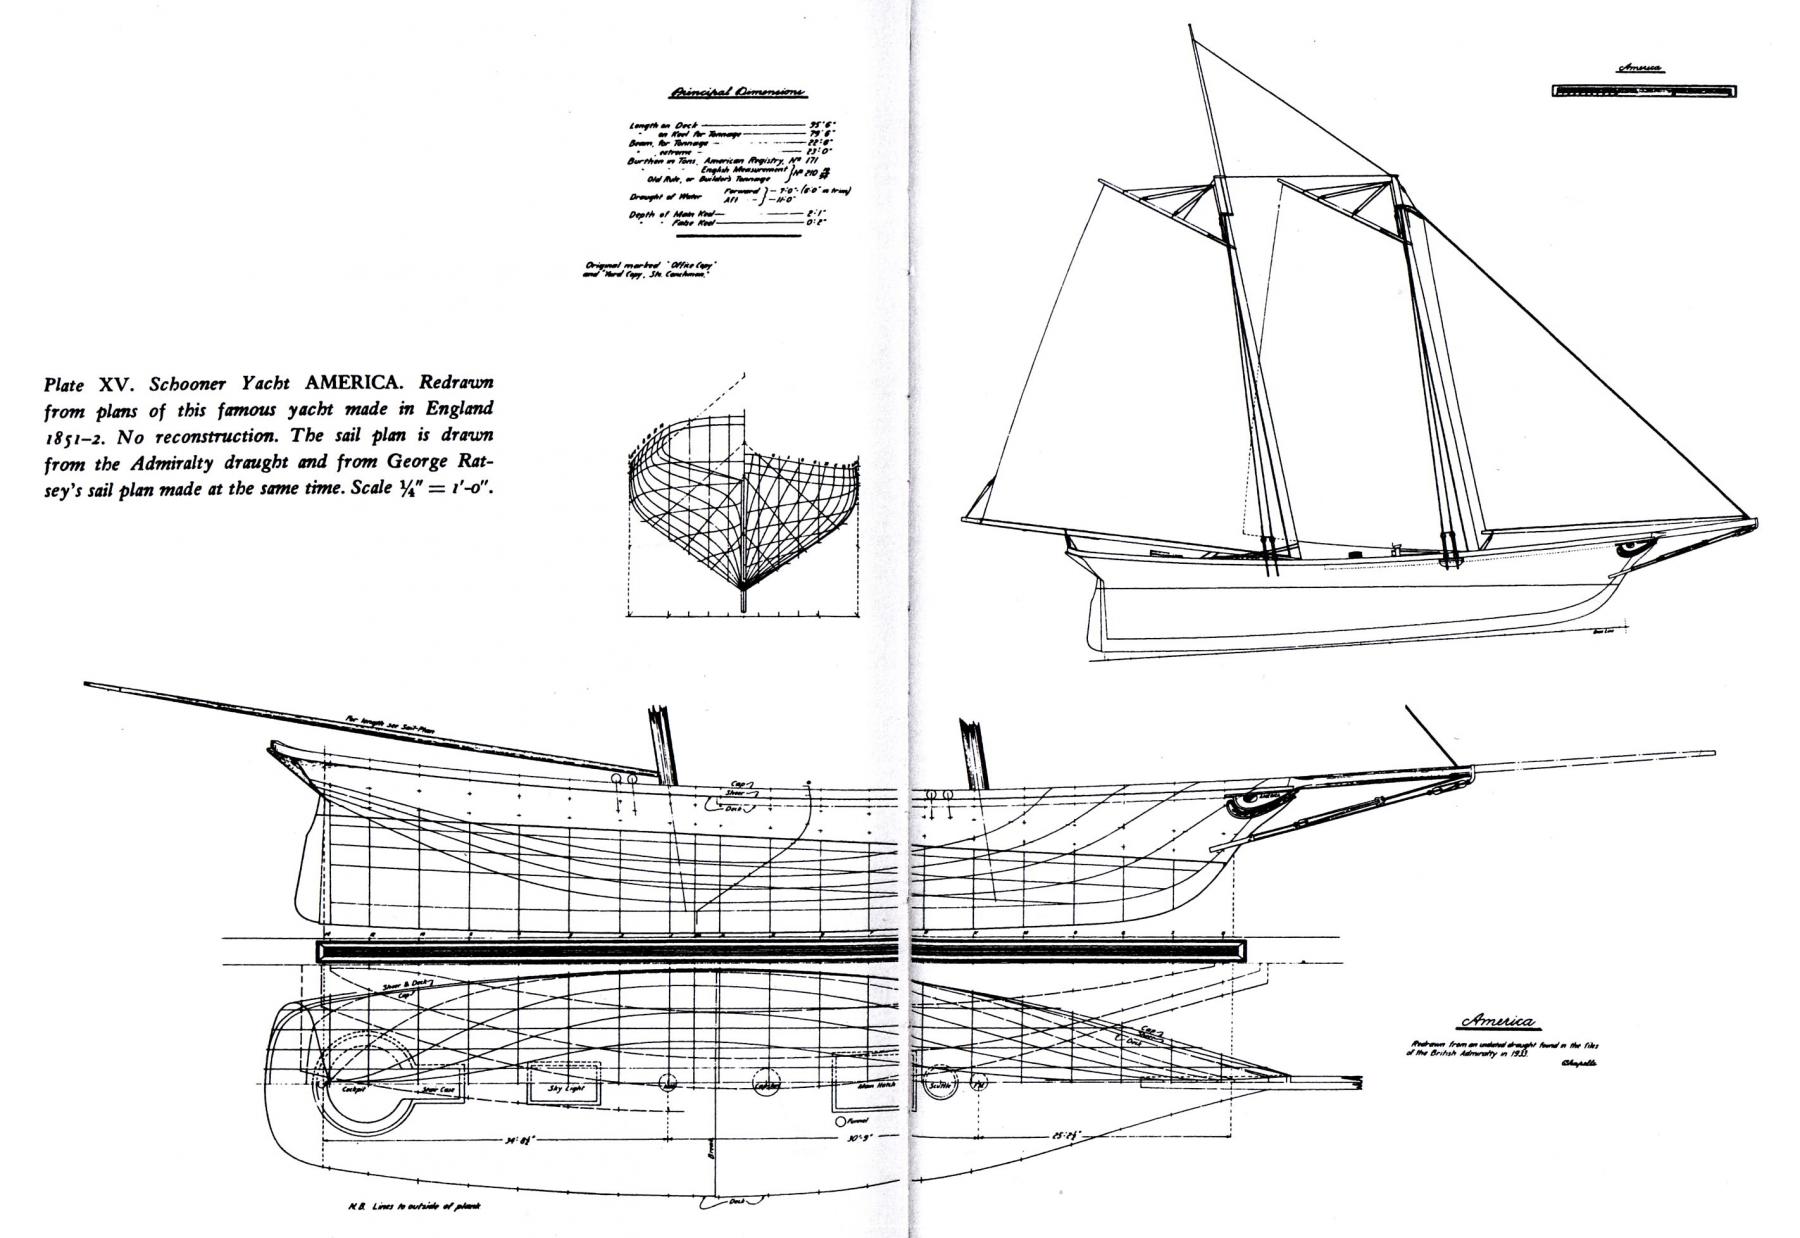
I've learned through experience and from listening to other modelers that trusting the documentation -- particularly in European kits -- is a bad plan. I looked at the only reference I had for the America, my 1935 copy of Howard I. Chappelle's The History of American Sailing Ships, which includes a few drawings and a good discussion of the vessel.
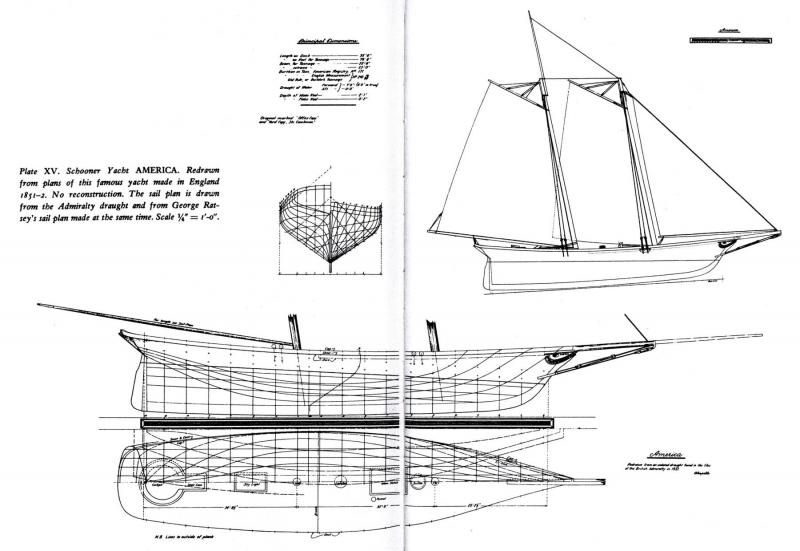
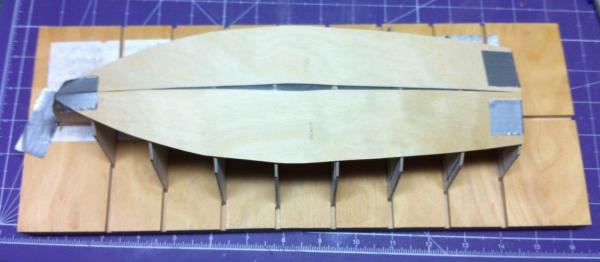
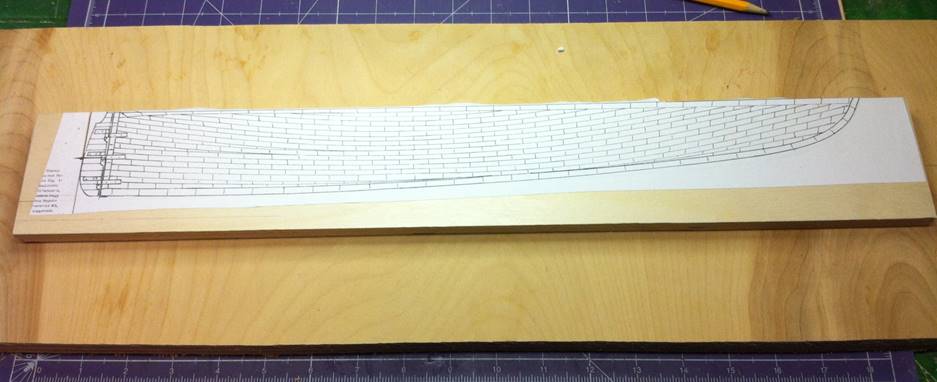
From the drawing I learned that she drew 6' forward and 11' aft. To keep the waterline level during construction, the model would have to sit on an incline. (At the time, I figured out the angle; I think it was 3°.) But then I looked more closely at the plans. This was not a case of simply cutting and incline. The keel sweeps gently from stern to stem. I would have to cut that curve to have the model sit on the building board.
That's what I did. I copied the plans and pasted them -- using spray adhesive -- to a piece of plywood...
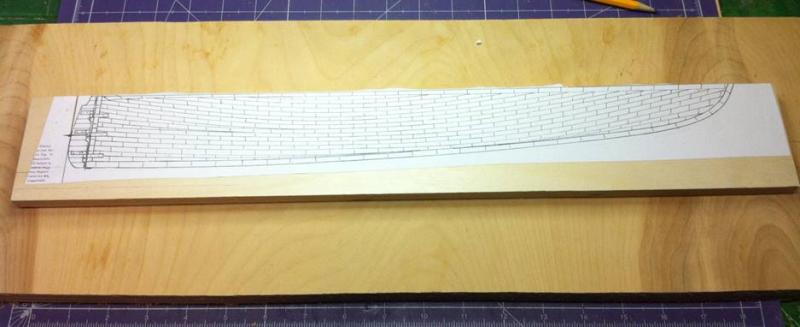
... and then cut the curve on my bandsaw. Here's the result.

I mounted the keel support on the building board. I left the rudder (or part of it) in place. The central former includes the stern post, but not the rudder, so when the time comes to swing the rudder, I'll remove that little piece. In the meantime, that's where the stern post will sit.
Once that was done, I installed some thin, square stock on either side of the central former. One problem with this kit: everything is warped. The central former is significantly out of true and I could tell right away it was going to take some work to get it back to where it needs to be. I know that, as I build, I'll need to move, and eventually remove, those strips, but everything's put together with white glue, so that can be easily done.

Note the daylight between the central former and the keel support. (The photo was taken before the square stock was installed.) This is a discrepancy between the plans and the kit components.
More to come on that.
Dan
- Nirvana and Mirabell61
-
2
-
An Eight Dollar Model
The footy model I've been puttering around with has been put on the shelf for a little while. I've just lost enthusiasm for the project. I'll probably get back to it at some point, though.
In September, I took the kids to a model and toy show at the DuPage County Fairgrounds (near Chicago). This event happens twice a year and the kids always find things there: action figures, models, other assorted plastic stuff... There are almost never wooden ship models at this show. It's all about plastic, and mostly cars and aircraft.
So I was walking down an aisle just browsing, trying to keep the kids in sight and saw this...
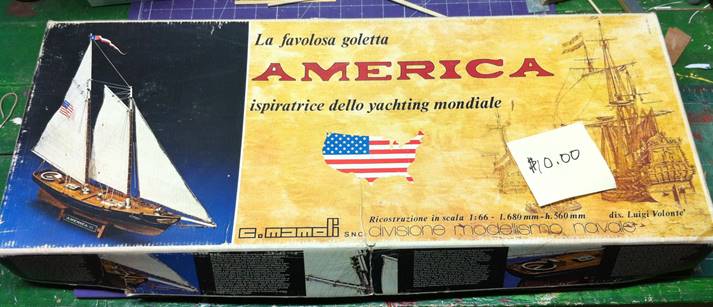
The guy in the booth, before I could say anything, said, "Give me eight bucks and it's yours."
I looked in the box. Everything appeared to be there, including some tools and a book. The wood alone was worth eight bucks. I bought it.
When I got home, I found that, indeed, everything was there and the plans looked really good. I decided to try to build the model instead of just scavenge model wood out of it. Although I'd never considered building a model of the America, this kit has piqued my interest.
Dan
-
Hello! And thanks for the excellent build log!
I'm starting on the Mamoli America. I have the building board done and I've shimmed up the central former to match the plans.
You seemed to have solved a problem I'm trying to figure out.
Back in September, you posted a picture showing the keel marked out.
How did you determine that width?
Initially, I was wondering if the false keel and stern post were actually part of the central former or something I would have to add later. Once I put the former up against the plans -- the whole ship plan, showing the coppering on the hull, not the outline of the central former -- it was clear that the keel and stern post were integrated into the central former.
That, of course, meant that I would have to take that into account when carving the former away at the bearding line and establishing the groove along the keel into which the planking will fit.
Thing is, I couldn't figure out how wide to make that keel. How did you to it, if you don't mind my asking?
Dan
- mtaylor and skipper1947
-
2
-
How about The World of Model Ships and Boats by Guy Williams. It's not technical and, although there are a lot of photos, it's not a coffee table book. It's really a history of models, why they were built and what we can learn from them.
Dan
- US-SteamNavy, Canute, mtaylor and 1 other
-
4
-
I think, as LA Don has said, that the transitional and early steam era is very interesting and would like to see some kits from that time. Eighteenth century French and British warships are great, but there are plenty of those kits out there.Name of ship .....or typeHow about the Great Eastern, the steamship Arctic, the Civil War era double-enders like USS Sassacus? How about some ships with paddlewheels or smokestacks and full sail rigs? How about ships like the Dutch ram turret warship Schorpioen. (There were a few US ships similar to Schorpioen...)Country of origin - date:I'm partial to American vessels, but that's not hard-and-fast.Material choices and what style...POB or POF or Solid hull ETC:Not a huge issue for me, but I like plank on bulkhead, wood construction.Price range you would expect to pay...whether realistic or not:I can swing $100 to $200 for a kit.How long do you prefer a build to last from a kit. Will you want to spend 6 months for a small kit or 6 years for that 100 gun French frigate from 1820?I build slowly. I see some complex kits -- like USS Syren, which I own -- as a Decade in a Box. I'll get to it eventually, but it's going to be a while. I prefer something that can be built in eighteen months to two years.Advanced or beginner......something in-between?Go ahead. Make it advanced. I'll figure it out.Dan
-
Thanks, Kurt! I'm going to use your masking tape tip. That'll protect the paint as much as possible.
The article recommends stiffening the sides of the hull too and I have some stock that should work for that. Good tip on beveling the edges too. Hadn't thought of that...
Dan
-
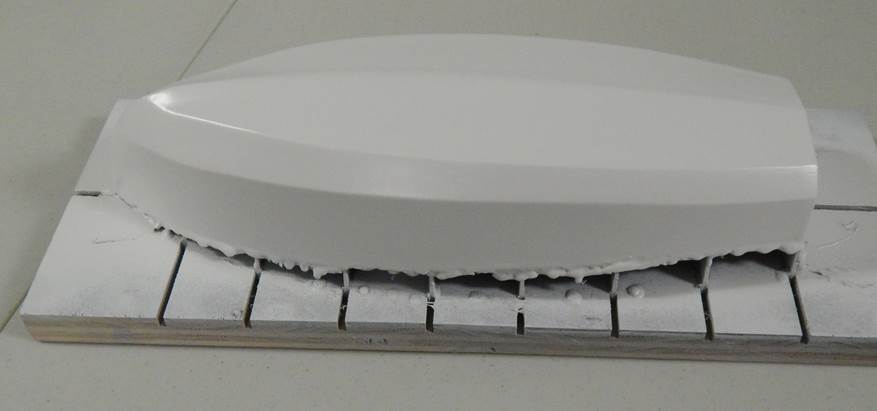
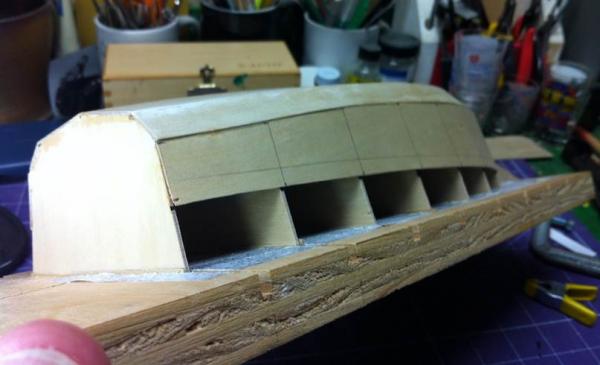
I finished off the bulkheads last night. Here they are!
And then I popped the hull off the formers. You can see a little bit of the resin that made its way between the hull sections, but the waxed paper I'd put on the formers kept the hull from sticking to them.
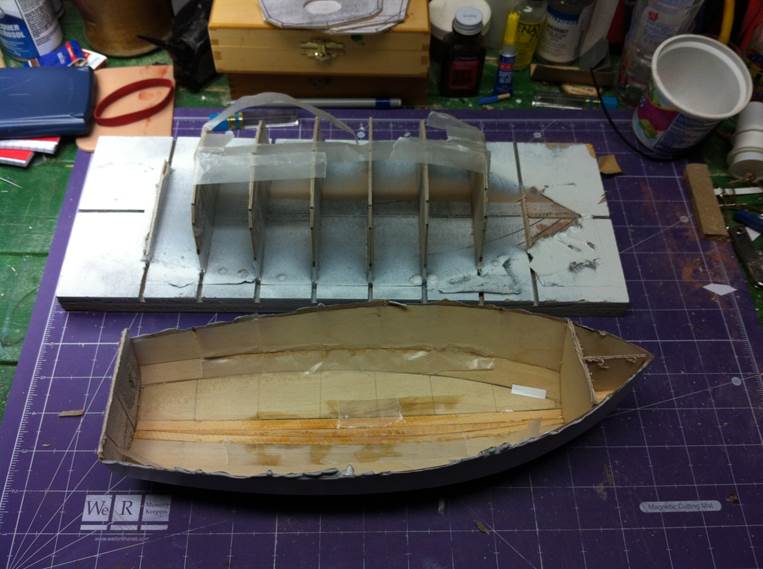
The edges were pretty rough because there was some resin globbed up there. It was easily sanded off with my little belt sander. I made sure to wear a dust mask while doing this as there are glass fibers in that resin. Don't want to be breathing that...
Here's the result. (The transom is still high. More on that below.)
As you can see in prior photos, the bow was right down close to the building board. That gave me very little room for a saw blade to cut it off the formers. I ended up clamping the building board in my machinist's vice and cutting the hull off with the thinnest blade I had: a hacksaw. It worked just fine. The stern was easily taken off with the proper tool: a coping saw.
From the article: "Note the deck camber, just over 1/8" midships, which needs to be applied to these bulkheads and also to the existing transom and to bulkhead #1." I'm going to have no problems with the transom or the bulkheads I just cut, but, because the hull was so tight against the building board forward, I had no choice but to cut the forward bulkheads almost flush with the gunwale. I may have to make a curved piece of plywood with the proper camber and add it to the forward bulkhead to get the right camber there. Need to do some measuring tonight.
I'm also going to need to sand down the sides of the boat a little bit to get rid of some excess resin globs. I tried that a little last night and I doubt that's going to be a big deal. It is going to screw up my super-nice paint job though!
Dan
-
It's been a while since I posted anything about my little footy. I've actually been working on it, but fairing the hull took a lot longer than I anticipated.
I primed the hull with some spray primer I had laying around. That was a bad move...
I used Bondo Glazing and Spot Putty to get rid of any imperfections in the hull, stuff that showed up when it was primed. The problem was that the spot putty took off the primer! (Okay. It's not automotive body work, where you use putty then you prime, but I think the problem would have happened either way. The primer and putty were not compatible. This was easily fixed by using a proper automotive primer.
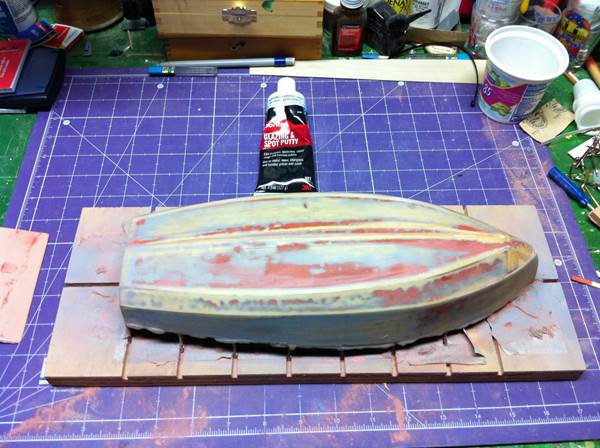
I used several primer coats, finding imperfections each time and correcting them with putty. Then I started putting down some final color (white), again from a spray can. It's Ace Hardware Interior and Exterior Enamel. I'm really pleased with the result. It's smooth and the the finish is tough enough for outdoor use.
And now on to the interior. Clay Feldman recommends leaving the hull on the formers while the bulkheads are fabricated. I did that, but I really want to cut the hull off and see what the interior looks like.
Anyway...
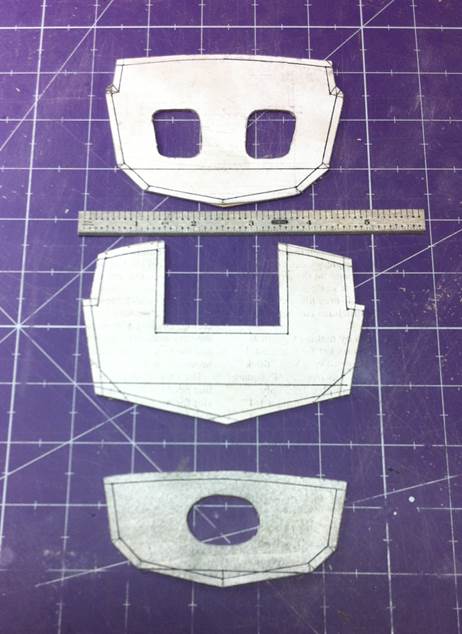
I scaled the diagram in the magazine up to full size. (If I remember right, it was about 123% of the original size.)
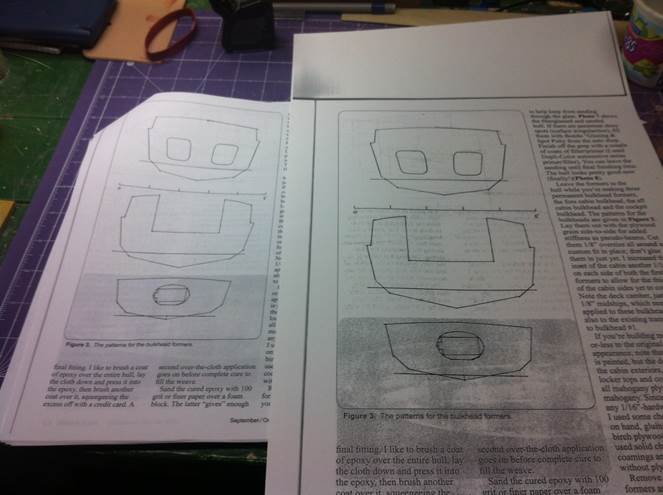
Then I used spray adhesive to attach the plan to 1/16" plywood.
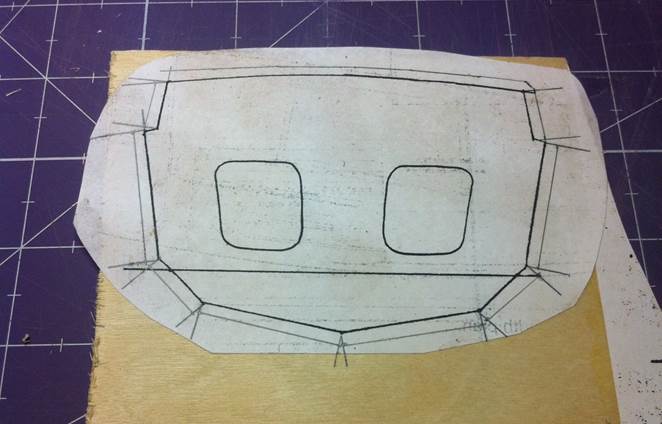
Clay recommends cutting the bulkhead out 1/8" oversized, so I drew an outline 1/8" from the bulkhead lines.
Then I cut the whole thing out with my jigsaw.
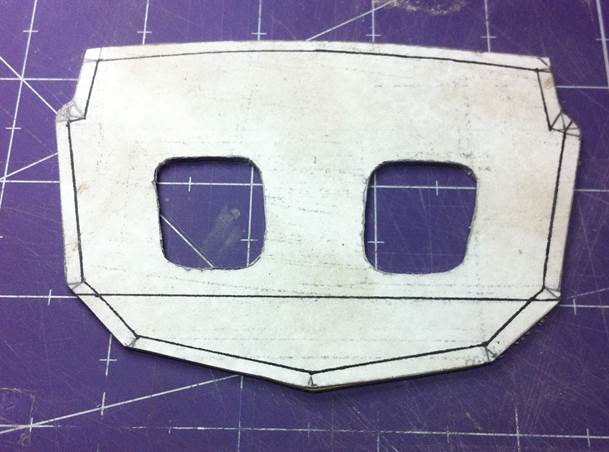
I got the second bulkhead cut out, glued to plywood and the guidelines drawn on last night, but it was getting late and I didn't cut it out from the plywood. Maybe tonight.
Up at the Manitowoc Maritime Museum last weekend, I got to talk to some guys who've built and raced footies, including Jim Knorr, who runs the Maritime Bay Model Sailing Club. My two sons had a good time running them around in the pond, too. Looking at his models, mine looks a little over-built! His were real racers.
Dan
-
Thanks, everyone!
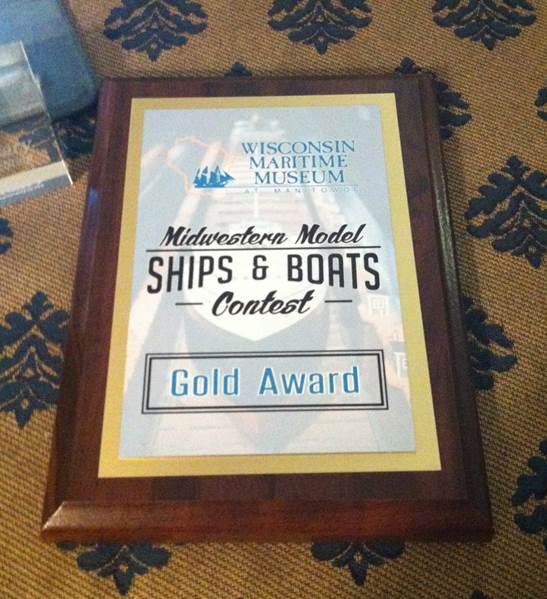
I entered the longboat in this year's Midwestern Model Ships & Boats Contest and Display at the Wisconsin Maritime Museum in Manitowoc, WI. This was the 40th annual contest and was absolutely fantastic. In addition to the regular model contest, we had a Masters Competition for Gold Award-winning models from prior years. Talk about some amazing work!
It's so much fun to get together with other modelers, see their work and learn how they achieve the results they do. I thoroughly enjoyed this year's event and would recommend it to anyone who can make his or her way to Manitowoc, even if you don't enter a model in the competition.
And, yes, my longboat won a Gold Award!
Dan
- Ryland Craze, dvm27, Canute and 8 others
-
11
-
Last month, at the monthly meeting of the Nautical Research and Model Ship Society of Chicago -- of which I'm a member -- Geoff Matson asked me, "Are you Catholic?"
Seemed an odd question...
"Yes," I said, "but not a very good one. Why do you ask?"
"Because your posts read like confessions!"
Guilty. See? I'm at least that good a Catholic.
So, with this post I'm going full-on Donald Trump. Everything's great. Yuuuuge! I must tell you: you're going to be very impressed.
It was time to do the fiberglassing of the hull. This was something relatively new for me. I did some real fiberglassing of real boat hulls back in high school, but that's a long time ago. (I'm a proud graduate of Green Bay Preble High School, Green Bay, WI, Class of '83. Go Hornets!) And back then the only option was polyester resin that required personal protective equipment -- including a respirator -- and a great deal of ventilation.
Instead of polyester, I used epoxy resin from West Systems which I bought at Stirn's Marine in Aurora, IL. Kurt Van Dahm warned me that this was going to be expensive, but it wasn't too bad. I got the resin and hardener for about $70.00. That's enough material to do several hulls.
I'd purchased some fiberglass cloth -- very light -- at HobbyTown and I talked to a lot of people about how I should approach this. Here's what I learned: everyone has a different way of doing this.
Kurt told me not to thin the epoxy out too much because it would run. My dad told me to just mix it up without thinning it at all. The guy at Stirn's told me to mix it up with some sawdust to fill any cracks or imperfections and he didn't think I really needed the fiberglass at all, just the epoxy. Kurt mentioned that too, that the epoxy itself would be doing most of the work. Clay Feldman recommended the fiberglass, though, and -- obviously -- I already had it so there was no reason not to use it. I found a really great video on YouTube that recommended thinning the epoxy 1:1 with denatured alcohol. The West Systems directions didn't explicitly recommend thinning, but suggested acetone.
(
)So...
First, I cut the fiberglass. The YouTube video recommended using very sharp scissors for that, which was good advice. You'd think it'd be easy to cut, but it really wasn't. Sharp scissors are necessary.

Then I mixed up the epoxy. For the first batch, I mixed 5:1 resin to hardner by volume. I used old yoghurt containers and the little cups you get creamer in at restaurants. Worked like a champ. Then I thinned by about 0.5:1 with acetone. The YouTube video recommended about double that amount of thinning, but he also said he wanted a consistency like water, which the 0.5:1 thinning delivered. I applied it using a disposable brush from Harbor Freight Tools ($0.59/each).
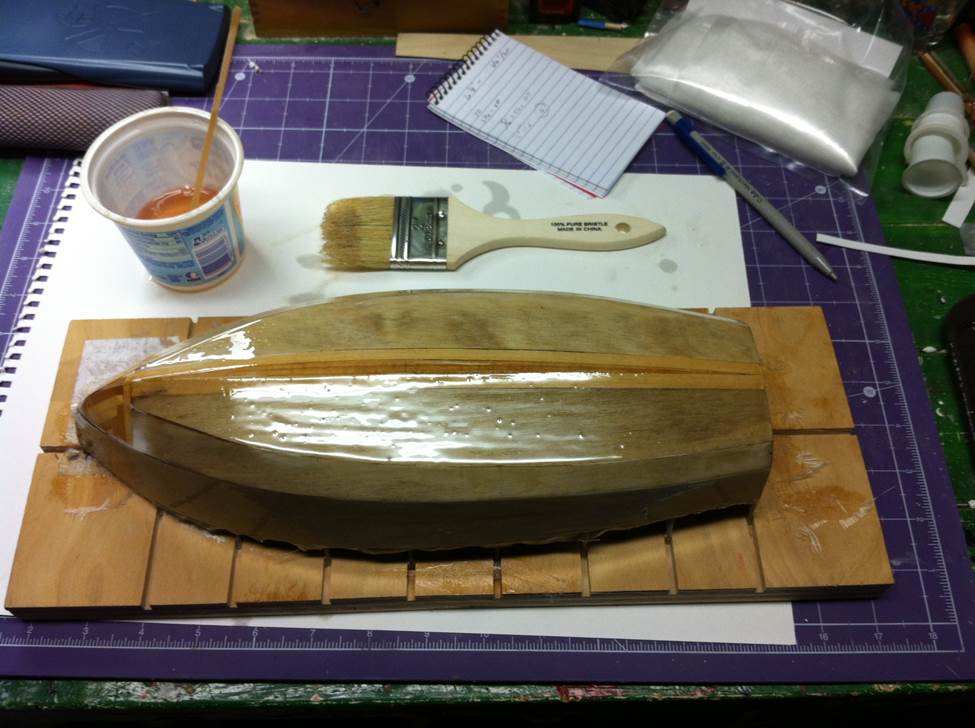
Here are the results:

It was yuuge! Very spectacular. Believe me: it was very impressive. Very impressive. Everyone I talk to, they say it's just extremely wonderful and great.
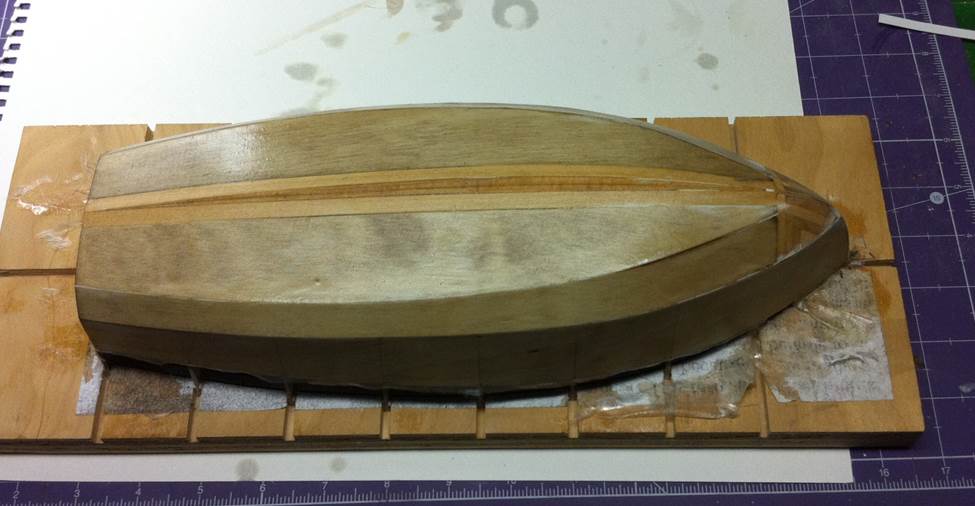
One thing I was concerned about going in was getting the fiberglass to bend around all the compound curves in the hull. Not to worry. The YouTube video showed how it would go around all those curves and, if it didn't, I could stop, let it dry, cut another piece of fiberglass and fair it in. Nothing to worry about. And there wasn't anything to worry about. I did the whole job with one piece of fiberglass and there were no creases in the end.
I cut away the excess fiberglass with an X-Acto blade before taking this picture.
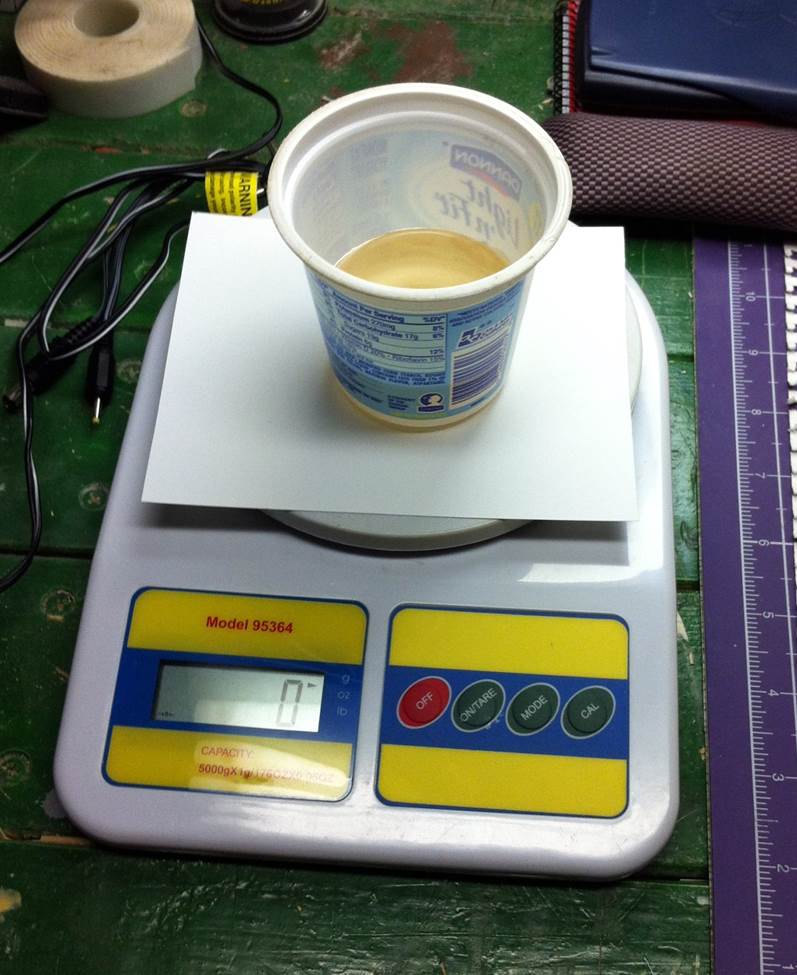
For the next batch, I measured it out by weight, again at 5:1 resin to hardener. I used a postal scale because I didn't want to make up as much as I did for the first batch.

And then I applied it. This is what it looked like right after applying the resin. After drying, it was evened out completely.

Very impressive. Very impressive. Everywhere I go, the people, I must say -- and I'll be completely honest with you -- they're very happy and, honestly, I am too. Not to brag, but I must say, there are a lot of boat hulls out there that, frankly, do not look this good, so, yes, we're all very happy with this result. Very impressed. I hear from people all the time, the best people, mind you, Donald ... uh, I mean Dan, that's the finest boat hull we've seen. I mean, seriously, they say that to me all the time. I don't ask them. They just say it. And these are top people, remember. Top people.
And so there you go, Geoff. A whole post without one confession of error or failure of any kind! (I'll go over that stuff at the next meeting...)
Next steps? I'm going to give the whole hull a light sanding and another coat. That ought to do it. Then I can detach it from the building board and start working on the interior.
Dan
-
Hi, Elijah,
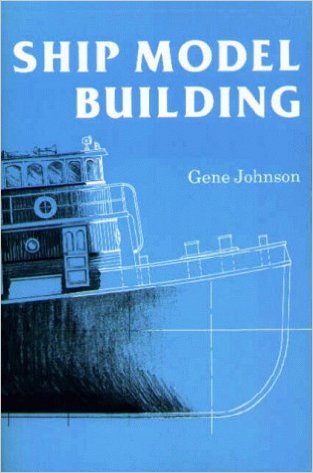
Looking good, sir. You may want to look for the book by Gene Johnson on building ship models - he has a short section on shaping solid hulls.
I think Wayne's referring to Ship Model Building by Gene Johnson.

You can get it for $0.01 plus the price of shipping on Amazon or request it -- as I just did -- from your local public library.
Dan
- Canute, trippwj, zoly99sask and 2 others
-
5
-
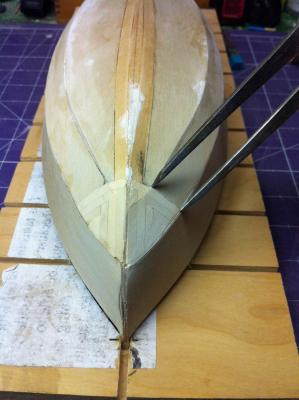
As I said before, I removed the port side. I used my heat gun as carefully as possible to avoid loosening up anything I wanted to retain.
It didn't take much to get the old glue off, just some sanding and scraping.
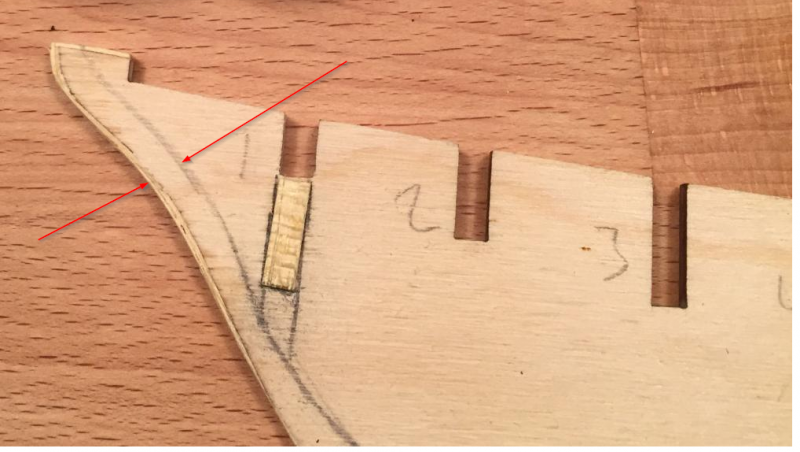
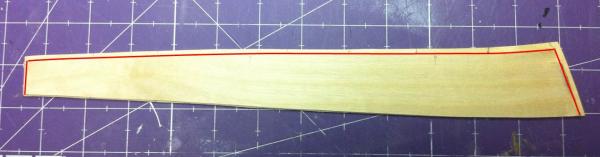
I used the old side as a template for the new one. I cut the new one out using my jigsaw, adding a little bit around the edges. The photo didn't turn out all that well, so I added the red lines to show where the old part ended and the new part began.
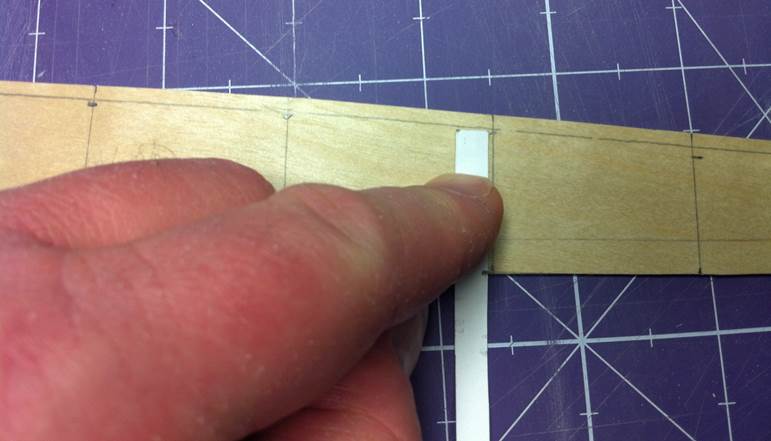
I've been thrice bitten now, so I was meticulous about measuring. I highlighted where gunwale should be on the formers again. Then I used a tick strip to measure from that point down to the top of the lower section of the hull.
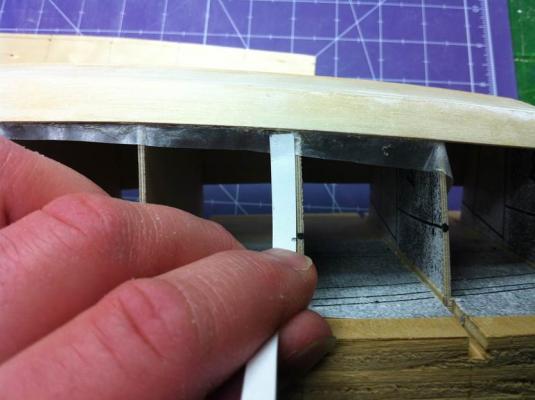
I placed the new port side on the model and marked where all the formers were. This is important because 1) the curve of the hull means they're not parallel to each other on the part or perpendicular to anything and 2) I needed a reference line for the measurements I made with the tick strip.
I marked all those dimensions on the part.

Then I just sanded the part down to the marks I'd made, adjusting as I went to make sure the curve faired with the part next to it.
I could tell I was on the right track when I lined up the bow.
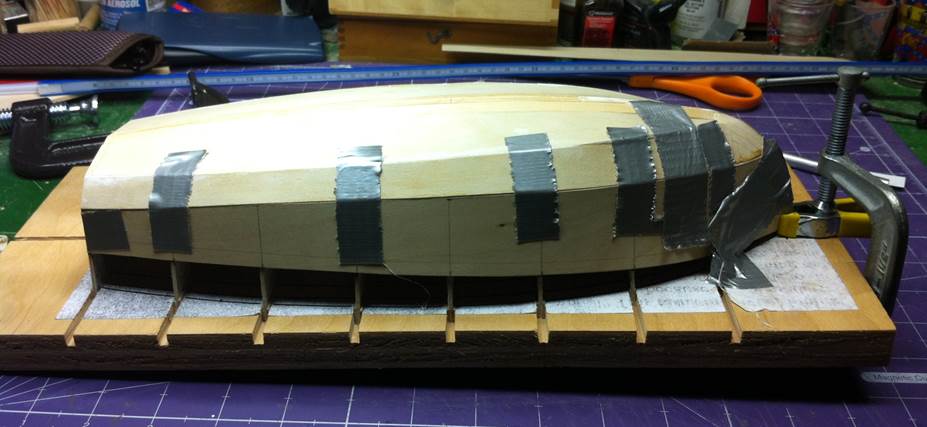
Then I applied glue and duct tape.
(In the article, Clay Feldman makes heavy use of duct tape. I'd never considered that before, but I'm a convert now. It's strong, flexible, allows you to clamp difficult shapes and, when you remove it, it doesn't leave residue and comes off easily.)

And here's the result:
When I took the clamps and tape off, the bow was lined up perfectly. I purposely left some excess on there so I could fair it in, but when you turn the model a little...

It's dead on balls accurate! That's what I was shooting for.
In the end, this little problem set me back a few days, but I think it was worth it. When you sight down the side of the model, the top of the wale is right along the marks, so'm pretty confident the hull is going to be straight and true.
Dan
- Elijah, Mark Pearse, hexnut and 3 others
-
6
-
I thought about building up or cutting down to make the gunwale right, but, after staring at it for a while, I decided it would probably be noticeable. Last night, I pulled off the starboard side. Pretty much trashed the part in the process, so I'll need to make another one, but that's no big deal. I can use the old one as a template. I also marked the dimensions on the frame again, to give myself a greater chance of getting everything lined up.
Interesting point about discouragement. I really did want to move along and frustration is setting in, but this isn't rocket science, I'm not on a deadline and if I'm ever going to learn to scratchbuild ... well, this comes with the territory.
The more ship modeling I do and the more I see what other people can do, the more I realize I need to learn. With each trial and error, I get closer to the result I want and I'm anxious to learn to do the fiberglassing of the hull and see if I can make an operational model. I think it's worth the effort.
Besides, I've only ever put one other model in the shelf, a model of Stephenson's Rocket from Occre. I made decent progress, but the kit was inaccurate in so many ways and I would have had to have done so much scratch building to get it the way I wanted it that I just moved on. Maybe, someday, I'll get back to it. This model I want to stick with for a while.
Dan
- Elijah, Omega1234, captainbob and 1 other
-
4
-
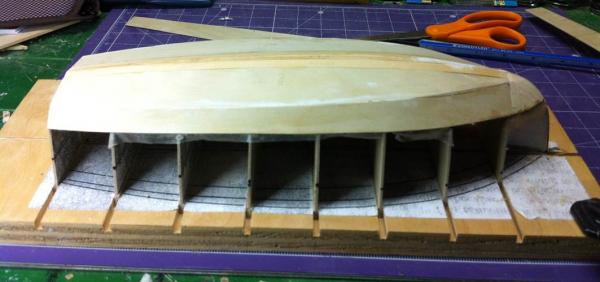
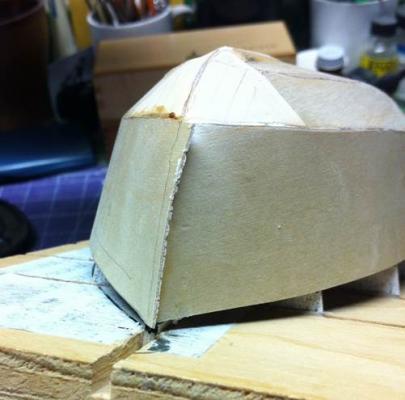
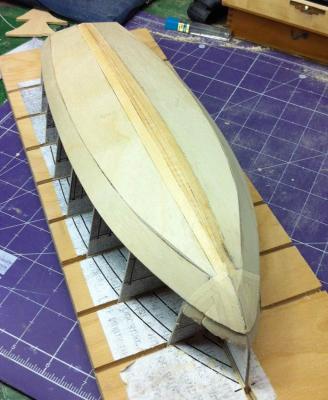
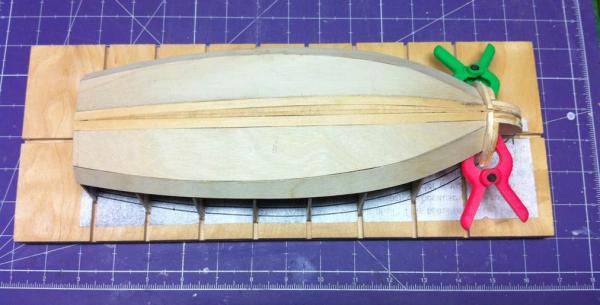
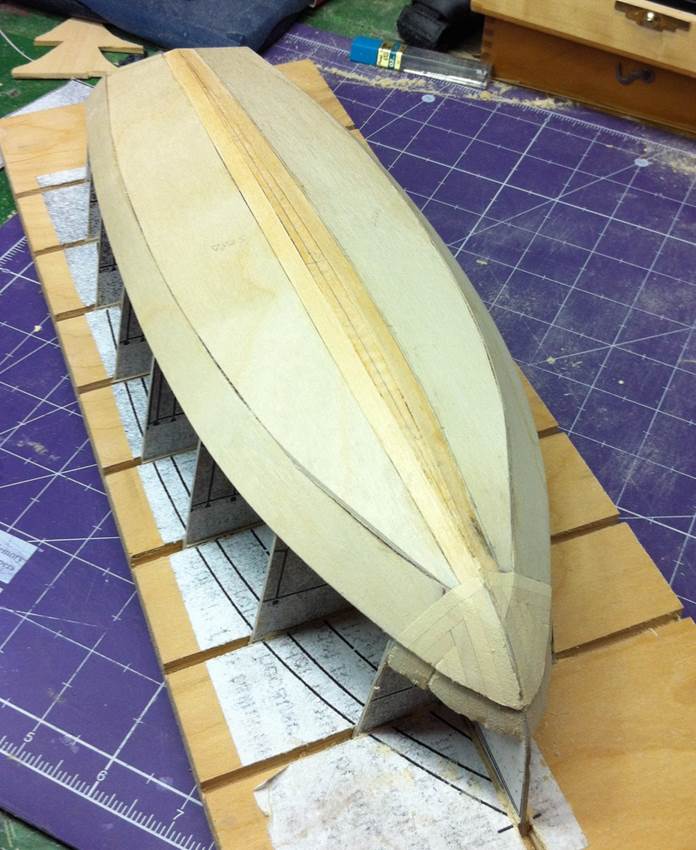
Two steps forward!
I finished forming the bow block. Like I said in prior posts, this will allow me to make the compound curve at the bow and give the hull sections something to bite into when glued in place.

The hull starts looking like a hull now...
I was very careful to make two, identical, sides of the hull. No way they were going to align on the model if they weren't the same off the model.
One tricky thing was getting those hull sides glued at the bow. The bow block made a big difference, but this 1/32" plywood is very stiff and it doesn't want to hold the hull shape. I had to re-glue it twice to get it to stick, even using Titebond III, which is a very strong adhesive. When I pulled the clamps off and it held, I figured I'd made a big step forward.
But wait!
Two steps forward ... one step back.
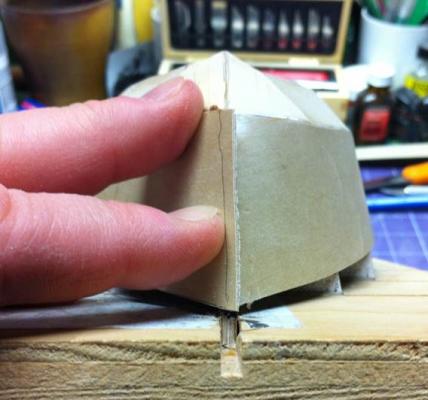
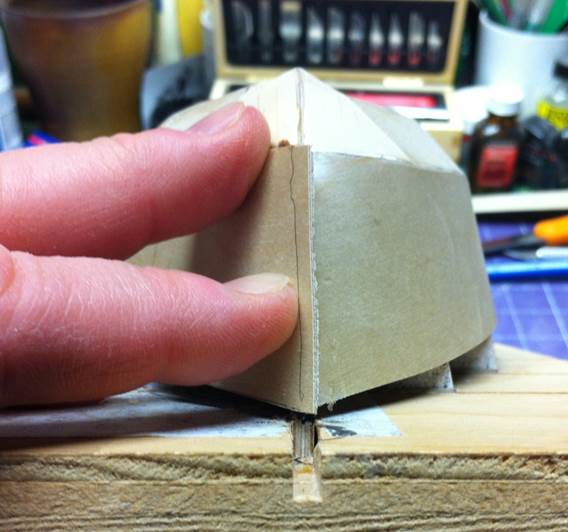
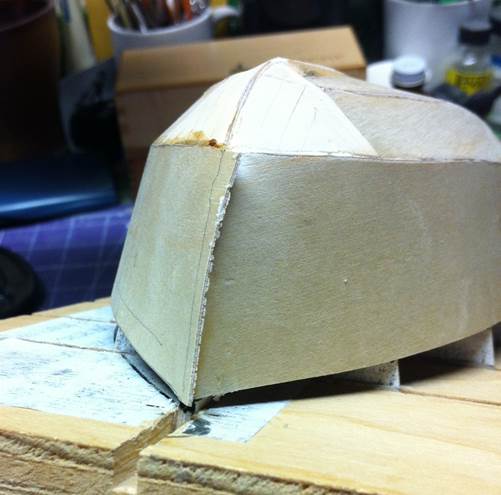
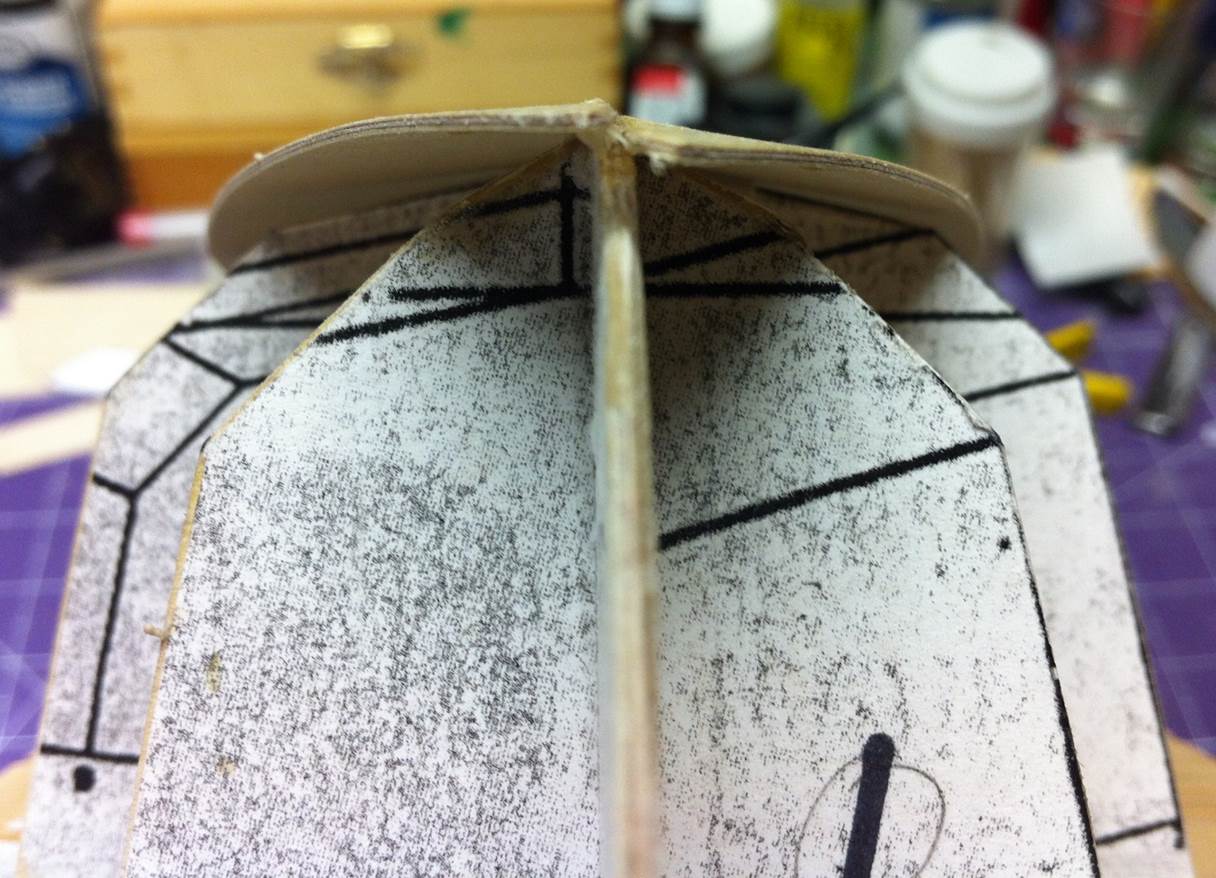
Check out the misalignment:
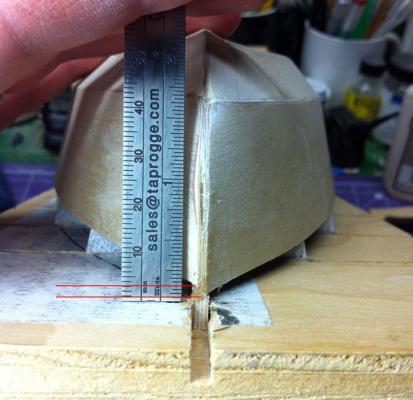
That's a misalignment of about 3/32", way too big to ignore ... and the bigger question: how did it happen?
Looking bow on, the bow block looks right. The two hull sections below it were identical. So where the gap come from?
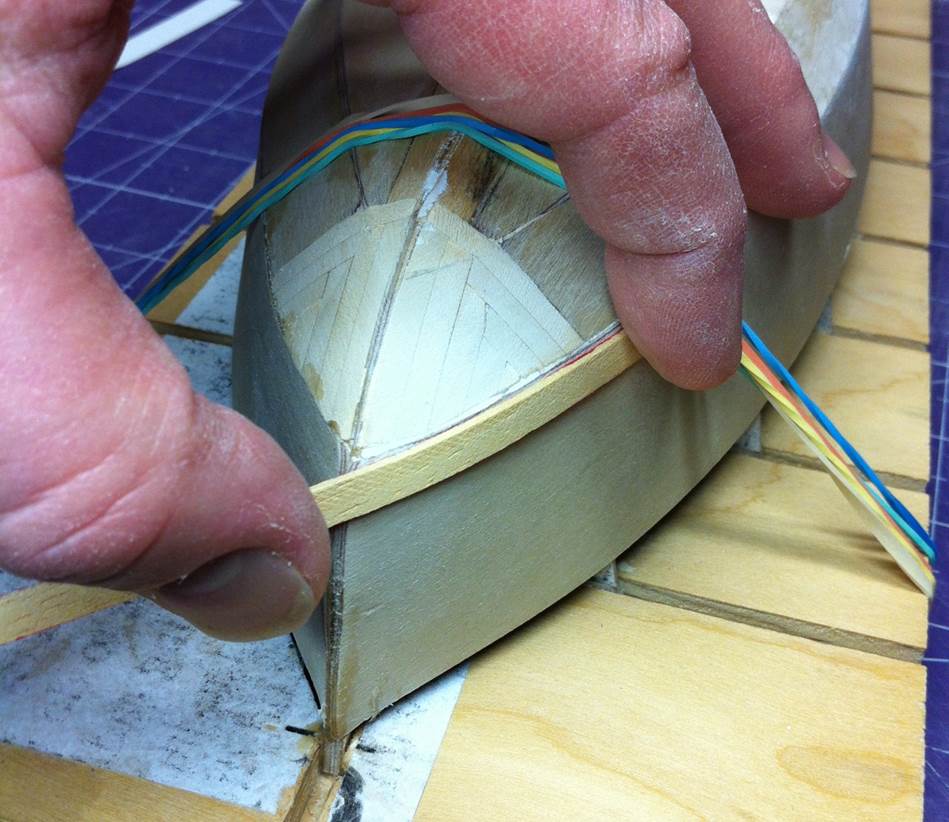
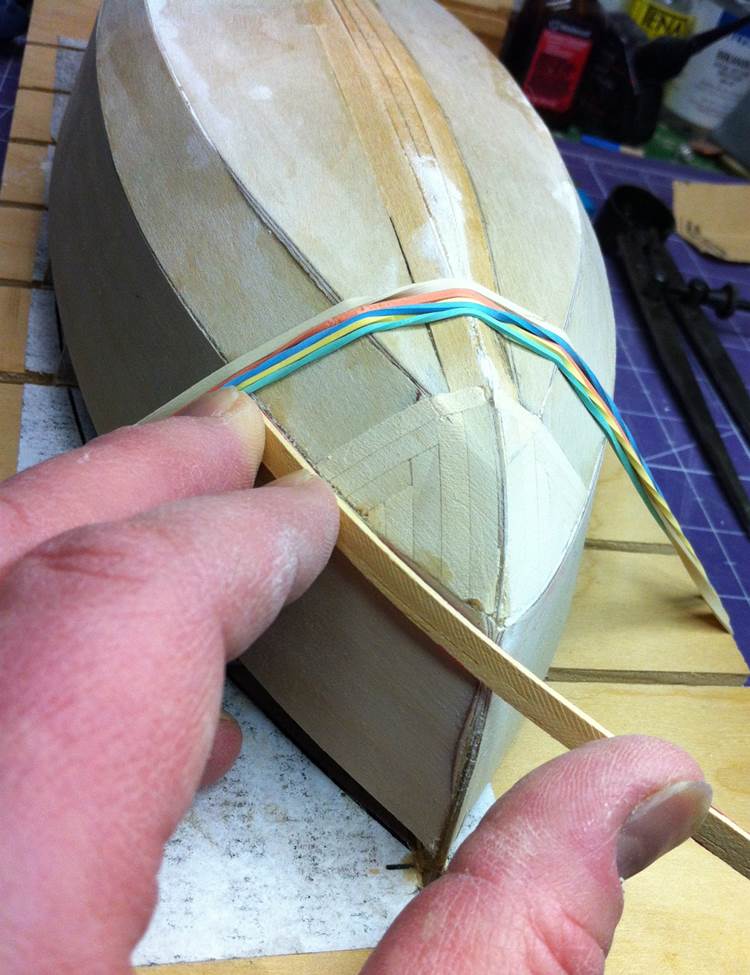
I think it's just a misalignment. Check this out. I laid a batten on the port side of the hull and it followed the curve of the hull just fine.

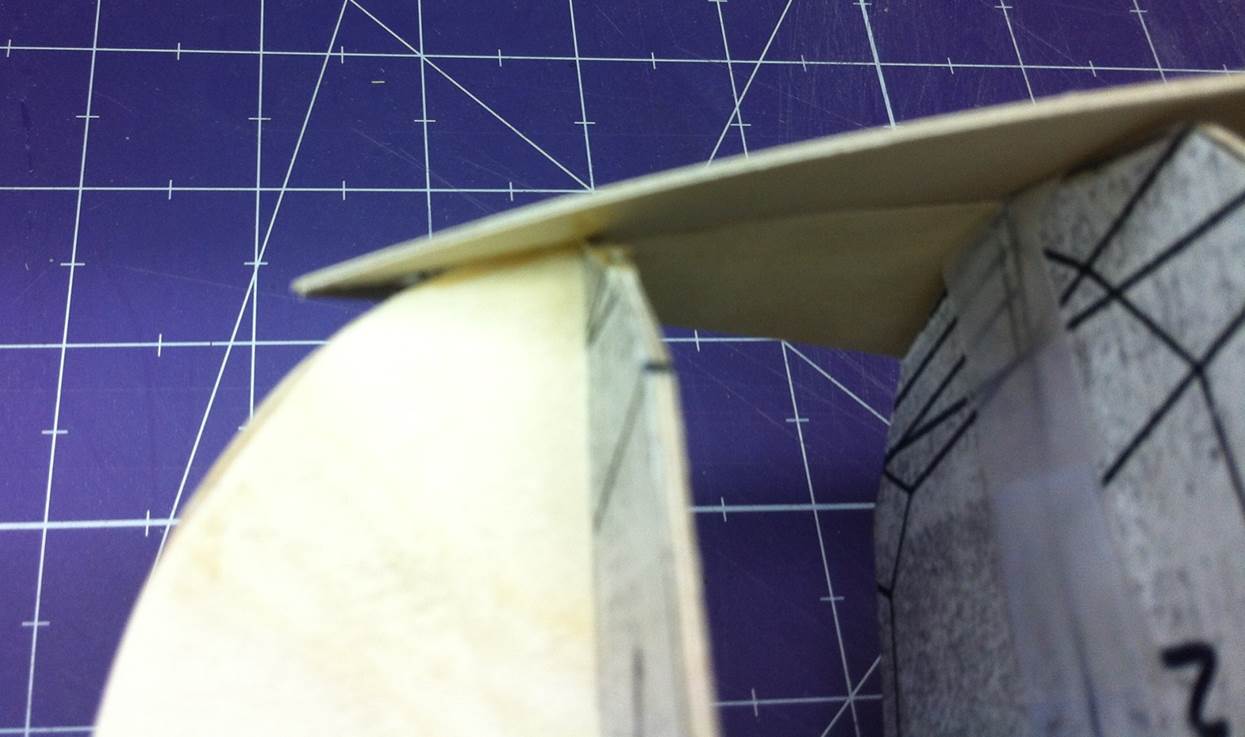
And then on the starboard side:
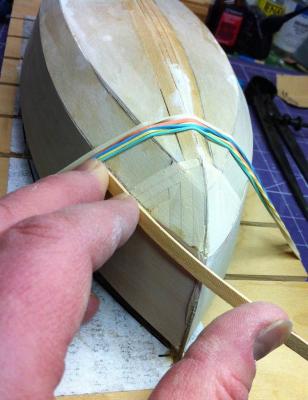
There's the gap.
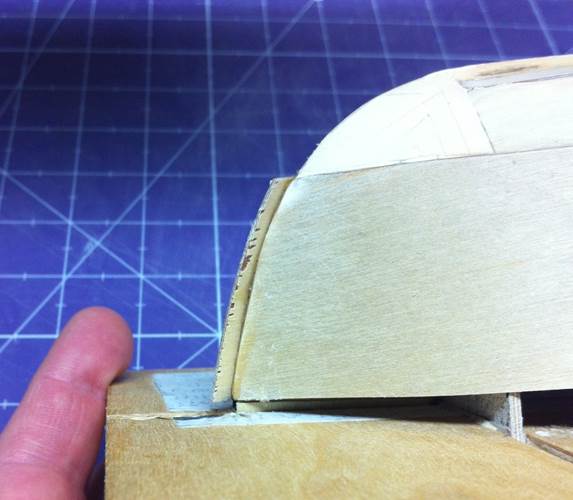
I think it's a little more than the bow block that's off. If I measure to the bottom of the bow block on both sides, there's a little gap there too:

So here's what I'm going to do, much as it pains me. (I was really looking forward to fiberglassing this hull and moving on to different things.)
- Heat up the joints and remove the starboard side. I might loosen up the port side in the process, but I don't see how I can avoid that.
- Clean up the glue and re-align the side so that the bow lines up properly.
- Glue it back in place.
- Fill in the gap with 1/32" stock and make all the angles work out.
This is a form for the fiberglass, so it really doesn't need to look perfect, but it has to be dimensionally perfect. That's what I'm shooting for.
Anyone got any other suggestions?
Dan
-
I saw the 1/64" plywood at Menard's and thought about using it, David, but then decided to stick to Clay Feldman's advice. In retrospect, I think it would have been easier to use the 1/64" stuff because it would have bent more readily around the bow. Live and learn. The bow blocks are made from basswood, so they should be pretty easy to work.
Dan
-
Doing something for the third time is sure a lot faster than doing it for the first time. I've removed and replaced the hull sections three times now, but I think I have it right this time.
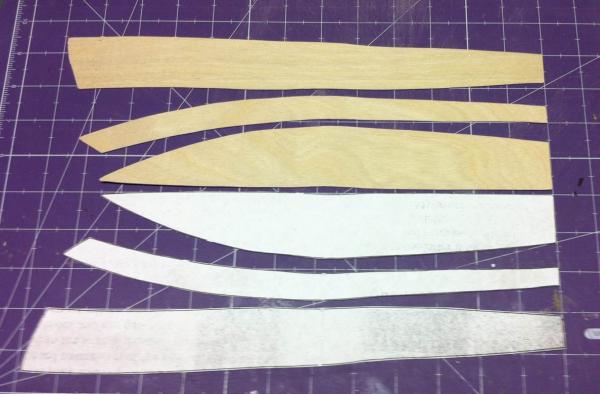
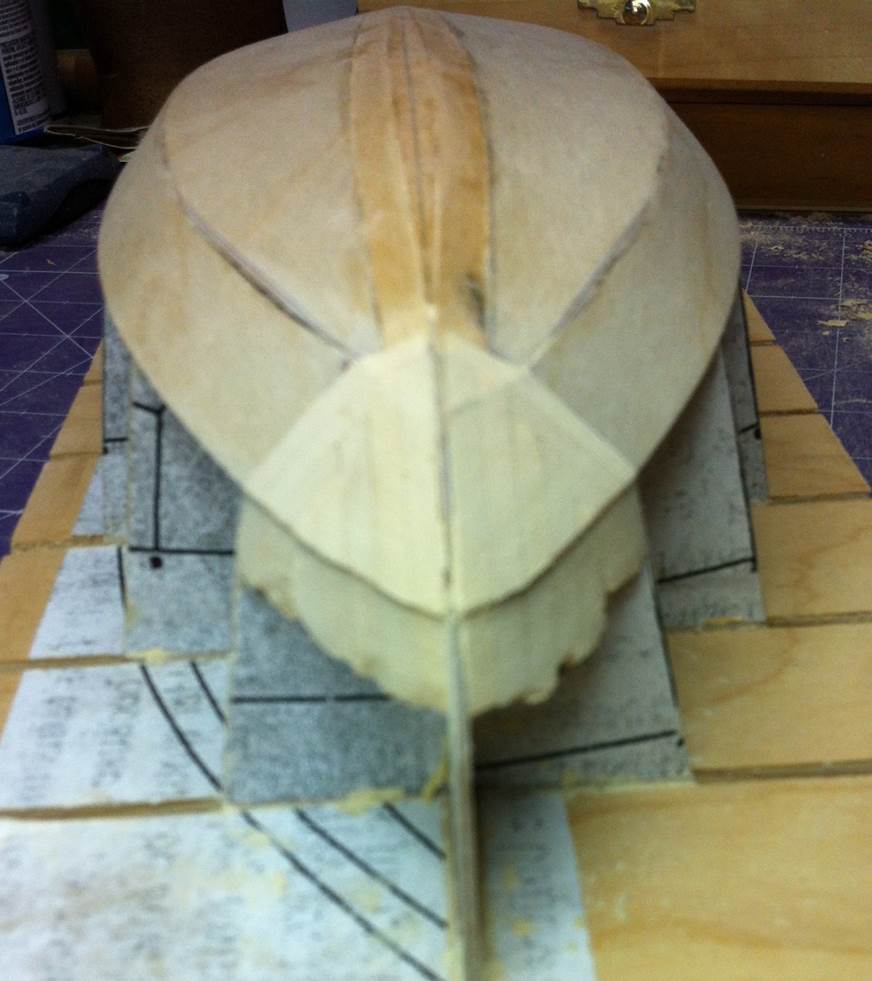
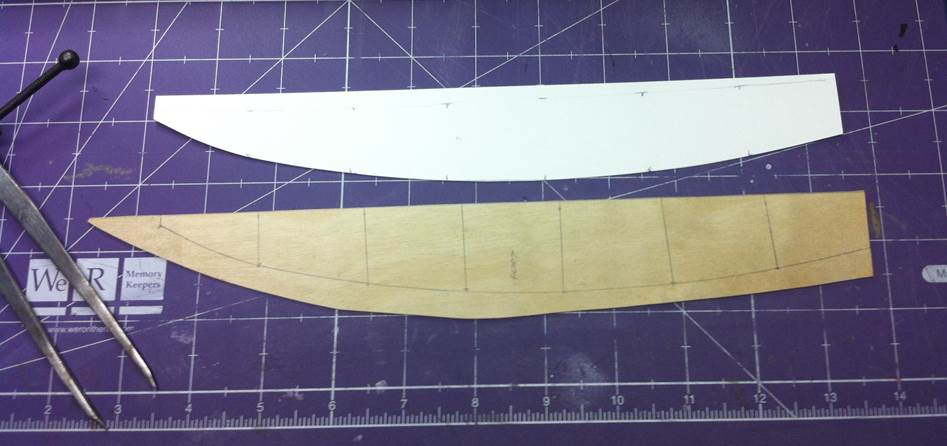
I used a cardstock template to define the hull bottom. This was fairly straightforward, but I got a clear lesson in what John Into and Nancy Price refer to as a "developable surface." (Their book, by the way, Fundamentals of Model Boat Building is worth a look.) Here's the template and the result.

And here's the result.
I started building up the block at the bow. Once I have the area all filled in, I'll take a rasp to it and bring it down to final dimensions. One error I did make: I'm going to be sanding end grain. I should have installed these bow pieces for and aft so I could sand with the grain. It's not going to make much difference because 1) no one is going to see it under the fiberglass and 2) I can use wood filler to eliminate any roughness, but I suspect the sanding will be more difficult because I didn't take the grain into consideration.
Dan
-
Welcome to the club, Elijah! It was nice meeting you on Saturday and I look forward to watching your progress on Phantom. It looks like you've made a great start.
I was thinking back to my first wooden ship model. It was USS Constitution from a kit by Scientific Models. (It's going for $23.00 on Ebay.)
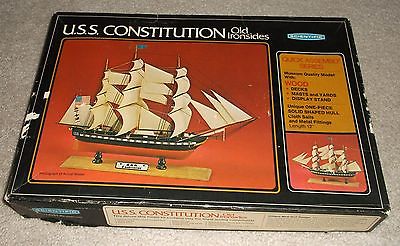
I think I was about your age. Like you, I didn't have much space, certainly none that I could call my own. The good news is you don't need much. I worked on a card table in the basement. You just need enough room to keep yourself organized and to allow glue and paint to dry.
And, like you, I didn't have much in the way of tools. Again, the good news is you really don't need many: sandpaper, x-acto knives, lots of clamps -- as you heard on Saturday, you can never have too many clamps! -- dividers, a straight edge, pencils ... really basic stuff that you probably have laying around the house. For things you don't have, just ask. The club is a great resource for help and the occasional tool.
A nice thing about building a Model Shipways kit is that they will replace materials, even if you mess them up yourself, at no charge. That takes the risk out of trying things and learning building techniques.
Again, welcome to the club! And good luck with your new model.
Dan
-
That's a very pretty little boat, Mark!
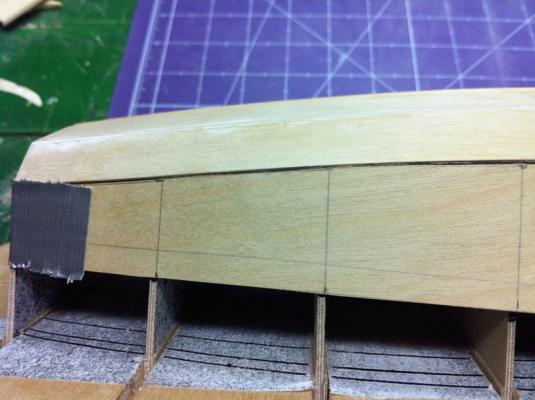
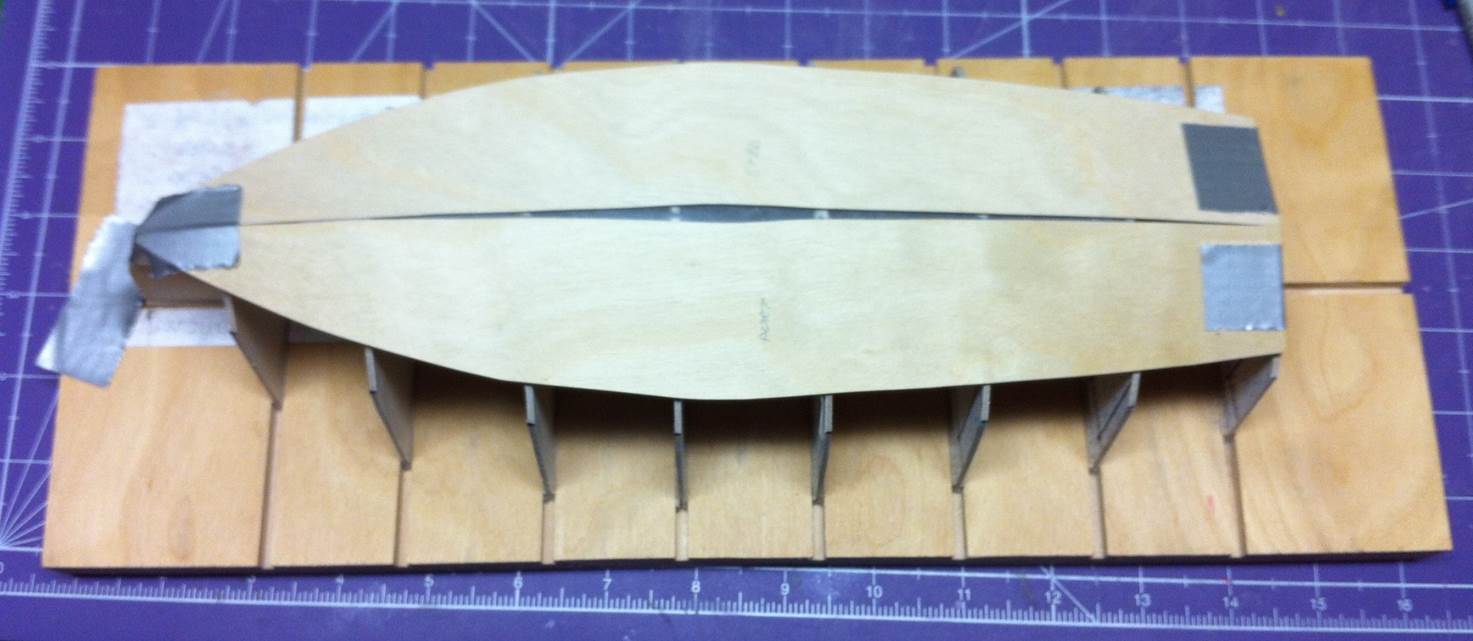
The bottom of the boat came off last night and I installed a couple of battens made out of 1/32" basswood.

The gap is still there -- because of the curvature of the hull -- but it's uniform port and starboard,not wavy like the original gap was. I can fill that and have a nice, straight line in the end. The other benefit of this approach is that I'll have a reference line to work from fore and aft. I can make a cardstock template from that line -- like you would from the garboard strake on a planked model -- and then cut the hull sections to align with it. Then it's just a drafting project: draw a line along each former, mark out the distance from the reference line to the chine, connect the dots and then cut it out.
And I thought this was going to be a quick little project...
Dan
- Omega1234, mtaylor and captainbob
-
3
-
Thanks for all the encouragement, everyone!
I got to work again yesterday. I can't say the results were what I was looking for, but I think I have a plan.
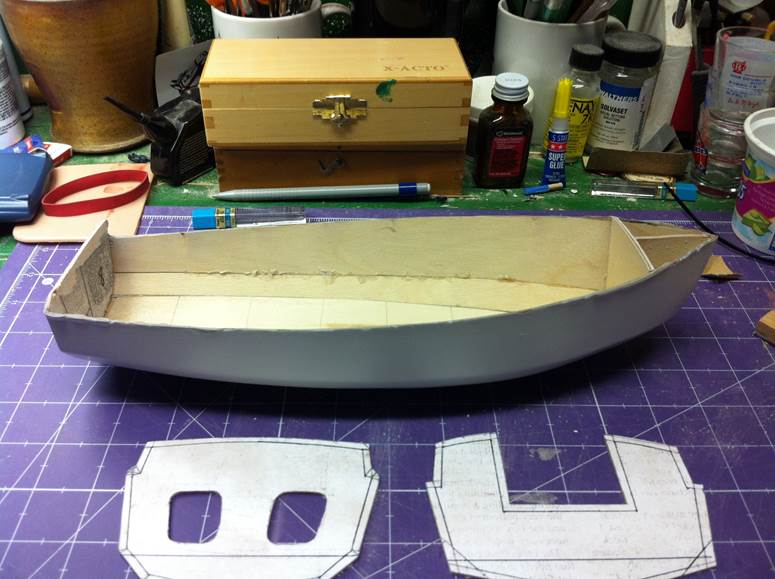
When I built my English Longboat, I quickly that deviation from Chuck's instructions was going to result in nothing but more work. I started out deviating from Clay's instructions by making my own templates that, in the end, were not symmetrical. I figured with my second attempt, I would not deviate from the instructions as written. I made a bunch of new copies of the hull templates, glued them to 1/32" plywood...
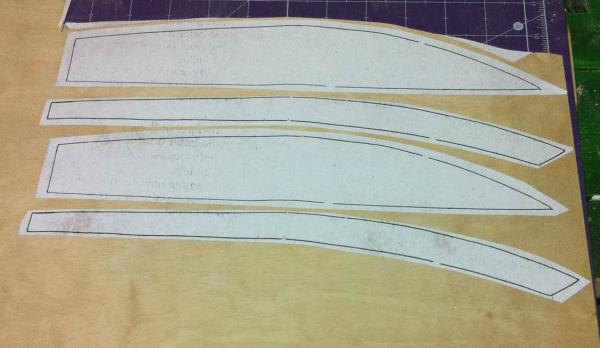
And then cut them out. They're Dead-On-Balls Accurate.
Just as I was the first time, I was very concerned about how wavy these templates looked. I want t a nice, straight chine on this boat, but there's not a gentle curve or straight line on any of these things. They look like they were drawn free hand. But, I just told myself to follow the guidance in the article. Clay's built a bunch of these things. I've never built one. His looks terrific. If I do what he did, I should be okay. So off I went. I put waxed paper over the frames I did not want glued to the hull.
I attached the Dead-On-Balls Accurate plywood sections to the hull with Titebond III, held in place with duct tape.
Note the gaps. There's just no way around this with the templates as they are. And it's not that the templates are oversized and can be cut down to fit. At Frame 5, just as they're laied out, they're right up to chine marking. Everywhere else, they're a little over, but there's that big gap at the centerline. If I straighten that out, everything else will be short. This is, essentially, what got me last time. I tried to straighten out the centerline and cut everything else and I wound up with a mess.
And then there's the bow. Clay surface sanded his plywood down to about 0.029" to make it more flexible. I don't have an easy way to do that. I did it by hand the first time around, which was alright I guess, but it wasn't perfect. This time, I didn't skinny anything down and I came up with this:

This actually looks worse than it is, but it's definitely a challenge getting the plywood to bend around the bow former.
So...
This morning in the shower -- I do some of my best thinking there -- I came up with an idea. Instead of trying to bend the plywood around the bow, why don't I do what you do with a static model: fill the bow area with basswood? Then I can cut the hull section back to Frame 1, which will mean it doesn't have to bend around anything.
The big gap on the centerline still concerns me, but I think I can fill that with scrap plywood and sand it to final shape.
And I can smooth out the outboard edges of the hull sections to make them fill the chine more closely. I don't want the hull all wavy.
Since I'm going to cover the hull with fiberglass, it doesn't need to be pretty, but it does need to be symmetrical and straight.
The only other thing I was thinking was to use 1/64" plywood instead of the 1/32" stuff. The thinner material will certainly bend more readily than the thick stuff. Got to think about that a little more ... and make another run to Menard's for more material if I decide to go that route.
Dan
-


Half Hull Planking Project by dcicero - NRG - Planking Tutorial by tlevine
in - Kit build logs for subjects built from 1751 - 1800
Posted
I am the proud owner of Toni's Introduction to Planking Kit #1 and, since I've got a little time off during the holidays, I decided to get started. I started by reading the instructions. (I've heard that enough times from Kurt to know to start there and it's mentioned in Toni's instructions. It's good advice and I found, even reading through them, I made at least one error early on.)
I mounted the plans to a piece of foam board, as instructed. Then I laid out the keel, keelson, stem components, deadwood and sternpost on the sheet to understand how they all fit together.
Next step is to cut the rabbet. I'll confess I read this section multiple times and Toni's posts here on MSW, which are slightly different from the instruction manual I have. I'm hoping I got this part right.
Toni says, "Measure the thickness of your planking. On this model I used 1/32" basswood which actually measured 0.43" thick." I had to think about that for a minute. 1/32" is 0.03125", quite a ways from 0.43". Then I measured the planking material in the kit:
I think this is a combination typo and a little dyslexia. The instruction manual should say 0.034" instead of 0.43". Doesn't matter. I figured it out and understand the point. You need that measurement to transfer it to the keel components, which I did. I did a little experimentation to make sure I drew an accurate line on those components. I set my compass, drew a line on some scrap paper and then measured it with the caliper. I had to do that a few times to adjust the compass properly, but it paid off.
I drew lines on both the outboard and top edges. (This is something Toni didn't say to do, but it made sense to me. It the angle is supposed to be 45°, then you need to know both sides of the right triangle to get the hypotenuse right ... right?
I have just a couple of observations. First, scraping the char off the components is a necessary task, I know, but I would urge people to take their time with it. I could have used power tools to do this or gone after it with some really coarse sandpaper, but I used the back of an old X-Acto blade as a scraper. It worked great and I didn't risk damaging the components. It took a little longer than other methods, but I think it was a good call.
For cutting the rabbet, again, I could have used power tools for that. I decided not to and I'm glad I did. (Toni designed this kit to be done by people without access to all that stuff, so it's not necessary.) I used the X-Acto blade again and then some sanding sticks to finish it off. That worked very well and, although it took a while, the results were better than I think I could have gotten with power tools. Small planes would have worked too. I tried to use mine, but found they were a little too aggressive and thought if I used them I might inadvertently take off more wood than I wanted to.
And no project would be complete without some errors. Even though the instructions are very clear about how far aft to go with the keel rabbet -- Figure 10 shows how far to carve it -- I still carved it all the way aft. I corrected that right away by gluing in some scrap wood and returning the keel to a square profile. Best thing about a wooden ship model: there's nothing you can't fix.
Here's the final product.
Now on to the frames.
Per the instructions, "the slots on the keelson were laser cut approximately 1/16" too shallow to help prevent breakage of the basswood keelson while making the rabbet." So I need to deepen them that 1/16" which will bring the distance between the bottom of the frame and the rabbet to about 1/16".
Off to the next step!
Dan