MORE HANDBOOKS ARE ON THEIR WAY! We will let you know when they get here.
×


Chuck Seiler
-
Posts
1,869 -
Joined
-
Last visited
Content Type
Profiles
Forums
Gallery
Events
Everything posted by Chuck Seiler
-
 It sounds like the consensus so far is "natural". I will try some natural stain on scrap and see how it looks.
 -
The stuff I got from the friend must have been old. It appears lead to me. I looked at AMAZON and found I can get bearings from 1MM up. I will look into doing that.
-
I will be doing more work tonight and tomorrow, so I will have more pics...including my assembly jig. A question for the assembled gallery: What color should I make the carriage? I am not s re the plan specifies. My original plan was some sort of brown stain, but I have plenty of brown already. Natural stain? Pale yellow dye? (more of an ocre) Barn red dye (much like the bricks)? Your thoughts and recommendos are encouraged.
-
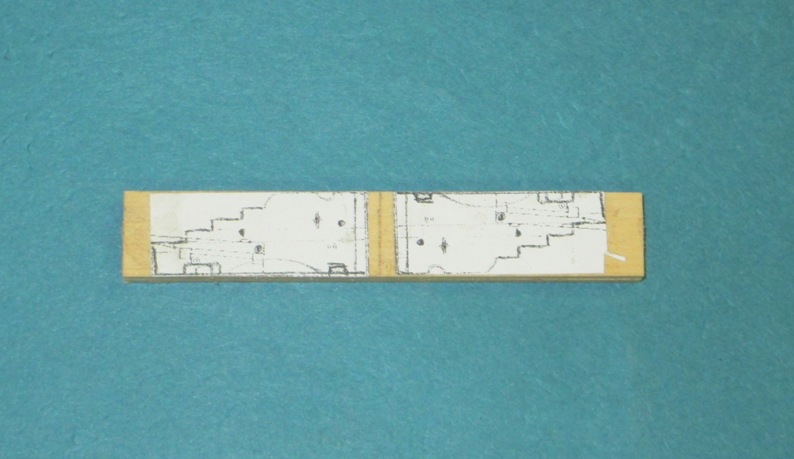
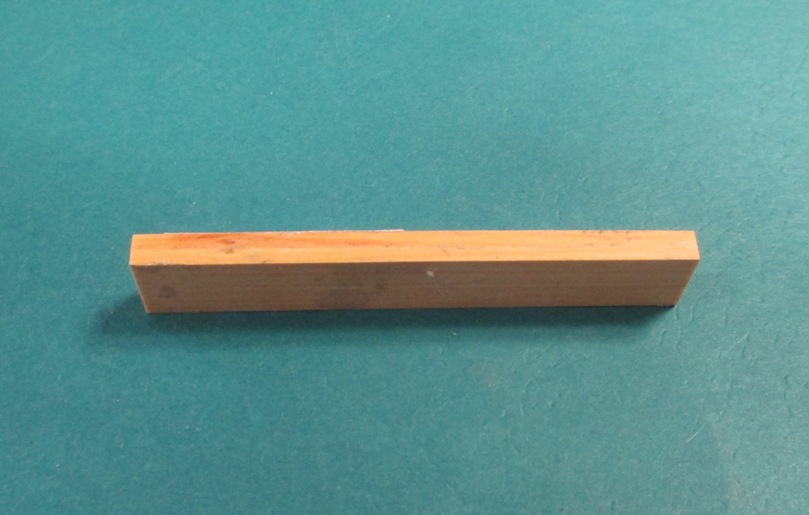
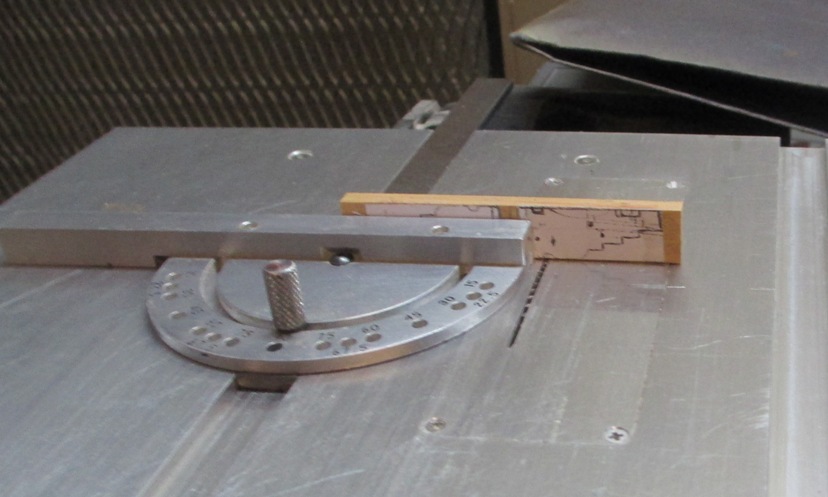
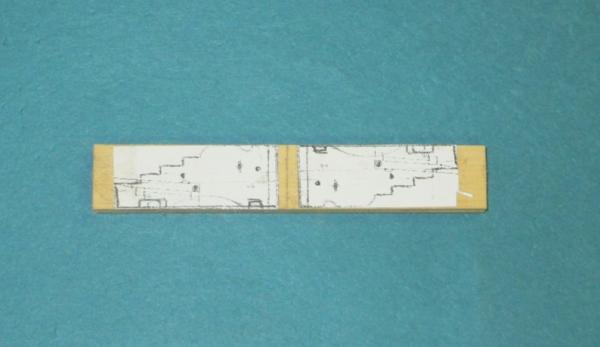
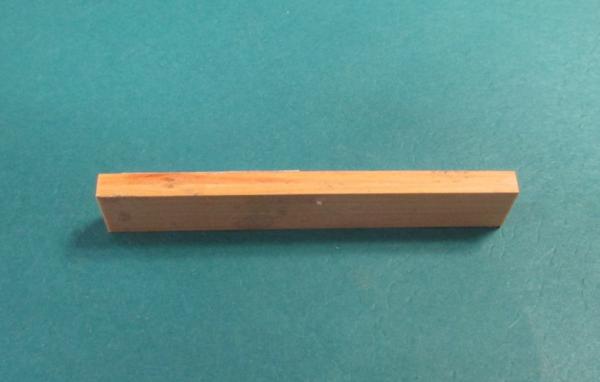
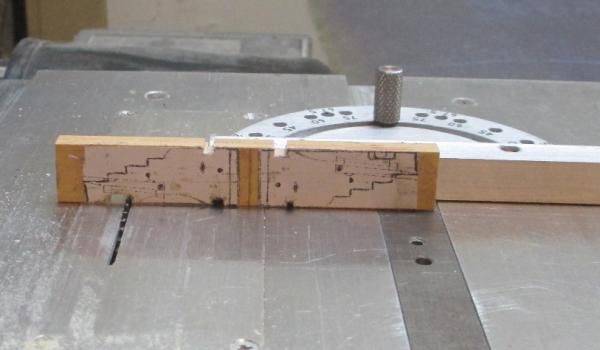
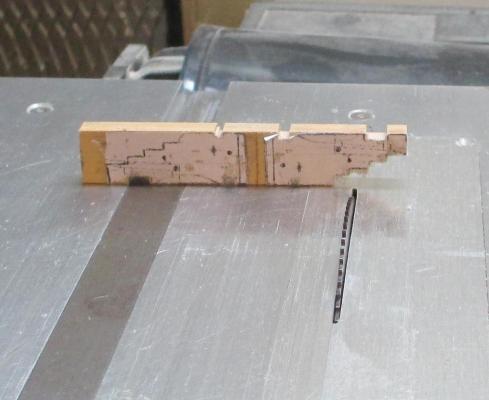
I cut the carriage templates to size and rubber cemented them to the stock I was using for the carriages. I decided to use a double wide piece of stock in order to facilitate using the table saw. It will be more obvious once you see it. I rubber cemented two pieces of stock together so that when I made the cuts, I would have two exact pieces. I actually made the stock slightly oversized, then milled it to the correct size...again, so the pieces would be exactly the same. In Modeler12's post, he is making a bunch of pieces at the same time. I could do the same by adding more pieces of stock, in multiples of 2. The other option (in retrospect) would be to use a thicker piece of stock and slicing it off later. Thickness is restricted by how long my drill bit used for drilling holes in the side (for bolts and eyebolts). This shows the basic milling method. I sense a bunch of folks with REAL mills are shuddering right now. The first cut is to make the trunnion "hole"...or half hole. I am sure there is a term, but I cannot recall. This is a starter cut. It will be rounded out with a file later. Here I am cutting the indent for the front axle. Now it is the safety guys that are shuddering. I decided to change operations a little in order to cut the rear axle indent. There was not enough stock to do it safely or accurately. It turned out pretty well. Next step was to cut the steps. This went well until I got almost to the end, then part of the stock snapped off. No damage, but I would have preferred it not happen. When I cut the other side, I made a initial cut at the back end of the carriage. This worked...it did not snap off this time. These look pretty crappy, but that is due to the paper residue, not the cut. If you looked from the other side you would see that it is very crisp. I don't know why I didn't take any pics of the reverse, but you will see them later.


-
One of the things I need to get out of the way sooner or later are the gun carriages. The two 9 pounder guns have traditional carriages, except the front wheels are the same size as the rear. The 12 pounder s mounted on a slide carriage (sled?). I am using cast pewter guns from LUMBERYARD. The carriages available from them are okay, but I am not wild about them. Chuck Passaro's carriages are too small for the guns used...plus I wanted to go with boxwood. Modeler12 in his "Making Gun Carriages" shows a great way to mass produce the sides of the carriage using a mill. Being a tablesaw/dremel type of guy, my method is less precise but simpler. The plans I was using had a good profile view of the slide carriage but only a quarter angle view of the traditional carriages. Taking measurements from the quarterview, I made modifications to the slide carriage diagram in order to fit the bill.
-
POOP!!! The stuff I put in last night apparently went away with the server. Fortunately I received an email/digest with it all included. I will reconstruct as best I can.
-
Jim Byrnes Model Machines
Chuck Seiler replied to Mahuna's topic in Modeling tools and Workshop Equipment
Featherboard featherboard featherboard featherboard featherboard........ -
Hmmm. Decisions, decisions. I am eyeballing the CONFEDERACY due to it's reduced price, but I need to finish PHILLY (end of May) and SULTANA (by next year) with scratch sloop PROVIDENCE on the drawing board and SYREN in the wings. Maybe I will forgo CONFEDERACY and wait for Winchelsea. Rusty. You said you used craft glue to affix your templates to the wood. Is that water based? Doesn't it have a tendency to distort the plan, or am I thinking about something else?
-
Chuck, When do you anticipate this kit going to market?
-
I used bird shoot for my cannon balls on PHILADELPHIA. A guy in our model guild gave them to me. It solves a short term problem, but I think I will have to replace them eventually. Lead has a tenancy to deteriorate over time and your lead fixtures end up as piles of dust at the bottom of your case. I think I will check out Amazon. Bill, did you try soaking them in a pickling agent such as vinegar or some stronger (if available)?
-
This weekend looks to be a little chilly...only 72 degrees. I will stay home and work on PHILLY. coming up...GUN CARRIAGES.
-
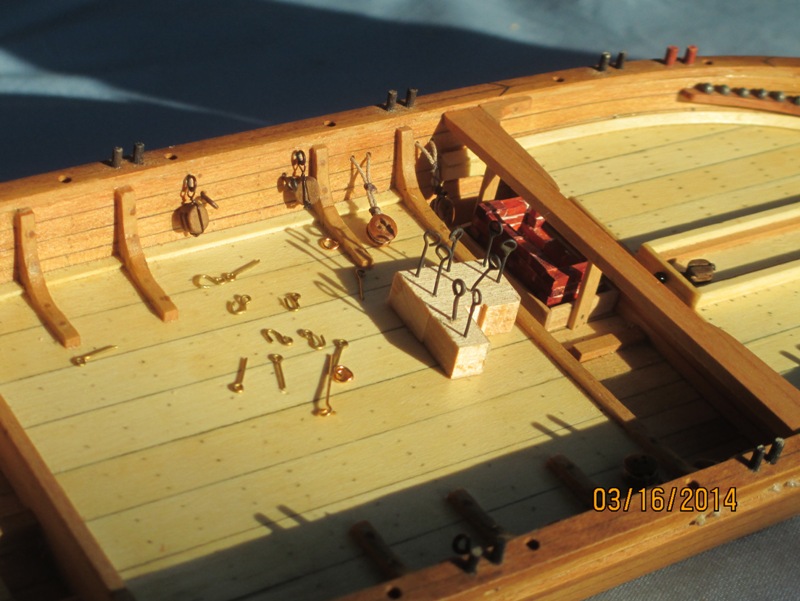
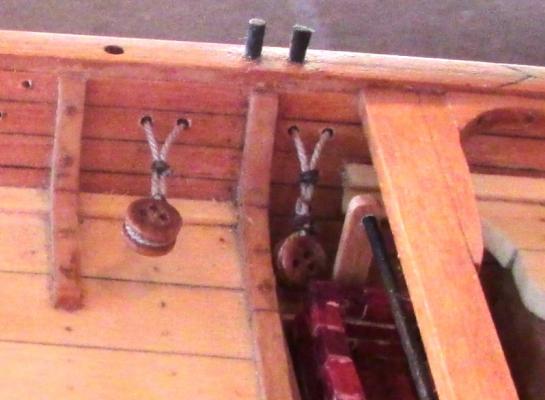
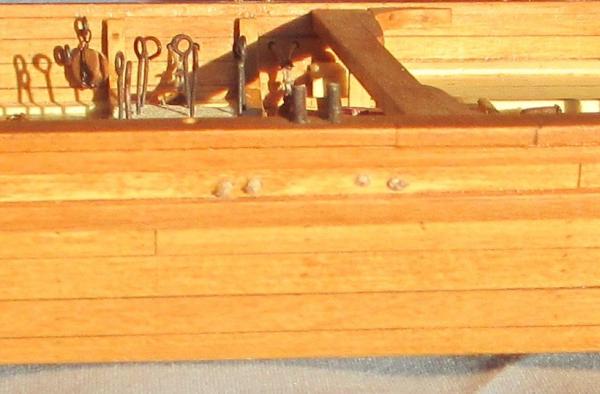
Here is some miscellaneous work I have been doing. I need to get a bunch of ringbolts, eyebolts and blocks ready for the next couple of phases. I generally have two problems with commercially bought eye bolts: (1) They are never quite the size (eye size) that I need/want...either too big or too small. Some of the eyebolts I have purchased or snagged from other kits I have (languishing on the back shelf) are the right size and some are not. (2) The brass is too pliable...too much stress or strain on the bolt will cause it to deform or open up. To solve this, I take 'too large' eyebolts and resize them. #1 solved. I also silver solder the eye and part of the shaft. This hardens and strengthens the bolt. Sometimes I will solder the eye closed so that there is no split in the eye and sometimes I will not, depending on whether or not I plan to put a ring in it later (or if I screw up the solder job...still learning). At any rate, it is hard enough that even if the gap is not shut, it will not pull open under strain. Hooks made from eyebolts. They will be soldered and blackened later. Two blocks have been completed, attached to eyebolts and mounted to the bulkhead for the port side 9 pounder gun. These blocks appear large, but that is what the plan calls for. Blocks are from Chuck Passaro. Brass is blackened using "Blacken-it".

-
Our shipmodel club mans a booth every year at the county fair, where we 'display our skills' and talk to folks about ship modeling. Three of the top four questions asked are: "Is that a pirate ship?" "Is that made of balsa wood?" and "How do you put a ship in a bottle?" ( #4 being "Wher eis the bathroom?") They would have a field day with this model!
- 36 replies
-
- 1
-

-
- black pearl
- bottle
- (and 1 more)
-
Stove? You get a stove and I get a fireplace? Benefits of being a general I guess. That padauk sure does make a reasonably good brick, eh? Looking good!!! Are you "live" or are you posting old stuff? If live, you are moving quite fast.
- 175 replies
-
- 3
-
-

-
- washington
- galley
- (and 1 more)
-
It has been a slow weekend. Big decisions....should I work on the model or go to the beach? Build model-go to the beach? Model-beach? beach-model? Hmmmmmmm Here are some more shots of previous work. Here you can see the lower deadeyes better than in previous shots. Yes, Virginia, the deadeyes are inboard. More proof that it was designed by army guys. The lower deadeyes are "stropped" with rope, with the two ends run through holes in the hull and knotted on the outside. Mine are simple overhand knots. I suspect the real ones are a bit more complicated. I had some problems with this. At first, I ran the lines through the holes and attempted to knot the lines. Once the lines were knotted, I could cut off the excess. <NOT> The locations of the knots had to be precise in order to ensure the deadeyes lines up properly. Given that one of my nicknames is "Nine Thumbs Charlie" I found this undo-able. I decided to knot the lines first, THEN pull the know through the holes. In order to do this, I had to enlarge the holes; large enough to get the knot through but not so large as to let the knot pass back through. You see some of my ironwork in the background.
-
I don't believe so. I don't think there is any metal plate on the Smithsonian ship. The book I was reading indicated there was charring. I suppose metal could be charred, but I took it to mean wood. I will go back and re-read that source.
-
Mike, Very impressive. It also has the benefit of not being 'one of the usual suspects'. I am enjoying your progress.
- 175 replies
-
- 2
-
-
- washington
- galley
- (and 1 more)
-
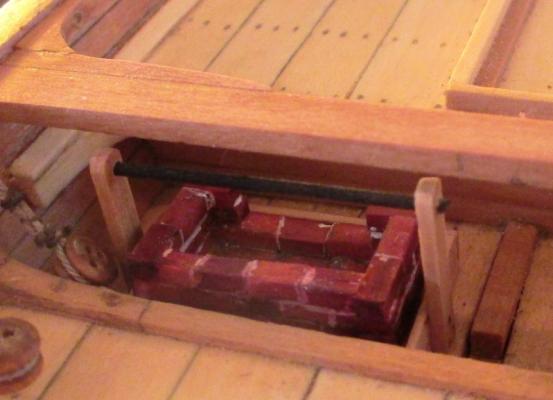
Several of us were opining whether or not it was moved from that location (where it was stored) and used in a more open location (less prone to setting critical parts of the vessel on fire). It is constructed in a wooden box filled with sand. Movable but heavy. It just seems very inconvenient where it is.
-
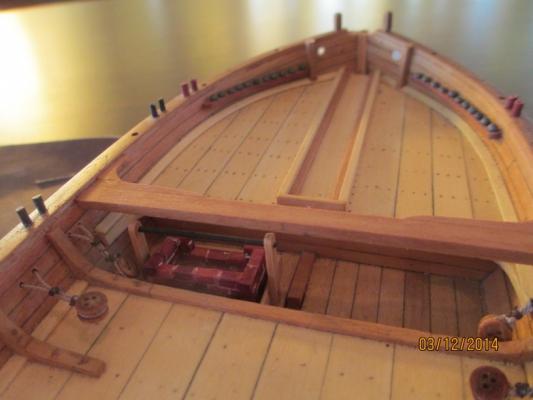
This photo encompasses almost al the work I got done since last post. --Cook stove complete and mounted. --Lower deadeyes rigged and installed. --Mast support beam completed and installed. Close up of cook stove.
-
Mike, Many thanks. PHILLY is a much simpler design/model than yours is. Your framing looks great. After an inconvenient 24 pound ball lodged at or below the waterline (you can see in the Smithsonian ship...the ball is still there), PHILADELPHIA started sinking by the bow. The 'bailing well' back aft was of little value at that point. WASHINGTON came alongside to take off the surviving crew...only to be captured later when WASHINGTON was overtaken by the British. Lt. Rue and some of the PHILLY crew made it to shore and made their way by land to Fort Ticonderoga. Are you talking about the British shortening th emast after they captured it or via a cannon ball.
- 175 replies
-
- 1
-
-
- washington
- galley
- (and 1 more)
-
Mike, Excellent!!! I believe that is your WASHINGTON lurking behind the sinking PHILADELPHIA in the photo on my build log (second post of the blog).
- 175 replies
-
- 1
-
-
- washington
- galley
- (and 1 more)
-
I expect to have pics showing progress on cookstove, deadeyes and mast support beam by tomorrow.
-
Mike, How does this compare to the row galleys used on Lake Champlain at the same time?
- 175 replies
-
- 1
-
-
- washington
- galley
- (and 1 more)
-
Bob, Welcome back online. Looking forward to the build continuing. When is the house warming/shop warming party?
-
Brian, I have had the MS RATTLESNAKE kit for years, sitting patiently in the closet. I look forward to your build.