


SawdustDave
-
Posts
1,770 -
Joined
-
Last visited
Content Type
Profiles
Forums
Gallery
Events
Posts posted by SawdustDave
-
-
OK, we have a pretty good ending to this particular brain f__t.
Shame on me for fitting those first deadeyes improperly oriented. Having never used heart shaped deadeyes before, I've never worried about orientation at this point since round deadeyes can easily be rotated when ready for reeving the lanyards.
The good news....
* Since the brass nails were pressure fitted, there was no big problem removing the five assemblies.
* Before - There were three corners, requiring five bends, to the shaping of the wire tightly around each deadeye.
* Fitted correctly - There are only two corners, requiring two bends! Much easier and quicker.
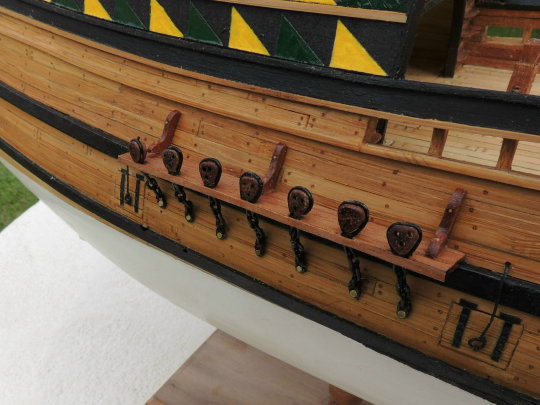
These seven assemblies seen here were done much quicker than the original five first posted.
Sometimes there's a silver lining to them dark clouds.


-
-
Thank you Piet and Omega. Just applied a thin coat of wipe-on poly to the channels and realized I should have done so before taking the above photos. What a difference!
Think I'll re-shoot later today after I finish installing the starboard waste channel assembly.
-
Beautiful job on the anchor.
-
Looks great Ken. I love the look of furled sails on a ship. Nice work.
-
-
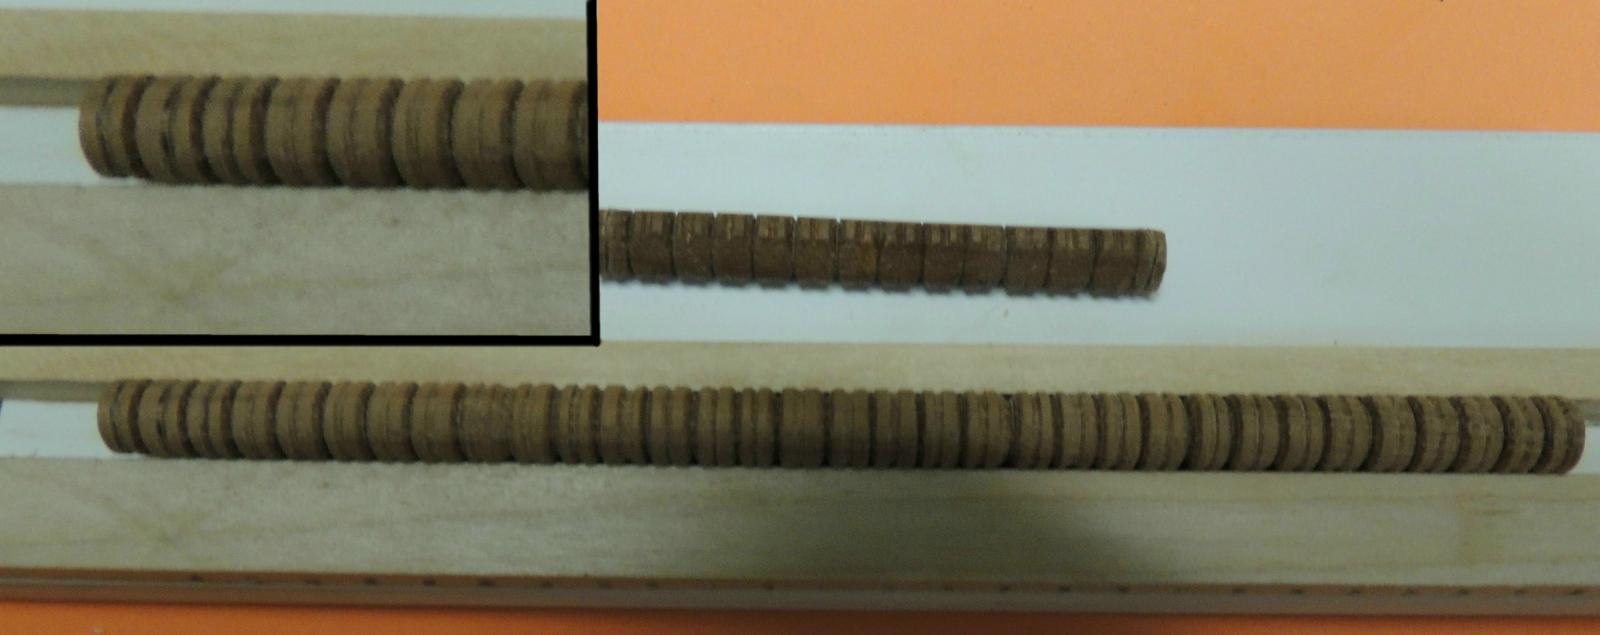
As for the deadeyes....
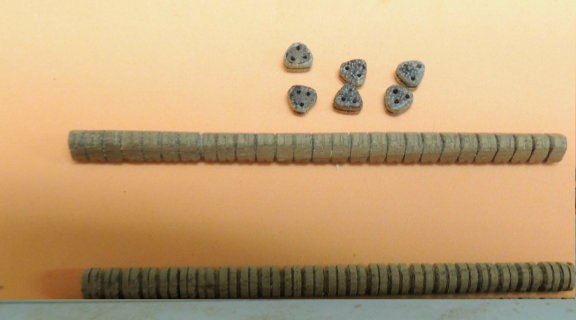
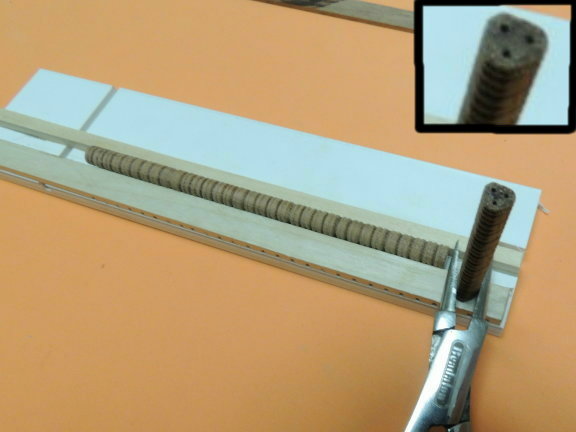
1st photo.... better look at the profile of the turned stock. Note the two boards used to keep the turned piece from moving around while being sanded.
2nd photo....better look at the scoring of the turning.
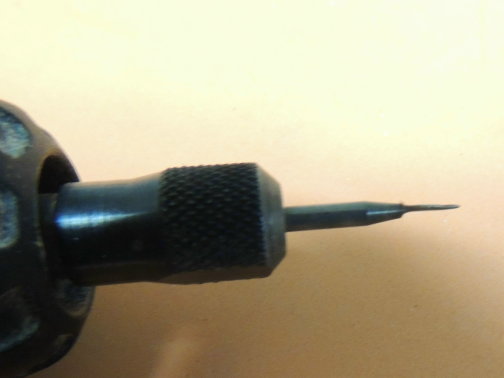
3rd photo.... the modified Dremel bit used to drill the deadeye holes.


-
Frank....Have you tried walnut? Works fairly well as long as you keep your tools sharp.
Let me know if I can be of further assistance.
-
Sure Thing Frank. Take a close look at the third photo and you can see my turnings.
Note that the one right below the cluster of deadeyes has been reShaped by sanding three sides fairly flat....careful not to take them too far because you don't want the tips to be sharp.
You might need to tell me if that helps, or are you having another type of problem.
-
Thanks Joe....going to take a while to crank all those little suckers out. This will be the first ship I've ever made the deadeyes for.
-
-
Thanks Popeye, Kees, and Russ. Since my golf plans for the morning is a rainout, it looks like I'll get in some shop time before poker night begins at 6:00pm.
-
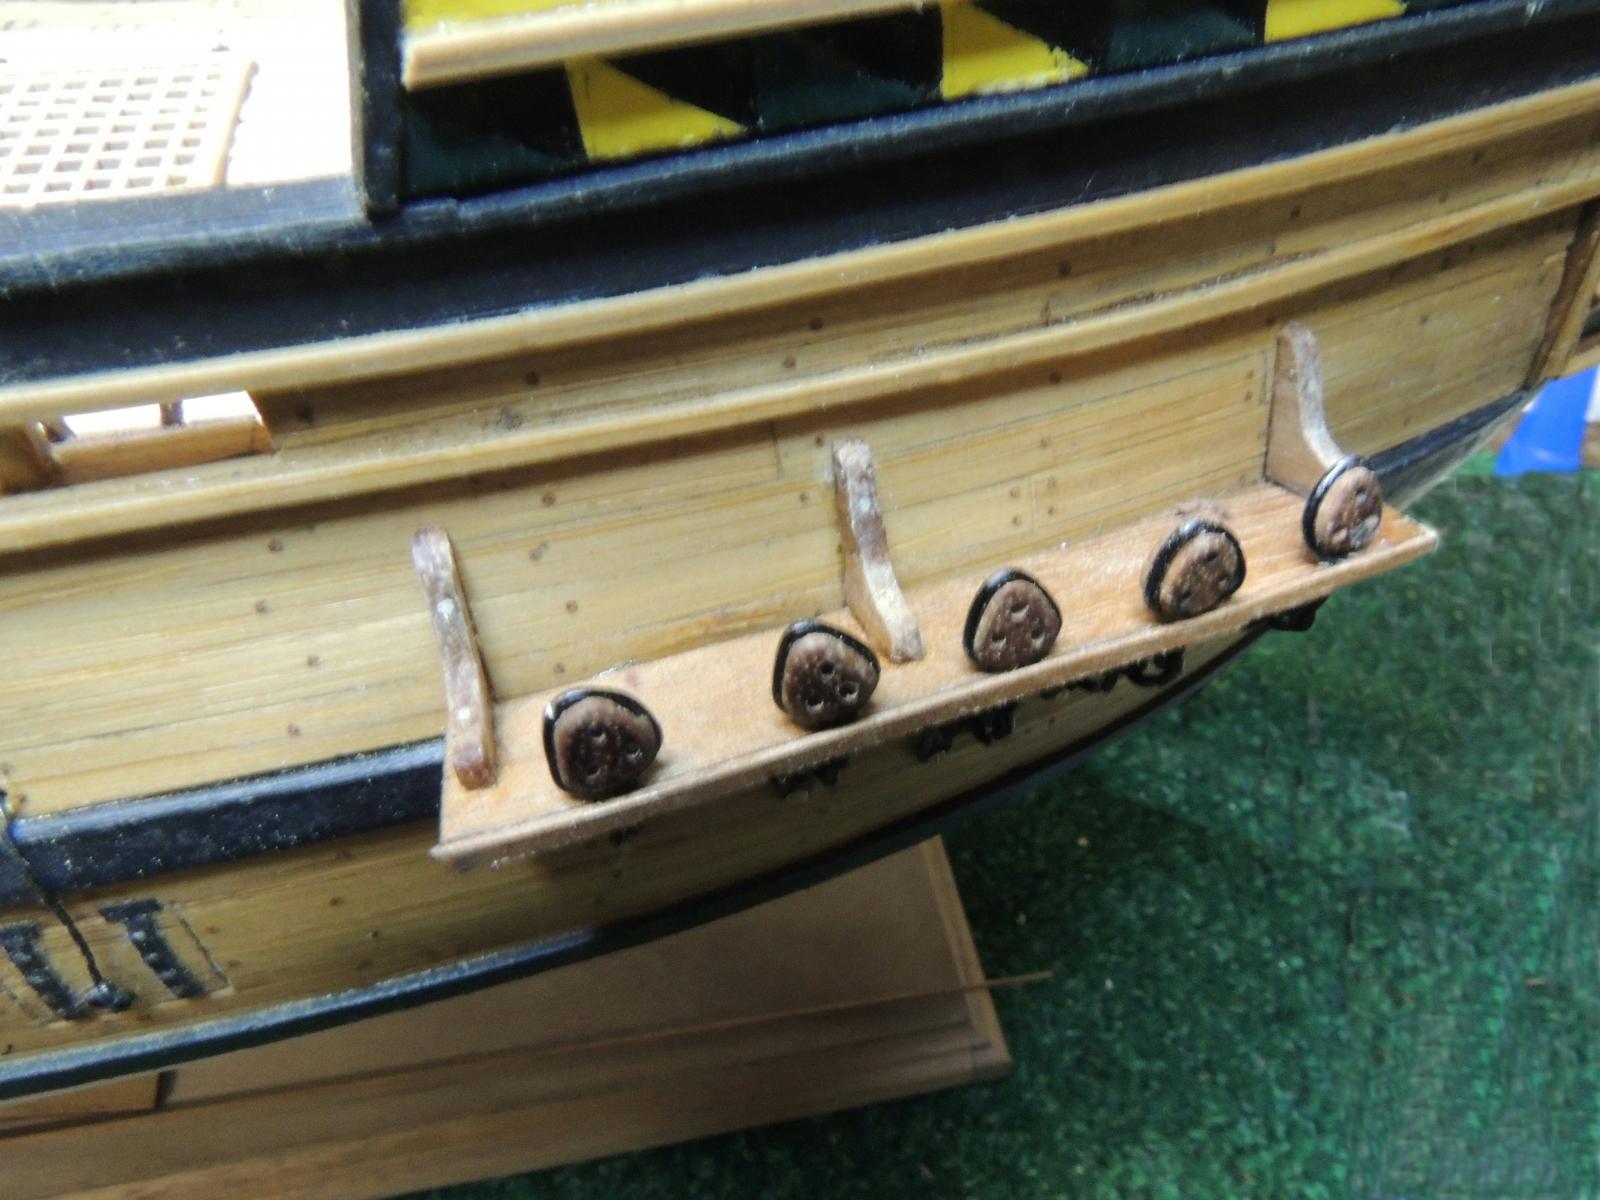
Quick update on next step....channels, deadeyes, and chain plates:
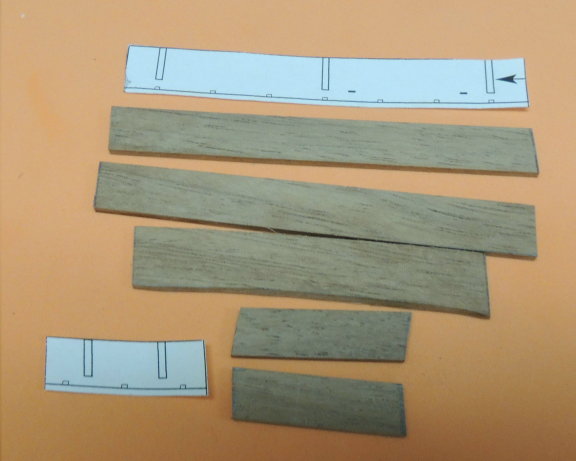
1st photo.... all channels have been rough cut.
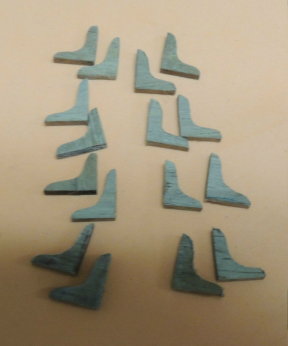
2nd photo....All knees have been shaped.
3rd photo.....used lathe to turn walnut stock and score each deadeye.
There are two sizes needed (60 pieces of 1/4" for lower channels - and 24 pieces of 3/16" for top mast shrouds).
Each deadeye will be drilled and dressed before cutting off....then finish dressed with a fine file.
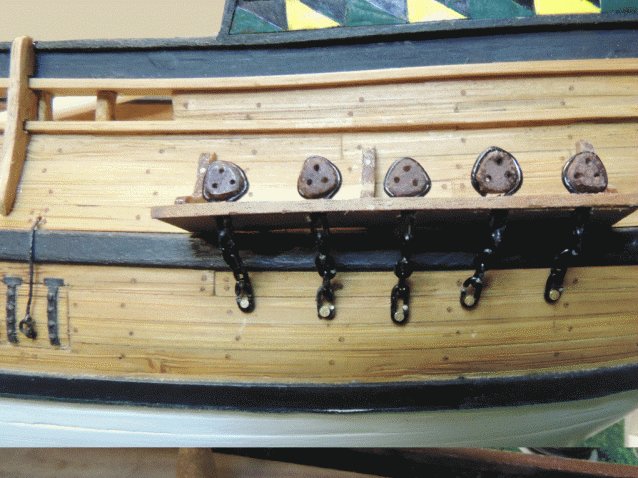
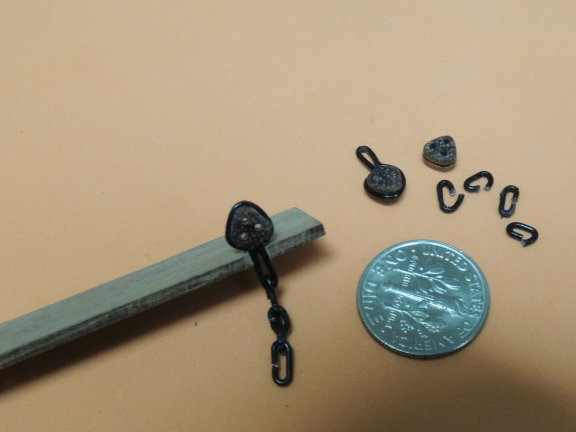
4th photo....shows channel, deadeye, and chain plate assembly.
The chain plates consist of 5 pieces cut and shaped from 74mm black wire. There will be 42 sets required.
I don't need to say what I will be busy working on for a next few days.

-
Looks great Andy Suggest you clear out the background of your photos in order for your subject to show up better. I usually spread a cheap plastic table cloth from Walmart for most of my shots. Anything with a solid color will do.
-
That's the way to go Frank. It's YOUR ship, and you can bash it up any way your heart desires. Please let me know when you launch your log.
-
Omega - I would have said the same thing about MF before I got into the smaller scale build and discovered there was much more to her than first meets the eye. In fact, after taking a couple of years off from modeling, I was looking for a little "warm-up" project before diving back into something more serious. Boy was I surprised. She's a real "sleeper" for sure.
I should add, I think Chuck Passaro's MF kit is excellent, (using his plan sheets for this build) and highly recommend it for builders at any level. Although, as a scratch builder, I tend to do some personal bashing, my MF is 90% strict adherence to his kit design. I look forward to tackling his Winnie once I ever finish these MF projects. It looks really special.....in the class of the Confederacy.
-
Thanks Adam, hope you're having a wonderful vacation....feel the same about seeing her rigged. I get to go to school on your work. I like that.

Russ - Always good to see you dropping in.
-
-
Russ....your progress on the deck fixtures are inspiring. I love your clean, sharp details. Beautiful job mate.
Dave
-
Please explain the bit you used to cut the tree nails Marsalv. Amazing!
And - what is the wood?
Beautiful deck by the way.
Enjoying your build very much.
-
-
-
-
Took a couple of days away from the shop to take the Admiral on a little road trip with some friends to the coast....great time had by all.
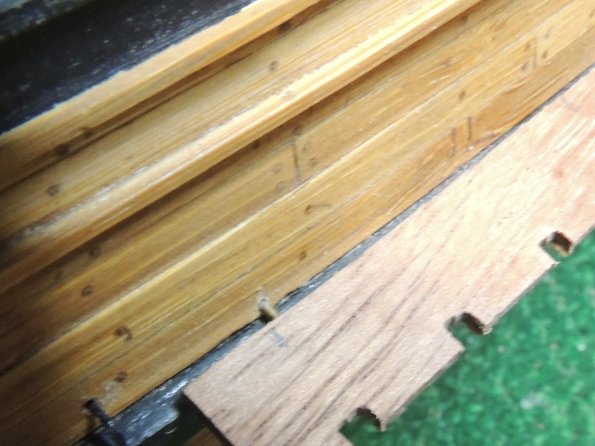
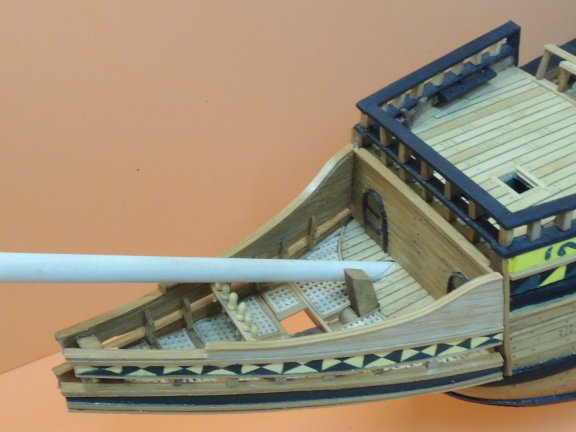
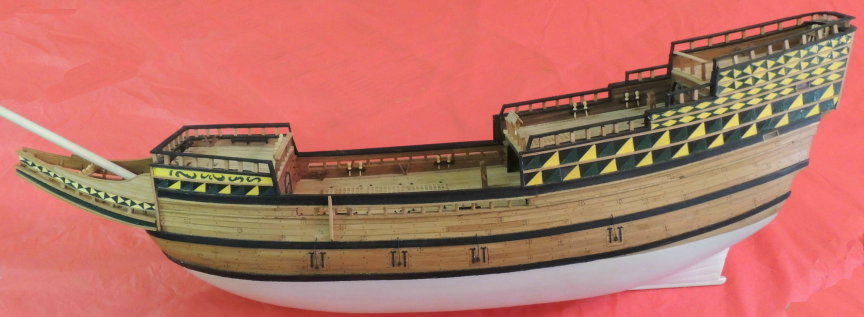
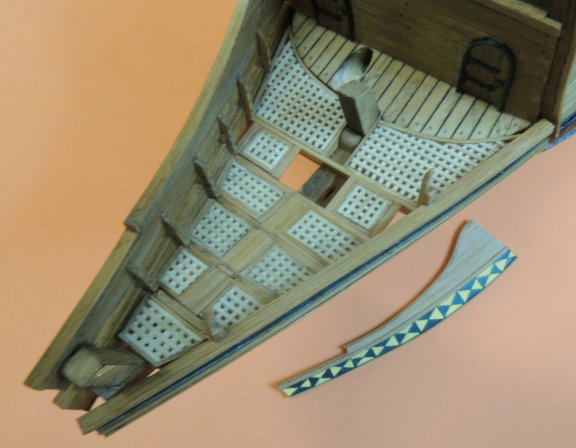
So we came back all fresh and anxious to re-tackle those pesky beakhead grids....
Made pretty good progress the last couple of days.....photo below
Now ready to attach the upper panel (seen in the background) on the port side and create the stanchions for that side.
As nice as it was to take time away, it feels pretty good to be back in the shop. I guess I have become re-addicted to this crazy hobby. I'm sure none of you have a similar issue.... huh?


Mayflower by SawdustDave - Finished
in - Build logs for subjects built 1751 - 1800
Posted · Edited by SawdustDave
You are so right Frank. I hate to think of what it would have been if I had fitted all thirty of these chain plate assemblies as I was going. And there's no reason to think I would have found my mistake before completing all of them.
I can picture the Amiral walking into the room and saying to me....."What's wrong sweetheart? Why are you crying?
Thank you Nigel.