


SawdustDave
-
Posts
1,770 -
Joined
-
Last visited
Content Type
Profiles
Forums
Gallery
Events
Posts posted by SawdustDave
-
-
Piet....knowing you, they are probably functional too.
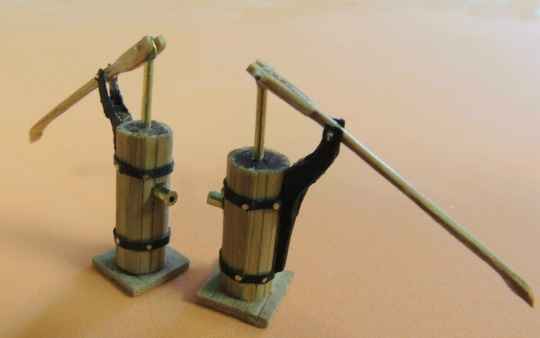
Frank....after a little thought to your request for some details, maybe this will help some.
The height of the pump's cylinder's are 5/8". So I began by planking a 2" long dowel with very thin strips of (you guessed it) bamboo.
After planking, I applied the bands (black vinyl) at proper intervals and used brass wire to emulate the nails (needle sharp tips).
After filing the brass nails slightly above flush with the bands, I then used a razor saw to cut the assembly to their measured lengths....giving me the two pump bodies.
Of course, the pump riser brackets and handles are sub-assemblies....pretty much straight forward as seen.
Hope this helps a little.
- Piet, mtaylor and CaptainSteve
-
 3
3
-
-
-
Hi Eitan....welcome to the world of scratch building, although, I'm not sure your approach to having your use of laser cut parts would completely stand up to the pure definition of "scratch building". Most of us scratch builders actually shape virtually all of our parts with a Swiss pocket knife....ha ha ha
Looks like you're off and running.
Found this pic of what I assume she will eventually look like.
Cheers mate

- yvesvidal and Elmer Cornish
-
2
-
Allan/Ed.... Can't argue your rather obvious point - skill is 90% "knowledge". The actual process of "learning" is one element, while the ability to APPLY knowledge becomes a practiced art. Not being machines or computers, we humans handle those two elements with greatly varying degrees of proficiency.
You, sir, are rarely gifted on both counts.
So I pulled up your postings to show my poker pals last night (none are Modelers). They have always thought I was kinda nuts....they think you are completely insane!
Then they proceeded to separate me from a moderate amount of hard earned dollars.
-
You continuously blow me away mate.
-
Nenad - early cup of java stimulates the gray matter. Works for me.
Thanks Joe/Augie/Piet
Popeye - Plenty of cello around the shop as well, but none were thick enough to accept the deep cuts I needed for this illusion.
Lot of tree nailing....as I look around at some of the really fine projects, I'm not sure I shouldn't do many more. Afraid my pattern doesn't lend to adding more at this point. The pattern on Remco's Kingfisher is a perfect example of how I would go, if I were to do it over again....not gonna happen.
Thanks all
-
Beautiful work Capt. Frank....also love the background setting of those last pics. Living on water has been a longtime dream....I envy you greatly. Looking forward to future progress postings.
Dave
-
Ed....you have no idea how much we appreciate this last posting. This level of extreme detail is so far beyond what most of us have ever attempted, it serves as an example for me personally that no amount of perfection is too much. While we may never achieve this skill level in our own work, we will be much better than we were.
Thanks mate.
I solute you with utmost respect.
Dave
- CaptainSteve and EdT
-
2
-
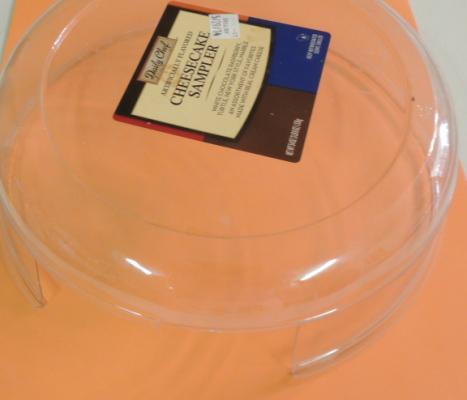
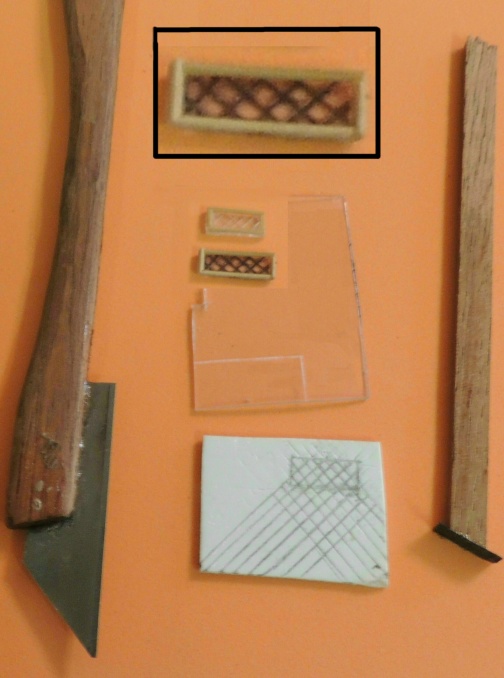
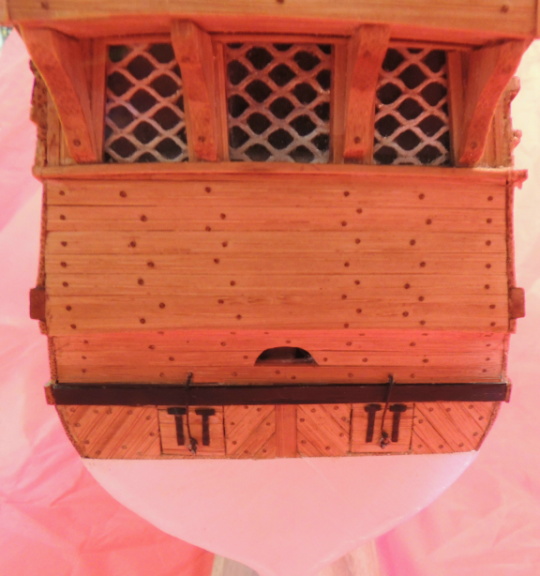
Small windows solution.....best I could come up with this morning. So I'm going with it for now.
First I had trouble finding a clear plastic for the window glass that wouldn't completely fog up with small application of CA.
The material also needed to be thick enough for me to cut deeply into the surface without cutting completely through.
After trying several different clear plastic from around my shop....all too thin....I went to the kitchen and found this cheese cake platter cover. Turned out to be perfect.
Used card stock to make a template for the alignment and spacing of the wire mesh....
Cut out a template for shape and size (including frame width)....glued it onto the end of a stick so I could keep it from moving around as I traced around it ....especially onto the side of the ship.
Finally - Used a sharp blade to make deep cuts into the plastic for each of the wire mesh lines....
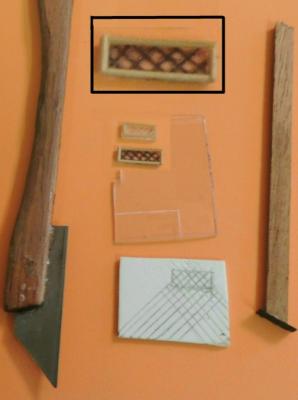
Then the cute part....to get the black wire mesh lines, I colored the entire surface completely with a wide tip Sharpie (washable) and immediately wiped the surface with a tissue, leaving the black ink in the deep cuts. Bingo!
For the frames, I used strips of bamboo that I had pulled through my draw plate.
These finished window units are sitting loosley in place....

Back to more treenailing this morning....
-
-
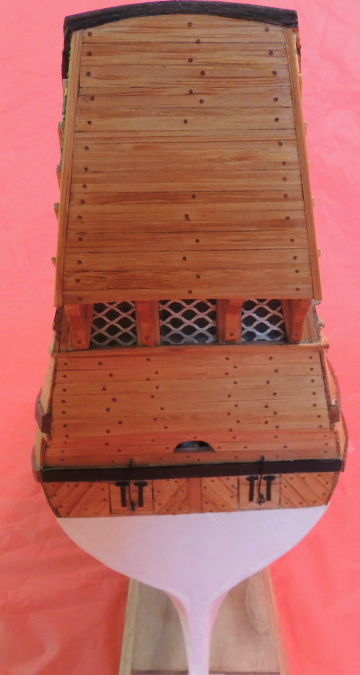
Omega, I am glad you appreciate those stern windows. I had to rip those little suckers out three times to try to get the geometric alignment of the gratings fairly close.
Now I'm working on the four little windows that will go near the stern (2 on each side). They are really tiny with gratings.
Tried several techniques so far and haven't hit on anything I like yet.
Closed up shop and called it a day. Maybe something will come to me during the night.
-
Decided to just paint a big sign to hang on the side.... "CHILDREN ON BOARD"
Now who would fire a killer tube at a bunch of chillen.
Seriously....That is one awsome u-boat Piet. You're a heck of a craftsman my friend.
Thanks for the visit, and for joining in on the fun chat..
Cheers
- Piet, pete48 and CaptainSteve
-
3
-
-
Pete...."faster boat"....you raise a good point mate.
So if I've got this great sonar system, but then I also have a very slow ship....So I get a little ping signal from Piet's killer torpedo launched in my direction....just in time to say "OH SH_T!"
Hmmmm
Me thinks we all need a better plan here.
- pete48, CaptainSteve, mtaylor and 1 other
-
4
-
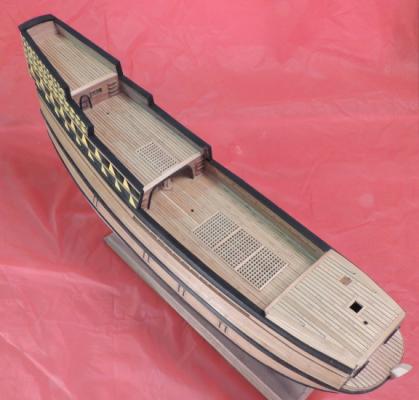
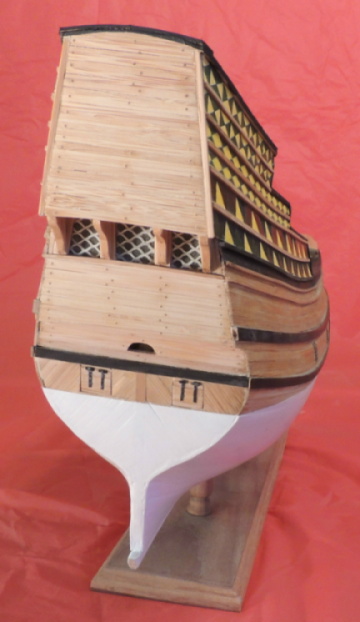
I didn't want to do any close up shots of the stern area until I first was able to finish the treenailing and then staining.

Also added the lift rope and rings to the gun port lids.

Finally got around to wiping a thin coat of poly to her walnut bulwarks. Brings out the rich grain very nicely. Liking the contrasting mix of colors from deck planking to bulwarks to the rails.

-
-
Thanks Pete and Frank...
Walmart "Greeter" ?.....I got fired from that job on my first day for telling a lady how nice her twins looked. She got all bent out of shape....
"Can't you see my two little girls is three years apart?! Stupid old man!"
So I said to her "Sorry lady, honest mistake. I just couldn't figure how someone as ugly as you managed to get laid TWICE."
Guess I'm not cut out to be a "Greeter" at WallyWorld huh?
-
Dropped charactrs....always figurd it ws jus me. Hmmm
Phunnie
The worst thing is when you somehow miss removing a small wood piece lodged out of sight....and it comes un-lodged after you have completely closed up the hull and decks.....rattles around inside. This happened with my little mini-Vic.
-
Hi Steve:
As much fun as the small plastic kits are....once you're ready for wood, you will be hooked for life. Enjoy.
Looking forward to your progress posts.
-
-
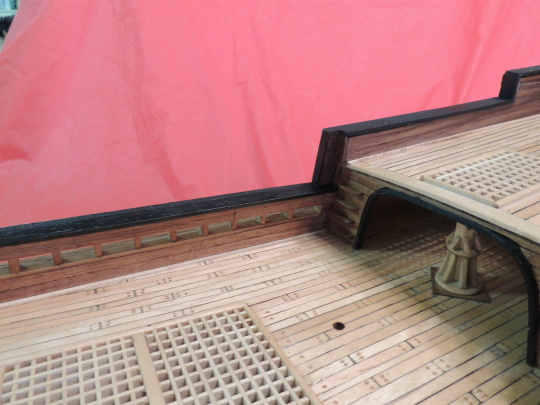
Panels mounted and trimmed out.
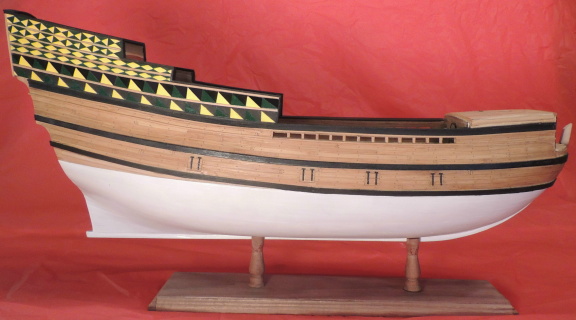
Hull painted to water line as suggested by all my mates.....8 coats of diluted acrylic.
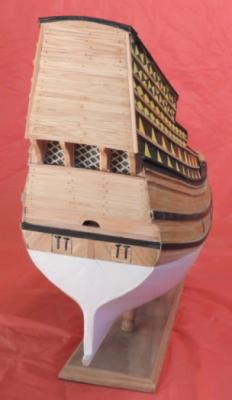
The water line landed very nicely just below the gun port lids. I really liked that.
As you can see, I've got another load of treenailing ahead of me.
Decided to paint all of her rails black....kinda liking the contrast (need some expert commentary on that issue)
Not going to do the forward panels for a while as I would like to spend some time on deck fixtures as a change of pace.
First, more treenailing.....lots of 'em.
-
Just for kicks, purchased a pack of double edge razor blades, cut one side down and stuck it on a handle....Conclusion is nope.....the blade is too thin, and it is actually too sharp....tends to move out of the cut line on second pass.
It does, however, make a pretty good scraper.
Scrap that idea....
All is not lost. I can use my old military shaving kit for old time sake. Only problem now is my bathroom mirror doesn't open up and then have the little slot inside the cabinet to dispose of used blades....anyone remember those?
Cheers
-
Been wondering about double edge blades Popeye....excellent point. Don't know the last time I purchased a pack of double edge Gillette blades, though I still have the stainless steel handle/holder I used in the military over 50 years ago. "Look sharp - feel sharp".
On my list for next trip to the drug store.
Dave


HMS Victory by Patrick Haw - Caldercraft - Scale 1/72
in - Kit build logs for subjects built from 1751 - 1800
Posted
Patrick:
Just found your build log for my favorite ship, having built her twice (different scales). WOW! What beautiful work sir. You are a very gifted artist indeed.
Pulling up a chair.
I salute you.
Dave