-
Posts
4,541 -
Joined
-
Last visited
Content Type
Profiles
Forums
Gallery
Events
Everything posted by Landlubber Mike
-
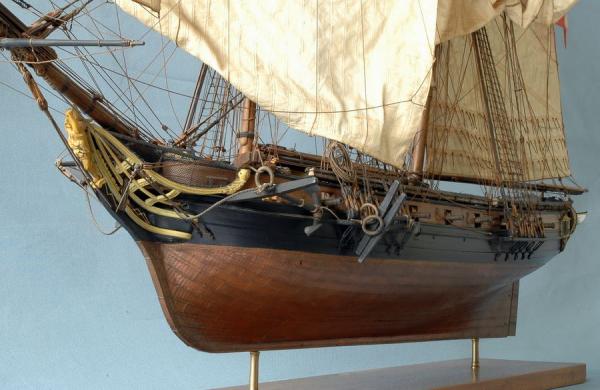
Thanks very much Jason. I'm actually thinking that I'll stain the pear a darker color (like a walnut color) as I want the model to take on a darker hue like the Le Cyclope below. I'm going to match the hatch coamings, ladders, deck items, etc. to the upper hull planking I think. I'm also considering using black stain for the wales and the part of the hull planking between the wales and the coppered section - I like the look on the Le Cyclope, and Realworkingsailor did it to good effect on his Pegasus as well:
-
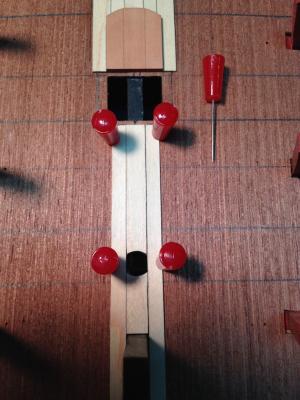
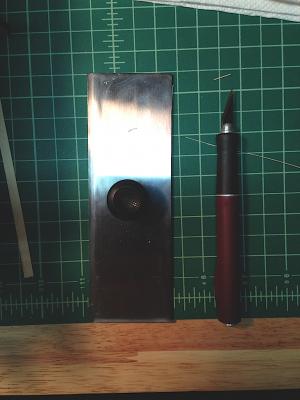
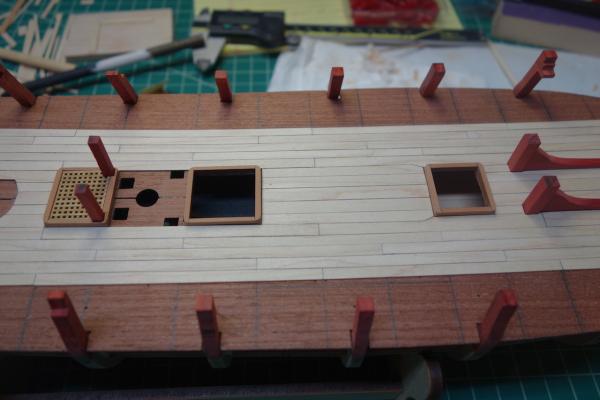
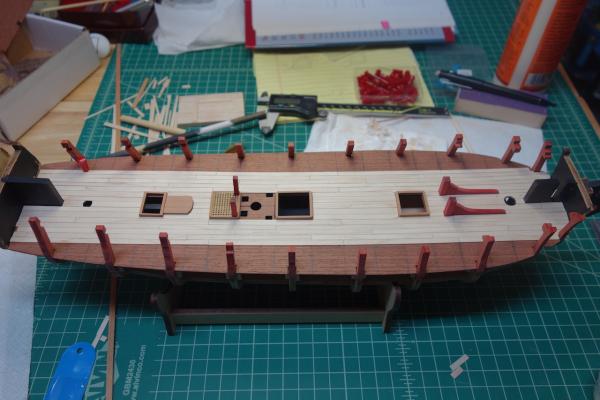
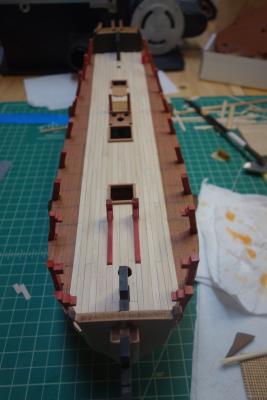
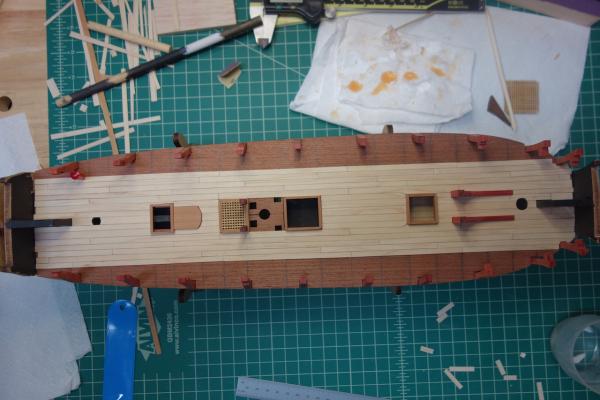
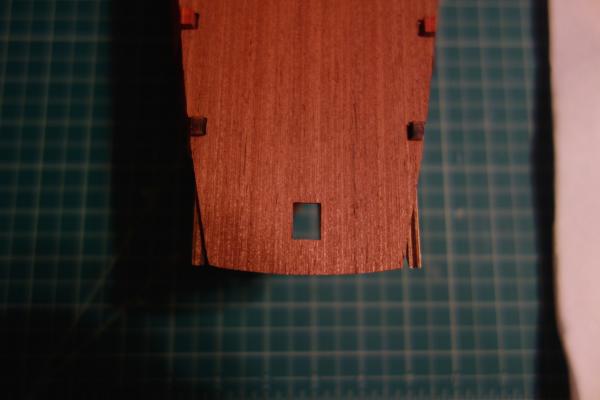
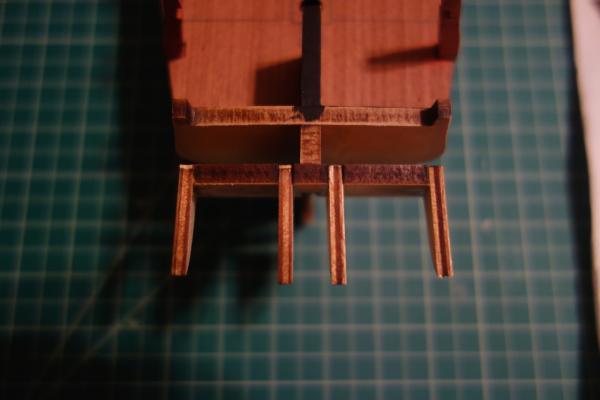
I've made some more progress on the deck planking. I'm planking the upper deck according to the TFFM plans, with the exception that I'm not curving the plank runs fore and aft. I figured that might be too much for my skill level at this time, plus, really the only planks that will be seen are the ones at the waist which are generally straight. Another big factor is that I'm down to two sheets of maple from Jeff and still need some for the quarterdeck and forecastle planking, as well as the gangways. Hopefully I should have enough. Also, since the planks under the the quarterdeck and forecastle won't be seen, I haven't been as concerned about getting pristine planking. Next up is to add four rows of anchor stock planking and the margin planks. I'll probably also add the gunport patterns soon so that I can more easily finish the upper deck planking. I made a mistake when first gluing the stern extensions as you can see in the pictures below in that I glued them perpendicular to the last bulkhead. When I dry fitted the quarterdeck template, I realized the outer extensions needed to curve inwards, so that change was made - thankfully without much issue. For the planking, just wanted to show a couple of tools that I've found very helpful. The first picture is of these thin red headed pins I found at Hobbylinc.com - they are very sharp and thin, so I was able to push them through the deck ply template, and use them to keep the planks pressed up against one another, as well as down onto the template when glued. The second picture is a handy straight edge that keeps your fingers well away from the x-acto blade when manually cutting your planks. This can be found at Micromark. After gashing my fingers a couple of times when the x-acto blade skipped over the edge of a thin ruler, this has been a finger saver.
-

Can i live without a BYRNES TABLE SAW
Landlubber Mike replied to shihawk's topic in Modeling tools and Workshop Equipment
I hope this doesn't derail the thread too much, but I was wondering if someone could explain to me why a mini drill press is needed if you have a Sherline Mill? I have a Sherline mill, and was hoping to use it instead of my Dremel drill press. That's really nice work Danny. This may be a dumb question, but how did you support the pieces as they approached the blade? I've seen examples of this kind of work and always wondered how people accomplished it as I worry about my fingers being anywhere the blade. -
Hi Martin, hope you and your family had a wonderful Thanksgiving Really nice work on the first planking - you're really flying along! I forget, what are you going to use for the second planking? By the way, I was near Woodcraft over the weekend and picked up a can of the General Finishes "Whitewash." With Jeff closing HobbyMill, I have been thinking about wood for future builds, which for me includes the Charles Morgan. The Morgan has a lot of white, which would be expensive to replicate with holly (or difficult to source straight enough stock for), so I have been thinking about alternative. The Whitewash looked perfect (to me at least) on Jeff's maple, where it gave it a nice white that wasn't garish at all and let the character of the wood come through (where paint covers it up). It even looked pretty good on pear and walnut. I think it combines the best of paint and stains - easy to apply and keeps wood character like stains, and colors well like paint. Just thought I'd pass that along in case you are thinking about white on your build.
- 467 replies
-
- fly
- victory models
-
(and 1 more)
Tagged with:
-
Gorgeous model Mobbsie, very well done! Seeing how it's almost as big as your couch puts things in perspective as to how big these models are
- 1,279 replies
-
- agamemnon
- caldercraft
-
(and 1 more)
Tagged with:
-
Hey Peter, very nice work. I added the bowsprit netting on my Badger - you're right, it's mostly hidden by the staysail if you end up furling it. A fun little detail to make.
- 431 replies
-
- pegasus
- victory models
-
(and 1 more)
Tagged with:
-
Thanks Martin. With you slightly ahead of me on your Fly build, I've learned a lot from your log. The discussion on hatches and gratings was very informative! Along with generally having a different color for the bitt cross pieces, I've been thinking of a modification for the riding bitts cross piece in particular. That cross piece had an elm "backing piece" - essentially a replaceable piece of wood given all the wear and tear on the aft side of the cross piece from the anchor cables. I've been toying with the idea of highlighting this by either using redheart for the cross piece and pear for the backing piece, or pear for the cross piece and boxwood for the backing piece.
-
I agree 100% Alistair. It's funny, a couple of years ago when I bought the Pegasus kit, I was originally planning on building it straight from the box with some modifications around the margins. The more I looked at BE's log (and yours and the other Swan class builds here as well) though, I realized I wouldn't be happy with that, and decided to push myself to building the best model I can. That's what's really great about MSW and the community here - you learn a lot from folks who are generous with their time in sharing their builds in a very friendly and supportive fashion. I tried to share as much as I could on my Badger build to give back - it would really make me feel good to see others read about my bumbling efforts and build much better Badgers in the future. Even with limited progress on my Lyme build, I've had a lot of fun spending the dozens of hours researching and trading thoughts with Ian and others.
-
Thanks Martin. Yep, the bitts, along with the quarterdeck and forecastle beams, are of redheart. I'll do the bulwark planking and cannon carriages in it too. I'm wondering about the cross pieces though. I'm wondering whether I should go with redheart, or maybe switch it up a bit and use pear for the cross pieces.
-

Micro-Mark Sand-It
Landlubber Mike replied to RichardG's topic in Modeling tools and Workshop Equipment
I have the Northwest Short Line version - it's pretty good, and definitely is better than hand sanding. I don't use it much though, as I find the Byrnes disc sander to be my go-to option. Frankly, I can't see how I would ever be a decent modeler without the disc sander - if you have the money and space, I would highly recommend it. -
Thanks guys. Alistair, thanks for pointing out the technique of butting the planking against the hatches. I think it makes for a very clean look, and you don't run into the issues of having the hatches sit halfway on a plank. BE, your build is the gold standard of the Swan class builds. I think I speak for most of us builders that if our builds came out half as nice as yours, we would be very happy.
-
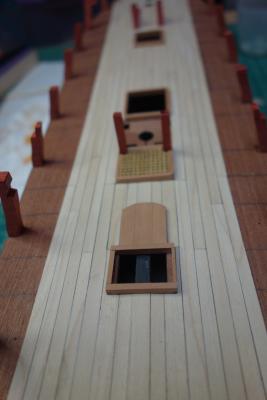
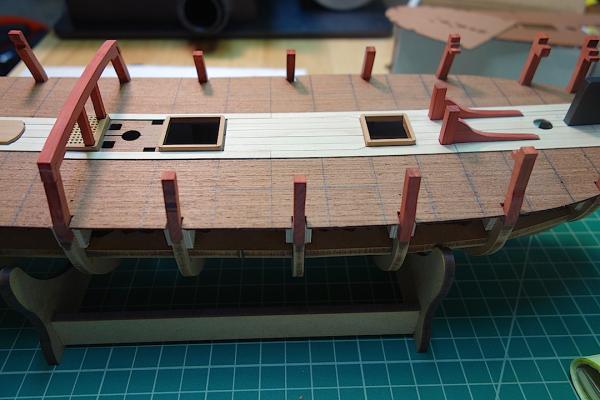
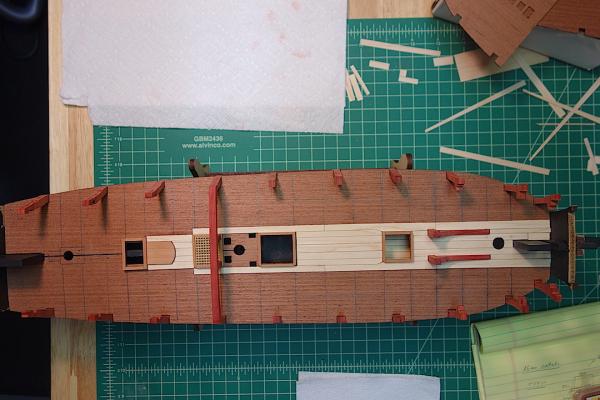
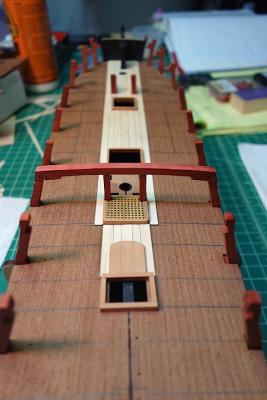
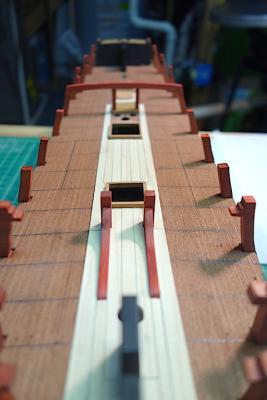
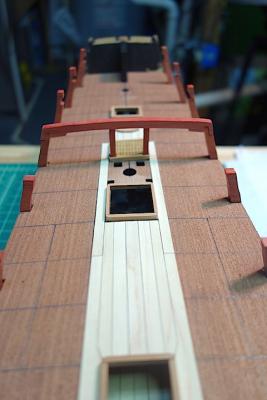
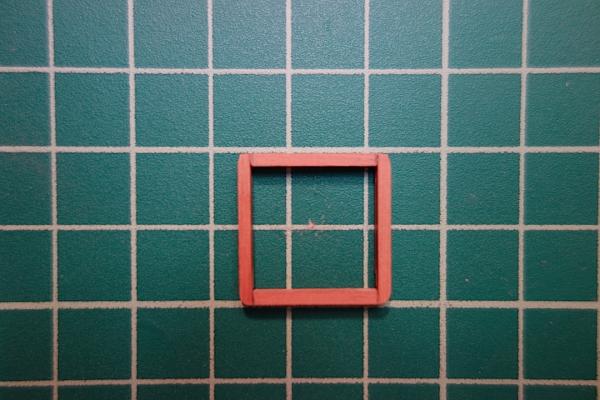
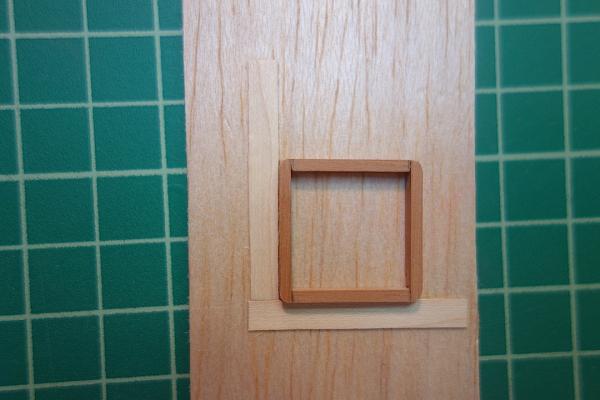
It's been a while, but I've made a little progress (work and kids are taking a lot of my time these days). I've managed to get some additional planks down, and have been adding final touches to the hatches and capstan step. Also have been slowly tweaking the main jeer bitts and riding bitts. Things are coming along pretty nicely I think. Here are some pictures - nothing aside from planks has been glued down to the deck yet. I started rounding the corners of the hatches. With the planks butting up against the hatches, the hatches are square at and below the level of the deck planking, and have rounded corners above the deck planking. So, here is my incredibly complex jig that I came up with to round the corners. Essentially, all it amounted to is adding two pieces of planking material at 90 degrees to each other, dropping the hatch into the corner, and using a sanding block to round the corner. I still need to sand camber into the tops, which will come next. On the deck planking in general, my plan was to add curved planks as in the TFFM model planking pattern. I'm not sure my skill level is up to the task, so I nixed that idea and thought I would take a short cut by using angled planks under the forecastle and quarterdeck. But in thinking a little bit more about it, different rows of planks in the TFFM pattern start to curve at different points along the deck. I started thinking that if I had them all become angled at the same point, then the deck would have an odd look to it. So, I've decided to use straight planks instead, but will use the TFFM pattern for locations of ends of planks, the anchor stock planking, etc. I still need to gear up the courage to work on the decorative details of the bitts, and figure out whether I want to use stains on the hatch coamings and upper hull planking. I go back and forth, but I think the hatch coamings at the least will need to be made darker in some fashion.
-

Landlubber Mike's technique for furled sails
Landlubber Mike replied to Landlubber Mike's topic in Masting, rigging and sails
Hi Shaun, Not sure exactly at the moment, I'd have to take a look at some of my books (the Harland book has a lot of great pictures of sails in various positions). Maybe take a look here - I think there is a picture of a furled staysail in the first set of pictures: http://www.charleswmorganmodel.com/cwm-museum---as-she-is-now.html -

Landlubber Mike's technique for furled sails
Landlubber Mike replied to Landlubber Mike's topic in Masting, rigging and sails
Unfortunately I don't. If I had to do it again, I'd search for even thinner material, like the thinnest handkerchief material I could find. On your earlier flag comment, I didn't add a flag pole to my Badger. I just attached the flag to the end of the gaff, with, if I remember correctly, lines that ran down to cleats on the bulwarks. Either way, with the sails furled, the ship could be viewed as at harbor. -
Since you're planning on planking over it with boxwood anyway, can't just just lay the plank flat, and fill any gaps with stealers? It's interesting - you read that you shouldn't bend planks laterally against their width, not have planks less than half of their width, etc., but when dealing with kit wood with equal strips I think it's very hard to plank fully by all those rules. Even on my Badger, I found I needed custom planks for a clean look. But of course for custom planks you usually need wider pieces of wood than your standard planks (I ended up buying some wider walnut strips for my Badger). Big reason for why I decided to buy sheets and cut my own planks.
- 467 replies
-
- fly
- victory models
-
(and 1 more)
Tagged with:
-
Hi Peter, nice start. Looking forward to seeing your work on this beautiful ship.
- 207 replies
-
- billing boats
- cutty sark
-
(and 1 more)
Tagged with:
-
Yeah, looking really great Eamonn. Very clean work, this is coming along very nicely.
- 1,039 replies
-
- ballahoo
- caldercraft
-
(and 2 more)
Tagged with:
-
Martin, I love the look of an all boxwood hull. There are a bunch of builds on here that took that approach (including Alistair at one point), and I believe that many of the famous old models primarily used boxwood. I think it will look great on your Fly - go for it! I painted the lower hull of my Badger "dull white" using Admiralty Paints, and I thought it looked a little too garish for my tastes. I also primed the hull before painting, which made the painted area look thicker/heavier, which was also one thing that I didn't particularly care for. The again, someone on here used a different white for their hull, and I thought it looked really good. After seeing Toni's Atalanta build, however, I'm thinking of using holly to represent the white stuff on my Lyme build - otherwise, I'm just planning to plank it all in pear. For my Pegasus, I'm planning to copper the hull. I plan to use pear above the waterline (still thinking of dying it a bit darker), but the kit's walnut below the waterline to save money (since it will be covered up anyway). Wow, very nice stove! Great job! Can I ask what color/brand of paint you used?
- 467 replies
-
- fly
- victory models
-
(and 1 more)
Tagged with:
-
First, just wanted to wish your pup a speedy recovery. It breaks my heart to see a furry companion in discomfort like that, but hopefully she is on the mend Looks great Martin. Taking the time in the beginning really helps. I think I spend 90% thinking, planning, more thinking, second and third guessing, and planning, and only 10% actually building Like SpyGlass, i was wondering about your use of the walnut. The lime is probably easier? I figured by using the walnut you were just going with one planking layer. Also, just wondering if you decided to paint the hull white or copper it? In either case, you probably don't need to be as precise lower on the hull. Though, I'll probably try to do my Pegasus as precise as possible just for practice for future builds.
- 467 replies
-
- fly
- victory models
-
(and 1 more)
Tagged with:
About us
Modelshipworld - Advancing Ship Modeling through Research
SSL Secured
Your security is important for us so this Website is SSL-Secured
NRG Mailing Address
Nautical Research Guild
237 South Lincoln Street
Westmont IL, 60559-1917
Model Ship World ® and the MSW logo are Registered Trademarks, and belong to the Nautical Research Guild (United States Patent and Trademark Office: No. 6,929,264 & No. 6,929,274, registered Dec. 20, 2022)
Helpful Links
About the NRG
If you enjoy building ship models that are historically accurate as well as beautiful, then The Nautical Research Guild (NRG) is just right for you.
The Guild is a non-profit educational organization whose mission is to “Advance Ship Modeling Through Research”. We provide support to our members in their efforts to raise the quality of their model ships.
The Nautical Research Guild has published our world-renowned quarterly magazine, The Nautical Research Journal, since 1955. The pages of the Journal are full of articles by accomplished ship modelers who show you how they create those exquisite details on their models, and by maritime historians who show you the correct details to build. The Journal is available in both print and digital editions. Go to the NRG web site (www.thenrg.org) to download a complimentary digital copy of the Journal. The NRG also publishes plan sets, books and compilations of back issues of the Journal and the former Ships in Scale and Model Ship Builder magazines.


