Landlubber Mike
-
Posts
4,549 -
Joined
-
Last visited
Content Type
Profiles
Forums
Gallery
Events
Everything posted by Landlubber Mike
-
 Superb work Bob as always. Very nice!
 -
Really nicely done BE. Your artistic touches make an already nice kit even nicer.
- 857 replies
-
- 3
-

-

-
- Sphinx
- Vanguard Models
- (and 1 more)
-
Just pulled up the instructions for the Hasegawa Mikasa deck. Doesn't seem to say anything, but I noticed it says the deck is 0.25mm. My guess is given how thin it it (seems as thin as a sheet of paper), you're probably ok putting it right on top of the existing plastic deck.
-
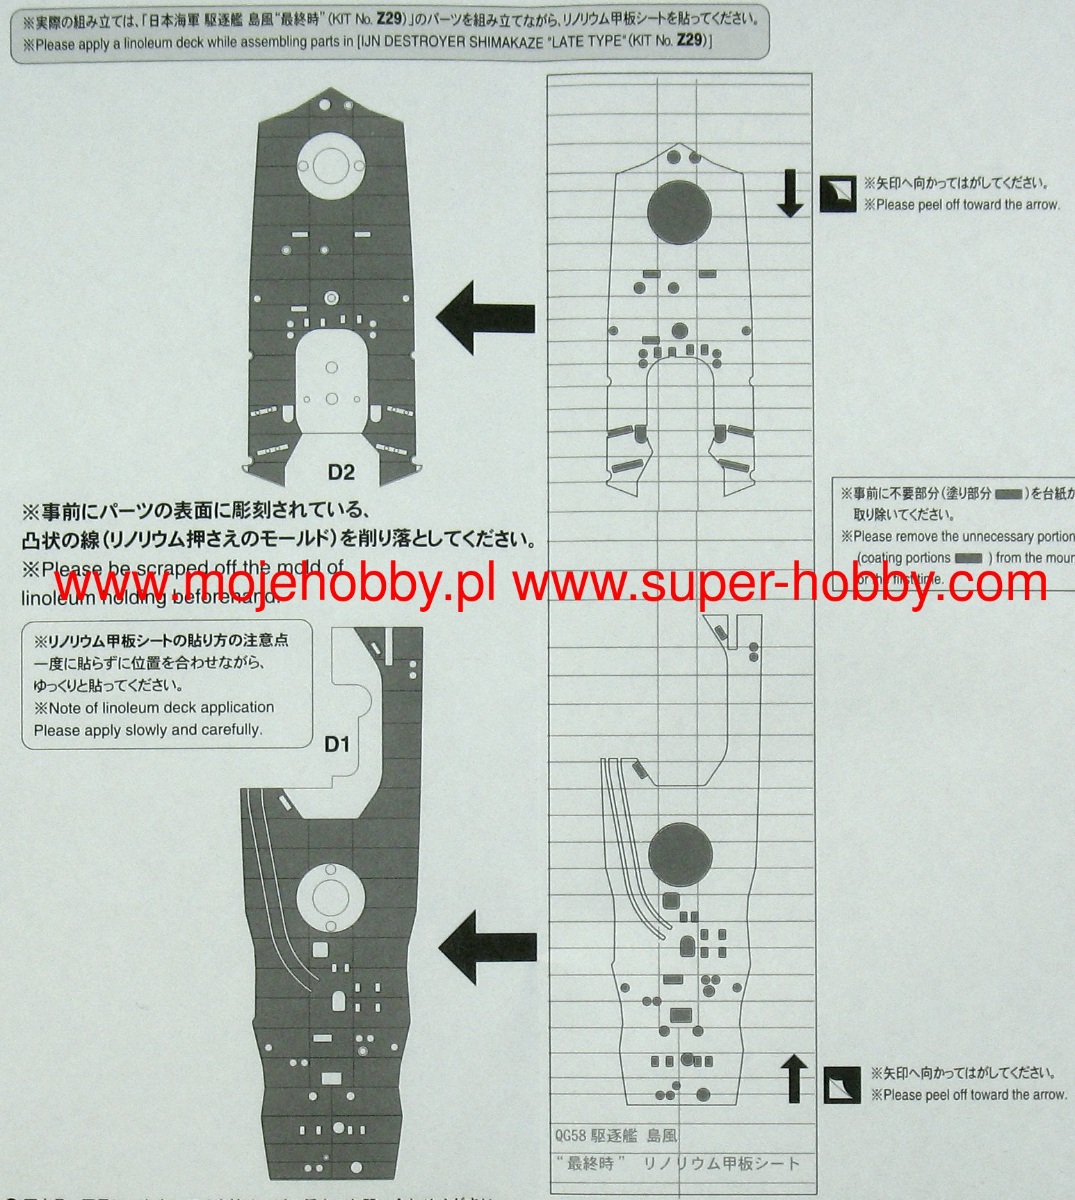
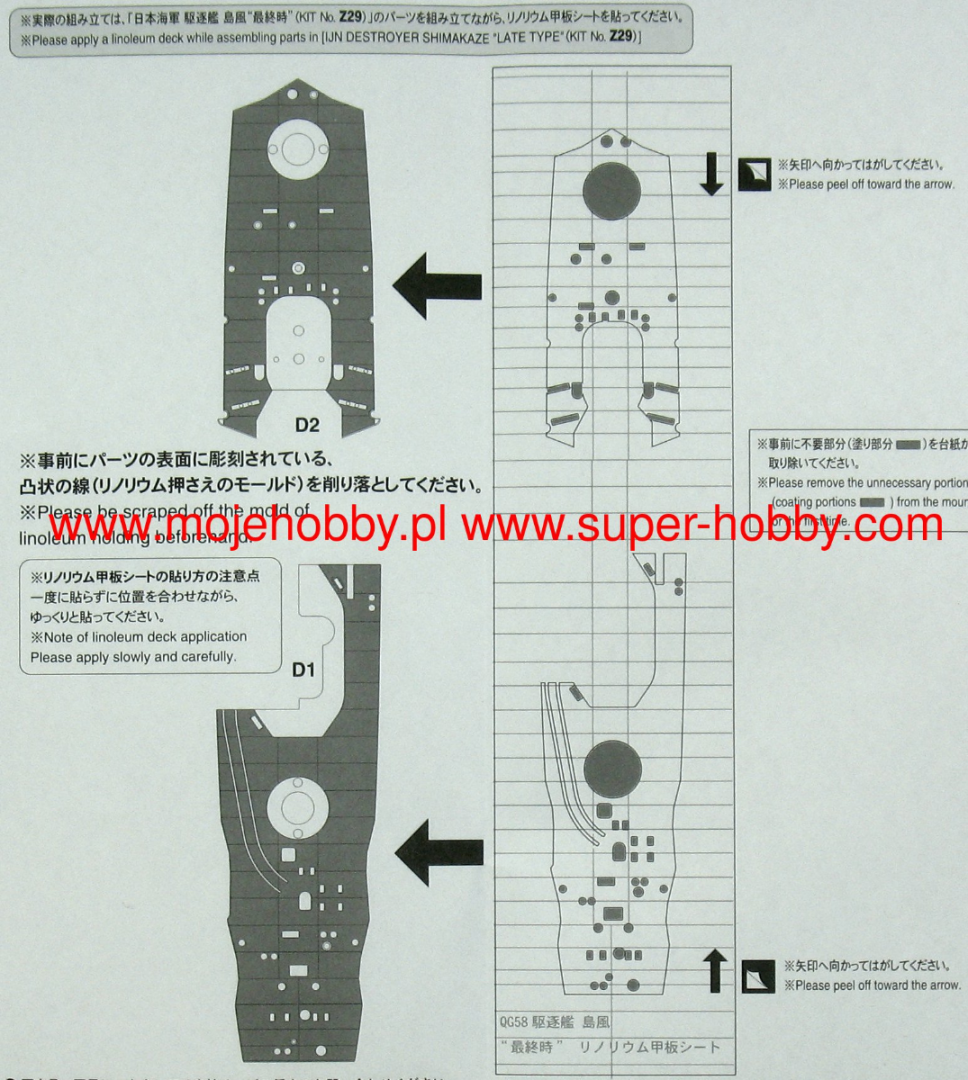
For the linoleum deck, there were raised lines for the brass deck hold downs. The Hasegawa instructions specifically said to scrape those off (translation in the instructions was a bit wonky), so I went ahead and did so. That seems to be a different situation than a scribed deck where for the most part, the deck is fairly smooth with just slight indents. I suppose if your instructions don't say anything, you can lay the wooden deck on top just to get a sense as to whether it would make the deck too high? Here are the instructions for the linoleum deck - maybe your deck instructions have something similar?
-
Doesn't the Hasegawa deck instructions tell you whether you need to cut or sand away the plastic details? I had good instructions on sticking on the linoleum deck appliqué on my Hasegawa destroyer.
-
Looking great Tim! I've always loved the Mikasa. I have the 1/700 Hasegawa kit with the Infini upgrade which I'll tackle sometime down the road. On the PE guns, I think they are usually worth it as the barrels don't need to be drilled out unlike the kit plastic ones which need to be drilled out or thinned. That's where you get your bang for the buck.
-
Unless there is a PE upgrade set specifically made for this kit/scale, if it were me, I'd be inclined to just buy another kit in a more standard scale and/or that has a dedicated upgrade set for it.
-
Mini lathe for mast making etc.
Landlubber Mike replied to Charlie pal's topic in Masting, rigging and sails
Sorry, thanks Roger for the clarification. Sherline also make a follower rest which clamps on the saddle/cross-slide and does exactly what Roger says: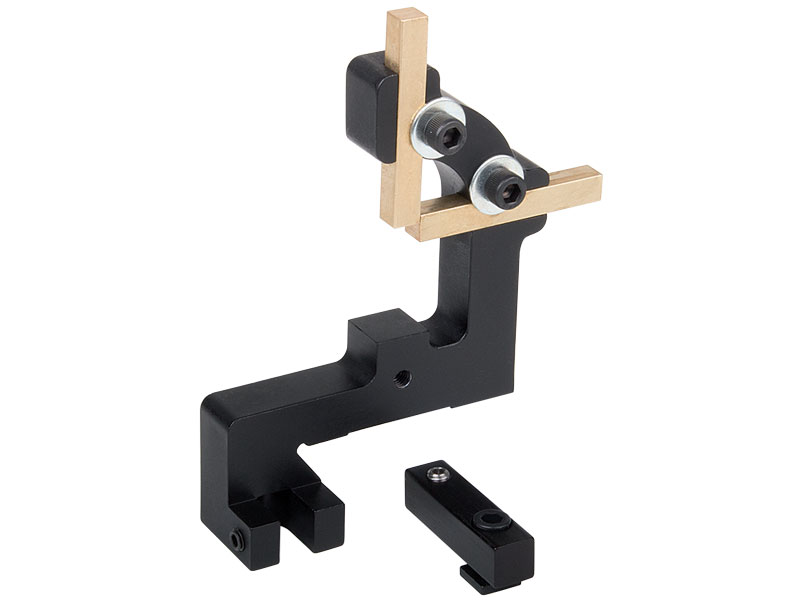
-
Would be a shame if those books are no longer published. I've been using the TFFM extensively on my Pegasus build, and have a few others on the shelf. Just glad I decided to buy the Sussex book a couple of months ago before things closed down.
-
I have adopted another orphaned kit
Landlubber Mike replied to mtdoramike's topic in RC Kits & Scratch building
That's really nicely done Mike. Love the colors you used. I'm sure the prior owner is looking down with a big smile of satisfaction. -
Mini lathe for mast making etc.
Landlubber Mike replied to Charlie pal's topic in Masting, rigging and sails
I used to have a Proxxon DB250, but sold it to buy a Sherline lathe to be able to turn metal and have more flexibility for turning projects in general (larger sized, etc.). The Proxxon was a really nice tool though. It made turning the masts and spars on my Badger a breeze. There is a hole that goes through the headstock so longer pieces are not necessarily a problem. I'm not sure of the diameter of that hole though. If that's what Proxxon refers to as the spindle bore, then that hole is 13/32" or 10mm. It might be too small if you are looking to turn a mast of a larger model (remember, it's a circle, so you won't be able to turn square stock that is 10mm x 10mm). It's been a while, but I think that may have been another reason I upgraded to a Sherline. You can deal with that potentially by buying the extended bed for the Proxxon so you are not relying on the hole in the headstock. The only thing I'm not sure about is whether there is a way to steady a longer piece on the extended bed so that it doesn't deflect out when you are applying tools. This is the steady rest Sherline sells for its lathe to give an idea of what I'm talking about. I haven't had the need to use it yet, but you see how the brass bars keep the stock from deflecting too much when applying cutting tools - particularly where the stock is very thin and has flex to it. Overall, I think for the vast majority of kits, the Proxxon is just fine. If you find the need to turn a larger diameter piece, you could always pre-shape the square stock into an octagon using a jig and small hand plane, and then use the Proxxon. Hope that helps.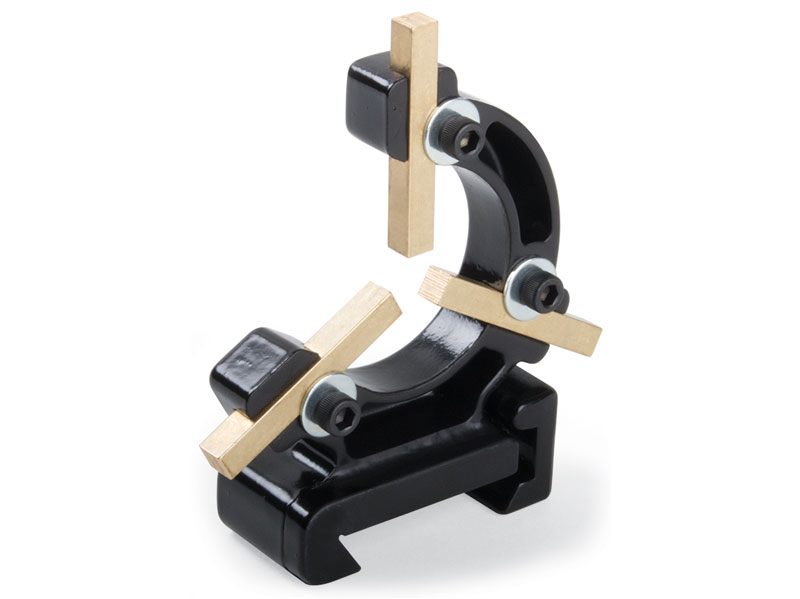
-
Another fantastic model Greg, congratulations! I actually went on the Navsource site the other day to look up other Casablanca class escort carriers to see if there were any cool pictures I could represent similar to what you did with the Thetis Bay. Very creative on your part! What's next?
- 126 replies
-
- 6
-
-
-
- Thetis Bay
- Finished
- (and 4 more)
-
Greg, is the warping a common effect? I have a few kits with wooden stick-on decks and heard of this problem. Is it remedied by pretreating the model with a gloss coat - I.e., does the deck’s adhesive bond better to a gloss coat than plastic? And in your experience, is it a good idea to use additional glue and not just rely on the adhesive? Thanks in advance!
- 126 replies
-
- 5
-
-
- Thetis Bay
- Finished
- (and 4 more)
-
BE, just had a chance to read through your build log. I didn't give a "thumbs up" to all your posts as I didn't want you to have to sign on with 100 notification alerts. But just wanted to say wow! Your work is stellar as always. The stern came out absolutely fantastic. One of these days I'll get back to my Pegasus and hope it comes out even half as nice as your work.
- 857 replies
-
- 4
-
-
-
- Sphinx
- Vanguard Models
- (and 1 more)
-
Glen, that came out really nicely! Fantastic job! I especially like your creative display. Well done!
-
Yeah - those circle type markings. I saw them on the picture, just wondering what they could be from.
- 126 replies
-
- 6
-
-
- Thetis Bay
- Finished
- (and 4 more)
-
Looks great Greg. Any idea what those dark circles were on the Cats from the pictures? Didn’t look like there was structural damage there but almost looked like a burn of some sort.
- 126 replies
-
- 7
-
-
-
- Thetis Bay
- Finished
- (and 4 more)
-
I feel like that too sometimes with some of my models. Drives me crazy when you can’t find that one picture!
-
Very nice job, well done on both! What is next on the bench?