Landlubber Mike
-
Posts
4,547 -
Joined
-
Last visited
Content Type
Profiles
Forums
Gallery
Events
Everything posted by Landlubber Mike
-
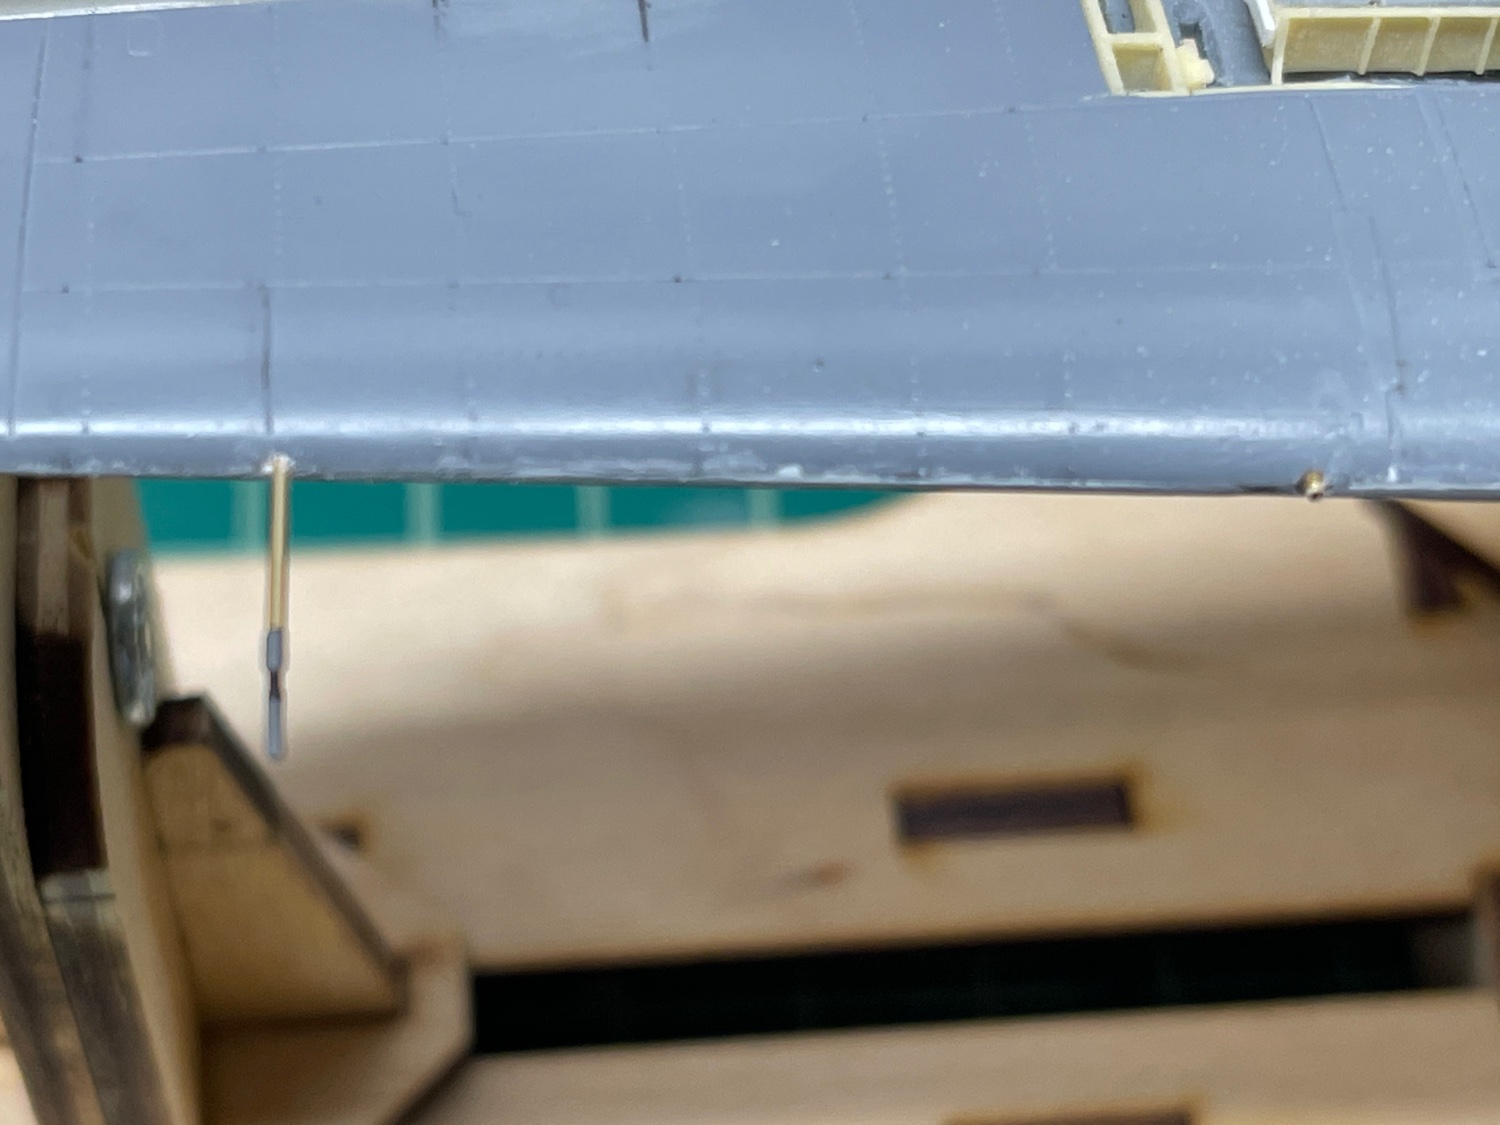
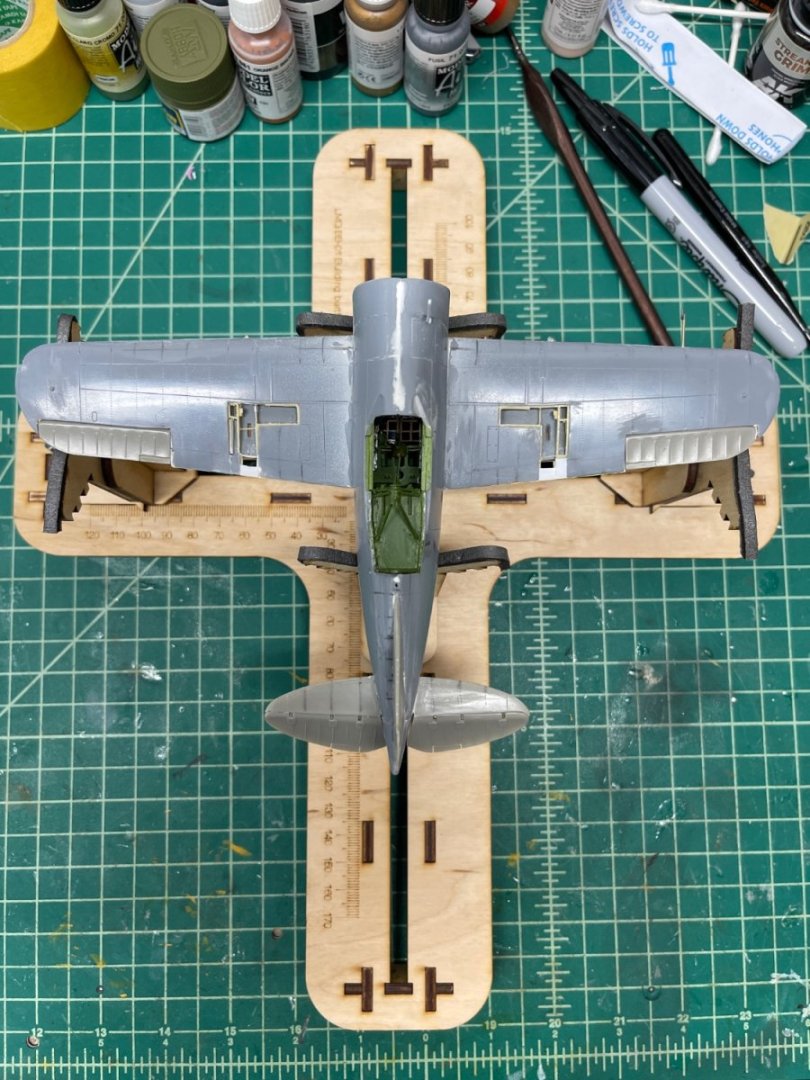
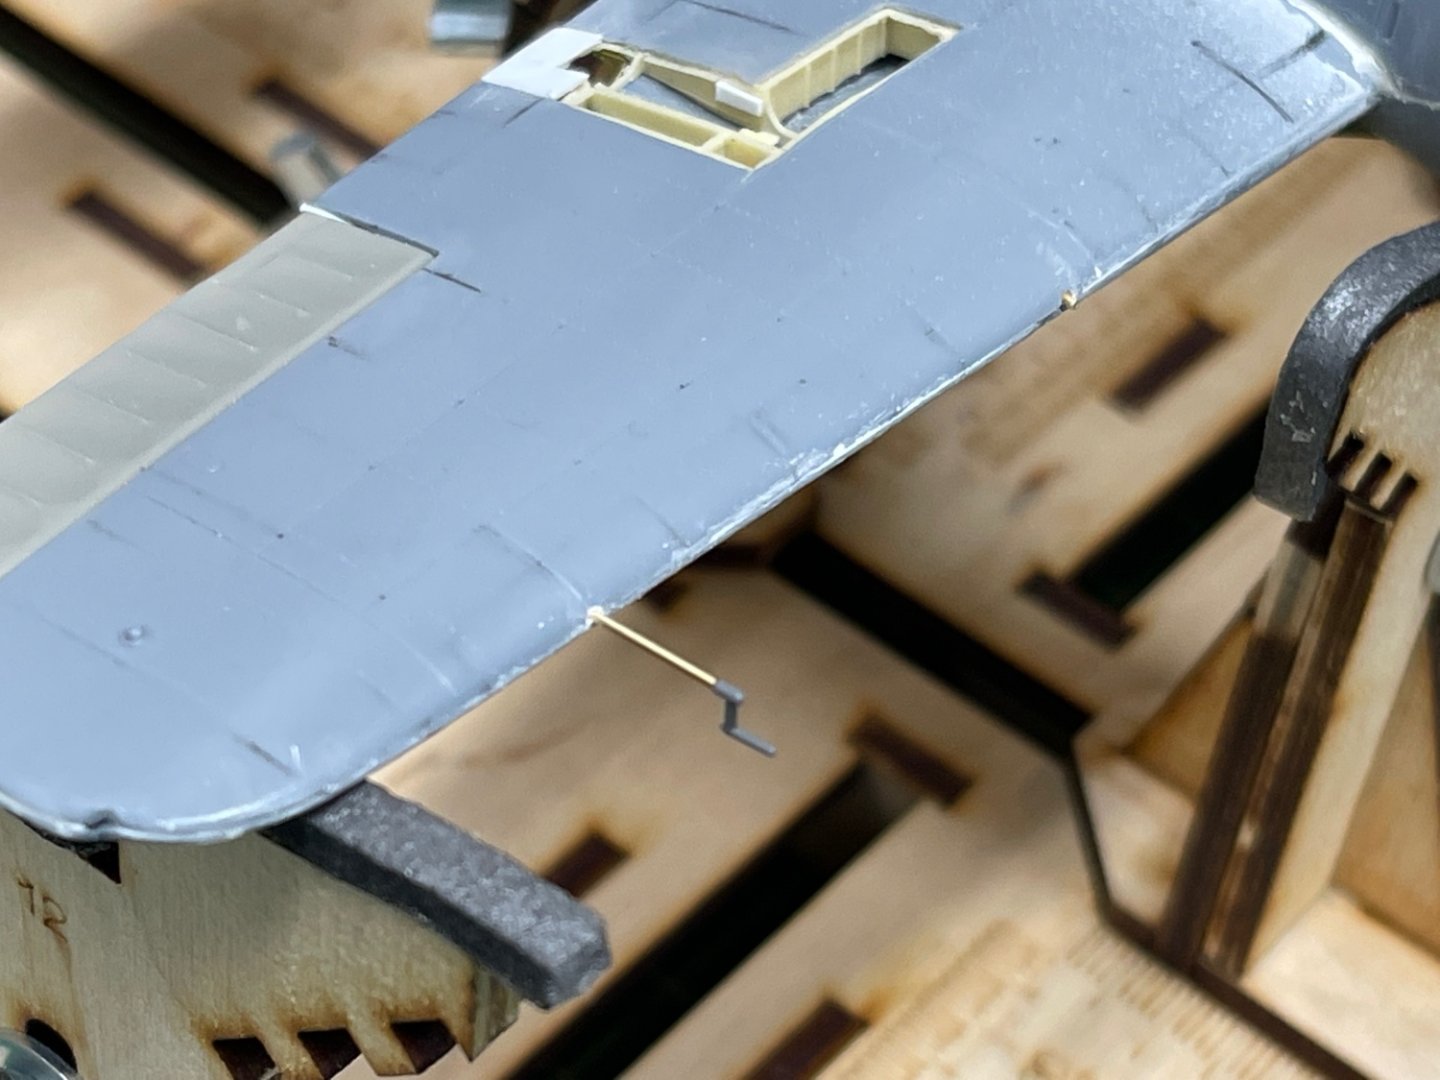
 Thanks guys, it's been an interesting adventure with all the aftermarket. I ended up adding brass gun barrels and a pitot from Master - a bit of a splurge, especially when you can barely see the guns, but the profiles look much more to scale and with better definition than the kit parts. I added rivets using my 0.75mm Rosie the Riveter wheel, and re-scribed some of the panel lines. I've also had to do a few other fixes as well. Apparently all Buffalos except the 339E only had one landing light on the port wing, so I went ahead and filled the starboard side (used my RP Toolz punch set and the 4.5mm punch filled the hole perfectly). It's not in the pictures here, but I also scratch built the radar antenna that goes on the starboard side of the cowl. The kit piece just glues to the side of the cowl, and wasn't a very robust piece of plastic, so I figured it was only a matter of time before I knocked it off. So, I drilled a hole into the cowl, and epoxied in a longer antenna where the base is inserted a few millimeters into the cowl. Seems a lot more robust and will be harder to break off. I'm now in the middle of priming everything with Mr. Surfacer 1500. I had some fit issues which Special Hobby is known for, so it's been prime, fill and sand, prime, and repeat. But getting closer to throwing some colors on it. Building into a nice kit I think. Thanks for looking in!
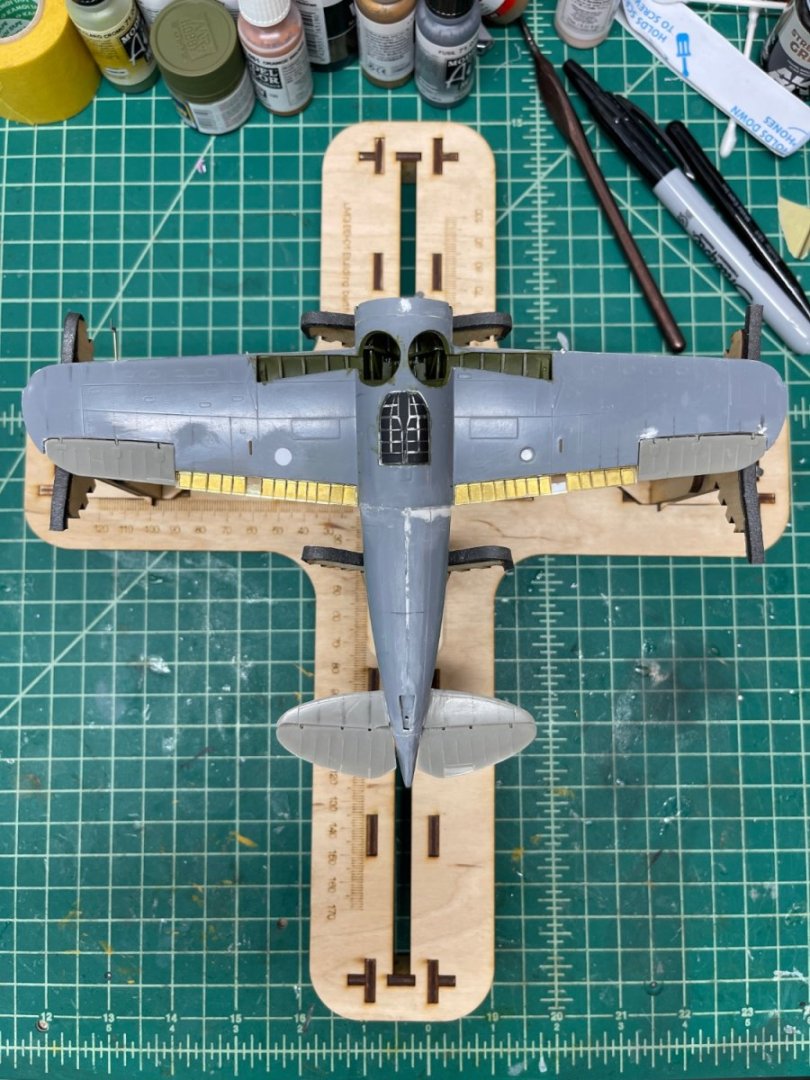

- 51 replies
-
- 13
-

-
Looking great Kevin! Fantastic job! What are you going to use for rigging? I was going to use EZ-Line Fine, but decided to go with Infini. But then I realized I didn't have the right size so had to order it 🤬 Hopefully should get it later this week.
-
Looking really good - nice job!
-
Absolutely fantastic Glen, great job!!! What a cool display! Your skills in SIB building are amazing, only to be matched by your creativity and ingenuity. Thanks for sharing with us!
- 194 replies
-
- 2
-
-
- Bottle
- Treasure Fleet
- (and 3 more)
-
Beautiful work Peter! Turning into a magnificent model!
- 366 replies
-
- 2
-
-
- bellerophon
- victory models
- (and 2 more)
-
That's really helpful, thank you! I was trying to figure out what to do as the Buffalo has a relatively long cockpit and i wasn't sure how to tape certain sections. Having the canopy on the model makes things much easier!
-
Sorry, meant how is the quality?
-
Coming along great so far!
-
Came out great Andrew! Looks like a fairly good sized model even at this small scale.
-
Nice looking model there - very cool subject, great job!
-
Nice choice Craig! How do you find the kit? I don't have any Wolfpack kits, but did use their wing fold aftermarket for my FM-1 build and I was impressed.
-
Amazing work Dan! Very nice job! Do you mind if I ask you a question? I see in earlier pictures you have the cockpit hood attached to the model when painting. Then later, I see the hood is off the model. How do you secure the cockpit to the model for the painting phase, so that it is strong enough to withstand the airbrush flow, but easy enough to remove? I'm about to prime my Buffalo, and was looking to do something similar - prime and paint with the cockpit hood on to avoid paint getting into the cockpit, but then opening up the hood for final display. Thanks!
-
Good start! Looking forward to seeing this one come along.
-
Great job Craig! Fantastic paint job!
-
Here is a review of the Ryujo, admittedly a bigger model, but it still gives me a bit of pause in trying out one of these kits: http://www.modelwarships.com/reviews/ships/ijn/cv/Ryujo-350-3dw/3DWildRyujo.htm
-
Hey guys, I was really excited when I first saw the 3D Wild kits, but do your research on them. I found some reviews on modelwarships.com (I think) and they were not that favorable. From what I remember, among other issues, the hulls are printed in sections, and the fit is not great at all. They can make a nice model, but there is a lot of work to be done to correct the kit issues.
-
That looks fantastic Ron - amazing job! Thanks for sharing your techniques with us.
- 542 replies
-
- 3
-
-
- Sphinx
- Vanguard Models
- (and 3 more)
-
That looks spectacular, nice job! Do you anneal all the brass in the kit? I wouldn't have thought to do so, but maybe can see doing it with larger pieces. Enjoy your trip!
-
Great work Kevin! The Yahagi looks fantastic! Is that the Tamiya Yukikaze? How did you find the kit? I might start that one as my next 1/350 build if I can ever find the motivation to finish my Shimakaze.
-
Looks very interesting. Will be great in your hands!
-
I vote for shelf model. If anyone can turn a dog into a beauty, it's you 😀 Looking forward to this one!
- 97 replies
-
- 10
-
-
What a great looking model Craig! Very nice job!