Landlubber Mike
-
Posts
4,551 -
Joined
-
Last visited
Content Type
Profiles
Forums
Gallery
Events
Everything posted by Landlubber Mike
-
 What a great looking model Craig! Very nice job!
 -
Thanks guys! Ken, this is perhaps a little overboard with all the aftermarket, but having things like the aircraft control surfaces as separate parts and in a different position makes for a more interesting model I think. Also, showing off the engine with the panels off adds some more details on what is otherwise going to be a fairly uninteresting model (given the markings, camo scheme, shape, etc.). I might try to build it as a diorama where it was being assembled, given that I believe the Americans put the planes together after the came off the boat. That might be tough given how much is already on the model, so maybe I'll just put it in a diorama receiving routine maintenance. Chris, I remember your card builds. I'm hoping that I can build mine half as well you did yours!
-
Hey Dave, it's a plastic kit with some resin and PE included in the box. The aftermarket is mostly resin with some PE as well. I started it maybe two months ago.
-
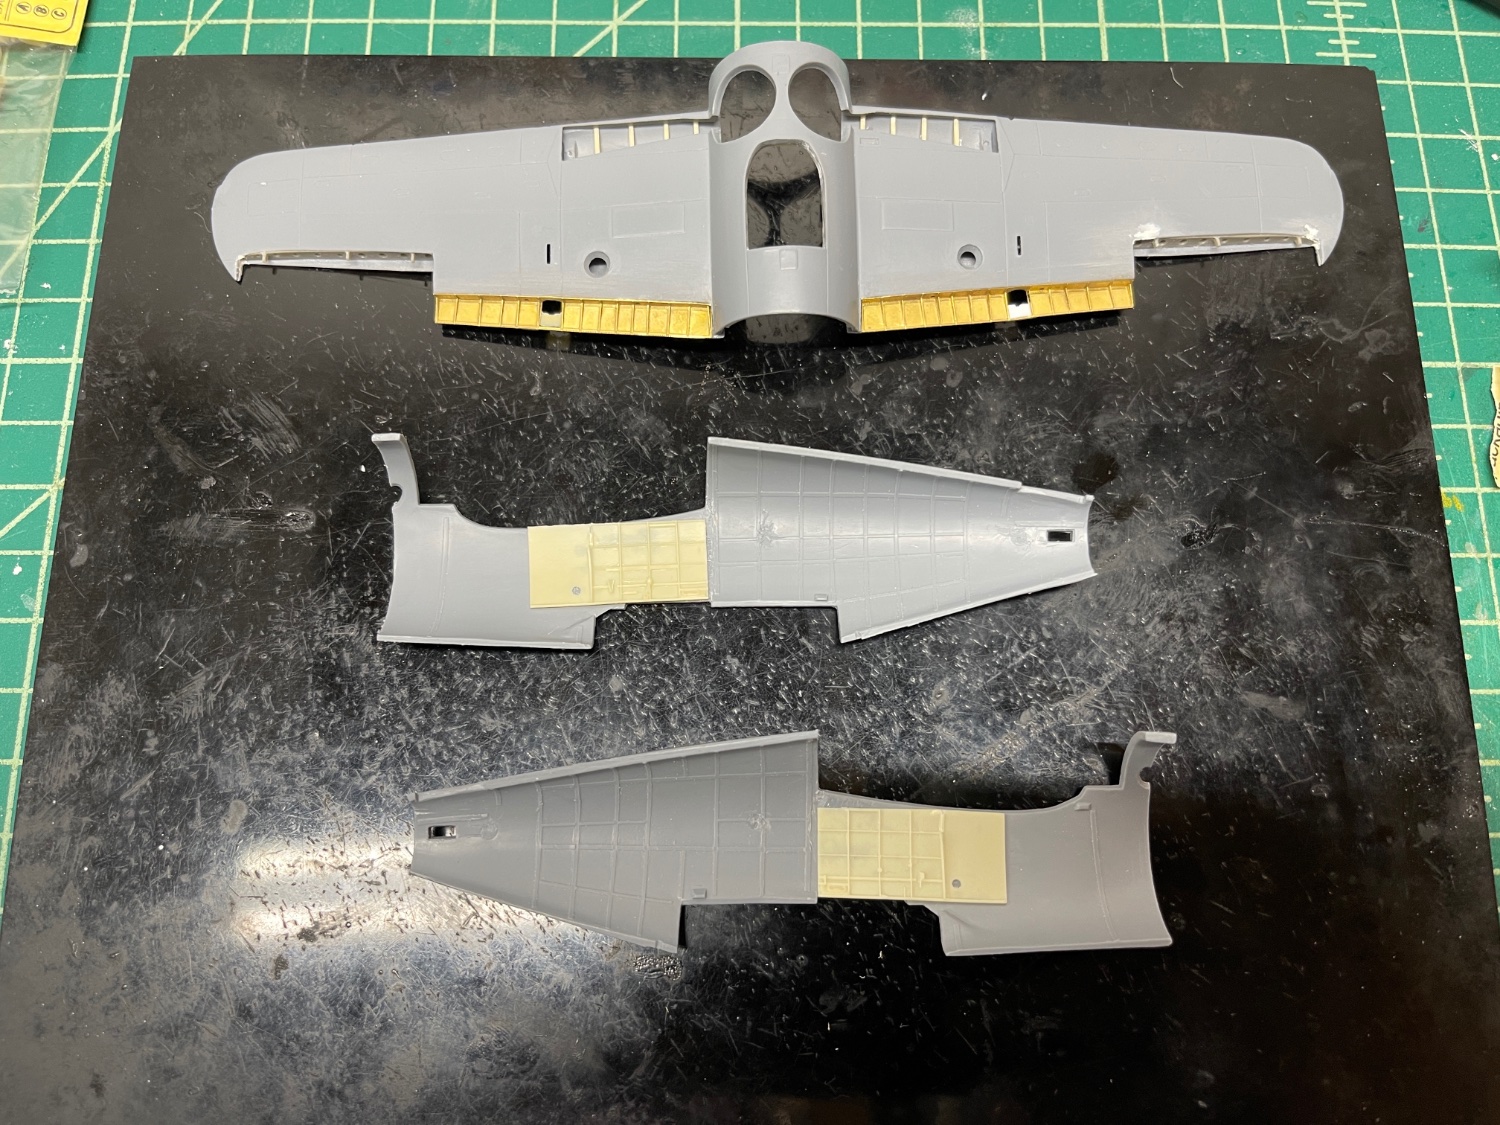
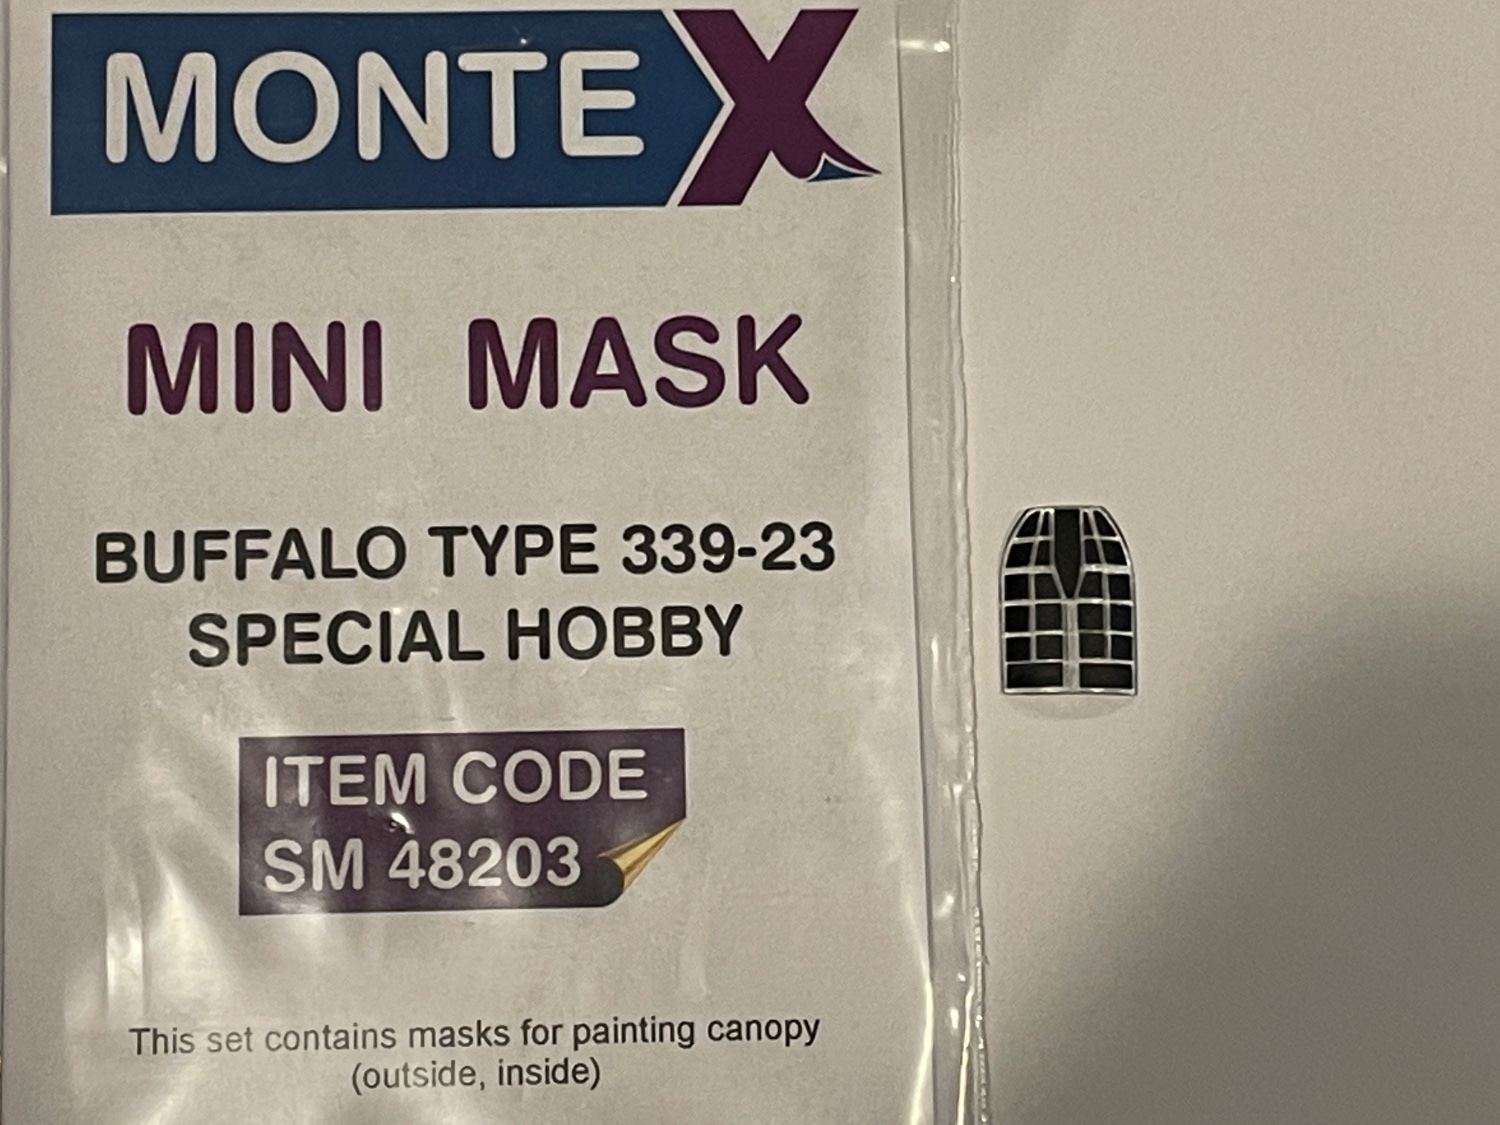
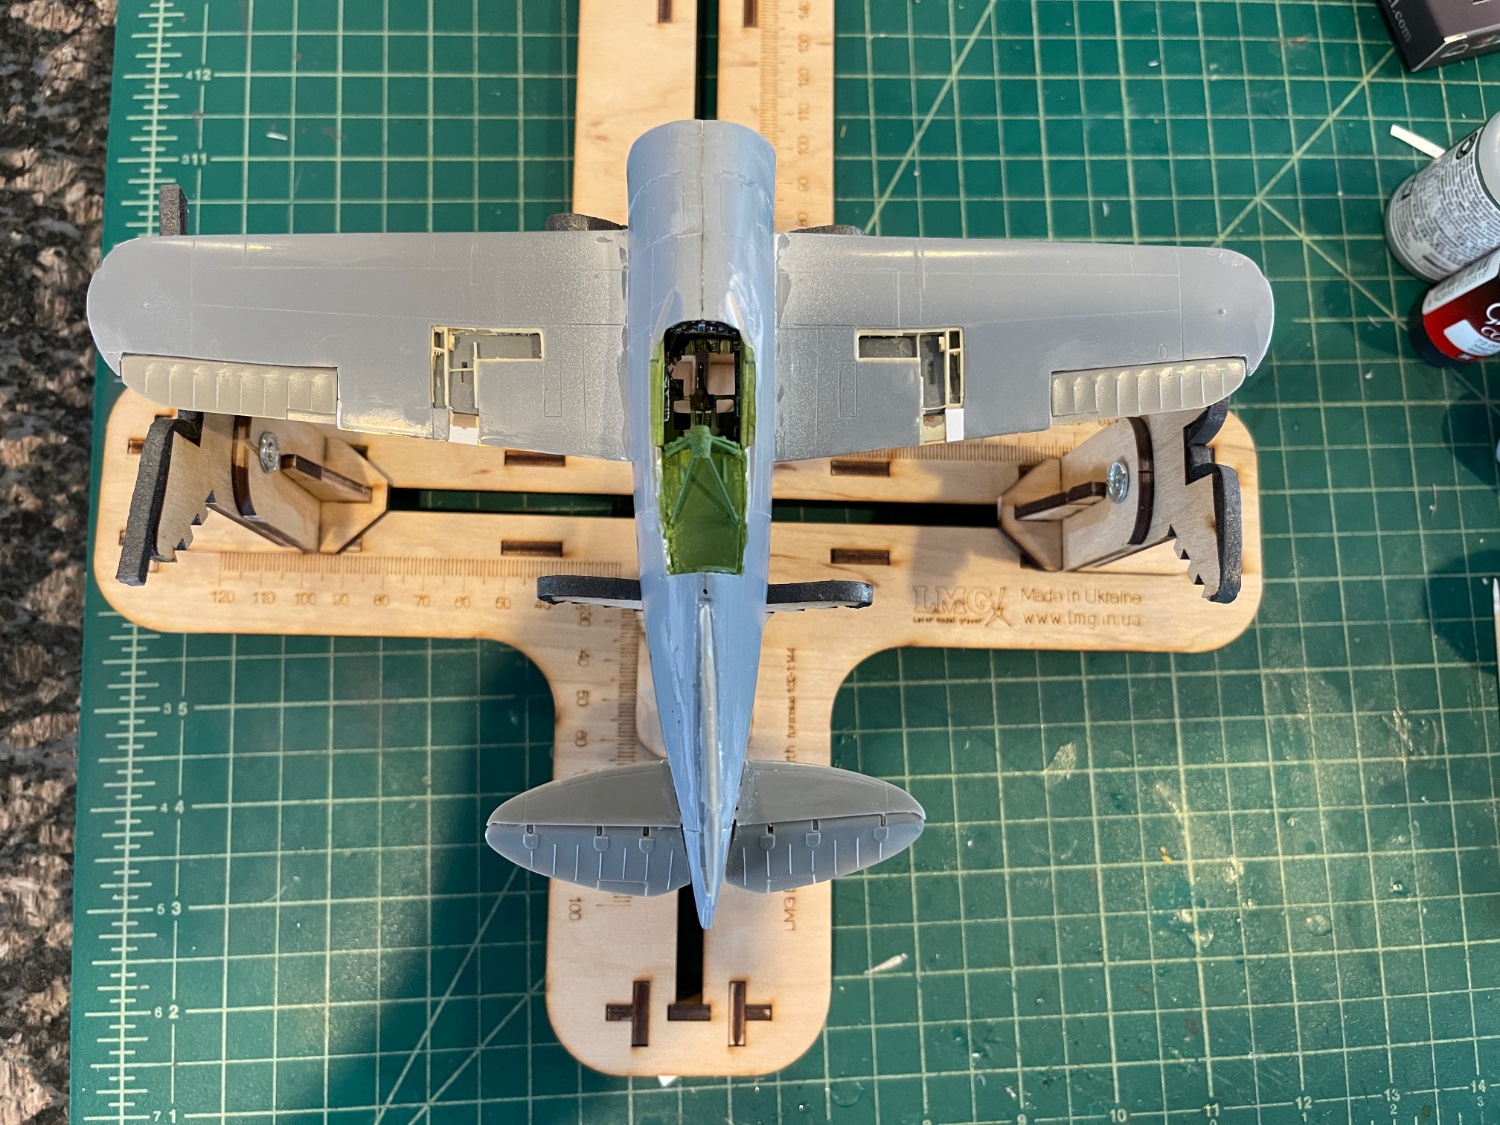
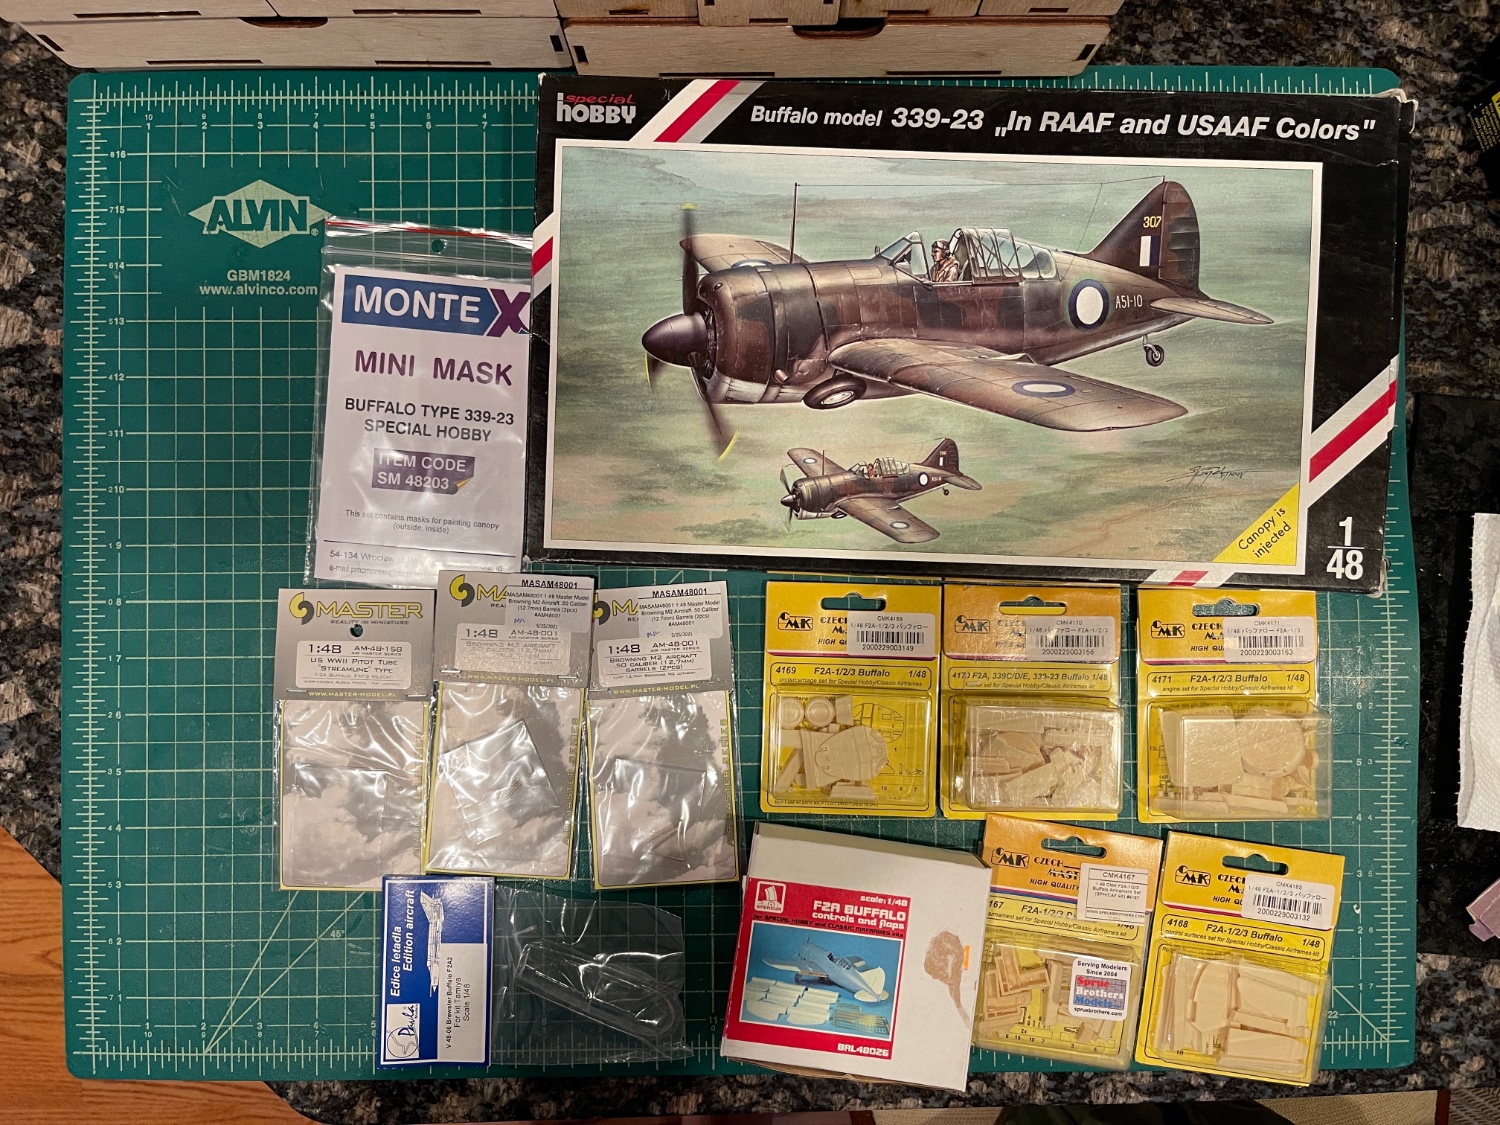
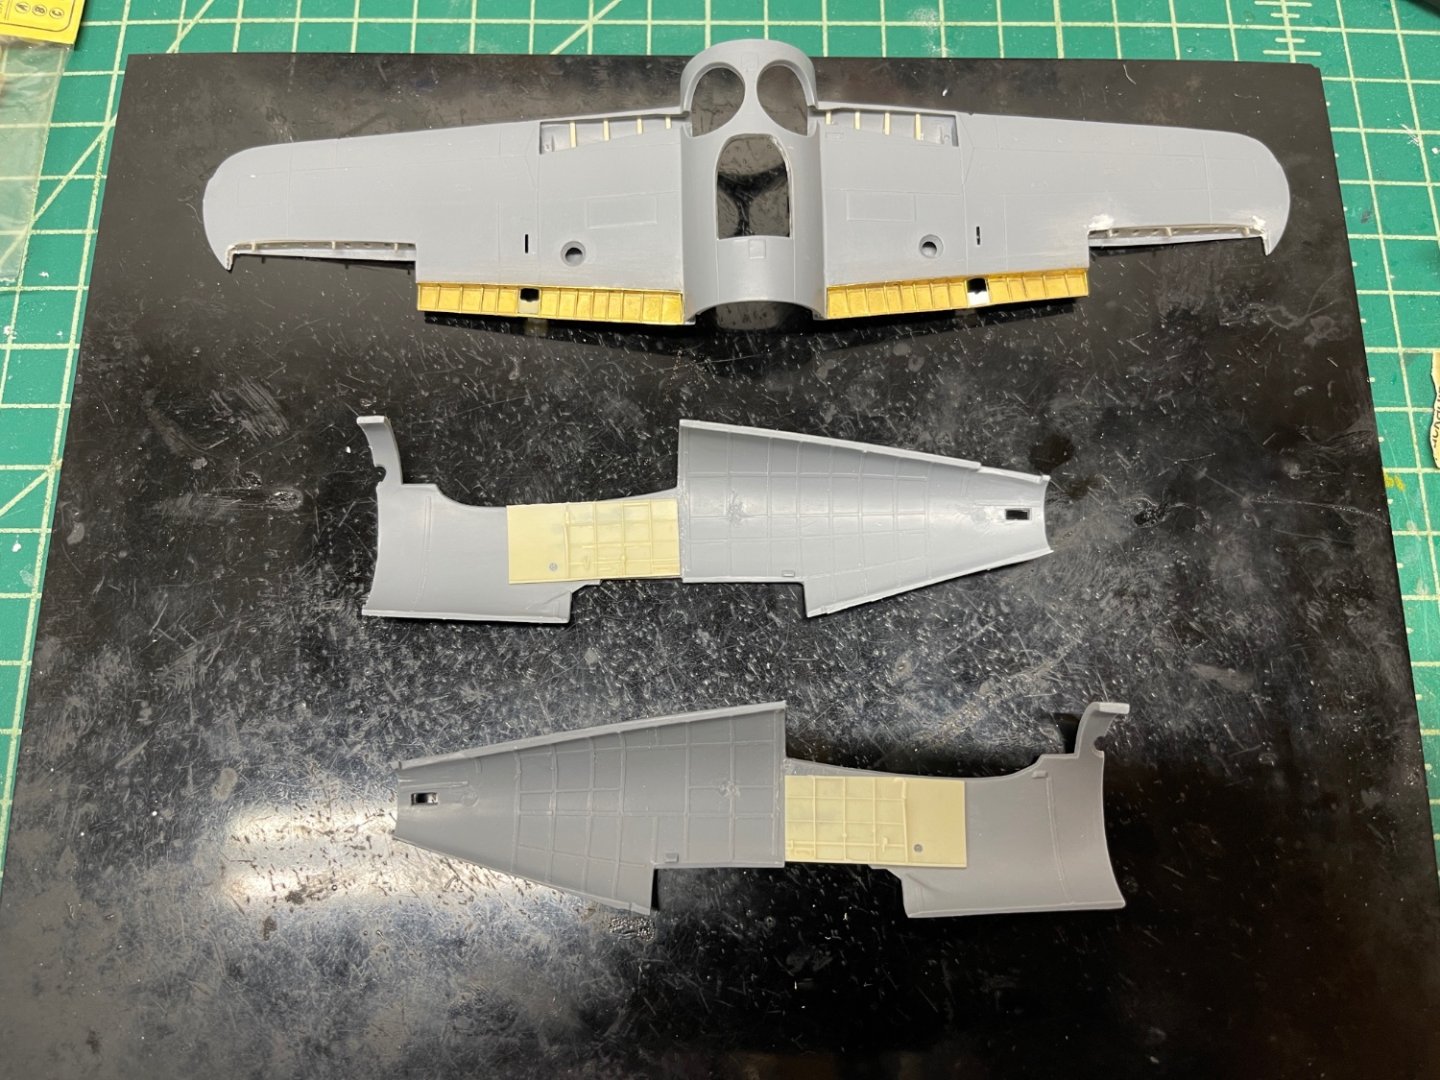
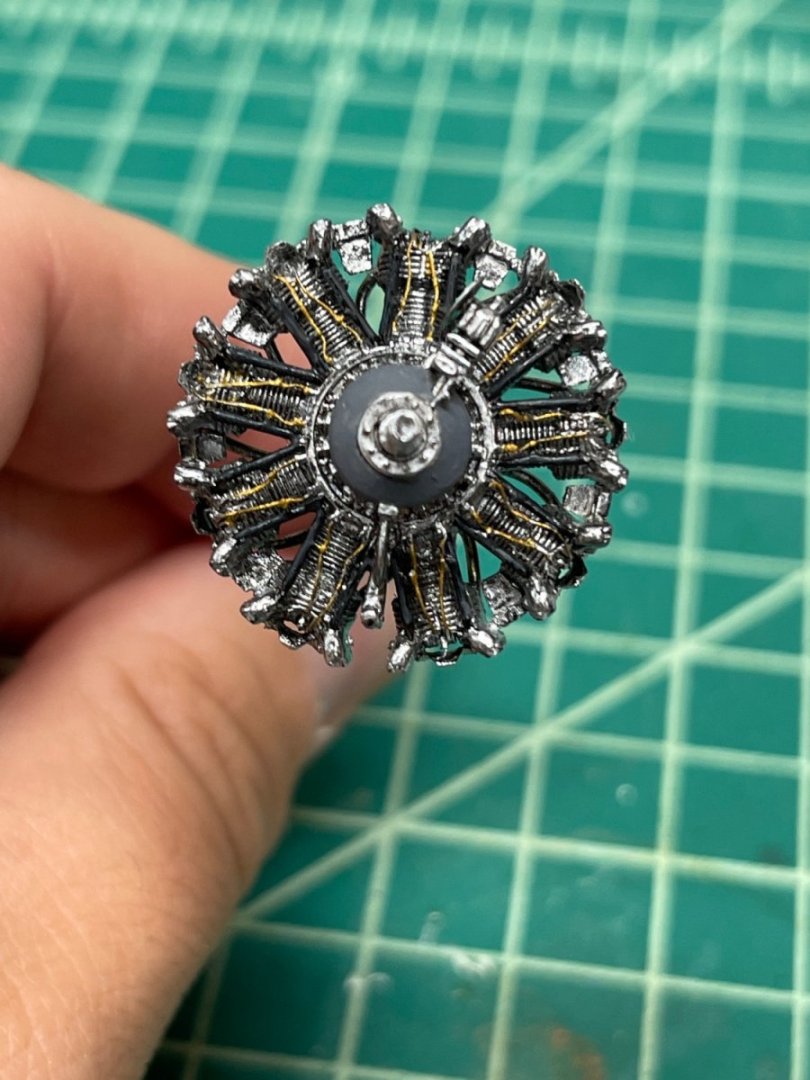
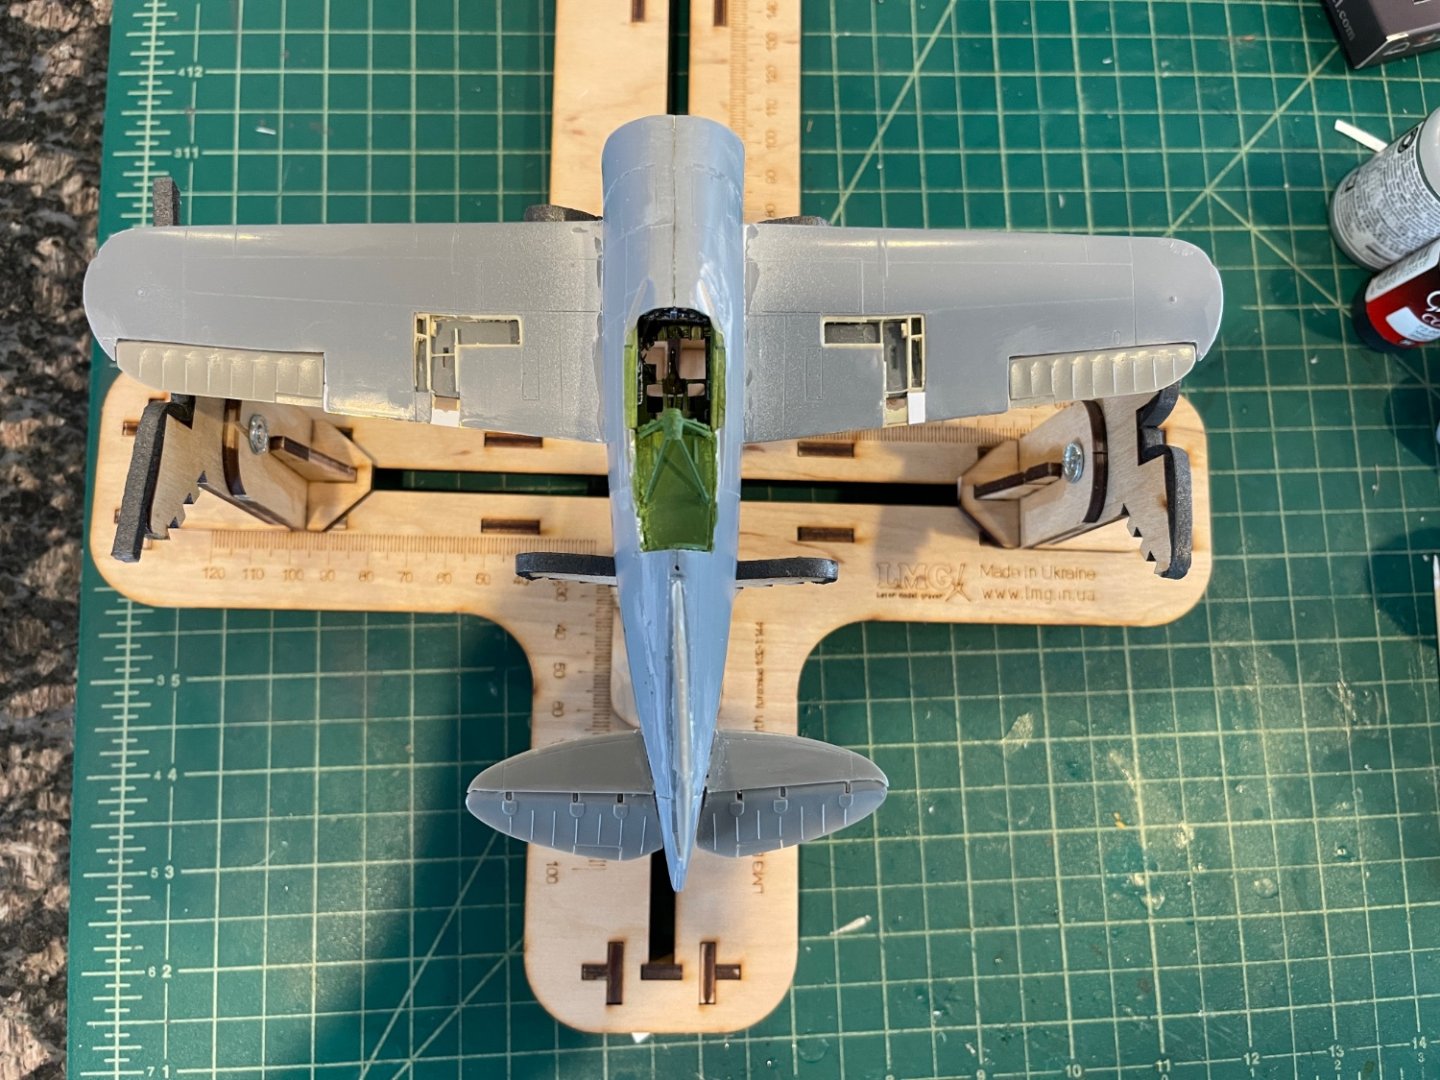
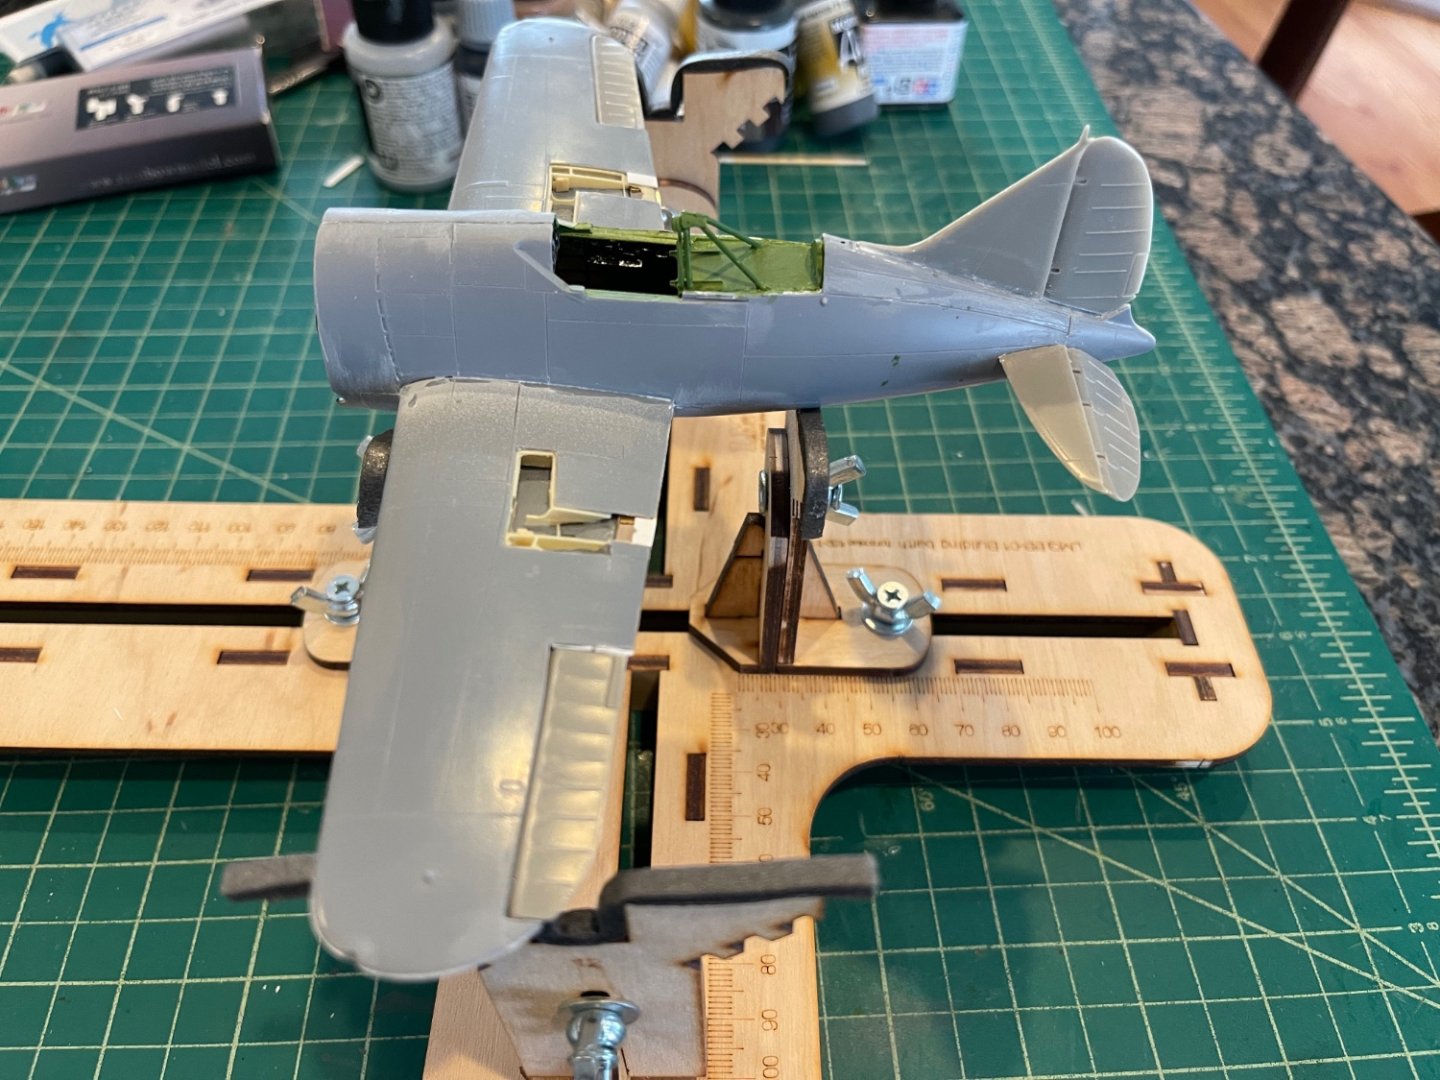
With all the aftermarket, this has been a little bit of a Frankenstein's monster. Five CMK sets (engine, cockpit, control surfaces, undercarriage, wing gun bays), along with the Brengun controls and flaps sets (which is a little better than the CMK set), means a lot of cutting away of the original model. Not for the faint of heart for sure! I didn't take many pictures along the way as I wasn't sure if I was going to be even partially successful, but things seemed to have worked out. The instructions for the kit as well as the CMK and Brengun aftermarket can be less than helpful at times unfortunately, leading to a lot of head scratching. Here is one picture which shows how much was cut away. It was very tricky with the wings because you had to thin down the plastic to almost hair width. I used knives, my micromotor and sandpaper to thin things down, but in some cases I had to fix things with really thin plastic card. The CMK engine builds up really nicely - here it is pre-weathering: This version of the Buffalo had an interesting large window right under the pilot. Thankfully Montex makes a mask for all the little window parts: Here is where I am at the moment. Looks like a Buffalo I think. I just need to fill and sand a bit more, add the pilot seat and lower window, and then re-scribe the panel lines and add rivets. Then off to prime and hope that Mr. Surfacer makes things nice and smooth. Thanks for looking in!

- 51 replies
-
- 17
-

-
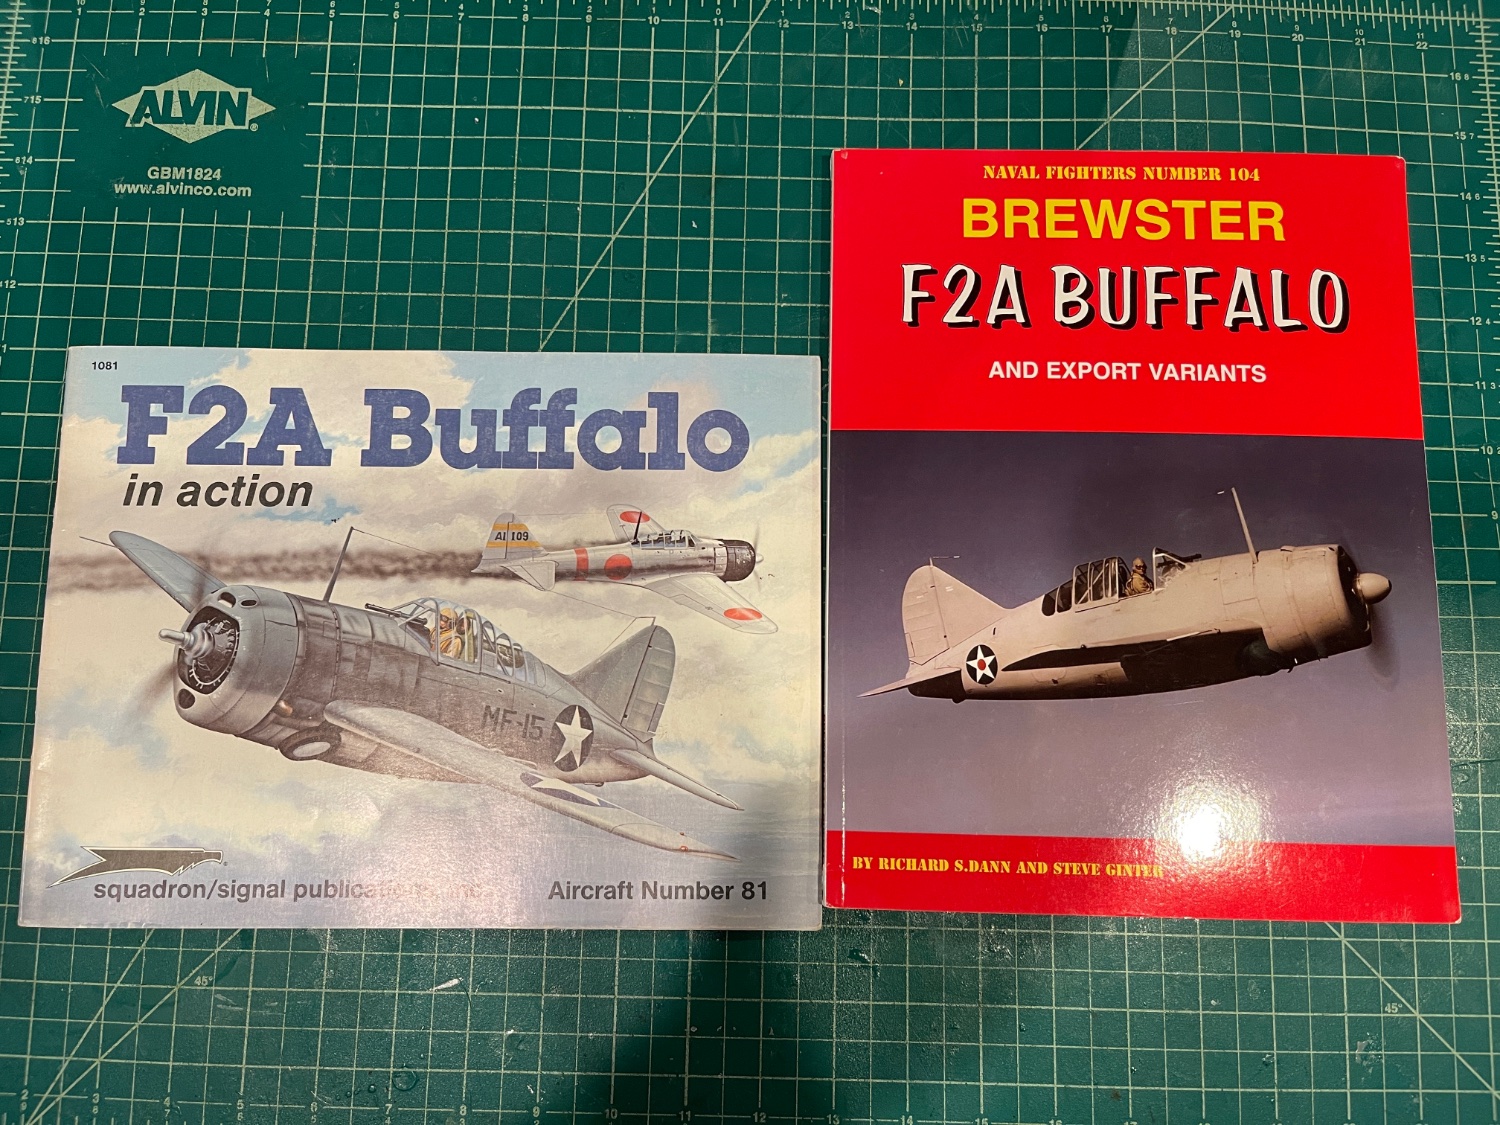
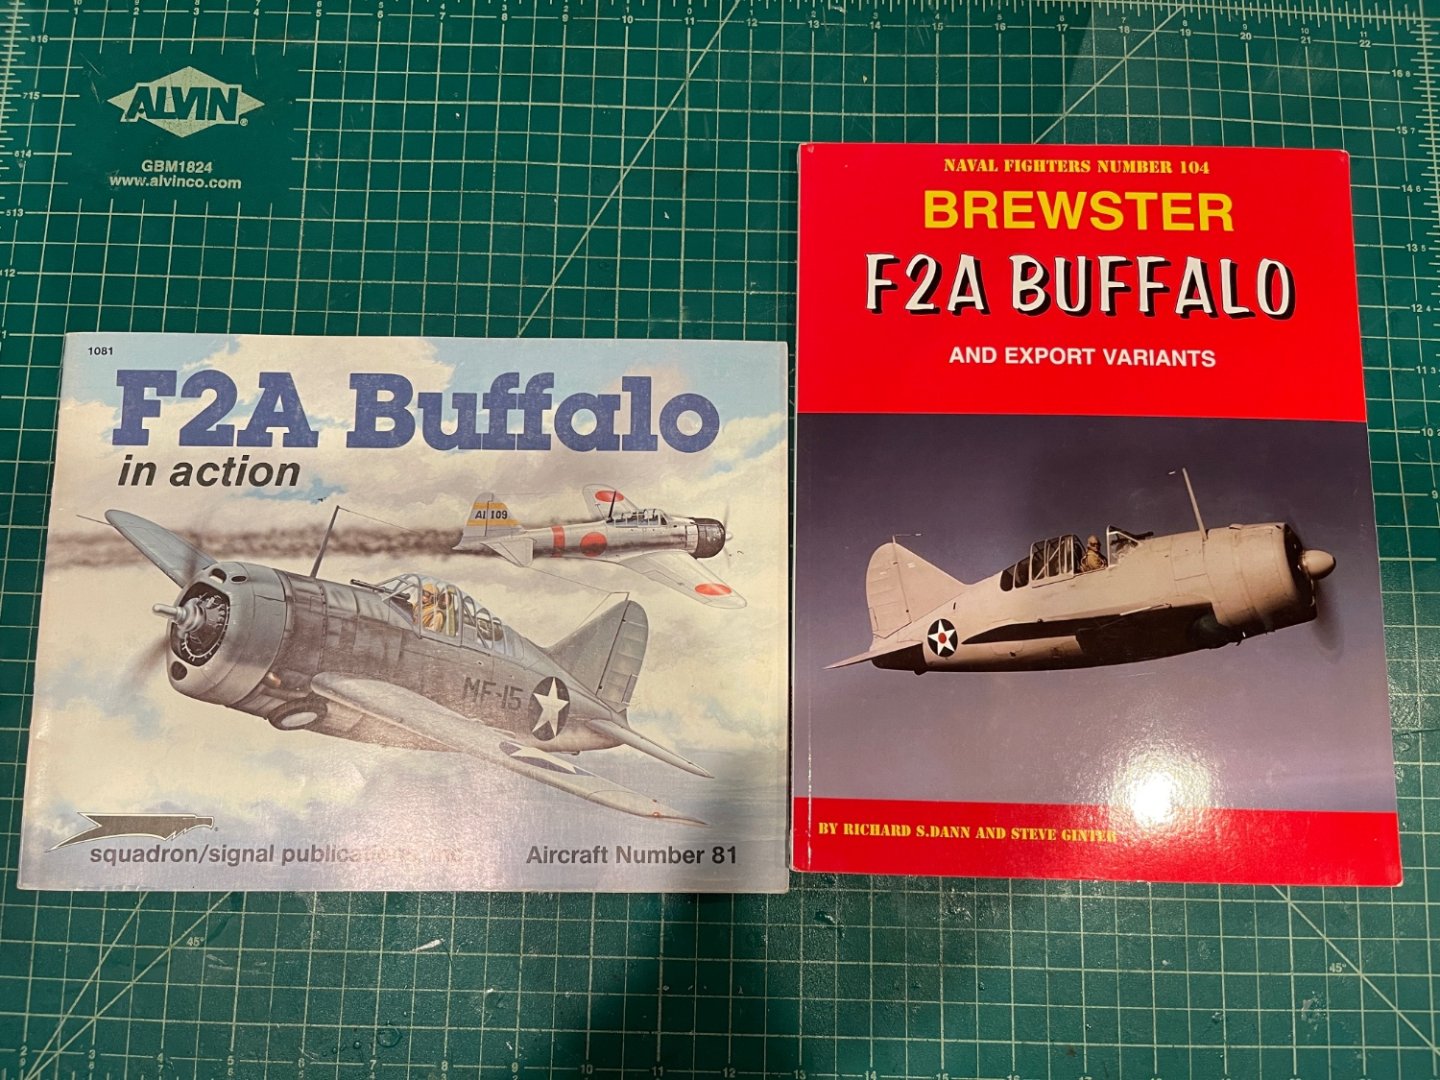
I'm at the very tail end of my Wildcat build, but can't seem to find the interest to finish it. So, what better way to keep the modeling going than starting a new kit? I was reminded that I hadn't started a build log here on it from @popeye the sailor, who is also working on a Special Hobby kit. I'm doing my best to catch Popeye with the most in-process kits, but I have a feeling I'm still way short. 😬 I picked this kit up from John at UMM a year or so ago - it came with all the CMK aftermarket for it and was a good deal, so I figured I might as well get it as I like quirkier subjects. I also added the Brengun controls and flaps set, a Pavla canopy (for Tamiya, but it might fit), and a few goodies from Master. Background reference materials: The Buffalo was an interesting aircraft that went through a number of variants before quickly becoming obsolete during WWII. The Fins did really well with their version of the Buffalo against the Germans. The model in this kit is one of the export versions, the 339-23. It was the last set of Buffalos built. Interestingly, the 20 of these planes were destined for Java, but when Java fell to the Japanese, they were diverted to Australia where they served with the USAAF and the RAAF, and ultimately, transferred back to the USAAF. With this kit, you can build two RAAF versions (one of which is a reconnaissance plane that was outfitted with three cameras), and two USAAF planes. The two RAAF versions and one of the USAAF planes are in green/olive drab came as in the box picture, and the last USAAF, which served as the personal aircraft of the air base commander, is in silver.

- 51 replies
-
- 11
-
-
F-86F-30 Sabre by Egilman - Kinetic - 1/32nd scale
Landlubber Mike replied to Egilman's topic in Non-ship/categorised builds
Amazing work Egilman - best wishes to you my friend. -
That's insanely good Dan, wow! Your painting techniques are incredible. Very nice job!
-
I saw the final work when I was out of town, but just wanted to chime in and congratulate you on another great build. Very nice job!
-
Hey Chris, really nice job on this one. I really love these planes with the yellow noses. If I could make a request - can you not do such a great job on them using card? I think you're making us plastic guys jealous with how amazing your work is.
- 165 replies
-
- 11
-
-

-
Hey Craig, I've been out of town, etc. most of the past month, and am just catching up on this board. Wow, what an incredible job you did! Very nice my friend! Even more important, congratulations to your daughter! You must be really proud of her Hope you're having a great summer!
-
Hey Kevin, how did I miss this one?? What a beauty! Nice job my friend. A wonderful addition to your already stellar collection of models.
-
Looks great Popeye! I feel for you my friend working on these Special Hobby kits. I'm going through a lot of the same pain on a 1/48 Buffalo kit, though I managed to self-inflict a lot more pain by adding a ton of aftermarket. Fit and instructions are not the greatest at times! But, they do build into nice models, and they have some interesting subjects. Speaking of which, I should probably post my Buffalo build. Hang in there my friend!
-
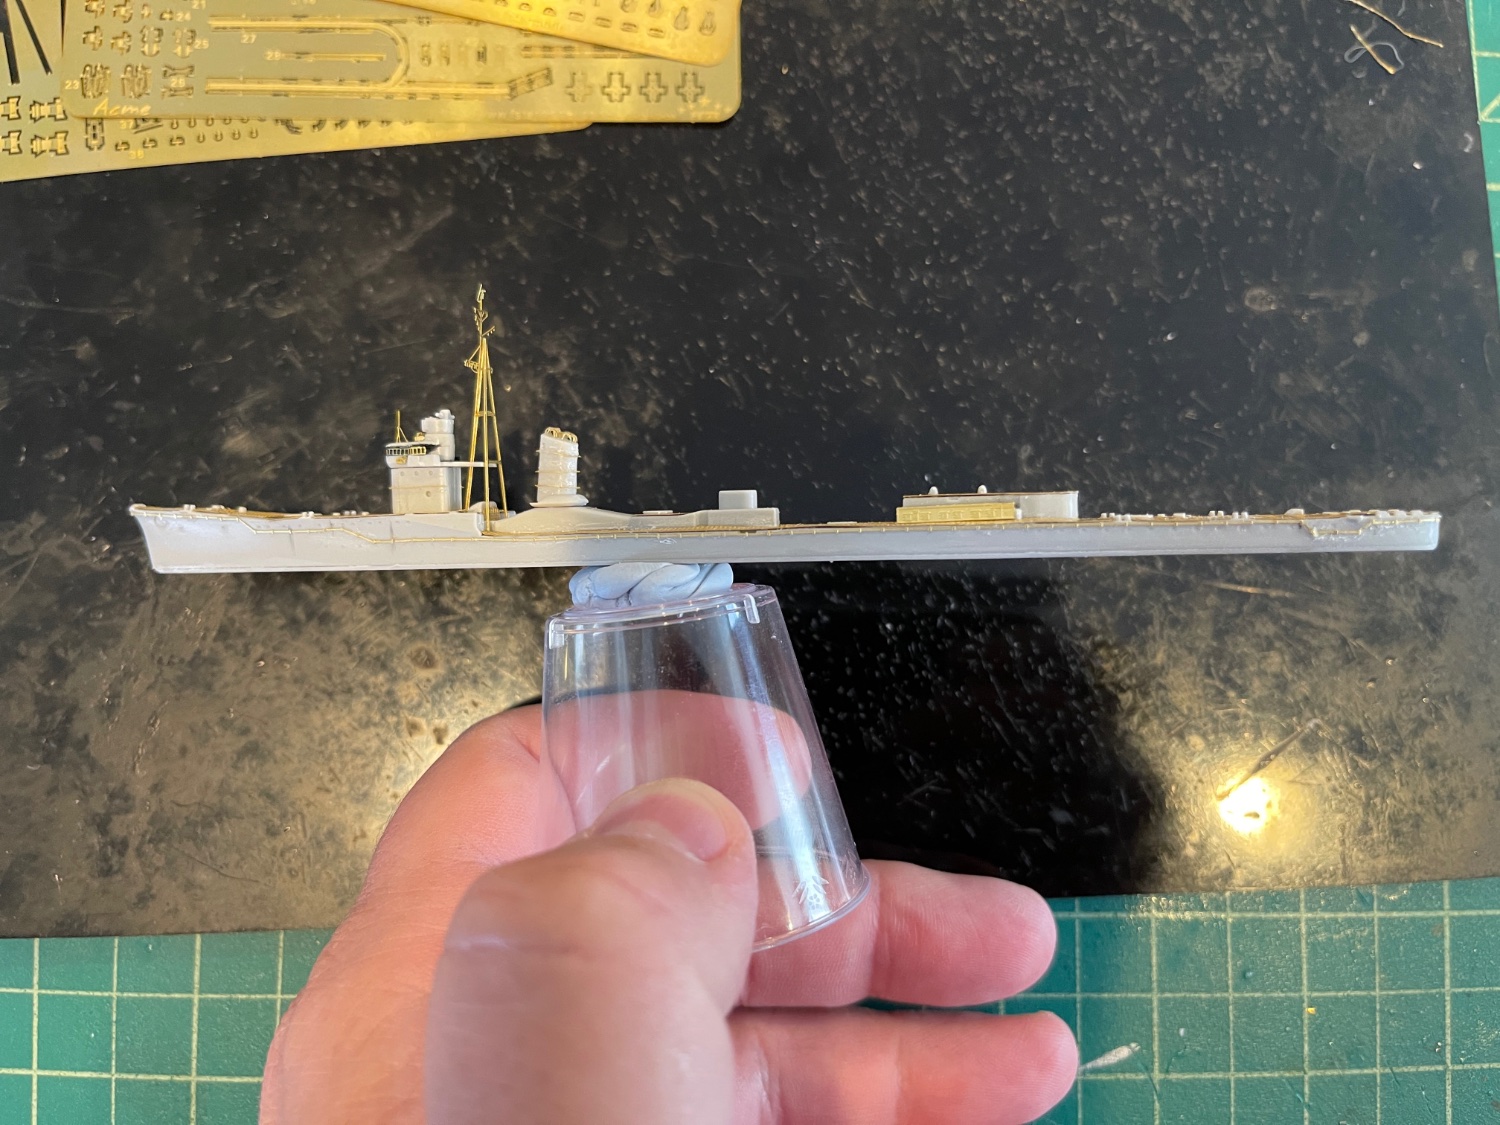
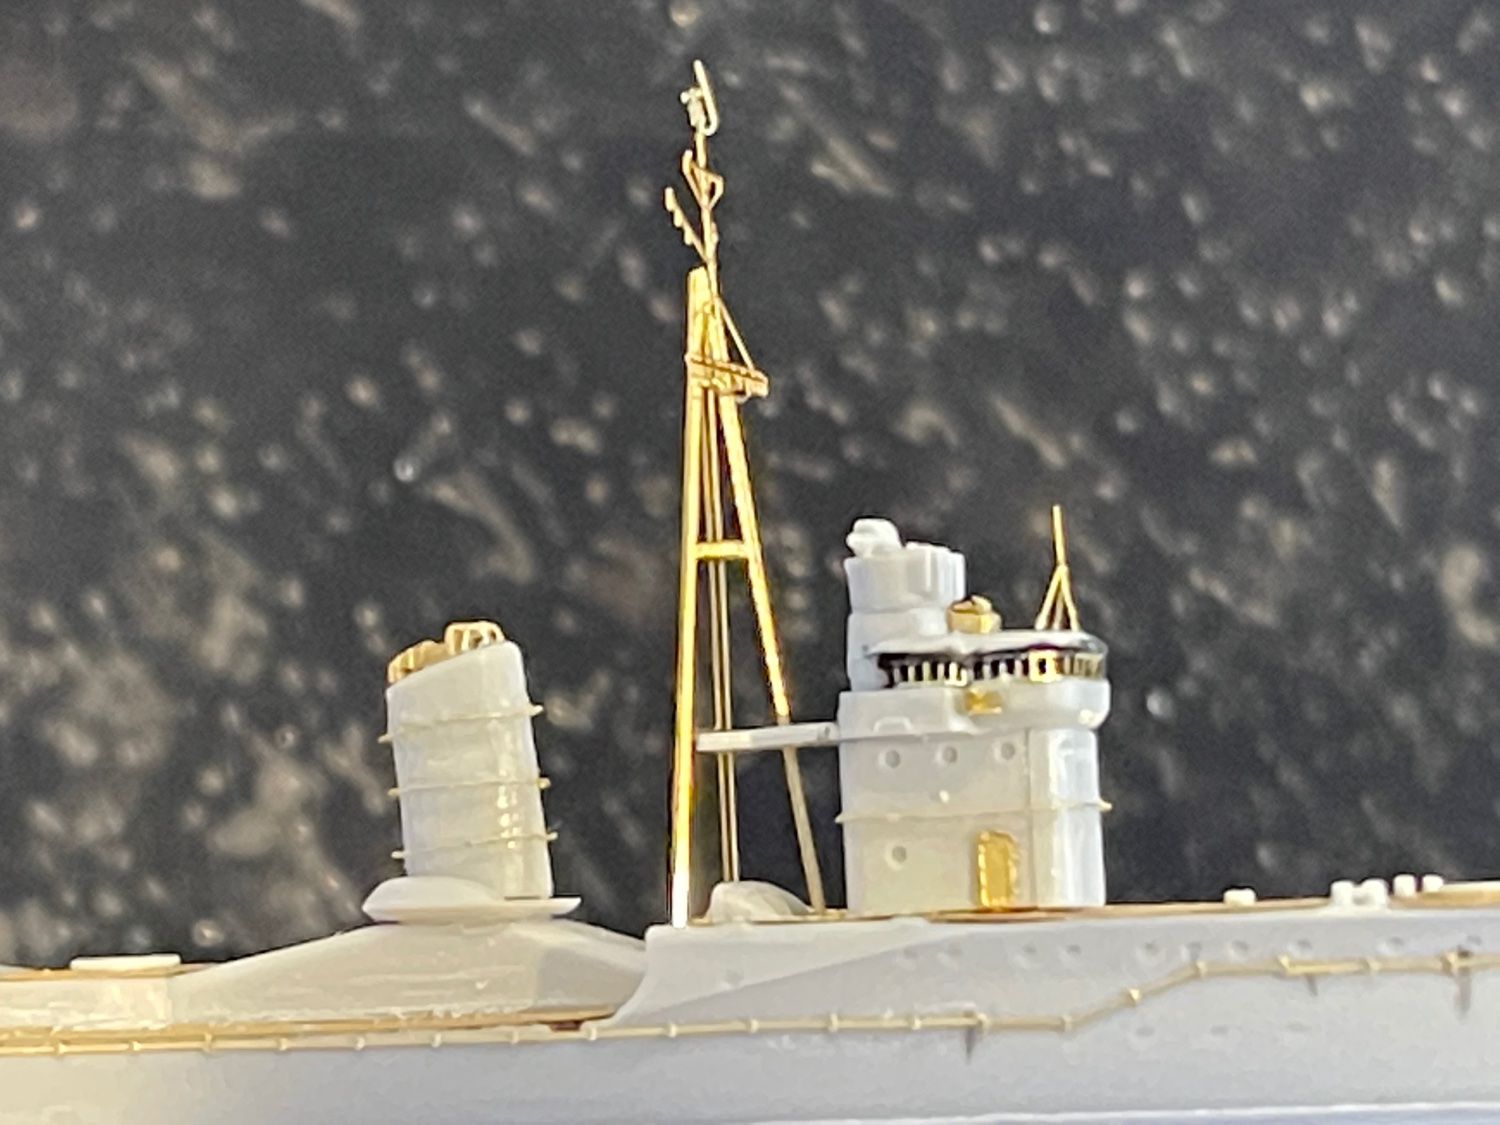
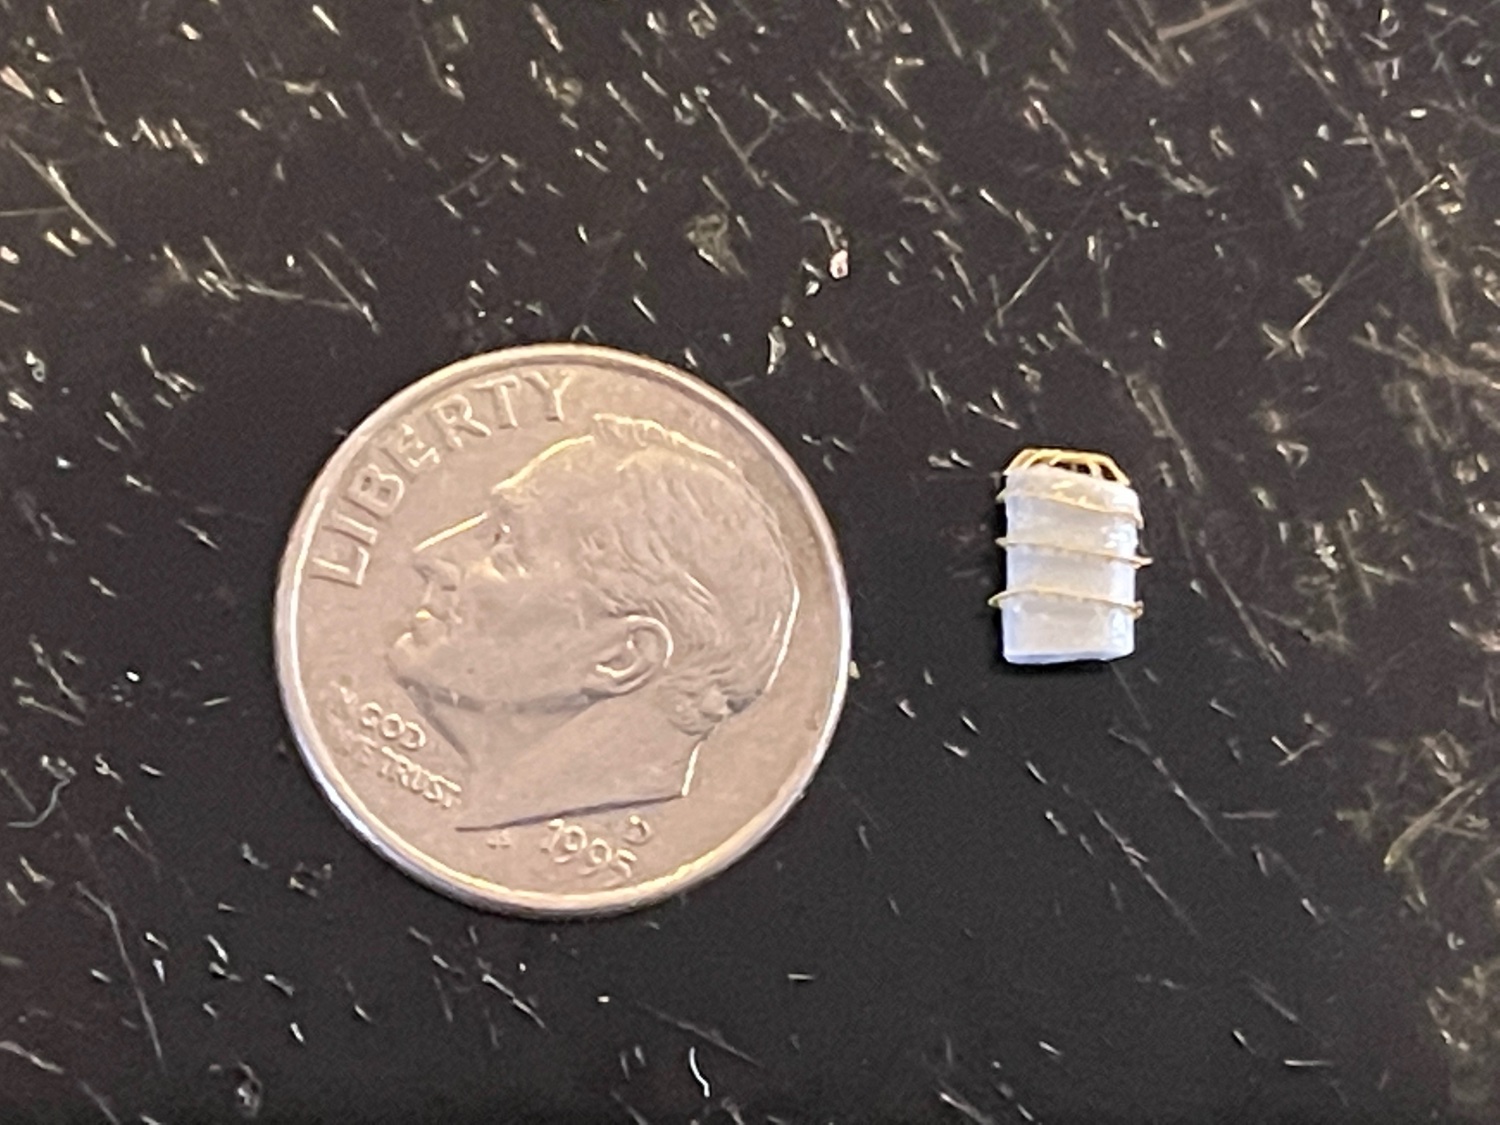
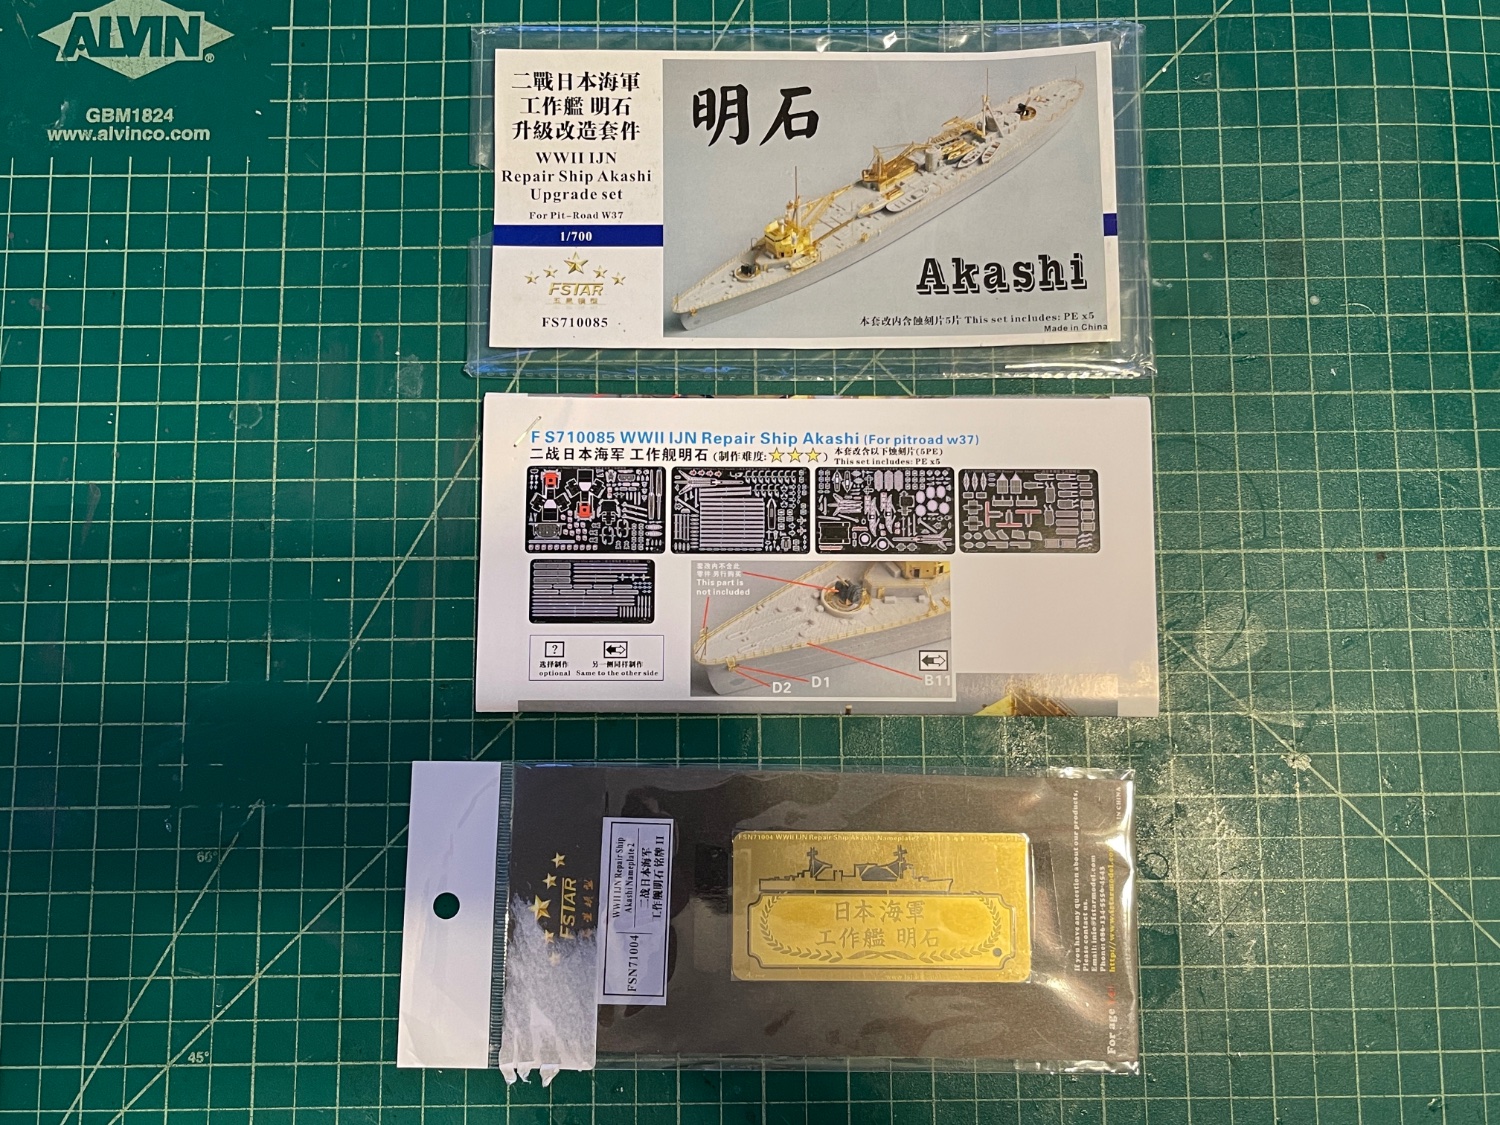
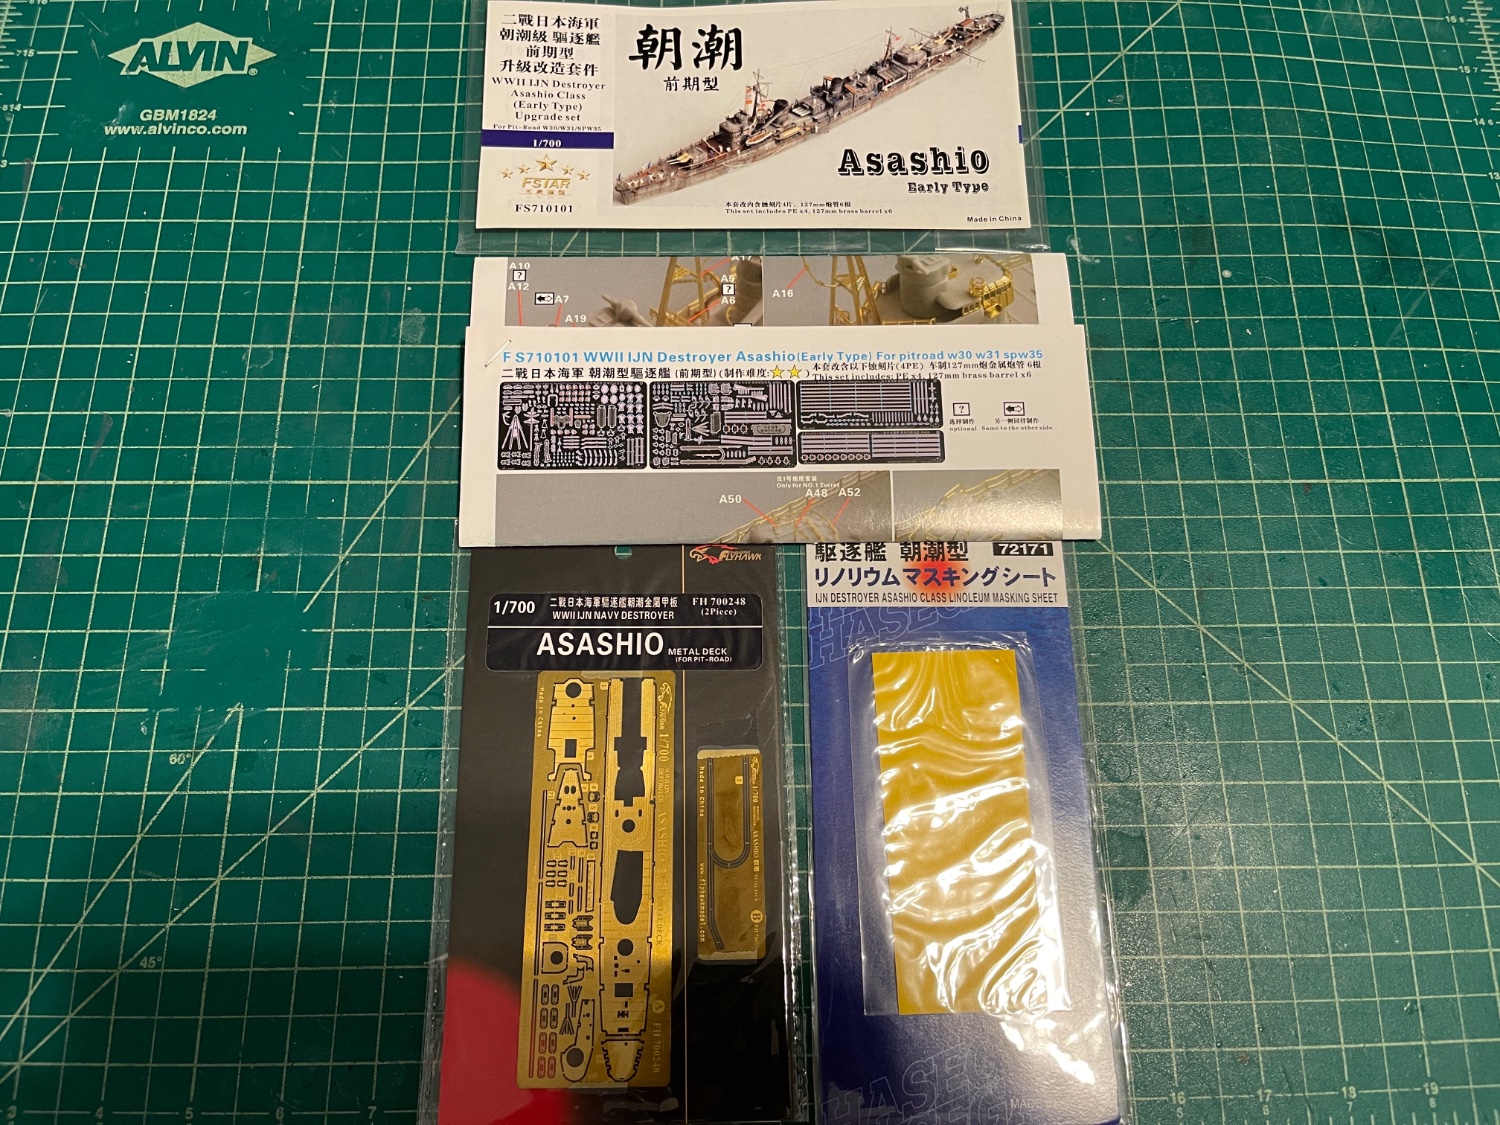
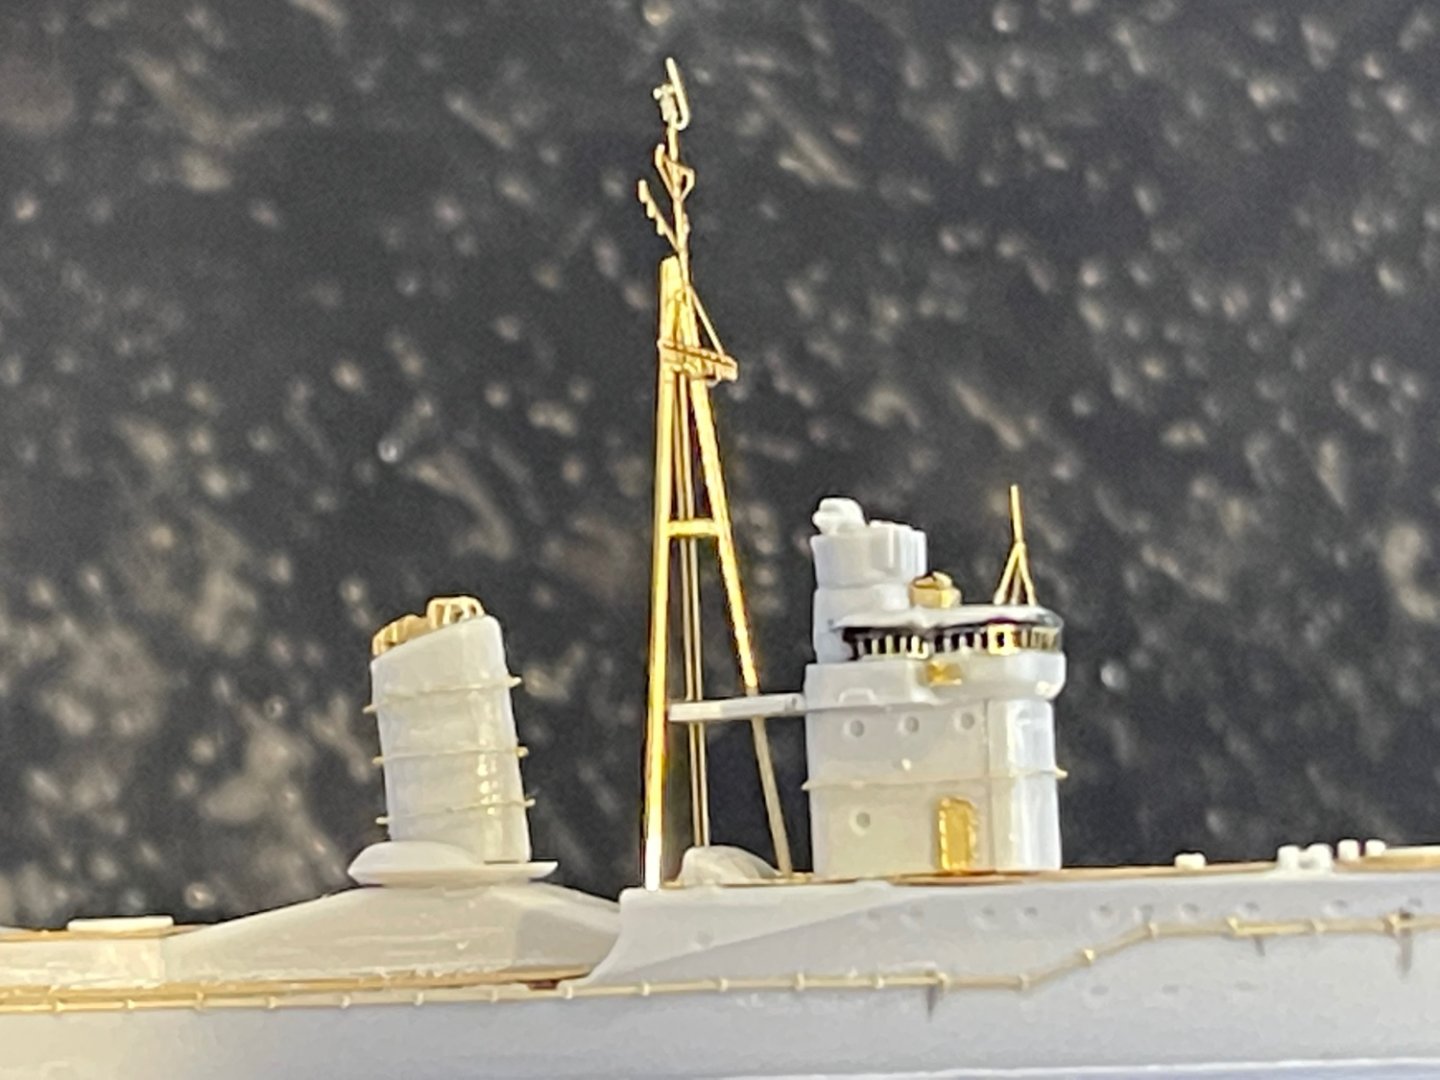
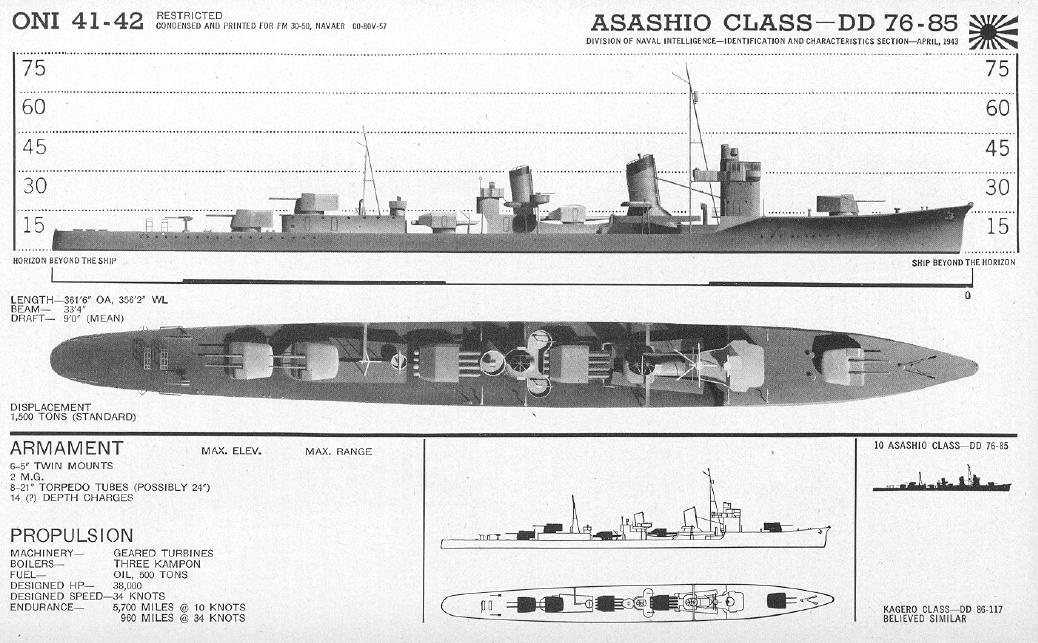
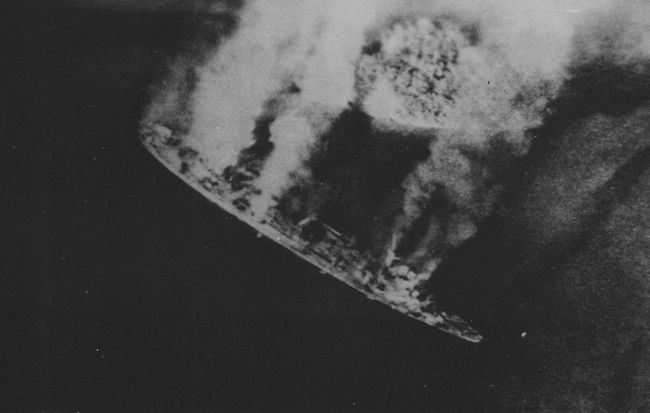
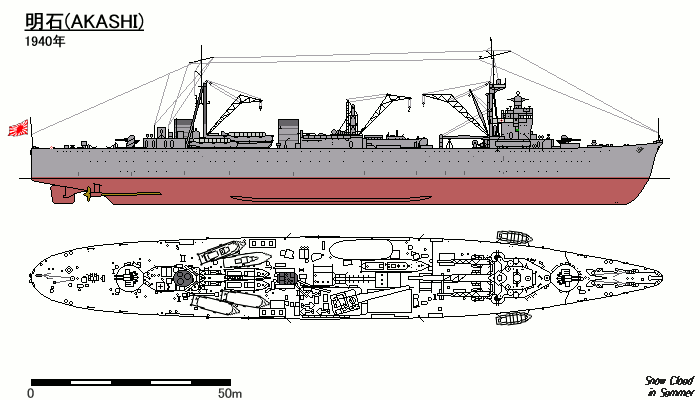
Since the Akashi is a little more complicated with the multiple cranes, I started with the Asashio. I installed the very nice Flyhawk deck, then worked on the bridge and some of the other details. The Five Star set is very comprehensive, and includes degaussing cables (first for me to add to a model). The instructions for the PE are only pictures of the completed item, so you have to figure out how to do the folds. It's generally not too difficult, but having experience from other models helps. With the other ship models, I've gotten a lot quicker with PE work, so I'm not anticipating this one should take too long. I couldn't find any pictures of the damage the Asashio took at Midway - the only details I came across were that the ship was hit by a 500lb bomb in the stern area and that it was strafed multiple times (losing 22 crew in the battle). So, after putting the ship together, I'll get to add some damage to it by carving out a chunk probably behind the rear-most turret. For some sense of scale, here is the rear funnel that I put together last night 😳


- 39 replies
-
- 10
-
-

-
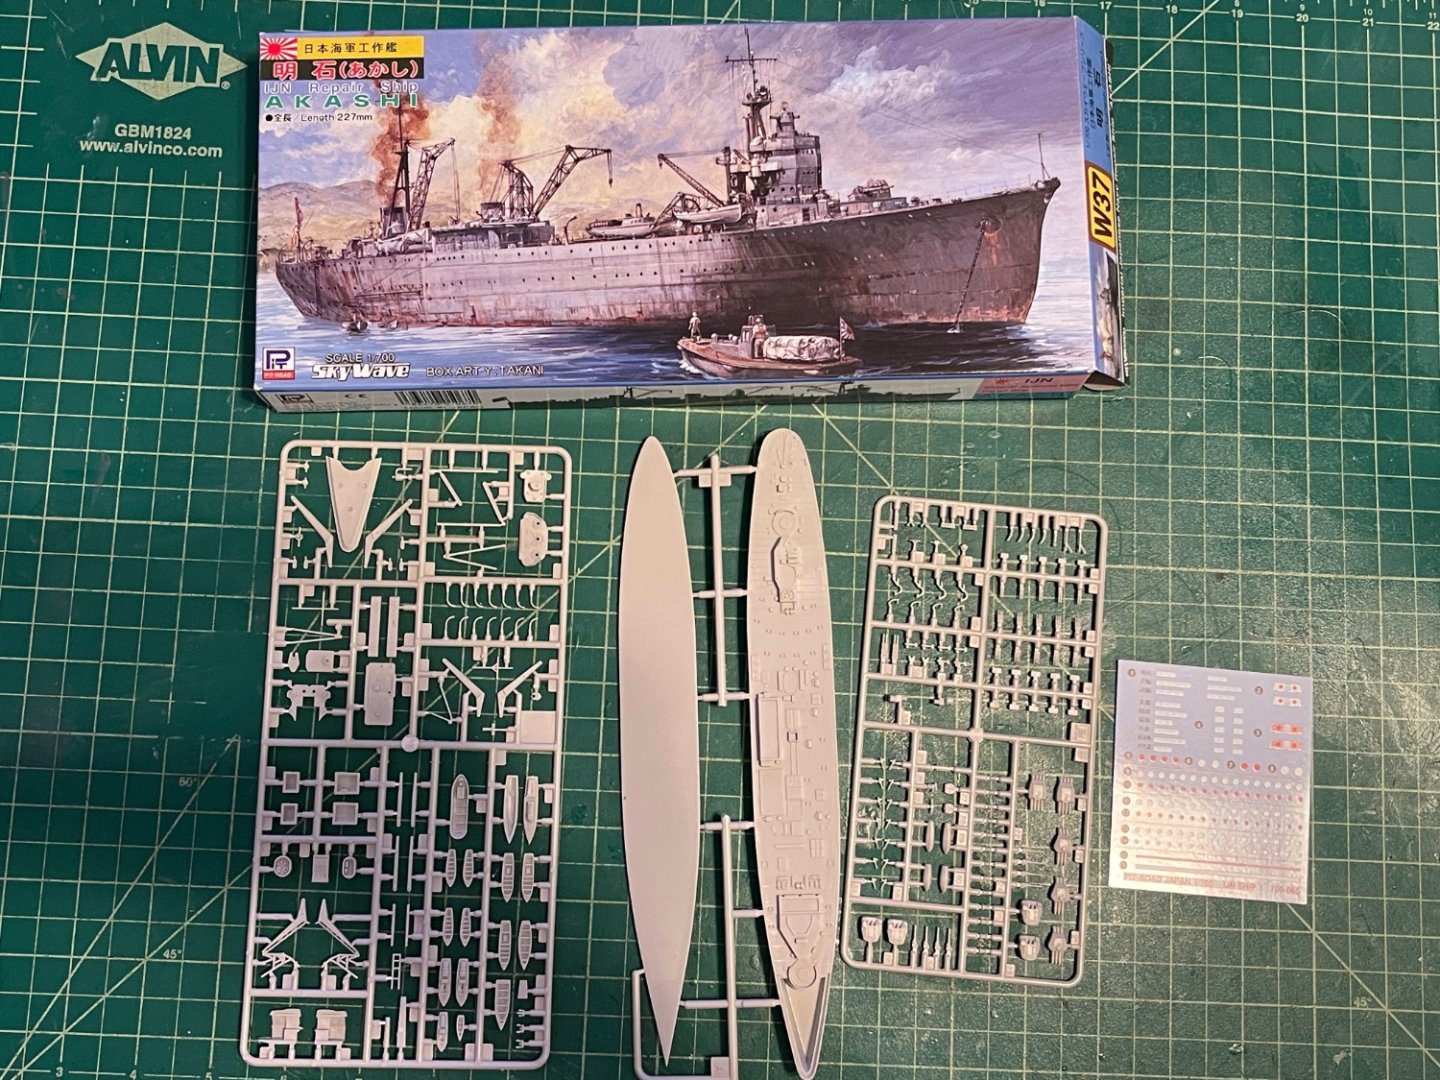
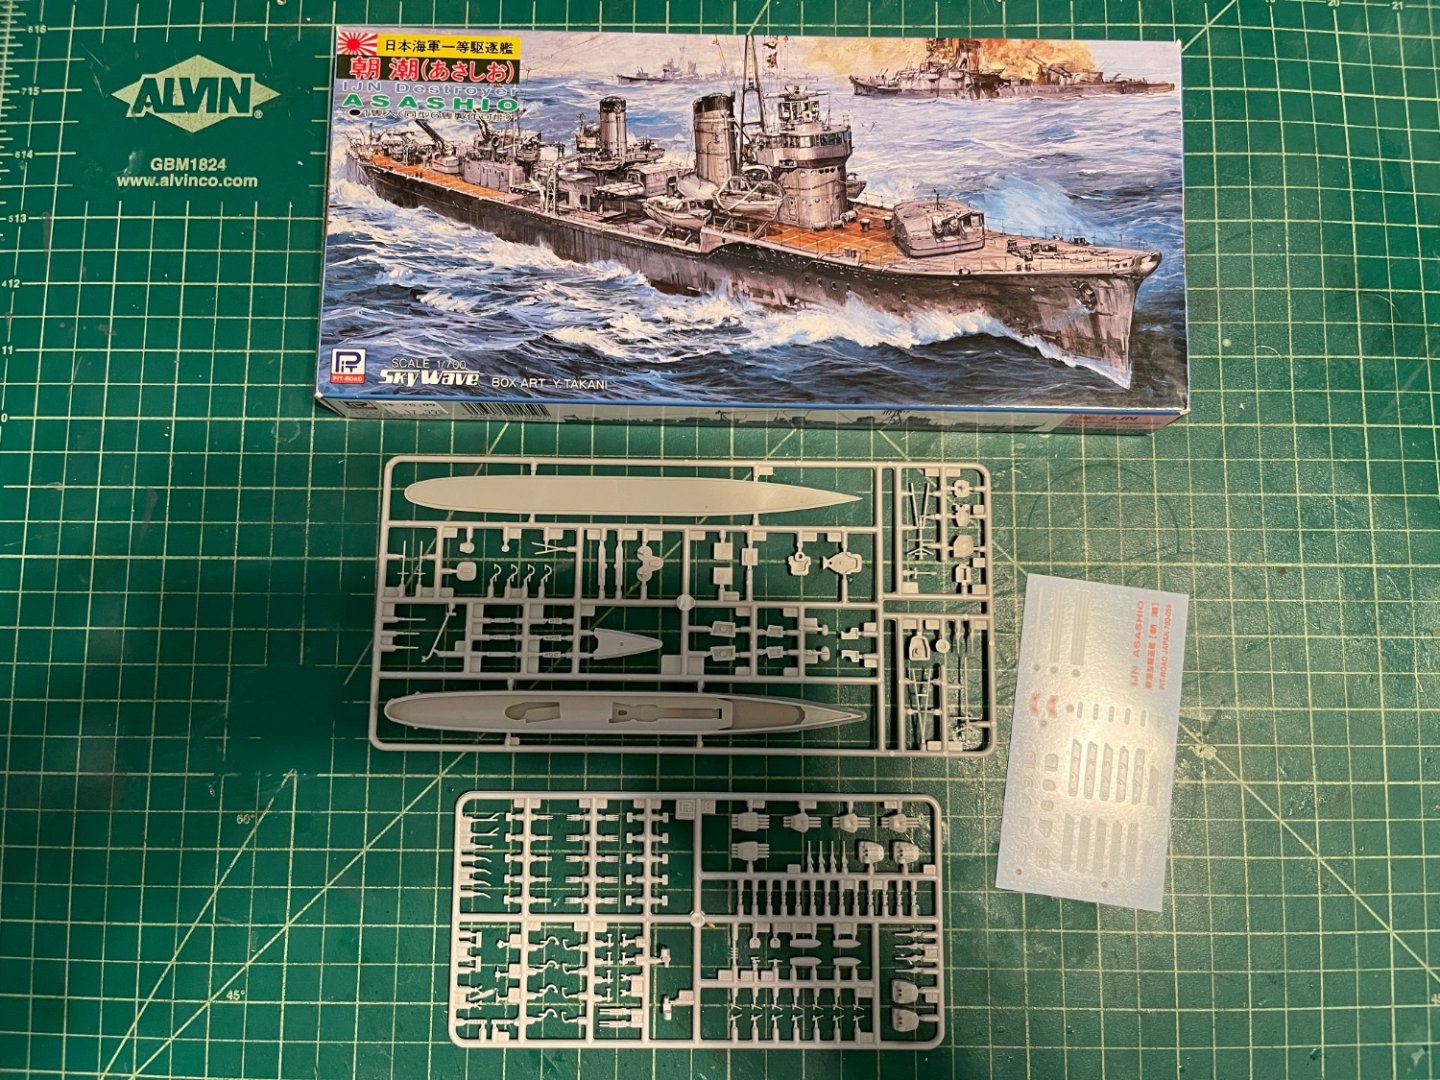
For the two kits, I'm starting with the excellent Pit Road Asashio and Akashi, as supplemented by the Five Star detail sets for both. I also happened to find a Flyhawk PE deck set for the Asashio, which has crisper details than the kit.


- 39 replies
-
- 11
-
-
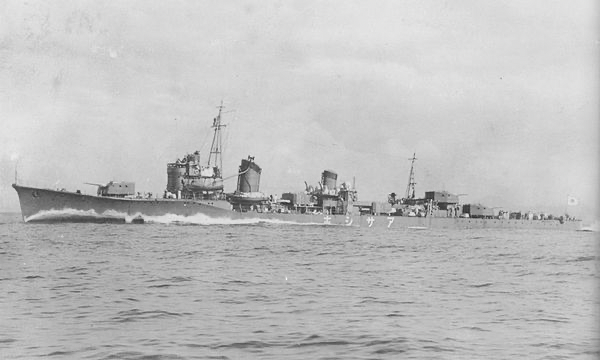
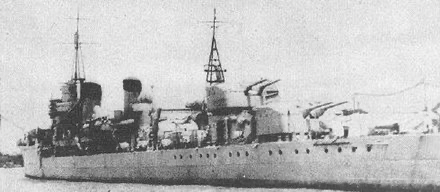
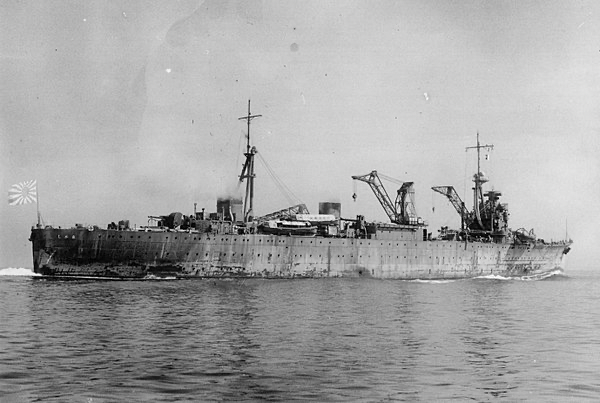
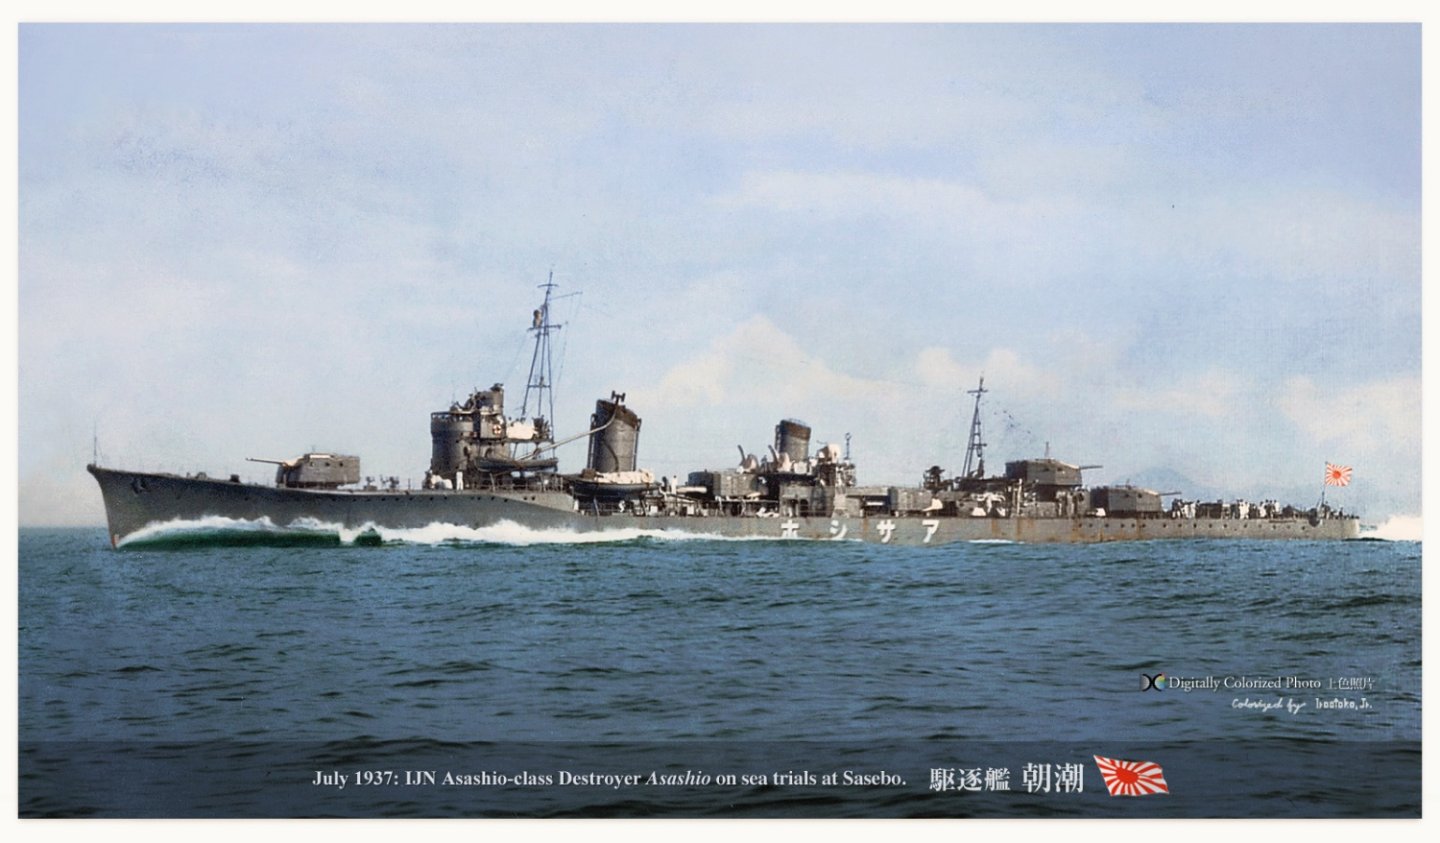
I've just about finished my Yaeyama, but to be a little more efficient with my time, I decided to build its waterline diorama base at the same time as I do another diorama setting or two. So, I started another kit (actually two). Asashio. I'm building the IJN destroyer Asashio ("Morning Cloud"), the lead ship of 10 Asashio-class destroyers built by Japan in the mid-1930s. It took part in the attack on Pearl Harbor and at the battles at Midway and Guadalcanal, and was later sunk in the Battle of the Bismarck Sea in 1943. Akashi. In researching the Asashio, I learned that a 500 pound bomb hit the stern of the ship in the Battle of Midway, and it received emergency repairs at Truk by the IJN repair ship, Akashi (named after the Akashi Strait). Since I also had the Akashi kit, I figured I would try to put together a diorama of the Akashi repairing the Asashio. The Akashi - completed in 1939 - was the only specifically-designed repair ship to be made by the Japanese (they had converted other ships to repair ships). The Akashi was quite busy during the war, and was sunk on March 30, 1944 while anchored off the Palau Islands.
- 39 replies
-
- 10
-
-
-
Oh I know, after watching the Mandalorian, I started thinking that modeling some of the Star Wars stuff looks fun. Must...be...strong...
-
Looks really sweet Craig, nice job!!! I'm trying to stay out of post-WWII aircraft modeling, but seeing yours makes my willpower drop...
- 148 replies
-
- 10
-
-
-
That looks like a perfect add-on. I just looked at the kit, and it has quite a lot of the important PE - railings, funnel tops, etc. Adding that Chinese set for the guns and deck will close the gap on what the kit itself is missing.
-
Glen, I just caught up with your log and wow, this is incredible work! Your ingenuity is really inspiring, and how fortuitous that you ran across the woman with nail art. Well done! I am feeling the pressure and suspense of the bottle insertion all the way over here! On those Dimple bottles, they are a favorite of SIB builders. It might be because they are triangular in shape so you can have a flat base. They aren't the easiest to find, but they are around. In VA, hard liquor is sold in state-run stores. They usually don't carry them, but occasionally you can find them. You can also buy empties on eBay.
- 194 replies
-
- 3
-
-

-
- Bottle
- Treasure Fleet
- (and 3 more)
-
Scharnhorst is a nice ship for sure. At 1/200, it's going to be a big one. I ended up buying a 1/200 Bismarck with full Pontos upgrade from someone on here a few years ago, and when the box showed up, I freaked out. Took some super quick action on my part to break down the shipping box and "hide" it on one of the model shelves. Of course, one of my twins who at the time was 7 saw it a few days later and told me she wanted me to build it for her. I told her she'd have to probably wait until she was in college 😬 Are you getting any aftermarket for it?
-
Awesome work as always Kevin! That Scharnhorst will be sweet! Cant wait to see your work on it.
-
Looks really sharp with that camo scheme - nice job!
-
I think it's Mr. Color line (all the "Mr." brands, except maybe Mr. Hobby?). I have, but haven't tried the product CDW just posted. I think I brushed it on something small but otherwise haven't used it. If you go to this guy's build log, at the 18 min mark he uses sandpaper to etch all the PE (not sure I feel comfortable doing that, especially at 1/700 scale where the PE is incredibly fragile, but he is a master modeler), and then at the 19 minute mark, he uses the rattle can version of what Craig posted):